Baldur's Gate 3 Logo
Guides

Baldur’s Gate III – Shadow Cursed Lands Quests

by NightlyGamingBinge in

The Shadow Cursed Lands is the first area you’ll come to during Act II of Baldur’s Gate III. This guide will cover the quests you can find in the Shadow Cursed Lands along with what you’ll need to do to complete them.

Find Arabella’s Parents

You’ll get this quest after finding Arabella just west of Mason’s Guild in the cemetery. She’ll ask you to help find her parents and then ask if she can stay with you until then. If you agree, most of the party will approve. Travel west of the cemetery to reach the House of Healing then head inside. Speak with Sister Kidwin to locate her parents. Return to your camp and speak with Arabella to let her know what happened. You’ll then need to wait a bit then check up on her in camp. When you return, Withers will be speaking with her. Talk to them both and Withers will say she needs to leave in order to learn how to control her power. If you agree with him, then he will show the girl her future which makes her happy. The quest will be completed and she’ll then reward you with an uncommon ring.

Find Mol

After the attempted kidnapping of Isobel, Mol will be taken during the fight. Speak with the kids near the kitchen and tell them you’ll get her back. This quest will be updated during the Defeat Ketheric Thorm main quest. Upon searching the area under the castle, Mol is nowhere to be found…

This quest will be carried into Act III. While exploring the Lower City of Baldur’s Gate, you’ll come to the Guildhall (in the Lower City Sewers) while following Jaheira’s companion quest or if you pick up the Aid the Underduke quest. It is there where you’ll learn about the fate of Mol finally completing this quest.

Find the Nightsong

This quest is a continuation of the Act I quest with the same name (you can view the first part here). During the main story quest objective, Infiltrate the Cult of the Absolute, Disciple Z’rell will task you will backing up Balthazar in Mausoleum. If you use the key to enter Balthazar’s room, you can head over to the bookshelf and look for the Protruding Book on the bottom right side. Interact with it to unlock the altar to the right of the bookshelf. Next loot the corpse in the room or Viscera’s pile of flesh for a heart then interact with the altar and combine the heart with it. This will open a secret door behind the bookshelf. Head inside and read the Research Notes. This will tell you that Balthazar was sent to the Mausoleum to find the Nightsong giving you this objective.

To push forward in this quest, you’ll need to complete the Chosen of Shar objective for Shadowheart’s Daughter of Darkness companion quest. You can check out the guide for it here!

When that is done, you’ll find the next part of this quest in Baldur’s Gate during Act III. Click here for our guide on it!

Find Zevlor

Head to Last Light Inn and speak with Cerys there to learn that Zevlor is missing. This will trigger the quest. You won’t be able to find Zevlor until you start the Defeat Ketheric Thorm main quest near the end of Act II. Check here for its guide where we’ll cover how to find Zevlor.

Kill Raphael’s Old Enemy

Travel to the Mausoleum Entrance located in the southwestern part of the Shadow-Cursed Lands near the Moonrise Towers to find Raphael. Speak with him (make sure to bring Astarion if you still have him) to learn that his old enemy is nearby and that you should not try to reason with it, but kill it. When you’re ready, head through the Mausoleum Entrance. To complete the quest, check out the Kill the Orthon objective in our Pale Elf guide here.

Lift the Shadow Curse

When you reach the Shadow-Cursed Lands, travel to your camp and speak with Halsin there. Bring up the curse to learn more about it also triggering the quest. Halsin will also tell you we need to find Thaniel if the curse is to be lifted. To start, travel to Last Light Inn and enter the inn. Head into the room on the north side of the building to find Art Cullagh lying on a bed. You’ll need to complete the quest Wake Up Art Cullagh before you can proceed. When that’s done, head back to Halsin and tell him about Art then meet him at Last Light Inn where you’ll speak with Art together. After the conversation, meet Halsin at the lakeshore on the northern side of Last Light.
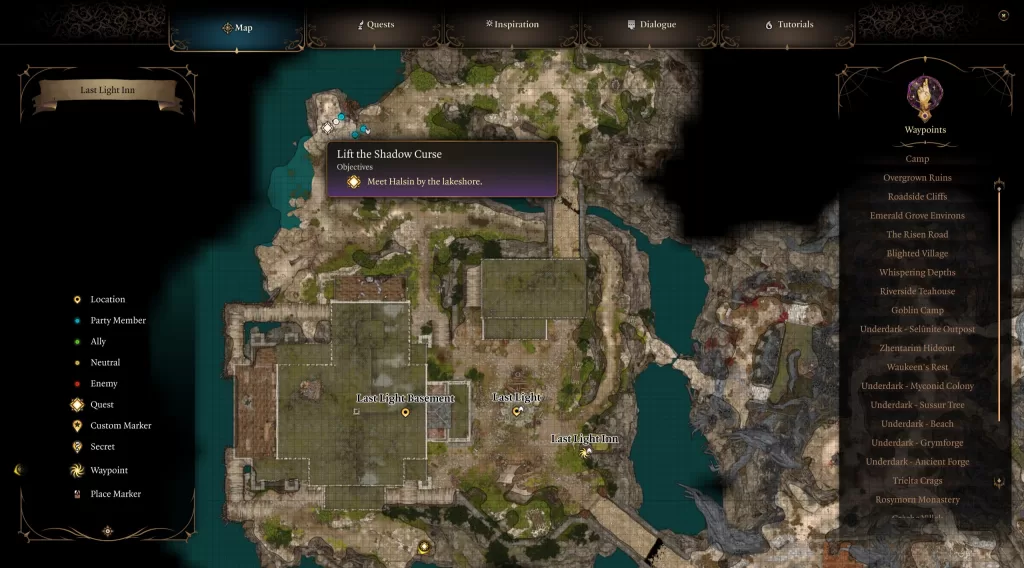
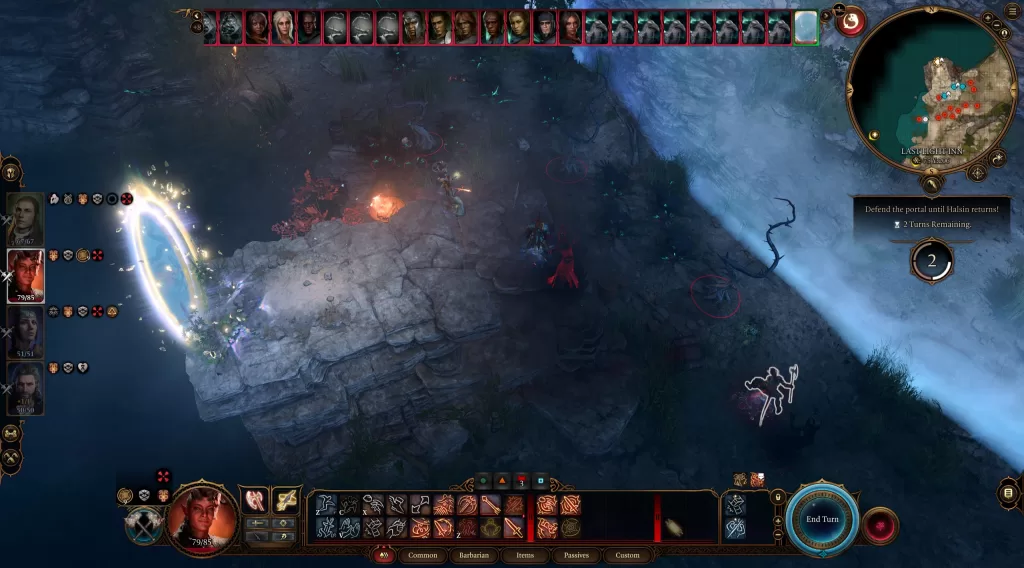
Head to Halsin and speak with him to learn what must be done. He’ll go through a portal while leaving you and the party behind to protect and keep it open. During this period, you’ll be attacked by multiple waves of Shadows and Shadow-Cursed enemies with the goal of keeping the portal open. Make sure to bring a couple of companions that have AOE attacks to deal with multiple enemies at once. Once Halsin returns, he’ll have Thaniel and take him back to camp. Clean up the enemies then meet them there. Halsin will say that Thaniel is missing part of himself and to heal him, we need to find it. You’ll also be able to add Halsin as a party member.
Our next destination is an old house up the eastern path next to the Shadowed Battlefield. If you’ve been there already, you’ve played hide-n-seek with Oliver already. If not, then you might have to do that first (we already did beforehand). Afterward, you can speak with him in the house and tell the lad you know who he really is, trying to convince him to come with you. He’ll say no and jump through a portal. You’ll need to follow after him which leads to a battle. Oliver will be under a Nightdome and surrounded by shadows. You’ll need to defeat the Shadow to damage the barrier. Taking out a Shadow Fiend deals 10 damage while defeating Mummy and Daddy will deal 60 damage each. Once the Nightdome’s HP reaches 0 you’ll be thrown into dialog with Oliver where you’ll have to convince him to return to Thaniel. Just be nice to him and speak with him like the child he is to convince him to return.
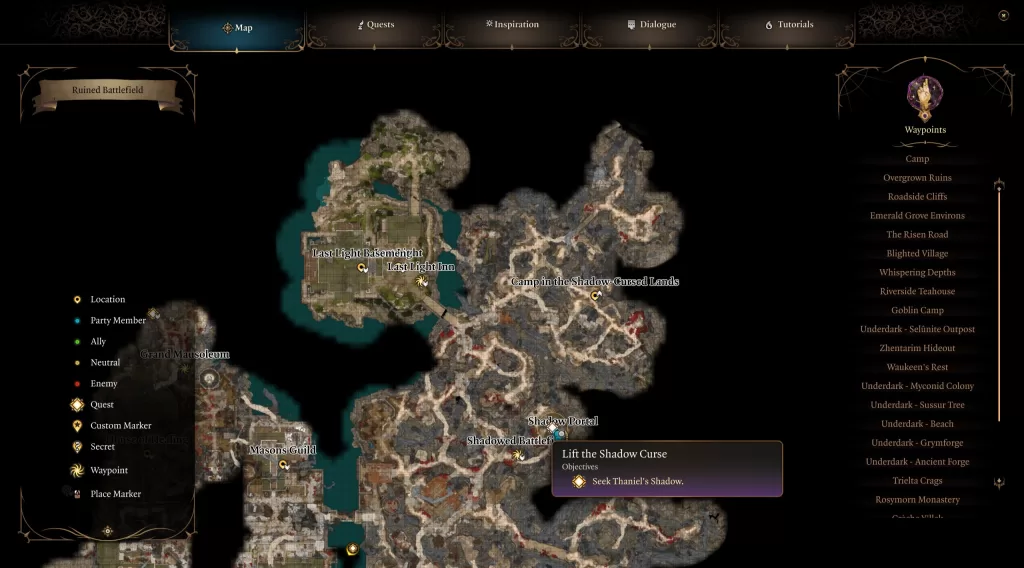
Head back to camp and speak with Halsin and Thaniel. In order to finally complete this quest, you’ll need to defeat Ketheric Thorm. It won’t officially updated to completed until you begin Act III.

Punish the Wicked

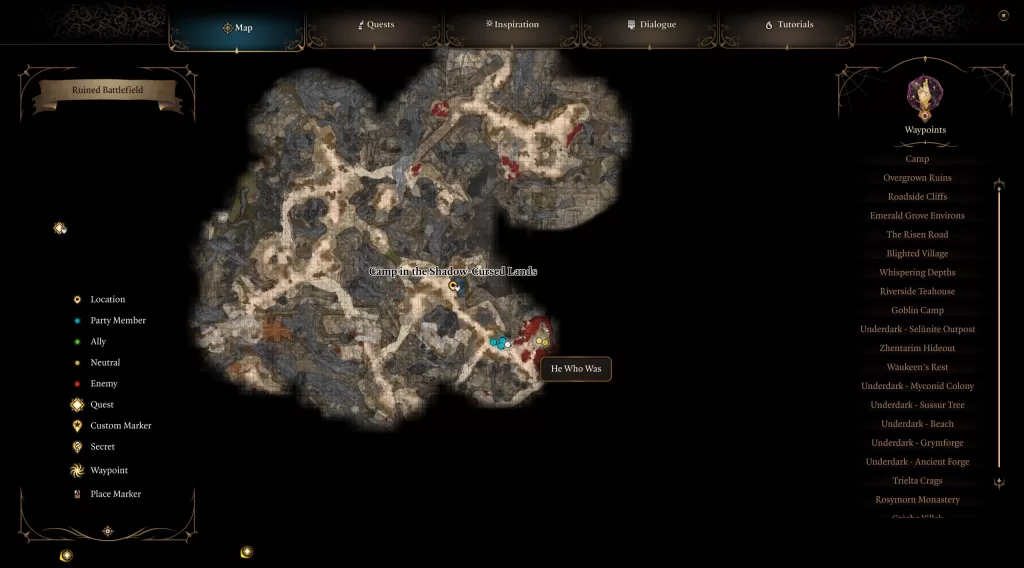
To start this quest, you’ll need to speak with He Who Was southeast of the Camp in the Shadow-Cursed Lands (east of Last Light Inn). The raven will deem you strong enough to help and request that you travel to the Waning Moon to locate a leger belonging to a killer.
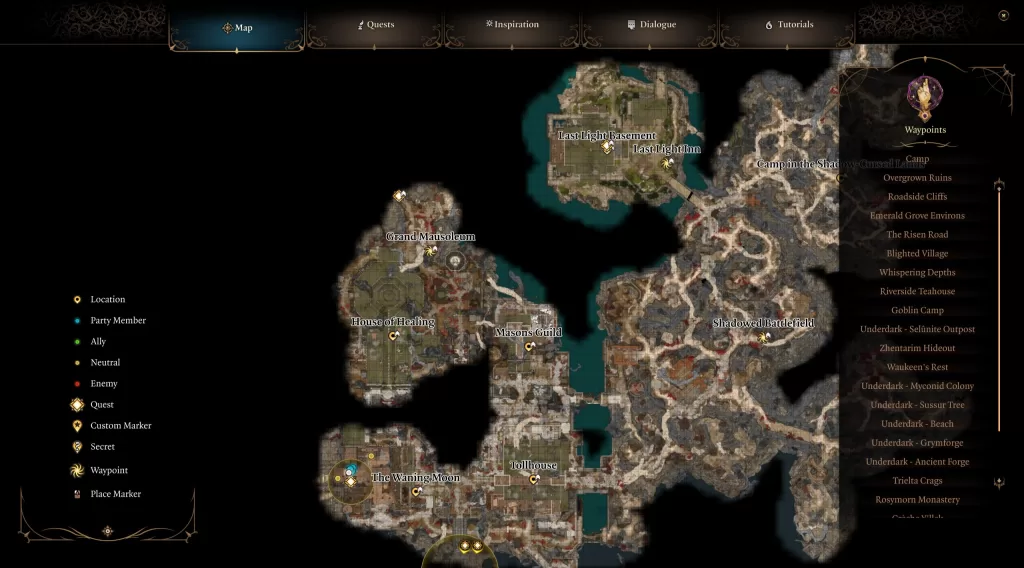
To find the Waning Moon, you’ll need to head to the southwestern corner of the map near the Moonrise Towers.
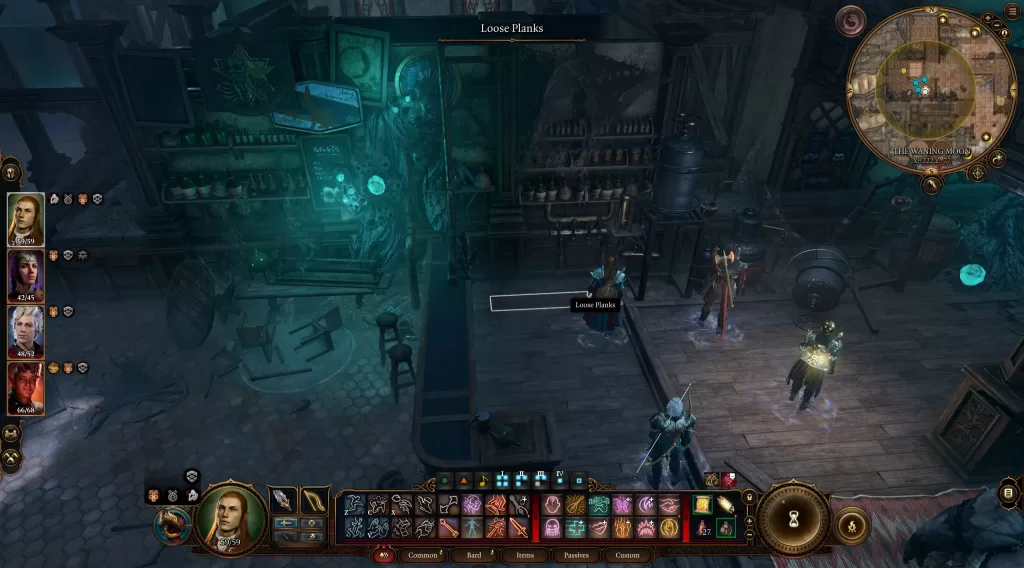
Once there, enter the tavern and make your way down to the lowest level. Approach the counter with Thisoblad Thorm behind it to start up a conversation. When prompted choose one of the first two options and the proprietor with invite you to drink with them. You’ll either need to drink and pass a skill check or decline. If you choose to decline, you’ll have to battle against Thisoblad and the other patrons. If you go the drinking route, you’ll have to pass a series of skill checks while drinking back and forth with the abomination. After a few turns, he will drink too much and burst. You’ll then be free to head behind the counter. There will be some loose planks under the beer tap that houses Madeline’s Ledger. You’ll need to pass a perception skill check to find it. Once it’s in your possession, deliver it to He Who Was.
He Who Was will tell you that it’s up to you to be the judge while he channels her into his body. You can speak with Madeline to learn what happened then render your judgment. If you forgive her, then the quest will compete and He Who Was will get angry and attack you along with his Raven. If you deem her guilty and tell her to stab herself, He Who Was will attack you. If you tell her it’s her fault and that she’s a monster then He Who Was will feel her agony and be pleased, awarding you some gold and the rare Raven Gloves which allow you to summon Quothe the Raven.

Rescue the Tieflings

** PLEASE NOTE – This quest is time sensitive and doing a couple of long rests will move it forward. You can save the Tieflings (and Wulbren) while only slightly moving the story forward.**

So the prerequisite to get this quest is to save the grove from the goblins. After doing that, once you reach Last Light Inn, you’ll find some of the tieflings from the grove are taking shelter there. Speak with them (Vex, Alfira, Rolan) to learn about the attack and that some of them were taken to Moonrise Towers. Please note that your past actions might impact who is here or not. We helped Alfira finish her song and convince Rolan to stay and help the grove which could affect their being at Moonrise Towers.

When you reach Moonrise Towers, make your way to the prison in the basement (the stairs are through the back right door when facing the throne). Down there you’ll find Lia, Cal, Lakriss and Danis in a cell. Speak with them to learn the gnomes are up to something. If one of the guards catches you talking to the prisoners, you’ll have to pass a skill check or fight them. Whatever you decide, you’ll need to complete Rescue Wulbren before you can proceed with this quest. When that’s done, return to Last Light and speak with Rolan, Alfira and Vex to complete this quest. They will each give you their own set of rewards.

Rescue Wulbren

** PLEASE NOTE – This quest is time sensitive and doing a couple of long rests will move it forward. You can save Wulbren (and the tieflings) while only slightly moving the story forward.**

This quest is started after rescuing the gnomes at the Grymforge from Nere towards the end of Act I. Speak with their leader and you’ll learn that Wulbren was taken to Moonrise Towers, but that gnomes are too weak to go after him. Thus it falls to us (or not).

If you have been helping Barcus Wroot up to this point, he can be found at Last Light Inn in Act II. Speak with him there and he’ll promise to make you something remarkable if you save Wulbren.

When you reach Moonrise Towers, make your way to the prison in the basement (the stairs are through the back right door when facing the throne). In the basement, locate Wulbren and speak with him (make sure to check in on the tieflings along the way). Tell him you’re there to break him out and he’ll say he needs some things to make their escape. Enter the Warden’s Office and speak with her to learn that the prisoner’s effects are being kept in a room at the top of the ladder. Climb up and head over the furthest table to find Wulbren’s Hammer on it. Grab the hammer and bring it back to the gnome keeping an eye out for the wander eye. As an FYI, this area is considered restricted so the Warden might show up and confront you. You can try to talk your way out of it or take down the warden. In addition, it’s possible for other guards to show up as well. You can also try convincing them you are supposed to be there or settle the matter in glorious combat.
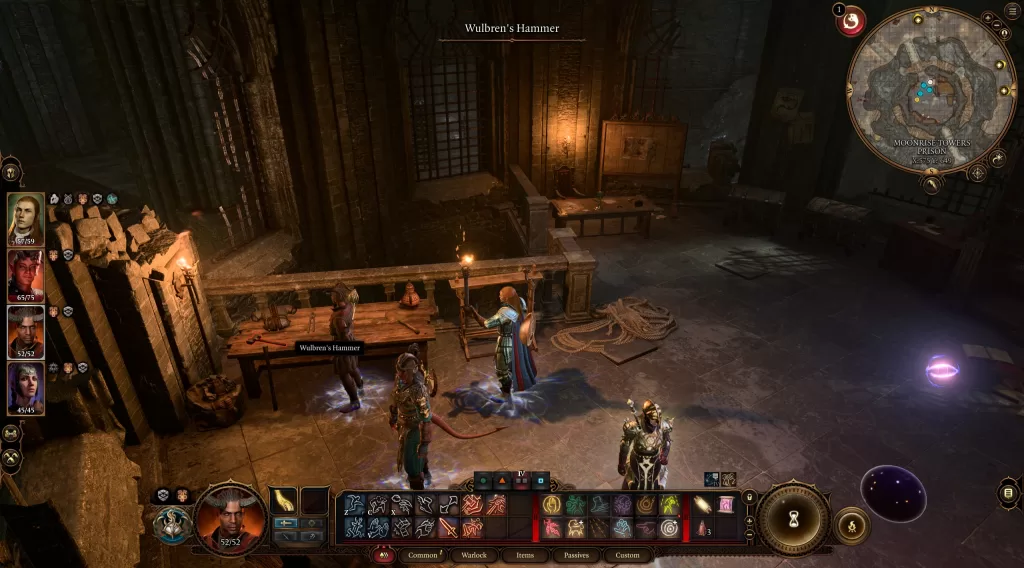
When that’s done and you have the hammer, take it back to Wulbren who will then wait for your word to execute the plan. When you say go, they will break a hole in the wall and head over to free the tieflings. While this is happening, a guard will make a b-line to the Warden’s room to flip the switch opening the cells and allowing them to pursue the prisoners. You’ll need to stop the guards from doing this and fight them off long enough for the prisoners to escape. To make it easier, deal with the guards first before telling the gnome to begin the escape. When the guards are no more, open cell 2 and head through the hole in the wall. **Please Note – If a guard flips the switch, it’s best to defeat them all and not attempt to close the cell. Doing this might bug the quest and gnomes might leave without saving the tieflings** Approach the boat at the dock to speak with Wulbren then send him to Last Light. The next time you go there, find Wulbren drinking at the inn and speak with him to complete the quest.

Wake Up Art Cullagh

The quest will be triggered upon finding Art during the Lift the Shadow Curse quest. If you pass a perception check after interacting with Art, you’ll notice a note under him. Pick it up and read it to discover he was sent by the Duke. It will also mention he was to investigate the House of Healing. To reach the House of Healing, travel to the southwestern part of the map, west of the Mason’s Guild.
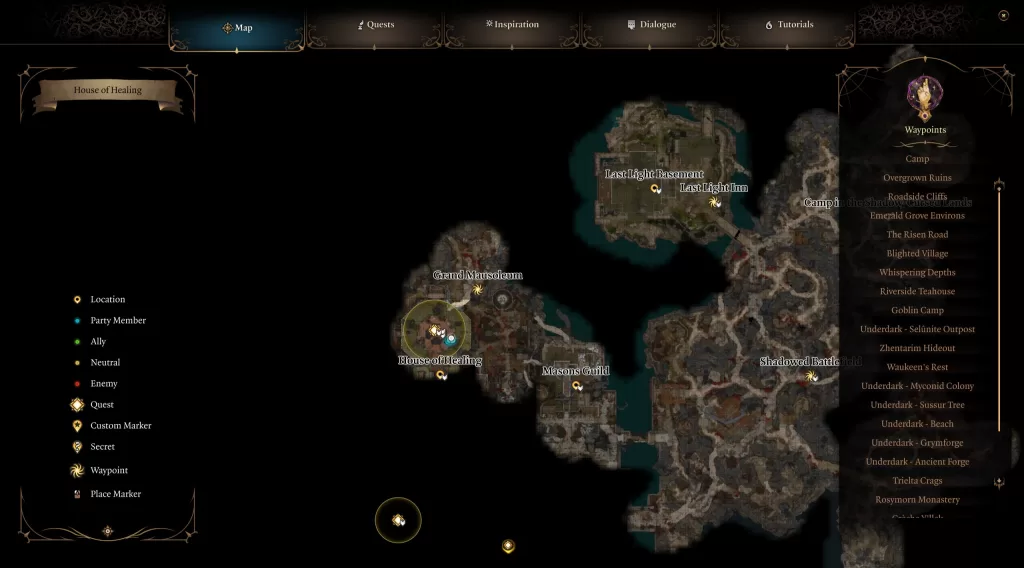
Once there head inside and make your way to the northern part of the building. If you come in through the front door, you’ll be stopped by Sister Sinda and have to pass a skill check to pass. Approach Malus Thorm in the middle of training the sisters. This will trigger a cutscene leading to some dialog. If you pass some skill checks, you can have him become the test subject for the sisters resulting in his death, otherwise, you’ll need to fight all 5 of them. Once he’s dead, loot him to find a Battered Lute. Take that loot back to Art and interact with him. Choose the option “Pull out Art’s lute and play” to wake him and complete the quest.


For more guides on Baldur’s Gate III, click here!

Trinity Trigger Logo
Game Guides

Trinity Trigger Guides and Walkthroughs

by NightlyGamingBinge in

Below are our guides and walkthroughs on Trinity Trigger!

Beast Keys

In Trinity Trigger, you can discover 10 blue treasure chests that contain beast keys. Click here for a guide on the locations of these blue treasure chests!

Chest Locations

As you explore the world in Trinity Trigger, you’ll come across areas that contain chests. Most of these chests can be found at the end of a hidden path. For guides on the locations of these chests, please click the areas below! Please note that we’ve listed the areas in alphabetical order.

Miscellaneous

Side Quests

Below are walkthroughs on the side quests found in Trinity Trigger!

Souvenirs

For the She’s Gonna Love It and A Gift for Firn, you’ll need to collect souvenirs. Click here for a guide on where to find them!

Hogwarts Legacy Logo
Guides

Hogwarts Legacy – Appearances From Quests

by NightlyGamingBinge in

In Hogwarts Legacy, you can collect 27 appearances from completing quests. These cosmetic alterations can be applied in the Gear Menu via the Change Appearance option.

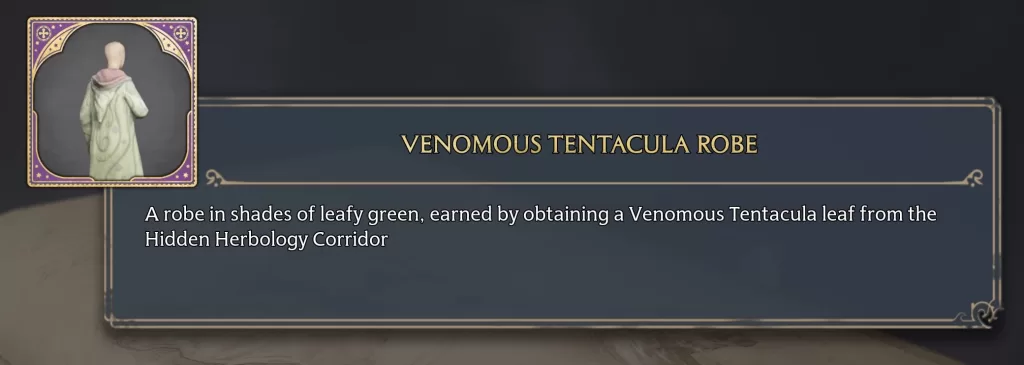
Venomous Tentacula Robe

To obtain this appearance, complete the Venomous Valour side quest!

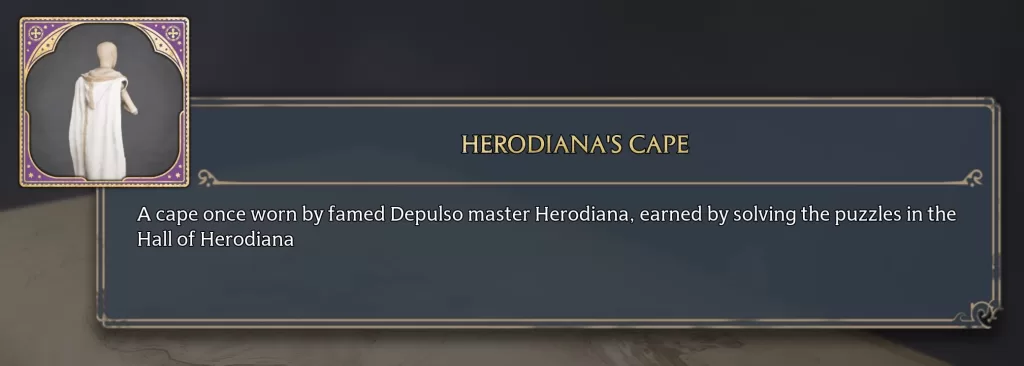
Herodiana’s Cape

To obtain the Herodiana’s Cape appearance, complete The Hall of Herodiana side quest.

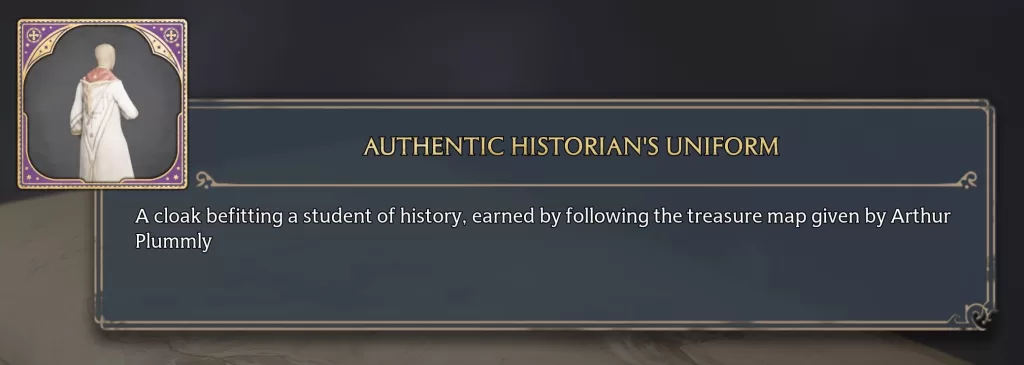
Authentic Historian’s Uniform

To obtain this appearance, complete the Cache in the Castle side quest.

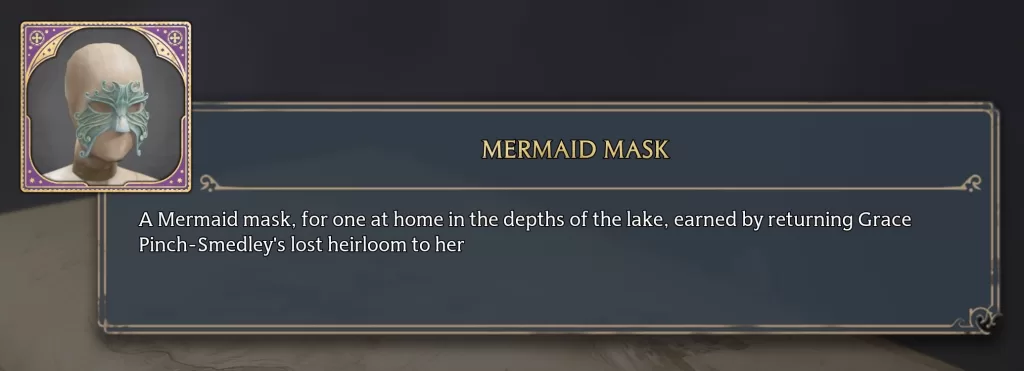
Mermaid Mask

To obtain the Mermaid Mask appearance, complete The Lost Astrolabe side quest.

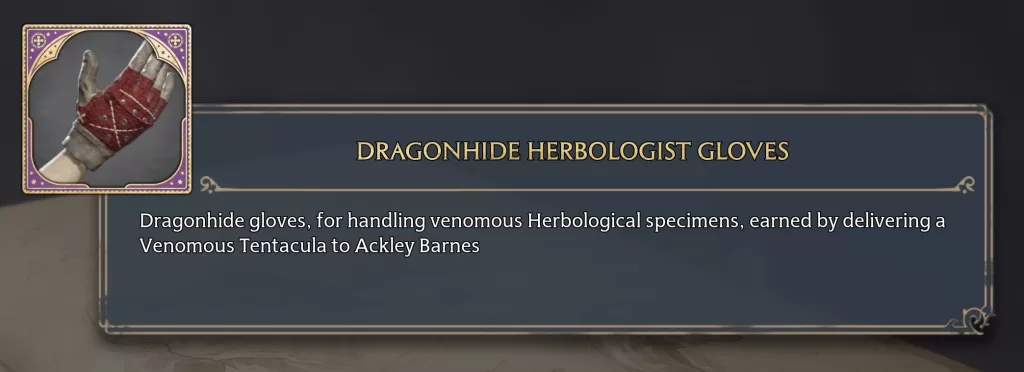
Dragonhide Herbologist Gloves

To obtain the Dragonhide Herbologist Gloves appearance, complete the Venomous Revenge side quest.

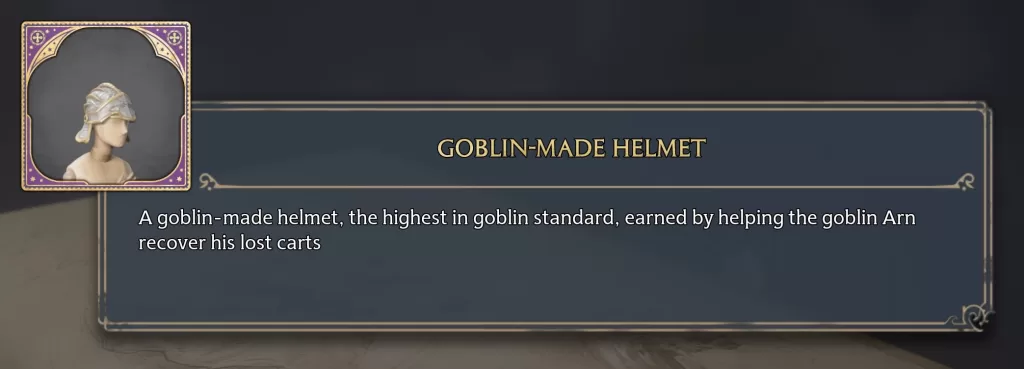
Goblin-Made Helmet

To obtain this appearance, complete the Carted Away side quest.

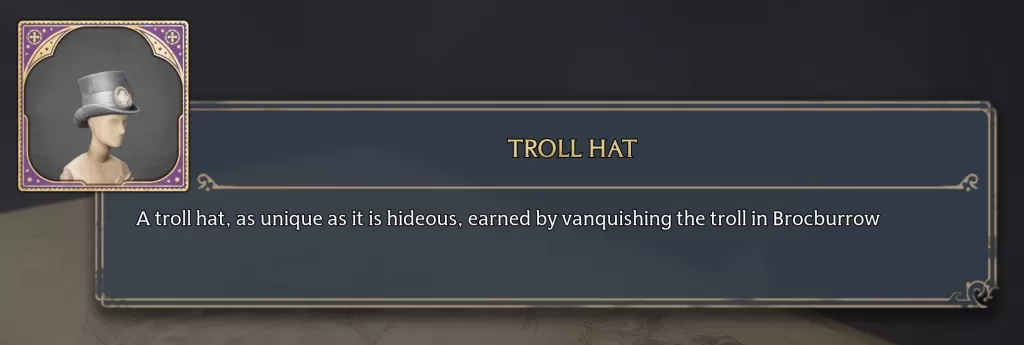
Troll Hat

To obtain this appearance, complete the Troll Control side quest.

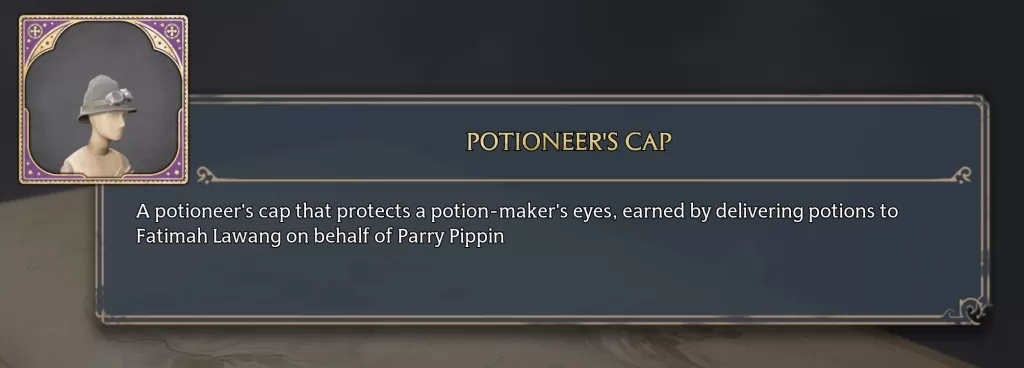
Potioneer’s Cap

To obtain this appearance, complete the A Demanding Delivery side quest.

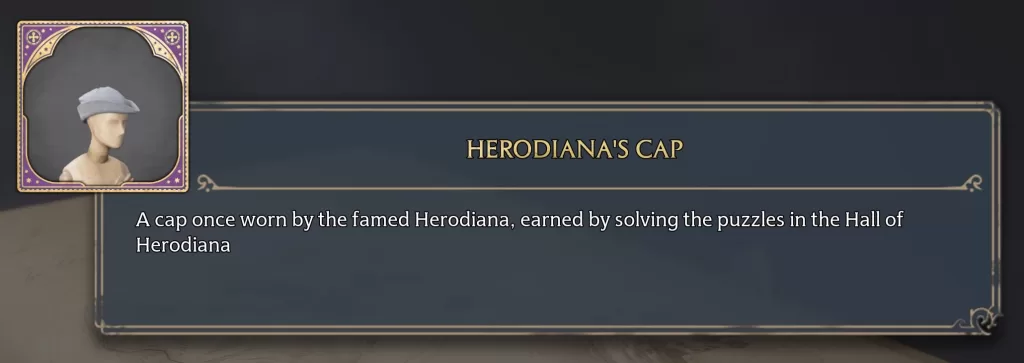
Herodiana’s Cap

To obtain this appearance, complete The Hall of Herodiana side quest.

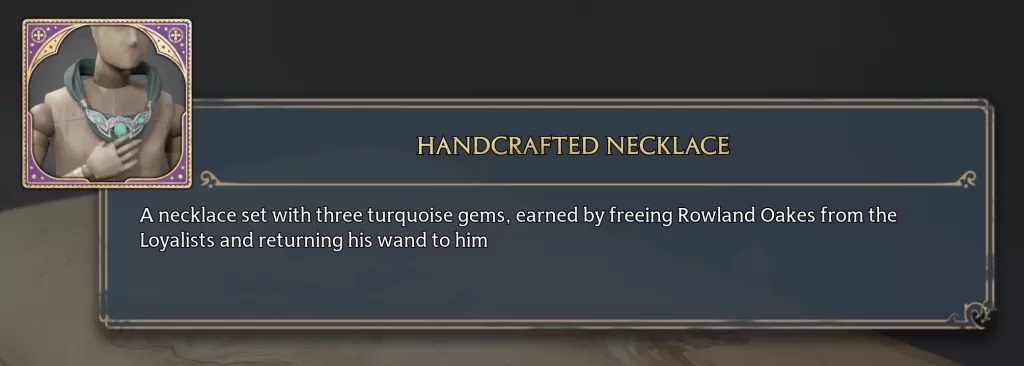
Handcrafted Necklace

To obtain this appearance, complete The Tale of Rowland Oakes side quest.

Treasure-Seeker’s Scarf

To obtain this appearance, complete the Ghost of Our Love side quest.

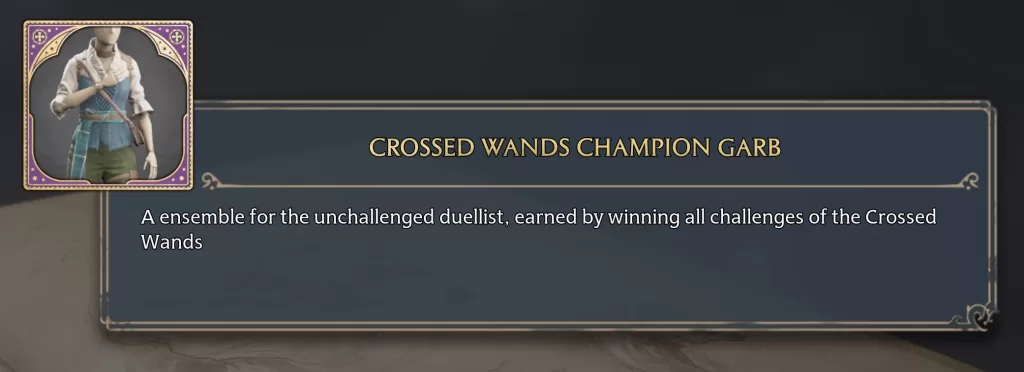
Crossed Wands Champion Garb

To obtain the Crossed Wands Champion Garb appearance, complete all 3 rounds during the Crossed Wands side quest.

Herodiana’s Attire

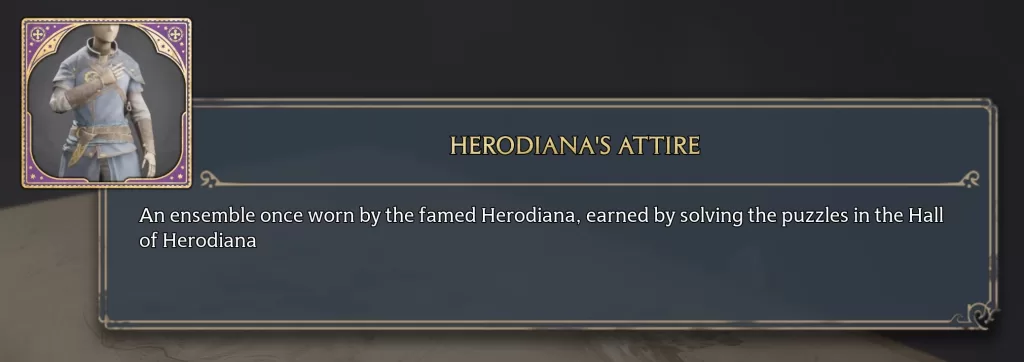
To obtain this appearance, complete The Hall of Herodiana side quest.

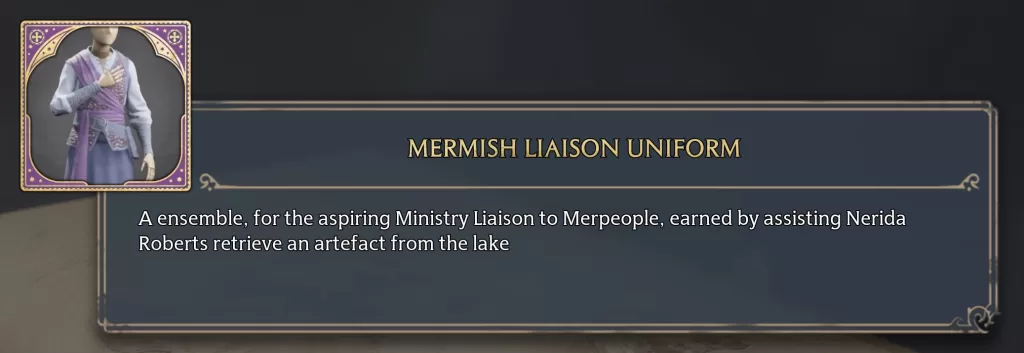
Mermish Liaison Uniform

To obtain this appearance, complete the Mer-ky Depths side quest.

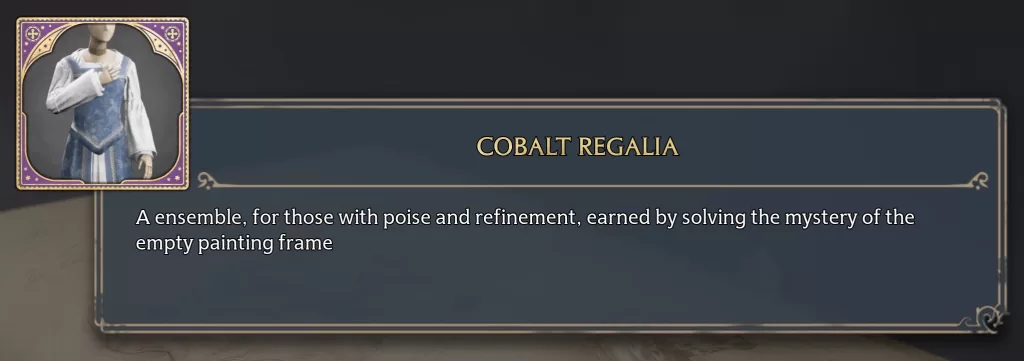
Cobalt Regalia

To obtain this appearance, complete the Like a Moth to a Frame side quest.

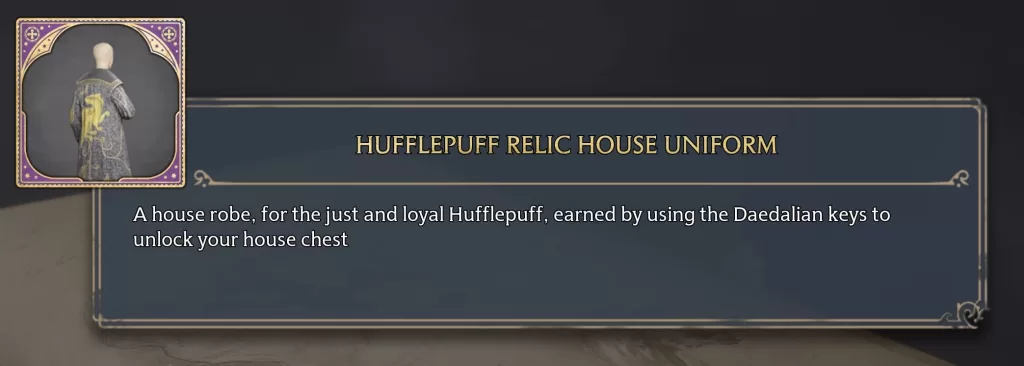
Relic House Uniform

To obtain this appearance which will vary depending on your house, complete The Daedalian Keys side quest.

Hogwarts Legacy Logo
Game Guides

Hogwarts Legacy Guides and Walkthroughs

by NightlyGamingBinge in

These are our guides and walkthroughs for Hogwarts Legacy!

Area Collectibles

Each area has Collection Chests, Field Guide Pages, Demiguise Statues, etc. Below are guides on where to find these collectibles in each area.

Challenge Rewards

As you play through Hogwarts Legacy, you can complete challenges from fighting enemies, collecting items and completing quests. The following are guides on the rewards received from completing these challenges:

Collections

Below are guides on where to find the collectibles in the pages under the Collections tab in the field guide.

Miscellaneous

Quests

Below are walkthroughs for the quests found in Hogwarts Legacy.

Star Ocean The Divine Force Walkthrough
Guides

Star Ocean: The Divine Force – Quests

by NightlyGamingBinge in

Below are the quests that can be found in Star Ocean: The Divine Force!

A Daughter’s Gift

Quest Giver: Skilled Dollmaker’s Daughter (Royal Capital Acendros City)

Objective: Deliver A Daughter’s Gift

Travel to Baldaar Citadel and speak with the Shy Father in the house west of the basilica. Speak with him again then return to the quest giver to complete the quest.

A Glimpse of Talent

Quest Giver: Magnificent Writer (Royal Capital Acendros City)

Objective: Provide advice to youth in Village of Eda

Travel to the Village of Eda and speak with the Aspiring Writer in the house east of the shop. Afterwards, return to the quest giver to complete the quest.

A Healing Herb

Quest Giver: Sickly Woman (Seaport of Rythal) in the southwestern house

Objective: Acquire and deliver Dillwhip x6

Dillwhip can be found in the Cottorinth Mountain Pass. It spawns at the first green glowy item you come across just north of the Cottorinth Region map transition. Once you’ve gathered 6 Dillwhip, return to the quest giver to complete the quest.

A Long-Awaited Message

Quest Giver: Manipulative Man (The Aucerian Highroad)

Objective: Deliver Letter from Mom

After you complete the A Healing Herb quest (see above), speak with the Sickly Woman a couple of times until you receive the letter. Return to the Manipulative Man on The Aucerian Highroad to deliver it and complete the quest.
A Memorable Hat

Quest Giver: Old Woman Preparing for a Trip (Seaport of Cotto)

Objective: Find A Lady’s Hat in Mt. Cottorinth

Travel to the Cottorinth Summit Approach and approach the giant circular area to the north. Right in the middle of the circle, you’ll find A Lady’s Hat! Return to the quest giver to complete the quest.

A Parent’s Love is Never Far

Quest Giver: Shy Father (Baldaar Citadel)

Objective: Purchase Bunny Figure from a shop in the royal city

Travel to the Royal Capital Acendros City and head to the item shop in the southern part of the map. Enter the building and speak with the shopkeeper. Go to the Bargain Buy tab then purchase the Bunny Figure for 30 fol. Return to the quest giver to complete the quest.
A Prized Pendant

Quest Giver: Married Woman (Seaport of Cotto)

Objective: Find and deliver a Keepsake Pendant

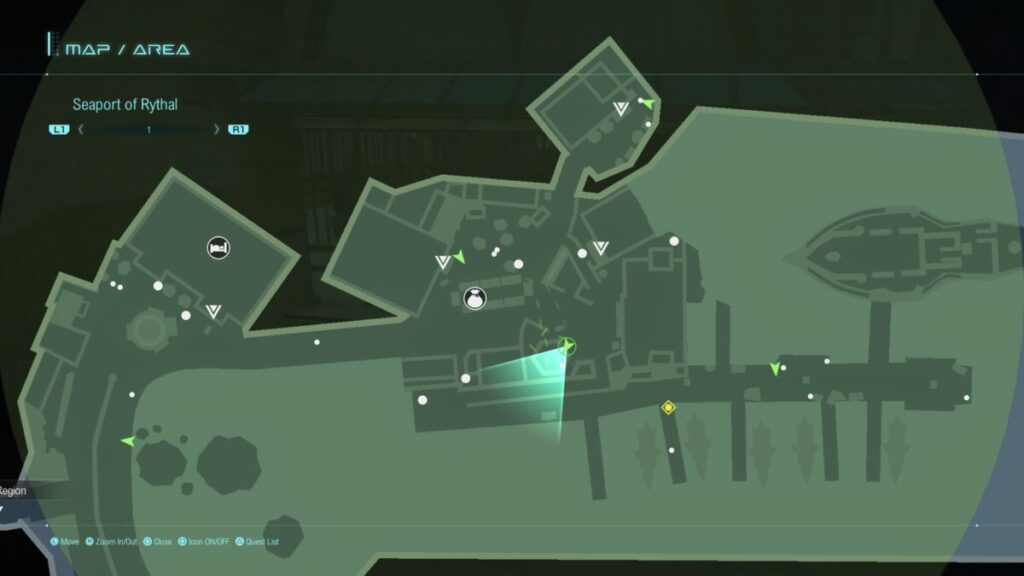
Travel to the Seaport of Rythal then head to the big ship. Break the wooden crates atop the ship to find the Keepsake Pendant then return to the quest giver to complete the quest.

A Ticket’s Destination

Quest Giver: Still Undaunted Explorer (Seaport of Rythal)

Objective: Find the Boarding Ticket

This ticket can be found on the roof southeast of the shop.

After you collect the ticket, return to the quest giver to complete the quest.
A Trekker’s Charm

Quest Giver: Still Undaunted Explorer (Village of Eda)

Objective: Deliver a Scent Bag

Travel to Hallowed Mount Galca – Lemthas and near the entrance from the Galca Shrine, you’ll find an Ancient Chimera. Defeat the Ancient Chimera by attacking its tail, causing it to drop the Scent Bag. After you find the Scent Bag, return to the quest giver to complete the quest!

An Unfair Apology

Quest Giver: Puffy (Imperial Capital)

Objective: Deliver Dendrobium

Dendrobium can be found at Hallowed Mount Galca-Lemthas. Once you’ve gotten a Dendrobium, return to Puffy to deliver it and complete the quest!

Brooch Hunt

Quest Giver: Unwell Woman (Royal Capital Acendros Palace Gardens)

Objective: Find Antique Brooch in the Aucerius Plains

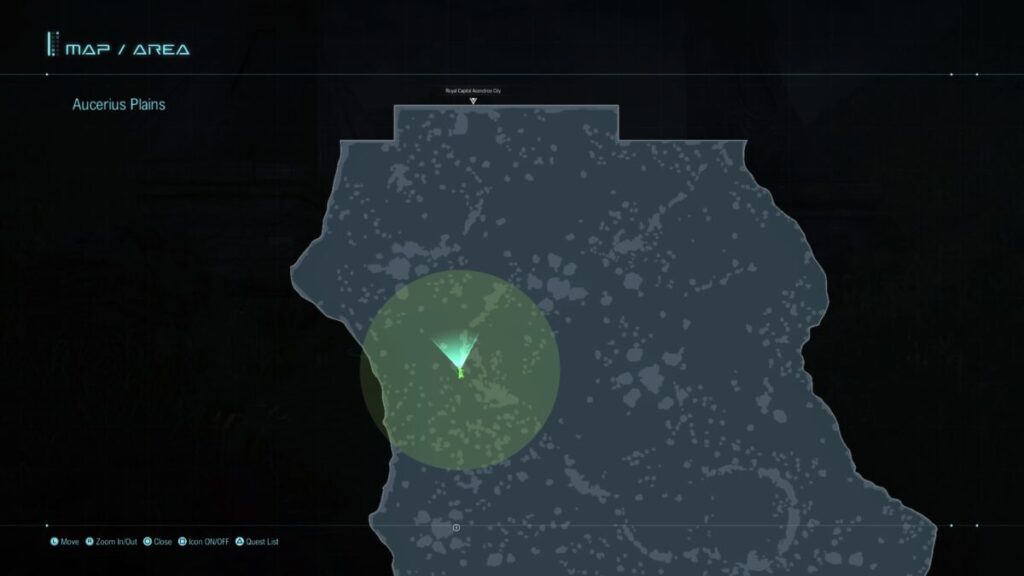
The Antique Brooch is a green item that can be found on the ground in the northern part of the Aucerius Plains at the below location.

Once you have the Antique Brooch, return to the quest giver to complete the quest!

Reward: Crytographic Message D

Cat Recall

Quest Giver: Elderly Man with a Cat (Imperial Capital)

Objective: Acquire a Speed Potion

Speed Potion can be crafted using the item creation menu. For a guide on how to craft this potion, click here! Once you’ve acquired 1 Speed Potion, return to the quest giver to complete the quest.
Chapter One in Becoming a Novelist

Quest Giver: Aspiring Writer (Village of Eda)

Objective: Deliver the Creative Writing Manuscript

Travel to the Royal Capital Acendros City and speak with the Magnificent Writer next to the large crystal on the northeastern side. He’ll say it’s trash! Return to the quest giver to complete the quest.
Creepy Crawly Critters

Quest Giver: Slightly Stinky Man (Royal Capital Acendros City)

Objective: Defeat Starving Worm x8

The client was attacked in the vicinity of Aucerius after eating a meal in Baldaar. When you’re ready, head to Baldaar Citadel and stay at the inn and eat Fermented Ratatouille. Afterwards, exit the town via the north to arrive in the Aucerius Plains. Once there, head down the main path until enemies spawn near an archway at the below location.

Defeat them then report back to the quest giver to complete the quest.
Reward: Cryptographic Message A-3

Defense Systems Down

Quest Giver: Security Guard in Need of a Fix (Parrapoeiam)

Objective: Silence the Defense System

Travel to the Integration Plant then head to Floor 4 to find the Defense System enemy. Defeat it then return to the quest giver to complete the quest.
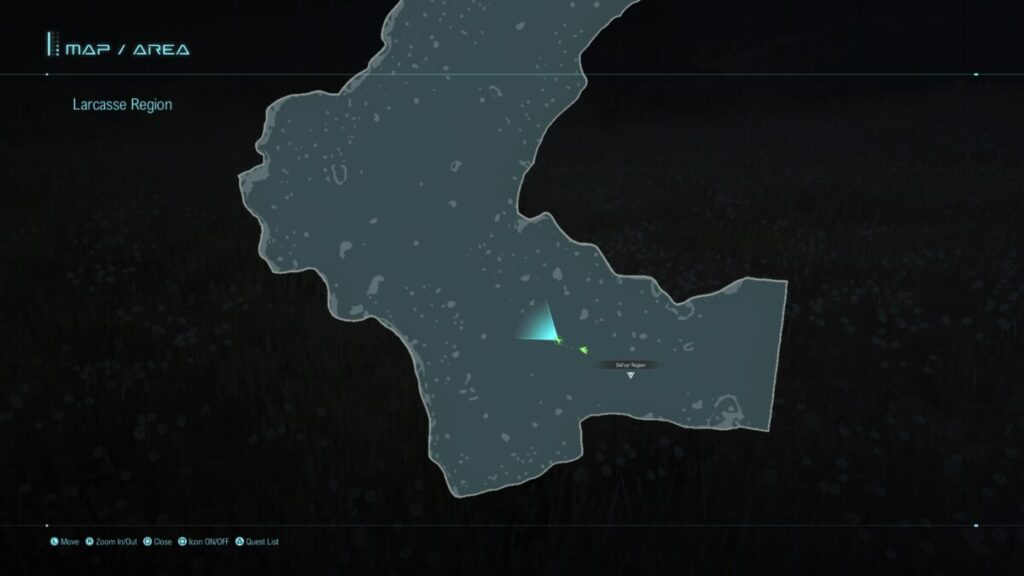
DELRYK ODDBALL

Quest Giver: Particular Craftsman (Delryk Village)

Objective: Acquire and deliver Tattered Robe x5

You can craft Tattered Robes using Scruffy Rags after completing the Welch the Compounder quest (see below!). Please note that you’ll want the crafting to be a failure to receive the Tattered Robes! We used Raymond when crafting and got them all pretty quickly! Once you’ve gotten all 5 Tattered Robes, return to Particular Craftsman in Delryk Village to complete the quest.
Endless Curiosity

Quest Giver: Researcher Striving for Peace (Parrapoeiam)

Objective: Defeat Nihlbethian Great Ape x10

Travel to Nihlbeth and defeat 10 Nihlbethian Great Apes near the path leading to the Ancient Coil. Afterwards, return to the quest giver to complete the quest!

Es’owa Initiation

Quest Giver: Shady Merchant (Seaport of Rythal)

Objective: Beat an Es’owa opponent to acquire the Coro playing piece

Defeat the Undefeated Boy in the Seaport of Rythal to receive the Coro pawn as a reward. Once you have the Coro pawn, return to the Shady Merchant to complete the quest.
Reward: Dorne pawn

Find My Kitty!

Quest Giver: Cat-Loving Girl (Larcette Village)

Objective: Find Chacham

The cat can be found on the roof of the most northwestern house in Larcette Village! Interact with the cat then return to the girl to complete the quest.
Reward: Cryptographic Message A-1

I Want to Be Disliked

Quest Giver: Concerned Woman (Baldaar Citadel)

Objective: Acquire Pheromone Enhancer

You can obtain the Pheromone Enhancer as a reward from the giant Mini-Bunny on Devotion Hill for turning in all of the Mini-Bunnies up to and including Parrapoeiam’s. Essentially, you have to find 17 Mini-Bunnies total. For a guide on where to find these Mini-Bunnies, click here! Once you have the Pheromone Enhancer, return to the quest giver to complete the quest!

J.J.’s on a Mission

Quest Giver: J.J. (Parrapoeiam)

Objective: Deliver Capacitor x8

The Avengers in the Integration Plant drop the Capacitors. Once you have 8 Capacitors, return to J.J. in the Parrapoeiam to complete the quest.

Junk Collector

Quest Giver: Particular Craftsman (Delryk Village)

Objective: Deliver Holey Armor x5

Holey Armor can be crafted after completing the Welch the Smithy quest (see below). Fail while crafting an item via the smithery tab to create the Holey Armor. Once you’ve gotten 5 Holey Armor, return to the Particular Craftsman to complete the quest.

Luggage Larceny

Quest Giver: Scumbag-Loathing Old Woman (Larcasse Region)

Objective: Retrieve Old Lady’s Belongings x3 from the Mhedume Ruins

Make your way to the Mhedume Ruins and defeat the Scumbag enemies until they drop the Old Lady’s Belongings. Please note the that drop is RNG based so the time it will take to get an enemy to drop it will vary. Once you’ve acquired the 3 items, return to the Scumbag-Loathing Old Woman in the Larcasse Region to complete the quest.

Reward: Secret Preparation Recipe

Mama’s Favorite

Quest Giver: Manipulative Man (Royal Capital Acendros City)

Objective: Deliver Mama’s Favorite Treat to Seaport of Rythal

Travel to Seaport of Rythal and speak with the Sickly Woman in a house. Afterwards, return to the Manipulative Man in Royal Capital Acendros City to complete the quest.

Reward: Cryptographic Message C

Material Deficit

Quest Giver: J.J. (Parrapoeiam)

Objective: Deliver Cylinder x16 to J.J.

Cylinders can be found at the below locations:

  • Nihlbeth
  • Hybrid Research Vessel Terranus
  • Battleship Scorpium
  • Parrapoeiam
  • Integration Plant

Cylinders can also be dropped from the below enemies:

  • Ghost Sentinel in Nihlbeth
  • Sentinel in Hybrid Research Vessel Terranus
  • Avenger in Integration Plant

Once you’ve gotten 20 Cylinders, speak with J.J. in the Parrapoeiam to complete the quest.

Meet Some Meat

Quest Giver: Romantically Assertive Woman (Village of Eda)

Objective: Deliver Game Meat x3

Game Meat can be obtained from smashing pots around Seaport of Rythal. Once you’ve gotten 3, return to the woman to complete the quest.

Native Pest of the Forest

Quest Giver: Undaunted Explorer (Larcette Village)

Objective: Defeat the Giga Toad x2 in Larcasse Weald

Travel to Larcasse Weald and defeat 2 Giga Toads in the middle of the southern area. Once you’ve defeated both, return to the quest giver to complete the quest!

One More Please

Quest Giver: Man Curious about Umaibo (Parrapoeiam)

Objective: Deliver Veggie Salad Umaibo x20

You can purchase Veggie Salad Umaibo from the Paladurnia shop. Once you’ve acquired the Veggie Salad Umaibo, return to the quest giver to complete the quest.

Parrapoeiam on the Rebound

Quest Giver: J.J. (Parrapoeiam)

Objective: Deliver Scorpium Chip x4

Scorpium Chip are dropped by the Centralist Federation Soldiers in the Battleship Scorpium and Integration Plant. Once you have 4 Scorpium Chips, return to J.J. to complete the quest.

Pesky Thieves

Quest Giver: Man Who Has Had Enough (Delryk Village)

Objective: Defeat Thieving Gangster x16 in Delryk Mines

Head on over to Delryk Mines and defeat 16 Thieving Gangsters! After you’ve defeated them all, return to the Man Who Has Had Enough to complete the quest.

Puffy’s Debut

Quest Giver: Puffy (Imperial Captial)

Objective: Acquire Farleen

Beat the Anxious Man in Larcette Village in Es’owa to receive Farleen as a reward. Afterwards, return to the quest giver to complete the quest!

Rout the Rest

Quest Giver: Meticulous Patrolman (Museum of Vergnisian Symbology)

Objective: Defeat Centralist Federation Officer x1 and Centralist Federation Soldier x30

Travel to Provenience Cavern and defeat 1 Centralist Federation Officer and 30 Centralist Federation Soldiers. Afterwards, return to the quest giver to complete the quest.

Such Soft and Fluffy Beds

Quest Giver: Innkeeper Looking to Upgrade (Seaport of Rythal)

Objective: Gather Axe Beak’s Feather x4

Axe Beak’s Feathers can be acquired from defeating Peryton in the Larcasse Region or Axe Beak in the Del’vyr Region. Once you’ve acquired them all, return to the innkeeper to complete the quest.

That Unyielding Door

Quest Giver: Melthia (Semiomancy Consortium) – Post Game

Objective: Acquire Spirit Ether x5

Spirit Ether can be obtained from the Lava Man in Nilbeth if you attack and destroy its arms (either right or left will do!). Once you’ve acquired the Spirit Ether, return to the quest giver to complete the quest!

The Actual Owner

Quest Giver: Vahnel (Seaport of Rythal)

Objective: Deliver Sumi to its owner in the Imperial City

Travel to the Imperial Capital then speak with the old man in the square with the item shop. Afterwards, return to the quest giver to complete the quest.

The Adventures of a Carefree Cat

Quest Giver: Cat-Loving Boy (Imperial Capital)

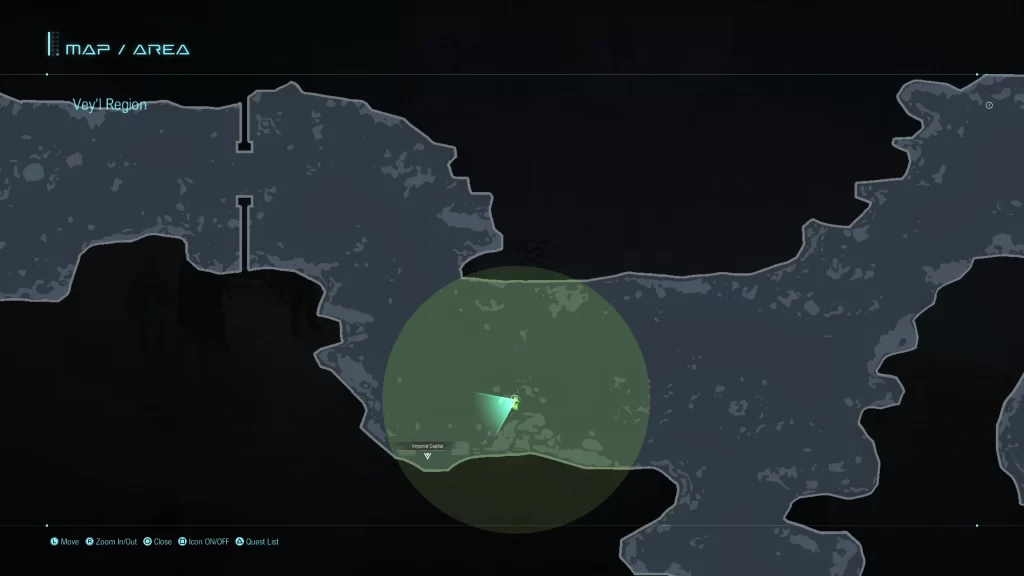
Objective: Find Leefa

Exit the Imperial Capital to reach the Vey’l Region. Head east to find the cat on some rocks.

Once you’ve located the cat, return to the quest giver to complete the quest.

Reward: Cryptographic Message A-2

The Corporal’s Farewell

Quest Giver: Soldier Who Survived (Baldaar Citadel)

Objective: Deliver the Letter from Corporal Sartus to a woman in Larcette Village

Travel to Larcette Village and head north of the inn to find the Lonely Woman working the fields. She’ll give you The Soldier’s Wife quest. Complete it then speak with the quest giver to complete the quest.

The Immortal Knight

Quest Giver: Corporal Swallowing His Pride (Seaport of Cotto)

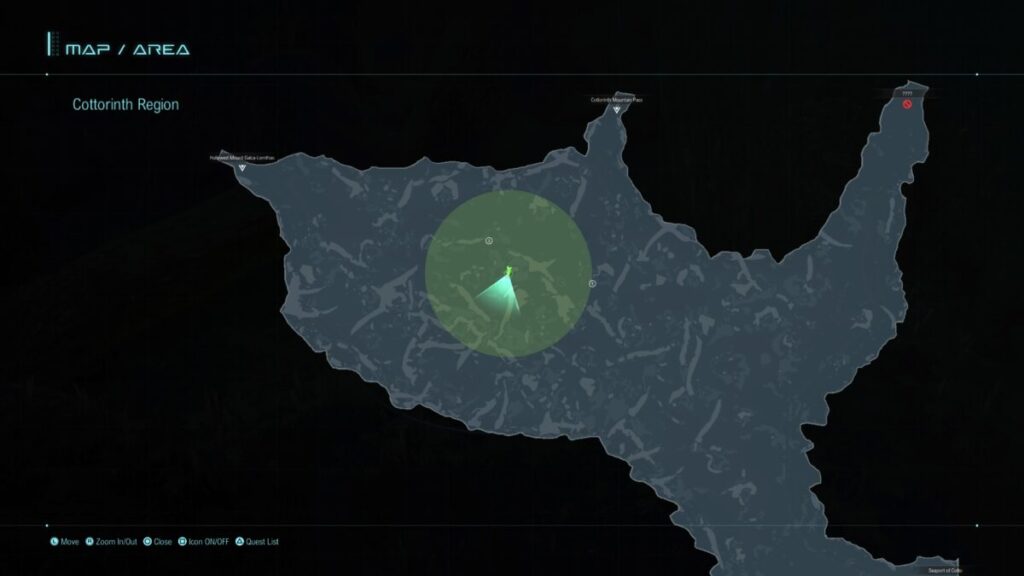
Objective: Defeat Grendelian Soul x5

Travel to Cottorinth Region and defeat 5 Grendelian Souls there. You can find a lot of these enemies within the green circle below!

After you defeat all the enemies, return to the quest giver to complete the quest.

The Man with No Plan

Quest Giver: Even Still Undaunted Explorer (Seaport of Cotto)

Objective: Deliver Youngster’s Belongings to Larcette Village

Make your way over to Larcette Village. Once there, travel to the house south of the inn just before the bridge to find Sister Annoyed by Her Brother outside. Speak with her! Afterwards, we returned to the quest giver in Seaport of Cotto, but he was not there! He can be found in the Royal Capital Acendros City. Speak with him on the eastern side to complete the quest.

Reward: Crytographic Message B

The Mechanic’s Saga

Quest Giver: Curious Mechanic (Merchant Vessel, the Aldous)

Objective: Acquire Scorpium Chip x10

Scorpium Chip are dropped by the Centralist Federation Soldiers in the Battleship Scorpium and Integration Plant. Once you have 4 Scorpium Chips, return to the quest giver to complete the quest.

The Peculiar Merchant’s Demand

Quest Giver: Santa, the Mercantilean (The Gauntlet)

Objective: Deliver Orichalcum x5 to Santa

For a guide on where Orichalcum can be found, click here! Once you’ve gotten all 5 Orichalcum, return to the quest giver to complete the quest.

The Perfect Detox

Quest Giver: Passionate Man (Baldaar Citadel)

Objective: Acquire Aquaberry Potion x2

Aquaberry Potion can be crafted using your item creation menu. For a guide on how to craft it, click here! Once you’ve gotten 2 Aquaberry Potions, return to the quest giver to complete the quest.

The Snack You Crave

Quest Giver: Man Curious about Umaibo (Parrapoeiam)

Objective: Deliver 1 Takoyaki Umaibo

You can purchase Takoyaki Umaibo from the Paladurnia item shop. Once you’ve acquired 1 Takoyaki Umaibo, return to the quest giver to complete the quest.

The Soldier’s Wife

Quest Giver: Lonely Woman (Larcette Village)

Objective: Deliver the Letter from Sartus’s Wife

Return to the Baldaar Citadel and speak with the Soldier Who Survived twice. Return to the quest giver to complete the quest.

The Trigger of War

Quest Giver: Bertrand (Castle Aucerius)

Objective: Find and defeat Vey’l Army Survivor x30

Travel to the Hybrid Research Vessel Terranus which can be found in the Vey’l Region then defeat 30 Vey’l Army Survivors. These enemies can be found throughout the Hybrid Research Vessel Terranus. Be sure to check the rooms as we found that these enemies tended to spawn there. After you defeat all the enemies, return to the quest giver to complete the quest.

The Undelivered

Quest Giver: Considerate Crewmate (Merchant Vessel, the Aldous in the Common Area)

Objective: Deliver the Container Addressed to Vyr

Travel to the Castle Aucerius to find Lola in a room near the central part and hand over the Container Addressed to Vyr. Afterwards, return to the quest giver to complete the quest.

This Man Needs Love

Quest Giver: Passionate Man (Baldaar Citadel)

Objective: Acquire Tears of Aphrodite x1

Tears of Aphrodite can be compounded using Aquaberries + Roly-Poly Bean in the item creation menu. Once you have the Tears of Aphrodite, return to the quest giver to complete the quest.

Unknown Organisms

Quest Giver: Researcher Striving for Peace (Parrapoeiam)

Objective: Defeat Death Pansy x10

Death Pansy can be found in the Aucerius Plains or The Aucerian Highroad. Defeat 10 Death Pansies then return to the quest giver to complete the quest.

Welch the Alchemist

Quest Giver: Welch (Delryk Village)

Objective: Acquire and deliver Electromagnetic Bomb (S) x5

You can purchase the Electromagnetic Bomb (S) from the Larcette Village Shop under the Bargain Buy section if you’ve completed his shop quests to unlock new wares. Once you’ve gotten all the Electromagnetic Bomb (S), return to Welch to hand them over and complete the quest!

Welch the Author

Quest Giver: Welch (Delryk Village)

Objective: Acquire and deliver Mithril x10

Mithril can be found around the Baldaar Citadel or purchased from the Royal Capital Acendros City Northern Shop and the Baldaar Citadel Shop. Once you have 10 Mithril, return to Welch to complete the quest.

Welch the Compounder

Quest Giver: Welch (Delryk Village)

Objective: Acquire and deliver Roly-Poly Bean x3

Roly-Poly Beans can essentially be found everywhere! Once you’ve acquired 3, return to Welch in Delryk Village to complete the quest.

Reward: Welch’s Communicator; Item Creation will also unlock!

Welch the Crafter

Quest Giver: Welch (Delryk Village) *This quest becomes available during the Mechanical Body main mission.*

Objective: Acquire and deliver Fresh Sage x5

If you don’t already have these in your inventory, Fresh Sage can be collected from the chests or on the ground. It can also be purchased from the shops in towns. When you have 5, return to Welch to complete the quest!

Welch the Engineer

Quest Giver: Welch (Delryk Village) * This quest is available during the Scheming upon Mt. Cottorinth main quest.*

Objective: Acquire and deliver Claidheamh Soluis x2

Claidheamh Soluis is a weapon that can be purchased at the shop in Delryk Village. Once you’ve gotten 2, return to Welch to complete the quest.

Welch the Smithy

Quest Giver: Welch (Delryk Village) * This quest is available during The Rot – A Creeping Terror main story mission.*

Objective: Acquire and deliver Silver x10

To easily obtain silver, purchase it from the Delryk Village shop. Once you have enough materials, return to Welch to complete the quest.

Welch the Synthesizer

Quest Giver: Welch (Delryk Village)

Objective: Acquire and deliver Fire Incantation x5

Head over to the Village of Eda item shop and purchase 5 Fire Incantation. Once you’ve gotten them, return to Welch to complete the quest!

What Could Be Inside?

Quest Giver: Meticulous Patrolman (Museum of Vergnisian Symbology)

Objective: Defeat Trapped Terror x3

The Trapped Terror can be found in Provenience Cavern. We found ours on Floors 2 and 3! Once you’ve defeated 3, return to the quest giver to complete the quest.

When I Sleep and When I Wake

Quest Giver: Boy Having Nightmares (Cottorinth Region)

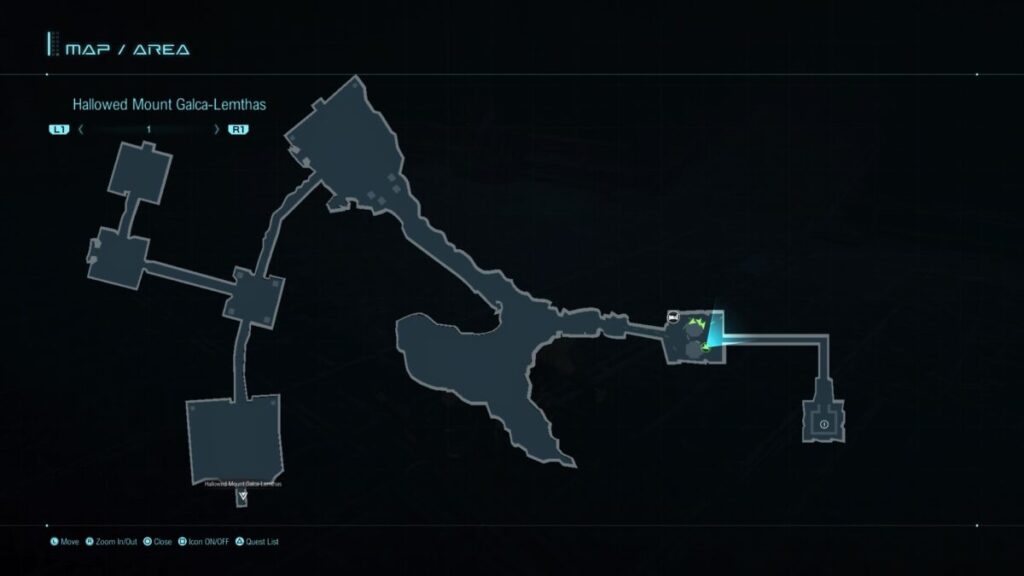
Objective: Defeat Death Specter Mors x5

Travel to the Hallowed Mount Galca-Lemthas and located the Death Specter Mors near the rest spot.

Defeat 5 of them then return to the quest giver to complete the quest.

WHY IS IT ONLY ME?

Quest Giver: Undaunted Explorer (Delryk Village)

Objective: Defeat Gluttonous Worm x10

First, stay at the inn in Delryk Village and eat the Invigorating Chunky Curry. Afterwards, travel to the Larcasse Region from the Del’vyr Region. If you fast travel, the event will not trigger! We also made sure to avoid battling to make sure we were still “full” by the time we arrived. When you head a short ways into Larcasse Region, the Gluttonous Worms will spawn.

Defeat 10 of them then return to the Undaunted Explorer to complete the quest.

Star Ocean The Divine Force Walkthrough
Guides

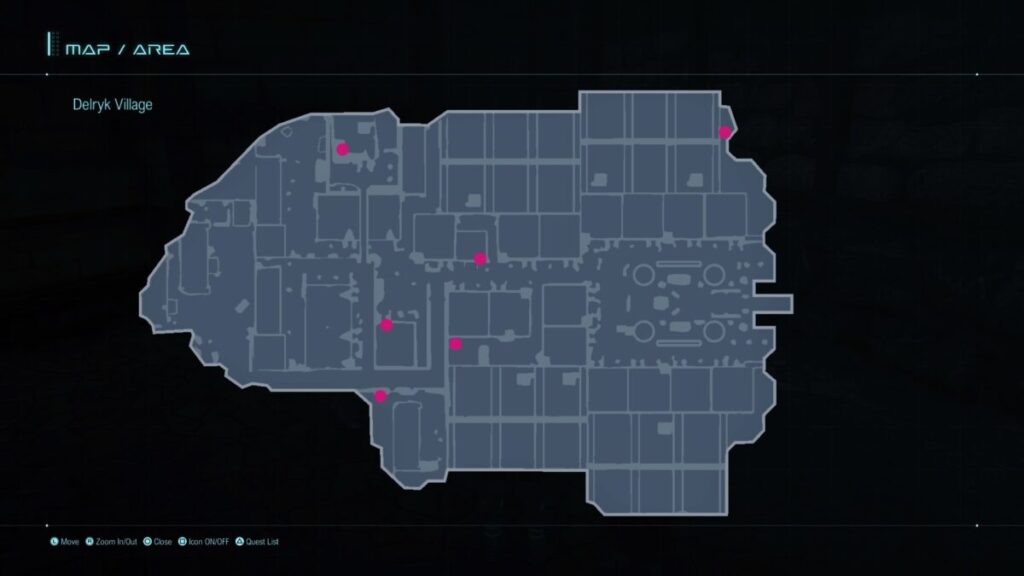
Star Ocean: The Divine Force – Delryk Village

by NightlyGamingBinge in

Below is a guide on the collectibles found in the Delryk Village of Star Ocean: The Divine Force. These collectibles consist of treasure chests and gatherable materials!

Es’owa Opponents

  • Obsessive Woman (Expert) – Next to a bench at the entrance to town from the Del’vyr Region
  • Masterful Boy (Apprentice) – Near the item shop
  • Man Full of Sunshine (Lv 4 Master) – Alley north of the item shop
  • Engrossed Man (Lv 2 Master) – Western side of town
  • Woman Disinterested in Games (Lv 1 Master) – Southwestern side of town outside the infirmary
  • Woman Who Needs to Party (Lv 1 Master) – Inside inn
  • Hidden Feelings – Head into Delryk Village to trigger the cutscene during The Kennys’ Descendant main quest
  • In Her Father’s Footsteps – Speak with Nina in the infirmary during The Kennys’ Descendant main quest

Treasure Chests

  • Fire Charm – Northwestern side of area on a roof behind a moving hand sign
  • Linen Cuirass – Western side of town at the top of a wooden tower
  • Chisato – Southwestern side of town on the wooden platform of the tall tower
  • Gold – Next to the weapon shop behind some bushes
  • Sacrificial Doll – Northeastern corner of the area
  • Secret Spice – Inside a house on the western side of the area

Gatherable Materials

  • Ancient Coin
  • Iron
  • Lodestone
  • Panacea Leaf
  • Roly-Poly Bean
  • Scrap Iron
  • Scruffy Rag
  • Shoddy Paper
  • Wool

Quests

For a guide on the below side quests, click here!

  • Why Is It Only Me?
  • Delryk Oddball

Side Stories

  • Chakram Devotion – Speak with Albaird after unlocking fast travel. He’ll pose a question. Select “They’re easy to use.”
  • Miner’s Town – Speak with Nina after the Albaird’s Struggle main story mission
  • Sweet Secrets – Speak with Albaird after the Albaird’s Struggle main story mission
  • Full Body Check? – Speak with Nina in the infirmary during The Rot – A Creeping Terror main story mission
  • Welch the Determined – Speak with Welch during the Cousin Theo main story
  • Truly? – Speak with Marielle during the Imperial Showdown main story
  • Sugary Allure – Speak with Albaird during the Scorpium Principles main story

Click here for the next guide on the collectibles at the Delryk Mines in Star Ocean: The Divine Force!

Atelier Sophie 2
Game Guides

Atelier Sophie 2 Walkthroughs and Guides

by MrsChappie in


Below are our walkthroughs and guides for Atelier Sophie 2: The Alchemist of the Mysterious Dream.


Landmarks

Guides on where to find the landmarks in each area.


Synthesizing

Useful information regarding synthesizing recipes.


Treasure Chests

Guides on what loot the treasure chests contain and where they can be found in each area!


Quests

Quests you can accept from Kati at the Crystal Sparkle Pavilion in Roytale. Rewards other than Cole are noted below!