The Nautiloid Crash Region is the starting point of Act I of Baldur’s Gate III after the Nautiloid crash. There you’ll find a handful of side quests you can complete for rewards to help your party in their search for a cure to the Mind Flayer Parasite occupying their skulls. This guide will cover the quests you can pick up in the Nautiloid Crash Region and what you’ll need to do in order to complete them.
Explore the Ruins
You’ll start this quest automatically when you approach the Chapel Entrance north of the Overgrown Ruins. There will be a group of bandits there trying to loot all the goodies for themselves. Approach them to start a conversation. If you pass one of the skill checks, you can convince them to leave without a fight or if you would like the EXP, you can attack them.
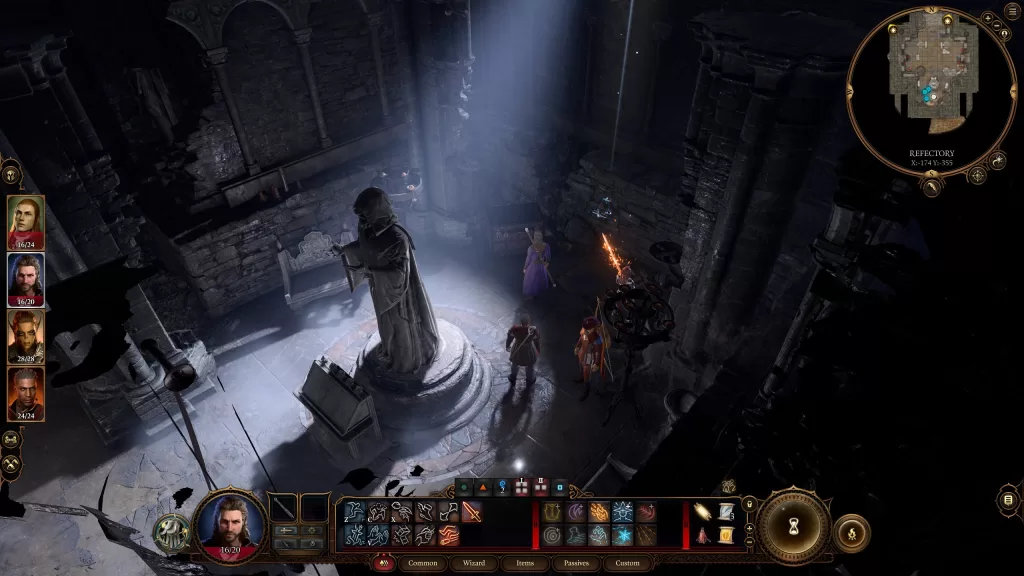
After scaring them off or taking them all out, head for the door leading into the Refectory. Interact with it to begin a conversation with someone on the other side. If you pass a skill check, you can convince them to open the door, otherwise, you’ll have to lockpick it. Head through then deal with Andorn. Loot the Bandit’s Key off of him then head for the locked door in the room. Use the lever to the left of the door to open it. Be wary as this leads to a fight with Andorn’s comrades. There will be 5 you’ll have to deal with. Once that’s done, head to the room at the end of the hallway with the statue then make your behind the statue. You’ll need to pass a perception check to spot a lever on the wall. Activate it and return to the hallway. The door on the left (which was locked) will now be open. Head inside then interact with the door there to reach the Dank Crypt.
Before we get into the Dank Crypt area, there are 2 other ways to reach the Dank Crypt. The first is by lockpicking the Ancient Door on the beach or lockpicking the hatch on the east side of the Chapel Entrance. Both require a skill check of 20 to be successful and both will grant you entry to the Dank Crypt allowing you to skip most of the bandits.
Now in the Dank Crypt, take a right and head through the Heavy Oak Doors. This will bring you into a room with some coffins. Before doing anything, circle the room and hopefully, you’ll get multiple perception checks revealing the traps in the room. On the west side of the central sarcophagus, there will be a pillar with a button on it. If you open the central sarcophagus then run over and push the button, you will disable all of the traps.
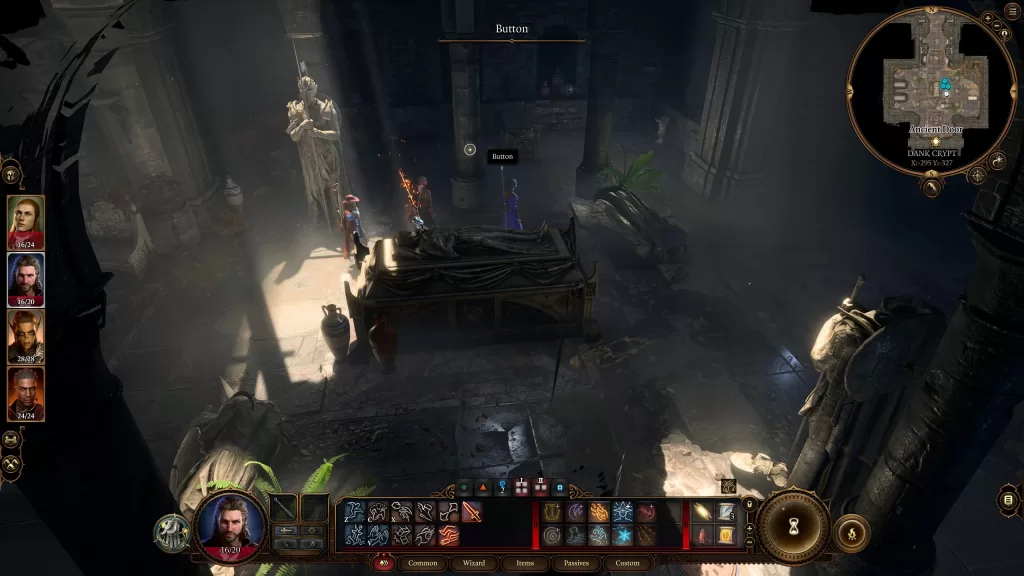
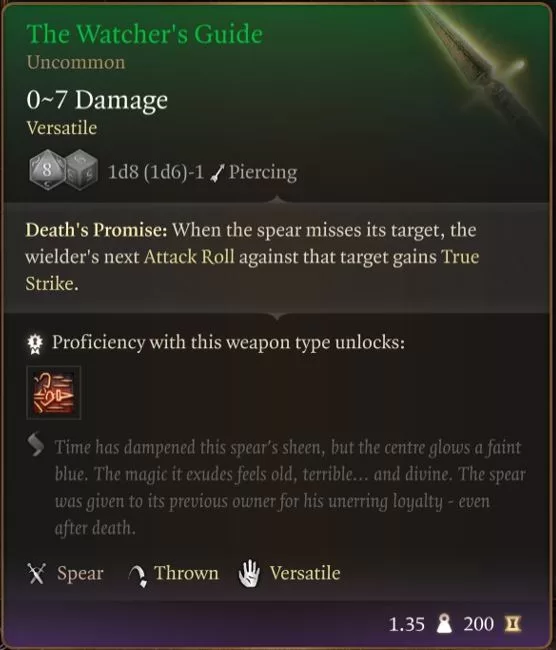
Return to the sarcophagus and loot it to receive The Watcher’s Guide spear and an Engraved Key.
With that out of the way, head north through the ruins to another set of Heavy Oak Doors and use the key you just got to open them. Head through the doorway and explore to your heart’s content. Make sure you enter the most northwestern room as it has a sarcophagus containing a Soul Coin and the Book of the Dead Gods for you to examine.
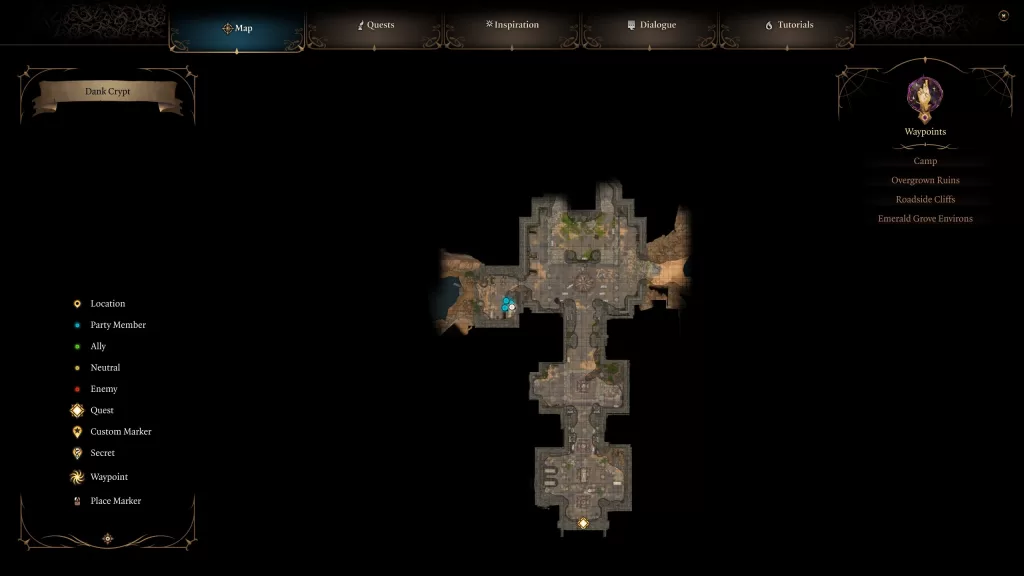
When you’re ready, head for the most northern part of the Dank Crypt with the giant statue. Climb the stairs on the left of the statue to find a button. Press the button to open a hidden door. This also awakens the skeletons that are in the room. Defeat them then head into the hidden room.
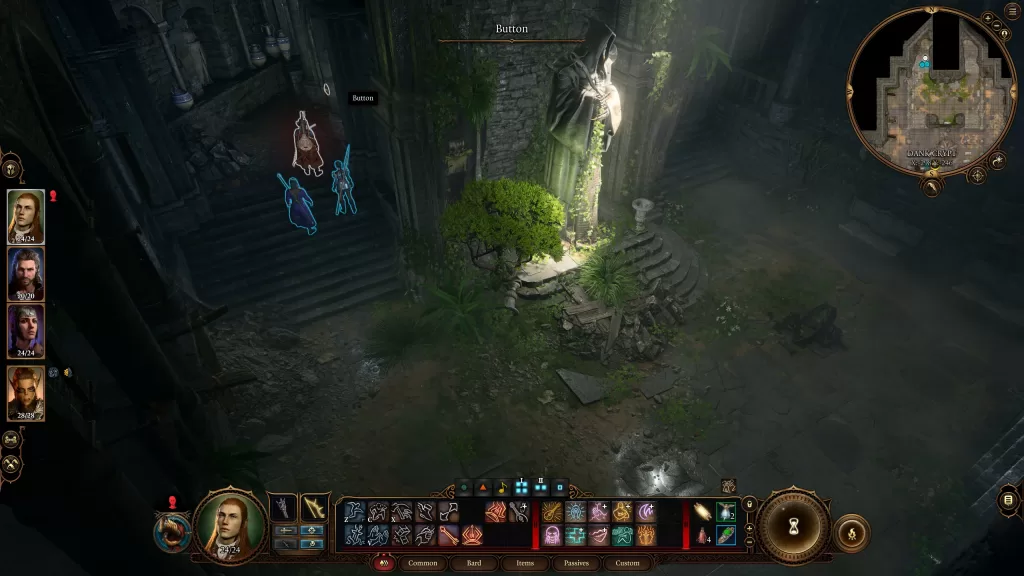
Loot the Heavy Chest in the room to find The Amulet of Lost Voices. Finally, open the Richly Adorned Sarcophagus to meet Withers! Pick whatever dialog options you want, but try not to be rude. After the conversation, he’ll say you will meet again and the quest will be complete. After some time passes, he’ll show up at your camp and can be used to bring back dead party members among other things. Make sure to loot his sarcophagus to get another Soul Coin.

Rewards: Soul Coin (in sarcophagus), The Amulet of Lost Voices (in a chest)
Find the Missing Shipment
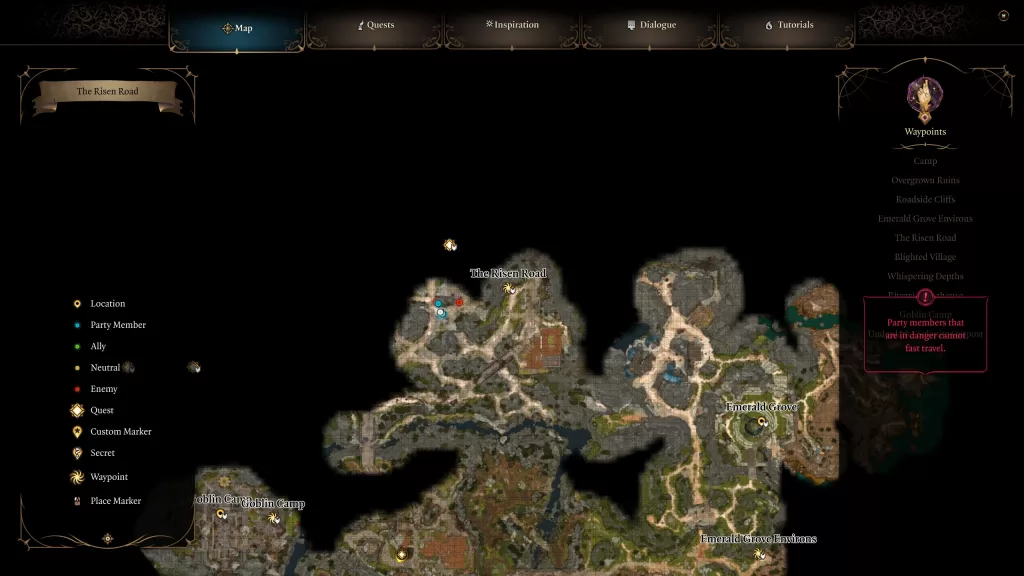
The quest can be found in the mountains northeast of Emerald Grove, to the west of the Risen Road. There is a cave there being attacked by a pack of Gnolls. Approaching the cave will throw you into combat. After the first turn, a dialog event with the Gnoll Warlord will trigger. Surprise! It too has a tadpole! Choose the first option to search further in its mind. This will add a new option to the list. You can now use your Illithid power to tell the gnoll to kill the people in the cave or feast on the rest of her pack. You can also withdraw from her mind and kill them all! (We chose to have her eat her pack!) After the battle, you’ll have more dialog with the gnoll who is not satisfied. You’ll have the option to tell her to eat herself, leave or sever the connection and attack her.
After dealing with the gnoll, one of the men trapped in the cave will approach and thank you for saving them. You can ask him a couple of questions like what he was doing and where they are going. As thanks, he’ll send you to meet some of his friends and give you a code word. Before he leaves, you can try to pass an intimidation check for the chest they are transporting instead. If you get it, the chest can be found in the cave and is sealed tight. You’ll have to pass a 20 Sleight of Hand check to unlock it or you can destroy it with your weapon. Inside you’ll find the Iron Flask which holds a dangerous creature and the quest will be completed.
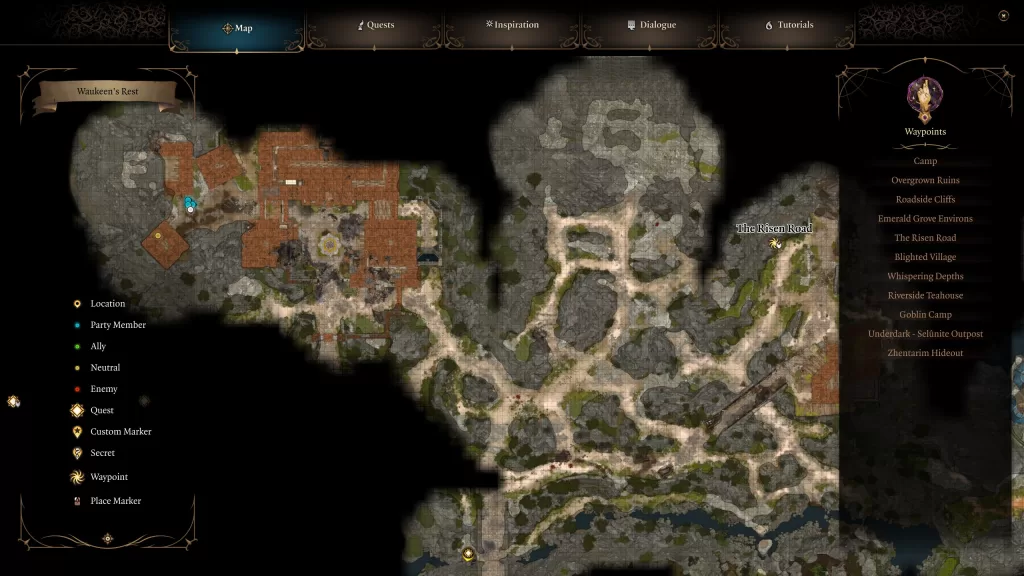
Alternatively, you can choose not to open the chest and instead use it as a bargaining chip. Travel further west to reach the burning town of Waukeen’s Rest. This is where the buddies of the guy from the cave can be found. Head to the west side of the area to find a couple of barns and a storage building, Enter the storage building (blocked with wooden crates) to trigger an event with one of the Zhentarim. Use the password that the caveman gave you to gain entry. Locate the hatch in the building and then use it to reach an underground area. Now look for the locked wardrobe and use the key that Salazon gave you to reveal a hidden door. Take that to reach the Zhentarim Hideout. Speak with Zarys there who will then task you with delivering the shipment to Baldur’s Gate and killing the man from the cave. If you refuse, then you’ll have to fight her and her goons. Accepting with complete the quest.
Find the Nightsong
Speak with Aradin in the Druids’ Grove to pick up this quest. He’ll tell you about a job his mercenary group took and even give you the contract. You can loot the contract off his corpse if he died during the initial battle against the goblins at the grove. Aradin will also mention that another of his group, Brian the dwarf, has a map leading to the relic they were supposed to retrieve, but he was killed by goblins… Luckily we don’t need it!
Make your way to the Goblin Camp then enter the old temple. Once inside, head for the priestess room west of the state in the southern part of the area. In her room on the right side will be a locked door. Pick the lock then head inside to reach the defiled temple. This area is guarded by the ogre Polma who is the bodyguard of the High Priestess. If you want to skip her, you can climb up a ladder near the door and jump down into a hallway when she isn’t looking. If she sees you, you can try and persuade her that you should be there otherwise you’ll need to take her out.
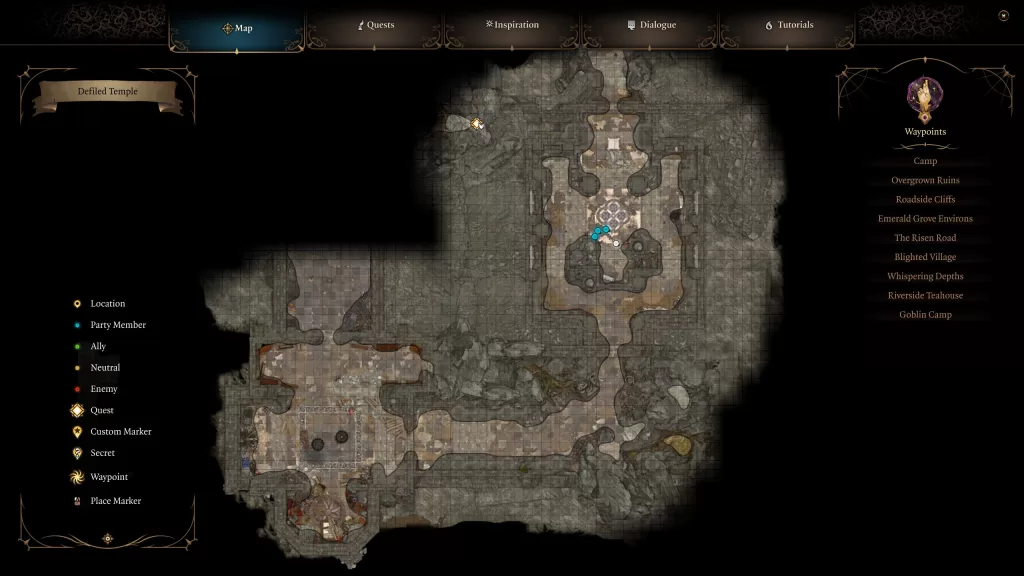
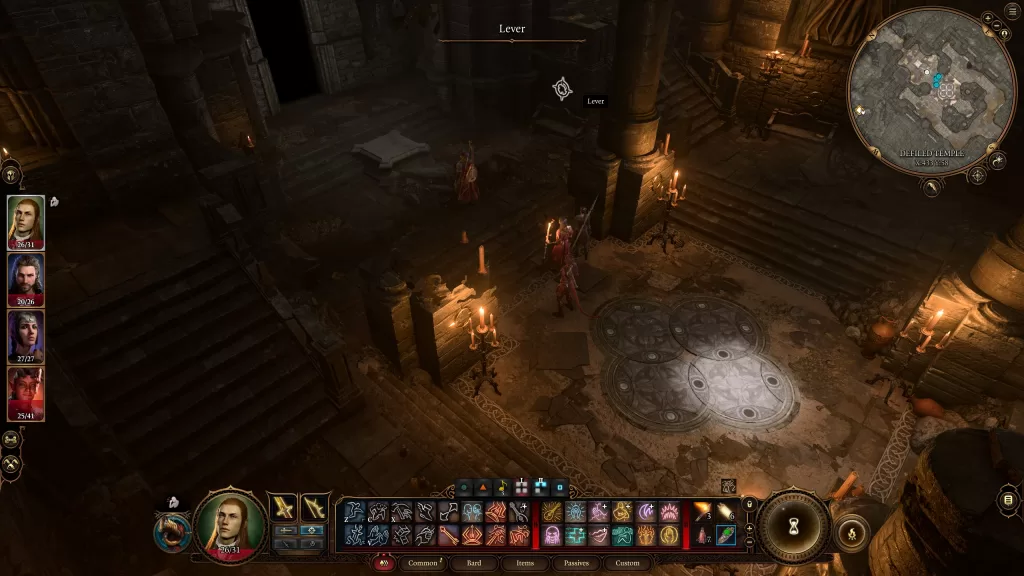
Continue down the hallway until you get to the Stone Disc puzzle in the middle of a dead-end room. Move the disc so they match the picture below to reveal a hidden path. Alternatively, there is a lever you can try to lockpick that will also open the way forward. Proceed through the new path and follow it to reach the Selunite Outpost in the Underdark.
UPDATE: The Nightsong quest can’t be completed until you reach Act II taking place in the Shadow-Cursed Lands. You can read about how to complete the other half of the quest on our Shadow Cursed Lands Quest guide.
Finish the Masterwork Weapon
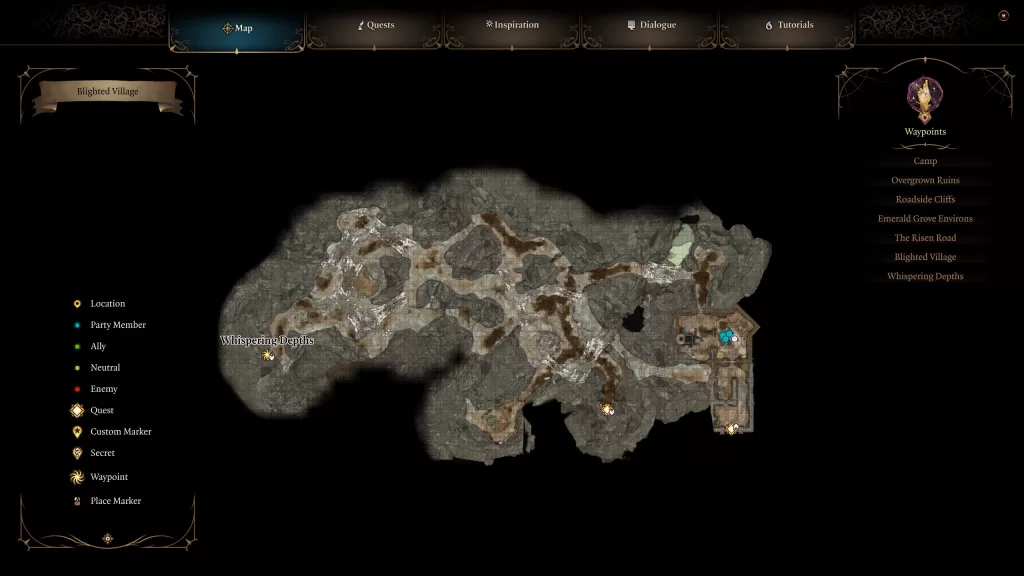
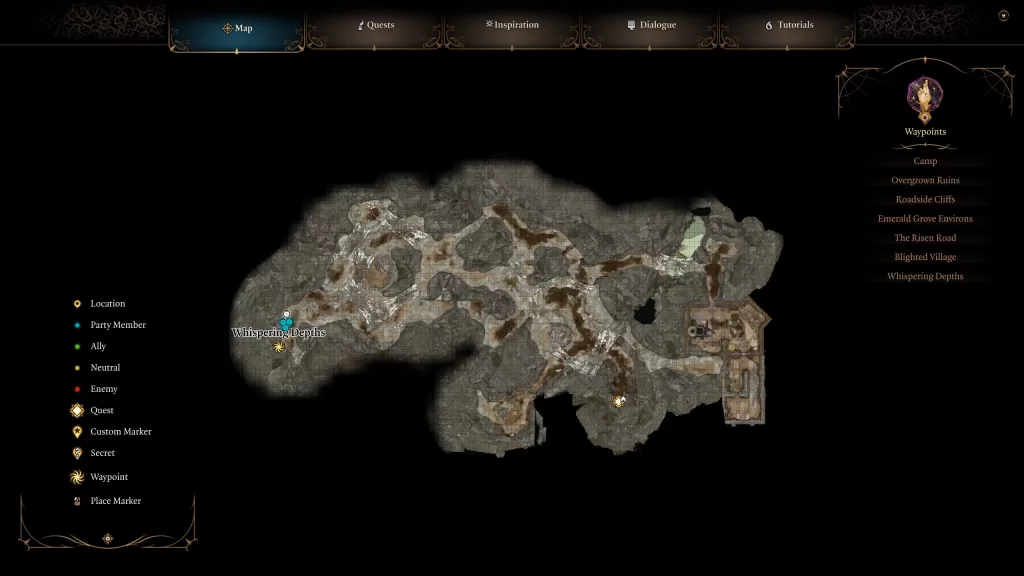
To start this quest, you’ll need to read the Highcliff’s Blueprints which can be found in the chest of a building on the east side of the Whispering Depths.
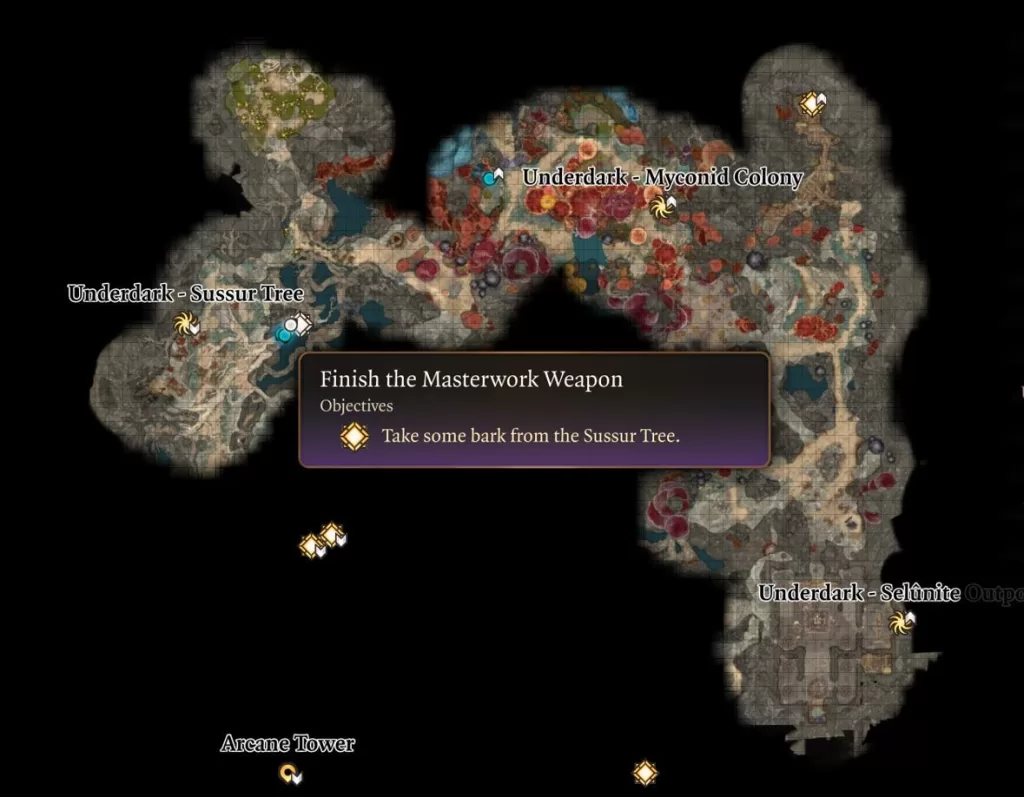
To forge one of the weapons in the blueprints you’ll need to first obtain some bark from a sussur tree which can be found in the Underdark. Once you gain access to it, you’ll want to head north from the Selunite Outpost to reach the Myconid Colony. From there, head west and you’ll reach the Sussur Tree. You’ll need to be careful though as the area is occupied by some vicious beasts and a crazy wizard guy. Locate the Ancient Sigil Circle to find some roots of the tree. Climb up them to reach the long section coming out of a giant hole. From there you can loot some bark.
Now that you have the bark returned to the Blighted Village and head back to the Whispering Depths. Make your way to the forge on the east side to begin forging the weapon. Interact with the Melting Furnace to get it going then use the Blacksmith’s Bellows to the right of it. Interact with the Melting Furnace once more to open the Combine Items menu. Add in the Sussur Tree Bark to finish preparing the furnace. Interact with it one more time to open the Combine Items menu and choose either a dagger, greatsword or sickle. This will complete the quest.
Free the Artist
This quest is technically a quest for the Baldur’s Gate area. but we’re including it here so you don’t miss it. You can pick it up from the Zentarim Hideout found under Waukeen’s Rest (see Find the Missing Shipment on how to get there).
We joined the Zhentarim in the mentioned quest and were able to speak with Brem. He has a slave who will sell you for 1000 gold. If you pass a skill check, you can talk him down to 600. After paying the money, speak with Oskar who can be found nearby to learn his story. He will then head off to Baldur’s Gate. That’s all we can do for this quest as of right now. We’ll expand on it more later.
Hunt the Devil
This quest is tied to the Our Firery Friend companion quest for Karlach. In an effort to reduce duplicating things, please check out our Our Fiery Friend guide for details on the Hunt the Devil quest.
Rescue the Gnome
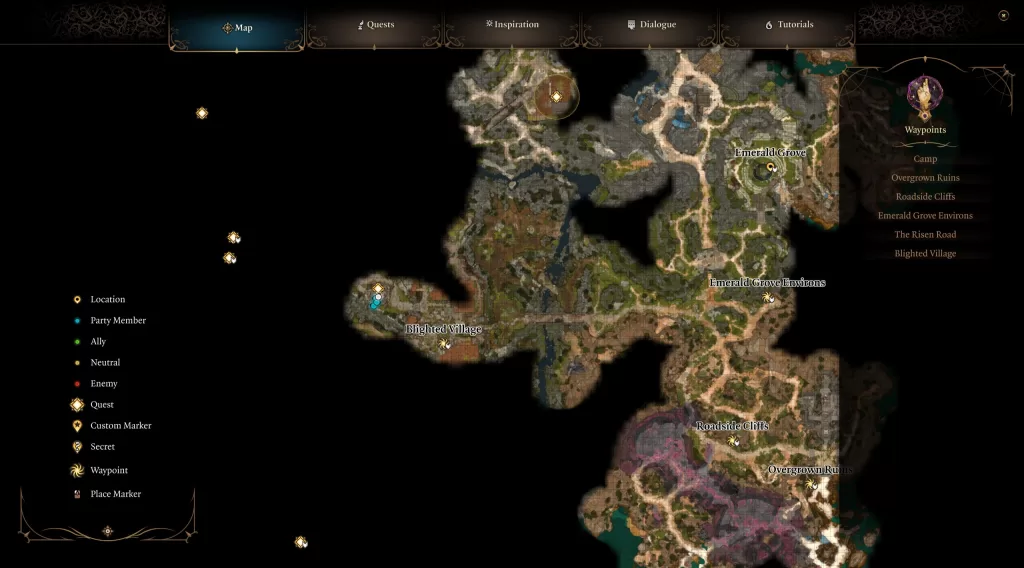
You’ll get this quest in the Blighted Village west of the Emerald Grove. The town is occupied by Goblins so be careful as you approach. If you pass a skill check, you can convince them to let you enter the town without a fight. Otherwise, you’ll have to take out the entire unit. Whatever route you choose, make your way to the west side of town to find a giant windmill with a Gnome tied to it. If you convinced the Goblins to peacefully let you into town, you’ll have to talk their leader into leaving the Gnome alone. If you do, he will pull the Goblins out of town. If not, looks like you’re fighting goblins!
In order to get the Gnome off the windmill, head inside through the back door and flip the brake lever to the left of the ladder under the gears. This will stop the windmill. Head back to the front and interact with the Gnome to start a conversation. He’ll ask you to cut him down, you can comply or leave him there. If you cut him down, the conversation continues. You can choose to extort him or let him go. You will get different approvals based on your choices. Either way, he’ll tell you to keep his pack if you can find it and be off. The quest will then be complete.
- I freed you. A little compensation would be nice. / Yes. My rewards – now.
- Shadowheart approves.
- You owe me nothing.
- Gale / Karlach approves.
Rewards: Permission to loot the gnome’s pack if you find it
Rescue the Trapped Man
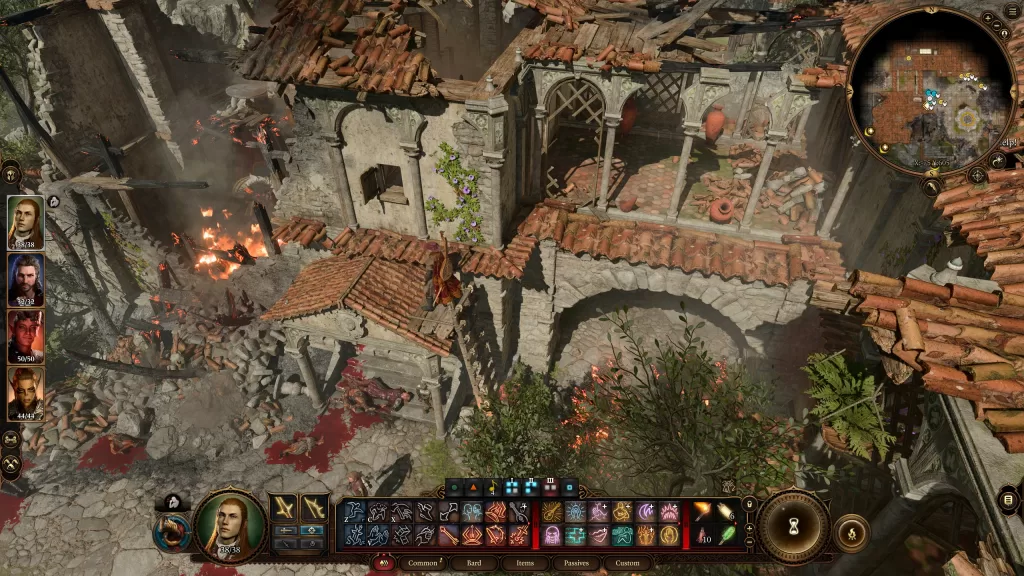
You’ll start this quest by visiting the burning town in the northern part of the area west of The Risen Road. Head to the courtyard the climb up the ladder leading against the left building. From there, you’ll want to jump over to the walkway and break the wooden door leading to the main building.
Next, you’ll want to jump inside the room and interact with Benryn who is trapped under a piece of 2×4. You’ll need to pass a skill check to lift the board off of him. He’ll then thank you can take off out the door. Follow him over to the building at the other end of the walkway. Speak with him there to ask why he and Mirieth were fighting. to which he’ll mention a dowry.
To find the dowry, head to the west side of the area where there are a couple of barns and a storage building. You’ll want to enter the barn on the right of the building and interact with the stack of hay. Passing a perception check will reveal a gilded chest in there. Open it to collect the dowry ring then bring it back to Beryn. You can hand it over or tell him you keeping it. Either option will complete the quest.
Save Mayrina
This quest is tied to the Find a Cure main quest sub-objective to Get Help From Auntie Ethel. For this section, we are assuming that you’ve decided to not get help from Ethel and are instead going to save Mayrina. Picking up from where Get Help From Auntie Ethel left off, you’ll be in a fight at Ethel’s house. She will turn invisible and take off through her fireplace with the girl. Chase after her with all of your party members ignoring the ads if you can. You’ll have to deactivate the fire and interact with the stairs using all 4 characters to reach her lair.
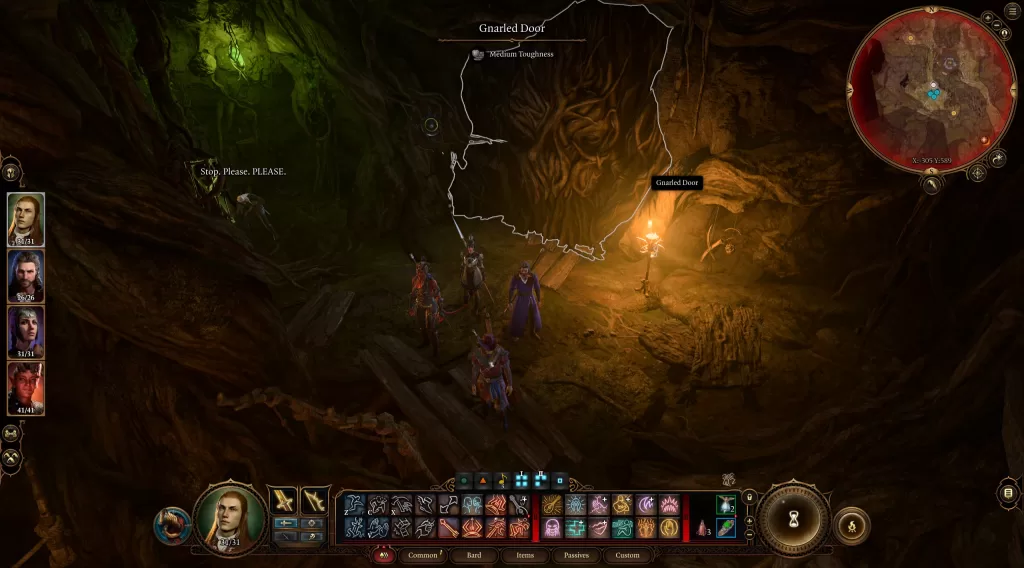
Feel free to look around the hag’s lair upon your arrival. When you’re ready to pursue her, head over to the Gnarled Door and interact with it. Regardless of the outcome, the door is actually an illusion and you can walk right through it. Do so to reach the Overgrown Tunnel. Inside, you’ll find 4 people under the hag’s control. You’ll need to deal with them or they will join her for the final fight. It’s worth noting, that no matter what you do, you cannot save them.
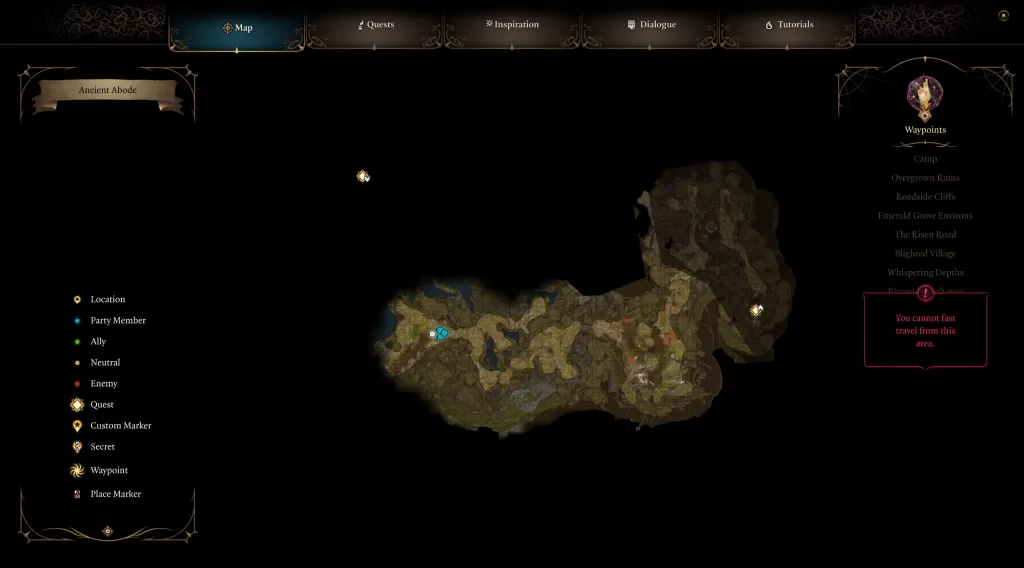
After the fight, continue heading through the tunnel jumping through the waterfall at the end. This will bring you to an area with multiple paths covered with toxic gas and loaded with traps. If you get close to the gas, you have a chance to spot where it’s coming from and can move an item there to block the gas flow. Keep an eye out for the flowers that explode. I ended up jumping down to the bottom a level at a time and healing up before approaching the Ancient Abode where the hag awaits.
When you reach the abode, Mayrina will be locked in a cage hanging from the center of the room. Approach her to cause the hag to show up beginning the fight. The below list is what she’ll do during the fight.
- Starts by making clones and setting the cage on fire
- Damaging the clones makes them disappear
- Use a water spell or something else to put out the flames on the cage
- She will change to look like the girl and then teleport the real one into battle
- Attack the one asking you to save her
- She will turn invisible and teleport around the map
After getting her health low, she will stop the battle begging you not to kill her. If you let her keep the girl, the hag will give you power in the form of an Ability Score +1. It will allow you to raise your Wisdom, Strength, Consitution, Dexterity, Intelligence or Charisma by 1 point. Below are all of the options you’ll get and the result for choosing each one (if you pass the skill checks).
| Choice | Result |
|---|---|
| No good can come of this. Let Mayrina go. | The girl goes free (and isn’t happy) Shadowheart disapproves Karlach approves |
| Keep the girl. I’ll take the power. | You get Ability Score +1 Shadowheart approves Karlach disapproves |
| I think a dead hag is the answer here. | You finish the fight and kill Ethel Shadowheart approves Karlach approves Corellon’s Grace staff Tarnished Charm |
| [INTIMIDATION] If you want to live, hand over Mayrina and this power. Right now. | The girl goes free (and isn’t happy) You get an Ability Score +1 Shadowheart approves Karlach approves |
| [DECEPTION] My reinforcements are nearly here. Give me the girl and power and they’ll spare you. | The girl goes free (and isn’t happy) You get an Ability Score +1 Shadowheart approves Karlach approves |
If you chose to let Ethel keep Mayrina, then the save Mayrina quest will be completed and the two will disappear. Choosing to keep the girl will cause the hag to leave but Mayrina will be really mad at you. This also applies if you save the girl and keep the power or just kill the hag. After making your decision, if you kept Mayrina, she will lay into you a bit for ruining everything and then storm off. The objective of the quest will update to search the lair for a way to help Mayrina. You’ll want to enter Ethel’s Acrid Workshop which can be found north of the cage the girl was trapped in. The room is filled with potions and some chests you can interact with for additional loot. Go to the table to the right of the giant spike-looking rock and loot the Bitter Divorce wand from the table. You’ll also want to grab the Ever-Seeing Eye off of the table and the Staff of Crones standing on a rock to the left of the stone stairs. When you’re done exploring the room, use the Mushroom Circle in the corner to be sent back outside to the Putrid Bog.
Head over to Mayrina who will be nearby and speak with her. Choose the option “I found a wand – I think I can resurrect your husband”. She will then beg you to bring her husband back. You’ll then be given the option to comply or to break the wand in two.
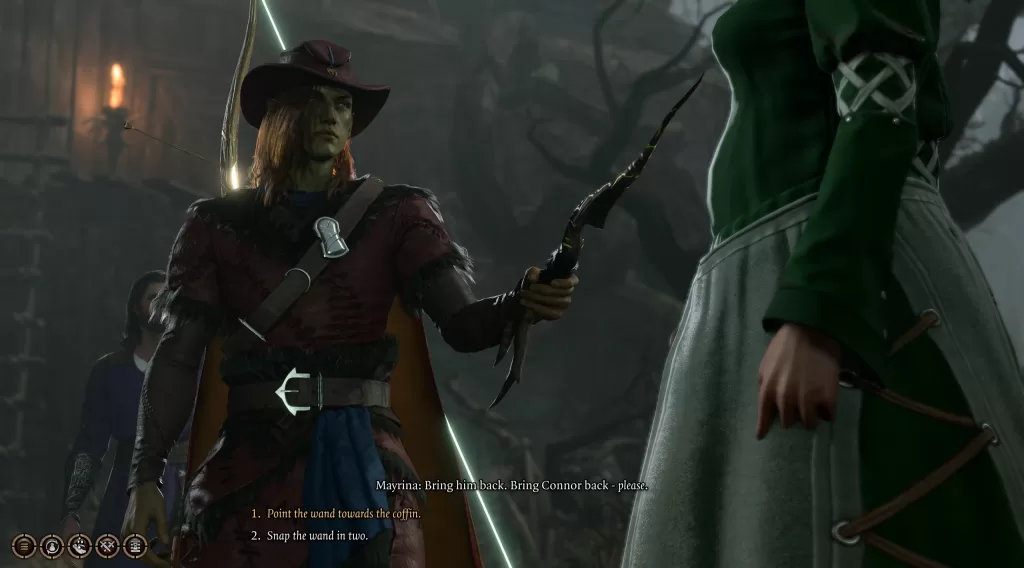
Breaking the wand in half will complete the quest. If you use the wand, Connor climbs out of the coffin as a zombie bound to serve whoever holds the wand. You’ll also be given a group of options. The quest will be completed after you pick one and the dialog ends.
| Choice | Result |
|---|---|
| This is your husband – do you want him or not? | You can give her the wand You can pocket the wand |
| Don’t worry – I have the wand. I’ll make use of him. | You keep the wand and Connor Mayrina is mad and runs off |
| We can always bury him again. | You can hand Connor over to Mayrina You can kill Connor (and Mayrina) |
| Kill the undead abomination. | You will kill Connor and Mayrina |
Search the Cellar
You can pick this quest up by reading the Apothecary’s Ledger on the front counter in the Apothecary’s shop which is next to the Ancient Sigil Circle at the Blighted Village. It states that there are some rare herbs hidden in the cellar. You can reach it by heading behind the counter and interacting with the wooded hatch on the floor.
Once you’re in the cellar, feel free to loot anything that isn’t tied down. What you’ll want to keep an eye out for is a stack of crates in an oddly shaped corner. Behind them is a lever that will reveal itself after you pass a perception check. Pull it to open a hidden passage behind a bookcase. Follow the passageway to reach an open area with a few caskets. Now would be a good time to save as you’re about to get jumped by a gang of skeletal guardians hiding in the caskets. Deal with them then loot the room. There is a mound of dirt you can dig up to reveal a chest. If you don’t have a shovel, there are a couple laying around.
After you’re done exploring, head over to the Ornate Mirror in the back of the room and interact with it. Surprise! It’s a magic mirror that wants to know your name. If you are proficient in arcane, then you can try and use that to learn more about the mirror. Follow that up by telling it your name which it doesn’t know. It will then ask you a series of questions to prove your knowledge. All three answers in the table work for Gale as this is a magic mirror and he is kind of an expert. The first two should be fine for everyone else. The correct answer to the third question is different based on who is talking to the mirror. You’ll want to pick the option that involves self-preservation. Answering all of the questions correctly will result in the mirror opening up revealing another hidden room. Alternatively, if you want to skip the questions, you can just try to pass the INTIMIDATION check by threatening to smash it into pieces. That will also cause the door to open.
| question | Answer |
|---|---|
| What think you of the zulkir known as Szass Tam? | Szass Tam is a foul, wretched creature A foul lich. May he die a thousand more deaths. (requires passing a history skill check) |
| Why might one use balsam ointment? | I read a doctor’s journal – he used balsam to clean a wound Balsam disinfects wounds. Surely everyone knows that? |
| If you could see anything in me, what would it be? | I’d see myself in my next incarnation: a living manifestation of Netherese magic. A mythal in my own right. I’d look for whatever spell would rid me of this worm in my head. |
Pass through the mirror to enter a secret laboratory (unless your name is Dee Dee, you can get out!). Make your way over to the desk with all of the science equipment on it then examine the Moonhaven Logbook to learn you’re in a necromancer’s lab! The objective will also update for you to find the necromancer’s book. Make sure to loot anything that strikes your fancy and keep a special eye out for a Gilded Chest in the southeast part of the lab to loot some rare Bracers of Defense.
When you’re ready, head to the east side of the room to find a locked gate. A successful perception skill check will reveal that it’s booby-trapped. What you want to do is unlock the door and snag the Necromancy of Thay book on the table past the gate. It too is booby-trapped by multiple traps. When you pick up the book you’ll get a couple of options (and comments from the peanut gallery). The turn-based mode will also start allowing you time to escape before the traps go off.
If you drop the tome with an intent to destroy it, then Karlach will approve and Gale will disapprove. If you actually want to destroy the book, you’ll need to hit it with some Radiant magic. Luckily Shadowheart’s Sacred Flame and Guiding Bolt both work. As soon as you destroy the book, the quest will be complete and you’ll be attacked by 3 level 5 shadows. Deal with them then feel free to leave the laboratory.
Now if you want to open the necromancy book, there’s still a little bit more to go. To start, exit the lab and make your way back up to the Blighted Village. Next head to the well near the Ancient Sigil Circle and interact with it. When prompted, choose the Investigation option and make sure you pass the check. You’ll now get the option to climb down the bucket rope. Choose that one to descend into the Whispering Depths.
In the depths, there will be 2 Phase Spiders and 2 Ettercaps that you’ll need to deal with. After they are taken care of, head to coordinates X:495 Y:365 to find the Apprentice’s Pack. Read the Apprentice’s Journal found inside to learn about a stone in the cave that might be able to open the book. Before pressing on, you may want to spend some time exploring mainly the eastern side and a living area in the south central part of the Whispering Depths. You’ll come across an uncommon Steelforged Sword and the uncommon Spiderstep Boots which allow you to move through webs unhindered.
Continue working your way west and eventually, you’ll meet the level 5 Phase Spider Matriarch circling her nest. If you look closely at the lower level, you’ll notice the Dark Amethyst. Time to whoop the matriarch and her spawnlings then grab that gem! If you loot the matriarch, you’ll get the uncommon Poisoner’s Robes which deal extra poison damage when the wearer casts a poison-based spell. If you don’t care about that, then you can cheese this fight a bit. Wait for her to walk out on one of the web bridges then light it on fire to start the fight. This will cause her to fall down below. On her next turn, she will teleport up to you. From there, hit her with the Thunderwave spell launching her down into a chasm below! Then all you need to do is clean up the two remaining enemies.
After you grab the gem, head a little further west to find the Whispering Depths Ancient Sigil Circle. You can now open your inventory and read the book. You’ll have the option to place the amethyst in the slot on the book’s cover. Choose that option to insert the gem. You’ll get one last set of options prompting you to open, destroy or put the book away. After all this work you might as well right?
Well, now that we have opened the book, otherworld forces are trying to communicate with us. You can turn the page up to three times, having to pass a saving throw skill check with each attempt and the number you must meet goes up each time. After the third attempt, the book closes and the objective updates. We now need to find a way to finish reading the Necromancy of Thay which you won’t be able to do until you reach Baldur’s Gate. Check out our Baldur’s Gate Quest guide here to finally complete this quest.