Below are our guides and walkthroughs for A Plague Tale: Requiem.
Collectible Walkthroughs
Below are walkthroughs for the collectibles found during each chapter. These collectibles include feathers and flowers for Hugo’s Collection, souvenirs, secret chests and tools!
First thing’s first, finish the Hunting for Ingredients support quest. Please note that it’s important to speak with Bennett in Morges on West Street first before speaking with Oscar behind the counter! Give her the eggs first then speak with Oscar! Once you complete the quest, turn it in at the terminal.
After you report the above requests at the terminal, head to the Fisherman’s Guild on East Street and speak with Branch Manger Cerdan to check your rank. If you caught all of the above fish, you’ll be a Professional Fisher now and will receive Hare quartz.
While on East Street, head to Long Lao Tavern & Inn. Enter the room on the left side of the inn. In the hallway with the giant cat statue, take the first door and speak with Lars inside. You’ll get the following support request:
Complete this support request and turn it in at the terminal. If you’ve completed all the support requests up to this point, you’ll receive a Septium Vein quartz!
When you’re ready to progress the story, travel to the Residential District and take the northern exit to the Mainz Mountain Path.
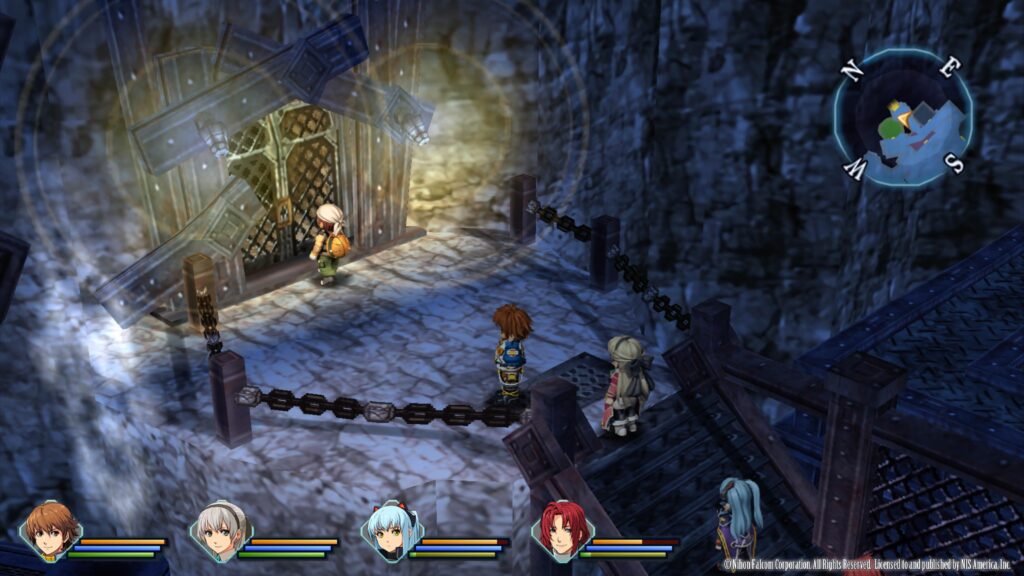
Mainz Mountain Path
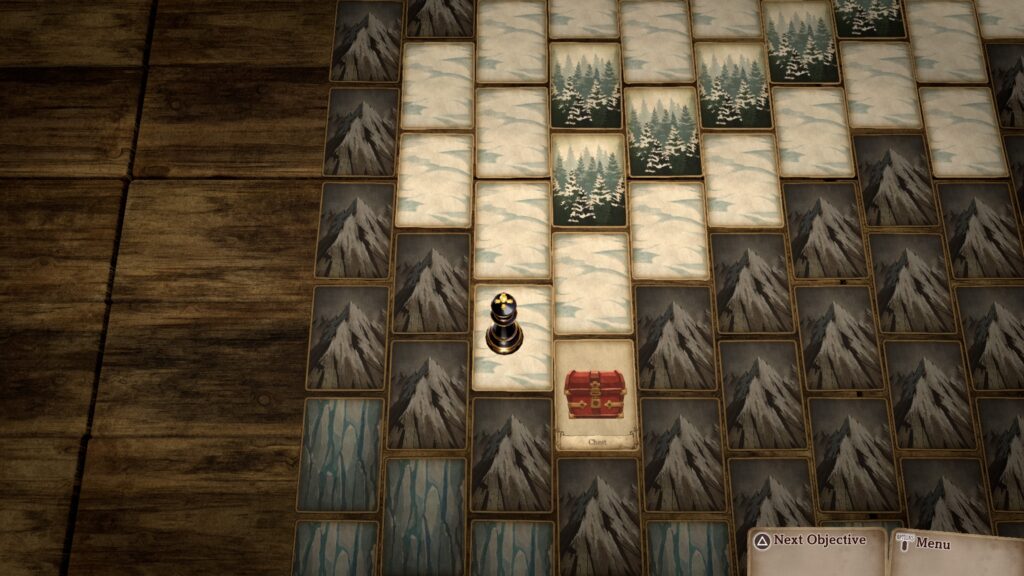
Area 1
Head forward a short way to trigger a cutscene. When it ends, you can explore the path to the northeast leading to the Crossbell Cathedral if you wish, however, there are no collectibles there. Instead, head to the western path.
Area 2
Explore this area to find the below.
Treasure Chests
Blind Quartz
Enemies
Rock Rat
Humming Gator
Earth Drome
Ale Slime
Fish
Snow Crab (Novice Rod, Earthworm)
Area 3
Explore this area to find the below. When you head uphill on the path, a cutscene will trigger. After it ends, continue along the path.
Treasure Chests
Time, Space and Mirage Sepith x50
Luminous Glasses
Enemies
Humming Gator
Ale Slime
Nepenthes
Rock Rat
Earth Drome
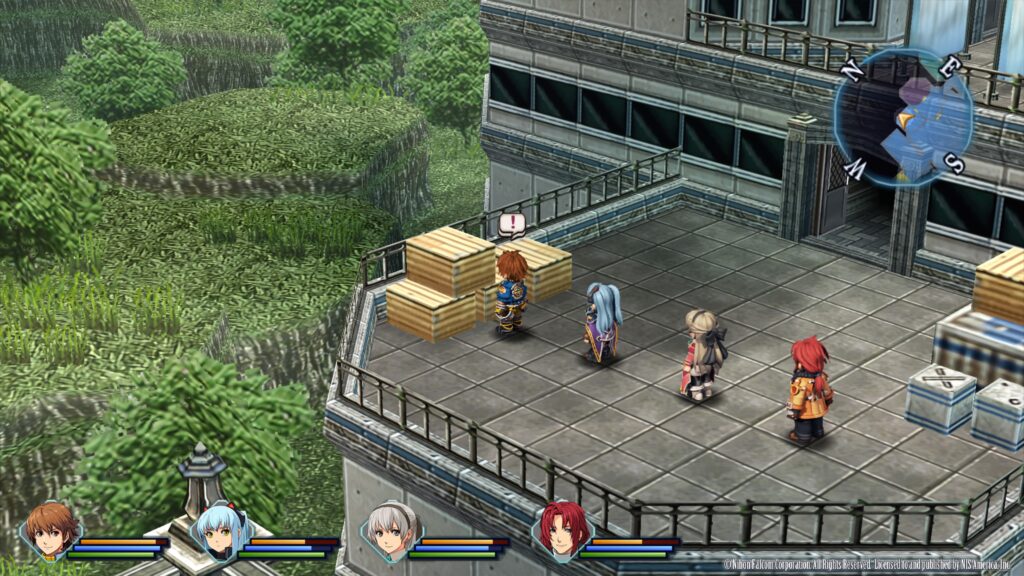
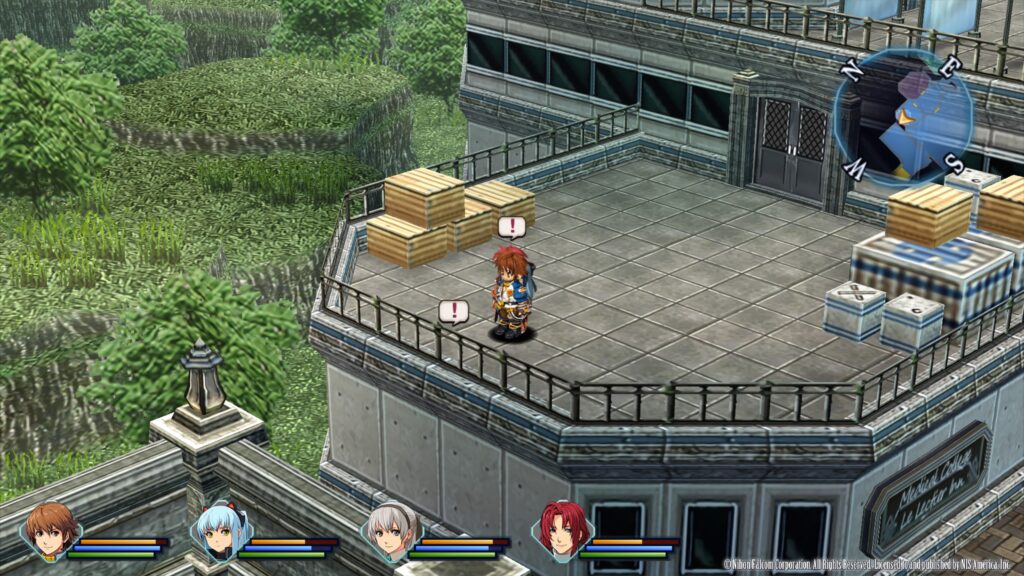
Area 4
Explore this area to find the below.
Treasure Chests
When you interact with this different colored chest on the western side of the area, you’ll sense that powerful monsters are in the chest and will have the option to challenge them. If you begin the fight, you’ll face 2 Level 35 Armored Hydra. Since you’ll do no damage against them, leave this chest unopened for now!
Enemies
Ale Slime
Nepenthes
Humming Gator
Earth Drome
Rock Rat
When you head under the bridge, a cutscene will trigger. Afterwards, take the northeastern path.
Area 5 (Northeastern path from bus stop in Area 4)
Once you enter this area, a cutscene will trigger. You won’t be able to do anything here so return to Area 4 with the bus stop. Proceed up the northwestern path.
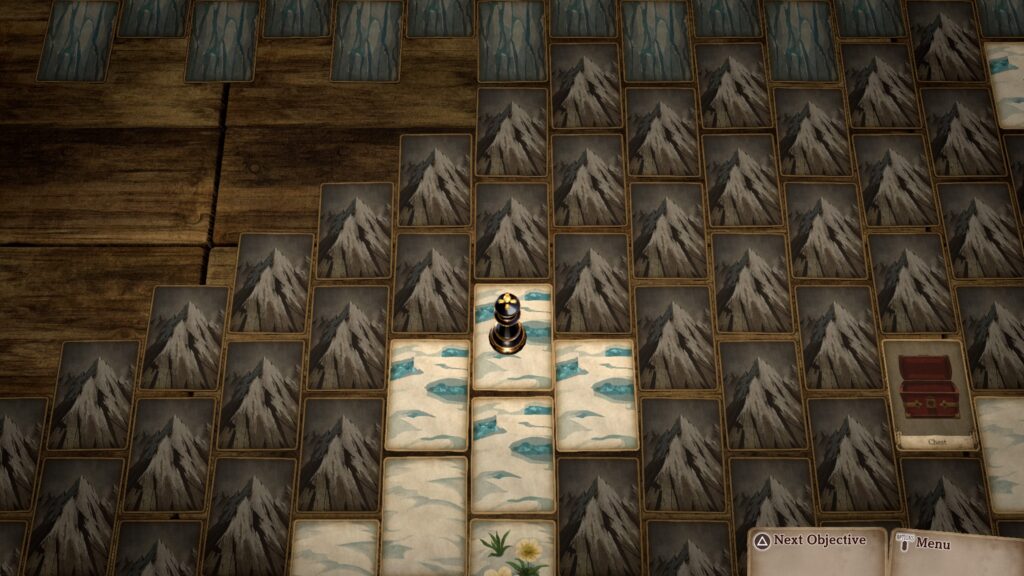
Mainz Mountain Path – Tunnel
Explore this area to find the below.
Treasure Chests
Earth, Water, Fire and Wind Sepith x50
Interact with the different colored chest to begin a fight against 6 Mottled Killers. Defeat them all to receive Engineer Boots.
Enemies
Killer Cricket
Mottled Killer (tan spider)
Mottled Murder (red spider)
Rocktopus
Mainz Mountain Path – After Tunnel
Enter the next area to trigger a cutscene. Choose the following:
Why was that wolf not the culprit?
The howl
The appearance
Both howl and appearance
Afterwards, continue along the path to find the following:
Treasure Chests
Reviving Balm
Enemies
Rozu
Rocktopus
Ale Slime
Mainz Mining Village
Once inside the village, head directly to the far east side and enter the large circular building (mayor’s house) to trigger a cutscene. Afterwards, head to the right side (when facing the mayor’s house) and go down the stairs, speaking with everyone you find (including those in the buildings). Return to the mayor’s house to trigger a cutscene. Return to the mayor’s house to trigger another cutscene. When prompted select the following:
What has yet to be confirmed?
Monsters’ identity
Monsters’ lair
Monsters’ objective
Which one corresponds to the ‘Culprit’?
Black Wolves
Unknown
Wolves’ Abilities
Property Damage/Injuries
Which one corresponds to the ‘Objective’?
Black Wolves
Unknown
Wolves’ Abilities
Property Damage/Injuries
Which one corresponds to the ‘Means’?
Black Wolves
Unknown
Wolves’ Abilities
Property Damage/Injuries
Which one corresponds to the ‘Result’?
Black Wolves
Unknown
Wolves’ Abilities
Property Damage/Injuries
What’s the name of the witness?
Harold Hayworth
Lytton
Shizuku MacLaine
Noel Seeker
Don’t interact with the table just quite yet. Instead, exit the inn then head down the stairs to the right of the mayor’s house. Enter the circular house on the southern side of the village and speak with Miner Max in bed to receive the below book.
Books
Back Alley Doctor Glenn – Ch. 3
Next, speak with the person (Mine Chief Hoffman) in front of the entrance to the mine on the northern side of town to the right of the general store.
During the cutscene, he will unlock the mine allowing us entry.
Mainz Mine
Head inside and explore to find the below!
Treasure Chests
Teara Balm
HP 2
Reviving Balm
Martial Arts Uniform
Enemies
Sticky Slug
Once you’ve explored everything, return to the entrance and exit the mine.
Mainz Mining Village
When you’re ready, interact with the table in your room at the inn and “stand by until midnight”. After the cutscene, a fight will trigger with 3 Doven Kaiser. Defeat them all to trigger a cutscene. When this cutscene completes, another fight will trigger. This time you’ll have to defeat Mafioso – Machete, Mafioso – Pistol and their 3 Doven Kaiser. Defeat them to complete this chapter!
Below is Part 2 of a walkthrough for the collectibles found during Chapter 1: Afternoon of the Wolves of The Legend of Heroes: Trails from Zero.
Crossbell
When you’re able to explore the city, stop by and feed the cat on the roof of the SSS building. We gave it a Tiger Rockfish that we caught in Armorica Village and were given an Attack 1.
Next up, head to West Street and make your way to the Bellheim Apartments. Once inside head downstairs then go into the middle apartment. Speak with Ryu to receive the below support request.
Complete this request and make sure to report it to the SSS terminal! Afterwards, head to the Administrative District and check in with Receptionist Rebecca at the C.P.D. Show her your Combat Notebook. If you’ve scanned all the monsters, you should receive 500 mira and U-Material.
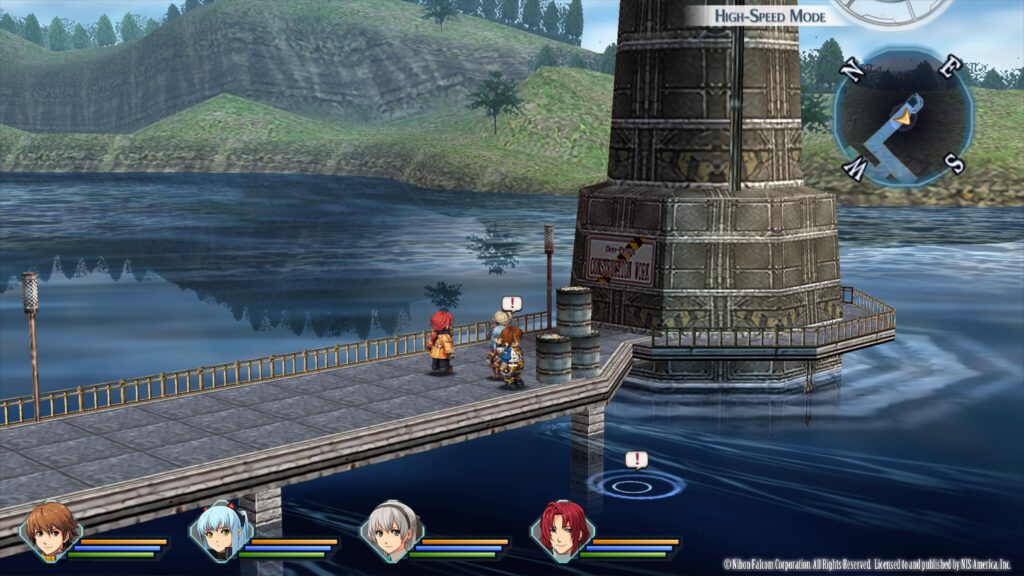
Next, head on over to the Harbor District and fish off the dock near the lighthouse to receive the below fish.
Fish
Pearlglass (Novice Rod, Dumplings)
Gluttonous Bass (Novice Rod, Earthworm)
Amorican Carp (Novice Rod, Dumplings, Earthworm)
Eel (Novice Rod, Earthworm)
With some entries in your Fishing Notebook, head to East Street and enter the Fisherman’s Guild. Speak with the Branch Manager Cerdan behind the counter and select “Check your rank” twice. He will examine your notebook and if you caught all of the above fish, you’ll earn the Hobbyist Fisher title and the Straw Hat.
Now that you’ve done everything, head to Station Street and interact with the bus stop on the southern side of the city to trigger a cutscene. When it concludes, exit the city to Ursula Road!
Ursula Road
Once on Ursula Road, explore the area to find the below.
Area 1
Enemies
Racohm
Ocean Drome
Deathcargot
Long-Eared Monkey
Kesalan
Fish (First northern path you can take. Follow it to the end where there is a rectangular platform. Fish off of the northern side!)
Carp (Novice Rod, Dumplings or Earthworm)
Eel (Novice Rod, Earthworm)
Snow Crab (Novice Rod, Earthworm)
Area 2
Treasure Chests
Coral Ring
EP Charge
Enemies
Deathcargot
Grass Drome
Ocean Drome
Kesalan
When you reach the southern part of this area, a cutscene will trigger followed by a fight against 2 Gordian. Defeat both of them to continue with the cutscene. Once it concludes, speak with the bus driver again to heal then continue south.
Area 3
Enemies
Ocean Drome
Kesalan
Backlash
Mossimon
Tropical Archer
Racohm
Treasure Chests
Reviving Balm
When you open the different colored chest on the eastern side of this area, a fight against 8 Backlash will trigger. Defeat them all to receive a Rune Cloth!
Impede 1
Please note that when you’re in this area, you’ll be able to fulfill an objective for the Hunting for Ingredients support request.
Area 4
Enemies
Fire Beetle
Butterflier
Ocean Drome
Spineedler
Treasure Chests
Tinkle Earrings
EP Charge
Each Sepith x20
St. Ursula Medical College
Explore the St. Ursula Medical College to find the below!
Recipes
Deluxe Beef Stew – Le Lectier Inn – Speak with the guy behind the counter
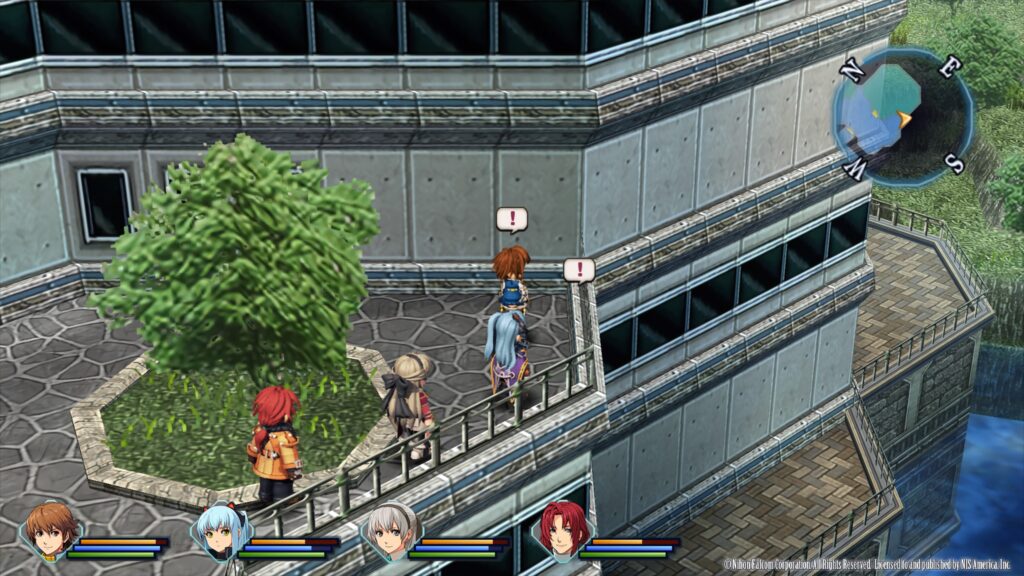
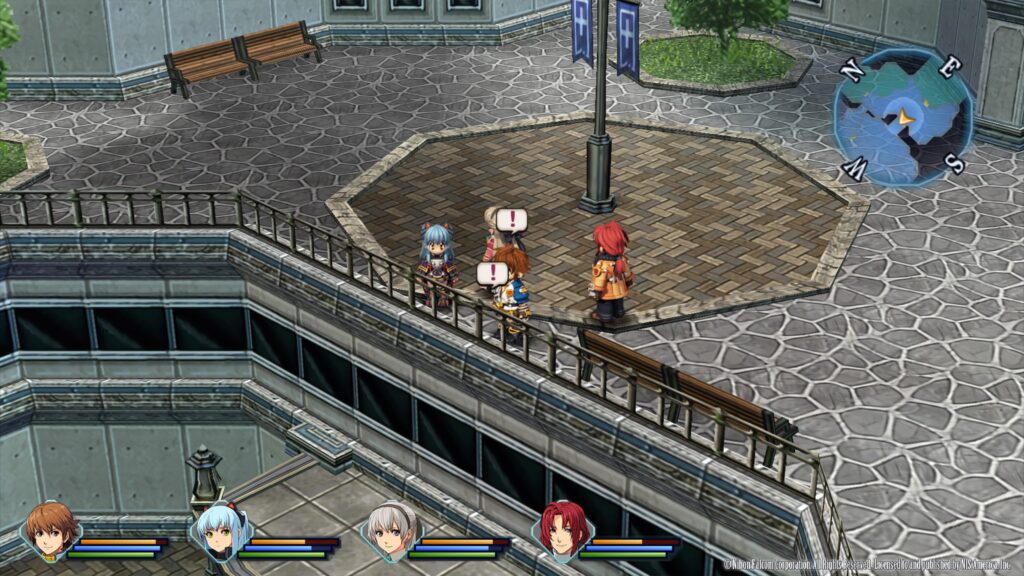
Once you’re ready, enter the main building on the east side of the area to trigger a cutscene then speak with Receptionist Sera (the female) behind the counter. When the cutscene ends, head upstairs to the top level then enter the area on the southwestern side to find the roof. Approach the bridge to trigger another cutscene. Afterwards, exit the room and head up the stairs on the right. On the new level, turn left and follow the path all the way to the end where you’ll see a giant EXIT sign. Exit here to reenter the roof. Once on the roof, follow the path until a cutscene triggers. Now you’ll have to investigate. First, head right and check the railing overlooking the water.
Next, head left along the rail and inspect the rail in the middle of this area overlooking the overhang below. It will be across from the light post with the two banners.
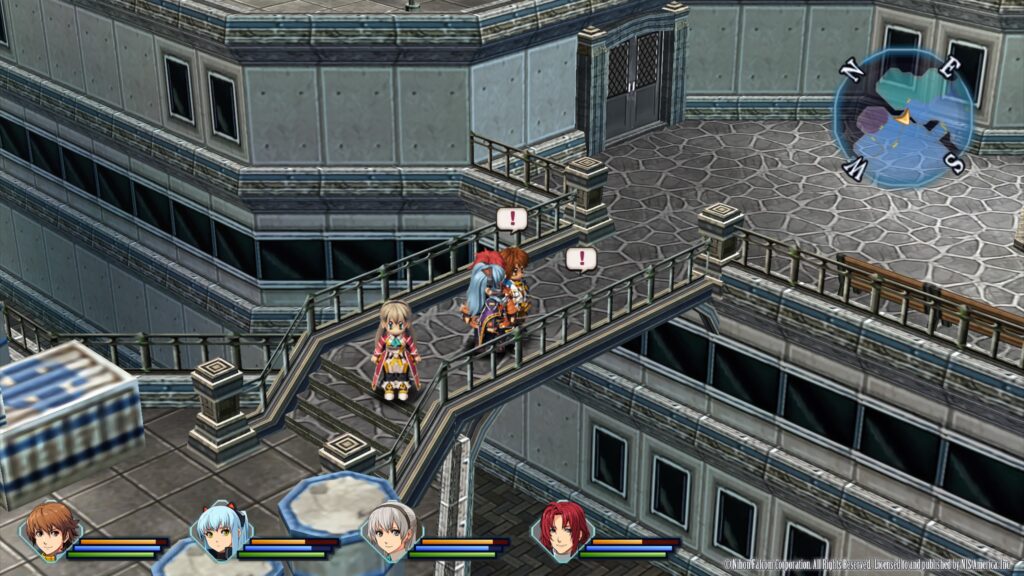
Continue heading left along the railing and inspect the railing on the bridge.
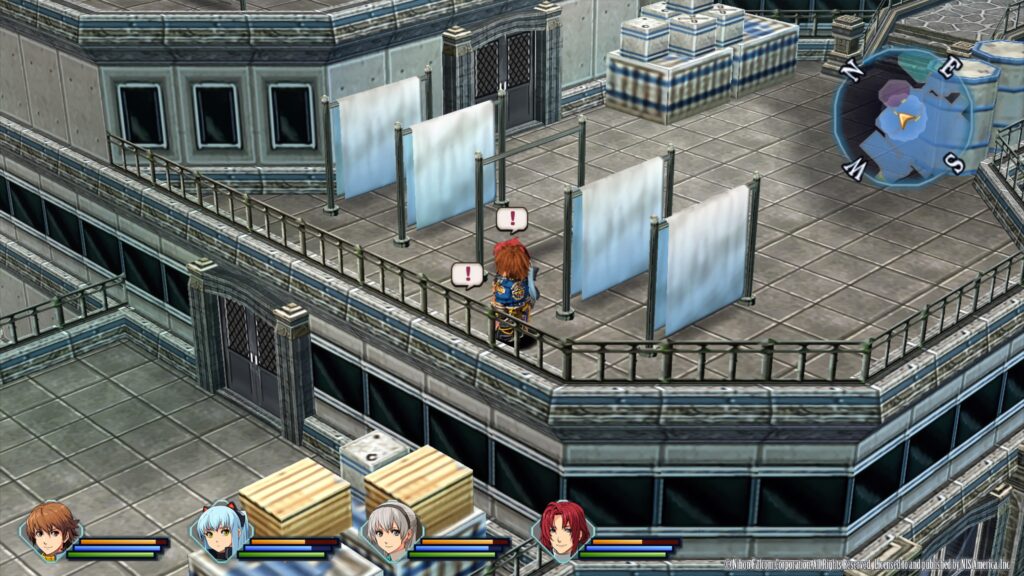
Next, head left and check the railing behind the hanging sheets.
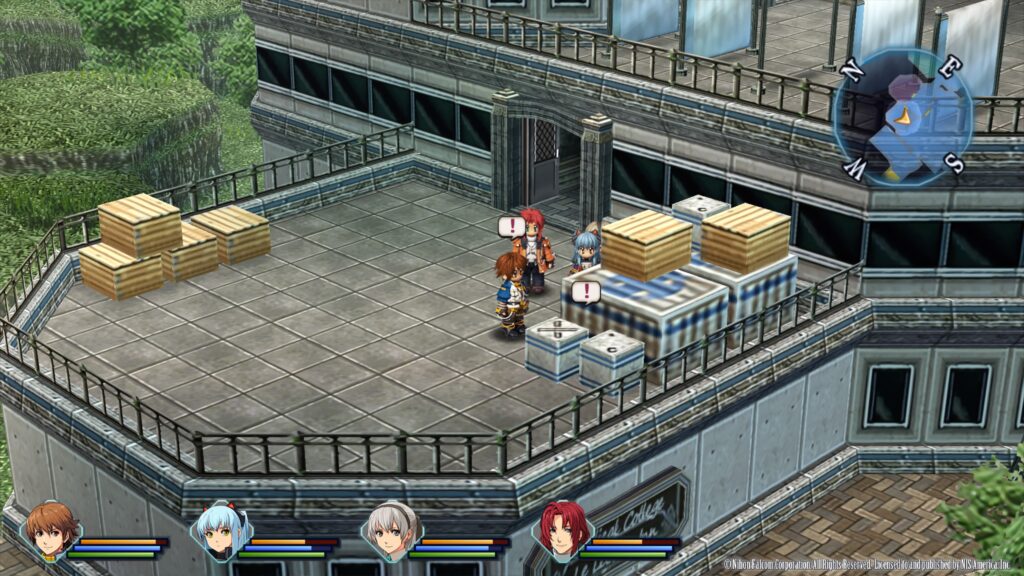
To investigate the area below, head through the nearby doors then take a right and head down the stairs. Once on the next level, enter through the door on the left. Follow this path to the far left. When you’re outside, interact with the boxes on the right side.
Tio points out the other boxes across from the ones above. Before heading back inside, interact with them.
Next, inspect the railing on the western side.
Afterwards, head inside and return all the way back to 2F where the Resident Lytton was. On this floor, speak with him then head to the Nurse Station to the northwest of Resident Lytton’s room. Speak with Nurse Philia. Instead of heading to the third floor to speak with Cecile, follow Martha into the room behind the Nurse Station and speak with her. A special scene with Martha and Tio will trigger. Exit this room to trigger another dialog event. Afterwards, head to 3F and enter room 304 to trigger a cutscene. When you’re ready to leave, interact with the bus stop and wait for the bus.
You’ll only be able to do Assistant with New Service and Overdue Book Retrieval right now. Complete those then explore the town to find the below!
Books
Crossbell Times – Issue 2 – West Street – Tallys’ General Store – Purchase for 100 mira
Recipes
Juicy Steak – West Street – Bellheim Apartments – Speak with Leyte
Fresh Fruit Juice – Administrative District – Speak with Croma at her juice stall
Event Items
Elegant Vase – Central Square – Department Times – Southwark General Store (Increases Elie’s bond)
Darts Set – Entertainment District – Barca Casino – Purchase for 1000 medals (Increases Randy’s bond)
Lemonade – East Street – House to the right of the Fisherman’s Guild next to the map transition to East Crossbell Highway
Make sure to stop in at the CPD in the Administrative District and show Receptionist Rebecca your Combat Notebook. If you’ve scanned every enemy you’ve come across so far, you’ll receive the following:
500 mira
U-Material
East Crossbell Highway
After you’re done exploring Crossbell, set out for East Crossbell Highway! When you first arrive, a cutscene will trigger. Explore the area to find the below!
Area 1
Treasure Chests
Teara Balm
Leather Jacket
Enemies
Berga Bug
Grass Drome
Area 2
Treasure Chests
Silver Brooch
Each Sepith x20
Enemies
Egg Snake
Berga Bug
Grass Drome
Metal Saucer
Teara Balm
Area 3
Treasure Chests
Steel Wrist
EP Charge
Enemies
Berga Bug
Metal Saucer
Grass Drome
Egg Snake
Acerbic Tomartian
Old Armorica Road
Area 1
Treasure Chests
Reviving Balm
Grasshoppers
Enemies
Golden Axe
Helmet Hunter
Bad Frogger
Deadly Dandelion
Magma Drome
Grass Drome
Area 2
Treasure Chests
Cool Necklace
U-Material
Mute
Enemies
Death Corolla
Deadly Dandelion
Magma Drome
Helmet Hunter
Area 3
Treasure Chests
Reviving Balm
Each Seriph x20
Opening the chest in the northern part of this area will lead to a fight against 6 Helmet Hunters. After you defeat them, you’ll receive Attack 2.
EP Charge
Enemies
Deadly Dandelion
Golden Axe
Magma Drome
Helmet Hunter
Death Corolla
Armorica Village
Once you finally arrive in Armorica Village, explore the town to find the below!
Recipes
Rustic Omelet Rice – Ash Tree Inn – Interact with the wooden plaque hanging on the wall on the right side of the room
Event Items
Model Orbal Car – Reoir General Store – Purchase for 1,000 mira
Treasure Chests
EP Cut 1 – In house on northeastern side of town
After you’re done exploring, enter the large building on the northern side of town to trigger a cutscene. Afterwards, exit the building and speak with Kopan on the bridge.
You’ll receive the Novice Rod, Earthworm x10, Dumplings x10 and Fishing Notebook. Head to the dock across from the bridge and fish to find the below.
Fish
Raineater (Novice Rod, Earthworm)
Tiger Rockfish (Novice Rod, Earthworm)
Armorican Carp (Novice Rod, Earthworm or Dumplings)
Rockeater (Novice Rod, Earthworm)
Next, enter the Ash Tree Inn. Speak with Gofan behind the counter then head upstairs and enter the room on the northwestern side. Speak with the Kind-Looking Man. Afterwards, speak with everyone in the village. After you’ve spoken to everyone, enter the house near the entrance of the town then leave. A cutscene will trigger. When it concludes, speak with Old Man Reoir in the Reoir General Store to receive the below book.
Book
Back Alley Doctor Glenn – Ch. 2
When you’re ready to leave, attempt to exit the town then interact with the nearby bus stop.
Below are our guides and walkthroughs for SD Gundam Battle Alliance!
Complete Mobile Suit List
Guides on how to unlock all the Mobile Suits in the game! These guides are broken apart based on series in the order they appear on the MS Settings screen.
Below is a walkthrough for Chapter 6 in Voice of Cards: The Beasts of Burden.
Newterra
Once in Newterra, head east until a cutscene triggers. When asked who’s opinion will you ask, select Pulche. He noticed a village to the northeast and you’ll all agree to head for it. Make your way directly to Silent Village as there are no chests along the way.
Silent Village
Once in the village, investigate the following:
Claw-Marked Ruin
Weapon Shop Ruin
Inn Ruin
Eerie Ruin
Apothecary Ruin
You’ll receive a Supreme Salve!
Sturdy Building
During the cutscene, arrange the three scraps of paper in order to receive the Newterra Map.
The cutscene will immediately lead into a fight. Defeat the creature that has 30 attack, 150 HP and 15 defense. Afterwards, you’ll have to make a choice of fighting through the unknown creatures or the Steelborough soldiers. Make your choice as it doesn’t matter. You’ll be fighting the creatures either way! Interact with the monster card to your right. Instead of fighting the monsters, you’ll be up against the two soldiers. They both have 26 attack, 80 HP and 12 defense. Defeat them then leave the village!
Newterra
Upon leaving the village, you’ll need to consult with your friends about what to do next. Select to ask Pulche. Afterwards, explore the area to find the below! When you’re ready to press forward, head to the northeastern corner of the area to find Monster Town. Upon getting near the town a cutscene will trigger. Choose to flee then select Fairy Dust.
Chests
2000G
East of Silent Village
Ring of Perseverance
Southwestern corner of area
Supreme Salve
Northwestern corner of area
2500G
Northern part of area
Events
Bloodied Doll
Find the owner
Keep it! See event below under the Silent Village section!!
Pretend you never saw it
Monster through telescope (Magemoth)
Attack!
Sneak up on it
Monster runs off
Ignore it
Roving Market
Speak with the Wandering Merchant! He will want an Ice Tortoise with 3 stars or above. The Ice Tortoise can be found in Snowfield and Newterra. As a reward, you’ll receive an Omnipanacea and the Seasoned Monster Tamer Certificate! This will pop the Seasoned Tamer trophy!
Speak with the Wandering Merchant again. This time he will want a Tailtoad with at least 3 stars. Tailtoads can be found in Endwall. As a reward, you’ll receive a Cursestay Ring and the Expert Monster Tamer Certificate! This will pop the Expert Tamer trophy!
Speak with the Wandering Merchant yet again. This time he will want a Magemoth with at least 3 stars. Magemoths can be found in Newterra. As a reward, you’ll receive a Supreme Inspirilixir and the Master Monster Tamer Certificate! This will pop the Master Tamer trophy!
For his last, most difficult request, speak with the Wandering Merchant to learn that he wants you to bring him a Seastone of any star ranking, which can be found in the Underground Passage.
As you do not have access to this creature yet, you’ll have to wait on this request. You can also visit the shops here to find the following:
Armorer
Steel Blades
Mercenary’s Blades
Hawksblade
Mercenary’s Sword
Mistralblade
Magic Staff
Thunderstaff
Sage’s Staff
Tamer’s Whip
Femme Fatale’s Whip
Knight’s Armor
Frostmail
Steel Breastplate
Knight’s Chainmail
Warrior’s Mail
Adventurer’s Attire
Martialist’s Garb
Firestay Ring
Waterstay Ring
Lightningstay Ring
Windstay Ring
Lightstay Ring
Darkstay Ring
Poisonstay Ring
Numbstay Ring
Freezestay Ring
Bindstay Ring
Cursestay Ring
Ring of Life
Ring of Compassion
Item Shop
Salve
Quality Salve
Omnisalve
Quality Omnisalve
Antidote
Curative
Defroster
Unsealer
Dispeller
Pepper-Upper
Serum
Panacea
Inspirilixir
Bomb
Invigorant
Protectorant
Soothstone
Oil Pot
Corrosive
Destruct-o-Box
Zapsmoke
Smoke Bomb
Bellwether
Bill of Good Fortune
Pet Shop
Slime
Iron Tortoise
Lesser Troll
Orc Child
Centaur
Wererat
Ogre
Red Fungo
Skull Soldier
Dryad
Voltwasp
Gargoyle
Venomslime
Magma Tortoise
Salamander
Death Crawler
Ice Tortoise
Snowy Treant
Lost Soul
Ghost
Devilwasp
Orc Wildling
Wyvern
Darktoad
Undine
Snowfield
While you’re out exploring for the Wandering Merchant’s event monsters, make your way to Snowfield. In Chapter 5, you should have received a treasure map in Endwall. Click here for the Chapter 5 walkthrough on where to find it! Make your way to the icy cards north of the flower card to find a chest containing the Stardust Raiment!
Monster Town
After entering the town, you’ll be given the opportunity to explore it to find the below! For story progression, interact with the Pet Shop. You’ll then be tasked with finding a plate in the Silent Village.
Characters
Wolf Villager
We chose to throw a Bill of Fortune and were given a Supreme Inspirilixir.
Mayor’s Residence
You’ll receive a Thunderstaff!
Shops
Armorer
Hawksblade
Evilsbane
Sage’s Staff
Dragontwist Whip
Darkmail
Warrior’s Mail
Spangle Dancewear
Firestay Ring
Waterstay Ring
Lightningstay Ring
Windstay Ring
Lightstay Ring
Darkstay Ring
Poisonstay Ring
Numbstay Ring
Freezestay Ring
Bindstay Ring
Cursestay Ring
Ring of Life
Ring of Compassion
Ring of Evasion
Gemstone Ring
Item Shop
Salve
Quality Salve
Supreme Salve
Omnisalve
Quality Omnisalve
Antidote
Curative
Defroster
Unsealer
Dispeller
Pepper-Upper
Serum
Panacea
Omnipanacea
Inspirilixir
Bomb
Invigorant
Protectorant
Soothstone
Oil Pot
Corrosive
Destruct-o-Box
Zapsmoke
Smoke Bomb
Bellwether
Bill of Good Fortune
Bill of Godly Fortune
Silent Village
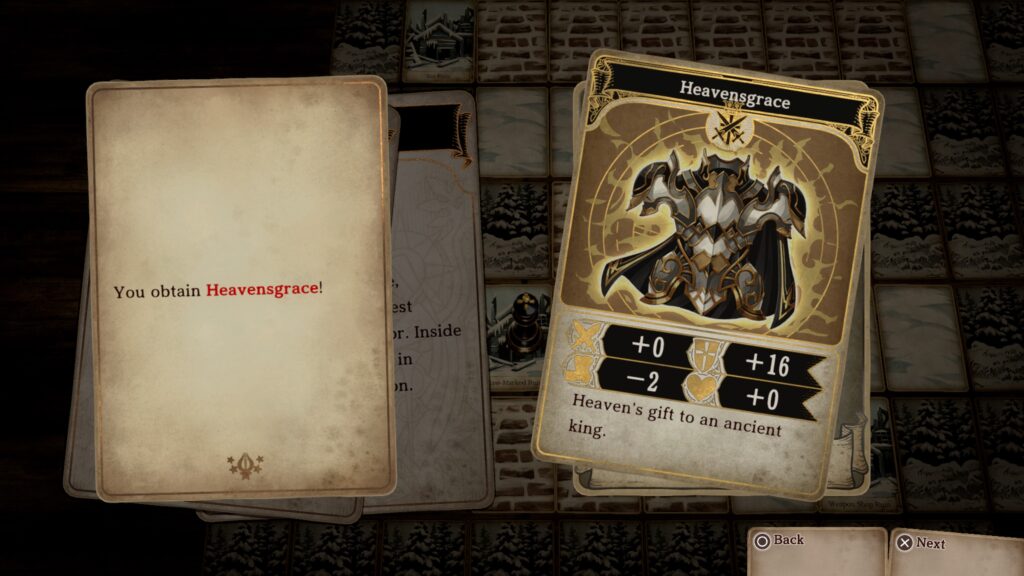
Return to Silent Village. Interact with the Claw Marked Ruin to trigger an event with the Bloodied Doll (if you previously picked it up!). You’ll receive the Heavensgrace! You’ll also receive the Smeared in Blood trophy!
To find the plate, interact with the Sturdy Building. Once you’ve gotten the Wooden Plate, exit this town and return to Monster Town.
Monster Town
Once in Monster Town, hand the plate over to the Pet Shop owner. If you have finished exploring the town, select “Save the Humans!” to trigger a fight against the monster. Defeat it then defeat all the monsters in town! Once everyone has been defeated, a boss fight will trigger! This monster has 42 attack, 280 HP and 25 defense. Defeat it to get your revenge!
Afterwards, we chose to listen to what the mayor said first instead of just killing him. He gave us the Mayor’s Residence Key. You’ll then have to decide whether or not to kill him. Since he wished to die to join his friend, we granted him that request and he thanked us. If you don’t, he seems sad to be alive and mumbles that he guesses his friend will just have to wait a little longer. Either way it does not impact the completion of Chapter 6. When you’re ready, enter the Mayor’s Residence to finish the chapter!
Below is a walkthrough for Chapter 3 in Voice of Cards: The Beasts of Burden.
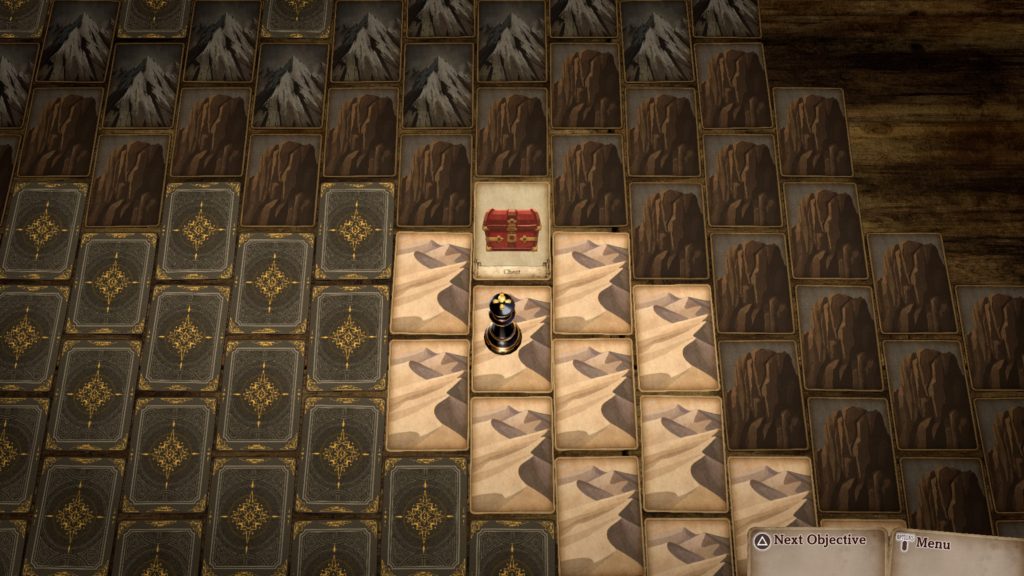
Desert
At the beginning of this chapter, head north to the glowing card to trigger a cutscene followed by a fight. Defeat the low level slime. After everyone joins your party again, return to where the glowing card was in the north. Once there, select someone to break the rocks. We chose L’gol and it worked! Proceed to the newly opened path.
Wasteland
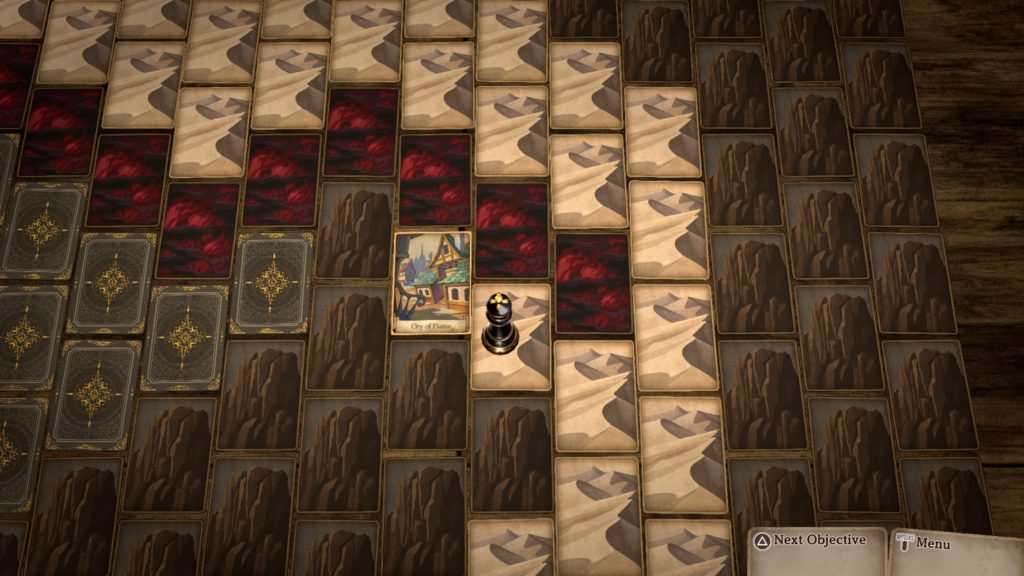
Head to the glowing card to find the City of Flame.
City of Flame
Enter the city then explore it to find the below.
Characters
Overheated Man near the Game Parlor to obtain his flipside story
Knowledgeable Old Woman south of the Armorer to obtain her flipside story
Shops
Pet Shop
Slime
Iron Tortoise
Lesser Troll
Orc Child
Centaur
Wererat
Ogre
Item Shop
Salve
Quality Salve
Antidote
Curative
Defroster
Unsealer
Dispeller
Pepper-Upper
Serum
Inspirilixir
Bomb
Invigorant
Protectorant
Smoke Bomb
Bellwether
Bill of Good Fortune
Armorer
Steel Blades
Mercenary’s Sword
Magic Staff
Tamer’s Whip
Knight’s Armor
Steel Breastplate
Adventurer’s Attire
Ring of Protection
Firestay Ring
Waterstay Ring
Lighteningstay Ring
Windstay Ring
Poisonstay Ring
Numbstay Ring
When you’re ready to progress, speak with the young man next to the Armorer then head to the mystery card just north of the Pet Shop to find Pulche. Afterwards, interact with the children’s card between the Pet Shop and Armorer. To help the orphans, you’ll have the following options:
Give Food
Do a Cheerful Dance
Ask Aristocrat for Help
The correct answer is to “Ask Aristocrat for Help”. If you don’t pick that one first, you can view the responses for the other options. Eventually, you’ll have to pick the correct answer. For the next task, head to the Manor in the southwestern corner of town. To persuade him, leave it to Pulche. You’ll then need to select the cause of the poisoning, which is a monster! Afterwards, leave the town.
Wasteland
In the northeastern corner of this area, you can find a chest containing 1000G!
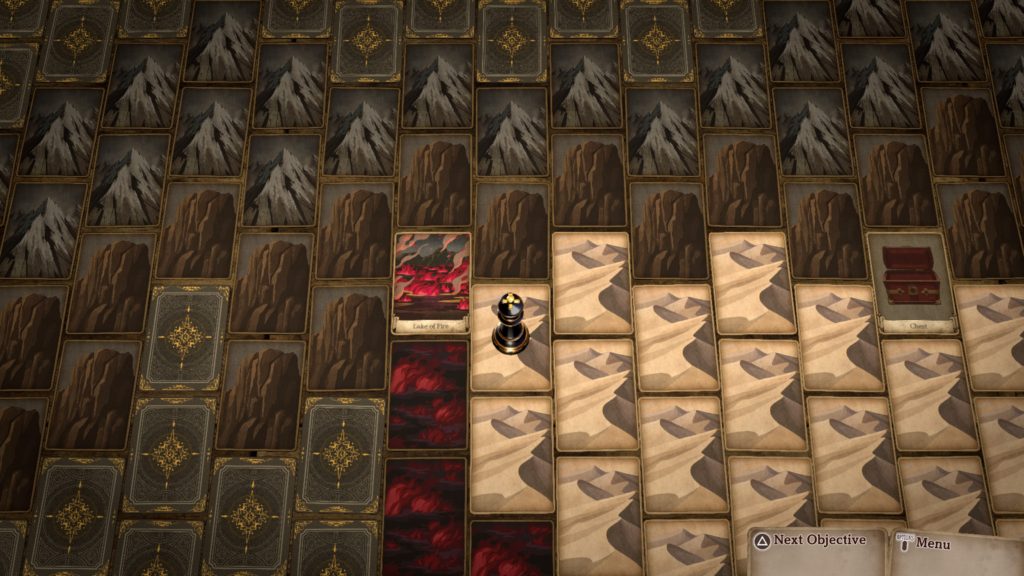
Just west of the chest you can find the Lake of Fire and enter the area.
Lake of Fire
In the northern part of this area, a chest contains a Firestay Ring!
Make your way south and head counterclockwise to reach the center of the area where you’ll find a chest containing an Omnisalve.
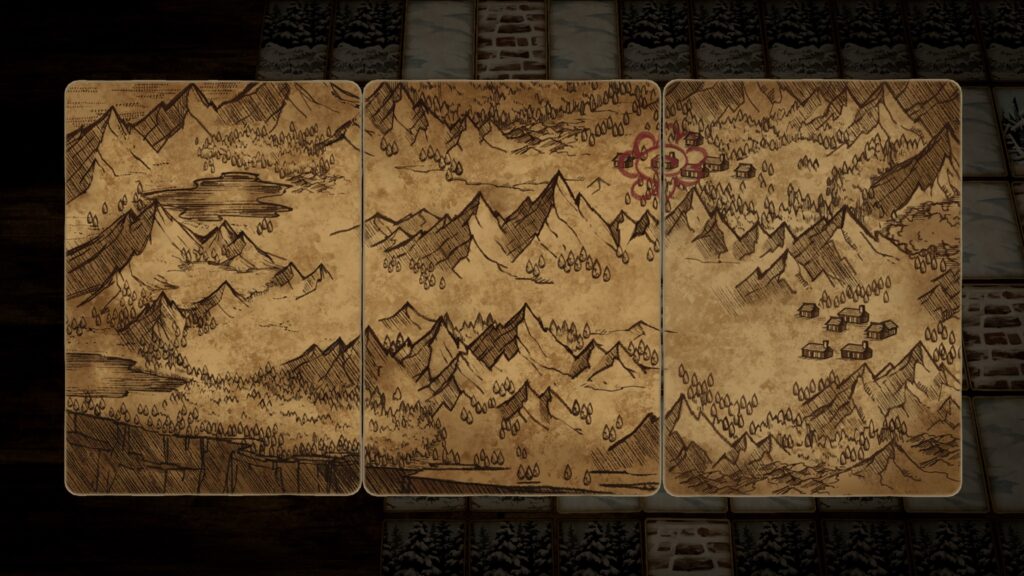
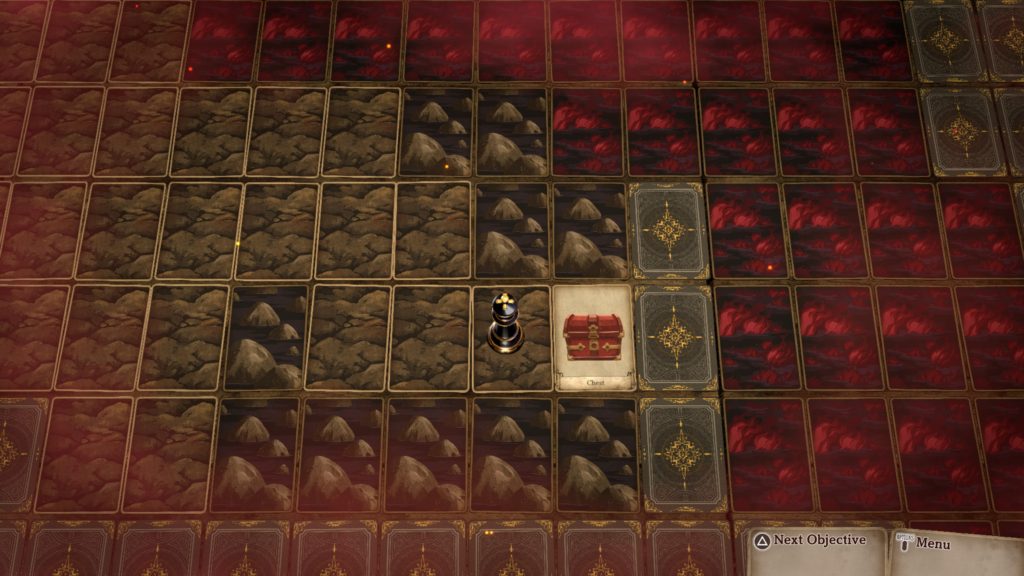
On the card in the southwestern corner of the area as shown in the picture below, an event involving a scrap of paper will trigger.
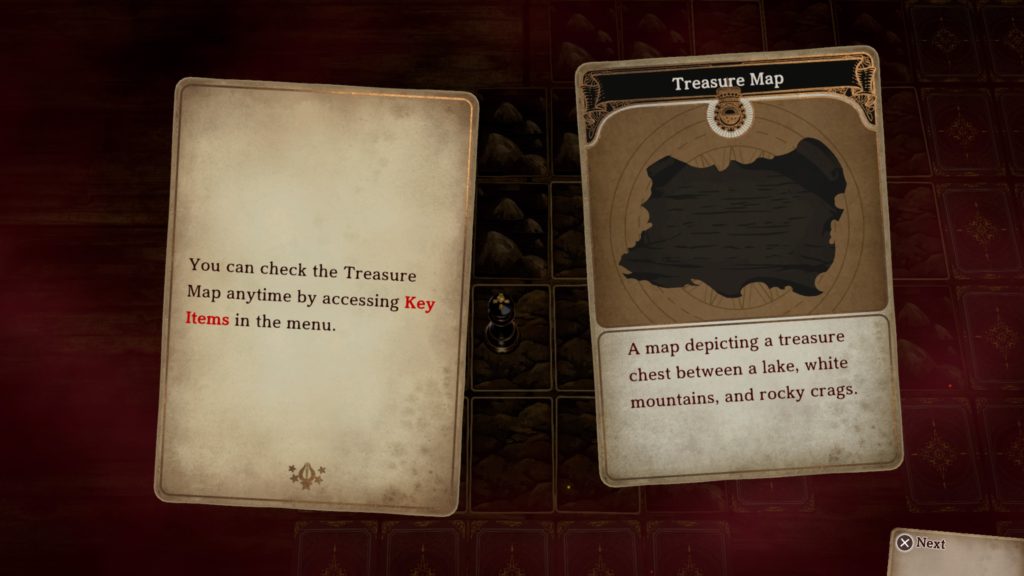
You’ll receive the Treasure Map key item! This treasure can be found in the Desert on the western side. Please see our Chapter 4 Walkthrough for the exact location.
In the southern part of the map, interact with the monster card to trigger a fight. Defeat the enemies to have a chance to obtain their cards!
Head north to find a chest containing a Panacea!
In the southeastern corner of the area, a chest contains a Bill of Godly Fortune!
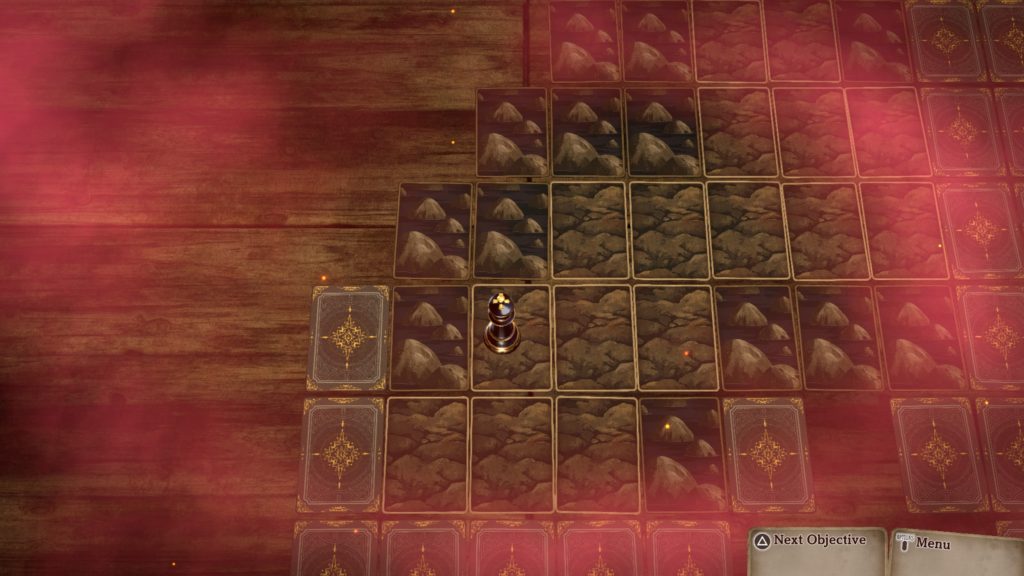
From the previous chest, head directly north to trigger a cutscene. Build bridges to make it across the fiery water! A chest containing a Firestay Ring can be found on the northeastern side of the area.
A chest containing a Bridge Part can be found just below the above chest!
Continue north towards the next glowing card. Interact with it to trigger a fight with the Flame Primal! It has 20 Attack, 150 HP and 12 Defense. The Firestay Rings will help immensely with this fight as it deals fire damage! As you almost defeat it, you’ll be given the option to dodge left or right. We dodged left and fell. Tralis jumped in the way and took the hit to save us. Afterwards, the whole team sealed away the monster! Head to the glowing card where the boss was to trigger another cutscene. With everything taken care of, return to the City of Flame.
City of Flame
Once in the City of Flame, a brief cutscene will trigger. When it does, head to the Manor in the southwestern corner of the area. In response to the aristocrat, tell them either choice as it does not matter. As for the solution, ask the Aristocrat. Newterra is a place! After the cutscene concludes, you’ll receive the Aristocrat’s flipside story. When you’re ready, head up to the orphans just north of the Pet Shop. We told them “You shouldn’t…” but they didn’t care. Next, speak with the Overheated Man, Ardent Woman, Orphaned Boy, Ambitious Lad and Knowledgeable Old Woman. You’ll then be tasked with leaving the city, however, it is warned that once you leave you’ll never be able to return. As such, make sure to take care of any business here before heading out! Once you exit the city, the chapter will complete!
This site uses cookies. By continuing to use this website, you are giving consent to cookies being used. For more information on cookies, view our Privacy Policy.OkPrivacy Policy