Shining Resonance
Guides

Shining Resonance Refrain – Fetch Quests

by Chappie in


A Gift for Someone – Rapple (Downtown)

  • Objective: Collect 2 Spirit Mistletoe
    • Spirit Mistletoe are dropped by the Daisy enemy located in the Elmore Springs of the Elmore Greatwood.
  • Reward: 1000G


An Elf’s Concoction – Kirika (Downtown/Campfire)

  • Objectives: Collect 3 Happyberry
    • Happyberries can be found in the Windia Grasslands.
  • Reward: 1 Magic Arrow


Beloved Crawlers – Liselotte (Downtown)

  • Objective: Collect 8 Hard Exo
    • Crawlers can be found around the Windia Grasslands.
  • Reward: 2 Potions


Break Challenge – Fromage (Castlefront Street)

  • Objective: Perform 10 Breaks
    • Break 10 enemies during combat
  • Reward: 3 Heal Mists


Bring me a Drink! – Drunk Man (Castlefront Street)

  • Objective: 5 Elmore Water
    • You can buy the Elmore Water from Liselotte’s Shop or find it in the Creek Path and Elmore Springs of the Elmore Greatwood.
  • Reward: 1 Avian Talon


Butterfly Dream Cantata – Fernando (Fountain Valley – Windia Grasslands)

  • Objective: Collect a Spirit Mistletoe
    • Complete the side quest Dogs of the Empire to get a Spirit Mistletoe as a reward or defeat the Daisy enemies located in the Elmore Greatwood.
  • Reward: Fernando’s Score


Challenging Carrots – Kirika (Downtown/Campfire)

  • Objective: Collect 7 Cheer Carrots
    • Cheer Carrots can be found around Marga or the Windia Grasslands.
  • Reward: 1 Heal Power


Combo Rythm – Fromage (Castlefront Street)

  • Objective: Max Combo 30
    • Preform a 30 hit combo in battle.
  • Reward: 1 Hit Bonus


Cooking Practice – Primula (Downtown)

  • Objective: Collect 5 Rosso Tomatoes
    • You can get the 5 Rosso Tomatoes from the side quest Farming Conditions or collect them from the Windia Grasslands.
  • Reward: Primula’s Sandwich


Dangerous Treasure – Talkative Man (Castlefront Street)

  • Objective: Collect 30 Alchemic
    • Head to the Thirsting Wastes in the Clavalle Crags to find a group of elemental crystals. Defeat them to collect the 30 Alchemic.
  • Reward: Hihiirokane


Dog Days – Rush (Downtown)

  • Objective: Collect 3 Broken Bones
    • Broken Bones can be obtained by defeating the skeleton monsters in Sleepy Hollow.
  • Reward: 1 Potion


Dragonfly Extract – Liselotte (Downtown)

  • Objective: Collect 5 Insect Fluid
    • Defeat dragonfly enemies located in the Ladlum Caverns.
  • Reward: Detox Bottle


Eloquent Melody of History – Rinna (Downtown / Campfire)

  • Objective: Collect 5 Sea Remnants
    • Sea Remnants can be found in the Ancient Graveyard or the Shattered Dam in the Ulde Desert.
  • Reward: 1 Four-Leaf Clover


Emma’s Errand – Emma (Downtown)

  • Objective: Collect 8 Kaiser Shrooms
    • Kaiser Shrooms can be found in the Ladlum Caverns or in the Forest of Giants located in the Elmore Greatwood.
  • Reward: 1 Seagull Lunch


For the Neighbors – Rinna (Downtown/Campfire)

  • Objectives: Collect 5 Bull Balm
    • Bull Balm can be found in the Windia Highlands.
  • Rewards: 3 Fish Oil


For the People – Sonia (Downtown)

  • Objective: Complete 10 quests
  • Reward: Shield 1


Ghost Raid – Liselotte (Downtown)

  • Objective: Collect 5 Muting Cloths
    • Muting Cloths is dropped by the Wraith enemy that spawns in the Ladlum Caverns. It shows up during the Op.3 main quest, Investigating the Ladlum Caverns.
  • Reward: 2 Mana Potions


Girlish Hobby – Marion (Castlefront Street)

  • Objective: Collect 7 Star Sand
    • Star Sand can be found along the Sharion Coast
  • Reward: 1 Fairy Doll


Gold Rush – Liselotte (Downtown/Campsite)

  • Objective: Collect 3 Hihiiro Scales
    • Hihiiro Scales are dropped off of the Sharpfin monsters located in along the Sharion Coast.
  • Reward: 2 Mana Mists


Good Medicine: Mushroom – Rapple (Downtown)

  • Objective: Collect 5 Fishwort Mushroom
    • You can collect the Fishwork Mushrooms in the Ladlum Caverns.
  • Reward: 5 Detox Bottles


Good Medicine: Needles – Rappels (Downtown)

  • Objective: Collect 5 Emperor Cactus
    • Emperor Cactus can be found in the Thirsting Wastes and Silent Badlands of the Clavalle Crags.
  • Reward: 5 Excecider


Good Medicine: Unexpected – Rapple (Downtown)

  • Objective: Collect 5 shiny moss
    • Shiny Moss can be collected in the Church Ruins of Sleepy Hollow.
  • Reward: 3 Elixir


Help Me! – Peasant Boy (Downtown)

  • Objective: Collect 3 Heal Mints
    • Heal Mints can be found in the Windia Grasslands.
  • Reward: 2 Light Rock


Heroic Anthem March – Fernando (Castlefront Street)

  • Objective: Collect 1 Giant Fist
    • Complete the mission Lion’s Den for Burroughs in Op.4.
  • Reward: 1 Fernando’s Score


I Can Fly – Dreaming Man (Downtown)

  • Objective: Collect 8 Red Bird Feathers
    • Red Bird Feathers are dropped by the Cassowary monster located in the Windia Grasslands.
  • Reward: 1 Crest of Darkness


Jiggly Pillows – Liselotte (Downtown)

  • Objective: Collect 5 Green Jiggly
    • Green Jiggly is dropped by the Green Paste monsters located in the Howling Hole of the Ladlum Caverns.
  • Reward: Happy Drink


Like a Girl – Marion (Castlefront Street)

  • Objective: Talk to Marion
  • Reward: 1 Weak Shot


Lost Technology – Lyle (Downtown)

  • Objective: Collect 5 Armonic Tomes
    • Campsite in the Silent Badlands
    • Glaucus Falls on the ground near some rocks
    • Gate of No Return at Gaelritz Prison
    • North side of the Drowsy Reefs in the Coral Caves on the opposite side of the advanced enemy Death Legs
    • Blue Cavern in the Logos Tundra (Op.5)
  • Reward: 3 Shining Stones


Marga’s Trend – Rinna (Downtown/Campfire)

  • Objective: Collect 3 Elmore Aloe
    • Elmore Aloe can be found in the Forest of Giants and Creek Path of the Elmore Greatwoods.
  • Reward: 5 Fighting Charge


Misty Graveyard – Stella (Downtown)

  • Objective: Collect 1 Afterworld Dew
    • Afterworld Dew can be found on the Gloompath located in Sleepy Hollow during fog.
  • Reward: 2 Afterworld Dew


My Backpack… – Scholar (Castlefront Street)

  • Objective: Collect 4 Lizard Skin
    • Lizard Skin is dropped by the Lizard Men located in the Elmore Springs of the Elmore Greatwood.
  • Reward: 2 Mistletoe Seed


Natural Conservation – Lestin (Castlefront Street)

  • Objective: Collect 8 Windia Swallowtail
    • Windia Swallowtail can be collected in the Windia Grasslands.
  • Reward: 1 Healing Echo


Need All the Help I Can Get – Passionate Soldier (Downtown)

  • Objective: Defeat the Grand Smasher
    • The Grand Smasher can be found in the Ancient Graveyard of the Ulde Desert
  • Reward: 1 Protecting Talisman


New Cauldron – Rapple (Downtown)

  • Objective: Synthesize a Pressure Cauldron
    • Collect 1 statue fragment (statues), 2 paste cores (green paste), and a large shell (Breedershell) then talk to Rapple and choose Item Synthesis. Find the Pressure Cauldron in the list and select it. Talk to Rapple to hand over the cauldron and complete the quest.
  • Reward: New Alchemy recipes + 1000G


Not Enough to Drink! – Drunk Man (Castlefront Street)

  • Objective: Collect 10 Cactus Leafs
    • Cactus Leafs are dropped by the Dahlia monster in the Clavalle Crags.
  • Reward: 1 Spider Sickle


Please! – Peasant Boy (Downtown)

  • Objective: Collect 3 Soothe Sages
    • Soothe Sage can be found in the Sharion Coast
  • Reward: 1 Frigid Rock


Protecting Cacti – Lestin (Castlefront Street)

  • Objective: Collect 8 Emperor Cactus
    • Emperor Cactus can be collected in the Thirsting Wastes or Silent Badlands of the Clavalle Crags.
  • Reward: Diva’s Lost Item


Protecting Scorpions – Lestin (Castlefront Street)

  • Objective: Collect 3 Ulde Scorpions
    • Ulde Scorpions can be collected in the Ulde Desert
  • Reward: 1 Diva’s Lost Item


Relentless Curiosity – Liselotte (Downtown)

  • Objectives: Collect 8 Enduring Light
    • Enduring Light are dropped by the Floating Octo enemies located in the Djinharna Ruins.
  • Rewards: 2 Flash Bottles


Rock Symbol – Agnum (Downtown/Campfire)

  • Objective: Collect 5 Cracked Skulls
    • Cracked Skulls are dropped by the skeleton enemies located in the Church Ruins of Sleepy Hollow.
  • Reward: 1 Burning Cookbook


Skincare – Rinna (Downtown)

  • Objective: Collect 3 Hollow Grass
    • Hollow Grass can be found at the Gloompath located in Sleepy Hollow.
  • Reward: 1 Sweet Parfait


Someone, Help Me! – Peasant Girl (Downtown)

  • Objective: Collect 3 Cure Basil
    • Cure Basil can be found in the Clavalle Crags or Sleepy Hollow.
  • Reward: 2 Old Magic Sand


Splendid Sandy Weather – Stella (Downtown)

  • Objective: Collect 1 Twilight Amber
    • Twilight Amber can be found in the Clavalle Crags during a sandstorm.
  • Reward: 2 Twilight Amber


Strong Against Cold – Rinna (Downtown / Campfire)

  • Objective: Collect 3 Frozemary
    • Frozemary can be collected around Mount Glanciel
  • Reward: 1 Excecider


Swimming in Sand – Liselotte (Downtown)

  • Objective: Collet 5 Sand Fish Fins
    • The Sand Fish Fins are dropped by the Sandripper monsters located in the Clavalle Crags. They only appear during sandstorms.
  • Reward: 2 High Potions


Symphonica Challenge – Fromage (Castlefront Street)

  • Objective: Initiate 10 B.A.N.D. Sessions
    • Perform  10 B.A.N.D Sessions during combat.
  • Reward: 3 Mana Mist


Symptomatic Treatment – Agnum (Castlefront Street)

  • Objective: Collect 5 Logos Ice
    • Logos Ice can be found at Giant’s Ridge on Mount Glanciel or in the Logos Tundra.
  • Reward: 1 Burning Cookbook


Tasty Endeavor: Appetizers – Hungry Lady (Downtown)

  • Objective: Collect 3 Fungus Hypha
    • Fungus Hypha is dropped by the Marasmius monster located in the Ladlum Caverns.
  • Reward: Giant Weapon


Tasty Endeavor: Dessert – Hungry Lady (Downtown)

  • Objective: Collect 8 Purple Wiggly
    • Purple Wigglies are dropped by the Purple Paste monsters located in Sleepy Hollow.
  • Reward: 1 Angelite


Tasty Endeavor: Seafood – Hungry Lady (Downtown)

  • Objective: Collect 3 Flying Fish Fin
    • Flying Fish Fins are dropped by the Sharpfin monster that can be found in the Djingharna Ruins or the Elmore Springs located in the Elmore Greatwood.
  • Reward: 3 Luring Kandelaar


The Best Water – Rapple (Downtown)

  • Objective: Collect 5 Elmore Water
    • Elmore Water can be found in the Creek Path and Elmore Springs of the Elmore Greatwood or you can buy them at Liselotte’s shop.
  • Reward: 3 High Potions


The Imperial Plant – Rinna (Downtown/Campfire)

  • Objective: Collect 3 Emperor Cactus
    • Emperor Cactus can be collected at the Thirsting Wastes or in the Silent Badlands of the Clavalle Crags.
  • Reward: 3 Aroma Bottes


The Right Amount of Salt – Kirika (Downtown)

  • Objective: Collect 10 Sharion Waters
    • Sharion Water can be found along the Sharion Coast.
  • Reward: 1 Sweet Parfait


The Sands of Time – Rinna (Downtown)

  • Objective: Collect 5 Lavar Stones
    • Lavar Stones can be found in the Thirsting Wastes of the Clavalle Crags.
  • Reward: 1 Four-Leaf Clover


Thunder-proof Umbrella – Liselotte (Downtown/Campsite)

  • Objective: Collect 5 Insulated Exo
    • Insulated Exo is dropped from the Thunder Crawler enemy located in the Elmore Greatwood. They only spawn duing the rain.
  • Reward: 2 Melt Bottles


Thunderous Forest – Stella (Downtown)

  • Objective: Collect an Angelite
    • Angelite can be obtained by defeating the Topaz Crystal enemy located in the Silent Badlands of the Clavalle Crags.
  • Reward: 2 Angelites


Today’s Enemy is Tomorrow’s… – Kirika (Downtown/Campfire)

  • Objective: Collect 5 Cheer Carrots
    • Cheer Carrots can be found around Marga or the Windia Grasslands
  • Reward: 1 Sweet Parfait


Twin Head Tails – Liselotte (Downtown)

  • Objective: Collect 7 Hound Tails
    • The Twin Head are dropped by the Twin Head monster located in the Forest of Giants in the Windia Grasslands.
  • Reward: 2 Fighting Charge


Unique Ensemble – Fernando (Windia Grasslands – Fountain Valley)

  • Objective: Collect a Goblin Kukri
    • The Goblin Kukri is dropped by the Goblin enemies located in the Windia Grasslands.
  • Reward: Fernando’s Score


Vitality Secret – Energetic Lady (Downtown)

  • Objective: Collect 1 Cordyceps
    • Cordyceps are dropped from the Psilocybe enemy in the Forest of Giants located in the Elmore Greatwood.
  • Reward: 3 Life Soma
 

Shining Resonance
Guides

Shining Resonance Refrain – Extermination Quests

by Chappie in


A Good Night’s Rest – Happy-Go-Lucky Lady (Castlefront Street)

  • Objectives: Defeat 40 Demons
    • Battle and defeat Goblins and Lizard men as both are classified as demons. You can find their specific locations in the monster location guide.
  • Reward: 1 Courageous Rest


A Jiggly Incident – Mellow Old Lady (Downtown)

  • Objective: Defeat the Slime Horde
    • Exit the Downtown of Marga to the Windia Highlands to find a Green Paste nearby. Initiate combat with it to fight the horde of slimes.
  • Reward: 1 Egg Shell


Blast the Ghosts – Angum (Downtown/Campfire)

  • Objective: Defeat 20 undead
    • The undead Skeletons can be found in Sleepy Hollow.
  • Reward: 1 Adversity Power


Burrough’s Chivalry – Burrough (Castlefront Street)

  • Objective: Defeat the Black Knight King
    • The Black Knight King can be found on the Gloompath of Sleepy Hollow
  • Reward: 1 Warrior Union


Can’t Go Fishing – Fisherman (Downtown)

  • Objective: Defeat 10 Withershell
    • Withershells can be found in the Clavalle Crags.
  • Reward: 3 Coral Reef


Chicken Race – Sonia (Downtown)

  • Objective: Defeat 20 Nature monsters
    • Defeat Nature enemies like the Dahlia in the Clavalle Crags or the Psilocybe of the Elmore Greatwood
  • Reward: 1 Marga Kebab


Chimera Danger – Vibrant Soldier (Castlefront Street)

  • Objective: Defeat 1 Chimera
  • Reward: 1 Devilish Candle


Clavalle Crags Ambush – Burroughs (Castlefront Street)

  • Objective: Defeat 30 Humans
    • The Imperial Soldiers are located in the Clavalle Crags.
  • Reward: 1 Dragon Horn


Disposing the Collection – Antique Man (Downtown)

  • Objective: Defeat 10 statues
    • Statues can be found in the Ladlum Caverns in the Windia Grasslands.
  • Reward: 3 Mana Crystals


Dogs of the Empire – Bratty Boy (Castlefront Street)

  • Objective: Defeat 10 Twin Heads
    • Twin Heads can be located in the Breeze Field located in the Windia Highlands.
  • Reward: 2 Spirit Mistletoe


Ecology Survey: Lighting – Scholar (Castlefront Street)

  • Objective: Defeat 10 Thunder Crawlers
    • You can find the Thunder Crawlers in the Elmore Greatwood during rain.
  • Reward: 3 Frog Oil


Ecology Survey: Stranded – Scholar (Castlefront Street)

  • Objective: Defeat 5 Cold Lily
    • Cold Lily enemies bound be found in Giant’s Ridge on Mount Glanciel or the Highwolf Shrine of the Logos Tundra
  • Reward: 2 Rainbow Jiggly


Elmore’s Defense – (Castlefront Street)

  • Objective: Defeat 20 Humans
    • The enemy soldiers are located in the Forest of Giants.
  • Reward: 1 Fluffy Mane


Farming Conditions – Farmer Lady (Downtown)

  • Objective: Defeat 8 Hobgoblins
    • Hobgoblins can be found in the Breeze Field of the Windia Grasslands.
  • Reward: 5 Rosso Tomato


Gang of Beasts – Sonia (Downtown / Campfire)

  • Objective: Defeat 20 Beasts
    • Defeat Hell Hounds and Cassowaries as they are classified as beasts. You can find their specific locations in the monster location guide.
  • Reward: 1 Marga Kebab


Gang of Three – Gossipy Lady (Downtown)

  • Objectives: Defeat the Manticore
    • Head to the Thirsting Wastes in the Clavalle Crags to locate and defeat the Manticore.
  • Objective 2: Defeat the Ahsgrimm
    • Head to the Silent Badlands in the Clavalle Crag to locate and defeat Ahsgrimm.
  • Objective 3: Defeat the Flare Dragon
    • Head to the Lost Garden in the Clavalle Crag to locate and defeat the Flare Dragon.
  • Rewards: 3 Jiggly Flans


Good Fortune 1 – Unlucky Lady (Downtown)

  • Objective: Defeat 20 Charcoal enemies
    • The Charcoal enemies are located along the Sharion Coast.
  • Reward: 2 Rotting Cross


Good Fortune 2 – Unlucky Lady (Downtown)

  • Objective: Defeat 10 Guard Skeletons
    • Guard Skeletons can be found at the Church Ruins or the Gloompath of Sleepy Hollow.
  • Reward: 1 Skullcum


Grandma Forgot – Mellow Old Lady (Downtown)

  • Objective: ???
    • Head to the Forest of Giants in the Elmore Greatwood and interact with the point of interest near the entryway to the Creek Path. This will initiate combat with a level 40 Ozone Dragon. Defeat it and return to the Mellow Old Lady.
  • Reward: 2 Egg Pouch


Hunt the Illusive Shadow – Rare Lover (Castlefront Street)

  • Objective: Defeat 5 Rare Monsters
    • Rare Monsters are enemies that randomly spawn during combat and look like eggs.
  • Reward: 1 Shining Stone


Inhumanly Helpful – Sonia (Downtown/Campfire)

  • Objective: Defeat 20 Demons
    • Battle and defeat Goblins and Lizard men as both are classified as demons. You can find their specific locations in the monster location guide.
  • Reward: 1 Marga Kebab


Knight’s Trail – Refined Girl (Castlefront Street)

  • Objective: Defeat 15 Dragons
    • Almost every region has a  dragon, so it should be easy to find one to farm. Check out this monster location guide to get the specific areas.
  • Reward: 1 Brave Mask


Lion’s Den – Burroughs (Castlefront Street)

  • Objective: Defeat 40 Imperial soldiers
    • Head to the Gloompath in the Sleepy Hollow and defeat the imperial soldiers there.
  • Reward: 1 Giant Fist


Maylm Mile – Stella (Downtown)

  • Objective: Defeat 99 Natures monsters
    • Defeat Nature monsters like the Dahlia in the Clavalle Crags or the Psilocybe of the Elmore Greatwood
  • Reward: ???


Mushroom Phobia – Talkative Lady (Castlefront Street)

  • Objective: Defeat 30 Nature enemies
    • Head to the Forest of Giants in the Elmore Greatwood to battle waves of mushroom-based enemies to complete this quest.
  • Reward: 1 Cordyceps


My Quill Pen… – Scholar (Castlefront Street)

  • Objective: Defeat 8 Cassowary
    • The Cassowary enemies are located in the Windia Highlands.
  • Reward: 3 Refresh Bottles


Need Even More Help – Earnest Soldier (Downtown)

  • Objective: Defeat 1 Sturm
    • Strum can be found in the Breeze Fields of the Windia Grasslands.
  • Reward: 2 Cordyceps


Need Help – Earnest Soldier (Downtown)

  • Objective: Defeat an Orc
    • The orc can be found at the Howling Hole of the Ladlum Caverns in the Windia Grasslands.
  • Reward: Warding Talisman


Need More Help – Passionate Soldier (Downtown)

  • Objective: Defeat the Life Reaper
    • The Life Reaper can be found in the Twilight Garden of the Djingharna Ruins.
  • Reward: 1 Brave Heart


No Such Thing as Ghosts – Bratty Boy (Castlefront Street)

  • Objective: Defeat the Dark Knight
    • The Dark Knight is located on the Gloompath in Sleepy Hollow.
  • Reward: 1 Brave Mask


Poison Frog Choir – Fruit Lady (Downtown)

  • Objective: Defeat 15 Poison Frogger
    • The Poison Frogger show up in the Elmore Forest during the fog. In my playthrough, the Windia Grasslands had fog while the Elmore Forest had rain, causing the Poison Frogger to show up.
  • Reward: 3 Spirit Seeds


Pollen Season – Happy-Go-Lucky Lady (Castlefront Street)

  • Objective: Defeat 5 Breedershell
    • The Breedershell enemies are located at the Breeze Field in the Windia Highlands.
  • Reward: 5 Heal Mint


Preparing for Winter – Fruit Lady (Downtown)

  • Objective: Defeat 1 Snow Griffon
    • The Snow Griffon can be found at Platina Peak located on Mount Glanciel.
  • Reward: 3 Dragon Apples


Second Battle of Fort Garahl – Burroughs (Castlefront Street)

  • Objective: Defeat 50 Humans
    • Head back to Fort Garahl and fight the Knight enemies there.
  • Reward: 1 Aura Blade


Stress Reliever – Energetic Lady (Downtown)

  • Objective: 30 Alchemic
    • Defeat 30 slime enemies to complete this objective. This is best done during the side quest A Jiggly Incident. If you don’t have the quest, you can find Green Paste enemies in the Howling Hole of the Ladlum Caverns.
  • Reward: 2 Luring Kandelaar


Tip of the Snow Mountain – Rinna (Downtown/Campfire)

  • Objective: Head to Dragon Shine in Logos Tundra
    • Defeat the 2 Elecmachina
  • Reward: 1 Heart Stealer


Guides

Vampyr – Alignment of Stars

by Chappie in


Investigation Received: Triggered automatically near the northern West End


Summary: Jonathan comes across a man trapped in a building by an Ekon who is calling out for help.


Objective(s):

  • Save the exhausted man by defeating his abductor
  • Talk and check on the exhausted man


Save the exhausted man by defeating his abductor

Head to the northern part of the West End to trigger this investigation. Defeat the vampire to update the objective.


Talk and check on the exhausted man

Follow the objective into the nearby building and talk to the man to complete the investigation.


Guides

Vampyr – Like Father, Like Daughter

by Chappie in


Investigation Received: Obtained in the underground passages under the park northeast of the West End. You will come across this quest before exiting the passages to reach the Dawson Mansion during the chapter 5 main story quest Unnatural Selection


Summary: Jonathan comes across a lady trapped in the sewer by a vampire with ill intentions.


Objective(s):

  • Find Louise Teasdale
  • Save the pugnacious young woman by defeating her abductor
  • Talk and check on the pugnacious young woman


Find Louise Teasdale

Reach the end of the underground passage under the park northeast of the West End. Before you take the stairs leading up to the Dawson Mansion, head to the right and follow the tunnel to a cell area where Louise is trapped.


Save the pugnacious young woman by defeating her abductor

Jump down into the cell area and defeat the Ekon.


Talk and check on the pugnacious young woman

Open the cage and talk to Louise to complete the investigation.


Guides

Vampyr – They Are Among Us

by Chappie in


Investigation Received: Talk to Clarence Crossley and choose the dialog options ‘Personal questions’ then ‘What have you discovered about vampires?’


Summary: A friend of Jonathan’s named Clarence is convinced that vampires exist and are currently in London. He asks Jonathan to help him collect articles talking about the different types of vampires.


Objective(s):

  • Find 6 articles (collectibles) about vampires for Clarence Crossley
    • Find “The heresy of the Pure Blood”
    • Find “The antique figure of the Vrykolakas”
    • Find “Fertile is the belly of the beast”
    • Find “Supremacy of Ekons”
    • Find “Rare species of vampires”
    • Find “The violence of Vulkods
  • Report to Clarence Crossley


Find “The heresy of the Pure Blood”

Located in a building in the northern West End (the same building from the Alignment of Stars investigation)


Find “The antique figure of the Vrykolakas”  

Located in Darius Petrescu’s house in Whitechapel


Find “Fertile is the belly of the beast”

Located in the hideout south of Pembroke Hospital that is unlocked during the investigation Burn After Reading


Find “Supremacy of Ekons”

Found in Harriet Jones’ room at the Skal Sewer Camp


Find “Rare species of vampires”

Located on a bookshelf in Dr. Swansea’s office


Find “The violence of Vulkods

Defeat the mini-boss in the passage on the way to Aloysius Dawson’s mansion during the chapter 5 main story mission Unnatural Selection


Report to Clarence Crossley

Head back to the West End and talk with Clarence to complete the investigation.


Guides

Vampyr – Occult Oculus

by Chappie in


Investigation Received: Find one of the Text in Braille hidden in the world.


Summary: Jonathan has come across a letter with the heading ‘Cure for Blindness’ that is written in Braille. He turns to Mason Swanborough for help translating it.


Objective(s):

  • Find someone who can read Braille alphabet 1/4
  • Bring back the Braille notes to Mason 2/4
  • Bring back the Braille notes to Mason 3/4
  • Bring back the Braille notes to Mason 4/4
  • Find the laboratory of the Brother of St. Paul’s Stole
  • Retrieve the potion recipe in the laboratory
  • Choose what to do with the chemist’s diary
    • Give it to Mason Swanborough
    • Keep the diary


Comments

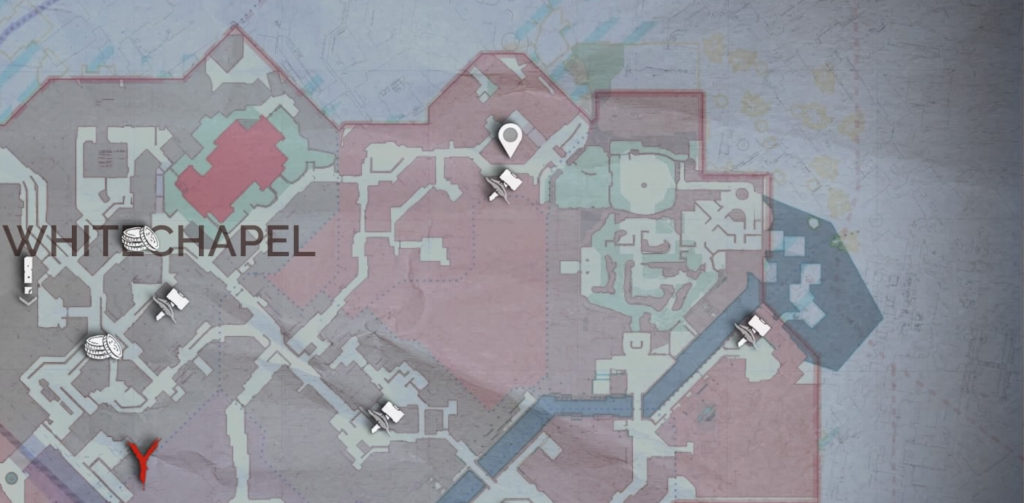
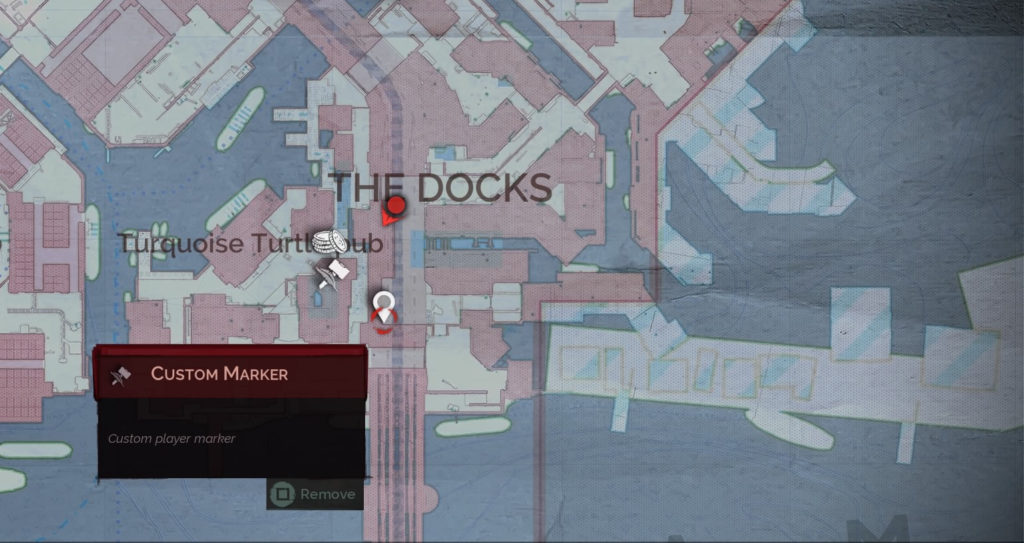
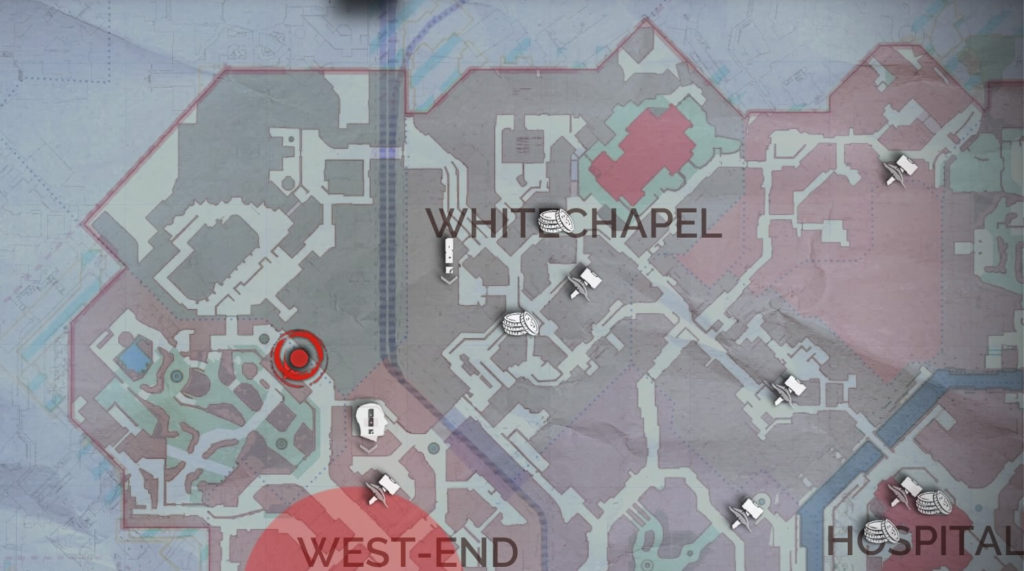
Finding any of the text in Braille will trigger this investigation and the objective will be to find someone who can read Braille. That person is Mason Swanborough who is located in Whitechapel to the east of the cemetery which is marked in the map below by the white custom marker.


Find someone who can read Braille alphabet 1/4

The easiest way to find the Text in Braille is to exit the Docks from the eastern exit (Lime House Dock) near where Seymour Fishburn likes to frequent into the Poplar Faubourg area. From there facing east, take a left past the barrel filled with fire down the steps. Take another left and walk forward to find the Text in Braille on a Priwen hunter’s corpse in the southwestern corner (white custom marker in the image below).


Bring back the Braille notes to Mason 2/4

Make your way to the Abandoned Investment Property located to the southwest of Whitechapel (image below) and enter it. From the entrance, head through the property taking the stairs up to the third level and through the door at the top. Once in the room on the third floor, turn right and jump down through the hole in the floor to the second level. Make your way to the bedroom in the north corner of the room. You will find the Braille note on the bed in this room. This is also where you get the investigation Retaliation, which should be triggered automatically by entering the property if you haven’t done it yet.


Bring back the Braille notes to Mason 3/4

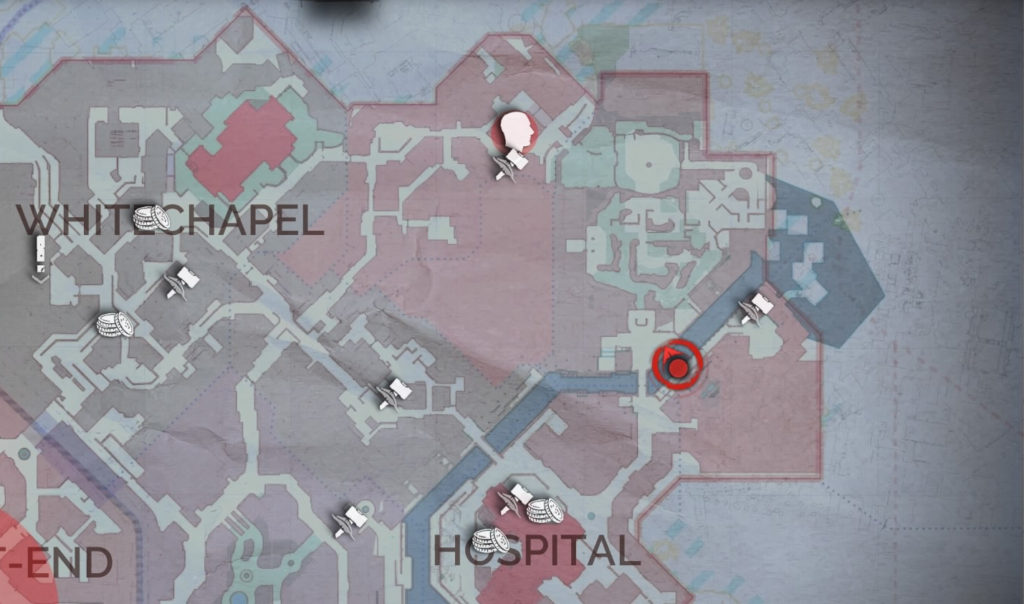
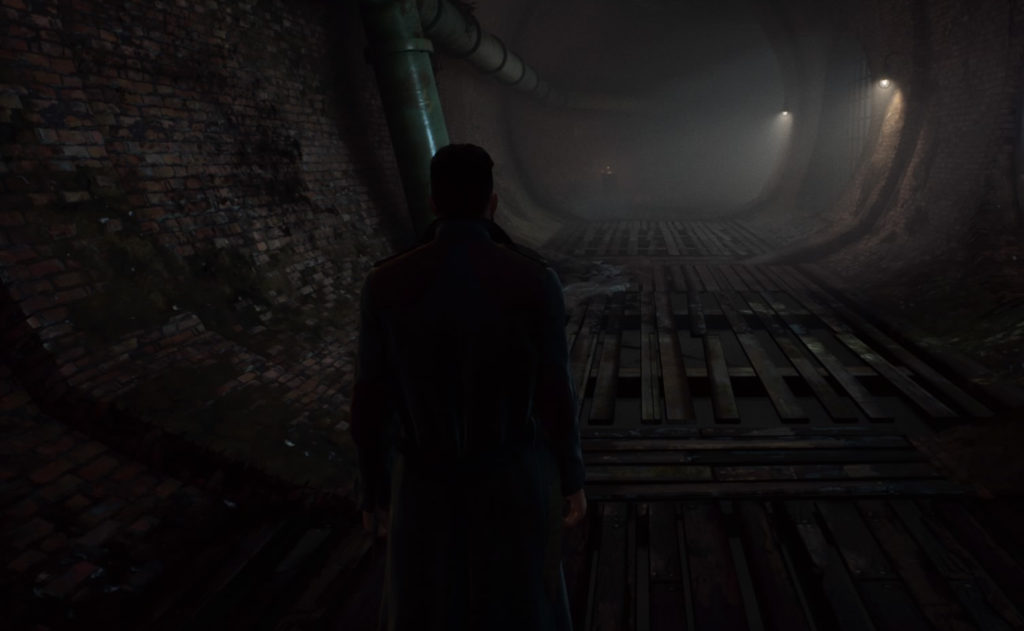
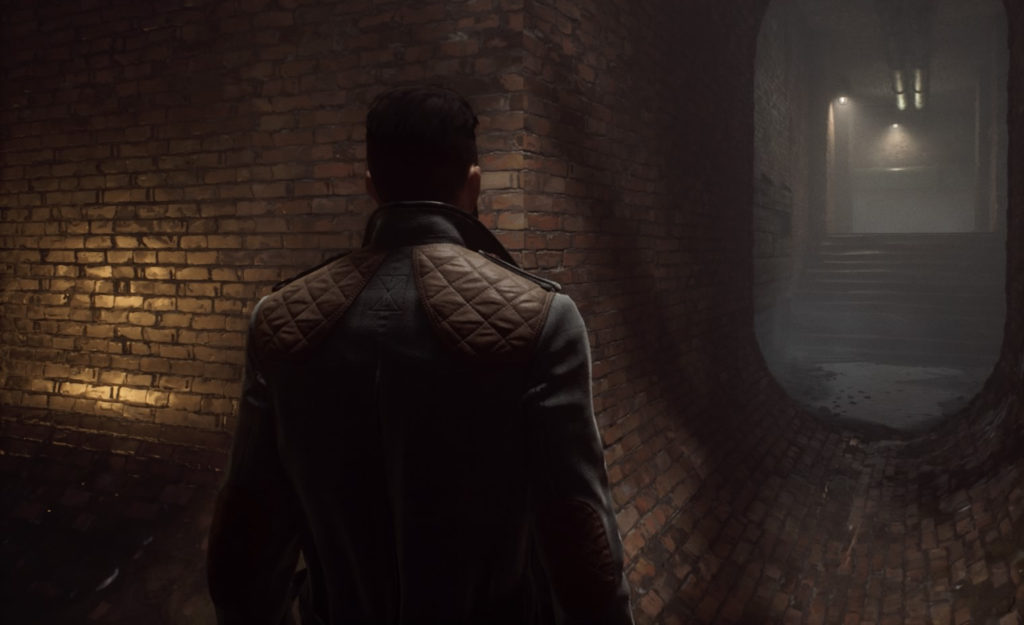
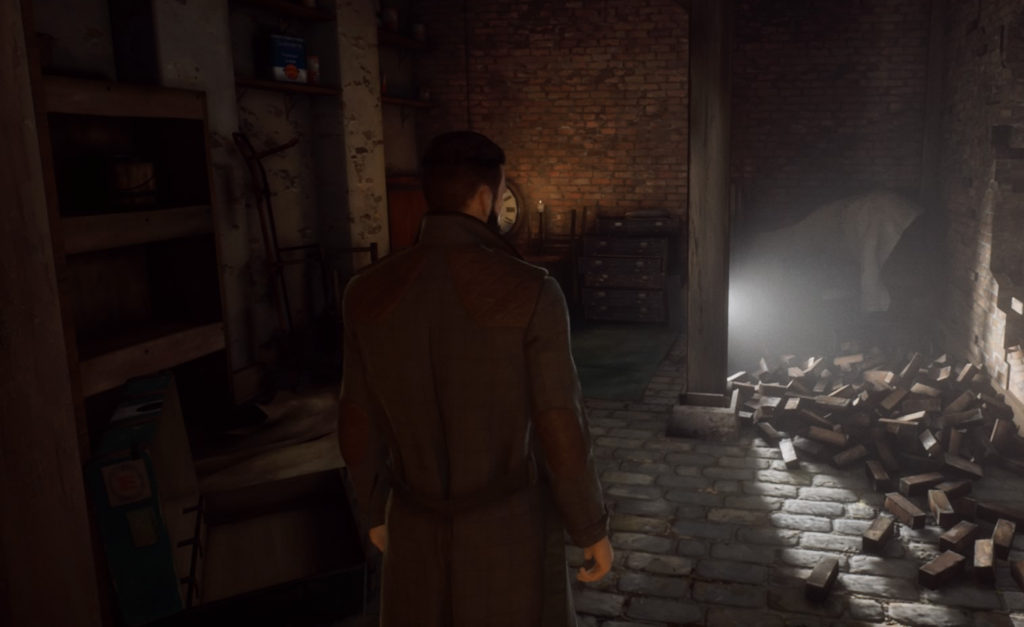
Travel to and enter the sewers west of the cemetery pictured in the 1st image below near the red locator. From the entrance, head down the stairs on the right and through a big circular brick doorway. Take a left and head towards the barrel with fire in it at the end of the corridor (2nd image below). Head right past the barrel and take the first left followed by another left (3rd image below). Head up the concrete stairs and take another left to enter a hallway. Follow that hallway to the doorway at the end and head through it. Take a right and teleport up to a ledge on the right wall leading further into the sewer. Follow that path and you will come to a section of the wall that is missing, exposing the room behind it. Head through the wall into this room (4th picture below) to find the Text in Braille tucked away in a dresser.


Bring back the Braille notes to Mason 4/4

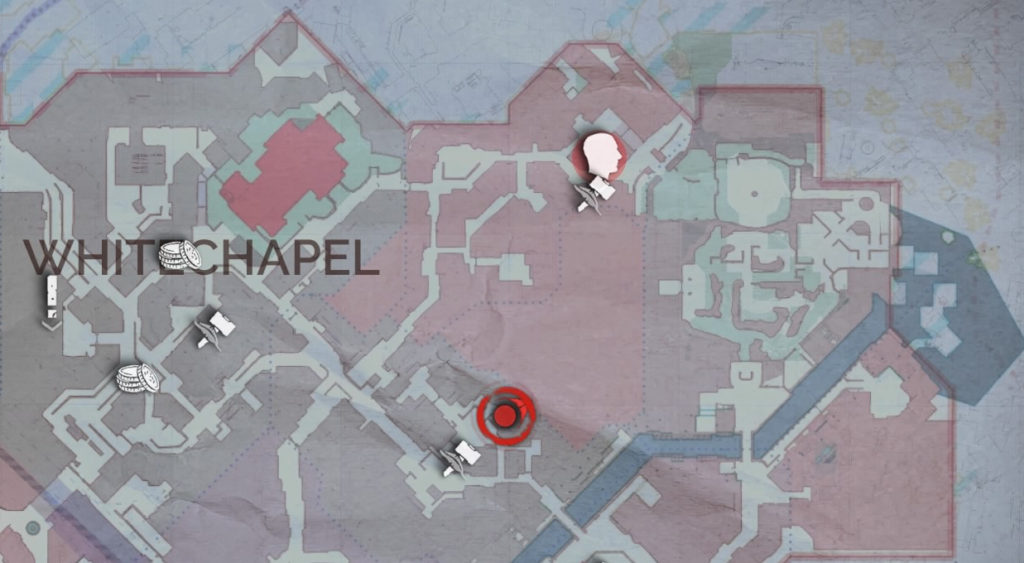
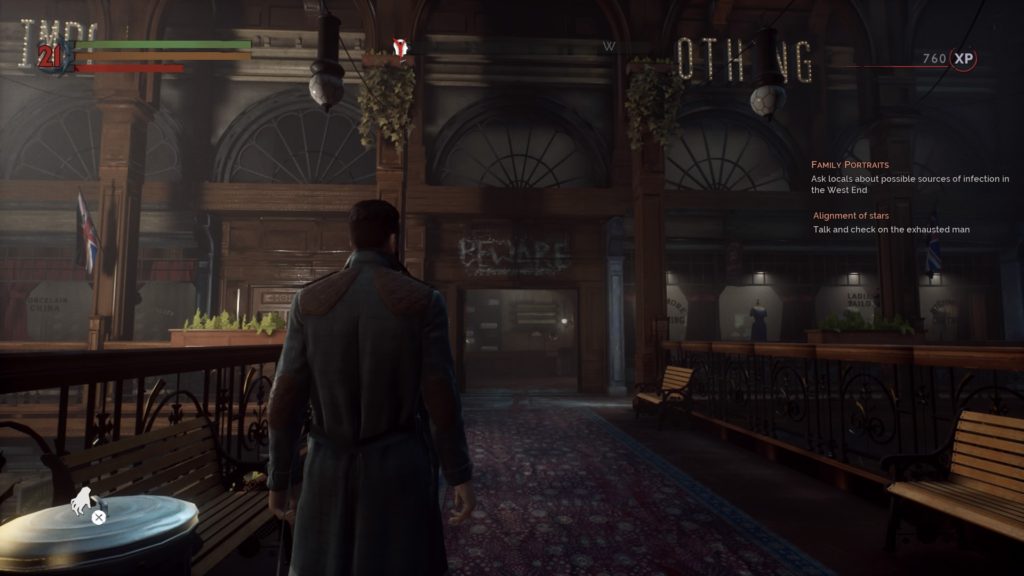
Head over to the mall-like area located just northeast of the West End (red locator in the 1st image below). Once there, head to the second level and enter the clothing store pictured in the second image below. Take the stairs in the store down to the first floor to find a pair of Skals feasting on an unlucky victim. Defeat them and inspect the body of the fallen Priwen hunter to find the Text in Braille.


Find the laboratory of the Brother of St. Paul’s Stole

Follow the new objective marker back to the sewers west of the cemetery where the Text in Braille was found. Take the stairs in that room up and head through the door at the top to reach the laboratory.


Retrieve the potion recipe in the laboratory

Move through the building and take the stairs to the second floor. You will enter a room with a named enemy. Defeat him and loot the Chemist Diary off of his corpse. Be sure to loot the rest of the room as the Blood Goddess Heresy collectible can also be found here.


Choose what to do with the chemist’s diary

Return to Mason’s house and talk with him. You can choose to give him the formula or keep it to complete the quest.


Guides

Vampyr – Whitechapel Citizen Hints

by Chappie in


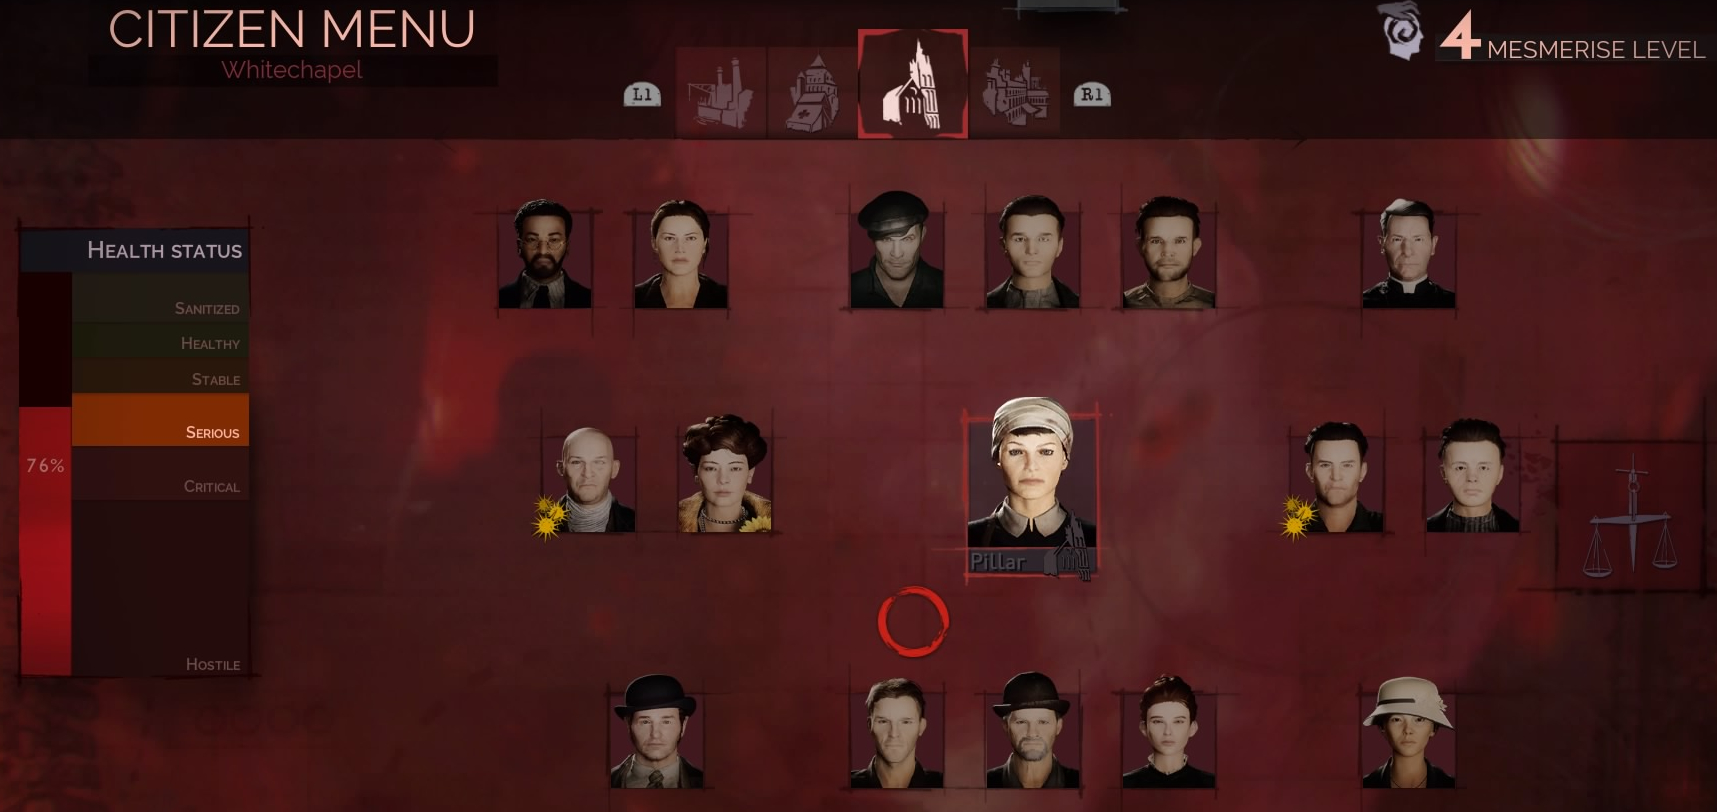
Citizens

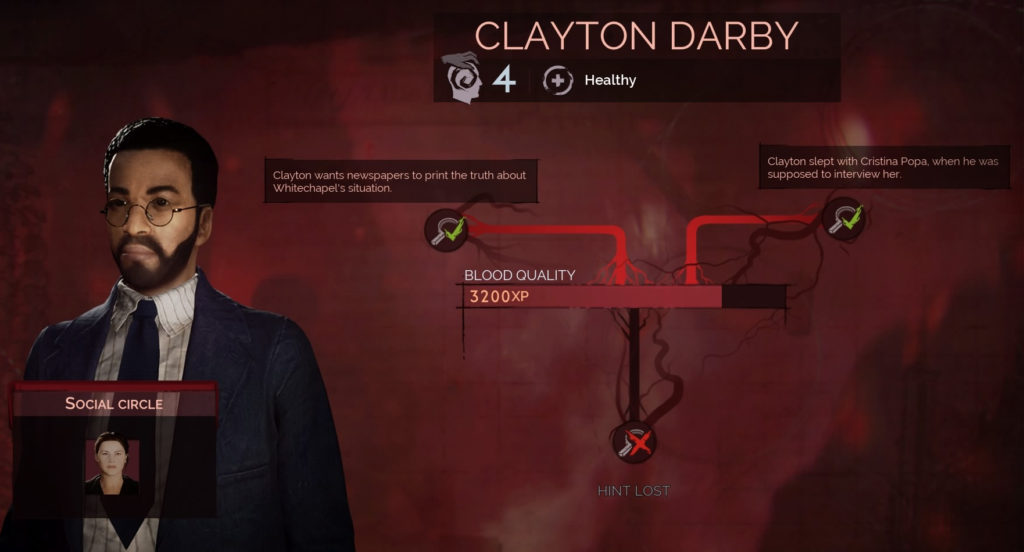
Clayton Darby –  3 hints

  • Clayton wants the newspapers to print the truth about Whitechapel’s situation
    • Talk to Clayton and choose the dialog options ‘Your investigation in London?’, ‘What are you doing here after sunset?’, then ‘You risk your life to reveal the truth?’
  • Clayton slept with Cristina Popa when he was supposed to interview here
    • Talk to Clayton and choose the dialog options ‘Personal questions’, ‘This woman really stole your wallet?’ (requires ‘Cristina is suspected’ Cristina hint) then ‘How did you meet her?’
  • Hint Lost
    • Complete the investigation A Cherished Souvenir and give the scarf to Clayton.  I did this investigation in chapter 5 and didn’t have the option to give the scarf to Clayton so I missed the hint.


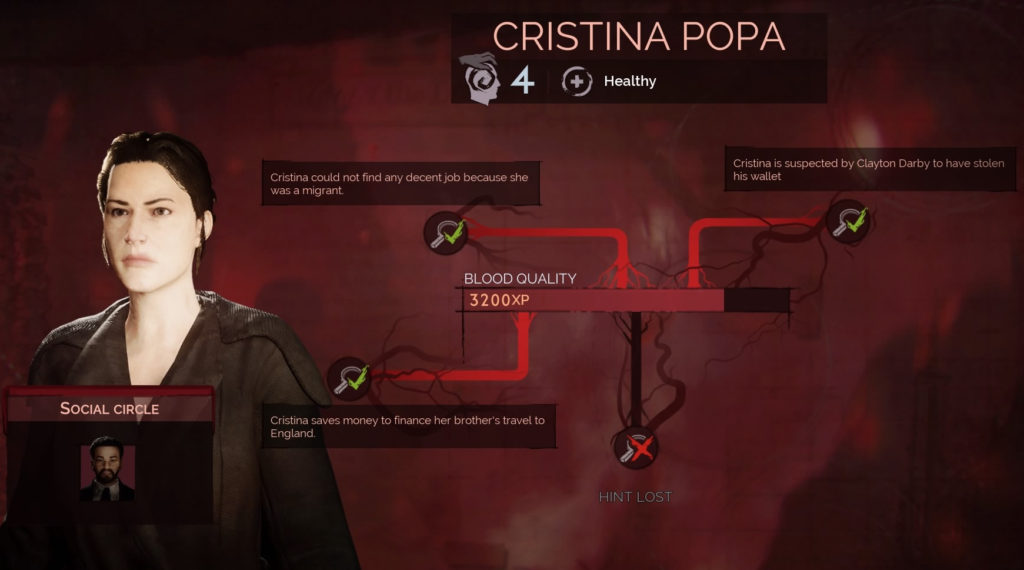
Cristina Popa – 4 hints

  • Cristina could not find any decent job because she was a migrant
    • Talk to Cristina and choose the dialog options ‘Personal questions’ then ‘Tell me about yourself’
  • Cristina is suspected by Clayton Darby to have stolen his wallet
    • Follow Cristina and Clayton to a fenced area where they have a private conversation. Teleport to the balcony above them and eavesdrop on their conversation.
  • Cristina saves money to finance her brother’s travel to England
    • Talk to Cristina and choose the dialog options ‘Personal questions’, ‘Did you steal Clayton Darby’s wallet?’. then ‘Perhaps Clayton is different?’
  • Hint Lost
    • Complete the investigation A Cherished Souvenir and give the scarf to Clayton.  I did this investigation in chapter 5 and didn’t have the option to give the scarf to Clayton so I missed the hint.


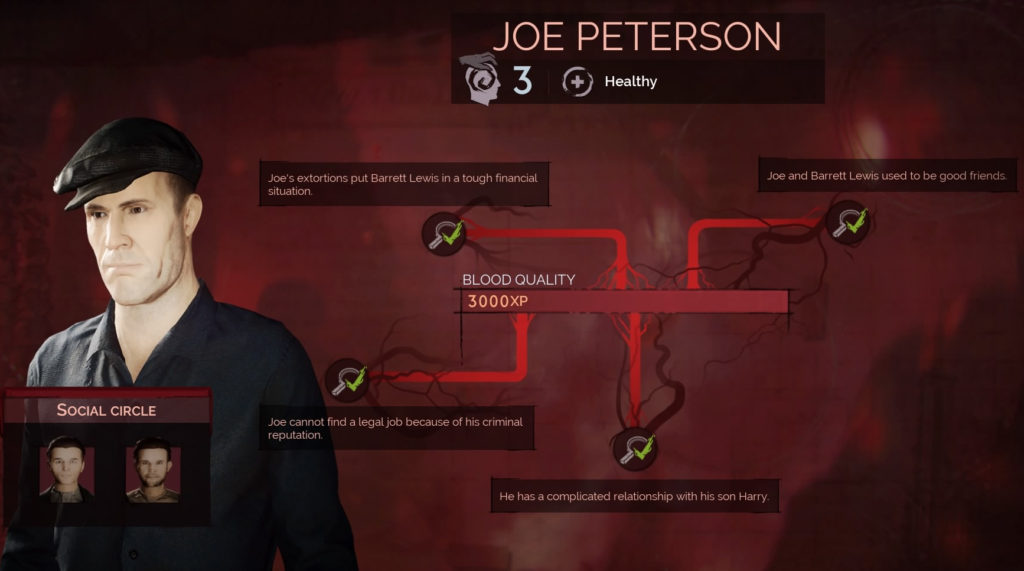
Joe Peterson – 4 hints

  • Joe’s extortions put Barrett Lewis in a tough financial situation
    • Talk to Barrett Lewis and choose the dialog options ‘Your life in London?’ then ‘How’s the business?’
  • Joe and Barrett Lewis used to be good friends
    • Talk to Joe and choose the dialog options ‘Your life in London?’ then ‘Do you enjoy bullying people?’ (need the extortion hint from Barrett)
  • He has a complicated relationship with his son Harry
    • Wait for Joe to enter his house then run around to the back of it. Teleport to the wooden platform just behind the back window of the house on the second level. Activate your vampire sense to find the eavesdrop location and listen in.
  • Joe cannot find a legal job because of his criminal reputation
    • Find the Job Refusal Letter in a trunk on the second level of Joe Peterson’s house


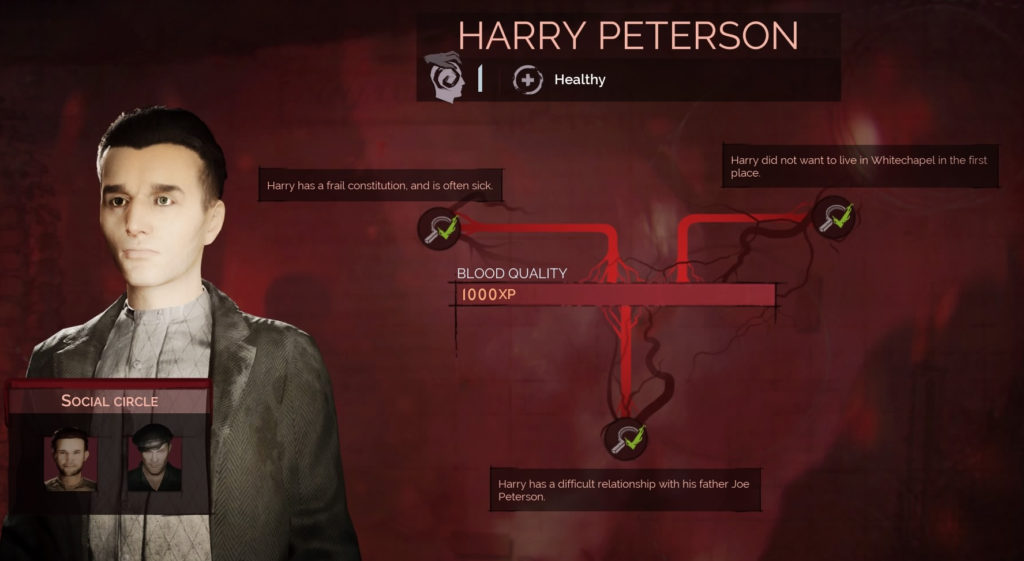
Harry Peterson – 3 hints

  • Harry has a frail constitution and is often sick
    • Talk to Harry and choose the dialog options ‘Your life in London?’ then ‘How do you feel?’
  • Harry did not want to live in Whitechapel in the first place
    • Talk to Harry and choose the dialog options ‘Your life in London?’ then ‘Not happy to live in Whitechapel’
  • Harry has a difficult relationship with his father Joe Peterson
    • Wait for Joe to enter his house then run around to the back of it. Teleport to the wooden platform just behind the back window of the house on the second level. Activate your vampire sense to find the eavesdrop location and listen in.


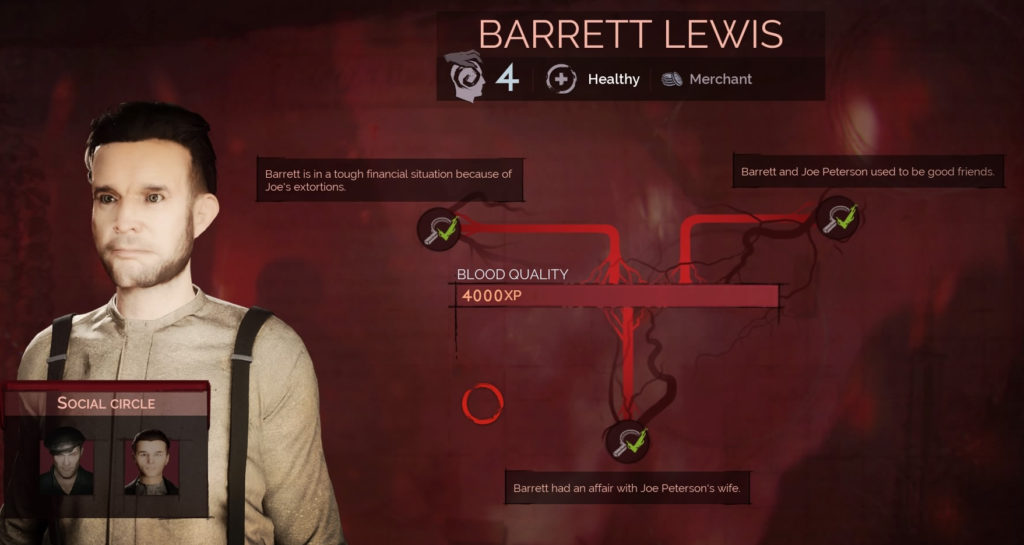
Barrett Lewis – 3 hints

  • Barrett is in a tough financial situation because of Joe’s extortions
    • Talk to Barrett and choose the dialog options ‘Your life in London?’ then ‘How is business?’
  • Barrett and Joe used to be good friends
    • Talk to Joe and choose the dialog options ‘Your life in London?’ then ‘Do you enjoy bullying people?’ (need the extortion hint from Barrett)
  • Barett had an affair with Joe Peterson’s wife


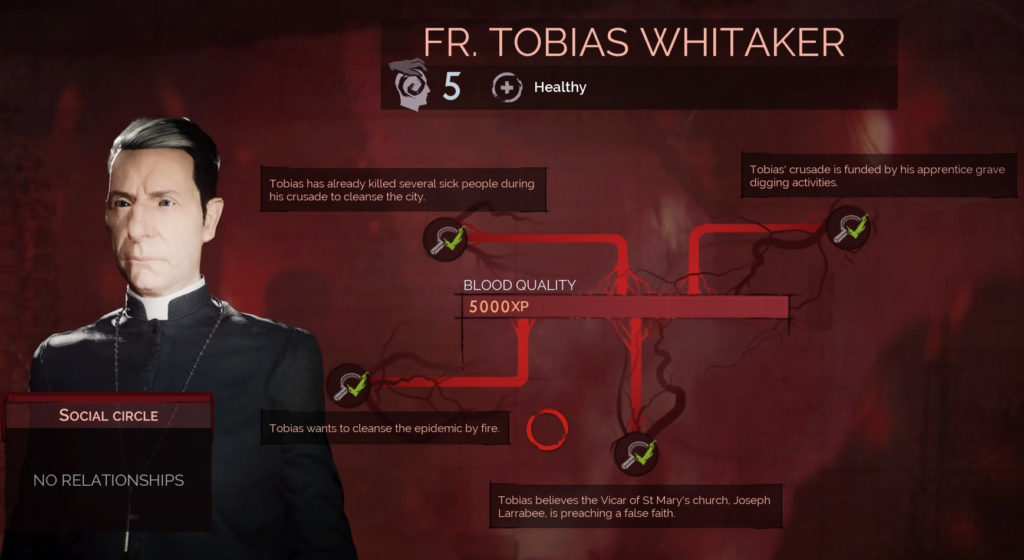
Fr. Tobias Whitaker – 4 hints

  • Tobias wants to cleanse the epidemic by fire
    • Talk to Tobias and choose the dialog options ‘Your life in London?’, ‘I am more lost than you thought?’, ‘I am listening…’, then ‘What is your plan?’
  • Tobias believes that the Vicar of St. Mary’s church, Joseph Larrabee, is preaching a false faith
    • Talk to Tobias and choose the dialog options ‘Your life in London?’, ‘How exactly will you cleanse this city?’ (requires the previous hint), then ‘But where do you stop?’ (top right option)
  • Tobias has already killed several sick people during his crusade to cleanse the city
    • Find the Personal Diary during the investigation Holy Crusade
  • Tobias’ crusade is funded by his apprentice’s grave digging activities
    • Talk to Tobias and choose the dialog options ‘Personal questions’, ‘Why send Samuel to the cemetery?’, and ‘Confess your crime!’ (these hints show up after the Holy Crusade investigation) to make the ‘Your disciple was a grave robber’ appear. Choose that dialog option.


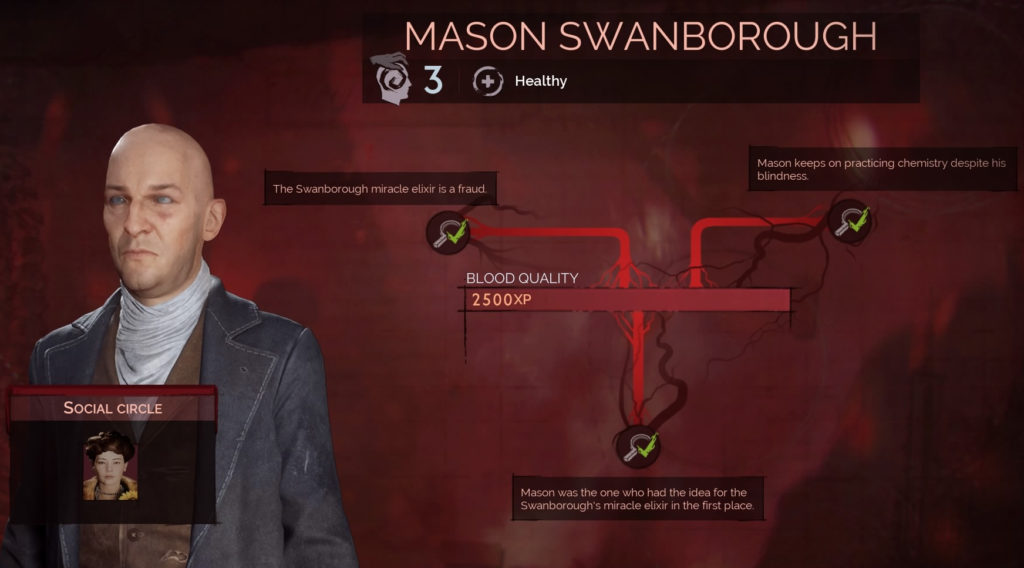
Mason Swanborough – 3 hints

  • The Swanborough miracle elixir is a fraud
    • Talk to Mason and choose the dialog option ‘Your life in London?’, ‘Is someone taking care of you?’, then ‘Where does she go?’
  • Mason keeps on practicing chemistry despite his blindness
    • Wait outside of Mason’s house with vampire sense active. When he heads to his chemistry station an eavesdrop event will occur. Head over the eavesdrop location near the window and observe him.
  • Mason was the one who had the idea for the Swanborough’s miracle elixir in the first place
    • Talk to Mason after witnessing his eavesdropping event and choose the dialog options ‘Personal questions’ then ‘Is your sister using you?’


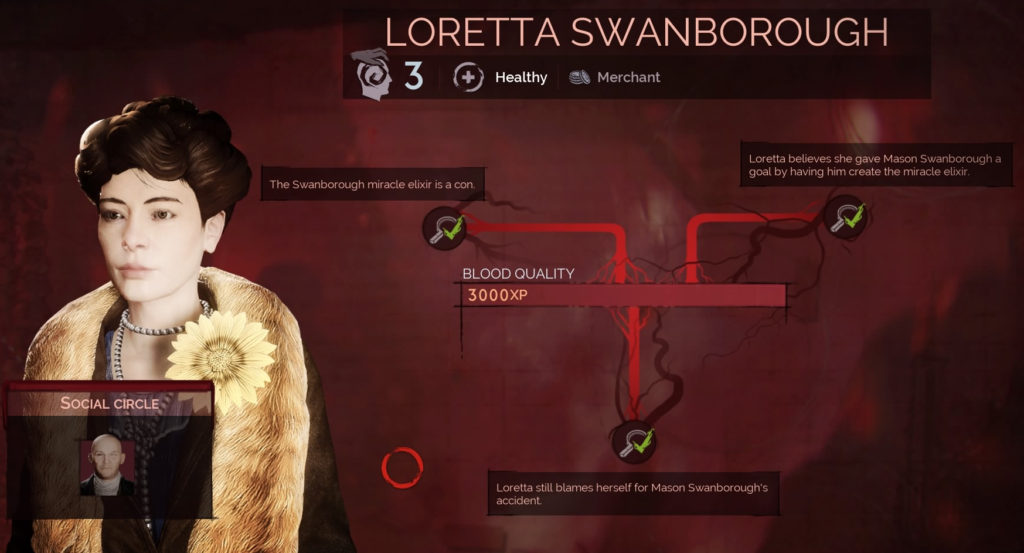
Loretta Swanborough – 3 hints

  • Loretta still blames herself for Mason Swanborough’s accident
    • Find Loretta’s Letter on the table in Mason Swanborough’s house located near Whitechapel Old Road west of the Cemetery
  • The Swanborough miracle elixir is a con
    • Talk to Mason Swanborough and choose the dialog option ‘Your life in London?’, ‘Is someone taking care of you?’, then ‘Where does she go?’
  • Loretta believes she gave Mason Swanborough a goal by having him create the miracle elixir
    • Talk to Loretta and choose the dialog options ‘Personal questions’, ‘Why feel so guilty about your brother?’, then ‘Easing your own guilt’


Dorothy Crane – 3 hints

  • Dorothy was a clandestine resistant in her homeland
    • Talk to Fr. Tobias Whitaker and choose the dialog option ‘I’m looking for Nurse Dorothy Crane?’ then ‘Why date Nurse Crane?’
  • Dorothy gives away drugs and medicine for free
    • Talk to Barrett Lewis and choose the dialog option ‘I’m looking for Nurse Crane’
  • Dorothy has a sister in Romania
    • Find the letter to Nurse Crane at the dispensary located in Whitechapel


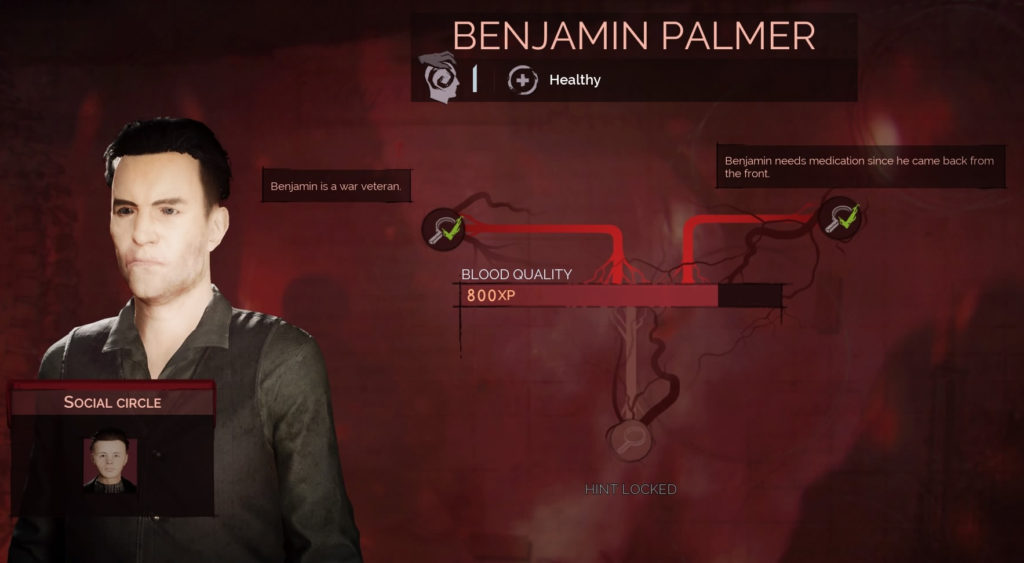
Benjamin Palmer – 3 hints

  • Benjamin is a war veteran
    • Talk to Albert Palmer and choose the dialog options ‘Your life in London?’, ‘Did you steal that man’s medication?’, then ‘Maybe you picked an easy target’
  • Benjamin needs medication since he came back from the front
    • Talk to Benjamin and choose the dialog options ‘Personal questions’, ‘Tell me about the war’, then ‘Don’t feel ashamed’


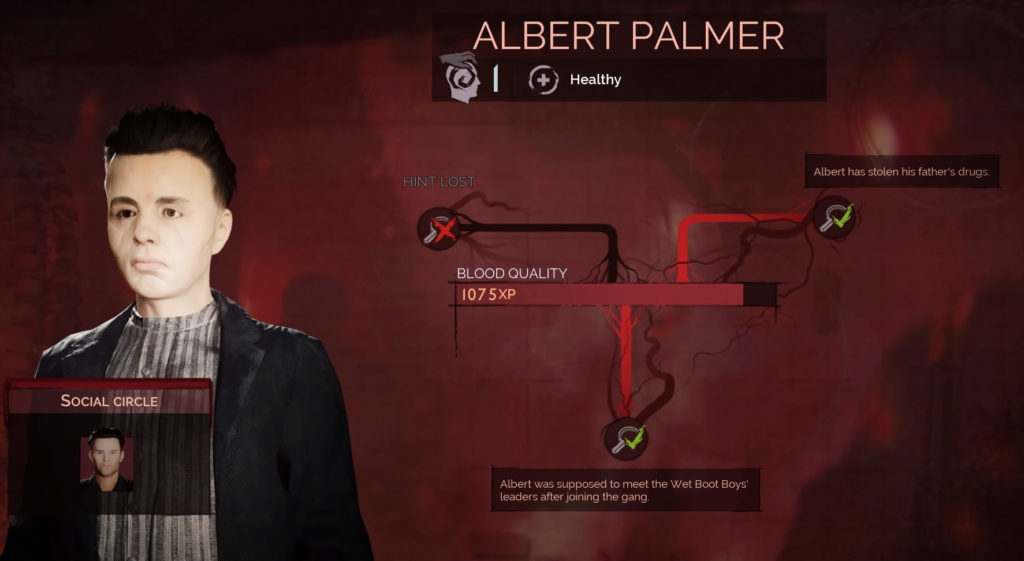
Albert Palmer – 3 hints

  • Albert was supposed to meet the Wet Boot Boy’s leaders after joining the gang
    • Find the Wet Boot Boys Note on a Furious Skal located near Whitechapel (image below)
  • Alber has stolen his father’s drugs
    • Wait for Alber to move, then follow him until he heads through a metal gate. TTeleportto the balcony on the building to the left of the gate. Jump down on the other side and head into the building to eavesdrop on him.
  • Hint Lost
    • Talk to Albert and choose the dialog options ‘Personal questions’ then ‘About the relationship with your father?’
      • During the Y dialog choice, choose the option about Benjamin being dangerous.


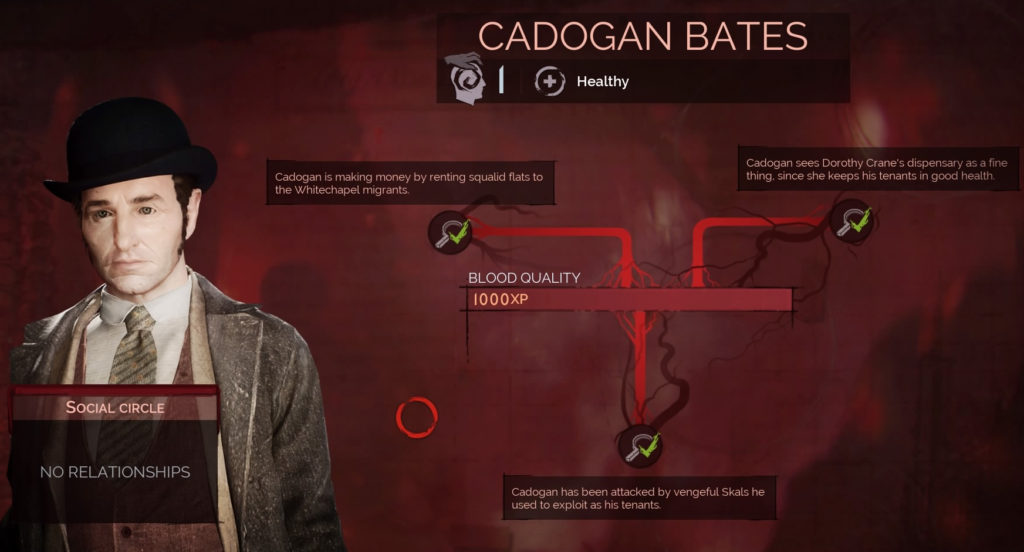
Cadogan Bates – 3 hints

  • Cadogan has been attacked by vengeful Skals he used to exploit as his tenants
    • Find the Petition Letter on the third floor of the Abandoned Investment Property near Whitechapel on the corpse of a previous Tenant
  • Cadogan is making money by renting squalid flats to the Whitechapel migrants
    • Talk to Cadogan and choose the dialog options ‘Your time in London?’ then ‘What is your business exactly?’
  • Cadogan sees Dorothy Crane’s dispensary as a fine thing since she keeps his tenants in good health
    • Talk to Cadogan and choose the dialog options ‘Any news on Nurse Crane’s dispensary?’ then ‘I’m sure you know more’


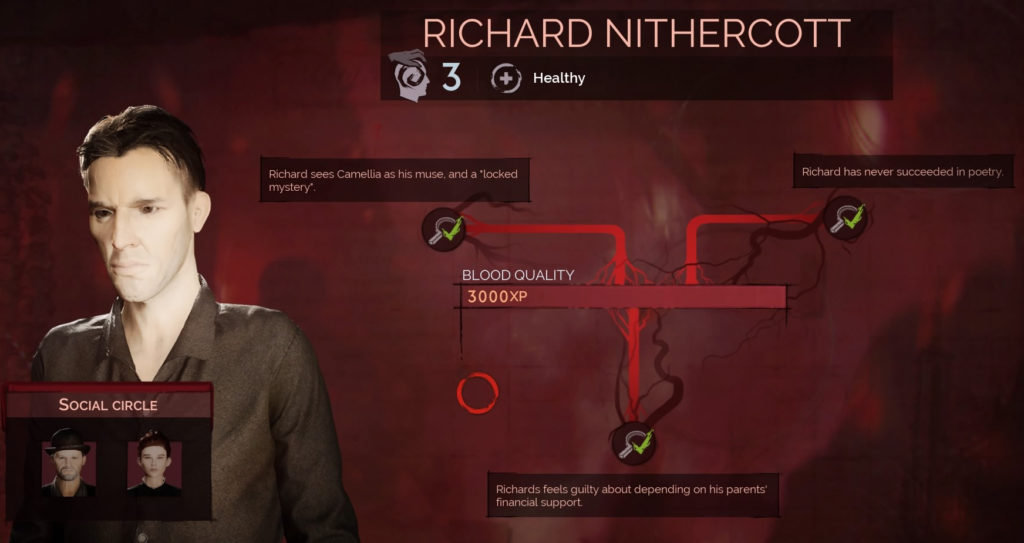
Richard Nithercott – 3 hints

  • Richard sees Camellia as his muse and ‘locked mystery’
    • Talk to Richard and choose the dialog options ‘Personal questions’, ‘Why seek inspiration in Whitechapel?’, then ‘Do you not think it a little morbid?’
  • Richard has never succeeded in poetry
    • Find the Editor Refusal Letter in a trash can behind the church of Whitechapel in the cemetery near a chair next to a fire. This is the same location Richard is located in.
  • Richard feels guilty about depending on his parents’ financial support
    • Talk to Richard and choose the dialog options ‘Personal questions’, ‘Do you make a living from your writing?’ (after finding the Editor Refusal Letter), then ‘You don’t seem to suffer from poverty’


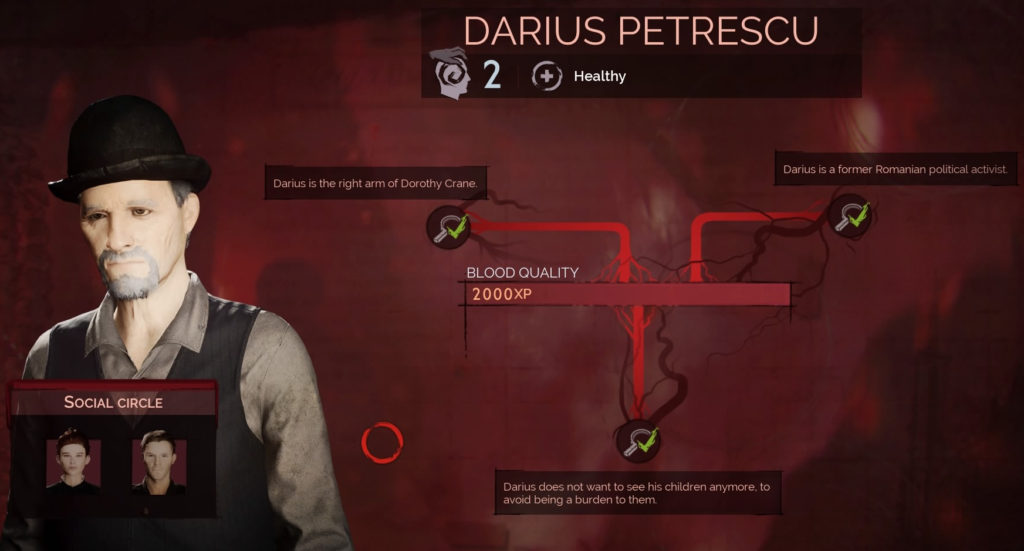
Darius Petrescu – 3 hints

  • Darius is the right arm of Dorothy Crane
    • Obtained by progressing through the main quest Blackmail during chapter 2
  • Darius is a former Romanian political activist
    • Talk to Richard Nithercott during the main quest Blackmail during chapter 2
  • Darius does not want to see his children anymore to avoid being a burden on them
    • Find Darius Petrescu’s Letter during the main quest Blackmail during chapter 2


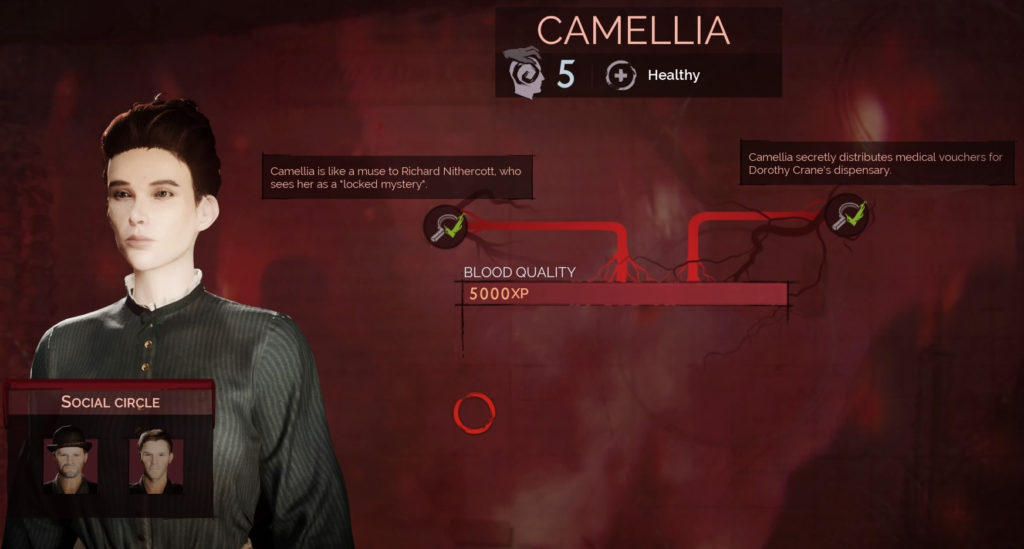
Camellia – 2 hints

  • Camellia secretly distributes medical vouchers for Dorothy Crane’s dispensary
    • Examine a flower pot near eastern Whitechapel
  • Camellia is like a muse to Richard Nithercott who sees her as a locked mystery
    • Talk to Richard Nithercott and choose the dialog options ‘Personal questions’, ‘Why seek inspiration in Whitechapel?’, then ‘Do you not think it a little morbid?’


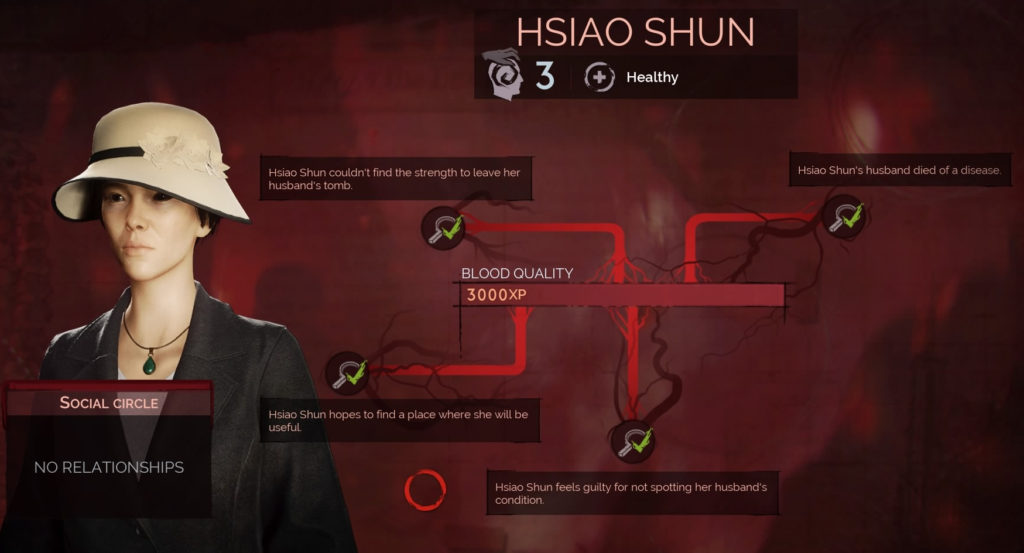
Hsiao Shun – 4 hints

  • Hsiao Shun couldn’t find the strength to leave her husband’s tomb
  • Hsiao Shun’s husband died of a disease
    • Talk to Hsiao and choose the dialog options ‘ Your life in London?’ then ‘About your husband’s death?’
  • Hsiao Shun feels guilty for not spotting her husband’s condition
    • Talk to Hsiao and choose the dialog options ‘Your life in London?’ then ‘Why are you blaming yourself?’
  • Hsiao Shun hopes to find a place where she will be useful
    • Talk to Hsiao and choose the dialog options ‘Personal questions’ then ‘How do you feel now?’