Rune Factory 5
Guides

Rune Factory 5 – Oswald’s Hideout

by Chappie in


Below is a walkthrough of the Oswald’s Hideout main story event in Rune Factory 5.


Client: Oswald

Location: Bandit King’s Old Base

Objective: Rescue Oswald’s left behind friend


To start this event, Terry will tell you about an anonymous message left for you requesting that you head to the Belpha Ruins at midnight. After doing so, Oswald will show up and ask you to rescue one of his friend’s left behind at his base. You’ll then want to rest and set out the next day. Make your way to the Bandit King’s Old Base, which can be found in the southeastern part of the Phoros Woodlands.


Bandit King’s Old Base 1F

Work your way through the first floor, defeating the enemies along the way. Keep your eye out for walls with cracks on them as you can break them using your mining hammer to reveal hidden areas. When you reach the middle of the floor, there will be a blue gate blocking your path forward. Head west to reach a room filled with mimics. Defeat them then flip the blue switch to cause the gate to lower. You’ll then need to return to the room with the blue gate and head east. This will bring you to a long room filled with traps. Run to the other end of the room, dodging the traps, to press the green switch. This will allow you to head forward into the next room. In the next room, there will be 3 switches near the entrance. Pressing the right switch causes an enemy to spawn. Pressing the middle one causes a boulder to fall down on you dealing damage. Pressing the left one lowers the gate blocking the way forward. Head past the gate and use the save point. Head to the next room to trigger a dialog event leading to a boss fight. Defeat the Geyser Bear then head to the next floor.


Bandit King’s Old Base 2F

Work your way through the second floor, defeating enemies as you go. After clearing the room with all of the bulls, you’ll come to a room with 4 switches. You’ll want to press the left (northern) switch to open the gate forward. Follow the path then use the save point. Head south to trigger a dialog event leading to the second boss fight. A good strategy for this fight is to stay behind the boss and attack it from behind. Defeat the Mysterious Lizard then head south into the next area. If you take the right path heading west, you’ll come to a room with a green switch at the end. Flip the switch to cause the green walls in the room to lower revealing enemies. You’ll have to defeat them all in order to leave this room. If you head to the eastern room, there will be more traps protecting the blue switch. Avoid them to activate the switch. Once both switches have been activated, you’ll be able to progress to the next floor.


Bandit King’s Old Base 3F

Once on this floor, use the save point then head forward into the big open room to trigger a dialog event leading the third boss fight against Dragon Golem. For this boss, stay on the sides of it. Also, watch out for the boulders that it flings. After you defeat it, a quick dialog event triggers. Head south to the next room where you’ll find Oswald’s friend. When you regain control of your character, the event completes!




Rune Factory 5
Guides

Rune Factory 5 – A Challenge!

by Chappie in


Below is a walkthrough of A Challenge! main story event in Rune Factory 5.


Client: Livia

Location: Kelve Lava Caves (Recommended Level: 12)

Objective: Investigate the Kelve Lava Caves


After Scarlett returns to the village, Livia will propose a challenge to see who can complete the request to investigate the Kelve Lava Caves first. When you’re ready, make your way northeast of Rigbarth. Keep following the path north to reach the Kelve Volcanic Region. This will lead you to the caves. Save outside then enter.


Kelve Lava Caves 1F

This floor is pretty straight forward. Make your way to the second floor, fighting the enemies along the way and grabbing any chests you come across. The chest near the entrance has the Water Laser spell, which can be helpful fighting the fire enemies inside the cave.


Kelve Lava Caves 2F

The second floor is basically one giant circle. You’ll fight groups of enemies as you work your way from room to room. The big thing to watch out for here are lava geysers shooting out from the ground. They deal damage to you and prevent you from passing through them. In the big room before the third floor, they will be in the middle of the fight area so you’ll have to navigate around the geysers while fighting the enemies.


Kelve Lava Caves 3F

Save your game then head to the center of the room to trigger a dialog event. When it concludes, you’ll engage in a boss fight with a fire snake. The snake used fire attacks and can inflict status ailments such as poison that will drain your health constantly. Do your best to dodge its attacks and hit him with water when you can to take him down. After you defeat the snake, another cutscene triggers.


Rigbarth

Head into the captain’s room leading to another dialog event that will lead to the completion of the event.


Astria Ascending
Game Guides

Astria Ascending Guides

by Chappie in


This page contains our guides for Astria Ascending. These guides are a work in progress and will be updated as we progress through the game.


Collectibles

J-Ster


Misc


Quests


Fallout 76
Guides

Fallout 76 – Wayward Souls

by Chappie in


Obtained: Automatically after completing the Reclamation Day quest


Speak with Pennington

Head down the stairs outside of the vault and speak with the robot near the large sign.


Speak to Lacey

Head underneath the large sign and down the stairs to find Lacey and Isela. Speak with Lacey.


Visit “The Wayward”

Follow the objective southeast until you reach the Wayward.


Deal with the attacker

Once you enter the Wayward, head forward a short way to trigger a dialog event. If your Charisma and Luck are level 2, you might be able to resolve the altercation peacefully. If not, you’ll engage in a fight with the Batter.


Speak to the bartender

Speak with Duchess and agree to help her.


Kingdom Come Deliverance Logo
Guides

Kingdom Come Deliverance – The Hunt Begins Walkthrough

by NightlyGamingBinge in

Welcome to NGB and our Kingdom Come Deliverance walkthrough for The Hunt Begins quest! Here you’ll find everything you’ll need to easily breeze through this quest.

The Hunt Begins Overview

Objective(s):

Go and Report to Captain Bernard in the Courtyard

Speak to Captain Bernard in the courtyard near the combat arena in Rattay when you are ready to leave. Keep in mind that this is a timed objective and will fail if you do not get to it within a few minutes.

Mount Your New Horse

Mount the grey horse called Pebbles.

Follow the Men to Neuhof

Exit Rattay to the east and follow the men until you reach Neuhof where a cutscene will trigger.

(Optional) Question the Survivors

Start by talking to Zora near the corpse of her husband and exhaust all dialog options.  Talk to Jakub, who is diagonally southwest of Zora in the same stable area, and exhaust all of his dialog options.  Then head north past Zora outside the stables. Once outside, head northeast past the pond to the main stables.  Talk to Mark who is sitting on a stump near a covered wagon and exhaust all of his dialog options. Finally, talk to Ginger who is standing by the barn door on the far left side of the barn and exhaust all of his dialog options.

(Optional) Scout the Area

Inspect the broken gate with cloth on it to the northwest, which is on the left side of the barn.  To fulfill this objective, we talked to all the survivors and found the area with the broken gate.

Explore the Area to the North of the Farm

From the broken gate, follow the trail in the woods northwest (there will be a trail of blood on this path) until you reach another road.  Inspect the bloody puddle in the middle of that road to complete the objective.

Find Out Where the Raiders Went / Explore the Clearing in the Woods

From the bloody puddle head east on the road past the three stumps on the left then turn left and head north over the small bank on the side of the road.  Keep heading north until you come across a path in the woods. Along a path, you will come across two of the raiders. You will need to fight one and talk to the other bandit that is sitting on the ground.

Search the Bandit

Search the bandit and grab the bloody hoofpick.

Find the Owner of the Hoofpick From Neuhof

Head back to Neuhof and talk to Zora.  Exhaust all dialog options to get the next objective.

Find Out From Jakub Where Ginger Could Have Fled

Talk to Jakub exhausting all dialog options while also promising no harm will come to Ginger. This will complete The Hunt Begins quest.

Kingdom Come Deliverance Guides and Walkthroughs

For more Kingdom Come Deliverance guides and walkthroughs, click here!

Kingdom Come Deliverance Logo
Guides

Kingdom Come Deliverance – The Prey Walkthrough

by NightlyGamingBinge in

Welcome to NGB and our Kingdom Come Deliverance walkthrough for The Prey quest! Here you’ll find everything you’ll need to easily breeze through this quest.

The Prey Overview

Acquired: Automatically after finishing Keeping the Peace

Objective(s):

Meet Lord Capon at Dawn in the Courtyard of the Upper Castle

Head back to the Rattay Mill and sleep until dawn.  Follow the objective to the east side of Rattay to meet Hans Capon. You can fail this if you don’t meet with Hans on time.

Follow Hans Capon

Talk to Hans Capon and choose either option as Henry will have to follow behind Hans on foot either way. After a while, the game will fast travel you to your destination.  Continue to follow Hans Capon to a campsite.

Bring Capon Wine and Bacon from his Saddlebag

Head over to Hans’ horse and grab the wine and bacon from Hans Capon’s horse.

Wait Until Dawn

Sleep until 7 am.

Compete with Sir Hans at Hunting Hares

Search the woods for rabbits and bag as many as you can.  I’d pick up as many arrows as you can scavenge from around your kill, because let’s be honest, you’re (most likely) not going to bring the animal down in one shot. At noon the quest will automatically update.

Go Back to the Camp

Follow the objective back to camp.

Wait for Sir Hans

After some time passes, the objective will automatically update.

Talk to Sir Hans

Talk to Hans to trigger a cutscene. If you managed to beat him at the hunting challenge, he’ll give Henry 100 Groschen.

Follow Hans Capon

Follow Hans northwest.  Eventually, he will get off his horse and a cutscene will trigger.

Run Down the Boar

This objective will automatically fail if you don’t have a horse to chase it on. Otherwise, follow the boar until the objective updates.

Find Hans Capon

Follow the objective to find Hans around the northwest corner of the search area.

Rescue Hans Capon

There will be two captors you will need to defeat. One is an archer and the other has a sword and shield. It is possible to free Hans without alerting them to your presence. It’s best to create a new save in case you do get spotted.

Untie Sir Hans

Find the tree that Sir Hans is tied to and untie him. This will trigger a quick cutscene.

Talk to Sir Hans

Talk to Hans Capon to trigger another cutscene that will complete The Prey quest.

Kingdom Come Deliverance Guides and Walkthroughs

For more Kingdom Come Deliverance guides and walkthroughs, click here!

Kingdom Come Deliverance Logo
Guides

Kingdom Come Deliverance – Unexpected Visit Walkthrough

by Chappie in

Welcome to NGB and our Kingdom Come Deliverance walkthrough for the Unexpected Visit quest! Here you’ll find everything you’ll need to easily breeze through this quest.

Unexpected Visit Overview

Acquired: Starting quest of the game

Objective(s):

Unexpected Visit Walkthrough

Go to Your Father

At the start of the Unexpected Visit main quest, exit Henry’s house and take a right heading north a short way to reach the forge where Henry’s father is working. Talk with him to get a list of errands that Henry needs to run in town.

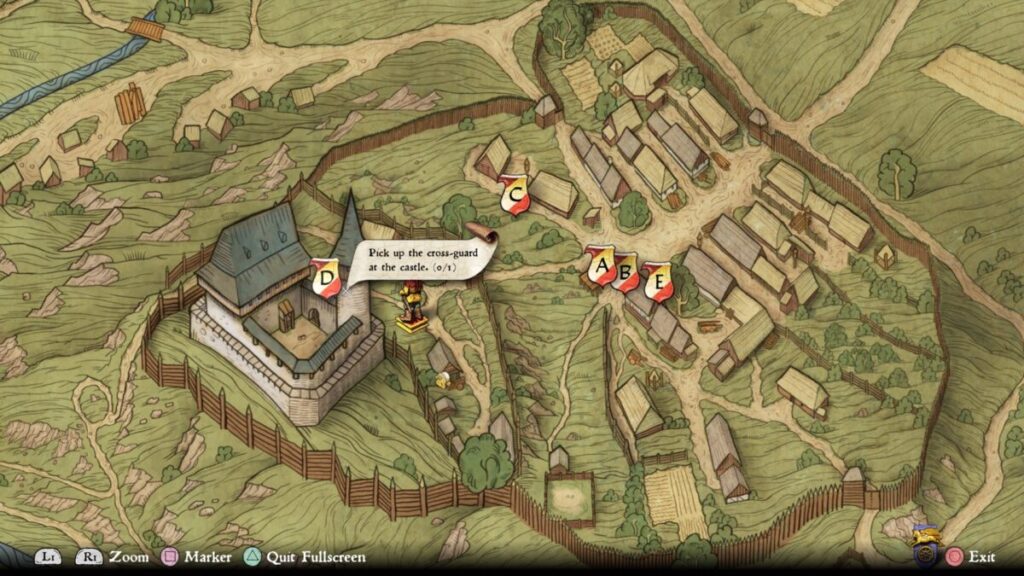
Kingdom Come Deliverance Unexpected Visit Main Quest Skalitz Map

Pick Up the Cross-Guard at the Castle

For this first task on Hal’s list during the Unexpected Visit main quest, follow the road northwest from the forge to reach the castle. Once there, speak with the two guards (Janek and Jaroslav) at the castle gate to obtain the cross-guard.

Go to the Sword-Fighting Lesson

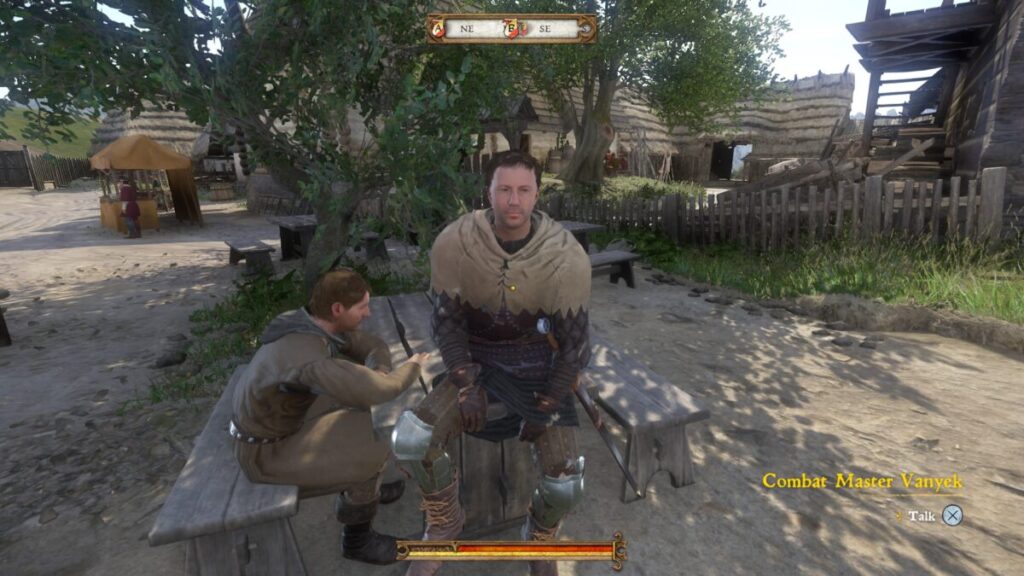
With the cross-guard now in our possession, it’s time for a sword-fighting lesson. Head east into town and when you reach the well, take a right by the gallows to find Combat Master Vanyek sitting on a picnic table (next to the dice table). Speak with Vanyek and tell him you’re ready for some training. Follow him southwest towards the herd of sheep to reach the combat arena then talk with him once again to begin the combat tutorial where you’ll learn the basics of sword-fighting.

Kingdom Come Deliverance Unexpected Visit Main Quest Combat Master Vanyek

Collect the Debt from Kunesh

Next up on Henry’s list of things to do during the Unexpected Visit quest is collecting the debt from Kunesh. You can find him working outside his house near the stables northwest of the gallows. Talk to him about collecting the debt to enter a persuasion dialog event. The generic and the speech dialog option will lead to the “Try to Get the Axe, Hammer and Nails Back Another Way” objective.  The strength dialog option will lead to a fight and the objective “Find Something at Kunesh’s Worth Selling”. If you win the fight, you will obtain Kunesh’s keys.

(Optional) Try to Get the Axe, Hammer and Nails Back Another Way

If you chose the strength dialog option, just take the items. If you pick the generic or speech dialog options, knock Kunesh out and take Kunesh’s keys to open the chest in his house. Inside, you’ll find the hammer, nails, and an axe to steal.

(Optional) Find Something at Kunesh’s Worth Selling

If you fought Kunesh and won, you can grab his axe from the wood splitting stump and enter his house. Go through the first door on the right, unlock the trunk under the window with the key, and take the hammer and nails. Getting the axe, hammer, and nails completes this goal.

(Optional) Get a Lockpick from Fritz to Open Kunesh’s Chest

If you choose the generic or speech dialogue options, sneak into Kunesh’s house and locate the locked chest to complete this task. Head towards the town center, past the wooden tables, into the fenced area near the tavern to trigger a cutscene. Your friends will ask for your help with a lousy job. Choose “I’ll do it, but I need your help in return.”

(Optional) Go with Your Friends to Deutsch’s House

Follow your friends to Deutsch’s house located on the eastern side of town.

(Optional) Discuss the Plan of Attack With Your Friends

Once at Deutsch’s house, talk with your friends to come up with a plan.

(Optional) Lure Deutsch’s Wife Away

Speak with Deutsch’s wife sitting on a bench near the house next to the chicken coup.  Mention to her that Deutch is running his mouth at the tavern and she will leave to deal with him.

(Optional) Go and Get Revenge on Deutsch

A cutscene will automatically trigger, followed by a good old-fashioned fistfight.

(Optional) Run from the Catchpole

Flea from the catchpole by following the guys southeast towards the fence surrounding Skalitz.

(Optional) Meet the Lads at Kunesh’s

Head over to Kunesh’s house and talk to the guys there. Fritz will give you a lockpick to open Kunesh’s chest if you asked for help dealing with Kunesh before the objective “Go with Your Friends to Deutsch’s House” is triggered. Talk to the guys again to complete the objective. Check out the objective “Try to Get the Axe, Hammer and Nails Back Another Way” above if you haven’t finished it yet.

Buy a Bag of Charcoal at Market

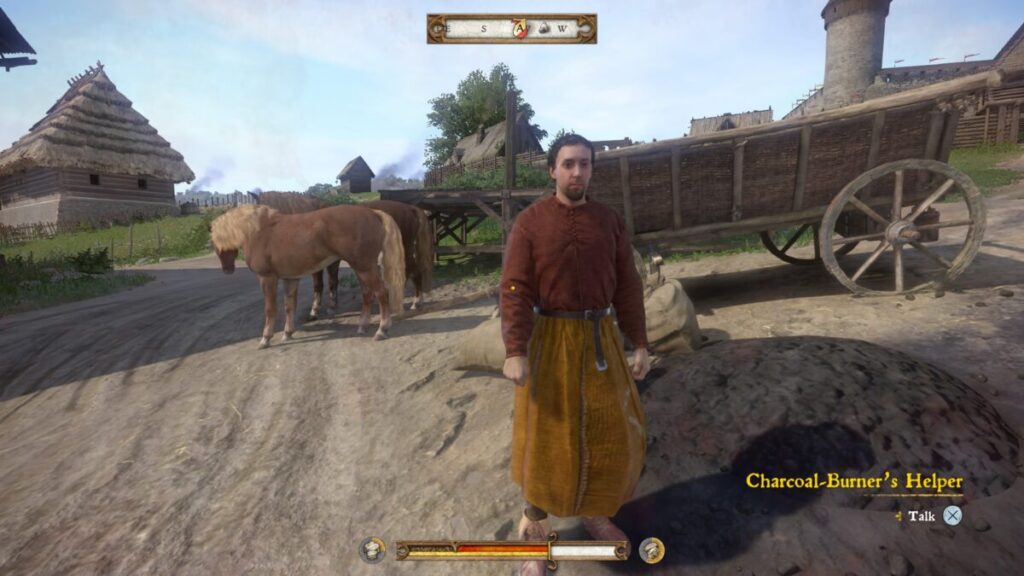
The Charcoal-Burner’s Helper in the middle of Skalitz standing in front of the gallows. Speak with him to trade and sell the axe, hammer and nails you got from Kunesh to buy 10 charcoals.

Kingdom Come Deliverance Unexpected Visit Main Quest Charcoal-Burner's Helper

Buy Ale at the Tavern

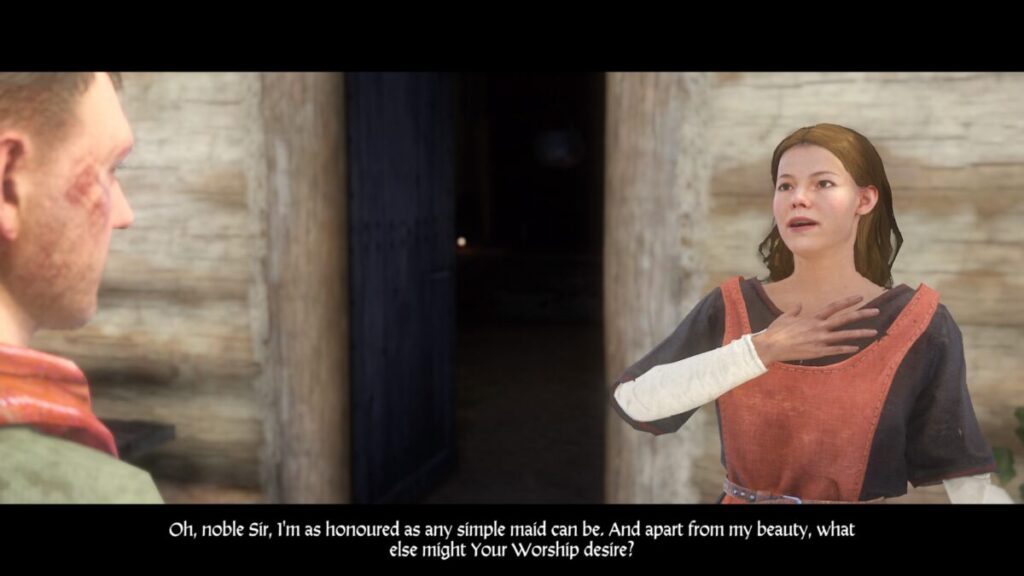
The last thing on Henry’s list is to grab some ale from the tavern. Travel to it in the fenced-in area near the center of Skalitz. If this is your first time there, a cutscene will trigger between Henry and his friends. Once it concludes, you’ll have the option then to help your friends teach Deutsch a lesson via the “Go with Your Friends to Deutsch’s House” objective above. Choosing to not go will lower Hal’s reputation a bit while going could land him in some hot water. Either way, head inside Bianca’s Tavern when you’re ready and speak with Bianca to obtain a pitcher of ale. She will also give you 5 Saviour Schnapps, which is a consumable item used in Kingdom Come Deliverance to save the game.

Kingdom Come Deliverance Unexpected Visit Main Quest Bianca's Tavern

Go Back to Father at the Forge

With Hal’s shopping list for the Unexpected Visit main quest completed, it’s time to head back to your father at his forge near Henry’s house.  Speak with him when you get there and tell him you’re ready to start forging to trigger a cutscene.

Go and Get Nails for Theresa

When you regain control of Henry, head into his house and take a left through the door to locate the trunk containing the nails and grab them (along with the rest of the chest’s contents). Head back to Theresa and speak with her to complete the Unexpected Visit quest.

Kingdom Come Deliverance Guides and Walkthroughs

For more Kingdom Come Deliverance guides and walkthroughs, click here!

Kingdom Come Deliverance Logo
Guides

Kingdom Come Deliverance – Keeping the Peace

by NightlyGamingBinge in

Welcome to NGB and our Kingdom Come Deliverance walkthrough for the Keeping the Peace quest! Here you’ll find everything you’ll need to easily breeze through this quest.

Keeping the Peace Overview

Acquired: Automatically after finishing Train Hard, Fight Easy

Objective(s):

(Optional) Pick Up Your Kit in the Lower Room of the Armoury

Exit the Bailiff’s and go down the stairs. Head east past the stockades following the objective. The Rattay Armoury is near the archery range. Go past the chicken coops to the outer wall of the castle and the Armoury will be on the right. Talk to guard sitting on the bench to retrieve your gear.

Join Nightingale on Patrol Between 11:00 and 19:00

Follow the objective to the west end of Rattay. Nightingale will be leaning against a wagon.

Follow Nightingale

Follow Nightingale as he walks around Rattay on patrol.

Solve the Dispute Between the Armourer and the Beggarwoman

Head up to talk to the bickering pair to trigger a cutscene. Choose whatever option you would like. Continue on your patrol with Nightingale afterwards

Sit Down With Nightingale

Play dice with Nightingale until it gets dark.

Ring the Bell

Head back to the Bailiff’s and ring the bell on the front of the building.

Close the Traders’ Tavern by the Market Square

Head to the middle of Rattay.  When you near the tavern, a cutscene will trigger. Afterwards, you will fist fight Hans Capon until another cutscene triggers and this will complete the Keeping the Peace quest.

Kingdom Come Deliverance Guides and Walkthroughs

For more Kingdom Come Deliverance guides and walkthroughs, click here!

Kingdom Come Deliverance Logo
Guides

Kingdom Come Deliverance – Train Hard, Fight Easy

by NightlyGamingBinge in

Welcome to NGB and our Kingdom Come Deliverance walkthrough for the Train Hard, Fight Easy quest! Here you’ll find everything you’ll need to easily breeze through this quest.

Train Hard, Fight Easy Overview

Acquired: Starts automatically after finishing Awakening

Objective(s):

Go to the Training Ground and Talk to Captain Bernard

Follow the objective east of Rattay to the combat arena outside of Rattay and talk to Captain Bernard.  Afterwards a combat tutorial will ensue until you are interrupted by Sir Hans. After he leaves, the training will resume until Bernard finishes showing you the basics.

Follow Bernard to the Shooting Range

Follow Captain Bernard west back into Rattay to the archery range.

Undertake Archery Training

Take a few shots at the target until a cutscene triggers.

Compete with Hans Capon in Archery

Try and beat Hans Capon in a friendly archery contest.  If you win or lose, Hans Capon will challenge you to a swordfight. If you’re having issues shooting the arrow, try aiming the arrow down and right a bit from your target.

Sword Fight with Hans Capon

Try and beat Hans Capon in a friendly sword fight using real swords.  If you beat Hans Capon in archery and sword fighting, you will get Hans Capon’s bow and he will make a couple excuses on why he lost.

Speak with Bernard

Talk to Captain Bernard.

Report to the Bailiff

Take the stairs across from the tailor to reach the second level above the tailor’s shop where you will find the Bailiff.  Talk to the Bailiff to trigger a cutscene that will complete the Train Hard, Fight Easy quest.

Kingdom Come Deliverance Guides and Walkthroughs

For more Kingdom Come Deliverance guides and walkthroughs, click here!

Kingdom Come Deliverance Logo
Guides

Kingdom Come Deliverance Run Walkthrough

by Chappie in

Welcome to NGB and our Kingdom Come Deliverance walkthrough for the Run quest! Here you’ll find everything you’ll need to easily breeze through this quest.

Run Overview

Acquired:  Starts automatically after finishing Unexpected Visit

Objective(s):

Get a Horse

Follow the trail heading south down the hillside towards Objective A. You will need to hurry because an enemy will be on your tail.

Kingdom Come Deliverance Run Walkthrough Get a Horse Map Location

(Optional) Help Theresa Escape from the Rapists

As you run by Theresa on the way to the horse, whistle to draw the attention of the attackers giving her time to escape (on PlayStation, this is the triangle button). Alternatively, you can sneak past them to get to the horse and ignore this, but it could come back to bite you in future quests.

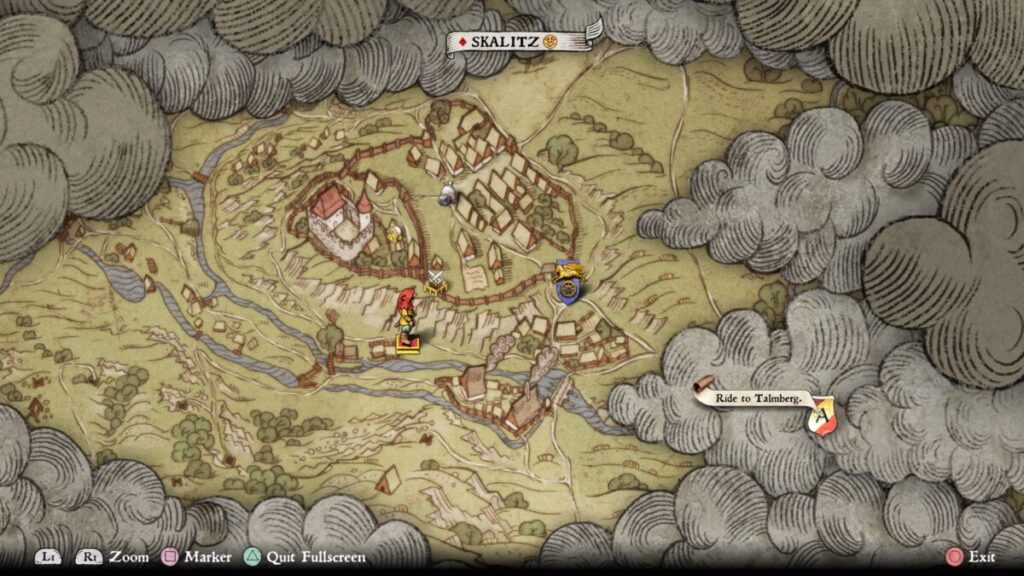
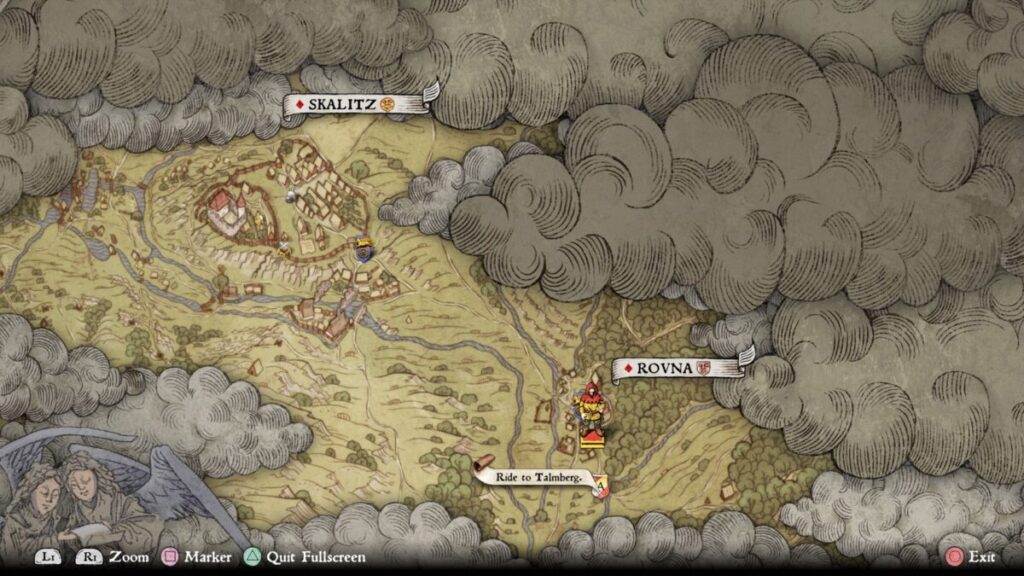
Ride to Talmberg

Steal a horse from the attackers and follow Objective A east to trigger a cutscene.  After the cutscene, you will need to continue to follow the objective towards Talmberg. Henry will also be chased by men on horseback, but it’s best to ignore them. When you get close to Talmberg, another cutscene will trigger.

Kingdom Come Deliverance Run Walkthrough Ride to Talmberg Map Location

Talk to Sir Robard

Following Objective B, exit the room of the Talmberg Castle and turn right down the stairs leading to the central courtyard. Once at the bottom, talk with Sir Robard.

Go with Sir Robard to the Kitchen

Follow Sir Robard as he heads towards a door under the stairs. Entering the door will trigger a cutscene.

Eat

Go on, eat all of the food on the table, You’ve earned it!

Go to the Courtyard Lodge and Sleep There Until Morning

Exit the kitchen and follow Objective A across the courtyard passing the well to find the lodge.  Interact with the bed to sit down then select the prompt to sleep and move the dial to the wee hours of the morning. In the middle of the night, the lady of the house will stop by to check in on Henry. You’ll then be given the option to tell her what happened during the attack or refuse to speak about it. The choice is yours.

Kingdom Come Deliverance Run Walkthrough The Inner Lodge

(Optional) Take the Torch from the Table

The torch is on the table that is located next to your bed. Pick it up and that game will provide a tutorial on how to use it.

Go to the Battlements via the Gateway Stairs

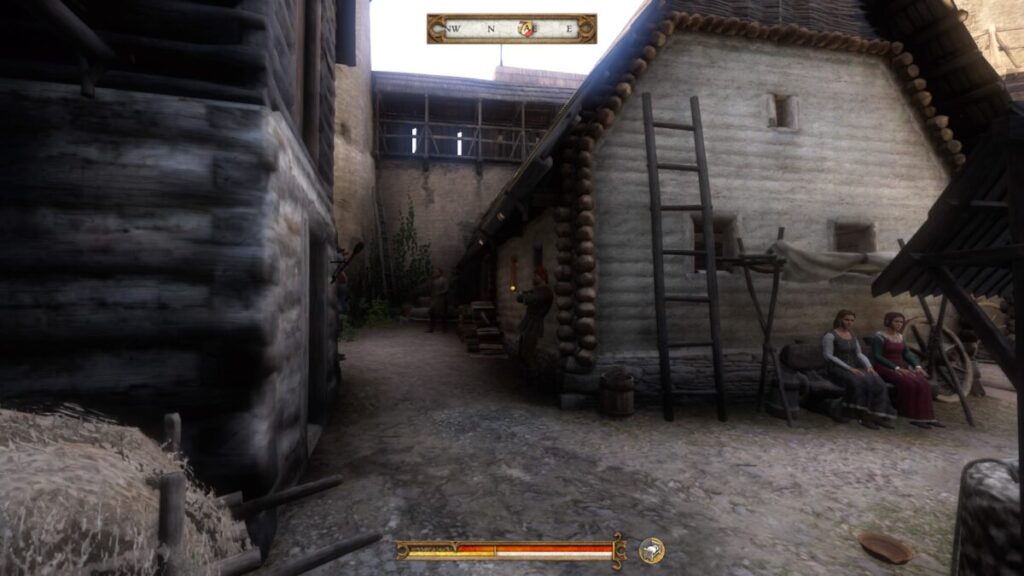
Exit the lodge and swing around ot the left side of the courtyard, heading towards the main gate of the inner castle.

Go to the Battlements and Talk to Captain Robard

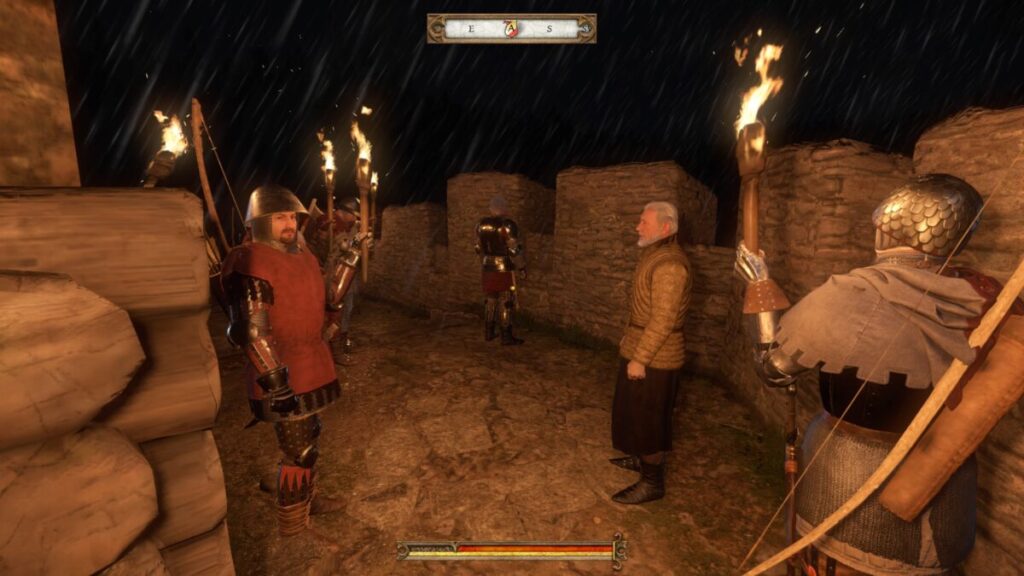
Once at the gate, turn left and take the steps up towards the battlements. Keep following the battlements until you reach Sir Robard. Speak with him and choose “What’s going on?” to trigger a cutscene.

Kingdom Come Deliverance Run Walkthrough Captain Robard on the Battlements

Talk to Sir Robard

Talk to Sir Robard to learn more about the situation and to start the next objective.

Keep Watch on the Battlements

Keep wandering around on the battlements until a guard stops to talk to you.

Wait Until Morning

Use the time skip button to wait until 7 am in the morning.

Go to the Battlements of the Outer Bailey

Head back down the stairs towards the gate to the outer battlement and cross the bridge to trigger another cutscene.

Talk to Sir Robard

From the outer battlement, head south following Objective A to find Sir Robard walking towards the castle following the cutscene. You will come across a persuasion check that may be too high to pass (my stats were at 4,5,5) but he’ll give you some more information about the current situation.

Get Out of the Castle

There are a couple of ways to escape from Talmberg Castle. The first option is to talk to Guard Radim near the outer battlement gate to the north. If you pass the persuasion check, he will let you pass through the gate if you are dressed as a Talmberg soldier (see next objective below).

Kingdom Come Deliverance Run Walkthrough Guard Radim

The second option would be to jump off the bridge near the gate leading to the center of the castle. The other option I found was to get yourself thrown in jail. After 24 in game hours, you will be released from jail outside of the castle.

(Optional) Get Talmberg Armour from the Guardhouse Above the Gate

Head back to the gate leading to the inner part of the castle and take a right up the stairs to the battlement where Henry was a lookout the night before. The guardhouse is the room to the right once at the top of the stairs. You will need to open the chest with a very easy lock to loot the Talmberg Armour. Be careful of the guards that pass by (they have Superman-level hearing). Equip the gear and return to Guard Radim and then talk to him. He will let you pass through the gate.

(Optional) Get a Horse

You can also steal a horse from the stables located in the inner portion of the stable near the lodge you stayed in before leaving the castle. Once you have it, take it to the bridge and jump down under the metal chains to escape

Flee the Castle and Get to Skaliz

If you left the castle with the help of Guard Radim, you are in good shape.  If you choose to jump off the bridge, the alarm will sound and the guards will start chasing you.  Once you leave the castle, start making your way north/northwest to Skaliz. If you manage to get caught by a guard, you’ll have a chance to persuade them to let you go. If that fails, you should be free once you’re released from jail.

Bury Your Loved Ones in Skalitz

On your way to Skaliz, a cutscene will trigger completing the quest.

Kingdom Come Deliverance Guides and Walkthroughs

For more Kingdom Come Deliverance guides and walkthroughs, click here!