Fire Emblem Engage Logo
Guides

Fire Emblem Engage – Chapter 8 Walkthrough

by NightlyGamingBinge in

Below is a walkthrough for Chapter 8: The Kingdom of Might in Fire Emblem Engage!

Skirmishes

Now might be a good time to do a couple of skirmishes if you wish. You can use them to level up units you normally don’t use or get others closer to classing up. Afterwards, you’ll be able to explore the area to gather items and adopt animals.

Brodia Castle

When you’re ready to proceed with the main story, travel to Brodia Castle for a dialog event. Once it ends, prepare to battle Princess Ivy and her legion of warriors. Diamant and Amber will join your group. To win, you’ll need to defeat Ivy while preventing her soldiers from taking the castle. An additional enemy will start spawning each turn as the battle progresses. You may want to make sure to bring an archer/bow user to handle the ballista. Please note that you can obtain the below items during the battle!

ItemObtained
500 GDropped by an enemy
Secret BookDropped by an enemy
Slim LanceDropped by an enemy Lance Flier
Wind (Tome)Dropped by an enemy mage

Once you take Ivy down, a dialog event will occur. You’ll receive 30,000 G when it ends. Make sure to explore the area, collecting items. Leave when you are ready.

Intermission: The Somniel

Back at the Somniel, fishing is now available. The Item Shop and Armory will also have additional goods for sale. This includes a Master Seal and 3 Second Seals at the Item Shop. Also make sure to check in with your allies and view any new dialog events or bonding scenes with the Emblems. When you’re ready to start the next chapter, leave the Somniel.

Click here for the next walkthrough on Chapter 9 in Fire Emblem Engage!
Guides

Digimon Story Cyber Sleuth – Chapter 8 Walkthrough

by NightlyGamingBinge in

Below is a walkthrough for Chapter 8: No Stopping the Gale Girls in Digimon Story Cyber Sleuth: Complete Edition.

Kowloon

When you gain control of your sleuth, use an access point to travel to EDEN then head to the park in Kowloon Lv1. Speak with Nokia there to trigger an event. When it ends, travel to the Zaxon Forum.

Zaxon Forum

Once on the Zaxon Forum, speak to the guy in the northwestern corner with a ! above his head. After recruiting your first hacker, head over to the Demons’ Den.

Demons’ Den

At the Demons’ Den, there will be three hackers with ! above their heads you’ll need to talk to. One of them will challenge you to a battle using a vaccine-type Kabuterimon and the virus-type Datamon. There also may be a Digimon medal in the back of the area to the right of the bar. After speaking with and recruiting the three hackers here, an event will trigger and you’ll be awarded 1,000 CSP.

Shinjuku

Exit EDEN and head over to Shinjuku then make your way downtown. You’ll find Arata at the end of the sidewalk near the subway. Speak with him to trigger an event after which you’ll want to make your way over to the access point in Shinjuku near where you loaded in to trigger another event and enter the Digital Line. Head through it to reach the other side.

Digital Line Digimon

  • Bakemon
  • Clockmon
  • Elecmon
  • Seadramon
  • ShellNumemon

Asakusu???

In the area, there will be a main road with a few side streets on both sides. Head towards the access point at the end of the road while grabbing the chests on the side roads along the way (there are 4 of them). When you reach the access point the way forward will be blocked. To proceed on, you’ll need to destroy the orbs in the side streets to the left and right of the access point. The left one is guarded by the vaccine-type Leomon and the right one is protected by the vaccine-type Reppamon.

With both orbs destroyed, the way forward is clear. Return to the access point to head into the area. This will trigger a cutscene leading to a fight against an Eater. Defeating it will trigger another event where you’ll receive 1,000 CSP and be returned to the agency.

Digimon

  • Frigimon
  • Gotsumon
  • Sunflowmon
  • Togemon

Detective Agency

When you regain control of your Sleuth, you’ll be prompted to complete a case and as luck would have it, a new one is added to the board. Grab the Problems at Digipedia case and complete it to progress the story. If you need help with the case, a guide can be found here.

Broadway

After completing the case, head up to Broadway 2F and interace with the poster near the Card Shop to trigger an event. You’ll then be called back to the agency to take on a new case.

Detective Agency

Grab the Living Doll, Dead Person case from the board and complete it to progress the story. In you need anyhelp, check out our guide here.

Shinjuku

Travel to Shinjuku then speak with Arata there for an event. Return to the agency and accep the his case, Rare Comic Colletion, from the board. Complete the case to progress the story. A guide for it can be found here. After completing the case an event will trigger leading to the end of the chapter.

Click here for a walkthrough for Chapter 9: Our Master Plan! in Digimon Story Cyber Sleuth: Complete Edition.

A Plague Tale Requiem Walkthrough
Guides

A Plague Tale: Requiem – Chapter 8 Collectibles Walkthrough

by MrsChappie in


Below is a walkthrough for the collectibles found during Chapter VIII: A Sea of Promises in A Plague Tale: Requiem. In this chapter, you’ll find a feather for Hugo’s Collection and souvenirs. Make sure to always pick up a knife if you see one so you can open the secret chests!


Hugo’s Collection: Black Kite

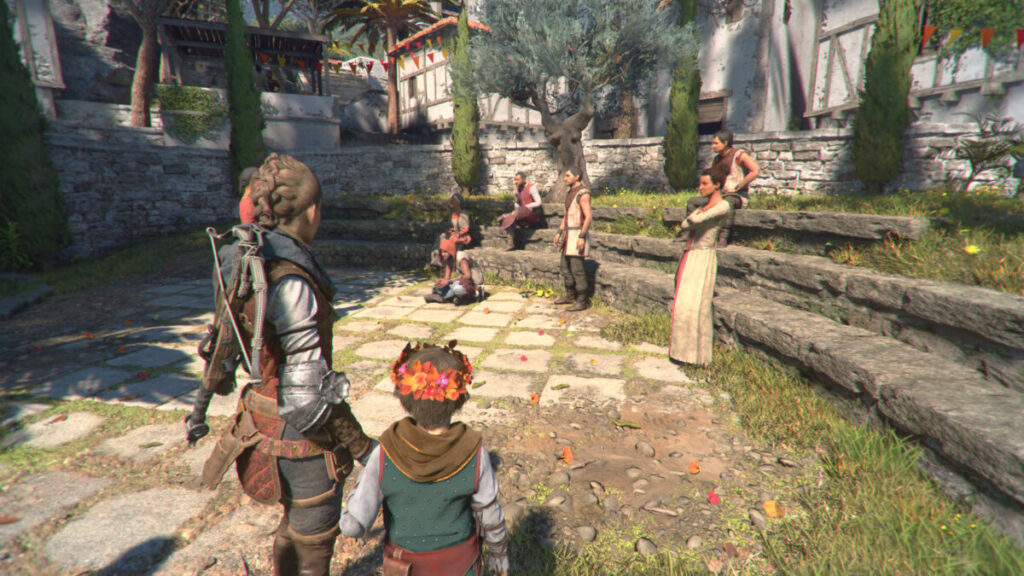
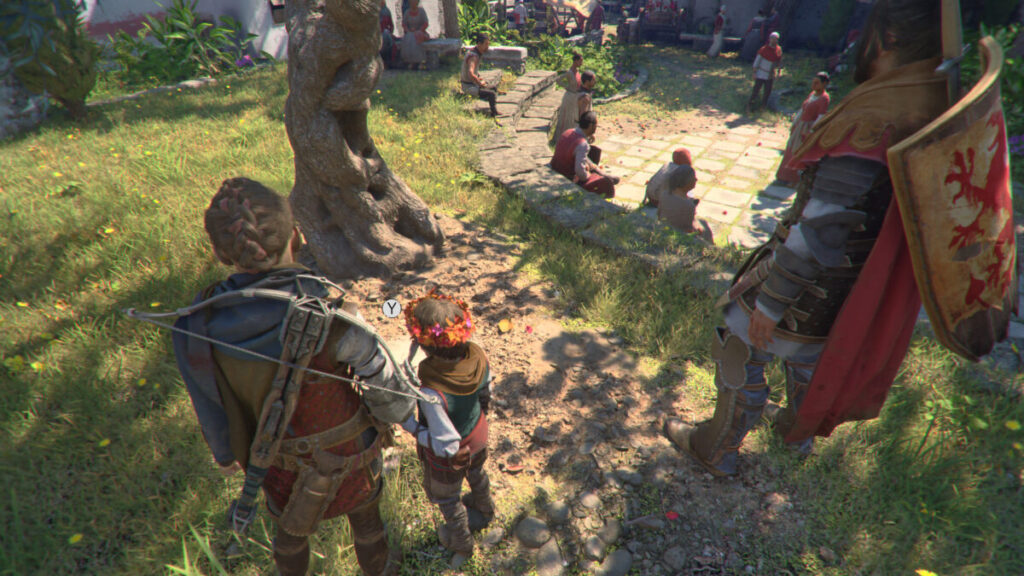
After exiting the boat, follow the path forward to reach the market. Head to the back left side to reach a grassy area. There will be a lady addressing a group of people.

Head behind the people to find the feather on the ground next to a tree.


Souvenir: Silent Lucinda

From the above collectible, head across the other side of the market to find a small archway. Head through it to reach a petting zoo.

Interact with Hugo to acquire the souvenir.


Souvenir: Flower Crown

Exit the market then take the first left down a flight of stairs to reach an enclosed area with a triangular table in the middle. Just past the table there will be a stand with wreaths.

Play the mini game to receive the souvenir. If you get all the pots accurately through the wreaths, you’ll receive the Perfect Throw achievement/trophy.


Guides

Valkyrie Elysium – The Serpent’s Nest Territory Hollow and Verdant Blossoms

by MrsChappie in


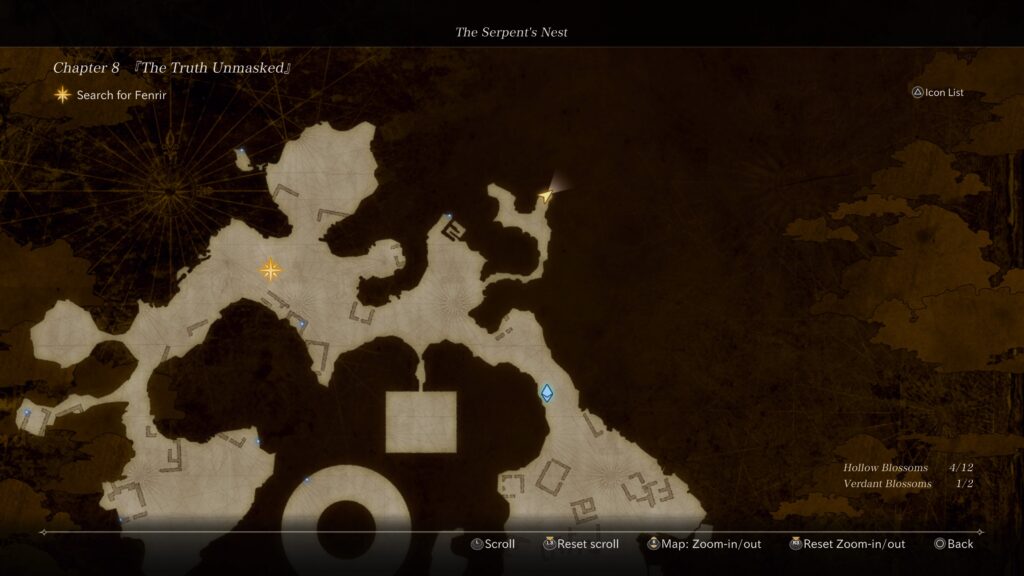
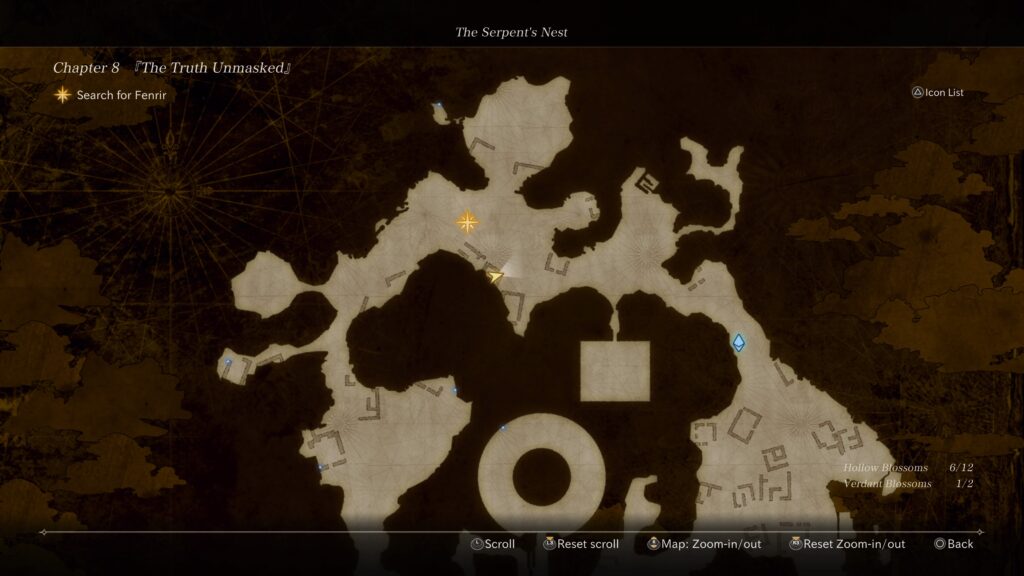
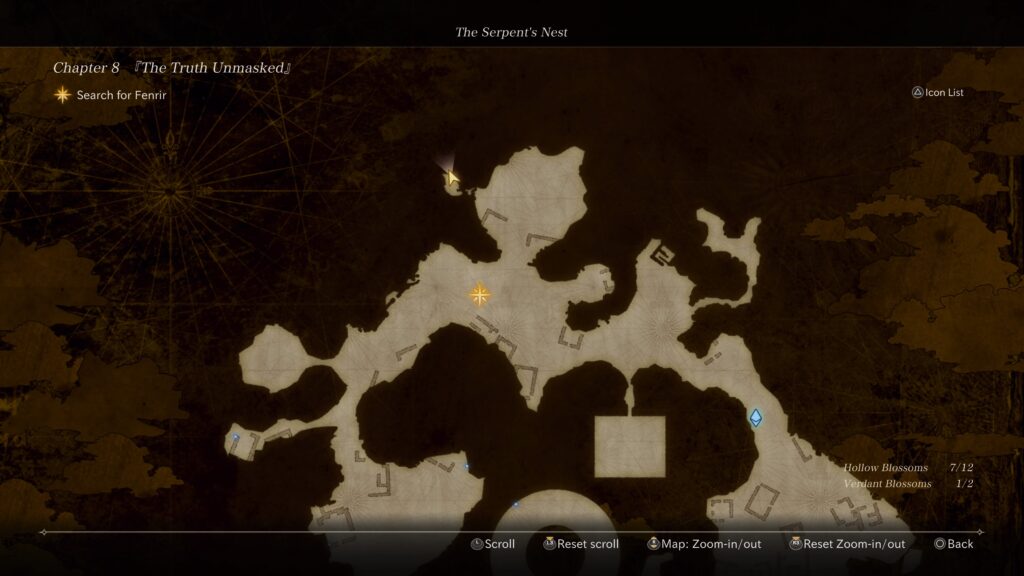
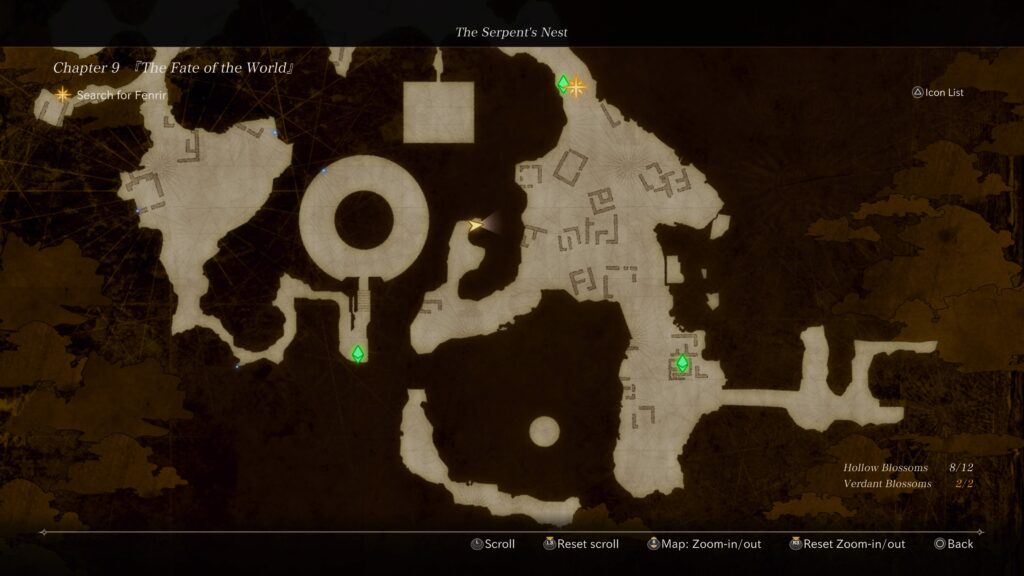
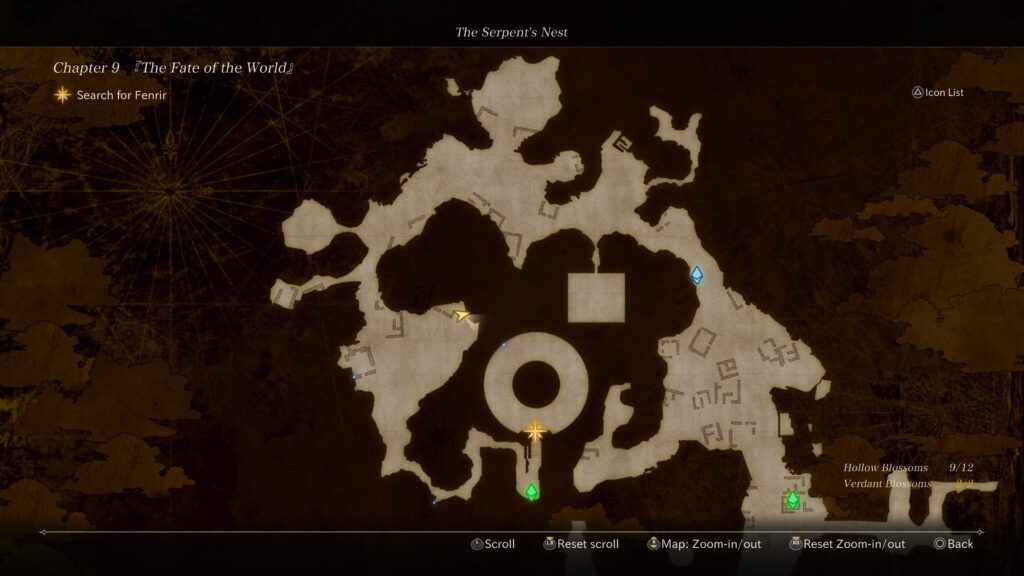
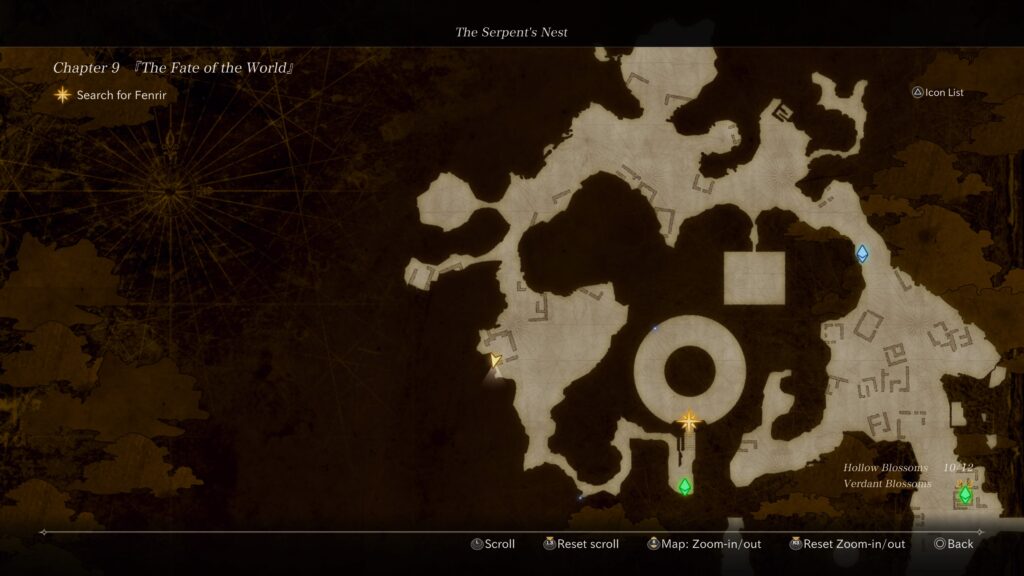
Below is a guide on where to find the hollow and verdant blossoms around the The Serpent’s Nest Territory in Valkyrie Elysium. For the purpose of this guide, all of the blossoms were obtained during the Chapter 8: The Truth Unmasked and Chapter 9: The Fate of the World main quest.


Chapter 8: The Truth Unmasked

Verdant Blossom

After the first Storage Camp, head southwest then take multiple Soul Chains to reach a secluded island. This blossom can be found on the southern tip.


Spear-Wielding Remnant Soldier

This blossom can be found on the same island as the above blossom near Armand on the northern tip.


Helpful Trader

This blossom can be found between the first and second Storage Camps on the west side.


Elderly Sailor

This blossom can be found between the first and second Storage Camps along the eastern side of the map.


Light-Fingered Grave Robber

This blossom can be found north of the second Storage Camp down a narrow path.


Fisherman Bengt

This blossom can be found northwest of the second Storage Camp behind a ruined building.


Butcher’s Widow

This blossom is located in a ruined building along the path northwest of the second Storage Camp.


Riverside Scribe

This blossom is along the water in the northern tip of the map.


Servant Einar

This blossom can be found on the western side of the map along a ruined building.


Chapter 9: The Fate of the World

Verdant Blossom

This blossom can be found between the first and second Storage Camps at the end of the western path.


Royal Professor Victor

This blossom is located on the western side of the map along a ruined building along the inner map’s edge.


Iron-Booted God

This blossom can be found on the western side of the map along the map’s outer edge in a ruined building behind some crates.


One-Armed God of Military

This blossom can be found on the path leading to the third Storage Camp.


Spore-Soaked Man

This blossom can be found just after the third Storage Camp along the rim of the pit.


Eastward
Guides

Eastward – Charon Walkthrough

by Chappie in


Below is a walkthrough for the Charon Chapter 8 quest in Eastward.


Save Sam!

Head east and step on the floor pad to reach the next area. The way forward is pretty linear so keep following the path and you’ll end up on a platform that seals behind you forcing you to fight a jumping zombie. After defeating it, if you take the eastern path, you’ll end up in a room with a chest containing 150 salt and a stove. Return to the western path to keep pressing on. After you pass the section where you dodged all of the lasers, there will be a teleport pad before a set of stairs. Take it to find a chest with a Health Orb, then return to the stairs to keep heading forward where you’ll eventually trigger a dialog event with a Proto Breeder who will take your weapons minus the pan. Follow the path east to trigger multiple dialog events then head through some areas based on previous places you’ve been. Head east then north through the bramble field to find a Heart Orb. Head forward to start a section of you being chased by miasma through a building. When you reach the end, a dialog event triggers. Afterwards, head east to trigger another leading to a fight with Isabel. You’ll need to take out her mirages and counter her attacks. You’ll go through three cycles before finally defeating her. This will trigger a dialog event,


The Final Battle

Follow the path east and down a flight of stairs to reach the Final Johnny. Stock up on ammo and healing items then save. When you’re ready, head east and place the three keys on the pedestal to open a door. Head through the door then work your way to the final boss. You’ll need to take down the barriers protecting the boss then shoot it with Sam’s ability. When you take it down a dialog event triggers and you’ll have beaten the game!!! Congratulations!!!


Final Fantasy VII Remake
Game Guides

Final Fantasy VII Remake Guides

by Chappie in


Below are guides and walkthroughs for Final Fantasy VII Remake and the Intermission DLC.


INTERmission DLC

Collectibles


Final Fantasy VII Remake

Cleanup Crew Trophy


Music Disc Locations


Odd Jobs / Side Quests


Guides

Judgment – Chapter 8’s Correct Dialog Choices

by Chappie in

*NOTE: For each correct choice, you gain 5 extra SP.


Missable Trophy:  Professional Password Presenter

When you are trying to track down information about where Hamura is, you will eventually head to L’Amant.  As you are talking to the guy standing next to the door who has you be his wing man, he will give you information on where Hamura is.  The password to get in the bar with no signs is as follows:

  • Knock three times
  • Can I talk to Moon?
  • Chateaubriand, blue

Correctly enter in the password to get the trophy and earn extra SP.