Main Gates
Quests
- Hazardous Harvest
- Obtained: Bulletin Board at Dandelion during Chapter 5
- Objective: Meet Baldwin at Trading Bureau
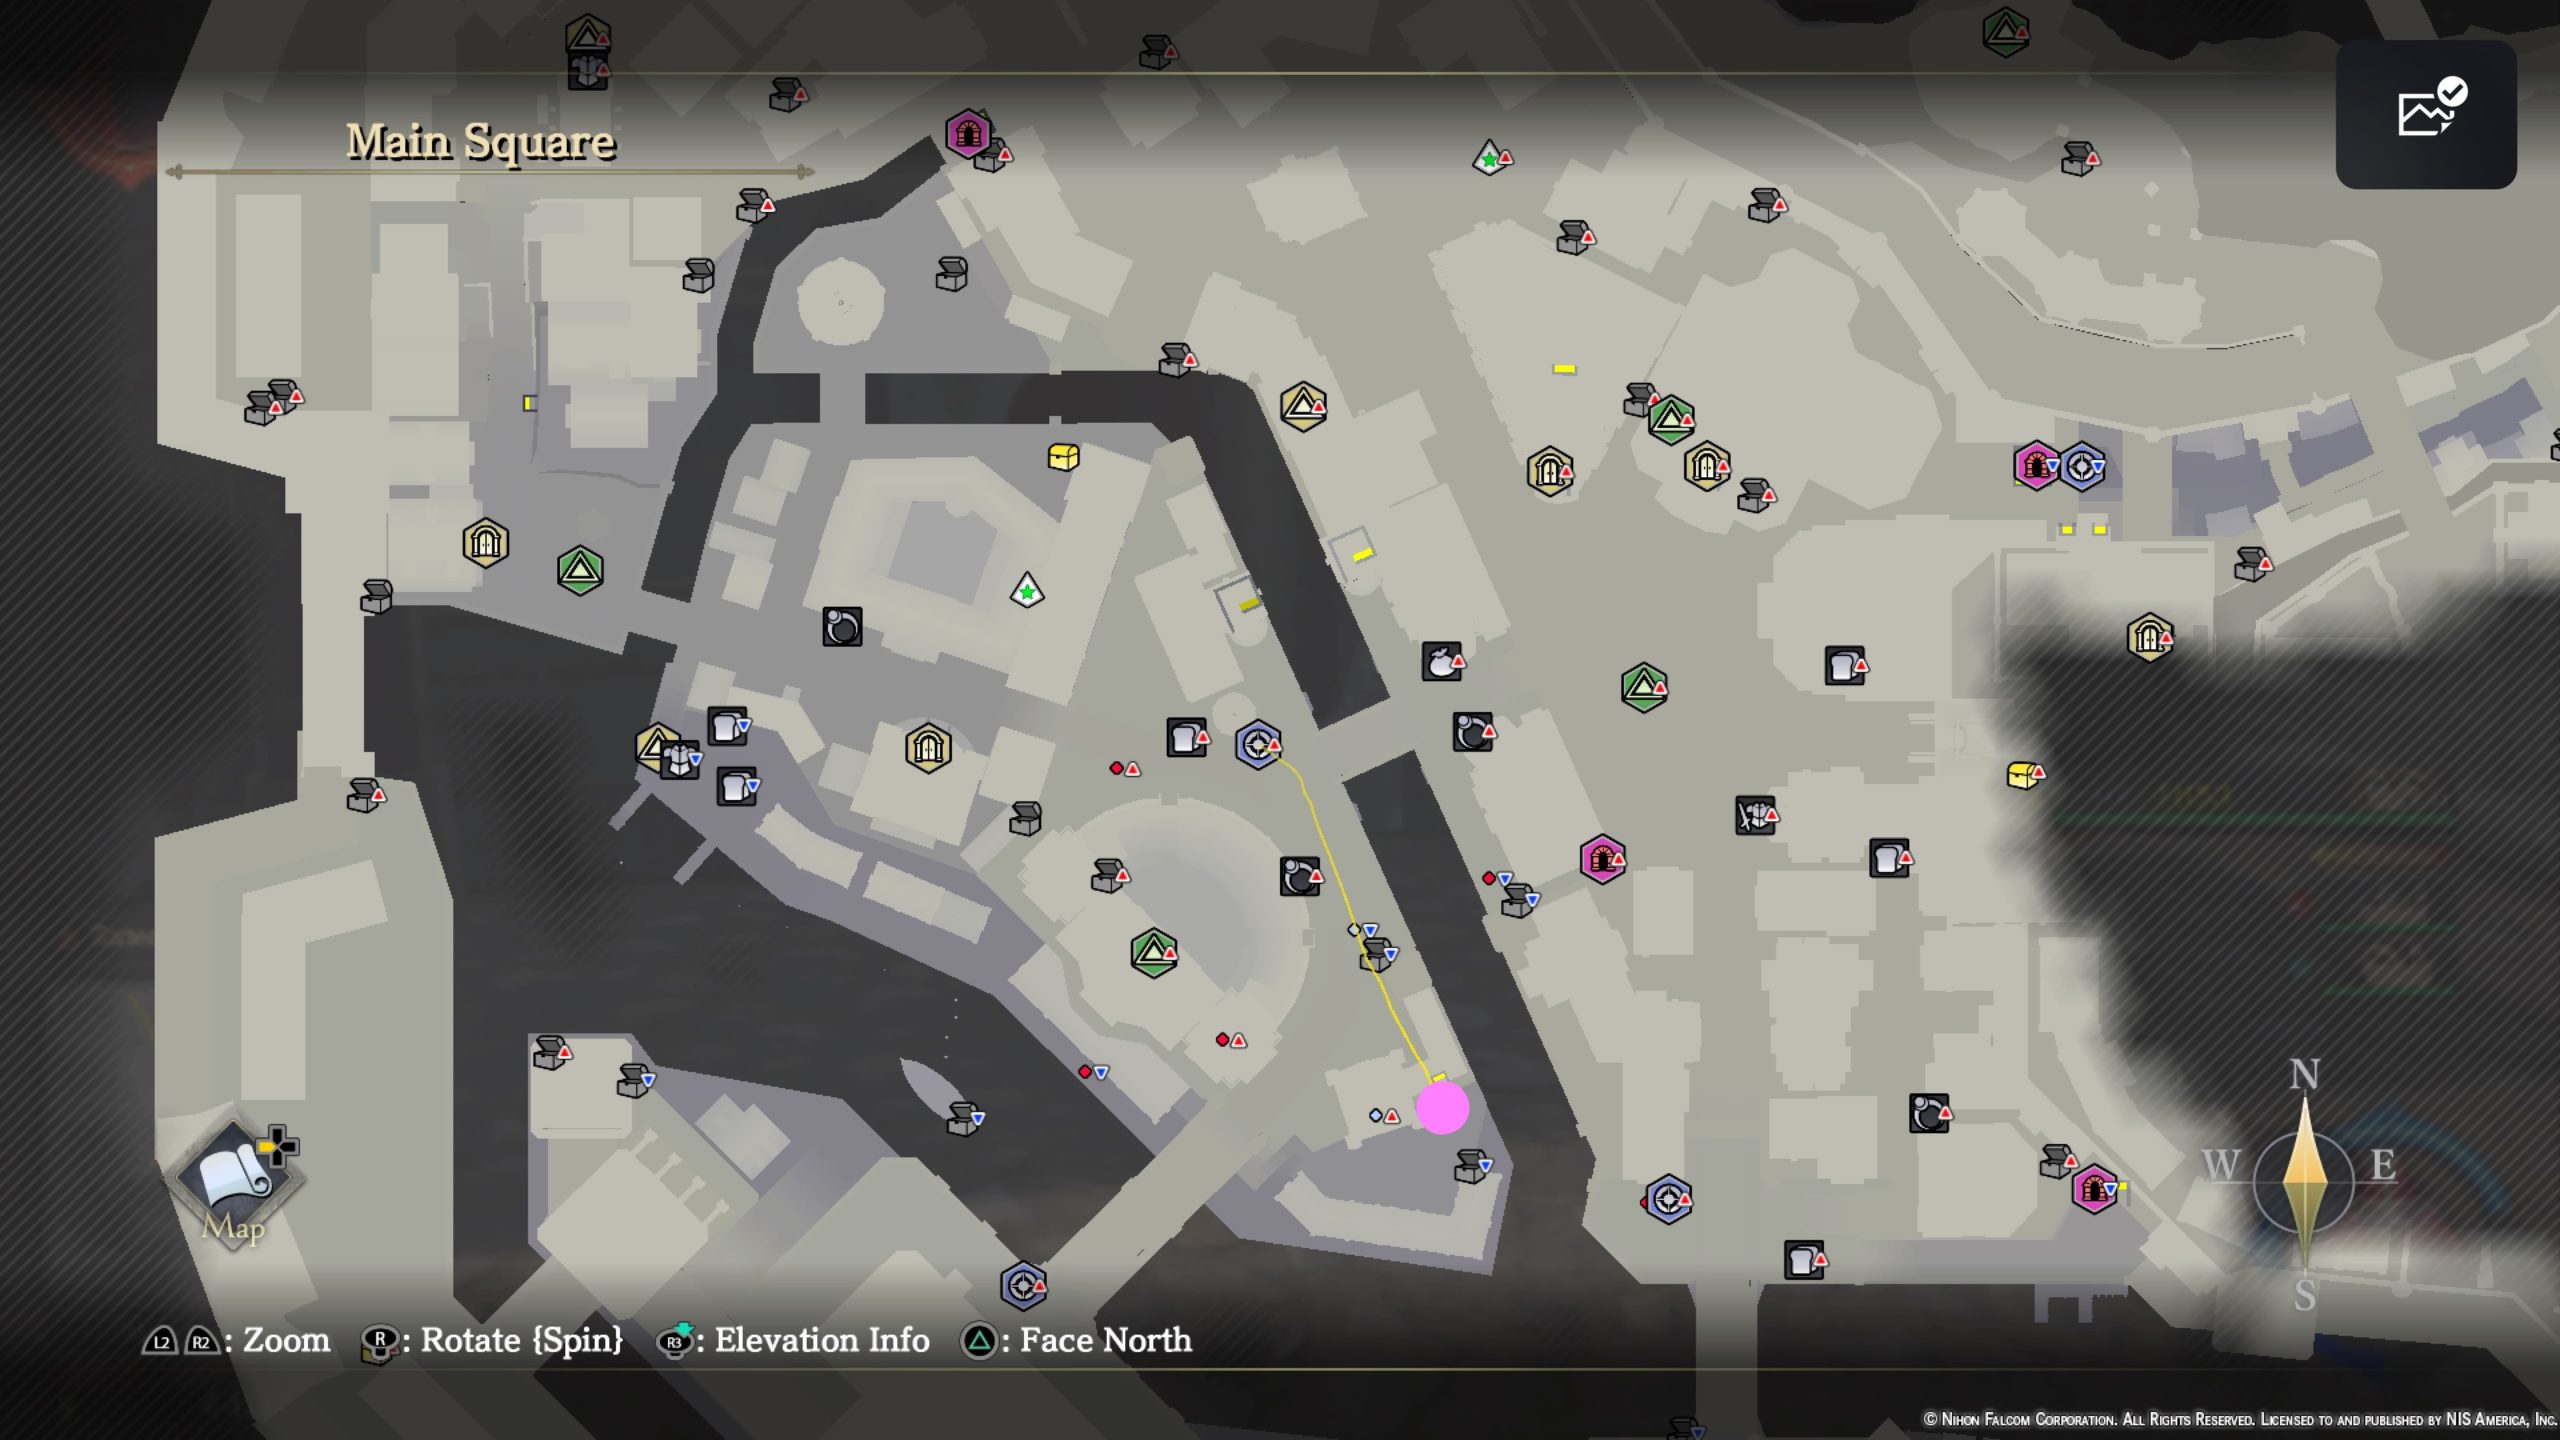
- Travel to the Trading Bureau at the Main Square and speak with Baldwin on the second floor. Afterwards, make your way to the southern part of Estatte Road to find Mount El Dore – Cave. Walk inside the cave to trigger a cutscene, and proceed through the cave until you reach the end. You’ll then be on Mount El Dore where a quick cutscene will trigger. Defeat the Hornville that spawn to continue with the cutscene and complete the quest.
- Reward: 3500 Gold
- Owner, Where Art Thou?
- Obtained: Bulletin Board at Dandelion during Chapter 5
- Objective: Meet Family on a Pilgrimage at the inn by the west gate of Artisan Lane
- Speak with the family near the Relief Tile in Artisan Lane then head to Rijndael Antiques to speak with Roderio. Next, travel to Main Square and speak with the Receptionist behind the ticket counter at the amphitheater. Use Doll’s gift to follow the footprints into the Central District. You’ll find the girl on the east side past Andelph’s Armory. Speak with her to complete the quest.
- Reward: Chamomile x10
- Prison Liberation
- Obtained: Bulletin Board at Dandelion during Chapter 5
- Objective: Rescue prisoner
- Speak with Parks in the basement of the Dandelion when you’re ready to begin the quest then make your way to the Central District to speak with Maxim. He’ll need you to get 1000 Gold and Dry-Aged Meat. For the Dry-Aged Meat, you can exchange for it at Arche’s Warehouse in the basement of the Dandelion for 4 Smoked Meat. You can purchase the Smoked Meat for 800 a piece from Durfee’s Butchery in Main Square or from Silhouette’s Errand Runs. Alternatively, you can visit the hidden area called Concealed Stockroom in Shantytown to receive 2 Dry-Aged Meat. Once you’ve obtained the items, return to Maxim to hand them over. You’ll then be given control of Prison Adol. Work your way through the prison until you reach a library. Examine the bookshelves to find a book on the prison transport, which will trigger a cutscene. Afterwards, you’ll regain control of your party. Head north through Estatte Road in pursuit of the wagon. When you get close enough, a cutscene will trigger followed by a fight. Defeat the group of knights to continue with the cutscene and complete the quest.
- Reward: 5000 Gold
- Wanted: Tarantiels
- Obtained: Bulletin Board at Dandelion during Chapter 5
- Objective: Defeat Tarantiel Eggs
- Travel to Dry Moat Ruins – Depths to defeat the cluster of eggs in the cage. Afterwards, head to Ruined Belfry in Central District to speak with Aprilis to complete the quest.
- Reward: Berserker’s Mask
- All That Glitters
- Obtained: Speak with Saradhi at Dandelion
- Objective: Find Saradhi
- When you gain control, make your way through the Decrepit Underpass until a cutscene triggers with Saradhi. Defeat the 4 bugs that spawn to continue with the cutscene and complete the quest.
- Reward: Golden Gloves
Shops
- Saradhi’s Dispensary – Available after completing All That Glitters quest
Central District
Recipes
- Roulade Recipe
- Speak with Perry at Perry’s Pub
Mount El Dore – Cave
Materials
- Copper Ore
- Iron Ore
Monsters
- Mushahr
- Jaganni
- Mundura
- Hornville
Treasure Chests

- 1200 Gold

- Black Fig x4
- Beast Hide x2
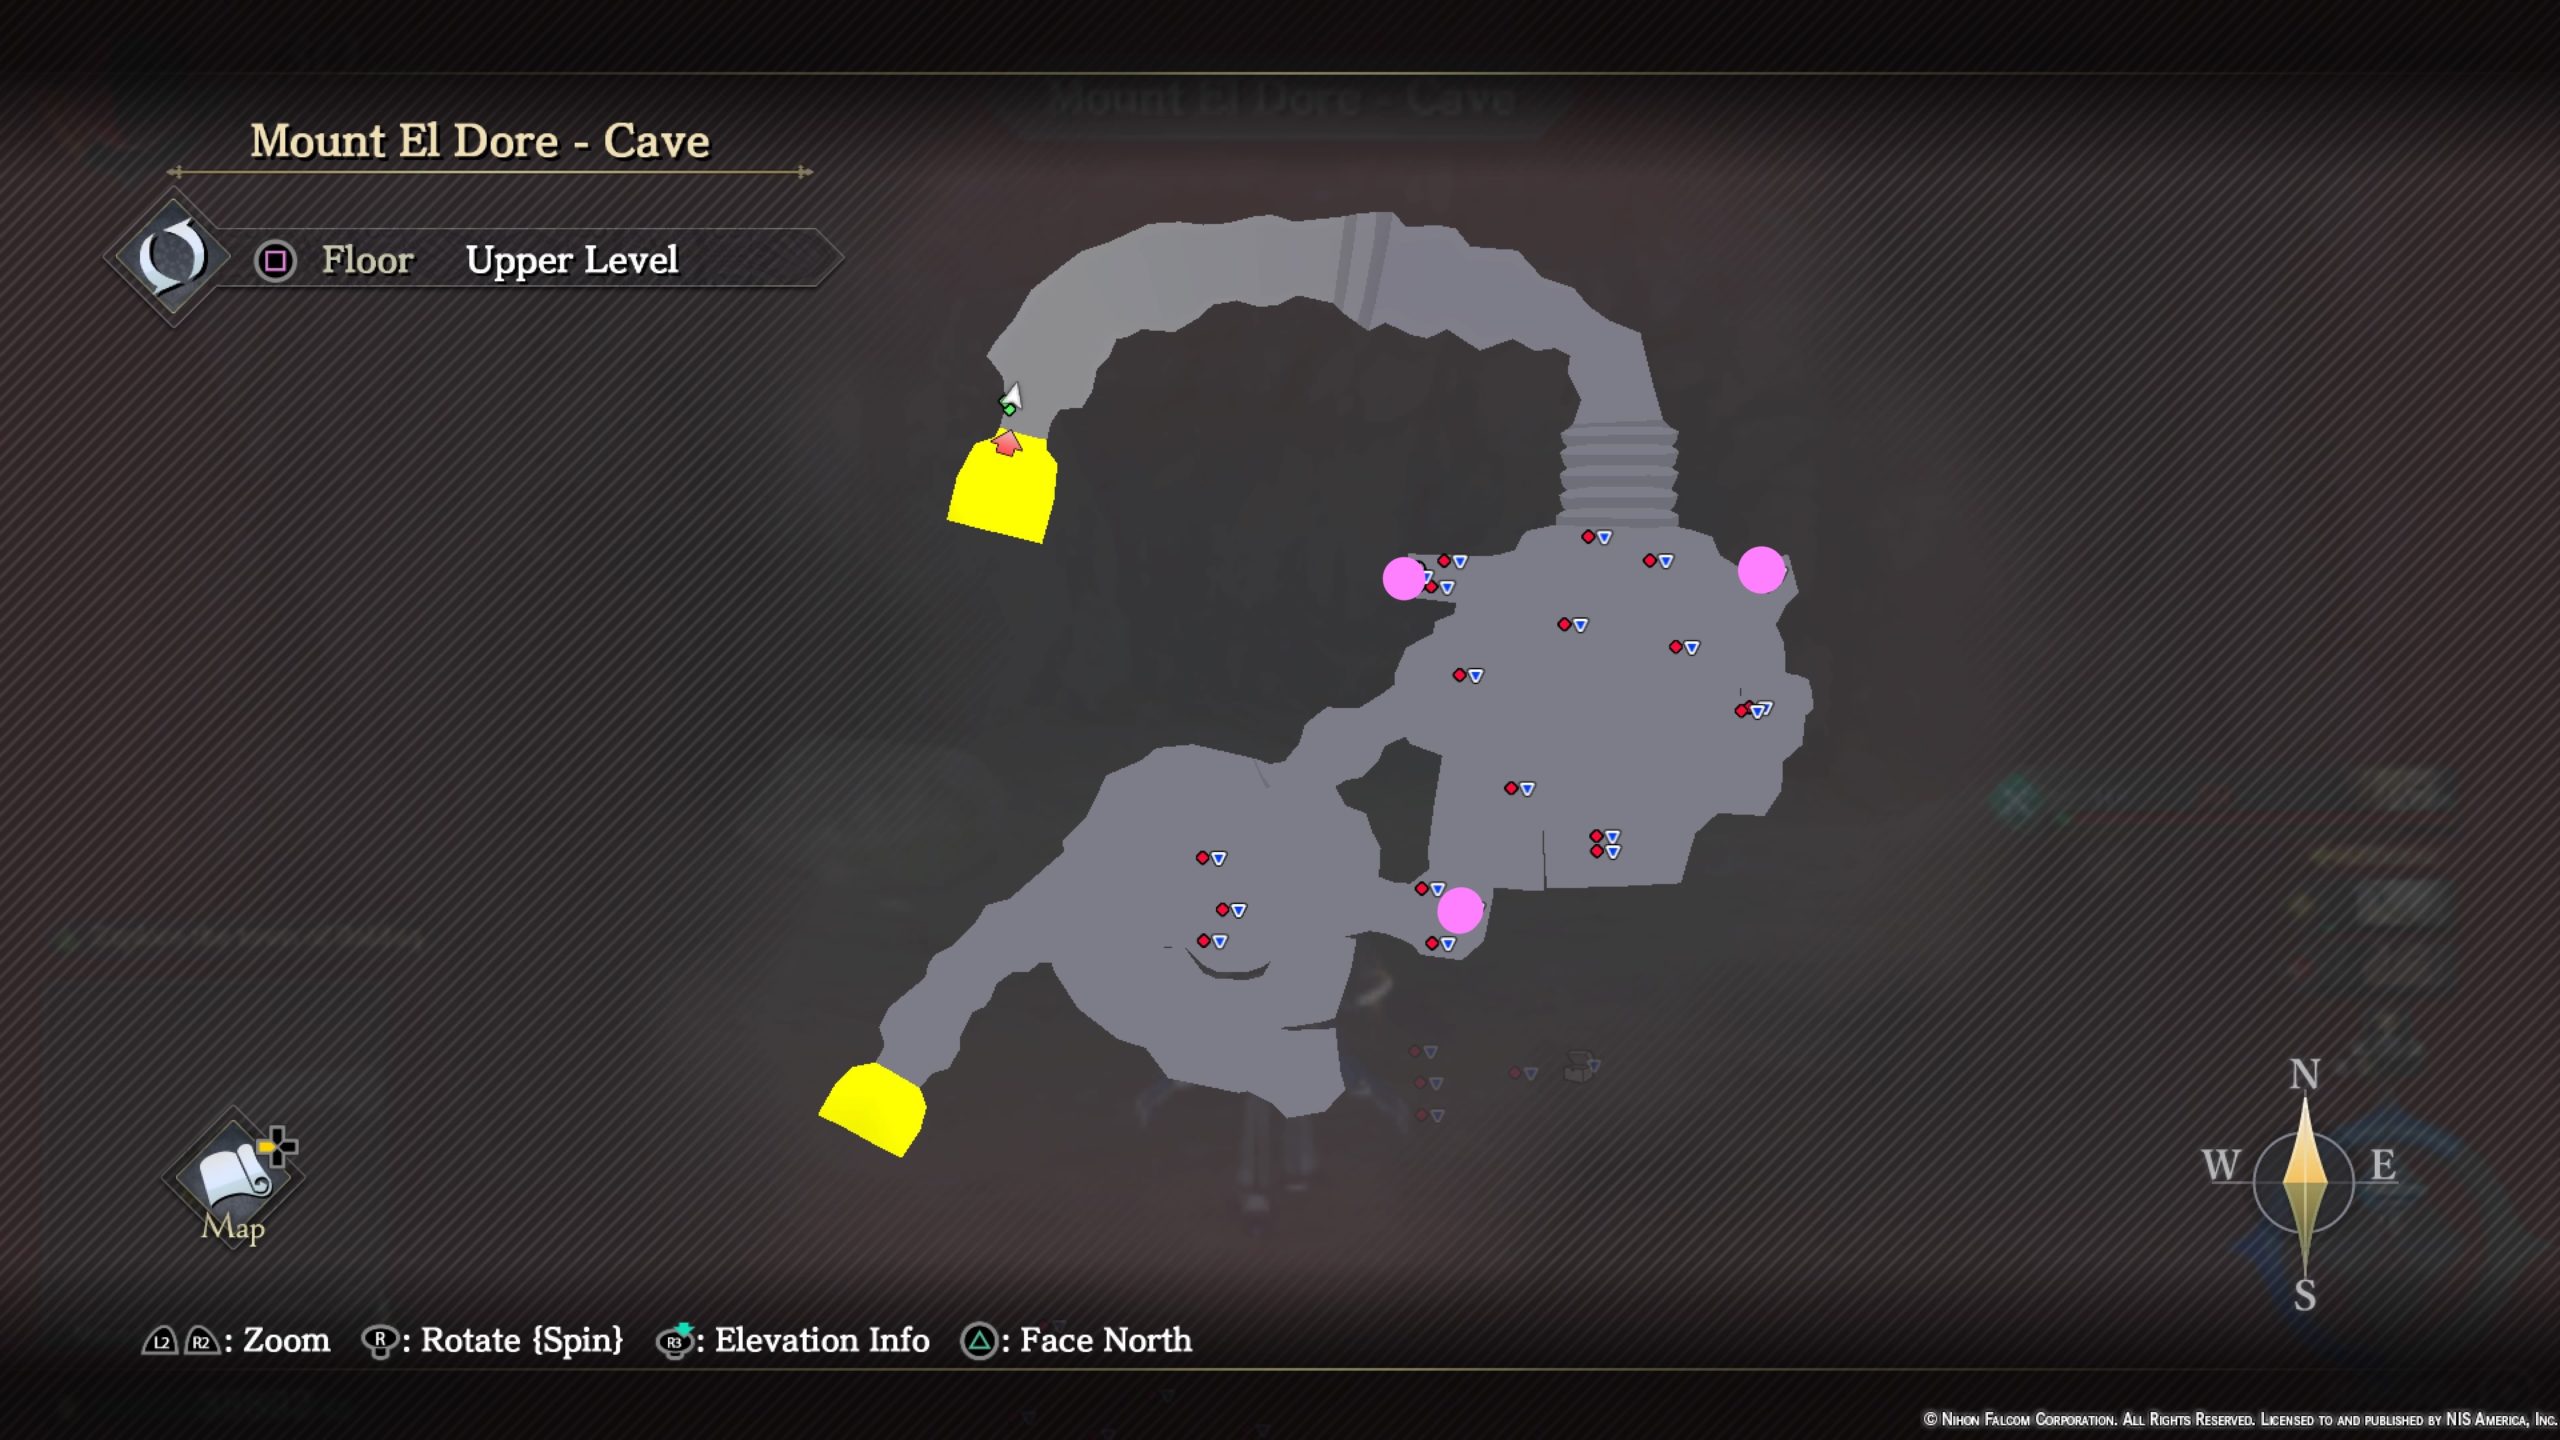
- Gaudy Gloves
- Luminescent Fluid x2
- Emollient x2
Mount El Dore
Landmarks
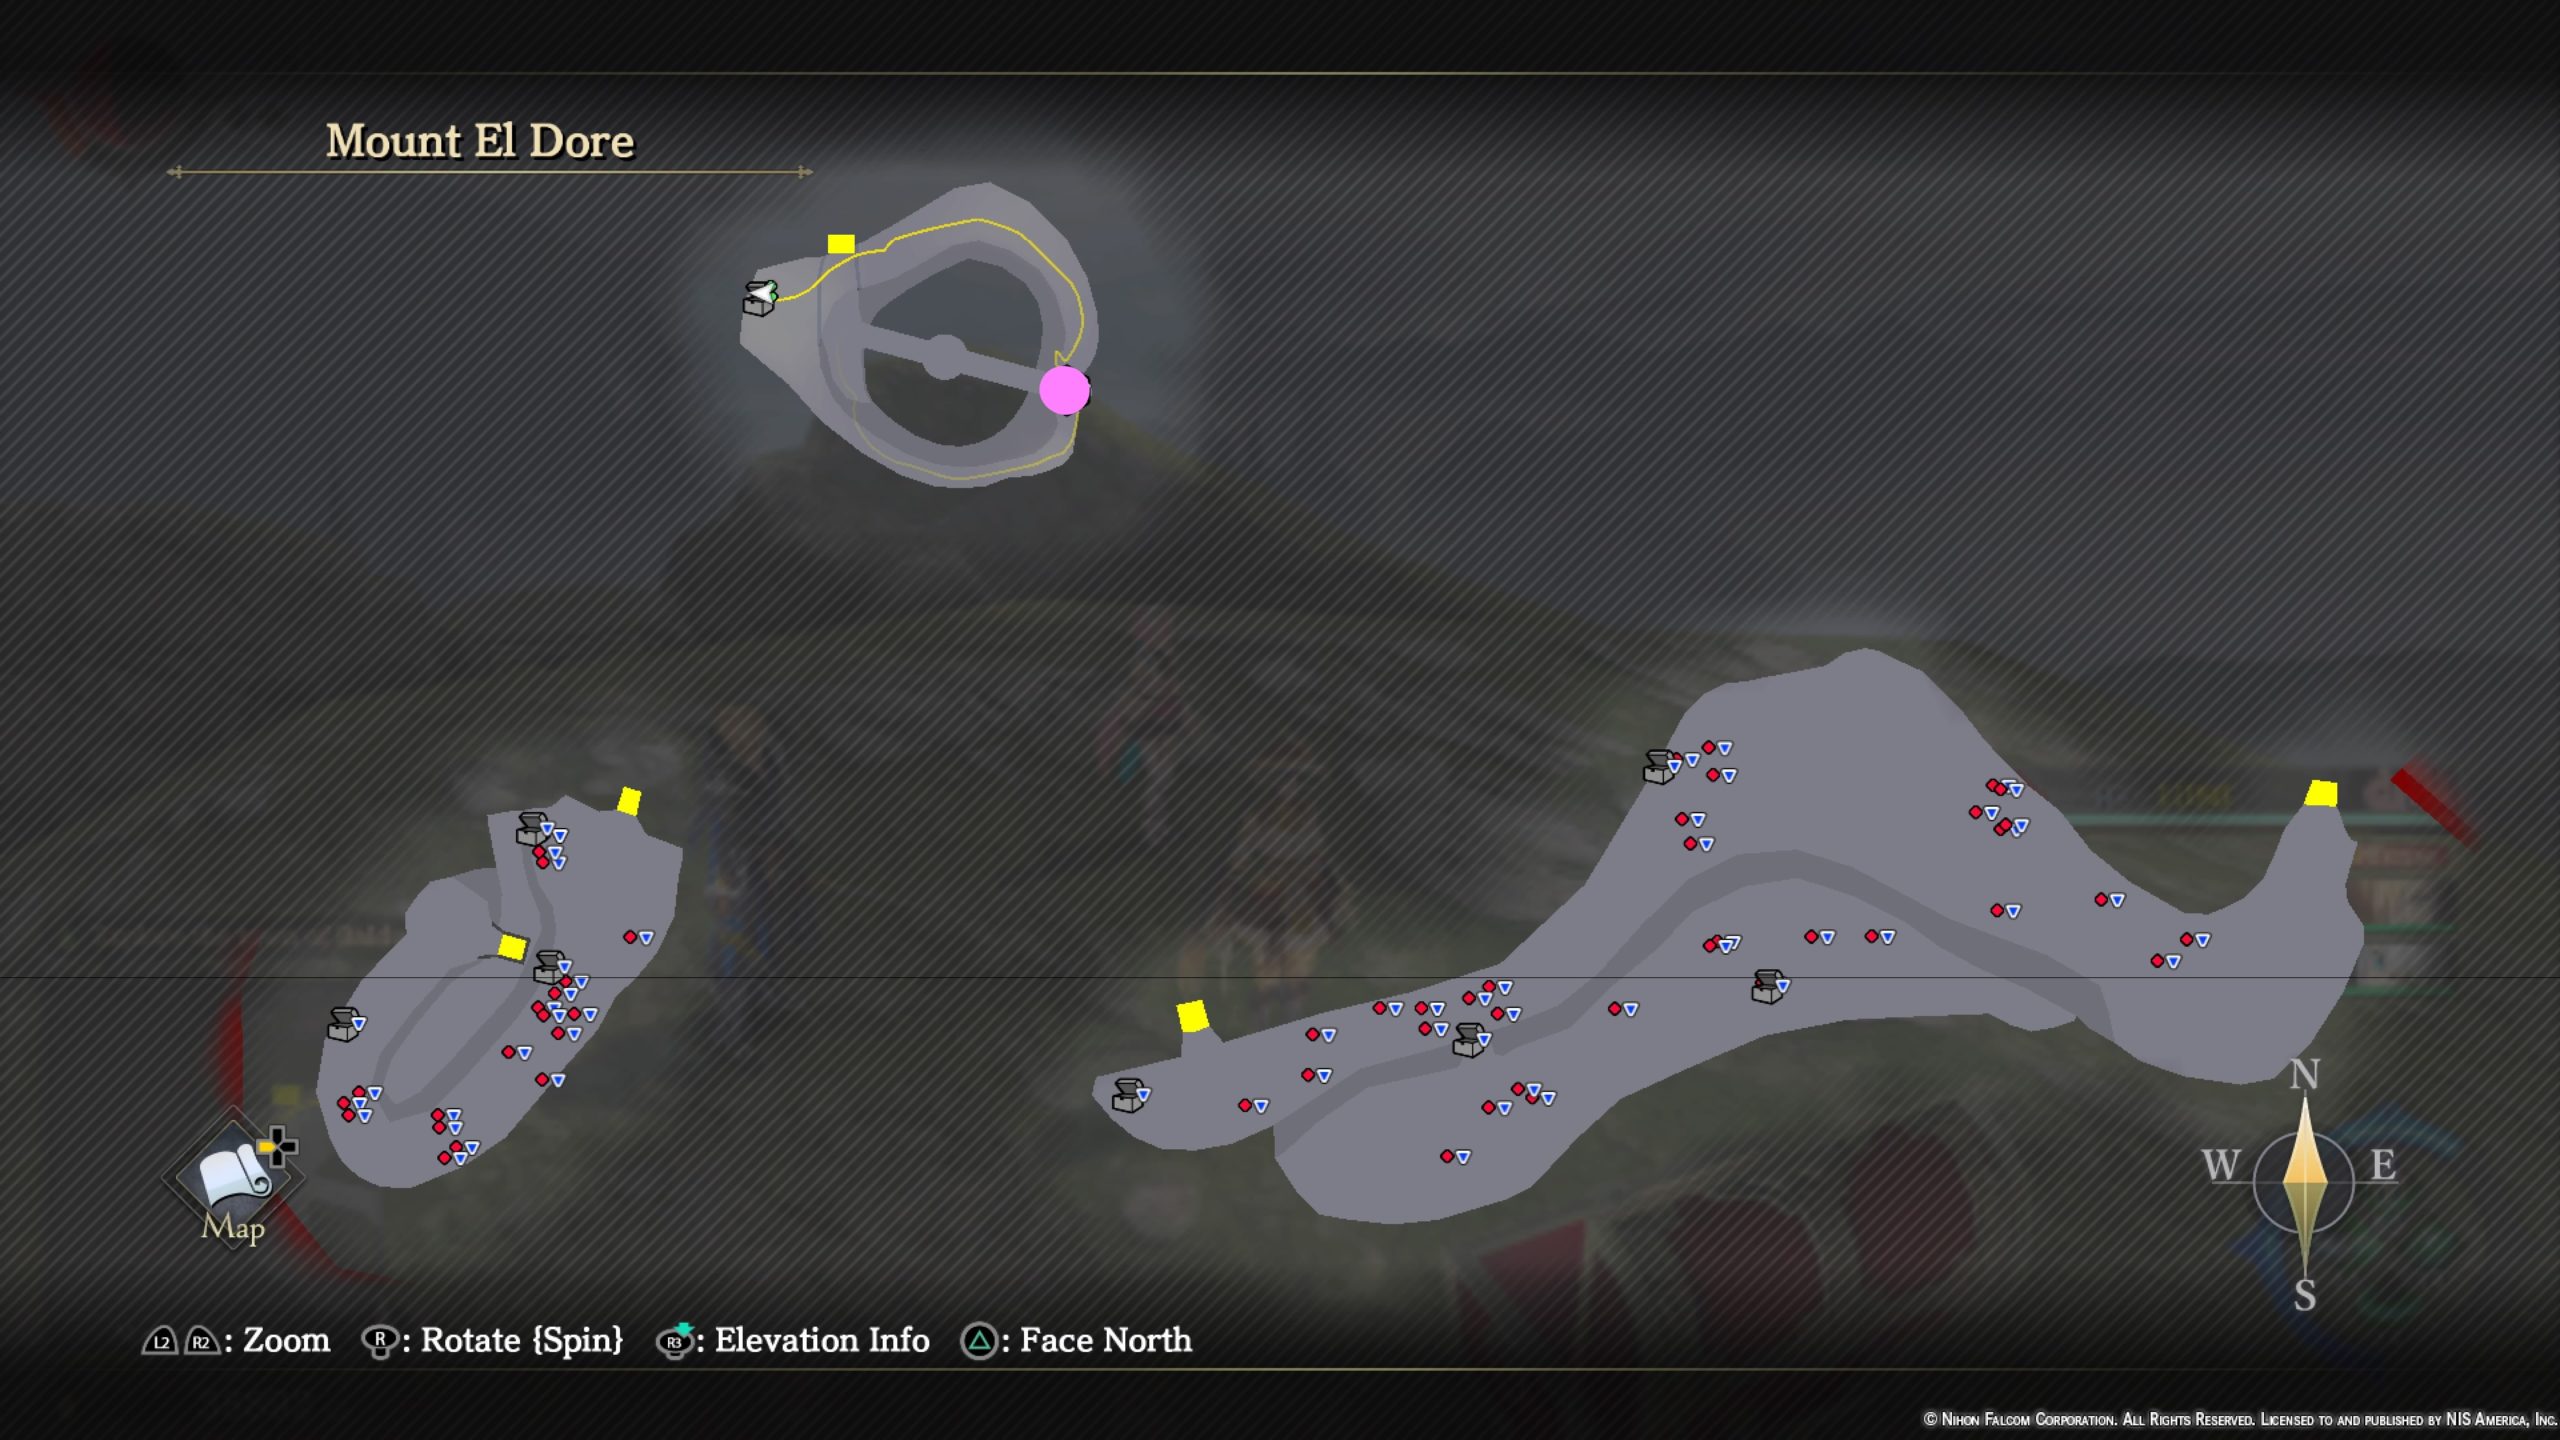
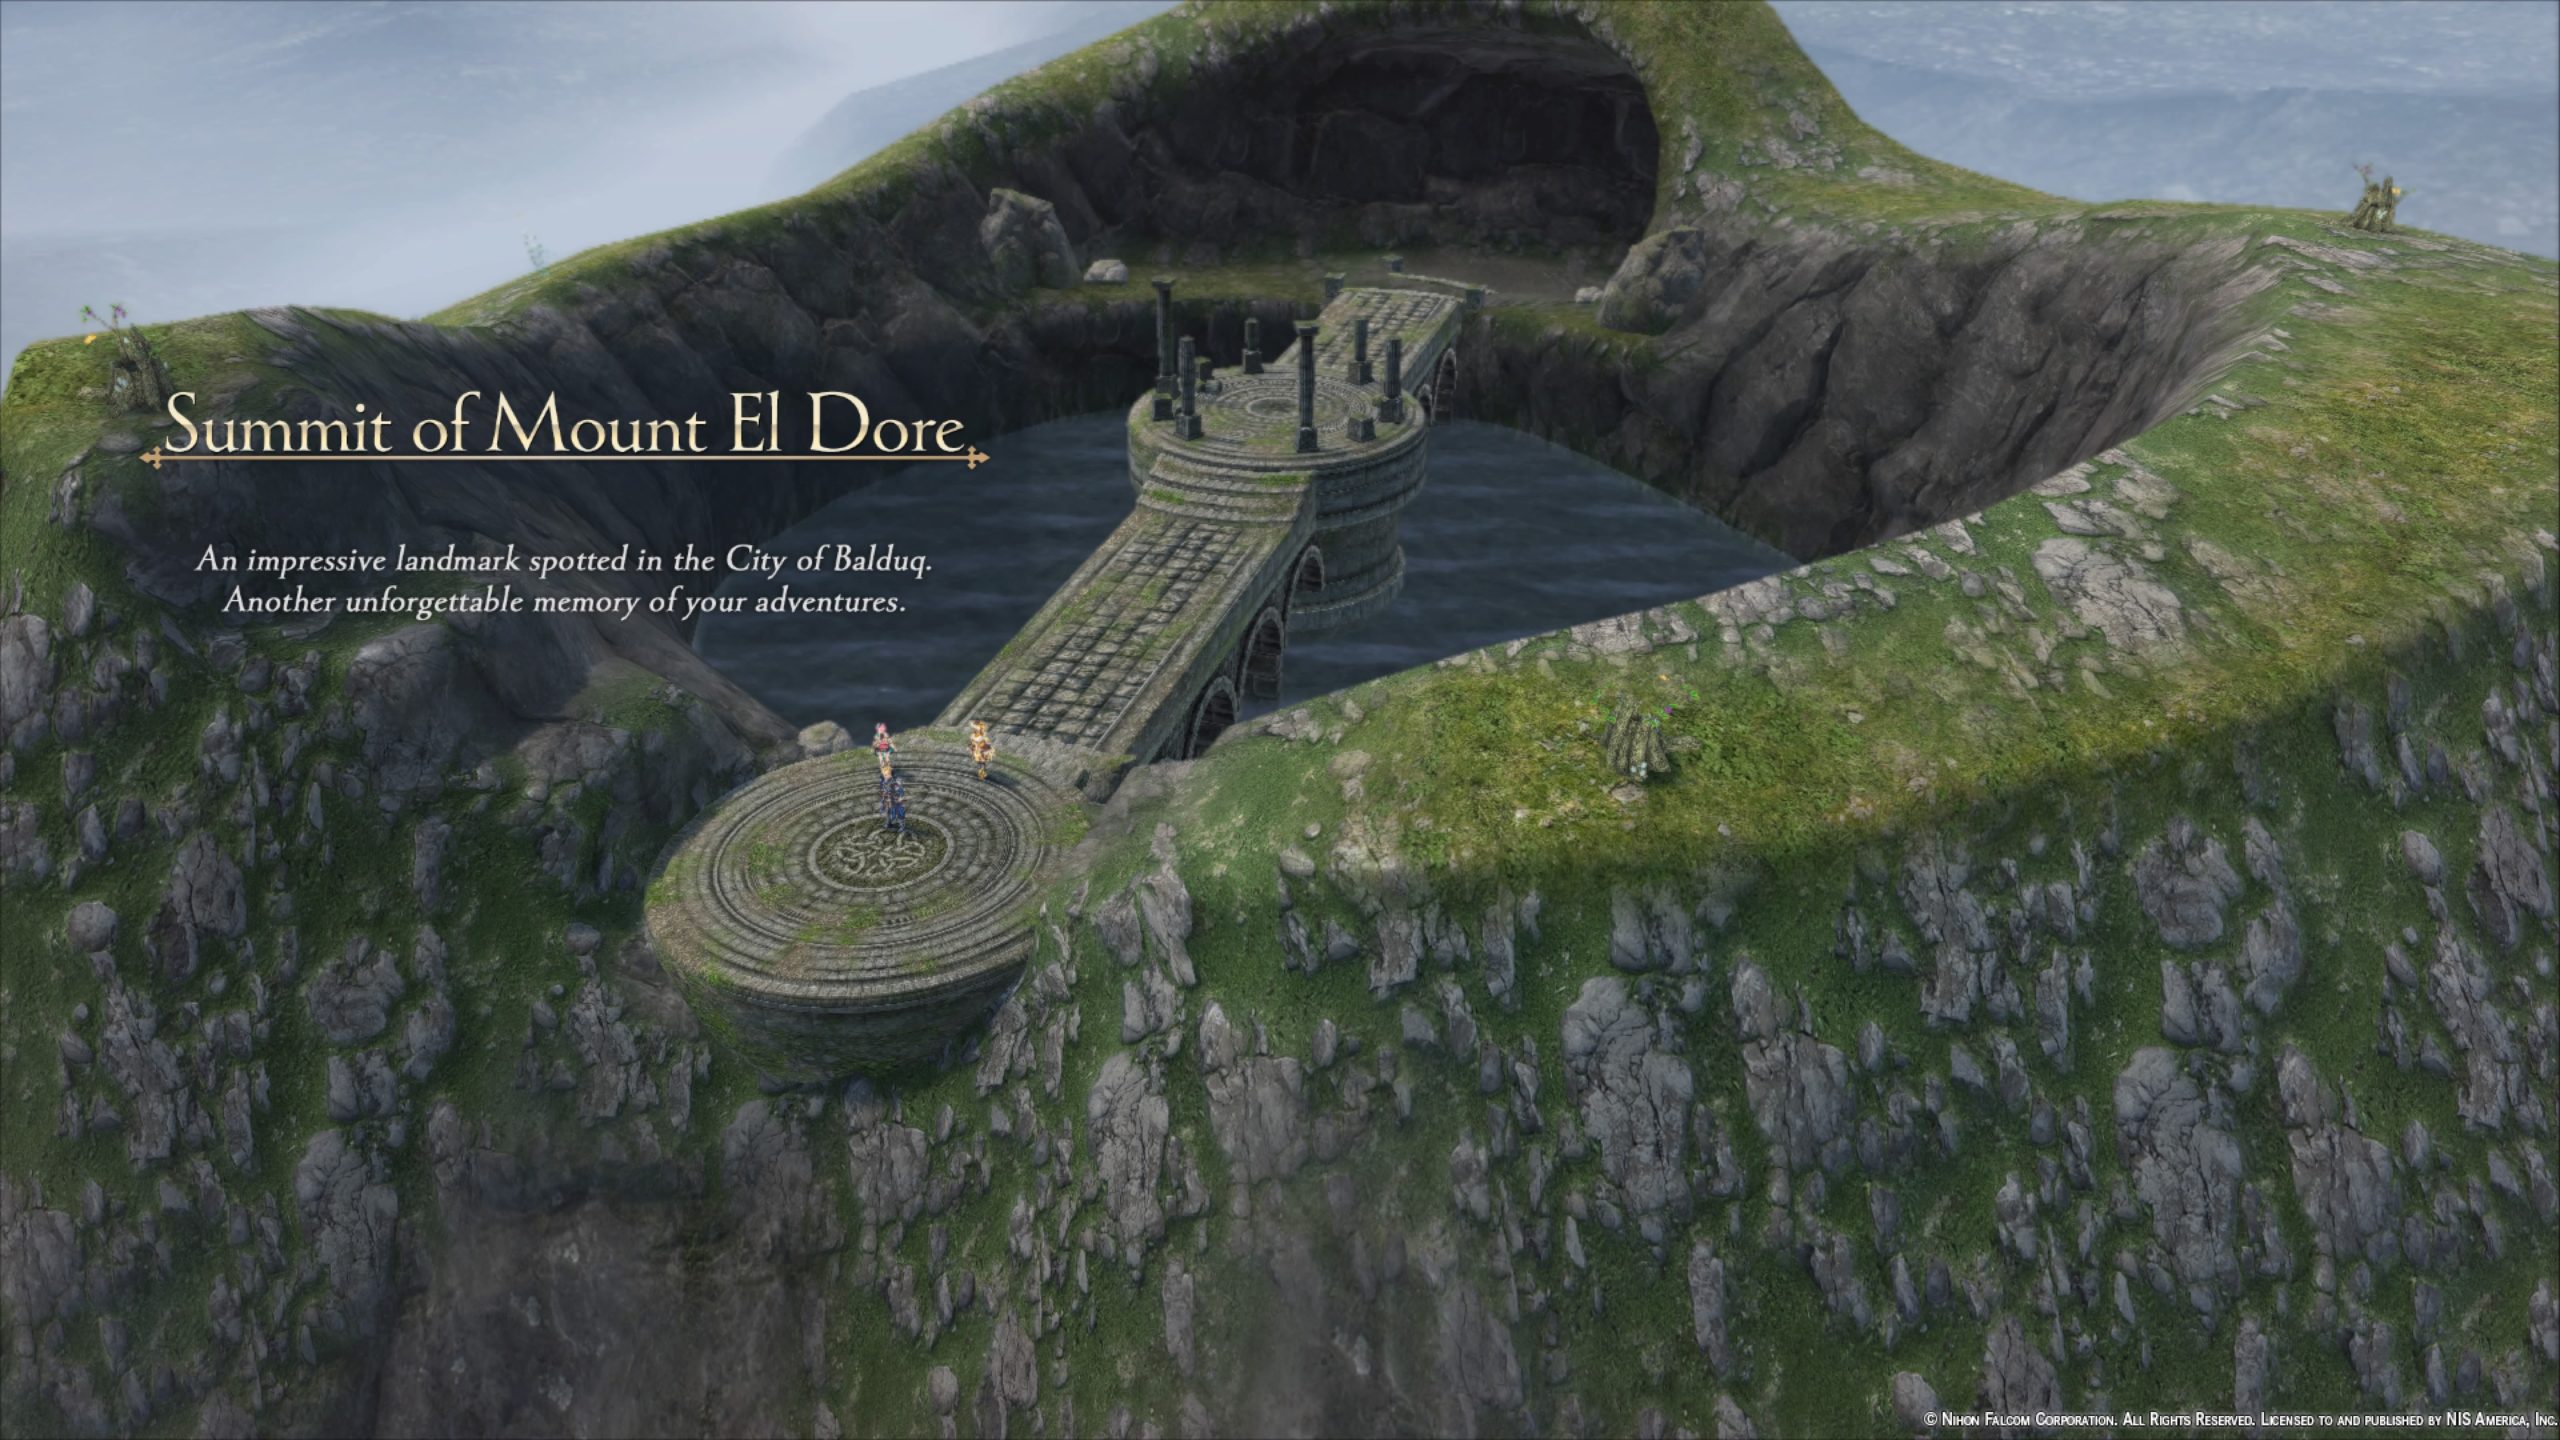
- Summit of Mount El Dore
Materials
- Aromatic Lumber
- Chamomile
- Glossy Leaf
- Small Leaf
- Sparkling Leaf (summit)
- Spirit Lumber (mid level)
Monsters
- Mushahr
- Jaganni
- Mundura
- Hornville
Treasure Chests
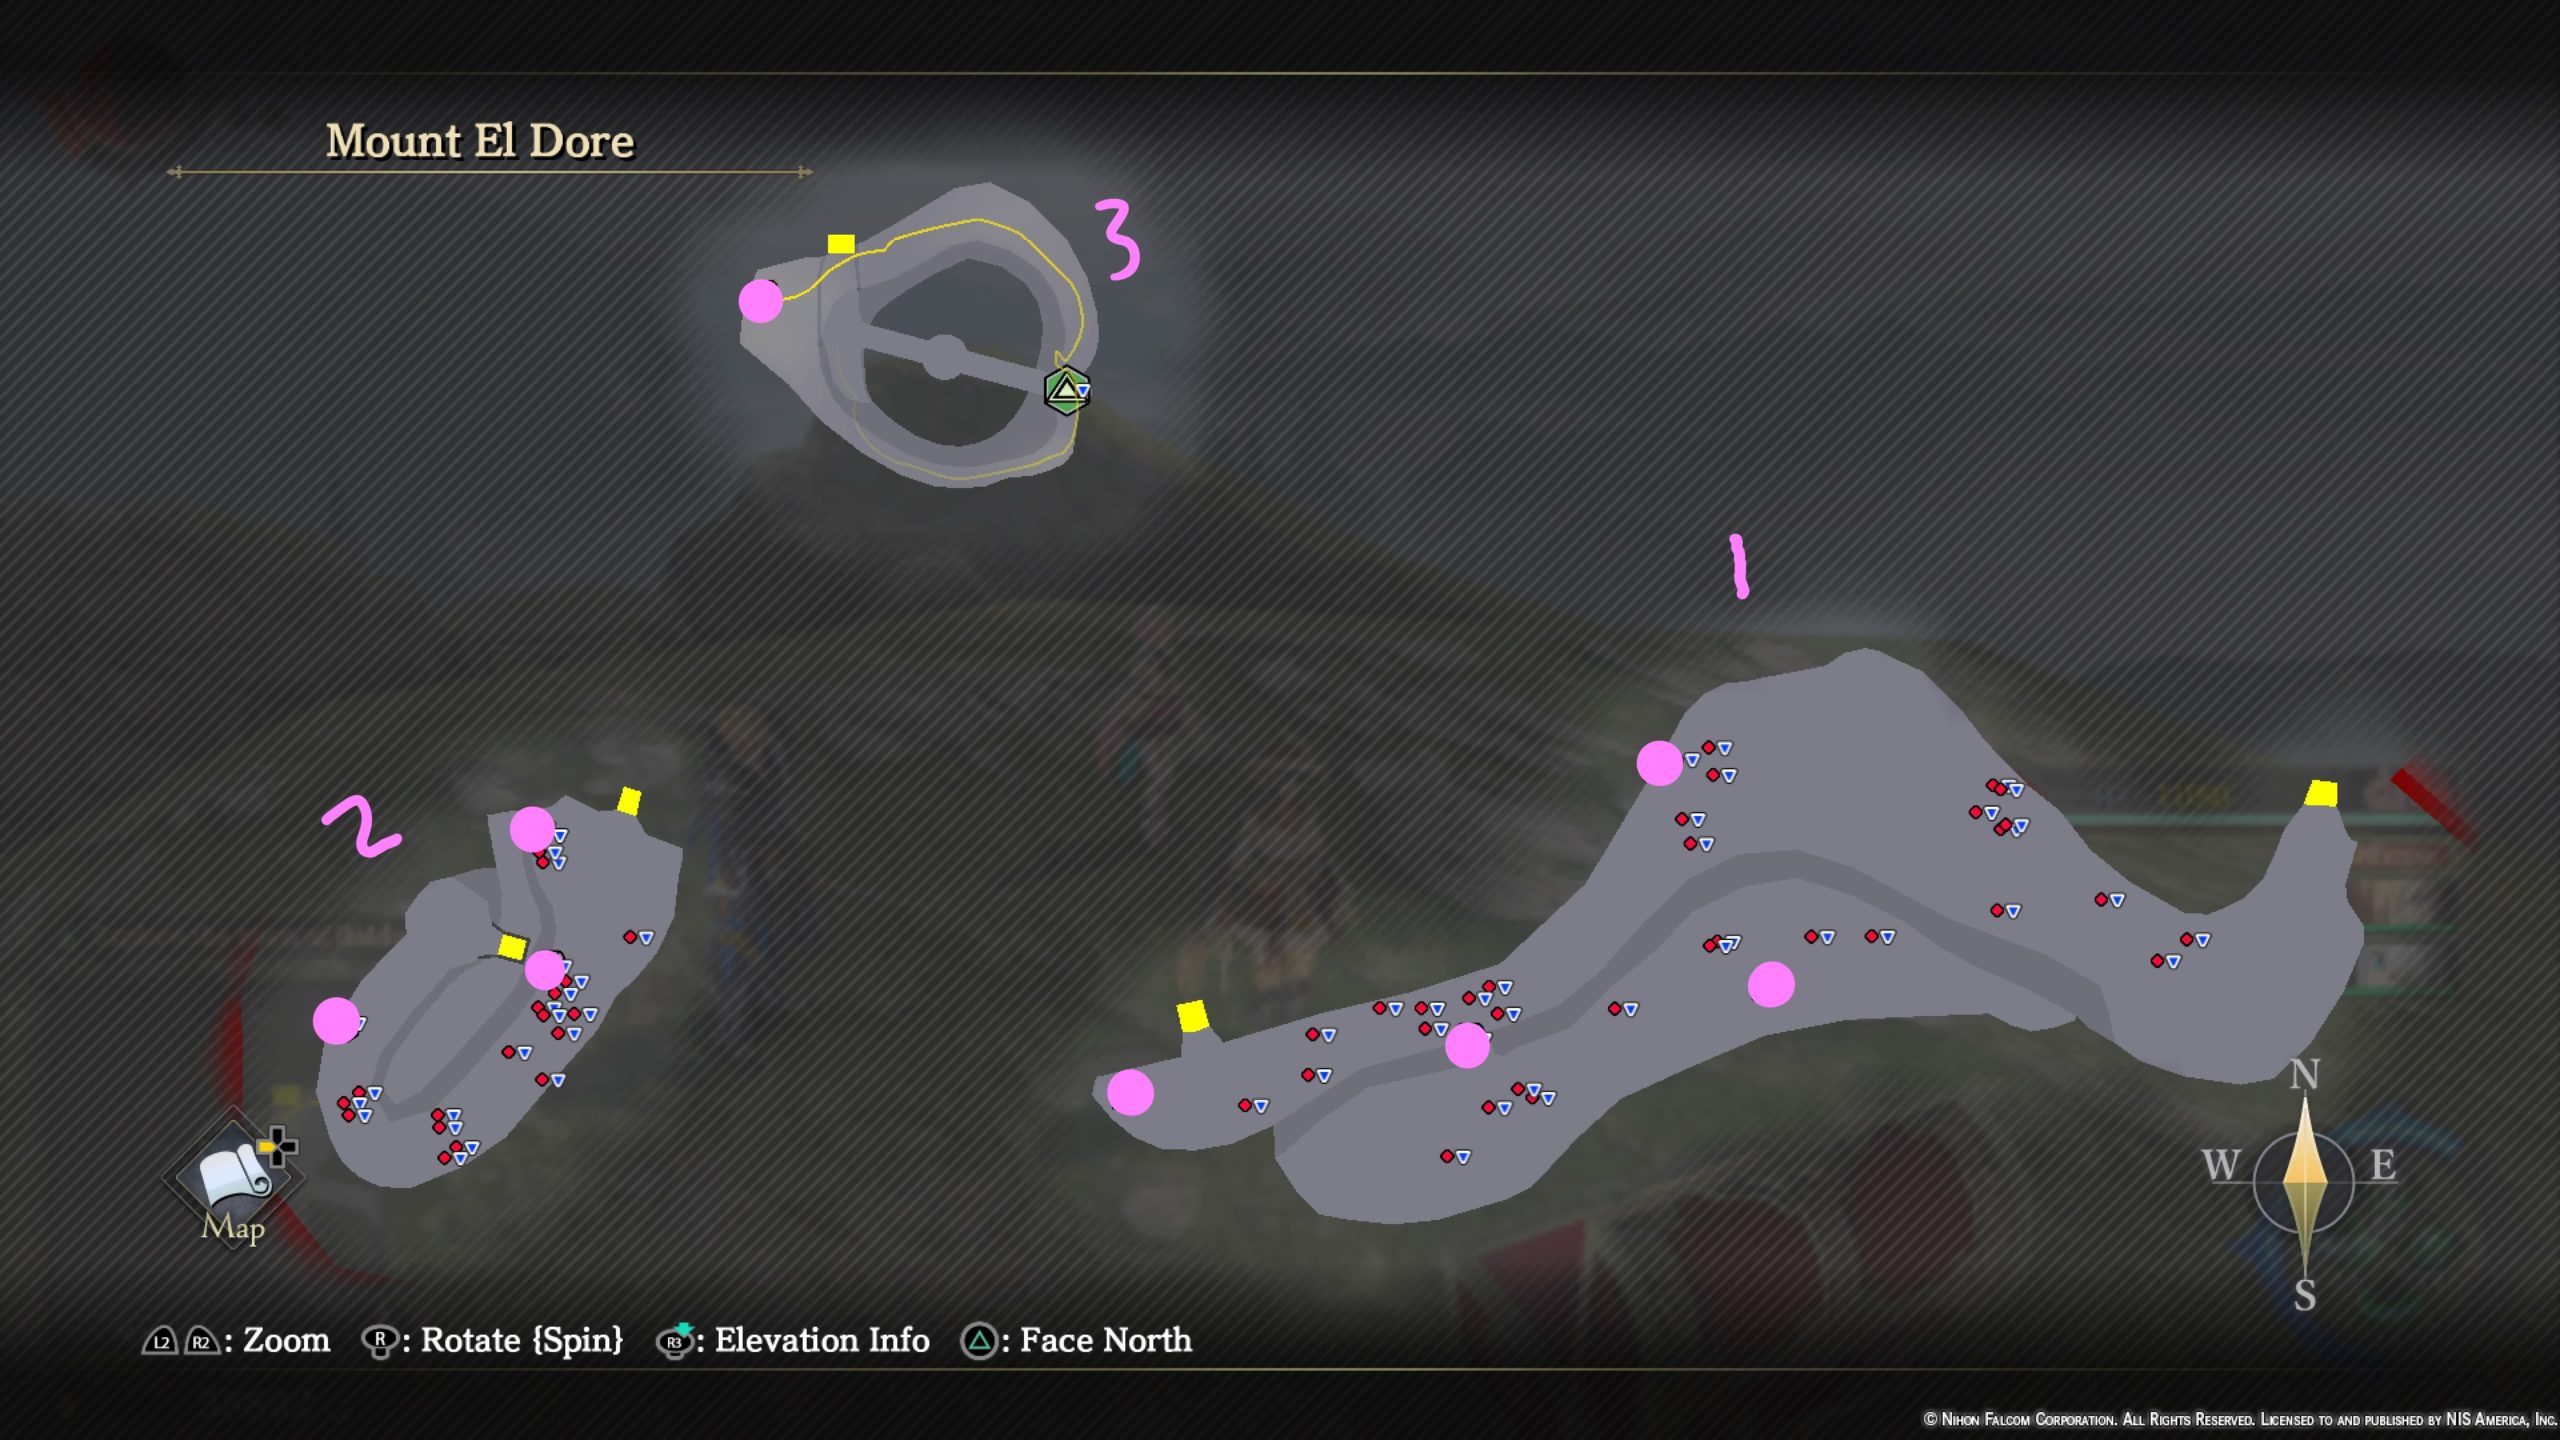
- White Asparagus x10
- Crimson Spar x3
- Bitter Remedy x2
- Blinding Bangle
- Expellant x3
- Midnight Sun Drop x2
- 1200 Gold
- Apocrypha: Karma
Balduq Prison – Depths
Treasure Chests
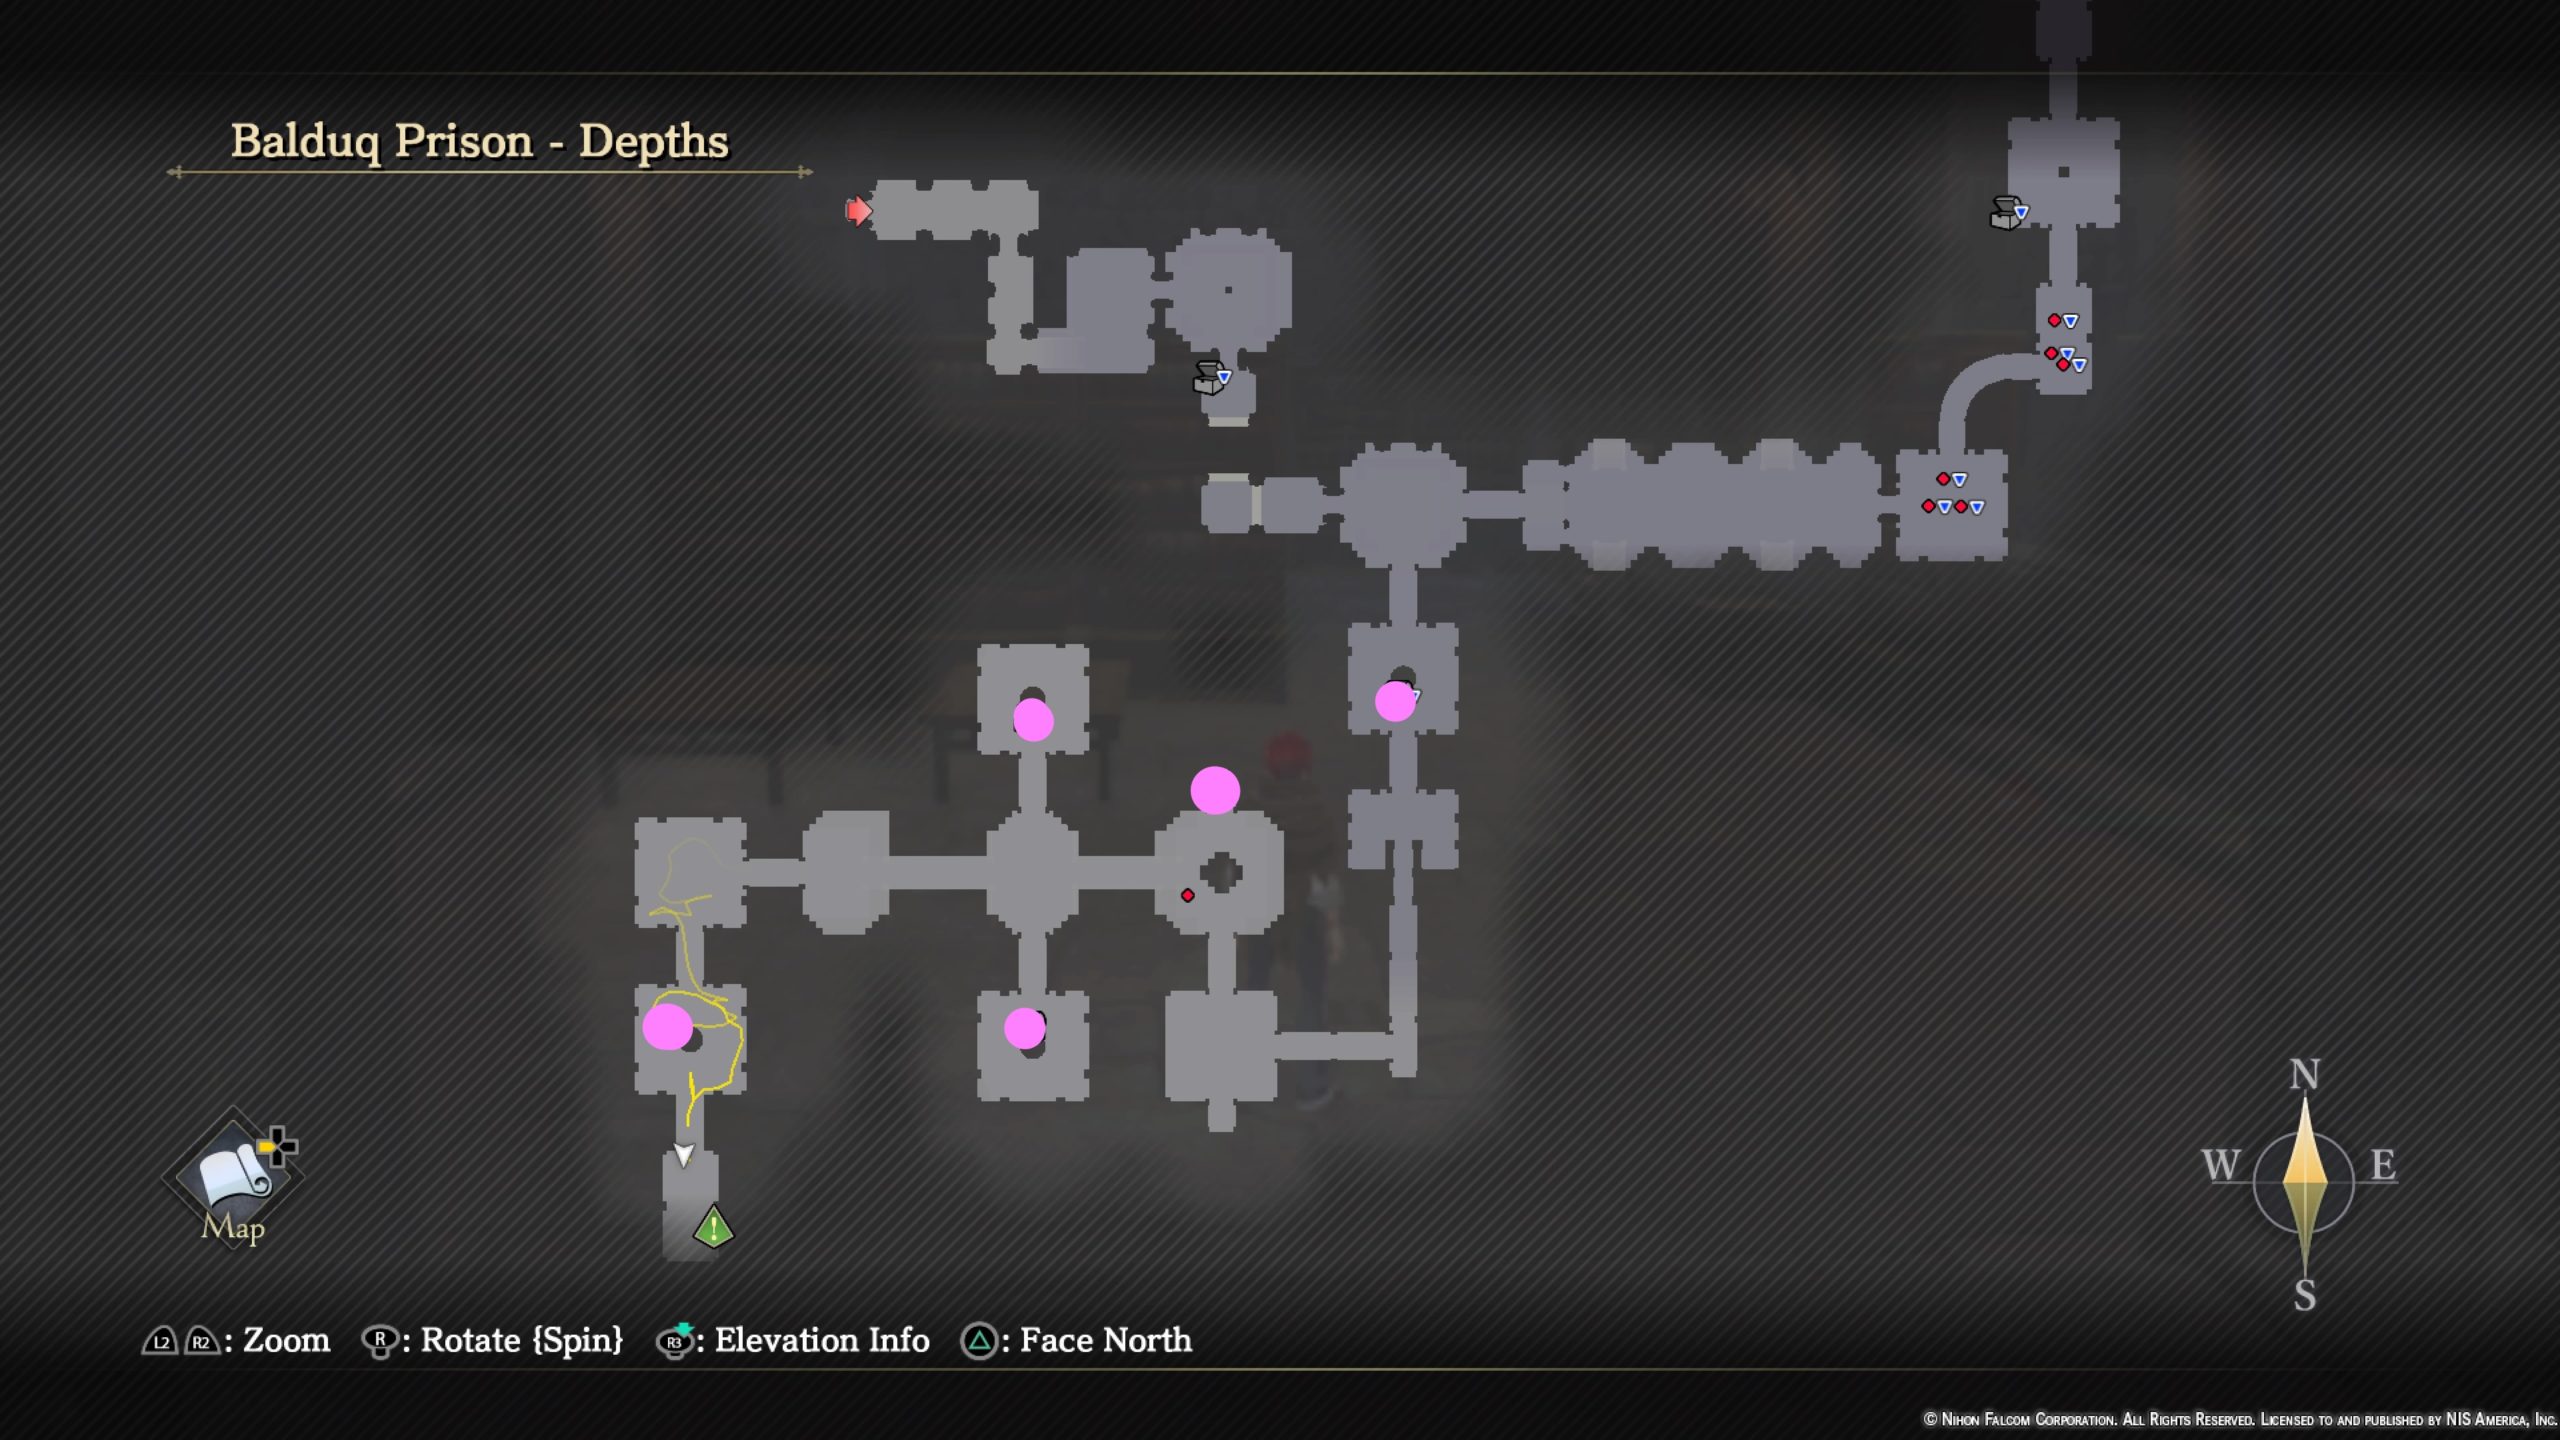
- Red Cheese
- Raisins x3
- 2500 Gold
- White Nut x3
- 2500 Gold
Concealed Stockroom (hidden area)
*To access this hidden area, travel to the upper level of Shantytown just above the Nirvana shop. On the east side under an archway, activate Doll’s gift to see the unseen revealing a brick you can interact with which causes a secret door to open.

Treasure Chests
- Grimnut x2
- Black Fig x2
- Nors Bleu x2
- Dry-aged Meat x2
Secret Medicine Stash (hidden area)
*To access this hidden area, travel to Central District. From Andelph’s Armory head west towards a metal fence. Jump over the fence to end up in an alleyway. Activate Doll’s gift to find a brick you can interact with to cause a secret door to open.

Treasure Chests
- Sweet Remedy x2
- Panacea x2
- Hermit’s Remedy x2
- Bitter Remedy x2
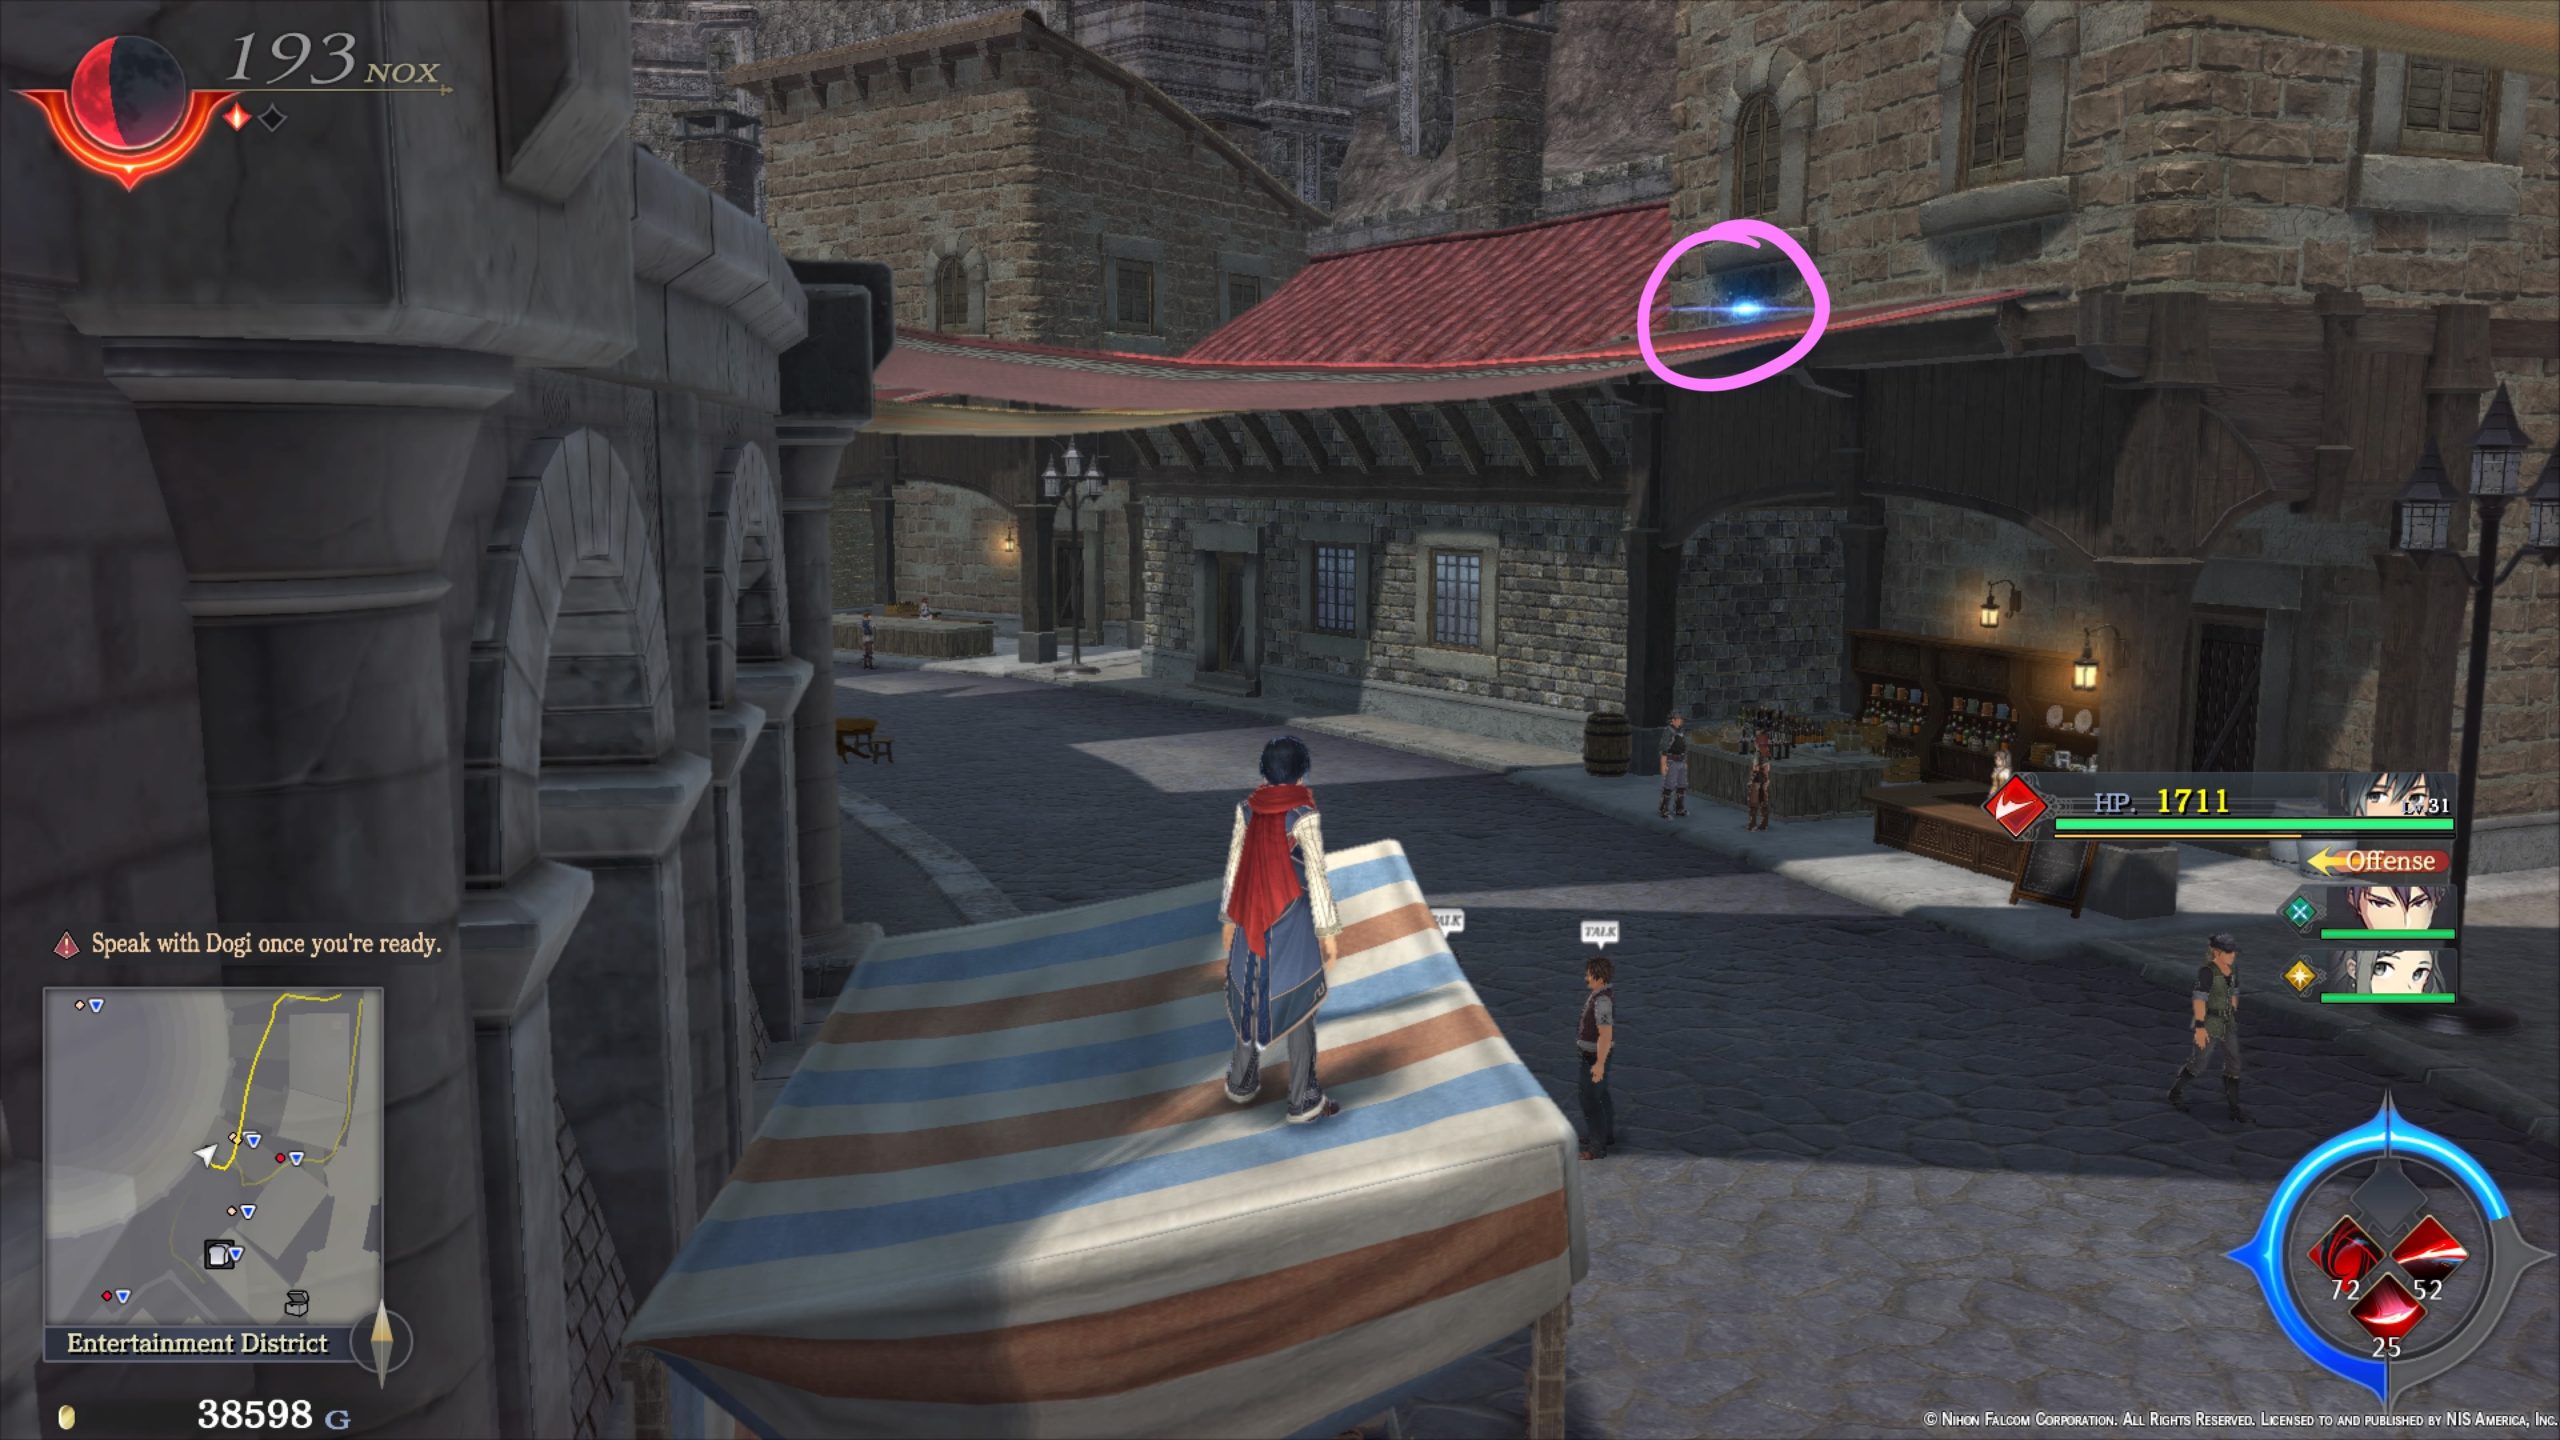
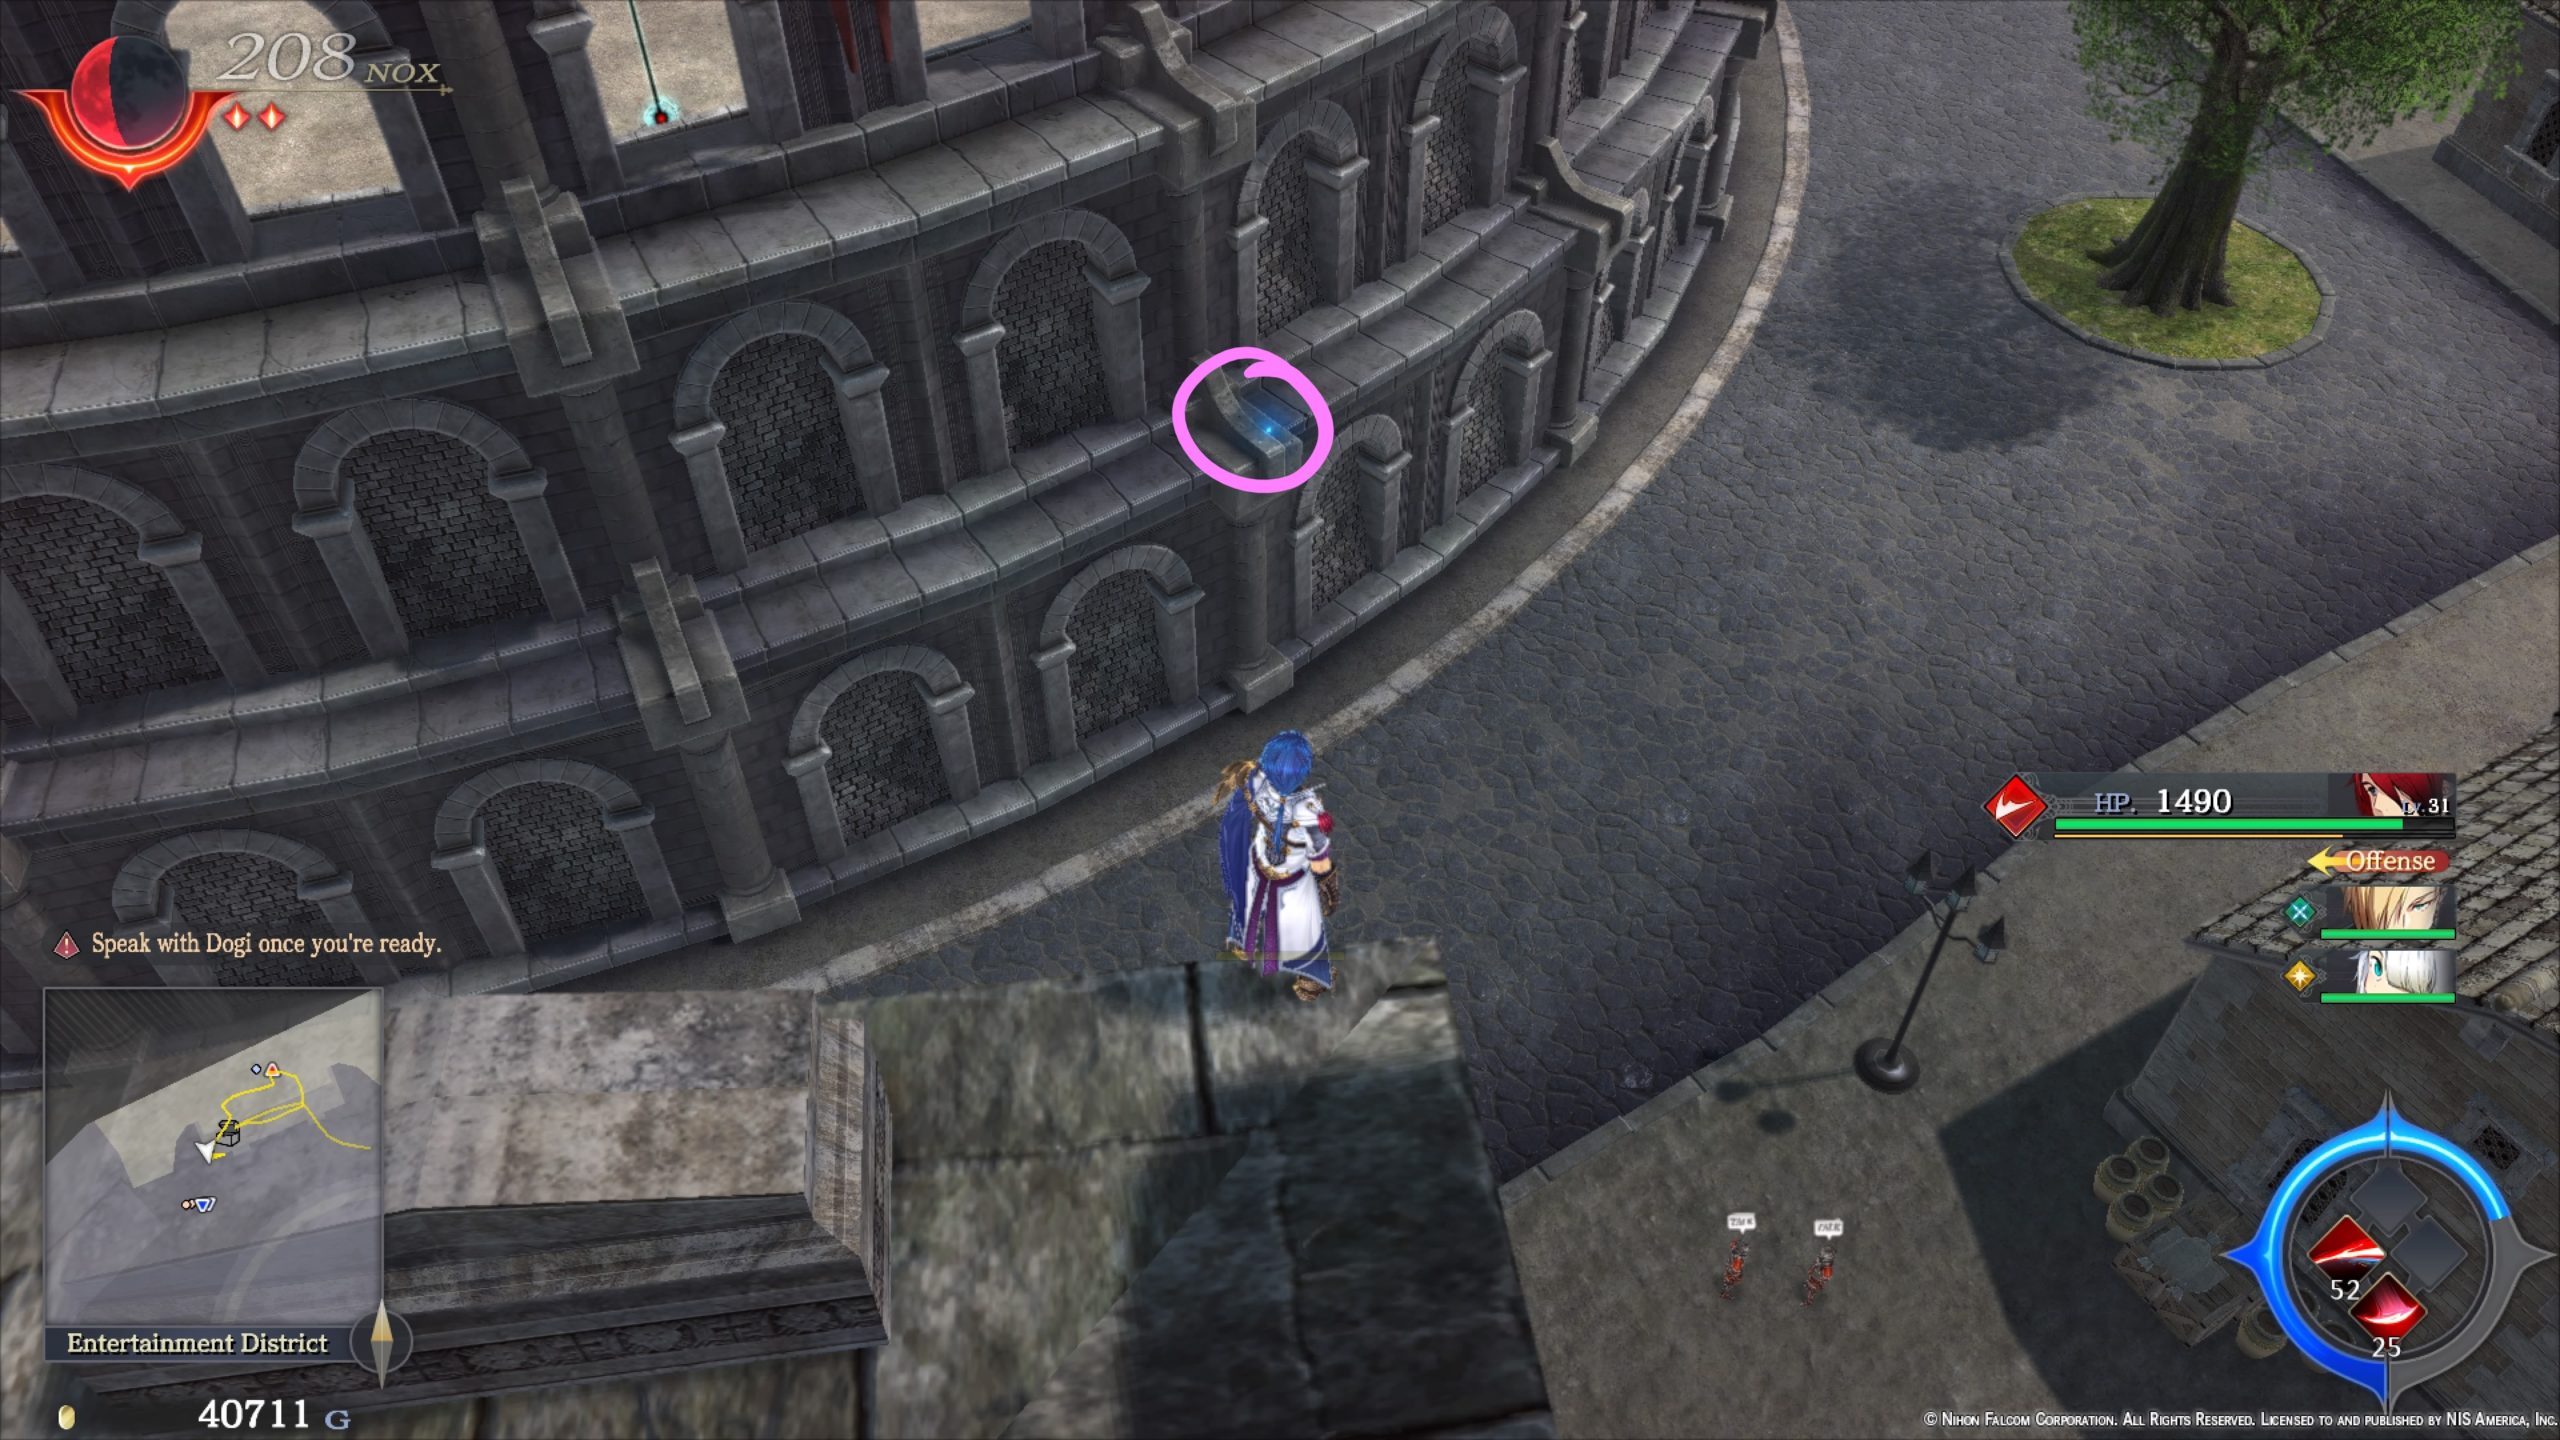
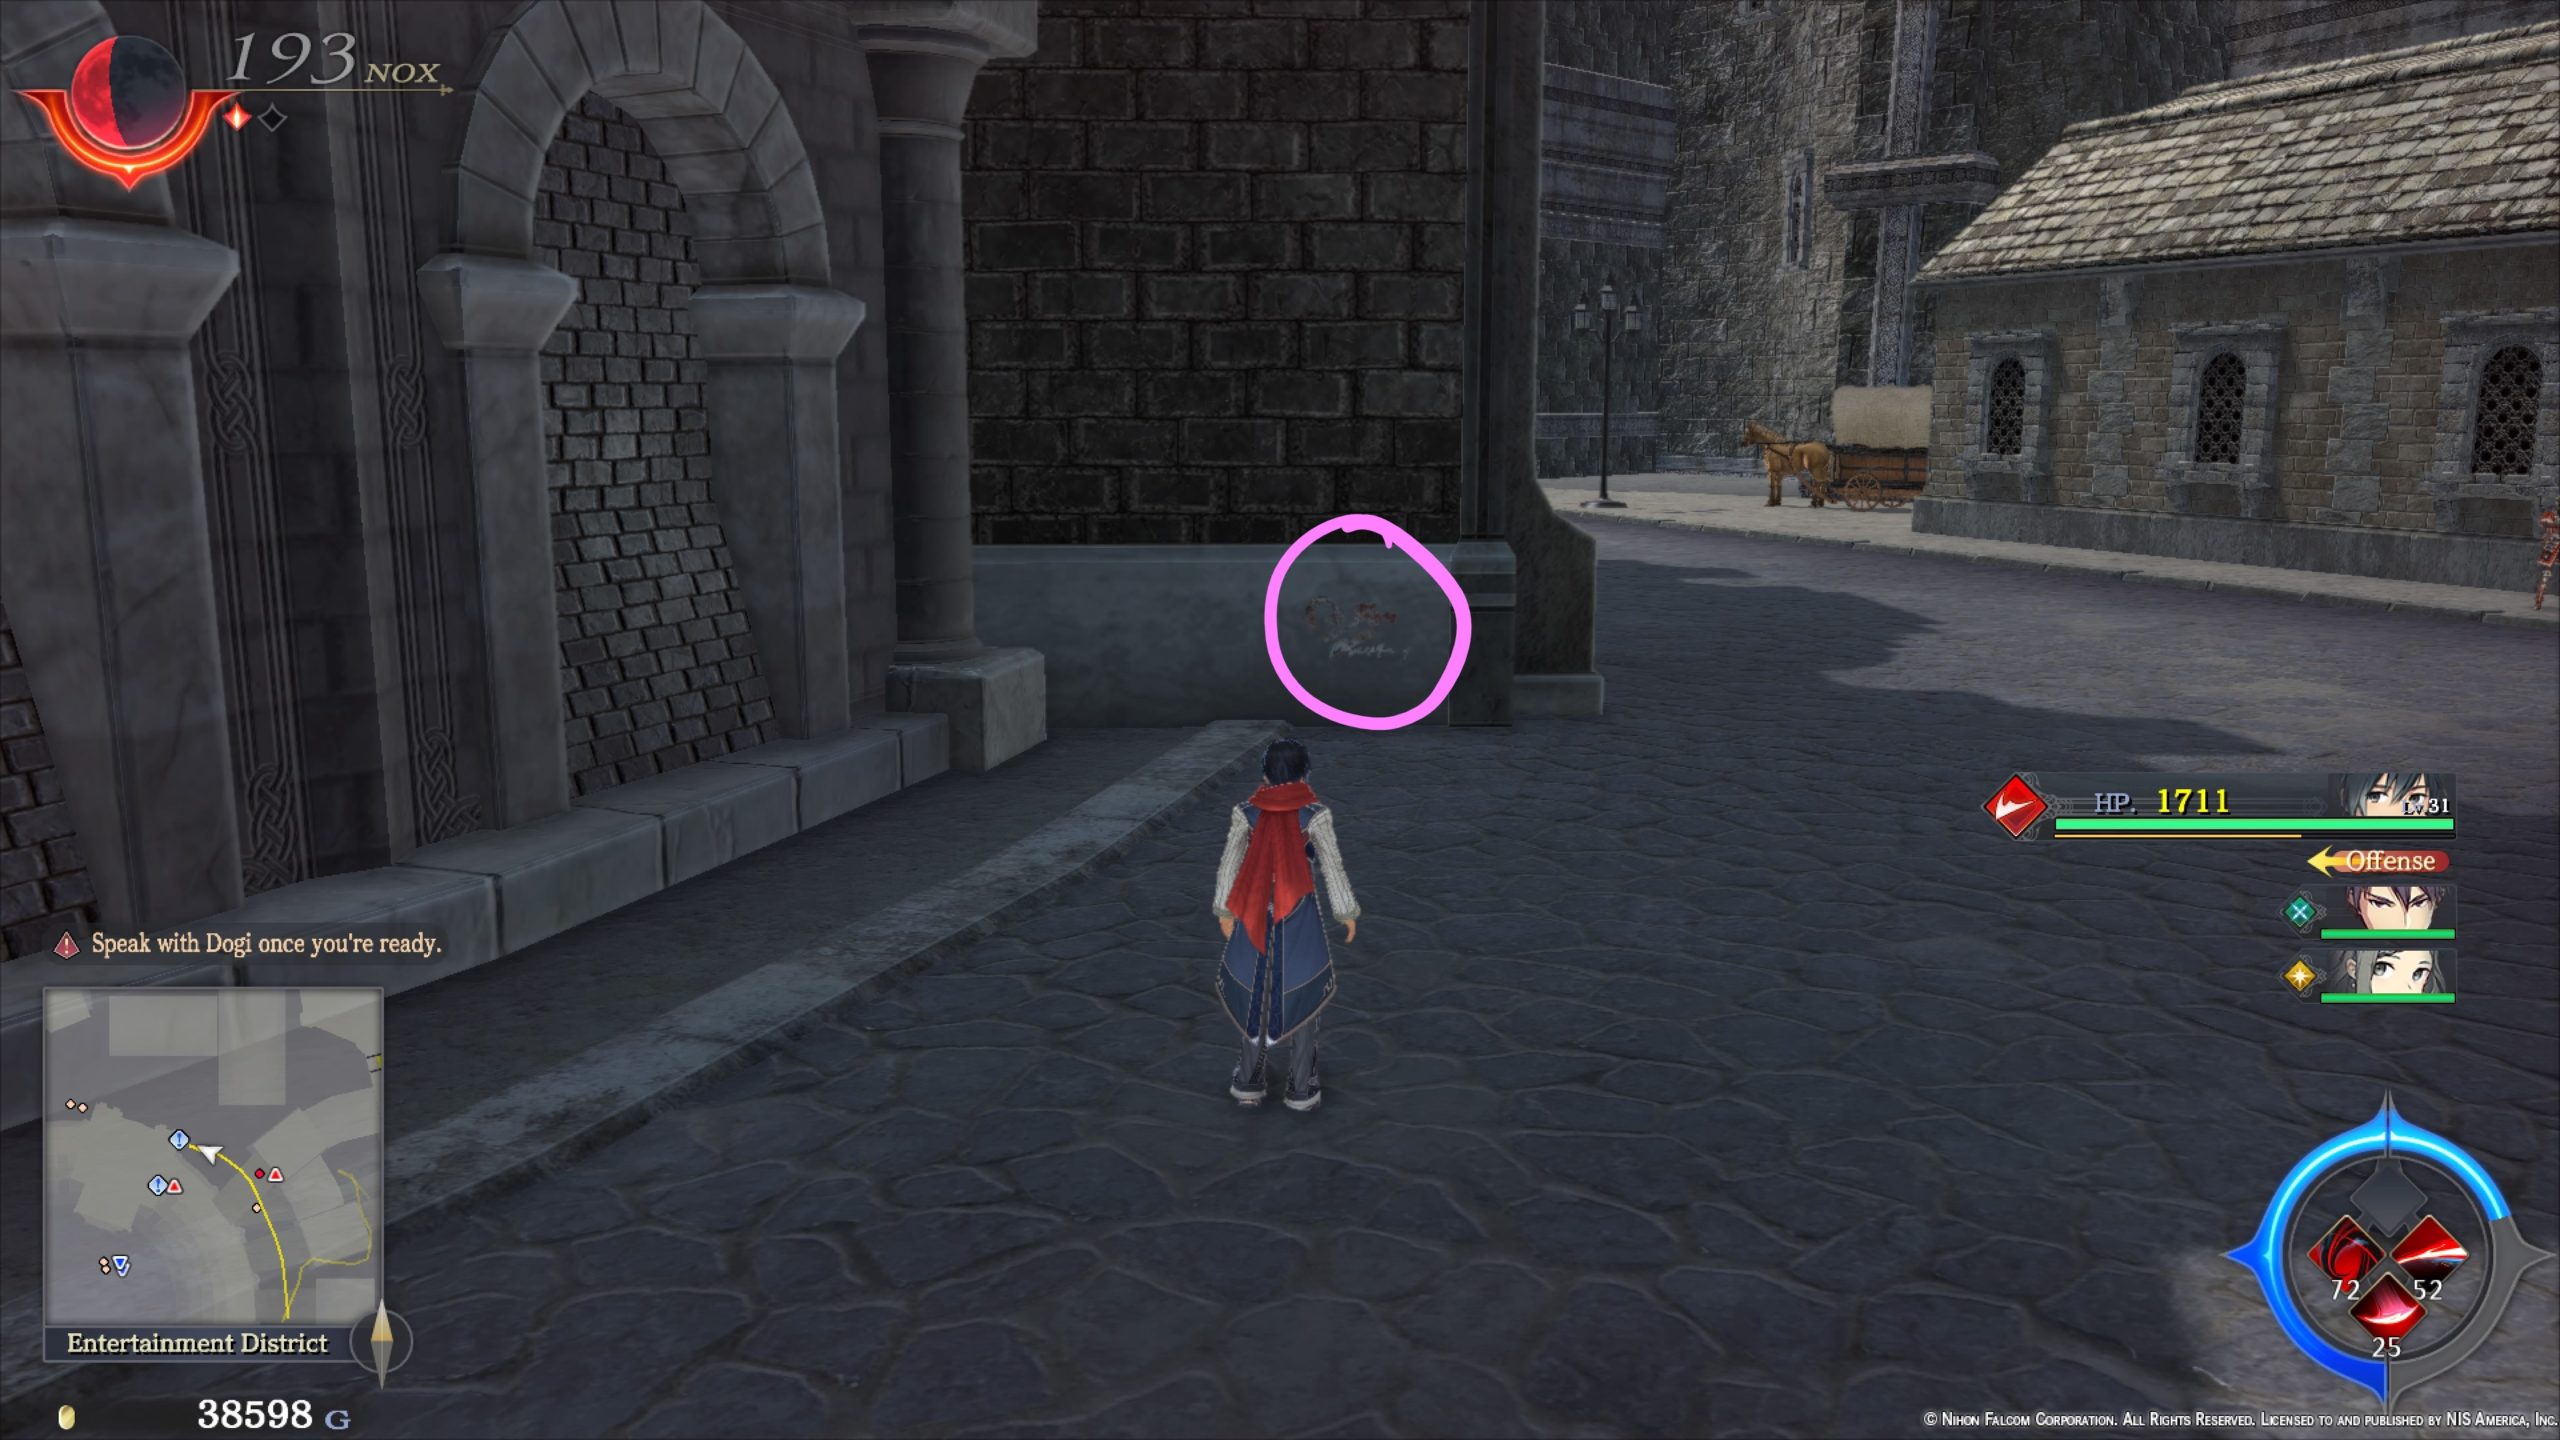
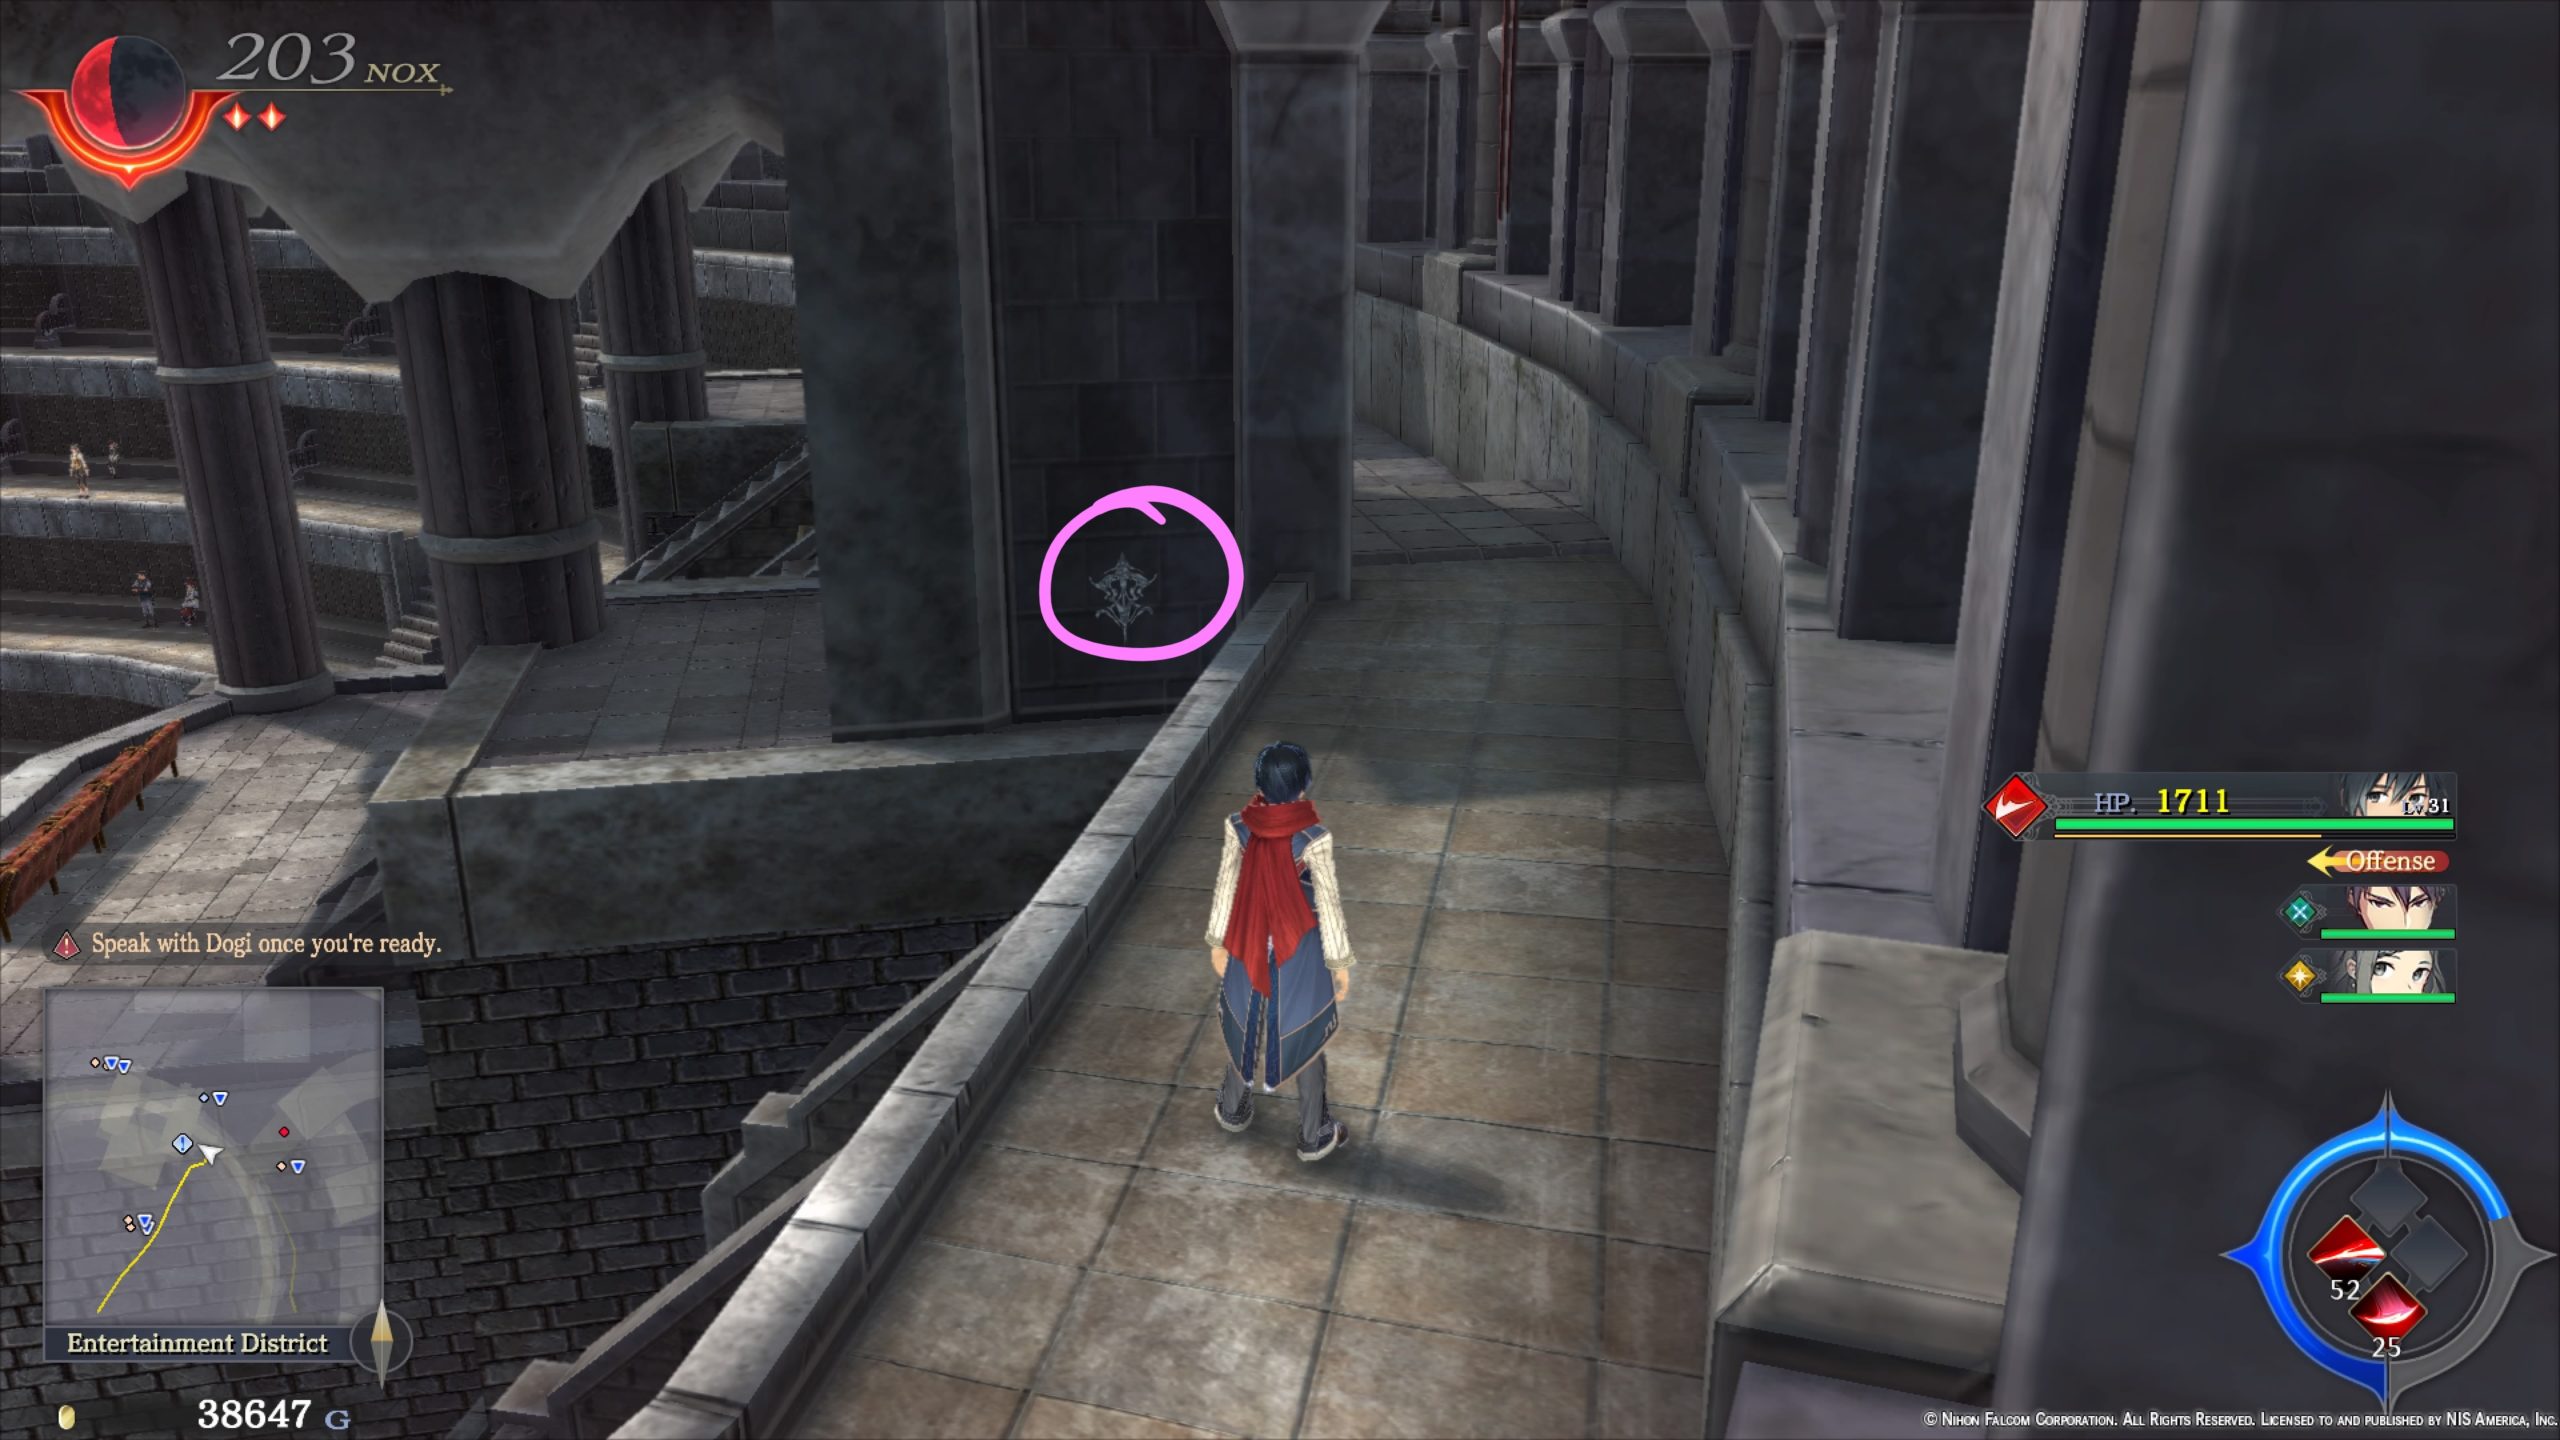
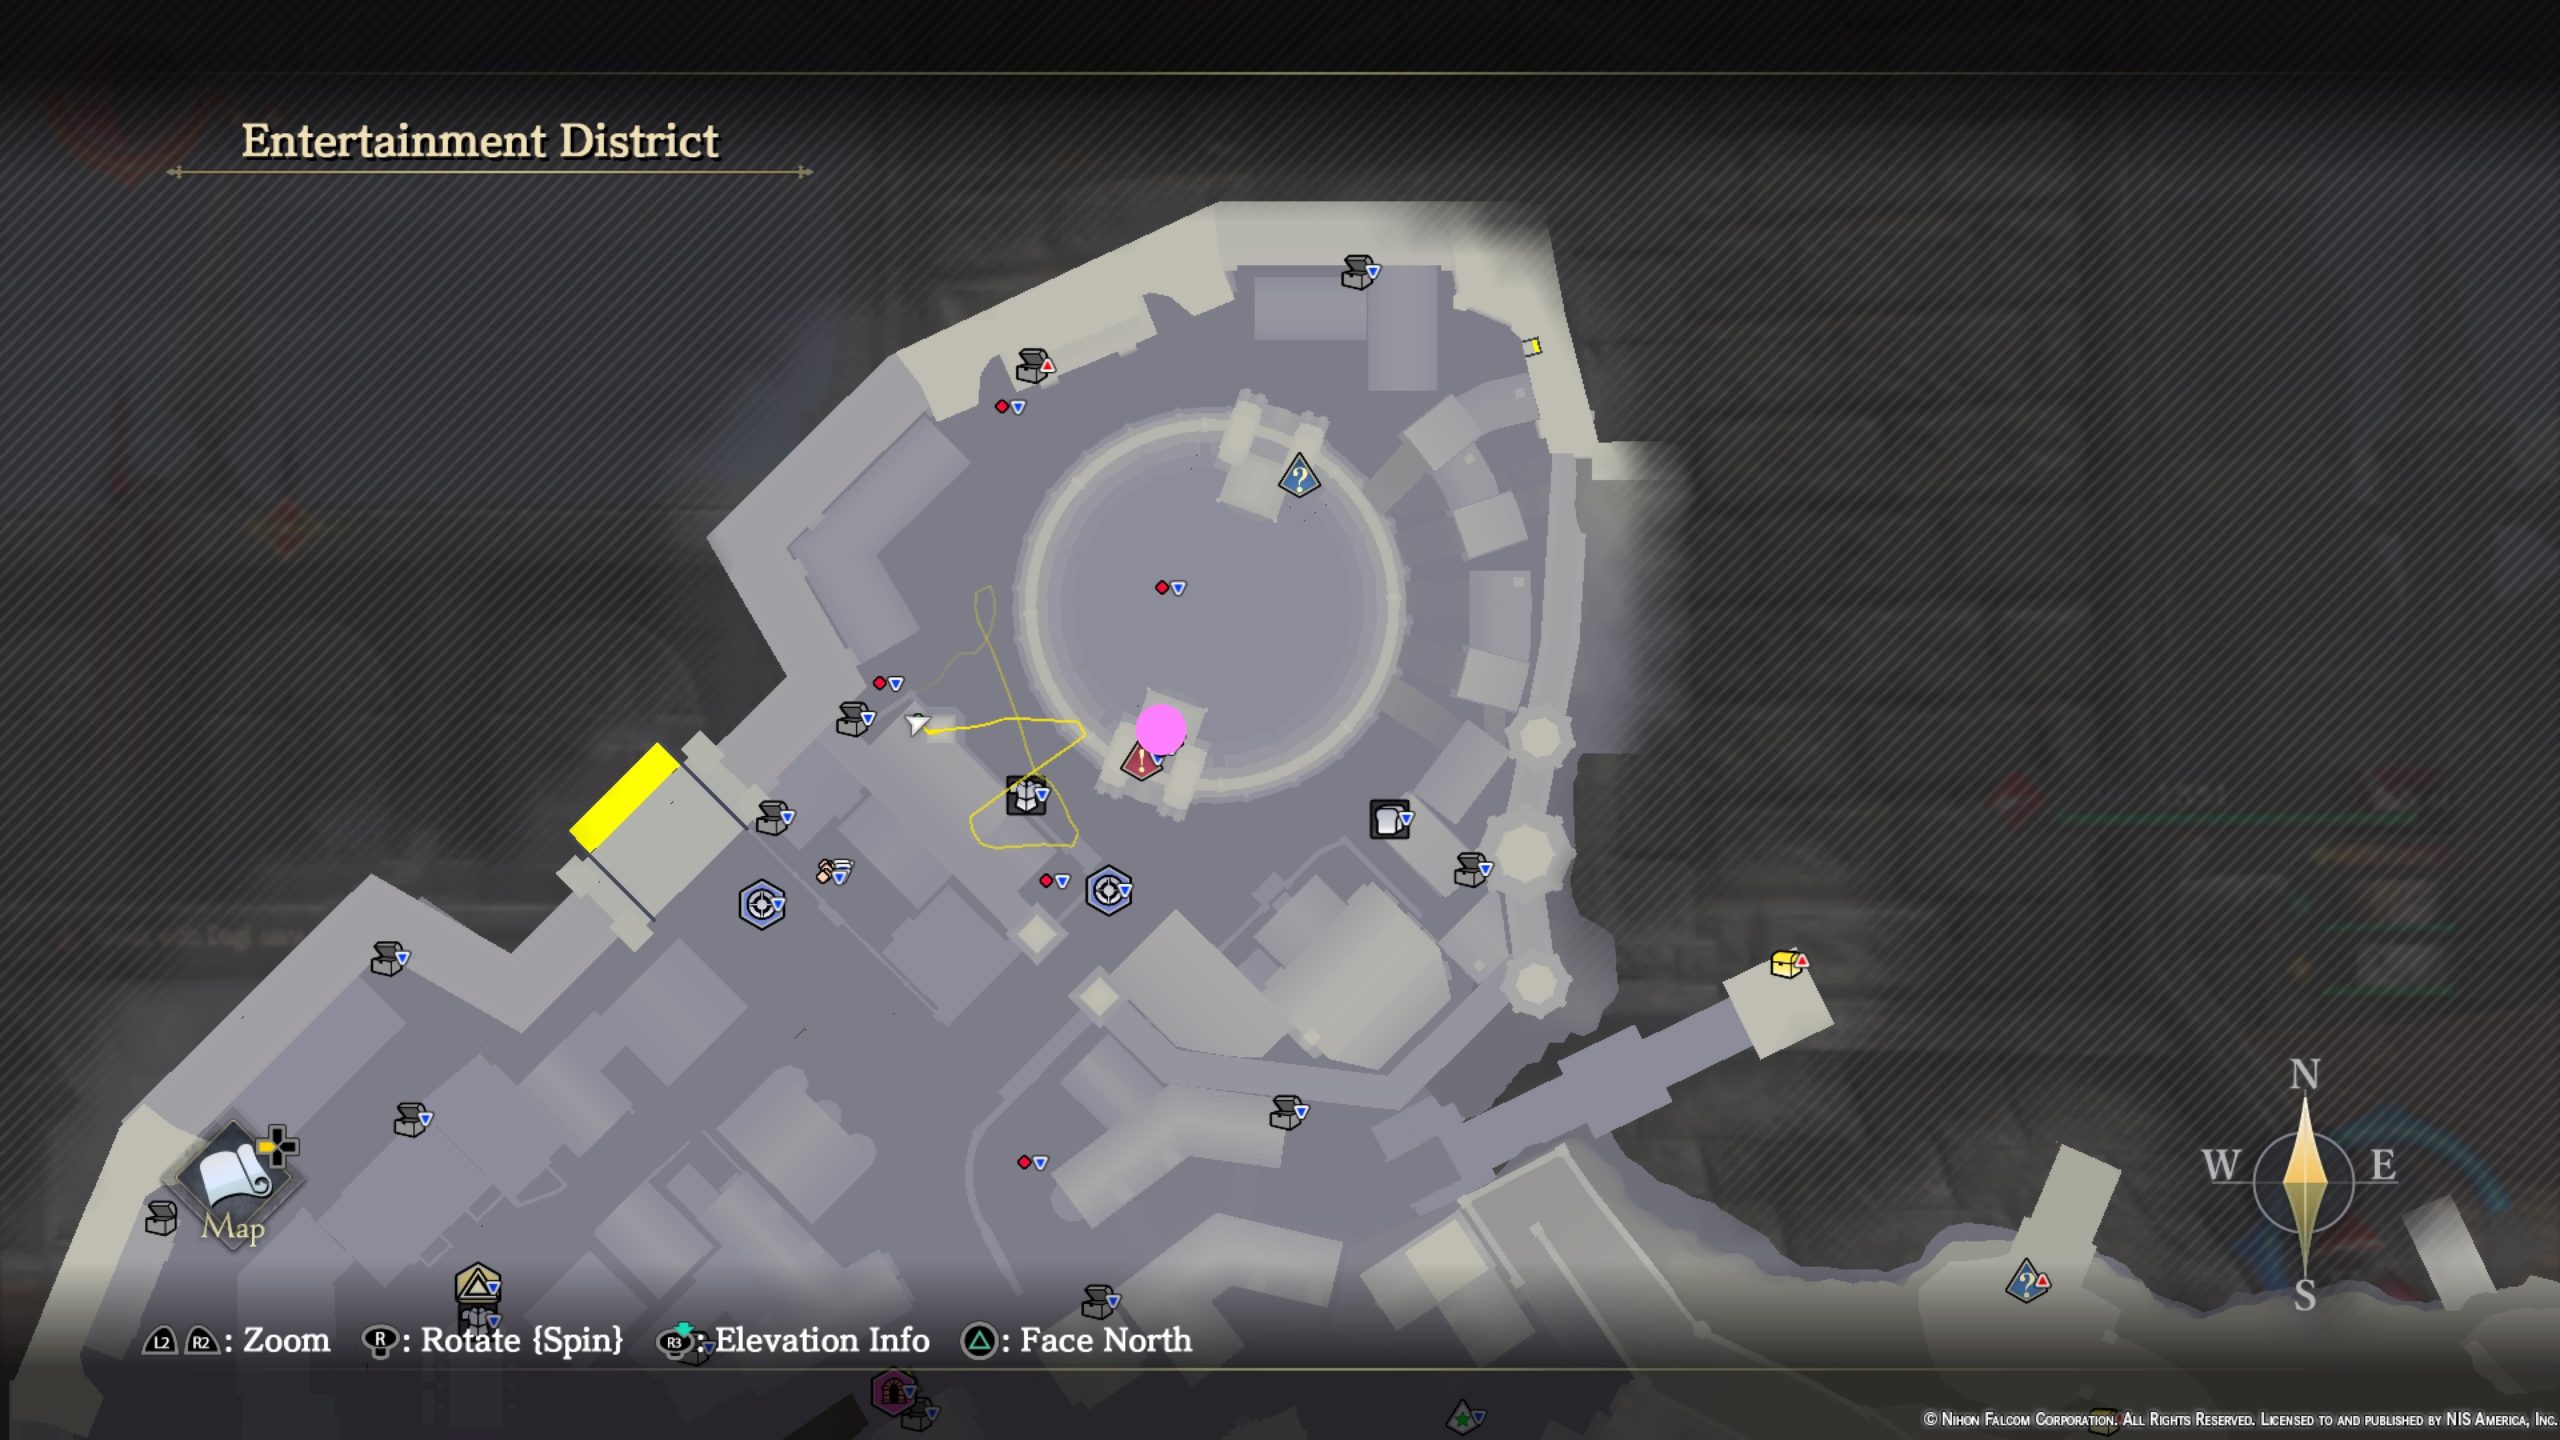
Entertainment District
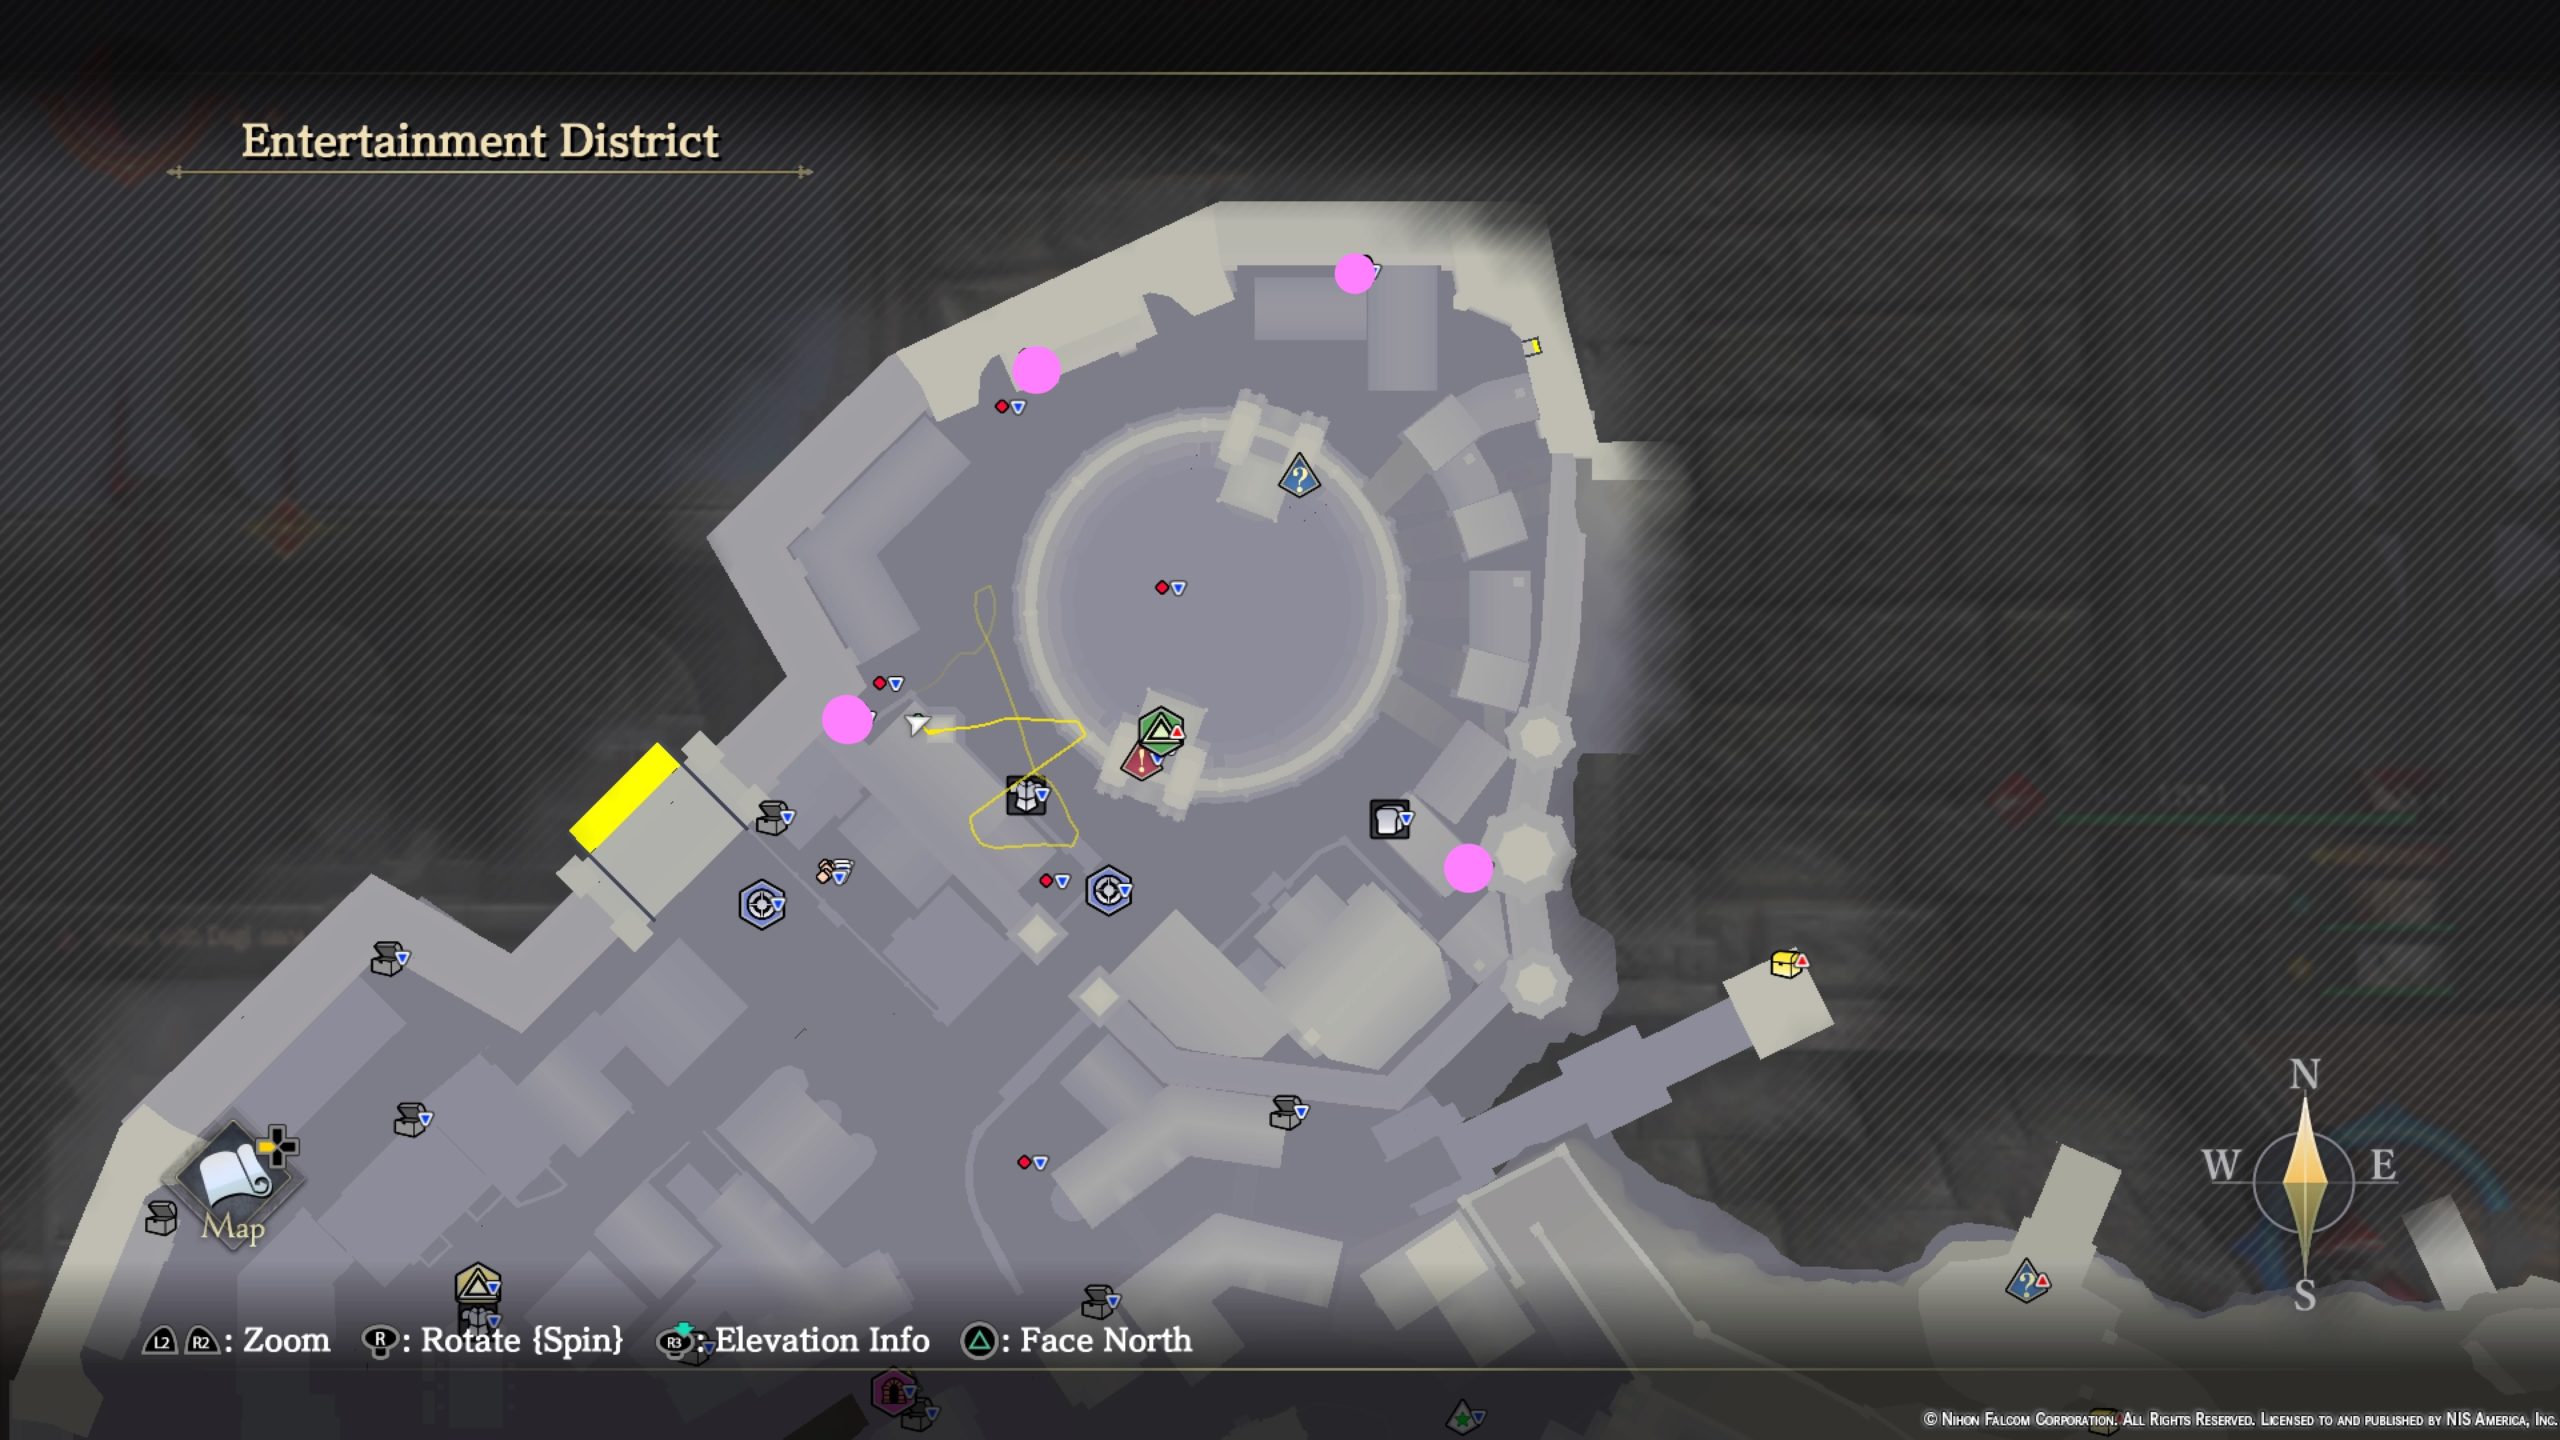
Azure Petals
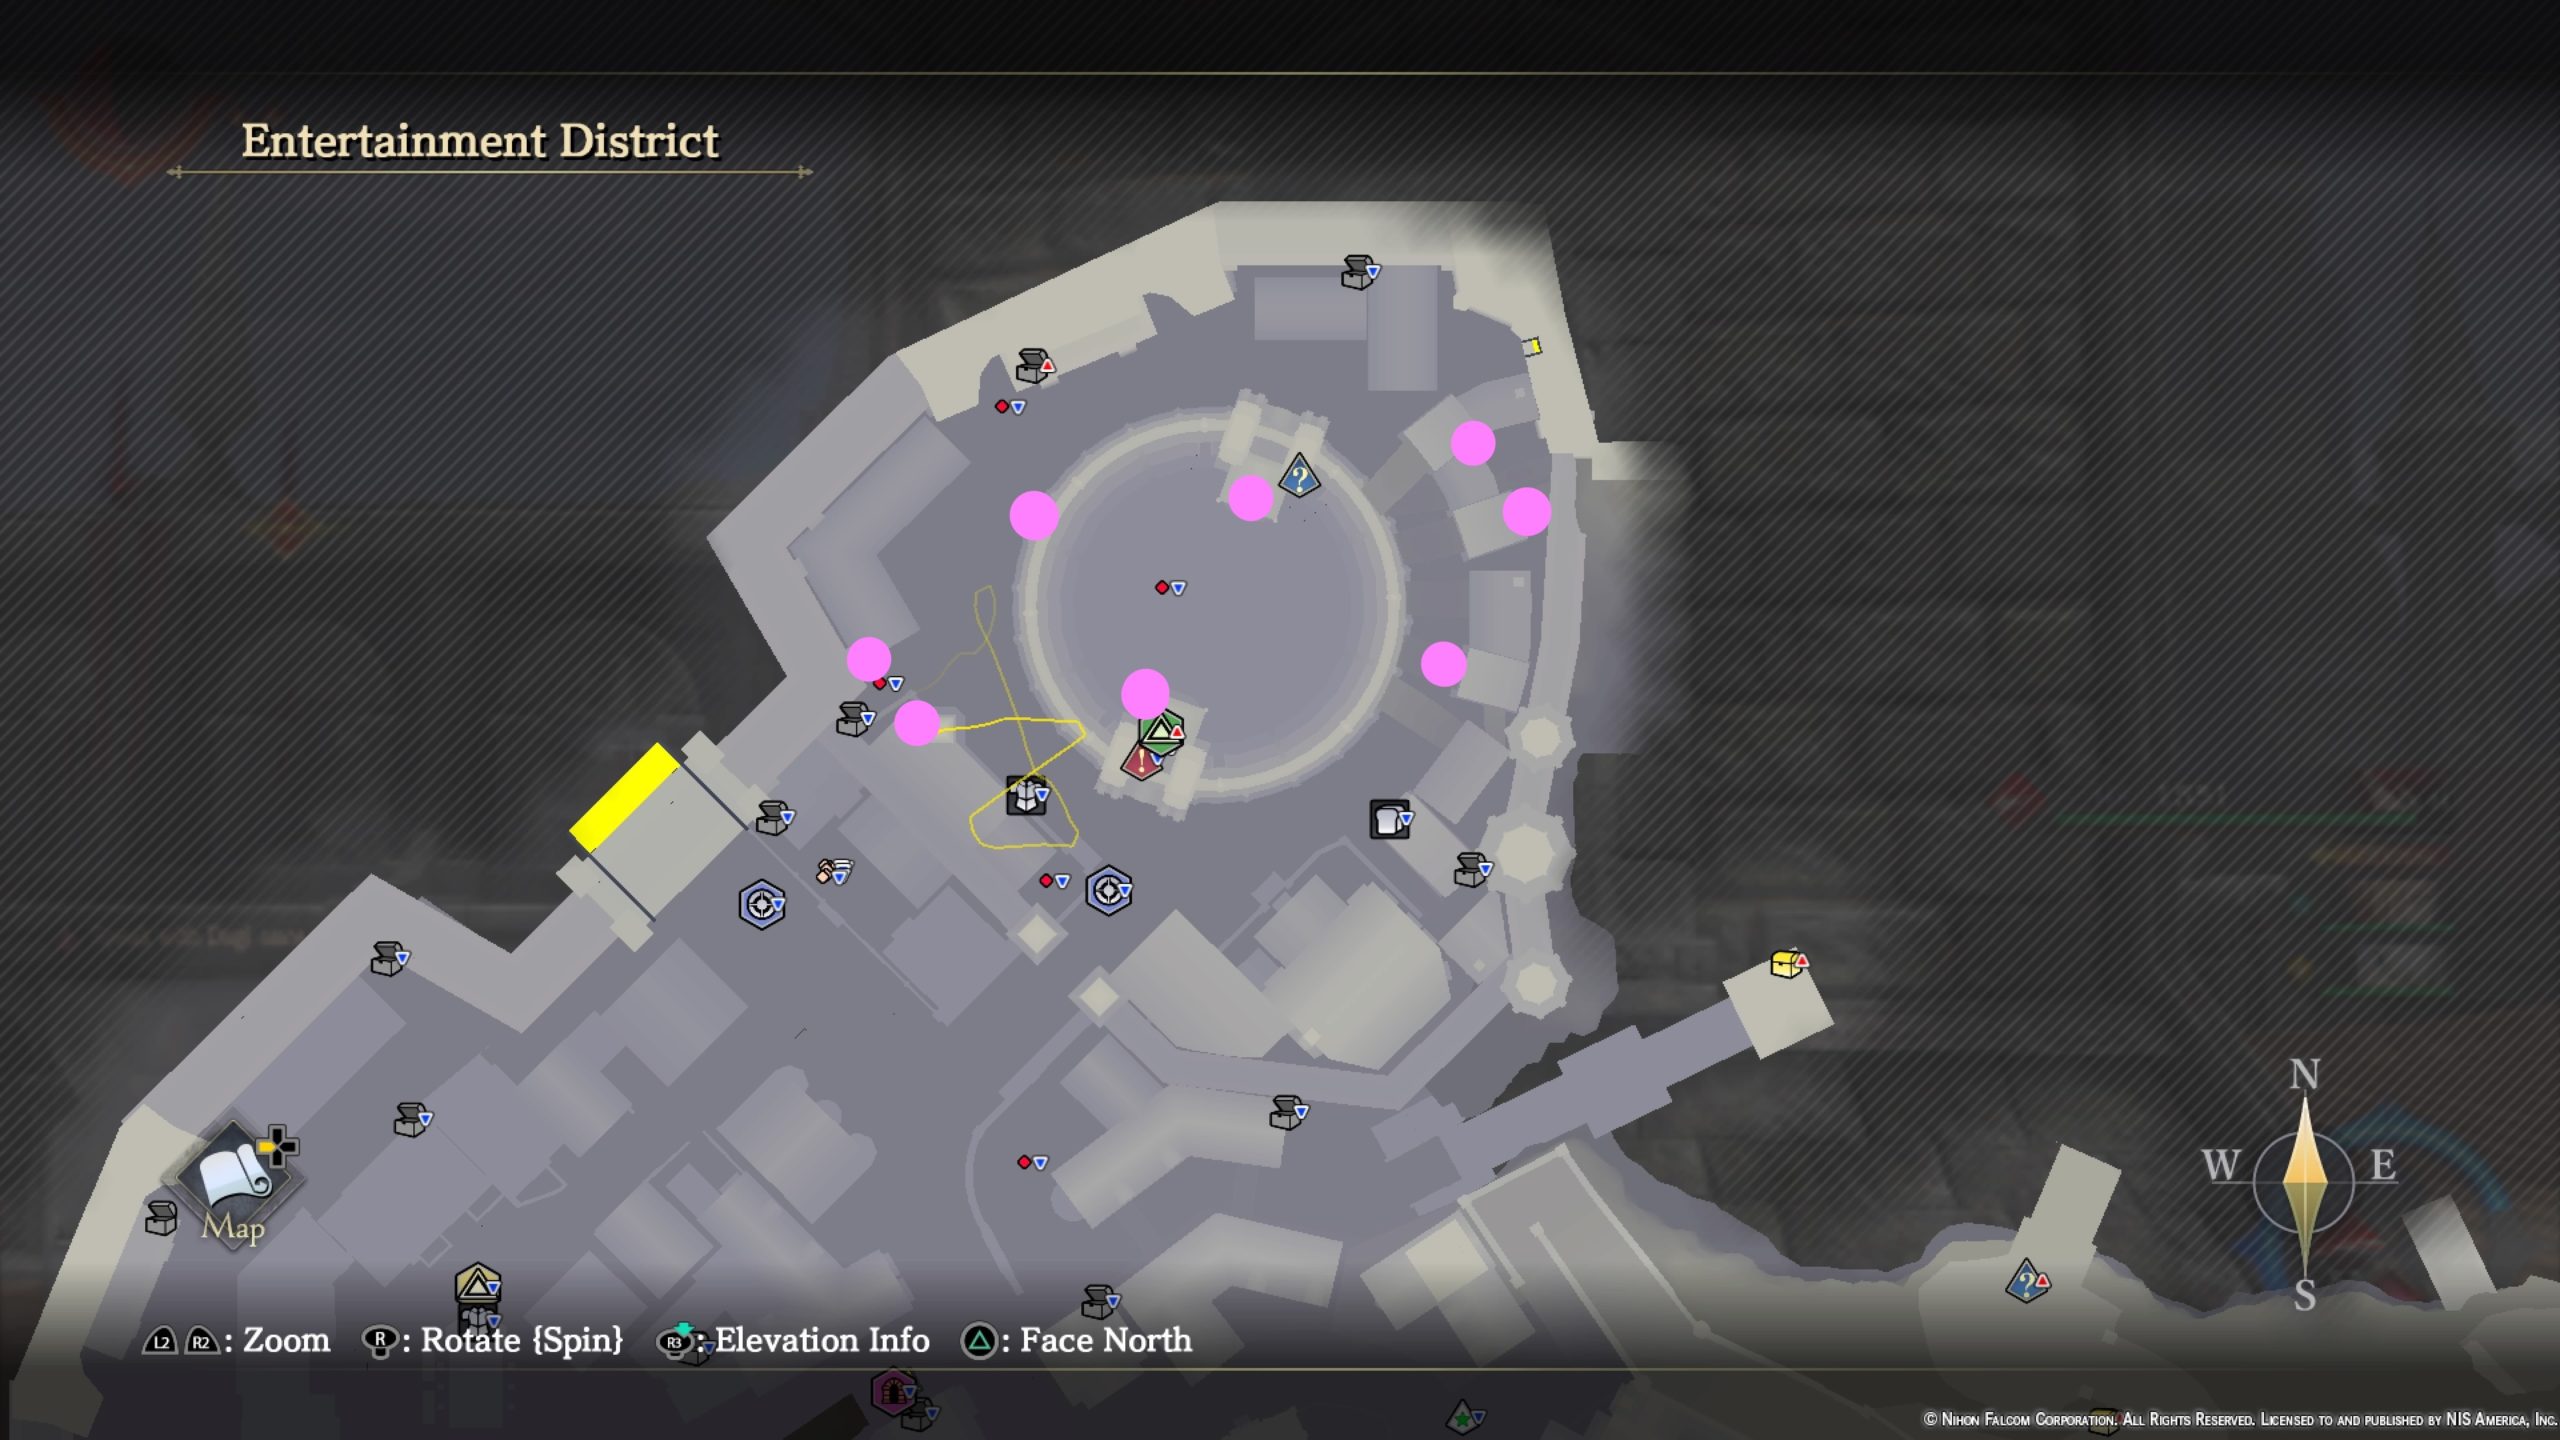
- In an alley on the northeastern part of the area on a stack of barrels
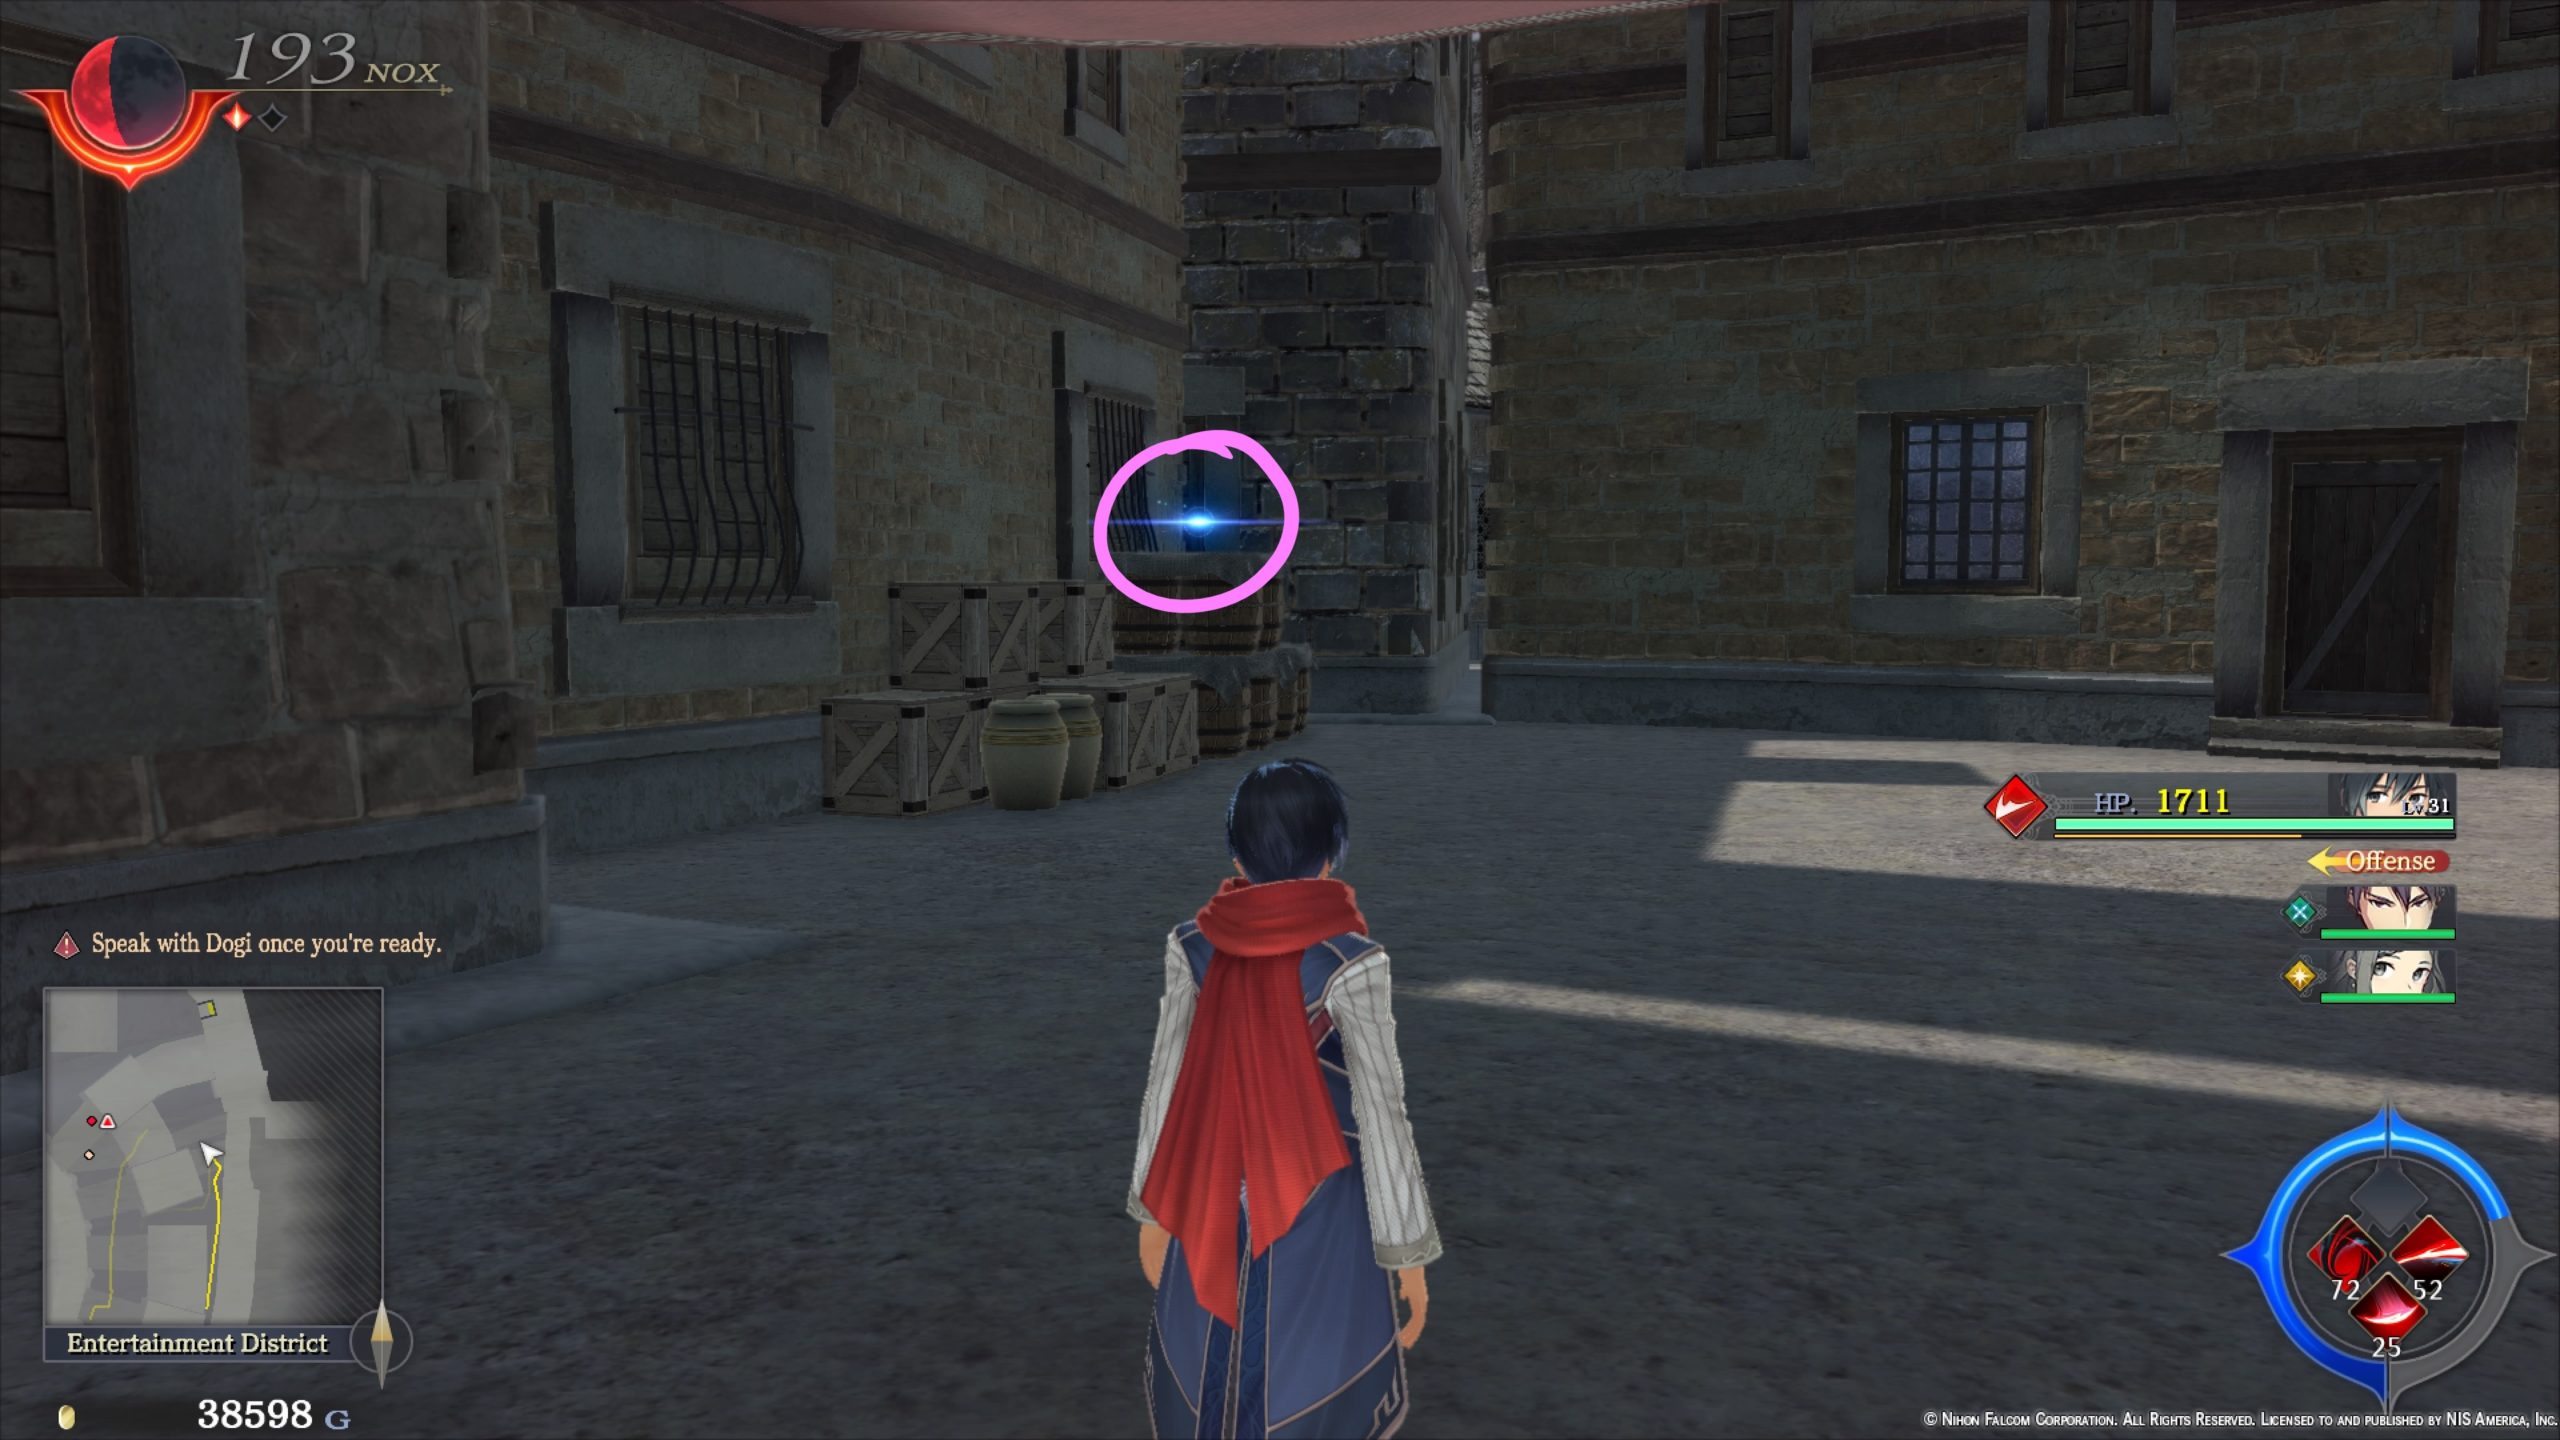
- On a cloth overhang shading the street on the east side of the Coliseum
- Inside the Coliseum near the special seating on the southern side

- Inside the Coliseum above the special seating on the northern side

- On the outer northwestern side of the Coliseum
- On top of a wagon near the Romun long building on the western part of the area

- On the pointed peak of a building near Lillet’s Gift Shop

- On a cloth overhang shading the alley in the northeastern part of the area

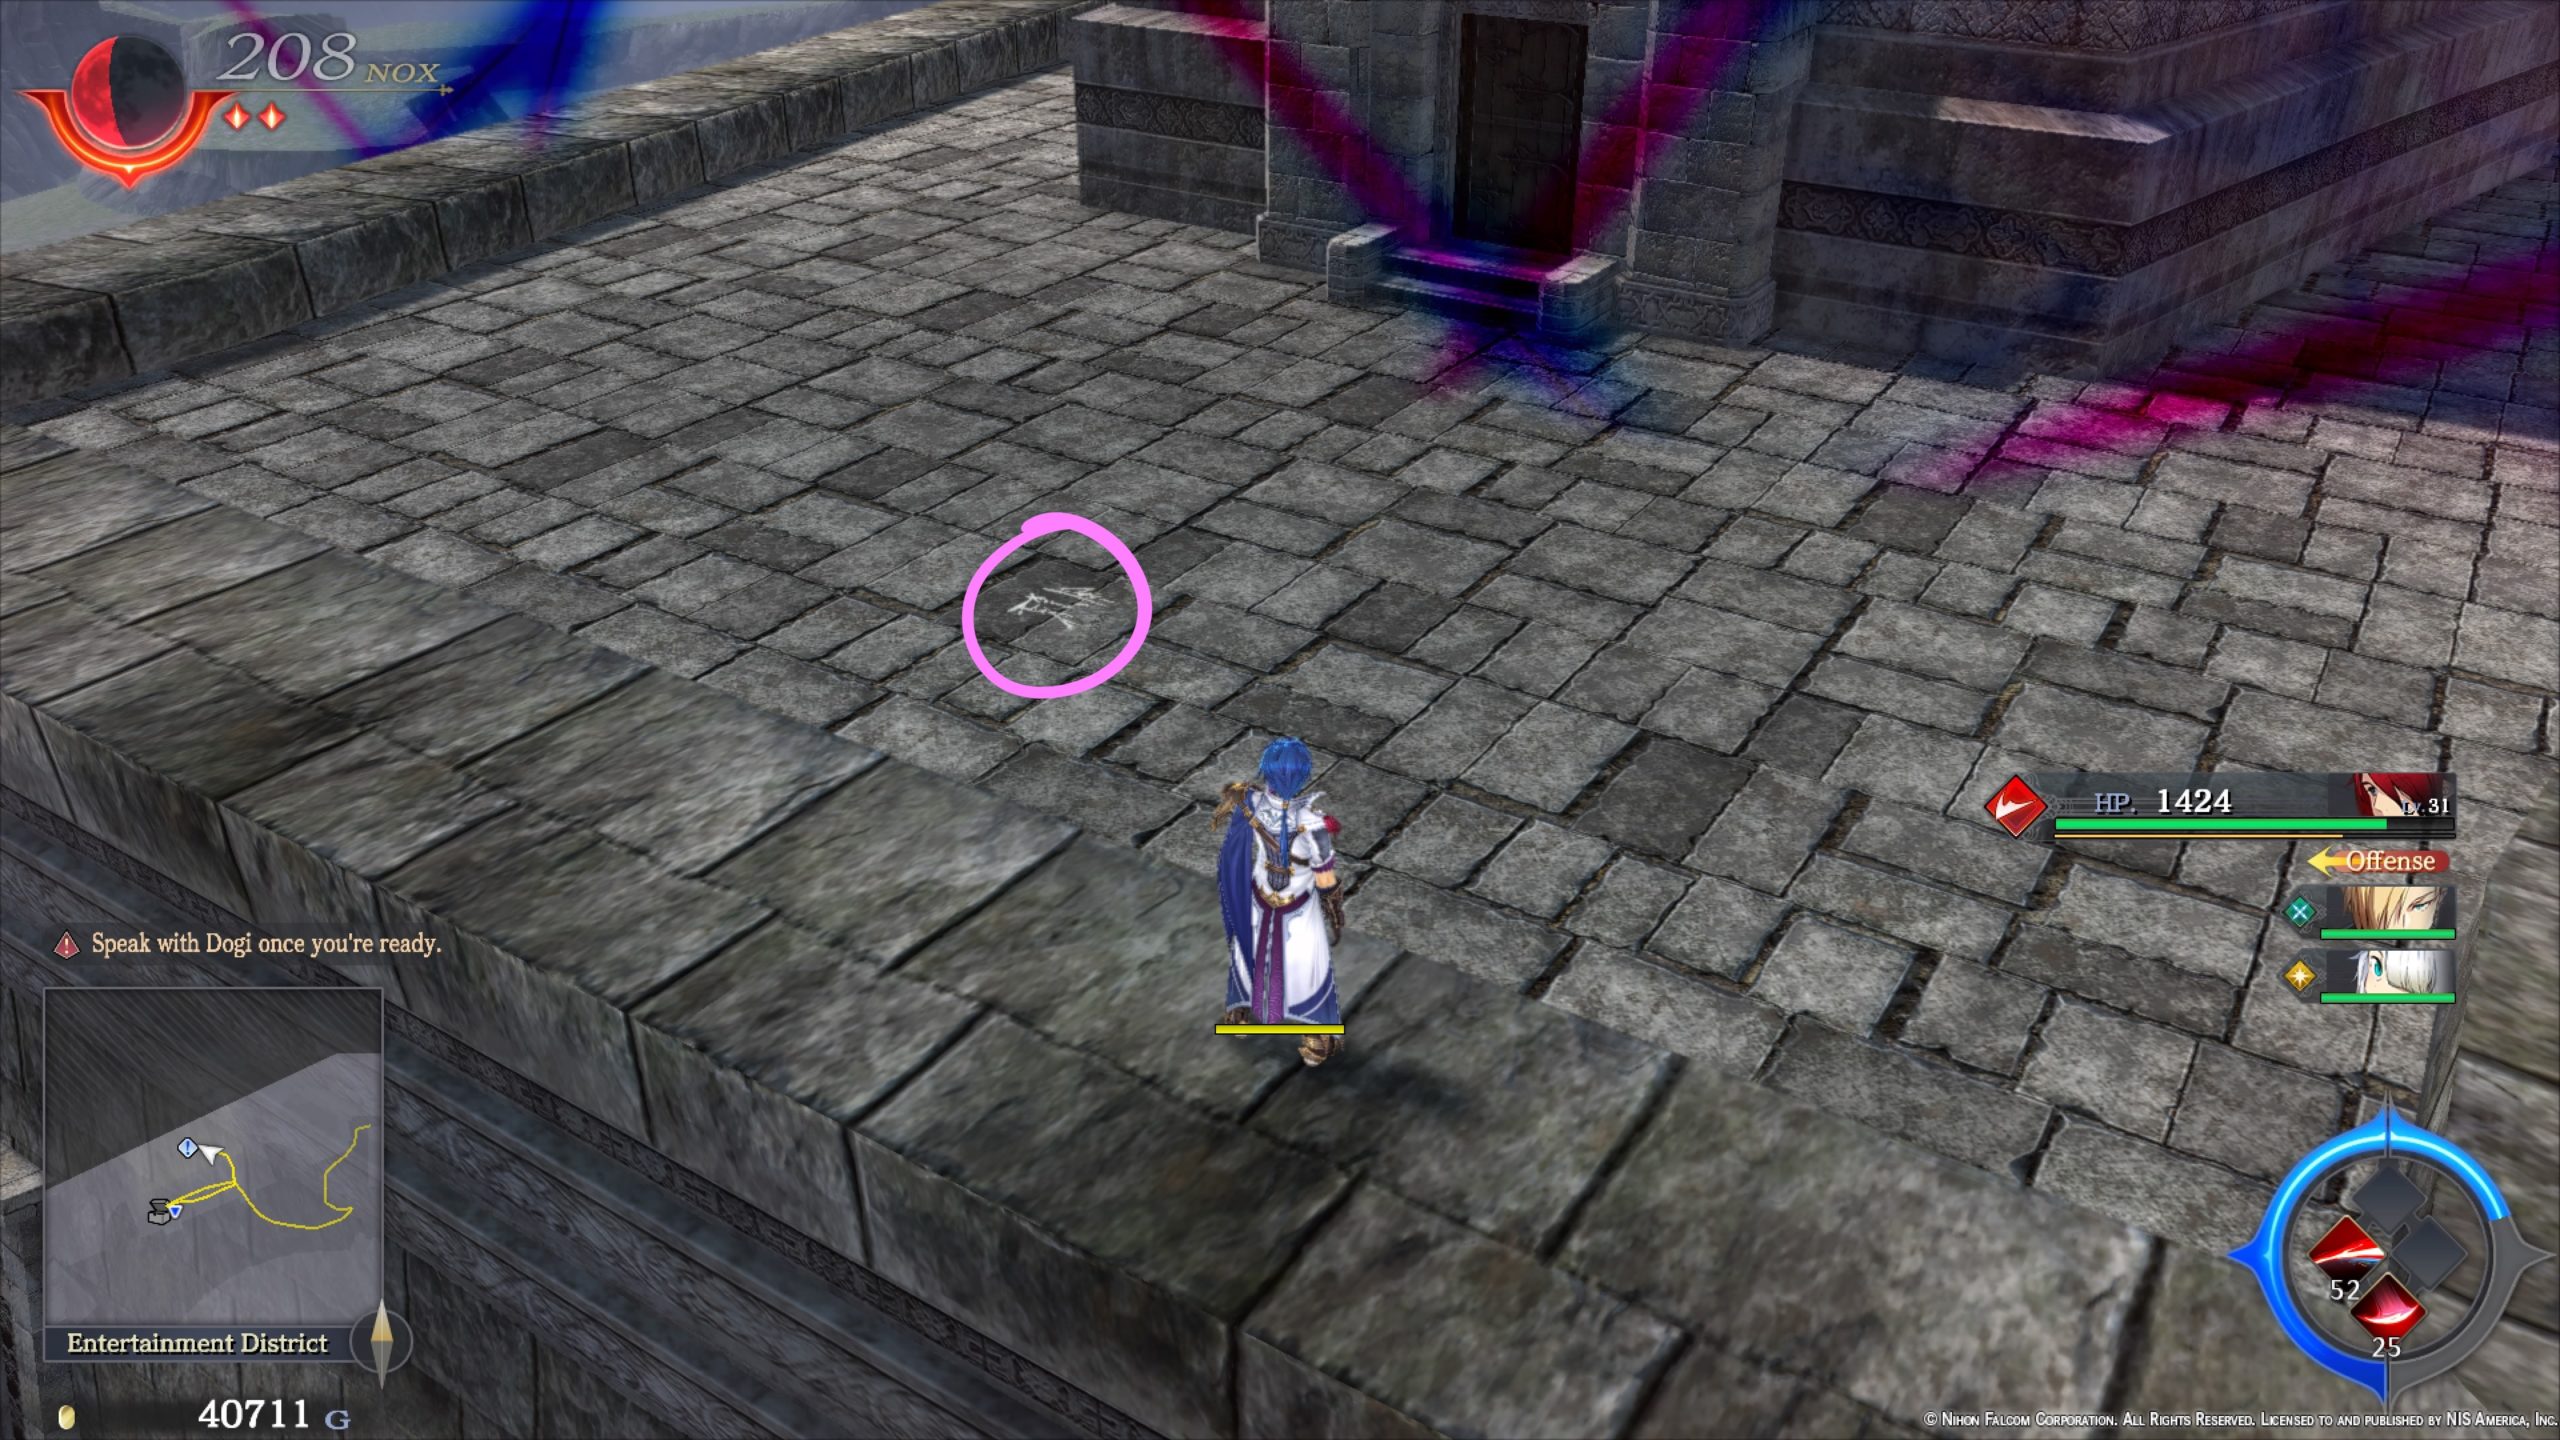
Graffiti

- On a wall in the southeastern part of the area

- On the wall of the Coliseum near the northern entrance
- Inside the Coliseum on the northern side near the special seating
- On the ground at the top of the tower along the northwestern part of the area
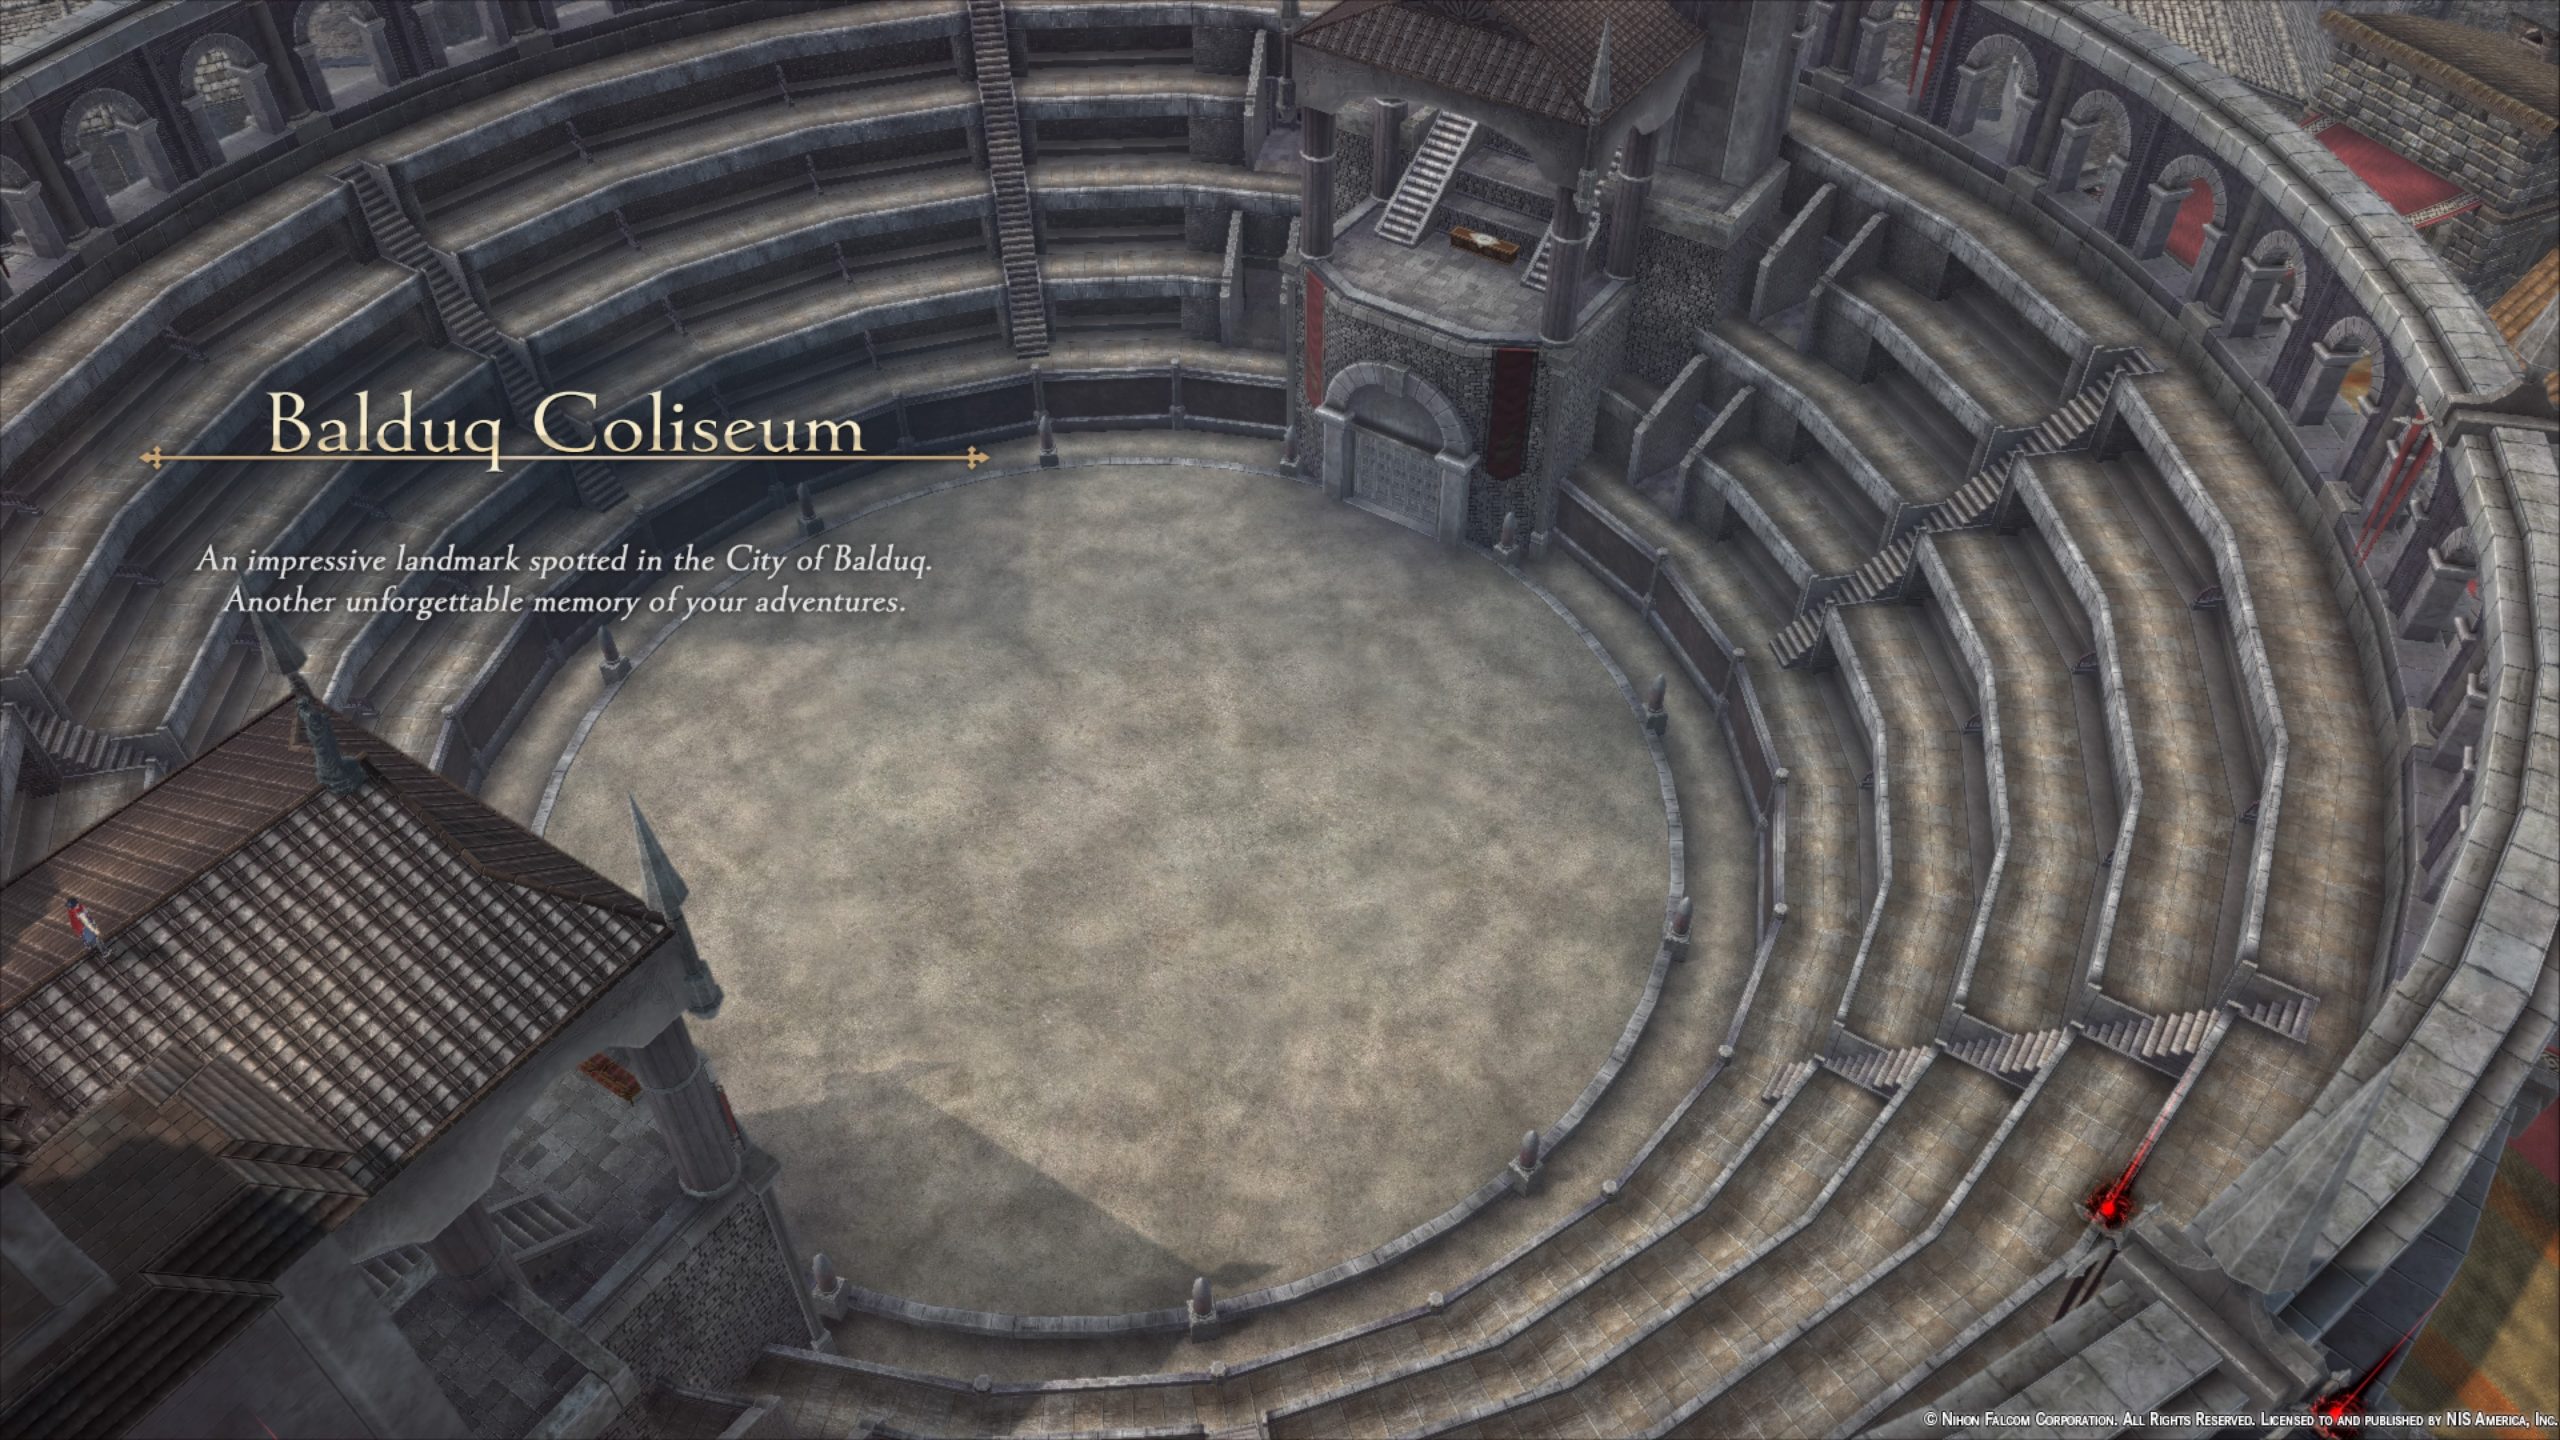
Landmarks
- Balduq Coliseum
Quests
- Scam on the Lam
- Obtained: Speak with the Coliseum Staff in the Entertainment District during Chapter 5
- Objective: Find the con artist gambler
- From the Coliseum Staff, head north and take a right down the first alley to locate the Suspicious Man speaking with a Middle-Aged Person. After the cutscene, chase the Suspicious Man and catch him. As soon as you get close enough, a cutscene will trigger and the quest will complete.
- Reward: 4000 Gold
Shops

- Lillet’s Gift Shop
- Jessica’s Brewery
Treasure Chests
- Cheese x5
- Red Cheese x2
- 2000 Gold
- Emollient x2
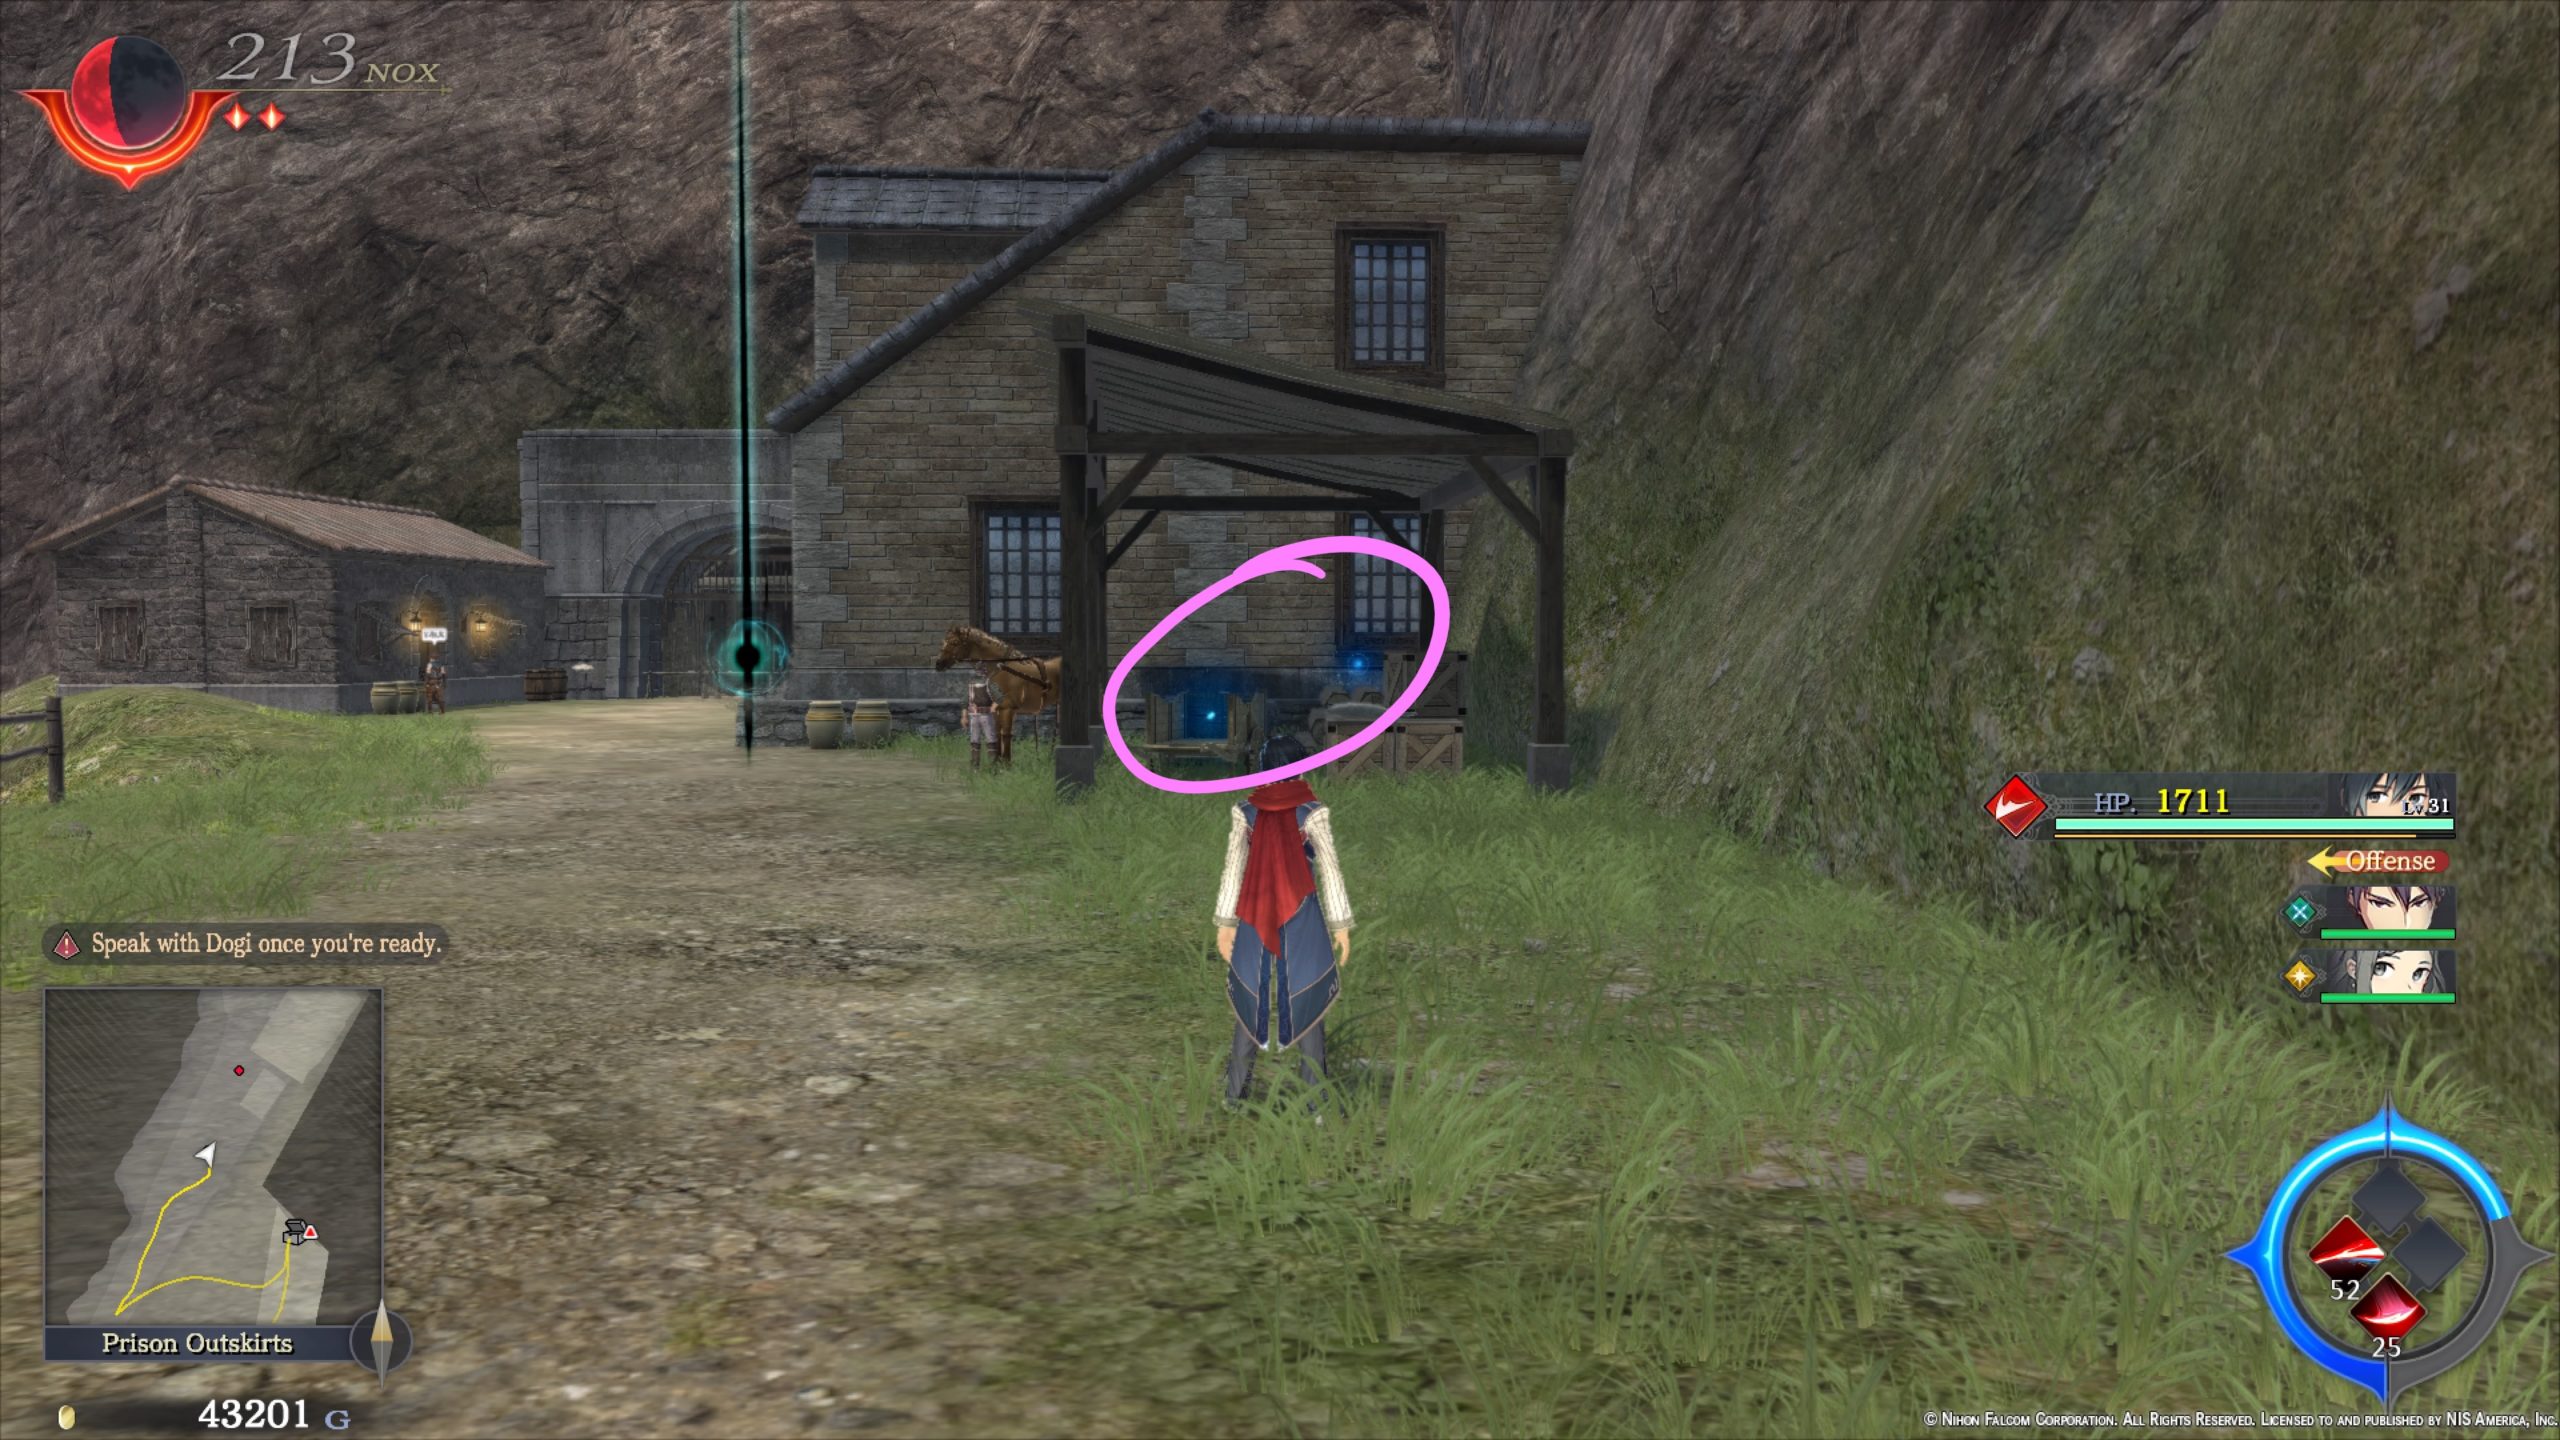
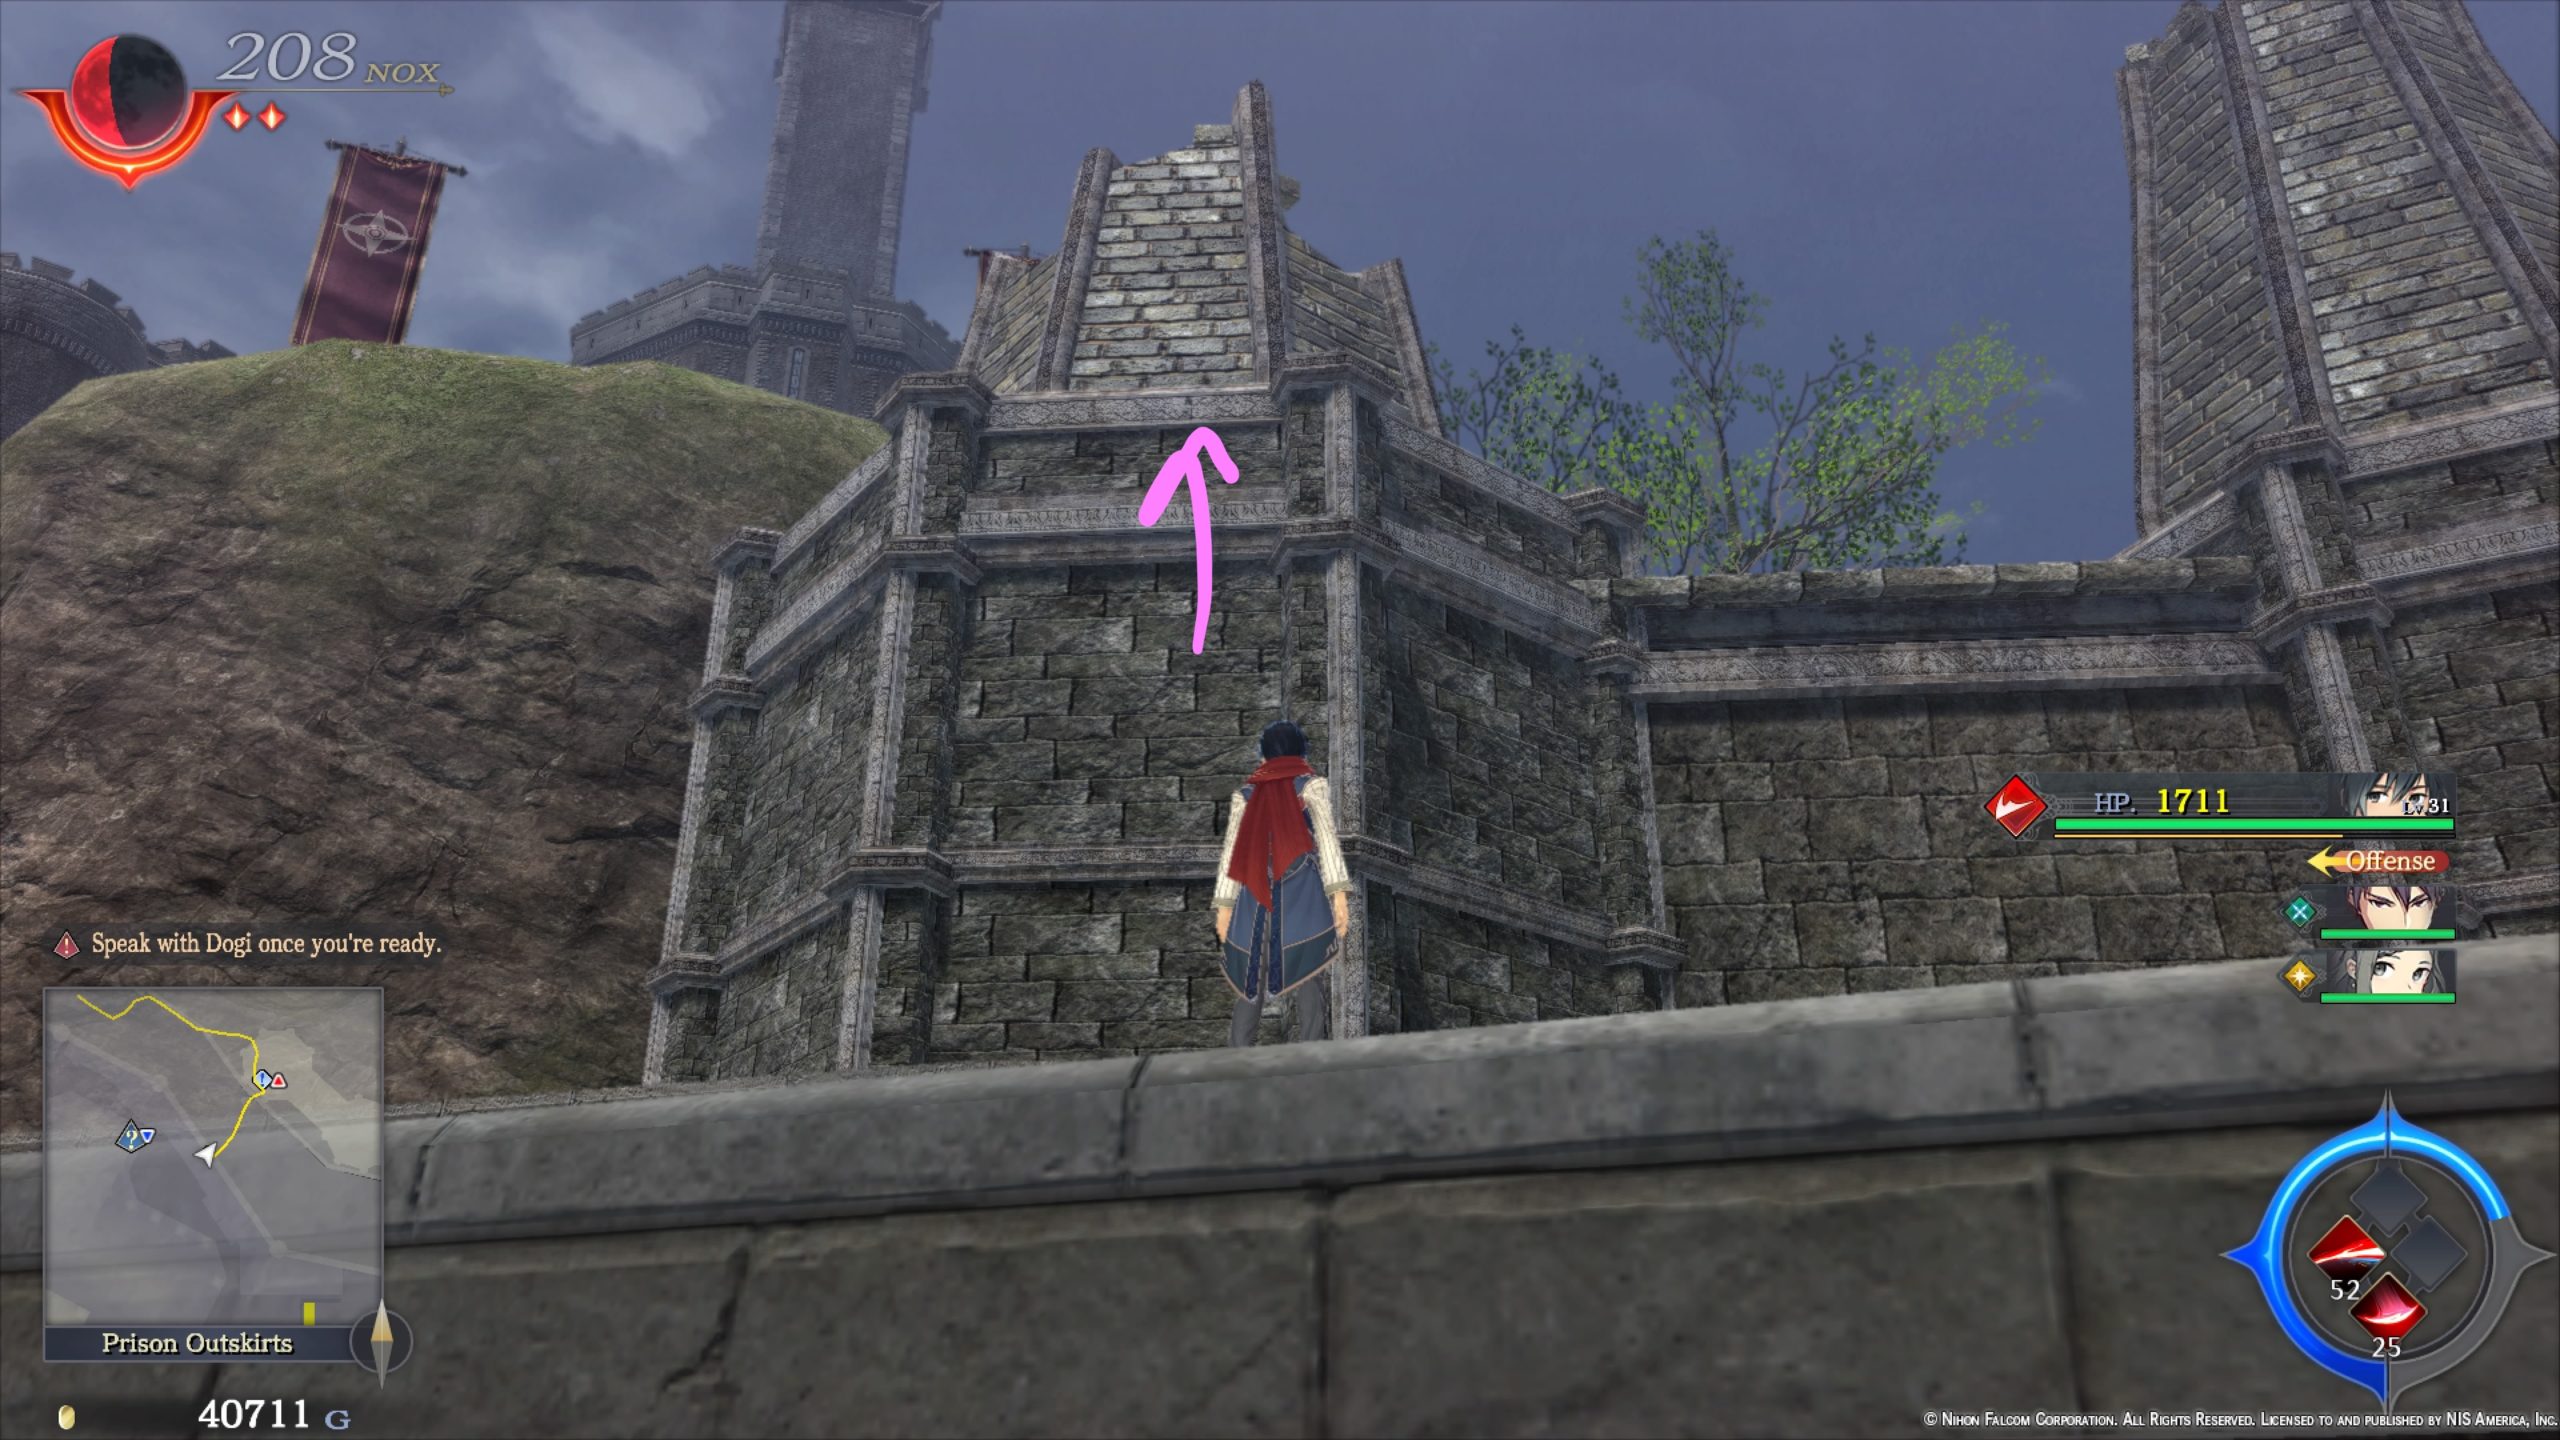
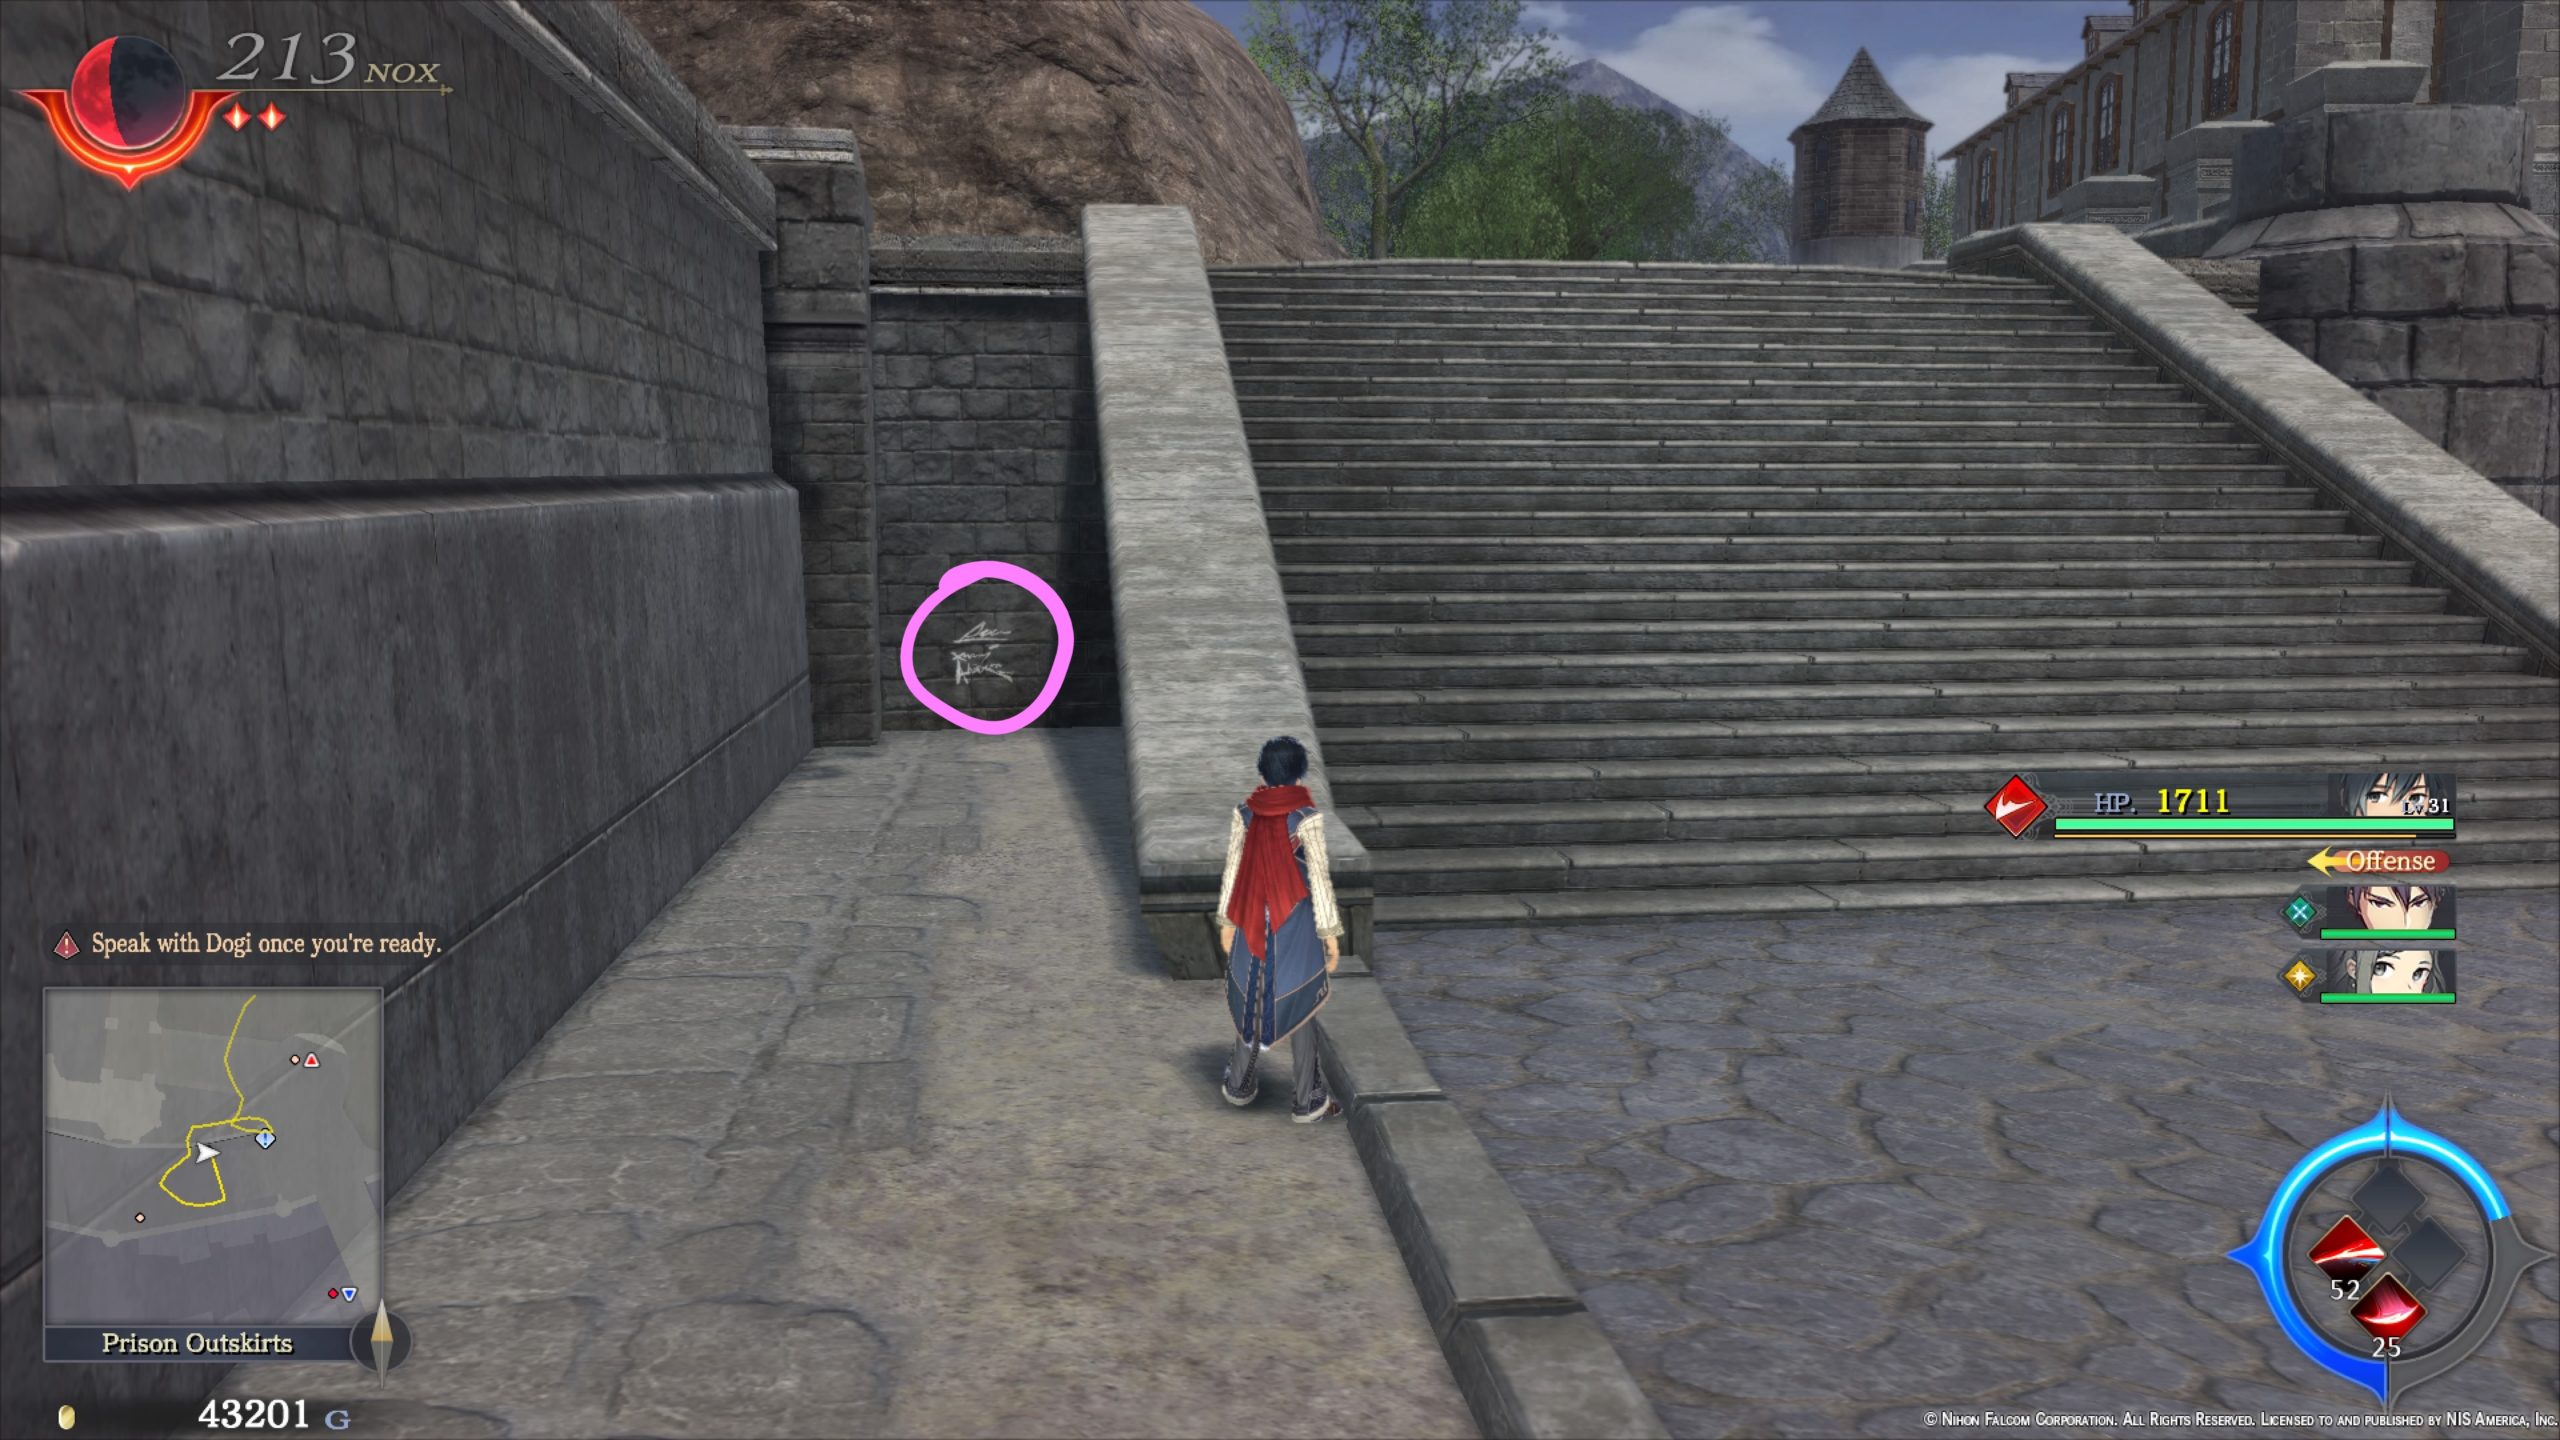
Prison Outskirts
Azure Petals

- On the rock cliff near the Prison Entrance Gate
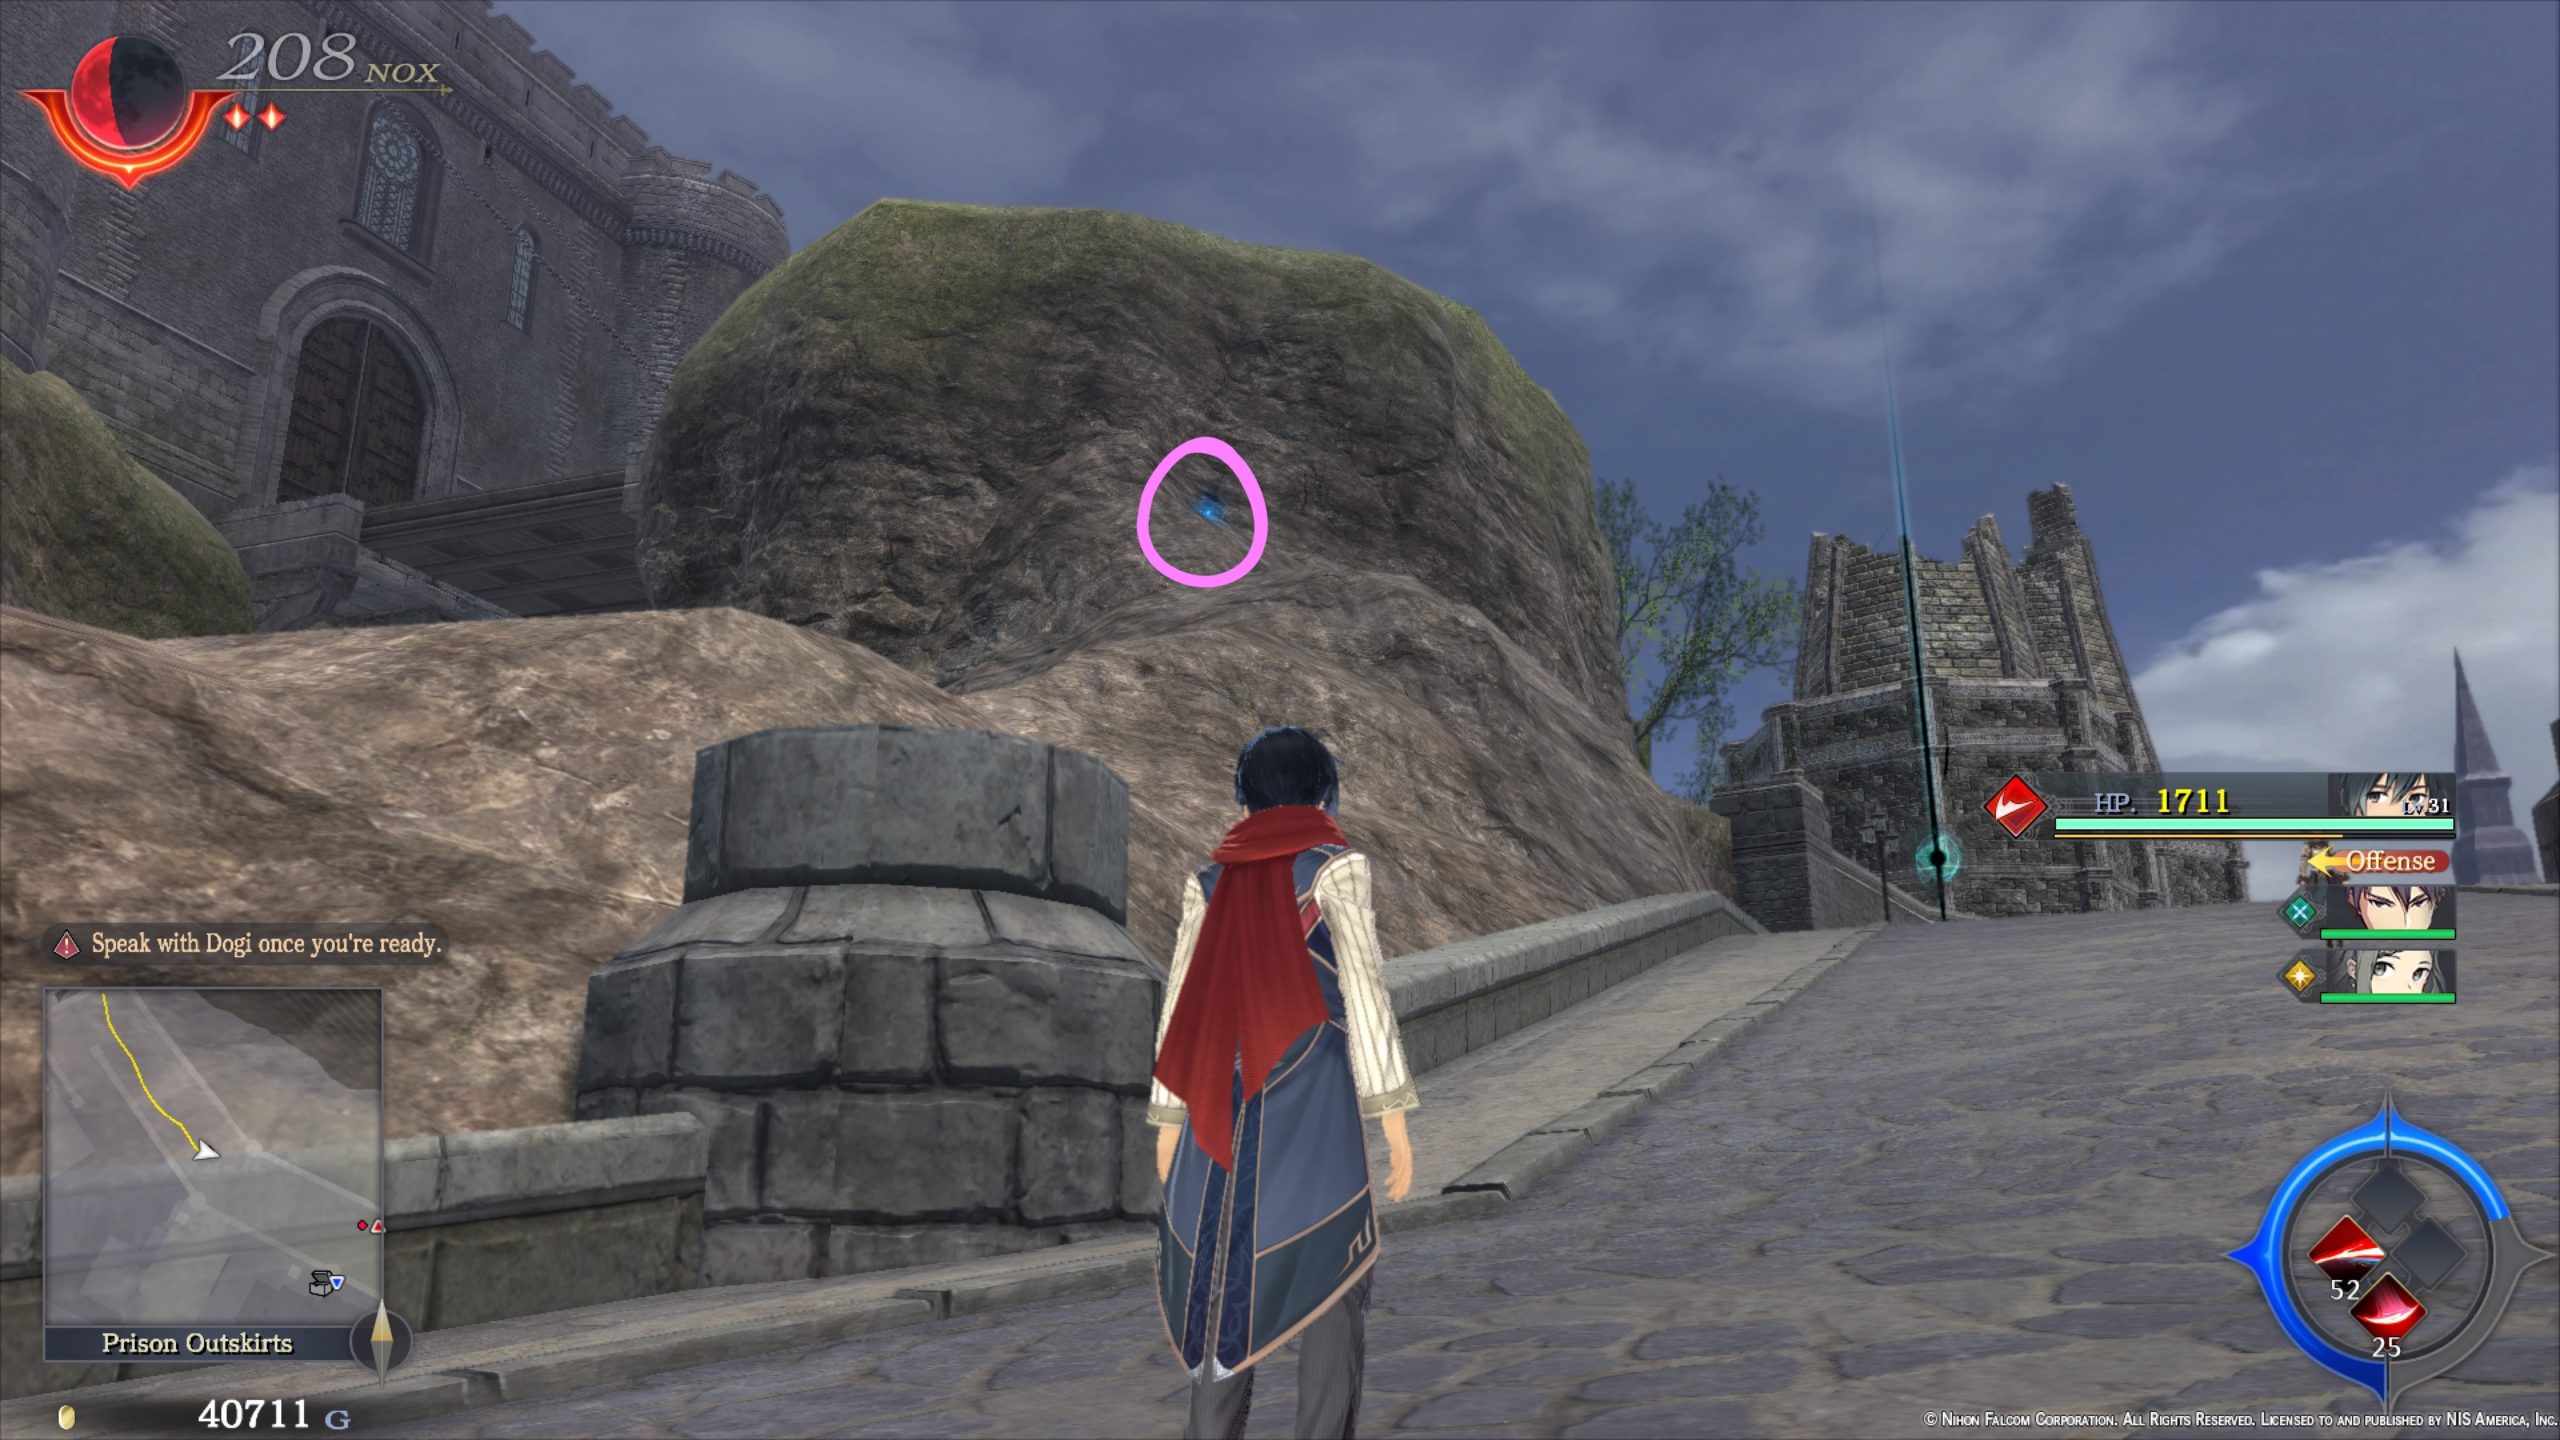
- In the top of a broken tower near the Prison Entrance Gate

- On top of the rock cliff in the central part of the area
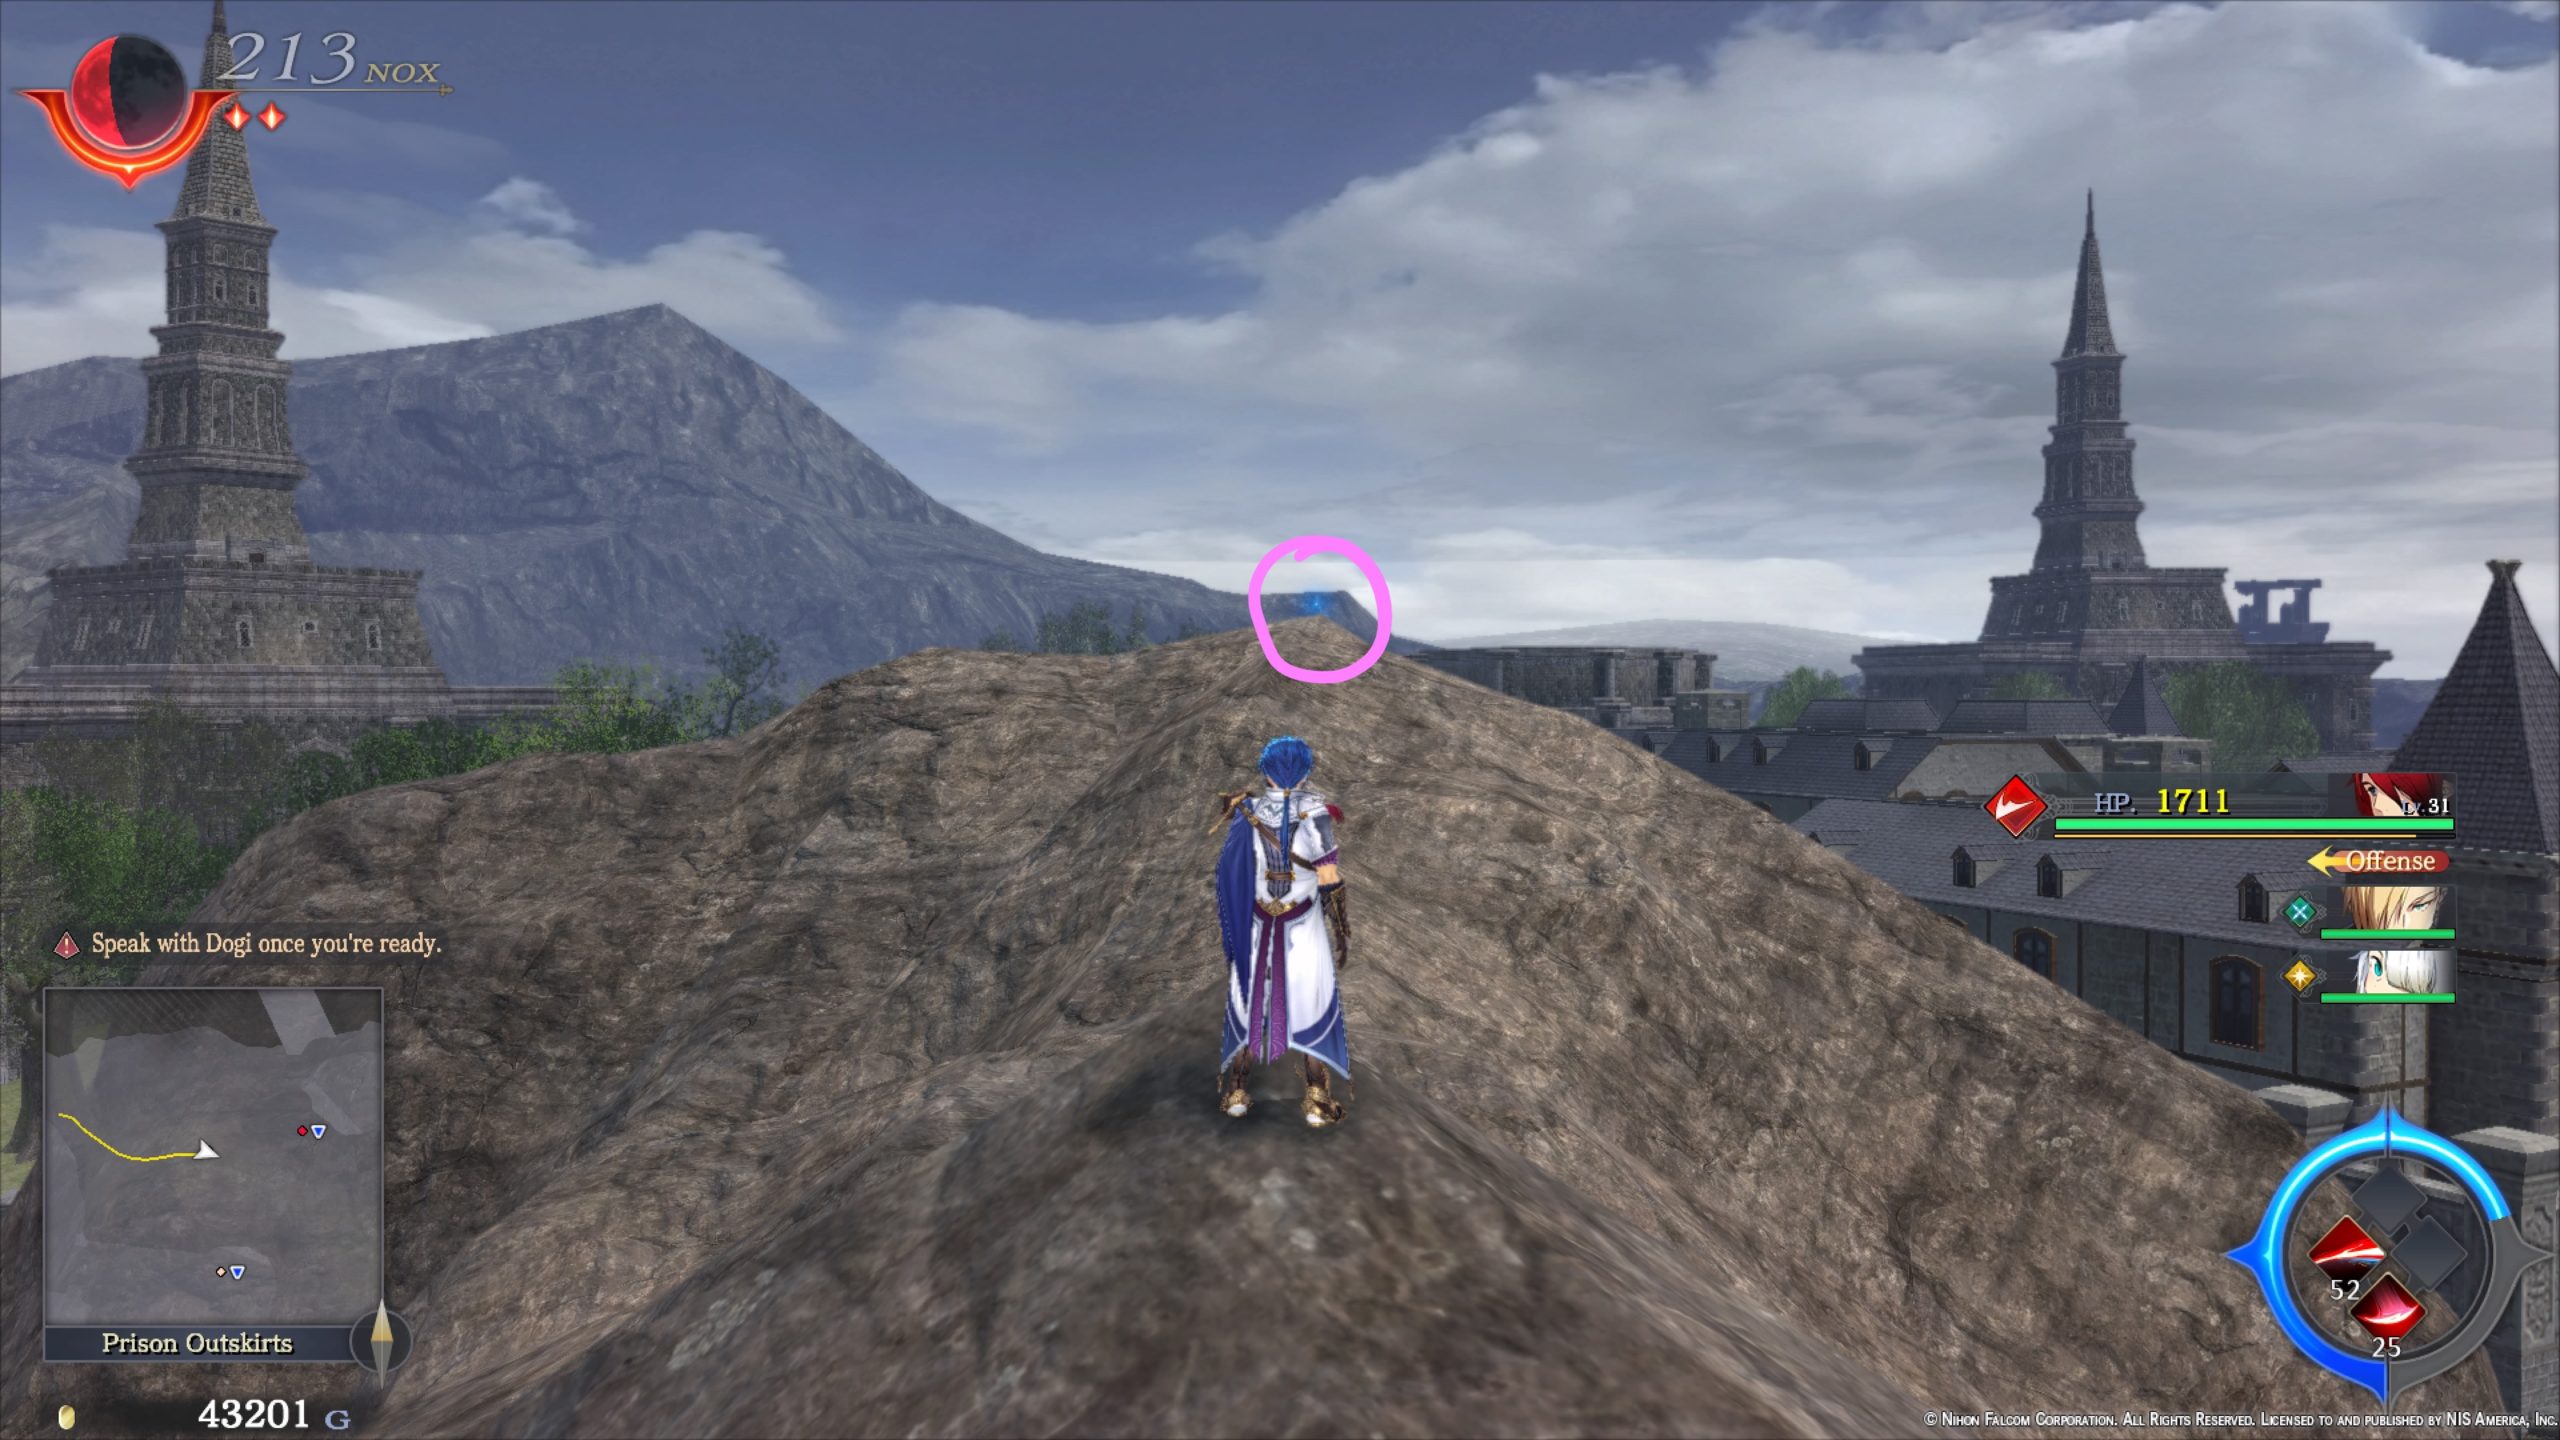
- At the base of a tree near the steps leading up to the Prison Entrance Gate
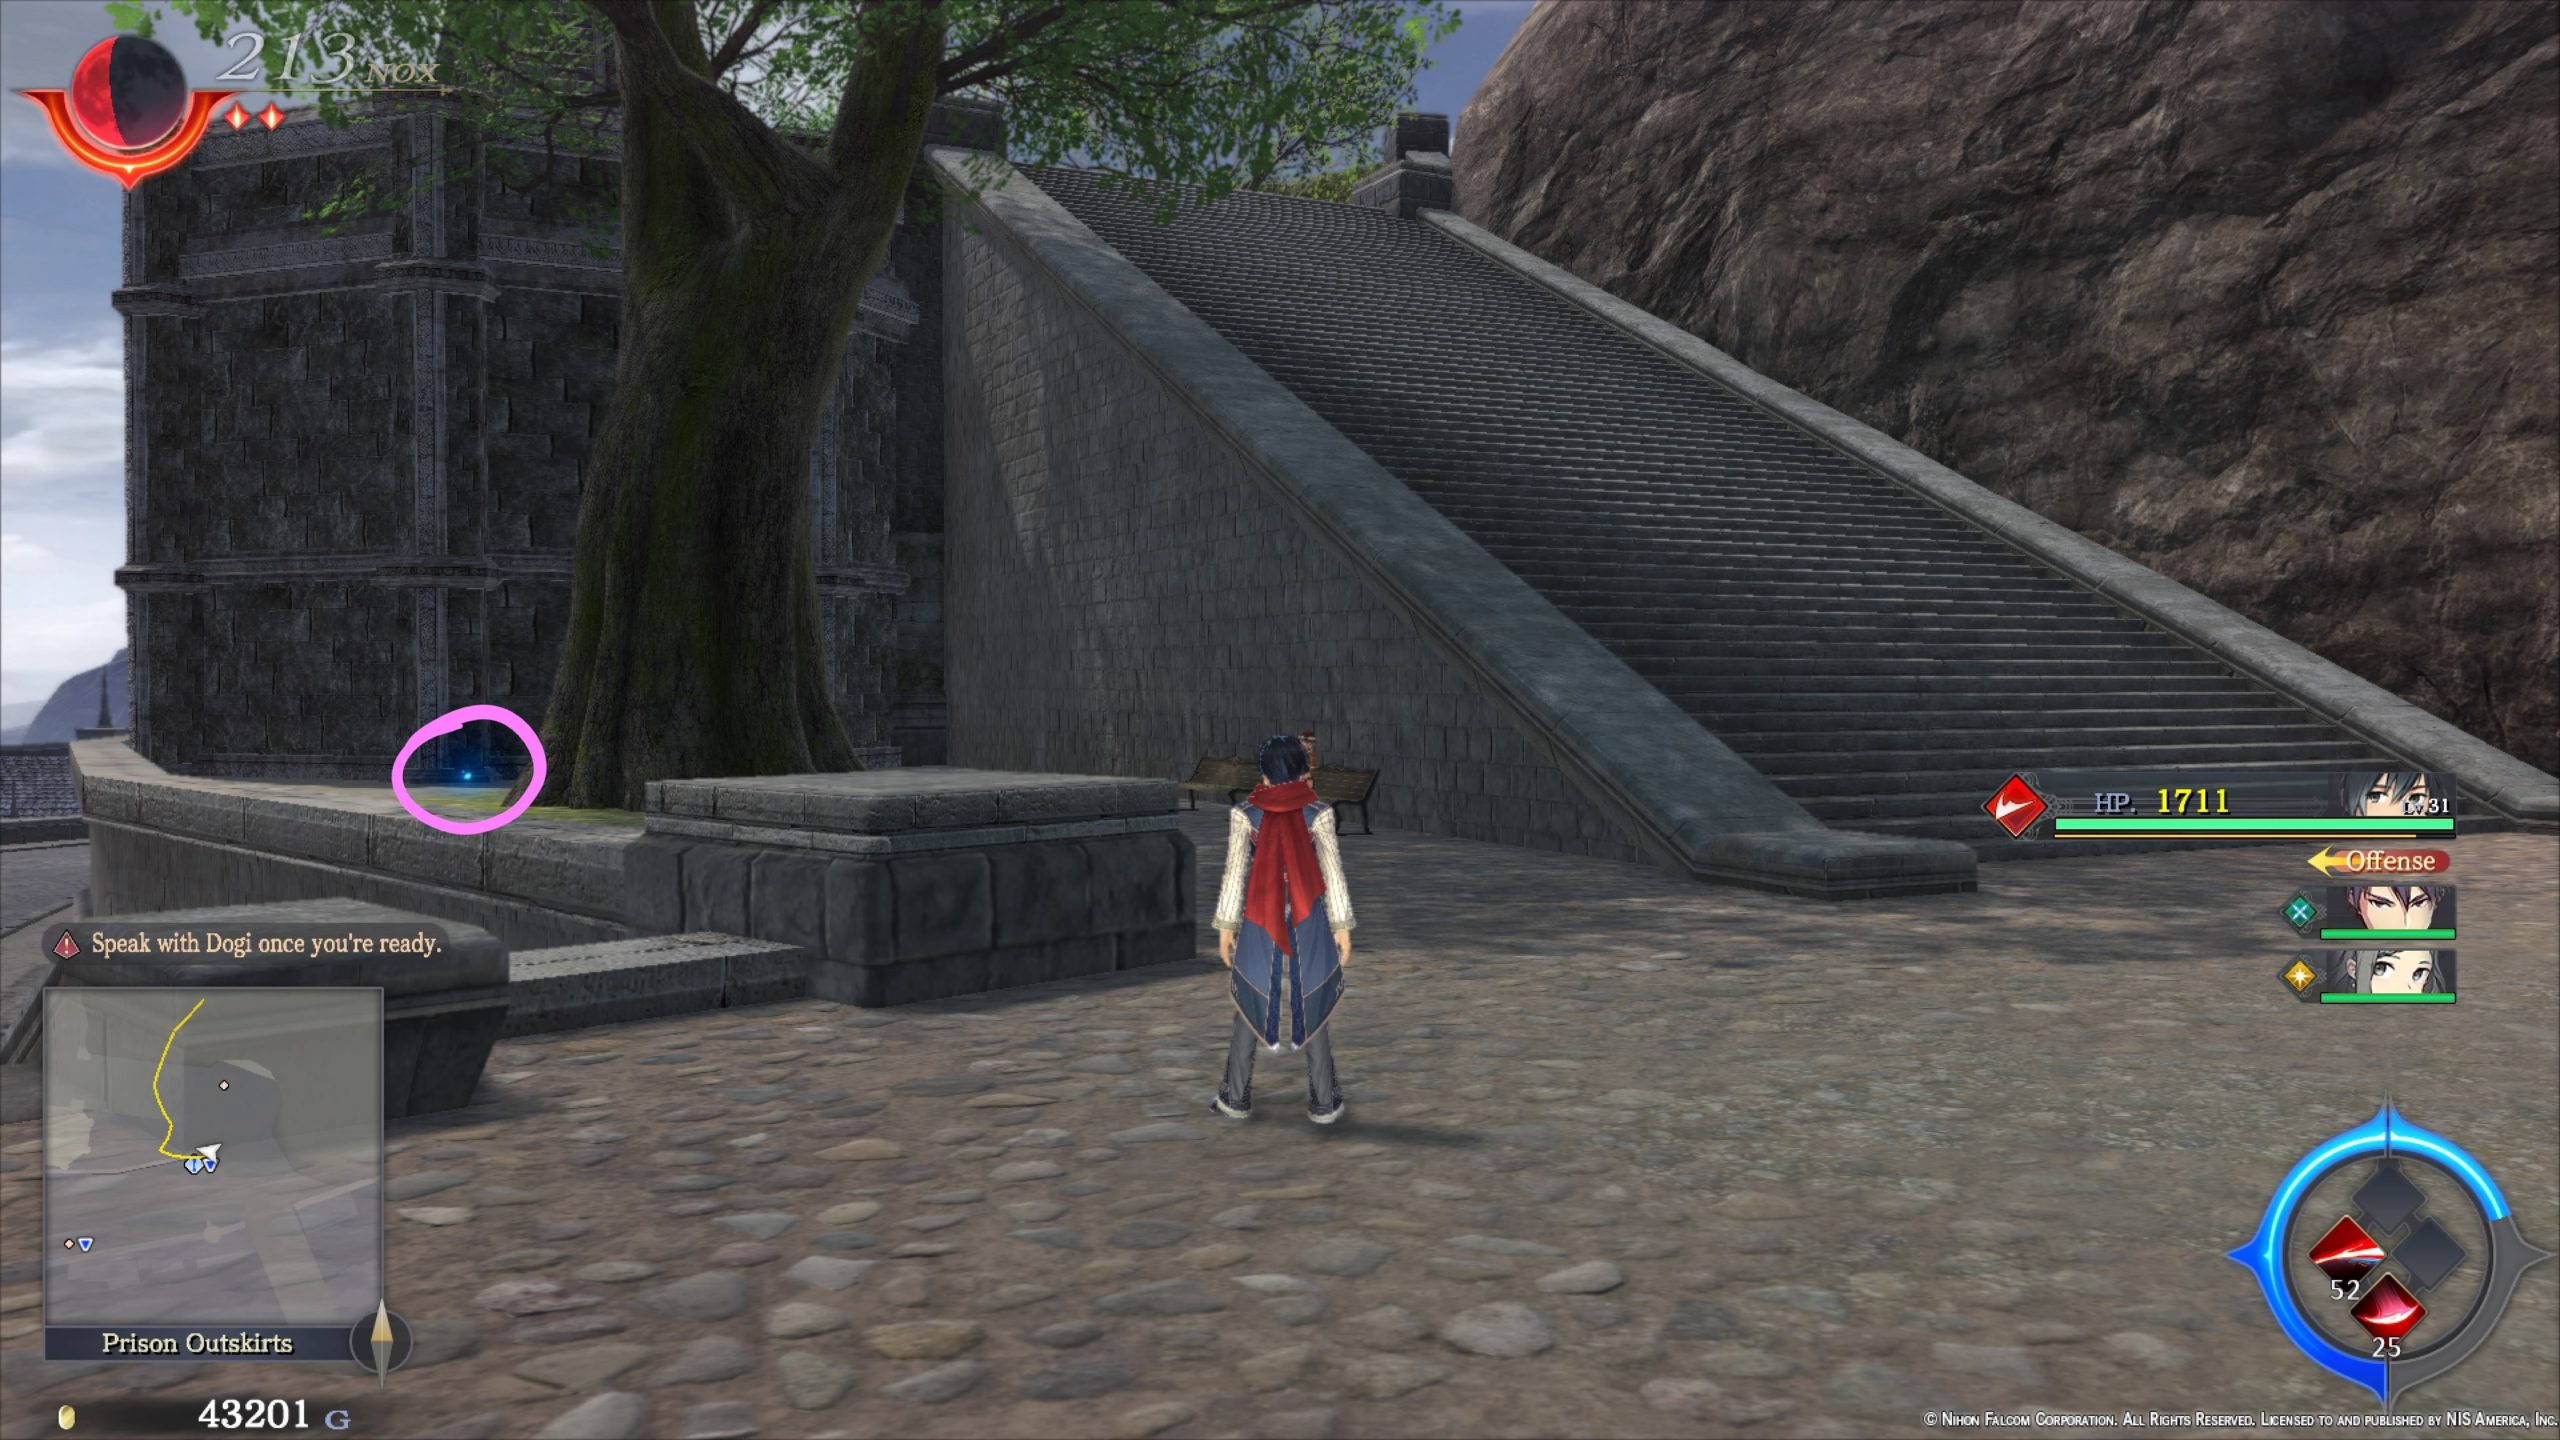
- On a tower in the northern part of the area directly west of La Petit Fleuriste

- On the top of a doorframe in the northern part of the area
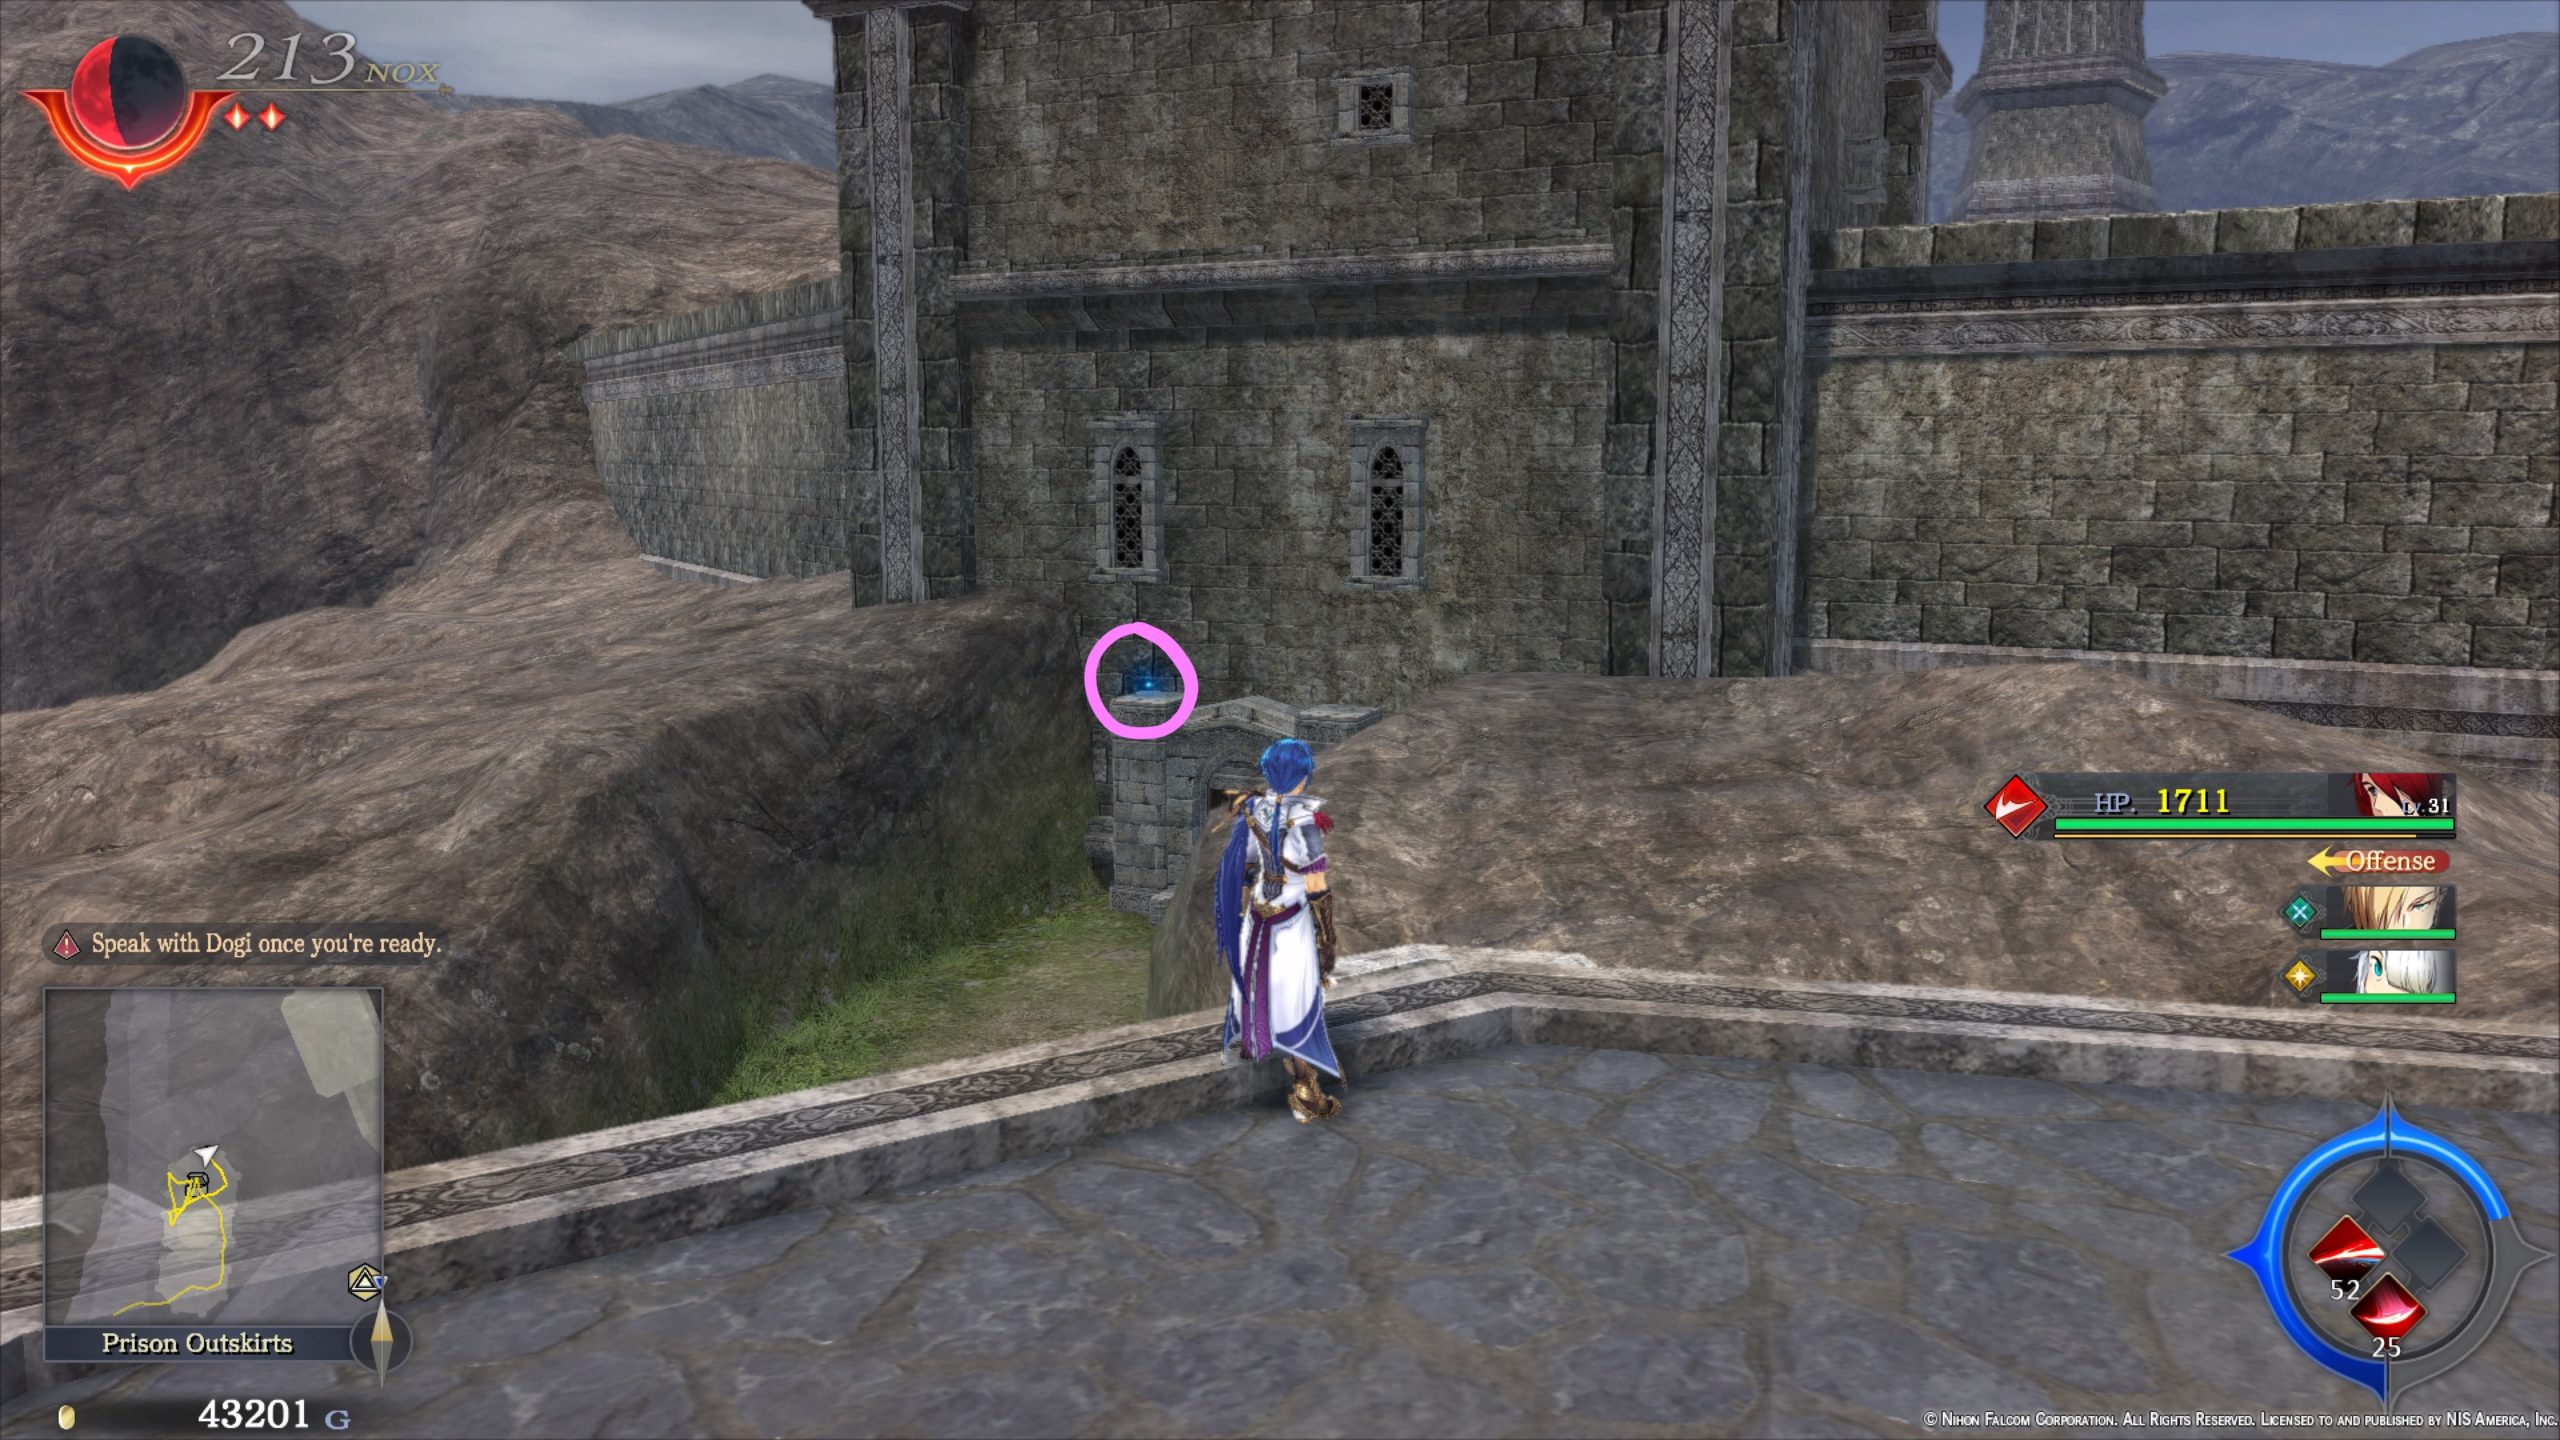
- 2 are under a shed in the very northern part of the area
- On the archway leading into the rock tunnel in the central part of the area

- On the top of a tower east of the Coliseum

Graffiti
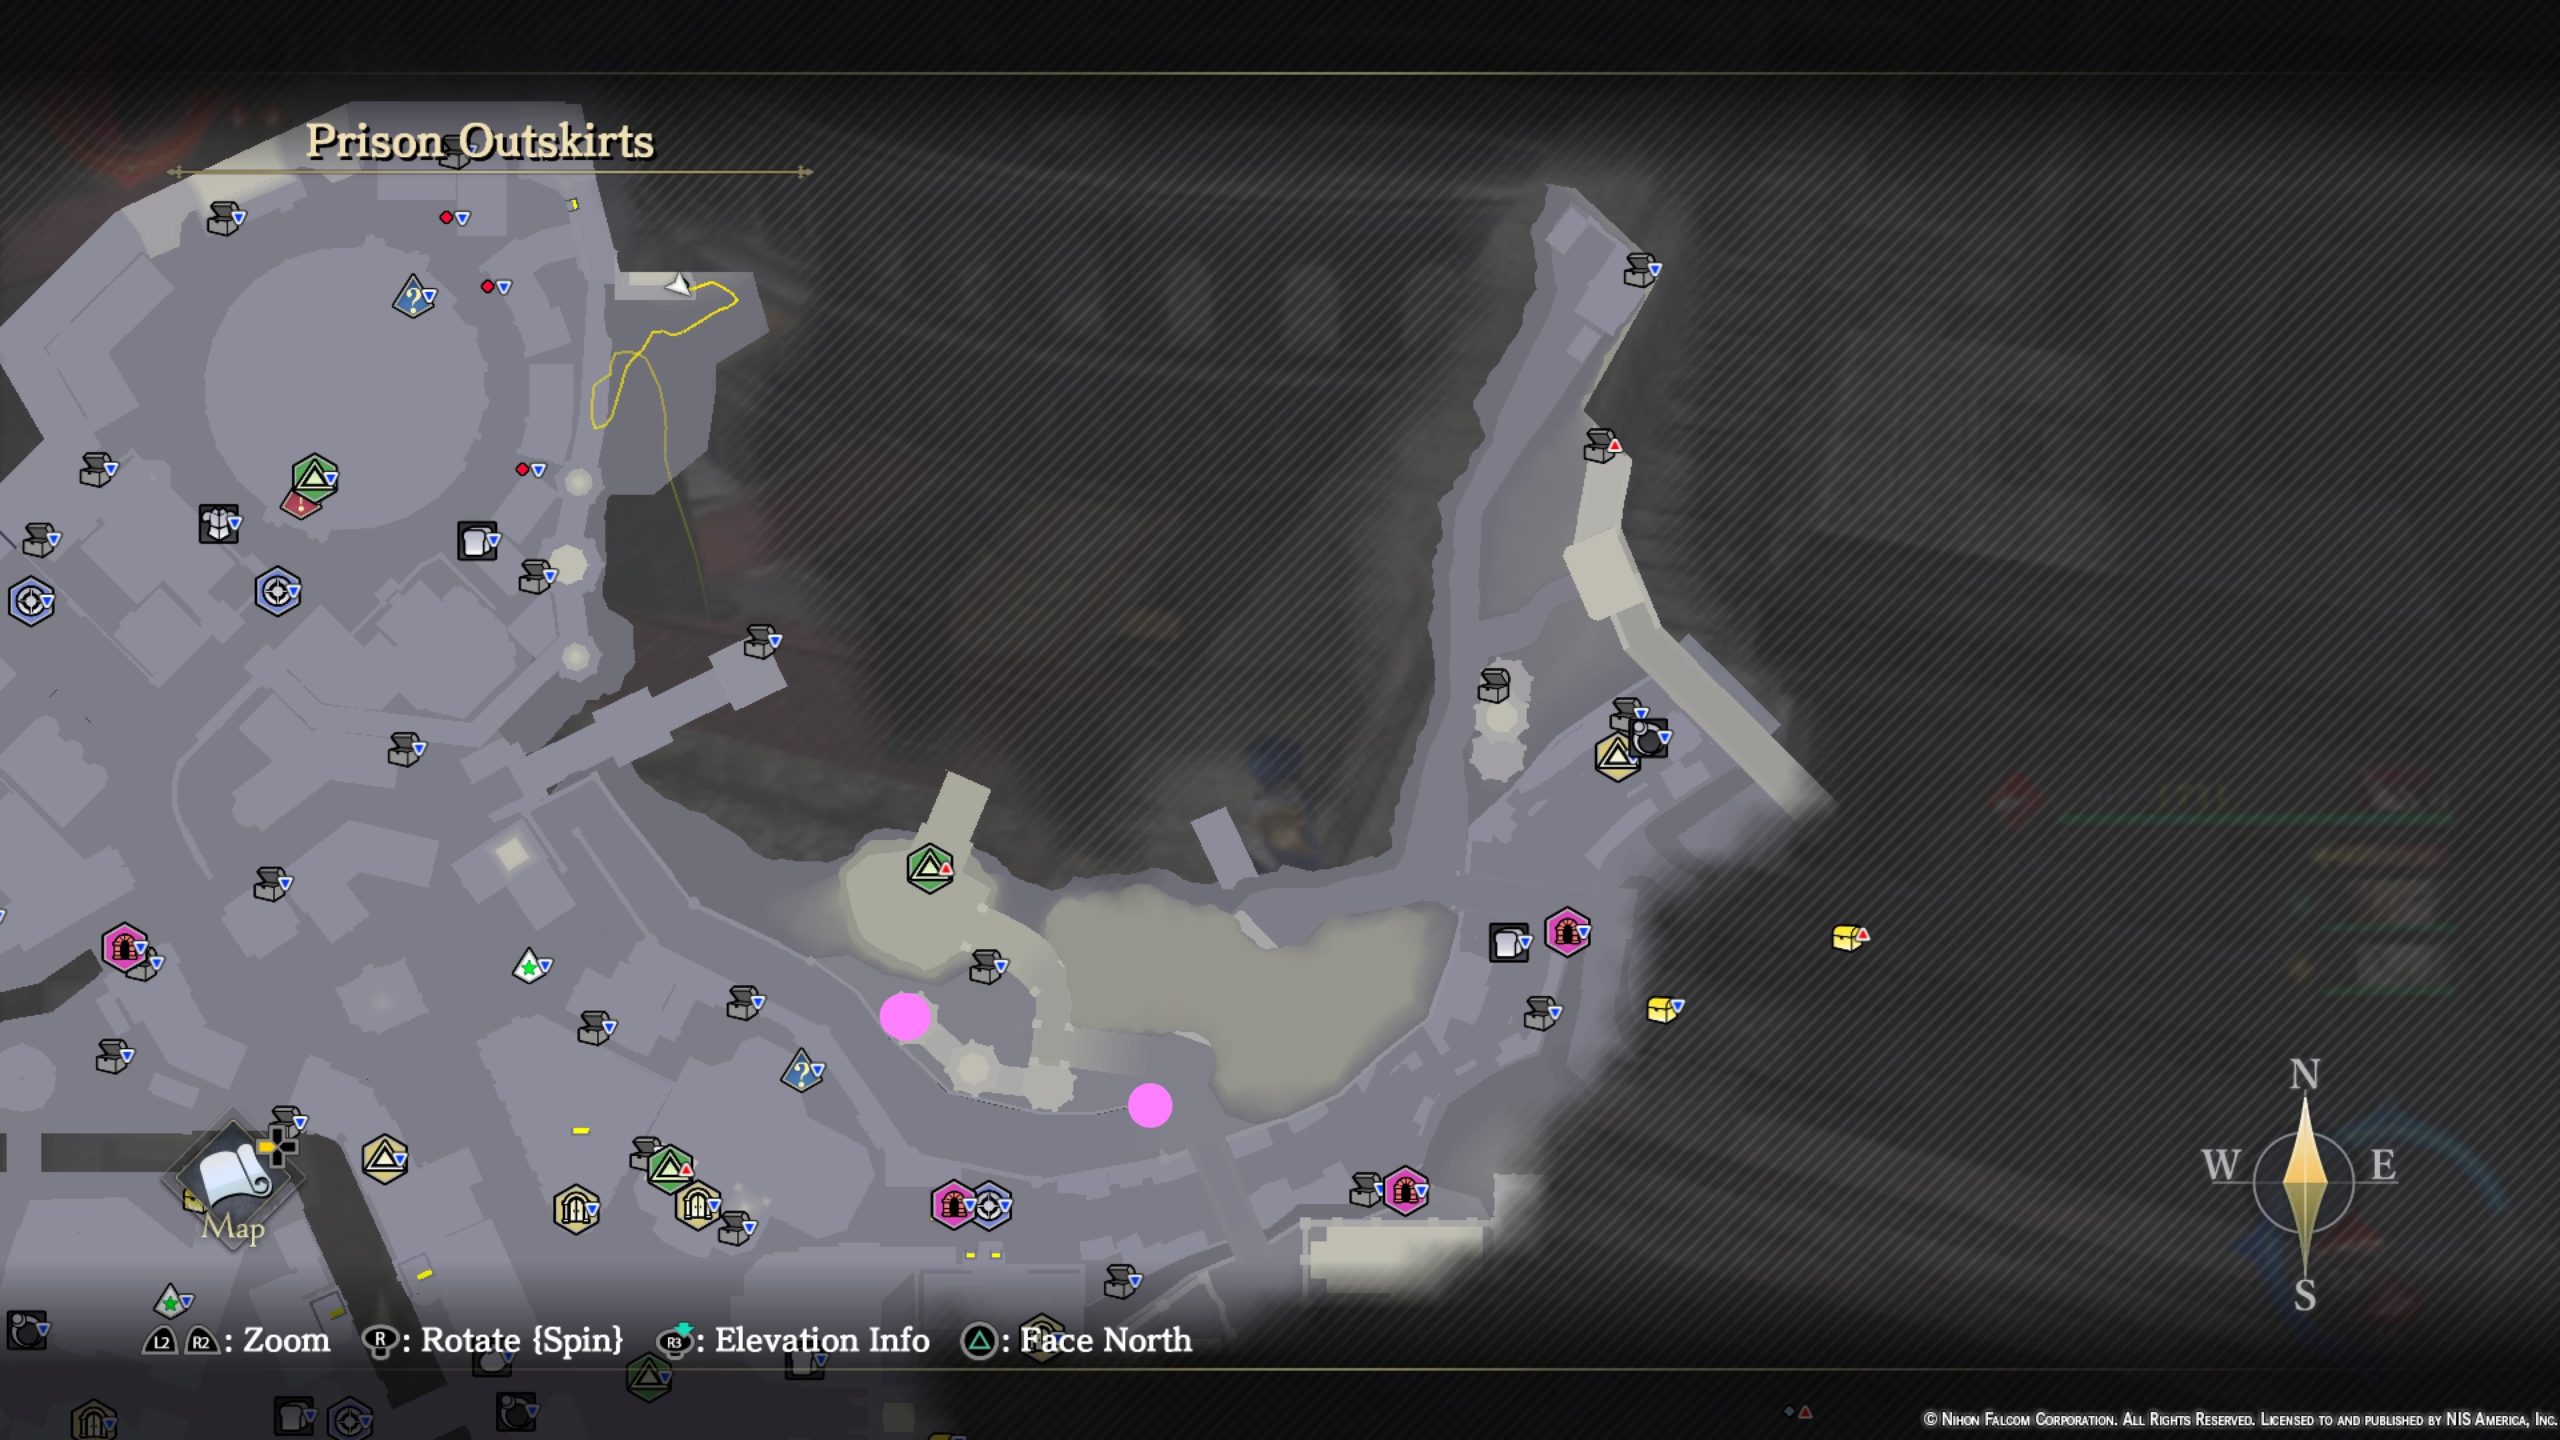
- By the top of a tower near the Prison Entrance Gate
- On a wall at the base of the stairs leading up to the Prison Entrance Gate
Landmarks

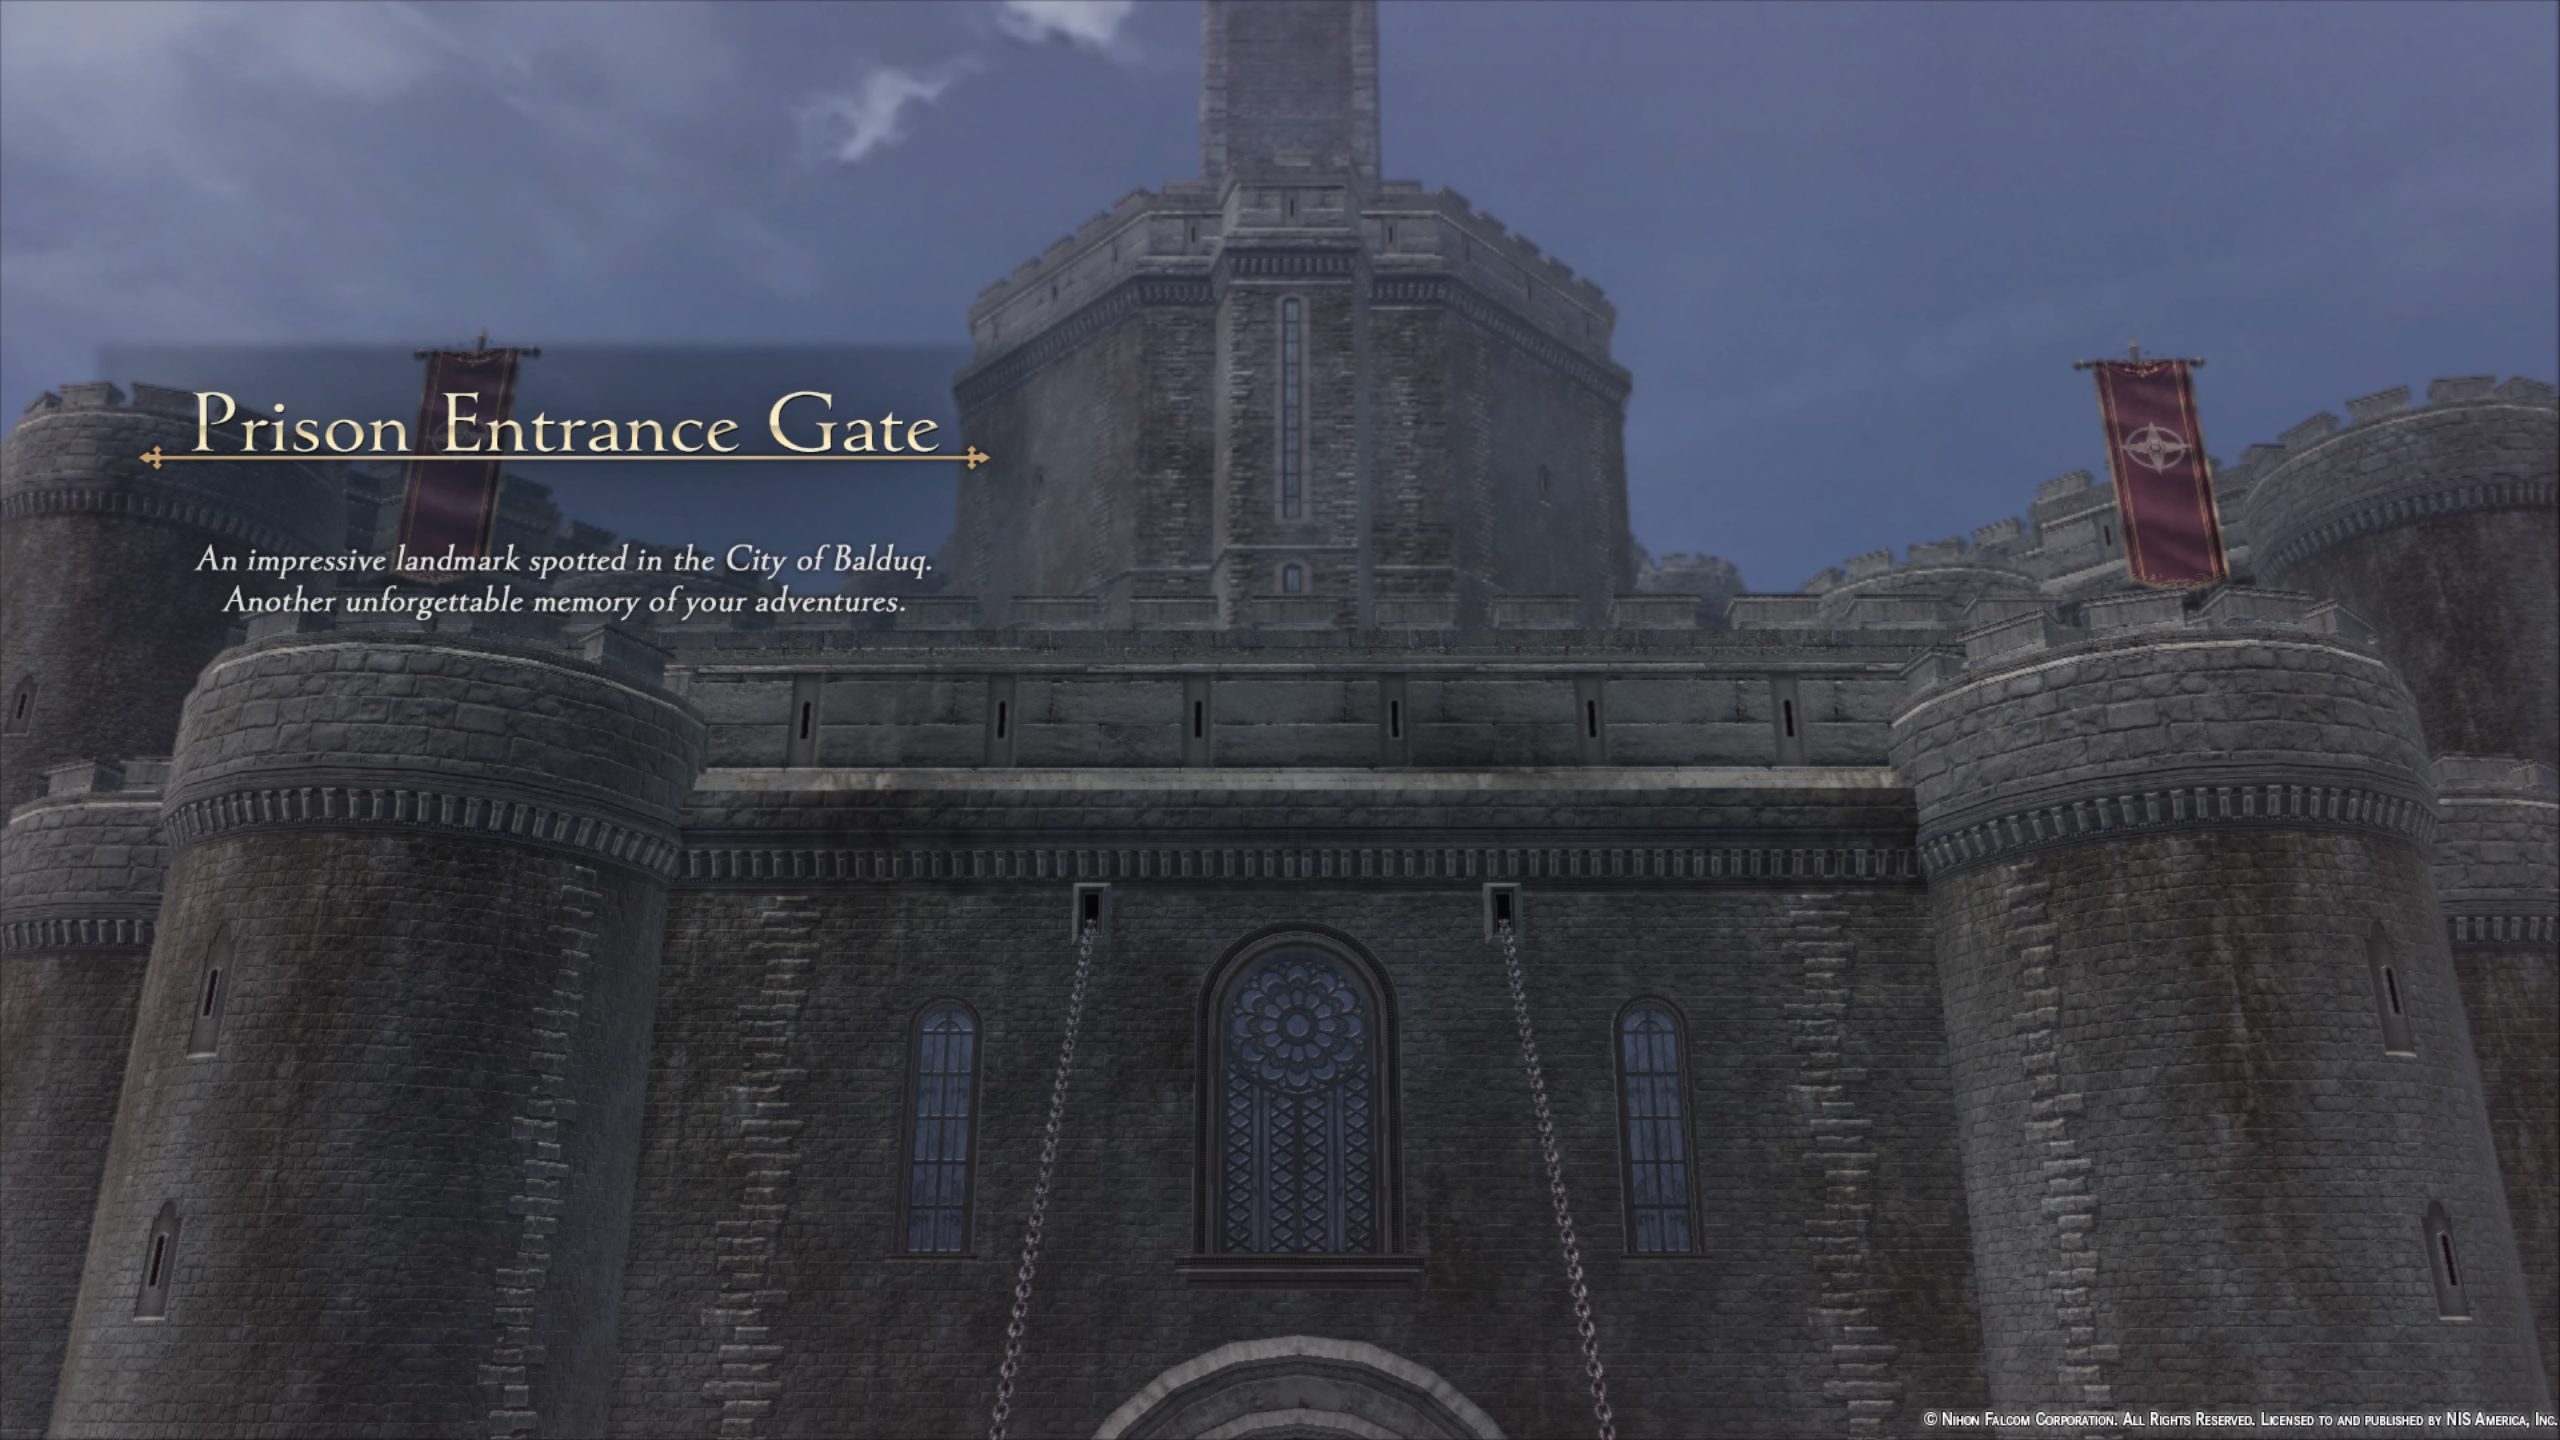
- Prison Entrance Gate
Recipe
- Potage Recipe
- Speak with Worker Witham in the northeastern part of the Prison Outskirts, which is accessible after defeating the second Grimwald Nox.
Treasure Chests

- Strength Elixir
- 2000 Gold
- Mushroom x5
- Defense Elixir x2
- Bitter Remedy
Hieroglyph Commandery
Miscellaneous
After obtaining the graffiti in the Entertainment District, head to the southwestern part of Hieroglyph Commandery to find a large tree near a knight outpost west of the main gate. Search behind the tree to find 4000 Gold.
Decrepit Underpass
Materials
- Chamomile
- Copper Ore
- Glossy Leaf
- Small Leaf
- Spirit Lumber
Monsters
- Moorgarth
- Gloggury
Treasure Chests
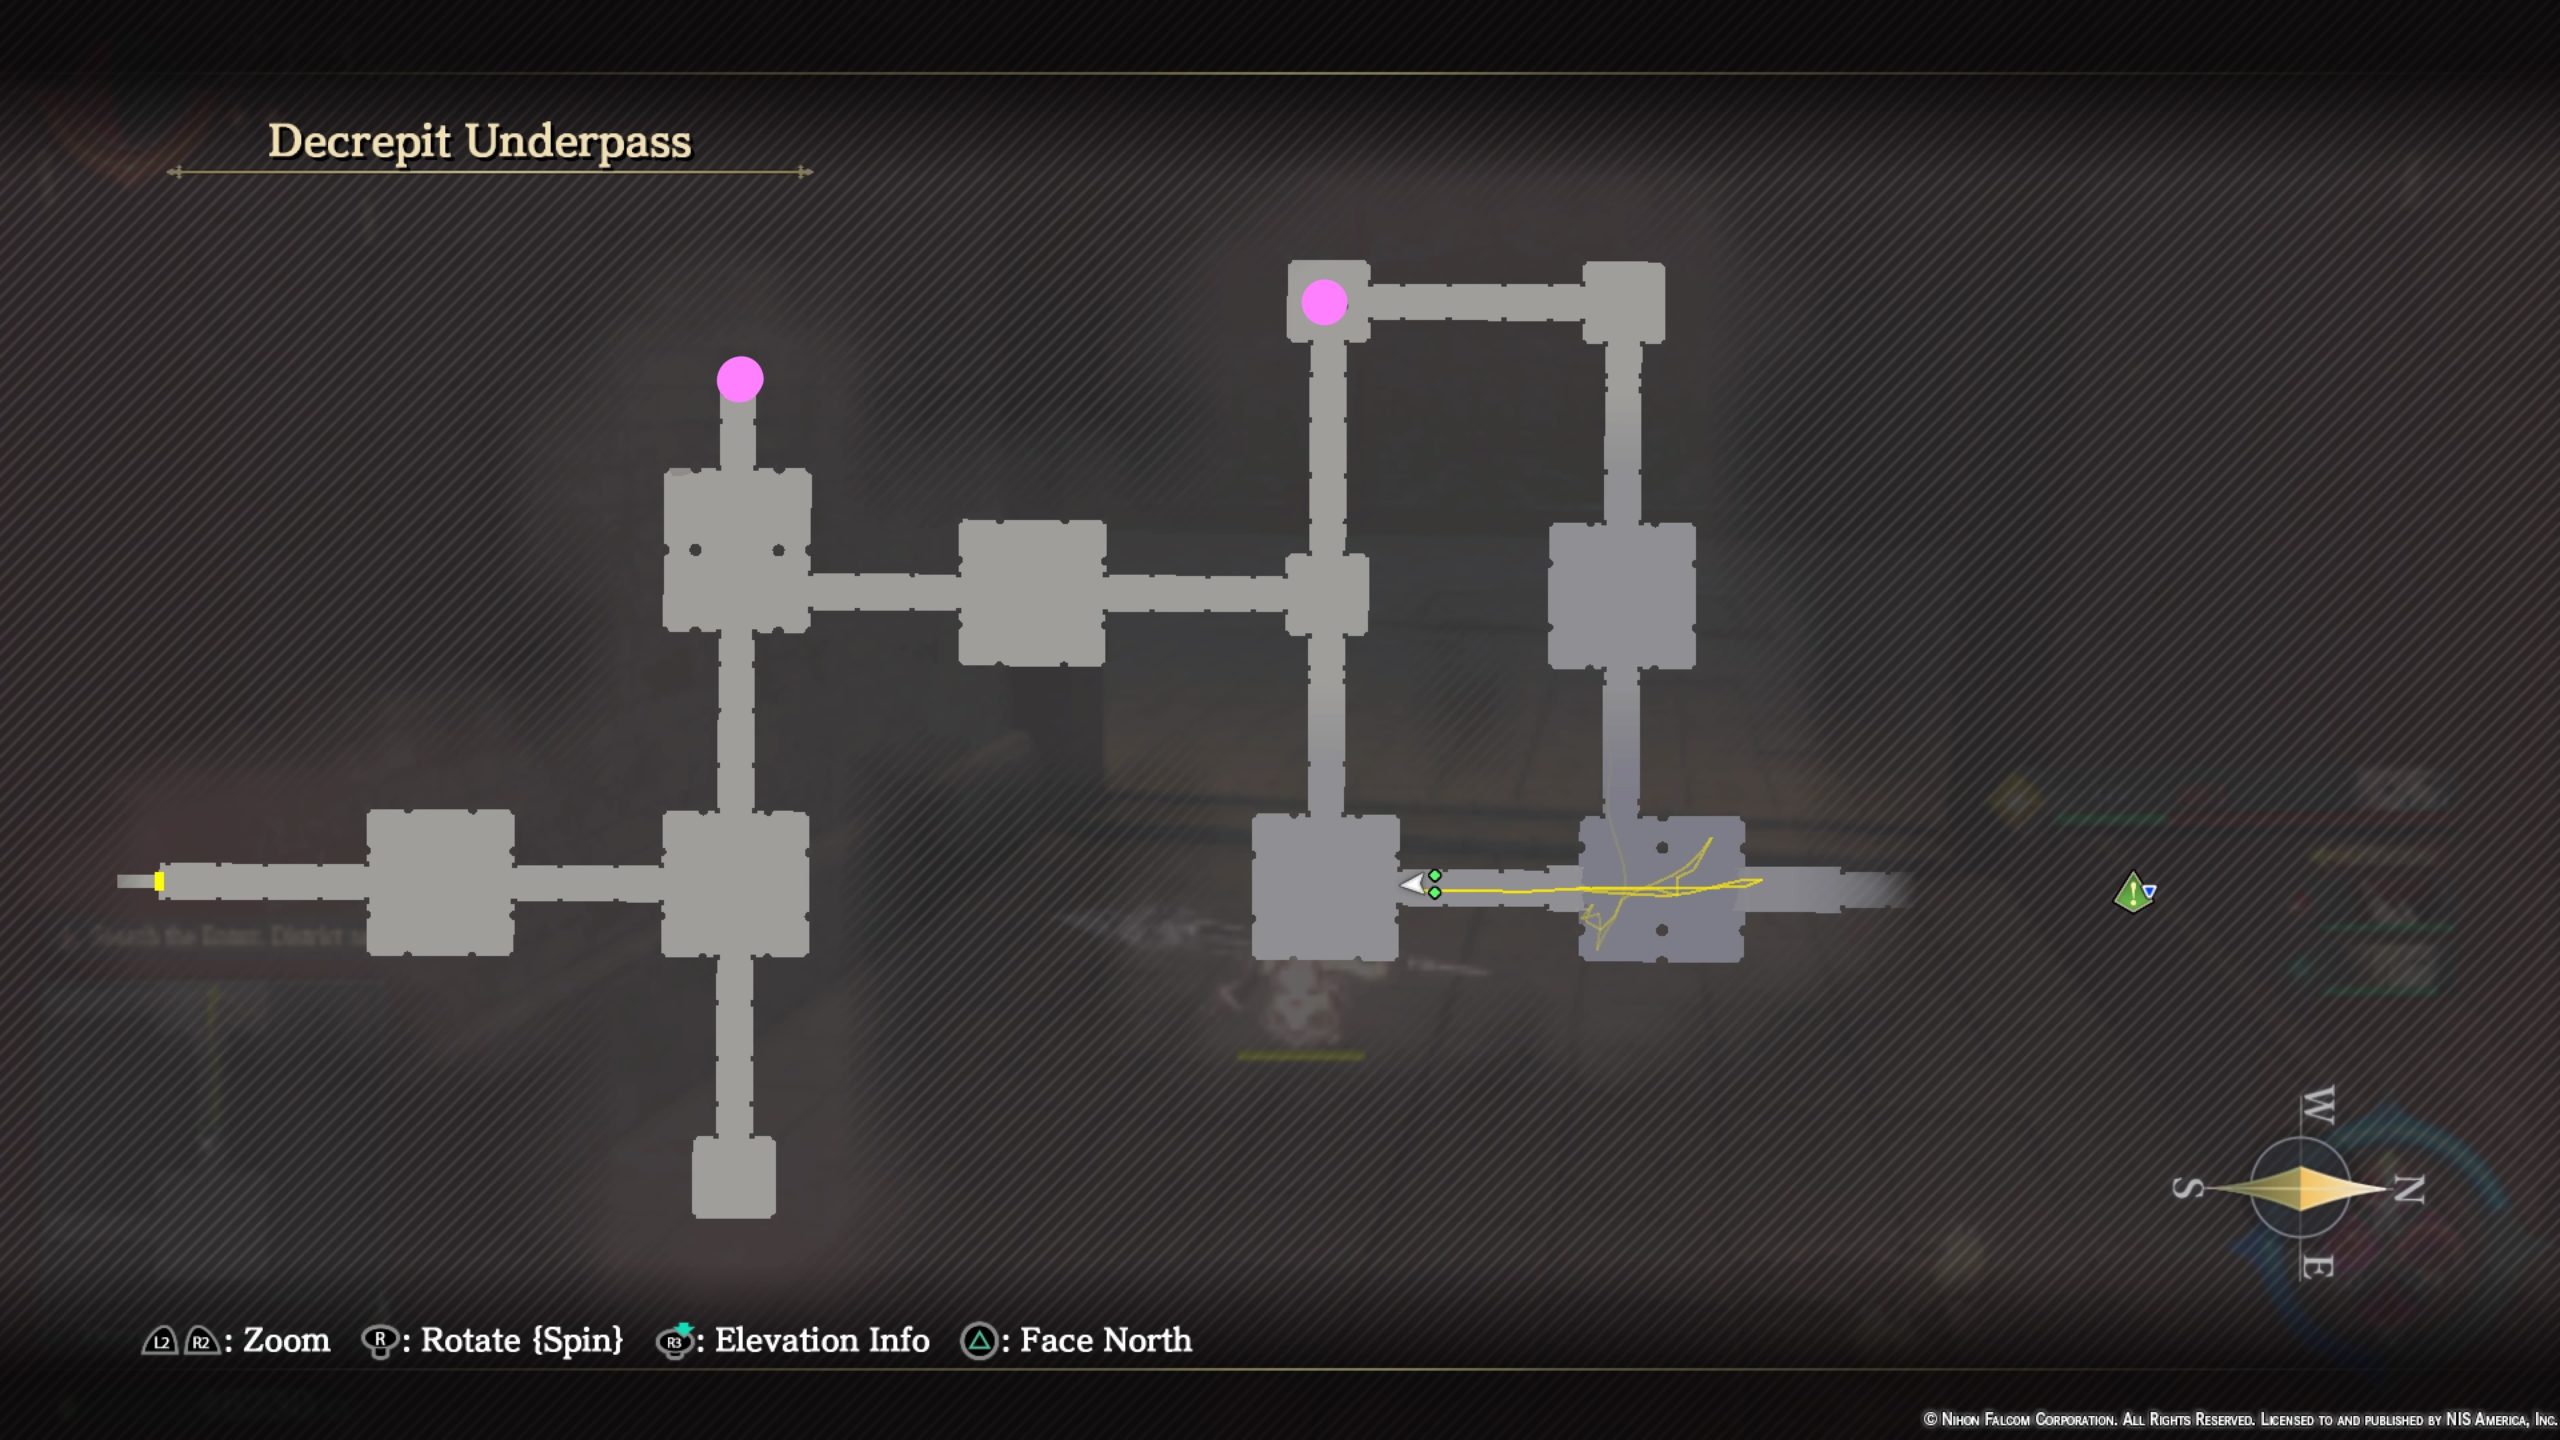
- Crimson Spar
- Life Elixir
Blocked Path (hidden area)
*To access this hidden area in the southern part of Main Square, you’ll need to activate Raging Bull’s gift to smash a wall.
Materials
- Aromatic Lumber
- Copper Ore
- Iron Ore
- Small Leaf
- Soul Lumber
- Sparkling Leaf
Monsters
- Plutoad
- Roche
- Cuhanni
- Tarantiel
Treasure Chests

- Crimson Spar x2
- Apis Charm
- Spirit Lumber x2
- Thrust Grimoire
- Smoked Meat
Groaning Grotto
Landmarks

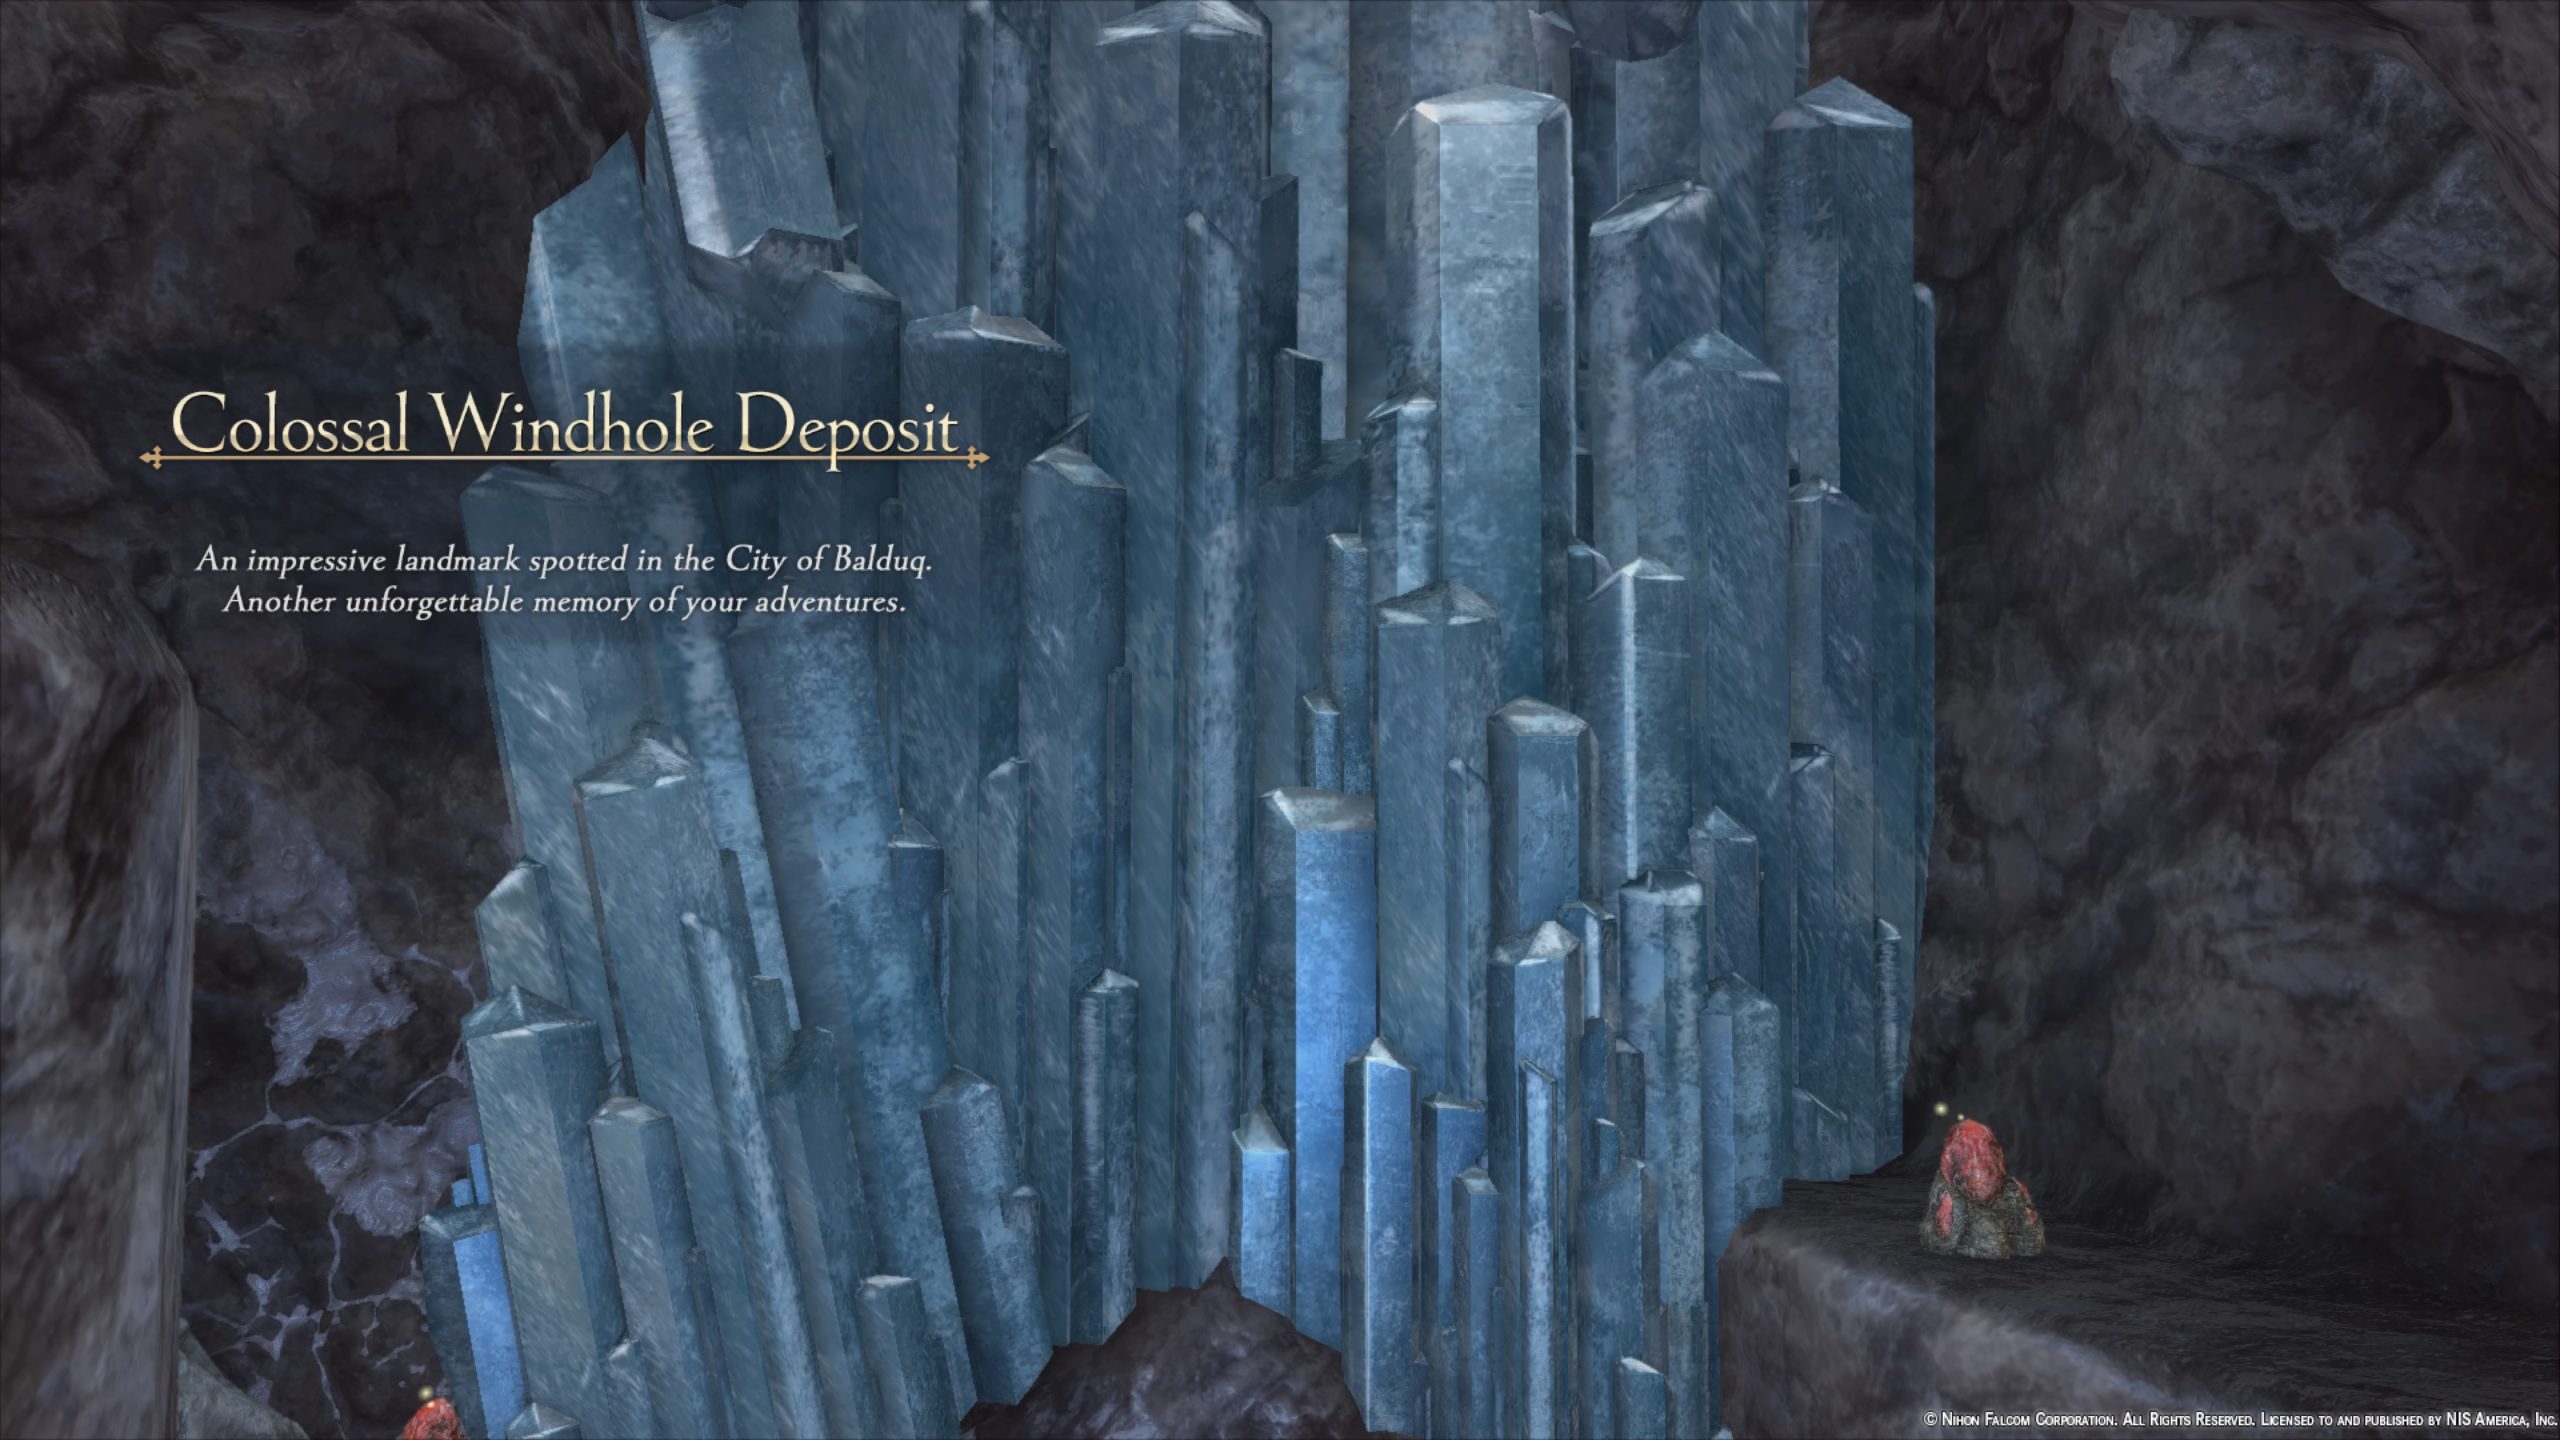
- Colossal Windhole Deposit
Materials
- Copper Ore
- Crimson Spar
- Iron Ore
Monsters
- Formi
- Formian
- Disgaze
- Adamangelo
Treasure Chests

- Boost Potion
- To reach this chest, follow the path from the entrance until you reach a broken section of tunnel on your left revealing a cavern. You’ll need to fly over to a flat wall on the other side then run up it to reach a ledge where you can smash a wall revealing the hidden chest.
- Panacea x2
- Soul Lumber x4
- Formian Cuticle x2
- Yellow Shawl
- 1400 Gold
- Sturdy Grimoire
- Crimson Spar x4
- Tiger Claw
- 2000 Gold
- Life Elixir
- Dry-aged Meat x2
West Dumping Ground
Treasure Chests

- Tempest Elixir
Click here for the next guide on Chapter 6!!