To begin the 30. An Unknown Shield side quest in Trinity Trigger, enter the Castle in Stahl then head into the room on the right (Hall of Shields). For this quest, you’ll need to give Alan in the Main Hall a Rusty Sword. Exit the room then head straight across to the western side to find Alan guarding the room leading to the Training Grounds. Speak with him then report back to the Hall of Shields to complete the quest. As a reward, you’ll receive a Defense Augite IV x1.
Guides
Baldur’s Gate III – Our Fiery Friend
Our Fiery Freind is the companion quest for Karlach in Baldur’s Gate III. You’ll receive this quest automatically after allowing this fiery lady to join your party.
How to Recruit Karlach
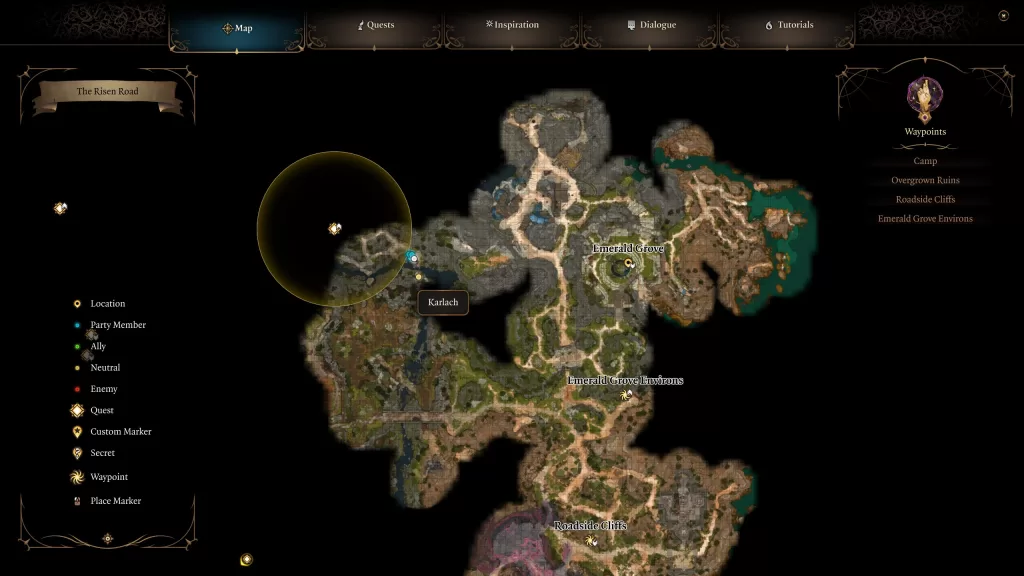
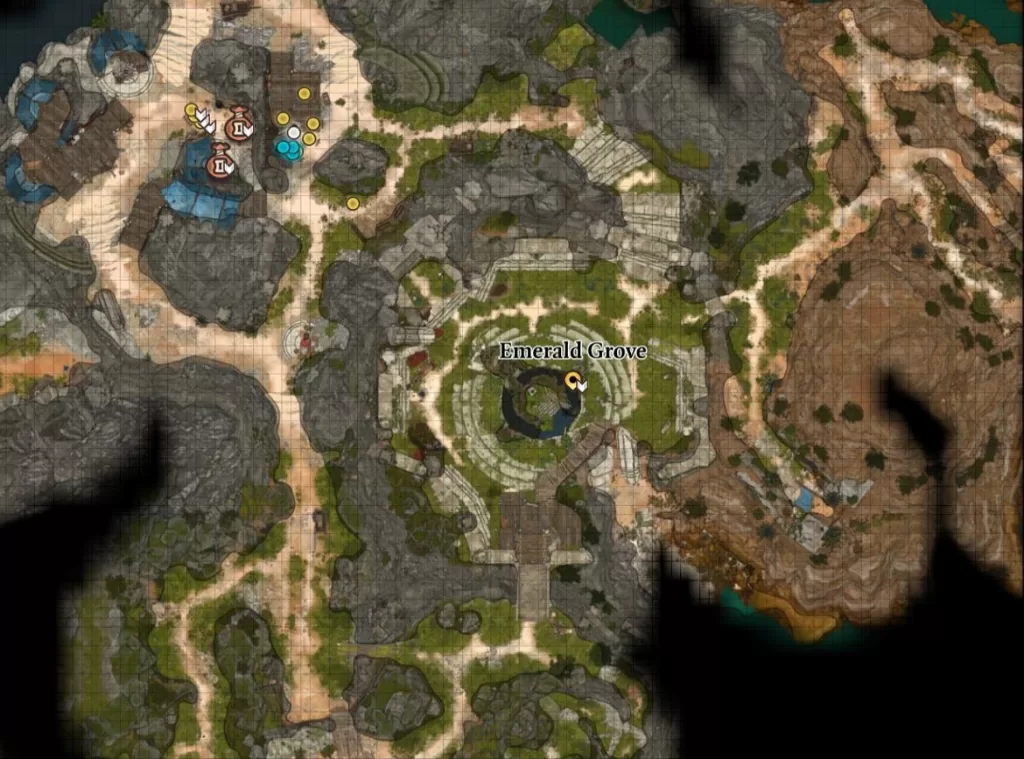
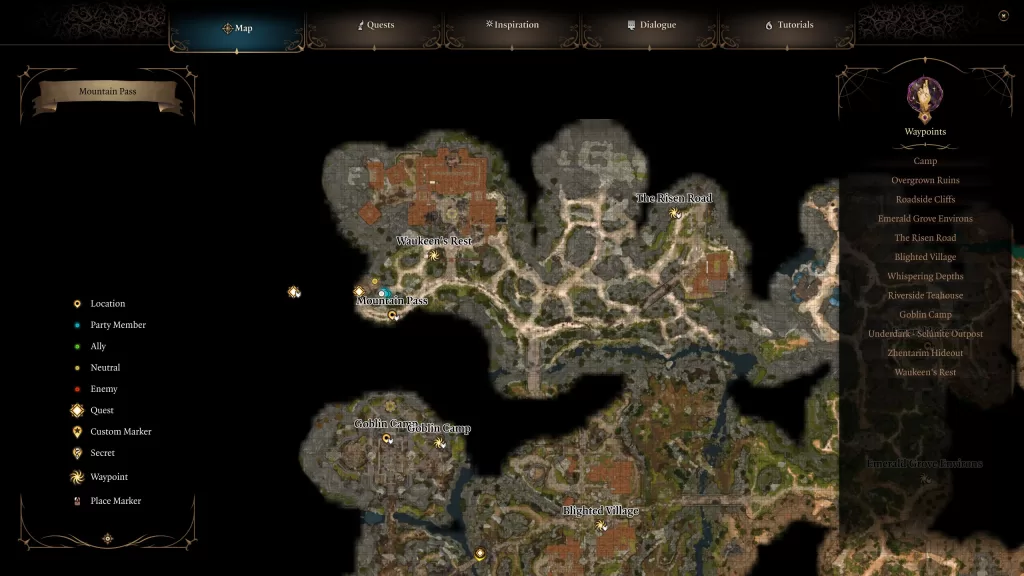
Karlach can be found on The Risen Road west of the Emerald Grove along the river. You’ll be led to her if you have Wyll in the party as tracking her down is part of his companion quest.
When you find her, you’ll learn that she was forced against her will to fight on the front lines and when the opportunity presented itself, she fled in hopes of returning home. You’ll then have the option to let her join you. If Wyll is with you, you’ll need to convince him not to attack her first. If you don’t have Wyll, he will show up and you’ll still have to try and get him to stand down… or you can deal with him. The choice is yours!
Deal with the Paladins of Tyr (Hunt the Devil)
As part of the deal with joining your party, Karlach will ask for help dealing with the Paladins of Tyr that were sent after her. They can be found up the path from where you first met Karlach in a building.
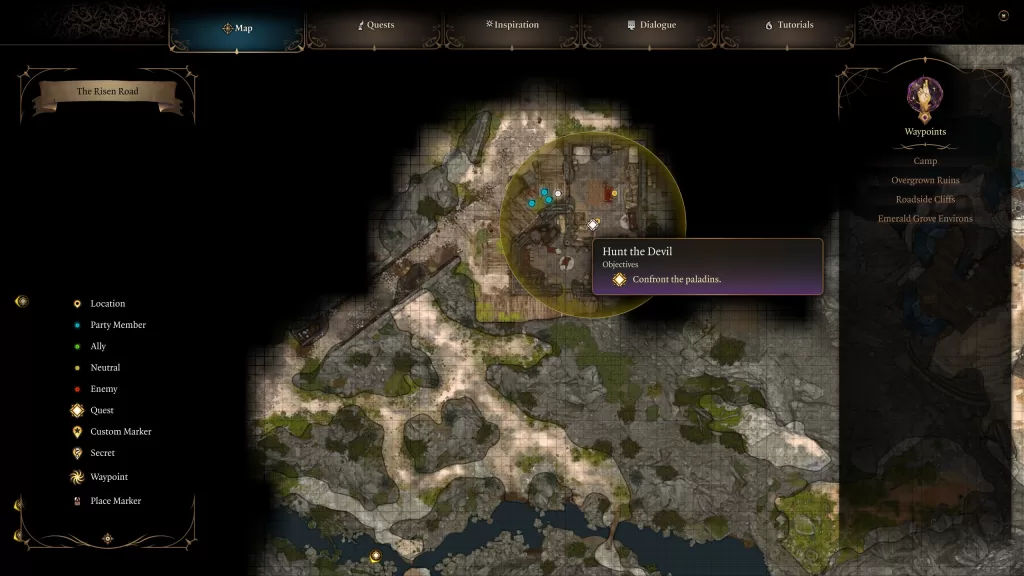
Make sure you are at least level 4 before heading inside to begin a conversation with Anders. He’ll claim they just want to be left alone, but if you read his thoughts, you’ll learn they are after Karlach. Further, if you pass the insight check, you’ll be able to tell he’s lying. Call them out on their BS to start a fight against the trio. After winning the battle, Karlach gets a little heated and starts burning the place down. It’s best to exit the building and let her do her thing. Speak with her when she calms down then exhaust her dialog options.
The Hellion’s Heart
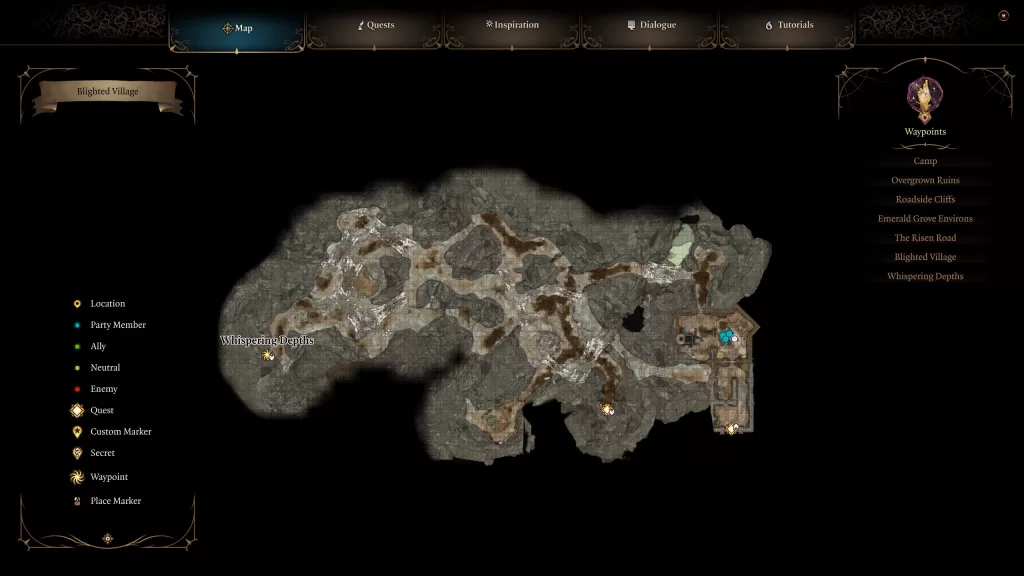
After dealing with the paladins, Karlach will inform the group that her engine is running hot and she needs an infernal mechanic to get it tuned up. Luckily for us, if you talked to everyone in the Druids’ Grove, you’ll know that Dammon in the Hollow fits the bill. Make your way over to his makeshift smithy and speak to him. Dammon will say he can fix Karlach’s engine but he’ll require Infernal Iron. You can loot one from a chest in an abandoned forge on the east side of the Whispering Depths. To reach it, travel to the Blighted Village then climb down the well.
Once you have the iron, take it back to Dammon and he’ll fashion something for Karlach. It’s not a permanent solution but will work until he comes up with something. Speak to Karlach afterward.
Once you start Act II and reach Last Light Inn, you’ll come across Dammon again. Speak with him there in the forge to receive some good and bad news. If you collected more Infernal Iron before leaving Act I, you can give him one now so that Karlach can touch people. After that happens, you better pull her in for a hug! Also, make sure to speak with her afterward. This objective will also be completed.
Act I Infernal Iron/Metal Locations
- Whispering Depths (Blighted Village) – Shown in the image under The Hellion’s Heart
- Goblin Camp – In Dror Ragzlin’s personal stash behind the throne
- Zhentarim Hideout (under Waukeen’s Rest) – In a locked chest behind a locked gate at the very northern part of the area
- Gyrmforge (Underdark) – Speak with Stonemason Kith and pass all three skill checks
Act II Infernal Iron/Metal Locations.
- Mason’s Guild (southwestern part of the area) – on a table near some cranes
- Gauntlet of Shar (northeastern part) – Defeat and loot Yurgir
- Gauntlet of Shar (vault west of Ancient Sigil Circle) – Lockpicking the 30 door
Find Lord Gortash
After completing the Defeat Ketheric Thorm main quest, speak with Karlach to learn about her history with Gortash. She’ll then tell you that she wants to hunt down and kill the man.
Once you reach Wyrm’s Rock Fortress in Baldur’s Bate, Gortash will invite you to attend his inauguration ceremony. Head through the doorway on the right (east) to find another set of doors leading to the Audience Hall. Enter the Audience Hall and head towards the throne to trigger a cutscene. During it, you’ll have to convince Karlach to not attack Gortash right now (or let her charge him to no avail).
Guides
Baldur’s Gate III – Optional Things to Do in Act I
In this Act I Things To Do guide for Baldur’s Gate III guide, we’ll list as many of the optional things you can do during Act I that we come across. I say as many because this game is huge! We’ll also link things to our other guides if you need some more info where it makes sense to do so. Happy Adventuring!
**PLEASE NOTE** – We will be playing a borderline hero character making mostly good or neutral decisions so the guides will be tailored to that at first.
- Side Quests
- Nautiloid
- Temporarily recruit Us
- Free and Temporailry recruit Shadowheart
- Defeat Commander Zhalk and loot the two-handed Everburn Blade off of him
- Beach
- Wilderness
- Investigate the Scuffed Rock in a hidden cave west of the crash site (X:143 Y: 283)
- Recruit Astarion west of the Nautiloid wreckage
- Speak with the injured Mind Flayer in the Nautiloid wreckage
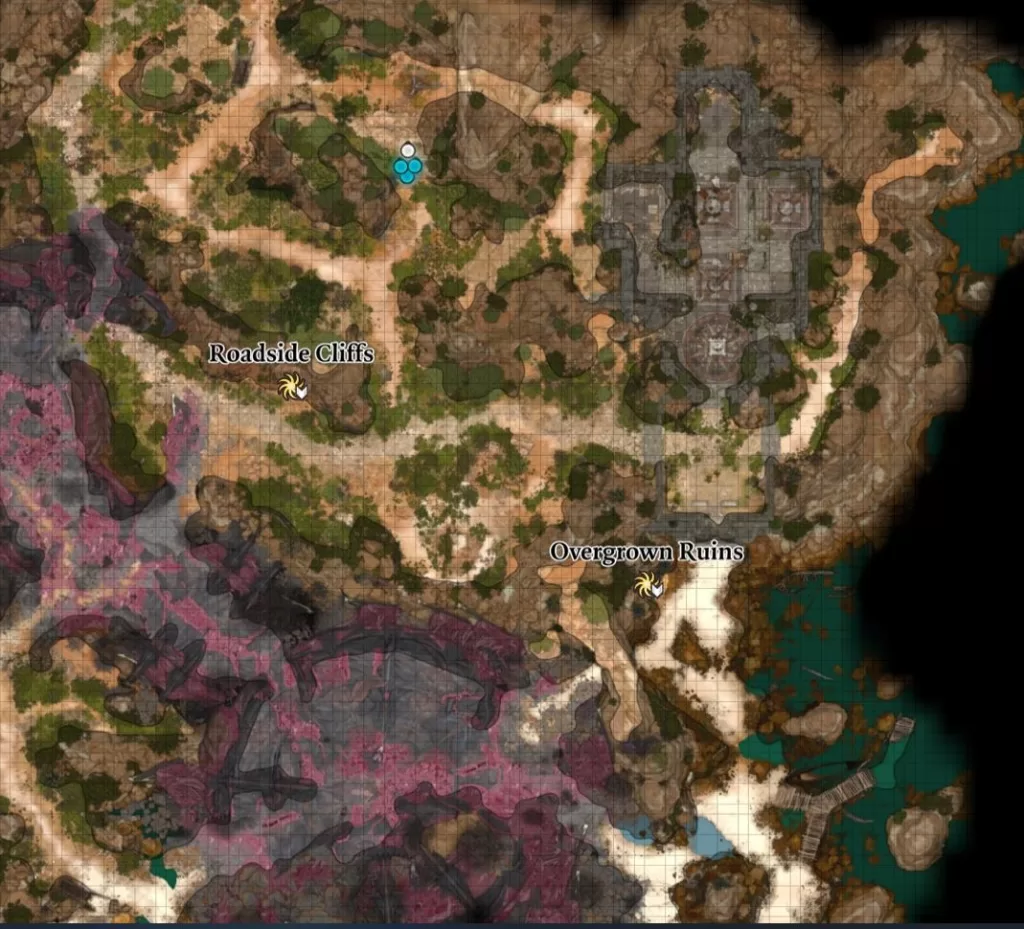
- Recruit Gale near the Roadside Cliffs Ancient Sigil Circle
- Recruit Lae’zel
- Druids’ Grove
- Save Nadira from the bugbear to get a Soul Coin
- Stop by Arron’s shop in the Hollow
- Speak to the squabbling tieflings in the Hollow
- Recruit Whyll
- Spare a few words for the kids in the Hollow at Asharak’s request
- Show Guex the proper way to swing a sword in the Hollow
- If you choose and pass the Athletics option, Gale / Lae’zel / Shadowheart will approve
- Talk to Okta to get some food in the Hollow
- Talk to Auntie Ethel and tell her about your affliction in the Hollow
- Check out Dammon’s smithy in the Hollow
- Talk to Aradin in the Hollow
- Deal with the Barth/Meli situation in the Hollow
- Visit Sazza the Goblin locked in her cell
- Talk with Doni along the path leading to the Inner Grove
- Talk to Mattis on the path leading to the Innder Grove
- Speak with Volo at the Sacred Pool
- Talk with Rath in the Emerald Grove
- Talk to Kagha in the Emerald Grove
- Speak with Mol in the Tiefling Hideout
- Donate 35g to the new Thieves Guild
- Make a wager with Lakrissa reachable via a ladder in the Secluded Chamber (where Zevlor is)
- Visit the beach east of the Sacred Pool
- Heal Pandirna of her paralysis
- Dank Crypt
- Loot a Soul Coin from a sarcophagus
- Loot The Watcher’s Guide from a sarcophagus
- Examine the Book of Dead Gods
- Meet Withers
- Loot Withers sarcophagus for a Soul Coin
- Underground Passage
- Defeat the Goblins and save Findal
- Forest
- Deal with Brynna, Andrick and Edowin
- Accept or Reject the tadpole
- Fight the Owlbear in its nest
- Open the Gilded Chest in the Owlbear Nest
- Be sure to bring Shadowheart along
- Help out Scratch
- Deal with Brynna, Andrick and Edowin
- Blighted Village
- Rescue the Gnome
- Look for the Cellar
- Explore the Whispering Depths
- Make friends with the Ogres
- Check out the barn just north of the city
- The Risen Road
- Open the vault door and explore the vault
- Interviene in the fight between the pack of gnolls and the men in the cave
- Waukeen’s Rest
- Help the man trapped in the burning building
- Goblin Camp
- Catch the chicken
- Be cleansed through pain with Abdirak
- Free Liam
- Rescue Volo
- Underdark
- Pull the sword from the stone!
- Visit the Myconid Colony
- Check out the Arcane Tower
- Defeat the Spectator
- Visit the Sussur Tree
- Obtain all three pieces of a broken staff and put them back together
- Underdark – Grymforge
- Talk with Stonemason Kith about the architecture
- Find the Harper Key and Stash Locations
- Mountain Pass
- Speak with Lady Esther
- Locate the Ceremonial Weapons at the Monastery
- Visit the Creche
- Check out the Classroom in the Creche
Guides
Baldur’s Gate III – Daughter of Darkness
Daughter of Darkness is the companion quest for Shadowheart in Baldur’s Gate III. You’ll receive this quest automatically after allowing our lady of darkness to join your party shortly after escaping from the Nautiloid and waking up on the beach.
Where to Find Shadowheart
There are two potential places you can find Shadowheart after escaping the Nautiloid ship in the game’s opening sequence. They are as follows:
- Passed out on the ground nearby where your character wakes up
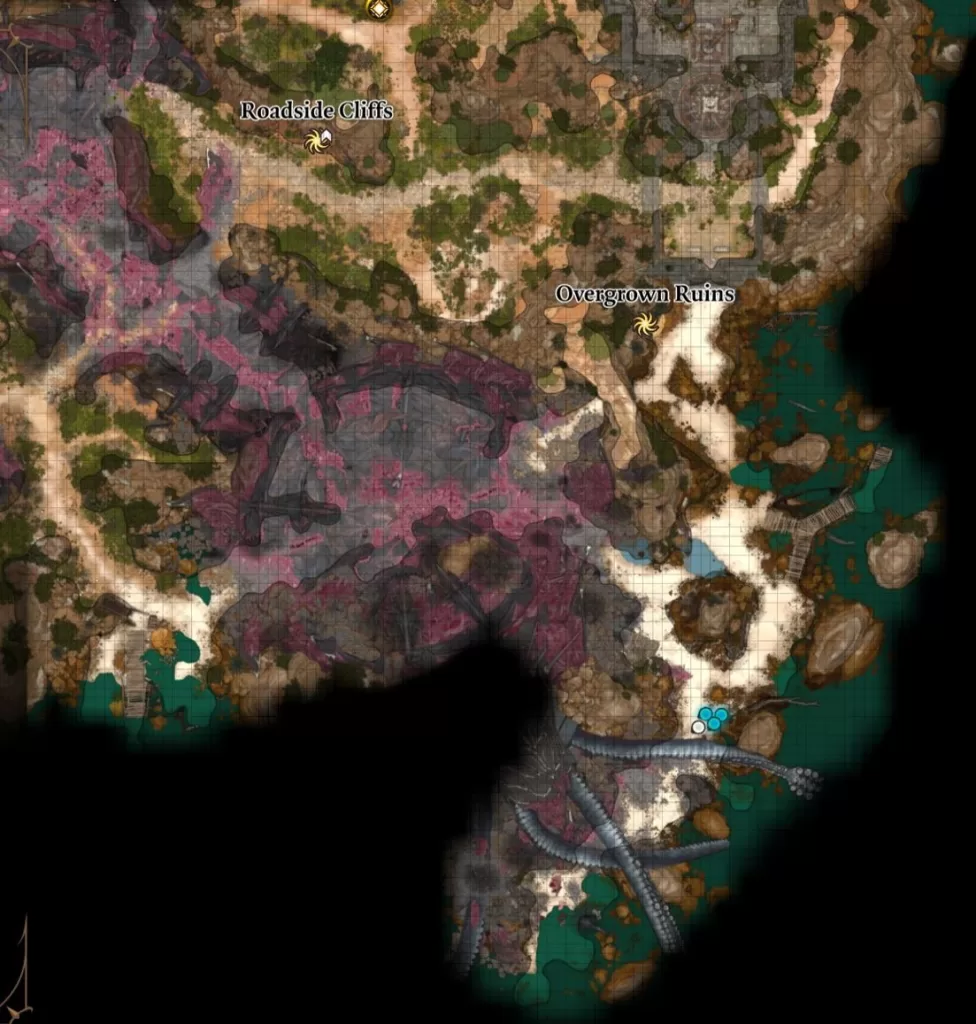
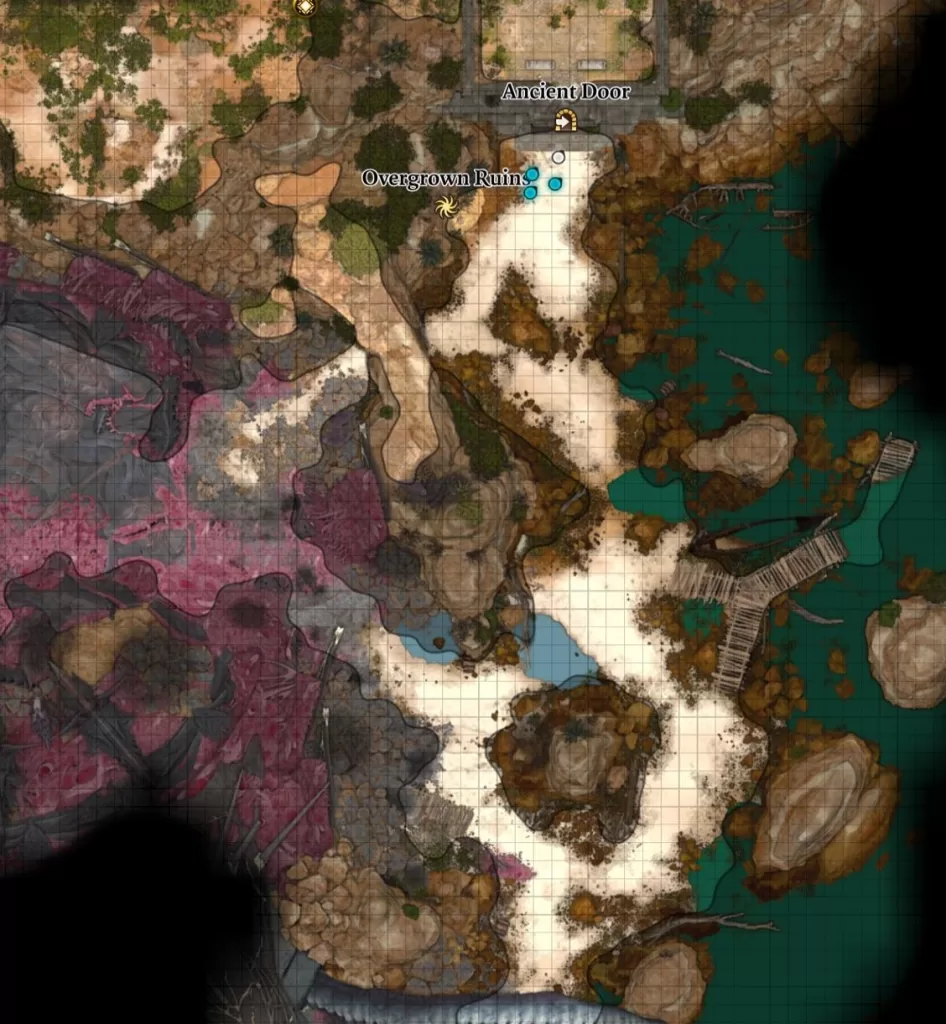
- Trying to open the Ancient Door near the Overgrown Ruins
For option 1, you’ll find her passed out near where you woke up on the beach if you freed her from the pod on the Nautiloid and allowed her to join your party. Interact with her to be given a handful of options:
- Wake her
- Reach for the artefact
- Leave
If you choose the first choice, then you’ll gently wake the sleeping beauty from her slumber resulting in a conversation where she’ll mention wanting to stay together. Choosing the second choice to try grabbing her artefact will result in Shadowheart waking up mid-grab. Either option from that conversation still ends with her wanting to stay together. You could also leave her there, but who would want to do that?
If you went with option 2 and left her to the powers that be, she can be found further northeast along the beach trying to break through the Ancient Door near the Overgrown Ruins. You can speak with her there to get her to join the party or not. Keep in mind that if she doesn’t officially join the party, you will not get the Daughter of Darkness companion quest.
Continue TRAVELING with Shadowheart
Once you first get her quest, there isn’t much you can do with it yet. You’ll need to travel with her a bit more to get her affection up. Doing the below things will also help.
- Speak with her at camp regularly
- Saw Shadowheart’s mysterious pain in action while talking with Kagha in the Emerald Grove
- Bring her with you to the Owlbear Nest and try to open the Gilded Chest
- Read the Old Schoolbook looted from the most southwestern building in the Blighted Village
- Make sure Shadowheart is in the party
- Shadowheart and Lae’zel will get into it at camp
- Make sure they don’t fight
- Bring Shadowheart near some wolves to learn she’s afraid of them
- Triggered for us at the creche in the Mountain Pass
The Chosen of Shar
This objective is a subquest of the Daughter of Darkness. You can get it from talking to Shadowheart in camp about her faith. She will eventually mention (with some persuasion) her aspiration to become a Dark Justiciar. That conversation will trigger the quest where you’ll then need to wait until you can access the Underdark. If you saved Halsin and the grove, he will tell you through dialog that he once helped purge the Dark Justiciars from the Underdark thus giving us our next heading.
Once you reach the Underdark, head for the Myconid Colony in the northern part of the area. Speak with the Sovereign and he’ll give you a quest to Defeat the Duergar Intruders. You’ll head to the Underdark Beach southwest of the city where you’ll find some Duergar. You can commandeer their boat to travel to the Grymforge. If you have Shadowheart with you, this will trigger an event where she recognizes some Shar statues telling us we are in the right place. You can check out the list below for some minor dialog with Shadowheart.
- Skeletons – Group of Shar worshippers north of the Underdark Grymforge along the main path
- Relic of Shar – At the end of the booby-trapped bridge behind the locked gate
- A skeleton hanging on the side of the rail has the key
- Hellish Fiends – Behind two giant locked wooden doors across the room from the booby-trapped bridge
After clearing the cave-in, head past the poison (you can cast Fog Cloud to clear it) and lockpick the door then head to the end of the broken bridge. Shadowheart will spot an ancient temple off in the distance making it our next objective which can’t be reached until Act II.
In Act II, if you bring Shadowheart with you to the Shadow-Cursed Lands, she will comment that she has a certain amount of resistance to the effects of the shadow curse given to her by Shar.
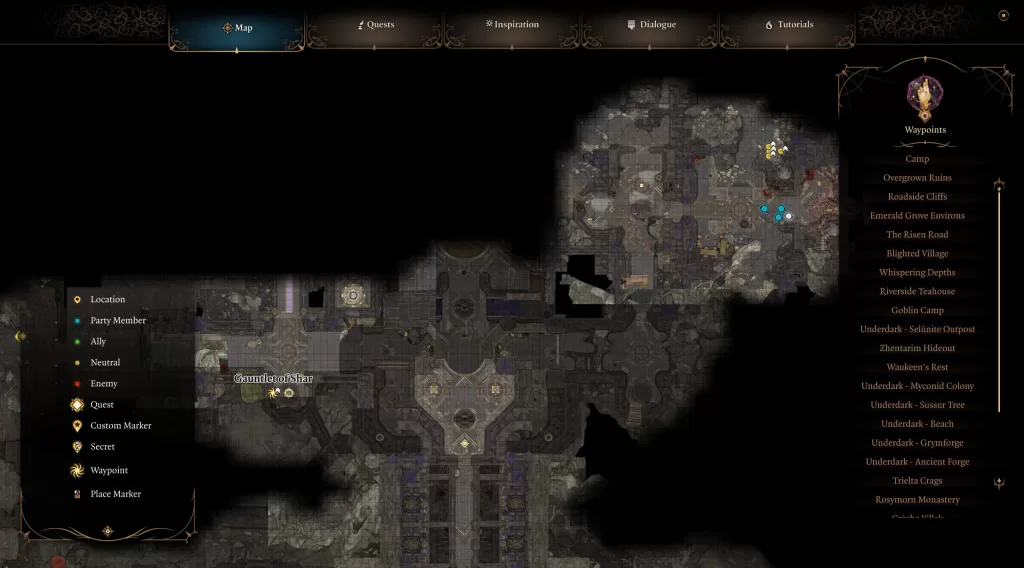
To finally progress this objective, you’ll need to travel to the Grand Mausoleum, which can be found in the southwestern part of the map near Moonrise Towers in Act II. You’ll be sent there during the main story and will need to solve a puzzle by pressing a button under each portrait in the northern room starting with the southwestern one and going counter-clockwise. This will open a hidden path bringing you to the Gauntlet of Shar.
Investigate the Gauntlet of Shar
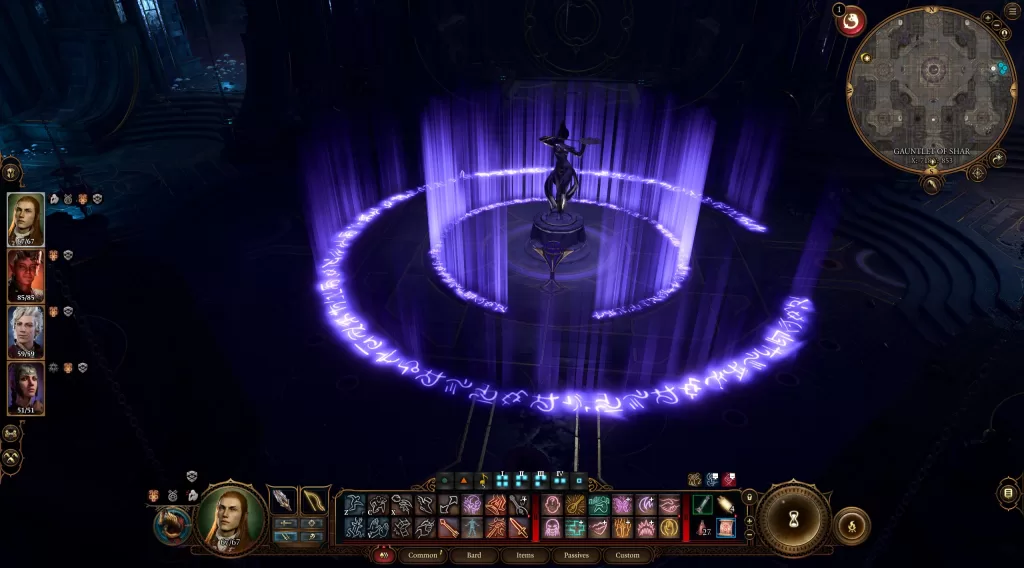
Once in the Gauntlet, follow the path north and through the doorway at the end to reach a room with a statue of Shar in the middle. There will also be a gem in front of it protected by an invisible barrier. You’ll want to keep an eye out for a ton of traps scattered around the room as you try to solve the puzzle. To move forward, you’ll need to reach and interact with the gem. Start by heading to the four crypts (watch out for the floor traps in each one) on both sides of the statue then flip the levers in each one. This will lower 4 Mystyic Thuribles from the roof to surround the statue putting the total number of thruibles to 8. You’ll then need to interact with each one to put the flame out to cause the barrier to appear. You can now follow the path to reach the gem, but you’ll want to ungroup a single character and use them to do it.
Please Note: If you have someone equipped with the Blood of Lathander mace, then the light it sheds will prevent the barrier from showing.
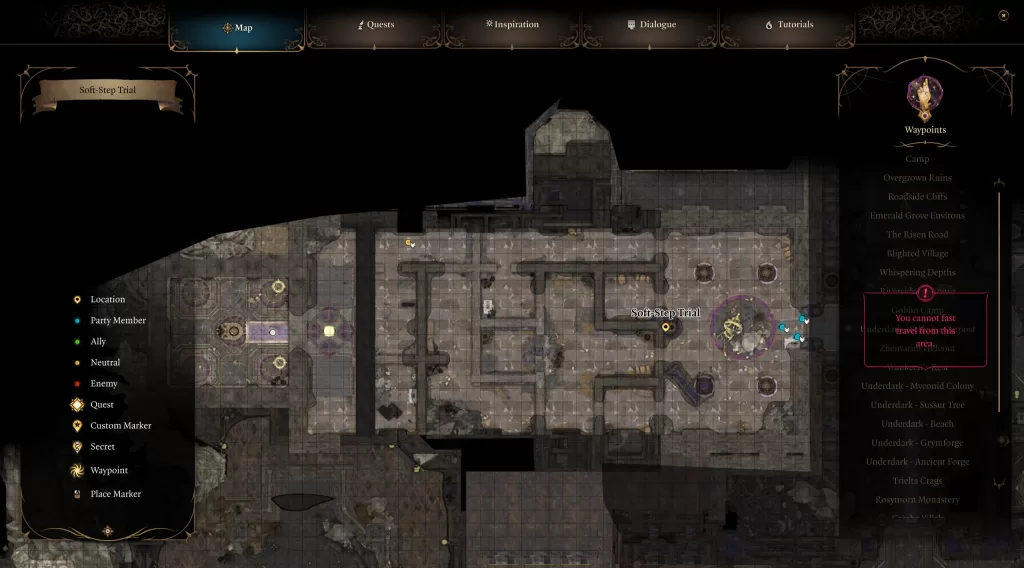
Soft-Step Trial
Once you activate the gem, head north through the doorway and follow the hallway there to the end. In the next room, take a left and keep going until you reach the Ancient Sigil Circle. Head north there then enter the first door on the left. There will be a Sacrificial Bowl you need to interact with. When prompted, choose to cut yourself and offer blood to the bowl. This will open the way forward where you’ll have to sneak past enemies to reach the gem at the end. Go through the rightmost door and follow the path straight until you reach the wall. There will be a button on the right you can press to lower the wall. Keep going straight through the doorway and take a left up the stairs. You’ll need to lockpick the gate to collect the gem passing this trial. Interact with the Umbral Transporter where the gem was to warp back to the first room.
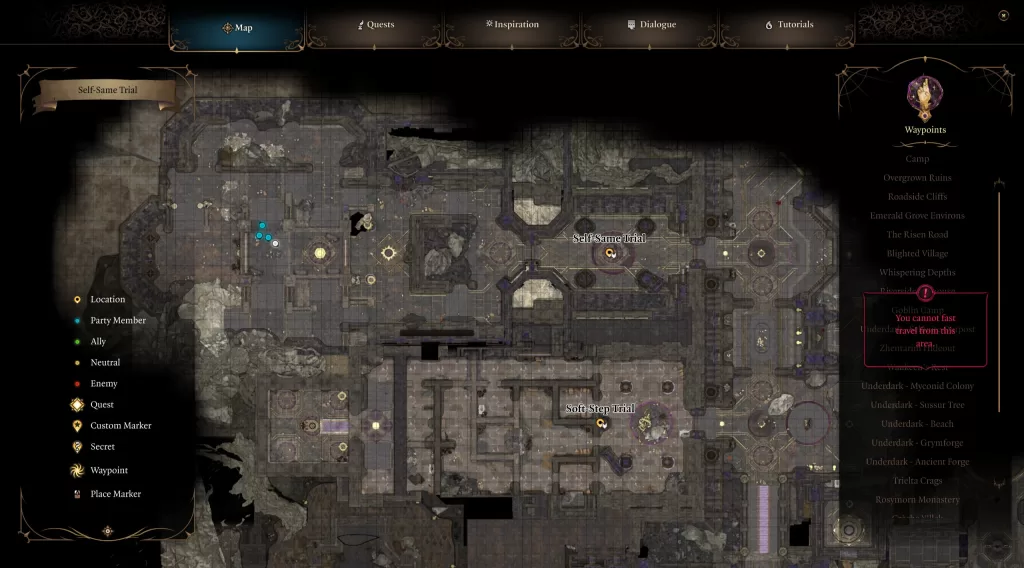
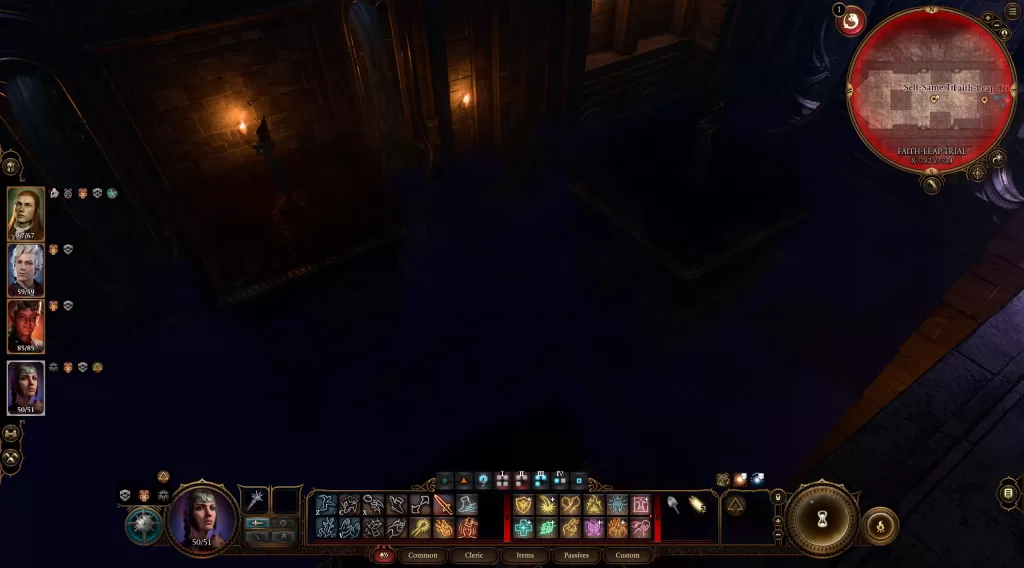
Self-Same Trial
Return to the long hallway and head left (going north). Enter the next door on your left to reach the next trial. Interact with the Sacrificial Bowl and offer your blood again. For this trial, you’ll be facing copies of your party in glorious combat. Defeat them to complete the challenge then look for the Umbral Gem. It should be near the last enemy you killed. After that, interact with the Umbral Transporter to return to the first room.
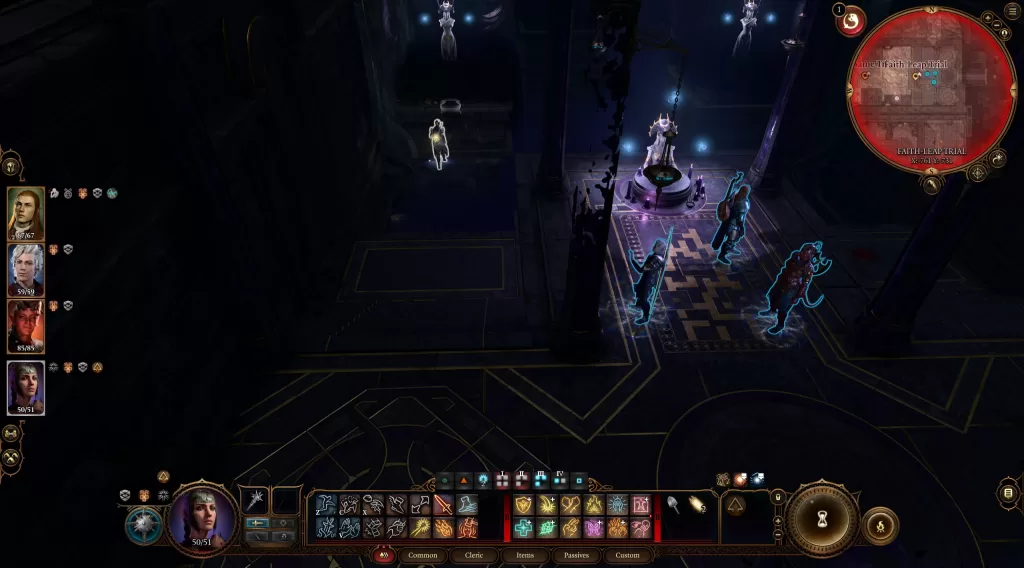
Faith-Lead Trial
Head back to the long hallway and take a left going down the stairs. You’ll want to enter the room past the wooden doors across from the stairs to reach the third trial. Again interact with the Sacrificial Bowl and offer your blood to start. You’ll then have to walk to the gem on the other end of the room following along an invisible path. Start by walking off the ledge on the left towards the middle then go straight across to the platform with the statue.
Head to the northwest part of that platform and walk out to about where the waterfall is. You’ll then want to go right towards the middle of the room until you are aligned with the back left corner of the central platform. Now head to that one. Now make your way to the northcentral part of the middle platform behind the statue. Walk off to the north heading toward the gem. Stop a little before halfway and jump to the gem. Collect it then use the Umbral Transporter to reach the beginning of the room.
Silent Library
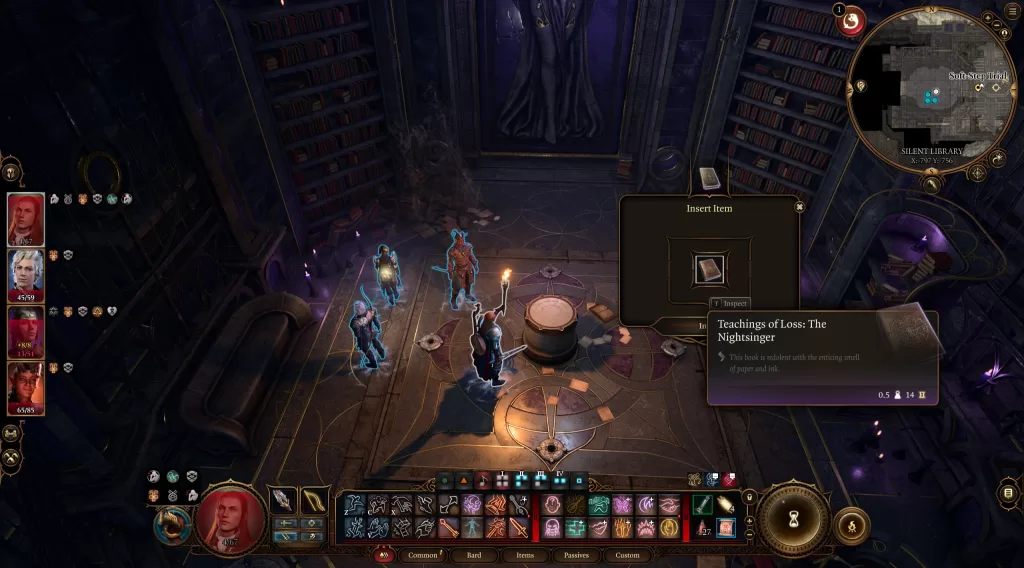
Continue working your way west down the hallway to the next room, the Silent Library. It will have a barrier covering the entrance that you can pass through. In here, you’ll need to defeat a handful of Justicar Nightweavers and the Librarian (an Umbral Termor). While the Librarian lives, silence will be cast on everyone in the room. Defeating it will allow you (and the enemies) to cast magic again. When they are dealt with, interact with the bookshelves looking for Teachings of Loss: The Nightsinger (it’s on the east side, watch out for traps).
Once you have the book, go to the gate in the back of the room and unlock it using lockpicking. You’ll then want to scope out the room, disabling the traps you find. When you’re finished with that, you can finally interact with the Riddle of the Night in the middle of the room. It will ask “What can silence the Nightsong” and open an Insert Item prompt. Use the book you found earlier “Teaching of Loss: The Nightsinger” to reveal a hidden path. Follow it to find the Spear of the Night resting on an altar. Also, make sure to loot the chest in the room before returning to the hallway.
Back in the hallway head south to reach the elevator. Pick up the lever handle on the ground there then take the elevator up. This will bring you near the Ancient Sigil Circle.
Orthon
Head to the northwestern part of the gauntlet to find the Orthon (this is part of Astarion’s quest). You’ll need to deal with him either by fighting, trying to help it out or my personal favorite, getting him to kill his minions and then himself with the power of persuasion. After that’s taken care of, you can find the Umbral Gem on the steps near Orthon’s Bed.
Venture into the Inner Sanctum
From the Ancient Sigil Circle, head west up three flights of stairs then take a left. Take the next left down a flight of stairs to reach the Pedestal of Reckoning with an Ancient Altar on it. Interact with the altar then insert an Umbral Gem to bring a moving platform to you. Climb on it then activate the Traversal Gem to reach another Ancient Altar.
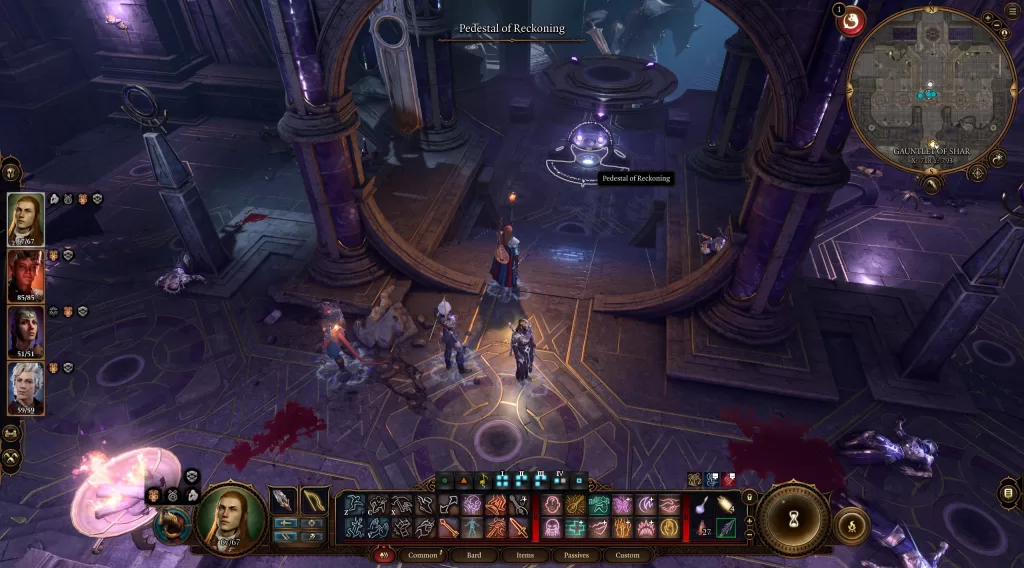
Interact with that and insert the remaining three Umbral Gems then proceed through the door. Work your way to the pool at the end interact with it and allow Shadowheart to pray. When she’s done, enter the Shadowfell Entrance. The game will prompt you that the choice you make here will have story ramifications.
*BEFORE HEADING IN* You may want to kill Balthazar before heading to Shadowfell if you were planning on doing it anyway.
You’ll reach the Dark Lady’s domain and be greeted by Balthazar if you haven’t killed him yet. Regardless of what choice you make, you cannot do anything to him. For this guide, we killed him before entering Shadowfell. Press on through the area by jumping down from rock to rock (the game is nice enough to give you Feather Fall). Eventually, you’ll reach Nightsong at the bottom who is imprisoned.
Approaching it will trigger a dialog event with Nightsong event where Shadowheart will say she’s there to kill Nightsong with the Spear of Shar. This is a major choice that will have some rippling effects. For starters after making the choice, you will not be able to return to Act I areas and some of your quests can fail depending on what they are. Below, some of the other consequences are listed.
Let Balthazar Have Nightsong
- N/A – We killed Balthazar so maybe next time!
Kill Nightsong
- Everyone at Last Light Dies (including Jaheira and Dammon who is needed for Karlach)
- Shadowheart commits to the Dark Lady and cannot be romanced
- You’ll get the legendary spear, Shar’s Spear of Evening
Save Nightsong
- Shadowheart can be romanced
- Moonlight Towers will suffer losses and Thorm will be vulnerable
- You’ll get the rare glaive, Moonlight Glaive
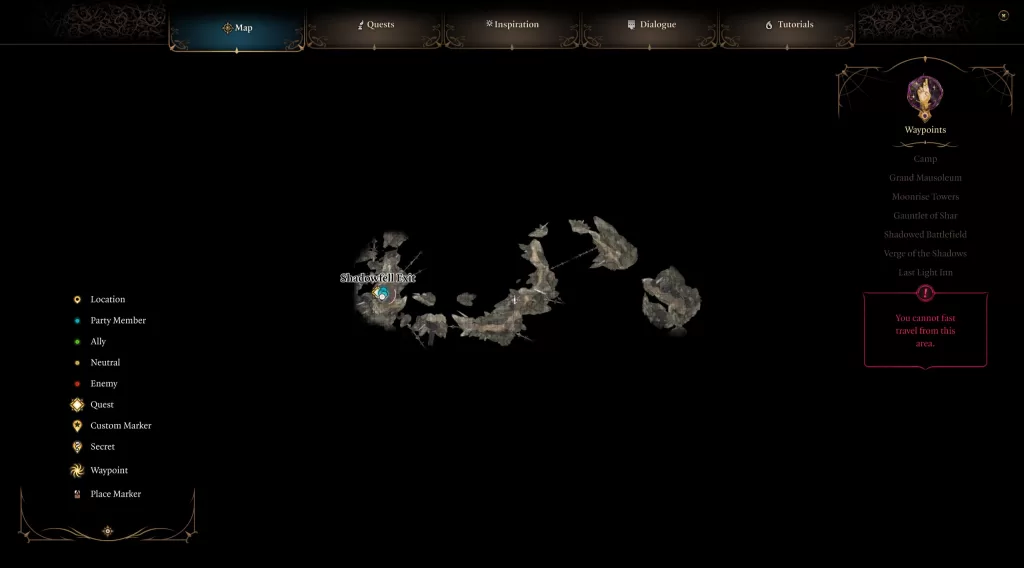
So for this section, we decided to save Nightsong by convincing Shadowheart to stay her spear. We are able to do so with the following dialog choices “Trust Shadowheart – do not interfere” and then “She knows something about you. Spare here, and see what she has to say”. This will cause Shadowheart to toss her spear away and help Nightsong. After a0 cutscene, interact with the Shadowfell Exit to leave. Note: Shadowheart almost had the maximum affection for our character and we knew about her fear of wolves which could have played a factor in these choices.
Back in the Shadow-Cursed Lands, Shadowheart will show up after the party. We’ll then learn that she was punished by Lady Shar and made an exile. You’ll then be able to lift her up or tell her to get over. You’ll also be able to finally confess any feelings you might have for her and she can finally return them. The Chosen of Shar objective will also be complete now.
Learn about Shadowheart’s past from Dame Aylin
After freeing Nightsong and taking down Ketheric Thorm, you’ll need to do a full rest back a camp (or a couple). Eventually, Nightsong will want to talk with you. Speak with her and Shadowheart will show up and question Nightsong about her past. After learning more about herself, Shadowheart’s next destination will be set. You’ll also be given the legendary spear, Selune’s Spear of Night. Make sure to check in with Shadowheart afterward. You might need to do a couple of full rests to get the dialog. She will mention needing to do something and to leave it with her. The next morning she will have an ! above her head. Speak with her to see what it was!
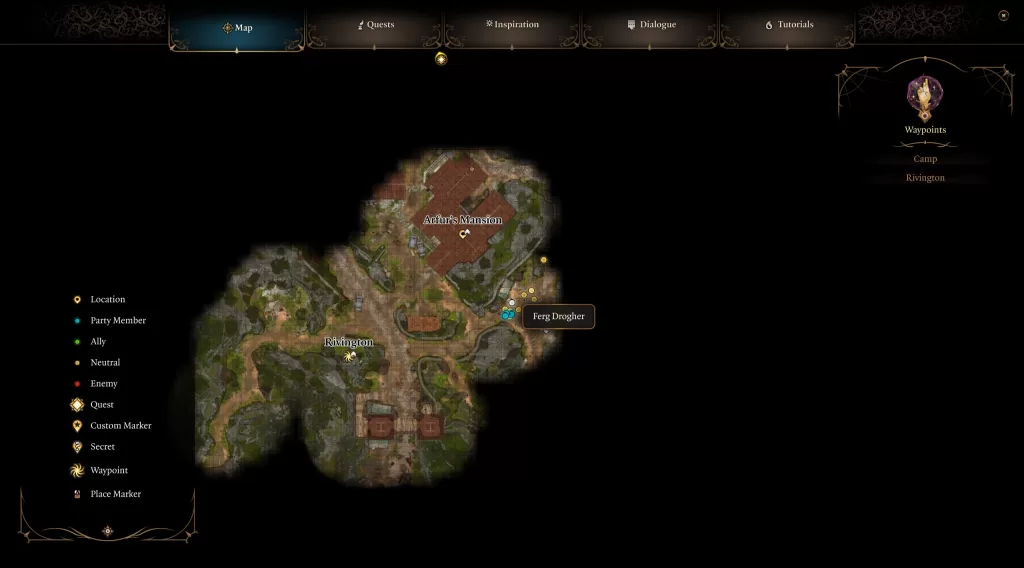
Find a Sharran Lookout
You’ll be able to complete this objective at the start of Act III after reaching Rivington. Follow the path east of the Rivington Ancient Sigil Circle looking for Ferg Drogher. Speak to him with Shadowheart in the party. He will send you to the House of Grief in the Lower City of Baldur’s Gate.
Journey to the House of Grief
…
Guides
Baldur’s Gate III – The Blade of Frontiers
The Blade of Frontiers is the companion quest for Wyll in Baldur’s Gate III. You’ll receive this quest automatically after allowing the famous hero to join your party when encountering him at the Druids’ Grove, provided he survived the initial goblin attack at the front gates.
How to Recruit Wyll
You’ll most likely meet Wyll at the Emerald Grove during the goblin attack upon your initial arrival. He’s the one who jumped off the gate to enter the fray. The first thing you’ll need to do if you want to recruit Wyll is make sure he doesn’t die during the battle. When that’s done, you can find him in the hollow of the grove training some young tieflings. Alternatively, if you found Karlach first, Wyll will show up to end her. You can then convince him to stop and join you there too.
Speak with him to trigger another mind melding session. You can then probe him for info on a devil he’s tracking and ask if he wants to join you to find a cure for the mind flayer in your head.
Hunt Down Karlach
As Wyll mentioned previously, he is on a quest to hunt down and kill the devil Karlach. To find her, you’ll want to head west of Emerald Grove to The Risen Road. She’ll be standing on a rock across a fallen tree bridge along the river.
Speak to her while Wyll is in the party to start up a conversation. You’ll learn that Karlach was forced to serve against her will and just wants to go home. You’ll then have a choice to make. You can let Wyll kill her which leads to a fight against Karlach or you can convince him to stay his blade. Doing so will present you with the opportunity to recruit Karlach. Either way, speak with him afterward. (We chose to recruit Karlach).
Rest at Camp
Head back to camp and do a Full Rest. This will trigger an event where a devil will show up in the camp. She’ll introduce herself as Mizora, Wyll’s patron, and come to punish him for not killing Karlach. If you stand up for Karlach, you’ll get approval from almost everyone. Mizora will then leave the camp giving you time to speak with Wyll.

Rescue Zariel’s Asset from Moonrise Towers
Continue traveling with Wyll until Act II when you reach Last Light Inn. After speaking with Jaheira in the Inn, rest at your camp to be visited by Mizora. She will task Wyll with freeing a demon that has been trapped at Moonrise Towers. If you pass a perception check, you’ll pick up on her needing this mission to be a success. You can then use this opportunity to have her release Wyll from his pact. If you pass a skill check, she will amend the contract after the job has been completed. Speak with Wyll afterward in camp.
This objective cannot be completed until you reach the Defeat Ketheric Thorm main quest towards the end of Act II.
The Grand Duke
To receive this objective, you’ll need to travel to Waukeen’s Rest. You can find it on the northwestern part of the map west of the Risen Road.
Once there, speak with Gauntlet Dain and persuade her to tell you what happened. She’ll respond that the Grand Duke was taken and the place burned to the ground. (When I did this Wyll was not in my party). Travel back to the camp and speak with Wyll. Mention the duke and he will freak out then tell you that the Grand Duke is his father. You can ask him more about his background, but make sure to promise that you’ll look for him.
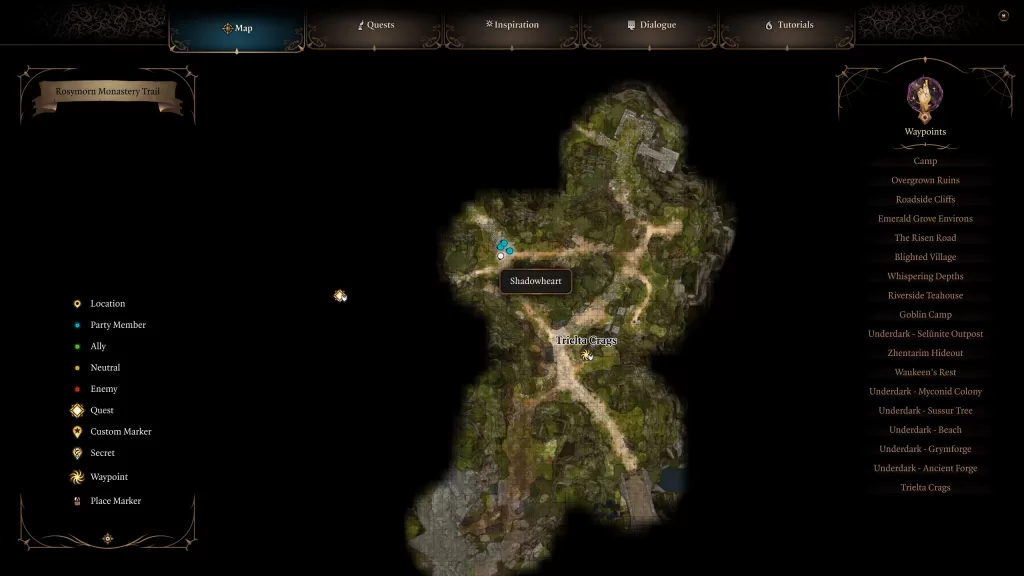
Once you reach the mountain pass, there will be some corpses on the ground north of the Trielta Crags fast travel point.
Interact with them to find a Missive from Moonrise stating that the duke is being delivered to Moonrise Towers. Wyll was not in my party when I found this note, so I had to speak with him at the camp about the note for some dialog. The objective does not update.
You can’t do the next part of this quest until you’re on the Defeat Ketheric Thorm Act II main quest towards the end of the act. During the quest, you’ll learn the Duke is being taken to Baldur’s Gate. After dealing with Thorm, you’ll be free to pursue him.
Attend Gortash’s Ordination Ceremony
Once you reach Wyrm’s Rock Fortress in Baldur’s Bate, head to the right side to find the doors leading to the Audience Hall. Mizora can be found there near the doors. Speak with her then attend the ceremony. Afterward. return to Mizora and speak with her once more. She’ll then travel to camp where you can speak with her thrice by resting. During this conversation, she will offer Wyll a deal. She will tell him where to find his father in return he serves her eternally or she breaks his pact but doesn’t tell him where to find his father.
For our playthrough, we are going to break the pact and still save Wyll’s dad.
Guides
Baldur’s Gate III – Where to Find Vendors
If your quest to remove (or conquer) the Intellect Devourer planted behind your eye in Baldur’s Gate III is going to be successful, you’ll need a couple of important things: decent gear and lots of gold! Our Where to Find Vendors guide is here to help you out! We’ll list where you can find each vendor so you can rake in that money by selling the things you don’t need and grabbing some additional items and equipment to make facing the challenges ahead a bit easier. The vendors have a mostly random item pool as to what shows up in their shop. You can reset their items by doing a Full Rest at your camp.
Act I
Emerald Grove
- Arron (merchant) – Near the entrance to the Hollow
- Auntie Ethel (apothecary) – In the tent behind the food pot
- Dammon (smith) – Across from the food pot
- Mattis (scammer) – The path leading to the Inner Grove
- Mol (second coming of the thieves guild) – In the Tiefling Hideout (requires you to be small to reach it)
Goblin’s Camp
- Grat the Trader (robber of graves) – In the plaza
- Roah Moonglow (black market) – In the temple
Mountain Pass
- Lady Esther – Near the Trielta Crags fast travel point
- A’jak’nir Jeera – Creche Y’llek in Rosymorn Monastery
Underdark
- Blurg – East side of the Myconid Colony
- Derryth Bonecloak – West side of the Myconid Colony
- Omeluum – East side of the Myconid Colony
- Corsair Greymon – At the Grymforge
- Stonemason Kith – At the Grymforge
Waukeen’s Rest
- Brem (smuggler) – In the Zhentarim Basement (only if you join)
Act II
Last Light Inn
- Quartermaster Talli – Near the entrance to the town
- Dammon – In the forge
- Mattis – In the Inn
Area near Moonrise Towers
- Sister Lidwin – In the House of Healing
Moonrise Towers
- Lann Tarv – Near the entrance of the towers
- Roah Moonglow – Near the entrance of the towers
- Araj Oblodra – In a room off the kitchen
Act III
Rivington
- Exxvikyap – In the Rivington General
- Mattis – Near the Requisitioned Barn
Circus of the Last Days
- Boney – Past Akabi
- Popper – West side of the circus
- Zara the Mummy – Near the entrance
Wyrm’s Crossing
- Theodric Shedeveer – Along the main road
- Roberon Silt – Along the main road
- Velson Oakes – Along the main road
- Glynda Oltower – Along the main road
- Hoots Hooligan – Bartender in Sharess’ Caress
- Entharl Danthelon – In Danthelon’s Dancing Axe
- Carmen Pennygood – In Carm’s Garm
Guides
Baldur’s Gate III – The Githyanki Warrior
The Githyanki Warrior is the companion quest for Lae’zel in Baldur’s Gate III. You’ll receive this quest automatically after allowing the bossy frog lady to join your party shortly after escaping from the Nautiloid.
Where to Find Lae’zel
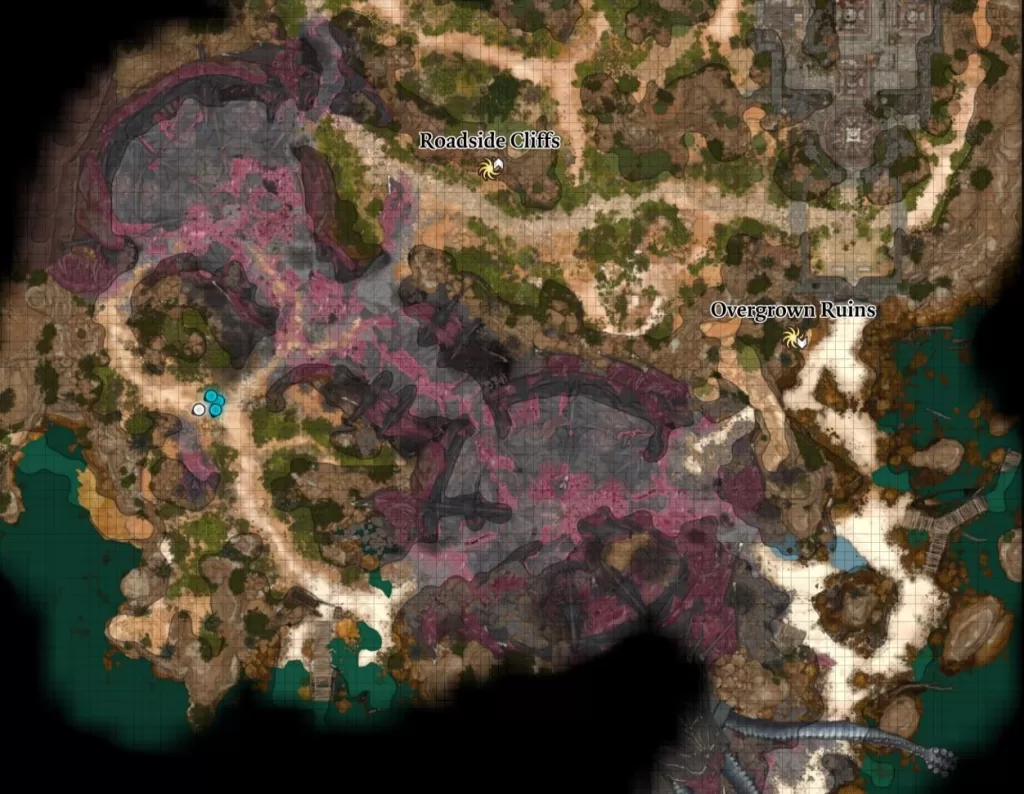
To find Lae’zek, make your way to the dirt path directly north of the Roadside Cliffs Ancient Sigil Circle at roughly coordinates X: 240 Y: 354. There you’ll find two tieflings that have her captured in a cage.
Approach them to trigger a cutscene where she will ask you to free her. You’ll then be presented with a number of options. Check out the table below to see what happens with each. If you can convince the tieflings to leave peacefully by using the first option on the table, you’ll get a persuasion check for a lead on a healer nearby.
| Option | Result |
|---|---|
| [DECEPTION] This creature is dangerous. Get out of here – leave it to me! | The tieflings leave Gale approves |
| [PERSUASION] Shoot down the trap. We must kill it before it harms someone. | You Fight Lae’zel Shadowheart approves |
| [BARD][DECEPTION] Oh, gods! You’ve caught a scout; the gith invasion force is right behind me – save yourselves! | Gales approves |
| Attack the tieflings. | You attack the tieflings Astarion approves Shadowheart disapproves |
| Leave. | You will have to fight the tieflings |
Getting the tieflings to leave either way on their own will bring this option.
| Option | Result |
|---|---|
| Now that they’re out of earshot, sure. | You are free to cut Lae’zel down… or not. |
| Say ‘please’. | You are free to cut Lae’zel down… or not. Astarion approves Shadowheart approves |
| Leave. | You are free to cut Lae’zel down… or not. |
You’ll also need to use a ranged weapon to shoot the bottom of the cage causing Lae’zel to fall out. Speak with her and you’ll have the option for her to join your party or you can tell her to eff off. Letting her join the party adds the option to seek out her comrades in arms to be purified! Adding her to the party or sending her to your camp will get a Gale approves and Shadowheart’s disapproves. If you tell her to get lost, you will lose out on this quest. The game does give you the option to still talk with her afterward to change your mind.
Find Zorru
While freeing Lae’zel from the tieflings, they mentioned that a guy named Zorru’s unit was taken out by a group of Githyanki. Lae’zel wants to track this guy down to get the details. Head for the Emerald Grove which is home to a local group of druids and make your way to the Hollow. Zorru can be found on the northern side near the prison cells. When you speak with him, make sure that Lae’zel is in the party. For this conversation, Lae’zel will try to lead the interrogation. If you back her up, you’ll get a couple of Lae’zel approves while Shadowheart disapproves. Conversely, if you lead the conversation you’ll get a couple of Shadowheart approves and Lae’zel dislikes. After getting the information, a ! will appear over Lae’zel’s head. Speak with her to have a quick chat. This will go one of two ways depending on if you let her do the interrogation or not.
Search for Signs of a Githyanki Creche
Now that we have an idea where the Githyanki might be, it’s time to head northwest to the mountain pass (west of Waukeen’s Rest). When you reach, approach the bridge near the objective to trigger a cutscene. After it ends, follow Lae’zel down to meet with her comrades. For the best outcome, let Lae’zel do the talking. When the dragon rider tells her to report to her creche, use persuasion to tell Lae’zel to play along. If you don’t you’ll have to fight off a squad of Githyanki. Regardless of what happens, you’ll need to travel to the Mountain Pass to locate the Creche.
Once you reach the Mountain Pass, head to the northwestern part of the area to find the Rosymorn Monastery. Follow that path leading into the monastery to trigger a cutscene. Afterward, you’ll want to enter the monastery through one of the ways listed below:
- Lockpick the main door
- Climb down onto a ledge overlooking the cliff and follow it east
- Climb up the vines near the fast travel point
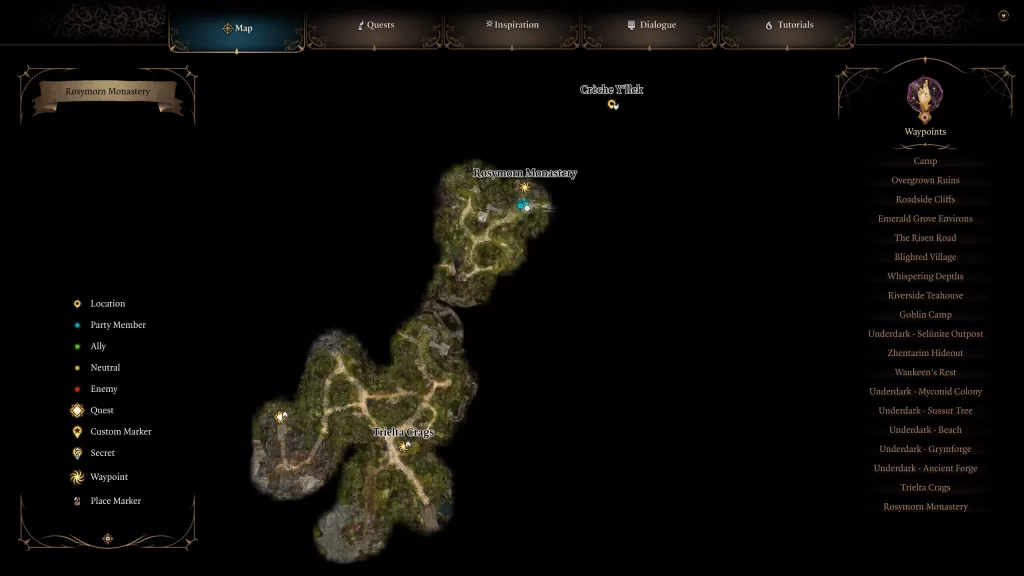
Next, look for the basement in the northern part of the building to reach the Creche. Go inside and then approach the group of Githyanki to start a conversation. After being asked a question, if you let Lae’zel answer and Shadowheart is in the party, she will disprove. You can also show them the artefact or pass a series of skill checks to gain entry.
Make your way to the infirmary on the west side of the building then speak with Ghustil Stornugoss and tell her about the tabpole. She’ll ask you how long you’ve been infected then send you to the Zaith’isk to have the little bugger removed. Interact with the machine and you’ll get the option to investigate it pending a skill check. If Lae’zel is with you, she will demand to go first. You can let her or make her wait on you. Either way, you’ll need to pass a series of skill checks to learn that the purification device is actually a murder weapon and to free yourself/Lae’zel from it pissing off the doctor. You can tell her that the parasite saved Lae’zel or convince her that it’s dead. Choosing to tell her the parasite saved Lae’zel with cause the doctor to run out of the room to get her tools while locking the party in the room. If you pick the lock or wait for the doctor to come back, then you’ll be attacked by a group of Githyanki. If you choose to tell her the parasite died, you’ll have to pass a Deception skill check. Doing this will result in the doctor letting you go. You’ll then need to bring Lae’zel to speak with the inquisitor.
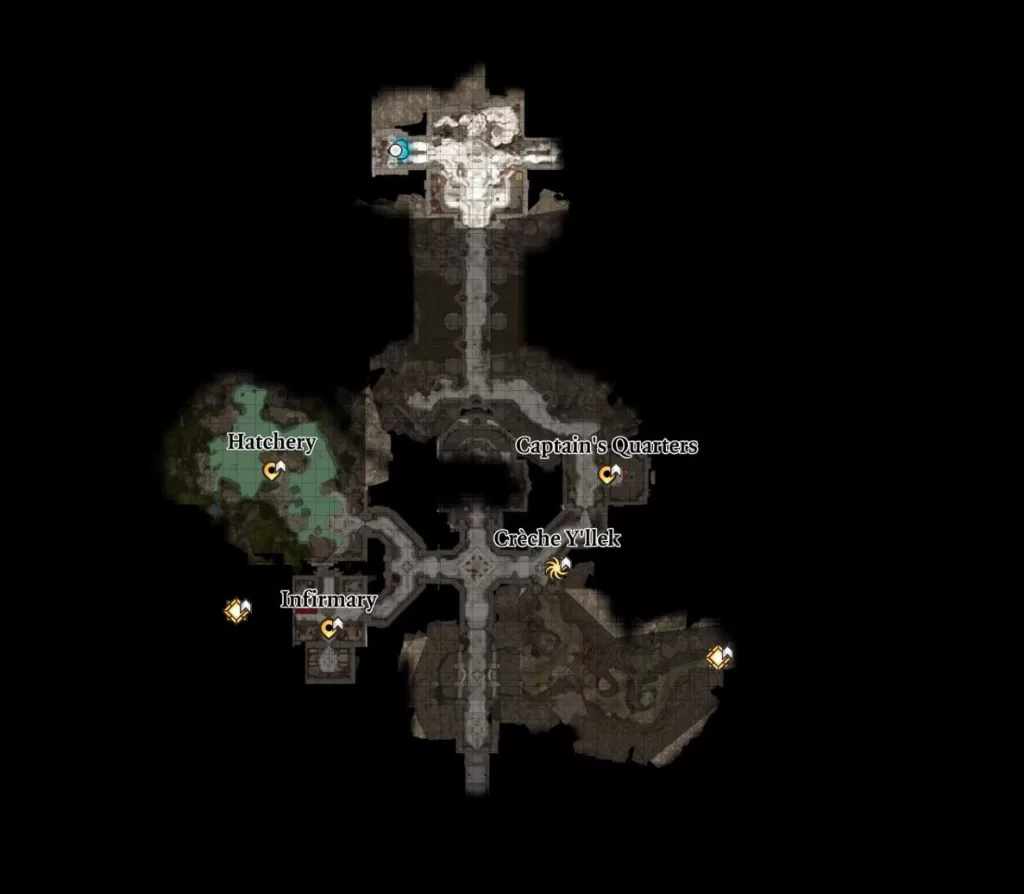
When you’re ready to proceed, head to the Captain’s Quarters and speak with her. Ask about the object they are seeking prompting you to make a face and her to ask if you have it. You’ll then have to pass a deception check to say no resulting in you not being granted an audience with the inquisitor. If you say you have it but won’t give it to her then you’ll have to fight a group of the Githyanki. You can then loot a Gith Shard from the Captain to lower the barrier allowing you to reach the inquisitor. If you say yes and hand over the artefact, she will take the object from you only for it to return on its own. She’ll then send you to talk with the Inquisitor a little deeper in the monastery. Speak with him and he too will ask for the artefact.
If you hand it over to him, the queen will make an appearance and ask that you kill the blight (aka your dream visitor) tainting it. If you agree, you’ll have to enter the relic. Approach the Beckoning Cave for the Dream Visitor to speak with you. They’ll ask to talk alone and offer you the choice to kill them or not. If you tell them you’re not there to kill them, they will say their trust was well placed in you and will tell you a secret about the queen. If you do choose to kill them, they don’t actually die and will heal saying that you broke their trust. Exit the Astral Prism after making either choice to be attacked by the inquisitor and his underlings. After dealing with them speak with Lae’zel who will be a tad bit confused by the series of events.
If you choose to deny his request, Lae’zel will threaten to show you her wrath. If you saved her from the purification process, you can use that as an option to get her to follow your lead, otherwise, you’ll need to pass a skill check (or open up a can of whoop ass on her). This also results in a battle with the inquisitor and his squad. After taking them all down, the queen will show up and try to get you to enter the artefact to deal with the Dream Visitor. It will play out similarly to the above paragraph minus the inquisitor and his goons attacking you afterward since they have already been dealt with. Another option here is to not enter the artefact and just walk away. If you do that, then you will not complete the personal quest to learn more about the artefact.
Regardless of the option you pick, all of the Githyanki will be hostel towards you now. If you return to the hallway outside the Captain’s Quarters, you’ll be able to fast travel again. Exit the Creche when you are aready.
Give Lae’zel Time to Think
After the events of the Creche, travel to a different area where you’ll be forced to rest at your camp. Interact with your bed to trigger a cutscene where Kith’rak Voss will show up at the camp claiming that the artefact is the key to liberating the Githyanki. He will then offer his aid and ask that you meet him at Baldur’s Gate. You can lead the conversation or allow Lae’zel to do so. You’ll also have the option to kill him or not. For now, we chose to let him live and agreed to meet at Baldur’s Gate. After the conversation, you’ll need to speak with Lae’zel in camp before resting.
Talk to Lae’zel about Orpheus
After the events at the beginning of Act III and exiting the Astral Plane, speak with Lea’zel in camp to learn more about Orpheus. You’ll both come to the conclusion that Voss was not lying.
Find Voss at Sharess’ Caress
In Act III you’ll start in the area of Rivington. Head to the northern part of the map and pass through the South Span Checkpoint. Continue heading forward and Sharess’ Caress will be on your right. Enter the building then go to the Upper Floor and enter the Devi’s Den. This leads to a conversation with Voss and Raphael. During the dialog with Raphael, he’ll tell you how to free Prince Orpheus and provide the means to do so asking for the crown controlling the Elder Brain in exchange. If you make the deal, then you’ll have to deliver on your promise (or betray Raphael later). If you decide to turn down the offer (you can come back and accept it later), there is a way to still get what you need and not side with the devil. That’s the path that were are going to follow for this guide.
Head down into the Sharess’ Caress and speak with Voss. You can lie and tell him you took the deal or be truthful and say you’re doing things another way. Voss will then say he’s forced to trust you and says he’ll be waiting in the underground once we get the Orphic Hammer.
NOTE: Doing a full rest will trigger a conversation with the queen who will make Lae’zel her chosen if she slays Orpheus. She intends to betray the queen, but you can persuade her not to if you wish. We are not going to side with the queen for this guide.
Retrieve the Orphic Hammer from the House of Hope
Travel to the Devil’s Fee in the Lower City of Baldur’s Gate. Once inside, take the stairs in the back of the room up. At the top of the second flight, interact with the Thirsty Ward on the wall to the right. This will prompt you to give it something to drink, whether it be water or beer. Satisfying its thirst will dispel the trap allowing you to then lock pick the door. Head inside and go to the left side of the room to find a pentagram on the ground. Once a character mentions something about it, head downstairs and speak with Helsik. Choose the persuasion option to acquire her help sneaking into the House of Hope. You can either pay or persuade her…
Guides
Baldur’s Gate III – The Pale Elf
The Pale Elf is the companion quest for Astarion in Baldur’s Gate III. You’ll receive this quest automatically after allowing this dashing nobleman to join your party shortly after escaping from the Nautiloid.
Where to Find Astarion
To find Astarion you’ll need to head west from the beach where your character wakes up and through the Nautiloid wreckage. He’ll be standing along a dirt path there near the coordinates X:183 Y:272.
Approach him to trigger a cutscene leading to a little tussle with him. Pretty much all of the options end with the Intellect Devourer connecting you both together stopping the fight. You’ll then be able to recruit him or tell the guy to hit the road. Choosing the latter results in you not getting this quest.
Continue traveling with Astarion
When you first get his quest, there isn’t much you can do with it yet. You’ll need to rest a couple of times to learn more about Astarion. One time he can be seen sneaking away and another he’ll try to bite your neck revealing himself to be a vampire. You’ll be given two options: To talk through it or to try passing a skill check where you’ll stab him through the heart with a stake. Doing the latter will result in him dying thus completing the quest.
If you take the first route, you can ask him some questions about his affliction. He will even suggest that you let him drink some of your blood so he can be stronger for the fights ahead. If you agree to this, you’ll have 2 chances to pass a skill check otherwise Astarion will drain the life from you. You’ll also get the bloodless debuff that gives you -1 to Attack Rolls, Saving Throws and Ability Checks. Do this or saying no will end the day. Speak with him again in camp to see the rest of the group’s reactions to learning what he really is.
if you travel to the Riverside Teahouse where Auntie Ethel calls home, you’ll meet a monster hunter named Gandrel. If you can pass a persuasion or intimidation skill check, you’ll learn that he is hunting Astarion. If you press him as to why, he’ll say that their children were stolen by vampires and that Astarion knows about it. You’ll have a choice. You can tell him where to find Astarion or protect the team’s resident vampire. When pressed, the option to attack also becomes available. For this playthrough, we chose to tell the man that Astarion was under our protection. Speak with Astarion the next time you’re in camp and mention Gandrel to learn a bit more about him.
In Act II when you’re nearing Moonrise Towers, the Grand Mausoleum will be nearby. Bring Astarion with you as you approach the area (I was controlling him). You’ll run into Rapahel there and the two will have a conversation. Astarion has some infernal runes carved into his back and would like to know what they say. Raphael said he would tell Astarion, but first, he would need to do him a favor by killing an Orthon.
Kill the Orthon
Head into the Grand Mausoleum and work your way to the Gauntlet of Shar, specifically the Gaunlet of Shar Ancient Sigil Circle. From there follow the path heading east then northeast to reach the domain of Yurgir. Follow the Displacer Beast there to find Yurgor, the Orthon we’ve been sent to hunt. He’ll smell Raphael on you and demand to know where the devil is. This will present you with a couple of options. You can attack him (and his followers) leading to a tough fight, offer to help him break free of the curse or persuade him to kill all of his followers and them himself. (We chose the last one!). Once the demon is dead, this objective will be completed.
Await Raphael’s Next Appearance
With the Orthon dead, it’s time to meet with Raphael. You can do this by heading back to camp and taking a long rest. This will trigger a cutscene where the devil will show up and tell you about the runes on Astarion’s back. Please note that you might have to do a few long rests for this cutscene to trigger.
Travel the road to Baldur’s Gate
After learning about the runes on his back, Astarion is ready to take Cazador out of the picture. Speak with him at the beginning of Act III before reaching the city in camp and he’ll tell you that we should seek out his fellow spawn to learn about Cazador’s plans.
Reach Cazador’s Palace
In Act III when you reach Rivington, head northeast of Arfur’s Mansion to find a camp (and make sure to bring Astarion with you). Speak with Ulma there and she will ask that Astarion save their children from his old master. You can make whatever choice you like, but we told Astarion that he owes them revenge if nothing else. You’ll also gain the Investigate Cazador’s Palace quest.
Next stop on the tour to head to Fraygo’s Flophouse across from the South Span of Wyrm’s Crossing. Again make sure you have Astarion in your party then go up to the second floor. You’ll find Dalyria and Pale Petras there. Interact with them to learn Cazador is hiding. Please note that if you rest a couple of days Astarion’s siblings will show up in the middle of the night and try to take him by force. This of course leads to a battle no matter what choices you make during their conversation!
To reach Cazador’s Palace, travel to the Lower City Central Wall waypoint in the Lower City of Baldur’s Gate. Enter the Central Watch Tower building that the waypoint rests on then climb up the stairs to reach the top of the wall. Follow it north to reach Cazador’s Palace. Along the way, you’ll run into some guards. If you tell them that you’re there to kill their master, they will of course attack you! To avoid combat, opt for the intimidation or deception checks. Afterwards, you’ll be able to continue. If you chose to fight the guards, make sure to loot the key from one of their corpses. Keep following the path to reach Szarr Palace.
Once inside, follow the red carpet through the curtain doorway. You’ll then reach the Sinister Door. Interact with this door to get a couple of skill checks. Passing them will tell you that there is a small slot in the door that something can fit in. From this point, feel free to explore the rooms. To continue the quest, you’ll need to head to the Door to the Kennel on the lower level. Head inside for Astarion to begin a conversation with Godey. You’ll need to defeat Godey then loot the Szarr Family Ring. This is the ring that you’ll need to insert into the Sinister Door to open it. Another thing to note is that there is a book in the guest room on the south side of the hallway from the kennel. It will be admitting a necrotic aura. You’ll need to get past the aura by jumping then loot the Mahogany Wardrobe to the left of the bed to receive the Kozakuran Dictionary which might help you understand the Sinister Door.
After opening the Sinister Door, you’ll enter the throne room immediately triggering a fight against some giant rats, bats, wolves and werewolves. If any of the thralls are nearby, they will join in the fight, too. Once you defeat everyone, you can explore the area or head directly to the Office Hall, which is on the southwestern side of the throne room. This will bring you to the Dais. Use this to descend under the palace to Cazador’s Dungeon.
Upon entering Cazador’s Dungeon, follow the hallway north. When you get to the end, there will be 3 doors. Head through the one on the left then cross over the bridge and interact with the glowing door. Use the ring to unlock it then head inside. Straight ahead you’ll see a skull on a pillow. Interact with it. During the interaction, you’ll need to pass multiple skill checks. When you’re done, you’ll receive the Black Mass Scroll. Make sure to read it to learn about the ritual that Cazador is trying to complete.
Next, return to the hallway with 3 doors then head through the northern door, which you’ll need to unlock using the ring. When you reach about halfway to the next door, a cutscene will trigger with a prisoner. After the cutscene, interact with the gate on the other side to find the Hunter kids.
Afterwards, continue north to find Cazador. Approach him to trigger a cutscene. If you brought Astarion, he’ll be captured and you’ll have 3 turns to free him using the Help command before he’s disintegrated and Cazador ascends. If you want to make the fight easier, bring some that knows telekinesis and throw Cazador into the abyss surrounding the area. This will finish him instantly, allowing you to focus on all the other enemies. Once Cazador’s HP goes to 0, he’ll be sent to the coffin in the middle of the arena. Approach the coffin as Astarion to trigger an event.
During this event, you’ll need to make a choice on whether to let Astarion complete the ritual or not. If you would like to talk about it, you’ll need to pass a persuasion check. If Astarion is prevented from ascending, he becomes happier. If he ascends, he’ll become cruel and unfriendly.
Next, you’ll need to make a choice about Cazador’s staff and the cells it controls. You can either kill the people in the cells, release them or leave them. If you release them, they will be sent to the Underdark where they’ll be free to live without harming the souls of Baldur’s Gate. Astarion will later tell you that he feels this option is the correct choice and it’s hinted that he might potentially become their leader/protector after the Absolute is dealt with. The Hunters will not be happy about this choice but they will back off once you mention that their children are among those sent to the Underdark. If you leave them there, then the Hunters will come in and take care of them all. If you kill them, then Astarion will regret the choice but the Hunters will say you did the right thing. This choice will complete The Pale Elf! On the way out, you’ll run into Ulma and the rest of the Hunters who will make a comment on your choice.
Guides
Baldur’s Gate III – The Wizard of Waterdeep
The Wizard of Waterdeep is the companion quest for Gale in Baldur’s Gate III. You’ll receive this quest automatically after allowing this intriguing wizard to join your party shortly after escaping from the Nautiloid.
How to Recruit Gale
Gale can be found at the Roadside Cliffs Ancient Sigil Circle on the north side of the Nautiloid wreckage.

Interact with it to trigger an event then touch the sigil to cause a hand to shoot out of the hole. You can help or leave. If you chose to leave, then you will miss out on Gale. You’ll need to pass a strength skill check to pull him out if you wish to save him. There are other class options as well. For example, the bard can attune to the sigils magic helping the portal quiet down a bit. Passing the skill check will cause Gale to emerge from the magical hole starting up a conversation with him. You’ll then be free to have him join the party or give him das boot! The coordinates for this area are X:223 Y:324.
Continue traveling with Gale
Once you first get his quest, there isn’t much you can do with it yet. You’ll need to travel with him until you raise his approval rating about halfway which can be done by doing things Gale approves of.
Prepare for Gale to request a magic item
Once you get Gale’s approval rating about halfway, he’ll want to speak with you about an important matter. Gale will tell you that he needs to consume the Weave from magic items or something terrible will happen. To prevent this, he’ll ask you to help him procure magic items for when the time comes. Make sure to agree. Magic items tend to be green or blue quality and will now indicate that they can be absorbed by Gale near the bottom when scrolling over them. It’s best to have on ready before he asks by keeping it on your main character.
Treat Gale’s Condition
Eventually, Gale will say he needs to speak with you then say it’s time and ask for a magical item to consume. Hand one over to him and enjoy the show. He’ll then give you a little more info about his condition. You’ll then need to do this a couple more times before Gale will finally tell you the truth behind his condition. Basically, if he doesn’t absorb the weave from magical items, he will explode with enough force to destroy a large town. He’ll then say if you wish he will leave the party. To continue on with the quest, tell him you’ll tackle it together.
Find Out What Elminster Wants with Gale
Once you reach the Mountain Path in Act I, you’ll want to travel west of the Trielta Crags fast travel point. Between two wooden bridges, you’ll come across a weary traveler.

Approach him with Gale in the party to trigger a conversation. Send Elminster back to your camp and when you’re ready, meet him there. Talk with the old timer to learn he was sent to us by Mystra who has a task for Gale to redeem himself. She also gave the wizard a way to stabilize Gale’s condition. You’ll then need to speak with Gale afterward.
Destroy the Heart of the Absolute
To complete this objective, you’ll need to be on the Defeat Ketheric Thorm main quest towards the end of Act II. Your party will follow Ketheric below Moonrise Tower and learn more about everything that’s going on. After defeating him, the objective will be completed and you’ll get a new one.
Seek Another Means of Defeating the Elder Brain
In Act III, you’ll come across Raphael again in a room on the upper level of Sharess’ Caress at Wyrm’s Crossing. He’ll tell you about this crown on the Elder Brain’s head. After the conversation, speak with Gale at camp who will suggest a trip to the Sorcerous Sundries bookstore in the Lower City of Baldur’s Gate.
Speak with the Bookseller at Sorcerous Sundries
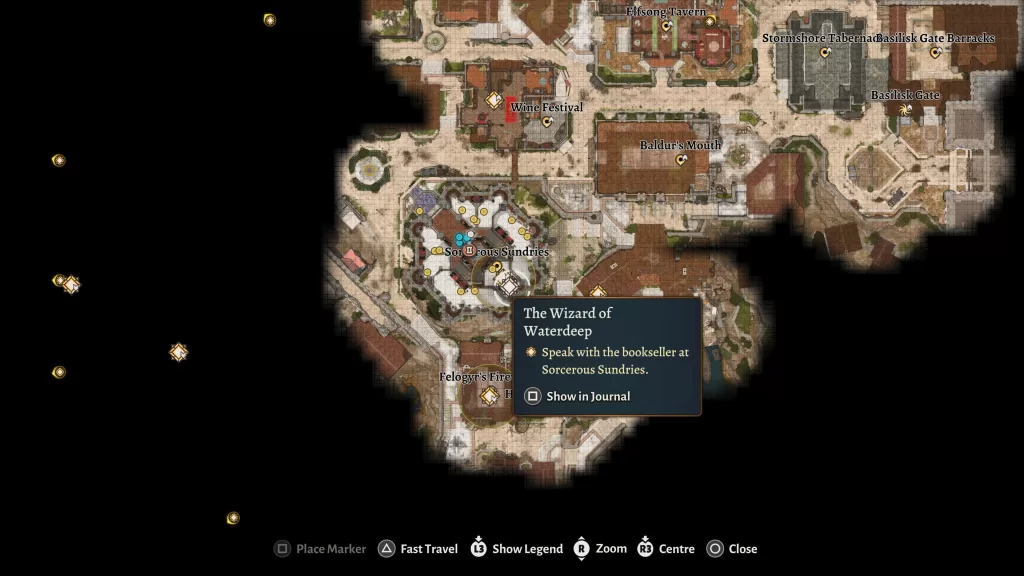
For the next stop, travel to the Sorcerous Sundries in the Lower City of Baldur’s Gate. Make your way there then head to Tolna Tome-Monger in the back of the store and speak with her. Quietly choose the option “I’m trying to find out about a particular Netherese crown. Have you anything on that subject?”. When she asks you which book you’re interested in, select “The Annals of Karsus”. She’ll then tell you a bit about the book but refuse to sell it to you. If you pass a persuasion, intimidation or deception skill check, she’ll tell you that the only way to the vault is through her office, which you are not allowed to go into.
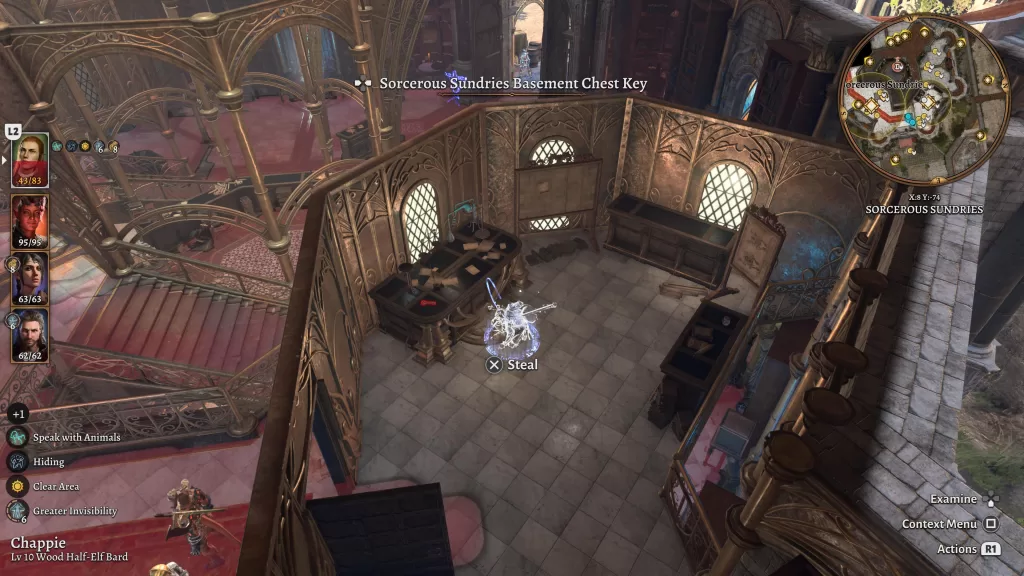
Head up to the second floor and take a left. Follow the walkway to the end to find the door to her office. In order to get inside, you’ll need to lock pick it! Make sure to have someone with high stealth and cast an invisibility spell to make sure you’re completely concealed when lock picking the door.
Once inside, loot the Basement Chest Key on the table along the left side of the room.
Next, head to the bookshelf in the corner and interact with the clasped book to open a portal.
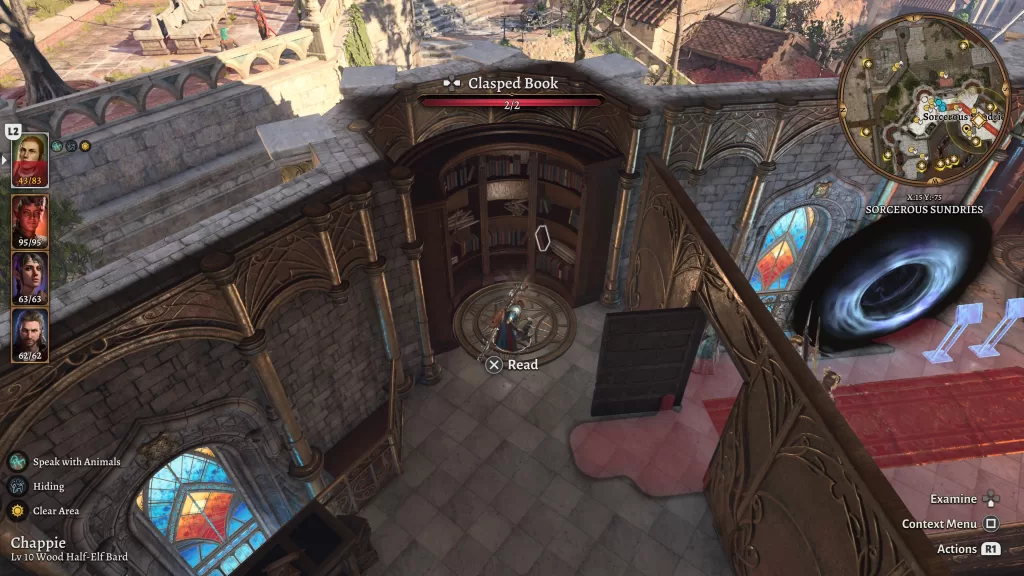
Jump inside to reach the Sorcerous Vault. Head through the wooden door in front of you. The next door is locked and you’ll need to smash through it. This will bring you to a circular room filled with multiple doors and armed with traps. Go through the door on the south side of the room labeled “Silverhand”. In the next room, head through the door labeled “Abjuration”. Lastly, head through the door labeled “Silver”.
In this room, activate the lever then return to the previous room and head through the “Demon” door. Now, pass through the door labeled “Karsus” where you’ll find the Karsus vault. Collect the tome inside then give it to Gale. This will trigger a cutscene where Gale will try to convince your character to reconstruct the crown correctly, granting the wearer God-like power! You’ll then have the choice whether you’ll allow him to proceed or convince him to stop. If you try to dissuade him, he’ll disapprove but you can promise to think about it.
After exiting the Sorcerous Sundries, Elminister will show up saying that Mystra wants an audience with Gale.
Meet with Mystra in the Stormshore Tabernacle
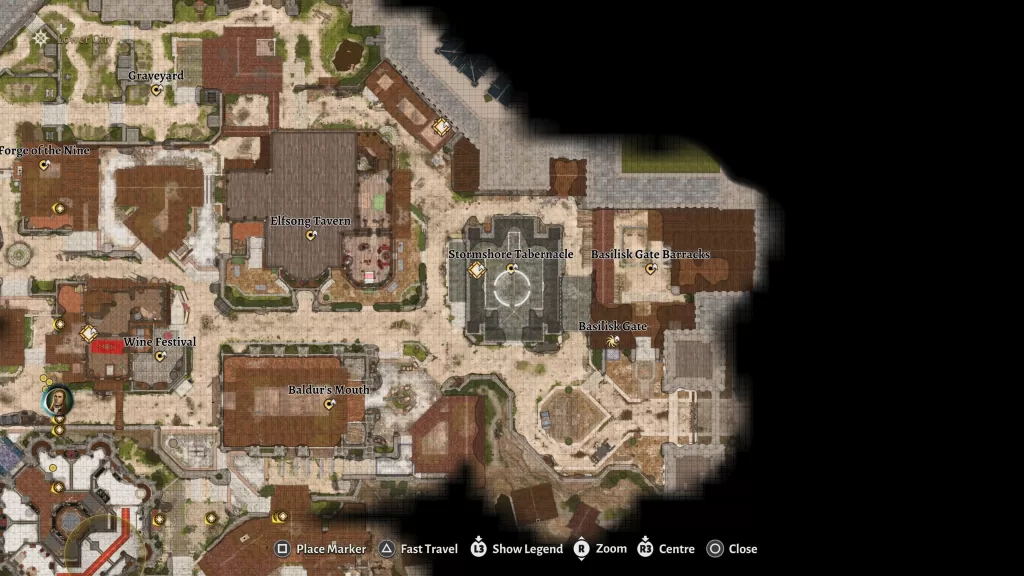
Travel to the Stormshore Tabernacle on the east side of the Lower City near the Basilisk Gate Barracks waypoint. Inside interact with the glowing Statue of Mystra. This will trigger a cutscene between Gale and the goddess. When he returns, speak with him.
Claim the Crown of Karsus
In order to begin this task, you’ll need to complete the Get Gortash’s Netherstone, Get Orin’s Netherstone and Confront the Elder Brain main quests…
Guides
Baldur’s Gate III – Druids’ Grove Quests
You’ll come to the Druids’ Grove as part of the main story in Act I of Baldur’s Gate III. There you’ll find a handful of side quests you can complete for rewards to help your party in their quest to get the Mind Flayer Parasite removed from their heads. This guide will cover the quests you can pick up in the Druids’ Grove and what you’ll need to do in order to complete them.
Find Your Belongings
Just before the steps leading to the Sacred Pool in the Inner Grove, there will be a shop stall operated by Mattis. Speak with him and he’ll do a magic trick in an attempt to get you to buy something. If you agree to look at his wares, then you’ll be mugged. Speak with both Mattis and Silfy who is standing nearby to learn about their boss Mol. Climb down the ladder behind the shop. At the bottom, there will be a perception check revealing a tiny hole. In order to go inside, you’ll need to be a smaller character or be able to shapeshift (looking at you Mask of the Shapeshifter from the Deluxe Edition!). Once you’re small enough, head through the hole to reach the Tiefling Hideout.
Scout around the hideout looking for Mol. When you find her, speak with her. If you saved Arabella or helped out with the locket already then she will thank you for helping. You can then talk to her about getting your belongings returned which will complete the quest.
**PLEASE NOTE** As of 8/10/2023 the quest is bugged and you may not get the option to have your items returned preventing the quest from completing.
Investigate the Beach
You’ll get this quest automatically when you reach the beach which can be found east of the Emerald Grove from the Sacred Pool. Work your way down the mountain path until you reach the water. There you’ll find the young tiefling Mirkon in some kind of trance. Approach the kid and speak with him to being a conversation. Focus on the sound until you pass the nature check to reveal the boy under a harpy’s charm. You’ll then need to pass another couple of skill checks to break free of the song. This will result in a battle against a group of 4 harpies.
Alternatively, you can just run into the water to start combat with them. After a few turns, a 5th one will show up. Defeat them all then speak with the child to learn he was sent there by Mol. He then tells you to seek out Doni and utter the passphrase to reach the Tiefling Hideout.
If you’ve already been there and met Mol, then you know where to find her. Before heading over there, go to the rock where the harpies were to find a small path leading to the ocean. There will be a chest there with some gold. If you keep following the path along the beach, then eventually you’ll spot the harpy’s nest. To reach it you’ll need a way to cross the gap too wide to jump. A character with Misty Step can get the job done. Loot the nest to receive a magic ring, ore and supply pack.
To complete the quest, speak with Mol. She will just thank you for helping the kid out. There will be no dialog option or reward.
Rewards: None
Rescue Volo
After speaking with Volo in the grove, you can find him at the Goblin Camp where he’s being kept as a prisoner. Speak with him in the courtyard. He will be moved to a cage inside the temple and you’ll get this quest. Head inside and take a right at the statue with the priestess. You’ll find him in a room over there. Speak with Gribbo in the same room. If you can pass a skill check, she will hand over the key to Volo’s cage and bugger off. You can then let him out to start a conversation. It will give you the option to send him on his way or to have him meet you at your camp. We did the latter option. Next time you are in you’re camp, check in with the writer. He’ll decide to remain in your camp completing the quest.
Rewards: Piece of gear
Save Arabella
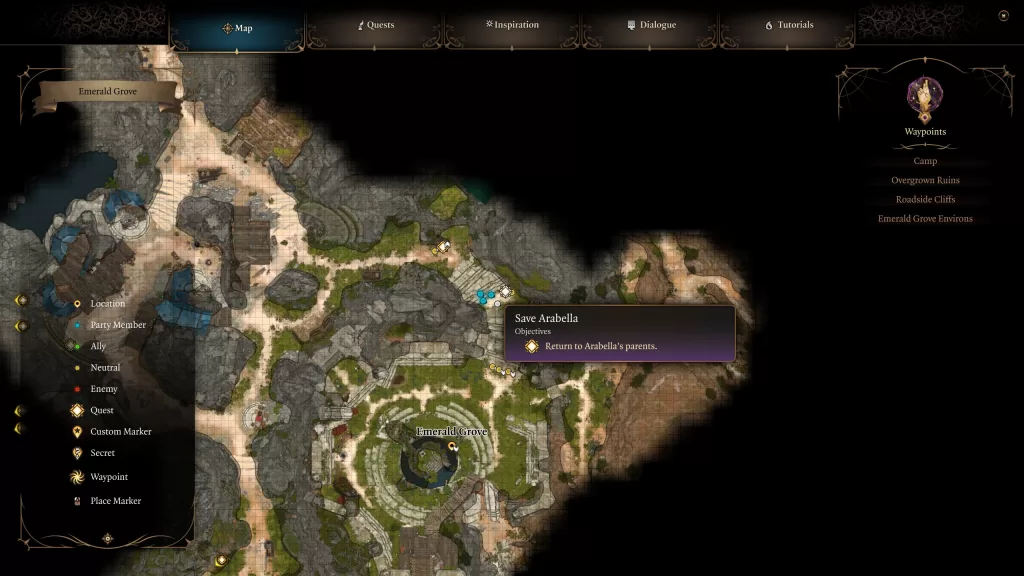
When you first approach the Inner Grove a cutscene will occur. In it, a group of angry tieflings will be protesting the magic ritual the druids are performing to seal off the grove. You’ll want to pay special attention to Komira and Locke. Their daughter tried to steal the relic required for the ritual but was caught and imprisoned. When the cutscene ends, head up the first flight of stairs and speak with them. They’ll tell you what happened and ask that you help to free their daughter giving you the Save Arabella quest.
Head back down the stairs to the Scared Pool. If this is your first time, then you’ll be stopped by a trio of druids. As long as you don’t attack them, you’ll be granted permission to pass because Kagha wants to have a word with you. Head through the Stone Door on the northwest side of the pool bringing you to the Emerald Grove. Follow the steps down to trigger a cutscene with Kagra, Rath and Arabella. Kagra will stick her poisonous snake on the girl threatening that it will bite her if she moves. In order to save her, you’ll need to pass a skill check. Doing so will see Kagra release Arabella and she will return to her parents. If you fail, Arabella will try running away and the snake will bite and kill her.
Either outcome, you’ll need to report back to the parents to complete the quest. If Arabella was killed, then Kagra will befall an unfortunate fate at the camp party later if you sided with the druids. Please note that you can do all of the above without speaking to Komira and Locke as its part of getting to Nettie for the Find a Cure main story quest.
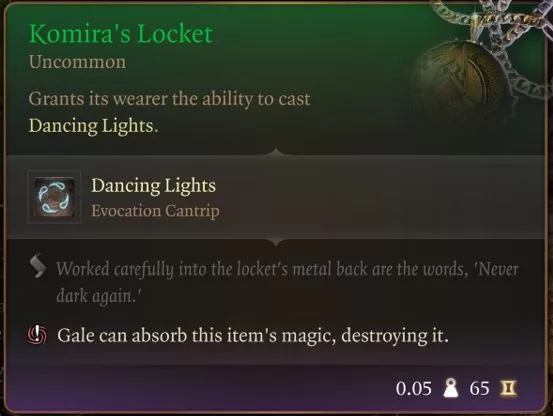
Rewards: Komira’s Locket (saving Arabella)
Save the Refugees
You can get this quest a number of ways with the main two being by talking to Zevlor and Kagha. If you speak to Zevlor right after reaching the grove, he’ll ask that you speak to Kagha on their behalf to buy them some more time before getting kicked out of the grove. Head for the Emerald Grove just past the Sacred Pool in the center of the area to reach Kagha. Talk with her to learn that she wants you to lead the tieflings to the city and that they have until the first prayer to be out.
Before returning to Zevlor, talk with Rath nearby. He will say that Halsin is the only one who can persuade Kagha to stop the ritual. Bring this information back to Zevlor in the Secluded Chamber past the Stone Door in the Hallow to let him know. He’ll say the only way that his people can make it safely to the city is by dealing with the Goblin leaders. Wyll will have some additional dialog if you bring him along. Agree to help then set out for the Goblin Camp west of the Emerald Grove Environs fast travel point. It will be just past the Blighed Village. When you get there, approach the front gate to being a conversation with the guards. If you pass a skill check they will let you inside the camp. If not then you’ll have to take care of them. If you go that route, make sure to destroy the war drum on the right ledge to prevent them from altering the rest of the camp to your presence. You’ll then be able to walk through the gate and follow the right path to reach the camp.
Your main objective it head through the Heavy Oak Doors leading to the temple. There is an ogre guarding the door, but he won’t stop you. Once you’re inside, you’ll have to pass a skill check with the guards there to pass without an incident. Otherwise, you’re going to be fighting a lot of goblins. Now you’re free to pick off the leaders of the goblin. They are listed below.
- True Soul Gut – You can have her go to her room and deal with her there.
- Minthara – You can fight her in the side area she’s in. Make sure to take care of the orb and drum first.
- Dror Ragzlin – Climb up into the rafters above his throne. Also, make sure to deal with both drums.
After all three are defeated, return to Zevlor in the Druids’ Grove to tell him the news. He’ll thank you and try to pay you. You can accept it or tell him to keep it. To complete the quest, you’ll need to attend the celebration at your camp.
There is another play here if you’re feeling a little naughty. Once you get into the temple at the Goblin Camp, seek out Minthara. She will tell you to join her in killing those that don’t worship the Absolute ie the druids. If you’ve already been to the grove, then you can tell here where they are. Otherwise, you’ll have to persuade Liam to tell you. You can then free him or leave him there. Return to Minthara with the information she’s after. Doing this will cause Karlach to leave your party for good. Minthara will then have you prepare for battle by resting at your camp. Head there and kick off a full rest. This will trigger a cutscene with Lae’zel. Persuade her not to kill you. You’ll also have a visitor in your dreams.
When you wake head to the grove for an event. Once inside, head up to Zevlor and speak with him. If you tell him you’ve sided with Minthara, then the whole camp will attack you. Play it cool and make it sound like you’re on their side. Then you can blow the horn and begin the attack. You’ll have one last chance to pick a side. Open the gate to support Minthara and take out the tieflings. She’ll then give the command to kill everyone at the grove. Defeat the enemies in the order listed below:
- The Hollow
- Secluded Chamber
- The Sacred Pool
Once you’ve cleared the areas above, return to Minthara in the Secluded Chamber and speak with her. After the conversation, you’ll be sent back to your camp for a celebration and the quest will be completed.
Steal the Sacred Idol
In order to receive this quest, you’ll need to reach the Tieflings Hideout and speak with Mol, their leader. Ask her if there is anything you can do to help out and she will request you steal the Sacred Idol. To reach the hideout, you can speak with a tiefling named Doni in the Hollow. He will then slip away into a hidden passageway. You’ll spot it if you pass a perception check. If you saved the tiefling child during the Investigate the Beach quest, he will give you a password to tell Doni who will show you the way to the hideout. Alternatively, look for Mattis at his shop a bit further down the path then climb down the ladder behind it. If you pass the perception check, then you’ll find a hole that also leads to the hideout. It’s worth noting that you’ll need to be small enough to climb through the hole. Races like the Gnome or Dwarf won’t have an issue. You can also squeeze through if you can shapeshift into something smaller. The Mask of the Shapeshifter you get from the deluxe version of the game can help.
Once you’ve spoken with Mol, head over to the center of Sacred Pool and locate the idol on its altar. There are a number of ways to go about doing it. You can cover the area in fog then walk up and take it for example. Once the idol leaves the altar, a druid will run up and check then declare it gone. This will cause the druids to start attacking everyone. If you’re quick you can teleport out and then deliver the Idol to Mol to complete the quest.
**PLEASE NOTE** We won’t have more options for this quest until our next playthrough as we are playing a hero character and heroes don’t steal stuff!
Reward: ???