You’ll come to the Druids’ Grove as part of the main story in Act I of Baldur’s Gate III. There you’ll find a handful of side quests you can complete for rewards to help your party in their quest to get the Mind Flayer Parasite removed from their heads. This guide will cover the quests you can pick up in the Druids’ Grove and what you’ll need to do in order to complete them.
Find Your Belongings
Just before the steps leading to the Sacred Pool in the Inner Grove, there will be a shop stall operated by Mattis. Speak with him and he’ll do a magic trick in an attempt to get you to buy something. If you agree to look at his wares, then you’ll be mugged. Speak with both Mattis and Silfy who is standing nearby to learn about their boss Mol. Climb down the ladder behind the shop. At the bottom, there will be a perception check revealing a tiny hole. In order to go inside, you’ll need to be a smaller character or be able to shapeshift (looking at you Mask of the Shapeshifter from the Deluxe Edition!). Once you’re small enough, head through the hole to reach the Tiefling Hideout.
Scout around the hideout looking for Mol. When you find her, speak with her. If you saved Arabella or helped out with the locket already then she will thank you for helping. You can then talk to her about getting your belongings returned which will complete the quest.
**PLEASE NOTE** As of 8/10/2023 the quest is bugged and you may not get the option to have your items returned preventing the quest from completing.
Investigate the Beach
You’ll get this quest automatically when you reach the beach which can be found east of the Emerald Grove from the Sacred Pool. Work your way down the mountain path until you reach the water. There you’ll find the young tiefling Mirkon in some kind of trance. Approach the kid and speak with him to being a conversation. Focus on the sound until you pass the nature check to reveal the boy under a harpy’s charm. You’ll then need to pass another couple of skill checks to break free of the song. This will result in a battle against a group of 4 harpies.
Alternatively, you can just run into the water to start combat with them. After a few turns, a 5th one will show up. Defeat them all then speak with the child to learn he was sent there by Mol. He then tells you to seek out Doni and utter the passphrase to reach the Tiefling Hideout.
If you’ve already been there and met Mol, then you know where to find her. Before heading over there, go to the rock where the harpies were to find a small path leading to the ocean. There will be a chest there with some gold. If you keep following the path along the beach, then eventually you’ll spot the harpy’s nest. To reach it you’ll need a way to cross the gap too wide to jump. A character with Misty Step can get the job done. Loot the nest to receive a magic ring, ore and supply pack.
To complete the quest, speak with Mol. She will just thank you for helping the kid out. There will be no dialog option or reward.
Rewards: None
Rescue Volo
After speaking with Volo in the grove, you can find him at the Goblin Camp where he’s being kept as a prisoner. Speak with him in the courtyard. He will be moved to a cage inside the temple and you’ll get this quest. Head inside and take a right at the statue with the priestess. You’ll find him in a room over there. Speak with Gribbo in the same room. If you can pass a skill check, she will hand over the key to Volo’s cage and bugger off. You can then let him out to start a conversation. It will give you the option to send him on his way or to have him meet you at your camp. We did the latter option. Next time you are in you’re camp, check in with the writer. He’ll decide to remain in your camp completing the quest.
Rewards: Piece of gear
Save Arabella
When you first approach the Inner Grove a cutscene will occur. In it, a group of angry tieflings will be protesting the magic ritual the druids are performing to seal off the grove. You’ll want to pay special attention to Komira and Locke. Their daughter tried to steal the relic required for the ritual but was caught and imprisoned. When the cutscene ends, head up the first flight of stairs and speak with them. They’ll tell you what happened and ask that you help to free their daughter giving you the Save Arabella quest.
Head back down the stairs to the Scared Pool. If this is your first time, then you’ll be stopped by a trio of druids. As long as you don’t attack them, you’ll be granted permission to pass because Kagha wants to have a word with you. Head through the Stone Door on the northwest side of the pool bringing you to the Emerald Grove. Follow the steps down to trigger a cutscene with Kagra, Rath and Arabella. Kagra will stick her poisonous snake on the girl threatening that it will bite her if she moves. In order to save her, you’ll need to pass a skill check. Doing so will see Kagra release Arabella and she will return to her parents. If you fail, Arabella will try running away and the snake will bite and kill her.
Either outcome, you’ll need to report back to the parents to complete the quest. If Arabella was killed, then Kagra will befall an unfortunate fate at the camp party later if you sided with the druids. Please note that you can do all of the above without speaking to Komira and Locke as its part of getting to Nettie for the Find a Cure main story quest.
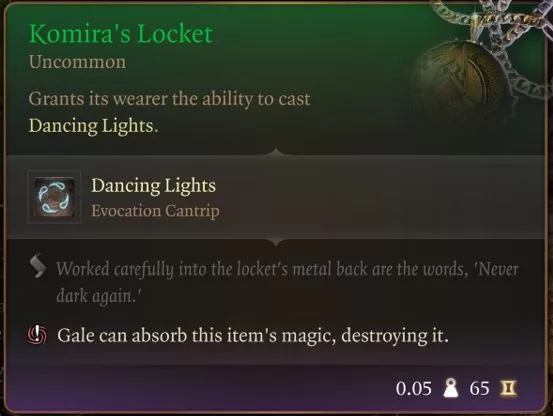
Rewards: Komira’s Locket (saving Arabella)
Save the Refugees
You can get this quest a number of ways with the main two being by talking to Zevlor and Kagha. If you speak to Zevlor right after reaching the grove, he’ll ask that you speak to Kagha on their behalf to buy them some more time before getting kicked out of the grove. Head for the Emerald Grove just past the Sacred Pool in the center of the area to reach Kagha. Talk with her to learn that she wants you to lead the tieflings to the city and that they have until the first prayer to be out.
Before returning to Zevlor, talk with Rath nearby. He will say that Halsin is the only one who can persuade Kagha to stop the ritual. Bring this information back to Zevlor in the Secluded Chamber past the Stone Door in the Hallow to let him know. He’ll say the only way that his people can make it safely to the city is by dealing with the Goblin leaders. Wyll will have some additional dialog if you bring him along. Agree to help then set out for the Goblin Camp west of the Emerald Grove Environs fast travel point. It will be just past the Blighed Village. When you get there, approach the front gate to being a conversation with the guards. If you pass a skill check they will let you inside the camp. If not then you’ll have to take care of them. If you go that route, make sure to destroy the war drum on the right ledge to prevent them from altering the rest of the camp to your presence. You’ll then be able to walk through the gate and follow the right path to reach the camp.
Your main objective it head through the Heavy Oak Doors leading to the temple. There is an ogre guarding the door, but he won’t stop you. Once you’re inside, you’ll have to pass a skill check with the guards there to pass without an incident. Otherwise, you’re going to be fighting a lot of goblins. Now you’re free to pick off the leaders of the goblin. They are listed below.
- True Soul Gut – You can have her go to her room and deal with her there.
- Minthara – You can fight her in the side area she’s in. Make sure to take care of the orb and drum first.
- Dror Ragzlin – Climb up into the rafters above his throne. Also, make sure to deal with both drums.
After all three are defeated, return to Zevlor in the Druids’ Grove to tell him the news. He’ll thank you and try to pay you. You can accept it or tell him to keep it. To complete the quest, you’ll need to attend the celebration at your camp.
There is another play here if you’re feeling a little naughty. Once you get into the temple at the Goblin Camp, seek out Minthara. She will tell you to join her in killing those that don’t worship the Absolute ie the druids. If you’ve already been to the grove, then you can tell here where they are. Otherwise, you’ll have to persuade Liam to tell you. You can then free him or leave him there. Return to Minthara with the information she’s after. Doing this will cause Karlach to leave your party for good. Minthara will then have you prepare for battle by resting at your camp. Head there and kick off a full rest. This will trigger a cutscene with Lae’zel. Persuade her not to kill you. You’ll also have a visitor in your dreams.
When you wake head to the grove for an event. Once inside, head up to Zevlor and speak with him. If you tell him you’ve sided with Minthara, then the whole camp will attack you. Play it cool and make it sound like you’re on their side. Then you can blow the horn and begin the attack. You’ll have one last chance to pick a side. Open the gate to support Minthara and take out the tieflings. She’ll then give the command to kill everyone at the grove. Defeat the enemies in the order listed below:
- The Hollow
- Secluded Chamber
- The Sacred Pool
Once you’ve cleared the areas above, return to Minthara in the Secluded Chamber and speak with her. After the conversation, you’ll be sent back to your camp for a celebration and the quest will be completed.
Steal the Sacred Idol
In order to receive this quest, you’ll need to reach the Tieflings Hideout and speak with Mol, their leader. Ask her if there is anything you can do to help out and she will request you steal the Sacred Idol. To reach the hideout, you can speak with a tiefling named Doni in the Hollow. He will then slip away into a hidden passageway. You’ll spot it if you pass a perception check. If you saved the tiefling child during the Investigate the Beach quest, he will give you a password to tell Doni who will show you the way to the hideout. Alternatively, look for Mattis at his shop a bit further down the path then climb down the ladder behind it. If you pass the perception check, then you’ll find a hole that also leads to the hideout. It’s worth noting that you’ll need to be small enough to climb through the hole. Races like the Gnome or Dwarf won’t have an issue. You can also squeeze through if you can shapeshift into something smaller. The Mask of the Shapeshifter you get from the deluxe version of the game can help.
Once you’ve spoken with Mol, head over to the center of Sacred Pool and locate the idol on its altar. There are a number of ways to go about doing it. You can cover the area in fog then walk up and take it for example. Once the idol leaves the altar, a druid will run up and check then declare it gone. This will cause the druids to start attacking everyone. If you’re quick you can teleport out and then deliver the Idol to Mol to complete the quest.
**PLEASE NOTE** We won’t have more options for this quest until our next playthrough as we are playing a hero character and heroes don’t steal stuff!
Reward: ???