Towards the end of Act I in Baldur’s Gate III, you’ll find yourself at a Githyanki Crech in the Mountain Pass. According to Lae’zel they have a way to purify the parasite. This guide will cover the quests you can find there and how to complete them.
Find the True Blood of Lathander
This quest can be started by looting the Strange Chunk of Amber from the Display Case in the Inquisitor’s Chambers at the Rosymorn Monastery. One of my party members detected that the artefact was fake prompting us to search for the real one. You can pass the item around to different party members to see if they will pass the check. The other way to get this quest is by finding all of the Ceremonial Weapons and placing them on their pedestals (which you’ll need to do anyway) then reading the Note to the next Dawnmaster note in the pouch you’ll be rewarded.
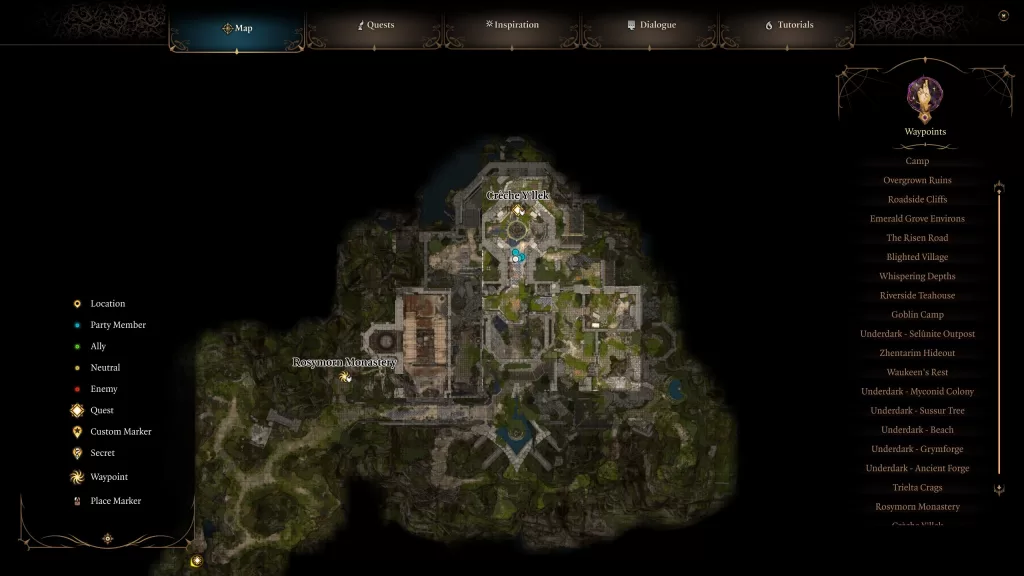
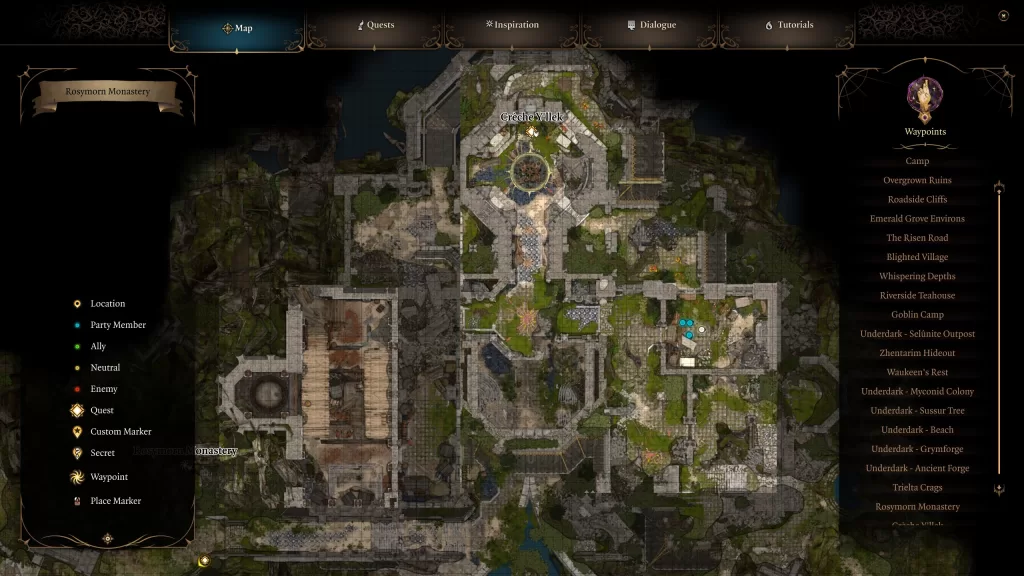
To start, you’ll need to find 3 ceremonial weapons scattered around the monastery and place them on their pedestal (unless you looted the Ceremonial Longsword, then you’ll also need to put that back!) in the room with a giant stained glass image on the floor in the northern part of the monastery. The order from left to right when entering the room is Battle Axe, Longsword, Warhammer and Mace. After doing this, the wall will open up between the Longsword and Warhammer allowing you to grab the Dawnmaster’s Crest from a pouch. Listed below is where you can find the Ceremonial Battle Axe, Mace and Warhammer.

Ceremonial Battle Axe
The battle axe can be found in a barricaded room with a Guardian of Faith on the east side of the building. You can jump over the things blocking the door or destroy them to gain entry. Doing so will invoke the wrath of the guardian. Defeat it then you’ll be able to grab the axe. It will either be on the floor or looted off of the guardian. Please note, I defeated the guardian before having the quest and it disappeared. When I went back, his corpse was there and the axe was on the ground. I had reloaded the game for this to happen.
Ceremonial Mace

The mace can be looted from a Kobold (you’ll have to fight a group of them) in the wine cellar of the monetary which is on the west side of the building. To reach it, head to the room where all of the Gremishka were then make your way to the northwestern part of the room. You can then jump down to the level below to reach the cellar. This is a bit of a jump and will result in you taking some damage. You can mitigate that by casting Feather Fall.
Ceremonial Warhammer

The Warhammer is located on the roof of the building in an eagle’s nest. To reach, head to the room where the pack of Gremishka made their next then look for some boards blocking a doorway. Break them and head through bringing you to an area with a small pool. There will be some vines there you can climb up to reach the roof. If you try to grab the weapon, the birds will turn hostel and you’ll have to fight them. This includes putting down for or trying to pick it up while invisible.
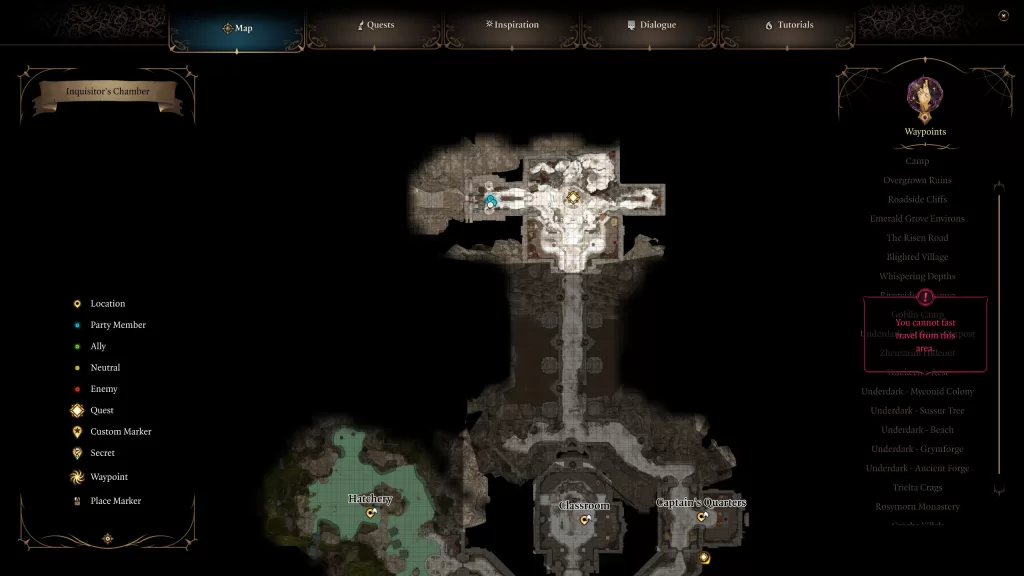
Dawnmaster’s Crest
With the Dawnmaster’s Crest, head to the room where you fought the Inquisitor (or will fight) then go to the western part of the room to find two statues. Facing the western wall, the one on the right needs to be turned so that it’s facing east. The one on the left needs to be turned so that it’s facing west. In order to turn the statue to the left, you’ll need to pass an Acrobatics check first which rolls when you interact with the statue. You can use Lae’zel’s Anstral Knowledge and select Dexterity to make this a little easier. Once the statues are in the correct position, the western wall will lower revealing a hidden path. Follow the path down the steps and head through the giant doors with the sun on them at the end to reach the Secret Chamber.
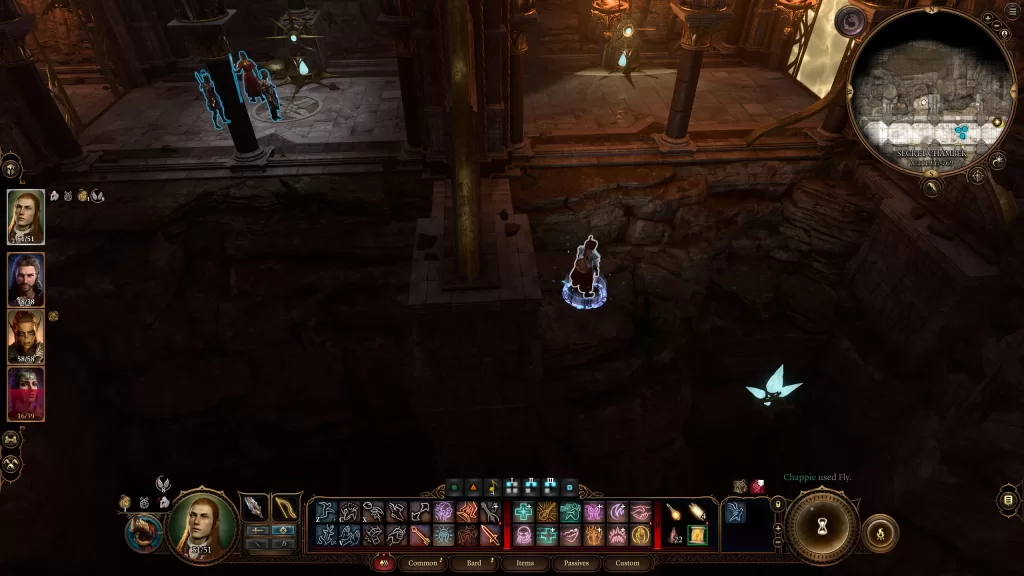
In the chamber, the way forward will be blocked by a barrier. Destroy the energy source to the left to the door to drop it then head inside. This will trigger turn-based mode as a trap is set off. Head over to the Dawnbreaker in the middle of the room and disarm it by passing a skill check. You’ll then need to cross a gap to the other side to disable two energy sources and another Dawnbreak. We did this by having Gale cast fly on another party member then flew over to the other side.
Once you get the barrier down, continue heading west to reach a platform with the Blood of Lathander on it. Place the crest in the pedestal under it to release the weapon and claim it for yourself completing the quest.
Steal a Githyanki Egg
You can pick up this quest from Lady Esther near the Trielta Crags fast travel point. She will ask you to still a Githyanki Egg so that the Society of Brilliance can raise it in an attempt to see if can overcome the Githyanki’s violent nature. You can choose if you want to get involved or not. Saying no will complete the quest while saying yes has you taking one from the Creche. If you have Lae’zek in the party, she will not be amused. You can also attempt to pass a skill check to get paid upfront.
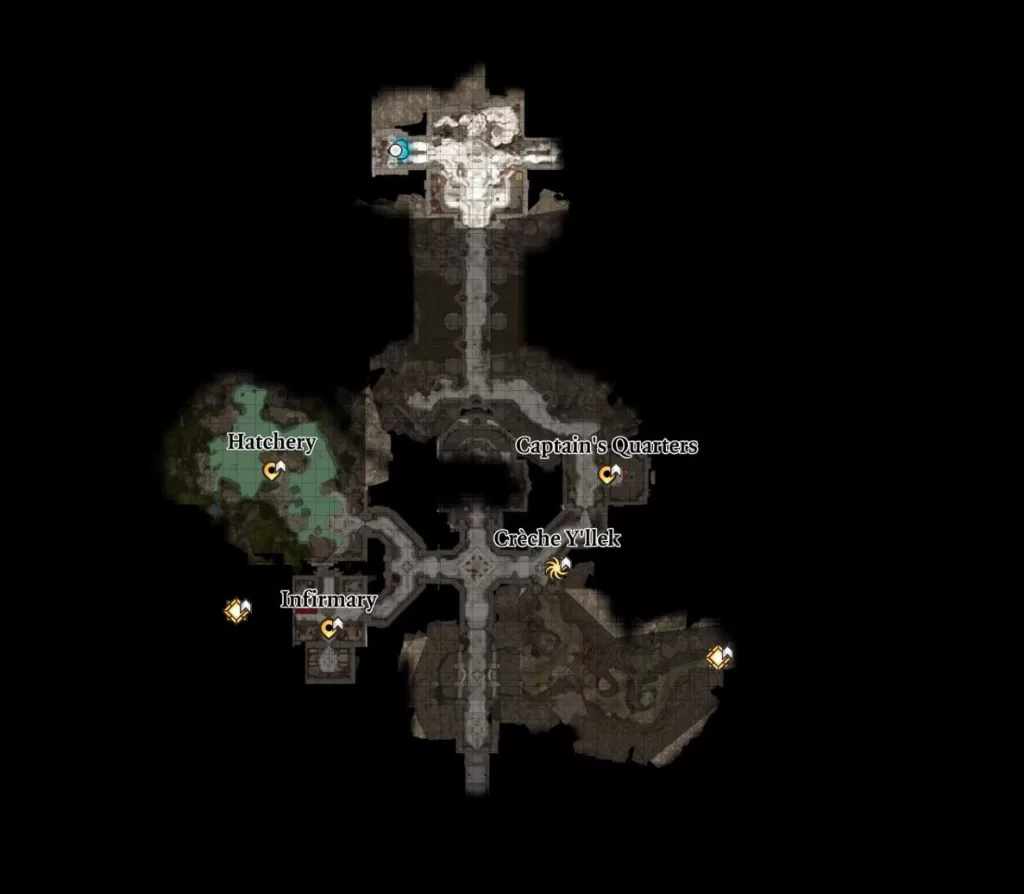
If you’re going to steal the egg, head for the basement of the Rosymorn Monastery to reach the Creche. You’ll then want to head for the northwest side of the area to find the hatchery with a single egg. It can be found at the back of the room in a pool of acid guarded by 3 Githyanki. You’ve got two options if you want the egg:
1. Try and take it with force. Picking up the egg will start combat with its trio of guardians that you’ll have to defeat.
2. You could try and persuade Varsh Ko’kuu to let you have it. Going this route, you’ll receive a pair of boots to make you immune to the acid allowing you to collect the egg (or crush it). Equip them then walk over to the egg and pick it up. You’ll then be free to deliver it to Lady Esther.
For more guides on Baldur’s Gate III, click here!