Marvel's Midnight Suns Logo
Guides

Midnight Suns – Words of Power

by NightlyGamingBinge in

This is a guide on how to acquire all the Words of Power for the following trophies in Marvel’s Midnight Suns:

  • Oshtur’s Gift Trophy – Acquire the “Open” Word of Power
  • Atum’s Call Trophy – Acquire the “Reveal” Word of Power
  • Hyppus’ Aid Trophy – Acquire the “Purify” Word of Power
  • Set’s Favor Trophy – Acquire the “Break” Word of Power

Open Word of Power

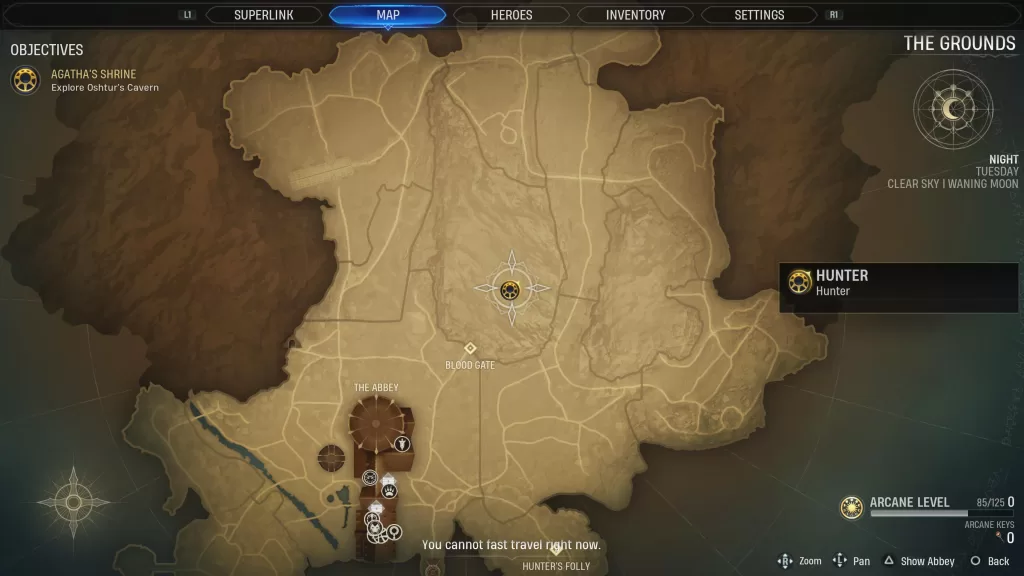
Complete the Trial of the Elder Gods: Oshtur Challenge Mission, which you’ll do as part of the story on the second night. This will give you access to Oshtur’s cavern. In the cavern, take the Moon Seal and place it on the statue before Oshtur. This action will reward you with the “Open” Word of Power.

Reveal Word of Power

You’ll first need to complete the Agatha’s Altar mystery to obtain a Moon Stone. Afterwards, make your way to the area far north of the Standing Stones to find the Trial of the Elder Gods: Atum.

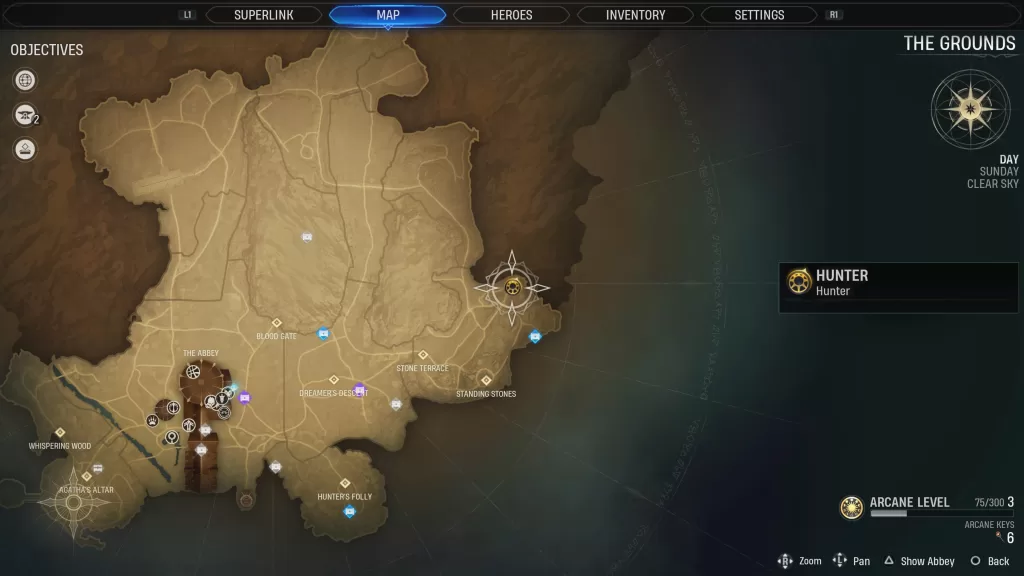
Please note this is a Level 8 challenge mission during which you’ll have to defeat 16 enemies within 4 turns using just Hunter and Charlie. Upon victory, head into the Elder Atum Shrine and place the Moon Seal on the altar before the statue to learn the “Reveal” Word of Power.

Purify Word of Power

You’ll first need to complete Hiram Shaw’s Church Mystery to obtain a Moon Stone. Afterwards, make your way to the area east of Agatha’s Cottage to find the Trial of the Elder Gods: Hyppus.

Please note this is a Level 12 challenge mission during which you’ll have to defeat 16 Lilin within 4 turns using just Hunter and Charlie. The trick to winning this one is to force the Dark Legion enemy to copy itself or other enemies by attacking them but not outright killing them. If you don’t copy them, there will not be enough enemies for you to defeat per the challenge’s objectives! Upon victory, head into the shrine and place the Moon Seal on the pedestal to learn the “Purify” Word of Power.

Break Word of Power

You’ll first need to complete Lilith’s Garden Mystery to obtain a Moon Stone. Afterwards, make your way north of Lilith’s Garden to find the Trial of the Elder Gods: Set.

Please note this is a Level 16 challenge mission during which you’ll have to defeat 16 Lilin within 4 turns using just Hunter and Charlie. Upon victory, head inside the shrine and place the Moon Seal on the pedestal to learn the “Break” Word of Power. If you use this Word of Power on the giant Set statue in the shrine, it will reveal an Arcane Chest!

For more guides on Marvel’s Midnight Suns, click here!

The Quarry
Guides

The Quarry Walkthroughs and Guides

by MrsChappie in


Below are our walkthroughs and guides for The Quarry.


Guides

Guides on where to find the collectibles in The Quarry!


Walkthroughs

Full walkthroughs on the choices and collectibles in The Quarry! Please note that for these walkthroughs we made sure everyone survived and collected as many collectibles as we could! You’ll have to do 2 playthroughs to get all the collectibles since in Chapter 2 you’ll only be able to select only one path (Rocky Road or Shady Glade). One path has a tarot card and the other has 2 clues.


Ratchet and Clank Rift Apart
Guides

Ratchet & Clank: Rift Apart – Might’ve Broken Something Trophy

by Chappie in


For the Might’ve Broken Something trophy in Ratchet & Clank: Rift Apart, you need to collect 3 Lorbs (aka Lombax Lore). These Lorbs can be found on Savali at the below locations. Please note that the trophy will not pop until you speak with a Monk Scholar at the spa in the center of the area.


Lorb 1

This Lorb is located at the Lombax Shrine on the western part of the giant island. You’ll need to step on the 3 switches powering the barrier to deactivate it.


Lorb 2

This Lorb is located in a ruin on the western part of the giant island. To reach it, you’ll need to defeat the enemies there.


Lorb 3

This Lorb is located on the eastern central side of Savali on a raised platform. You’ll need to use the Hover Boots to reach it.


Lorb 4

This Lorb is located in the northeastern part of Savali in a cave.


Lore 5

This Lorb is located on the eastern side of Savali on the side of a hill.


Lorb 6

This Lorb is located in the southeastern part of Savali in a small cave behind boxes.


Lorb 7

This Lorb is located in the southern part of Savali on a cliff in the middle of 4 pillars. You’ll need to shoot a red light on a pillar a few times to activate the altar.


Lorb 8

This Lorb is located on the southern part of Savali on a cliff ledge. To reach it, you’ll need to use the wall jumps.


Lorb 9

This Lorb is located at the spa in the center part of the area.


Lorb 10

This Lorb is located in the northwestern part of the area on a moving platform. You’ll need to chase behind it then use your hookshot to latch onto it.


Lorb 11

This Lorb is located on a giant rock in the central southeastern area. You’ll need to use some rifts to reach it.


Lorb 12 

This Lorb is located on a cliffside on the southern small island. If you head across from where Gary is, you’ll see some rifts. Head through the 3 rifts then go on the grind rail to reach it.


Ratchet and Clank Rift Apart
Guides

Ratchet & Clank: Rift Apart – Aim to Misbehave Trophy

by Chappie in


In Ratchet & Clank: Rift Apart, you’ll come across spybots! If you find all the spybots, Ms. Zurkon will craft you the ultimate weapon called the RYNO! When you acquire the RYNO, you’ll earn the Aim to Misbehave trophy!


Corson V (aka Nefarious City)

The first one is an optional objective in Nefarious City. It is located in the factory.


Sargasso

To obtain this spybot, collect 60 Zurpstones for Trudi on Sargasso, which unlocks after leaving Scarstu Debris Field.


Savali

This spybot can be found on a pirate ship in a cave on the northeastern part of the area.


Blizar Prime

You’ll be awarded this spybot if you help the missing chef!


Torren IV

This spybot is located on the east side of the area with the vendor. You can reach it by taking a magnetic walkway.


Cordelion

This spybot is located on a ledge in the Dimensionator Forge. You need to use a rift to reach it.


Ardolis

This spybot is located on the most northeastern island reachable via Speetle.


Viceron

This spybot is located in the vent ducts above where Clank was being held prisoner.


Scarstu Debris Field at Zurkie’s

Complete the Gold challenge Vroom Around.


Scarstu Debris Field

On a platform behind the entrance to Zurkie’s. You can only reach it using a swingshot.


Ratchet and Clank Rift Apart
Guides

Ratchet & Clank: Rift Apart – BOING! Trophy

by Chappie in


For the BOING! trophy in Ratchet & Clank: Rift Apart, you’ll need to bounce on Big Al, Clank and Qwark’s Parade Balloons. These balloons can be found in the Hidden Pocket Dimension, which is located in Nefarious City aka Corson V (see below).


Ratchet and Clank Rift Apart
Guides

Ratchet & Clank: Rift Apart – Nooks and Crannies Trophy

by Chappie in


For the Nooks and Crannies trophy in Ratchet & Clank: Rift Apart, you’ll need to collect 5 Gold Bolts. These bolts can be found at the following locations:


Corson V

Gold Bolt 1

This bolt can be found on a balcony on the upper level of the factory.


Gold Bolt 2

After entering the club, you’ll pursue the Phantom. Eventually, you’ll reach a big open area with a tree on each side and a wall jump in the middle. When facing the wall jump, head right passing the tree on the left side. This will bring you to a loading area. Use the 2 rifts to reach the Gold Bolt.


Gold Bolt 3

From Mrs. Zurkon, head to the moving platform across from her shop leading to the beginning area. Take the platform up then jump to the raised walkway on the right next to the wall with the 07 written on it. In front of you, there will be a broken section of fence. Jump to the pipe then use Phantom Dash on the wall to reach the area containing the bolt.


Sargasso

Gold Bolt 4

This bolt can be found on the island east of Rivet’s Hideout behind a giant machine.


Gold Bolt 5

This bolt is located at the very top of the mountain containing Rivet’s Hideout in a circular ring. You can only reach this using Trudi.


Gold Bolt 6

This bolt is located northwest of the vendor at the refinery. There will be a rift on a secluded island containing the bolt.


Scarstu Debris Field

Gold Bolt 7

To reach the bolt underneath the platform south of the Hidden Pocket Dimension, you will need to glide to it.


Gold Bolt 8

Complete the Bronze challenge: Awesome Bugtrax Done Quick in Zurkie’s.


Gold Bolt 9

Complete the Silver challenge Pest Control at Zurkie’s.


Savali

Gold Bolt 10

This is located on a secluded platform in the western part of the giant island. To reach it, you’ll have to head to the northern part of the area to find some boost pads lined up. Boost through the pads, hitting the green switches as you go. If you’re quick enough, a rift will open when you hit the third switch.


Gold Bolt 11

This bolt is located on a mobile platform in the southern part of the area. You’ll need to follow along behind it using the Hover Boots then use the Omniglove to hookshot onto it. Once on top, you’ll be able to disable it.


Gold Bolt 12

This bolt is located in the catacombs behind the door with a virus infected console. You’ll come here as part of the story.


Blizar Prime

Gold Bolt 13

This bolt is located in the very southern tip of the area in the dimension with lava.


Gold Bolt 14

This bolt is located at the end of a broken magnetic wall in the eastern central part of the area.


Gold Bolt 15

This bolt is located in the northeastern section of the area near the missing chef. You’ll need to use the crystals to switch to it.


Torren IV

Gold Bolt 16

This bolt is located in the far southeastern part of the area near where you start.


Gold Bolt 17

This bolt is located on a rail after fixing the fixer. To reach it take the rail out of Junk Town then jump through a rift along the rail onto another rail that contains the bolt.


Cordelion

Gold Bolt 18

This bolt is located on a platform on the eastern side near the starting area. To reach it, you’ll need to head to the top of the tower and hit the blizon. Afterwards, head back down the tower then jump and glide towards the platform. When you get close enough, use the rift then hit the blizon crystal to collect the bolt.


Gold Bolt 19

This bolt is located after you take the elevator down. Head east then take the first left to find a blocked doorway. Use the rift to enter the room containing the bolt.


Gold Bolt 20

This bolt can be found in the western part of the underwater area.


Ardolis

Gold Bolt 21

This bolt can be found during the Pirate Trials.


Gold Bolt 22

This bolt can be found near the central area of the map. To reach it, you’ll need to take a Speetle to the east side. Over there, you will find a path leading to the west with a ramp that you can use to reach the bolt.


Viceron

Gold Bolt 23

This bolt can be found east of the vendor at the start of the area on an impounded pirate ship.


Gold Bolt 24

This bolt can be found on a platform when chasing Ratchet and Kit.


Gold Bolt 25

This bolt is located in the VIP section in a cell. You can reach it after turning off the power to the VIP section.