Below is a walkthrough for Chapter 5 of The Quarry. Please note that your choices, QTEs and collectibles found will impact the story. We highlighted the options we chose during our playthrough in orange. Keep in mind that we kept everyone alive and collected as many collectibles as we could!
During the scene with Nick and Abi, you’ll have the following choices:
- Grateful “I’m okay”
- Compassionate “How are you?”
- Press X to Speak Up (We did not do this as we wanted to stay quiet!)
- Reassuring “We’ll be fine, just be careful”
- Cautious “Don’t go it’s dangerous”
When you’re Kaitlyn, you’ll have the below choices.
- QTE: Right
- QTE: Left (We didn’t do so the big guy can throw blood on her to protect her.)
- QTE: Left (We didn’t do so the big guy can throw blood on her to protect her.)
- Shoot the big guy holding the table so he drops a clue you can pick up later!
When you’re with Nick and Abi again, you’ll have the below choices.
- Insecure “I’m pouring my heart out here”
- Confident “Don’t worry about Kaitlyn”
- Intrigued “I thought things would go further”
- Bitter “You’re hard to read”
- Hide
- Run
- Hold Breath Event! (Hold X until the red on the screen stops!)
Follow the path through the forest. After crossing the little bridge leading to the cabins, stick to the left side to find a bear trap near a gate. Interact with it to find the Triggered Bear Trap clue.
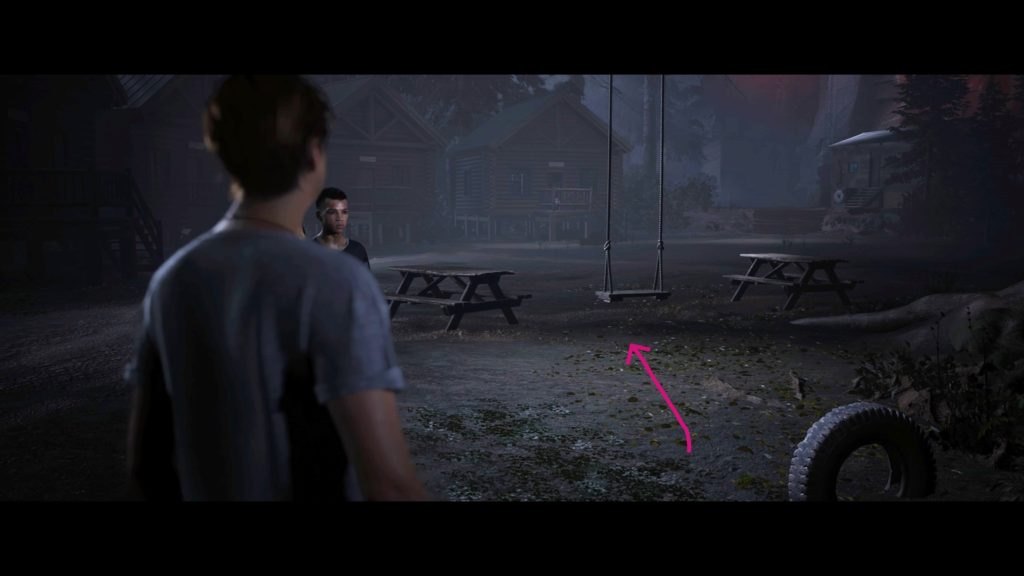
Next, head toward the swing hanging from the big tree in the middle of the cabins and walk between the 2 picnic tables to have the camera angle change revealing The Devil tarot card.
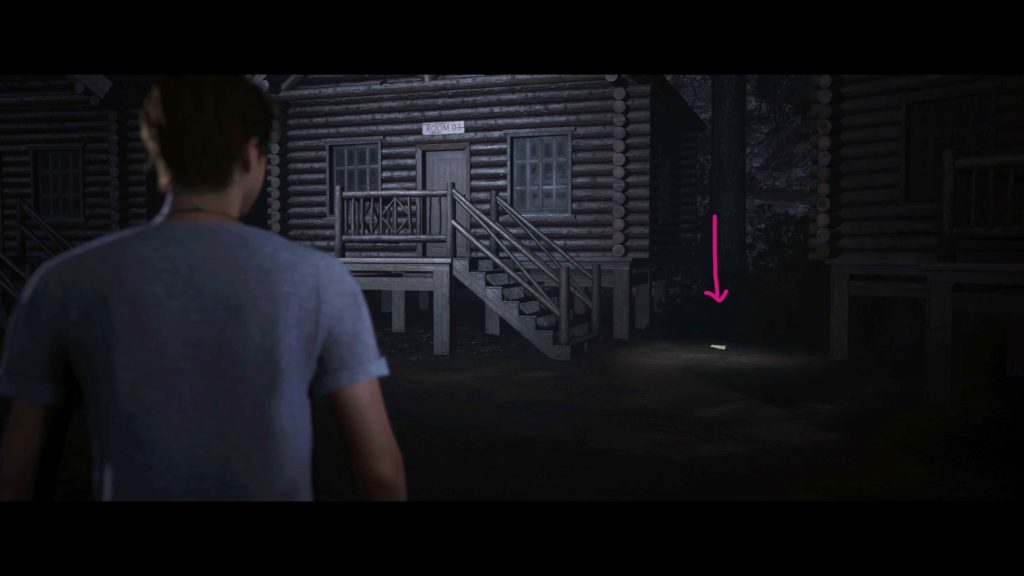
Head across the way Room 03 to find the Letter to Camp Nurse clue on the ground next to the cabin.
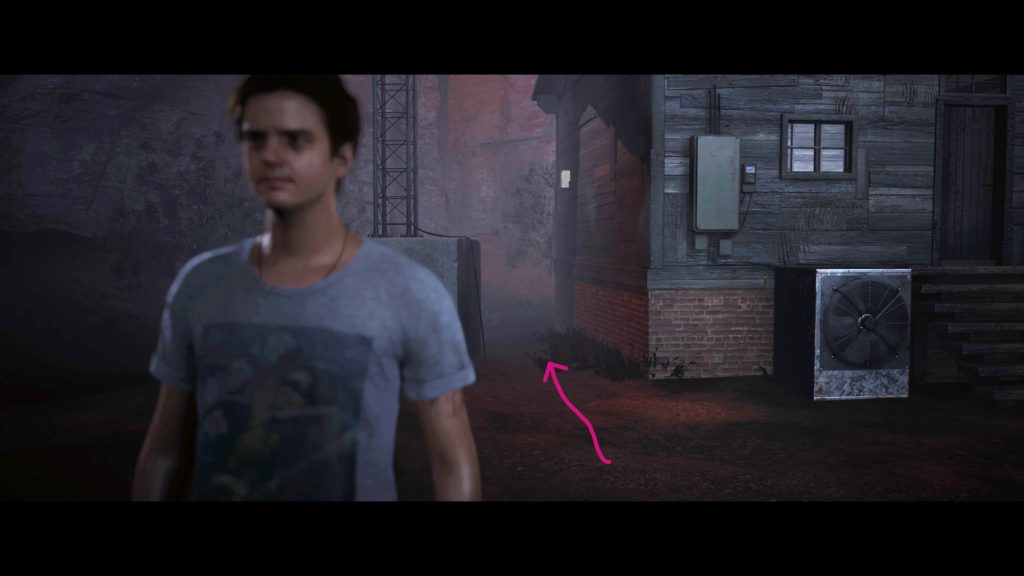
Follow Ryan past the ring of cabins to the Radio Hut but don’t go inside just yet. To the left of the door, interact with the claw marks on the wall just above the silver fan. You’ll receive the Claw Marks evidence.
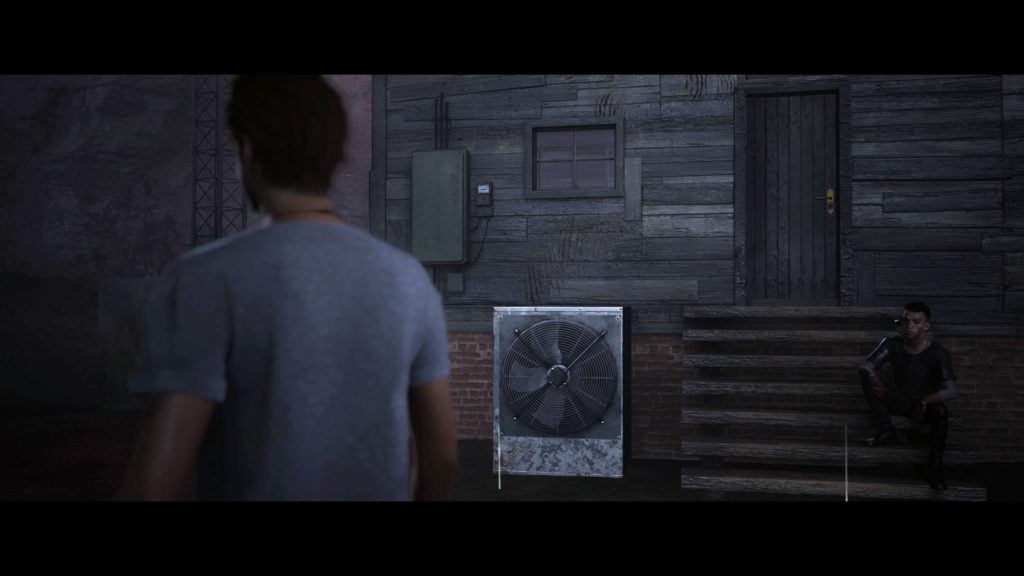
Before interacting with the door of the Radio Hut, swing left around the corner of the building to find The Hermit tarot card.
When you’re done exploring, speak with Ryan.
- Uncertain “Gimme a minute”
- Confident “All good”
- Dismissive “Don’t think it’ll help”
- Interested “How do you know this stuff?”
- Reassuring “They might not mean us”
- Concerned “That’s totally us”
- Aggressive “Fuck you!”
- Apologetic “I wasn’t sure”
- Press R2 to Shoot (We didn’t do this!)
- Desperate “Anything we can do?”
- Aggressive “We gotta kill it”
- Supportive “Do it!”
- Apprehensive “We gotta kill it”
- Urgent “Hurray!
- Calm “Take a breath”
- Desperate “Okay. Just hang on”
- Terrified “No way!”
- Shotgun
- Chainsaw (You’ll earn the Just a Flesh Wound trophy!)
- Uncertain “I don’t know”
- Reassuring “We’re okay for now”
With that the chapter concludes. As always you’ll get to talk with the woman again.
Click here for the next walkthrough on Chapter 6 in The Quarry!