Below is our walkthrough for Chapter 3 – The Tale of the Onix Maiden in the Voice of Cards: The Forsaken Maiden.
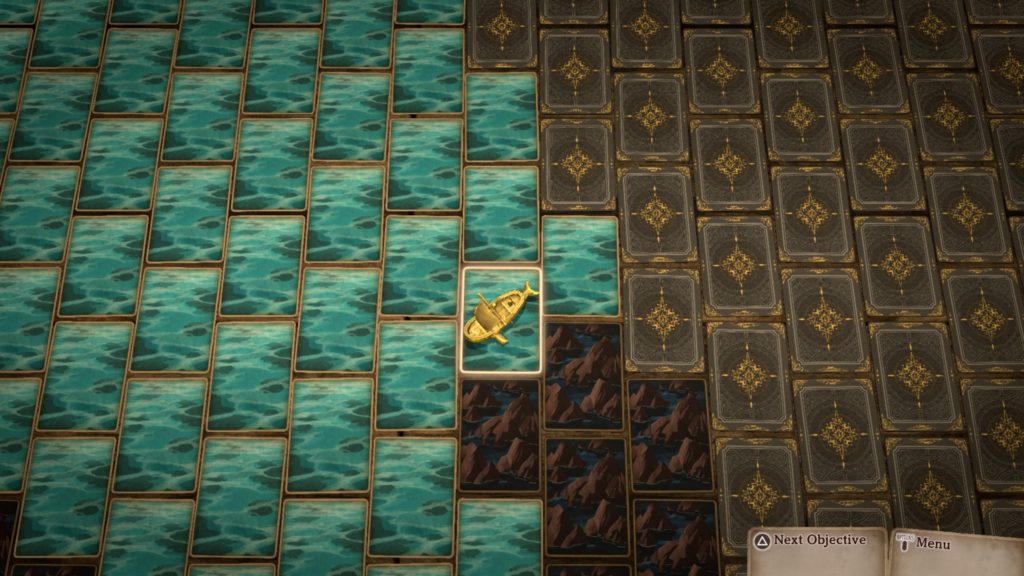
World Map
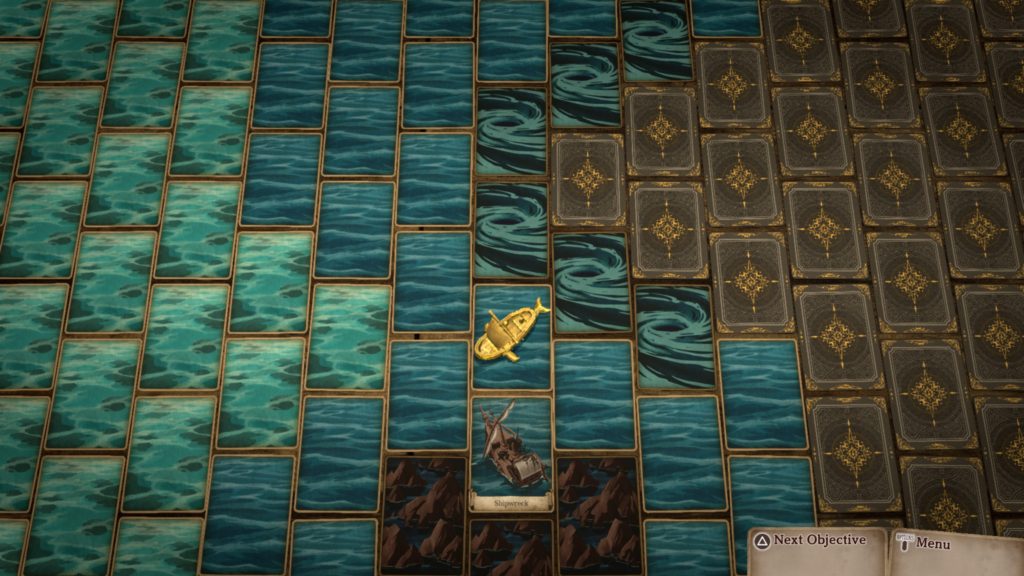
After the cutscene, you’ll be standing on the North Isle Pier. Head southeast to the glowing card directly east of Omega Village to continue the story. During the cutscene, take a peak at Laty’s diary to learn more about her. Afterwards, explore the eastern sea to find the below as you make your way to East Isle.
Events
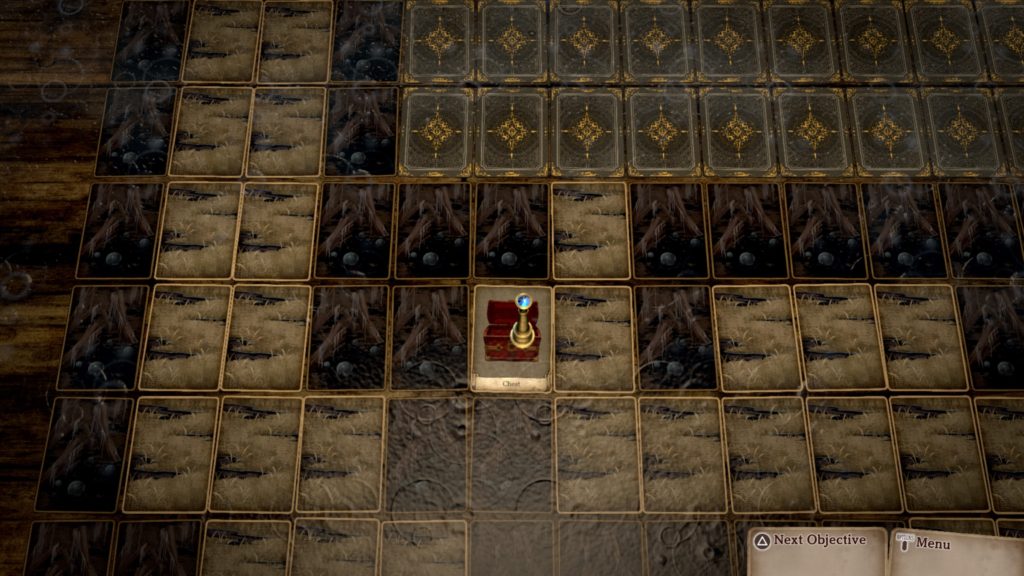
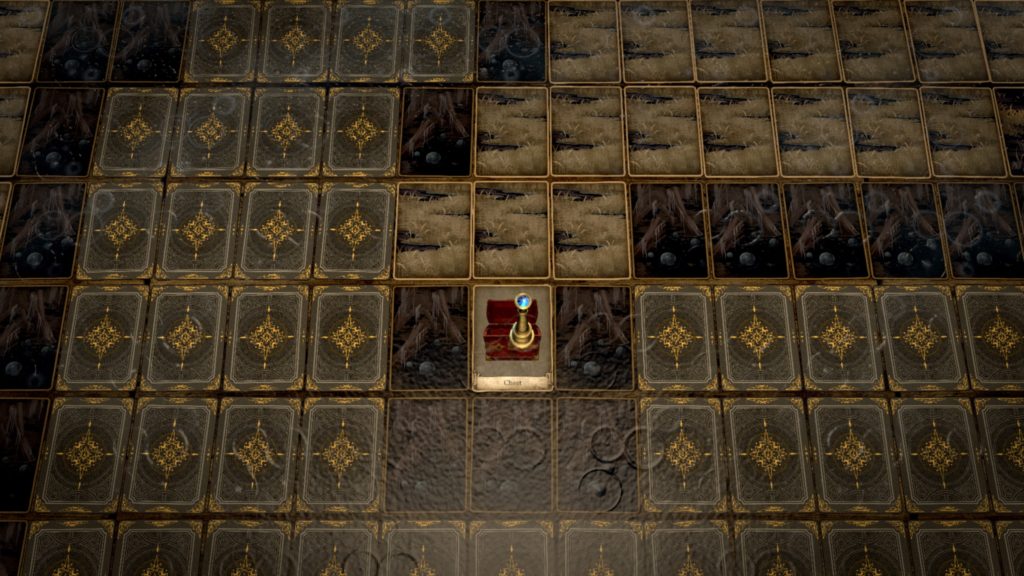
A chest floats by
We found this event on the above card. Make sure to grab the chest. Once you do, you’ll be attacked by lizard enemies. Defeat them to receive the Scratched-Up Key! You’ll need this key to open a cabin at a Shipwreck in the far northeastern corner of the eastern sea. You’ll have to complete the below Whirlpool event (see World Map Event below) to unlock this Shipwreck. After entering the cabin, you’ll receive the Ring of Compassion II.
Ship in the southeastern corner of the eastern sea
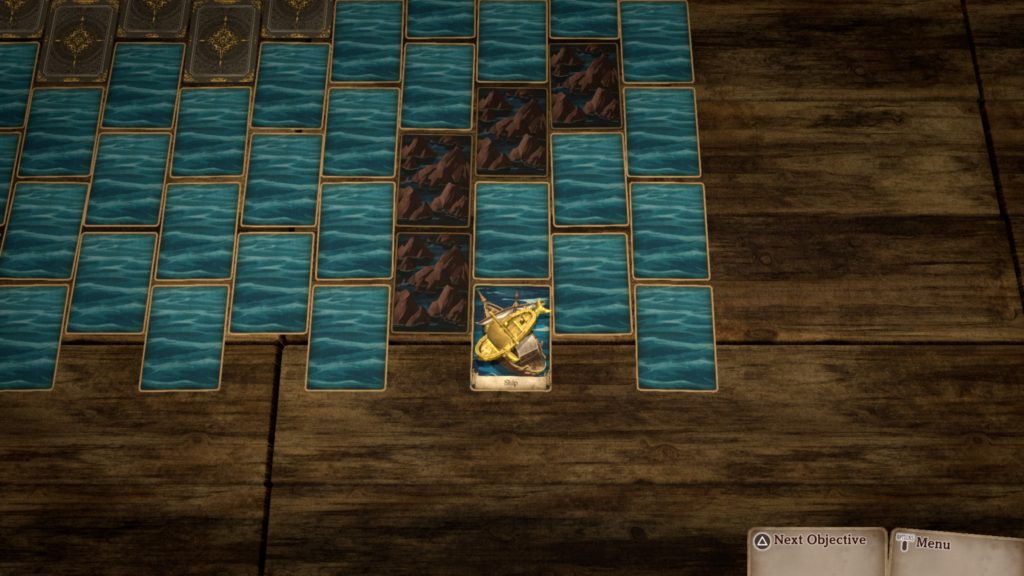
He wants a shiny, round stone. You can find the Shiny Stone on the northeastern part of the East Isle during a Shipwreck Event (see East Isle Event below!). Give him the stone to receive Silvery Ore!
Whirlpool impedes your path
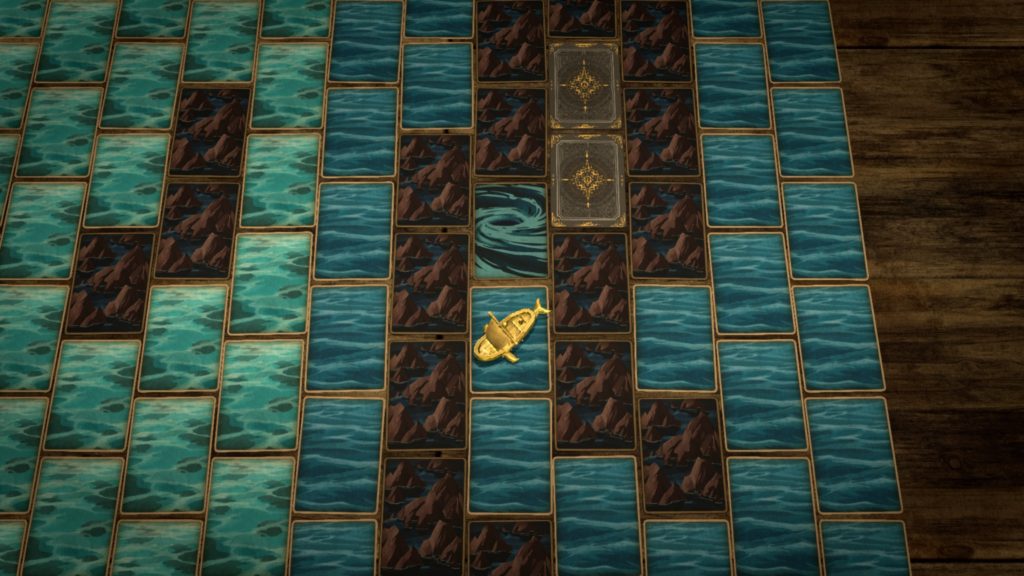
This event can be found just before a whirlpool card in the tunnel created by rocks on the northeastern side of the map. You’ll have the choice to scatter the pod. Select to get rid of the monsters. A battle with 4 worms will ensue. Defeat them to calm the sea. The whirlpool will subside, allowing you to continue down the narrow path and head to the Shipwreck.
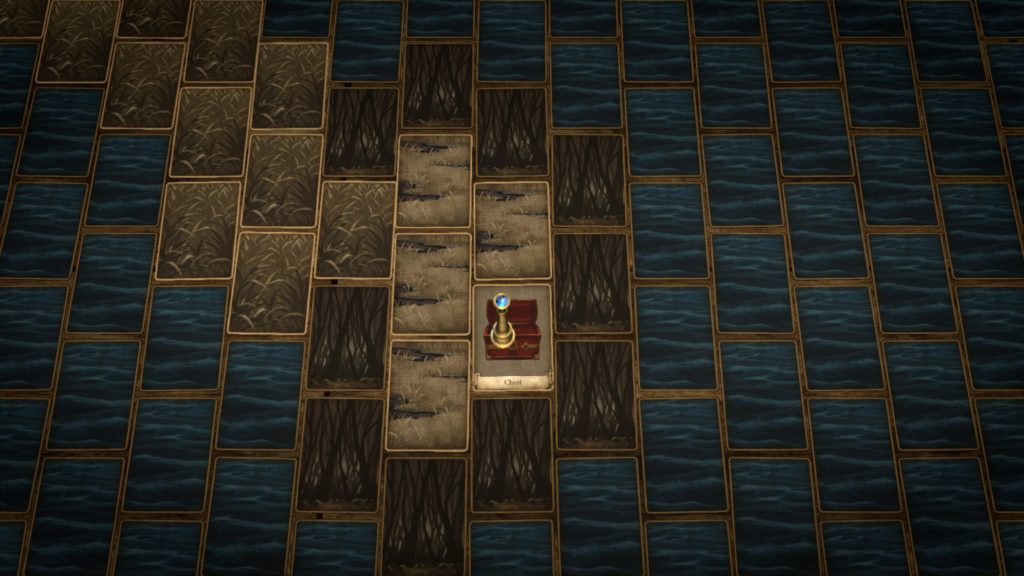
Treasure
As you explore the eastern sea, land on the Shipwreck cards to receive the following:
1000G – Next to rocks in the central part of the eastern sea

Chunky Gold Nugget – Southern part of the eastern sea
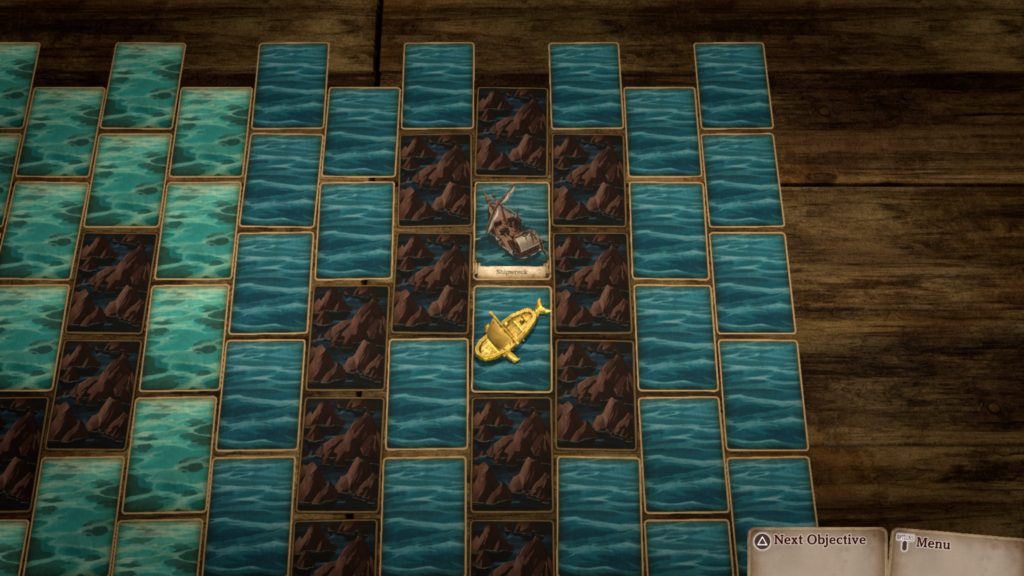
Ring of Life II – Just past the whirlpool in the northeastern corner of the eastern sea. To subside the whirlpool, you’ll have to defeat the Worms guarding it (see World Map Event above). After obtaining this loot, you can use the Scratched-Up Key (see World Map Event above) to enter the cabin. You’ll receive the Ring of Compassion II.
East Isle
Dock at the northern shore of the East Isle then explore to find the below.
Event
Shipwreck

This Shipwreck can be found on the far northeastern side of the island. Interact with this card to find a Man Outside Treasure Hold. He’ll need some sort of stick or something to get in. Hand over the Bent Stick, which you received during a World Event near the North Isle. For a guide on how to obtain this object, click here! As a reward, you’ll receive the Shiny Stone! You’ll then be able to bring this Shiny Stone to the collector in the southeastern corner of the sea below the East Isle.
When you’re ready, head to the East Isle Pier to continue with the story. Head east to find Fenmoss. As you approach the village, a cutscene will trigger and you’ll have to fight 3 lizard enemies that have 55 HP each! Defeat them! If you finish exploring East Isle, you can find the below chest!
Treasure
Freezestay Ring – Southeastern corner of East Isle
Fenmoss
Enter the village and explore to find the below.
People
Speak with the below people to receive their flipside stories.
- Black-Clad Man near the entrance – Man in Black’s flipside story
- Black-Clad Woman near the Item Shop – Woman in Black’s flipside story
- Suspicious Man in northwestern corner – Suspicious Man’s flipside story
Shops
From the Armorer, you can purchase the below items.
- Iron Sword – 200G
- Mercenary’s Sword – 800G
- Protector’s Sword – 8000G
- Traveler’s Apparel – 200G
- Adventurer’s Attire – 800G
- Martialist’s Garb – 8000G
From the Accessory Shop, you can purchase the below items.
- Ring of Protection – 300G
- Poisonstay Ring – 900G
- Numbstay Ring – 900G
- Freezestay Ring – 900G
- Bindstay Ring – 900G
- Cursestay Ring – 900G
- Gemstone Ring – 3000G
From the Item Shop, you can purchase the below items.
- Salve – 20G
- Quality Salve – 100G
- Supreme Salve – 500G
- Omnisalve – 160G
- Quality Omnisalve – 500G
- Antidote – 40G
- Curative – 40G
- Defroster – 40G
- Unsealer – 60G
- Dispeller – 60G
- Pepper-Upper – 60G
- Serum – 60G
- Panacea – 280G
- Inspirilixir – 800G
- Invigorant – 180G
- Protectorant – 180G
- Soothstone – 1000G
- Destruct-o-Box – 200G
- Bellwether – 100G
- Smoke Bomb – 100G
When you’re ready to progress the story, speak with the mayor who can be found on the western side of town near the shrine. After speaking with the mayor, exit the town and head northeast to the Wicked Wetlands.
Wicked Wetlands
After entering the Wicked Wetlands, head forward a short way to encounter Queni and Blight. You’ll then be able to freely explore this area in search of the flower. Continue forward a short way to find the Glowing Butterfly. As you make your way through the area, following the Glowing Butterfly, you’ll be able to find the below chests.
Treasure
Bellwether – Southeastern corner
Ring of Evasion – Central western side
Omnipanacea – Central part
When you reach the center of the spiral, a cutscene will trigger with the Glowing Butterfly. Afterwards, interact with the flower to trigger a fight with 4 enemies that have 48 HP each! They are weak to Fire and resist Wind and Lightning. Defeat them!

Afterwards, you’ll be teleported out of the Wicked Wetlands.
Fenmoss
Enter the town. After the cutscene, rest up at the Inn then head to the Maiden’s Shrine. Speak with everyone inside the shrine. Afterwards, a cutscene will trigger with the mayor. Exit the village and return to the Wicked Wetlands!
Wicked Wetlands
Once in the wetlands, head to the map transition on the far north side to reach the Fiends’ Nest. Once inside, you’ll have to stop the invasion. Start by heading to the Imp card with as little steps as you can! Interact with her card to begin a fight with 2 Imps that have 52 HP each. Defeat them! Next, travel to the Wind Wasp. For this one, you’ll need to defeat 3 of them. They each have 36 HP! Afterwards, head to the Killer Frog to begin a fight with 3 of them. They all have 42 HP! Defeat them then a short scene will trigger. The boss will move down and 2 more enemies will spawn. Head to the Lizard Warrior to begin a fight with 2 of them. They each have 50 HP. Defeat them then head to the Taurus. You’ll begin a battle with 2 enemies that each have 58 HP. Defeat these as well then it’ll be time for the boss! Head to its card to trigger a fight with the creature that has 250 HP! It is weak to dark. Defeat it!
Afterwards, head to the altar to find an egg. You’ll be asked if you’d like to break the egg and will be given the following options:
- Smash It to Bits
- Smash the egg to protect Fenmoss.
- Just Leave It
Leave the Fiends’ Nest and return to Fenmoss to trigger a cutscene.
Fenmoss
Speak with all the male villagers then go to the Maiden Shrine to check on Queni. Speak with the people assembled to trigger a cutscene. Afterwards, the tale will complete!