Below are the collectibles that can be found during The Blood Swamps campaign in Doom Eternal: The Ancient Gods Part 1. You will need to collect the codex pages to earn the Required Reading trophy and the Support Runes for the Lucky Charm Bracelet trophy. Locating all the secret encounters will reward you with the Hypersonic trophy!
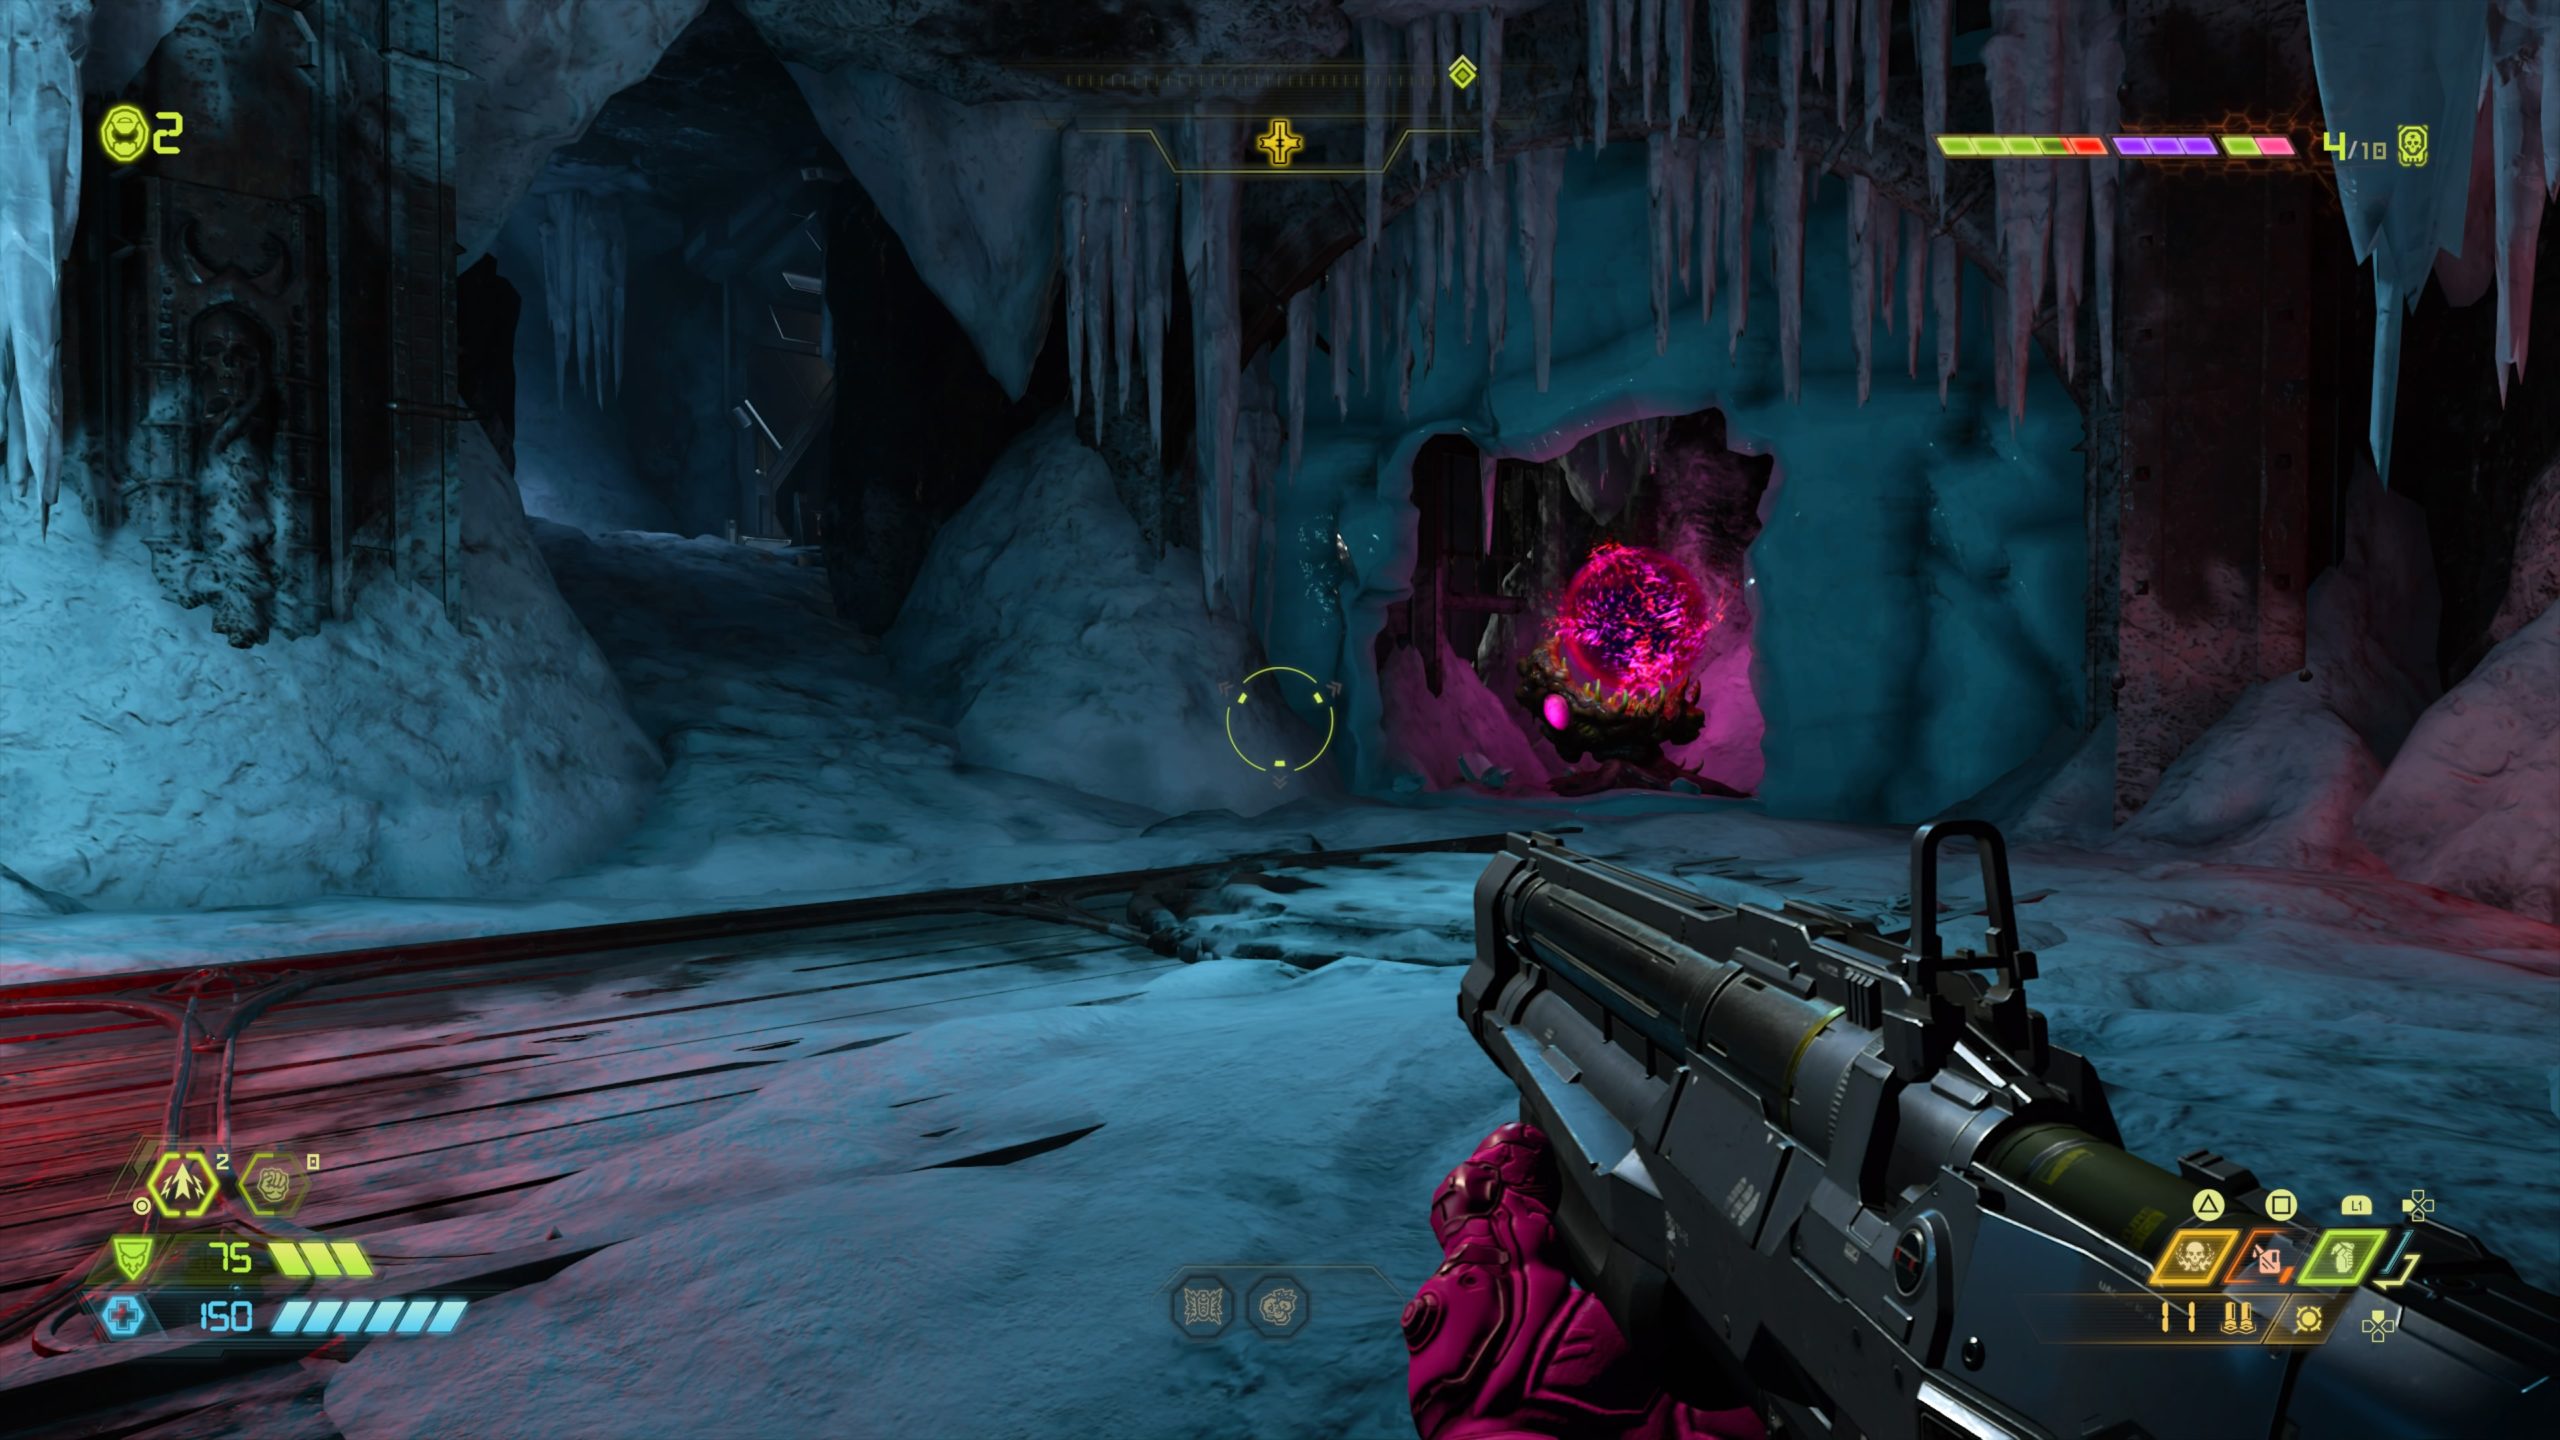
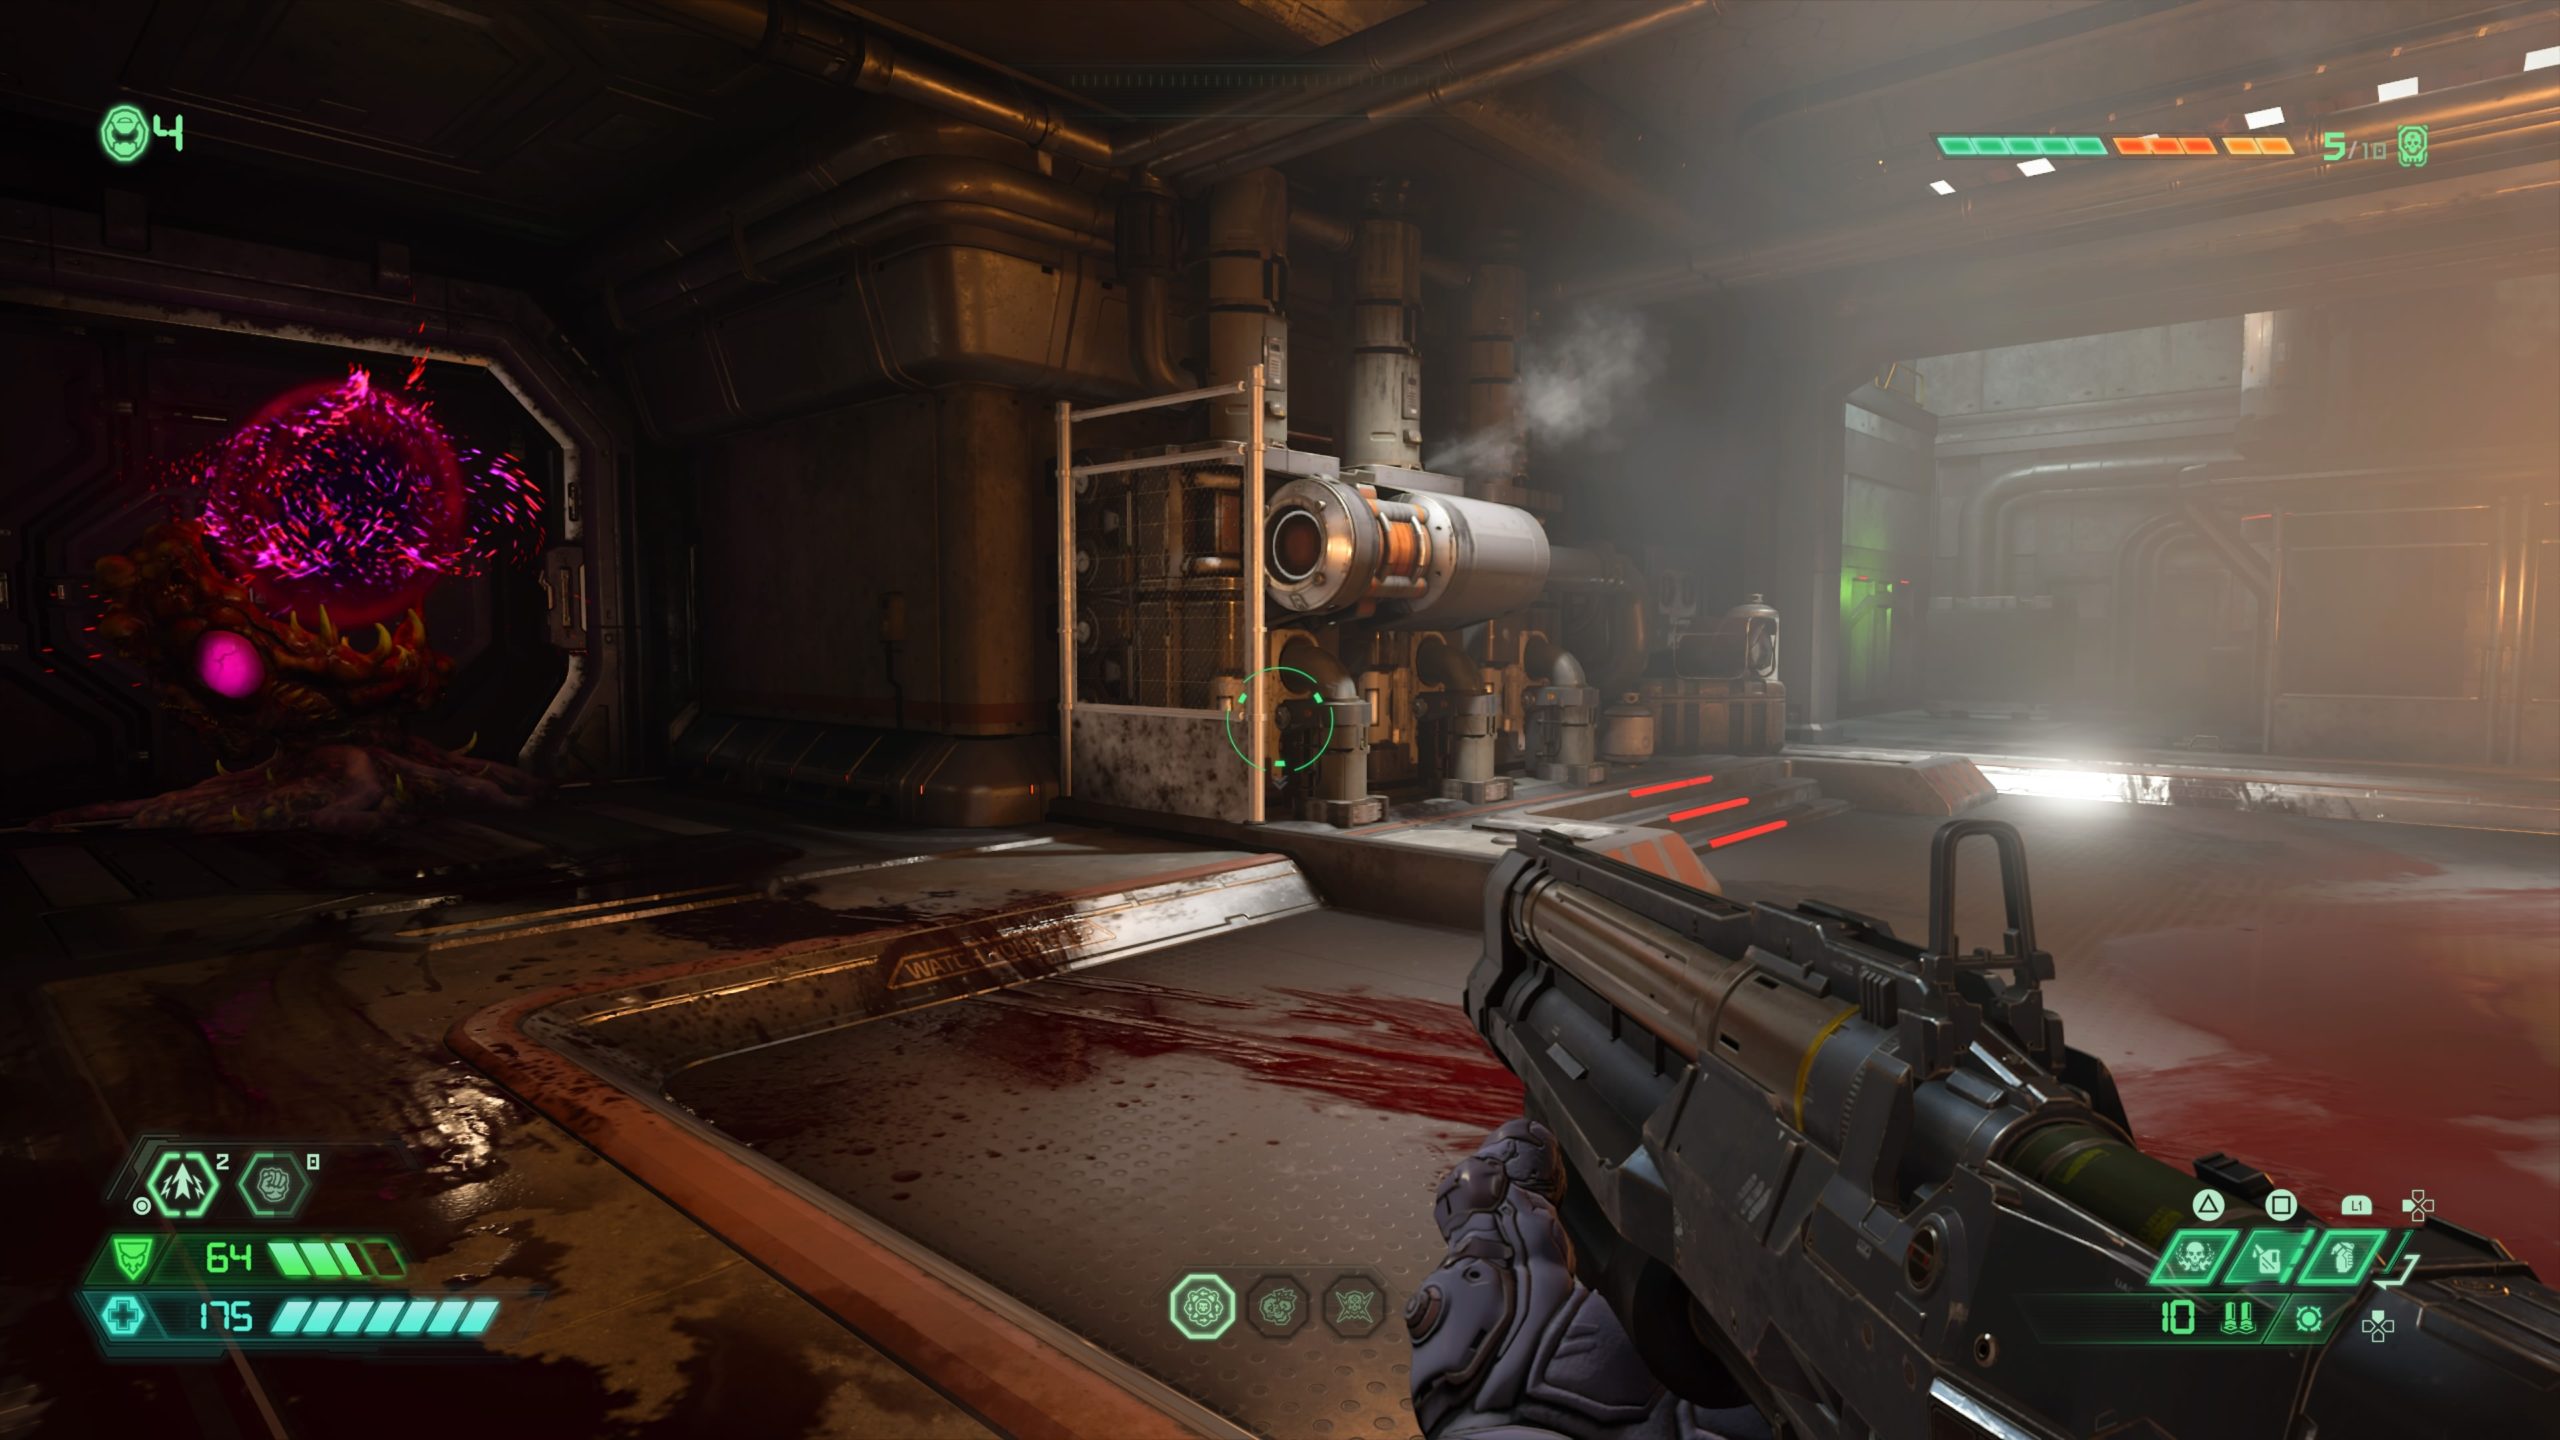
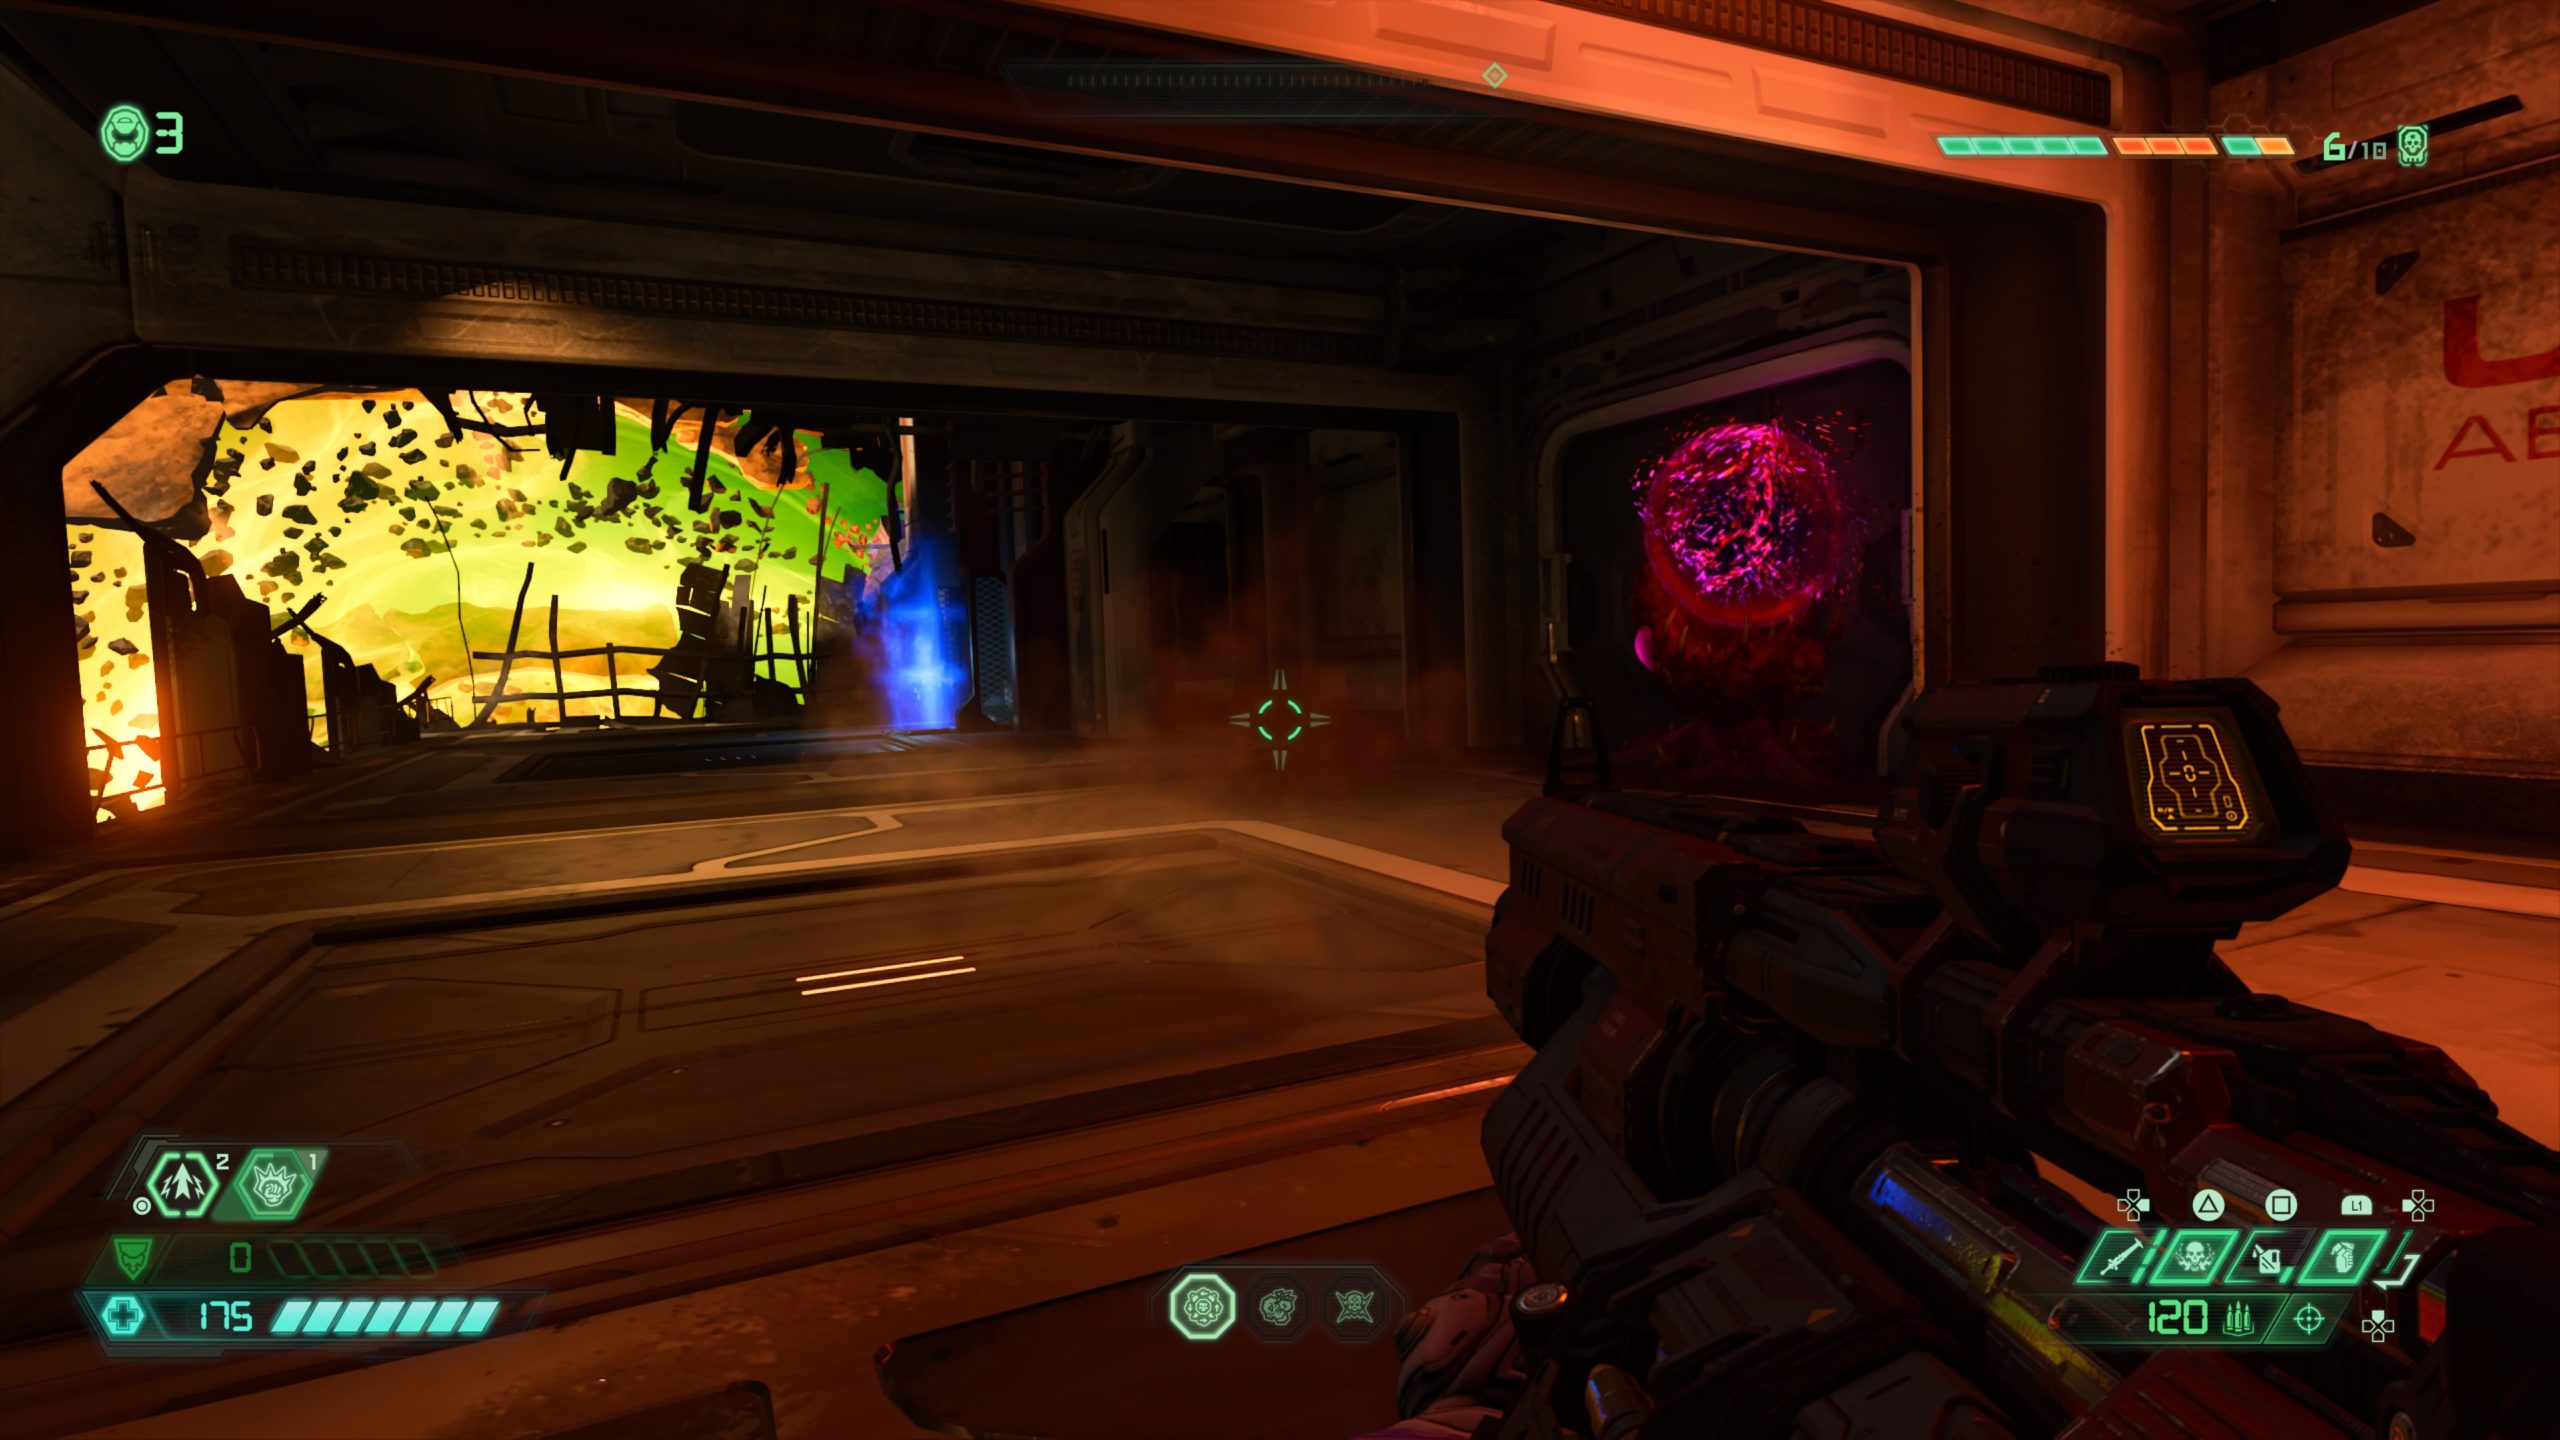
Destroy the the Father’s Life Sphere
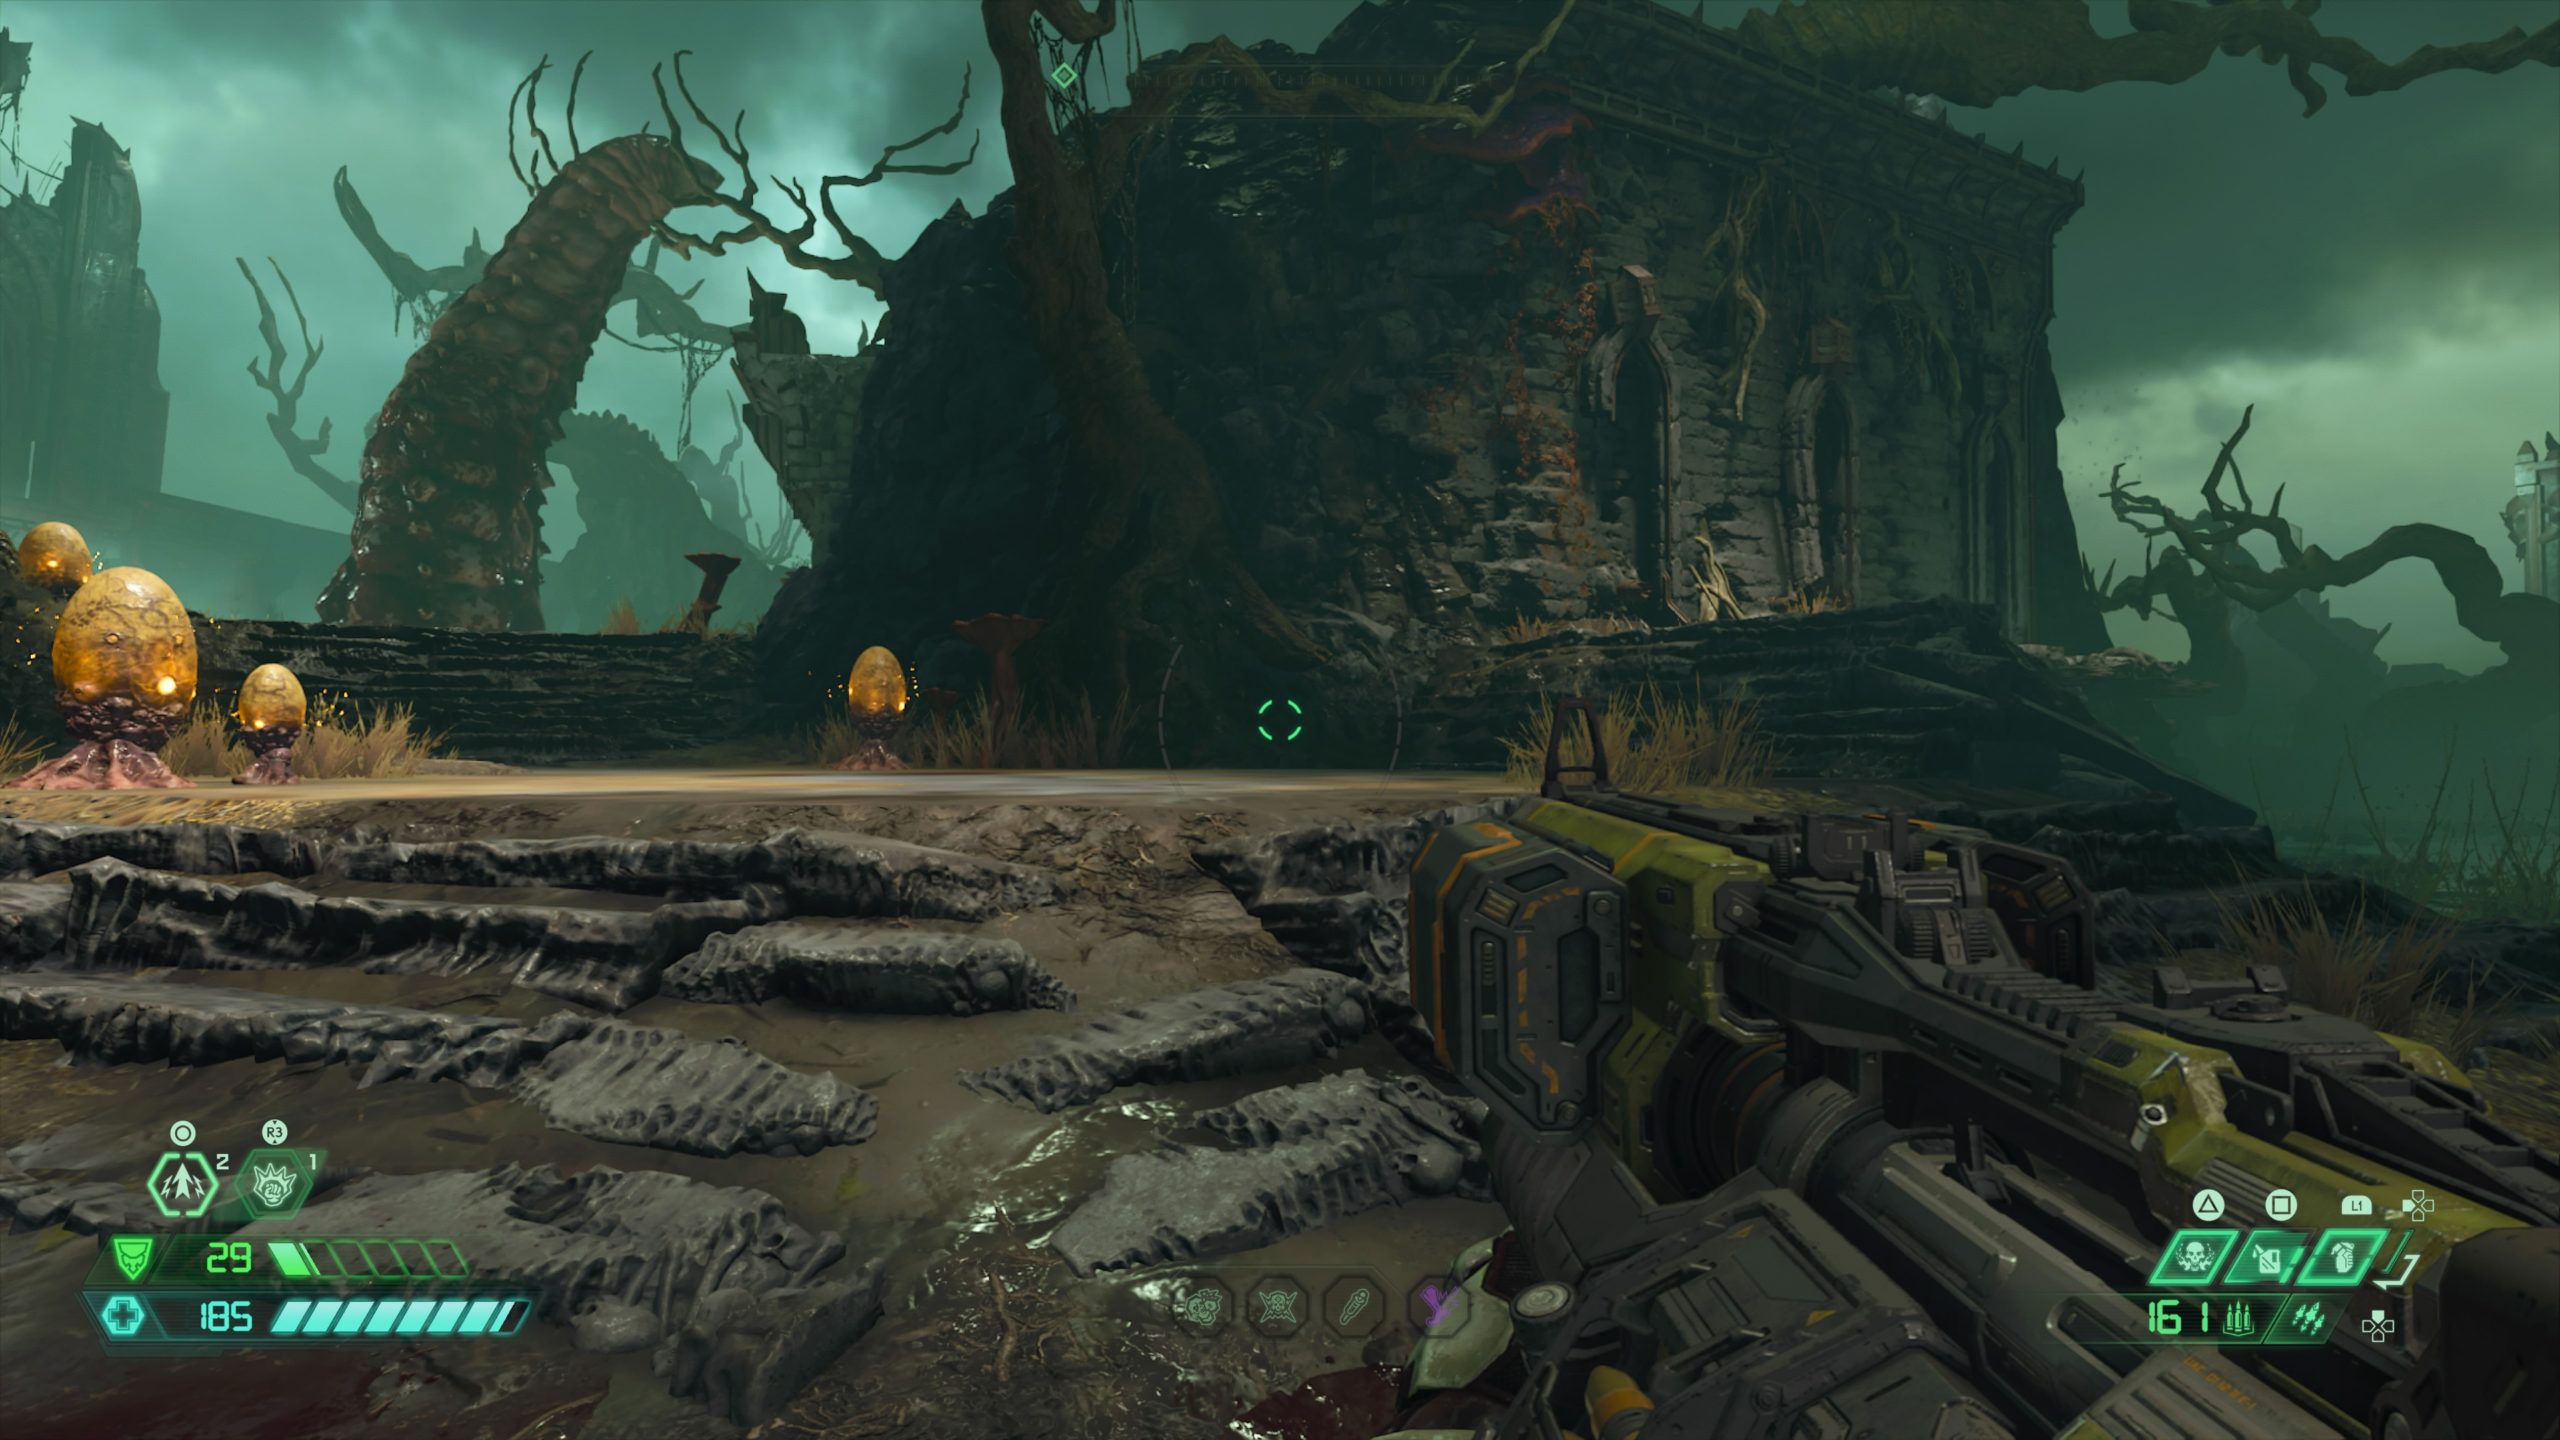
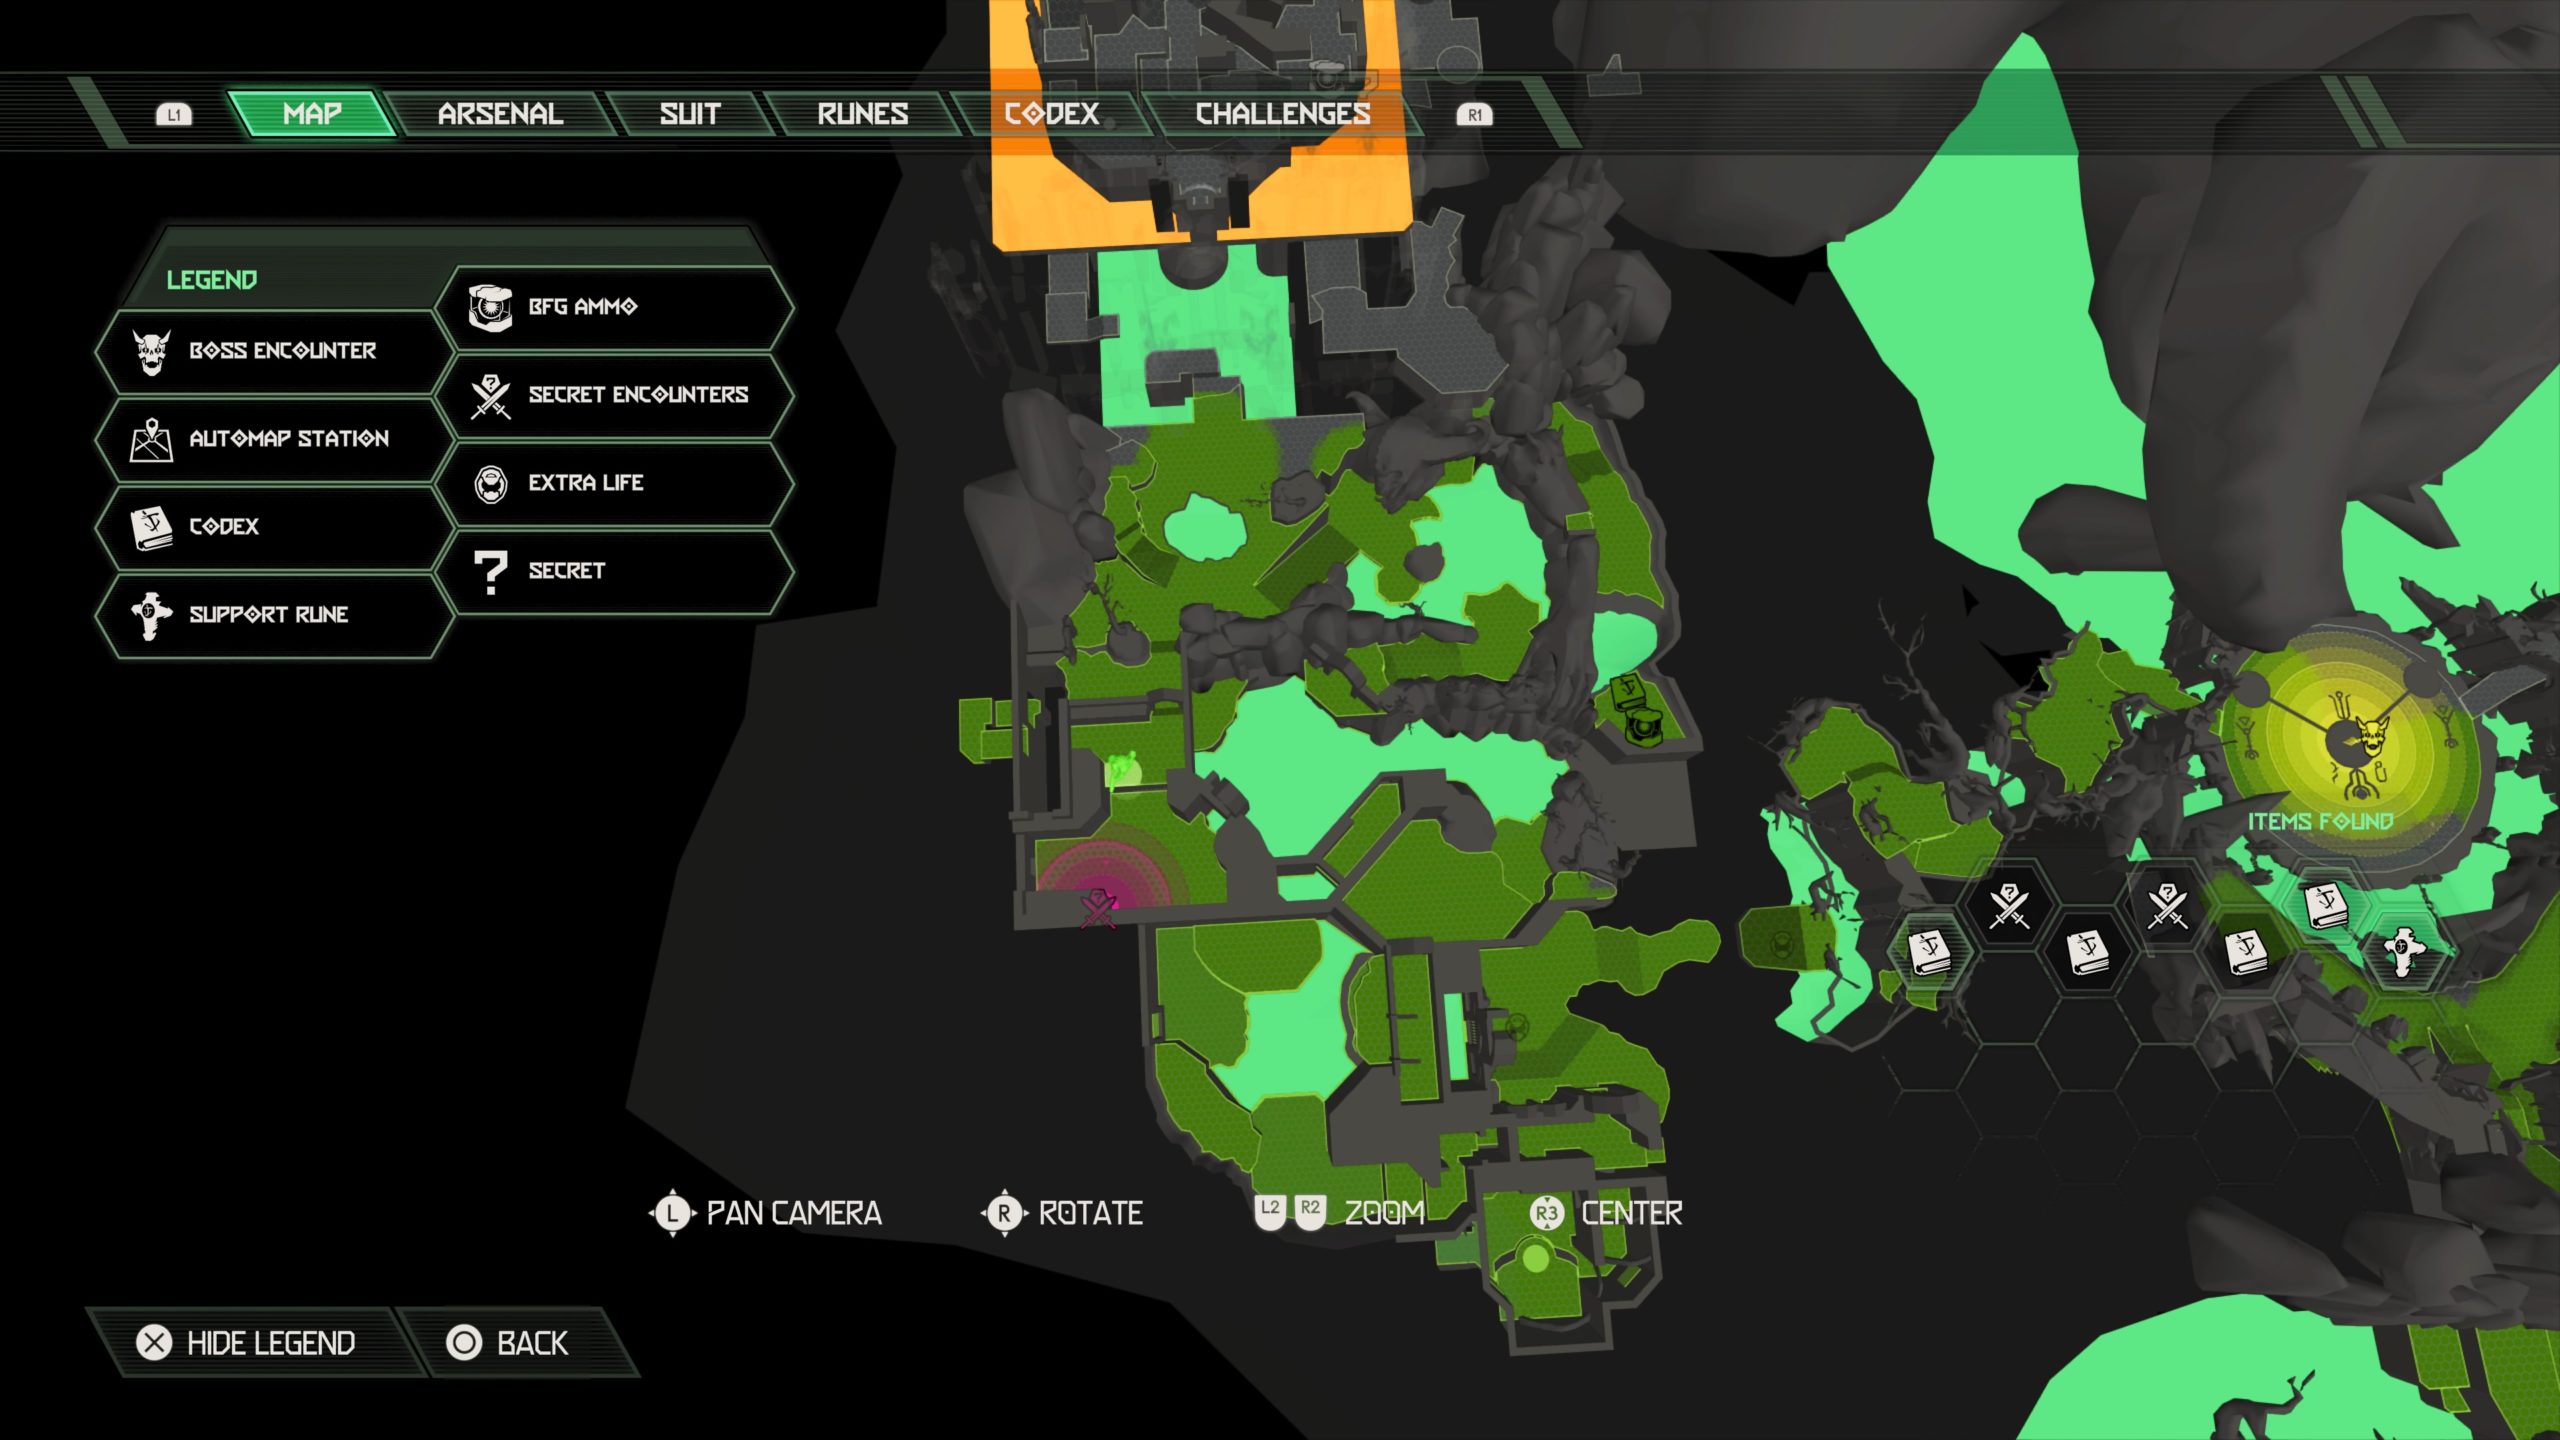
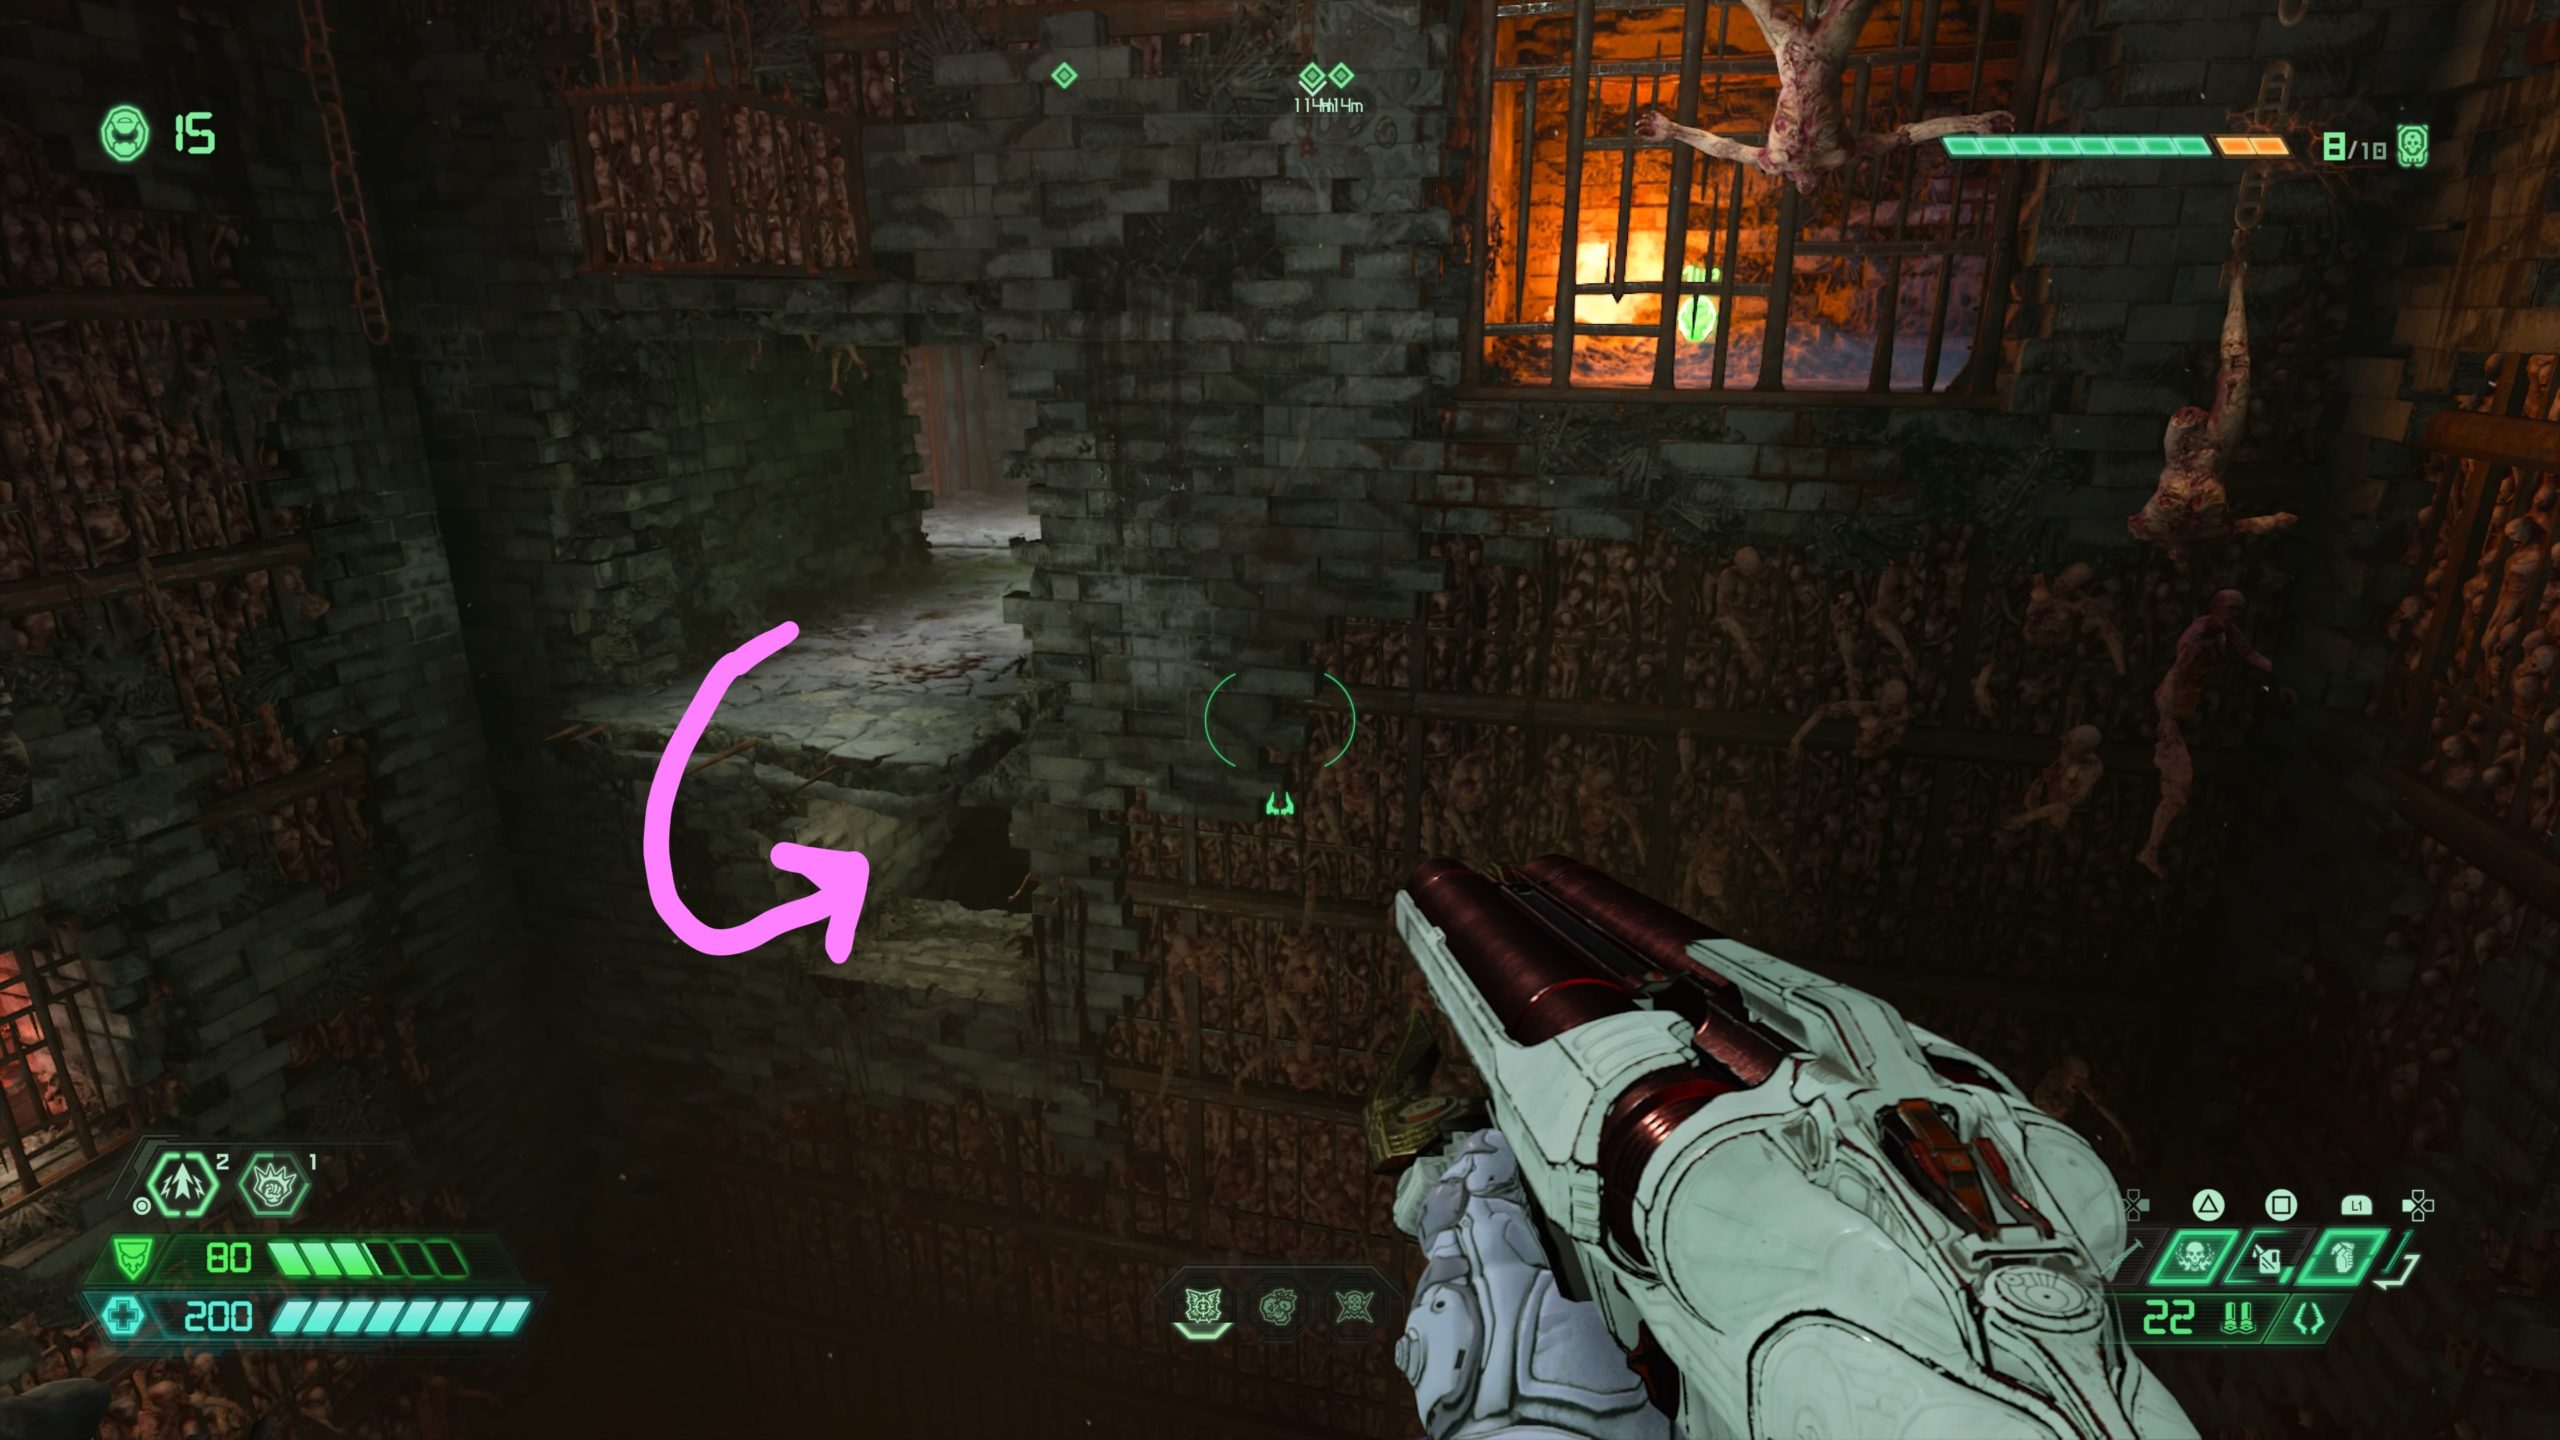
Support Rune
Work your way through the Blood Swamps until you reach the giant tentacle. Climb up to the elevated section of ground and head down the stairs. Take a left up another section of stairs then head to the end of the walkway and drop down to the ground below. Melee the breakable wall in the building and head inside until you spot the rune.
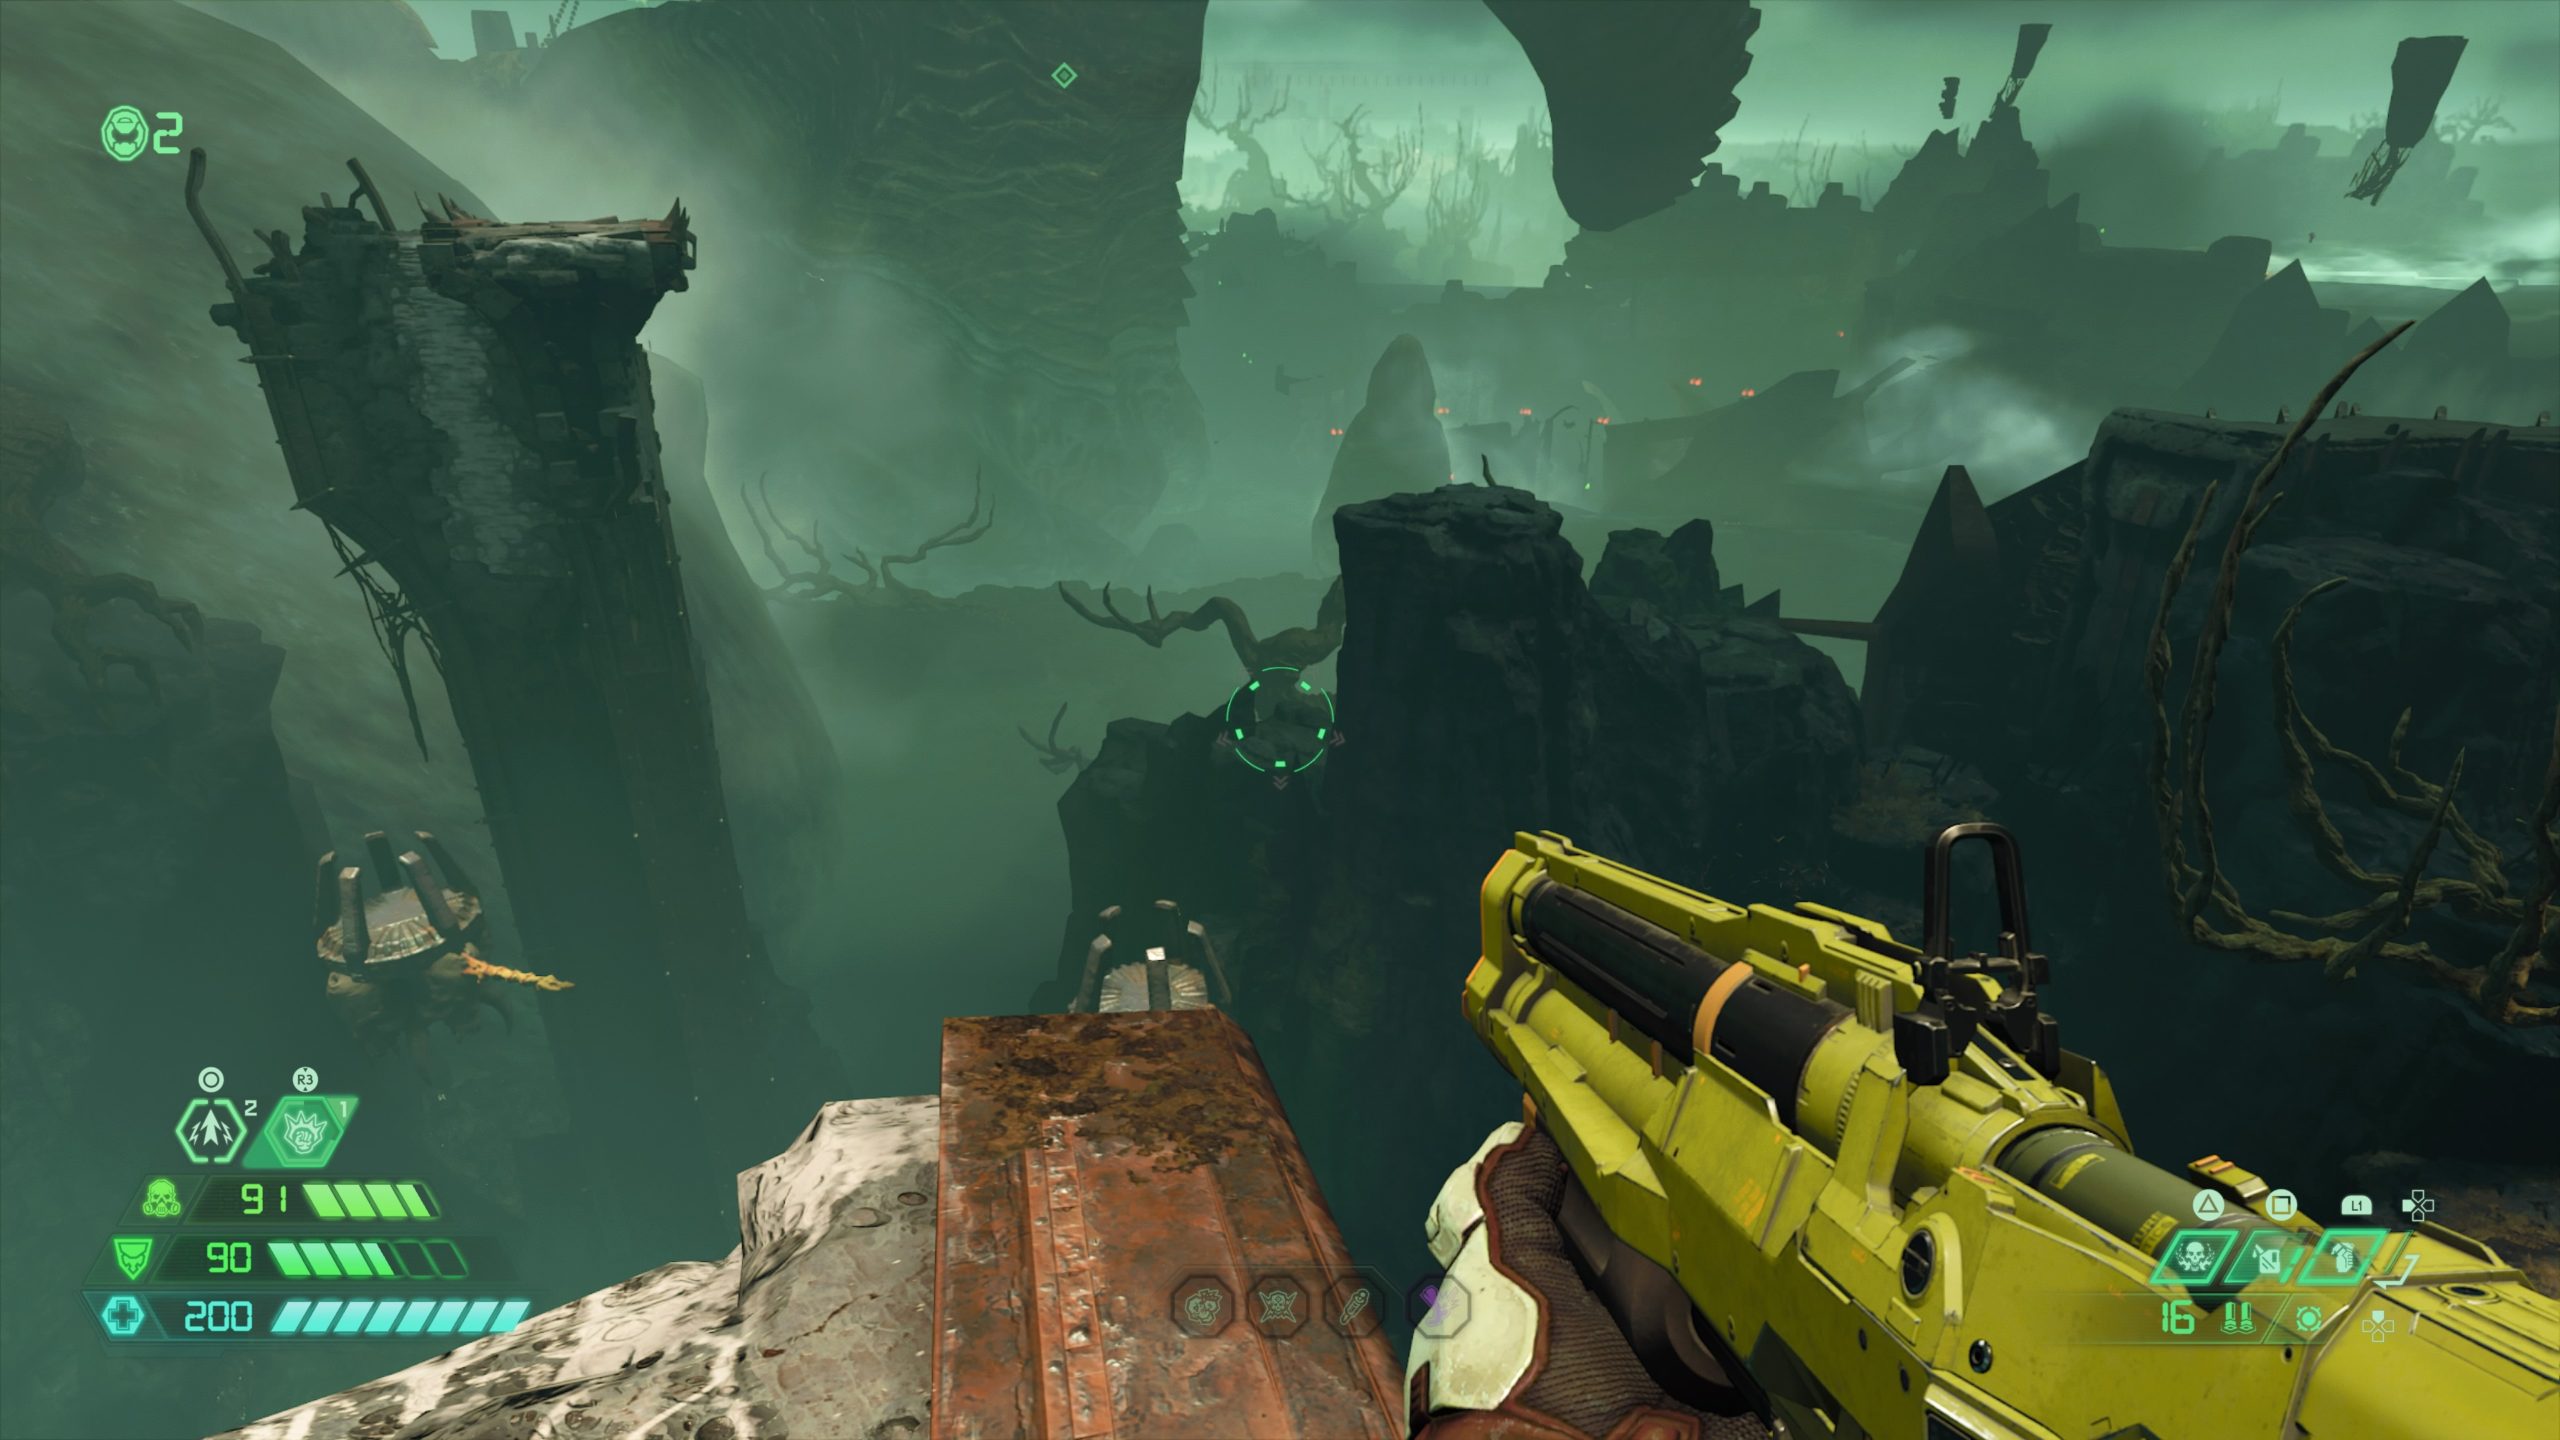
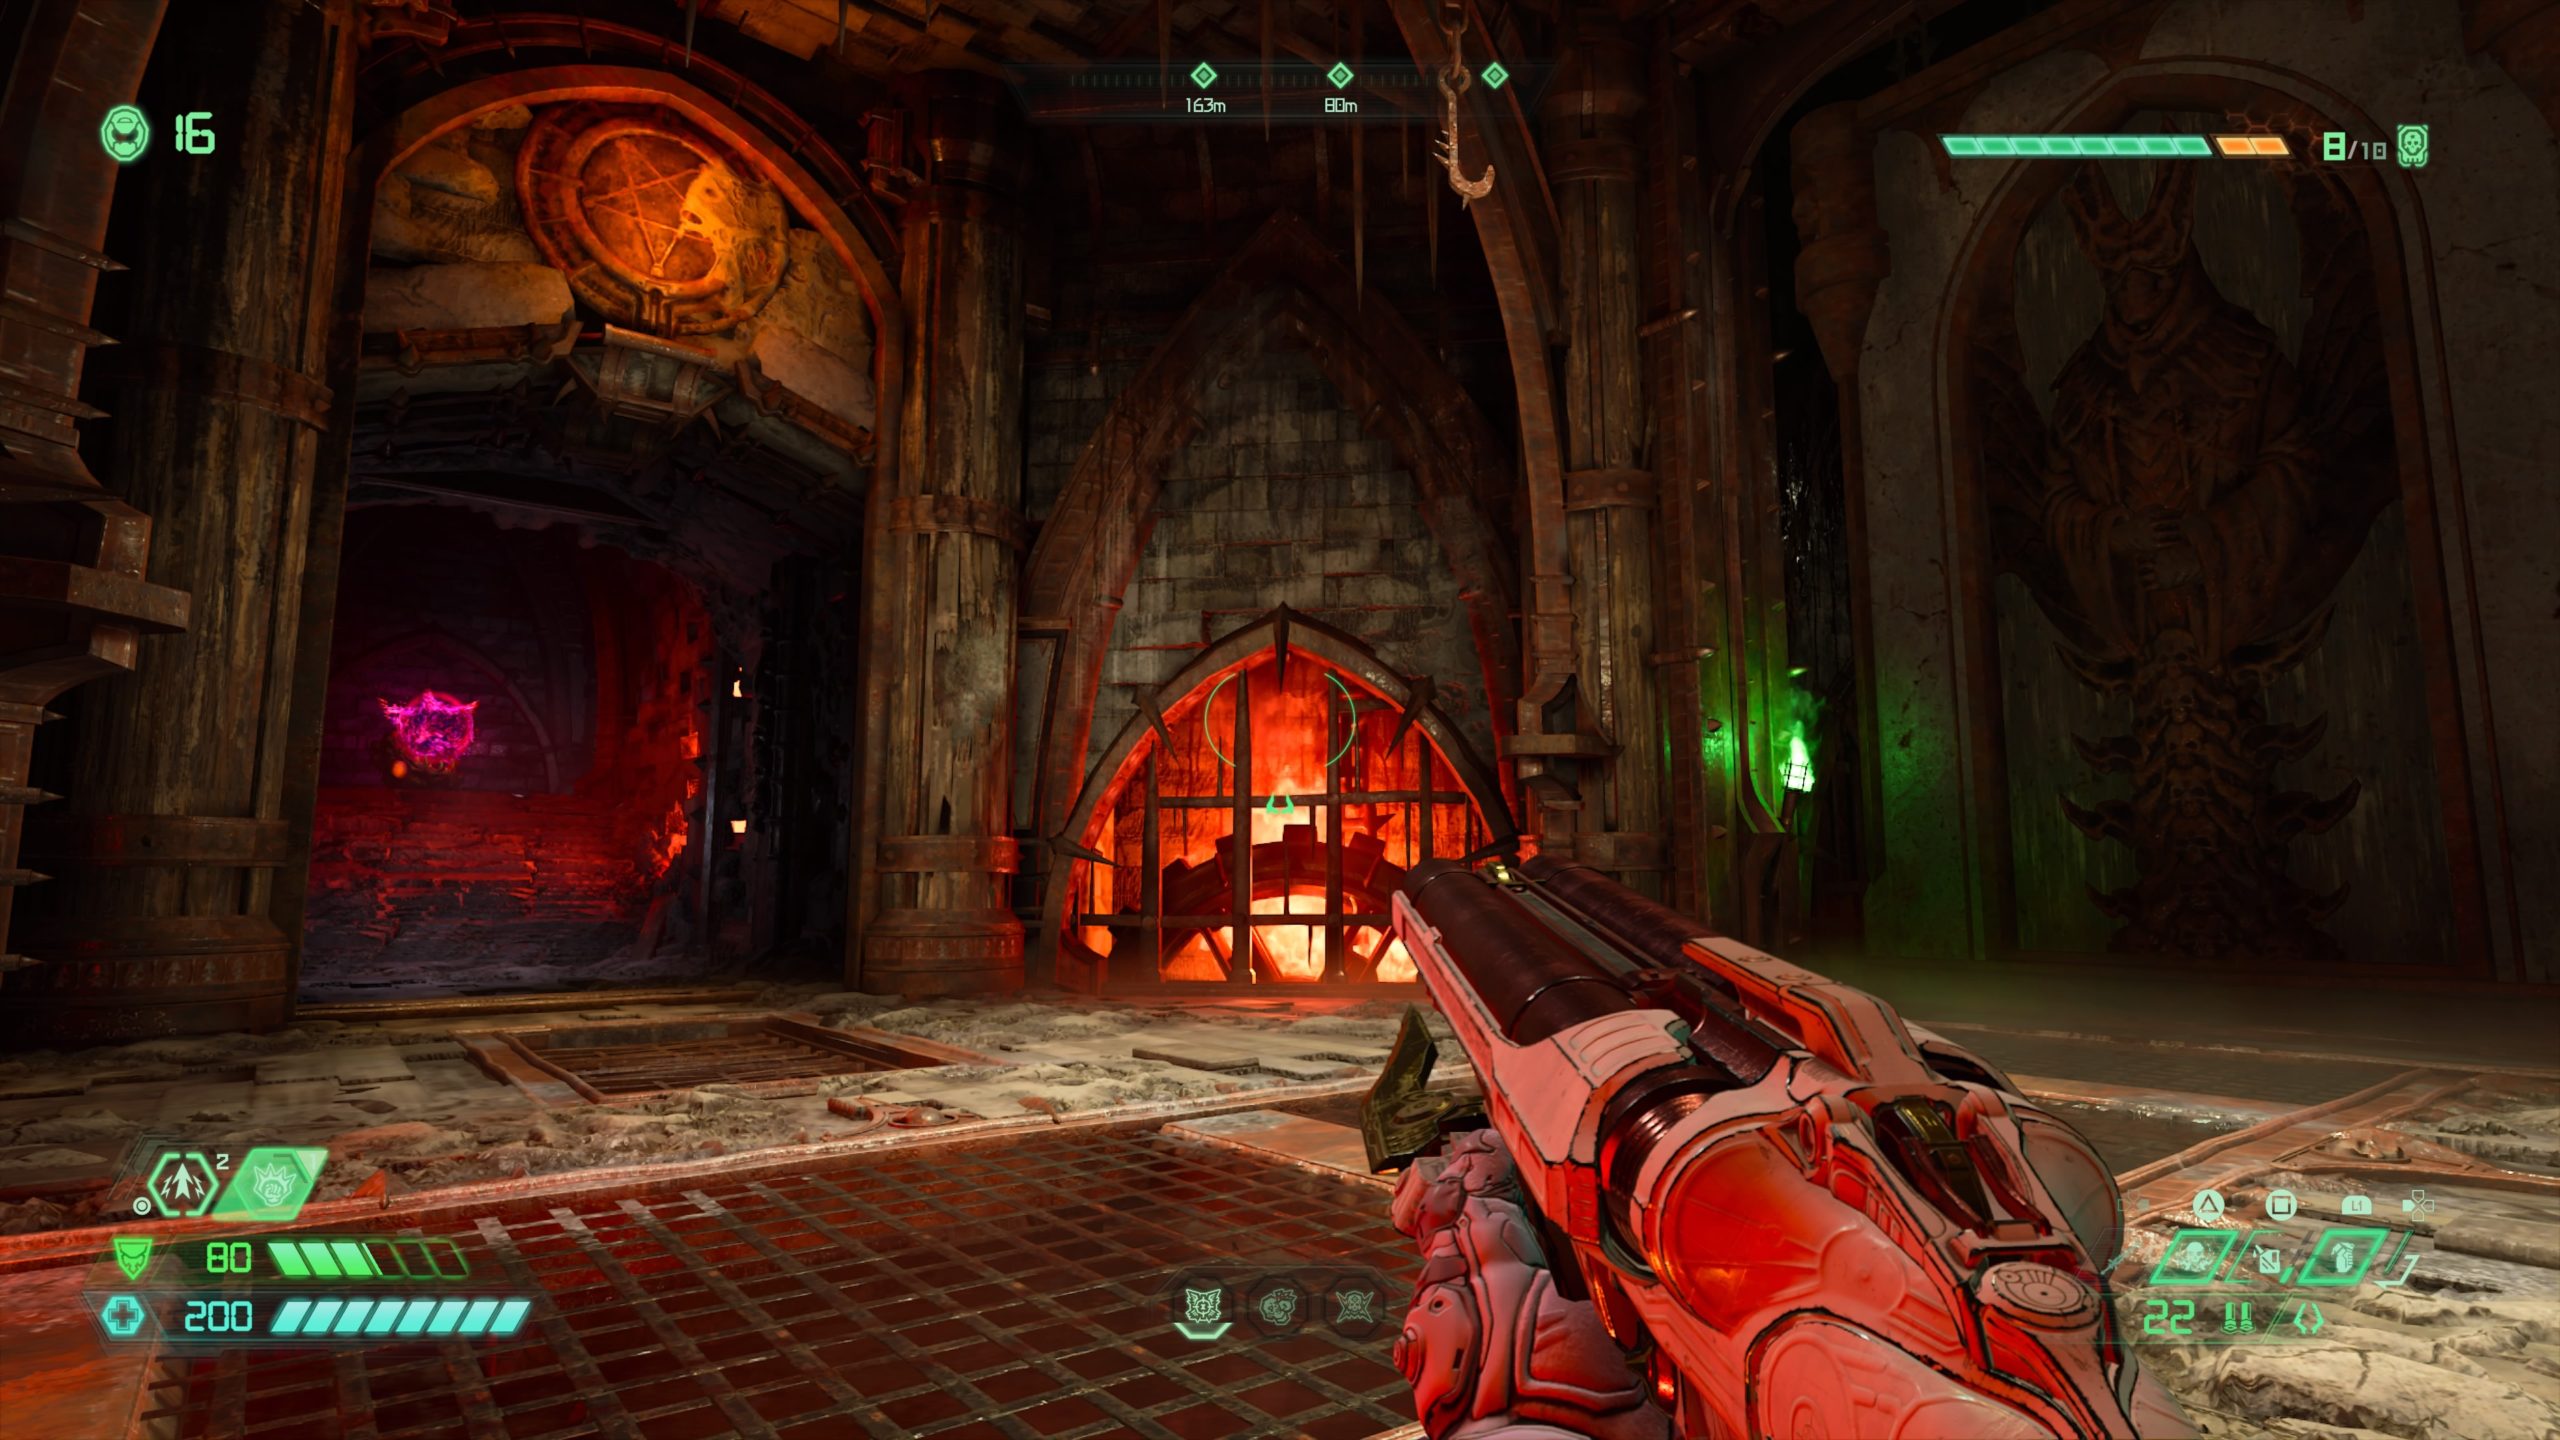
Codex: Book of the Seraphs Part V
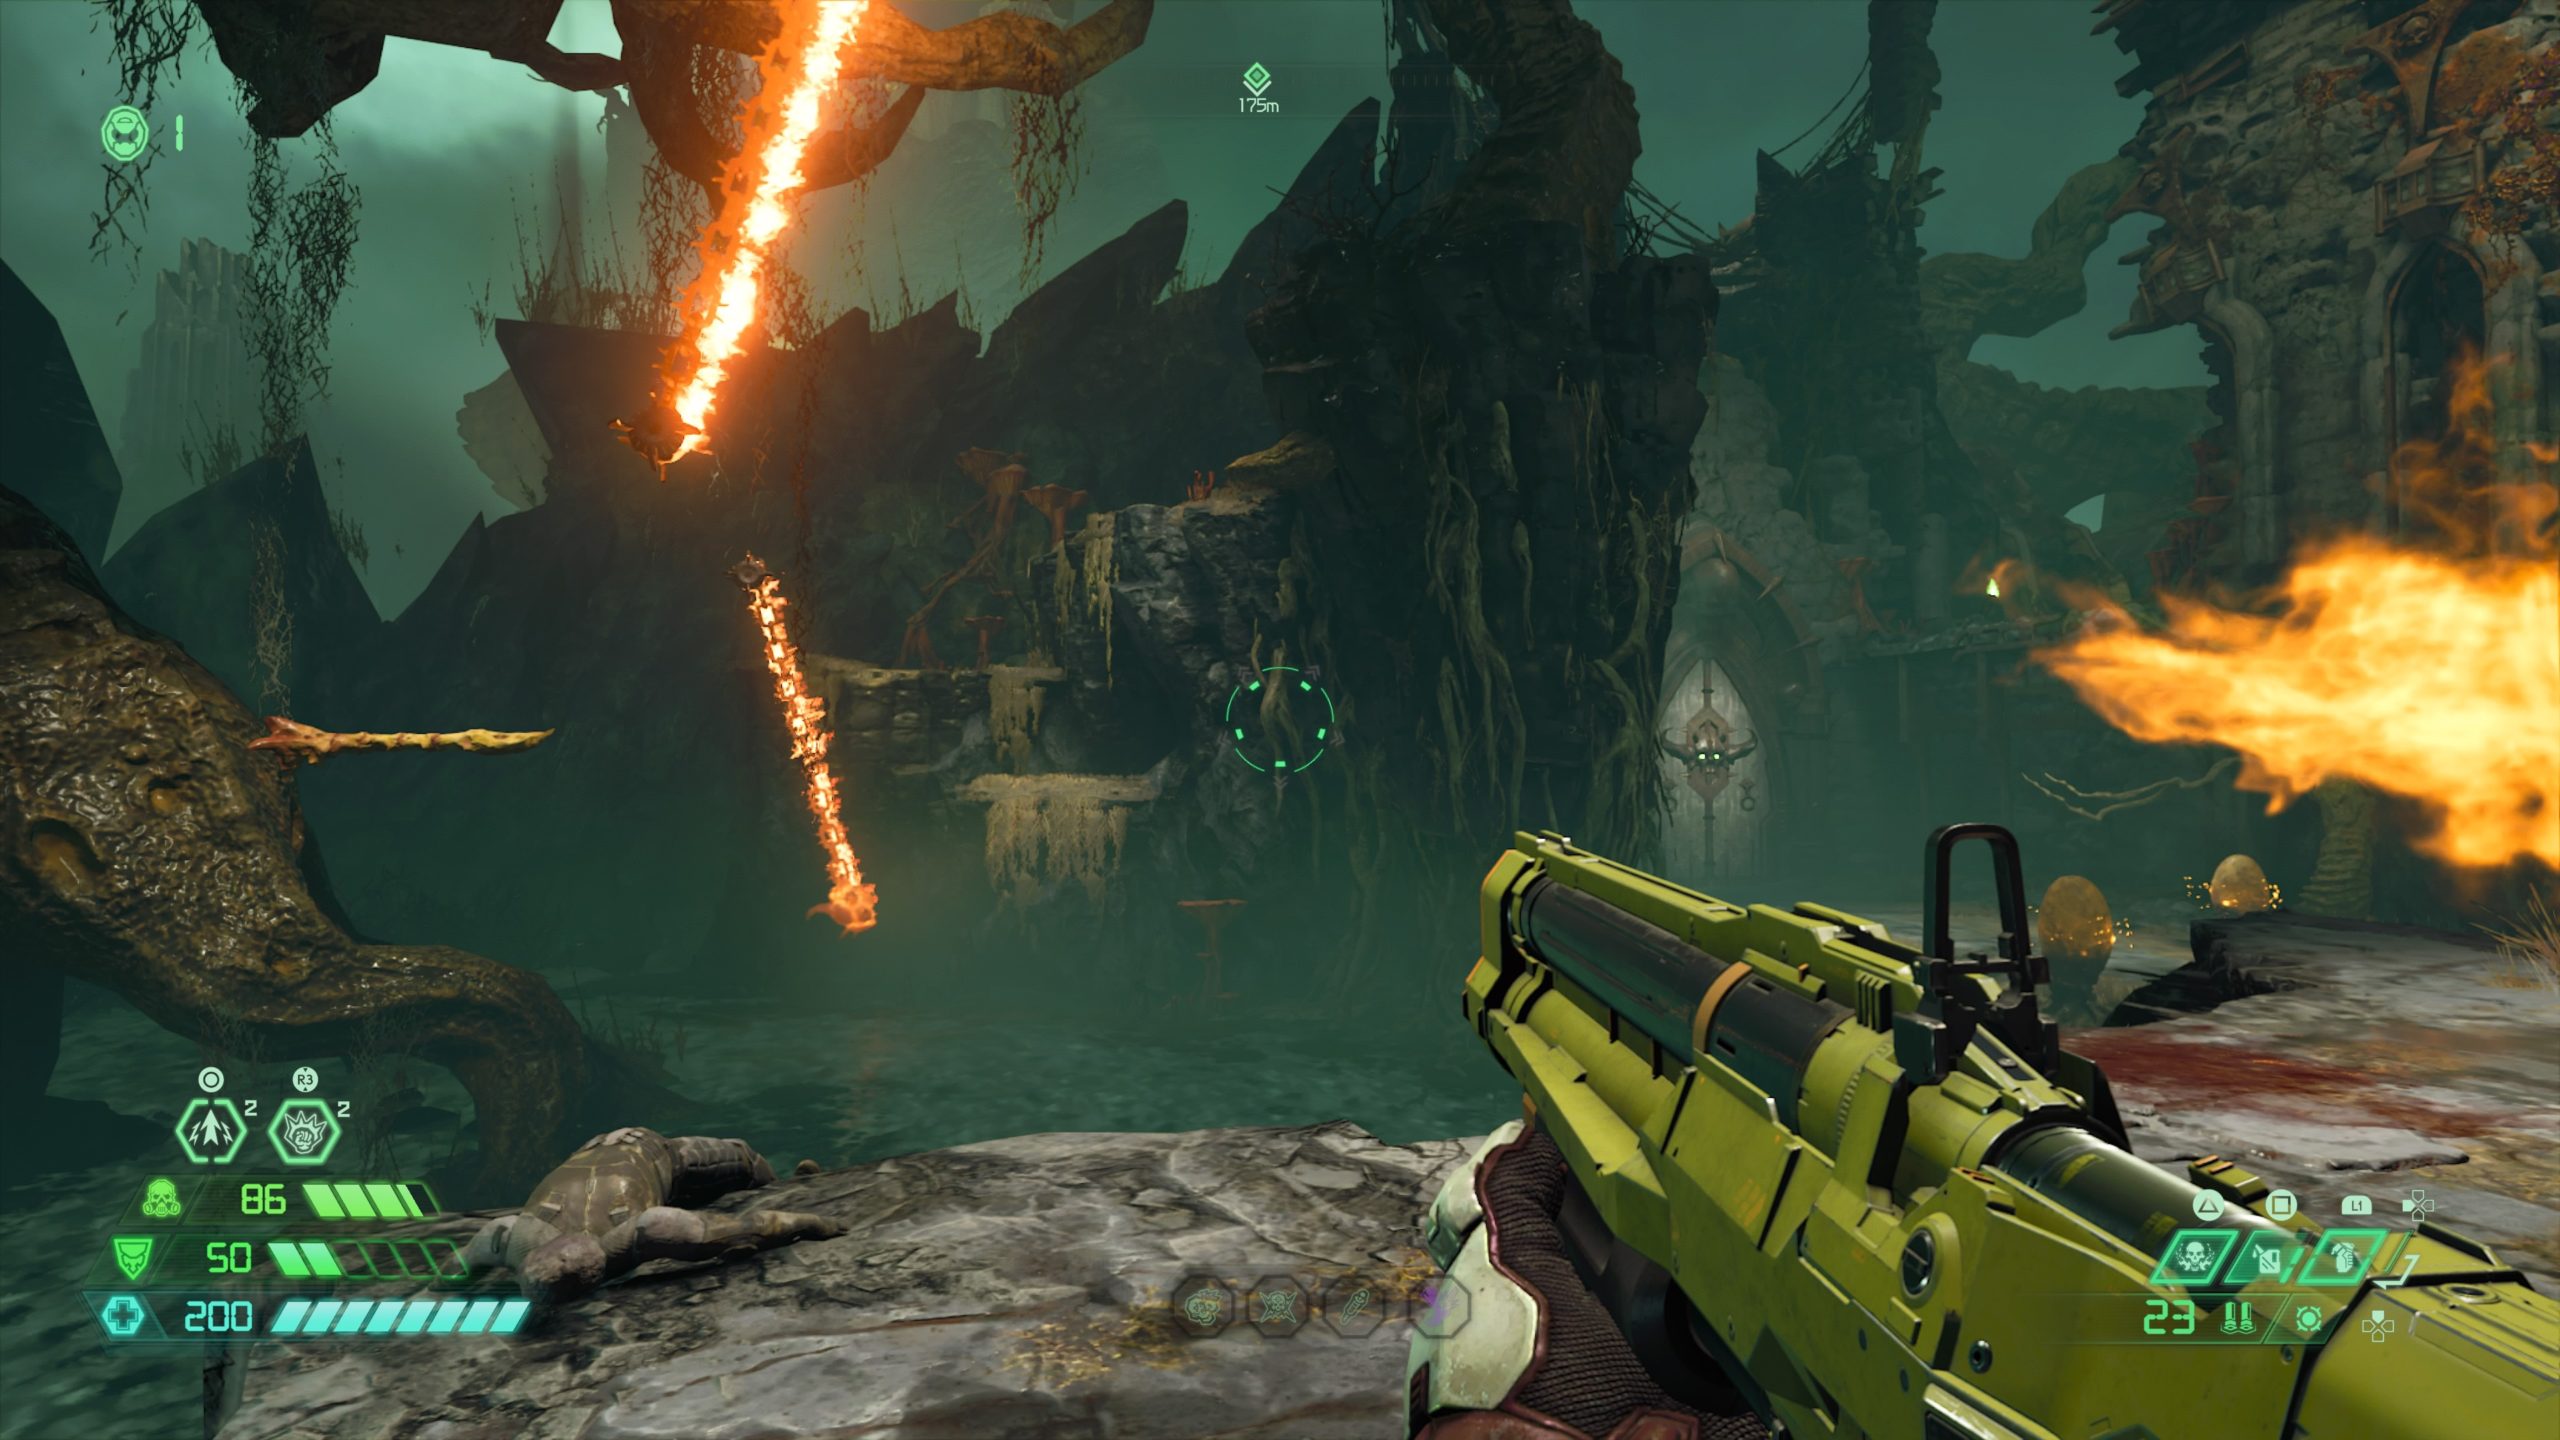
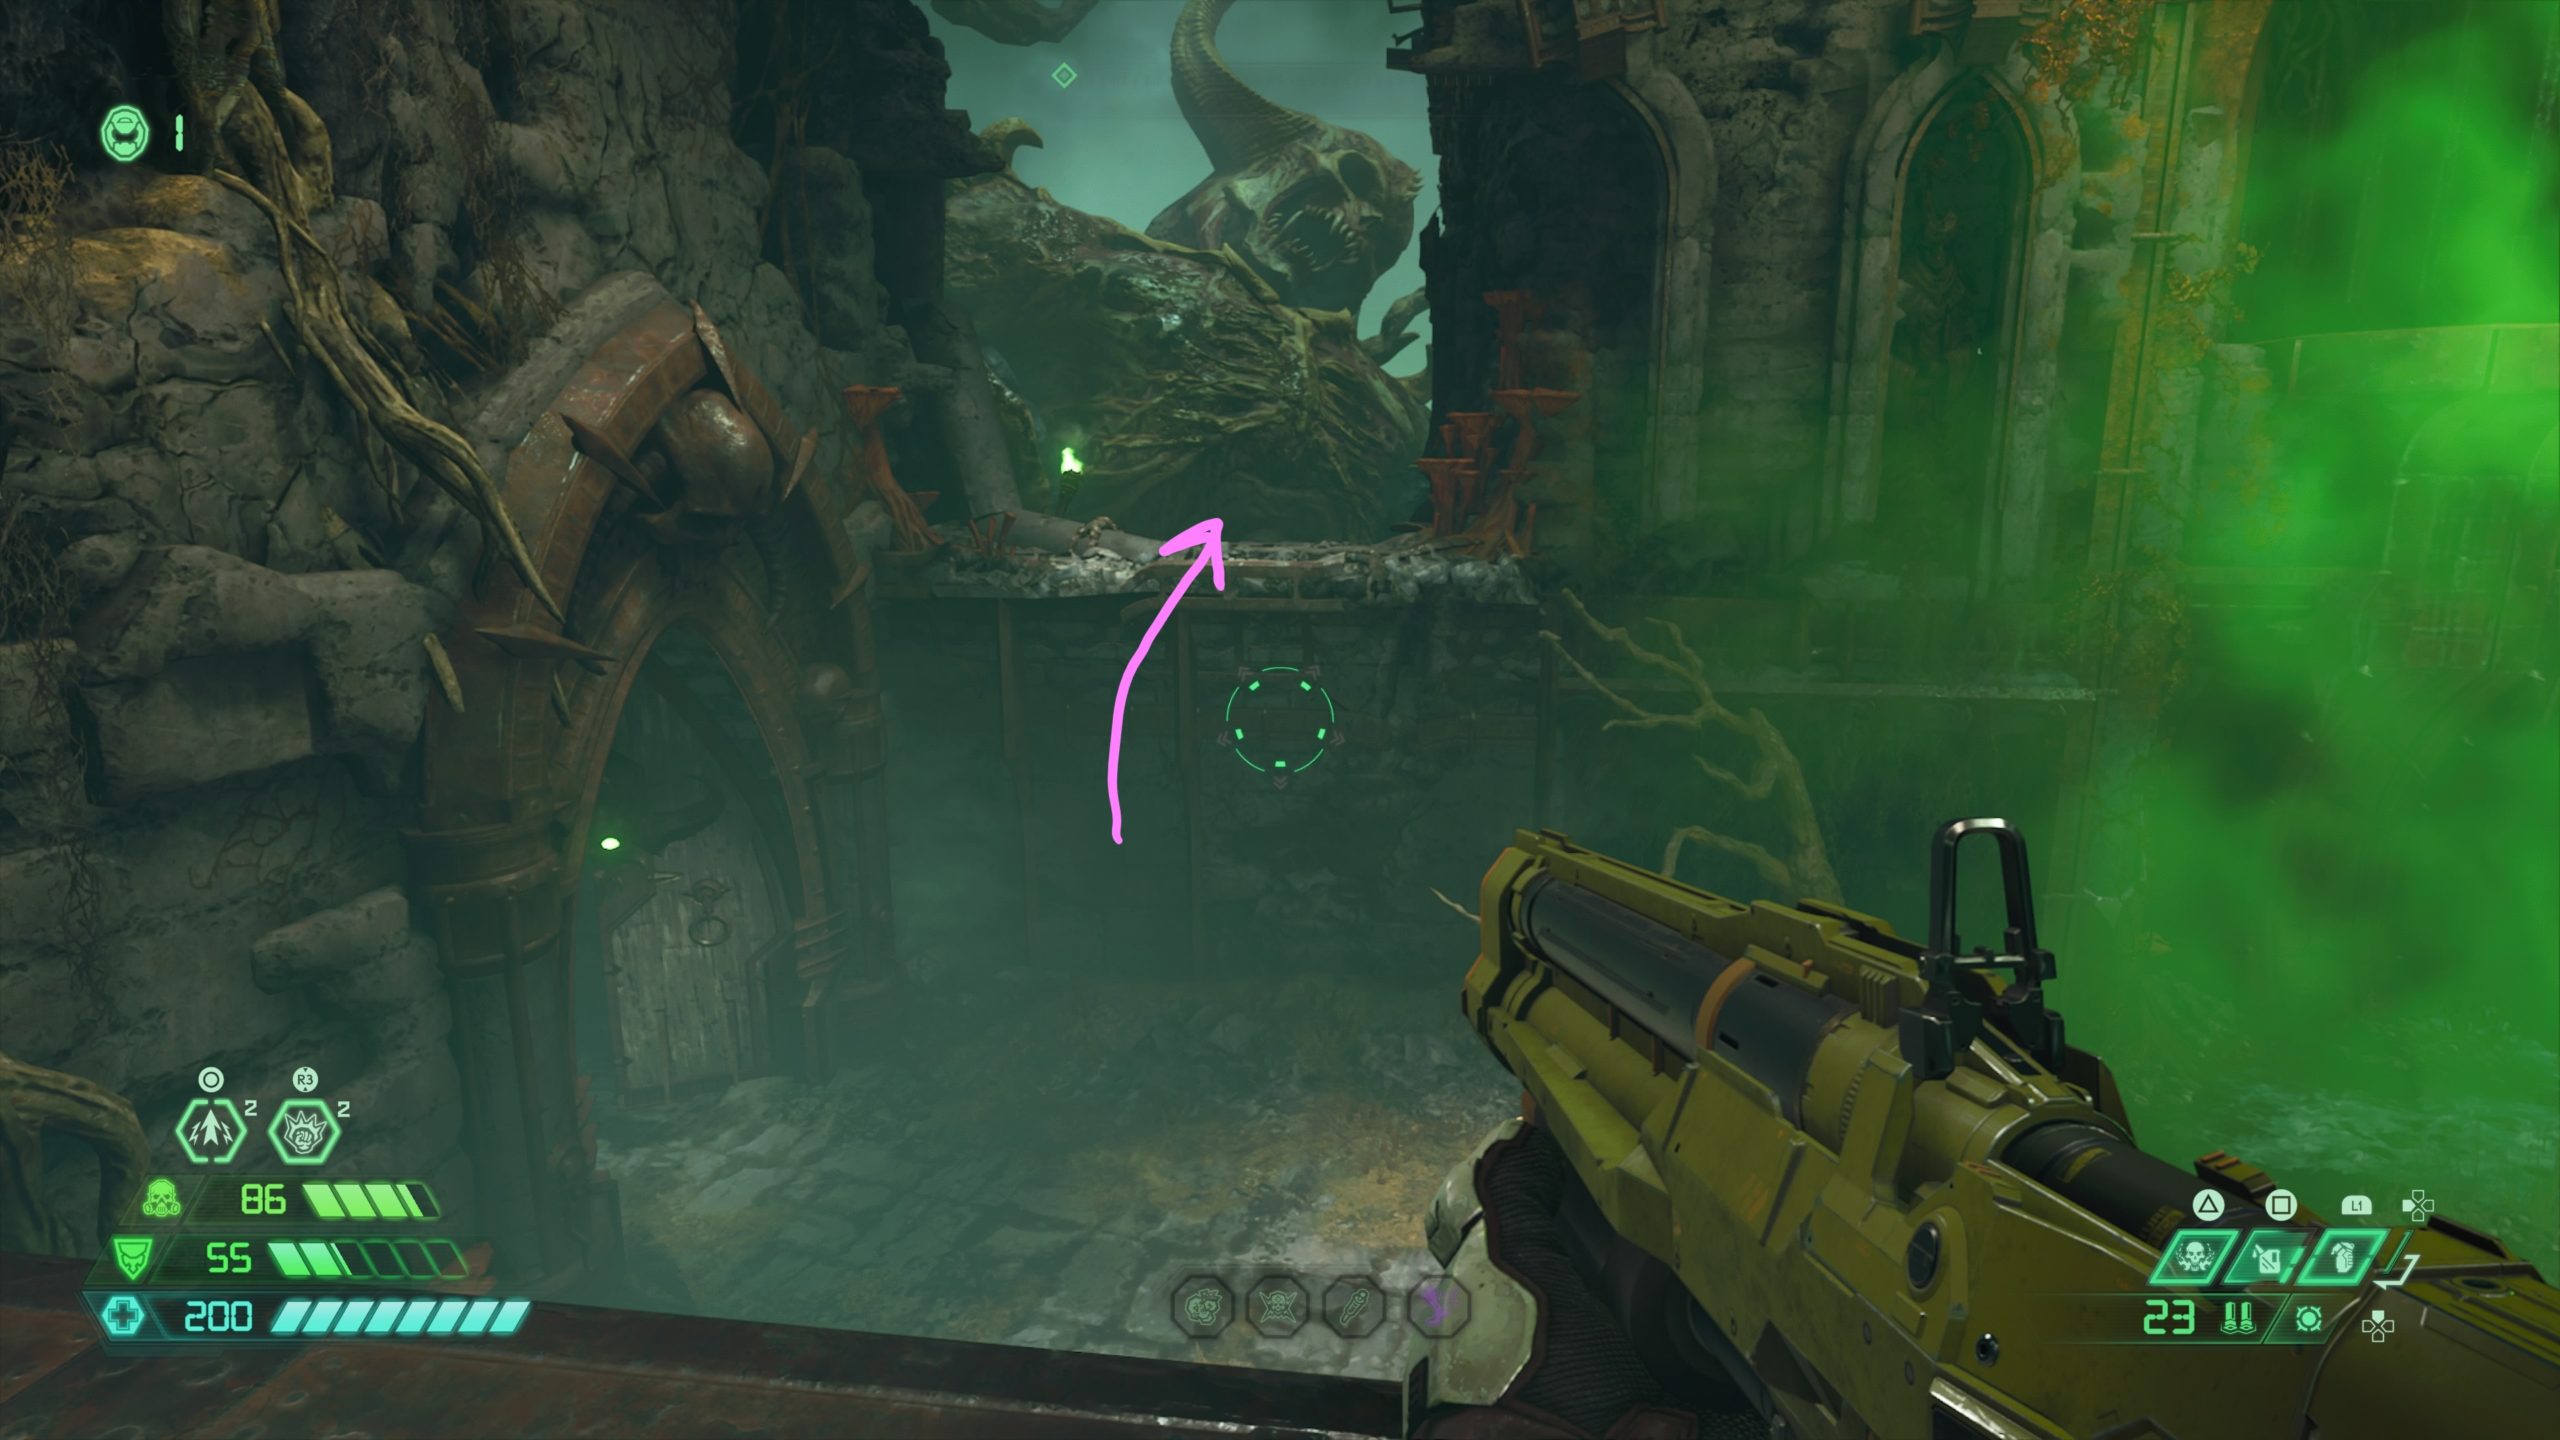
When you come to a giant wooden sealed door, you’ll need to make your way to the top right section of the wall by using the jump bar near the spinning fire chains.
Jump across the gap to the top of the wall across the way then drop down into the water. Pick up the hazmat suit and dive into the water. Turn around to find a little hole containing the codex.
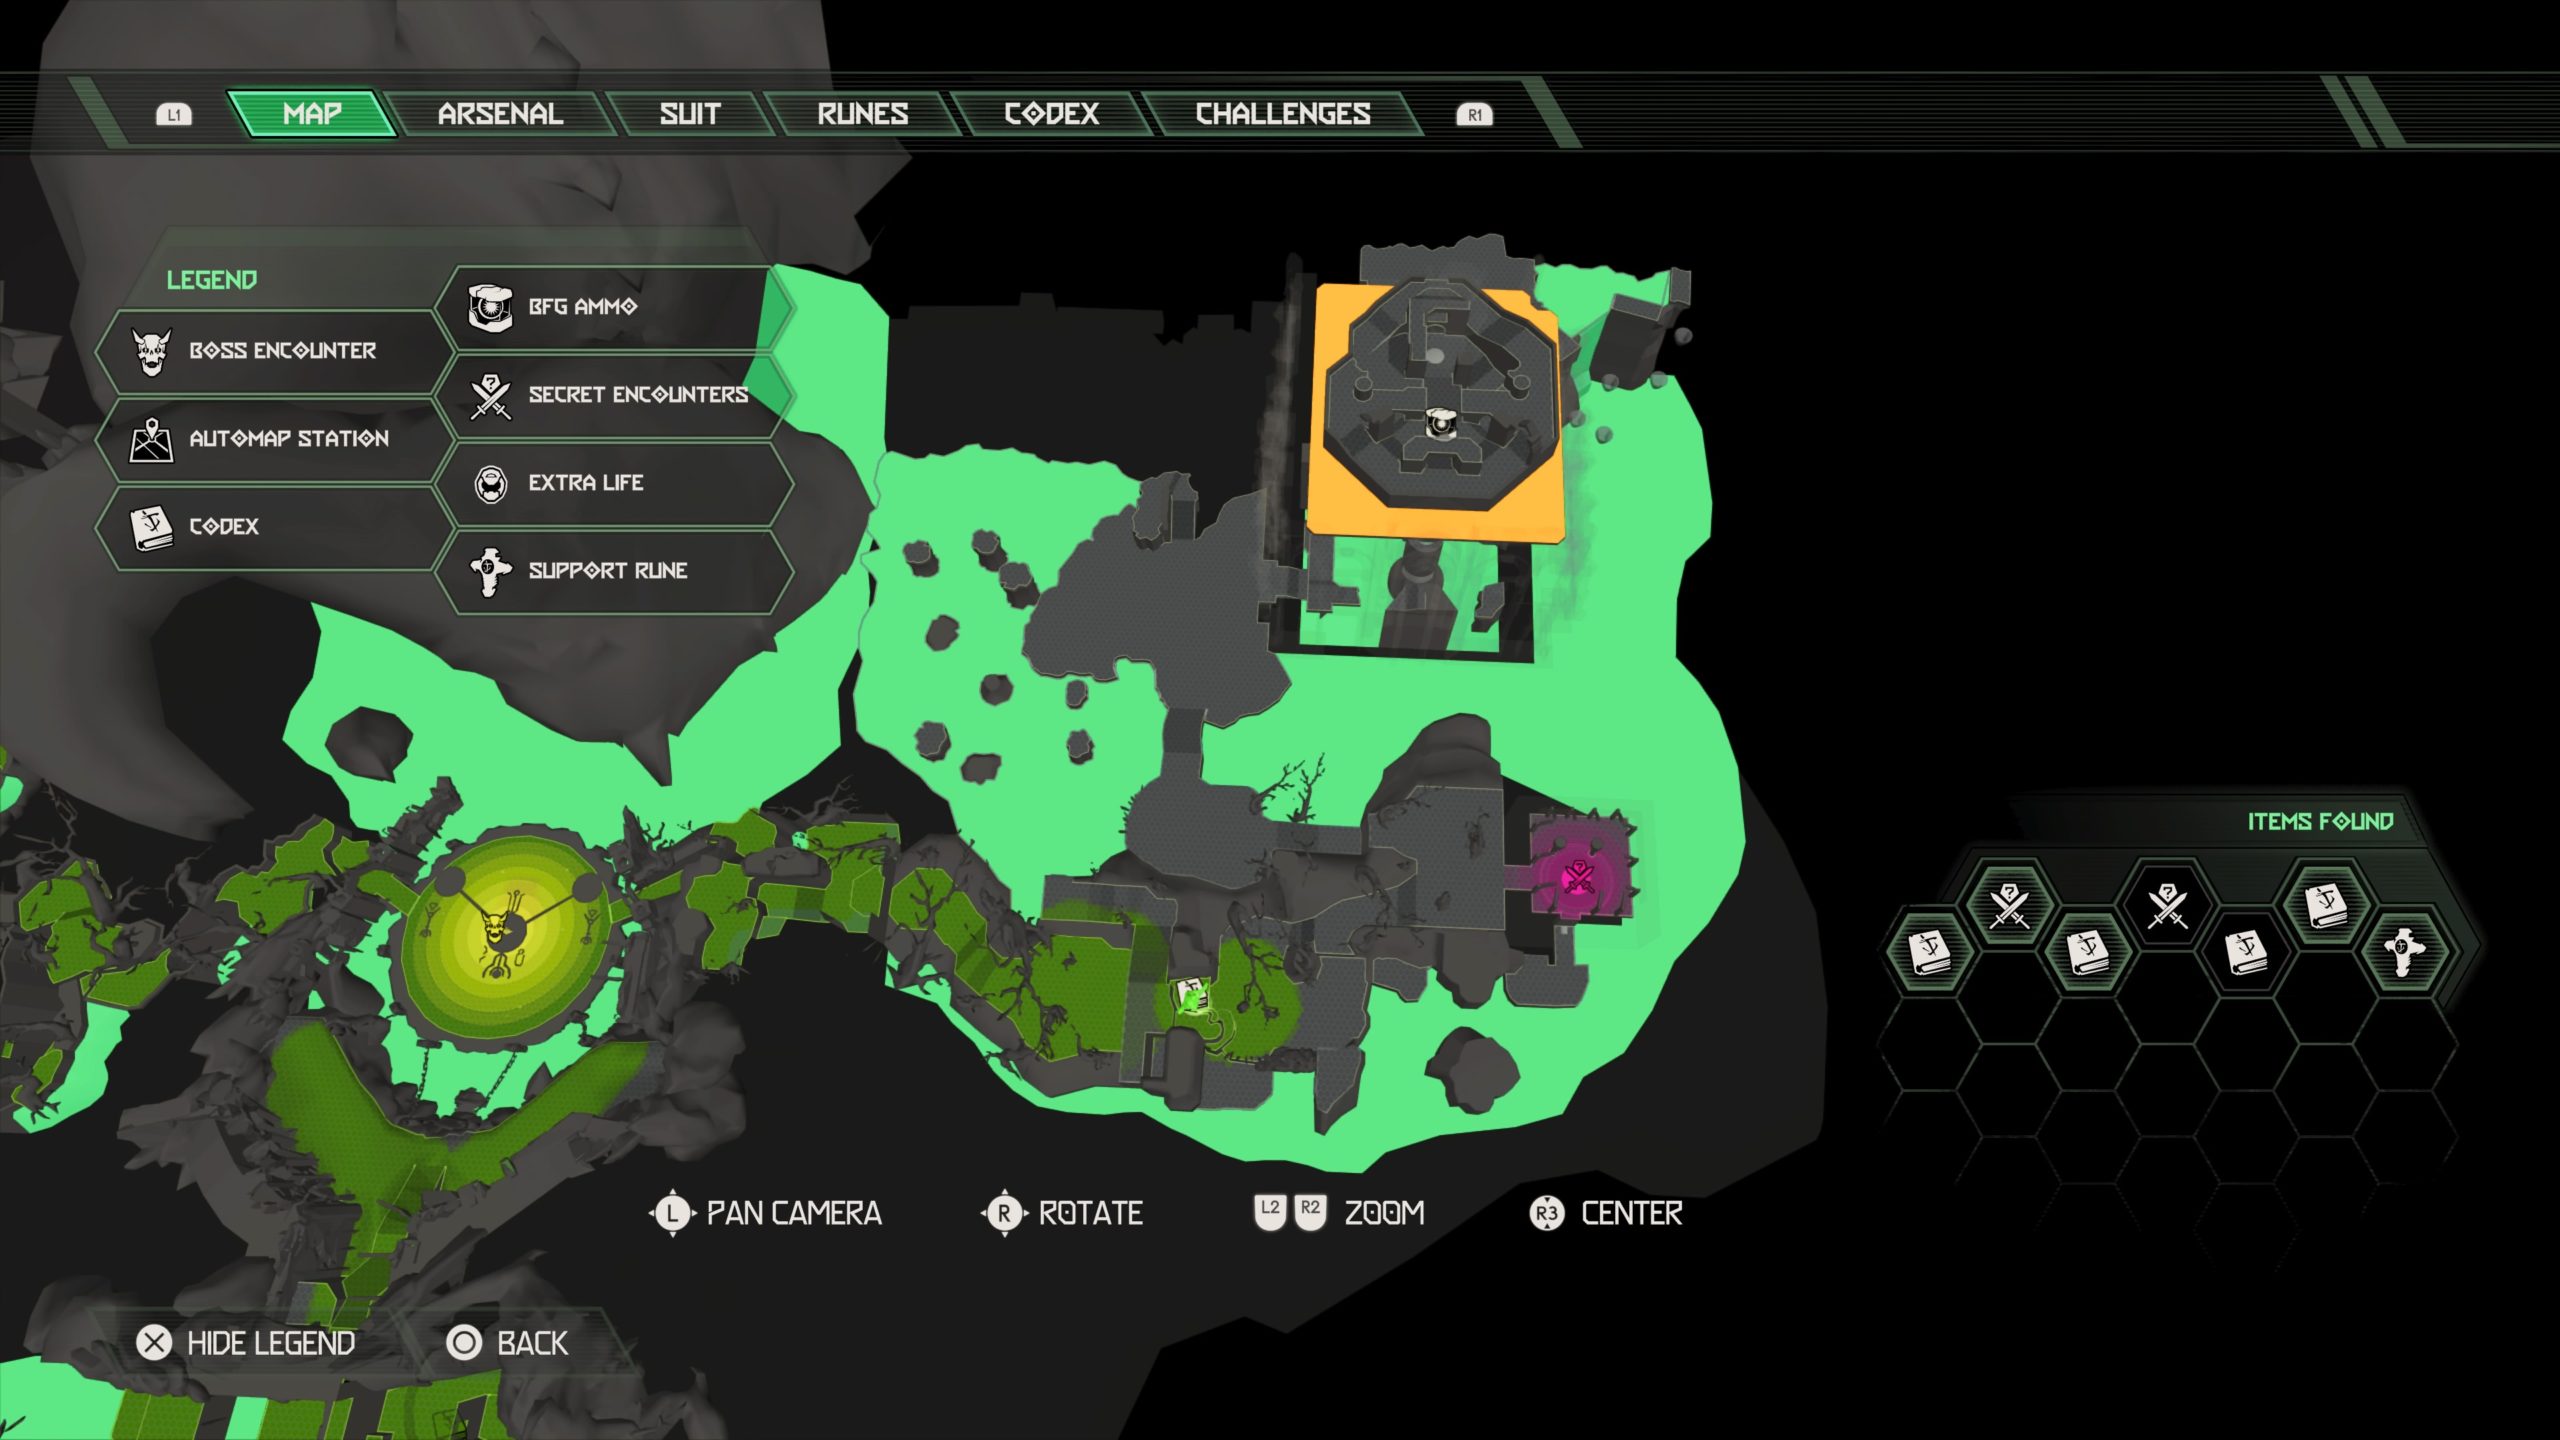
Extra Life
After using a green skull to open the sealed doors as part of the story, turn around and drop down to the ground below. The extra life will be located behind a breakable door to the right.
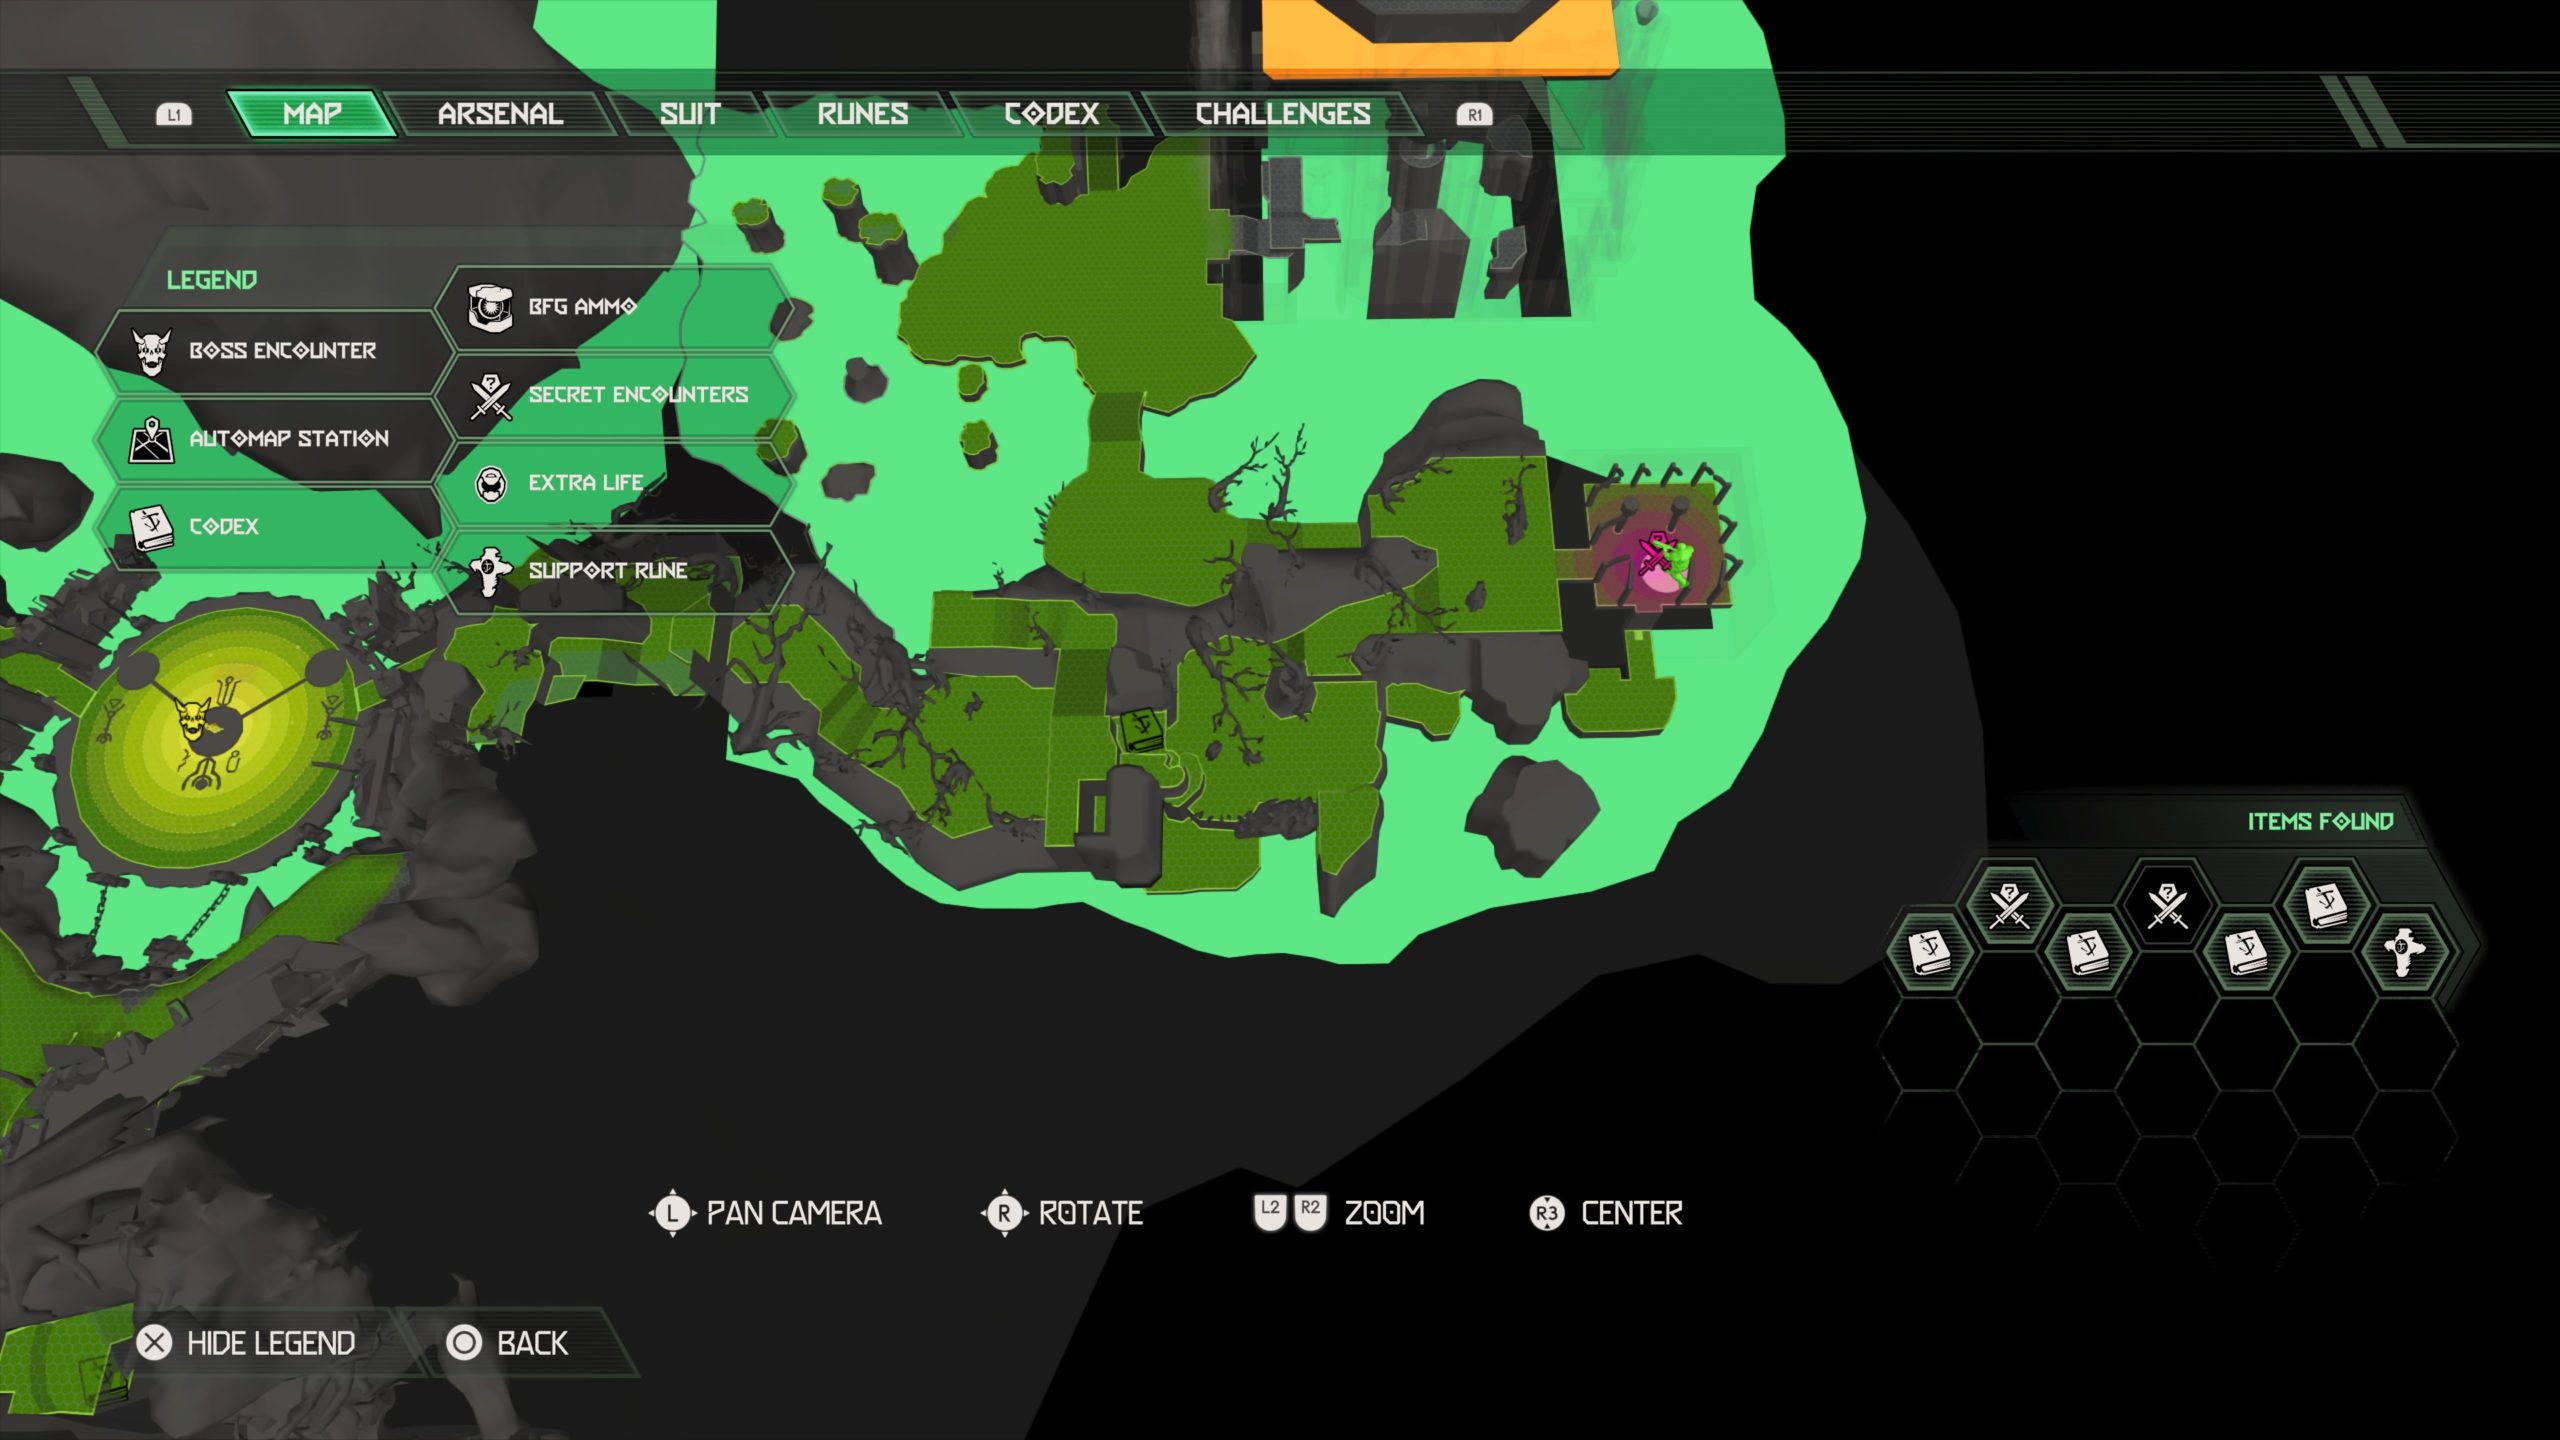
Extra Life
From the life sphere, follow the path to the western trial. When you reach the ravine, look down to find a cave behind a small waterfall draining into the ravine underneath the path your suppose to take. Jump to the cave to find the extra life.
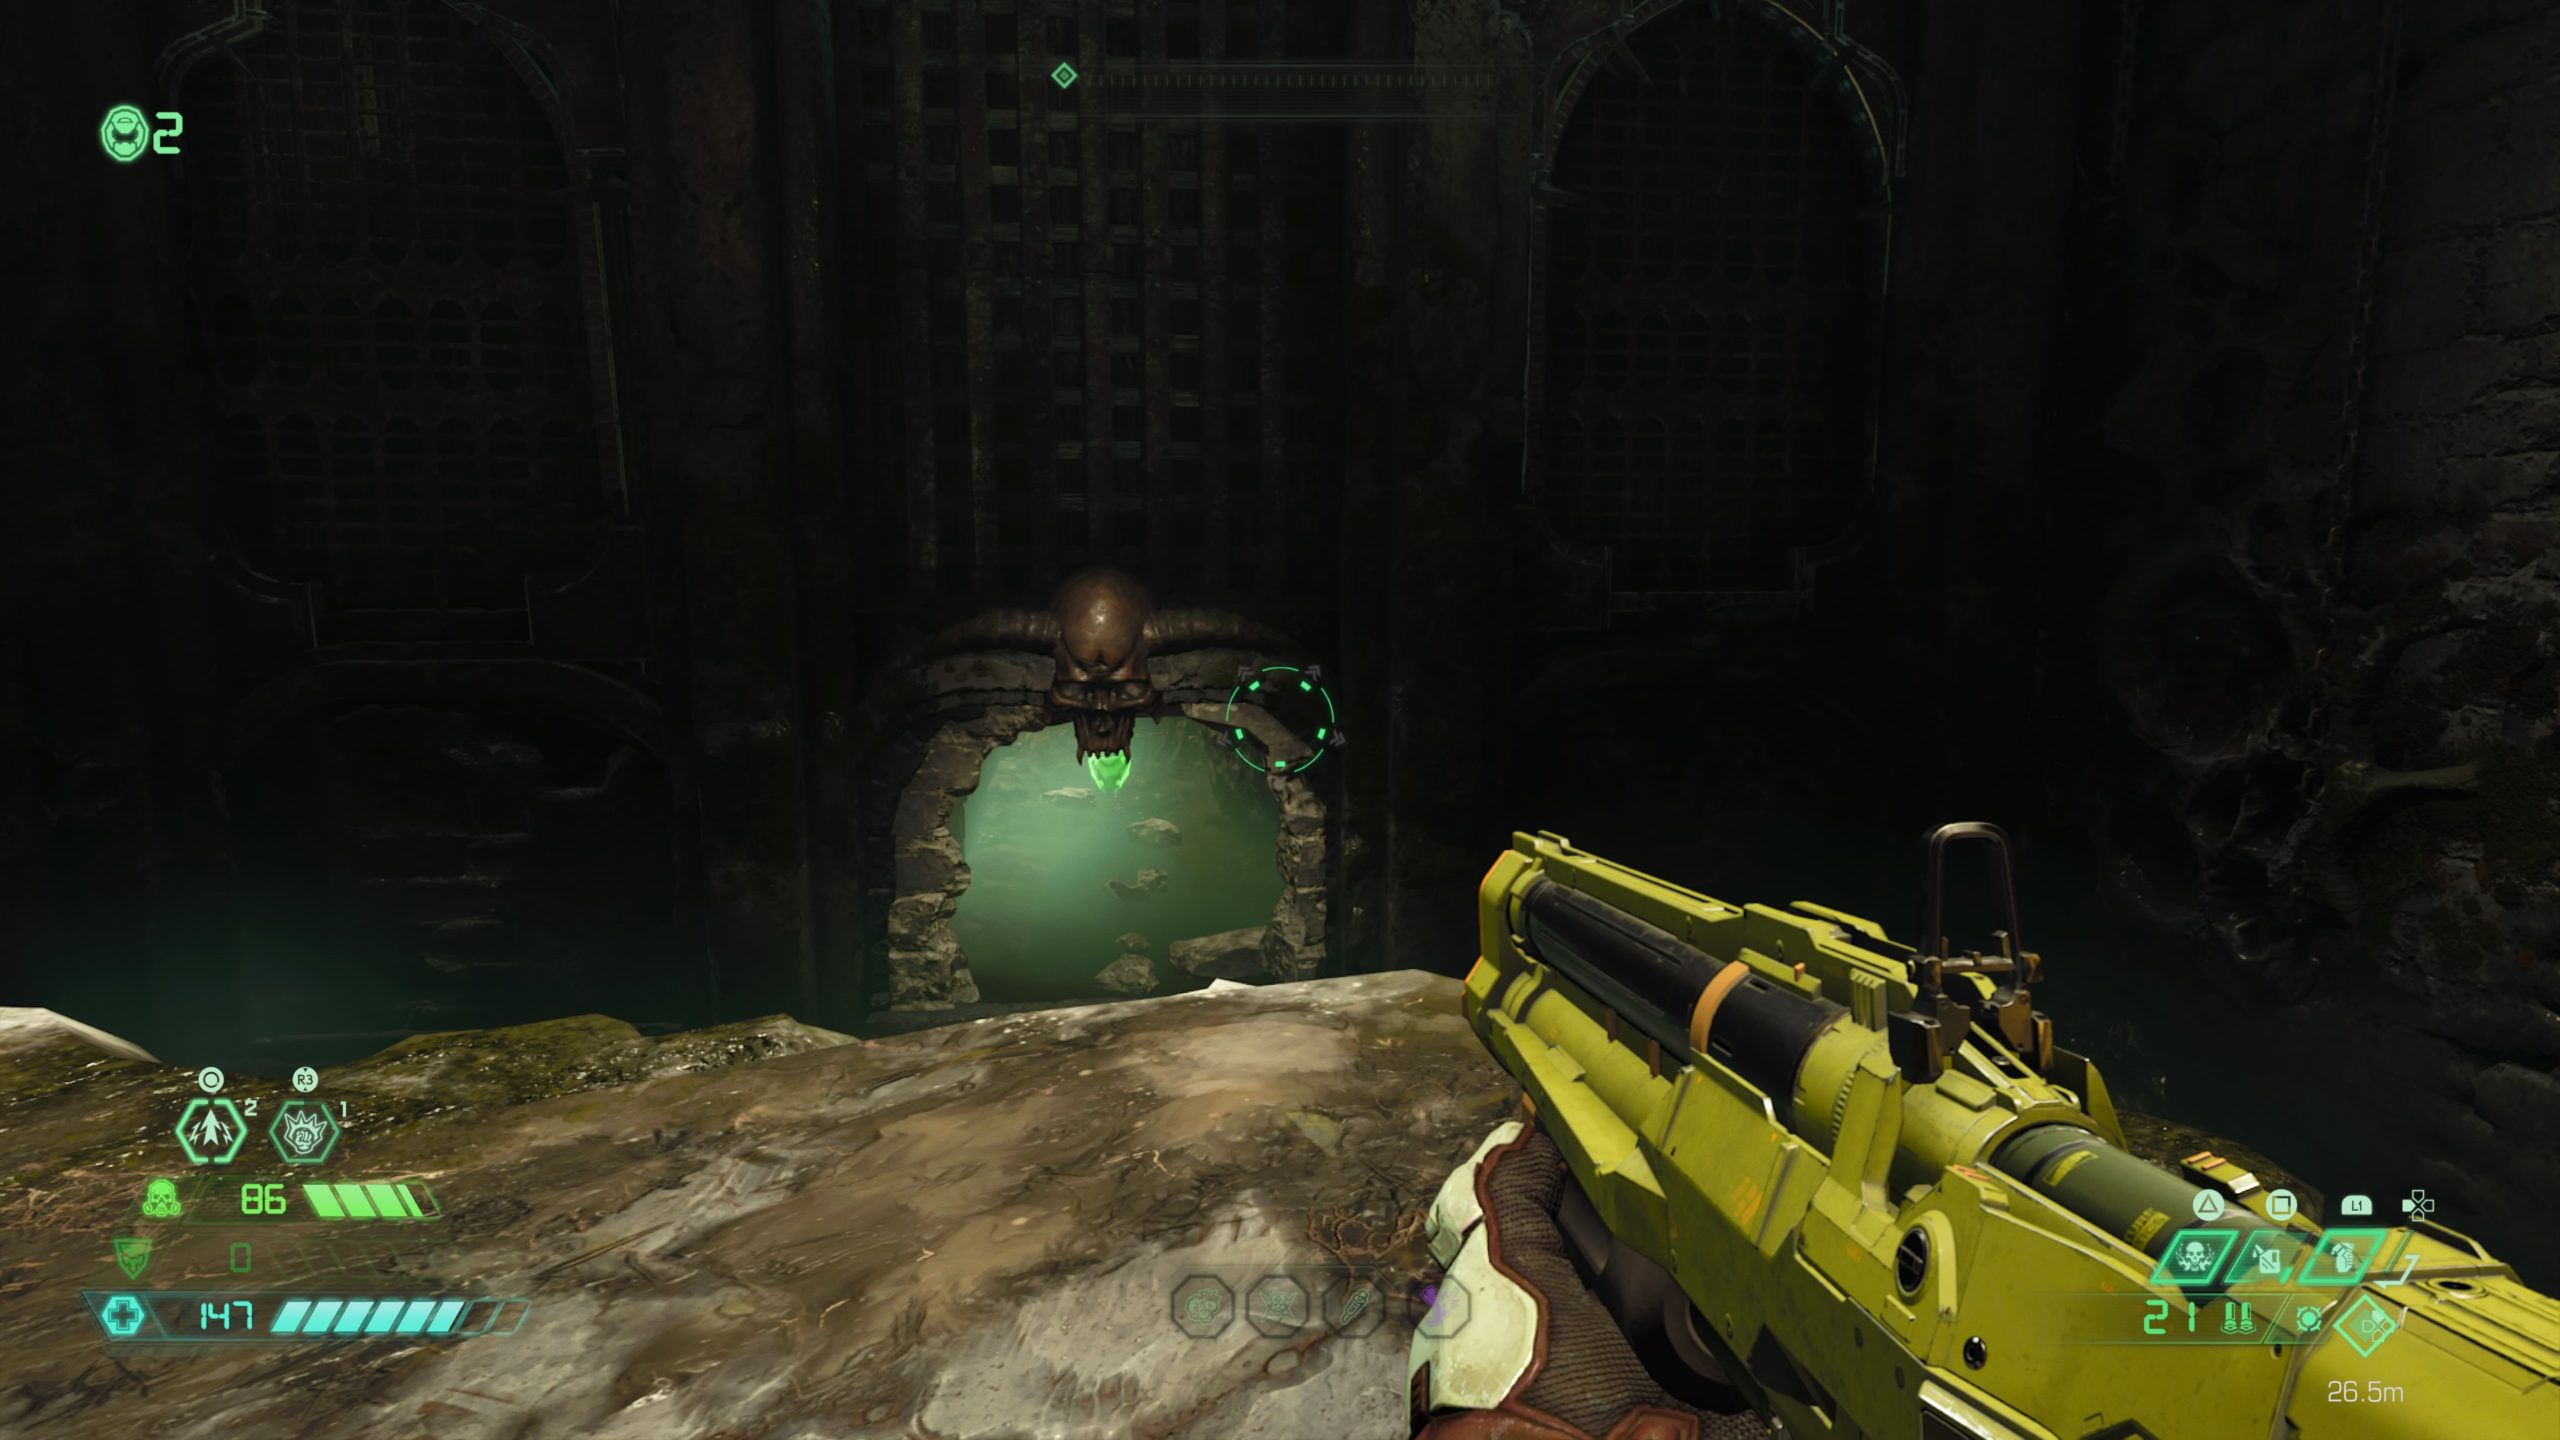
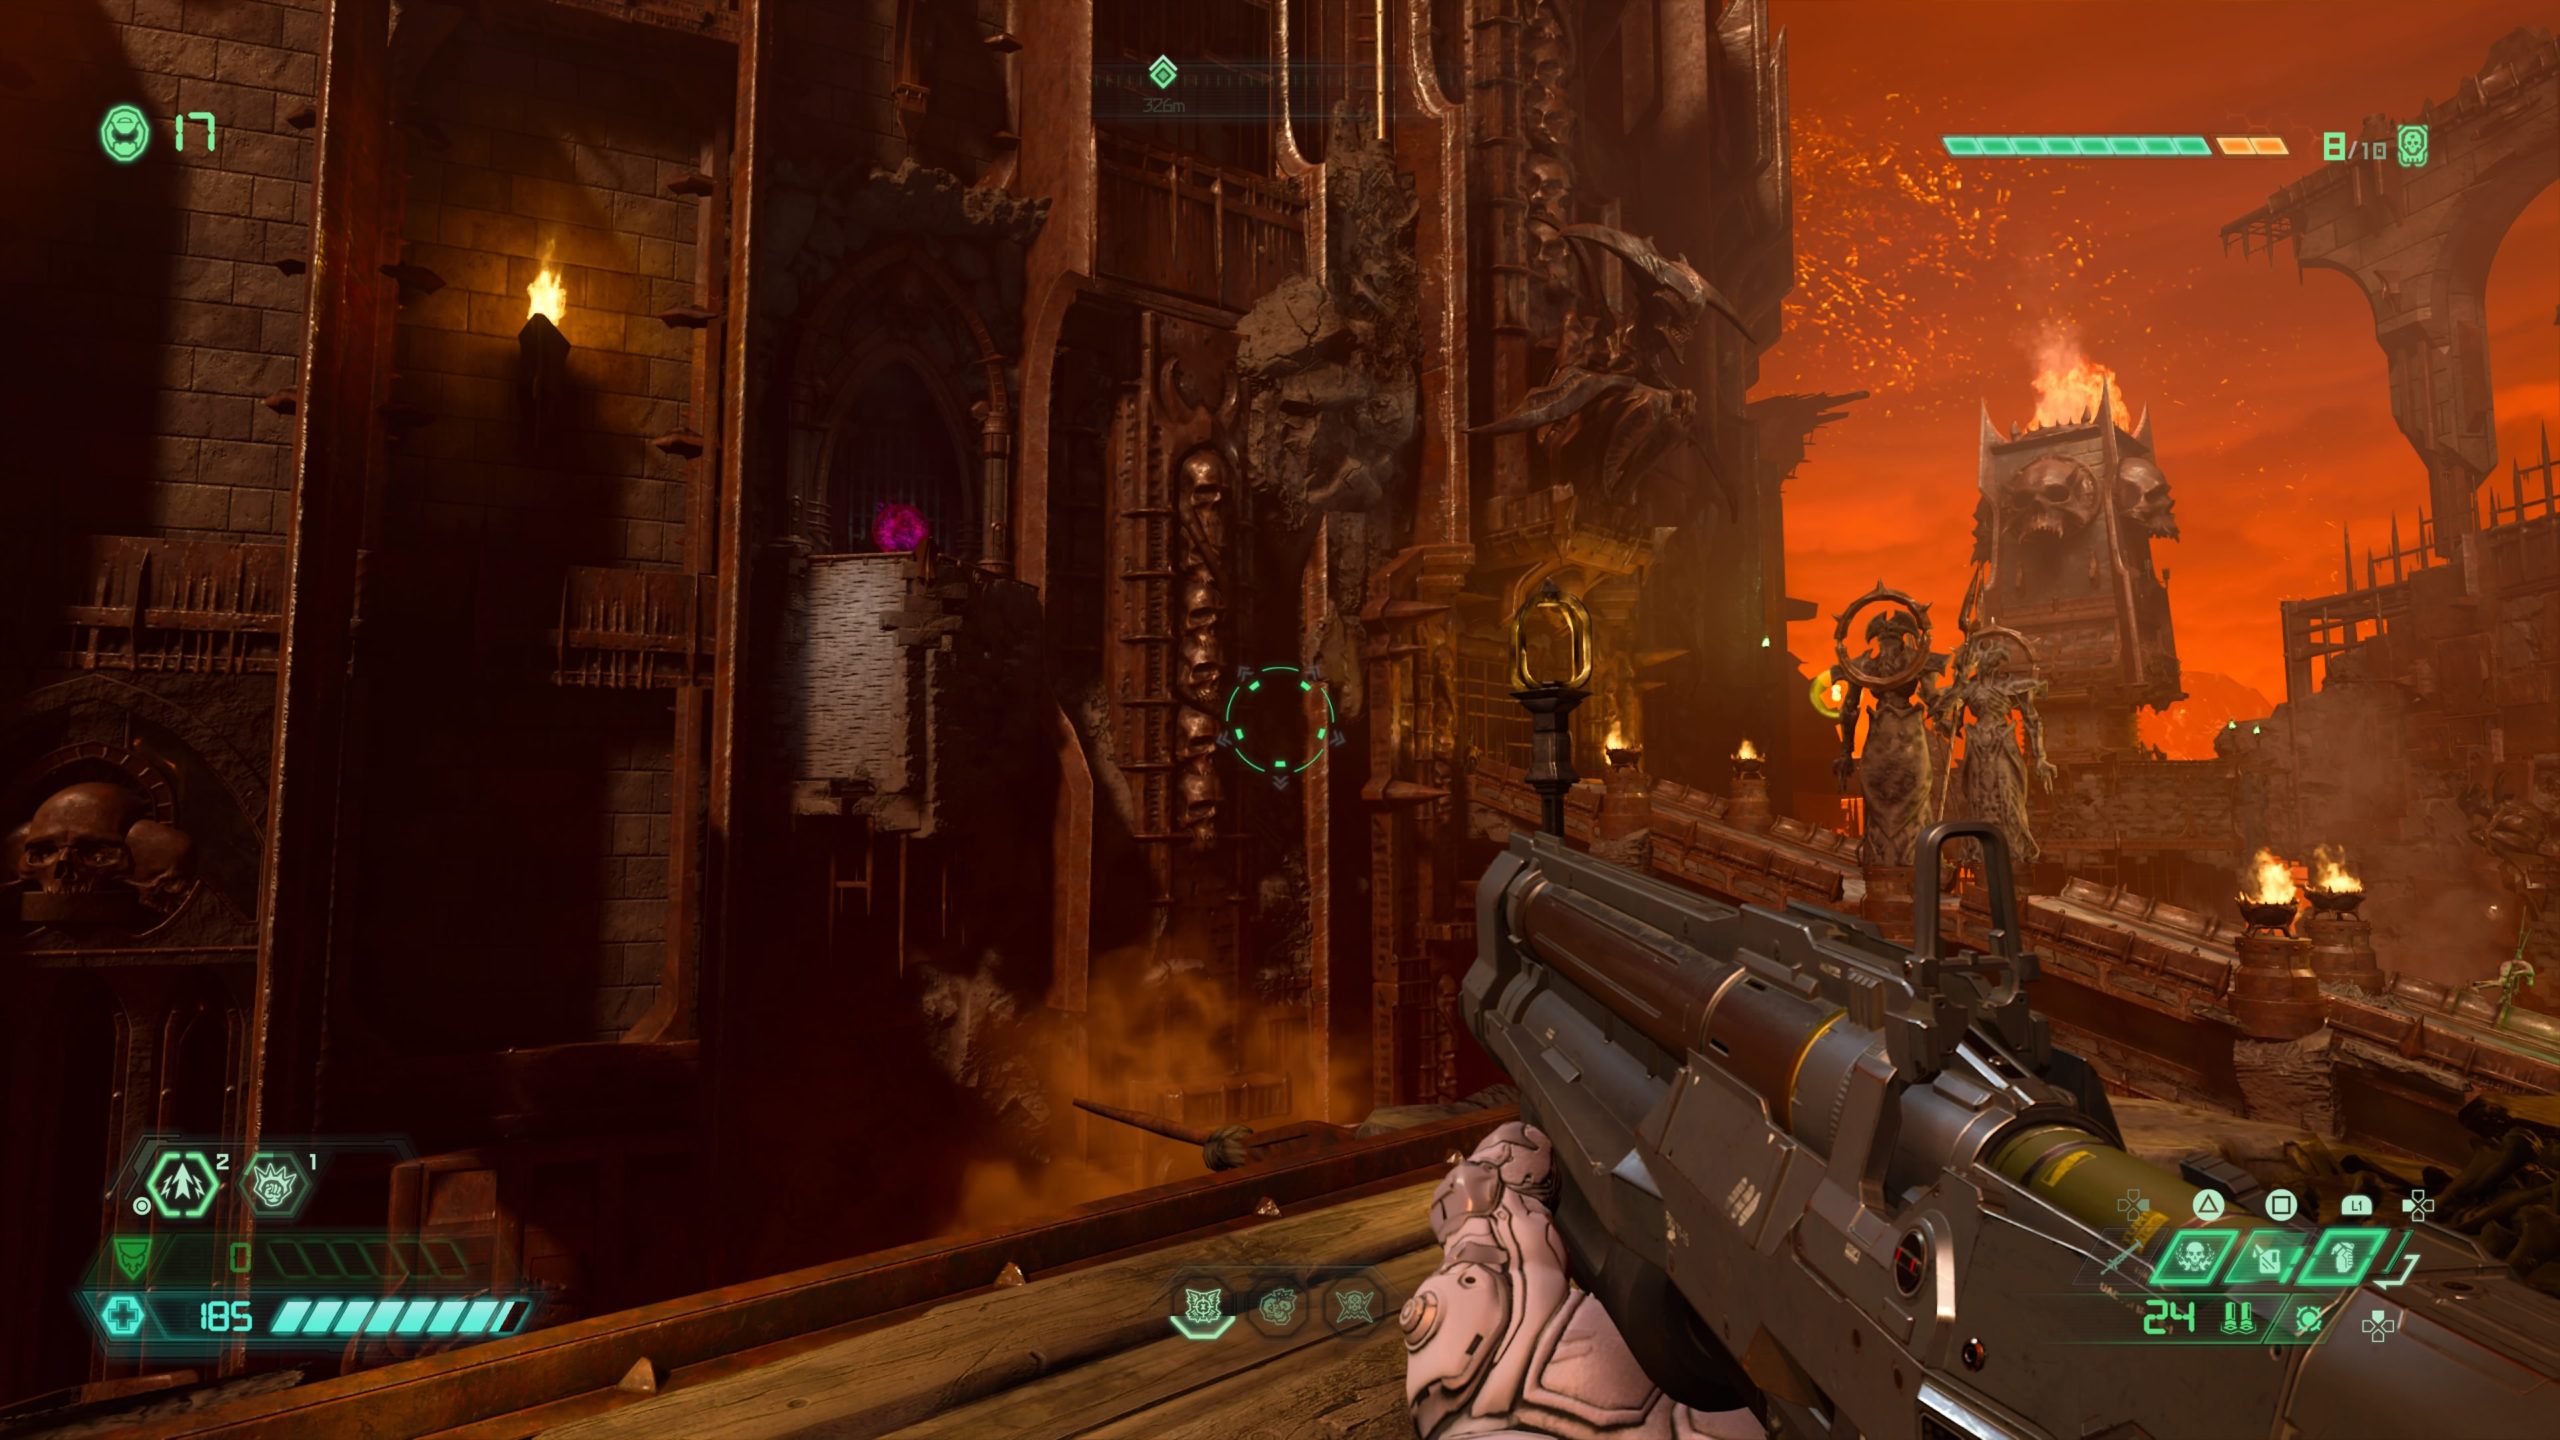
Extra Life
This extra life can be found on the way to the western trial in the water. To release the water, you will need to break the wall underneath the skull.
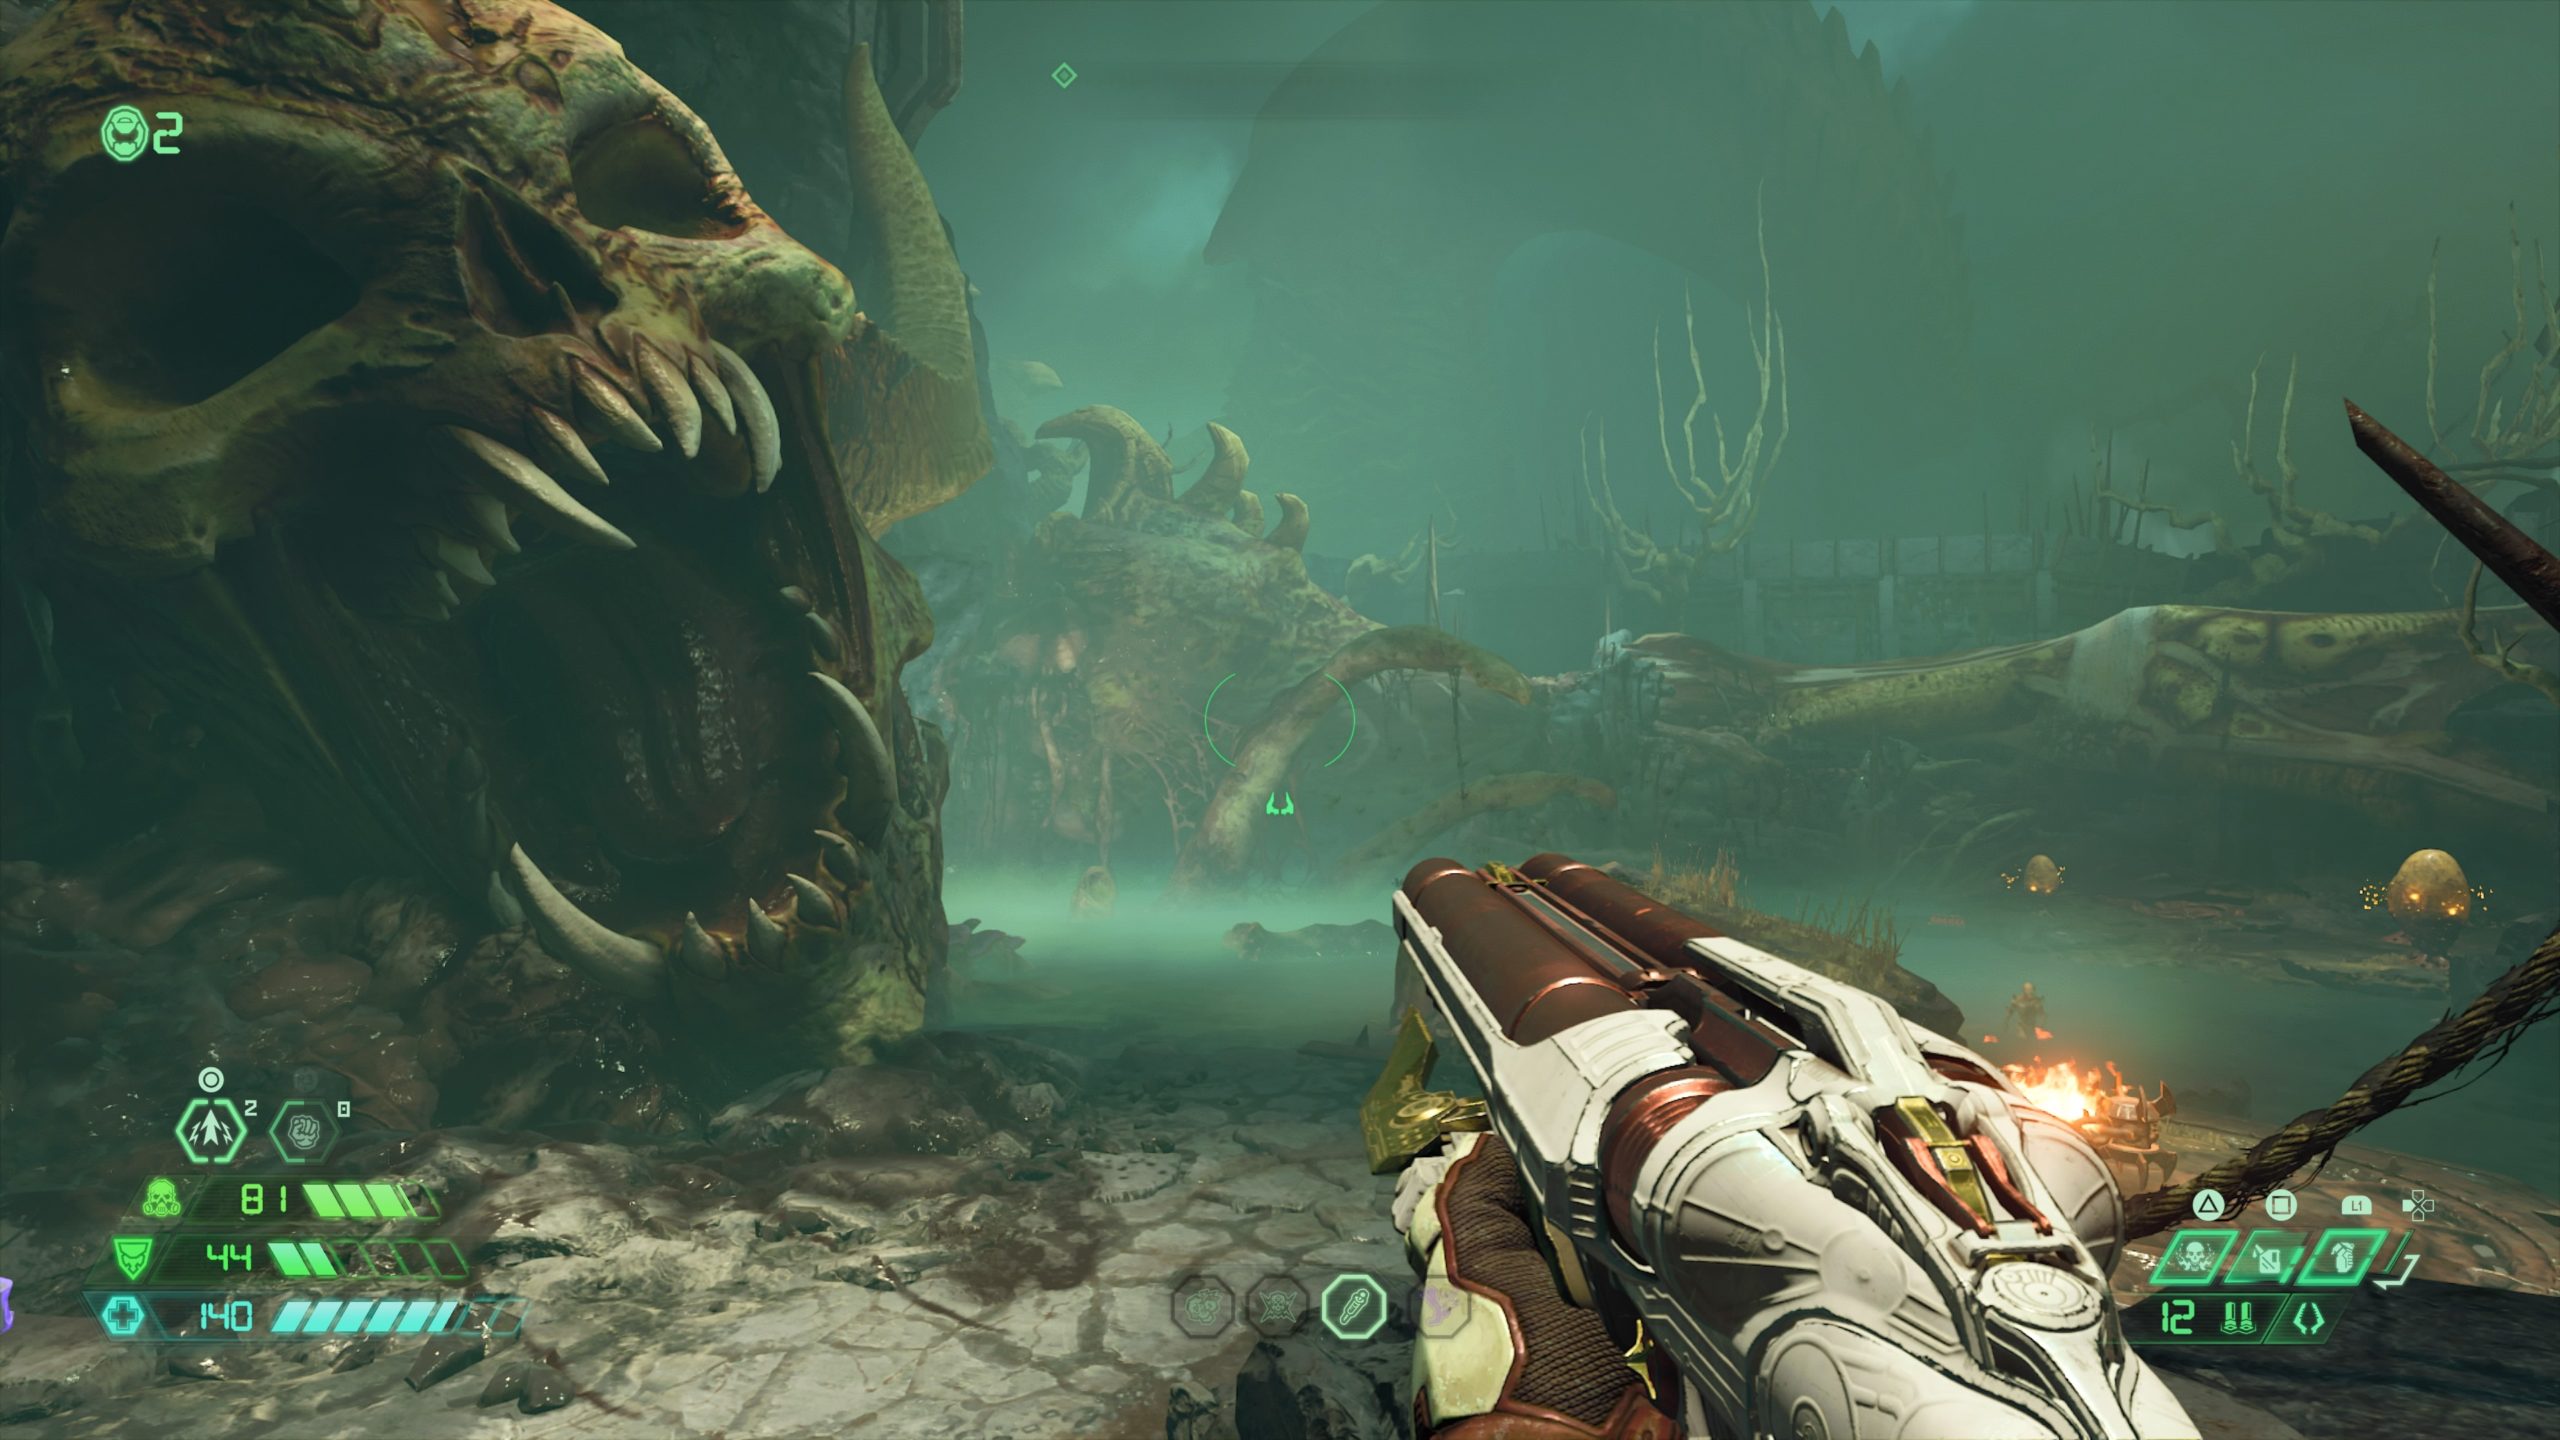
Codex: Book of the Seraphs Part VI
As you progress towards the western trial, you’ll come to a foggy area with a lot of enemies in the water near the remains of a giant skeleton. By the base of its neck, there will be deep water you can dive into. Search for the underwater cave then follow it to the end. When you emerge from the other side, follow the path to reach a gap.
Jump across the gap to locate the codex.
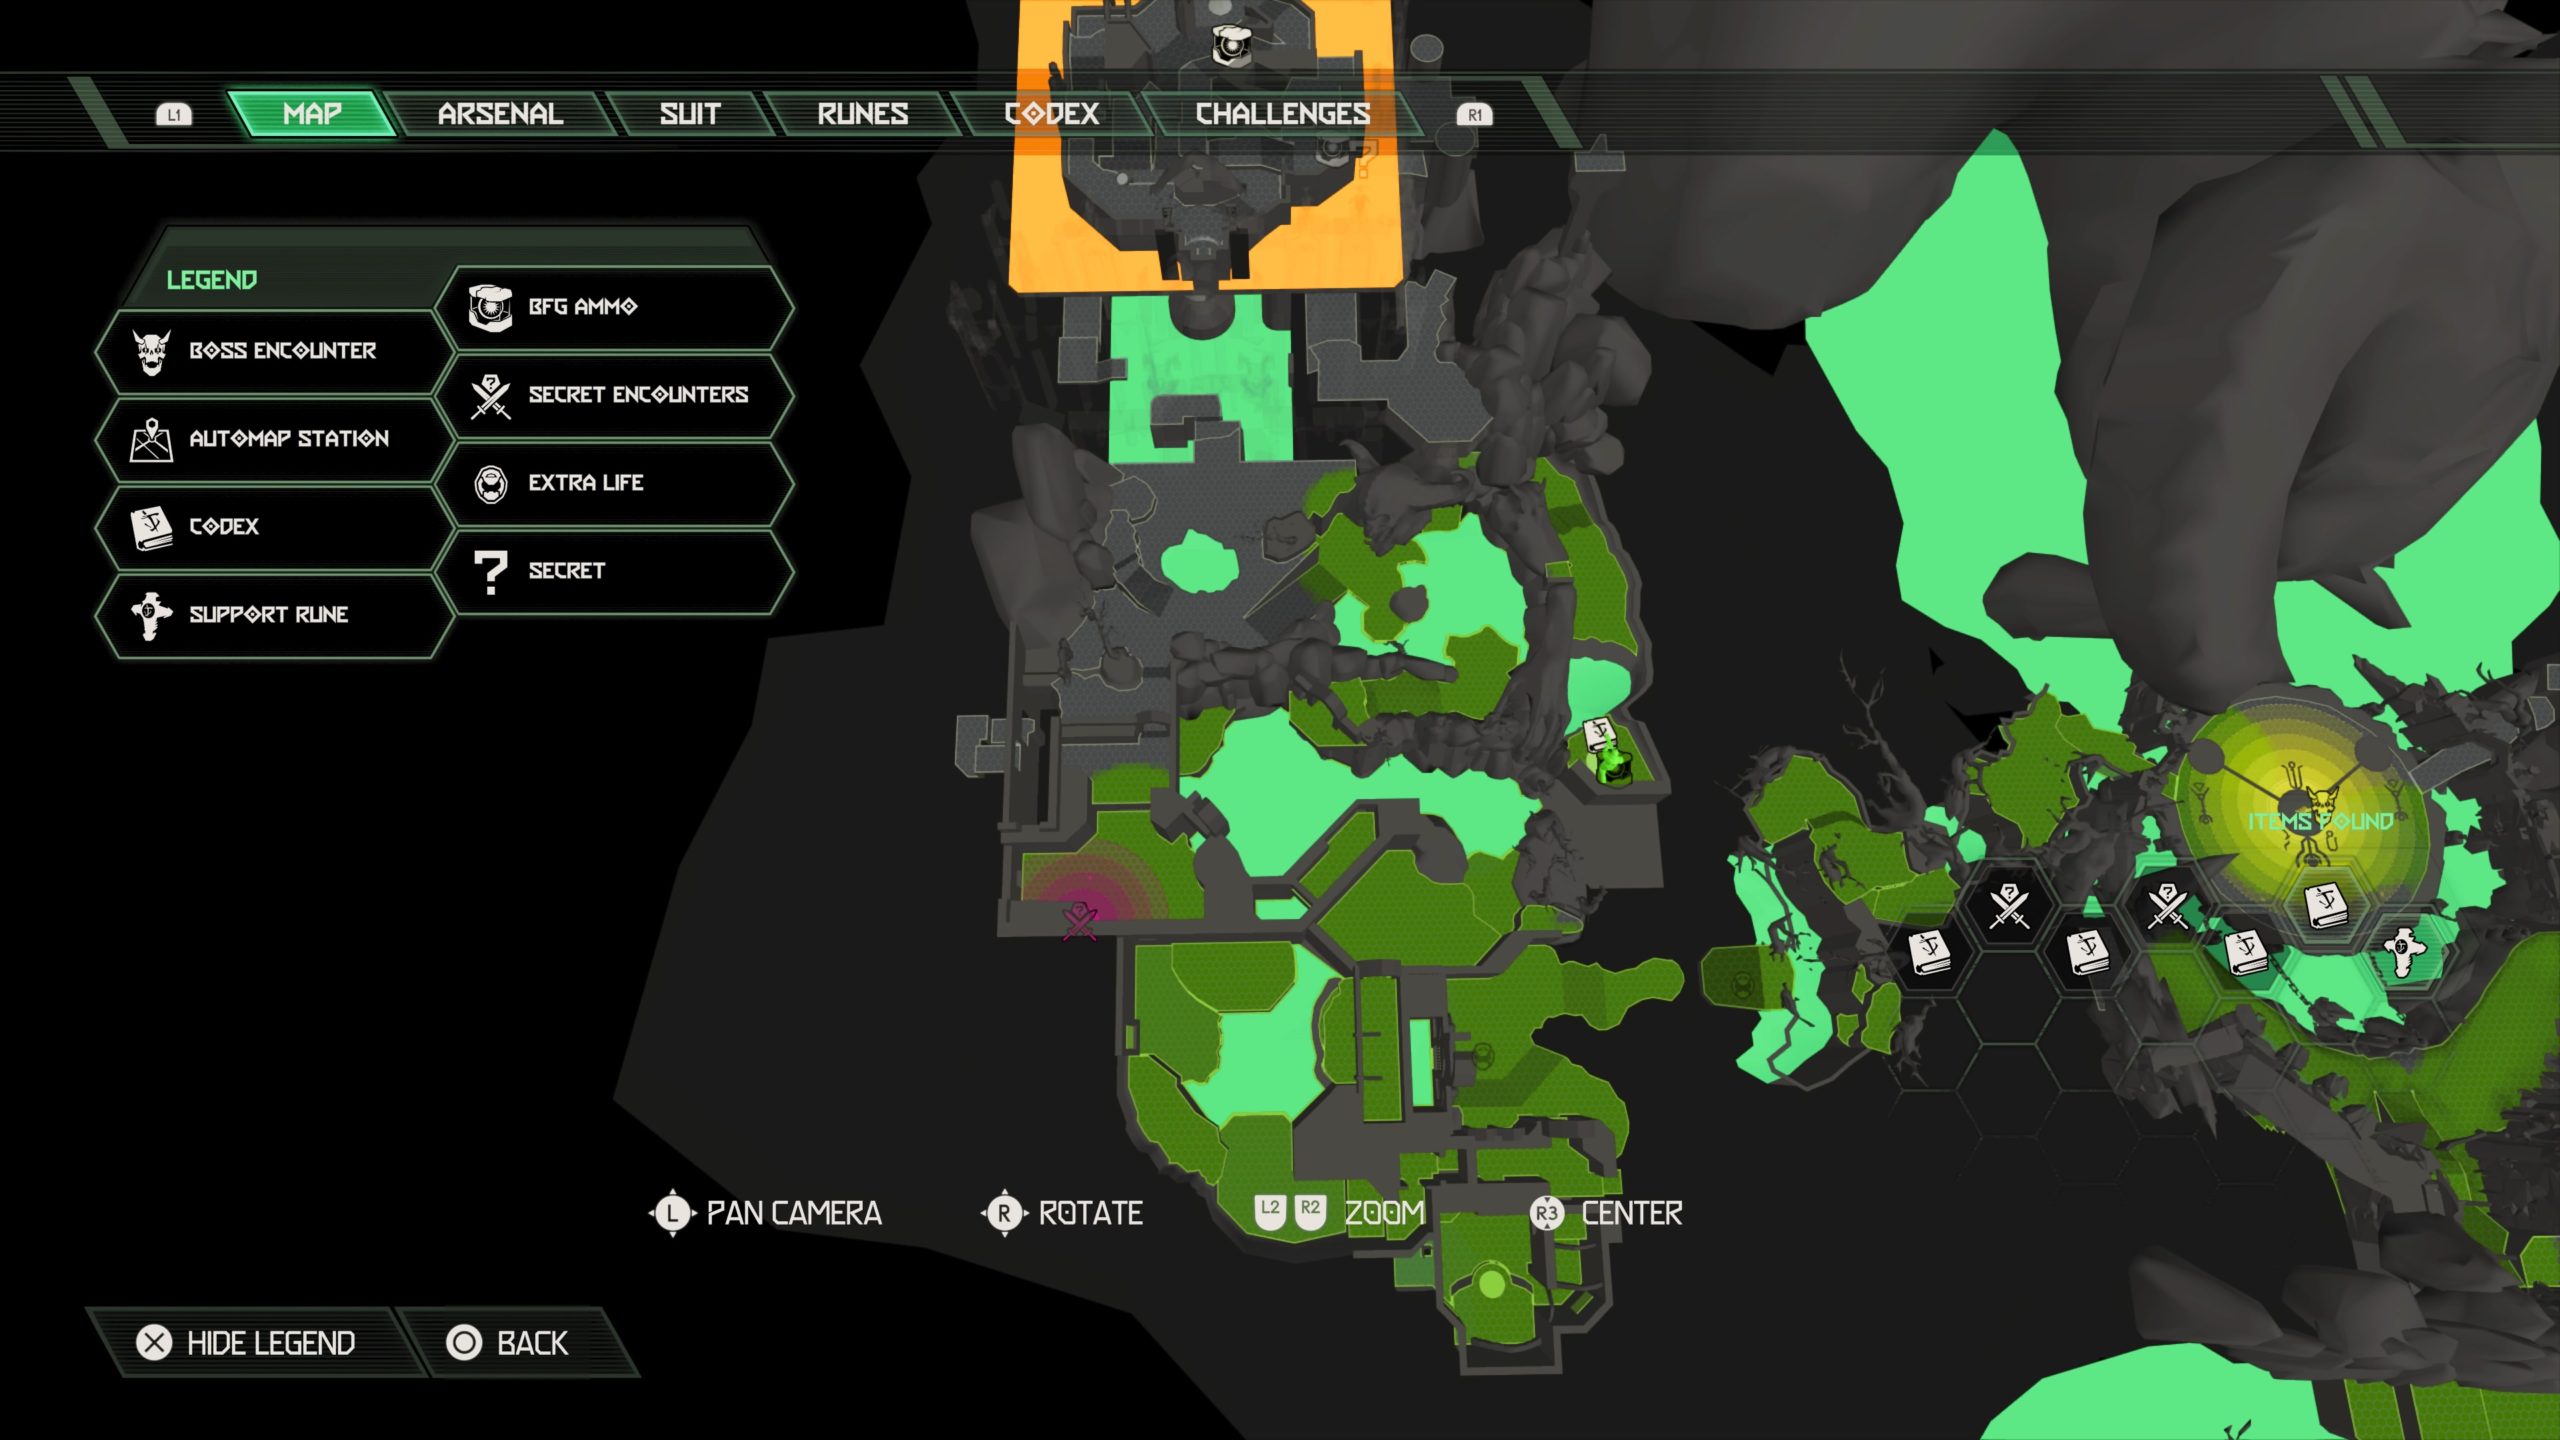
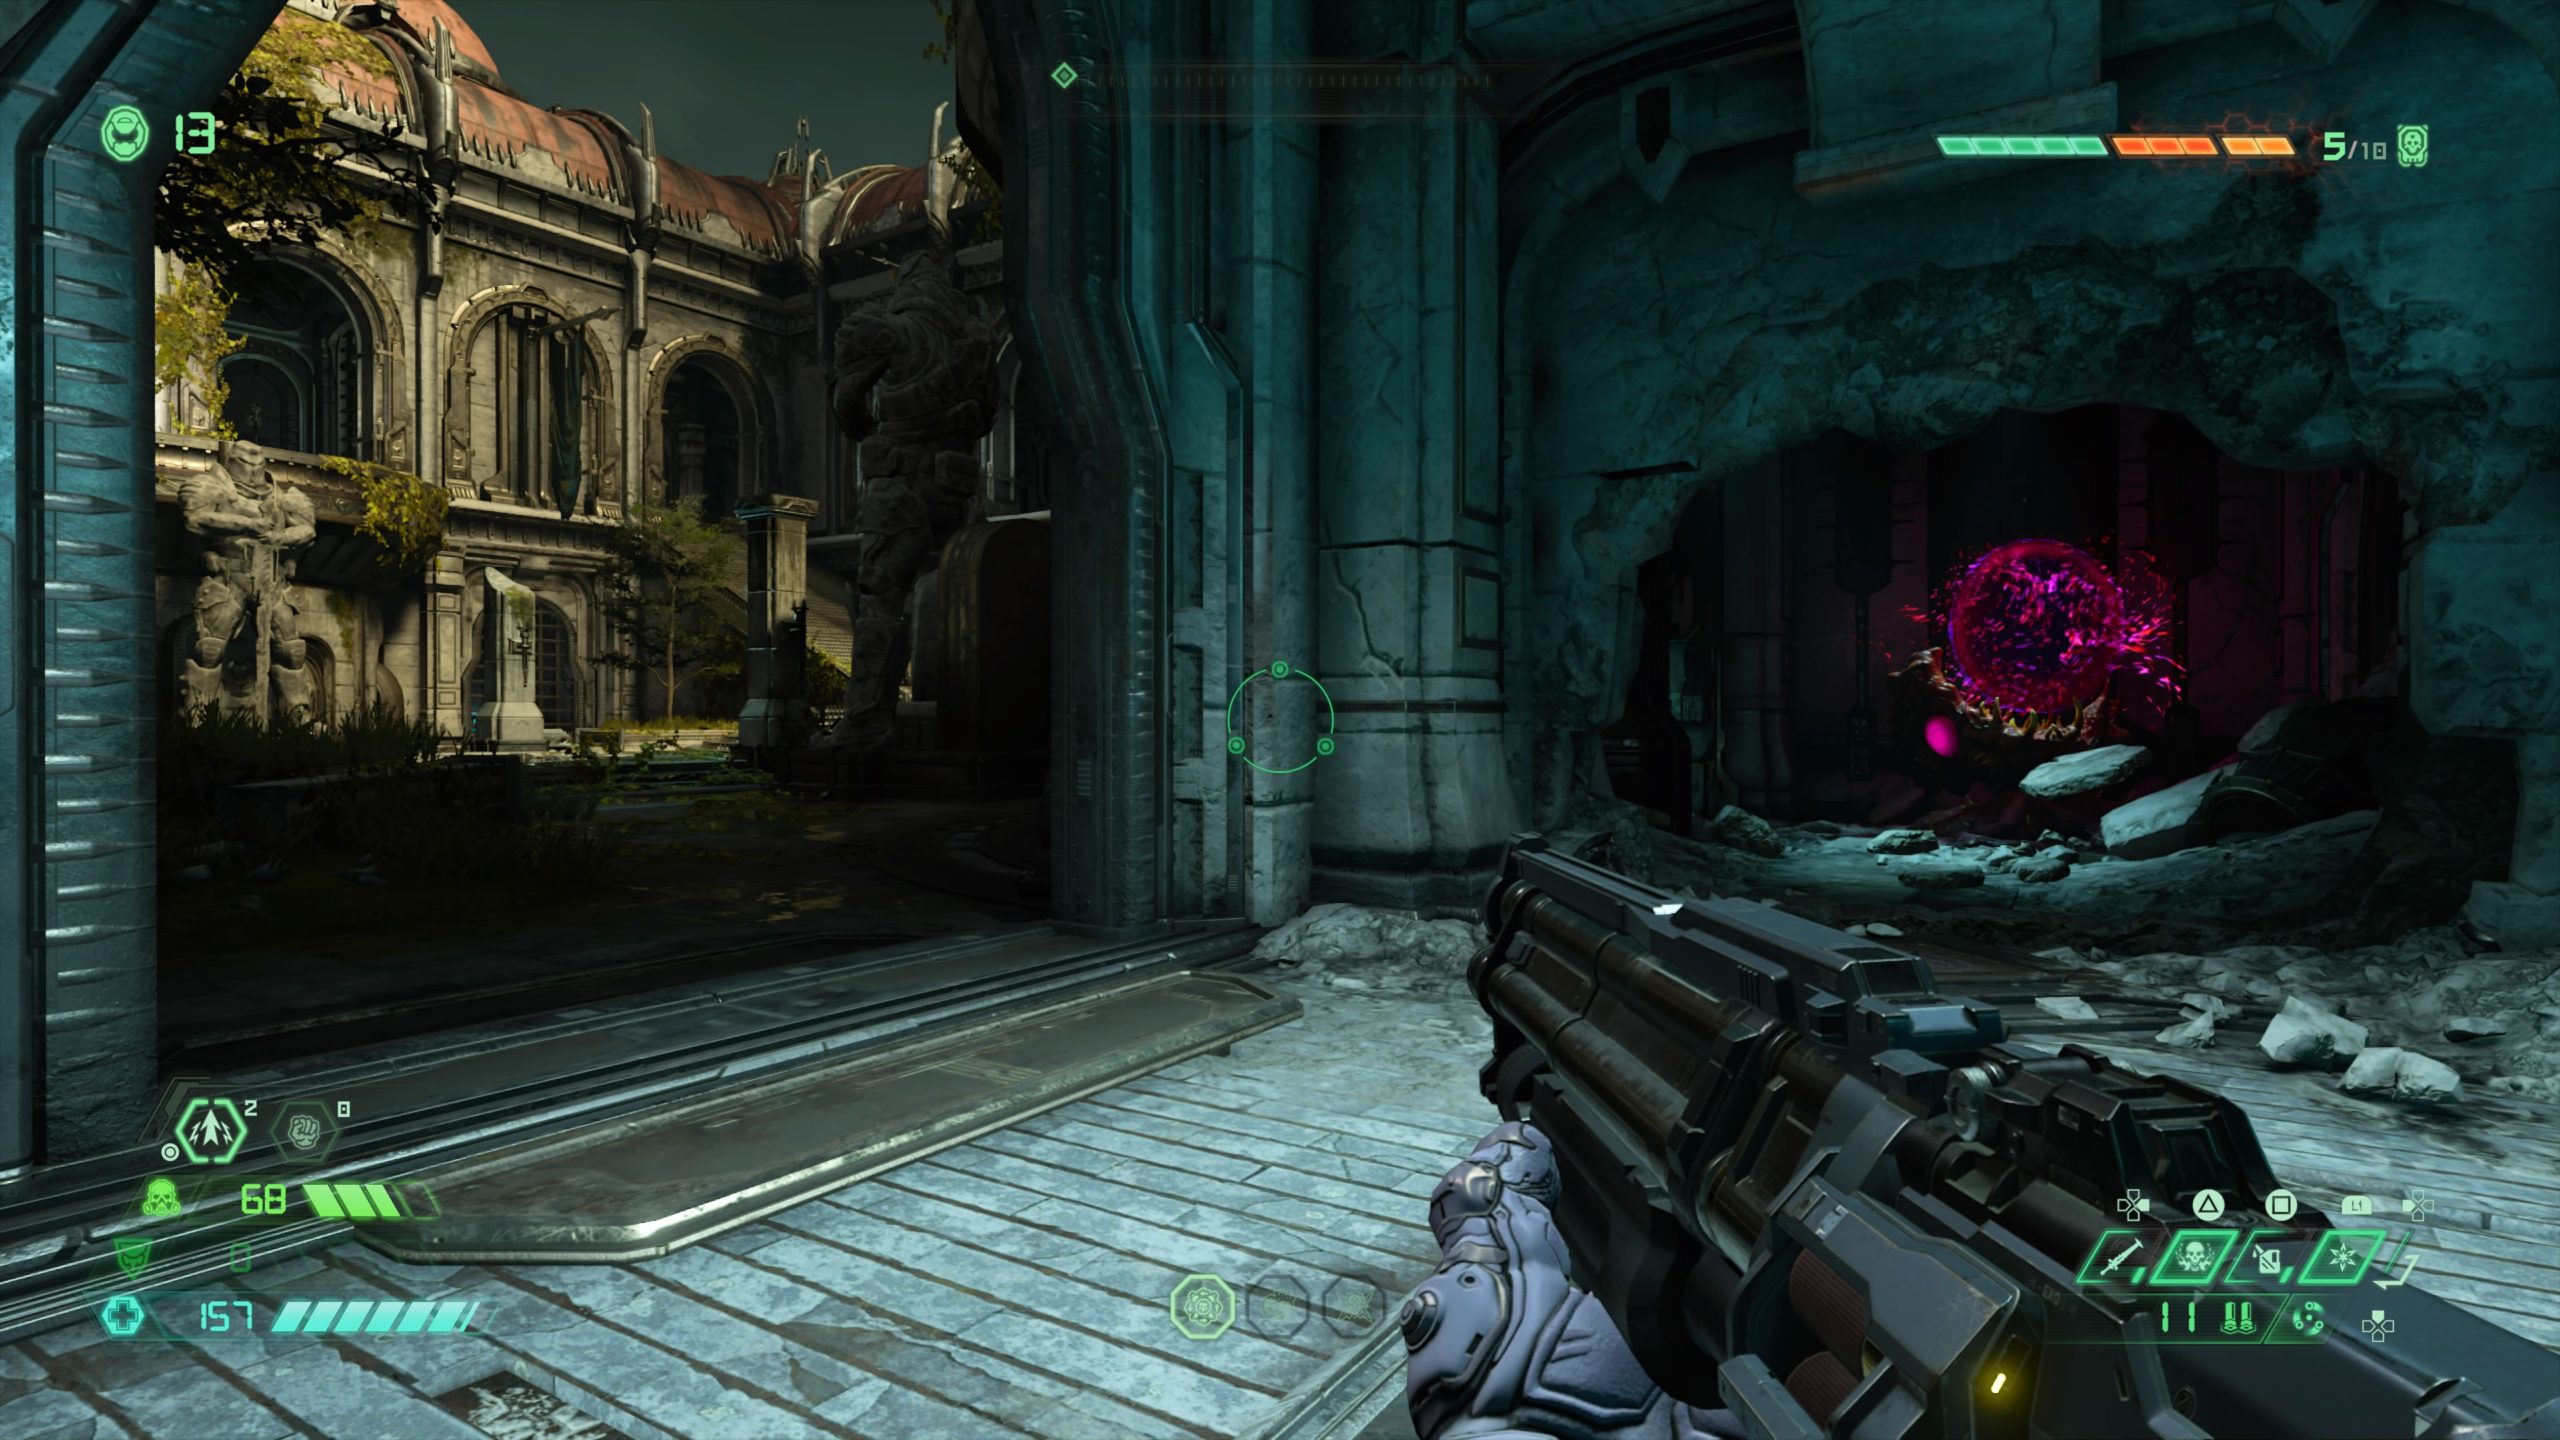
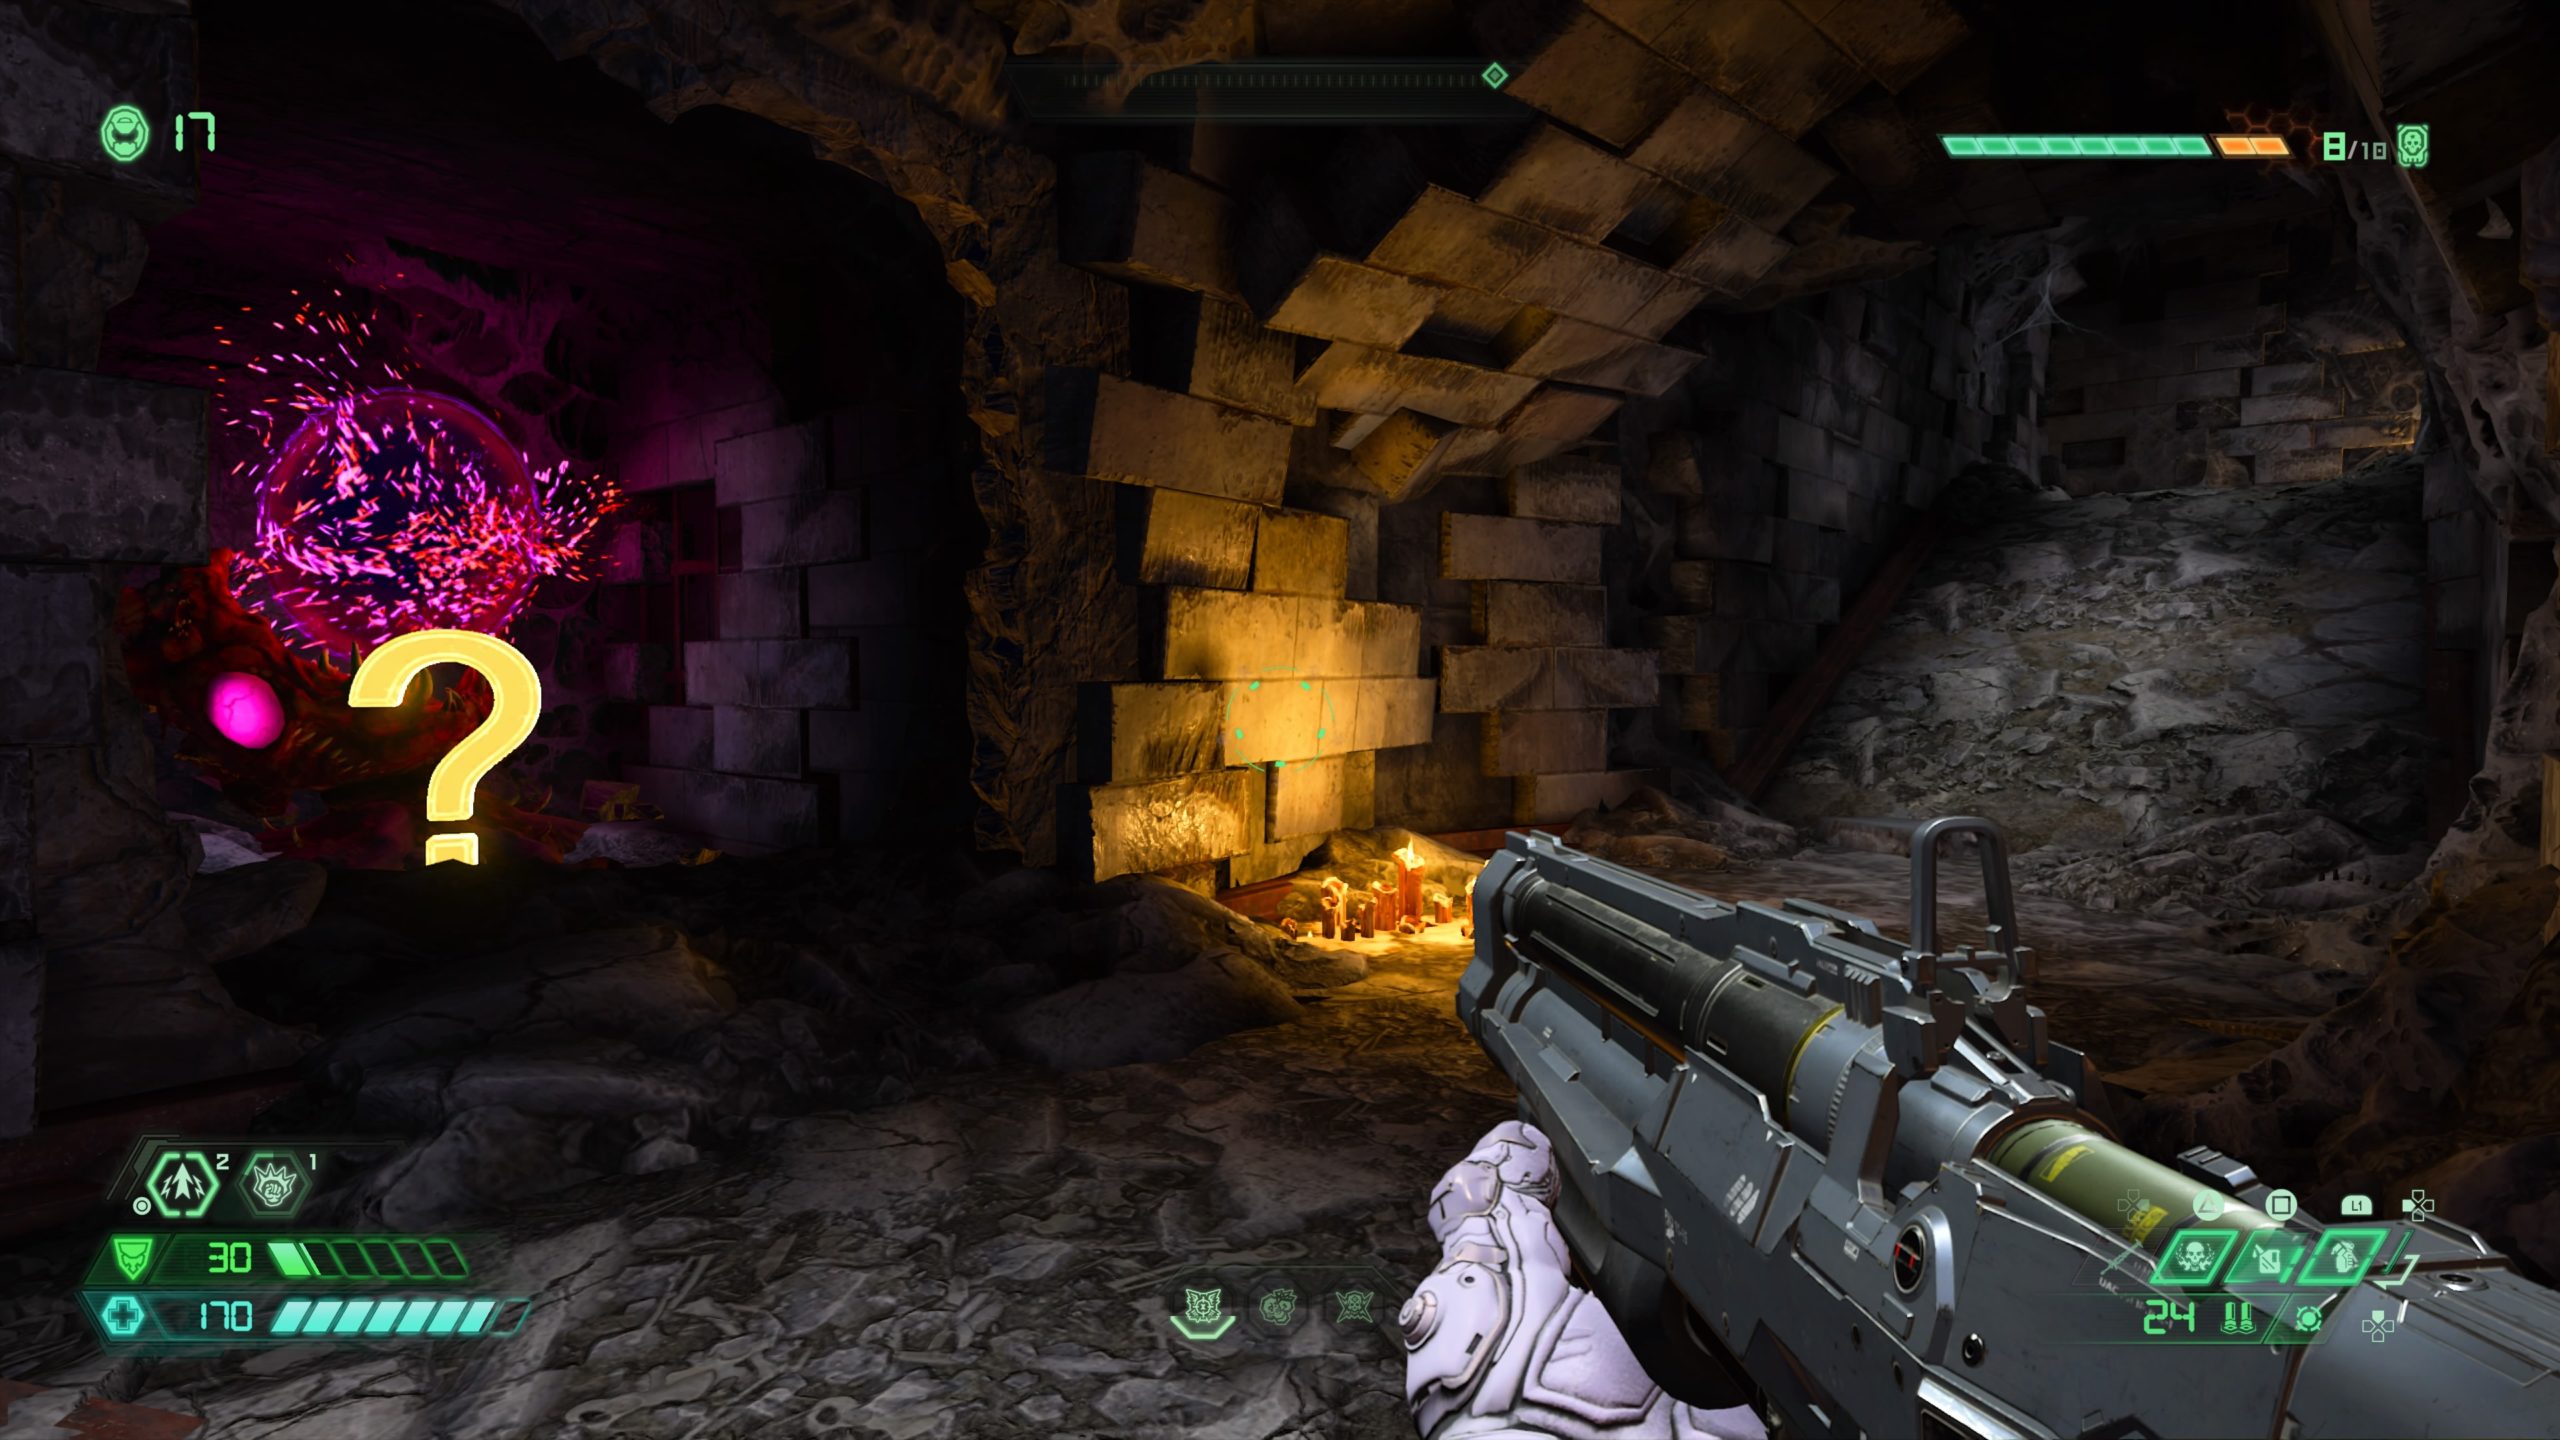
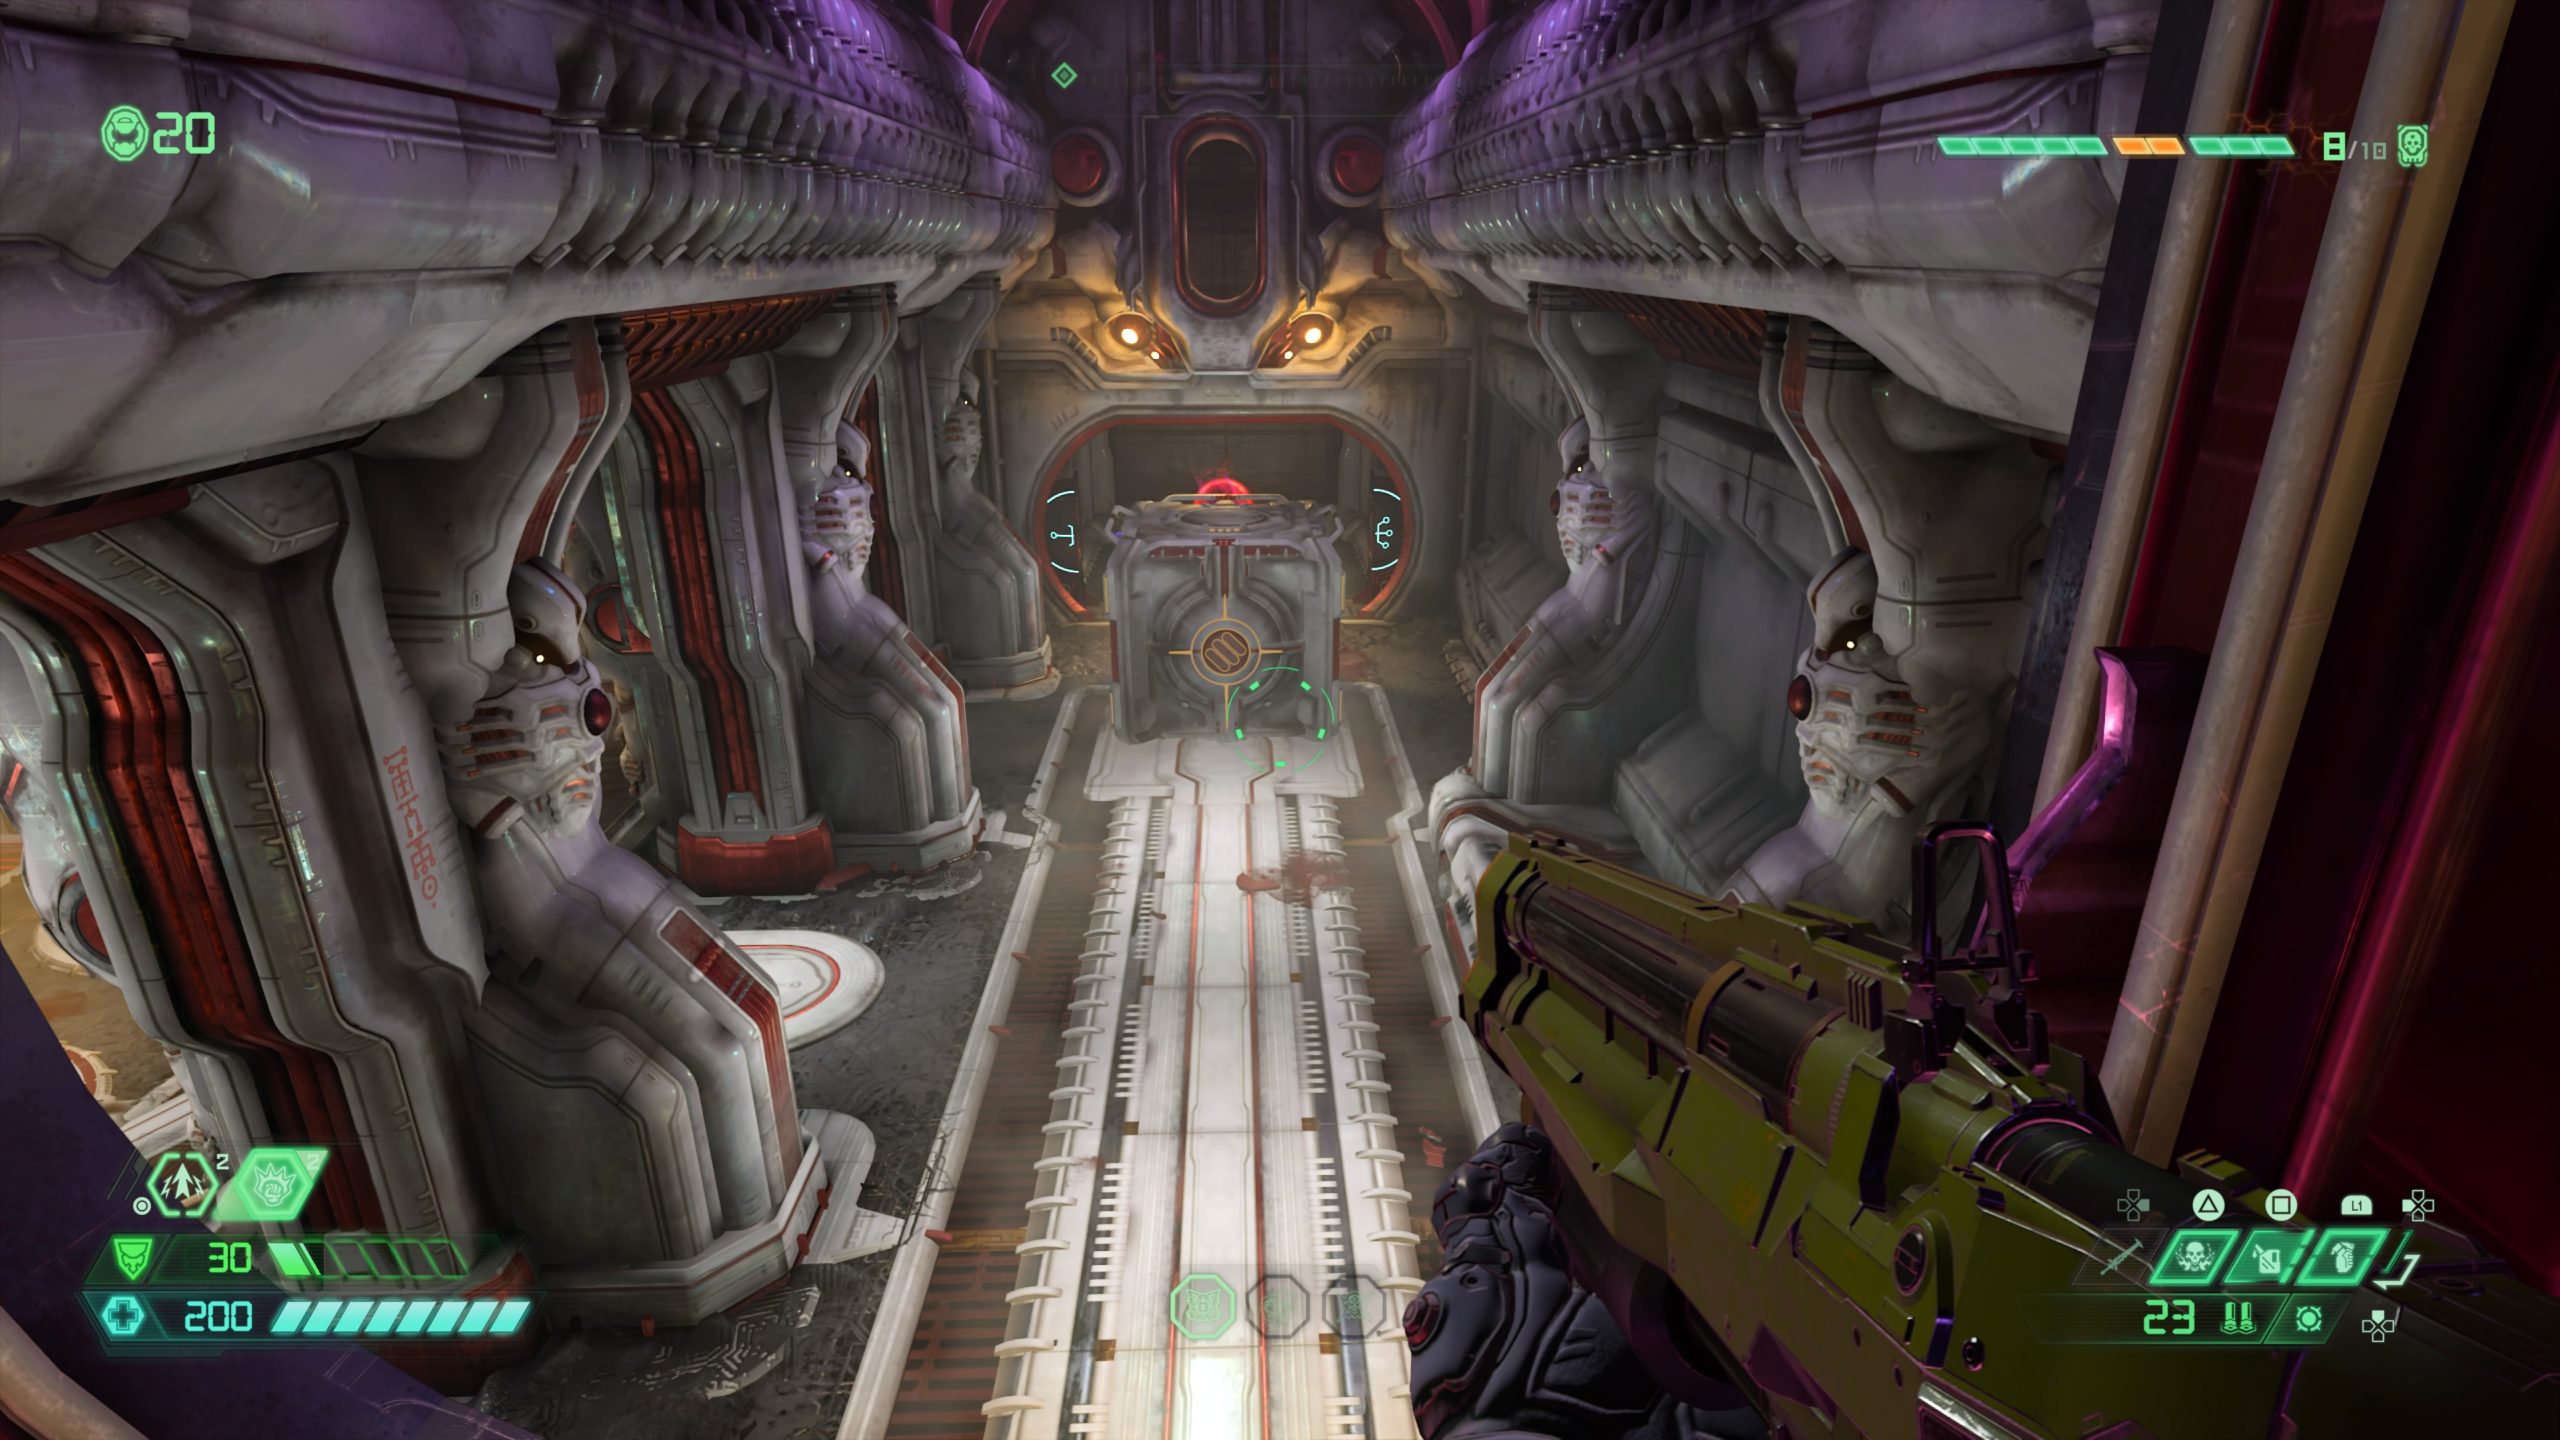
Secret Encounter
Facing the door to the western trial, head to the back left side of the courtyard and climb up a small set of stairs. Take a right then drop down below to a platform across the gap. Follow the path forward coming to a ledge. Smash through the wall ahead and melee the giant metal cube to unseal the secret encounter below.
Codex: Book of the Seraphs Part VIII
Just before reaching the top of the tower for the western trial, you’ll reach an open area with 2 spinning yellow spin bars. Use the 2 bars to reach a climb wall to the right of the far bar. Climb to the top of the wall then jump across the gap to reach the codex.
Codex: Book of the Seraphs Part VII
As you head towards the eastern trial, you’ll come across a spirit wolf leading you to an alter site where you’ll have to fight off a wave of enemies. This codex can be found on a ledge overlooking the ritual site of the second wolf.
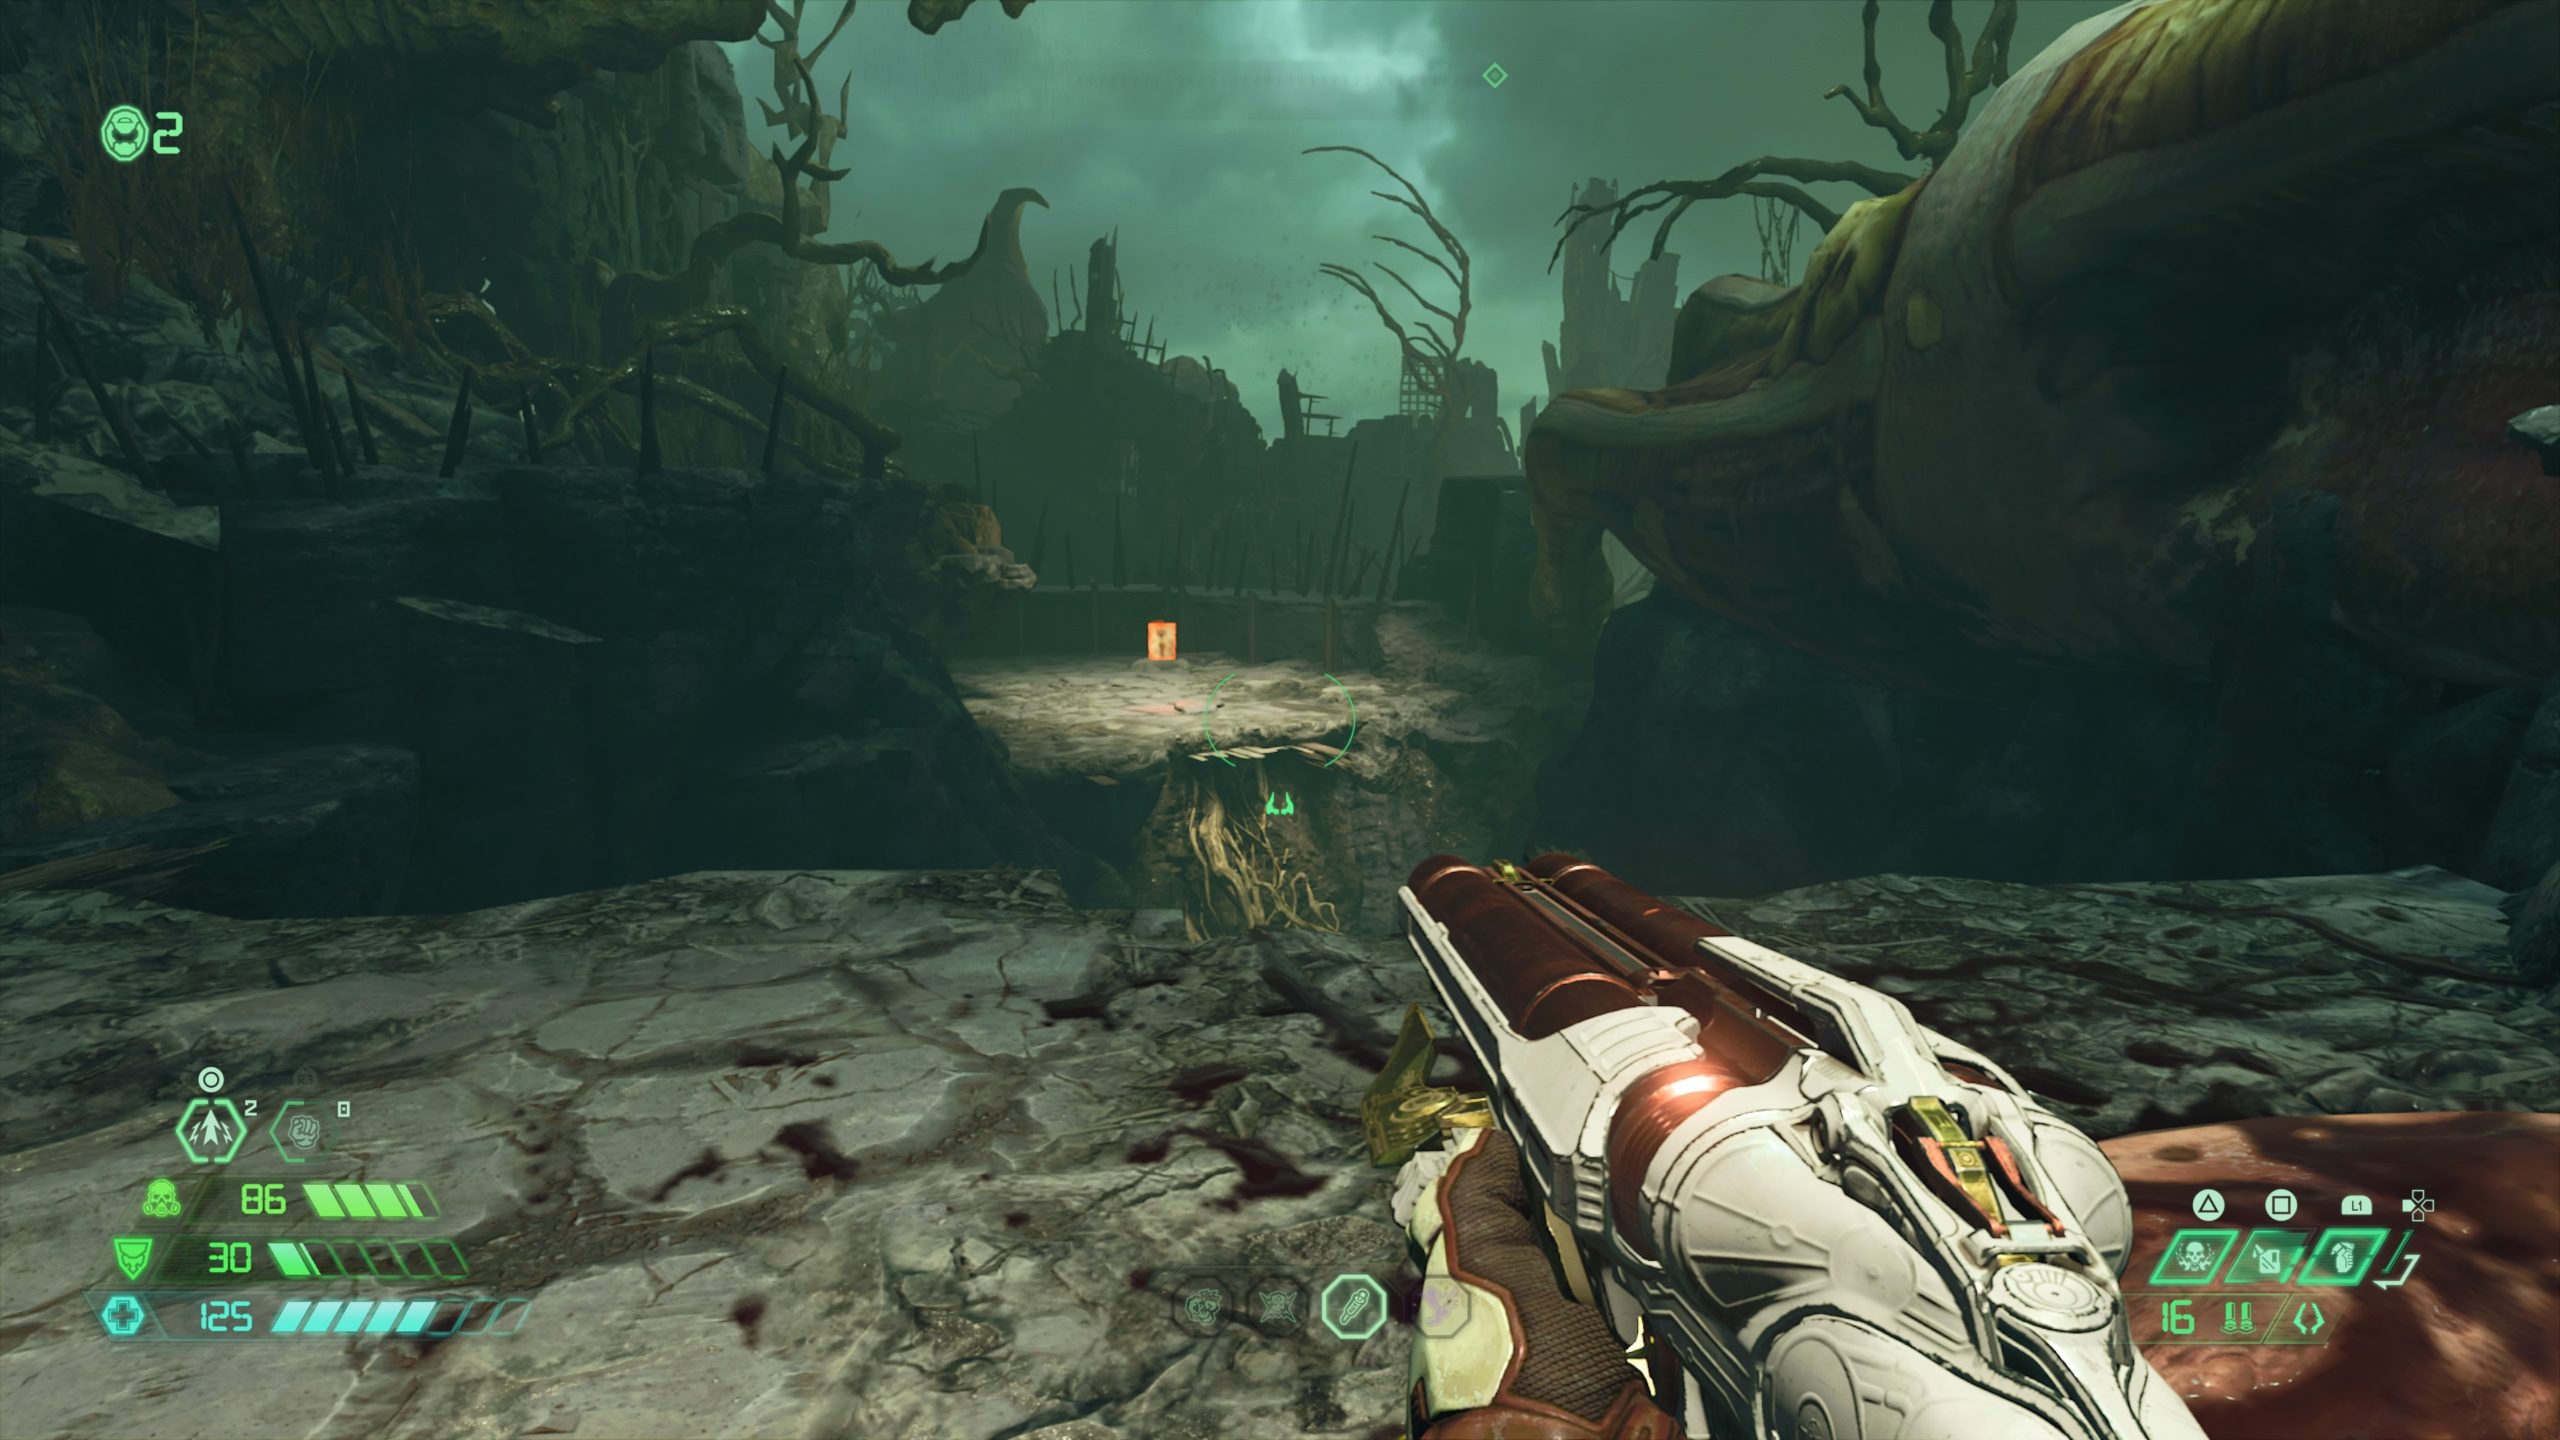
Secret Encounter
This encounter can be found behind a gate in the third area that the spirit wolf leads you to. To reach it, head to the gate leading to the tower of the trial then press forward west of the gate. Follow the path around to a marsh area. You’ll need to jump to the second rock column sticking out of the marsh with an exploding egg.
From there, jump straight ahead east to use a spin bar to reach a climb wall. Follow the path to reach a giant metal cube that you will need to use to unseal the way to the encounter.
Below are the collectibles that can be found during the UAC Atlantica Facility campaign in Doom Eternal: The Ancient Gods Part 1. You will need to collect the codex pages to earn the Required Reading trophy and the Support Runes for the Lucky Charm Bracelet trophy. Locating all the secret encounters will reward you with the Hypersonic trophy!
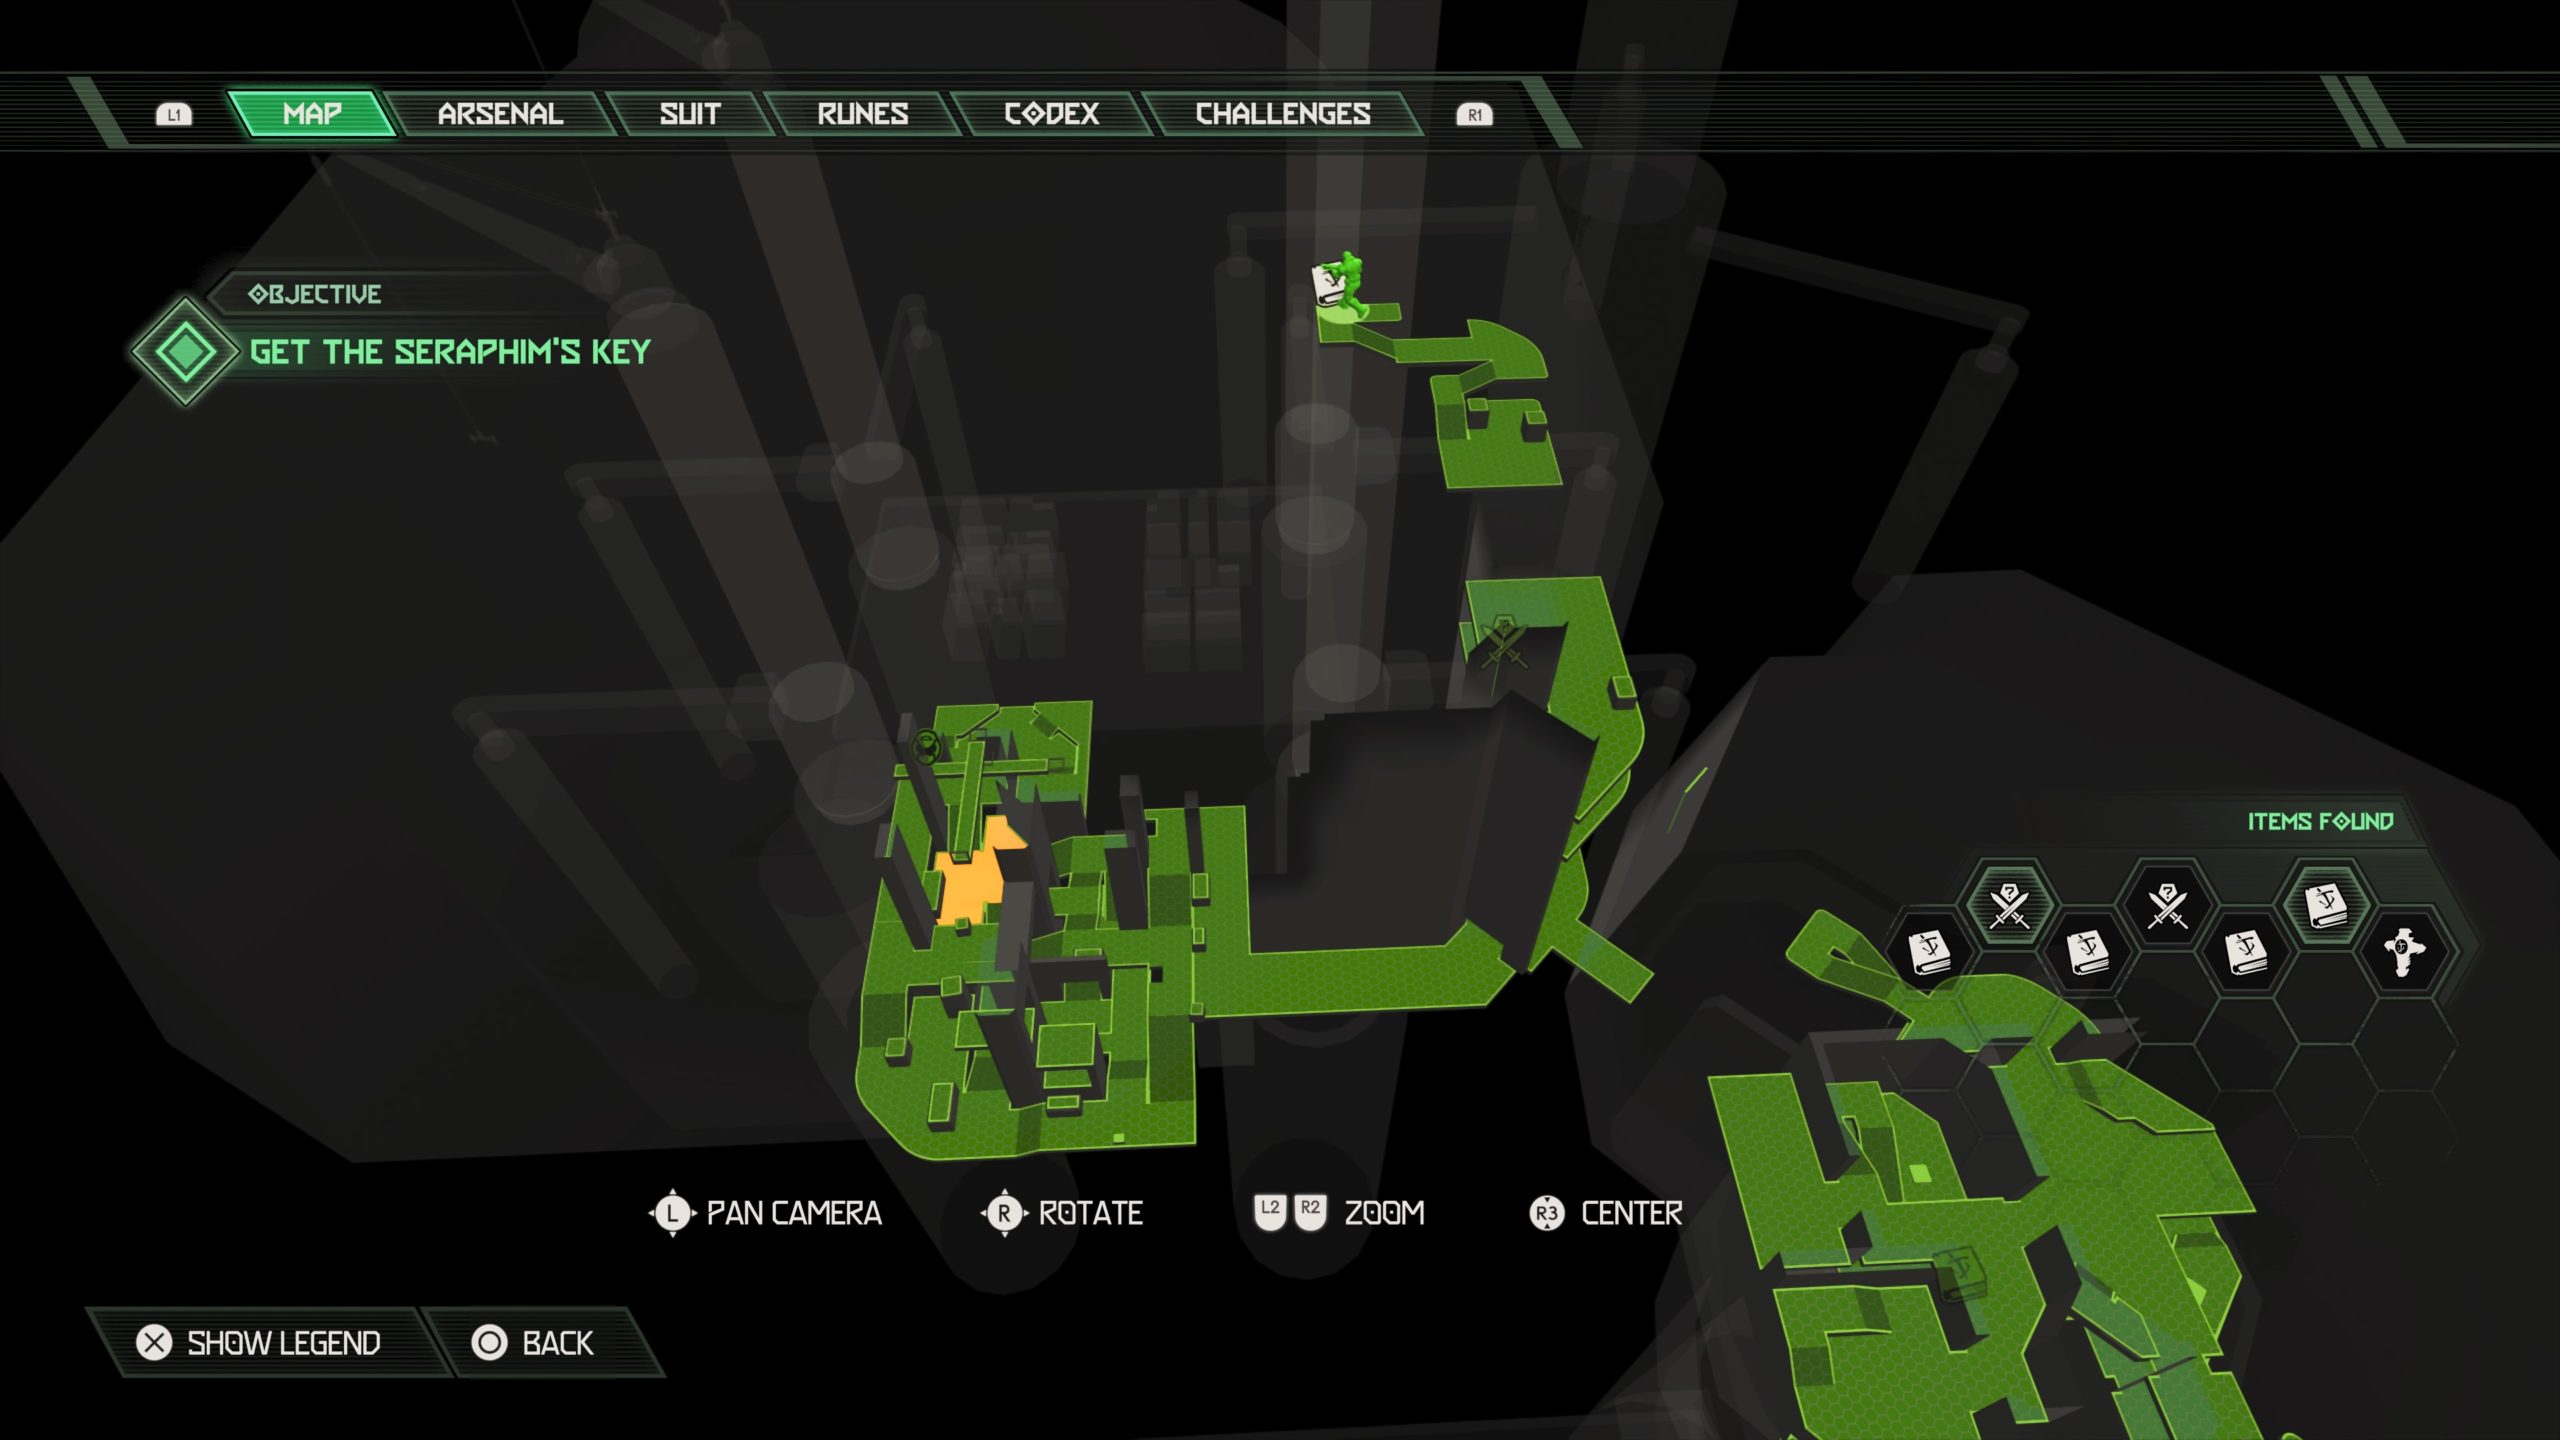
UAC Facility (Intact) – Get the Seraphim’s Key
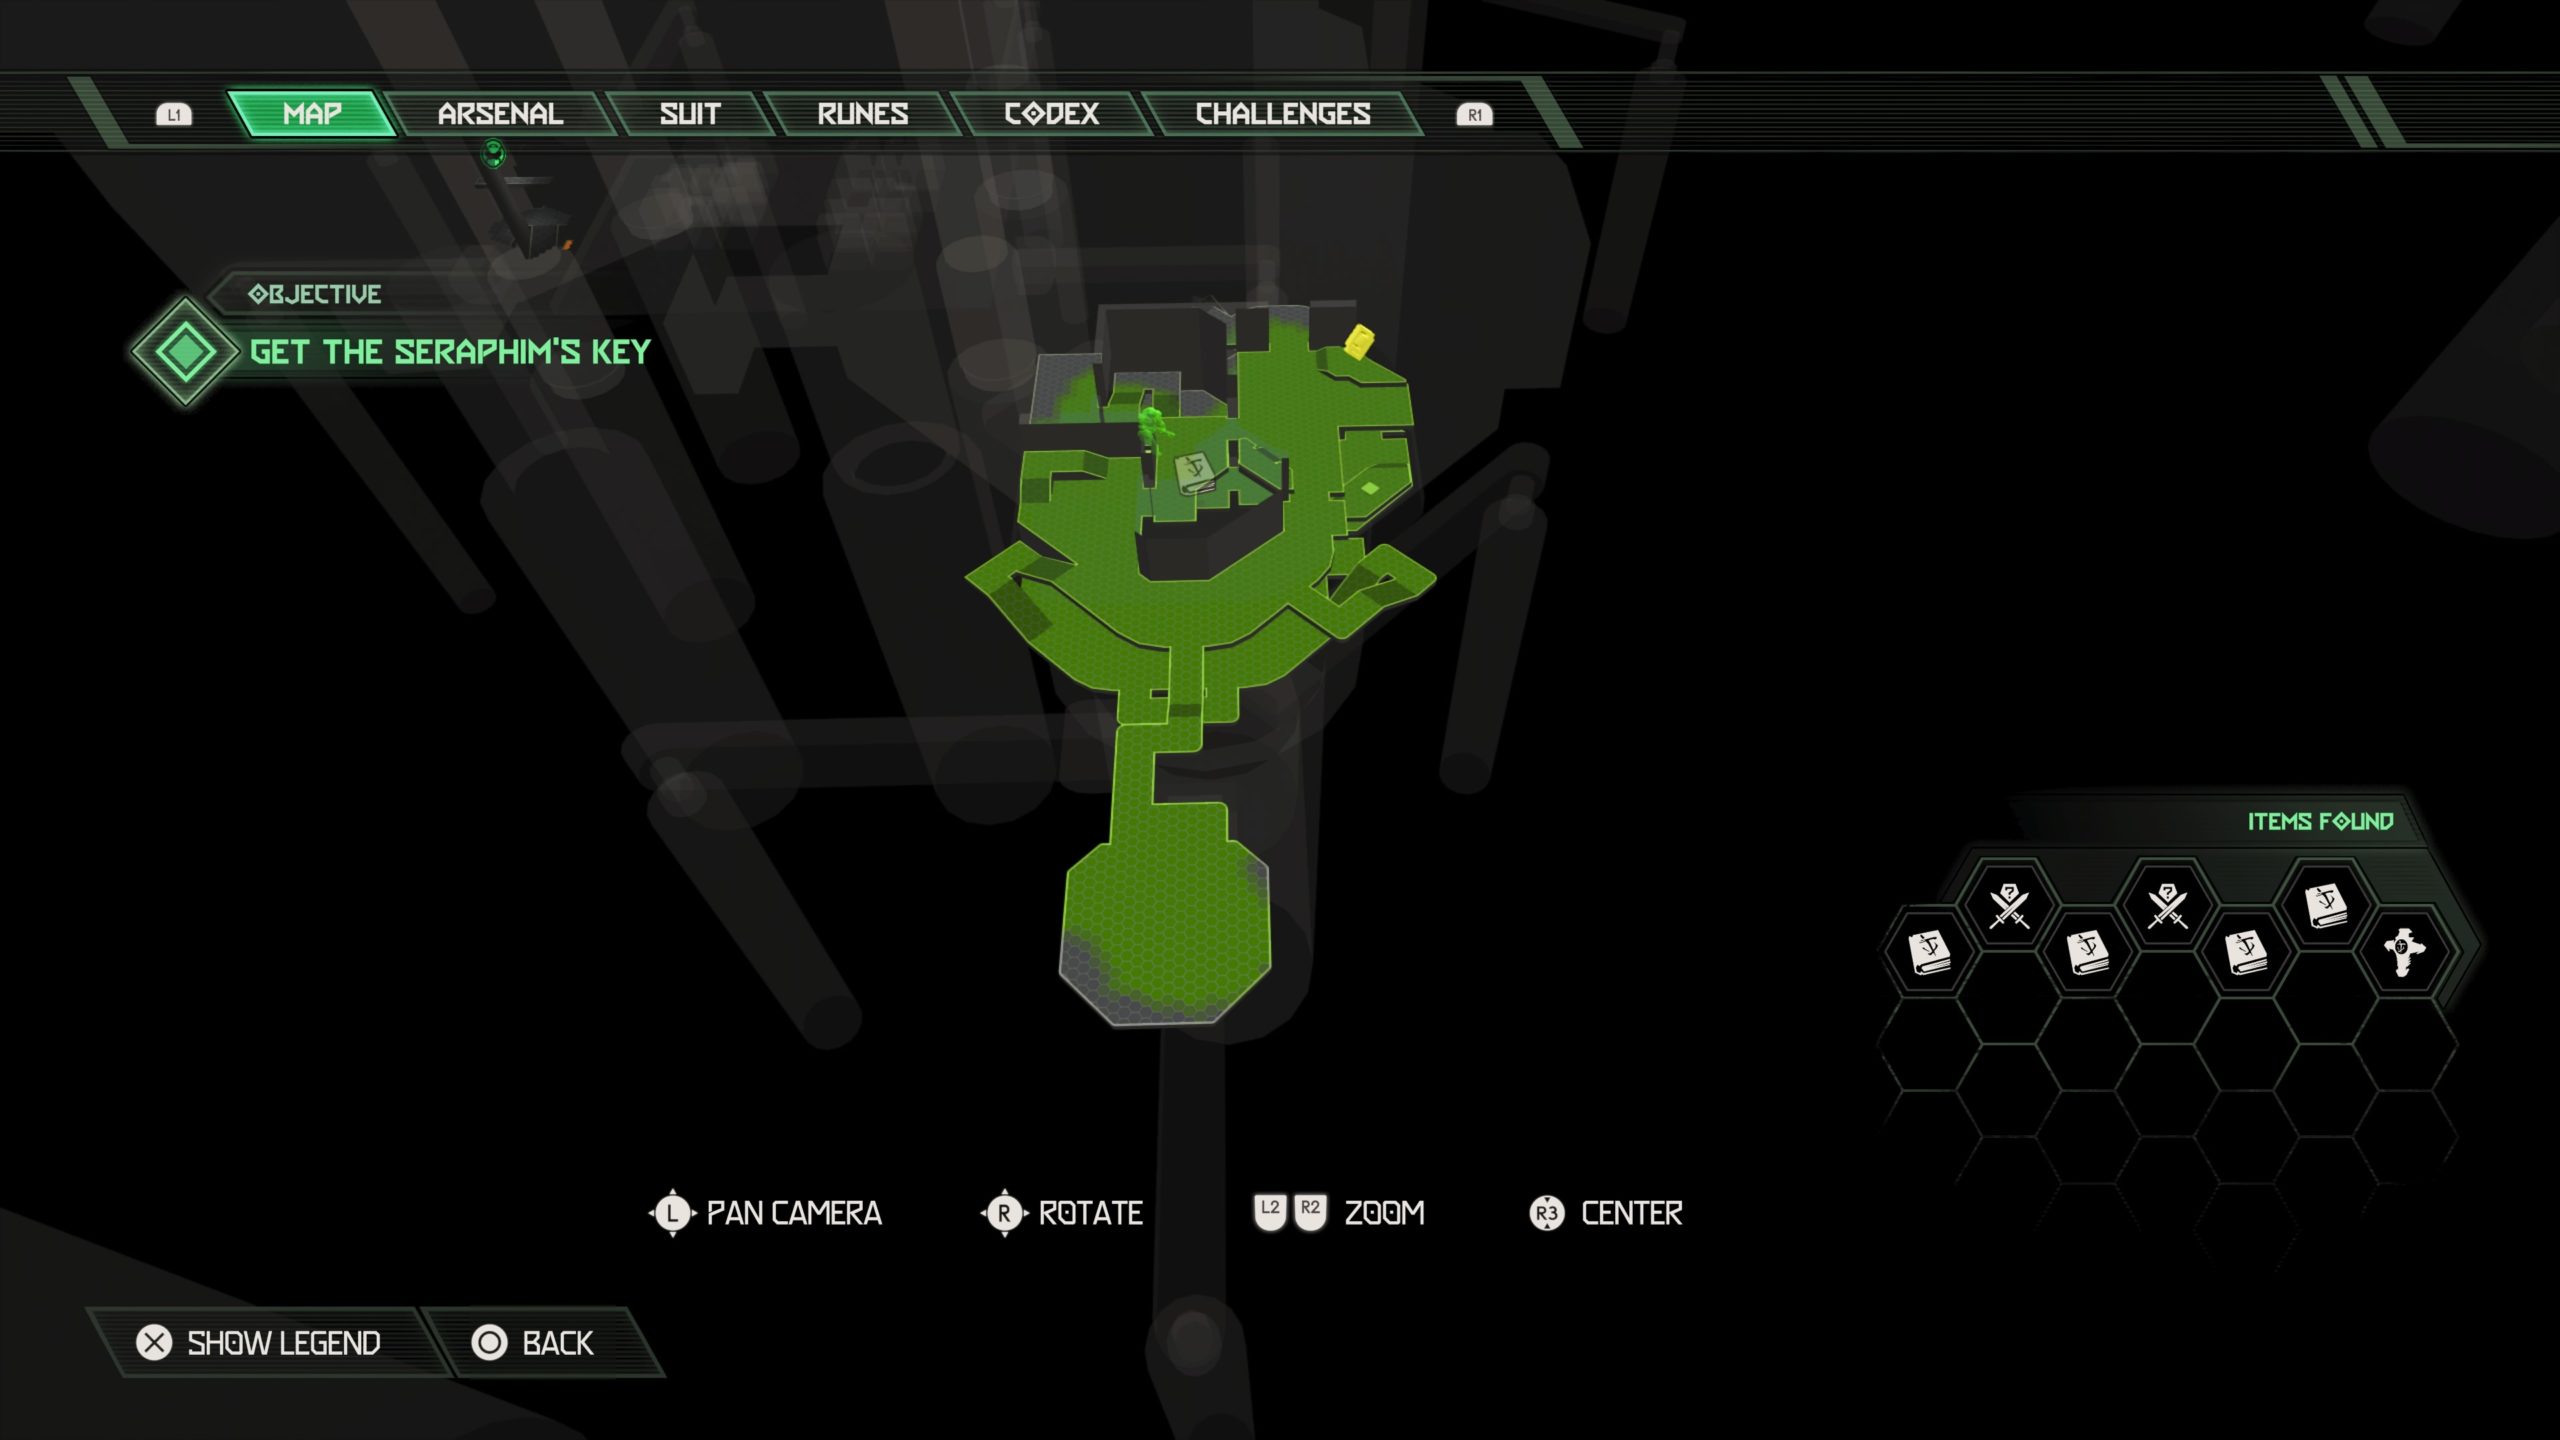
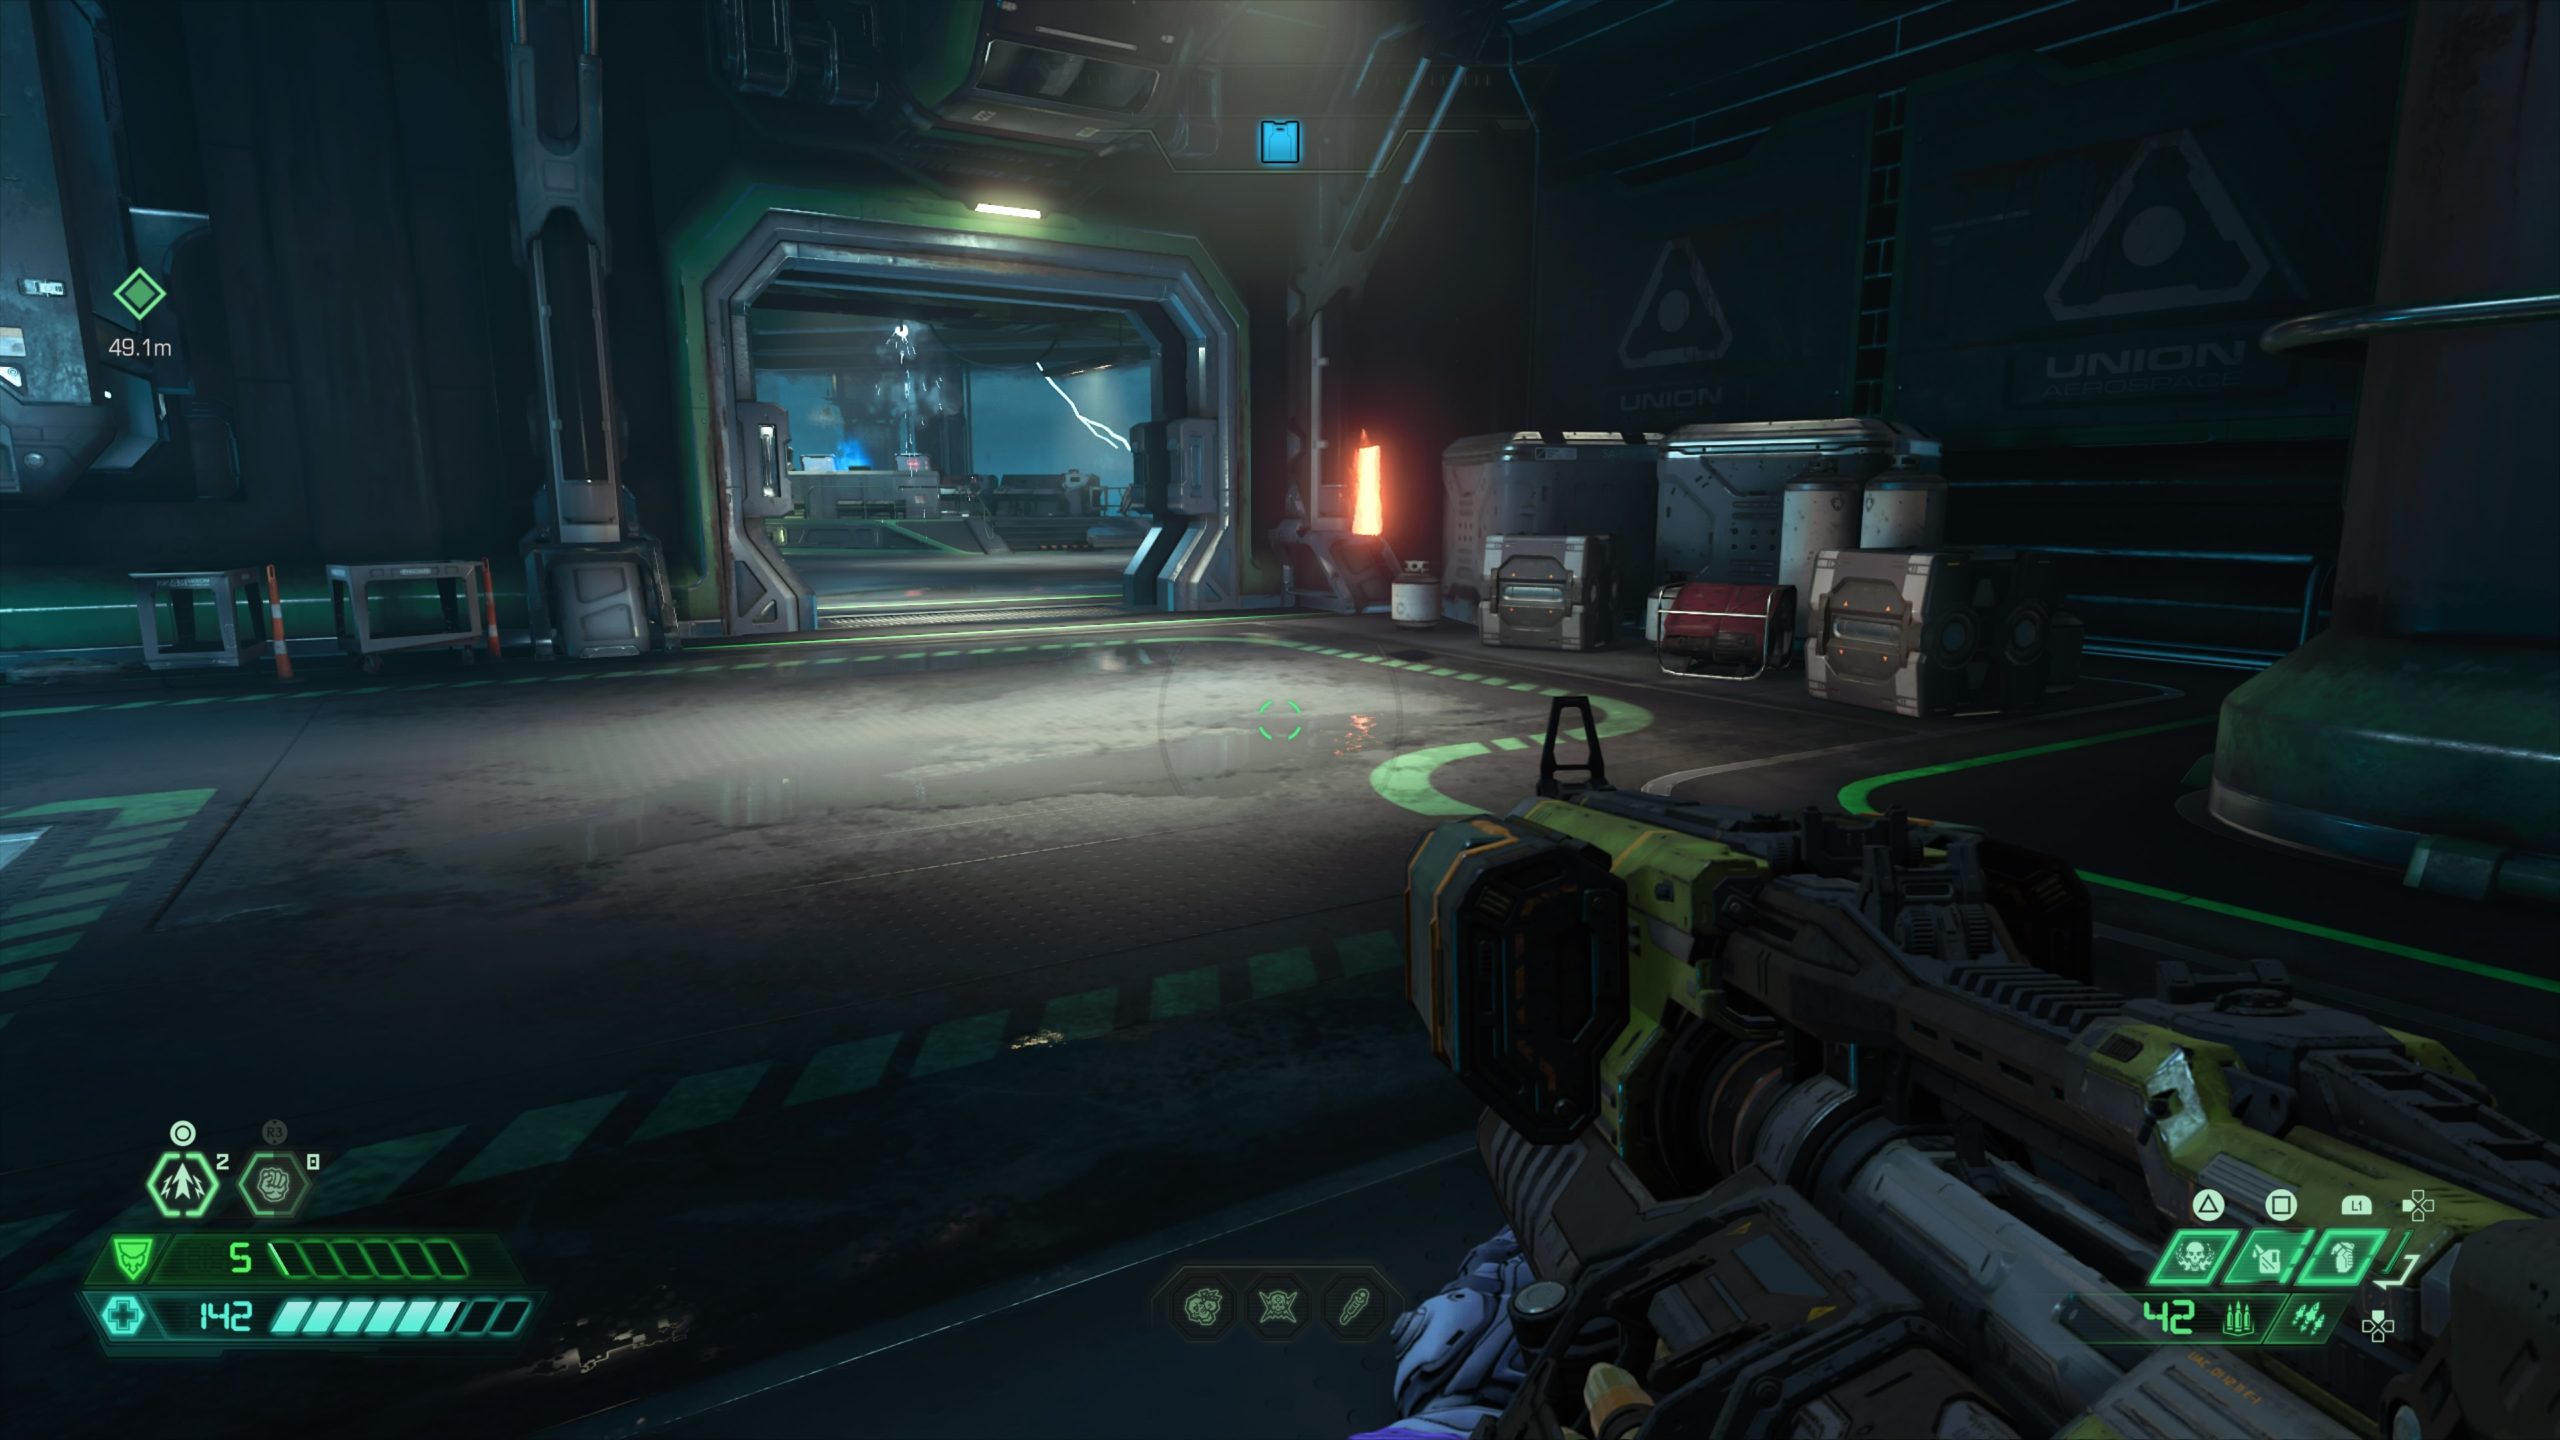
Codex: Book of the Seraphs Part 1
This codex is located on the bottom level of the UAC structure near the starting point. It is located in the section of the structure requiring Blue Access. It is across from a set of stairs and a jump pad.
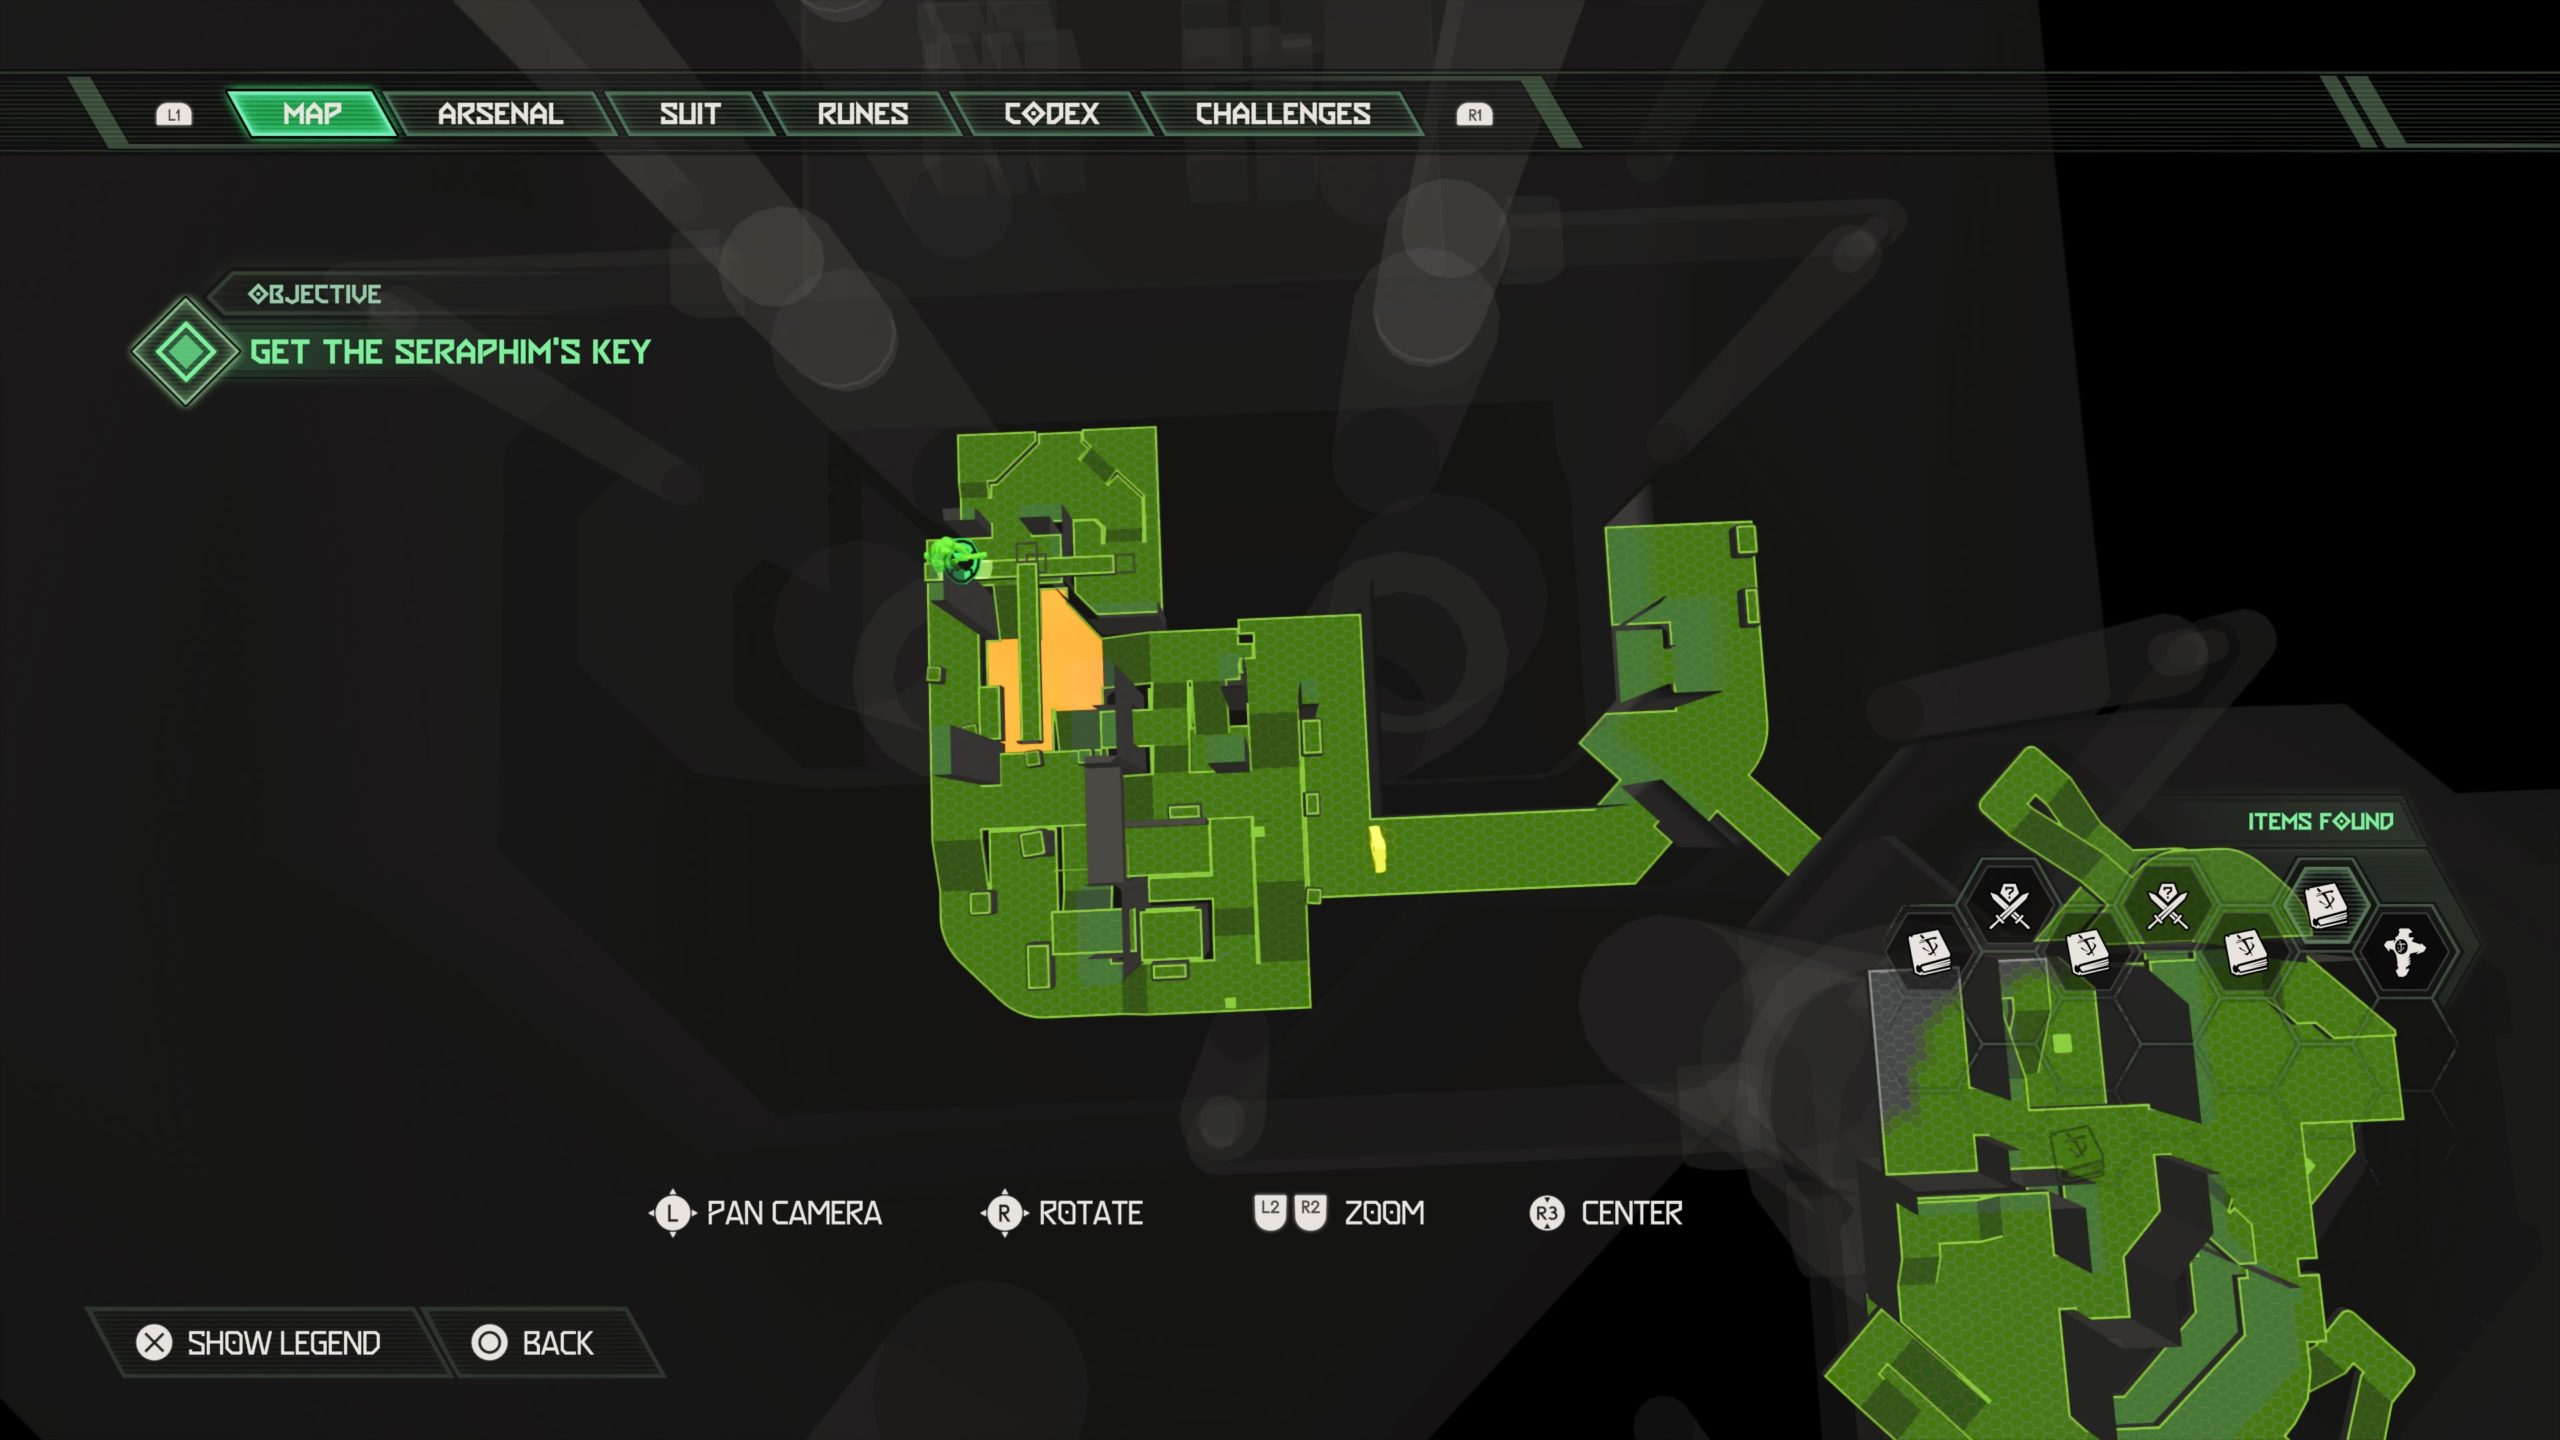
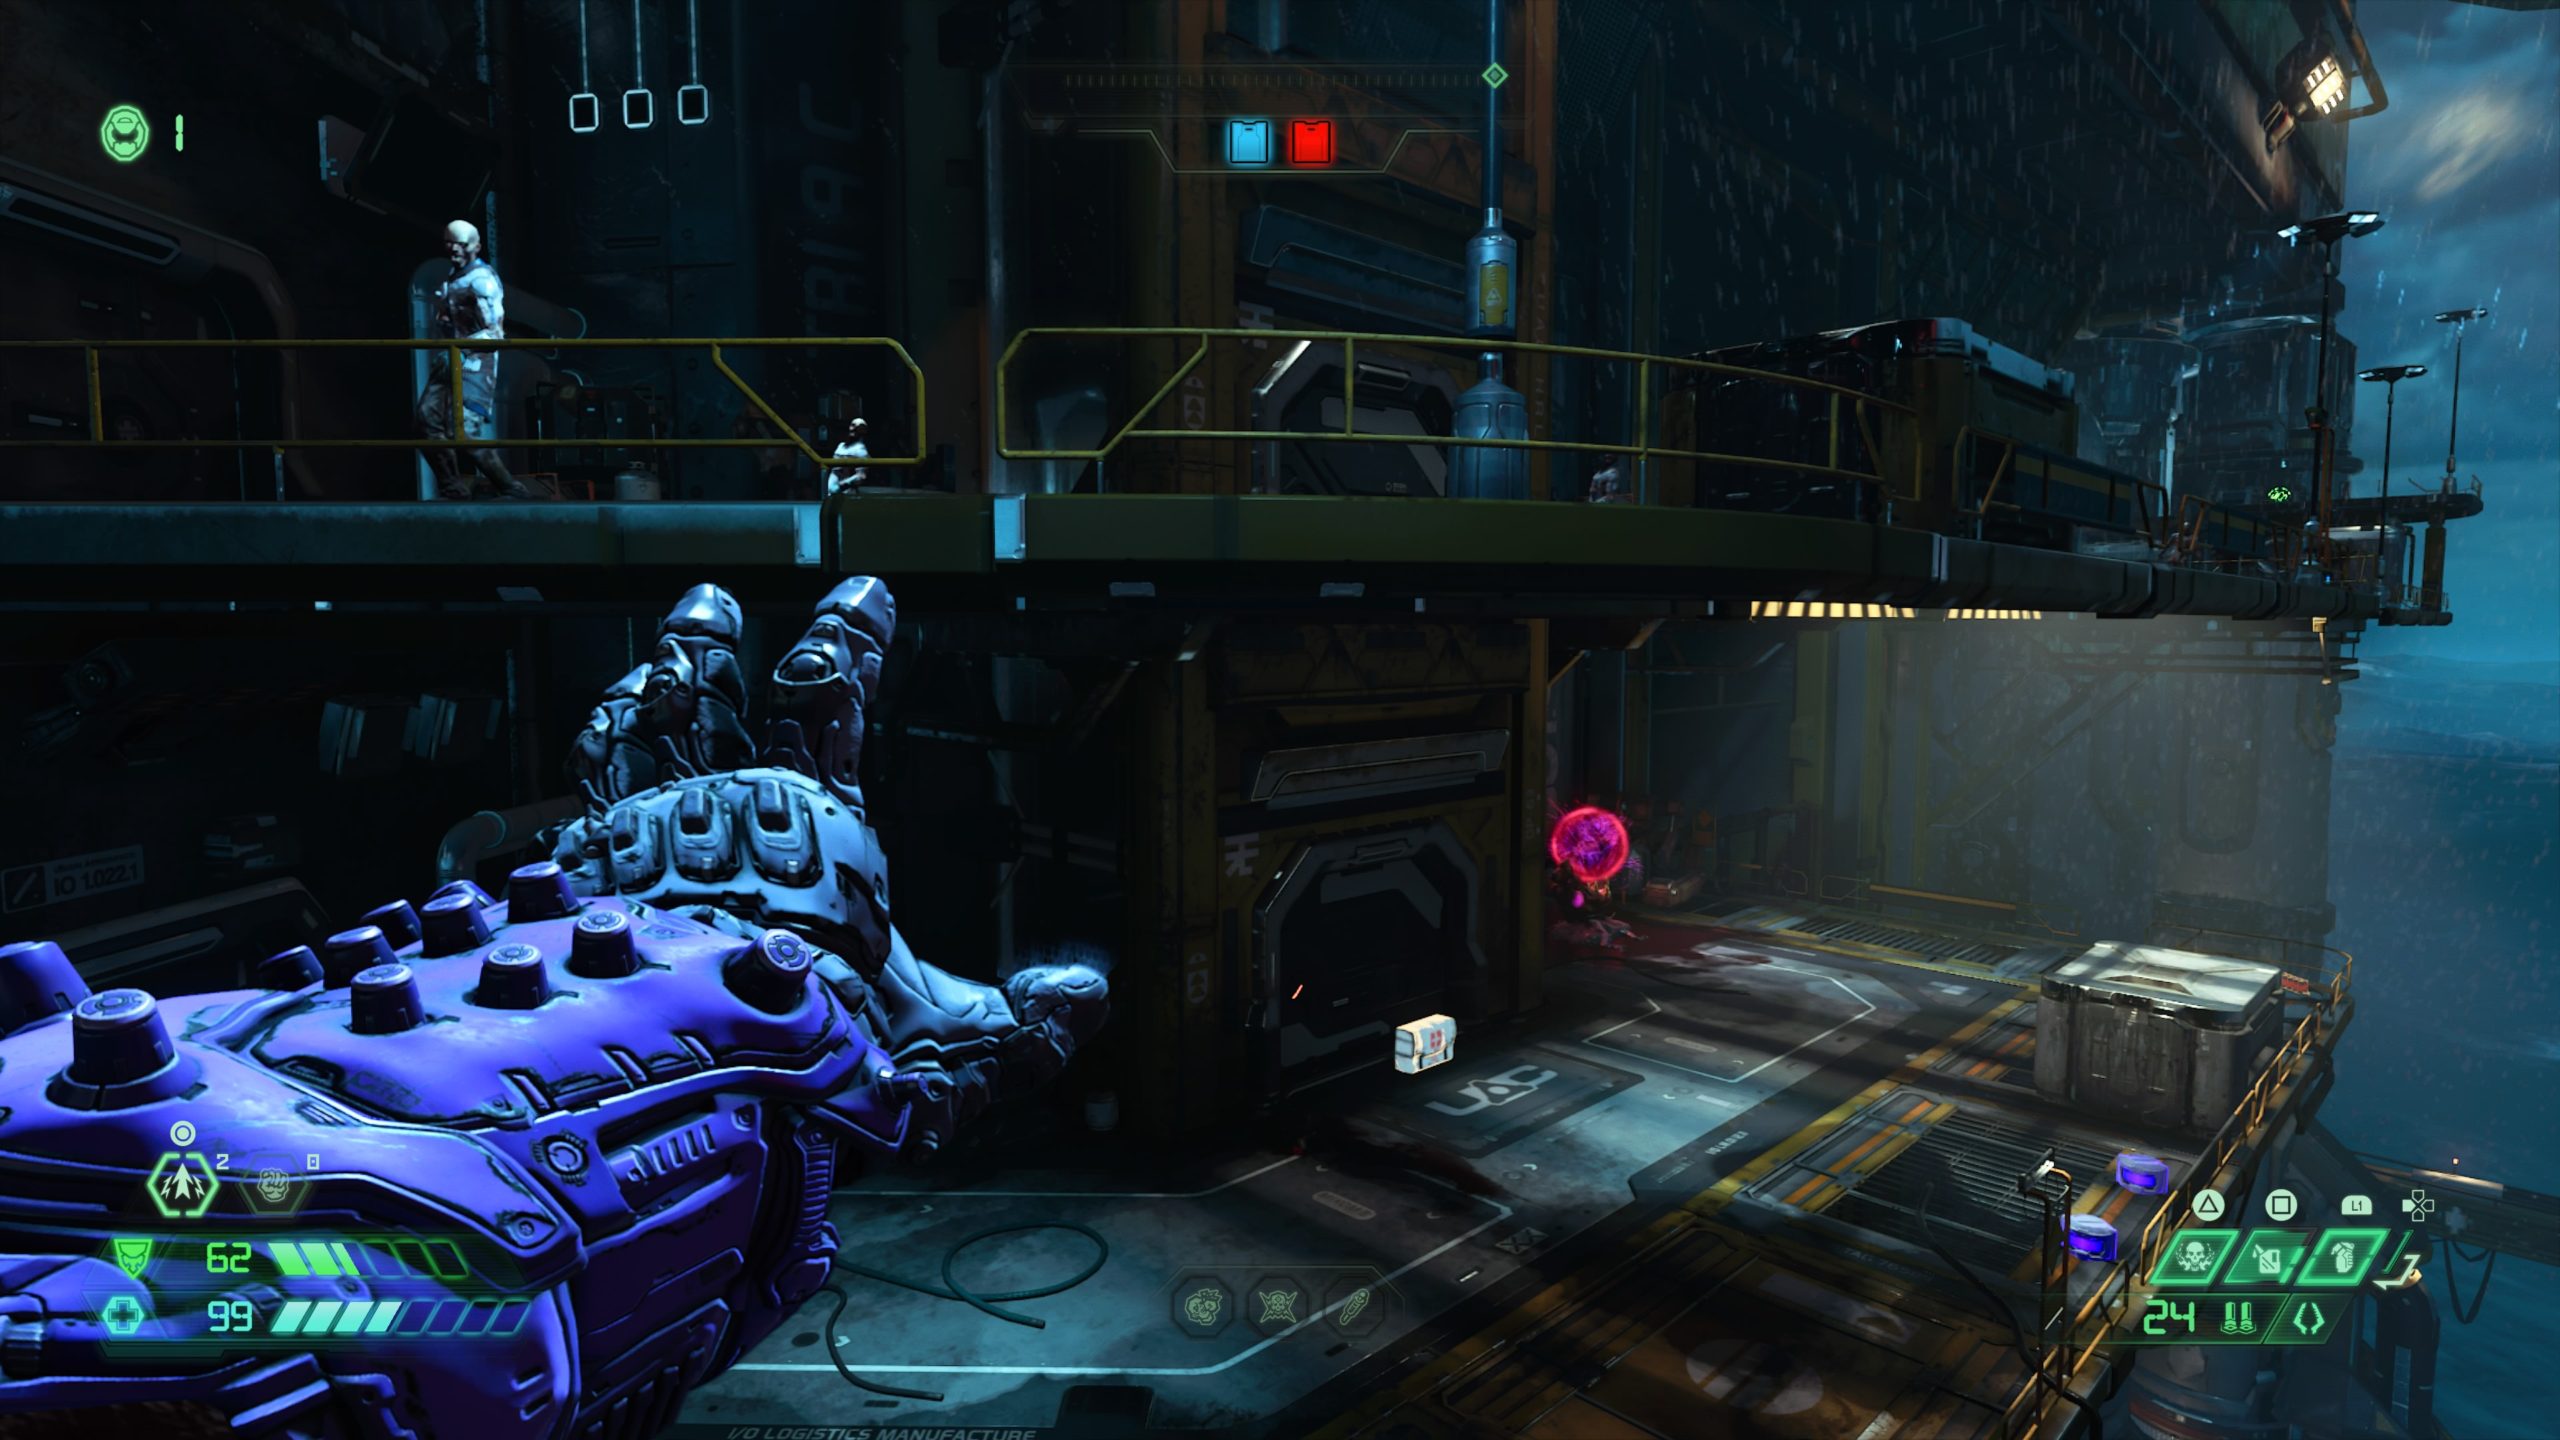
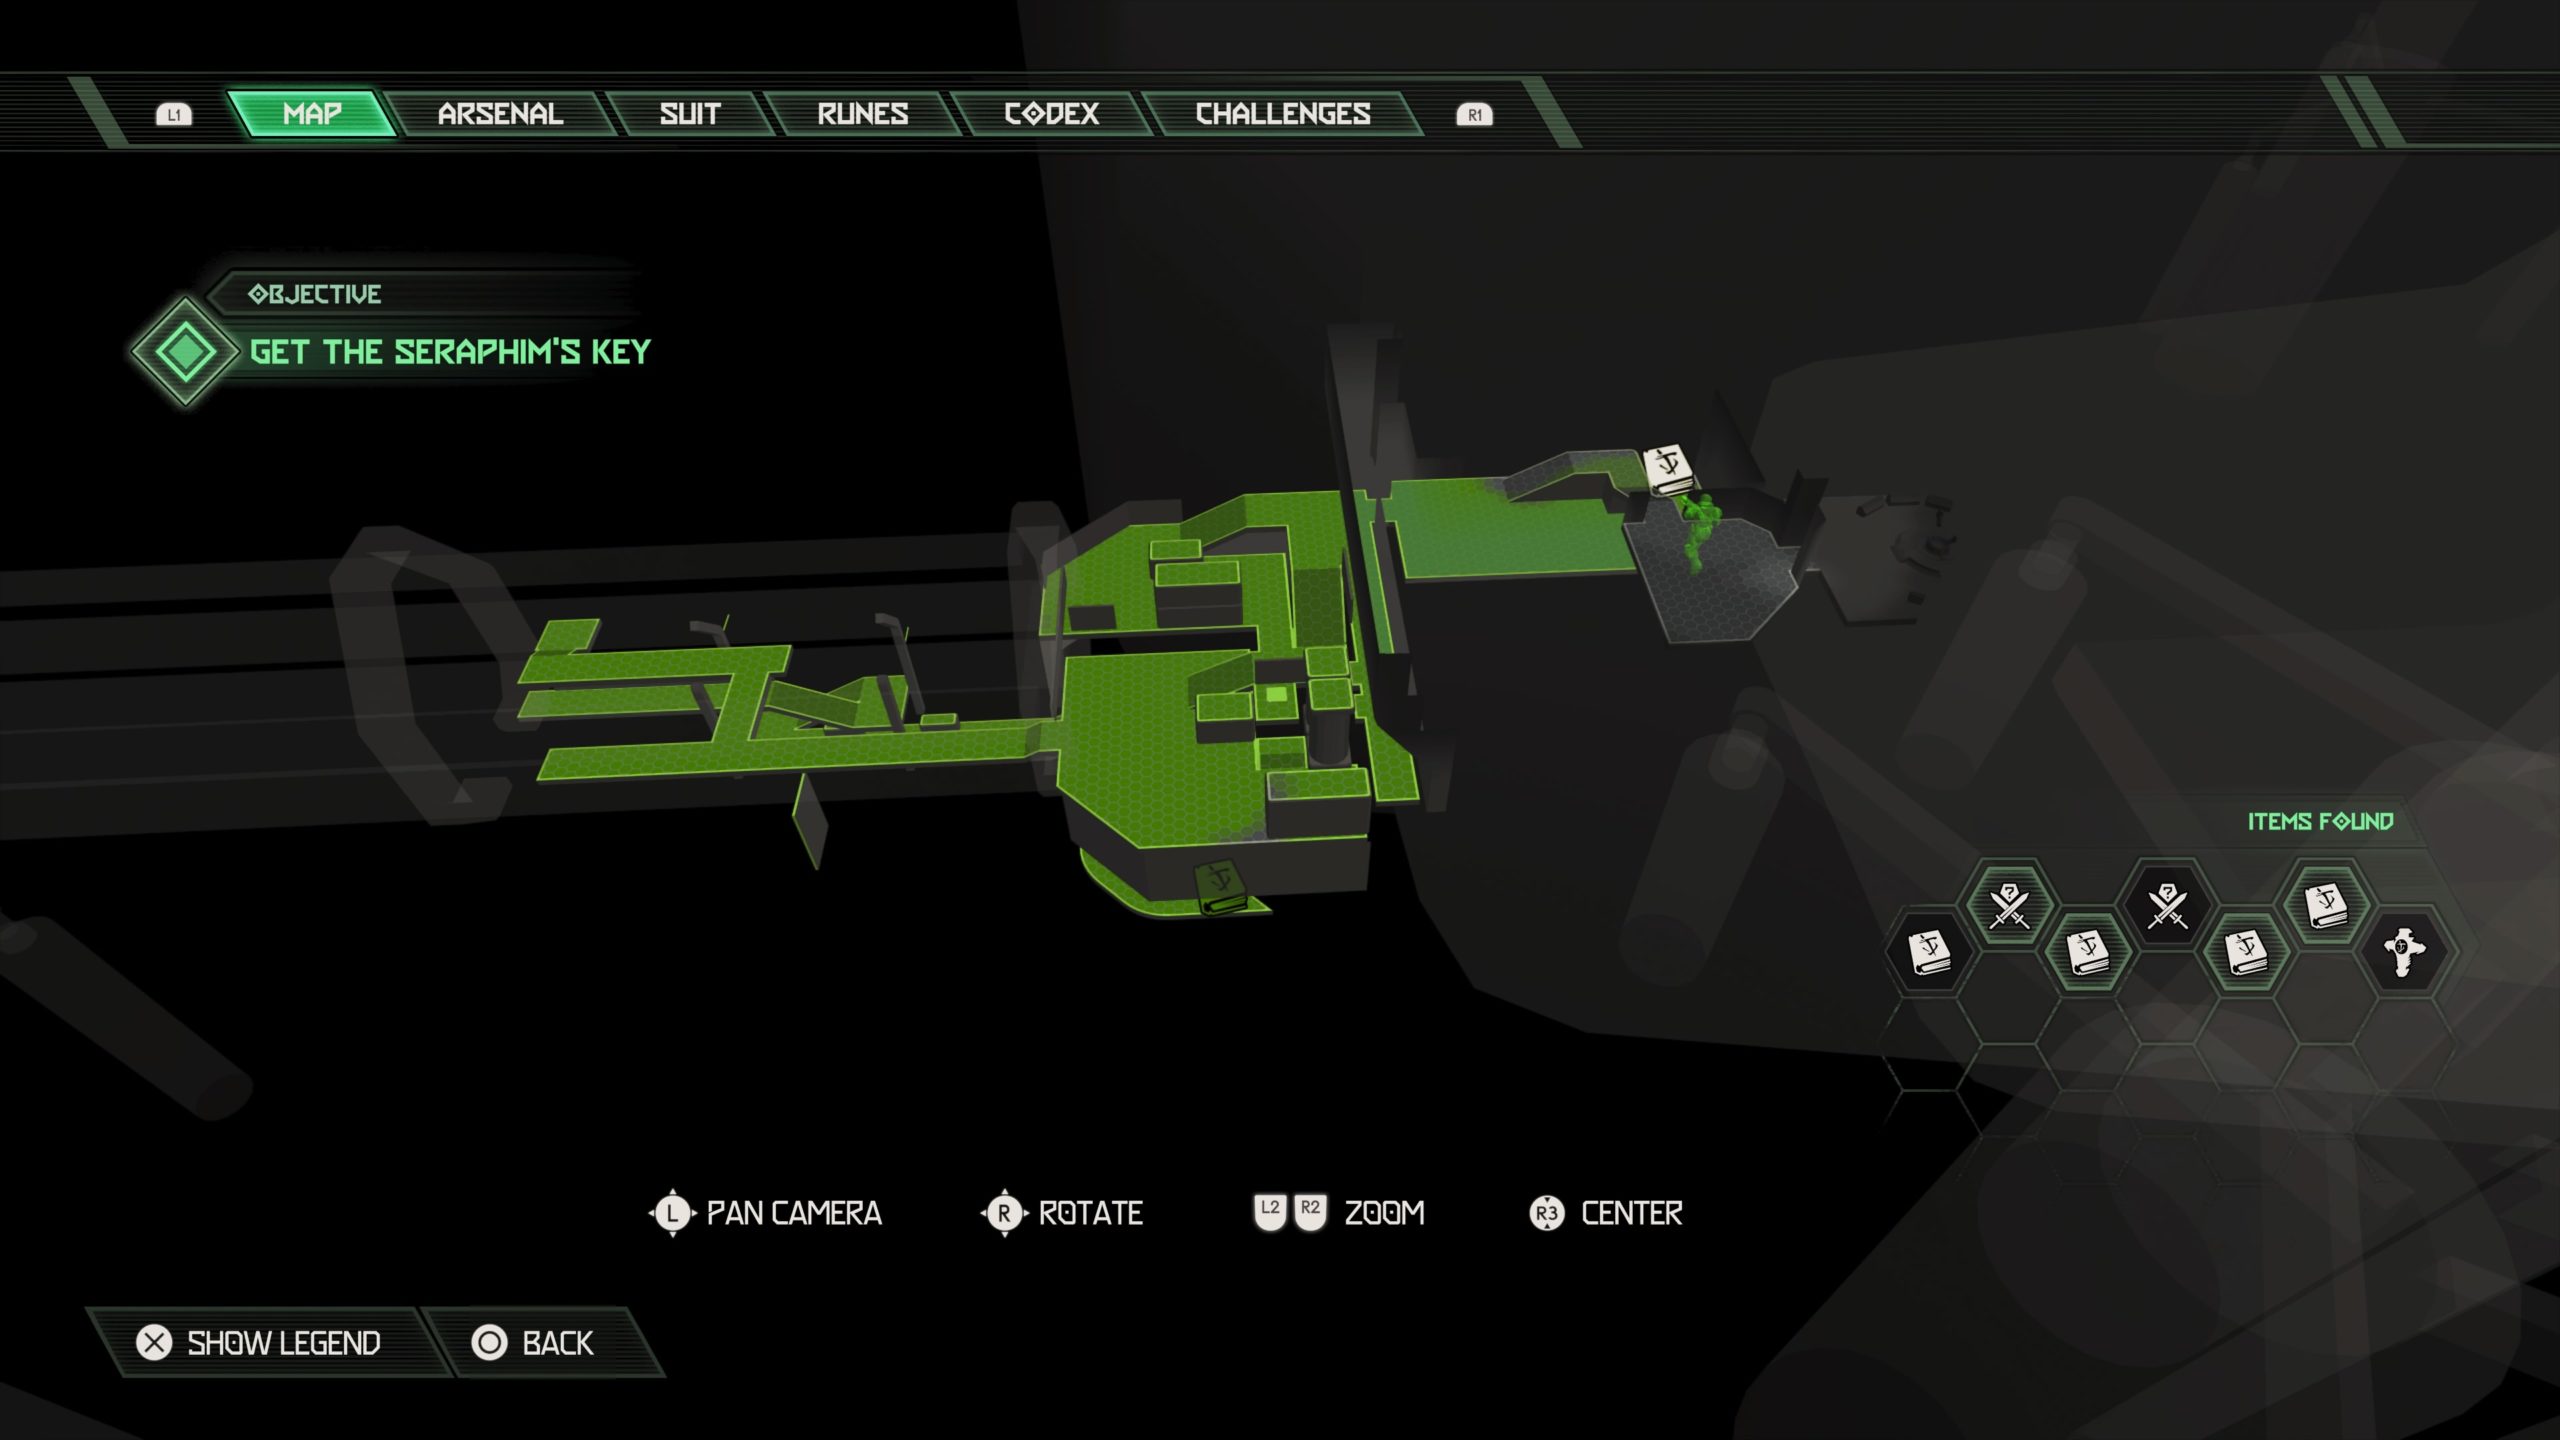
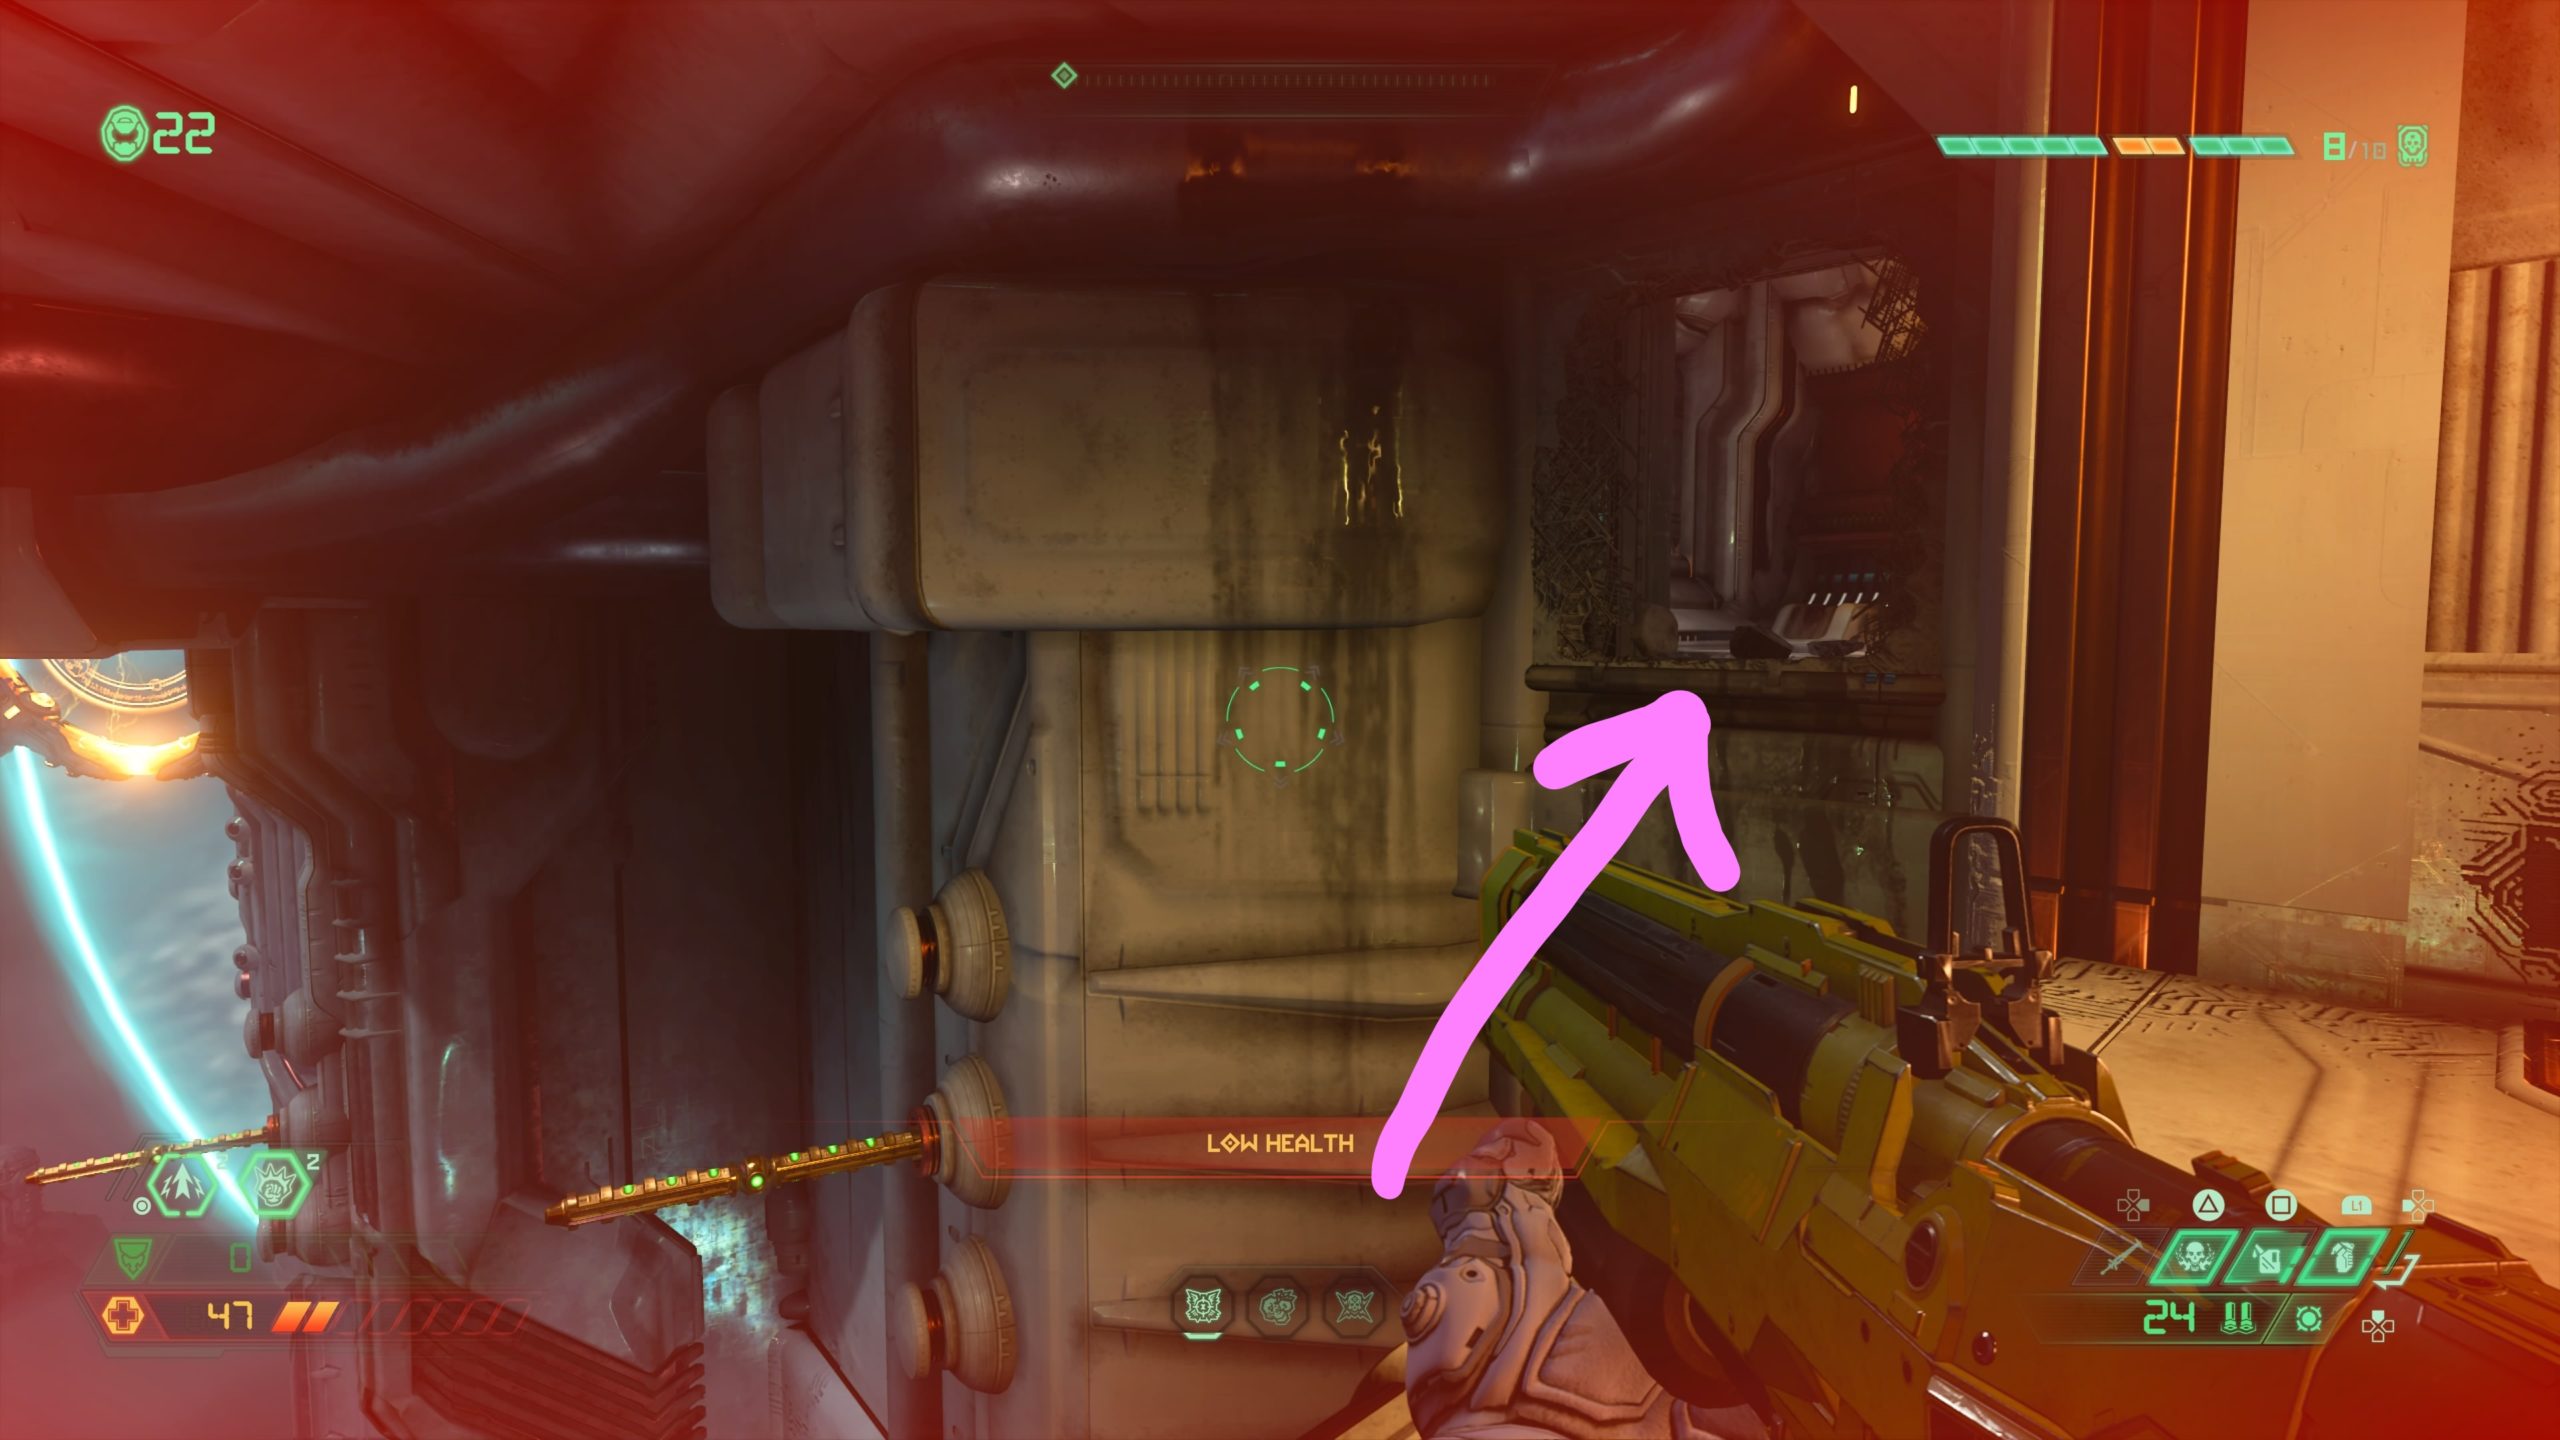
Extra Life
This extra life can be found in the vent shaft above the room containing the Red Access key card.
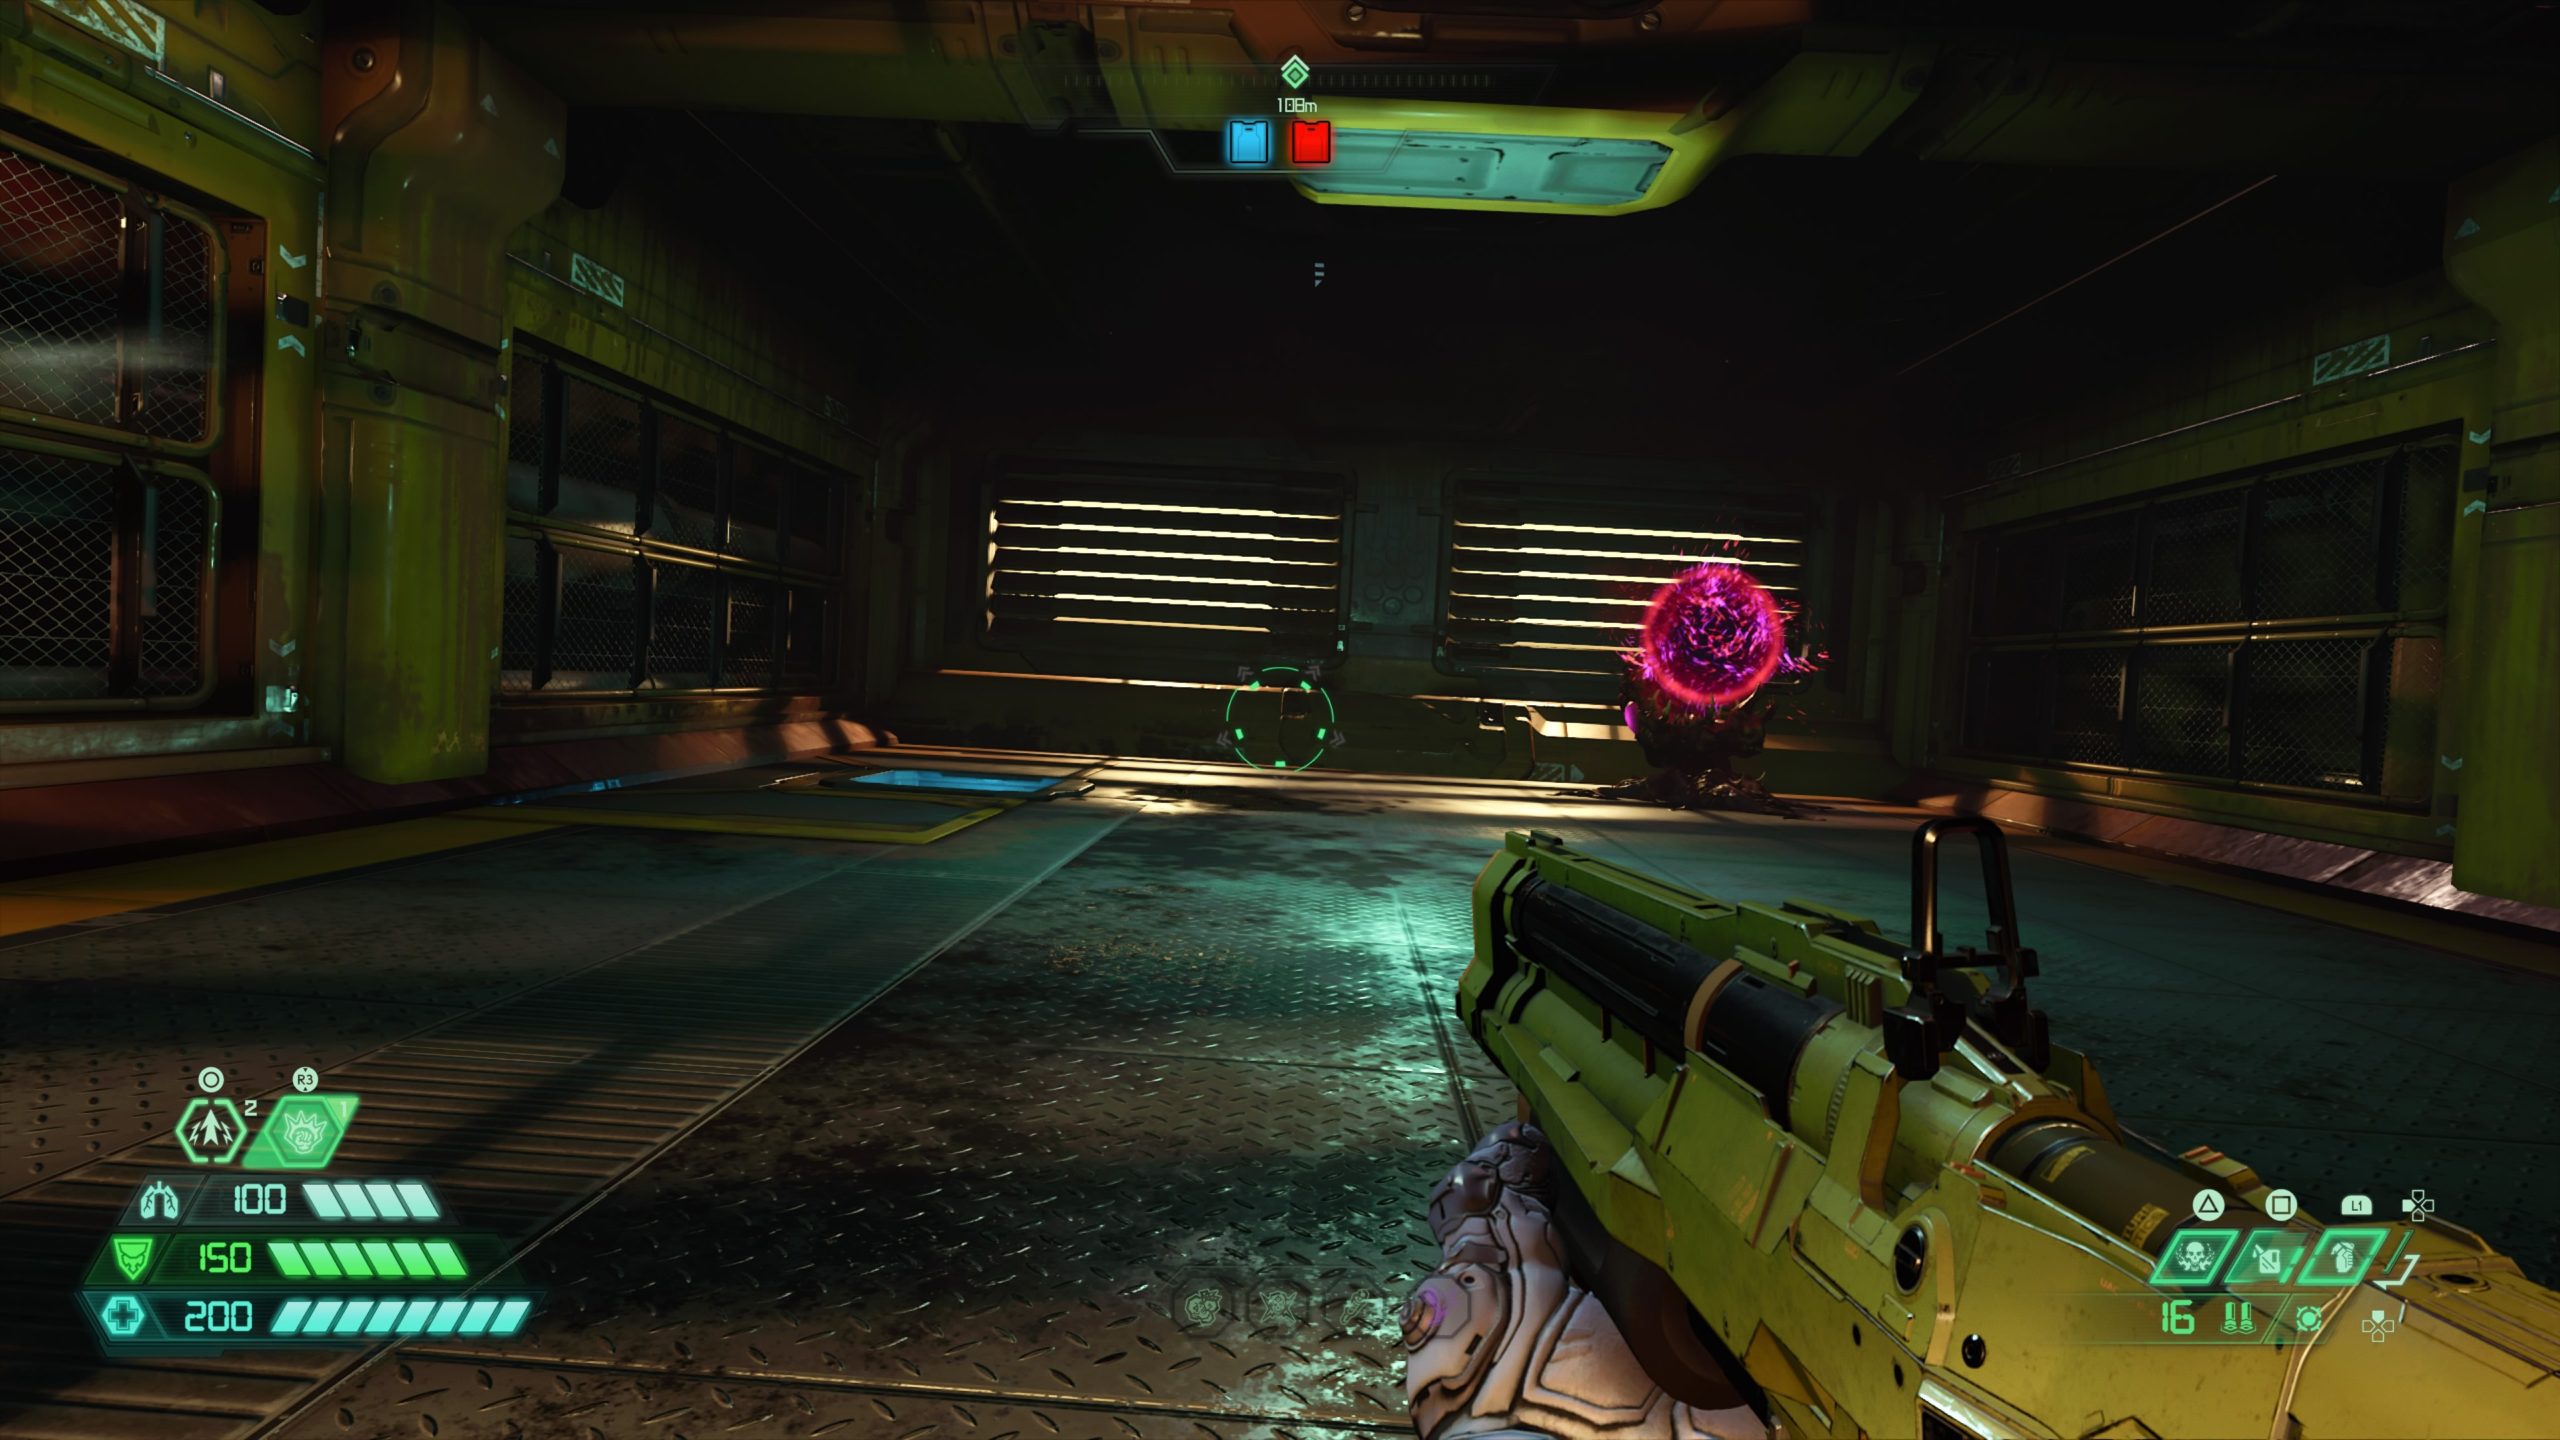
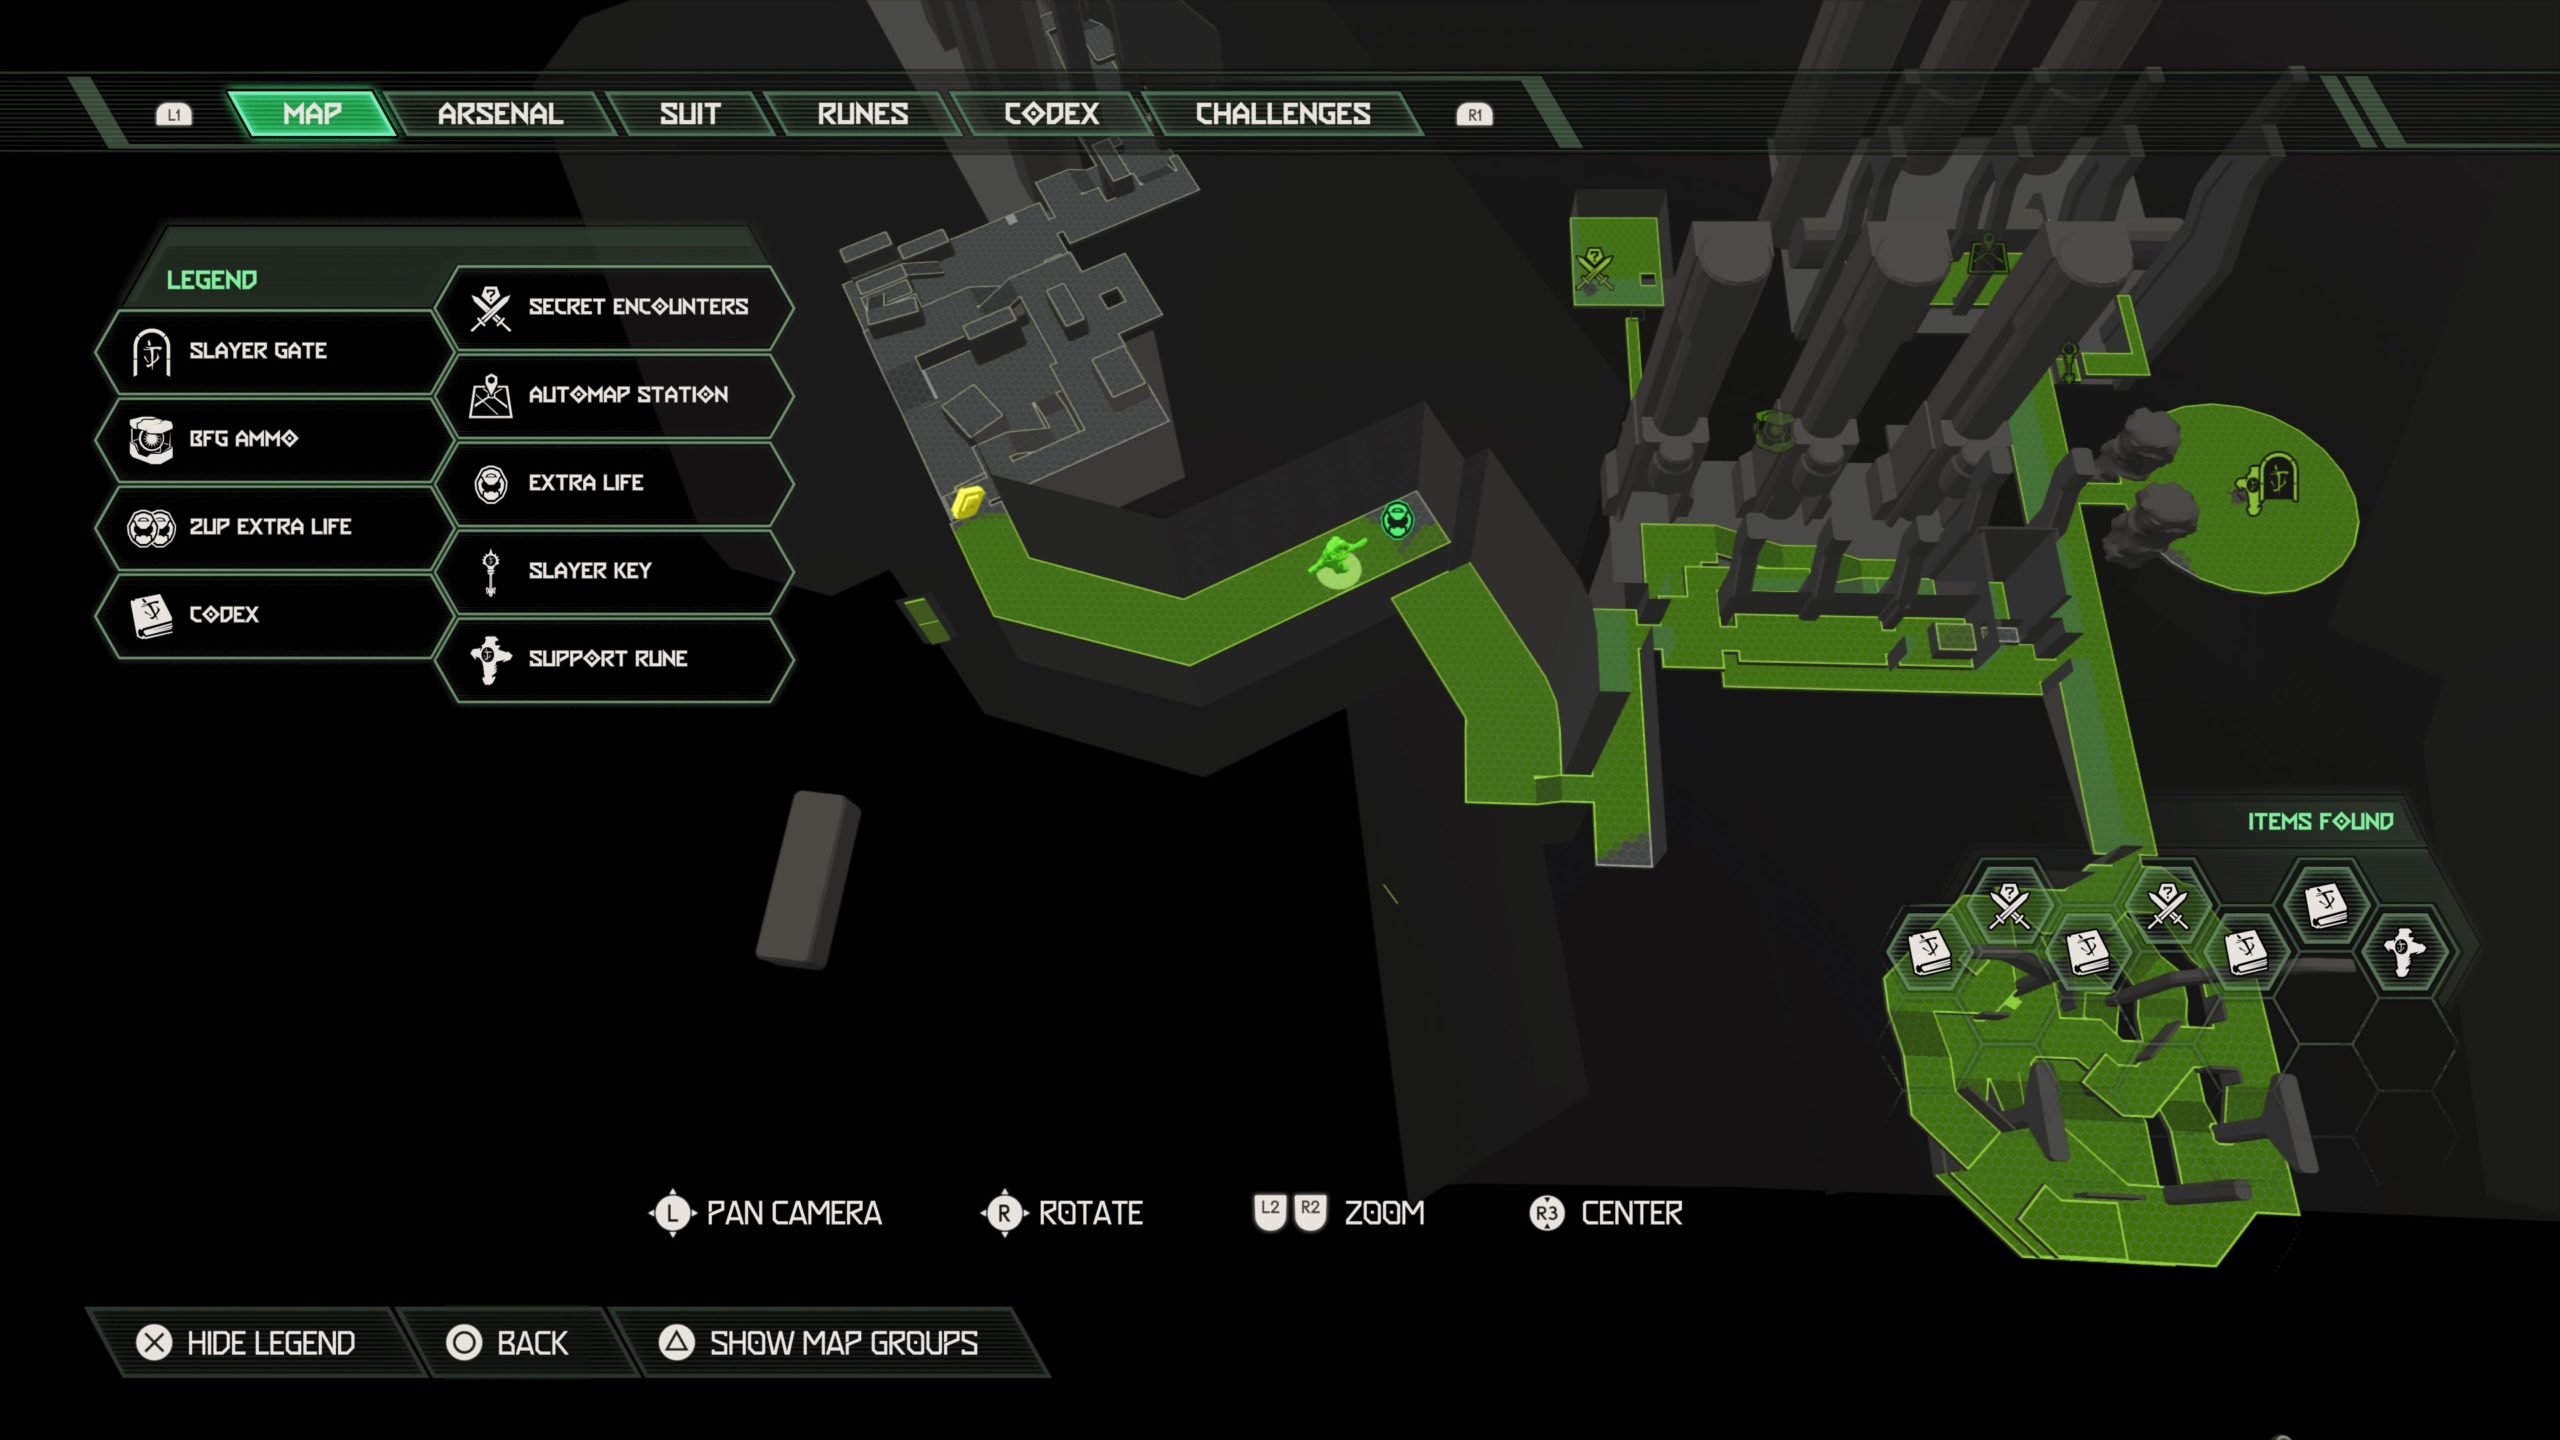
Secret Encounter
After using the elevator to ascend, head straight ahead and jump on the climb wall across the gap then descend. Turn around and jump across the gap to reach a lower platform containing this secret encounter.
Codex: Book of the Seraphs Part II
After ascending the elevator, you’ll need to disable a giant fan to jump across the gap to reach a platform on the other side. Do so then head forward a short way to reach a lever that needs to be melee’d. Head left past the lever to reach a set of stairs. Go up the stairs to find the codex.
Codex: Book of the Seraphs Part III
After using a fan to launch yourself across a giant gap to the climb wall on the other side, you’ll jump down to a metal platform below. Instead of taking the stairs up, follow the walkway towards a giant sealed metal door. Jump over the railing to the right of the door to reach a ledge. Follow it around to find the codex.
Codex: Book of the Seraphs Part IV
After fighting the Doom Hunter for the first time, head through the doorway to the facility to reach a room containing a set of stairs leading to the second level. The codex can be found on the other side of the stairs.
UAC Facility (Destroyed) – Locate the Seraphim
Slayer Key
After clearing the first area of enemies in the destroyed UAC Facility, you’ll enter a long hallway filled with tentacles. Enter the doorway at the end of the hallway to reach another hallway filled with lasers. Continue heading through the hallway passing the Slayer Gate.
Defeat the Tyrant then continue through the door to reach a loading dock with the area map. Jump up on the cargo to the left of the map and look over the ledge to find some yellow spin poles.
Use the poles to reach a ventilation shaft then crash through it. Follow the shaft to find the Slayer Key.
Support Rune
This rune can be obtained after defeating the above Slayer Gate.
Secret Encounter
After obtaining the dive suit, head back out to the large room and enter the water to look for a breakable grate. Break this then head into the vent shaft to find the secret room containing the secret encounter.
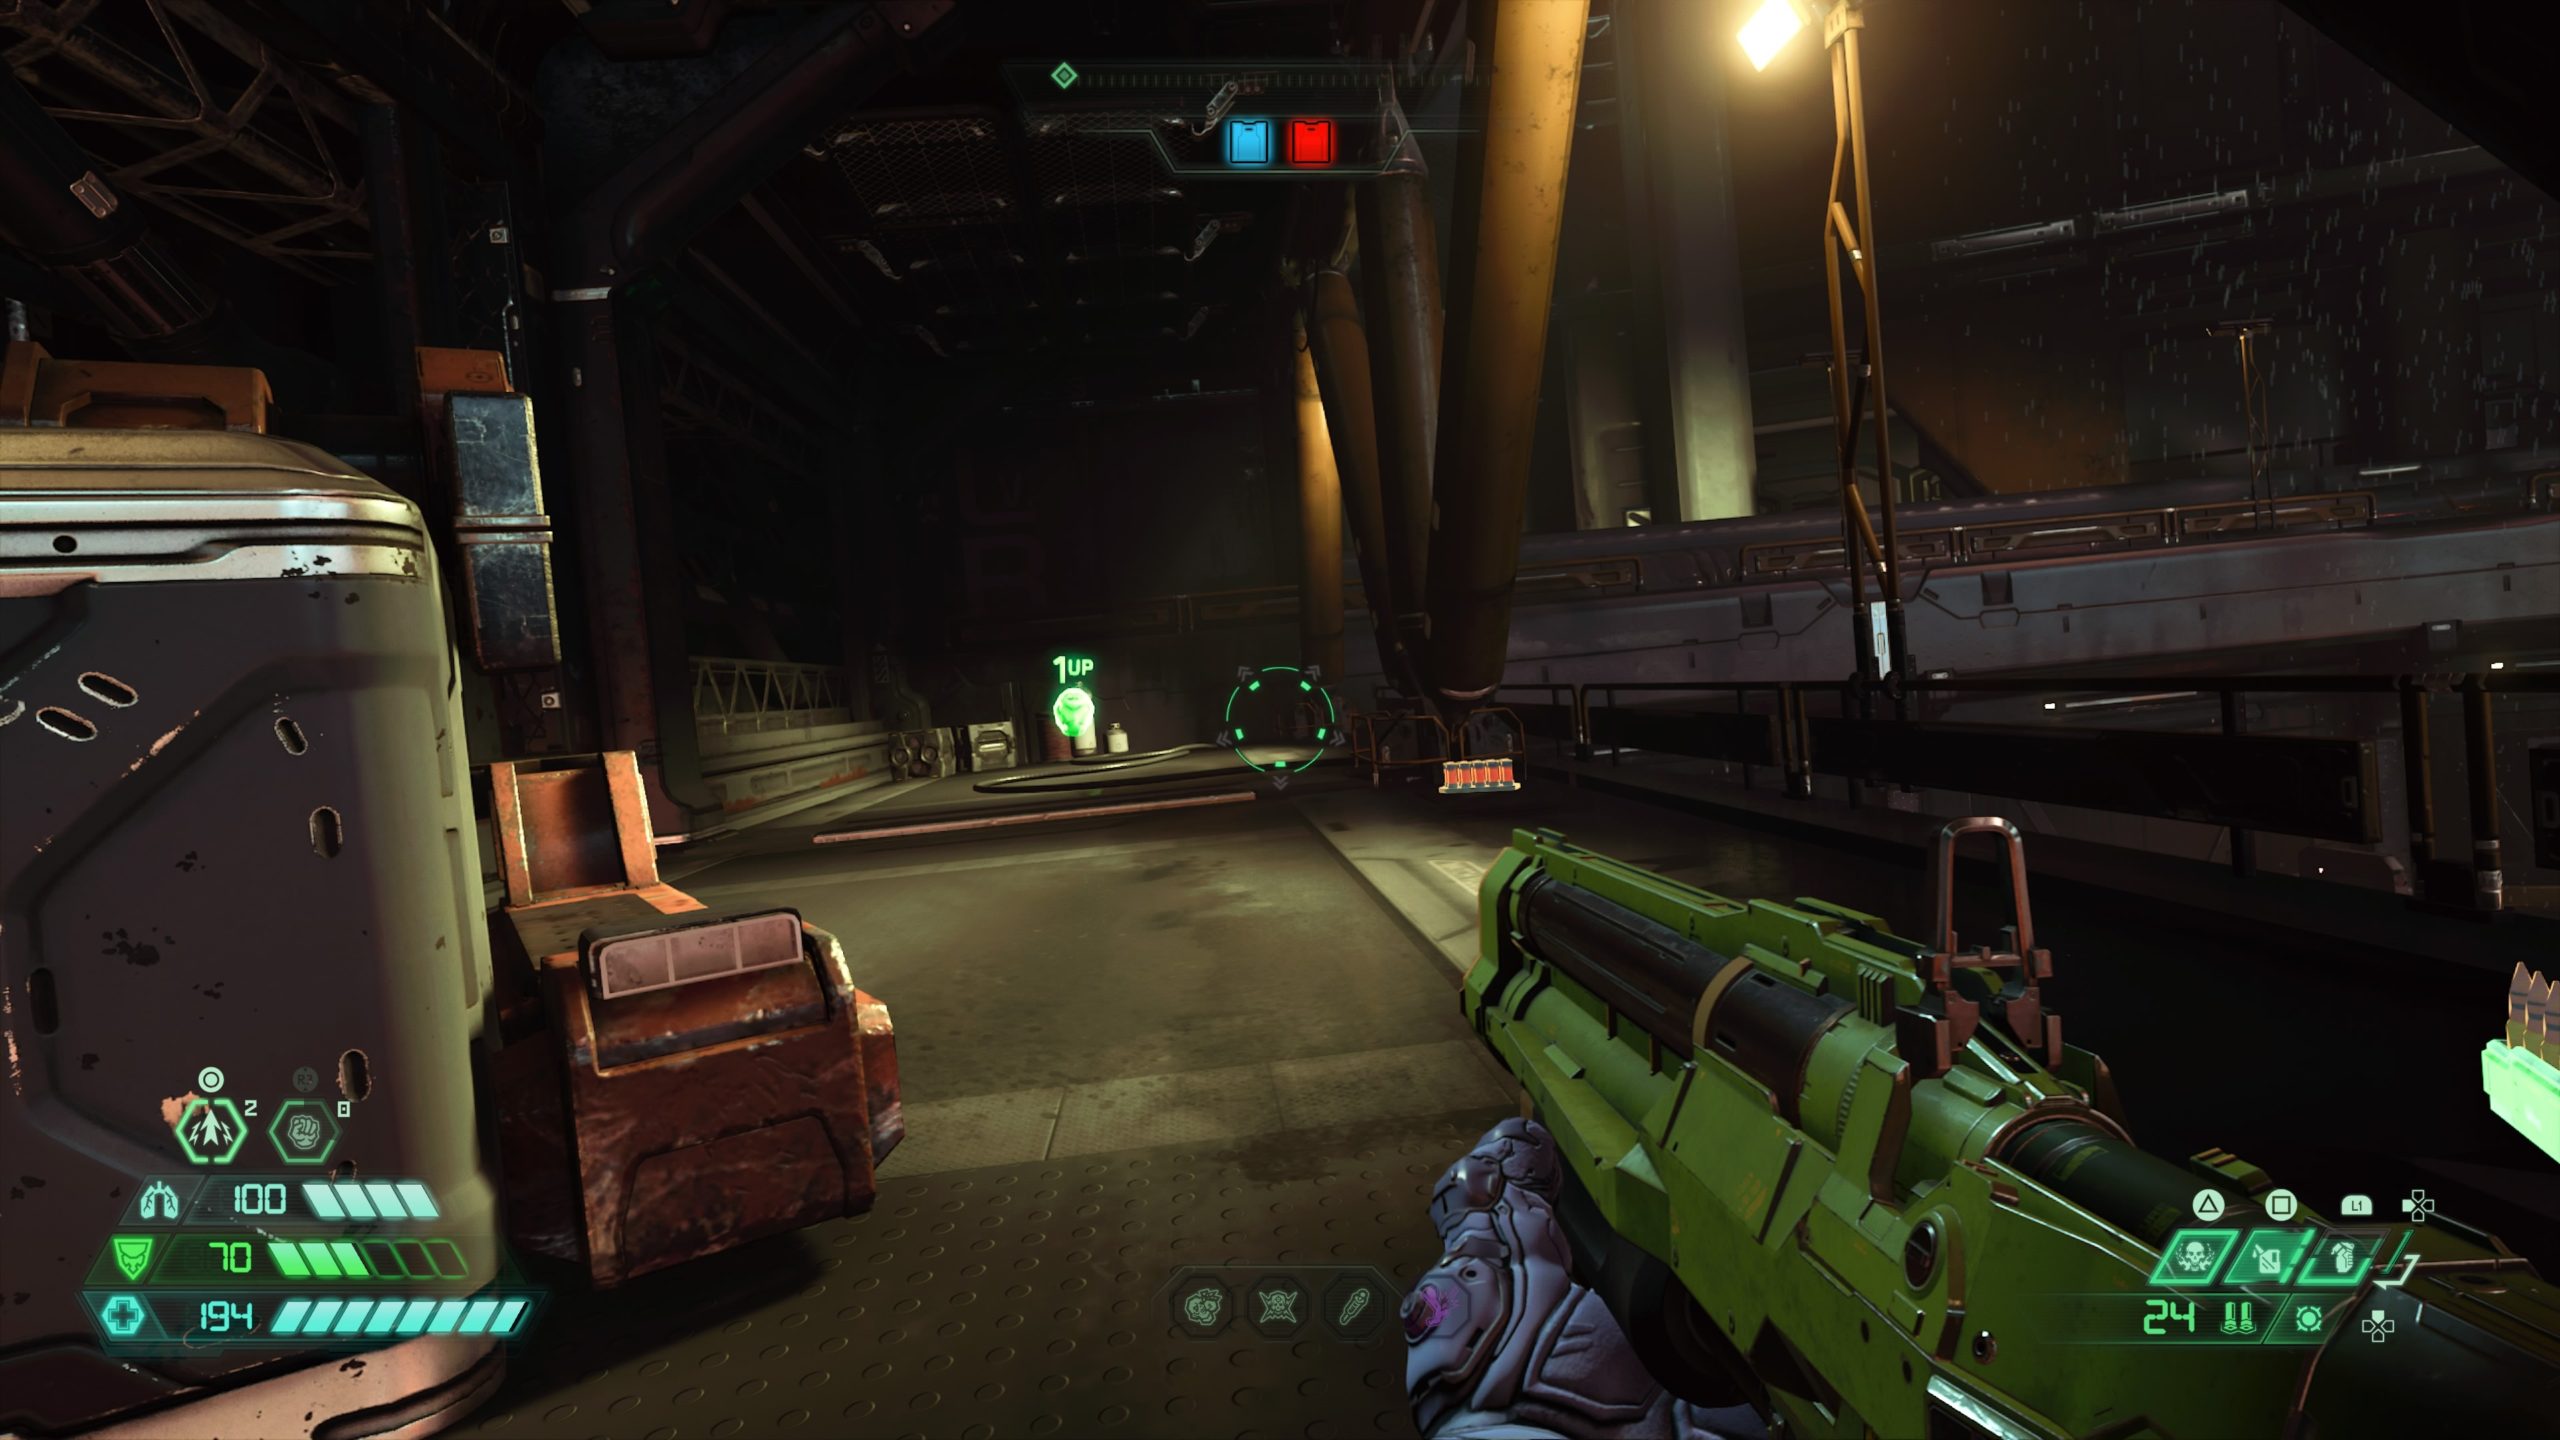
Extra Life
After punching the lever and using the yellow spin bar to jump onto a shipping container, allow the shipping container to take you to a climb wall. Climb up the wall then jump to the platform on the right. Follow the path right to reach the extra life at the end.
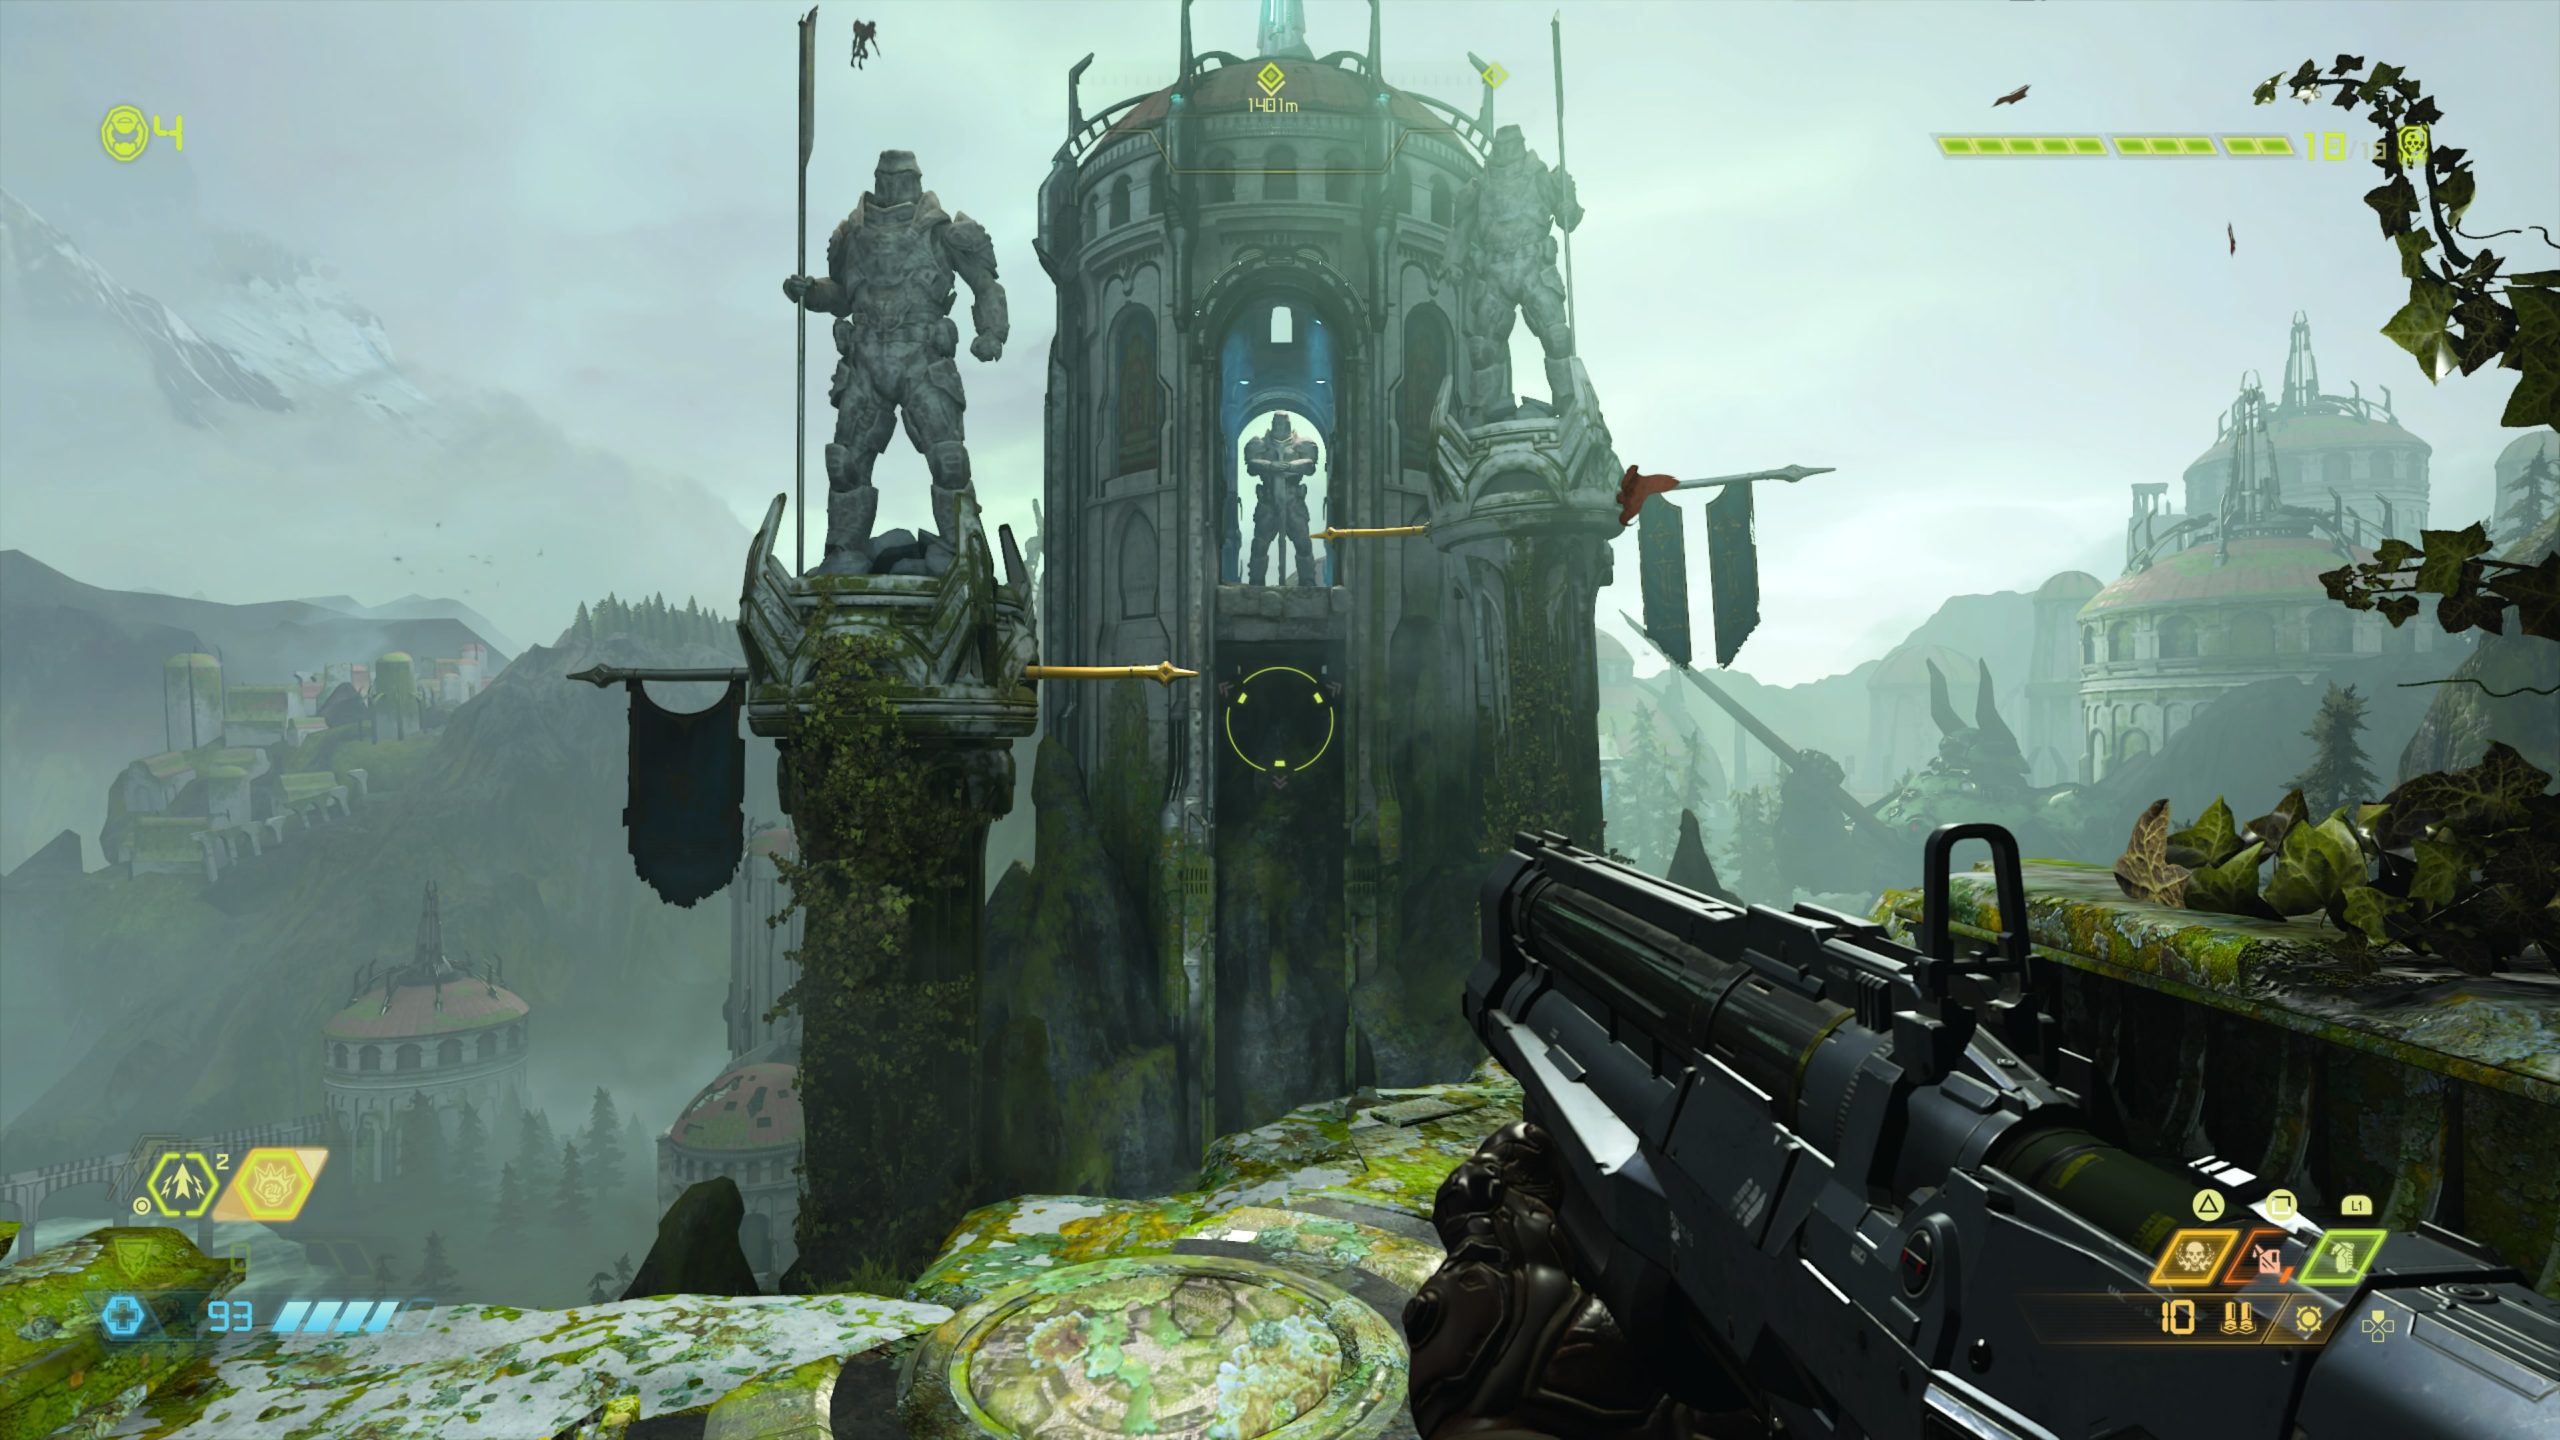
The secret encounter is located in the tower with a statue being guarded by two sentinel statues on pillars. Use the gold spin bars to reach the top of the tower. The secret encounter is located behind the statue.
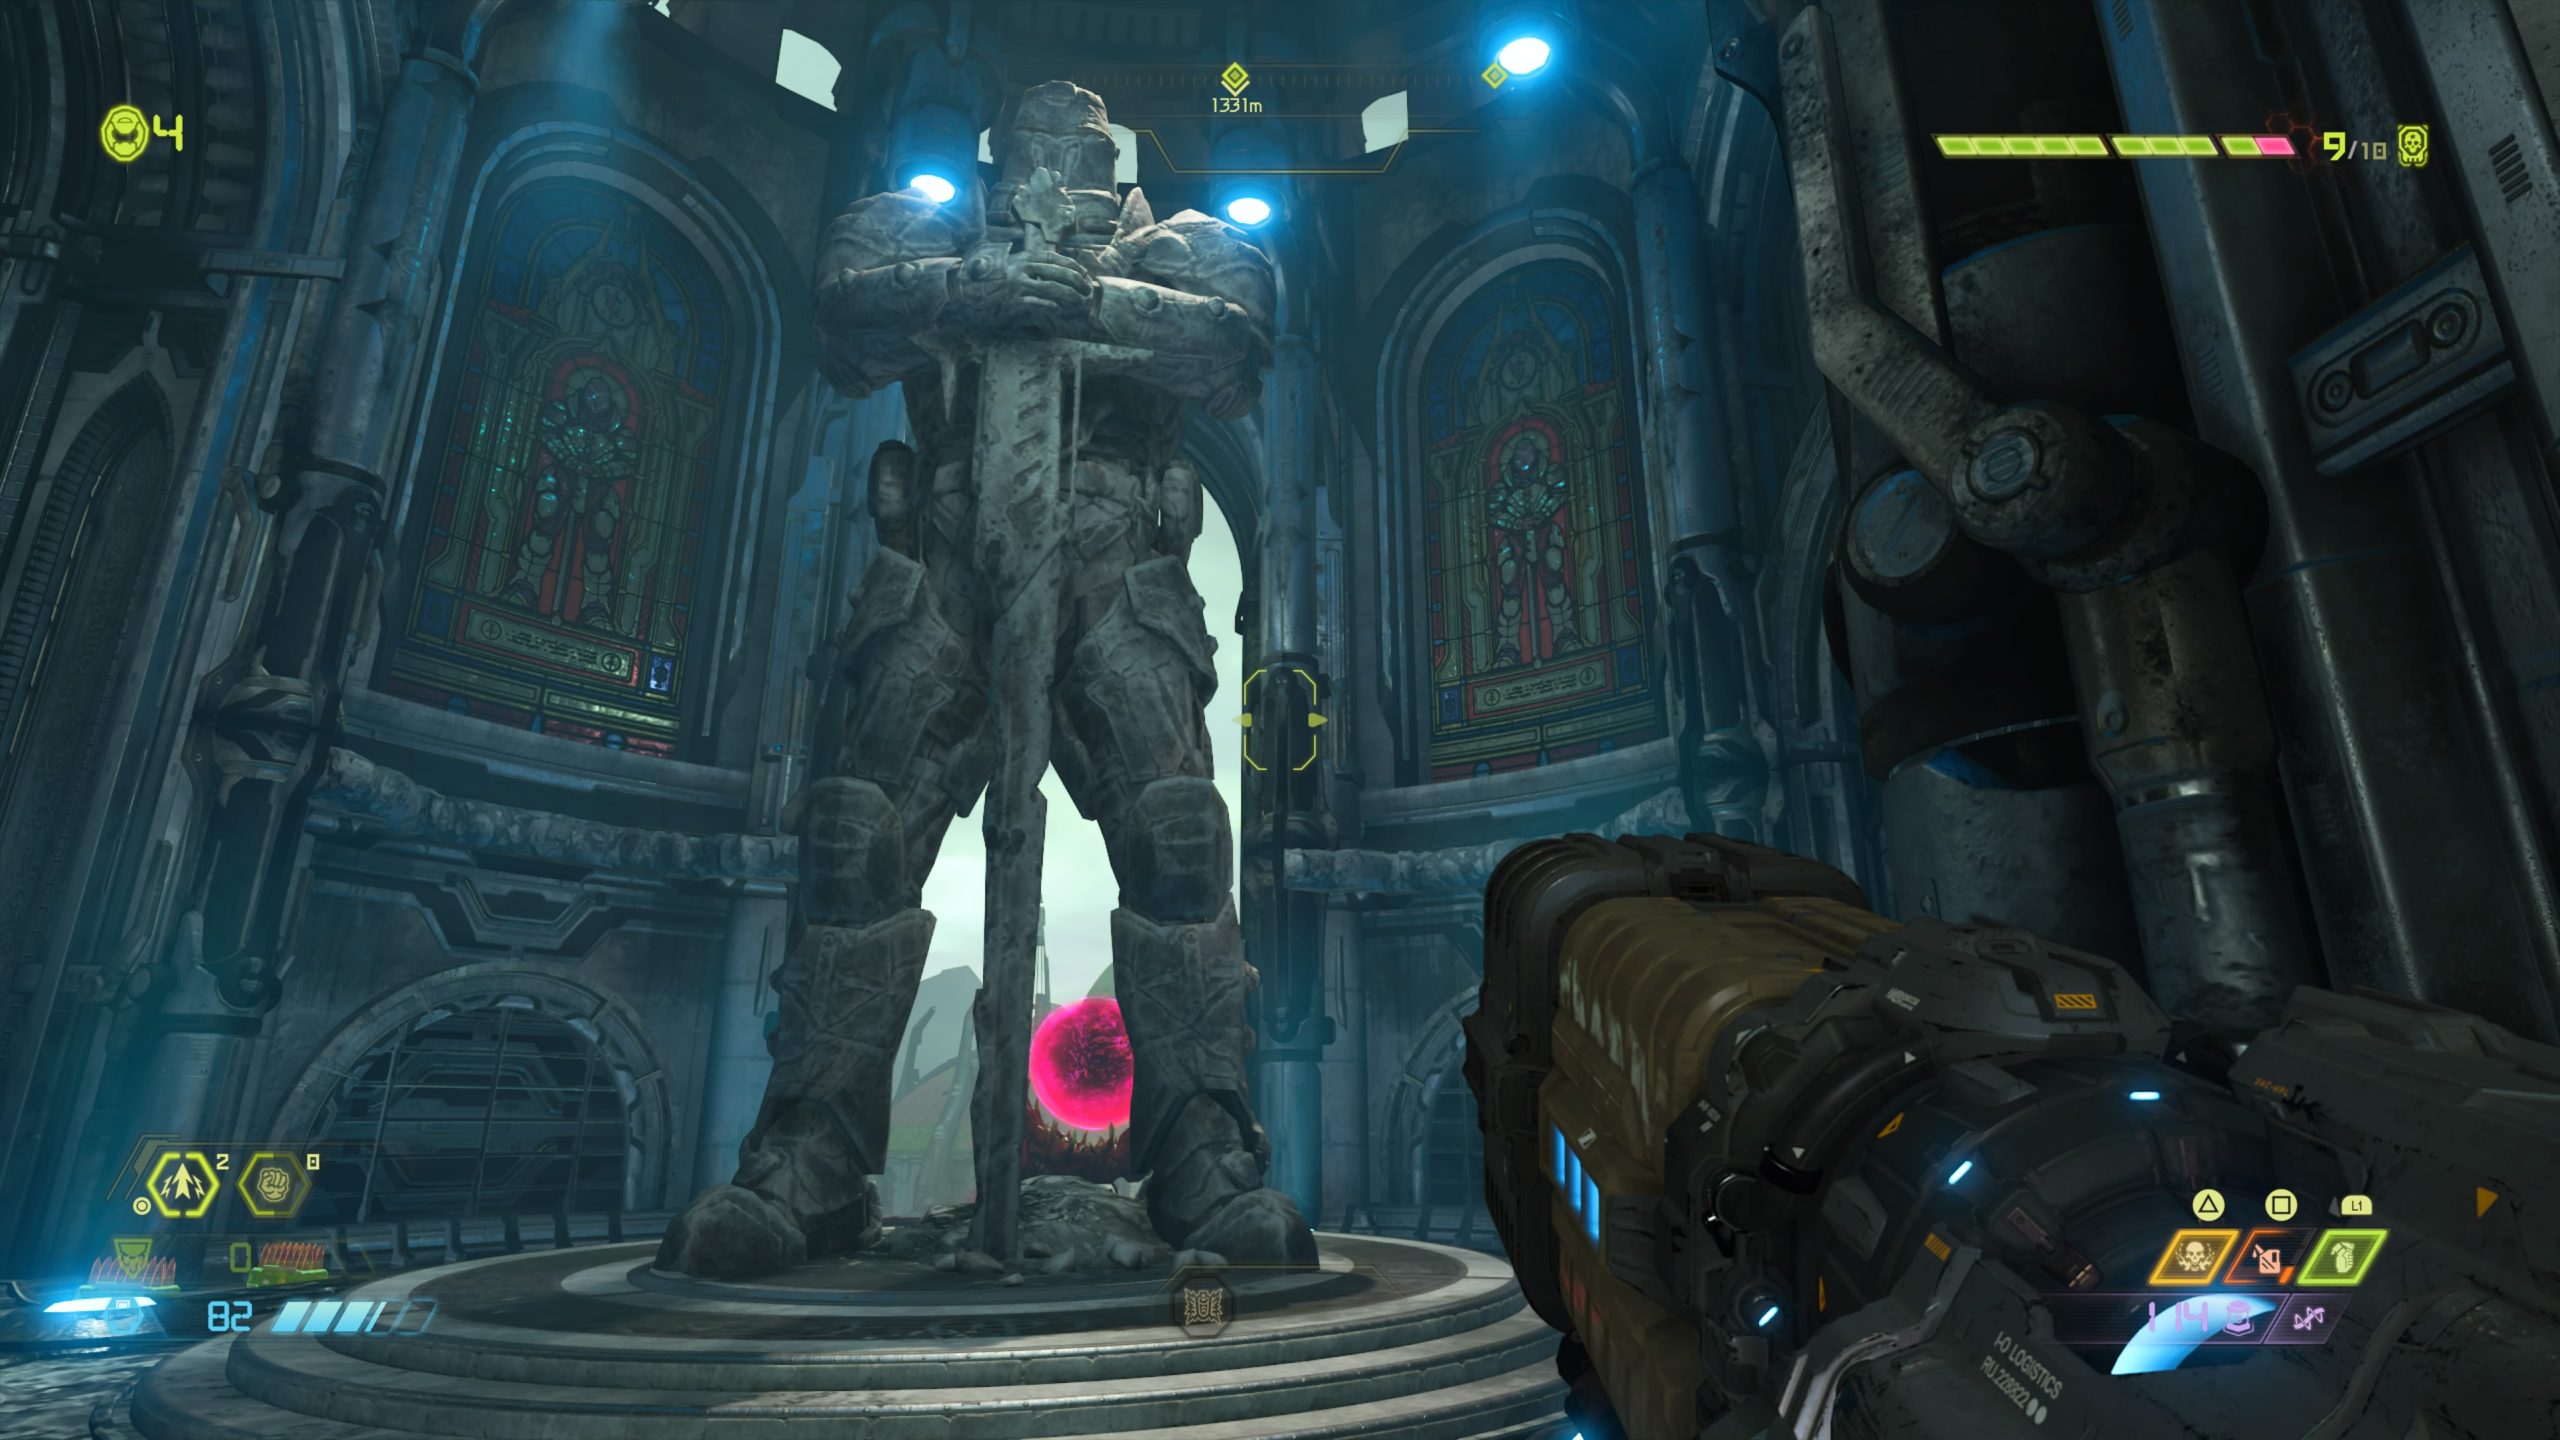
Hell (Travel Point – Belphegor’s Gate)
The secret encounter is located at the base of the giant sentinel robot holding the spear.
Mission 3: Cultist Base
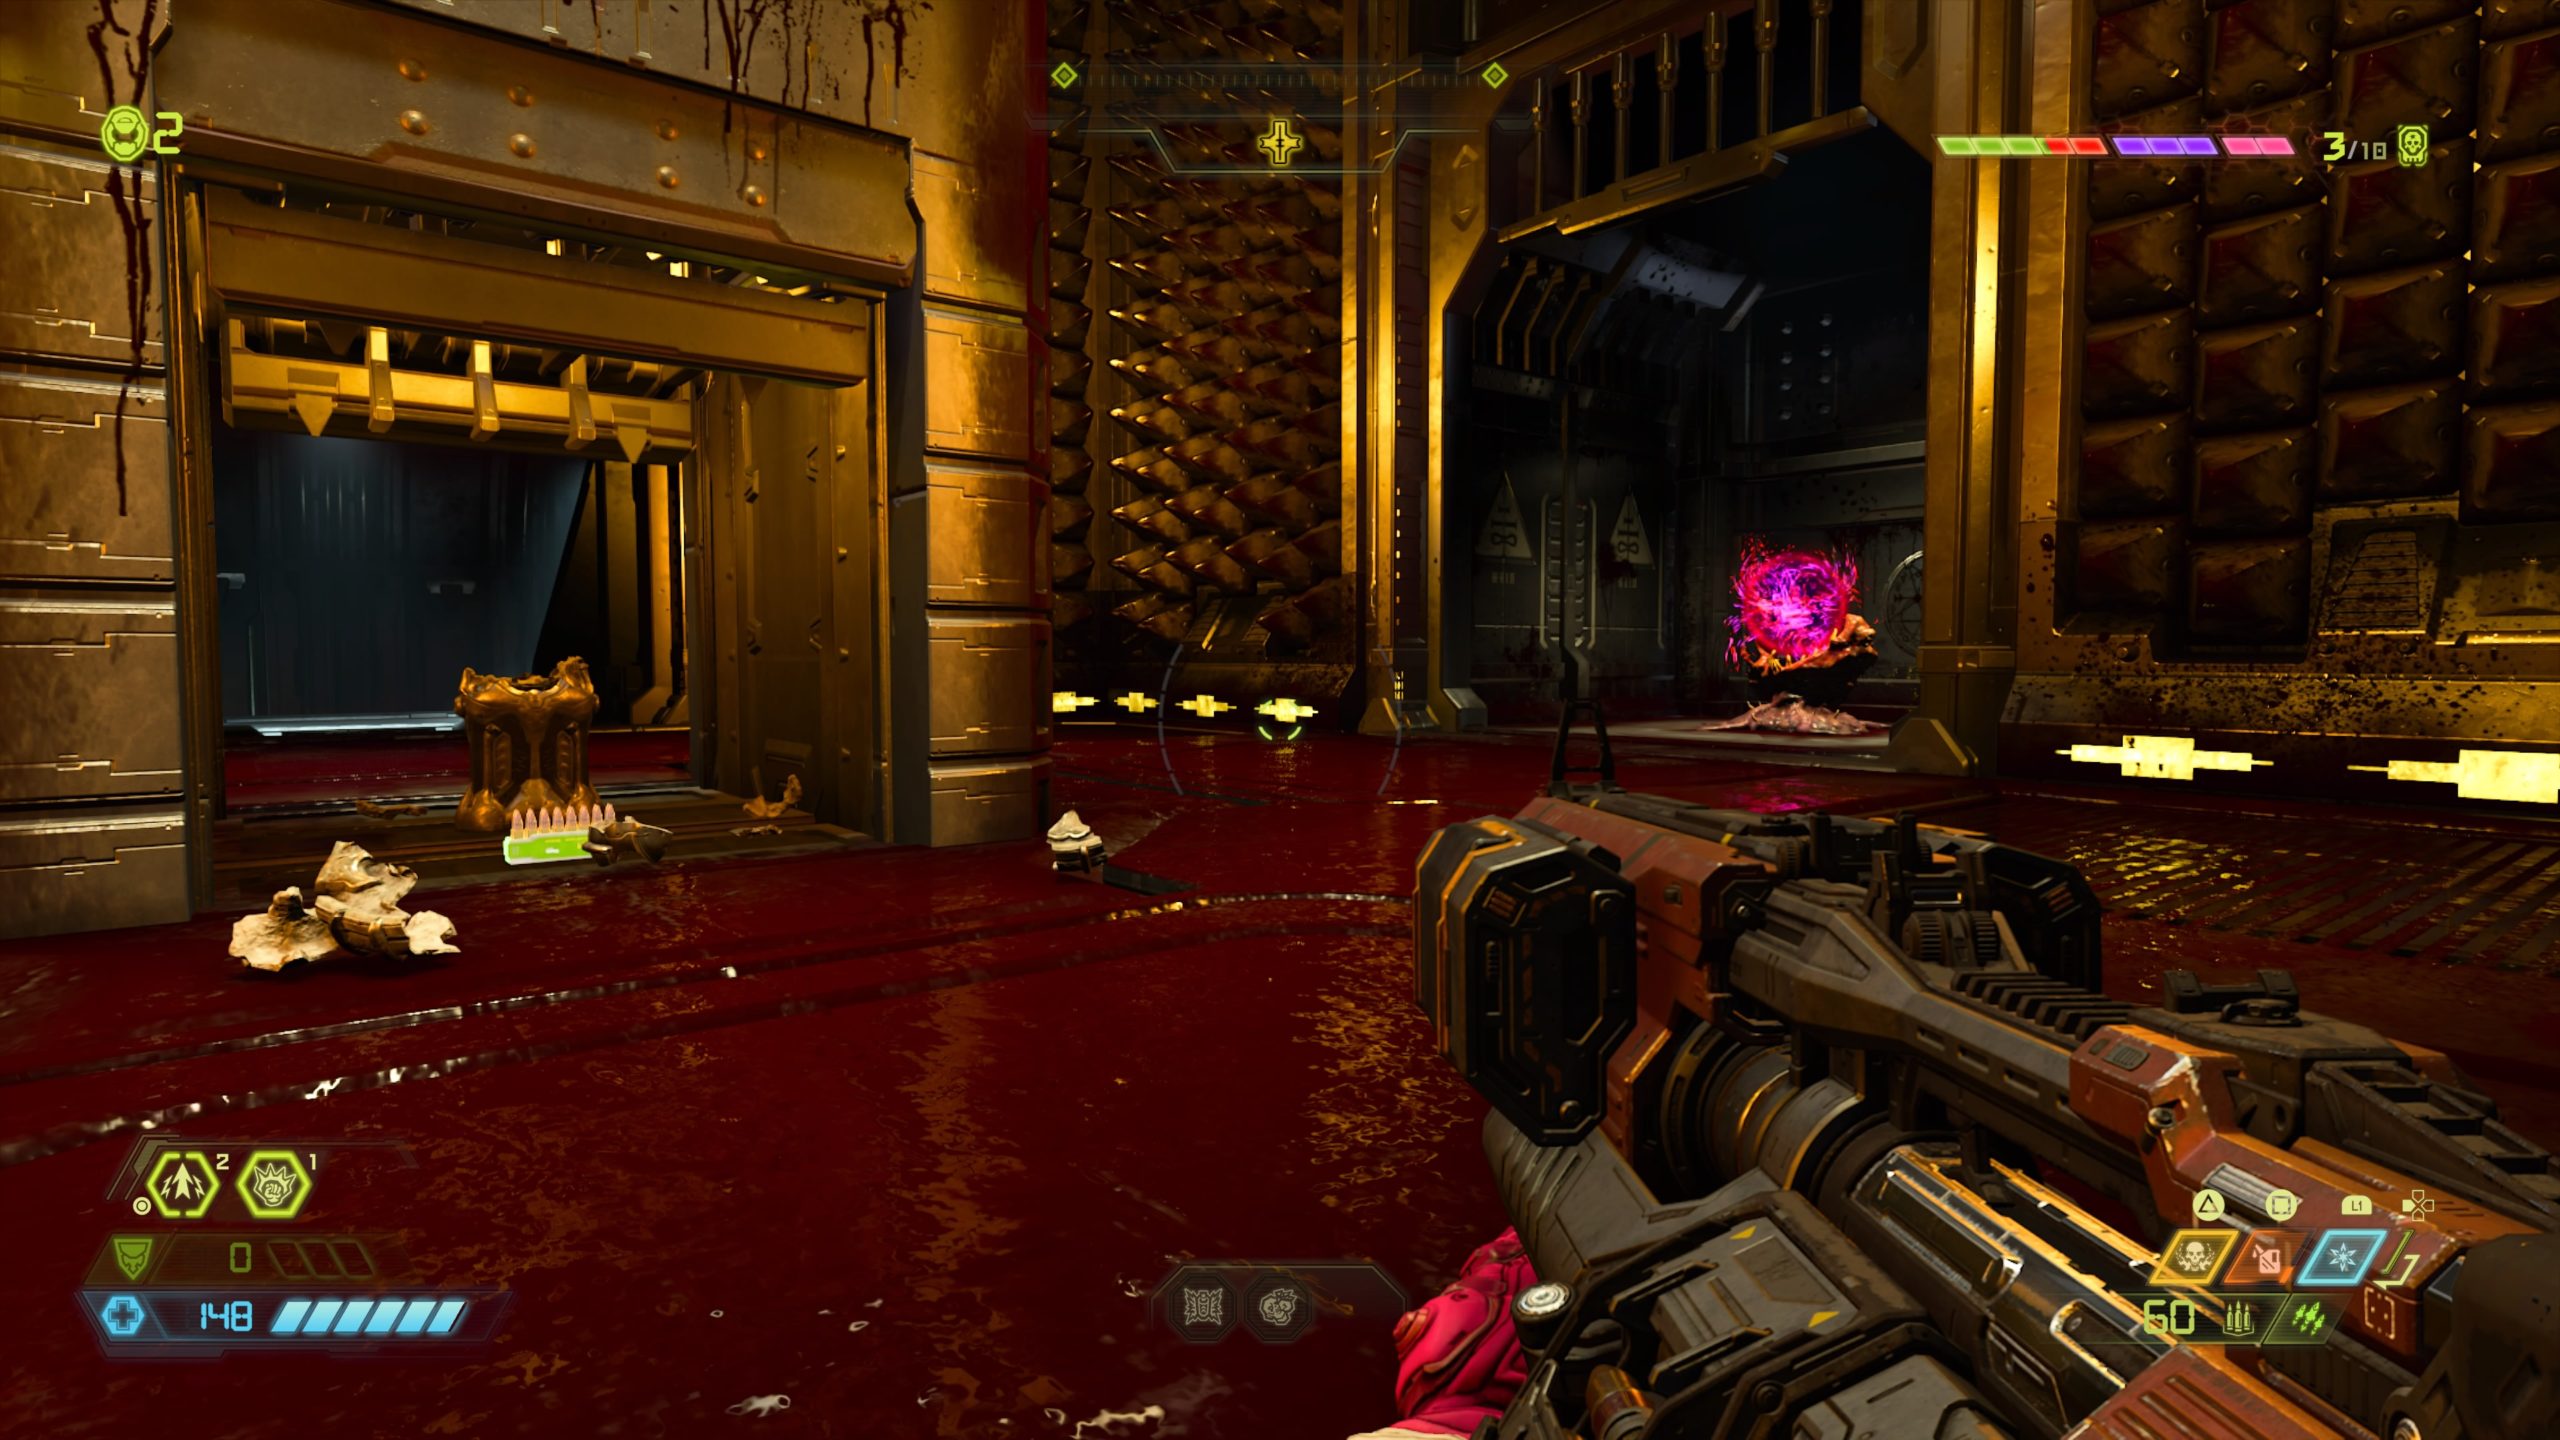
Cultist Base (Travel Point – Basilica of Adjuration)
You’ll come across this encounter during the Obtain your Super Shotgun objective. To reach it, you will need to look for the room with the Automap Station to find a moat of red stuff. Wall jump through the moat without touching the red then climb up the wall at the end to reach a metal platform containing a skull switch. Use the switch to gain access to the encounter.
Cultist Base (Travel Point – Forge of Transfiguration)
After the guillotine hallway, you’ll reach a circular room with a skull slab in the middle. Head forward until you get to the two pillars with four climbable walls. Use them to climb to the very top. Once at the top climb up a ledge then take a right down a narrow tunnel. At the bottom, turn left and melee the cracked wall to reveal the secret encounter.
Mission 5: Super Gore Nest
Upper Area (Travel Point – Star Mall)
From the fast travel point, head to the center of the room with the moving gunk press. Head past the press and use the green portal to arrive in a gunk covered room. Head to the side of the room with three openings behind you. Take the right ramp up and turn right at the top to find the secret encounter.
Lower Area (Travel Point: Toxin Refinery)
From the fast travel point, head forward, jumping over the moat of toxic liquid, then head through a teeth covered doorway. This will bring you to a room filled with toxic waterfalls and fire cannon balls. Look to the right to spot a climbable wall. Use this wall to reach a platform the next level down. The secret encounter will be located on this platform.
Mission 6: Arc Complex
The Waste Tunnels
From the fast travel point, head down the purple gunk filled tunnel and drop down into the room below. Climb on the platform a short distance away and use the gold spin bar and dashes to reach the platform in the corner of the room. Jump to the tunnel across from the platform and follow it to the end. Dodge the electric spikes along the way to eventually end up at an elevator. Take it up then exit the elevator to find yourself in another hallway. Follow it right dodging more electric spikes ending up at a door. Pass through the door and take a left heading through another door. Drop down the ledge on the right and head to the back of the room to find the secret encounter.
Moring Aeronautics
From the fast travel point, head right into the interior portion of the building to locate a set of stairs. Head up two flights of stairs then take a left. Follow the hallway to the end then jump across the way to the other side to find the secret encounter.
Mission 7: Mars Core
UAC – UAC Outpost LD
From the fast travel point, drop down onto the platform below and head to the walkway across from the portal near the edge of the platform. Drop down the hole under the walkway to locate the hallway leading further into the level. To the left of it will be a wall with a crack in it. Melee the wall, but don’t head through yet. Look down to the right to see a doorway. Jump to the doorway then climb up the stairs. At the top take a left to spot the secret encounter.
Meteor – Martian Chunks
From the fast travel point, turn around and head through the doorway with “MAINTENANCE 02” written above it. Head to the back of the room and melee the cracked vent to reveal another room with a portal in the floor. Jump into the portal to find the secret encounter.
Mission 9: Taras Nabad
Atrium Plaza
From the fast travel point, enter the doorway in front of you and take a right, dropping down the hole in the hallway. Follow the path forward to arrive in a big open courtyard with multiple Sentinel statues. Head down the stairs in front of you and take a left past the rectangular pool. Take a left after the Sentinel statue to head under the above walkway lit by blue lights. Turn left and melee the cracked wall to find the secret encounter.
Catacombs
From the fast travel point, work your way through the sewer section of the catacombs. Exit the tunnels to arrive in a large open room filled with lift pads and spin bars. Head to the far right corner of the room to find a set of stairs leading up to a room filled with barrels. In that room, there will be a cracked wall on the left side of the room near a stack of barrels. Melee the wall and jump down into the cave to find the secret encounter.
Mission 10: Nekravol – Part I
The Mill
From the fast travel point, take a right and follow the path to the end then head left past the green diamond and under a spiked ceiling. After the spiked ceiling, take a right up a flight of stairs to find a room. Once in the room, take the right doorway up a flight of stairs. Facing the Sentinel, take the left path to the end of the ledge. Under the ledge there will be a small opening that you will need to head through. The easiest way to reach this is to walk off with your back towards the gap. Once you walk off, you’ll need to dash onto the ledge below to reach the secret encounter.
Passage of the Damned
From the fast travel point, head right climbing a flight of bloody stairs. You will then need to head through the area with the spinning fire column via the climbable walls then jump on top of the moving metal cages on the left side of the room to reach the room above. The secret encounter will be located up the stairs on the left side.
Mission 11: Nekravol – Part II
Corpse Conveyor
From the fast travel point, head down the bridge and about halfway across look to the left underneath the bridge to find a blue lift pad. Jump off the bridge and use dash to reach the lift pad to shoot towards a platform with a spinning cylinder shooting fire. Work your way around the platform to locate another platform with a climbable wall. Jump to the climbable wall to reach another platform. Follow the platform around to locate a climbable wall underneath a ledge. Jump to the wall and climb to the top to find the secret encounter.
Soul Extraction
From the fast travel point, head to the back left of the room to find a hallway leading deeper into the level. Take the first left in the hallway. At the end of the hallway, there will be a cracked wall. Melee the wall to reveal the secret encounter.
Mission 13: Urdak
Guardians of Sanctuary
From the fast travel point, jump down to the area below then head through the room. Use the metal cube in this room to jump through the oval shaped hole and follow it to a hidden room on the other side that contains the secret encounter.
Xanthous Harmonizer
From the fast travel point, turn around and head through the door on the left side of the building. This will bring you to a ledge overlooking the giant beam. Look immediately to the right side on the outside of the building just before the first gold spin bar to find a cracked wall. Dash through the wall to find the hidden area containing the secret encounter.
This site uses cookies. By continuing to use this website, you are giving consent to cookies being used. For more information on cookies, view our Privacy Policy.OkPrivacy Policy