![]()
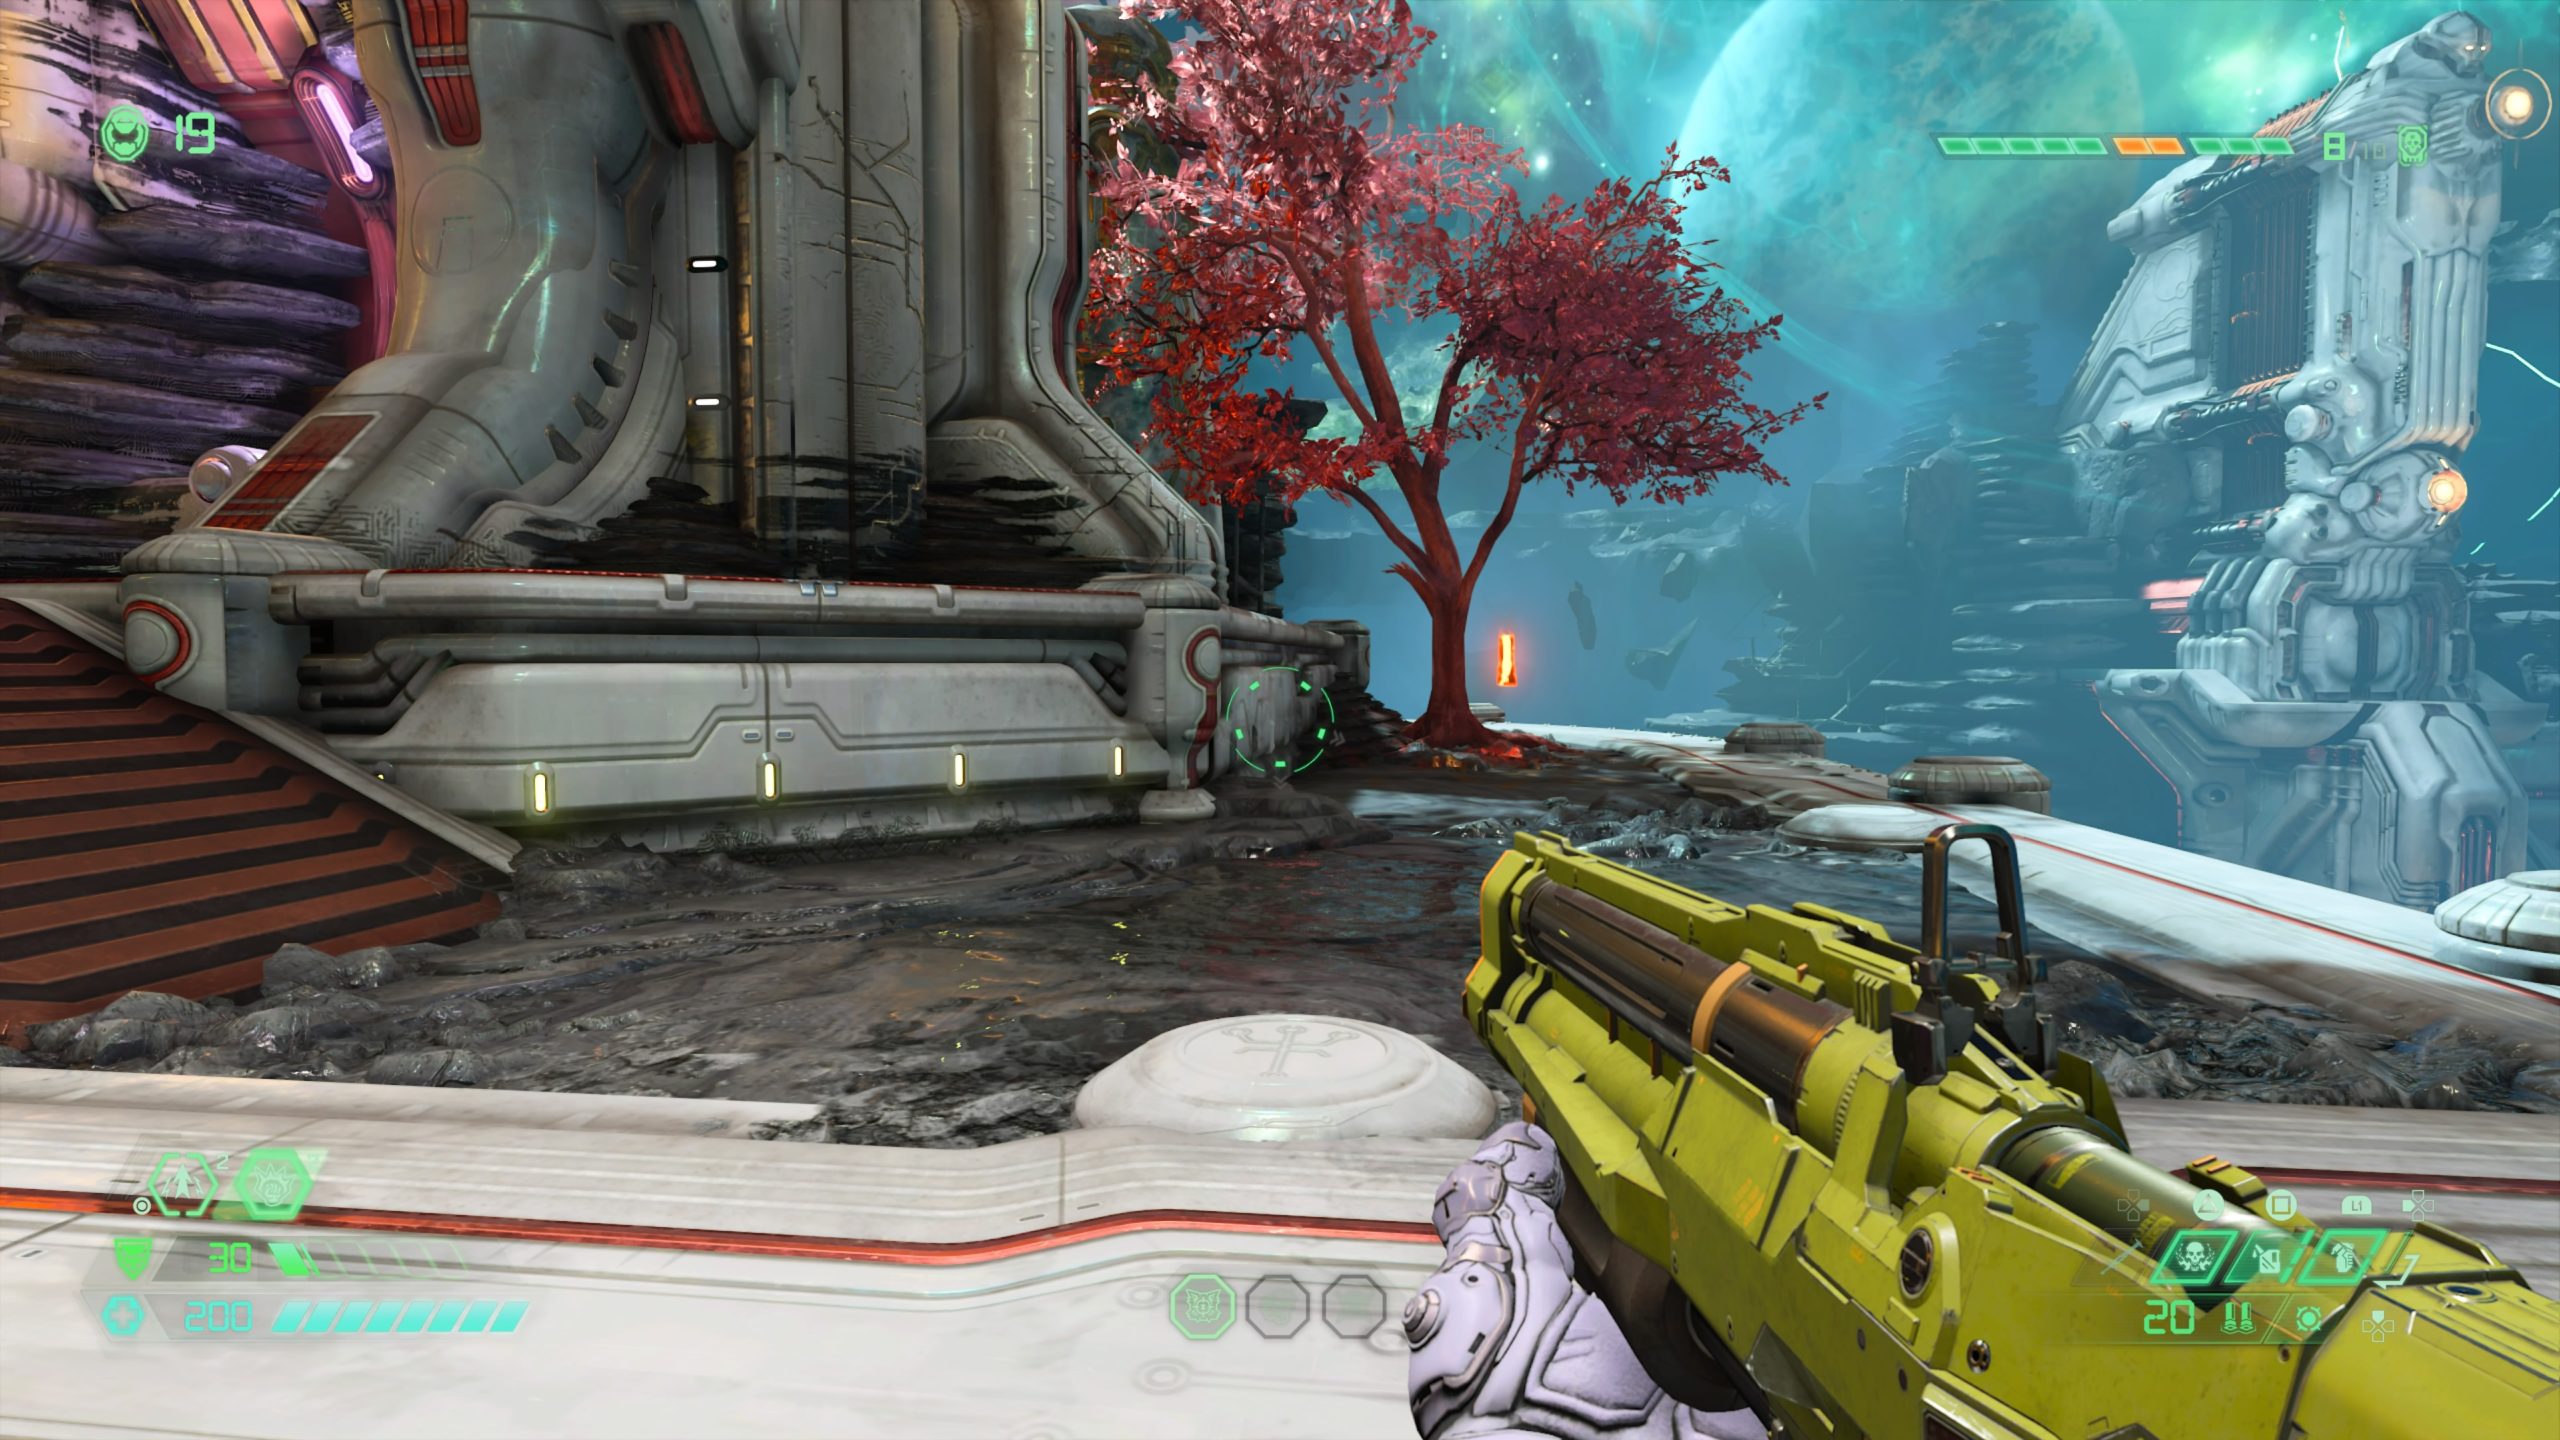
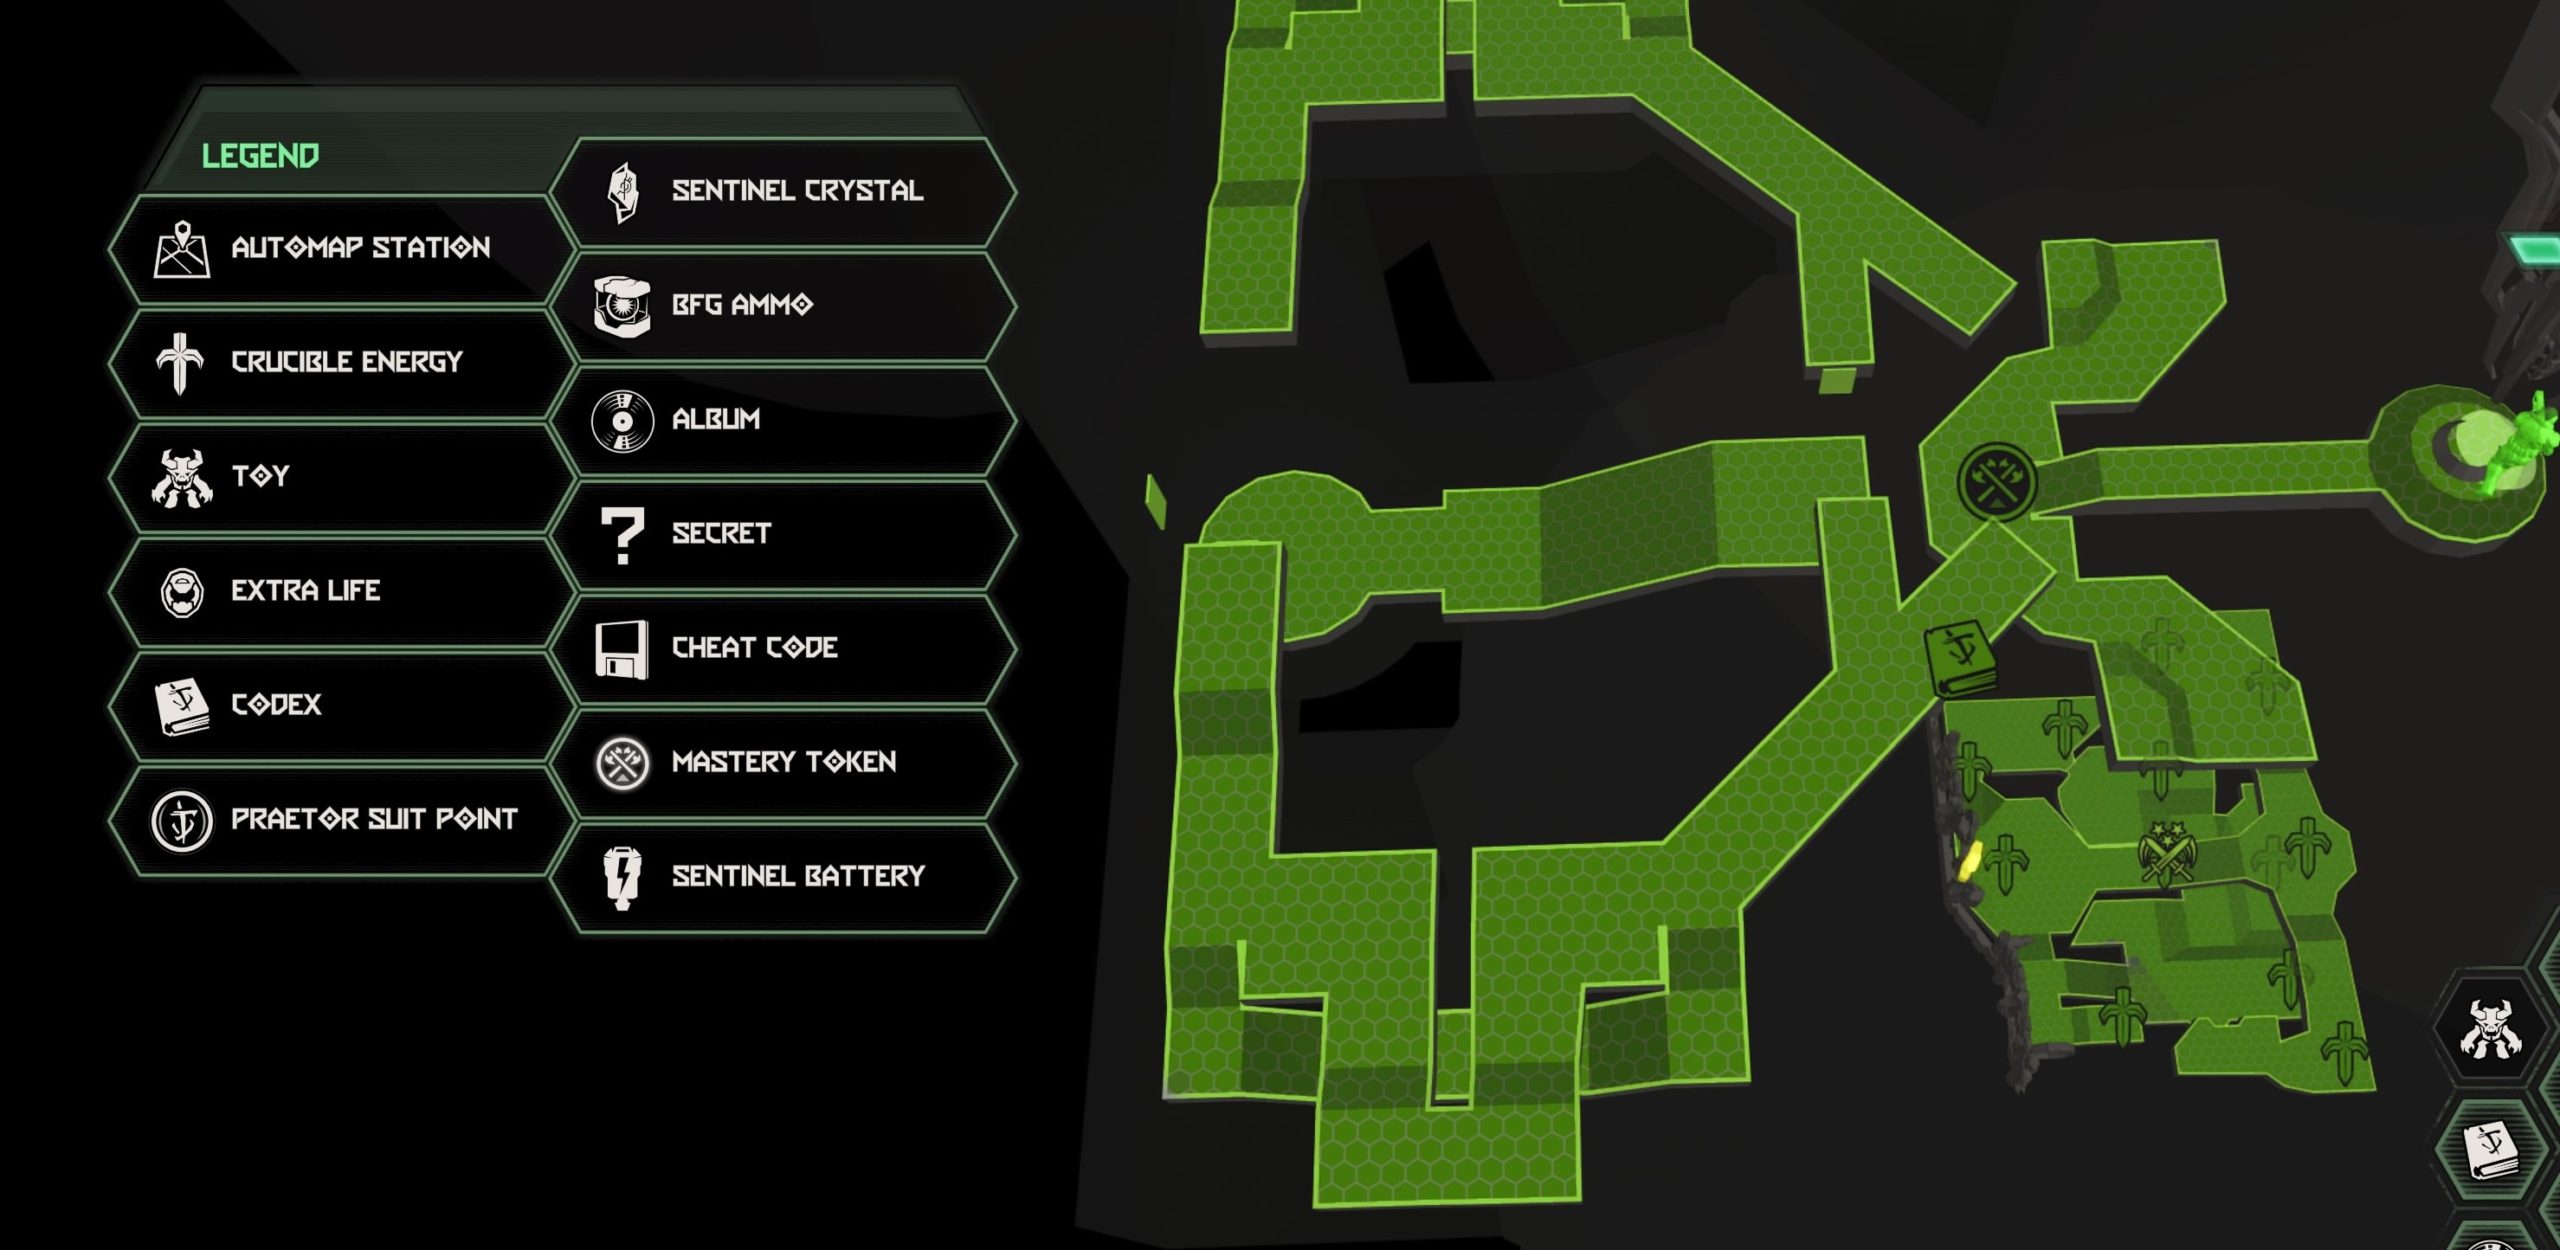
Viris West
Codex: Story of Earth – Final Sin
From the fast travel point, turn around and head through the building. The codex can be found in the elevator lobby next to a UAC Spokesperson hologram.

![]()
Codex: Story of Earth – Final Sin
From the fast travel point, turn around and head through the building. The codex can be found in the elevator lobby next to a UAC Spokesperson hologram.
![]()
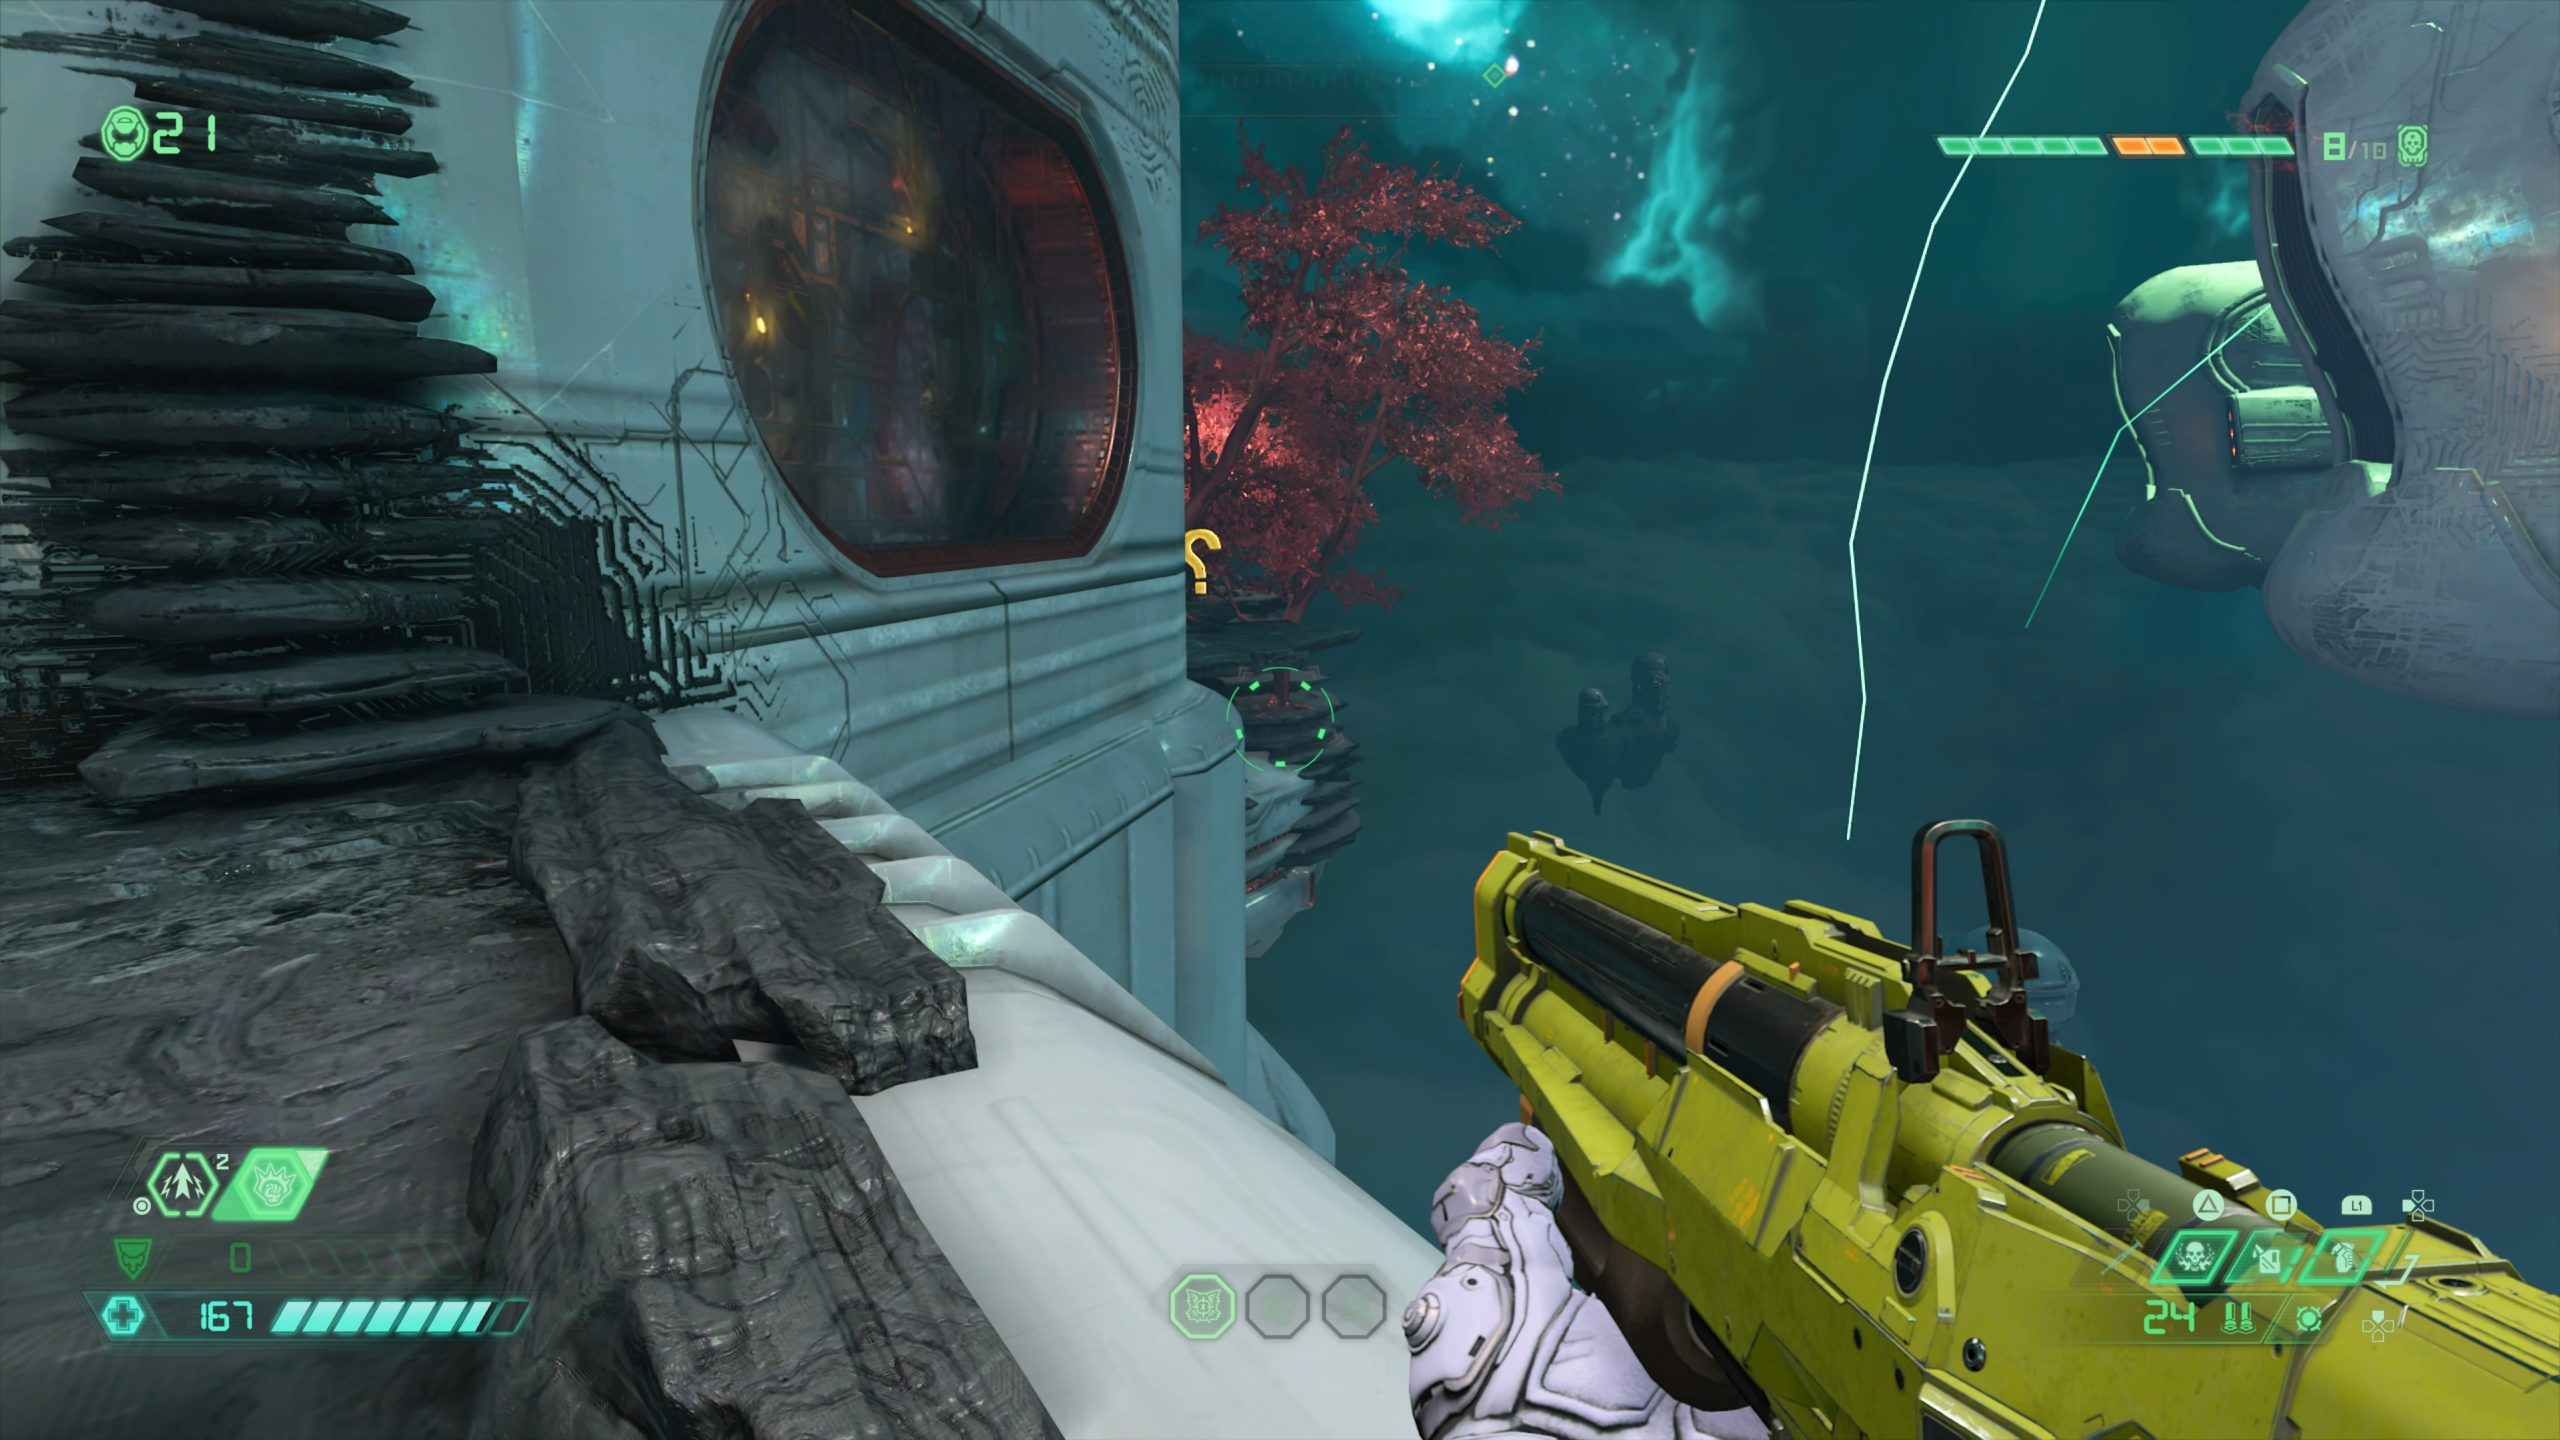
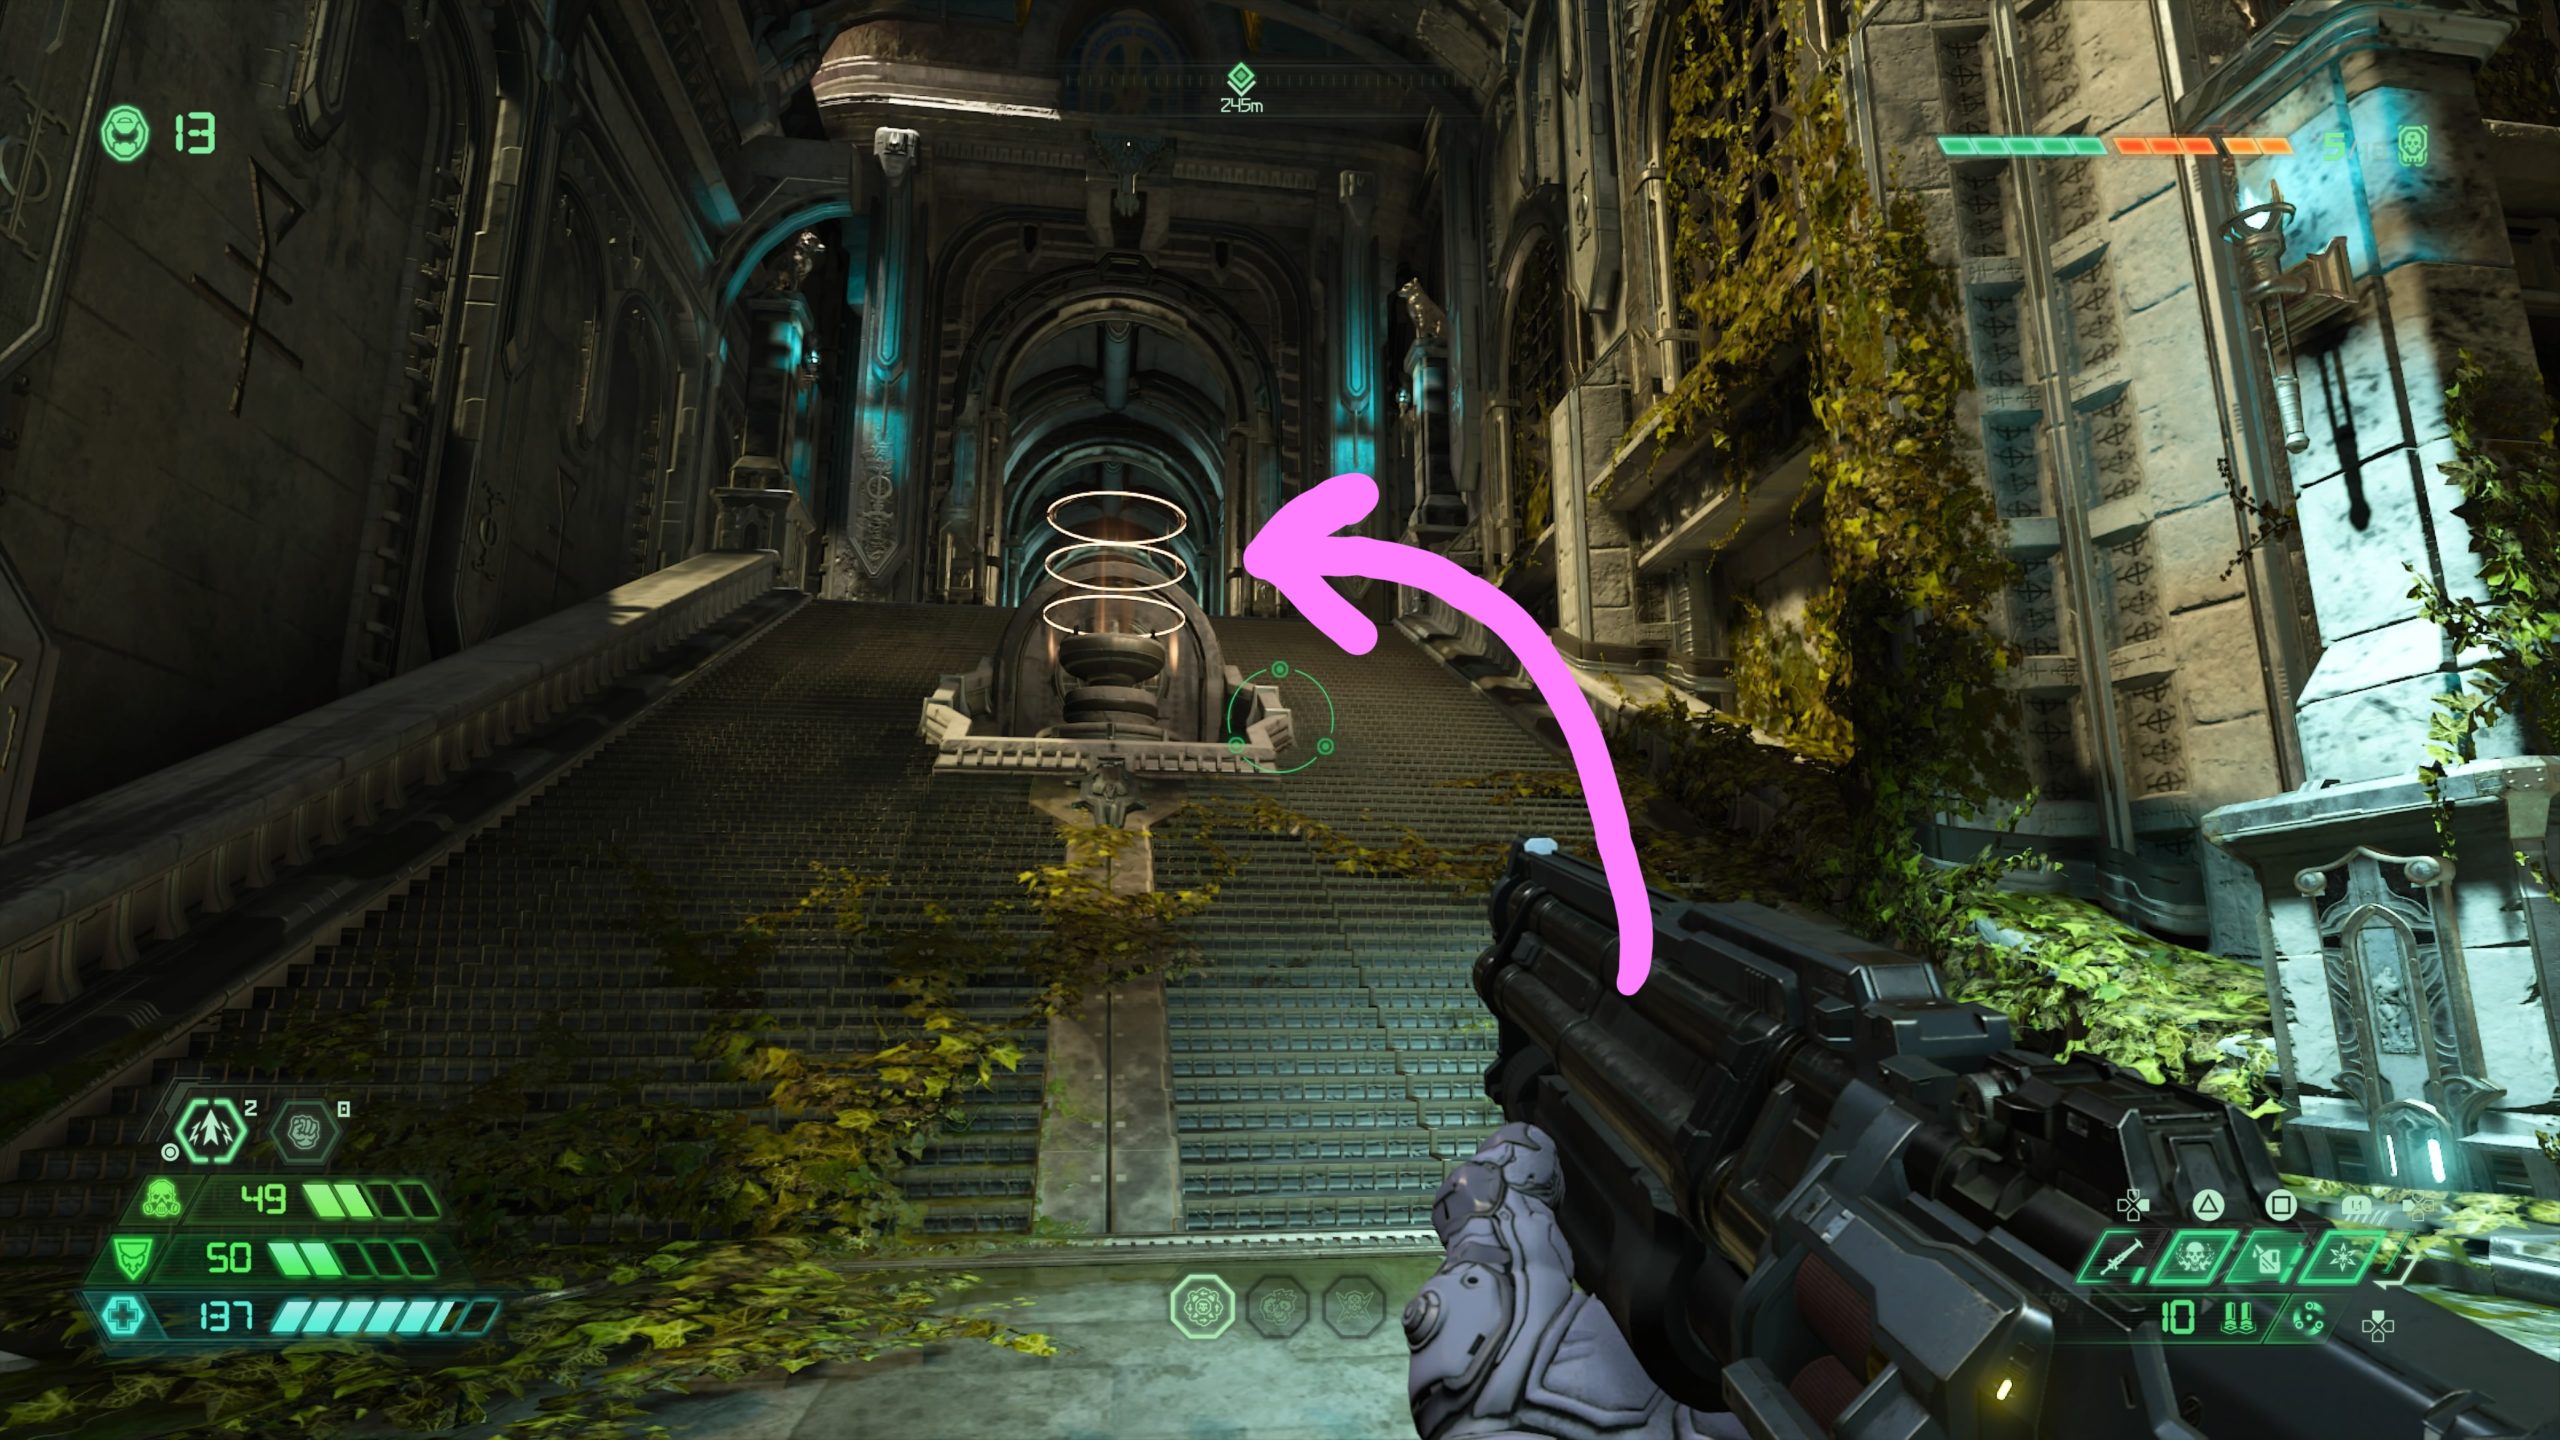
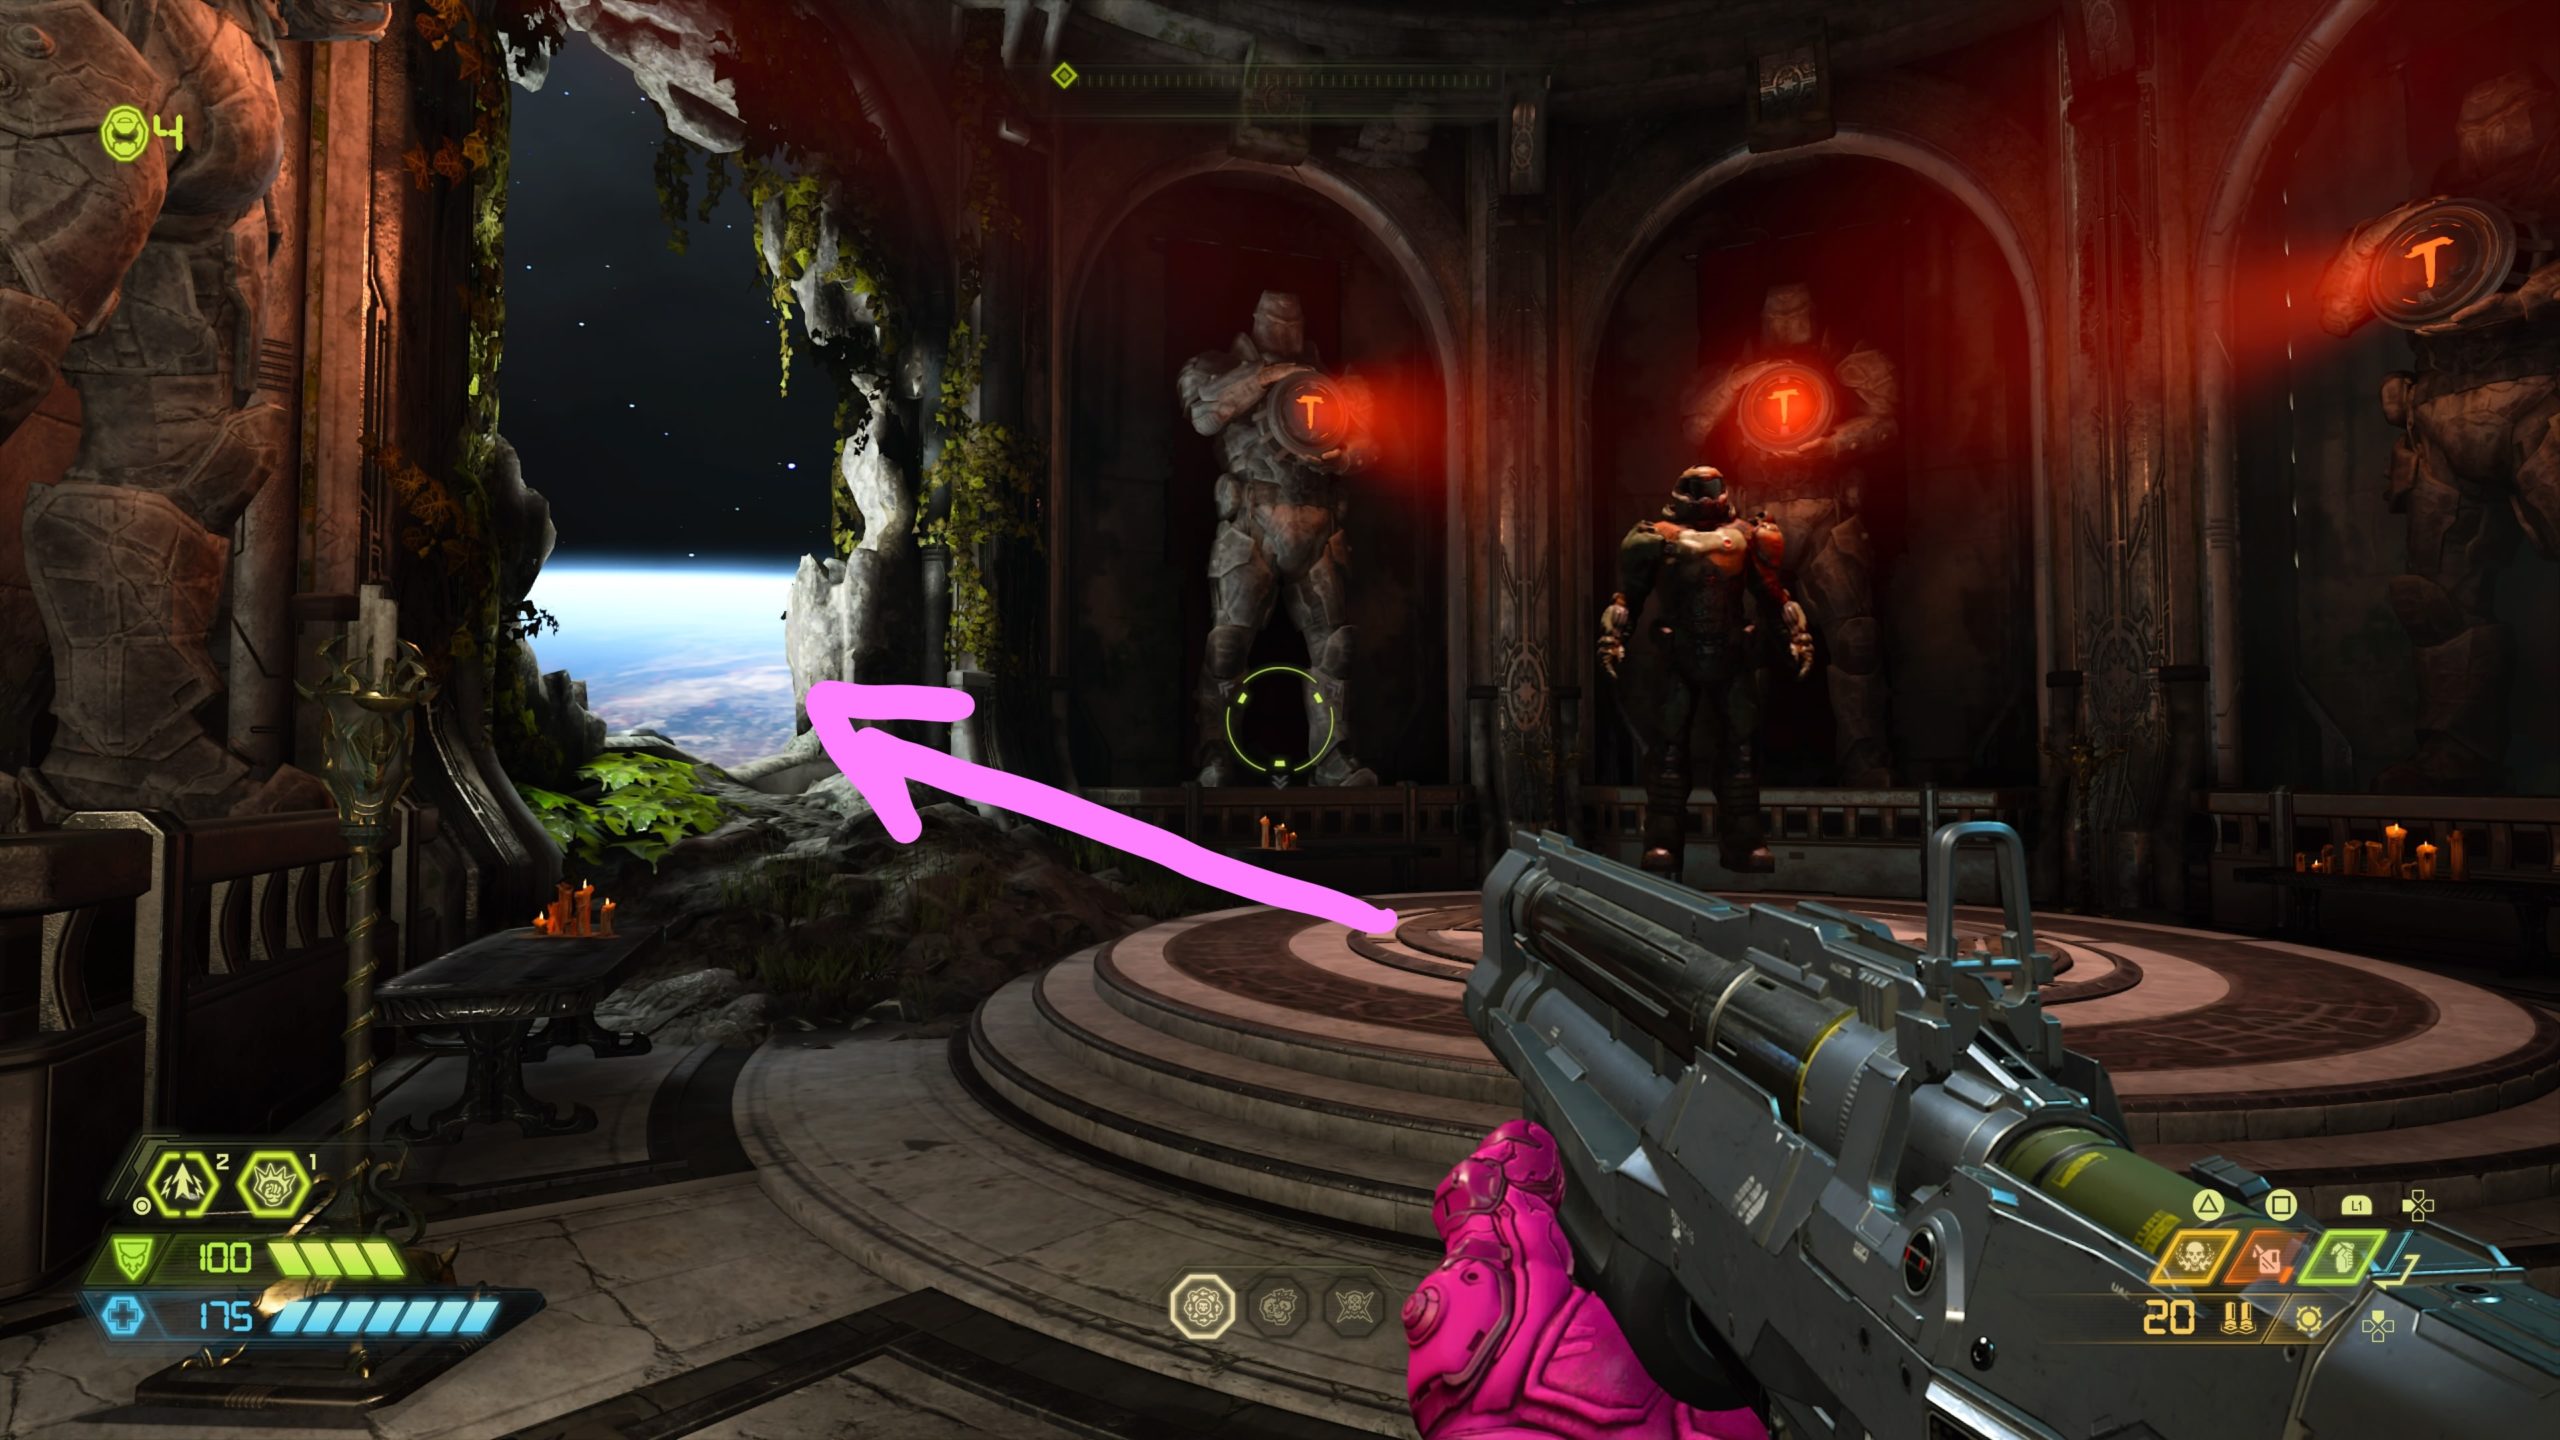
Codex: Story of the Maykrs – Urdak
From the fast travel point, head down the stairs and to the left to find the codex.
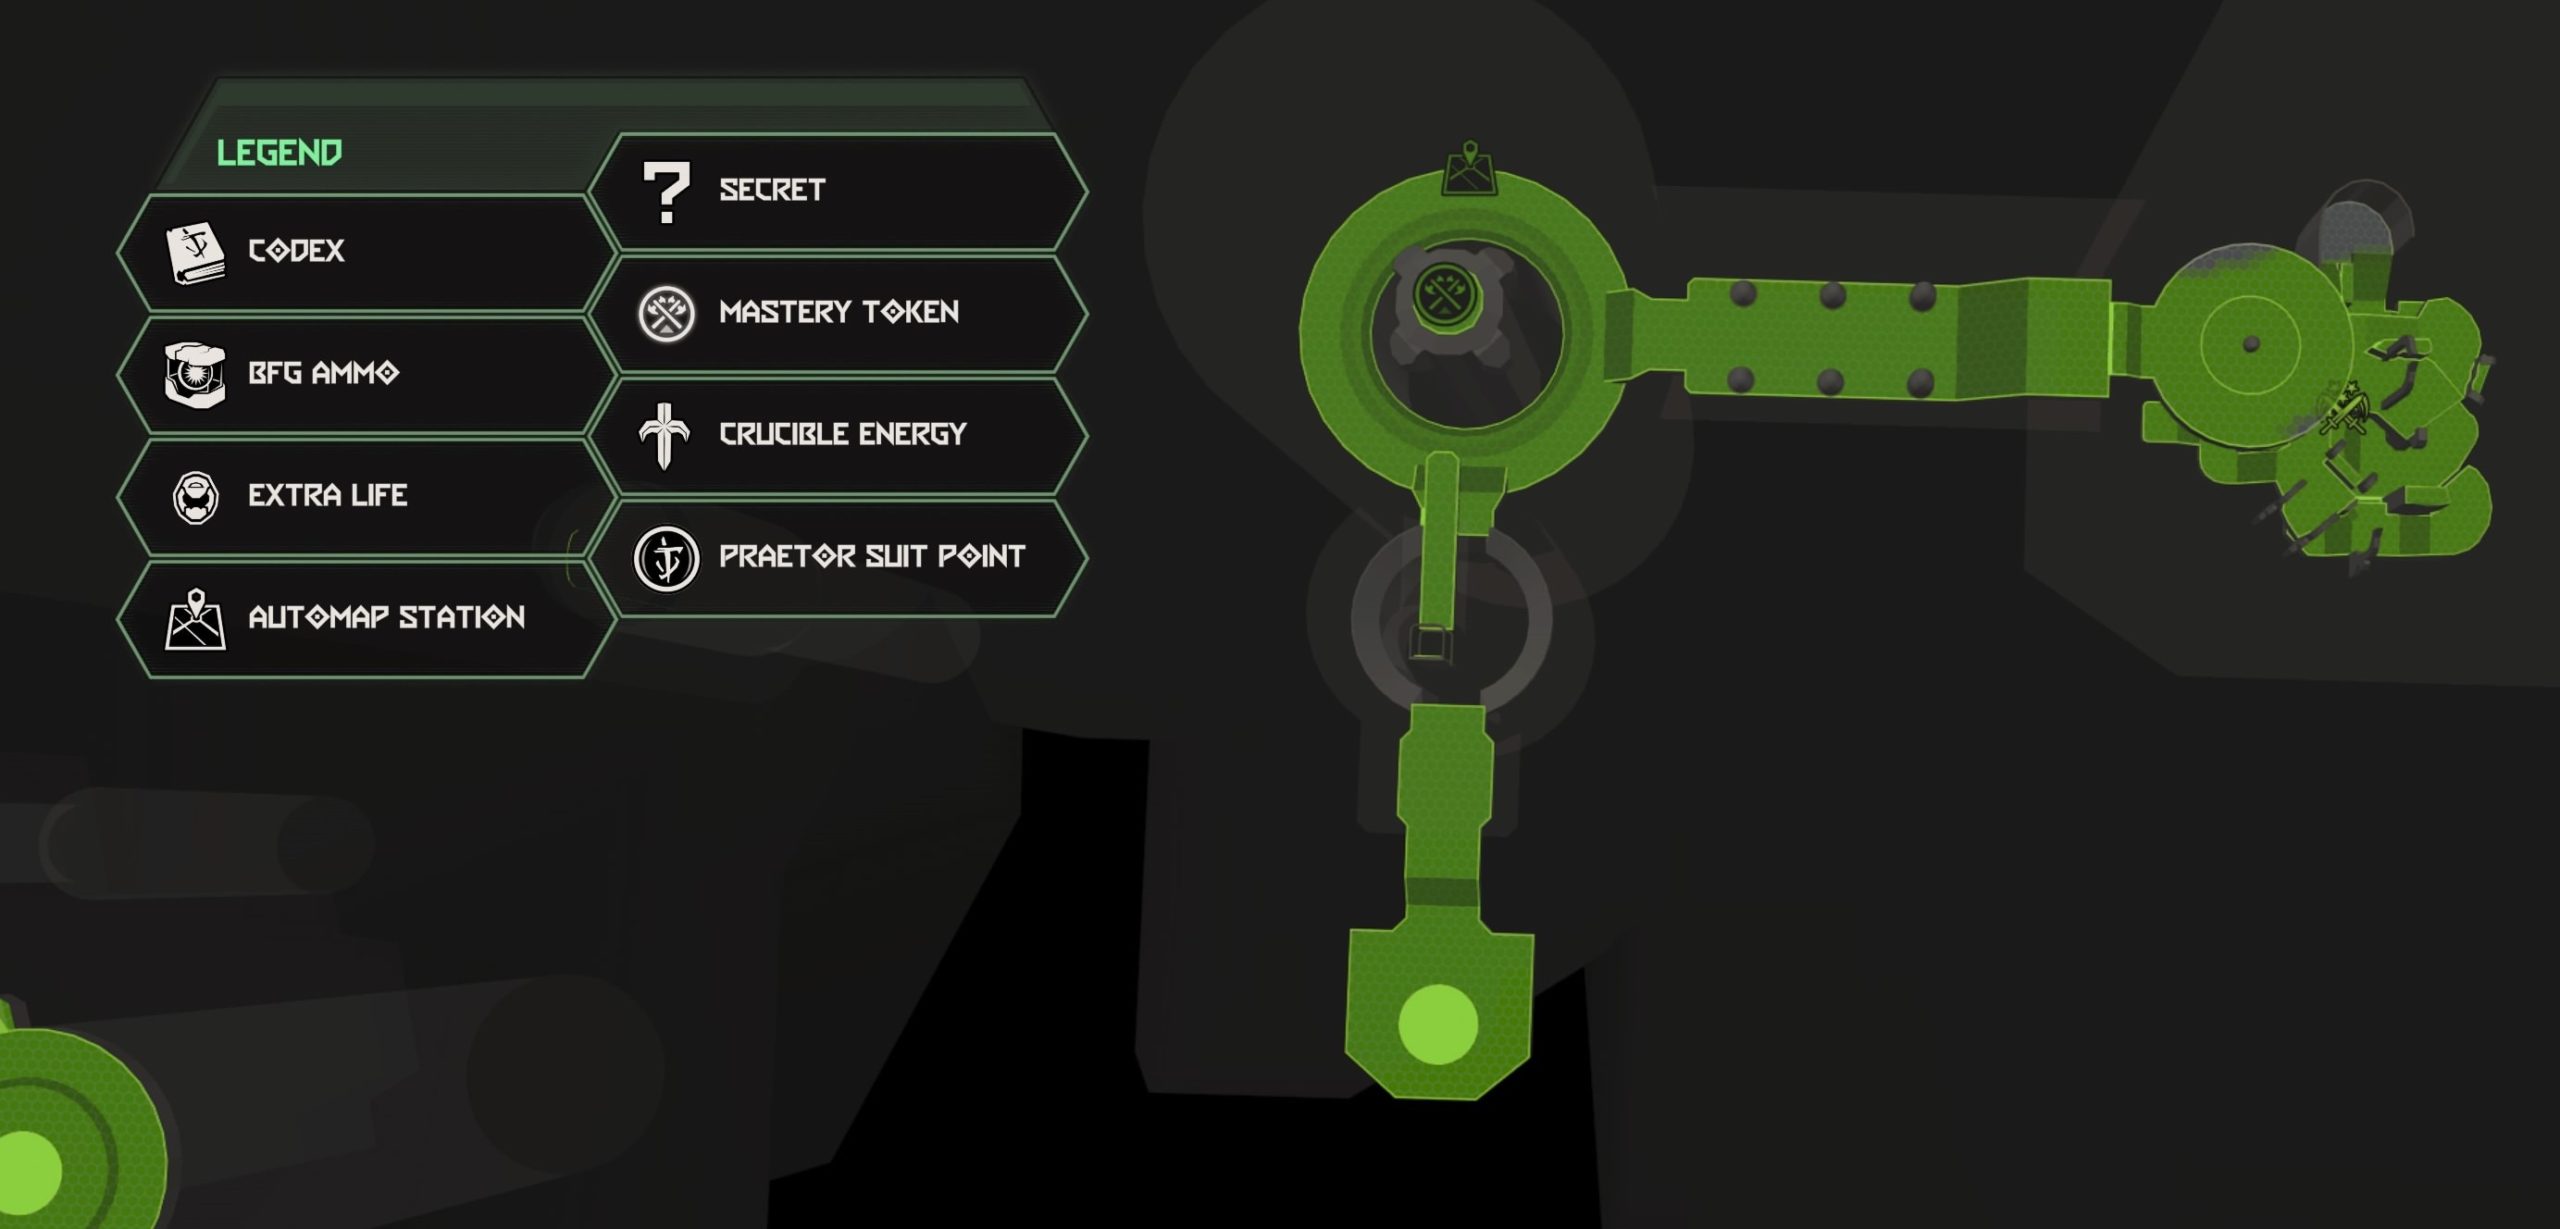
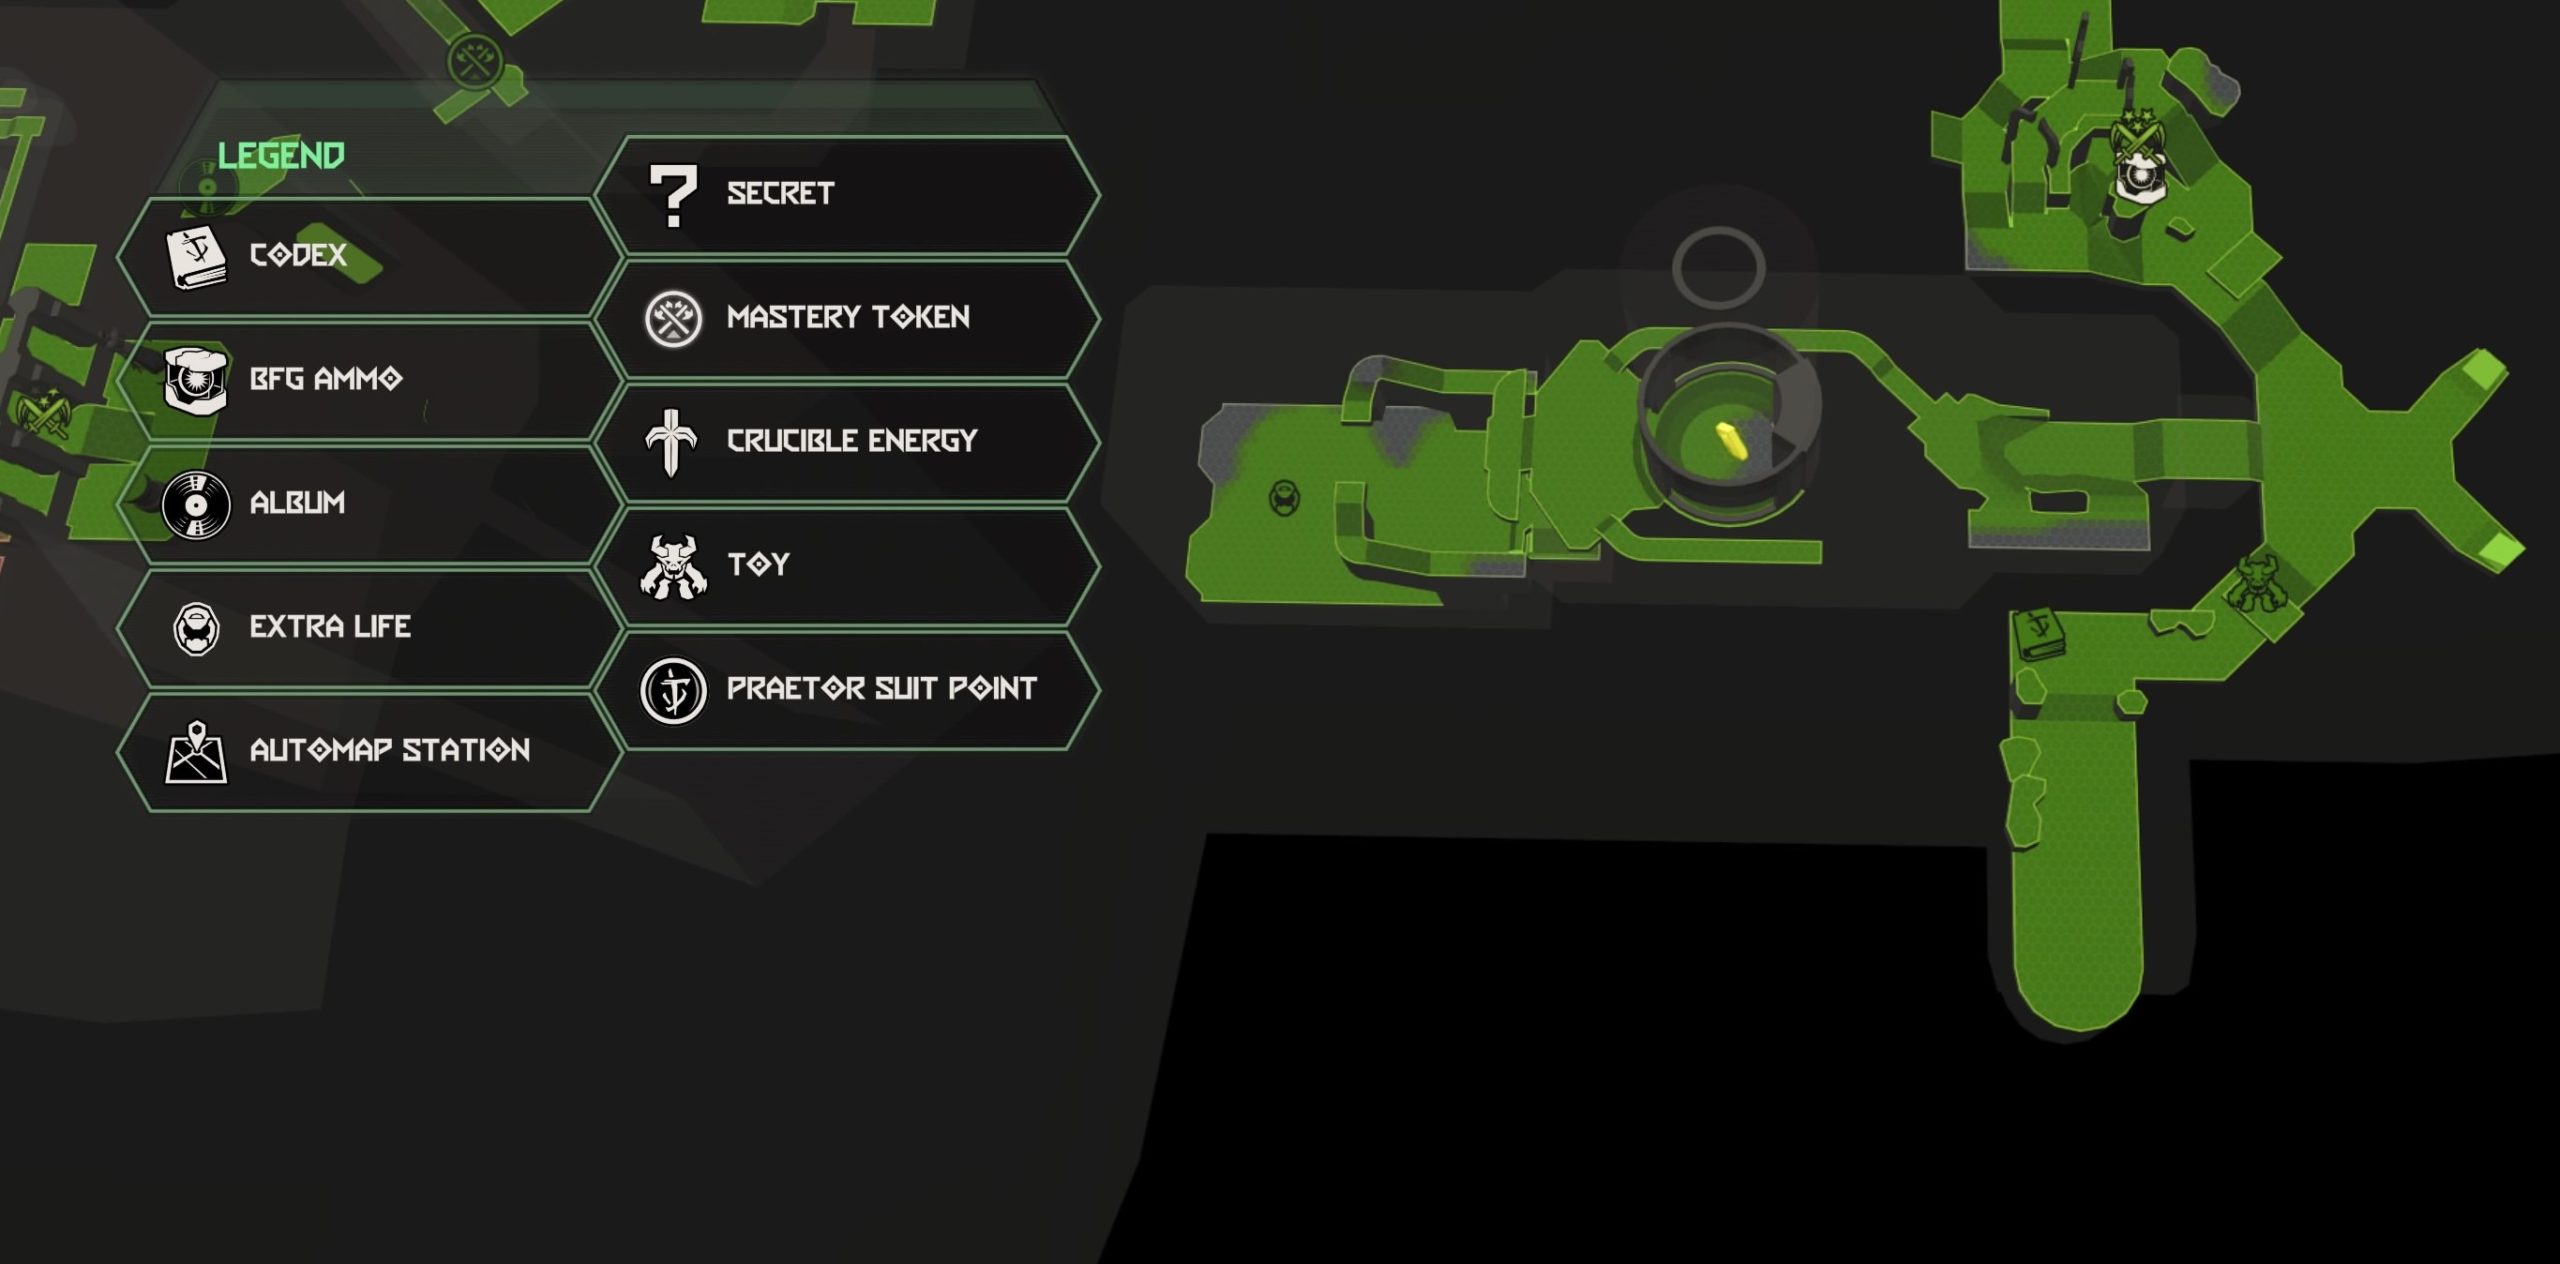
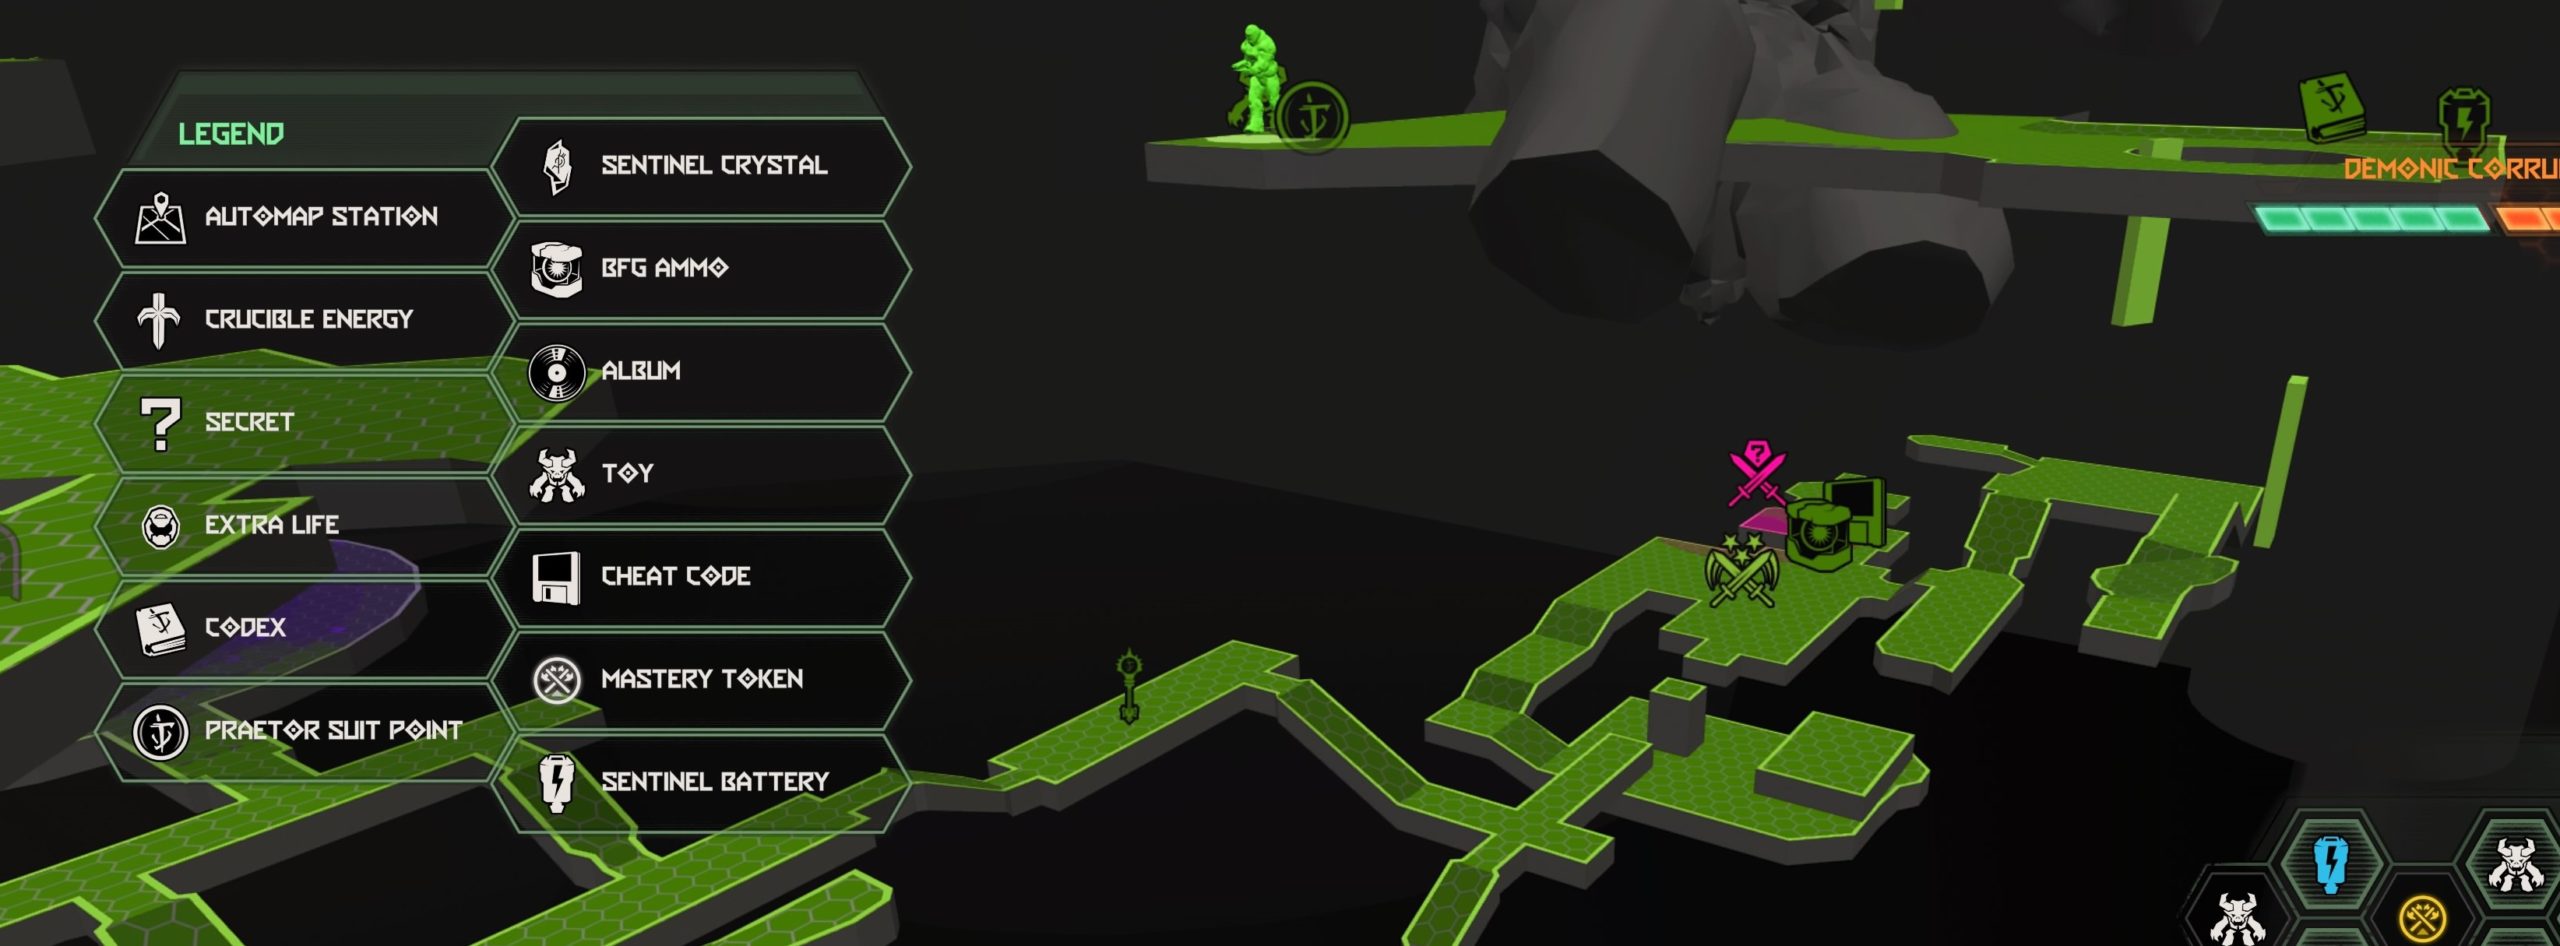
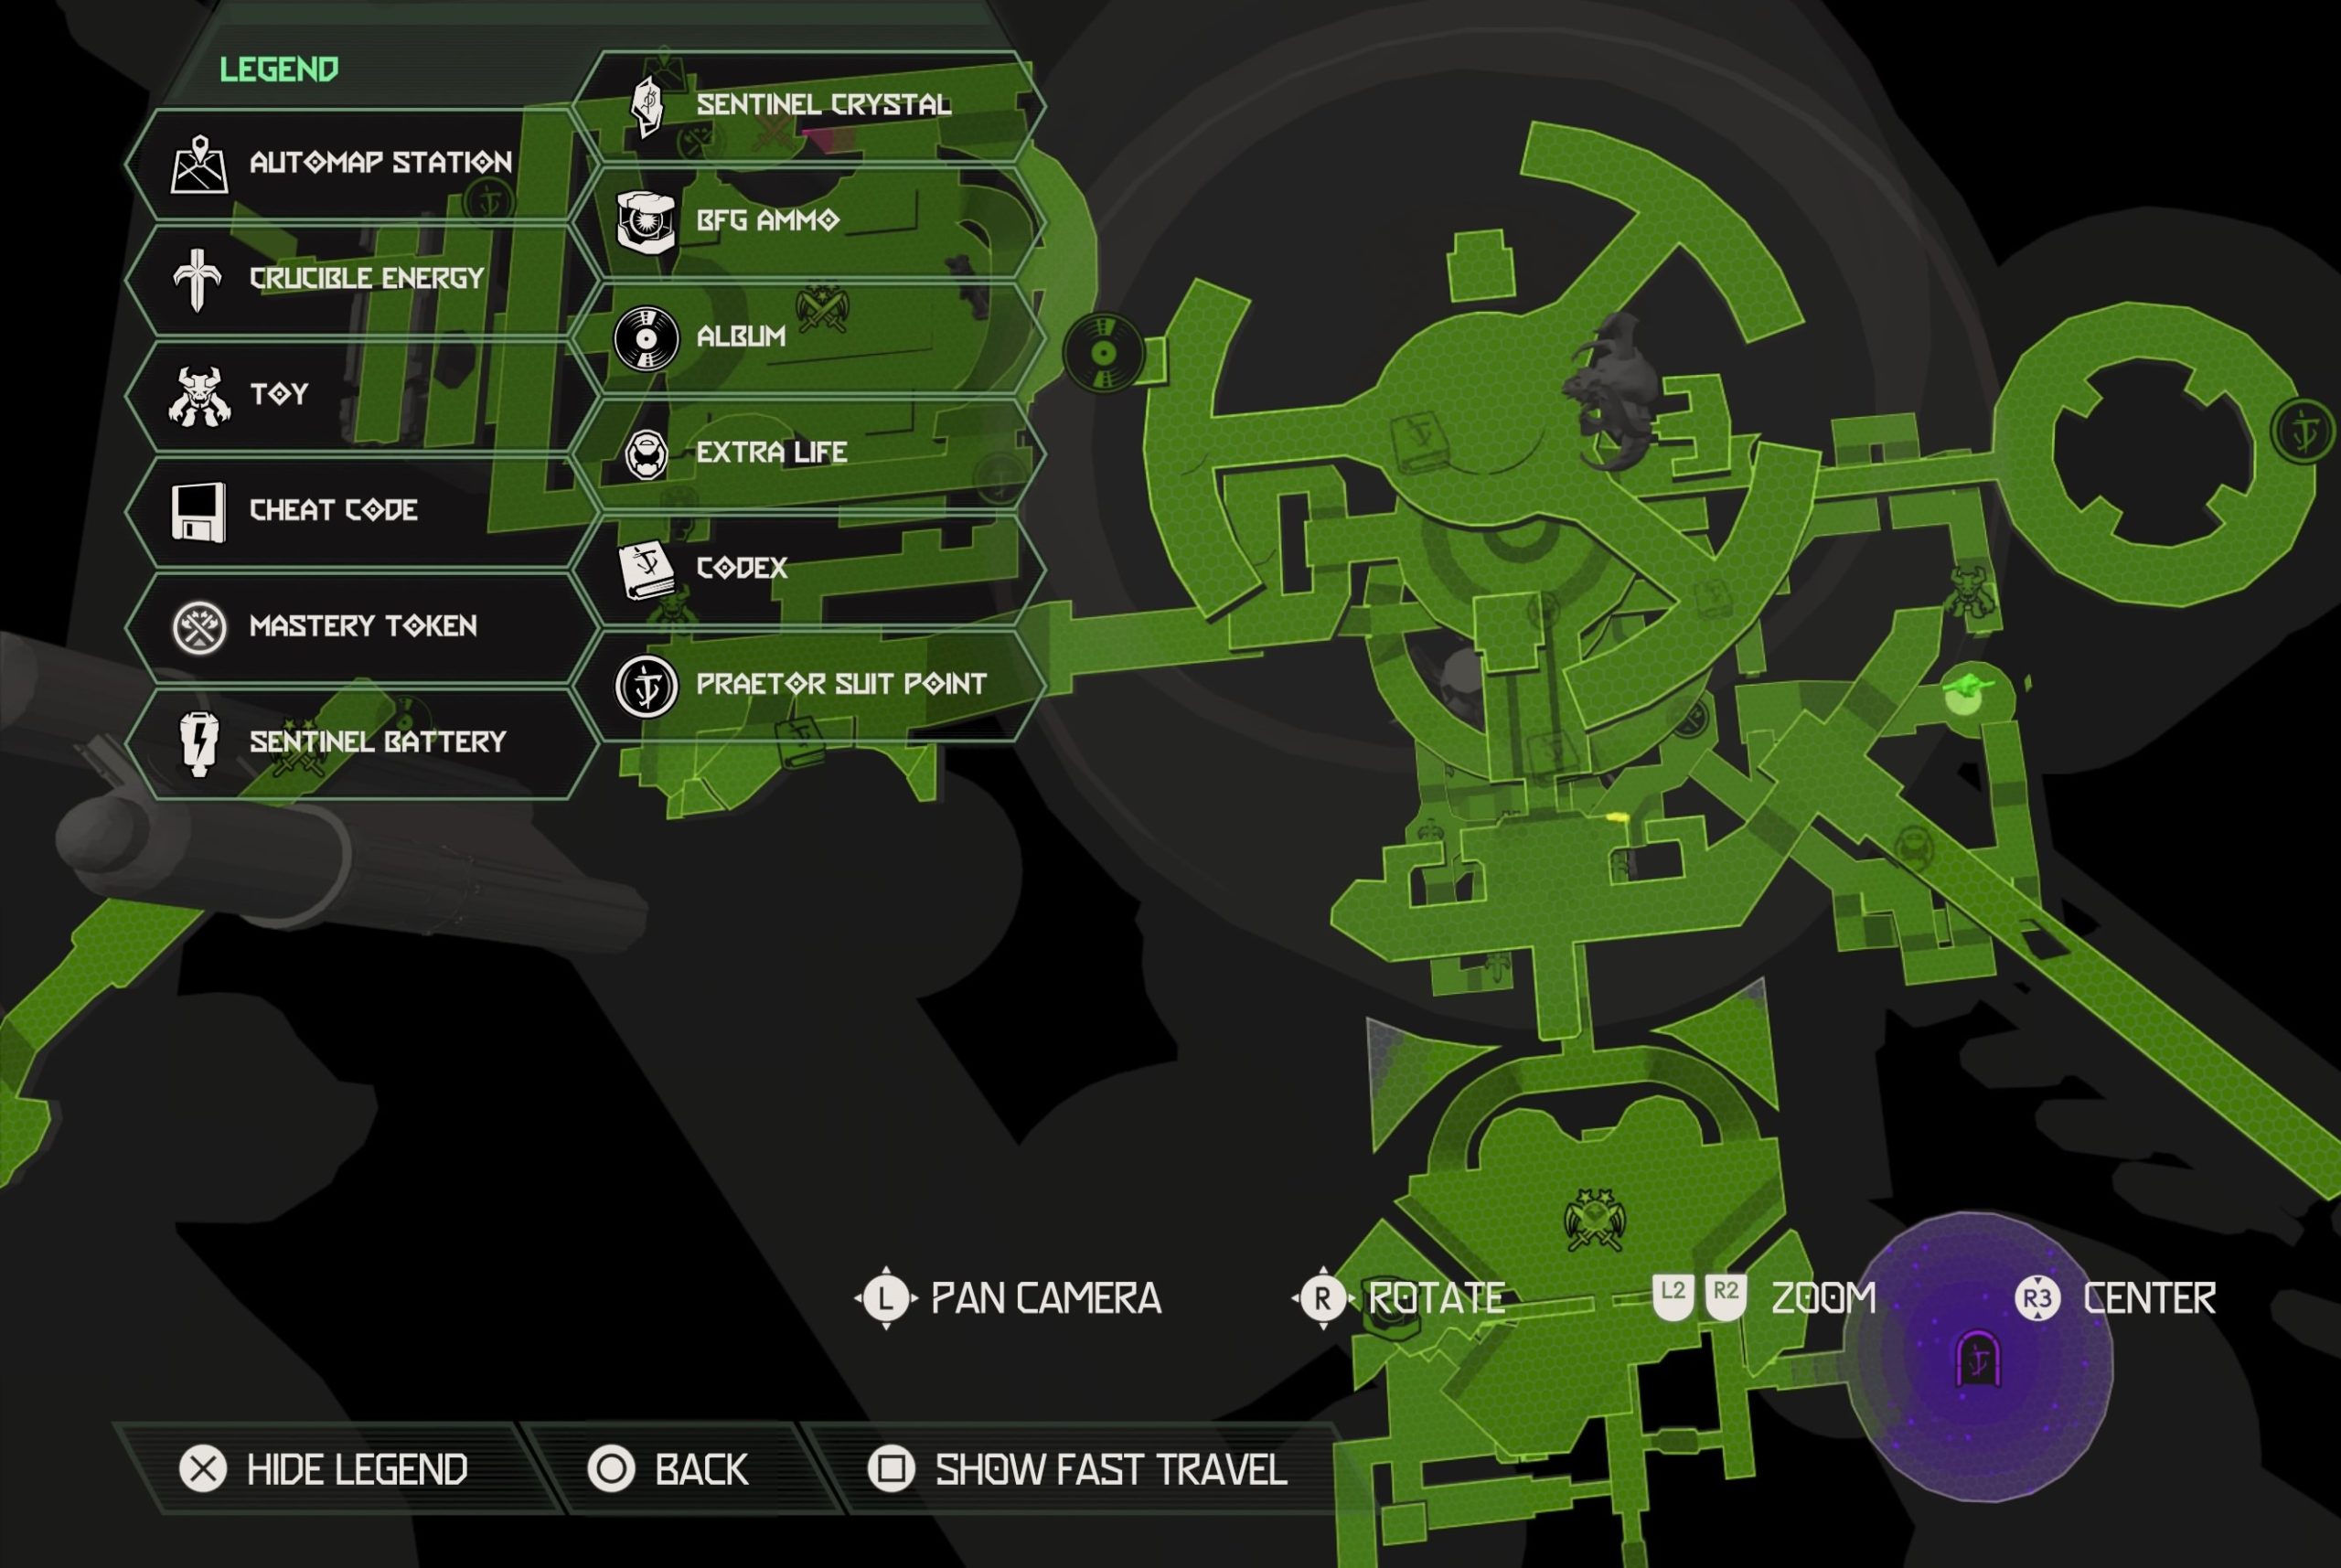
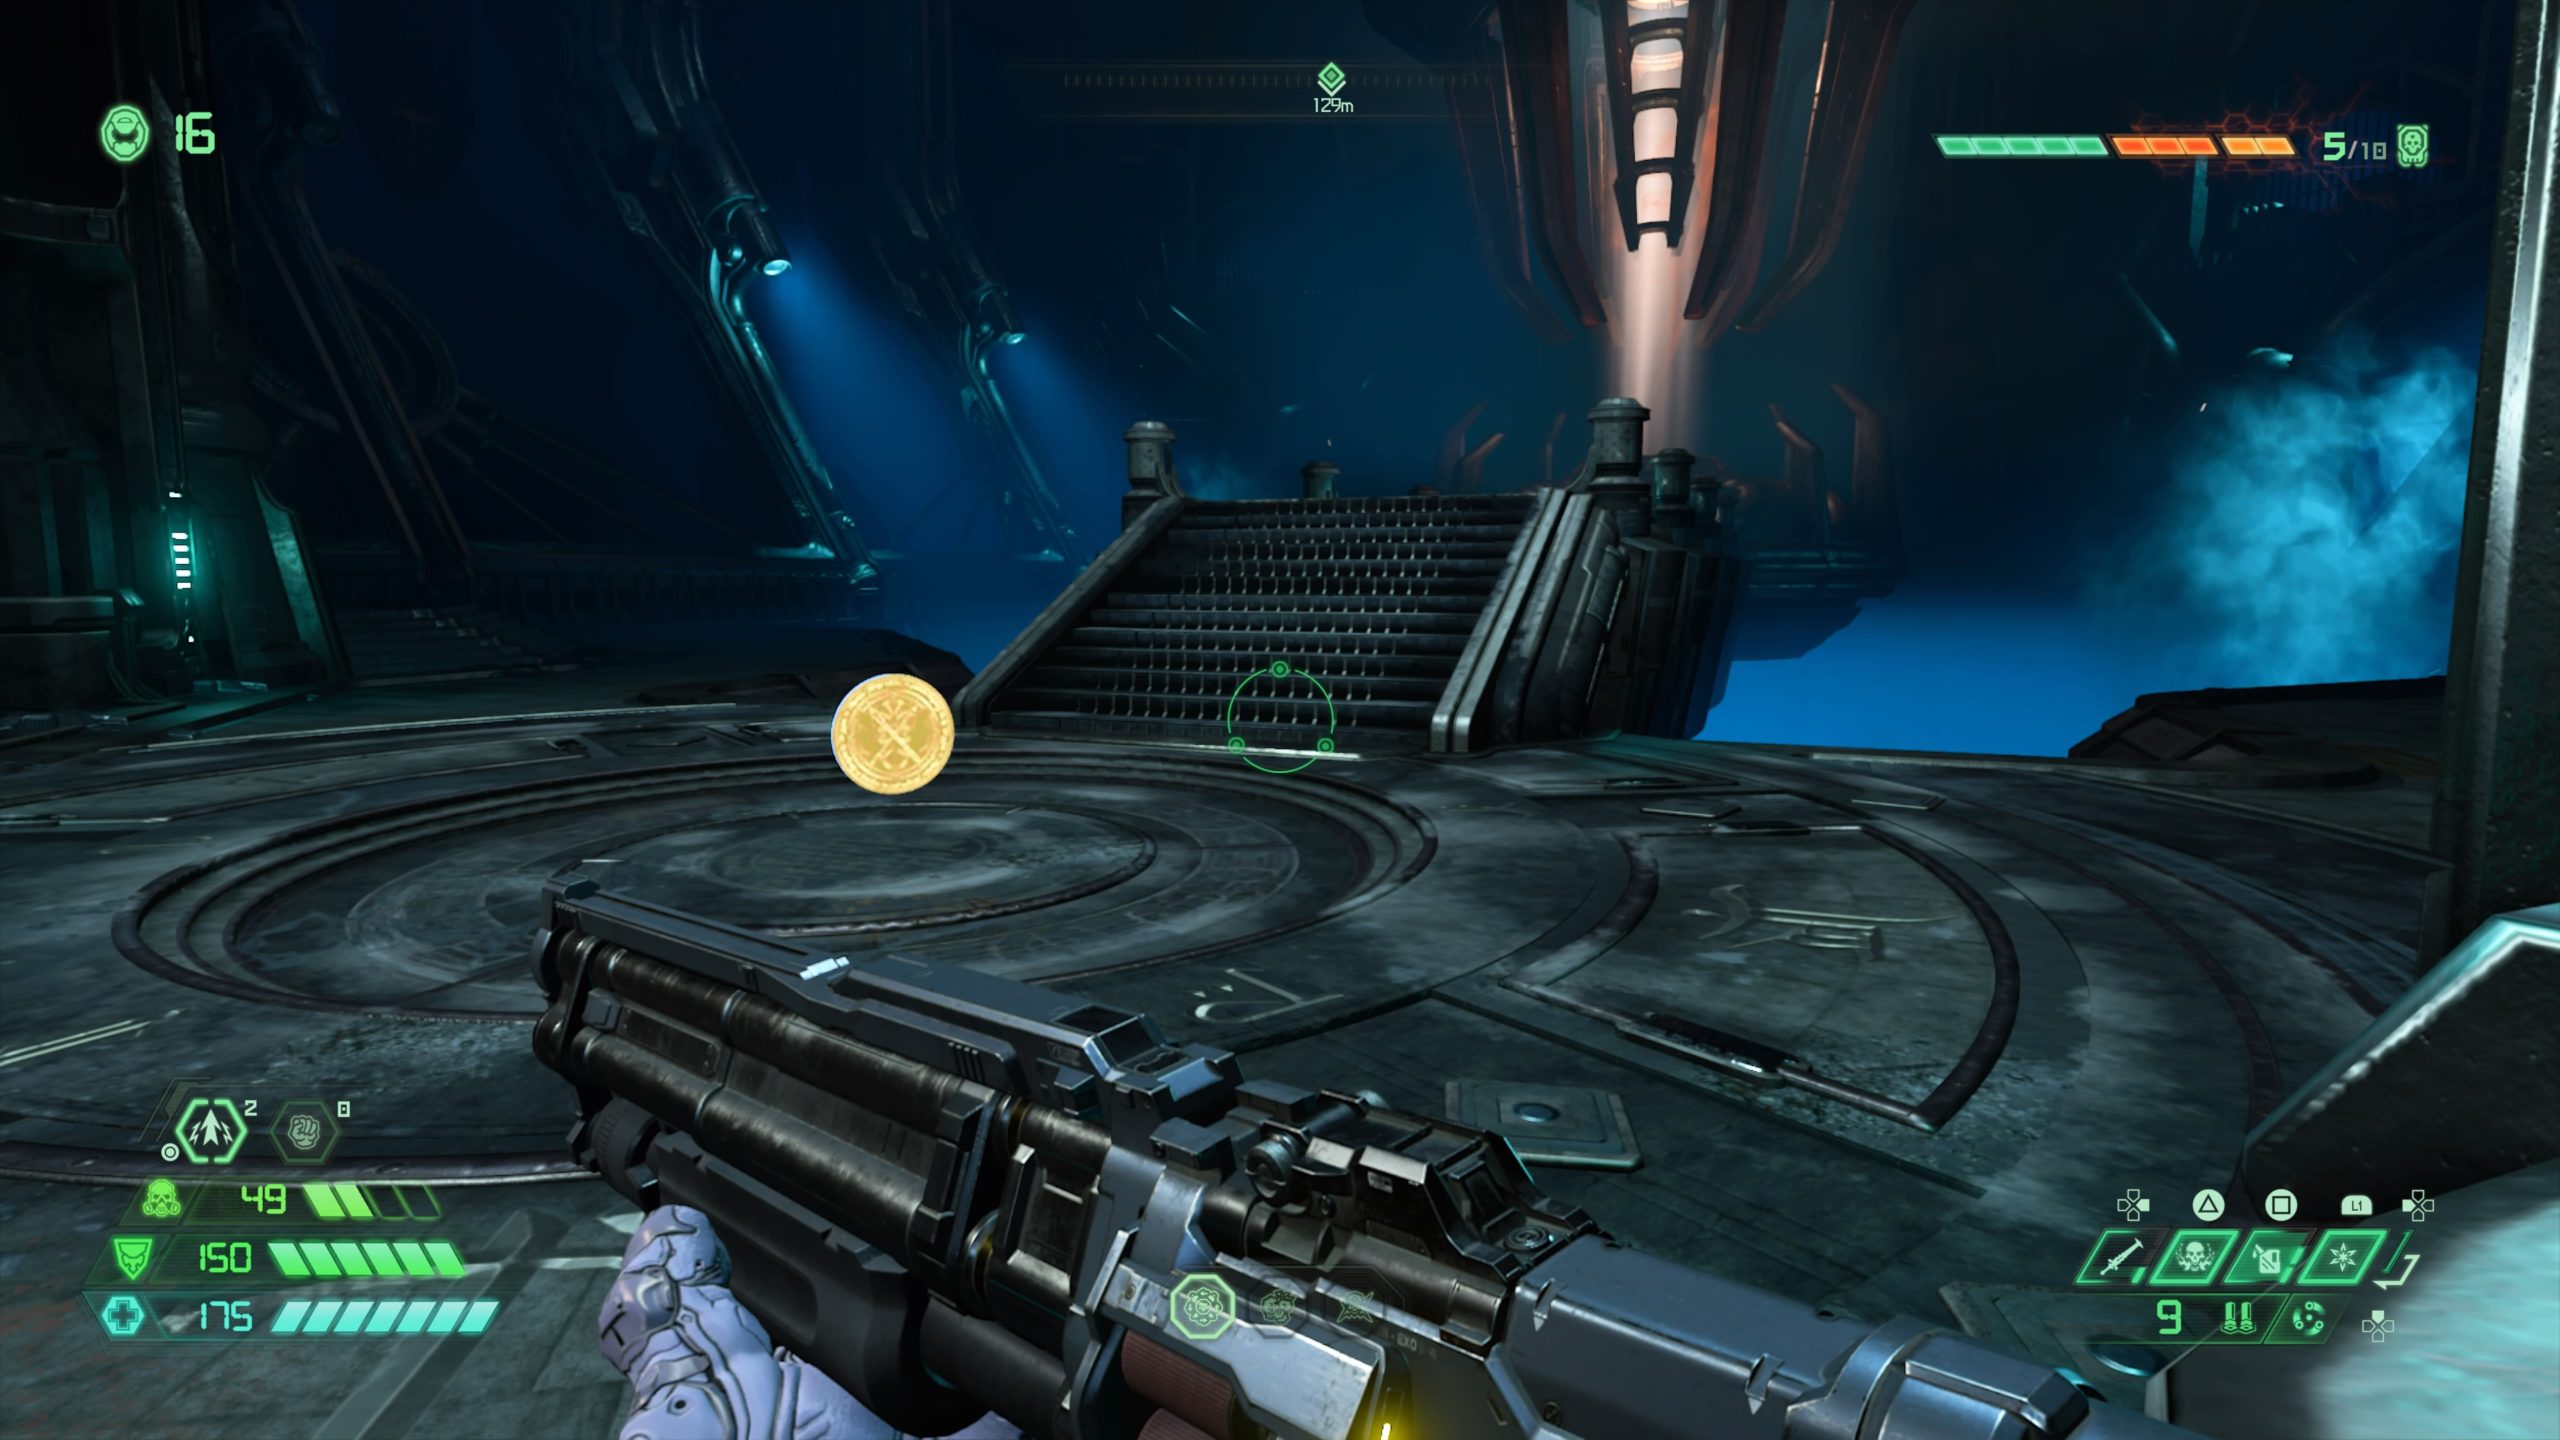
Mastery Token

From the fast travel point, enter the building and jump across the gap to the other side. Turn around to face the way you came and shoot the green diamond on the ceiling to lower a platform. Jump to the platform and ride it up to the top then climb up the climbable wall to reach a tunnel. Head through the tunnel to reach the platform in the center of the room containing the token.
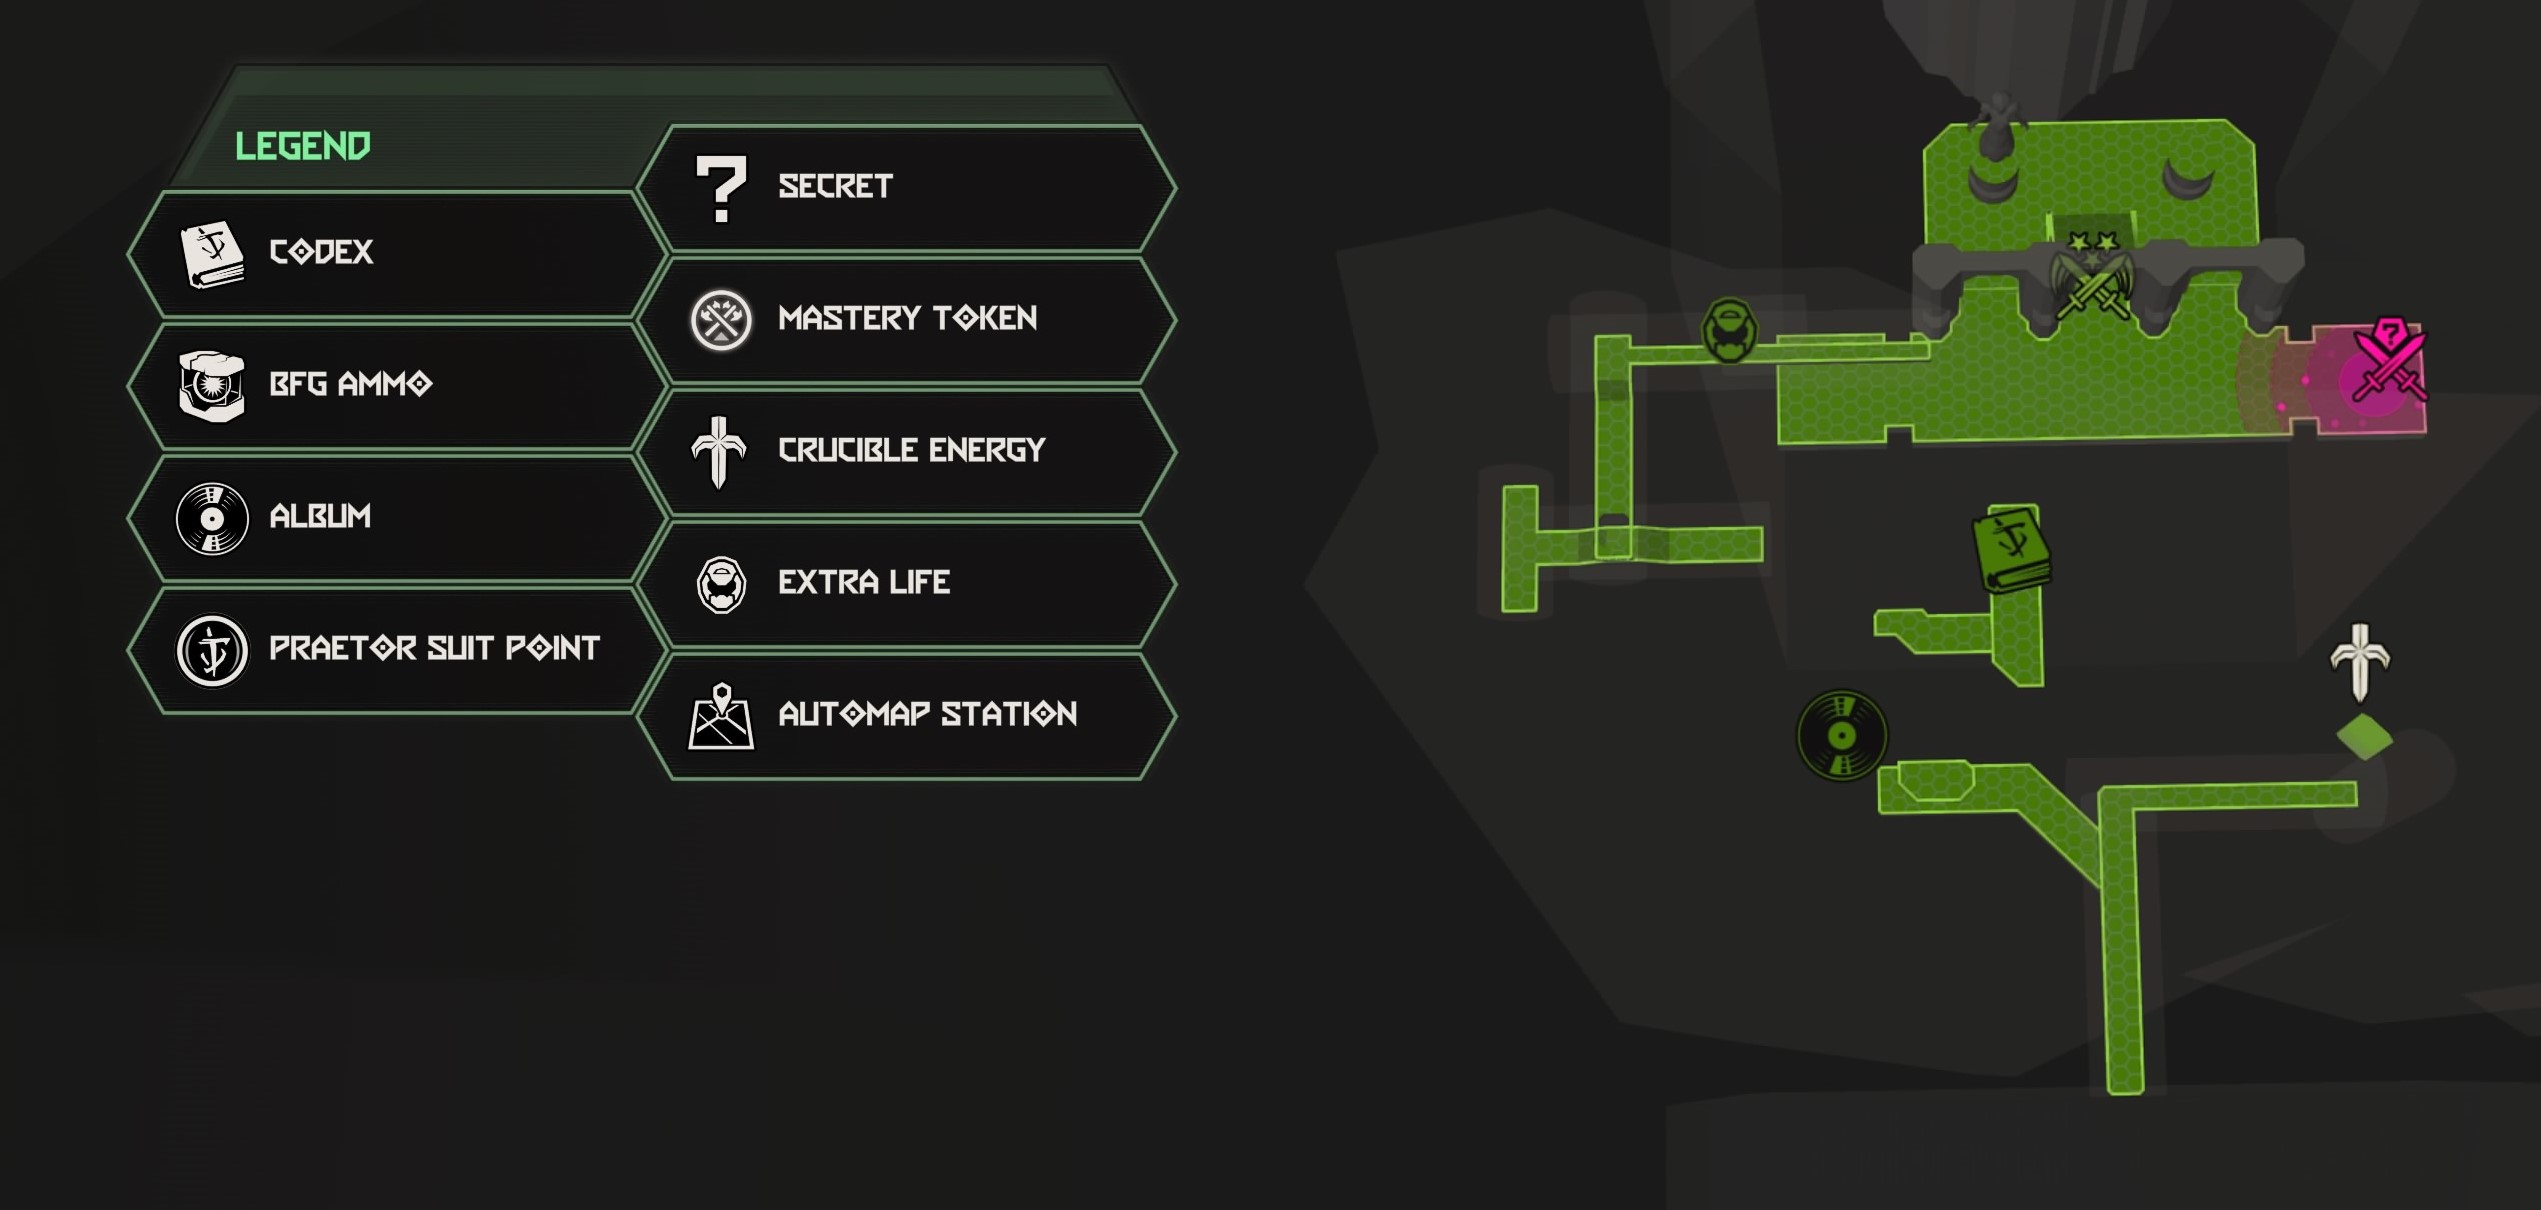
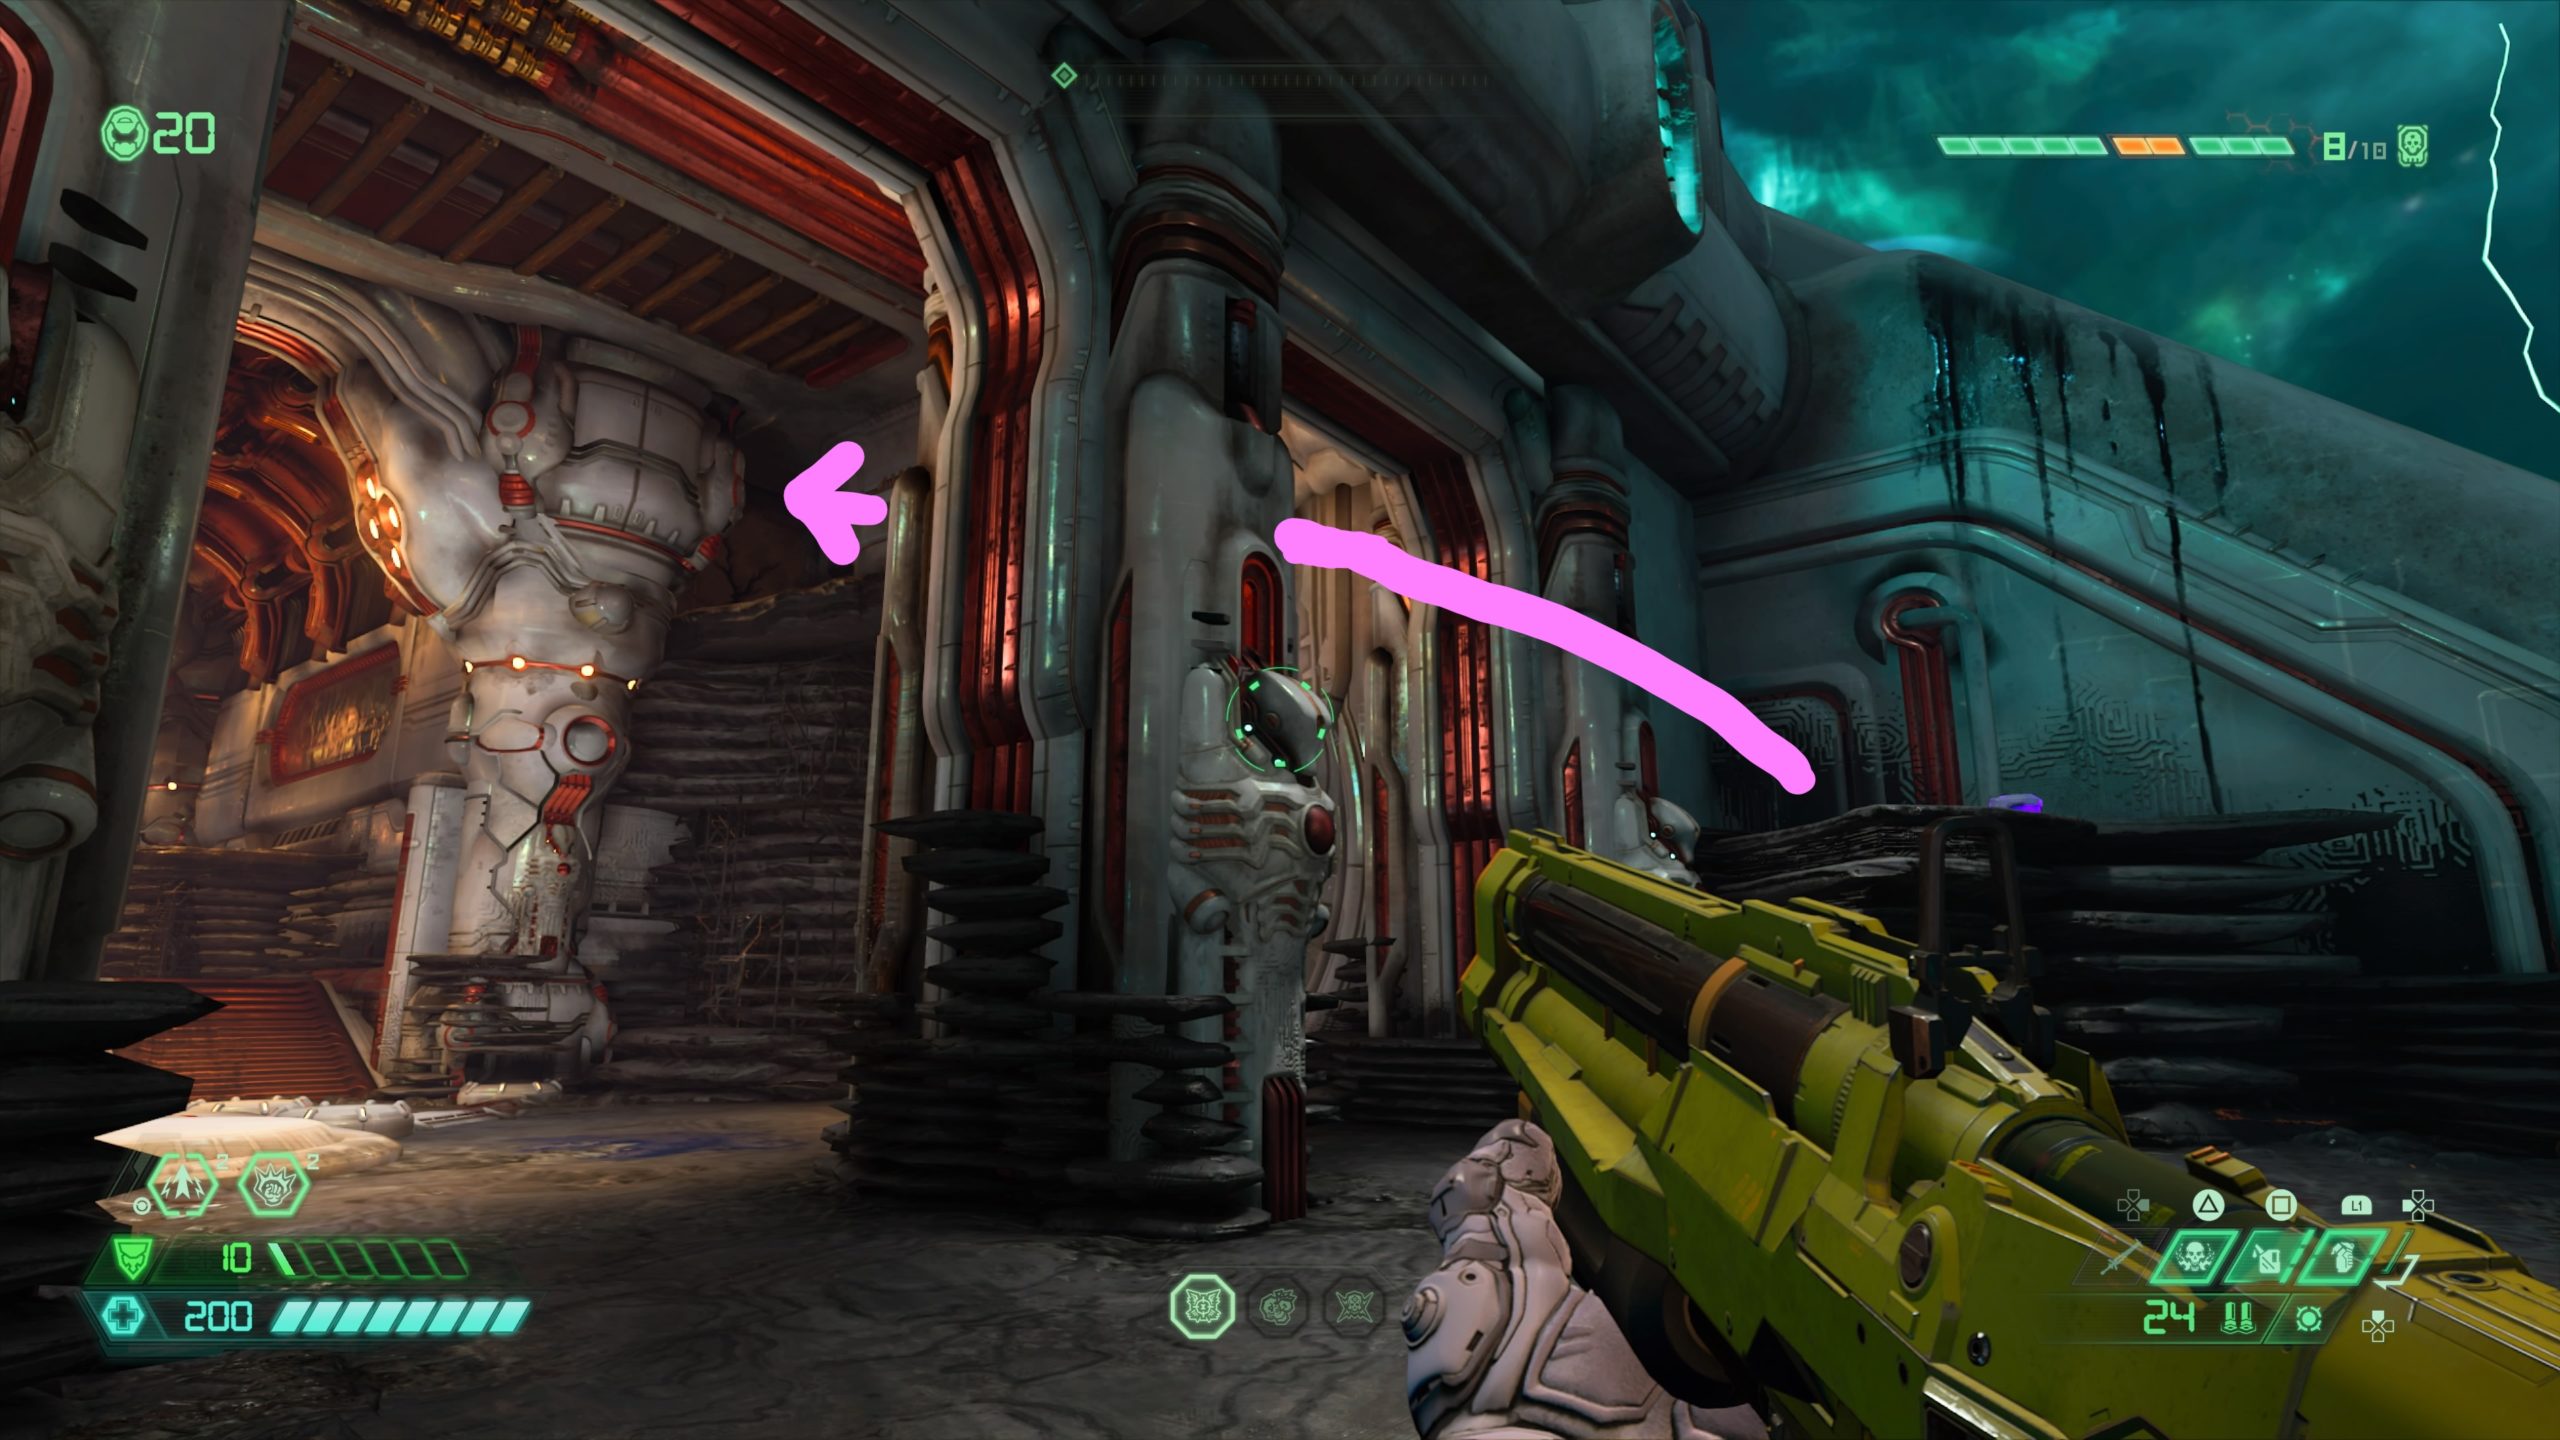
Codex: Story of Hell – Icon of Sin

From the fast travel point, turn around and follow the tunnel. When you reach the end, the codex will be on a platform across from you.
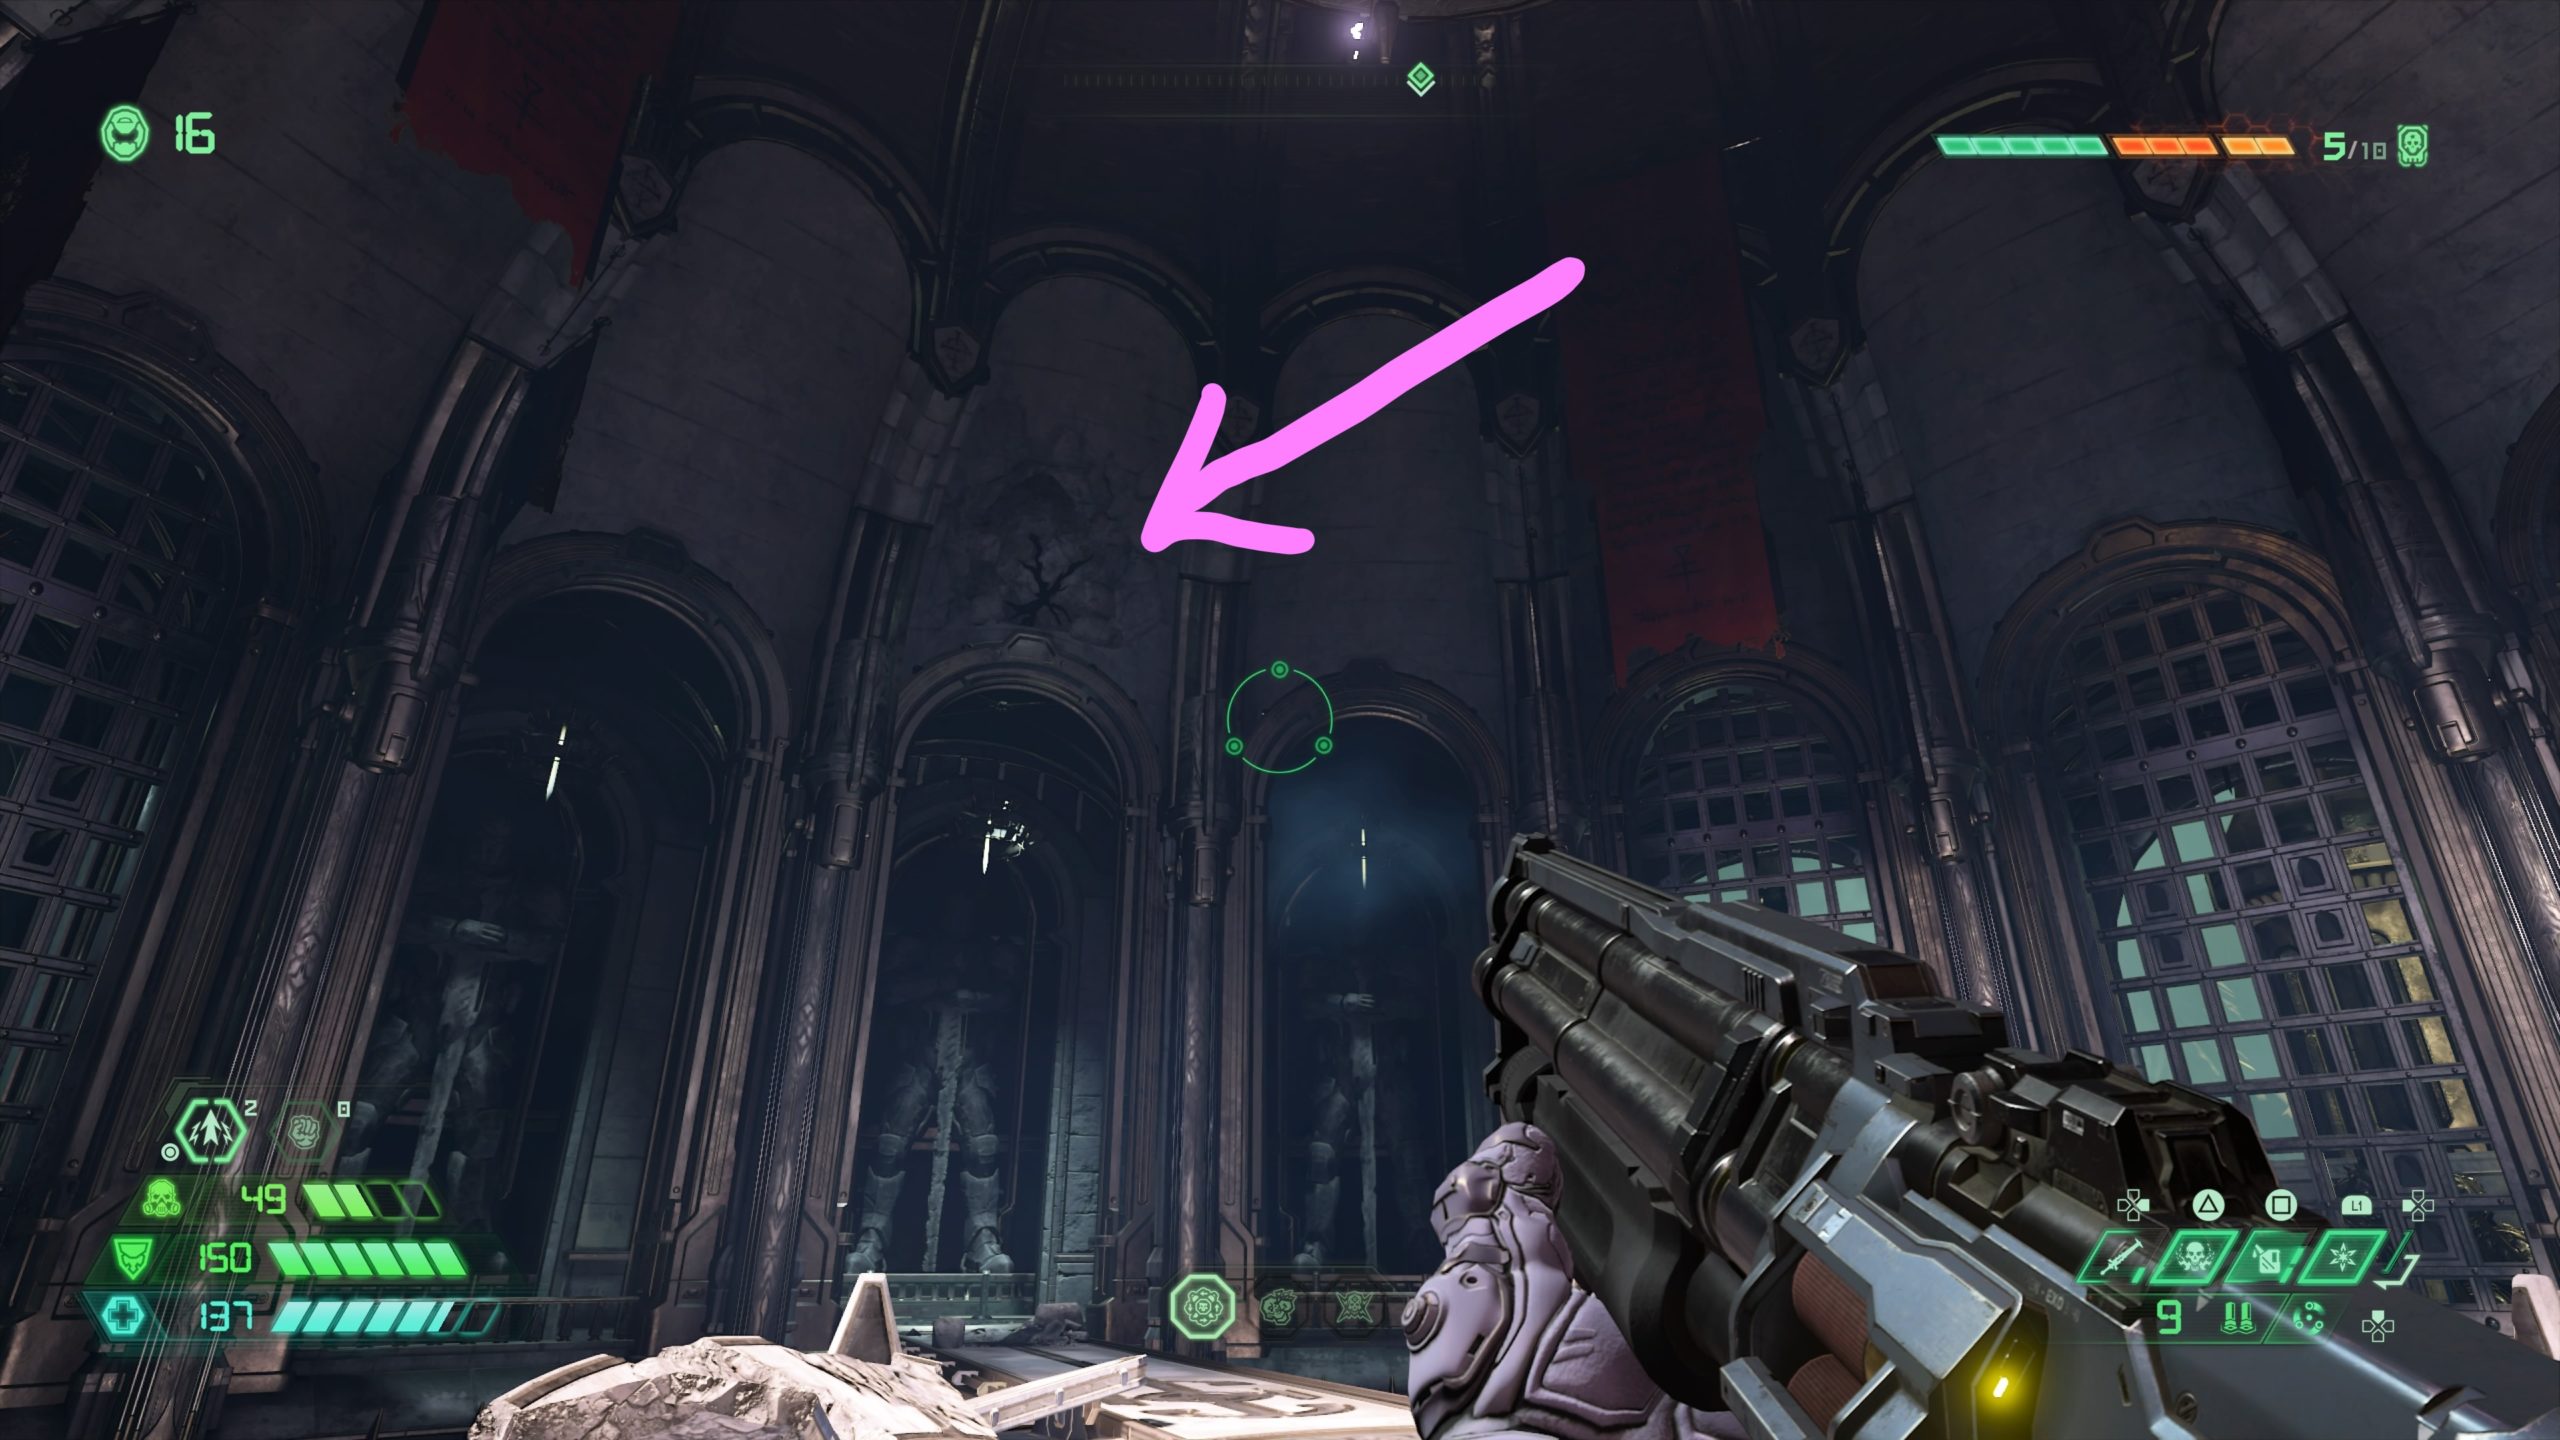
Album: Quake II – Descent into Cerberon

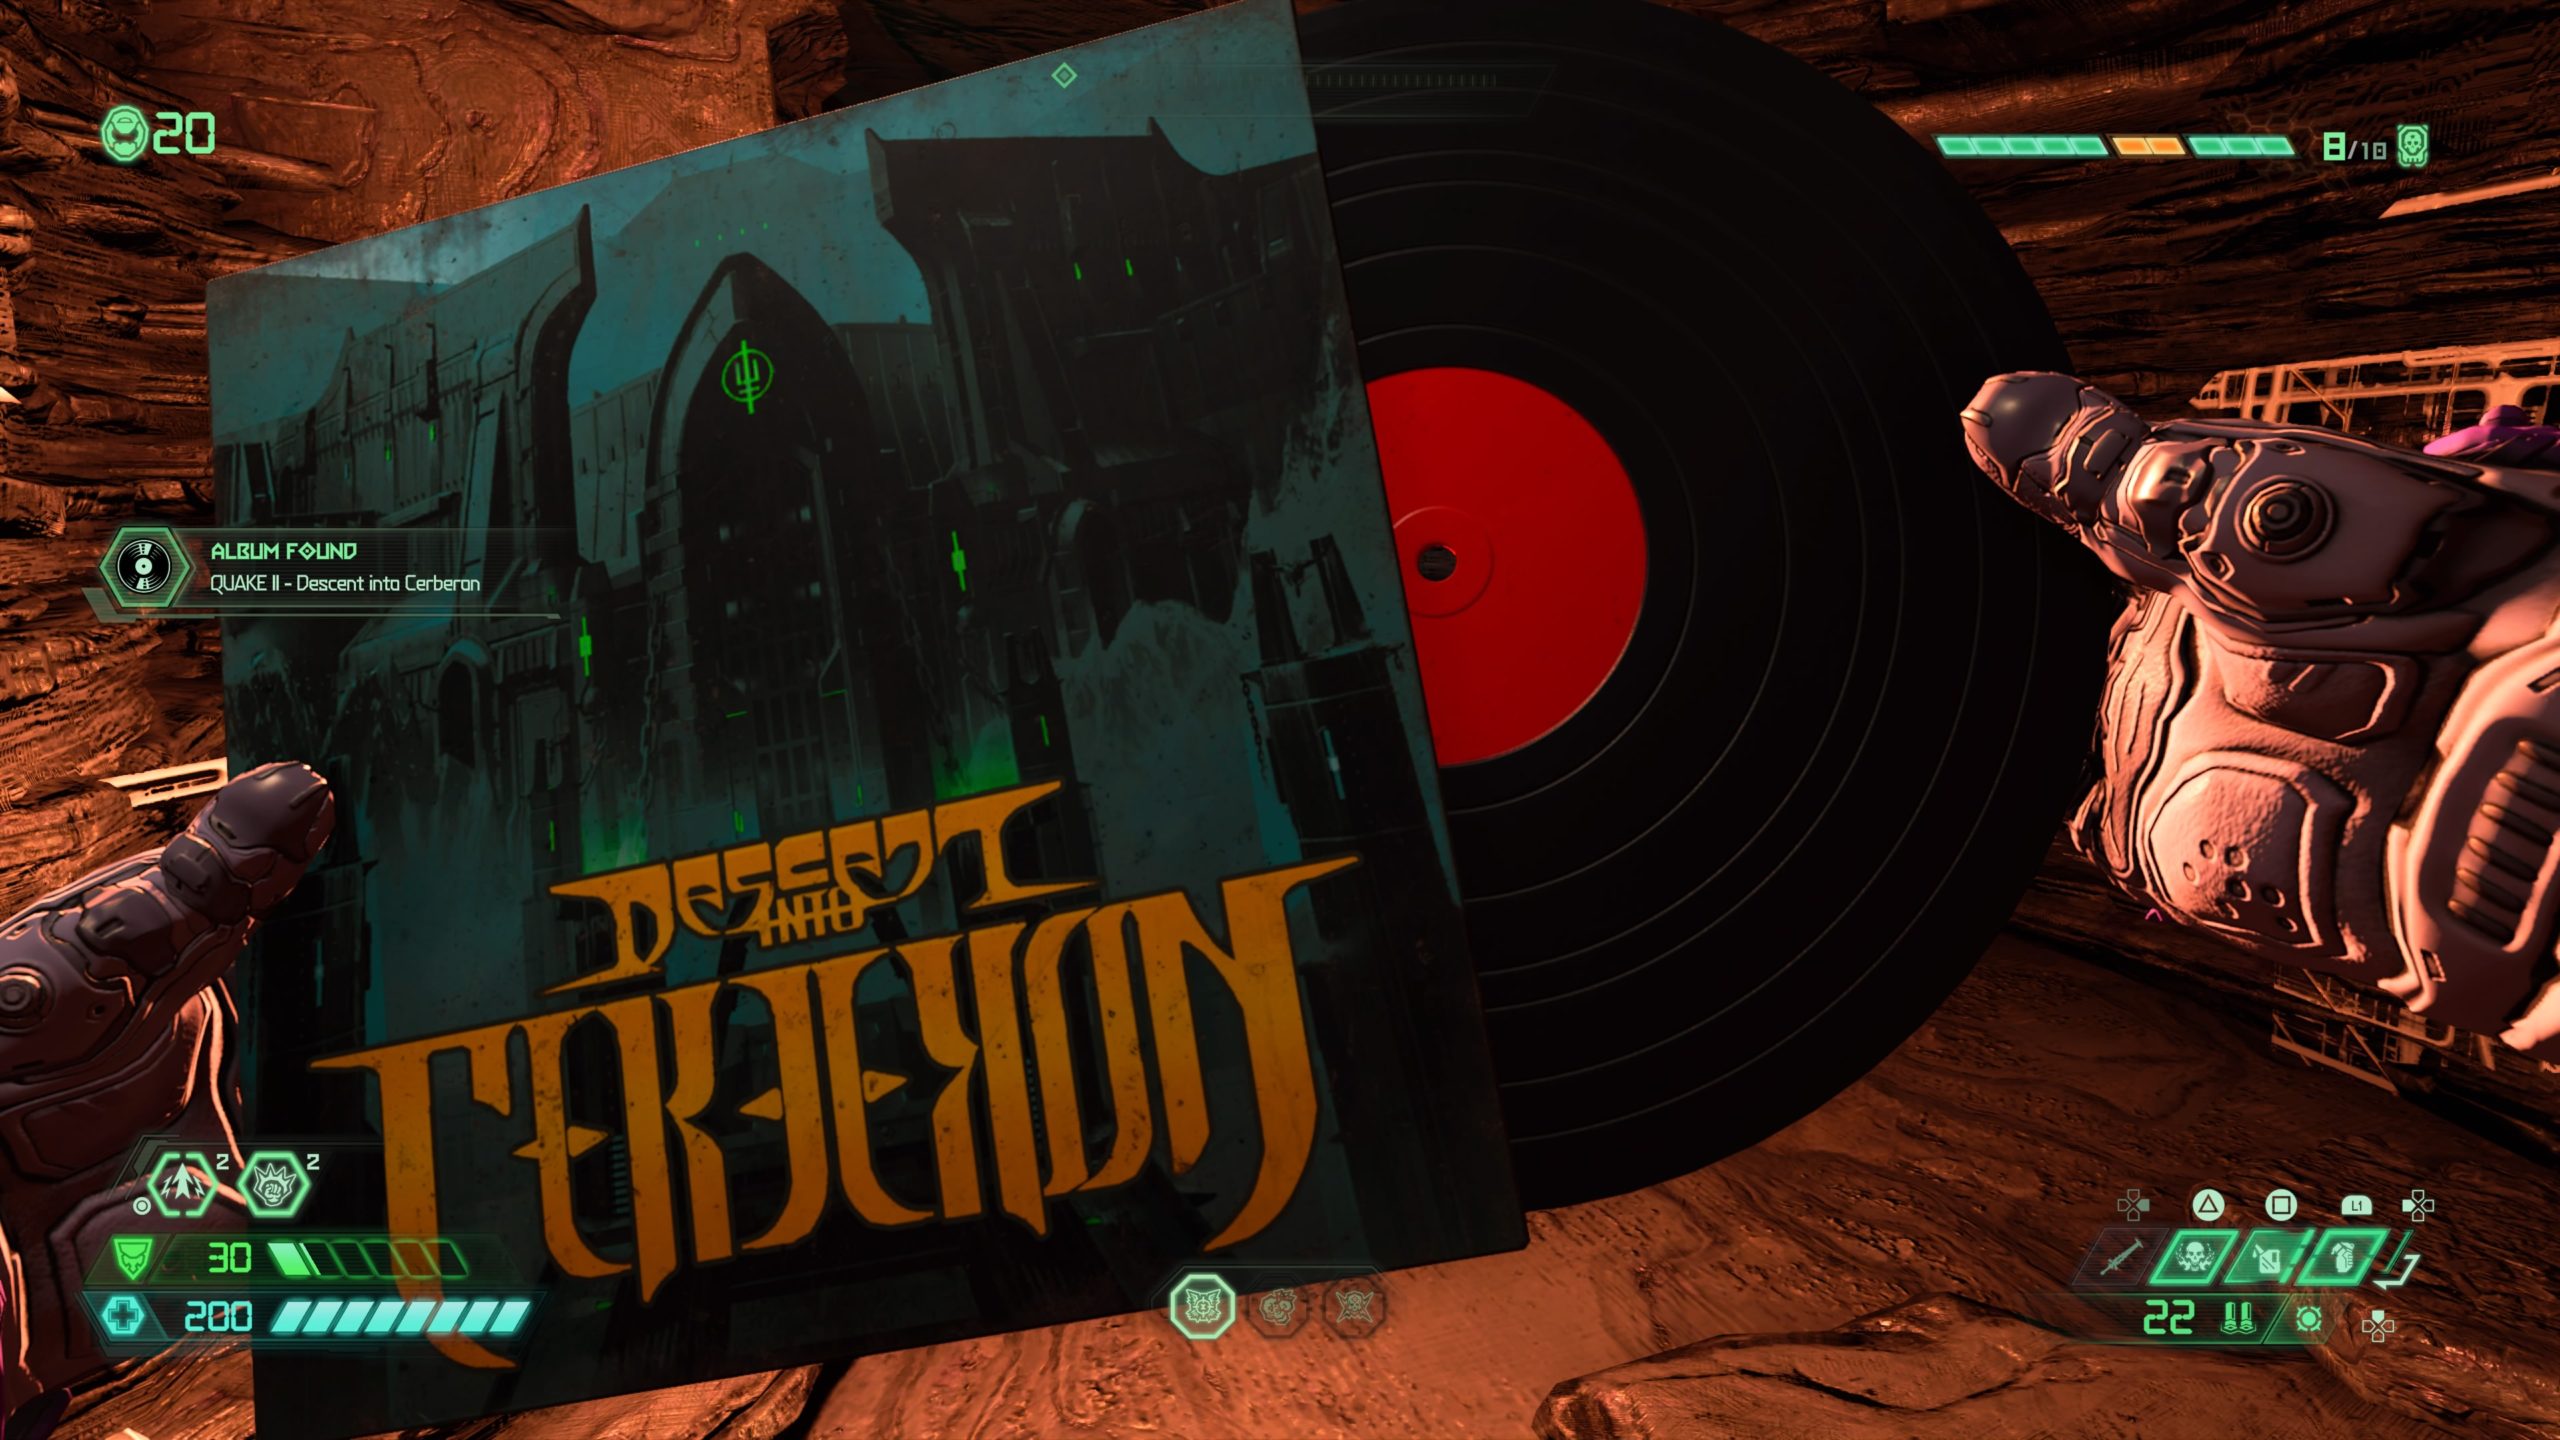
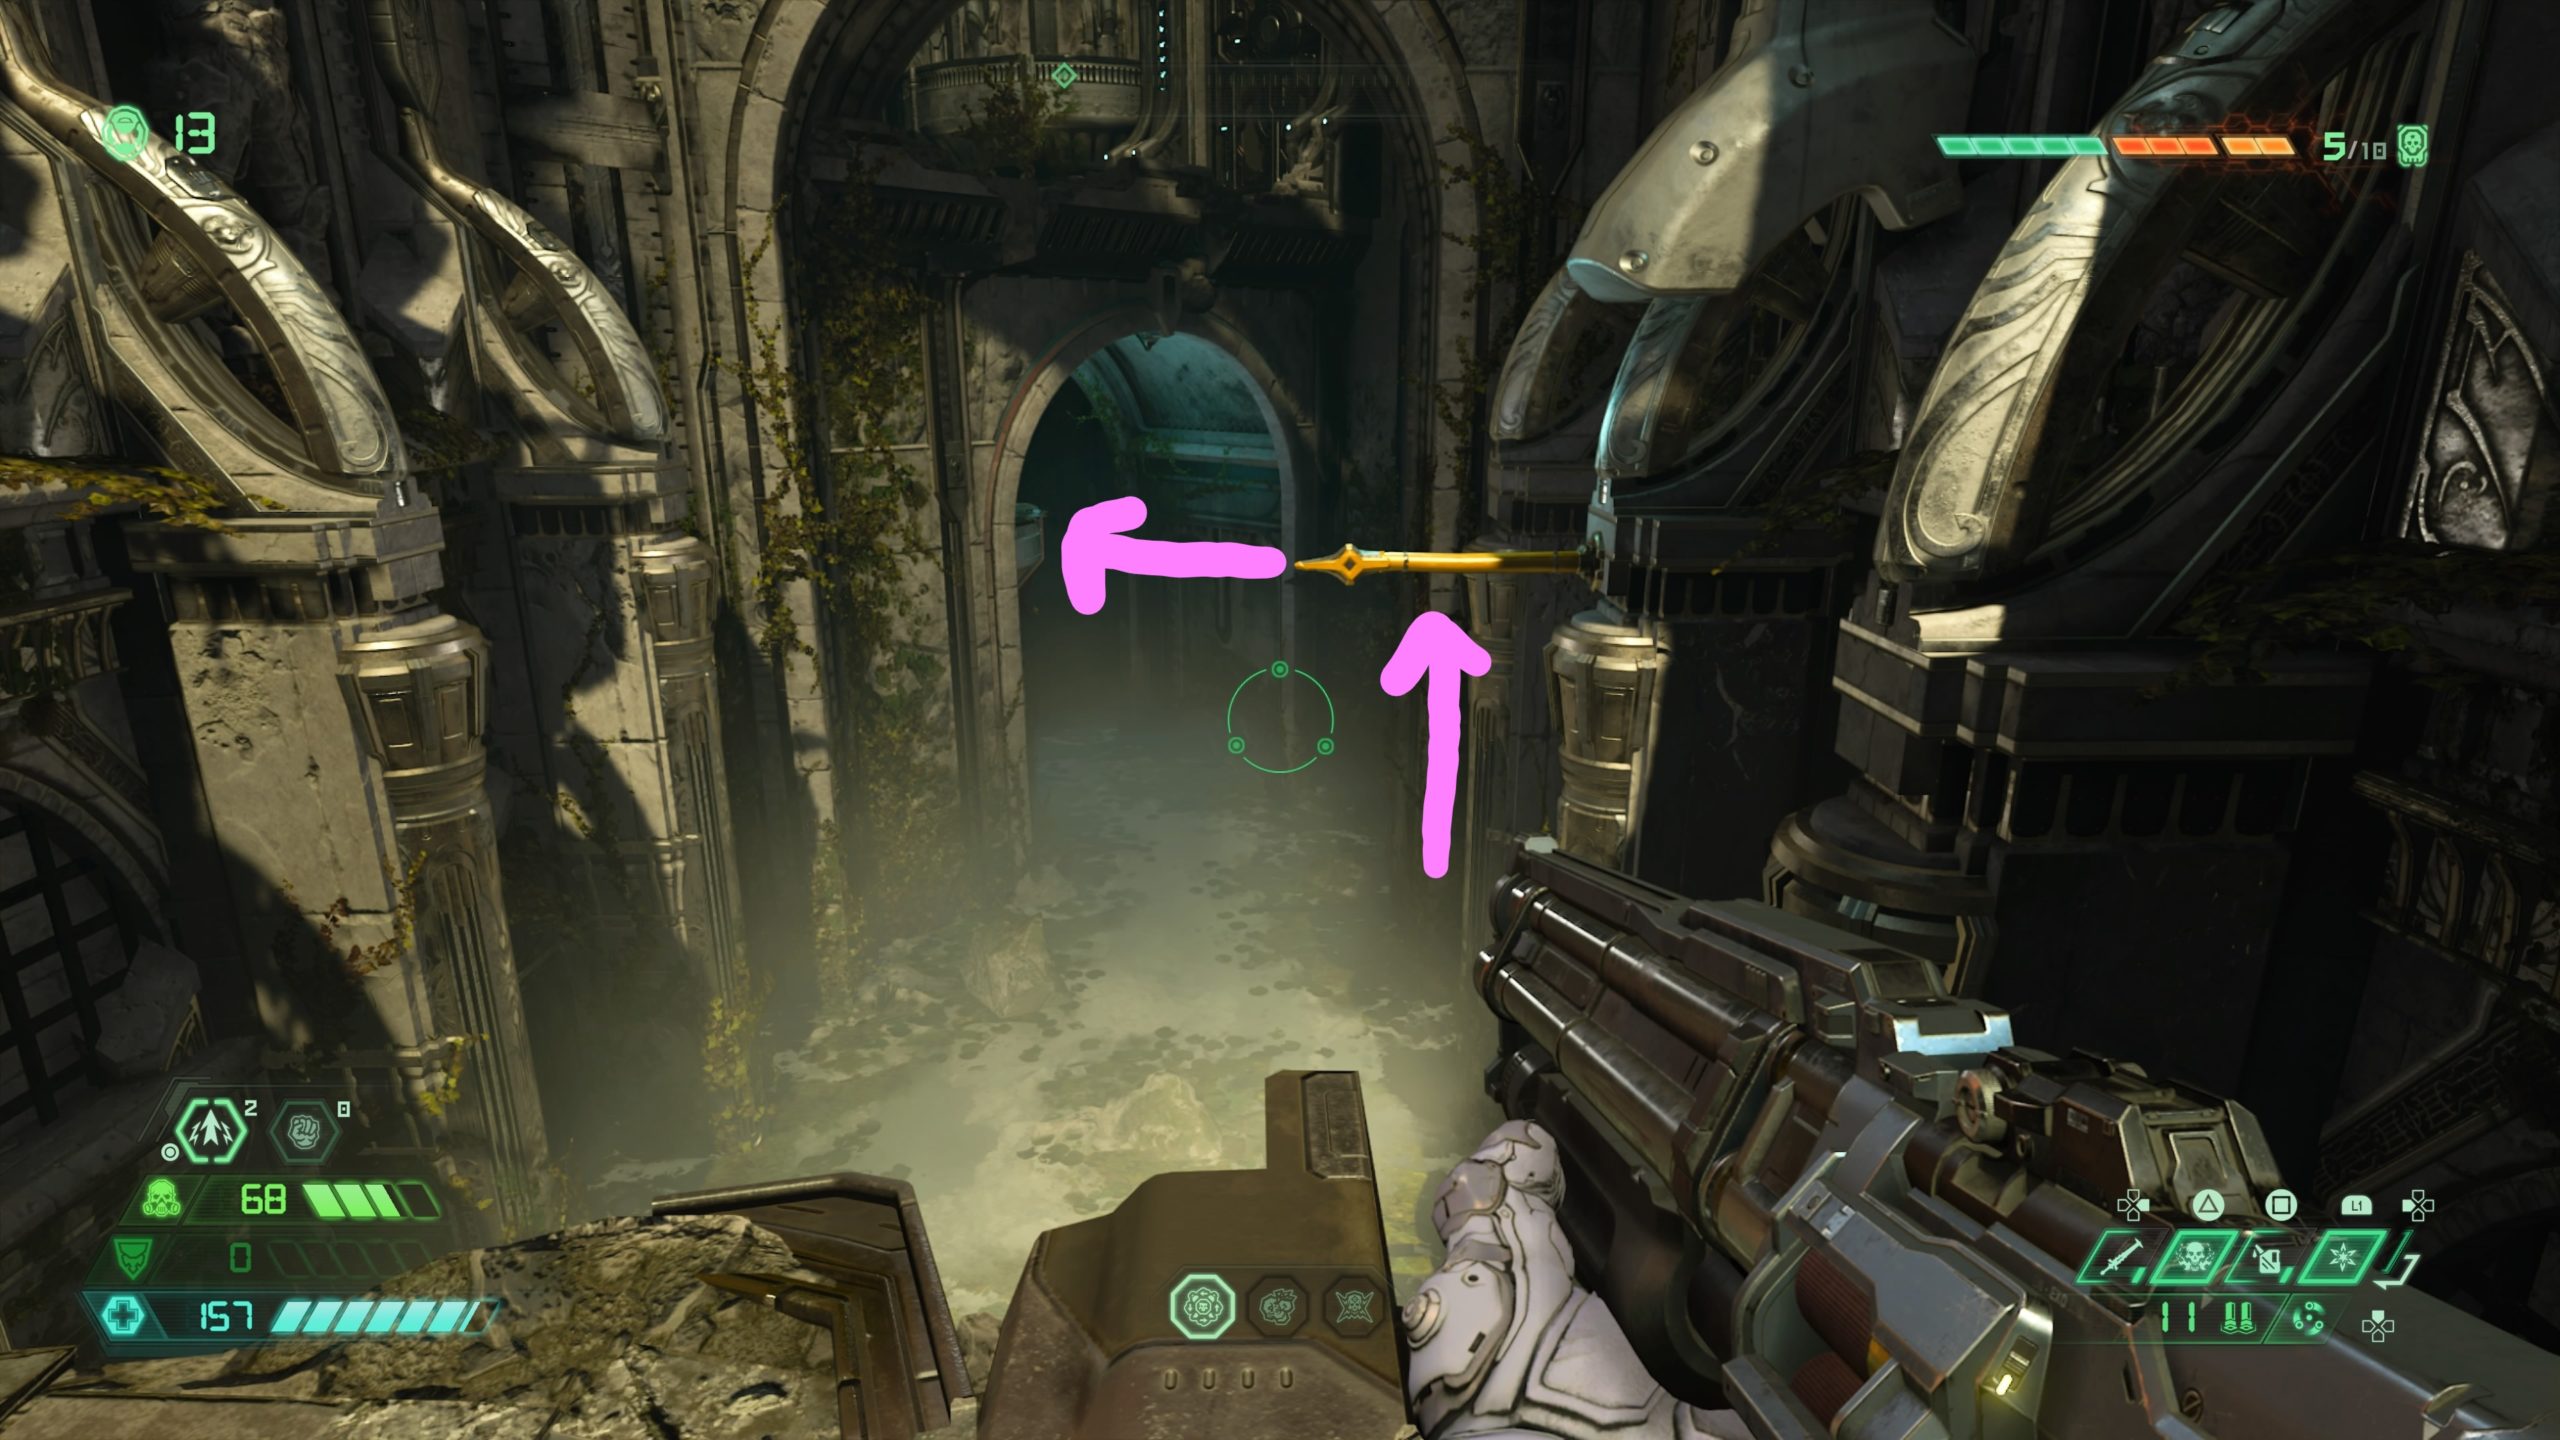
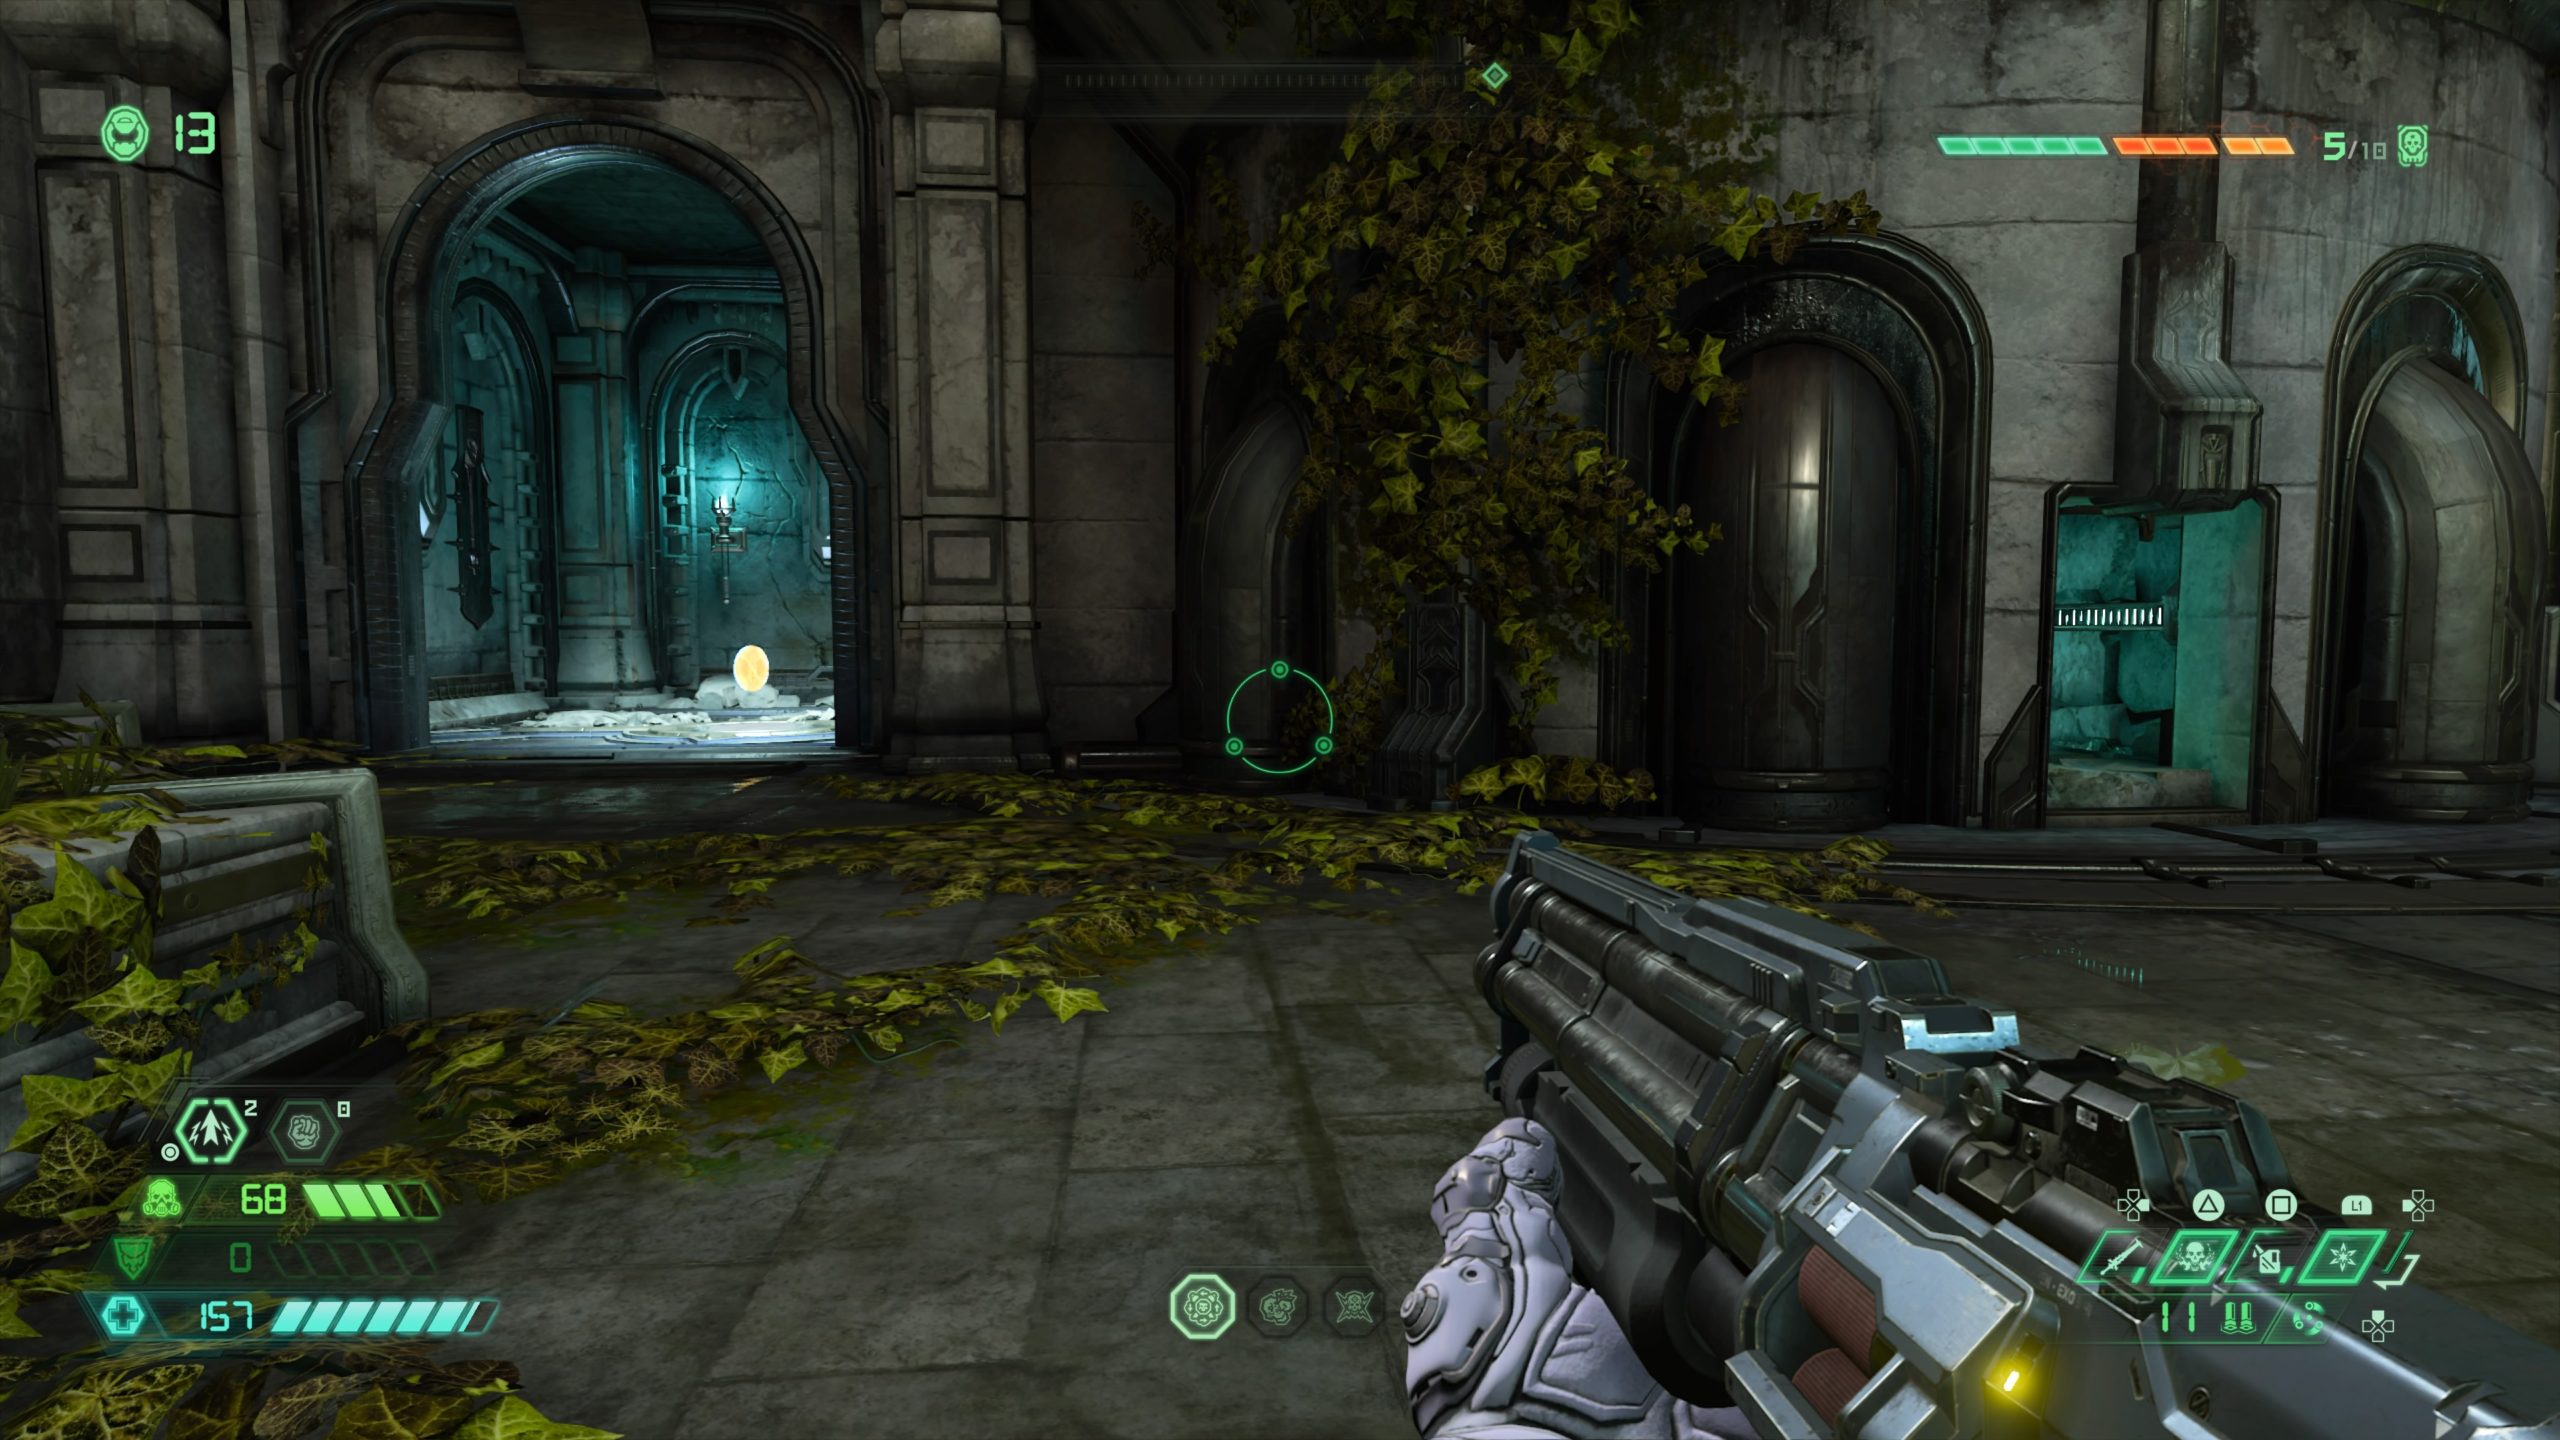
From the codex, look up to the left to spot a small ledge. Jump to the ledge and melee the cracked wall to reveal the album.
Mastery Token

From the fast travel point, turn around and jump through the circular opening. The token will be located on the left on a platform.
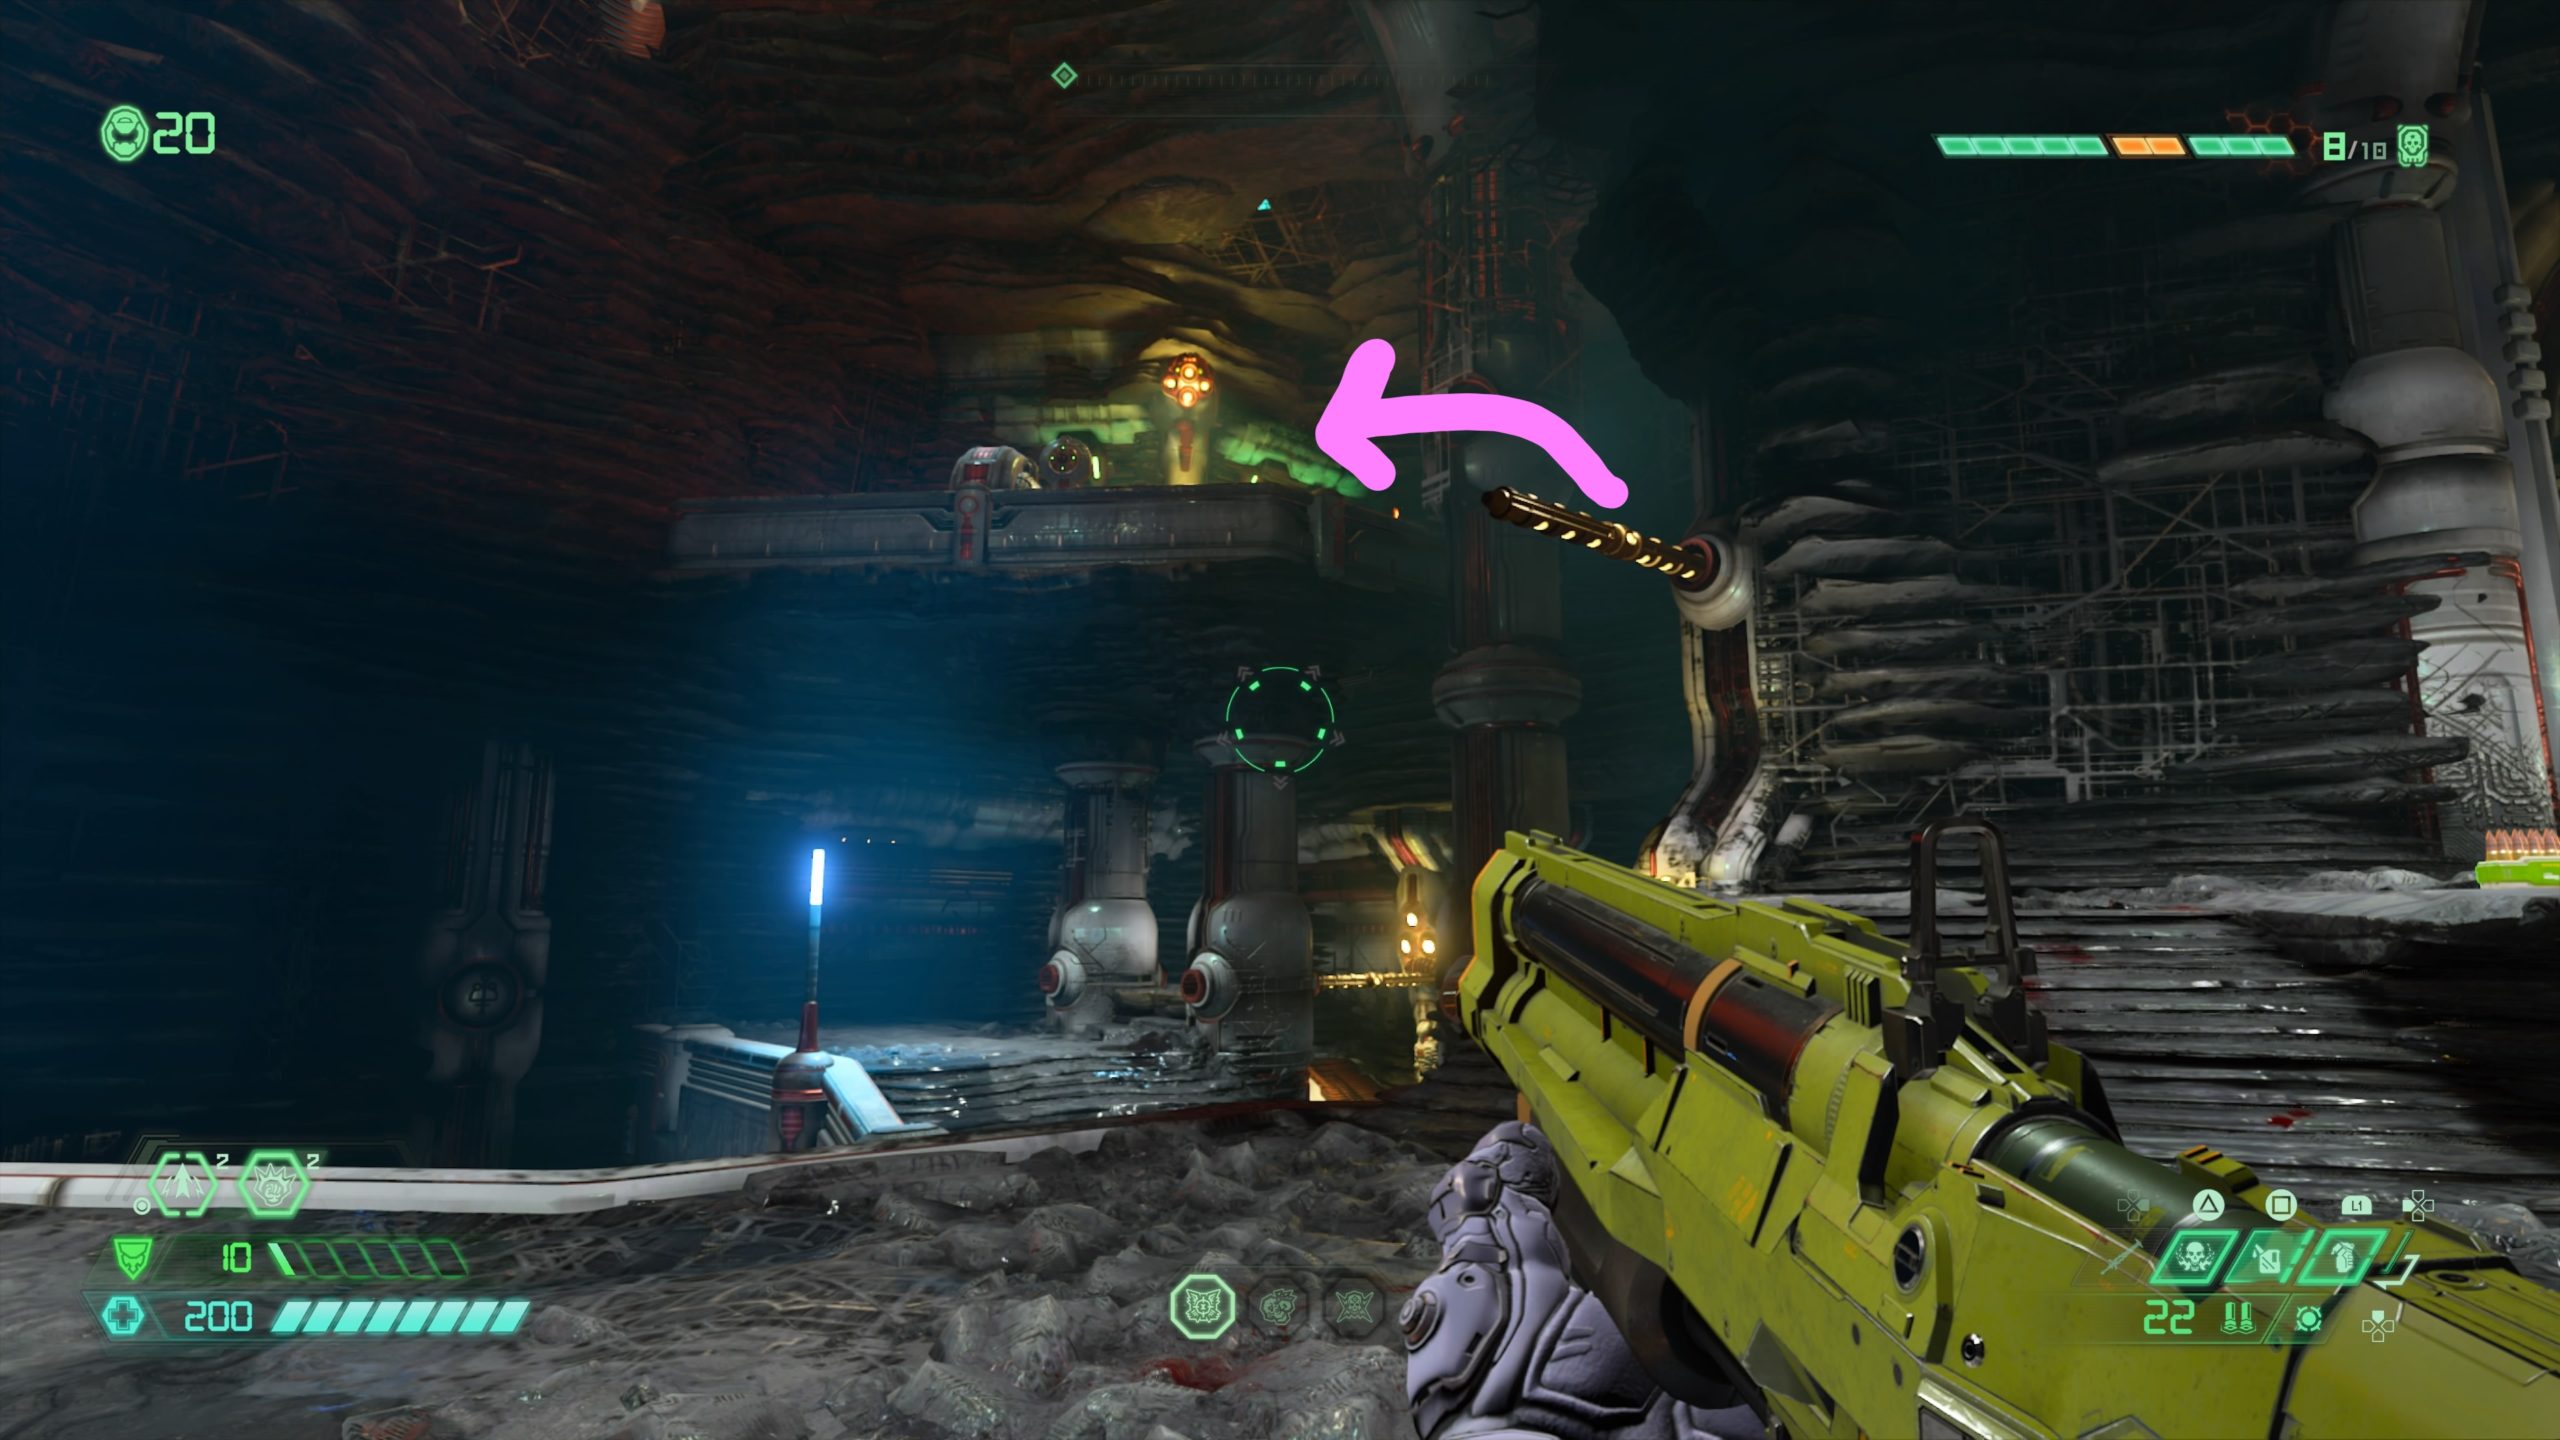
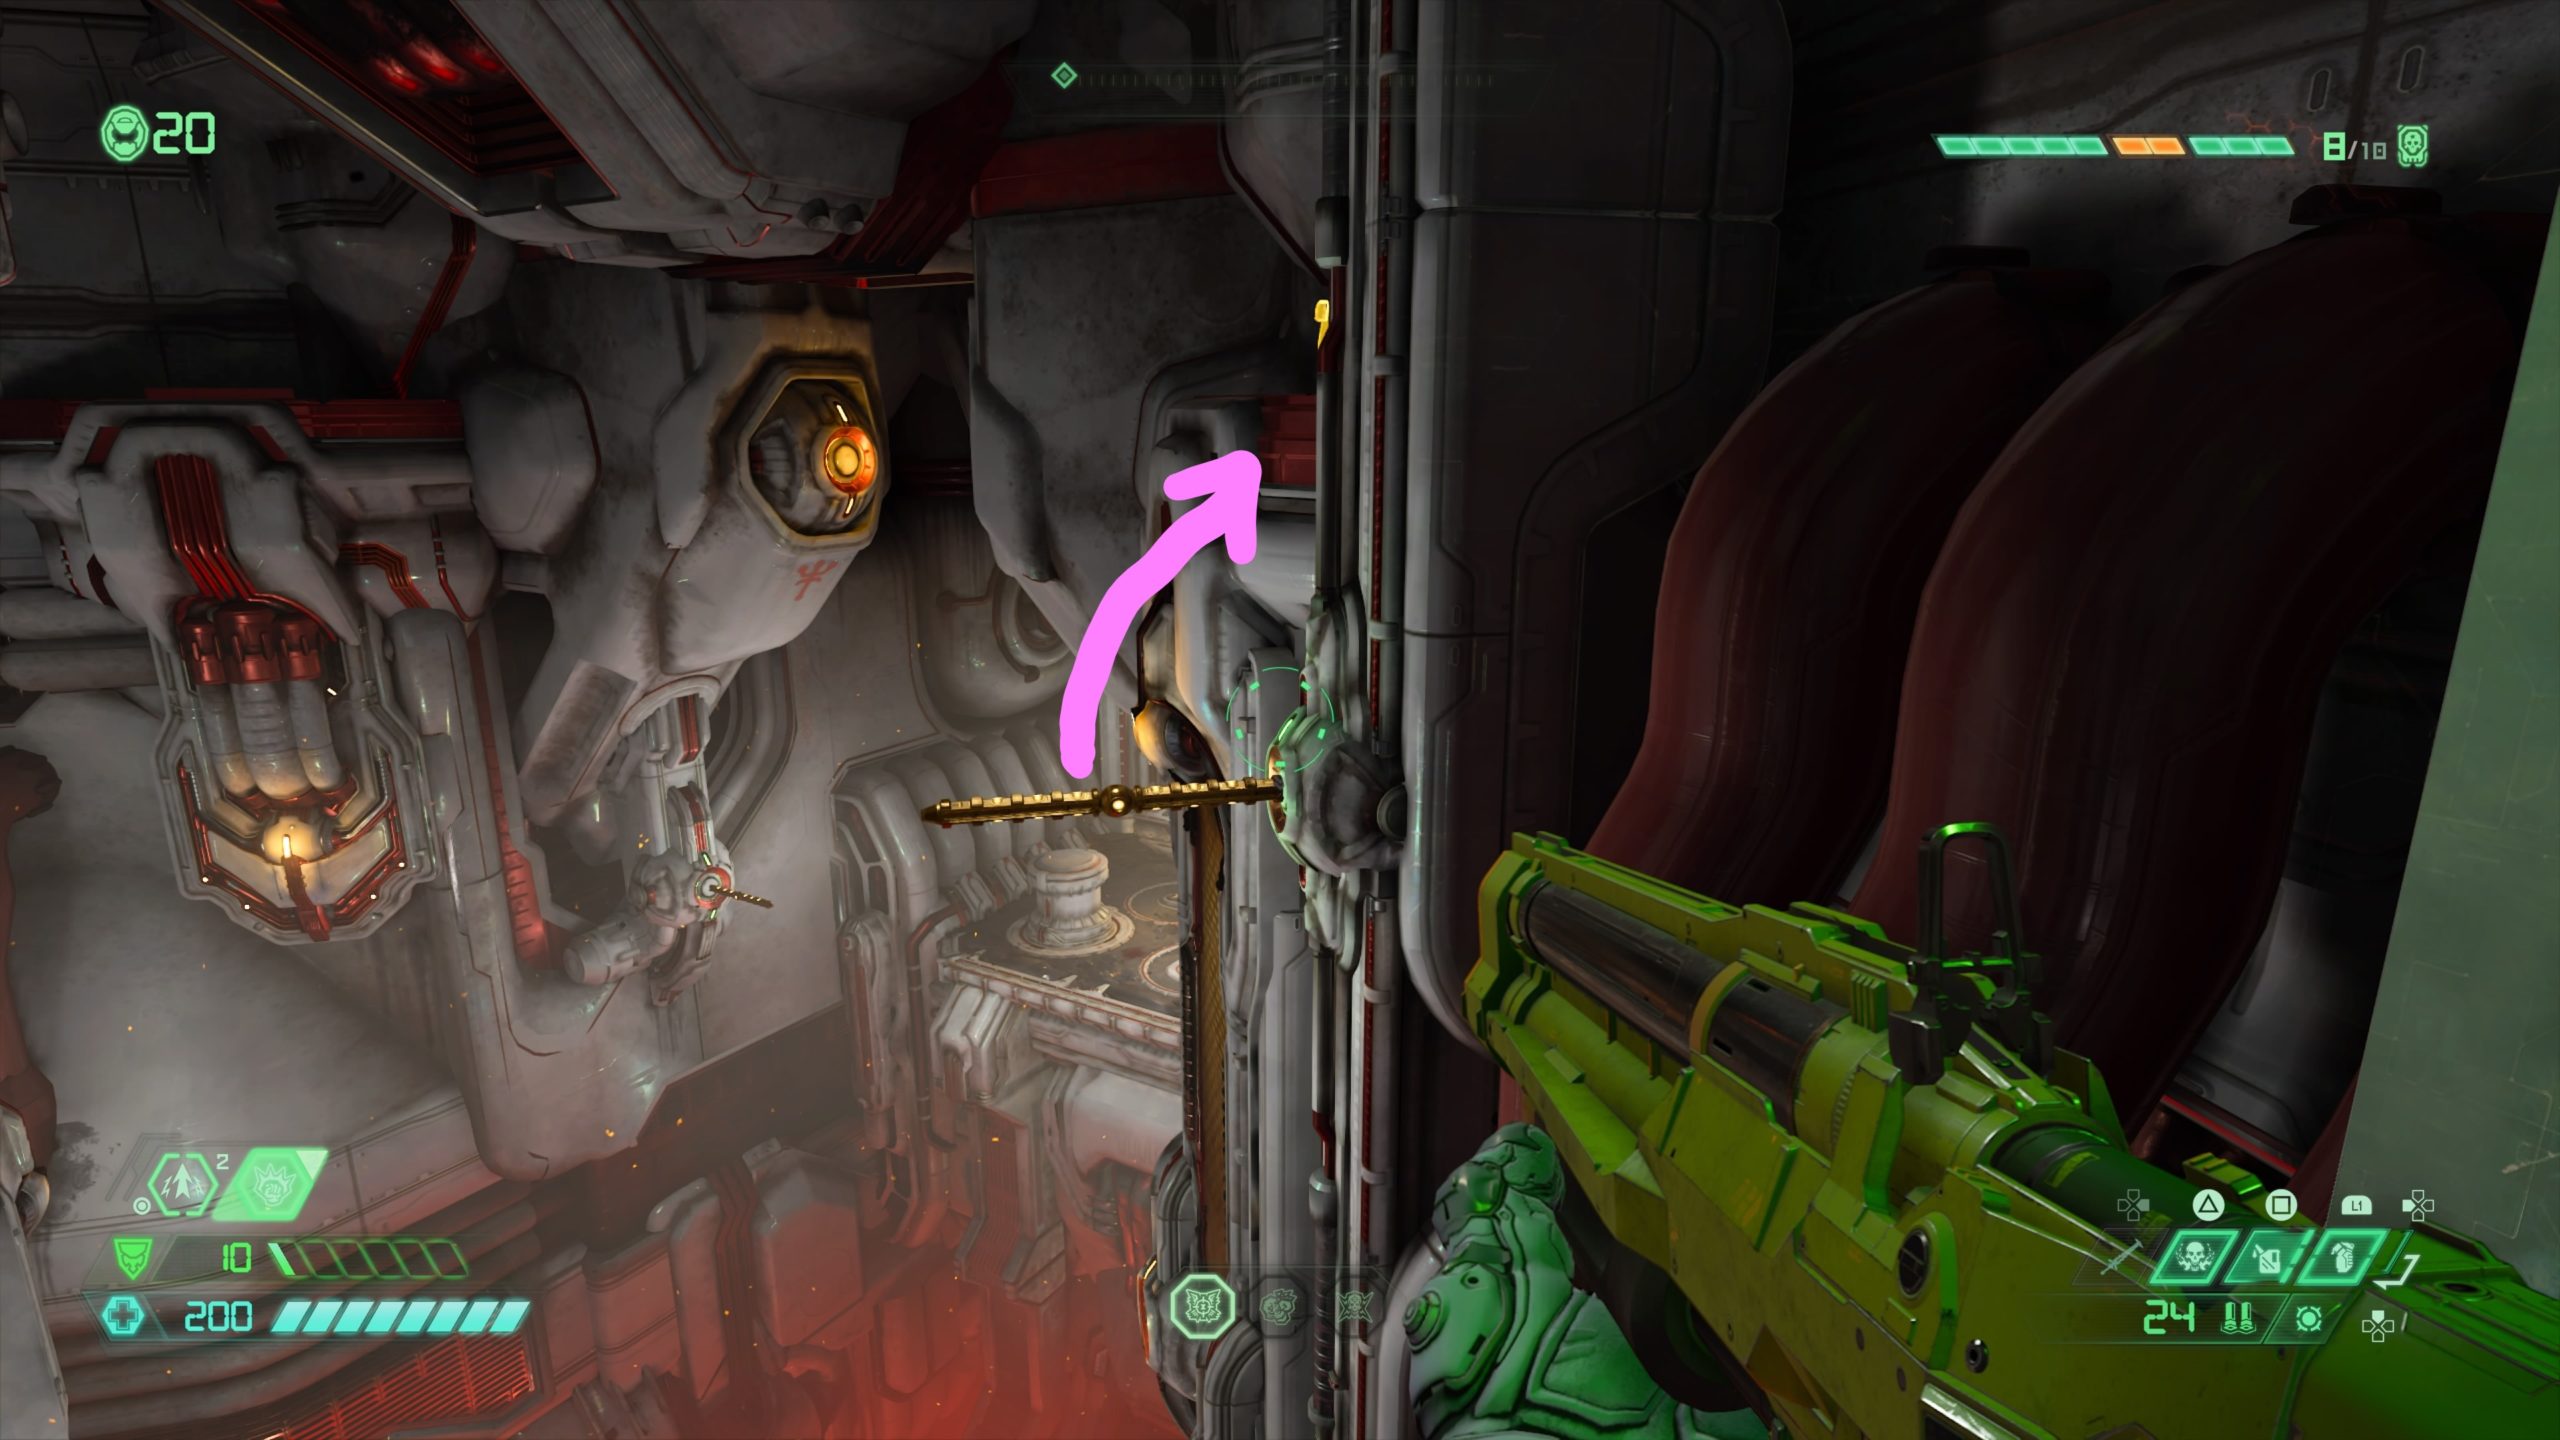
Album: Doom (2016) – Rip and Tear
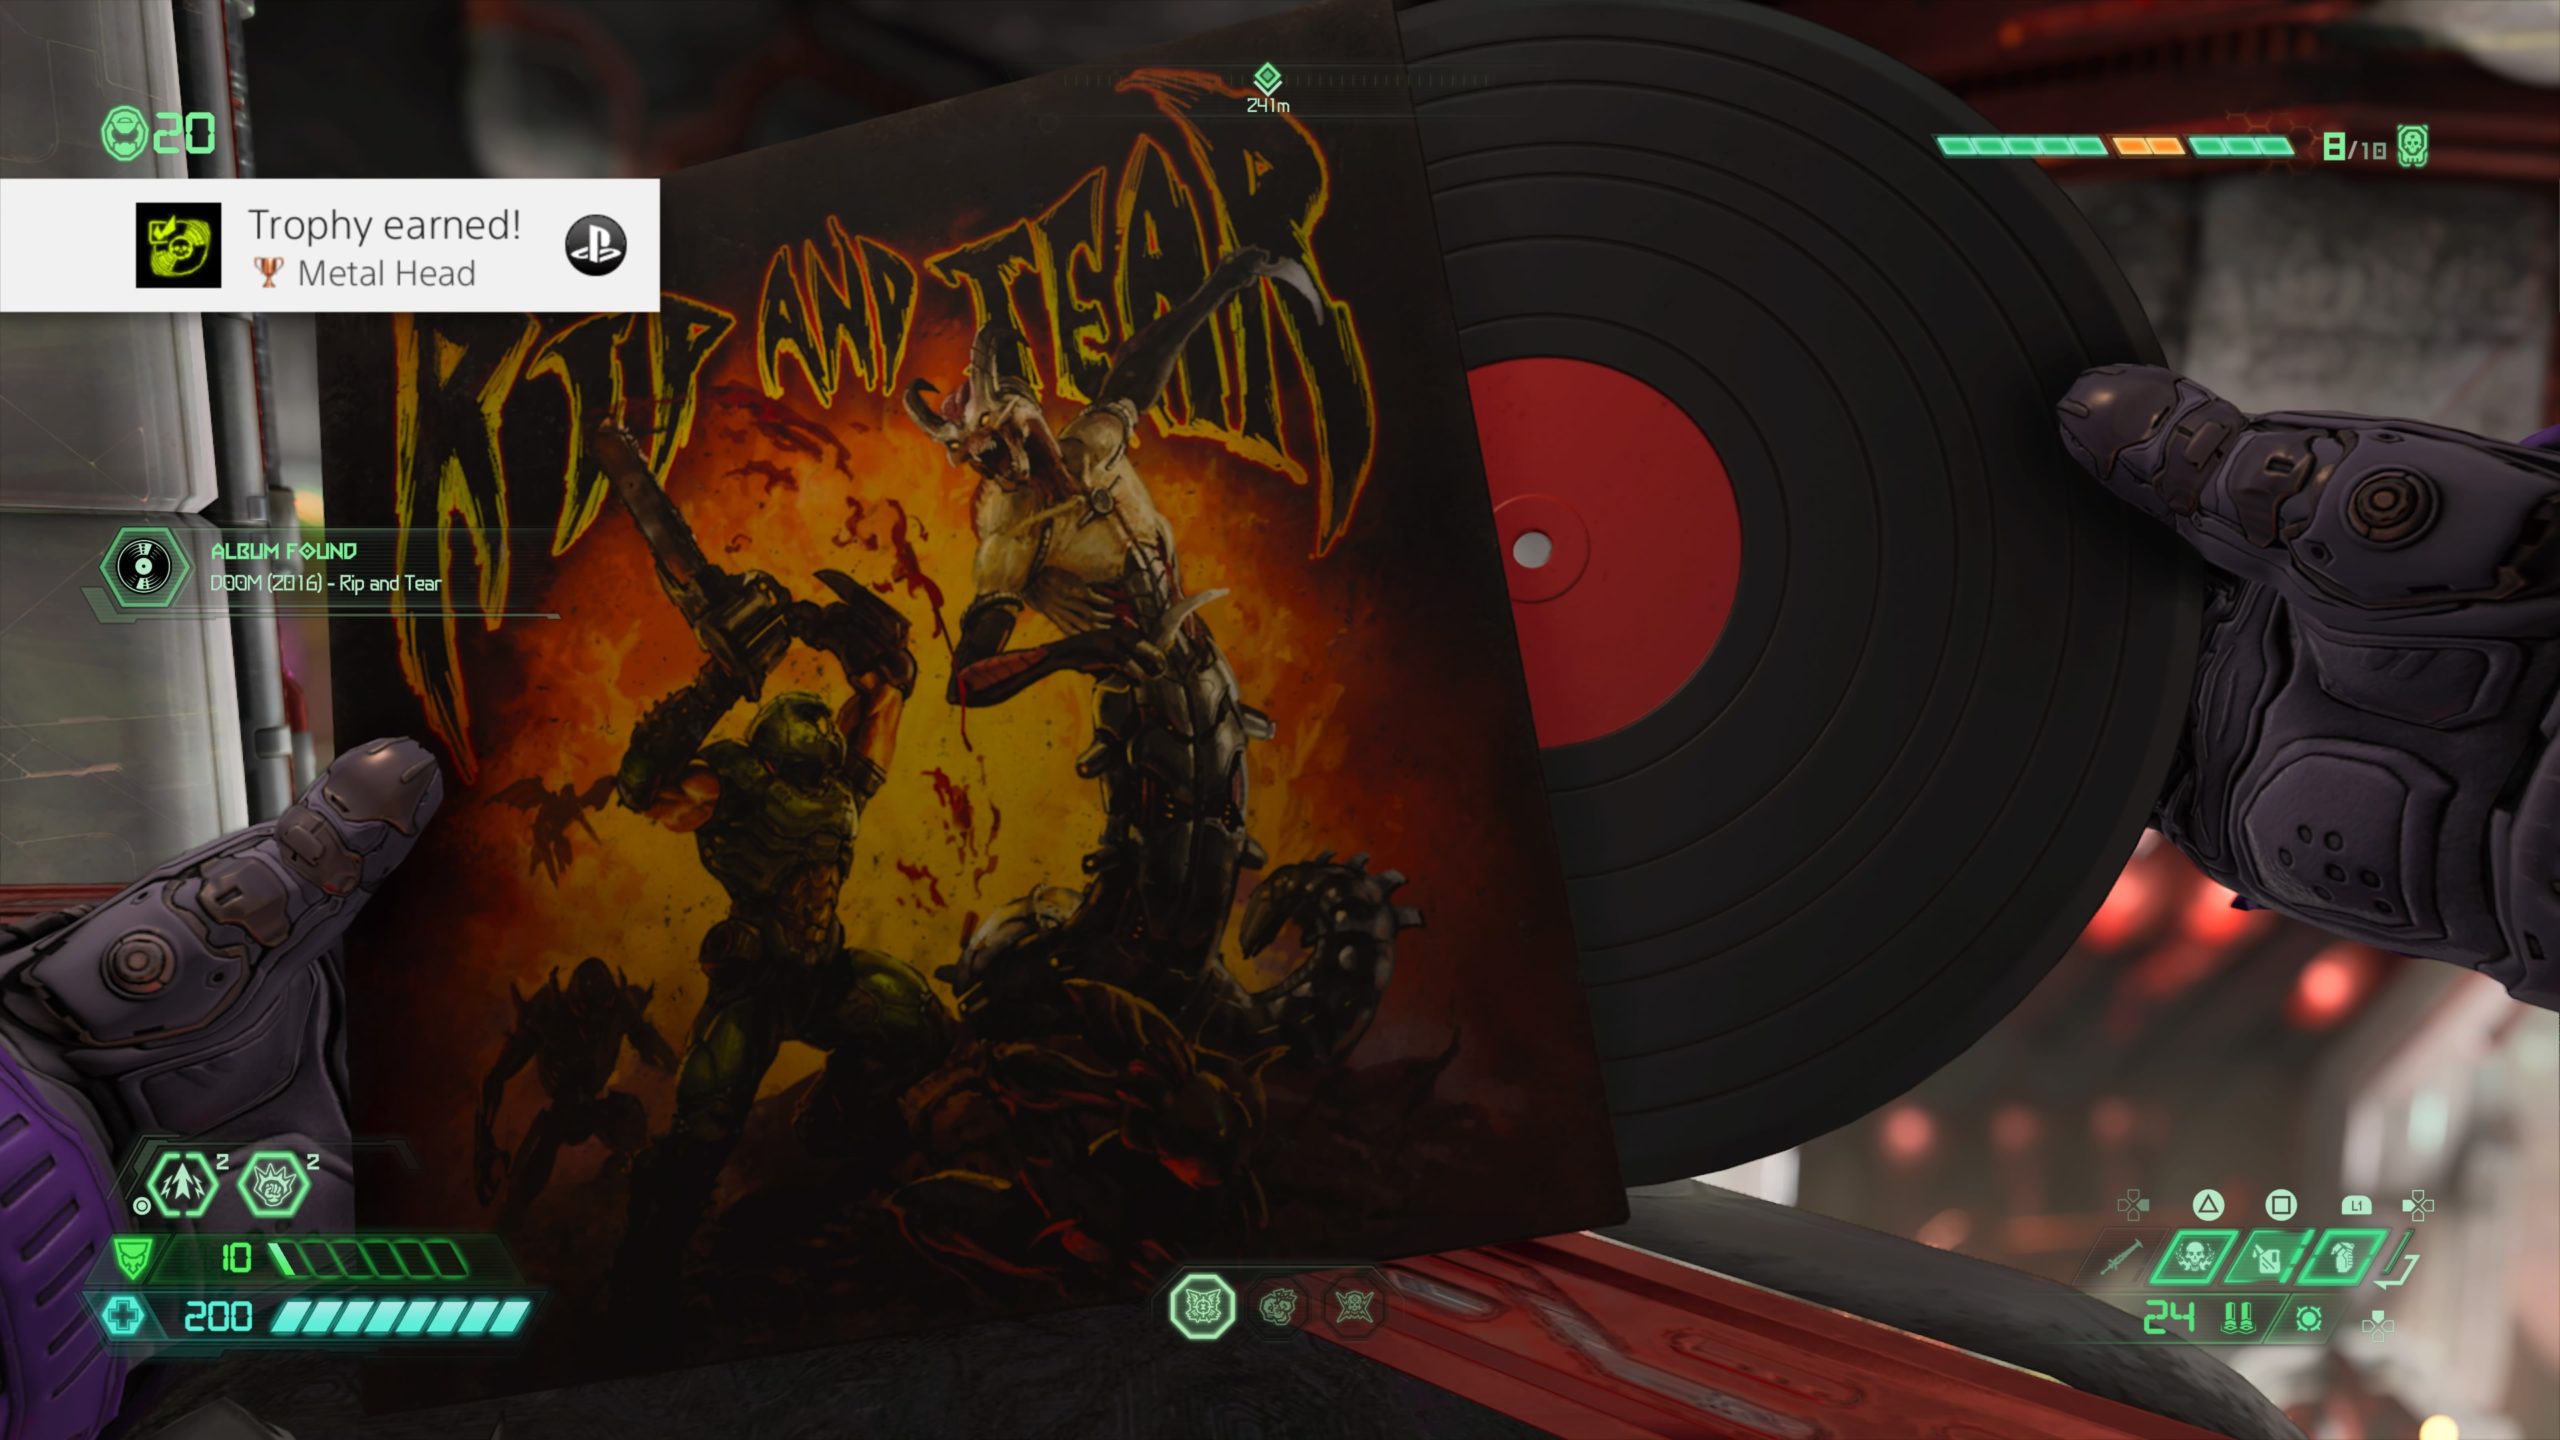
From the token, drop down into the area below and walk to the ovular doorway that will bring you to an area with a giant gap in the middle. Use the spin bar in front of you to reach the ledge containing the album.
Codex: Story of the Maykrs – Khan Maykr
From the fast travel point, use the spin bar straight ahead to reach the ledge beyond it (above the lift pad). Follow the path to the right to find another spin bar. Use it to reach the ledge lit by green lights containing the punch switch and codex.
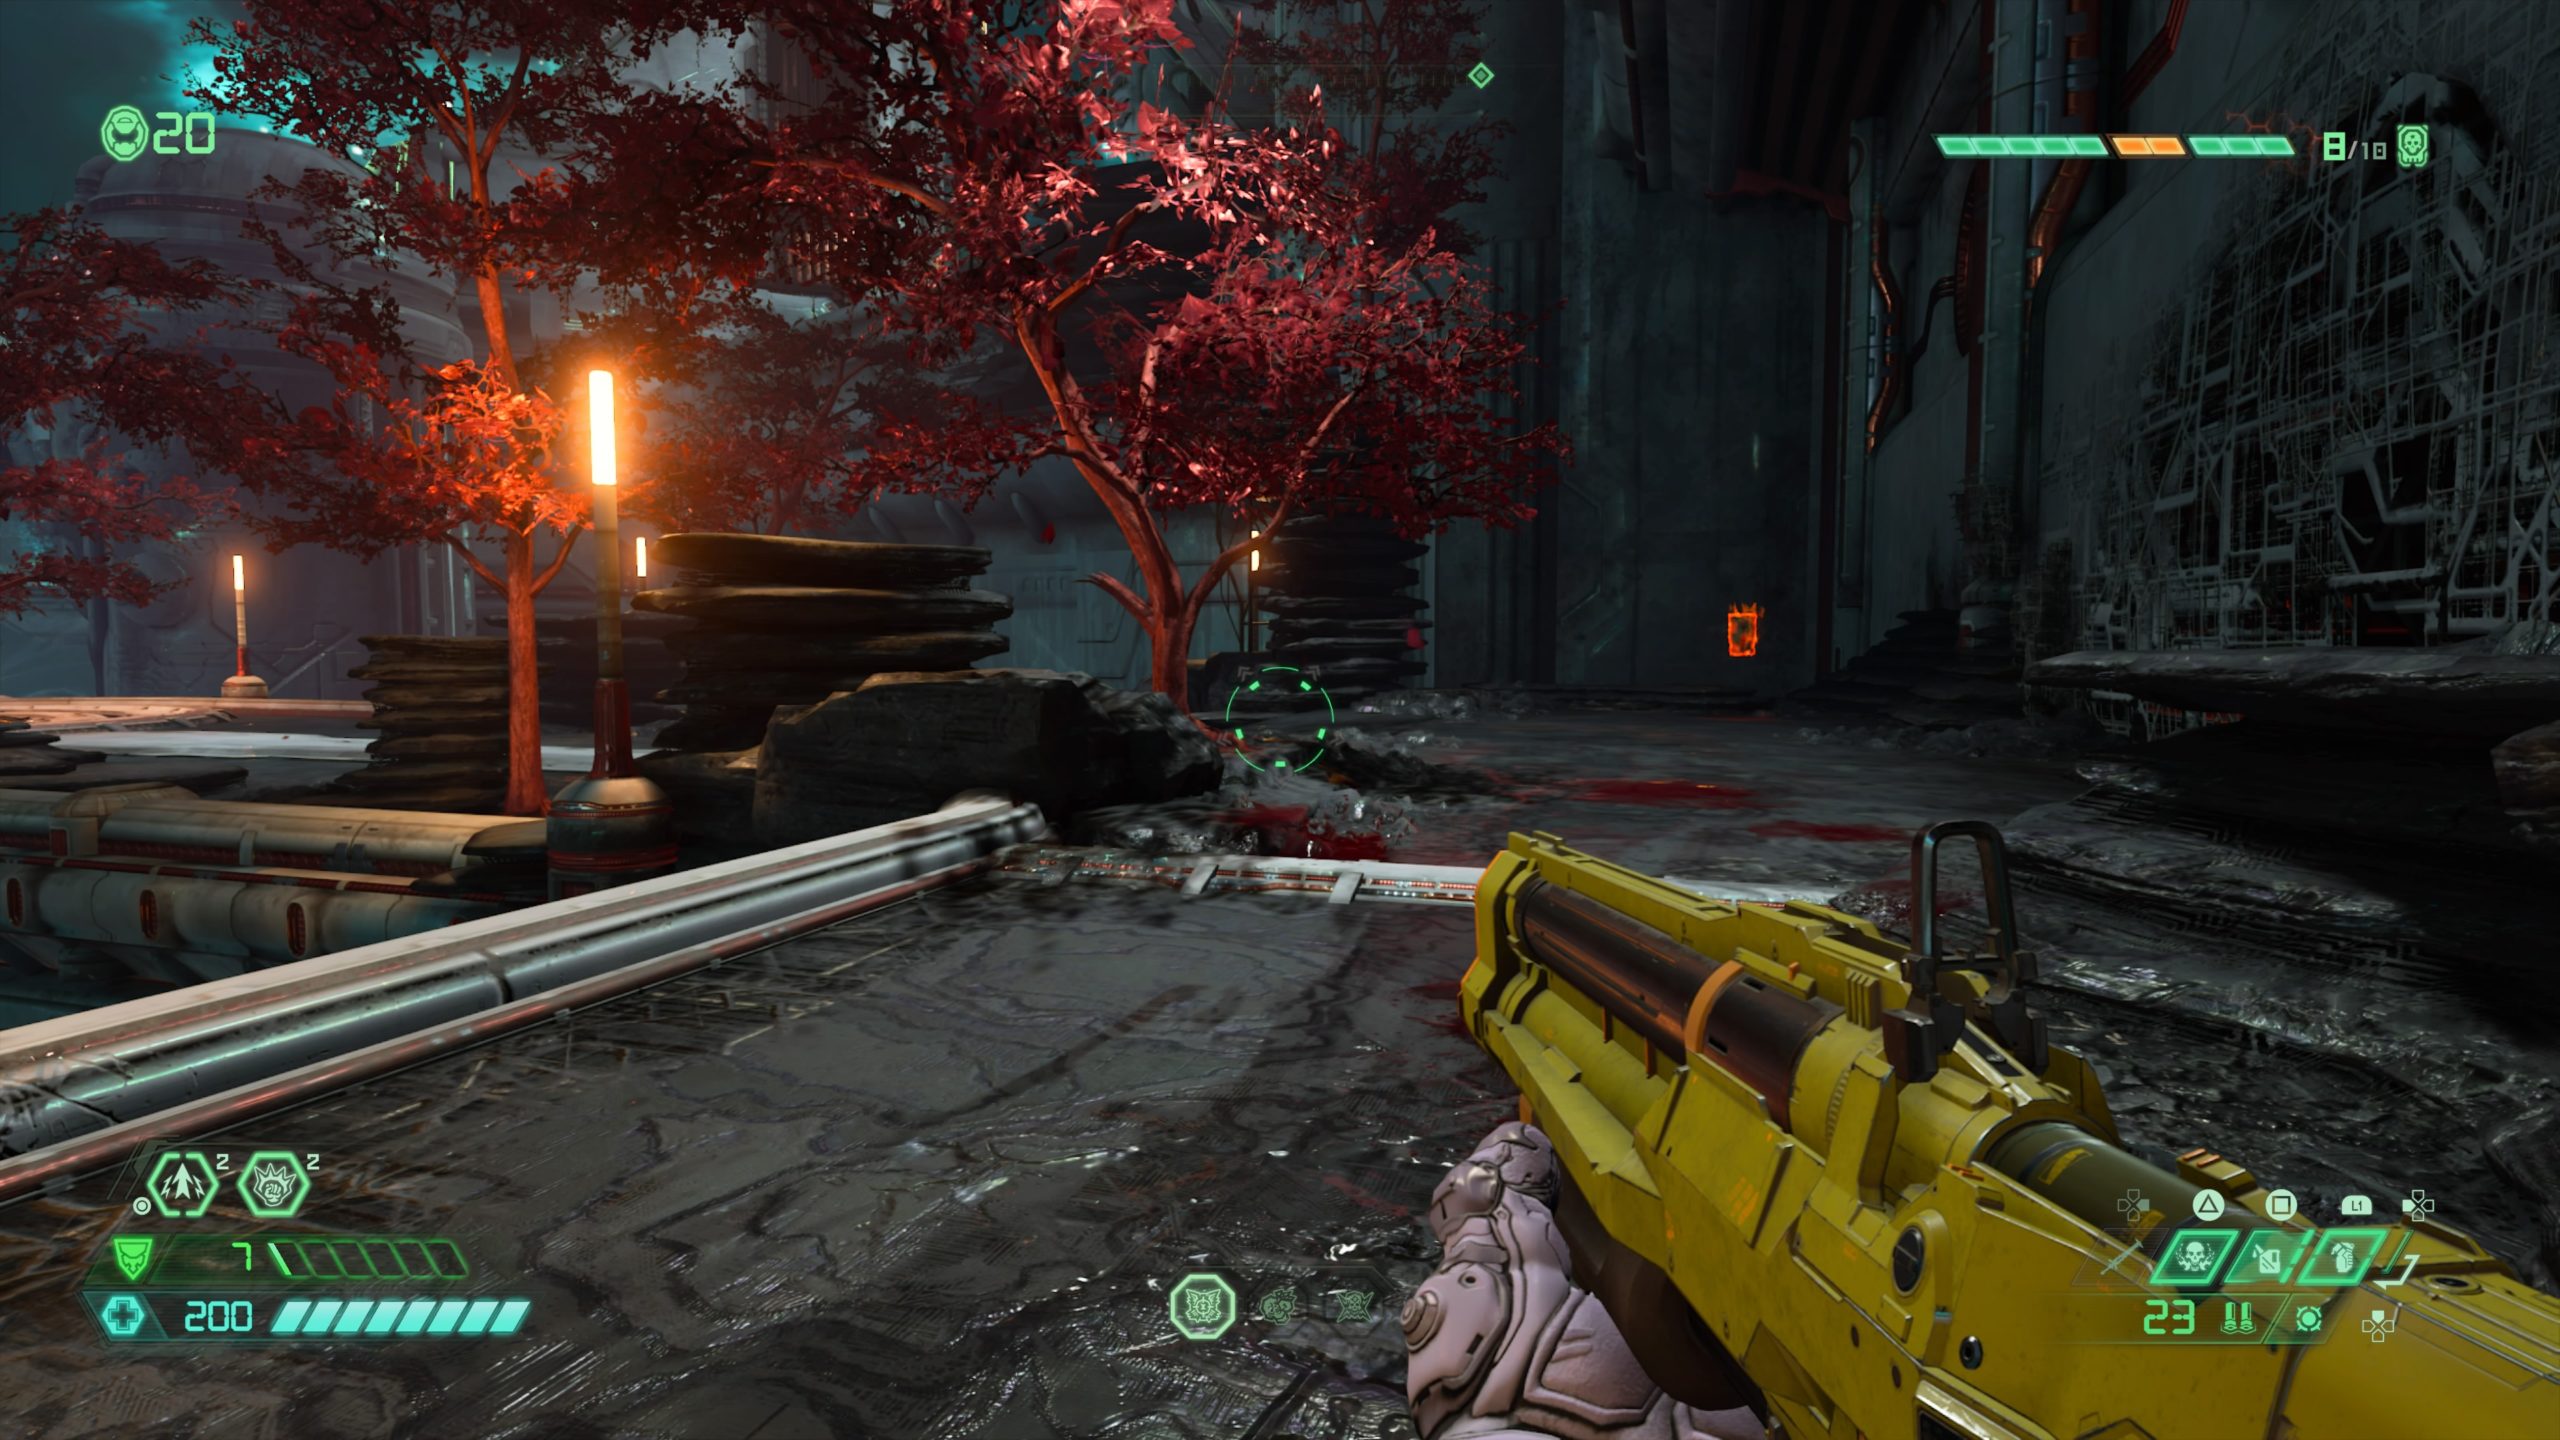
Toy: Khan Maykr
From the fast travel point, head to the right side of the room past the open doorway. In the next room proceed through the door and head through a hallway to reach an outdoor area. Head towards the trees on the right. You will need to walk off the ledge backwards near the lamp post and tree to find a small ledge containing the collectible. You will need to use dash to reach it.
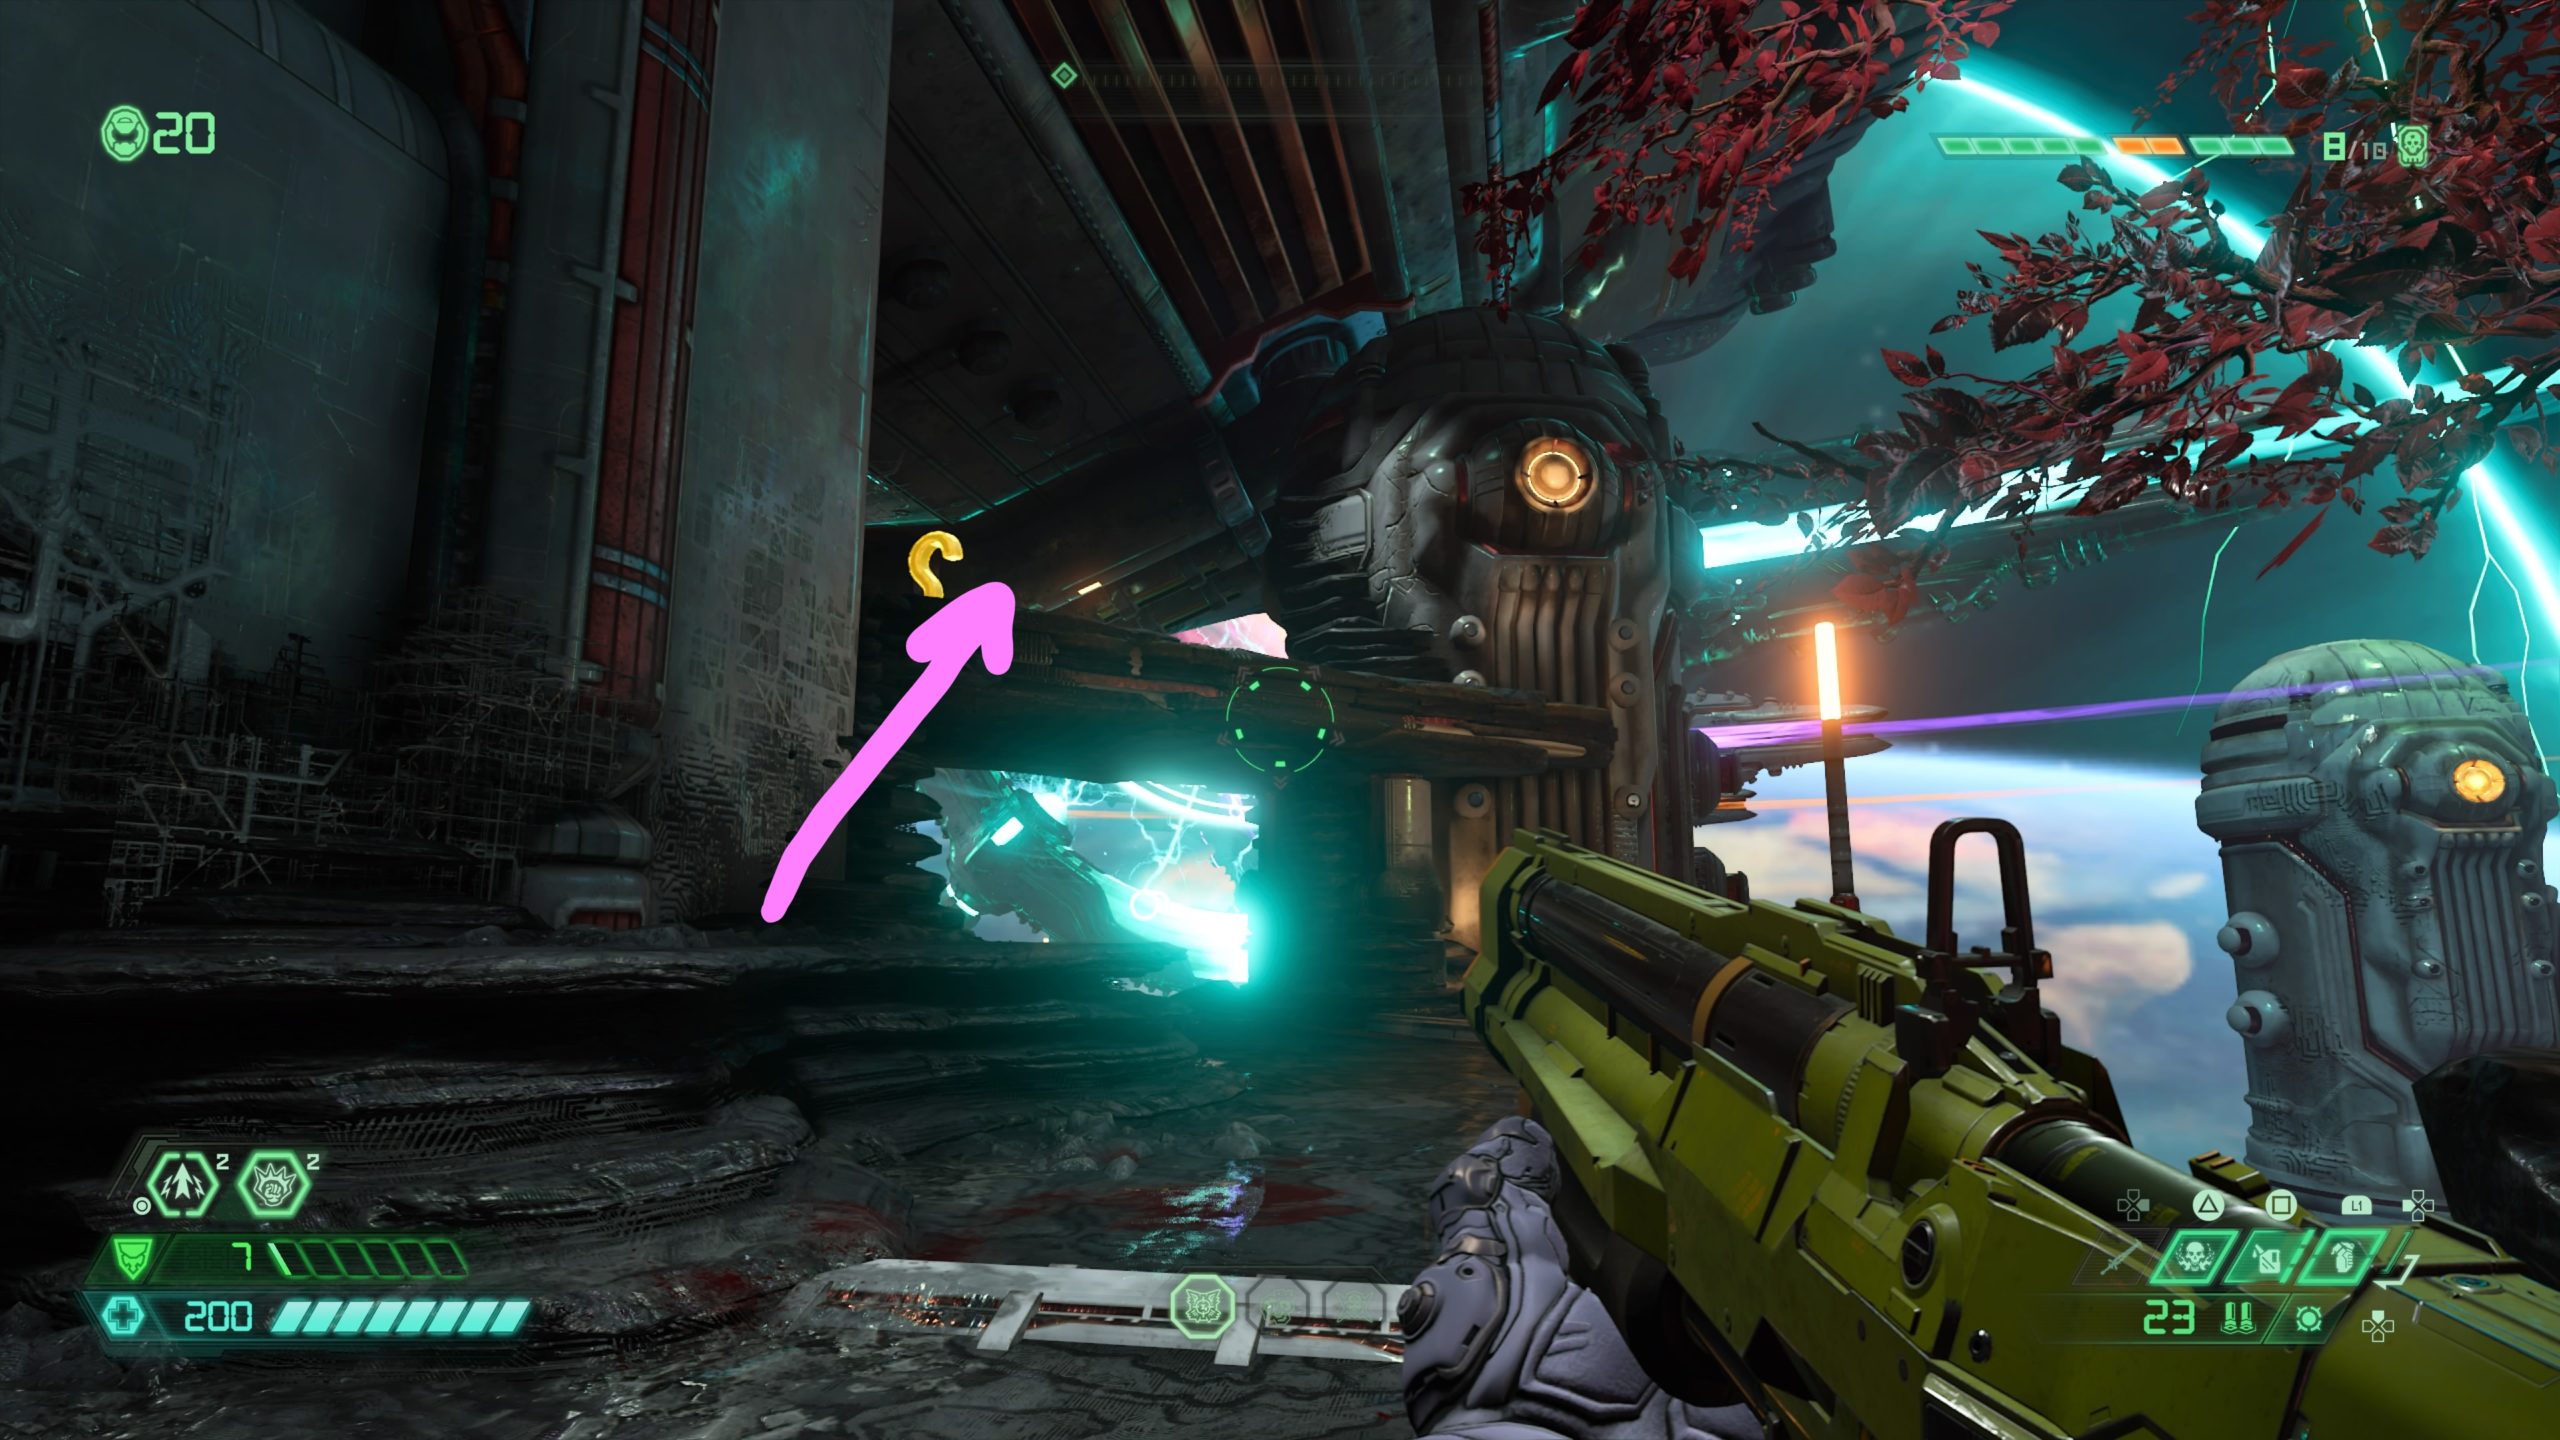
Praetor Suit Point
From the toy, use the portal to reach the ledge above then step on the green switch to trigger the warp gates. Jump to the warp gate and follow the path right along the structure. You will need to use the stack on the right of the structure outside to reach the ledge on the inside containing the cracked wall. Melee the wall to reach the Sentinel holding the point.
Codex: Story of the Maykrs – Maykr Angels
From the fast travel point, follow the path right along the building (left of the door leading to the lacerator) to find the codex.
Toy: Maykr Drone

From the codex, take the path heading back towards the fast travel point to find a higher ledge a short distance away. Use the layered rocks on the left side before the ledge to jump onto the ledge. The ledge contains the collectible.
Praetor Suit Point

From the fast travel point, head into the structure to find the Sentinel holding the point behind the elevator.
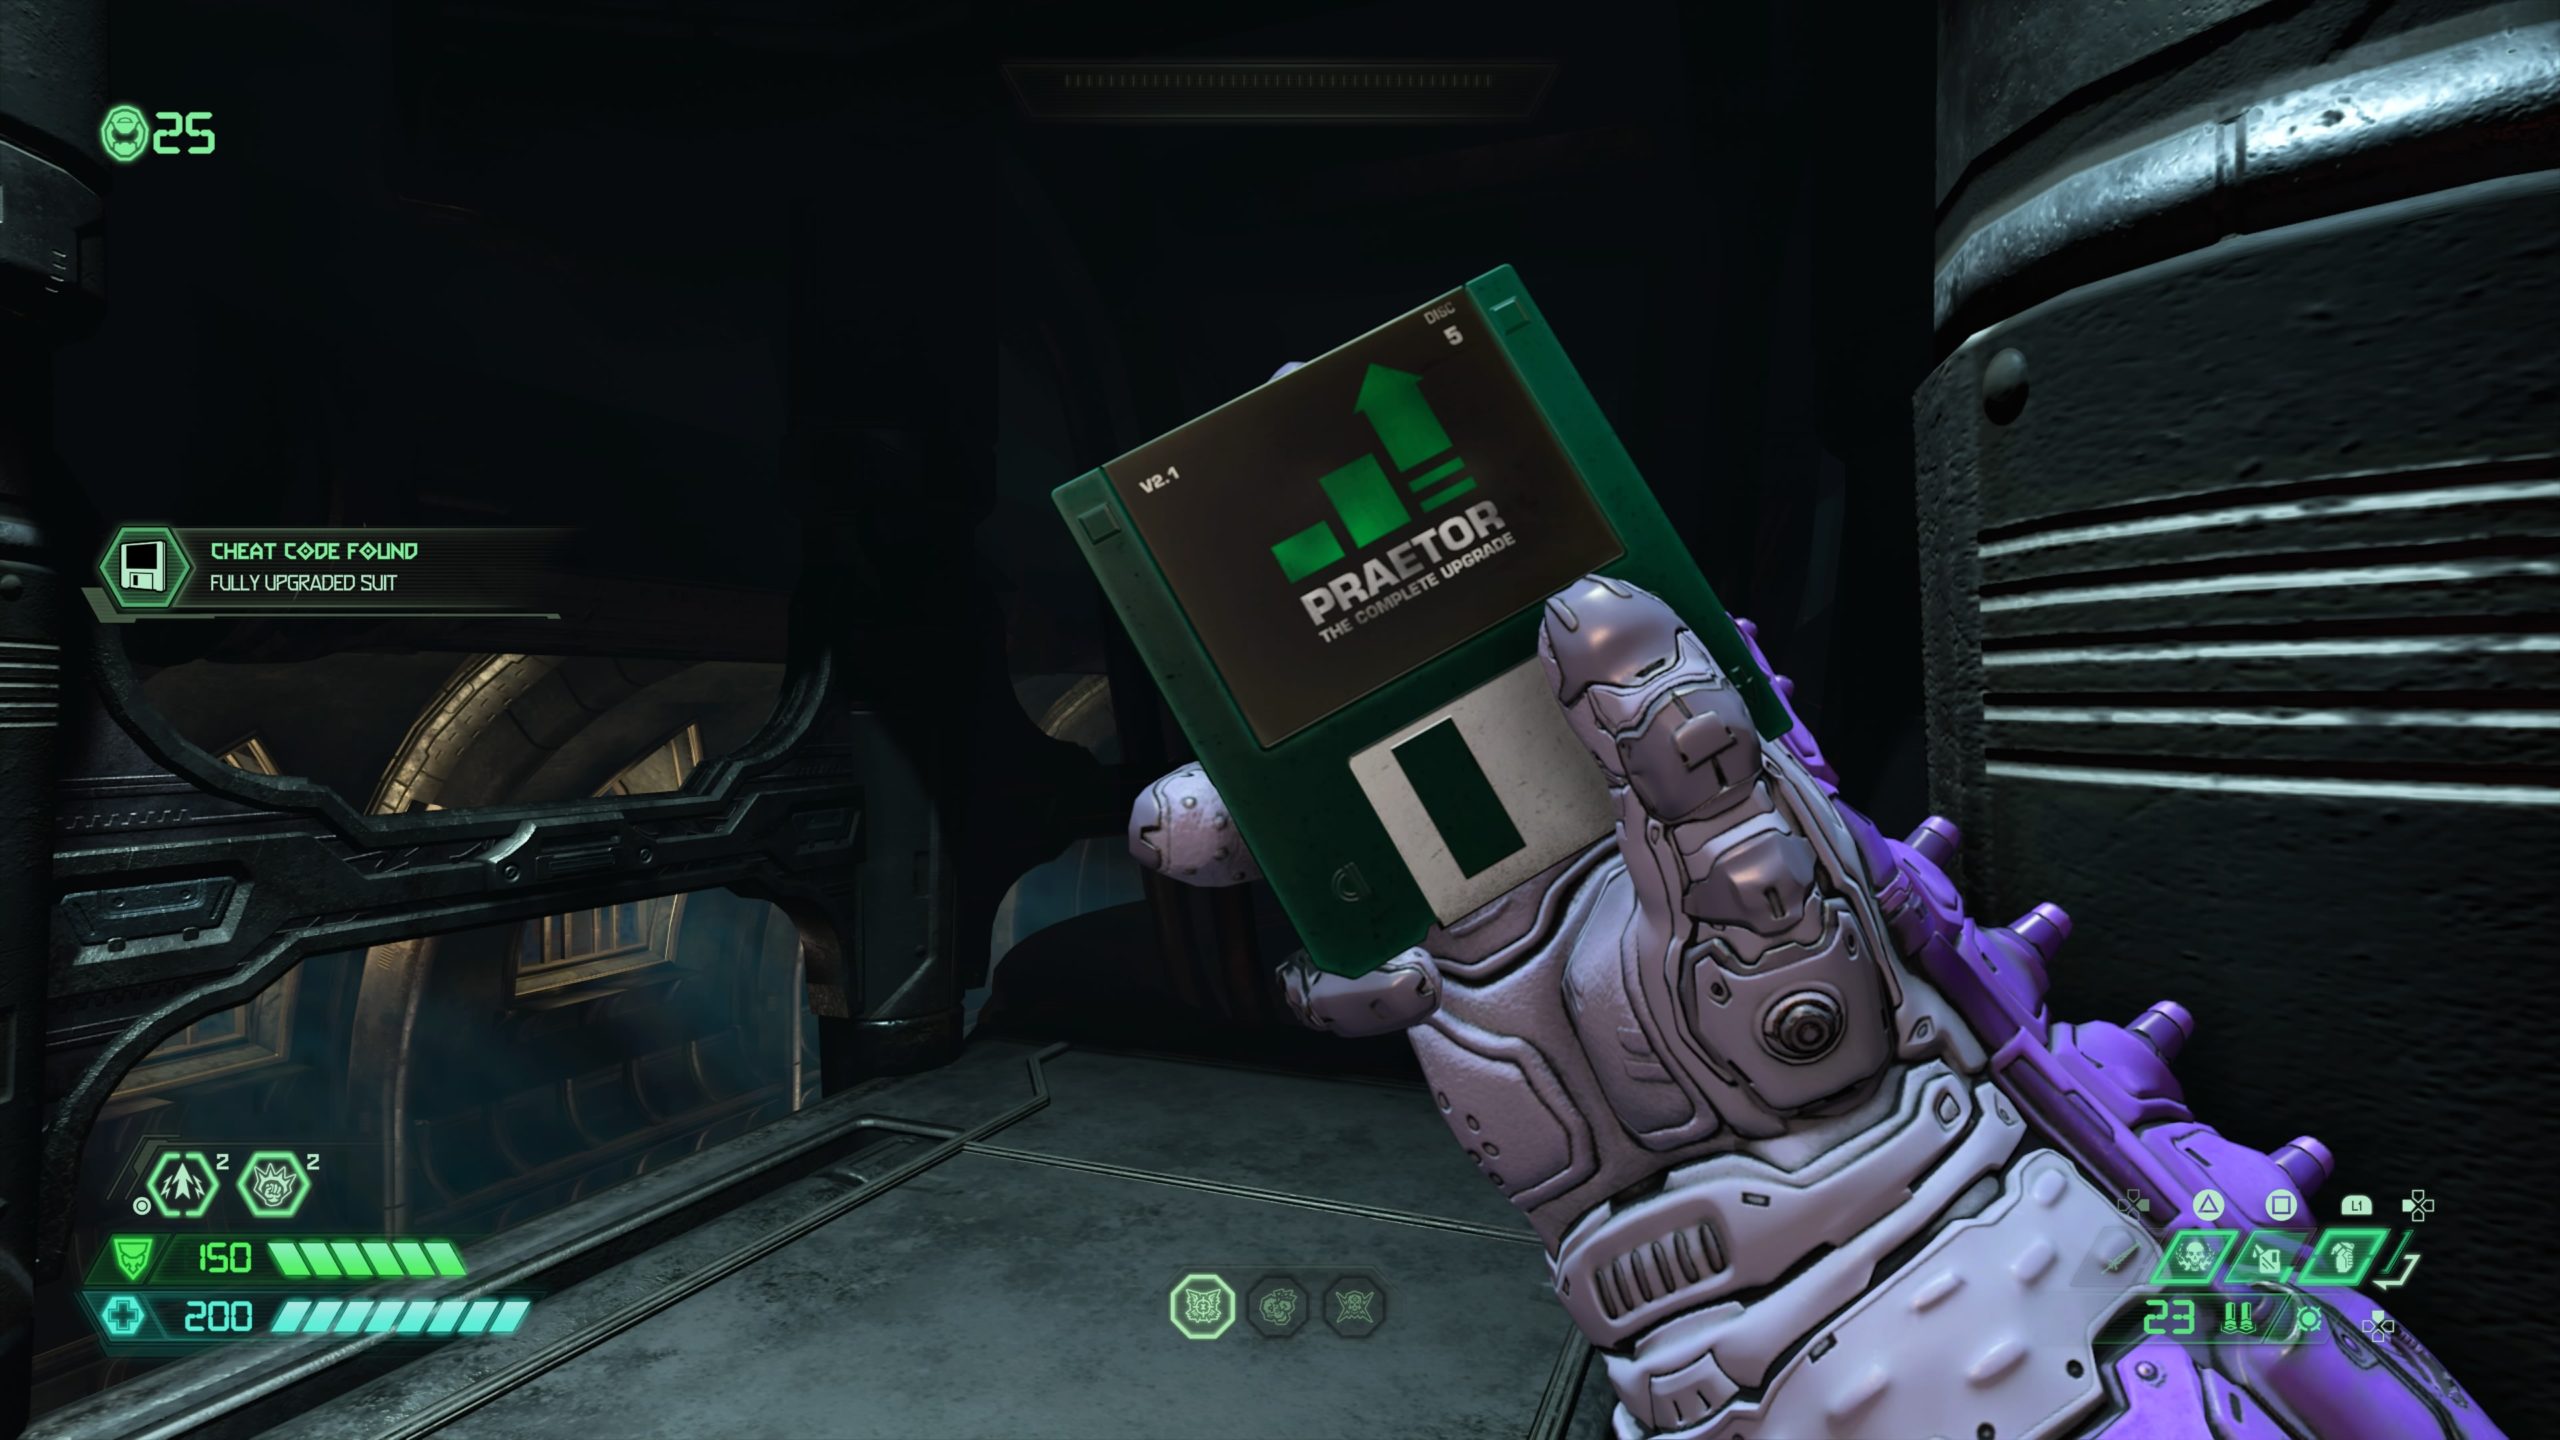
Cheat Code: Powerup Mode: Berserk
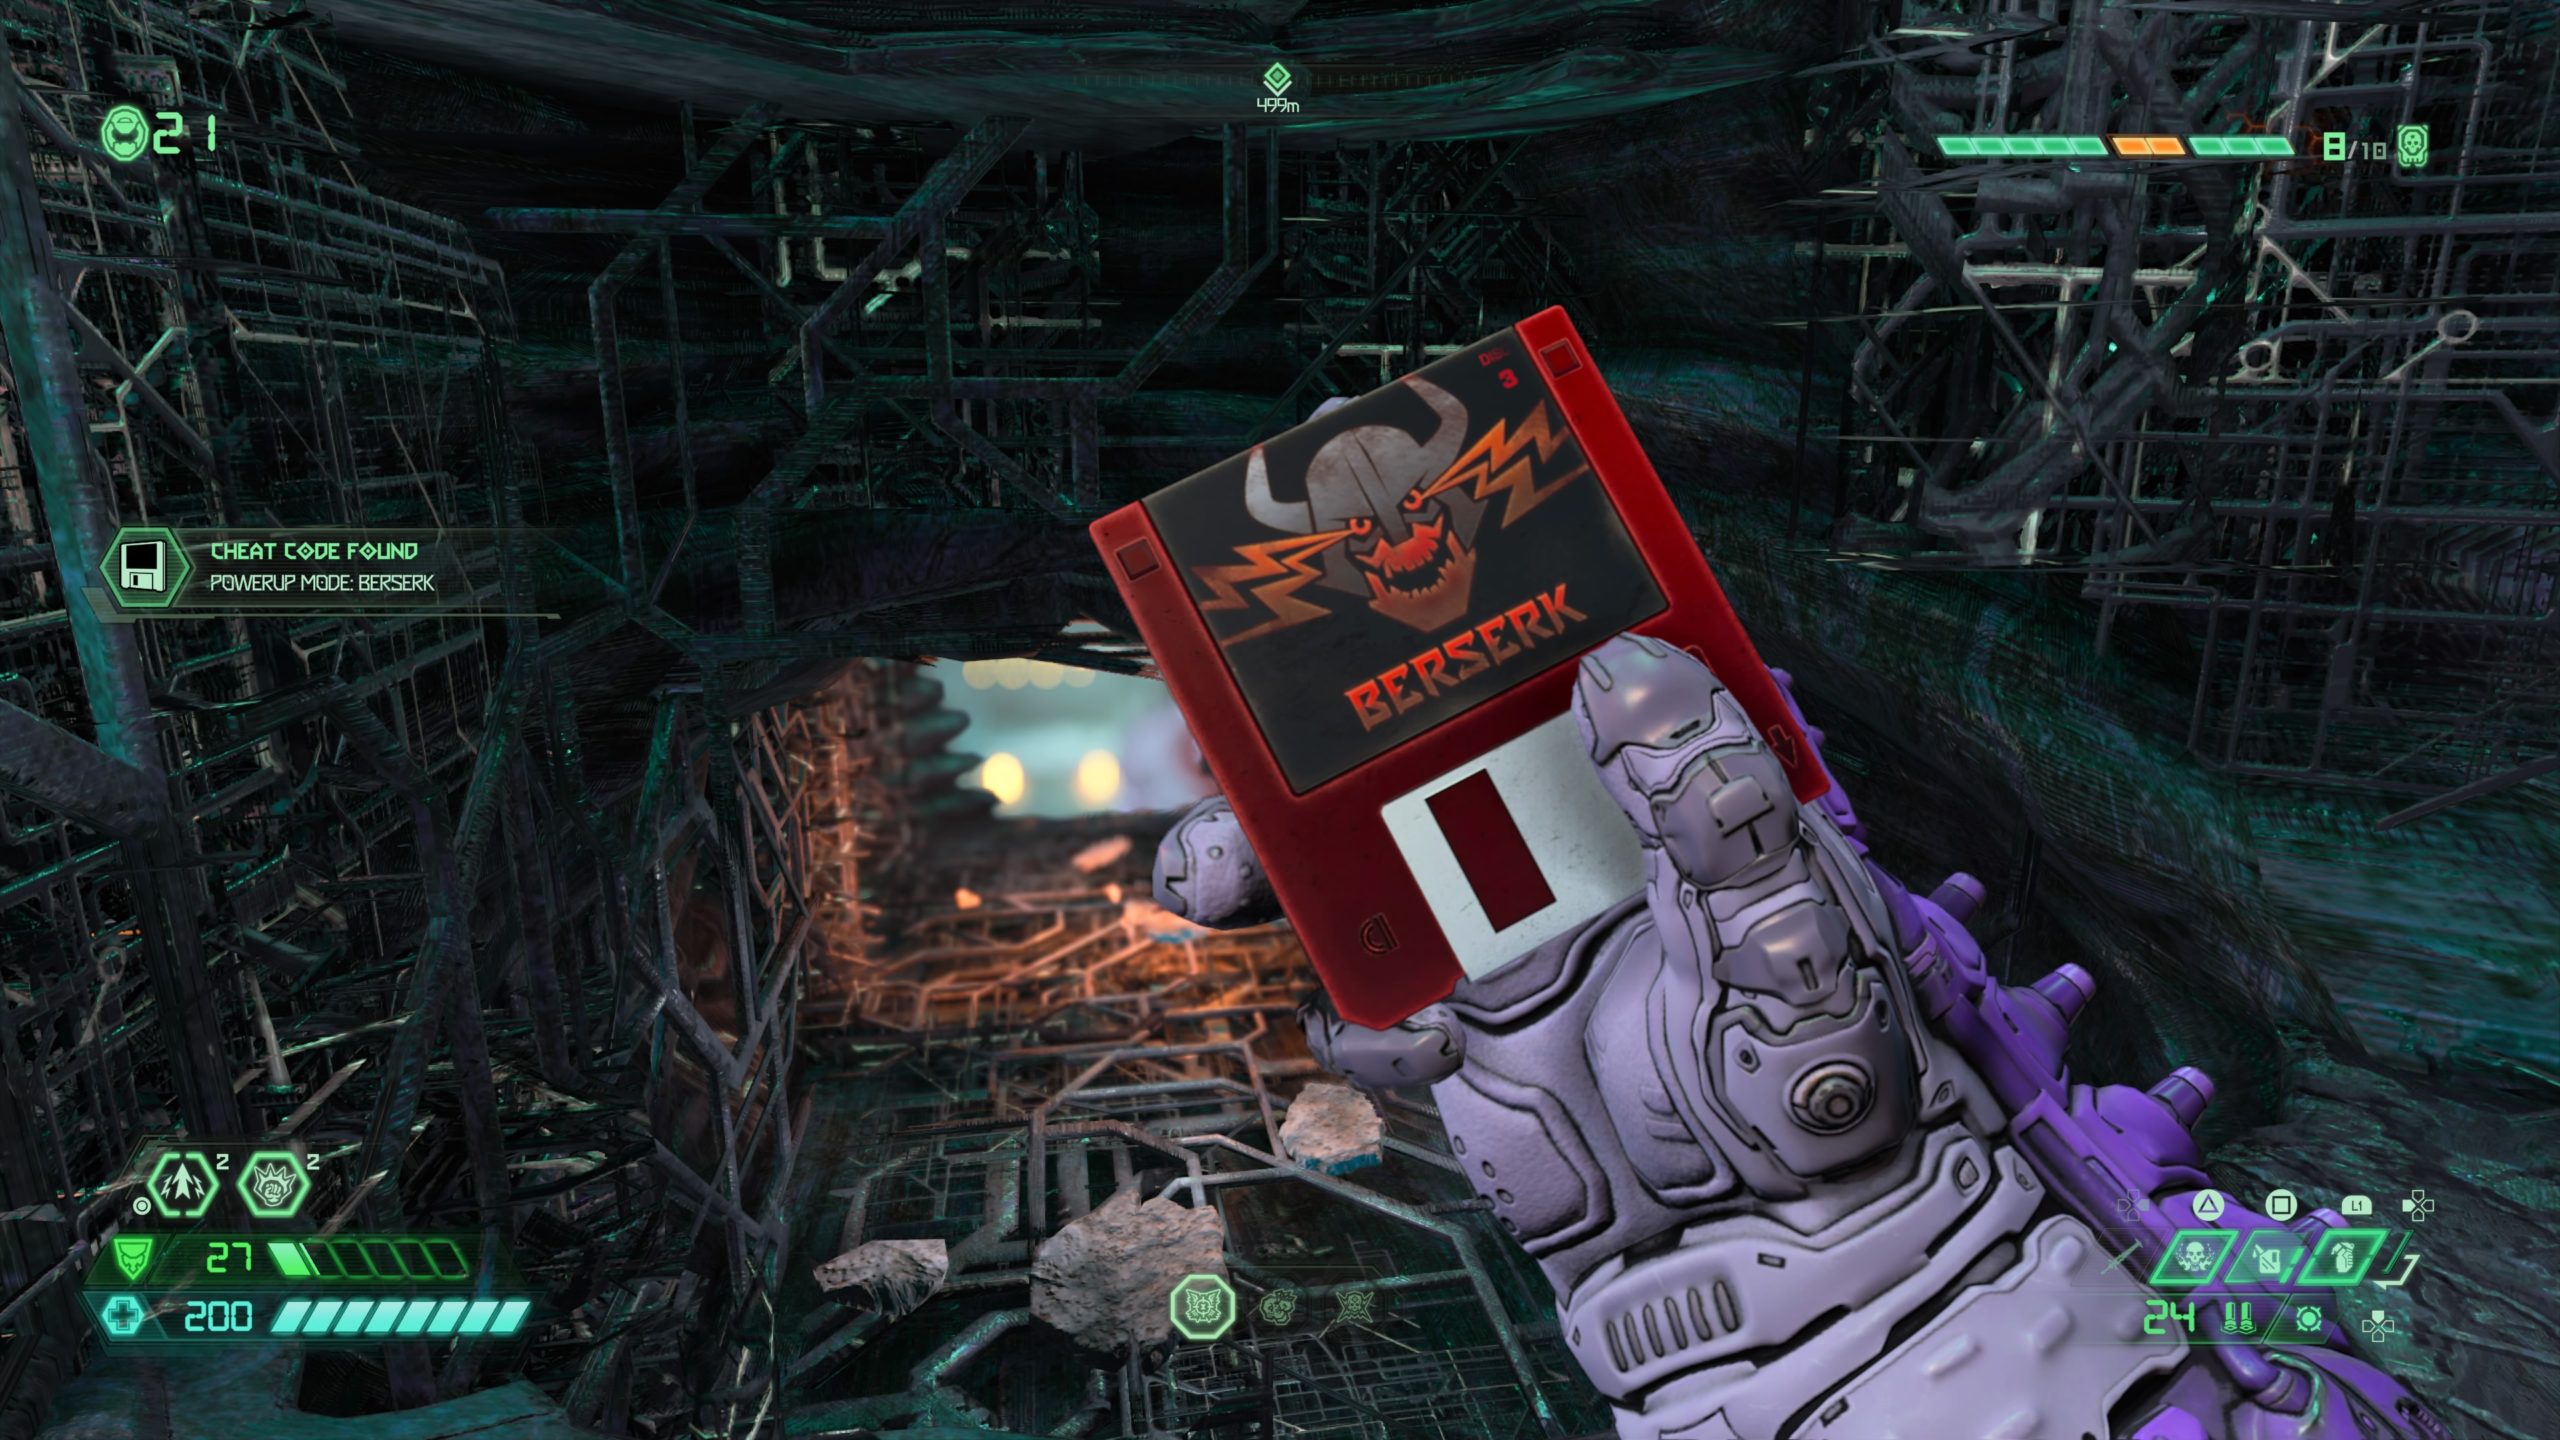
From the sentinel, take the elevator up then head through the doorway to reach a control room. Head through the door on the left to go outside. Head to the left ledge overlooking the giant beam to spot a cracked wall in the side of the structure. Jump to the wall and melee it to find the cheat code inside.

Toy: Spectre

From the fast travel point, enter the door and head left through the area to reach another doorway. Follow the hallway to the end to go back outside. Step on the green switch to spawn a warp portal. Jump through it then dash to two hanging climbable walls to reach the structure in the distance. On the second hanging wall, turn left and jump to the small opening with a green light above it. Head inside and go through the door on the left. Take the elevator up and follow the path right to find a door. Head through the door and walk to the ledge straight ahead. The collectible can be found to the left along the side of the building. Use double jump and dash to reach it.
![]()

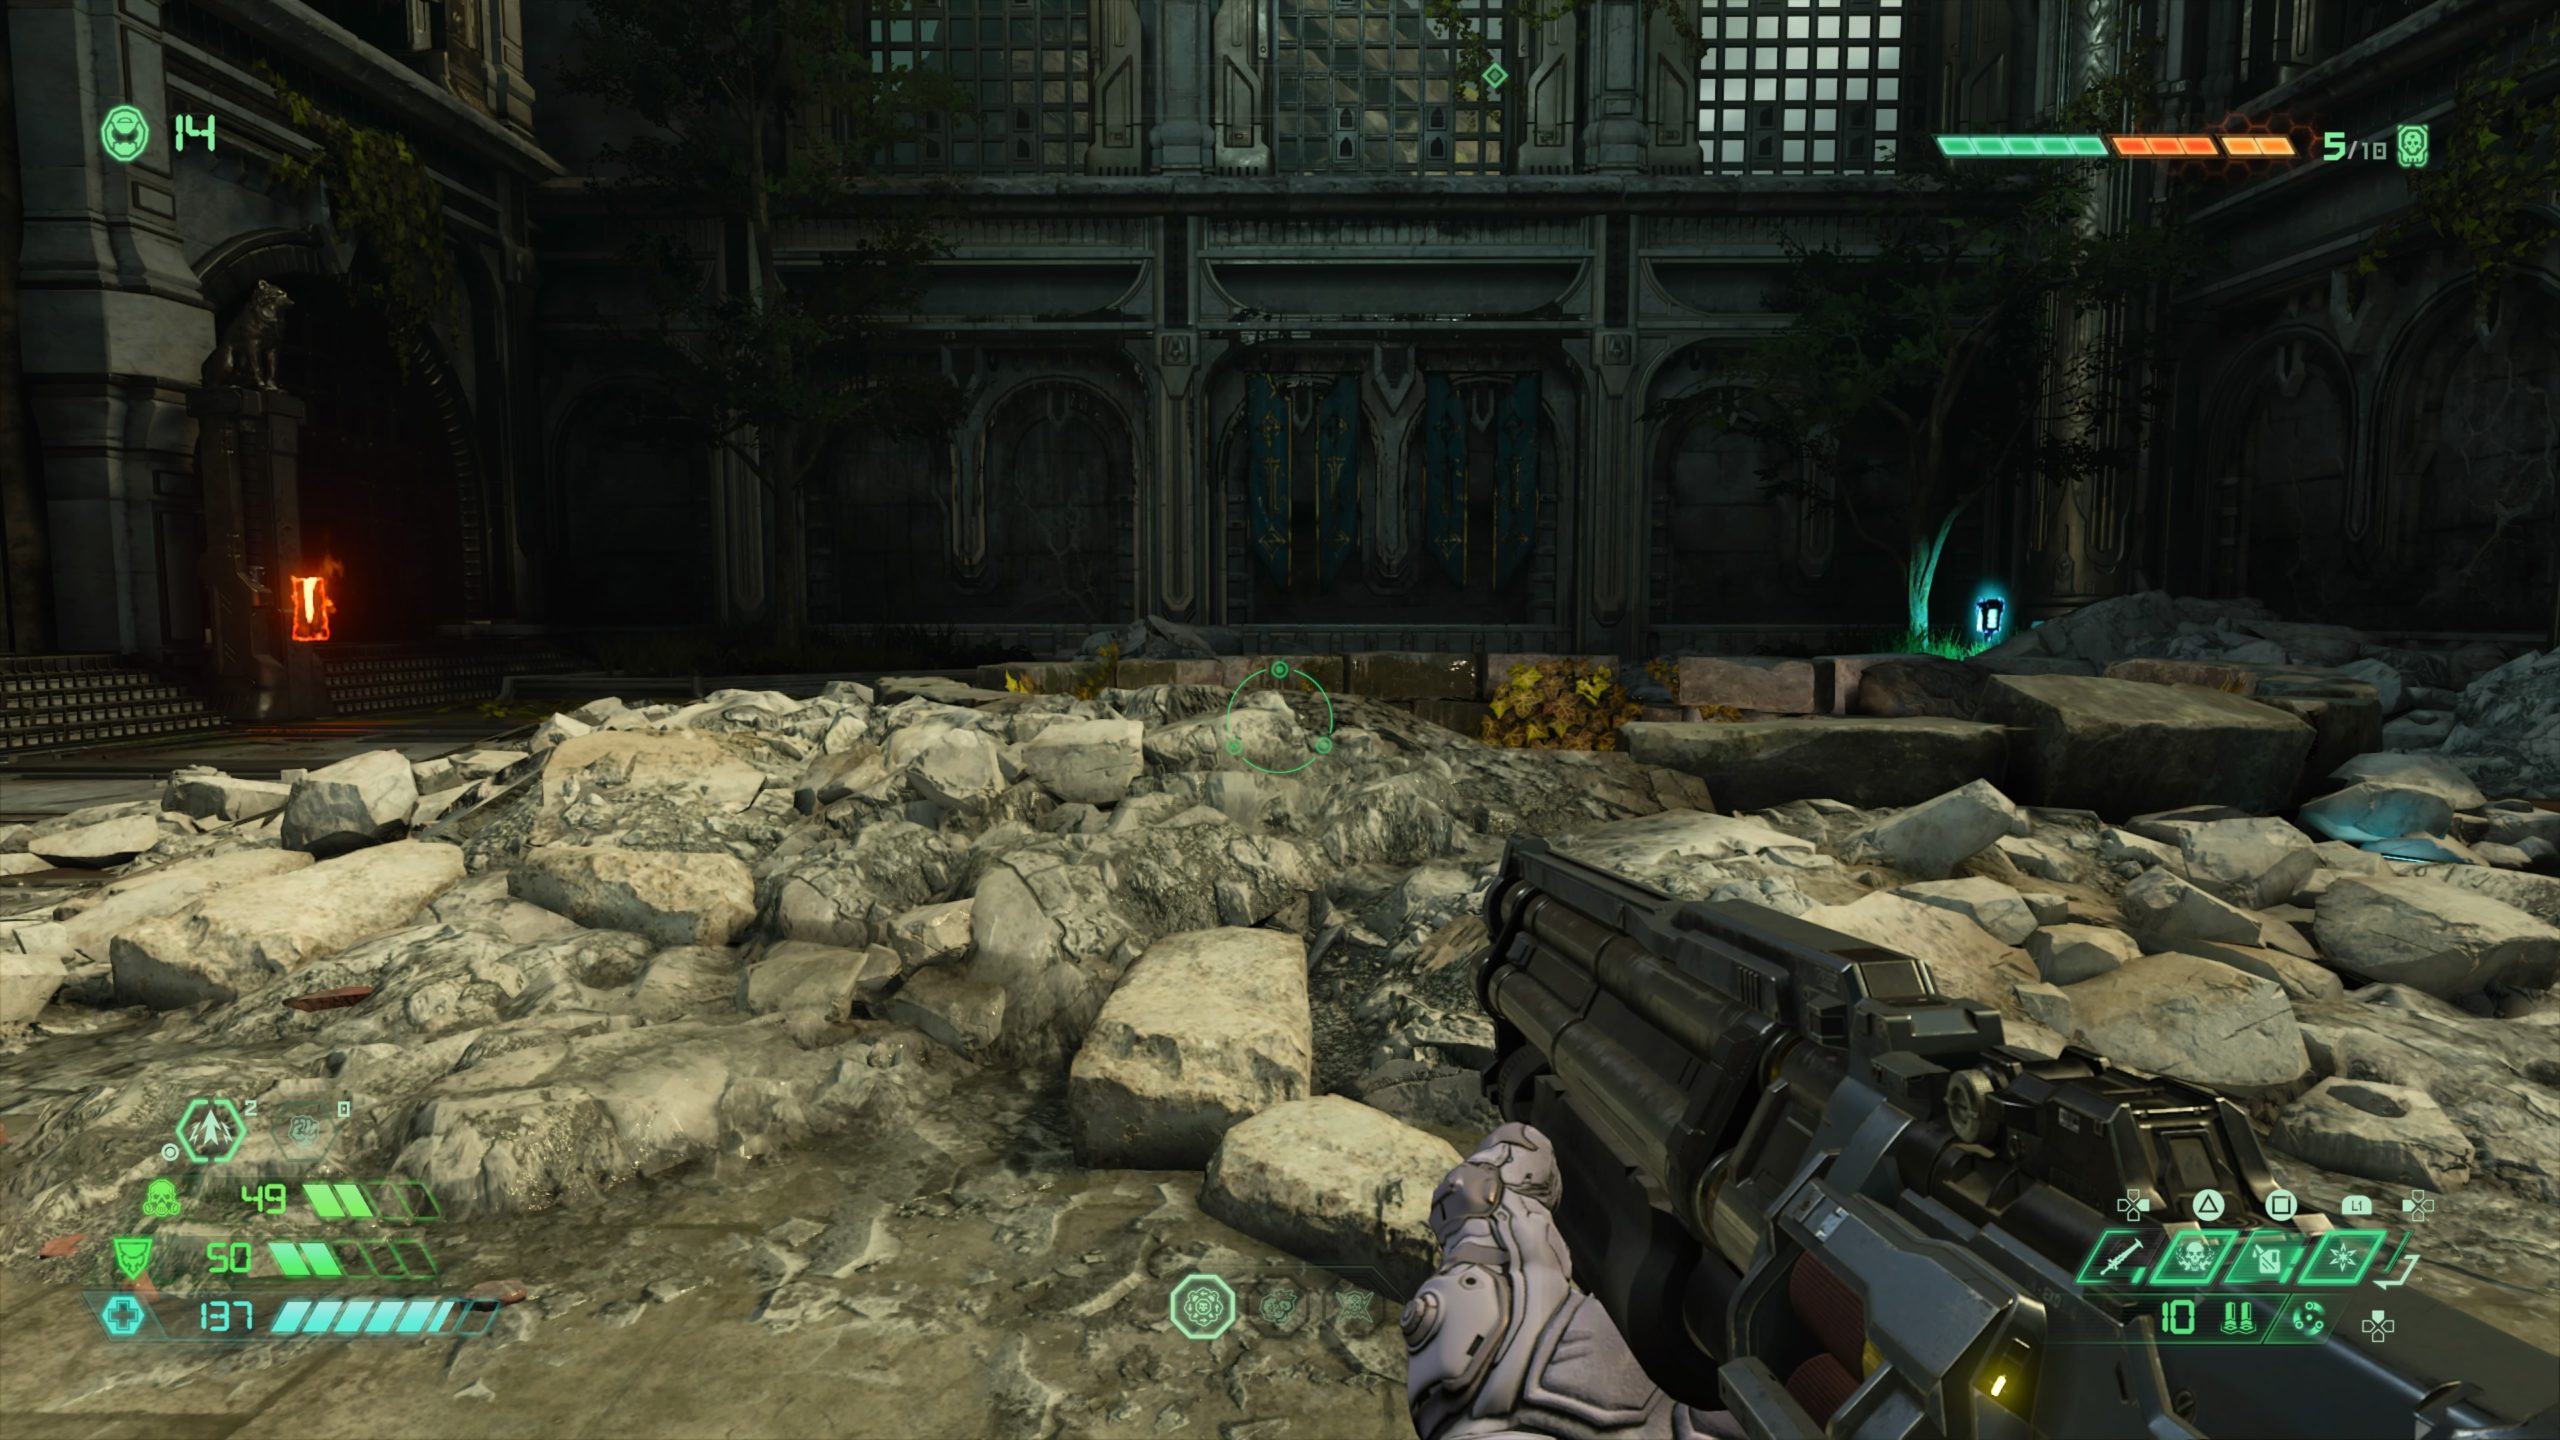
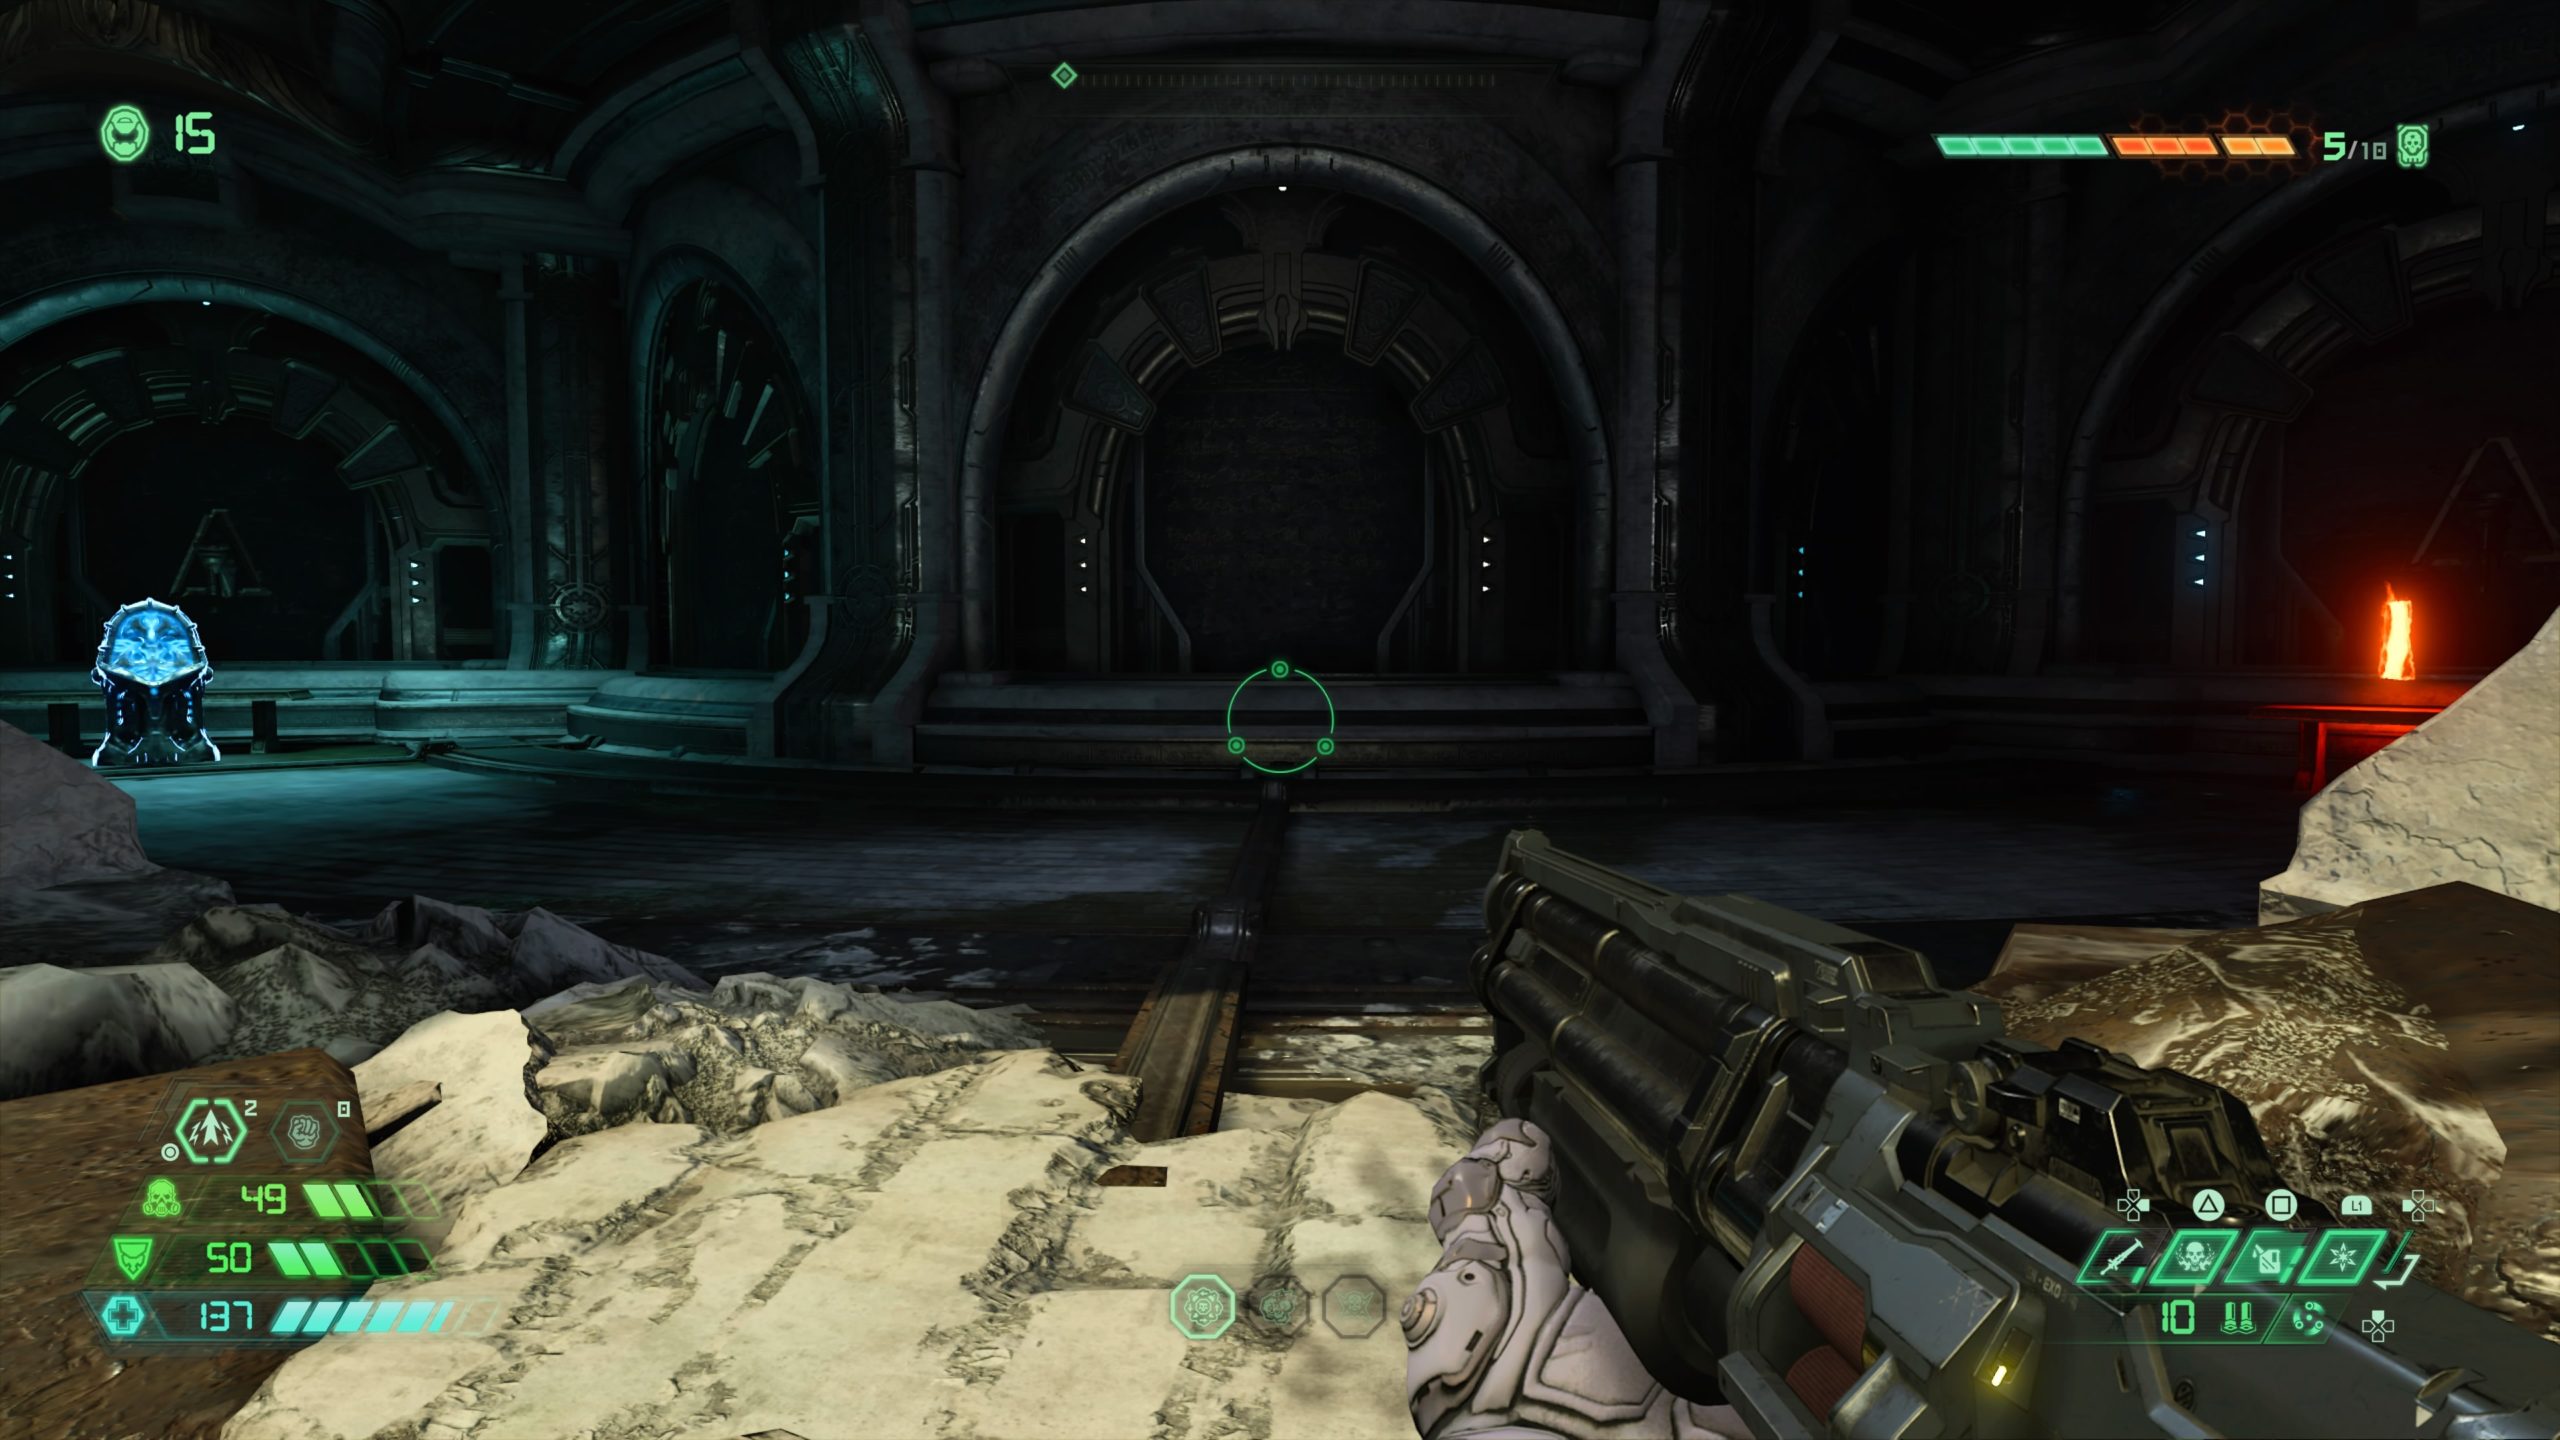
Codex: Story of the Sentinels – Taras Nabad
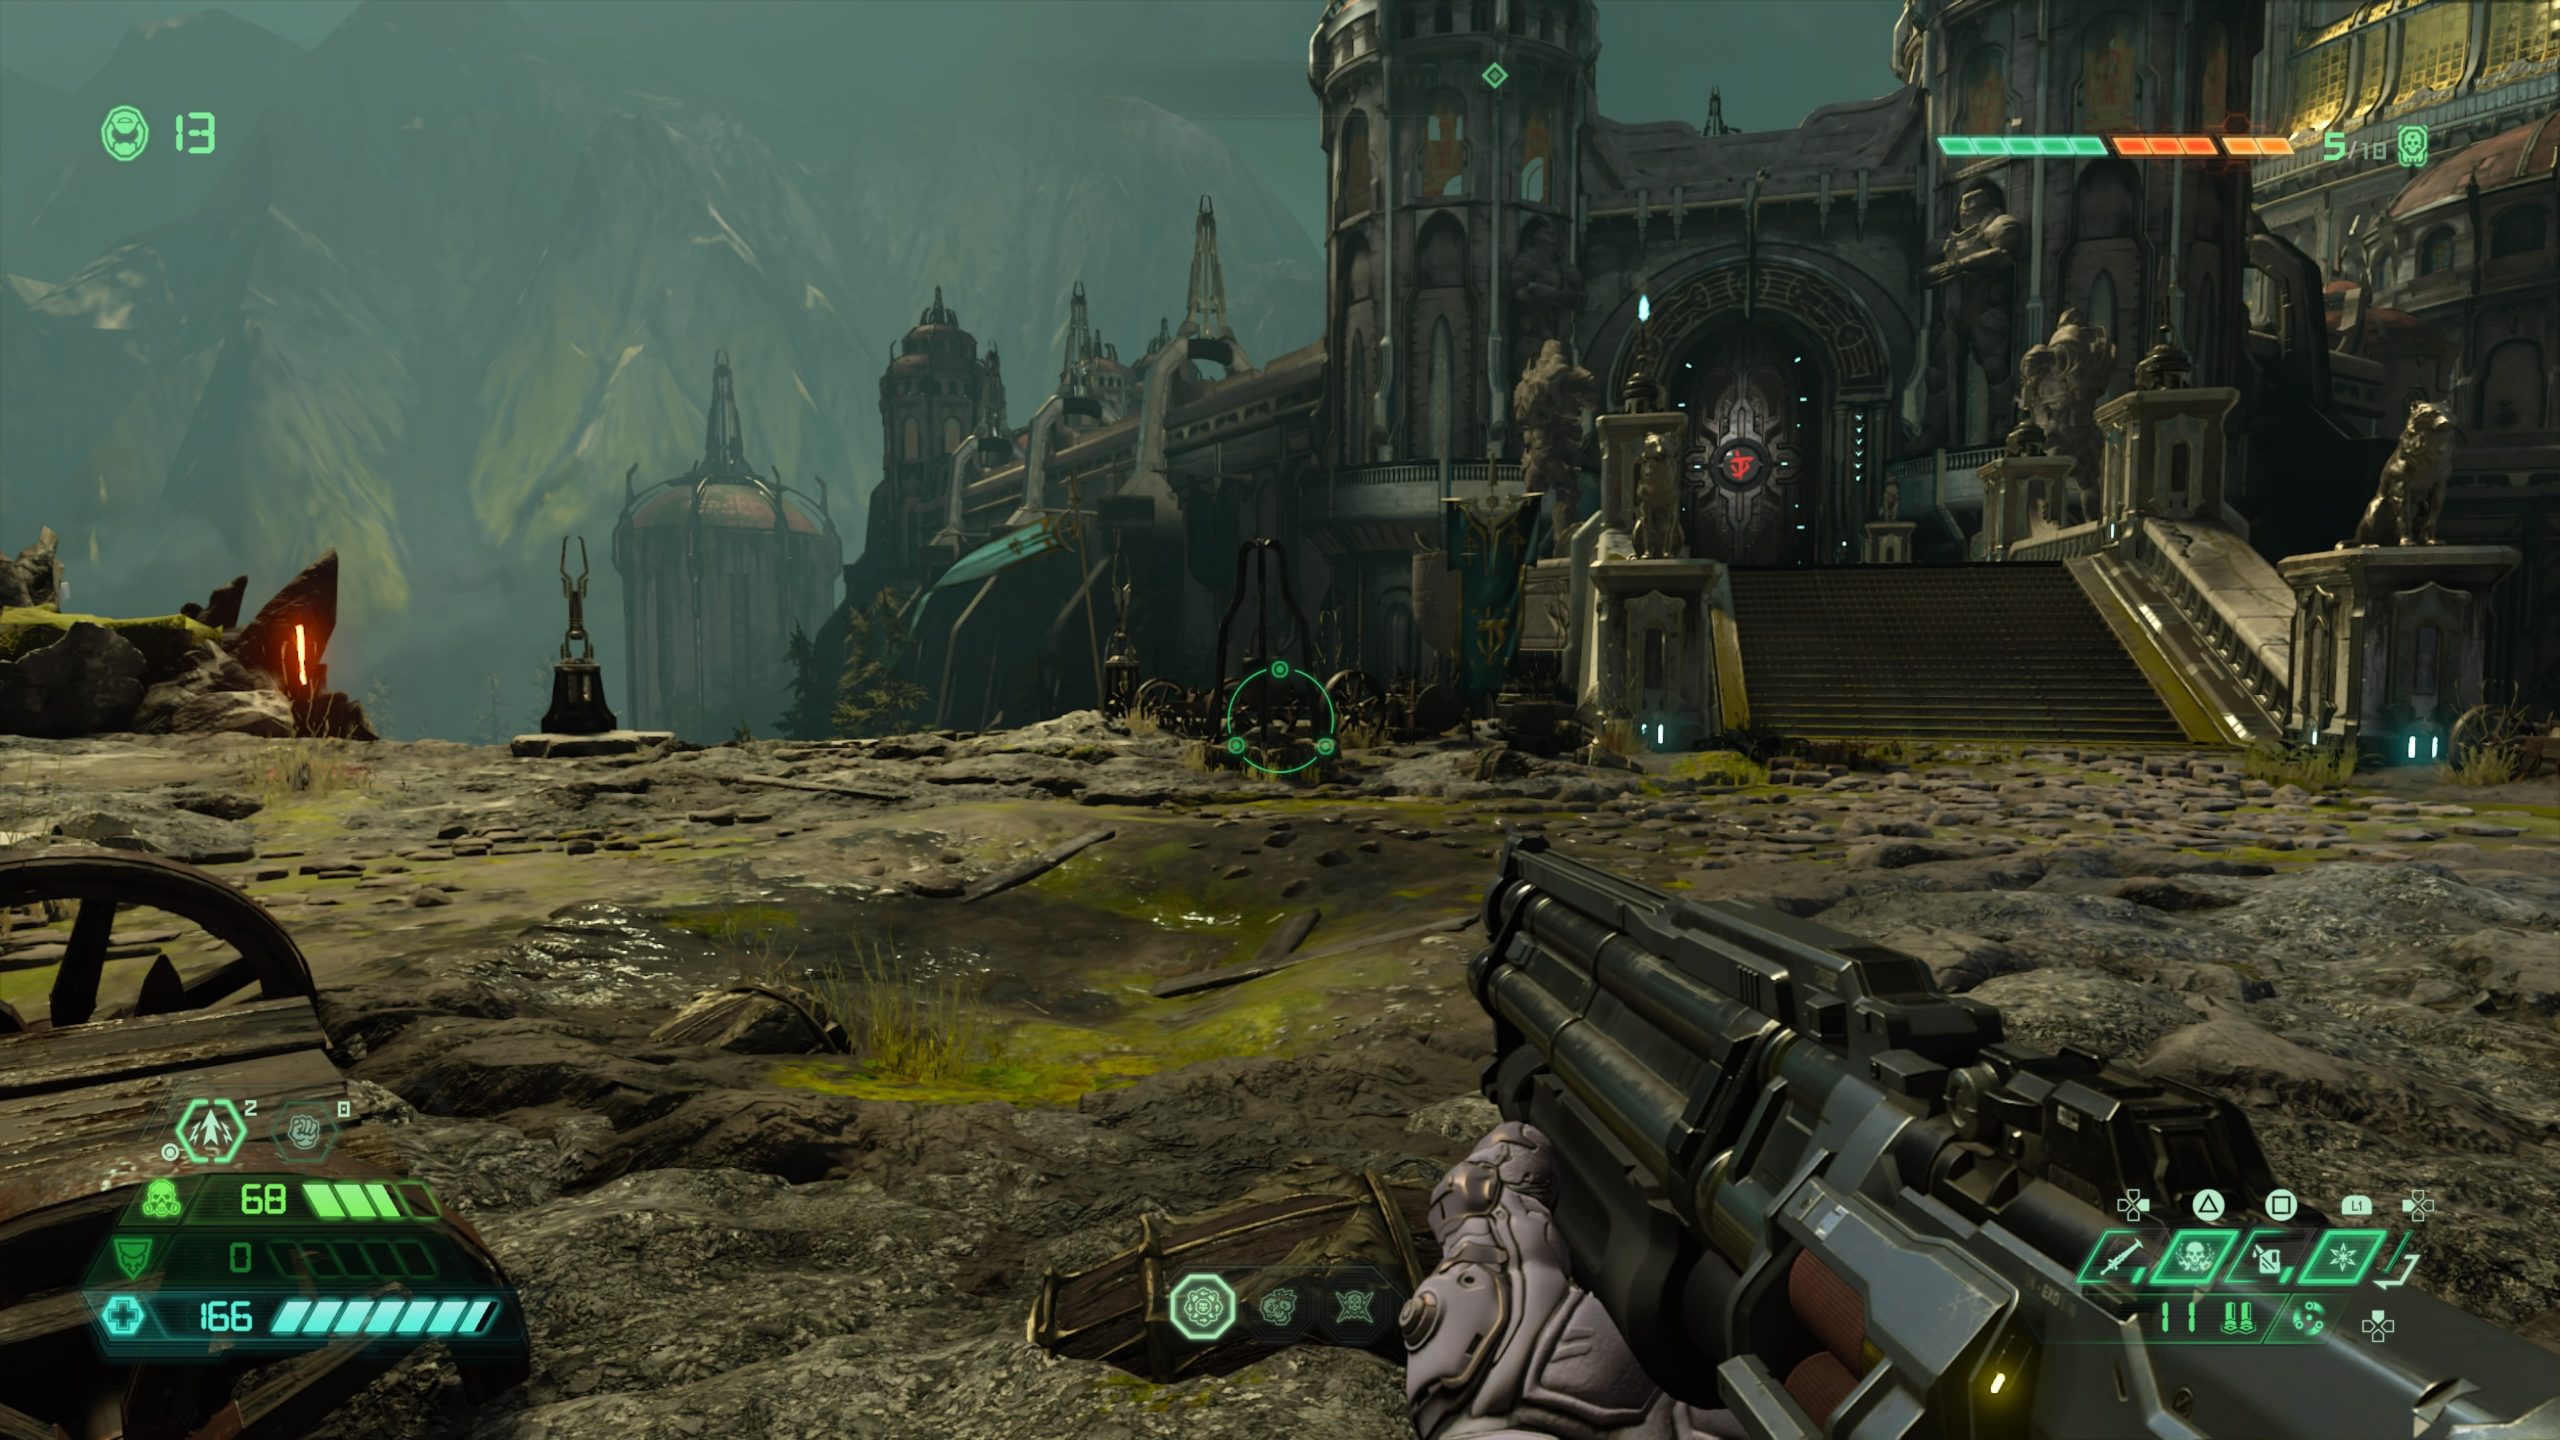
From the fast travel point, jump to the land at the bottom of the stairs just before the entrance to the city. The codex will be on the left of the stairs near the edge of the cliff.
Sentinel Battery
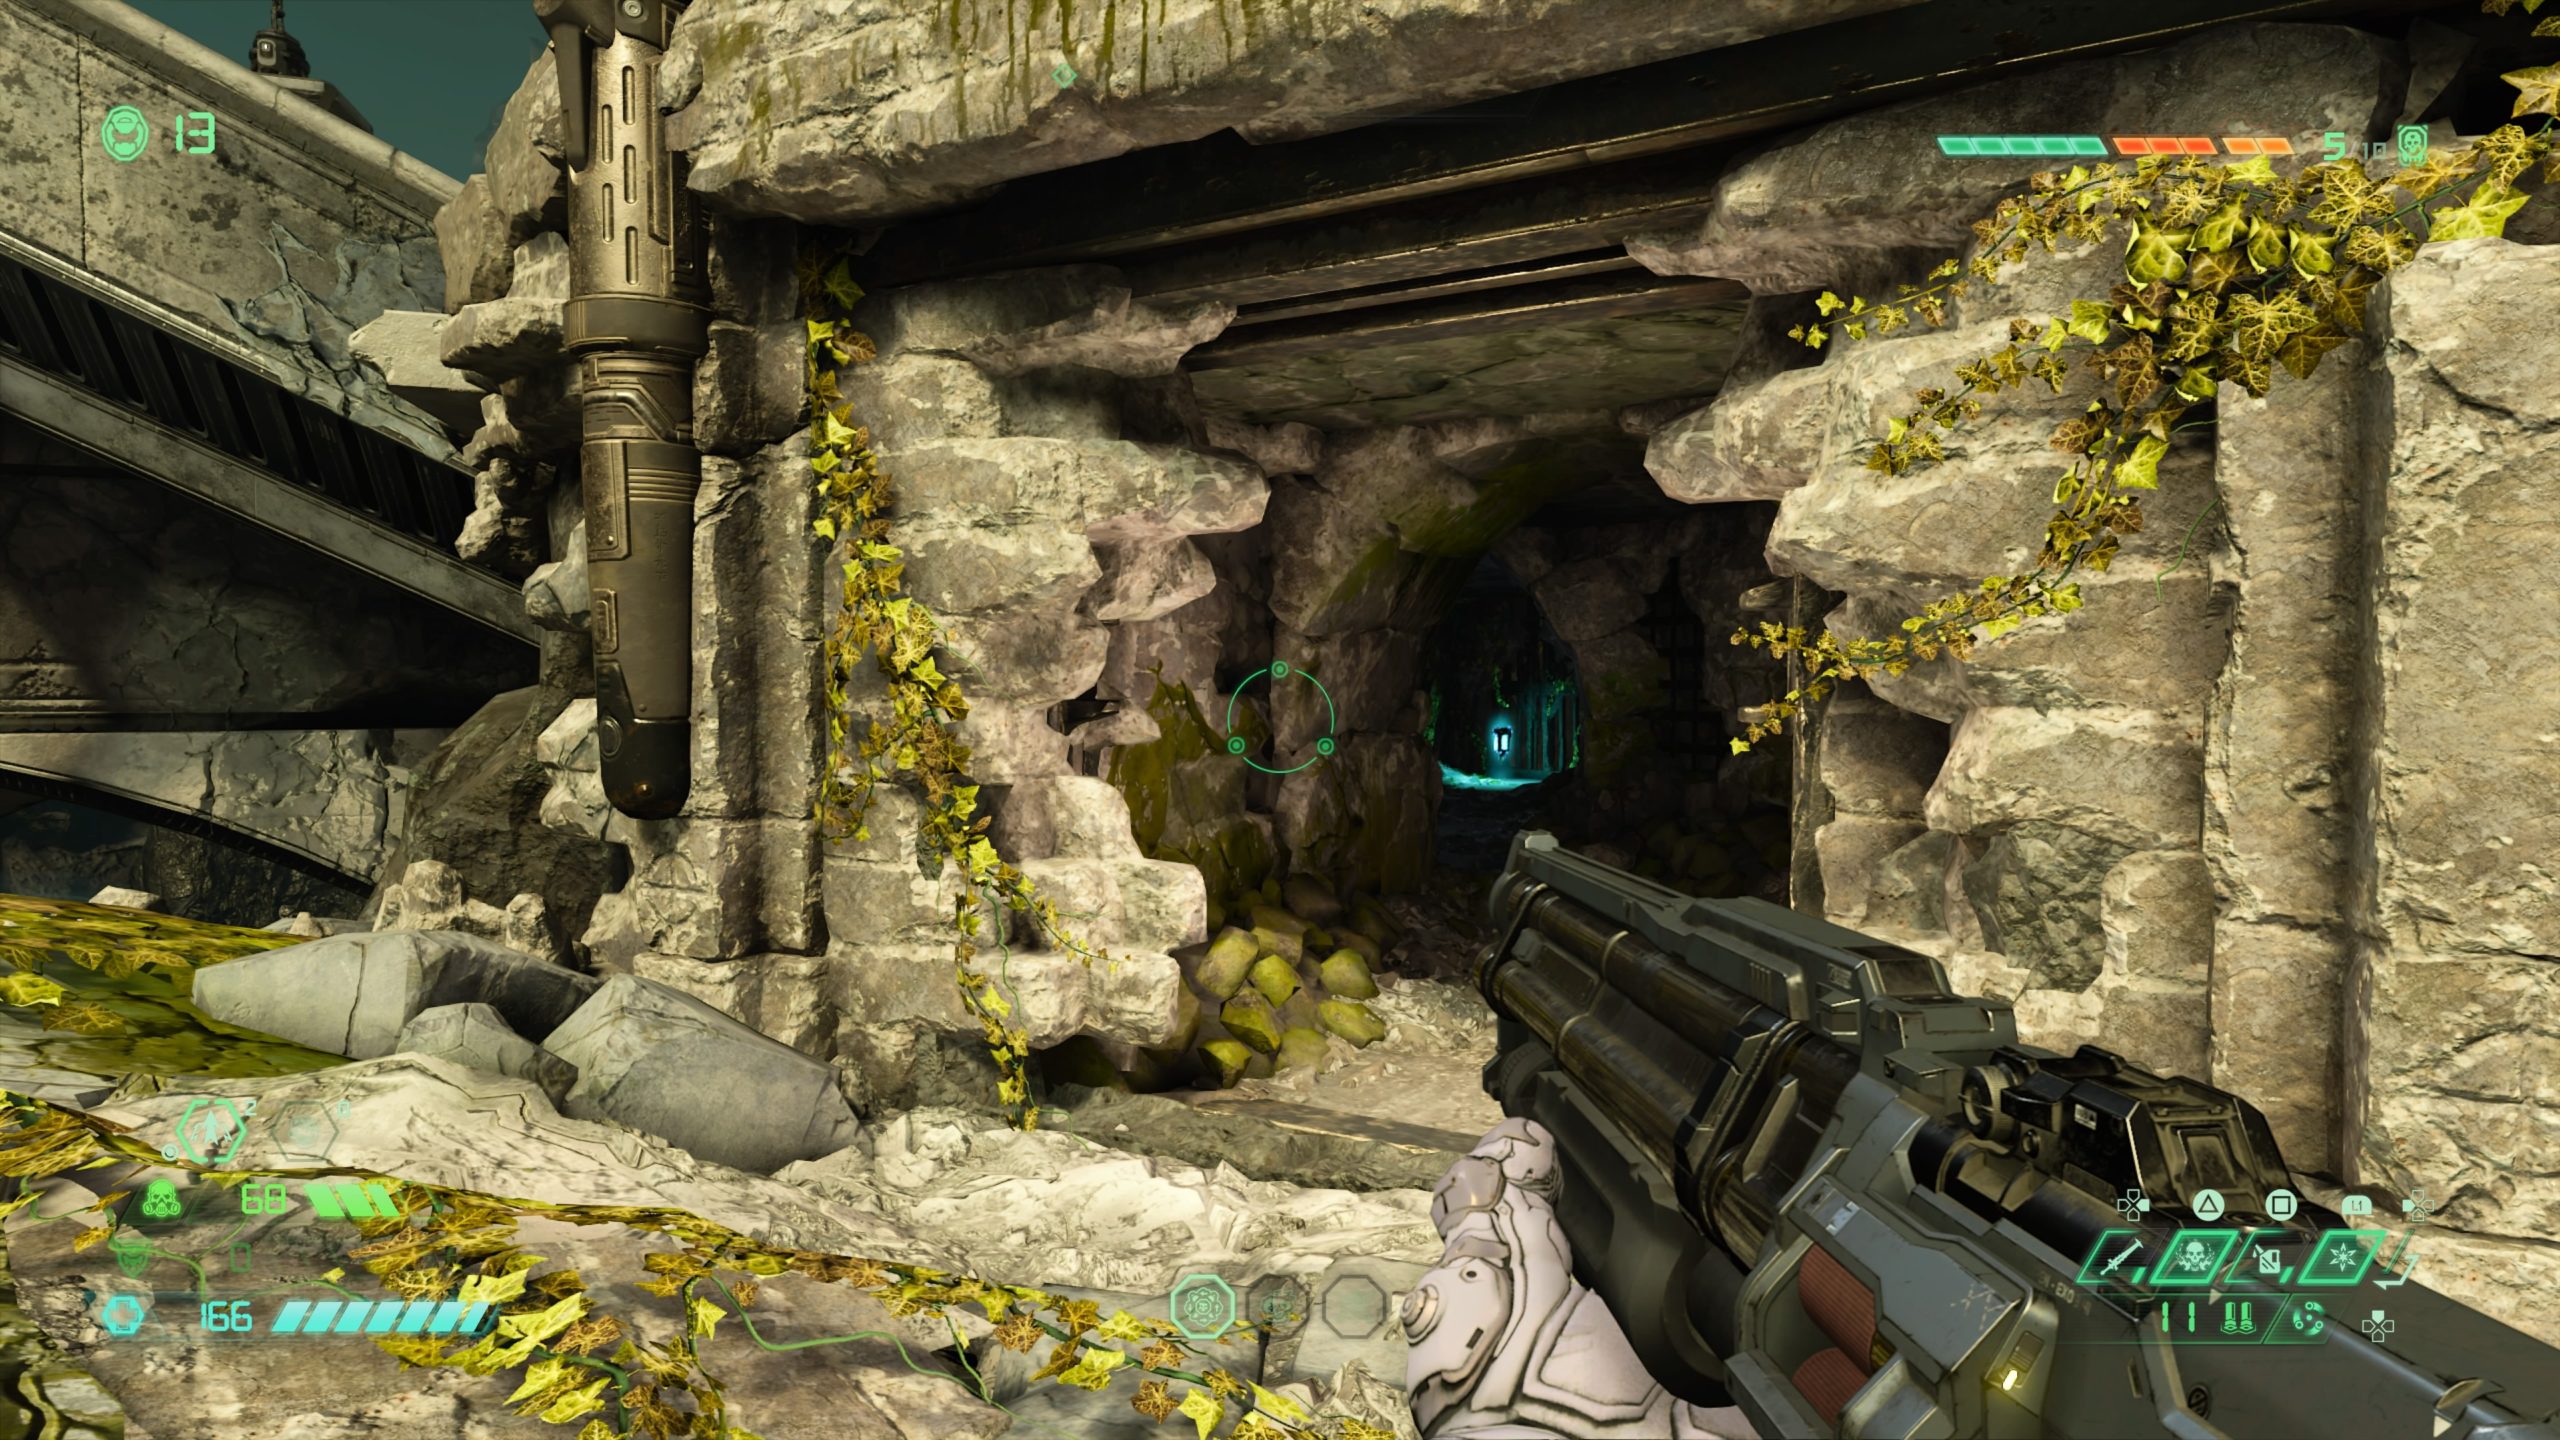
From the codex, drop off the nearby ledge to land on a platform below. Melee the cracked wall to reveal a tunnel. The battery will be at the end of this tunnel.
Album: Doom (2016) – BFG Division
From the fast travel point, turn around and head back to the end of the bridge. Drop down to the walkway below via the crumbled portion of bridge. Take the walkway to the end then locate the gold spin bar hanging from a column. Use the bar to reach a hidden ledge under a walkway in the distance to find the album.
Praetor Suit Point

From the fast travel point, enter the doorway in front of you and take a left to find the Sentinel holding the point.
Mastery Token
From the fast travel point, enter the doorway in front of you and take a right, dropping down the hole in the hallway. Follow the path forward to arrive in a big open courtyard with multiple Sentinel statues. Head down the stairs in front of you and take a left past the rectangular pool. Take a left after the Sentinel statue to head under the above walkway lit by blue lights. Turn left and melee the cracked wall then head past the secret encounter into a little tunnel. At the end of the tunnel, interact with the green button to unlock the gate containing the Mastery Token in the next room.
Sentinel Battery

From the fast travel point, enter the doorway in front of you and take a right, dropping down the hole in the hallway. Follow the path forward to arrive in a big open courtyard with multiple Sentinel statues. Head to the other end of the courtyard past the rectangular pool then go up the stairs at the end. Facing the stained glass window of the sword, take a right heading towards a small set of stairs. At the base of the stairs, look left to find a statue of a Sentinel kneeling. Melee the statue to reveal a switch. Press the switch to raise the gate blocking the hanging weight. Head up the stairs and follow the walkway to the end to reach the room with the weight. Use the climbable wall to get up high enough to break the chain to cause the weight to fall and crash through the floor. Drop down into the newly created hole to collect the battery.
Praetor Suit Point

From the fast travel point, turn around and head down the stairs. Once at the bottom of the stairs, head through the doorway on the right then take a right to follow the hallway to the end. The Sentinel holding the point will be on the left.
Toy: Cyber Mancubus

From the fast travel point, turn around and head down the stairs. At the bottom of the stairs take a left and head behind the column to find a sentinel statue next to a vine covered wall. Melee the statue to reveal a switch. Press the switch then return to the stairs to find three lights in the center of it. You will need to jump into the center of the stacked lights to unlock the gate containing the toy. Once unlocked, head down the stairs past the doorway on the right to collect the toy.
Codex: Story of the Sentinels – History of the Sentinels Part X

From the fast travel point, turn around and head down the stairs. Once at the bottom of the stairs, take the stairs to the left up to a raised level to find the codex.
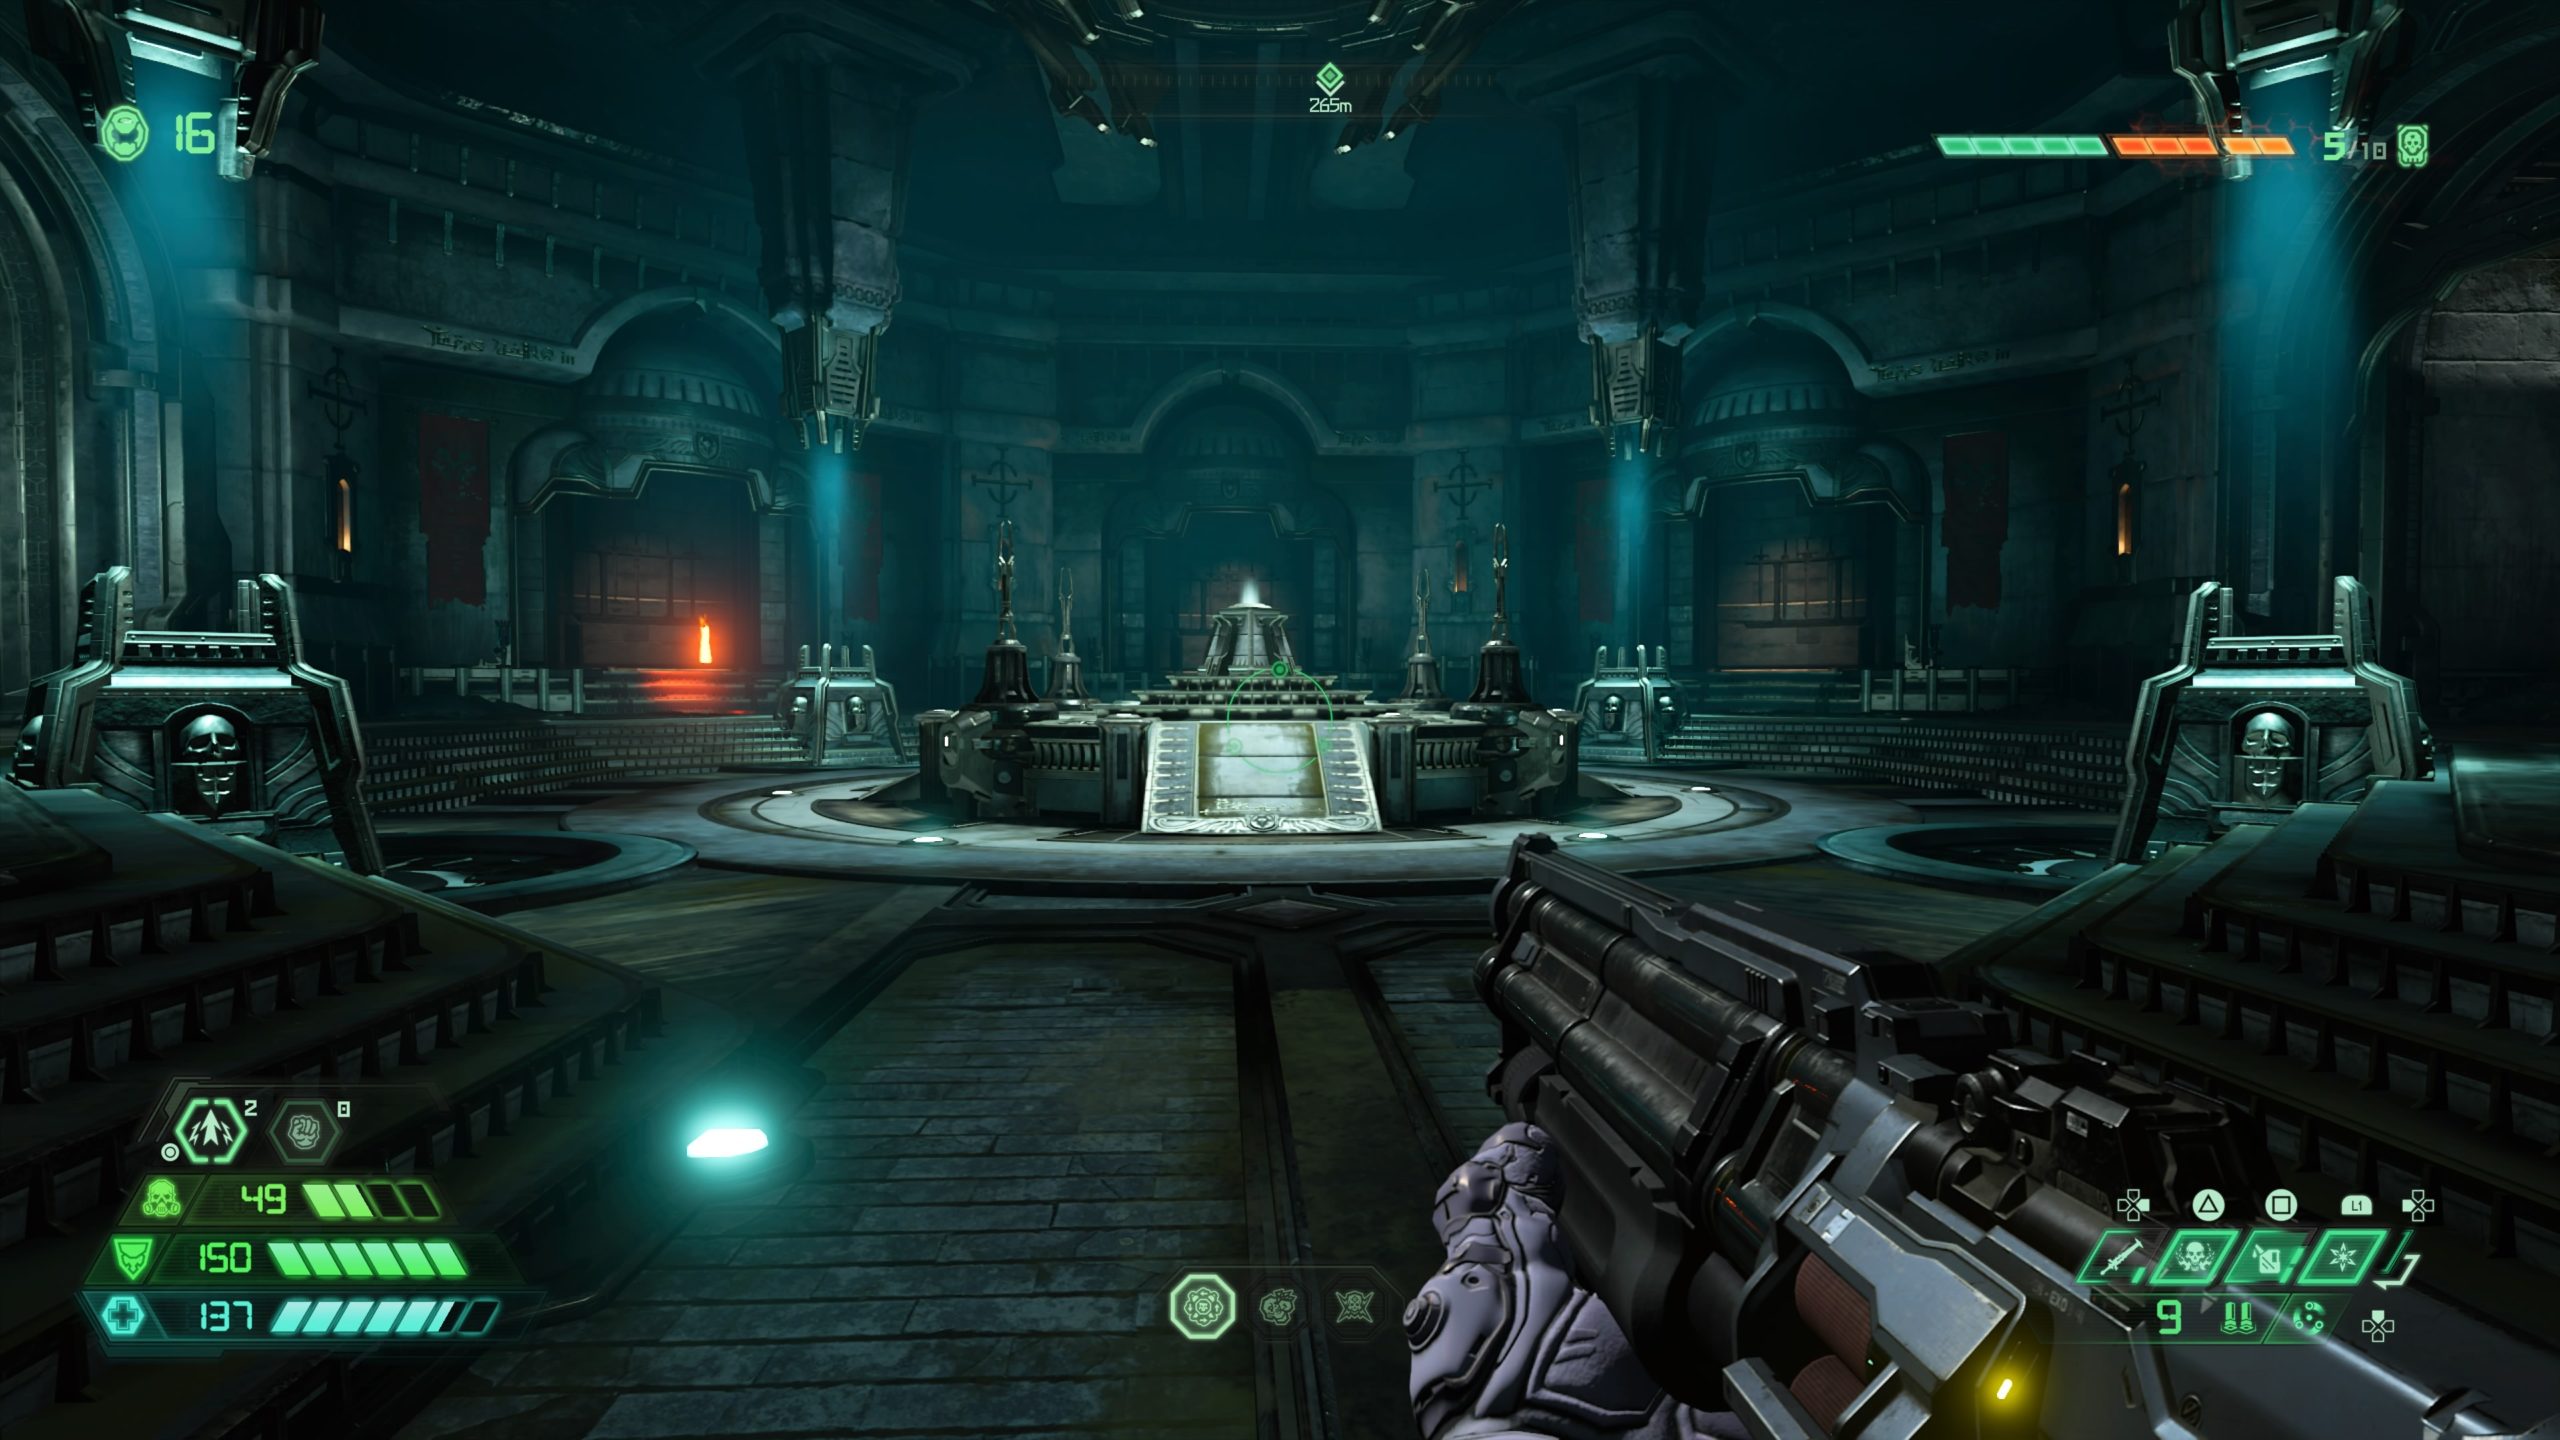
Codex: Story of the Sentinel – The Divinity Machine
From the fast travel point, head straight forward to arrive in a room with a giant machine in the middle. Follow the path right to find the codex.
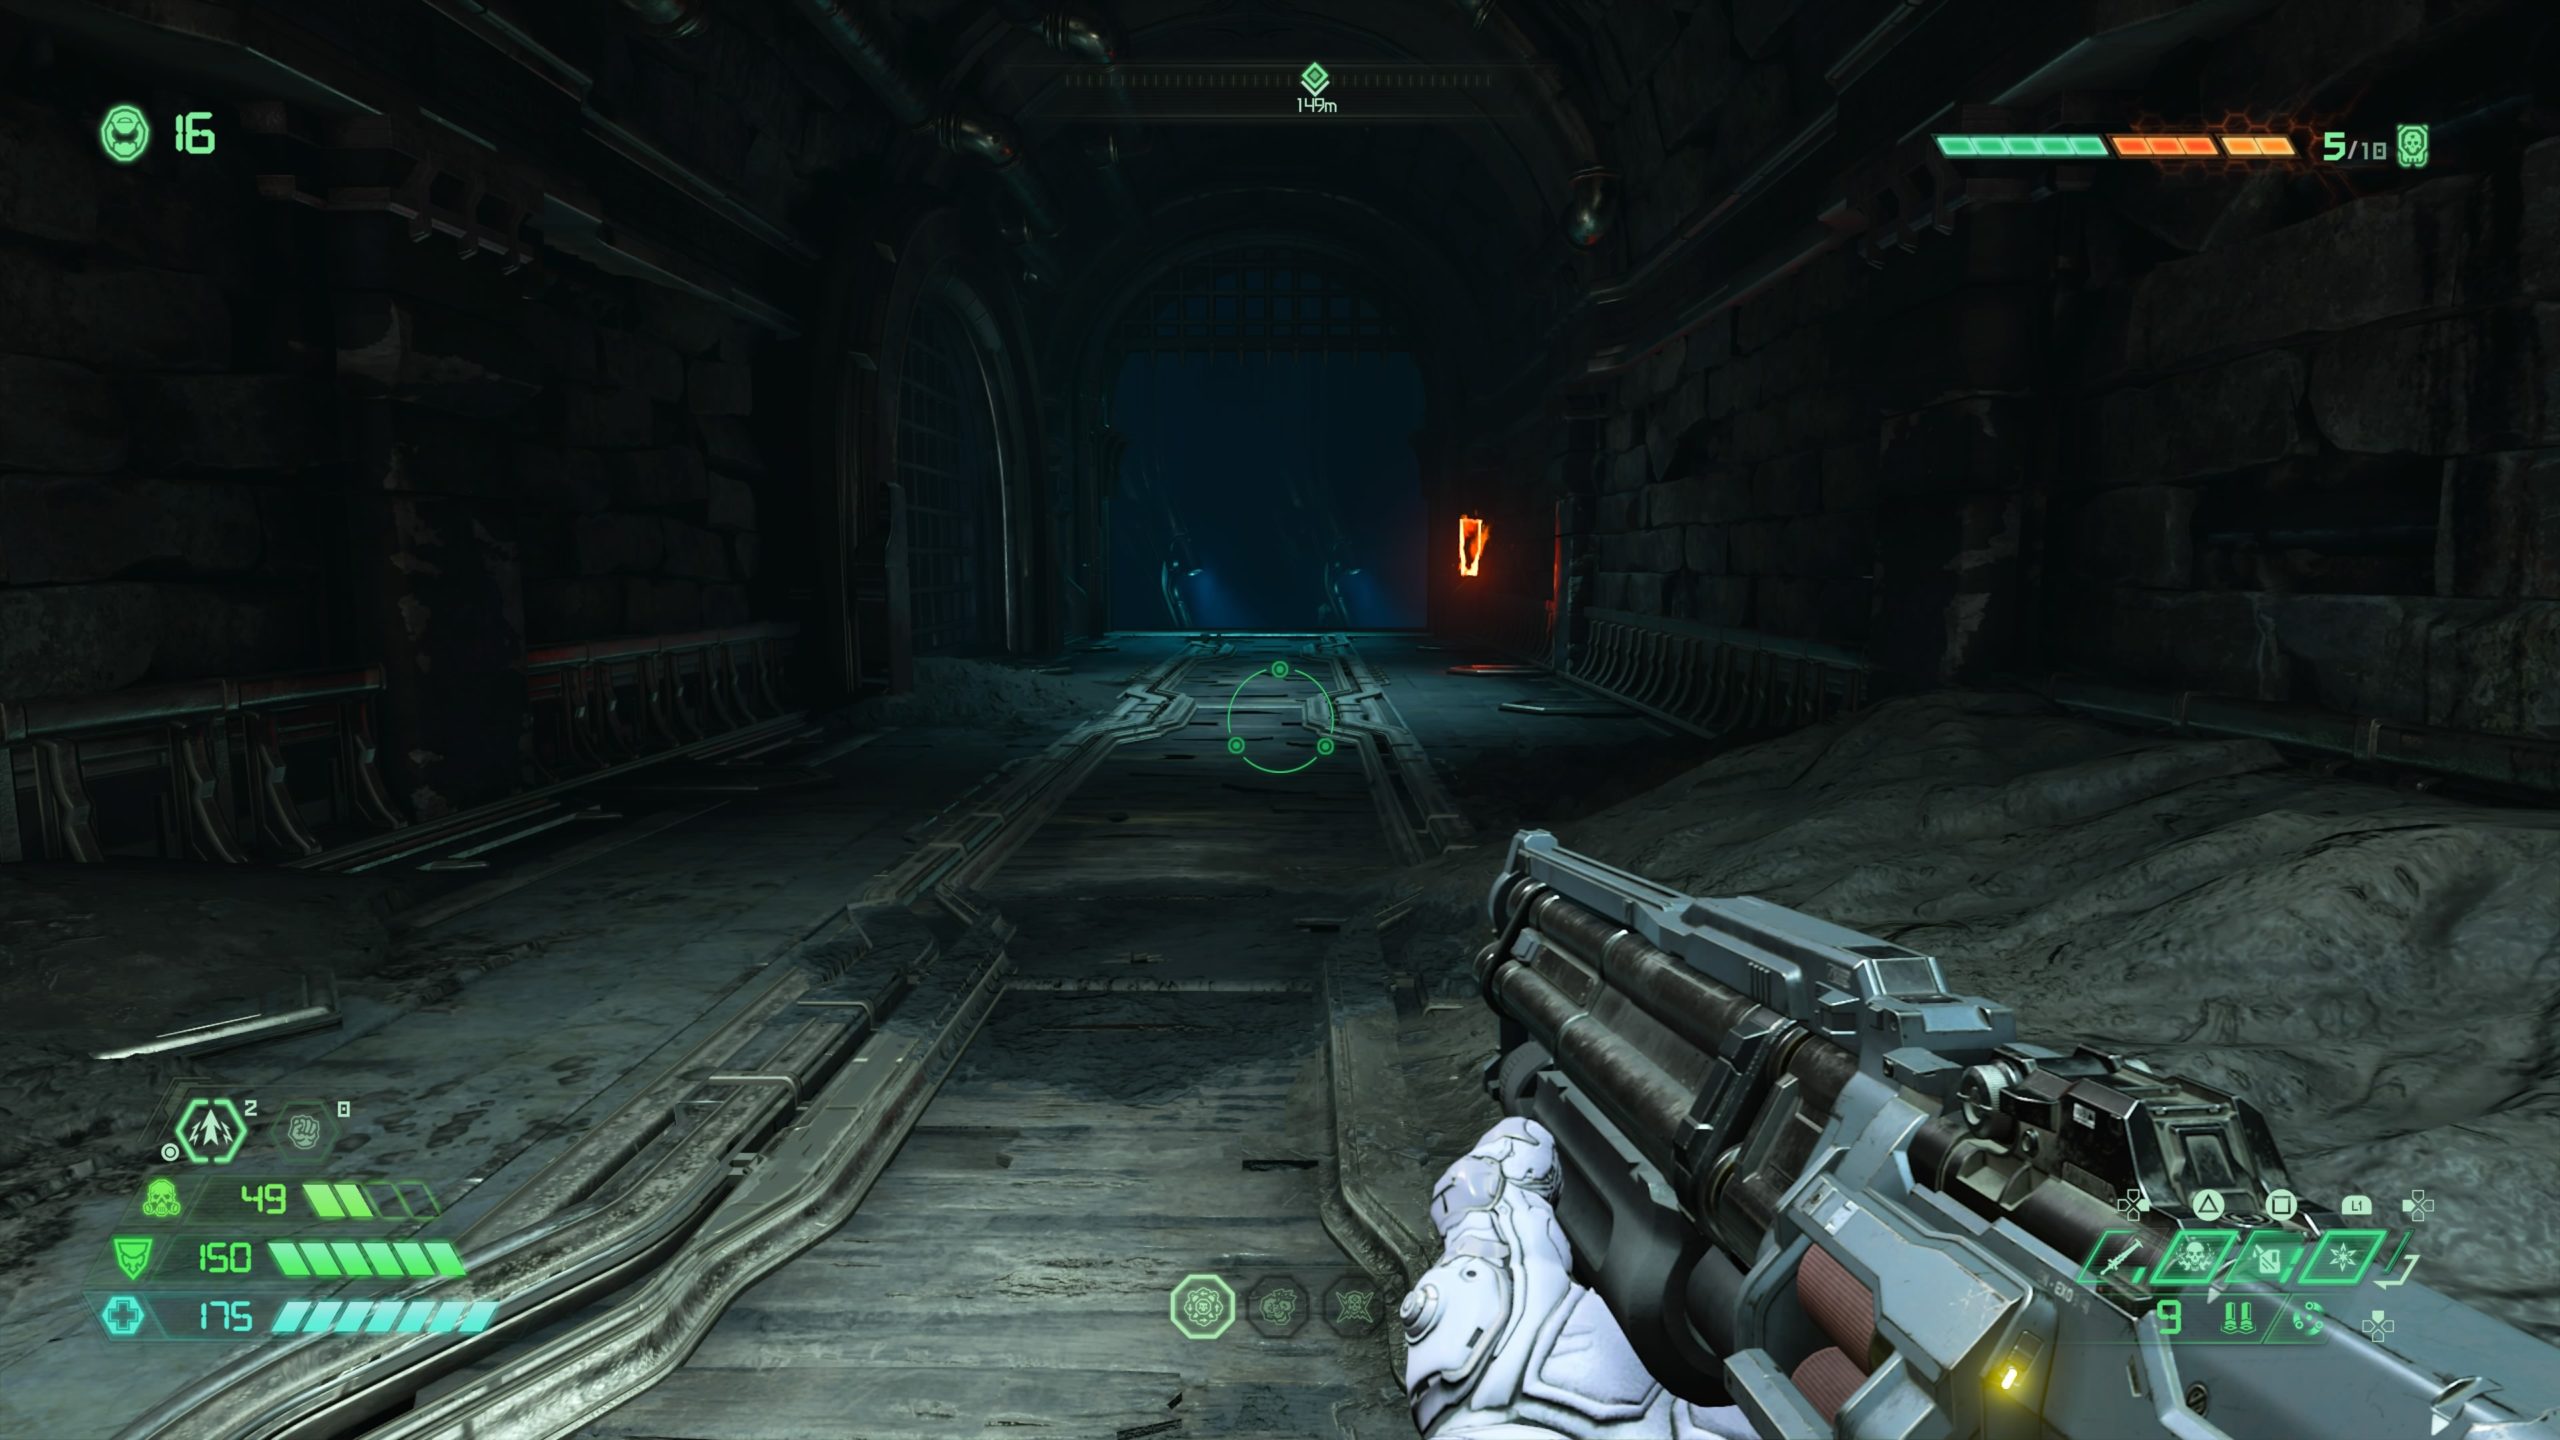
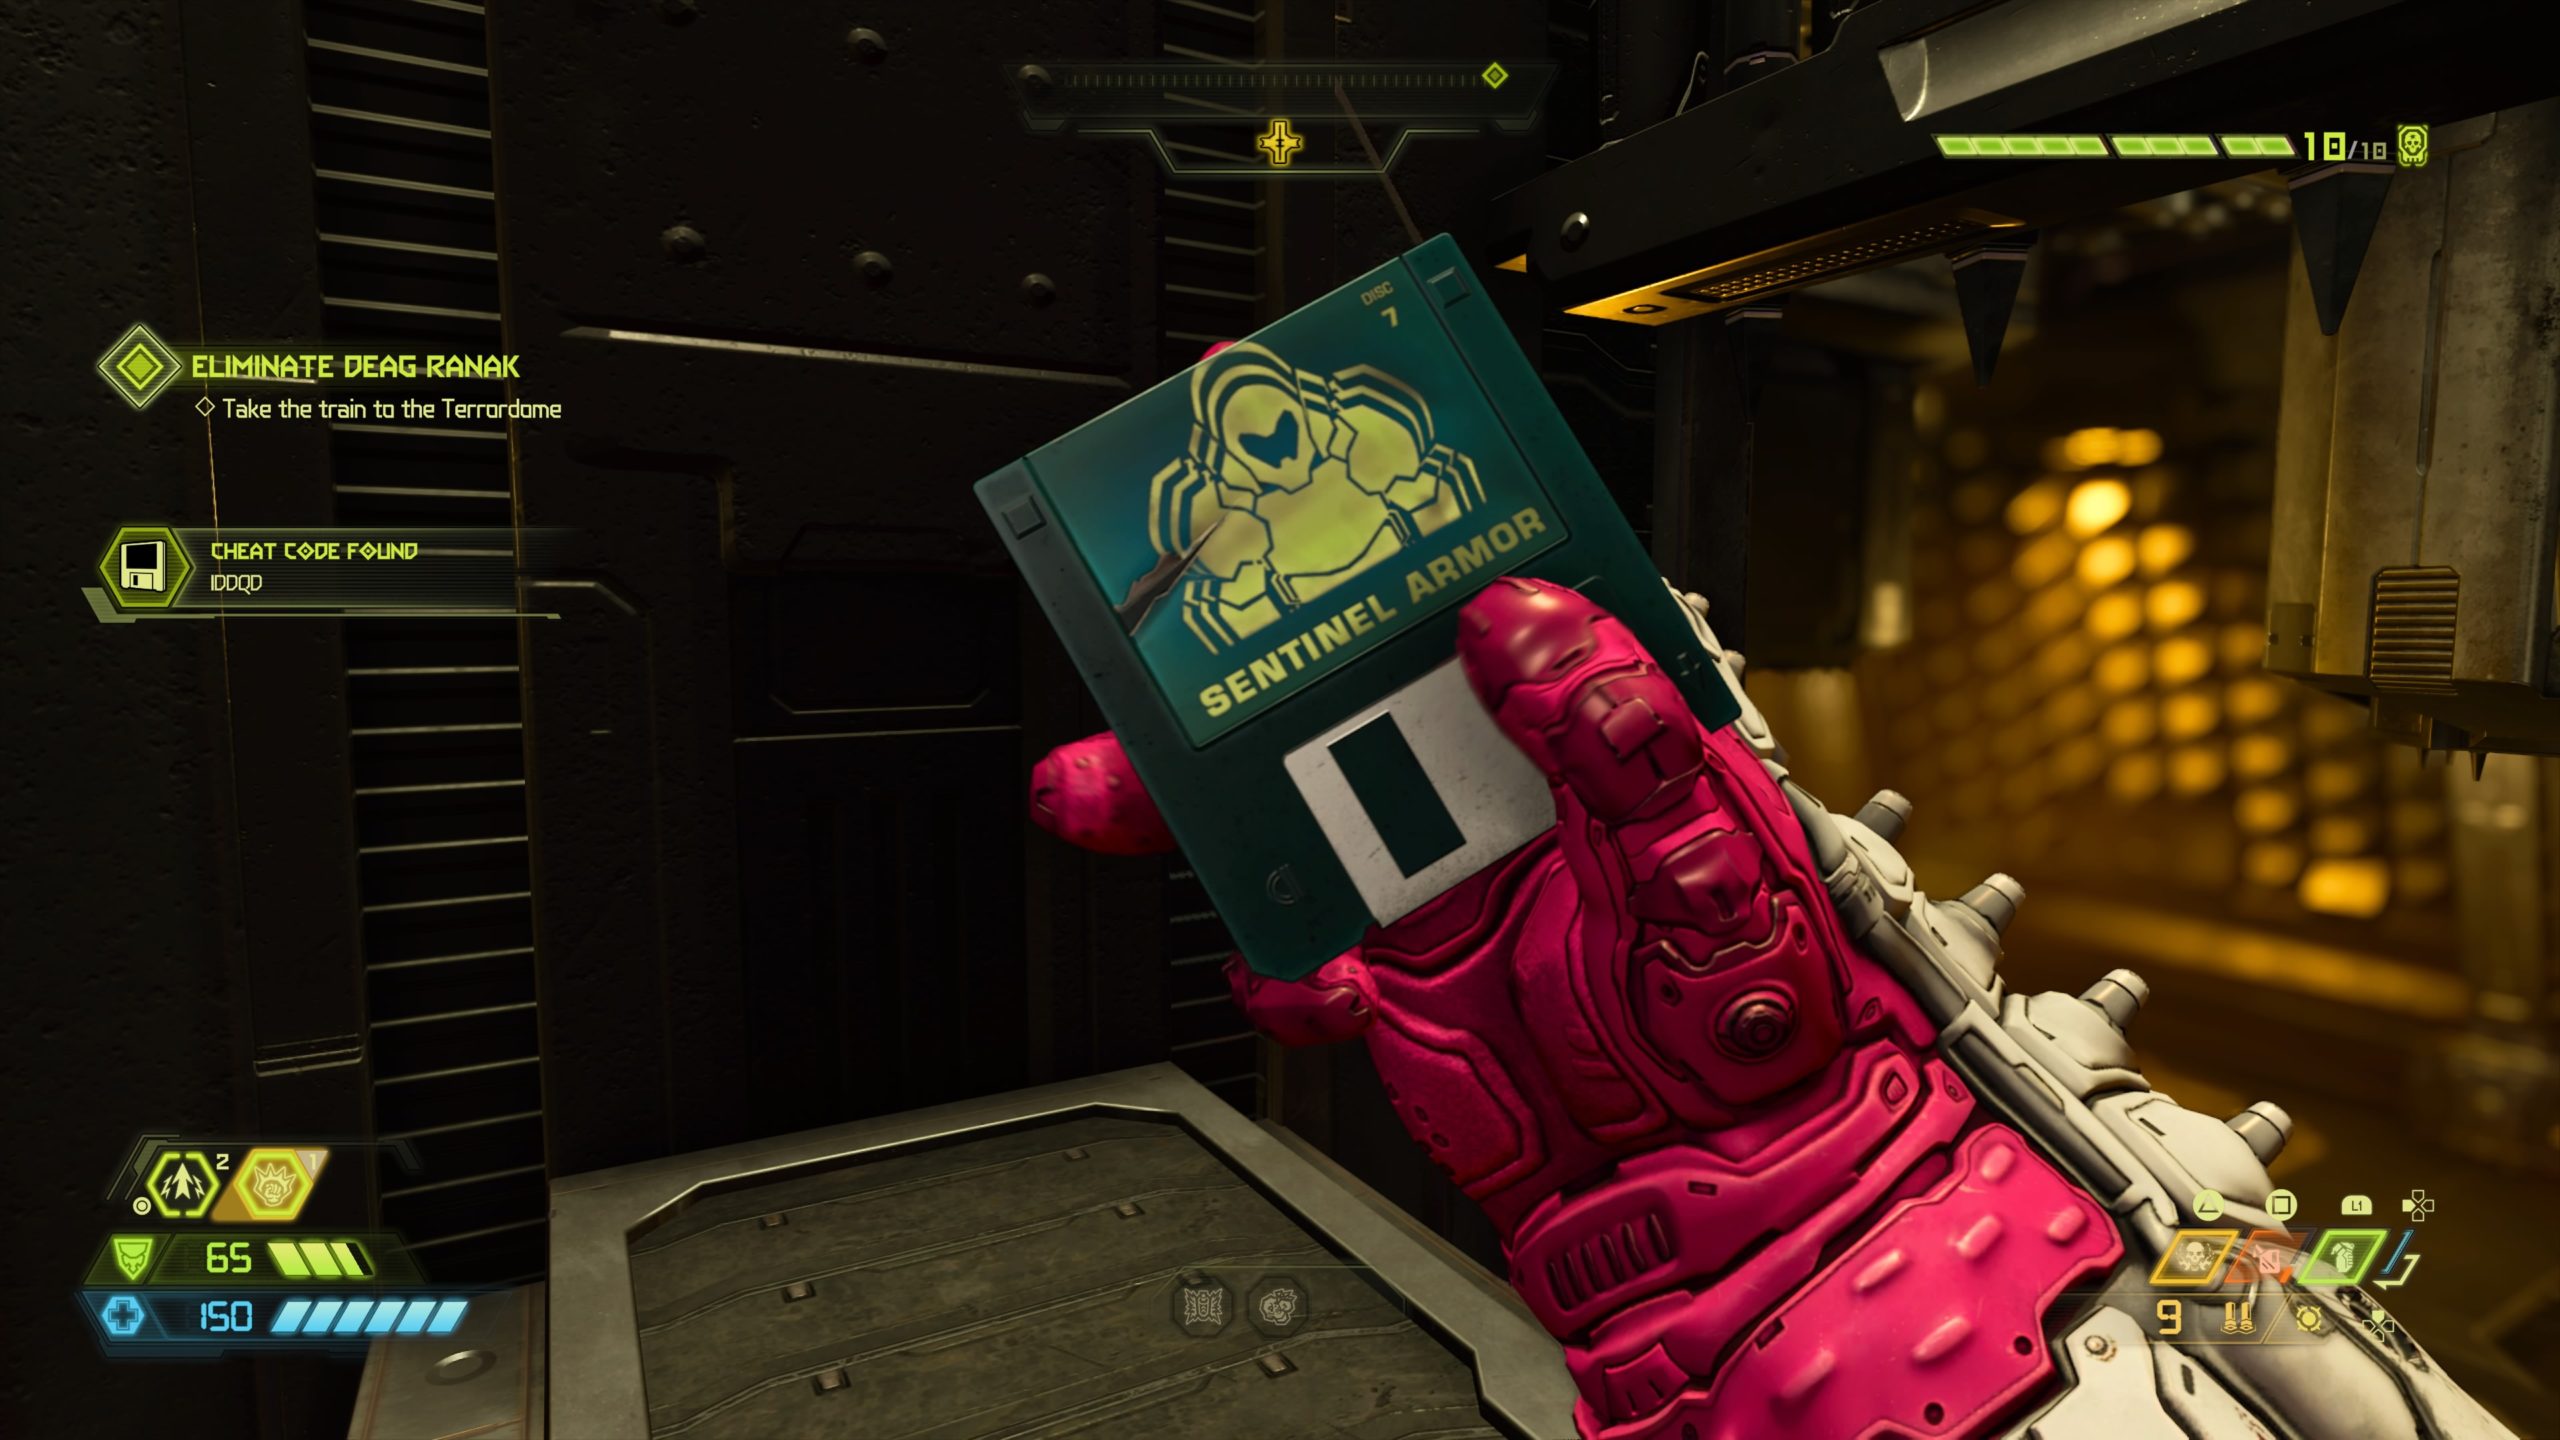
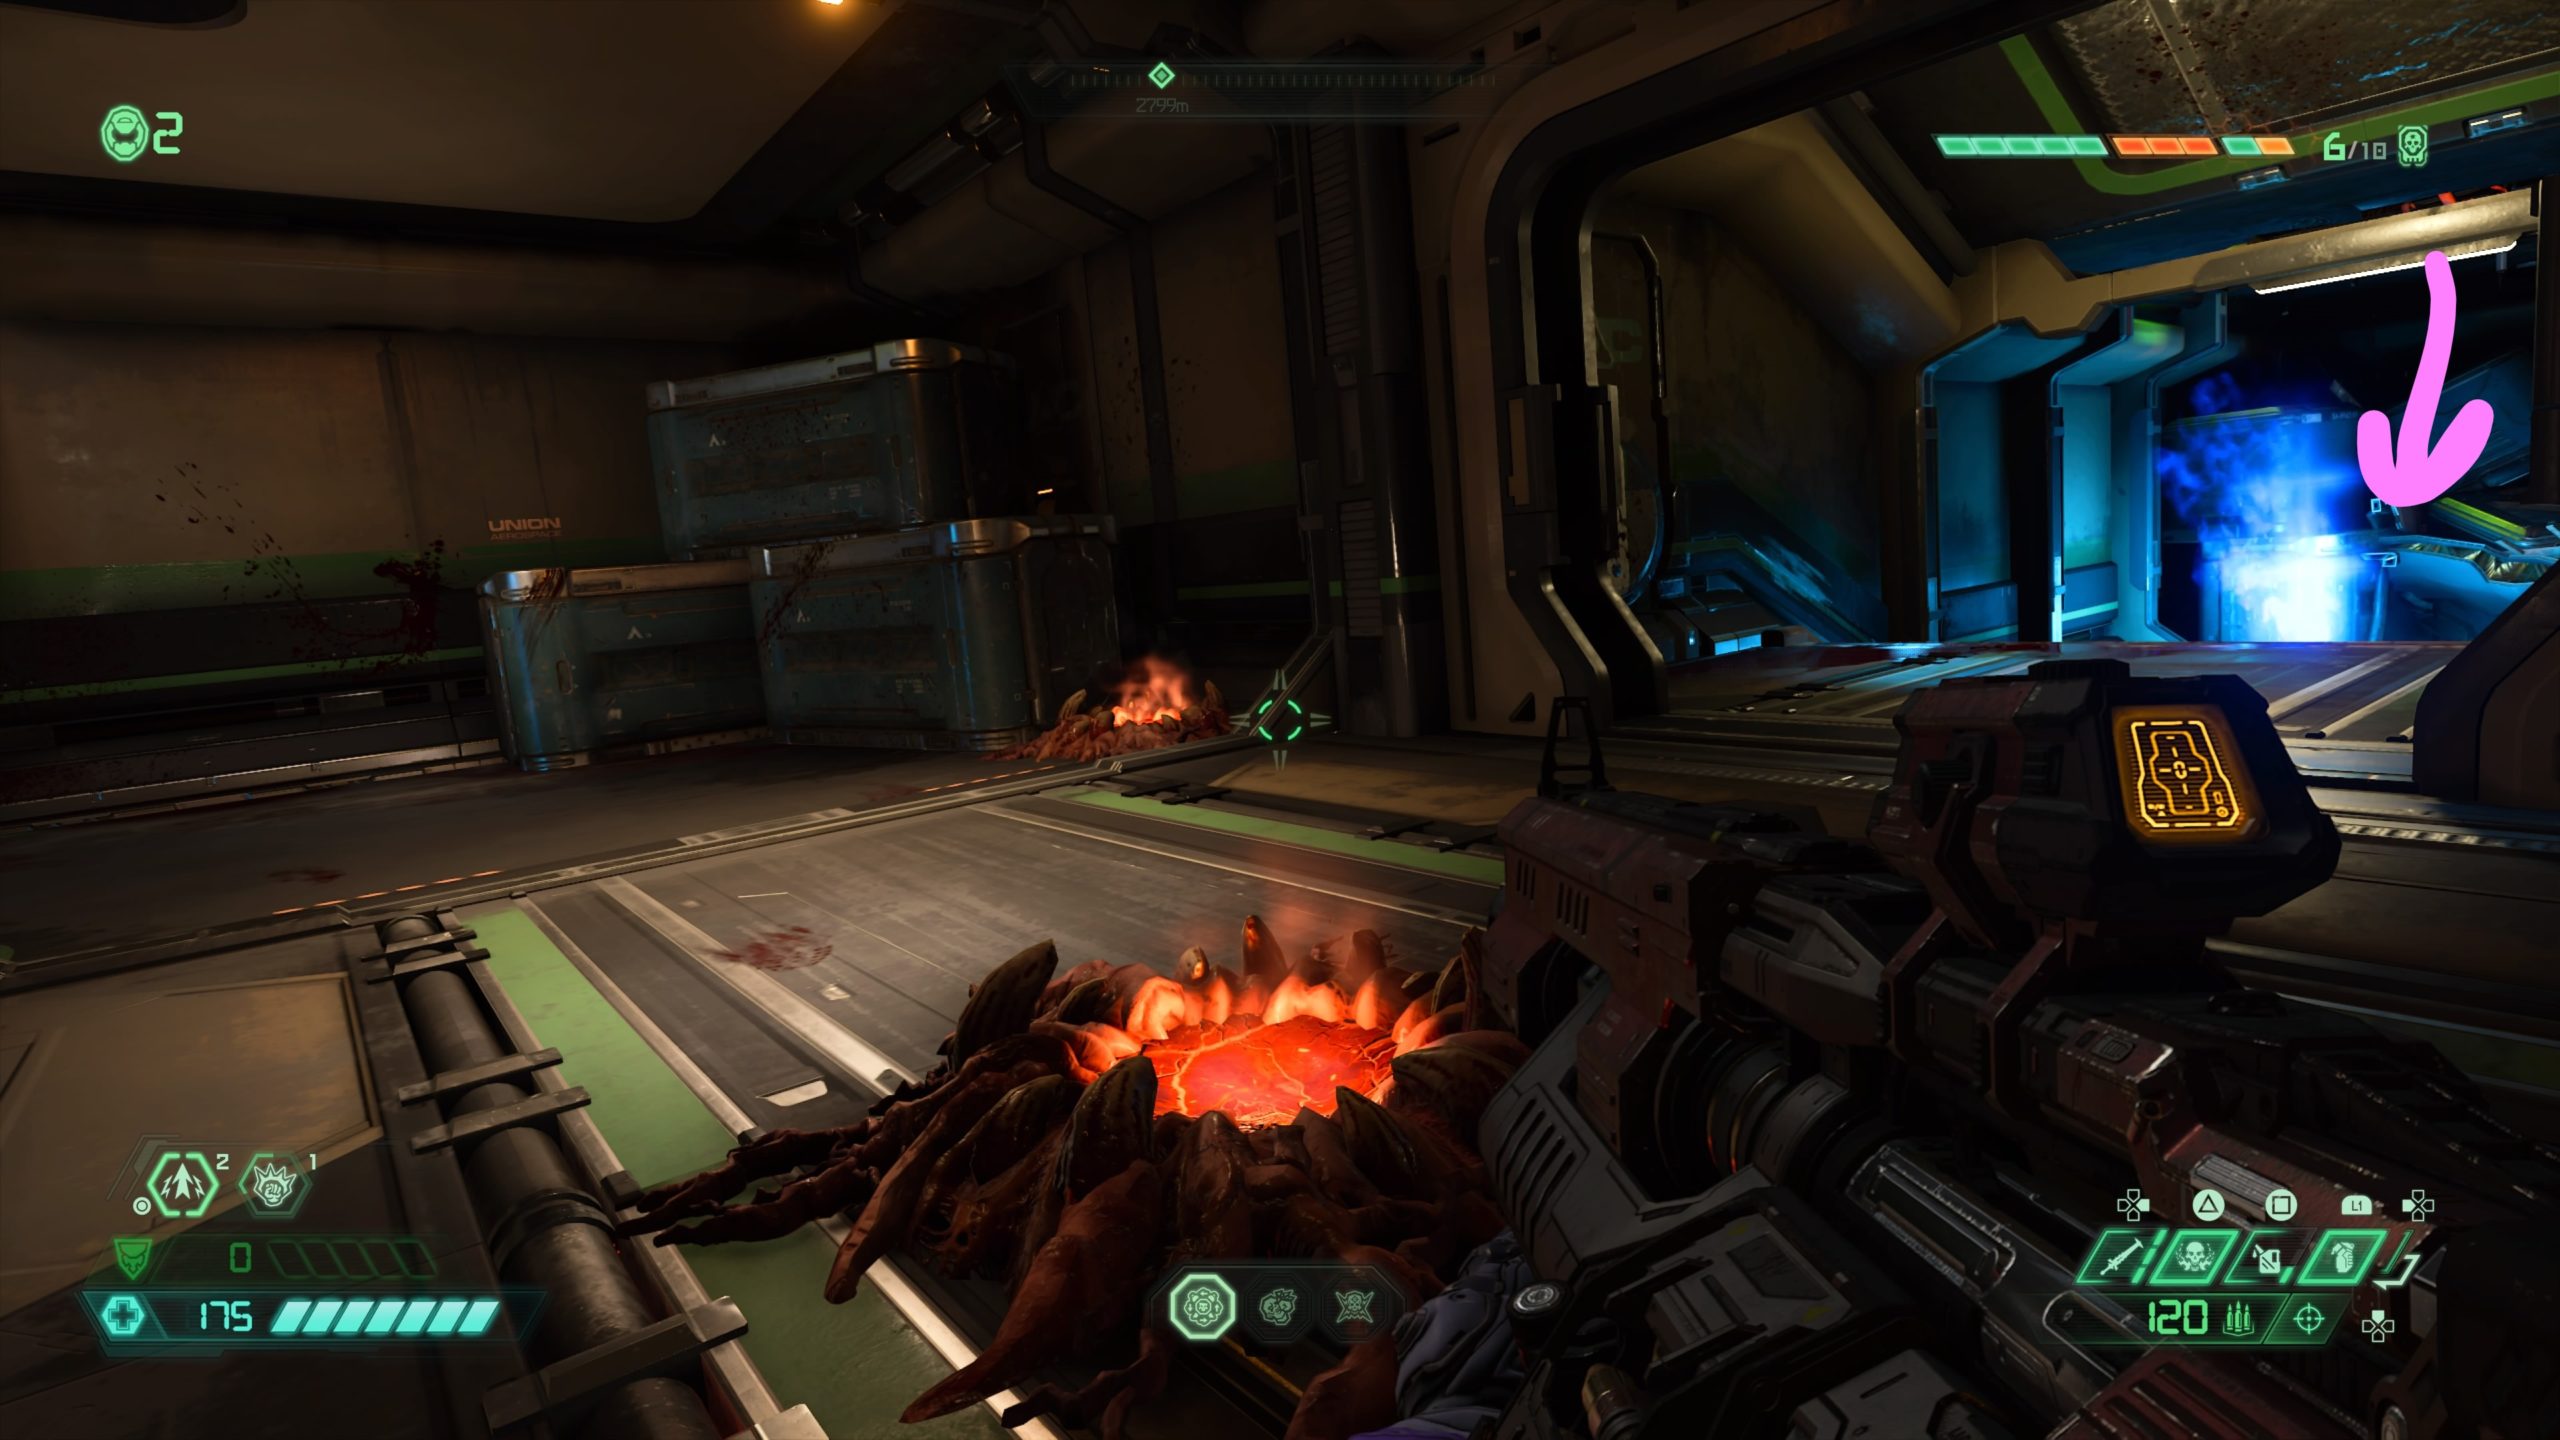
Cheat Code

From the fast travel point, work your way through the sewer section of the catacombs. Exit the tunnels to arrive in a large open room filled with lift pads and spin bars. Head to the far right corner of the room to find a set of stairs leading up to a room filled with barrels. In that room, there will be a cracked wall on the left side of the room near a stack of barrels. Melee the wall and jump down into the cave to find the collectible.
Codex: Story of the Sentinels – History of the Sentinels Part XI / Sentinel Battery
From the fast travel point, turn around to find both the codex and battery.
Praetor Suit Point
From the fast travel point, head forward and climb over the titan’s legs to find the Sentinel holding the point to the left of the titan’s body.
Toy: Marauder
From the Praetor Suit Point above, look to the right of him to find a cracked wall. Melee the wall to find the toy.

Praetor Suit Point
From the fast travel point, head right and take the stairs up to find the Sentinel standing behind a column with a spin bar.
Codex: Story of the Sentinel – History of the Sentinel Part XII / Sentinel Crystal
From the fast travel point, drop down to the ledge below and head into the room to find the two collectibles.
Codex: Story of the Sentinels – History of the Sentinels Part XIII
From the fast travel point, drop down to the bridge below and jump across the gap to the other side. Head down the hallway and work your way to the Sentinel vault. The codex can be found on the left side of the room just past the central pedestal.
Album: Quake II – Rage

From the fast travel point, use the lift pads to launch yourself towards a cracked wall near the roof. Melee the wall to collect the album.
Praetor Suit Point

From the fast travel point, drop down the hole in front of the throne. Head down the stairs then drop into another hole. The Sentinel will be located on the far side of this room.
Toy: Pain Elemental

From the above Praetor Suit Point, look down the hole in the middle. There will be a small area on the right side about halfway down that contains the toy. You will have to jump to this area then use dash to bust through the bars trapping the toy. We recommend using the Chrono Strike rune to slow yourself down as you approach the middle of the shaft. Timing is key on this one!
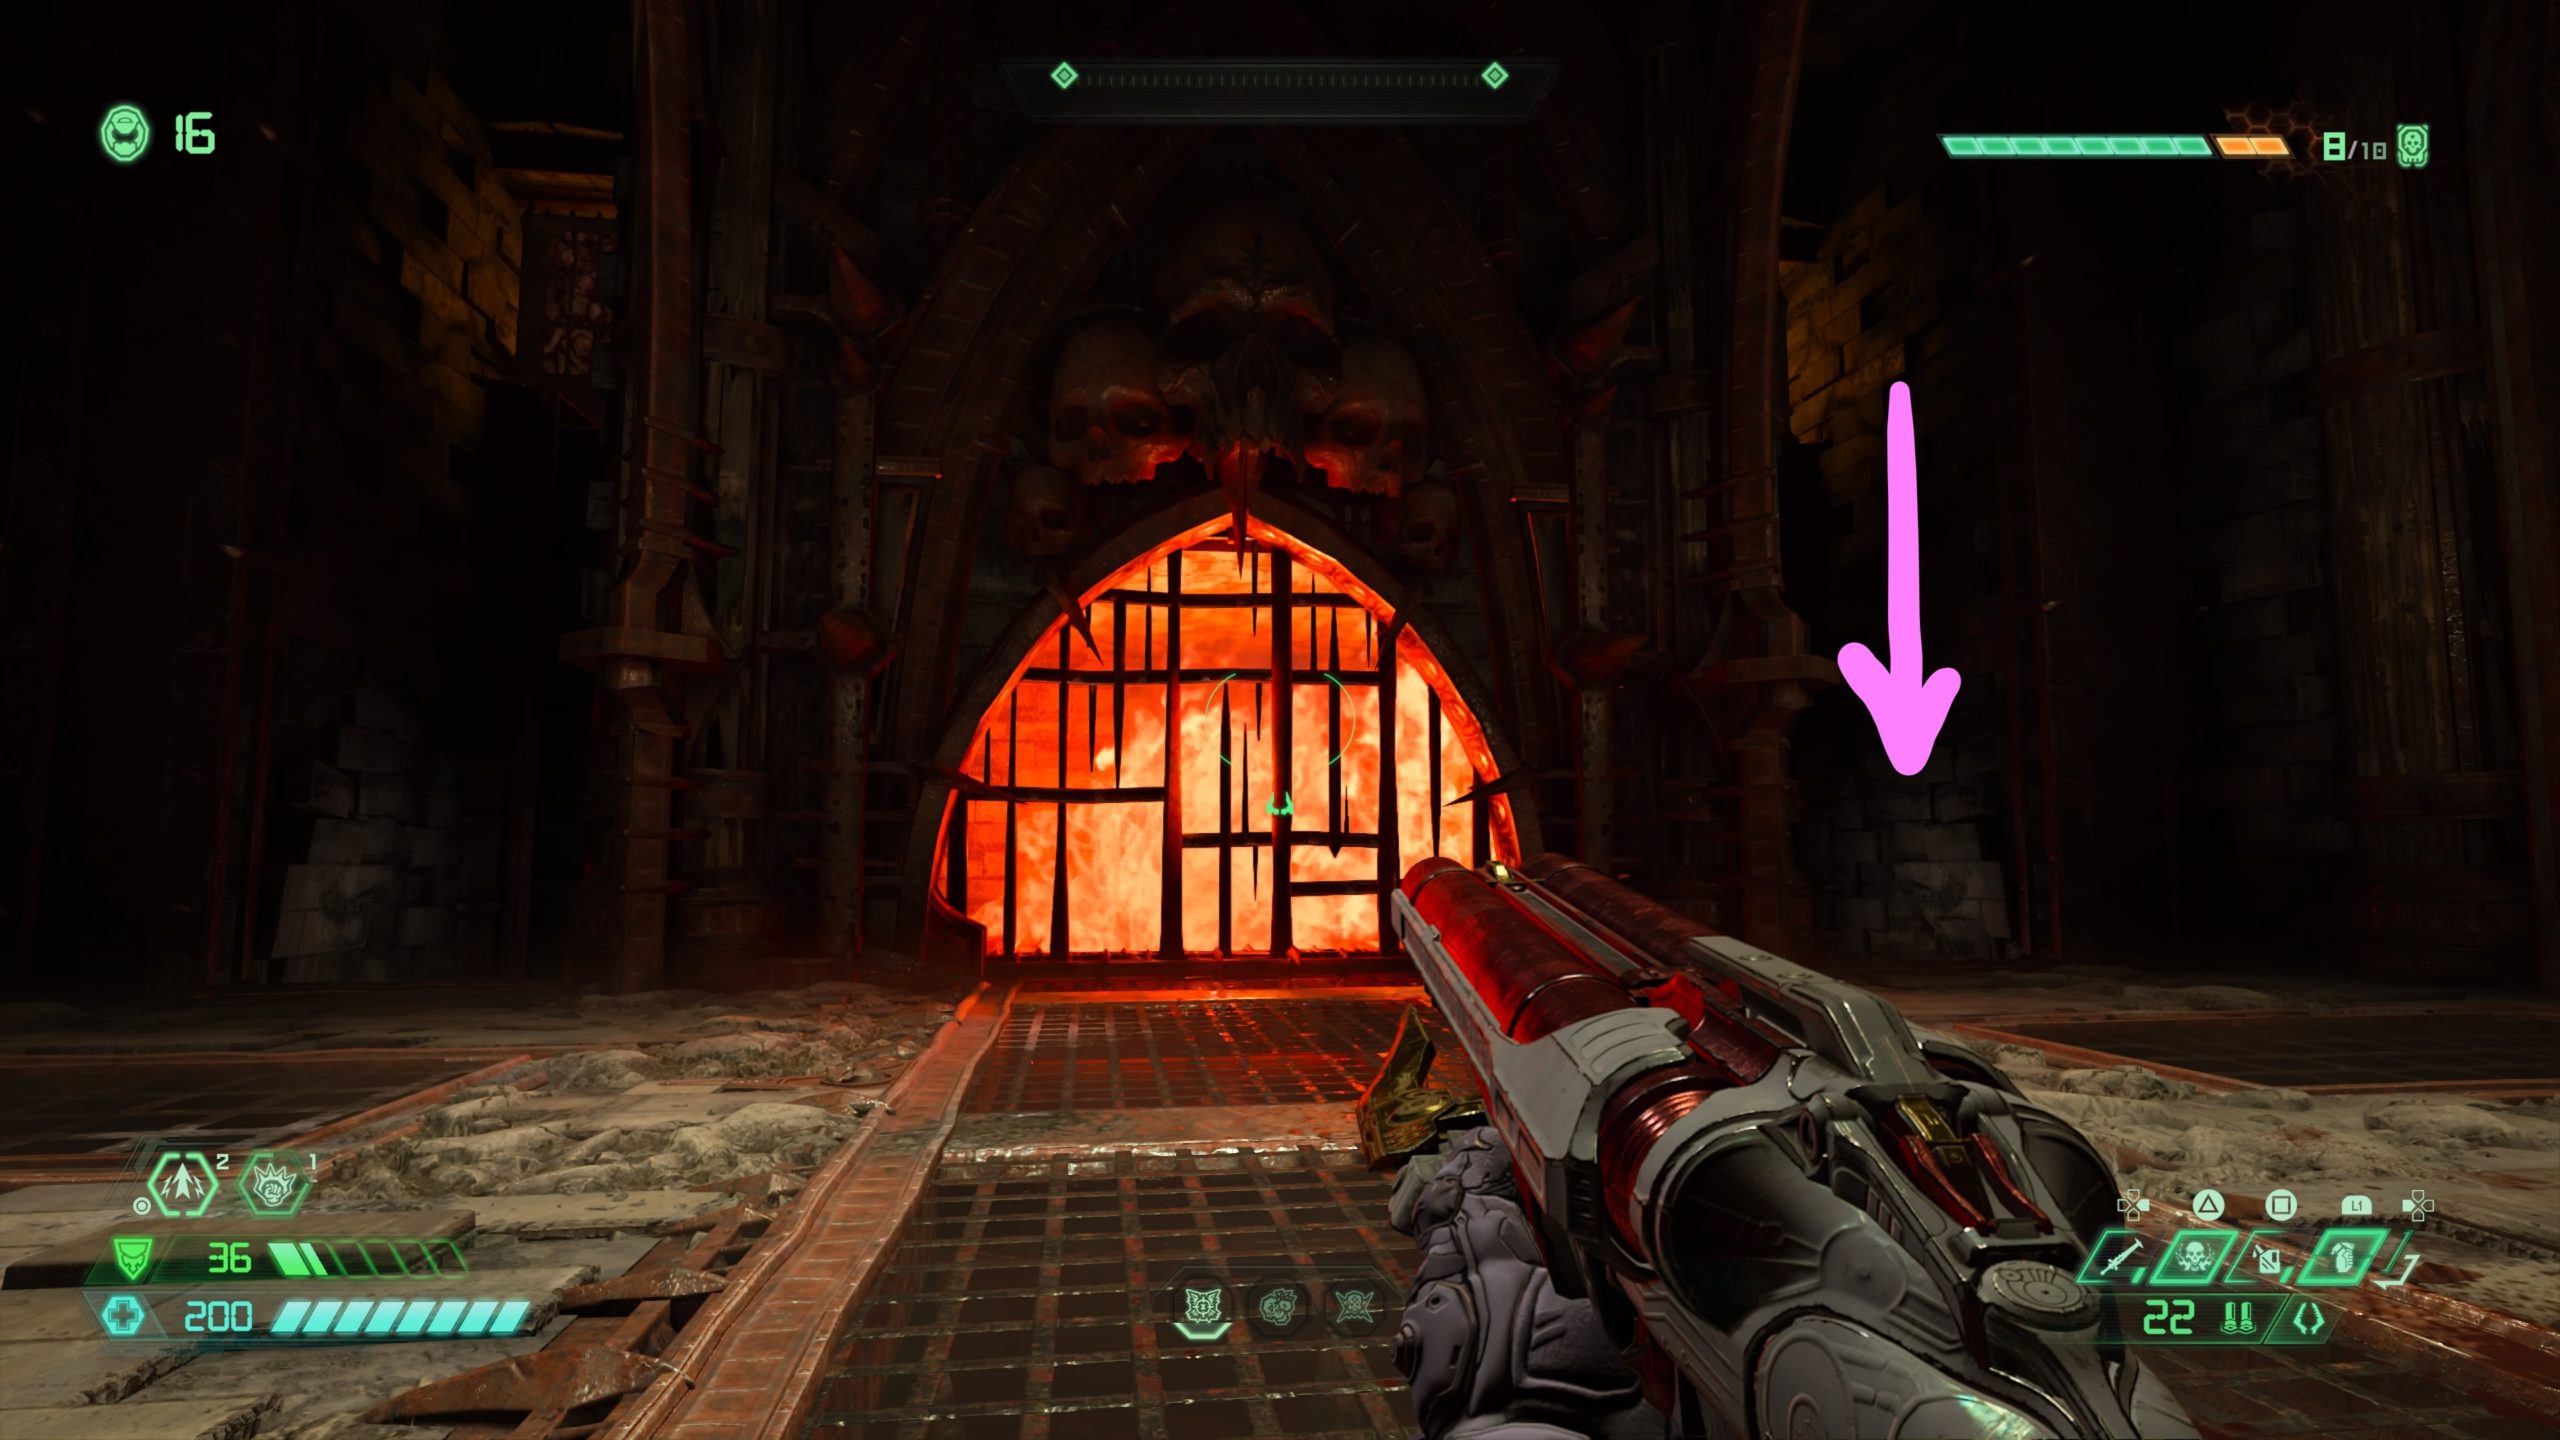
Codex: Story of the Sentinels – History of the Sentinel Part XIV
From the fast travel point, the codex will be right in front of you.
Mastery Token
From the codex, drop down to the platform below to find the collectible.
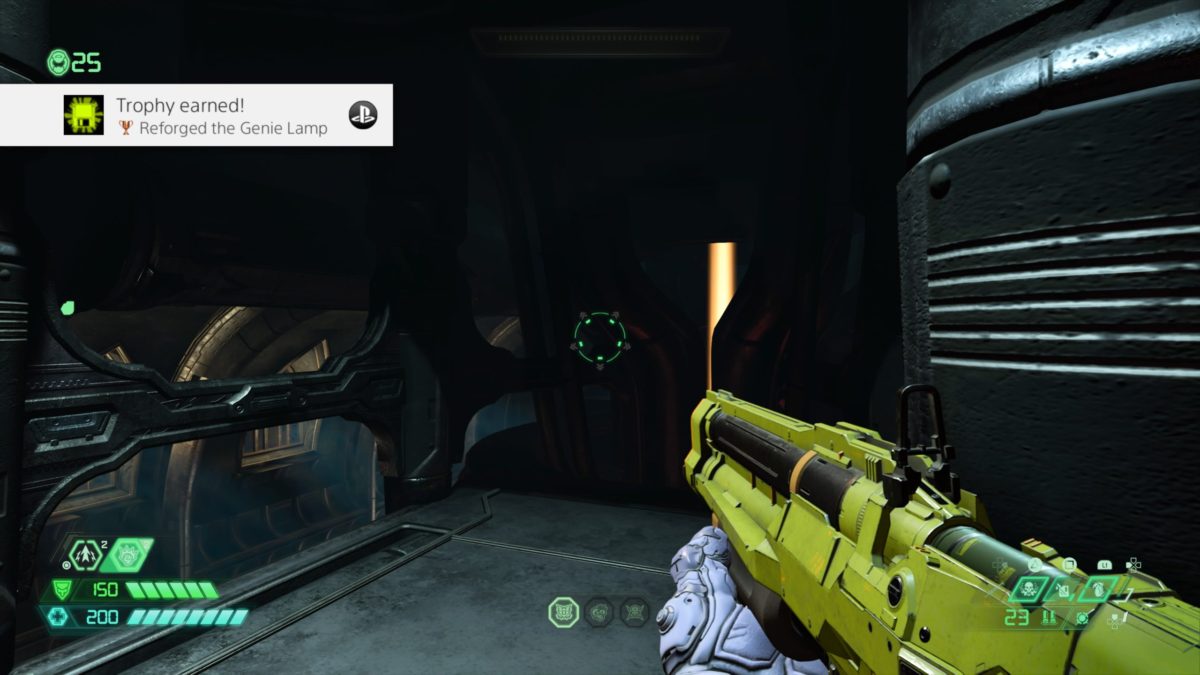
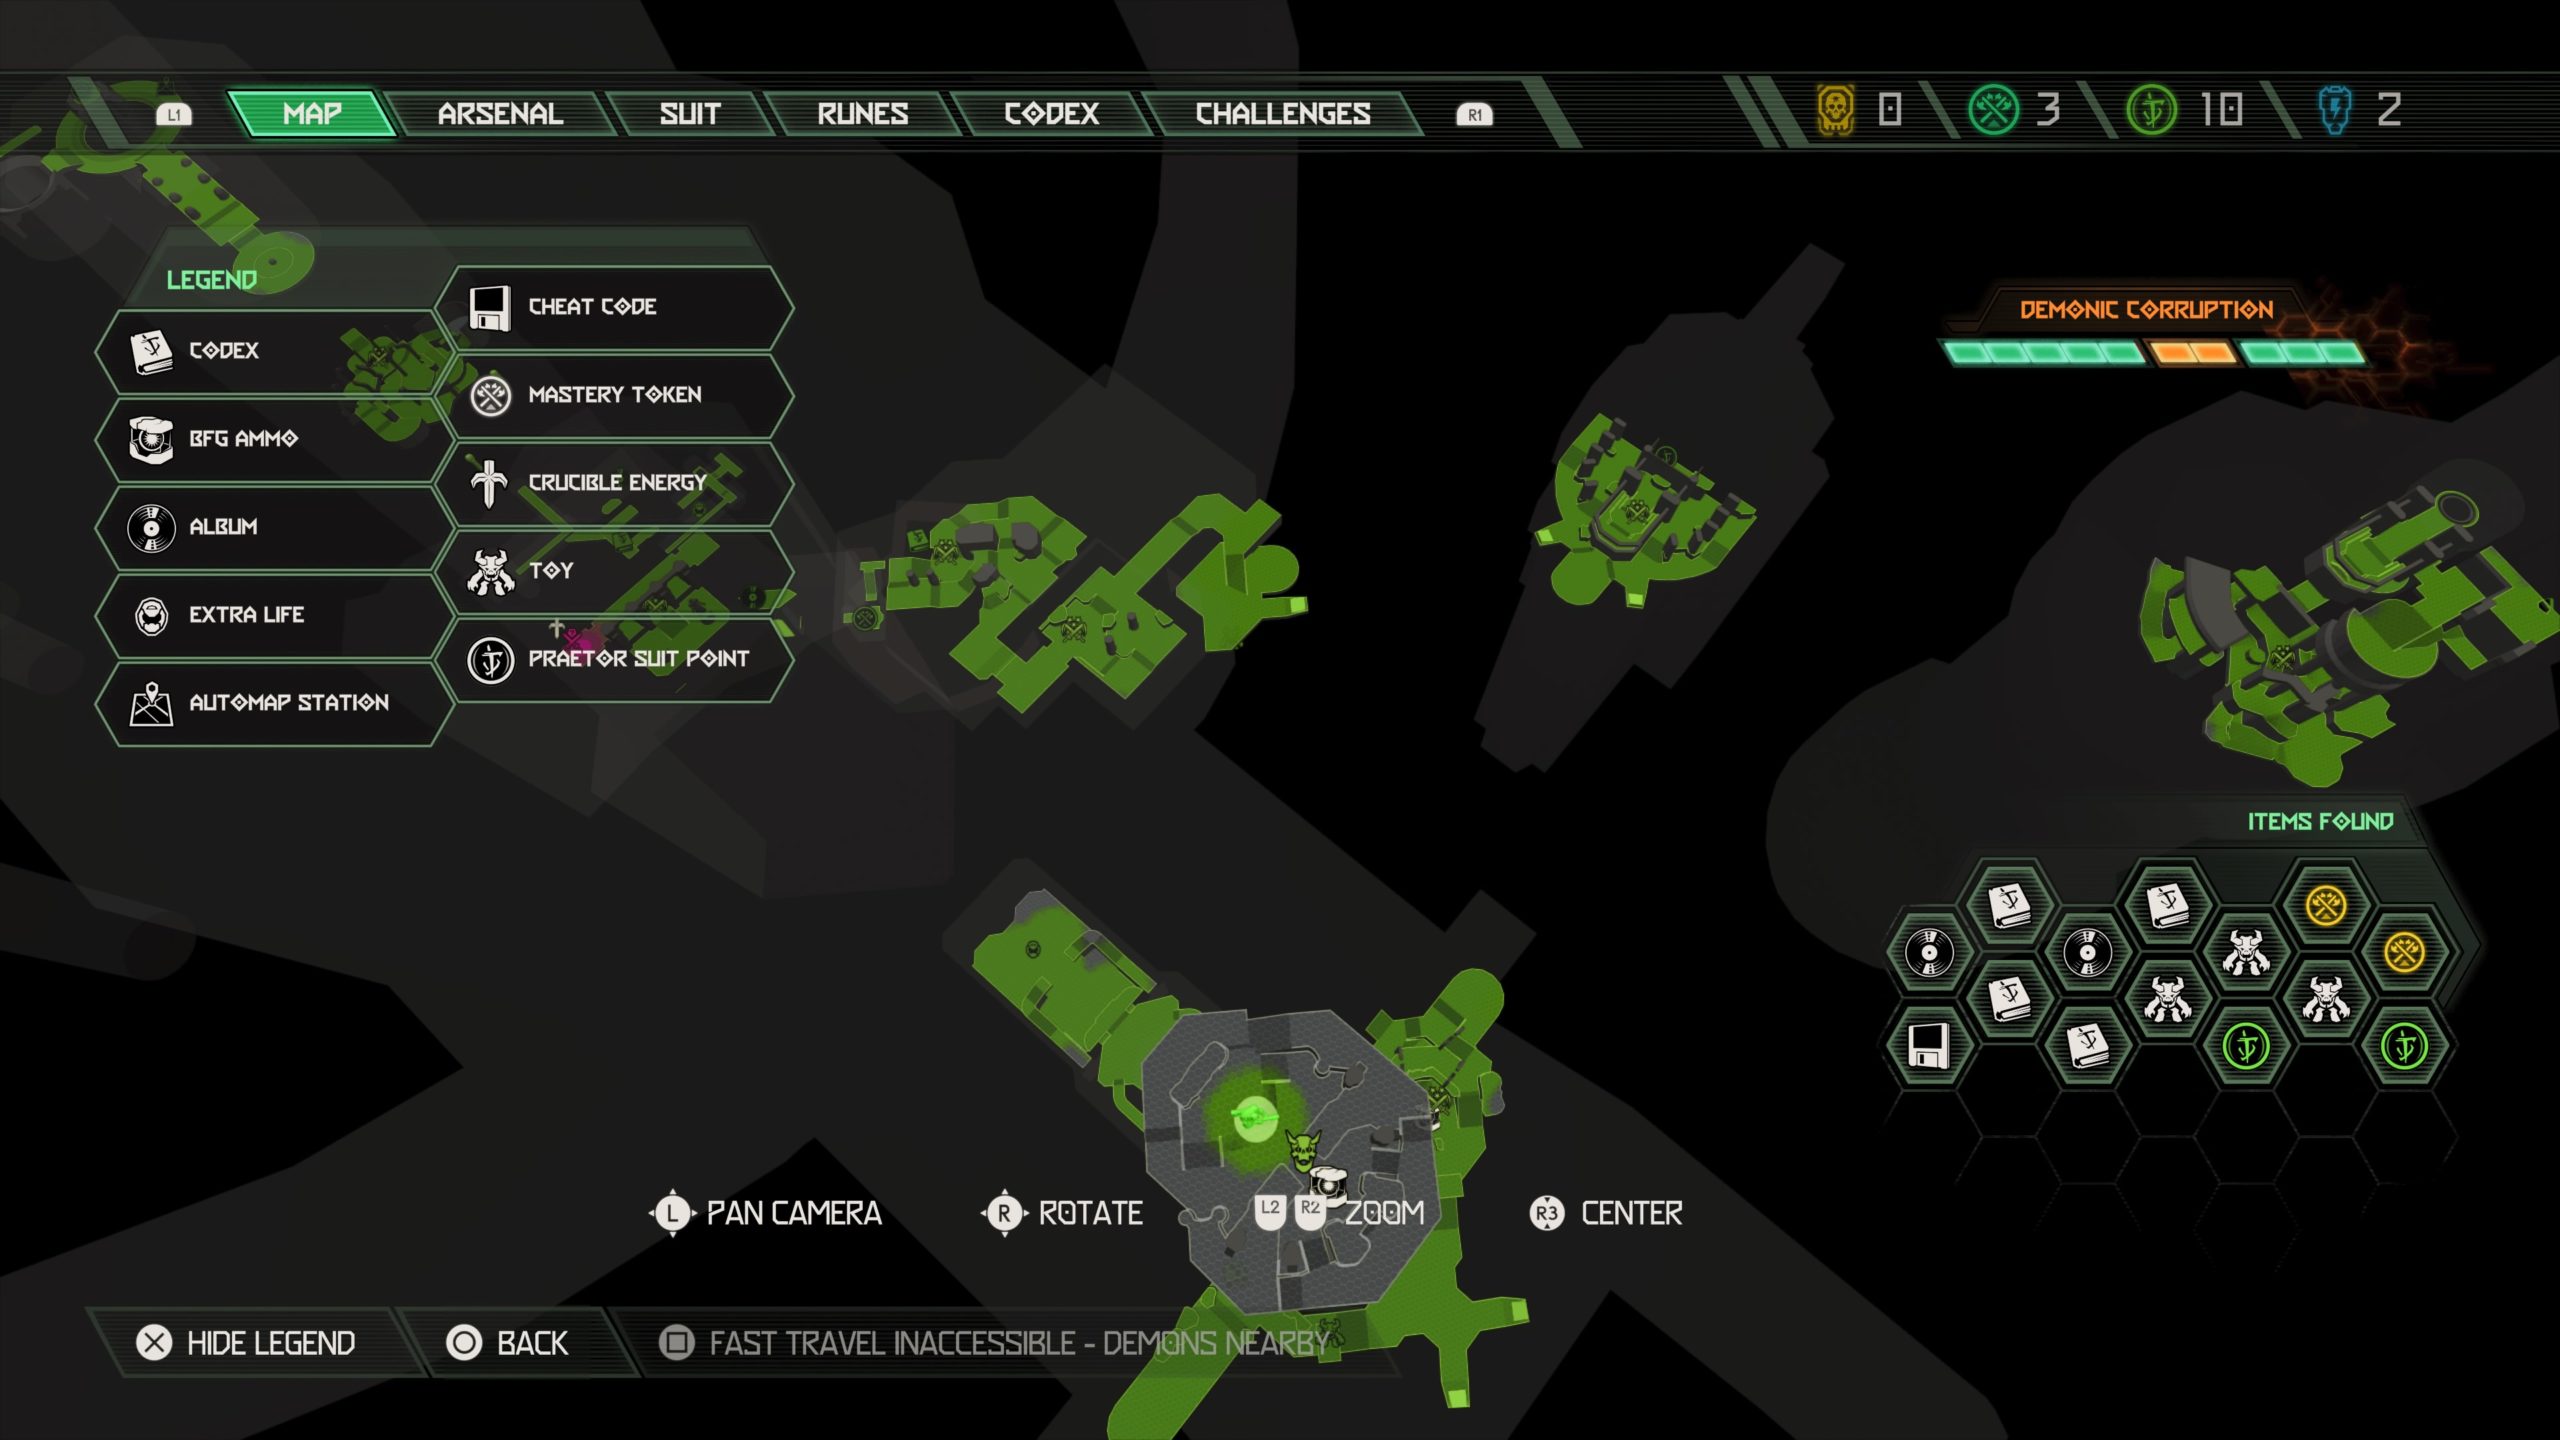
As you slay the demons of hell, keep an eye out for the cheat codes. If you obtain all the cheat codes in a single save slot, you can unlock the Reforged the Genie Lamp trophy, which is of course needed for the platinum trophy! If you miss a cheat code, you can always go back to the travel point to obtain it.
You will obtain the Cheat Code Quakecon Mode after unlocking all of the Praetor Suit Perks. Check out this guide for the locations of all the Praetor Suit Points!
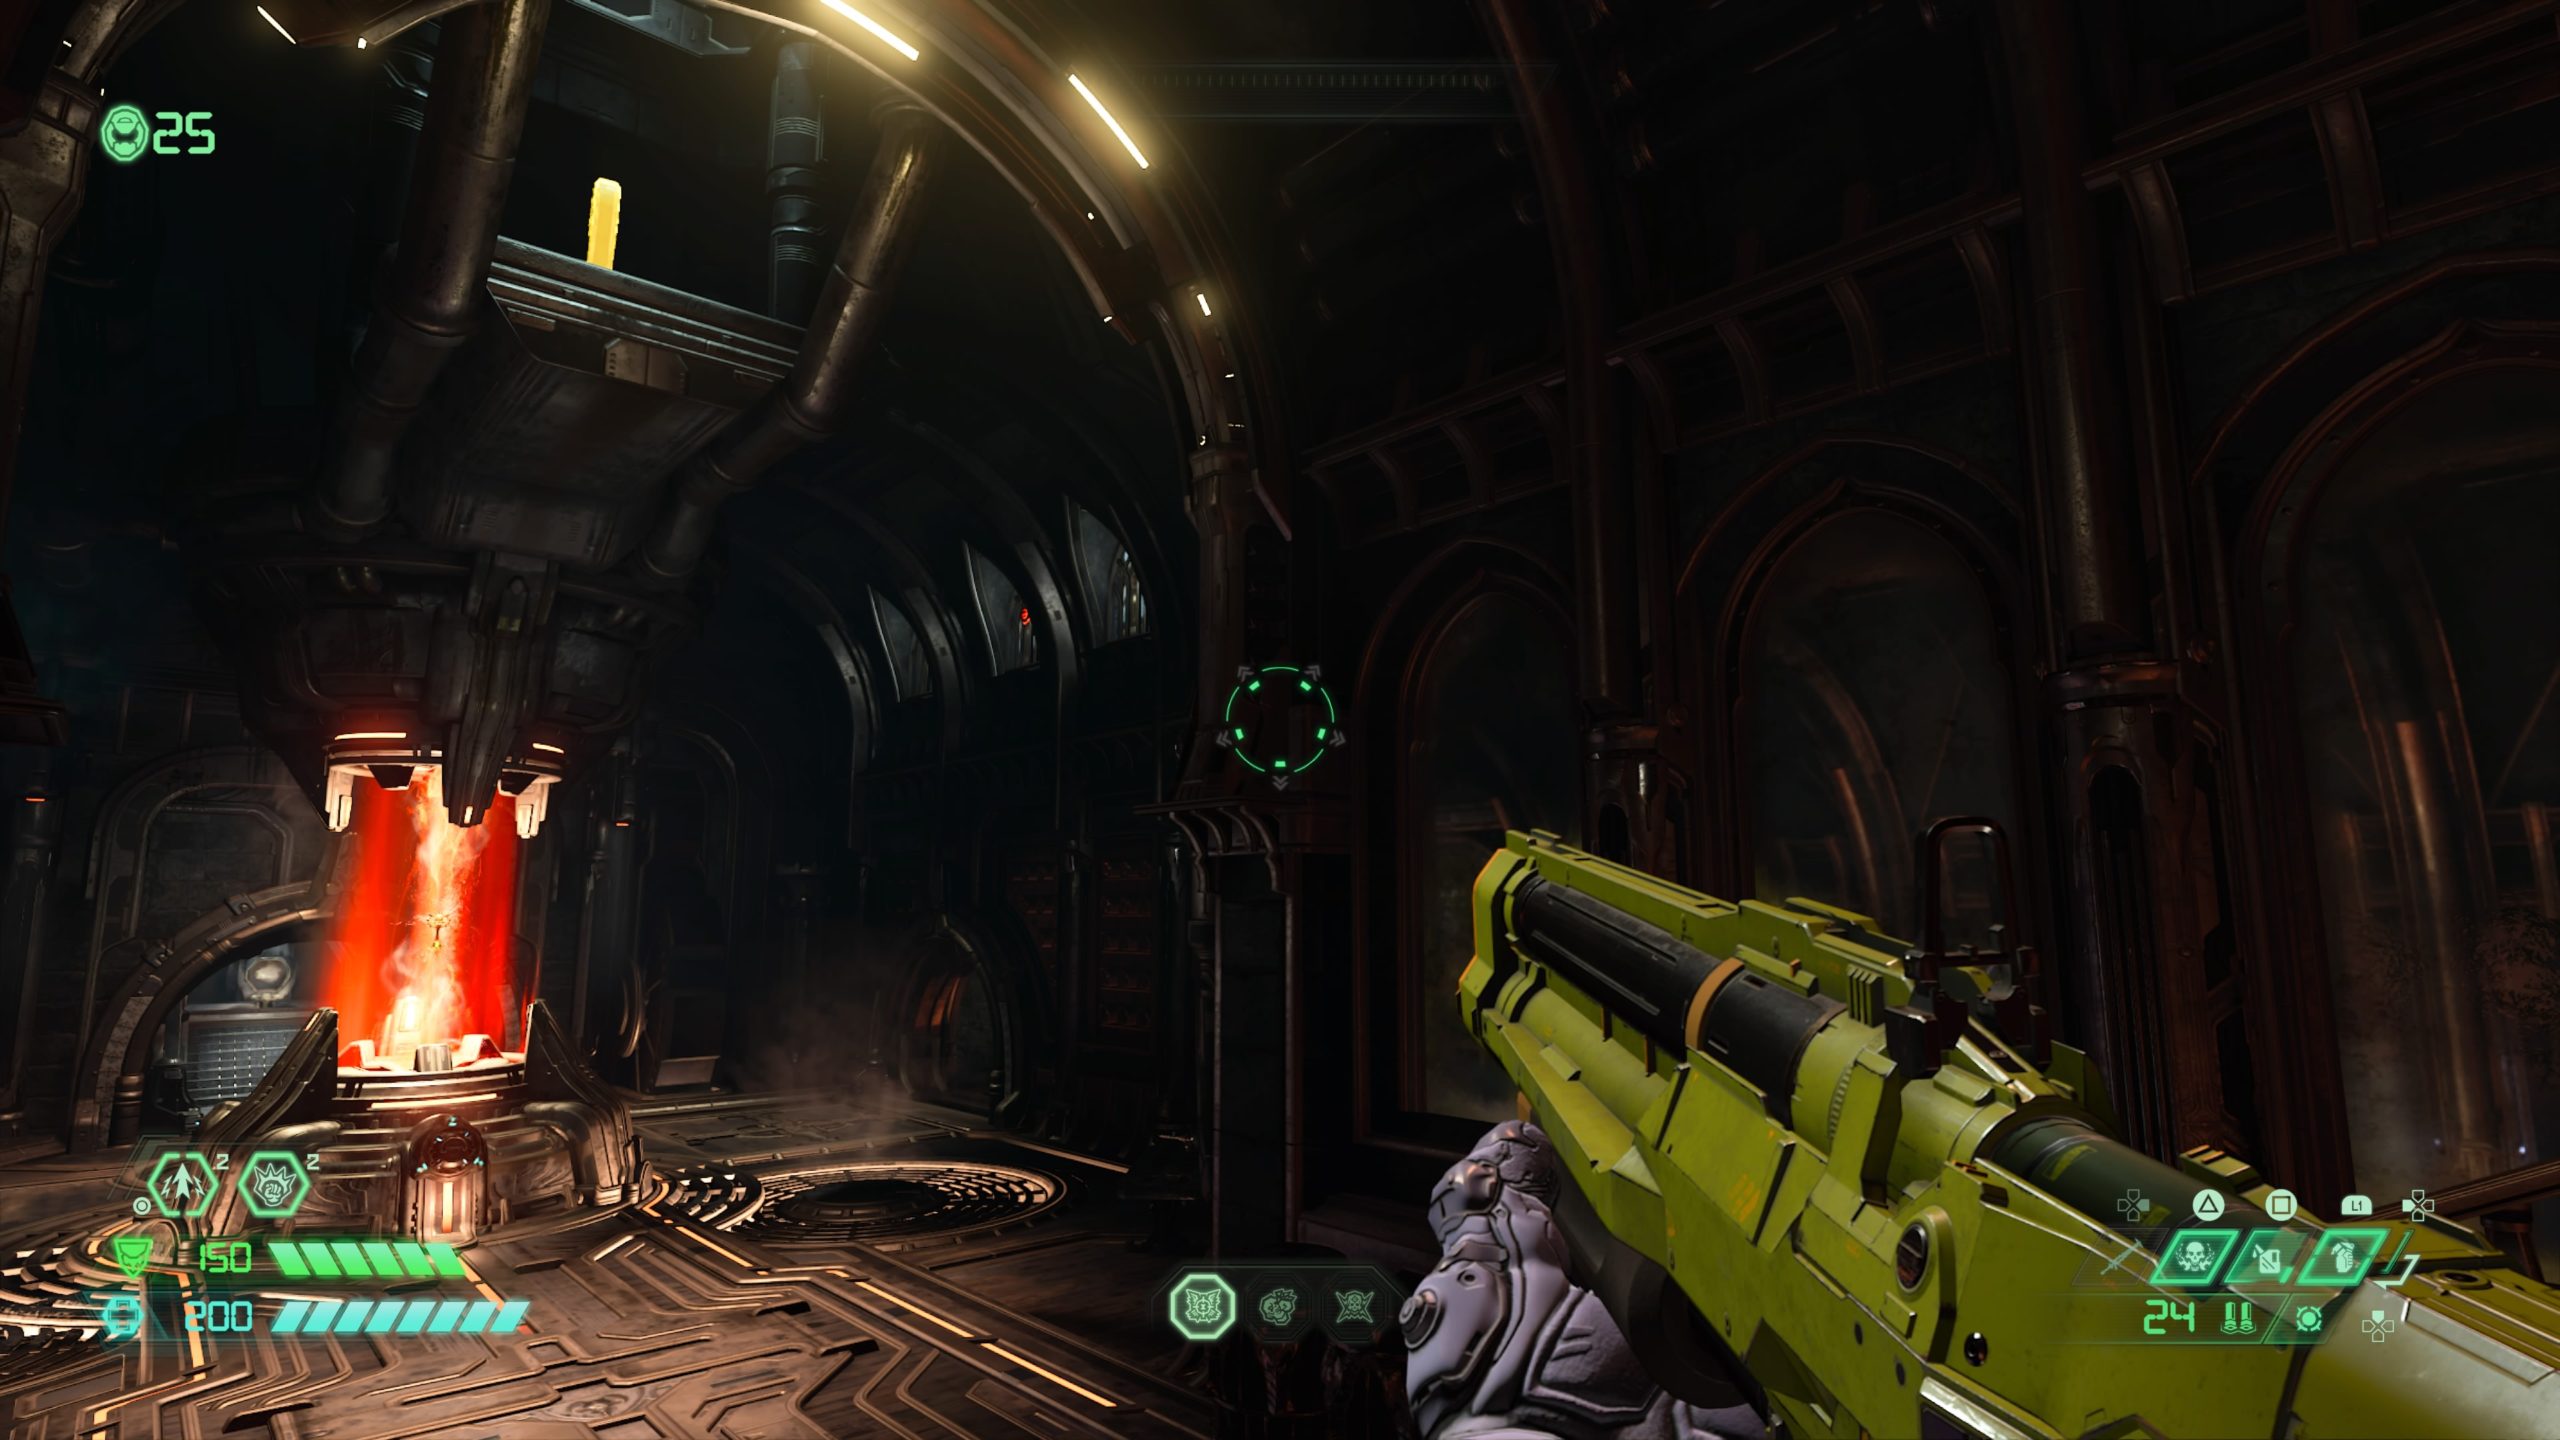
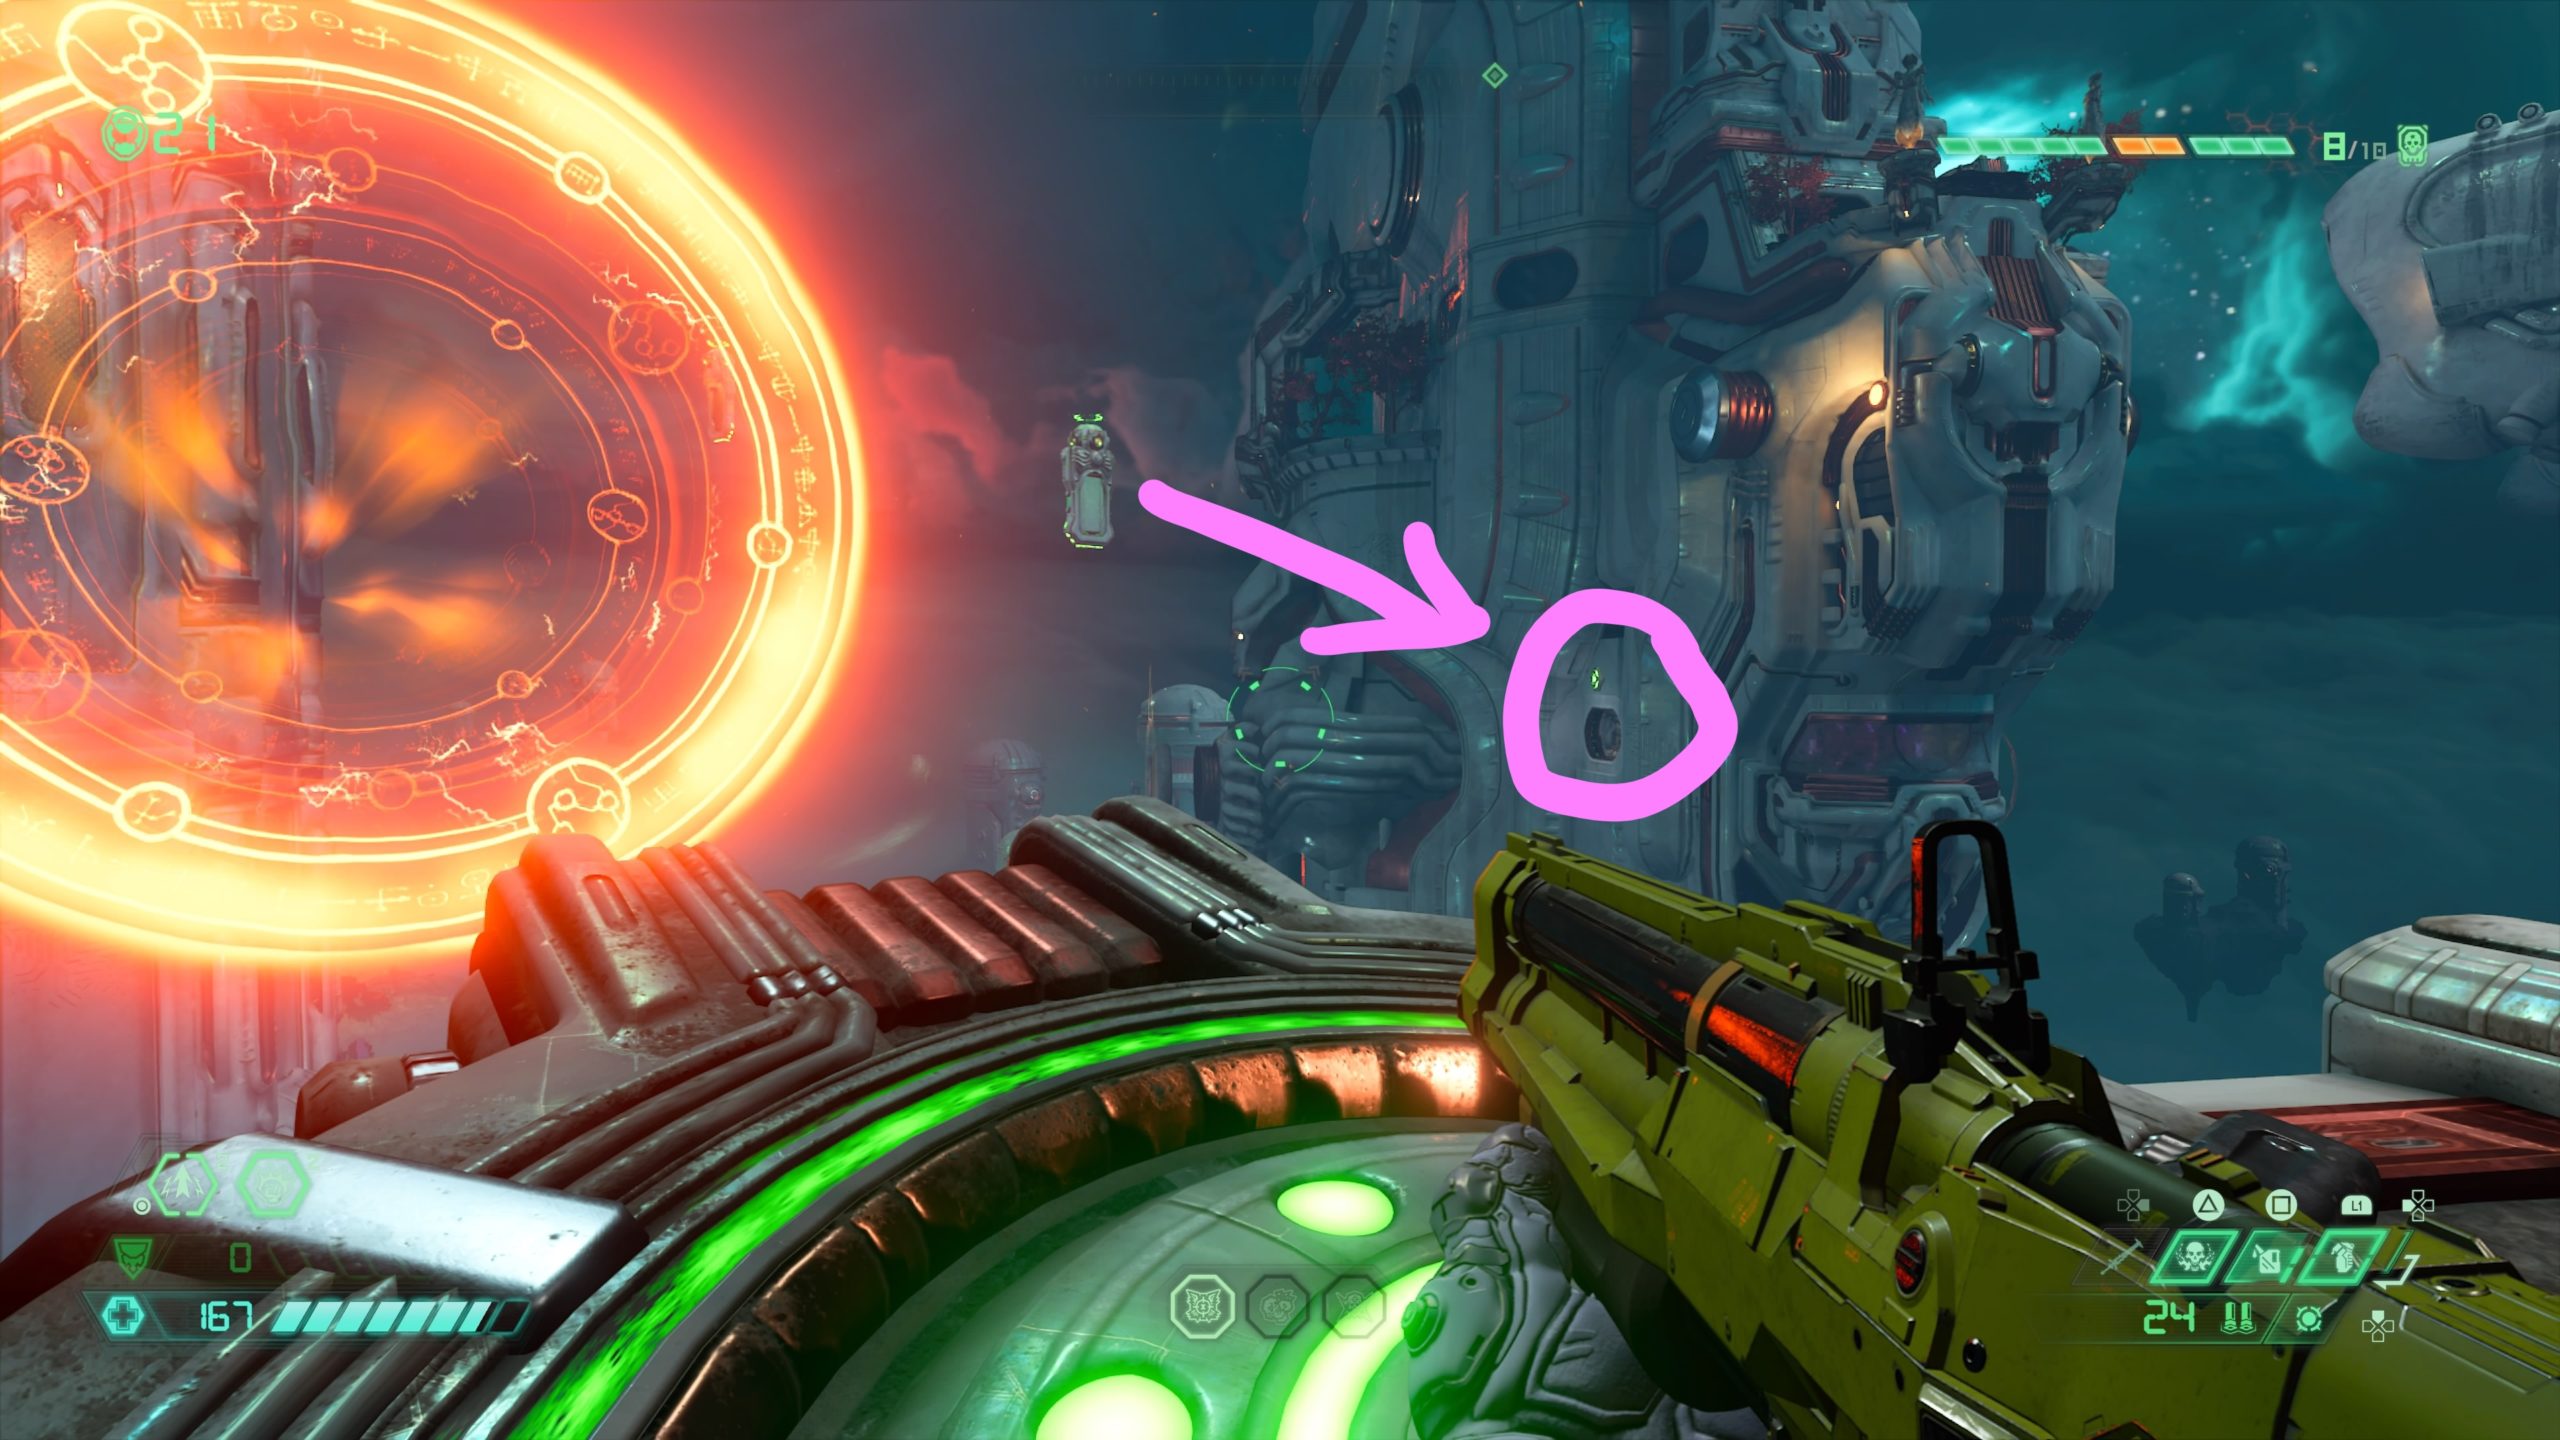
In the room with the ship’s power source, the cheat code can be found in a duct hanging from the ceiling. Towards the end of the game, one of the windows to the right of the power source will have a red target on it. Shoot this window to turn on a lift pad. Use the lift pad to launch yourself into the duct to collect the cheat code.
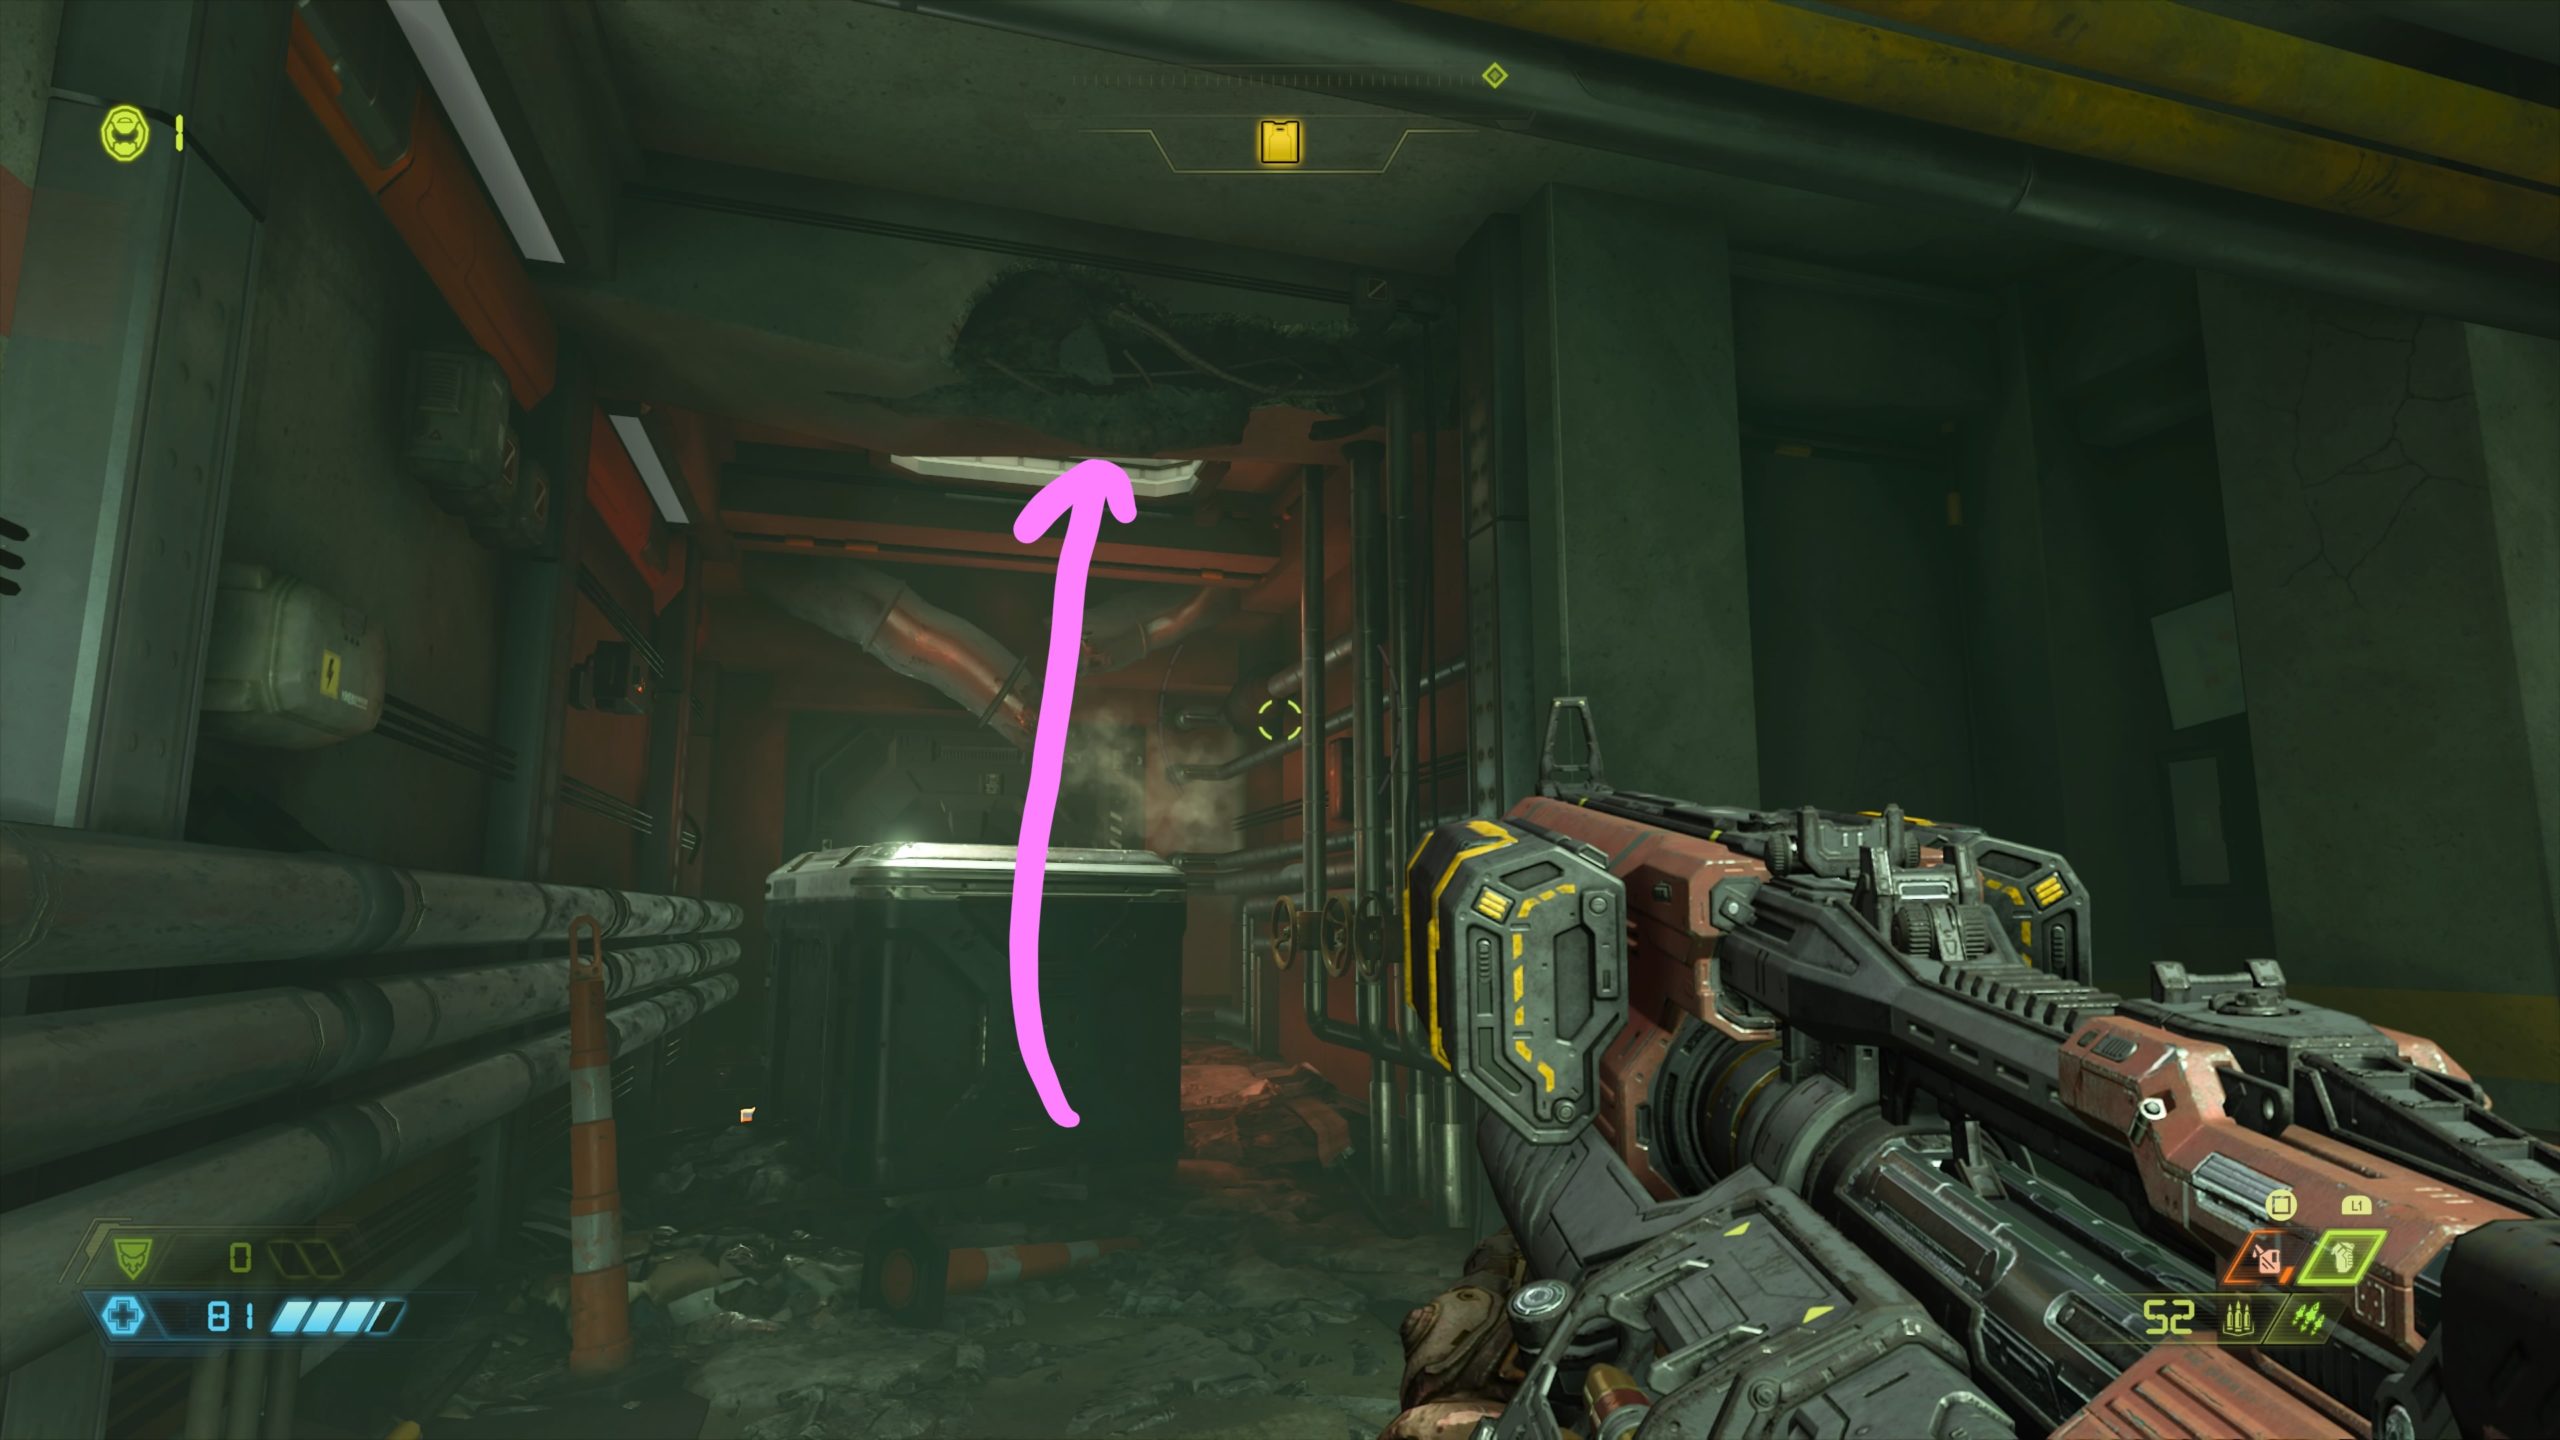
After jumping across the giant chasm and climbing through a subway train, you’ll wind up in a subway tunnel. Follow the tunnel forward, taking the first right into a maintenance area. Head through the hallway, passing two worm nests. When you come to the third worm nest, take a right (instead of left heading past the third worm nest) and climb onto a metal crate. From there, jump into the open hatch leading to a ventilation shaft. Punch open the gate and follow the shaft forward to find the cheat code at the end.
Travel to the Forge of Transfiguration. The cheat code will be in the center column. Use the gold spin bar on the side then dash into the small compartment to reach the cheat code.

This cheat code is located above the coffin that was unsealed (coffin in a sealed cylinder in middle of room). To reach it, exit the room and jump to a circular walkway then use the climbable walls to reach a top level where you can press the skull switch. From here jump to the cylinder and use the climbable wall to reach the top where the cheat code can be found.

From the fast travel point, follow the walkway left until you get to the room with the purple Ivan sign. Take a right and drop down to the ledge below then head straight to the tip of the ledge overlooking the giant monster building. Just below the monster, there will be a circular area surrounded by teeth. This area can be broken so smash through the hole using dash to find the cheat code.
After you use two sentinel batteries to unlock the room containing the original Praetor Suit, head to the hole in the side of the room on the left side. Face the suit and back off the edge, causing you to fall. Be prepared to dash into a secret room below containing the cheat code.
From the fast travel point, head for the stairs leading the monitors that says “SYSTEM CRITICAL”, but don’t go up them. Instead, drop down to lower level by the green light to the left of them. Take the first left in the hallway and use the lift pad to reach the room contained the cheat code.
From the fast travel point, work your way through the sewer section of the catacombs. Exit the tunnels to arrive in a large open room filled with lift pads and spin bars. Head to the far right corner of the room to find a set of stairs leading up to a room filled with barrels. In that room, there will be a cracked wall on the left side of the room near a stack of barrels. Melee the wall and jump down into the cave to find the collectible.

From the Passage of the Damned fast travel point, head right climbing a flight of bloody stairs. You will then need to head through the area with the spinning fire column via the climbable walls then jump on top of the moving metal cages on the left side of the room to reach the room above. Take a left under the moving press to reach a big open room with a spinning rectangle with spikes in front of you. Head to the other side of the room past the spiked rectangle through the two moving presses. In the next room you will need to drop down under the moving crates to reach a hidden area below containing the cheat code.
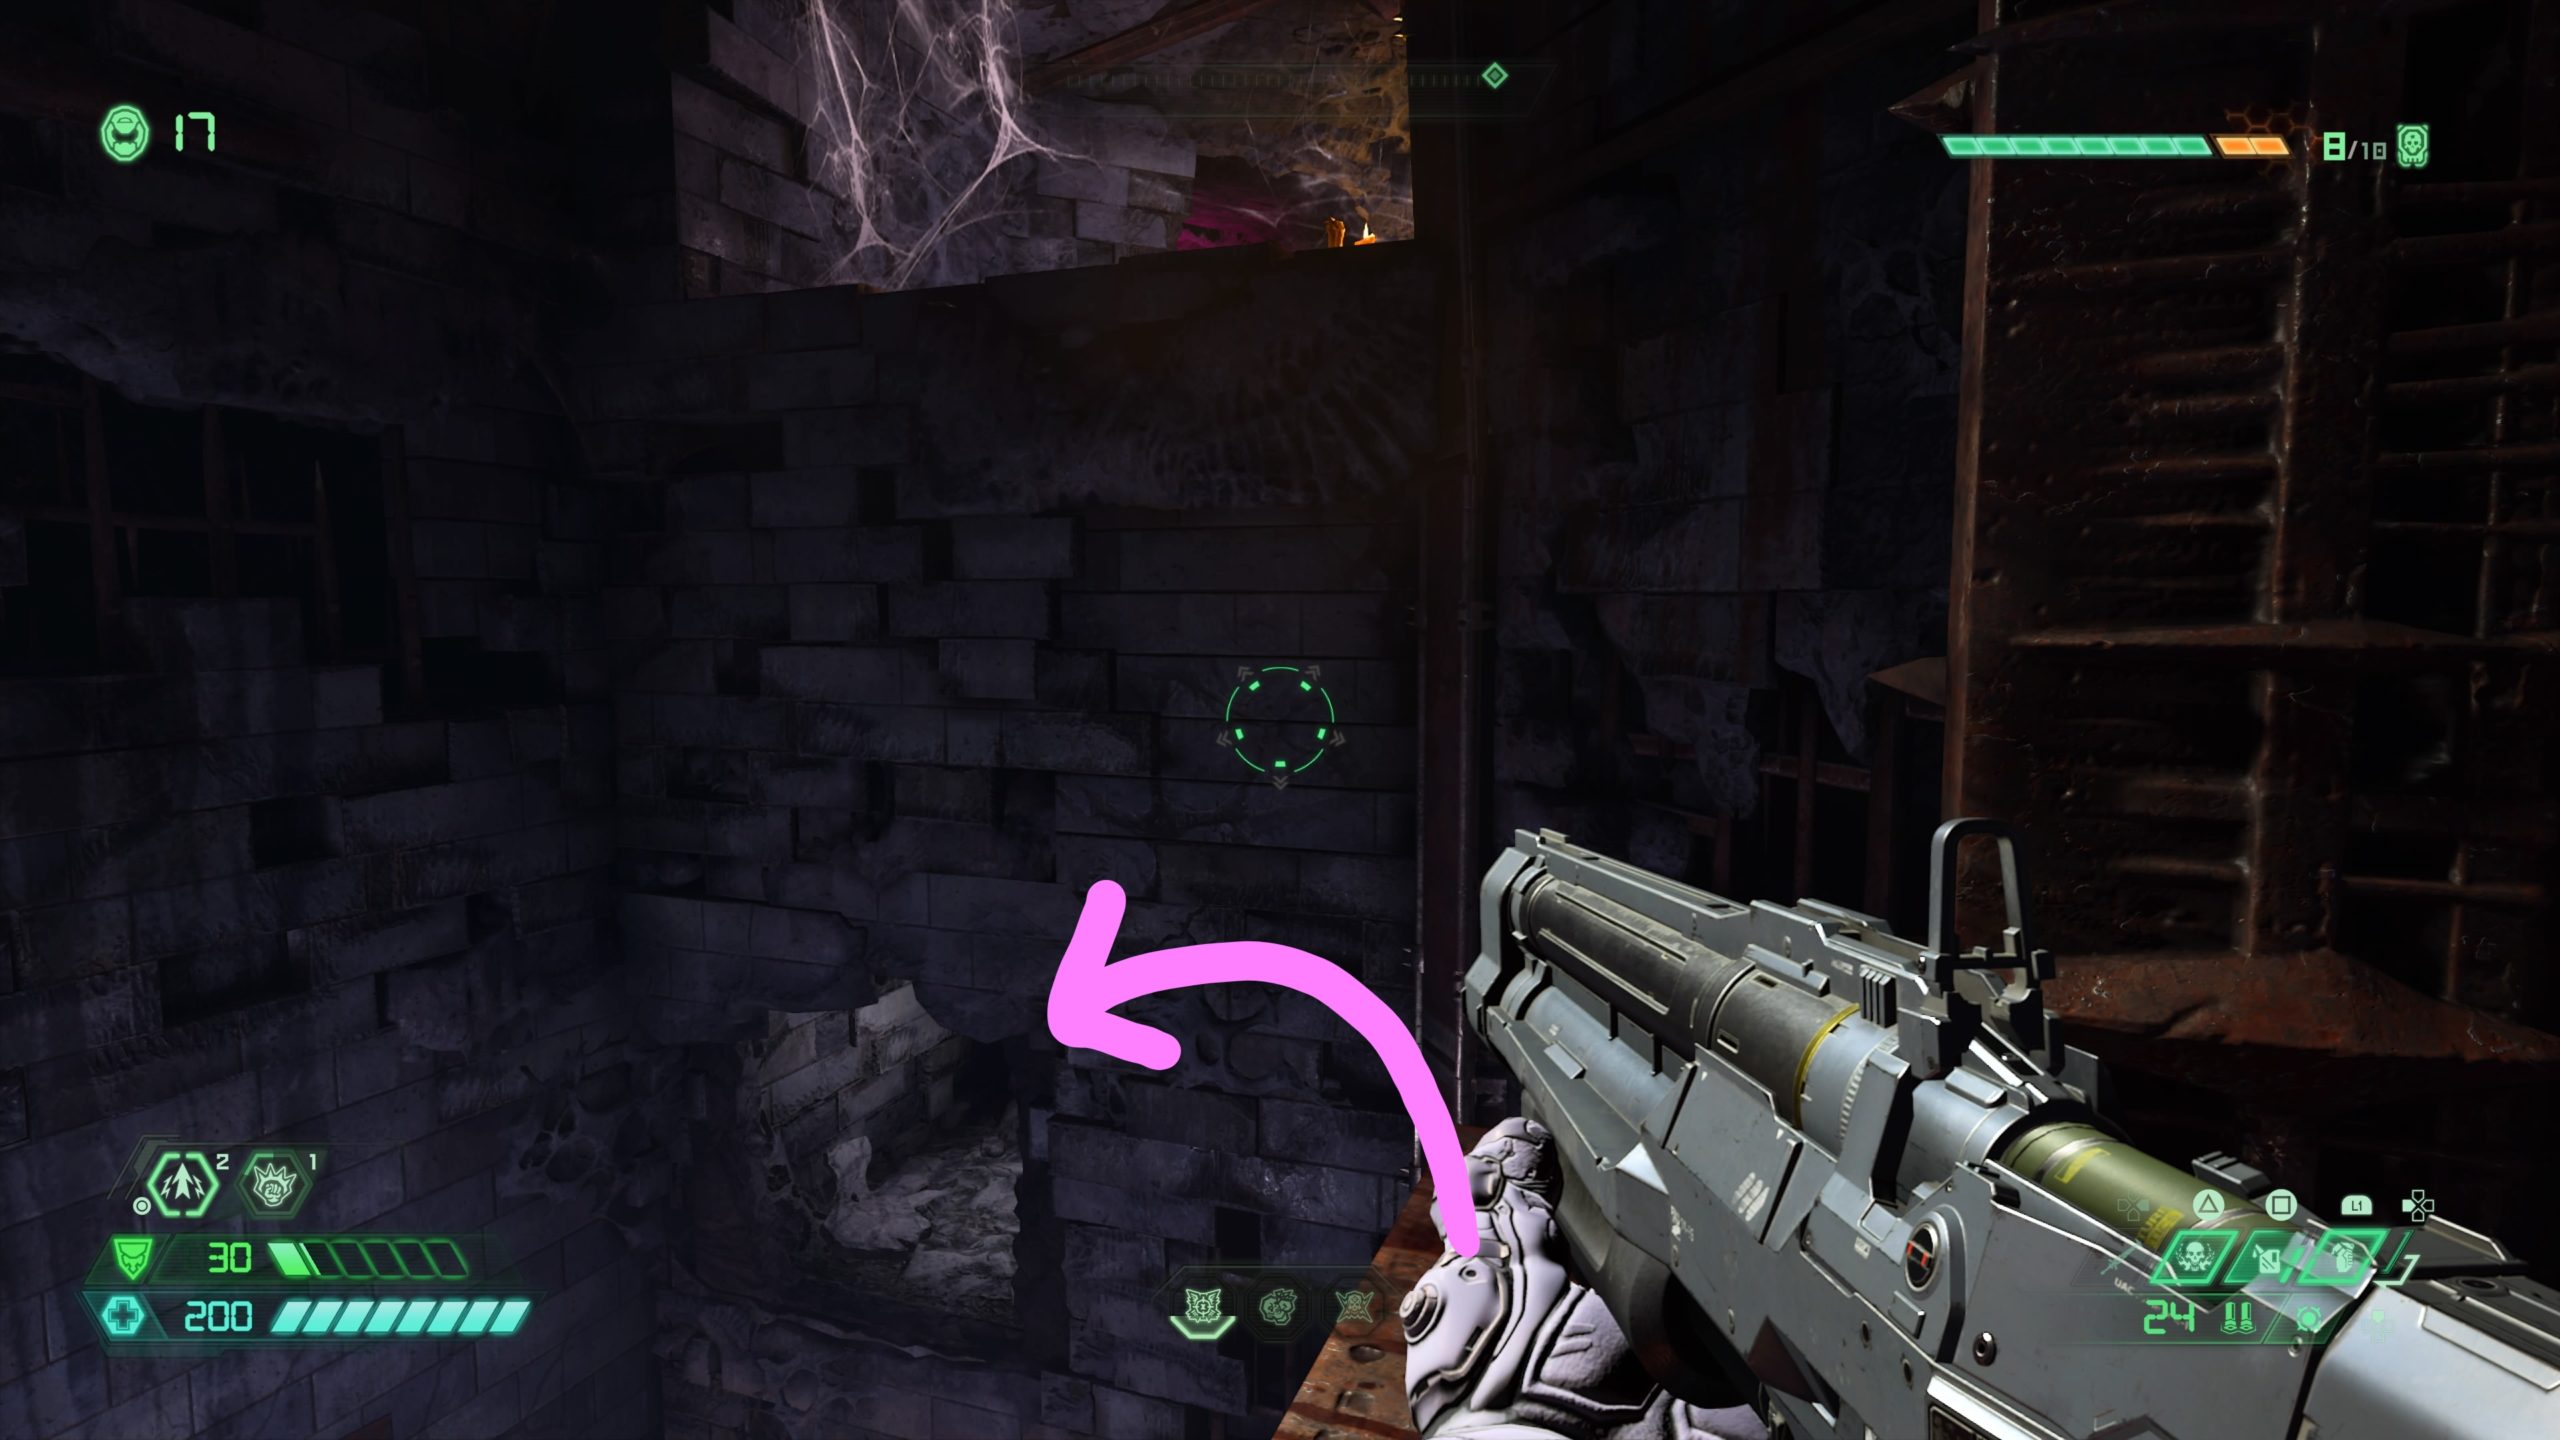

From the fast travel point, head to the back left of the room to find a hallway leading deeper into the level. Take a left continuing down the hallway until you come to the end. Jump to the bloody ledge on the left in the shaft. Look down under where you came from to find a crackable wall. Dash through the wall to find the cheat code.
From the fast travel point, turn around and jump down the long shaft backwards then dash forward to reach a hidden area containing the cheat code.
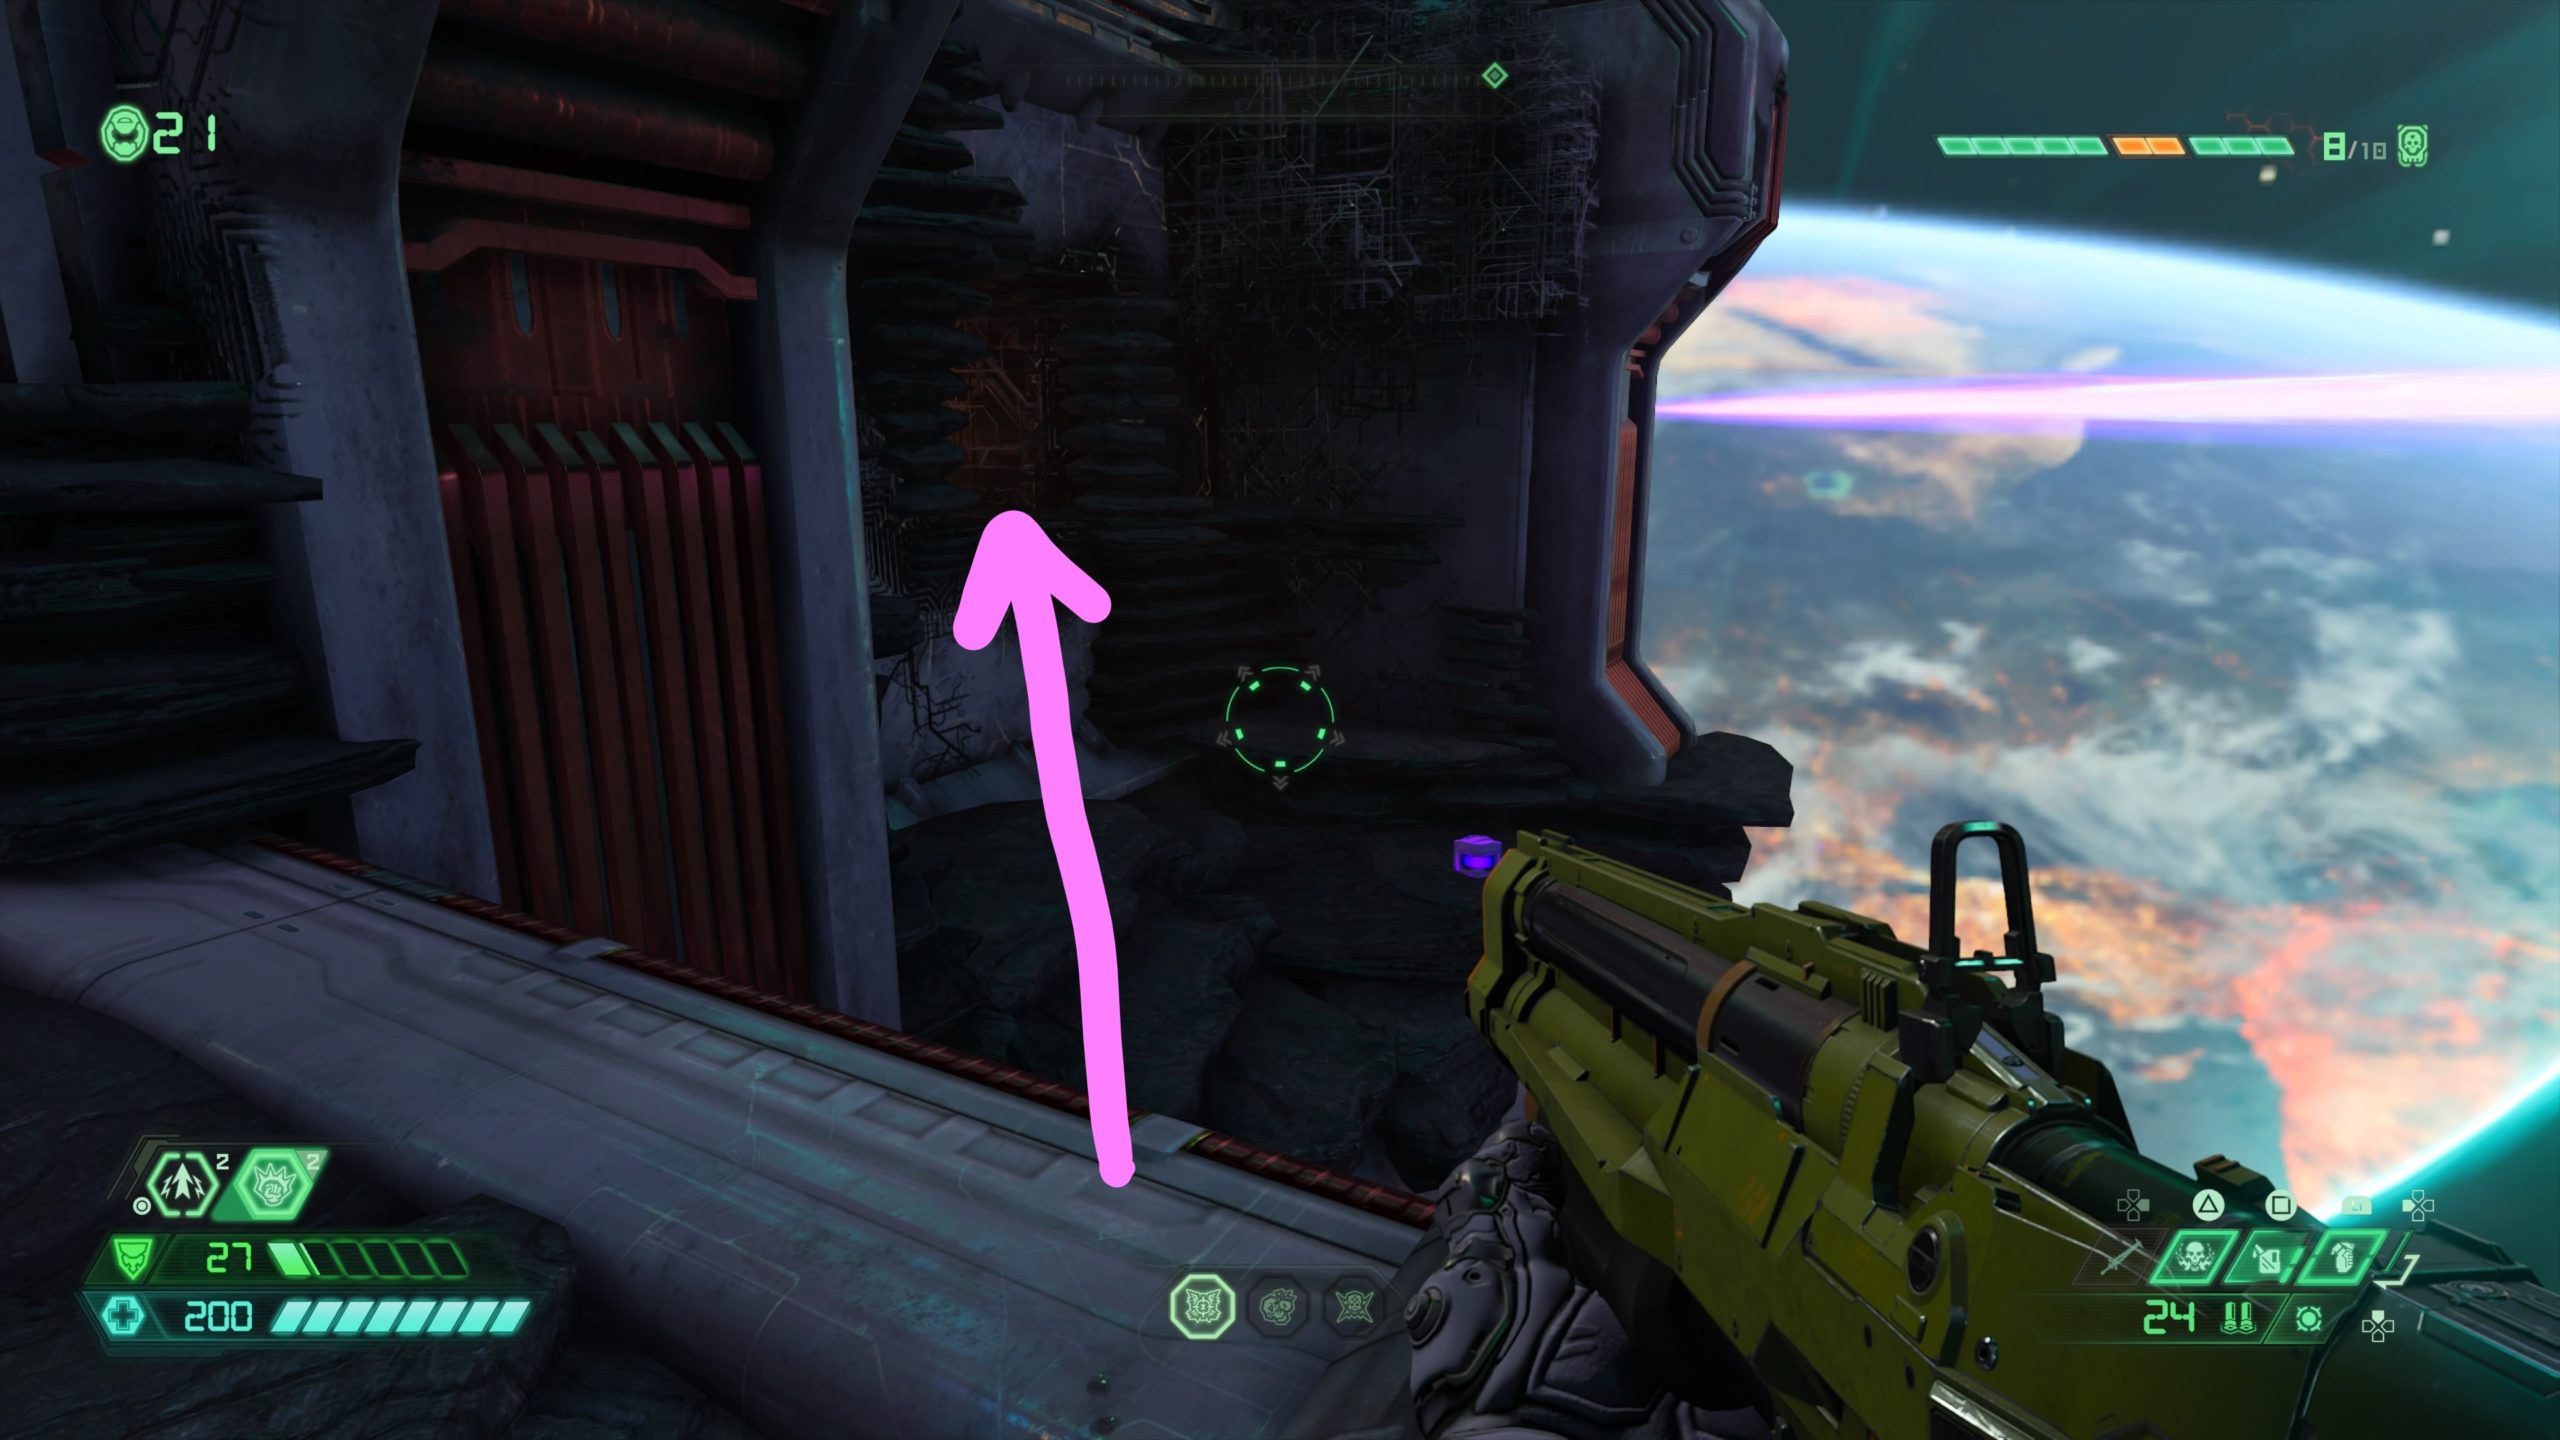
From the fast travel point, head into the structure and take the elevator up then head through the doorway to reach a control room. Head through the door on the left to go outside. Head to the left ledge overlooking the giant beam to spot a cracked wall in the side of the structure. Jump to the wall and melee it to find the cheat code inside.
Below are our guides and walkthroughs for Doom Eternal.