![]()
Viris West
Codex: Story of Earth – Final Sin
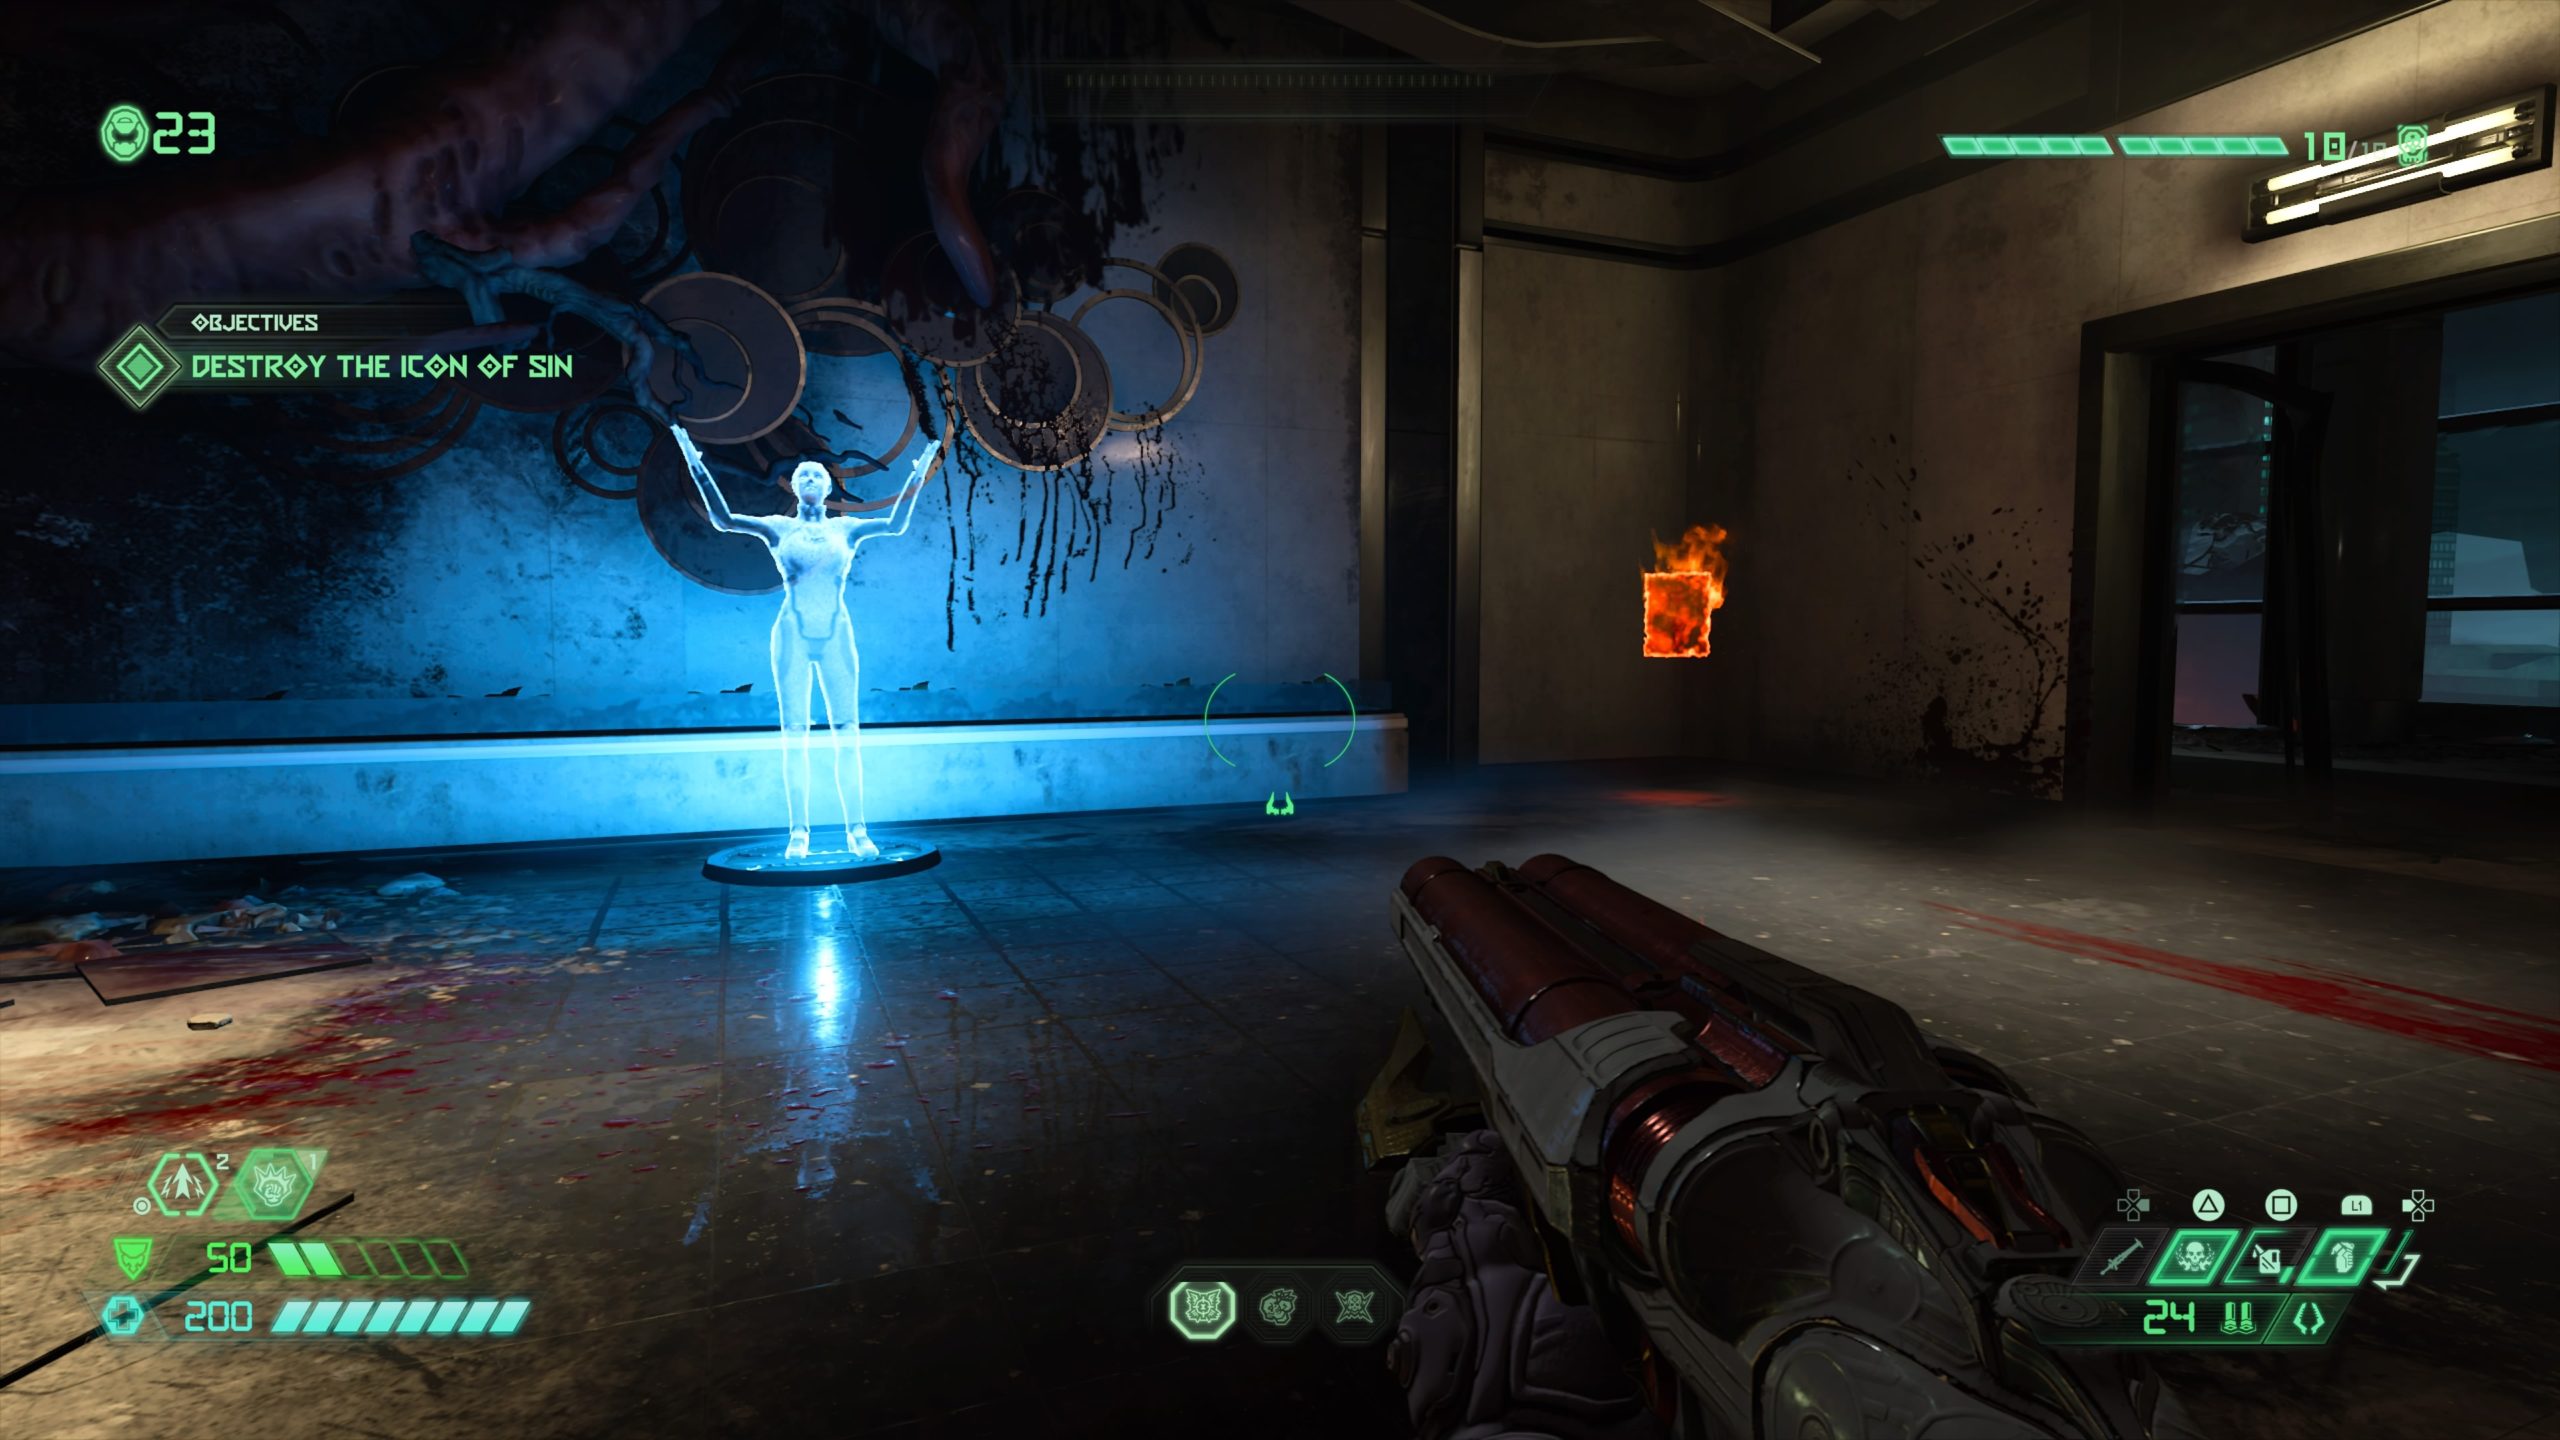
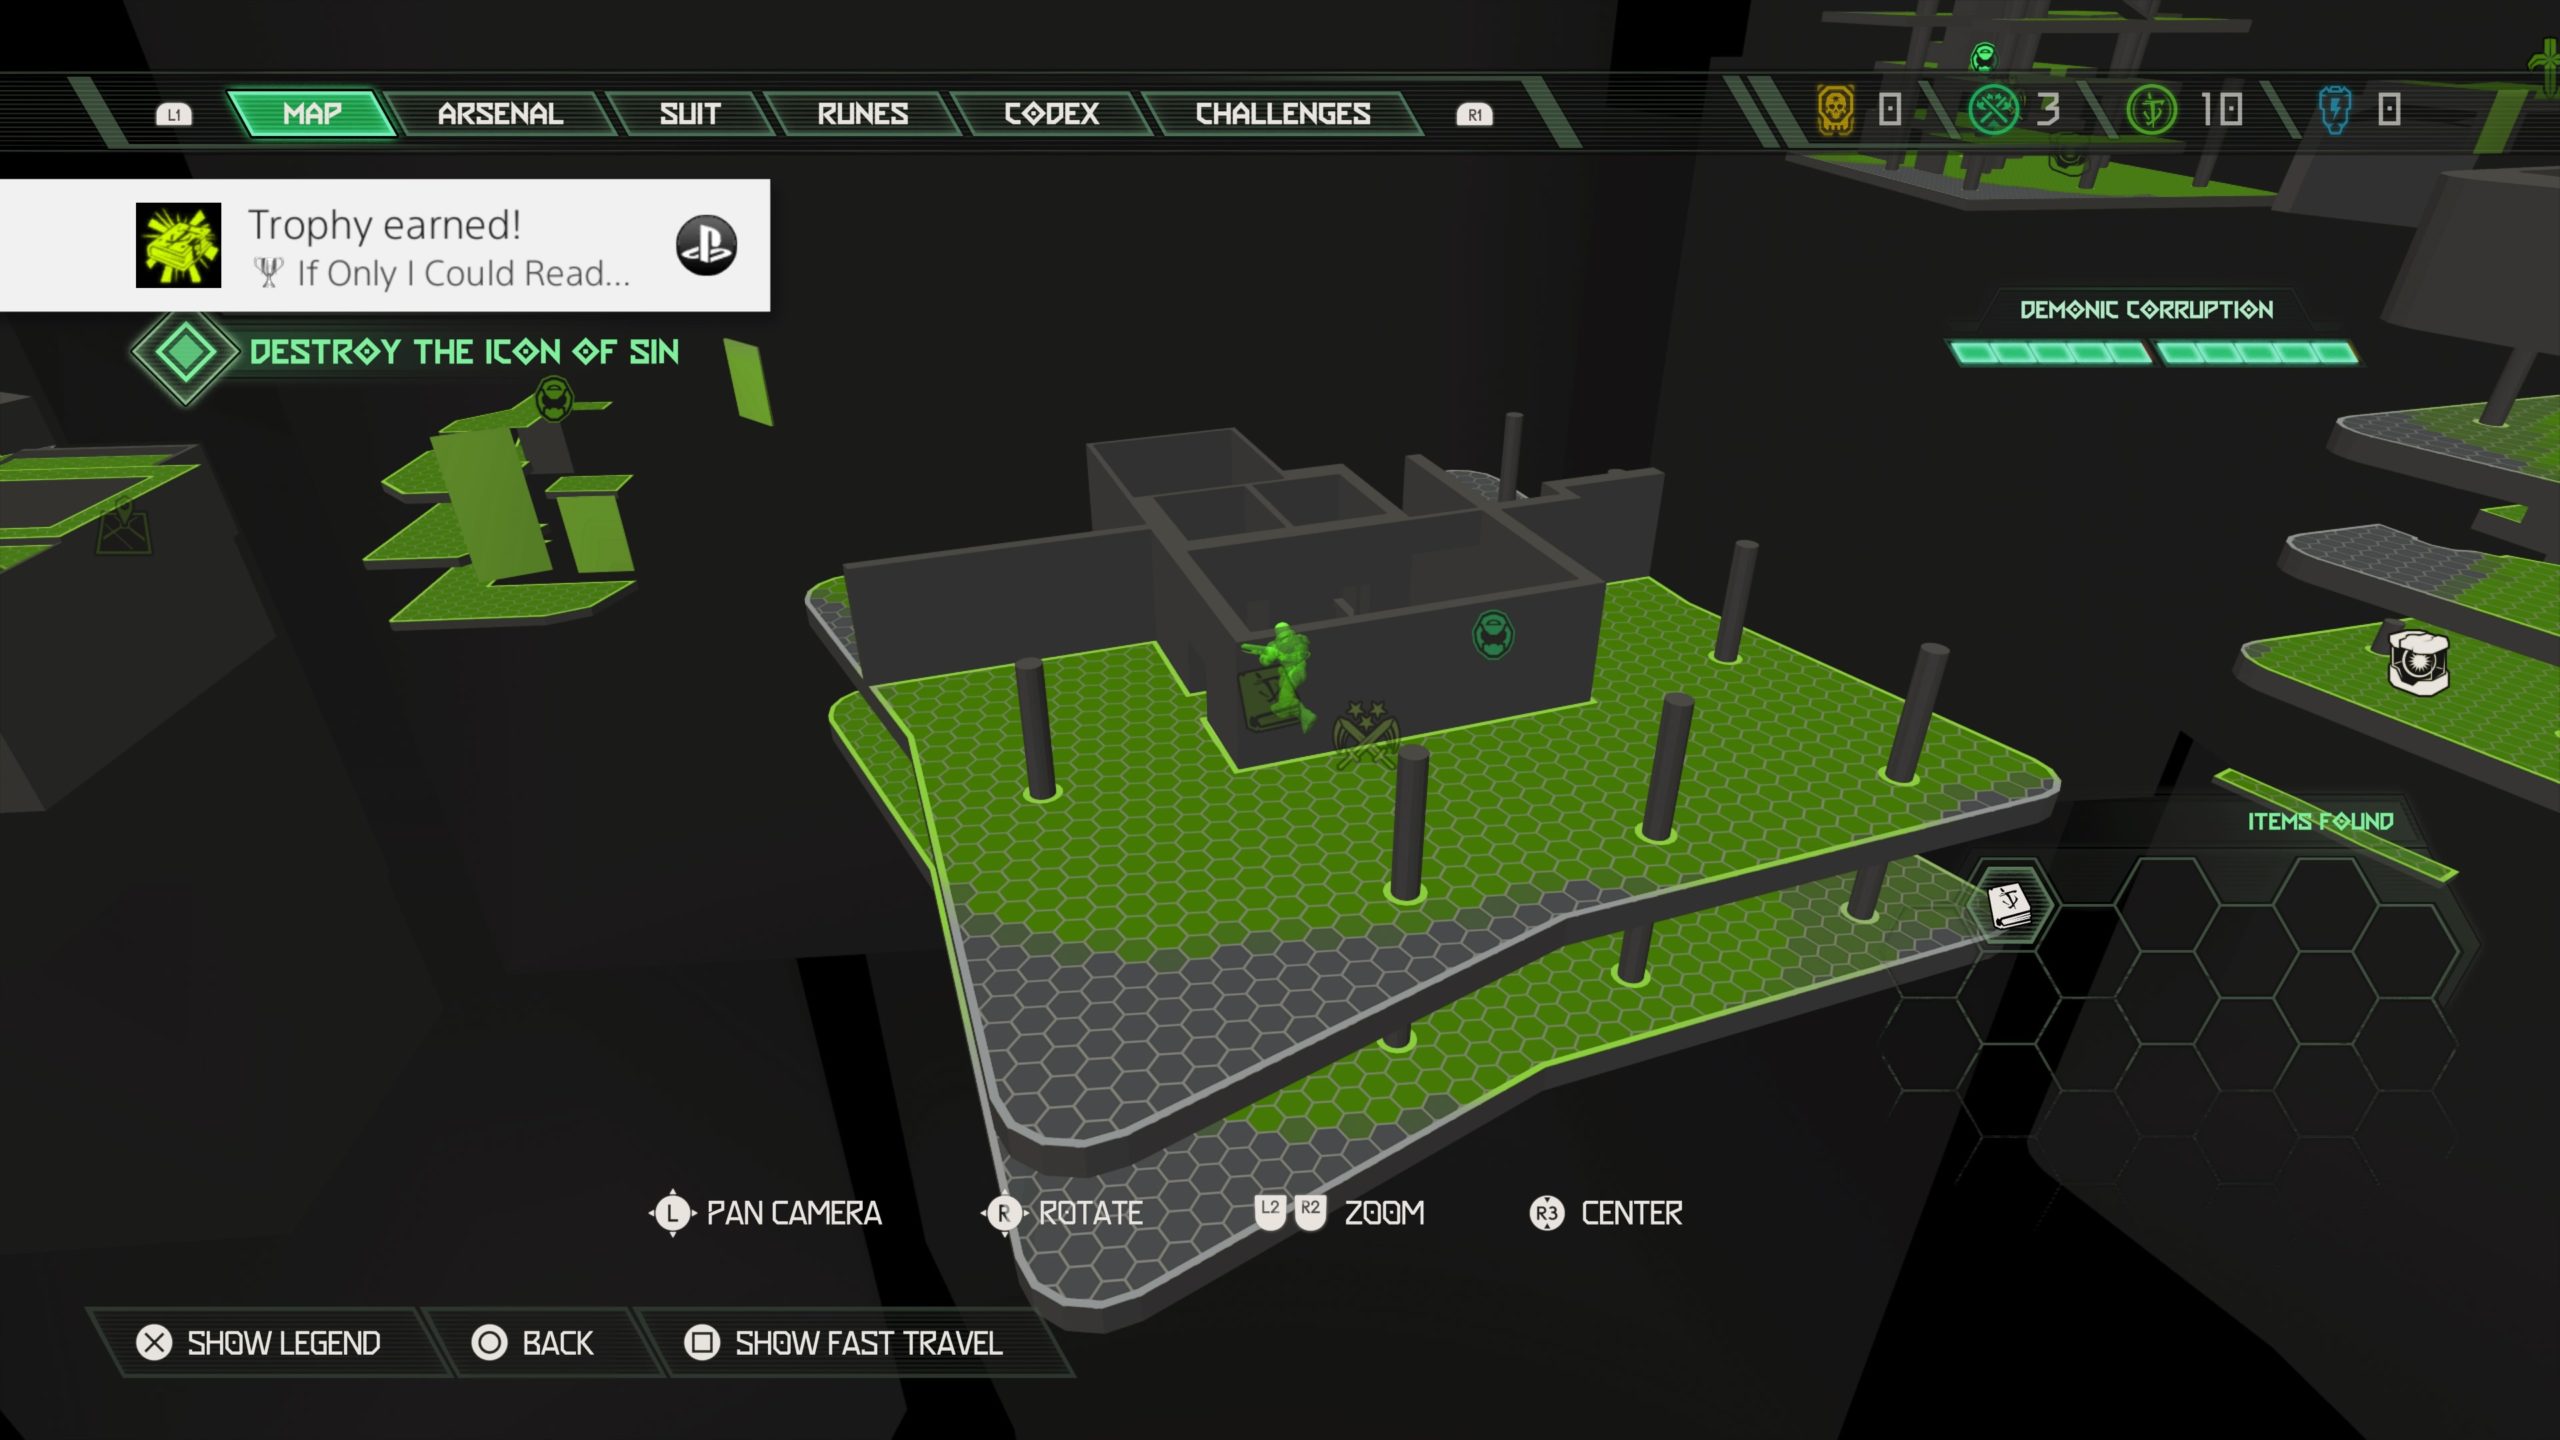
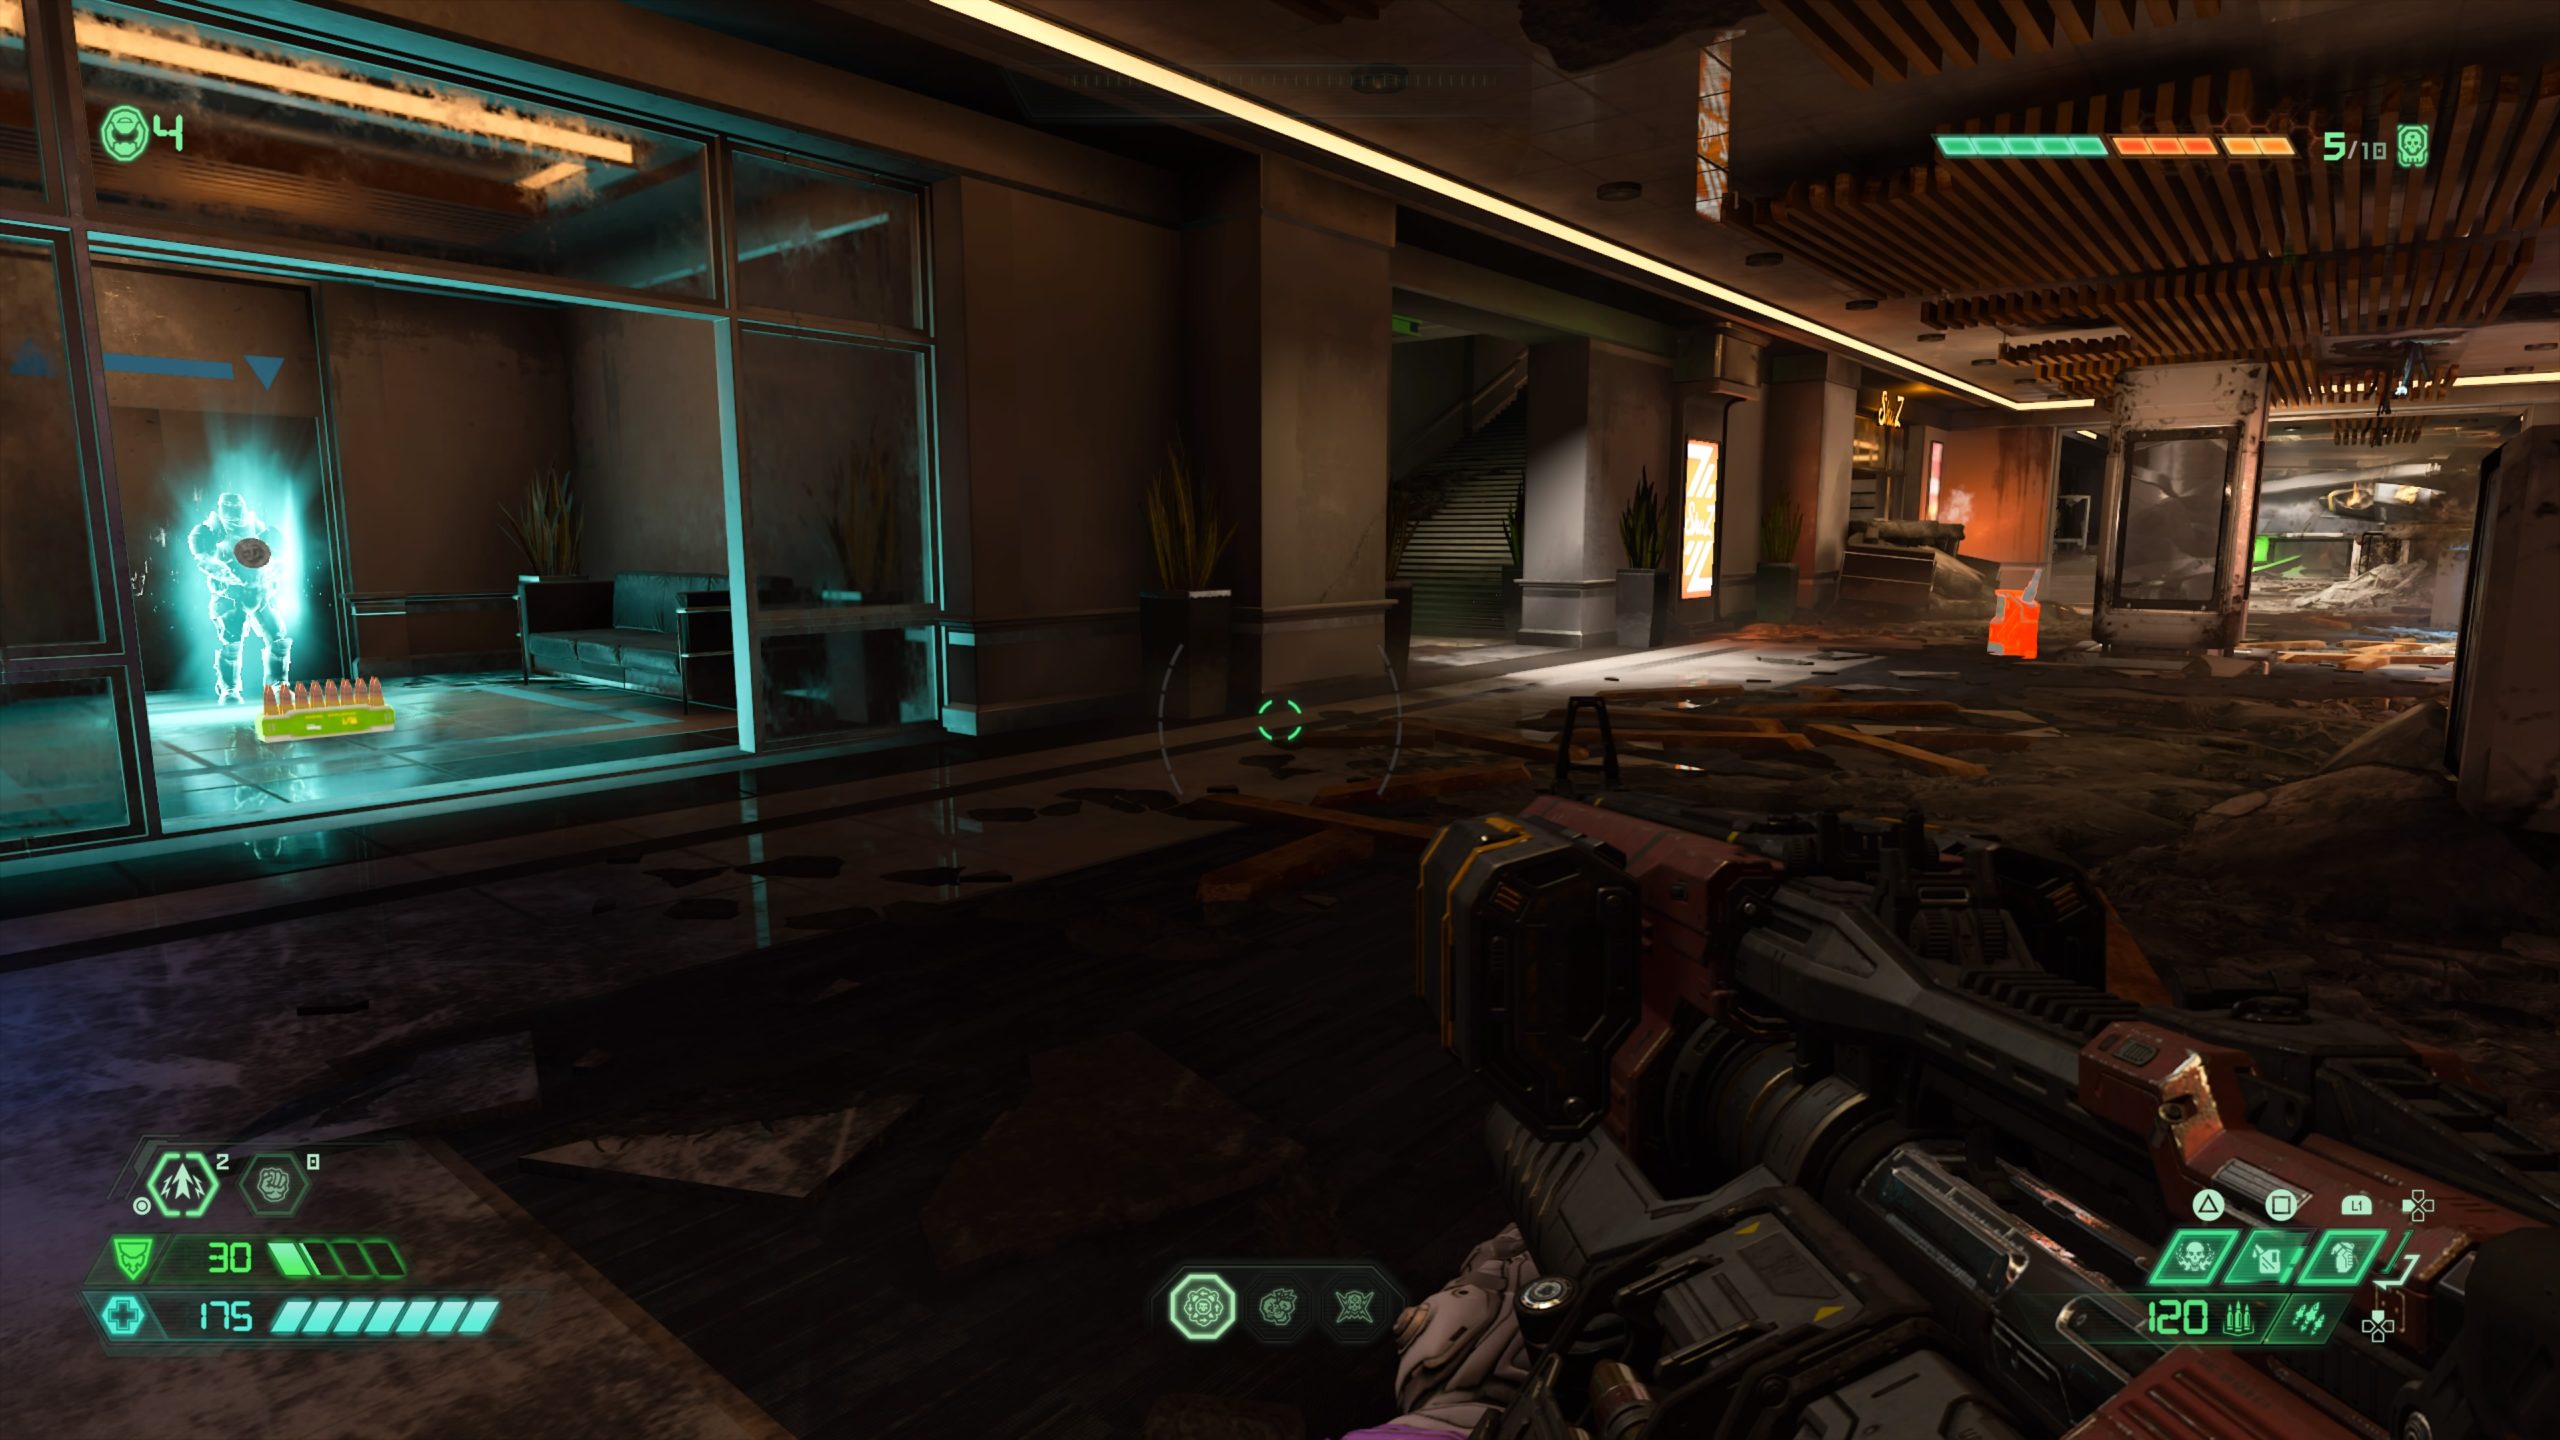
From the fast travel point, turn around and head through the building. The codex can be found in the elevator lobby next to a UAC Spokesperson hologram.

![]()
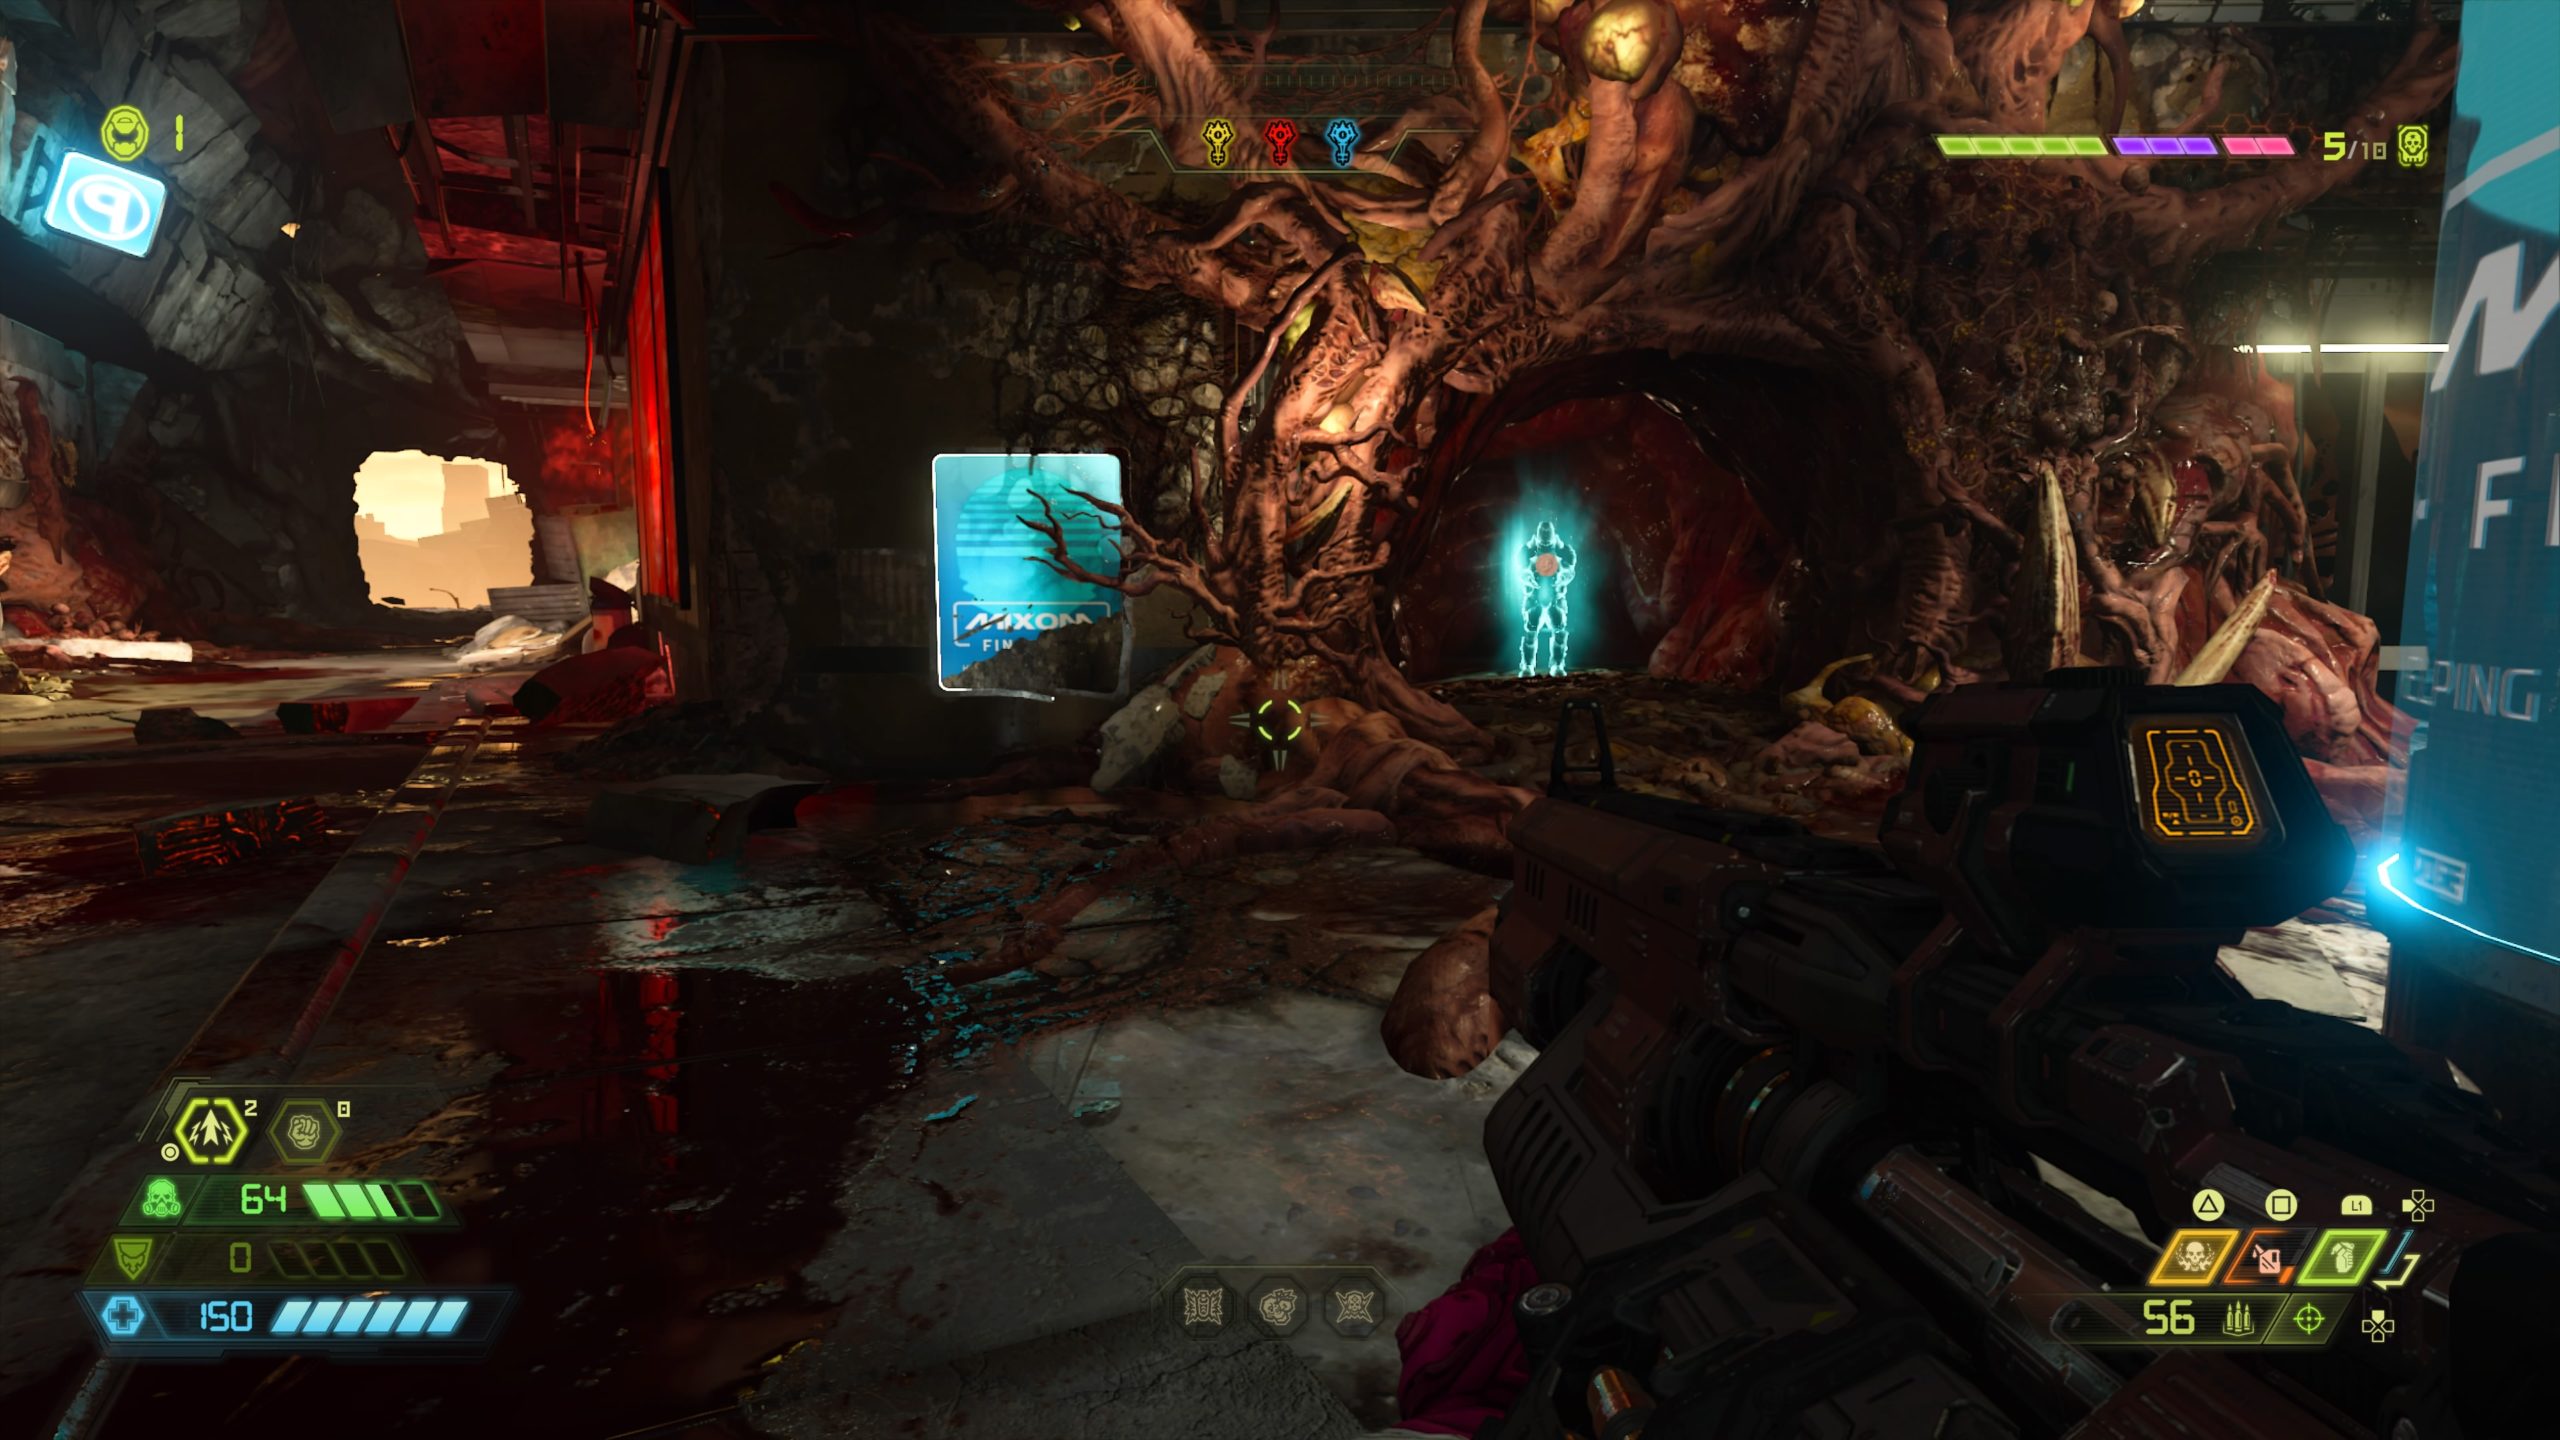
Codex: Story of Earth – Final Sin
From the fast travel point, turn around and head through the building. The codex can be found in the elevator lobby next to a UAC Spokesperson hologram.
![]()
Codex: Story of the Maykrs – Urdak
From the fast travel point, head down the stairs and to the left to find the codex.
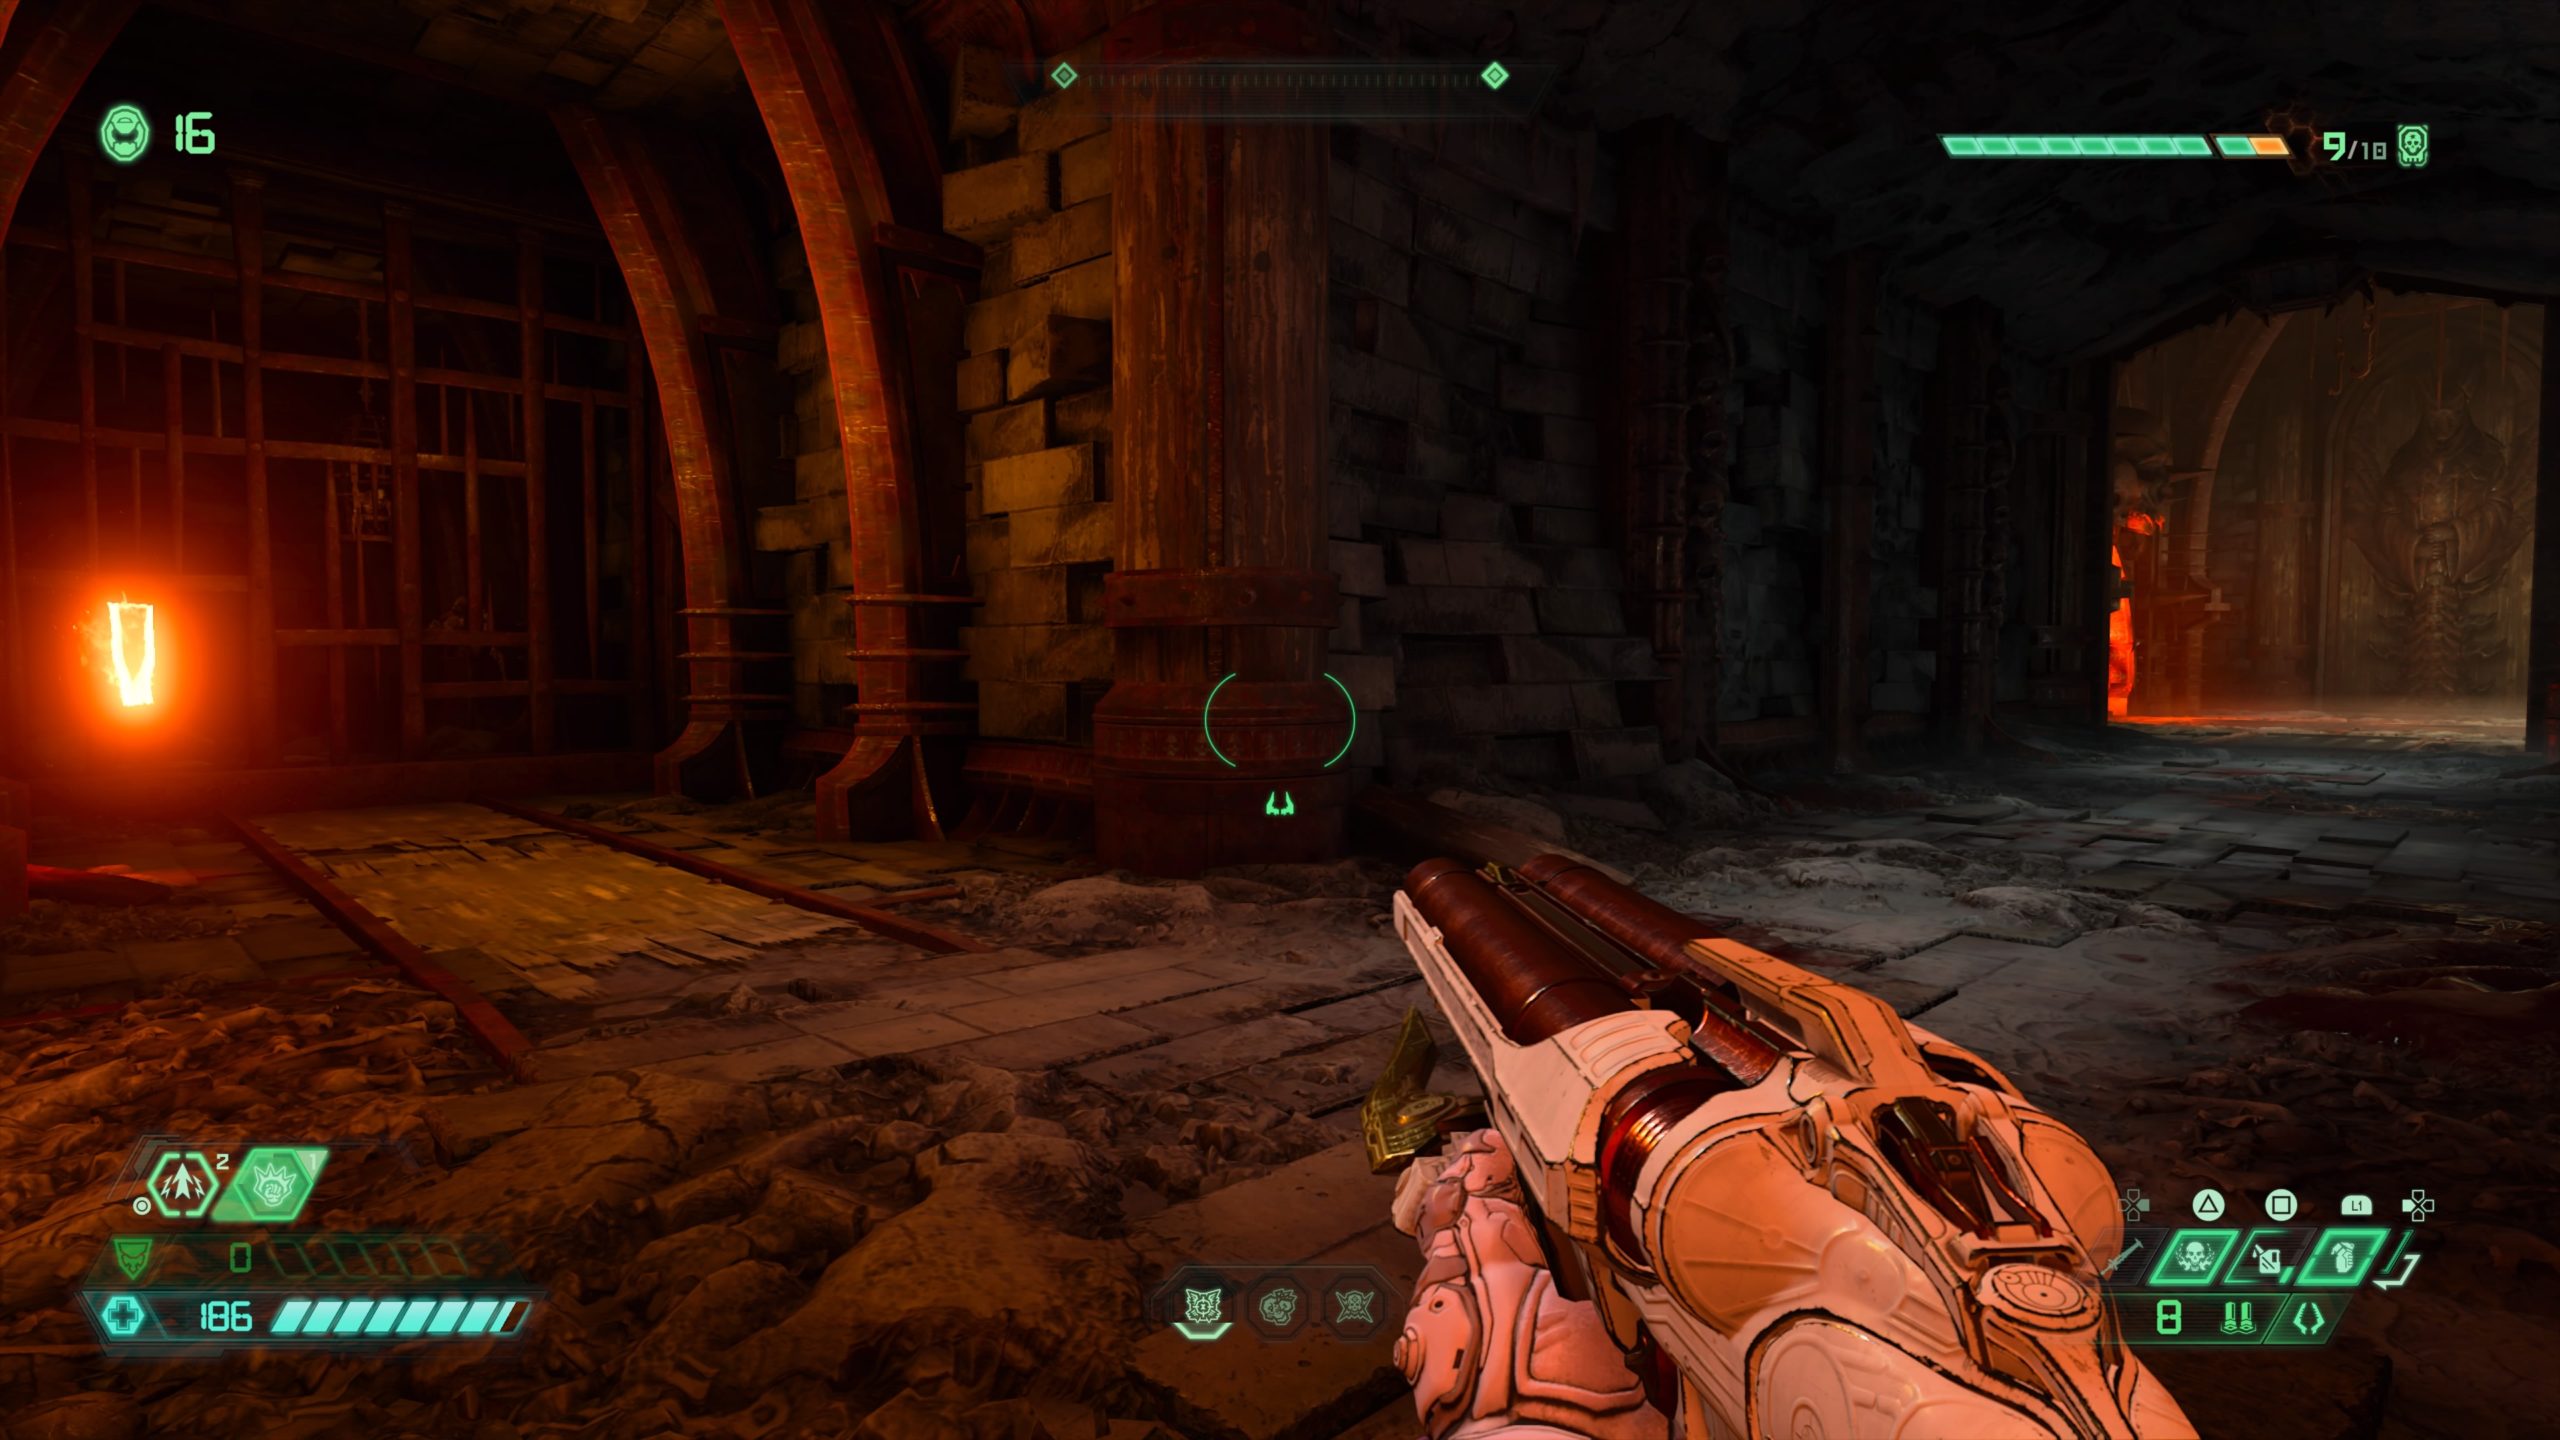
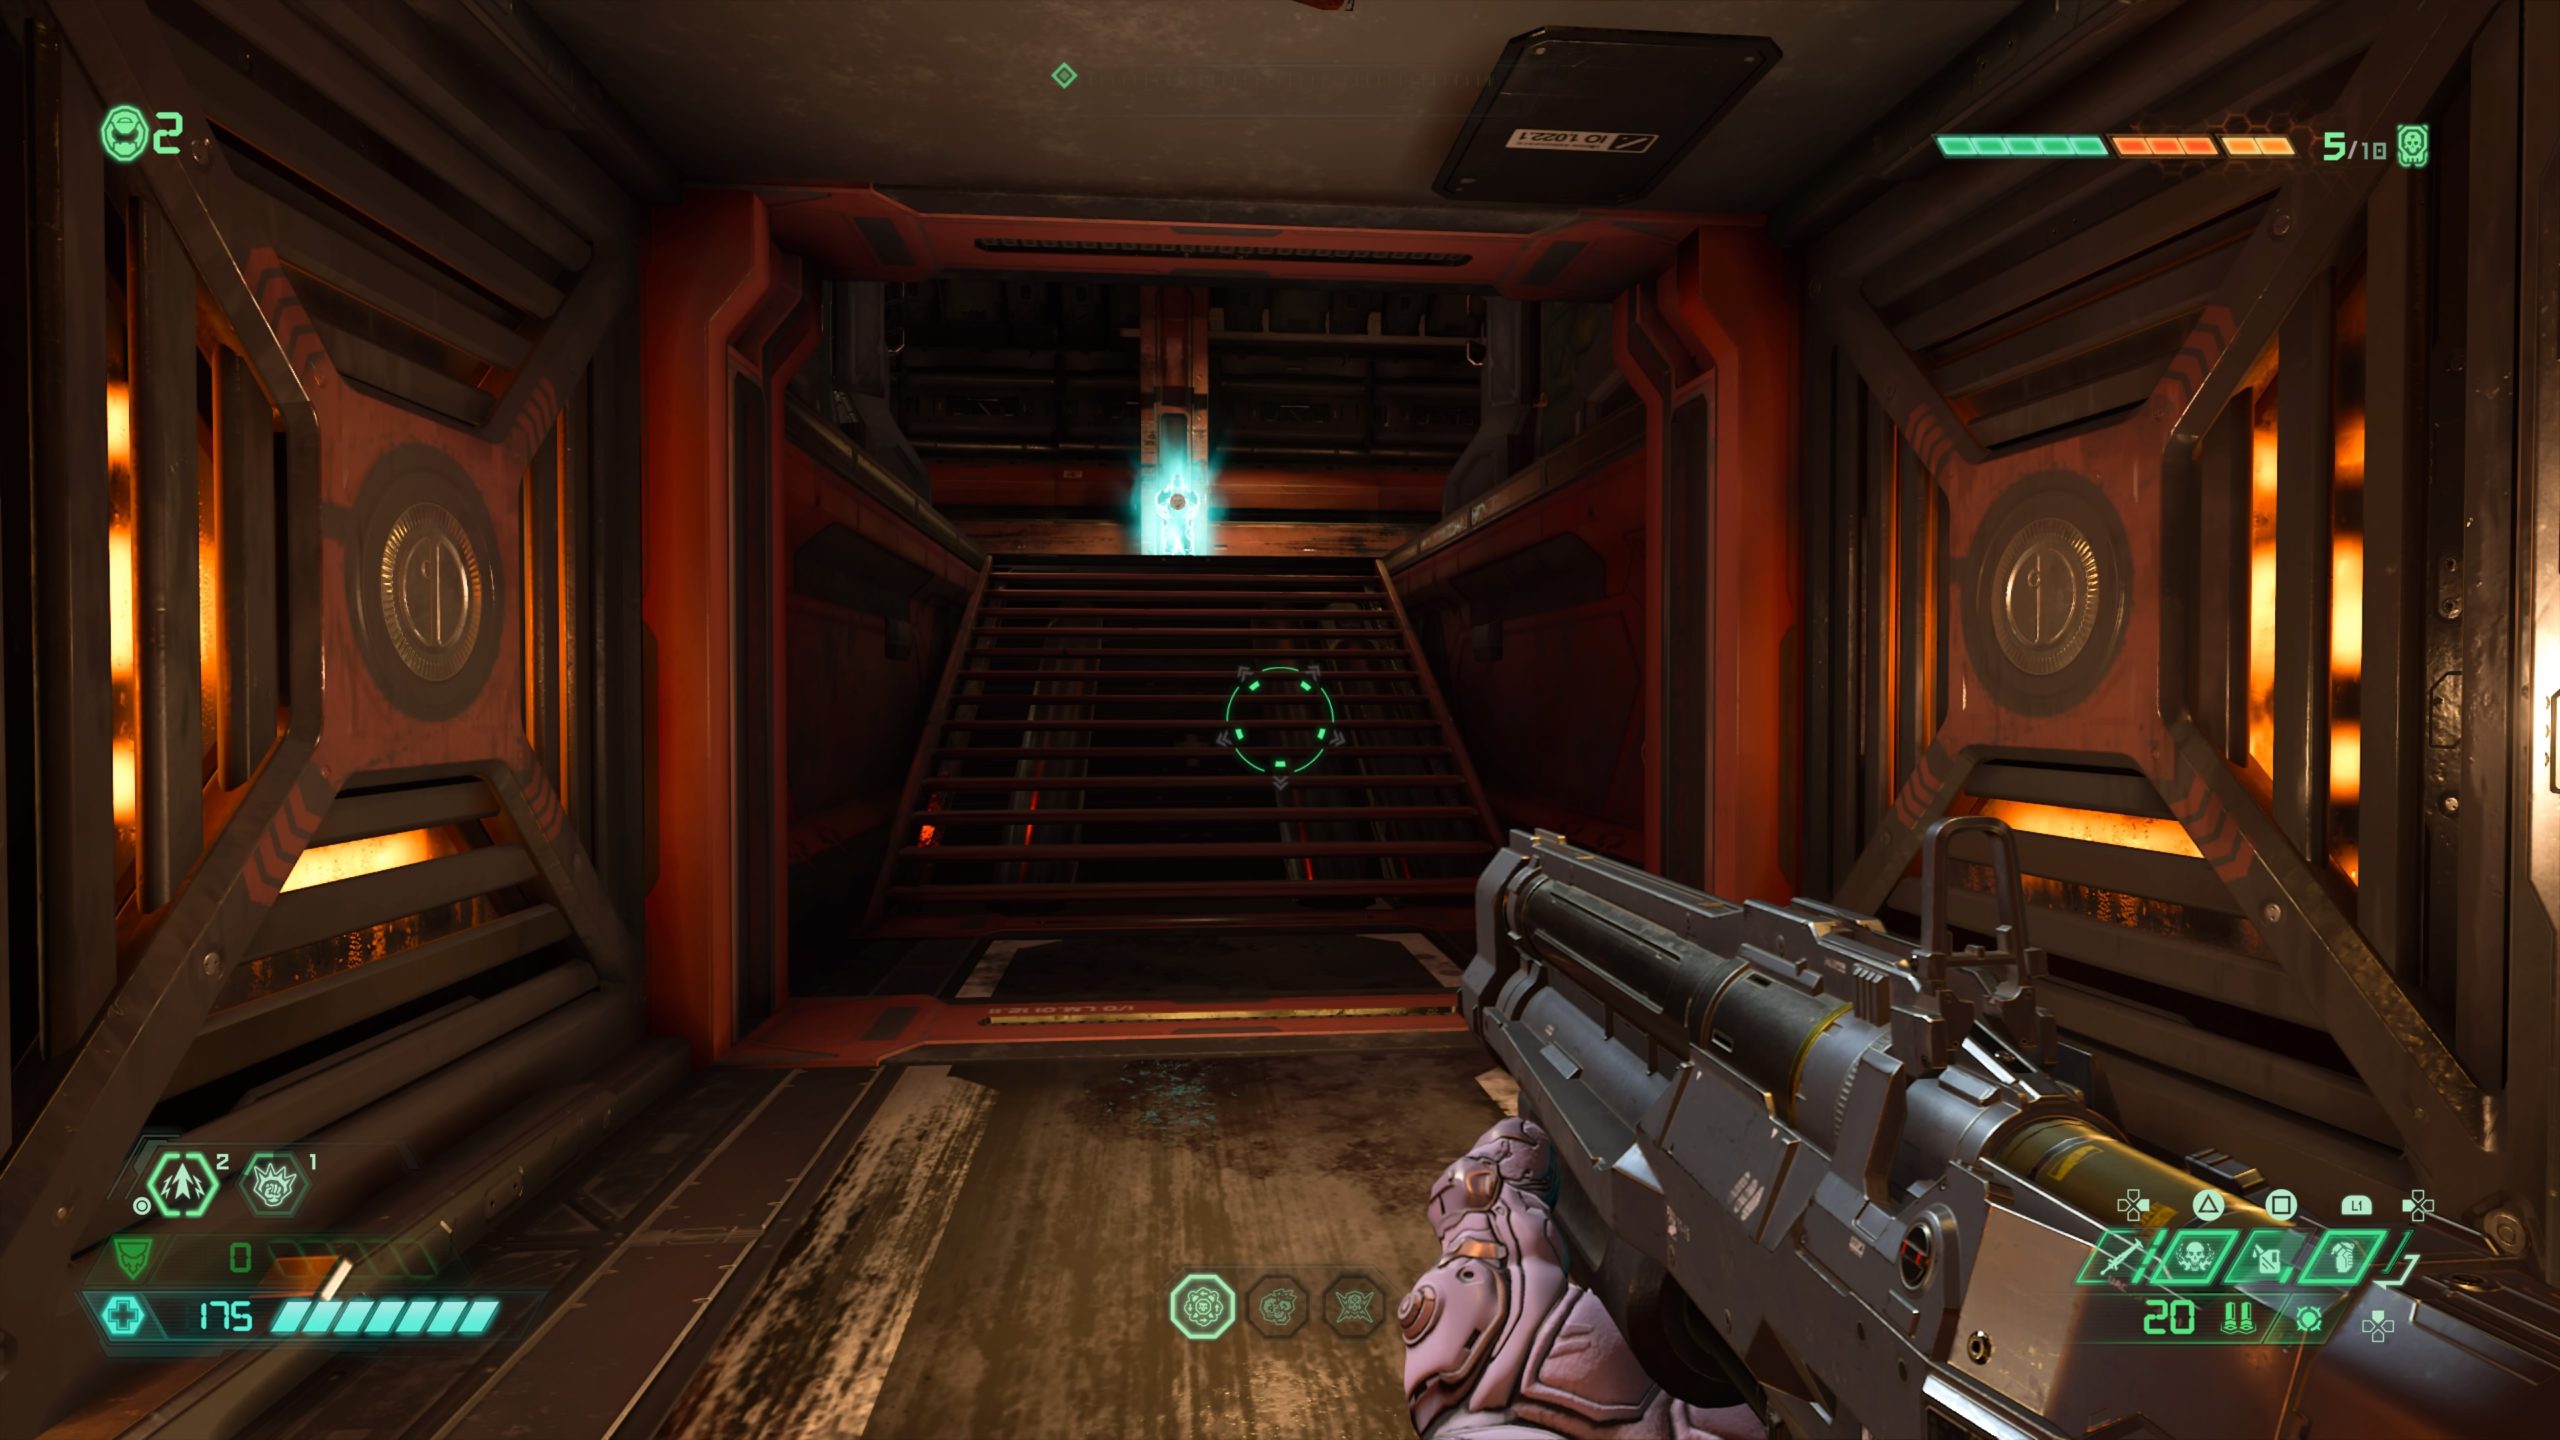
Mastery Token

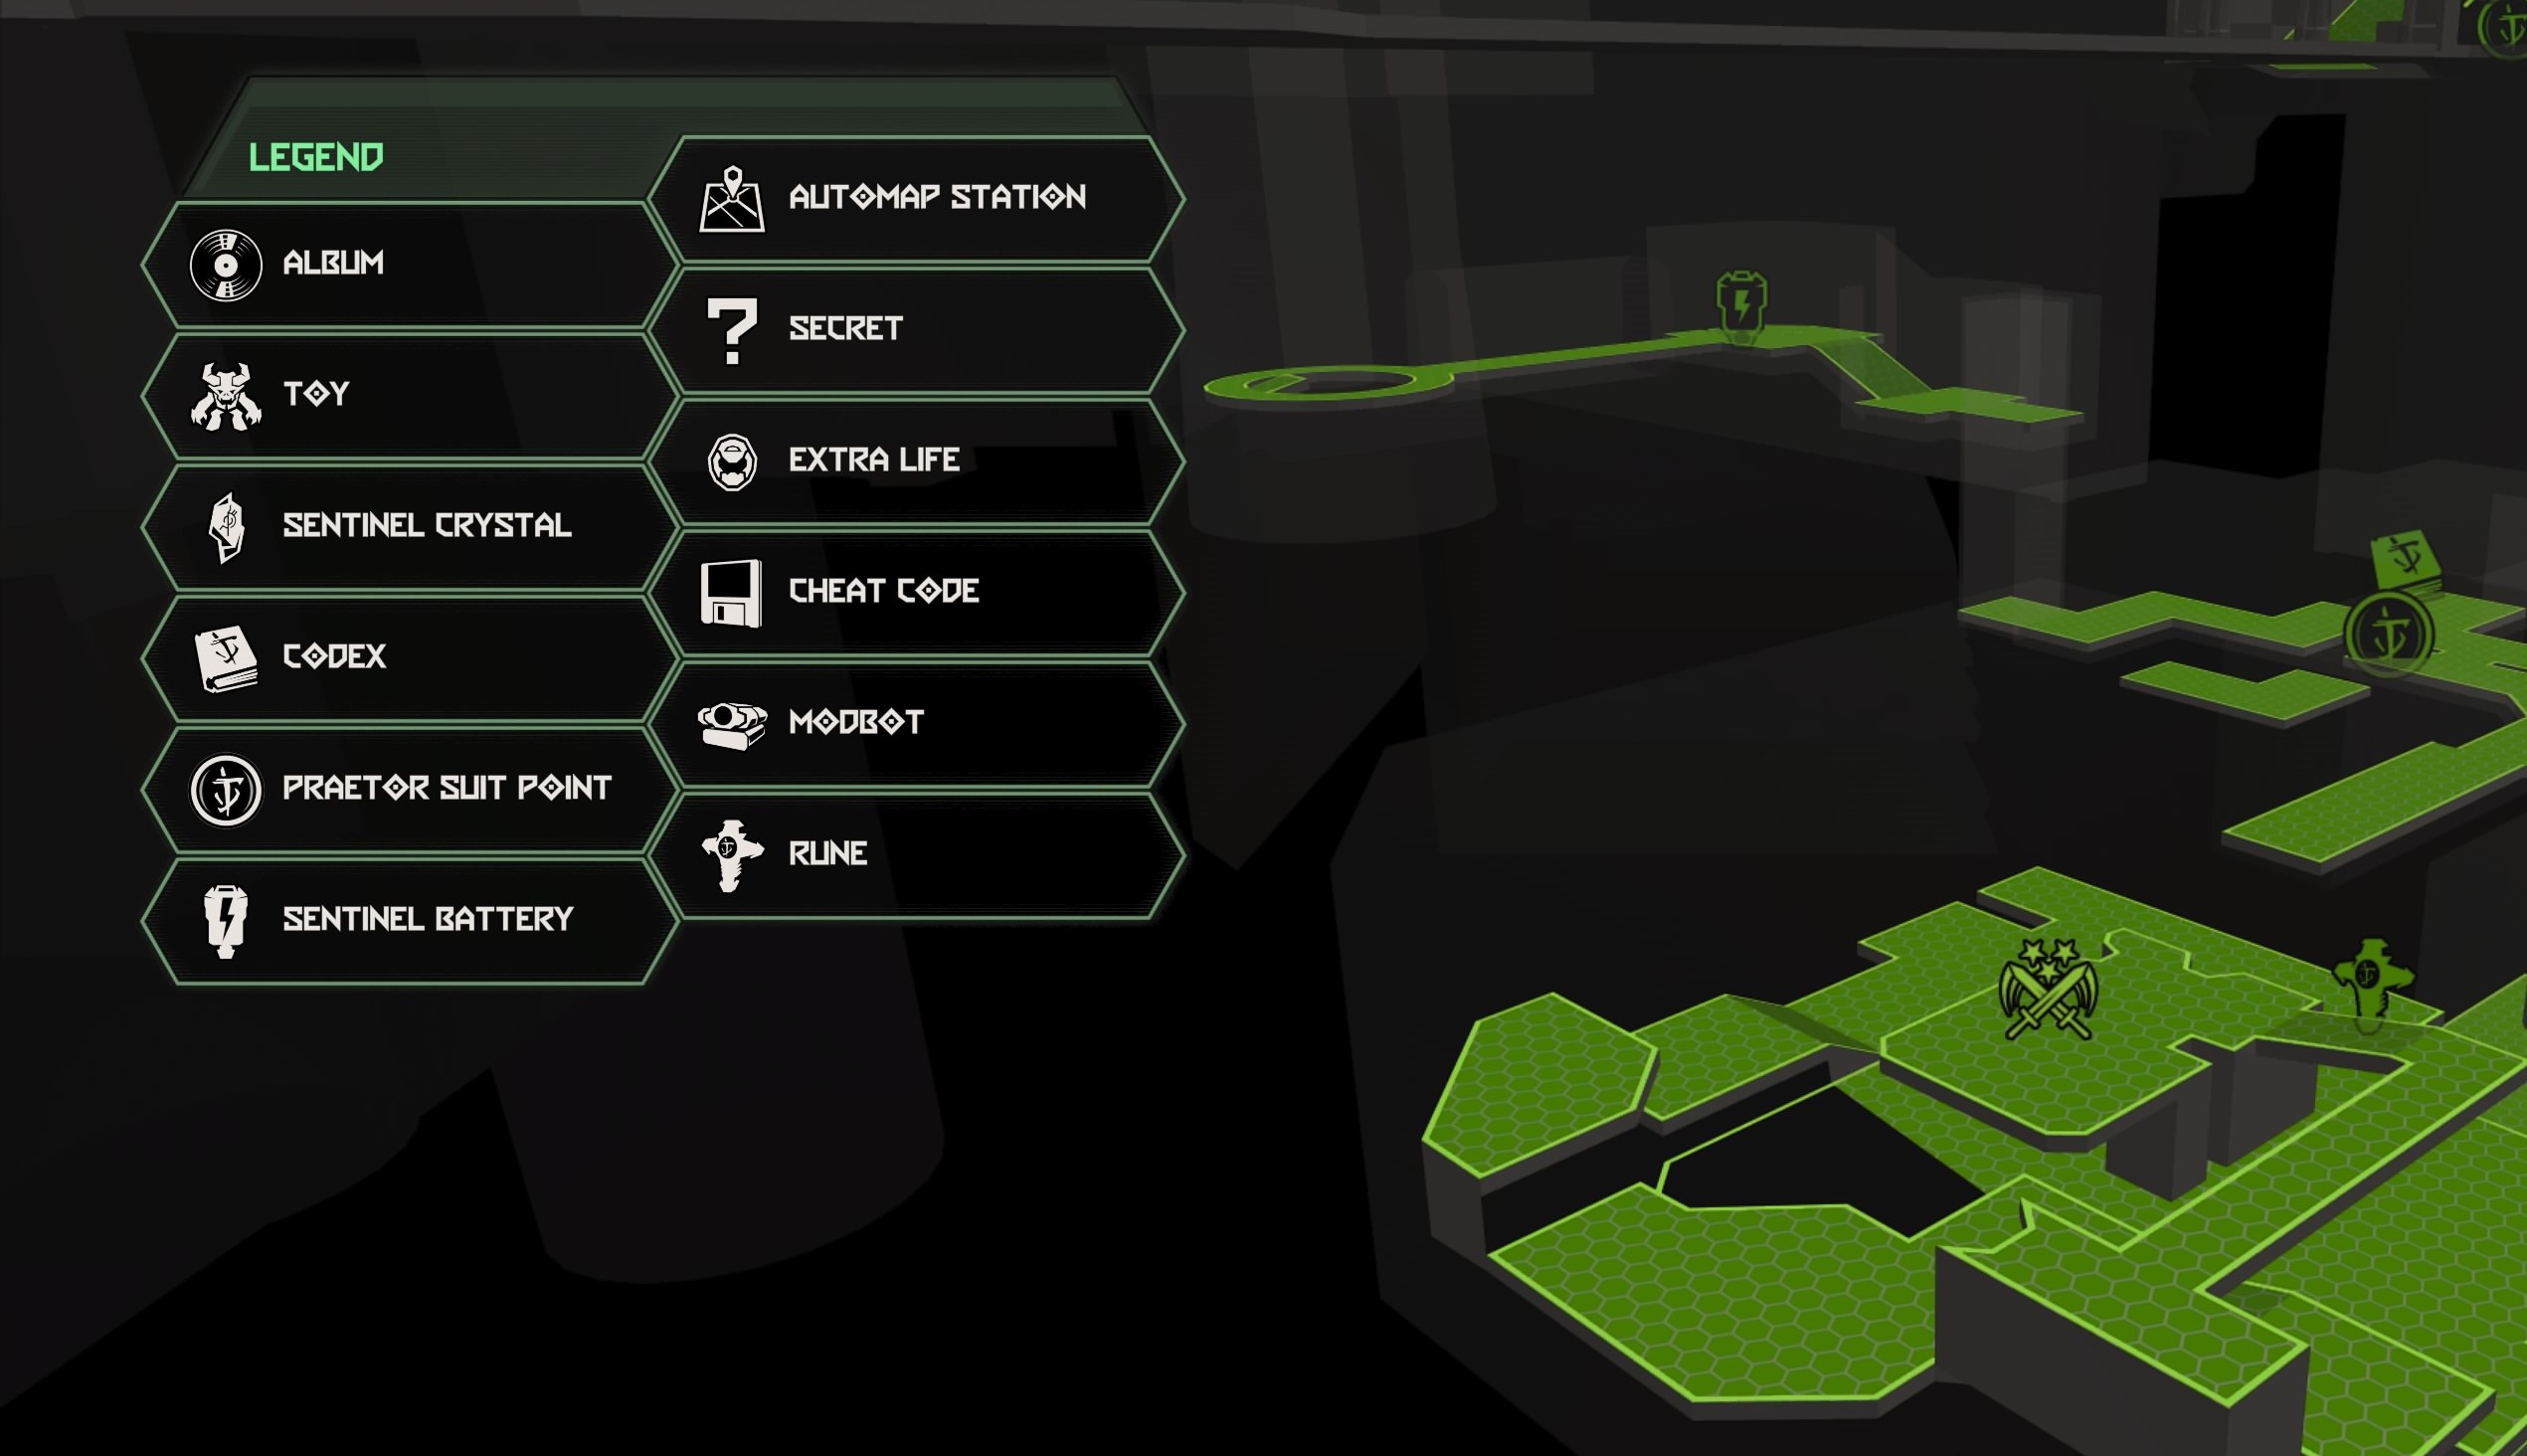
From the fast travel point, enter the building and jump across the gap to the other side. Turn around to face the way you came and shoot the green diamond on the ceiling to lower a platform. Jump to the platform and ride it up to the top then climb up the climbable wall to reach a tunnel. Head through the tunnel to reach the platform in the center of the room containing the token.
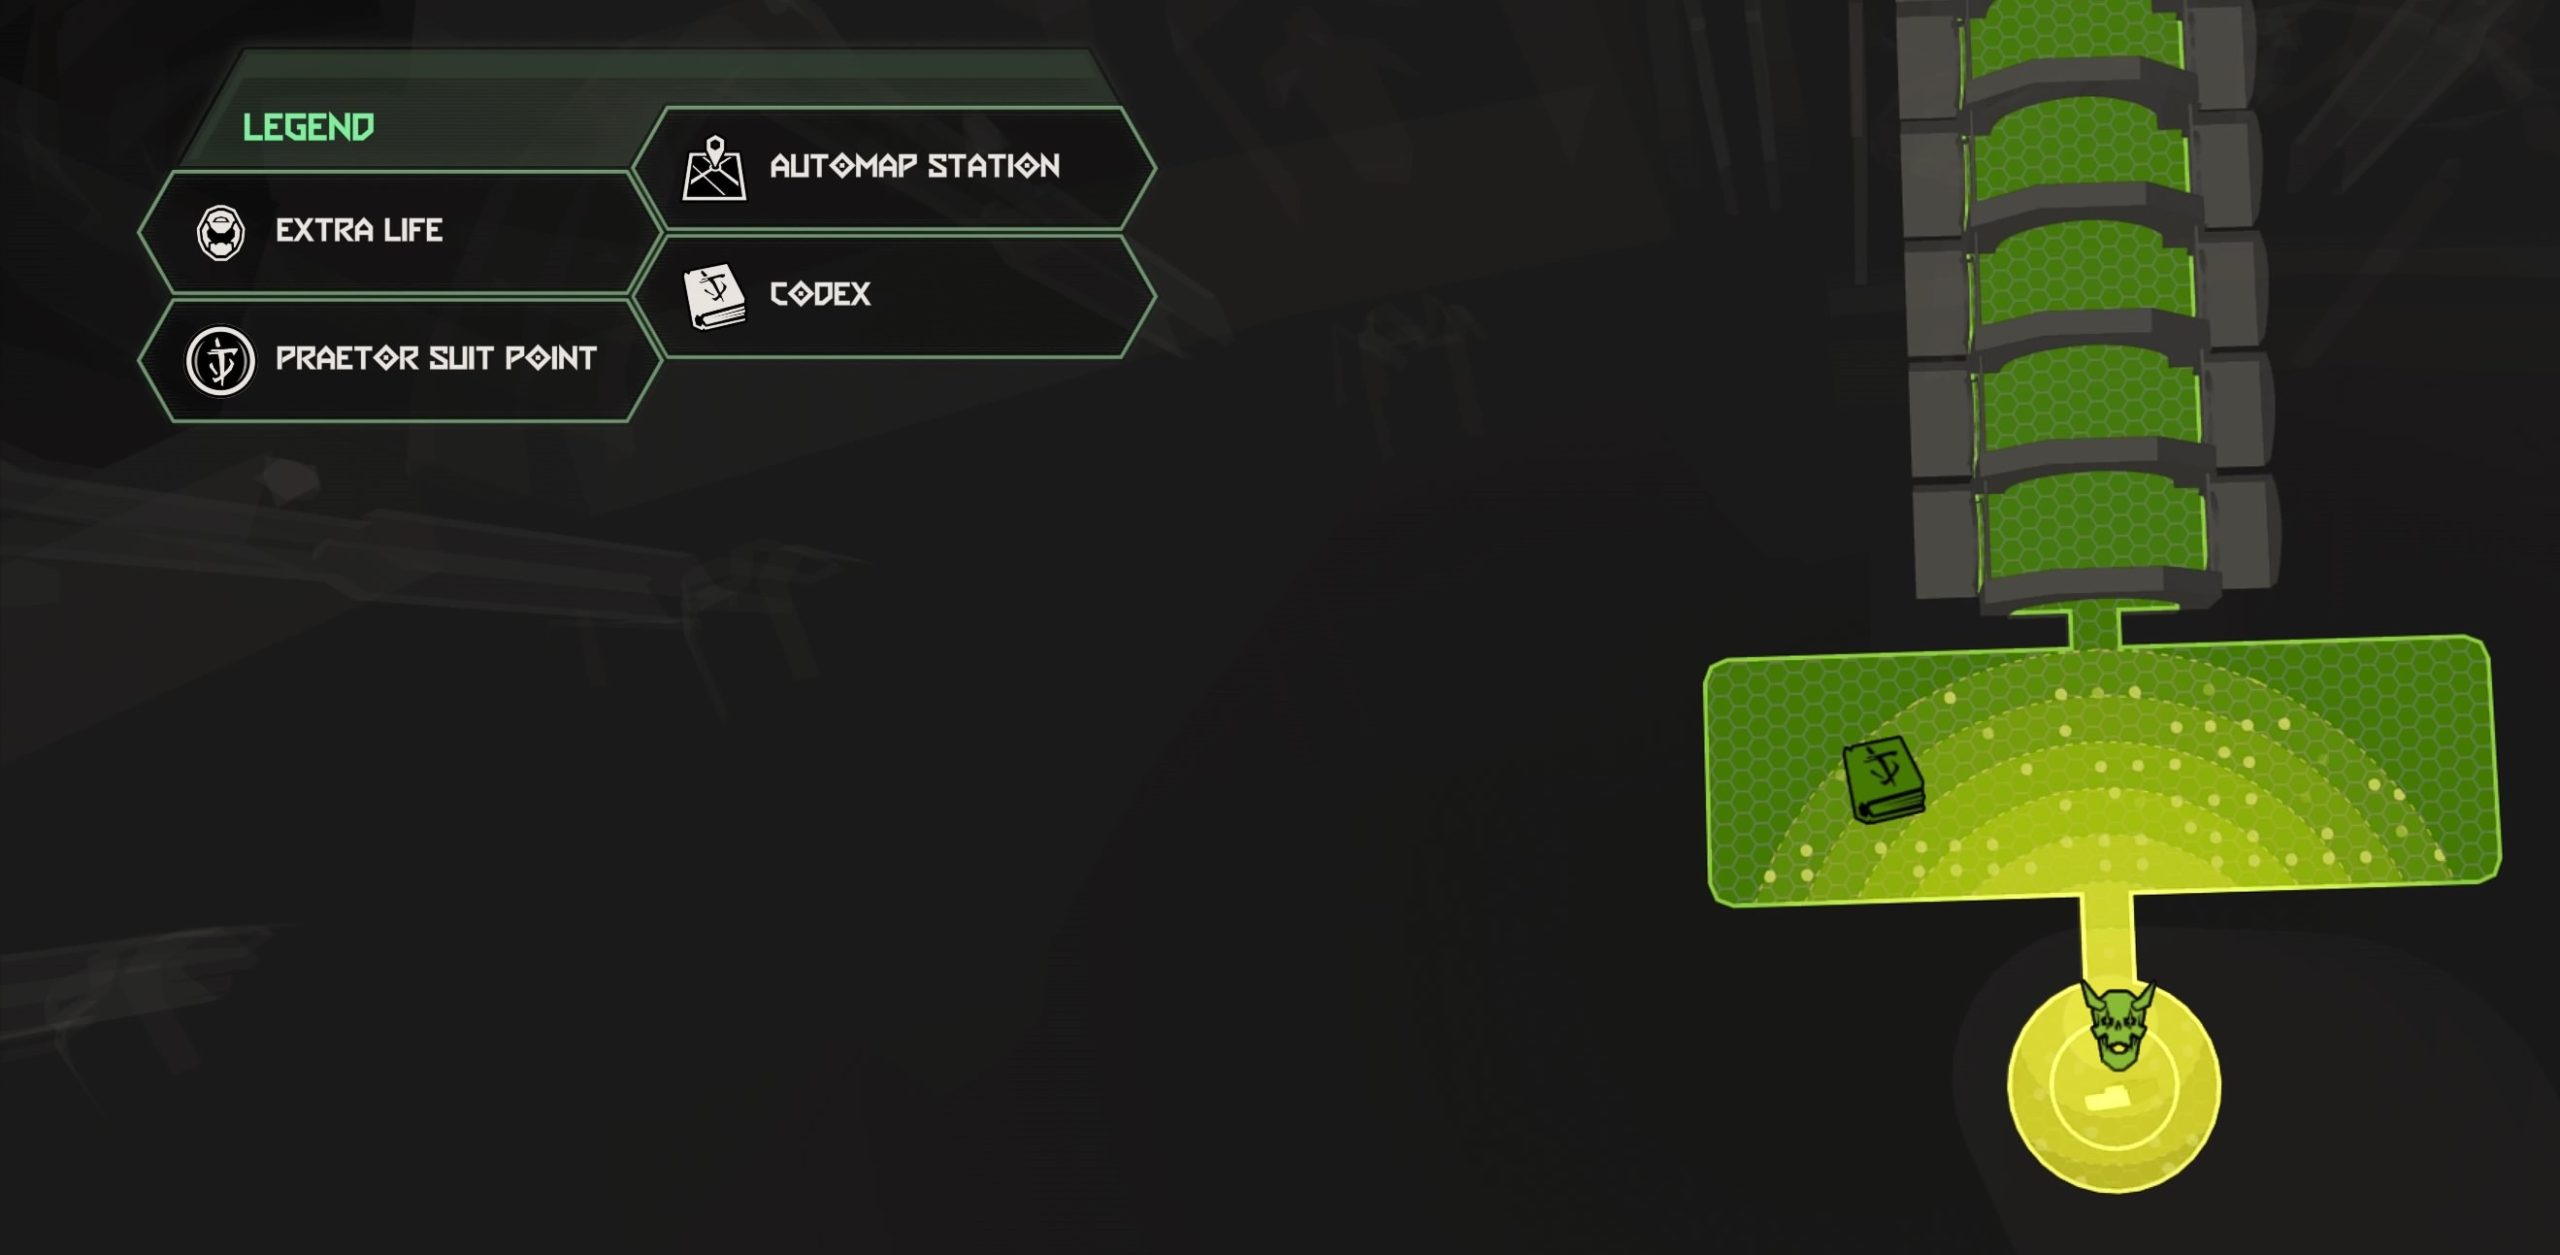
Codex: Story of Hell – Icon of Sin

From the fast travel point, turn around and follow the tunnel. When you reach the end, the codex will be on a platform across from you.
Album: Quake II – Descent into Cerberon

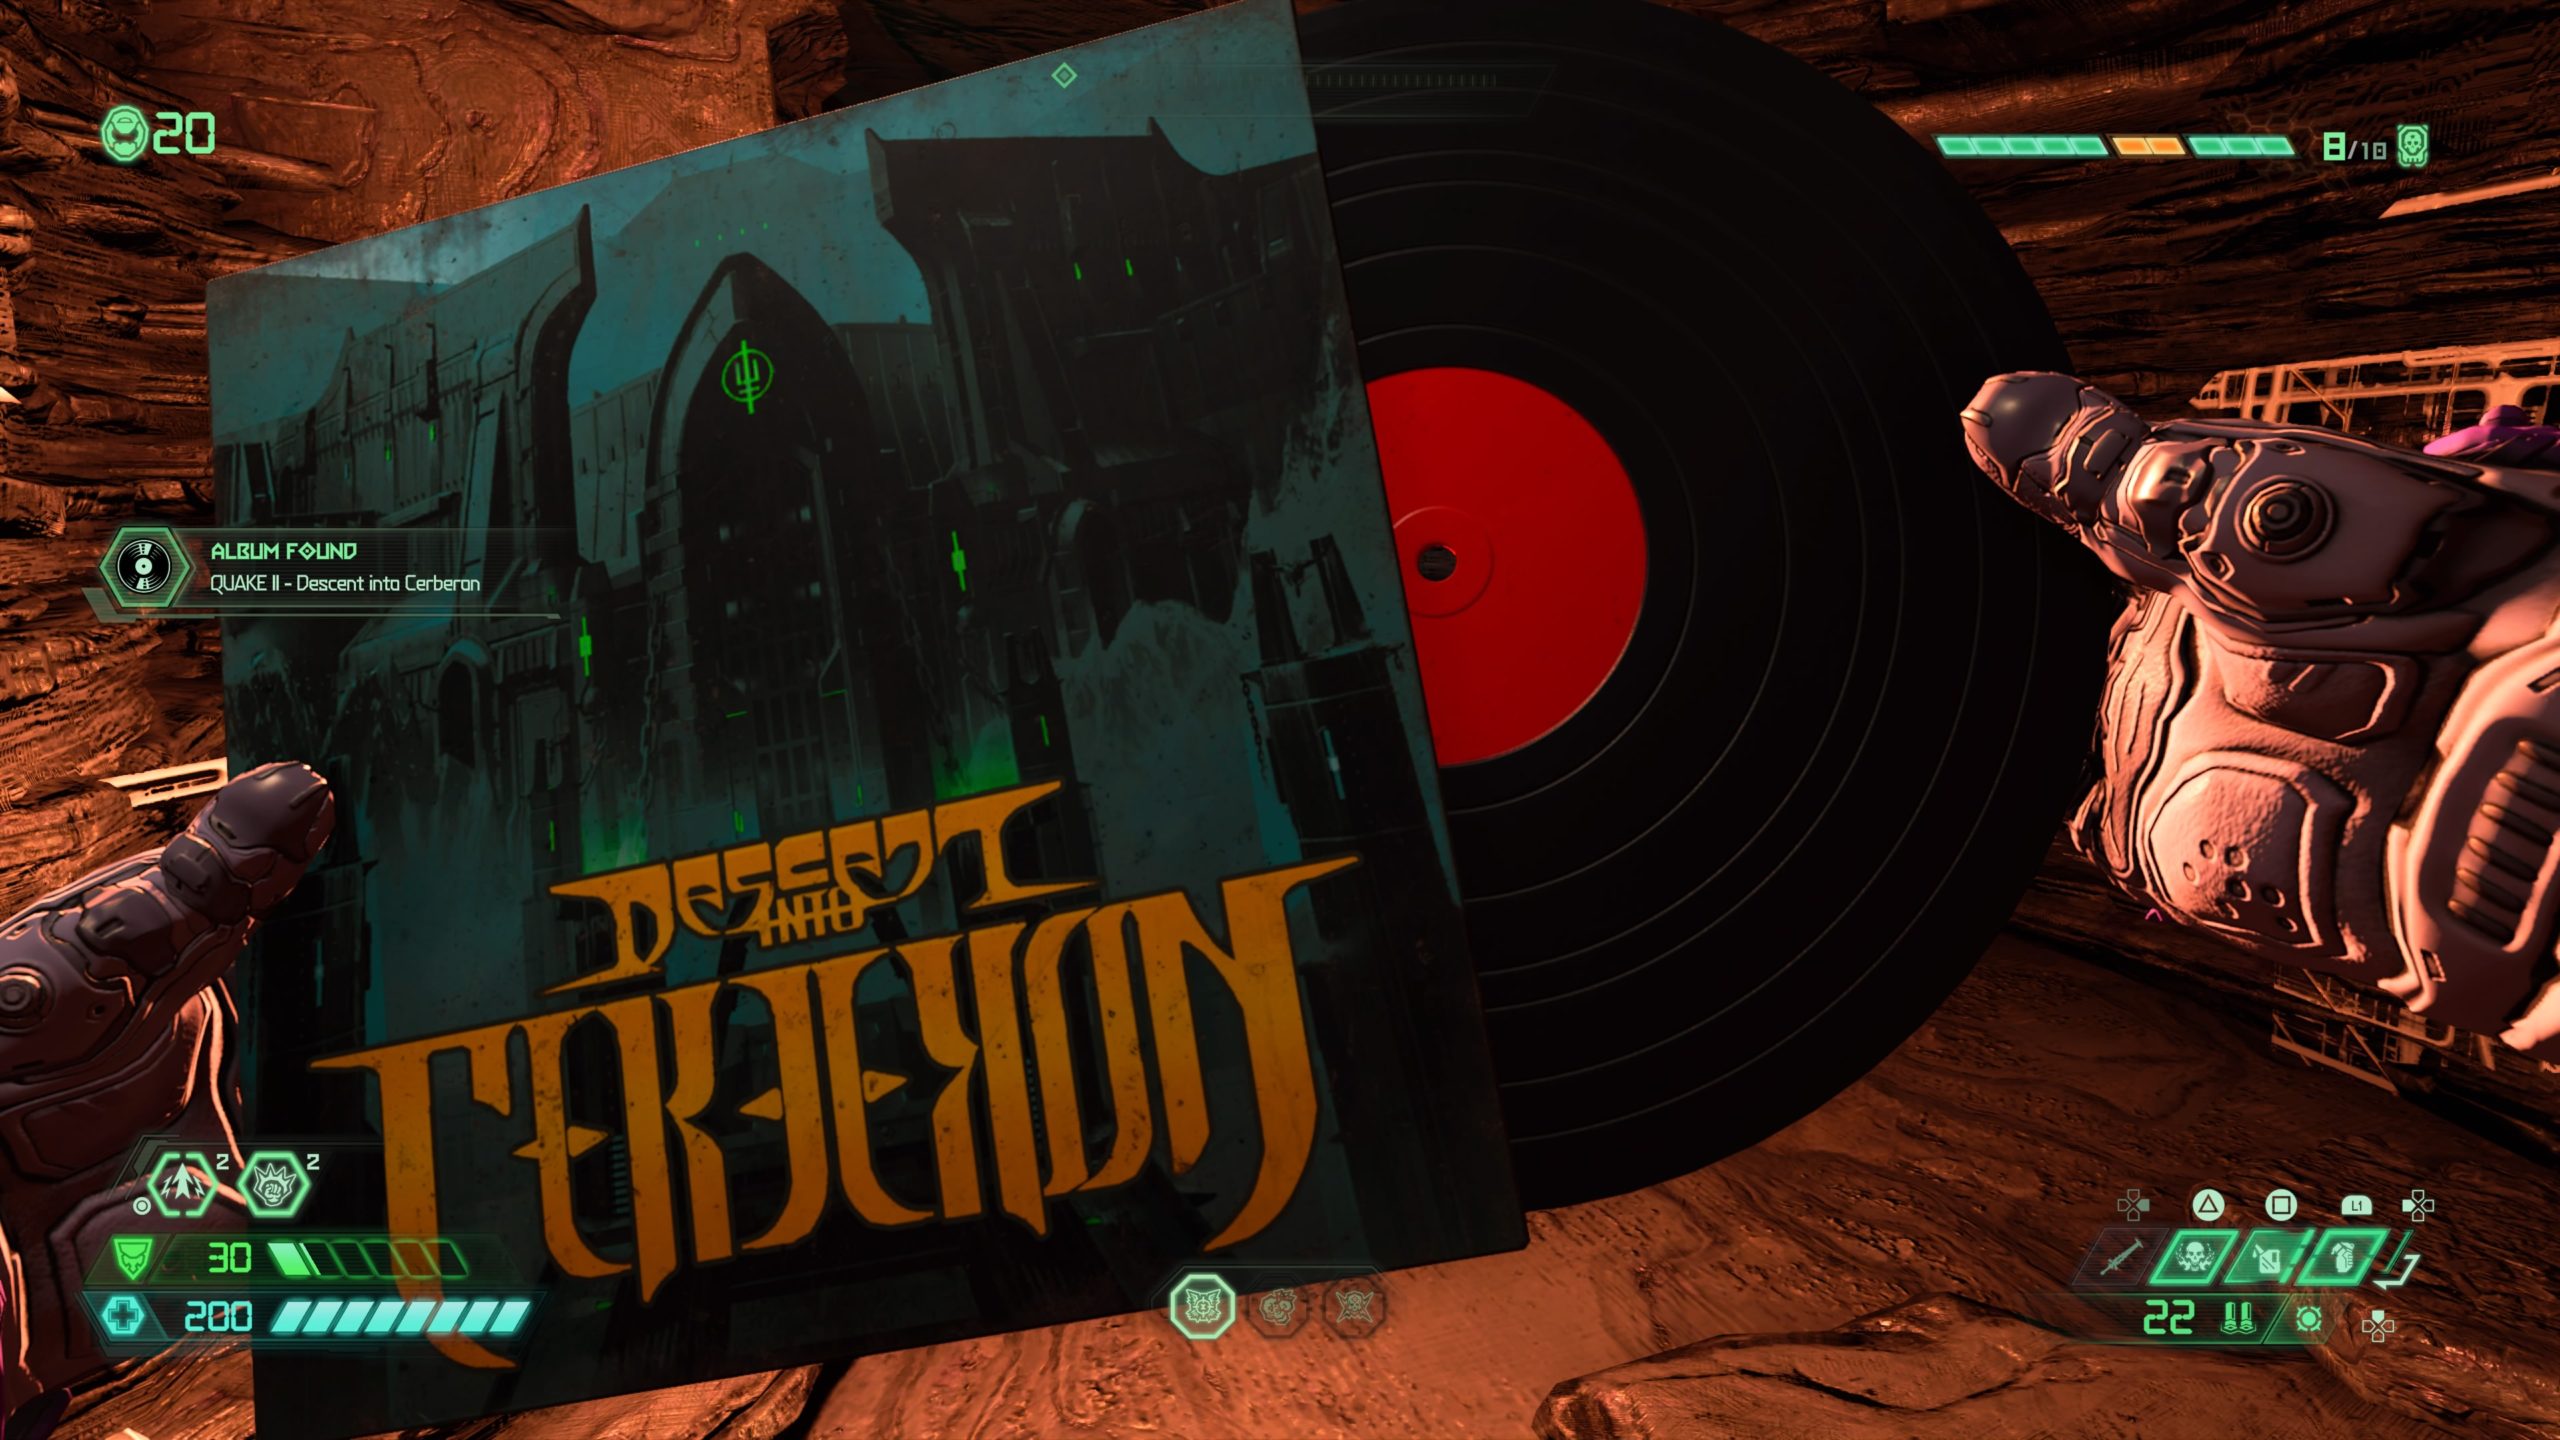
From the codex, look up to the left to spot a small ledge. Jump to the ledge and melee the cracked wall to reveal the album.
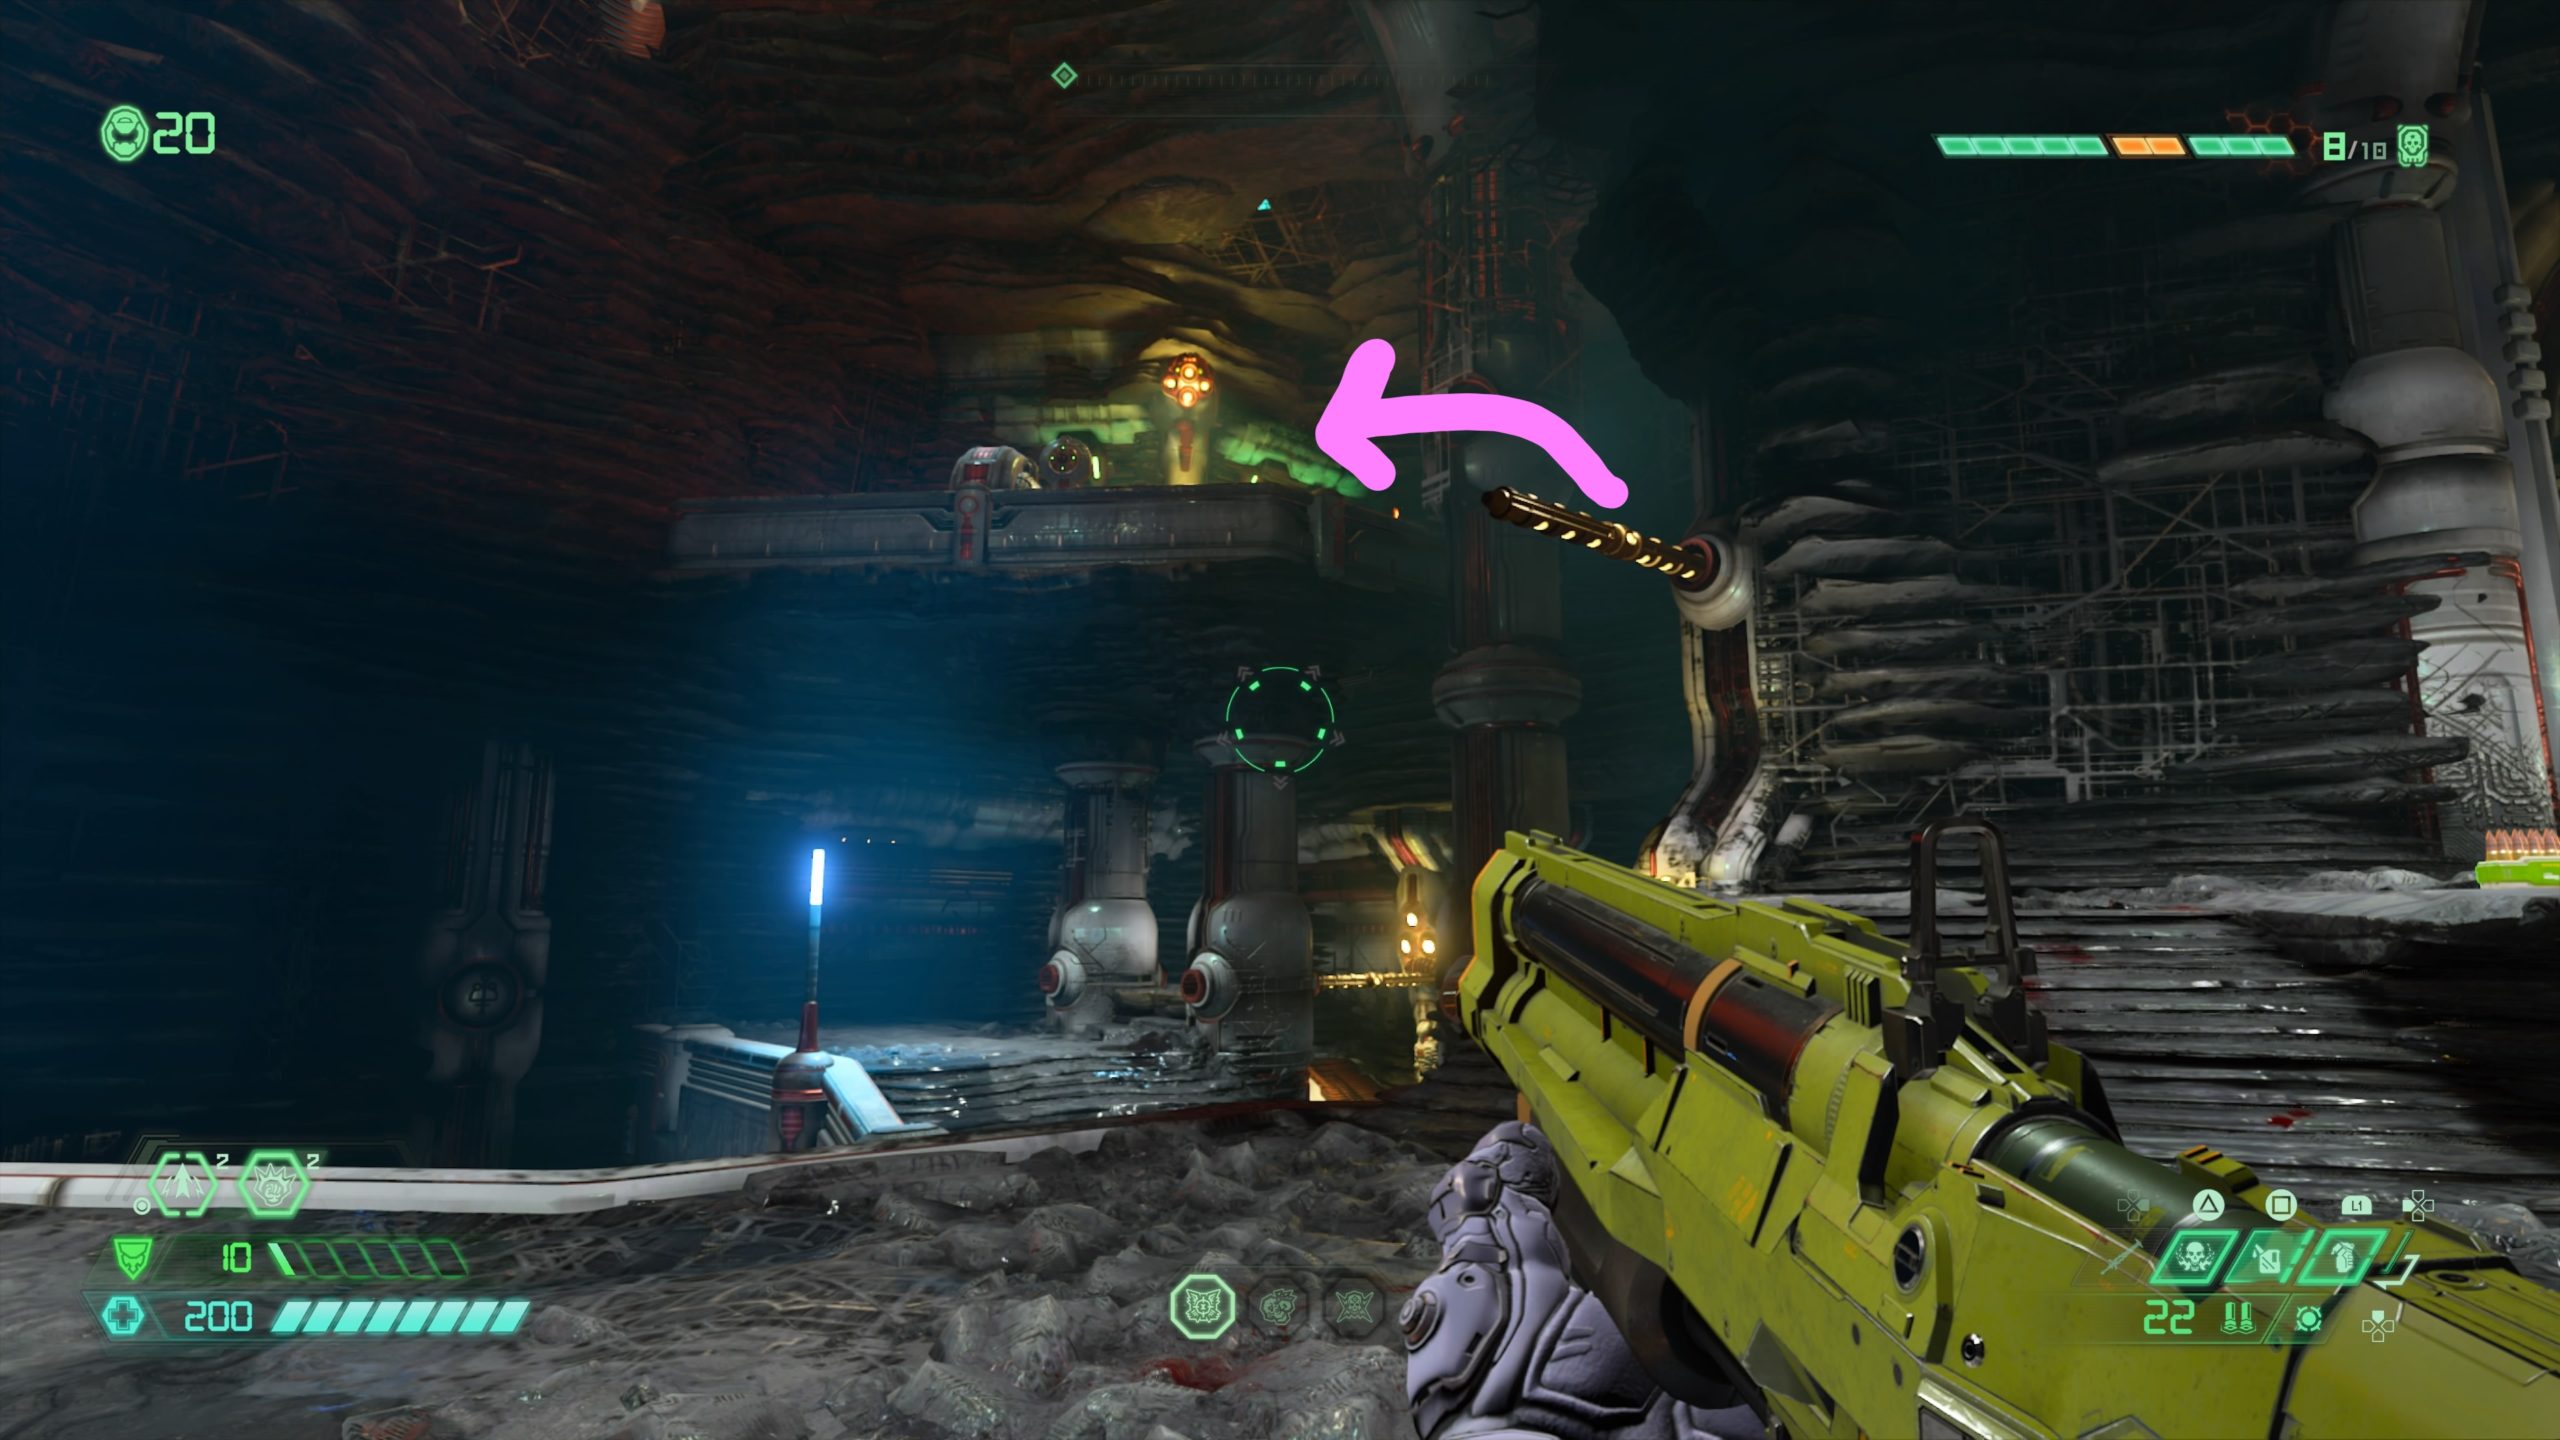
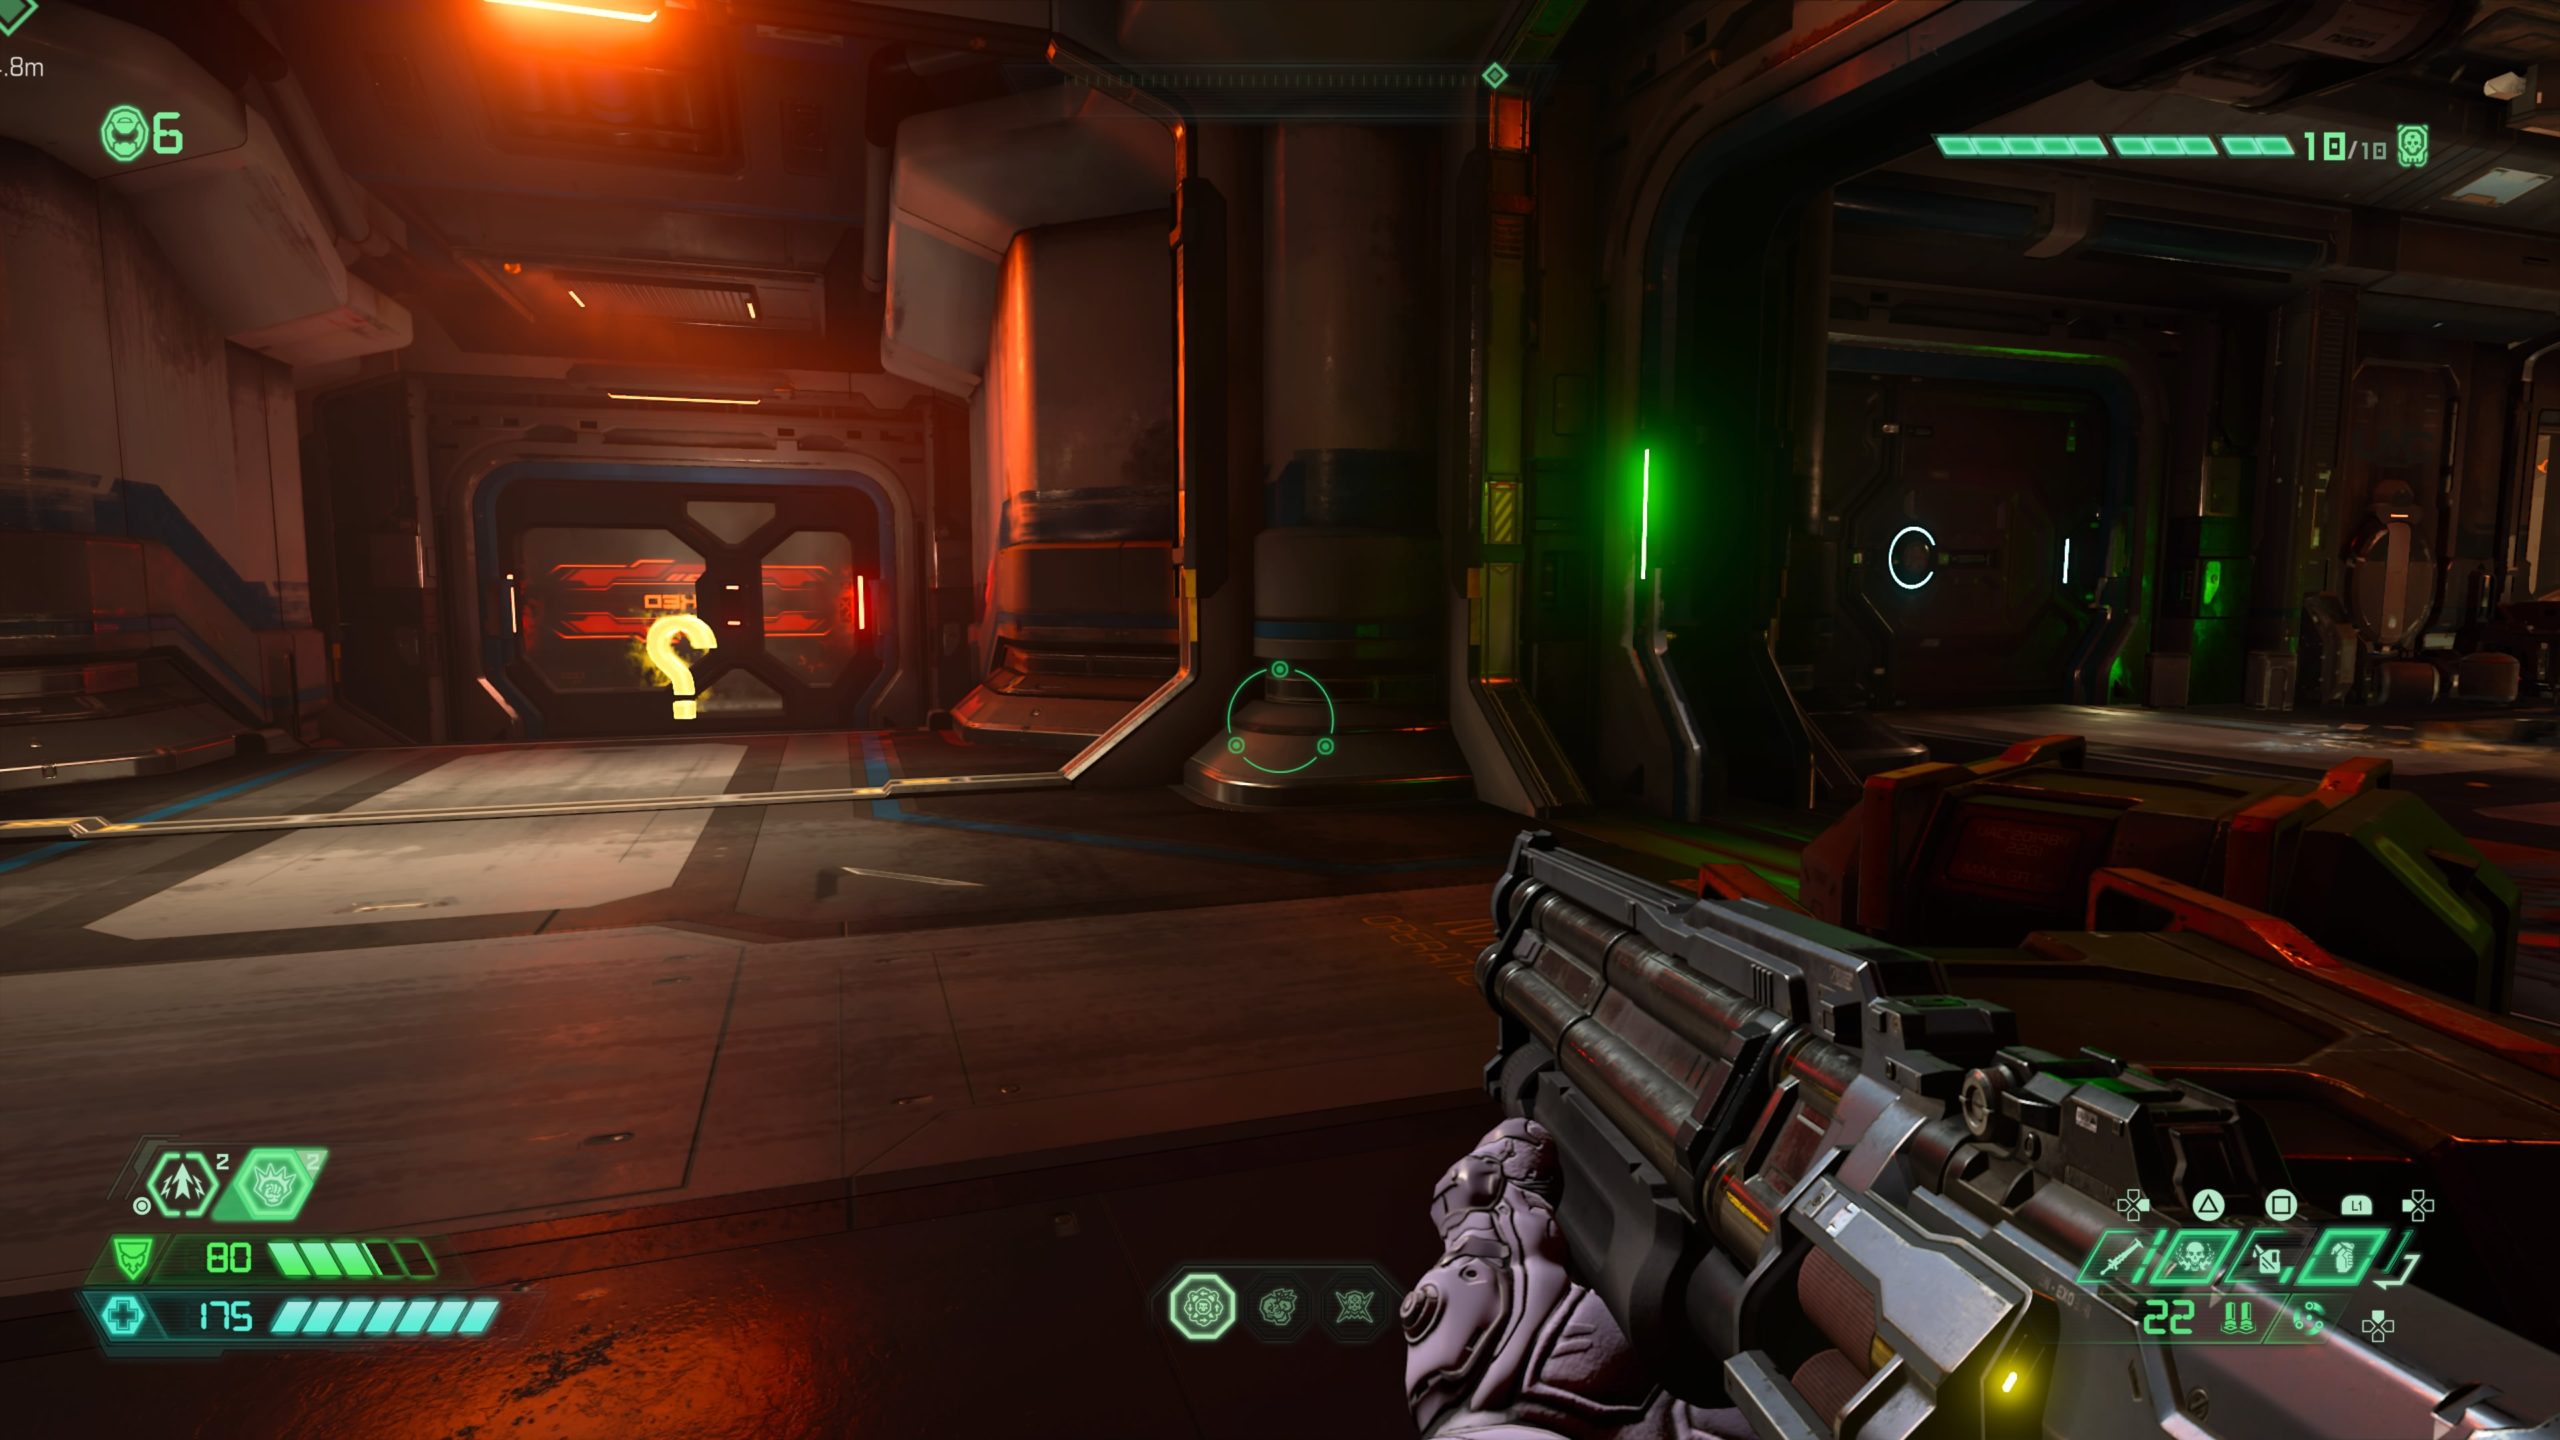
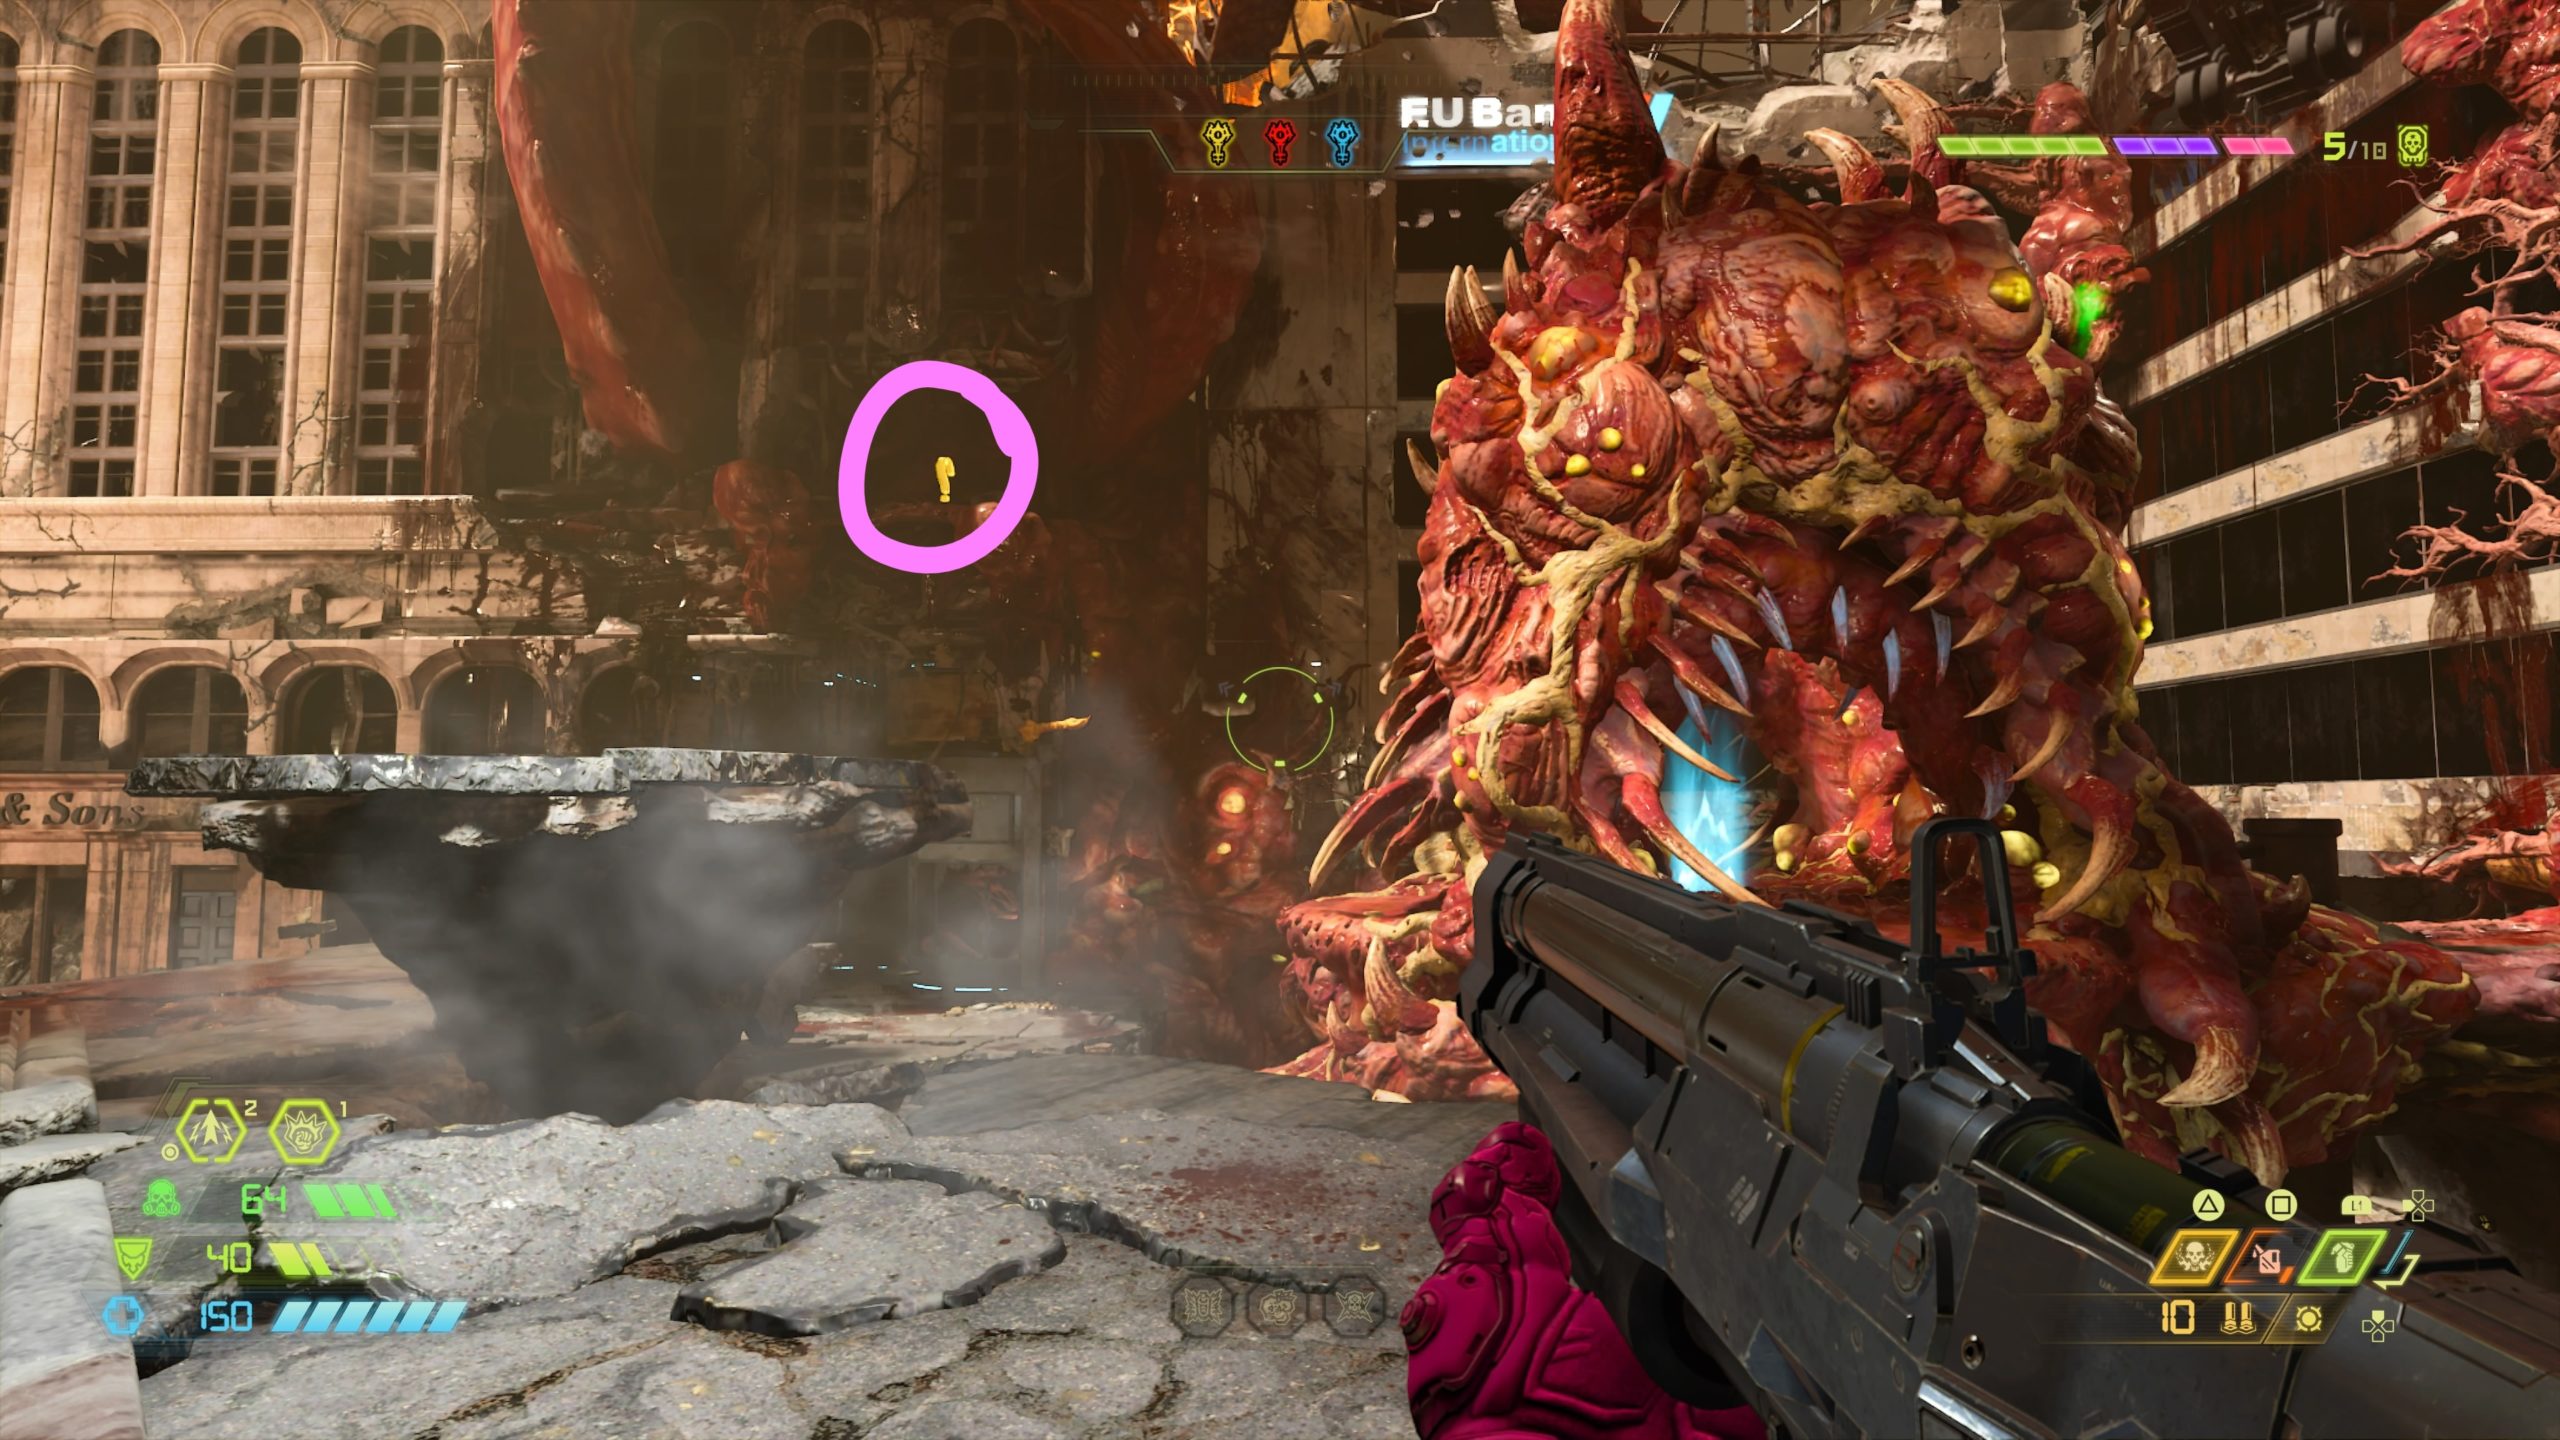
Mastery Token

From the fast travel point, turn around and jump through the circular opening. The token will be located on the left on a platform.
Album: Doom (2016) – Rip and Tear
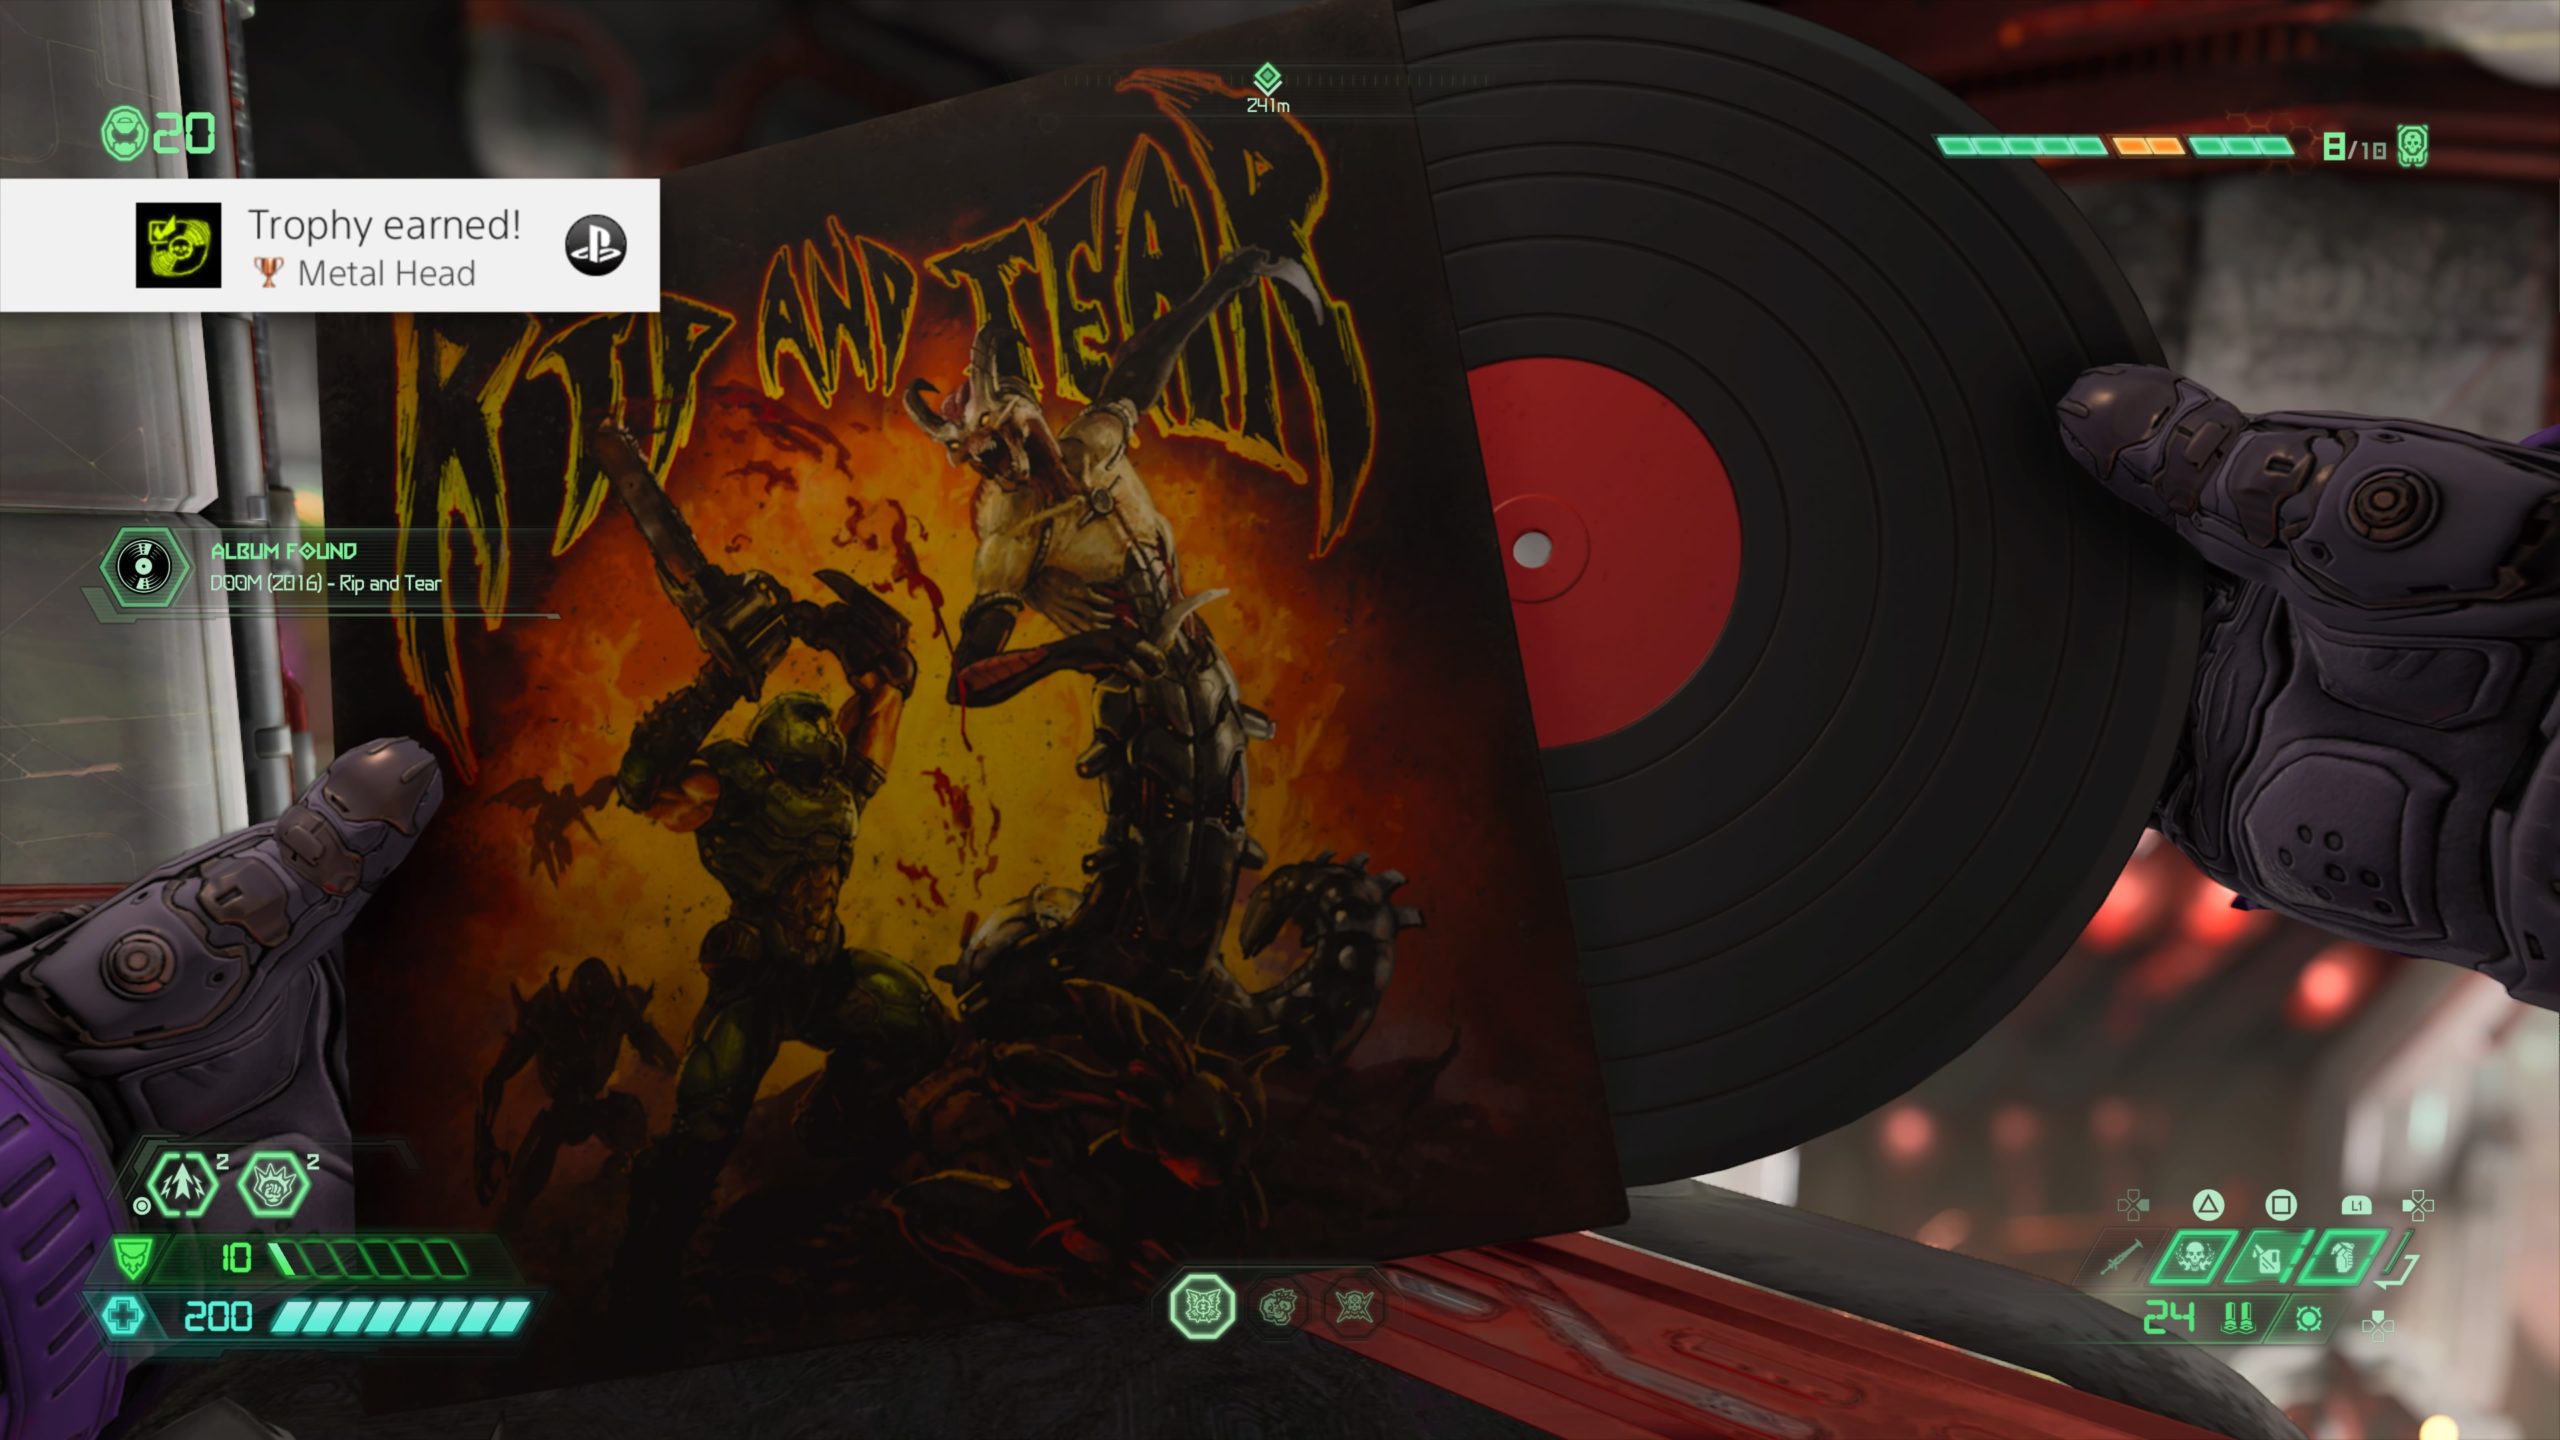
From the token, drop down into the area below and walk to the ovular doorway that will bring you to an area with a giant gap in the middle. Use the spin bar in front of you to reach the ledge containing the album.
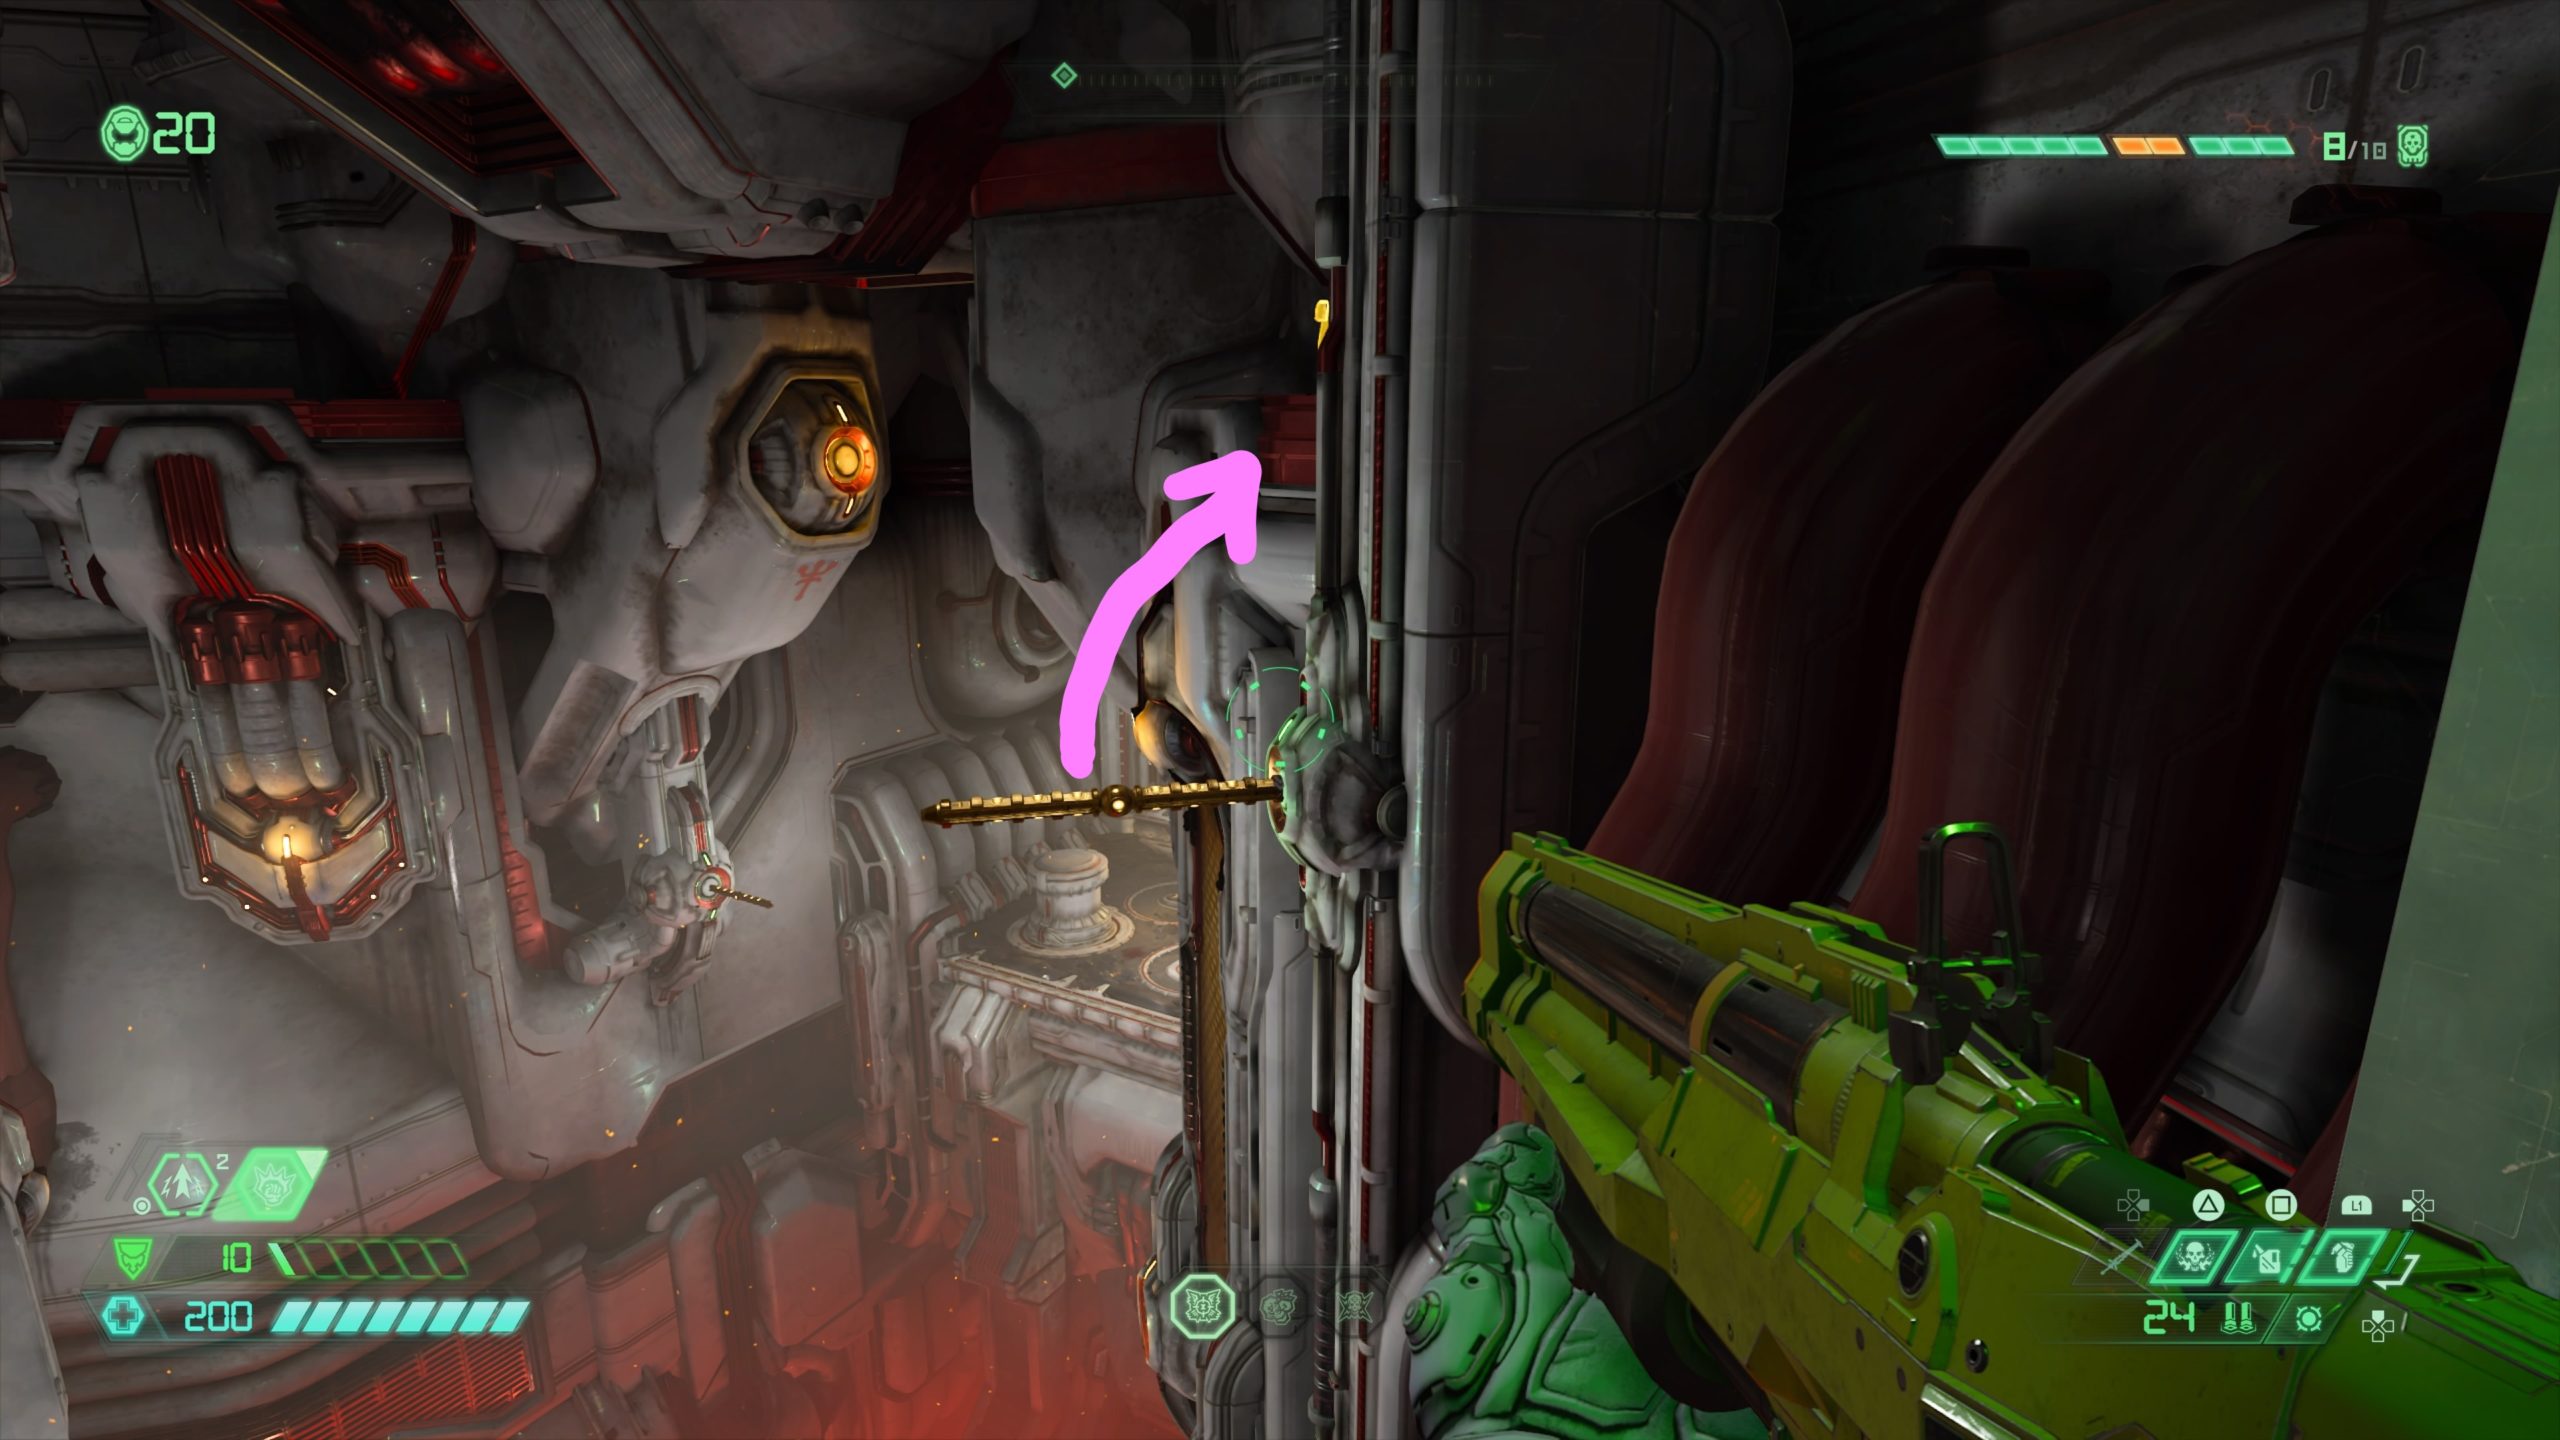
Codex: Story of the Maykrs – Khan Maykr
From the fast travel point, use the spin bar straight ahead to reach the ledge beyond it (above the lift pad). Follow the path to the right to find another spin bar. Use it to reach the ledge lit by green lights containing the punch switch and codex.
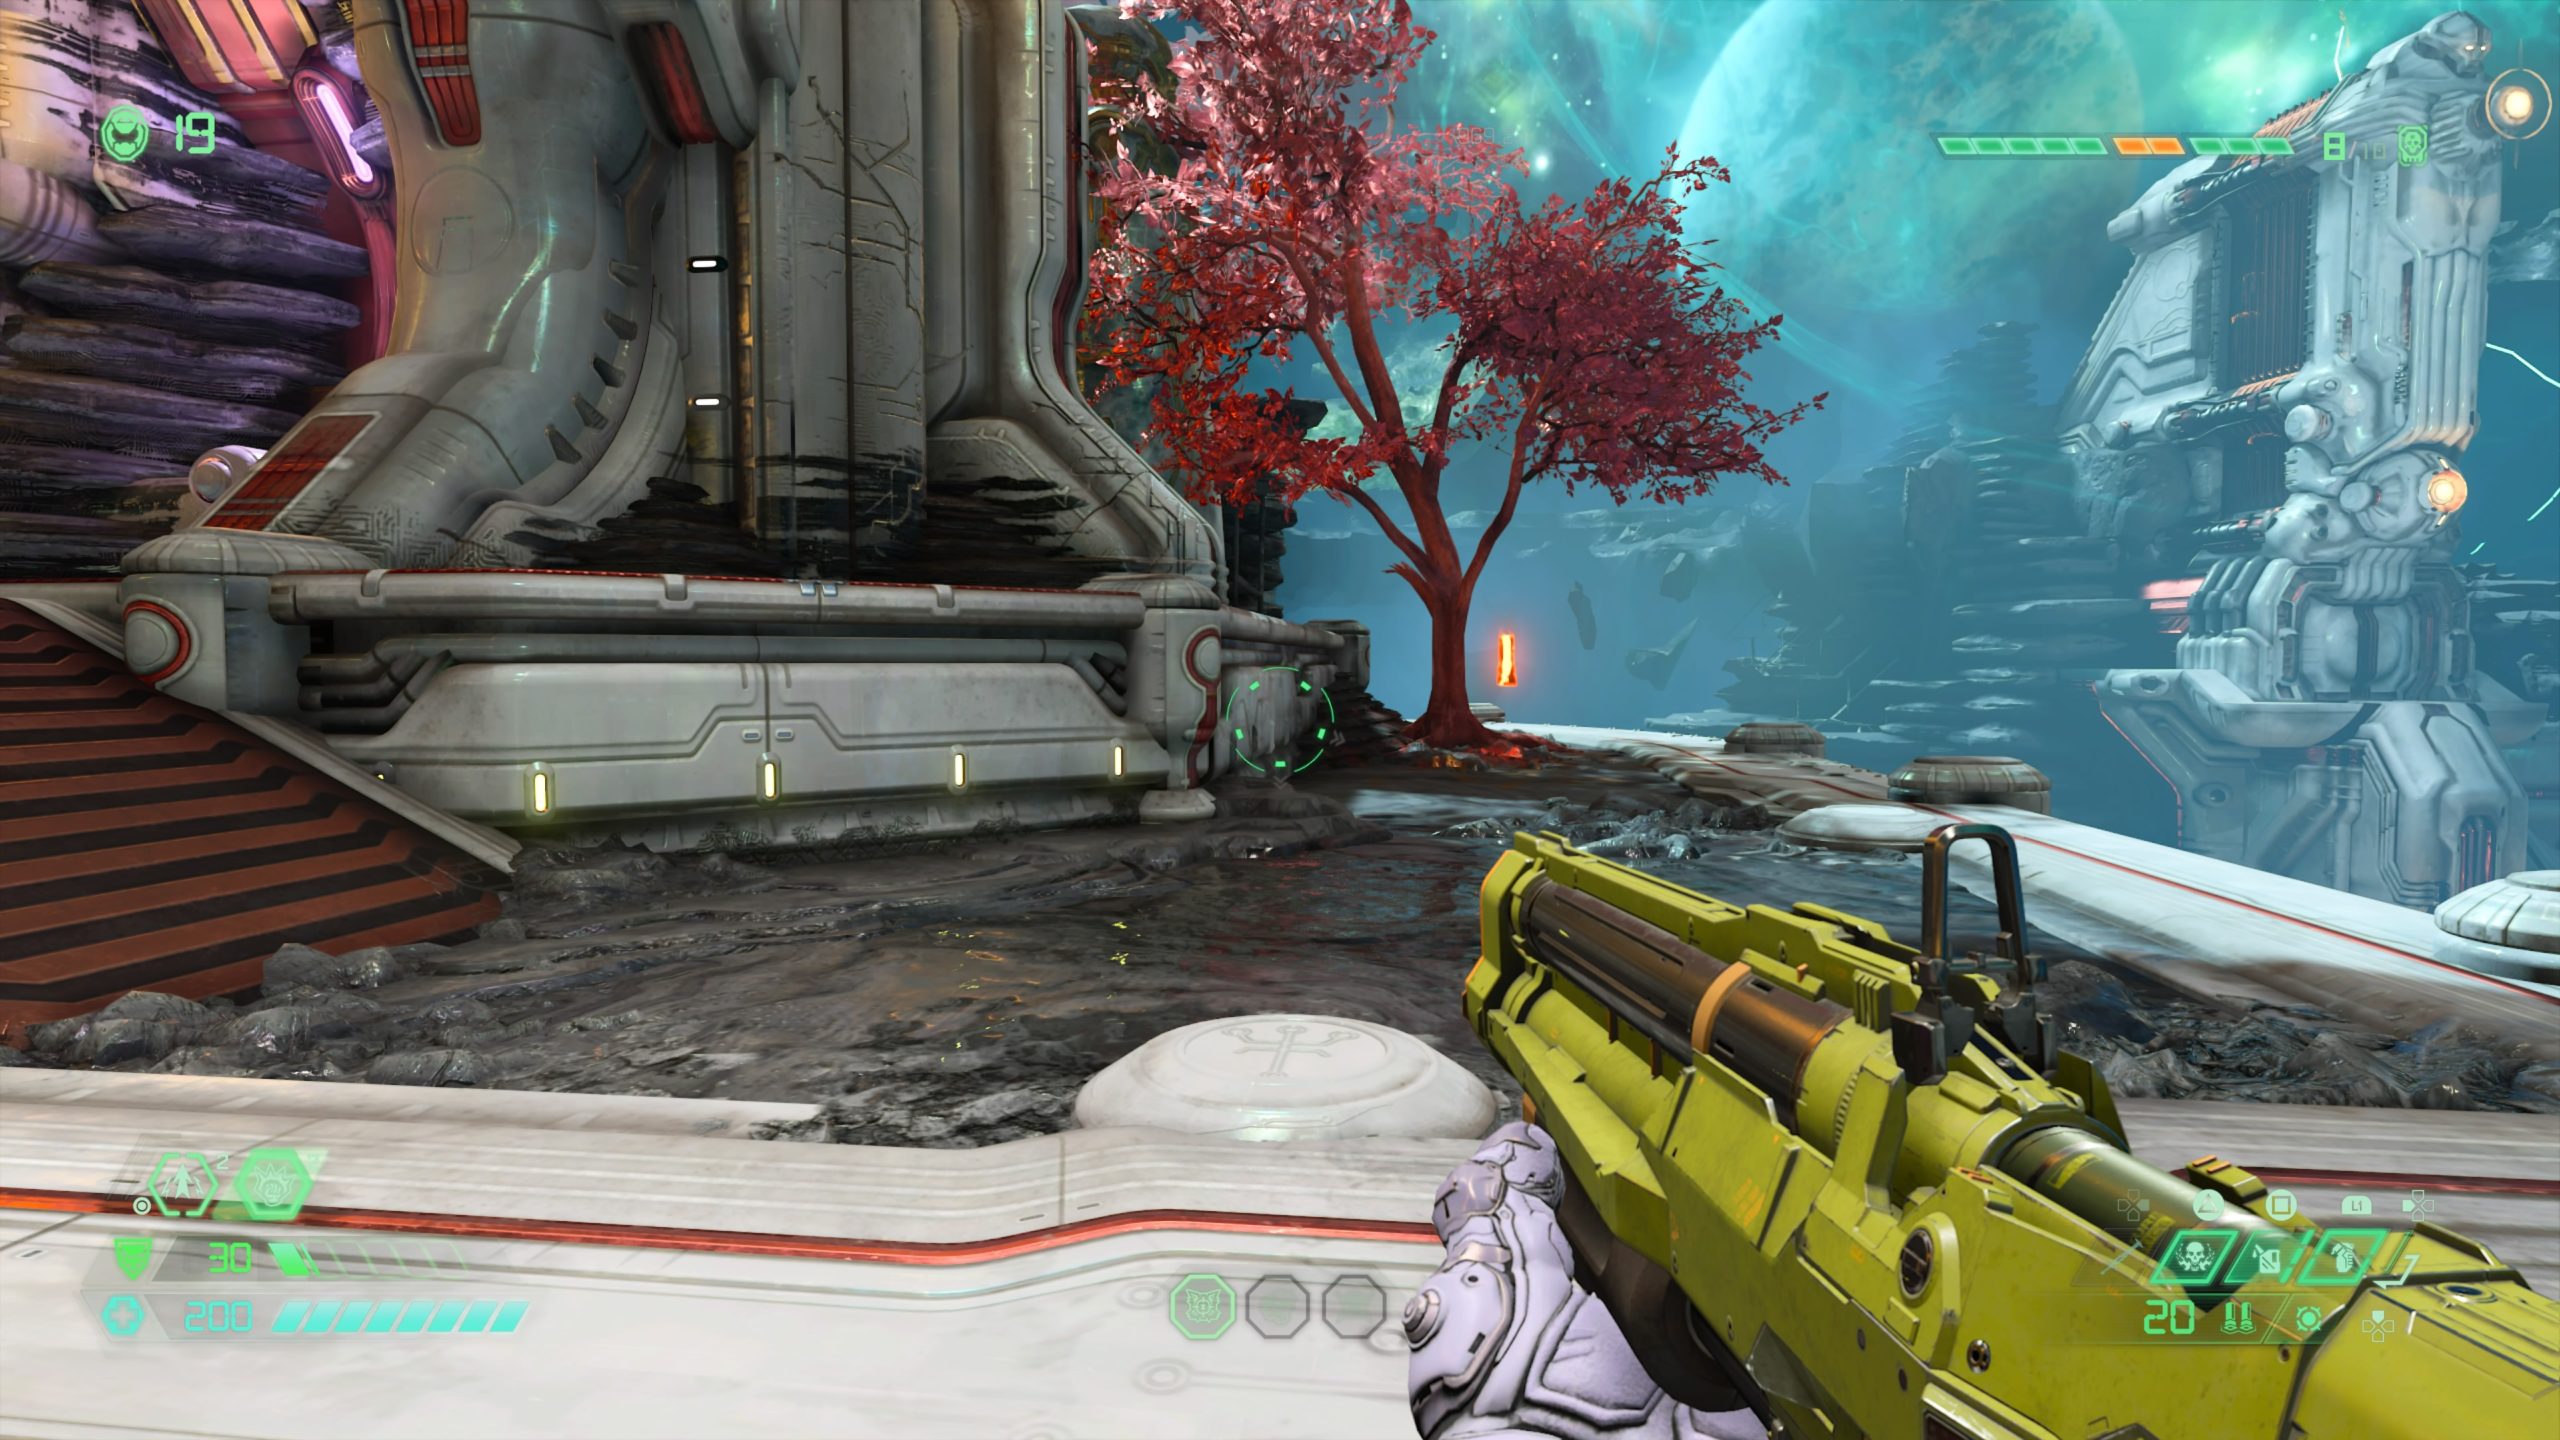
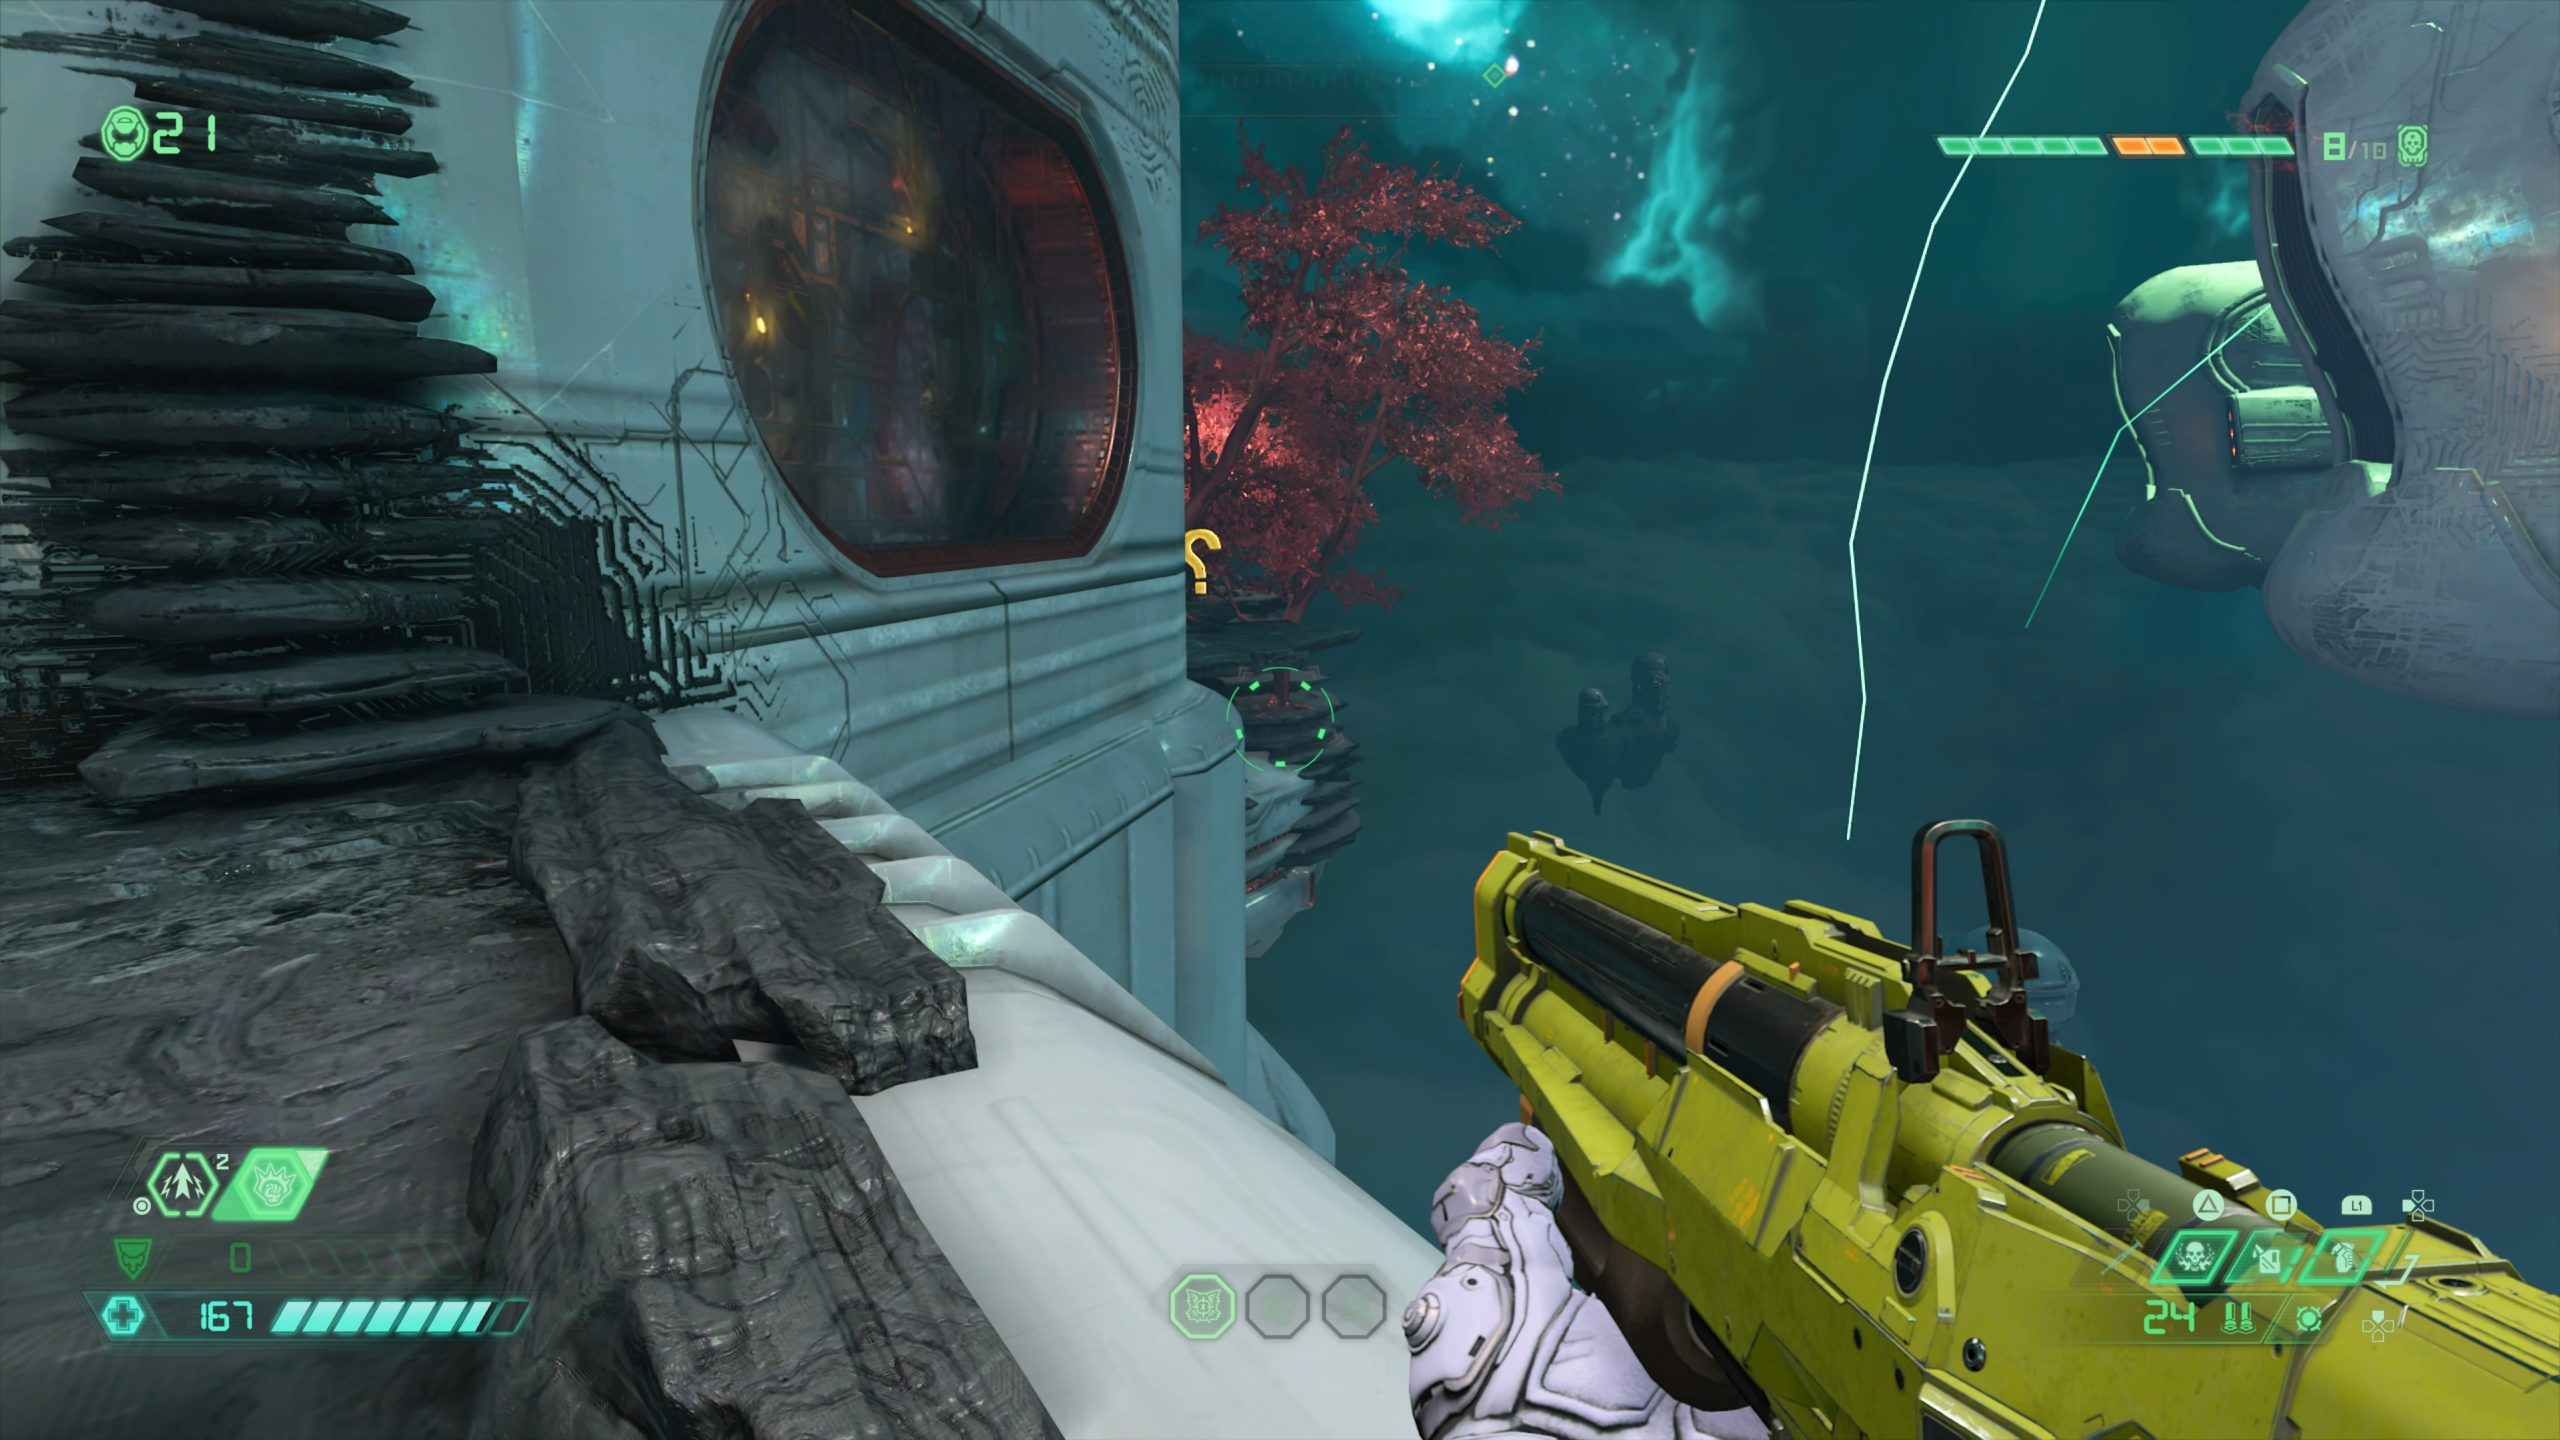
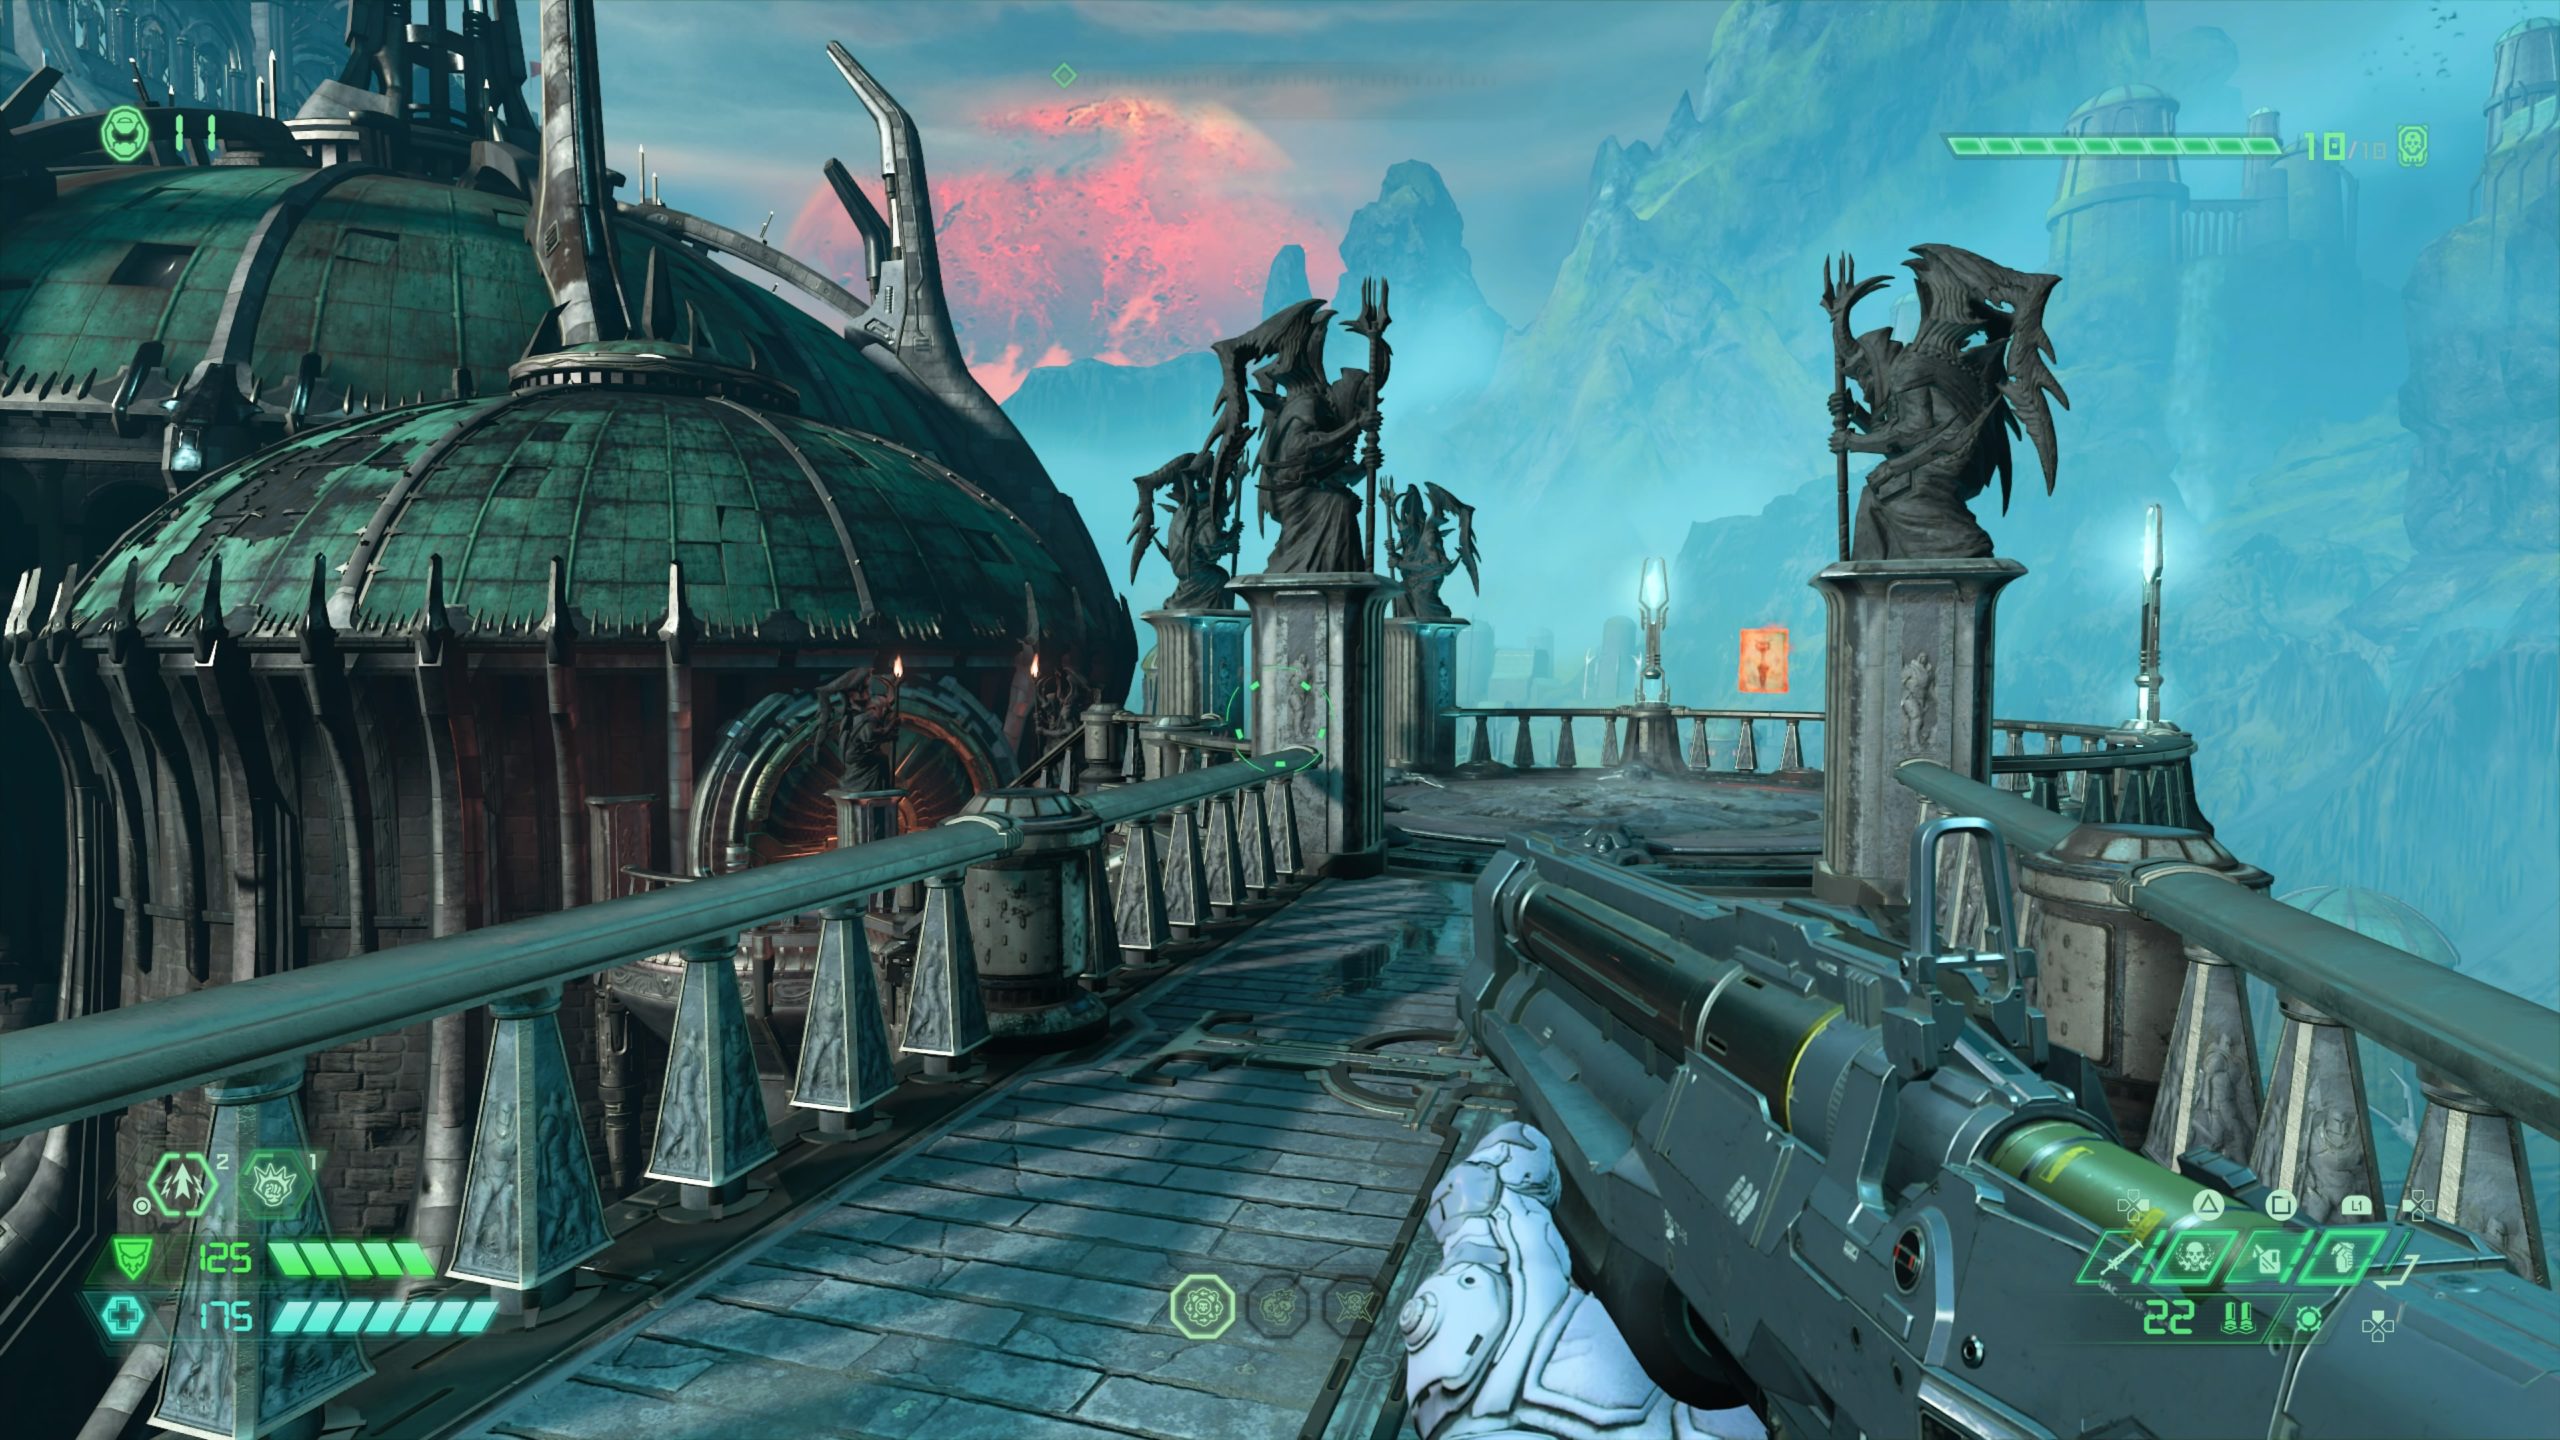
Toy: Khan Maykr
From the fast travel point, head to the right side of the room past the open doorway. In the next room proceed through the door and head through a hallway to reach an outdoor area. Head towards the trees on the right. You will need to walk off the ledge backwards near the lamp post and tree to find a small ledge containing the collectible. You will need to use dash to reach it.
Praetor Suit Point
From the toy, use the portal to reach the ledge above then step on the green switch to trigger the warp gates. Jump to the warp gate and follow the path right along the structure. You will need to use the stack on the right of the structure outside to reach the ledge on the inside containing the cracked wall. Melee the wall to reach the Sentinel holding the point.
Codex: Story of the Maykrs – Maykr Angels
From the fast travel point, follow the path right along the building (left of the door leading to the lacerator) to find the codex.
Toy: Maykr Drone

From the codex, take the path heading back towards the fast travel point to find a higher ledge a short distance away. Use the layered rocks on the left side before the ledge to jump onto the ledge. The ledge contains the collectible.
Praetor Suit Point

From the fast travel point, head into the structure to find the Sentinel holding the point behind the elevator.
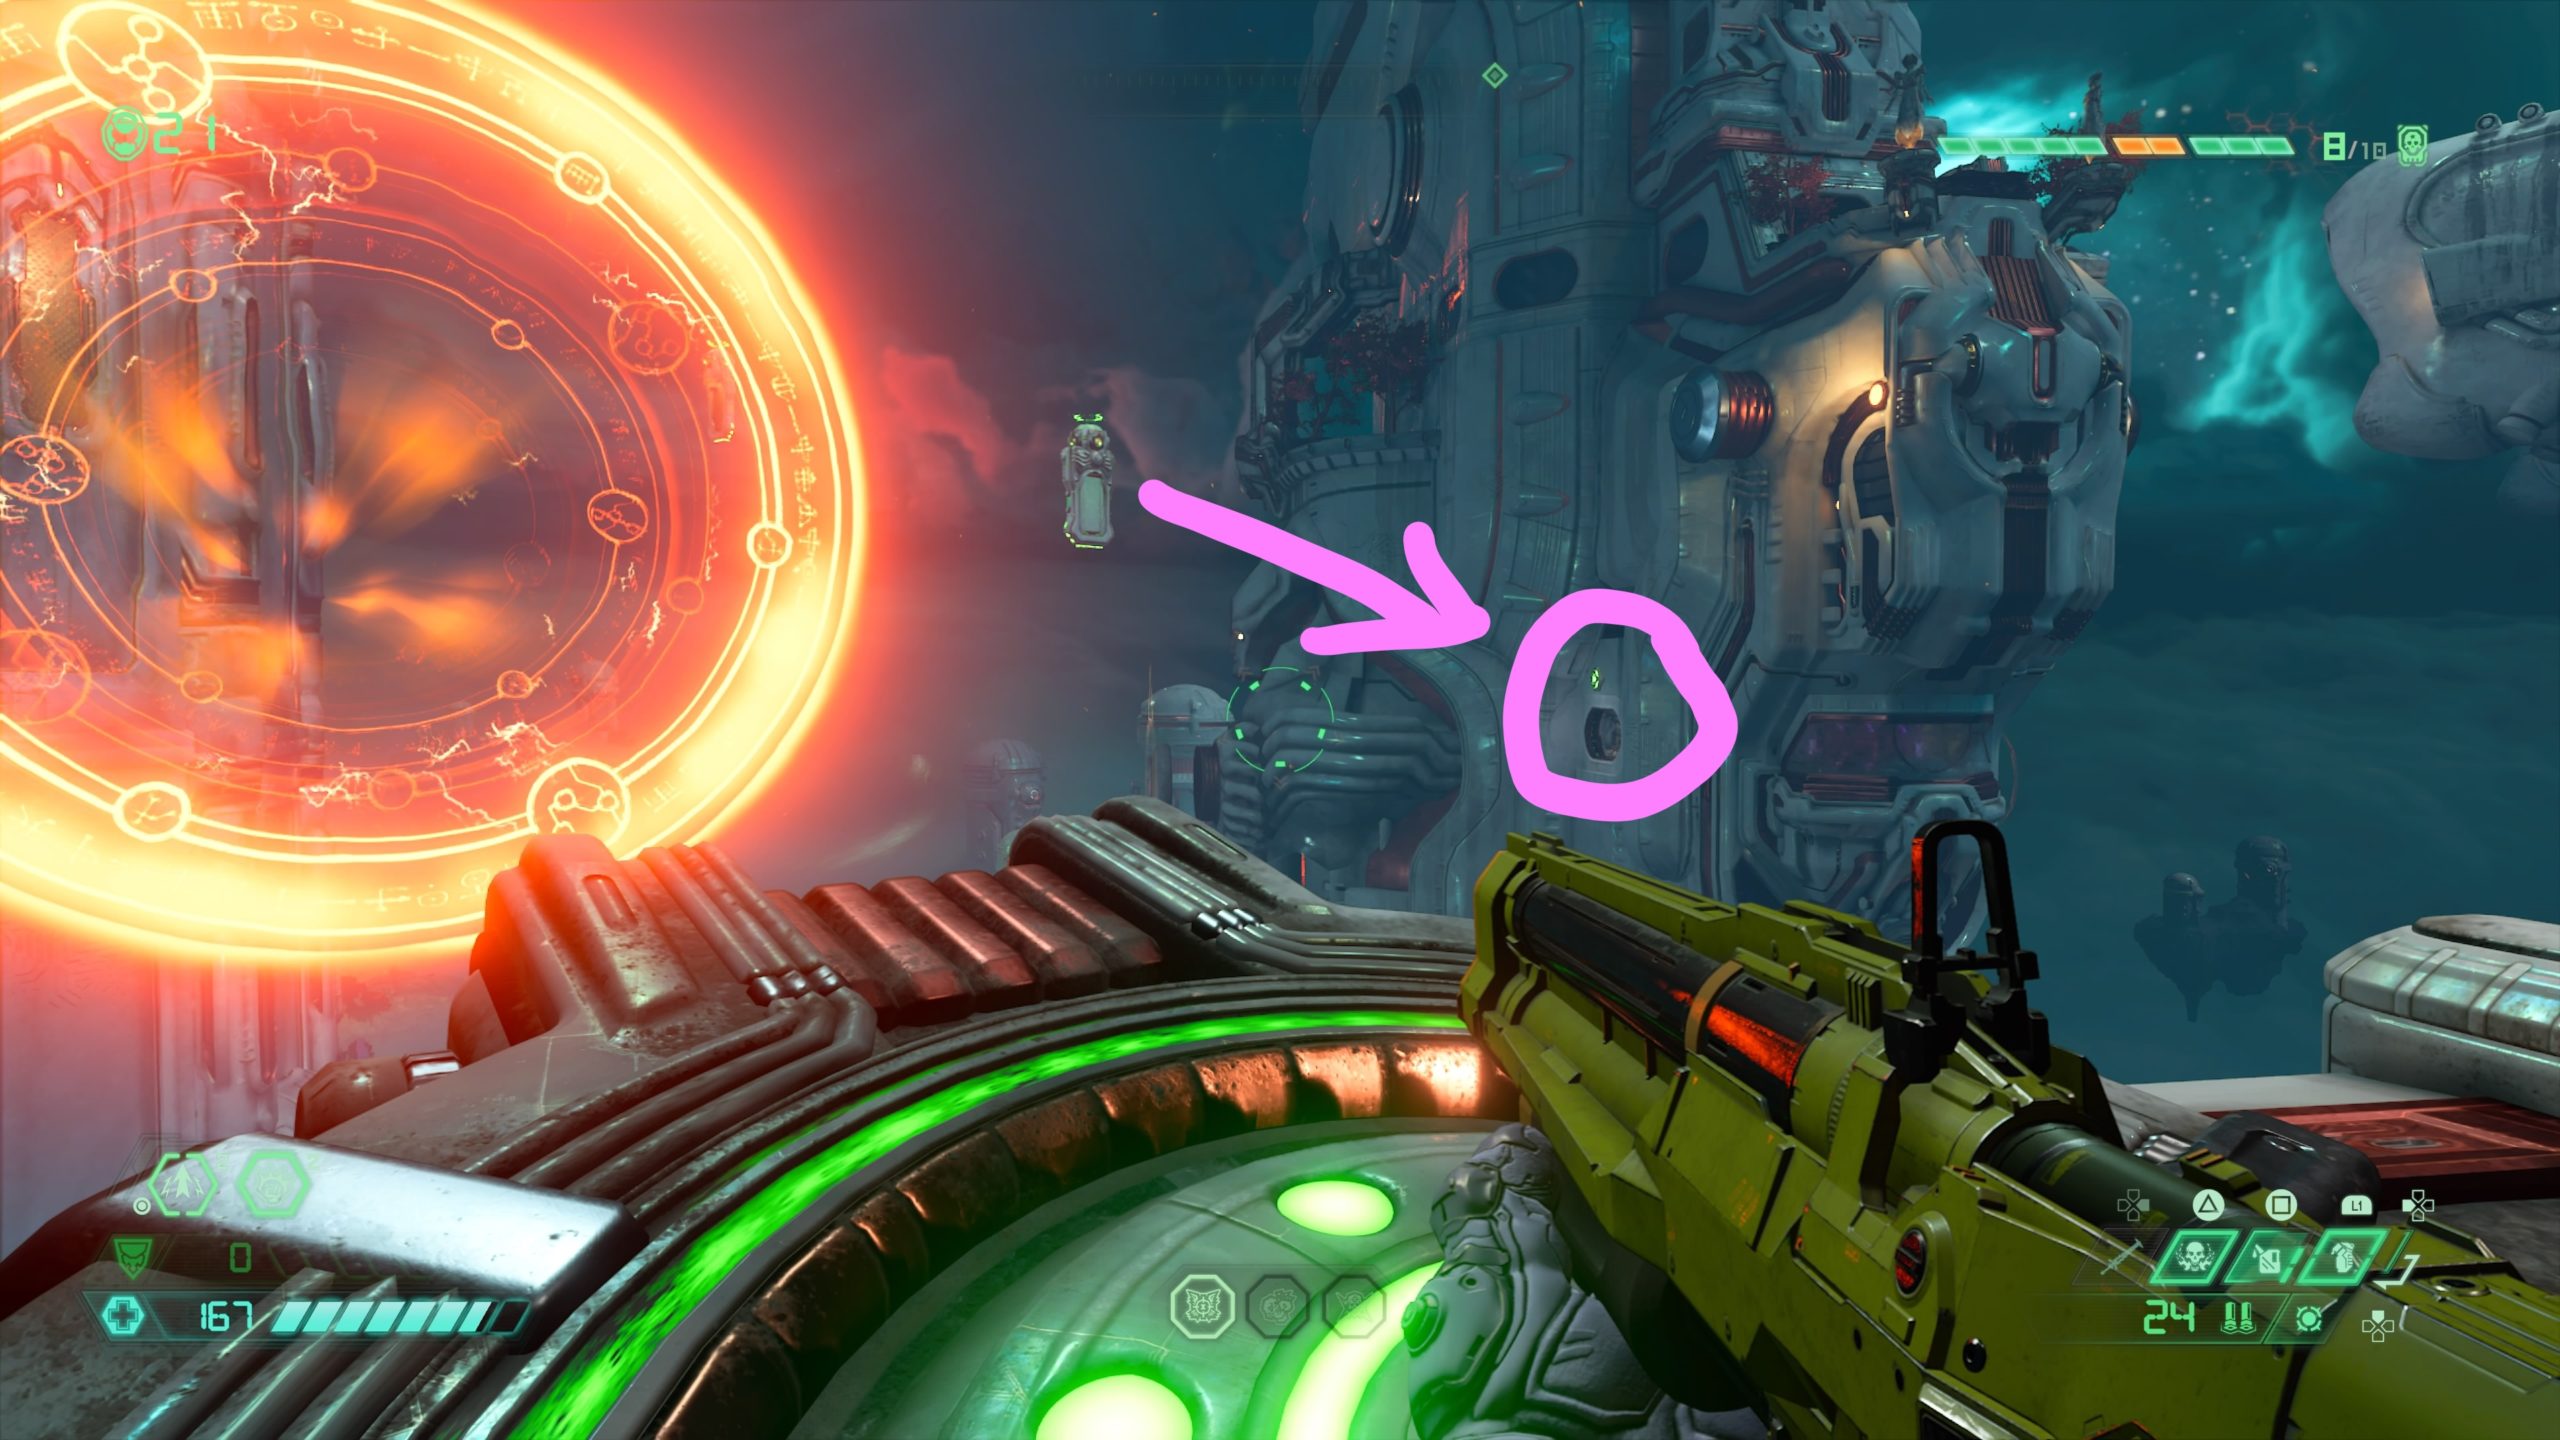
Cheat Code: Powerup Mode: Berserk
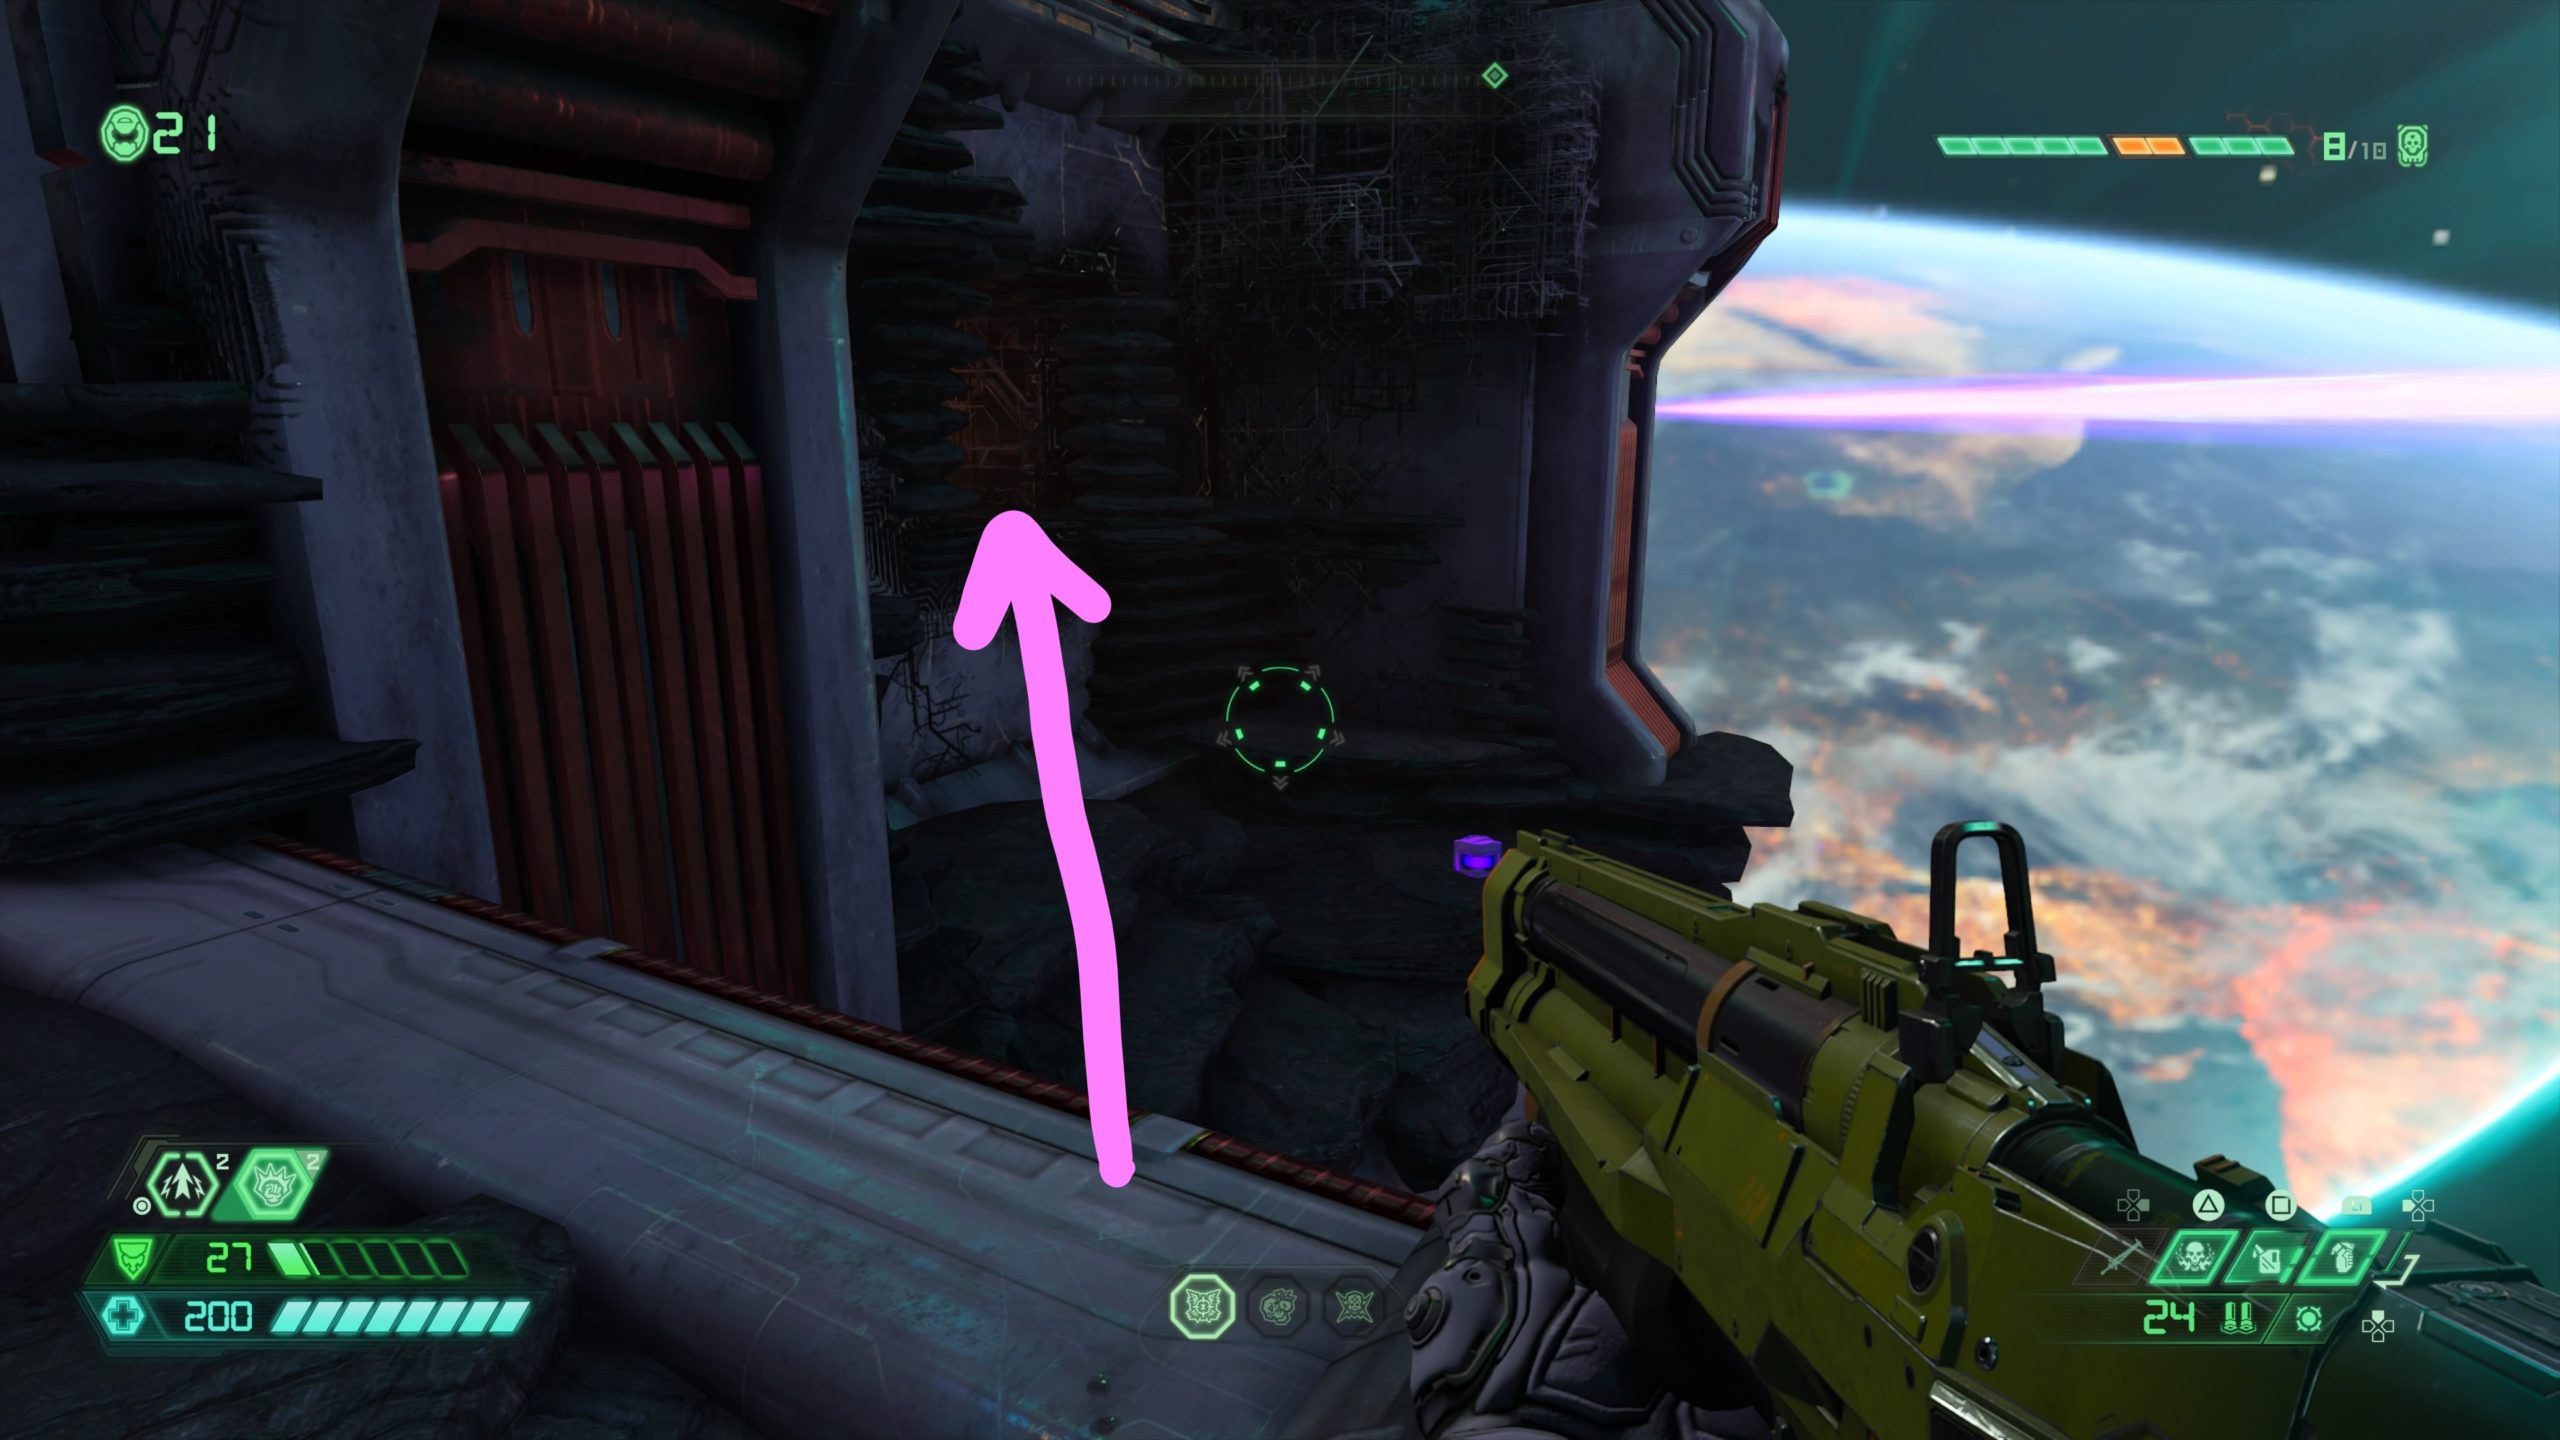
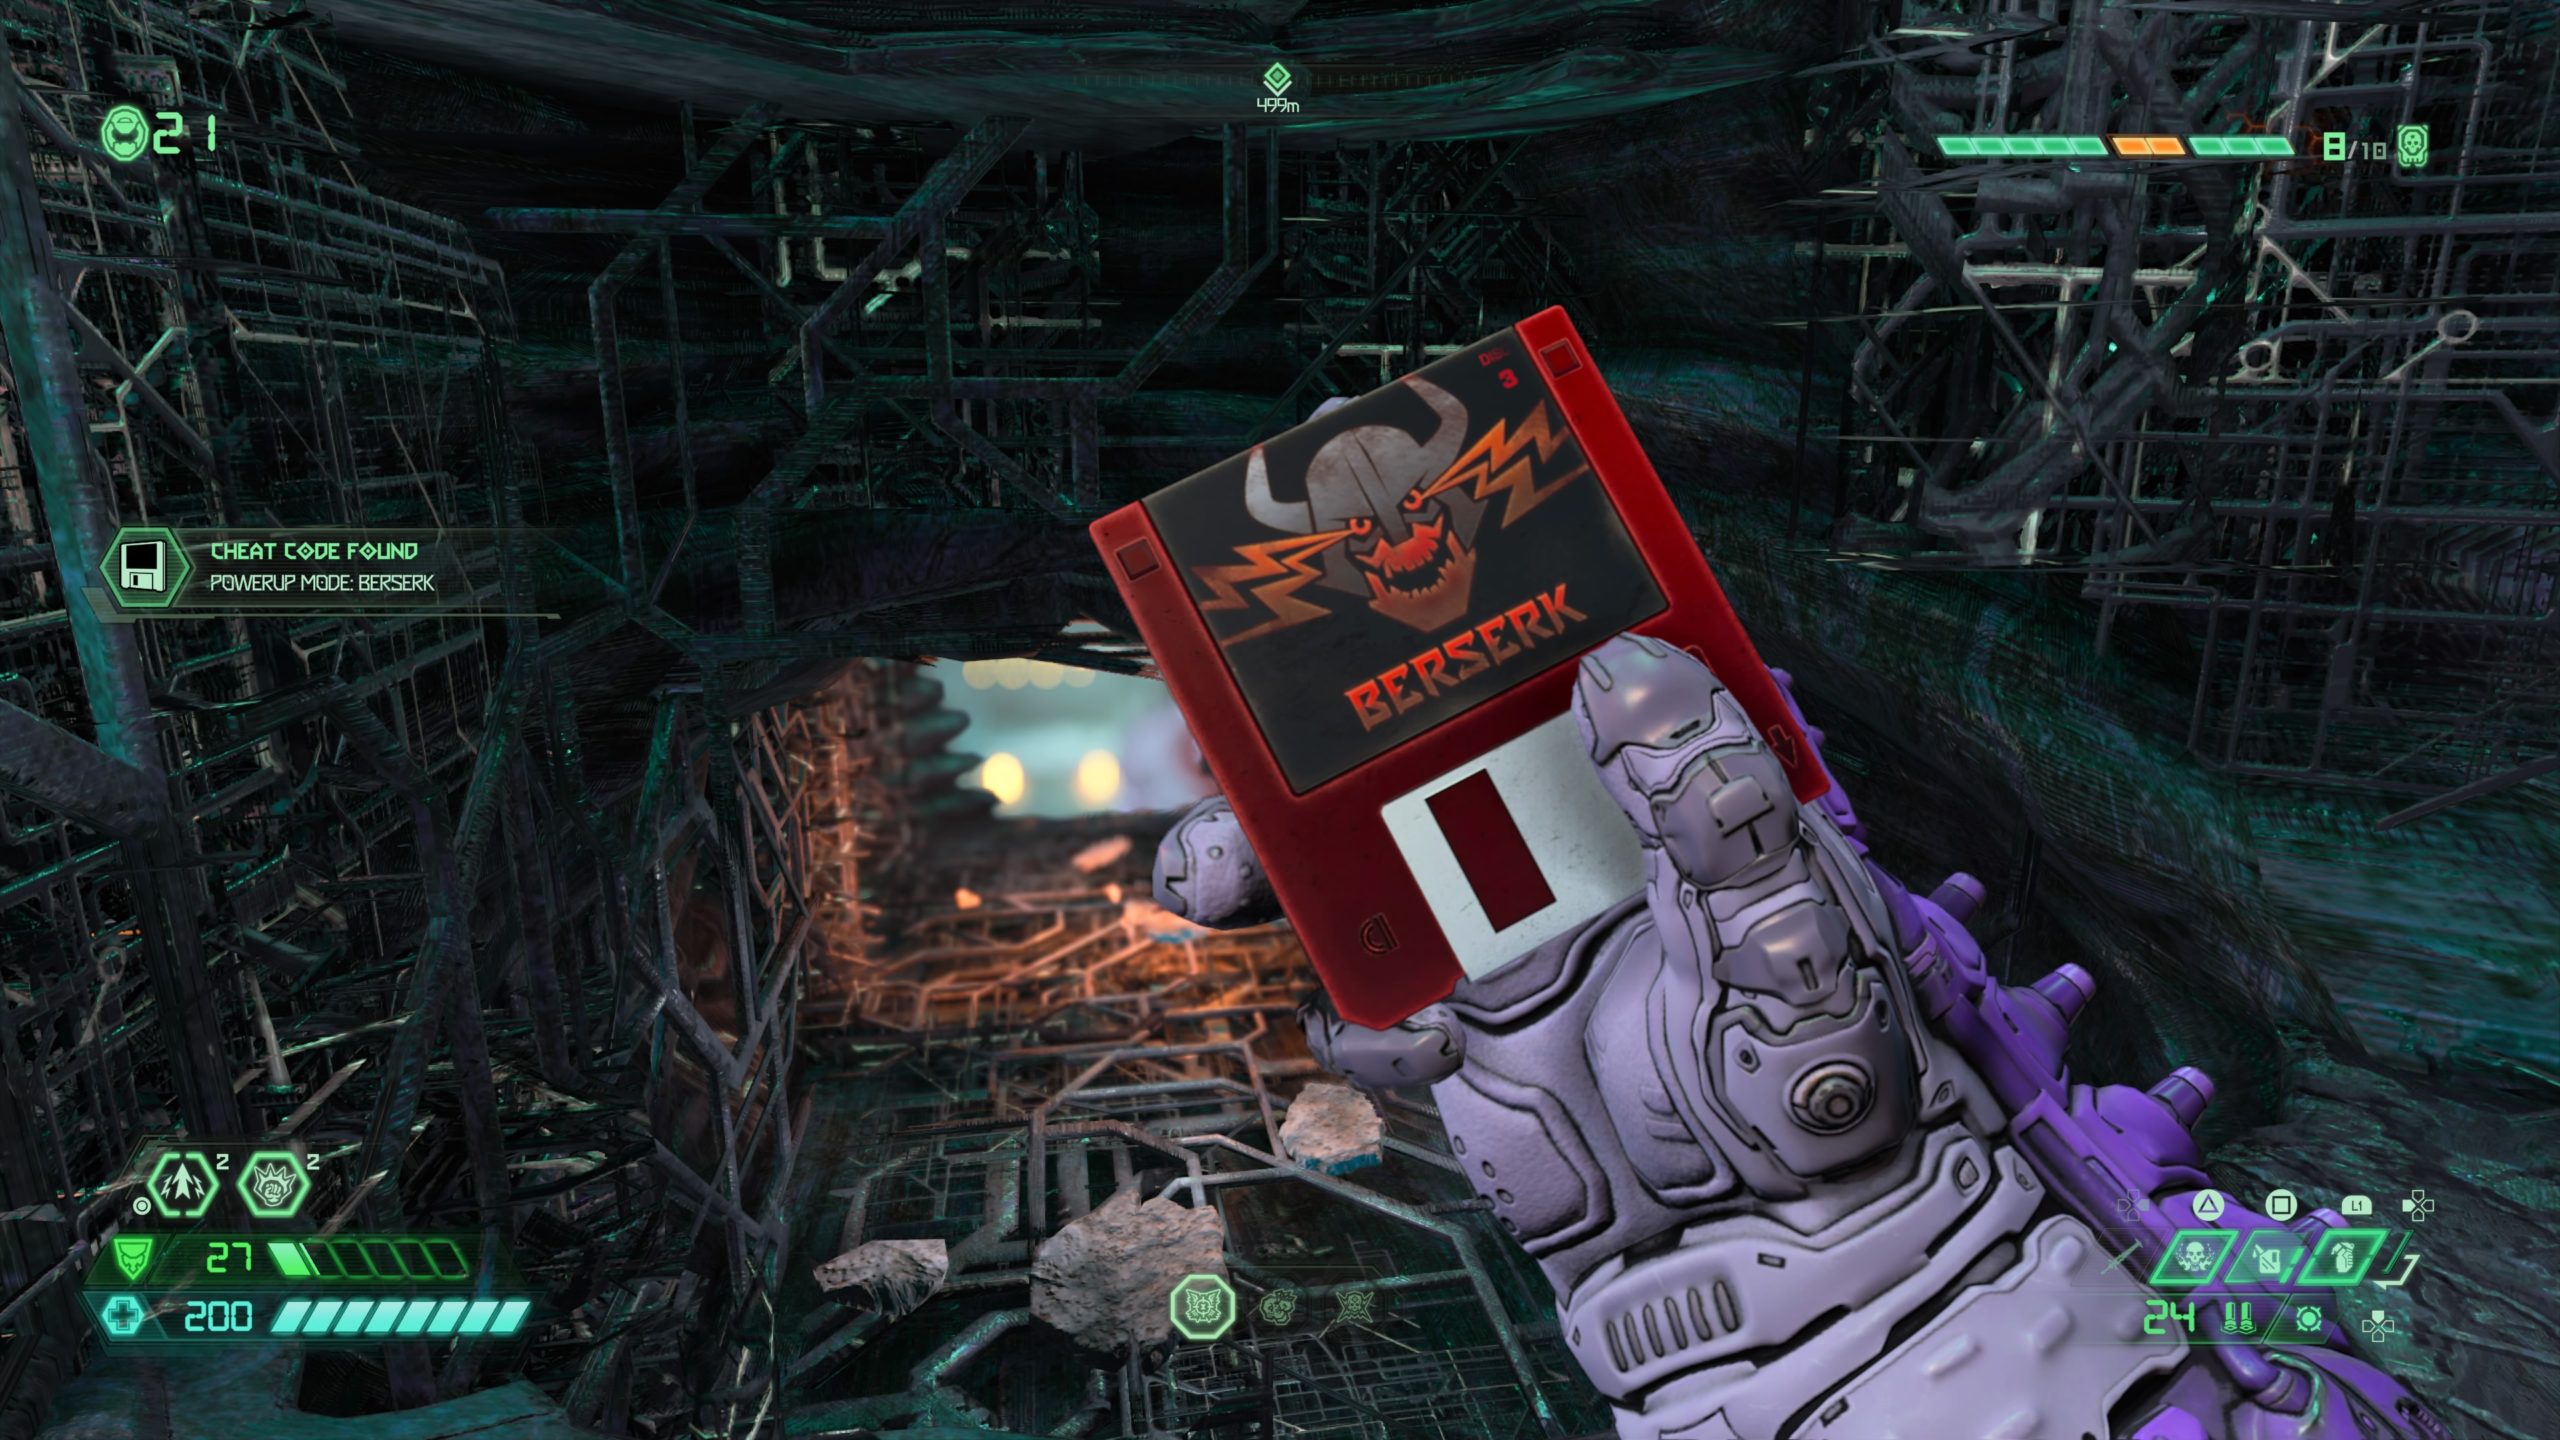
From the sentinel, take the elevator up then head through the doorway to reach a control room. Head through the door on the left to go outside. Head to the left ledge overlooking the giant beam to spot a cracked wall in the side of the structure. Jump to the wall and melee it to find the cheat code inside.

Toy: Spectre

From the fast travel point, enter the door and head left through the area to reach another doorway. Follow the hallway to the end to go back outside. Step on the green switch to spawn a warp portal. Jump through it then dash to two hanging climbable walls to reach the structure in the distance. On the second hanging wall, turn left and jump to the small opening with a green light above it. Head inside and go through the door on the left. Take the elevator up and follow the path right to find a door. Head through the door and walk to the ledge straight ahead. The collectible can be found to the left along the side of the building. Use double jump and dash to reach it.
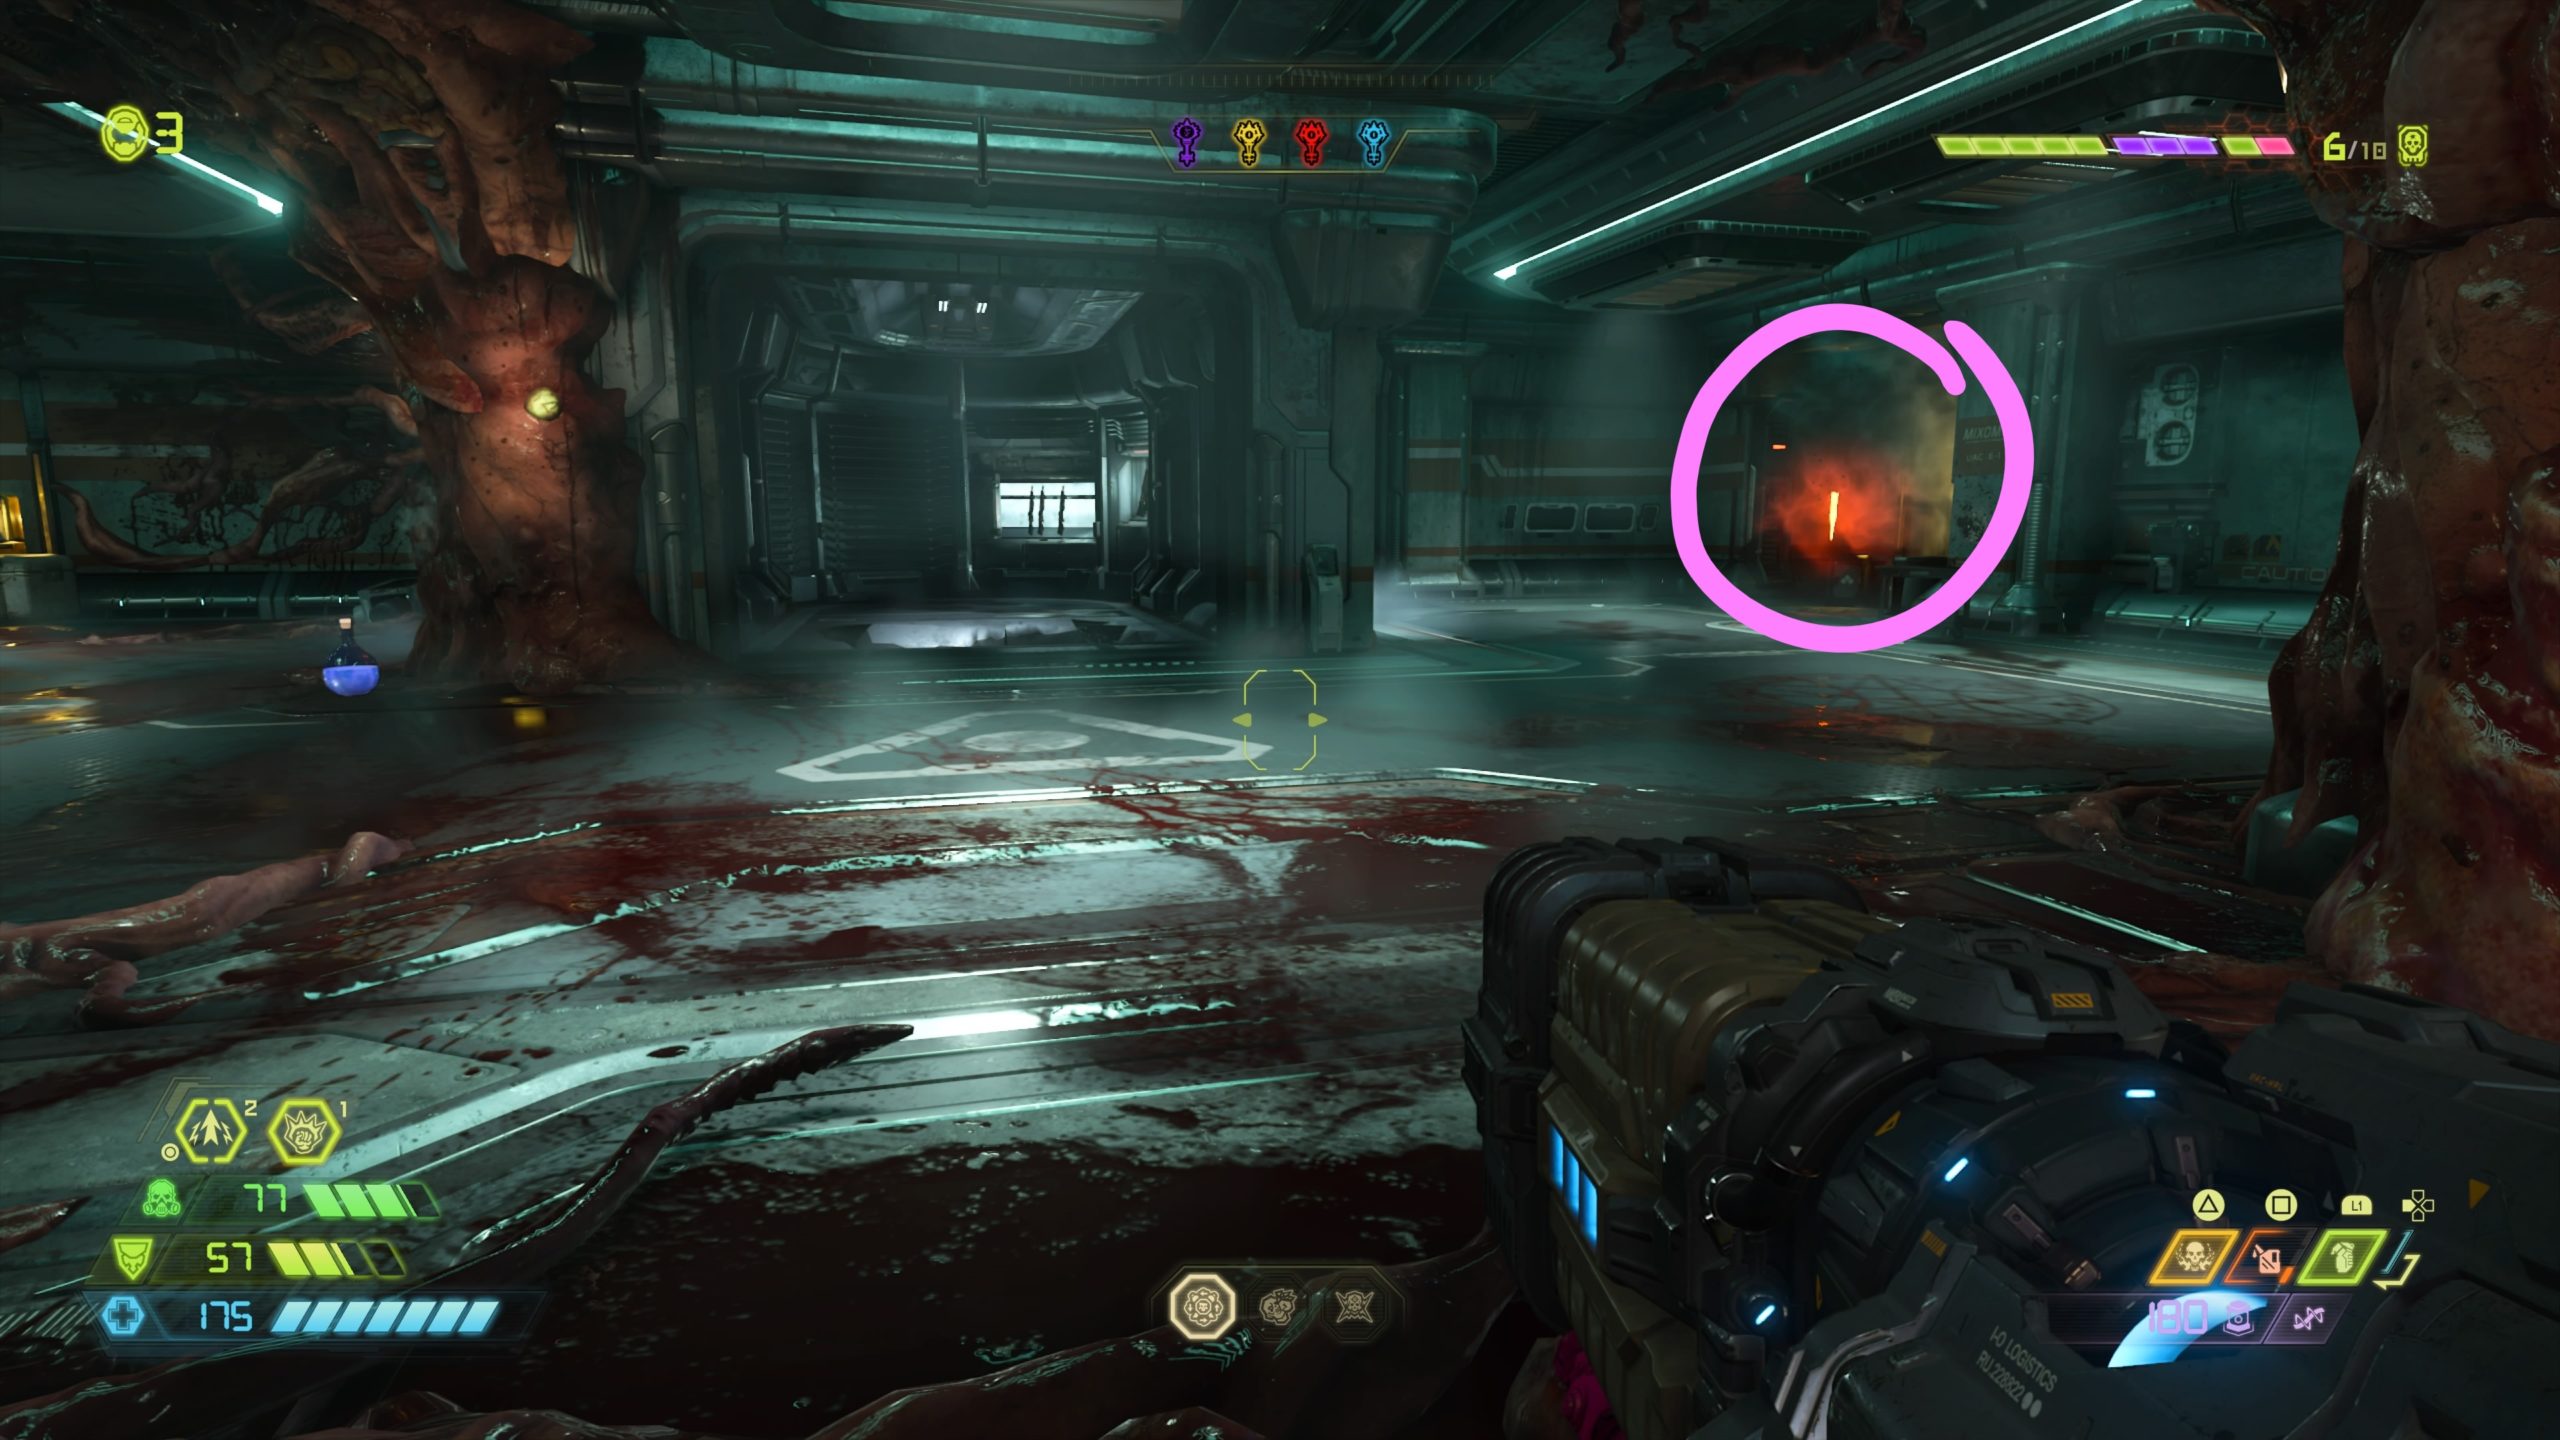
![]()
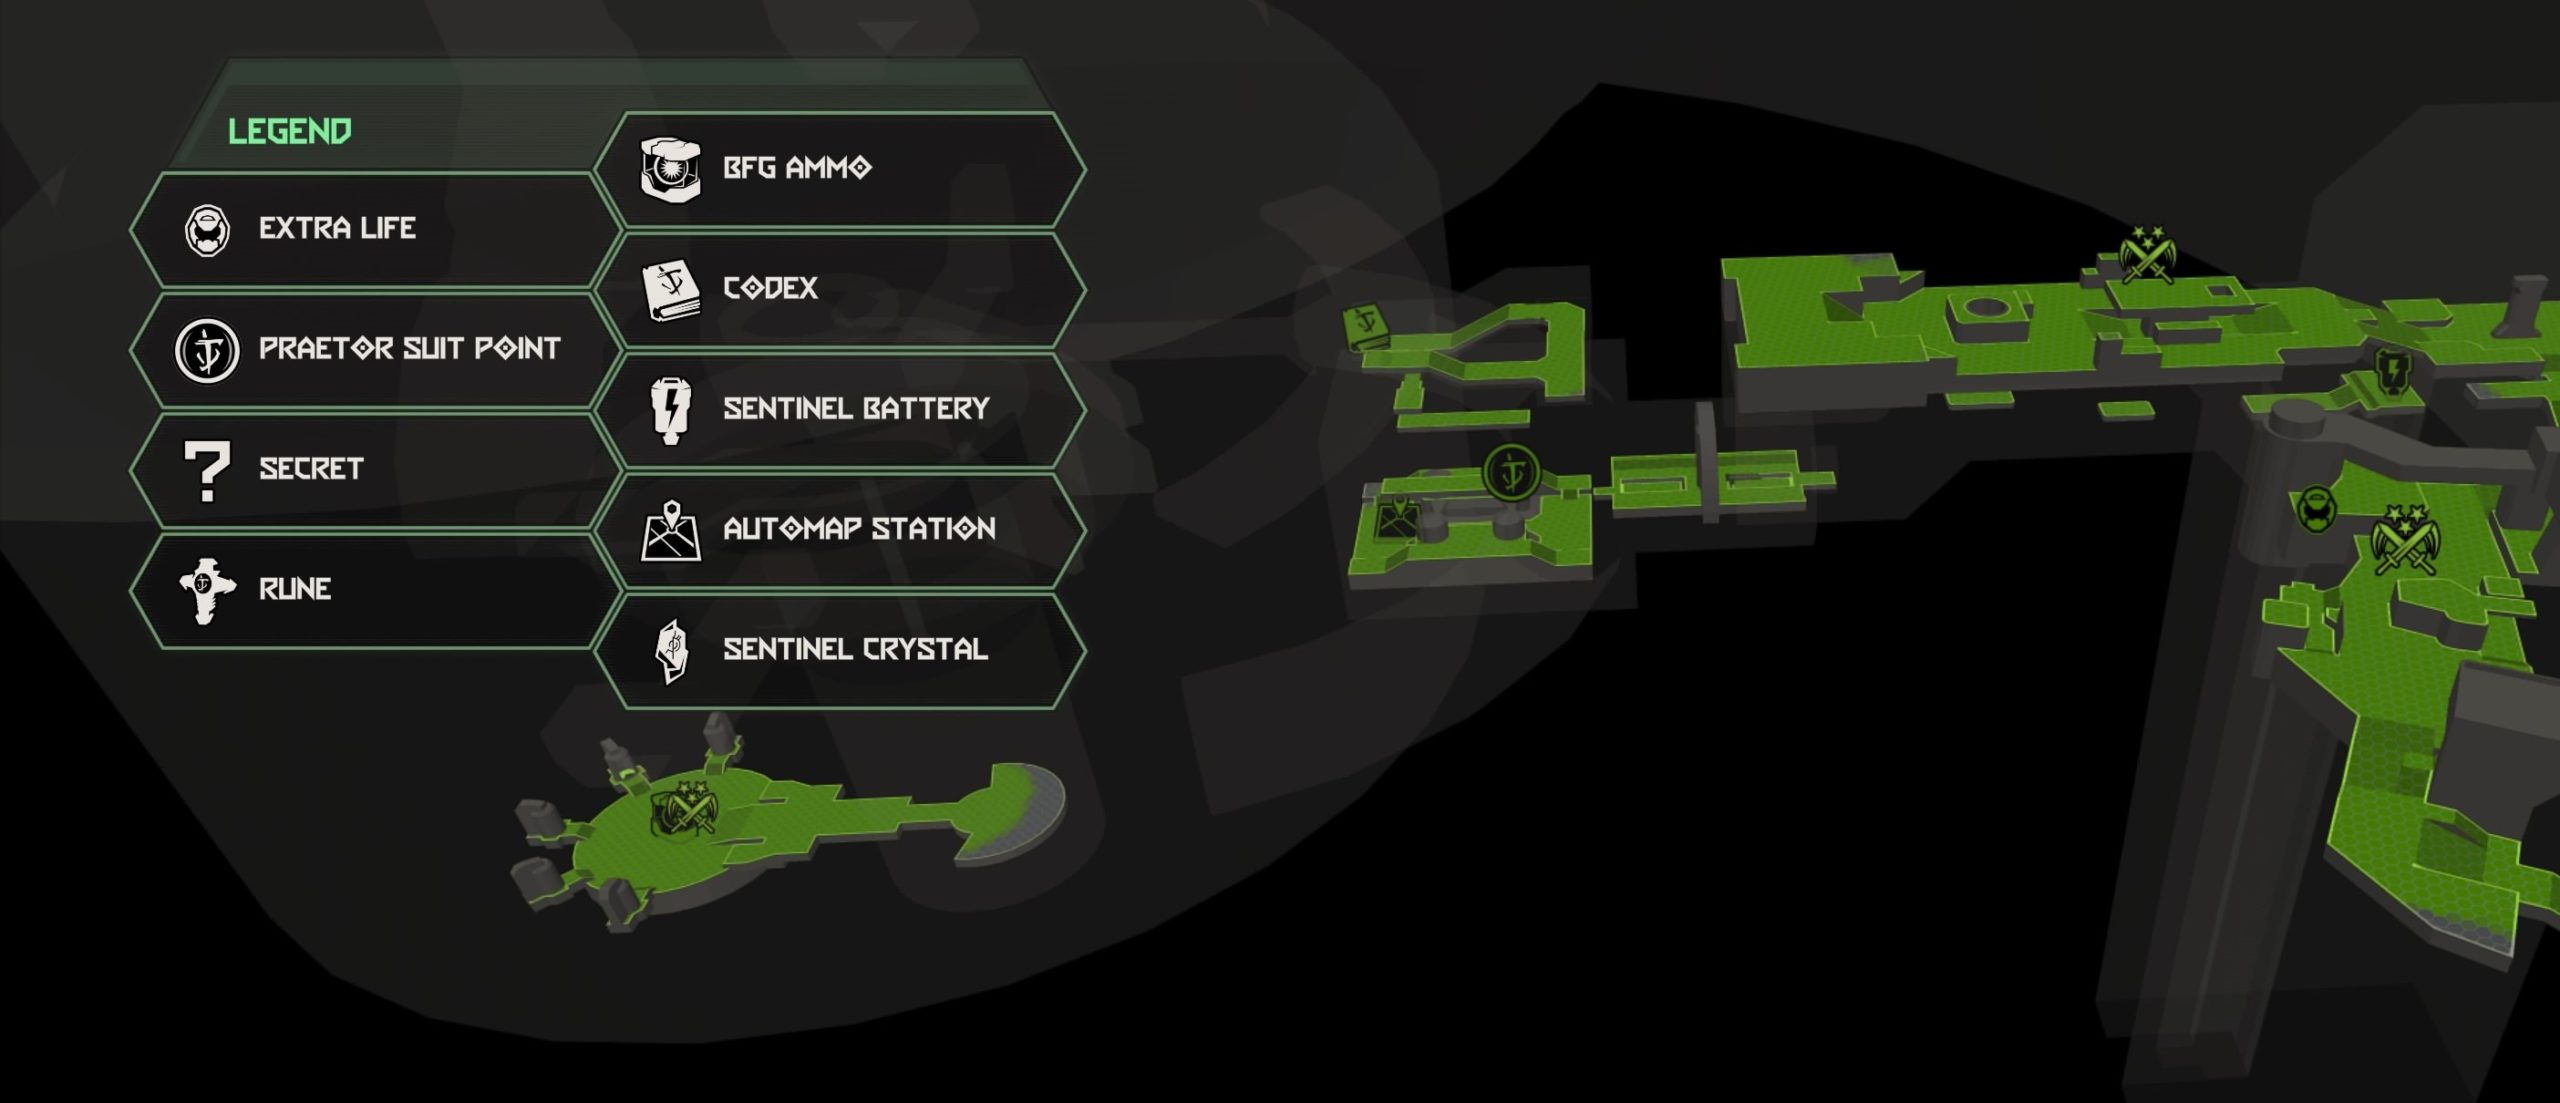
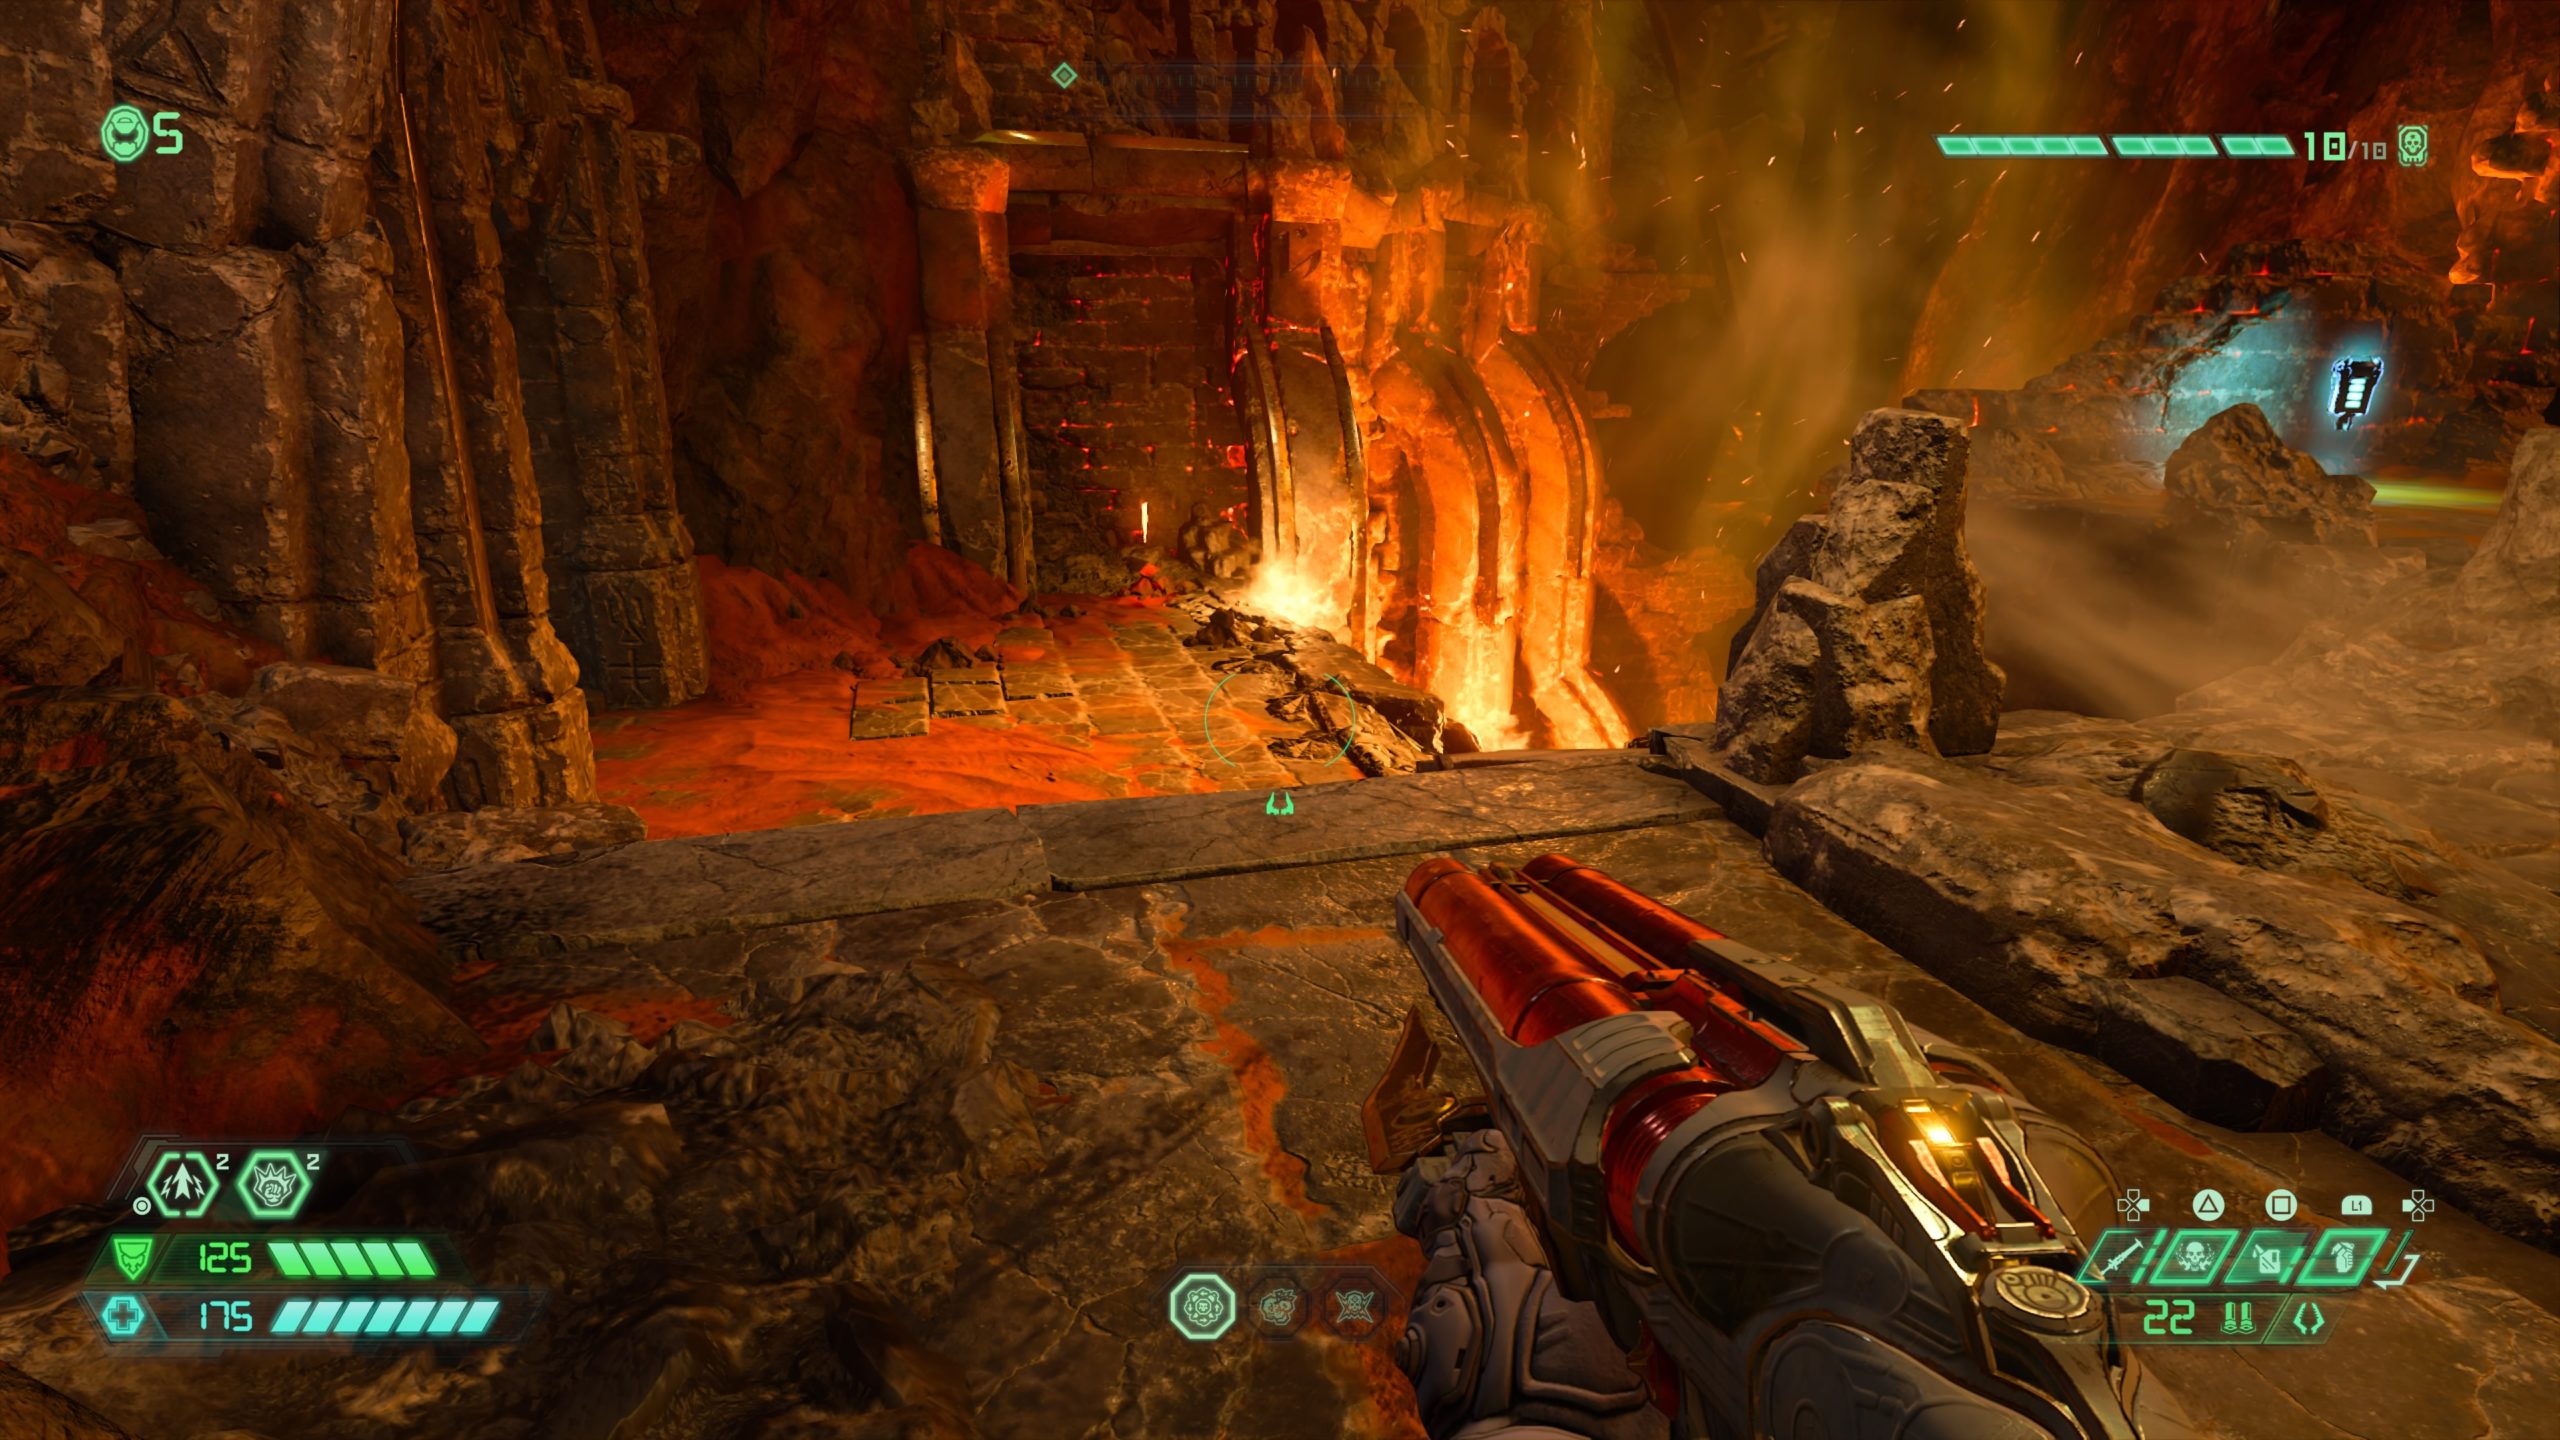
Sentinel Crystal
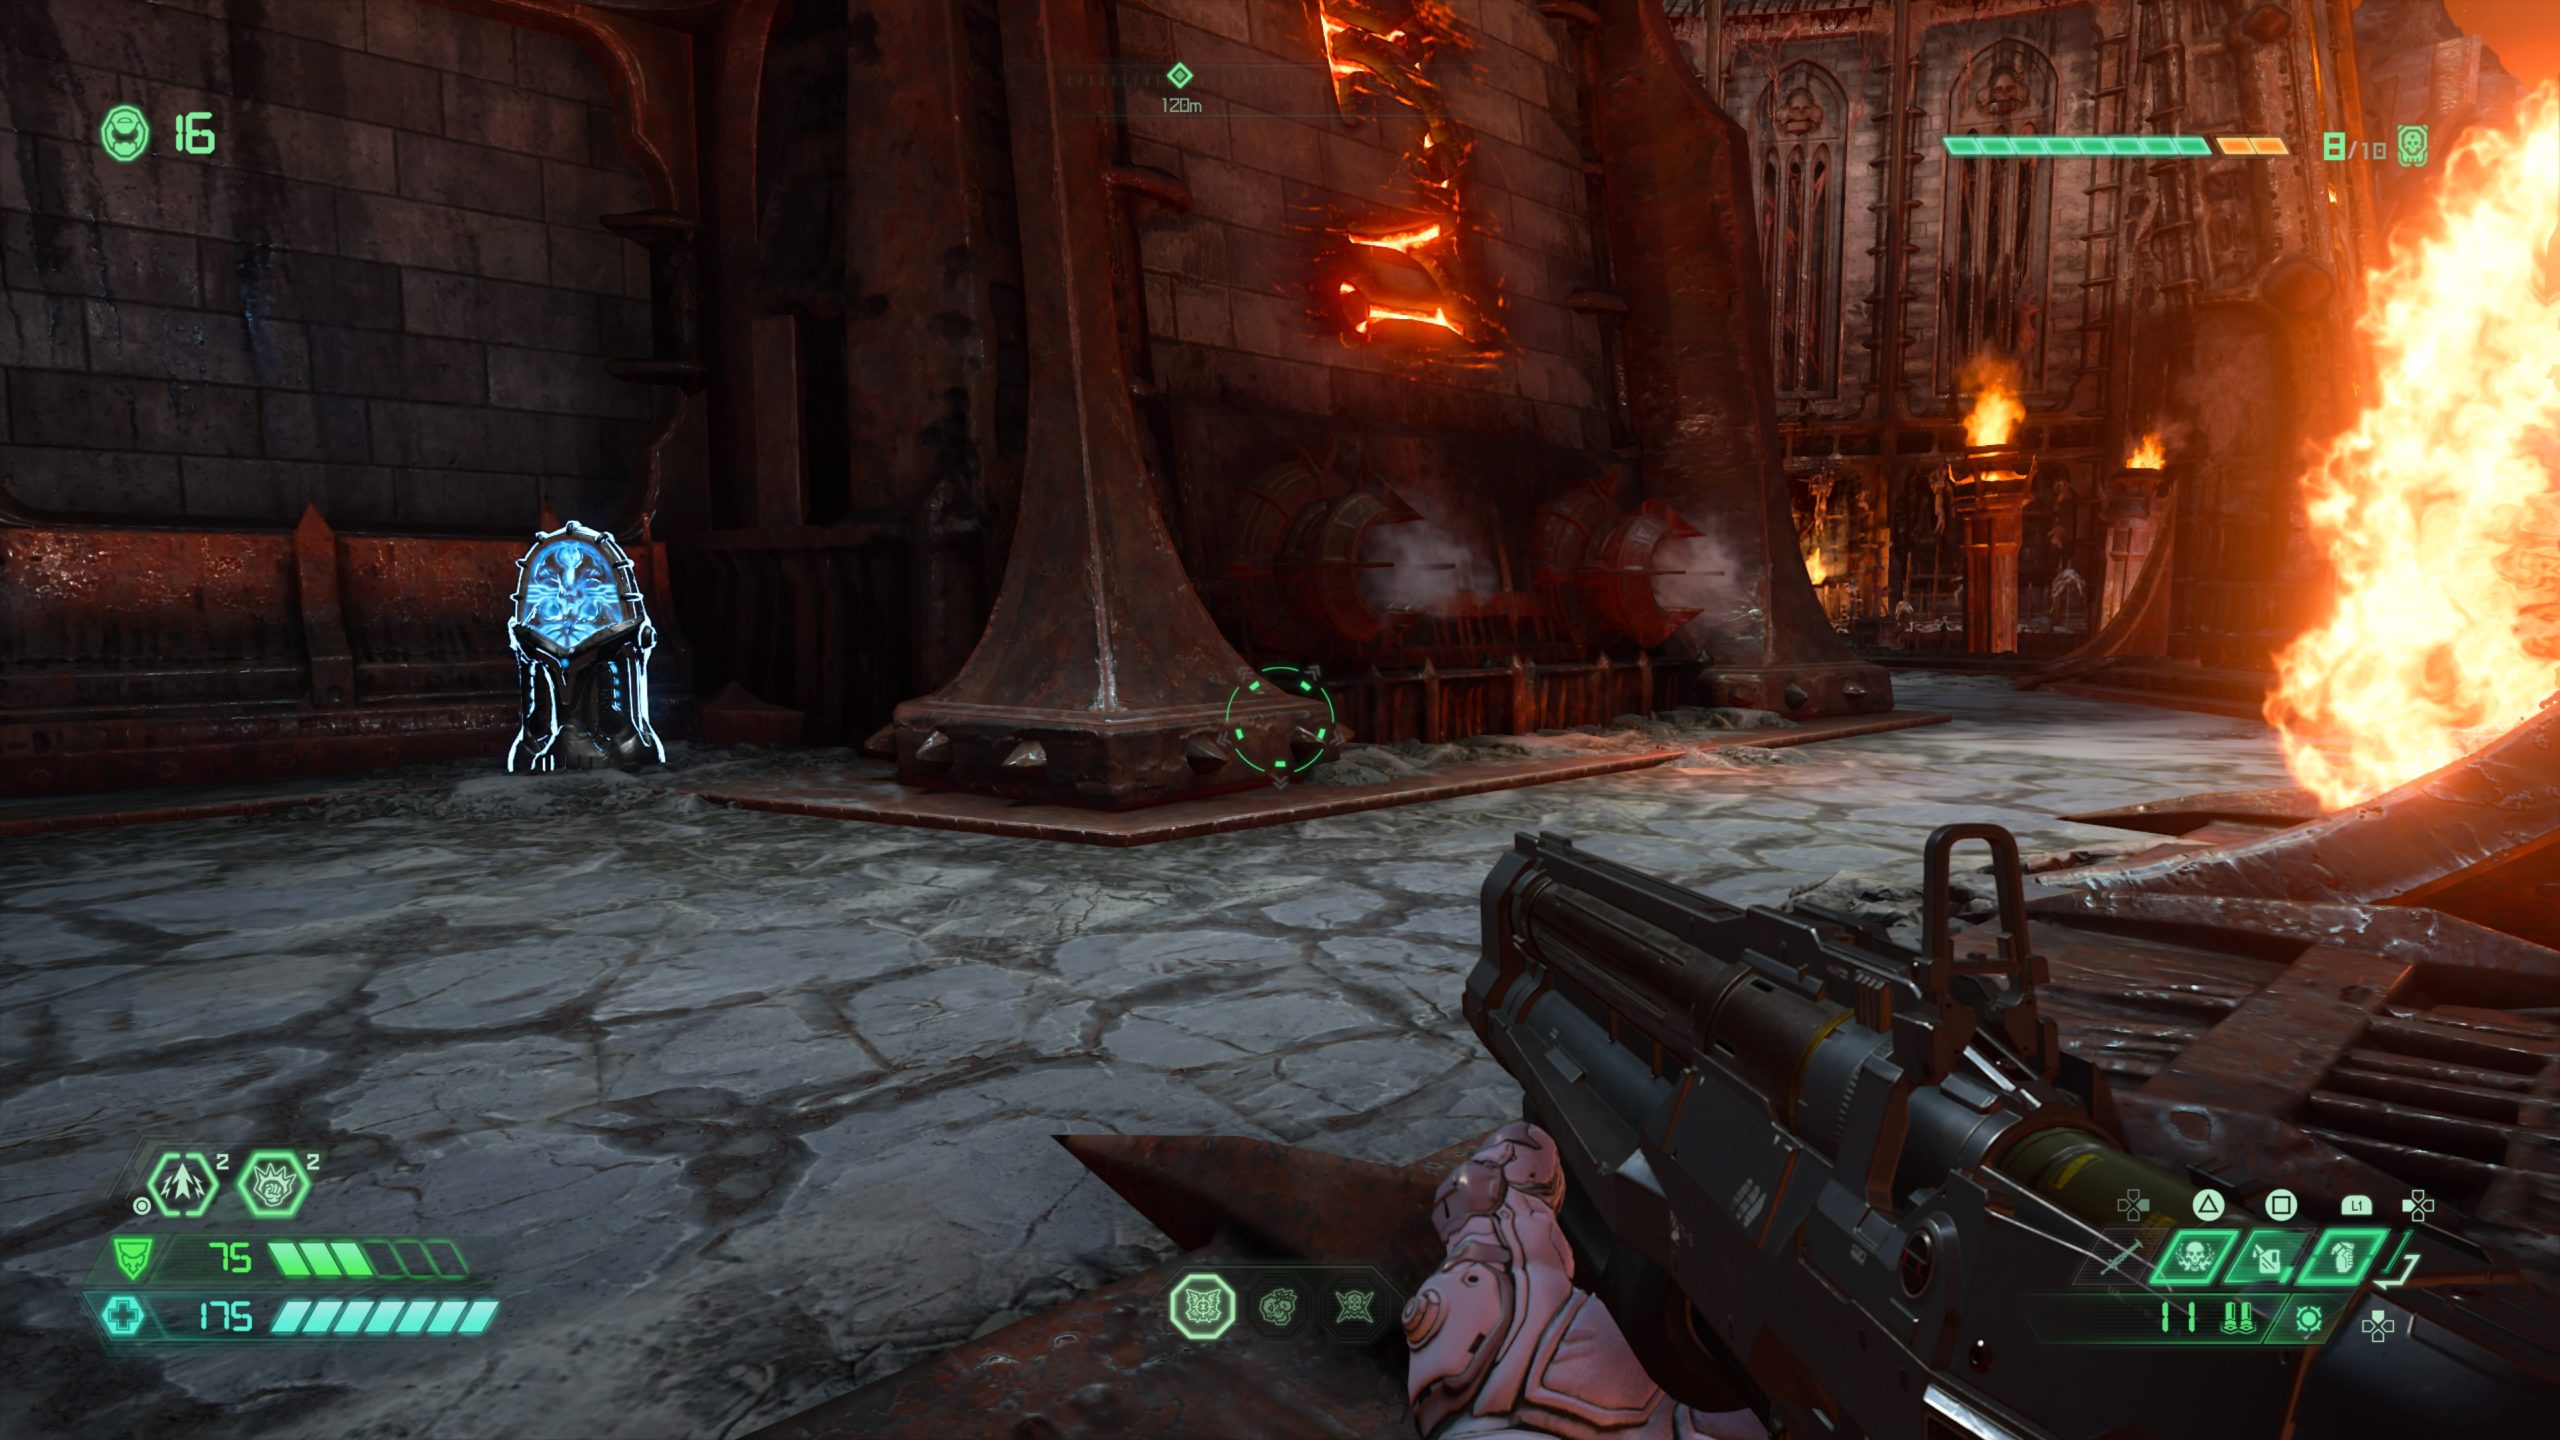
From the starting point, follow the broken walkway through the lava pit then climb the stairs at the end. Once at the top, take a left and follow the walkway around to find the Sentinel Crystal past the cannons shooting fireballs.
Codex: Story of Hell – Nekravol – Part I
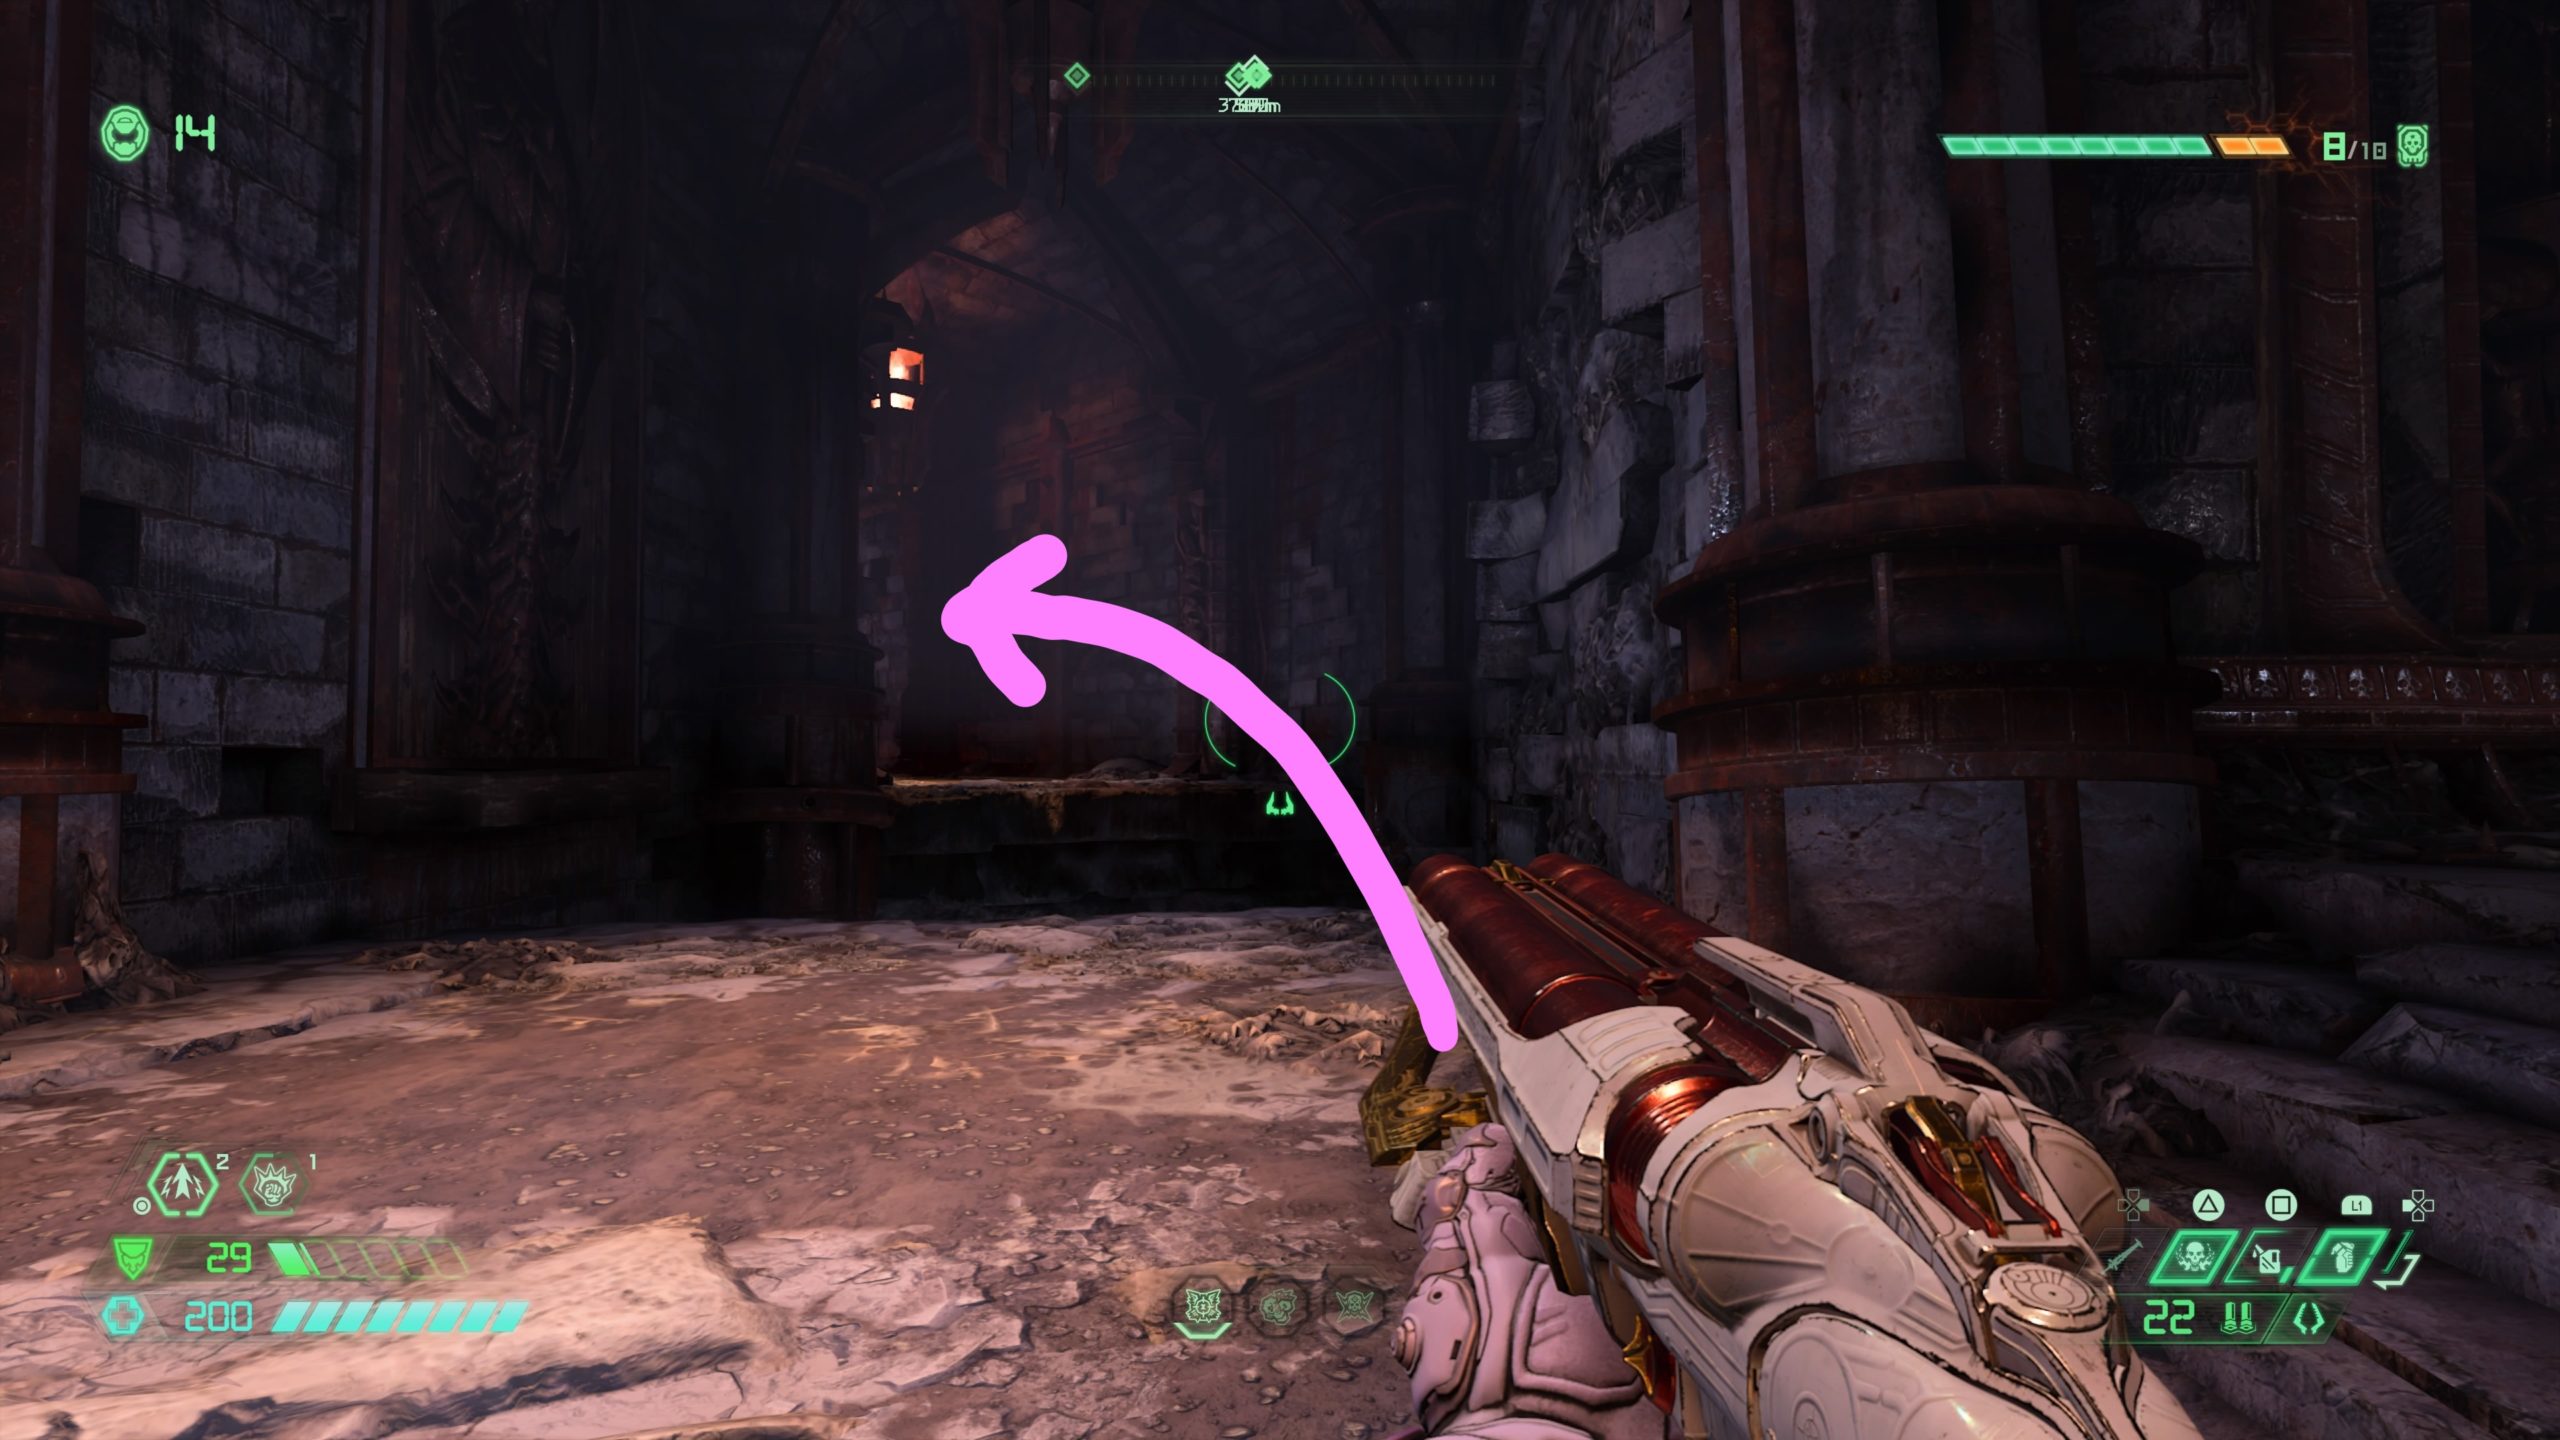
From the Sentinel Crystal, follow the walkway around past the stairs to the other side. You’ll need to climb up a couple of rock ledges and use a spin bar to reach a climbable wall. Use the climbable wall to reach the inside of the structure. Head down the nearby stairs and take a left passing some columns to reach a gap at the end of the hallway. Jump across the gap then head forward to the end of the slab to reach another gap in the floor. Jump across the gap to the left to find the codex.
Toy: Barren of Hell
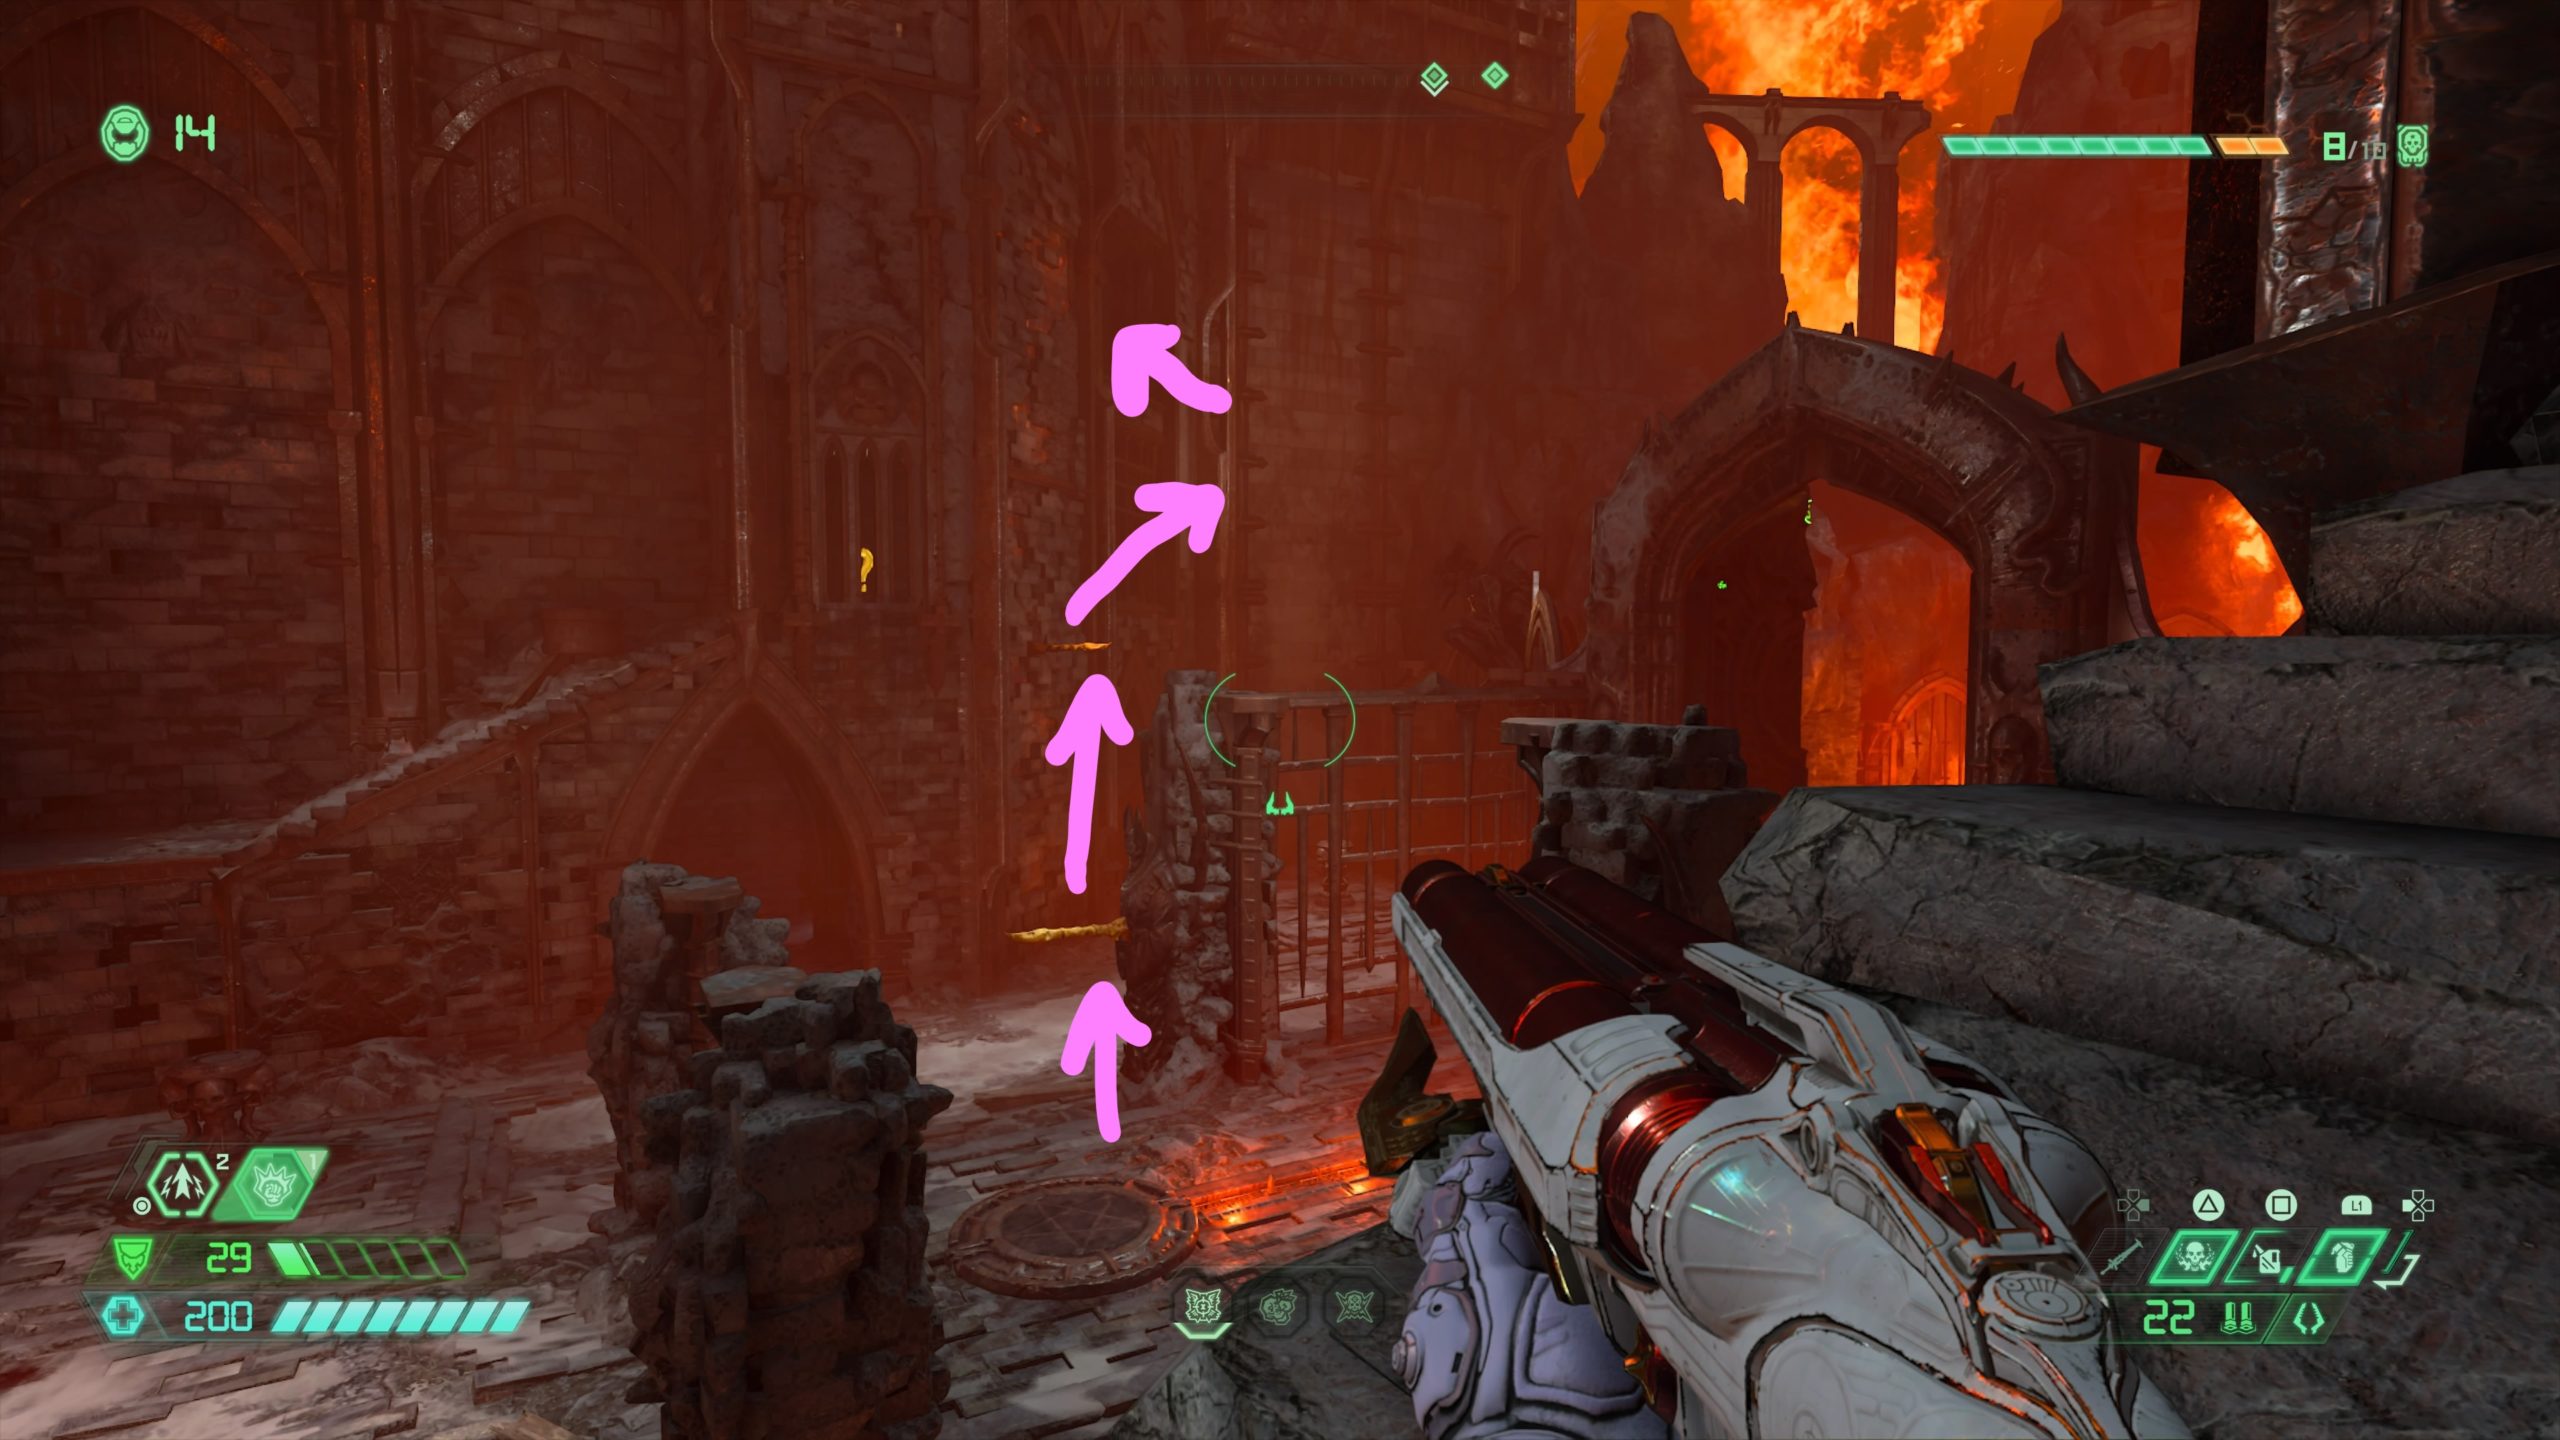
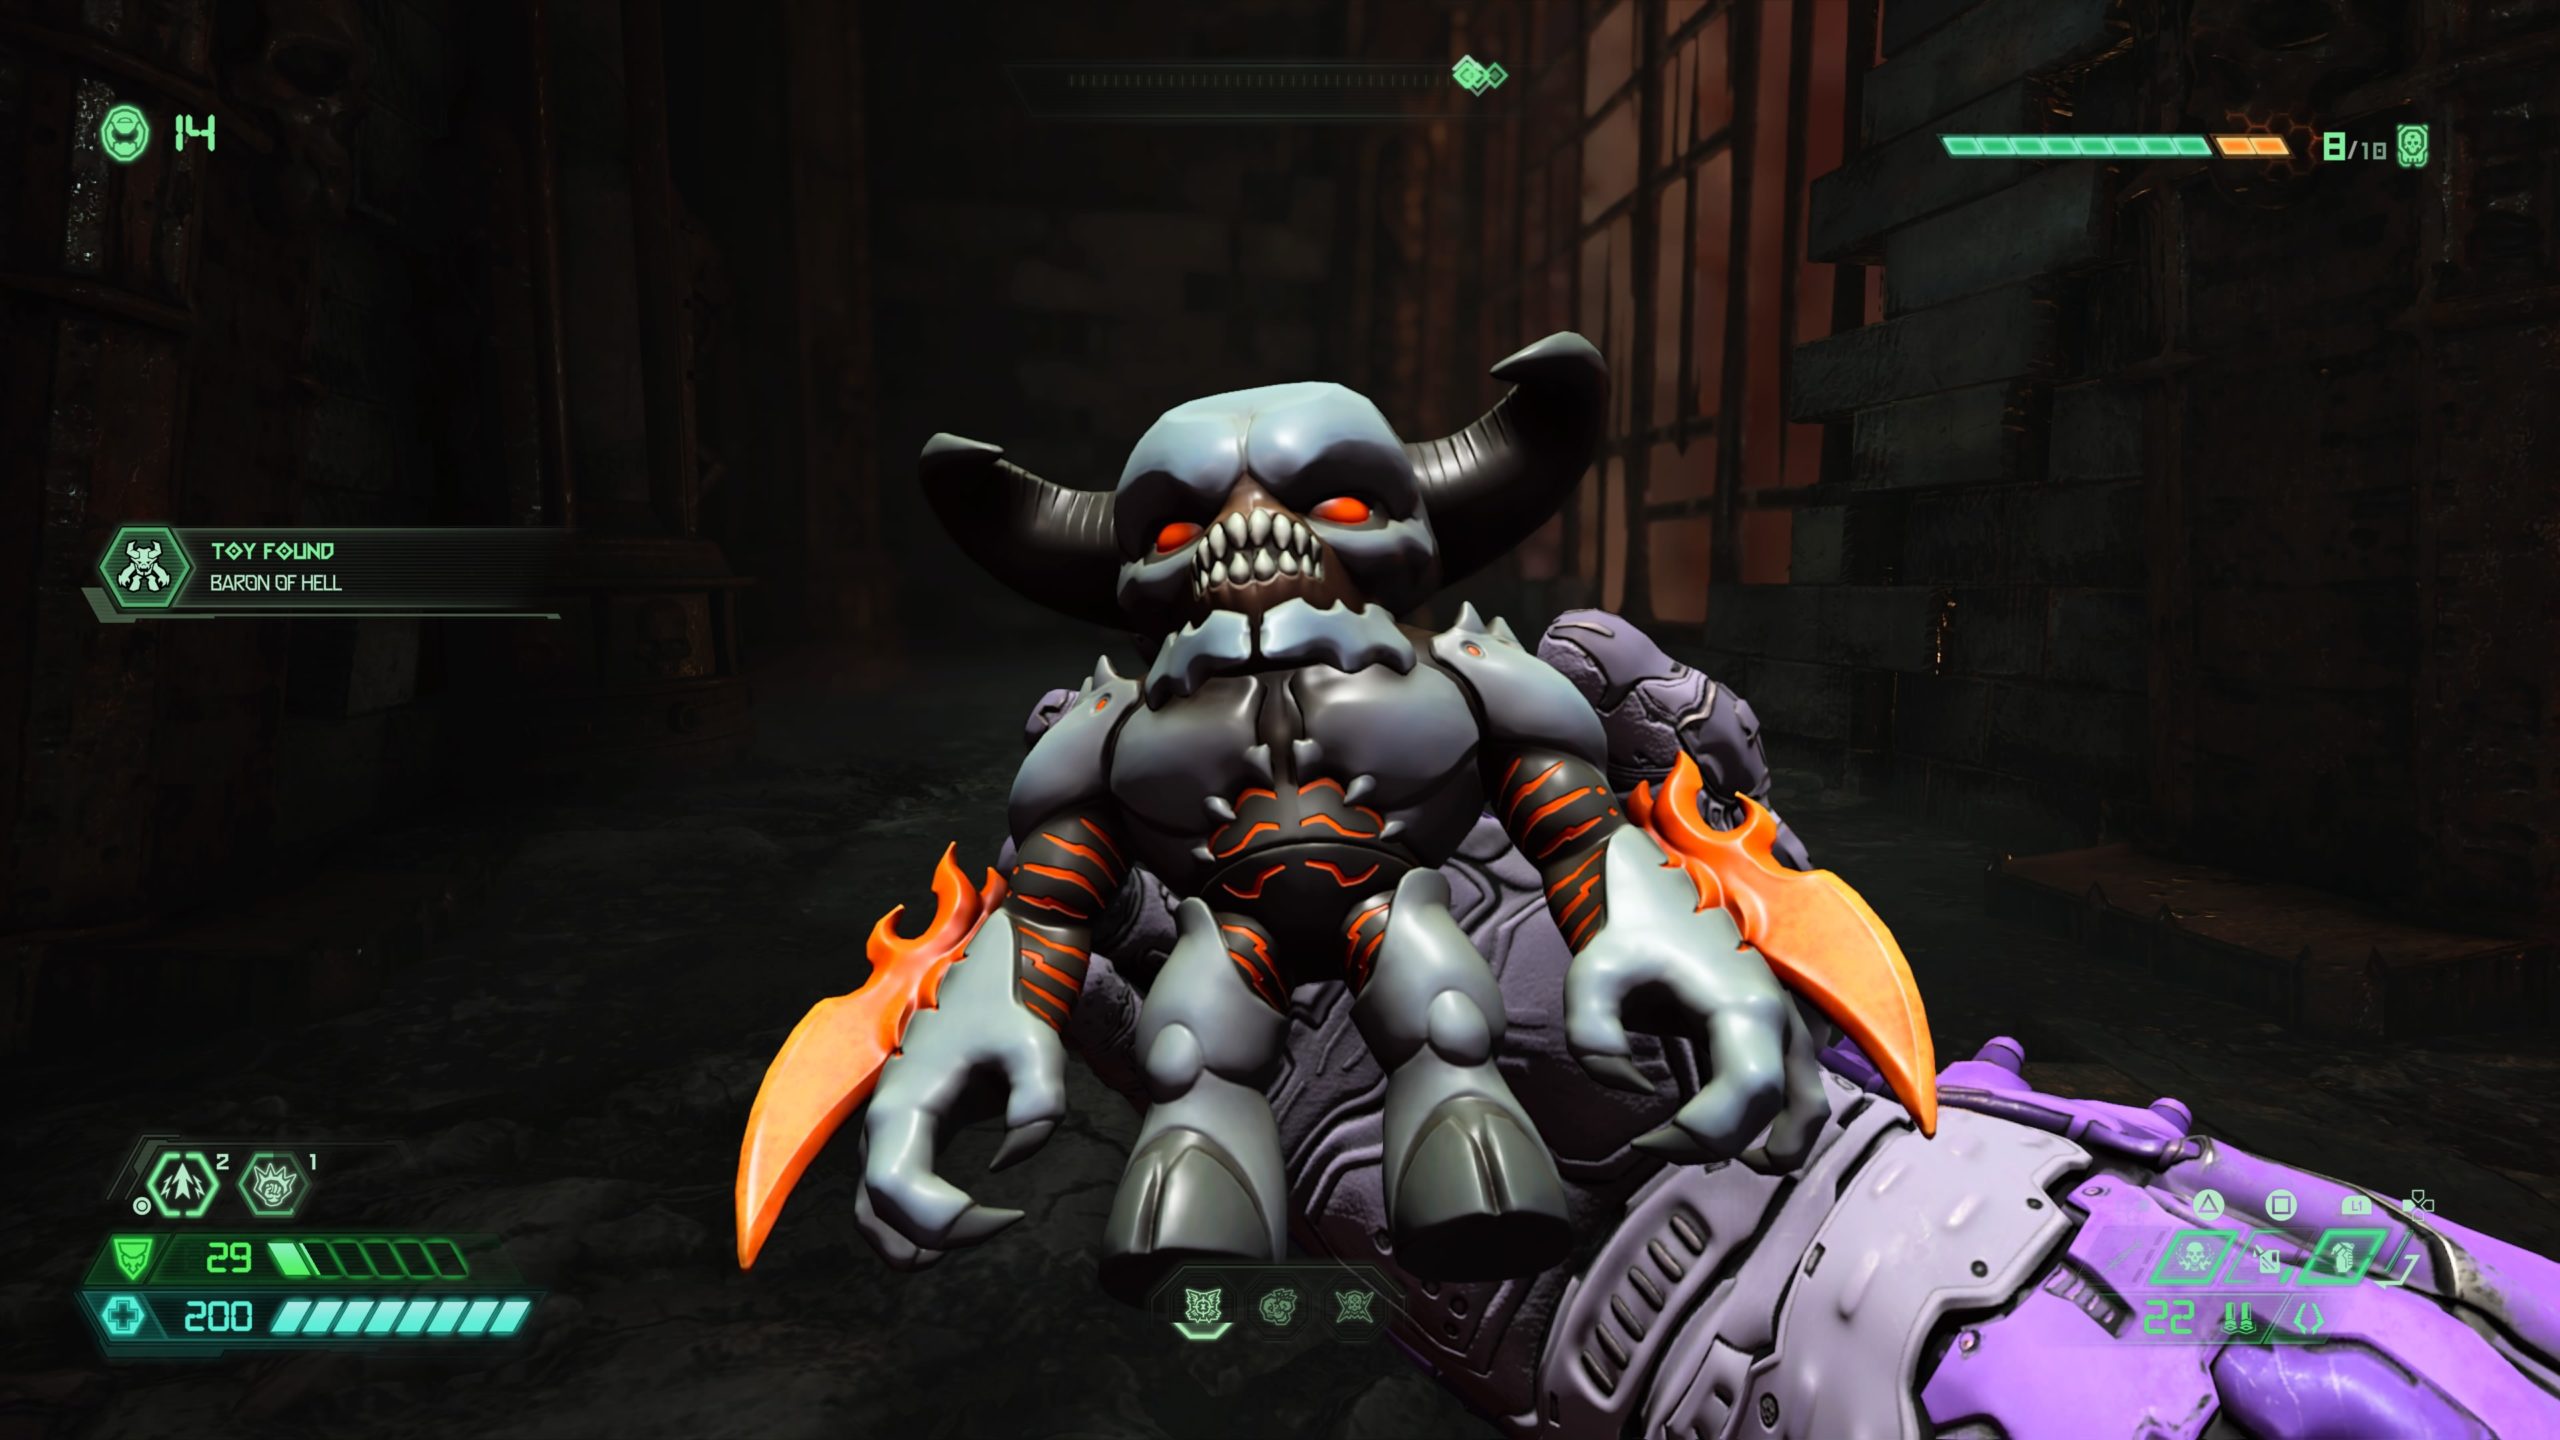
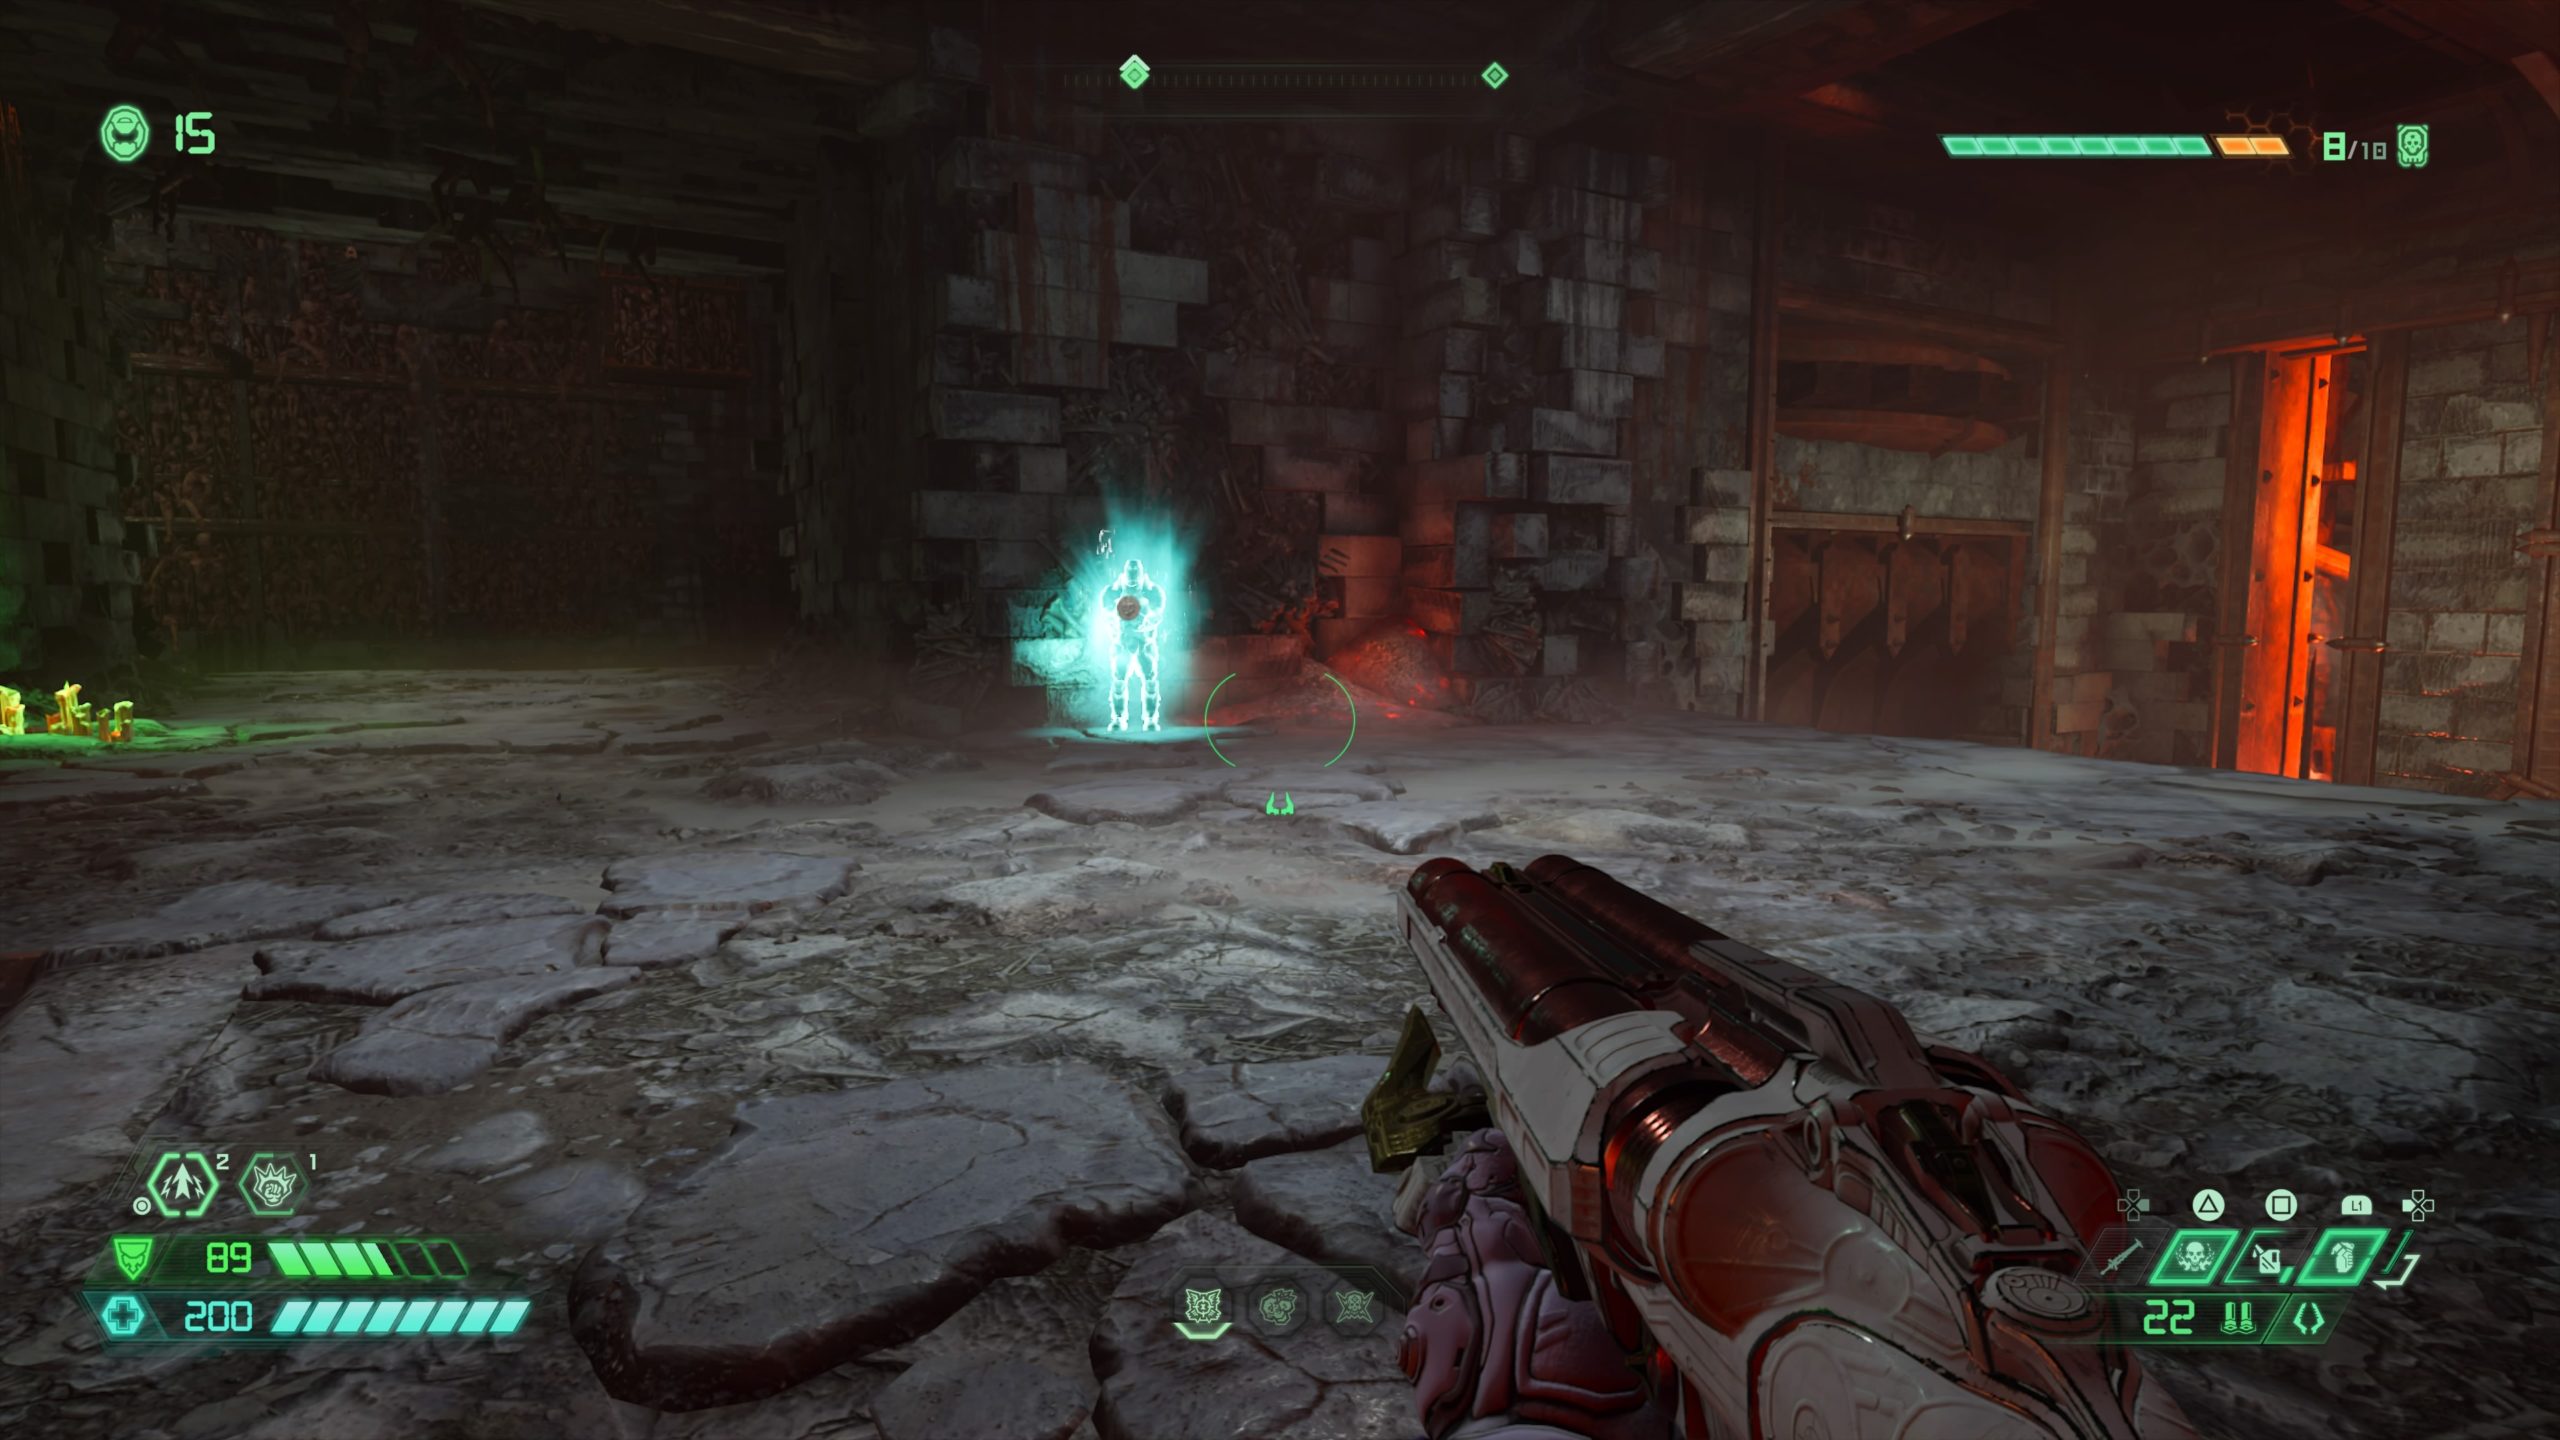
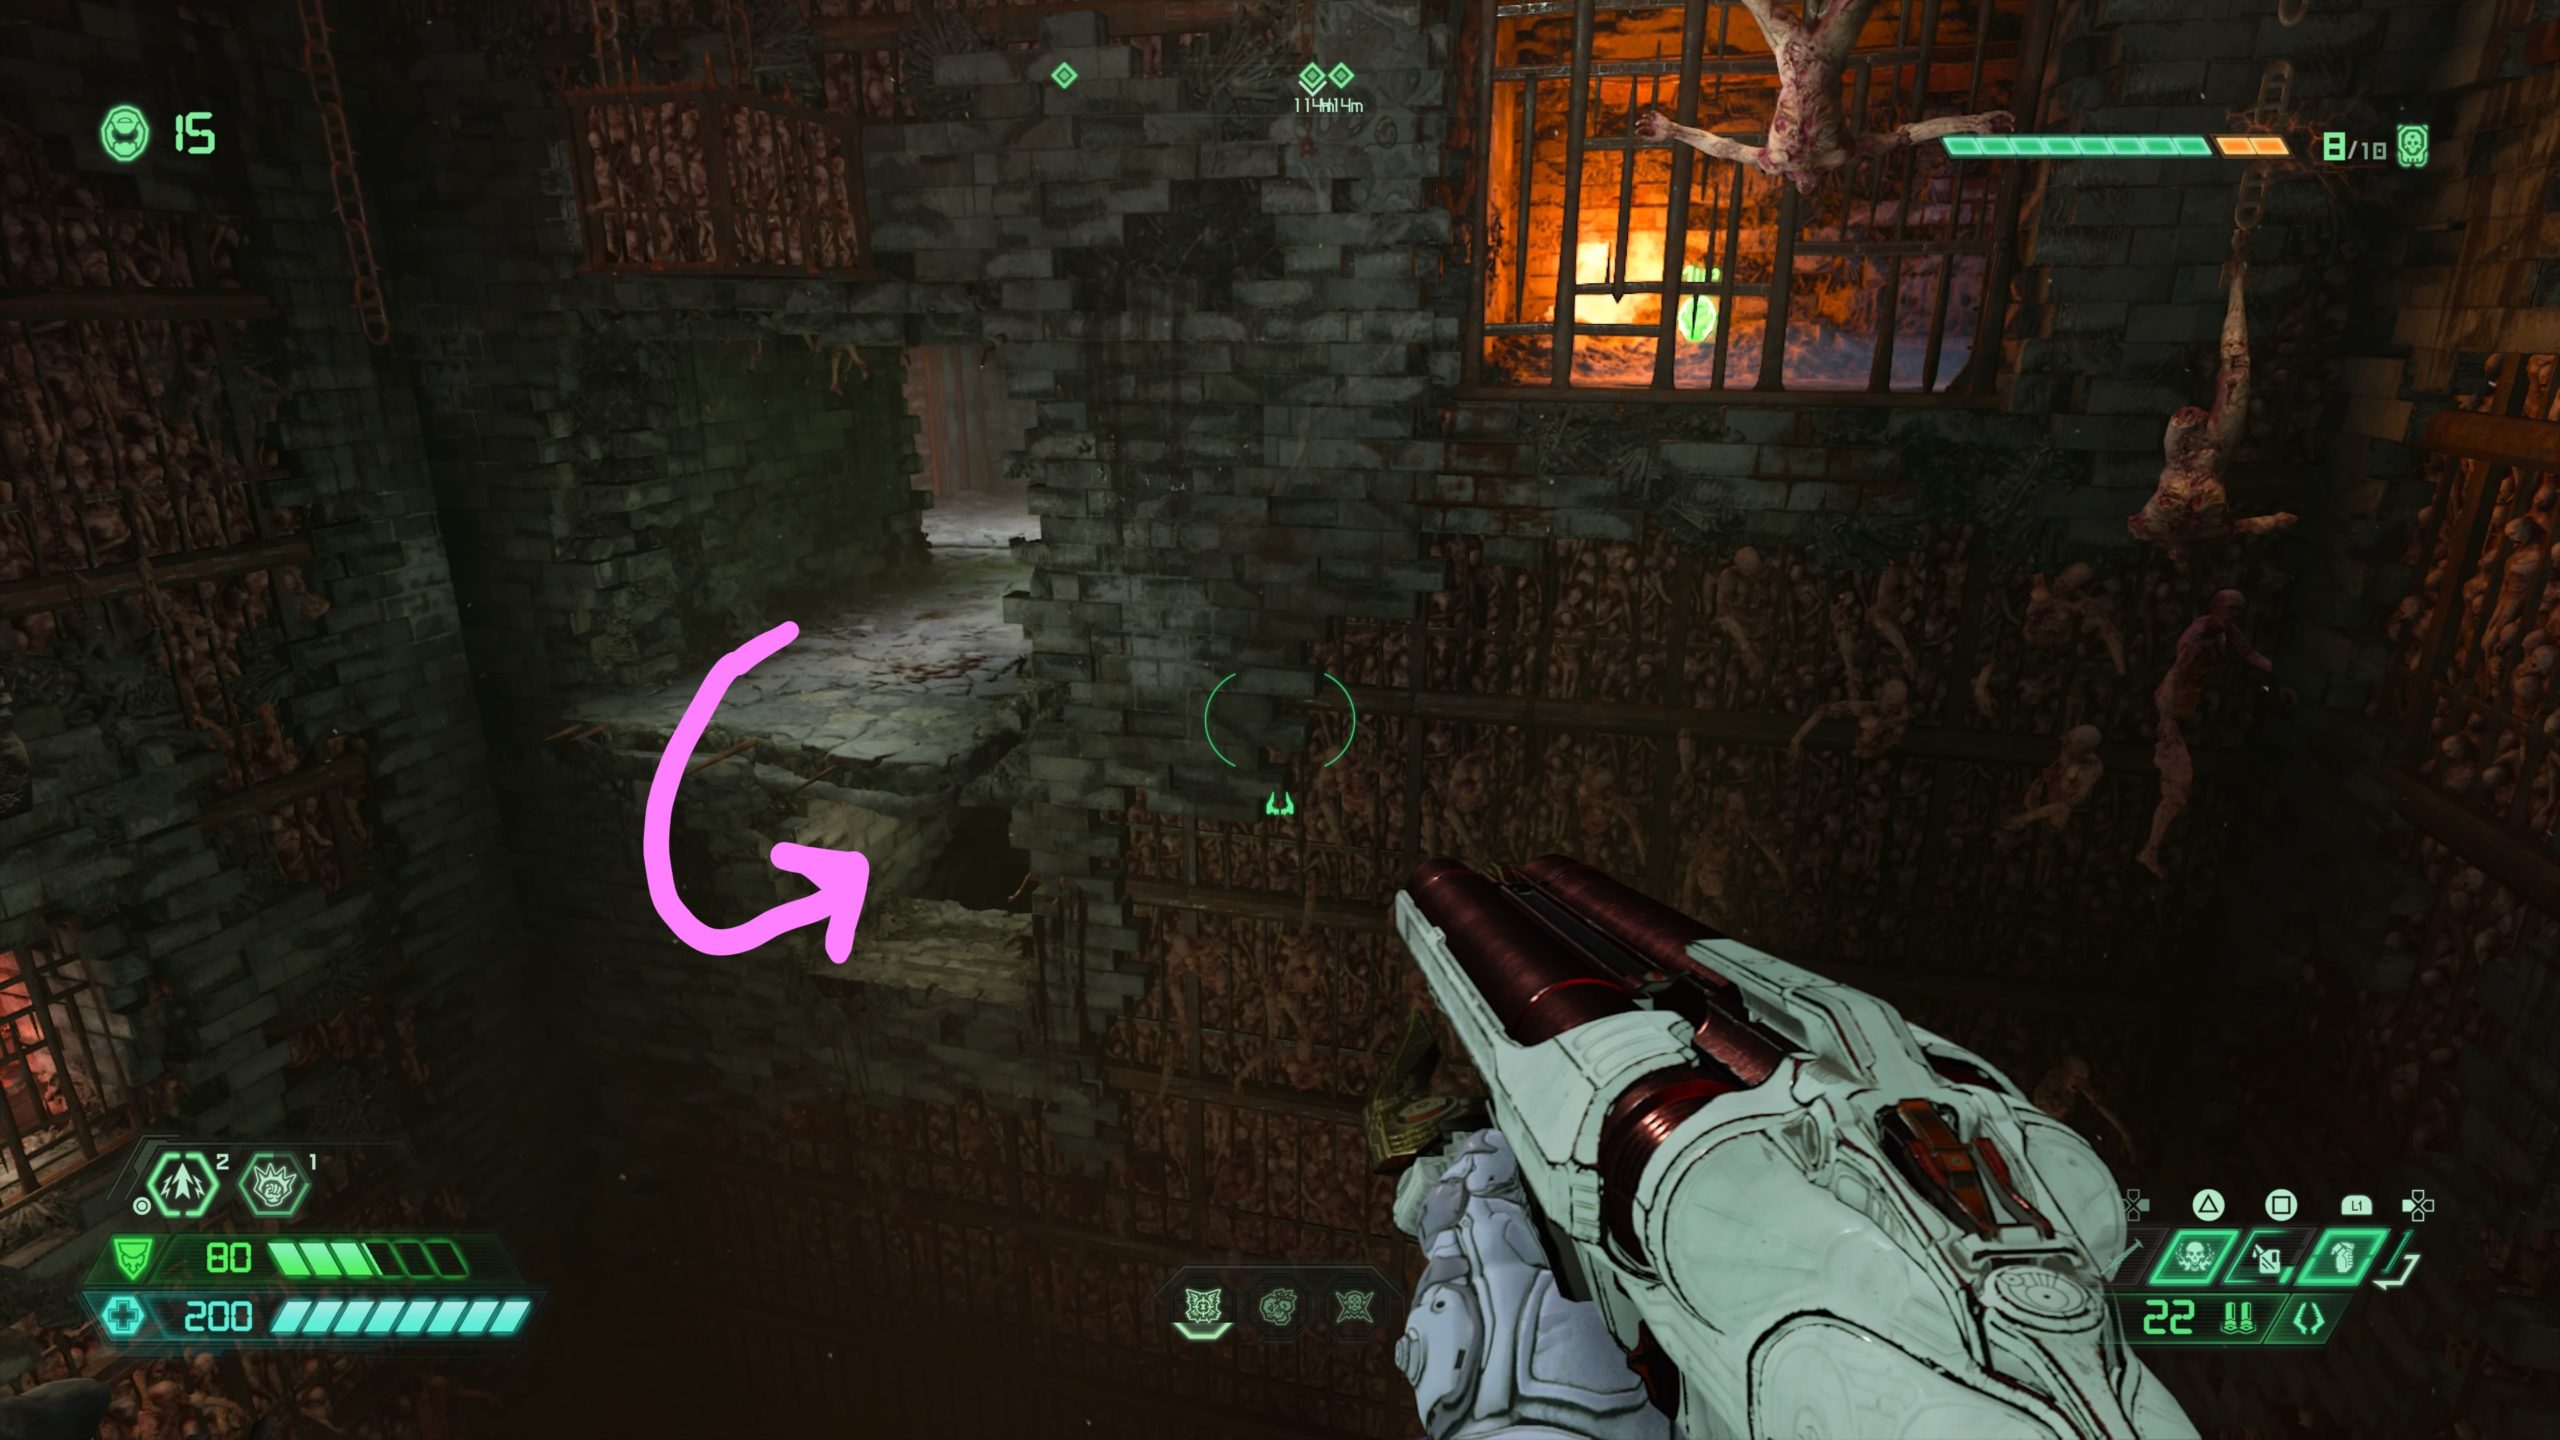
From the codex, drop down the nearby hole and head through the nearby doorway to reach a courtyard. To reach the collectible behind the bars on the other side of the courtyard, you will need to use the spin bar on the left section of the main gate to reach another spin bar on the adjacent wall. Use that bar to reach a climbable wall on the same side as the spin bar. Climb up to the top then jump into a small room and drop down the hole to reach the toy.

Praetor Suit Point
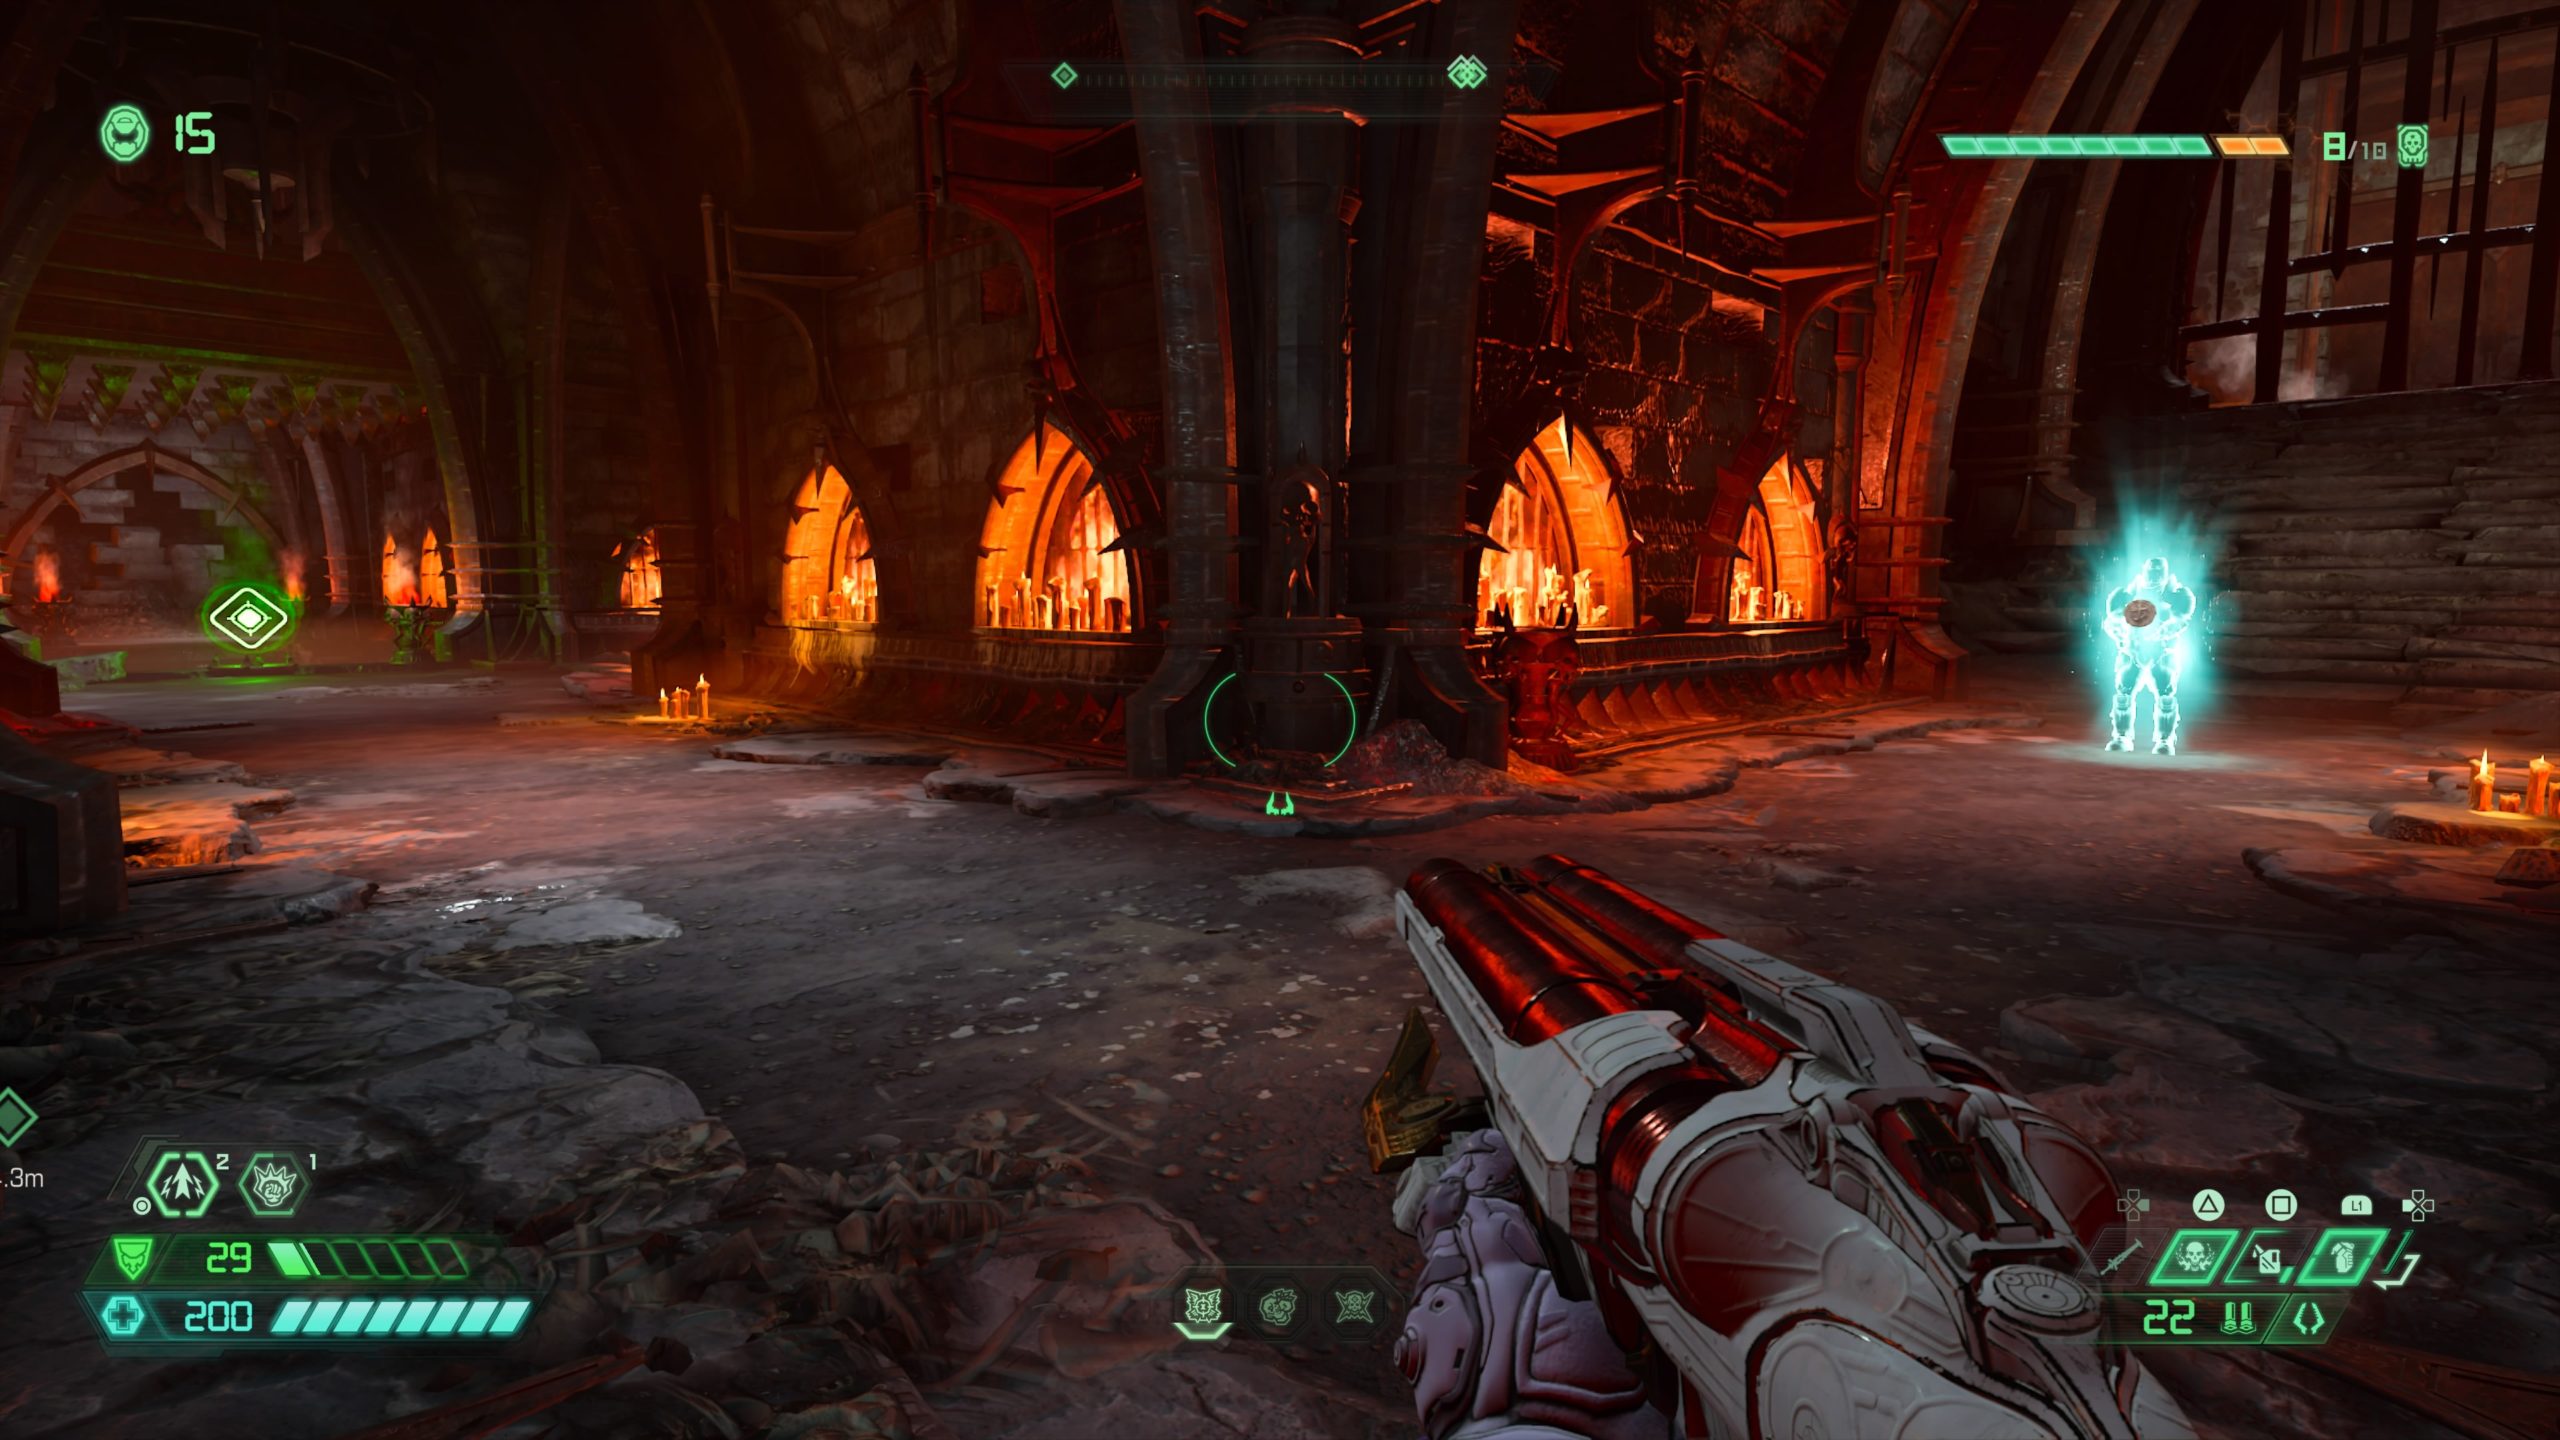
From the fast travel point, take a right and follow the path to the end to find the Sentinel holding the point.
Mastery Token

From the Praetor Suit Point, head left past the green diamond and under a spiked ceiling. After the spiked ceiling, take a right up a flight of stairs to find the mastery token on the other side of the room.
Praetor Suit Point
With your back to the mastery token, take the left doorway up a flight of stairs to find the Sentinel holding the point at the top.
Toy: Gladiator
 Facing the Sentinel, take the left path to the end of the ledge. Under the ledge there will be a small opening that you will need to head through. The easiest way to reach this is to walk off with your back towards the gap. Once you walk off, you’ll need to dash onto the ledge below. Follow the path past the secret encounter then climb up the wall at the end to enter a hidden room containing the toy.

Album: KEEN – You’ve Got to Eat Your Vegetables!

From the fast travel point, head right climbing a flight of bloody stairs. You will then need to head through the area with spinning fire column via the climbable walls then jump on top of the moving metal cages on the left side of the room to reach the room above. Head through the left doorway past the secret encounter to find the album.
Toy: Doom Hunter / Mastery Token
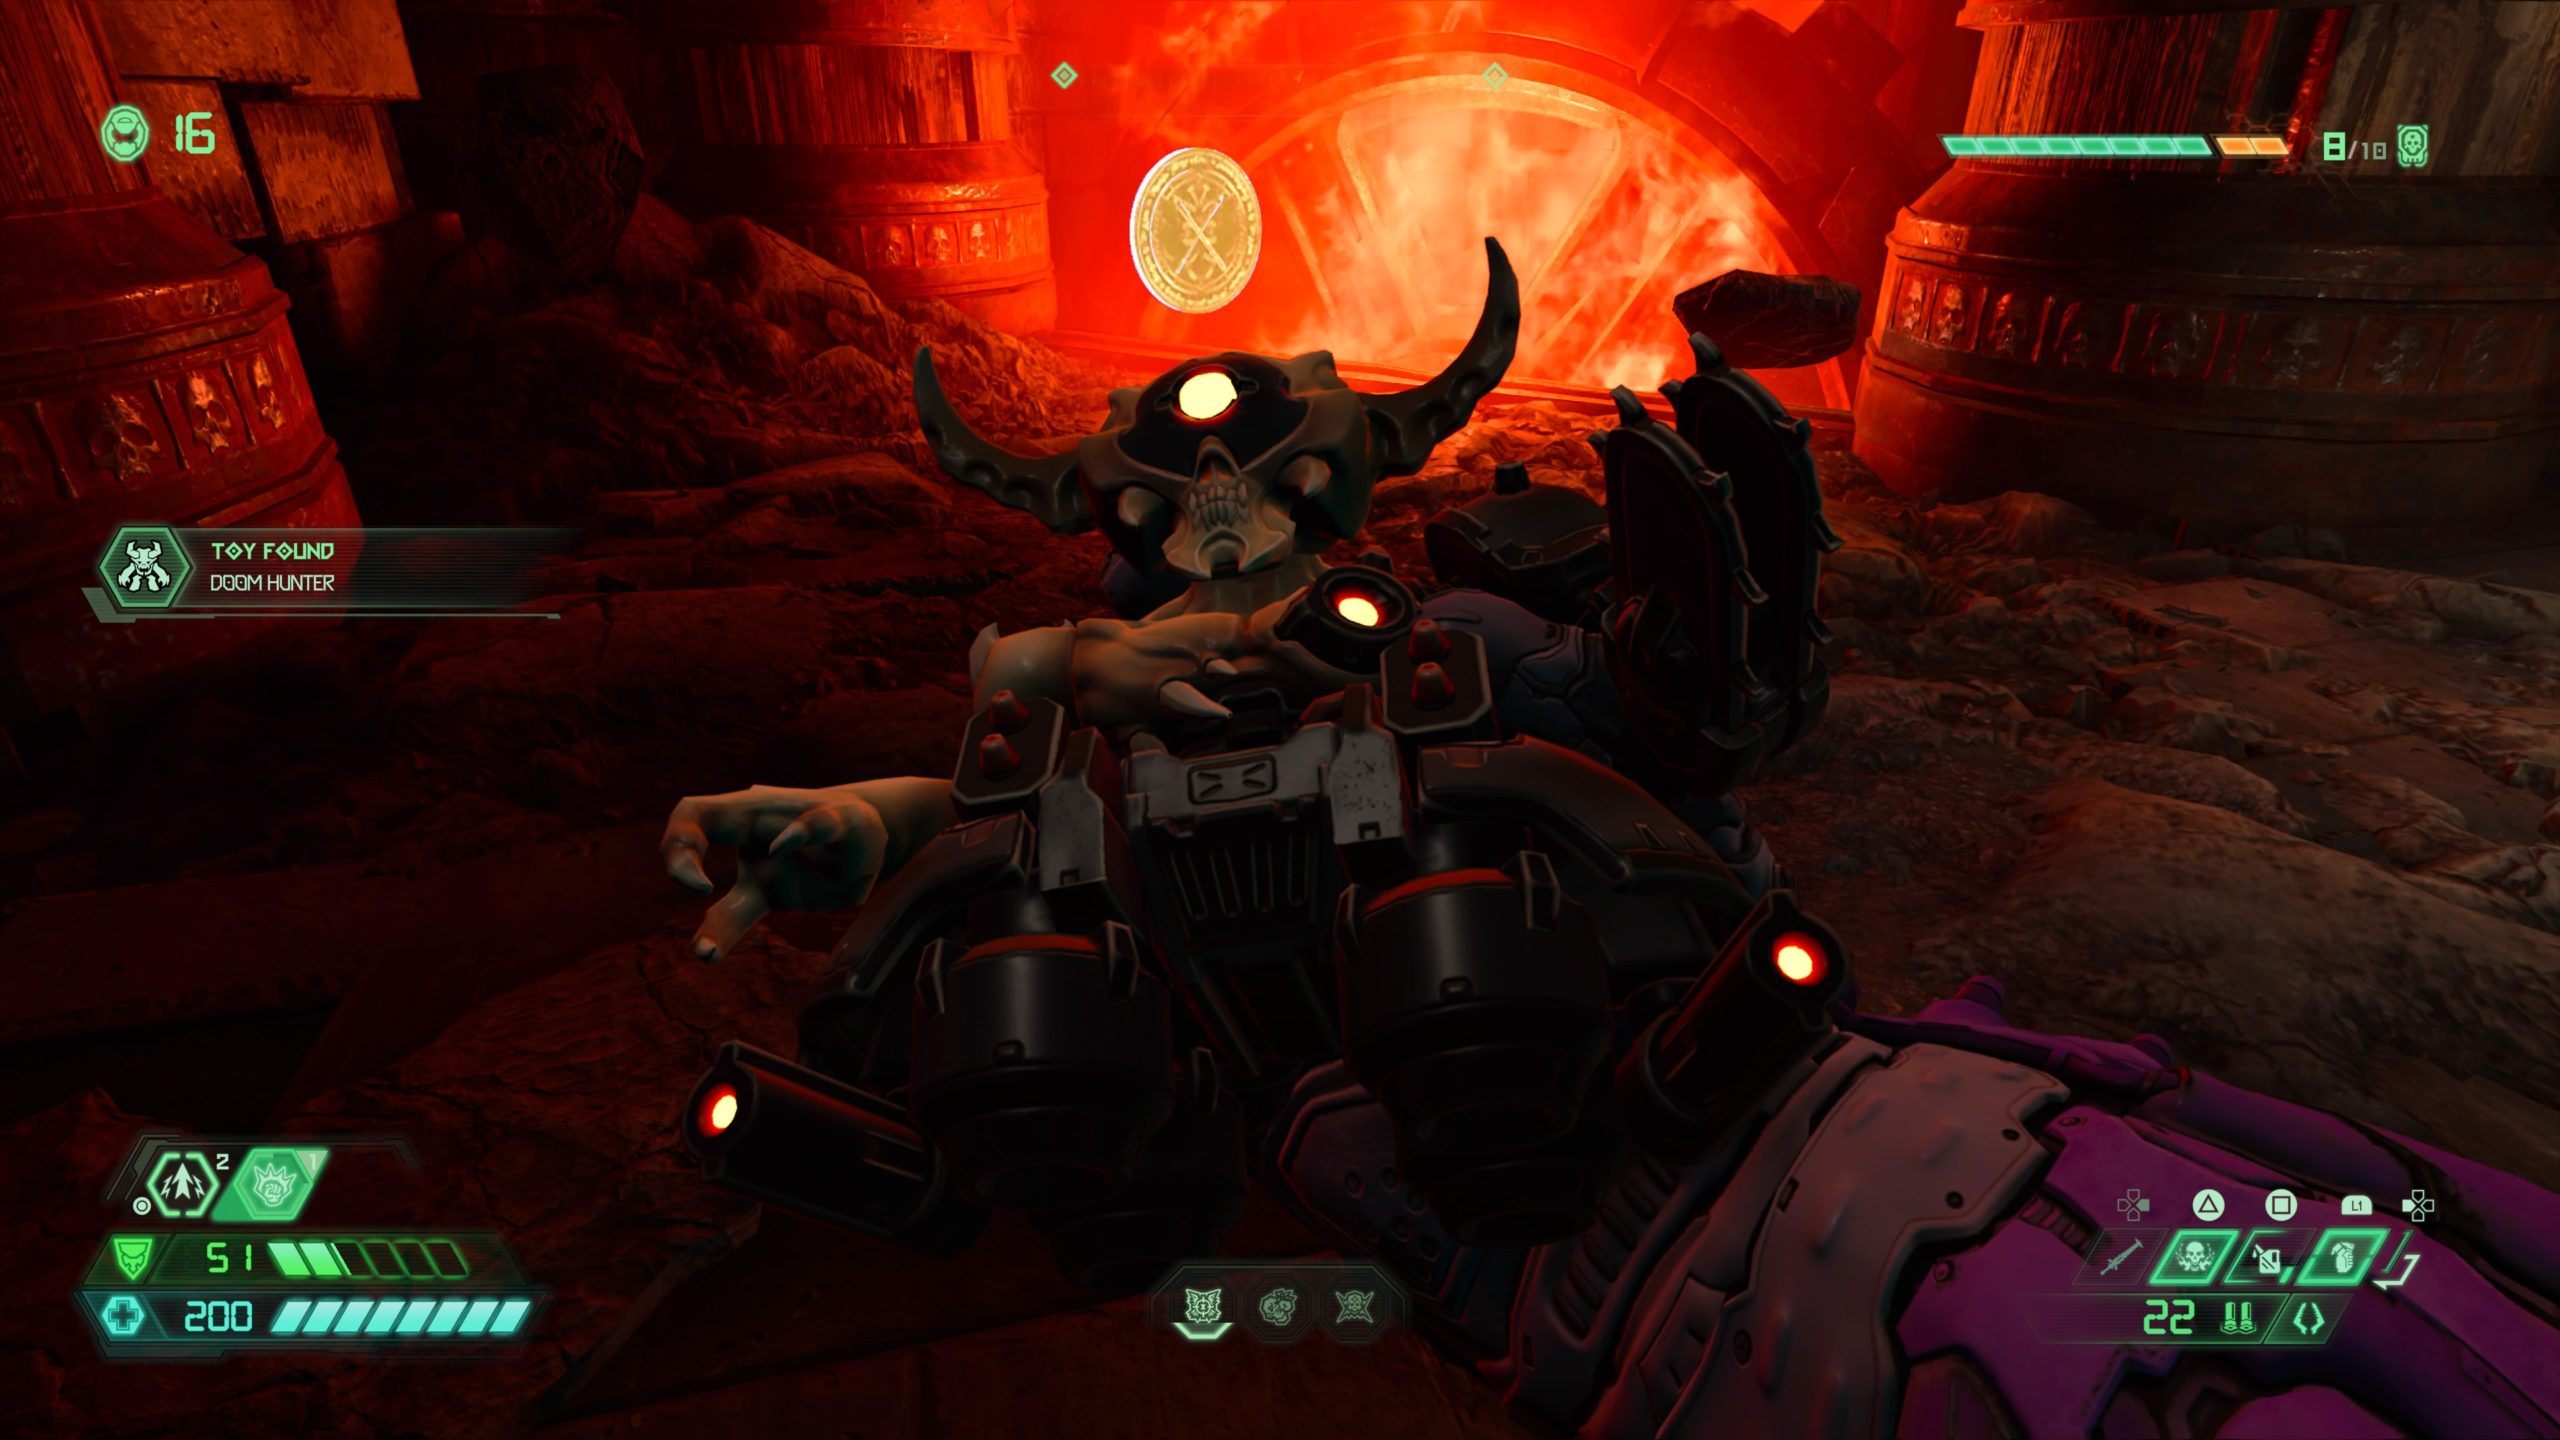
From the album, head back down the stairs then take a left under the moving press. Stay in the middle of the two moving presses to spot a cracked wall under the first press. Melee the wall to find these collectibles.
Cheat Code: Famine Mode

From the above collectibles, exit the room and head right to reach a big open room with a spinning rectangle with spikes in front of you. Head to the other side of the room past the spiked rectangle through the two moving presses. In the next room you will need to drop down under the moving crates to reach a hidden area below containing the cheat code.
Codex: Story of Hell – Fuel the Eternal Flame Part I
From the cheat code, ride the cage up to the floor above then head down the hallway that does not have the moving presses to find the codex at the end on the right.
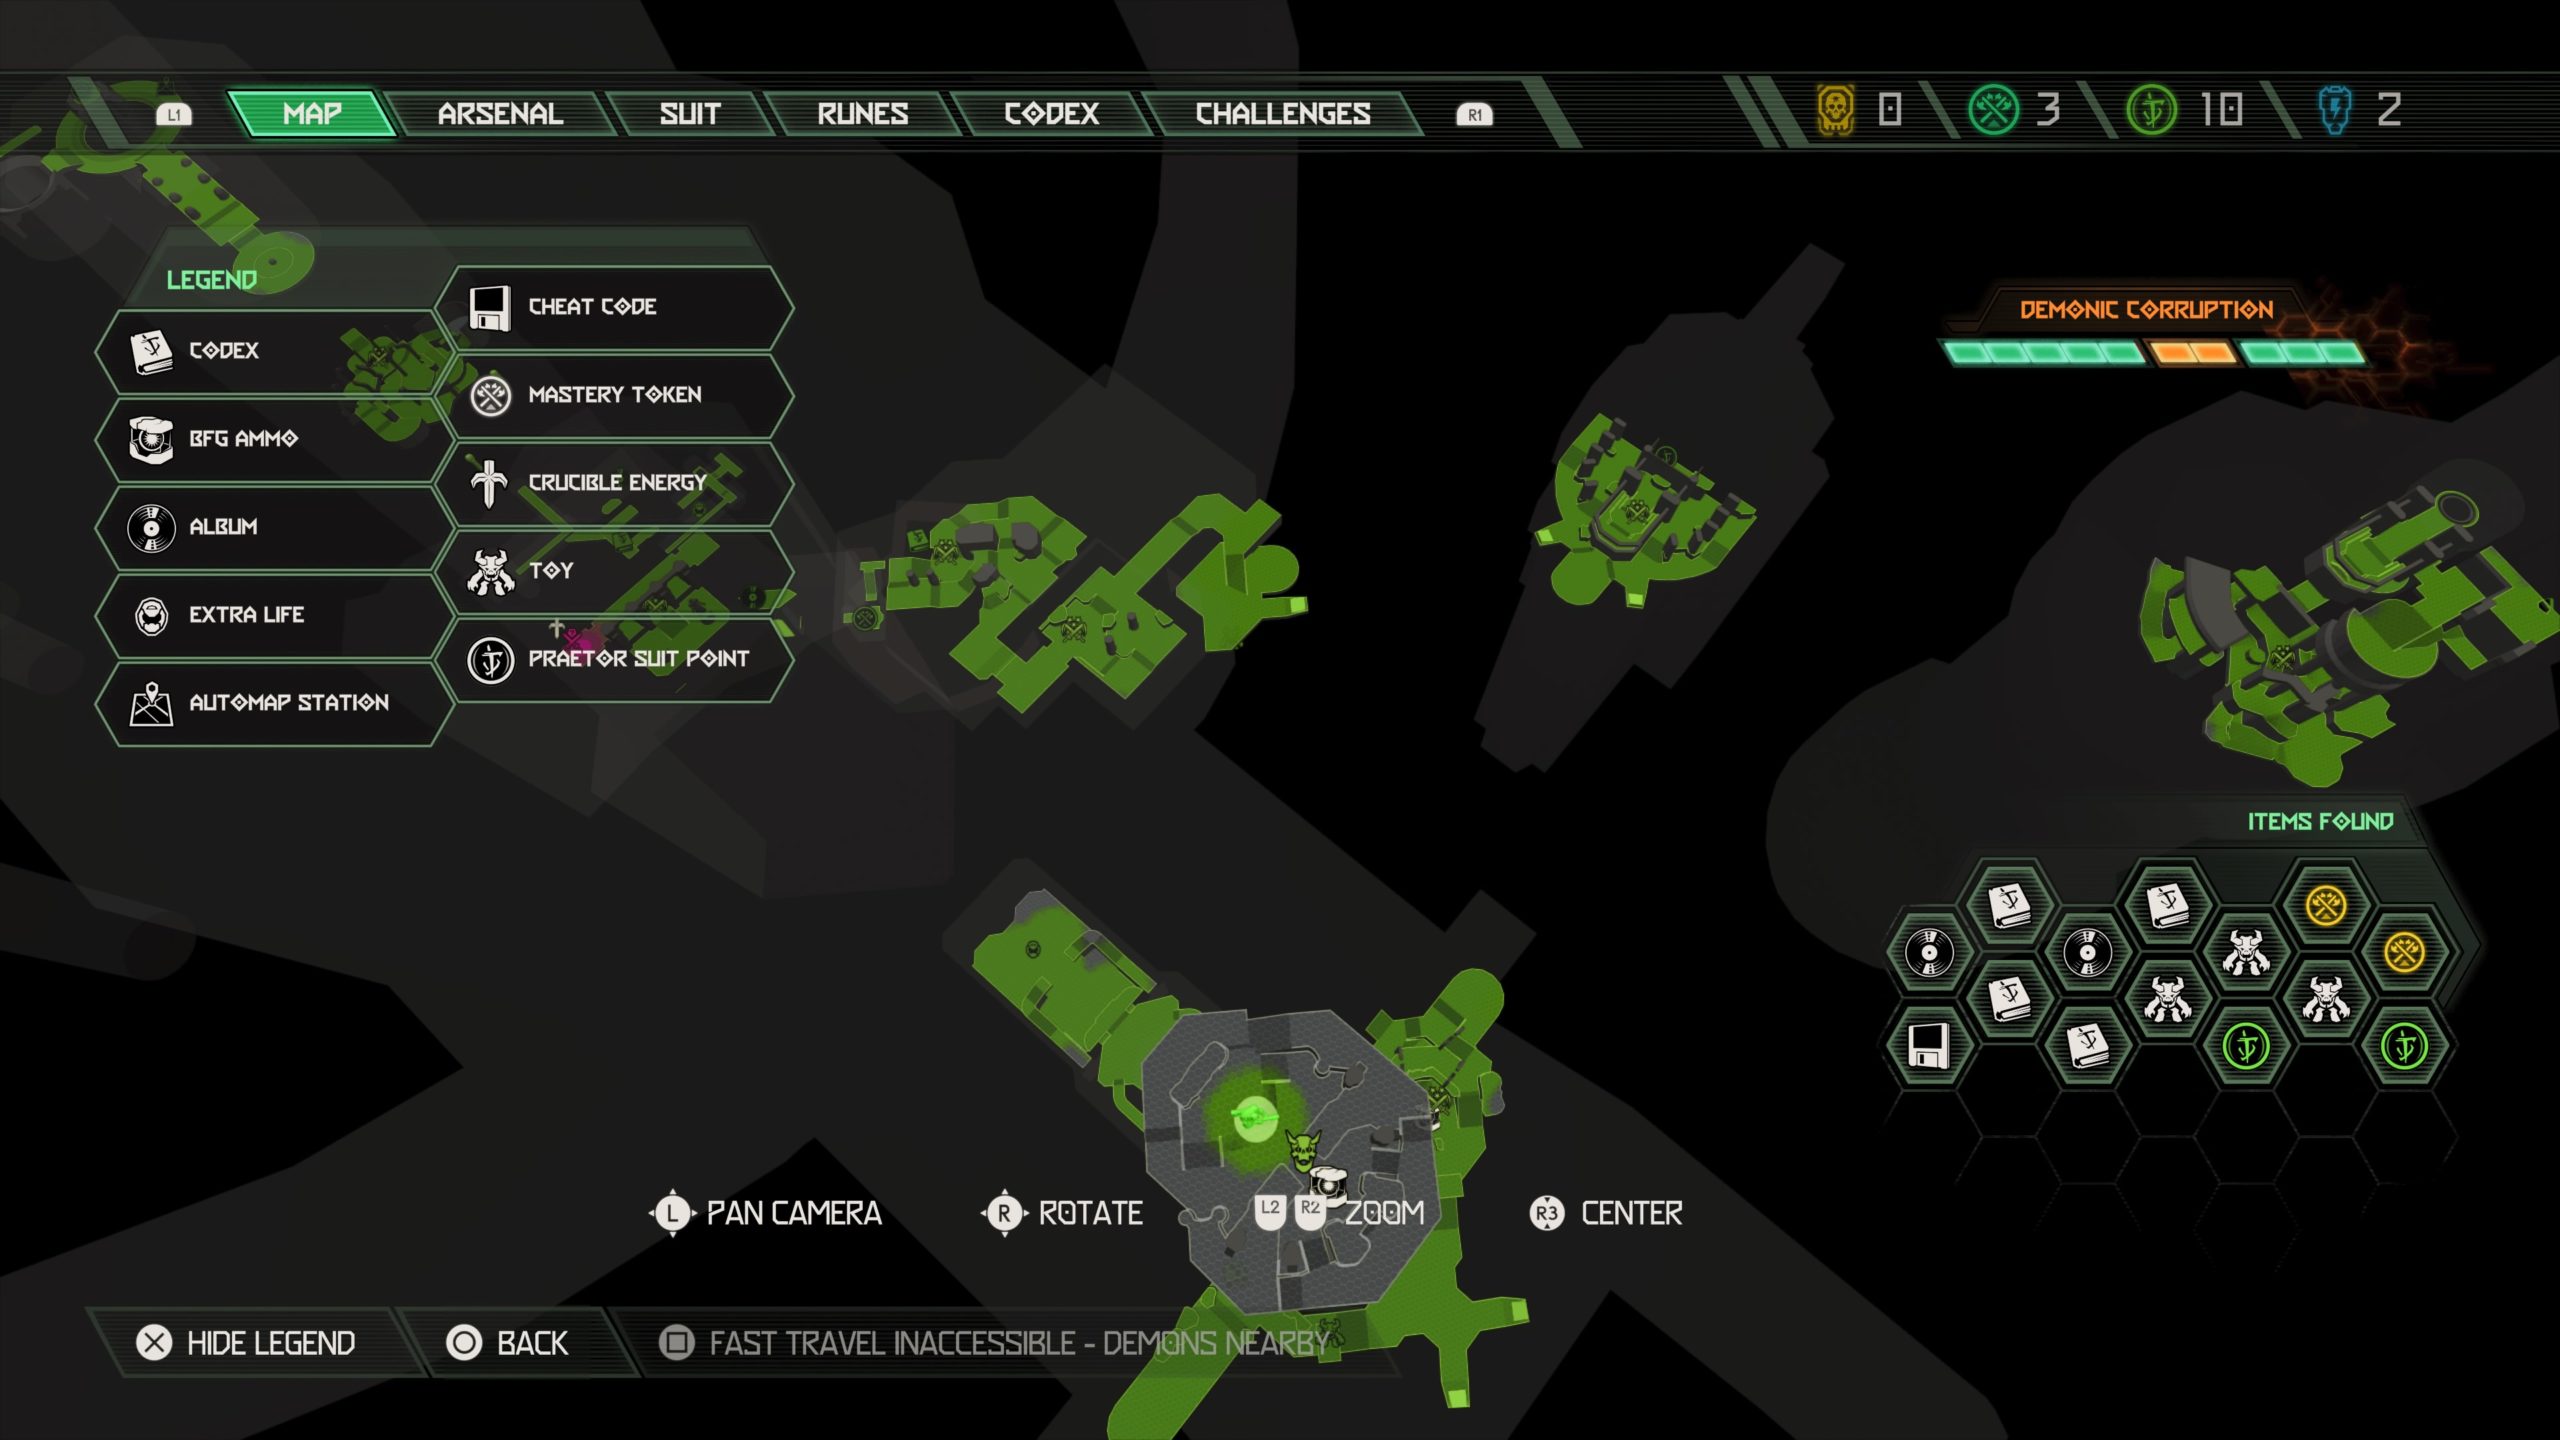
Praetor Suit Point

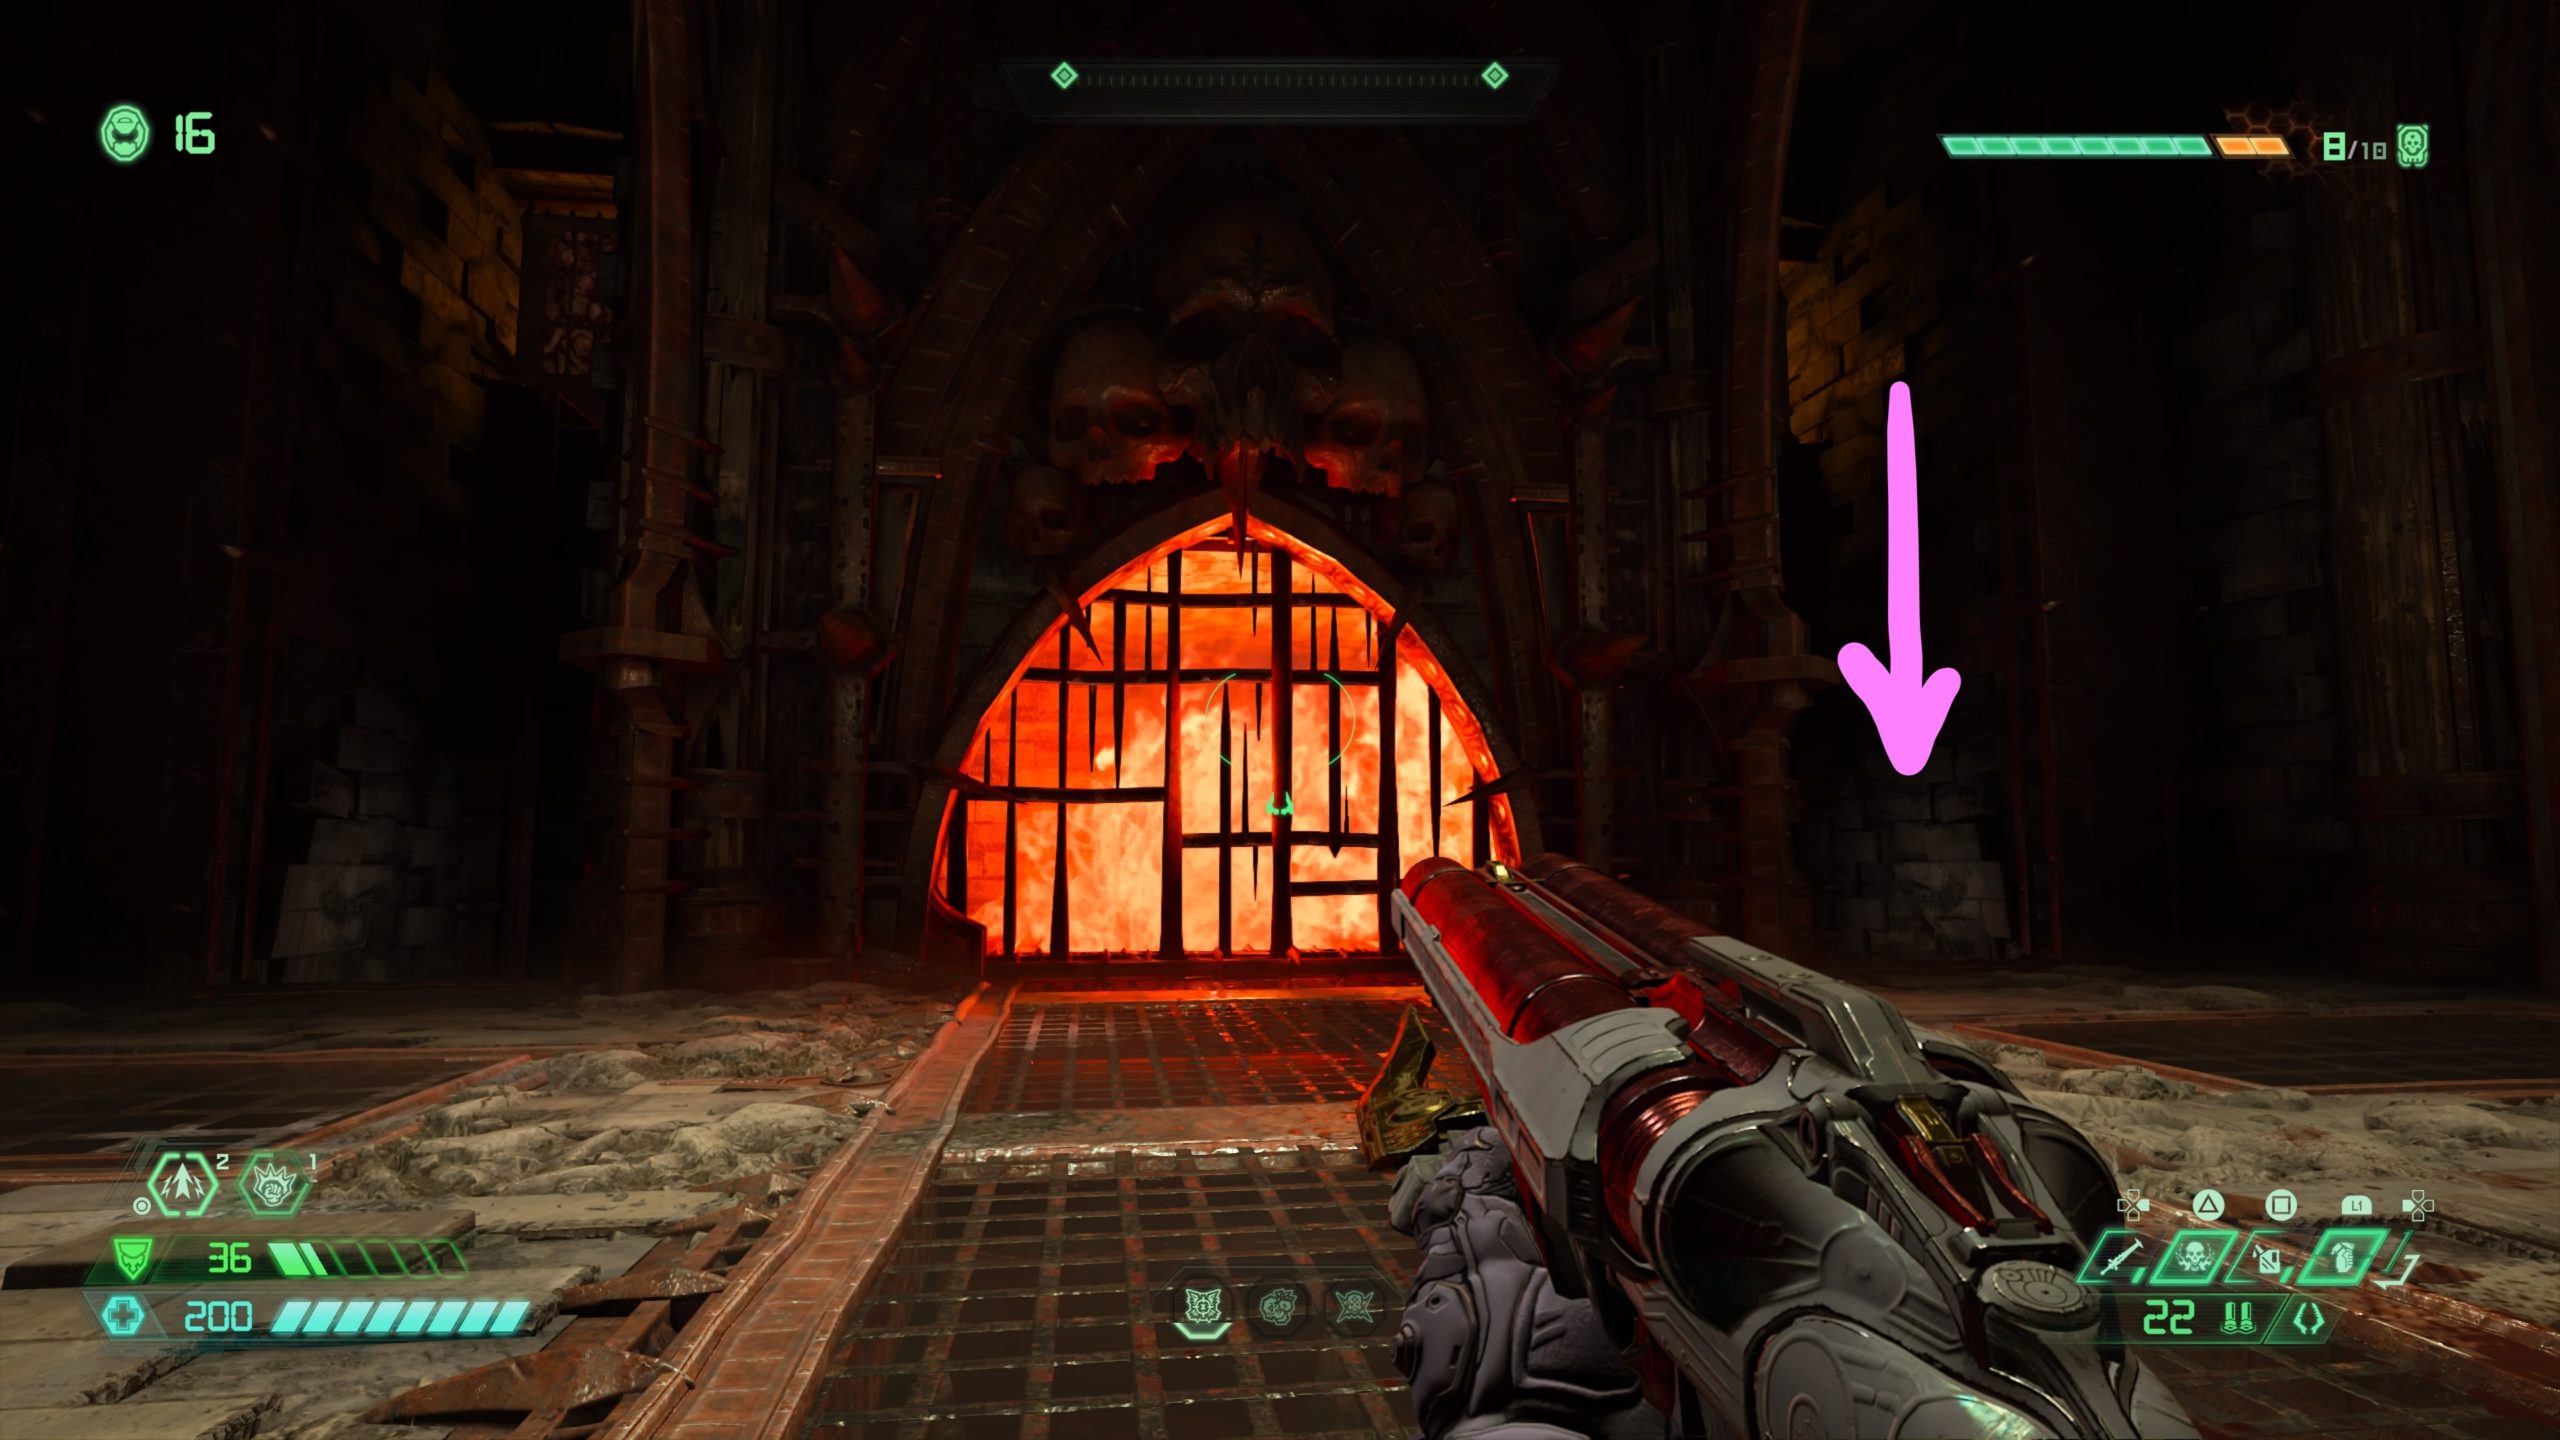
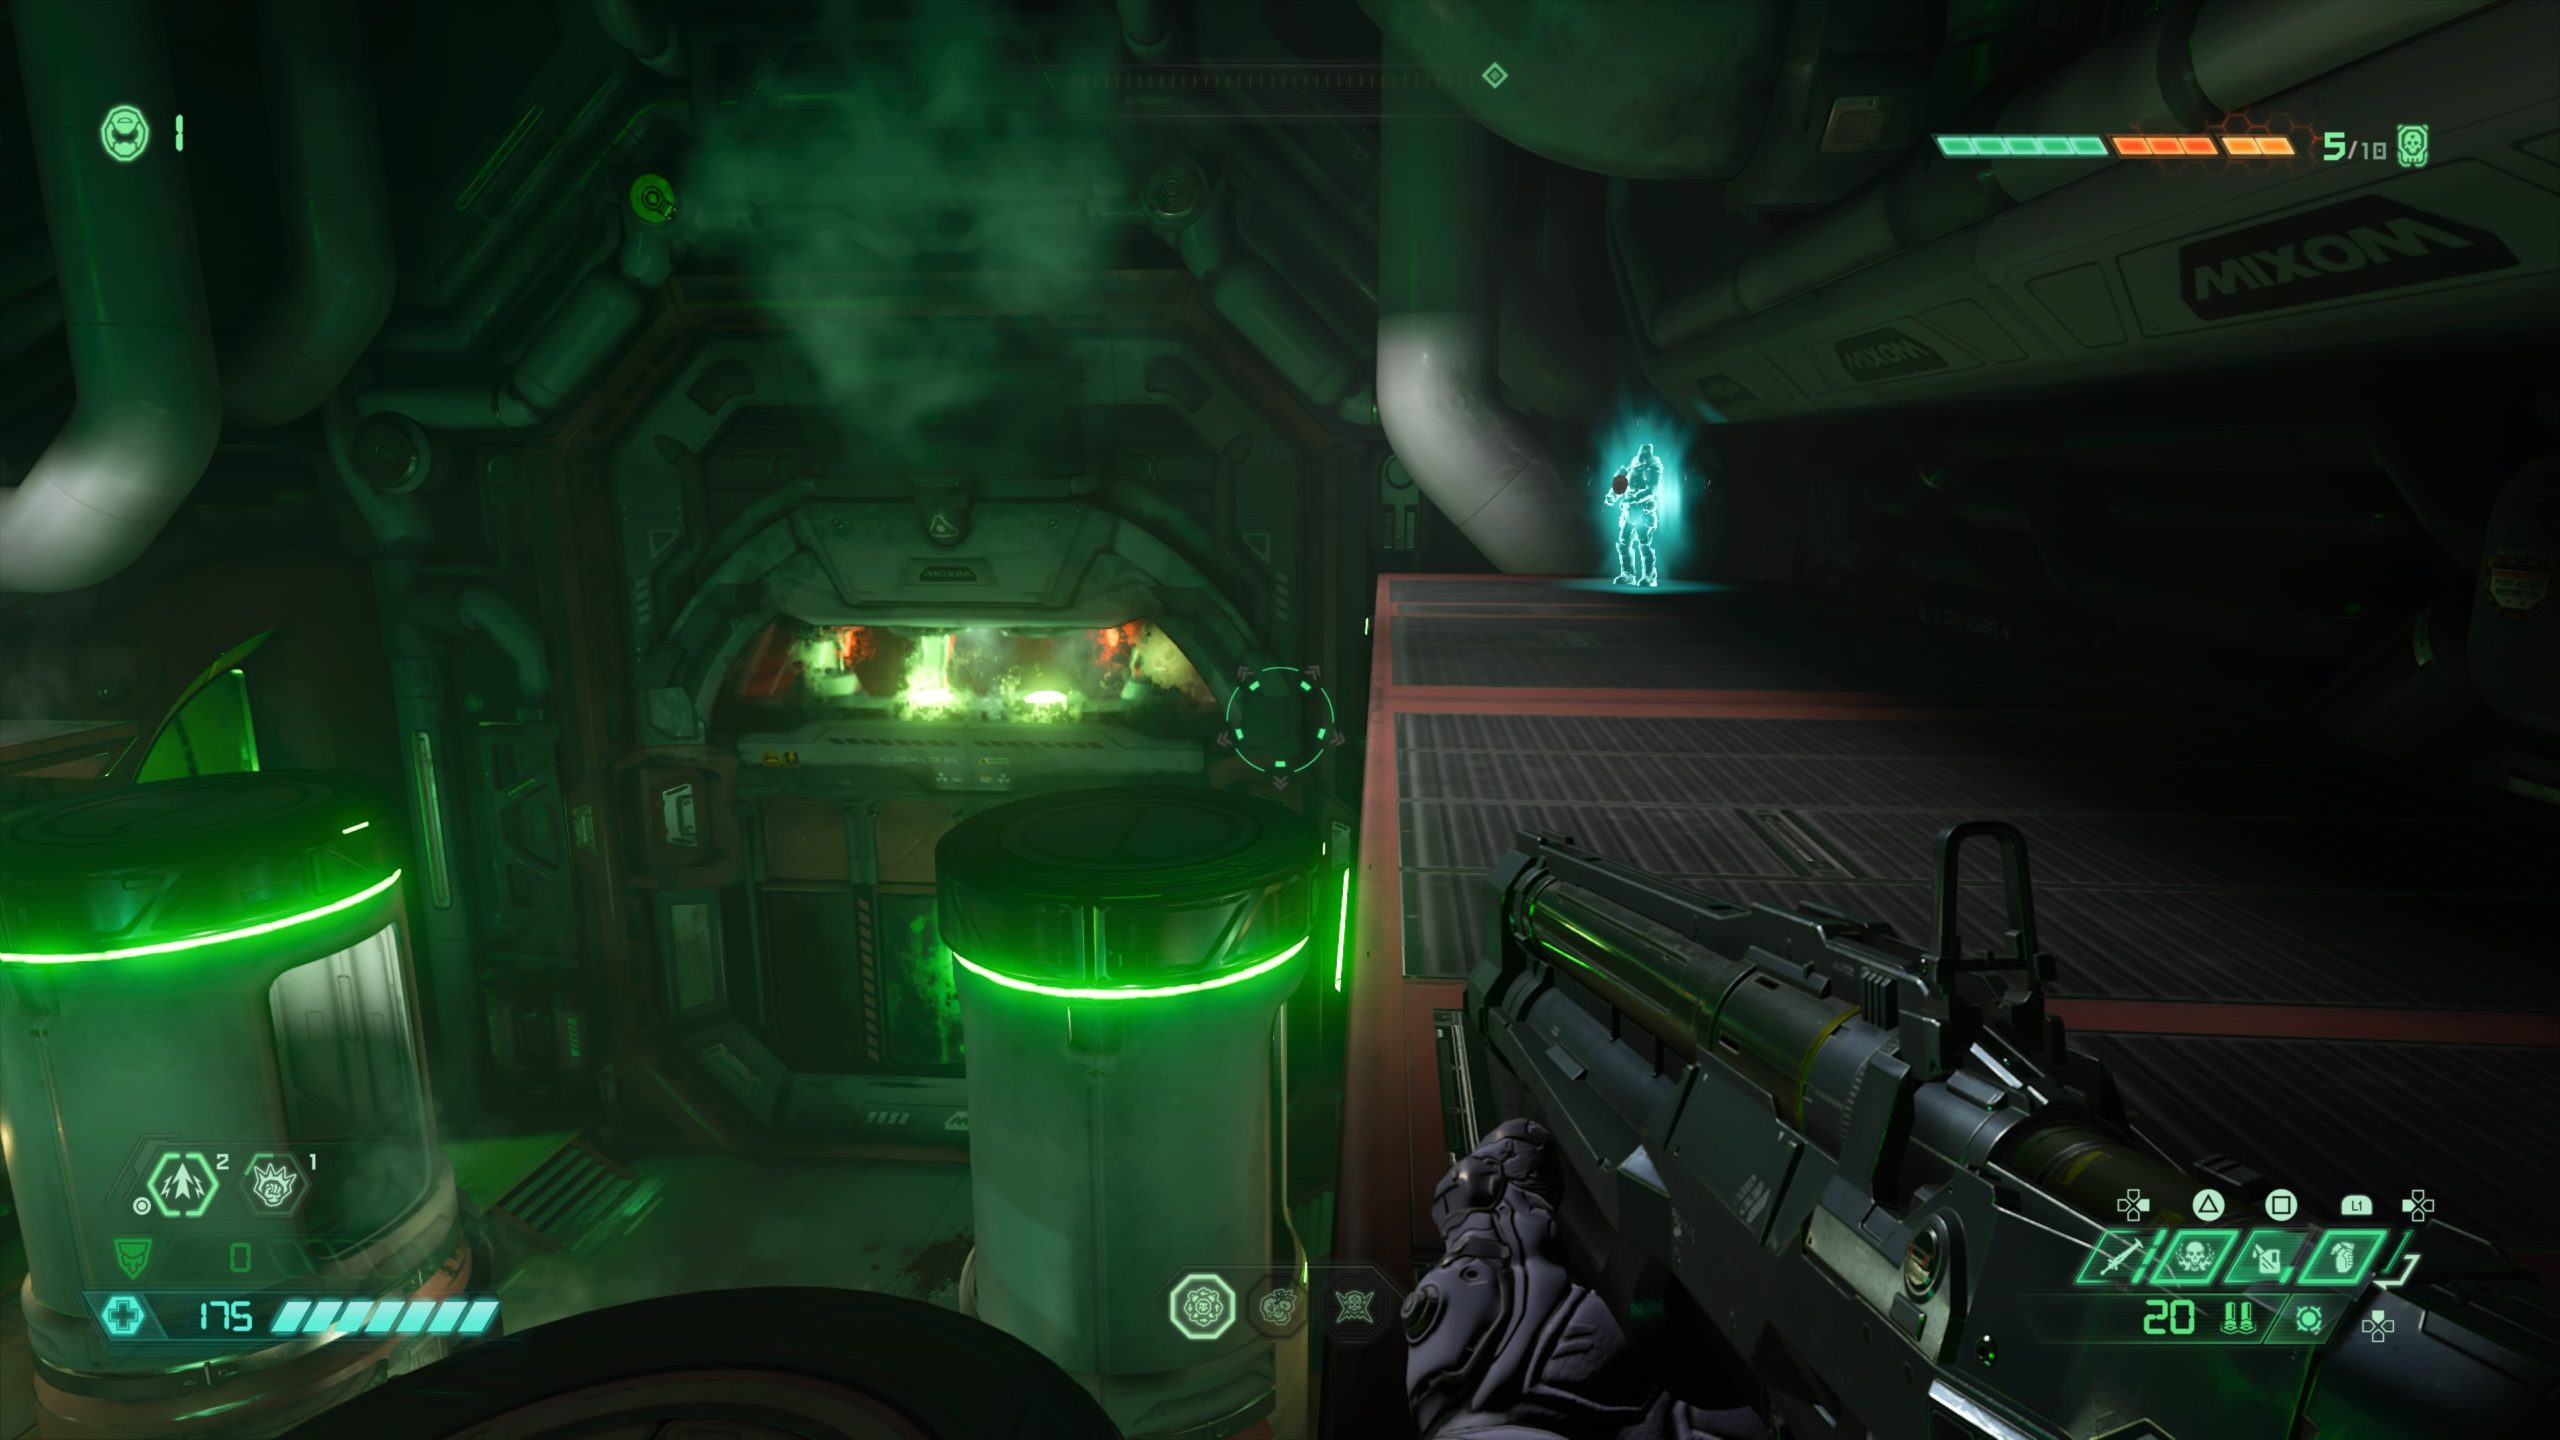
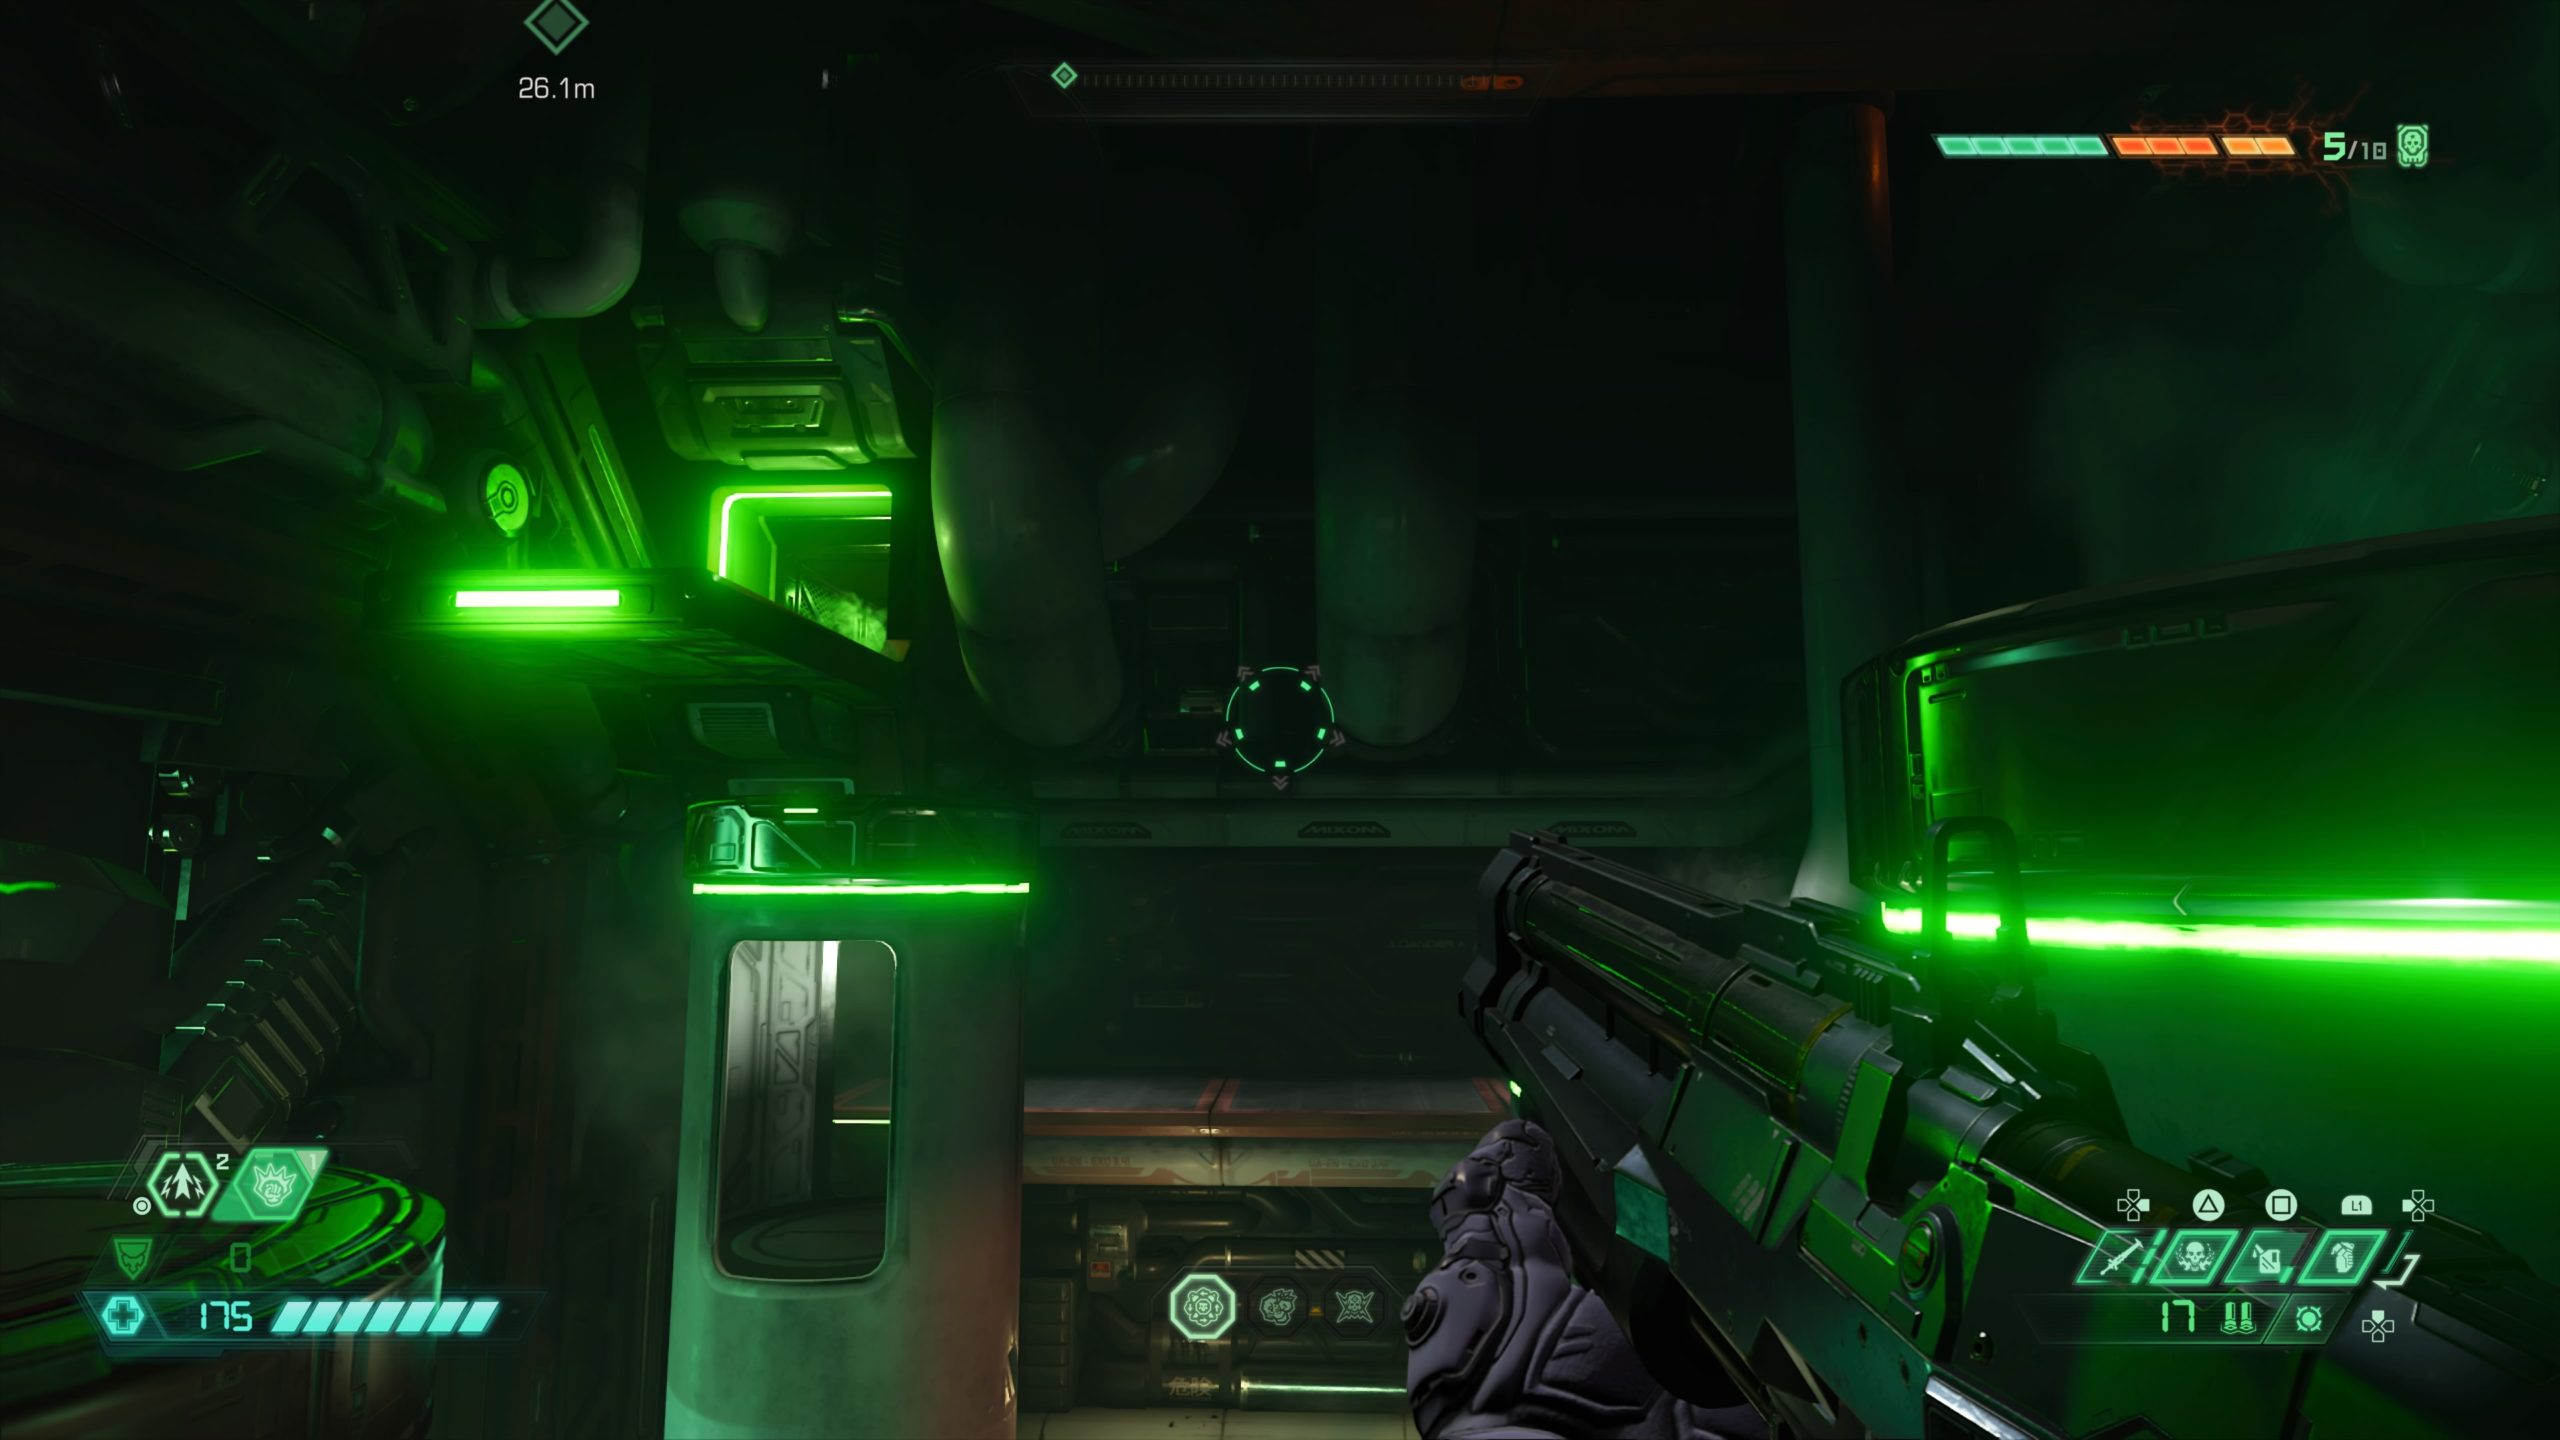
From the fast travel point, head to the other side of the room and turn around. Use the first gold spin bar to reach the higher gold spin bar. Use that spin bar to reach the ledge above the fast travel point with a green skull (see above).

Facing the skull, jump to the ledge on the left and work your way through the hall of presses and fire to find the Sentinel holding the point at the end.
![]()
Codex: Story of the Sentinels – Sentinel Prime
From the starting point, follow the walkway down just before the first building to find the codex.
Codex: Story of the Sentinels – Sentinel History Part IV

From the codex, head down the stairs and enter the door. Use the skull to activate the elevator. The codex will be located at the bottom of the elevator in the hallway leading to the next room.
Codex: Story of the Sentinels – Sentinel History Part V
From the above codex, continue down the hall and enter the next room. Head through the circular room and into the square shaped hallway to find the codex just before the next room.
Codex: Story of the Sentinels – Sentinel History Part VI
From the above codex, pass through the forge-like room and enter the hallway on the other side. Enter the room at the end of the hallway to find the codex behind bars. To reach it, enter through the doorway to the left of the bars and take an immediate right.
Codex: Story of the Sentinels – Sentinel History Part VII
From the above codex, climb up the nearby ledge and use the gold spin bar above the doorway to reach a higher walkway. At the top of the walkway, turn left to find the next codex.
Codex: Story of the Sentinels – Sentinel History Part VIII
From the above codex, turn around and follow the walkway forward into a room with a staircase leading up in the middle. Take the path to the right of the stairs to find the codex at the end.
Praetor Suit Point
From the above codex, return to the stairs and take them up to the top. Once there take a right and follow the walkway to the end. Across from you will be another walkway containing the Sentinel holding the point.
Codex: Story of the Sentinels – Sentinel History Part IX

Return to the top of the stairs and head through the doorway then climb a small flight of stairs to find the codex on the left.
Codex: Story of Hell – Deag Grav
Press the skull to activate the elevator. Once at the top, the codex will be located behind you near the edge.
Codex: Story of Hell – Gladiator
Head down the long hallway towards the Colosseum to find the codex on the right.
*NOTE: This guide was written assuming that you completed this area and are returning to the locations via fast travel points.

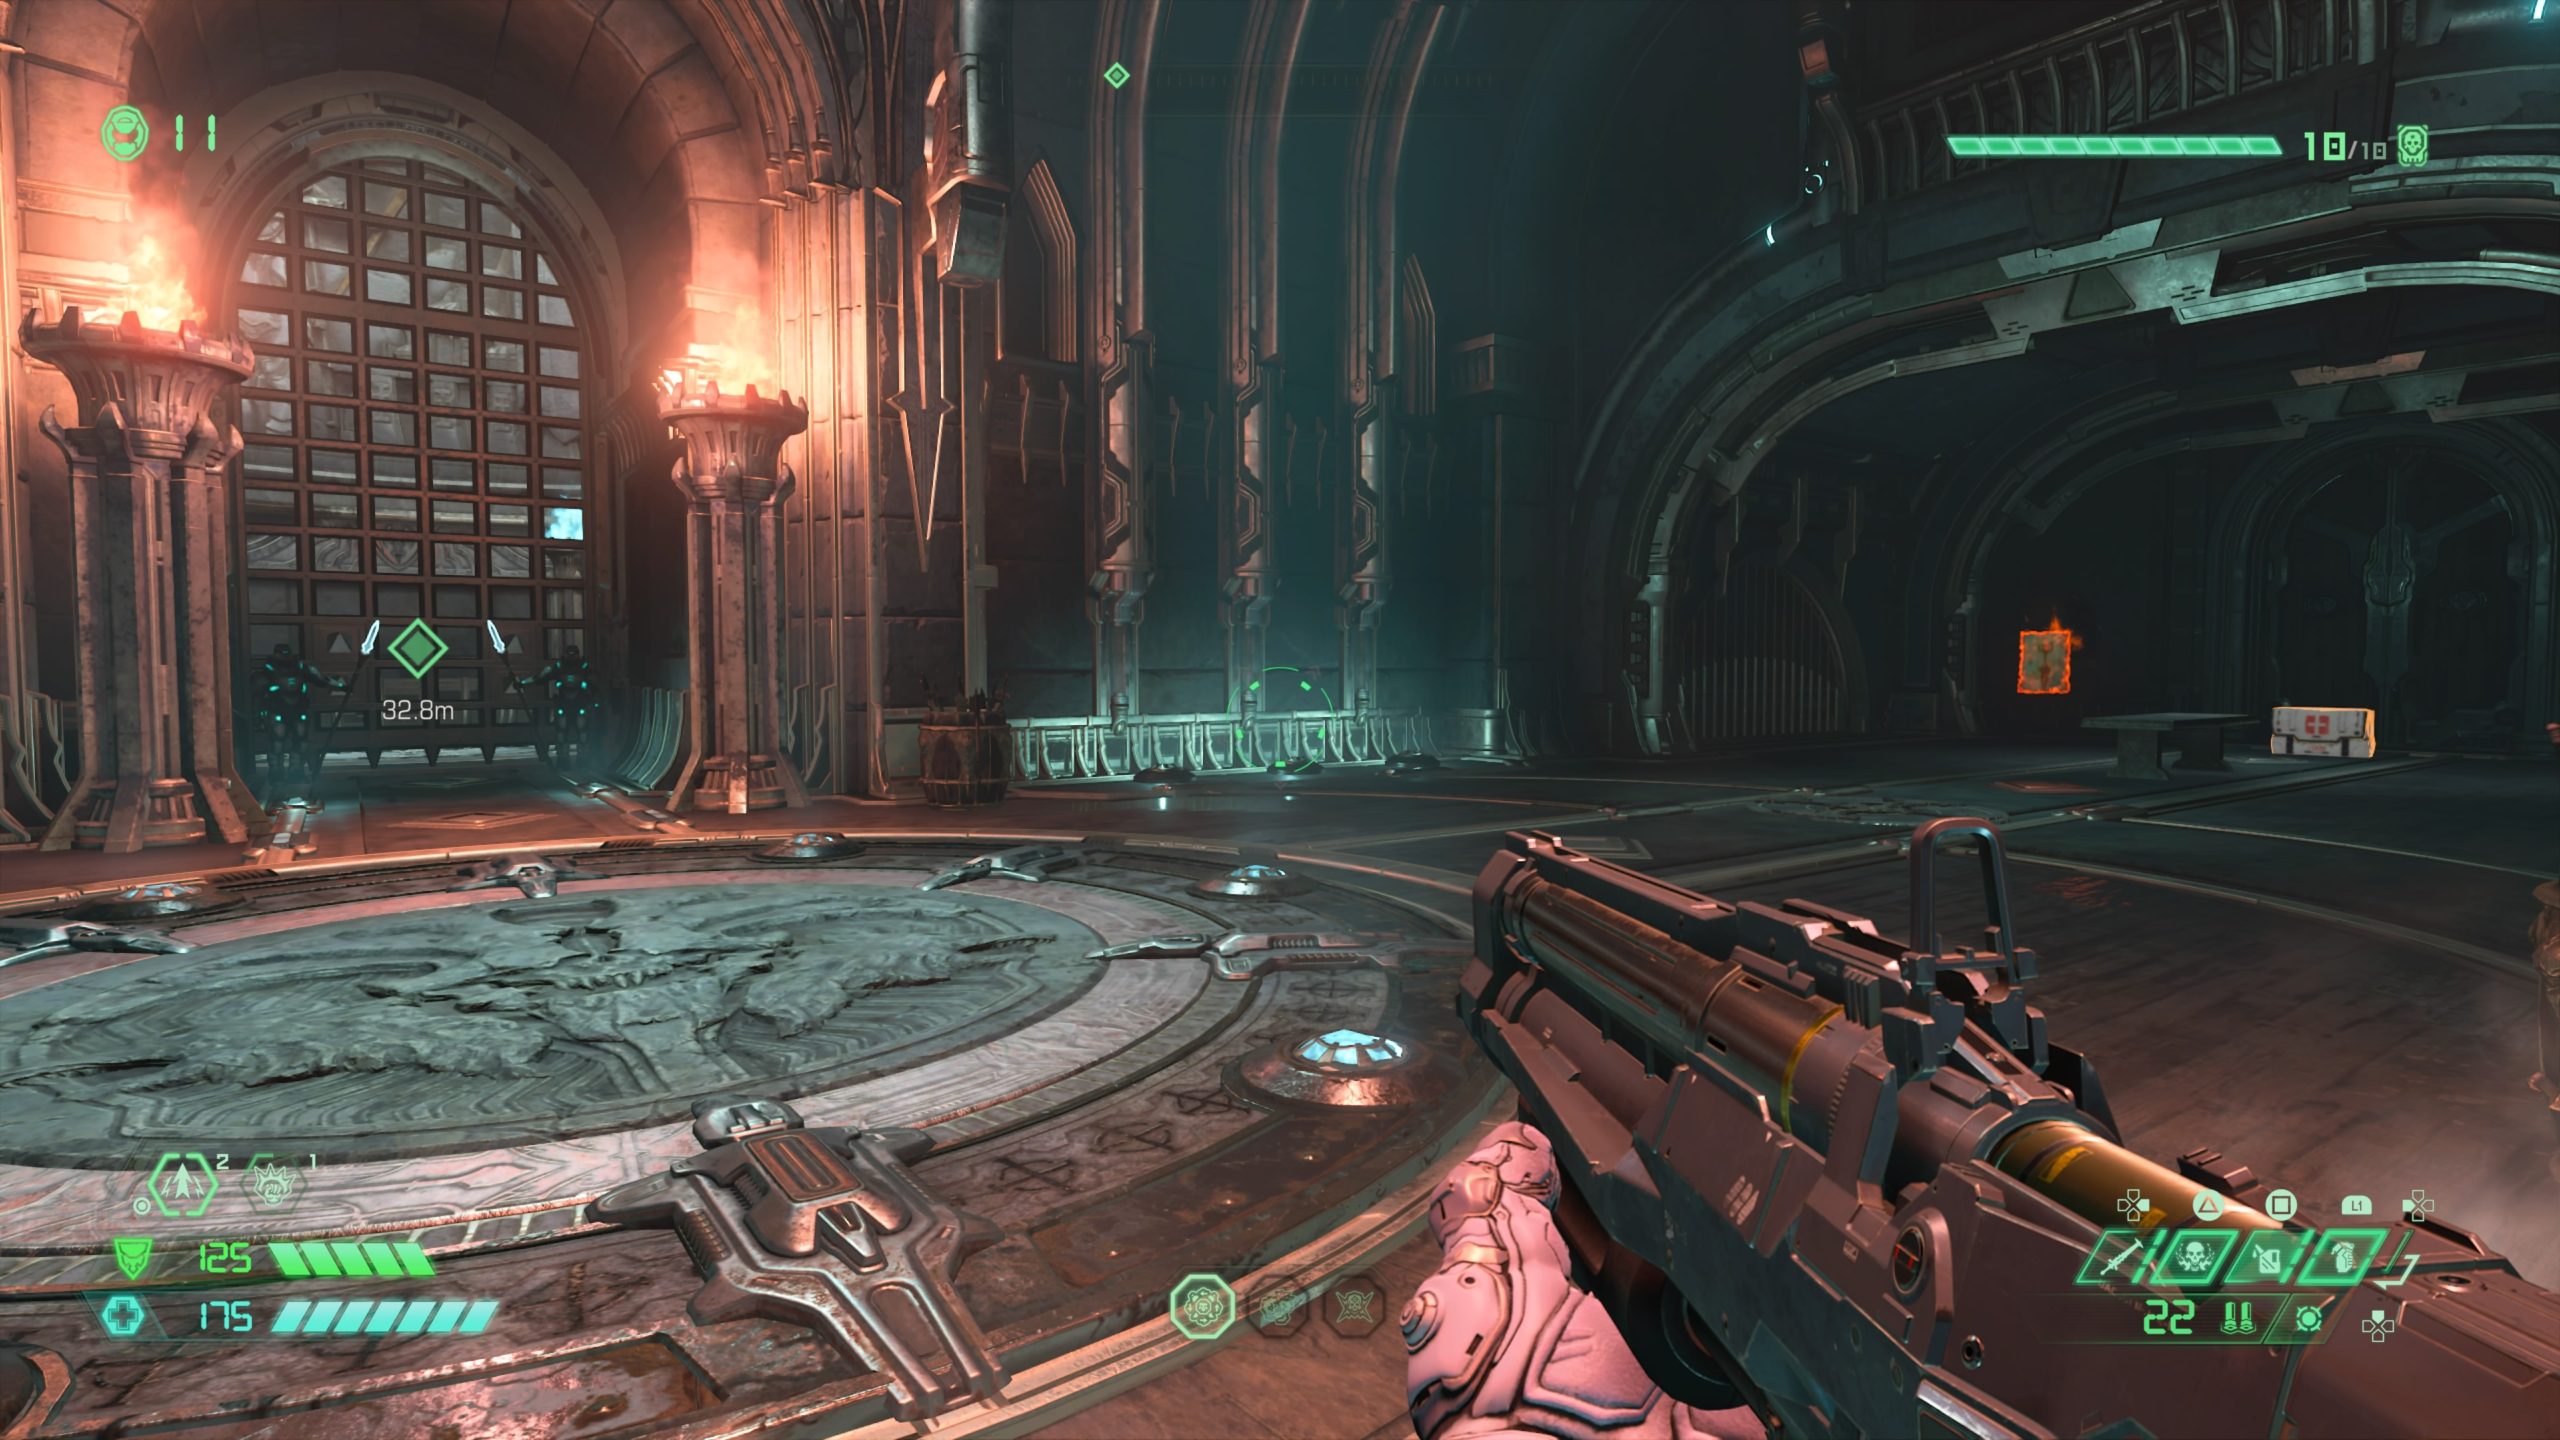
Rune
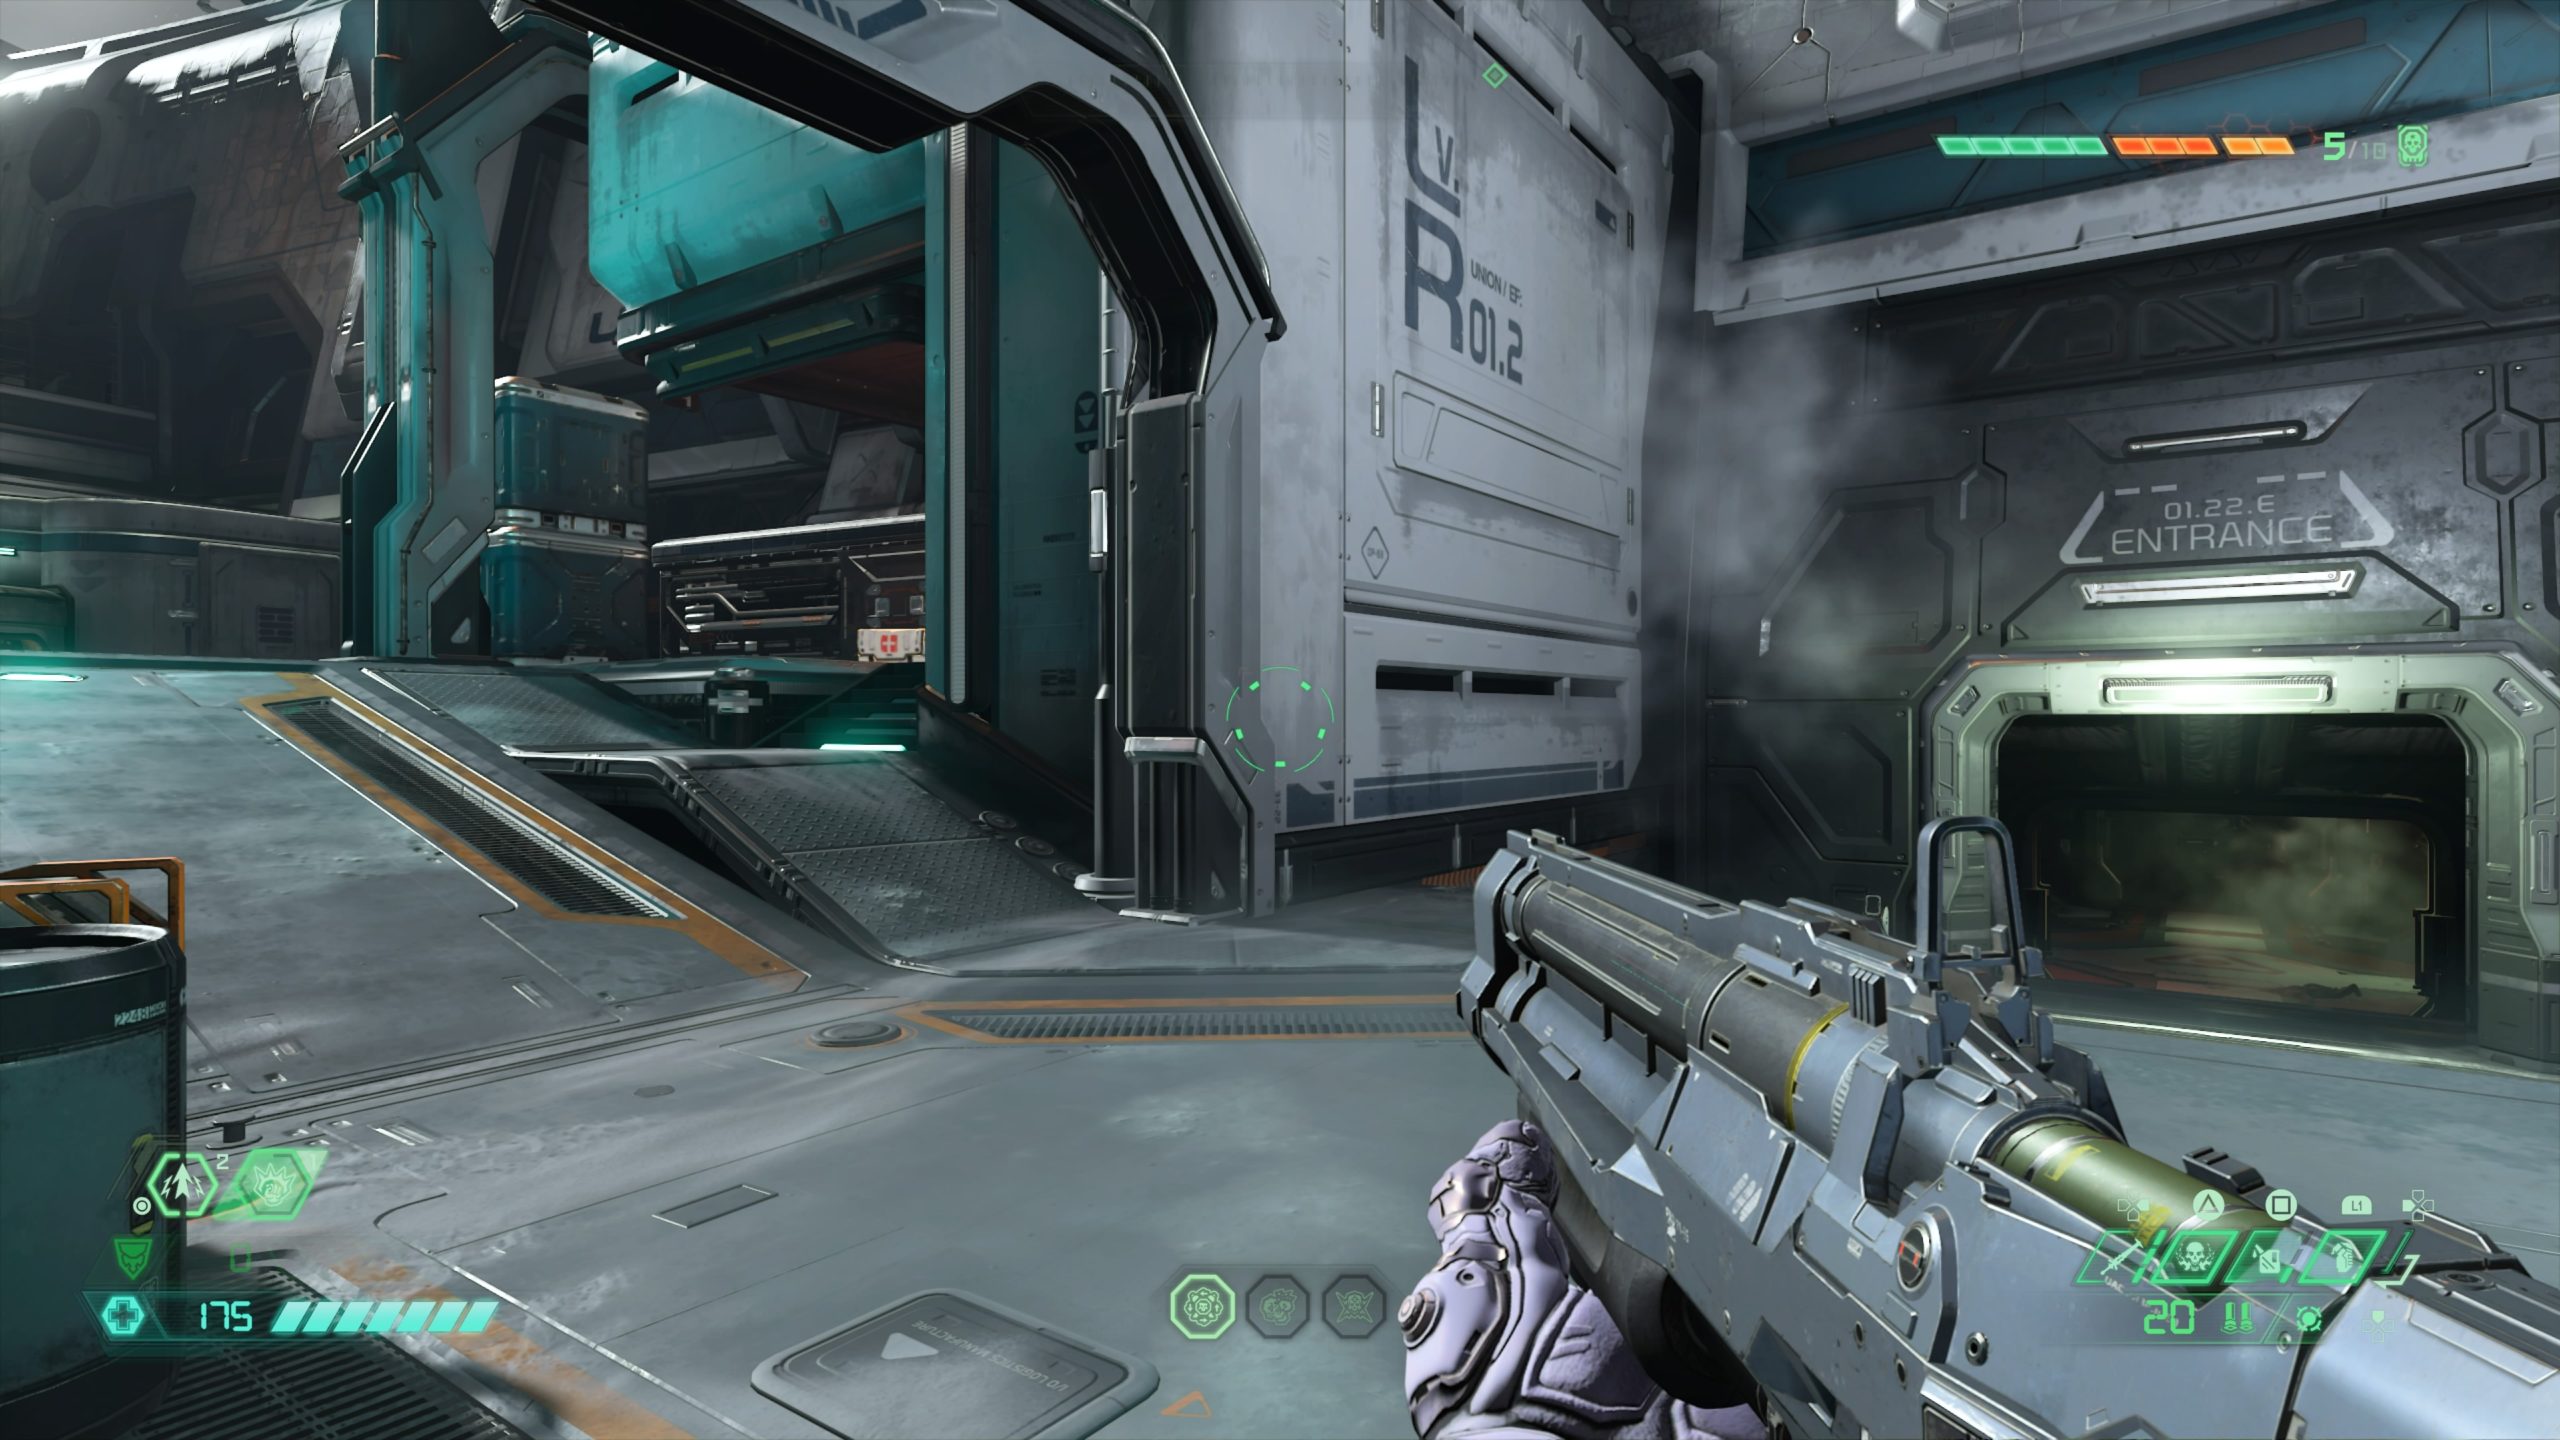
From the fast travel point, turn around heading down the ramp and through the doorway (marked ENTRANCE 01.22.E). Take a left and pass through the door across from the UAC Spokesperson hologram. Follow the hallway through another door to locate the rune.
Sentinel Battery
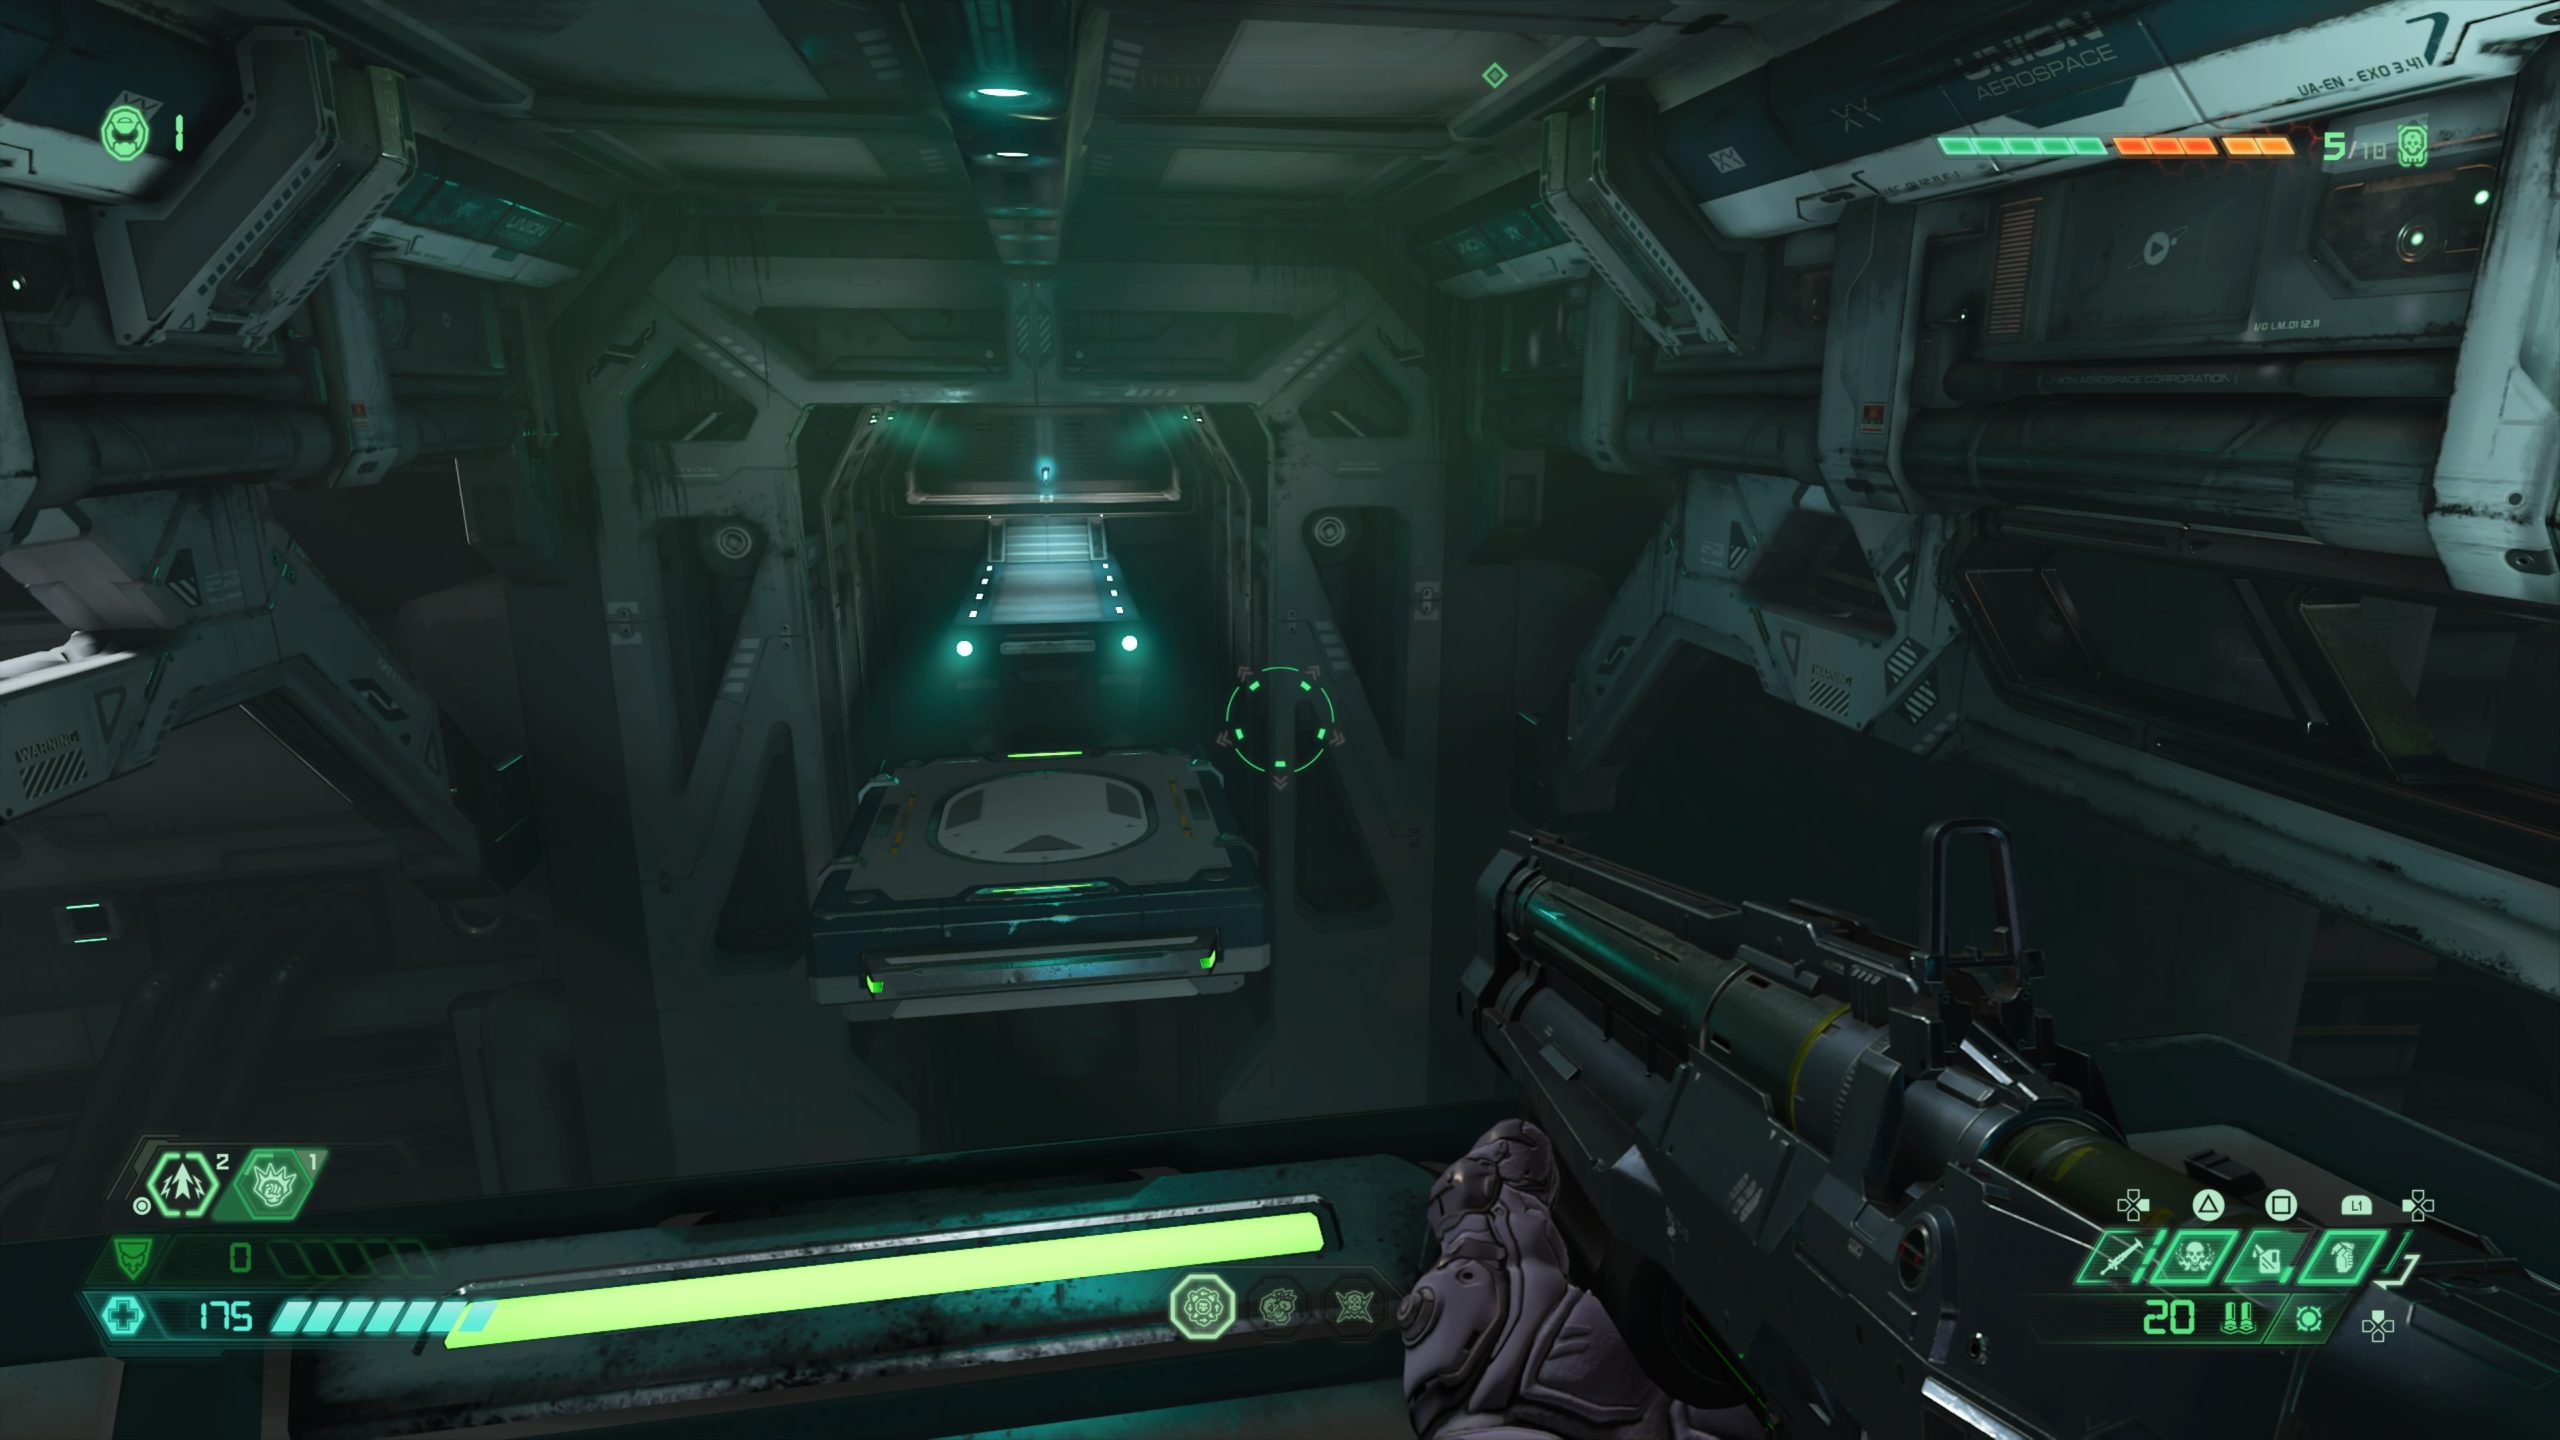
From the fast travel point, work your way forward until you drop down onto a platform leading to the BFG Core. Turn around to see another platform leading to the battery.
Praetor Suit Point
From the fast travel point, head forward through an opening near the tiny pistons. This will bring you to a room with four giant moving cylinders. Use the cylinders to reach the platform on the top left of the room to locate the sentinel with the point.
Codex: BFG-10000
From the Praetor Suit Point above, jump to the small platform with a green light on the other side of the room. Head through the duct on the platform and take a left to find the codex.
Praetor Suit Point
From the fast travel point, drop down onto the platform below and head to the walkway across from the portal near the edge of the platform. Drop down the hole under the walkway the locate the hallway leading further into the level. To the left of it will be a wall with a crack in it. Melee the wall but don’t head through yet. Look down to the right to see a doorway. Jump to the doorway to see the sentinel with the Praetor Suit Point at the top of some stairs.
Toy: Prowler
Facing the sentinel from above, follow the hallway left and pass through the door then take a right down the next hallway to arrive at an elevator. Take it up to the top then head through the doorway on the right side of the room to find the toy.
Rune

Head back to the room and exit through the door on the right. Head through the hallway and out another door (past a UAC Spokesperson hologram) to find the rune.

Cheat Code: Powerup Mode: Onslaught
From the fast travel point, head for the stairs leading to the monitors that says “SYSTEM CRITICAL” but don’t go up them. Instead, drop down to lower level by the green light to the left of them. Take the first left in the hallway and use the lift pad to reach the room contained the cheat code.
Praetor Suit Point

From the cheat code, head through the nearby hole in the wall then cross the room to the doorway on the other side. Go through the doorway then take a left climbing up the fallen crate to reach the vent shaft. Climb up to the top to find the sentinel with the point.
Album: Doom 64 – Intro

From the sentinel, jump/dash to the lift pad in the middle of the room and use it to reach the walkway just above it. Turn around to locate a gold spin bar and a duct with the album just behind it. Use the bar to reach the collectible.

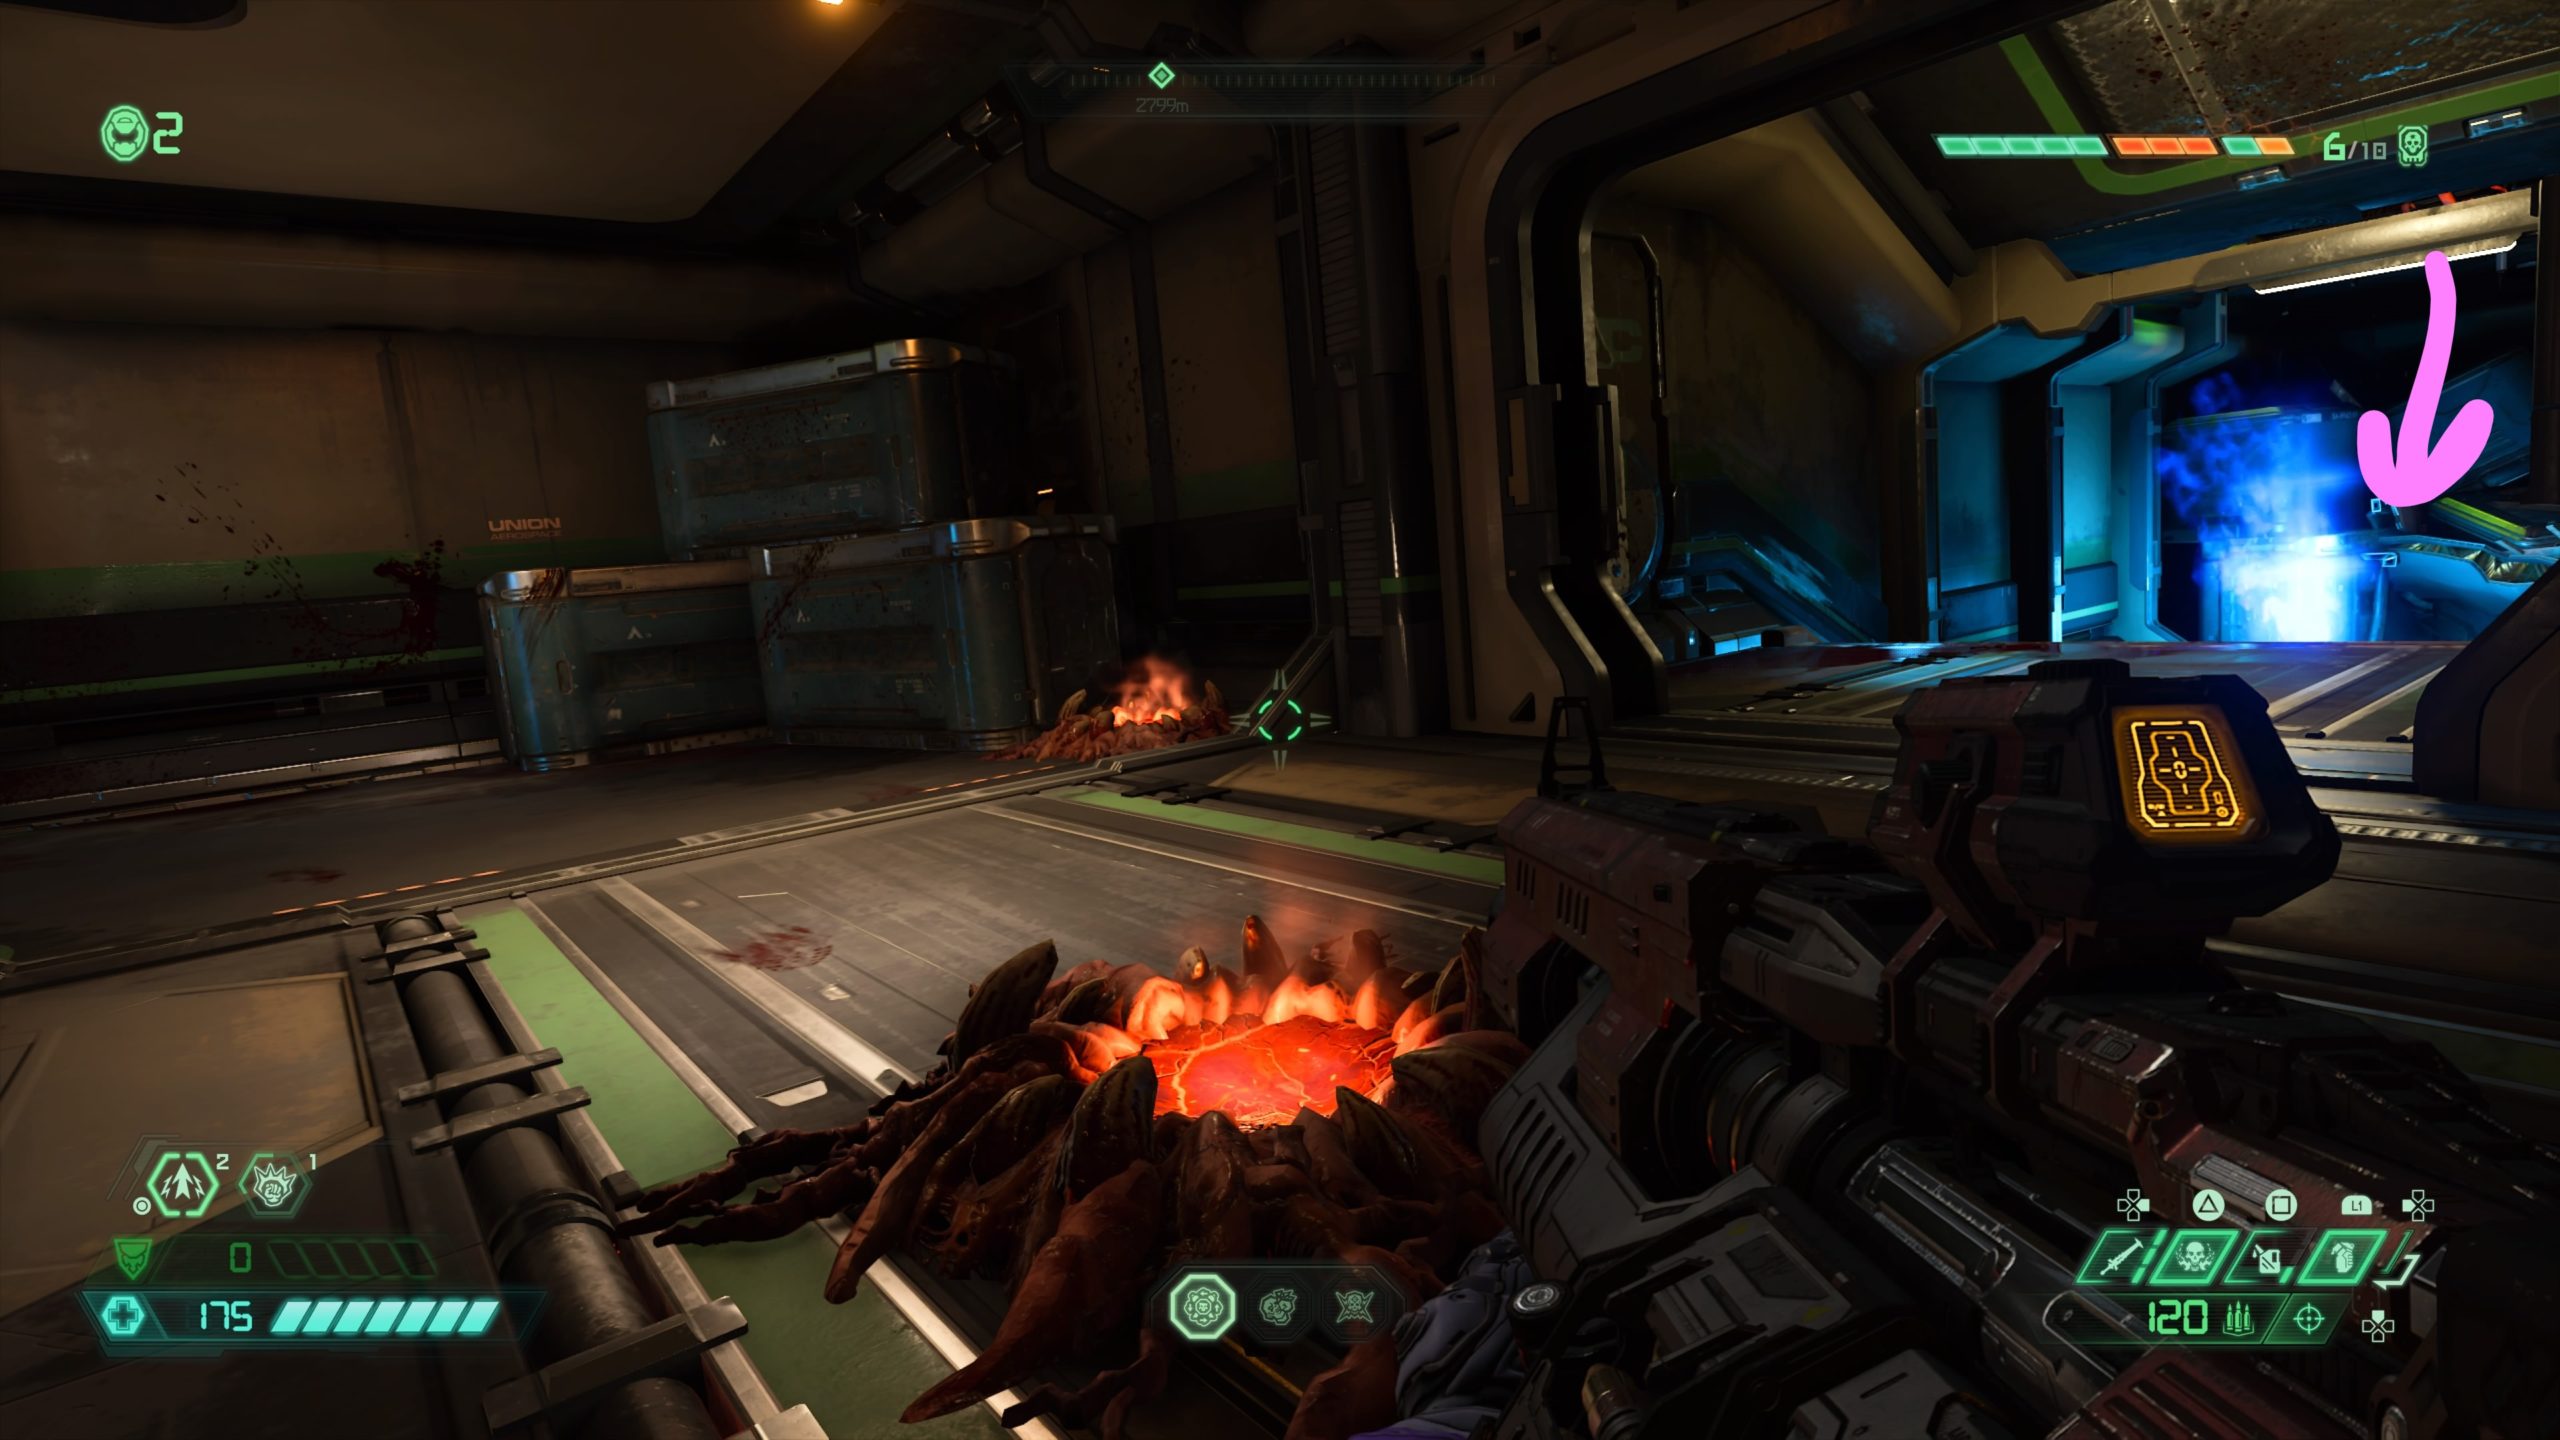
Toy: Carcass
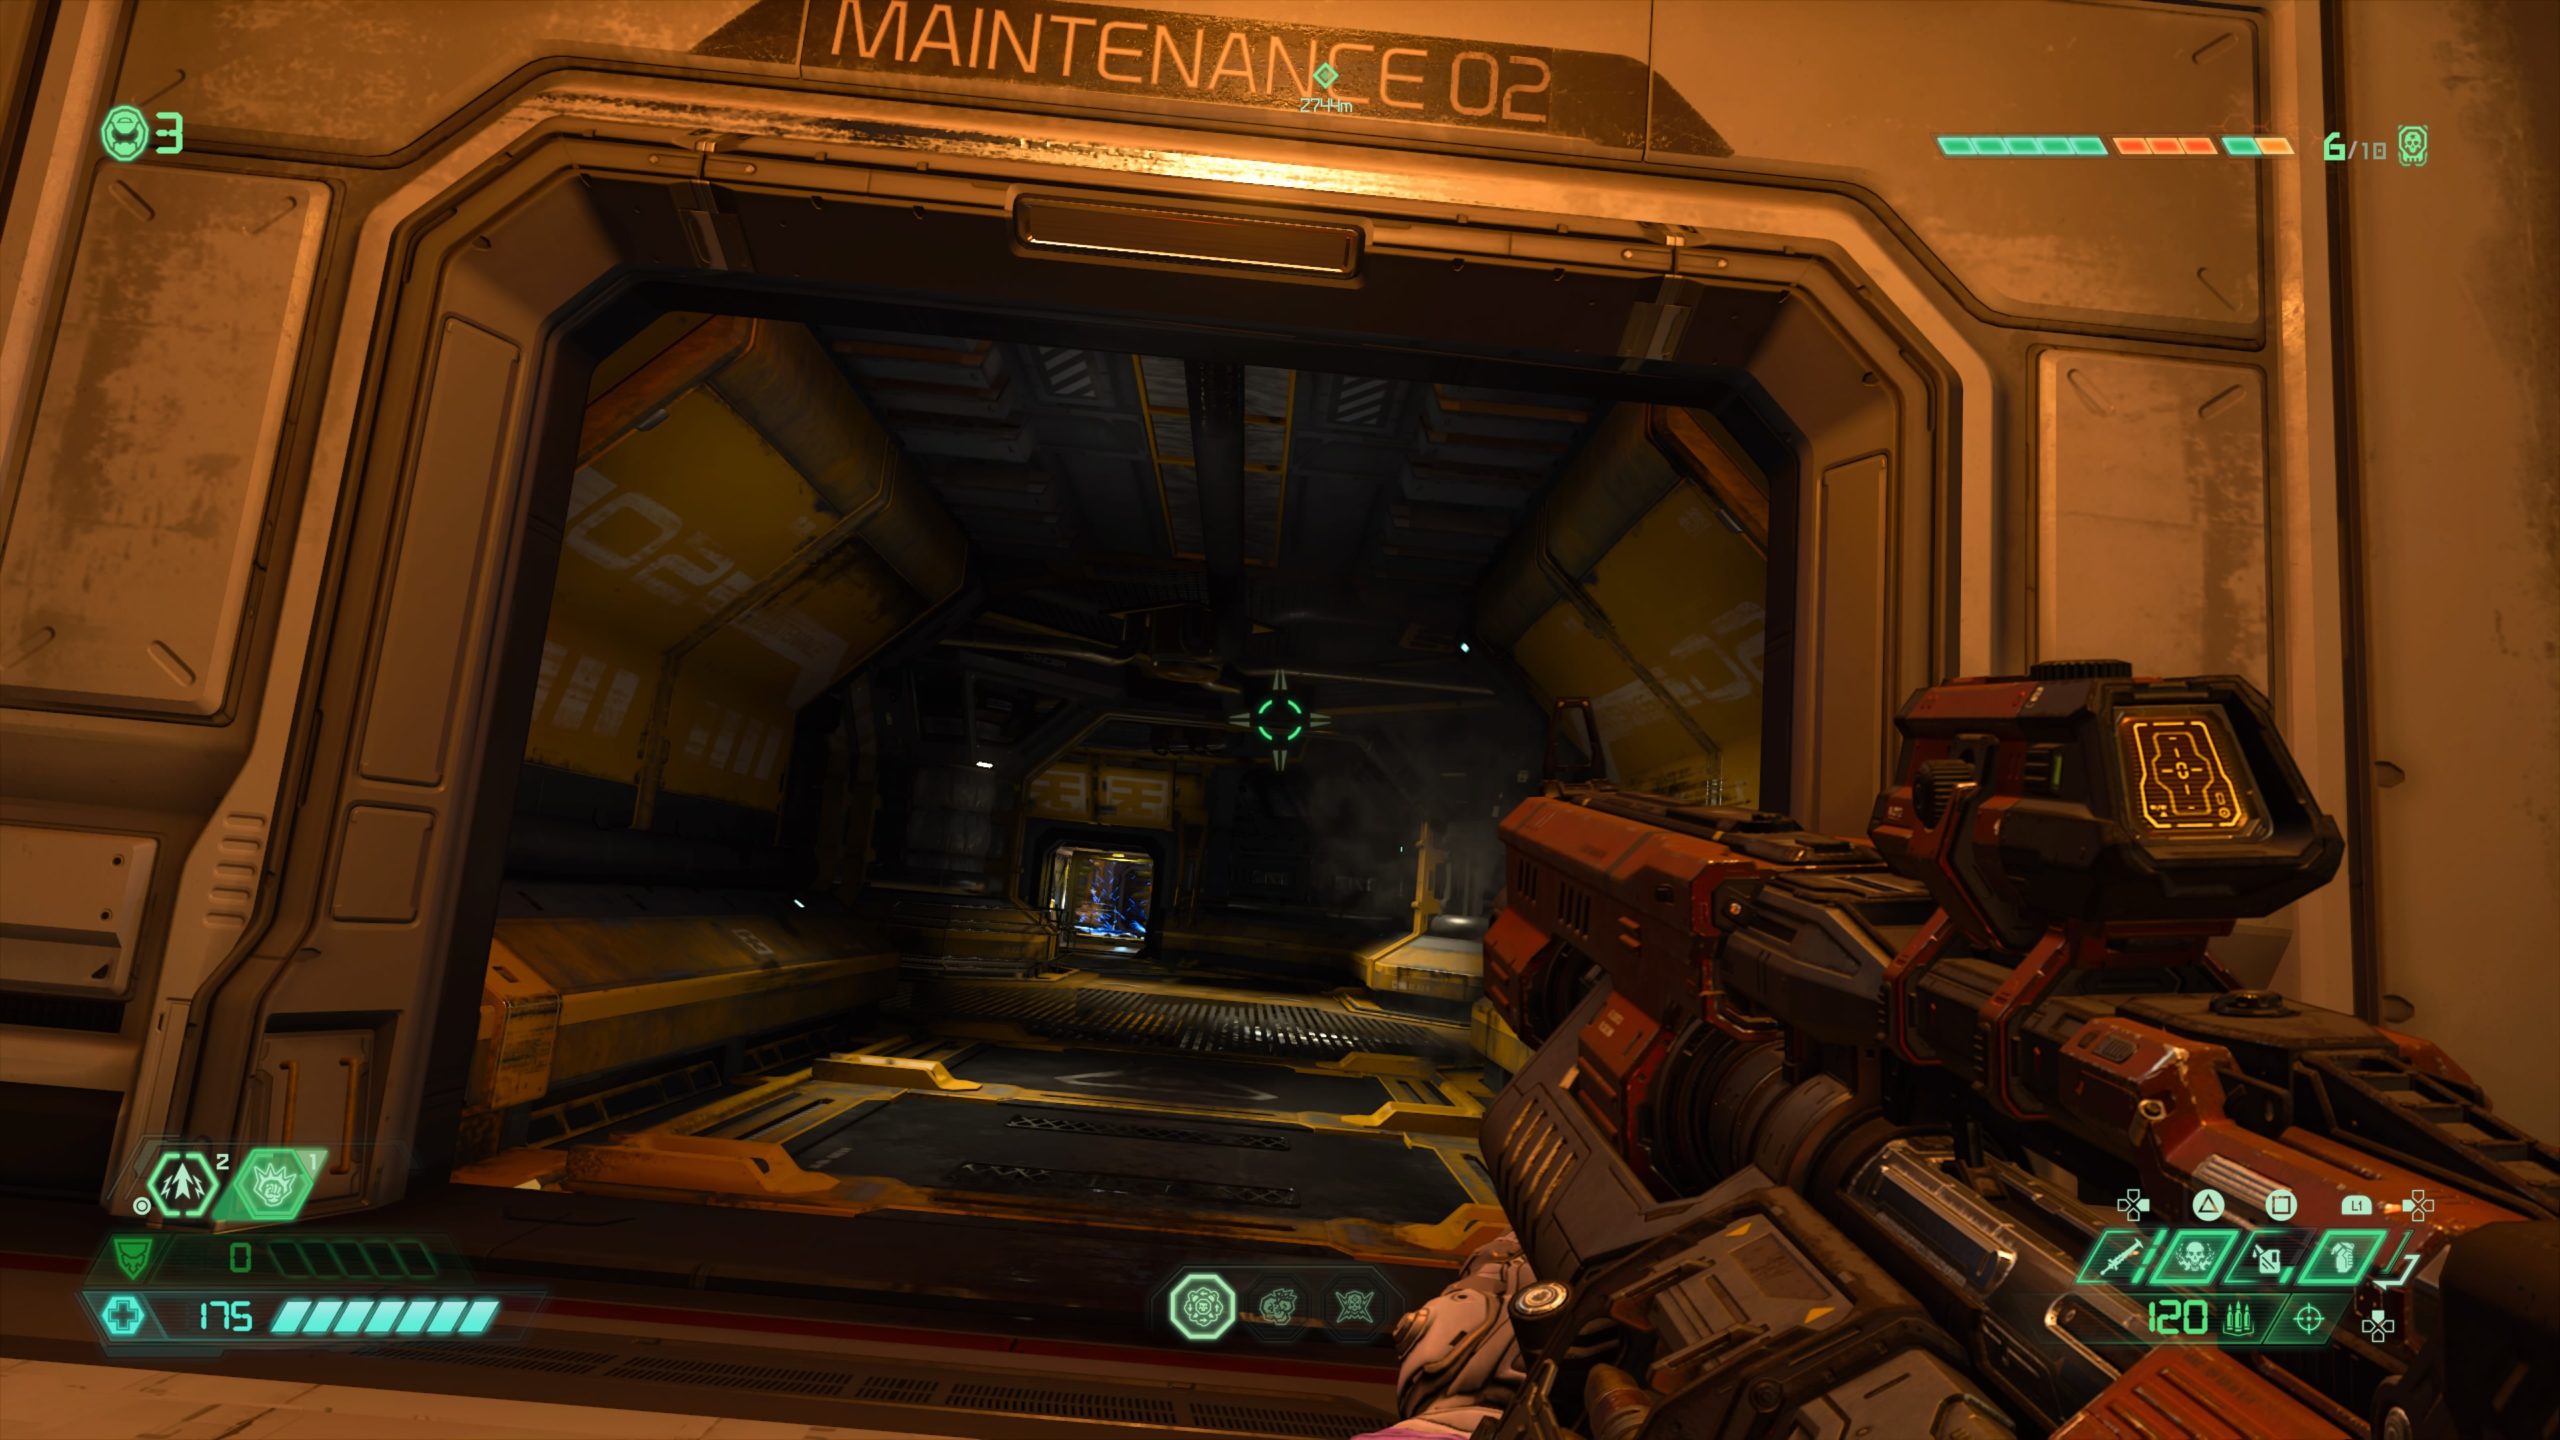
From the fast travel point, turn around and head through the doorway with “MAINTENANCE 02” written above it. Head to the back of the room and melee the cracked vent to reveal another room with a portal in the floor. Jump into the portal then head for the lift pad straight ahead. Use it to reach a walkway above. Follow the walkway into a room containing the toy behind a support column.
Praetor Suit Point

From the fast travel point, head forward towards the three floating pillars with climbable walls. Jump to the floating rock just before them then use that rock to reach the the third rock. The sentinel will be at the top with the point.
Sentinel Battery
Facing the sentinel from above, head to the structure behind the giant rock to the left (with the 4 red circles of electricity). The battery can be found on the top of this structure. You will need to use the lift pad to head to the Union Aerospace facility. Facing the entrance, head left to the end of the balcony. From there you can reach a pipe you can use to swing to a floating rock then to the roof housing the battery.
Sentinel Crystal
From the fast travel point, turn around and head out the door. Jump right around the building to reach the other side of the broken walkway then take a right to enter the room with the crystal.
Album: Quake Champions – Goroth

From the fast travel point, head left in the facility through a doorway. Once through the doorway, take a right and interact with the console to raise a pillar from the ground in the previous room. Head back through the doorway and take a left to see the pillar. Use it to break the vent shaft on the left and enter the duct to find the album.
Toy: Pinky

From the fast travel point, head left into the facility and pass through three doorways to reach a room filled with blue glowing crates. Head straight through the room then drop down the hatch in the hallway. Facing the open doorway, turn left and melee the grate to reveal an opening. Head through it and use the lift pad in the next room to reach the locked room containing the toy.
Sentinel Battery

From the fast travel point, follow the path forward dropping down off the ledge at the end. Turn right to find the battery.
Codex: Story of the Sentinels – The Lost City of Hebeth
From the battery, head down the nearby steps to find the codex near a doorway.
Praetor Suit Coin

Head through the doorway near the above codex and down a small set of steps. Turn left and head to the end to find the sentinel in a small room to the right.
*NOTE: This guide was written assuming that you completed this area and are returning to the locations via fast travel points.

Toy: Mancubus

From the fast travel point, head up the stairs past the flaming debris and follow the hallway to the end. When you reach the broken window (leading to the lobby) take a right and keep following the hallway down to the tree at the end. Enter the room to the right of the tree then head behind the column in the center of the room to find the toy.
Prater Suit Point
From the Mancubus toy, exit the room and head straight down the hallway past the tree towards the beginning of the level. When you reach the end of the hallway, jump through the broken window on the right to reach the hotel lobby. Look for the Emerson logo behind the check-in desk. When you find it, head down the hallway to the left of it. This will bring you to an open room with some couches and chairs scattered about and a UAC Spokesperson hologram near the a window. Facing the hologram, head to the left side of the room to find a hole in the floor leading to a lower level. Jump down this hole and the one in the next room to arrive in a hallway. Take the nearby steps down then swing a right to find the point in front of an elevator.

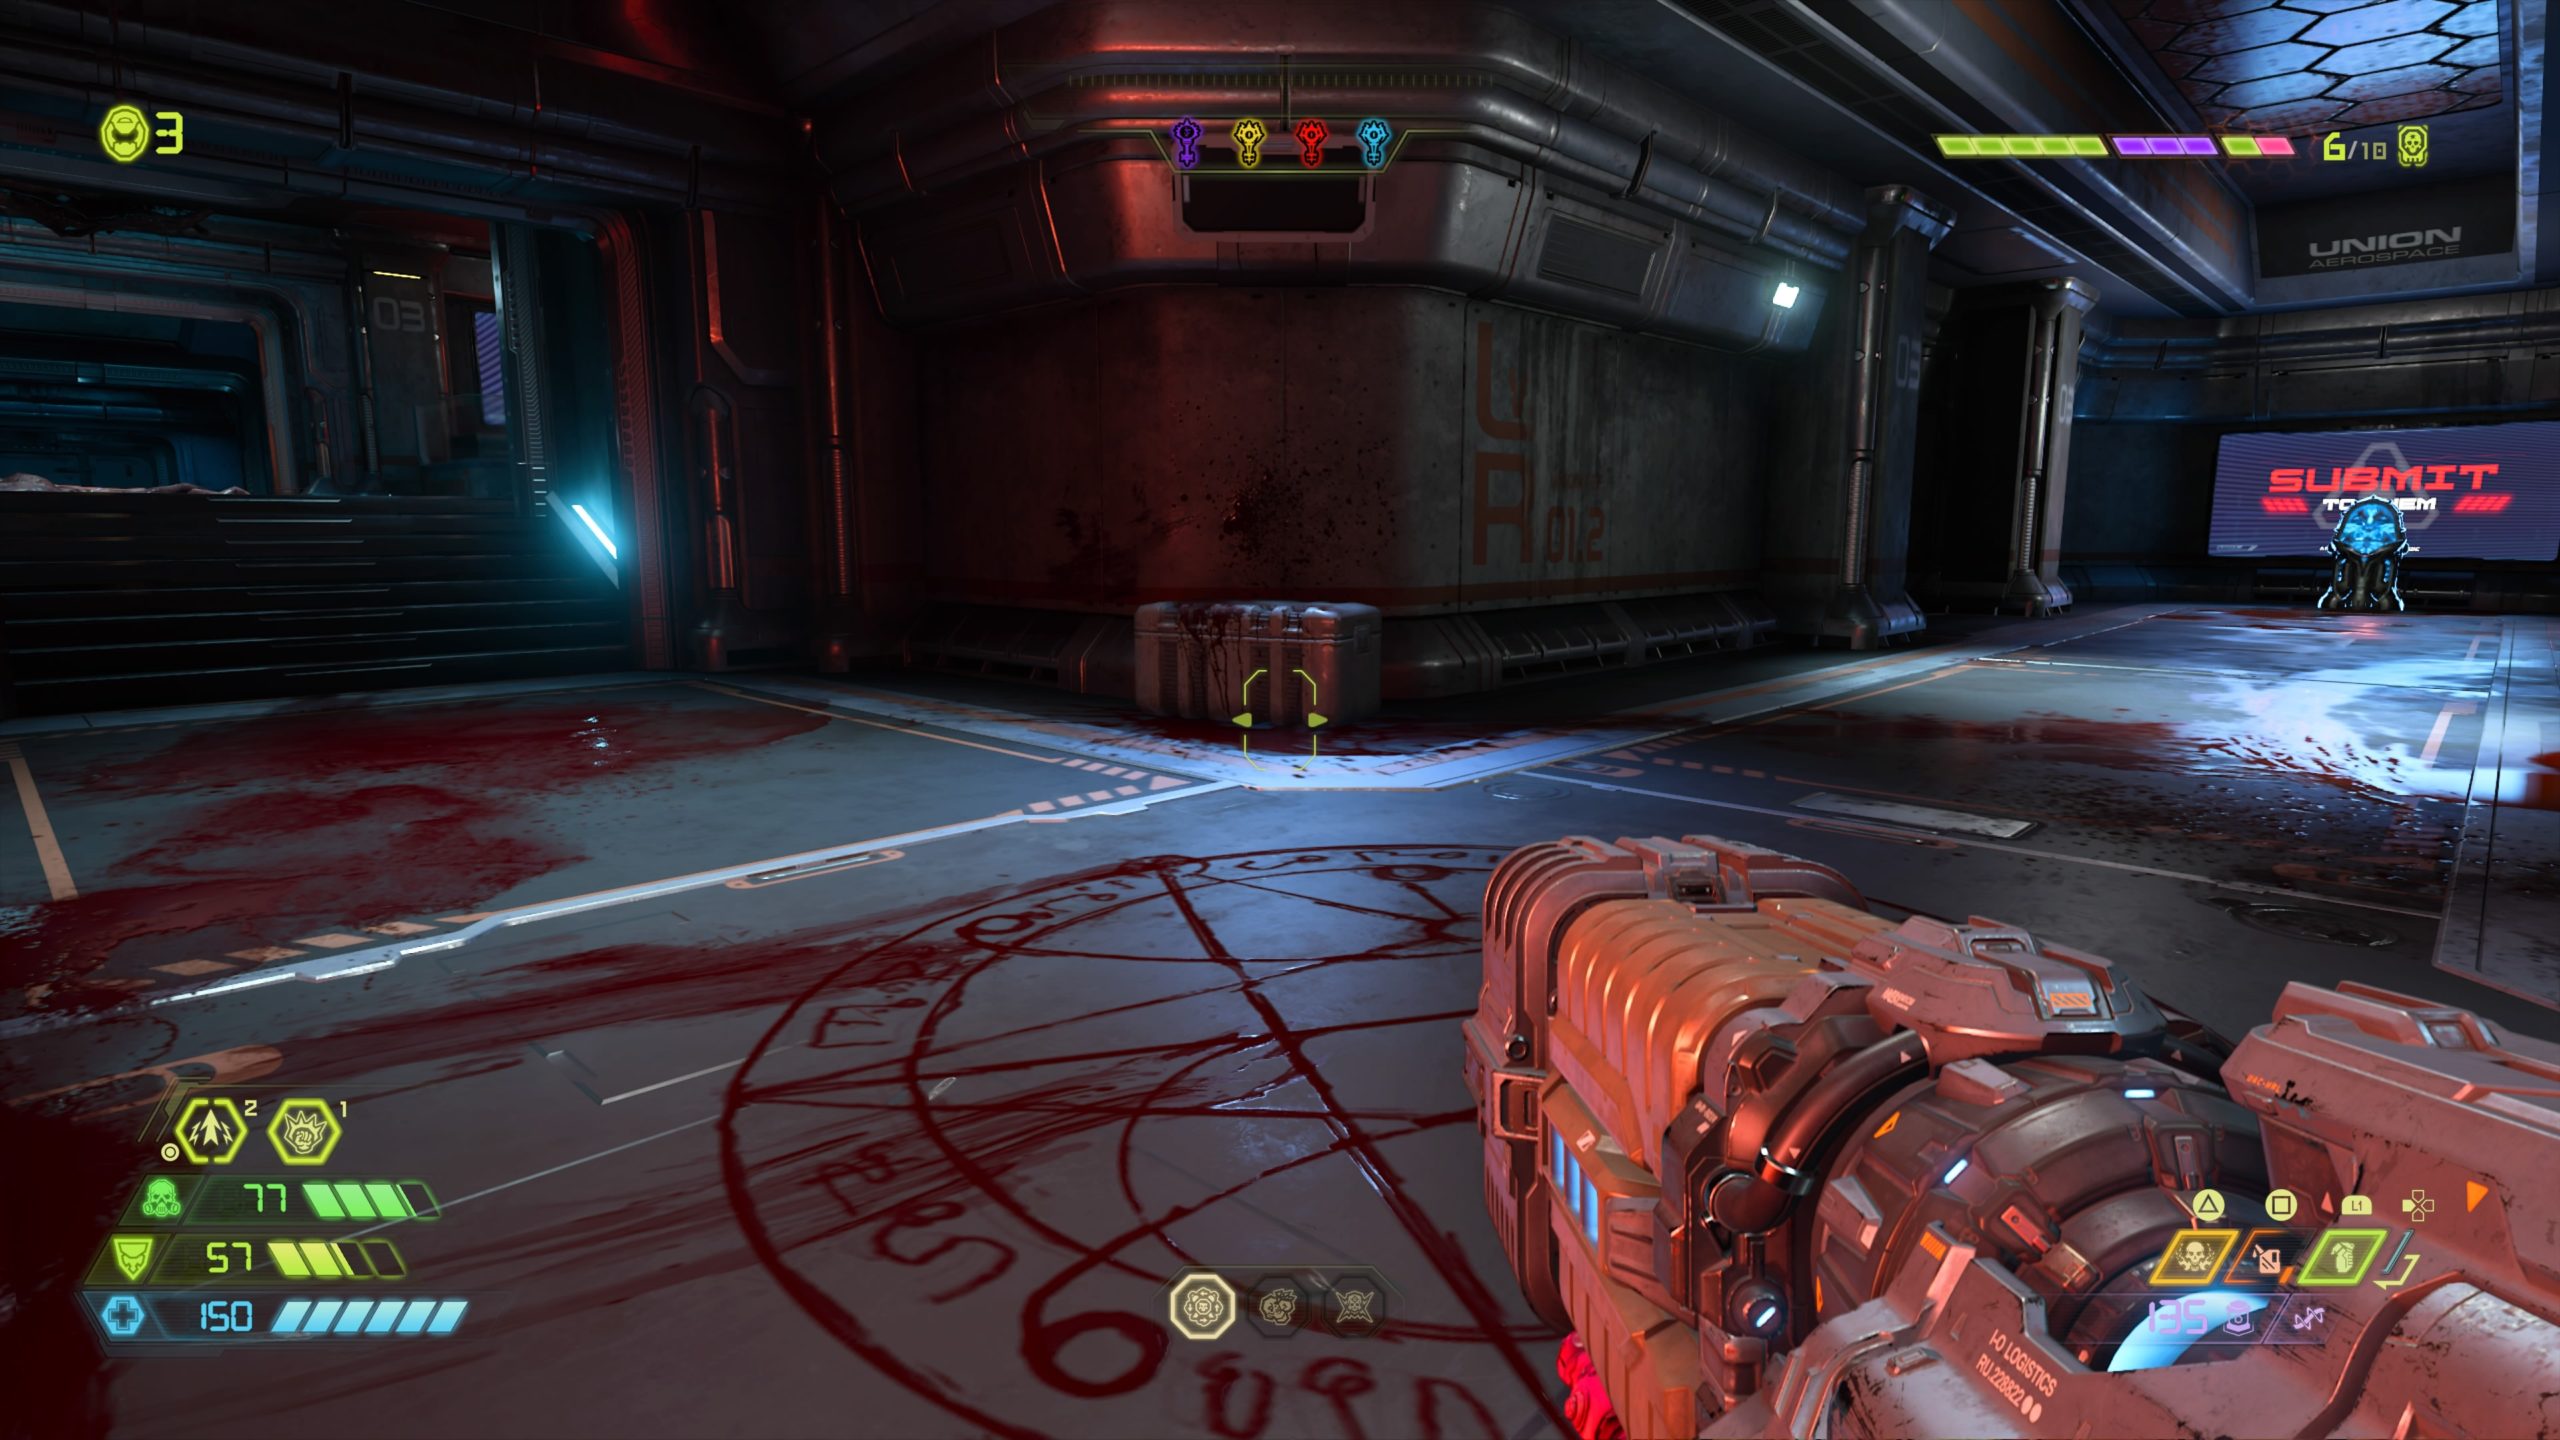
Codex: Story of Earth – The Arc – Part II

From the fast travel point, turn around and head right through the kitchen. Pass through the broken wall then look to the right to find the codex behind a desk.
Sentinel Battery

From the fast travel point, head down the hallway and through the door at the end. Enter the A9 Security room to locate the battery.
Codex: Story of Earth – The Return of Dr. Samuel Hayden – Part I
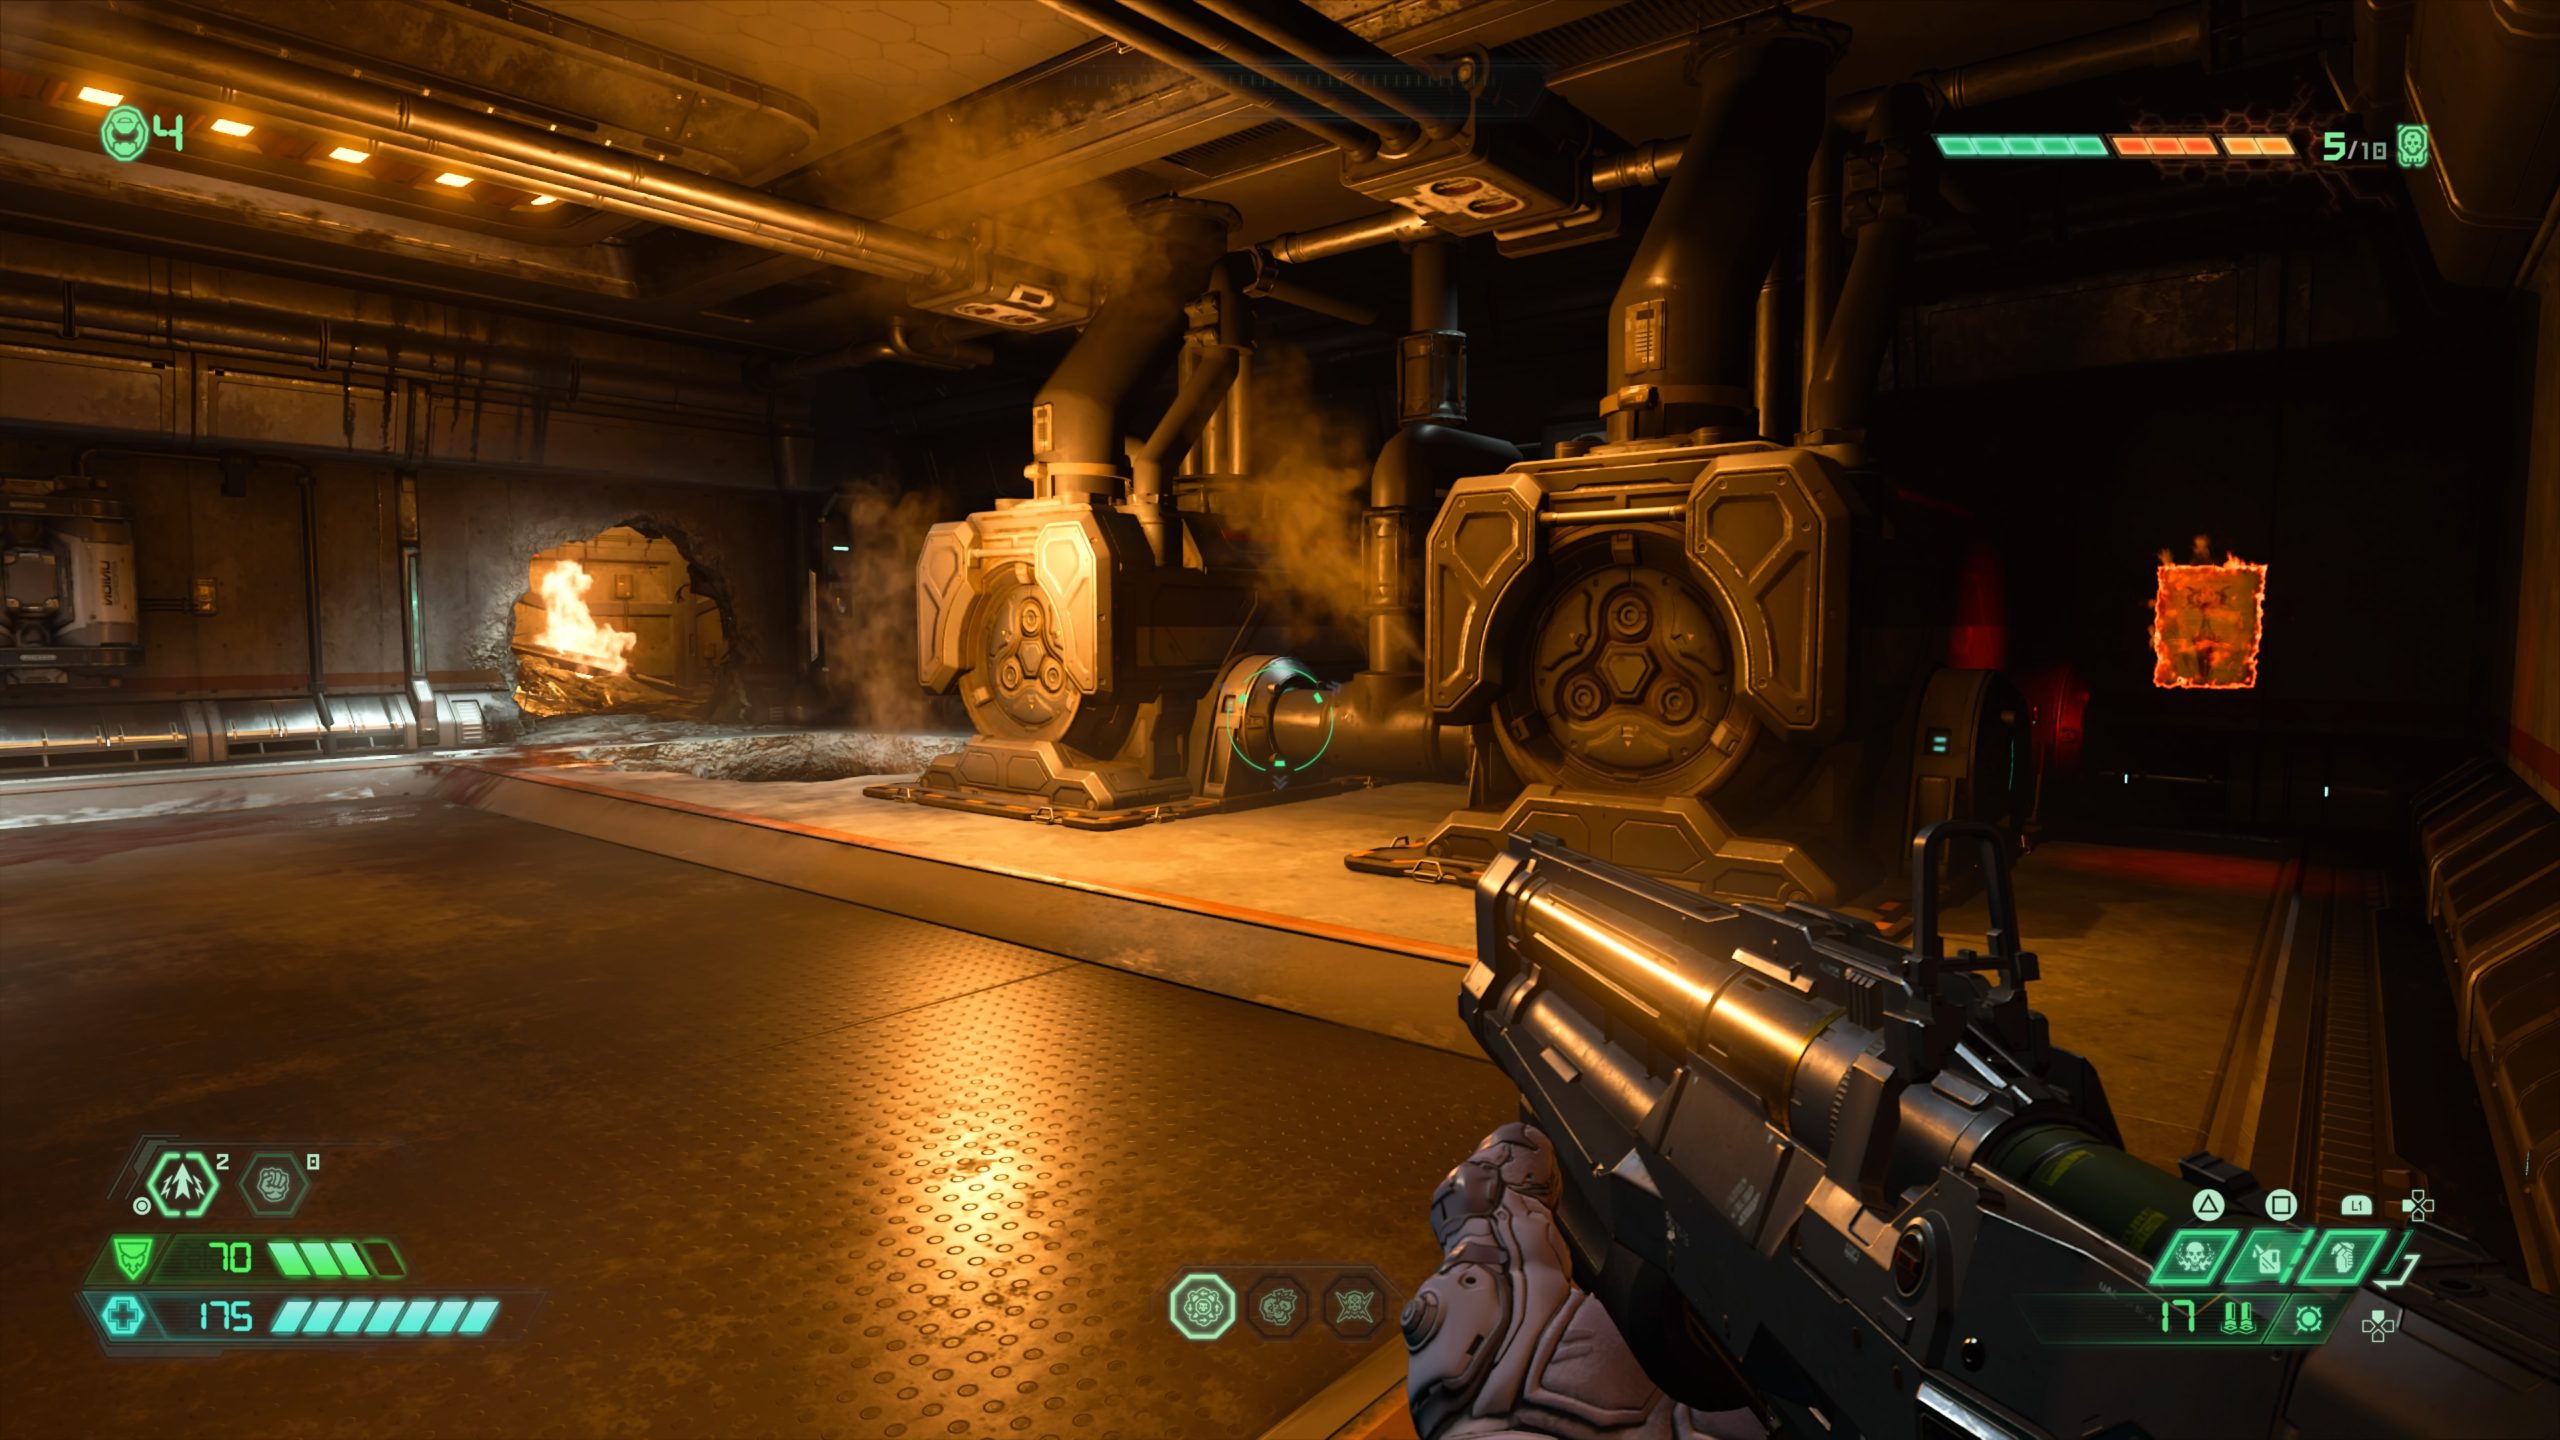
Exit the A9 Security room and head down the nearby stairs, passing the UAC Spokesperson hologram, into an elevator. Take the elevator down and exit it into a hallway. Follow the hallway, jumping over the hole in the floor. Next take a left through the hole in the wall next to the burning debris to find the codex in the next room behind a generator.
Praetor Suit Point

From the codex above, follow the room left taking a right through a hole in the wall. On the other side of the hole, look to the right to spot the Praetor Suit Point.
Rune
Head down the hallway from the Praetor Suit Point above and drop down the hole at the end to locate the rune.

Sentinel Battery
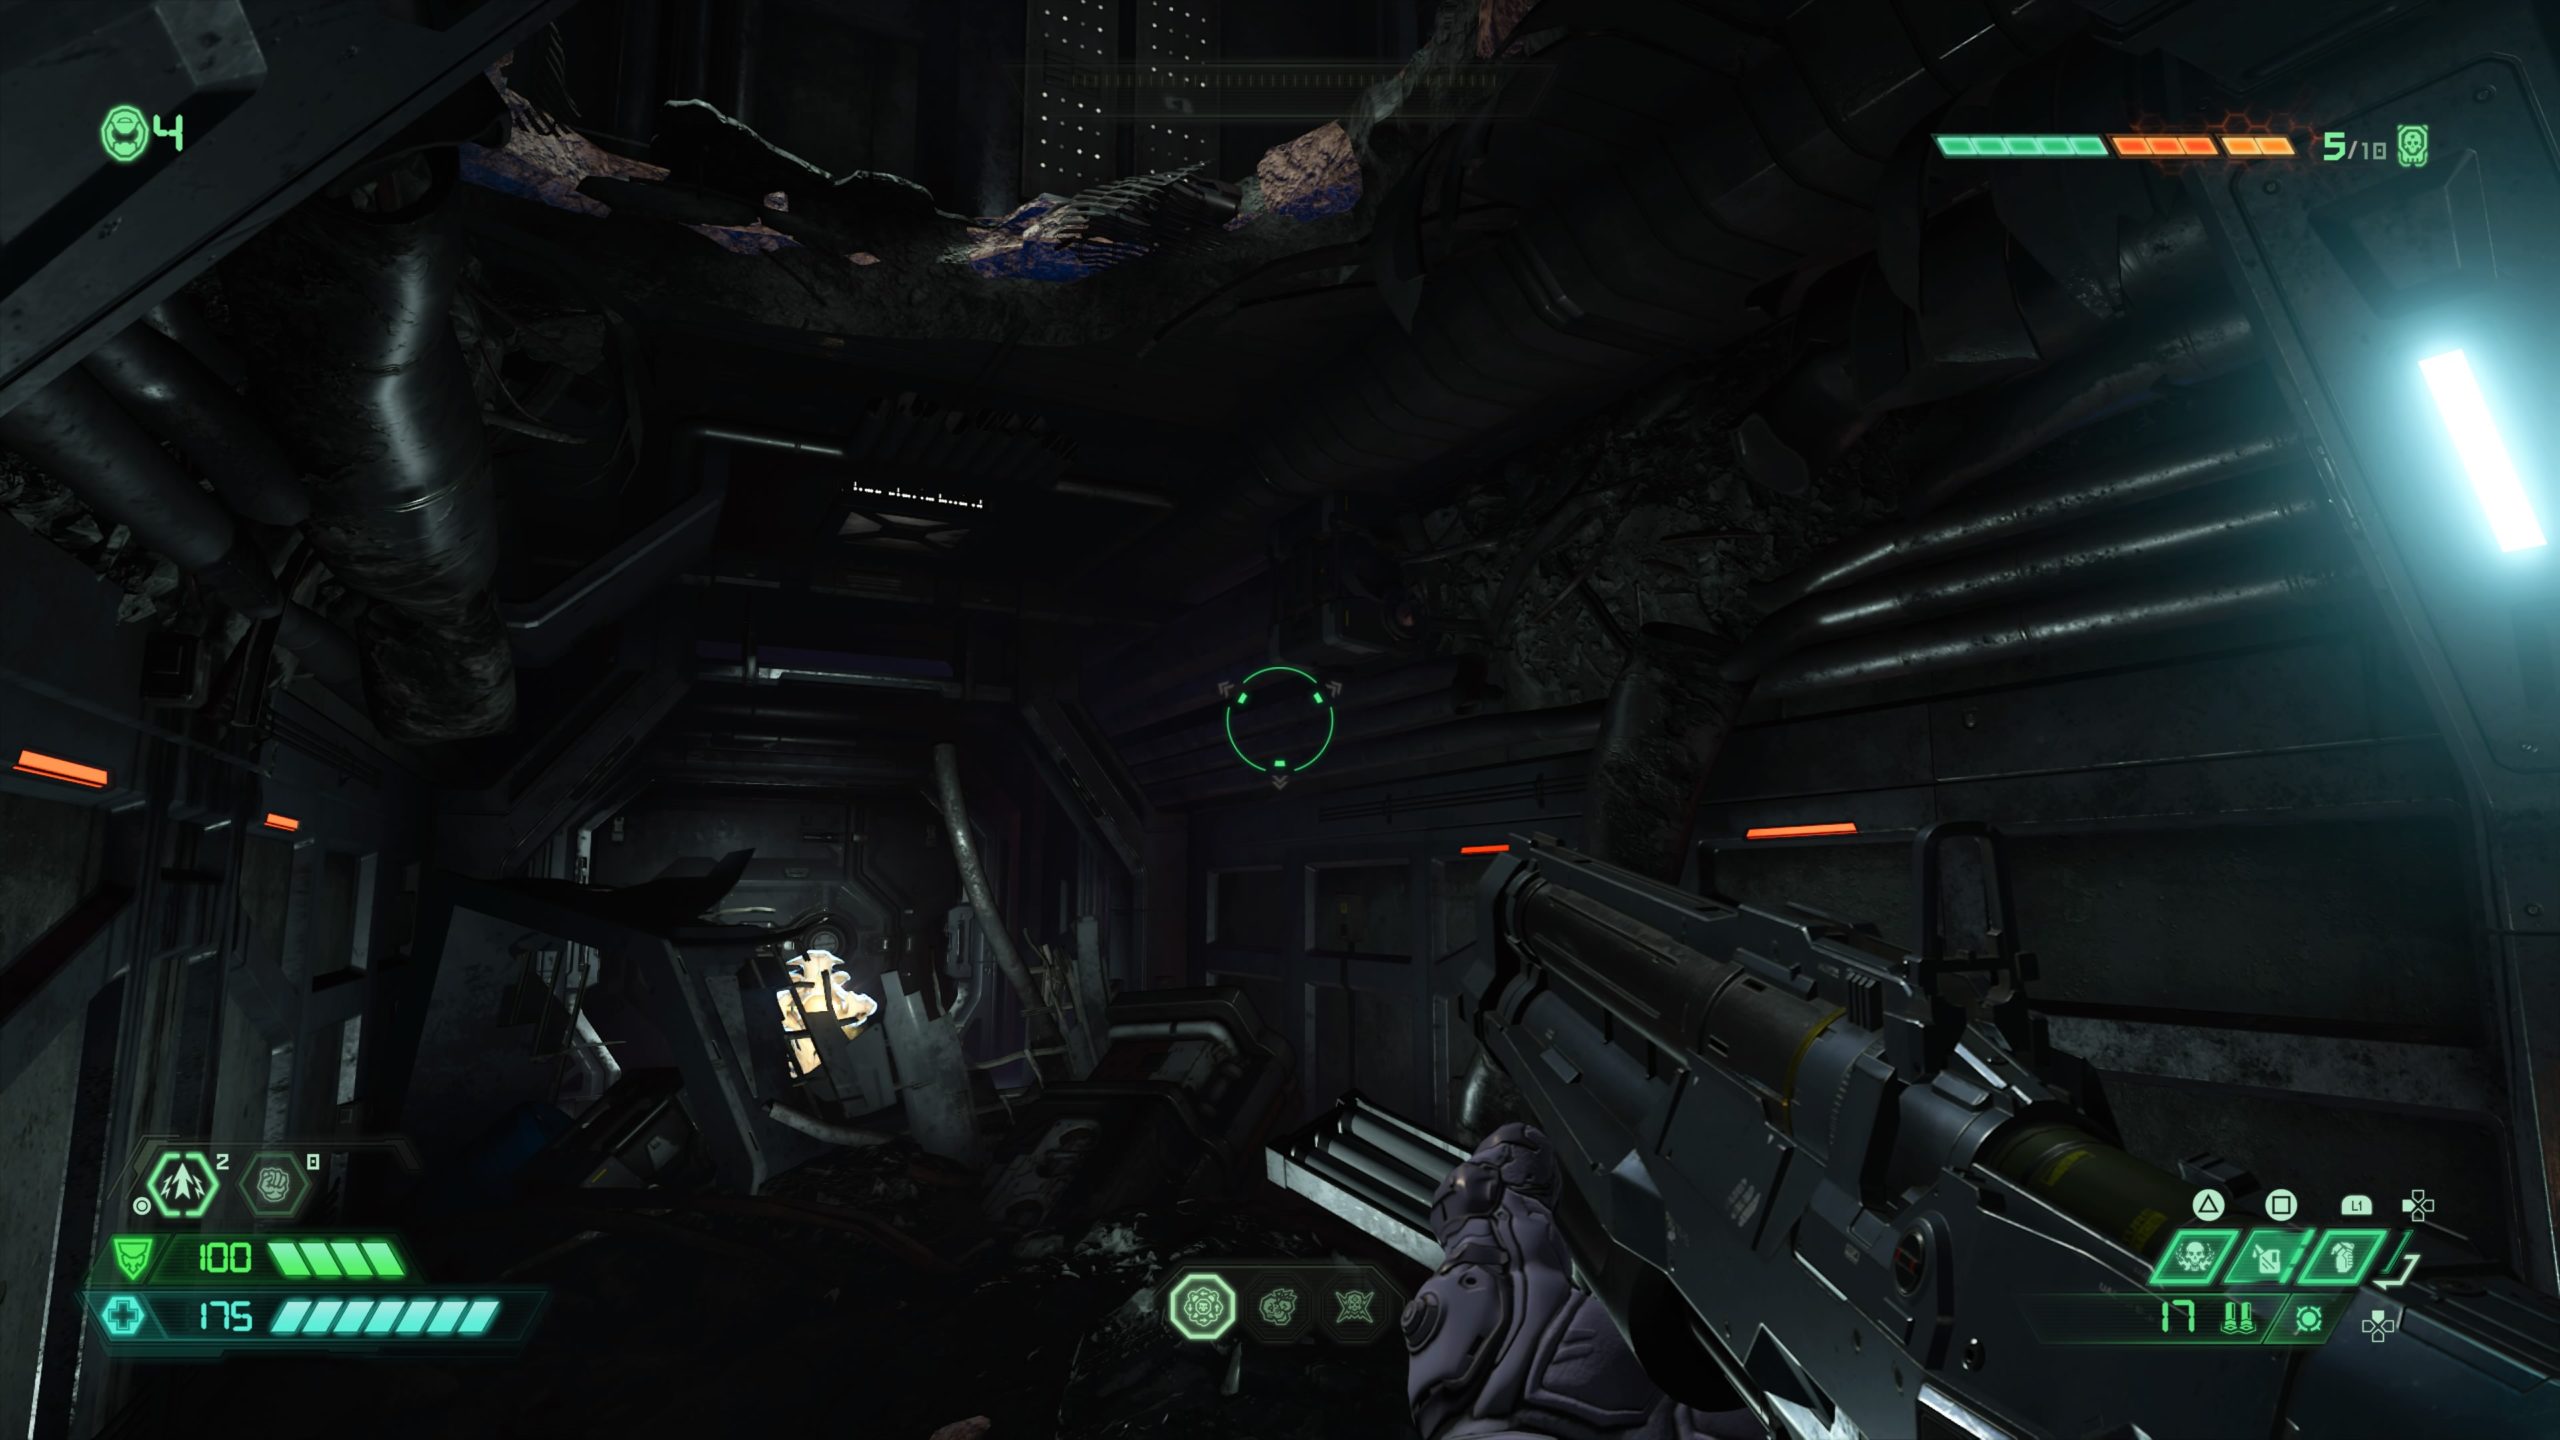
From the fast travel point, head down the purple gunk filled tunnel and drop down into the room below. Climb on the the platform a short distance away. Use the gold spin bar and dashes to reach the battery in the corner of the room.
Codex: The Return of Dr. Samuel Hayden – Part II
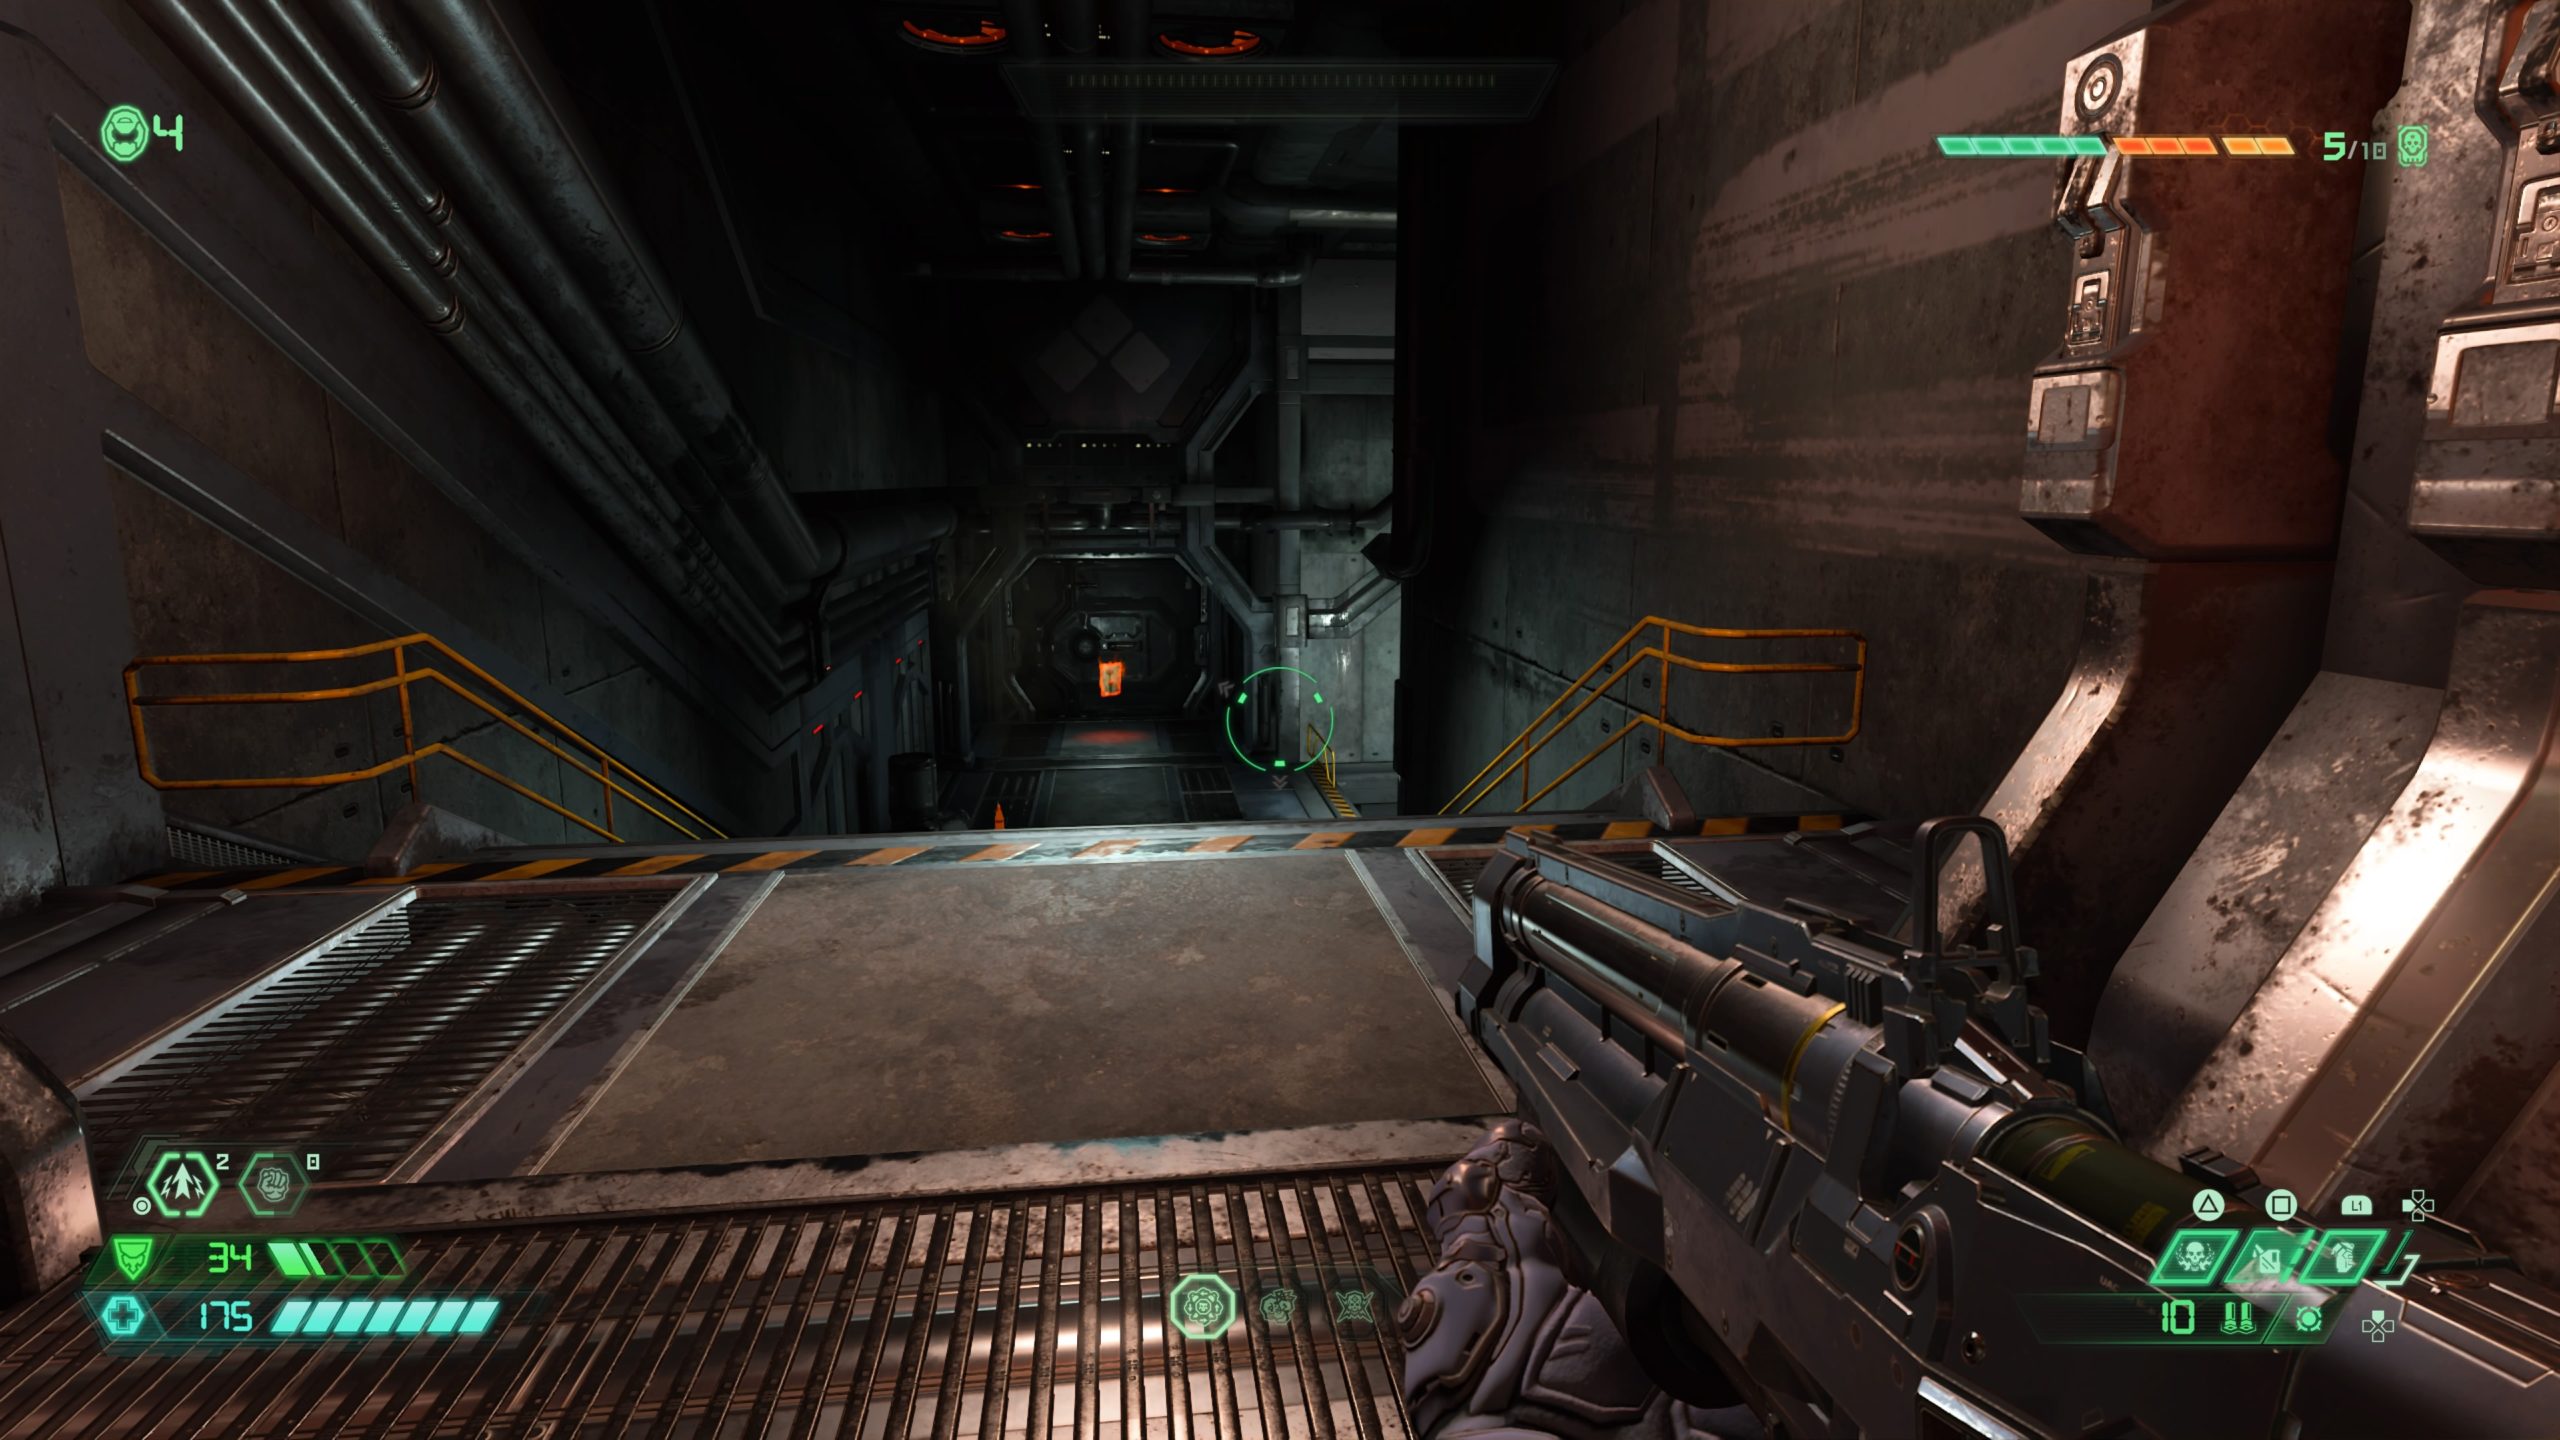
Jump to the tunnel across from the battery and follow it. Dodge the electric spikes along the way to eventually end up at an elevator. Take it up then exit it to find yourself in another hallway. Follow it right dodging more electric spikes as you go then pass through the door at the end. Once through the doorway, take a left heading through another door. The codex will be straight ahead.
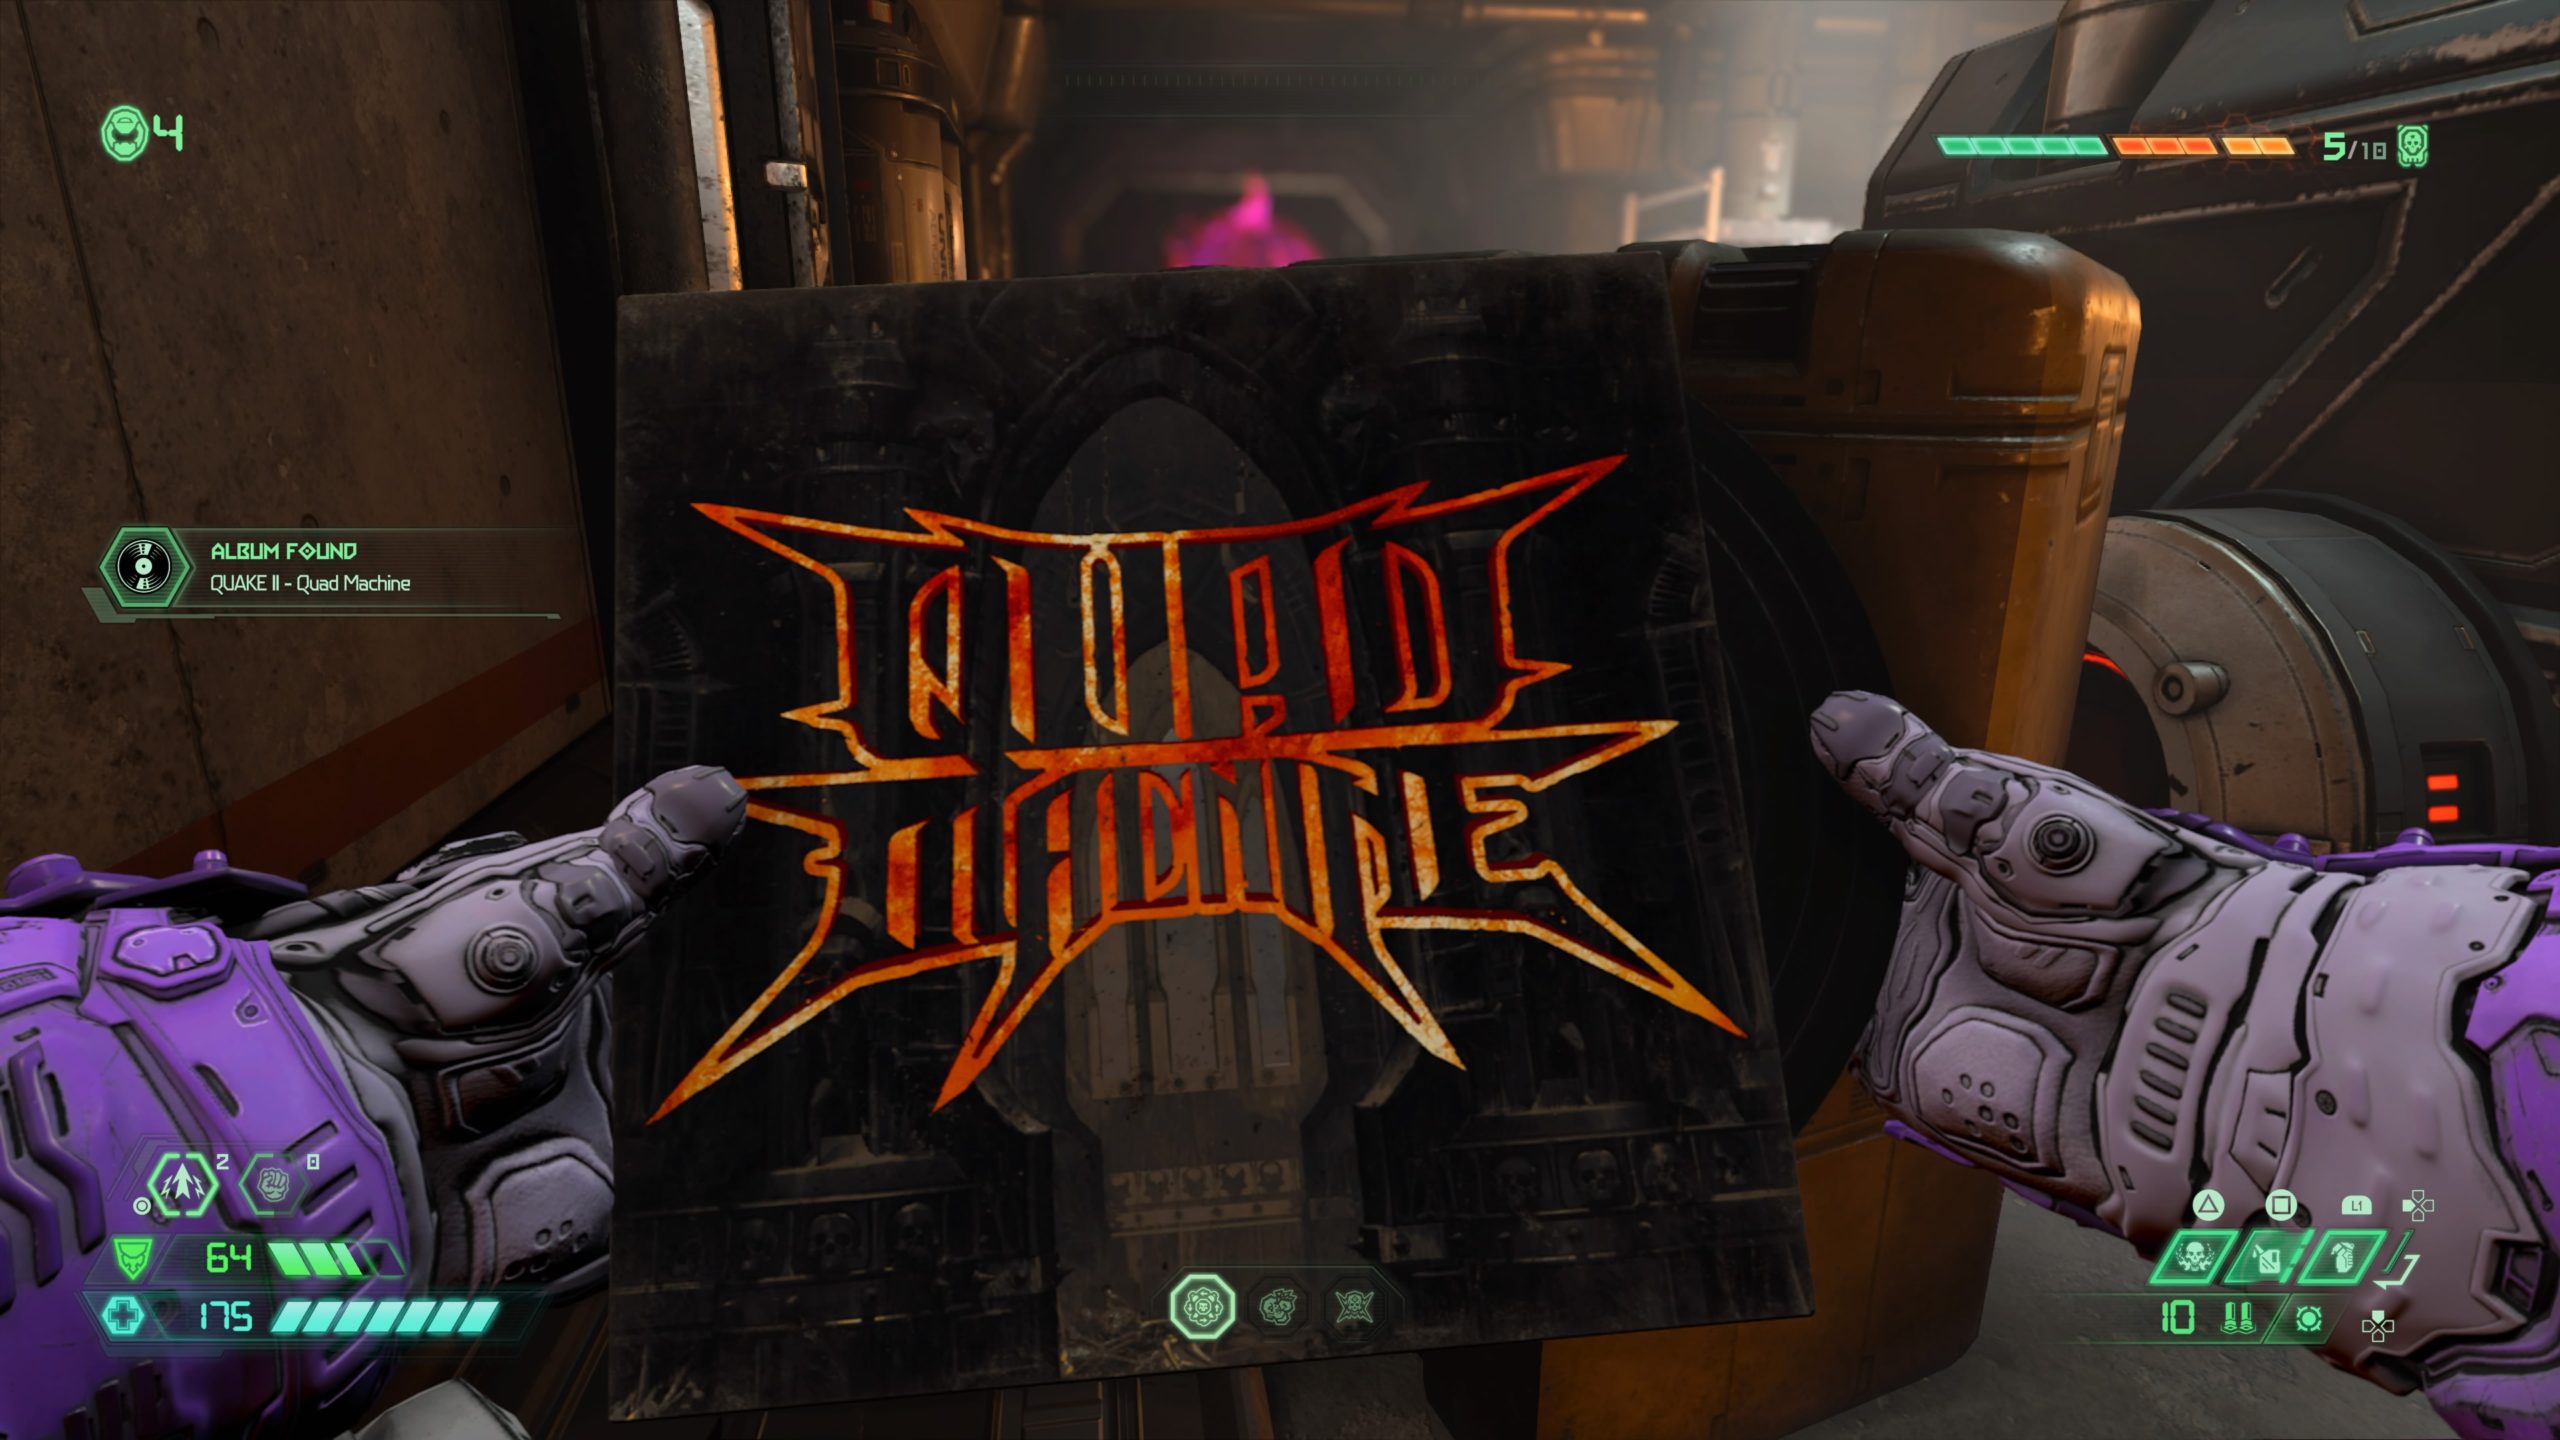
Album: Quake II – Quad Machine

From the codex, drop down the nearby ledge and head to the back of the room to find the album behind a generator.
Modbot
From the starting point, turn right to find the modbot.
Sentinel Battery / Toy: Cueball
From the above modbot, head towards the brown doors in the direction you just came from and take a left to find some stairs. Climb the stairs, then take a left at the top to come to a broken walkway. Use the climbable wall on the right side of the room to reach the other side of the broken walkway containing the battery and toy.
Cheat Code: IDKFA
From the above collectibles, head back to broken walkway on the other side of the room (near the stairs leading to the Slayer Gate) to locate a broken window. Jump out the window and use the gold spin bar to reach the room on the other side. Jump into the hole in the middle of the room to obtain the cheat code.
Modbot
From the cheat code above, jump out of the hole and head into the hallway. Take a right just before the stairs followed by another right to find the modbot.

Codex: Story of Earth – The Arc – Part I
From the fast travel point, jump out the window to the building across the way. Once in the other building, turn left and jump over the fallen debris to find a cracked wall. Melee the wall and head up the stairs to find a codex at the top of the stairs.
Sentinel Crystal

From the codex, head down a flight of stairs and jump through the hole in the wall in the middle of the stairwell. The sentinel crystal will be located to the right of the breakable wall.
Praetor Suit Point

From the crystal, break the boarded wall then head into the room beyond it. Go past the golden plane and head out the broken window to the left of the room, using a series of gold spin bars and climbable walls to reach the top level of the building. Once inside, follow the hallway, taking a left through a broken wall into an elevator shaft. Climb up the elevator, exiting on the right near a UAC Spokesperson hologram. The Praetor Suit Point will be located in this room.

Codex: Story of Earth – Samuel Hayden / Praetor Suit Point

From the fast travel point, head right into the interior portion of the building to locate a set of stairs. Head up two flights of stairs then take a left. Follow the hallway to the end to find the codex. From the codex, head forward and jump across the way to the other side to find the Praetor Suit Point.
Toy: Whiplash
From the Praetor Suit Point, jump back over to where the codex was across the way then head down the hallway back towards the stairs and take two flights up. At the top of the stairs, take a left through some debris to find the toy.
Rune
From the toy, head back through the debris into a hallway and follow it straight ahead to the end. Jump through the hole in the wall to a building on the other side. Follow the hallway through a flaming doorway. Take a right followed by a left to come to a hole in the floor. Drop down into the hole to find the rune.

Praetor Suit Point
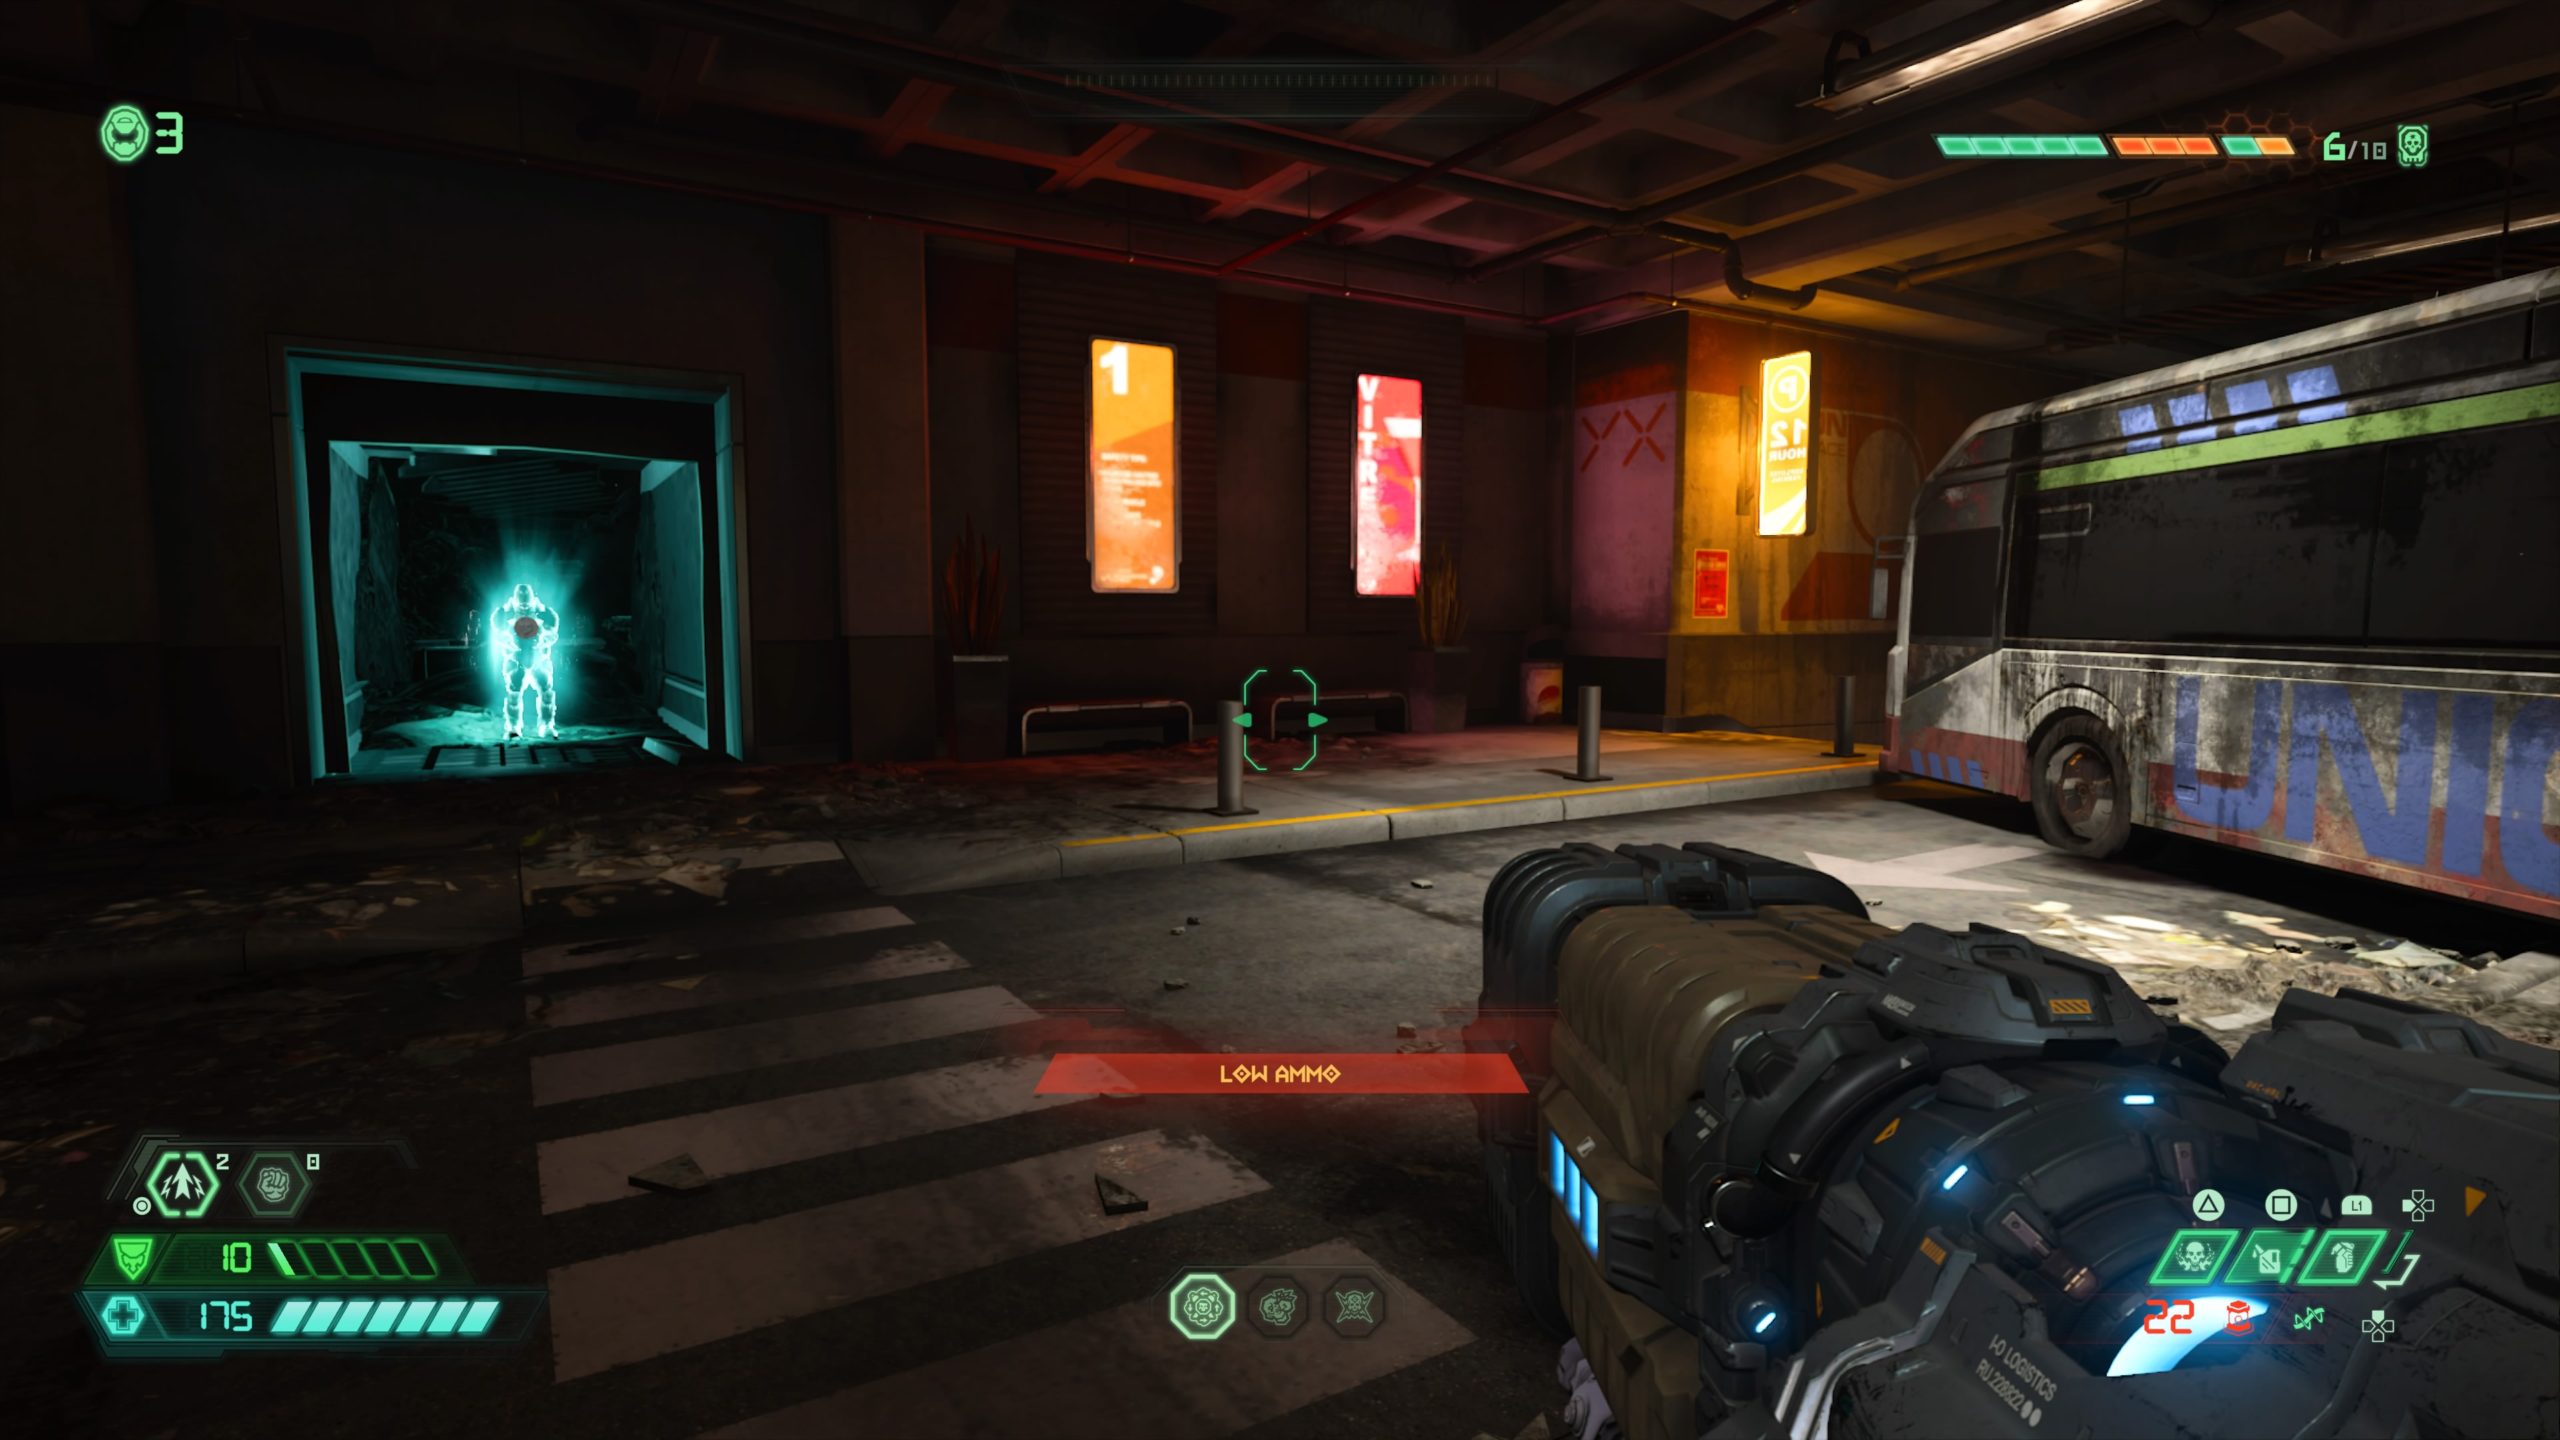
From the fast travel area, turn around heading into the parking lot. Pass the bus on the right side and enter the room on the right to find the Praetor Suit Point.
Album: Quake III – Intro

From the Praetor Suit Point, head to the ramp in the middle of the garage to reach the second level. At the top of the ramp, swing left and head through the exterior access doorway. Take a right to find the album.
*NOTE: This guide was written assuming that you completed this area and are returning to the locations via fast travel points.

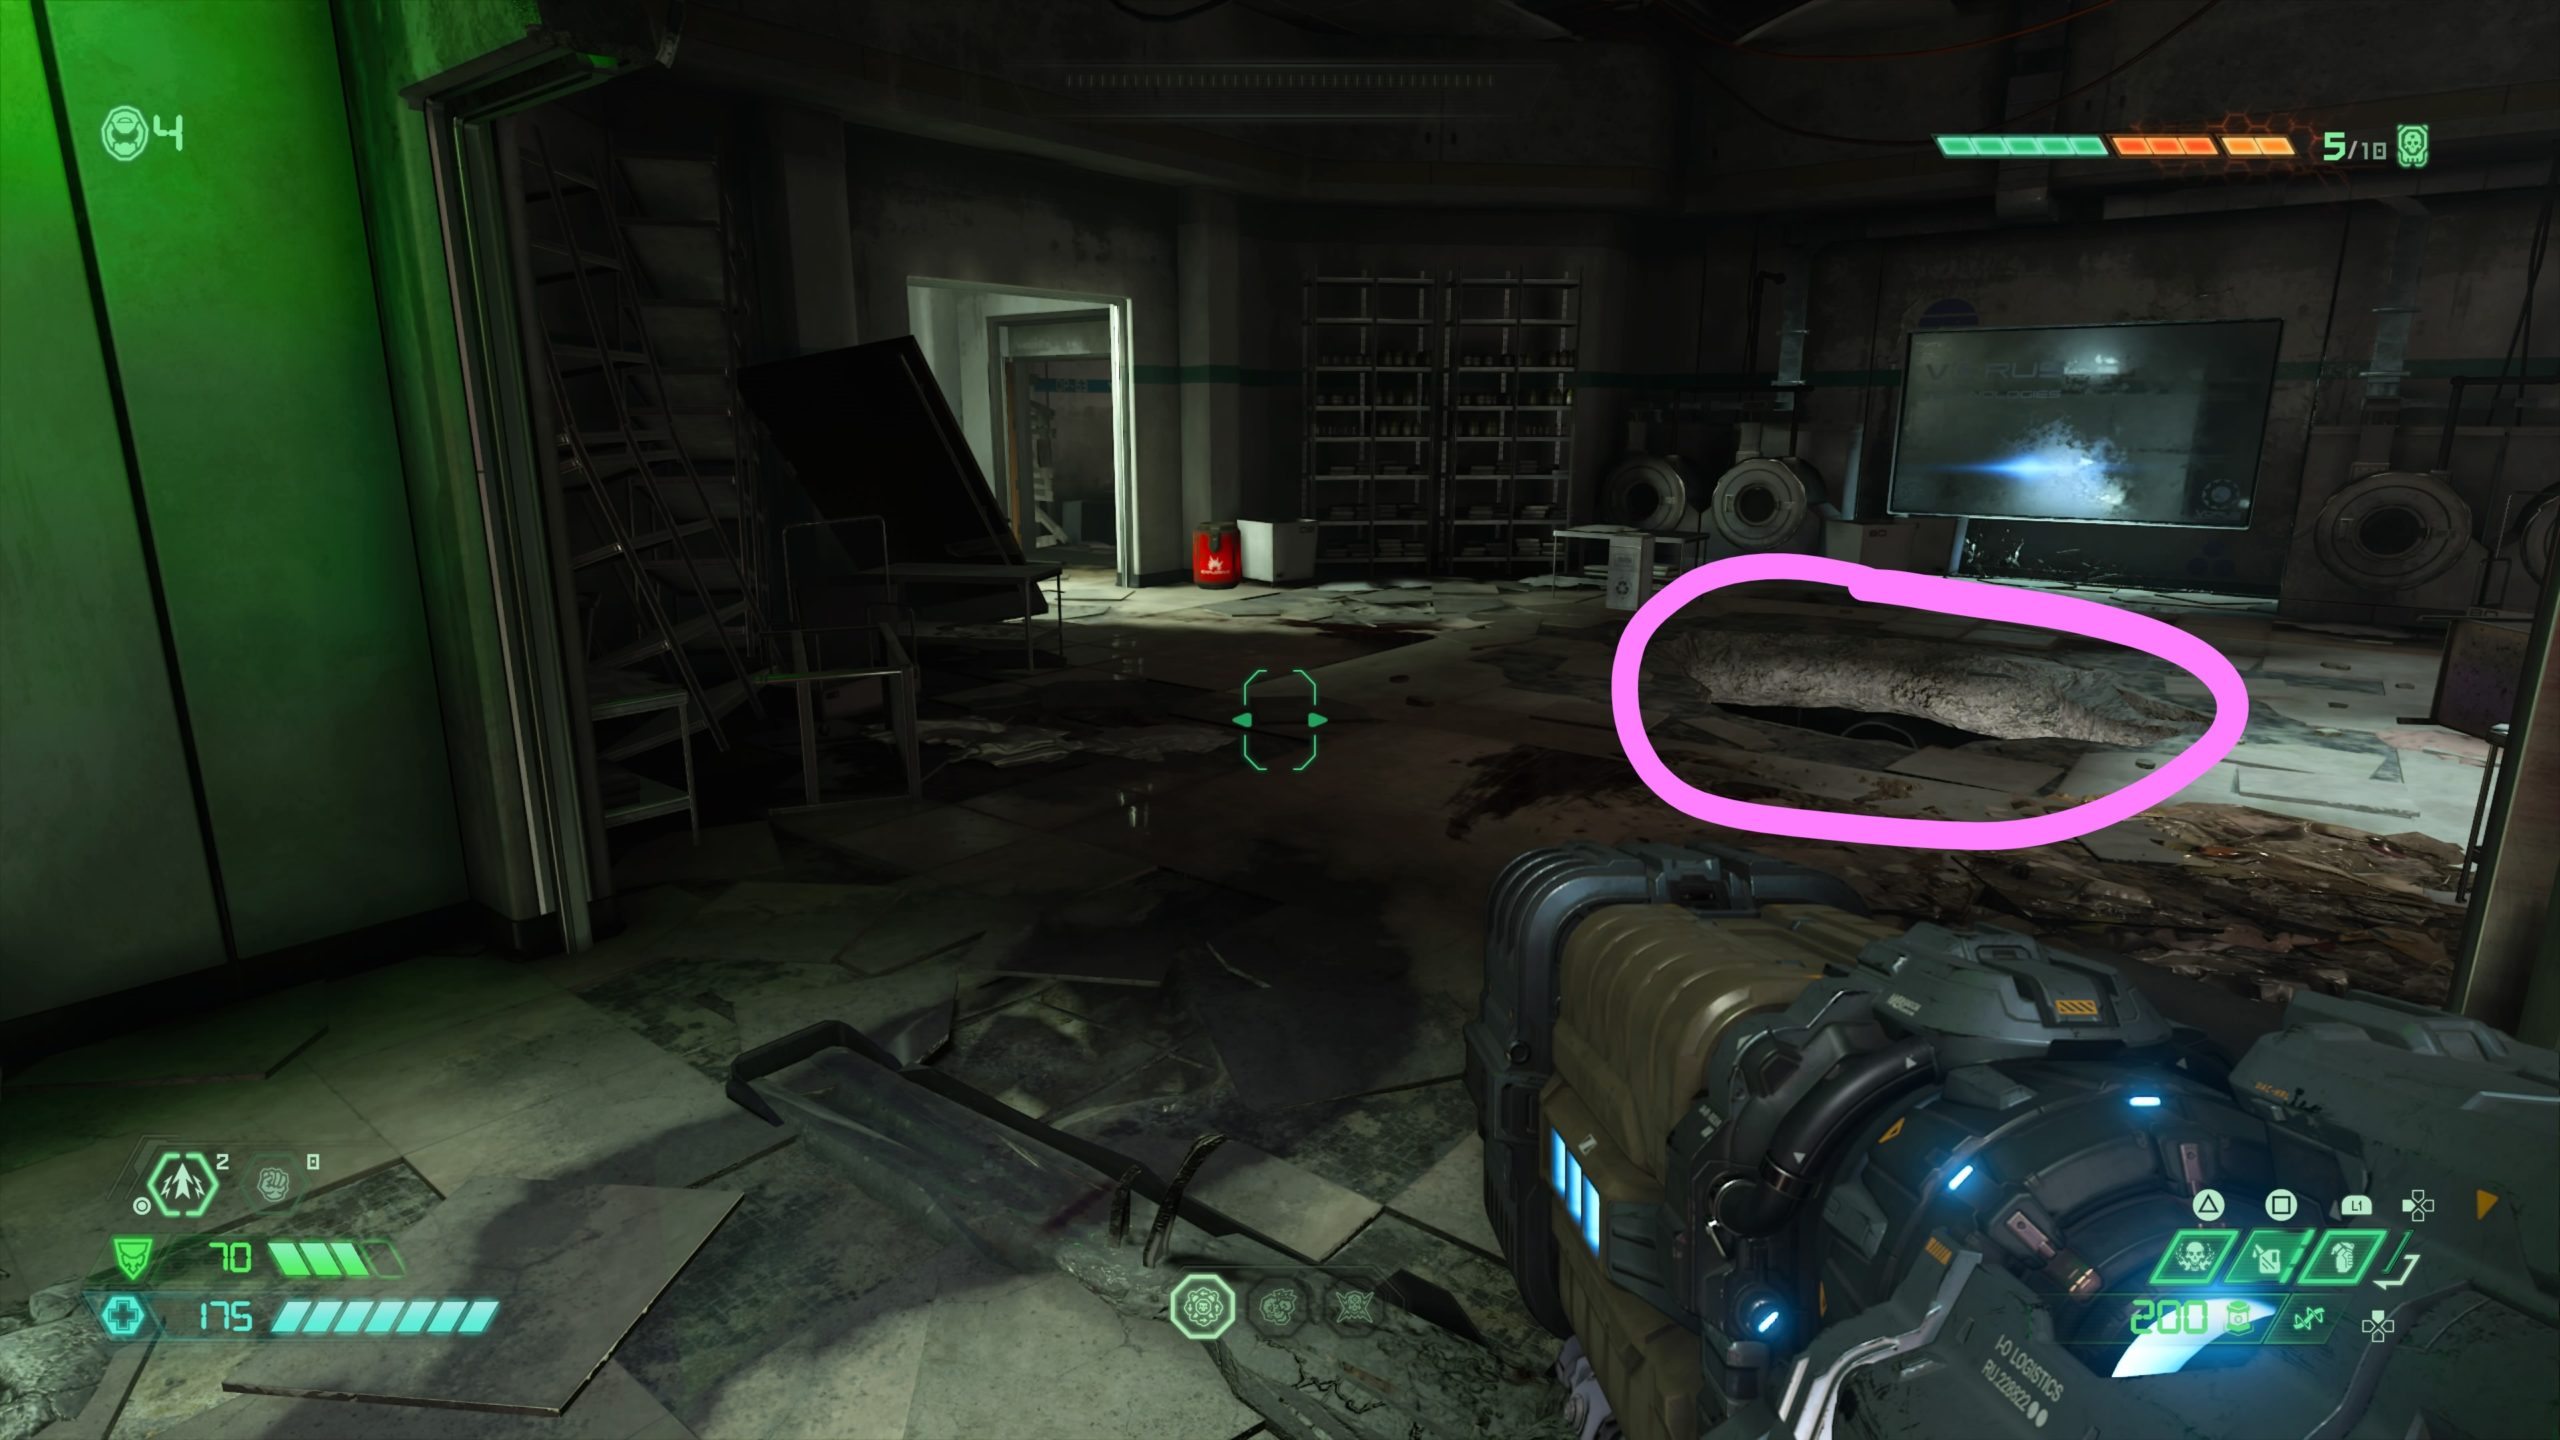
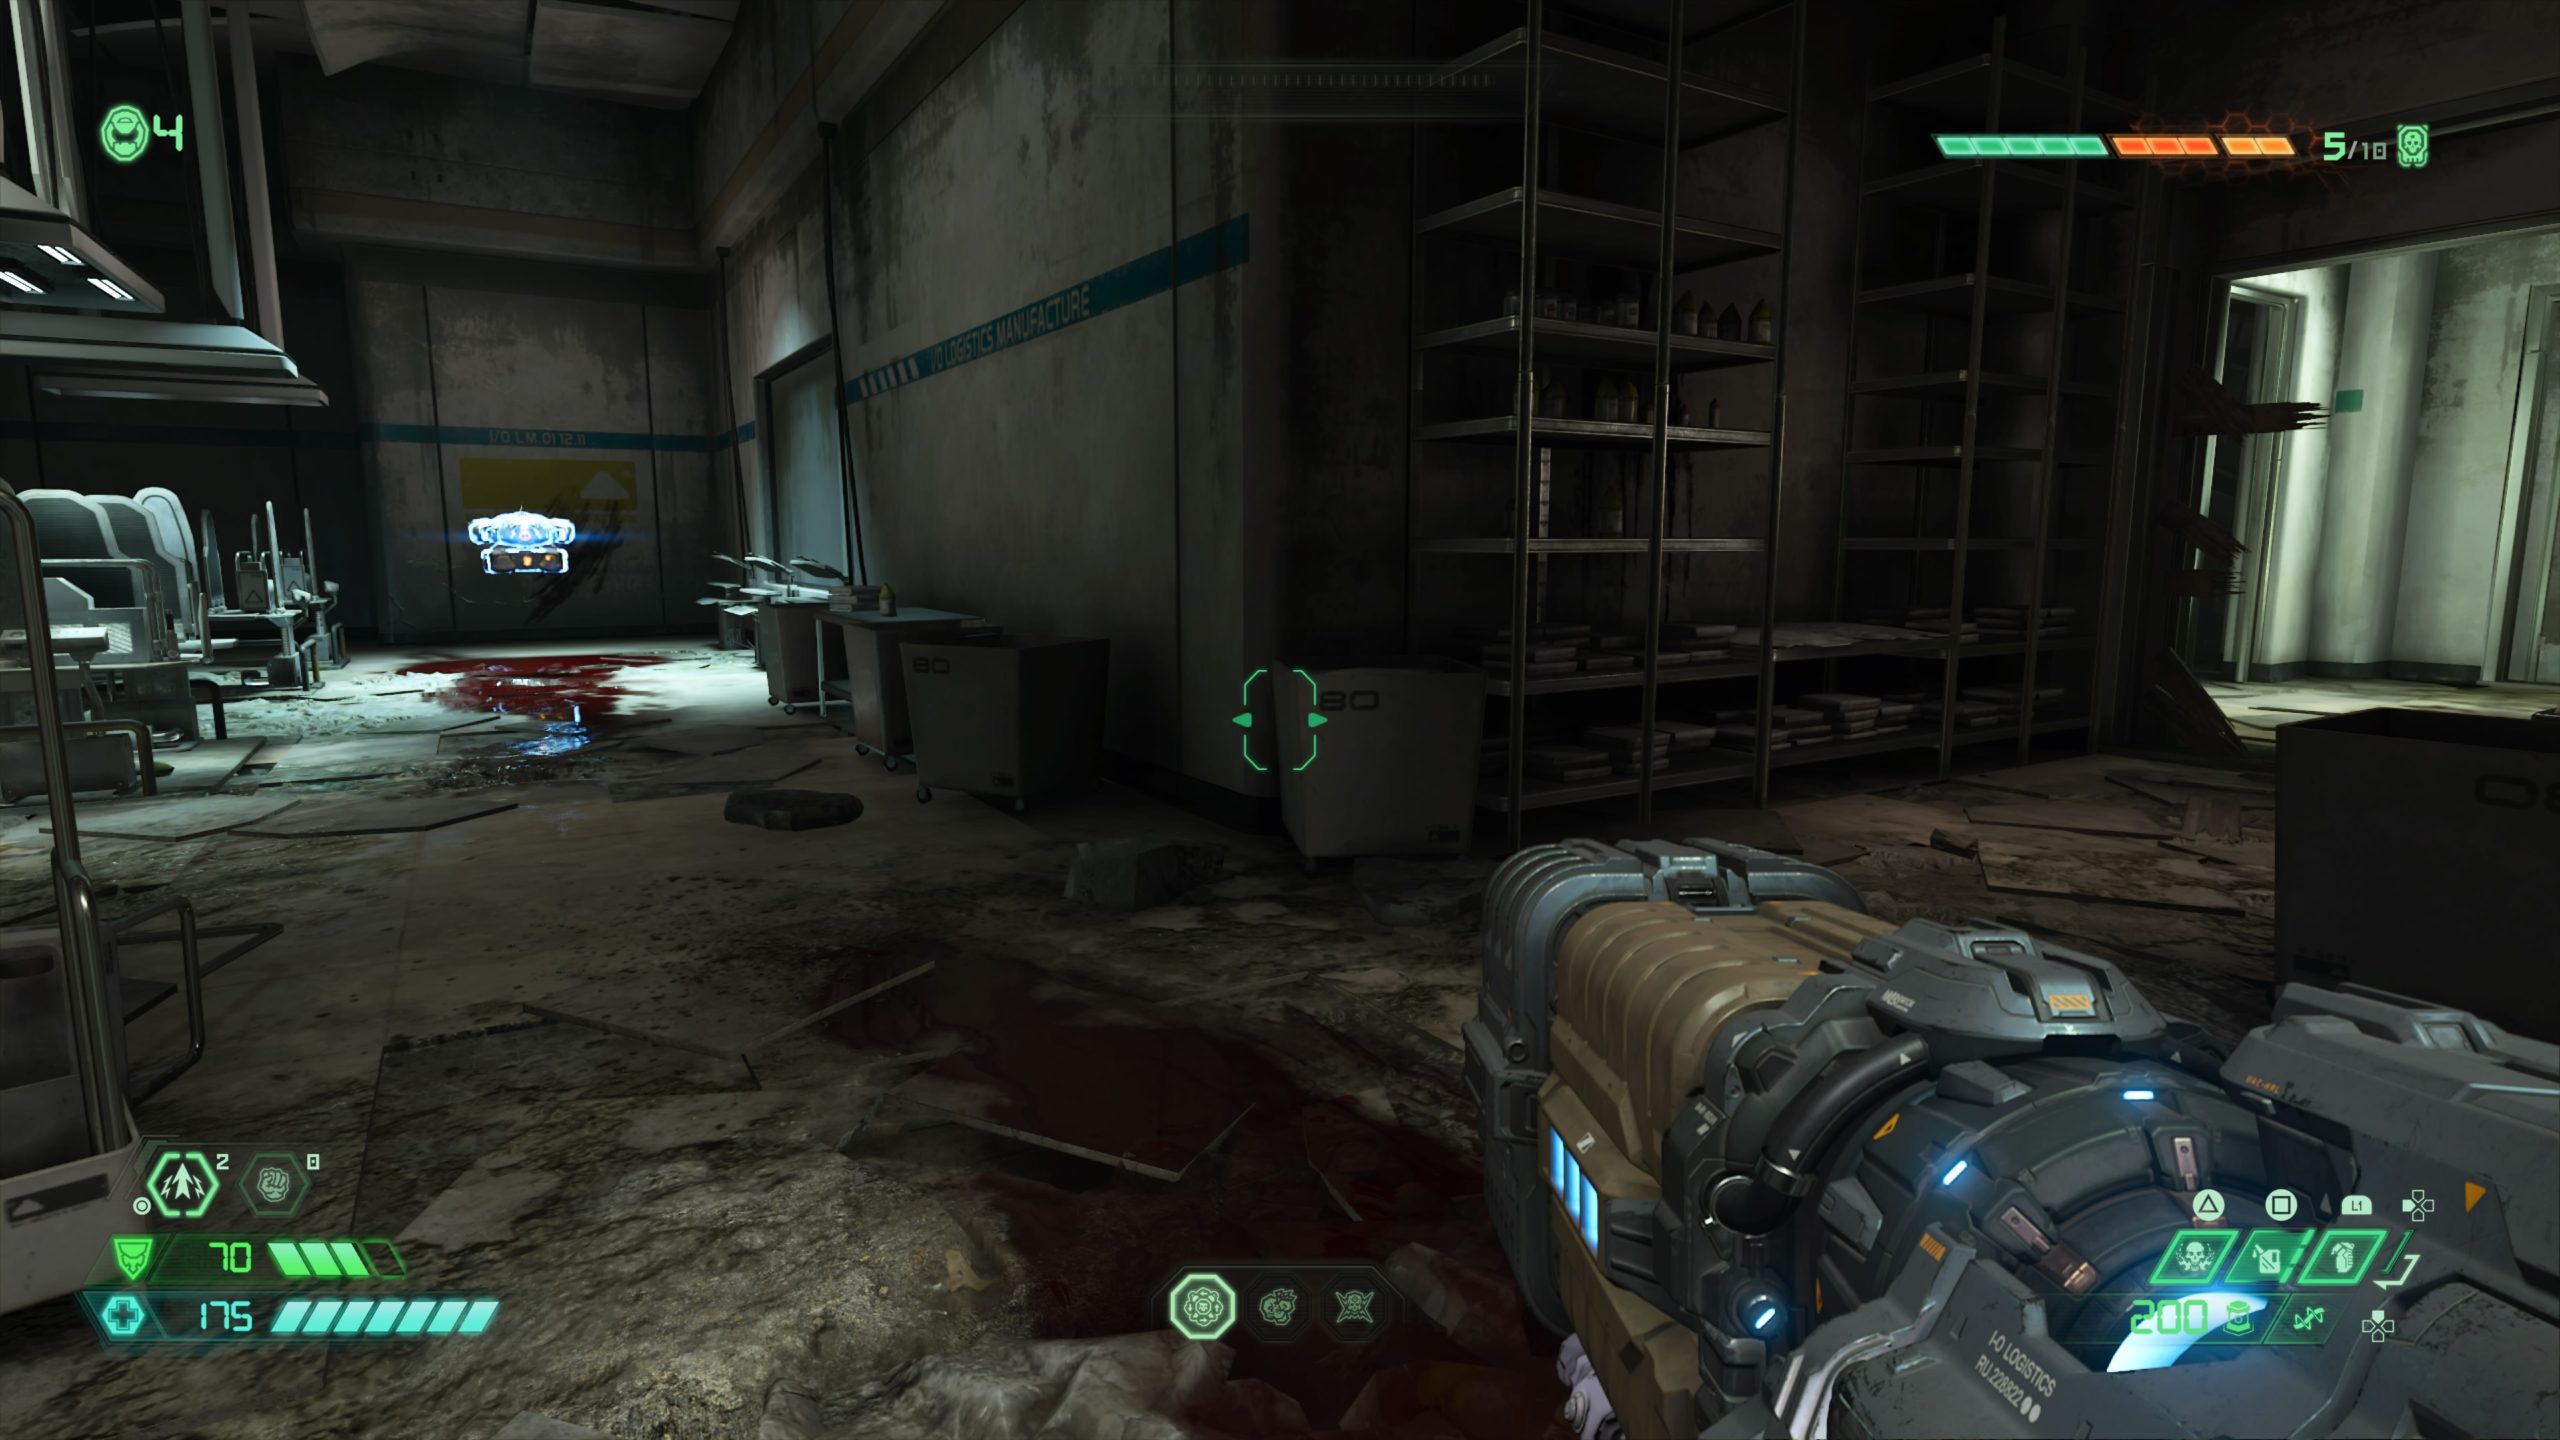
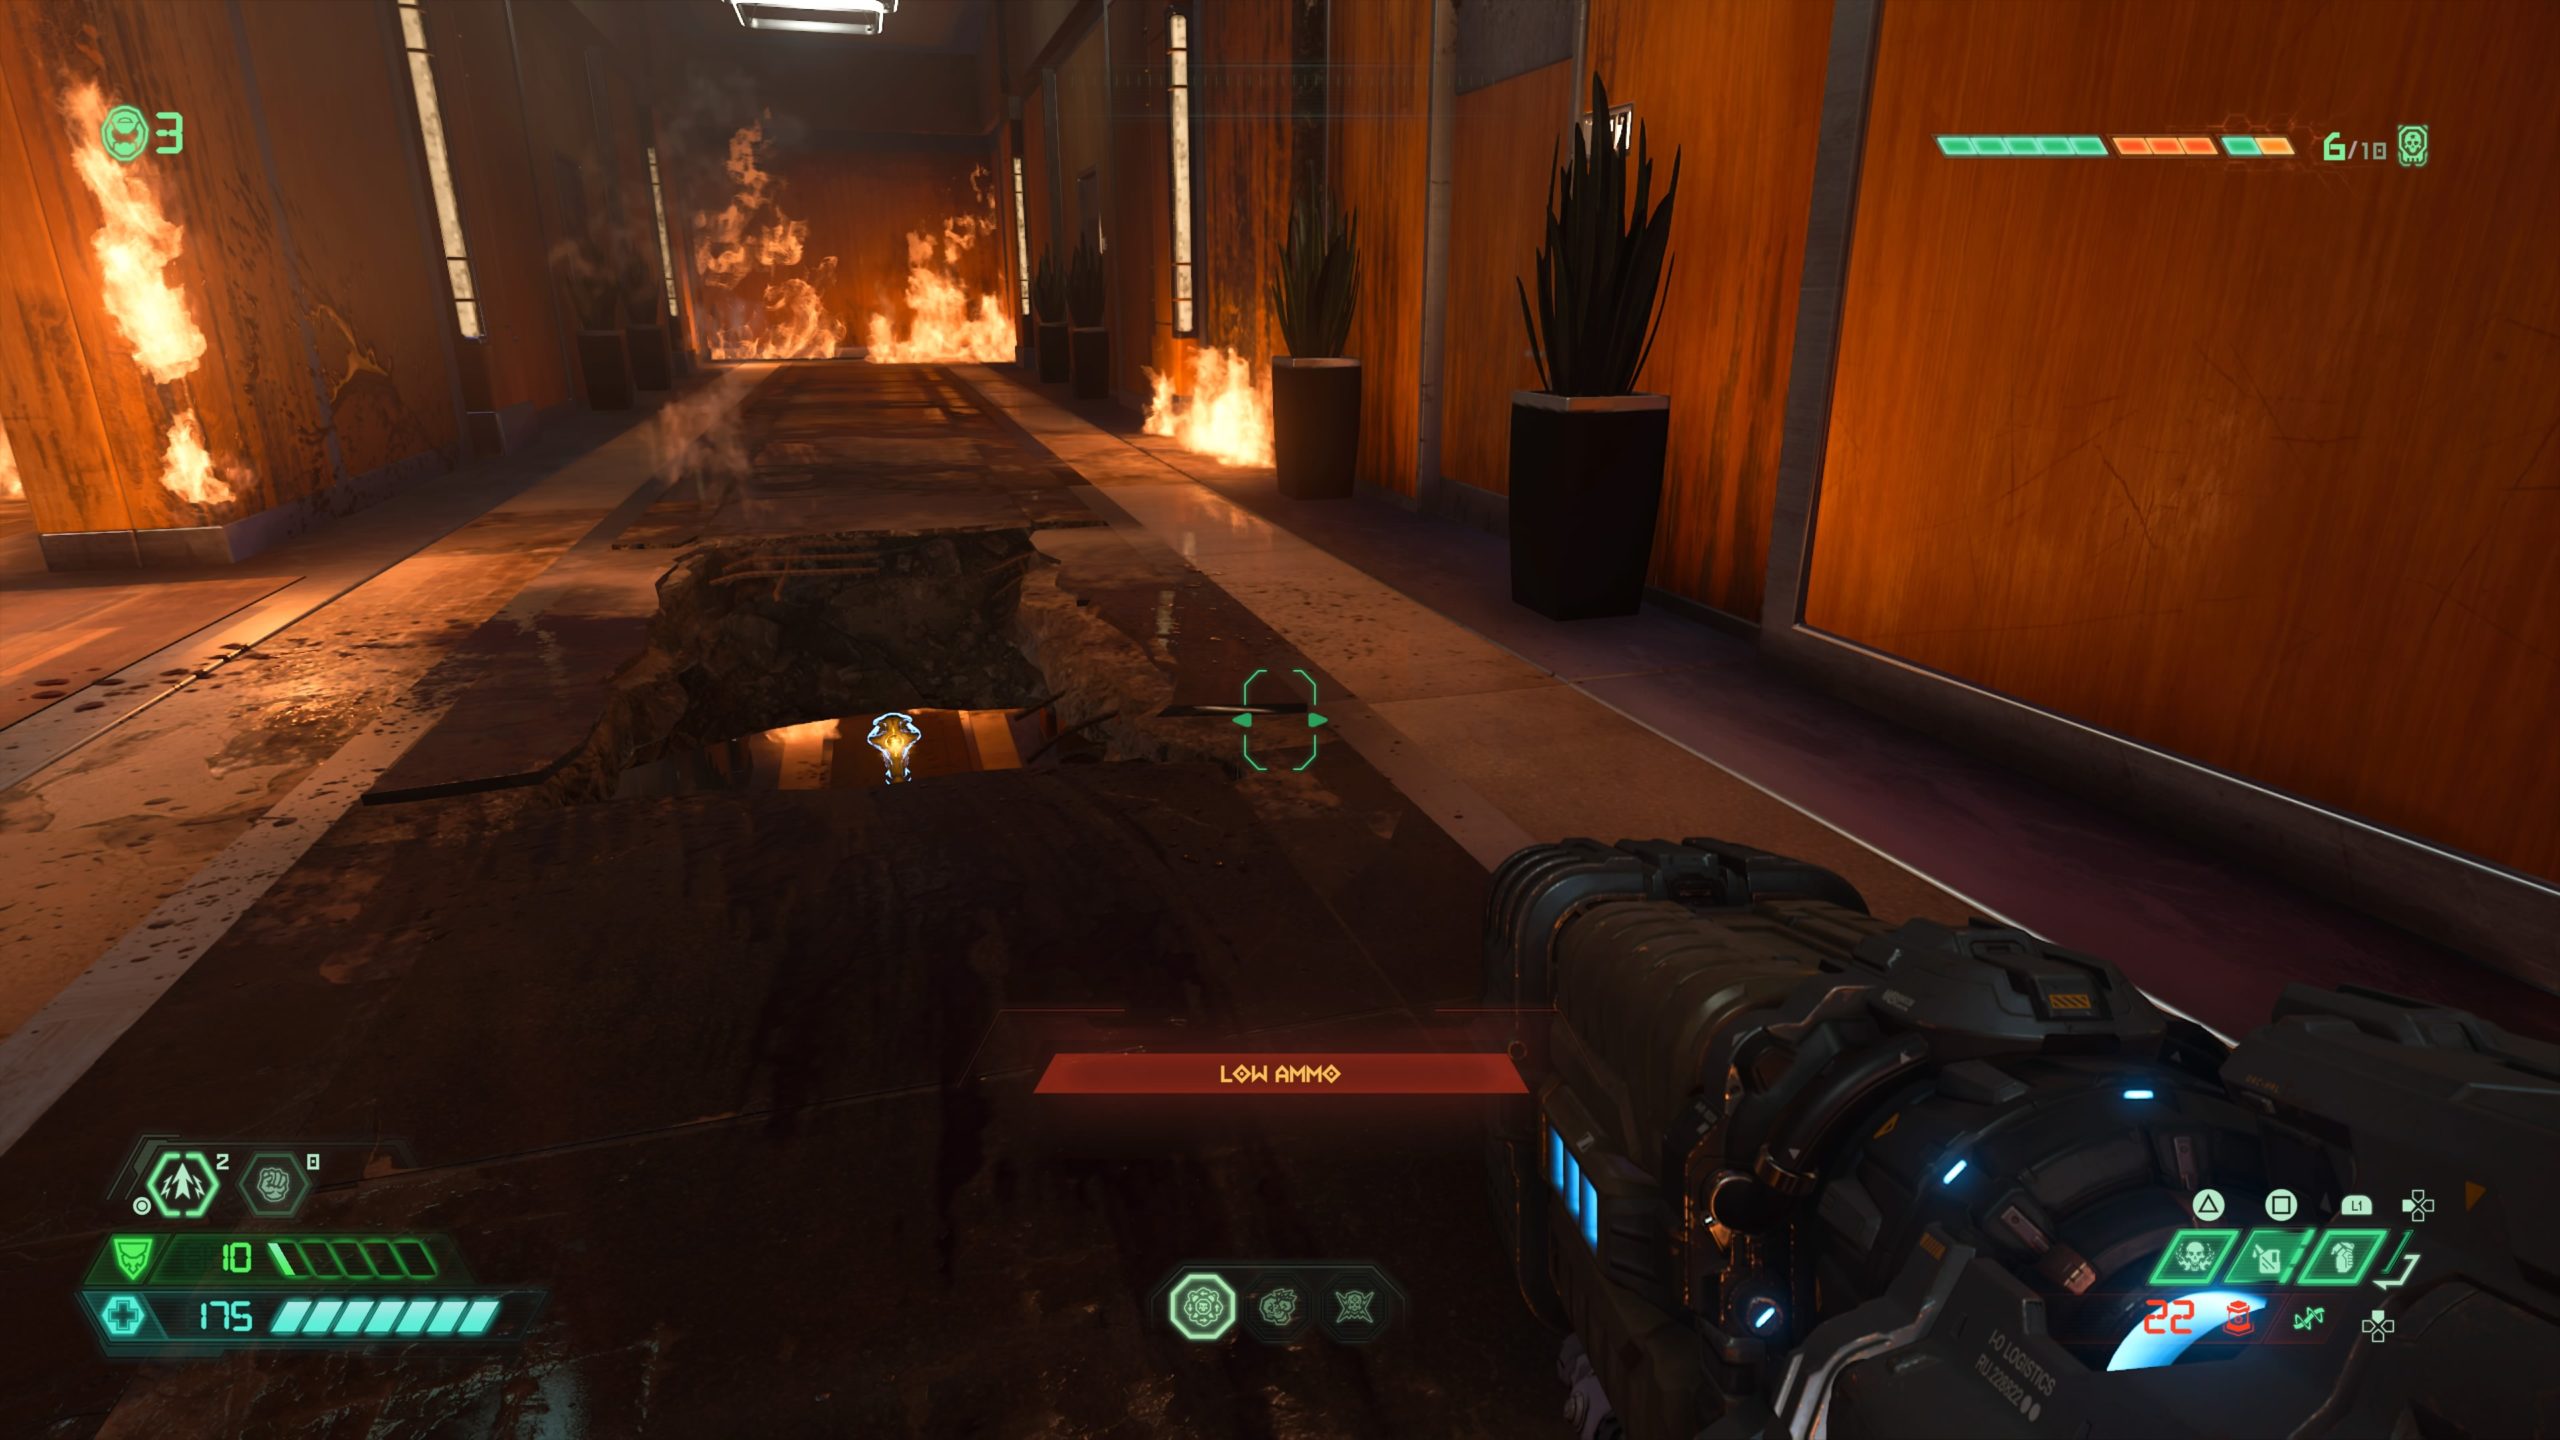
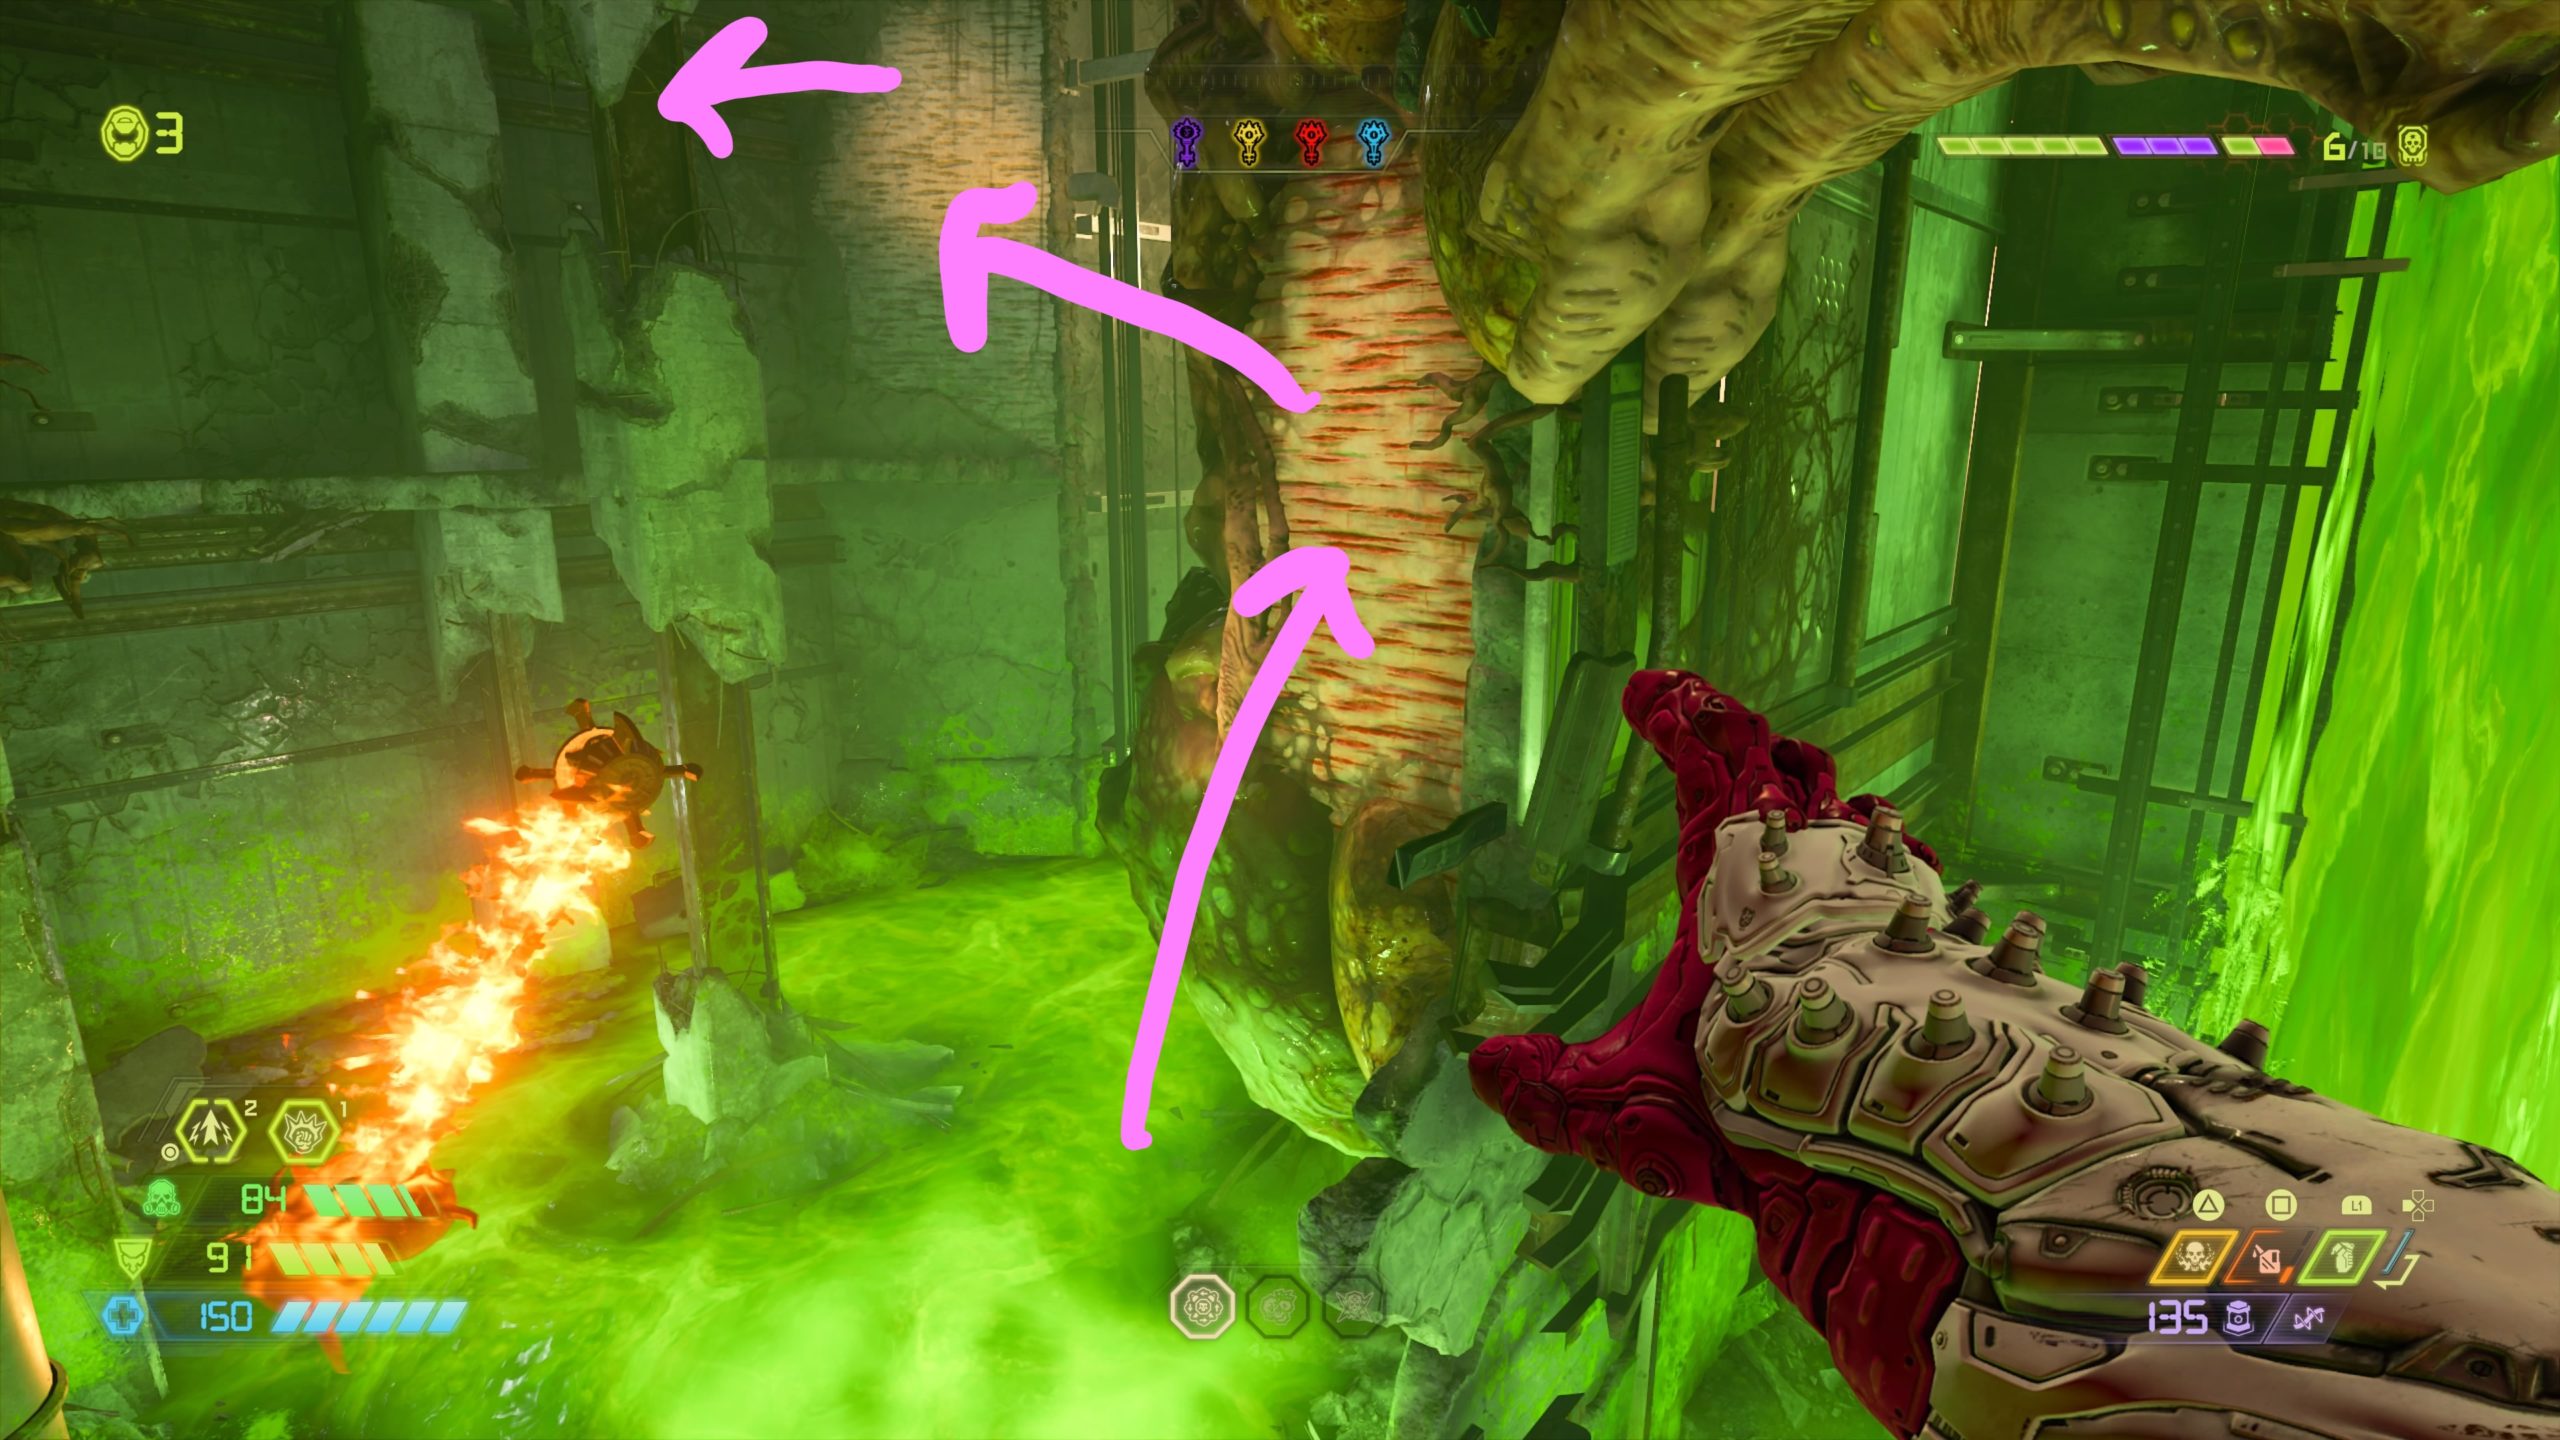
Codex: Story of Earth – The Hellgrowth – Part I
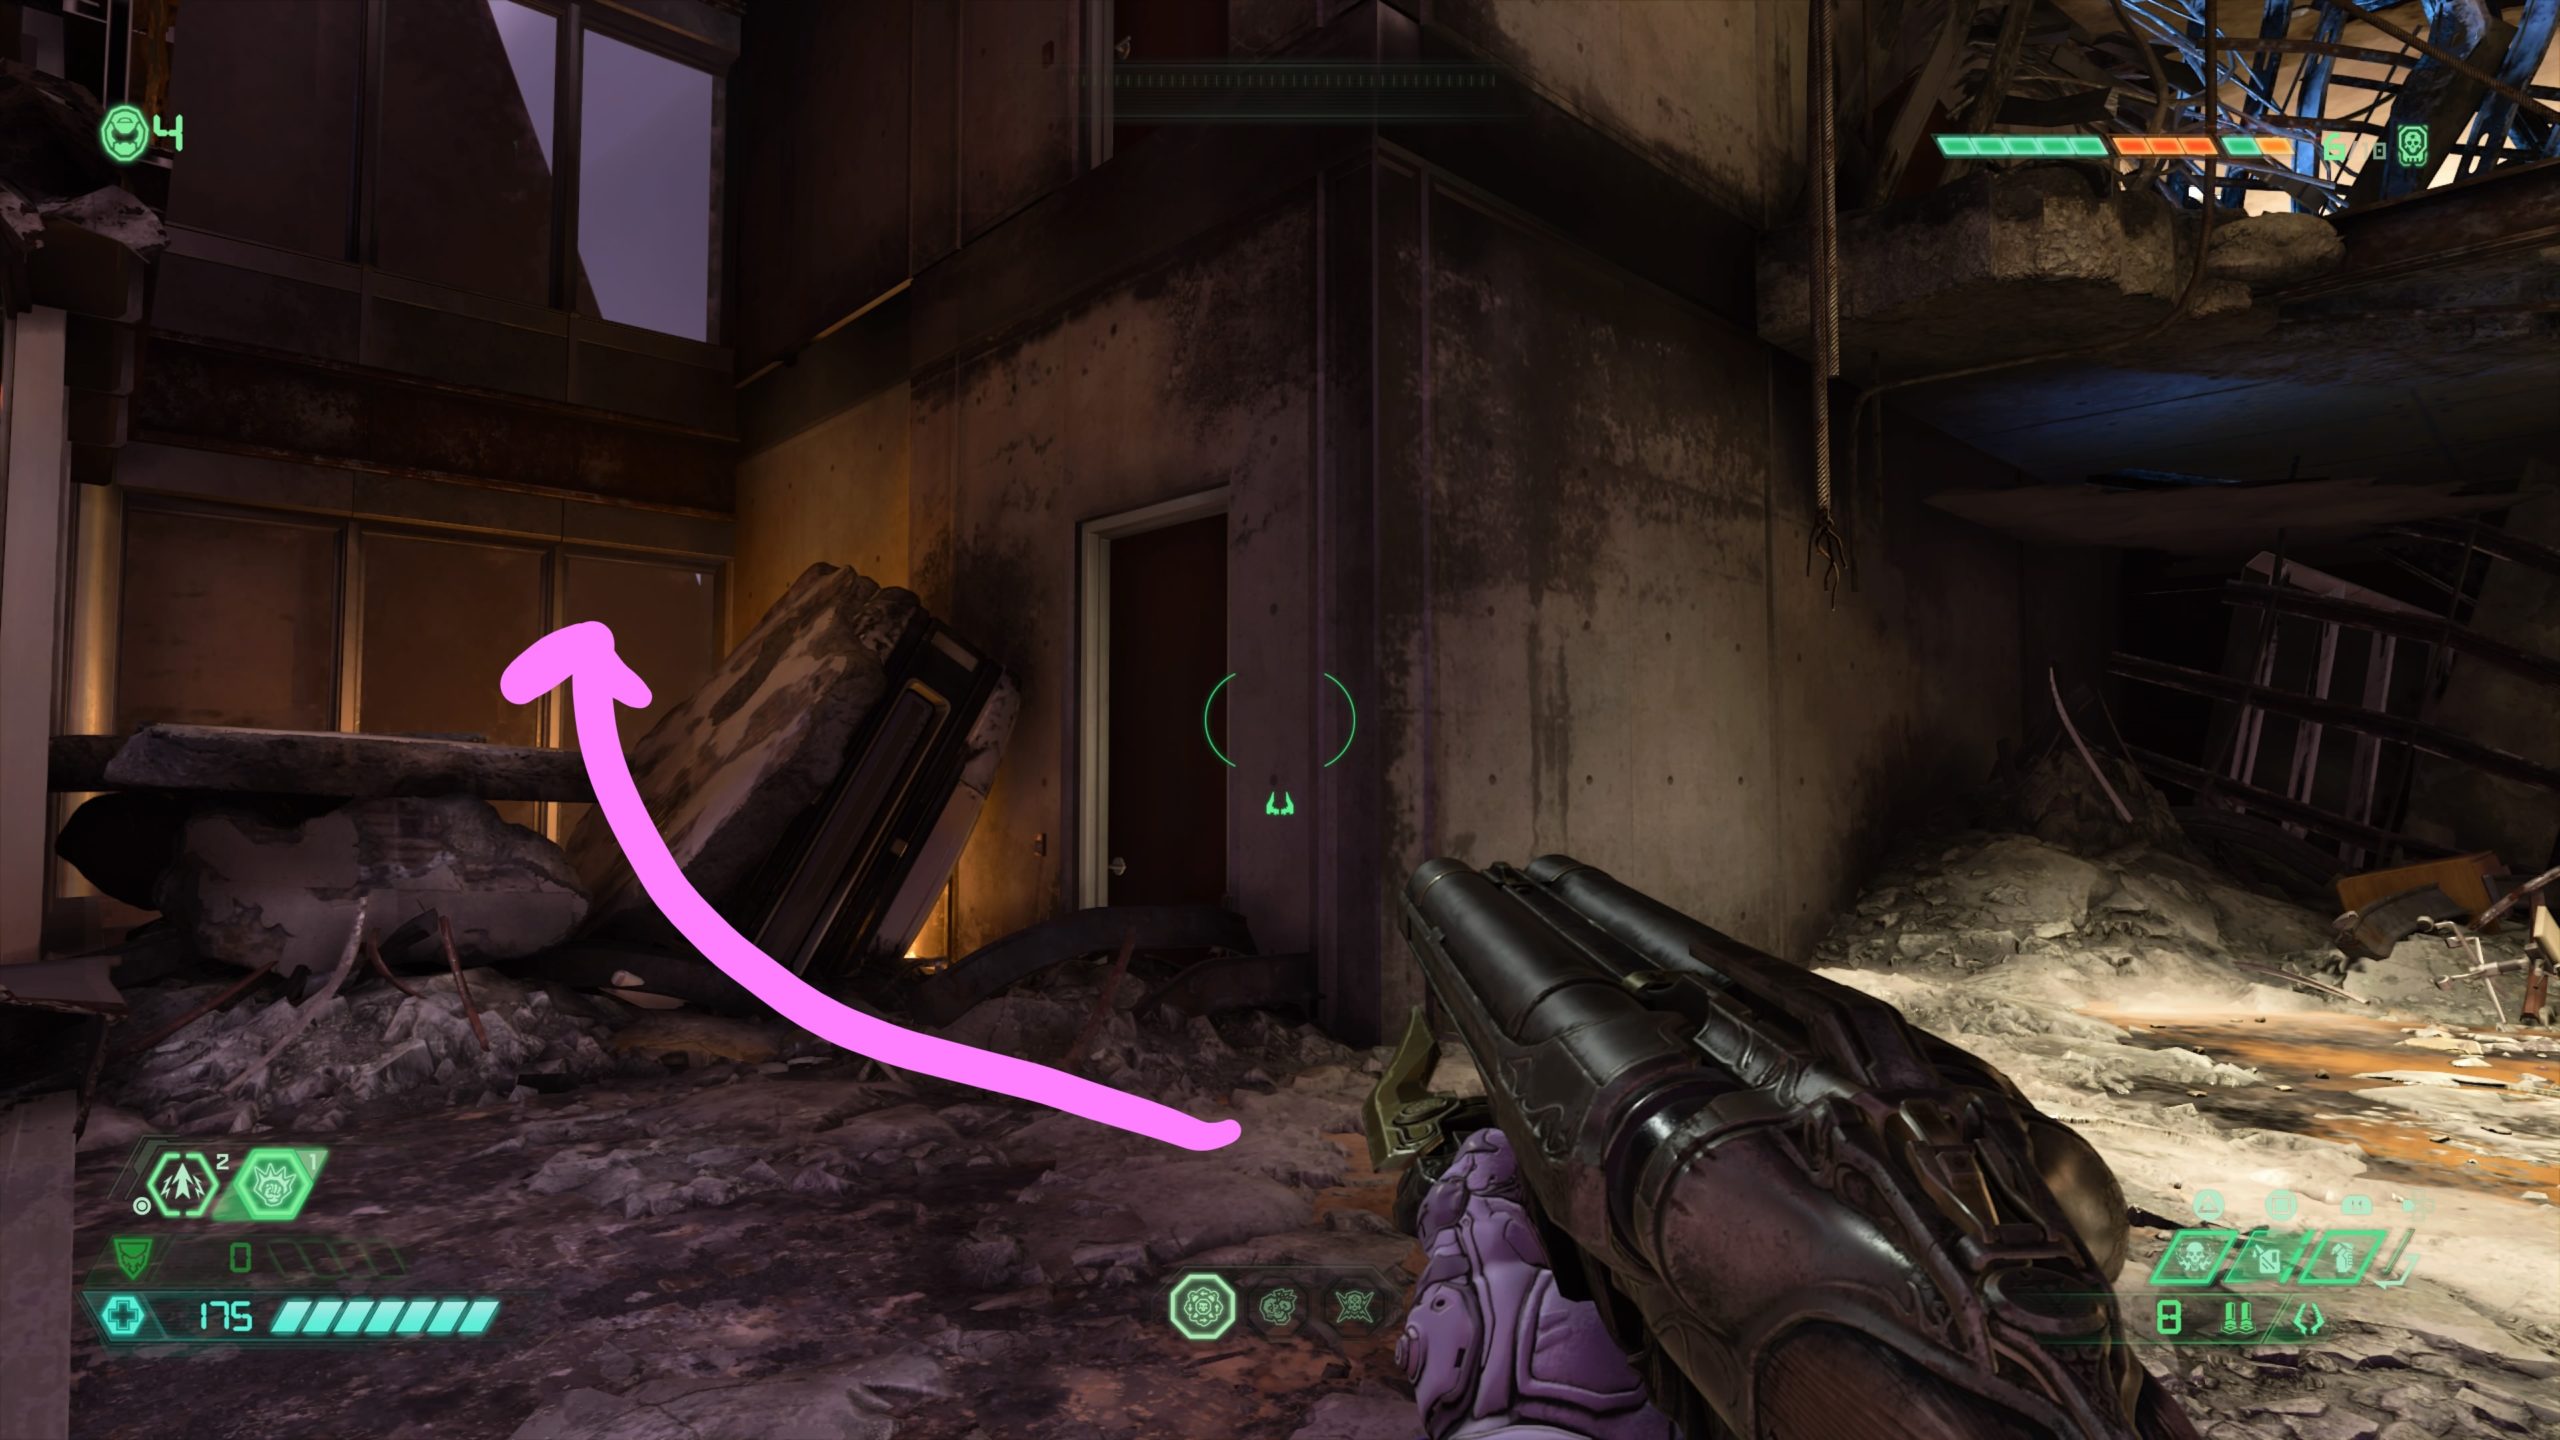
From the fast travel point, turn around and head back towards the entrance. When you reach the blood soaked road, jump down to the ledge below on the left. Jump down one more level to find the codex.
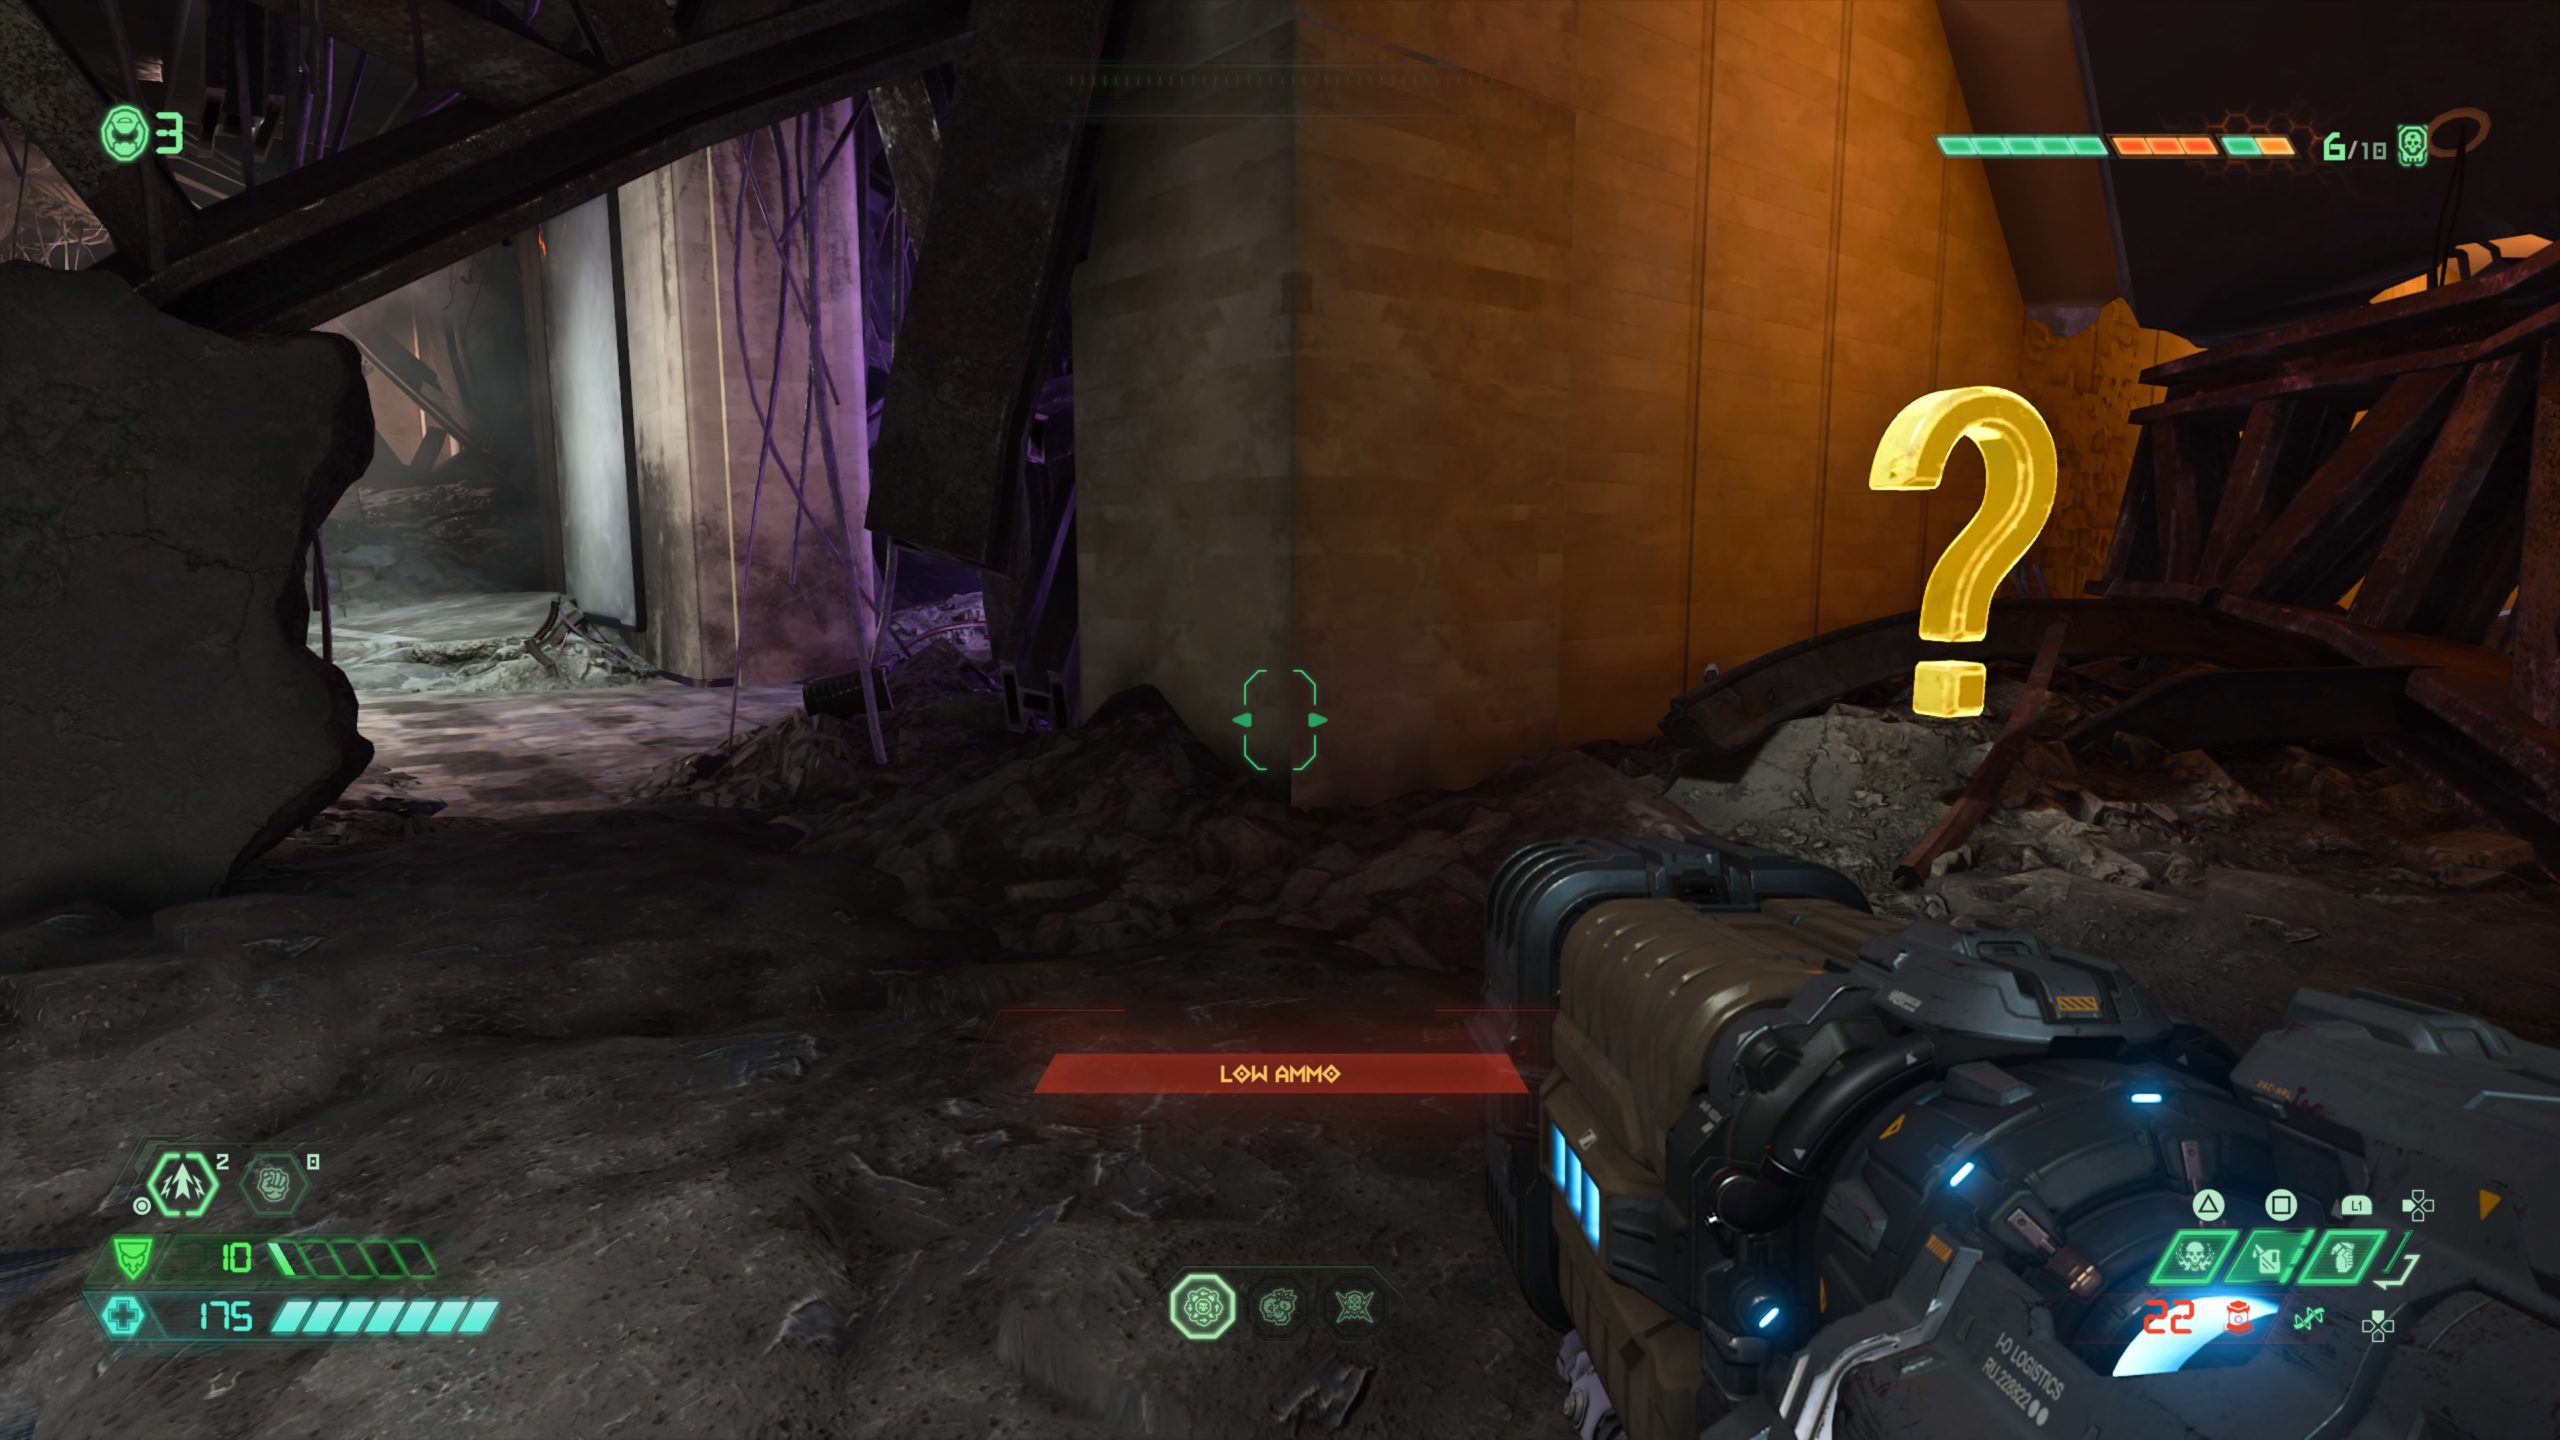
Praetor Suit Point
*NOTE: In order to reach this point, you must first collect the extra life from the gunk covered pillar nearby. To obtain the extra life from the gunk covered pillar, start from the fast travel point and head straight forward. Take a right just before the gunk covered column and proceed to the room at the end with a gunk covered pillar. Use the gold spin bar on the pillar to reach the second level. Look for a crack in the wall then melee the wall to reveal the extra life. Use double jump and dash to reach the extra life on the gunk covered column. When you land on the pillar, the pillar will go down, causing teeth to open, revealing the sentinel holding the Praetor Suit Point.
Toy: Mecha Zombie
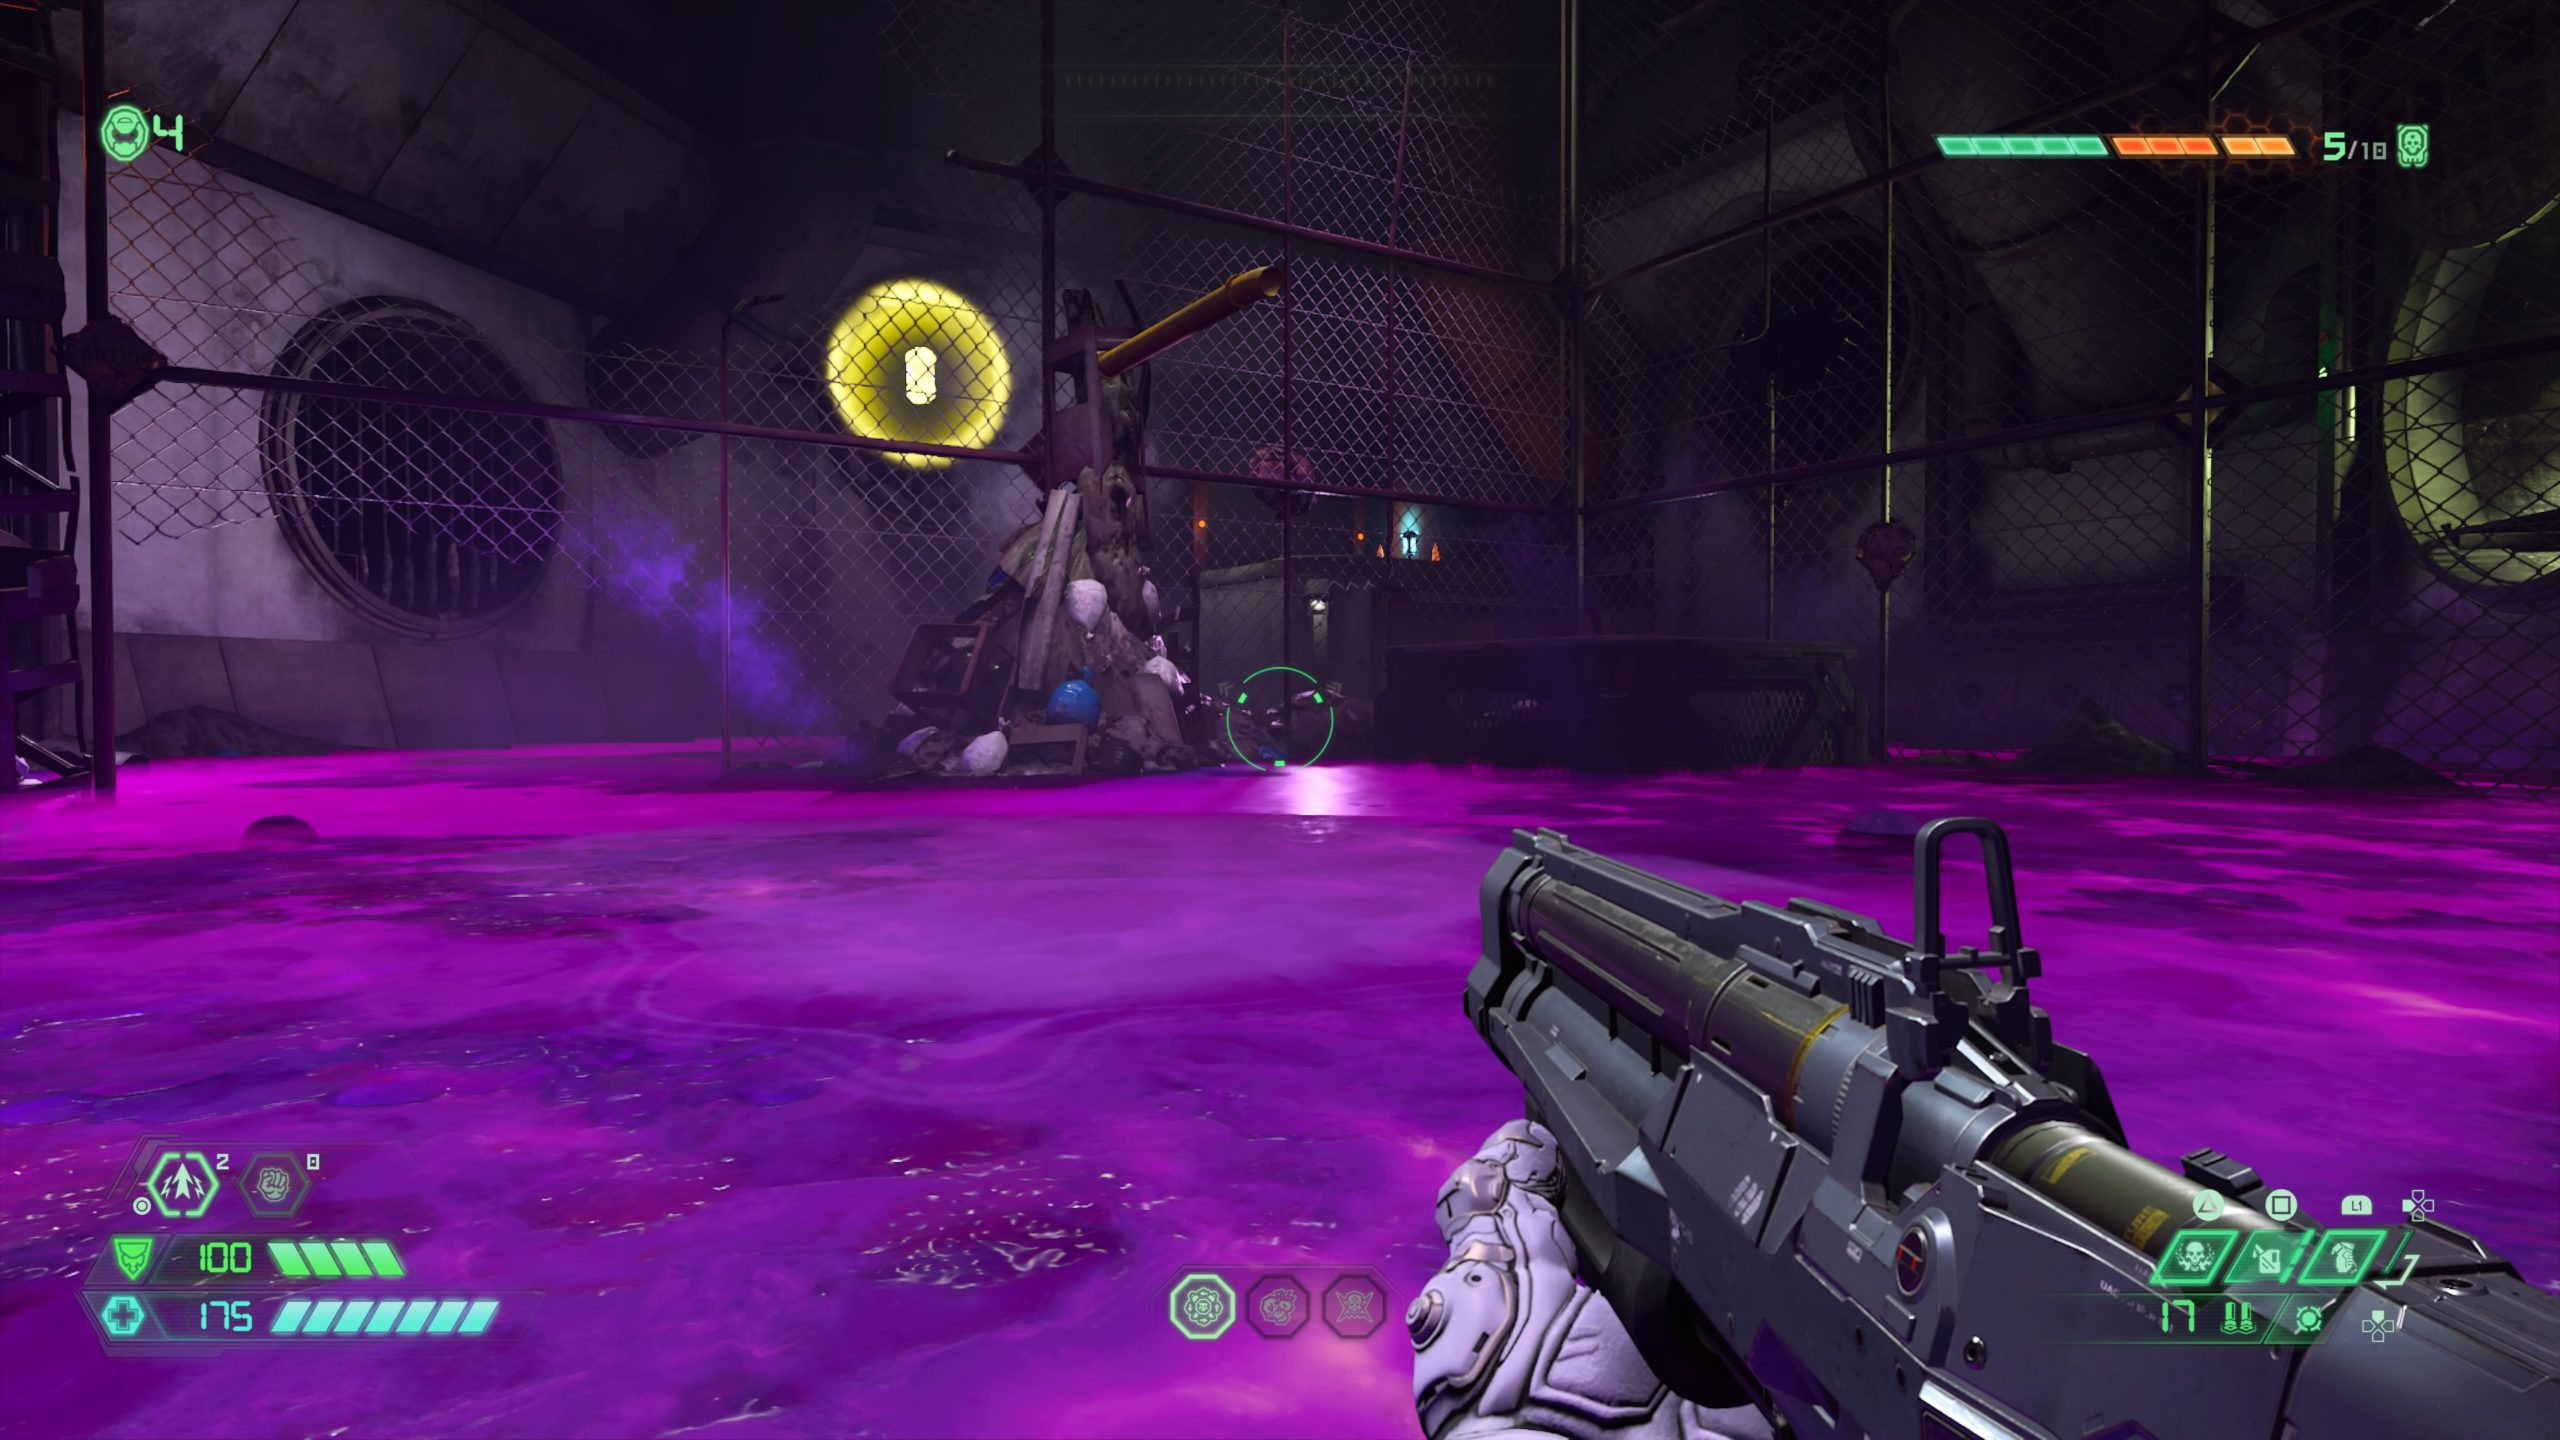
From the fast travel point, proceed forward, passing a gunk covered column, to reach a blue air stream flow in the middle of a gunk tower. You will need the blue key to unseal the teeth. Use the lift pad to reach the collectible on the ledge to the left behind the tower.
Sentinel Battery
Head back to the blue air stream flow in the middle of a gunk tower. Use the lift pad and turn right to find a long climbable wall. Avoiding the debris, jump to the climbable wall and work your way up it to reach the room at the top, which contains the battery.
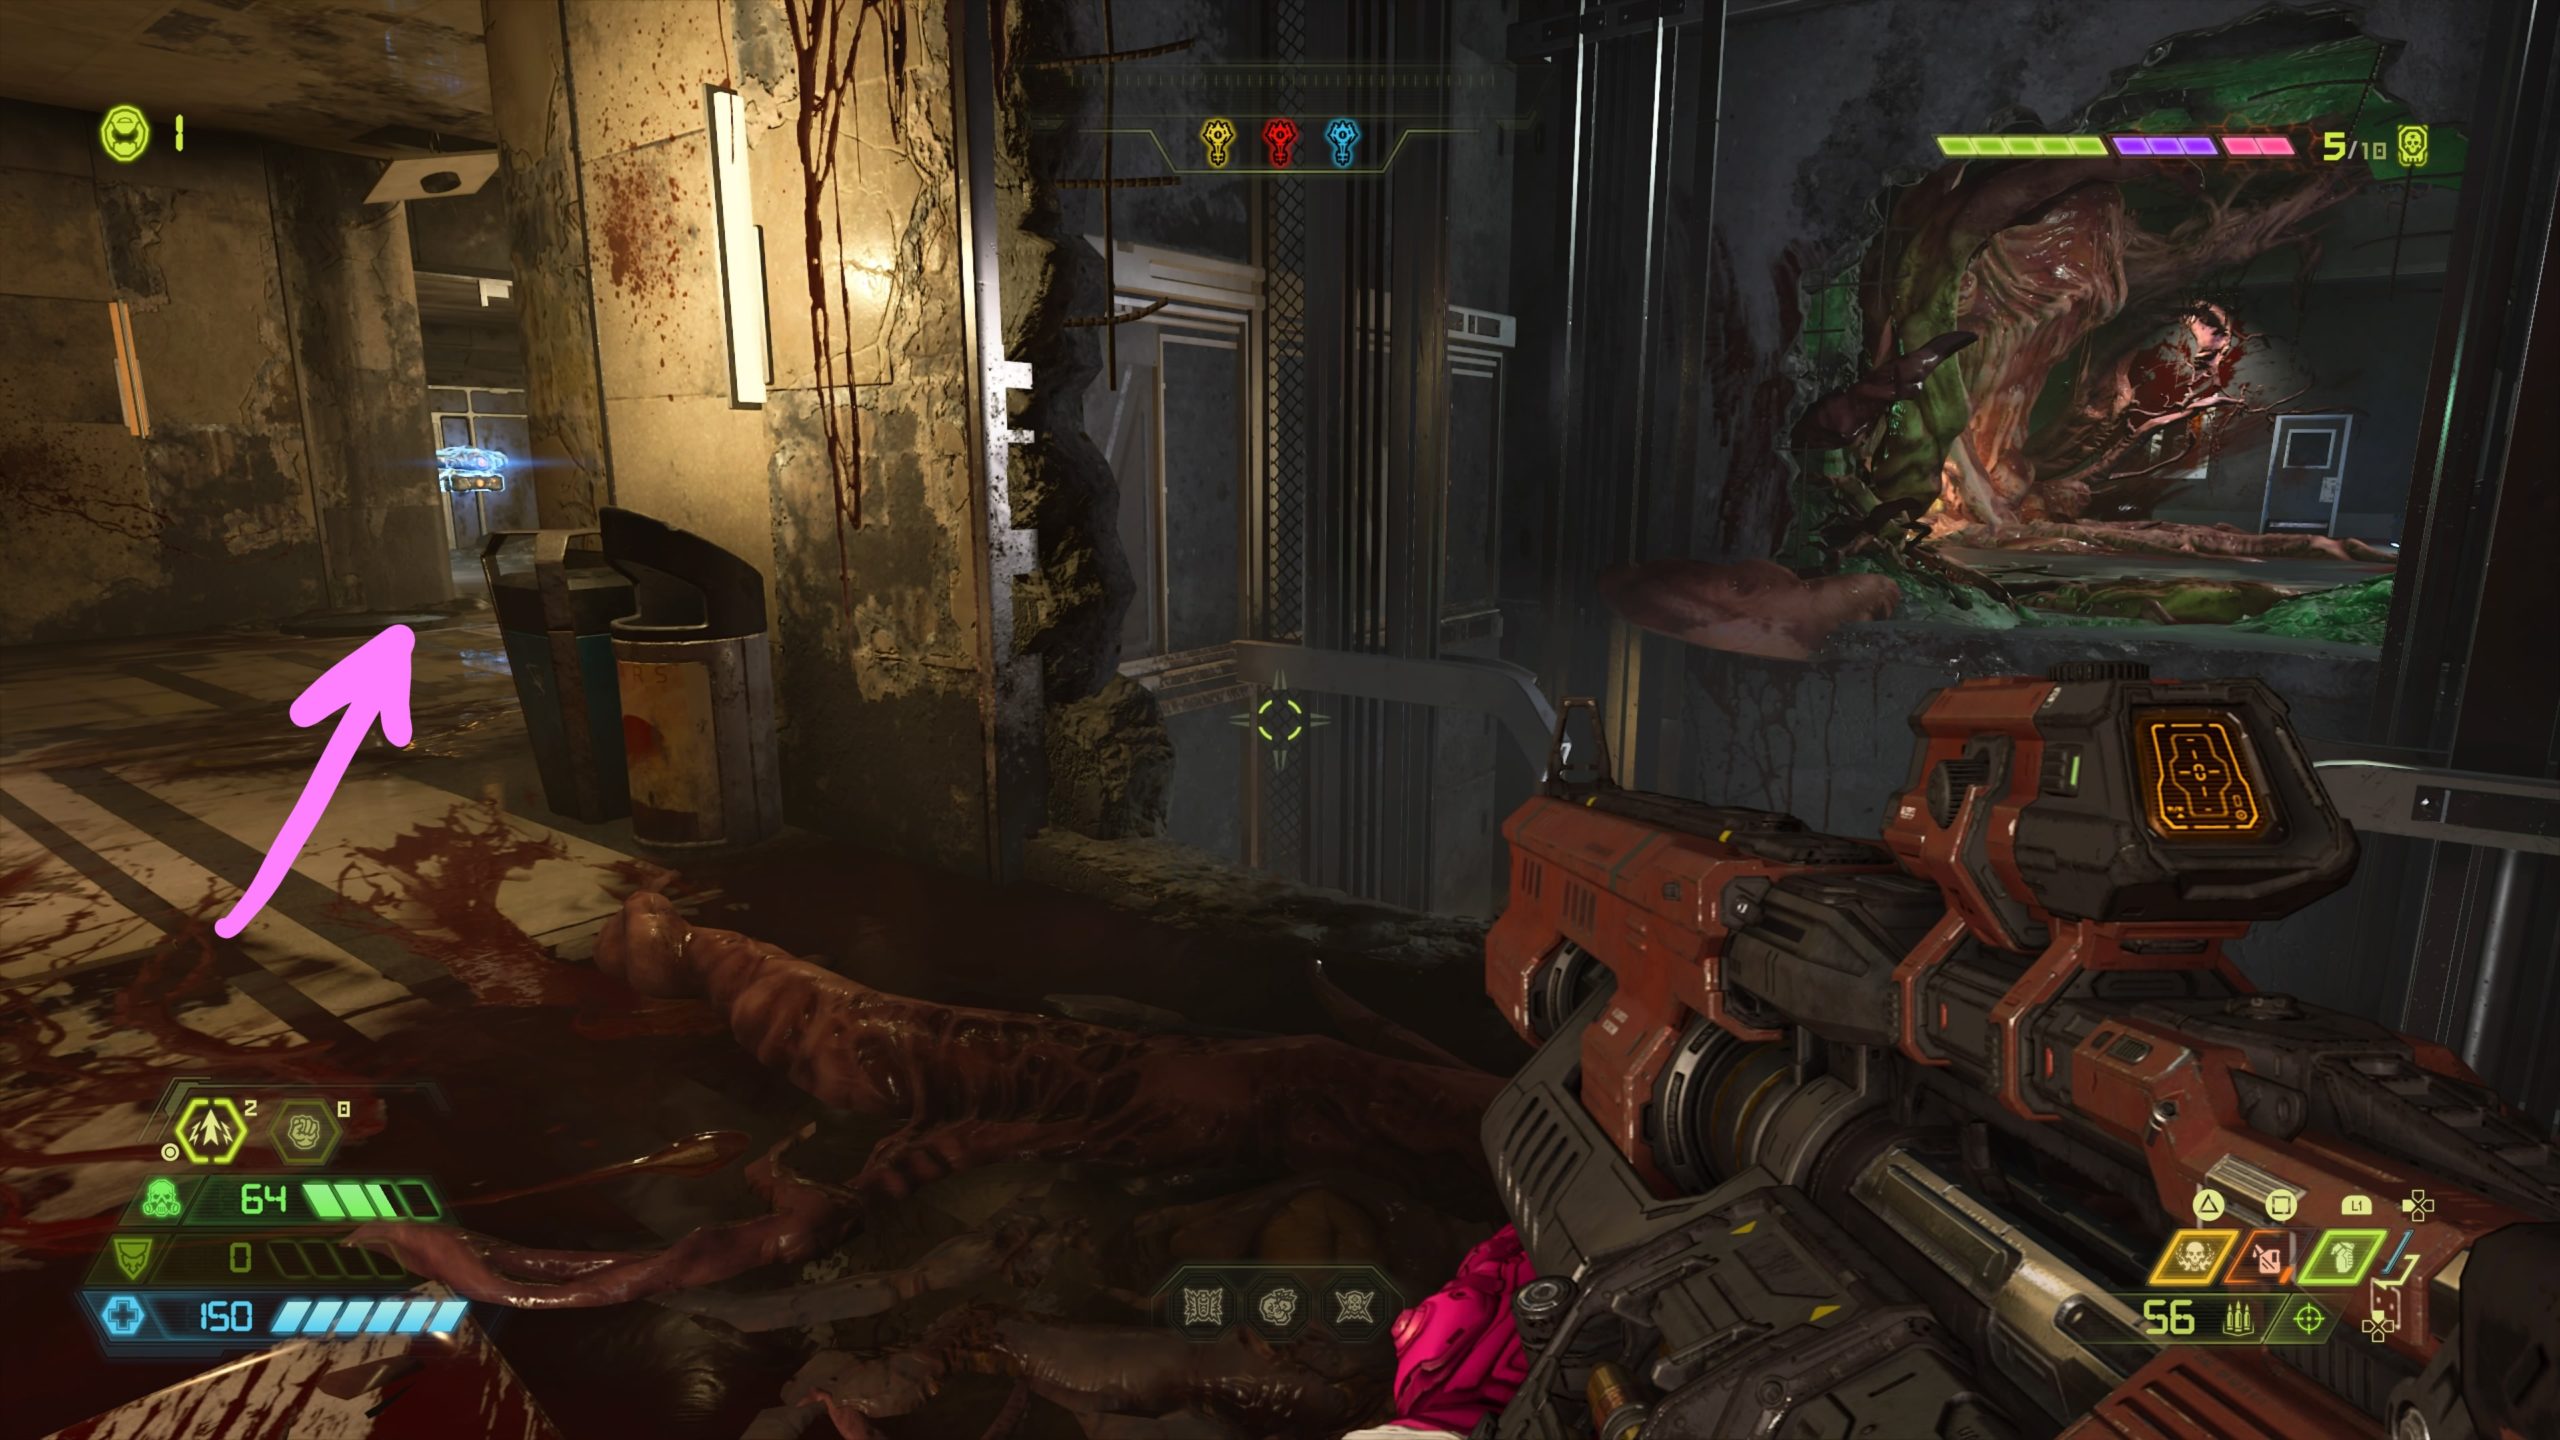
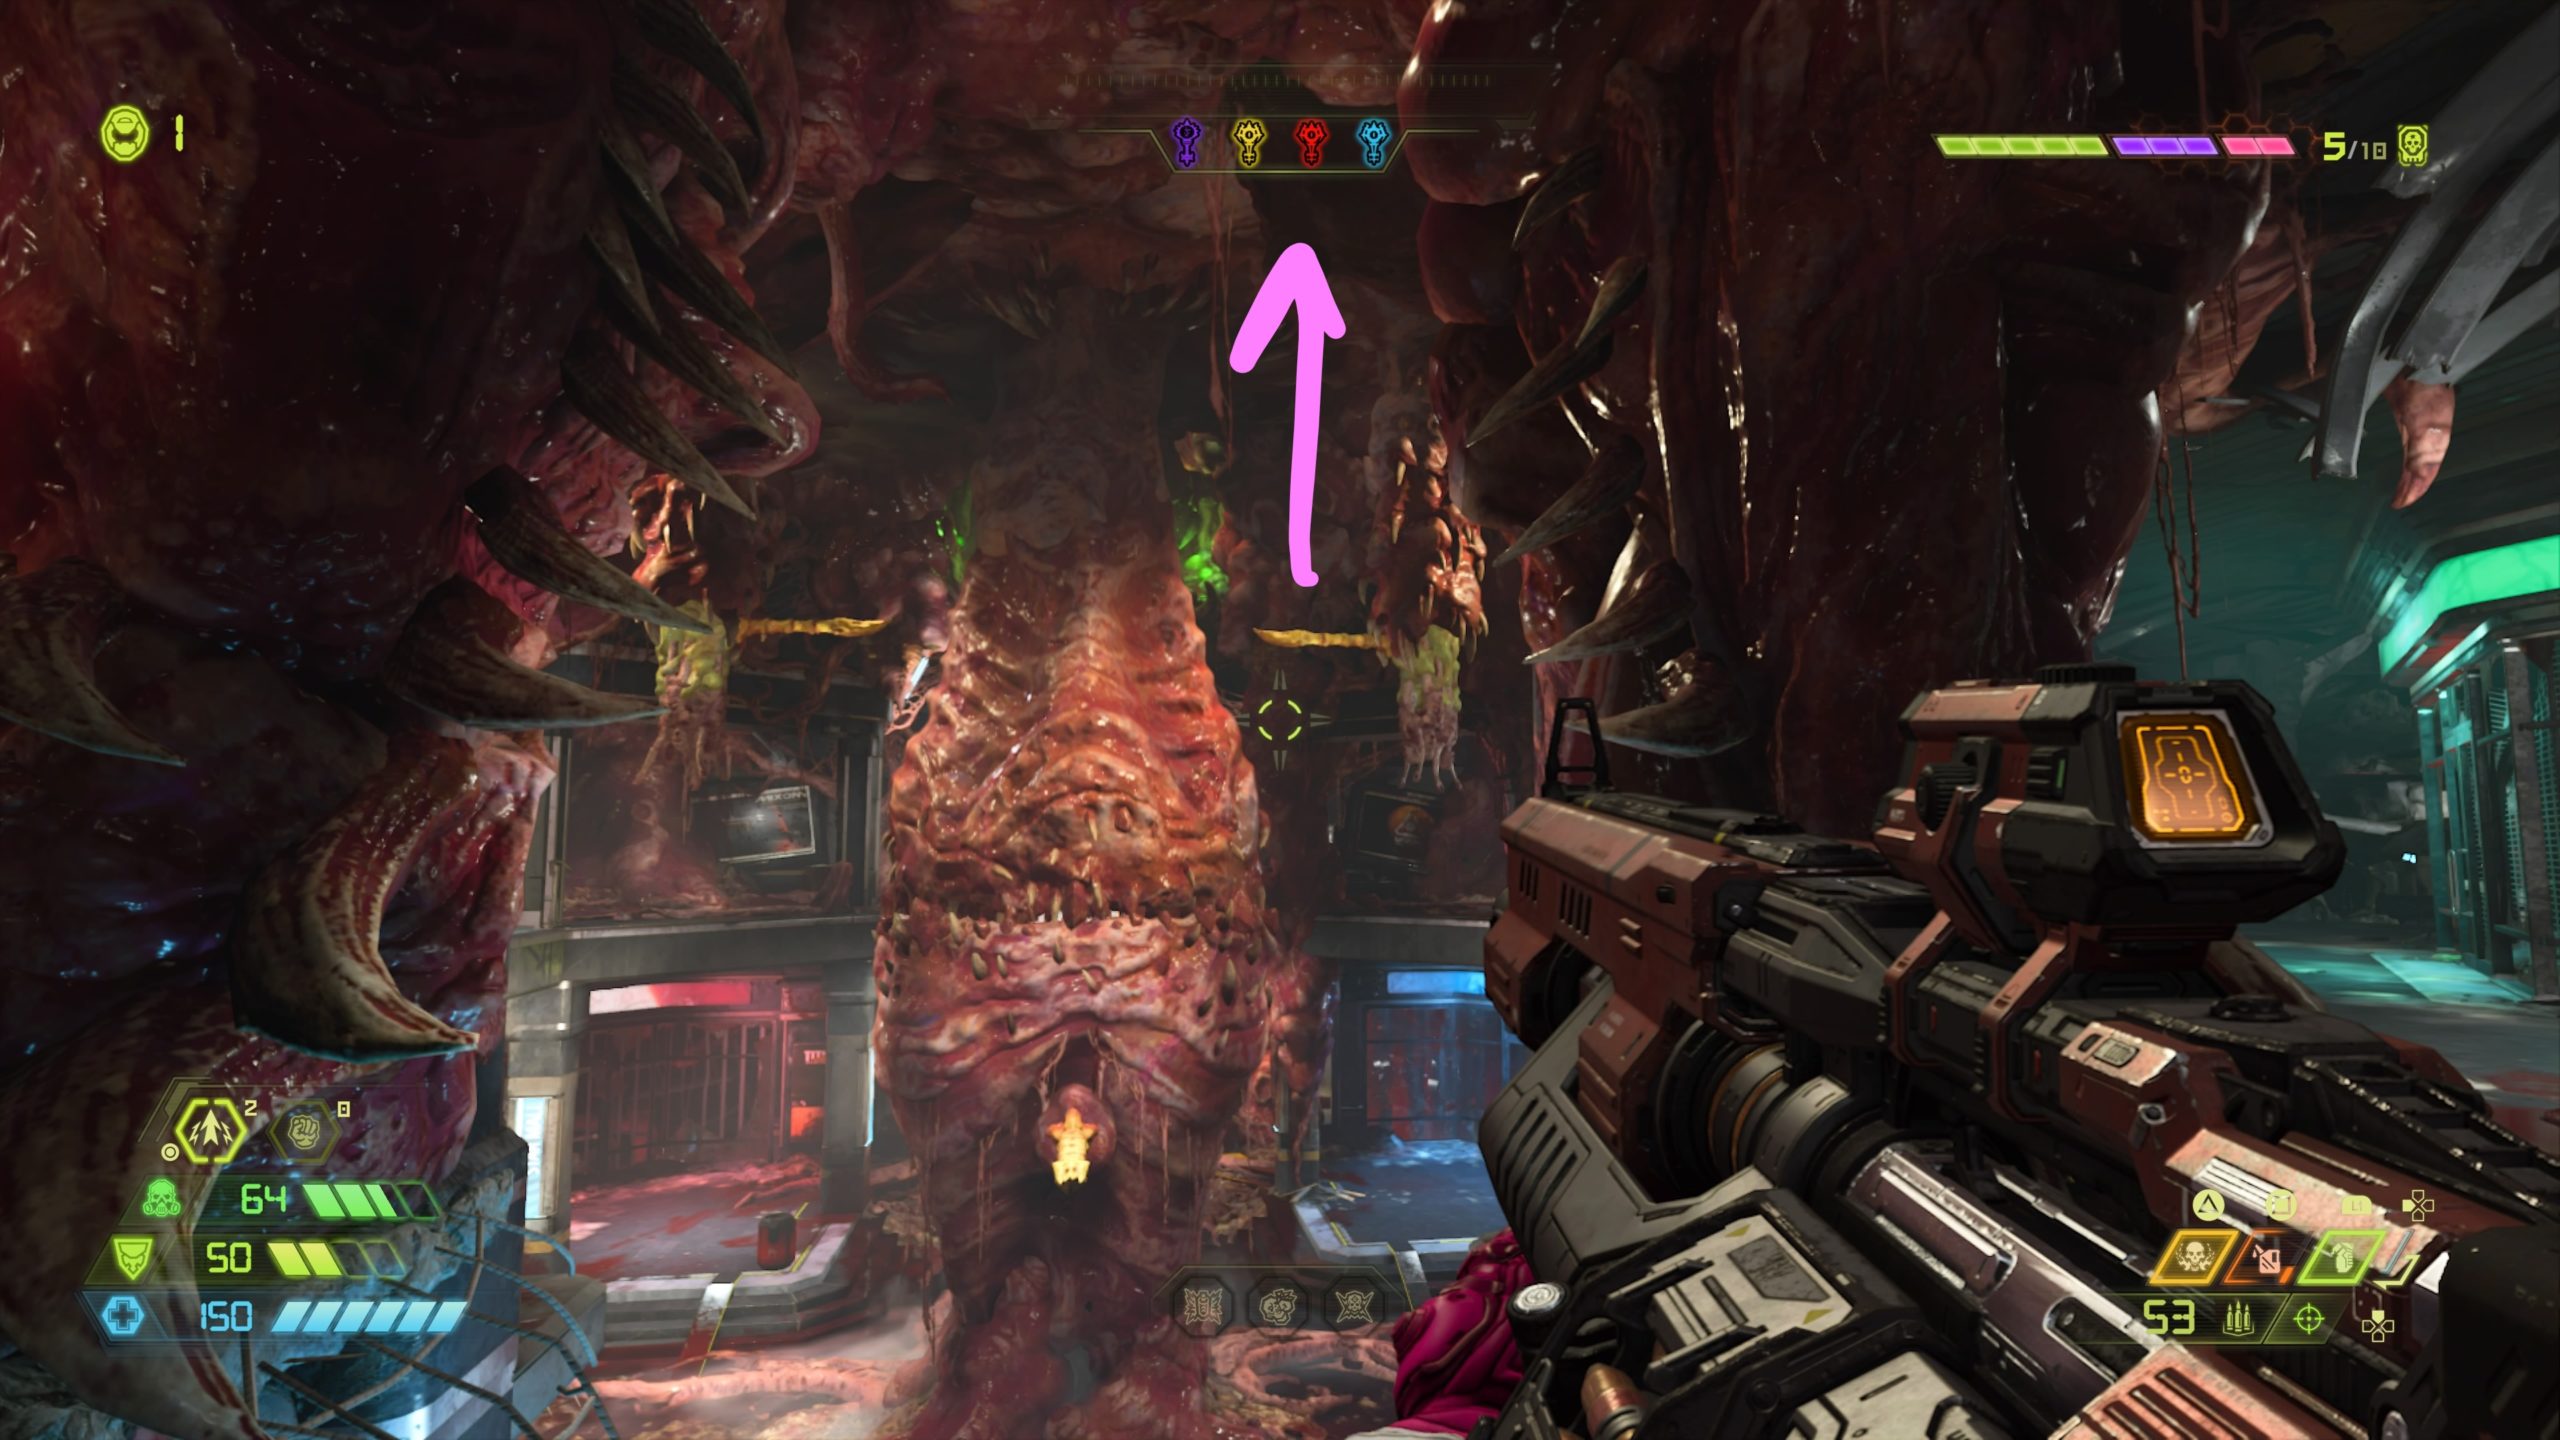
Album: Wolf #D – Wondering About My Loved Ones
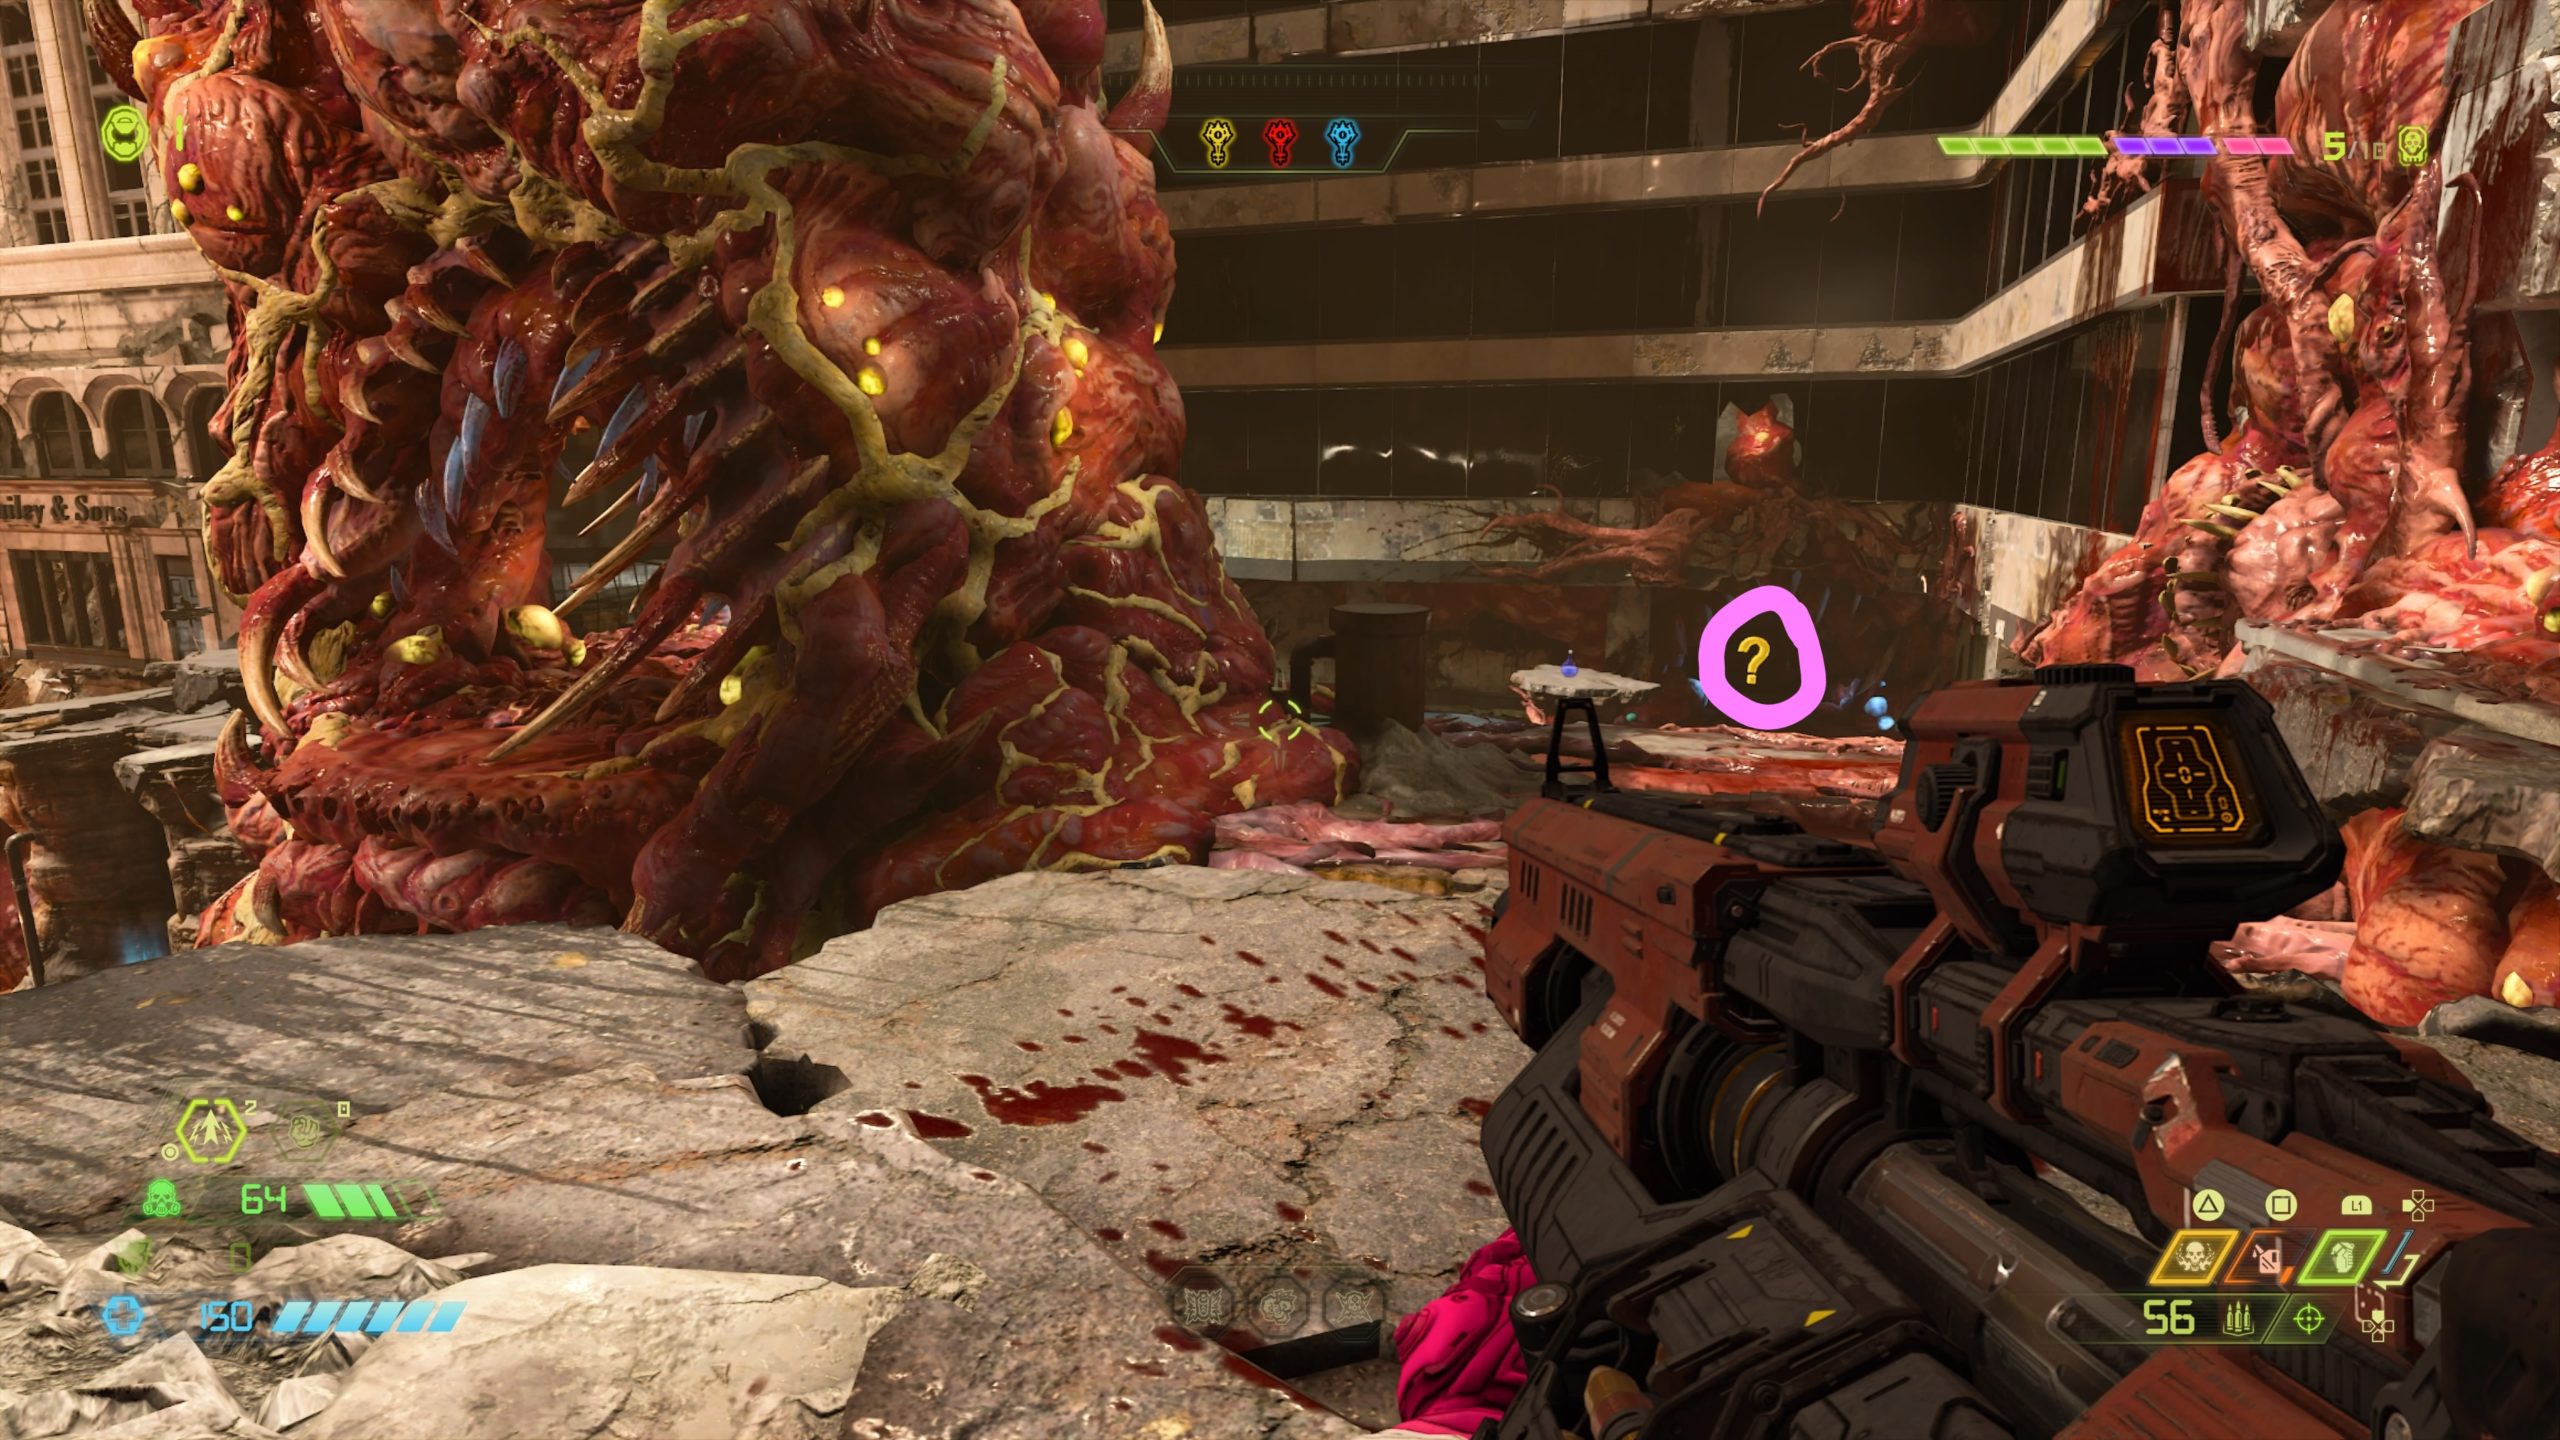
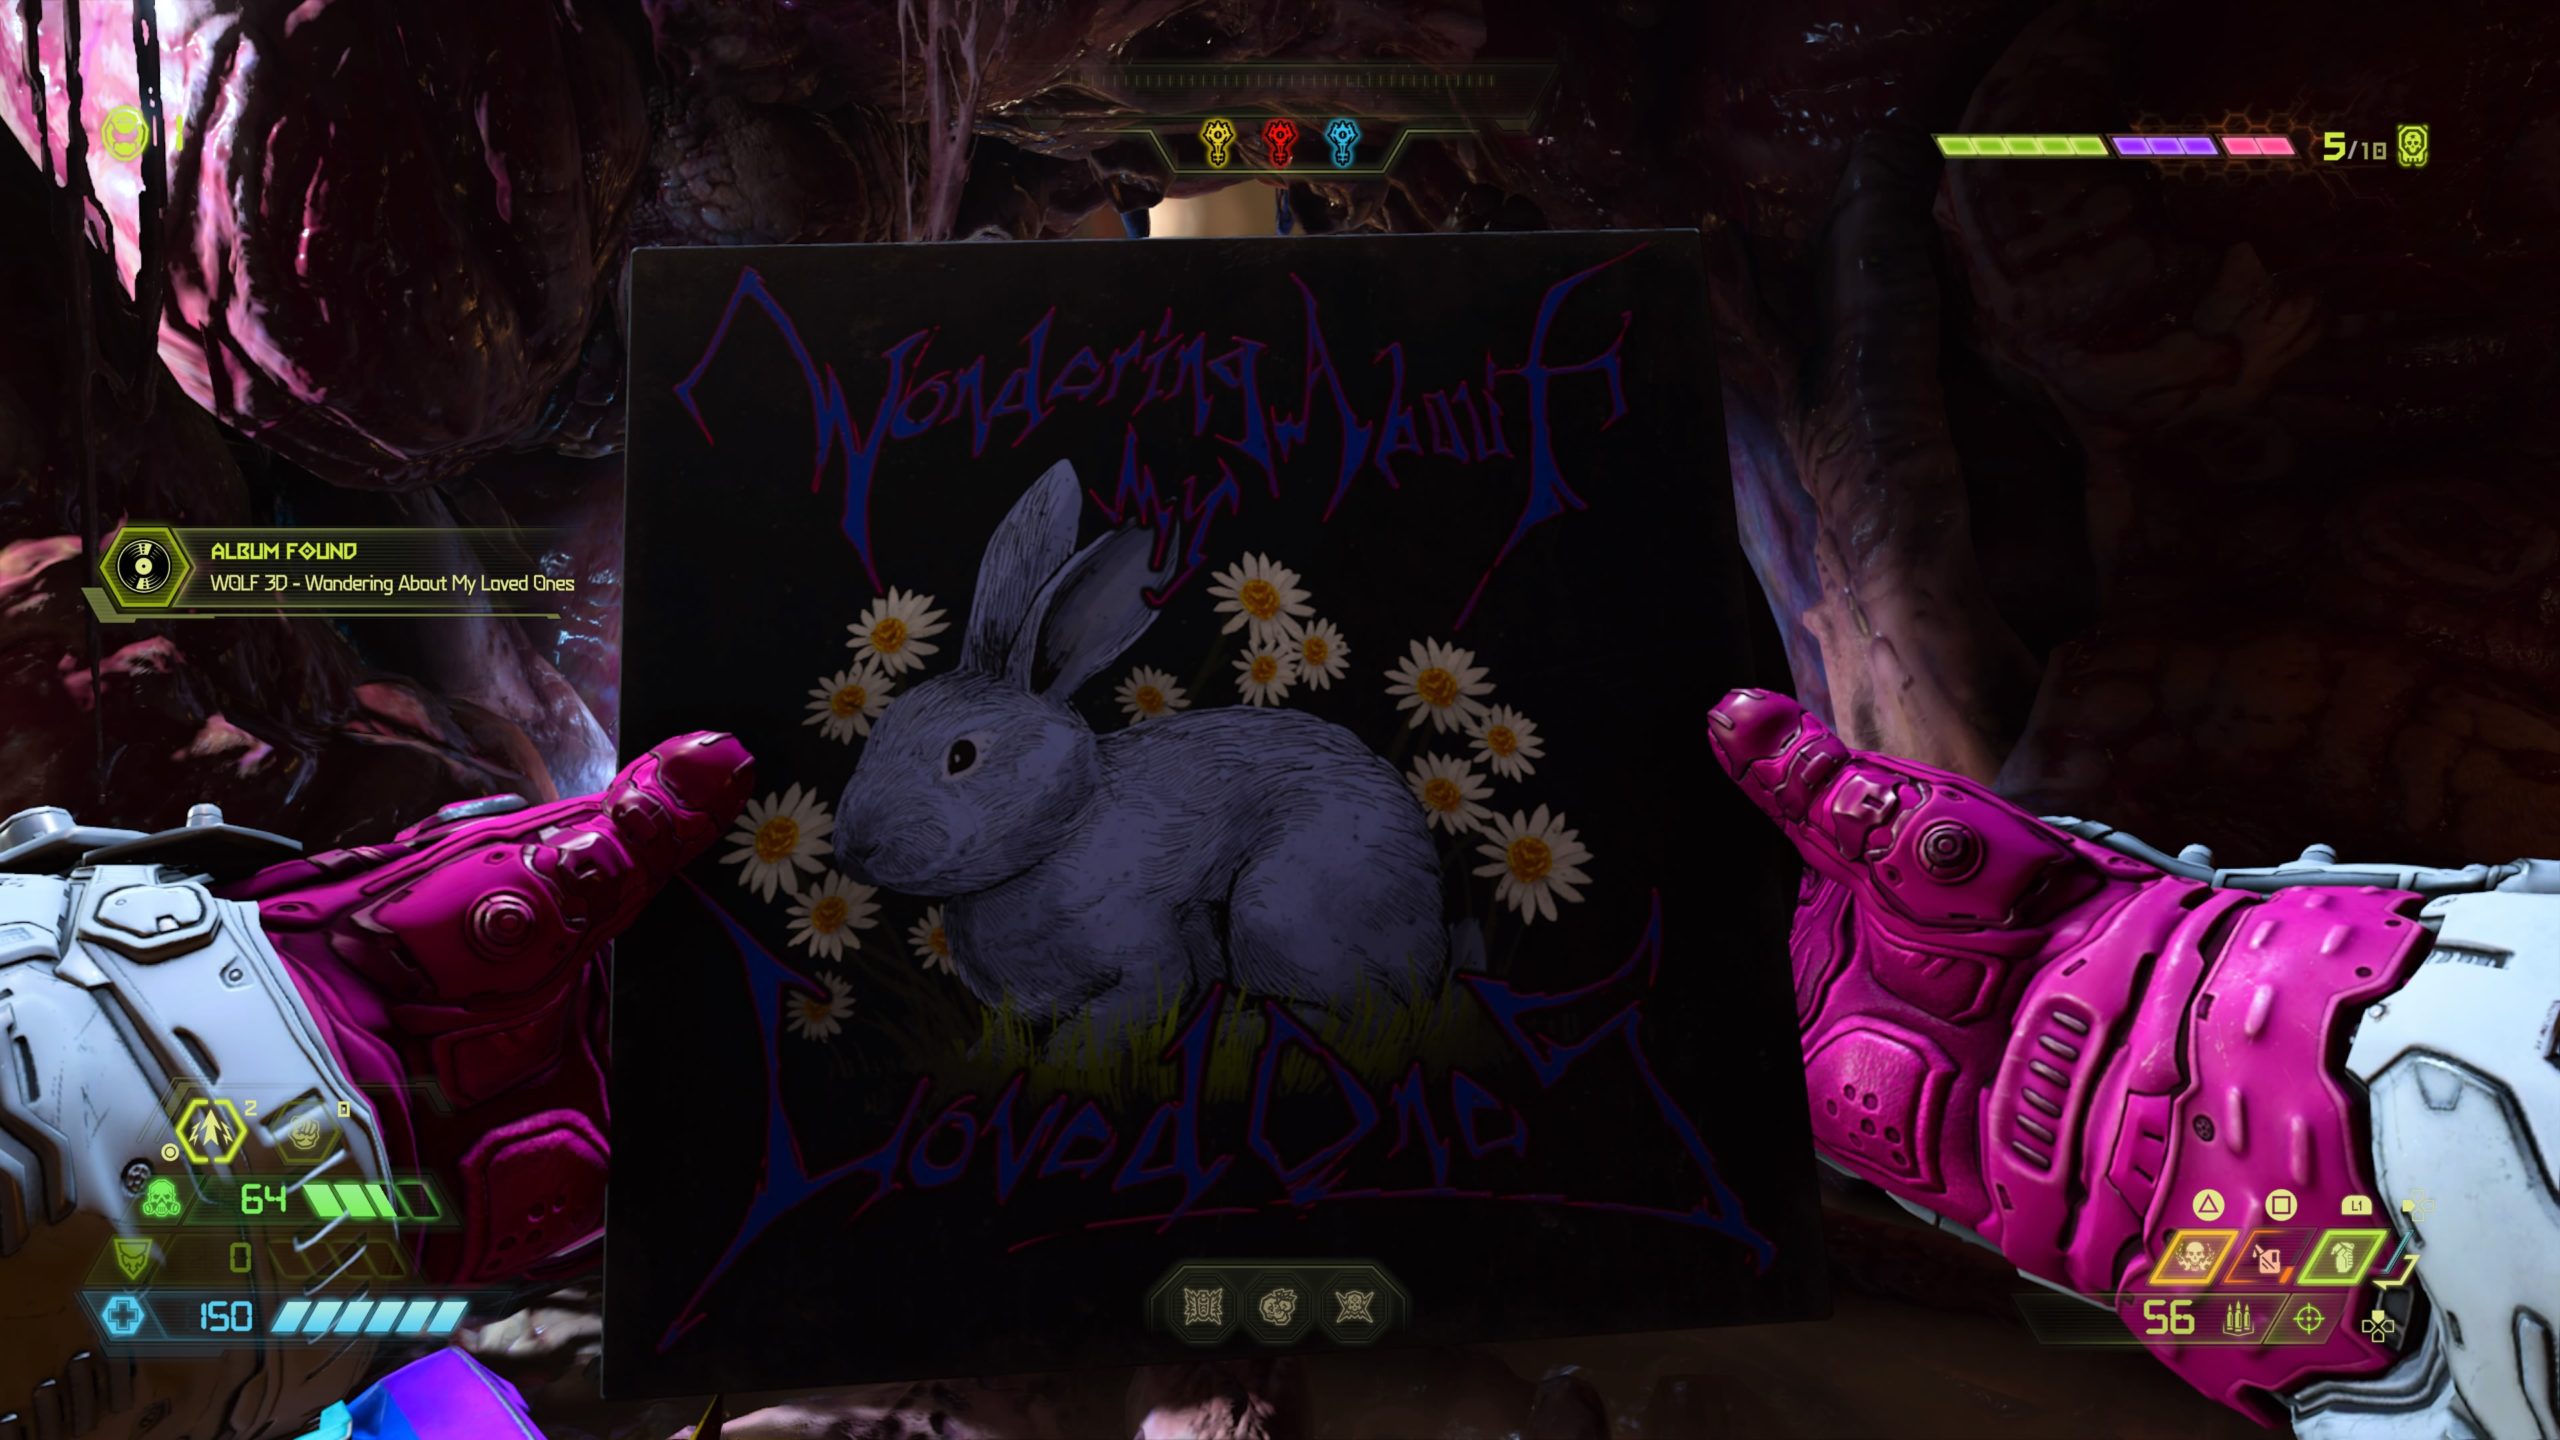
This collectible is located behind the gunk tower on the right side in a room sealed by teeth. In order to unseal the room, you will need to obtain the blue key.
Codex: Story of Earth – The Hellgrowth – Part II

This collectible is located past the gunk tower on the right side at the end of a hallway.
Modbot
From the fast travel point, turn around heading back down a hallway past the UHGO and Farm Don’s stores. Take a left at the end of the hallway and jump across the gap to reach the modbot at the end of the room.
Toy: Soldier (Shield)
From the fast travel point, head to the center of the room with the moving gunk press. Use the gold spin bar to reach the cave on the other side of it towards the top of the room. Once in the cave, turn around and face the press to find a room above it. Enter the room to find the toy.
Praetor Suit Point
From the fast travel point, head to the center of the room with the moving gunk press. Head past the press and use the green portal to arrive in a gunk covered room. Head to the side of the room with three openings behind you. Take the left ramp up and turn left at the top to find the sentinel holding the point.
Rune

From the fast travel point, drop down into the lower level of the room with the moving gunk press. Take a left heading through a teeth doorway and turn right at the end of the hallway to use the lift pad to reach a gunk covered room containing the rune.
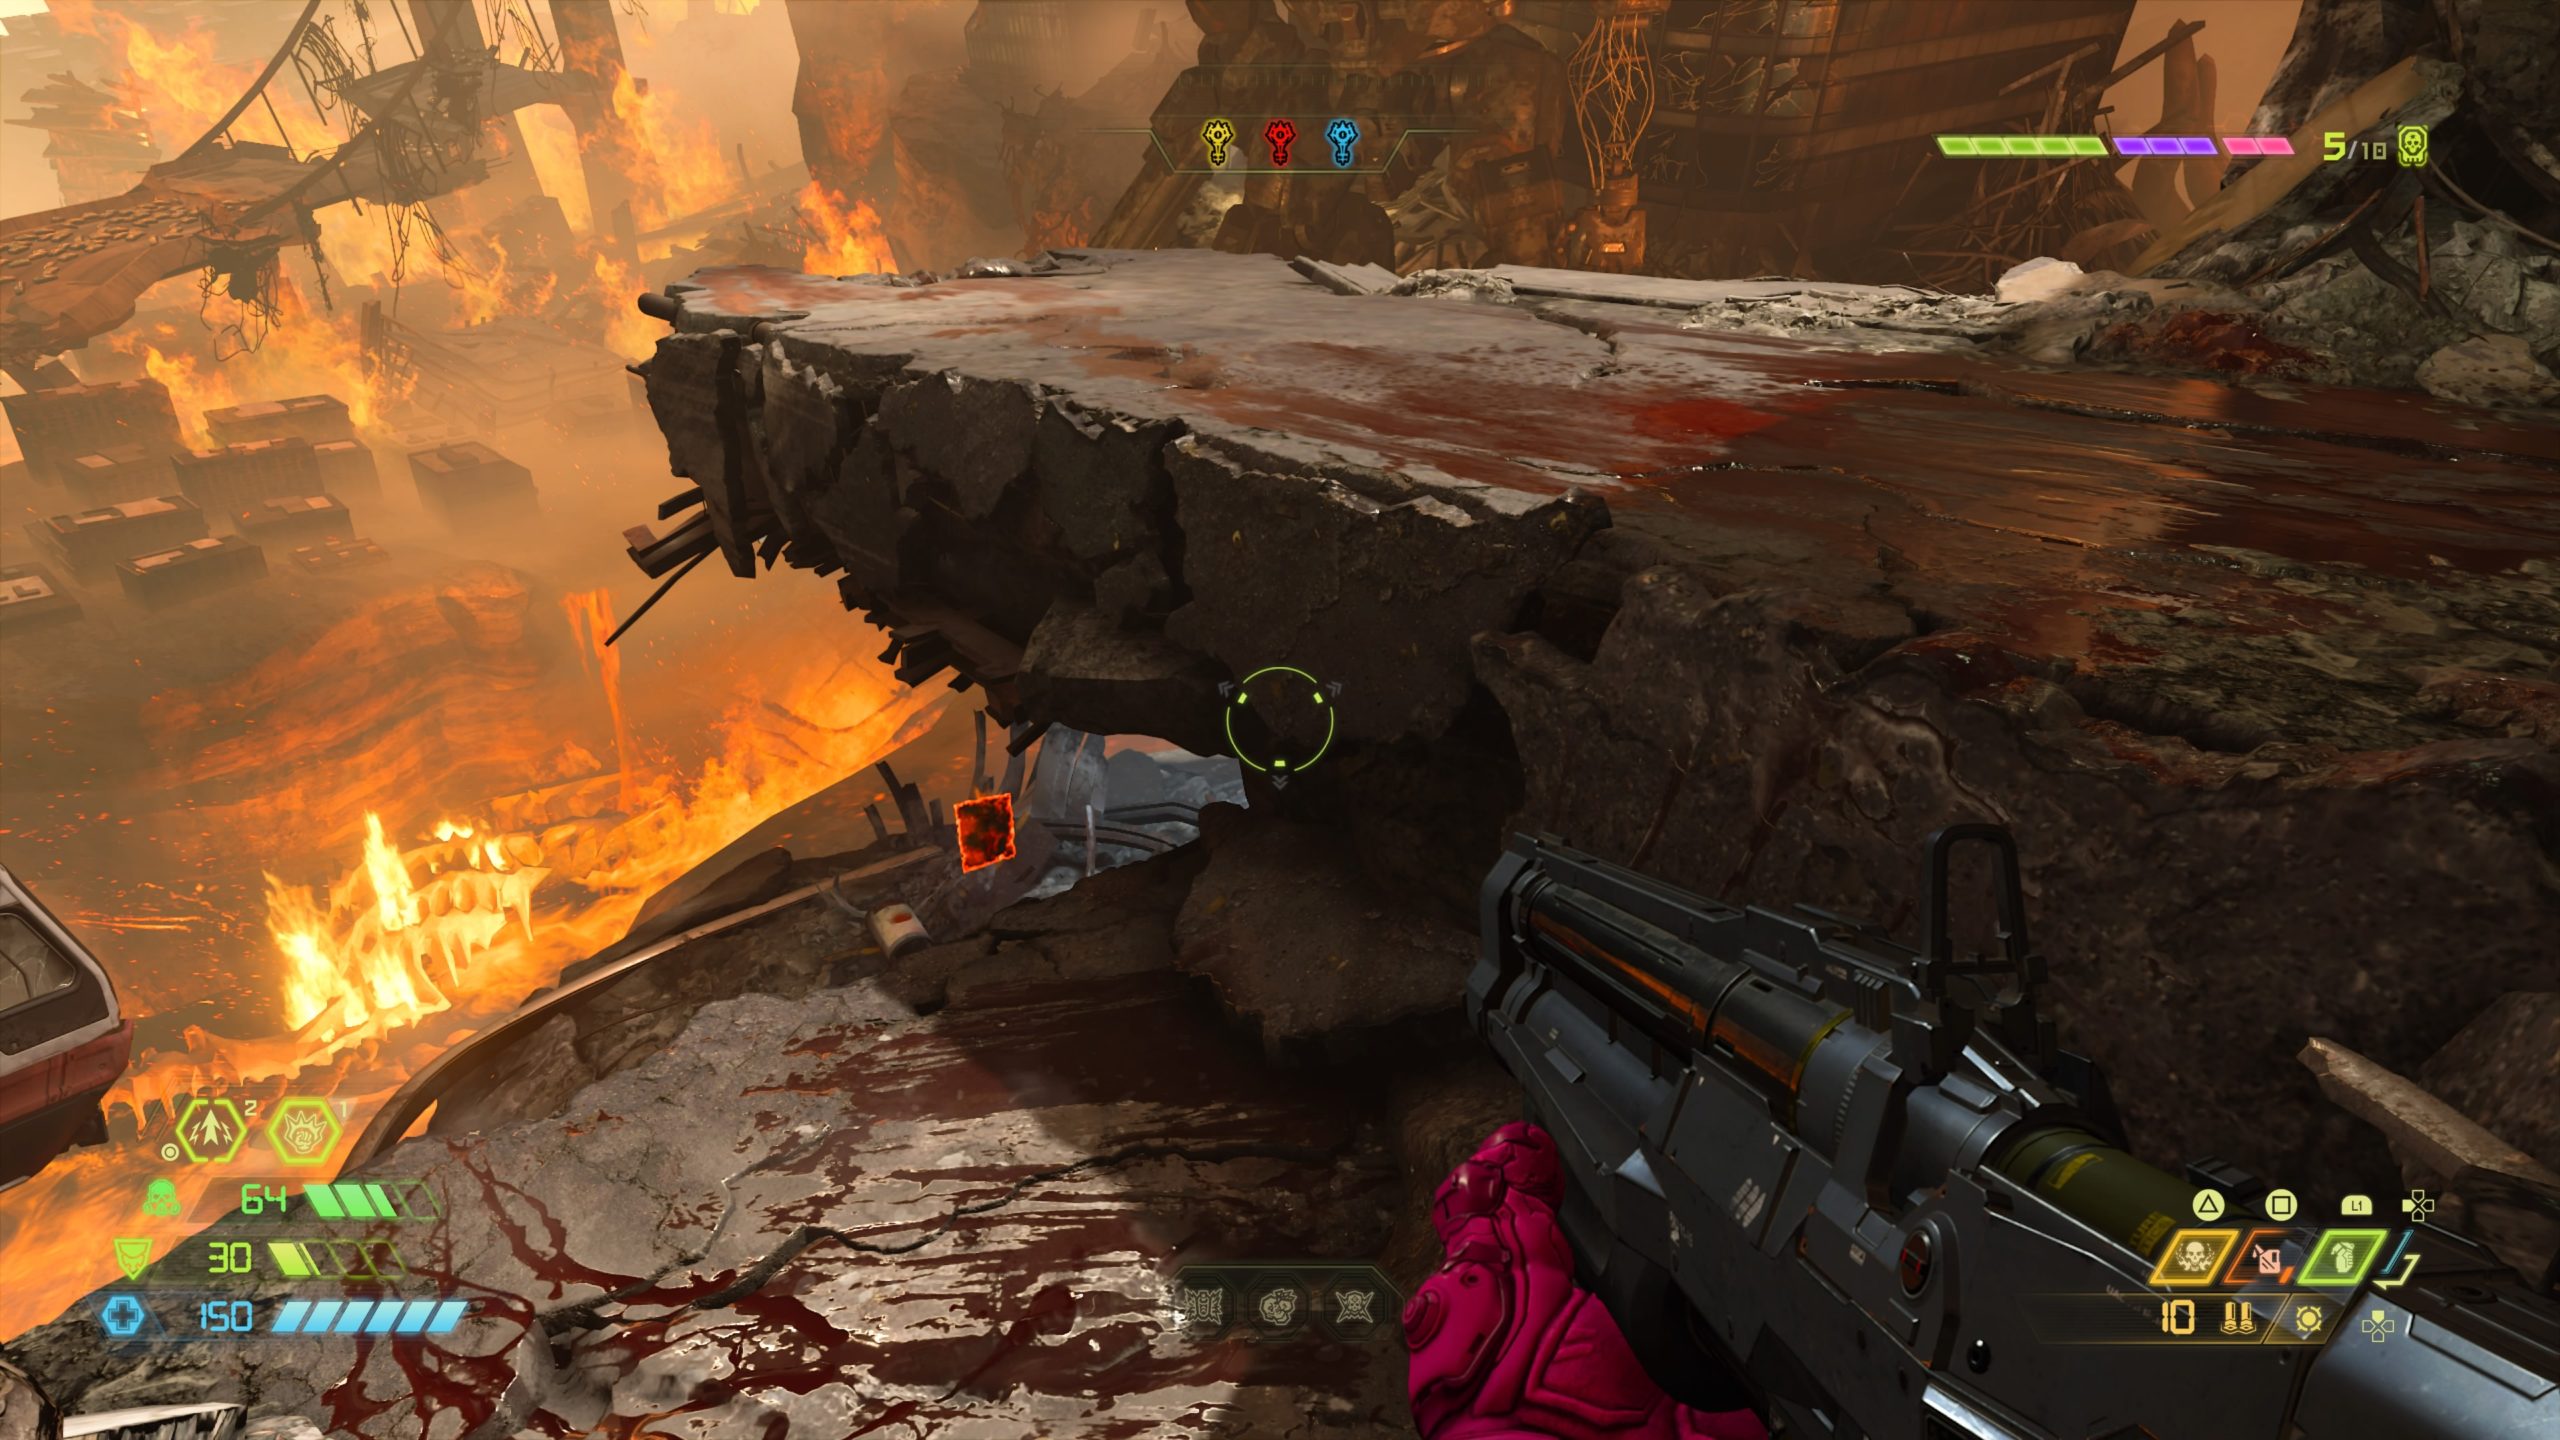
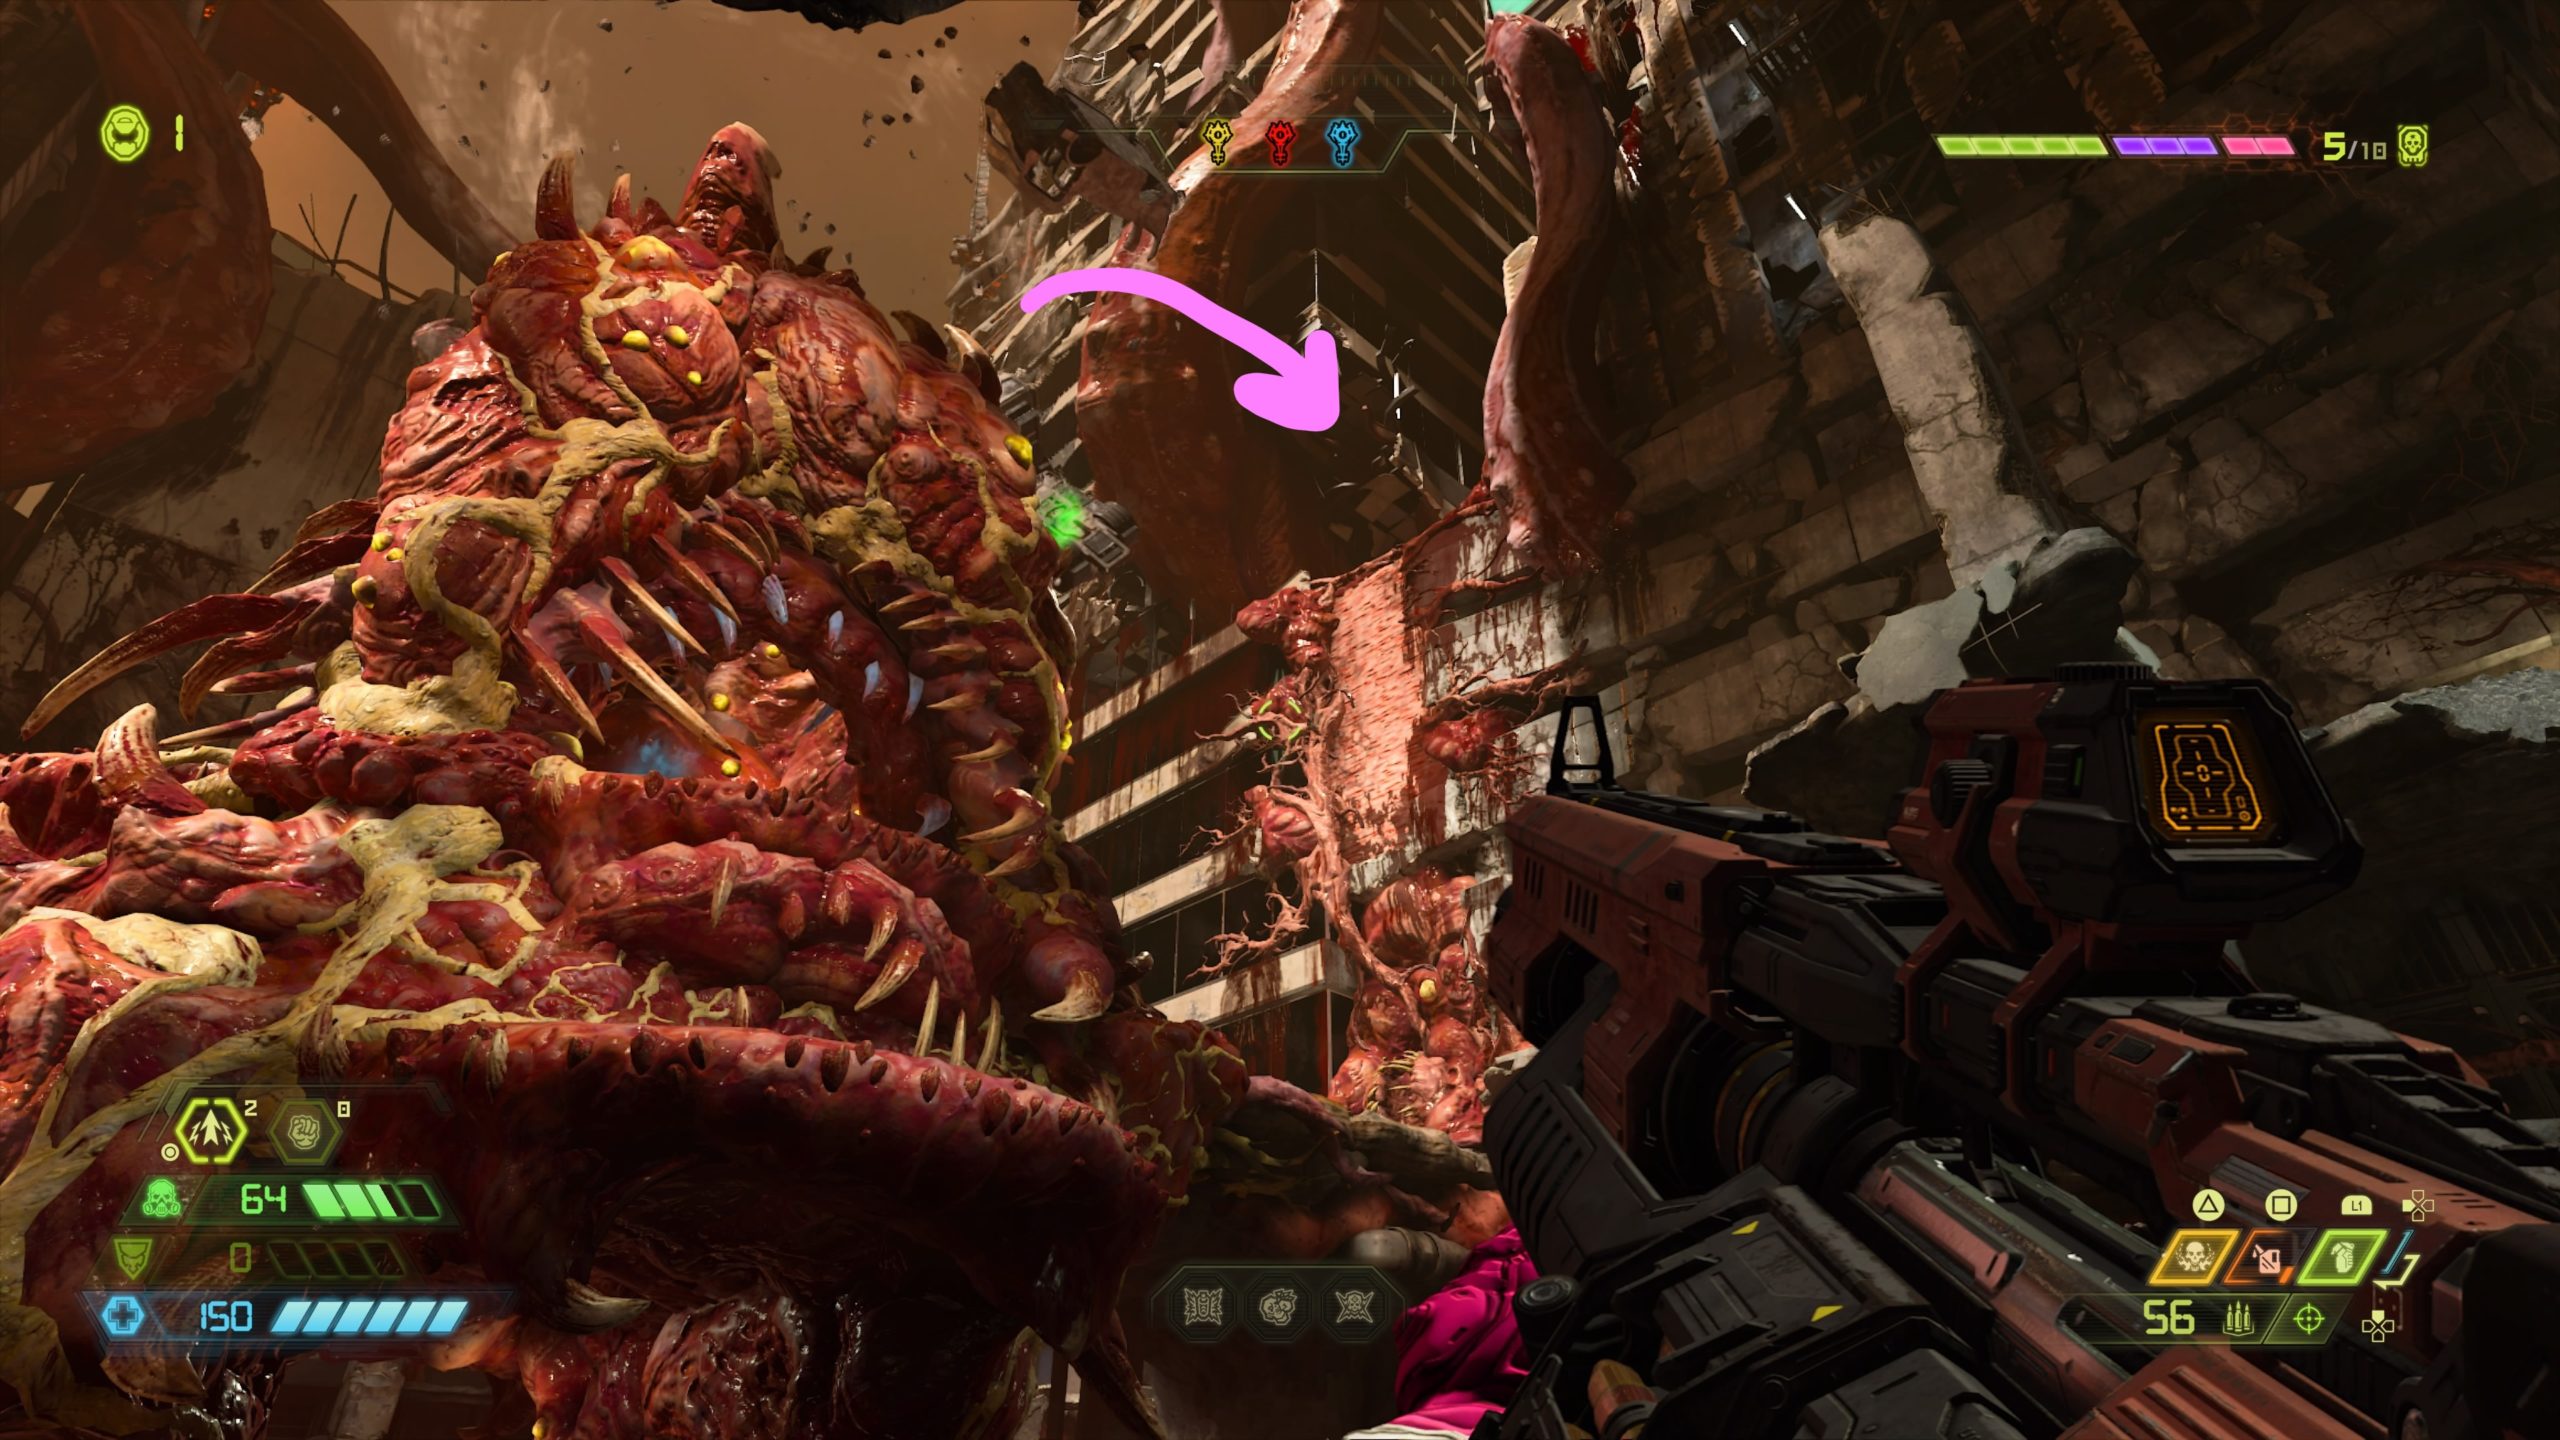
Cheat Code

From the fast travel point, follow the walkway left until you get to the room with the purple Ivan sign. Take a right and drop down to the ledge below then head straight to the tip of the ledge overlooking the giant monster building. Just below the monster, there will be a circular area surrounded by teeth. This area can be broken so jump into the hole using dash to smash through and find the cheat code.
Empyrean Key
The key is acquired by defeating the Slayer Gate.

Rune
From the fast travel point, turn around and head through the broken section of wall to find the rune.
Sentinel Battery
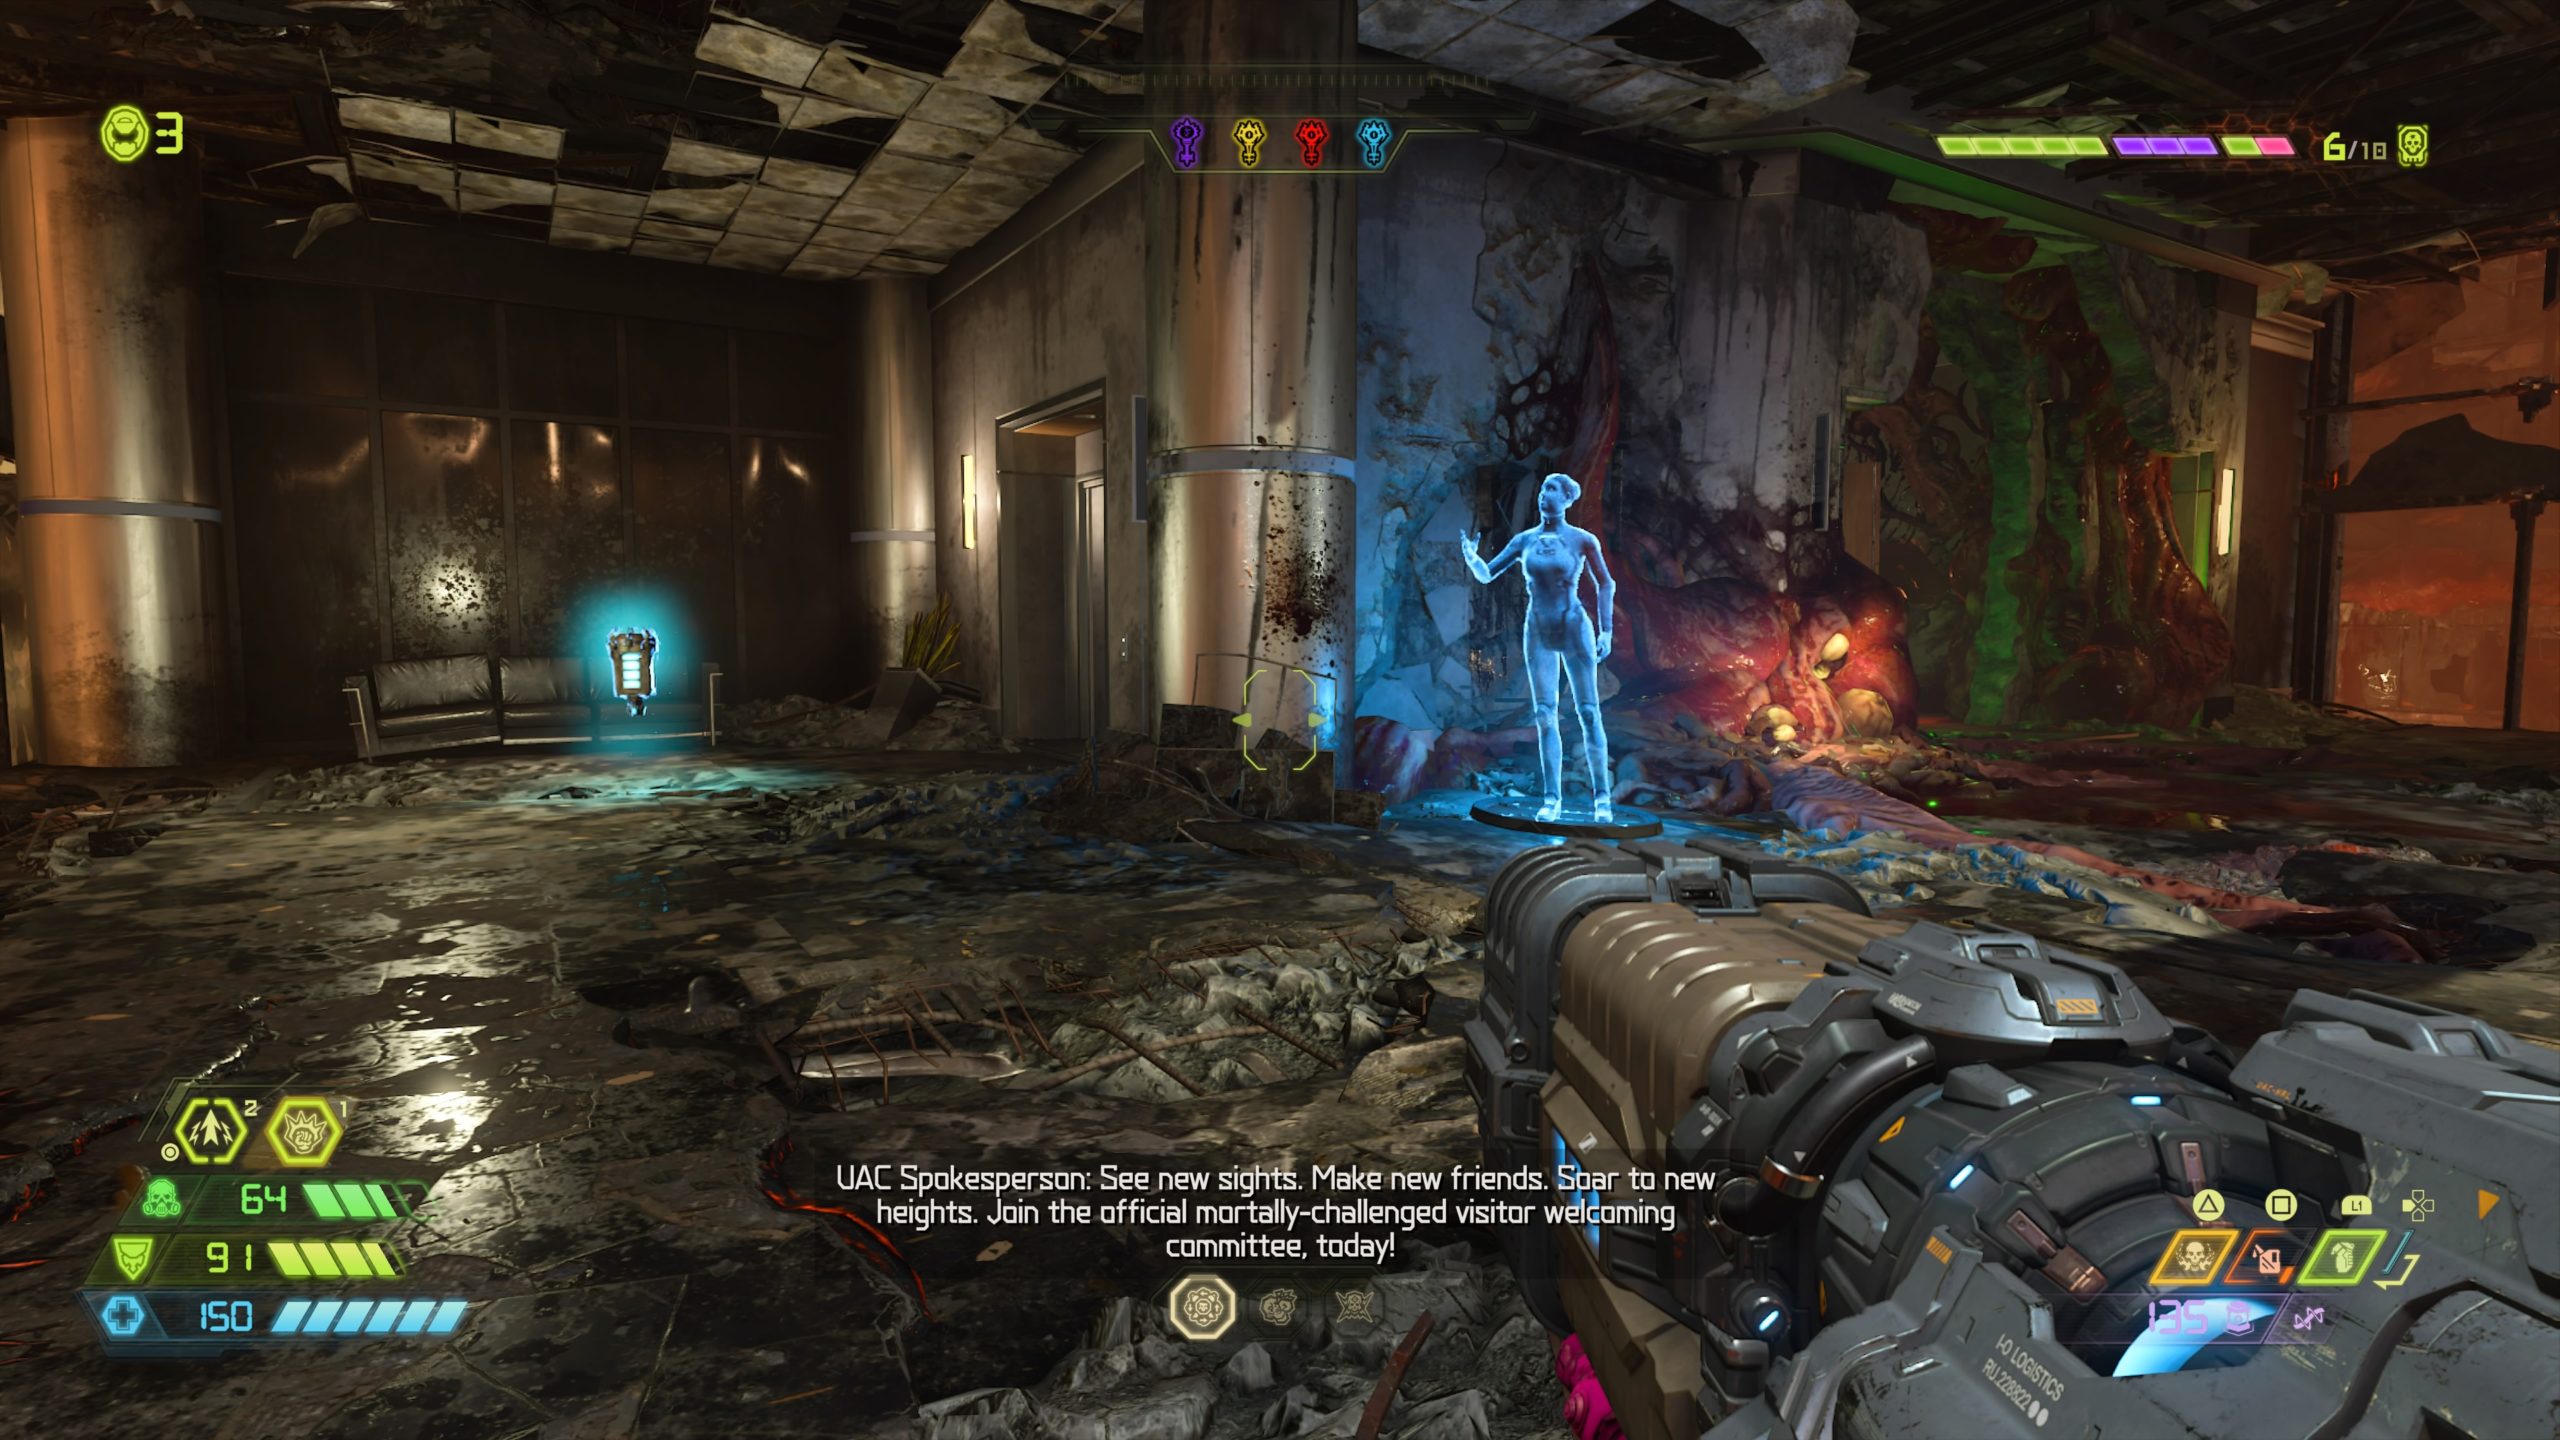
Facing the previous collectible, head left following the hallway down a flight of stairs. At the bottom of the stairs swing right past the UAC Spokesperson hologram to locate the battery.
Album: Doom III – Main Theme
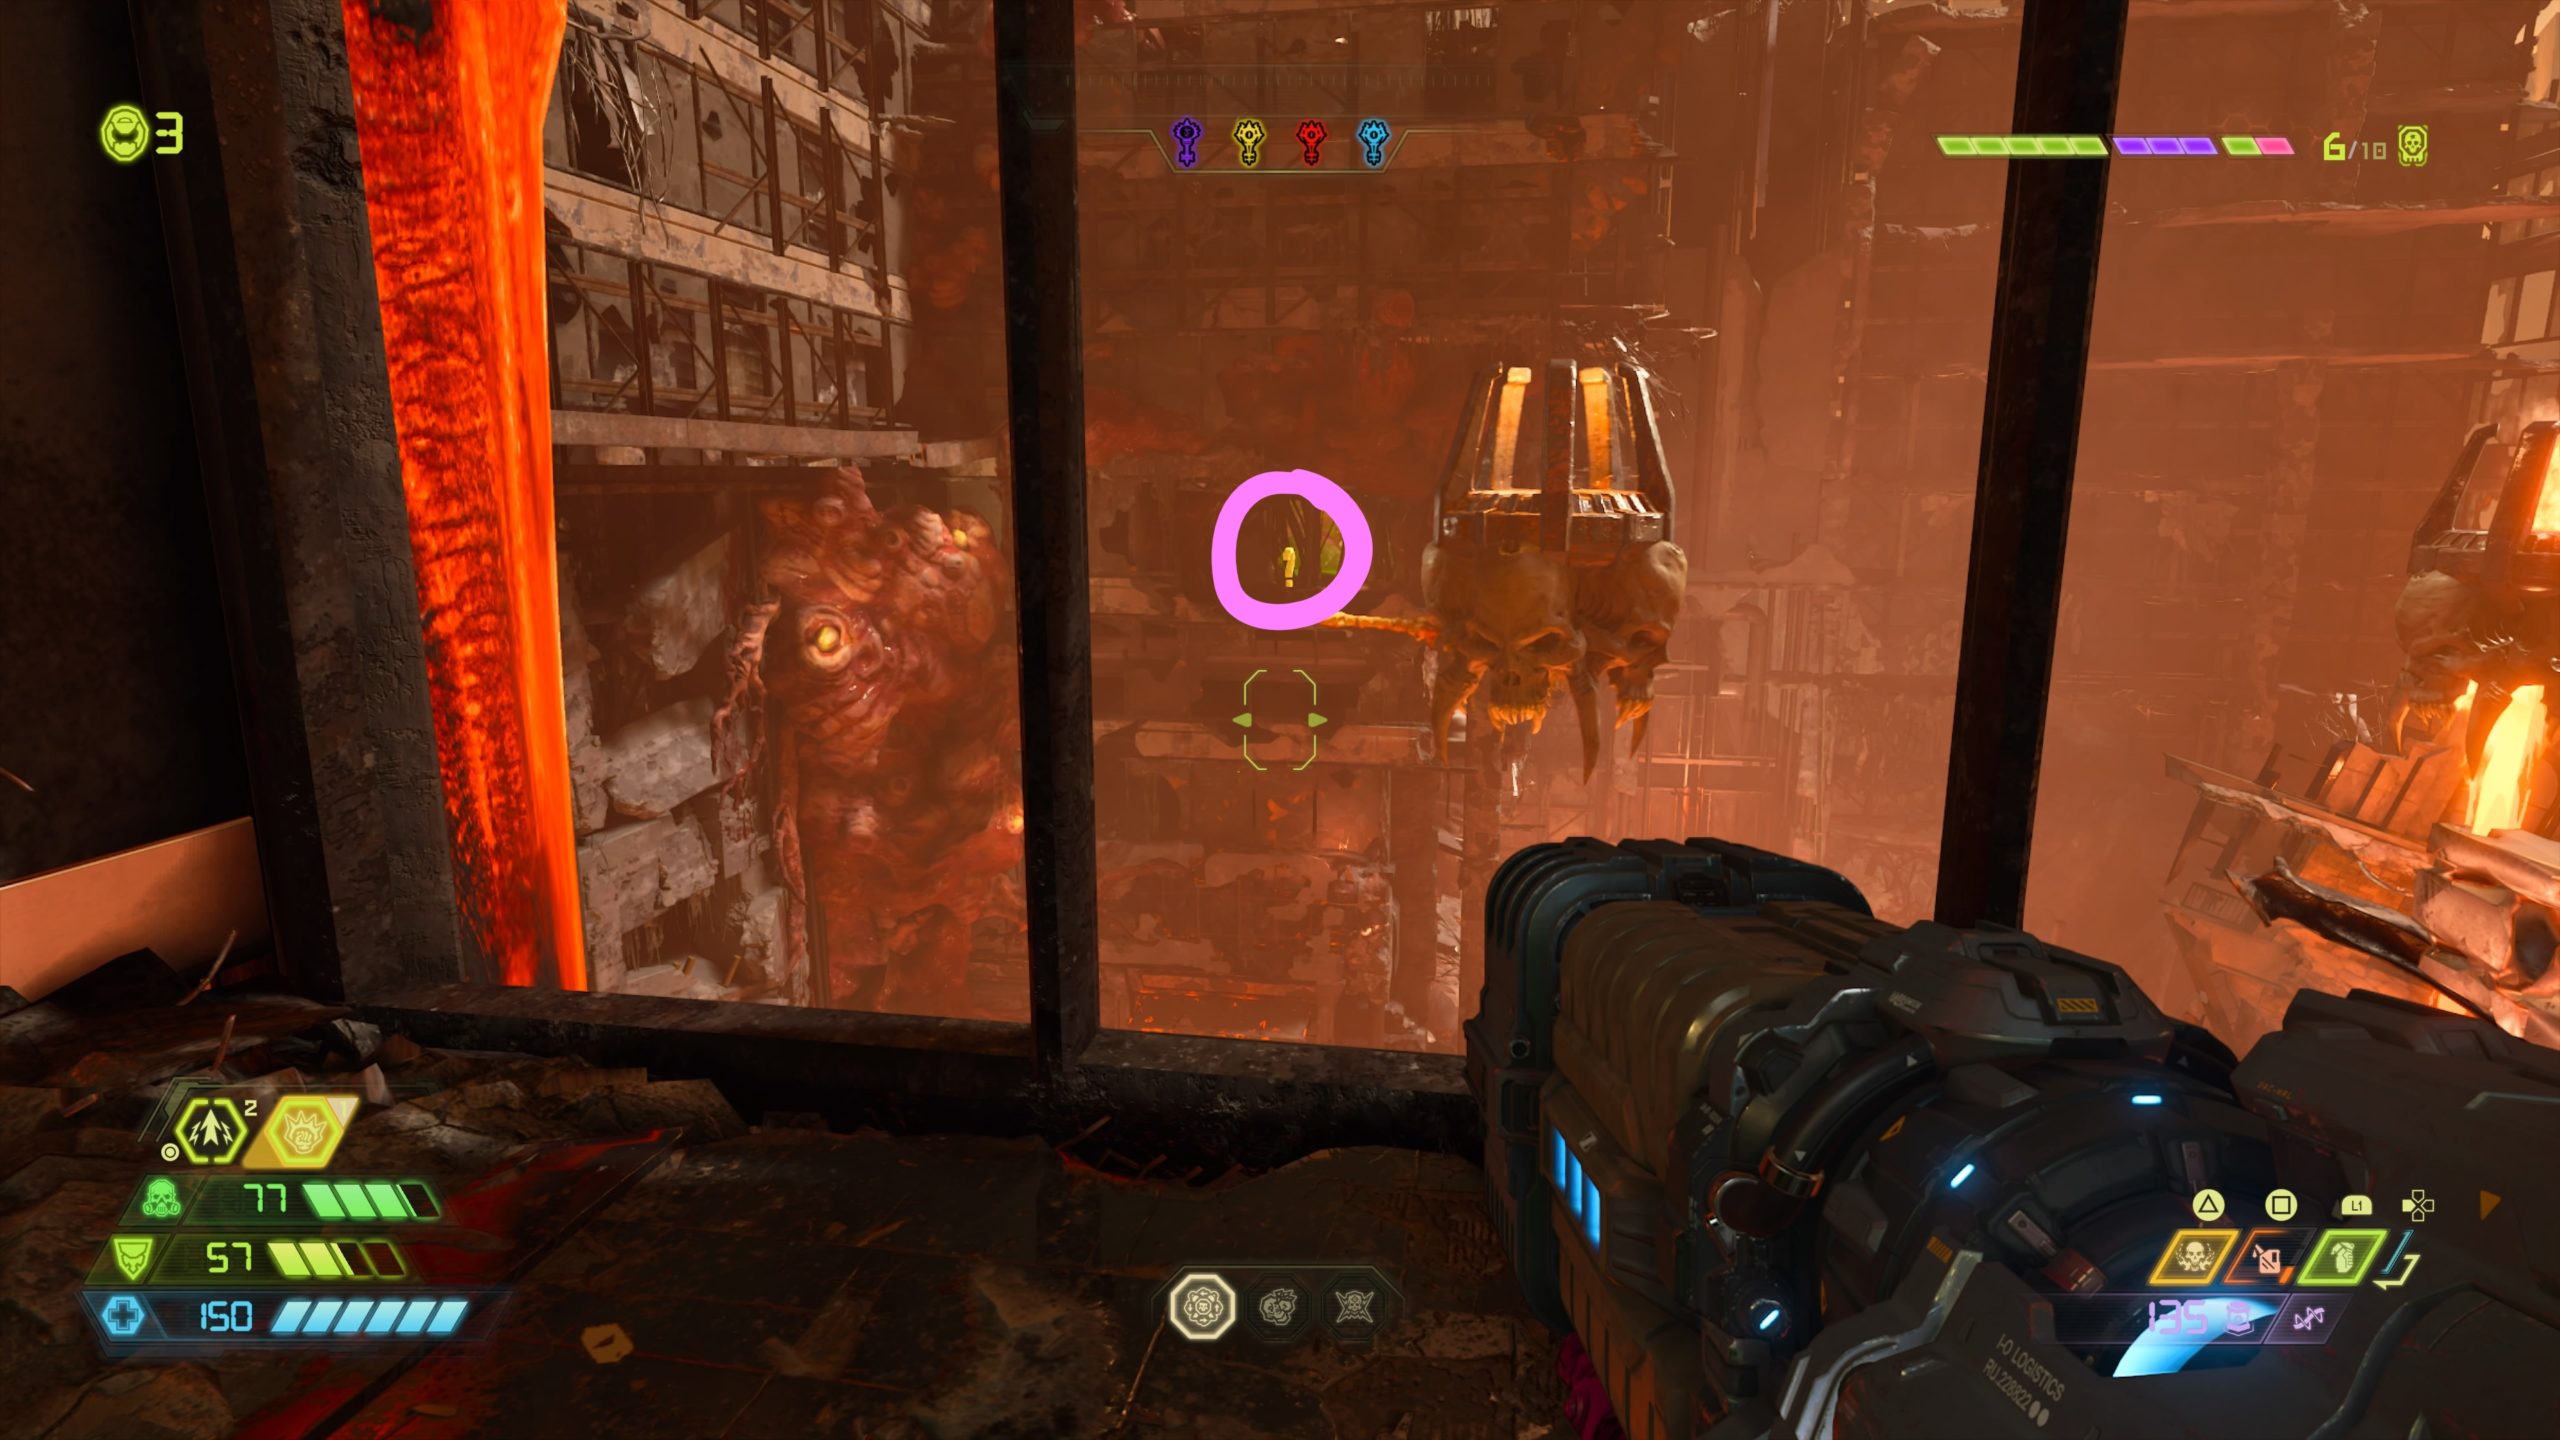
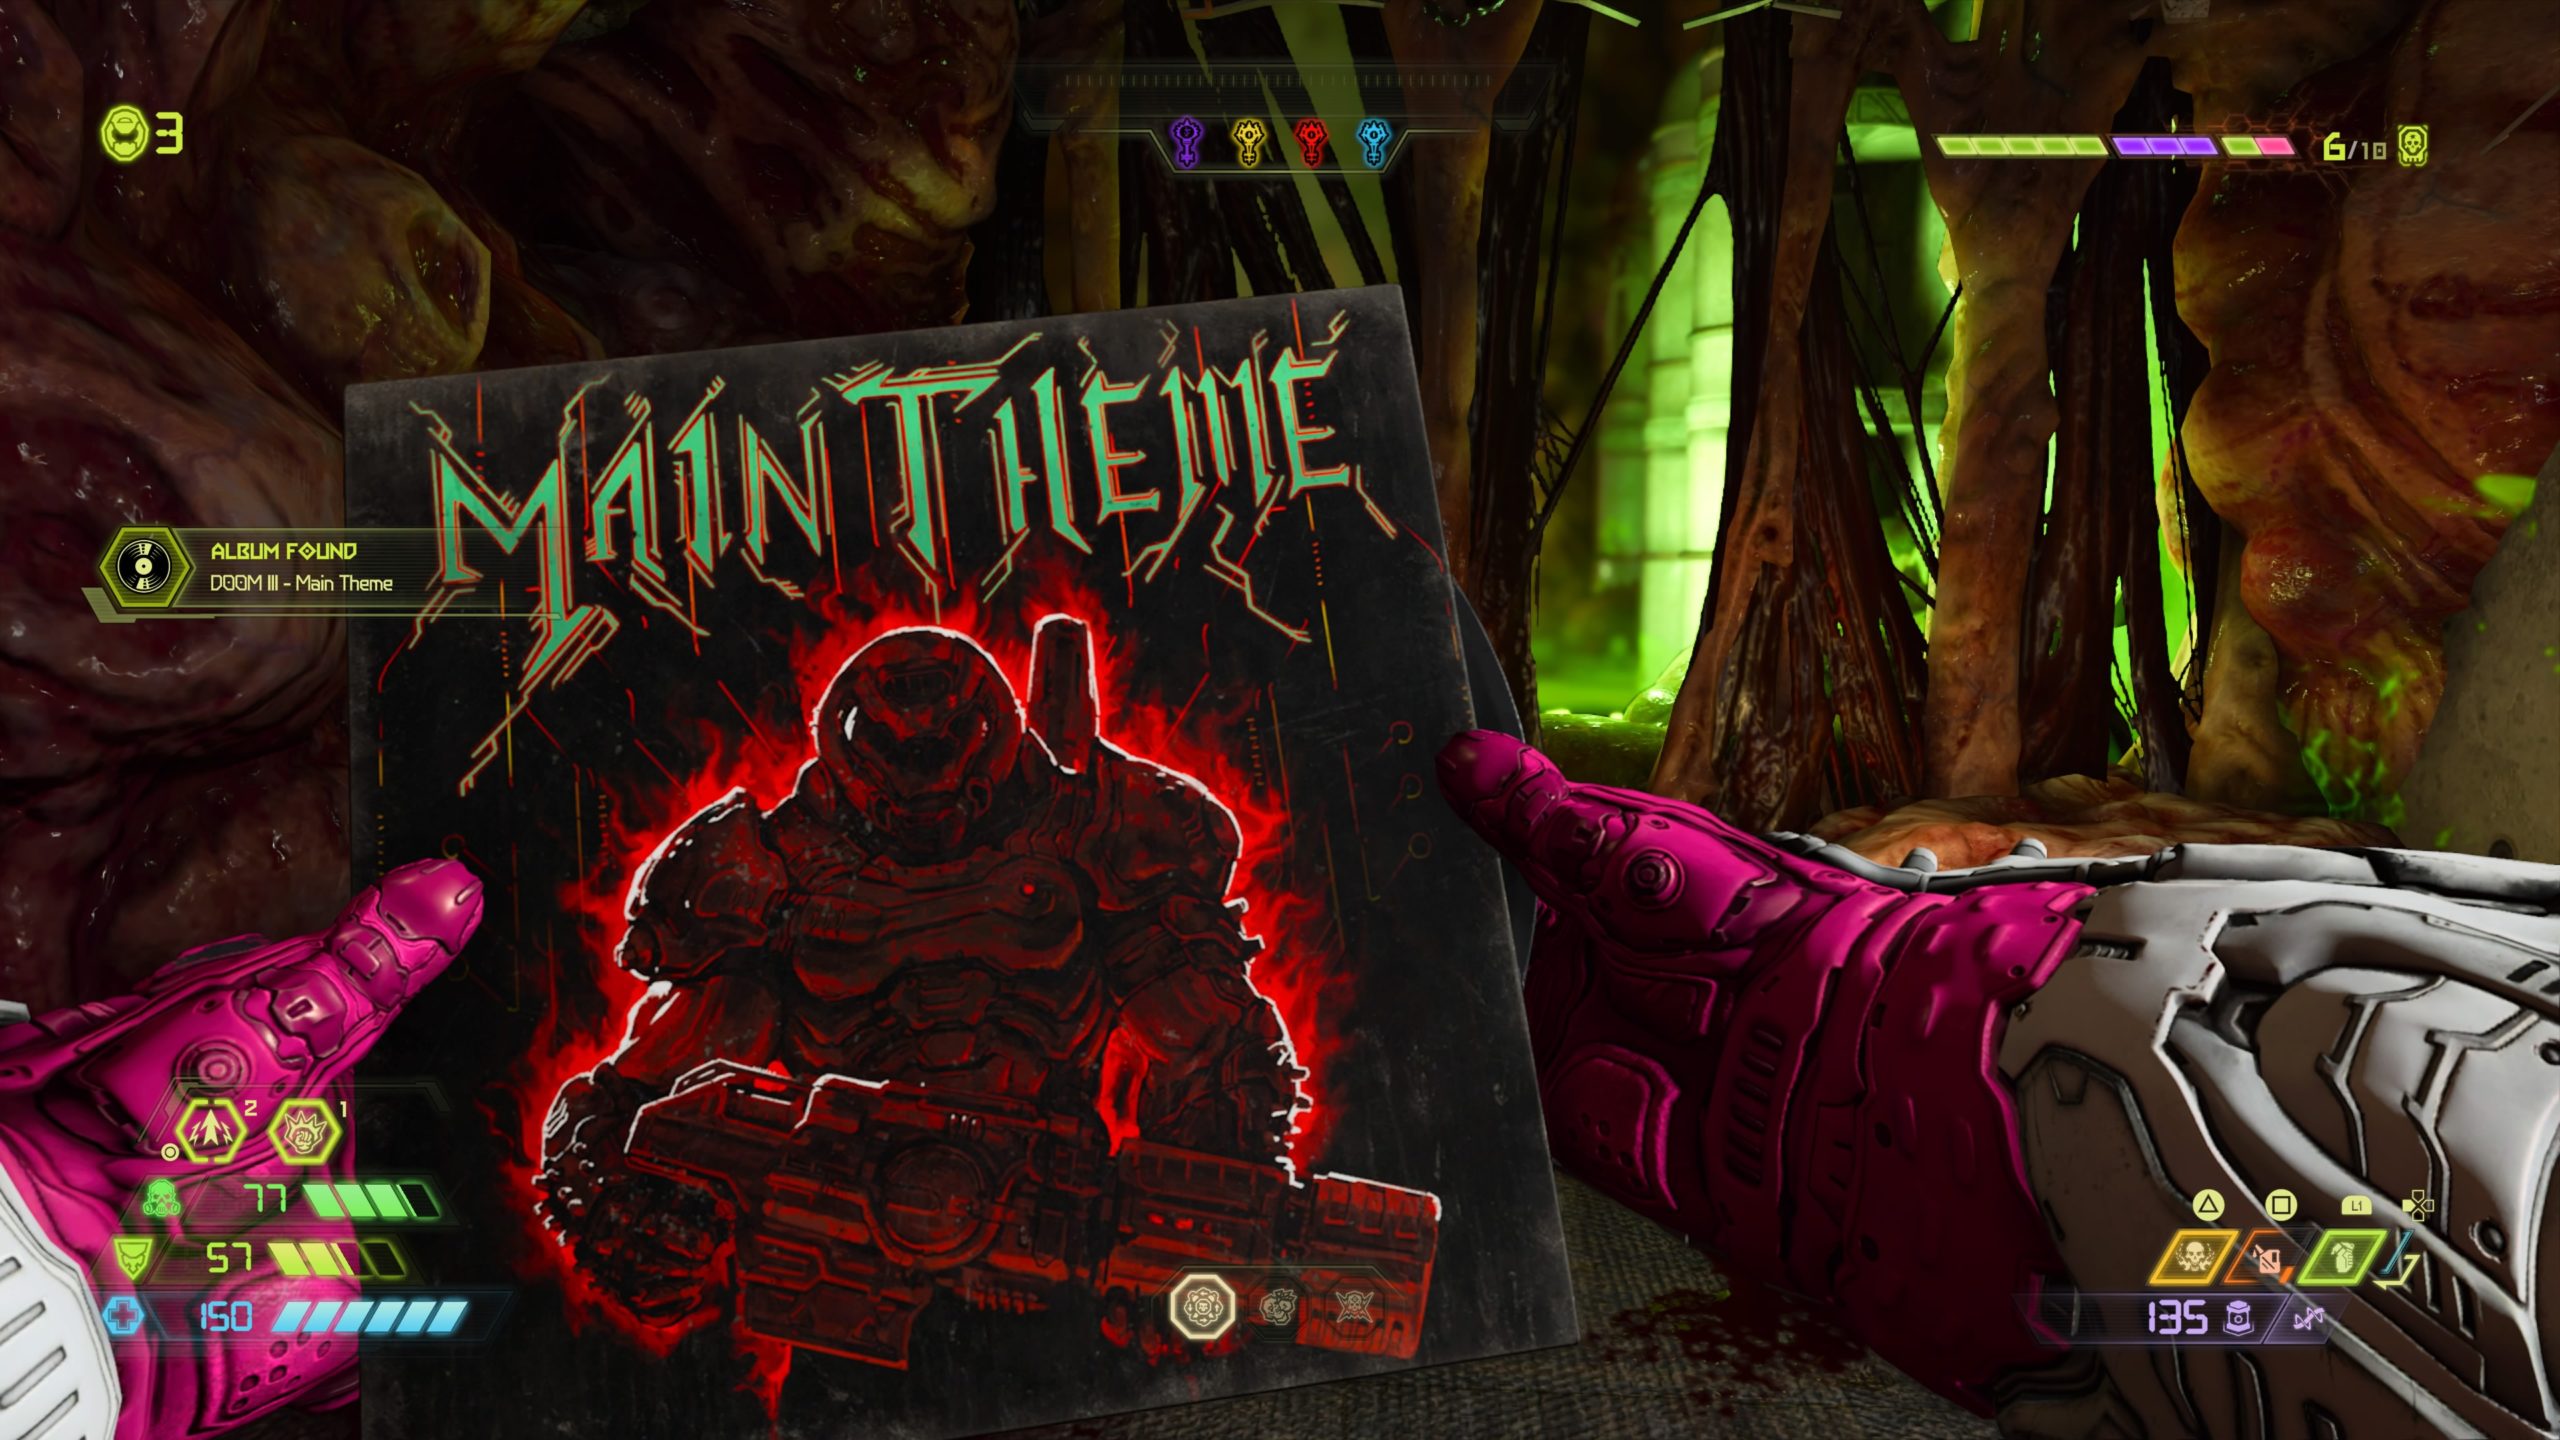
From the fast travel point, turn around, heading into the green lit room, and follow the hallway down a flight of stairs. At the bottom of the stairs, take a left and head to a window overlooking a spinning skull cauldron. Jump onto the gold spin bar to reach the building across the way containing the album.
Praetor Suit Point

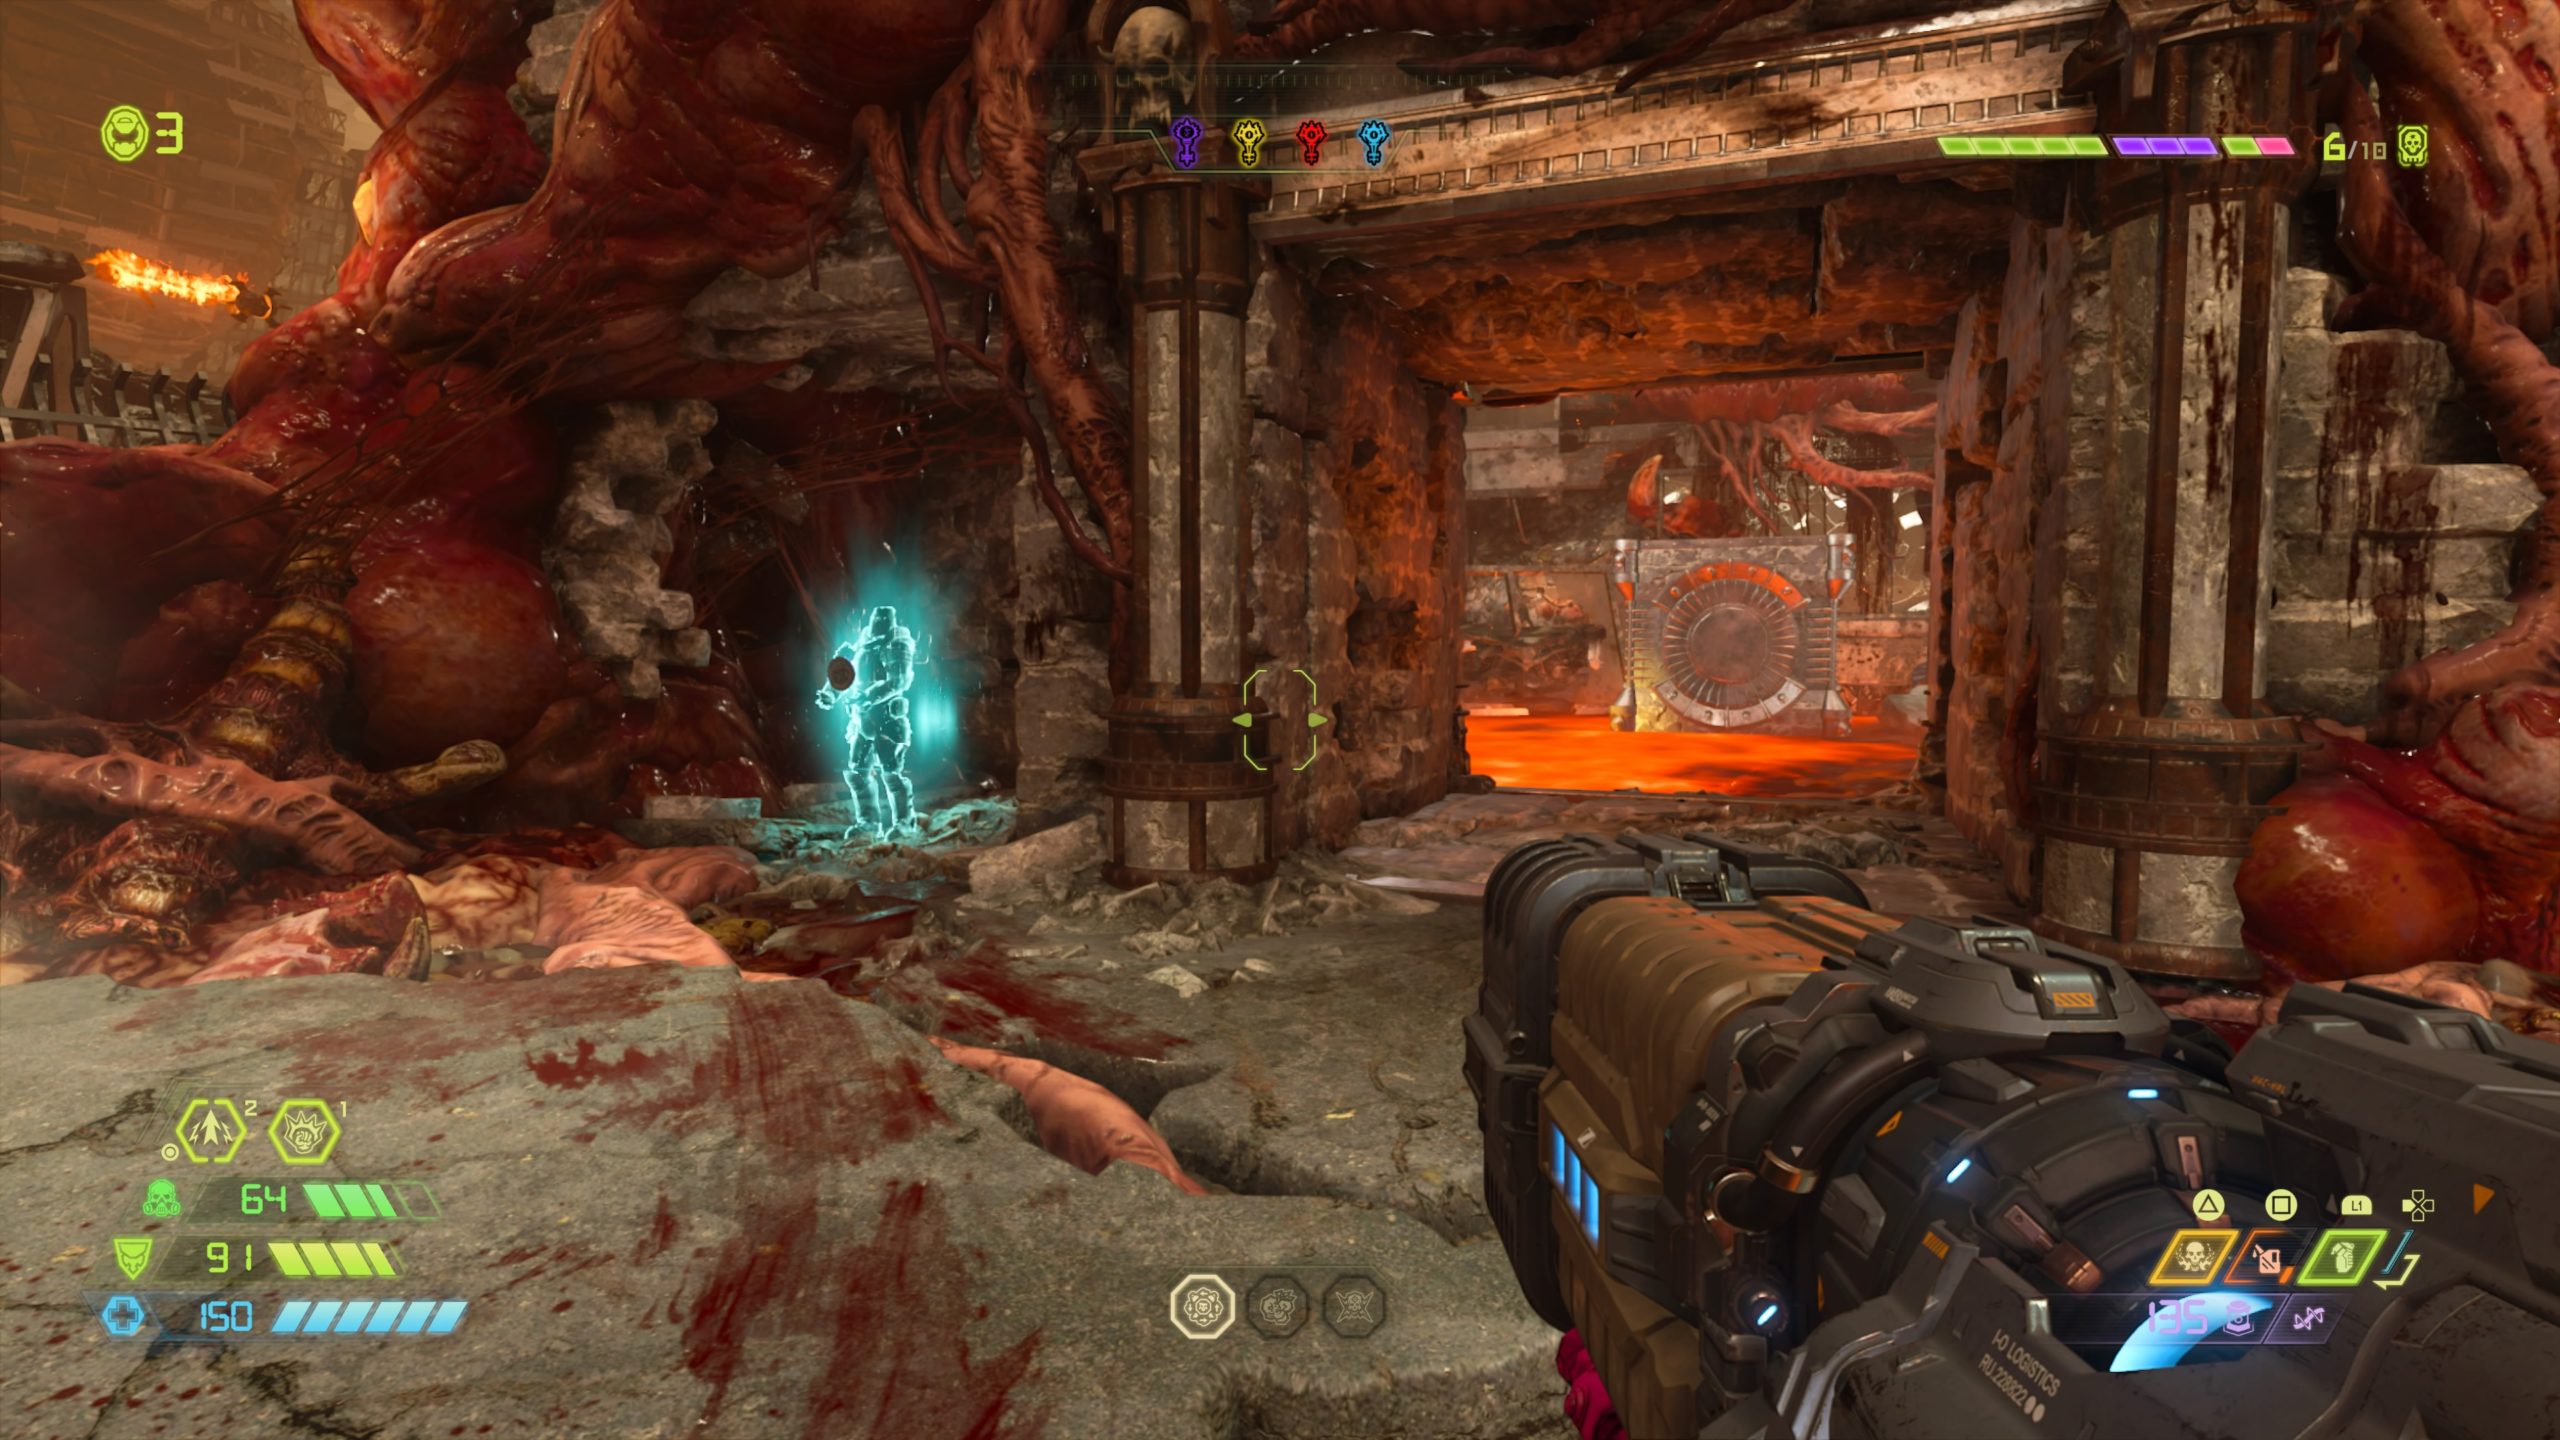
From the fast travel point, turn around, heading into the green lit room, and follow the hallway down a flight of stairs. Jump through the hole in the window straight ahead to land on a giant concrete slab with lava in the middle. Head to the square structure to find the sentinel holding the point along the back of it.
Praetor Suit Point
From the fast travel point, head forward through the teeth guarded doorway and follow the hallway to the end. Work your way through the toxic room using the climbable walls. When you go past the fire spinning chain, jump to the climbable wall just beyond it then head to the wall across the way and turn around to find the room with the sentinel holding the point near the top.
Sentinel Crystal
From the fast travel point, head forward towards the green portal guarded by the teeth. Just before the teeth, take a left down a small flight of stairs followed by another left to locate the crystal at the end of the hallway.
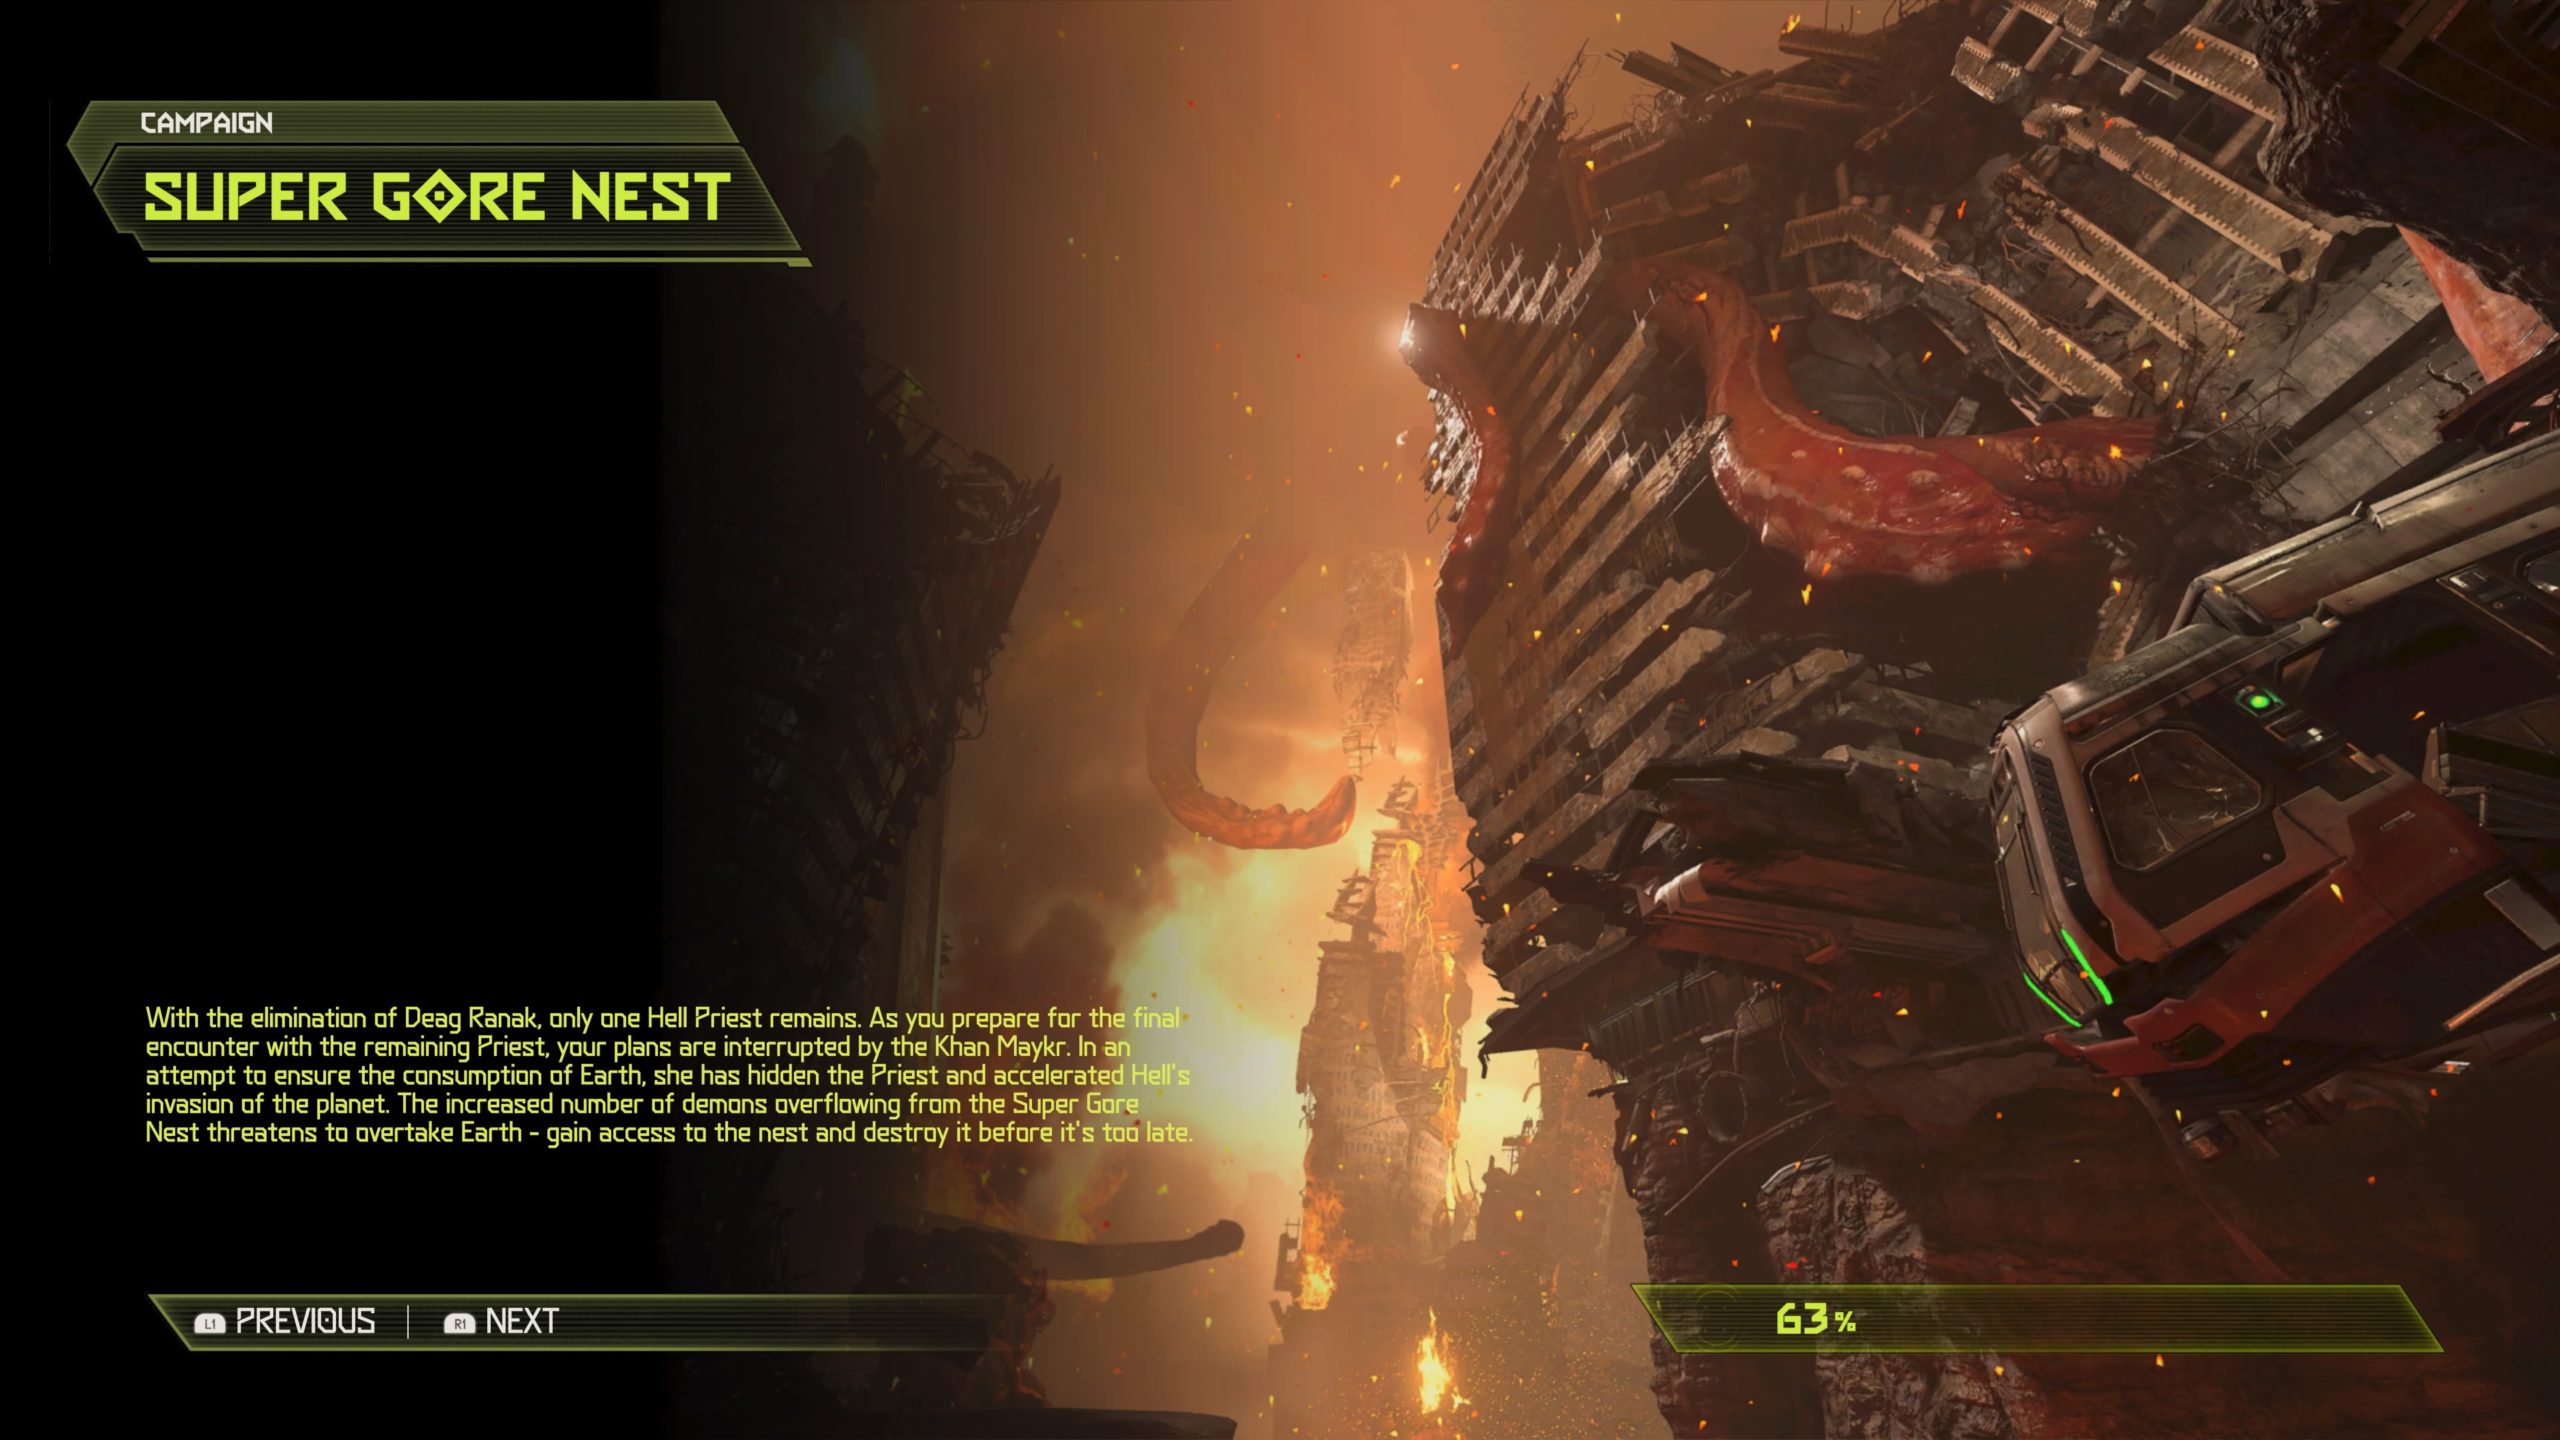
Codex: Story of Earth – Super Gore Nest
From the fast travel point, turn around and head up the ramp. The codex will be on the right side of the next room.
Praetor Suit Point

From the fast travel point, jump down into the green toxic liquid and follow the path right through a doorway to find the sentinel holding the point at the end.
Toy: Revenant
From the fast travel point, head forward, jumping over the moat of toxic liquid, then pass through a teeth covered doorway. This will bring you to a room filled with toxic waterfalls and fire cannon balls. Jump down into the toxic bit below and follow the stream left through a doorway. This will bring you to a tunnel containing the toy towards the end.
Sentinel Battery
From the fast travel point, follow the toxic liquid left past some spinning fire chains. This will bring you to a room with a spinning column shooting fire cannon balls. Head past the column and follow the toxic liquid through a tunnel. At the end of the tunnel, jump up to a ledge to find the battery.
Modbot
From the fast travel point, head through the doorway behind you (opposite of the giant heart) and take a left, passing through another doorway, into a gunk covered room with a UAC Spokesperson hologram and the Automap Station. Head through the door on the right side of the room and jump over the electric floor, passing through another doorway, bringing you into a waterlogged, gunk covered room. Head through the doorway on the right side of the room and follow the tunnel to the end to find the weapon mod.
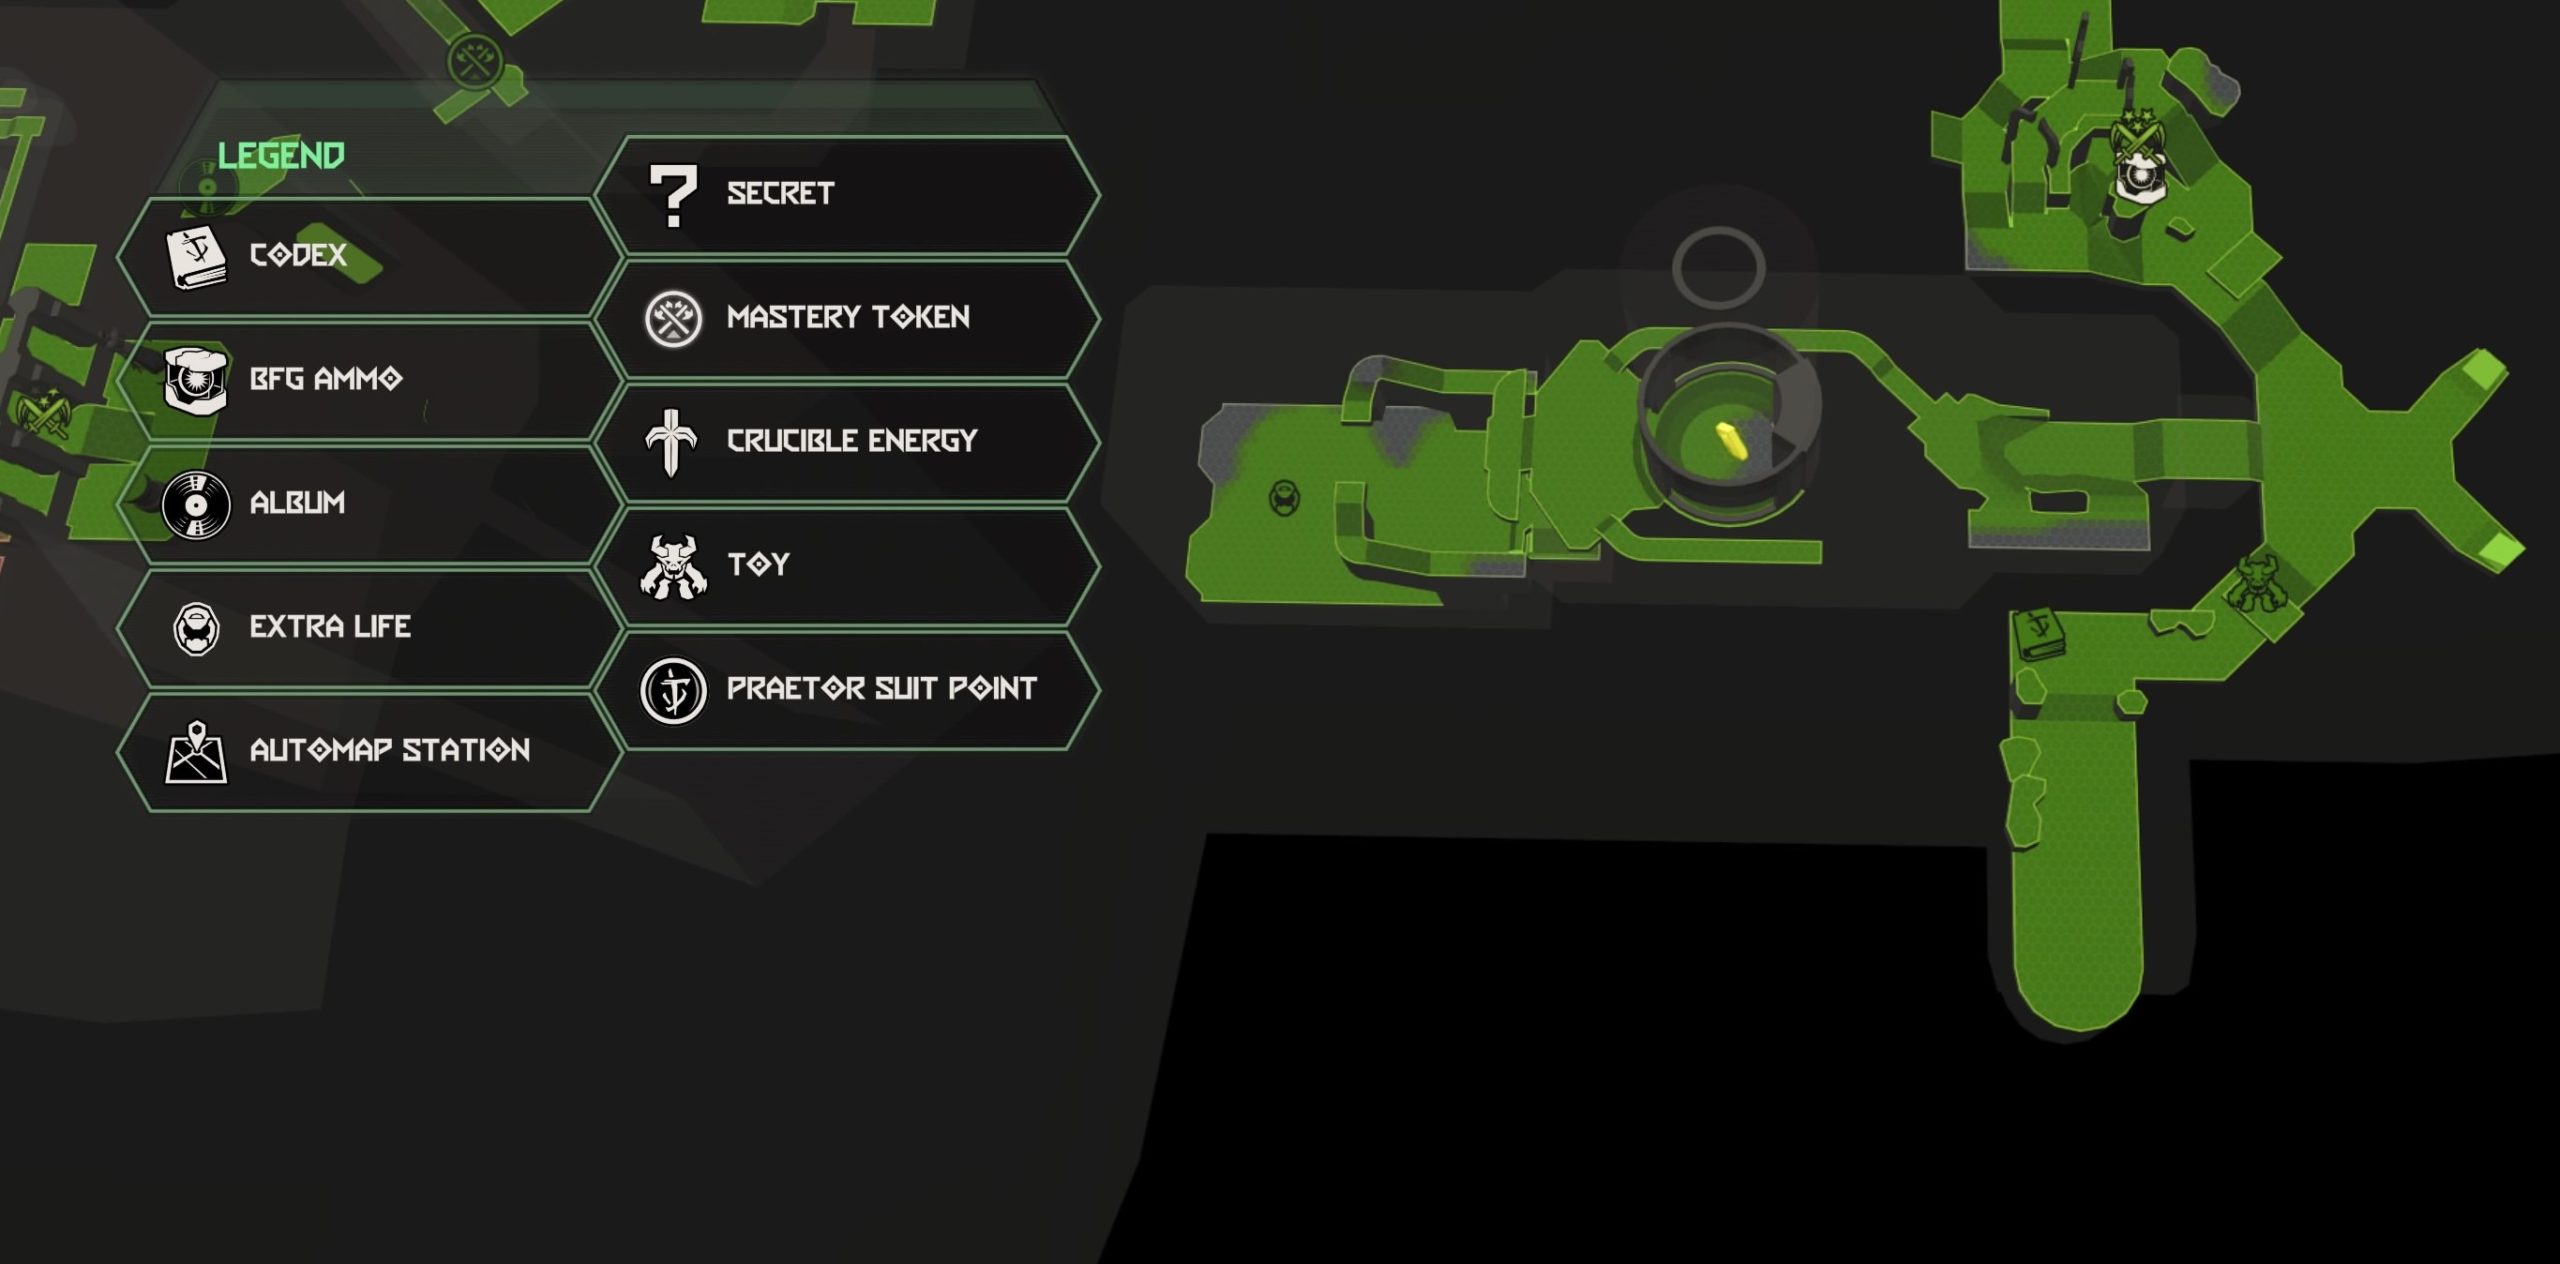
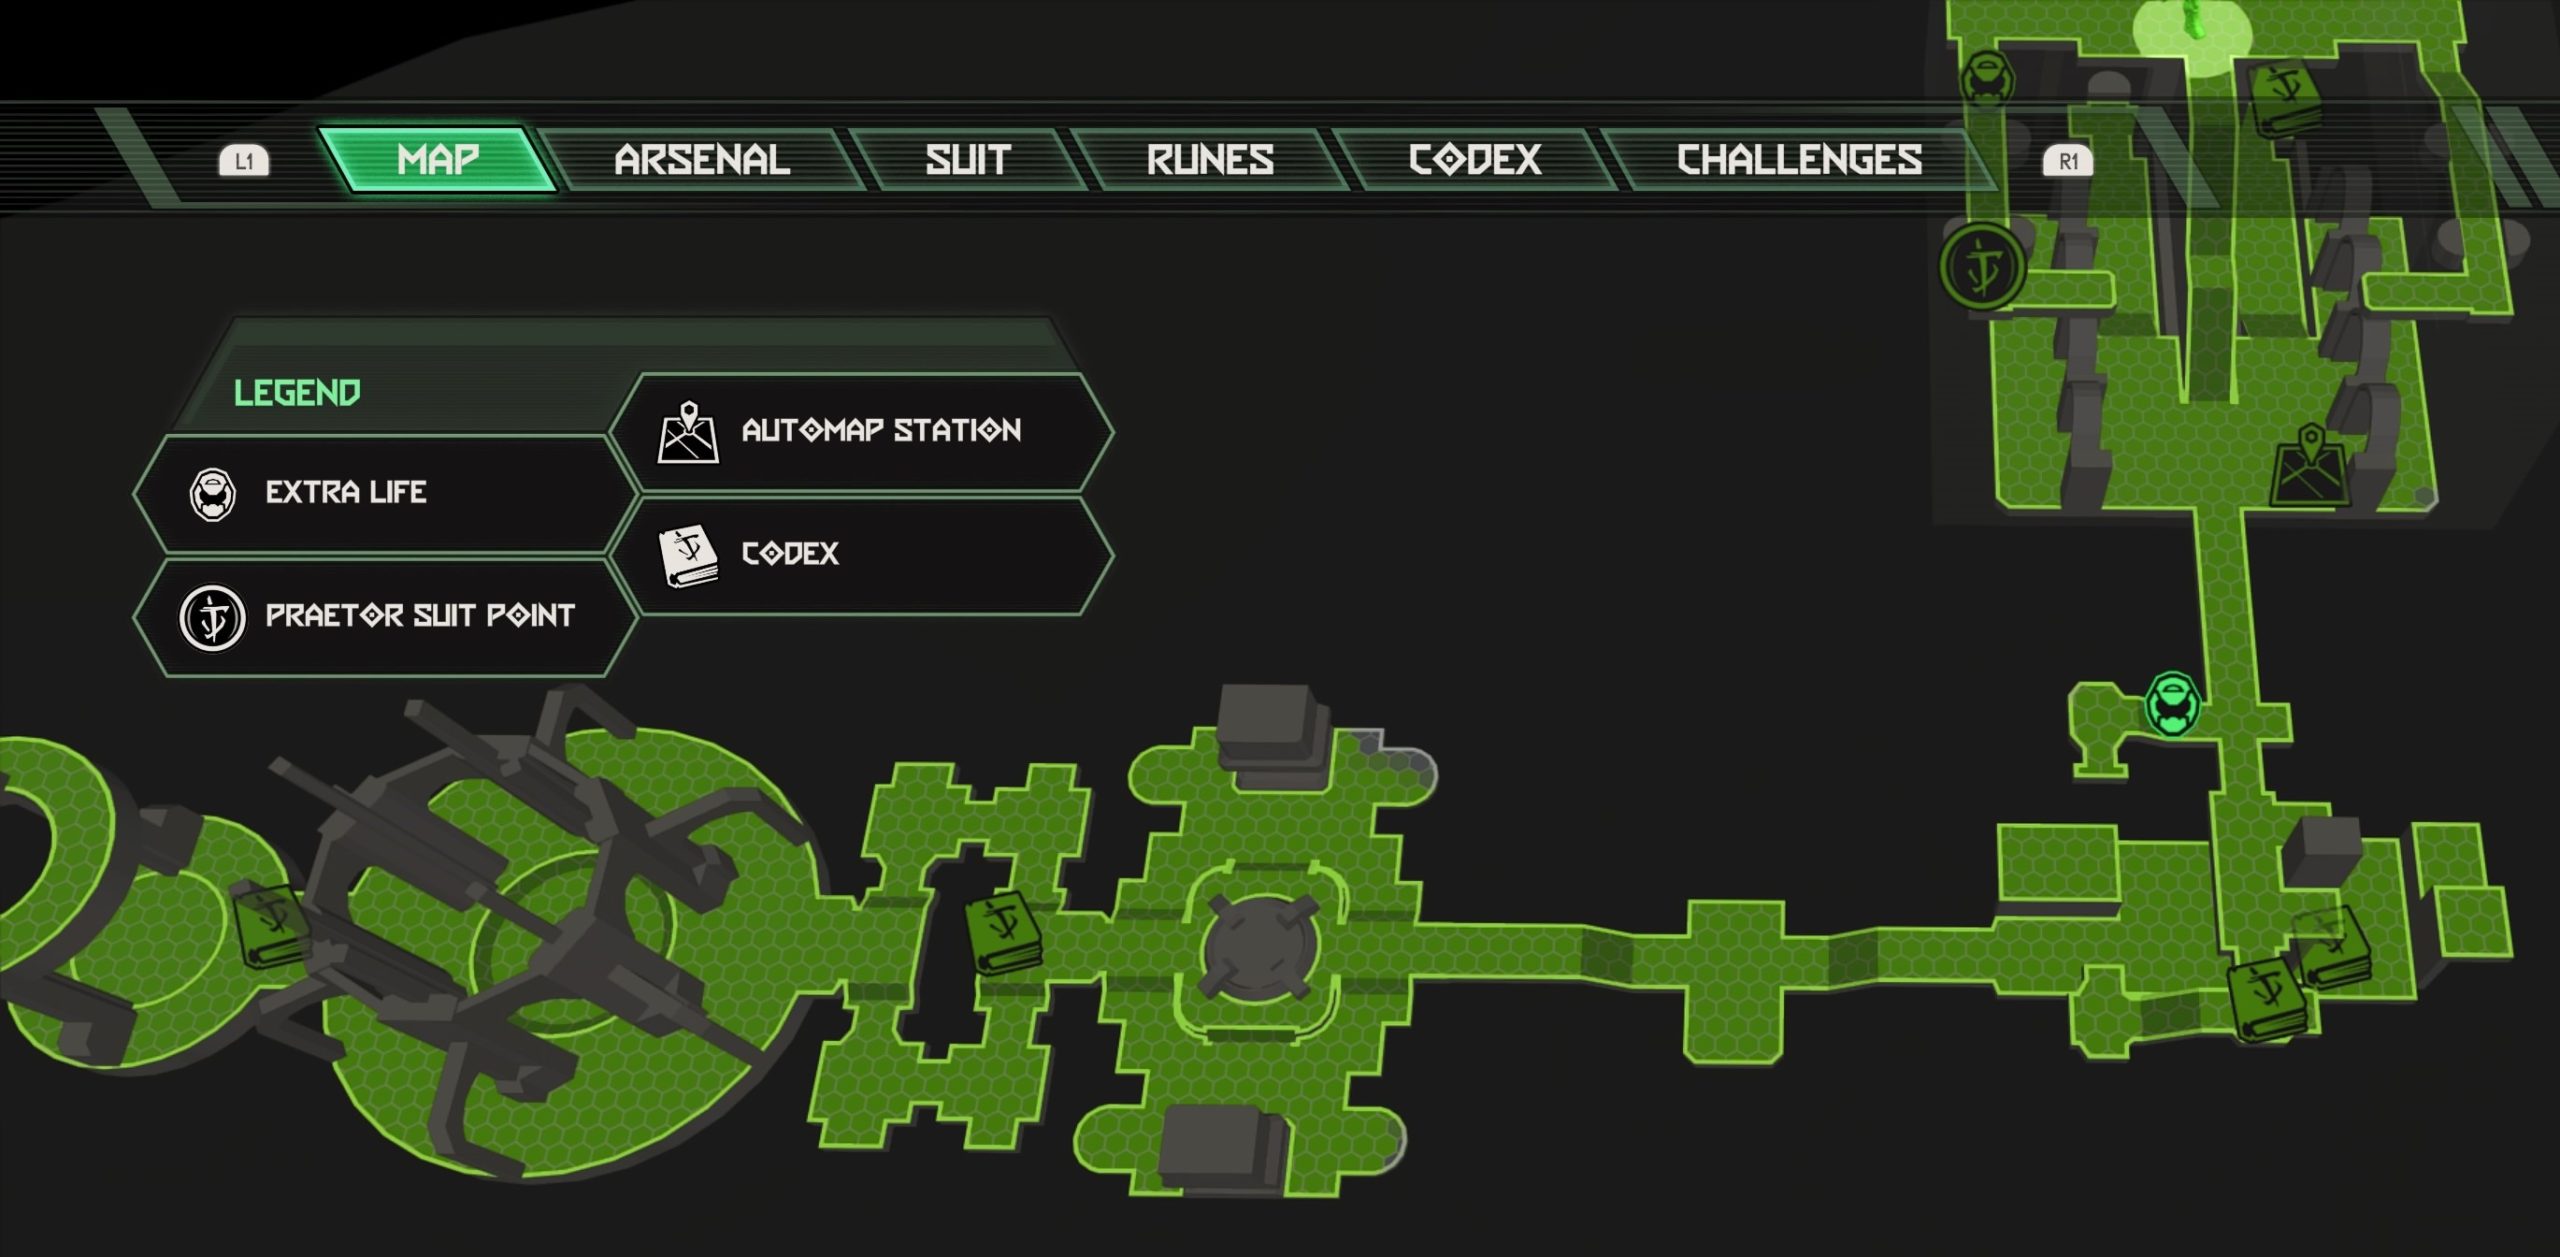
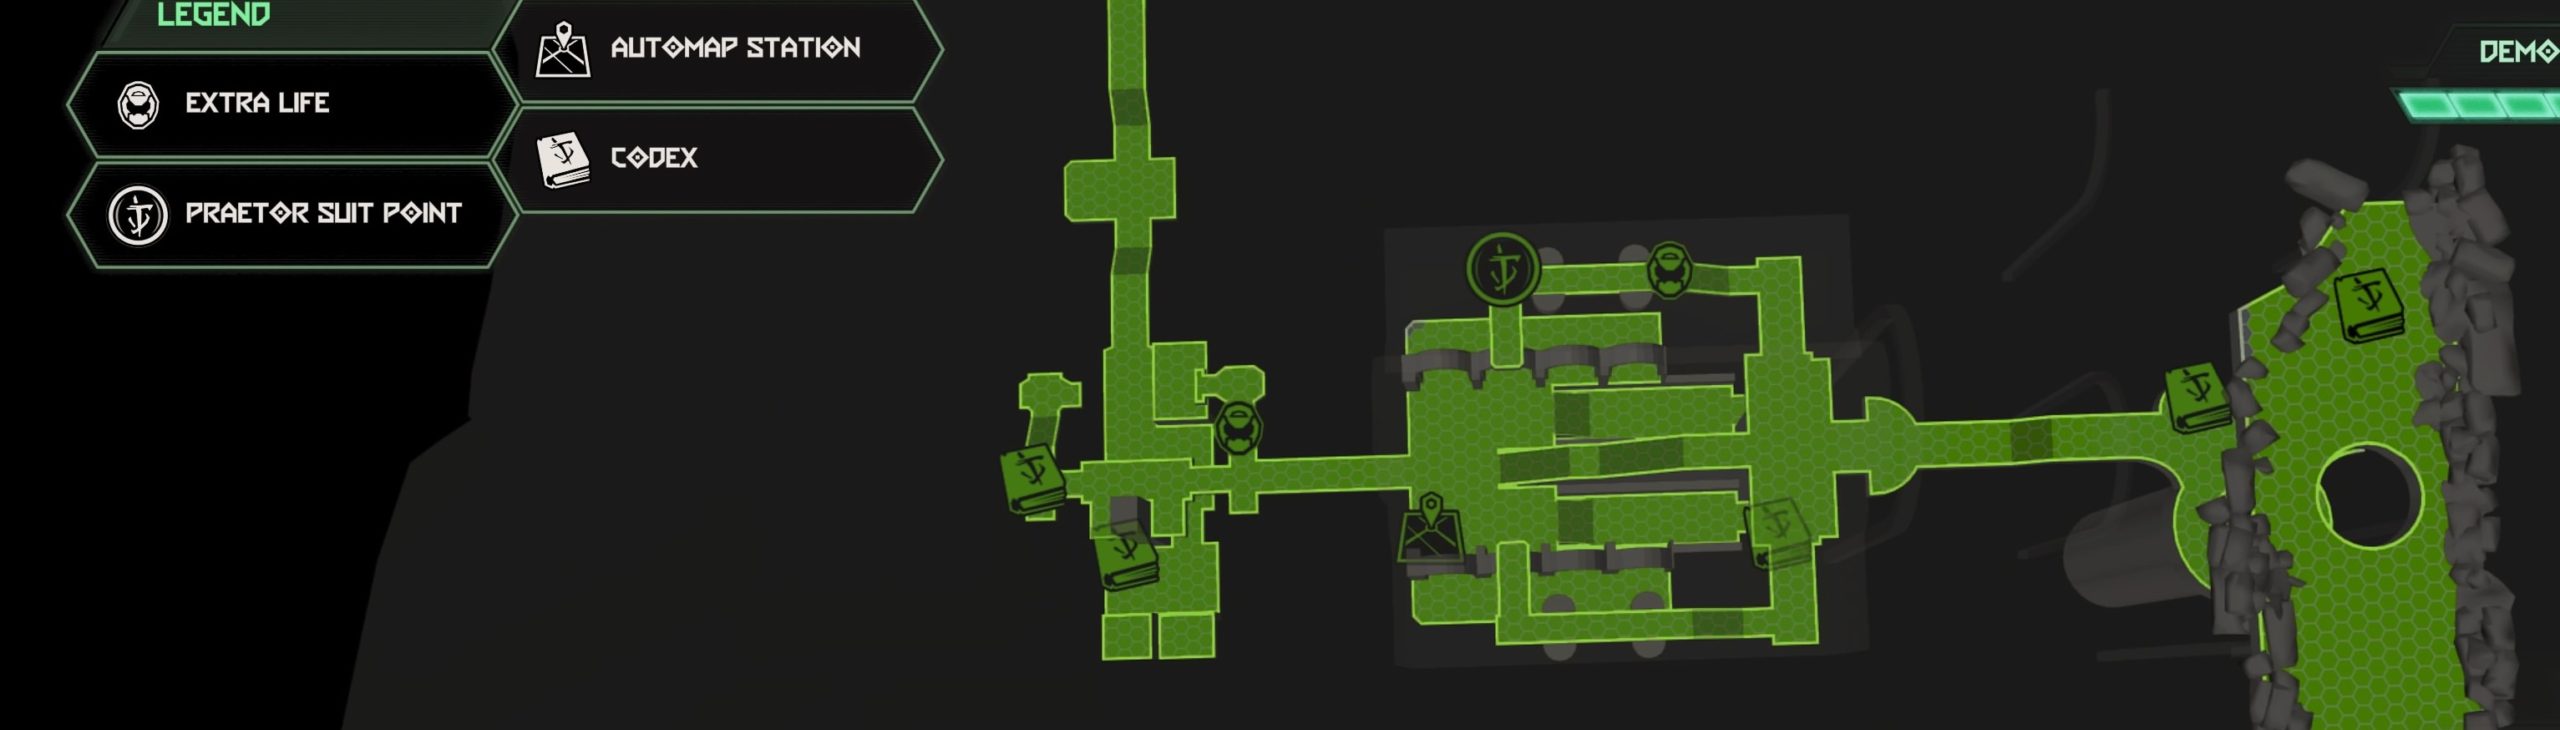
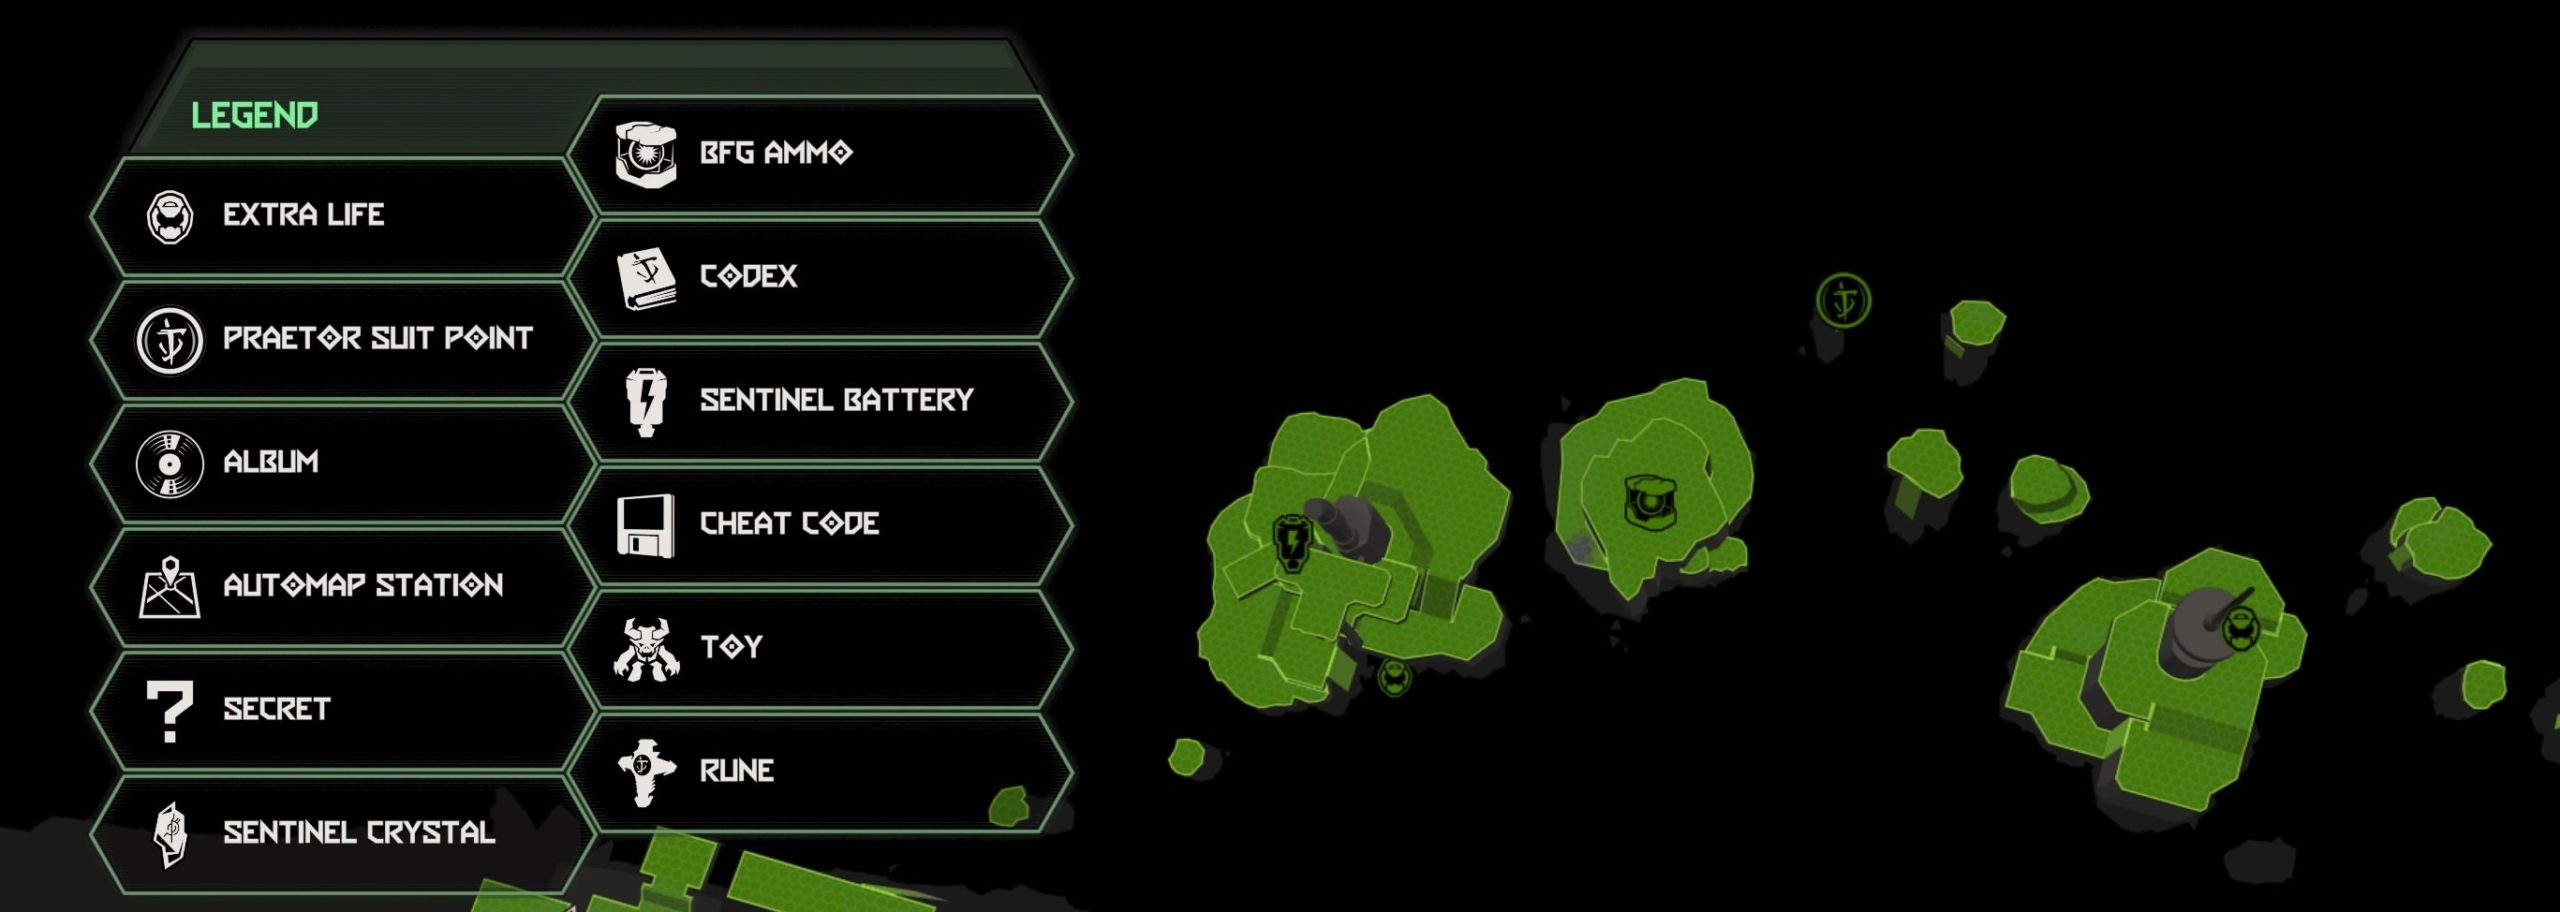
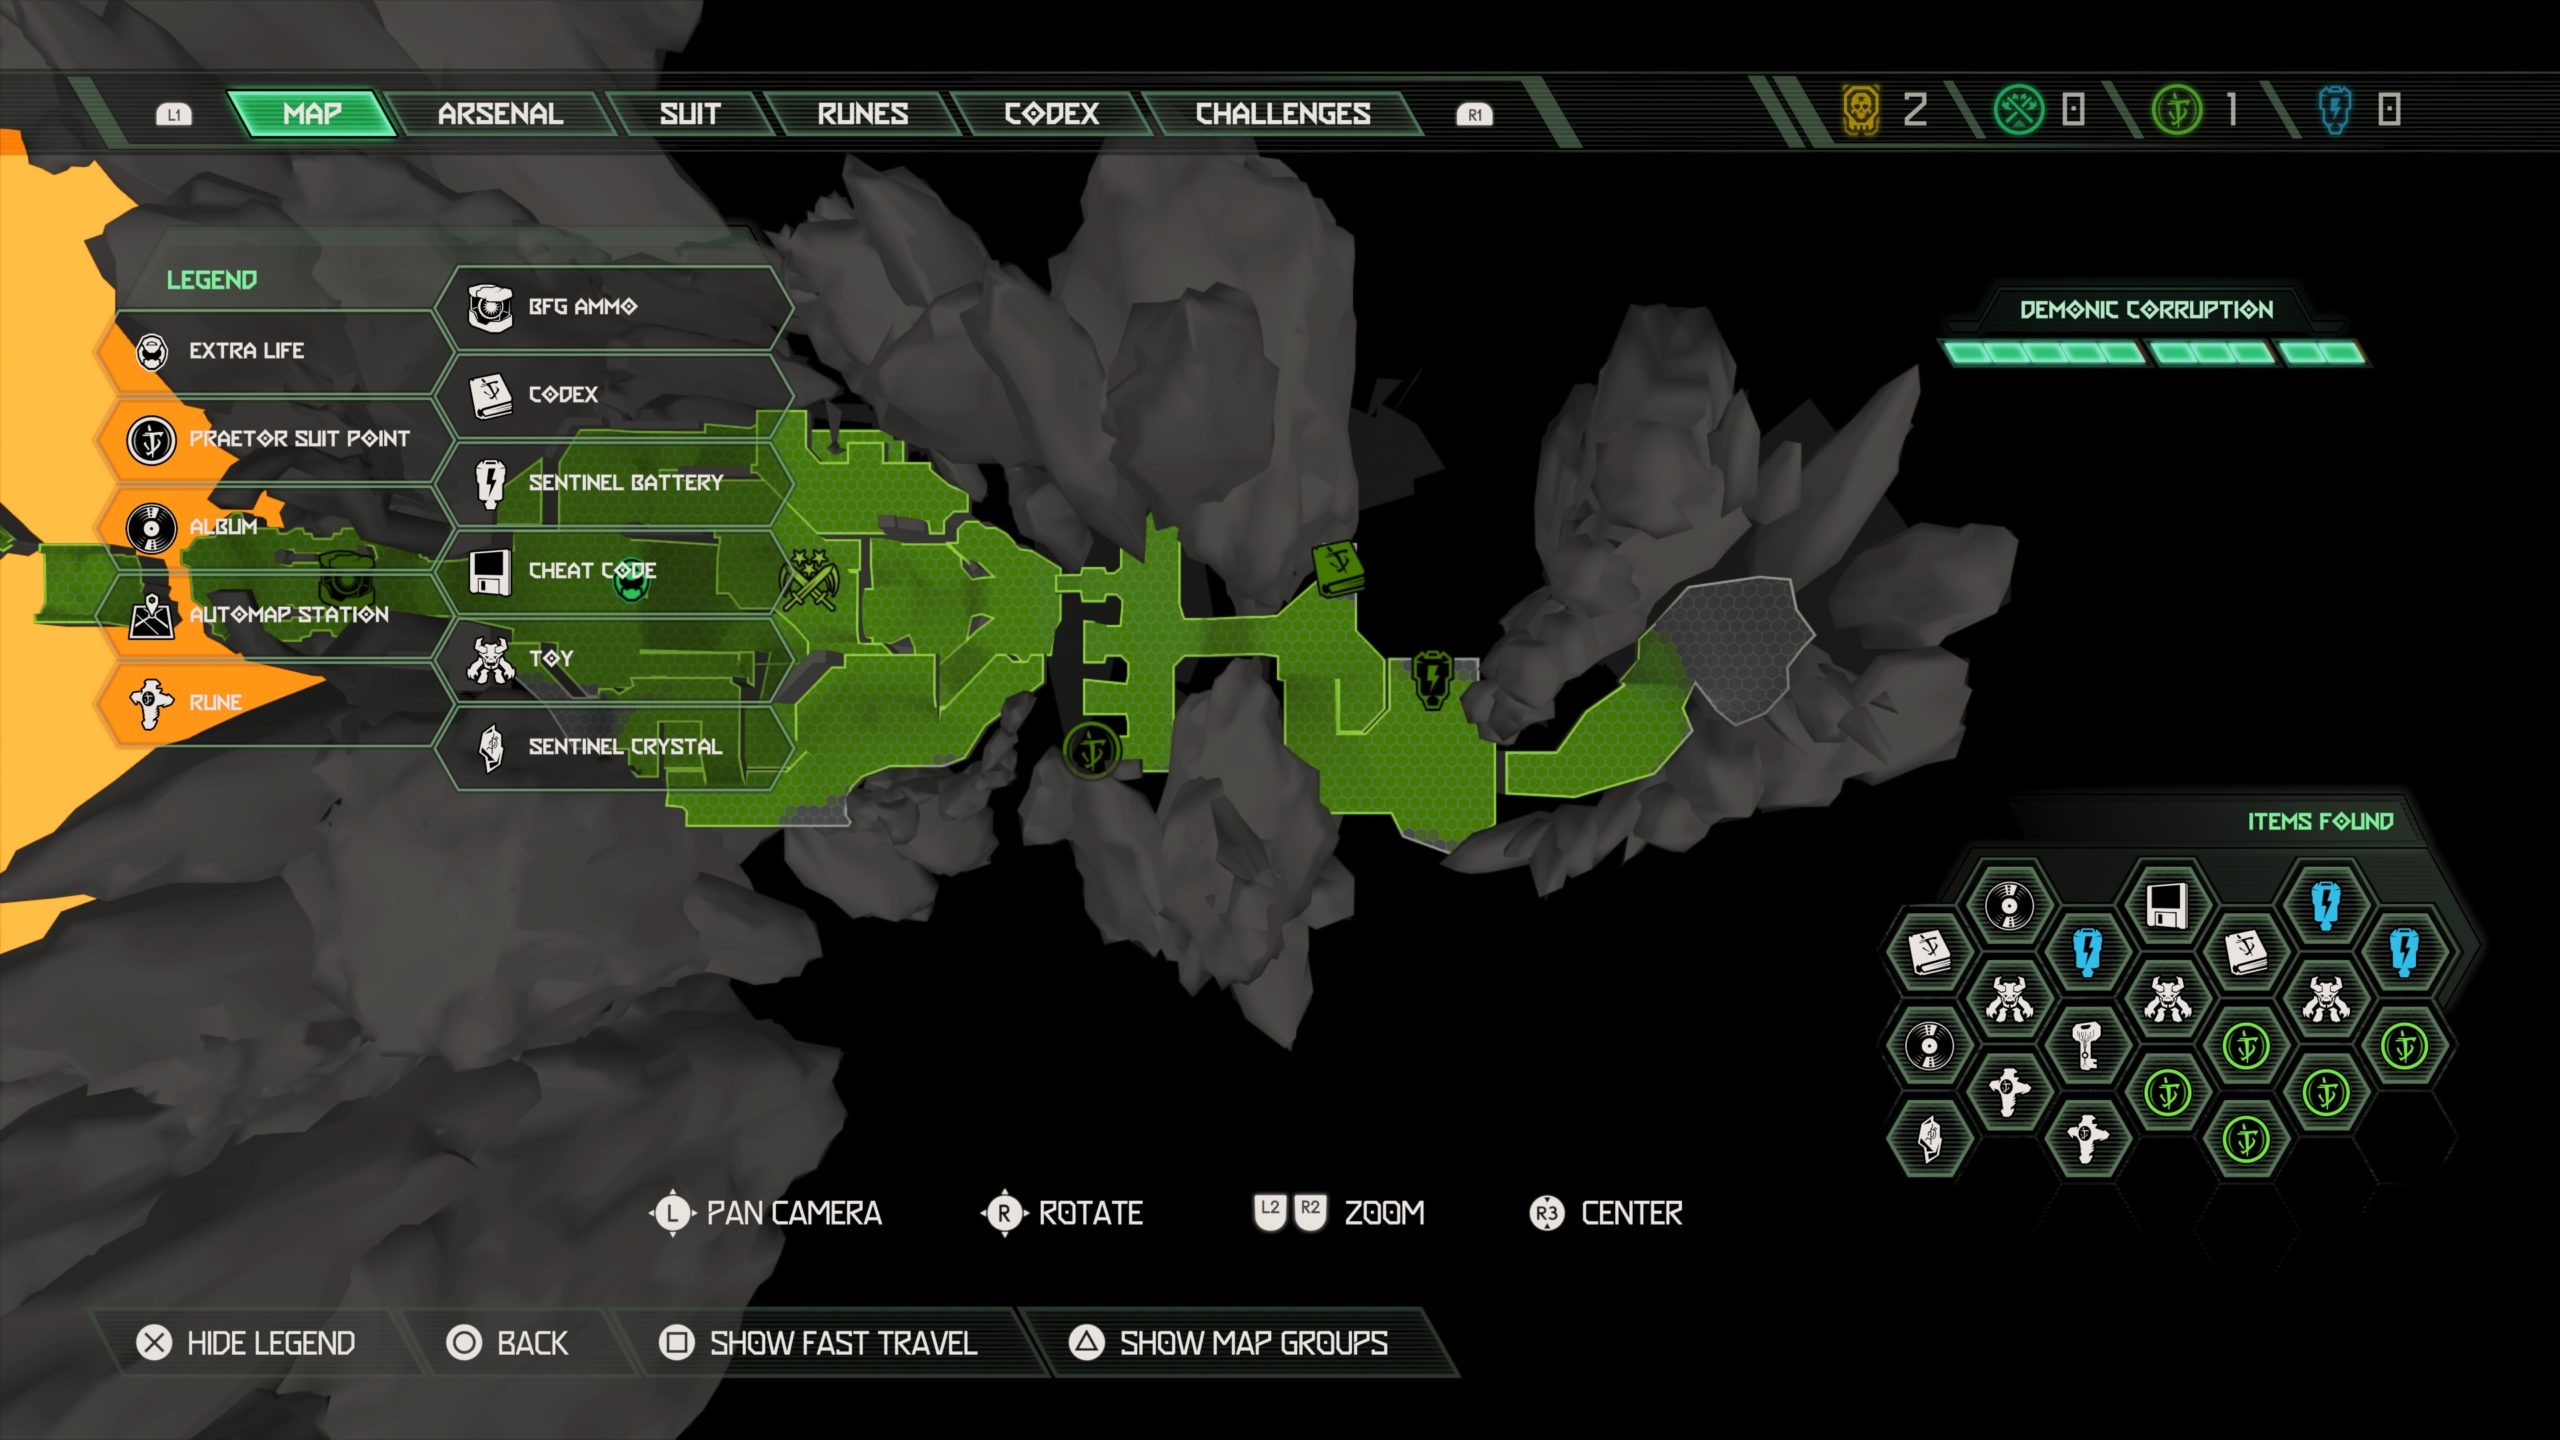
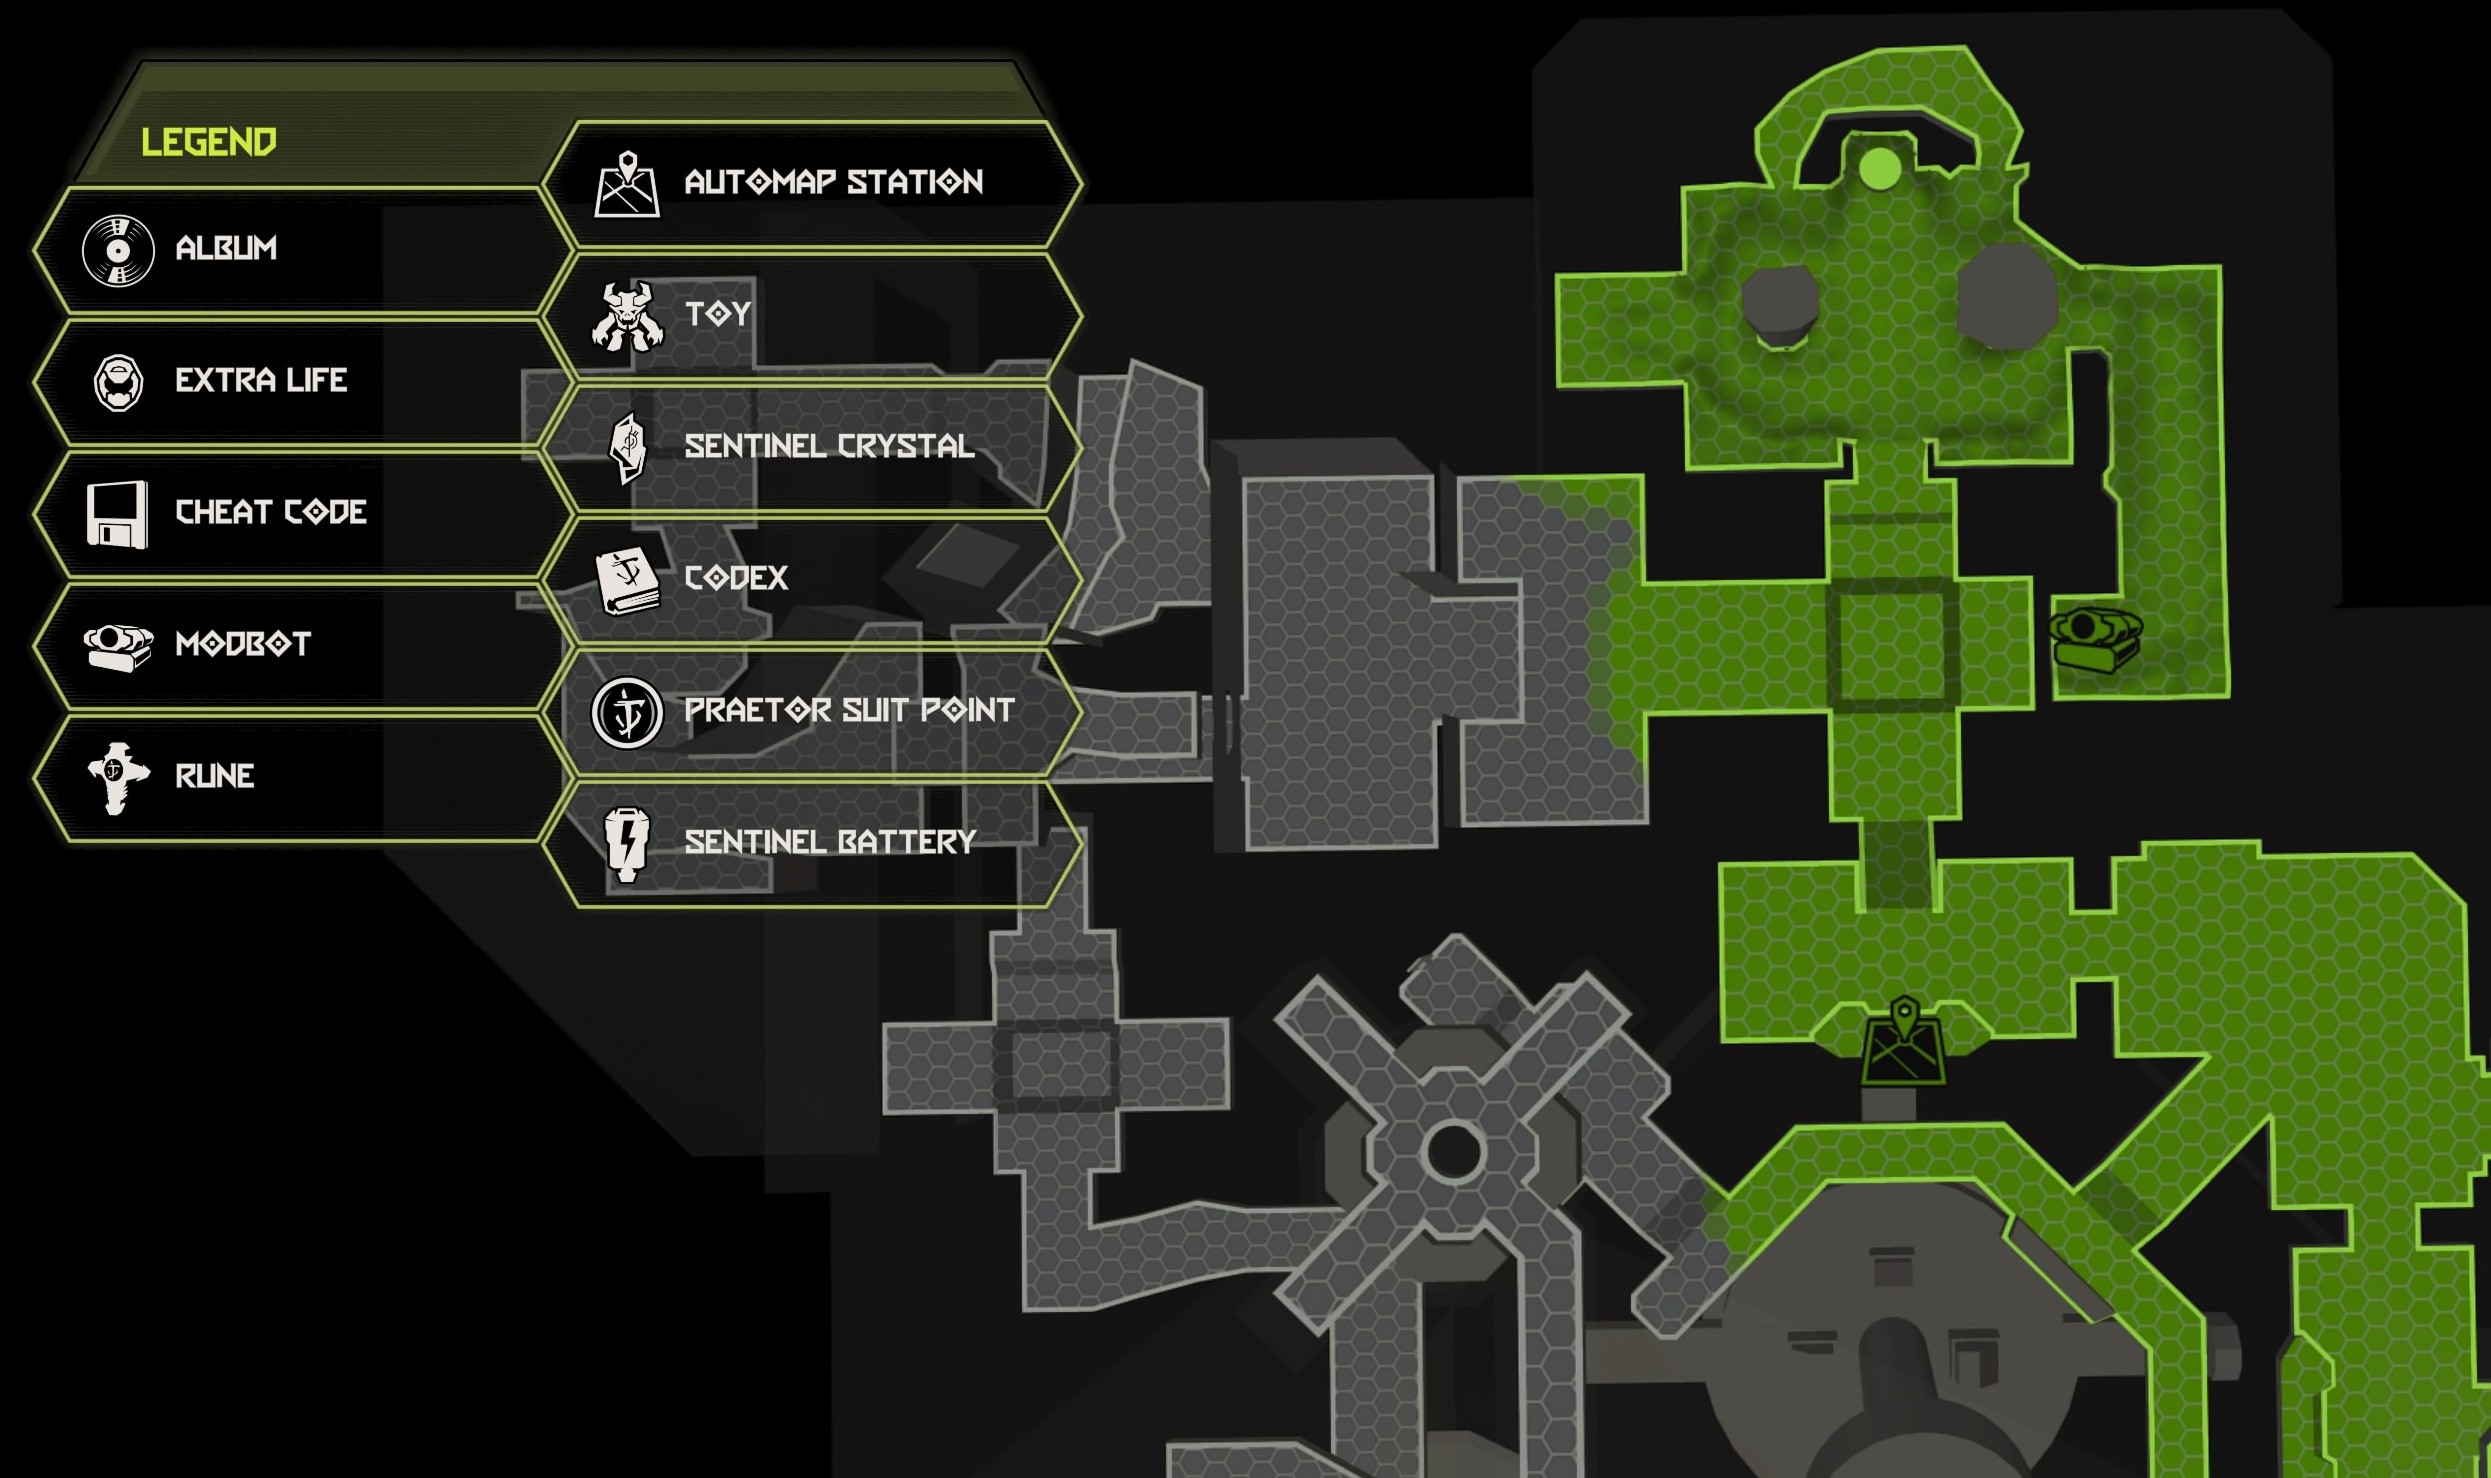
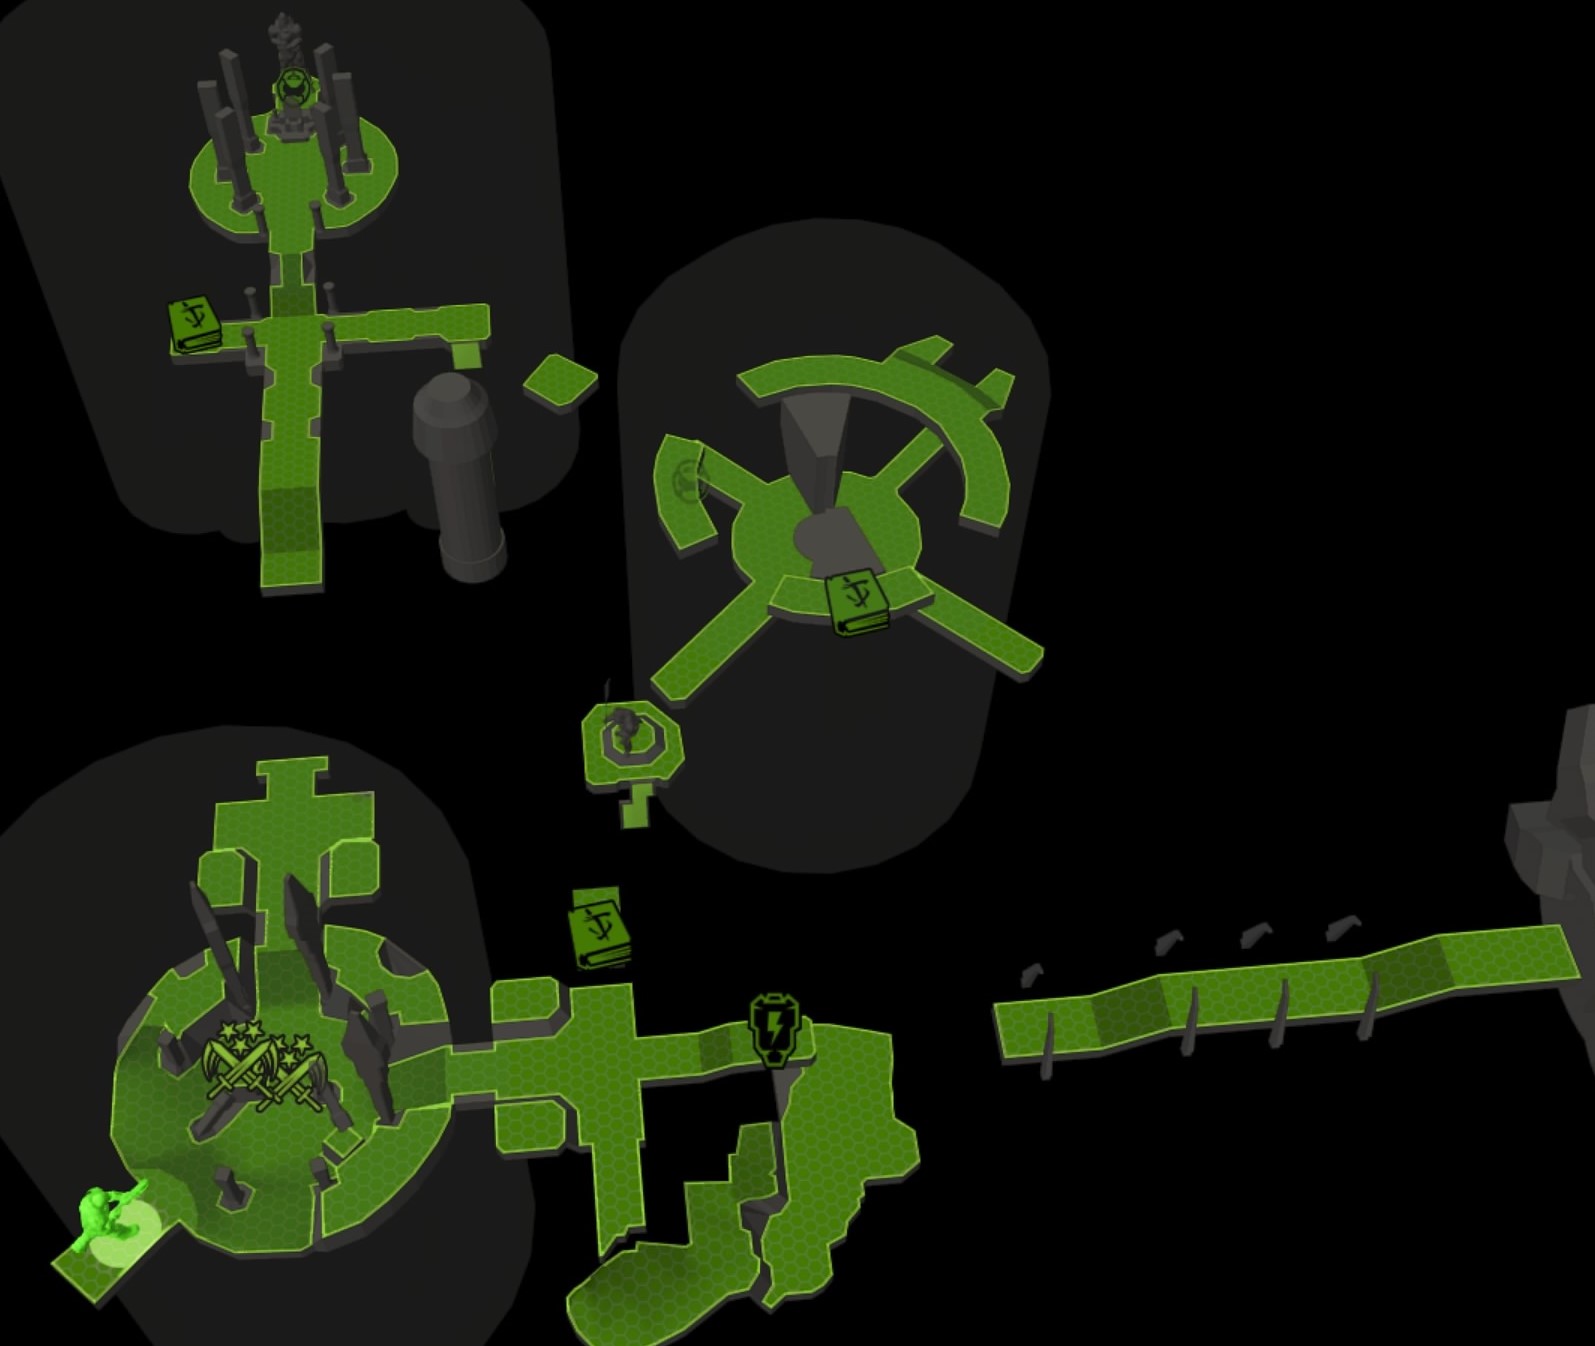
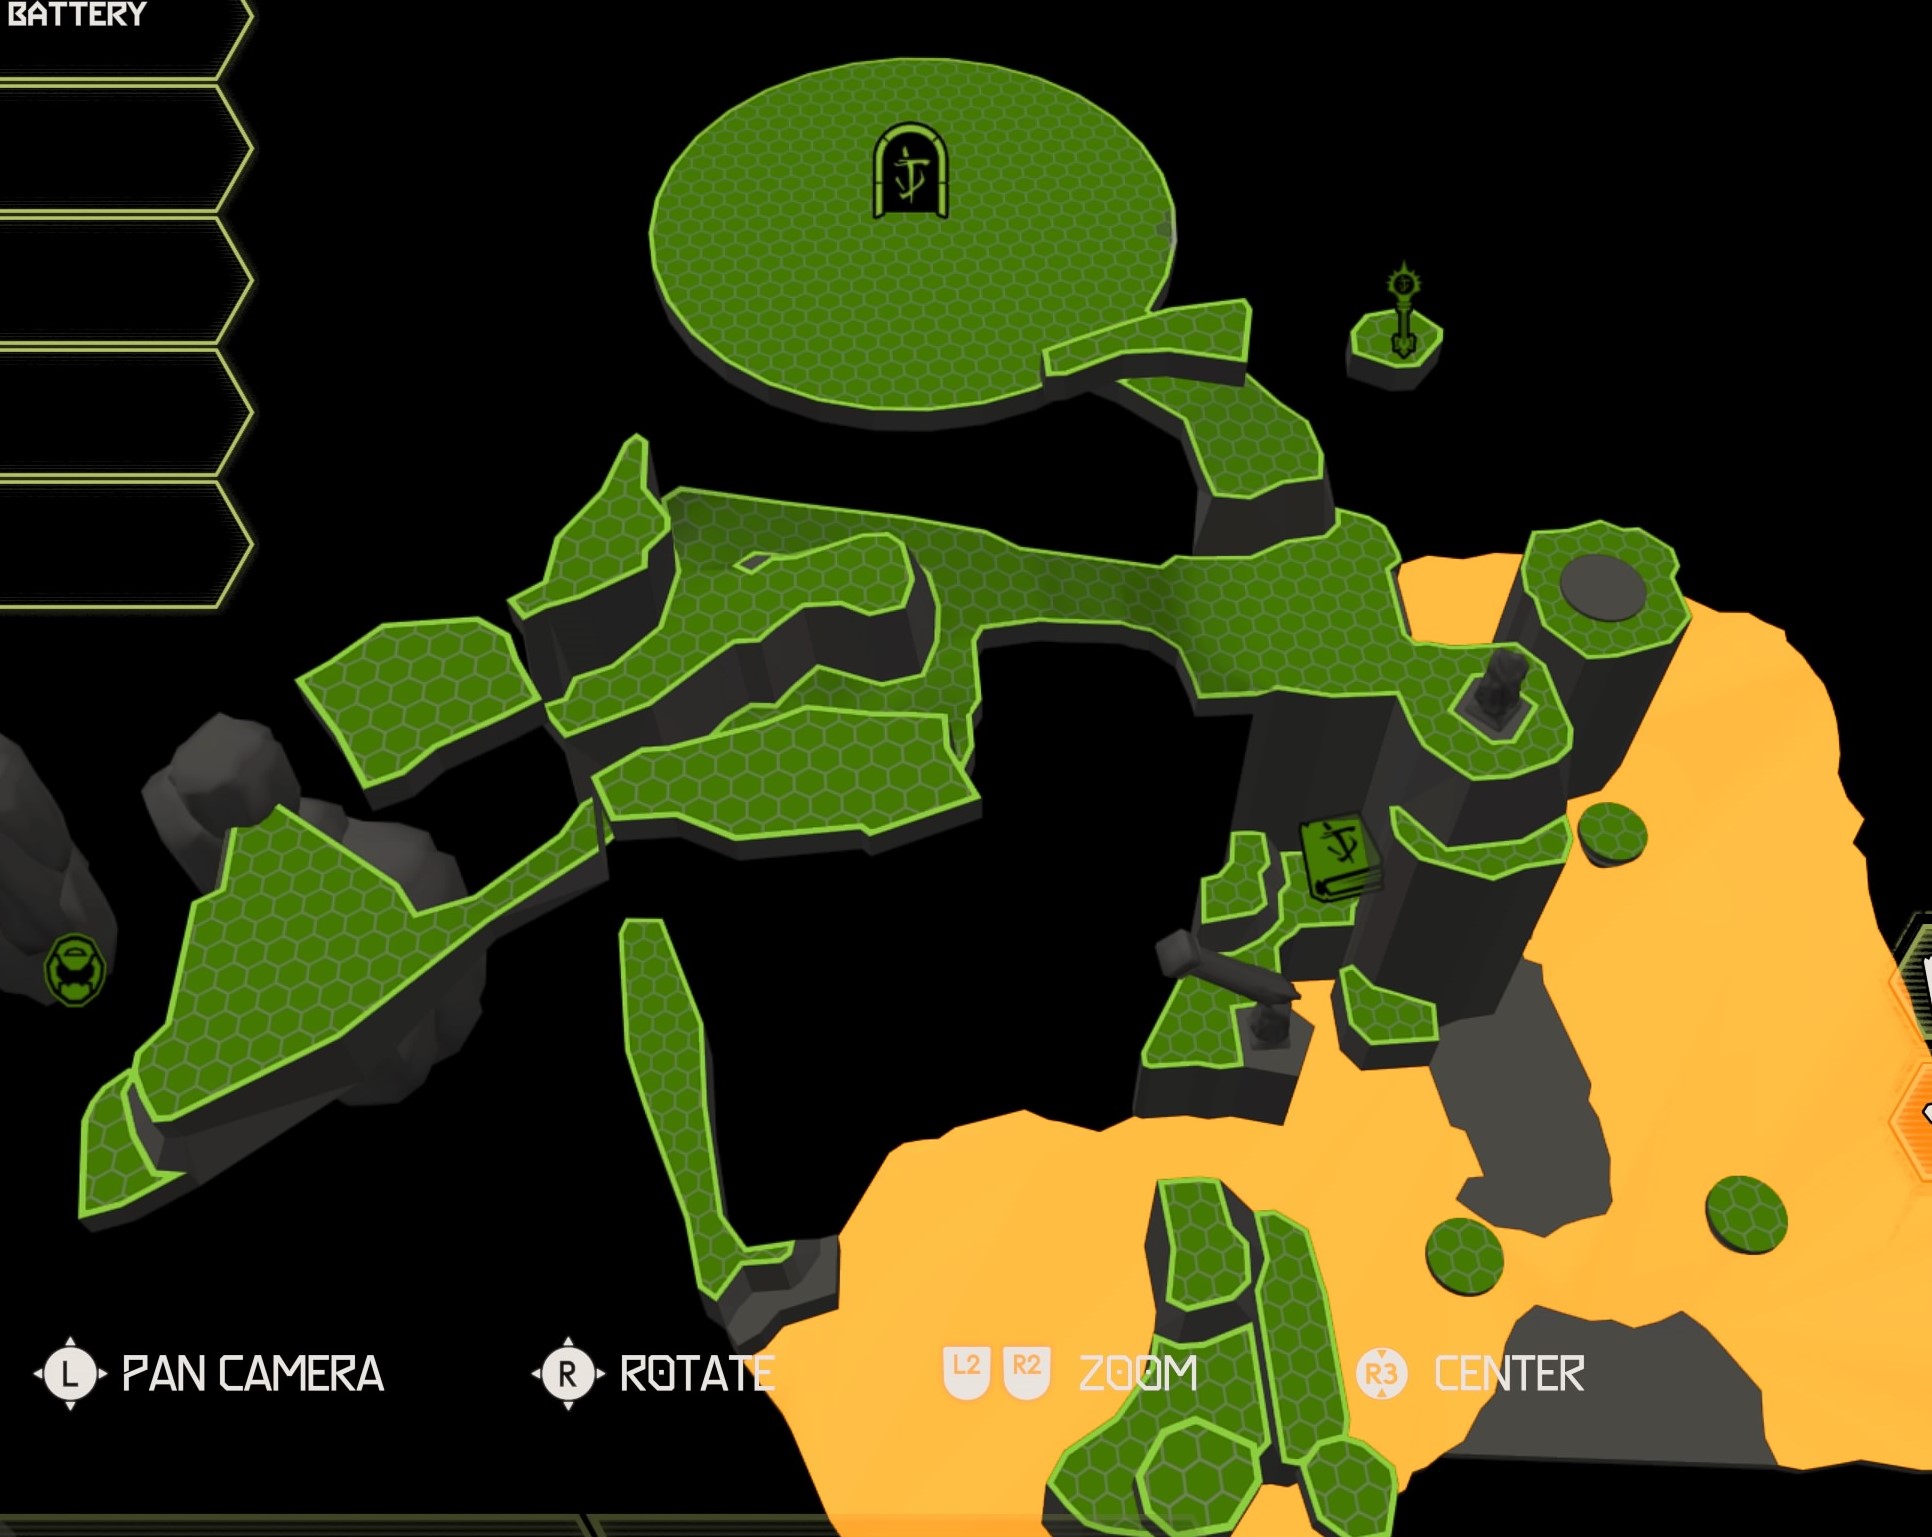
The second mission called Exultia in Doom Eternal contains a total of 15 collectibles. There are 1 album, 7 codices, 1 Empyrean key, 1 modbot, 1 rune, 1 sentinel battery, 1 sentinel crystal and 2 toys.

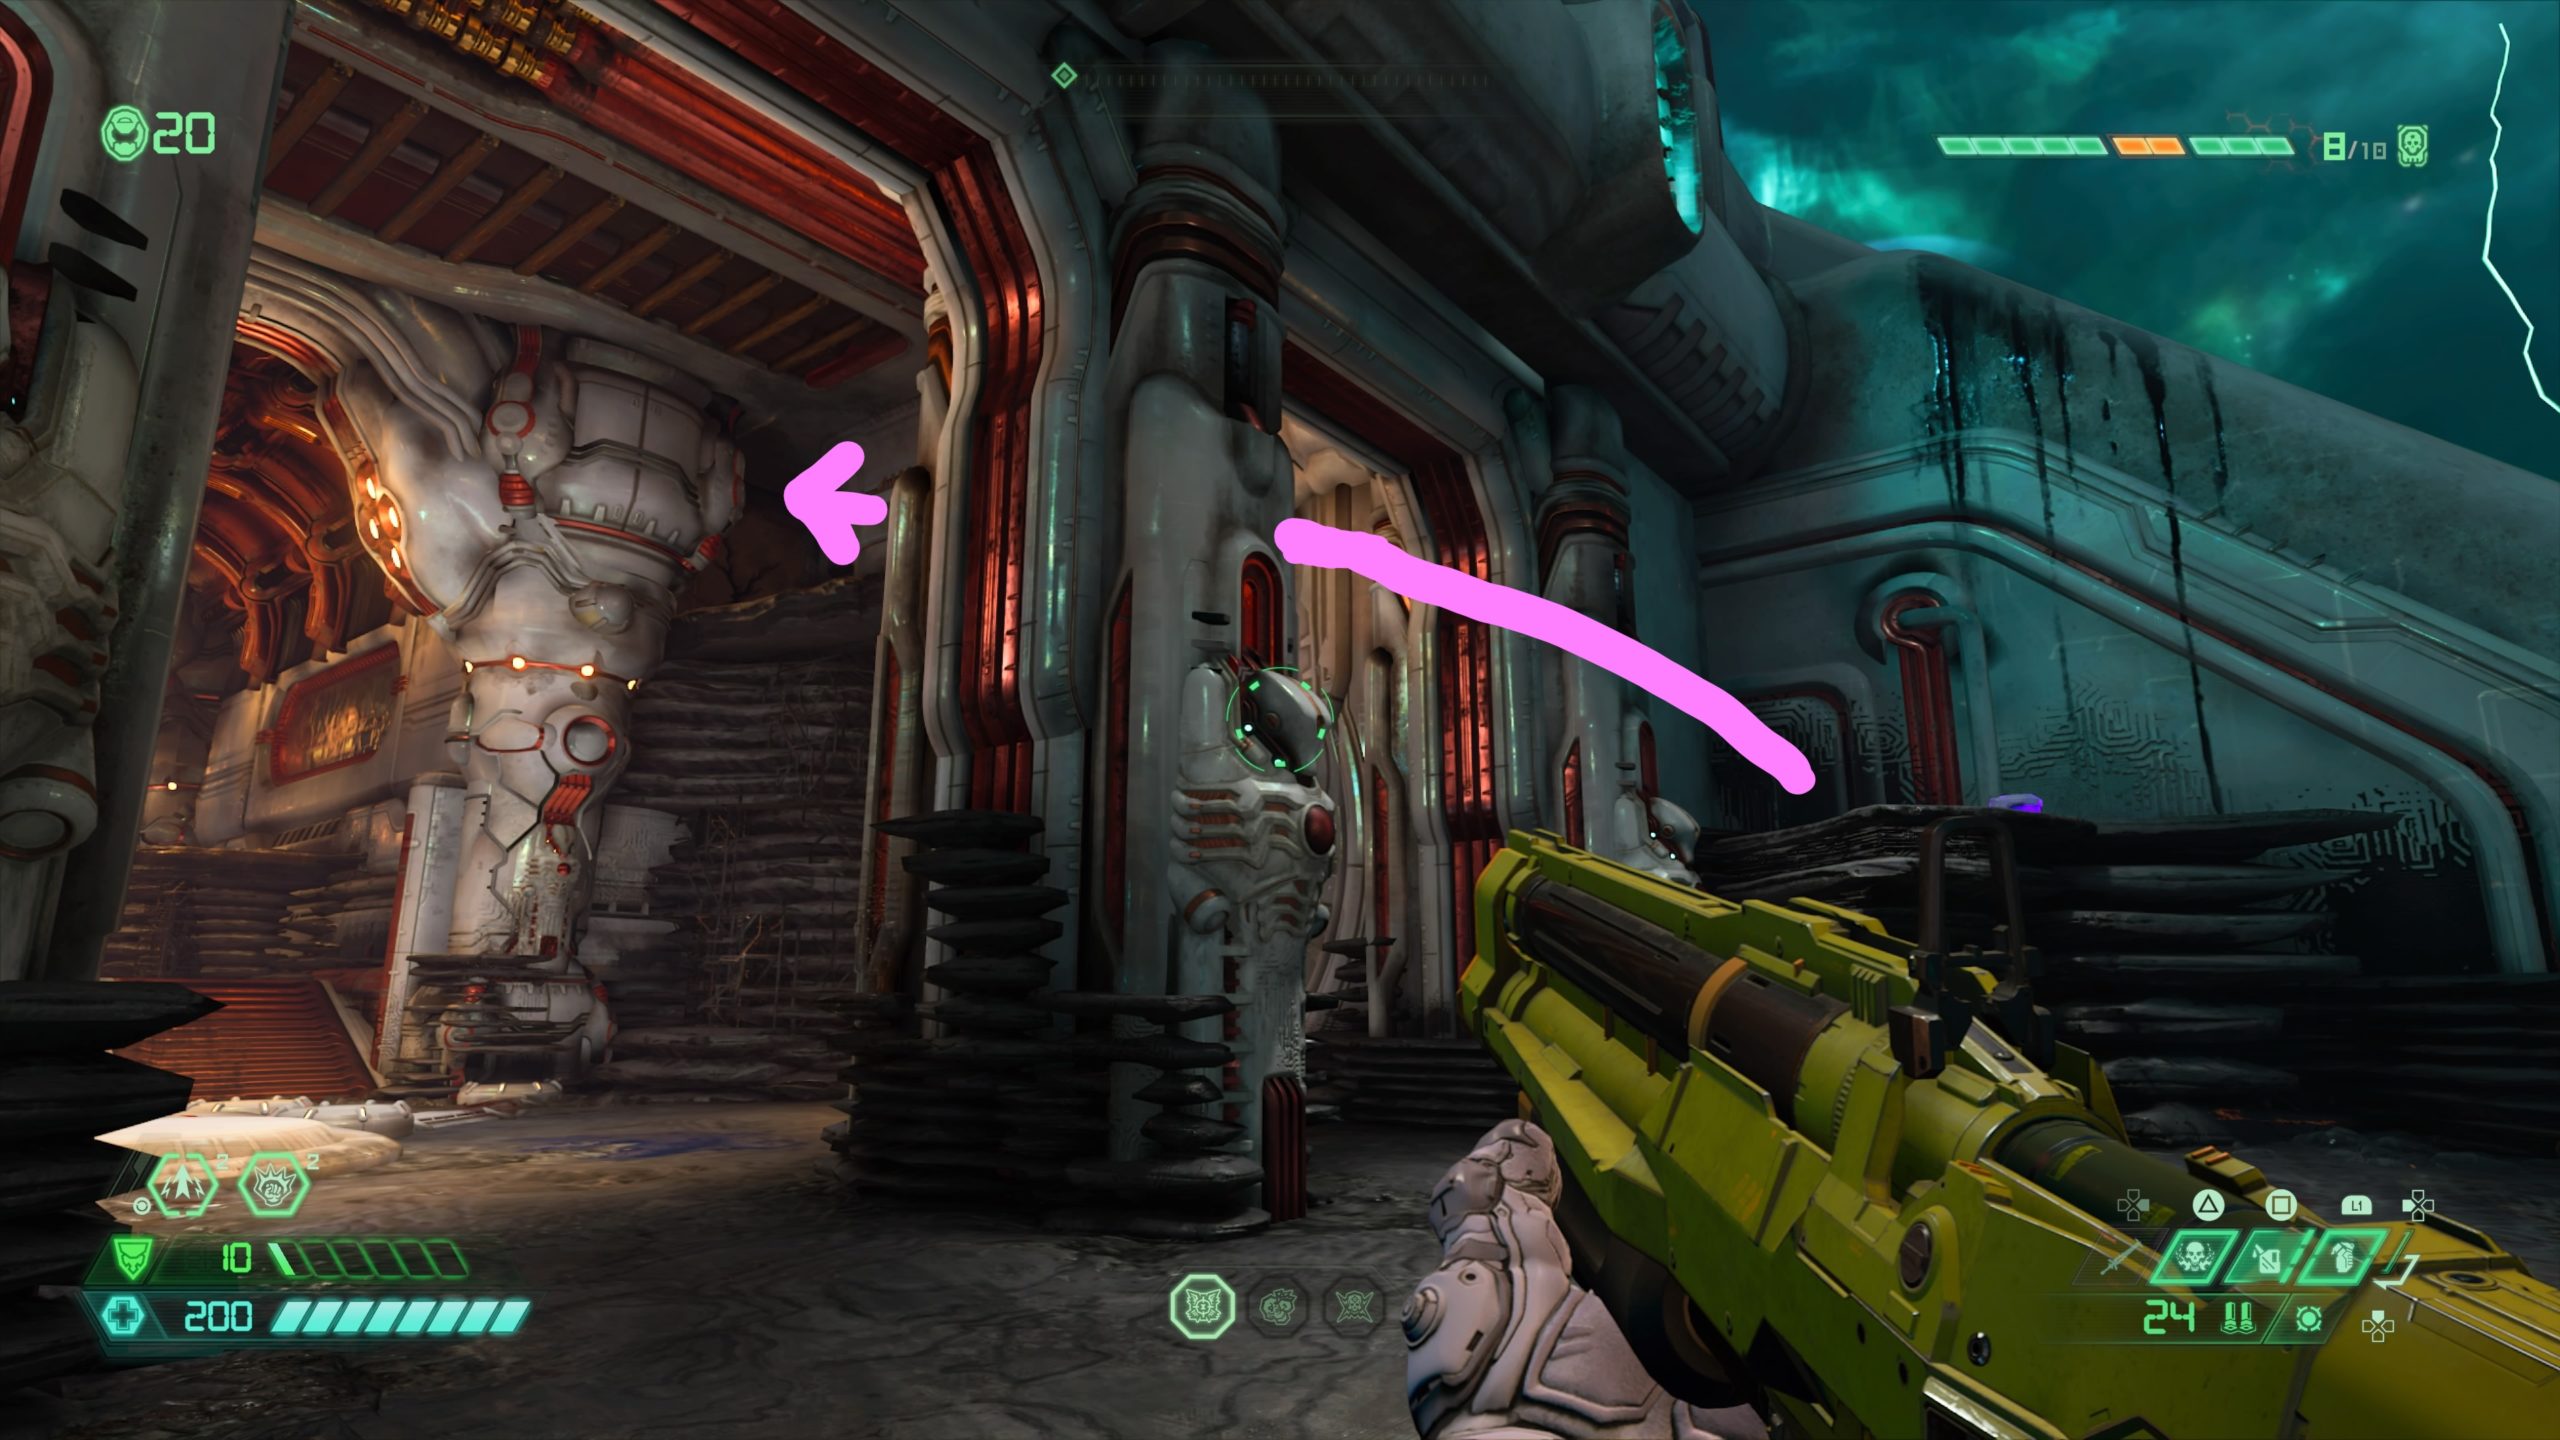
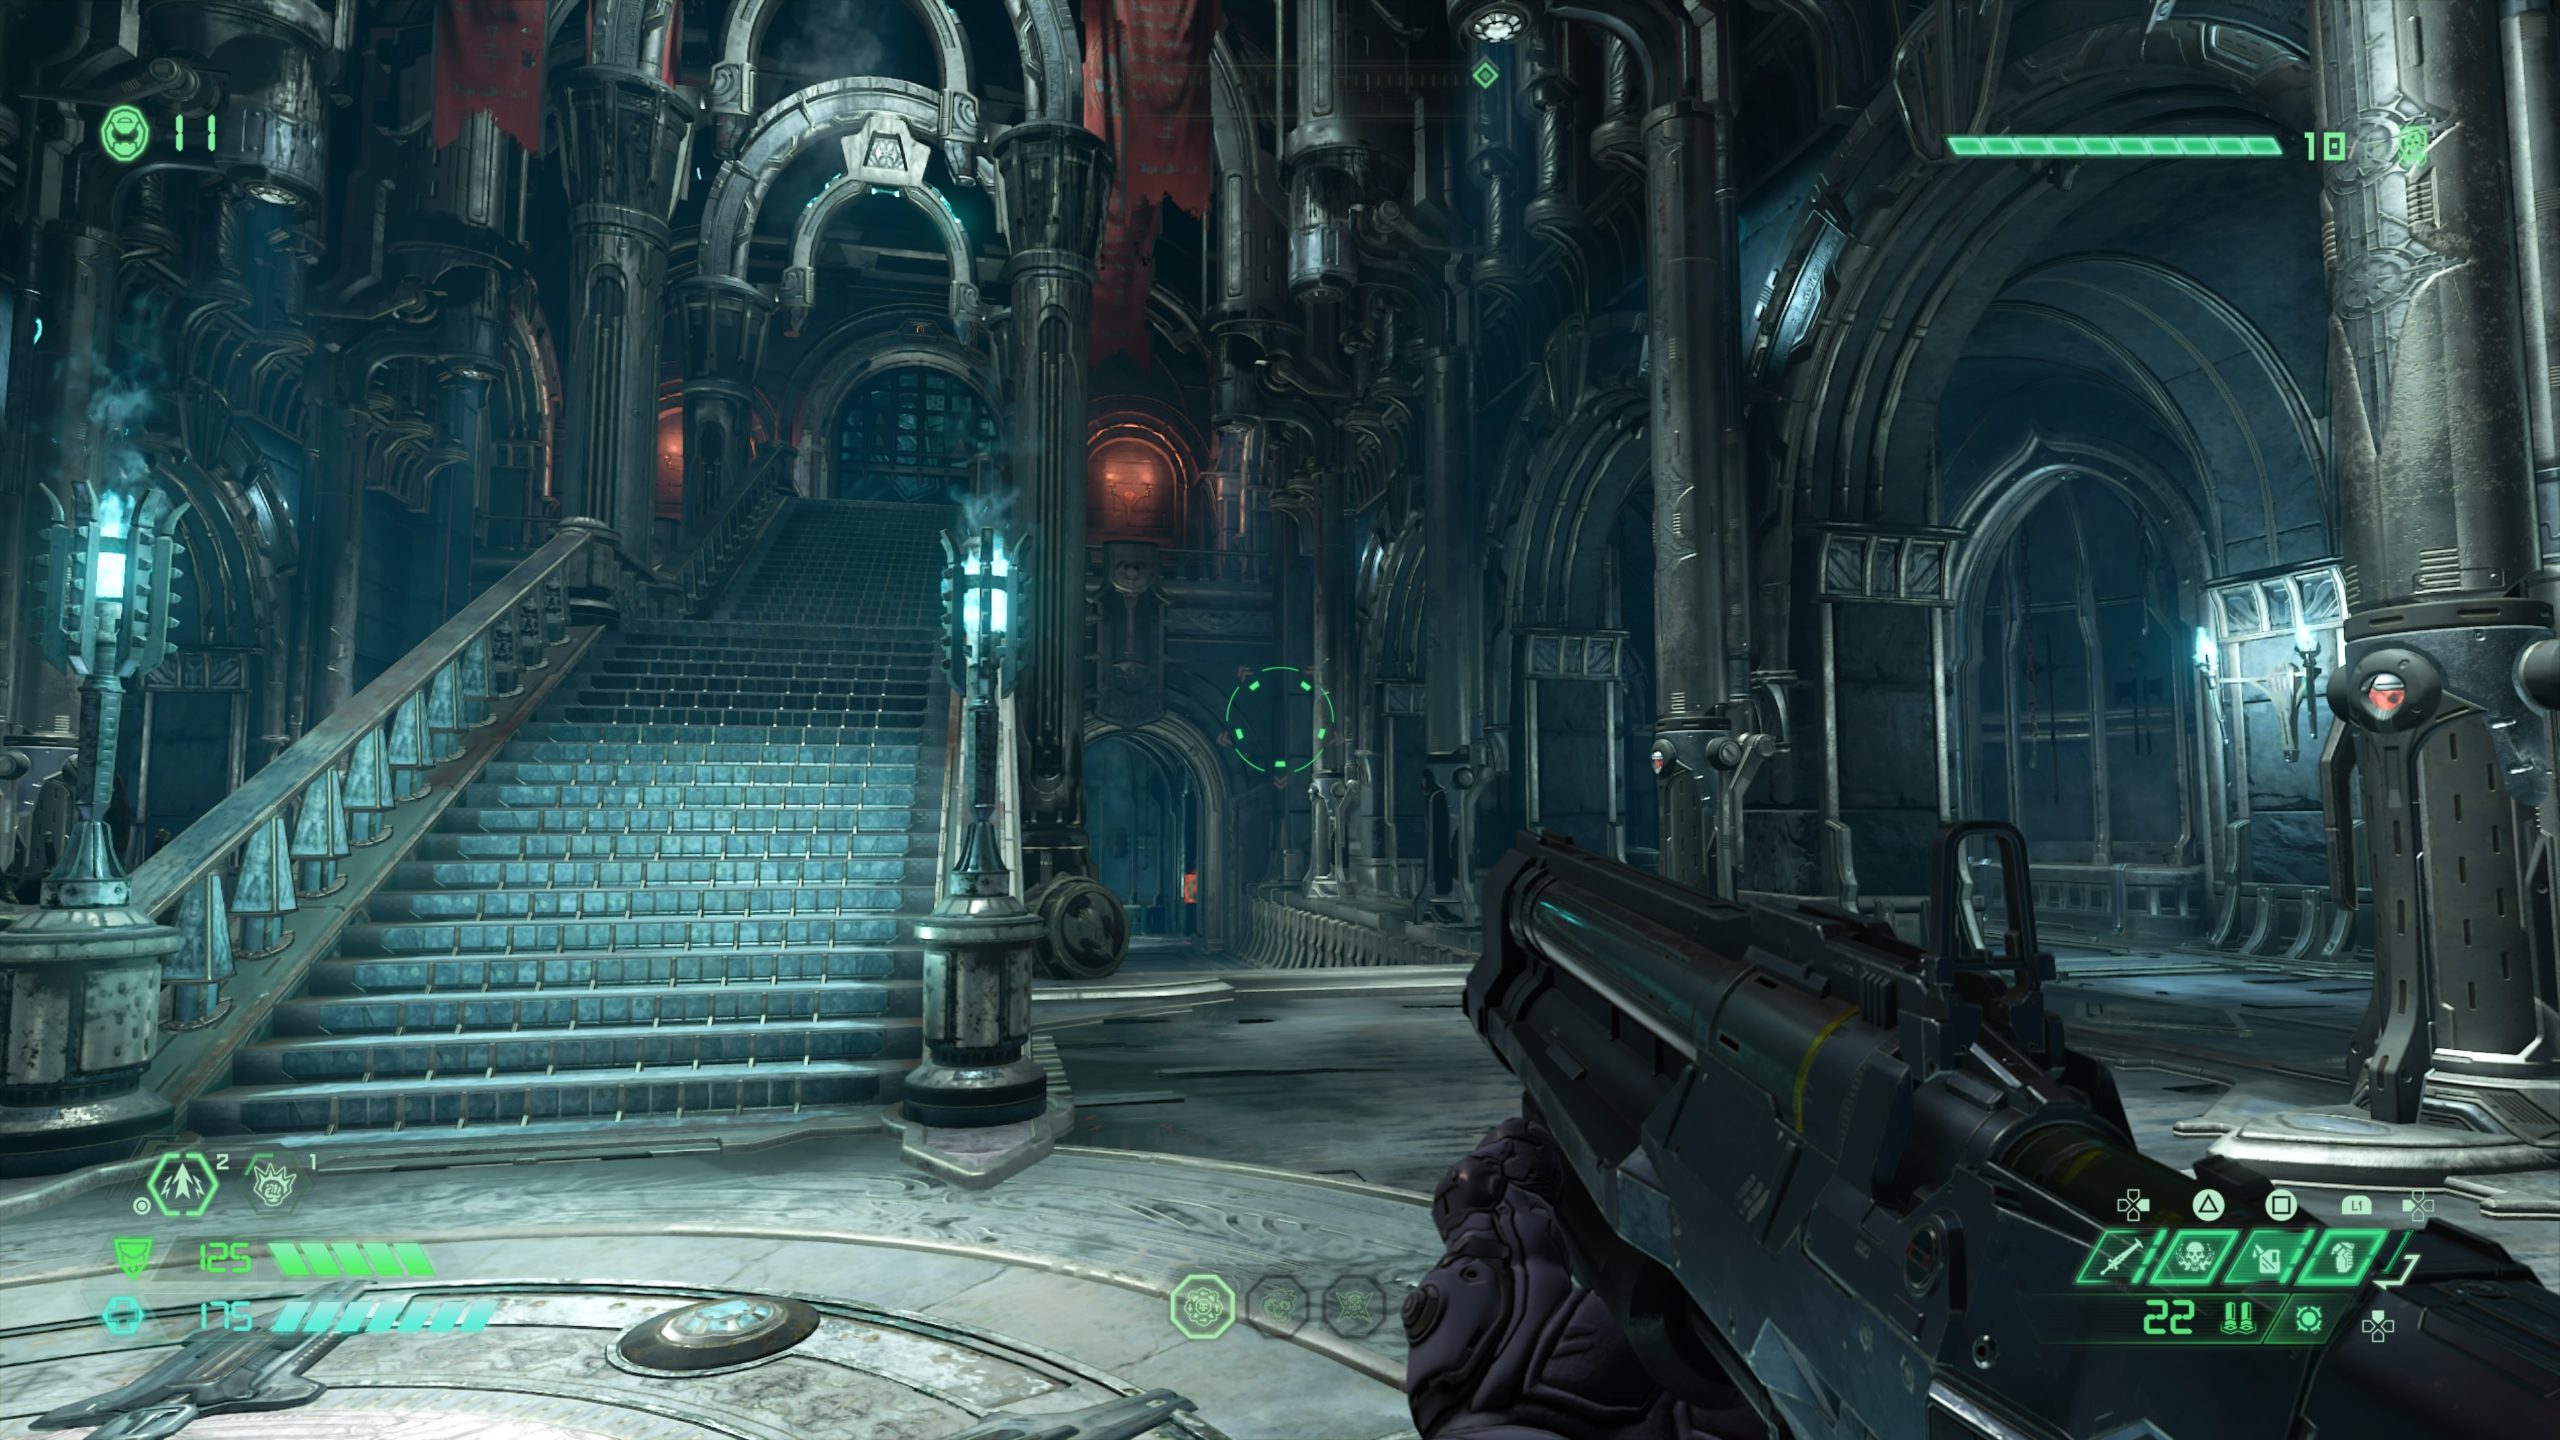
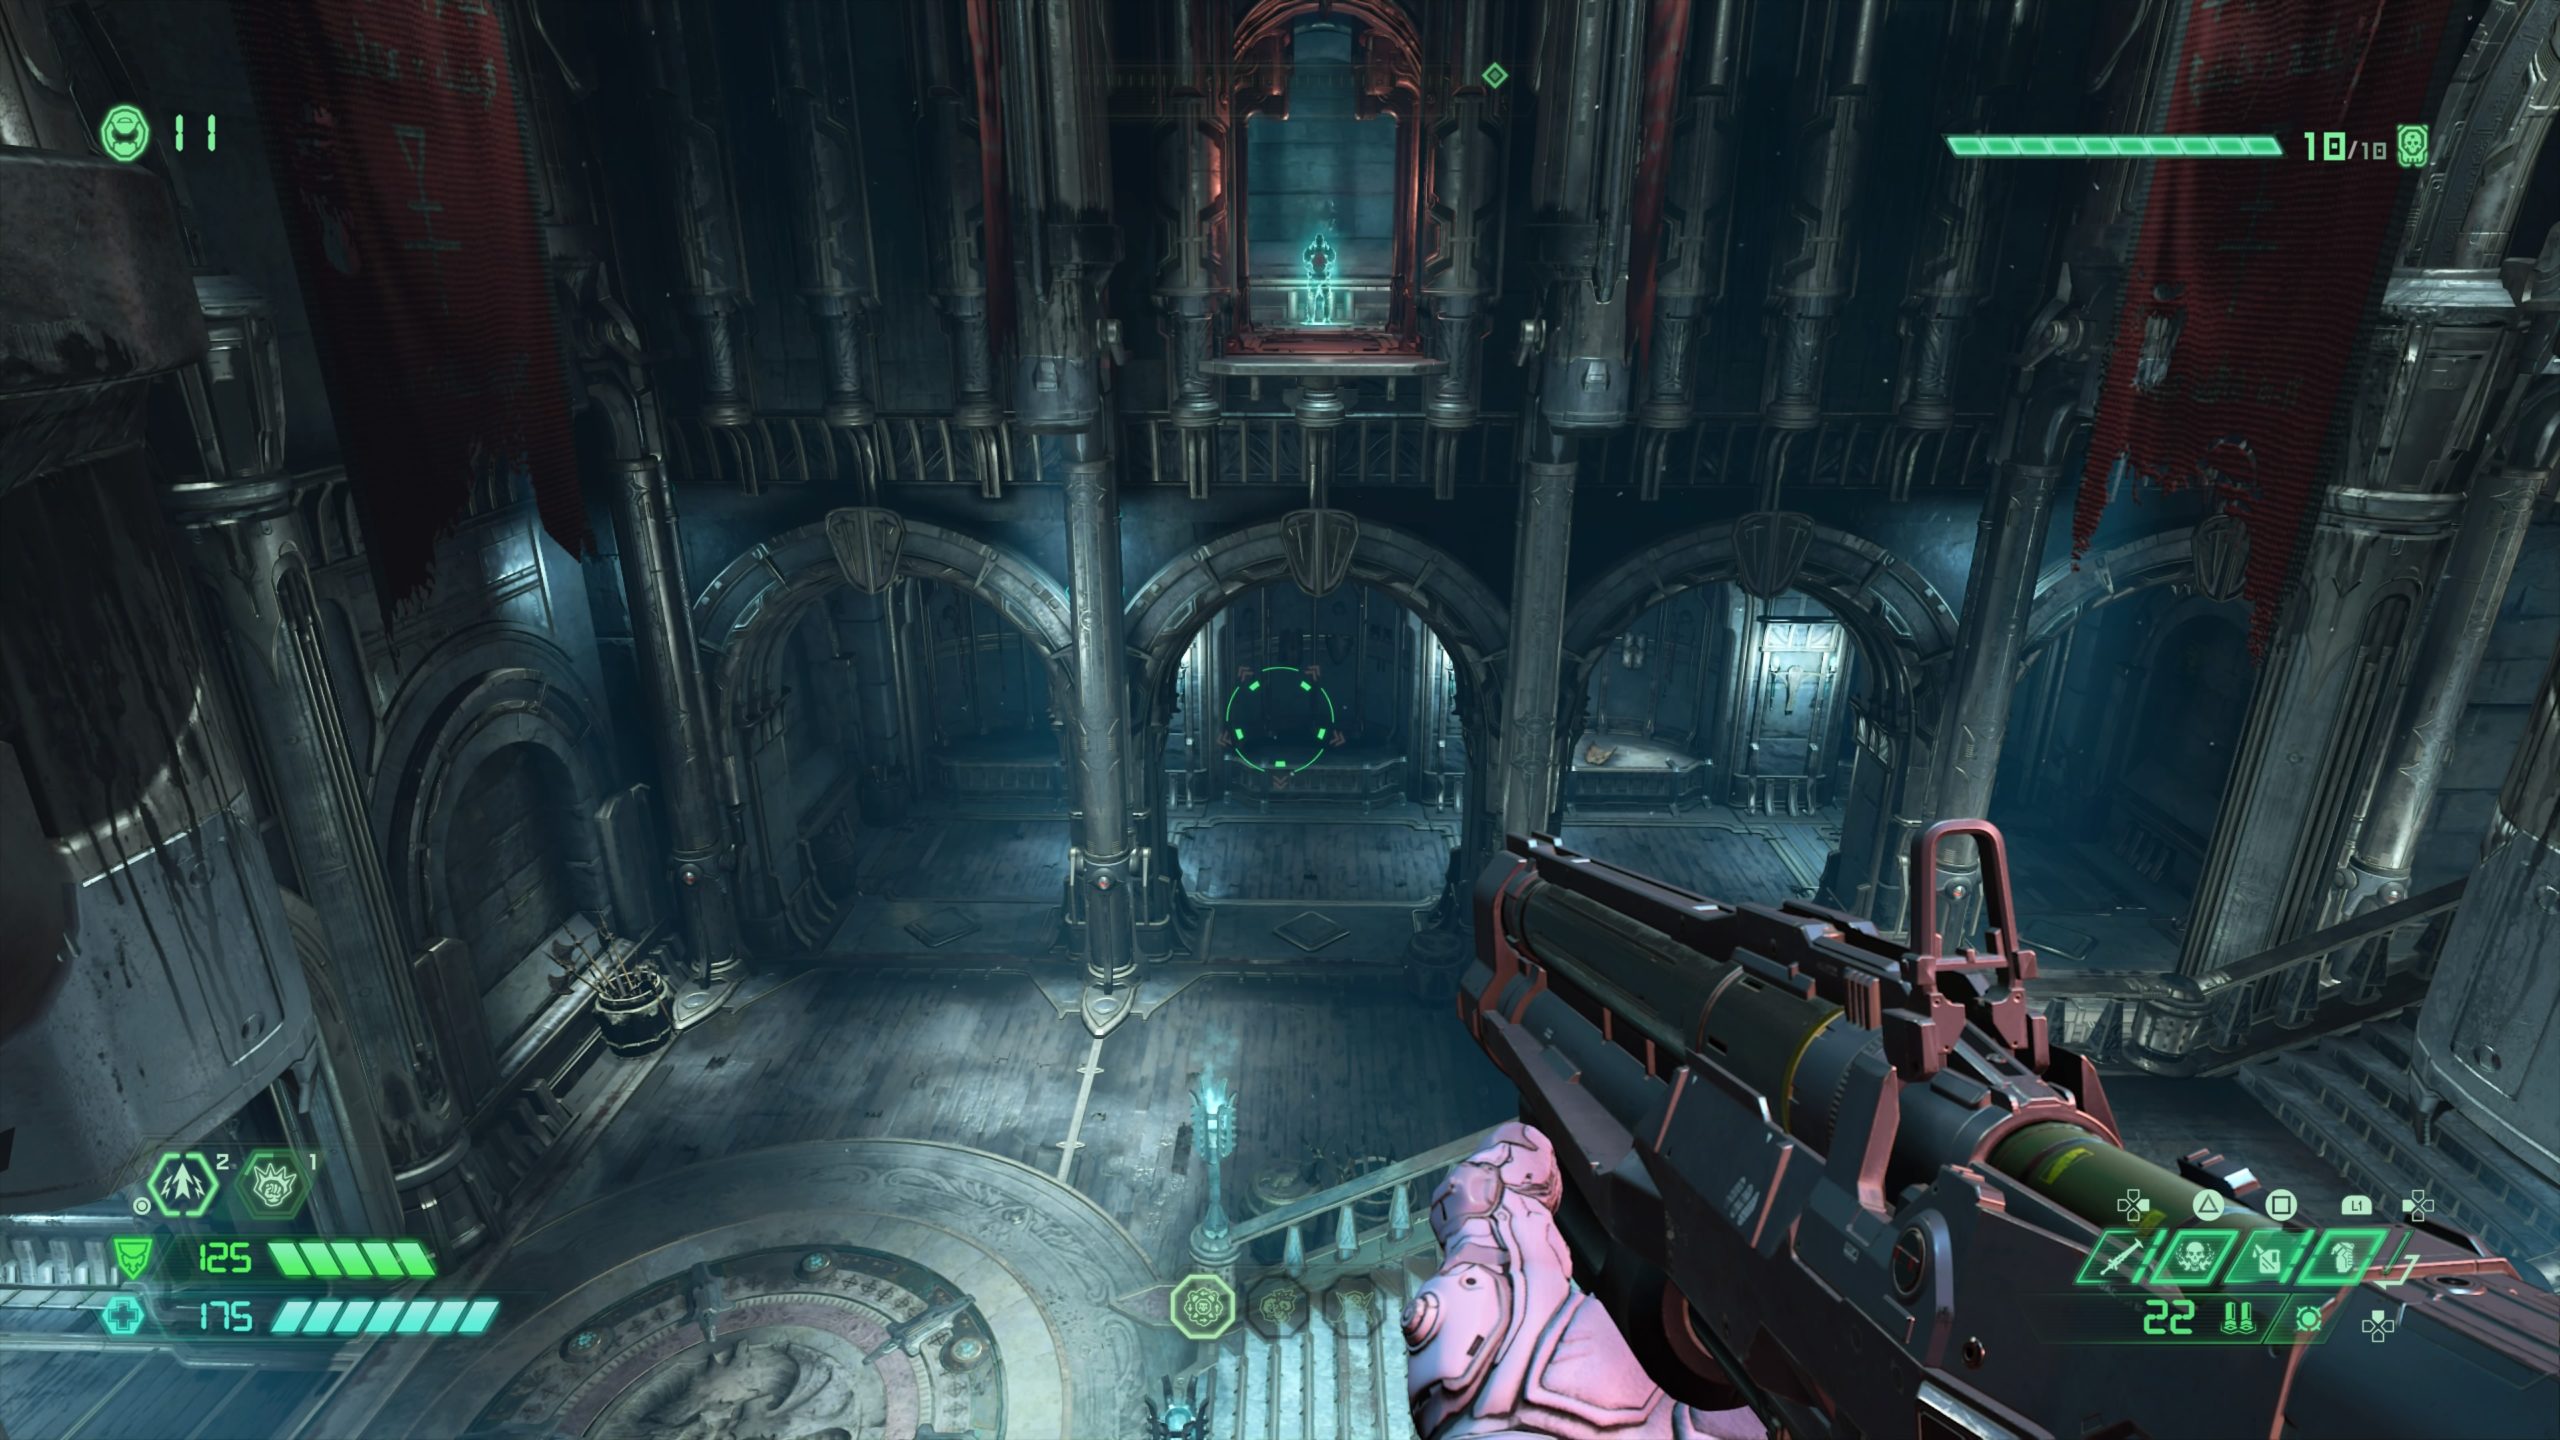
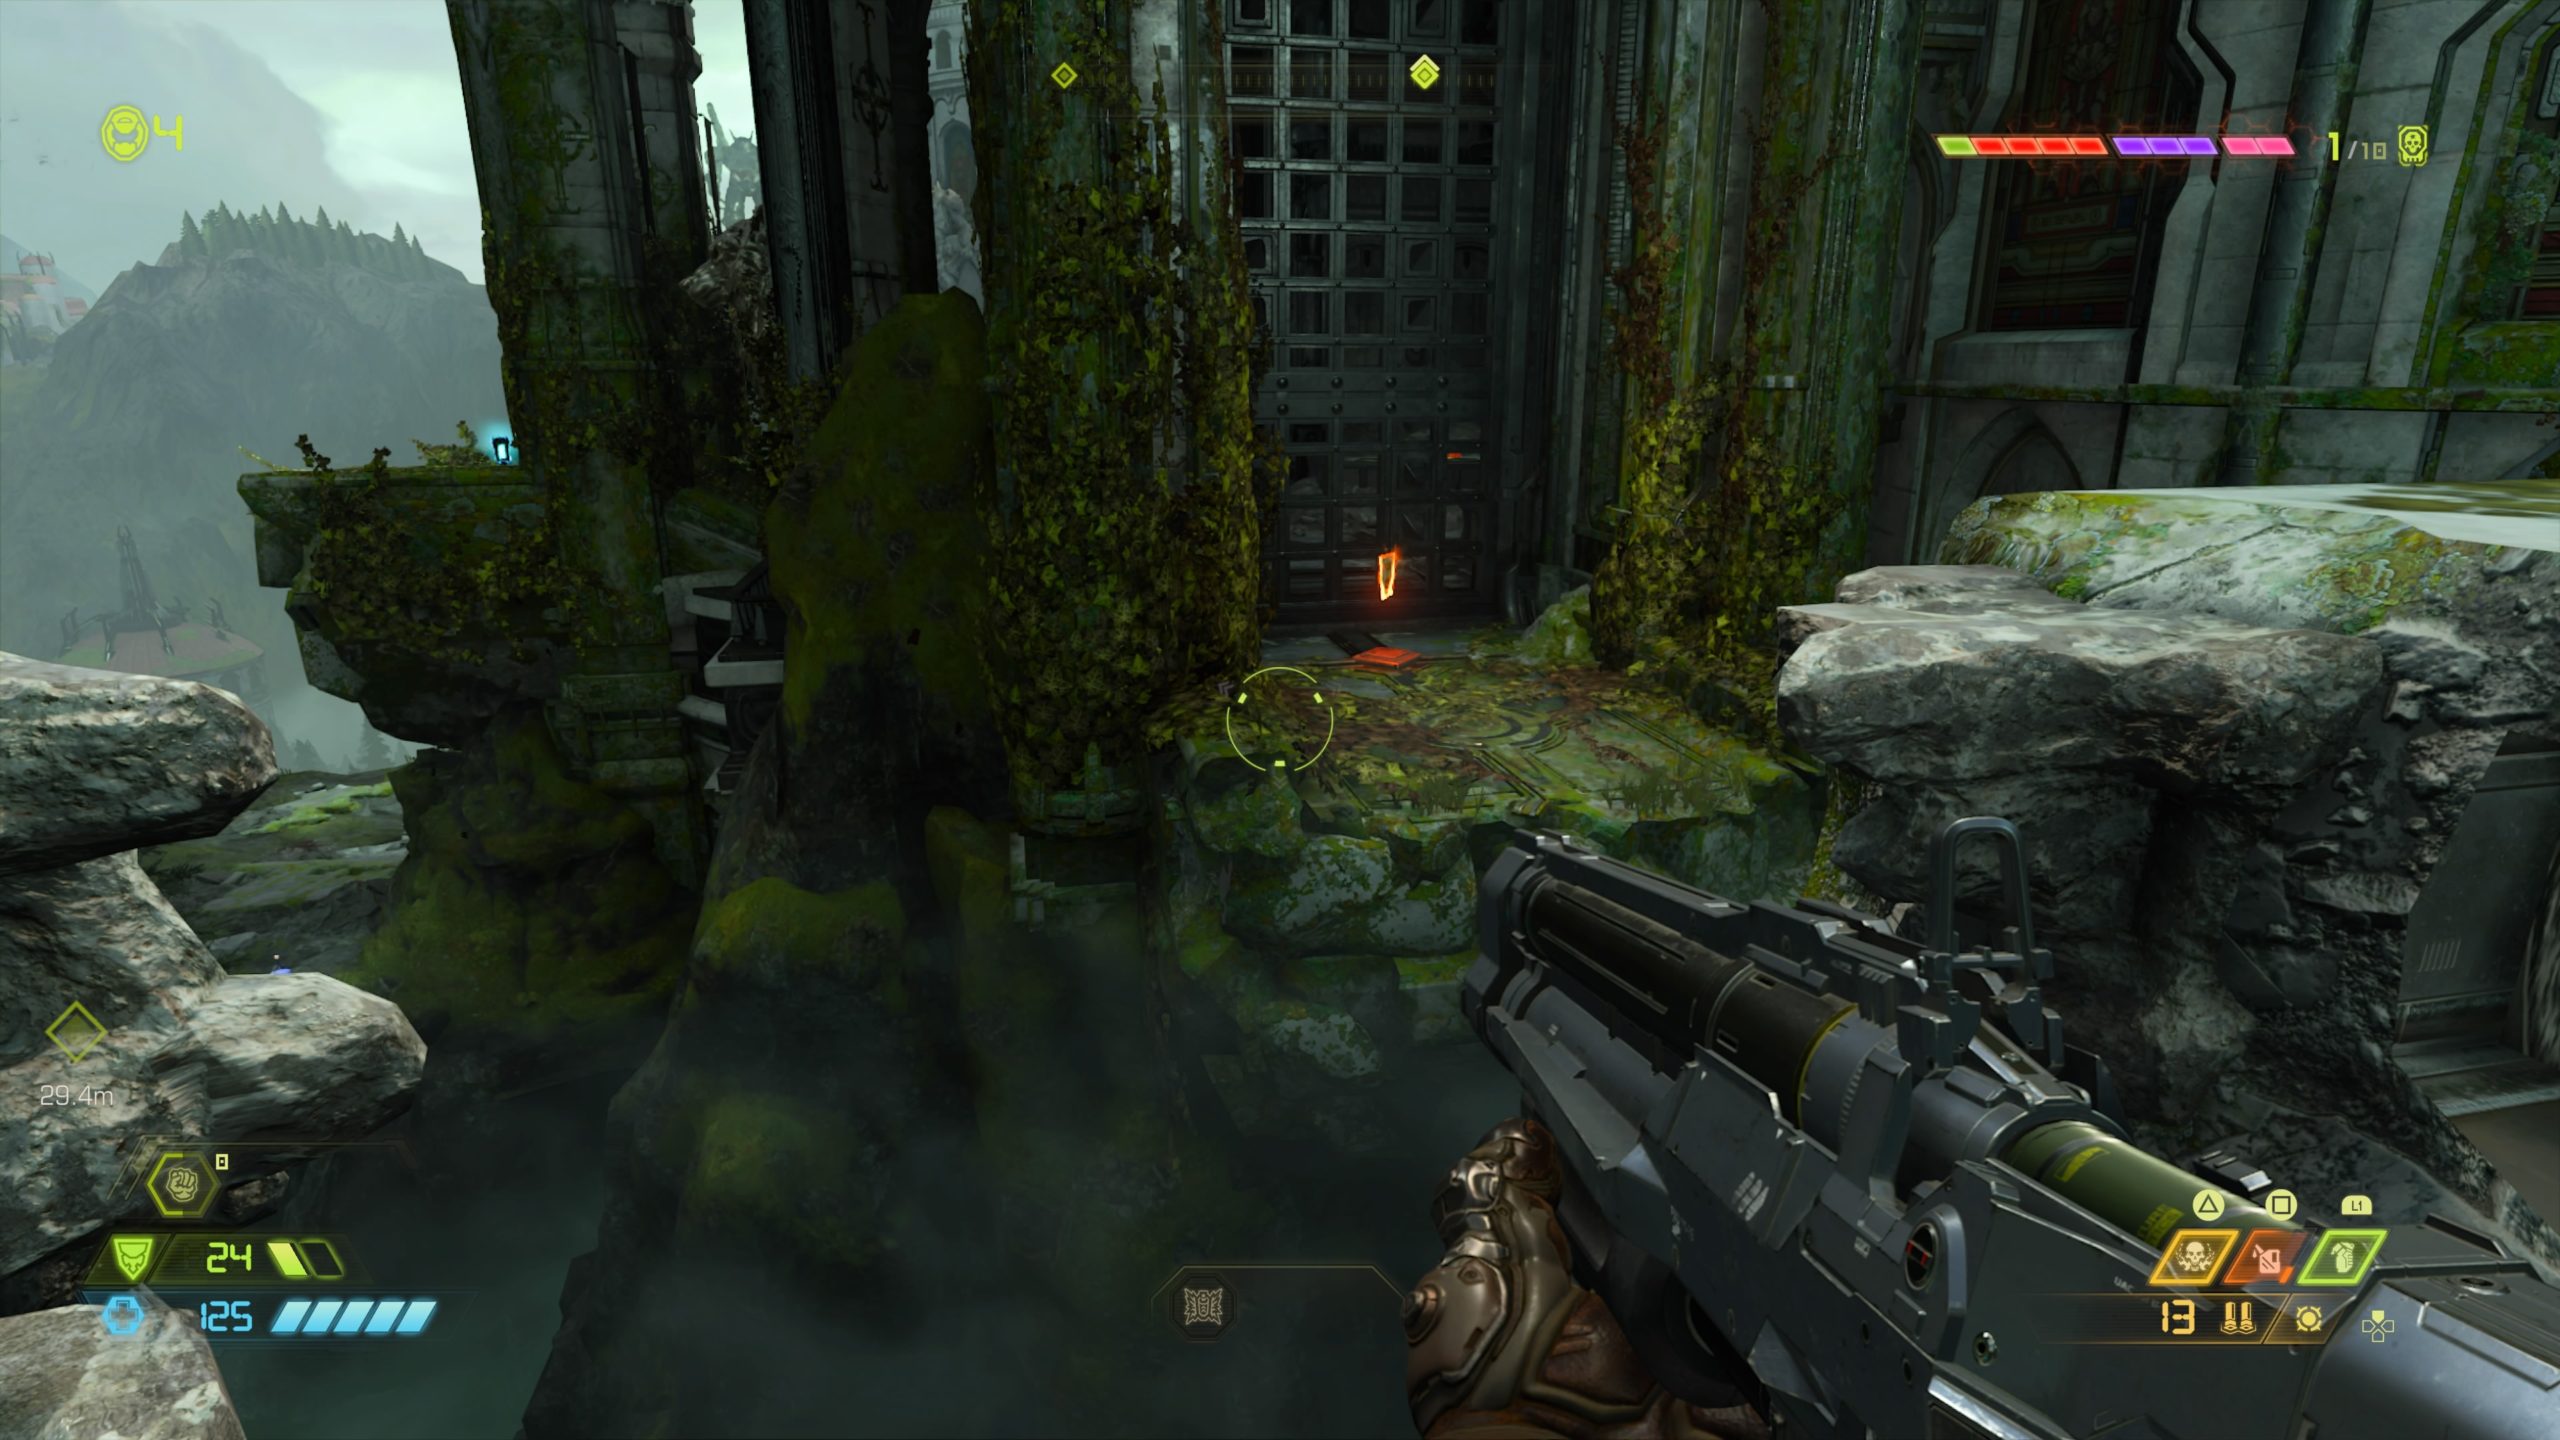
Codex: Story of the Sentinels – Exultia
From the Exultia starting point, jump down to the ledge below then use the climbable wall to move through the broken section of wall with the two Sentinel statues on top. This will bring you to a broken section of bridge. Follow it into the upper level of a circular room. Drop down to the lower level then jump towards the gold spin bar in the middle of the long floor-less hallway using it to reach the other side. When you reach the stone statue at the end of the hallway, there will be a cracked section of wall on the left. Melee the wall and head through the hole. Take a left to locate the codex.
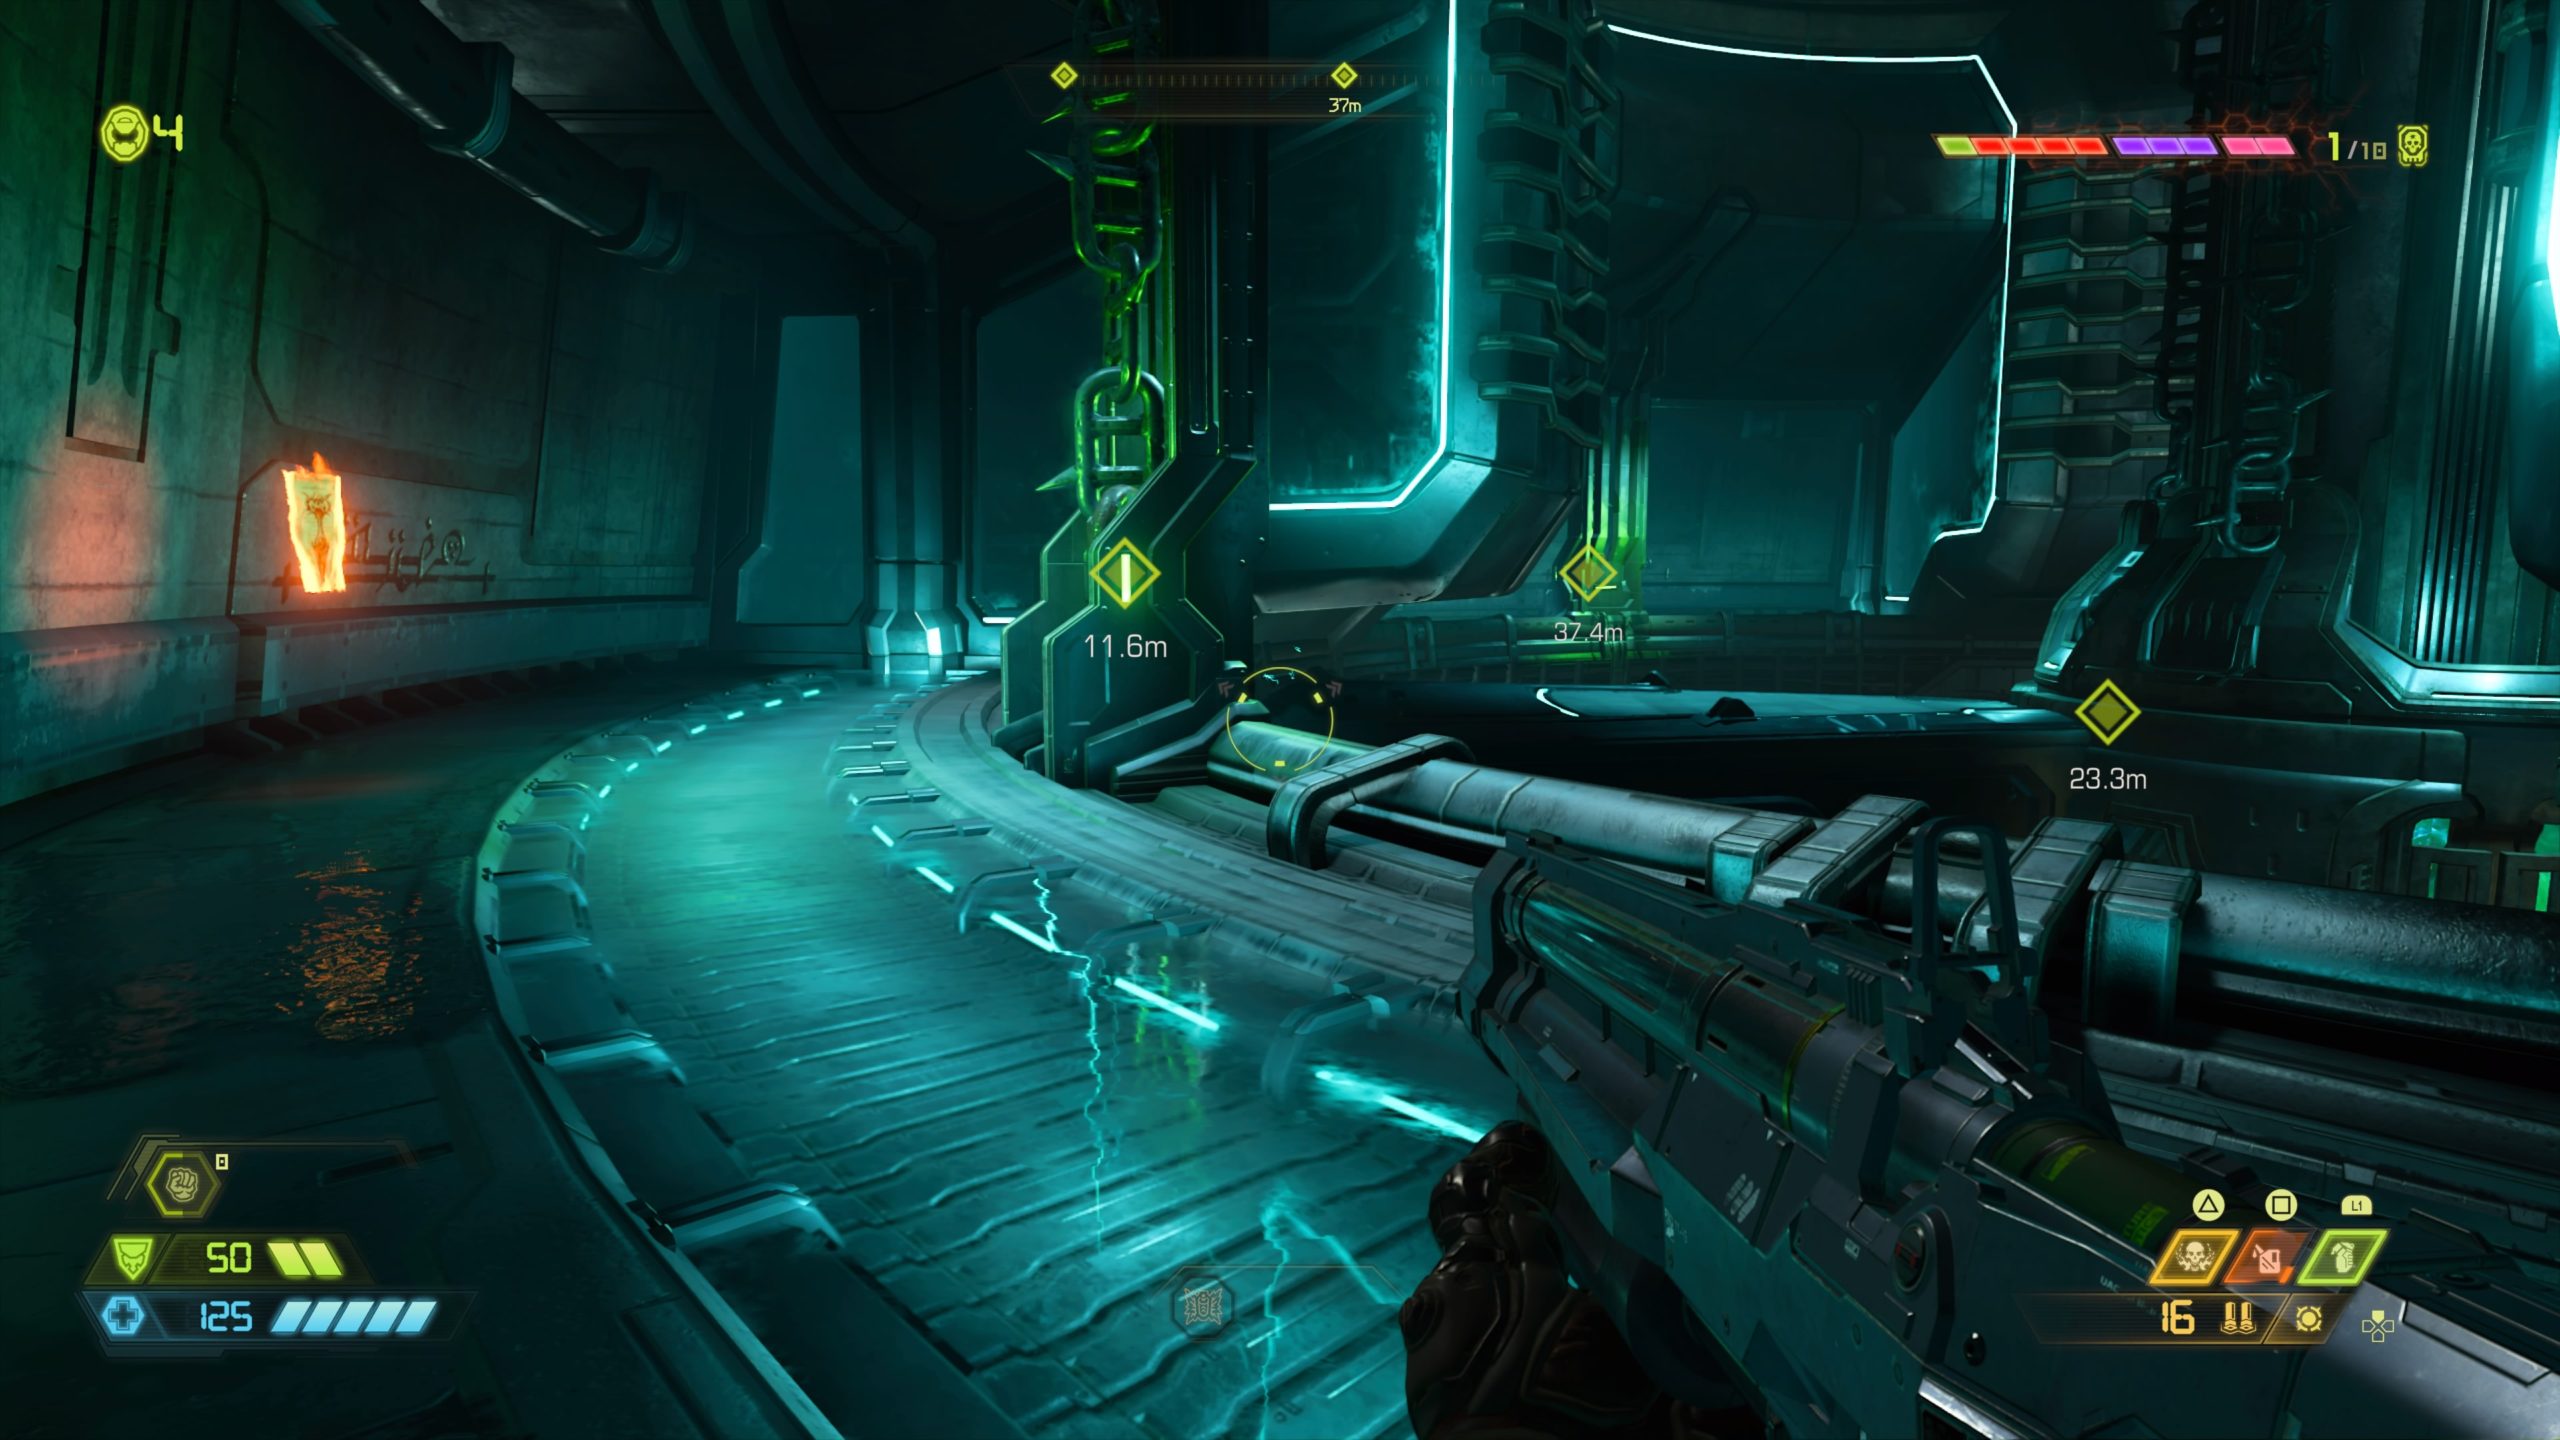
Rune

When you gain control after unlocking the Blood Punch ability, you will find yourself in a circular hallway. Follow the hallway around and dodge the lightning streaks to reach the rune at the end.
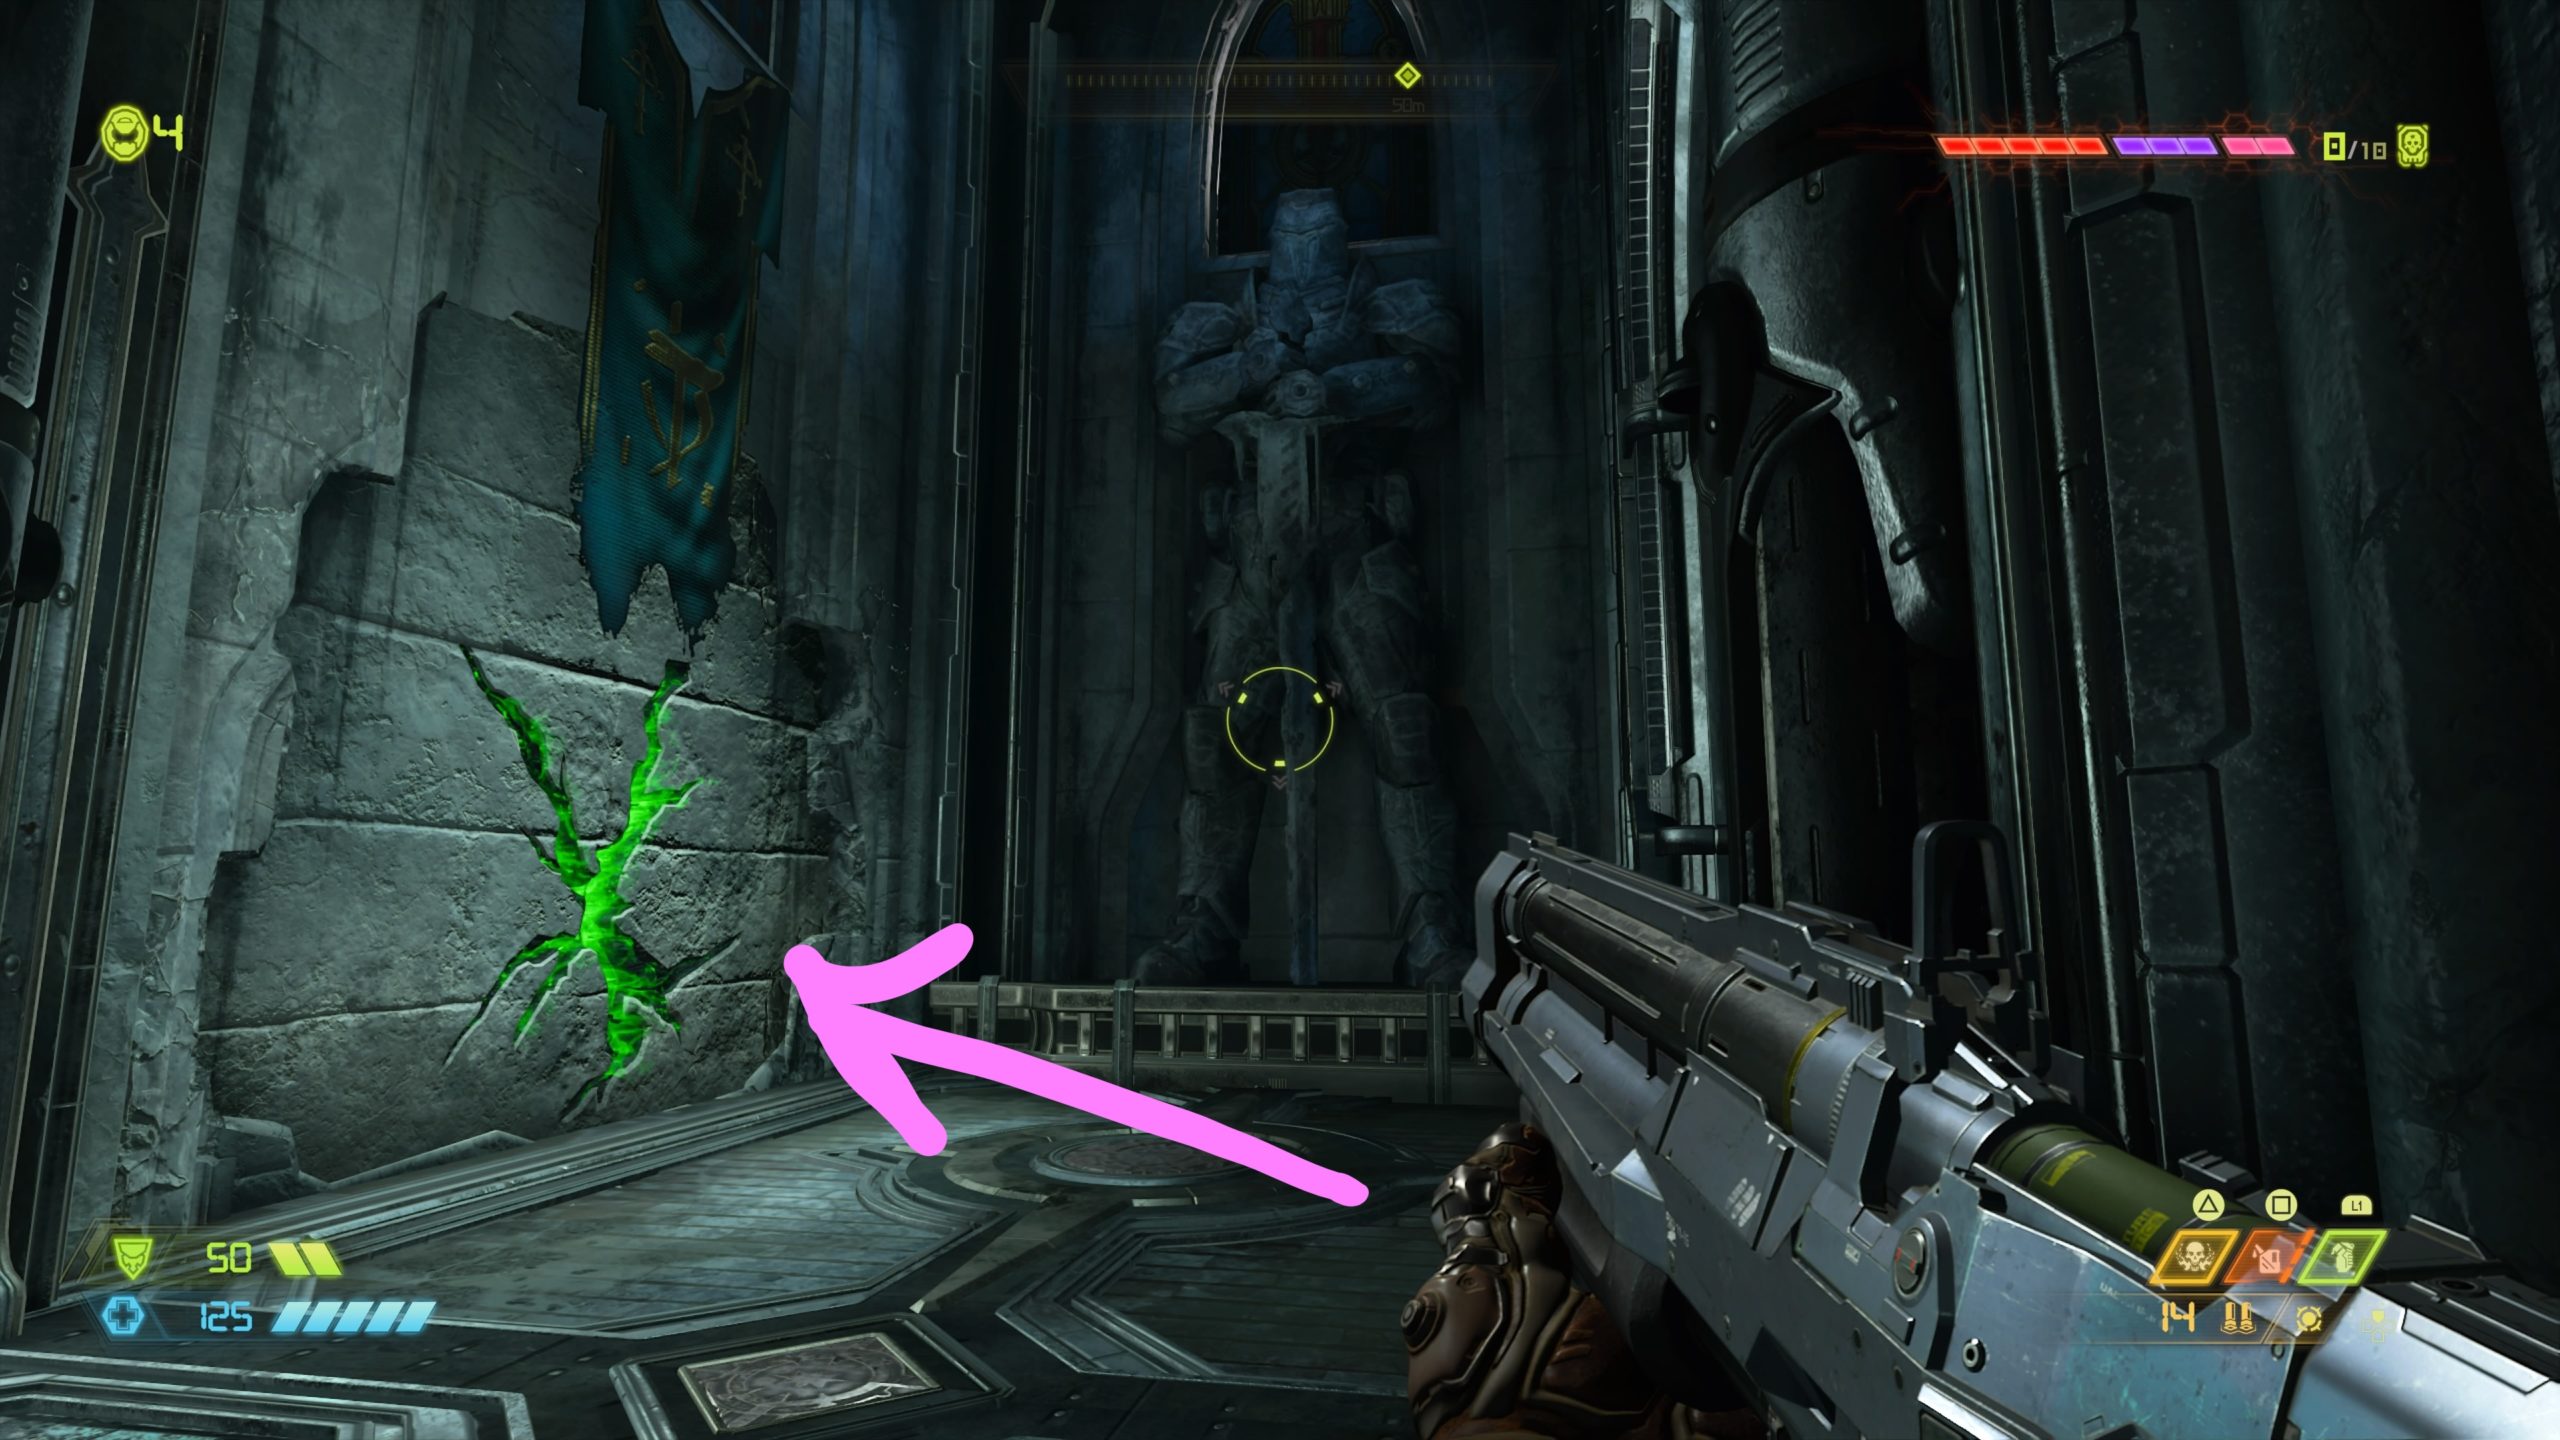
Toy: Arachnotron
From the previous collectible, head through the nearby hole leading to the center of the structure and follow the steps on the right down until you come to an open doorway on the right. Head through the doorway and melee the wall on the left to reveal a hidden room containing the toy.
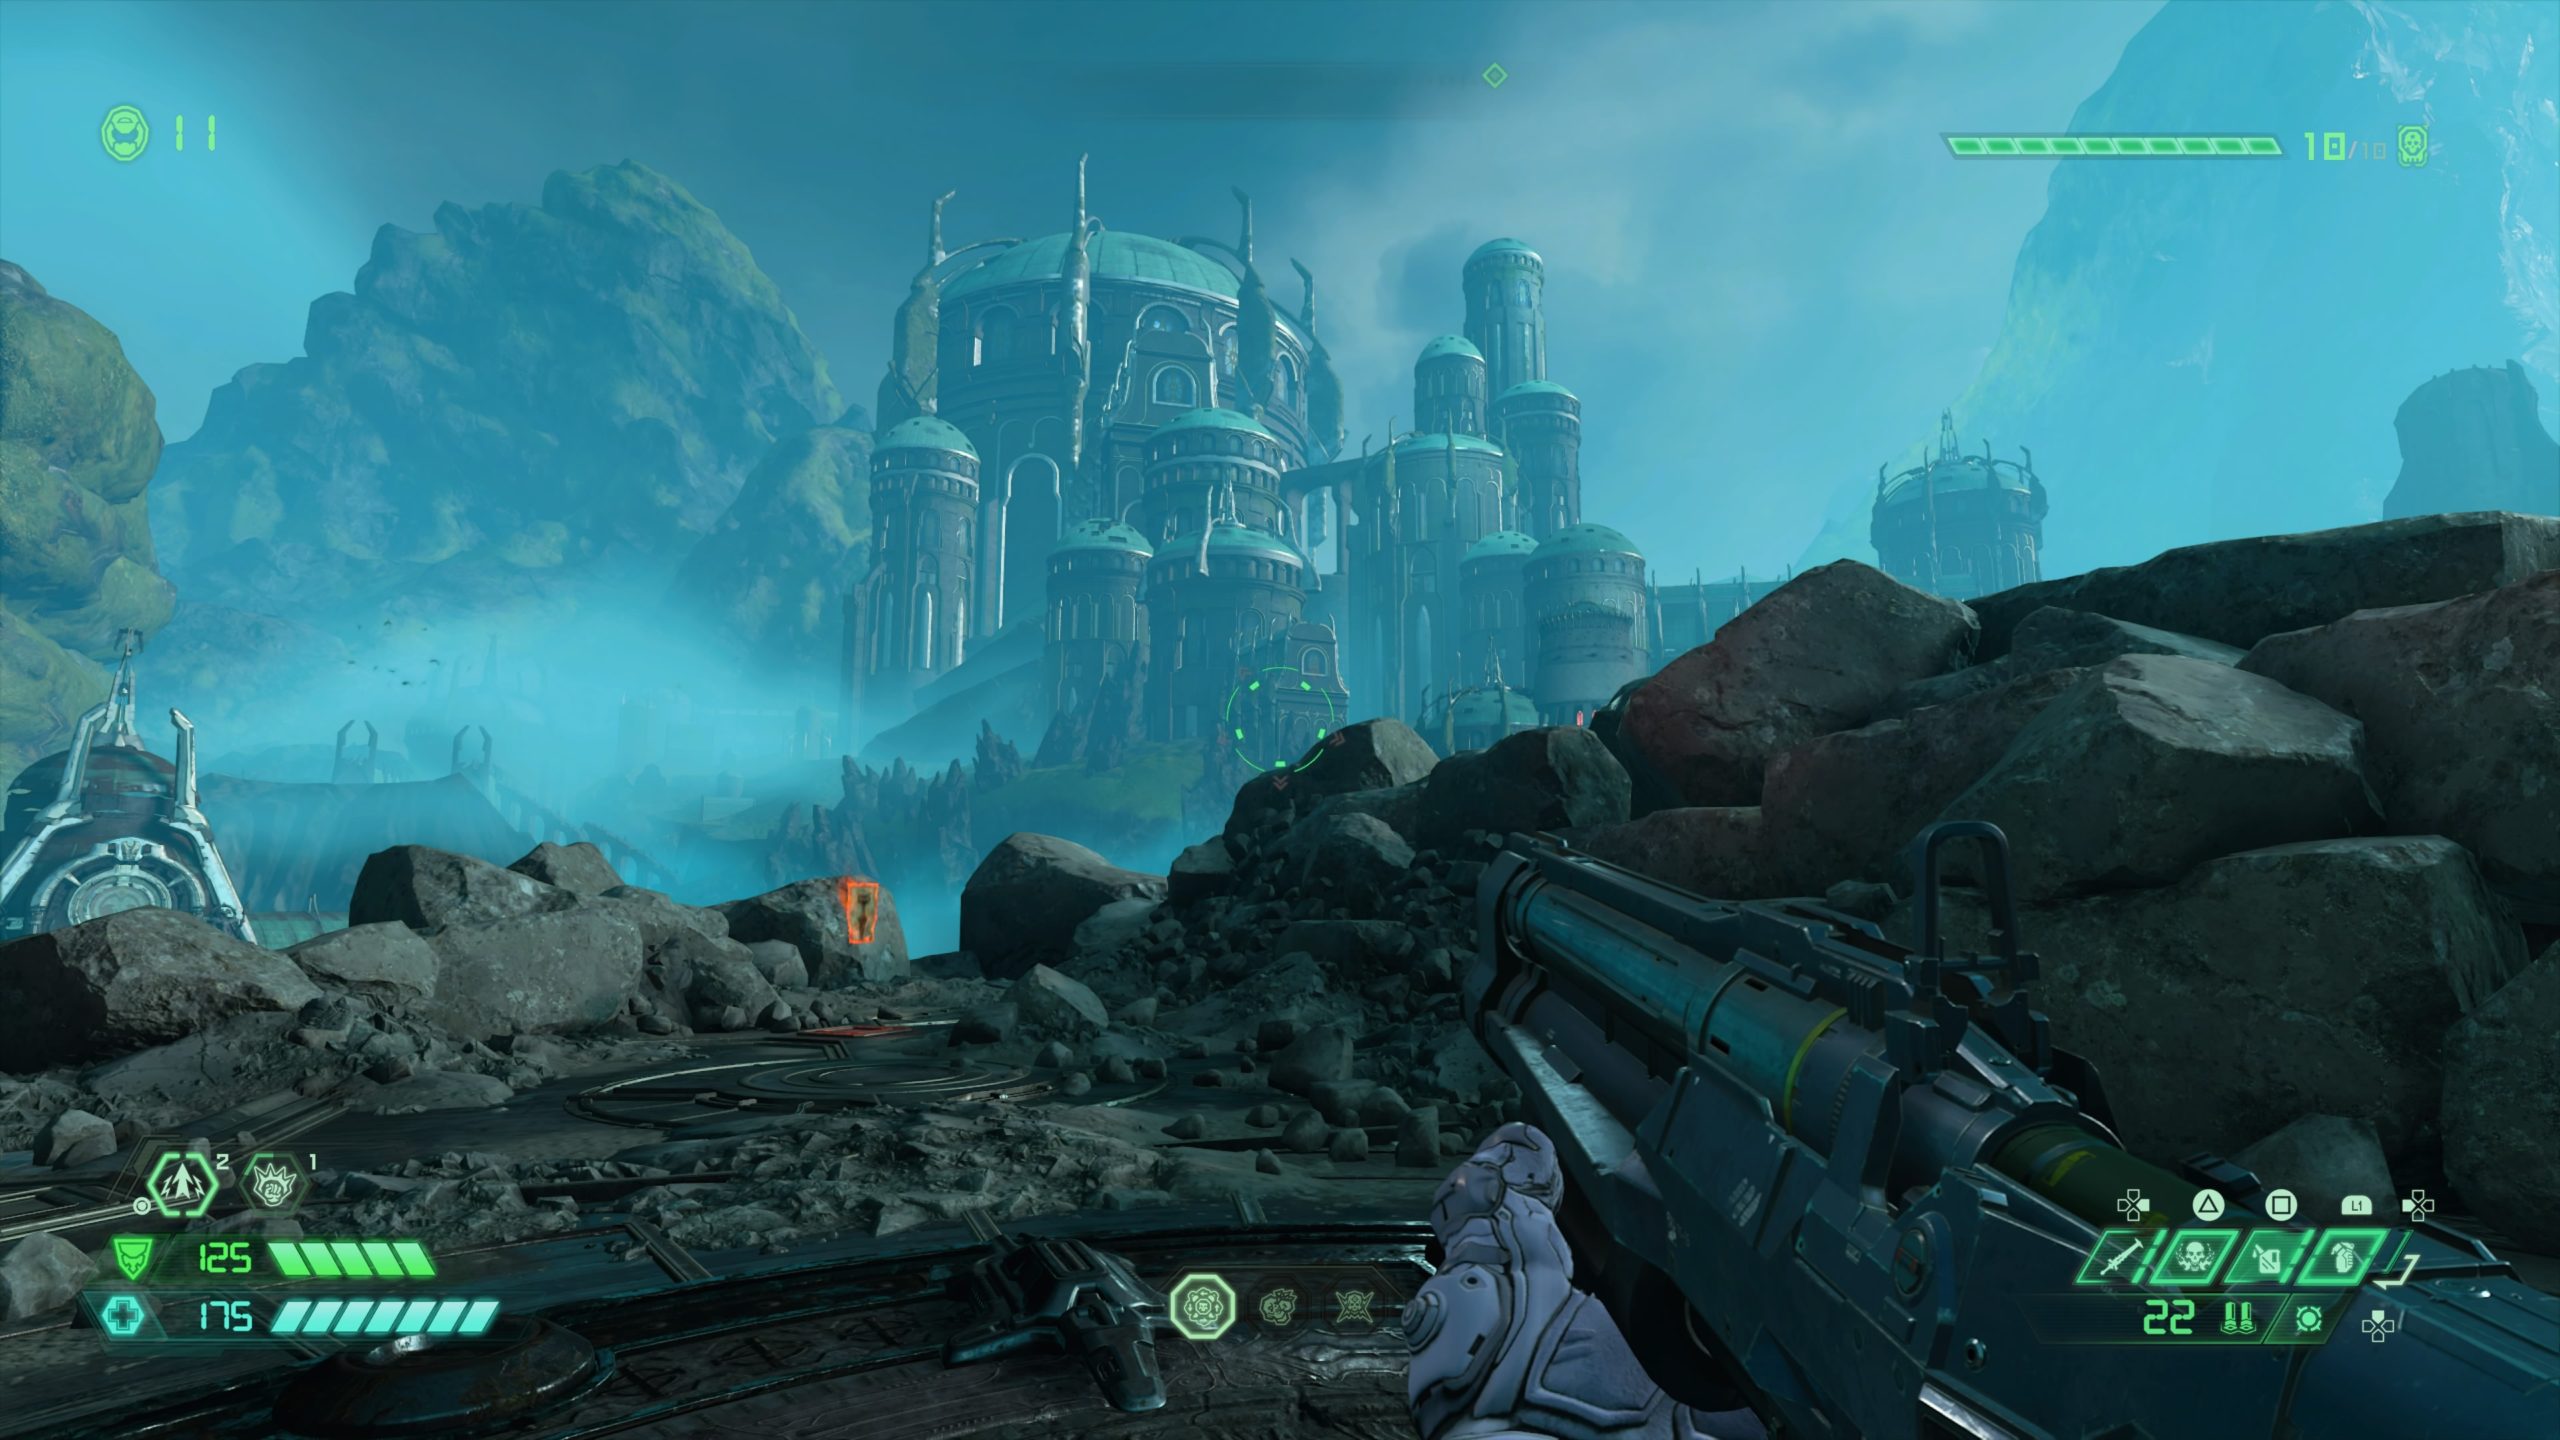
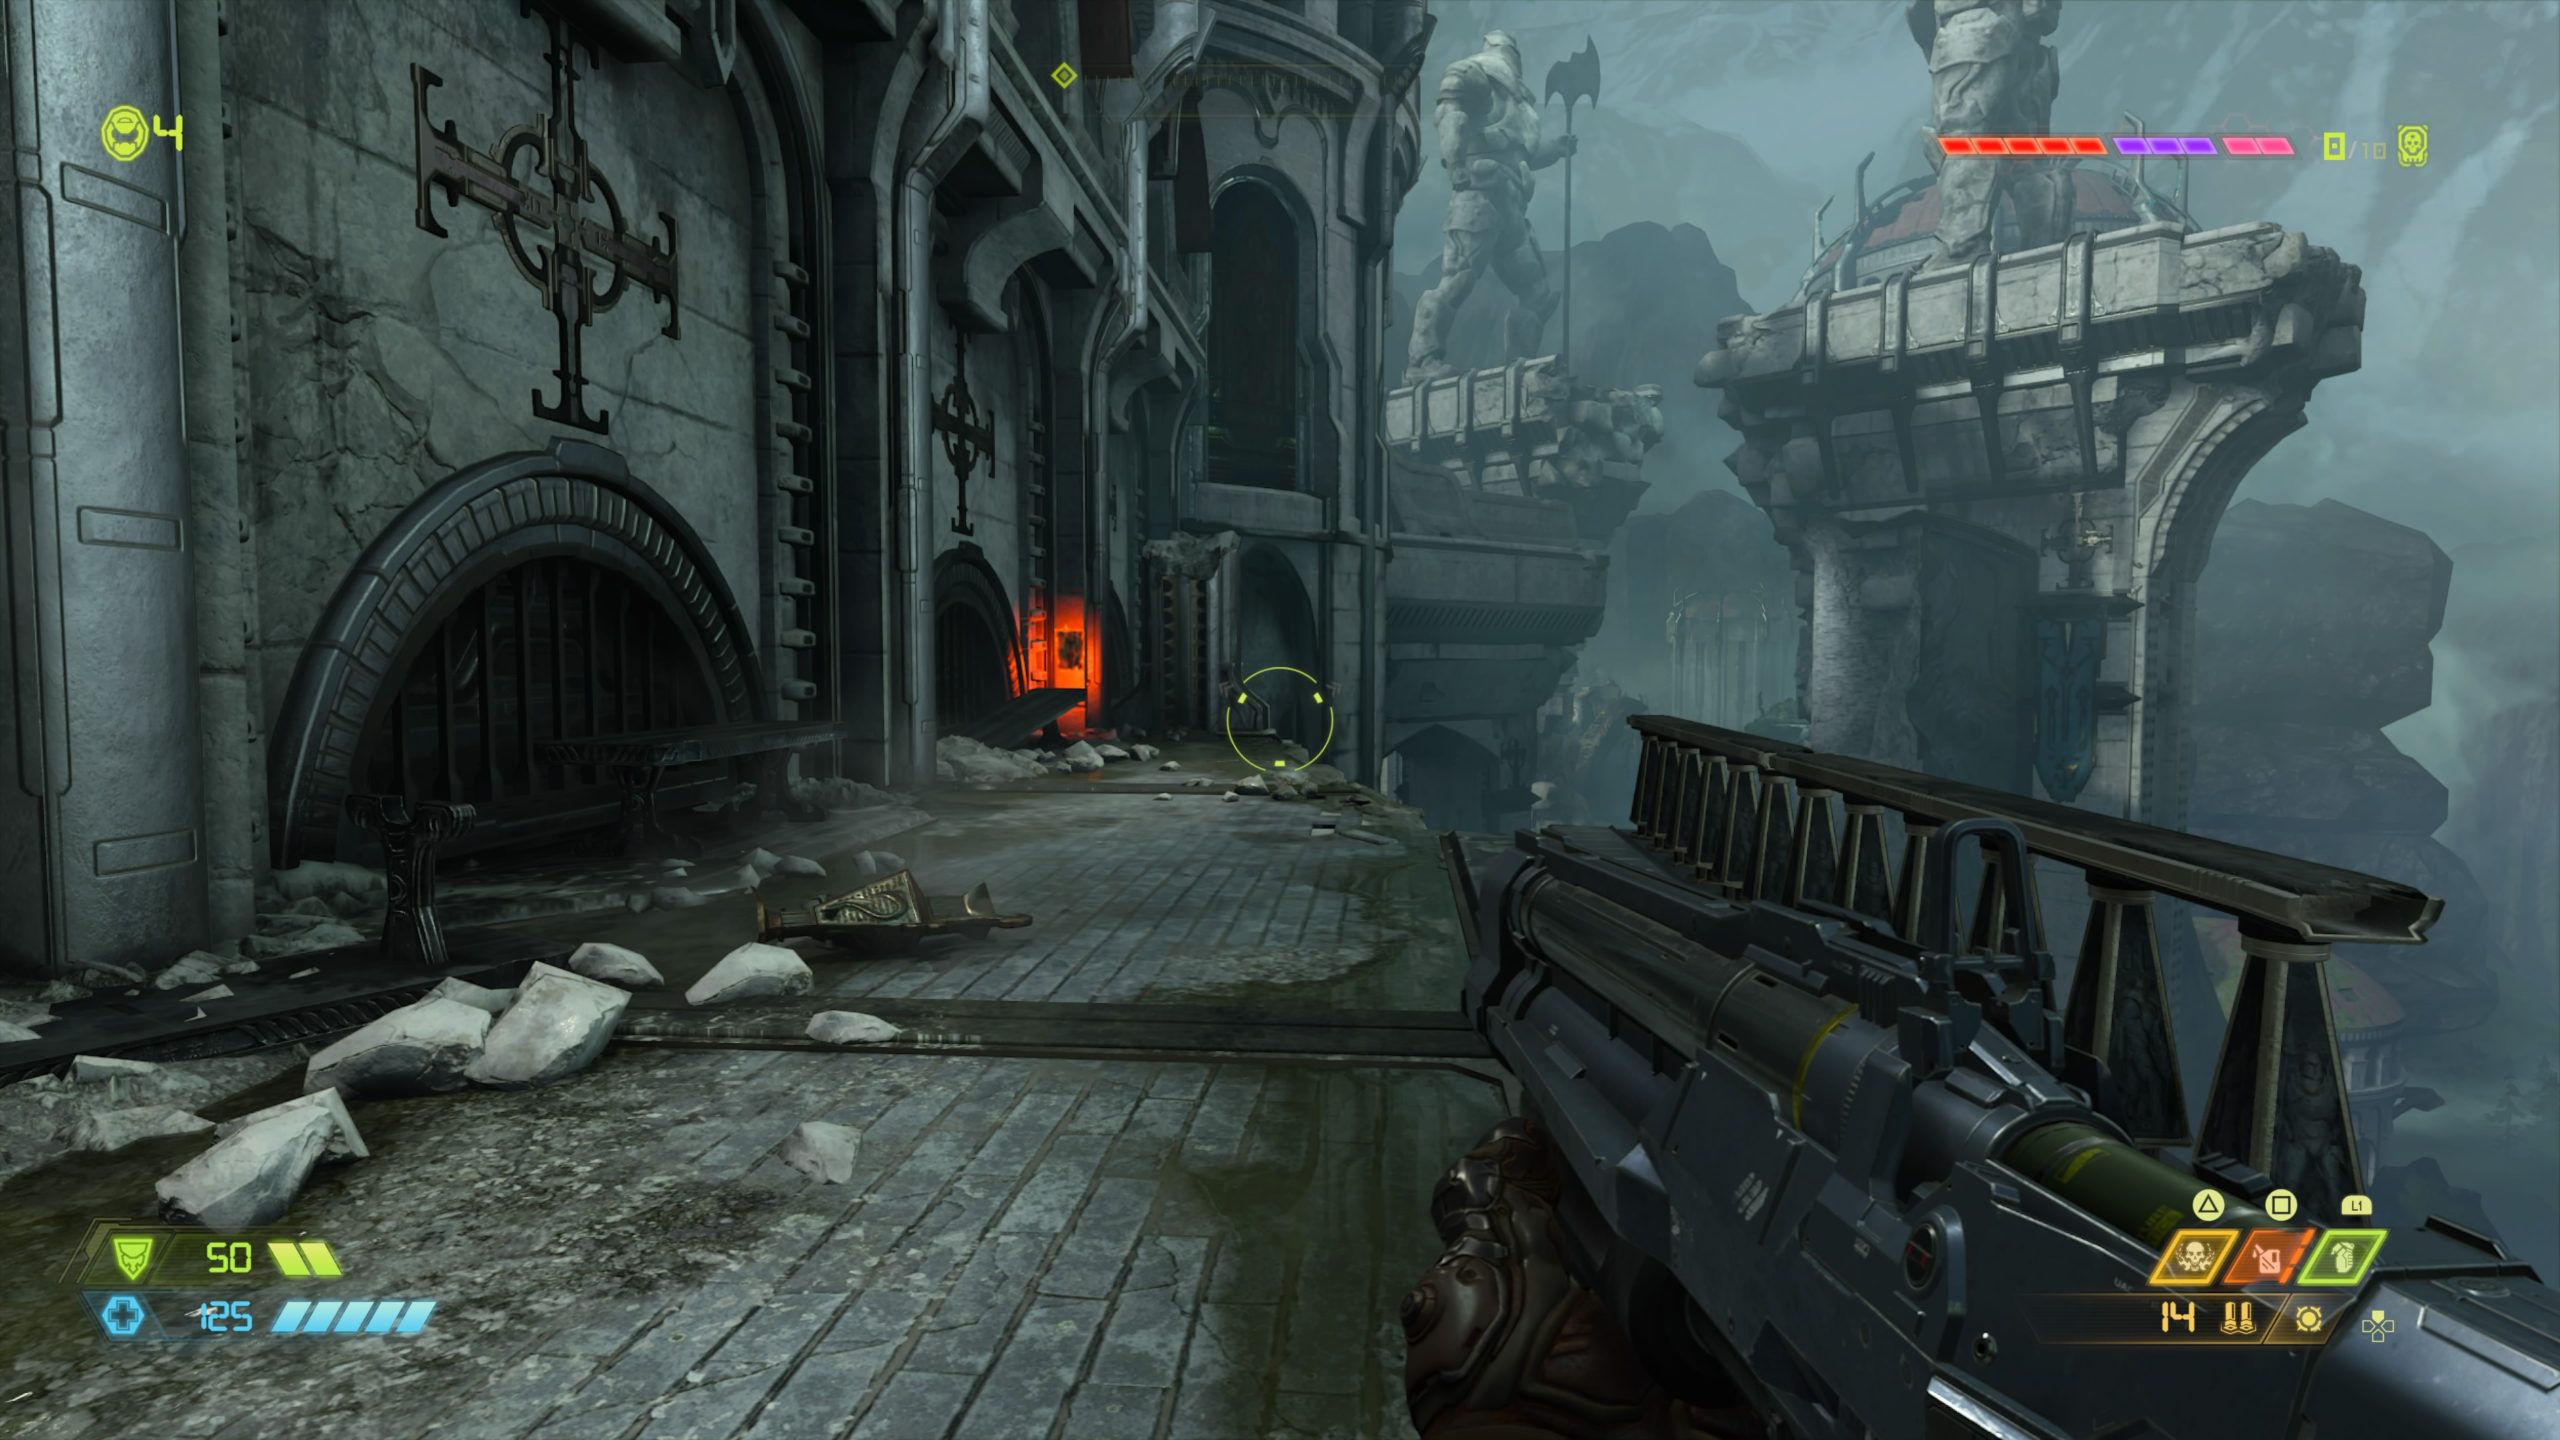
Codex: Story of the Sentinels – The Wolf
After exiting the room with the wall cannons shooting fireballs, jump across the broken section of bridge to reach a big open circular room filled with enemies. Defeat the enemies to open the way forward. This will bring you to an area outside overlooking a tower guarded by two Sentinel statues. Instead of jumping to the gold spin bars, drop down the cliff side and follow the path to the left. Use the the gold spin bar to reach a wall climbing area just past it. Climb up the wall then turn around to where you just came from to find the codex across the way on a small ledge.
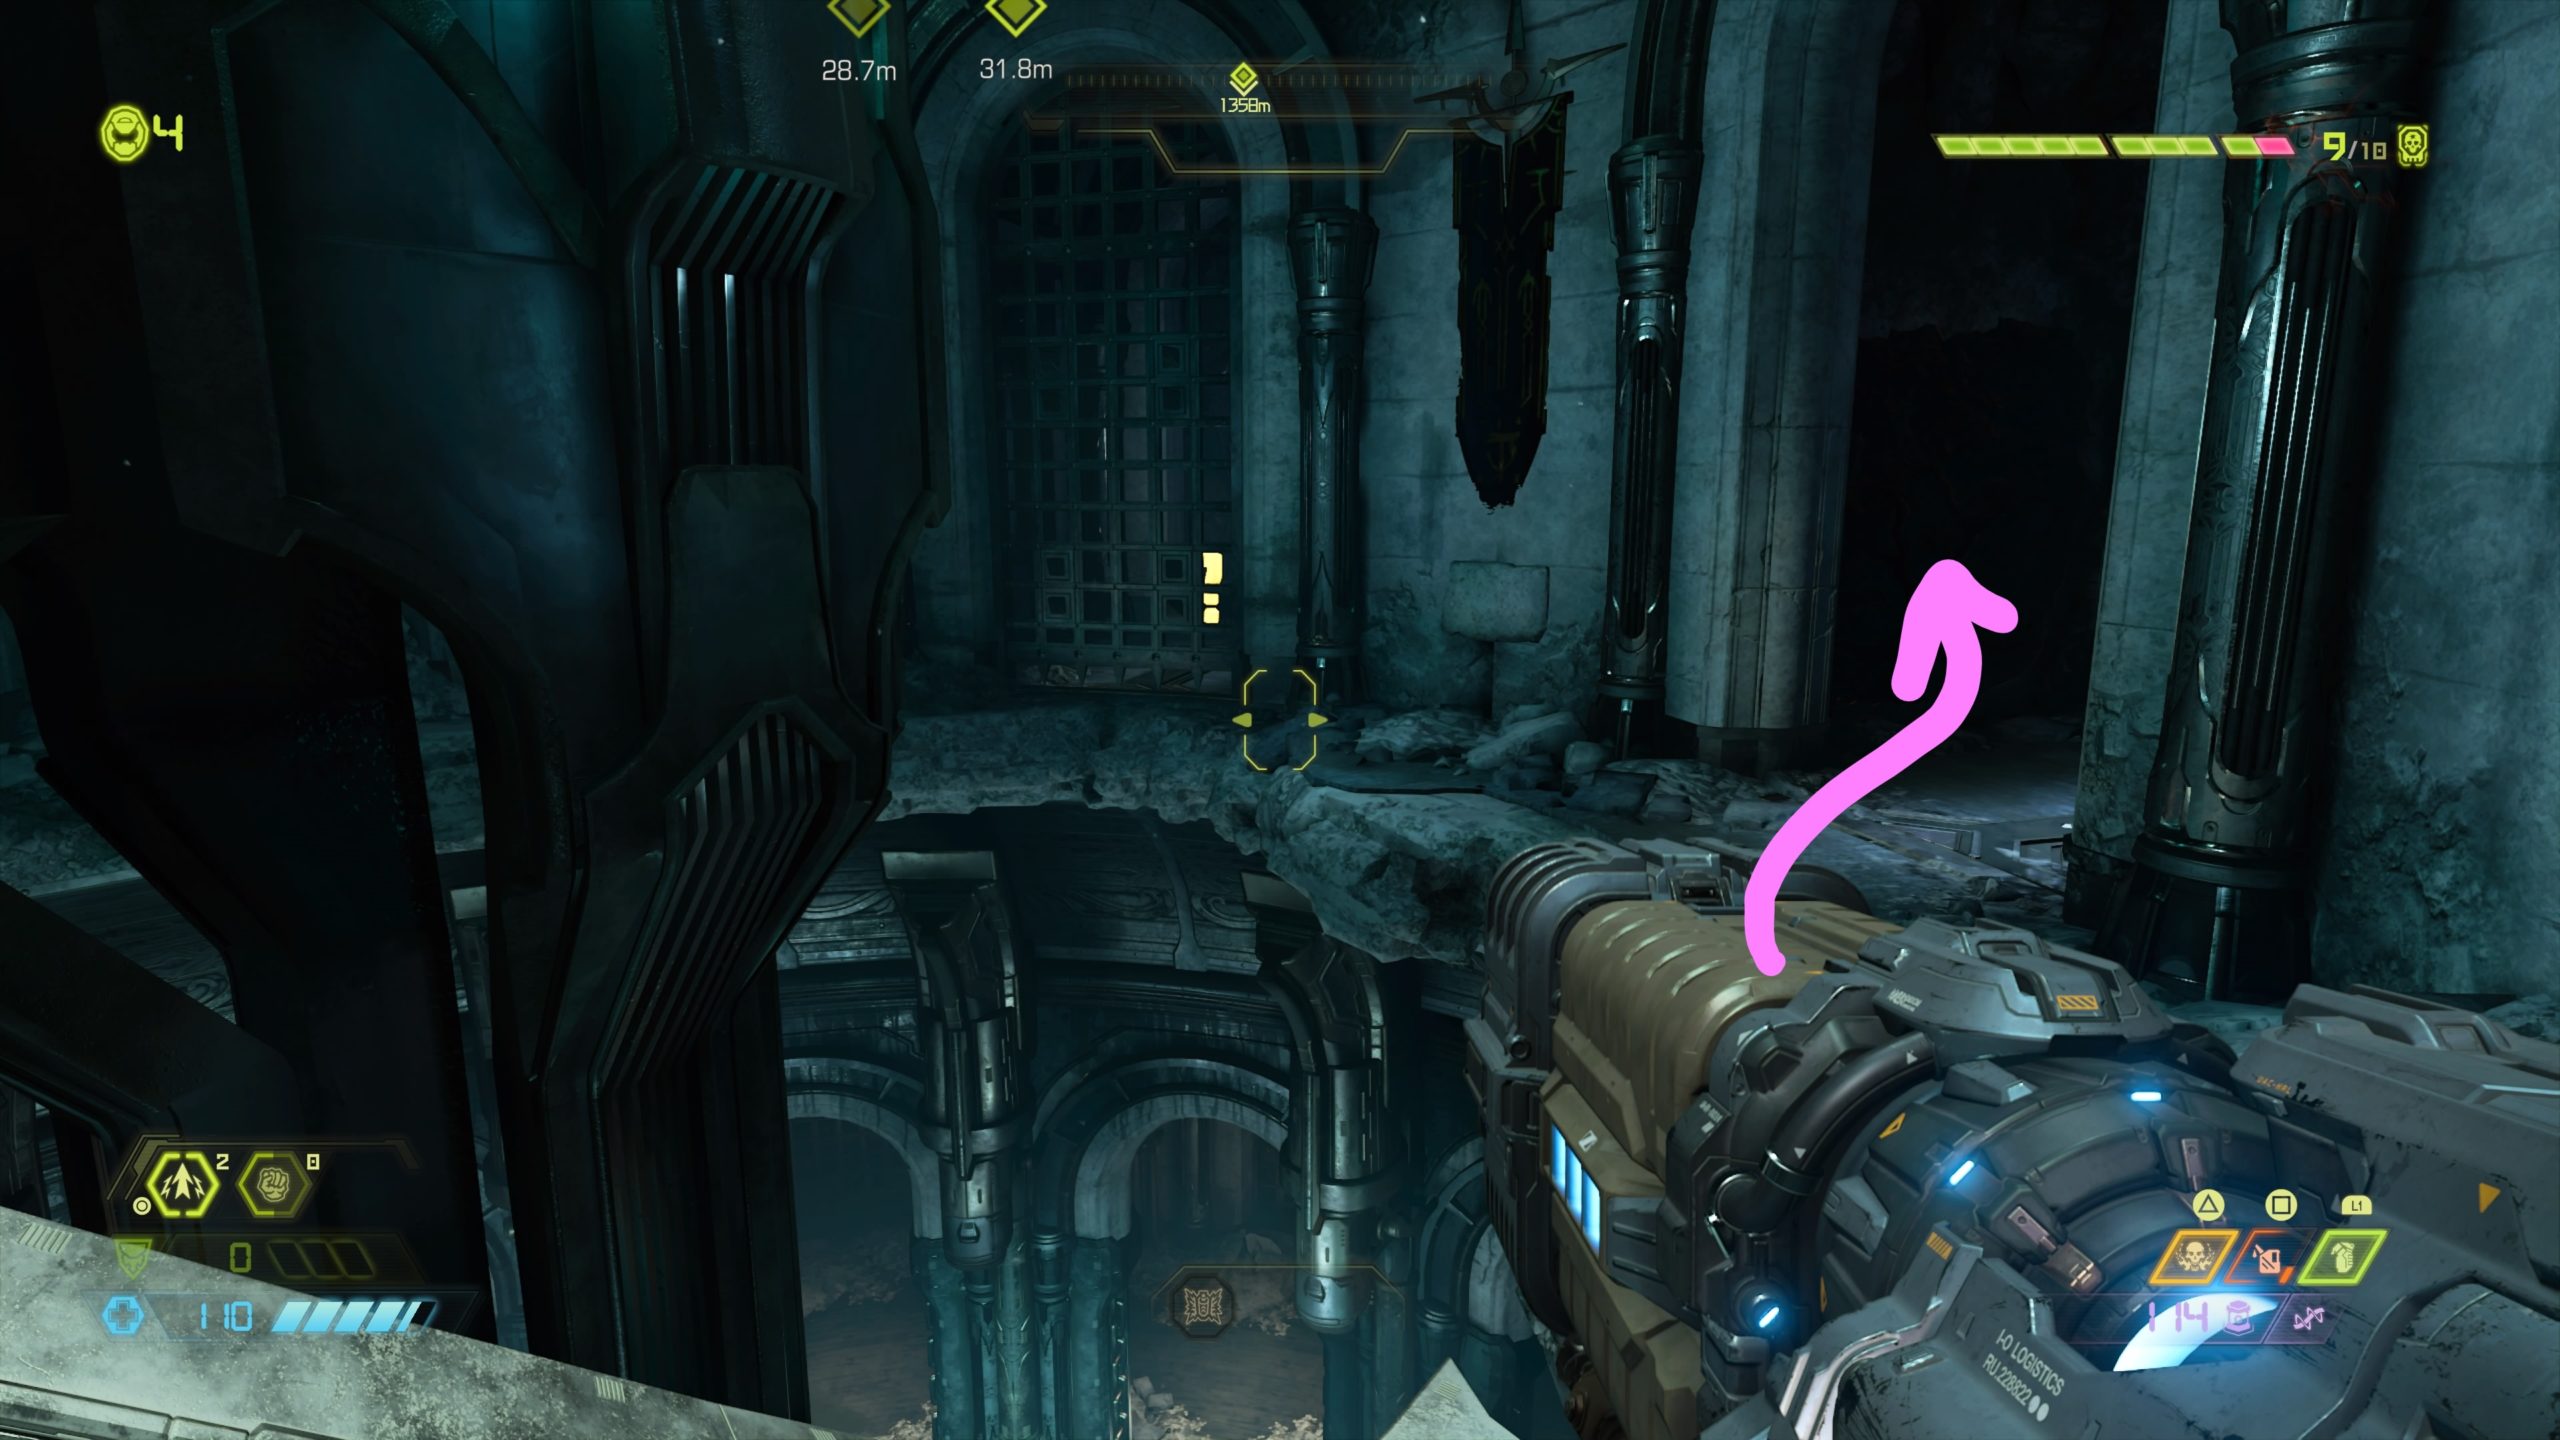
Codex: Story of the Sentinels – Sentinel History Part I
This codex is located in the room with the giant spinning propeller where you obtain the Dash ability. On the ground level, follow the propeller around the room to reach an opening with a giant metal cube. Use the cube to jump to the second level. You can then use the propeller to reach the codex, or if you have Dash unlocked, you can use that ability to reach the codex on the second level.
Codex: Story of the Sentinels – King Novik
This codex is located at the bottom of the stairs just past the king’s throne room.
Sentinel Battery
After you meet the king, you’ll head back to the big open circular room with an electric floor. After you clear out this room, a gate guarding the battery will open, allowing you to collect it.
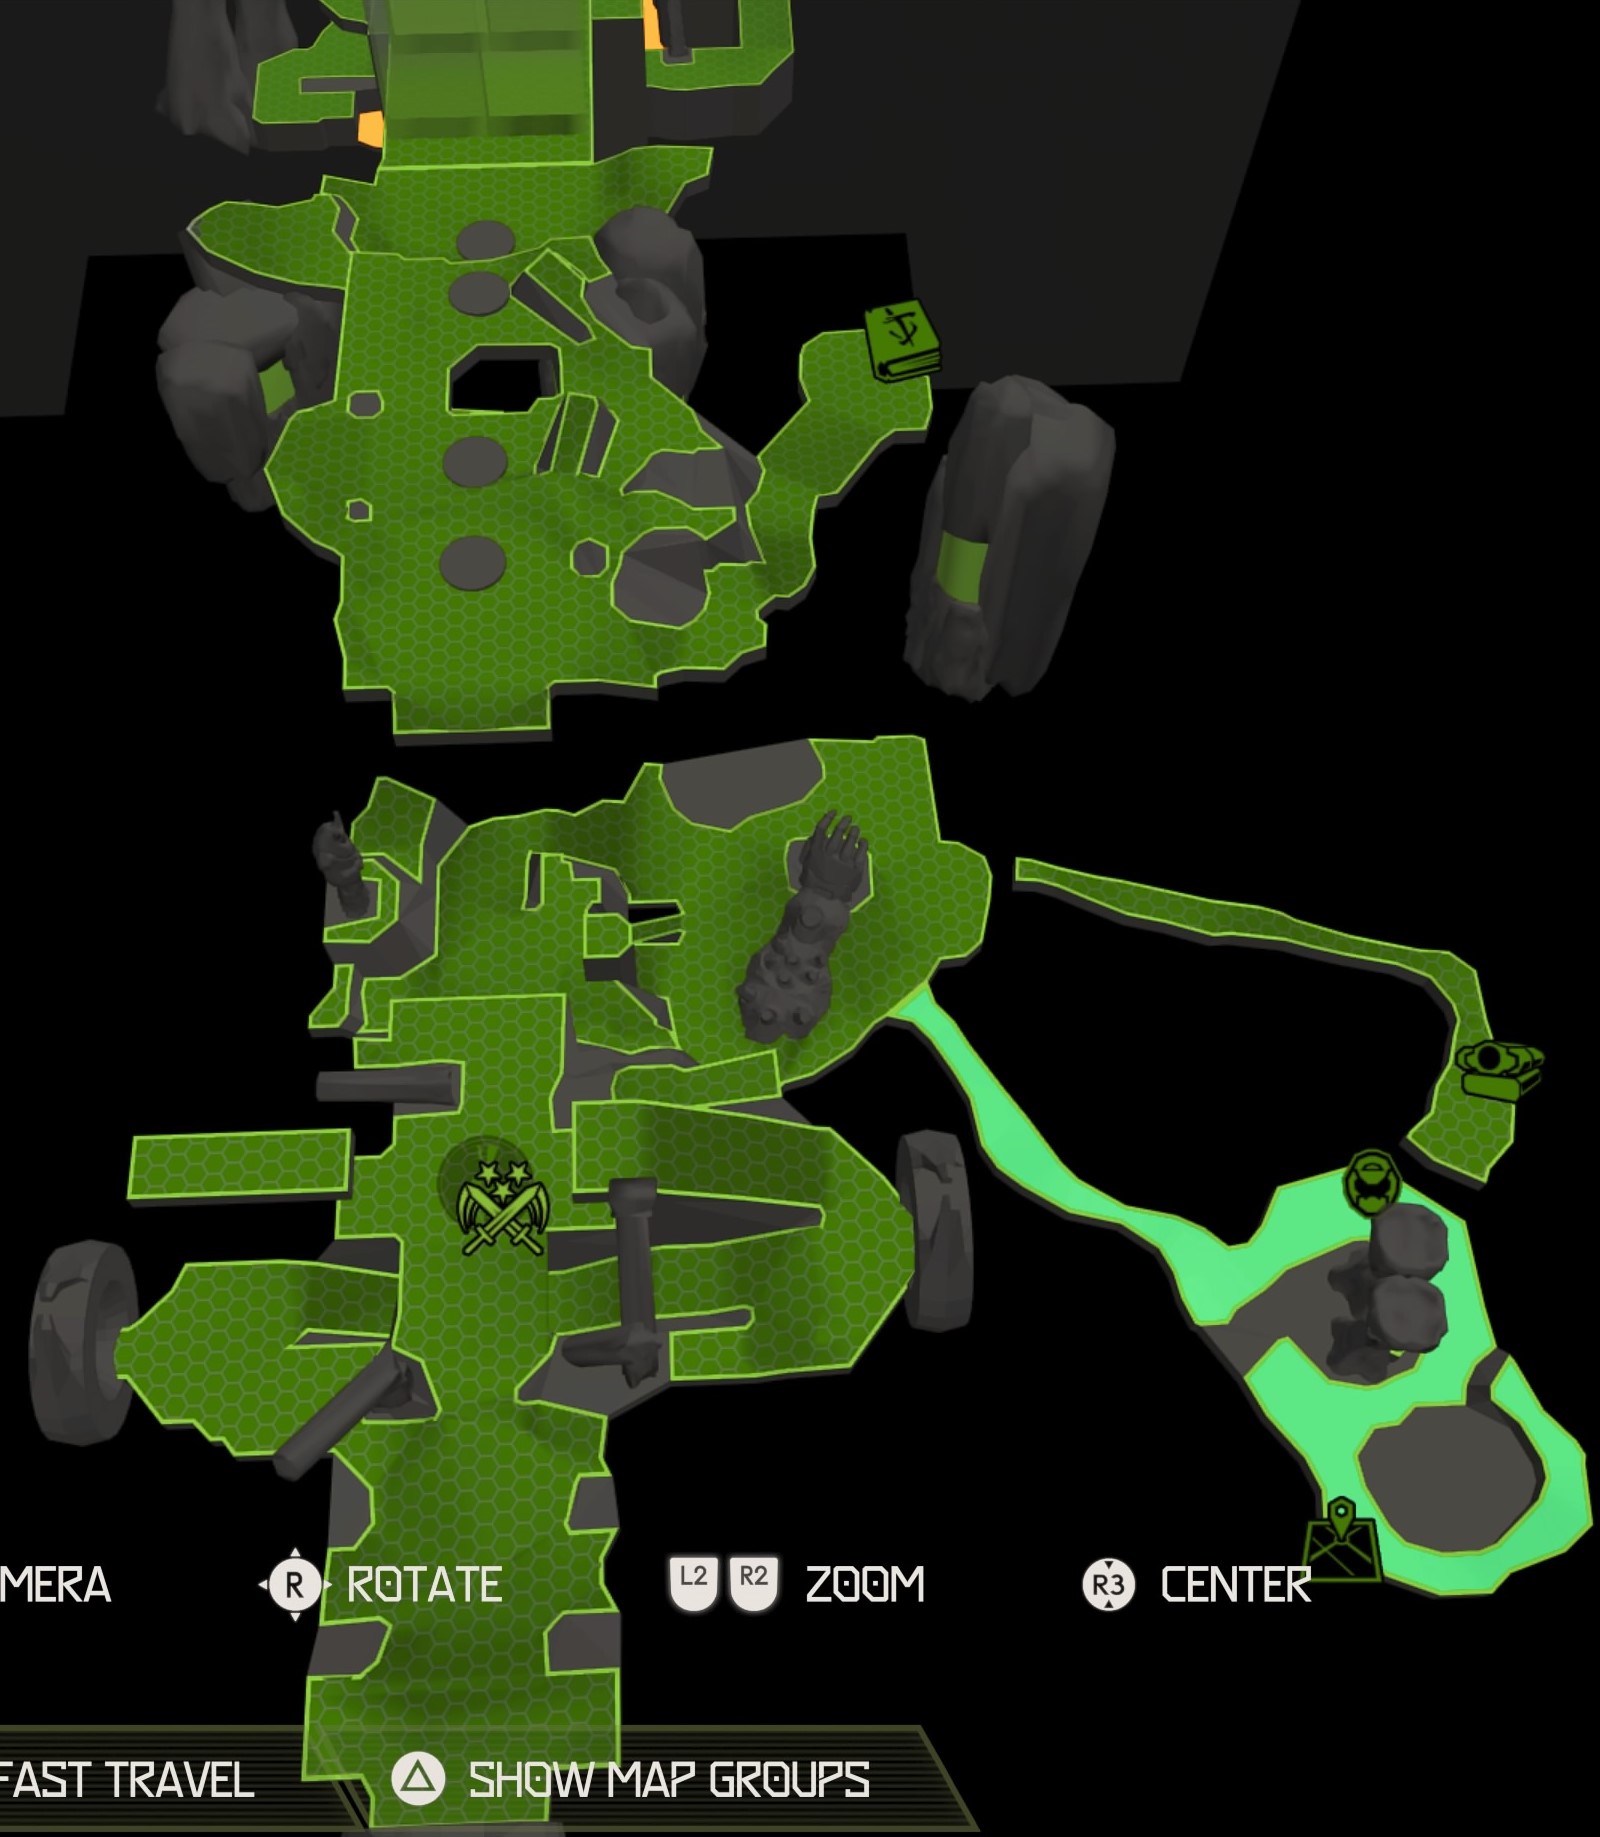
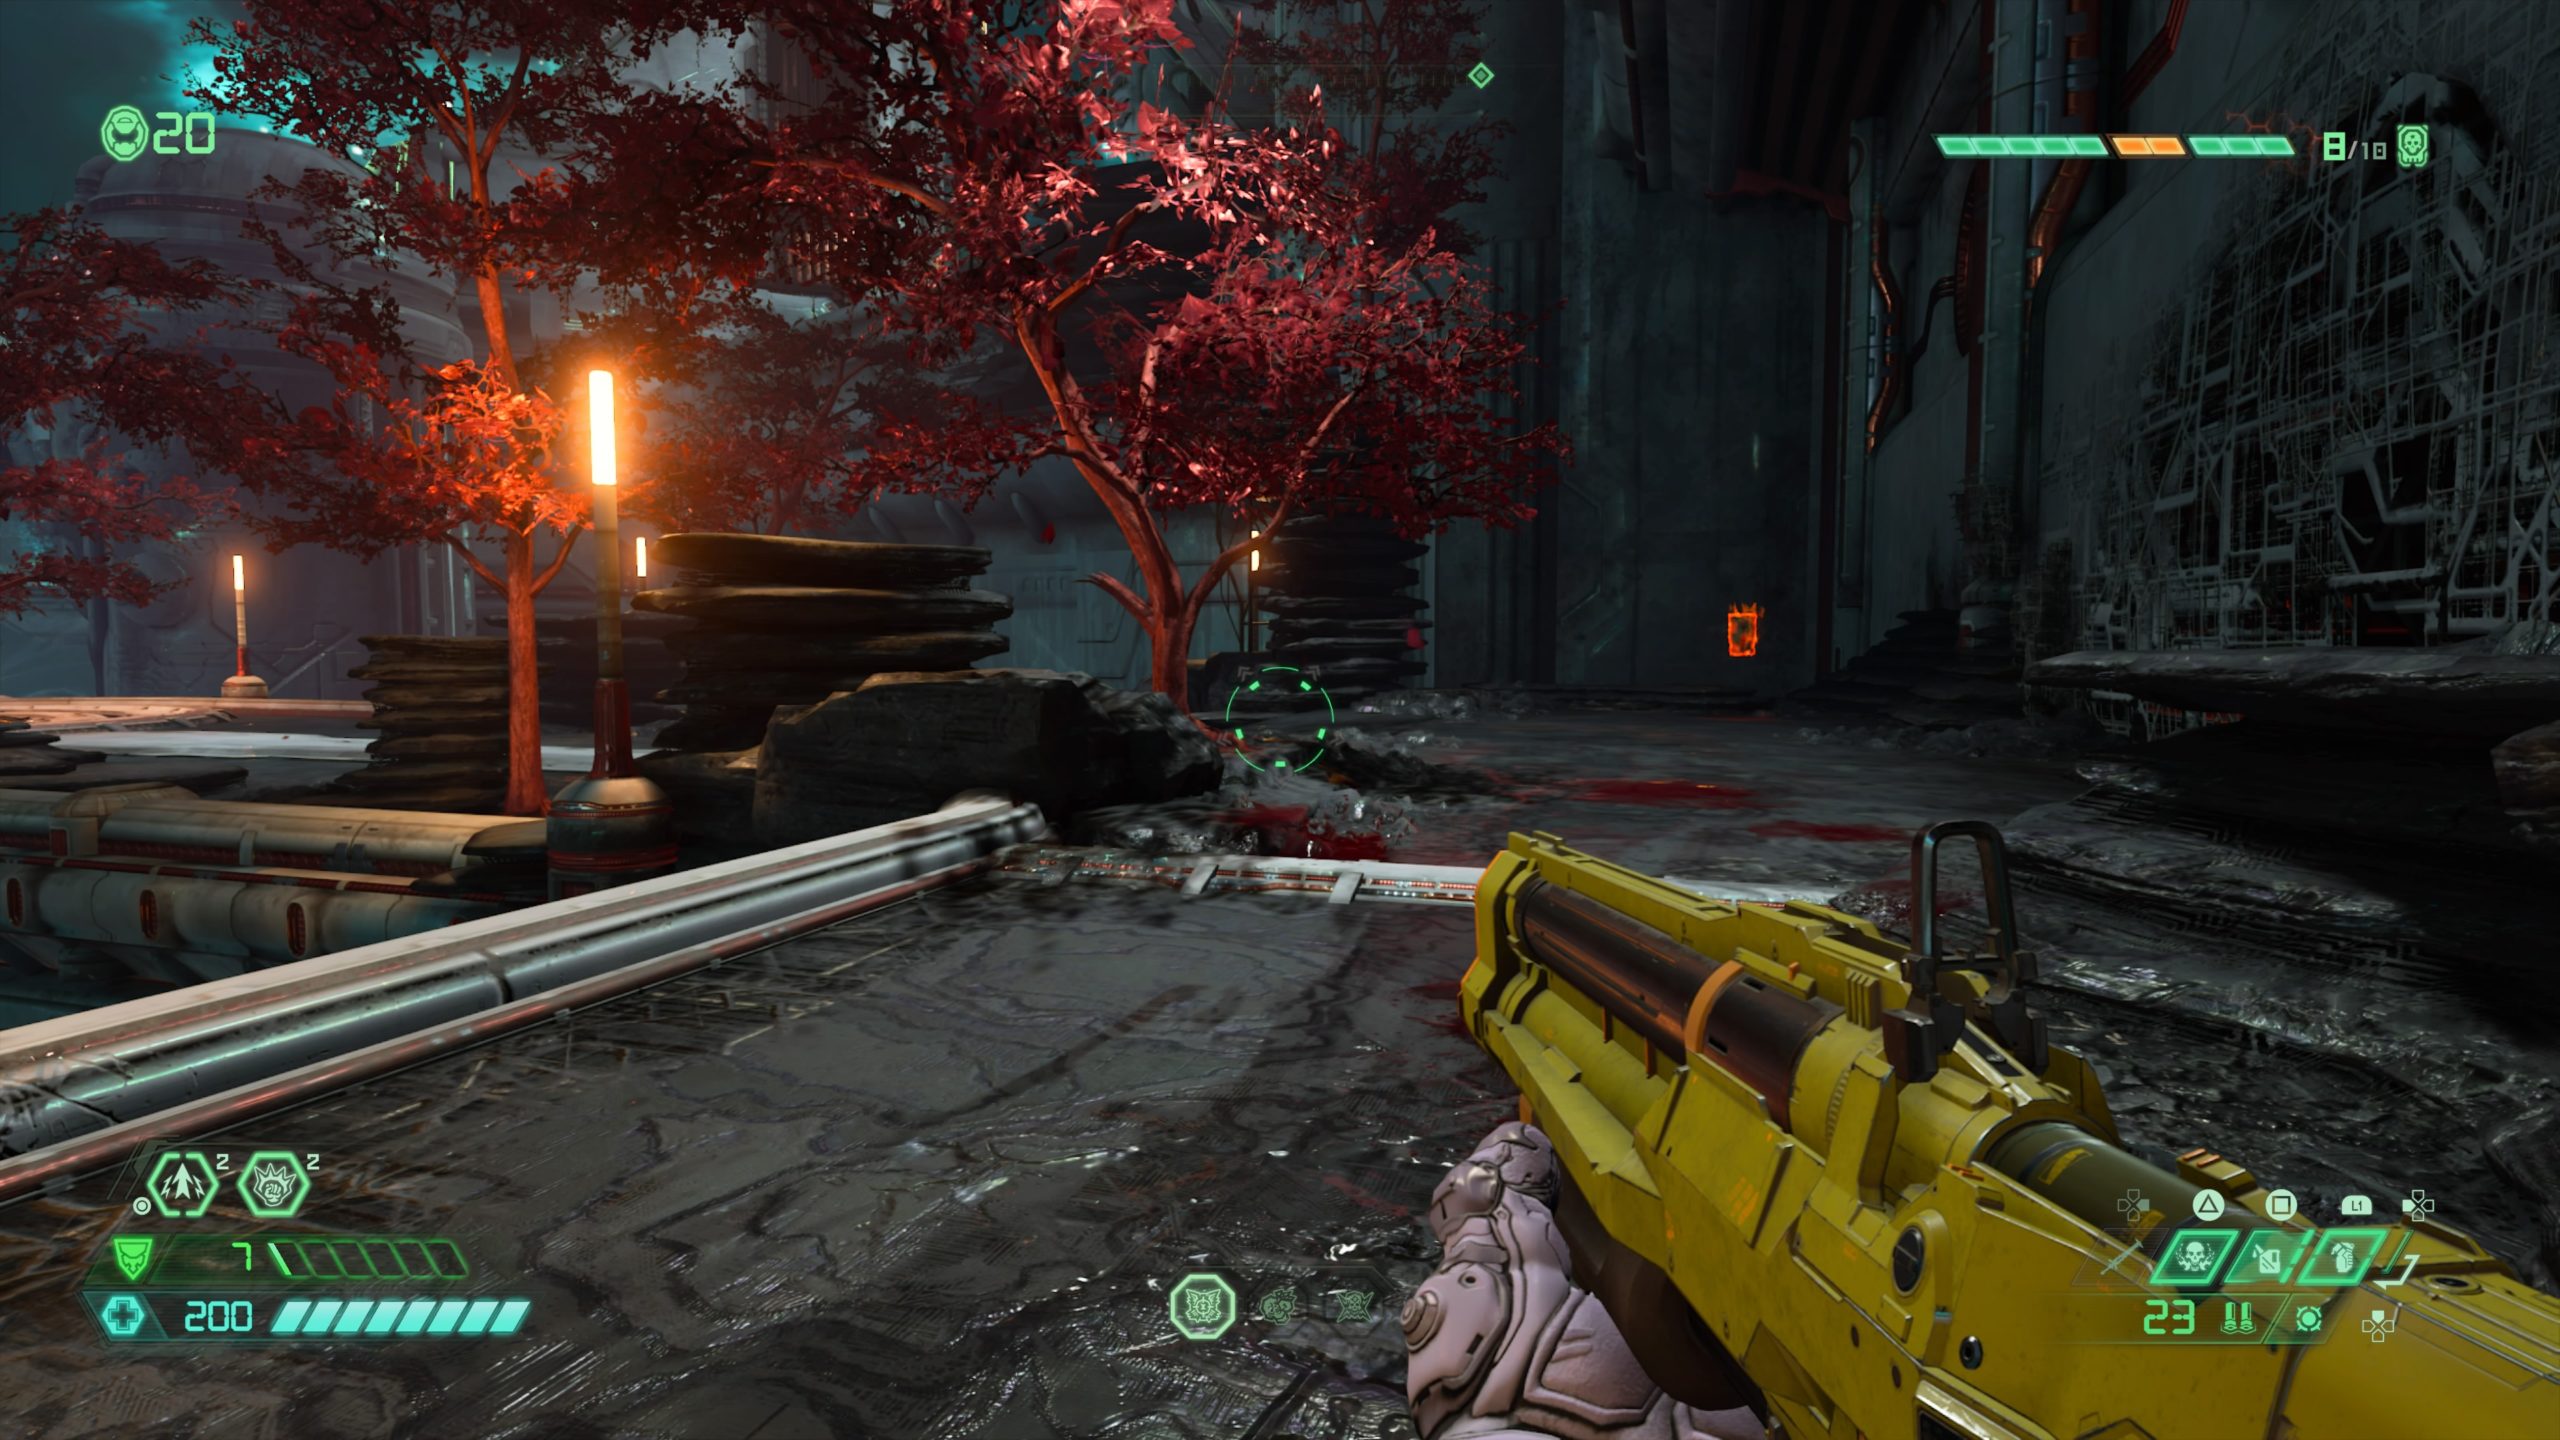
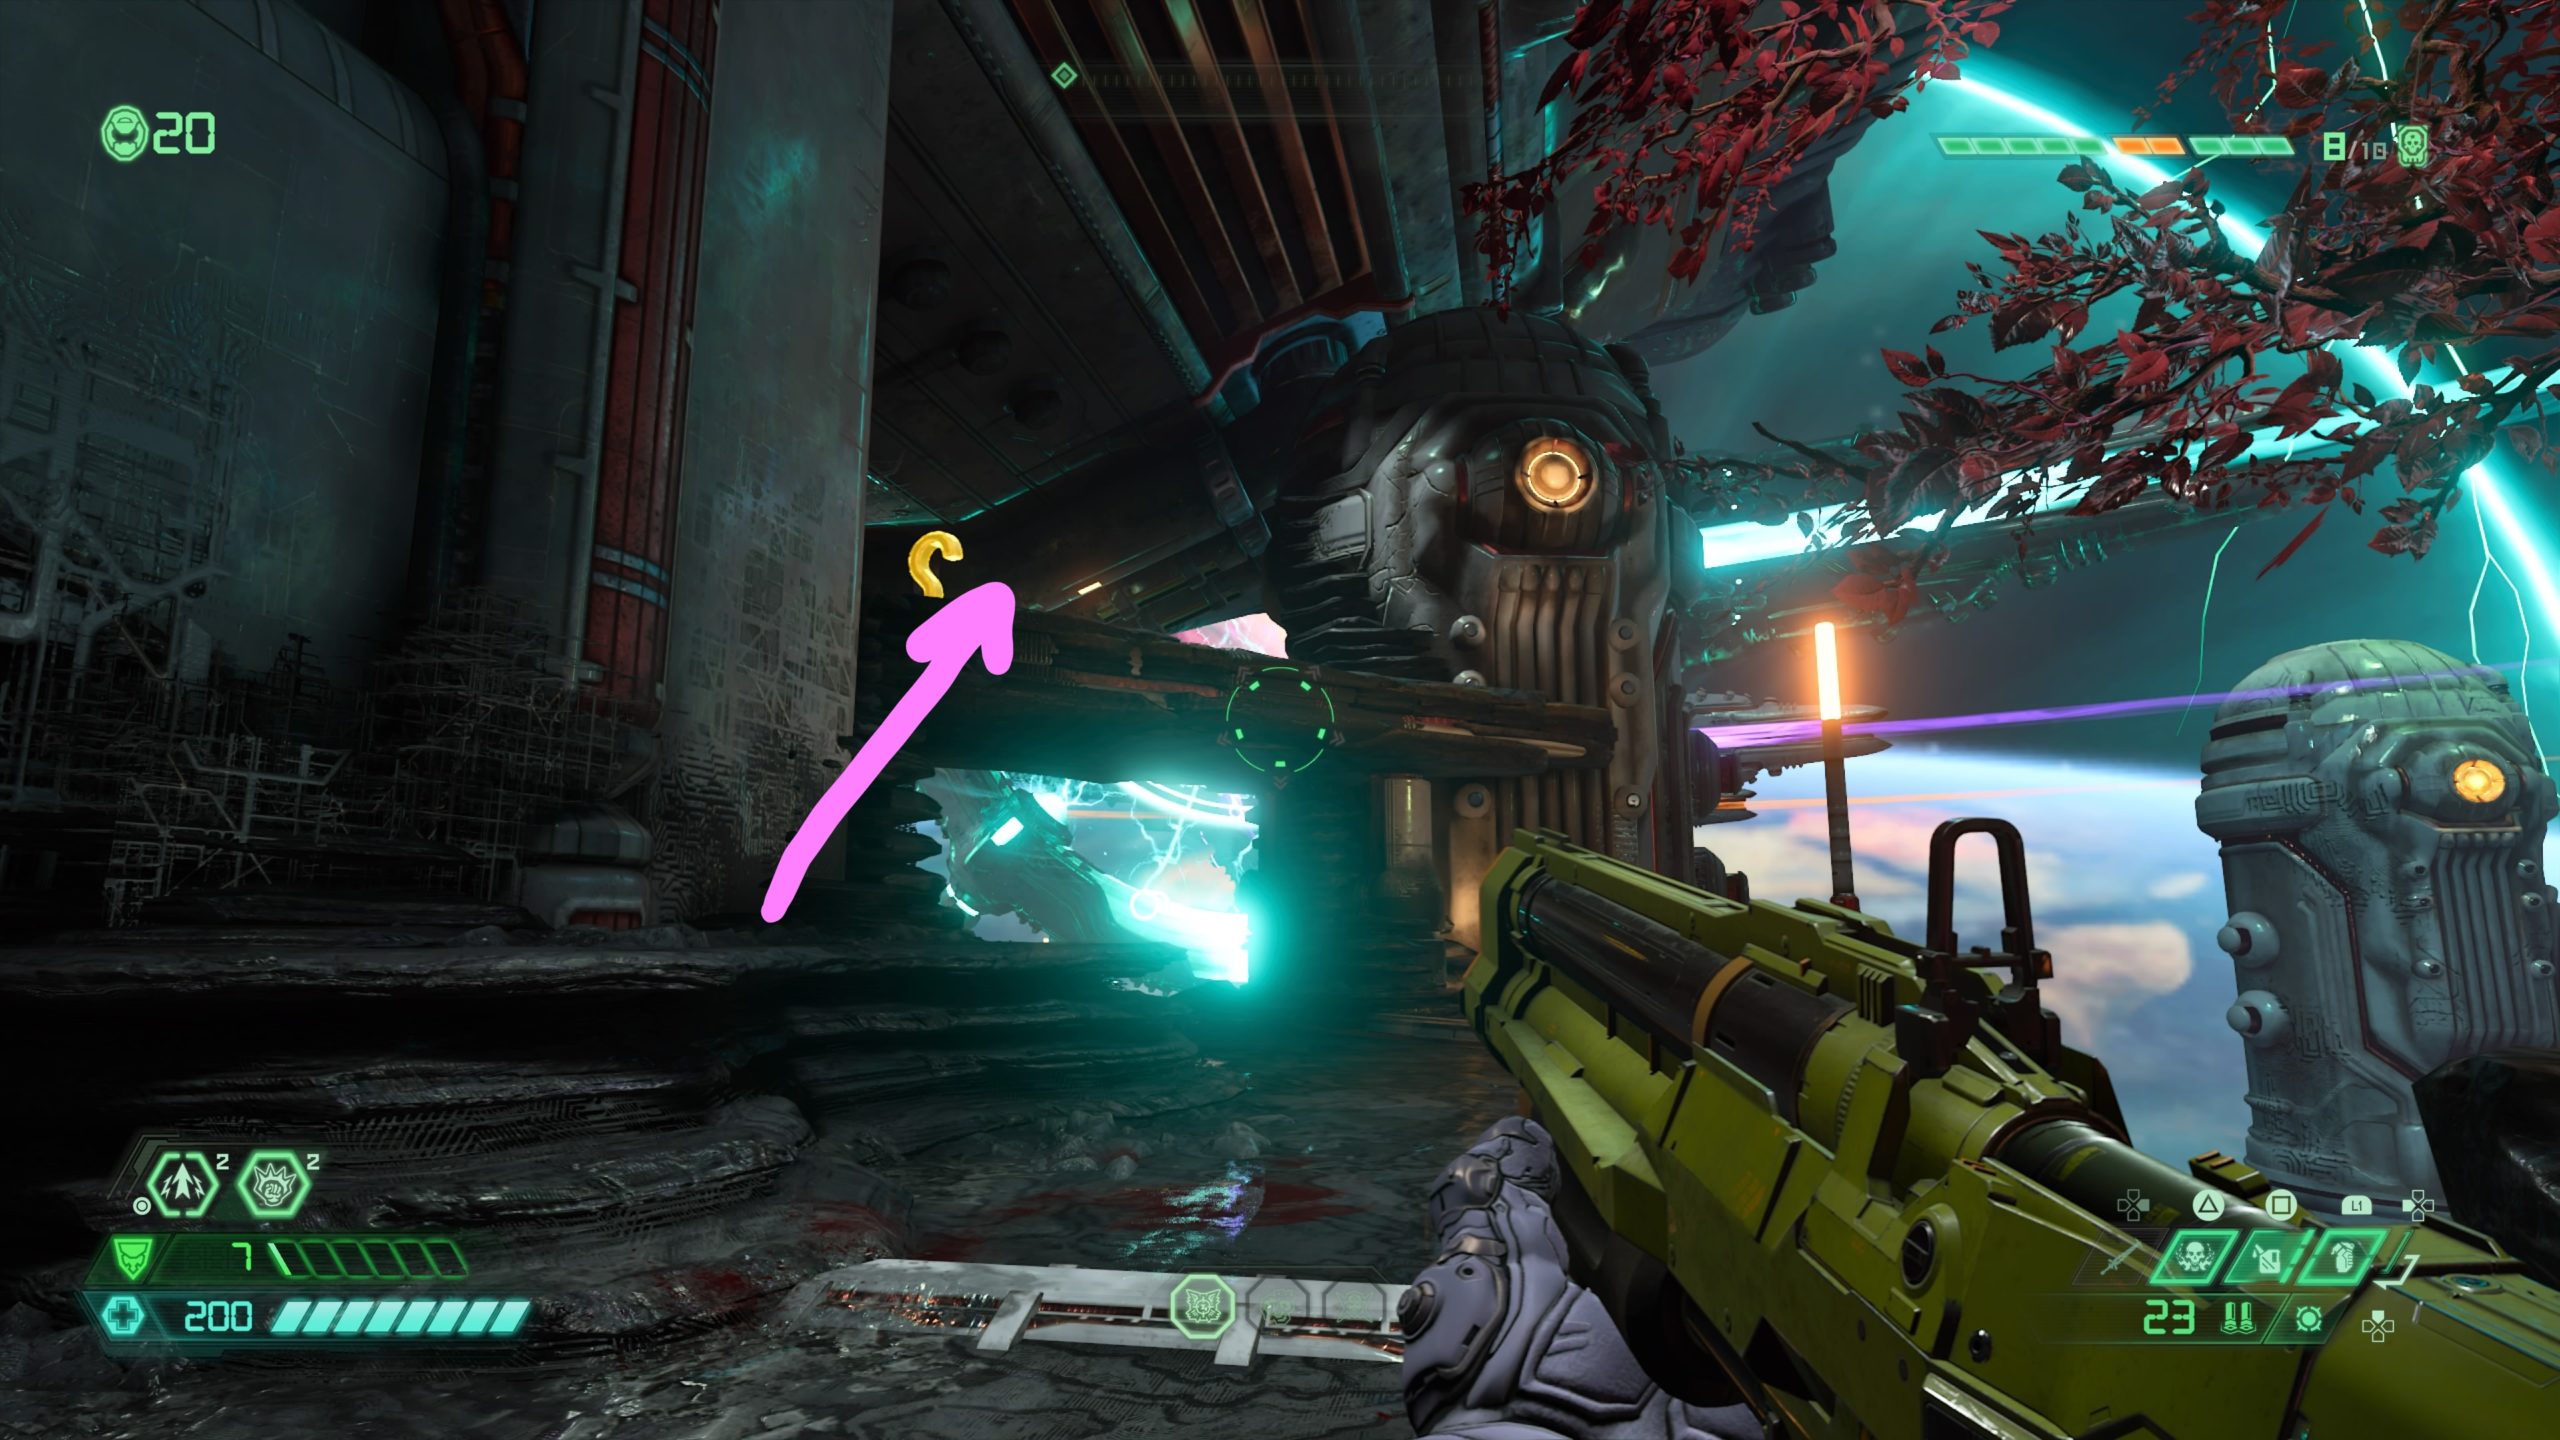
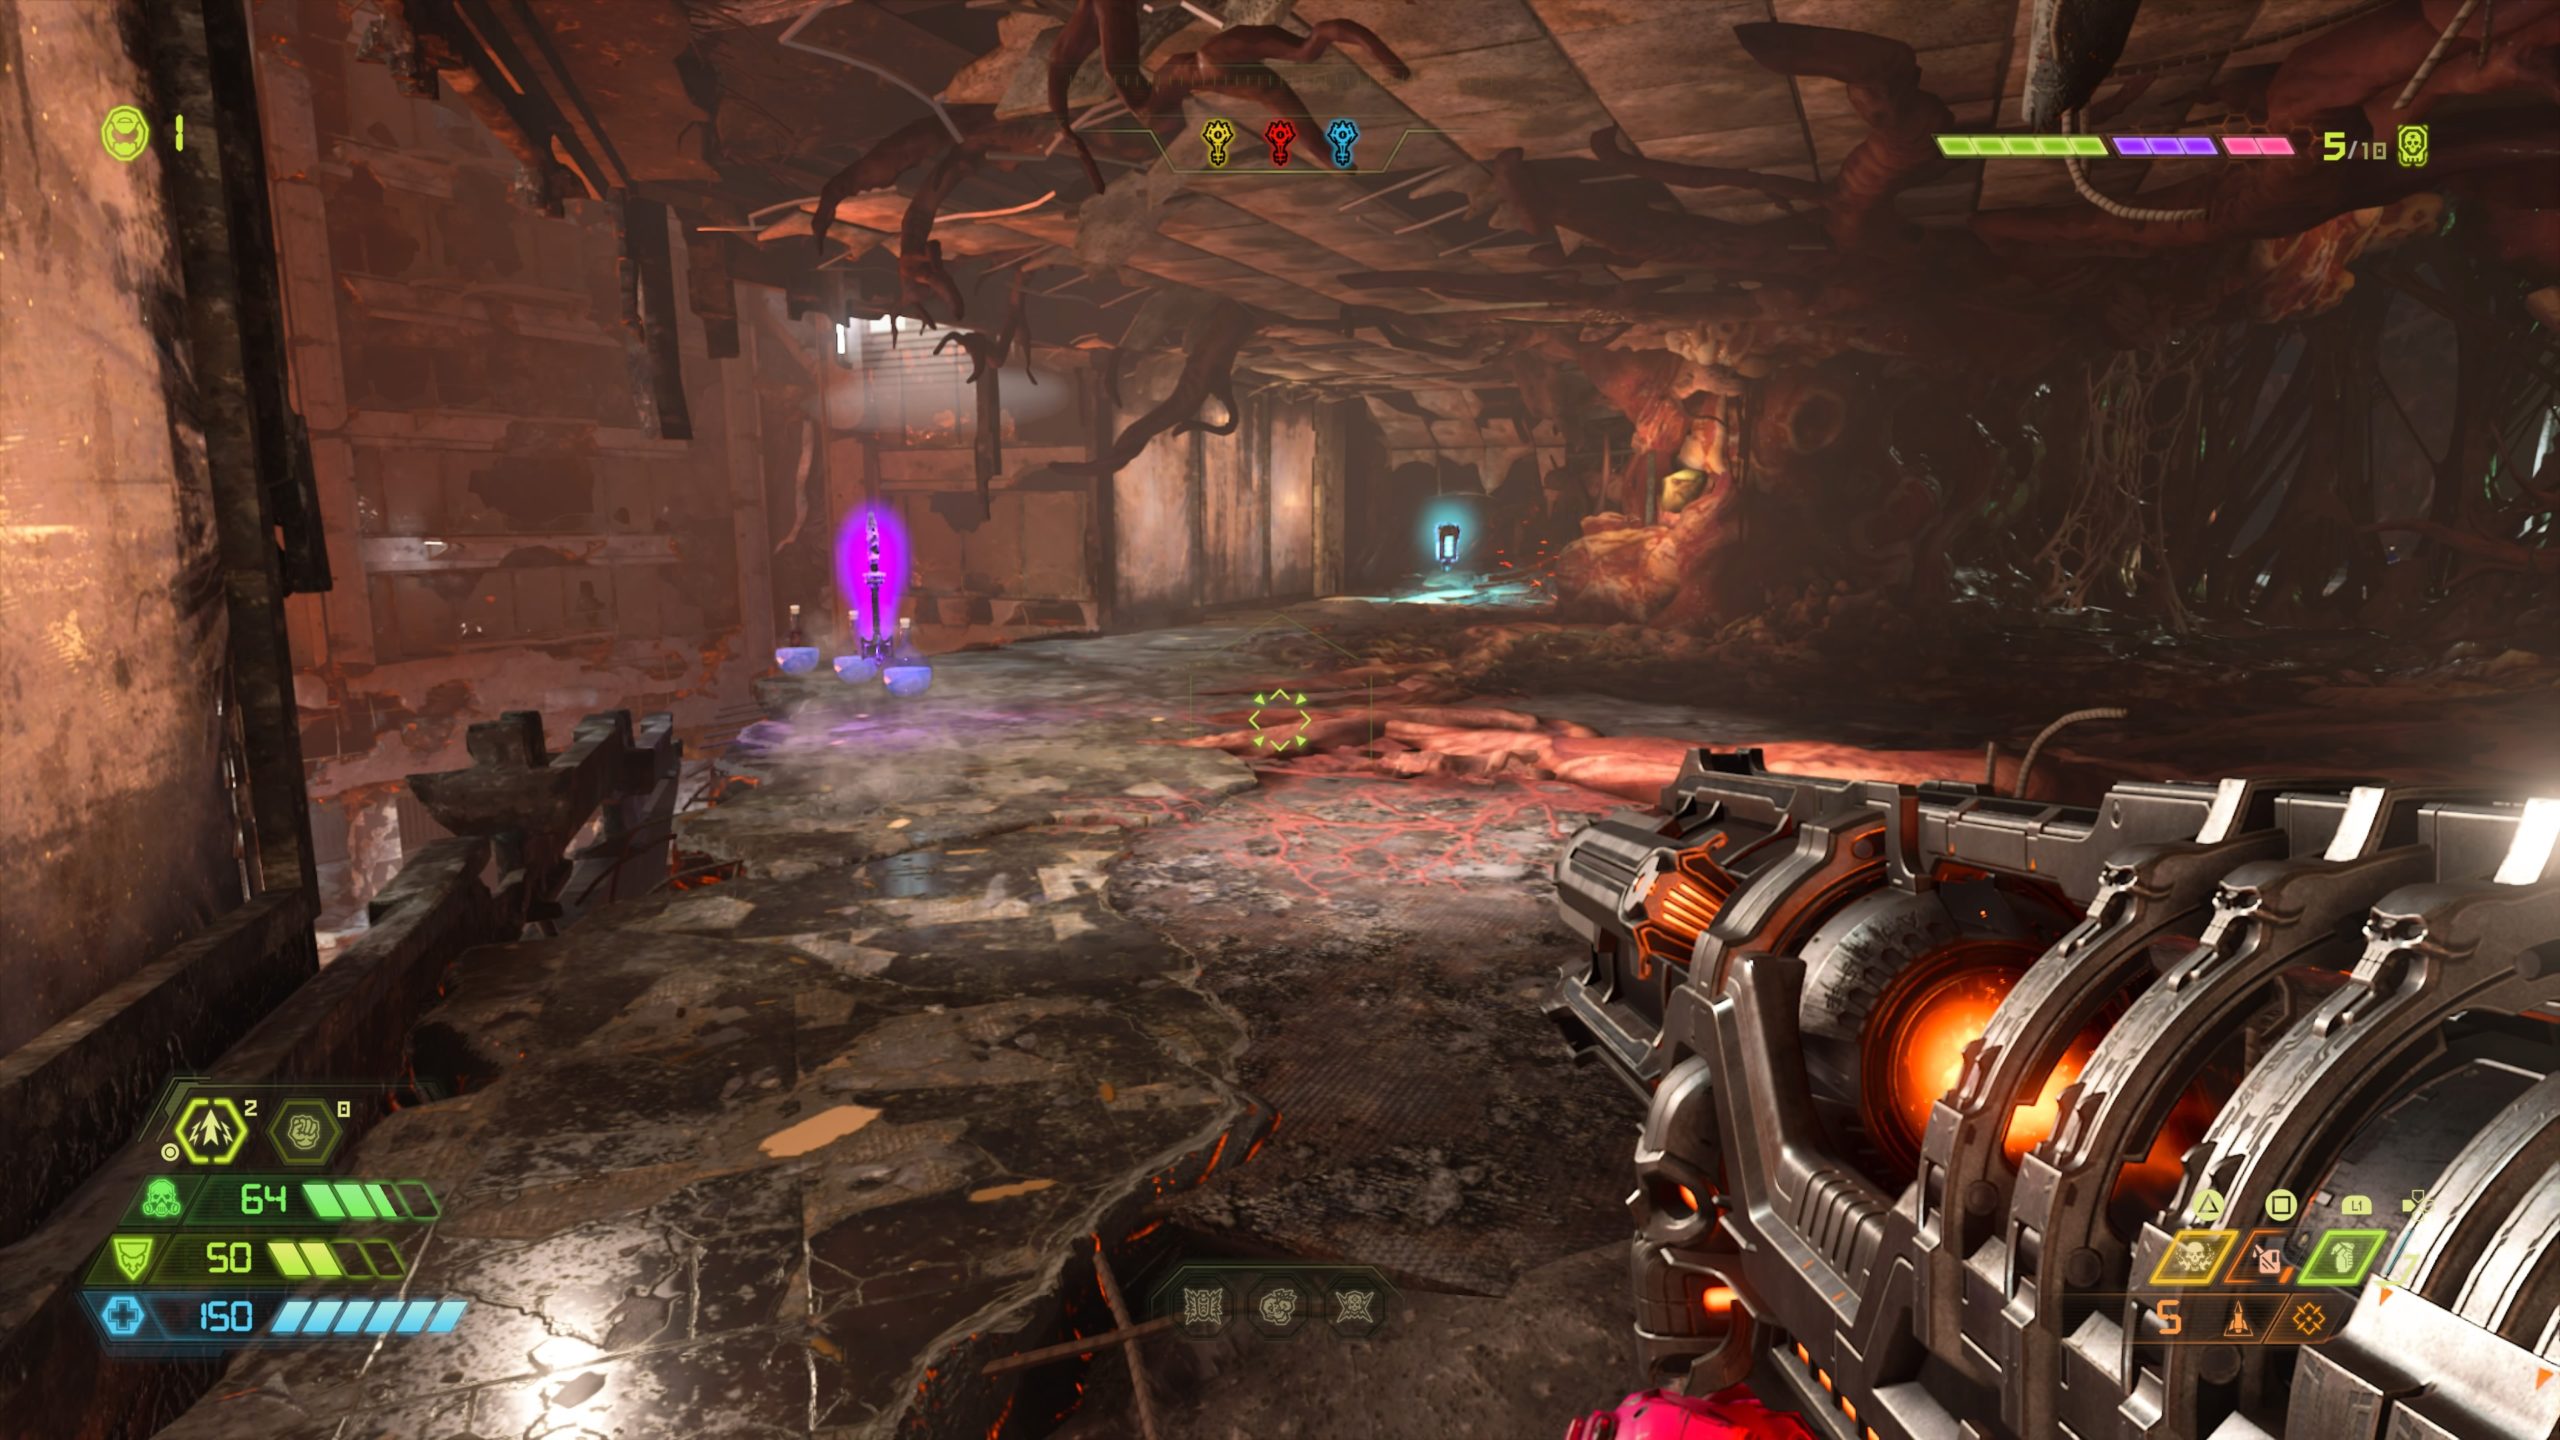
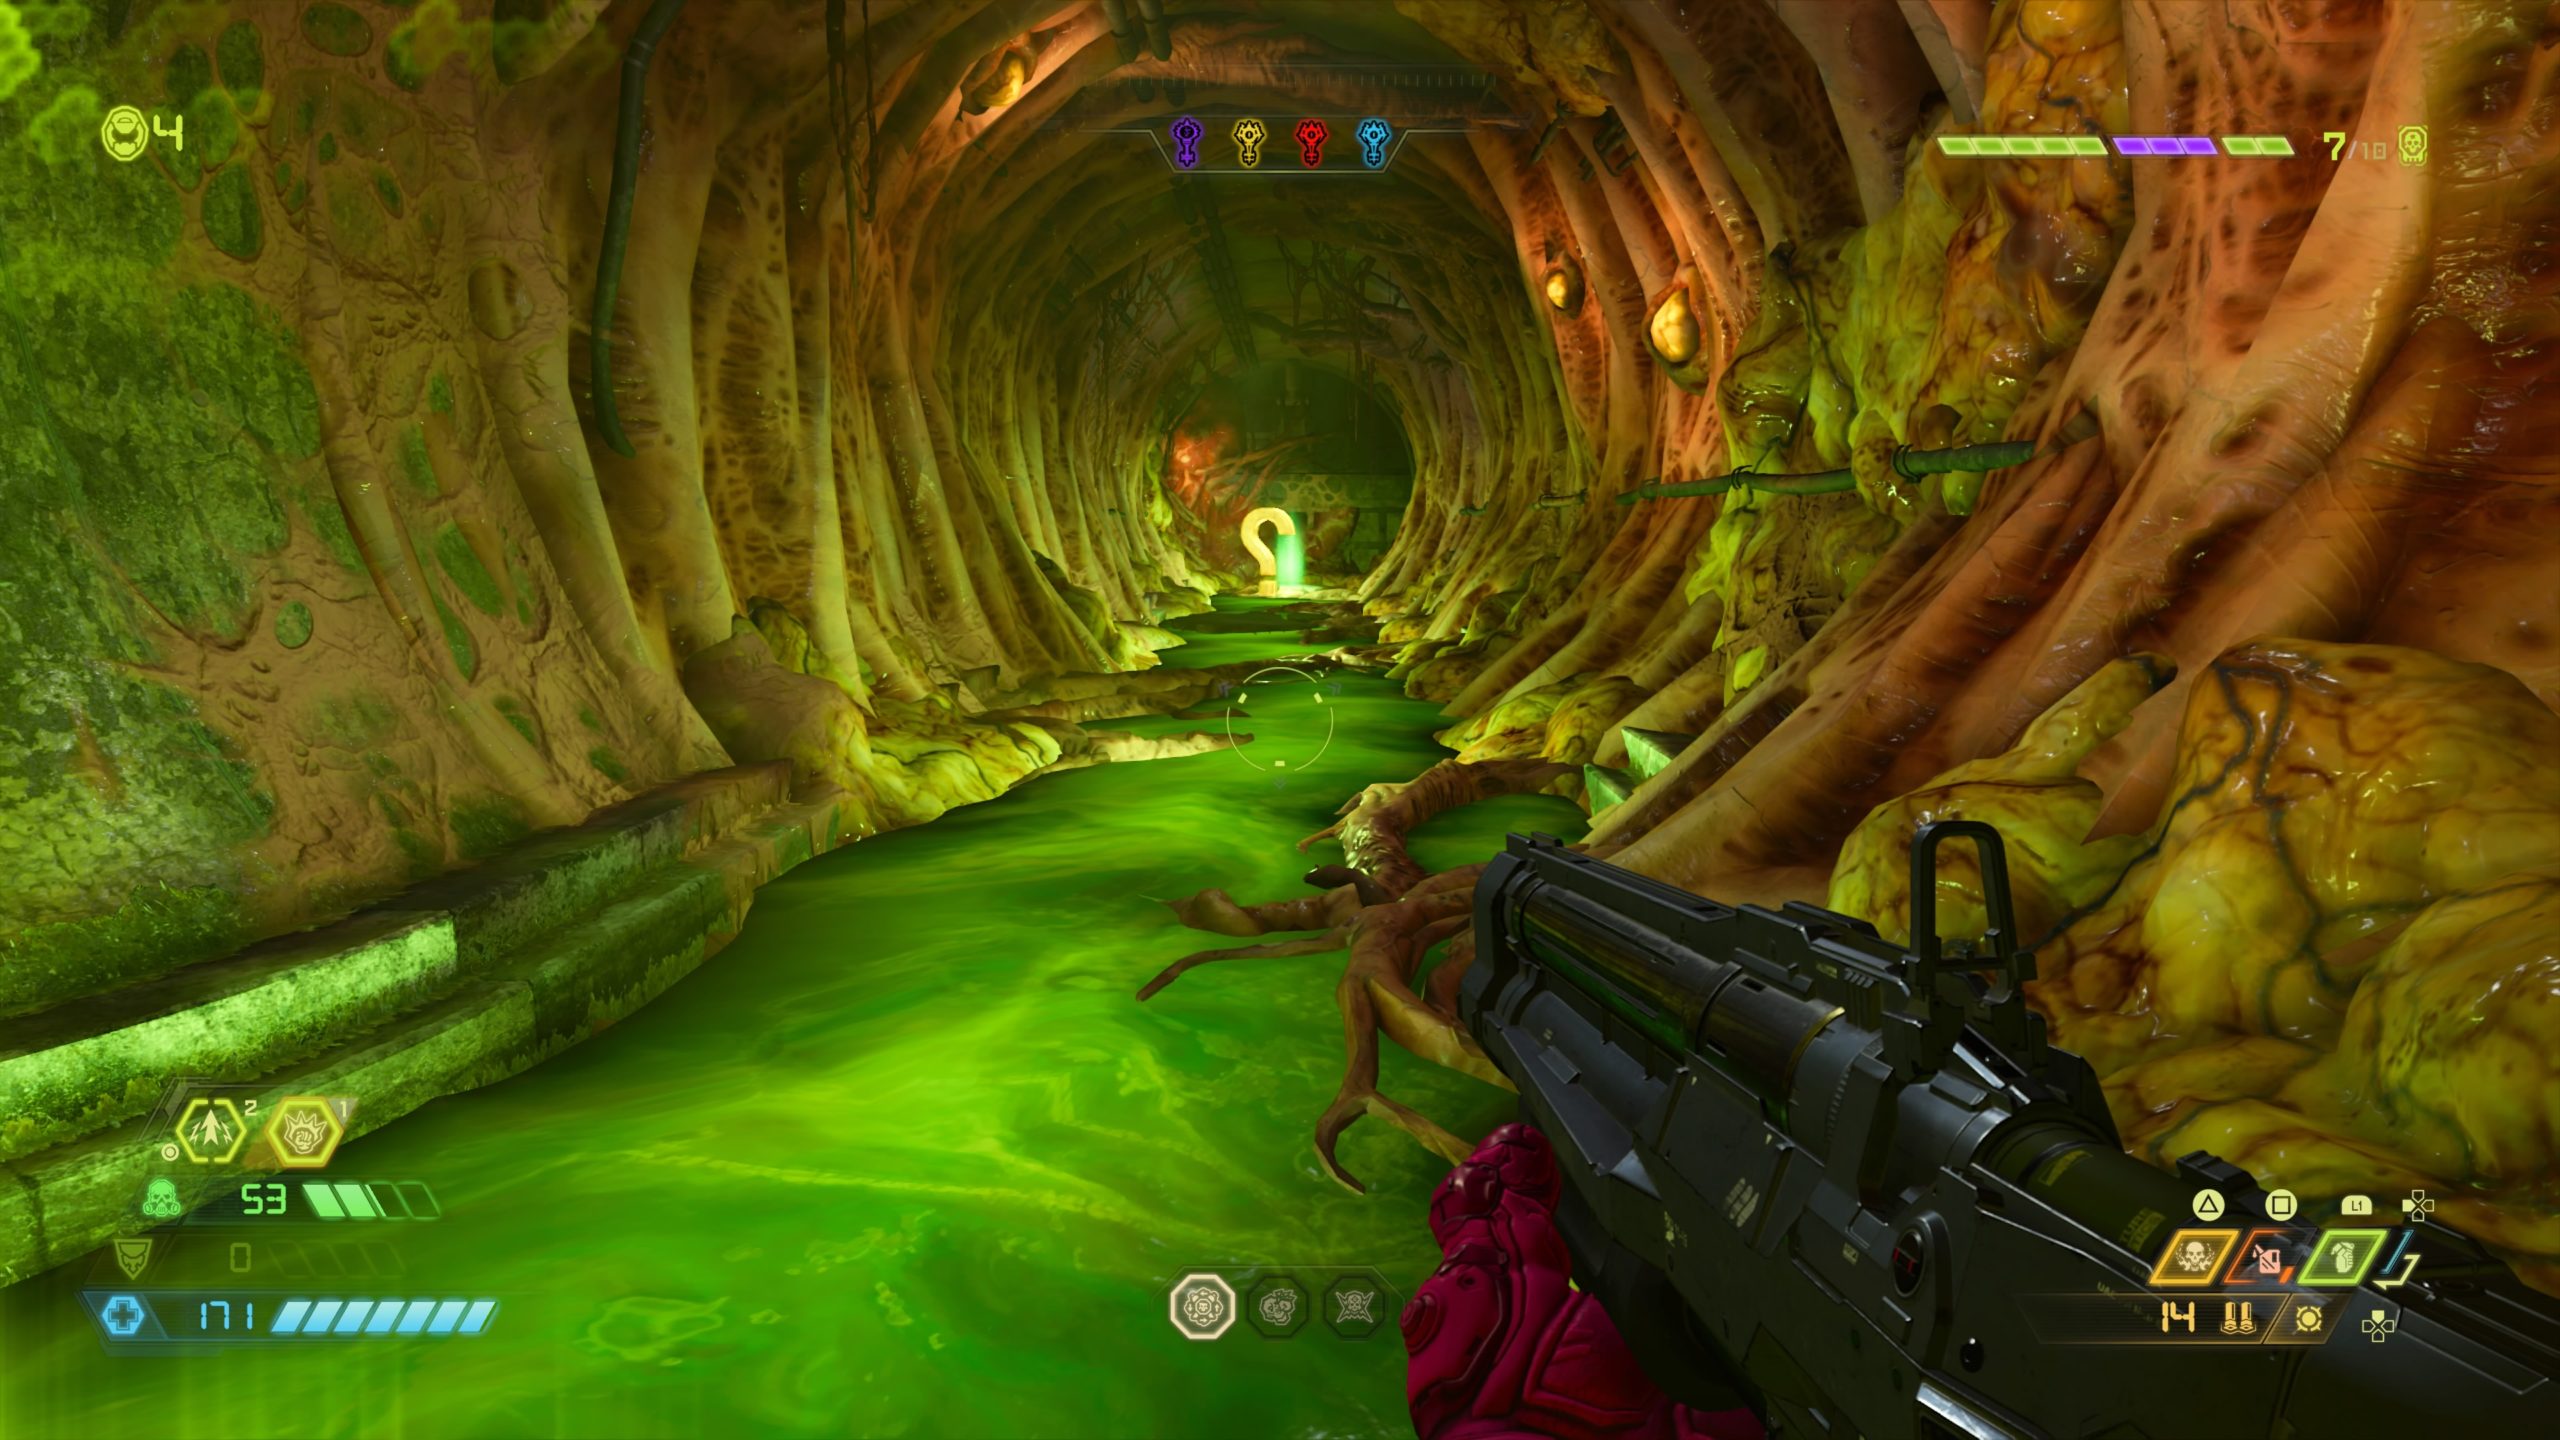
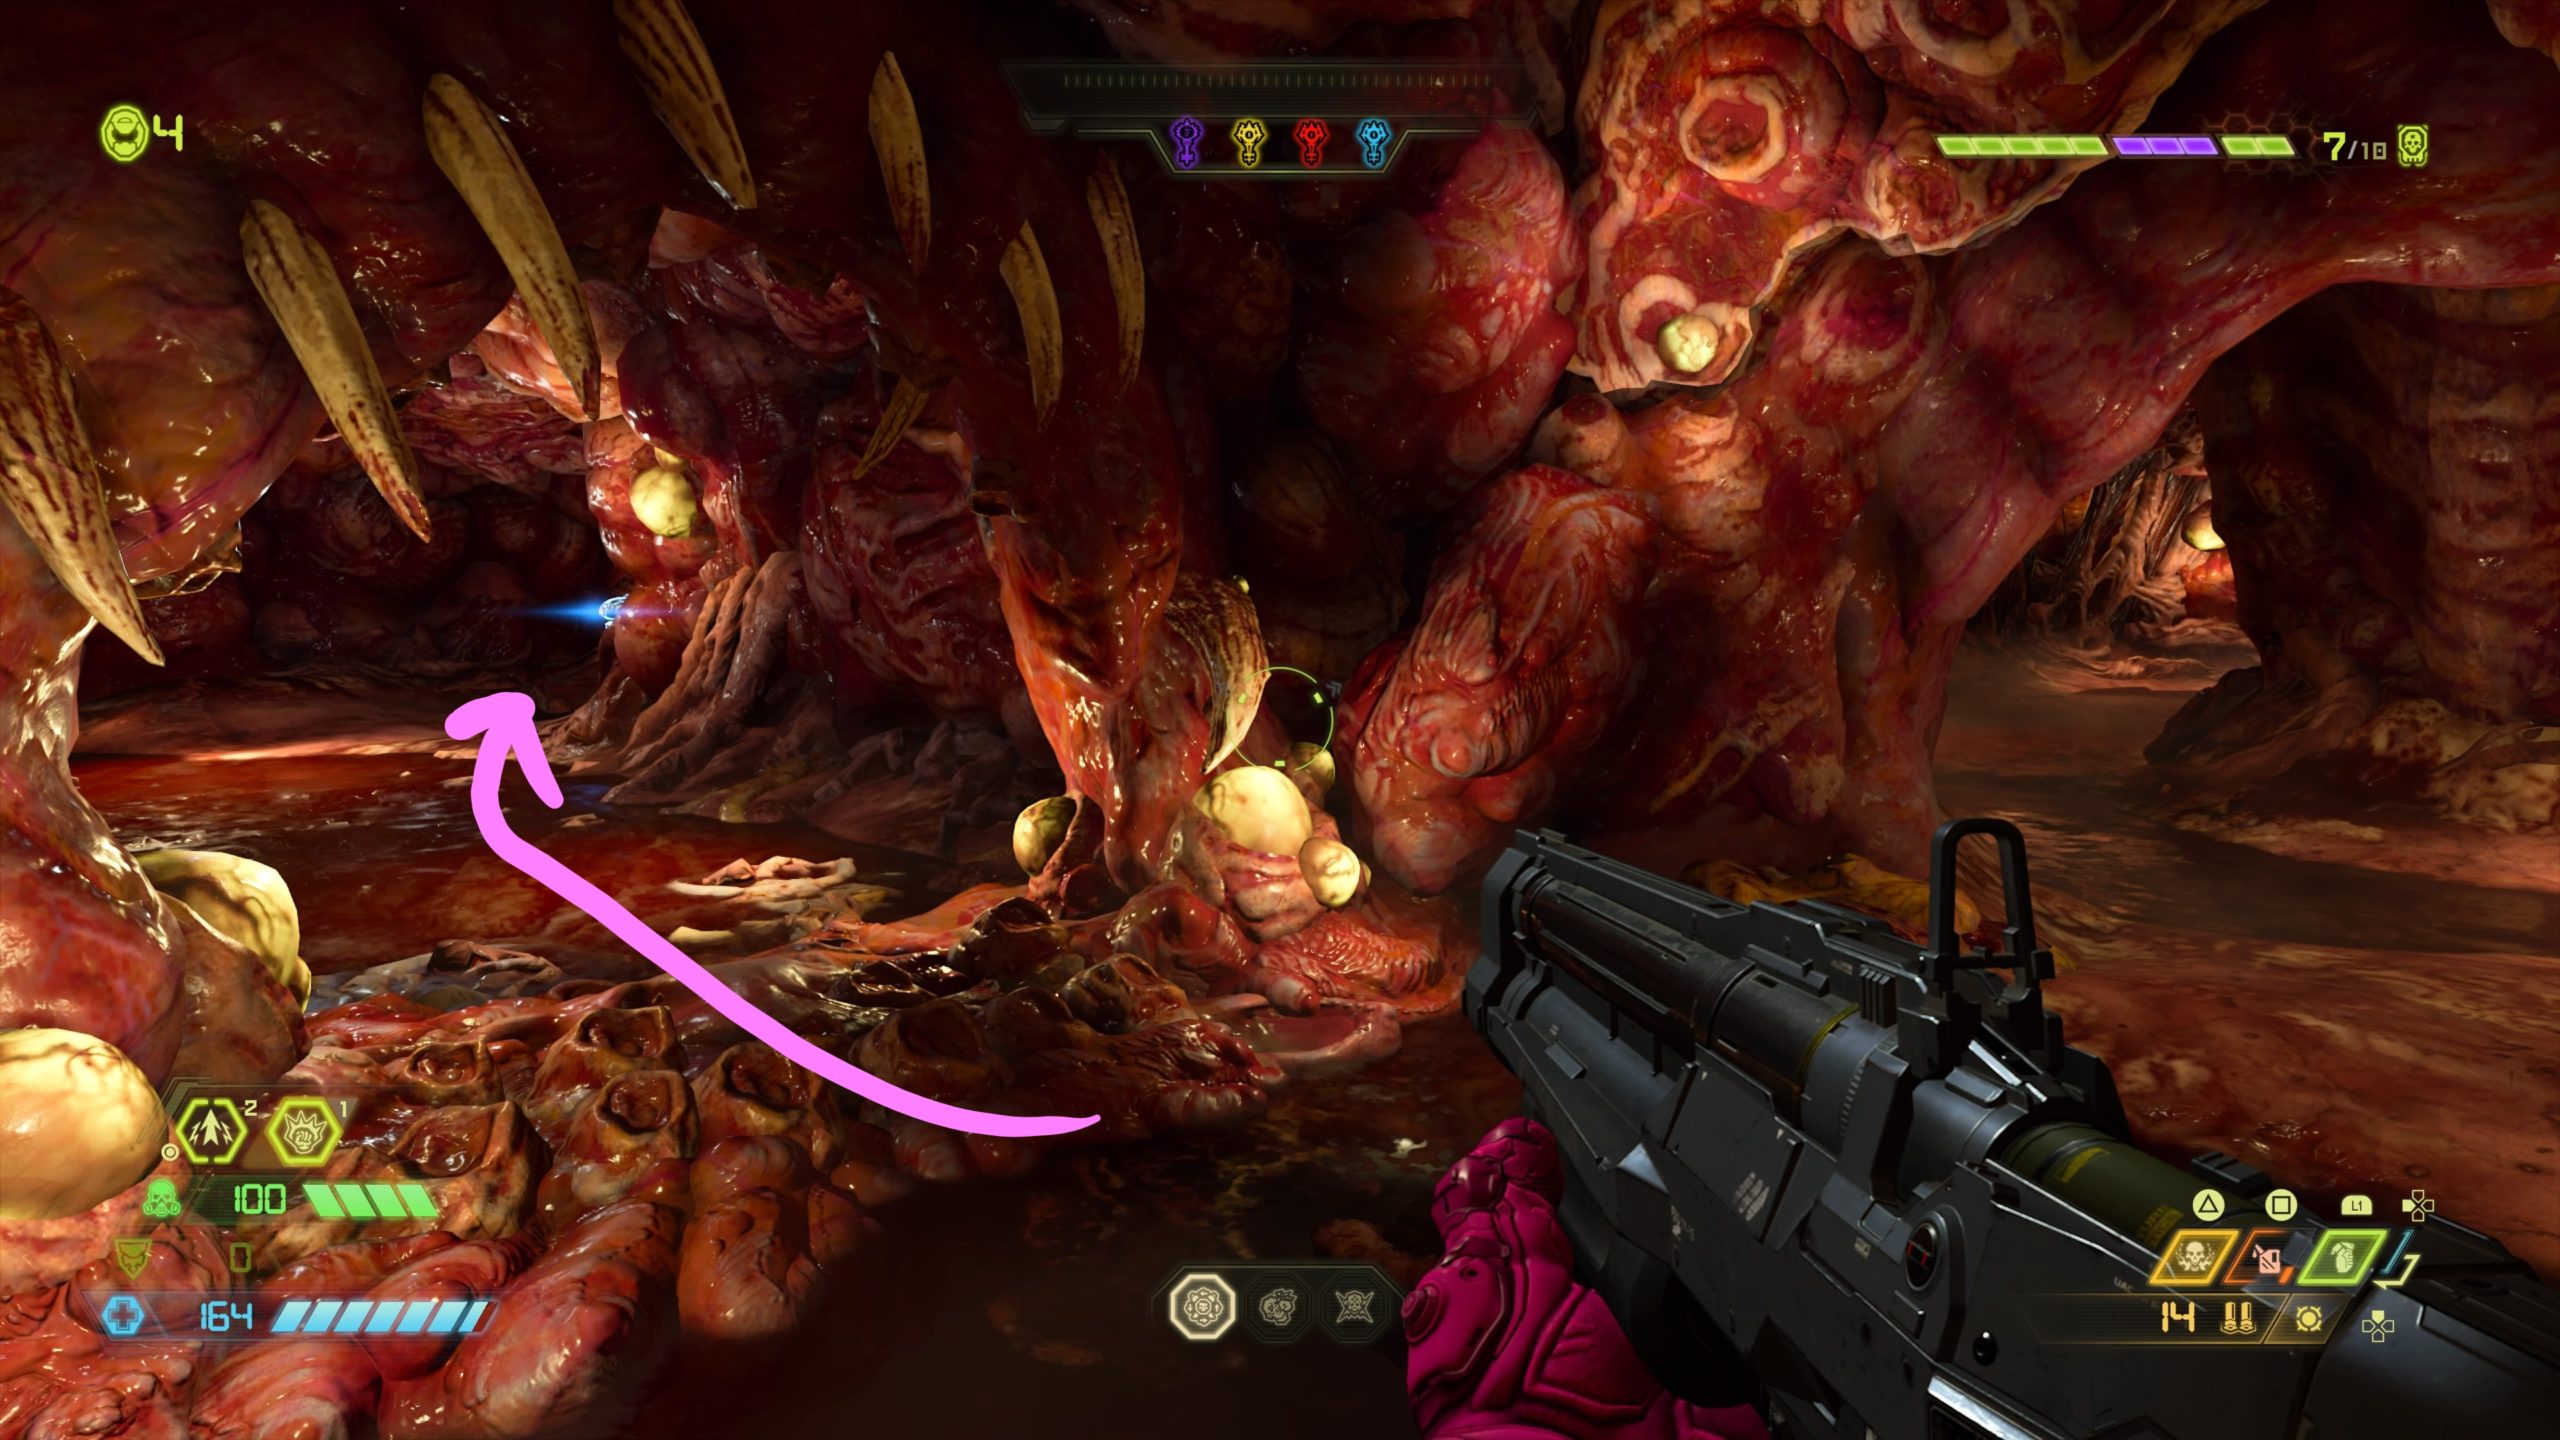
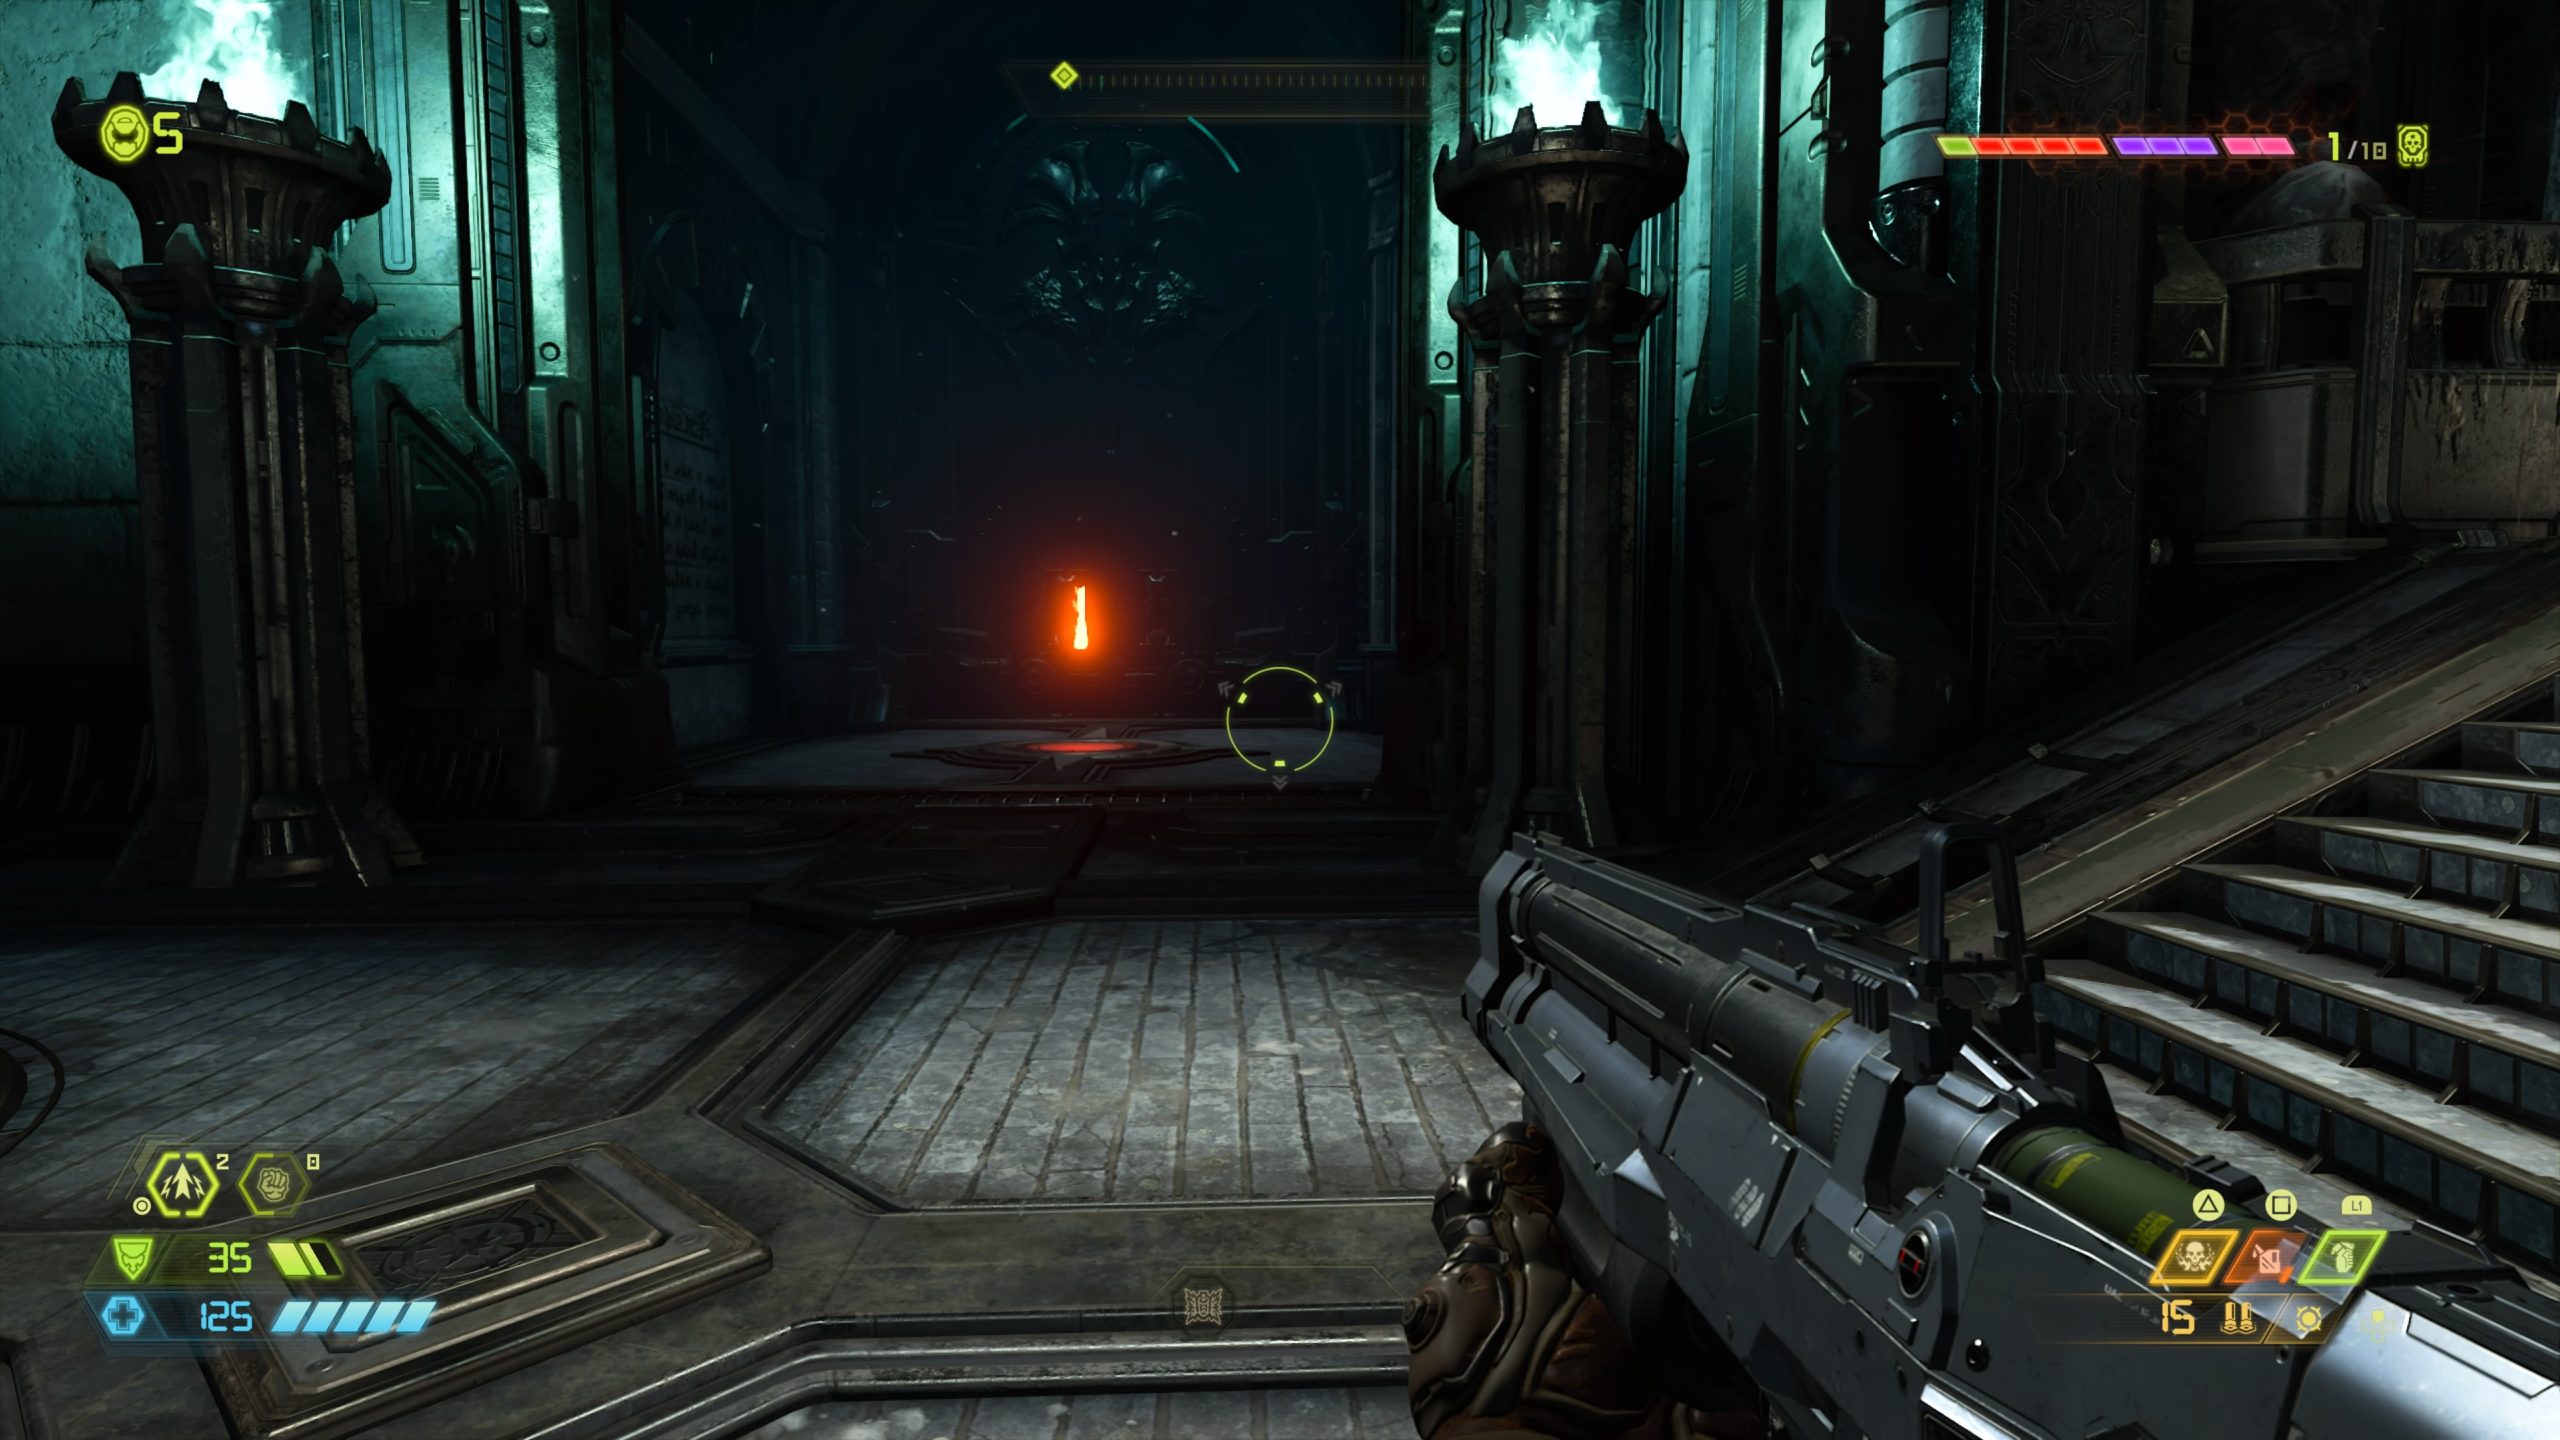
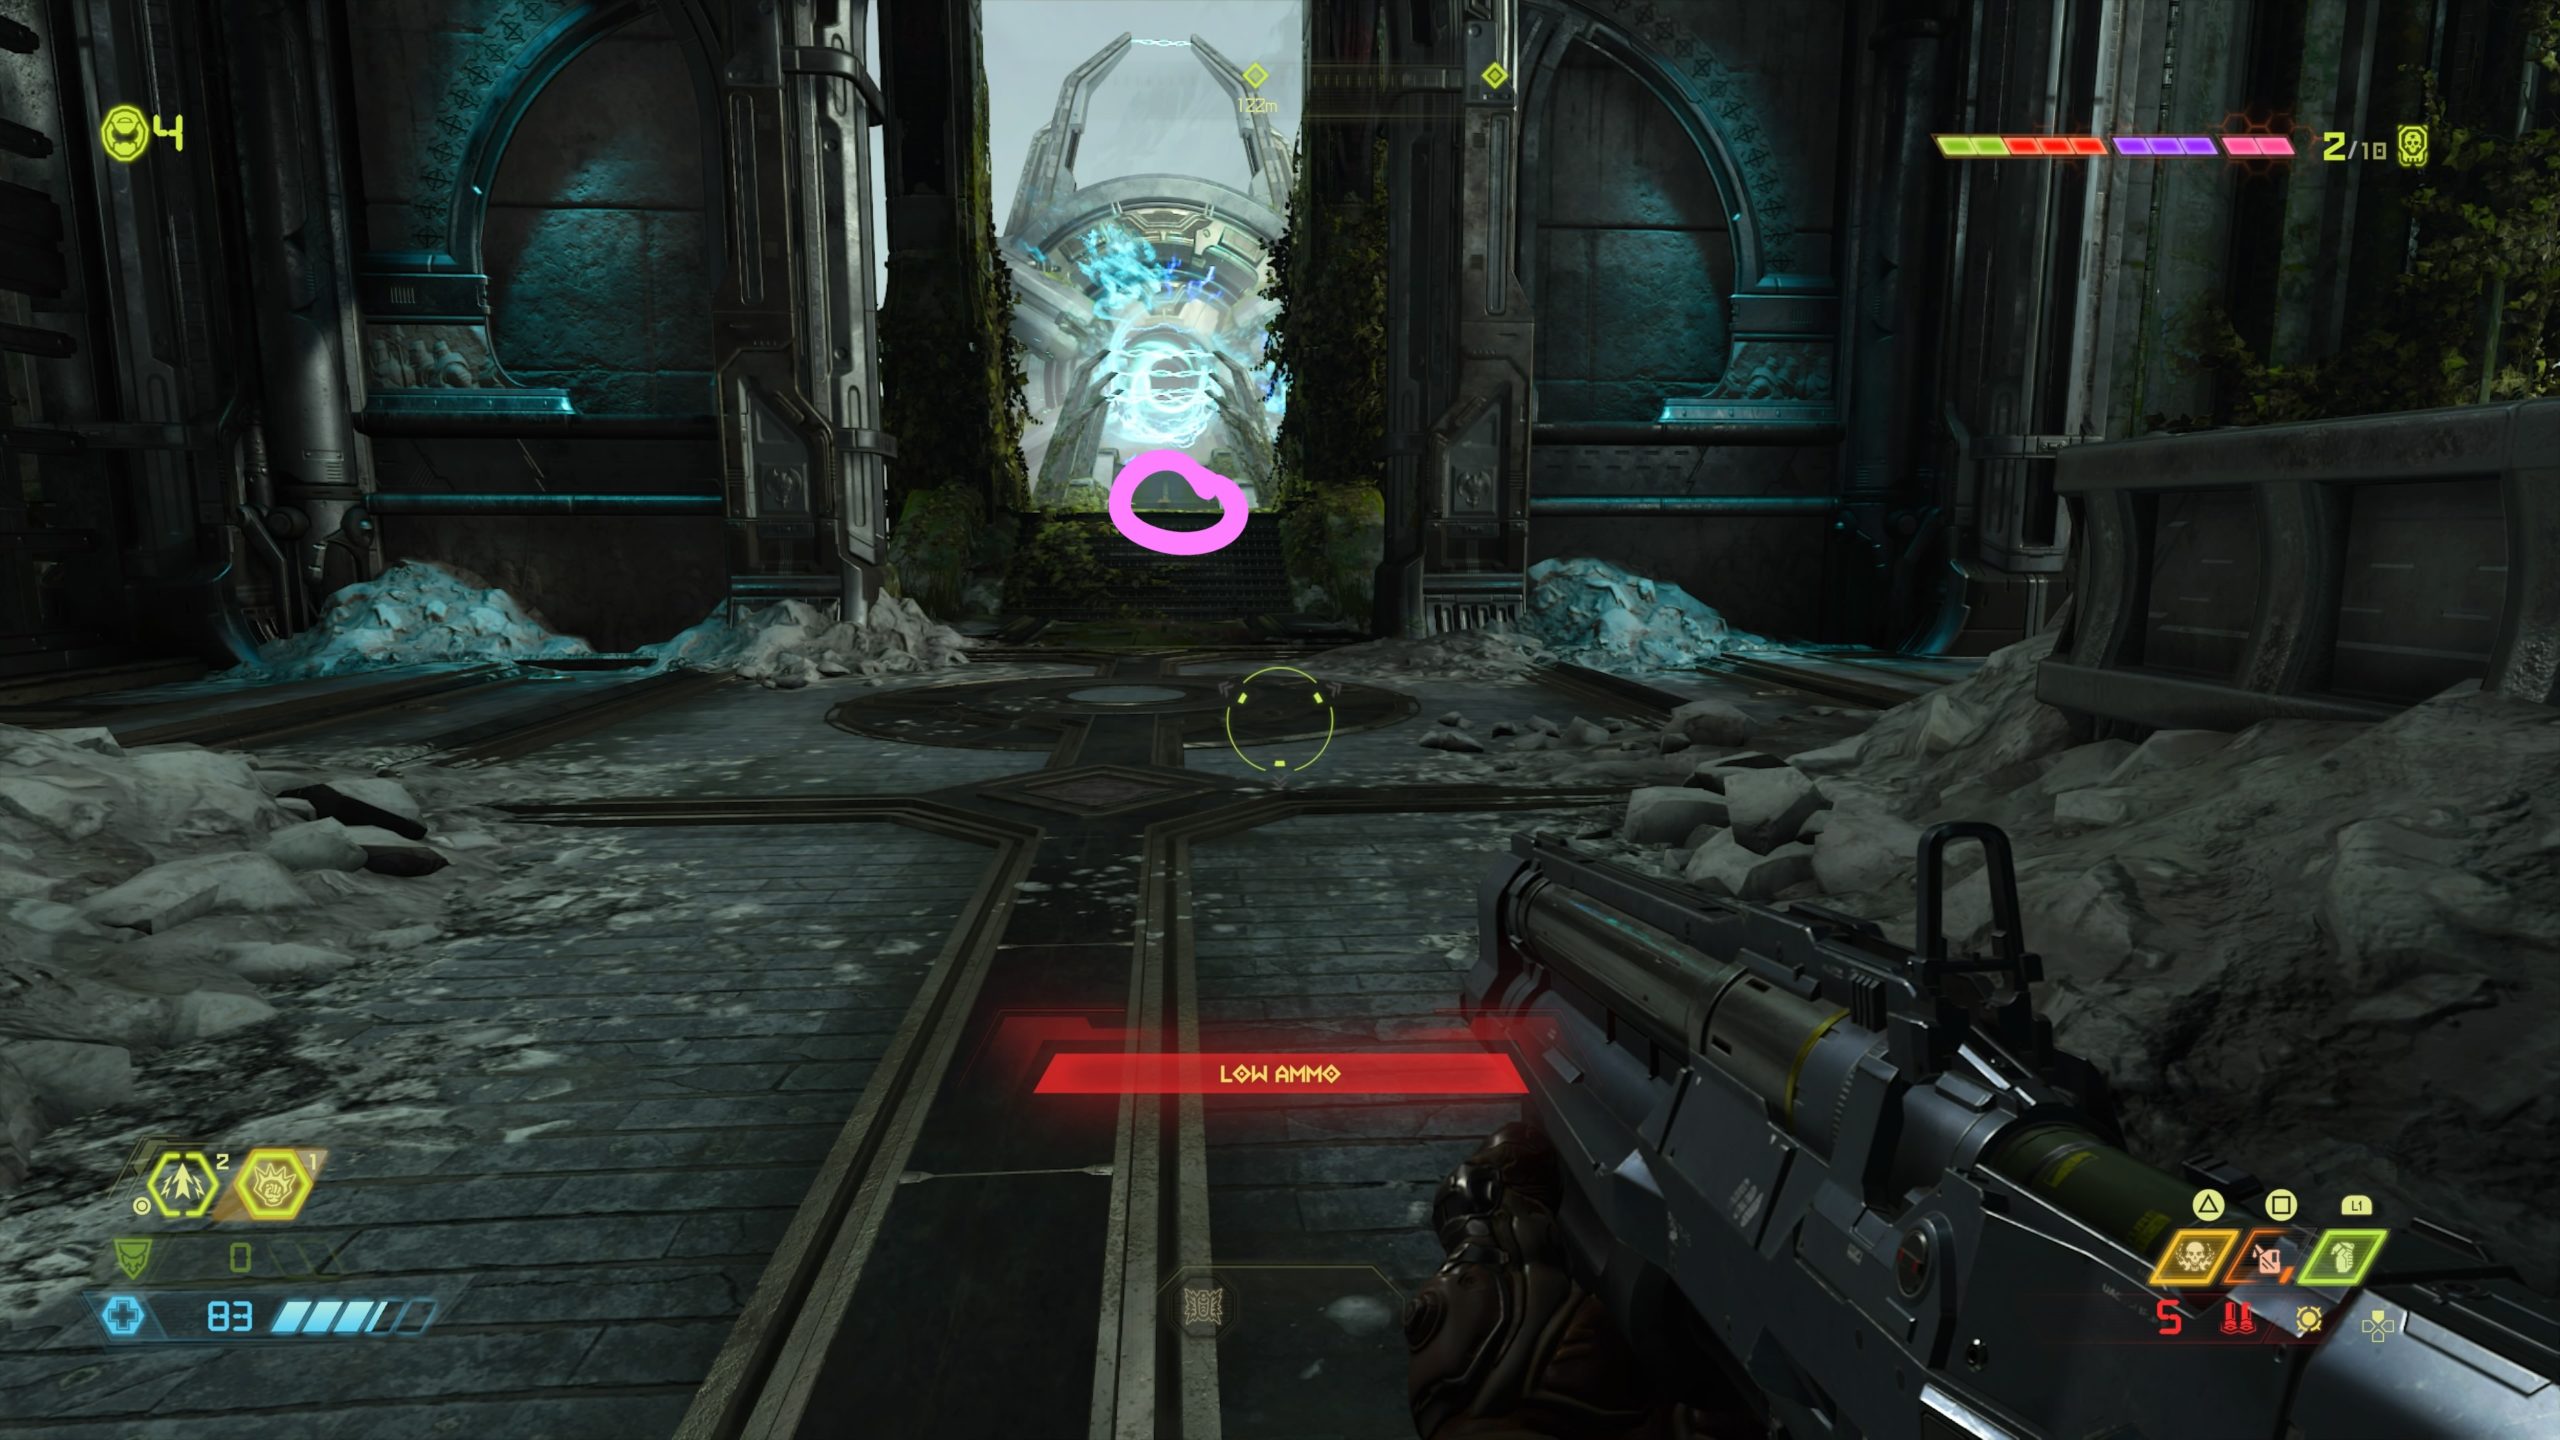
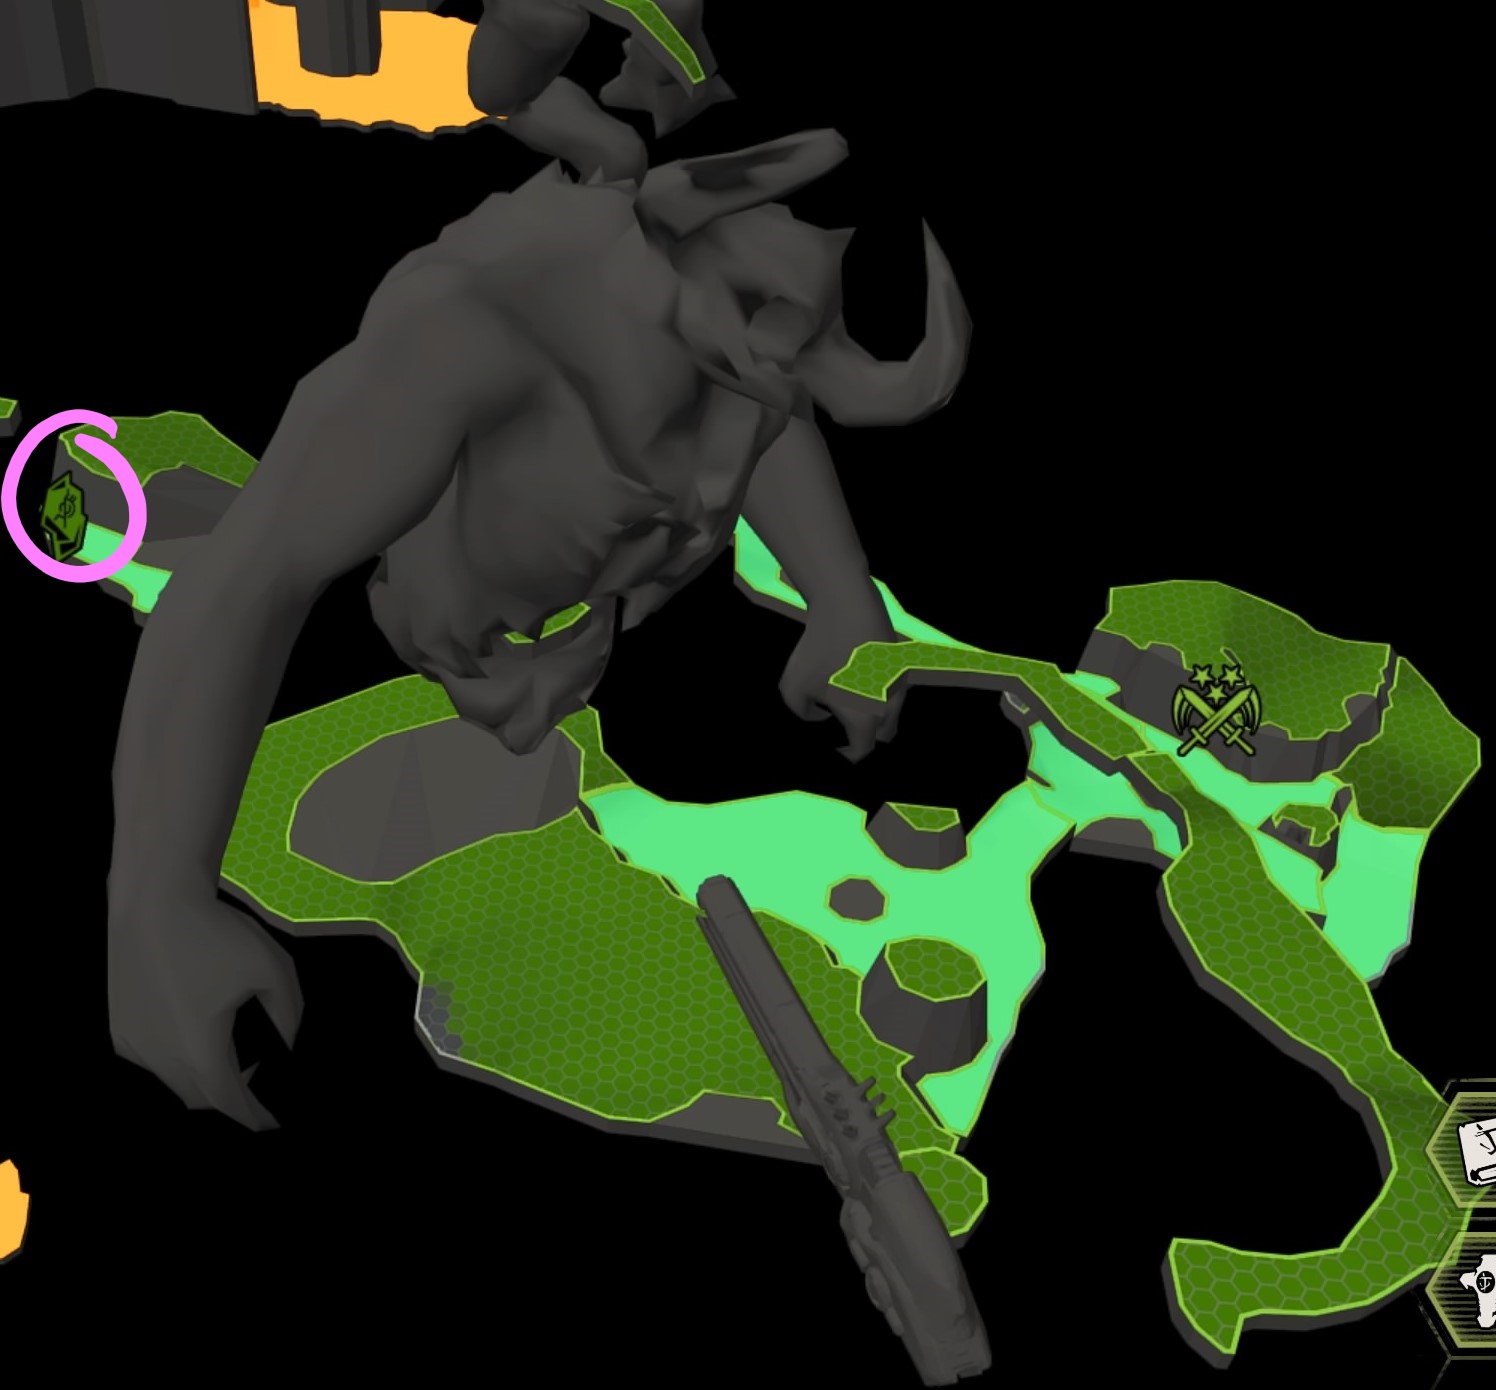
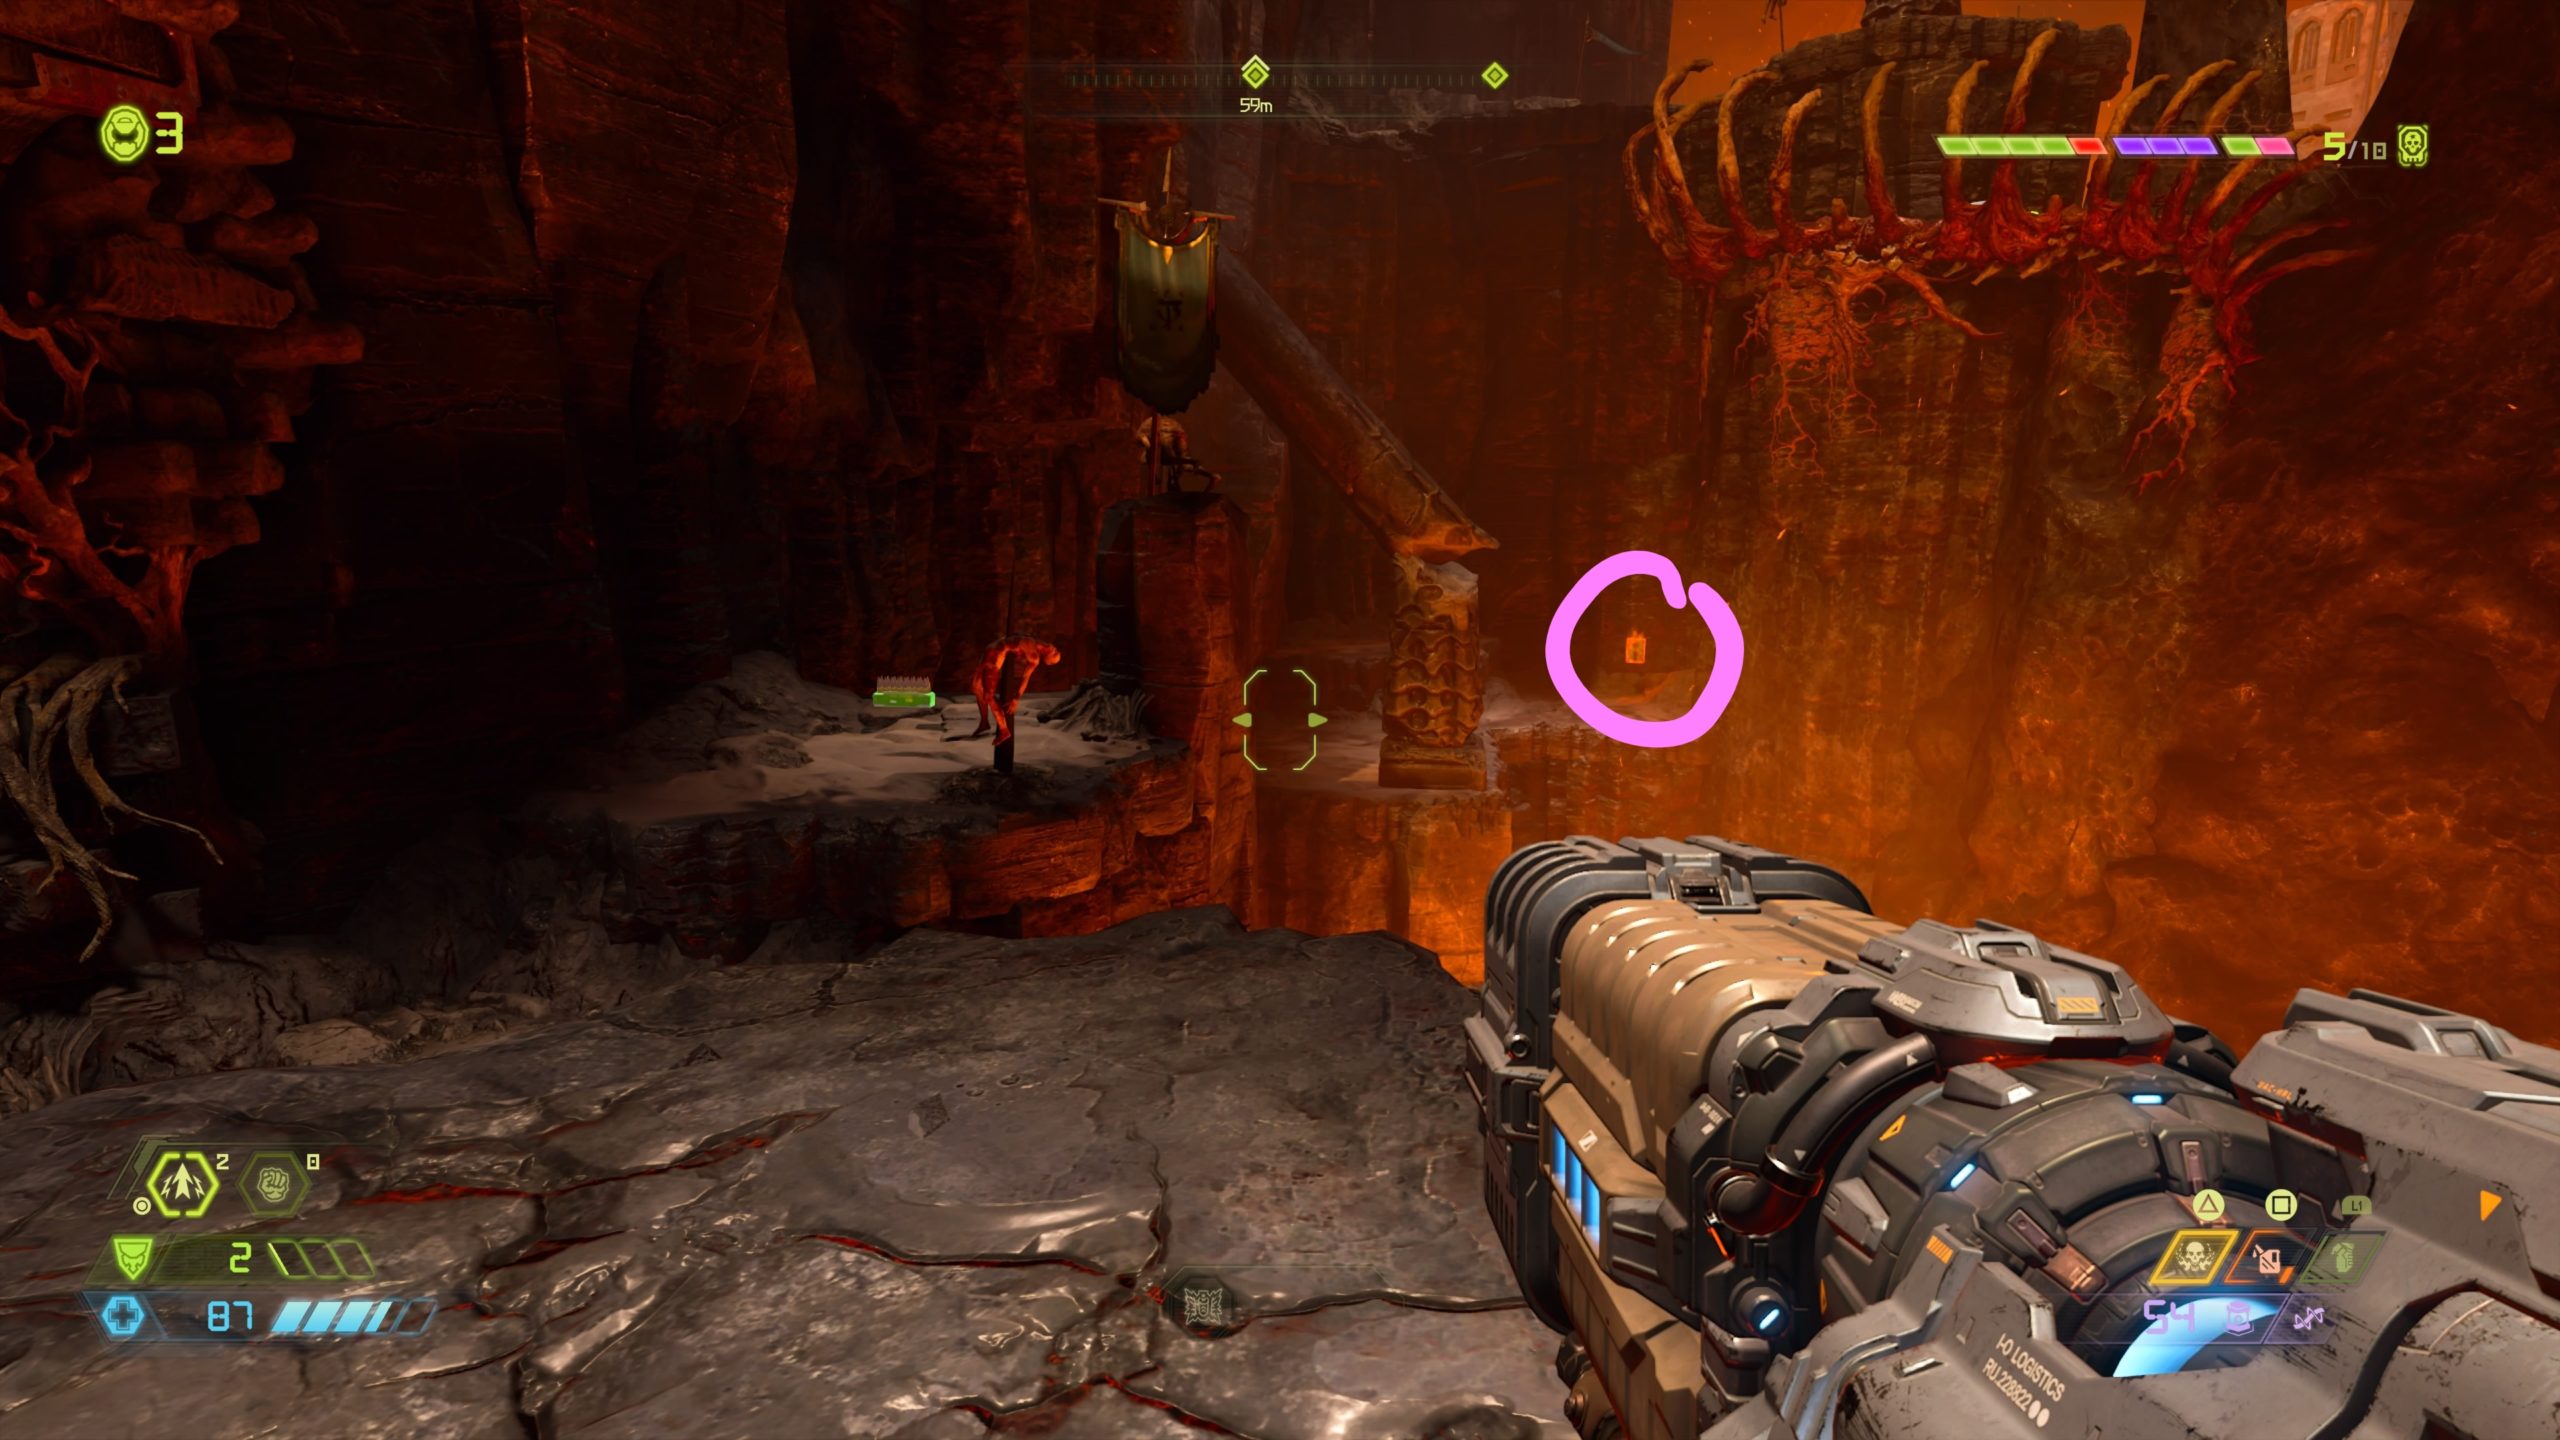
Album: DOOM – At Doom’s Gate
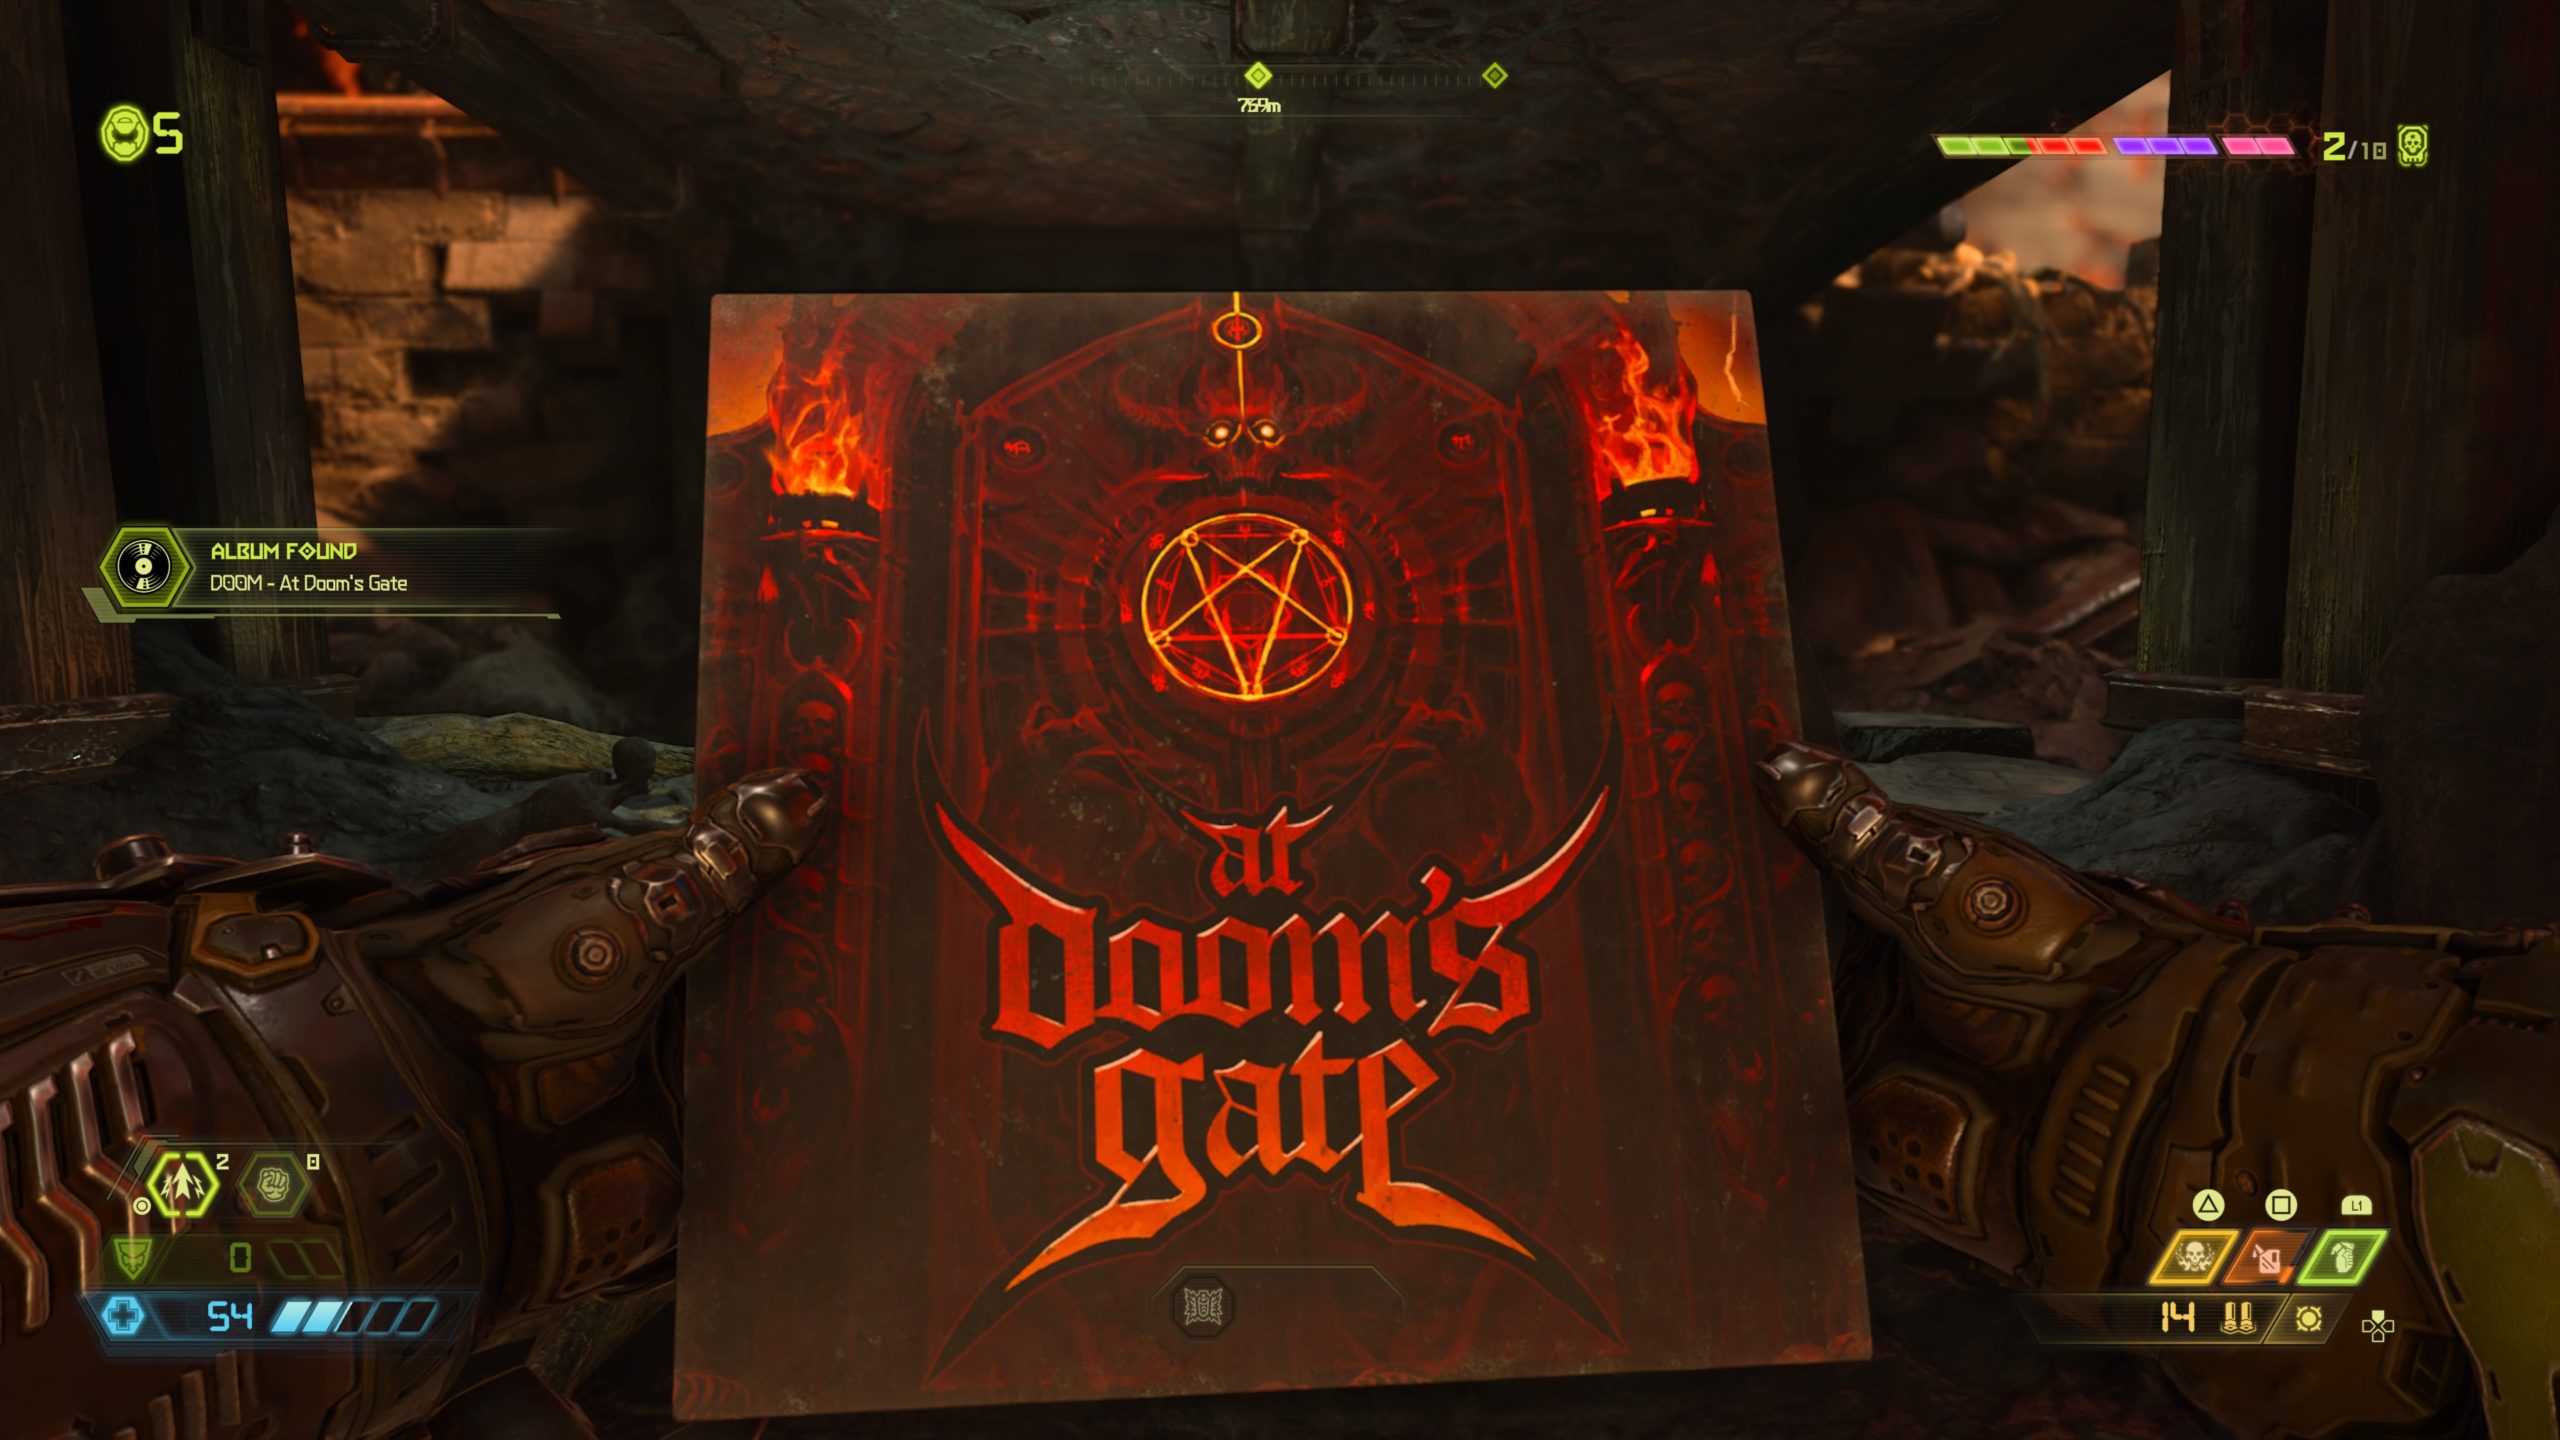
From the starting point in Hell, head down the stairs and keep moving forward passing by flaming demon skulls. Towards the end of the path, you will need to drop down to a lower level, which will lead you to an area with a giant robot hand. At the base of the ramp just before the hand, look immediately to the right to find a metal cube. Head to the other side of the cube and melee it to send the cube flying, revealing a secret underground tunnel. Head through the tunnel to locate the album.
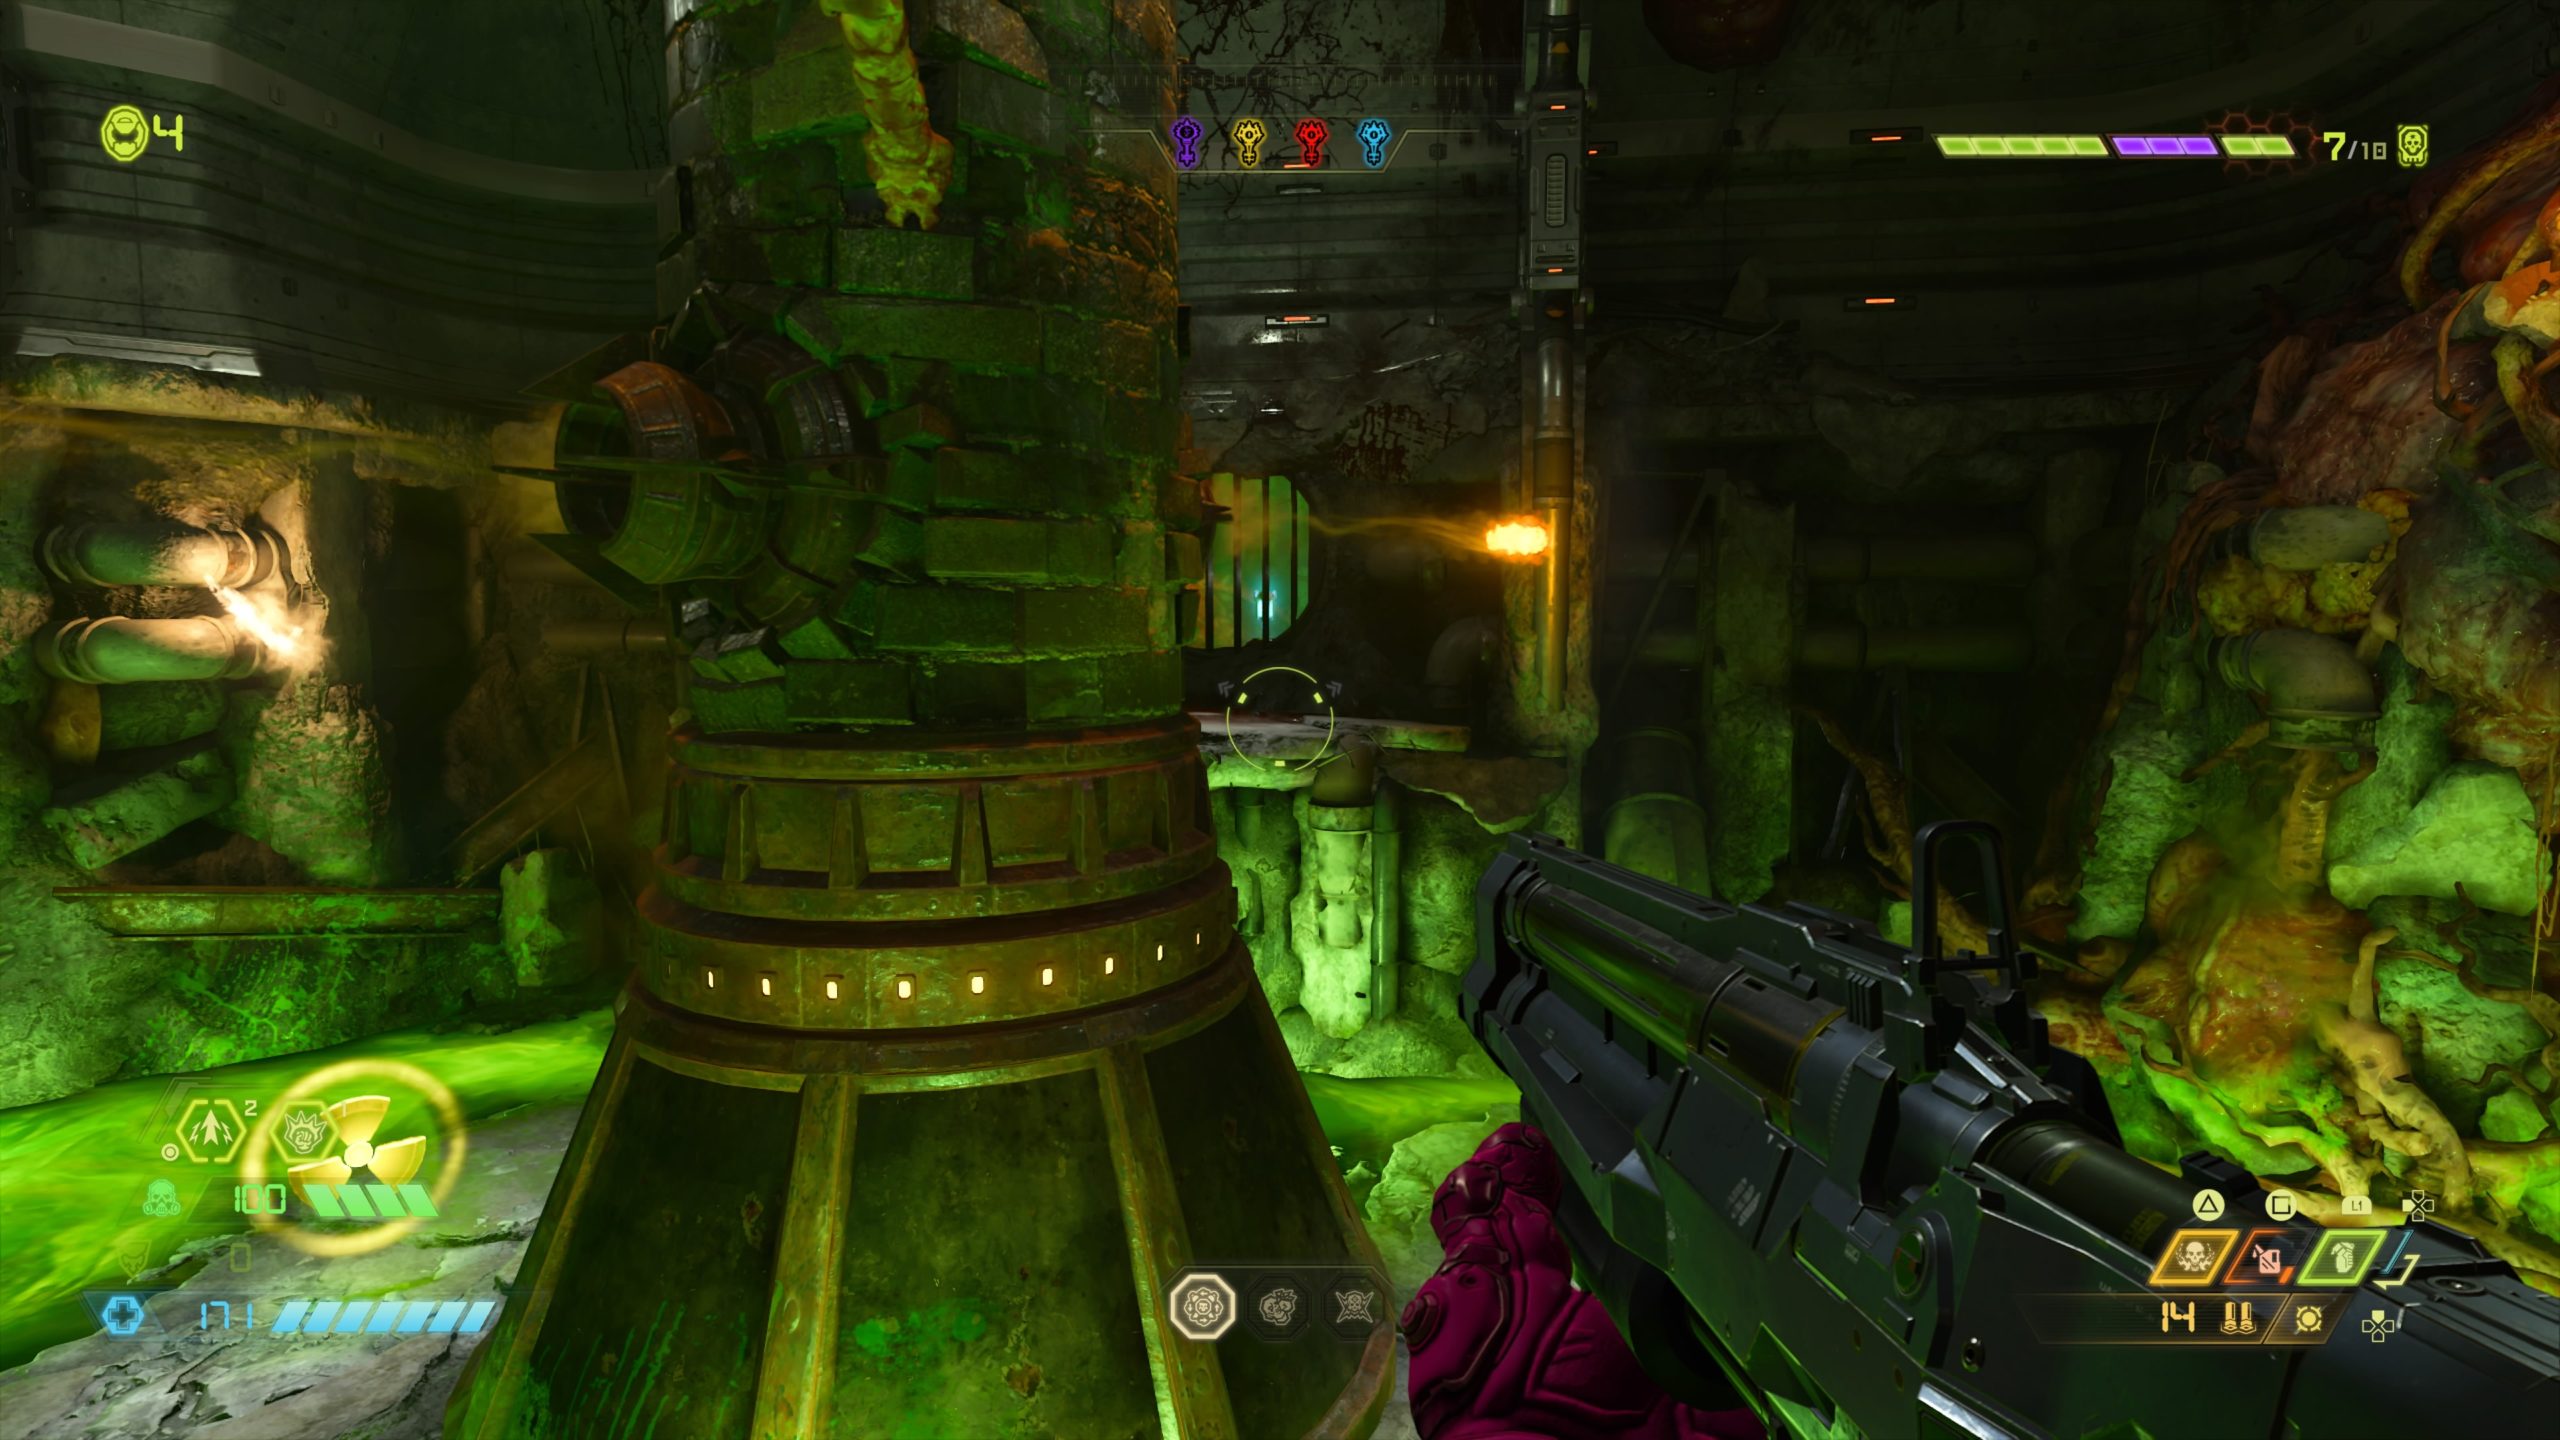
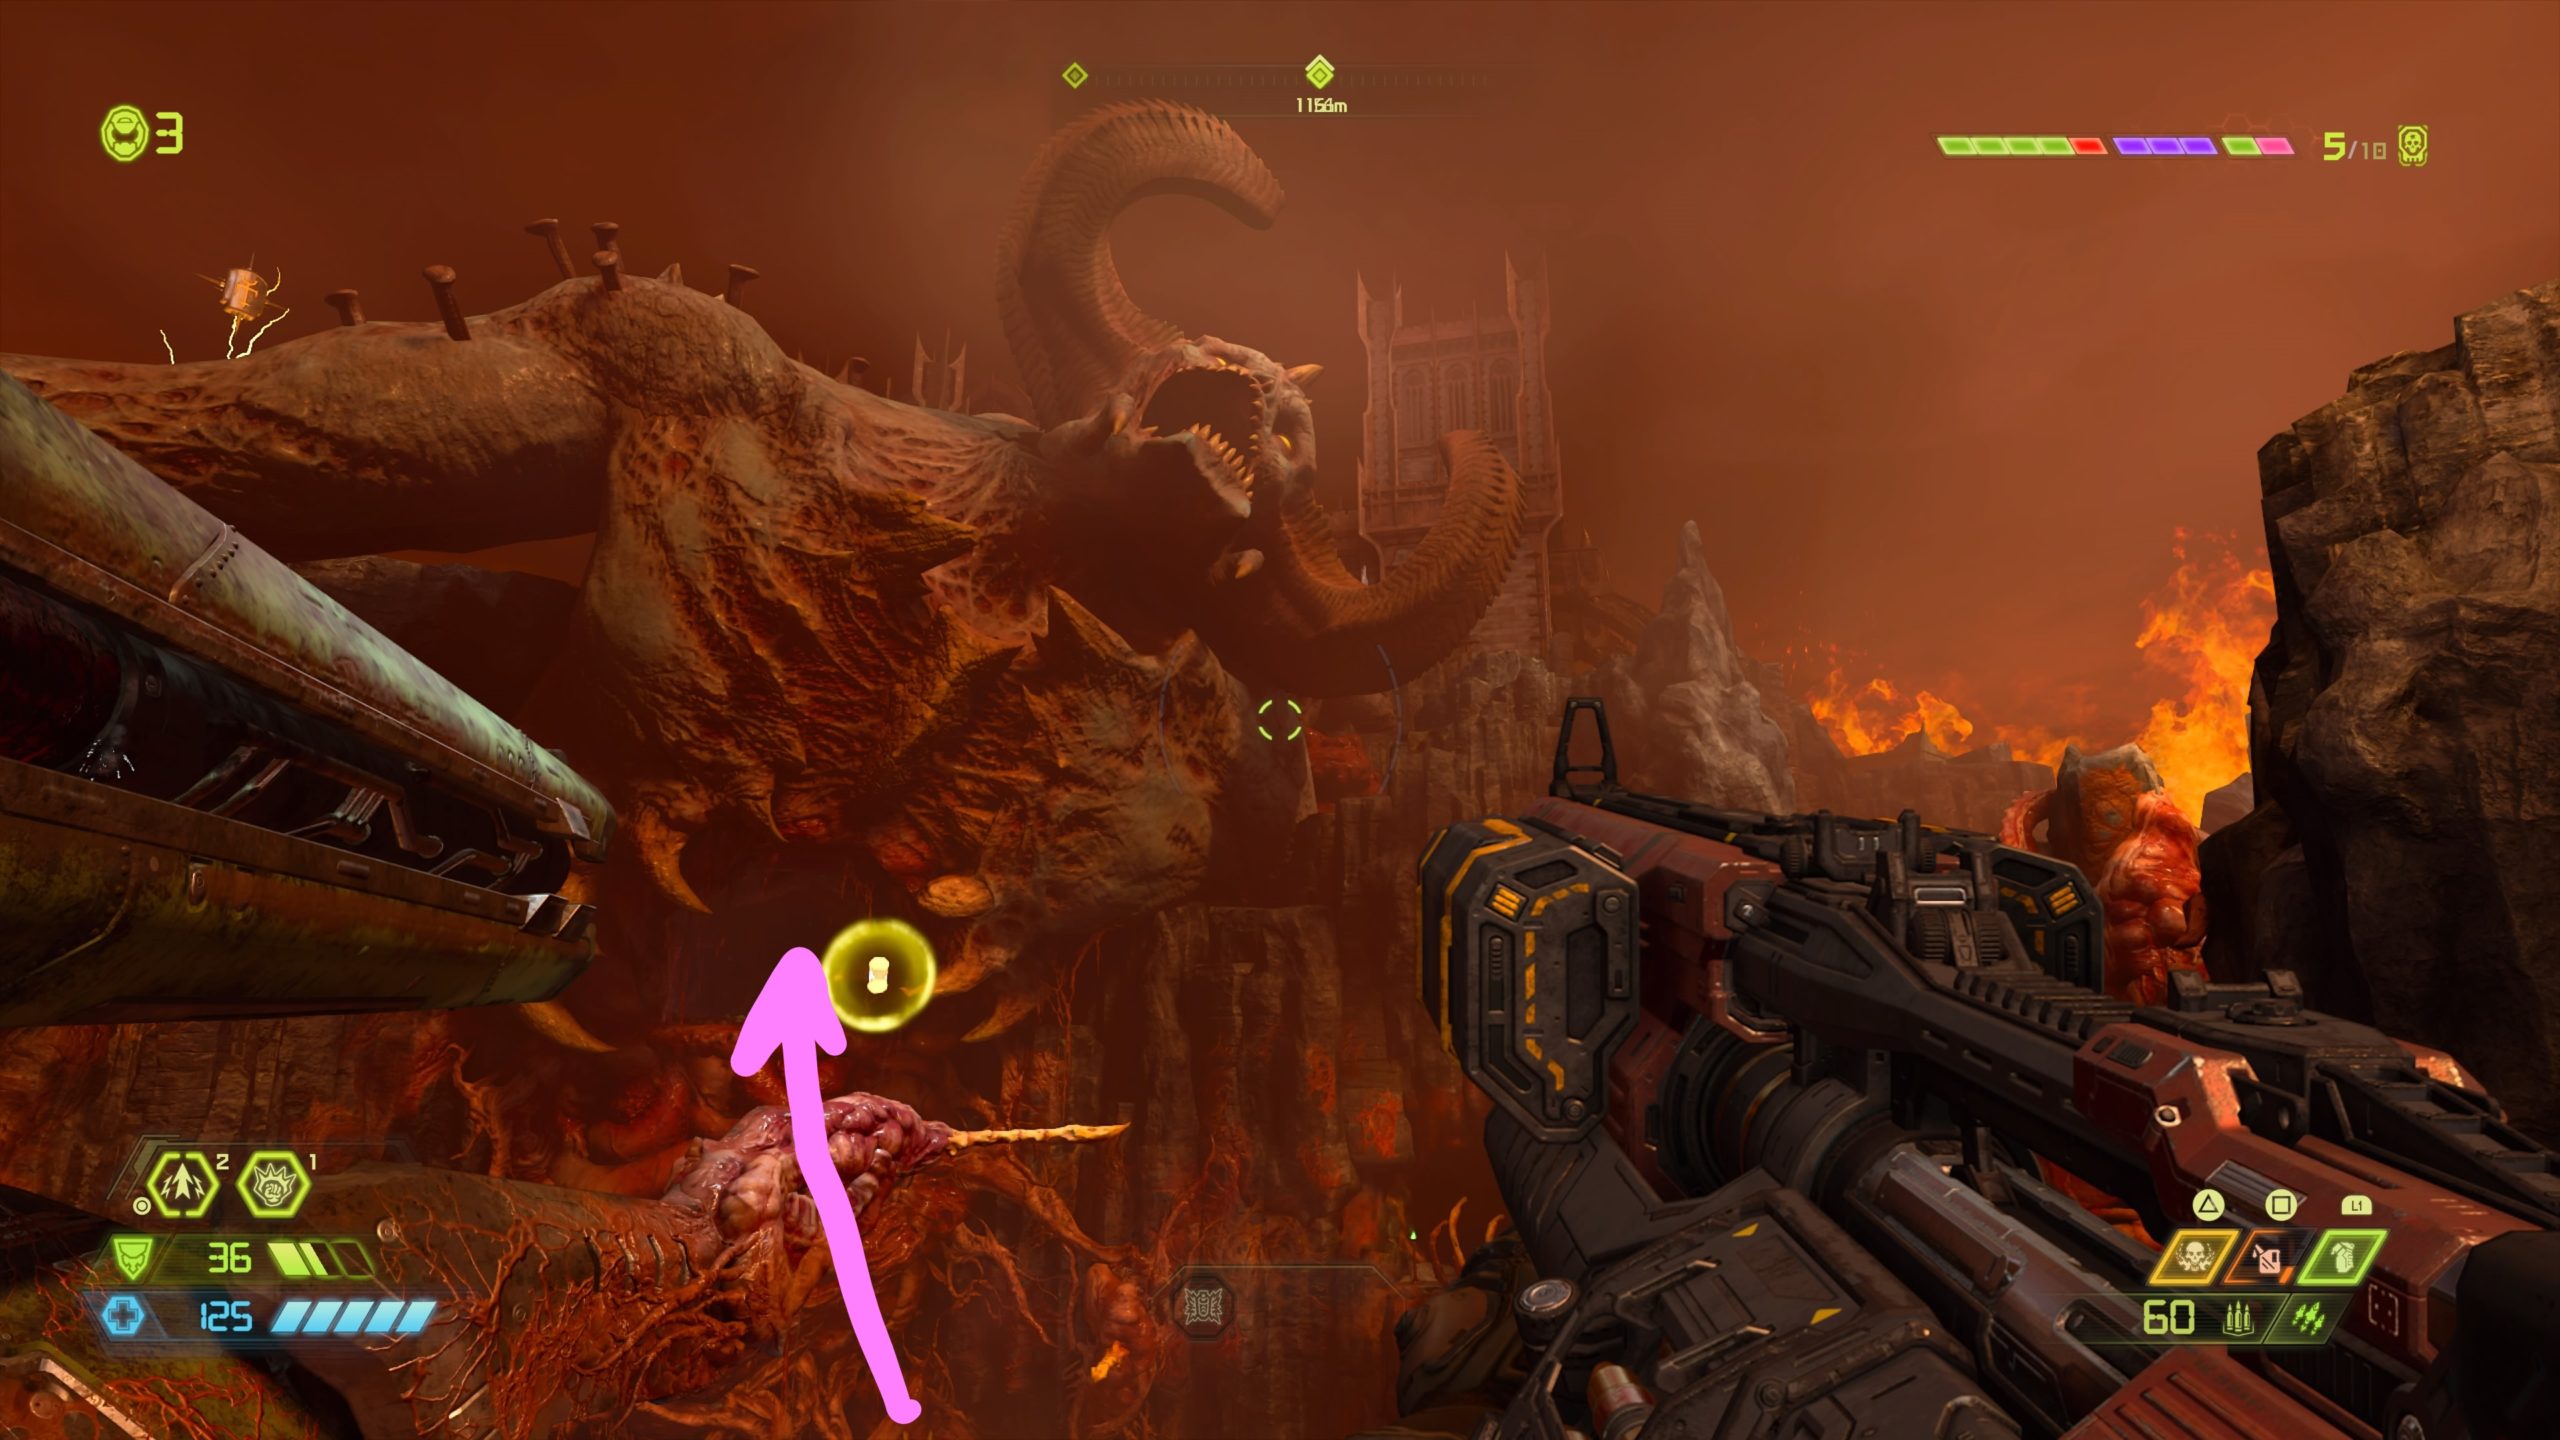
Modbot
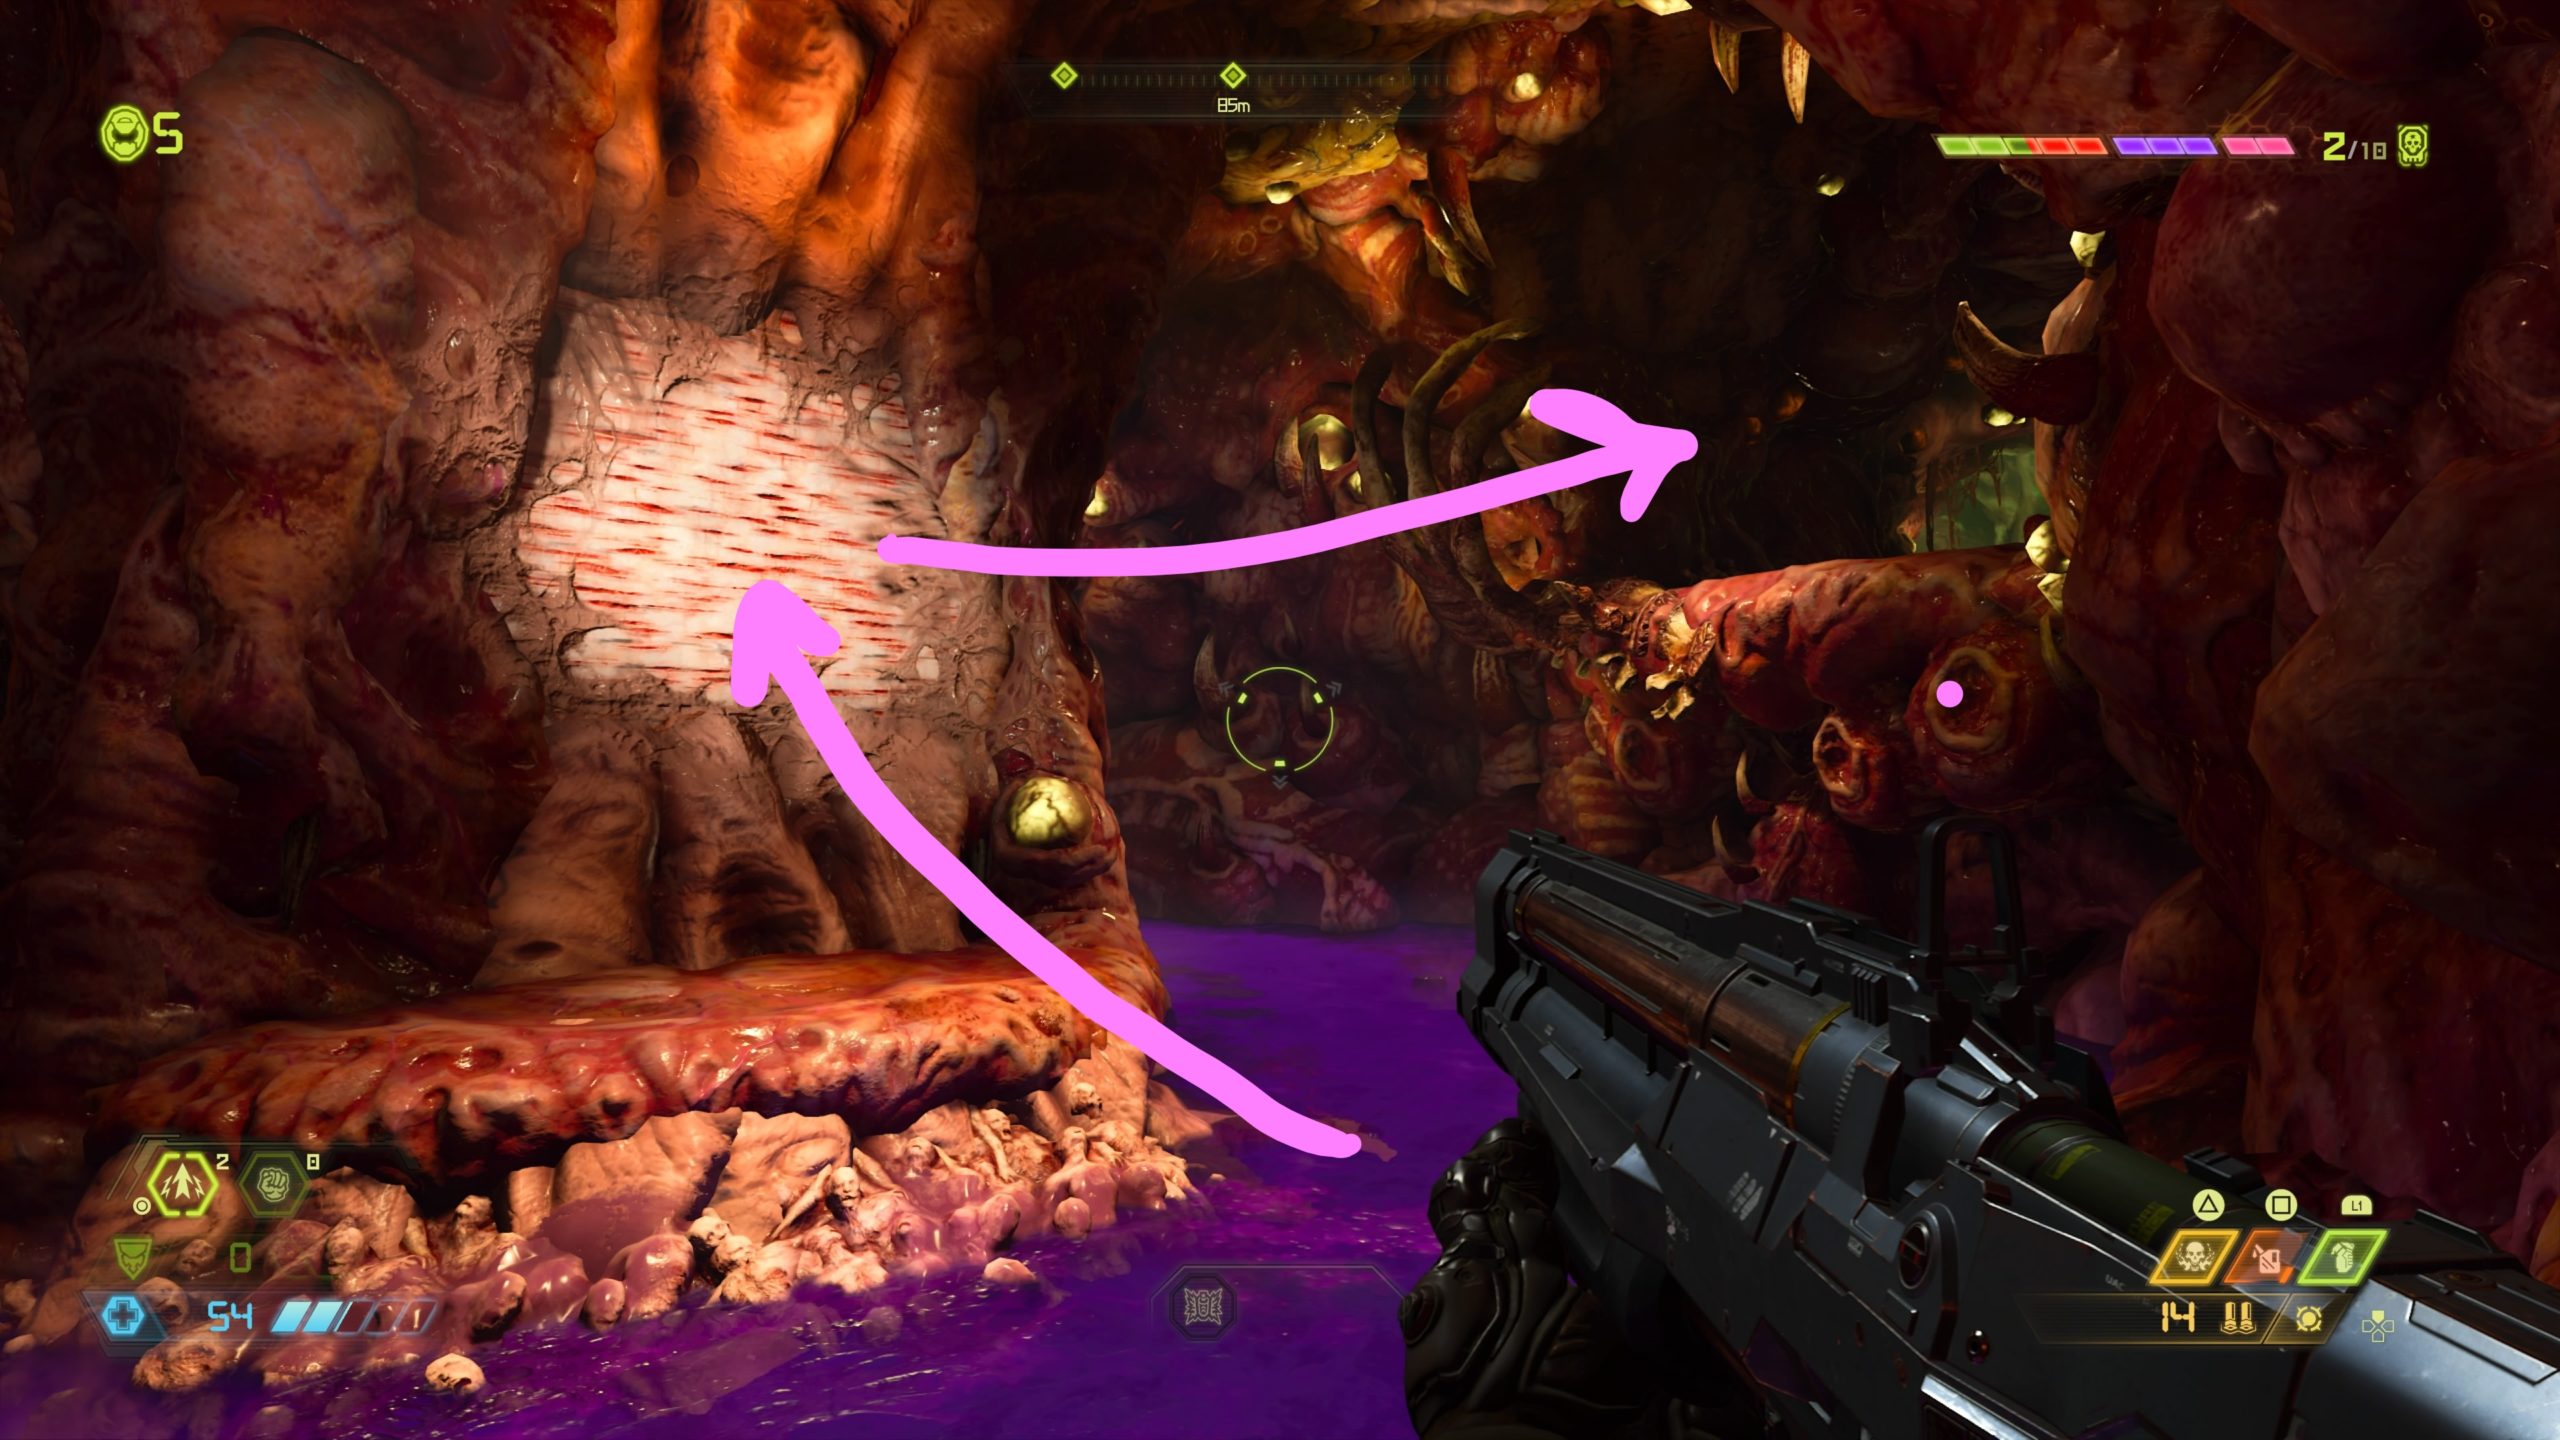
From the previous collectible, you will need to defeat all the enemies to unseal the entrance to the cave on the other side of the hand. Proceed into the cave with purple liquid on the ground. This liquid will reduce your movement speed and prevent you from jumping. Watch out for the tentacles in the liquid as you work your way through the cave until you find a pillar in the center of the cave that you can use to wall climb. Use the climbable wall to reach a higher level in the cave to find the weapon mod.
Codex: Story of the Sentinels: Sentinel History Part II
After blasting a hole in the wall with the giant robot hand, proceed forward into the area using a couple of wall climbing sections to reach a platform, which will contain the codex.
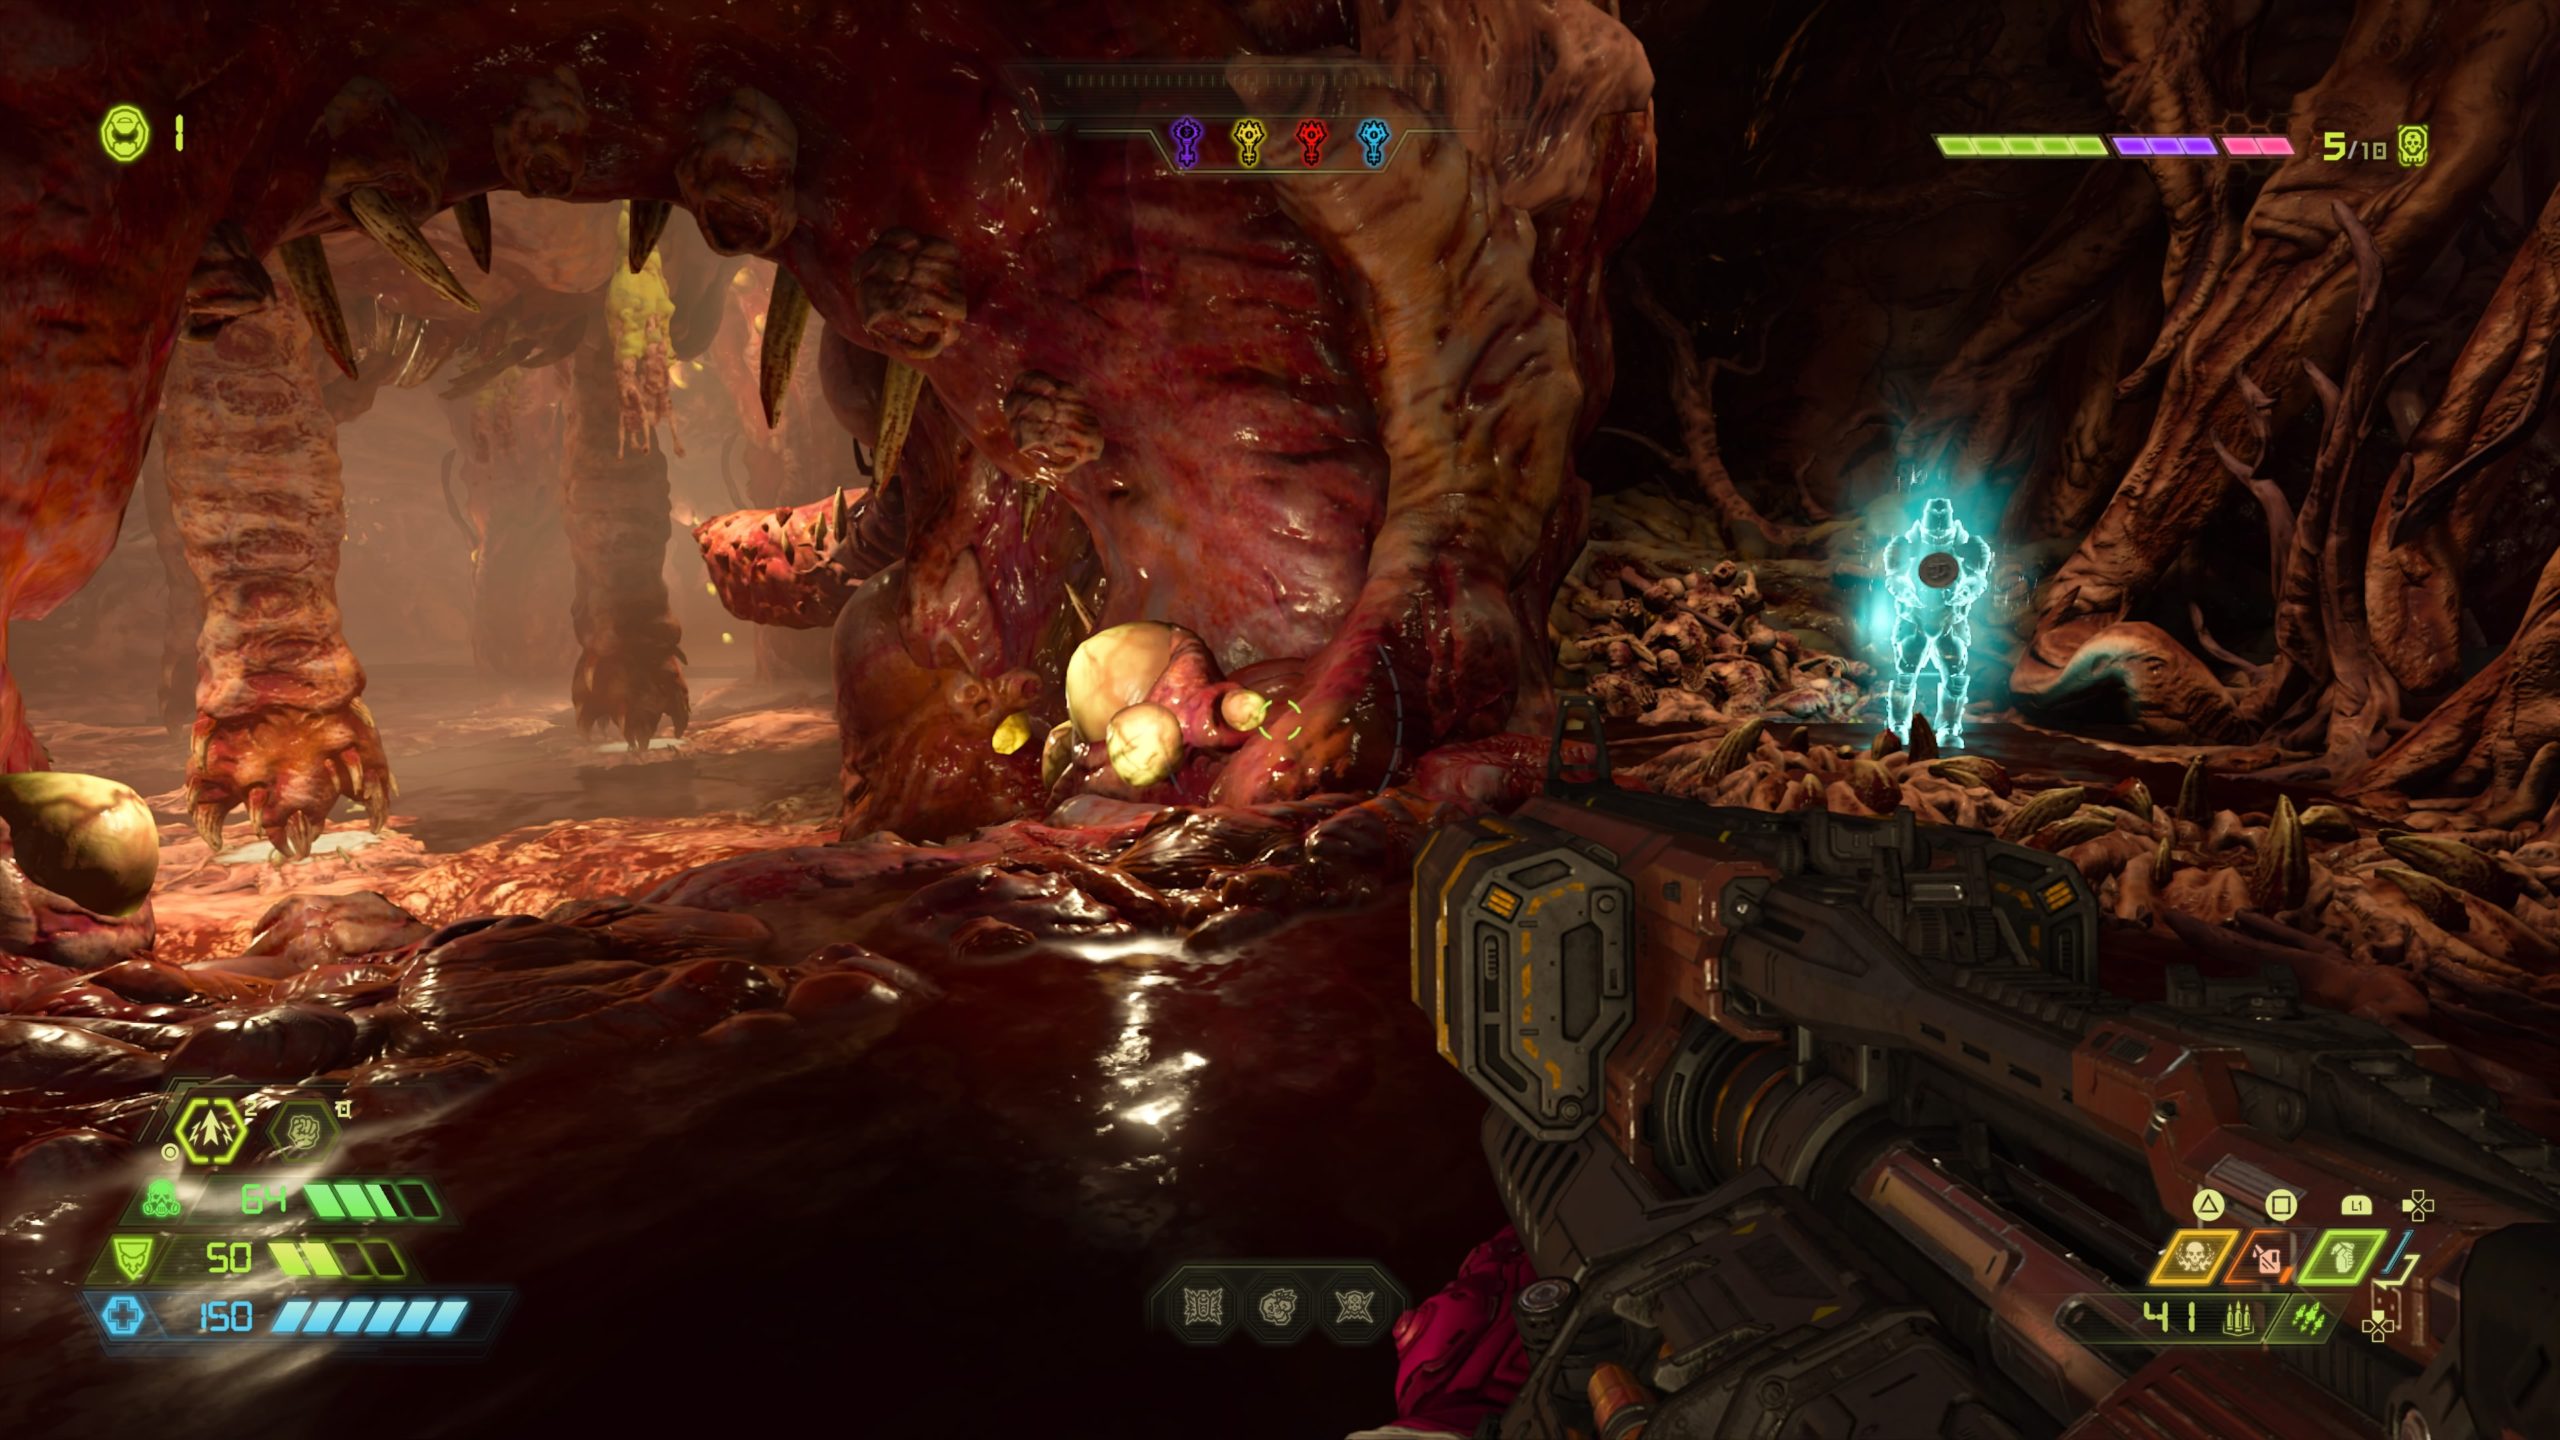
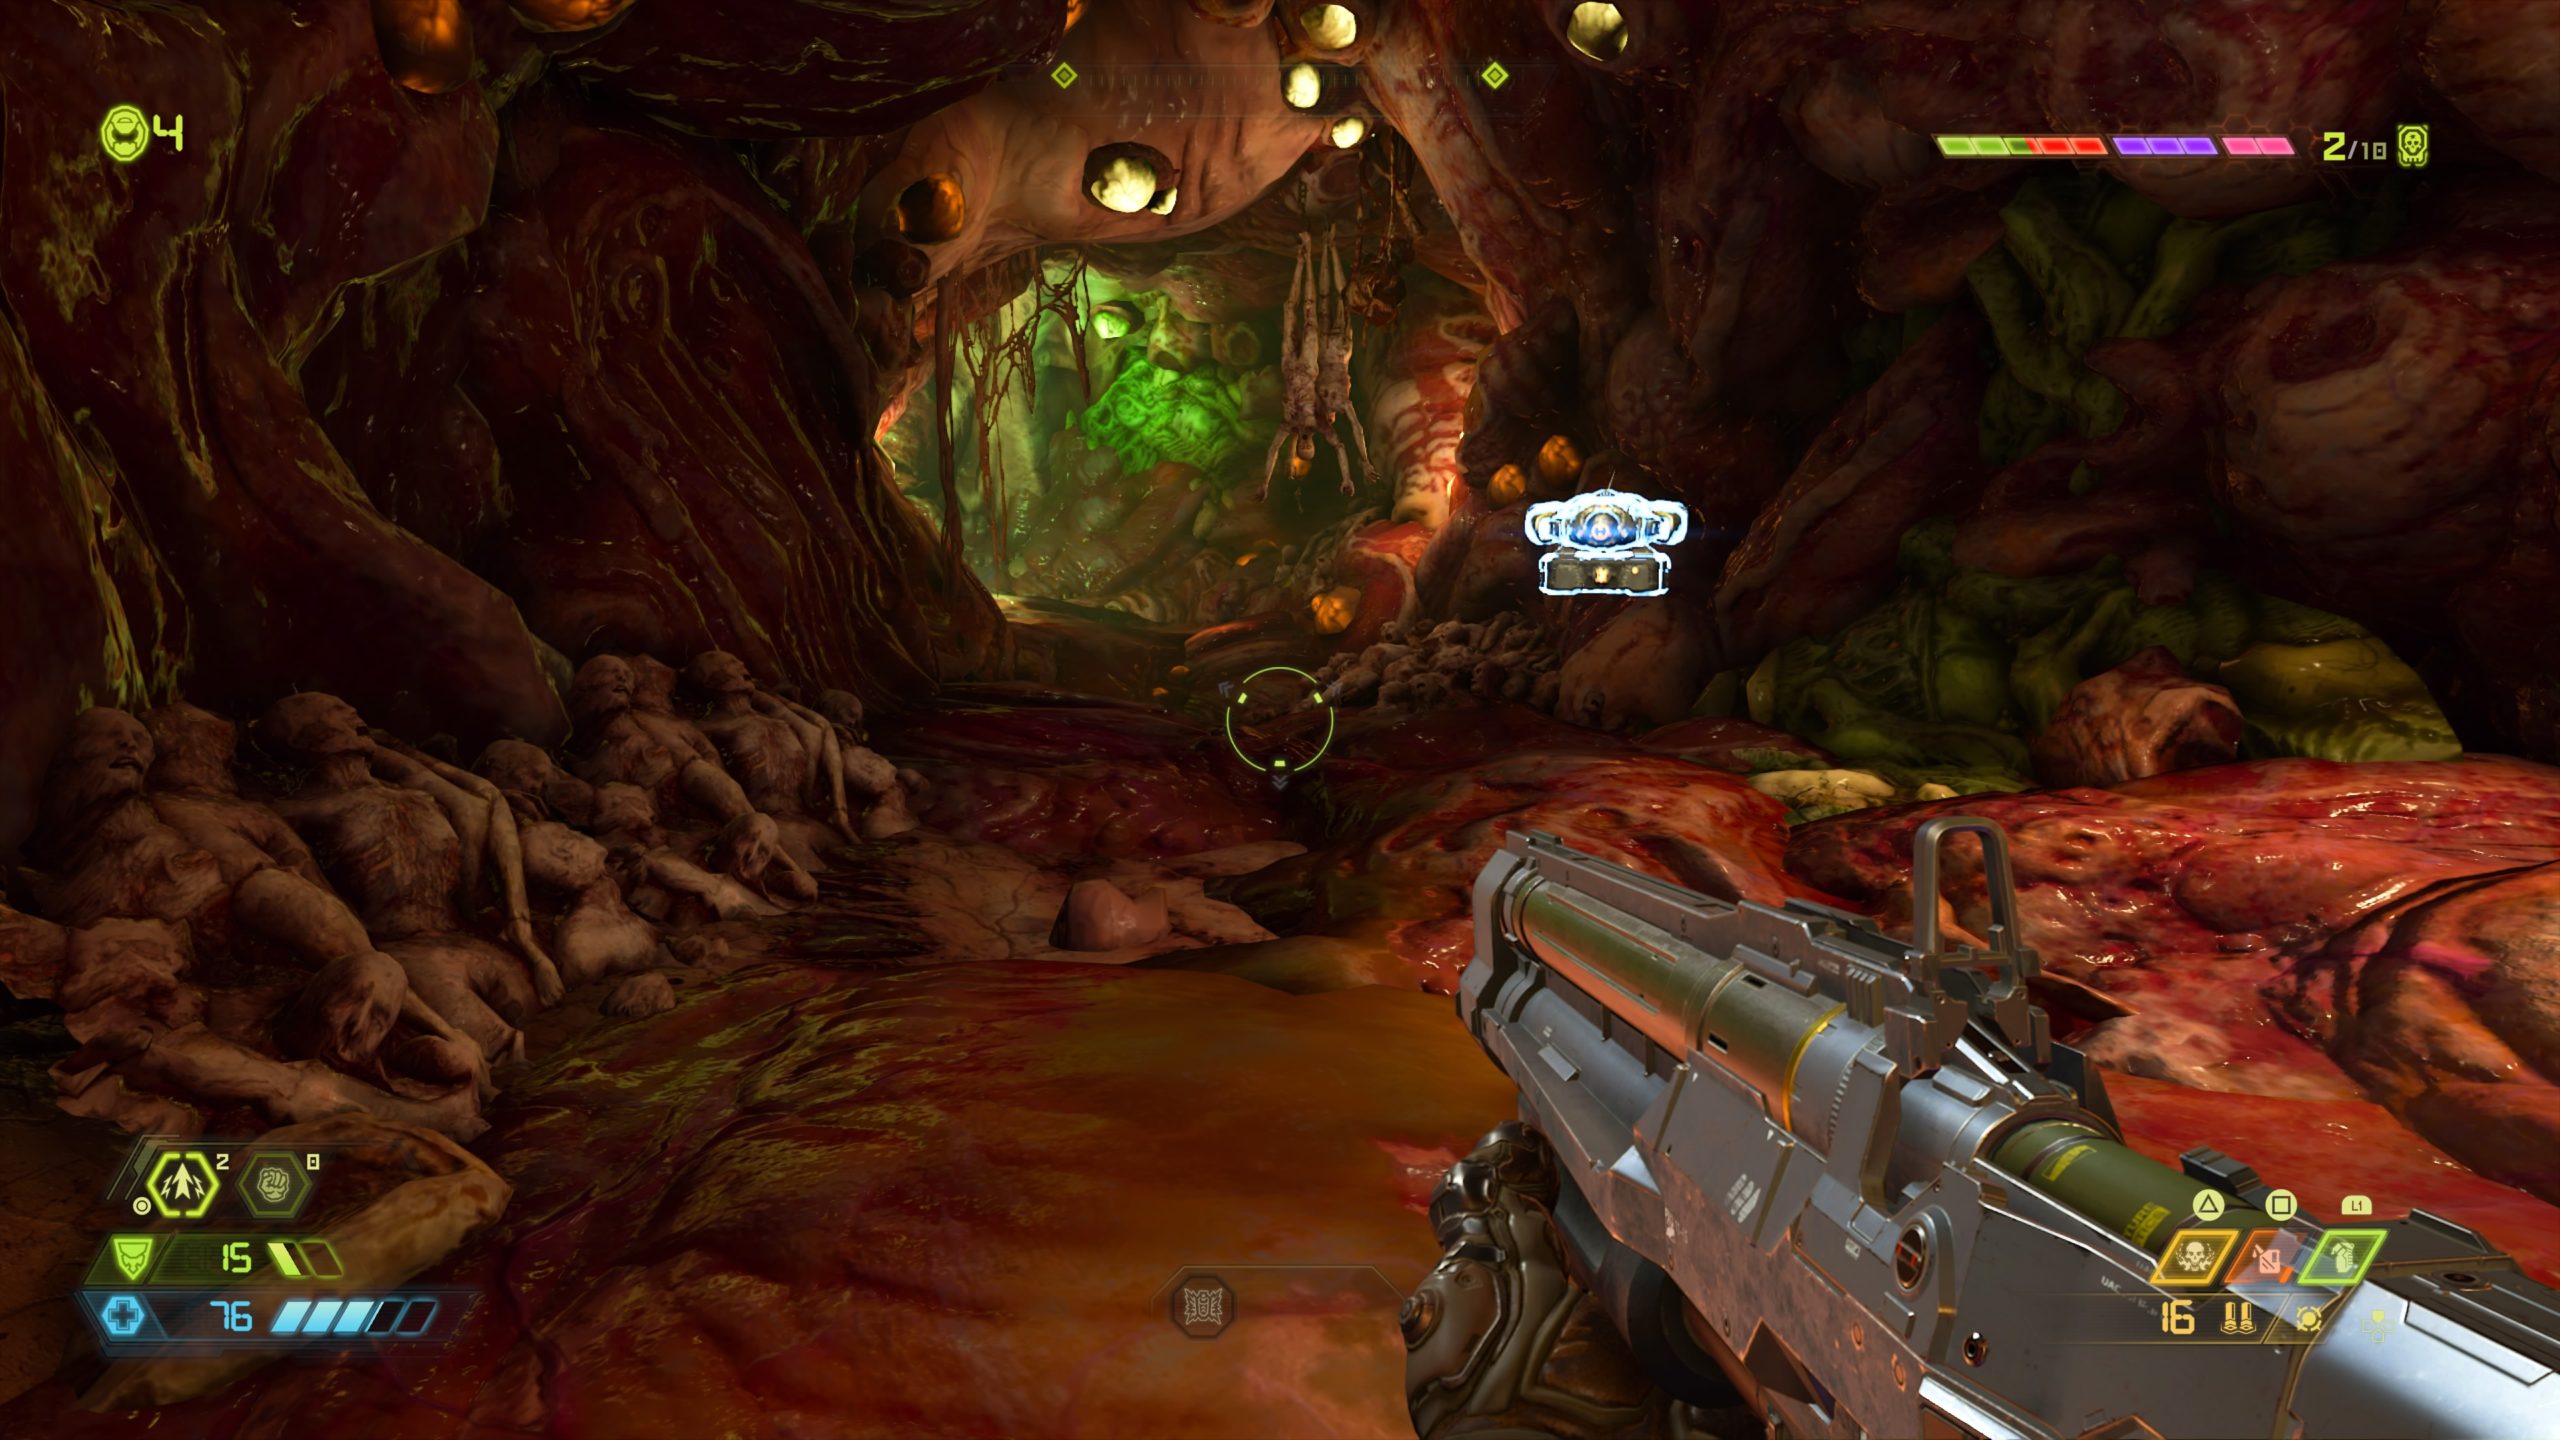
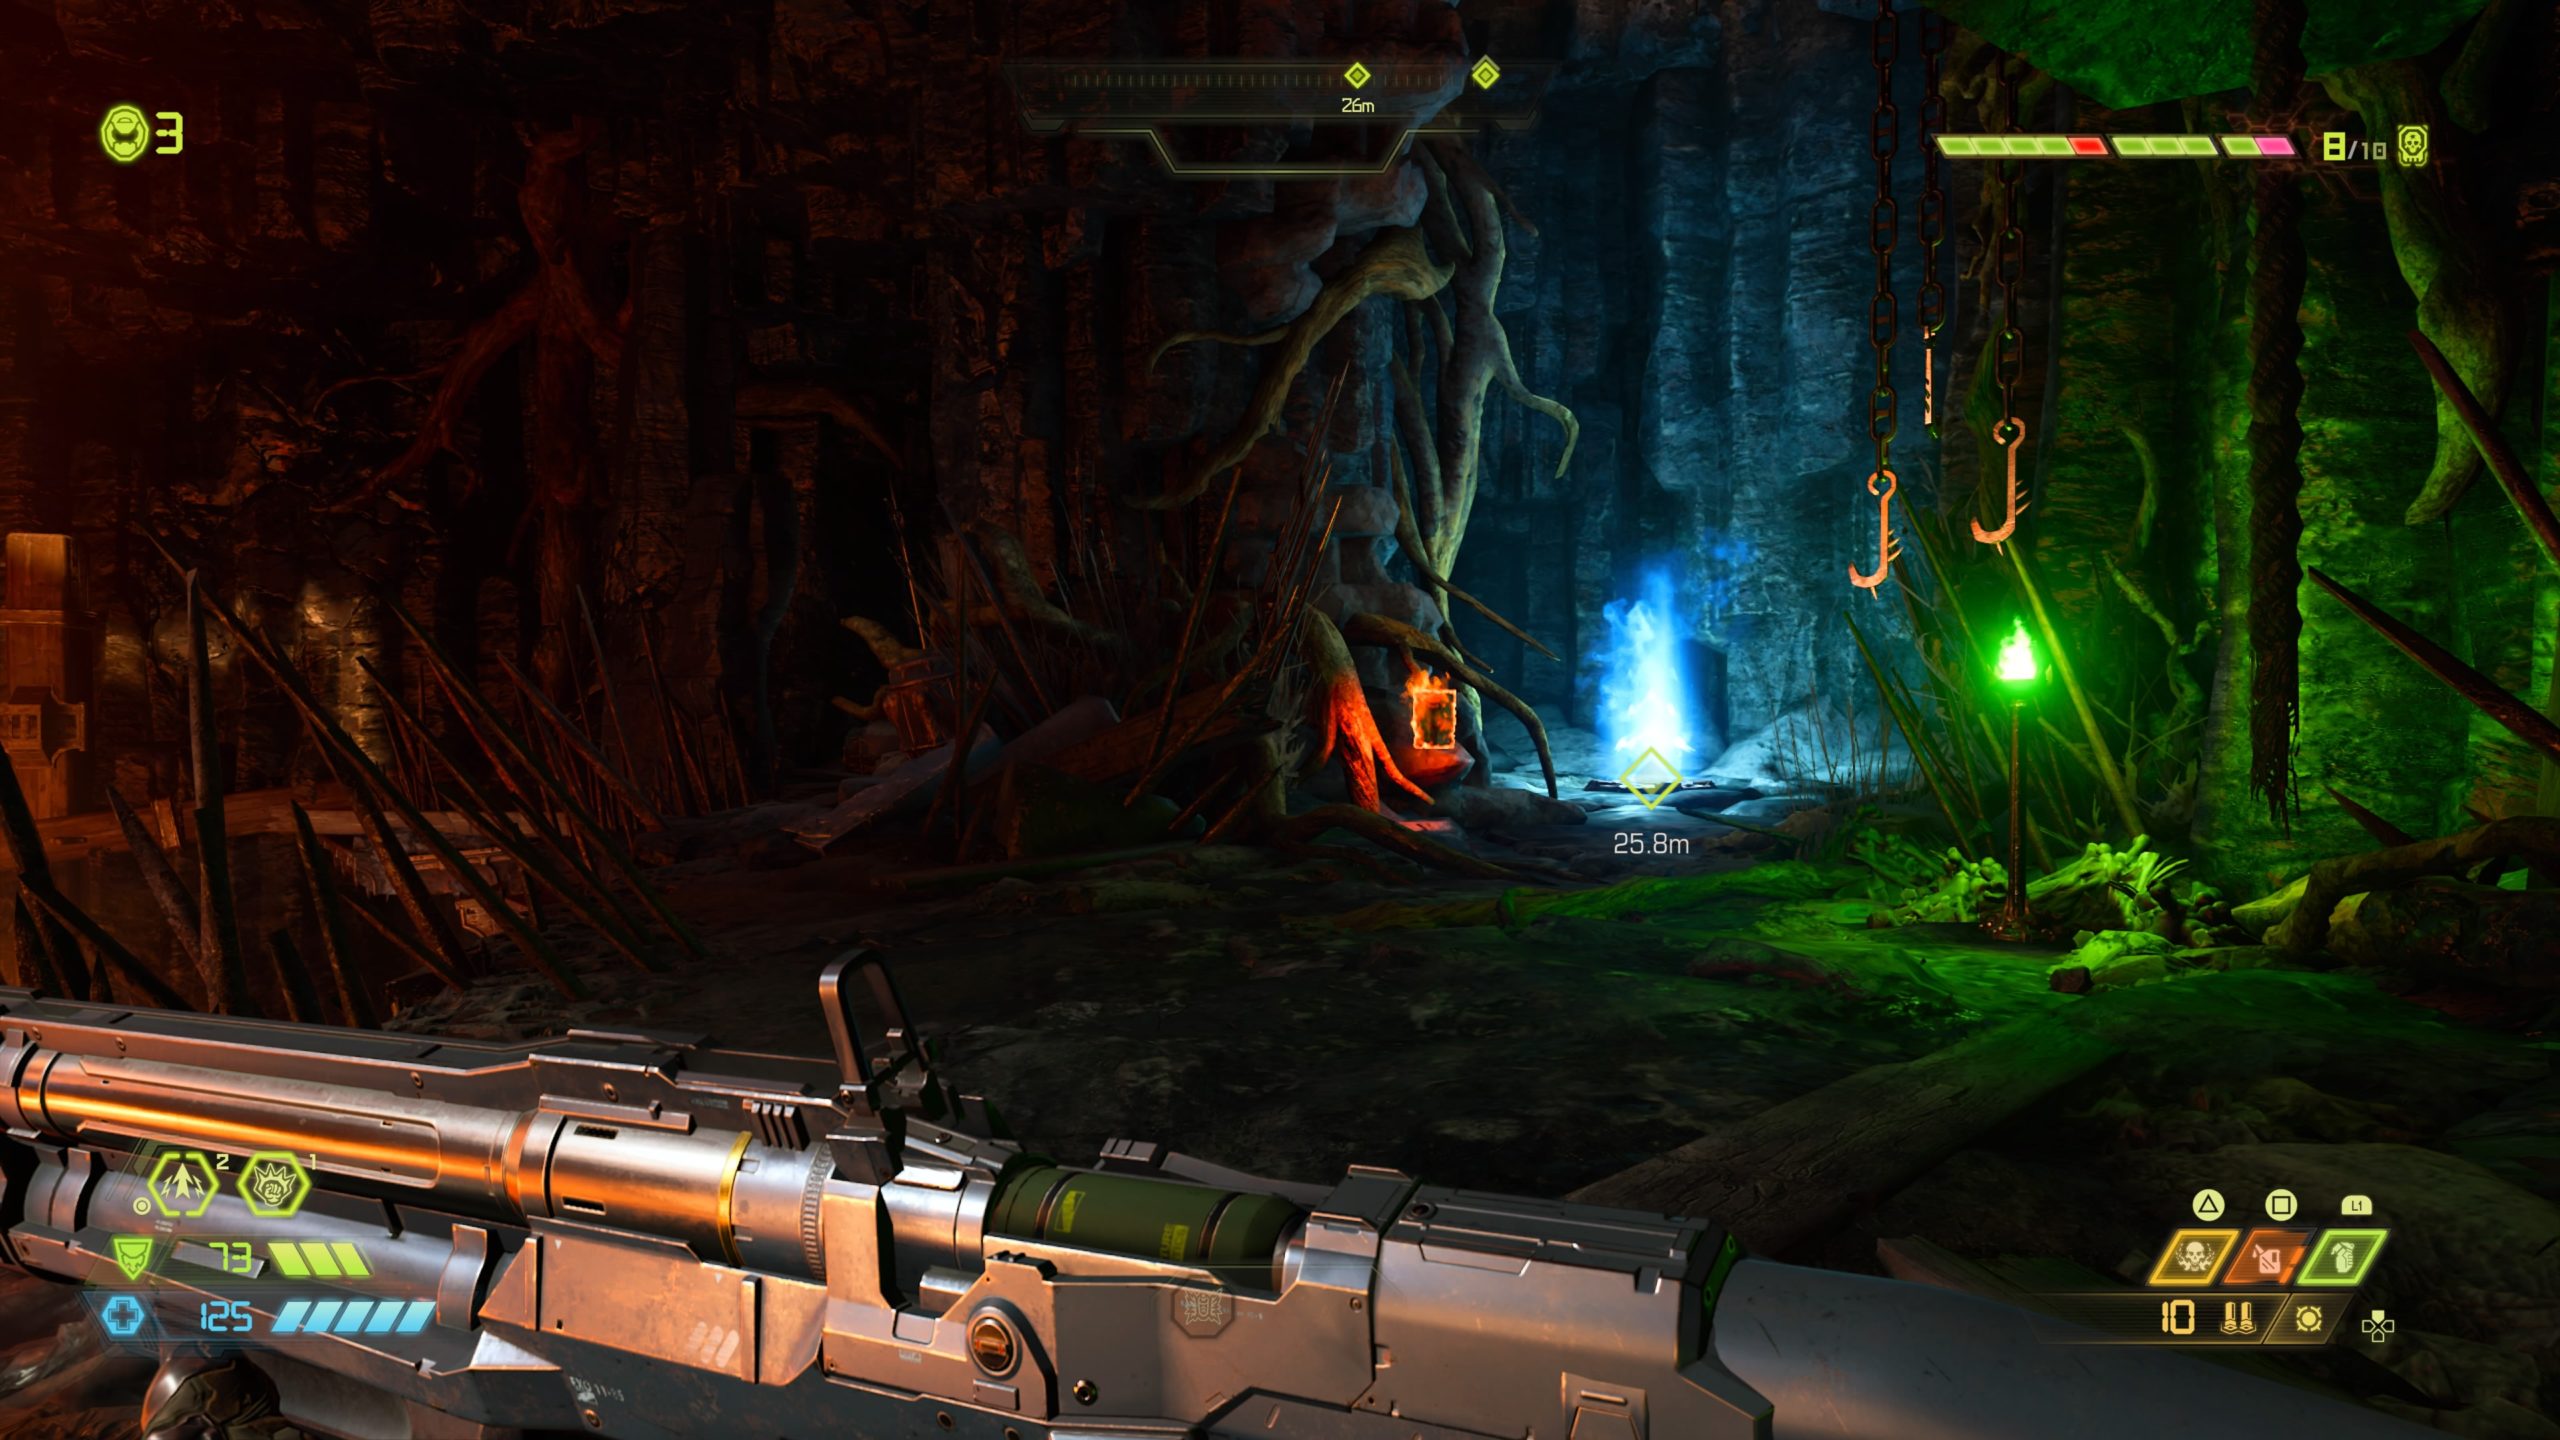
Sentinel Crystal

The crystal is locate inside the giant demon that you blasted a hole through. To find it, head forward a short way through the hole until you reach the pool of purple liquid. Follow the liquid left, minding the sneaky tentacles, to find the crystal.
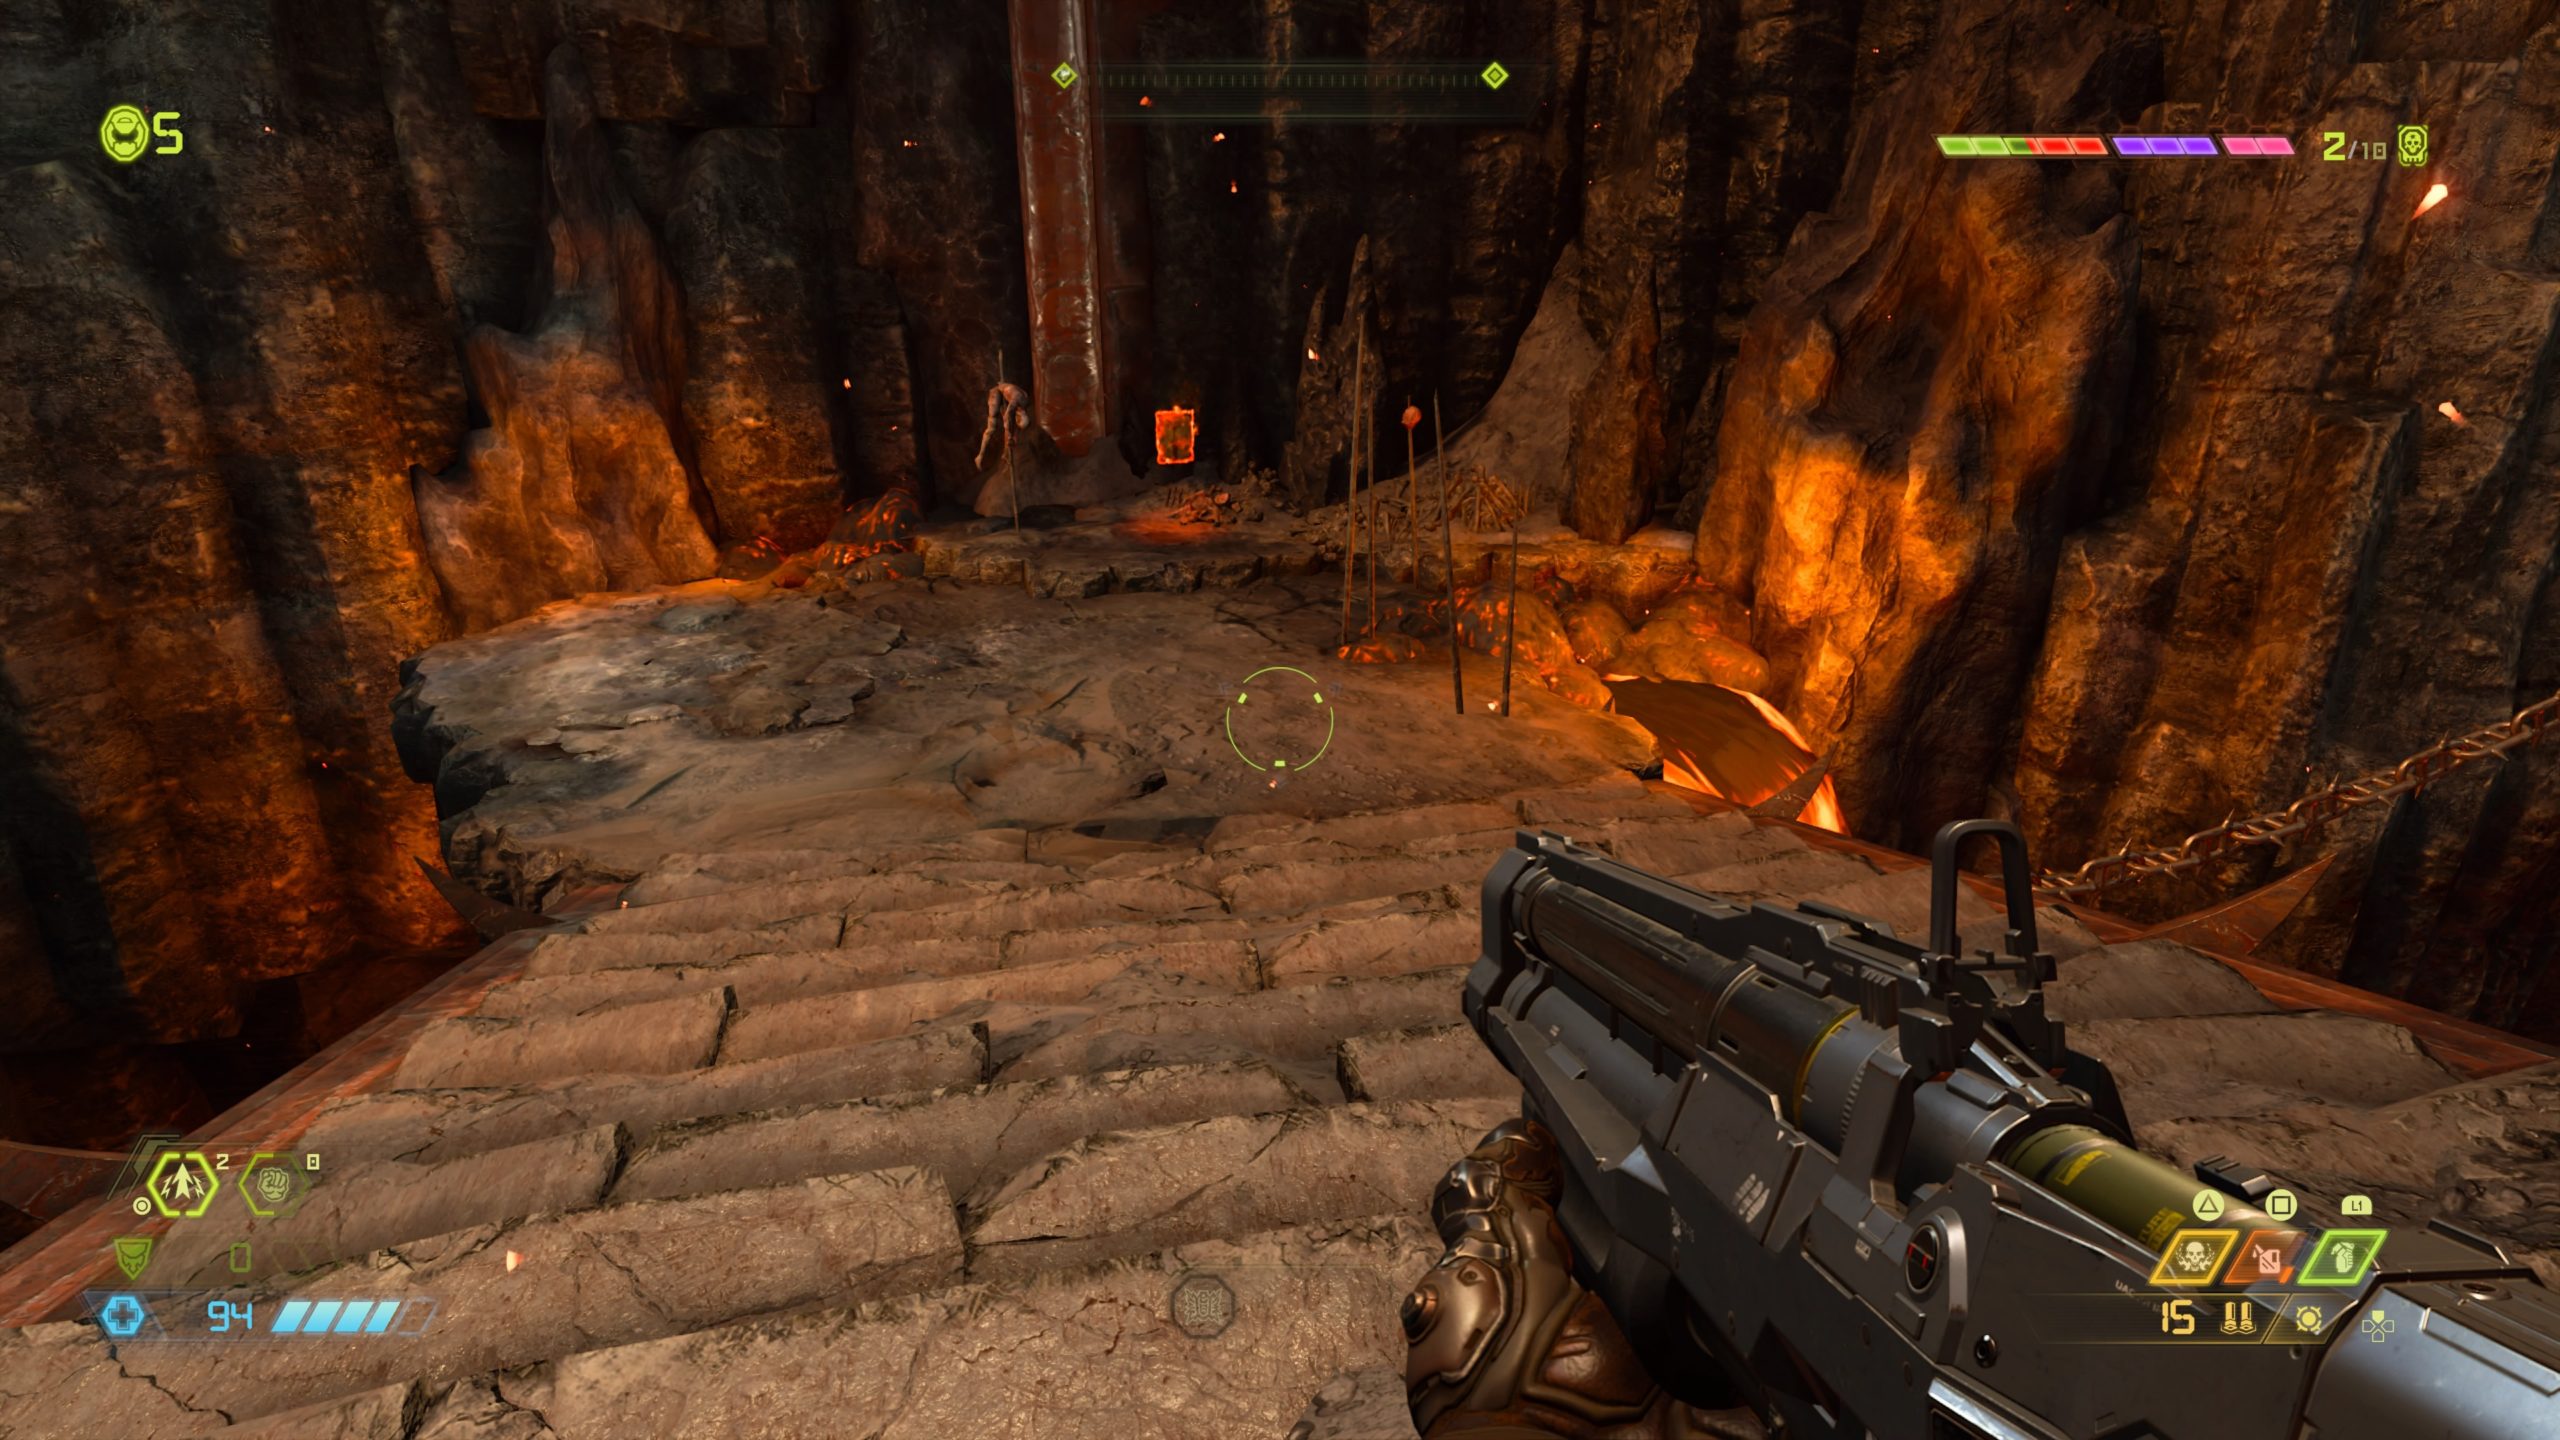
Codex: Story of the Sentinels – Sentinel History Part III
From the previous collectible, continue through the demon to emerge in an area with lava flowing below. Leap across the rock pillars to locate the codex.
Empyrean Key
The key is awarded for completing the first Slayer Gate.

Codex: Story of the Sentinels – The Betrayer
The codex is located in the upper level of the Betrayer’s lair.
Toy: Cacodemon

The toy can be found in the corner on a ledge at the top of the lava waterfall near the lair of the Betrayer. You can reach it by using the Double Jump and Dash abilities.
Below are our guides and walkthroughs for Doom Eternal.