Guides

Digimon Story Cyber Sleuth – Digimon Locations

by NightlyGamingBinge in

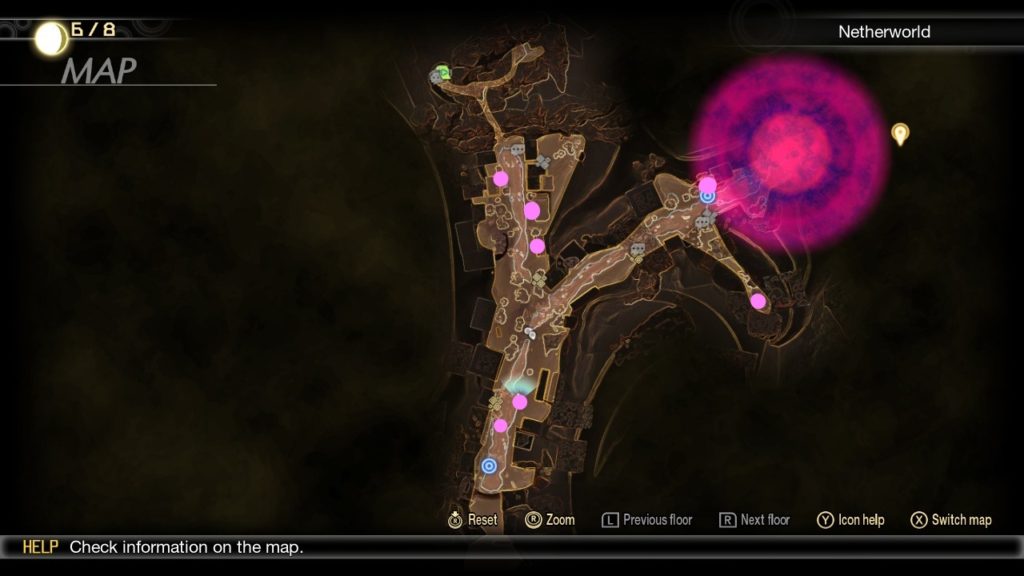
Below is a guide on where to find Digimon in Digimon Story Cyber Sleuth: Complete Edition. **Please note this guide is a work in progress!**

No.DigimonLocationStageTypeAttribute
018AgumonRookieVaccineFire
077AngemonChampionVaccineLight
152AngewomonUltimateVaccineLight
021ArmadillomonAkihabara???RookieFreeEarth
055BetamonKowloon Lv. 3RookieVirusWater
122BirdramonChampionVaccineFire
050BiyomonKowloon Lv. 2RookieVaccineWind
191BlackKingNumemonUltimateVirusDark
004BotamonDigital Network ITraining IFreeNeutral
015BukamonDigital Network I
Digital Network IV
Training IIFreeWater
038ChuumonRookieVirusEarth
119DorugamonChampionDataEarth
044DorumonShinjuku ???RookieDataNeutral
023ElecmonRookieDataElectric
076ExVeemonValhalla ServerChampionFreeNeutral
051FalcomonAvalon ServerRookieVaccineWind
052FanBeemonRookieVirusPlant
027GabumonDigital Network IVRookieDataFire
025GaomonAkihabara???RookieDataNeutral
GaoGamonValhalla ServerData
084GargomonValhalla ServerChampionVaccineElectric
154GarudamonChampionVaccineFire
085GarurumonNakano UnderpassChampionVaccineFire
115GatomonChampionVaccineLight
026GazimonRookieVirusDark
094GekomonKowloon Lv. 4ChampionVirusWater
095GeremonChampionVirusElectric
033GoblinmonKowloon Lv. 2RookieVirusEarth
GoldNumemonKowloon Lv. 4
034GomamonRookieVaccineWater
032GotsumonShinjuku???RookieDataEarth
161GrademonUltimateVaccineNeutral
090GreymonValhalla ServerChampionVaccineFire
GuardromonValhalla Server
GuilmonKowloon Lv. 4RookieVirus
045HagurumonRookieVirusElectric
056HawkmonAkihabara???RookieFreeWind
071IkkakumonNakano UnderpassChampionVaccineWater
022ImpmonRookieVirusDark
082KabuterimonKowloon Lv. 4ChampionVaccinePlant
007KoromonKowloon Lv. 1Training IIFreeFire
001KuramonShinjuku ???Training IFreeNeutral
093KuwagamonChampionVirusPlant
KyubimonNakano Underpass
059LalamonKowloon Lv. 2RookieDataPlant
LeomonValhalla Server
063LopmonShinjuku???RookieRookieEarth
061LunamonRookieDataWater
MegaKabuterimonNakano Underpass
016MotimonDigital Network IITraining IIFreeNeutral
121NumemonAkihabara???ChampionVirusEarth
012NyaromonDigital Network IVTraining IIFreeLight
078OgremonChampionVirusEarth
024OtamamonKowloon Lv. 2RookieVirusWater
002PabumonKowloon Lv. 1Training IFreeNeutral
013PagumonTraining IIFreeDark
048PalmonRookieDataPlant
046PatamonKowloon Lv. 3RookieDataWind
PeckmonNakano Underpass
005PoyomoDigital Network II
Kowloon Lv. 1
Training IFreeNeutral
003PunimonDigital Network ITraining IFreeNeutral
062RenamonKowloon Lv. 4RookieDataPlant
139ReppamonChampionVaccineLight
209RizeGreymonUltimateVaccineFire
328RyudamonRookieVaccineNeutral
054SalamonAvalon ServerRookieVaccineLight
SeadramonNakano Underpass
083ShellNumemonNakano UnderpassChampionVirusWater
107StarmonAvalon ServerChampionData
109StrikedramonChampionVaccineEarth
106SukamonKowloon Lv. 4ChampionVirusEarth
102SunflowmonChampionDataPlant
035SyakomonRookieVirusWater
112TankmonValhalla ServerChampionDataElectric
008TanemonDigital Network II (Rare Spawn)Training IIFreePlant
040TentomonKowloon Lv. 3RookieVaccinePlant
039TerriermonRookieVaccineWind
011TokomonKowloon Lv. 3Training IIFreeNeutral
041ToyAgumonKowloon Lv. 3
Kowloon Lv. 4
RookieVaccineNeutral
010TsumemonShinjuku ???Training IIFreeDark
009TsunomonKowloon Lv. 1 (Rare Spawn)
Kowloon Lv. 3
Training IIFreeEarth
125VeedramonChampionVaccineWind
053VeemonRookieFreeNeutral
129VegiemonAkihabara???ChampionVirusPlant
017WanyamonKowloon Lv. 2Training IIFreeWind
140WaspmonAvalon Server
Valhalla Server
ChampionVirusElectric
064WormmonAvalon ServerRookieFree
014YokomonKowloon Lv. 2Training IIFreePlant
Shin Megami Tensei V
Guides

Shin Megami Tensei V – Shiba Miman Locations

by Chappie in

Welcome to NGB and our Shin Megami Tensei V guide on the Shiba Miman locations. Here you’ll find the locations of the Miman around Shiba.

Shiba Miman Locations

Shin Megami Tensei V Shiba Miman Locations

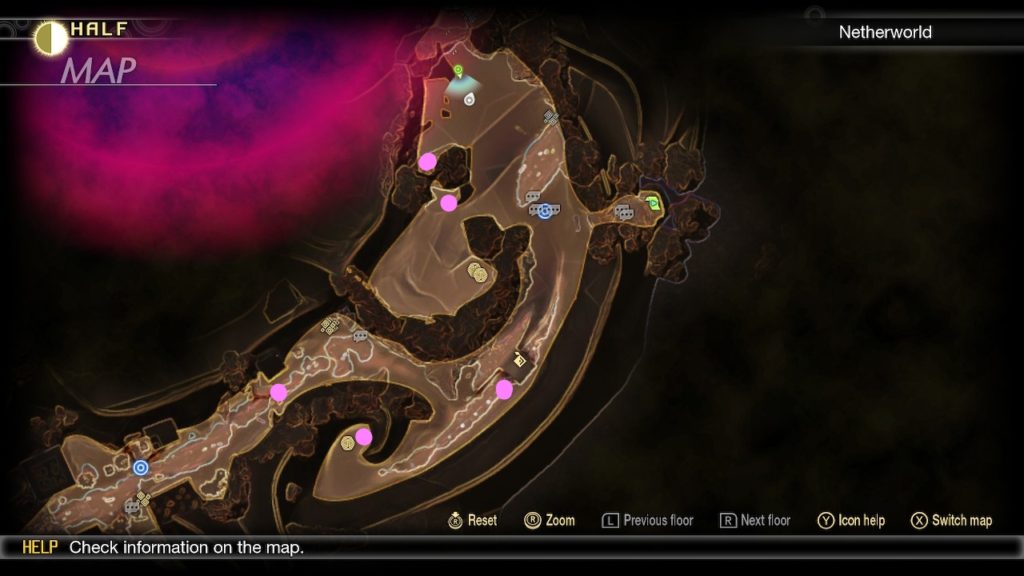
Miman 1

Located on top of a giant rock to the left side of the road just past where the Abscess was.

Miman 2

Located behind a rock at the end of the path south of the train.

Miman 3

Located on the northern right side of the train under an overpass.

Miman 4

Located at a dead end west of the Shiba Leyline Fount.

Miman 5

Located behind a rock southwest of the giant punishing foe wandering around the area.

More Shiba Miman Locations

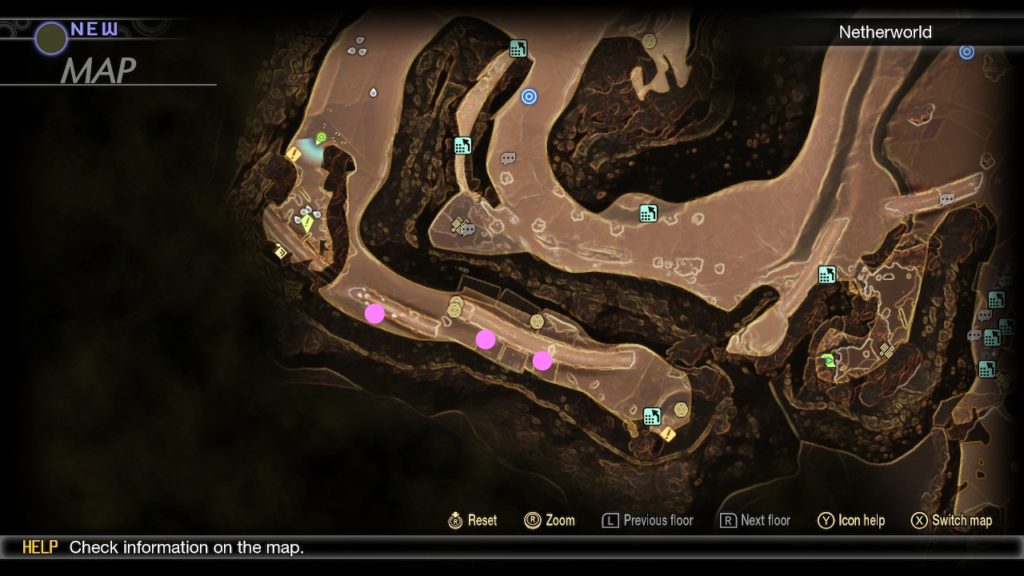
The below Miman can be found in the northern part of Shiba, which is accessible via the Tokyo Tower.

Shiba Miman Locations

Miman 6

This Miman can be found on the south side of the highway next to a support beam.

Miman 7

This one can be found in a ruined building just past the highway.

Miman 8

It is located in a ruined building past the previous Miman.

Shin Megami Tensei V Guides and Walkthroughs

Click here for the next guide on the locations of the Miman in Hamamatsucho and Shiba Park! For other Shin Megami Tensei V guides and walkthroughs, click here!

Shin Megami Tensei V
Guides

Shin Megami Tensei V – Tamachi / Mita Miman Locations

by Chappie in

Welcome to NGB and our Shin Megami Tensei V guide on the Tamachi and Mita Miman locations. Here you’ll find the locations of the Miman around Tamachi.

Tamachi / Mita Miman Locations

Shin Megami Tensei V - Tamachi / Mita Miman Locations

Miman 1

Located just past the Tamachi Leyline Fount on the left side of the road.

Miman 2

Located on the steps leading to the walkway over the street north of the Tamachi Leyline Fount.

Miman 3

Located in the northwestern part of the city on the 1st floor of a ruined building along the right side of the road.

Miman 4

Located in the northwestern part of the city on the right side of the street past a street light between a giant rock and a fallen building.

Miman 5

Located in the northwestern part of the city on the left side of the road in a ruined building closer to the cave.

Miman 6

Located on the northeastern part of the city southeast of the Mita Leyline Fount behind some rubble.

Miman 7

Located on a rock just past the walkway above the Mita Leyline Fount.

Shin Megami Tensei V Guides and Walkthroughs

Click here for the next guide on the locations of the Miman in Shiba! For other Shin Megami Tensei V guides and walkthroughs, click here!

Astria Ascending
Guides

Astria Ascending – Locations

by Chappie in


This guide is a list of locations in Astria Ascending.


Harmonia

  • Harmonia Tower
    • F000 – Entrance
      • Floor 000
    • F165 – Council Room
      • Floor 165
      • Council Room
      • Haevelion Port
    • F295 – Arcadium
      • Floor 295
      • Arcadium
      • Yuno’s Balcony
  • Tower Entrance
  • Central Plaza
    • Train Station
  • United Town – Uptown
  • Marketplace
    • The Guild
    • Weapon Shop
  • Residential Area
    • Large House
    • House


Awisi Wood

  • Area 1
  • Area 2


Zeft Heights

  • Area 1
  • Area 2


Arktan Valley

  • Area 1
  • Area 2


Peyska Spring

  • Area 1
  • Area 2
  • Peyska Spring Sewers


Harmony Orchard

  • Area 1


Vetira

  • Item Shop
  • The Guild
  • Weapon Shop


The Swamps

  • Area 1
  • Area 2
  • Area 3
  • Area 4
  • Area 5
  • Pisces Temple


Arsion

  • Item Shop
  • The Guild
  • Weapon Shop
  • Dagmar’s House


Blazing Field

  • Area 1
  • Area 2
  • Area 3
  • Area 4
  • Area 5
  • Area 6
  • Area 7
  • Area 8
  • Oasis/Aries Temple


Astria Ascending
Guides

Astria Ascending – Chest Locations

by Chappie in


Below you’ll find the chest locations in Astria Ascending and their contents. This guide is a work in progress and will be updated as we progress through the game.


Harmonia Tower

F 165 Council Room – Haevelion Port

  • Potion x2, Potion+ x1, Ether x2


F295 Arcadium – Yuno’s Balcony

  • 250 Lums


Residential Area

Migmie Shop

  • Ulan-Harnesser Token


Peyska Spring

Peyska Spring Sewers

  • 500 Lums
  • Confuse Guard Ring
  • Potion x3


The Swamps

Area 2

  • Evalach x1
  • Stat Orb x3


Area 3

  • Meryan Robe x1
  • Ether x3 (requires fire Zodiac Ring power)
  • Life Core x1 (requires fire Zodiac Ring power)


Area 4

  • Koeia x1
  • Circlet x1
  • Angel Wings x1 (requires earth Zodiac Ring power)


Chapter XI

  • 1650 Lums


Pisces Temple

Entrance

  • Remedy x3 and Life Core x1
    • From the first area of The Swamps, head through the eastern door then head through the eastern door in the next area to find the chest.


Room of Intuition

  • Wizard Hat x1
    • From the fast travel point, head through the door to the west then make your way to the east side of the room


Anun Prayer Room

  • Ancient Artifact x1 (hidden behind a tree)
  • Water Ore x3
    • From the prayer room take the western door then eastern to reach the chest
  • Cebes x1 (you’ll be ambushed when you open this chest)
    • From the prayer room take the western door then the middle. Head west through two areas to find the chest at the far western side of the third area


Blazing Field

Area 2

  • Botein x1 and Stat Orb x1
    • Located on scaffolding
  • Pulsar x1 and Stat Orb x1
    • Located on long scaffolding near the door leading to Area 3


Area before Oasis

  • Mirror Shield and Stat Orb
    • Located at the very top


4th Area East of Arsion *Requires the earth power for the Zodiac Ring*

  • 1850 Lums


Path to the Sagittarius Temple *Requires upgraded fire power from the Sagittarius Temple*

  • Heaven’s Whisper x1


Aries Temple

Area 1

  • Alruba x1


Area 2

  • 1000 Lums
  • Stat Orb x3


Room of Courage

  • Evasion Necklace x1
  • Jabbah x1
  • Adhafera x1 (Chapter XI)


Argon Prayer Room

  • Fafnir x1


Grand Canyon

Broken Bridge

  • Life Core x1
  • Defense Necklace x1
    • 1st area west of Broken Bridge fast travel point
  • Peyskan Robe x1
    • 2nd area west of Broken Bridge fast travel point
  • ???
    • 3rd area west of Broken Bridge fast travel point
  • 3000 Lums
    • 1st area east of Broken Bridge fast travel point


Ranta Entrance – Road to Outskirts

  • Aeror Ore x1
    • 1st area east of the Ranta Entrance – Road to Outskirts fast travel point


Path to the Capricorn Temple

  • Angel Wings x1
  • Forceus, Firus, Iceus, Talamus. Aerus. Nixus, Waterus, Eriorus, Umbrus Crystal x3


Path to the Taurus Temple

  • Omni Ether x1 (require you to have cleared the Sagittarius Temple)
  • Forceus, Firus, Iceus, Talamus. Aerus. Nixus, Waterus, Eriorus, Umbrus Ore x3
  • Panacea x1
  • Elixir x1
  • Omni Panacea x1


Virgo Temple

Area 5

  • 2000 Lums
  • Tyndareus x1


Room of Loyalty

  • Big Hat x1


2nd Area East of Room of Loyalty

  • Stat Orb x4


3rd Area East of the Room of Loyalty

  • Panacea x1
  • Talam Ore and Talamor Ore
  • Omni Ether+ x1
  • Iron Plate x1
  • Unfocus Guard Ring x1
    • For this one you’ll need to light up the main panel on the ground level by collecting the blue light from the 3 panels in this room. Once you’ve put them all in the main panel, climb straight up from the chest and drop down a statue to make the chest accessible.


Leo Temple

Entrance

  • Bronze Shield x1


Underground Passage

  • 4000 Lums
  • Stat Orb x4
  • Luck Necklace x1 (this one requires the earth power of the Zodiac Ring to reach)
  • Granite Plate x1


Gemini Temple

  • Stat Orb x3
  • Meleph x1
  • 3500 Lums
  • Omni Panacea x2
    • Room of Intelligence
  • Elixir x2, Angel Wings x2 and 25000 Lums
    • Room of Intelligence – Defeat the enemies that pop out from the chest.


Scorpio Temple

Statue of Zibani

  • Meryan Hat x1


Room of Passion

  • Girtab x1
  • Achilles x1
  • Omni Ether X x1
  • Panacea and Elixir
    • Defeat the enemies that pop out from the chest
  • Awisian Crown x1


Sagittarius Temple

Statue of Helicon 

  • Zeftian Plate x1


Room of Honesty

  • Titawin x1
  • Omni Potion x1
  • Angel Kiss x2
  • Great Helm x1
  • Zeftian Mantle x1
  • Meryan Hat x1
  • Omni Panacea
    • Surprise attack
  • Elixir x1
    • Surprise attack
  • Blood Shield x1


Room of Optimism

  • Panacea x1
  • Achilles x1
  • Omni Ether x1


Taurus Temple

Statue of Vesakha

  • Forceus, Firus, Iceus, Talamus, Aerus, Nixus, Waterus, Eriorus, and Umbrus Crystals x5
    • Defeat the enemies that pop out of the chest
  • Zeftian Plate x1
  • Assorted items
    • Defeat the enemies that pop out of the chest
  • Gold Shield x1
  • Achilles x1


Room of Stability

  • Peyskan Cap x1


Room of Devotion

  • Great Helm x1
  • Omni Potion X x1
  • Elixir
    • Defeat the enemies that pop out of the chest
  • Omni Ether X x1


Archipelago

Gemini Temple Entrance

  • Life Core x1
  • Panacea x1
  • 5000 Lums
  • Angel Wings x1
  • Forceus, Firus, Iceus, Talamus, Aerus, Nixus, Waterus, Eriorus, and Umbrus Crystals x2
  • Omni Panacea x1
  • Stun Guard Ring x1


Windam

Weapon Shop

  • Altair x1


Cancer Temple

Statue of Karkinos

  • Peyskan Cap x1
  • Panacea x1
  • Acubens x1


Room of Wisdom

  • Zeftian Plate x1
  • Zeftian Robe x1
  • Blood Shield x1


Capricorn Temple

Statue of Amalthea

  • Zipline x1
    • Surprise attack chest
  • Blue Orb x1
  • Zeftian Armor x1


Room of Ambition

  • Zipline x1


Room of Discipline

  • Zeftian Plate x1


Libra Temple

Statue of Shamash

  • Curse Guard Ring x1
    • Surprise attack chest
  • Peyskan Cap x1
  • Omni Panacea x1
    • Surprise attack chest
  • Zeftian Plate x1
  • Awisian Crown x1
  • Brachium x1


Room of Balance

  • Angel Wings x2
  • Elixir x1
    • Surprise attack chest


Aquarius Temple

Statue of Ganymede

  • Peyskan Cap x1
  • Angel Kiss x2
    • Surprise attack chest
  • Gold Shield x1


Room of Determination

  • Tseen x1
  • Zefitan Plate x1
  • Sadachbia x1
  • Elixir x1
    • Surprise attack chest
  • Stun Guard Ring x2
    • Surprise attack chest
  • Omni Ether X x1
  • Angel Wings x2


Room of Imagination

  • Forceus, Firus, Iceus, Talamus, Aerus, Nixus, Waterus, Eriorus, and Umbrus Crystals x5
    • Surprise attack chest
  • 2000 Lums


Harmony Tower

Lower Floors

  • Mirach x1, Skat x1, Albaldah x1, Arkusha x1
    • Surprise attack chest
  • Awisi Robe x1
  • Aten x1, Bursters x1, Elnath x1, Tejat x1
    • Surprise attack chest
  • Awisi Plate x1
  • Stellar Helm x1


Upper Floors

  • Antinous x1, Zuben x1, Citadelle x1
    • Surprise attack chest
  • Awisi Armor x1
  • Stellar Diadem x1
  • Zaurak x1, Regulus x1, Vindemia x1
    • Surprise attack chest


Post Game

Vetira 

  • Outside
    • Ran x1


Uptown

  • Hamal x1


Residential Area

  • Migmie Shop
    • Almach x1


Harmonia Tower

  • Floor 000 Entrance
    • Myia x1


Peyska Spring

  • Second area
    • Heze x1


Harmony Orchard

  • Luck Cape x1


Arktan Valley

  • Second area
    • Denebola x1


Zeft Heights

  • Second area
    • Zavijava x1


Awisi Woods

  • Zimar’s House
    • Thuban x1


Ranta

  • In eastern house
    • Quasar x2
    • Brazer Token x1


Wendal’s Orchard

  • House
    • Duende


Earth Cape

  • Heze


Astria Ascending
Guides

Astria Ascending – Items Guide

by Chappie in


Below you’ll find the list of all 90 items in Astria Ascending and where to find them. Please note that as you progress through the story, new items will be unlocked at the shops! Also, this guide is a work in progress and will be updated as we progress through the game.


  1. ???
  2. Potion
    • Staring Item
  3. Potion+
    • Side Quest Reward
    • Purchase from the Item Shop in Arsion for 300 Lums
  4. Potion X
    • Purchase from the Item Shop in Arsion for 1900 Lums
  5. Omni Potion
    • Starting Item
  6. Omni Potion +
    • Purchase from the Item Shop in Arsion for 800 Lums
  7. Omni Potion X
    • Purchase from the Item Shop in Arsion for 5400 Lums
  8. Ether
    • Starting Item
  9. Ether +
  10. Ether X
    • Purchase from the Item Shop in Arsion for 3500 Lums
  11. Omni Ether
    • Starting Item
  12. Omni Ether +
    • Purchase from the Item Shop in Arsion for 1500 Lums
  13. Omni Ether X
    • Purchase from the Item Shop in Arsion for 7500 Lums
  14. Elixir
    • Purchase from the Item Shop in Arsion for 15,000 Lums
  15. Omni Elixir
    • Purchase from Stormig who is in the far southeastern corner of Archipelago for 50,000 Lums
  16. Life Fragment
    • Starting Item
  17. Life Core
    • Purchase from the Item Shop in Arsion for 2500 Lums
  18. Angel Kiss
    • Purchase at the Item Shop in Vetira for 1200 Lums
    • Purchase from the Item Shop in Arsion for 1200 Lums
  19. Angel Wings
    • Purchase from the Item Shop in Arsion for 7600 Lums
  20. Remedy
    • Starting Item
  21. Panacea
    • Purchase from the Item Shop in Arsion for 1800 Lums
  22. Omni Panacea
    • Purchase from the Item Shop in Arsion for 8900 Lums
  23. Stat Orb
    • Starting Item
  24. Force Ore
    • Purchase from the Item Shop in Arsion for 120 Lums
  25. Forceor Ore
    • Purchase from the Item Shop in Ranta for 240 Lums
  26. Forceus Ore
    • Purchase from the Item Shop in Ranta for 1500 Lums
  27. Forcerima Ore
    • Purchase from Stormig who is in the far southeastern corner of Archipelago for 9200 Lums
  28. Fire Ore
    • Purchase from the Item Shop in Arsion for 120 Lums
  29. Firor Ore
    • Purchase from the Item Shop in Ranta for 240 Lums
  30. Firus Ore
    • Purchase from the Item Shop in Ranta for 1500 Lums
  31. Firerima Ore
    • Purchase from Stormig who is in the far southeastern corner of Archipelago for 9200 Lums
  32. Ice Ore
    • Stolen off of Tufa Noises
    • Purchase from the Item Shop in Arsion for 120 Lums
  33. Iceor Ore
    • Purchase from the Item Shop in Ranta for 240 Lums
  34. Iceus Ore
    • Purchase from the Item Shop in Ranta for 1500 Lums
  35. Icerima Ore
    • Purchase from Stormig who is in the far southeastern corner of Archipelago for 9200 Lums
  36. Talam Ore
    • Purchase from the Item Shop in Arsion for 120 Lums
  37. Talamore Ore
    • Purchase from the Item Shop in Ranta for 240 Lums
  38. Talamus Ore
    • Purchase from the Item Shop in Ranta for 1500 Lums
  39. Talamarima Ore
    • Purchase from Stormig who is in the far southeastern corner of Archipelago for 9200 Lums
  40. Aero Ore
    • Stolen off of Samiri Noises
    • Purchase from the Item Shop in Arsion for 120 Lums
  41. Aeror Ore
    • Purchase from the Item Shop in Ranta for 240 Lums
  42. Aerus Ore
    • Purchase from the Item Shop in Ranta for 1500 Lums
  43. Aerima Ore
    • Purchase from Stormig who is in the far southeastern corner of Archipelago for 9200 Lums
  44. Nix Ore
    • Purchase from the Item Shop in Arsion for 120 Lums
  45. Nixor Ore
    • Purchase from the Item Shop in Ranta for 240 Lums
  46. Nixus Ore
    • Purchase from the Item Shop in Ranta for 1500 Lums
  47. Nixurima Ore
    • Purchase from Stormig who is in the far southeastern corner of Archipelago for 9200 Lums
  48. Water Ore
    • Purchase from the Item Shop in Arsion for 120 Lums
  49. Wateror Ore
    • Purchase from the Item Shop in Ranta for 240 Lums
  50. Waterus Ore
    • Purchase from the Item Shop in Ranta for 1500 Lums
  51. Waterima Ore
    • Purchase from Stormig who is in the far southeastern corner of Archipelago for 9200 Lums
  52. Erio Ore
    • Purchase from the Item Shop in Arsion for 120 Lums
  53. Erior Ore
    • Purchase from the Item Shop in Ranta for 240 Lums
  54. Eriorus Ore
    • Purchase from the Item Shop in Ranta for 1500 Lums
  55. Eriorima Ore
    • Purchase from Stormig who is in the far southeastern corner of Archipelago for 9200 Lums
  56. Umbre Ore
    • Purchase from the Item Shop in Arsion for 120 Lums
  57. Umbror Ore
    • Purchase from the Item Shop in Ranta for 240 Lums
  58. Umbrus Ore
    • Purchase from the Item Shop in Ranta for 1500 Lums
  59. Umbrerima Ore
    • Purchase from Stormig who is in the far southeastern corner of Archipelago for 9200 Lums
  60. Force Crystal
    • Purchase from the Item Shop in Arsion for 1040 Lums
  61. Forceor Crystal
    • Purchase from the Item Shop in Ranta for 1940 Lums
  62. Forceus Crystal
    • Purchase from the Item Shop in Ranta for 5500 Lums
  63. Fire Crystal
    • Purchase from the Item Shop in Arsion for 1040 Lums
  64. Firor Crystal
    • Purchase from the Item Shop in Ranta for 1940 Lums
  65. Firus Crystal
    • Purchase from the Item Shop in Ranta for 5500 Lums
  66. Ice Crystal
    • Purchase from the Item Shop in Arsion for 1040 Lums
  67. Iceor Crystal
    • Purchase from the Item Shop in Ranta for 1940 Lums
  68. Iceus Crystal
    • Purchase from the Item Shop in Ranta for 5500 Lums
  69. Talam Crystal 
    • Purchase from the Item Shop in Arsion for 1040 Lums
  70. Talamor Crystal
    • Purchase from the Item Shop in Ranta for 1940 Lums
  71. Talamus Crystal
    • Purchase from the Item Shop in Ranta for 5500 Lums
  72. Aero Crystal
    • Purchase from the Item Shop in Arsion for 1040 Lums
  73. Aeror Crystal
    • Purchase from the Item Shop in Ranta for 1940 Lums
  74. Aerus Crystal
    • Purchase from the Item Shop in Ranta for 5500 Lums
  75. Nix Crystal
    • Purchase from the Item Shop in Arsion for 1040 Lums
  76. Nixor Crystal
    • Purchase from the Item Shop in Ranta for 1940 Lums
  77. Nixus Crystal
    • Purchase from the Item Shop in Ranta for 5500 Lums
  78. Water Crystal
    • Purchase from the Item Shop in Arsion for 1040 Lum
  79. Wateror Crystal
    • Purchase from the Item Shop in Ranta for 1940 Lums
  80. Waterus Crystal
    • Purchase from the Item Shop in Ranta for 5500 Lums
  81. Erio Crystal
    • Purchase from the Item Shop in Arsion for 1040 Lums
  82. Erior Crystal
    • Purchase from the Item Shop in Ranta for 1940 Lums
  83. Eriorus Crystal
    • Purchase from the Item Shop in Ranta for 5500 Lums
  84. Umbre Crystal
    • Purchase from the Item Shop in Arsion for 1040 Lums
  85. Umbror Crystal
    • Purchase from the Item Shop in Ranta for 1940 Lums
  86. Umbrus Crystal
    • Purchase from the Item Shop in Ranta for 5500 Lums
  87. Bronze Stone
    • ?
  88. Silver Stone
  89. Gold Stone
    • Complete the Birth of a Legend side quest
  90. ???


Eastward
Guides

Eastward – Chapter 7 Heart Orbs

by Chappie in


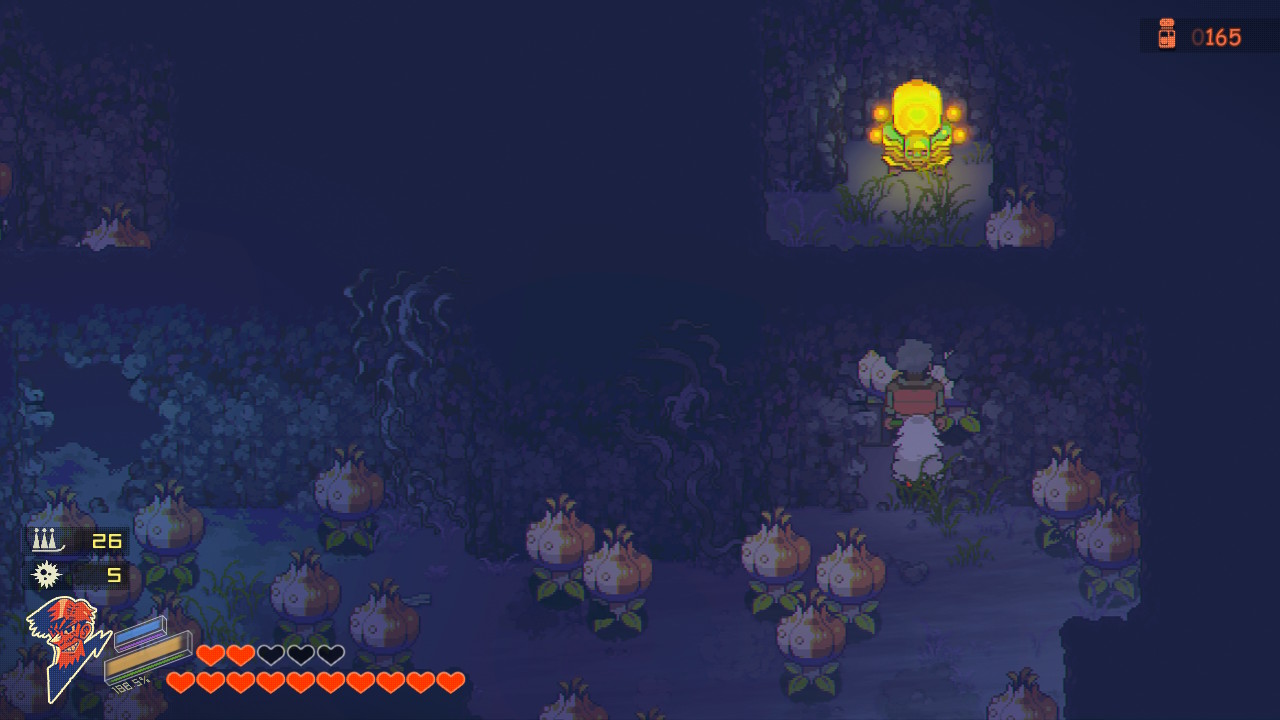
Below is a guide on where to find the Heart Orbs in Chapter 7 of Eastward.


Grave

This Heart Orb can be found in the 1st area of the Grave behind a cracked wall just before transitioning to the next area. You’ll need to use a bomb to break the wall allowing you to reach it. This will be during the quest Blast from the Past.


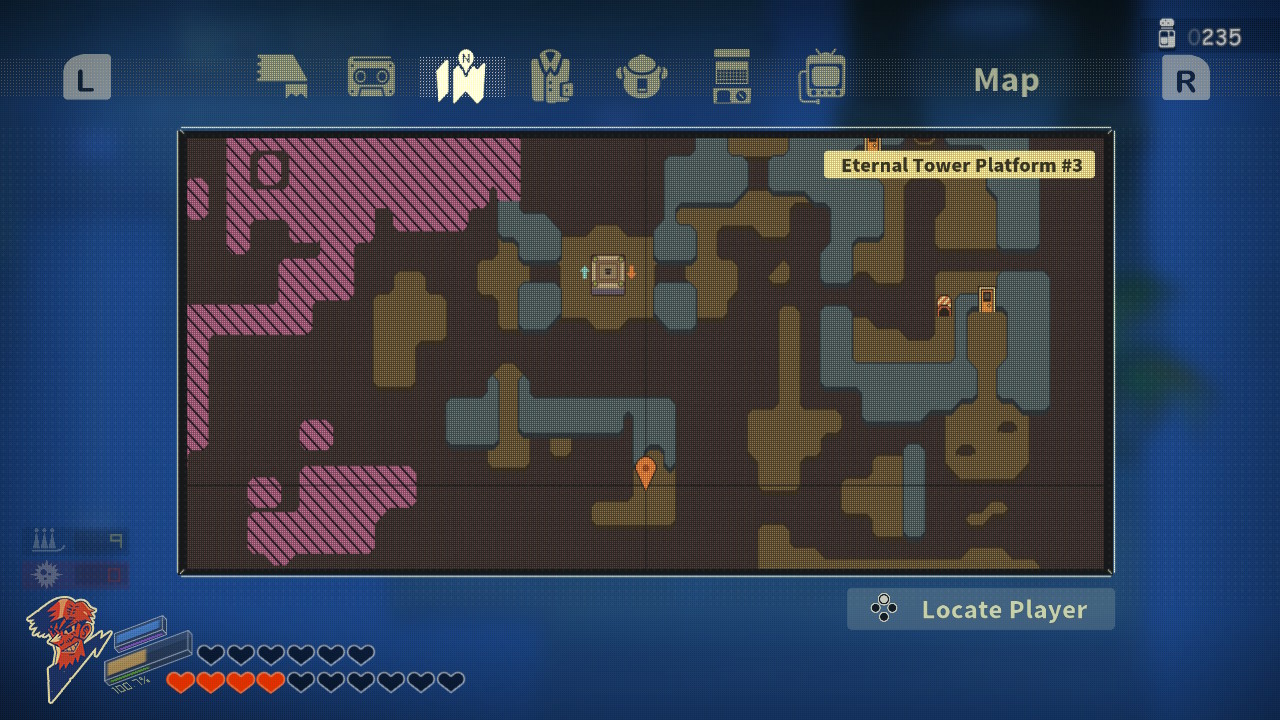
Eternal Tower Platform #3

This Heart Orb can be found south of the first western area from the Elevator. You’ll need to ride the 1st platform down then shoot the rail of the second platform to move it down also. Head back up on your platform then shoot the second rail to move the other platform. Climb on as it passes by then use it to reach the chest with the Heart Orb.


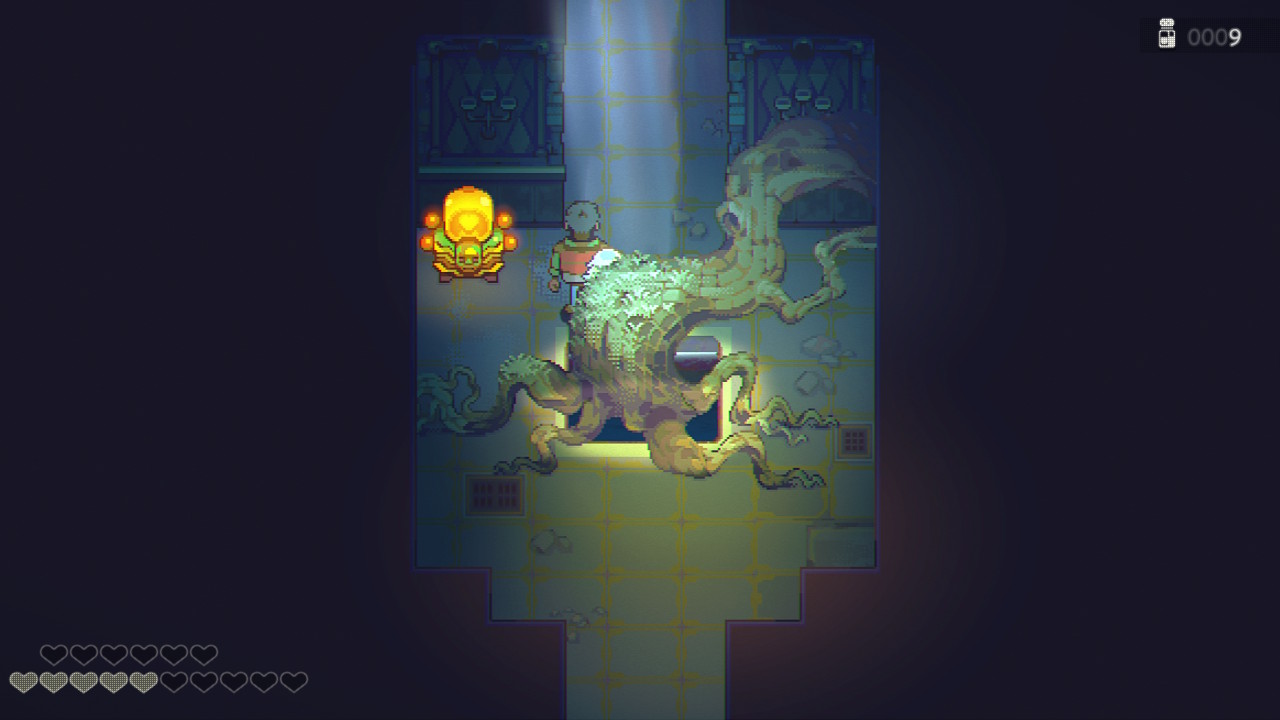
Eternal Tower

The chest containing this Heart Orb can be found at the entrance to the real Eternal Tower after ending the illusion.


Eastward – Chapter 5 Heart Orb Locations

by Chappie in


Below is a guide on where to find the Heart Orbs in Chapter 5 of Eastward.


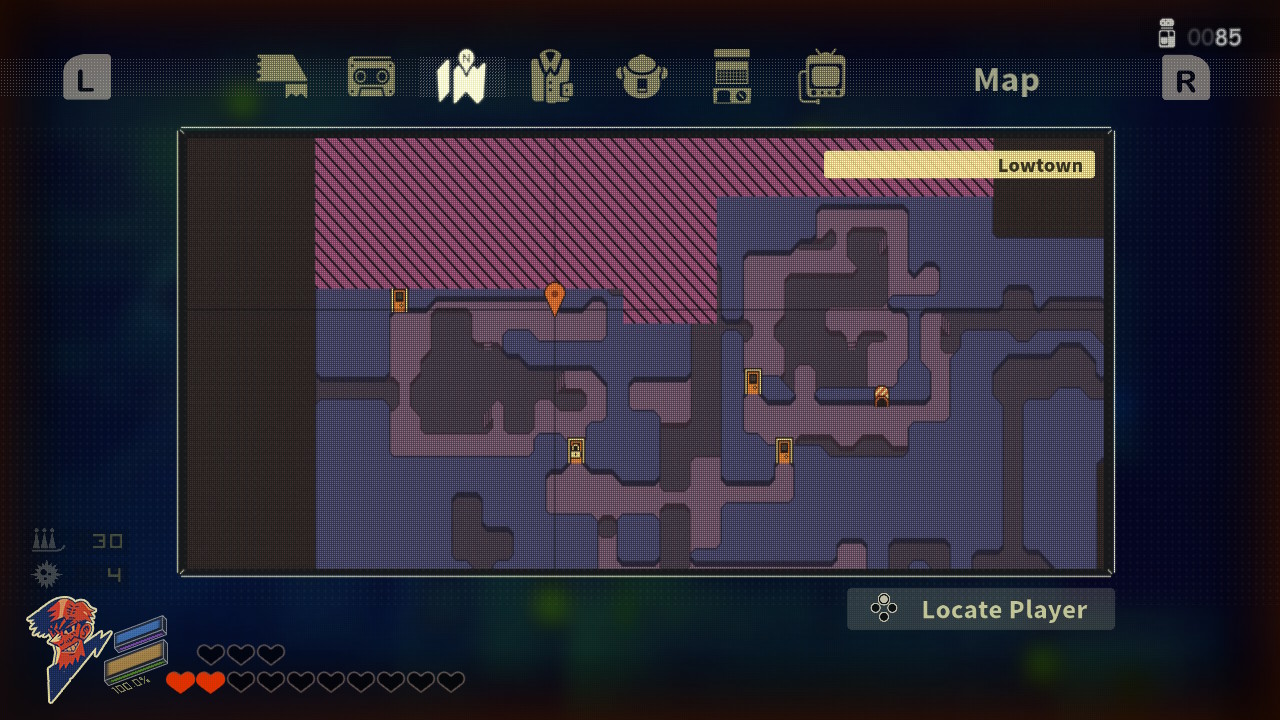
Lowtown

You’ll come across the chest containing this Heart Orb during The Aftermath quest. It will be in the northeastern part of a room full of miasma monsters hidden behind a bookshelf you’ll have to move.


Eastward
Guides

Eastward – Chapter 4 Heart Orb Locations

by Chappie in


Below is a guide on where to find the Heart Orbs in Chapter 4 of Eastward.


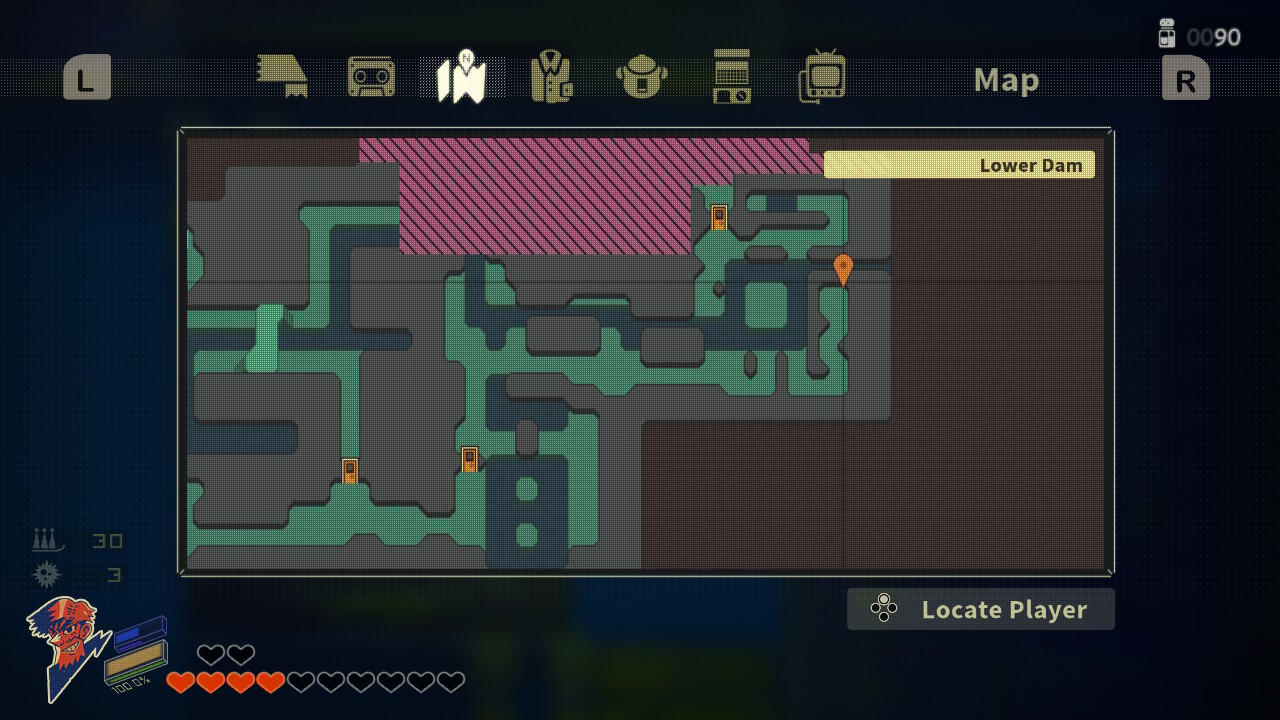
Lower Dam

This Heart Orb can be found in a room containing a central platform surround by water and a raft that moves around it. You’ll come here during the Second Wave quest. You’ll need to take the raft to the southeastern part of the room to reach the chest with the orb.


Eastward
Guides

Eastward – Chapter 3 Heart Orb Locations

by Chappie in


Below is a guide on where to find the Heart Orbs in Chapter 3 of Eastward.


City Outskirts

From the start of the City Outskirts, head east passing the pond. Keep going east to reach the next area then take the path north to reach another area. Head past the first fence then take a right. After defeating the spikey enemies there, move east a little bit to see some cracked stone pillars blocking off a set of stairs. Drop a bomb then head down the stairs (be prepared to fight!). When you head far enough into the cave, the way out will be sealed and two teleporting cows show up. They teleport around the cave shooting milk at you. Dodge the milk and attack them when you can. A good way to deal some damage is to stun them with Sam, then using John’s frying pan to wail on them. After you defeat the two cows, head up the stairs to find a chest with the Heart Orb.


Old Town (past Grandpop’s House)

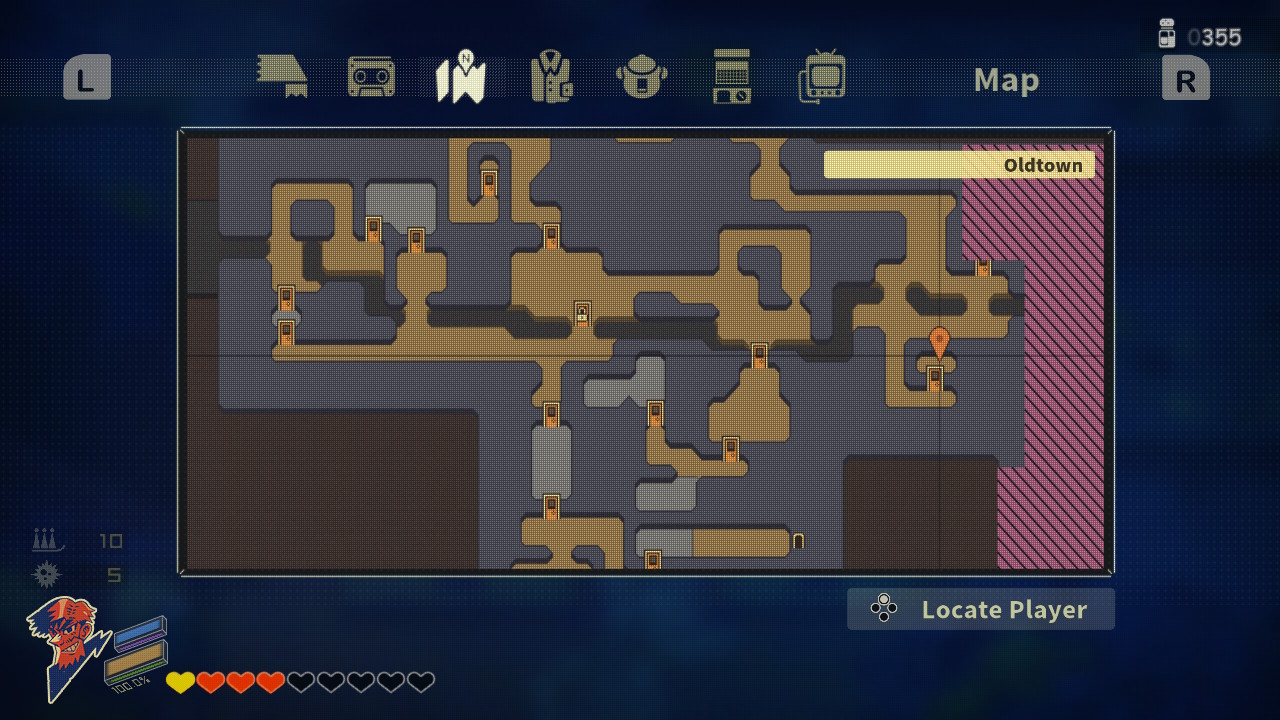
During the New Dam City quest, while looking for a slime-breeding forest, you’ll come to a road with a zombie and venus fly traps. The chest containing this Heart Orb can be found after crossing a bridge south of the road and following the southwestern path. This will bring you to an area guarded by three zombies. Defeat them to reach the chest.


New Dawn City

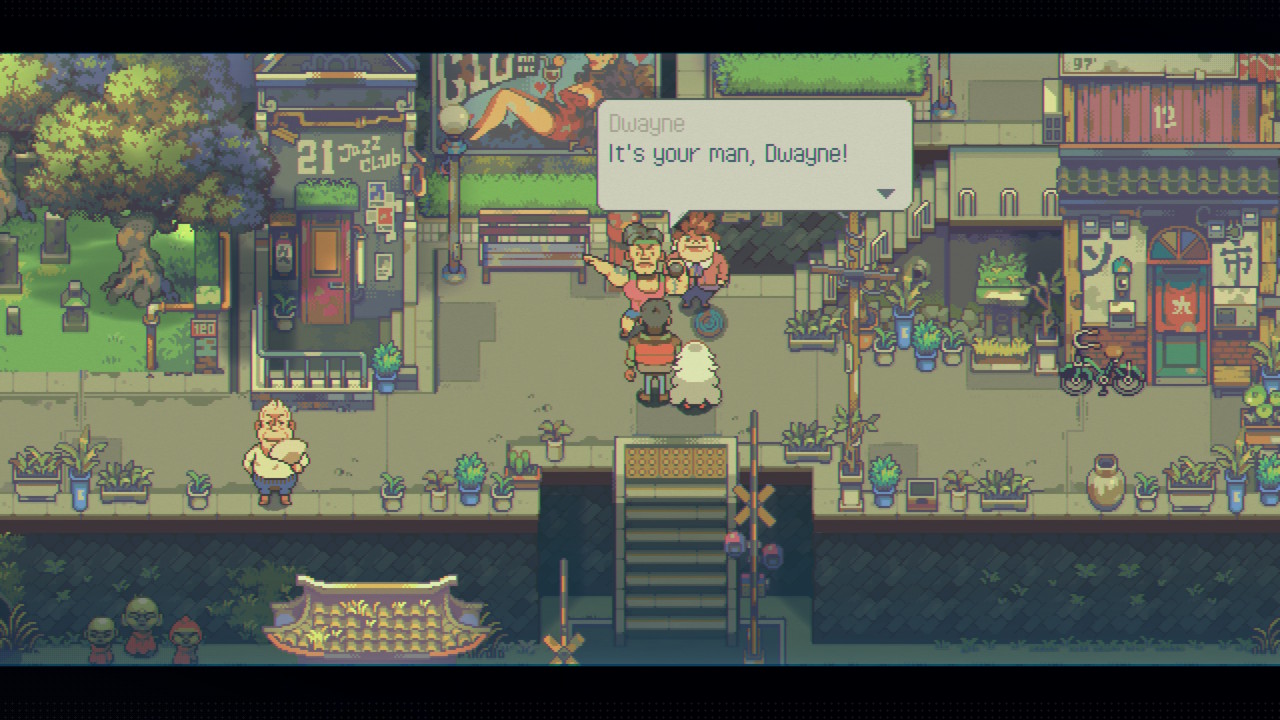
This Heart Orb can be obtained by helping Dwyane find the perfect dish during the chapter 3 quest, A Big Dam Plan. You’ll want to head to Uptown and speak with Dwayne near the bench, he’ll ask you to make him a burger set. Travel to the Coin Palace and speak with Mikey on the game floor to receive the Burger Set recipe. You’ll need meat, fish and fruit to cook the burger. This can be done in Lowtown (reachable through Dragon Market). Return to Dwayne and give him the burger. Speak with him again then go to Lowtown and talk with Big Jaw. Choose the “put up the dough” option to get the Vegetable Stir-Fry recipe. Use the stove in Lowtown to create the dish using vegetables. Take the stir-fry back to Dwayne and give it to him for another dialog event. When it ends, head to Jazz 21 and speak with Kurahachi1 to receive a Diet Set. You’ll need an egg, chicken and lobster to cook this dish. Those items can be found in The King Krab and The Friendly Spendie, but keep in mind that the items for sale change so you might have to do some other stuff until they appear. After cooking the Diet Set, take it to Dwyane for one last dialog event. When it ends, you’ll receive a Heart Orb.


New Daw City

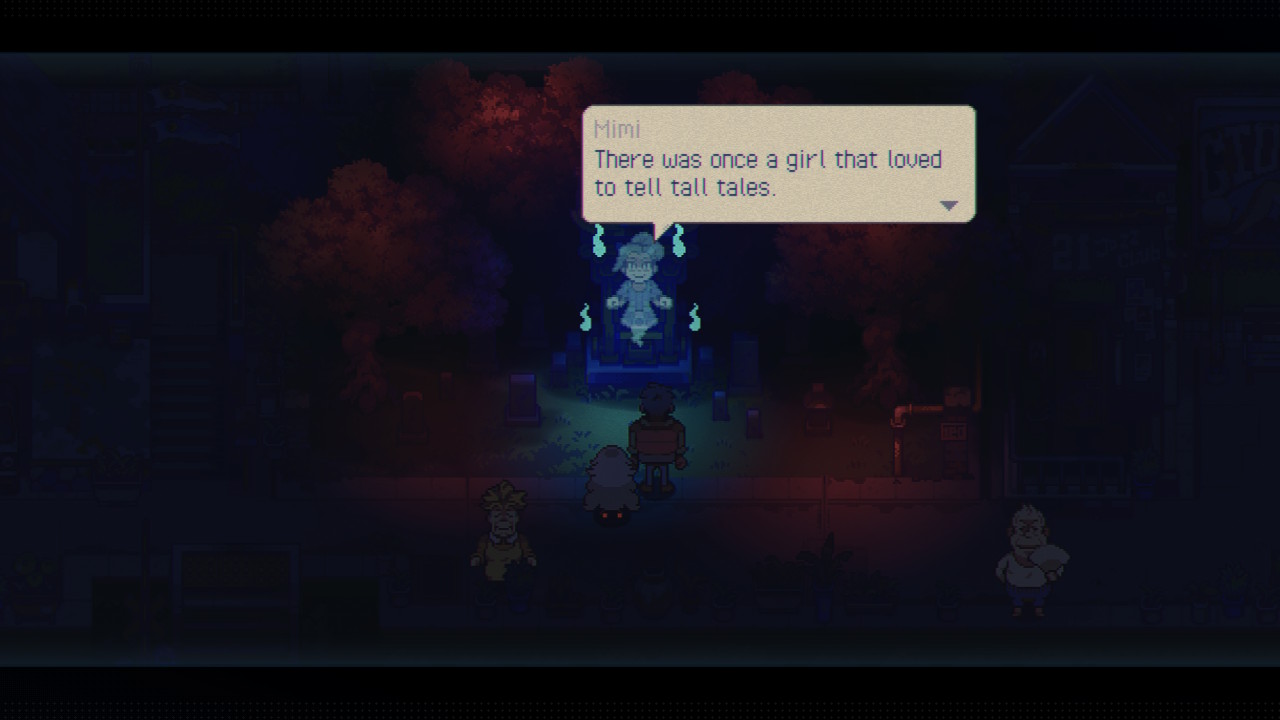
This Heart Orb can be obtained from Mimi at the shrine in Uptown after listening to all of her ghost stories. You can hear the stories by interacting with scattered around the different areas in chapter 3. They are listed below:

  • Dragon Market
    • On the ground in the northwestern part of the area
  • Hot Springs
    • To the left of the main doors of the hot spring
  •  Lowtown
    • On a table in the western part of the area
  • Midtown
    • In an alleyway between two buildings (one of the buildings has a pig statue)
  • Princess Avenue
    • In an alley under a fan to the right of the path leading to Rocket Mansion


Quake Valley

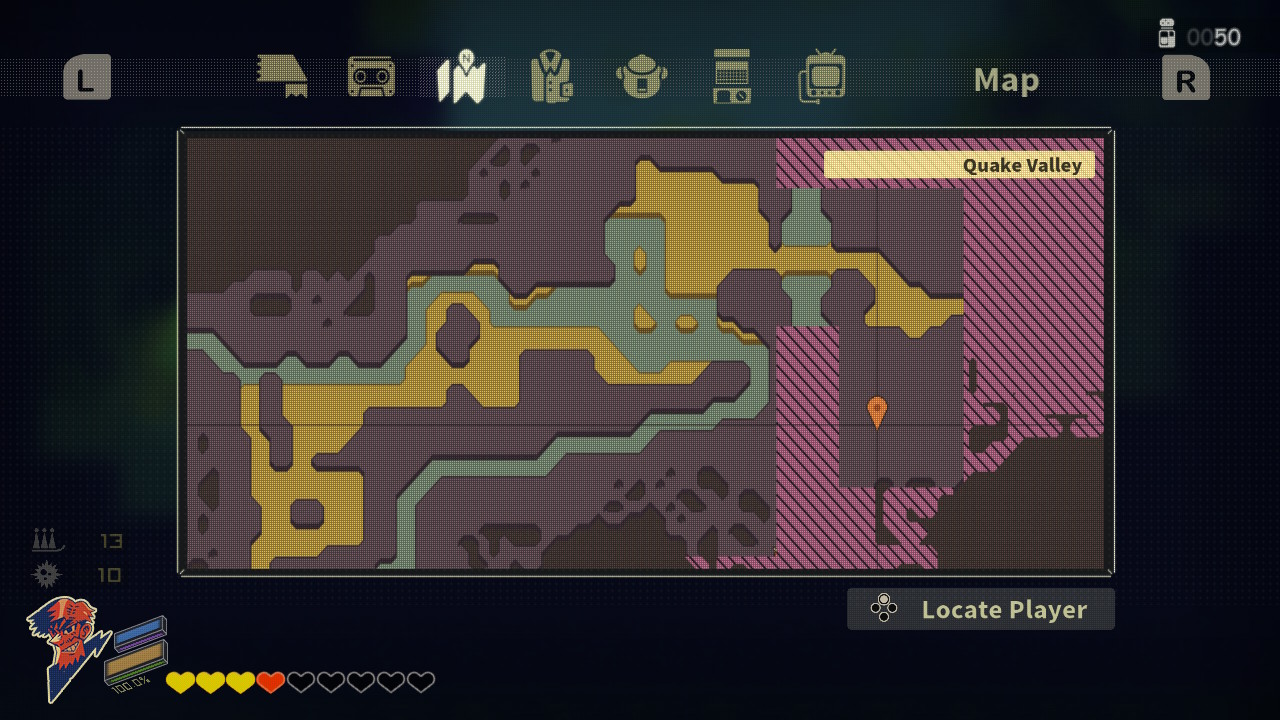
This Heart Orb is located in a chest found at the eastern part of the area which you’ll access as part of the A Golden Feast quest.