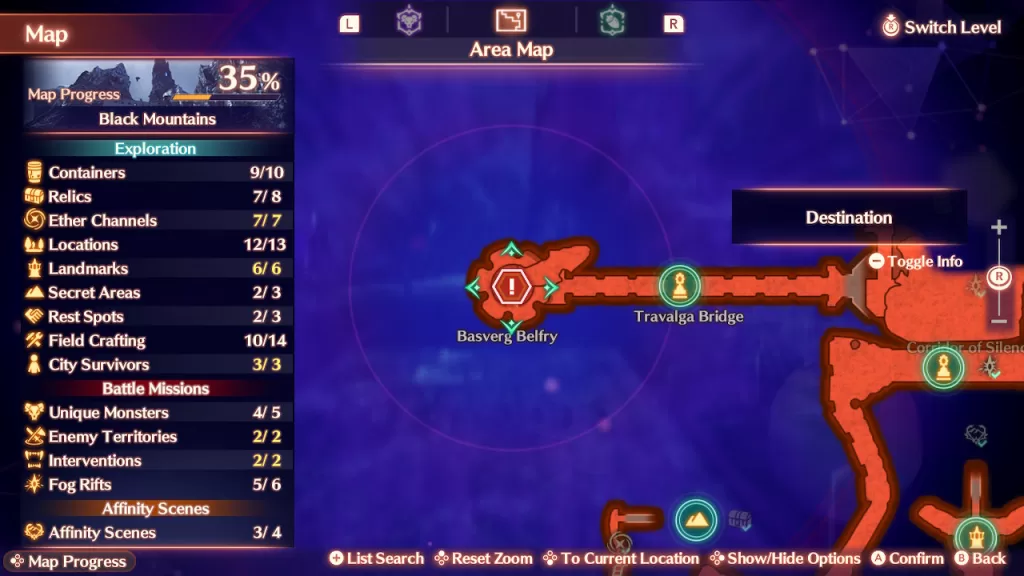
As you explore The Ragmos Desolation in Xenoblade Chronicles 3 Future Redeemed, you can find Affinity Scenes, City Survivors, Containers, Field Crafting, Relics, Secret Areas, Unique Monsters, etc. There locations can be found below!
Affinity Scenes
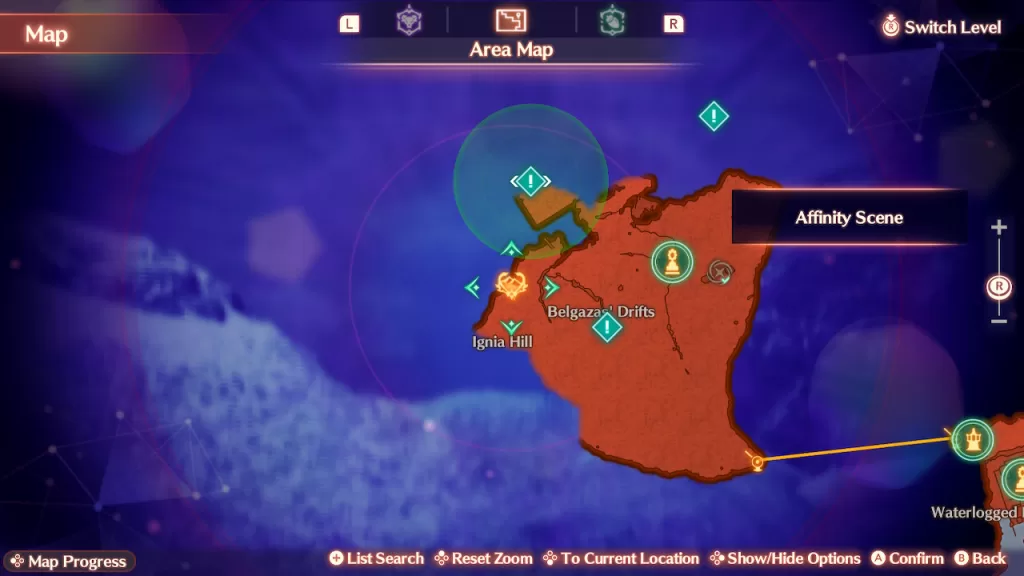
1. Ignia Hill
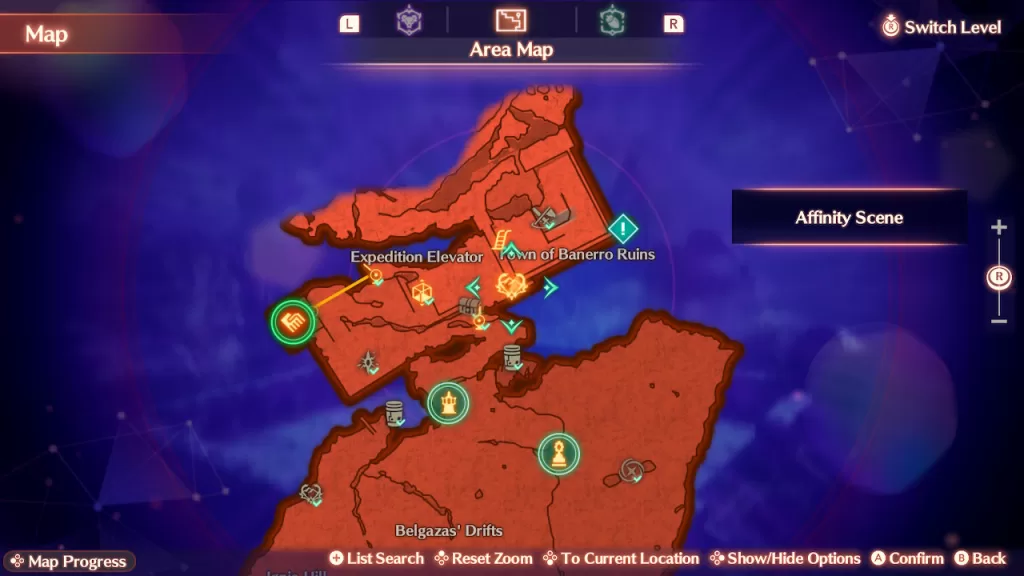
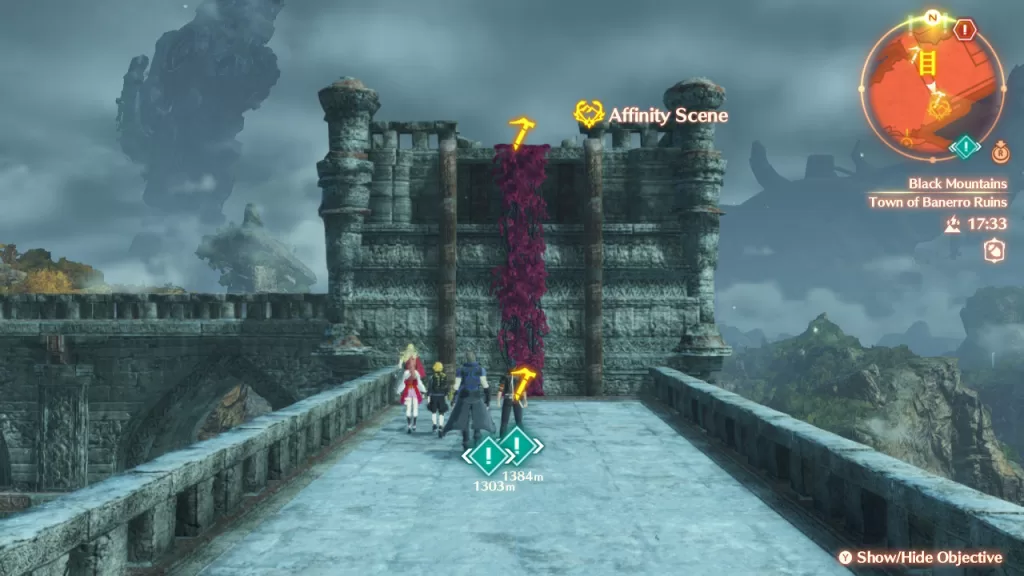
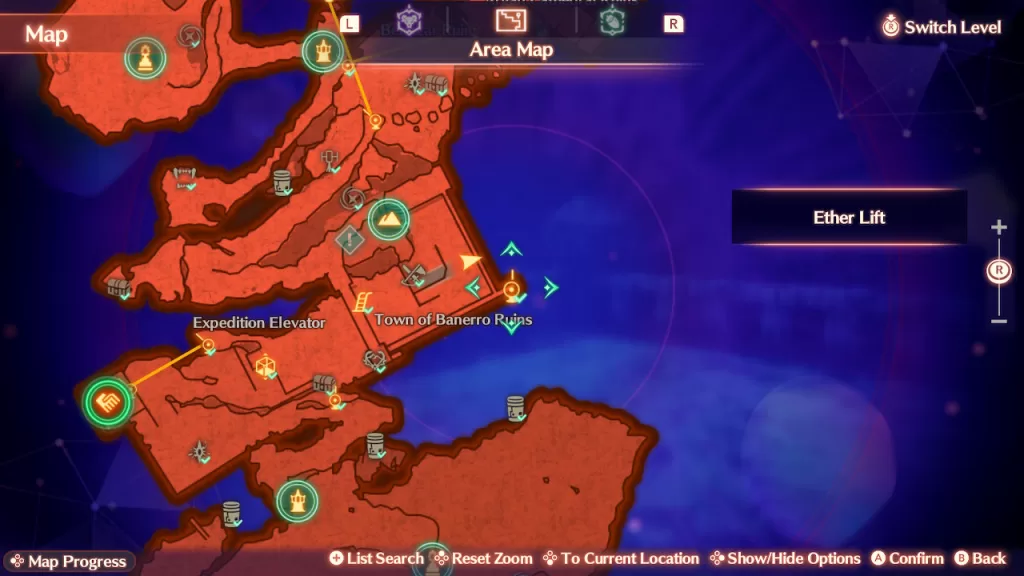
2. Town of Banerro Ruins
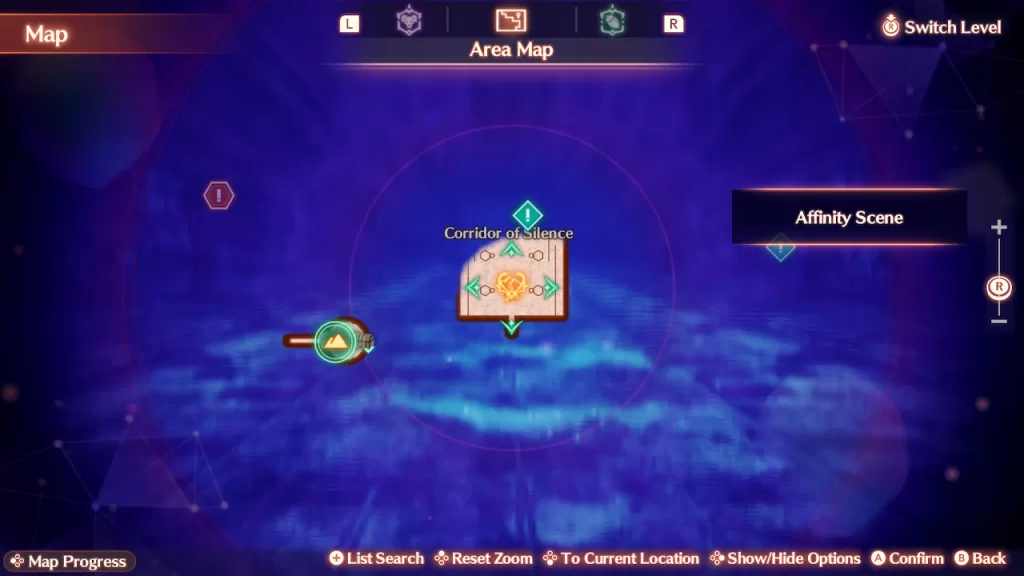
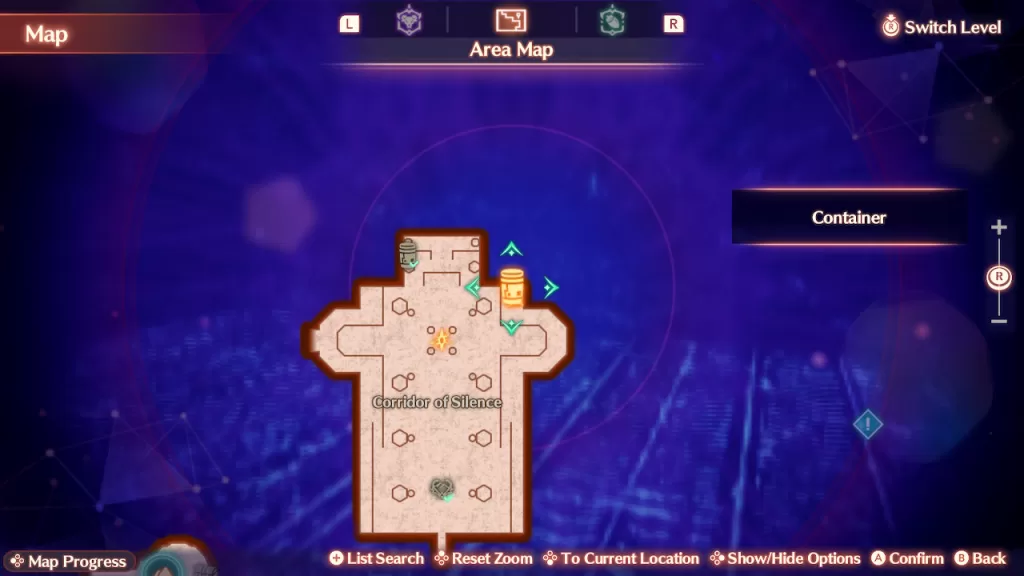
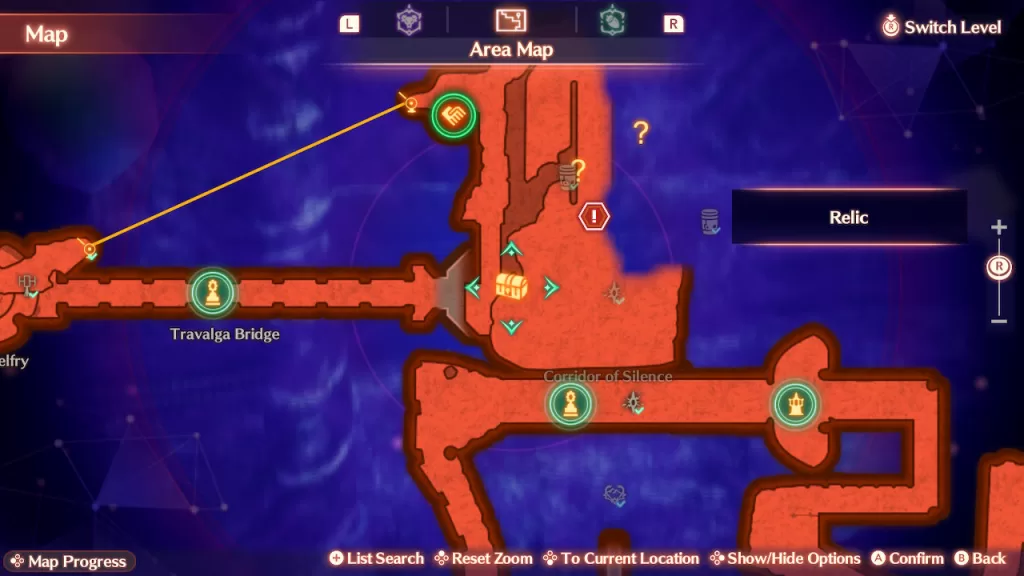
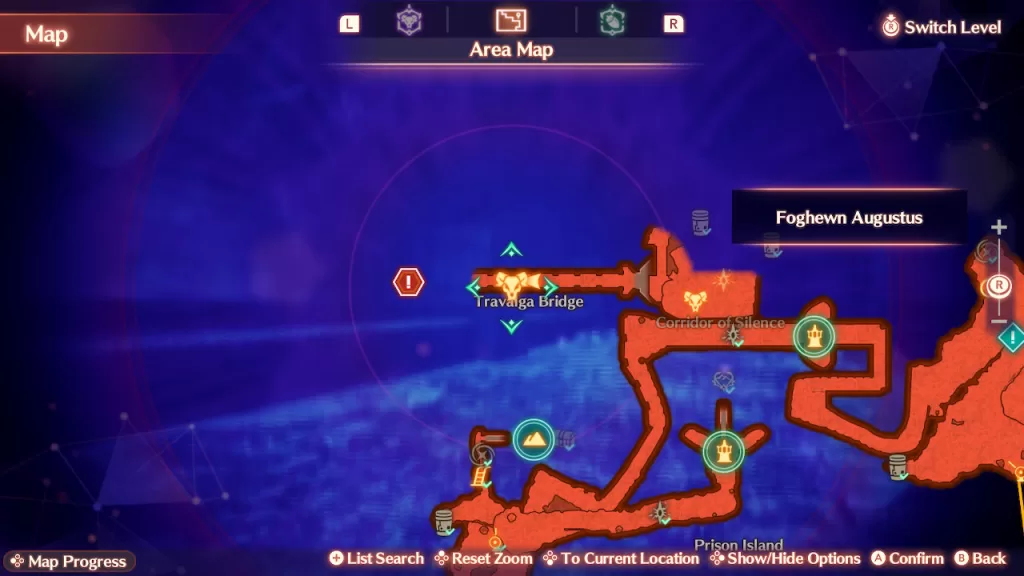
3. Corridor of Silence
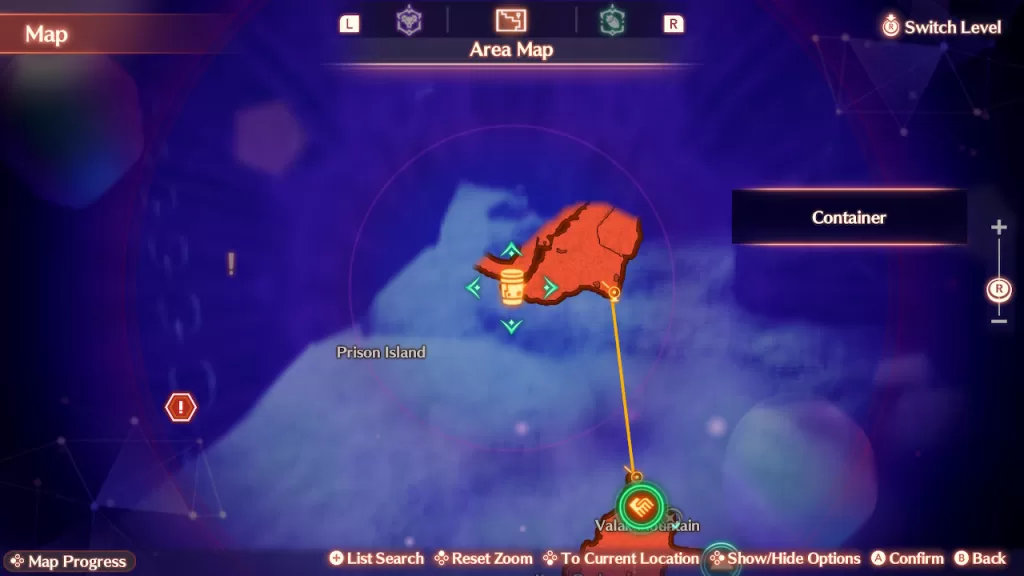
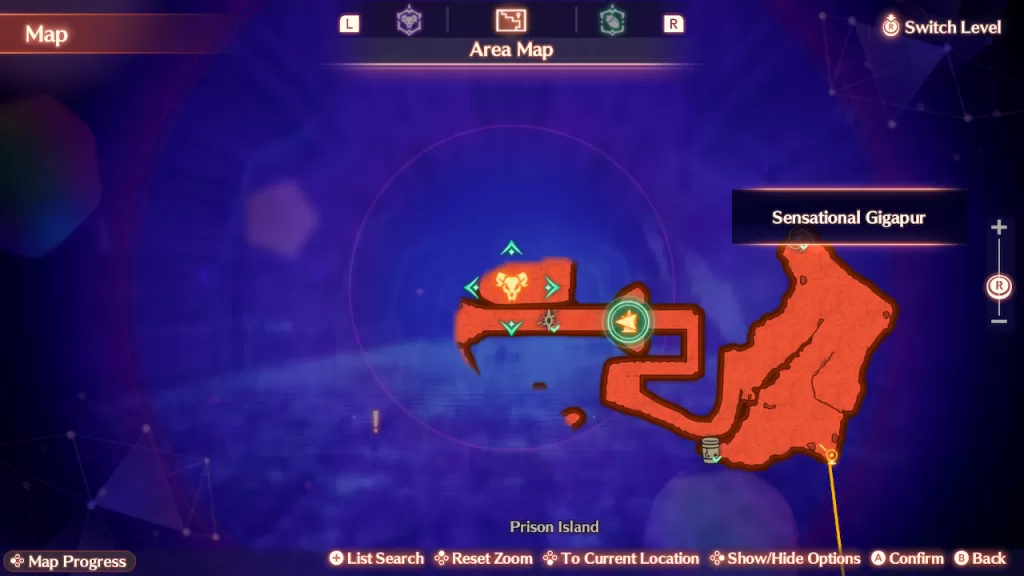
4. Prison Island
City Survivors
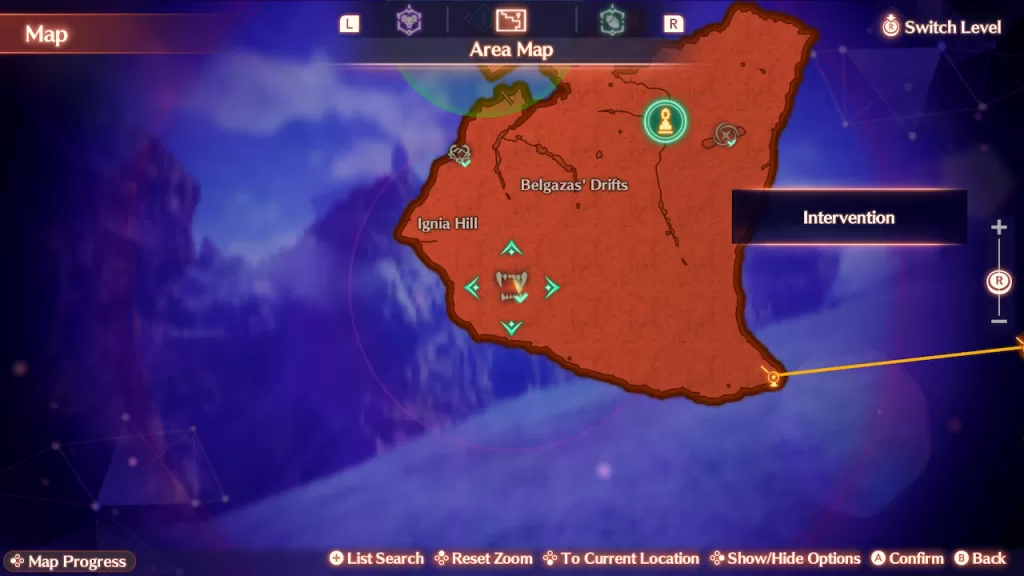
1. Complete the intervention in southeastern Ignia Hill
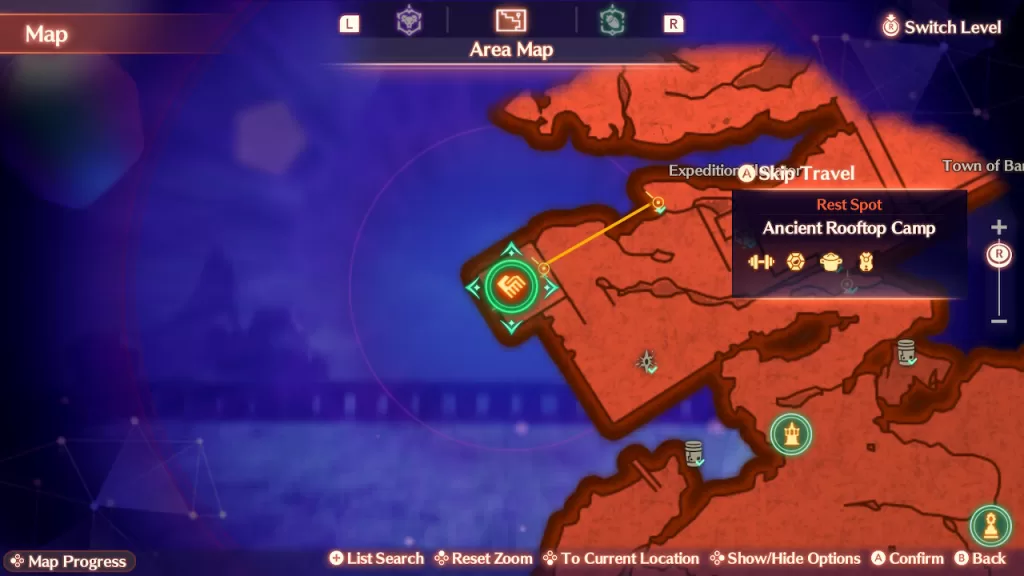
2. At Ancient Rooftop Camp rest spot which is reachable via an ether slide
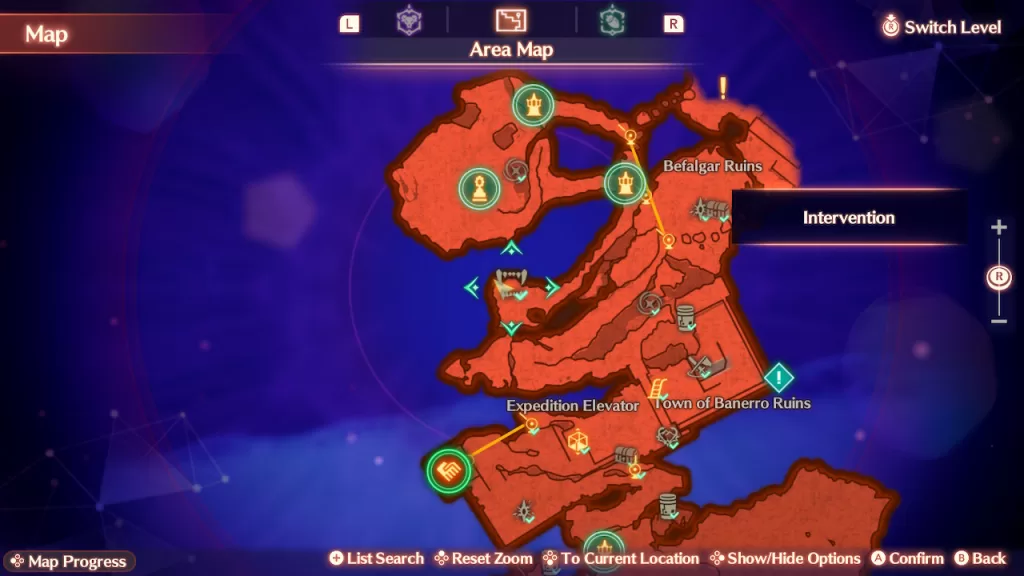
3. Cummings can be found by defeating the intervention on the western side of the map
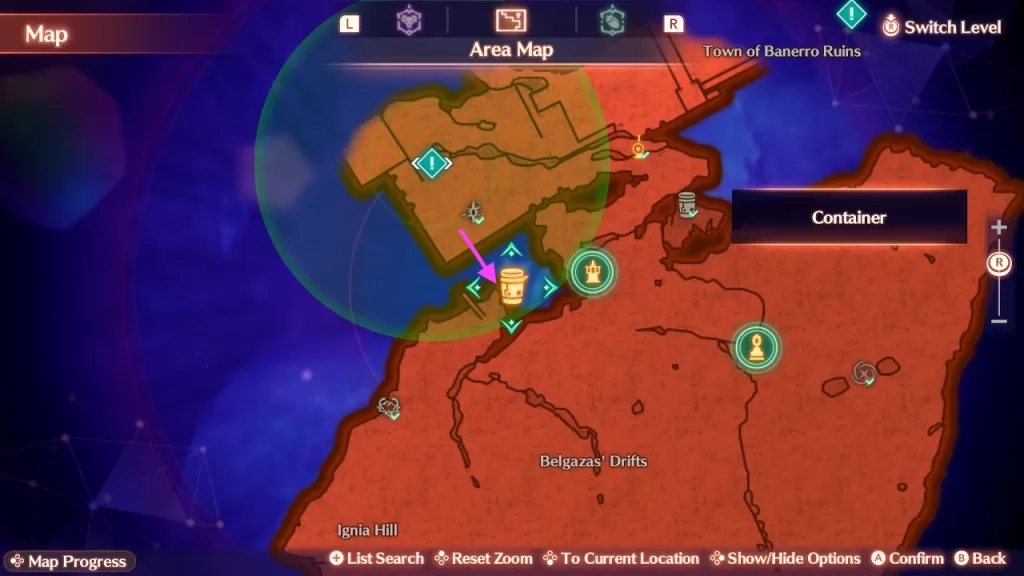
Containers
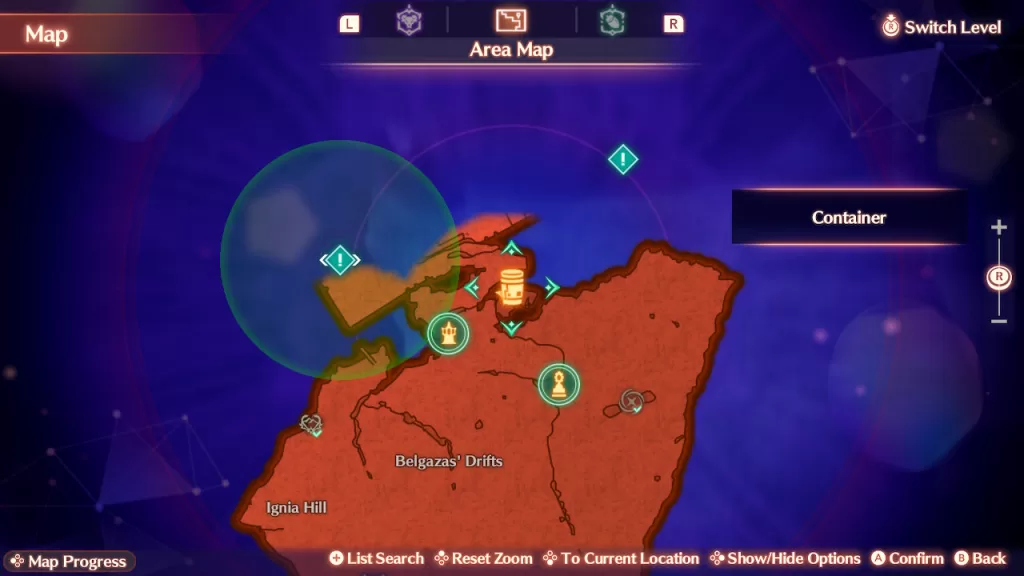
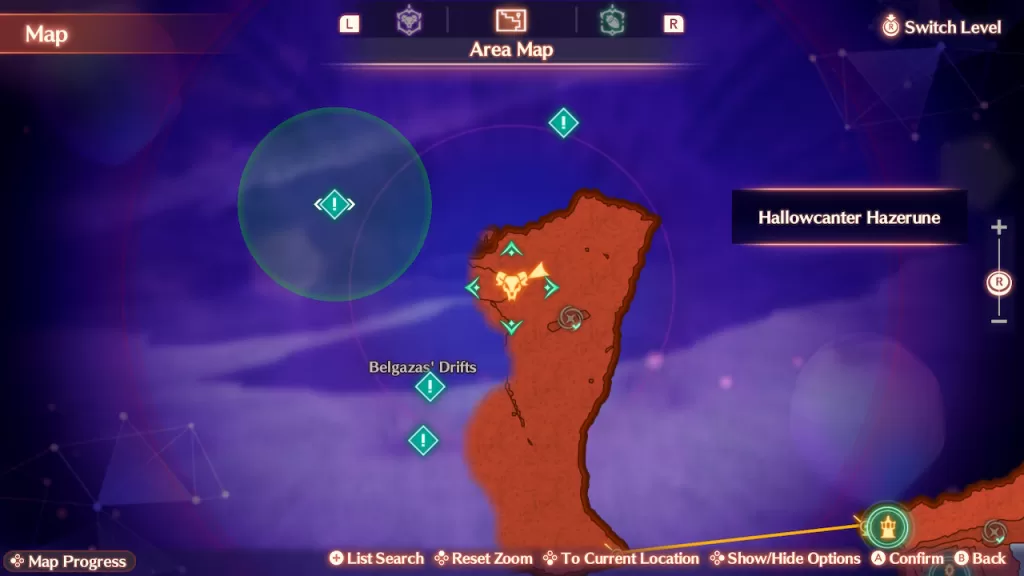
1. Belgazas’ Drifts – On a ledge of the mountain. You’ll need to drop down/jump to it.
2. Near the Fog Rift jump down over the railing to reach this chest perched on a cliff
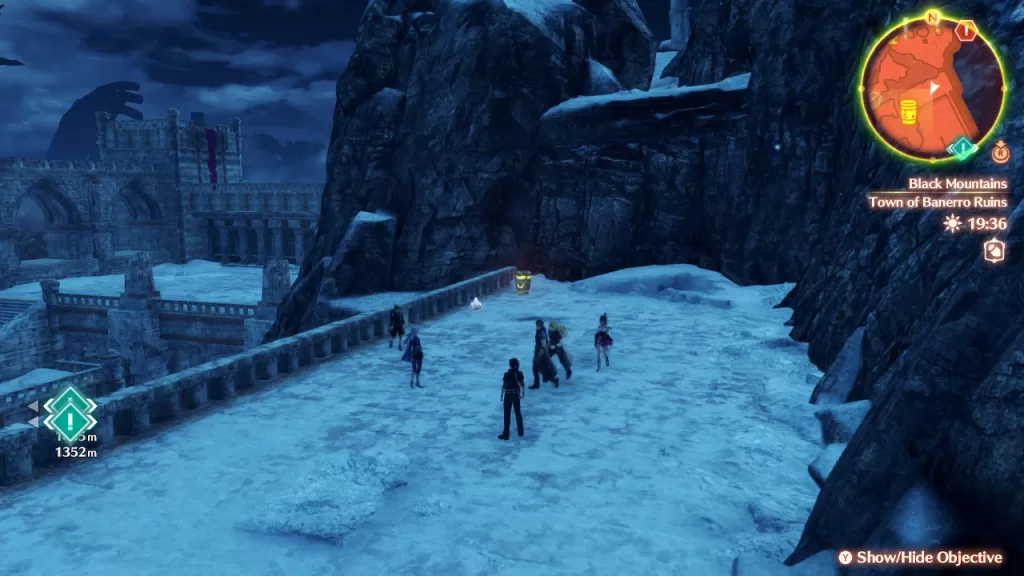
3. Town of Banerro Ruins
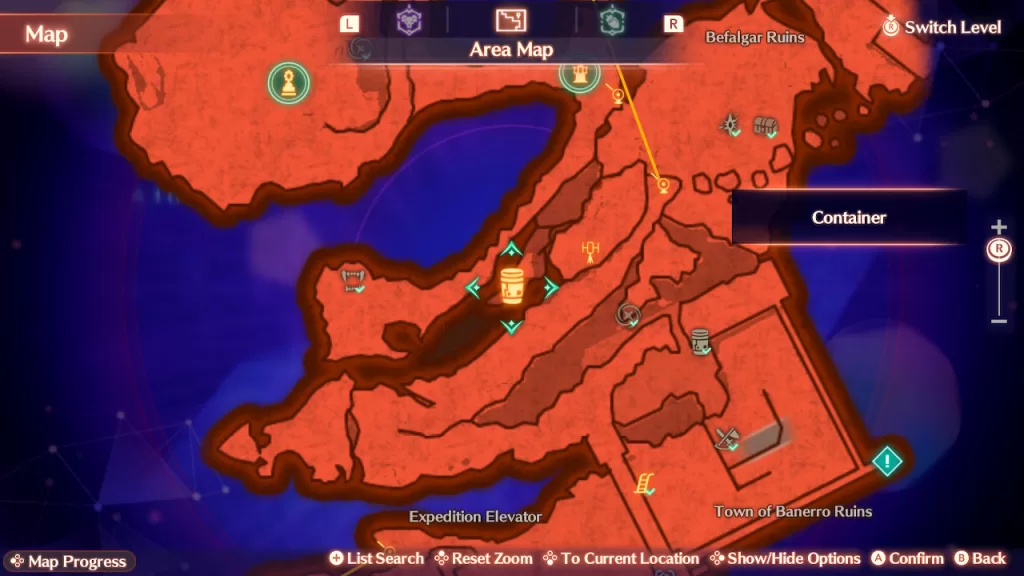
4. On the side of the mountain
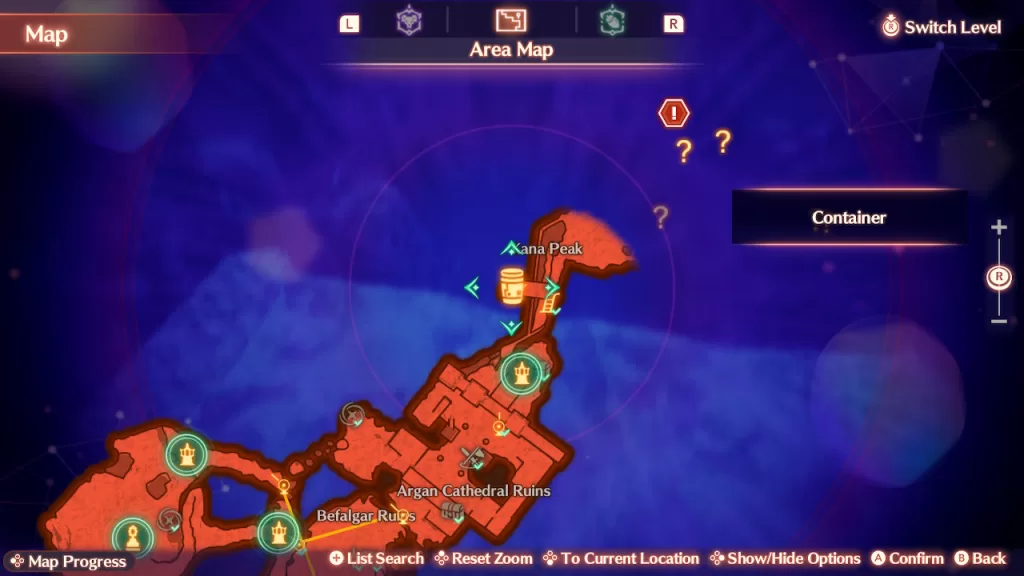
5. Kana Peak
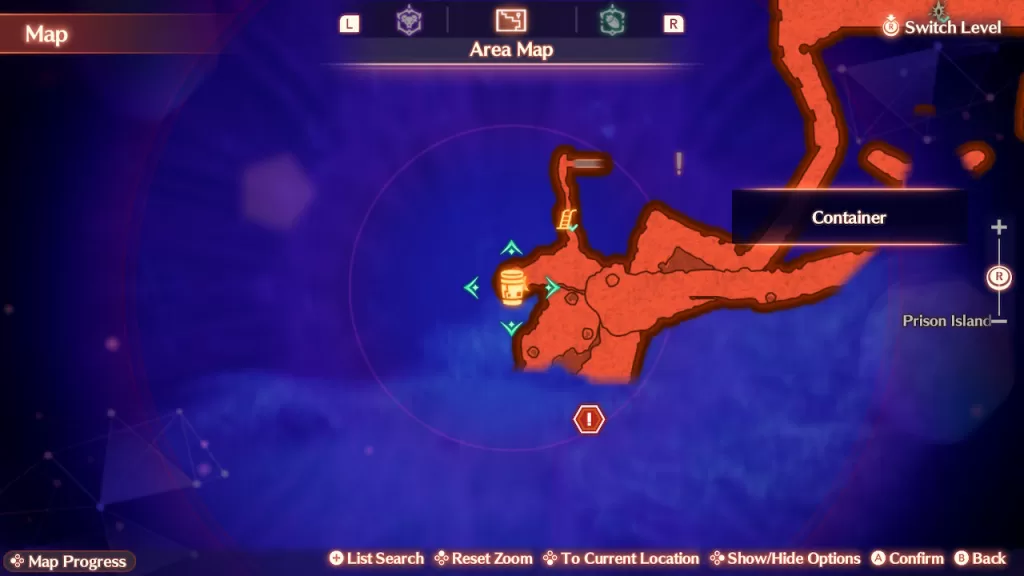
6. Southern side of Prison Island just after crossing ether slide
7. Prison Island
8. Corridor of Silence
9. Corridor of Silence balcony
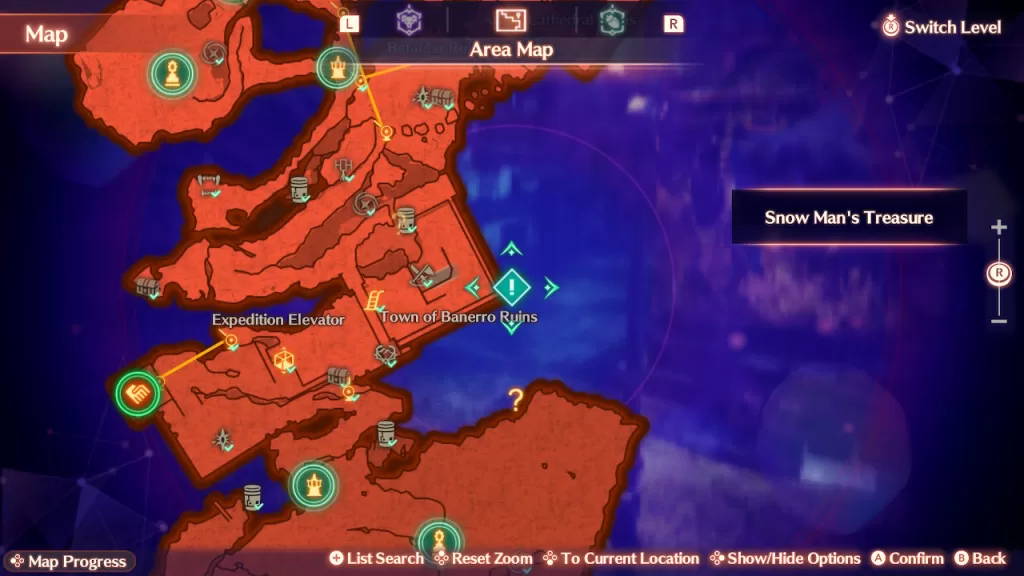
10. Cliff on side of mountain – You’ll be able to reach this container after you take the ether lift on the eastern side of Town of Banerro Ruins which is available during the Snow Man’s Treasure standard quest
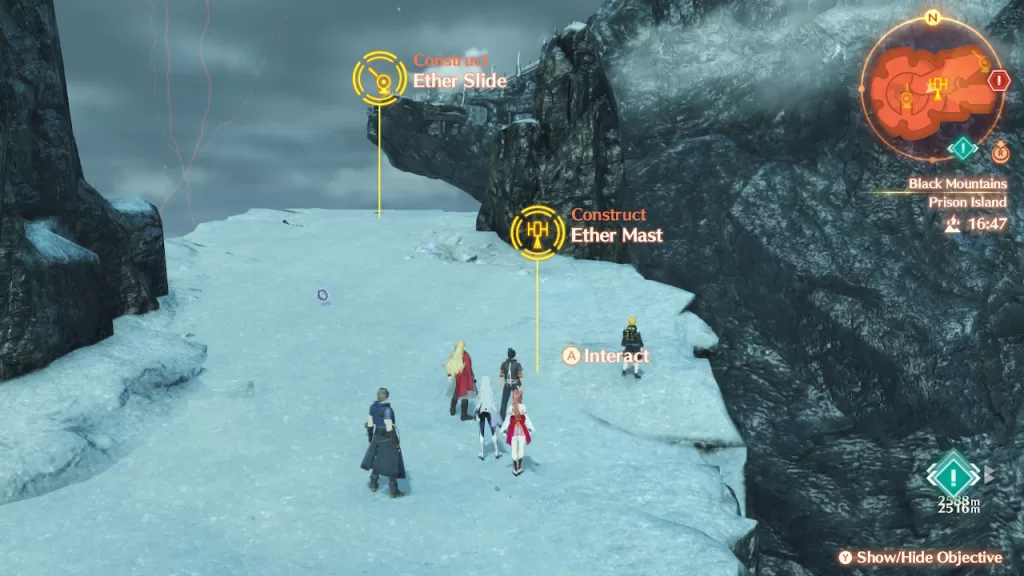
Field Crafting
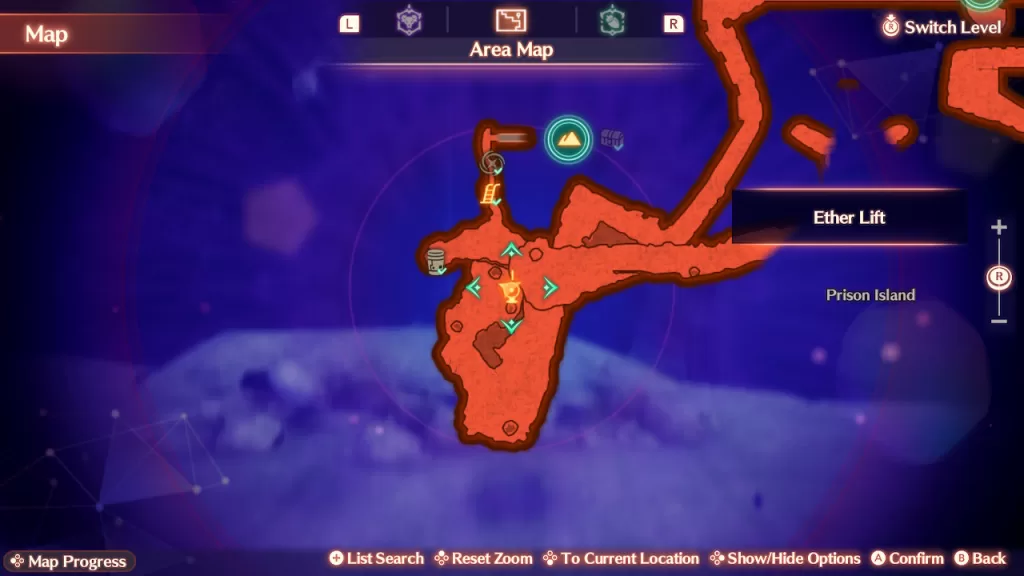
1. Ether Lift
2. Elevator
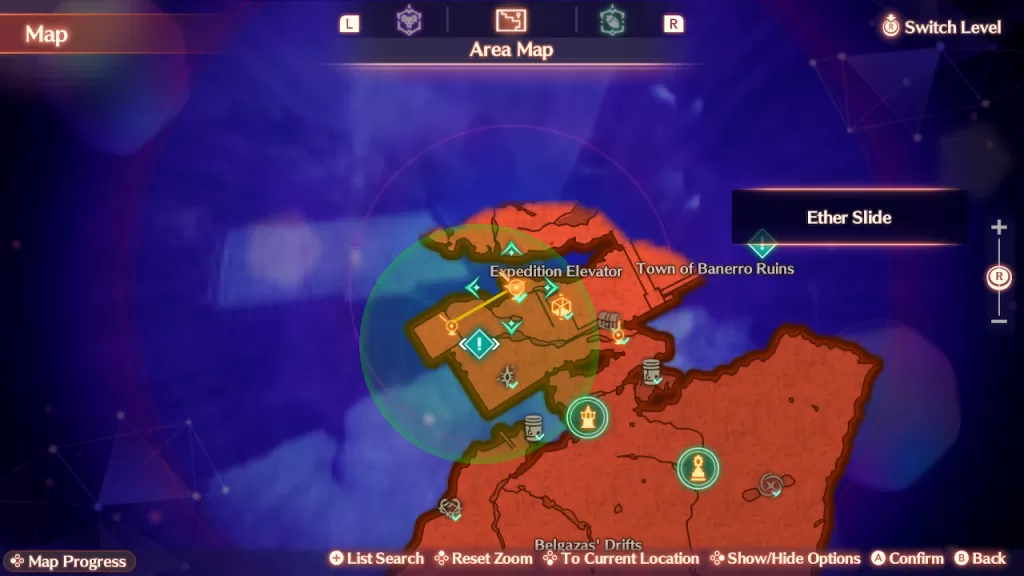
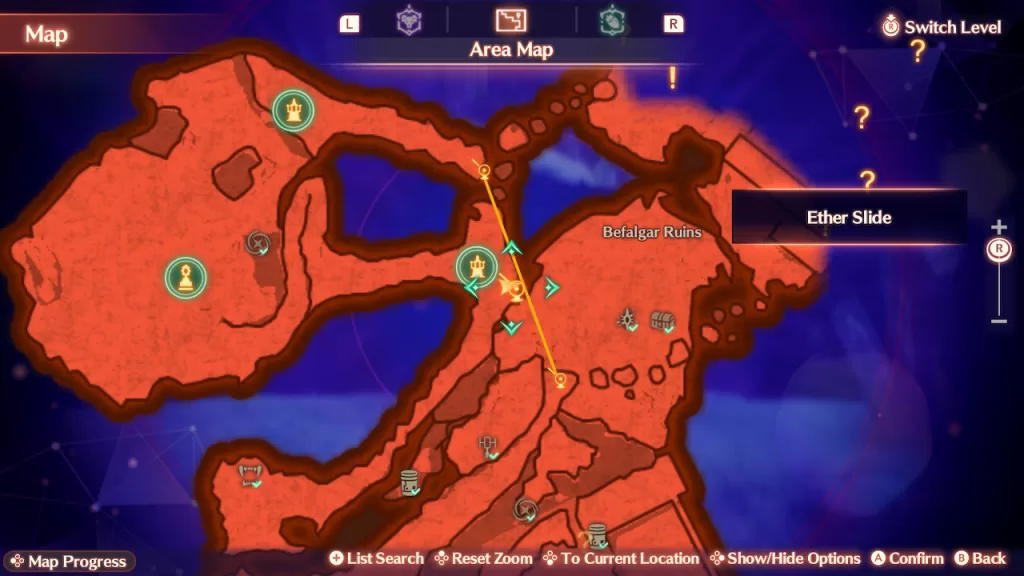
3. Ether Slide
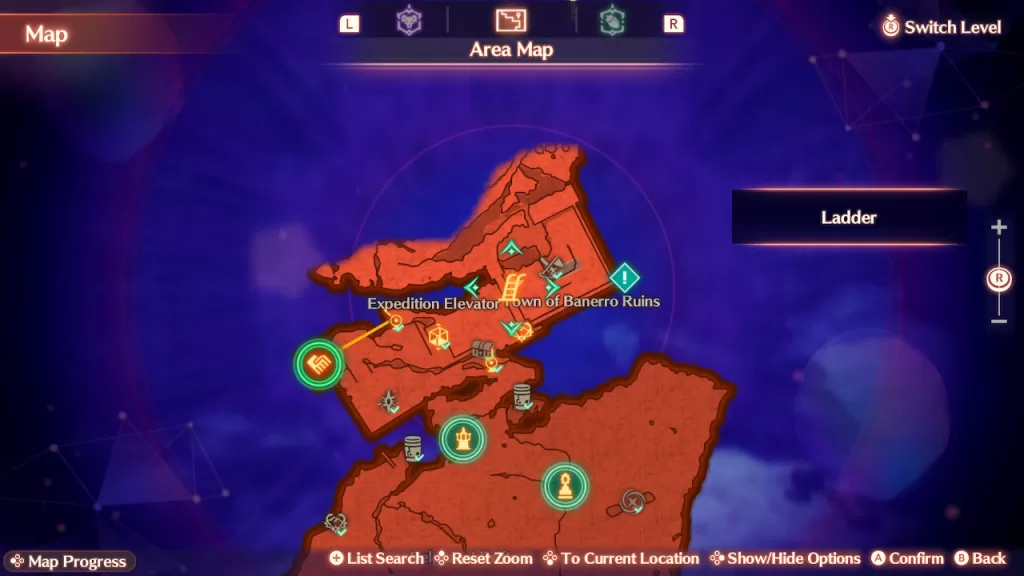
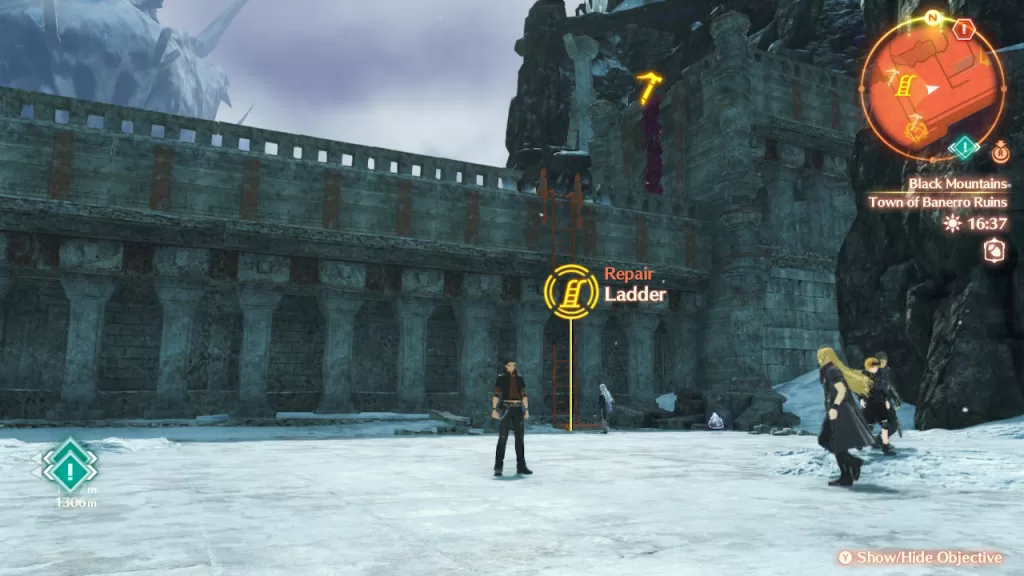
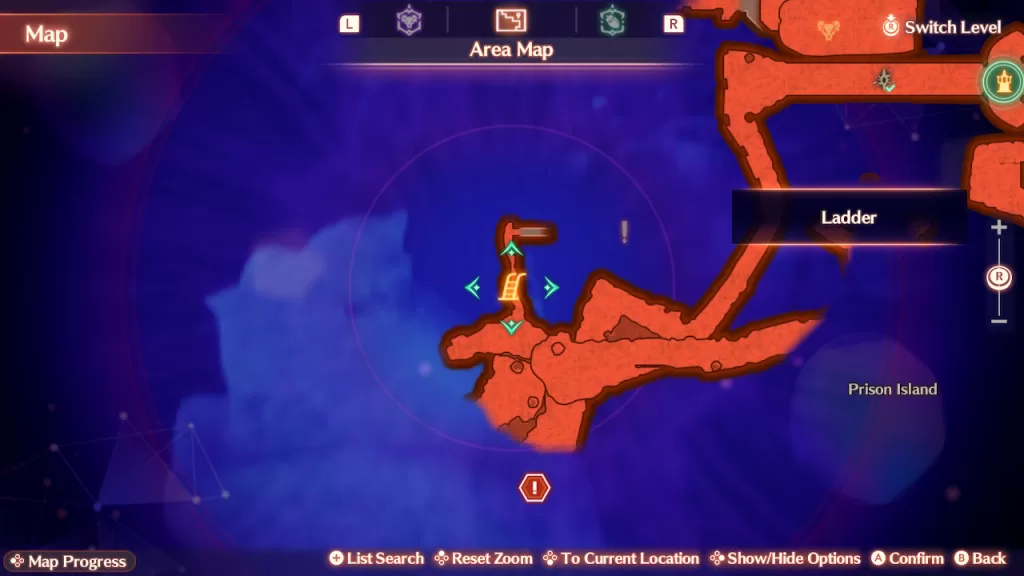
4. Ladder
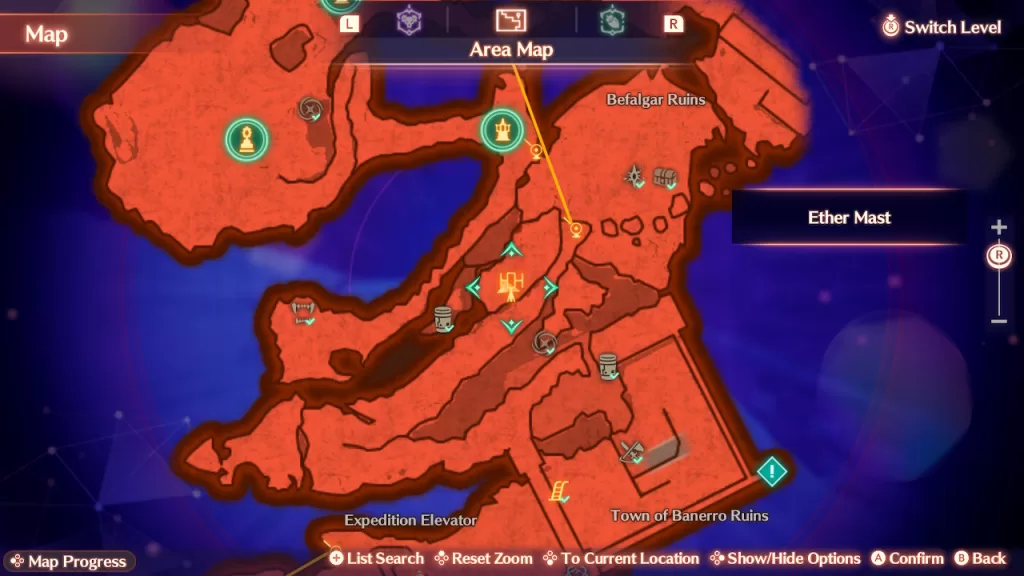
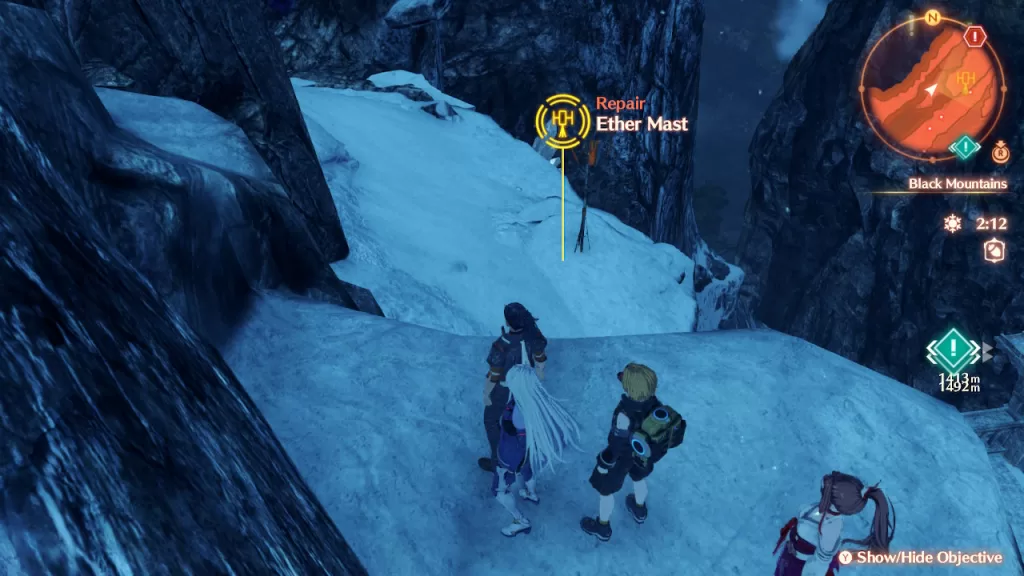
5. Ether Mast
6. Ether Slide
7. Ether Lift
8. Ladder
9. Ladder
10. Ether Lift
11. Ether Lift
12. & 13. Ether Mast and Ether Slide
14. Ether Lift
Relics
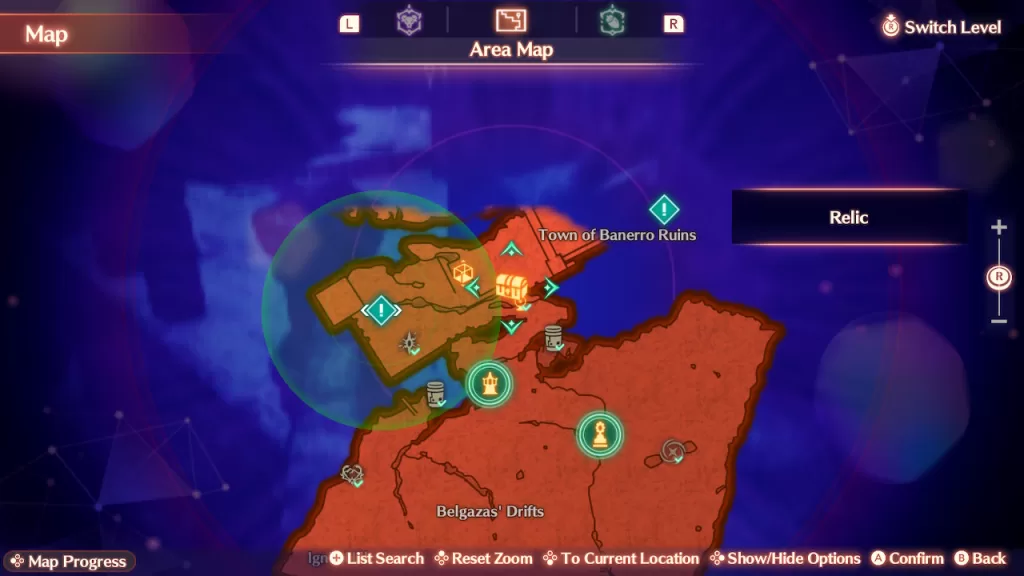
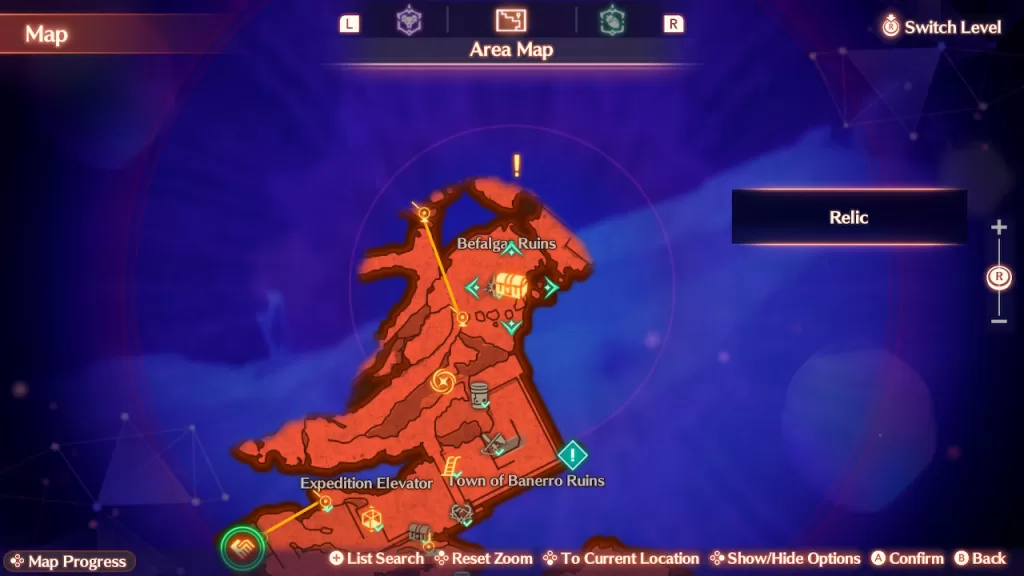
1. Town of Banerro Ruins – Use the ether lift to reach it
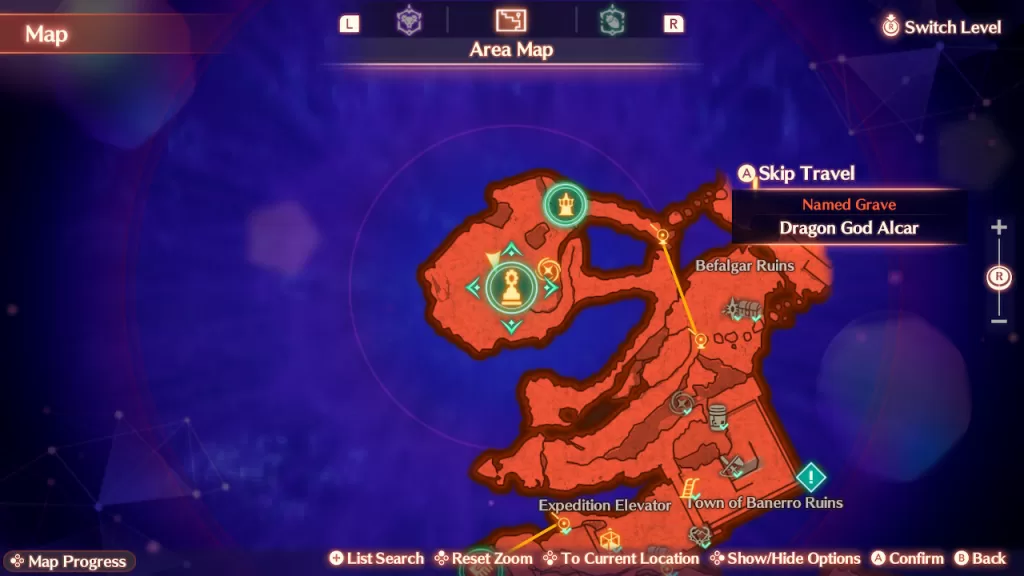
2. Befalgar Ruins near a fog rift
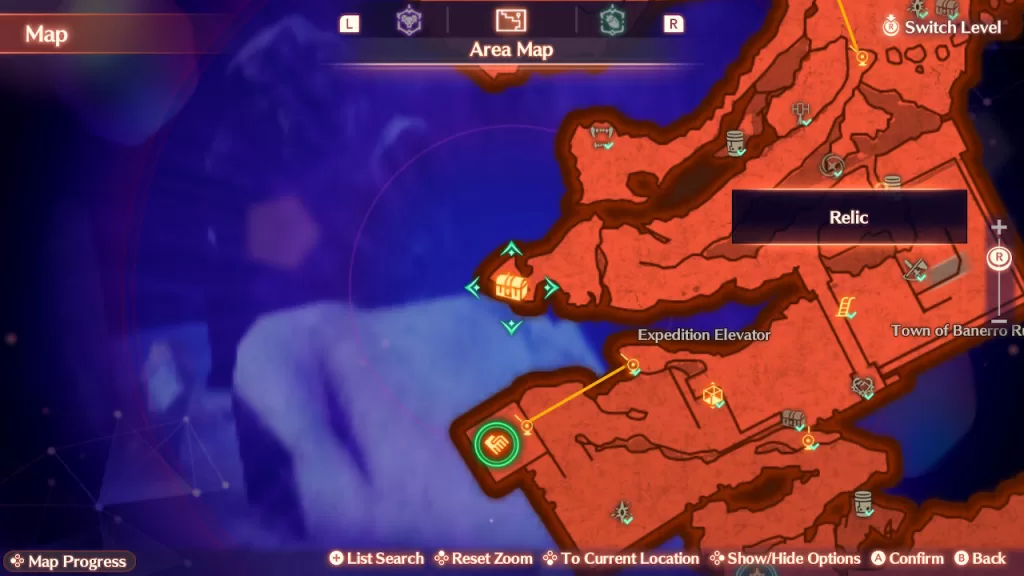
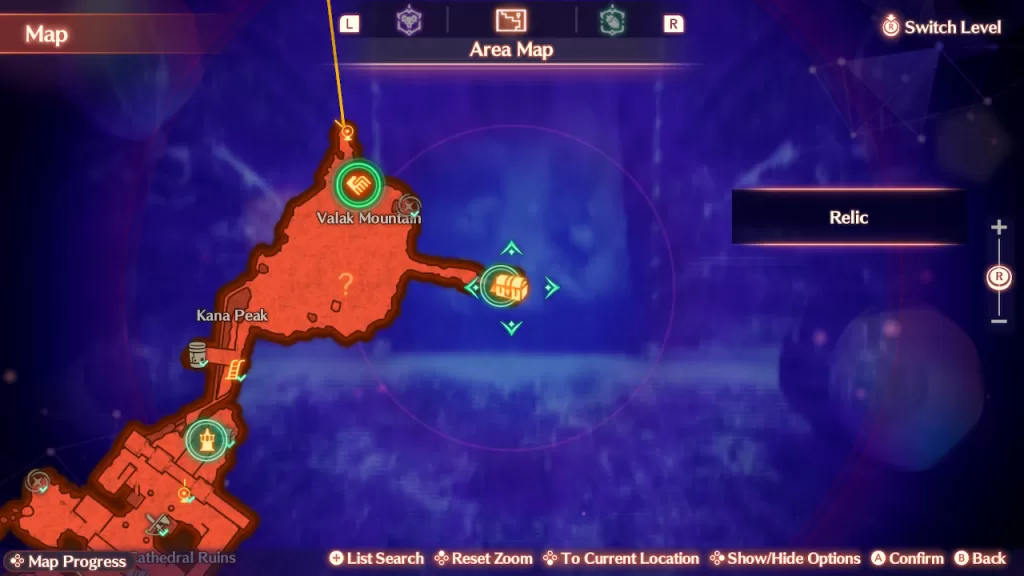
3. On the side of the mountain on the western side of the map. You’ll need to drop down to it.
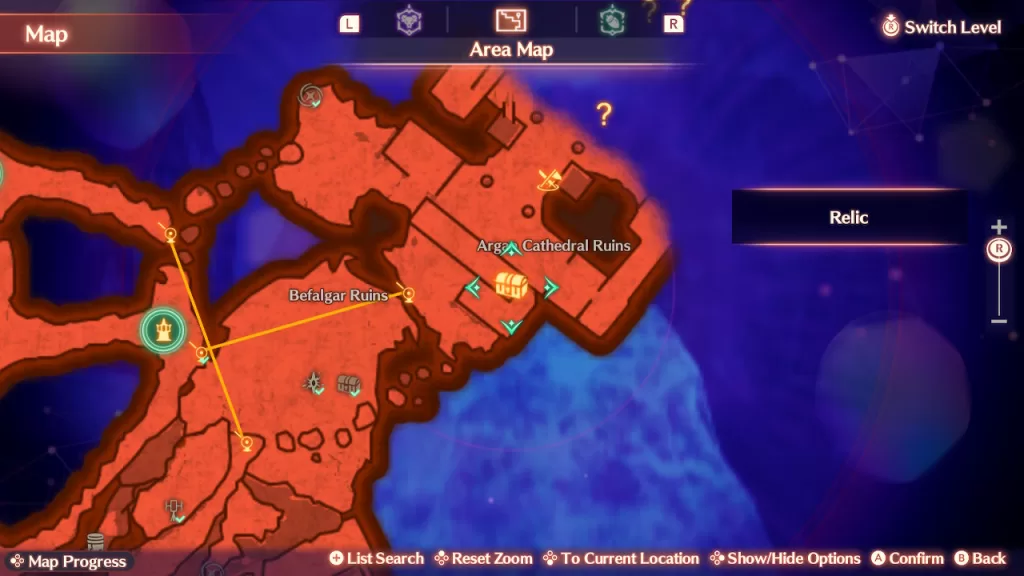
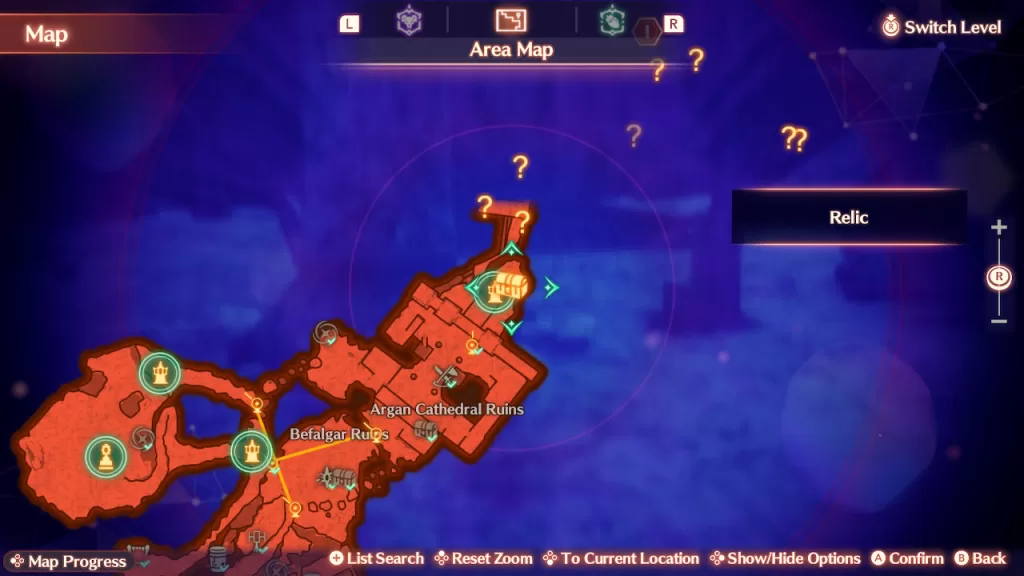
4. Argan Cathedral Ruins
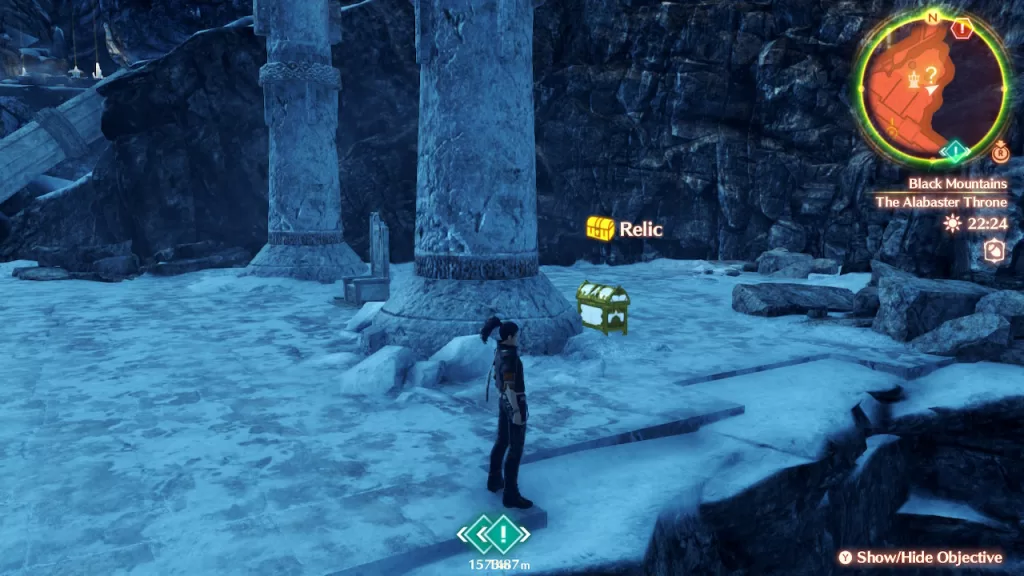
5. The Alabaster Throne
6. Three Sage Tabernacle
7. Third Sanctum
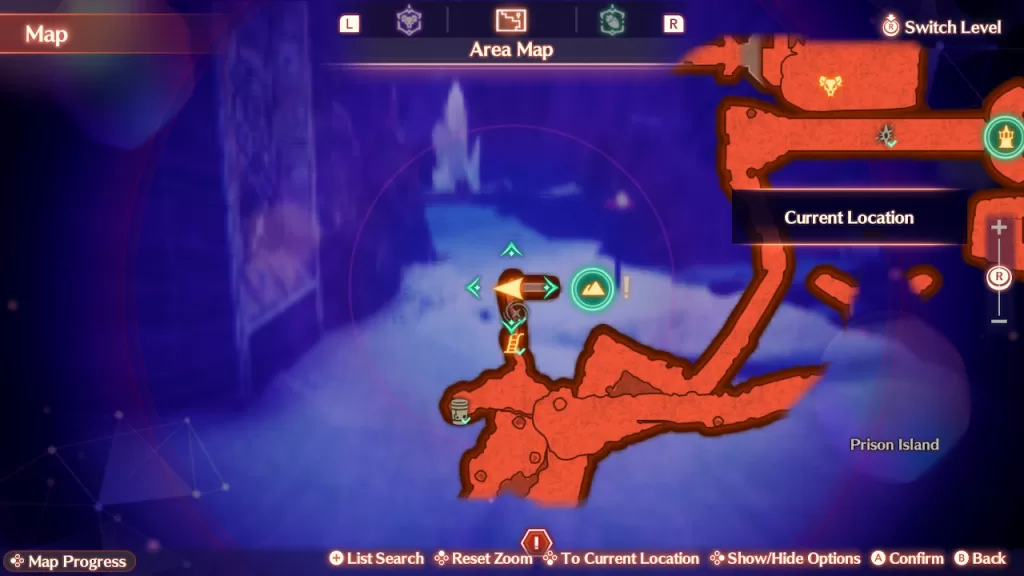
8. Prison Island
Secret Areas
1. Three Sage Tabernacle
2. Third Sanctum
3. La Luz Temple
This area is reachable during the Snow Man’s Treasure standard quest. You’ll need to take the ether lift on the eastern side of Town of Banerro Ruins to reach it.
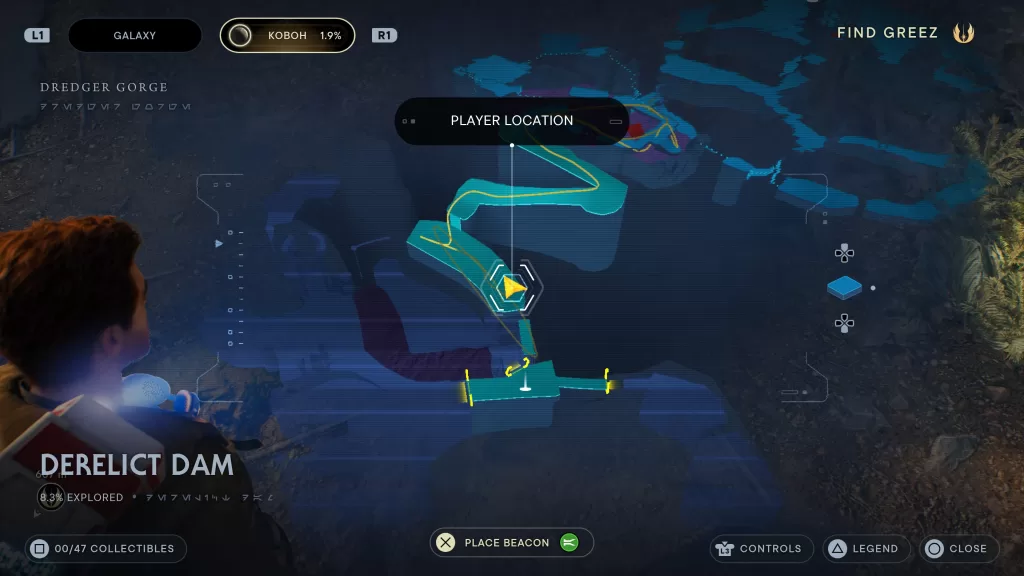
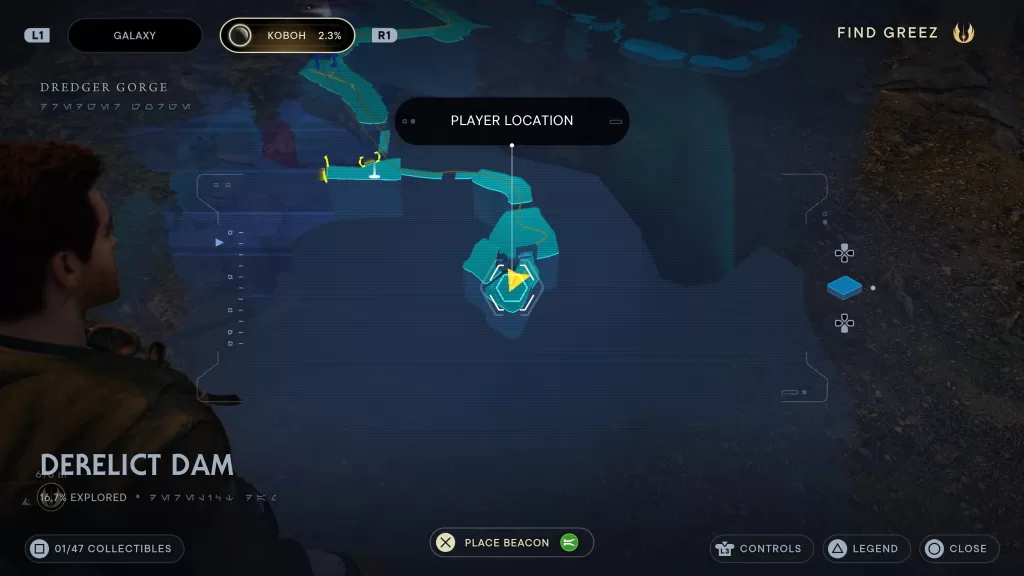
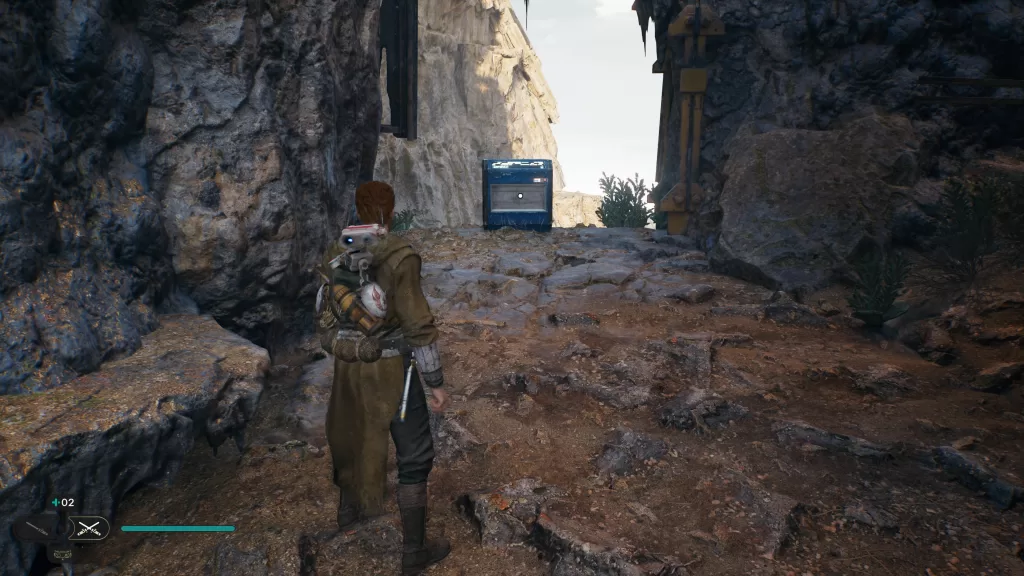
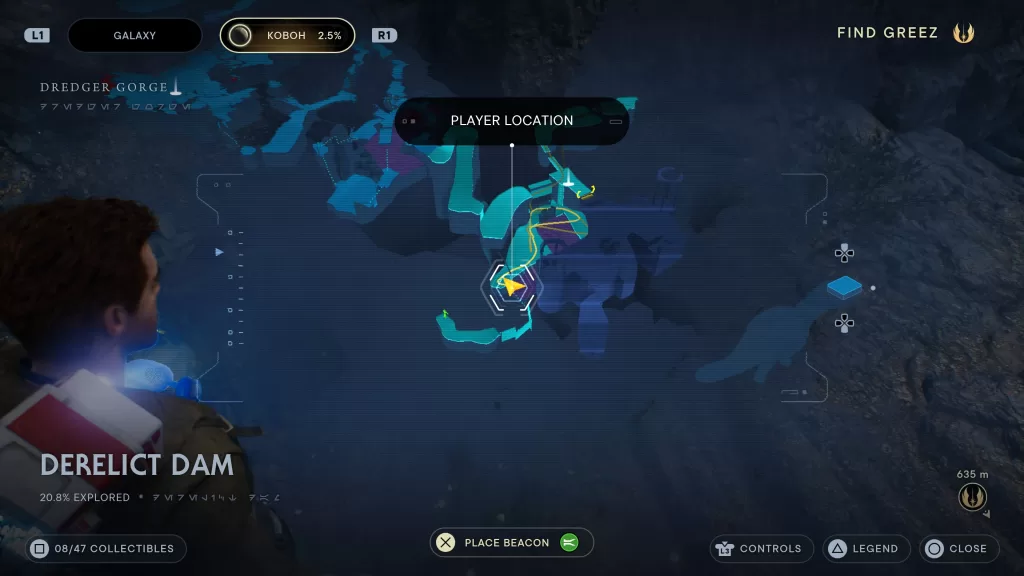
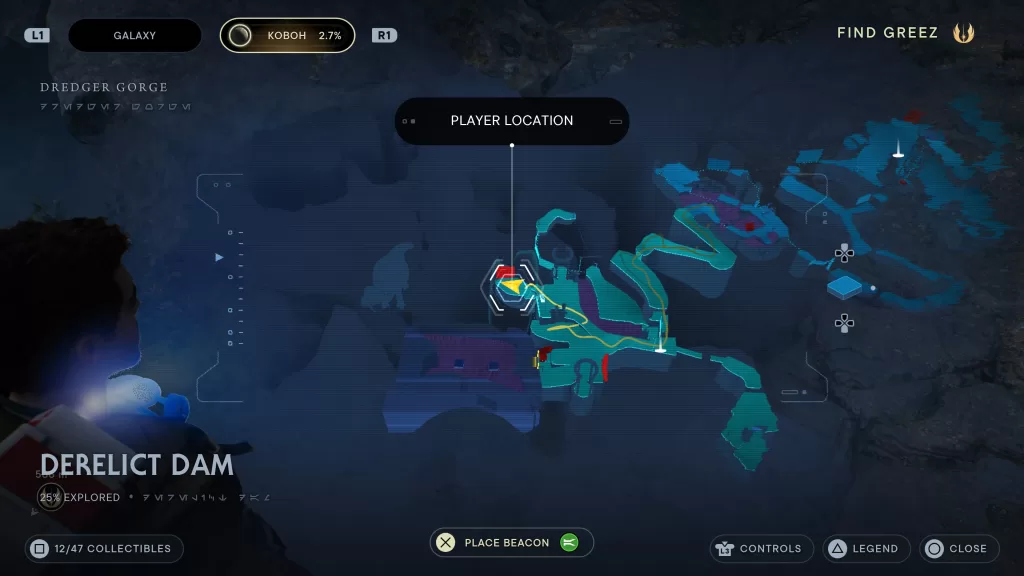
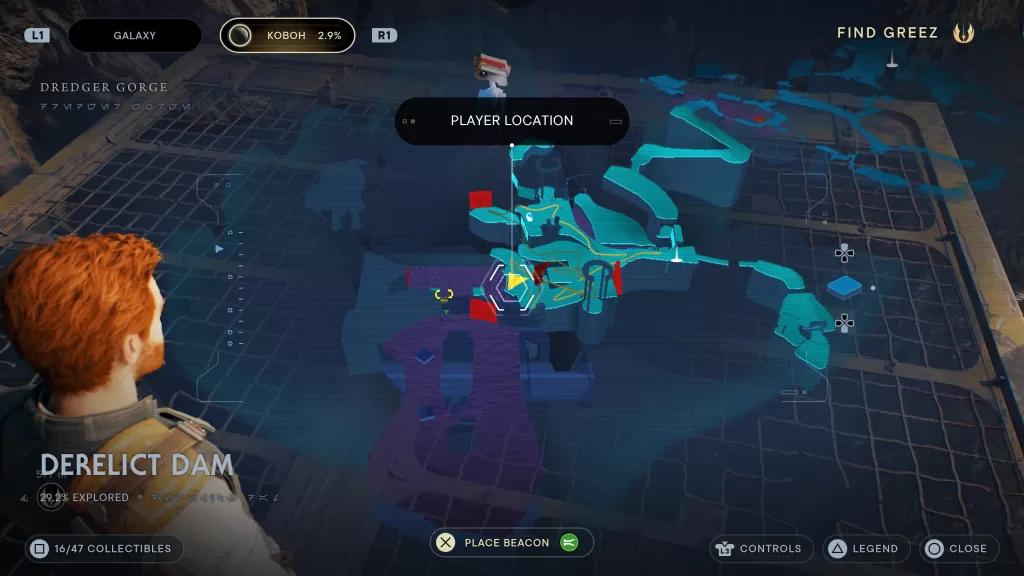
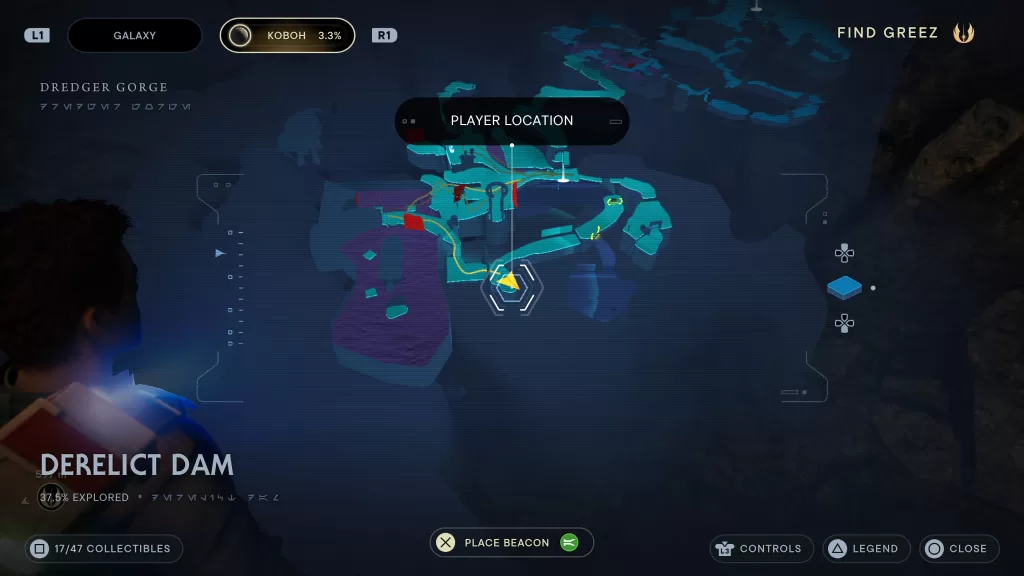
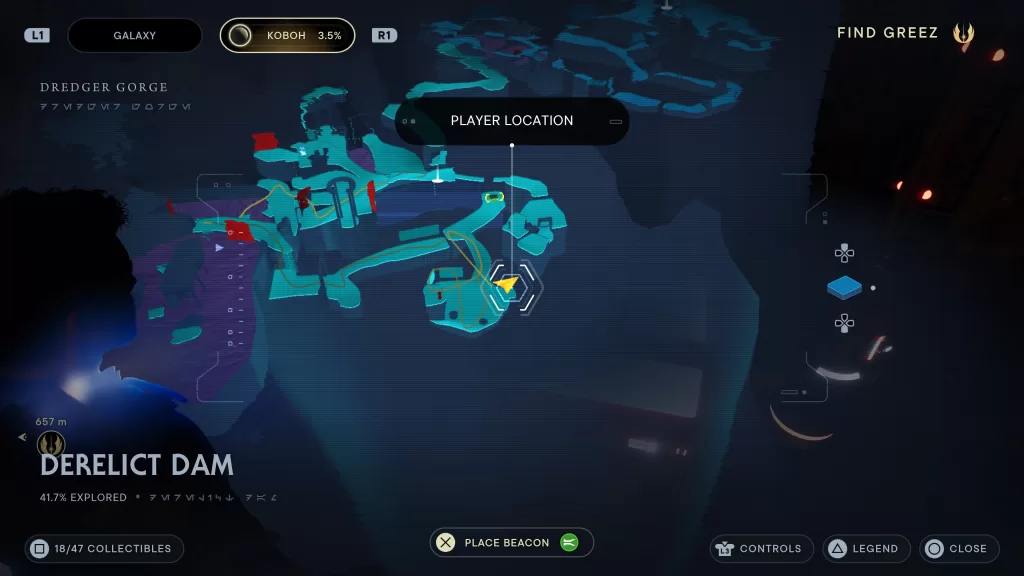
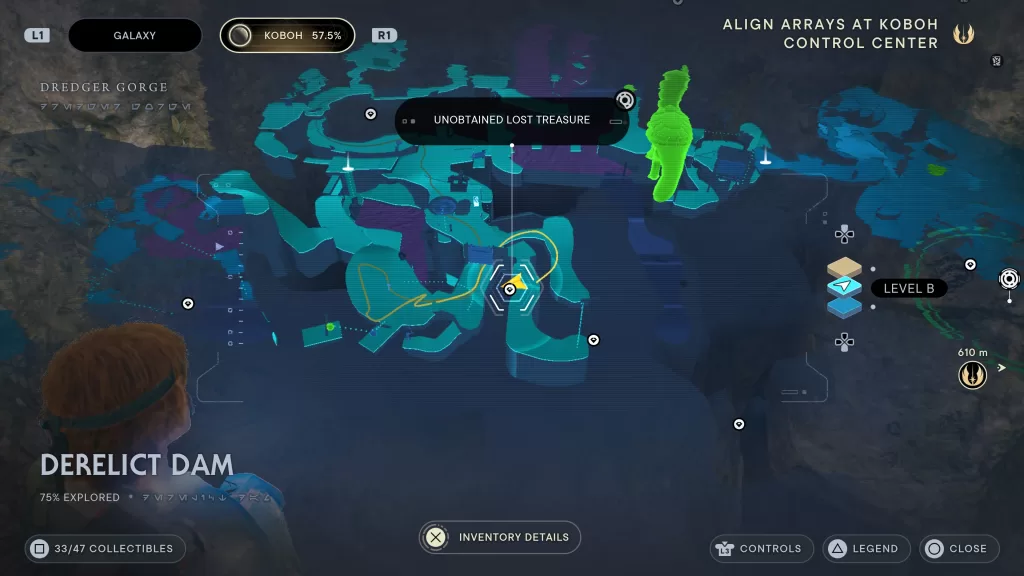
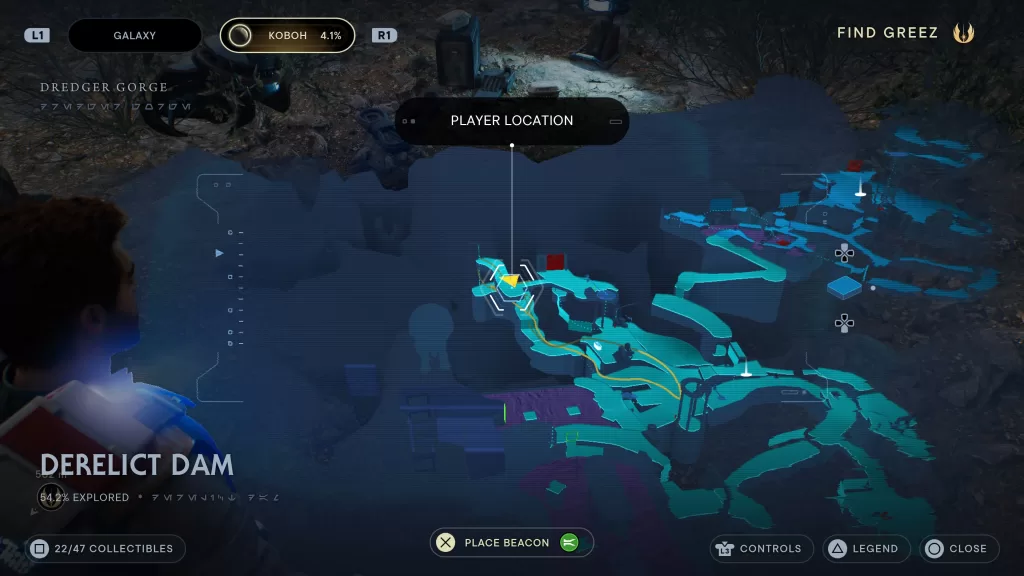
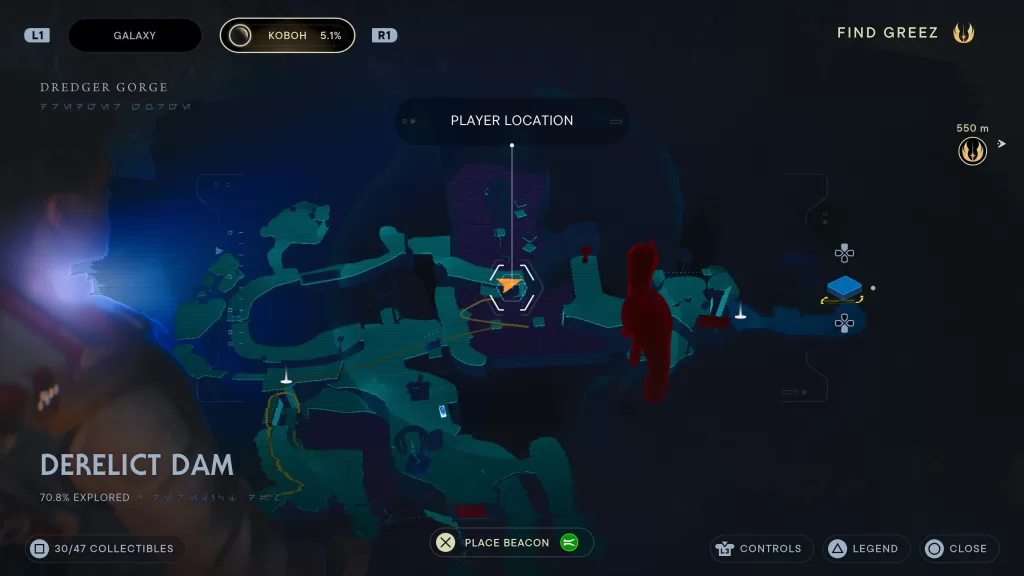
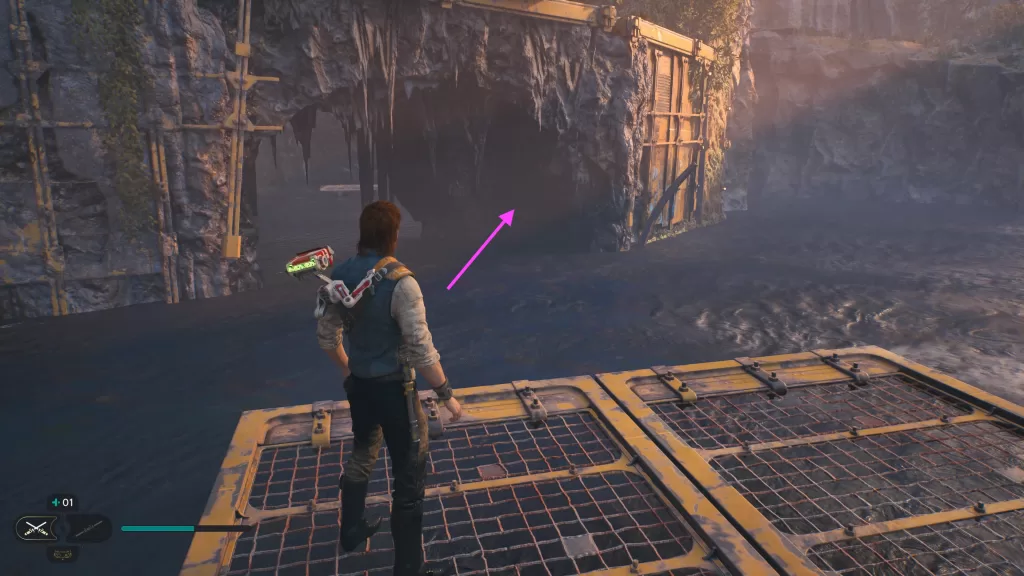
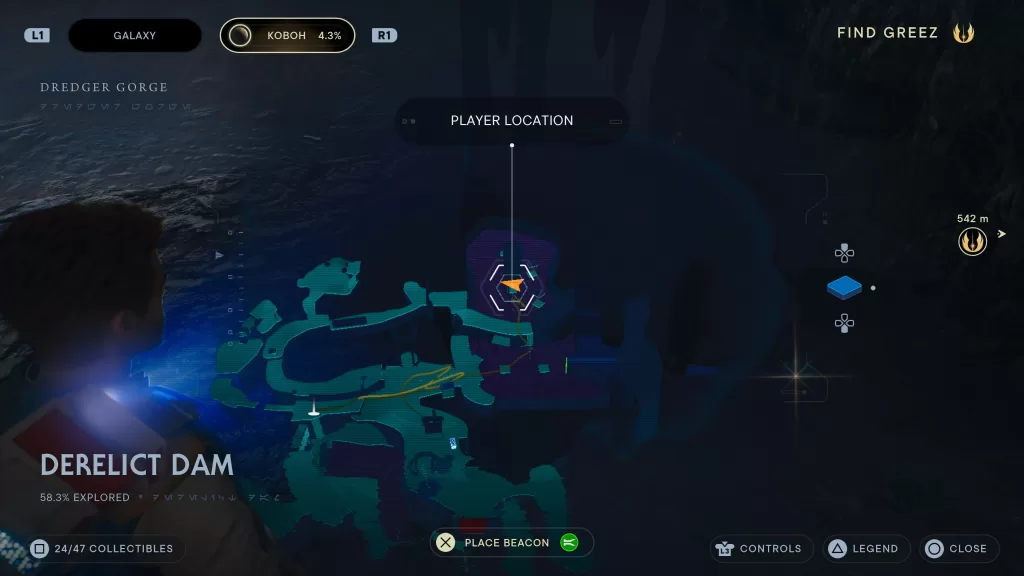
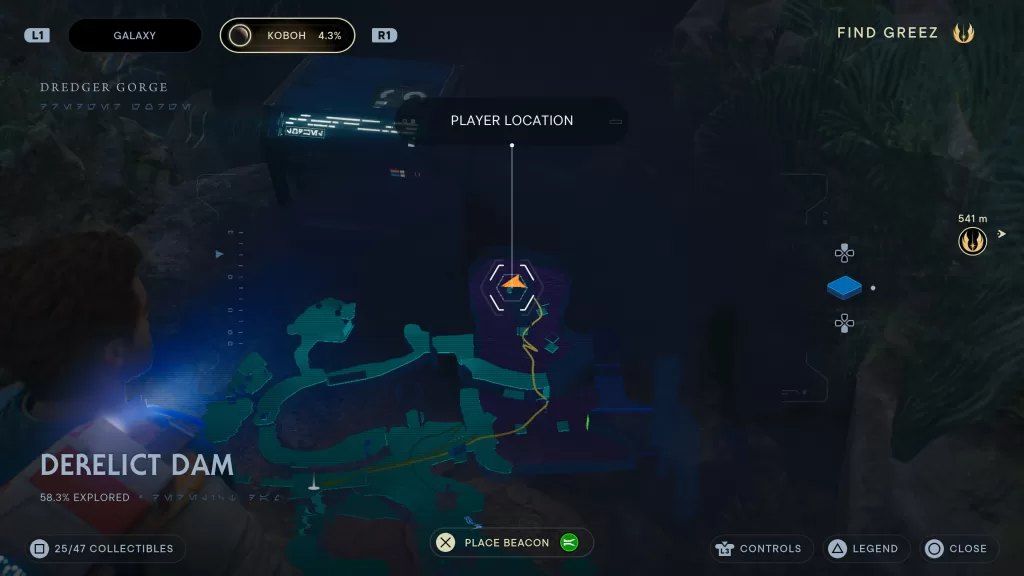
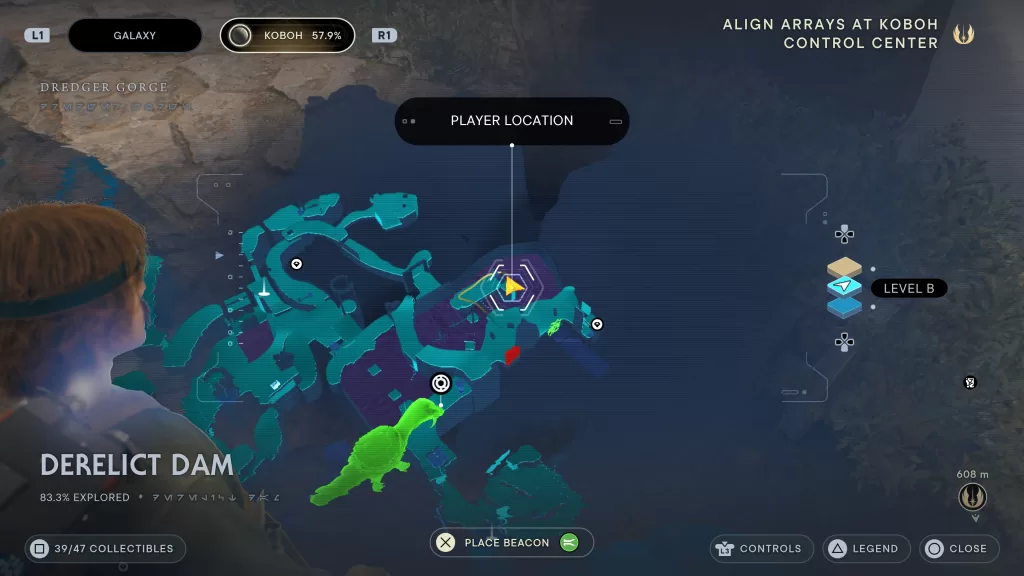
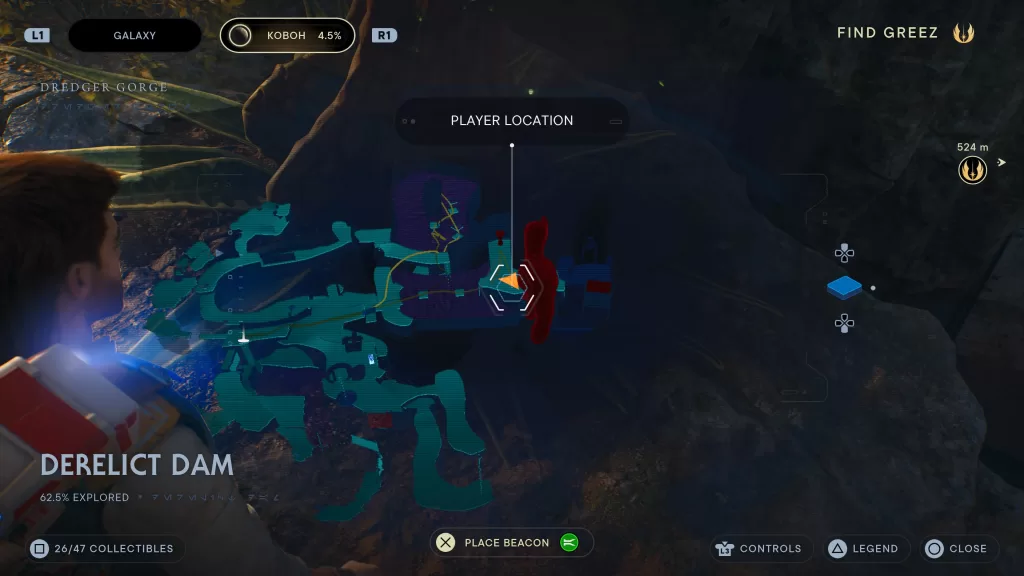
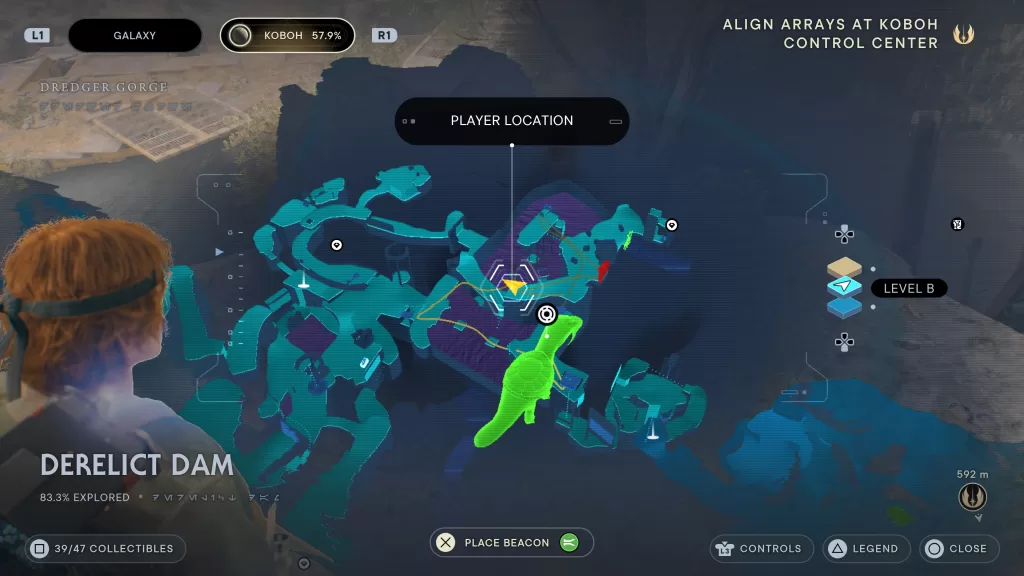
Need help finding the collectibles in the Derelict Dam on Koboh? Check out our Koboh Derelict Dam collectibles guide below!
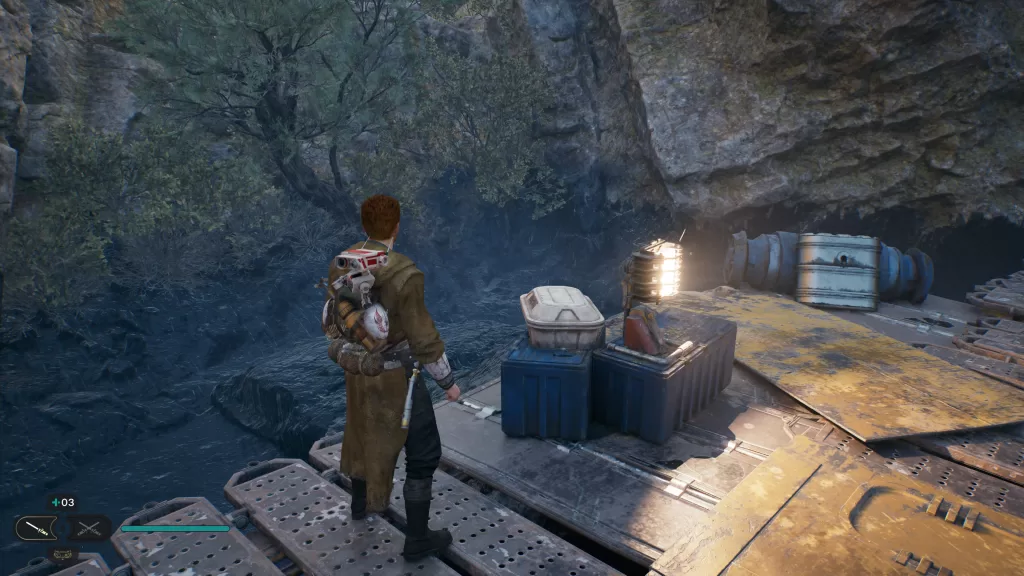
Databank – Murdered Prospecter
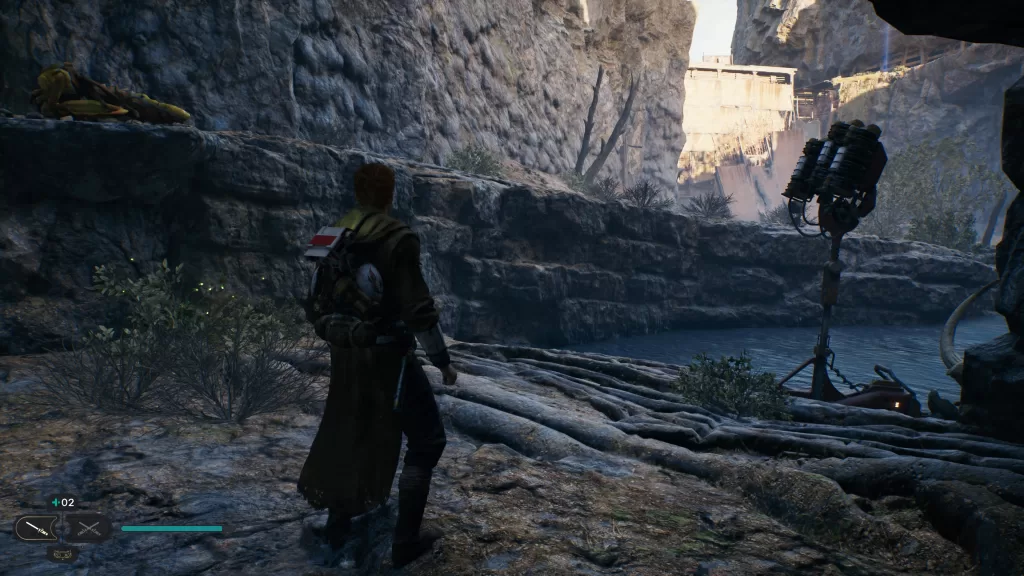
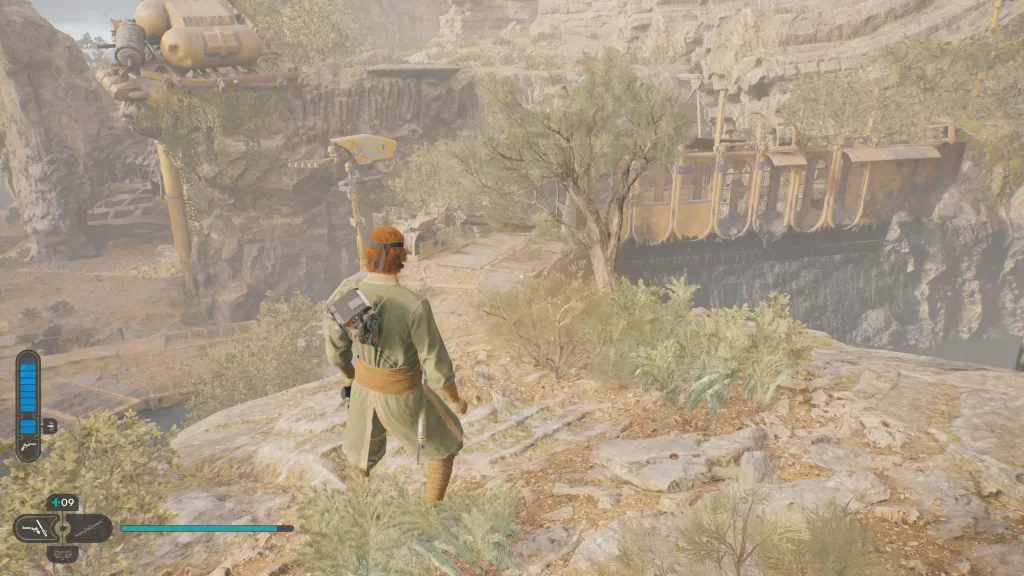
From the Meditation Point, look to the path leading back to the Gorge Crash Site. You’ll need to jump onto and walk across the broken bridge. You’ll then find a corpse leaning against a yellow light post.
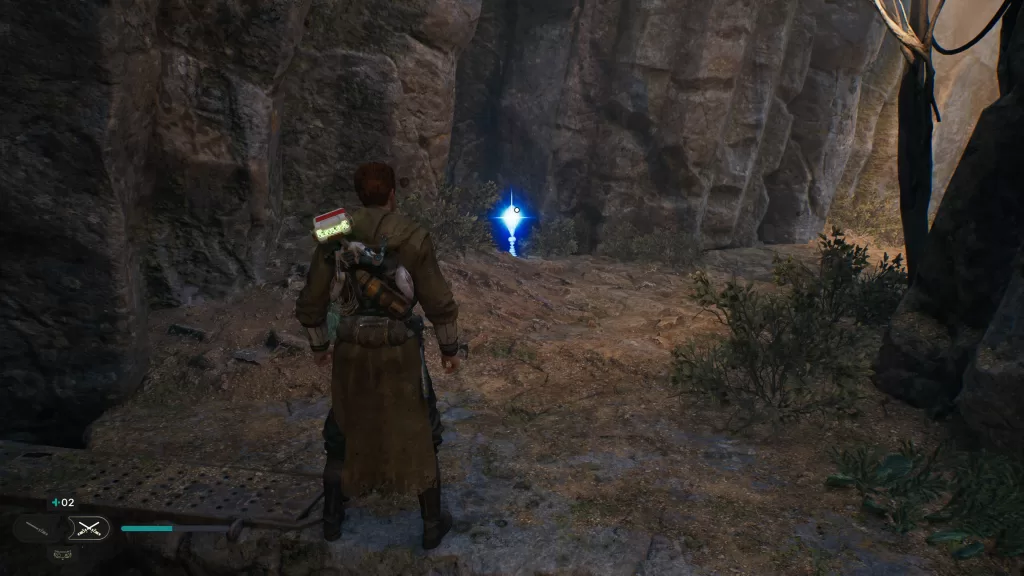
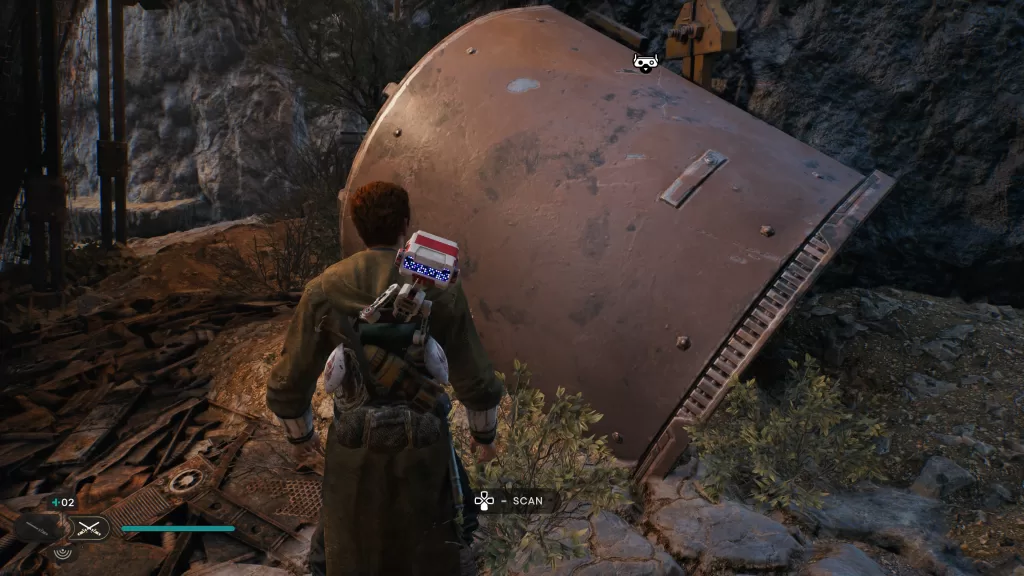
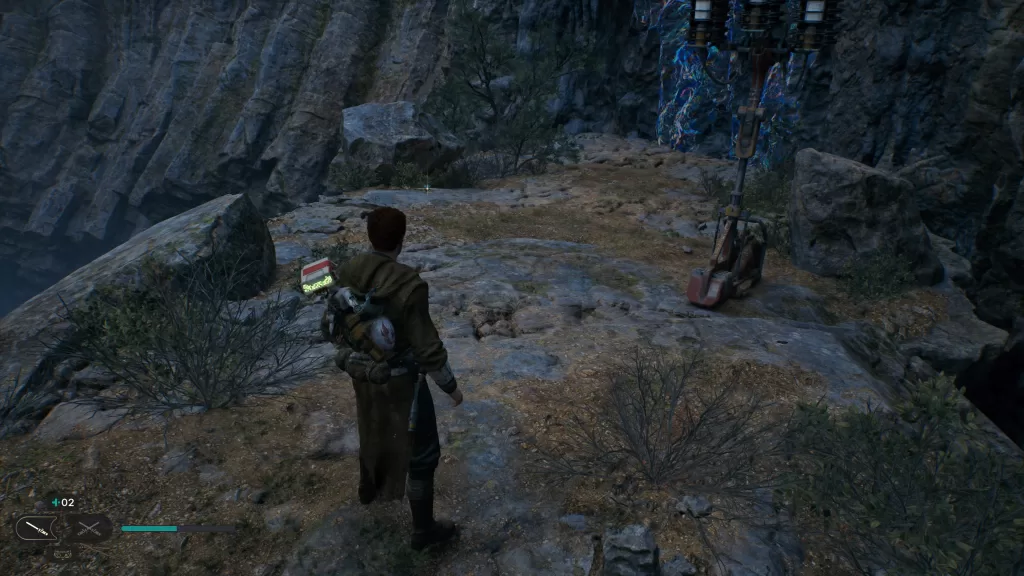
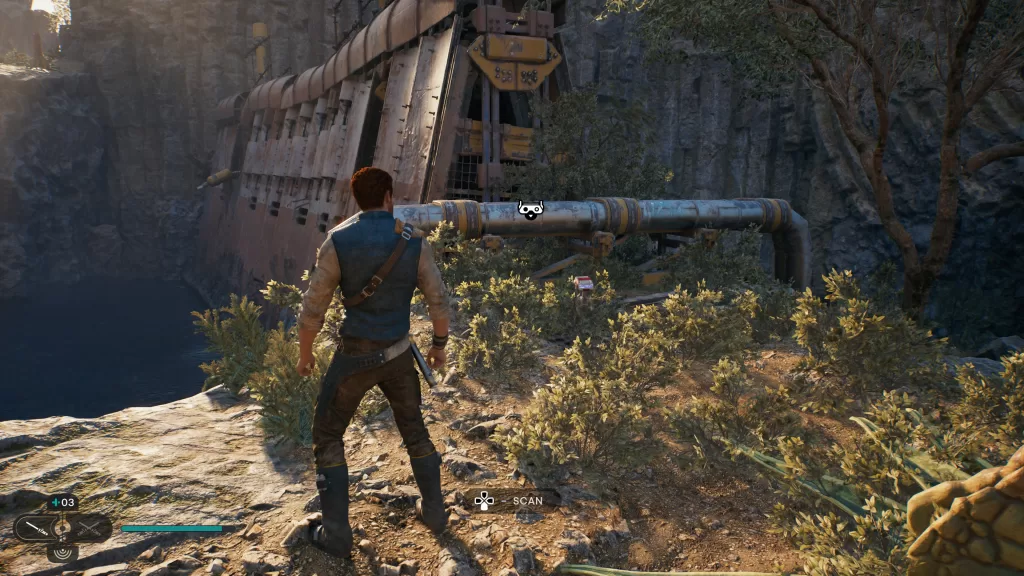
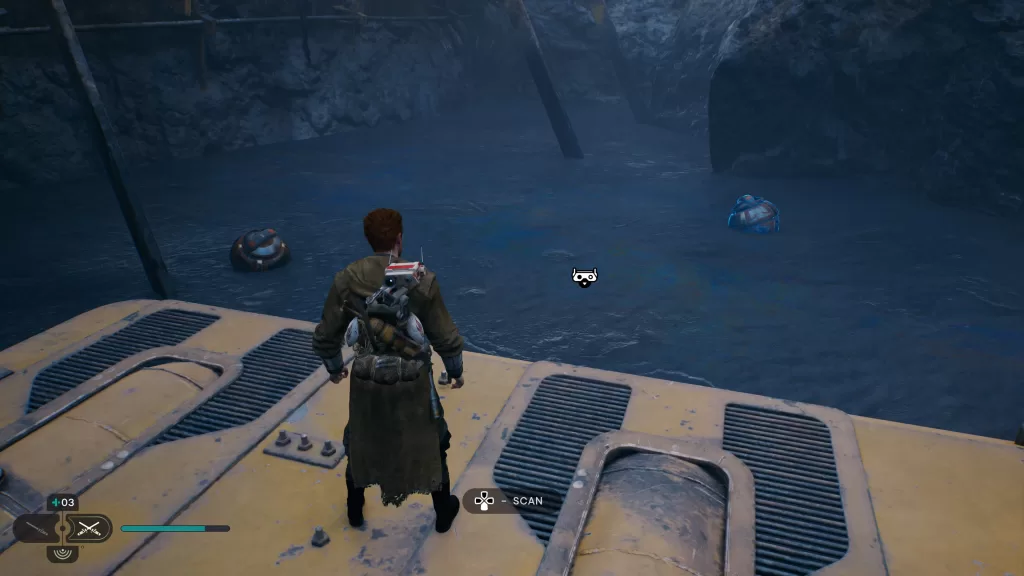
Databank – Gorocco Nest
From the Meditation Point facing the broken bridge, head right crossing a metal bridge with a gap. Follow the path to a dead end then use the Force to lower a section of wall to make a ramp. Climb up the ledge to find the databank.
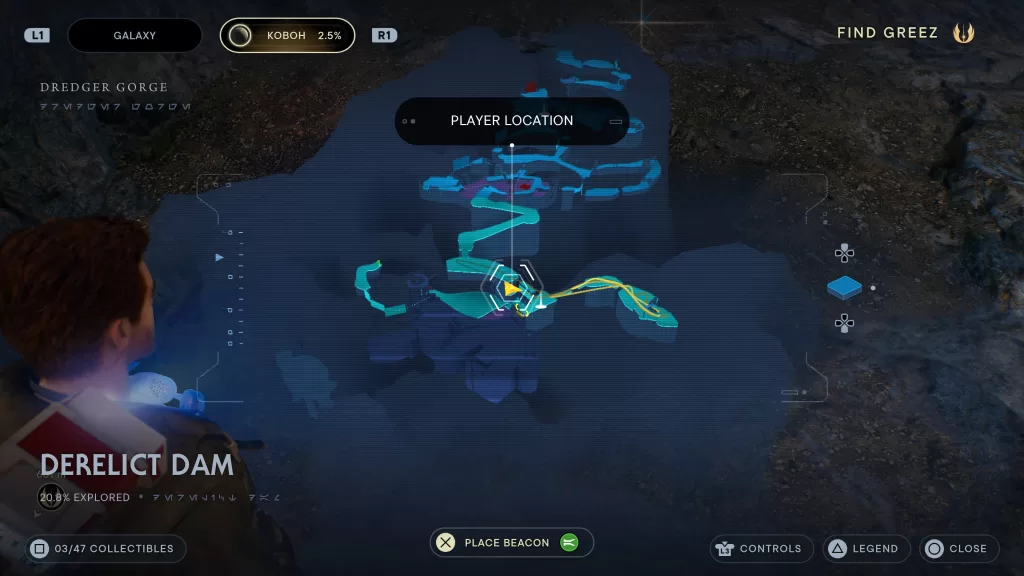
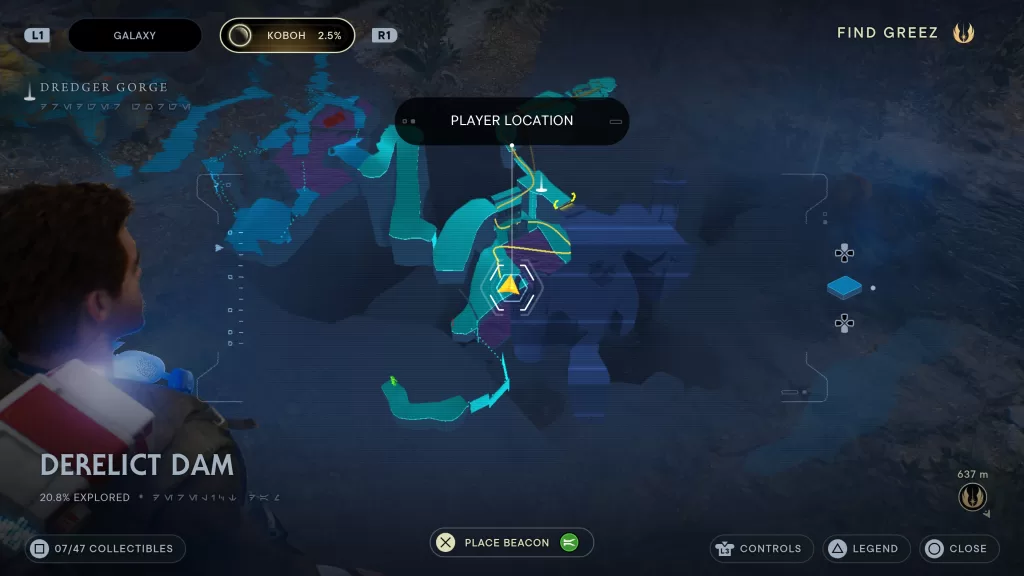
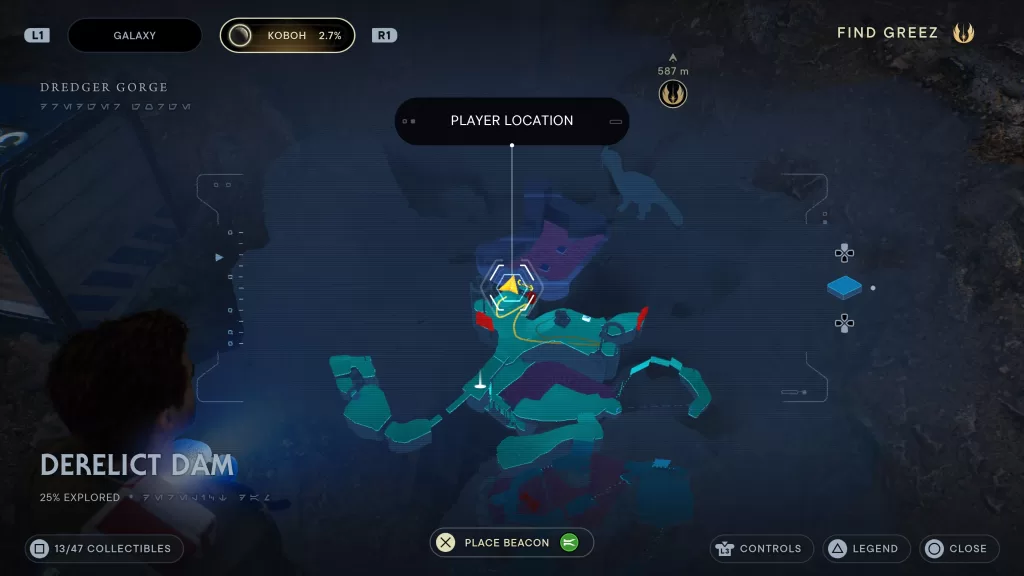
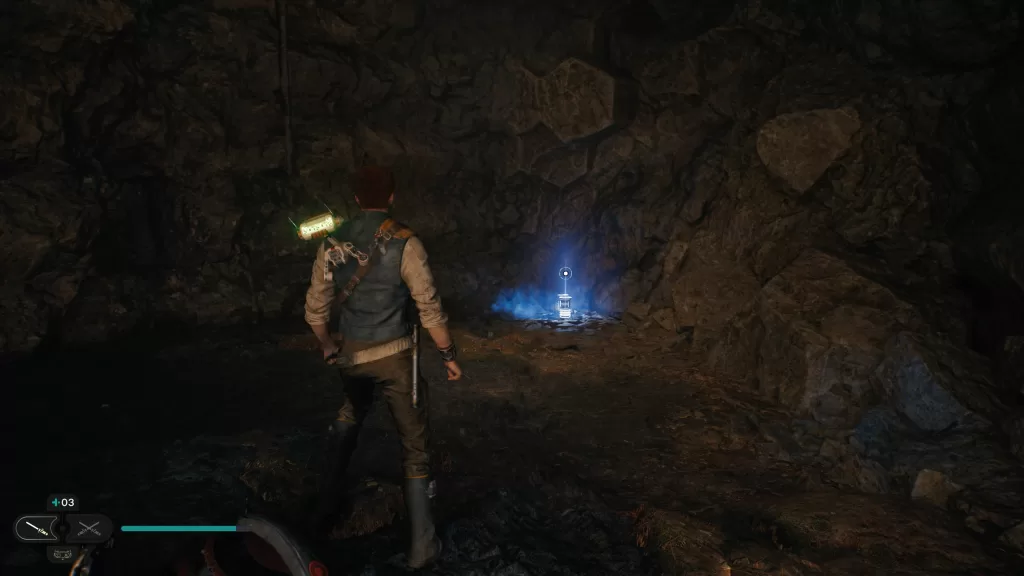
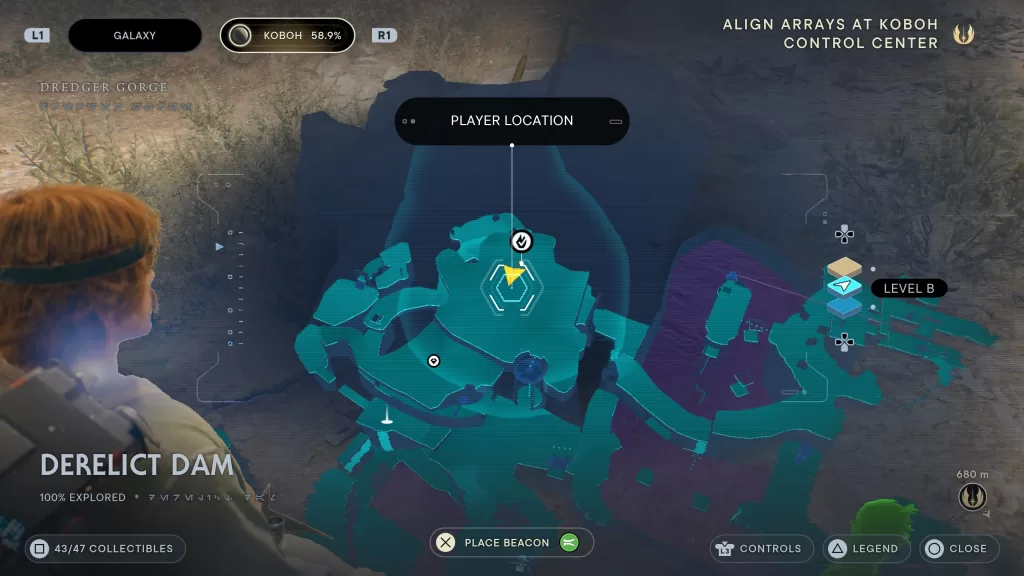
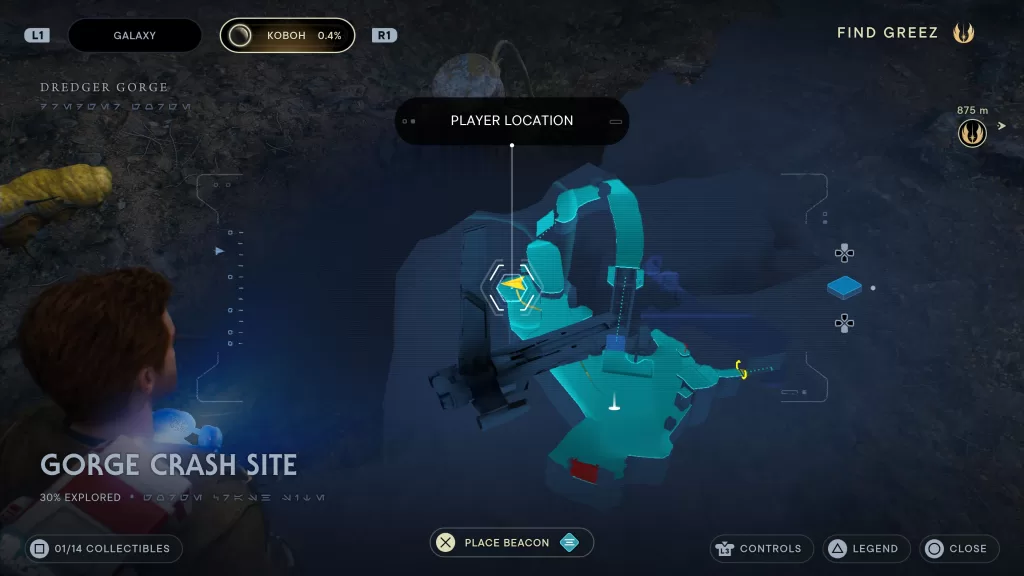
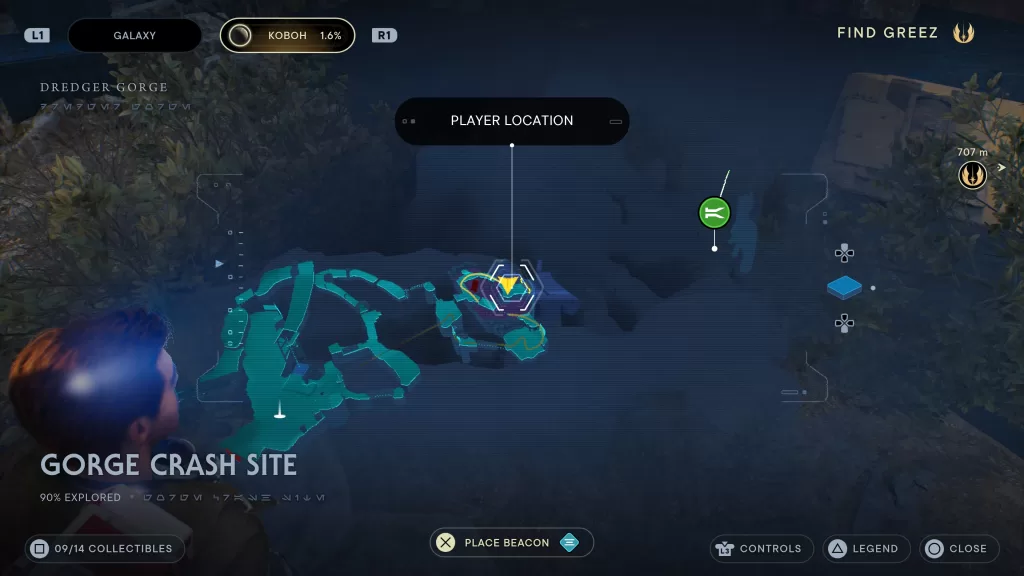
Essense – Health
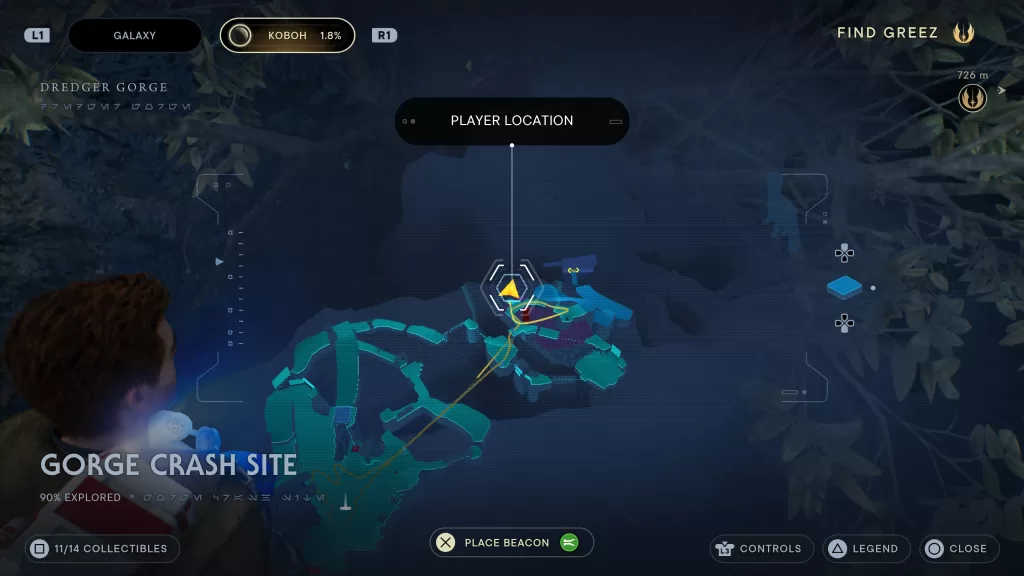
When facing the above collectible, it can be found to the right after climbing up a small ledge (see above map picture).
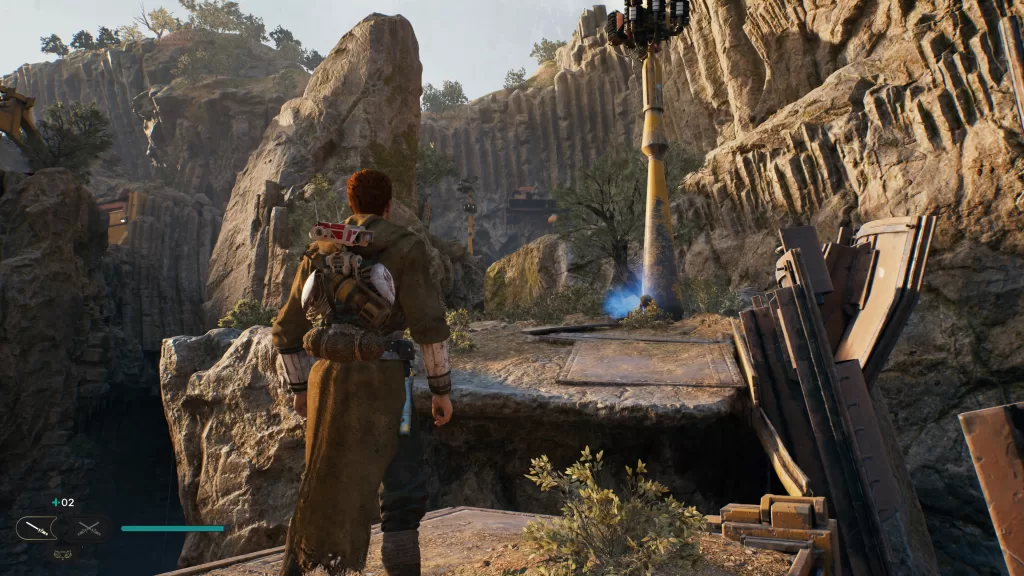
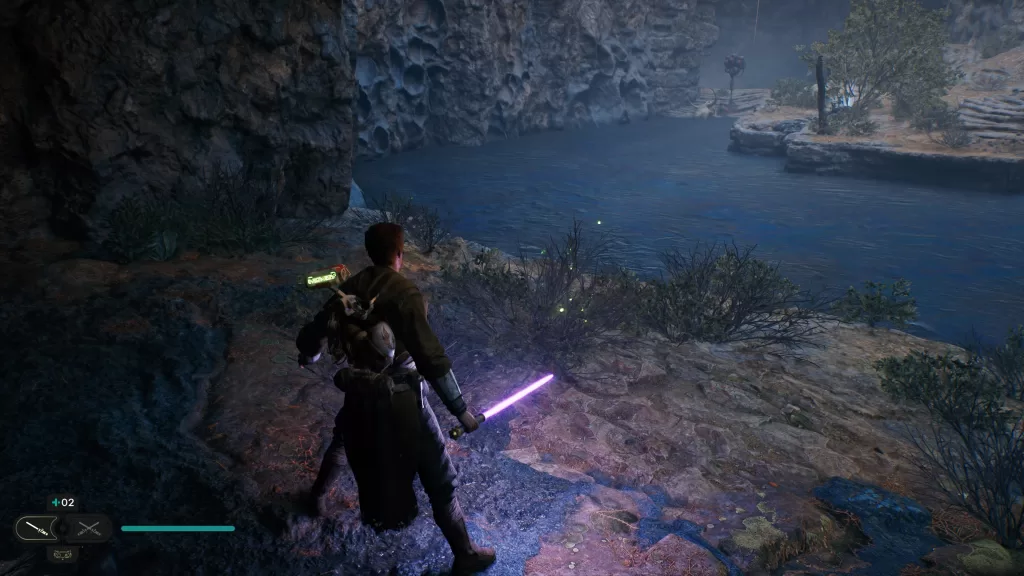
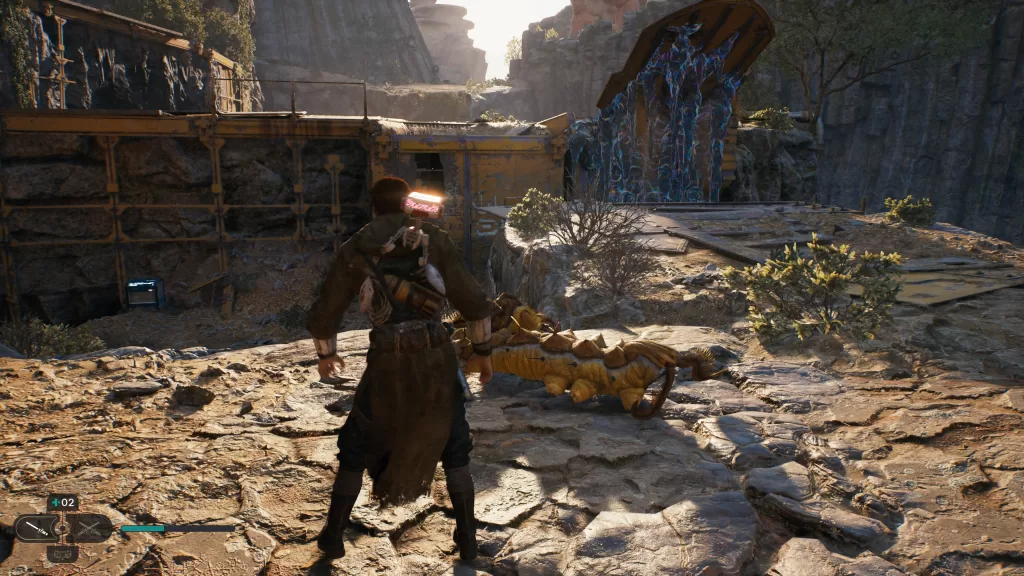
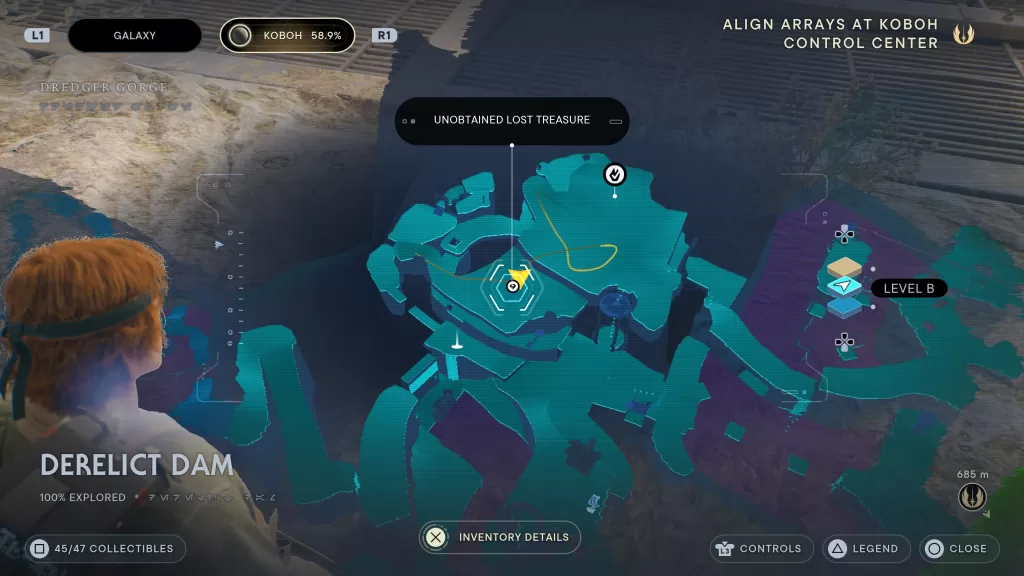
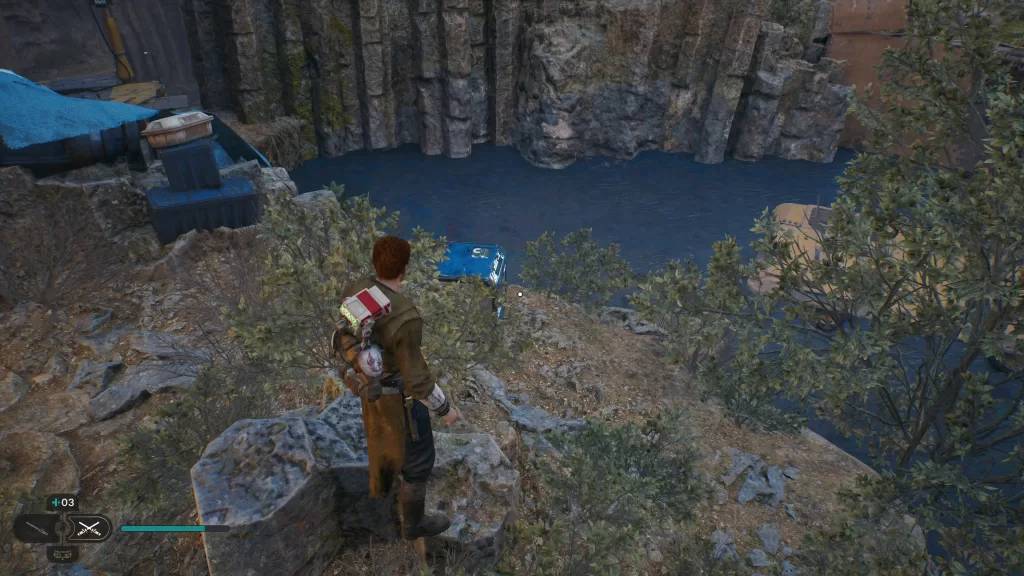
Treasure – Priorite Shard
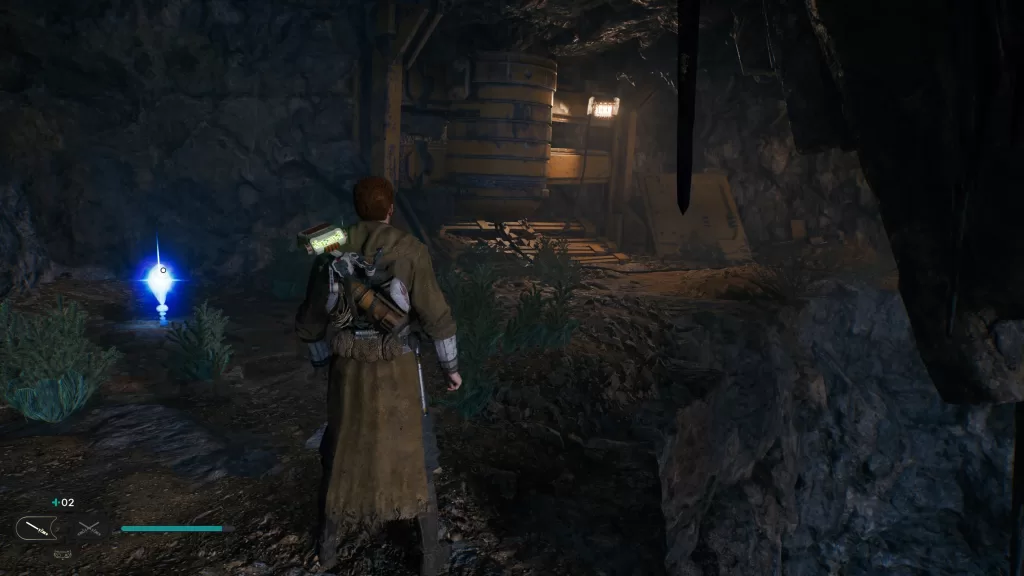
From the Mediation Point, jump to the middle platform of the broken bridge then head on down to find the treasure on a ledge.
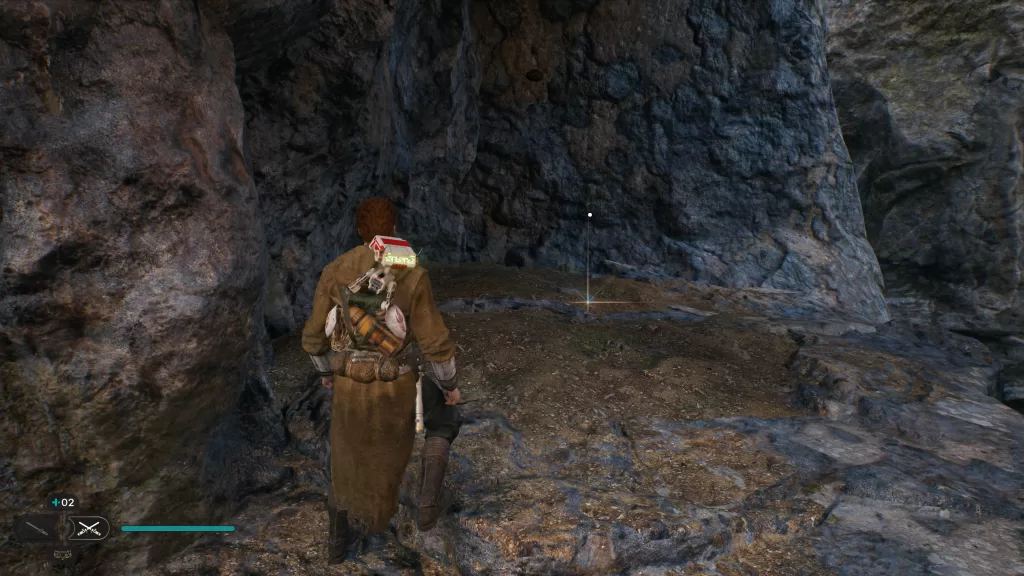
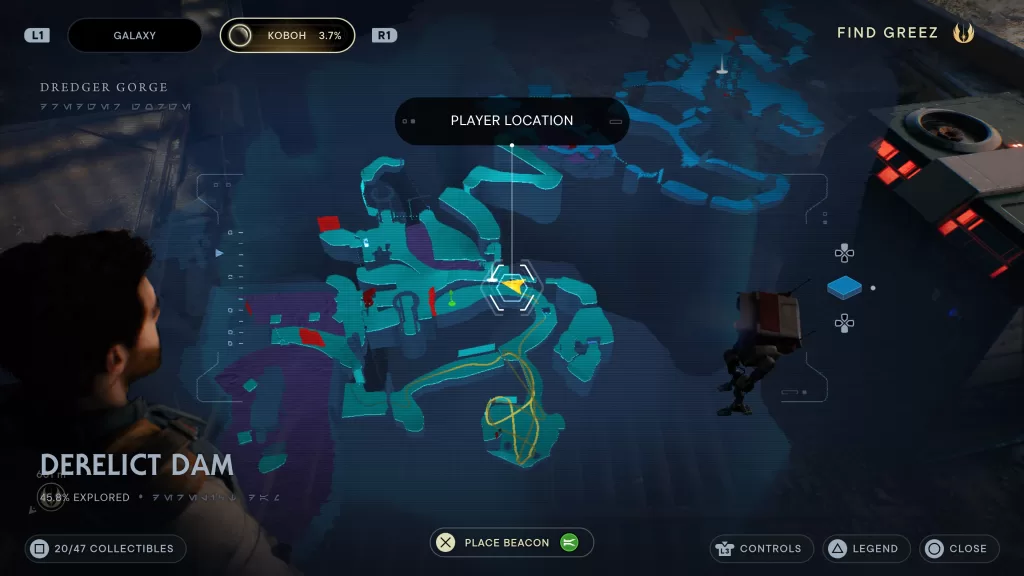
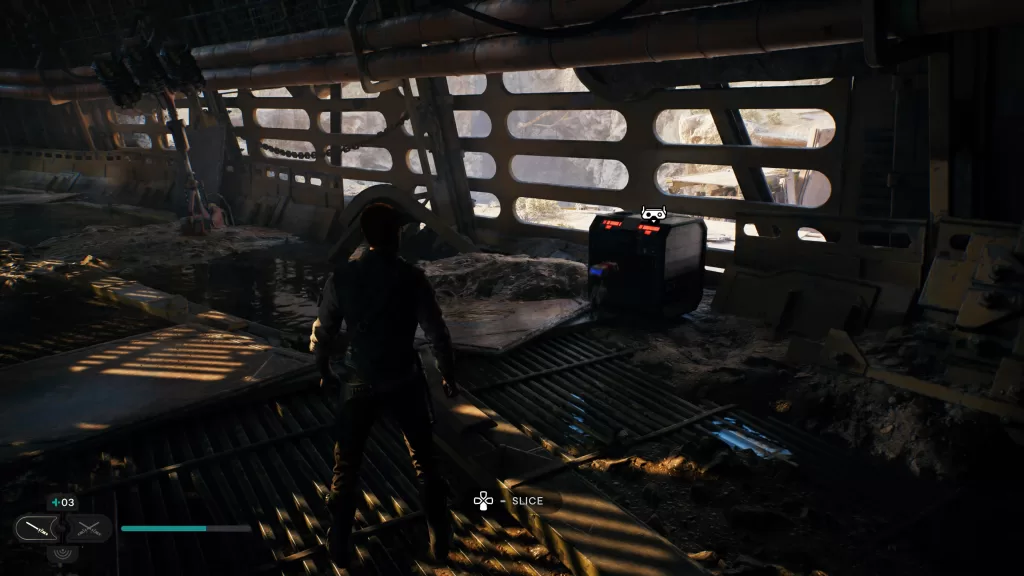
Chest – Body: Scrapyard
From the previous collectible drop down to find the chest (see above map picture).
Databank – Destroyed Dam
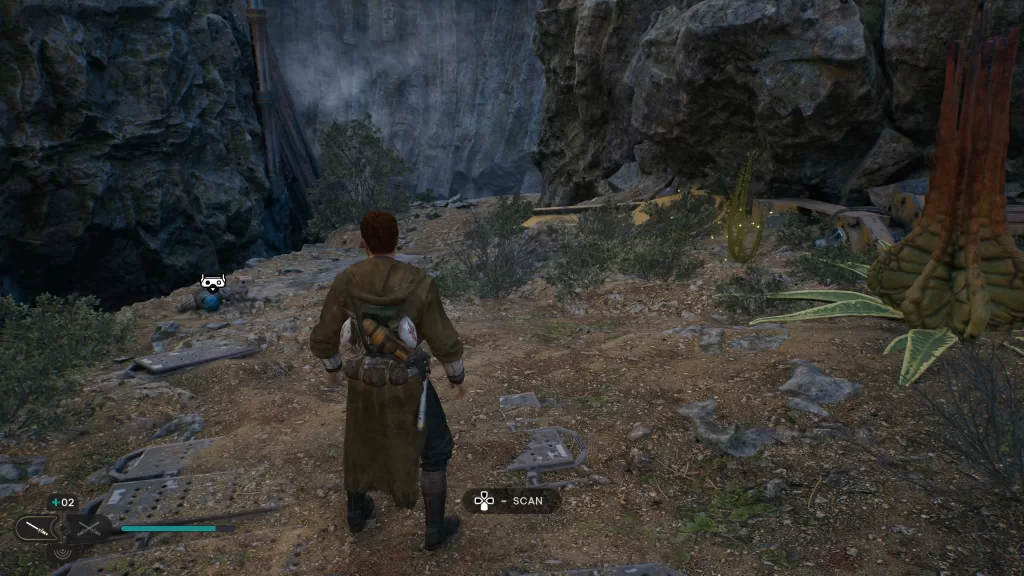
Facing the above chest, head right to find this collectible just before the climbable vines.
Seed Pod – Cactus Ball: Felucian Yellow
From the previous collectible, look at the hanging vines then head right to find the plant along the tar.
Databank – Drowned Prospector
From the above collectible, swing around to the other side of the tar to find this corpse next to a bush.
Seed Pod – Cactus Ball
From the above collectible, keep following along the tar until you find a rope you can swing on. Instead of swinging on it, drop down to find the plant.
Essence – Skill Point
From the above collectible, use the rope to swing over to a runnable wall. Get as high as you can to reach the high ledge containing this collectible.
Databank – Dead Bedlam Raider
From the Meditation Point face the grates in the wall then follow the path to the right. Jump down then continue straight going down a short ways to find this collectible.
Seed Pod – Cactus Ball
This collectible can be found across the above collectible (see above pictures).
Treasure – Priorite Shard
Facing the workbench, head down the path to the right then jump down. You’ll find this treasure here.
Chest – Weapon Material: Light Metal
From the Meditation Point, face the grates in the wall then follow the path to the right, jump down then take a left. Head down the slope to find the chest.
Seed Pod – Fire Pineapple: Felucian Yellow
Next to the above collectible under some crystalized tar.
Databank – Dam Flow Pipes
From the above collectible, head up the slight hill then take a left. Jump across the gap on to a metal ledge next to the crystalized tar then head right. The databank will be at the end of the path.
Databank – CRumbling Dam Wall
From the above pipes, turn around and follow the path in the opposite direction looking for the tar coming out the side of a cliff. Walk over to the edge of the metal walkway to reach the scan point.
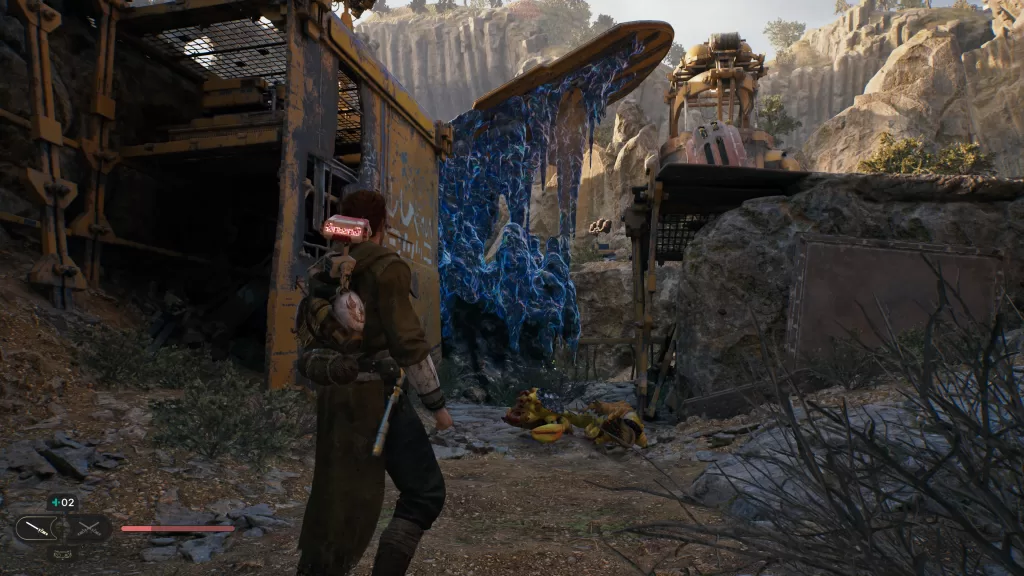
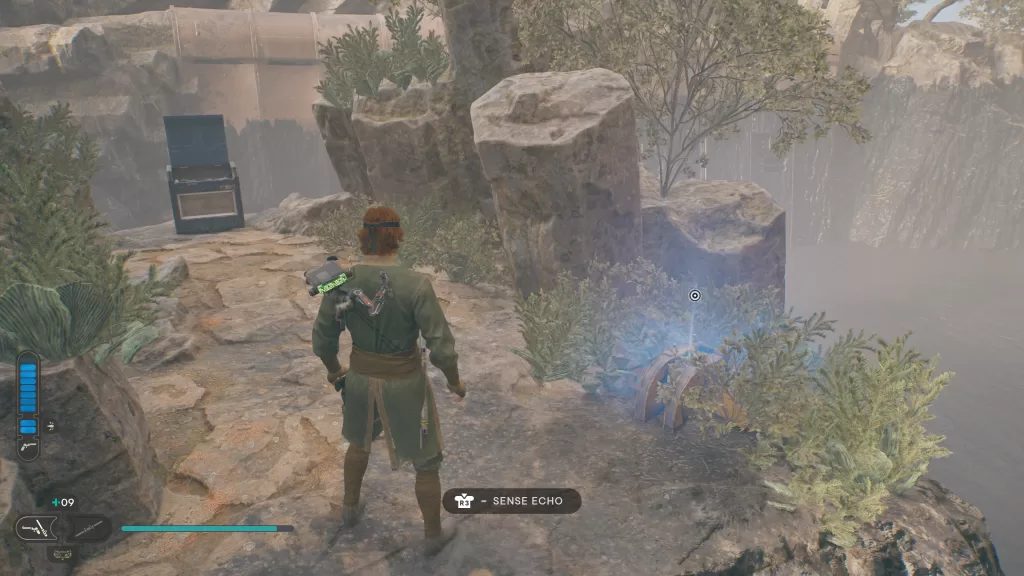
Databank – A Desperate Escape
Starting at the Crumbling Dam Wall, drop down into the tar pit below then head for the platform. From there, use your grapple to reach some vines. Climb up to the top and follow the path left. When you reach the mines, take a right in side to spot the echo.
Chest – Weapon Materials: Two-Toned Metal
From the above databank, head further into the mine where you’ll encounter the first BX Droid. Climb up the ledge past it then take a right to reach a big open room with a lit brazier in it. The chest will be on the left side of the room across from the brazier. You won’t be able to open it until you progress further in the game after you obtain the electro dart. Please note that after we opened this chest we got jumped by Vashtan Wolfe.
Chest – BD-1 Materials: Anodized Metal
Still in the same room as the above chest, look for the runnable wall on the other side. Use it to reach a ledge containing the next chest.
Treasure – Priorite Shard
Again, we are still in the same room as the two above chests. This shard can be found in the unlit brazier.
Chest – Jacket: Tactical
From the above collectible, exit the room and take a right follow the path deeper through the tunnel. You’ll then drop through a hole in the ground and keep following the path to find this chest next to a window on the right overlooking the meditation point.
Databank – Creature Bones
After gaining access to the Roller Mine spawn in the room behind the meditation point, lead one down the path to the right of the workbench and throw it at the crystalized tar on the ledge below. Follow the newly revealed path to a rope and scant the bones in the wall behind it.
Treasure – Priorite Shard
Climb up the rope near the Creature Bones. Look to the left of the light pole to find a small rock bridge you can jump down to. It will be at the end of this bridge in some grass.
Databank – Abandoned Encampment
Head back up to the main path then follow it until the path winds left. It will be on the ground at the curve.
Seed Pod – Cactus Ball
This plant can be found right behind the above collectible.
Essence – Force Essence
From the above collectible, follow that path left then take a right towards the elevator to locate the essence.
Obtainable after destroying the crumbling dam wall and raising the tar level
Treasure – Priorite Shard
Under the crumbling dam after blowing it up. There will be a cave under it on the right side. To have enough time to reach the cave, jump out into the tar.
Treasure – Priorite Shard
From the Meditation Point facing the grate windows in the wall, head right and jump down. Keep going straight up the metal ramp. From there jump onto a platform in the tar. Make your way to the vines on the side of the cliff on the left. Climb up to the top and deal with the 2 enemies there. Look for a pipe you can jump onto straight ahead. Follow the pipes, drop hanging under the rock to continue to the collectible.
Chest – Hair: Mullet
From the above collectible, face the giant rock and look to the right to spot platform in the tar. Head to it then look to the left to find a climbable wall. Head to the top to find the chest.
Databank – The Dredger Run
This echo can be found in the grass just before the above chest. You may need to progress in the story for it to show up.
Seed Pod – Fire Pineapple
From the Meditation Point, face the grated windows and head right. Jump down then continue heading straight over the metal ramp. When you reach the tar pit, jump on both platforms to reach the vines at the other end of the tar pit. Climb up onto the ledge then head forward a short way to find the plant under our new big friend.
Chest – Head: Scrapyard
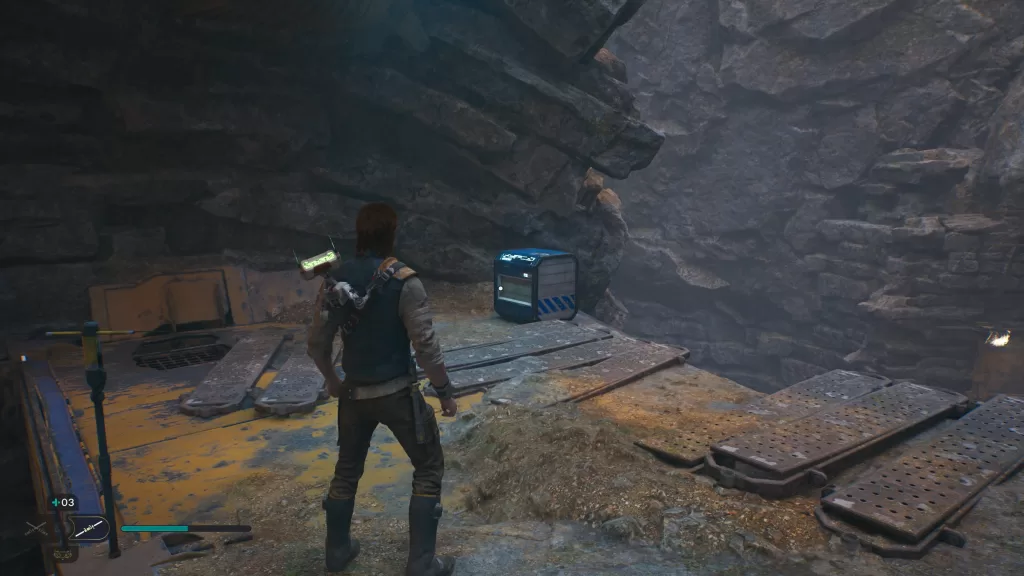
After dropping down the elevator, follow the path around to reach a small area where you’ll fight a handful of droids. You’ll find a giant metal cube here. Use it to reach a running wall on the other side of the area. Do so then use the running wall to reach the chest.
Treasure – Priorite Shard
From the Southern Reach Meditation Point, look towards the elevator shaft then wall jump to the top of the shaft to reach the shard.
After Unlocking Opening Doors with the Force and Floating Grapple Points
Chest – Max Stims Increased
Starting at the workbench, take the shortcut elevator near it up. At the top, follow the path to reach a giant yellow door. Use the Force to open it then follow the path. You’ll need to fight a Gorocco Matriarch. If you look at the ledge facing the elevator, you’ll find a chest.
Seed Pod – Fire Pineapple x3 / Treasure – Priorite Shard / Essence – Skill Point
From the chest, turn around and locate the floating grapple points. Use them to reach the other side. Climb up to the top where you’ll find multiple collectibles. At the top of the ledge, hug the right wall to find 3 Seed Pods. If you follow the ledge to the left of the seed pods, there will be a tree with a Priorite Shard at its base. On the other side of the tree, you’ll find the essence.
Seed Pod – Fire Pineapple: Alderaanian Blue
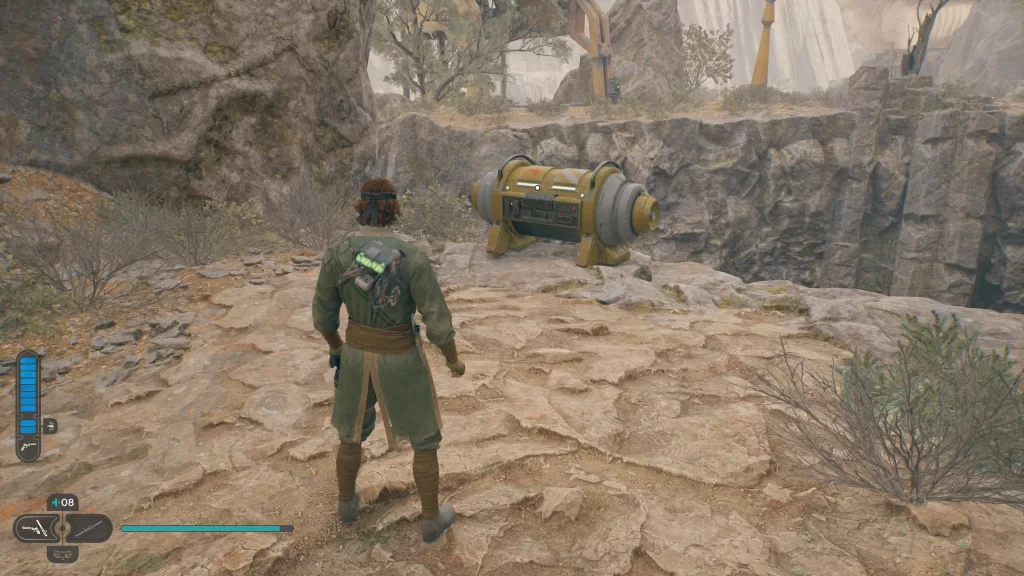
Near the giant dinosaur looking thing there will be a lift you need to use the Force to lower. Once you do, jump on top of it to reach the higher ledge. At the top, follow the path to the left to find this pod at the end on the right.
Treasure – Priorite Shard
From the above collectible, head back up the path heading towards the lift. Take a left at the end of the path and keep heading straight. When you reach the light post, look to the right to find an orb on a pedestal between two rock walls. Climb up the wall to reach the treasure.
Essence – New Perk Slot
From the above collectible, drop down the ledge. Grab the orb on the pedestal and bring it to the mining device across the gap where the droids were. Place it in the device to turn on a laser. This will open a new area. Head to that area and follow the laser to find a device you can splice under it. Splicing this machine causes a Roller Mine to spawn. You’ll want to quickly jump up the ledge with it following you then use the Force to lift it up. Don’t throw it, just let it go. Guide it between the yellow crates. Use it to destroy the breakable wall. Head through the opening and stop just before the edge (don’t use climbable walls). Use Koboh Grinder ability to spray a path using the purple matter from the laser up the wall to destroy the matter on the climbable wall. You’ll now be able to use the two runnable walls to reach the newly opened climbable wall. Climb on up then follow the path to reach the outdoor balcony where you’ll find the essence.
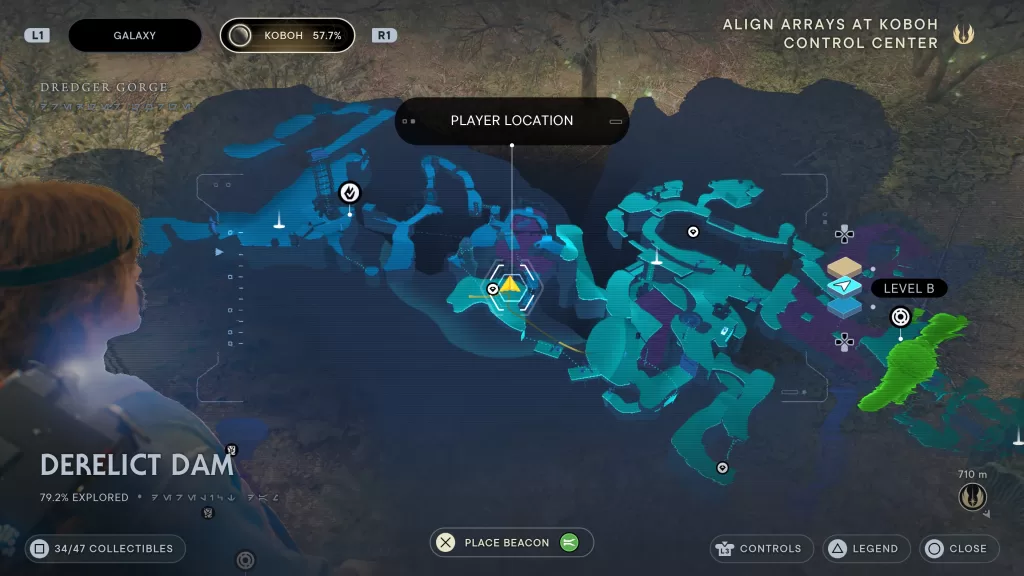
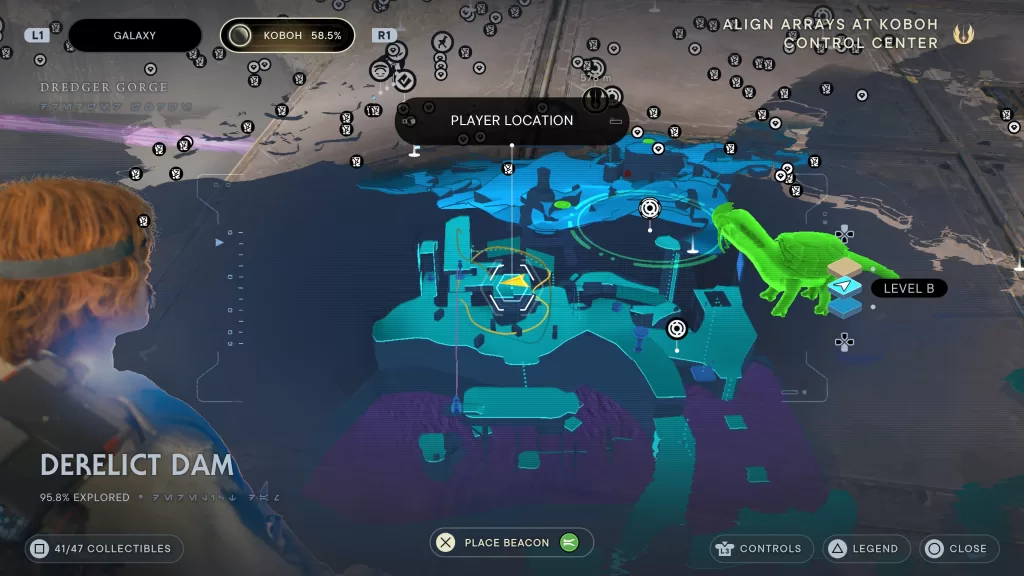
In order to get the below collectibles, you’ll need to have progressed to the Forest Array and saved the giant bird.
FORCE TEAR
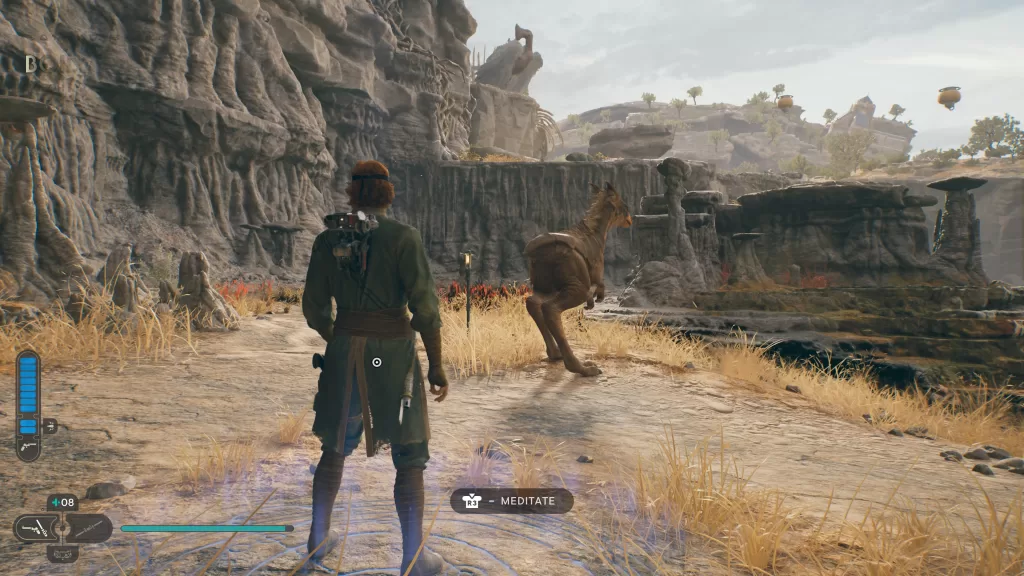
Travel to the Boiling Bluff Meditation Point. There will be a creature you can mount.
Hop on then use it to jump to the top of the ledge just past where it was at. If you look to the right, you’ll find a couple of floating grapple points with a device that spawns them. Grab one and toss it near the other two. Use it to reach the stone pillar in front of the giant bird.
You should then be prompted with pushing a button to travel. Press it to be dropped off at a new location in the Derelict Dam. If you head forward towards the brick-looking wall, you’ll find it on the ground. This tear is quite challenging as it’s an obstacle course using your Force powers.
Seed Pods – Fire Pineapple: Dathomirian Red / Fire Pineapple x2
These 3 Seed Pods can all be found around the Force Tear.
Treasure – Priorite Shard
From the above collectible, drop down to the ledge below with the metal grate to find the droid and take it out.
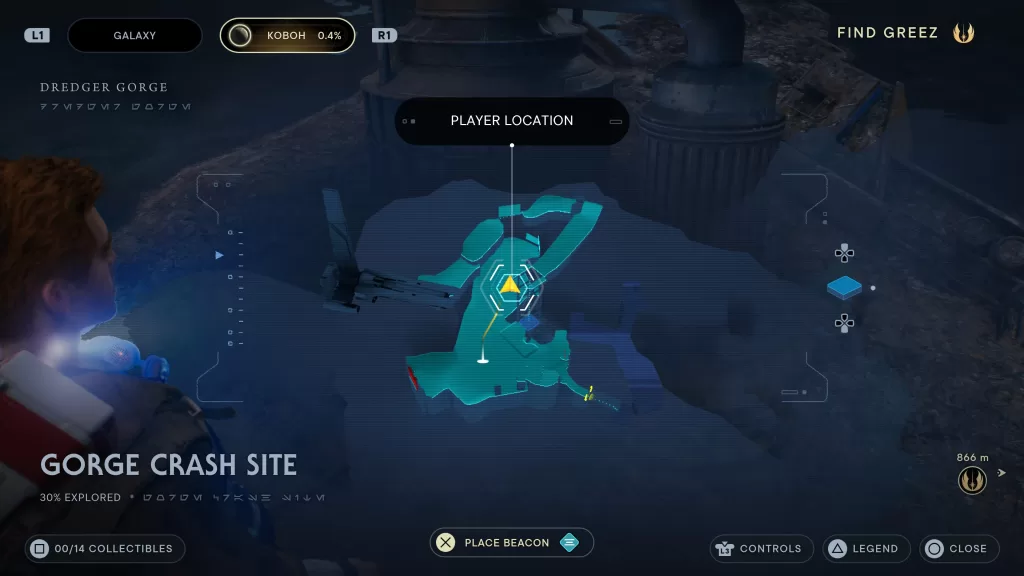
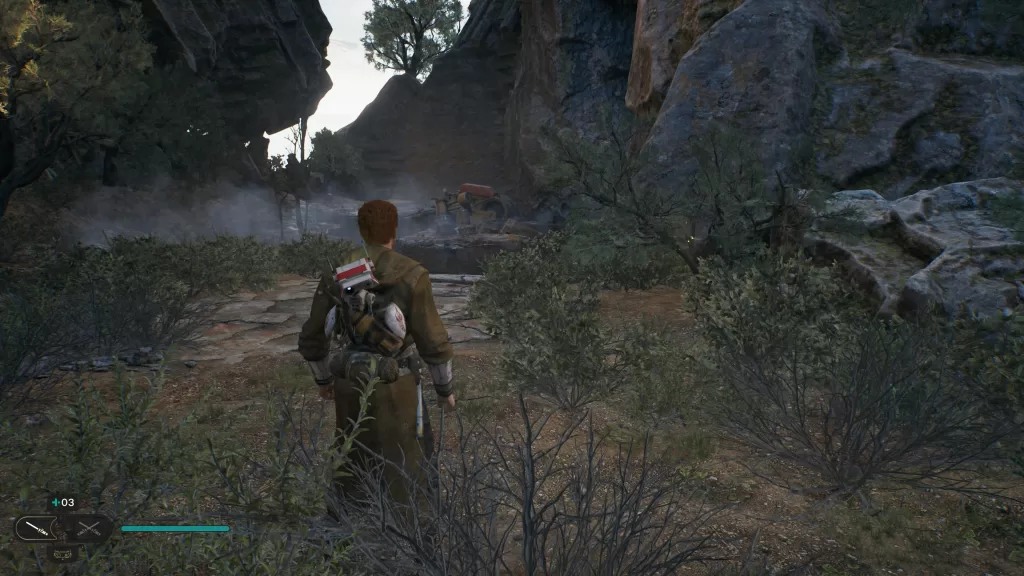
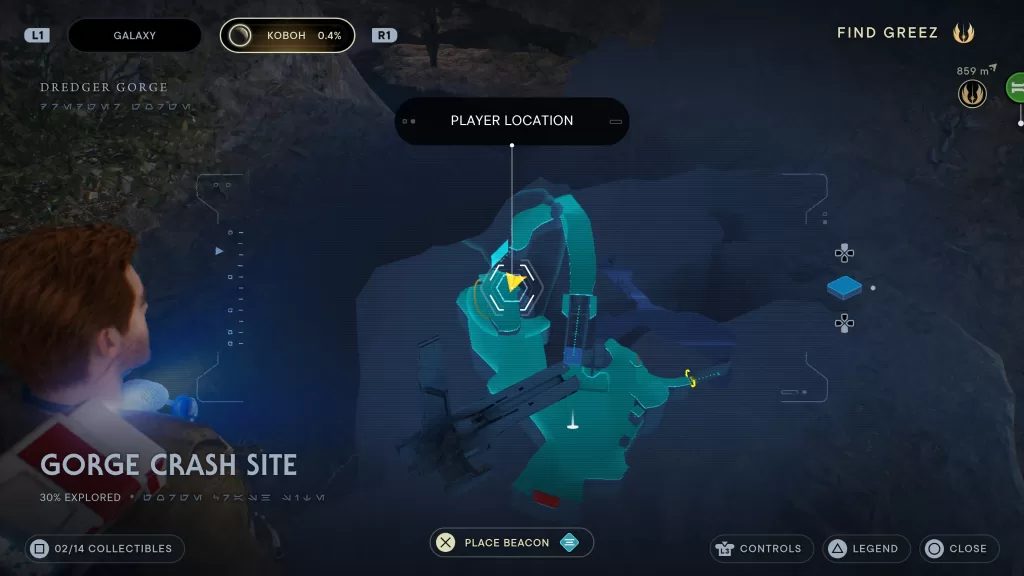
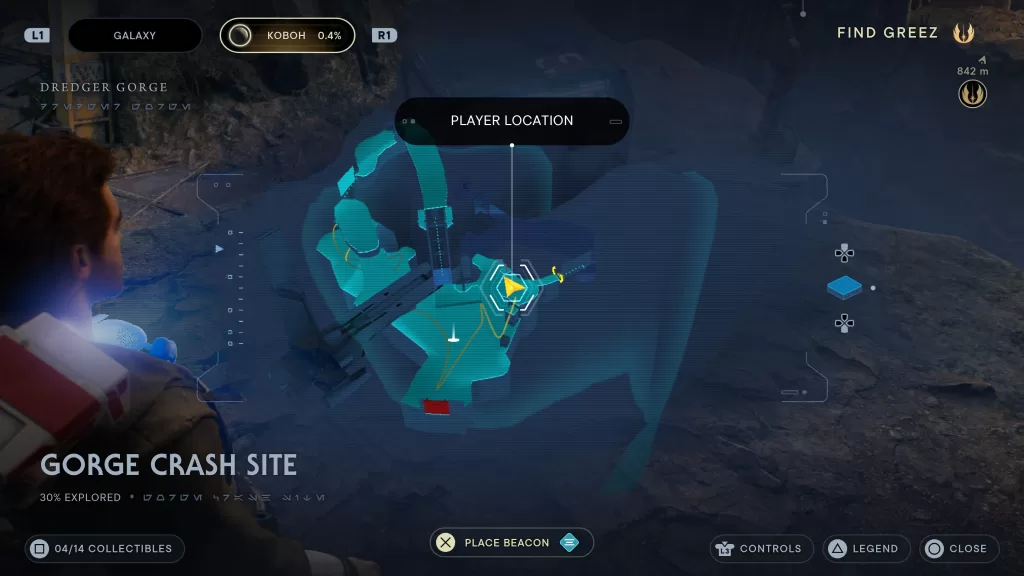
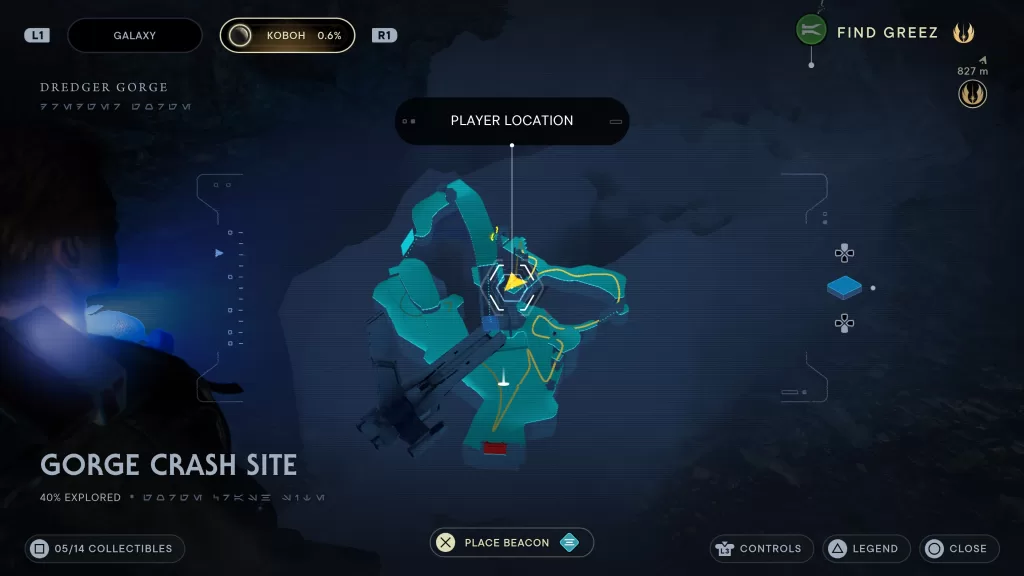
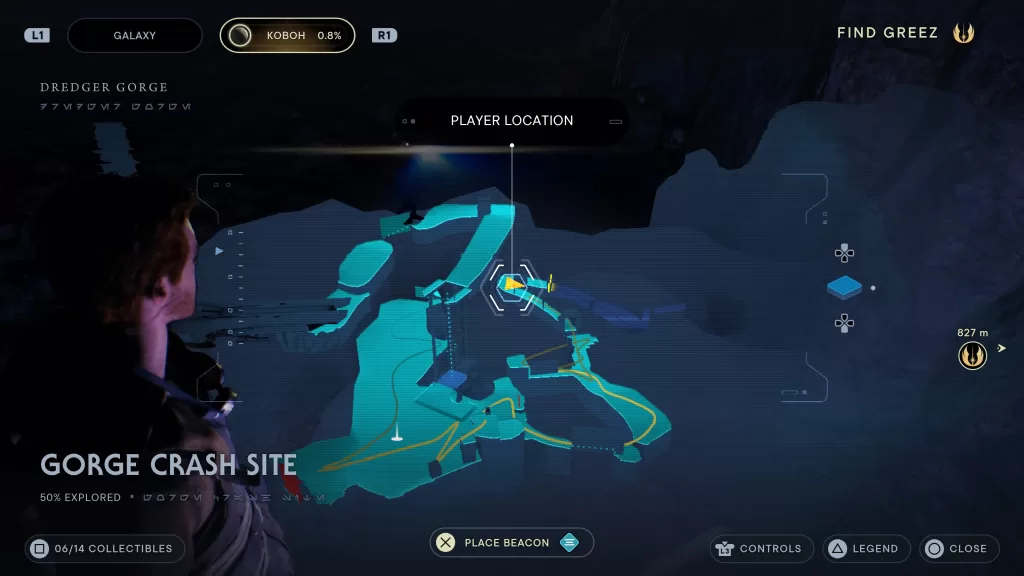
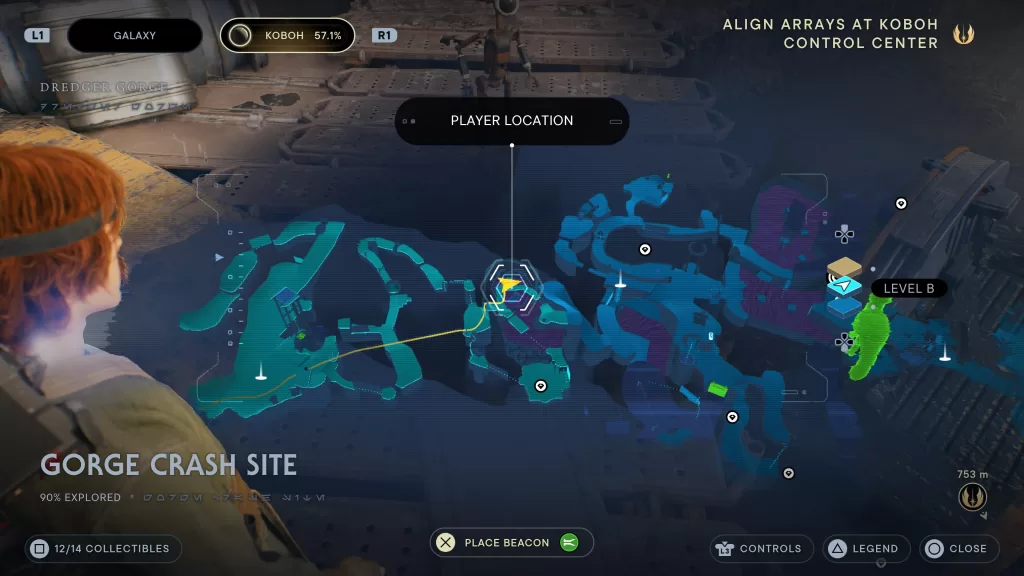
Need help finding the collectibles in the Gorge Crash Site on Koboh? Check out our Koboh Gorge Crash Site collectibles guide below!
Seed Pod – Fire Pineapple: Nabooan Green
When facing the elevator from the Meditation Point, it is to the left of the elevator on the other side of the tree by the rock.
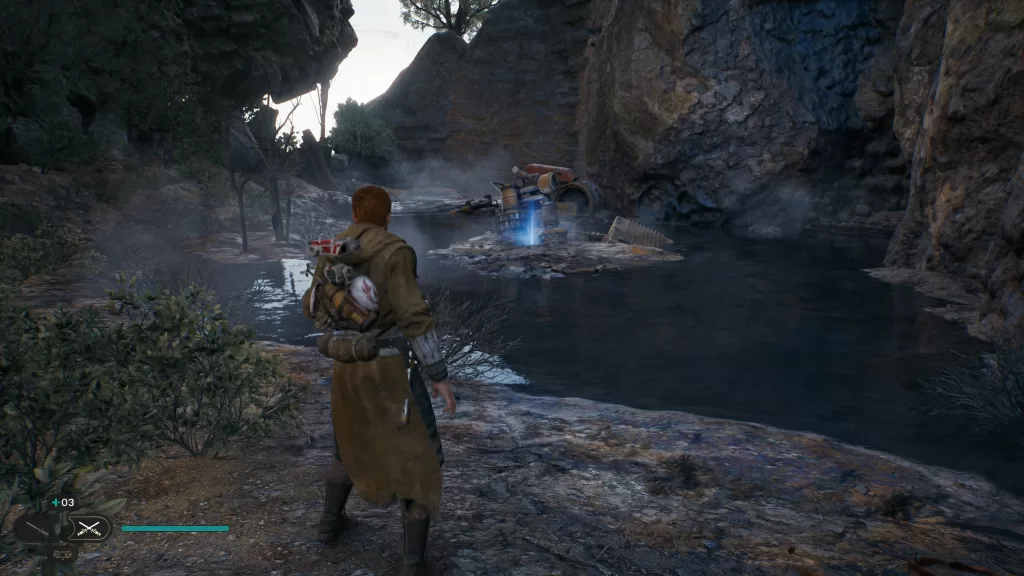
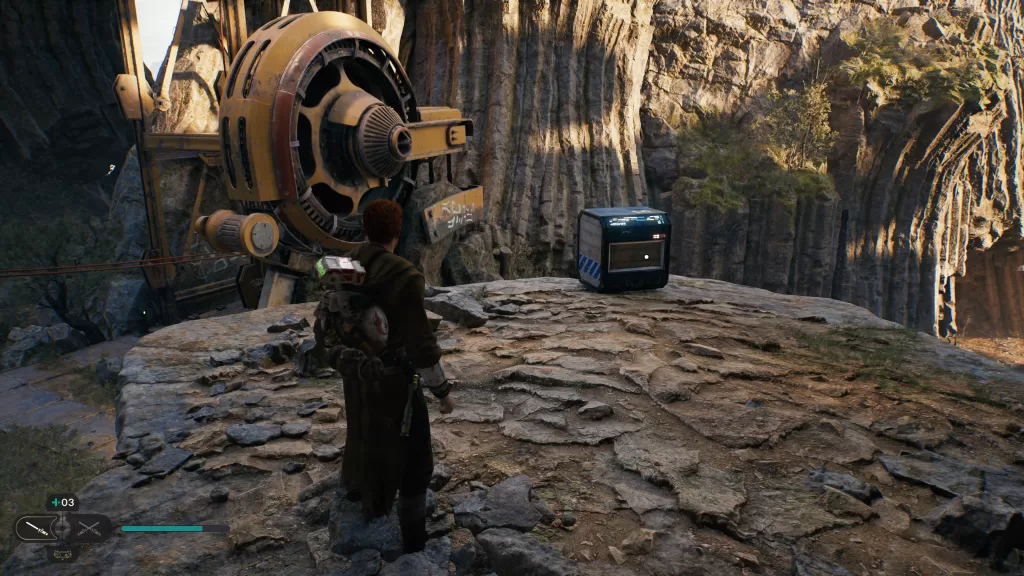
Databank – Broken Dredging Machine
When facing the elevator from the Meditation Point, follow the path left to find this collectible on an island in the water.
Databank – Broken Mining Droid
From the previous collectible, head past it to find the scannable broken down droid.
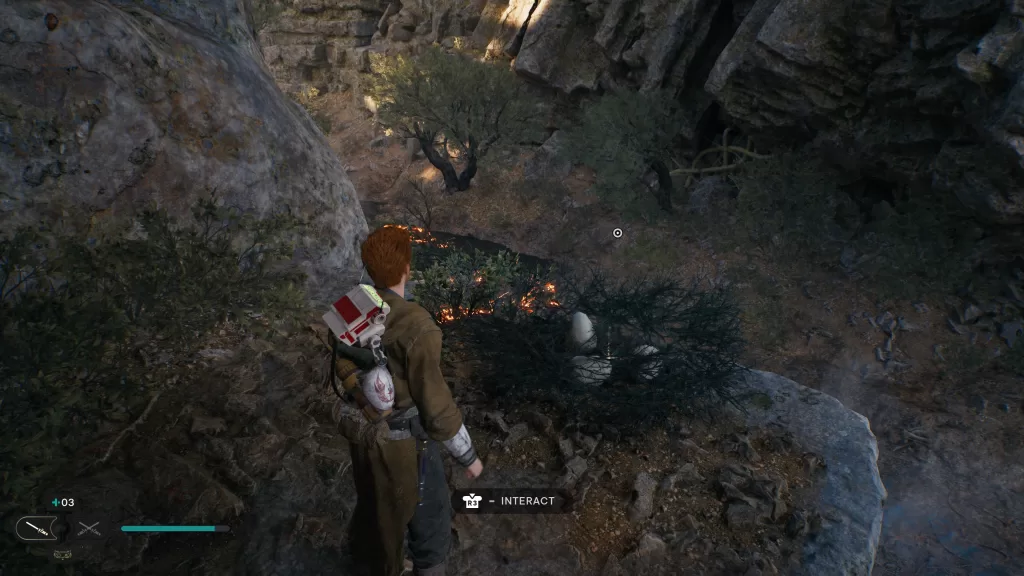
Treasure – Priorite Shard
Facing the previous collectible, look to the right to find a wall you can jump up. Do so to find a ledge containing a nest.
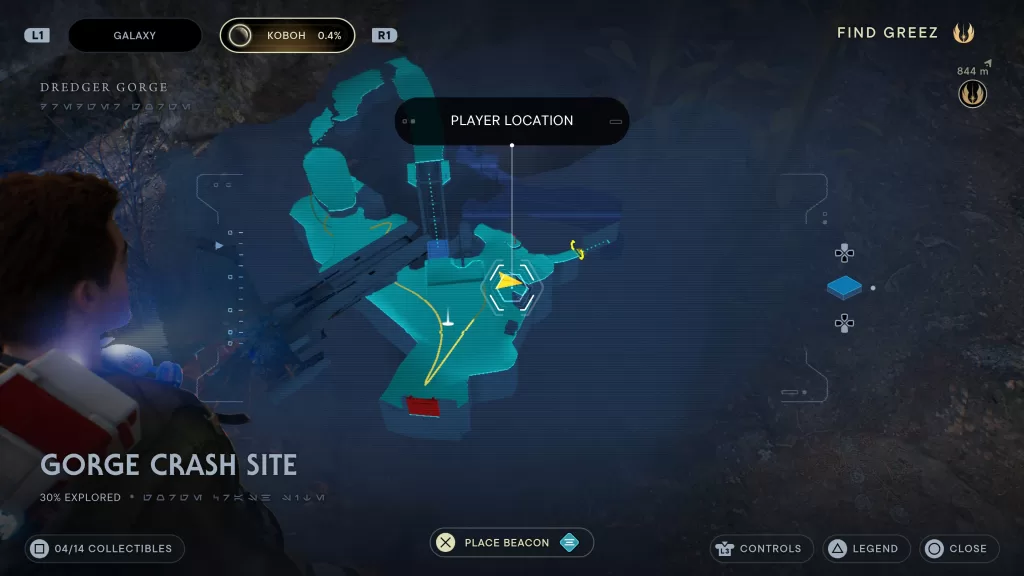
Seed Pod – Cactus Ball
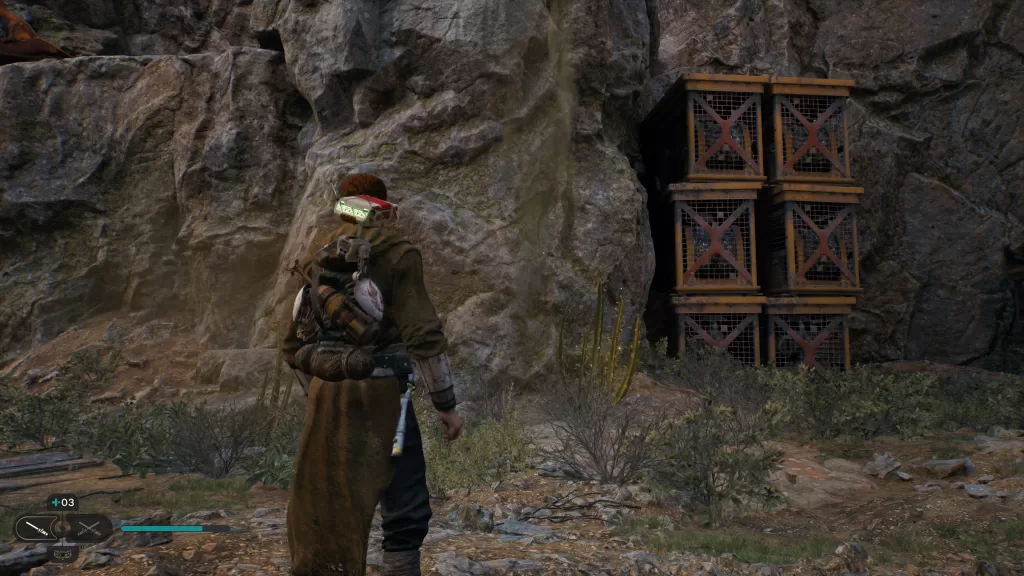
Facing the elevator while standing on the Meditation Point, head to the right and look for a group of metal crates. Hit the plant in front of them with your lightsaber.
Chest – Photoreceptors: Scrayard
From the previous collectible, head to the side of the stacked metal crates and use your grapple to reach them. This will bring you to a stone rock containing the chest.
Treasure – Priorite Shard
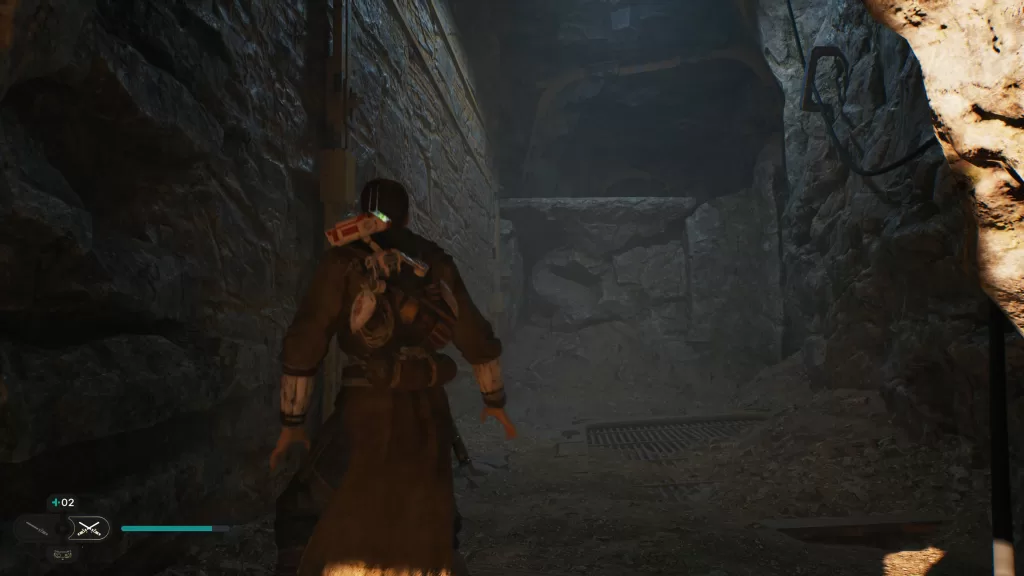
This shard can be found near where you find the first group of Battle Droids near the crash site. After defeating the droids, head into the cavern. Immediately take a left to find a side tunnel with a wall you can run jump on. Do that to reach a ledge containing the shard.
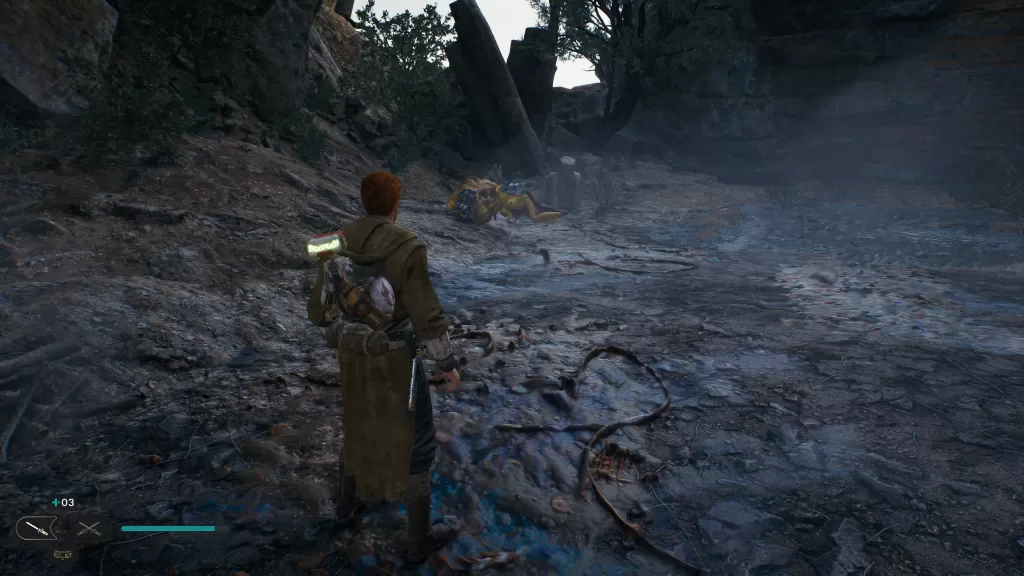
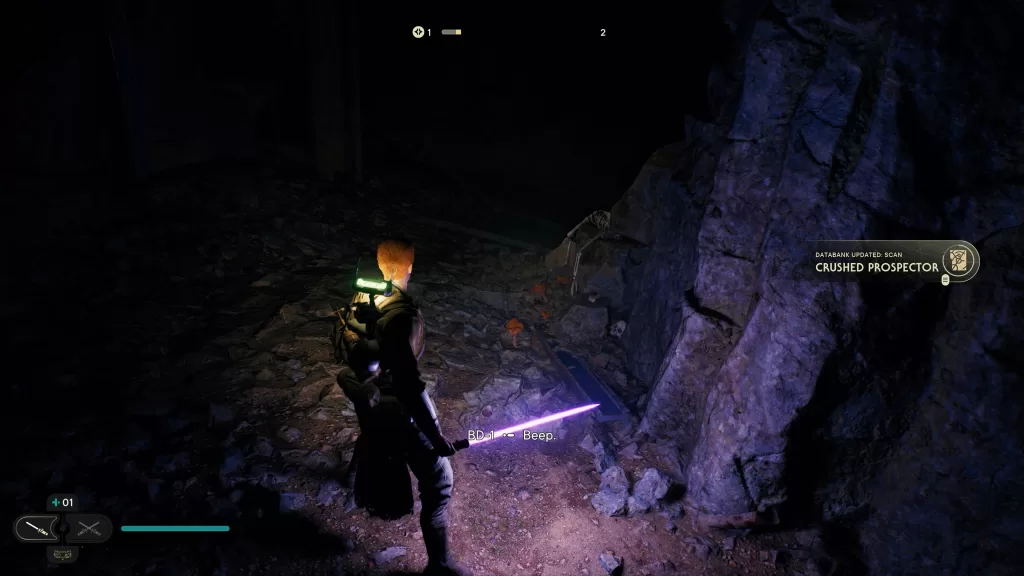
Databank – Crushed Prospector
Along the main path after defeating the first Raider Grunt in the tunnel.
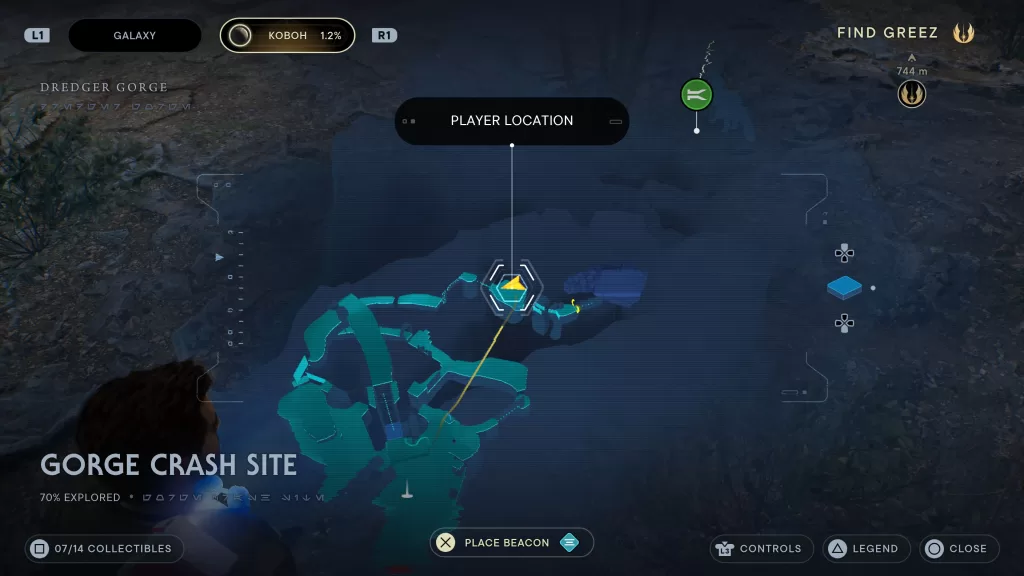
Seed Pod – Cactus Ball
Near the shortcut zip line that leads back to the Meditation Point. Use the lightsaber to cut it down.
Databank – Koboh Tar
In a tar pit along the main path just after using the zip line shortcut from the Meditation Point
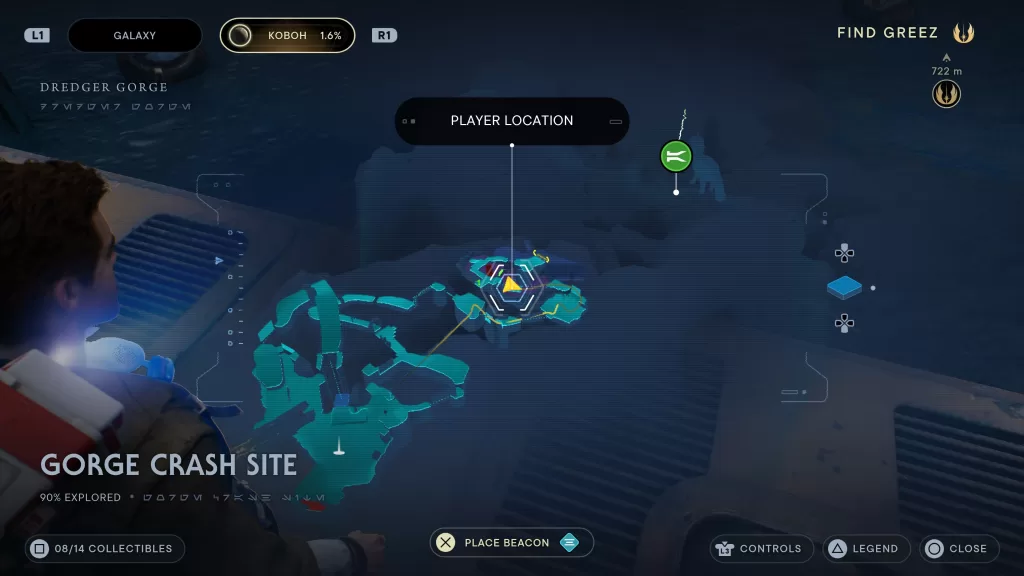
Seed Pod – Fire Pineapple
Head to the ship trapped in tar. Once there look for the droid then head down the path behind him to face a rock wall. Cut the brush on the right to receive the seed.
Chest – Short Beard
On a cliff overlooking the tar pit near the second shortcut
**The below collectibles become available after you unlock the ability to open doors with the Force.**
Force Tear
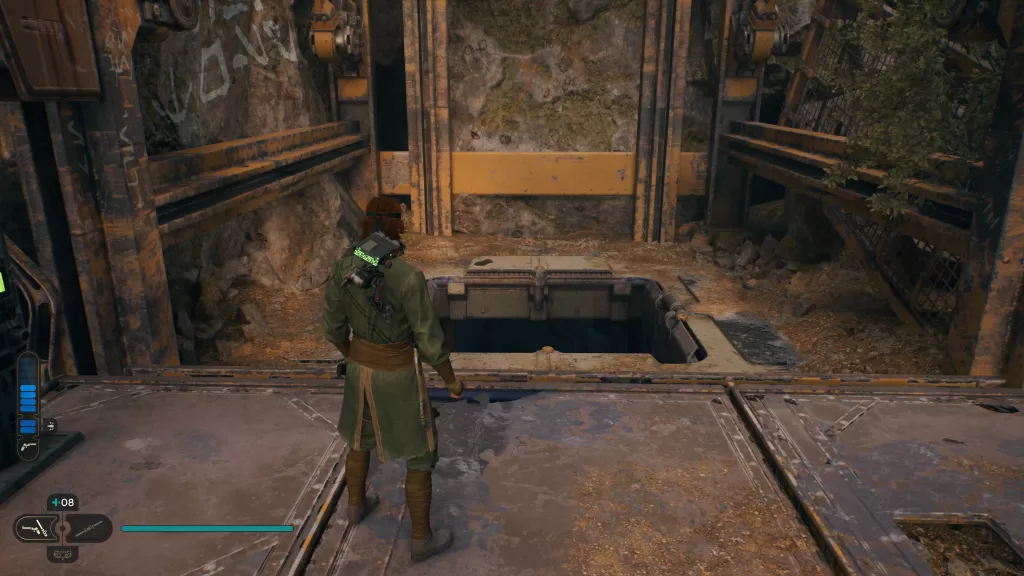
Start at the Meditation Point and send the elevator up (don’t ride it!). Under it you’ll find a hatch you can open. Drop down to find the Force Tear at the end.
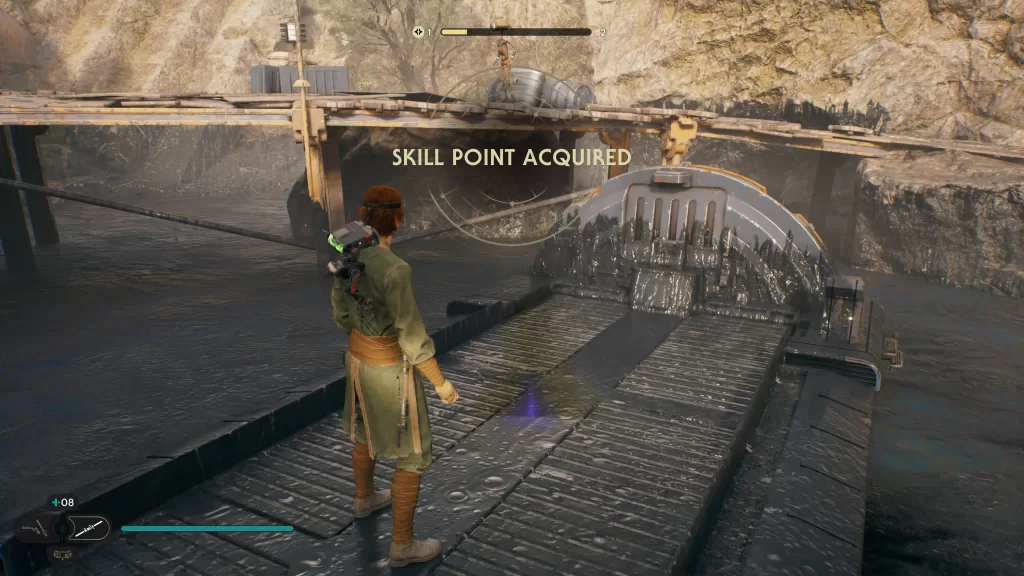
Essence: Skill Point
Near the end of the area in the tar pit right before Derelict Dam. There will be a crashed ship that you must use the Force to raise out of the tar. The essence can be found on this ship.
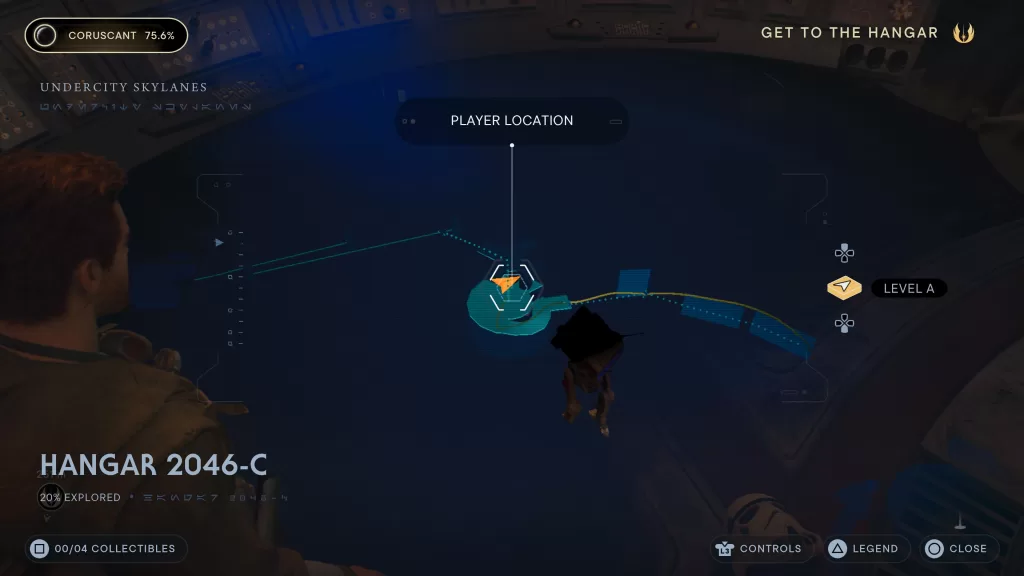
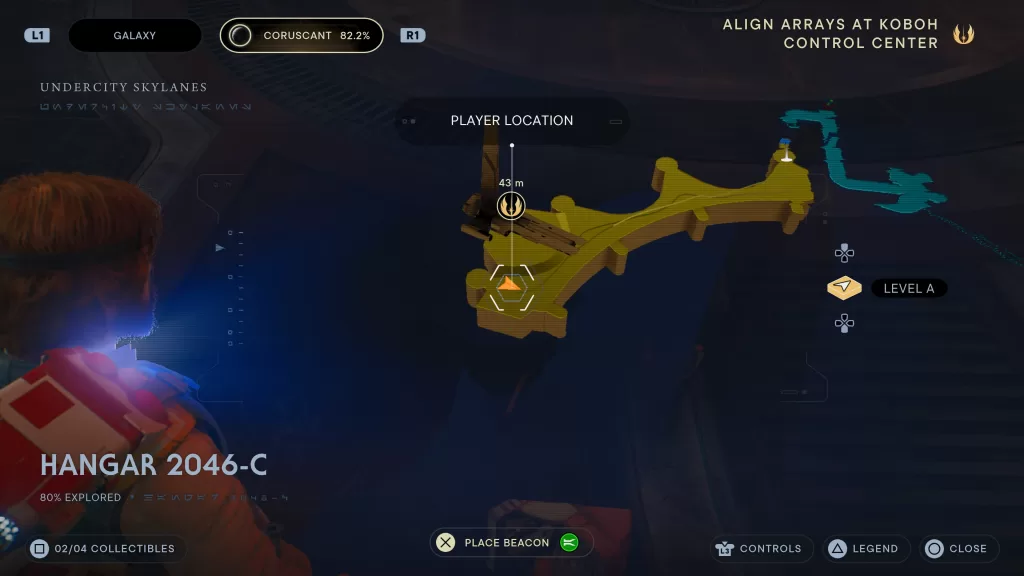
Need help locating the collectibles in Hangar 2046-C on Coruscant? Check out our Coruscant Hangar 2046-C collectibles guide below!
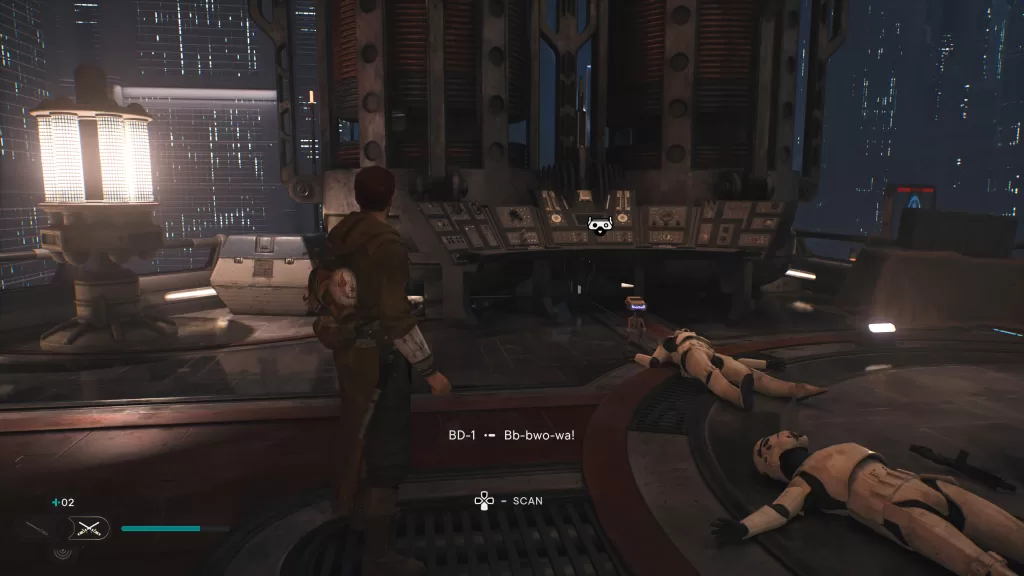
Databank – Air Traffic Control Perch
When coming from the Skylane Regulation Station, you’ll have to wall run on 3 billboards to reach the hangar. At the top of the stairs after fighting some enemies, scan the console.
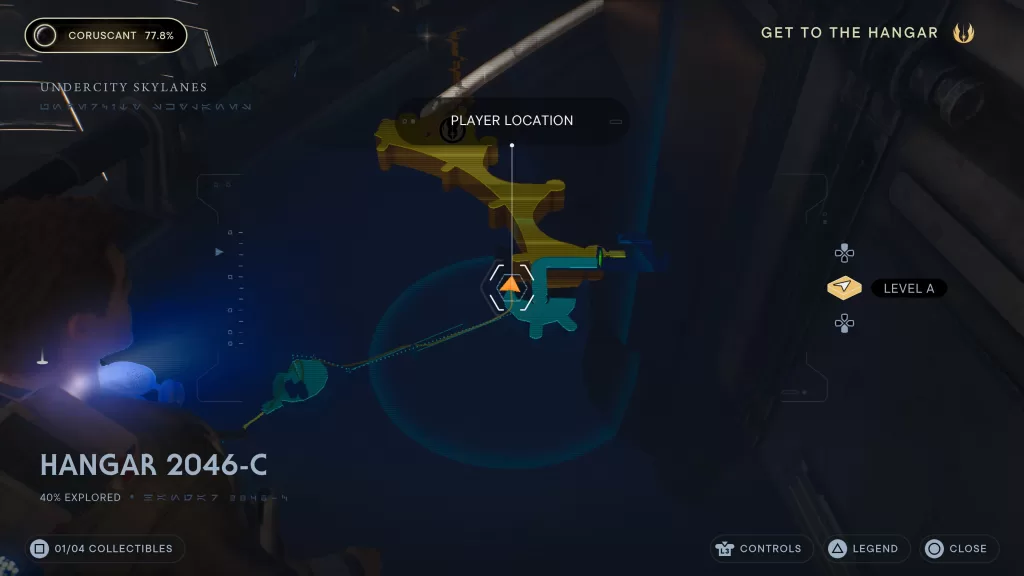
Treasure – Priorite Shard
To the left of the actual hangar.
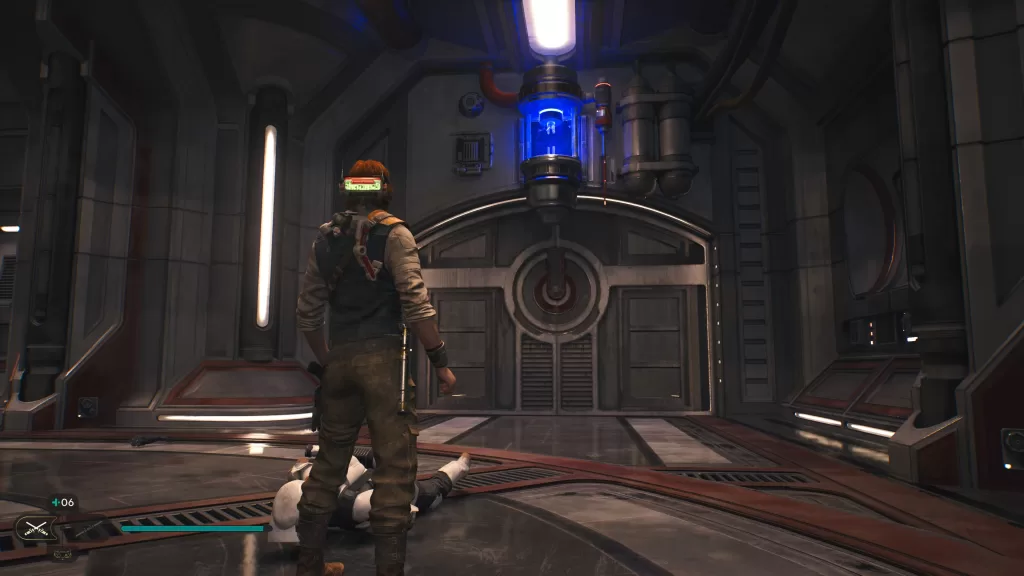
Chest – Slice: DT Sentry
This collectible can’t be contained until you unlock the Electro Dart near the end of the main story. Starting at the meditation point, take the nearby elevator up then follow the hall right looking for the first door on the left. Use the dart on the conductors above the door to open it. You’ll then need to defeat the D-L1T Sentry Droid. After the battle, scan the monitor at the back of the room with BD-1 to receive the collectible.
Treasure – Priorite Shard
This treasure can be found on the other side of the Mantis where it’s docked in the hangar. You’ll need to destroy a Scavenger Bot to collect it. This won’t be available until your second visit to Coruscant.
For other guides on Star Wars Jedi Survivor, click here!
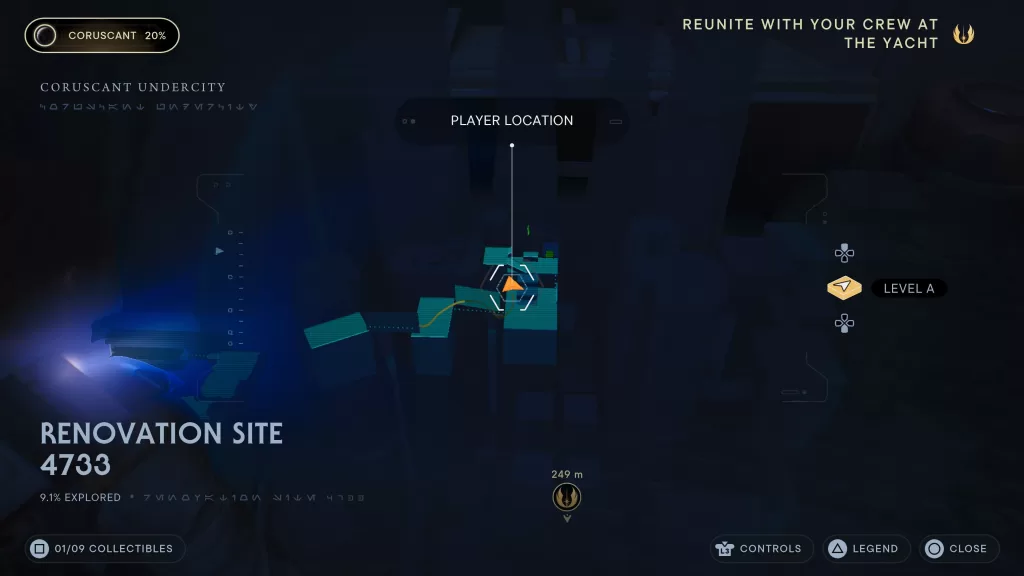
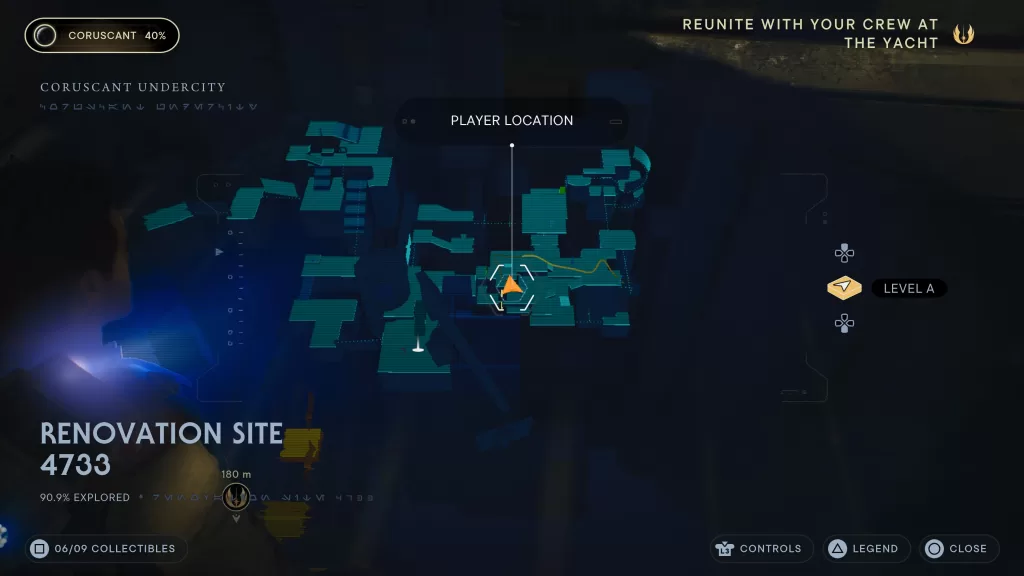
Need help finding the collectibles at Renovation Site 4733 on Coruscant? Check out our Coruscant Renovation Site 4733 collectibles guide below!
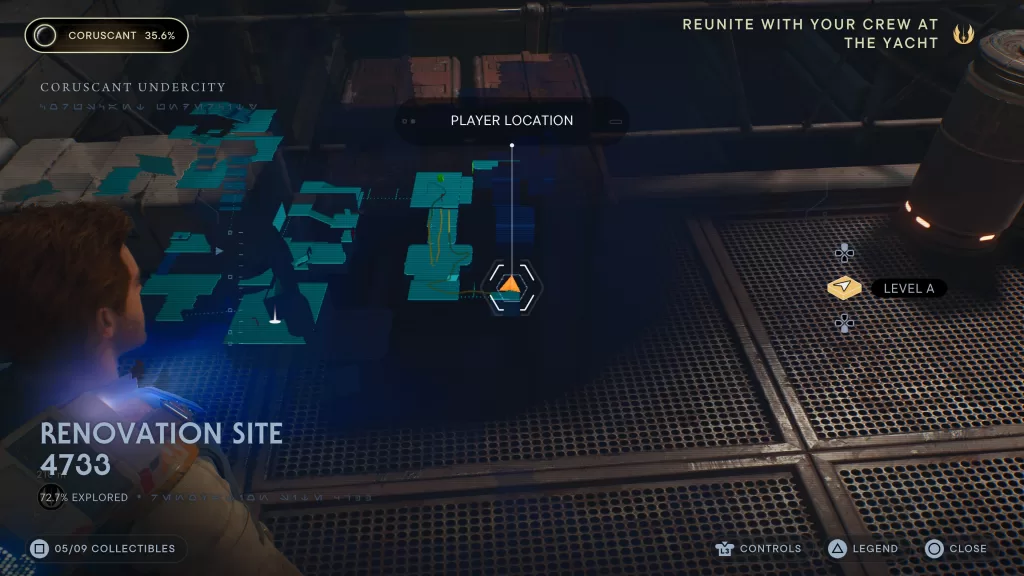
Treasure – Priorite Shard
After using the zip line to reach the Renovation Site, you’ll use the wall run twice bringing you to an area with a wet, slippery ramp. The collectible can be found to the left of the ramp.
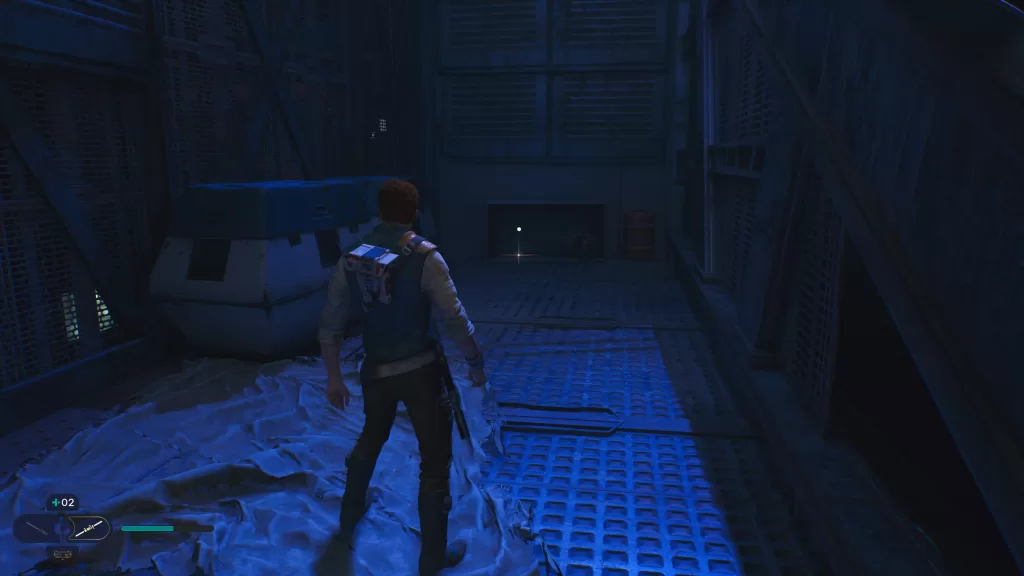
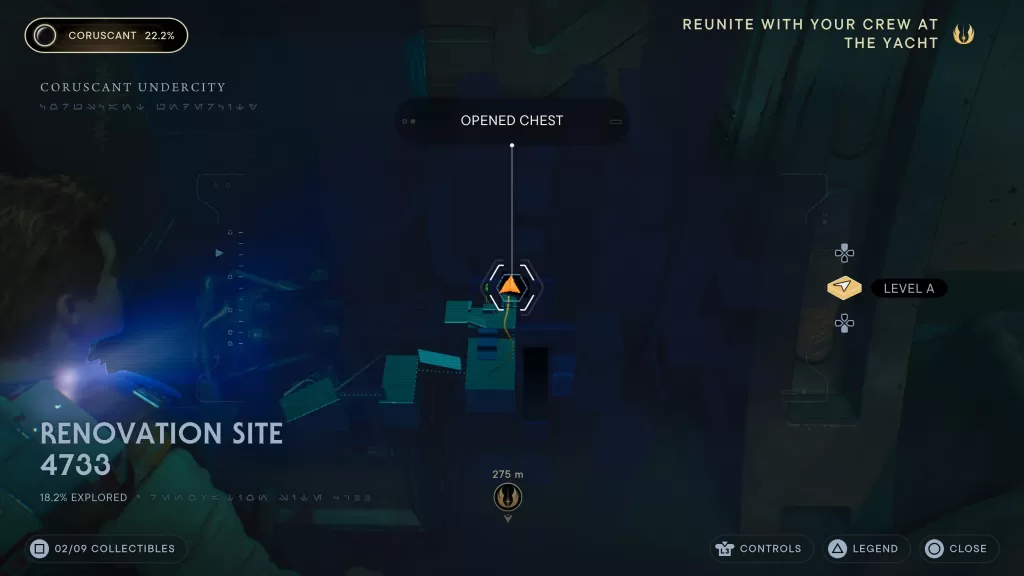
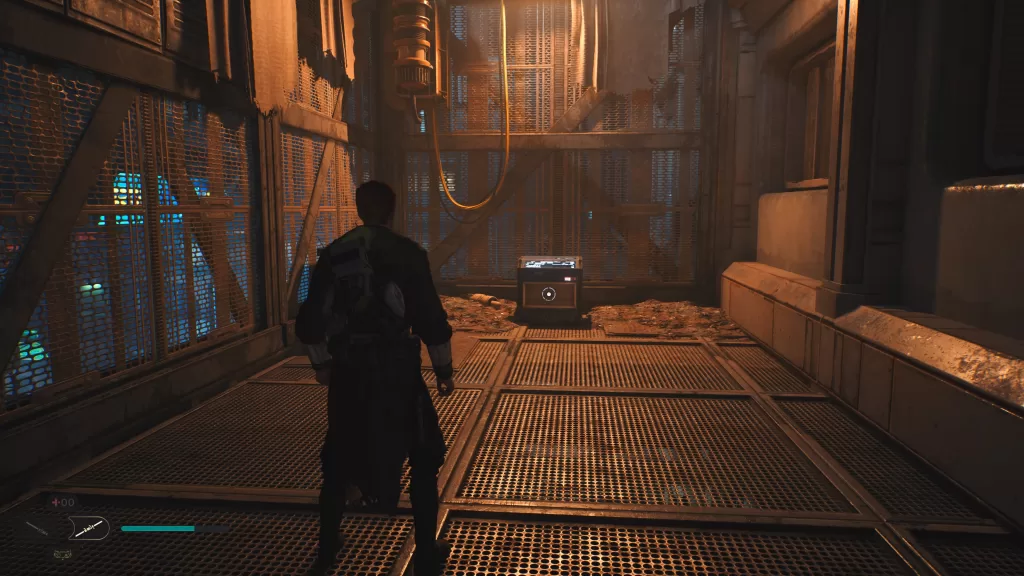
Chest – BD-1 Materials: Coruscant Paint
From the previous collectible, head to the right side of the ramp then wall jump to reach the top of the ramp. Once at the top, splice the door straight ahead to reveal the chest.
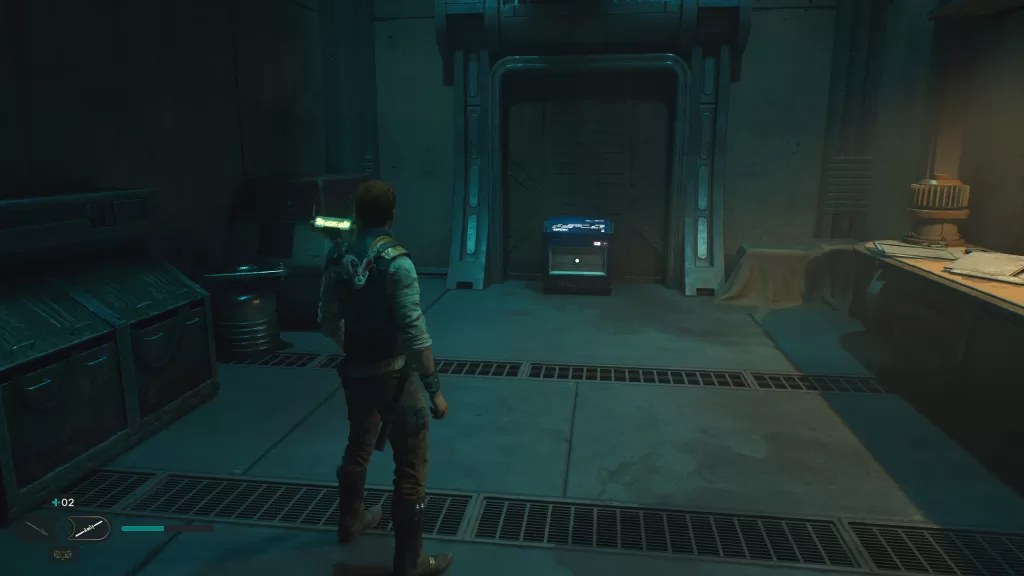
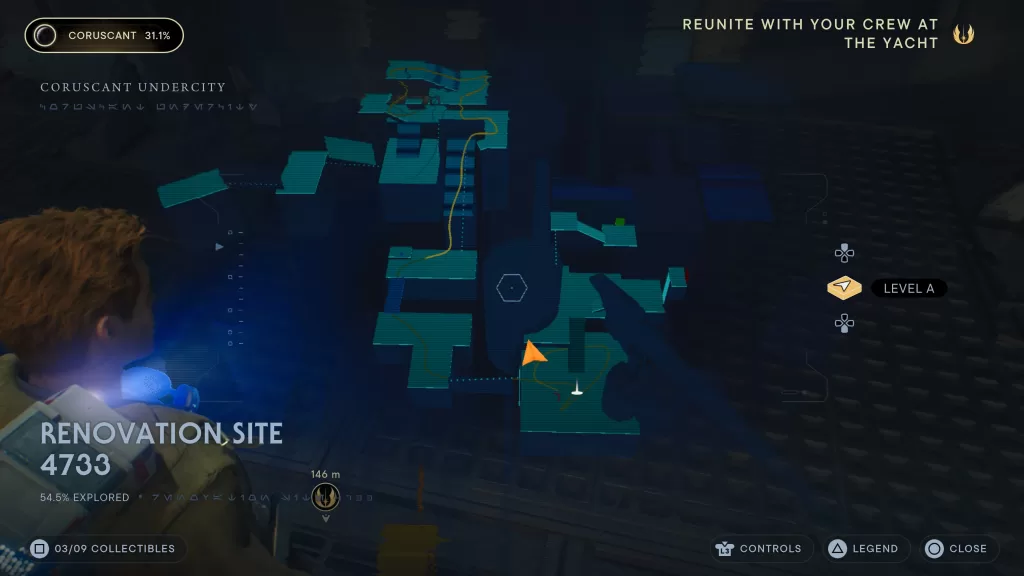
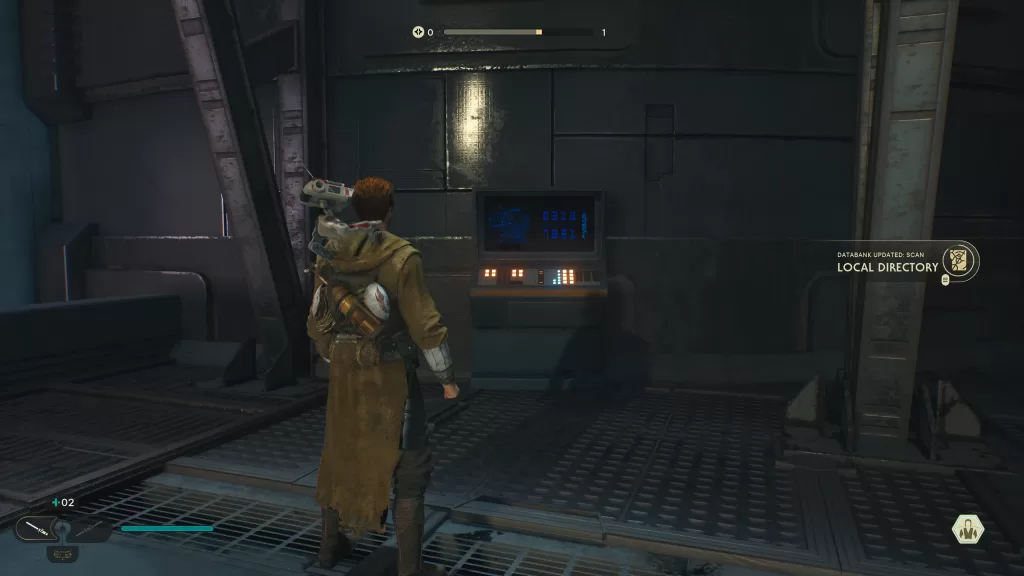
Databank – Local Directory
From the Meditation Point, face the stairs and look to the left to find it against the wall.
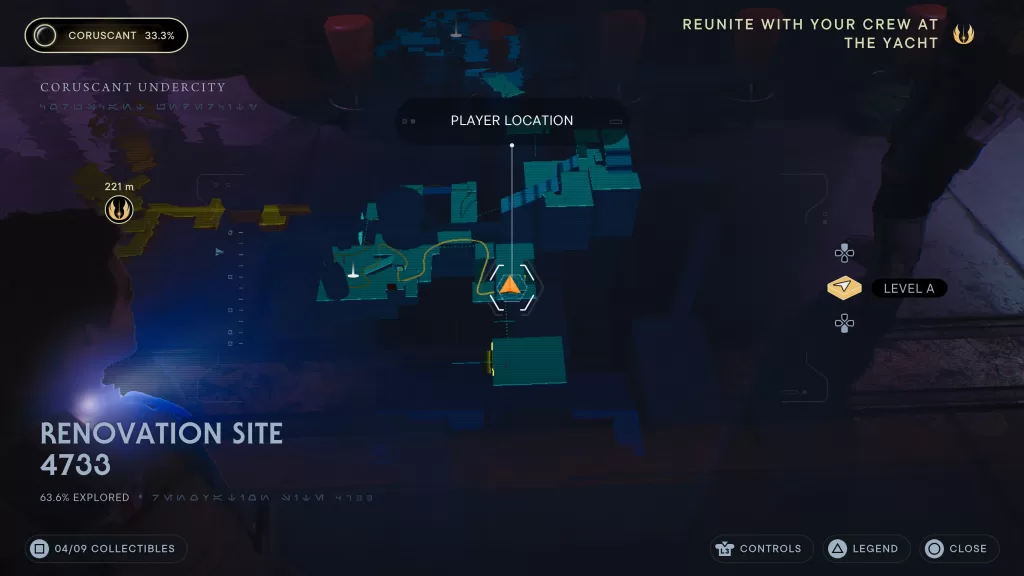
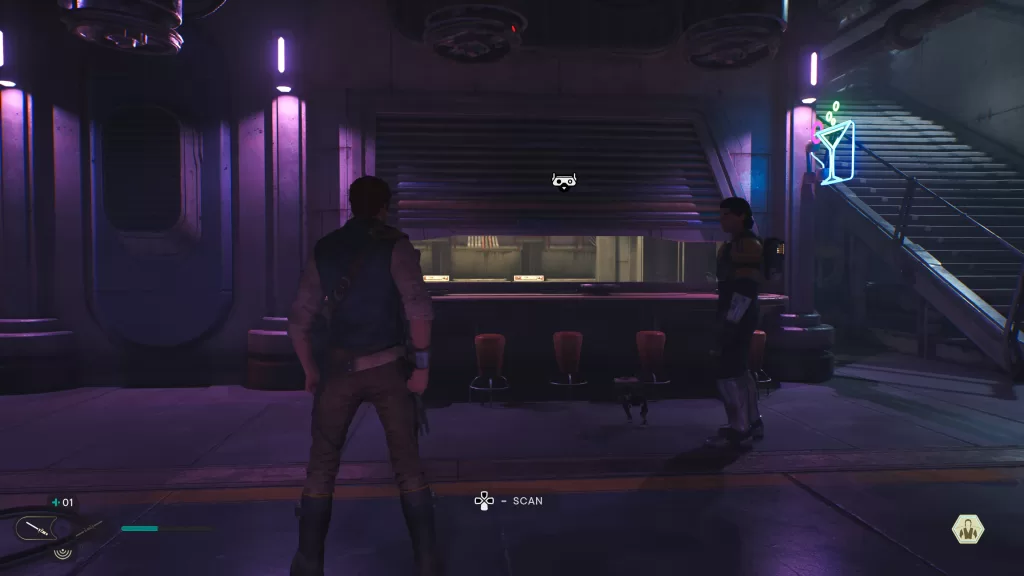
Databank – Desi’s Noodles
From Meditation Point, head up the stairs and keep going straight. Wall jump across the gap then take a right, heading down another flight of stairs. Turn left and go through a doorway to reach the restaurant. Scan it!
Treasure – Pirorite Shard
As you progress through the area, you’ll reach a section where there is a plaza of Stormtroopers below. Cal will have to jump from one pipe to another to sneak past. Unfortunately for him, the pipe breaks and he’ll have to take out the Stormtroopers. From this plaza facing the purple sign, head up the stairs to the right of this sign and take a left to find a gap. Use the pole to cross to find the shard.
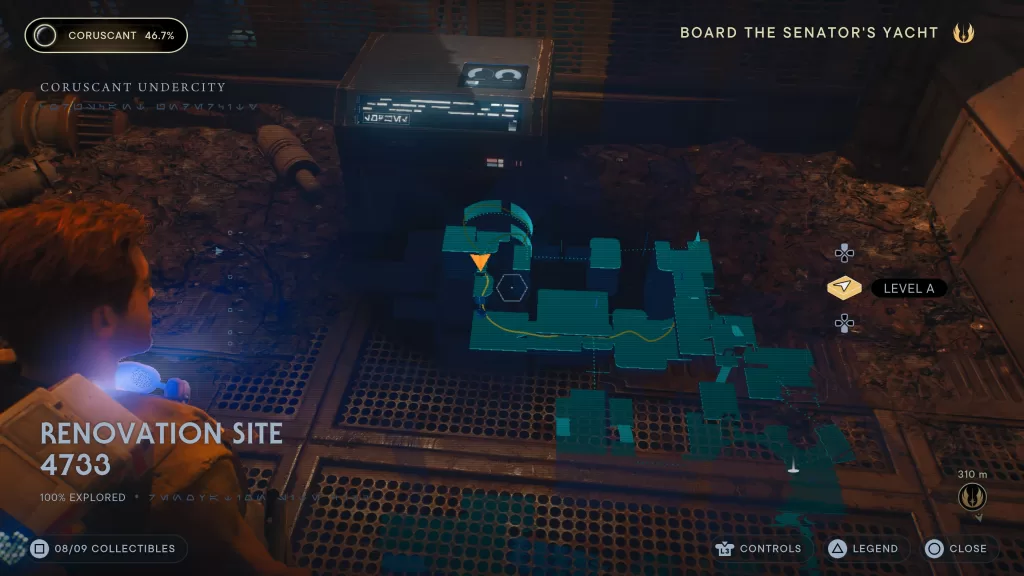
Chest – Grip: Patience
Looking at your map with the stairs facing north of the Meditation Point, this chest will be found in the northeastern part of the area in the section with the 3 curved screens. From the above collectible, it’s on the opposite side of the plaza. You’ll have to move a giant cube under a section of climbable wall. Once you reach the top, use the ceiling to climb across the gap. This will bring you onto the roof of the building. Use the blue and white monitor to wall jump on to reach the next building. On top of this building use the 2 higher blue and white monitors to wall jump across to find the platform with the chest.
Treasure – Priorite Shard
After unlocking the shortcut leading to the crane, head up the stairs from the Meditation Point then take a right going up a second set of stairs. Head through the doorway and climb up the wall. At the top, head through the door then take a right going down a flight of stairs. This collectible will be under these stairs. (This is just before the mini boss!)
Databank – Abandoned Shop
From the previous collectible, head up the stairs and take a right. Head down a short flight of stairs (where Stormtroopers were). At the bottom, take a right and head down another flight of stairs. Look to your left to find a zip line. From here look to the right to find another set of stairs you’ll want to take down. Jump over the broken sections then head through the doorway on the left.
Databank – Ascension Cable
This databank unlocks automatically as you progress through the area.
For the next guide on the collectibles found in the Industrial Stacks, click here! For other guides on Star Wars Jedi Survivor, click here!
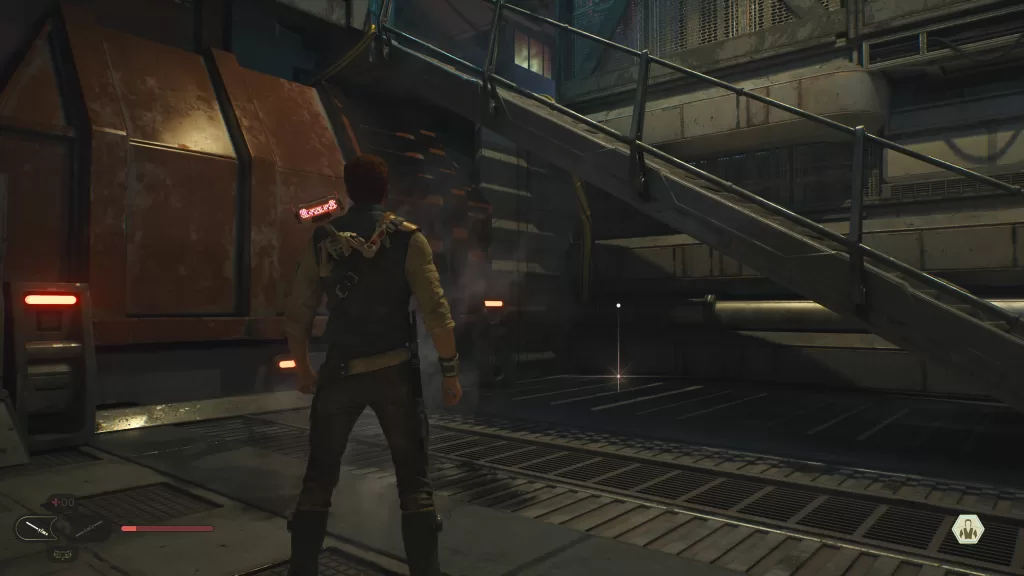
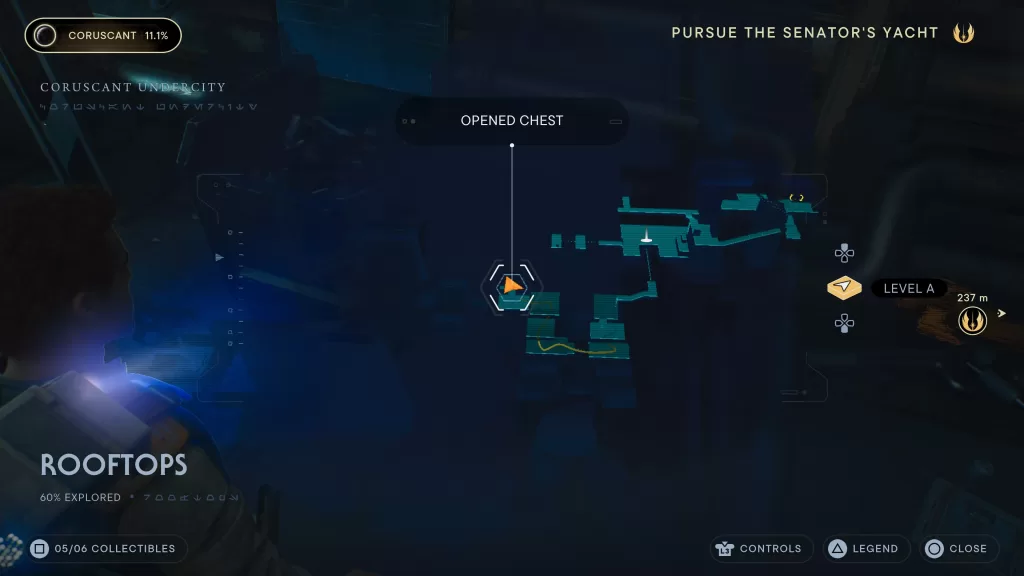
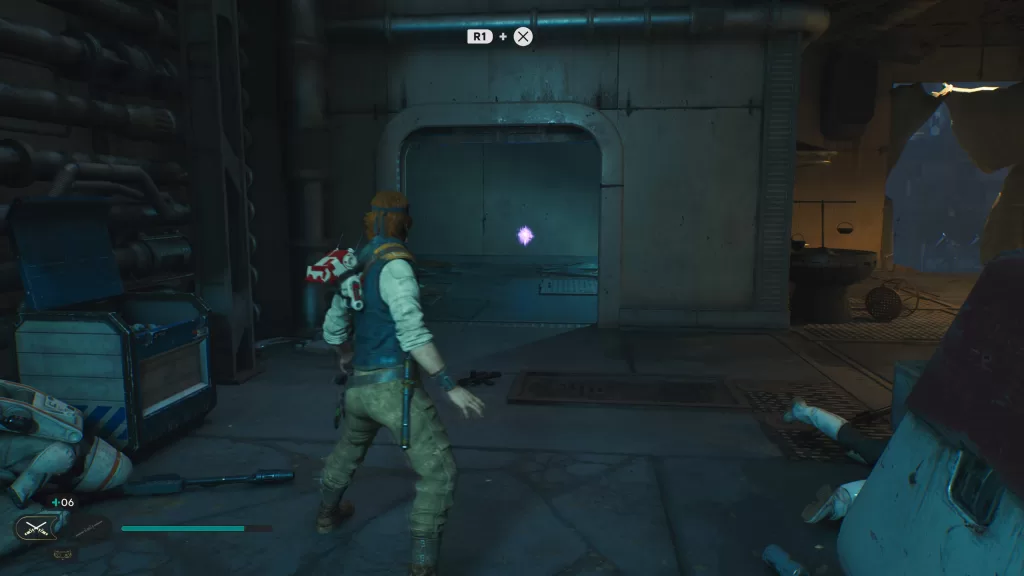
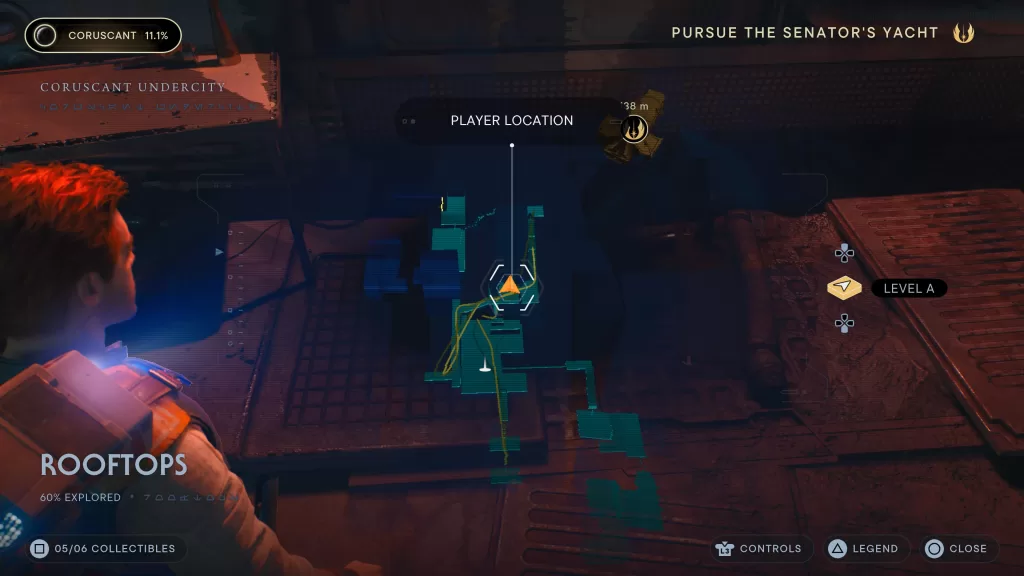
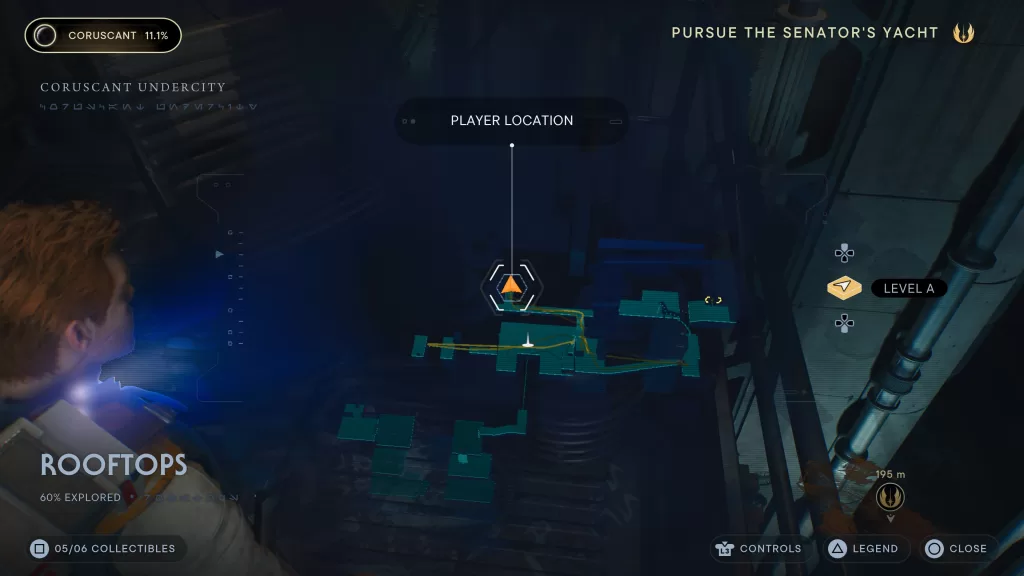
Need help finding the collectibles along the Rooftops of Coruscant? Check out our Coruscant Rooftops collectibles guide below!
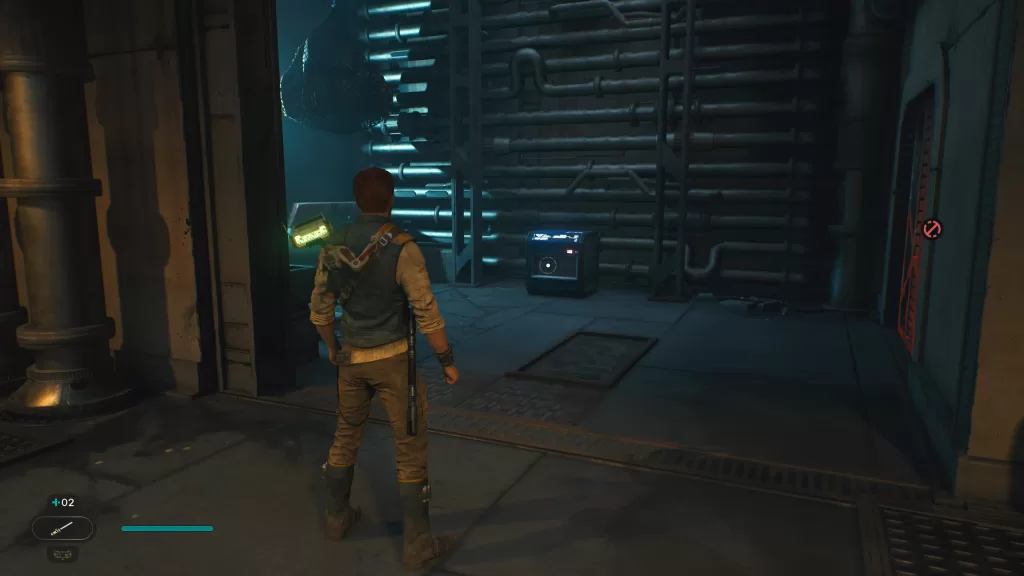
Chest – Emitter: Patience
After you first gain control of Cal, look for a small side room with a locked door to find the chest. (Should be on your left.)
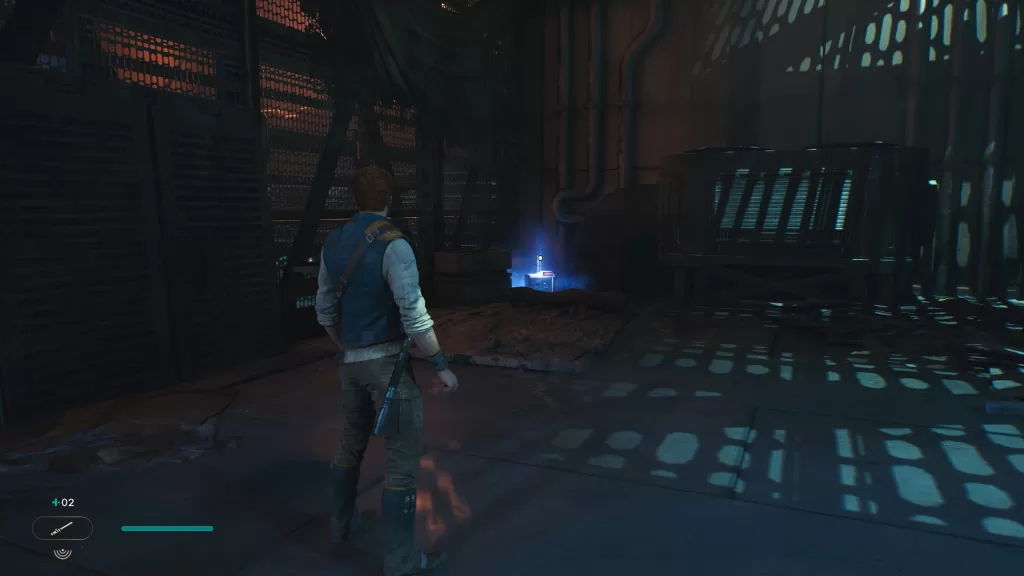
Force Tear – Skill Point
This collective is unavailable until you unlock the ability to lift objects with force by progressing further in the main story. To find the force tear, use lift on the door to the right of the above chest then head inside the room. Interact with the tear to kick off a challenge where you’ll need to defeat two Rancor.
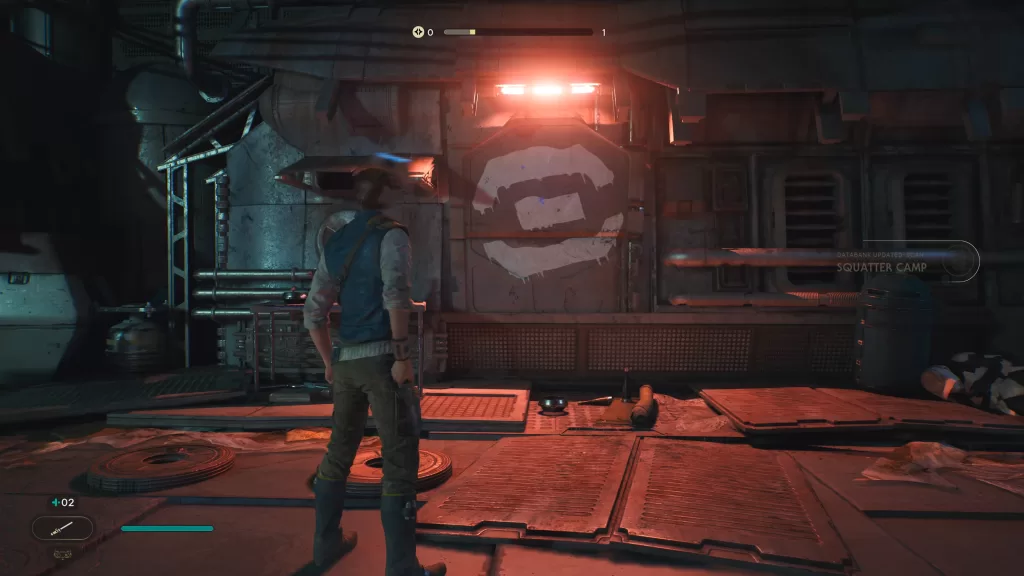
Databank – Abandoned Squatter Site
While standing on the Meditation Point, face the three spinning fans. Head around the metal wall to the right of the spinning fans to find the collectible.
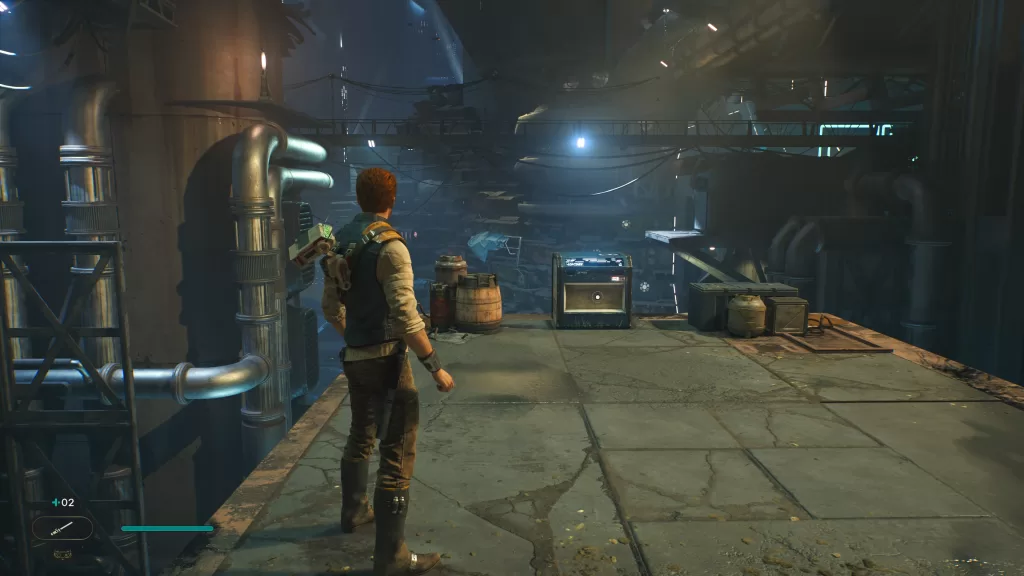
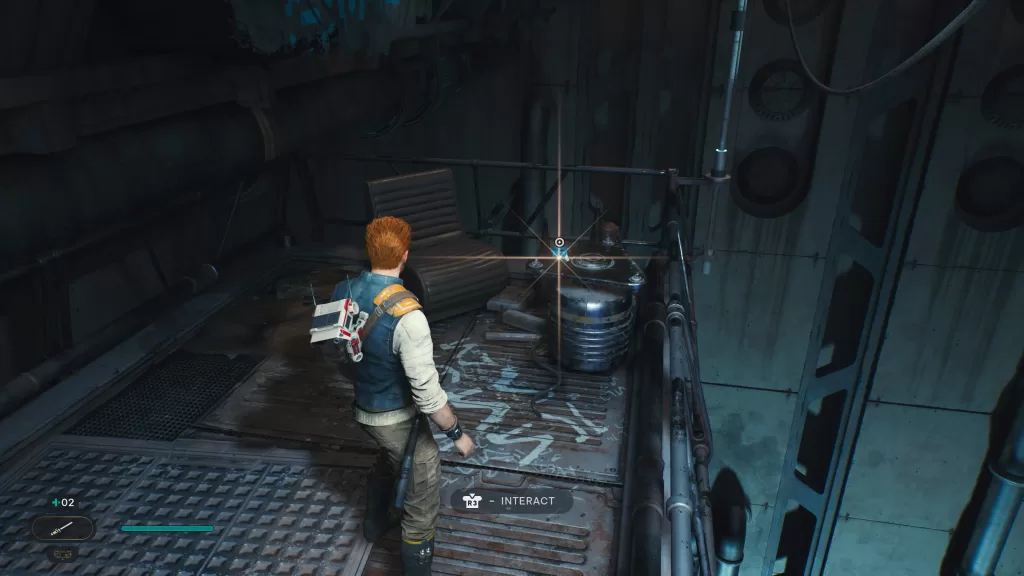
Chest – Switch: Patience
From the Meditation Point, face the 3 spinning fans then head to the right and use BD-1 to slice open the door. Head through onto a walkway and use the force to close the pipe spewing water. Jump across 2 platforms to find the chest.
Databank – Squatter Camp
From the Meditation Point, face the 3 spinning fans then head left, jumping onto a metal structure. Climb up the climbable wall. At the top, dispatch the three enemies then scan the while symbol under the light.
Treasure – Priorite Shard
From the previous collectible, face the white symbol then head left and go down the stairs. Follow the path to the end.
For the next guide on the collectibles found at the Renovation Site 4733, click here! For other guides on Star Wars Jedi Survivor, click here!
Explore the galaxy with Cal Kestis while sticking it to the Empire in Star Wars Jedi Survivor! Our Jedi Survivor guides will help you find those pesky collectibles scattered around each planet.
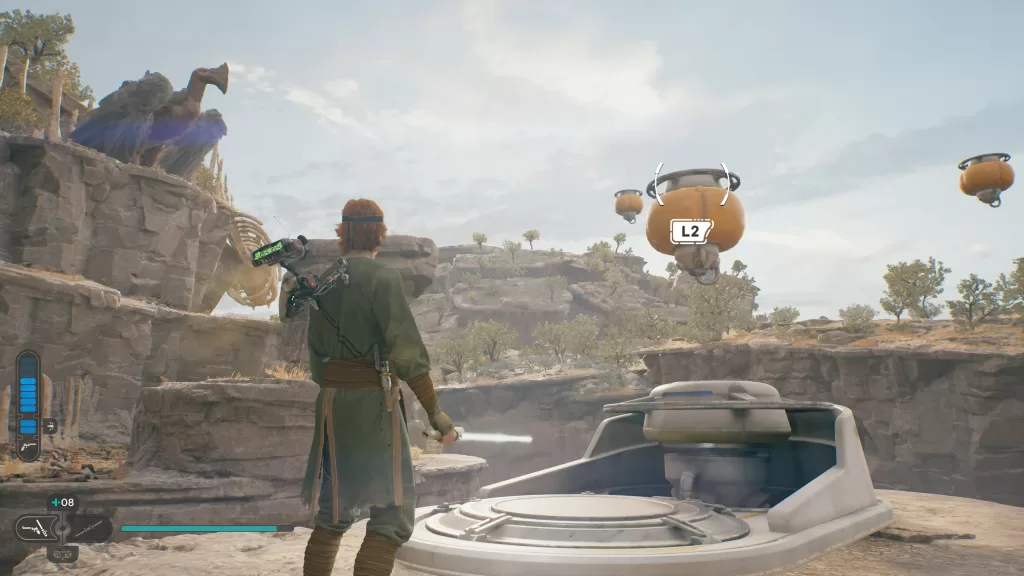
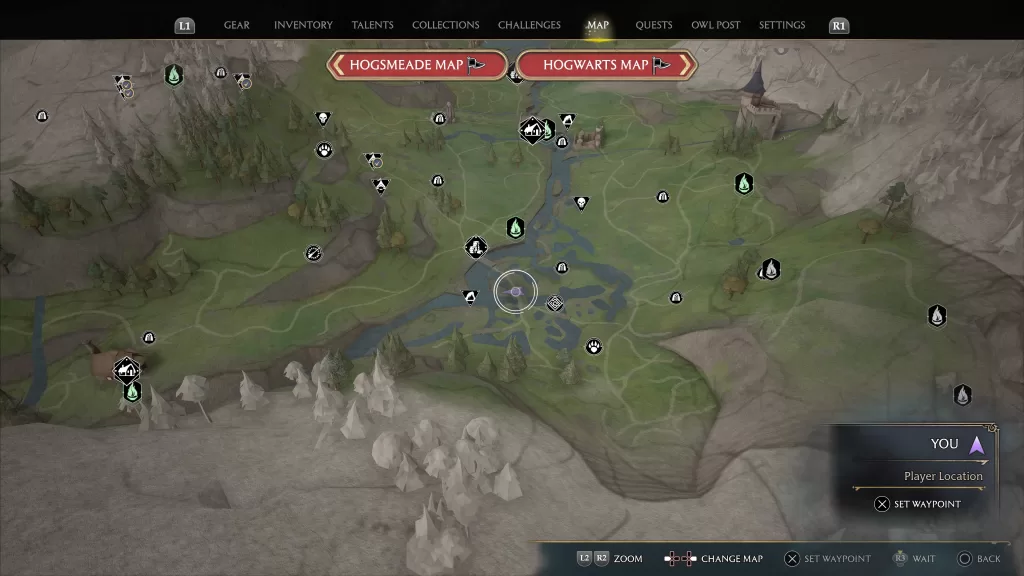
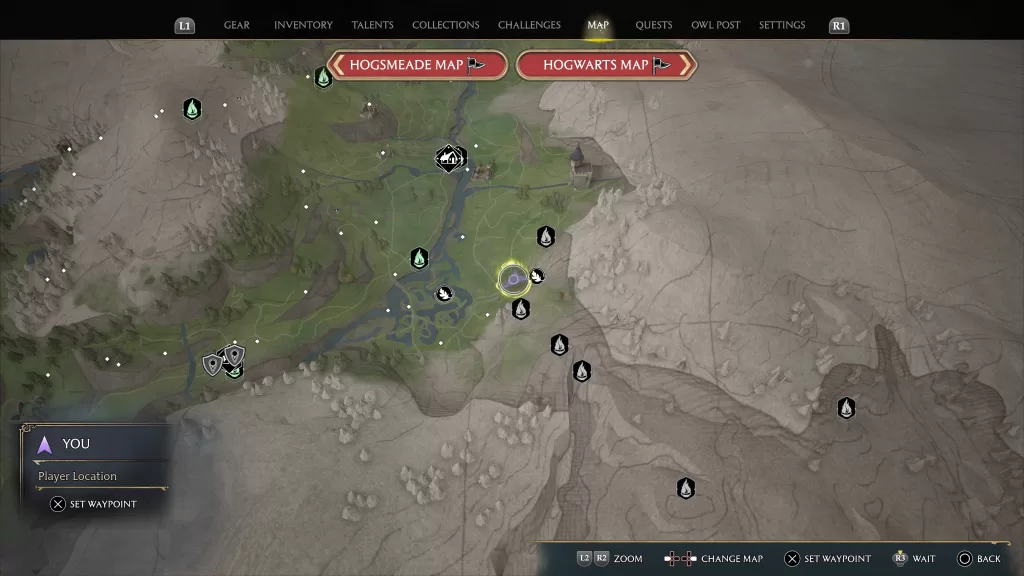
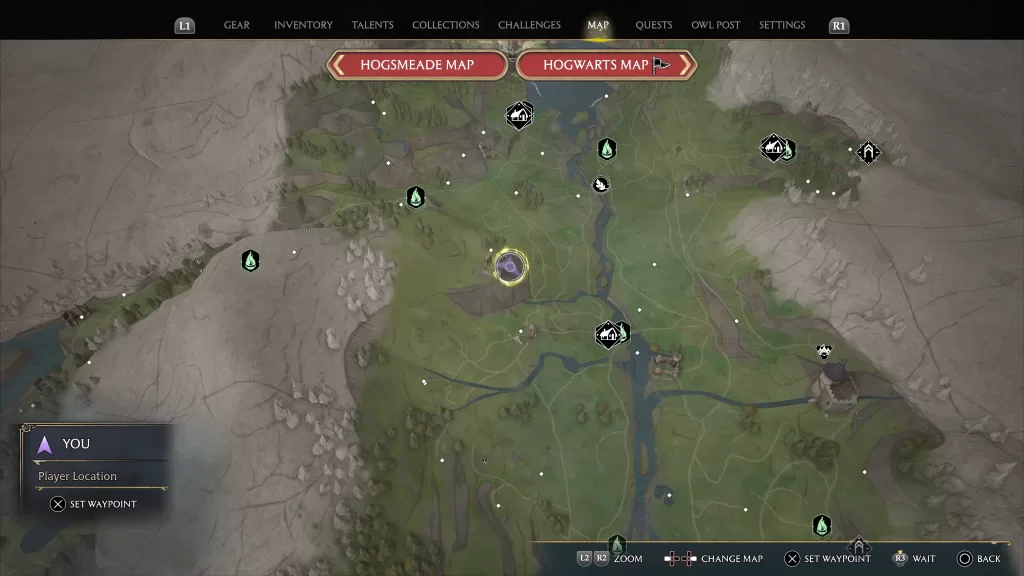
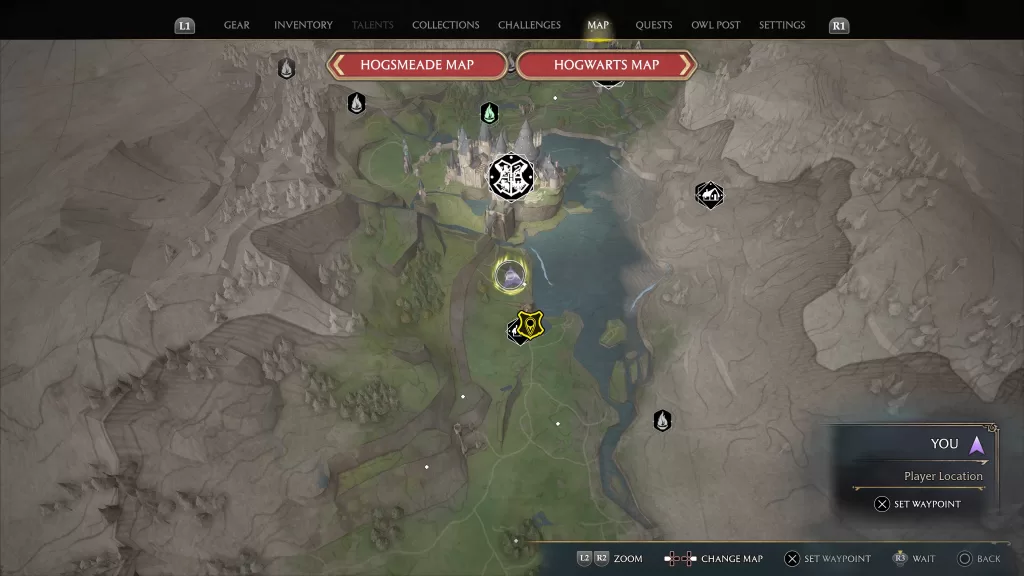
While exploring in Hogwarts Legacy, you’ll come across collectibles needed to fill out your collections and complete challenges. The World Map shows the complete area of the Highlands that includes Hogwarts, Hogsmeade and many other small villages and hamlets. If you zoom all the way out using the L2 button while viewing the World Map, you can see that the area is further broken apart into different regions that each contain a listing of the collectibles found there. This guide will focus on the following collectibles can be found in the South Sea Bog region:
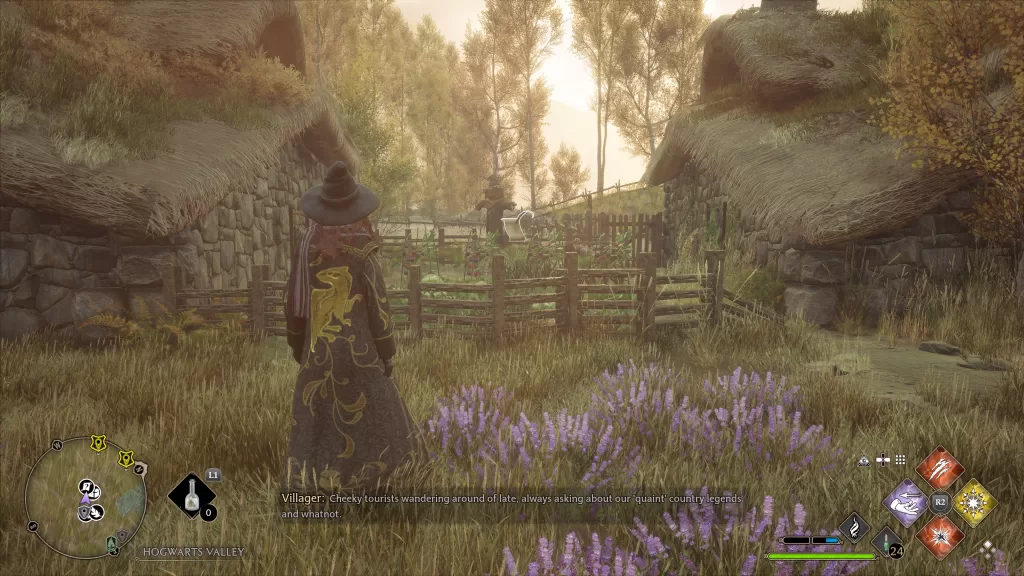
While exploring in Hogwarts Legacy, you’ll come across collectibles needed to fill out your collections and complete challenges. The World Map shows the complete area of the Highlands that includes Hogwarts, Hogsmeade and many other small villages and hamlets. If you zoom all the way out using the L2 button while viewing the World Map, you can see that the area is further broken apart into different regions that each contain a listing of the collectibles found there. This guide will focus on the following collectibles can be found in the Hogwarts Valley region:
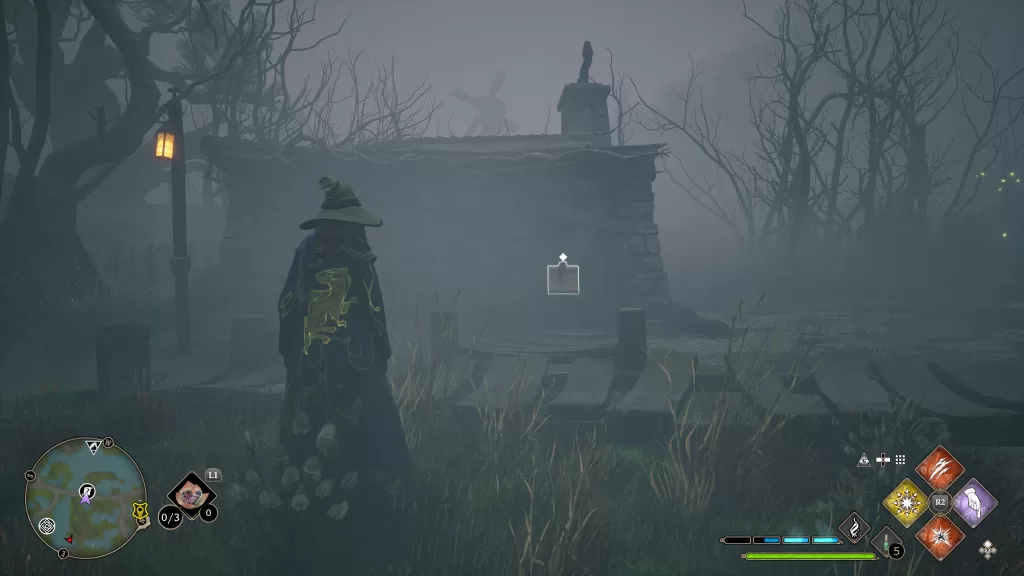
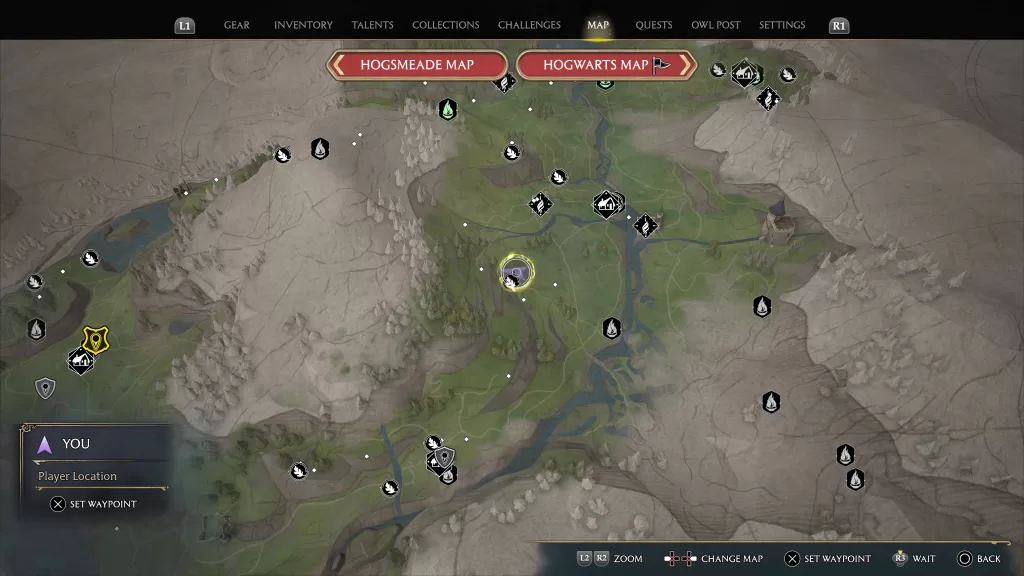
This town can be found in the northeastern part of the Hogwarts Valley region and contains the following collectibles:
Collection Chests x4
Field Guide Pages x1
Demiguise Statues x1
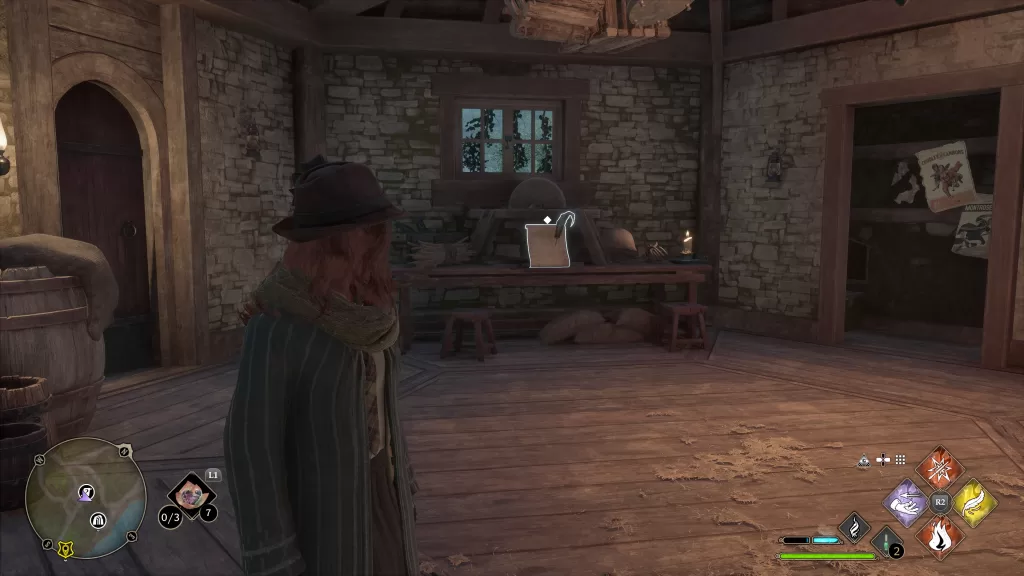
Collection Chests
1. This chest can be found in the house just south of the Floo Flame.
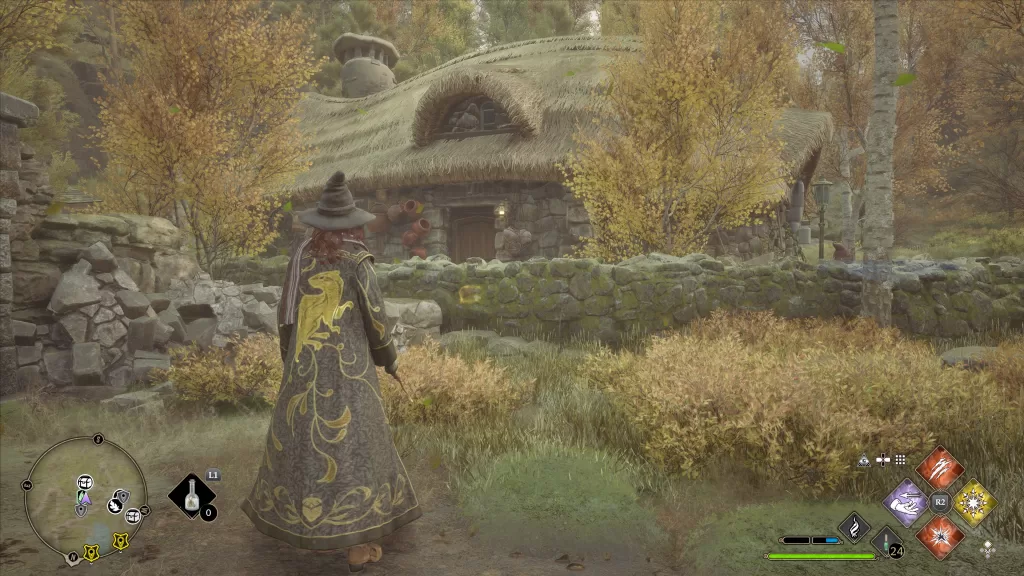
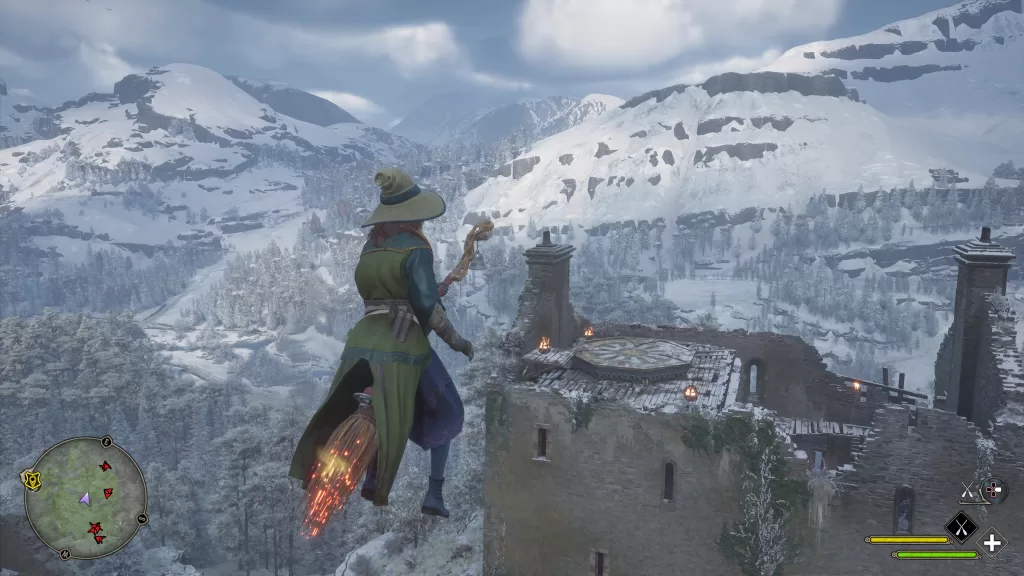
2. This chest can be found on the roof of a chimney next to the locked house across (west) of the shop. To reach it, head around to the back of the house to find a platform you can move. We jumped onto this and got on the roof of the house. From there, we were able to reach this chest.
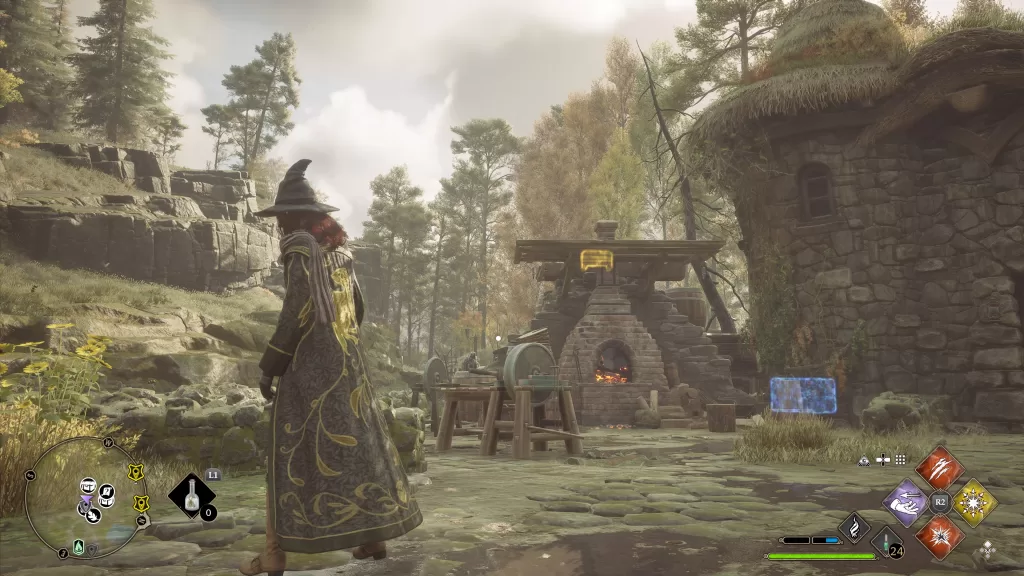
3. This chest can be found inside a locked house on the northwestern side of town.
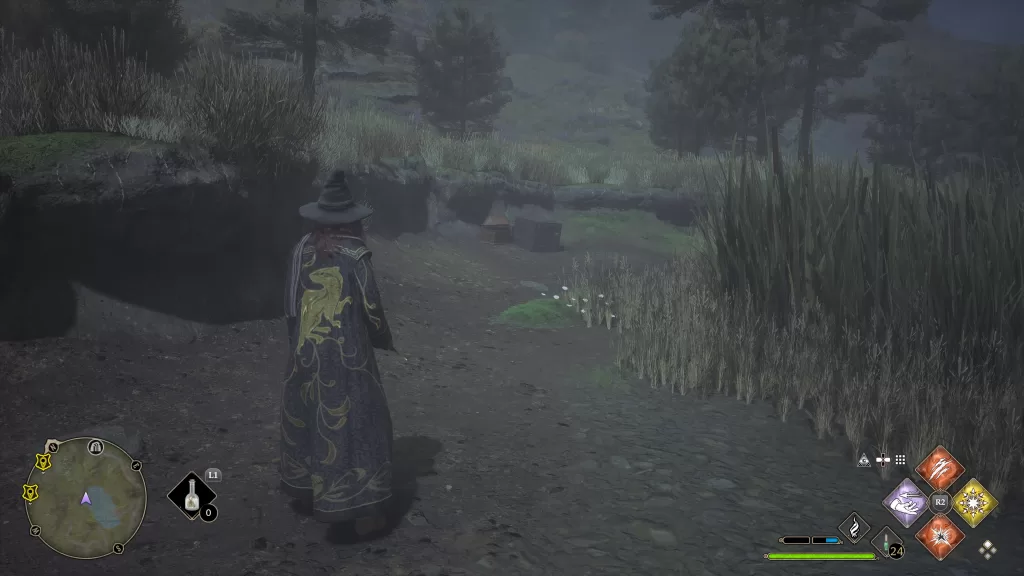
4. This chest can be found next to a wooden crate on the north side of the lake on the north side of town.
Field Guide Pages
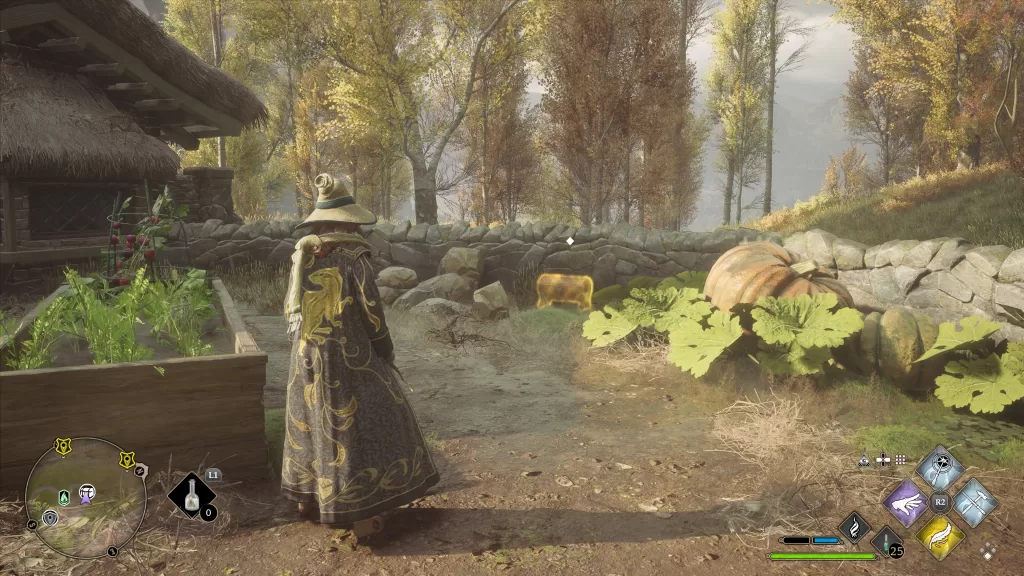
1. Enchanted Scarecrow Guide Page
Use Revelio on the scarecrow in the garden between two houses northwest of the shop.
Demiguise Statues
1. This statue can be found inside a locked house on the northwestern side of town.
Keenbridge
This town can be found in the south central part of the Hogwarts Valley region and contains the following collectibles:
Collection Chests x4
Field Guide Pages x3
Demiguise Statues x1
Collection Chests
1. This chest can be found in the garden shed in the garden directly south of the Floo Flame.
2. From the Floo Flame, follow the path left (south) until you reach a house just before a bridge. Use Alohomora to open the house then head inside and collect the chest from the upstairs bedroom.
3. This chest can be found in an outhouse looking building on the western side of town.
4. This chest can be found in the locked house directly behind the shop to the west.
Field Guide Pages
1. Ginger Root Guide Page
This page can be found right next to the Floo Flame. Use Revelio on the bar to spot the page.
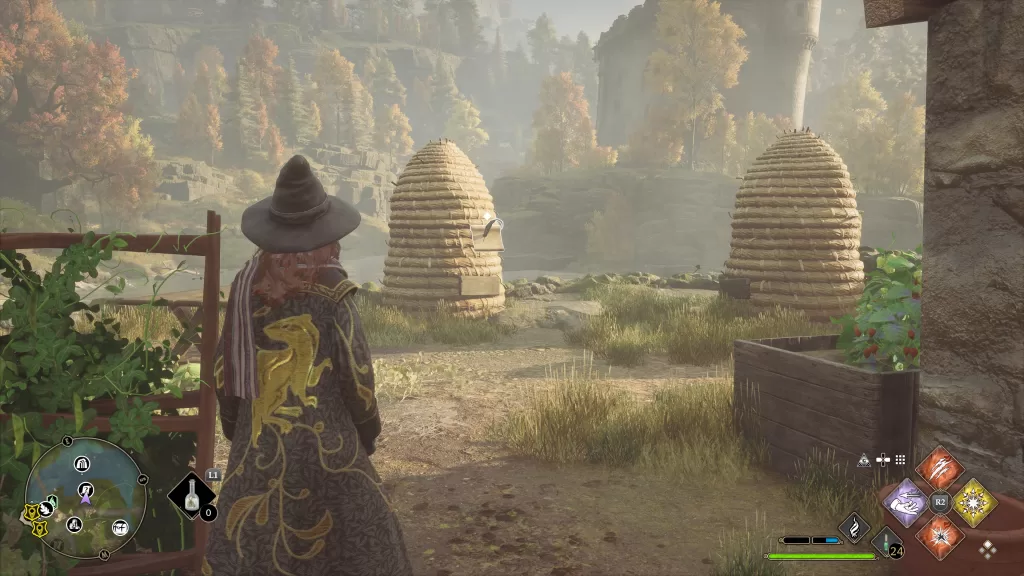
2. Beehives Guide Page
This page can be found in the garden just south of the Floo Flame. Use Revelio on the beehives to find it.
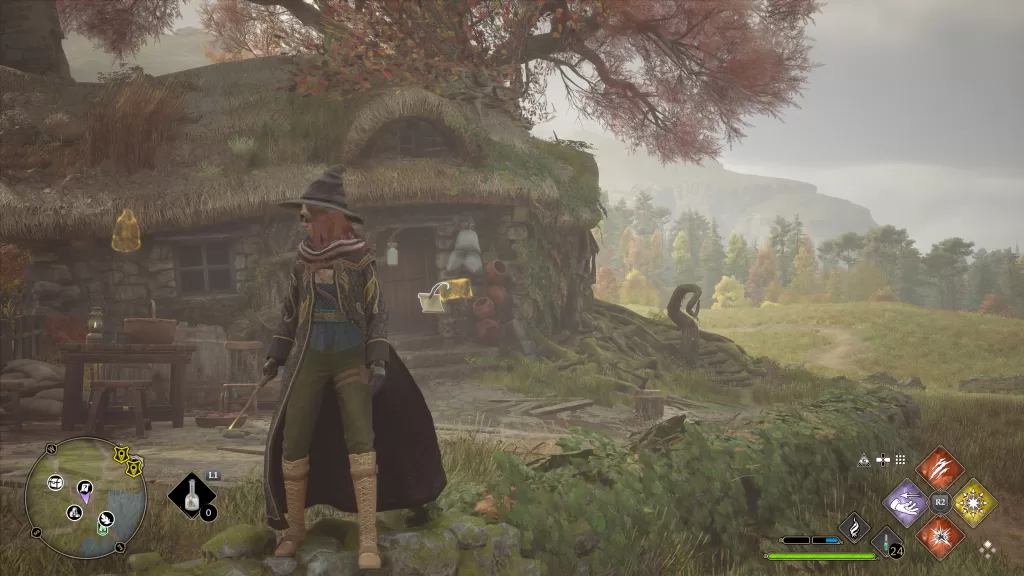
3. The Tilted House Guide Page
From the Floo Flame, head northwest and use Revelio in front of the house to reveal the page.
Demiguise Statues
1. This statue can be found in the locked house directly behind the shop to the west.
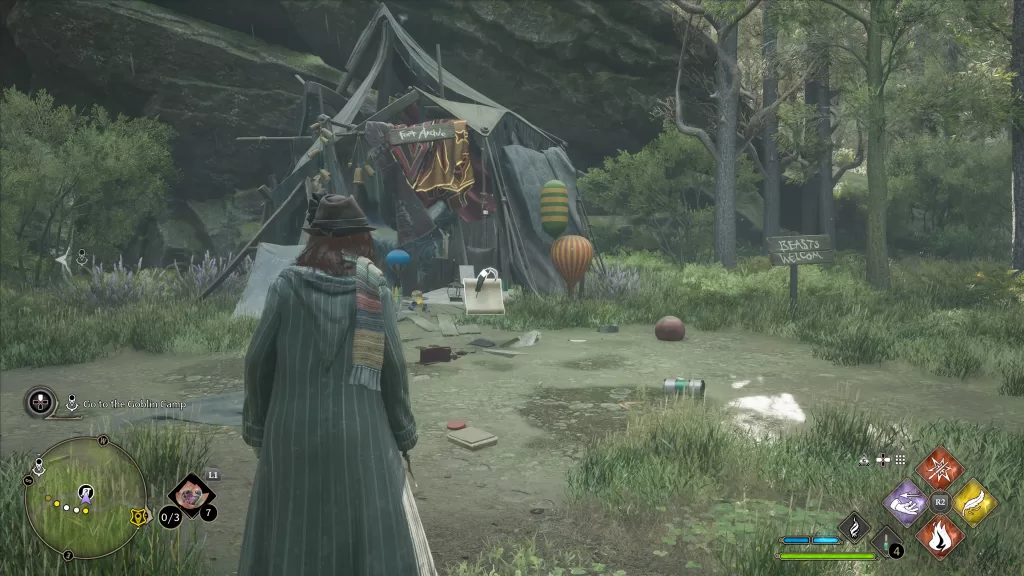
Small Bandit Camp
This camp can be found southwest of Keenbridge and contains 1 Collection Chest that can be found inside a tent.
Open World
These collectibles can be found outside of towns and other nameable places in the open areas of the Hogwarts Valley region.
Field Guide Pages
1. Hebridean Black Scale Guide Page
This page can be found south of Lower Hogsfield.
Use Revelio on the destroyed tent to find the page.
2. Doxy Egg Guide Page
This page can be found in a Small Bandit Camp just southwest of Keenbridge. Use Revelio in the large tent next to a chest to reveal the page.
3. Lace Doily Guide Page
This page can be found directly west of Keenbridge in front of a large tree next to the ruins of a castle.
4. Murtlap Tentacles Guide Page
This page can be found west of the Central Hogwarts Valley Floo Flame on the other side of the river. Use Revelio on the small stacked rock towers to find the page.
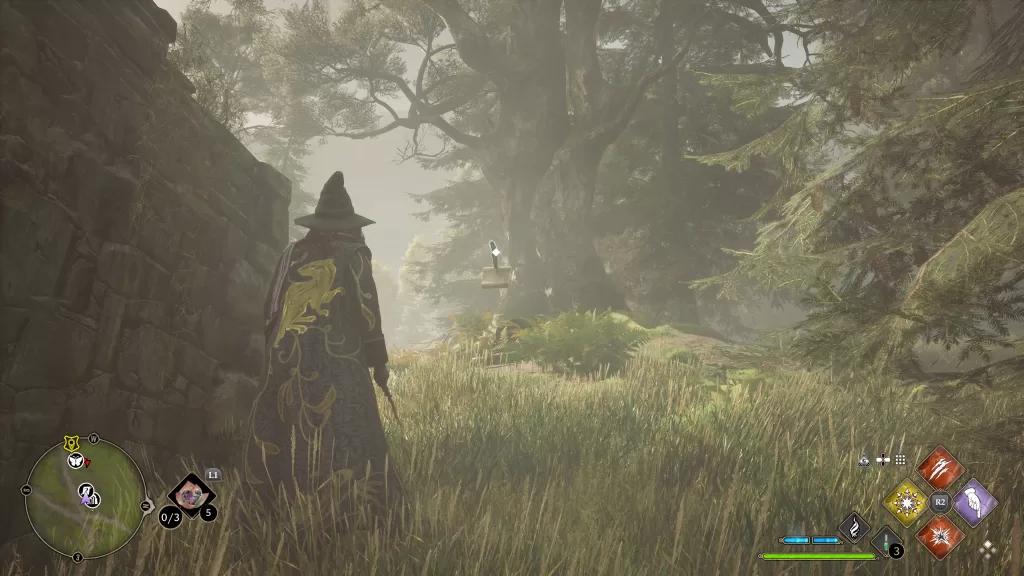
Landing Platforms
1. This platform can be found at the below location.
2. This landing platform can be found at the below location.
3. This landing platform can be found at the below location.
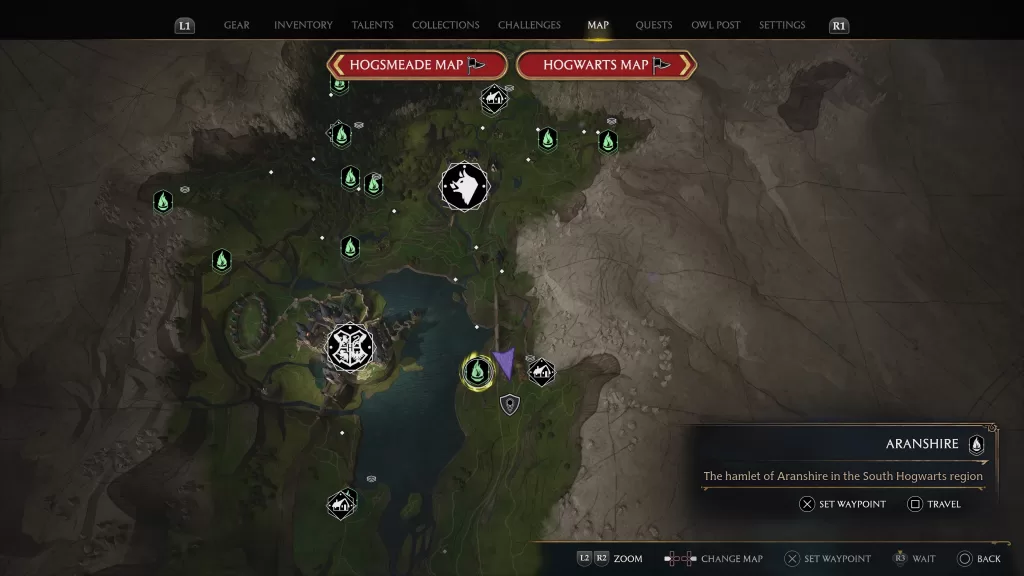
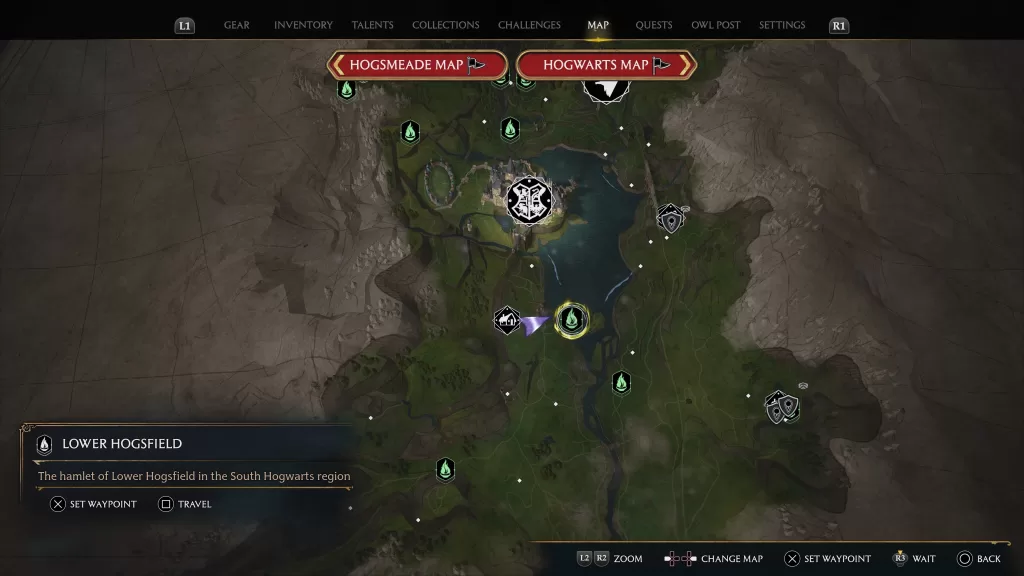
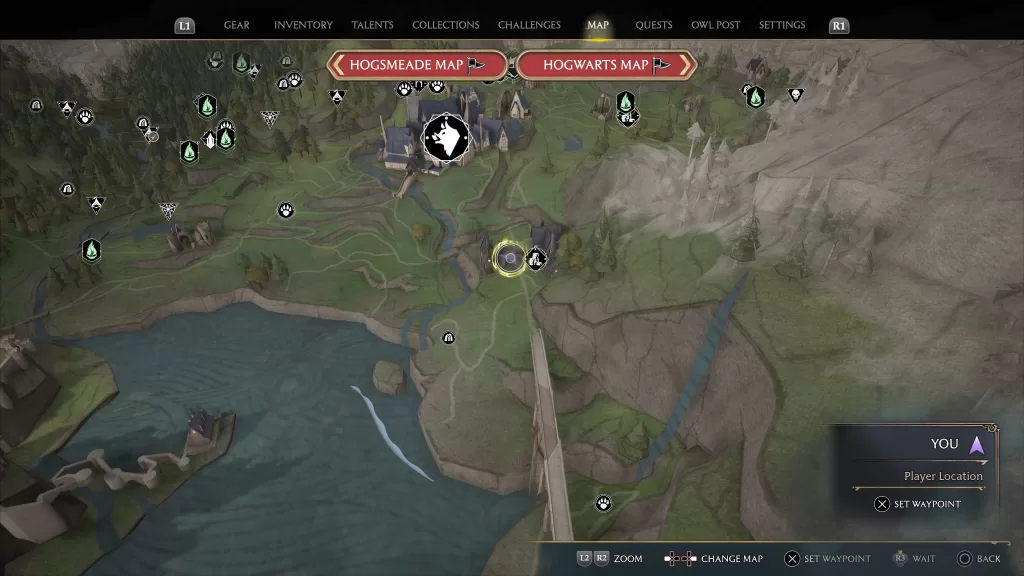
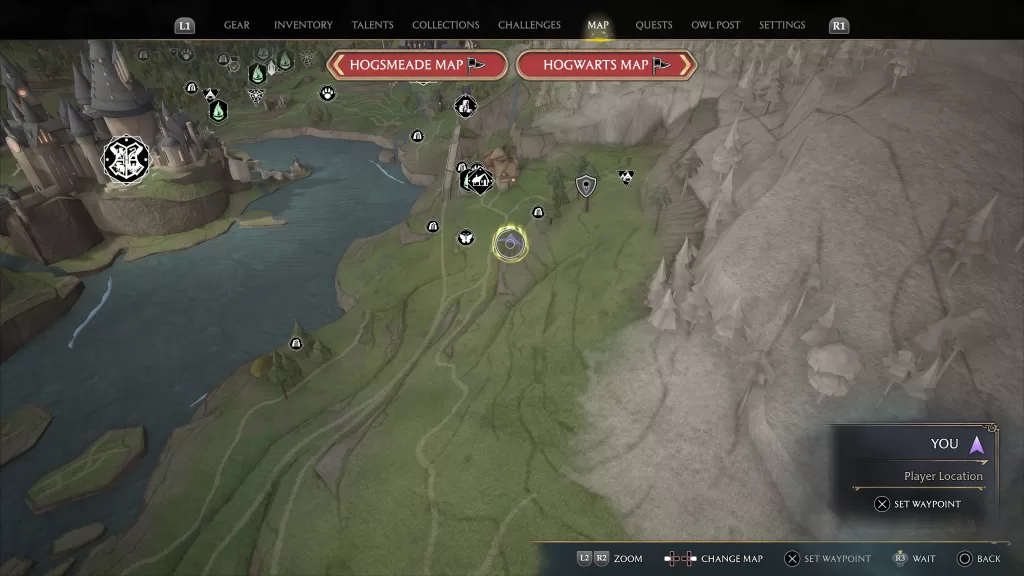
While exploring in Hogwarts Legacy, you’ll come across collectibles needed to fill out your collections and complete challenges. The World Map shows the complete area of the Highlands that includes Hogwarts, Hogsmeade and many other small villages and hamlets. If you zoom all the way out using the L2 button while viewing the World Map, you can see that the area is further broken apart into different regions that each contain a listing of the collectibles found there. This guide will focus on the following collectibles can be found in the South Hogwarts Region:
This town can be found in the eastern part of the South Hogwarts Region and contains the following collectibles:
Collection Chests x4
Field Guide Pages x1
Demiguise Statues x1
Collection Chests
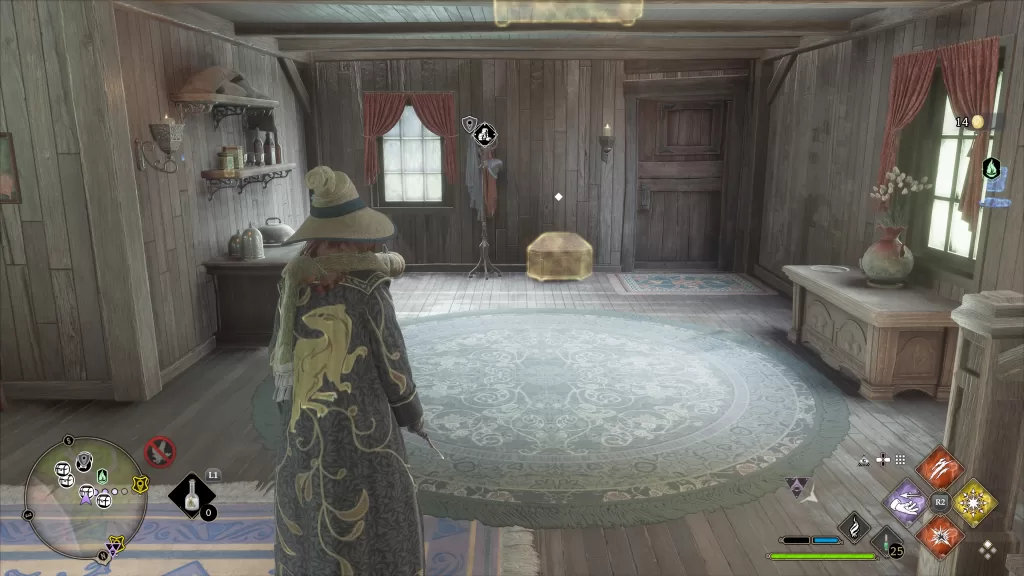
1. This chest can be found inside a house directly east of the Aranshire Floo Flame. It next to a coat rack by the front door.
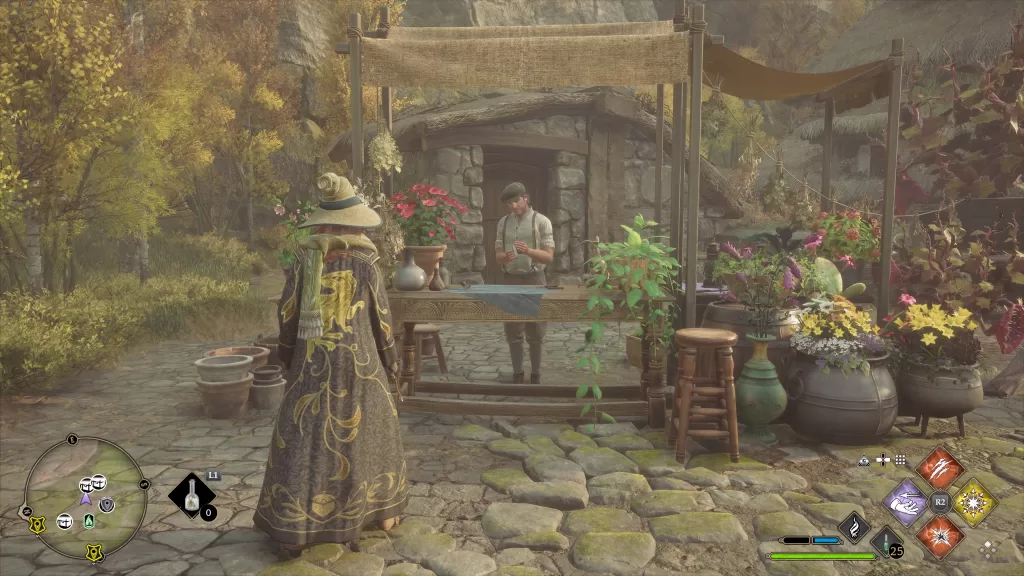
2. This chest can be found inside the small building behind the flower stall directly across (east) from the Floo Flame.
3. This chest can be found inside the house directly across (east) from the shop.
4. This chest can be found under a stone pile in the garden northeast of the Floo Flame. Use Depulso to remove the stone.
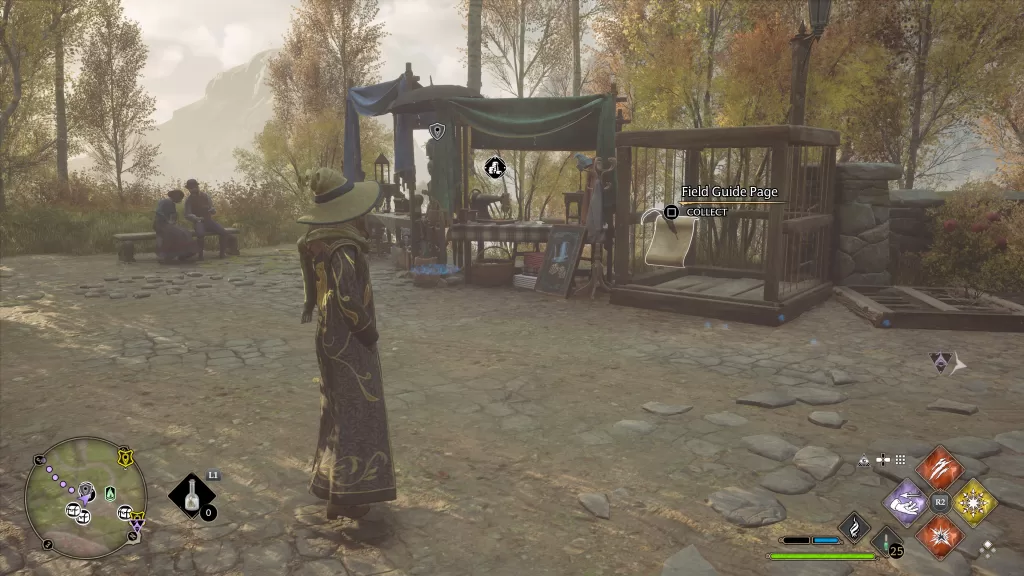
Field Guide Page
1. Spider Parts Guide Page
Use Revelio on the shop in town to find the page.
Demiguise Statues
1.When facing the Aranshire Floo Flame, head to the house on the right (north) and use Alohomora Level I to unlock the door. Enter the home heading up the stairs to the second level. The statue will be on the ground at the foot of the bed.
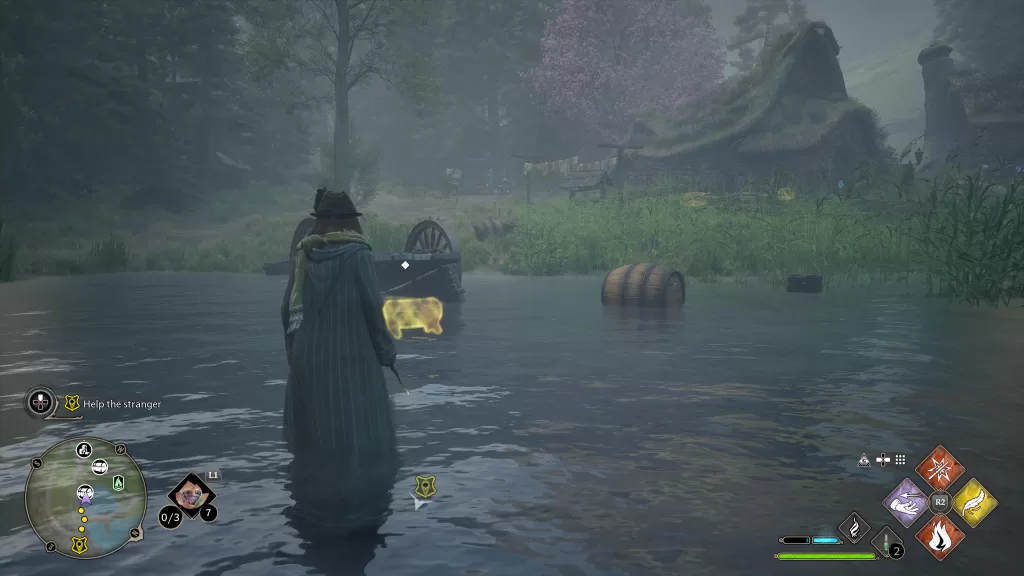
Lower Hogsfield
This town can be found in the southern part of the South Hogwarts Region and contains the following collectibles:
Collection Chests x3
Demiguise Statues x1
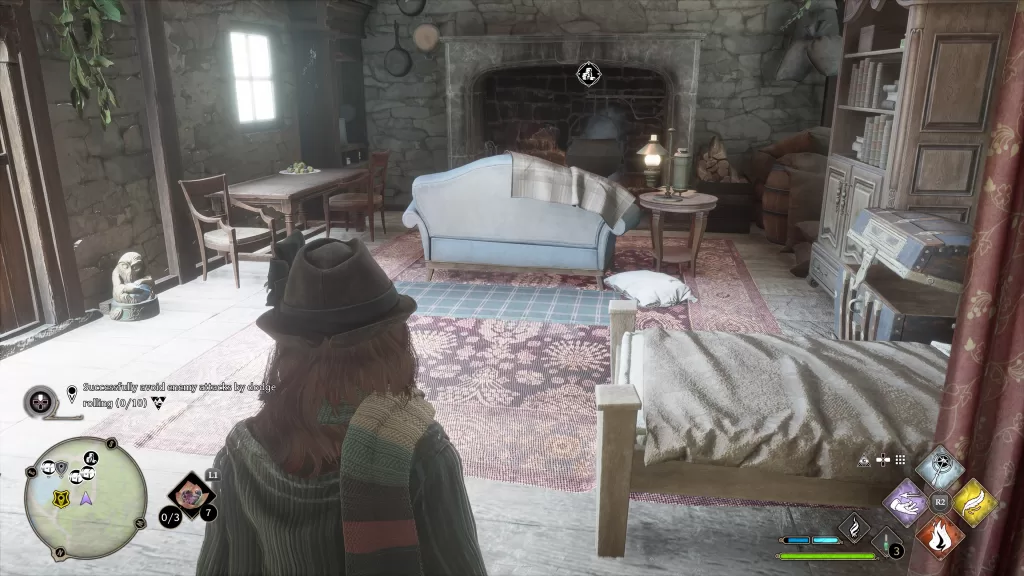
Collection Chests
1. This chest can be found behind the house next to the shop.
2. This chest can be found in the water next to a cart just east of the shop.
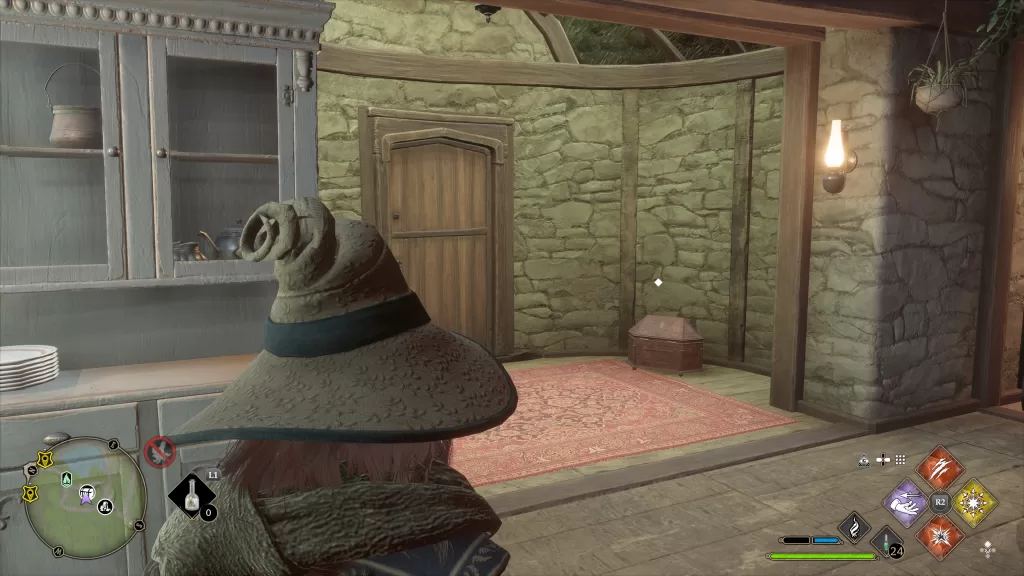
3. This chest can be found inside the locked house right next to the front door.
Demiguise Statues
1. Enter the house next to the Lower Hogsfield Floo Flame. You can find this statue on the ground next to the door.
Open World
These collectibles can be found outside of towns and other nameable places in the open areas of the South Hogwarts Region.
Field Guide Pages
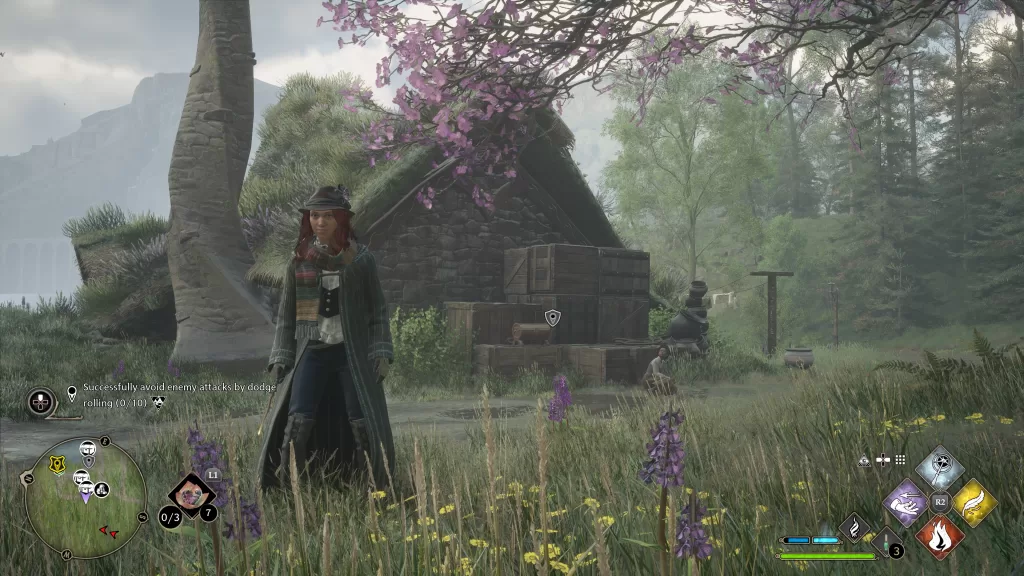
1. Groundskeeper’s Tools Guide Page
This page can be found south of Hogwarts at the location shown below.
Enter the hut and use Revelio to spot the page!
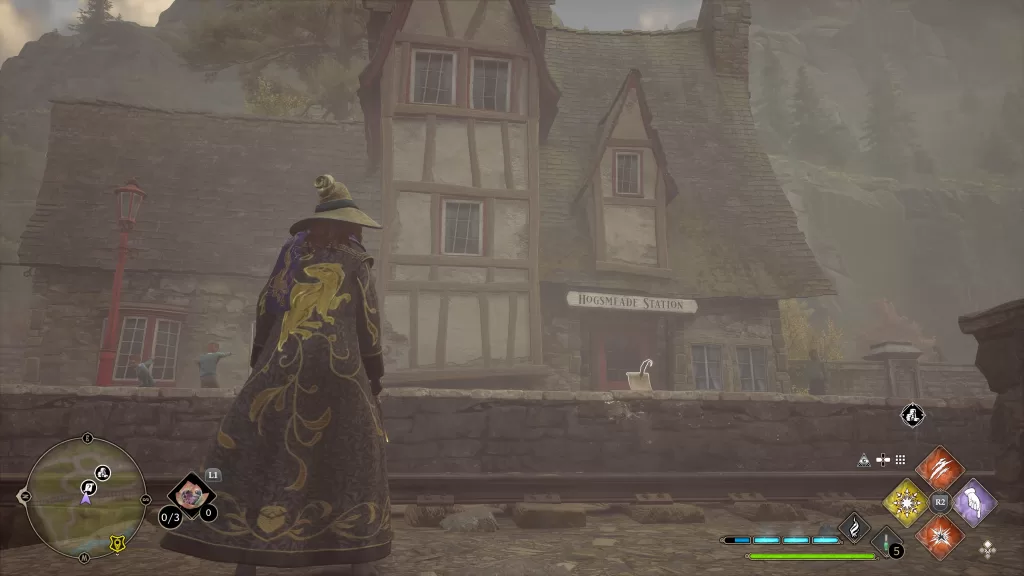
2. Hogsmeade Station Ticket Office Guide Page
This page can be found southeast of Hogsmeade at the station next to Leopold Babcocke’s shop.
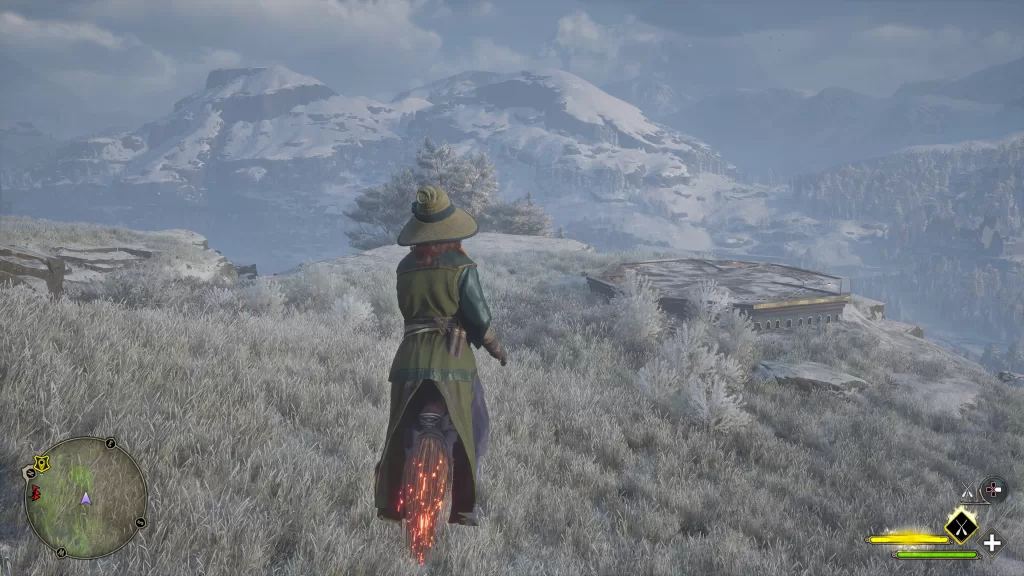
Landing Platforms
1. This platform can be found in a cliff on the southeastern side of the South Hogwarts Region, south of Aranshire.
Search
This site uses cookies. By continuing to use this website, you are giving consent to cookies being used. For more information on cookies, view our Privacy Policy.OkPrivacy Policy