Buy from Merchant Tommy at the Celdic Grand Market
Carnelia Reprint – Chapter 2
Buy Merchant Tommy at the Celdic Grand Market
Imperial Chronicle – Issue 1
Buy from Chris near the Market Manager’s house
Red Moon Rose – Chapter 2
Given to you by Anita in the Grand Market after completing the hidden quest A Day as a Merchant on Field Study Day 1
Fish
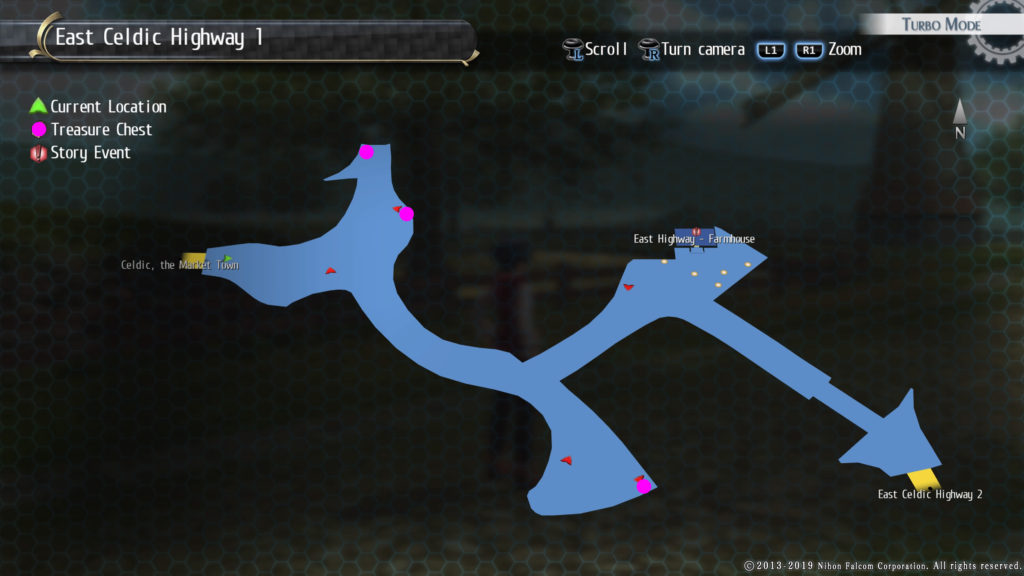
East Celdic Highway 1 (Behind the most southern windmill in the river)
Kasagin
Swordtail
Carp (NG+/Nightmare, Beginner Rod)
Anor Carp (NG+/Nightmare, Beginner Rod)
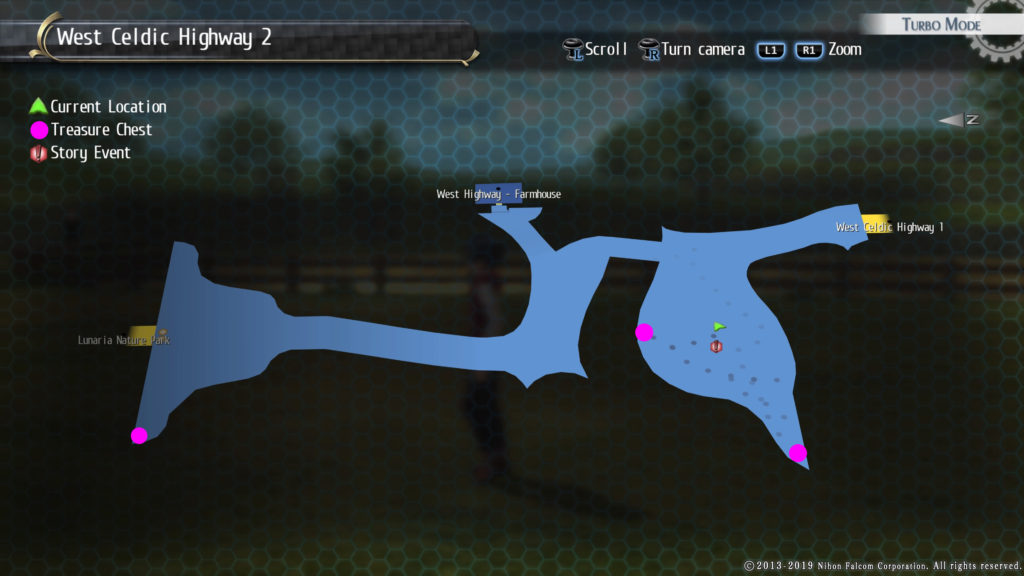
West Celdic Highway 2 (near the entrance to Lunaria Nature Park
Crayfish
Swordtail
Gluttonous Bass (NG+/Nightmare, Beginner Rod)
Master Quartz
Scepter
Purchase from Samus for 2,000 mira from Oddvin’s Arms and Orbal Factory
Monsters & Treasure Chests
East Celdic Highway 1
Monsters
Ripper Squirrel
King Dragonfly
Fanged Wolf
Crop Muncher
Treasure Chests
Groundbait
EP Charge I
Proxy Puppet
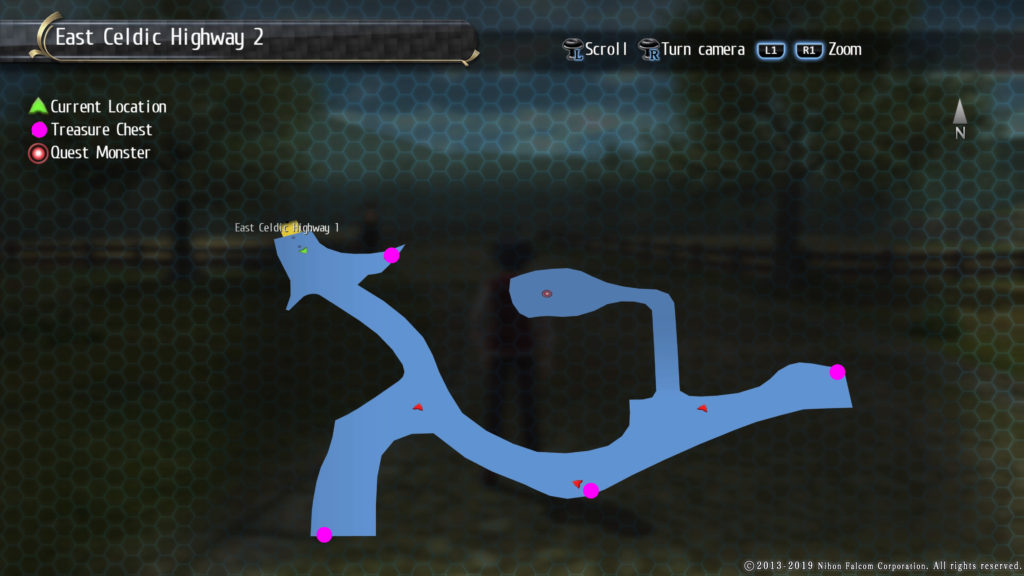
East Celdic Highway 2
Monsters
King Dragonfly
Ripper Squirrel
Fanged Wolf
Treasure Chests
Teara Balm
HP 1
Reviving Balm
Earth Lance
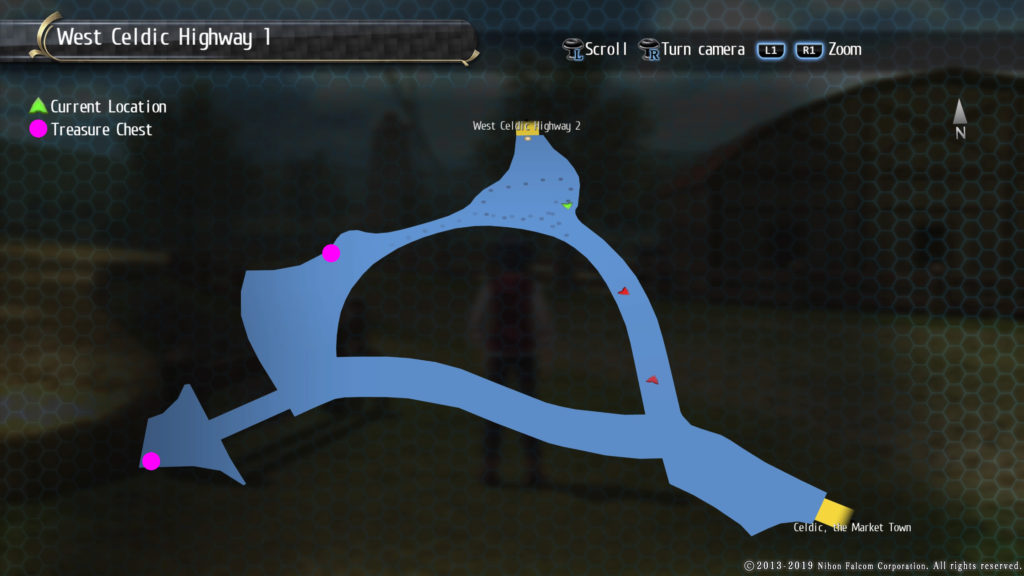
West Celdic Highway 1
Monsters
Acerbic Tomartian
Deathcargot
Evil Crow
Fanged Wolf
King Dragonfly
Ripper Squirrel
Treasure Chests
100 of Each Sepith
EP 1
West Celdic Highway 2
Monsters
Crop Muncher
Deathcargot
Evil Crow
Treasure Chests
Curia Balm
Aqua Bleed
EP Charge II
Recipes
Sweet Cookie
Received from Margot at Weathercock Inn
Whole Juice
Received from Tisel in the East Highway Farmhouse on East Highway 1
Quests
East Celdic Highway Monster
Objective: Defeat the monster on East Highway 2
Talk with Syro
Make your way to the East Highway Farmhouse located on East Highway 1 just before East Highway 2, then enter the farmhouse and talk to Syro near the bookcases
Head for the plateau near the middle of the map on East Highway 2 to find the monster and defeat it
Return to Syro at the East Highway Farmhouse and talk with him
Reward: Fresh Egg x 10, Starberry x 10, Honey Syrup x 10, Coarse Rock Salt x 10
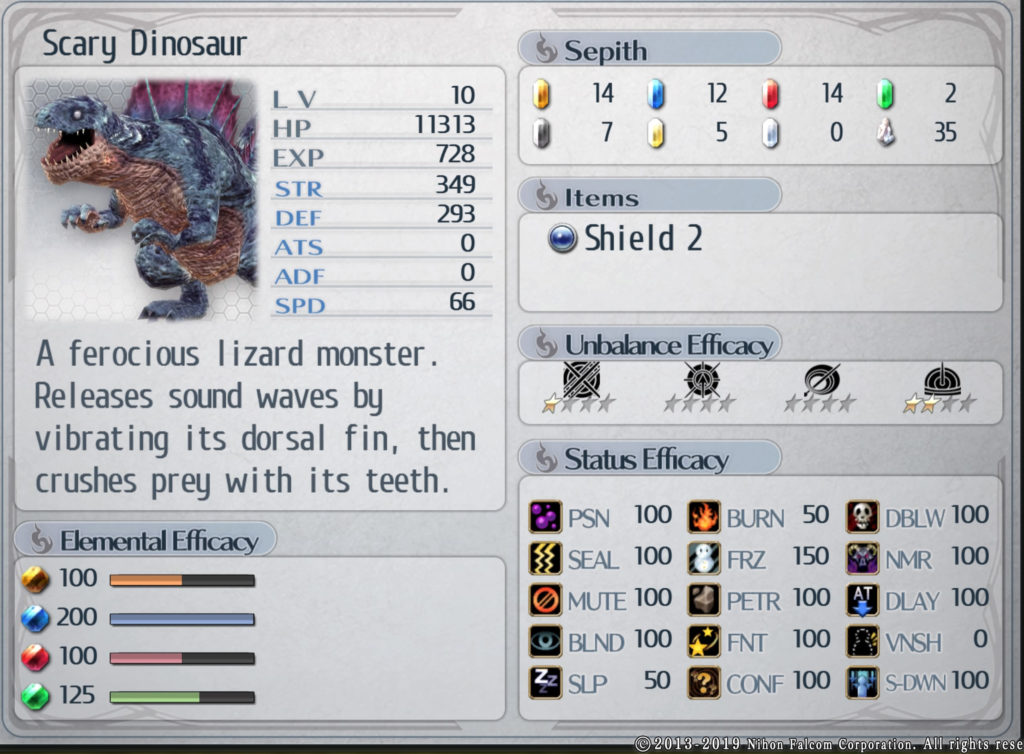
*Hard Mode Stats
Scary Dinosaur Attacks
Erie Soundwave
A roar attack that sends out a shock wave that deals damage and decreases defense
Chop Attack
An attack that bites a party member and can inflict the paralyze status
Crash Bite
An arts attack that bites the target multiple times for a lot of damage
Tail Blow
A tailspin attack that deals damage to any party member in range
For this fight, I had Rean and Laura on the left and right side of the dino while Alisa was just close enough to attack with her bow and arts leaving Elliot a bit further back to heal and use his arts as necessary. The strategy here is to keep the boss focused on Rean and Laura while Alisa and Elliot attack from a distance. That main two attacks to watch out for are the Chop Attack that can leave a party member paralyzed and the Crash Bite attack. As soon as the dino begins charging, use Rean’s Autumn Leaf Cutter craft to interrupt it. I would also make sure you start the fight off by having 200 CP for each party member. That way you can use Rean’s Motivate craft to buff attack and Elliot’s Resounding Beat to buff the party’s defense as well as give them health regen. If you find yourself in a tight shop, Alisa has the Blessed Arrow craft that heals a generous amount. Also, make sure to use water based arts as they do double the damage to the dino.
Any Bright Ideas?
Objective: Replace the orbment light in the road lamp on the western highway
Talk to Samus in the Orbal
Replace orbment light
Has B-02 written on it near a windmill in front of the nature park
Use the code 466515 to replace the light
Head to West Celdic Highway 2 and examine the road lamp next to the windmill. When prompted for the code, select the option 466515. Return to Samus.
Reward: Detection
For the Common Cold
Objective: Collect the ingredients needed to make medicine
Talk to Father Zibel in the Celdic Church
Collect a bear claw and imperial carrots for Father Zibel
Bear Claw
Obtained in the Grand Market from the vendor Old Man Flint
Imperial Carrots
Obtained from Farmer Paul located in his farmhouse on West Celdic Highway 2
Bring ingredients to Father Zibel
Reward: Teara Balm x 3, Celestial Balm x 3
A Day as a Merchant (Hidden Quest)
Objective: Run a Merchant Stall for the evening
Talk to Merchant Lymon (2nd on the left) in the Grand Market after completing the other 3 quests and talking to Market Manager Otto.
Ozette wants 5 tomatoes
Answer: 35 Mira
Tourist wants wine
Answer: 900 Mira
Answer: Include cheese for 20% off
Anita wants cabbages
Answer: Sell 5 for 60
Reward: Coral Bracelet, Marble Bracelet (bonus reward for selecting the right answers)
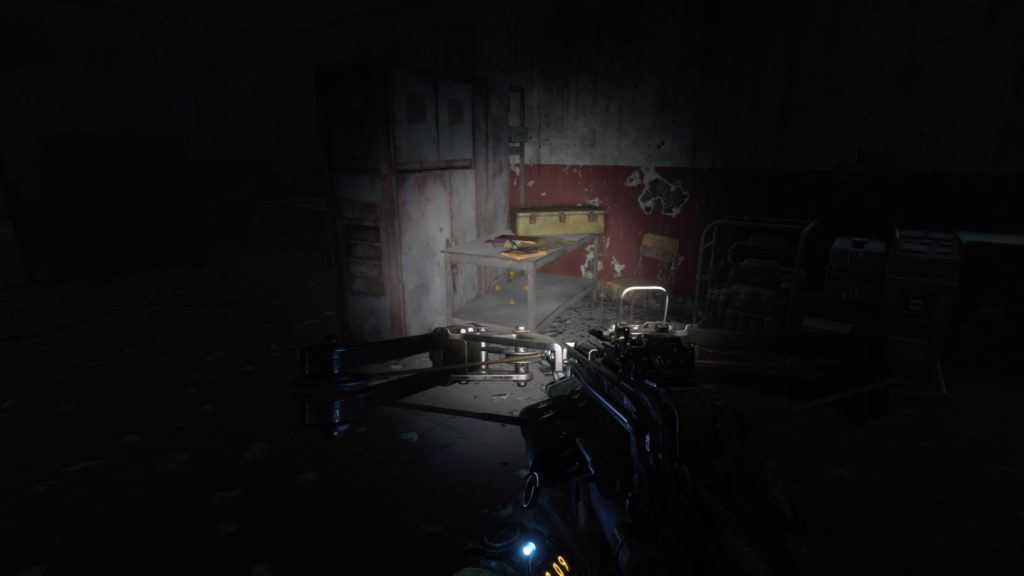
After entering the Metro and fighting the first batch of enemies, follow Miller into a room. The postcard will be on the white metal cabinet between two blue lockers to the right of the door.
Radiogram Transcript
In the room with the hanging cages where Miller mentions that it reminds him of the execution pit from Moscow, the diary will be up the ramp to the right on a metal table next to a corpse.
Weathered Report
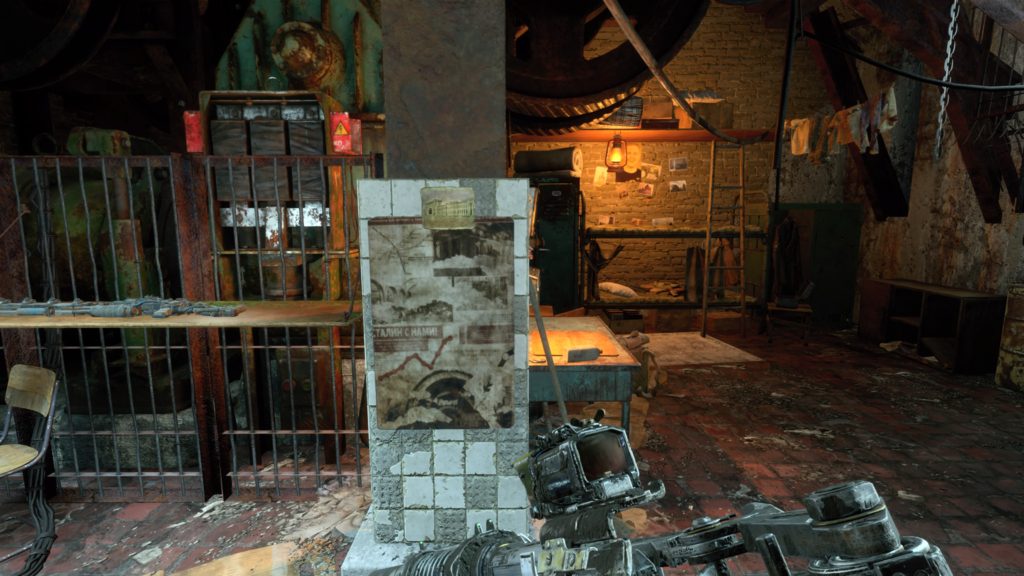
From the previous collectible, keep heading forward and eventually you will head up an escalator. Miller will talk about how the soldiers used chlorine to kill the people in the Metro. The way forward will be blocked, so Miller mentions using the service tunnels. You will then head to the other side of the area and kick a door open. Head forward through two rooms to enter a room with red and white walls. The diary will be sitting on a table in the left side of the room.
Orders
This diary will be on a map board in the command center where Miller radios the Aurora.
Postcard 21
This postcard will be on the end of the metal support column in the command center where Miller radios the Aurora.
Notebook
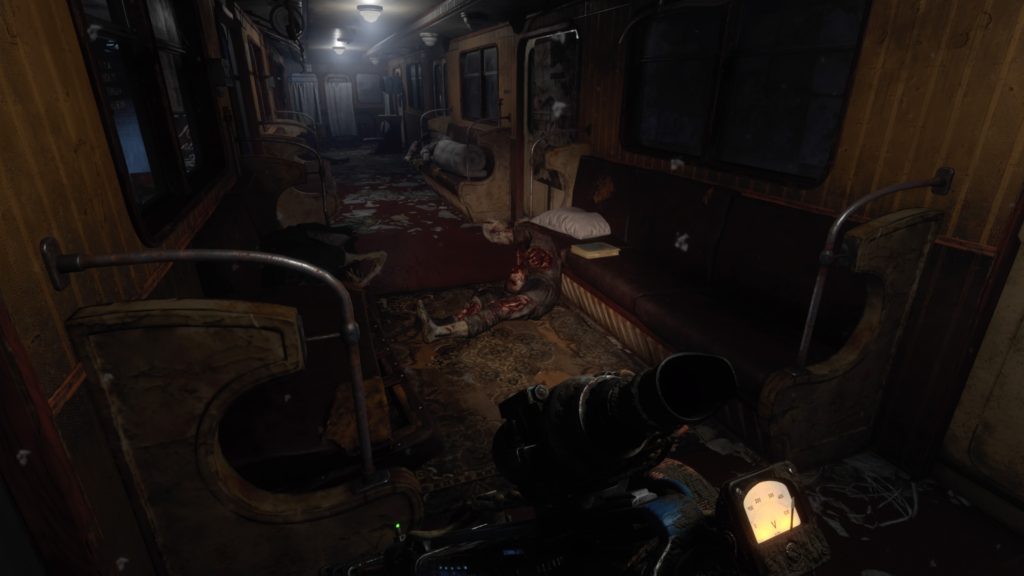
After leaving the command center, head up the wooden stairs to the right of the danger sign and keep following the path until you reach a train car. Enter it and turn left to find this diary on a seat on the right next to a corpse.
Worn-Out Diary
From the previous diary, keep heading deeper into the Metro until you come to the boat. Ride it forward until you reach a wooden platform that has sandbags piled on it just before a red gate. Dock the boat and head through the doorway. At the end of the hall, turn right and follow the left wall all the way to the end. From there turn left and pass through another doorway at the end of the hallway. In the room squeeze through the blue door in the middle of the room and use the fallen lockers to head through a hole in the wall. This will drop you into another room. The diary will be in this room on a table to the left.
Browned Note
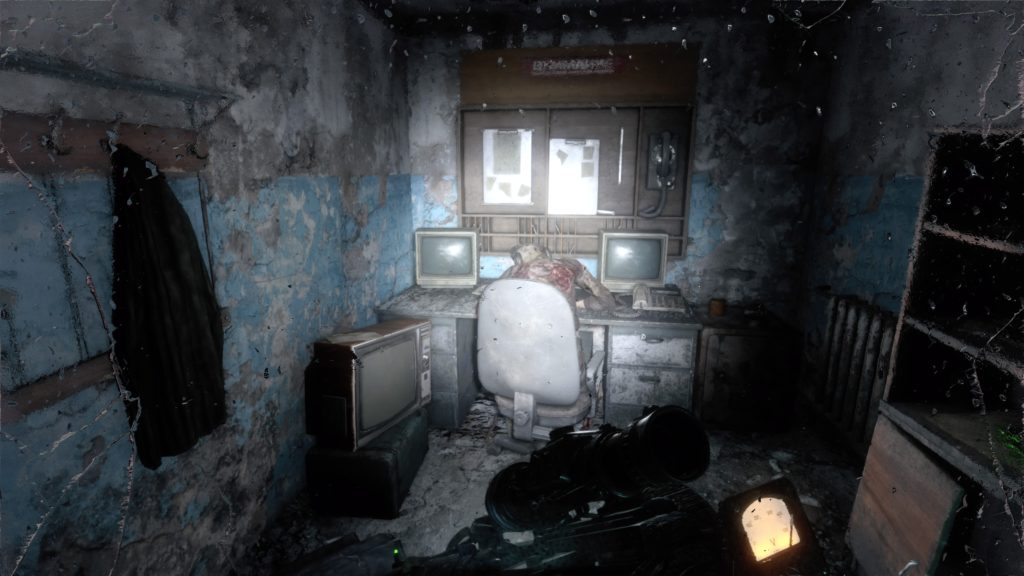
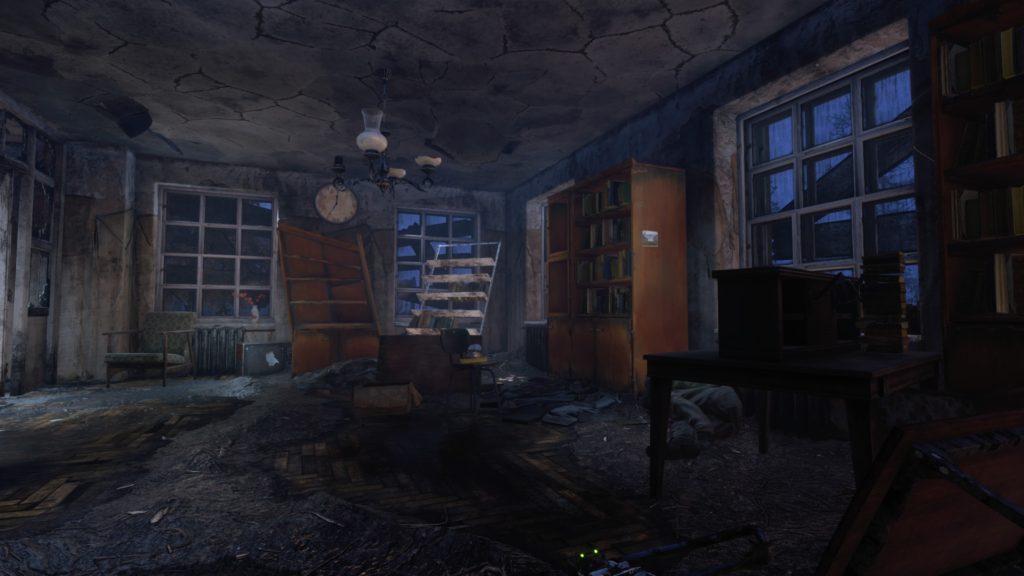
After finishing the boat section, a cutscene will play. When you regain control of Artyom, follow the illusion down the train platform. When you reach the end, take the escalators up and keep pressing forward past the ticket gates and into a hallway. As you reach the end of the hallway, a teal door will be on your left. Head through it to find this diary sitting on a TV to the left of a desk.
Dusty Notebook
Keep heading forward from the previous diary and eventually you will make it outside. Follow the path forward until Artyom has a flashback to when the war started. Shortly after that, you will jump into a hole with a tank sticking out of it leading to a tunnel. Facing the tank, head left until you come to a dead end. This diary will be next to a couple of skeletons frozen in the snow.
Shipping List
From the previous diary, turn around and follow the tunnel to the other end. Keep moving forward until you meet a Blind One (monkey). After a brief cutscene, you will enter a building where the stairs forward are blocked by a power operated gate. Work your way to the top floor of this building to reach an overhang leading to an adjacent building. Jump over to the other building and take the right path passed the wooden shelves and a skeleton on the ground. Continue by taking another right and jumping to the bottom of a stairwell. Open the blue door at the bottom to find this diary on a metal kart.
Follow Krest to the front of the train and sit down at the table to listen to Miller going over the plan. Once he’s finished, head back into the passenger train car and make your way to the workbench. This diary will be sitting on a counter across from the bathroom.
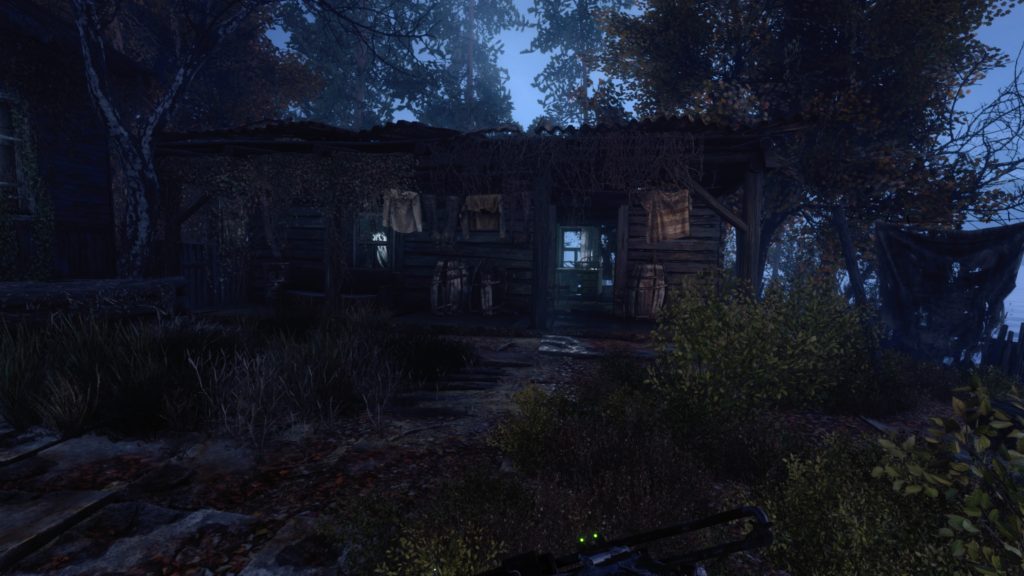
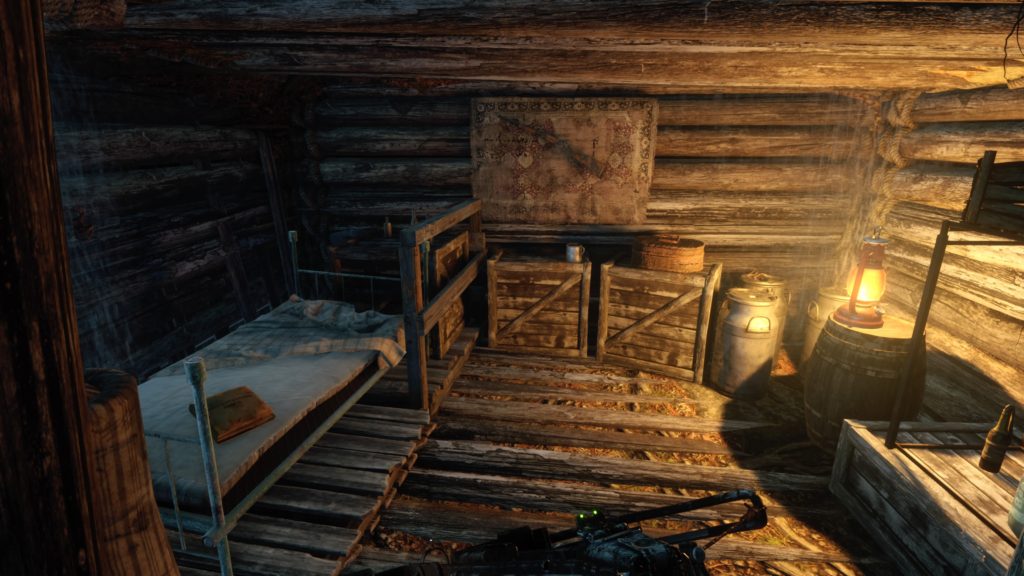
After gaining control of Artyom and obtaining the crossbow from the white statue, head right and pass the front of the house to enter a shack with some laundry hung in front of it. Once in the shack, turn left into the back room to find the postcard on a broken mirror.
Note on a Crossbow Bolt (Diary 1)
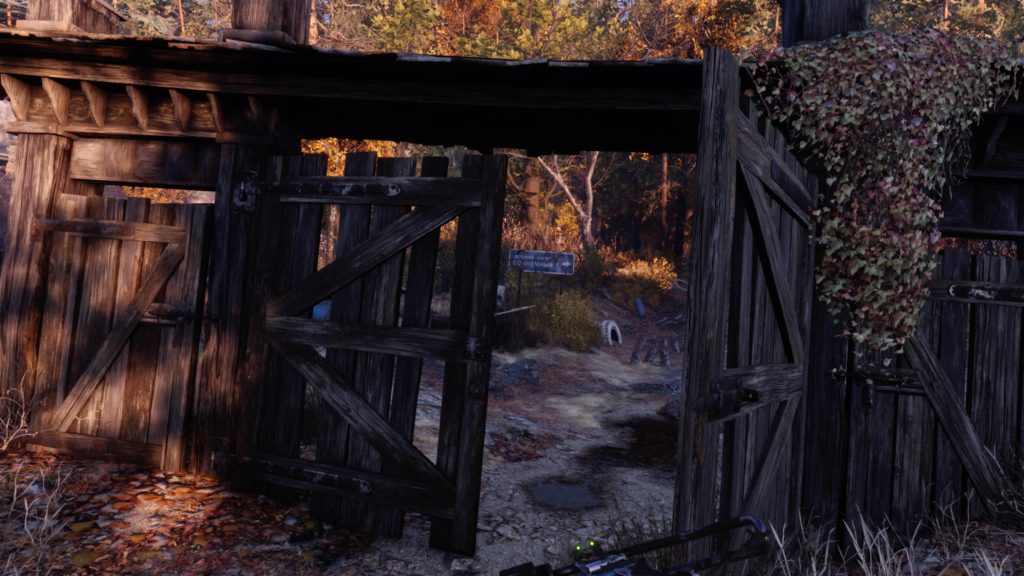
From the white statue where you got the crossbow, head past the left side of the house to the wooden gate. This diary will be on a crossbow bolt suck on the other side of the left fence. If it is not there, reload your last checkpoint and it should show up.
Unsent Letter (Diary 2)
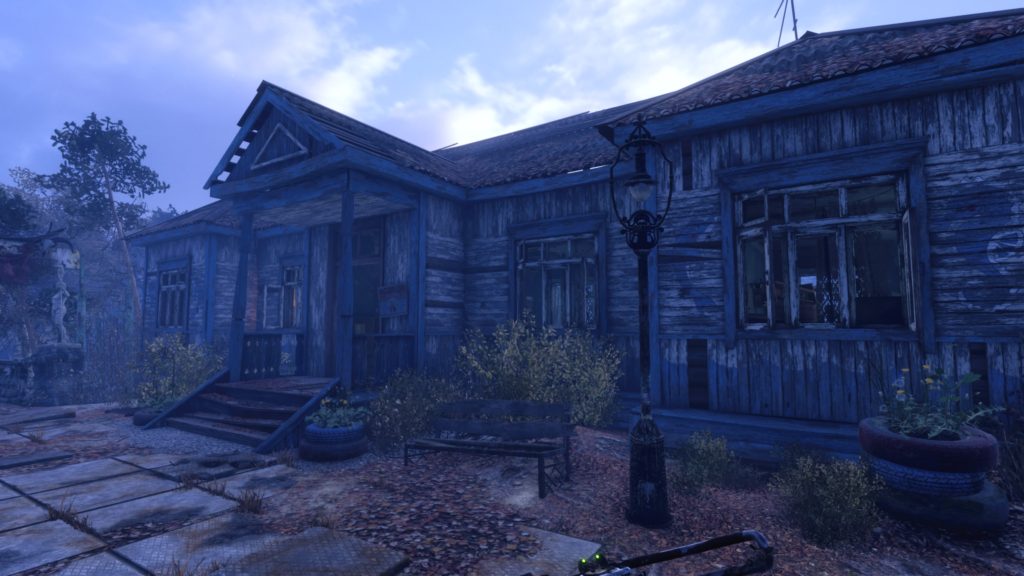
From the previous collectible, turn right and follow the road across a bridge ending up on a sidewalk path leading to a statue at the end. Follow the path and take a left at the statue (break the statue using your melee for a trophy) to reach a schoolhouse. Enter the school to find this diary on the first desk to the left.
Postcard 16
From the previous collectible, exit the school and turn right towards the broken bridge. Head down the left part of the bridge towards the pond and keep left, passing a tree with a skull and bones. Walk through the broken fence and into the building. Follow the path straight ahead to find the postcard on the left bookshelf next to the window straight in front of you.
Little Kid’s Note (Diary 3)
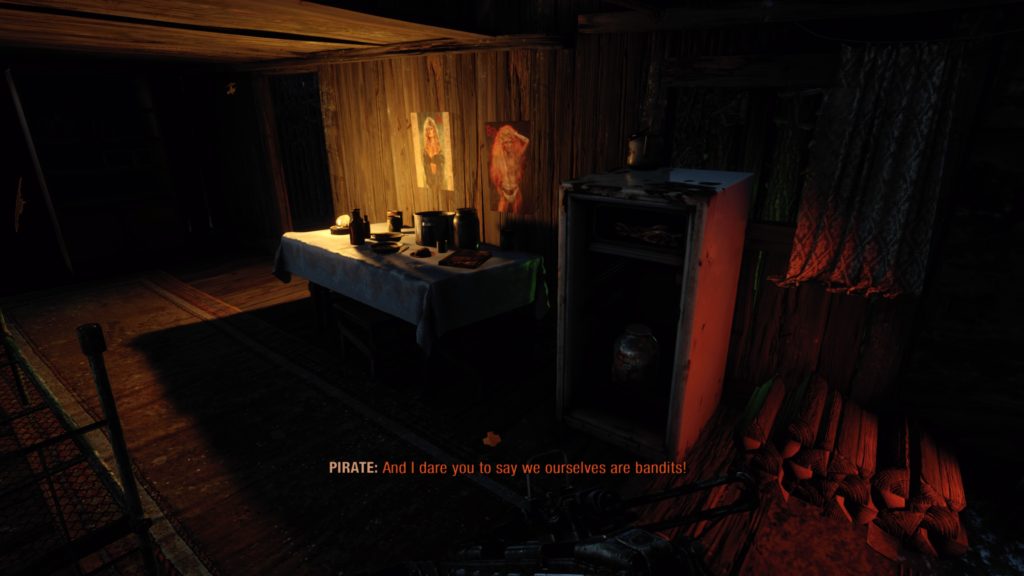
From the schoolhouse, head straight across the broken bridge, jumping over the gap. Enter the first building on the right (there will be three pirates in here) and head to the room on the right side. The diary will be to the right on a table.
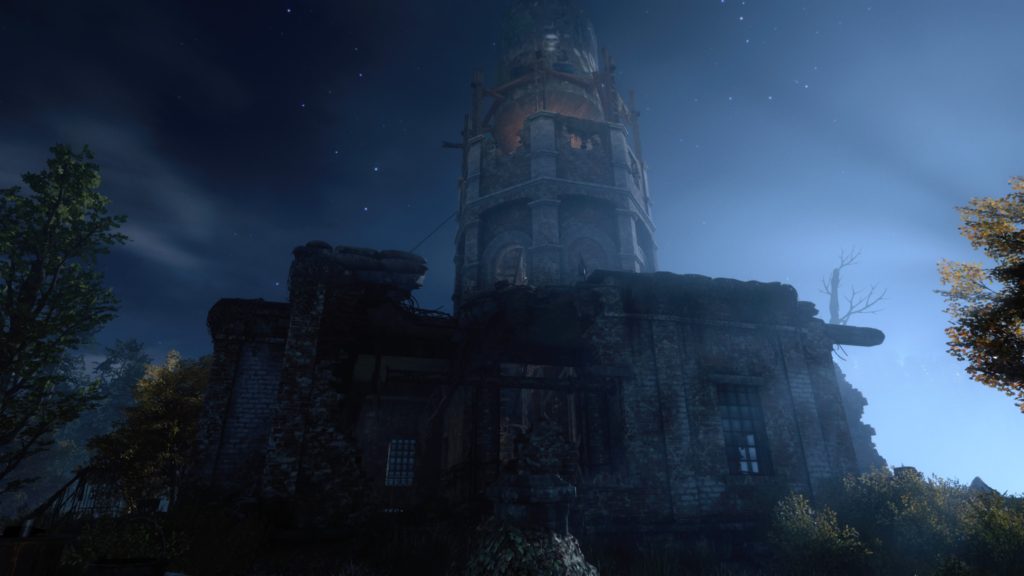
Solemn Oath (Diary 4)
From the previous collectible, exit the building and head right up the stairs to the gazebo. Once at the gazebo turn left and enter the building with the tower on the right. Take the stairs in the middle of the building to the top of the tower to find the diary on a wooden crate next to a zip line.
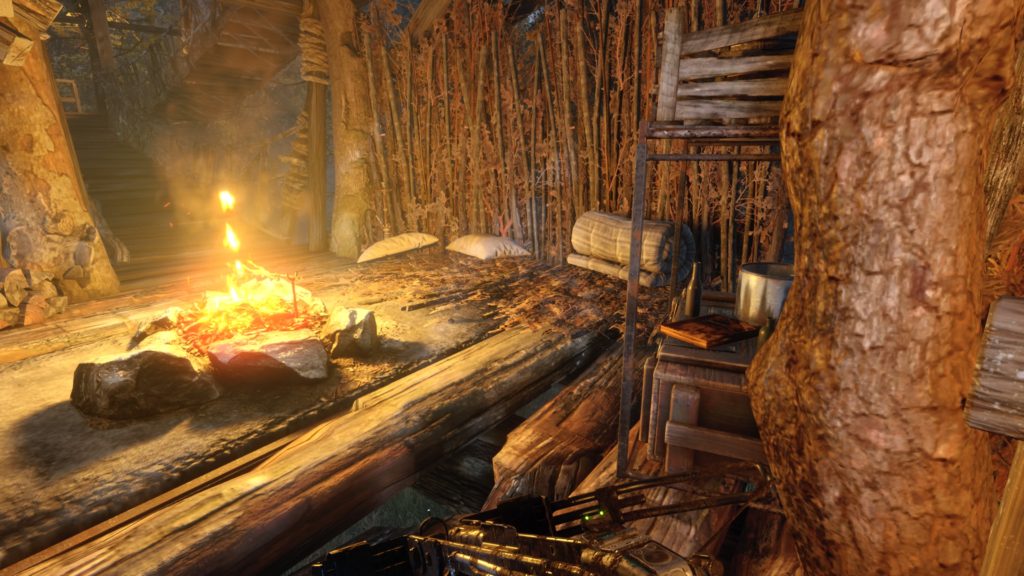
Dusty Diary (Diary 6)
From the previous collectible, take the zip line and follow the path forward until you come to a treehouse on the left. Climb the ladder and the diary will be immediately on your right sitting on a crate.
Alchemist’s Log (Diary 5)
From the previous collectible, take the zip line down and head straight ahead into the enemy’s campsite. The diary is located behind the guy whistling on the bed. Note: You cannot sneak up on him because you will break a stick every time no matter what angle you try, which will alert him of your presence. Highly recommend doing a quick save beforehand.
Lost Diary (Diary 7)
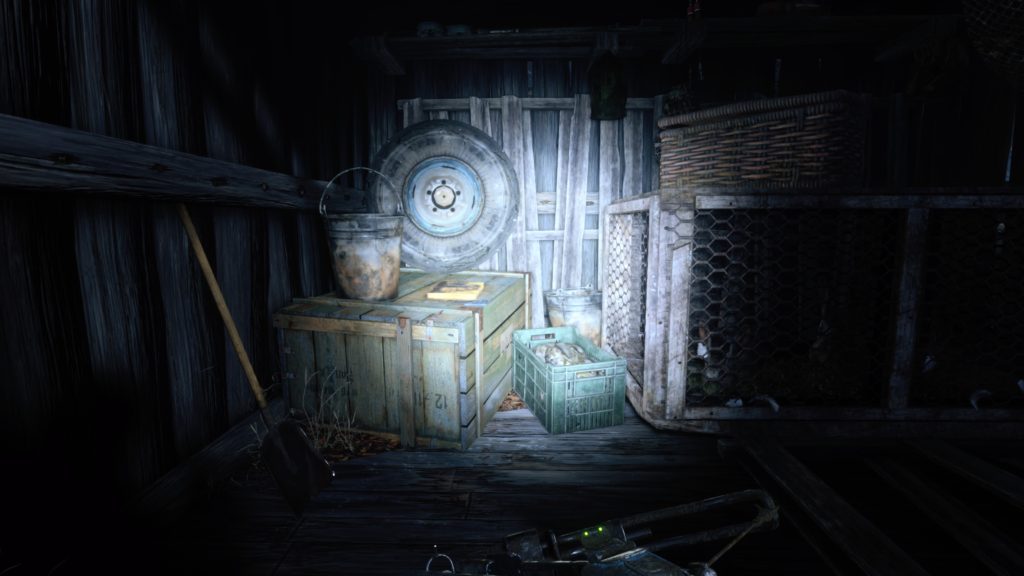
Head slightly northeast from the treehouse. You will spot an arched tree with a shack behind it on the water’s edge. Enter the shack via the side near the water to find the diary on a wooden crate next to a metal bucket.
Dusty Notebook (Diary 8)
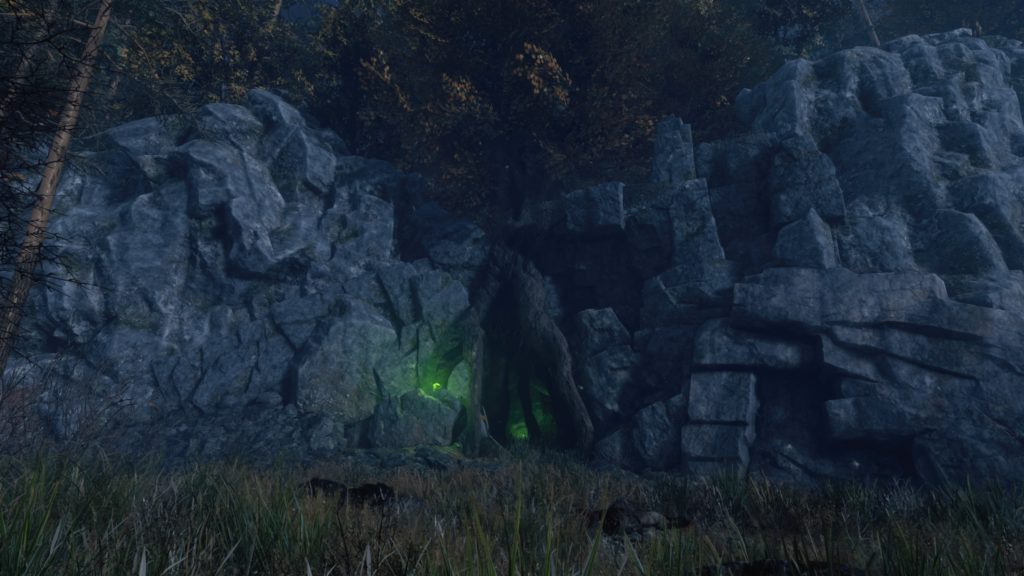
From the last collectible head west back across the road until you see a tree’s roots growing around a cave in the cliff. Be mindful of the wolves in the area and enter the cave. The diary is located on a desk at the end of the cave.
Calligraphic Note (Diary 9)
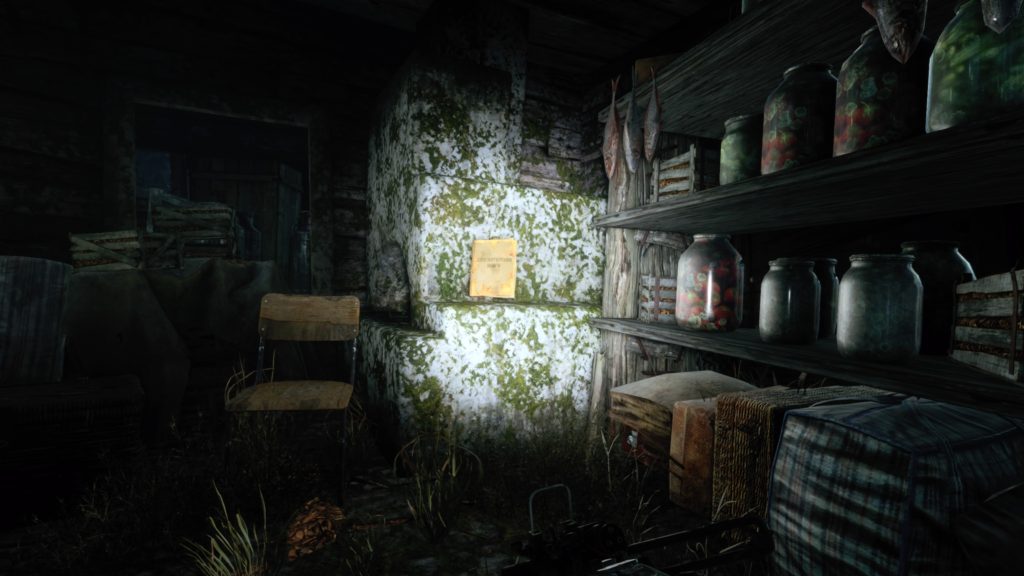
After you get your backpack back, follow the path forward until you reach a totem next to a treehouse. Turn left at the totem and follow the path until you reach a wooden entryway. Turn right just before the entryway and follow the fence until you reach a section of broken fence. Head through the gap and into the building straight ahead to find the diary resting on the fireplace.
Scribbled Note (Diary 10)
When you reach the enemy village via the zip line, take the rope bridge right and follow the path until you reach the hut with the drummer. Use the ladder on the right side just before the drummer to reach the ground level. Enter the building on your left. The diary will be on the table in the left side of the room.
Worn-Out Letter (Diary 11)
After you leave the enemy village via zip lines, follow the path into the cave on the right with the wooden entrance. The diary is located right inside the cave on a bench to the right.
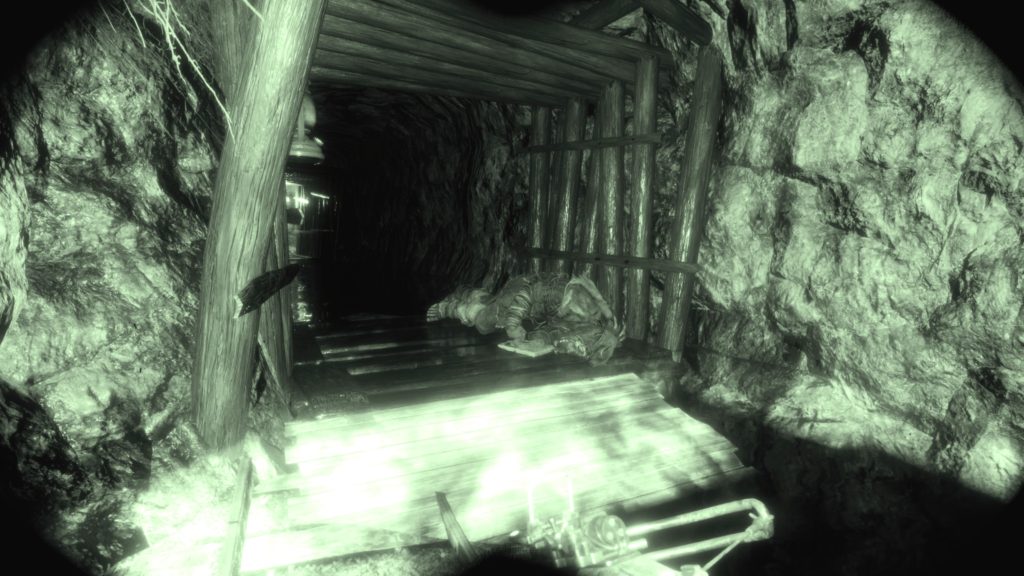
Crumpled Note (Diary 12)
The diary is located further inside the cave tunnel next to a corpse just before a ladder.
Postcard 17
After exiting the cave and proceeding through a building, head down the stairs and proceed to the house straight ahead. The diary is located on the wall next to a door frame in a room with a sunflower tablecloth.
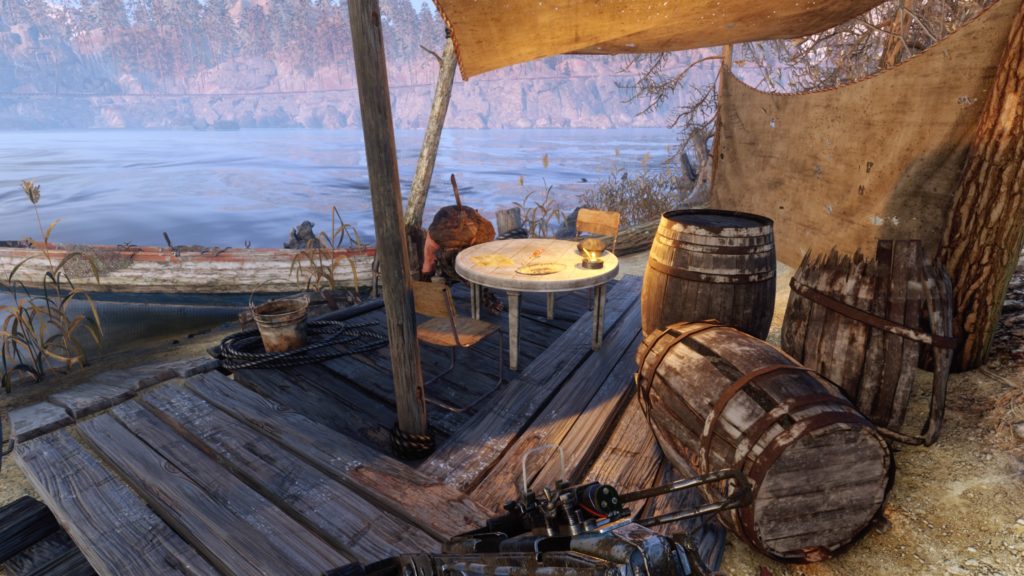
Dirty Diary (Diary 13)
After you pass under the extended arm of an excavator and exit the village, follow the path forward until you reach the river’s edge. Turn right and follow the road to the end where you will find the diary sitting on a table. Alternatively, after leaving Olga in the church, head down the ladder and follow the path straight. When you reach the cross straight ahead, turn right and follow the path along the cliffside to reach a rope ladder you can kick down. Climb down the ladder and head straight ahead, turning right to follow along the water’s edge. The diary will be located at the dead end sitting on a table.
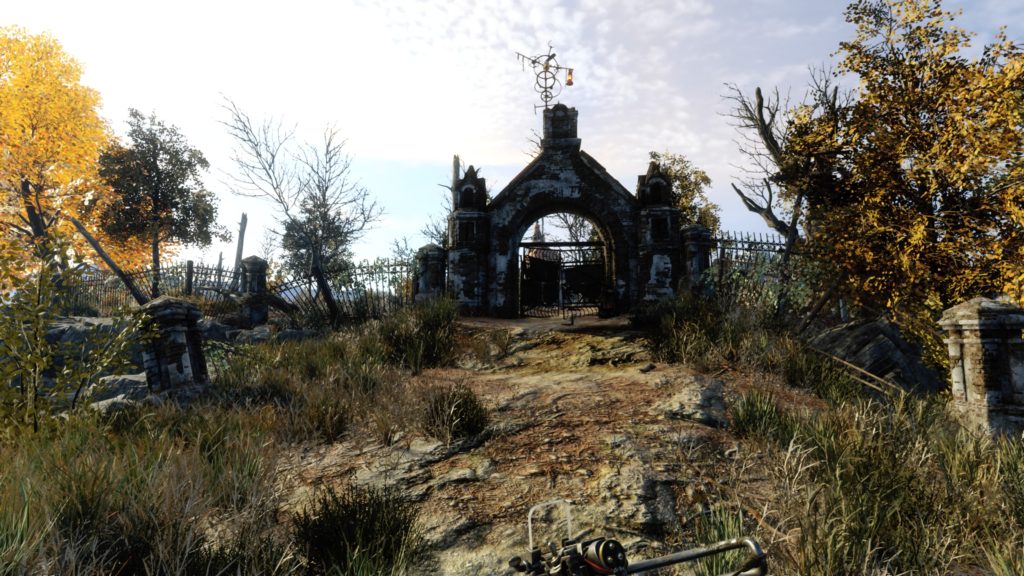
Hunter’s Note (Diary 14)
Work your way back through the village to reach a graveyard/church on the north side of the village. Alternatively, from the central campsite, head up to the church gate to find the diary on the ground next to a corpse leaning against the gate on the right side.
Weathered Note (Diary 15)
After leaving Olga in the church, head down the ladder and follow the path straight. When you reach the cross straight ahead, take the left path down the stairs until you reach a gazebo overlooking the water below. The diary is located on the left side of the gazebo on a sack.
Folded Note (Diary 16)
From the previous collectible, take the zip line down and follow the path to the left until you come to an enemy village. Climb up the ladder to enter the village and work your way through until you come to a shack with two oars crossed and a life preserver in the middle over the doorway. Head into this building and the diary will be straight ahead on a table.
Postcard 18
After leaving the boat, you will need to work your way through the three step electrical puzzle to gain access to the Admiral’s room (which is part of the story). The postcard is located in this room to the right on the wall with a bunch of postcards/pictures. (Note: By entering this room, you will complete the trophy of 5 o’clock: Take part in the Admiral’s tea party on the Taiga level.)
Blood-Soaked Letter (Diary 17)
After leaving the Admiral’s room via zip line, head into a tunnel and work your way through. Head up a set of yellow stairs and grab the red gas can to the left of a large red door in a room with green walls. Carry the can down the stairs and into the room below to put the gas in a generator. Head back up the yellow stairs and flip the switch to the right of the large red door, opening it. The diary is located under a corpse straight ahead.
Unfinished Letter (Diary 18)
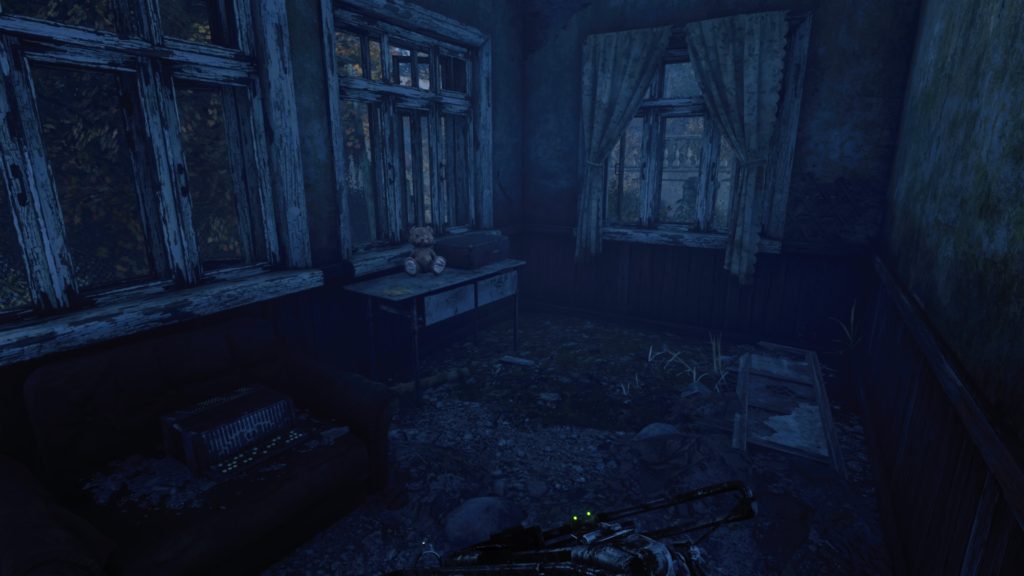
After exiting the underground tunnel and meeting up with Alyosha, head through the town into the second house on the left with two vehicles parked in front of it. The diary is located on a table straight ahead after entering.
Postcard 19
From the above collectible, head into the next room on the left. The postcard will be on the green wall directly to the left of the doorway.
From Artyom’s room, turn right heading towards the workbench. Exit the passenger car and head onto the train car carrying the diesel fuel. Walk past the fuel tank and turn right to find this diary on a workbench across from Artyom’s van.
This site uses cookies. By continuing to use this website, you are giving consent to cookies being used. For more information on cookies, view our Privacy Policy.OkPrivacy Policy