Welcome to our Chapter 3: Yltheum Collectibles Guide for Immortals of Aveum! In this guide we’ll cover all the collectibles that you can find during the Yltheum mission.
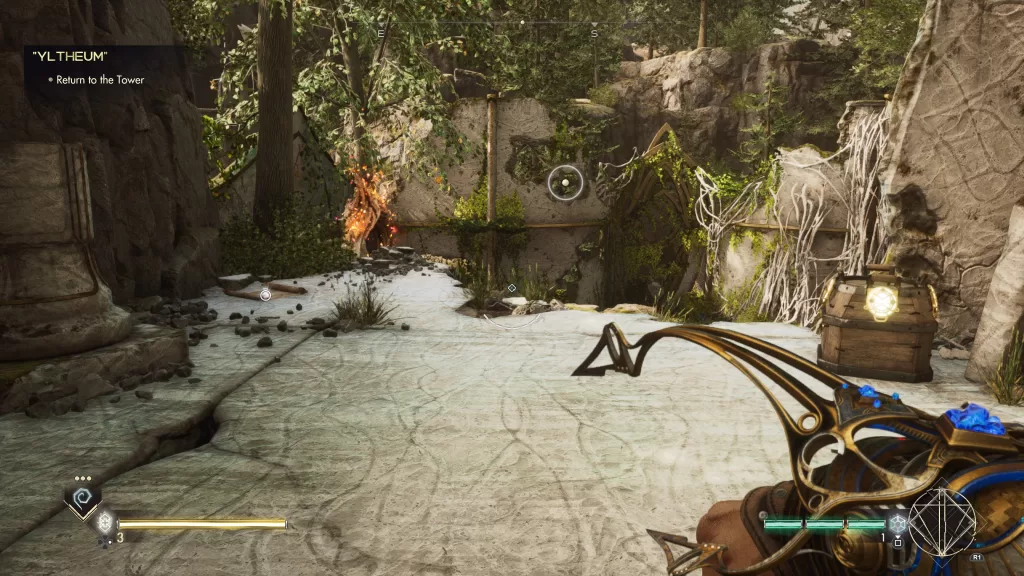
Return to the Tower
Lore: Spell Altars, Annotated
This lore can be found in the ruins behind the blue locked door on the ground of the upper ledge just before the spell altar.
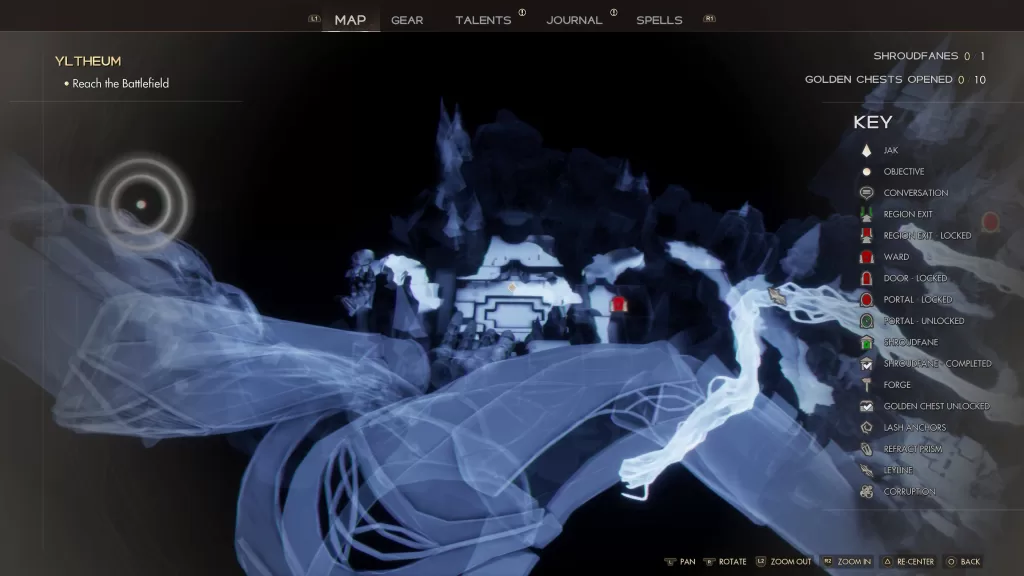
Gold Chest: Cinder Ring
After unlocking the Blastwave in the ruins, you’ll jump down to the same courtyard where you previously fought a bunch of enemies and will need to fight some more. Afterwards, use each of the different colored spells on their corresponding crystals to unlock the door thus revealing the chest.
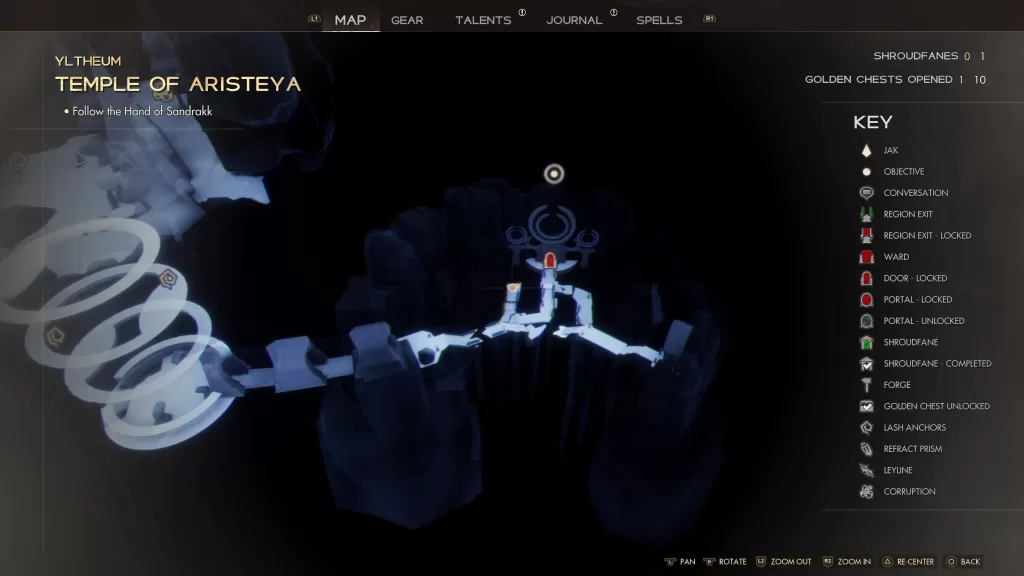
Follow the Hand of Sandrakk
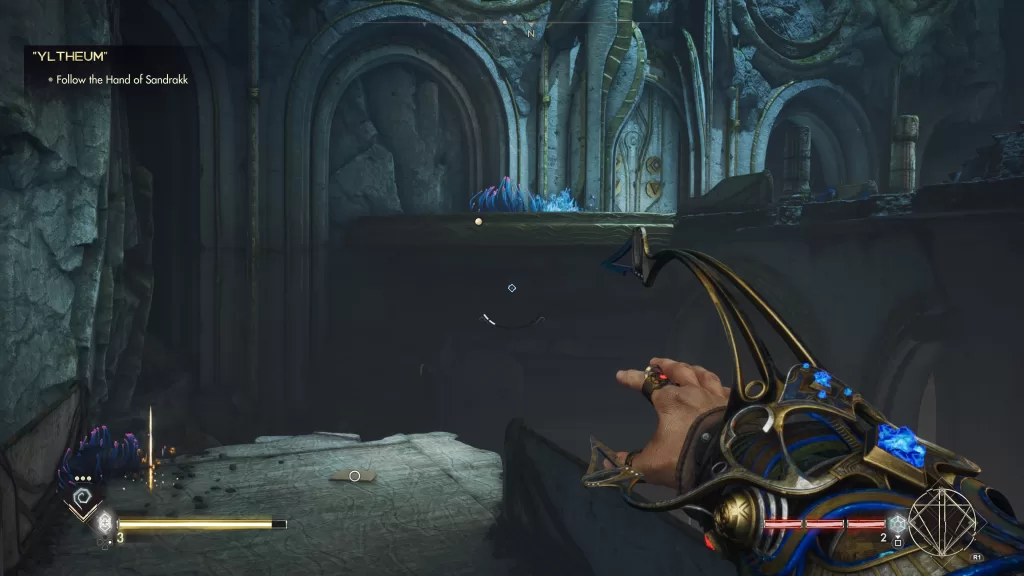
Lore: Druahmen Fanesong
After dropping down into the temple, you’ll find this lore on the ground in the large open area with a bunch of walkable platforms.
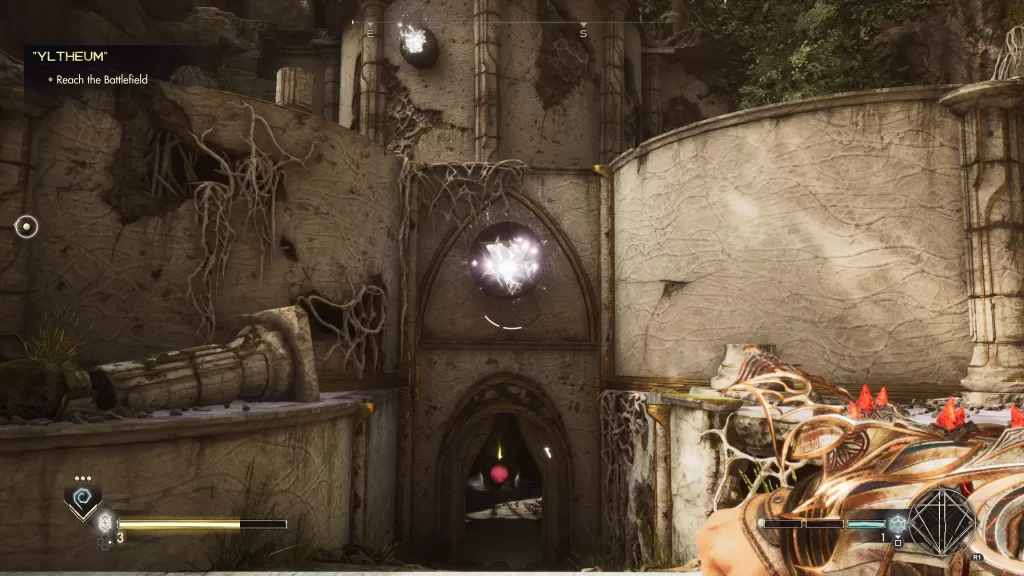
Reach the Battlefield
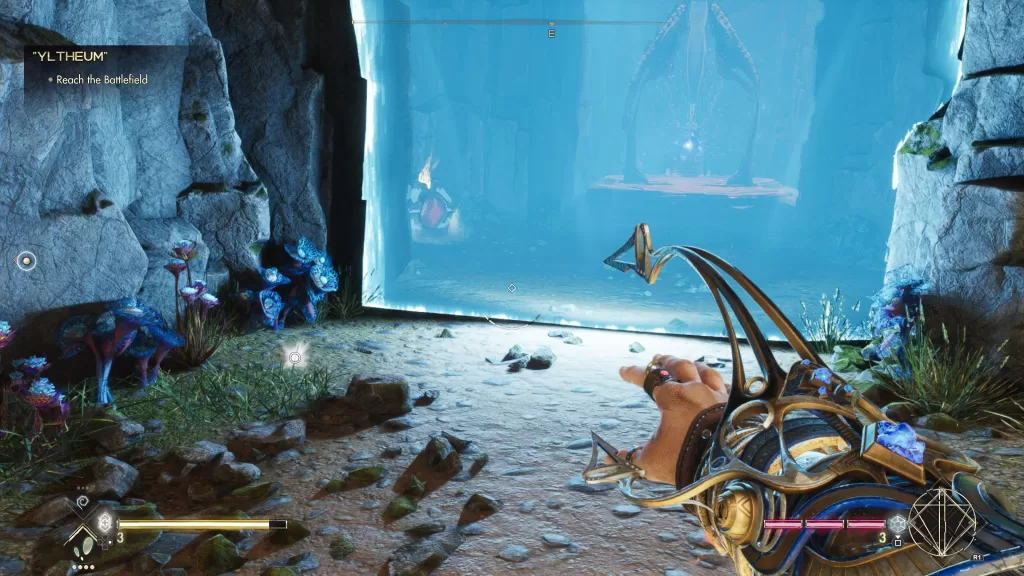
Lore: Shroudfanes and Sentience
After exiting the temple, look on your right to find a blue barrier. Just before the barrier you’ll find this lore on the ground.
Below are walkthroughs for the Prologue, Chapter 1, Chapter 2 and Chapter 3 in Fire Emblem Engage. Please note that these chapters are mainly tutorials and little exploring can be done.
Prologue
Just after the first cutscene during the Prologue: The Emblems in Fire Emblem Engage, you’ll begin a tutorial fight with an unknown foe. Defeat the foe following the tutorial prompts to trigger another cutscene leading to the end of the Prologue.
Chapter 1
In Chapter 1: Awake at Last, a battle will ensue following the conclusion of the cutscene. You’ll receive additional tutorials during the fight. Be sure to pay attention and use them to your advantage to defeat the enemies. Post battle, you’ll be able to explore the grounds of the Lythos Grasslands. Speak with everyone if you wish and examine the shiny spots around the area to find items. When you’re ready, leave the area to begin the next chapter.
Chapter 2
At the start of Chapter 2: Queen Lumera, a lengthy cutscene will play out followed by a fight against Lumera. Defeat her to trigger another battle. Once again, defeat the queen who will be using a ring containing Sigurd this time. More tutorials will be shown during this fight. Again, use them to your benefit to win the battle. Post battle you’ll receive the Liberation sword and will be transported to the Lythos Castle Gardens. Speak with everyone if you wish then explore the area to retrieve items. Depart the area when you’re ready to begin the next chapter.
Chapter 3
After the cutscene at the start of Chapter 3: Hostilities, a battle will trigger. Defeat some of the enemies to trigger a cutscene with Alfred. He will join the fray with his retainers, Etie and Boucheron. When the battle resumes, defeat the enemies! After the cutscene, you’ll find yourself in the Ring Vault. Explore the area looking for items and speaking with people then depart when you’re ready to begin the next chapter.
Below is a walkthrough for the collectibles found during Chapter III: A Burden of Blood in A Plague Tale: Requiem.
Tool
Before raising the gate to leave the city, loot this tool from a chest up the stairs near the crank.
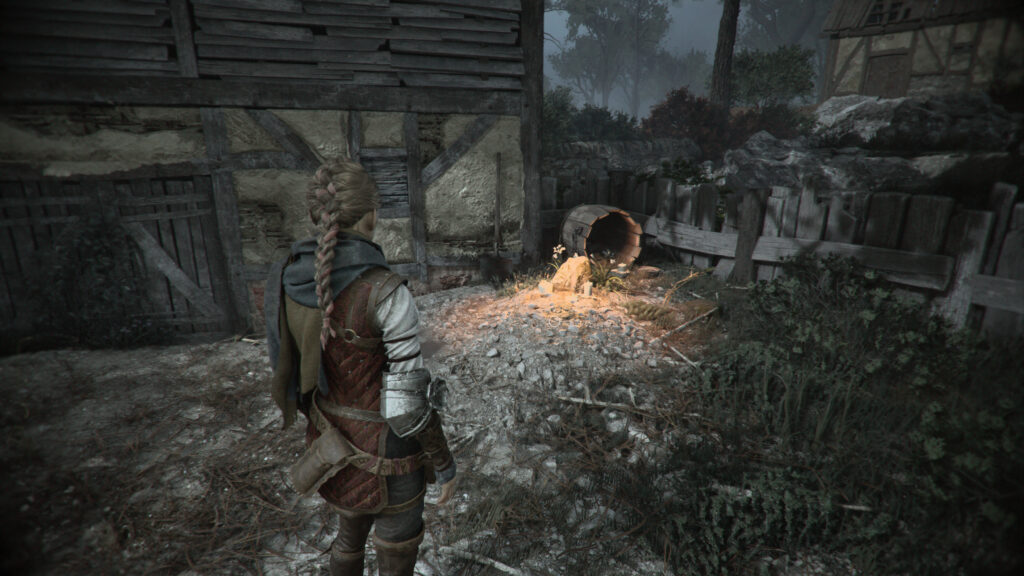
Souvenir: A Grave
After you exit the city, follow the path down to reach a forge. Across from the forge will be a small fenced in area. Follow along the fence to the right of the gate.
This will give you access to hit the lock on the gate with your slingshot. Head inside and interact with the grave next to the house to collect the souvenir.
Hugo’s Collection: Chamomile
When you reach the Herbalist’s garden, head to the back left and look for the tree with a wooden ladder leaning against it.
The flower can be found hanging from the branch to the left of the ladder. You’ll need to hit the lock holding the container the flower is in to cause it to drop.
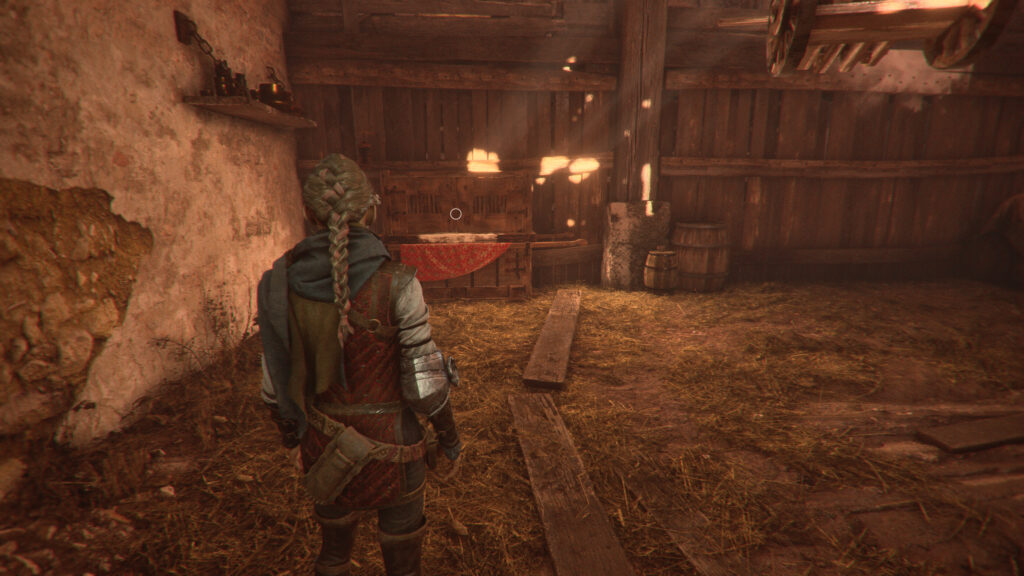
Secret Chest / Tool
This secret chest is obtained in the depot where you retrieve your sling. It is directly across from where you found your sling and requires 1 knife to open.
This chest will contain a tool!
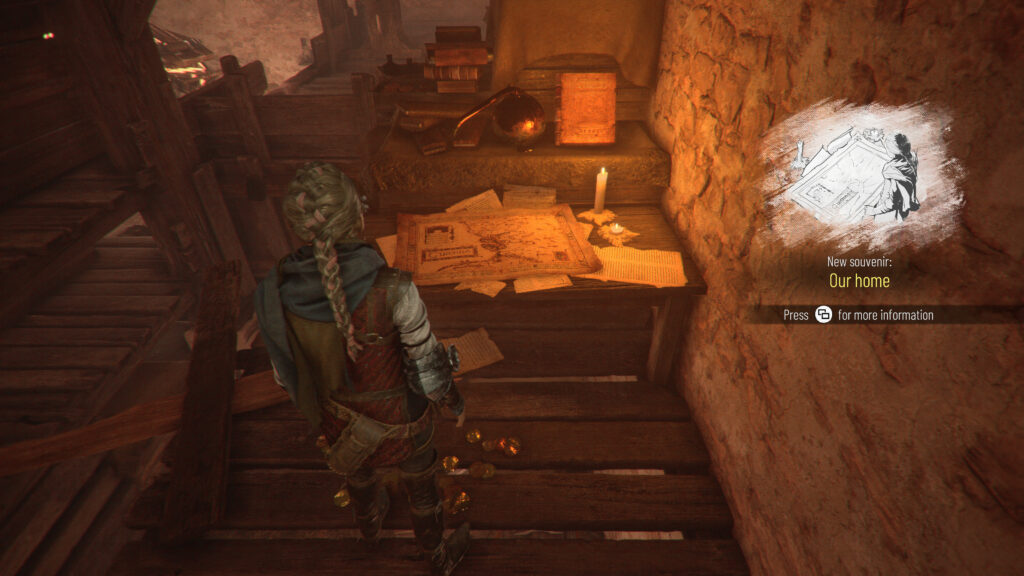
Souvenir: Our Home
After getting the slingshot, climb up the ladder in the depot to reach the second level. Follow the walkway left to come across a board you can knock down with your slingshot. Cross it then examine the table to find the souvenir.
Below is a guide on where to find the hollow and verdant blossoms around the Galdban Territory in Valkyrie Elysium. For the purpose of this guide, all of the blossoms were obtained during the Chapter 3: An Unexpected Encounter and Chapter 4: Victim of the Gods main quests.
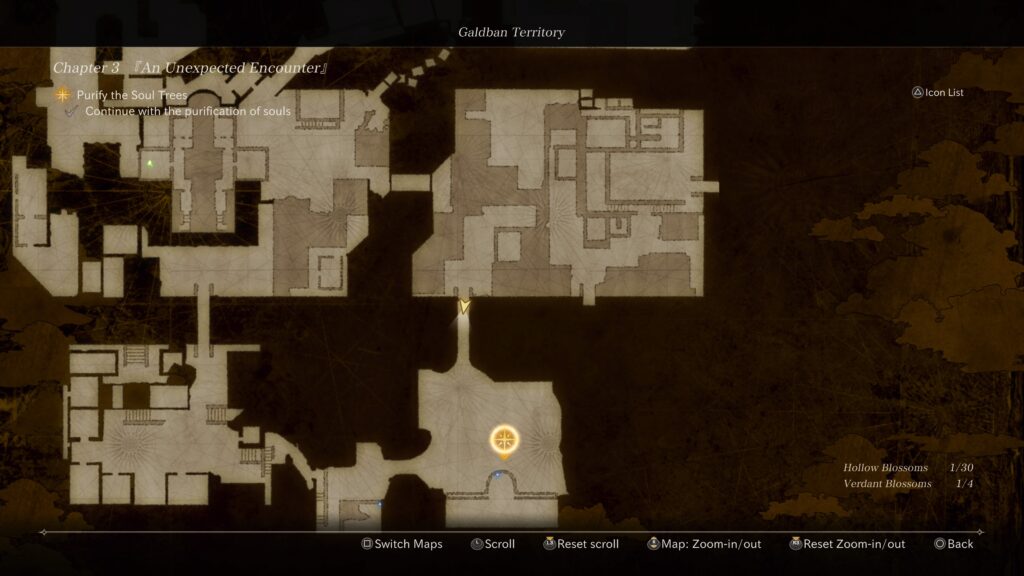
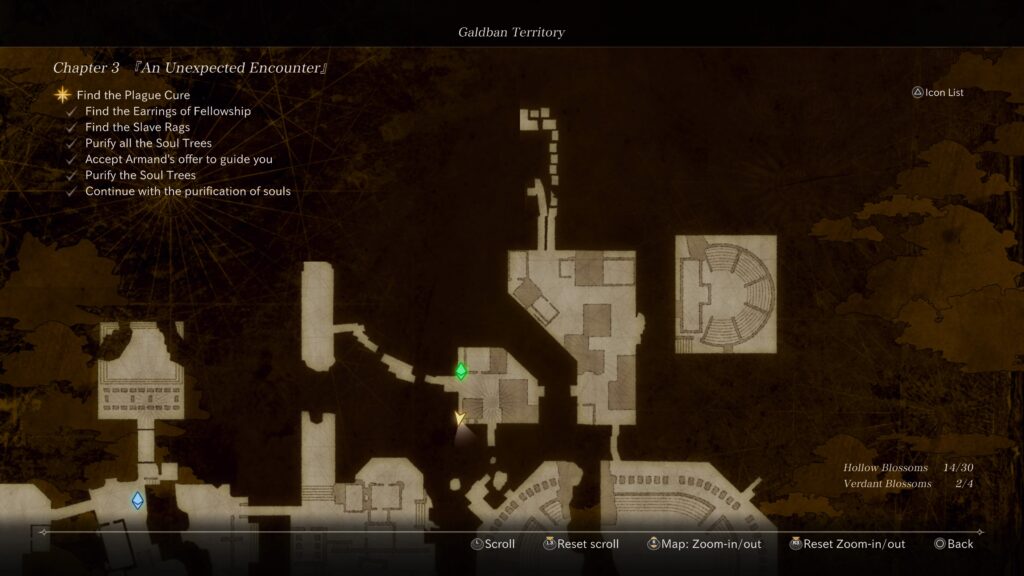
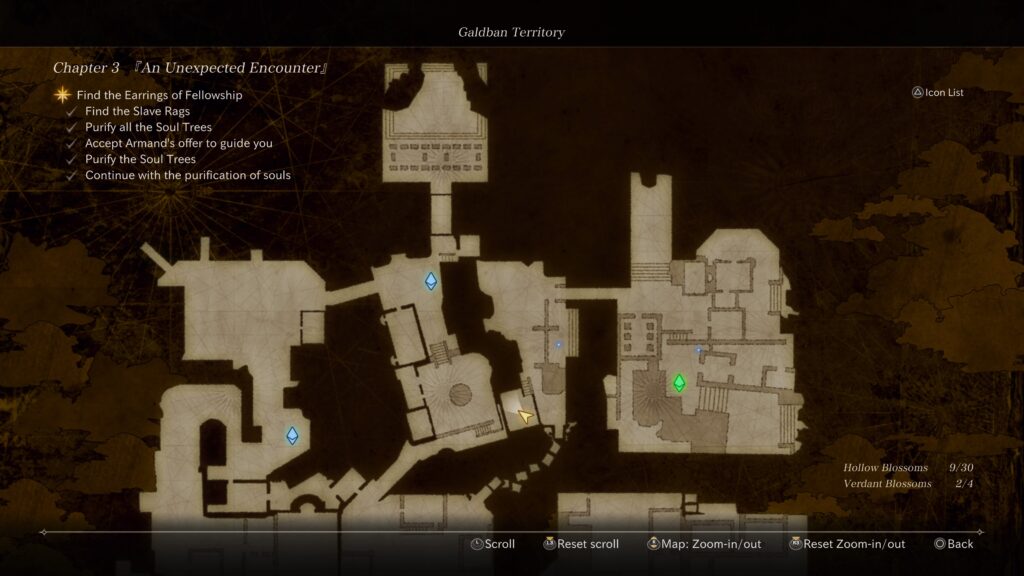
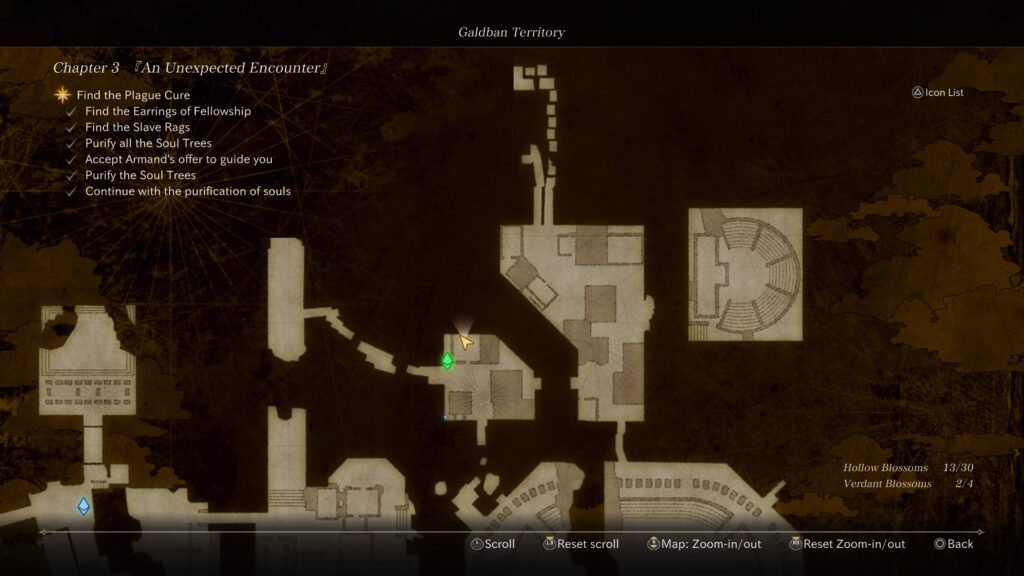
Chapter 3: An Unexpected Encounter
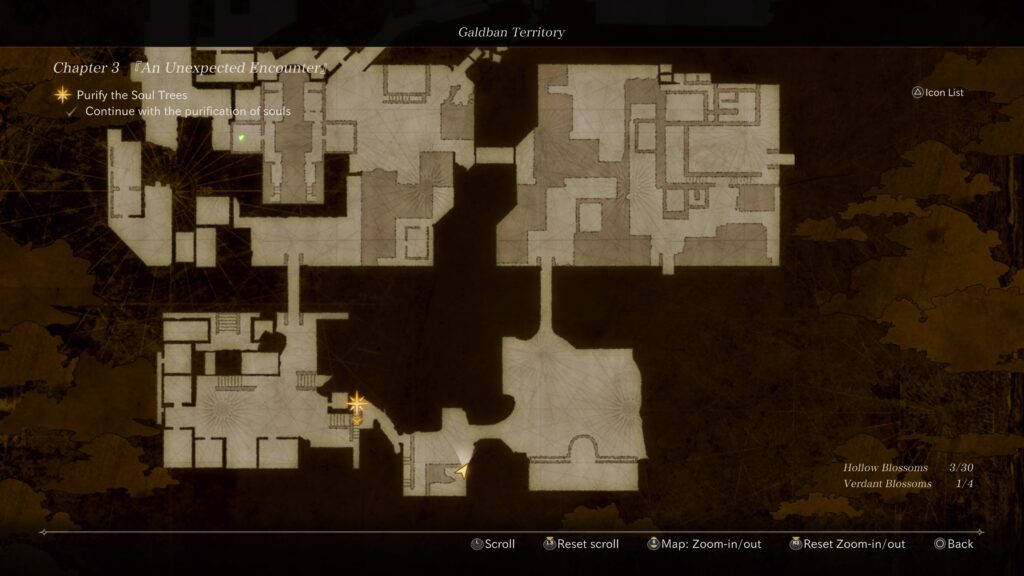
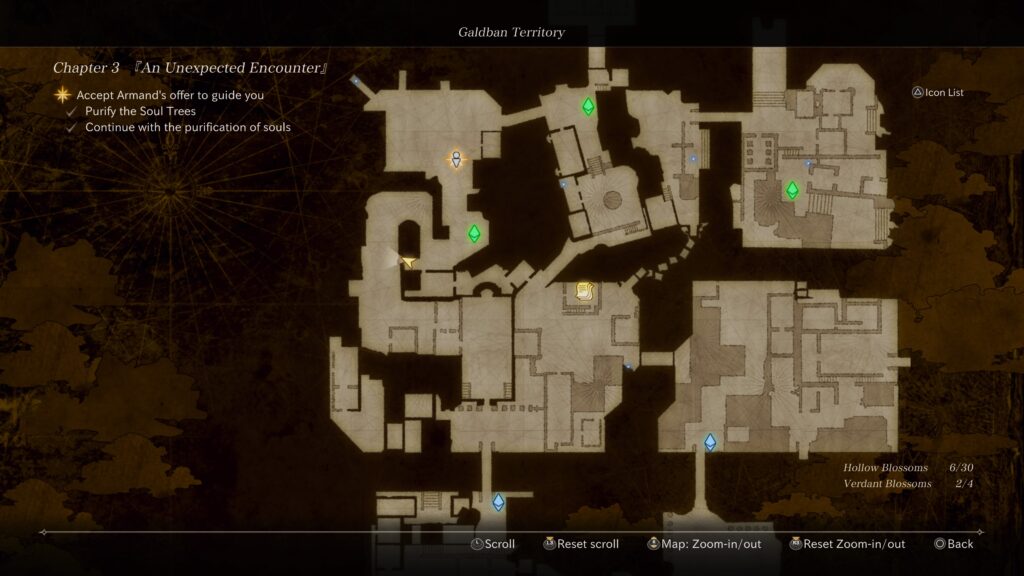
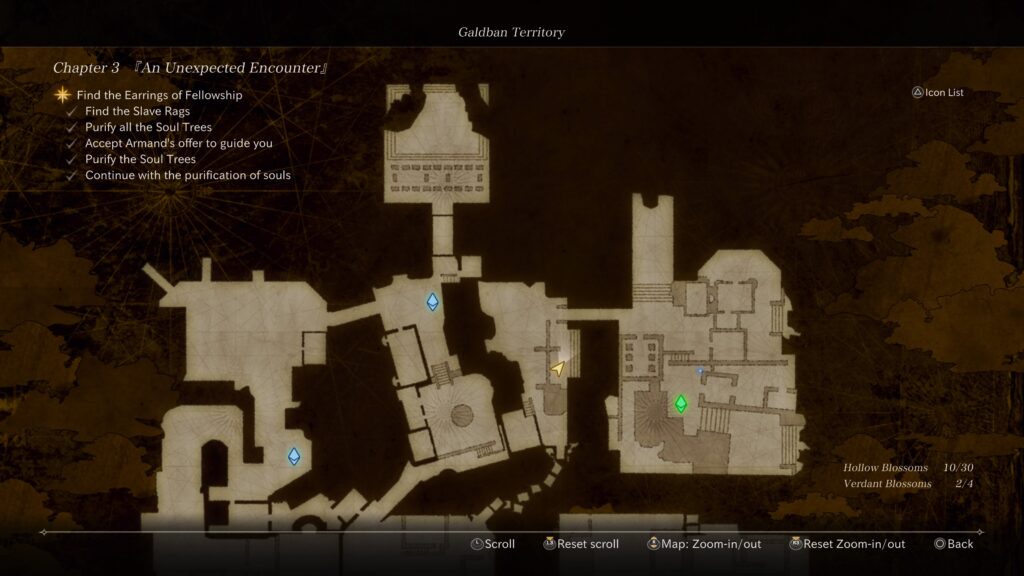
Well-Informed Strategist
This blossom can be found along the building immediately to the left of the starting area past the railing.
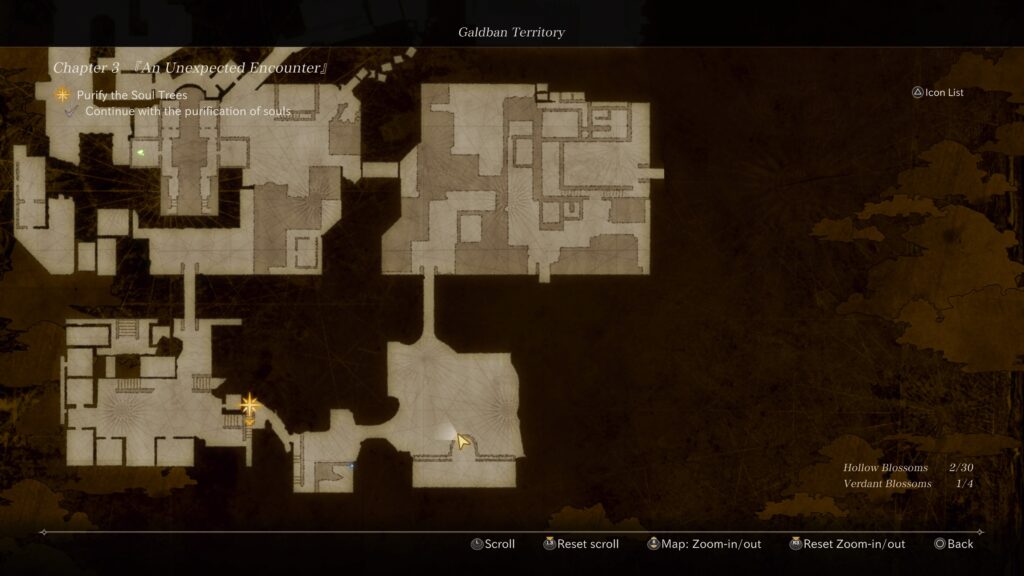
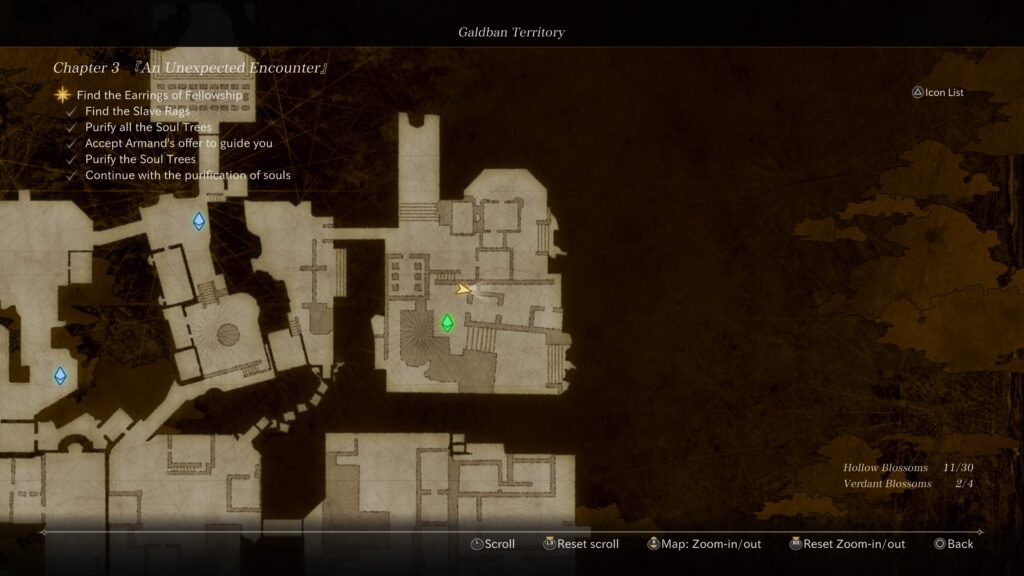
Verdant Blossom
This blossom can be found on a bridge just past the first Storage Camp.
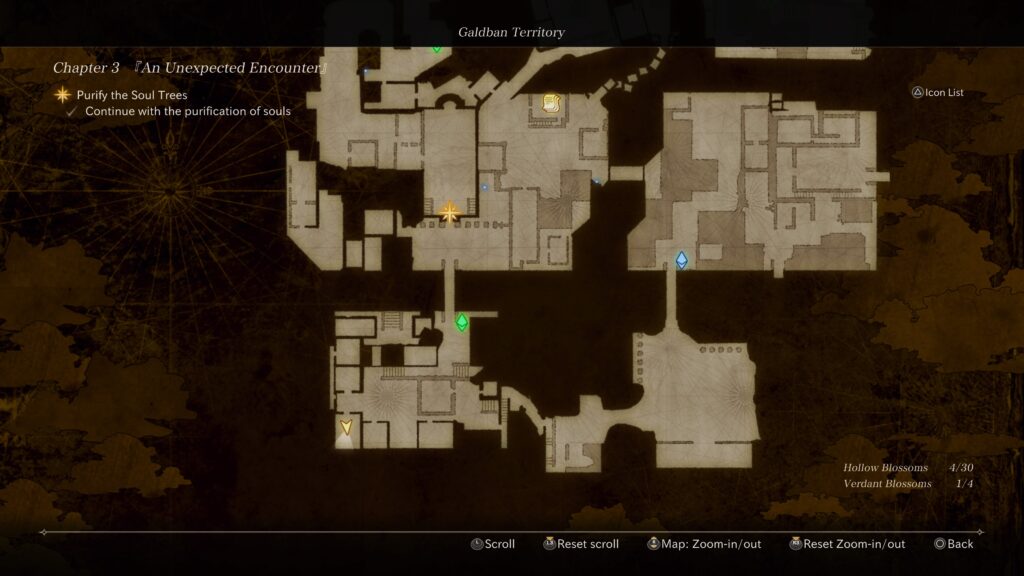
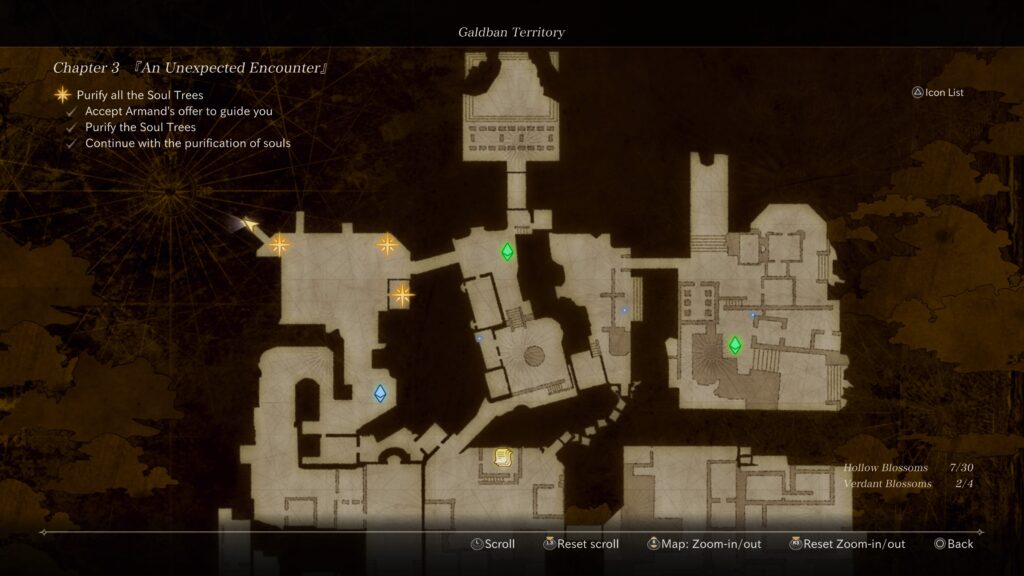
Young Stable Boy
This blossom can be found on a balcony overlooking the second Soul Tree you come across just past the first Storage Camp.
Arrogant Noble
This blossom can be found in the southcentral part of the map.
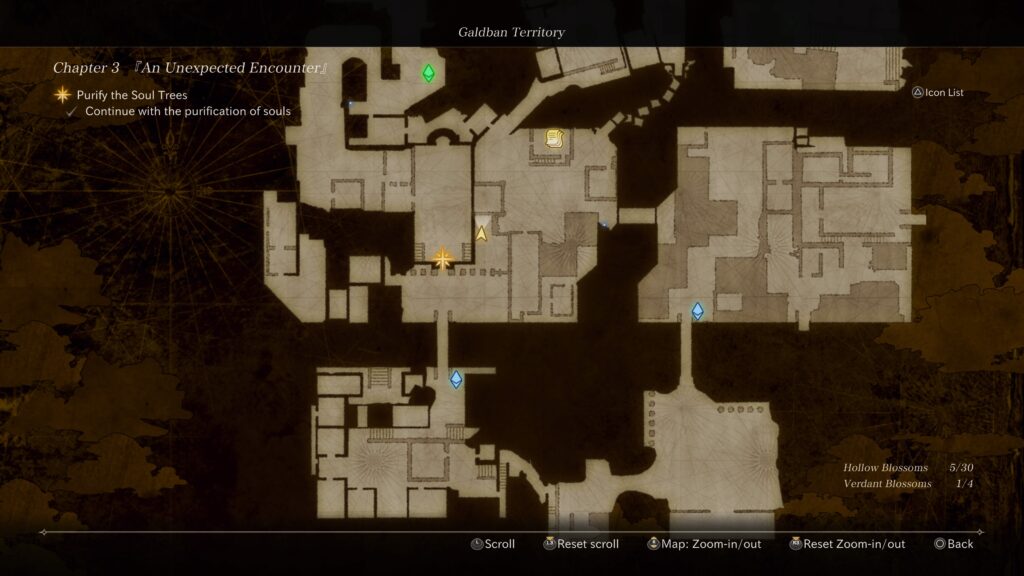
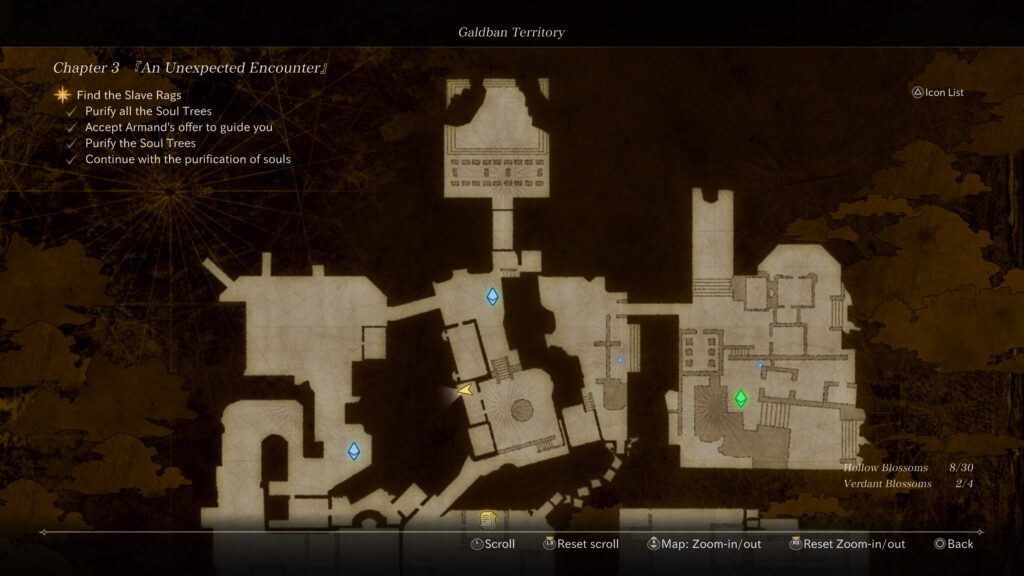
Girl Who Believed in the Future
This blossom can be found in the southwest building near a Soul Tree.
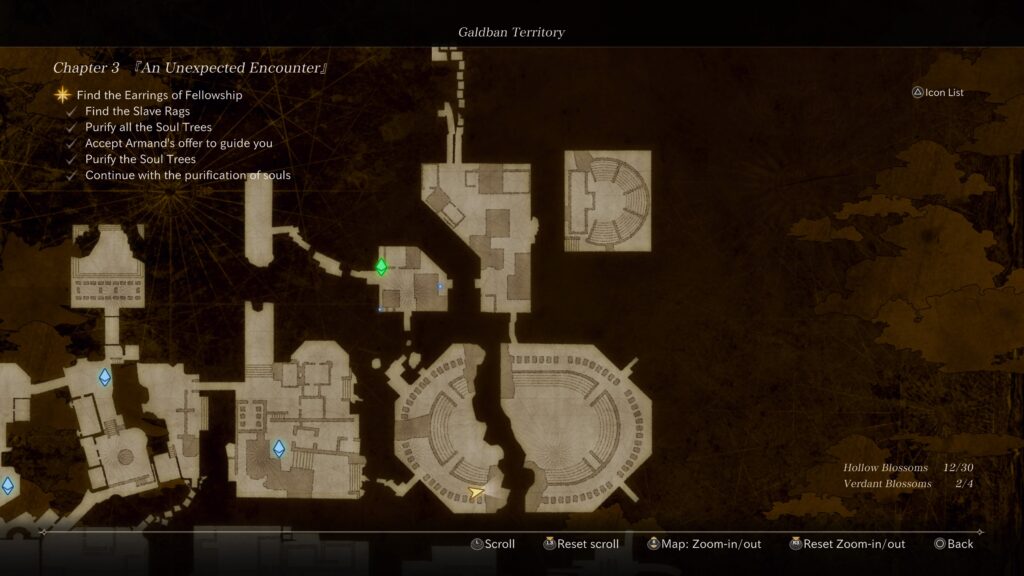
Suspicious Jeweler
This blossom can be found over the bridge from the second Storage Camp in a room on the right side.
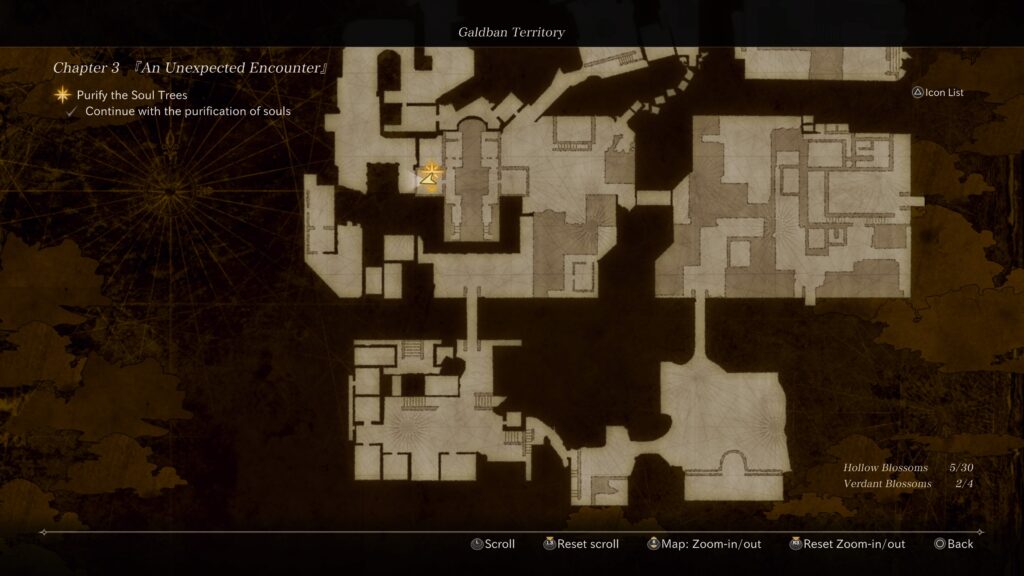
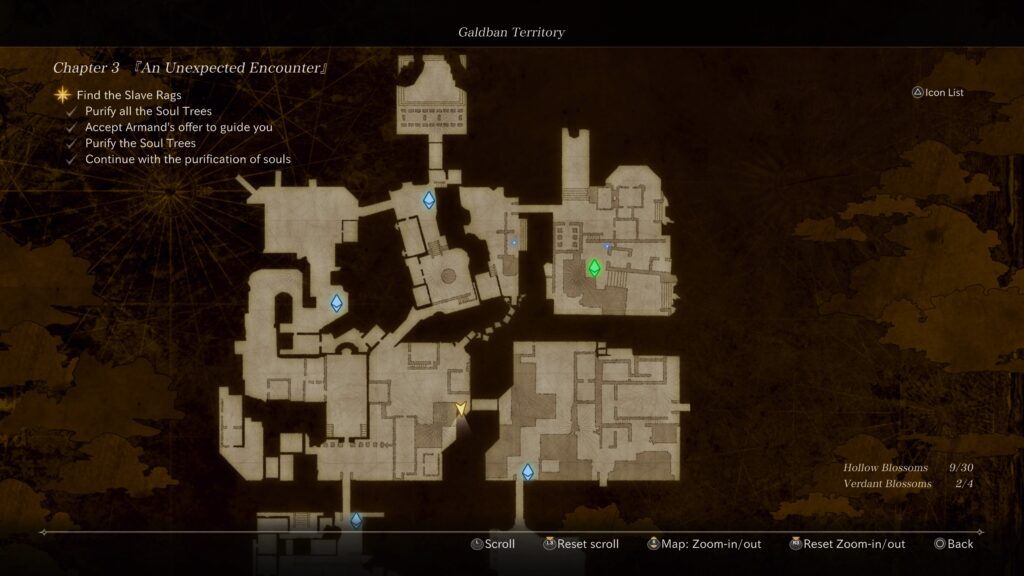
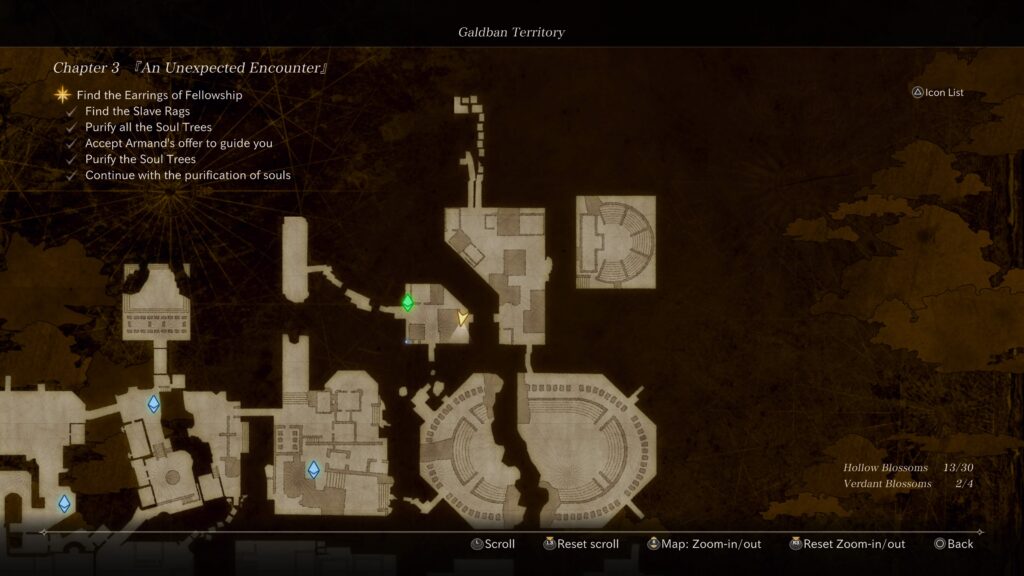
Verdant Blossom
This blossom can be found on the upper level of the church on the left side.
Boastful Wife
This blossom can be found just before the third Storage Camp next to the columns of a building.
People-Loving Prince
This blossom can be found on the northwestern side of the large area just past the third Storage Camp on a dock.
History Buff Jester
This blossom is located in a building up the stairs south of the fourth Storage Camp.
Weak-Willed Carpenter
This blossom is located near the drawbridge south of the fourth Storage Camp.
Brave General
This blossom is found after the fourth Storage Camp near the bridge leading to the fifth Storage Camp.
Backroad Sage
This blossom can be found next to the fifth Storage Camp.
New Recruit Fitz
This blossom can be found in the area between the fifth and sixth Storage Camp.
Stubborn Fortune Teller
This blossom is located east of the sixth Storage Camp.
Solitary Jailer
This blossom can be found directly south of the sixth Storage Camp.
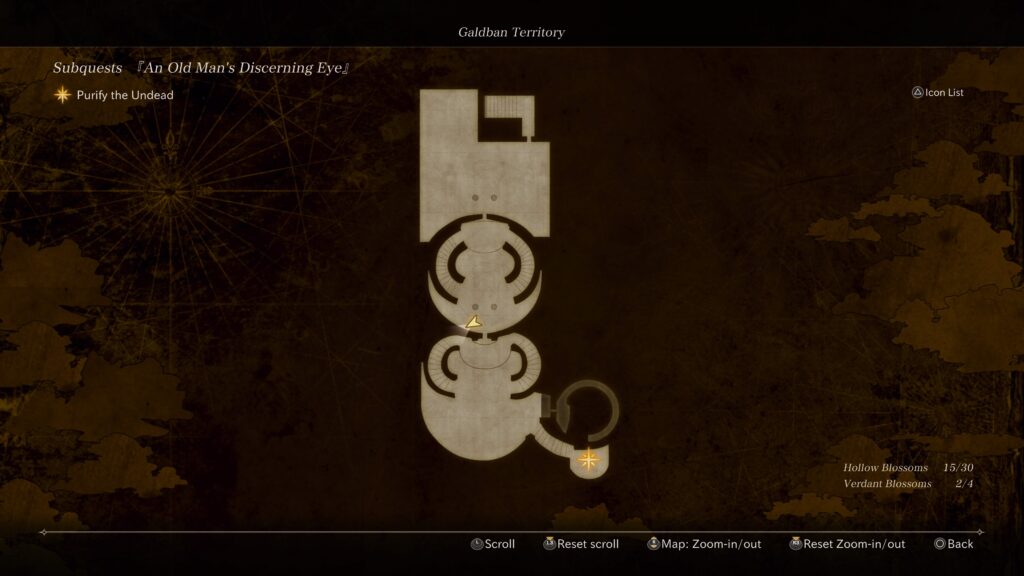
Large Man with Wounded Cheek
This blossom is tricky to reach and can be found on an interior platform with a chest across from a grand staircase in the palace during An Old Man’s Discerning Eye subquest. To reach it, equip the Baleygrspear. Stand on either side of the stairs (about 5 steps up from the bottom) then double jump towards the platform with the chest. At the tallest point of the second jump, hit the regular attack button followed by the heavy attack button. With the spear, this will cause you to lunge up onto the platform. It took us multiple tries before we finally made it but it is possible!
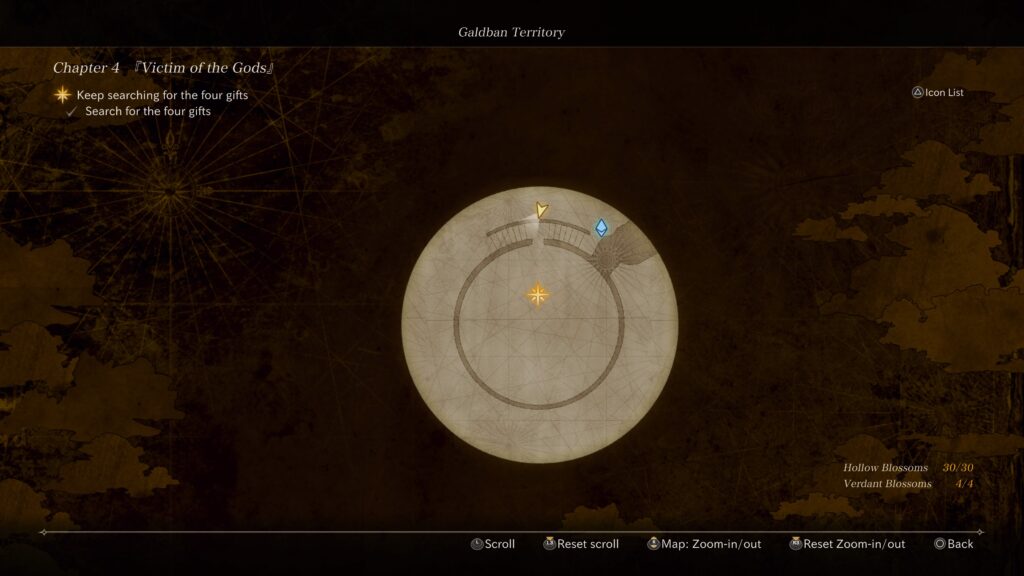
Chapter 4: Victim of the Gods
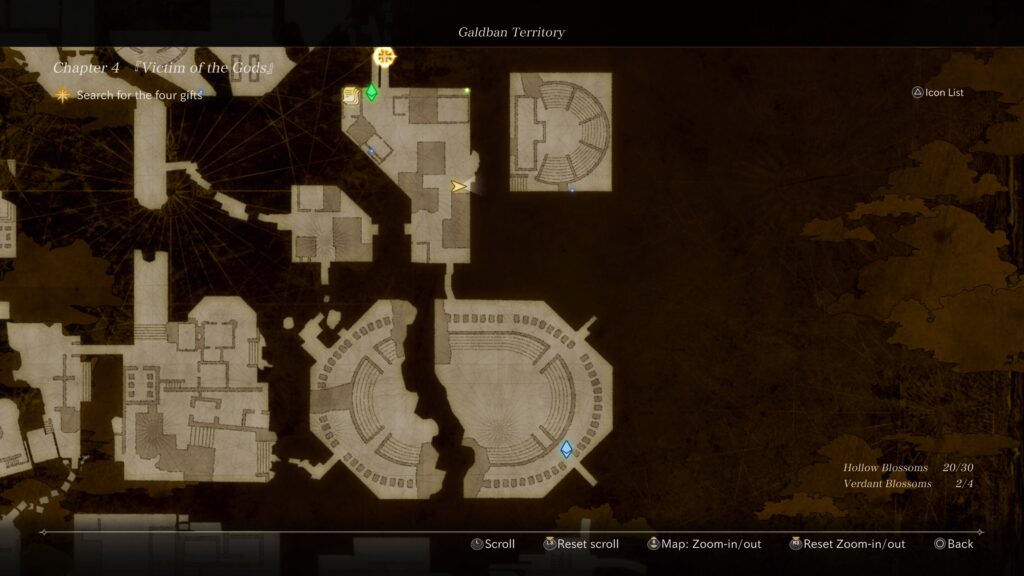
Unkept Bearded God
At the start of the chapter, head directly west up flight of stairs to find it on a balcony.
Frigid Wind Storyteller
From the first Storage Camp, head right to find it along the railing overlooking the water.
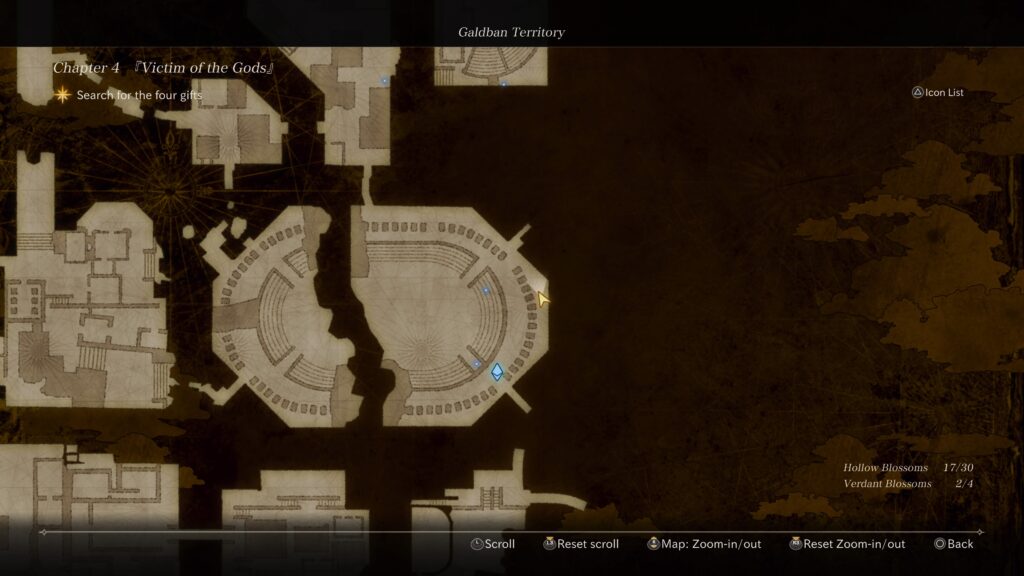
Servant Einar
This blossom can be found in the stadium near the first Storage Camp.
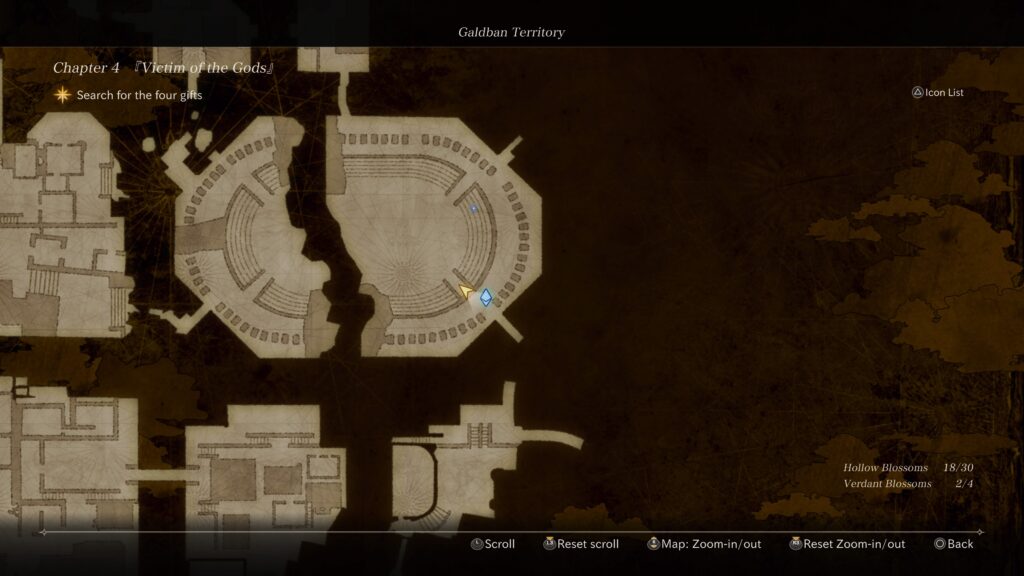
Dusty Broker
This blossom can be found near the above blossom in the stands.
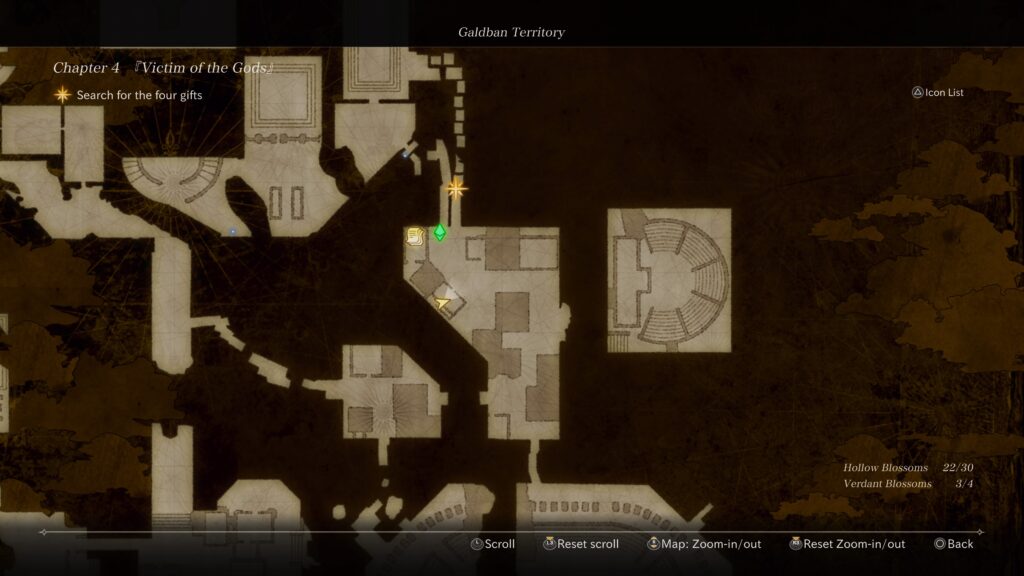
Theologian Fredrick
This blossom can be found southeast of the second Storage Camp.
Old Lodgings Landlady
This blossom can be found on the outside of the amphitheater east of the second Storage Camp.
Verdant Blossom
This blossom can be found directly east of the second Storage Camp.
High-Spirited Girl
This blossom can be found on a second level of the building directly south of the second Storage Camp.
Troubled Clergyman
This blossom can be found on a higher wooden platform north of the second Storage Camp. You’ll need to use a Soul Chain to reach it.
Big-Town Haberdashery
This blossom is located under the stairs next to the third Storage Camp just after the Hilde boss fight.
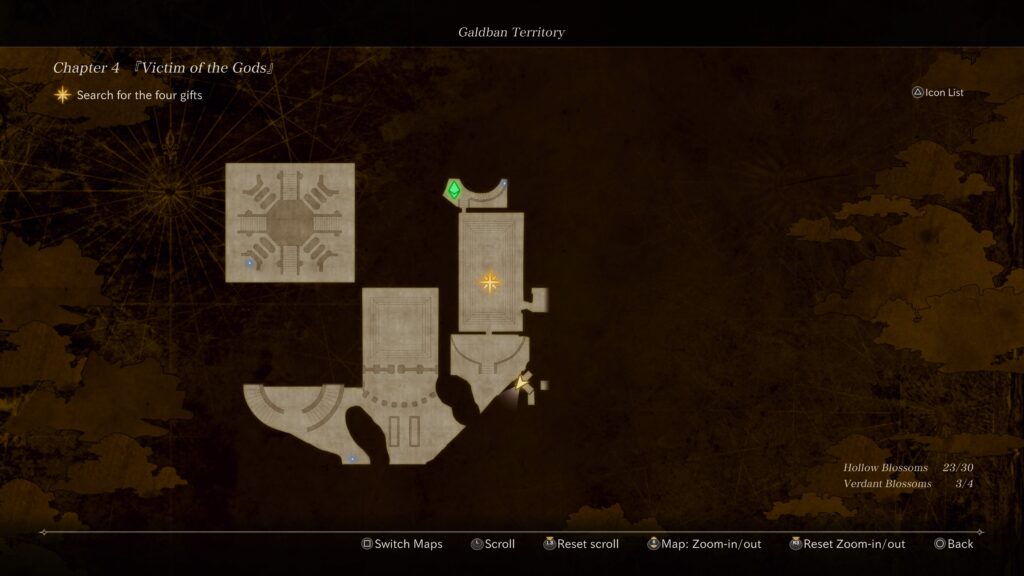
Girl Who Believed in the Future
From the fourth Storage Camp, head down the stairs and enter the building at the end. Ride the elevator down. Exit the elevator and turn right. Head down the stairs and keep following the room, ignoring the exit to the right, to find the blossom.
Mountain Pass Asbjorn
From the previous blossom, exit the building and take a right. Head down the stairs on the left. At the bottom of the stairs, take a left and the blossom will be on the right between some debris.
The Red Scale’s Head Accountant
From the doors of the banquet hall, head south to exit this building then take a right. Head west to find another doorway. The blossom will be in this room behind a wooden table.
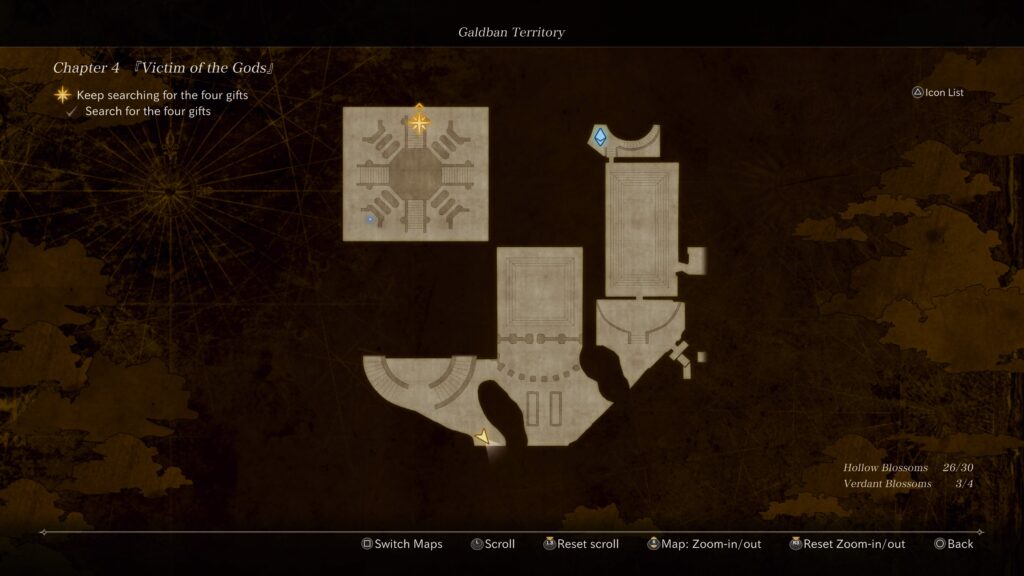
A Certain High-Level God
When facing the door of the banquet hall, head up the left set of stairs then follow the hallway left to find it at the end.
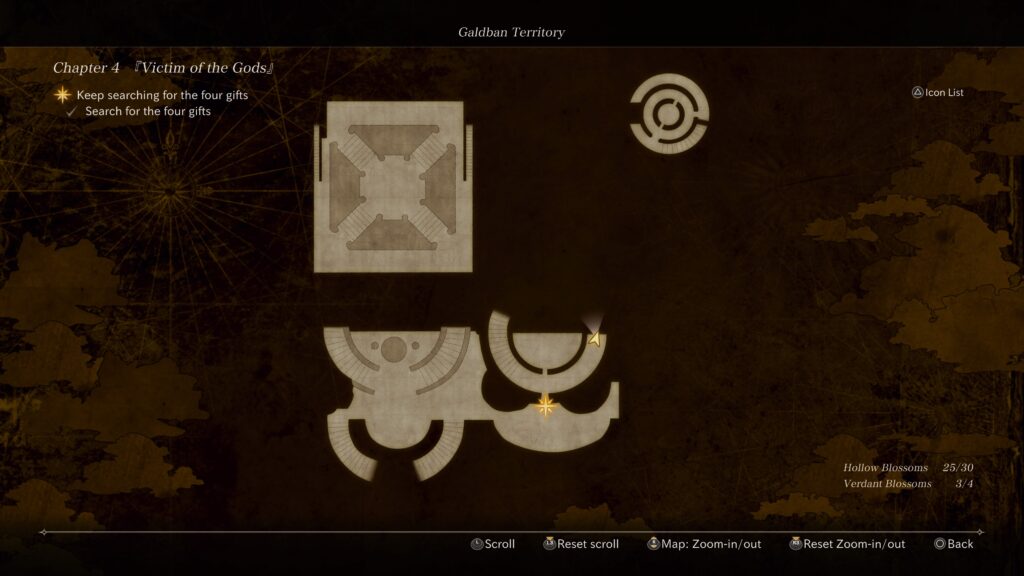
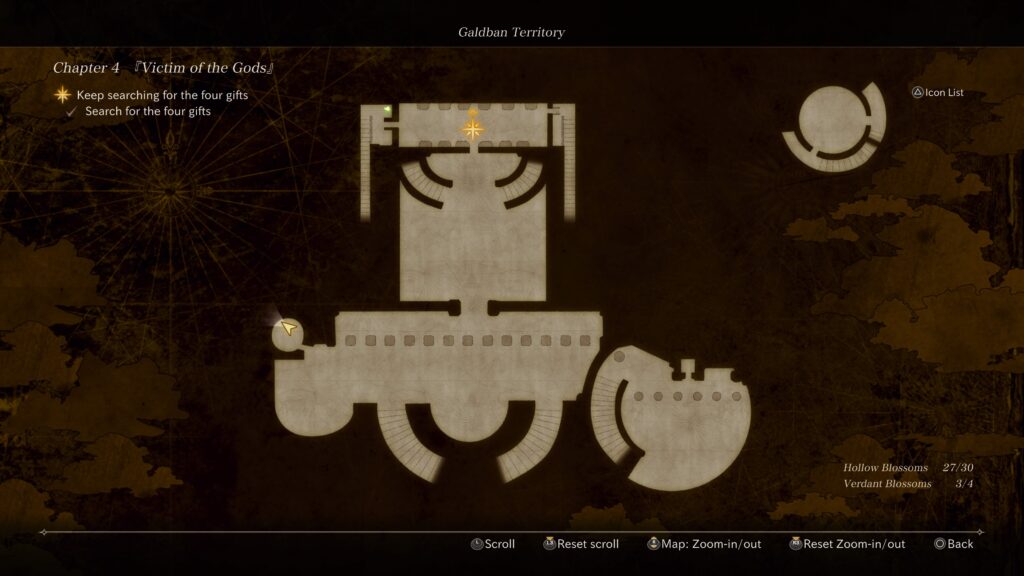
Verdant Blossom
When you enter the banquet hall, take a right and head down a small flight of stairs then a bigger flight of stairs. At the bottom of the stairs, follow the room to the right, keeping along the wall. This will bring you to another set of stairs on the west side of the room. Head up the stairs to find the item.
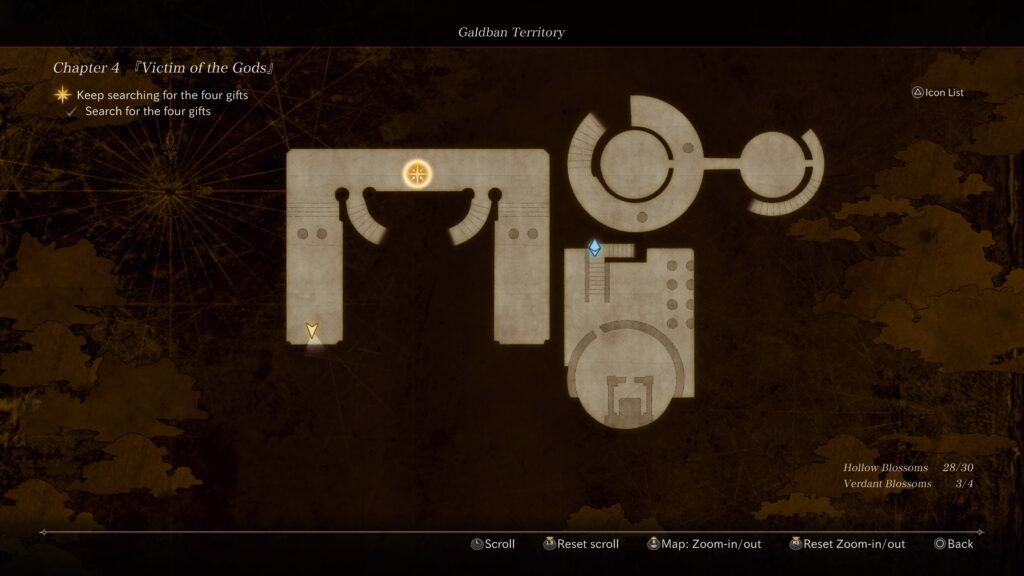
Dark Slate Faerie
This blossom can be found on the lower level of the banquet hall.
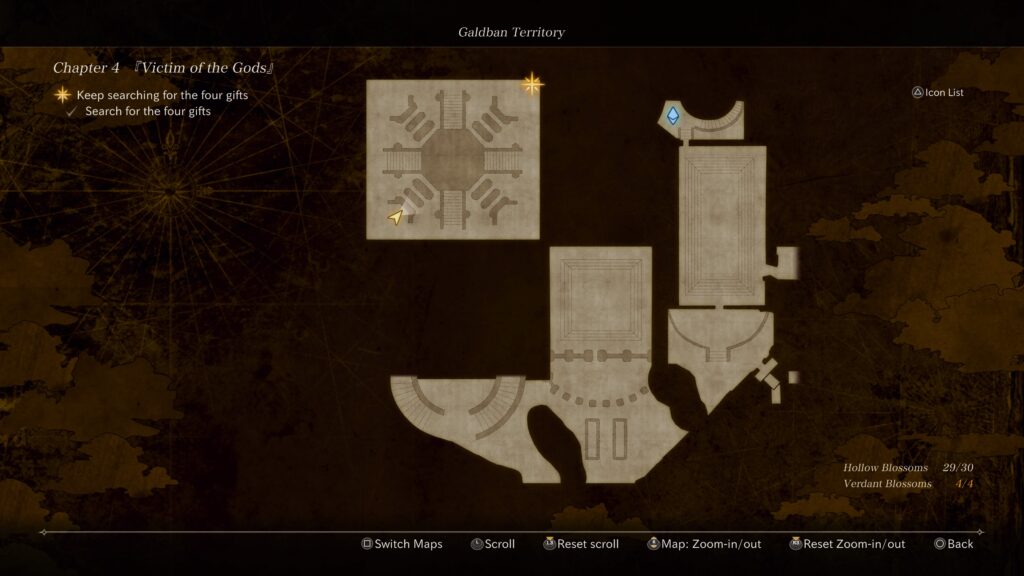
Crowned Battle Maiden
This blossom can be found after taking the elevator in the banquet hall down to the Underground Shrine of the palace.
Below is a walkthrough for Chapter 3 in Voice of Cards: The Beasts of Burden.
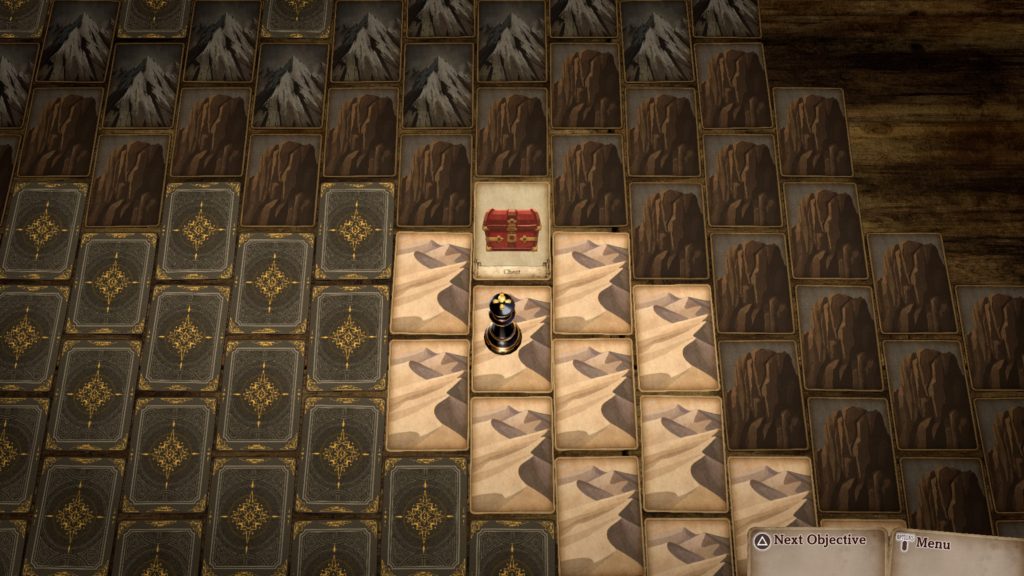
Desert
At the beginning of this chapter, head north to the glowing card to trigger a cutscene followed by a fight. Defeat the low level slime. After everyone joins your party again, return to where the glowing card was in the north. Once there, select someone to break the rocks. We chose L’gol and it worked! Proceed to the newly opened path.
Wasteland
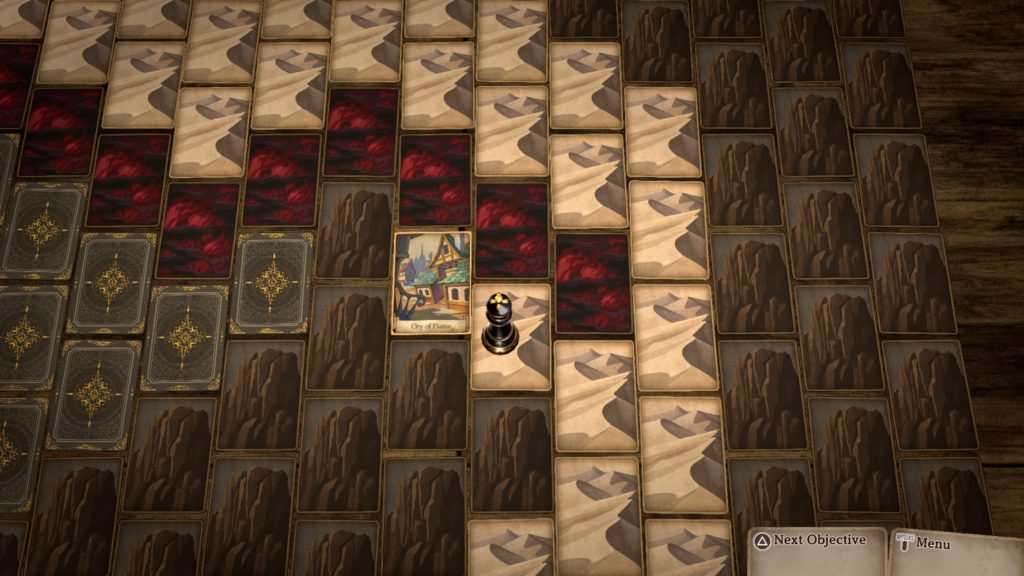
Head to the glowing card to find the City of Flame.
City of Flame
Enter the city then explore it to find the below.
Characters
Overheated Man near the Game Parlor to obtain his flipside story
Knowledgeable Old Woman south of the Armorer to obtain her flipside story
Shops
Pet Shop
Slime
Iron Tortoise
Lesser Troll
Orc Child
Centaur
Wererat
Ogre
Item Shop
Salve
Quality Salve
Antidote
Curative
Defroster
Unsealer
Dispeller
Pepper-Upper
Serum
Inspirilixir
Bomb
Invigorant
Protectorant
Smoke Bomb
Bellwether
Bill of Good Fortune
Armorer
Steel Blades
Mercenary’s Sword
Magic Staff
Tamer’s Whip
Knight’s Armor
Steel Breastplate
Adventurer’s Attire
Ring of Protection
Firestay Ring
Waterstay Ring
Lighteningstay Ring
Windstay Ring
Poisonstay Ring
Numbstay Ring
When you’re ready to progress, speak with the young man next to the Armorer then head to the mystery card just north of the Pet Shop to find Pulche. Afterwards, interact with the children’s card between the Pet Shop and Armorer. To help the orphans, you’ll have the following options:
Give Food
Do a Cheerful Dance
Ask Aristocrat for Help
The correct answer is to “Ask Aristocrat for Help”. If you don’t pick that one first, you can view the responses for the other options. Eventually, you’ll have to pick the correct answer. For the next task, head to the Manor in the southwestern corner of town. To persuade him, leave it to Pulche. You’ll then need to select the cause of the poisoning, which is a monster! Afterwards, leave the town.
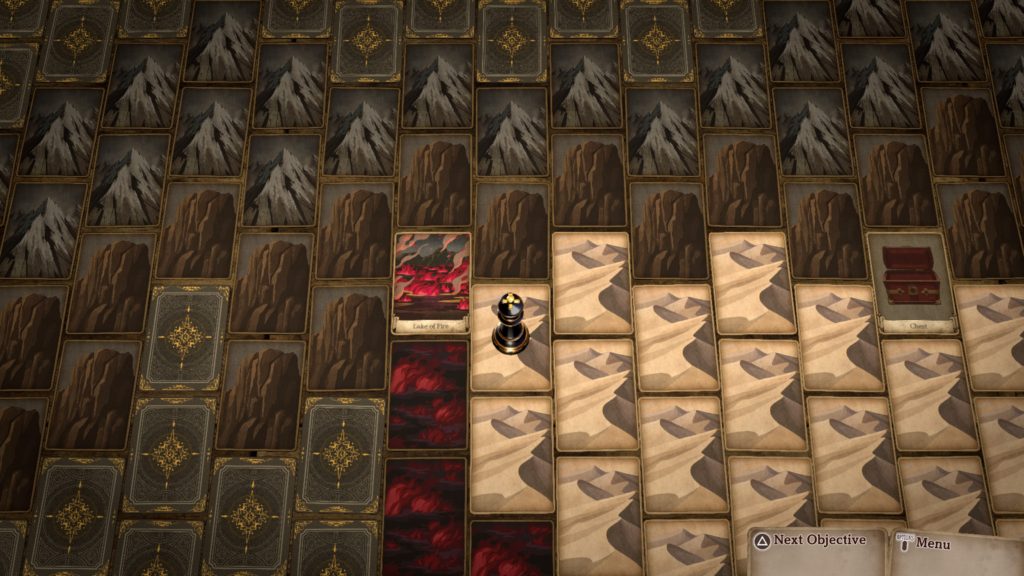
Wasteland
In the northeastern corner of this area, you can find a chest containing 1000G!
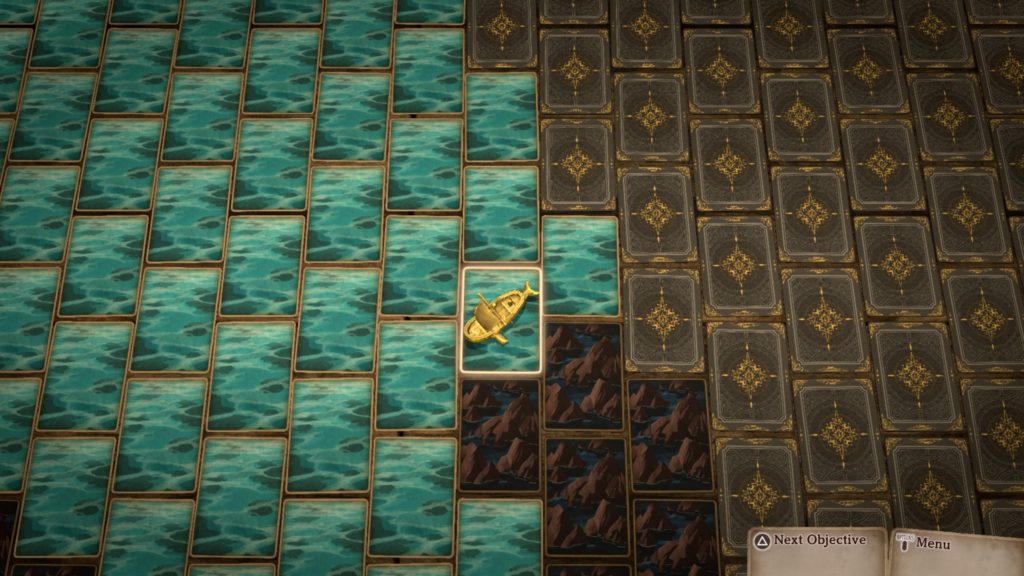
Just west of the chest you can find the Lake of Fire and enter the area.
Lake of Fire
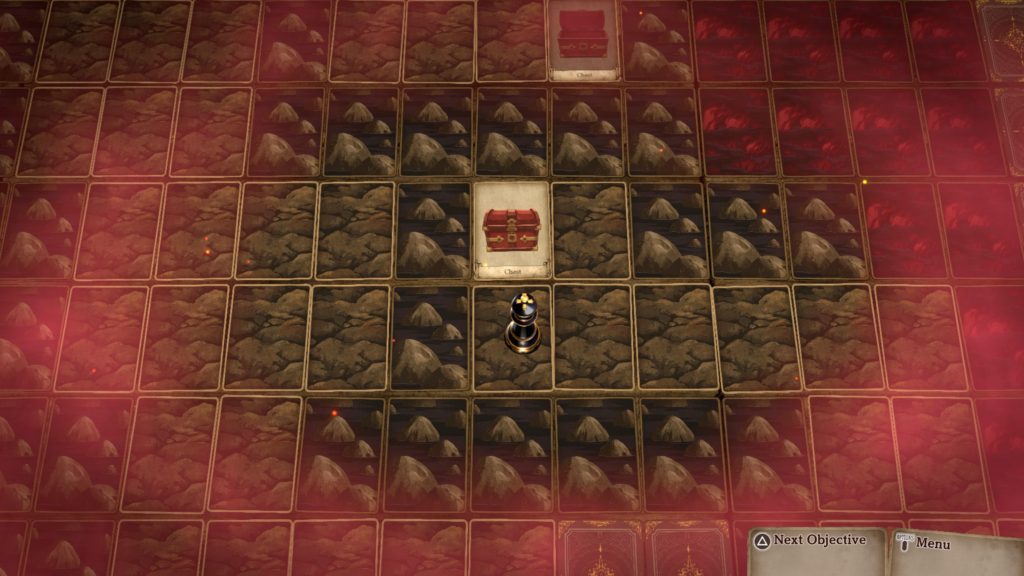
In the northern part of this area, a chest contains a Firestay Ring!
Make your way south and head counterclockwise to reach the center of the area where you’ll find a chest containing an Omnisalve.
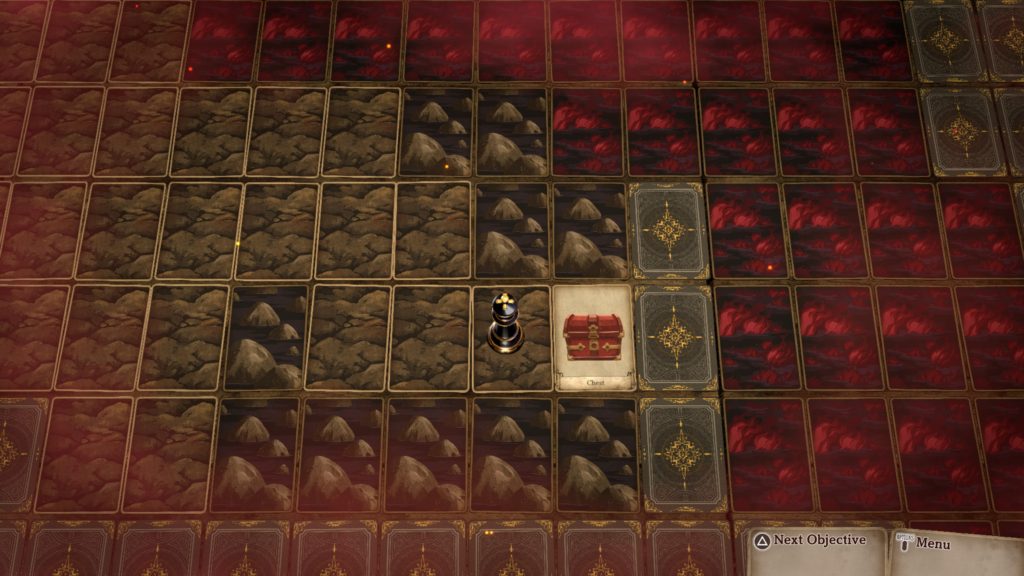
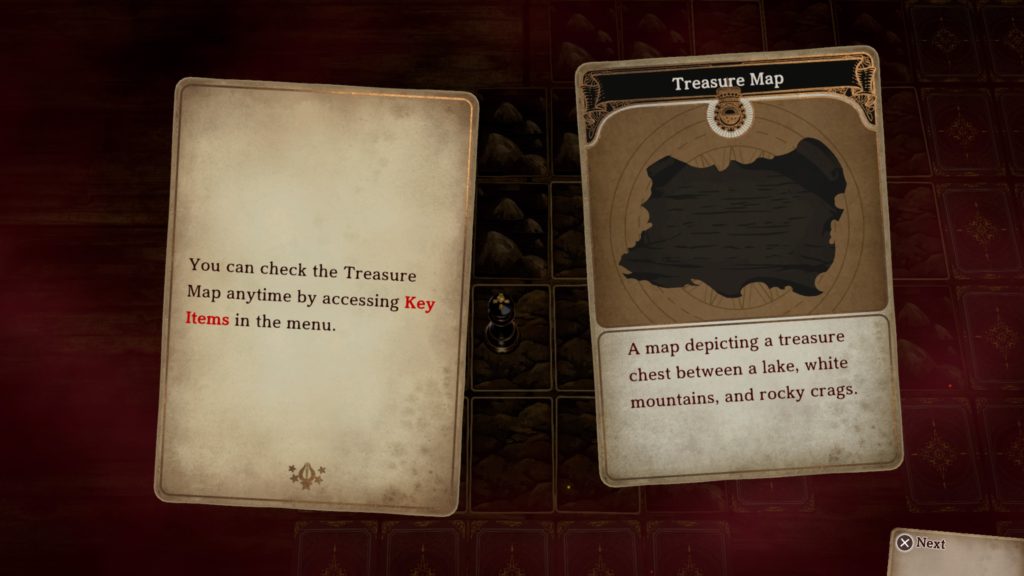
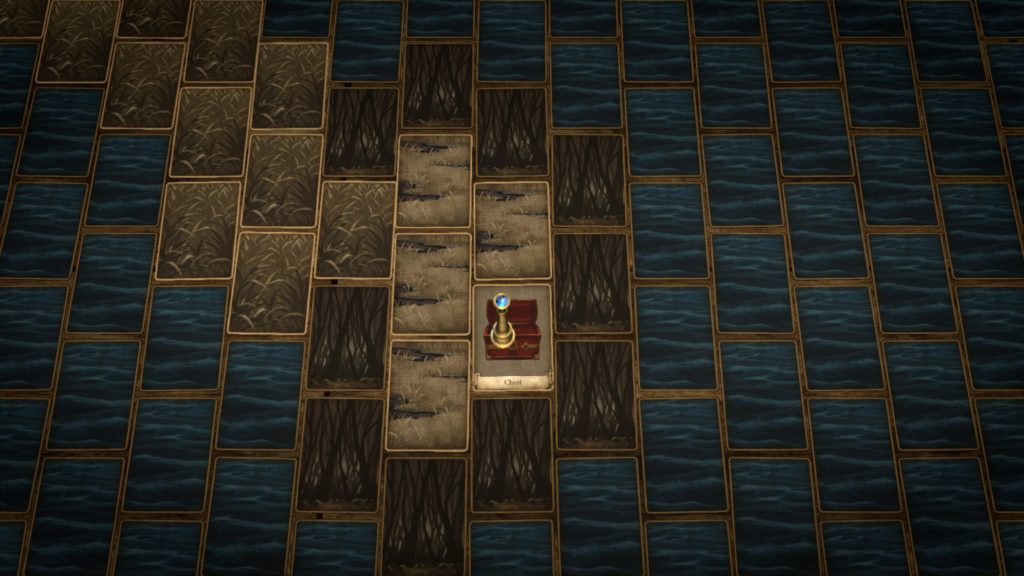
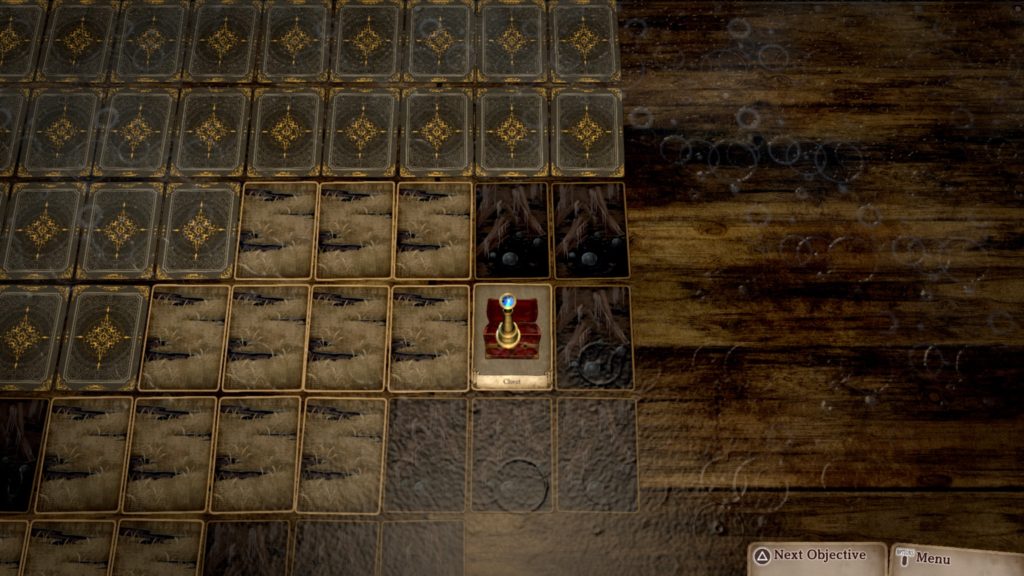
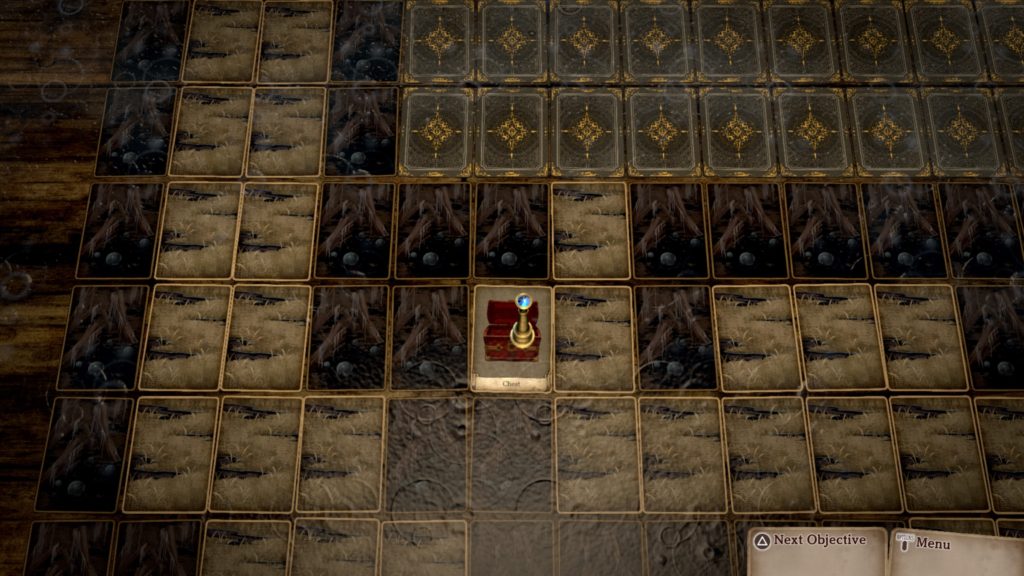
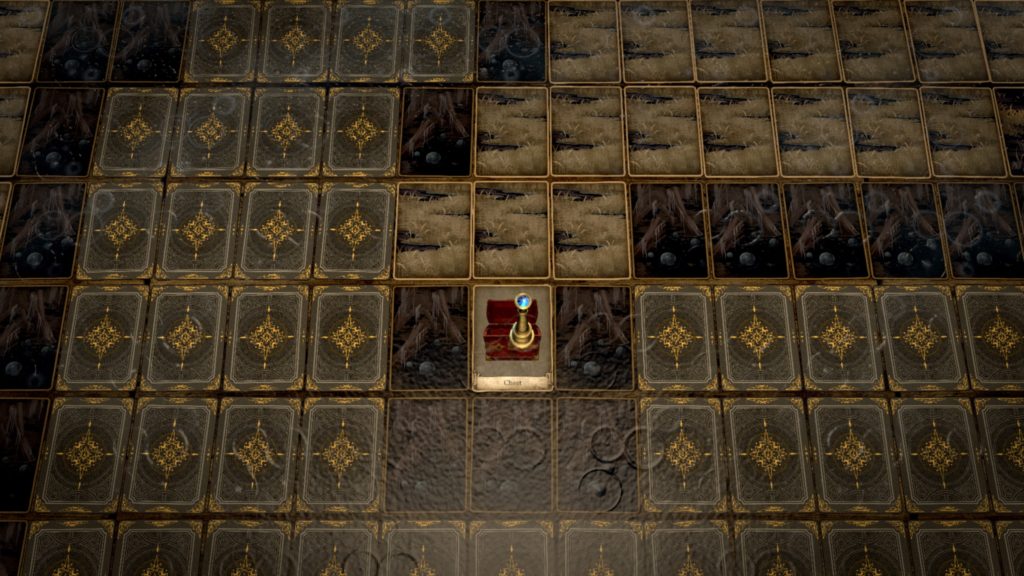
On the card in the southwestern corner of the area as shown in the picture below, an event involving a scrap of paper will trigger.
You’ll receive the Treasure Map key item! This treasure can be found in the Desert on the western side. Please see our Chapter 4 Walkthrough for the exact location.
In the southern part of the map, interact with the monster card to trigger a fight. Defeat the enemies to have a chance to obtain their cards!
Head north to find a chest containing a Panacea!
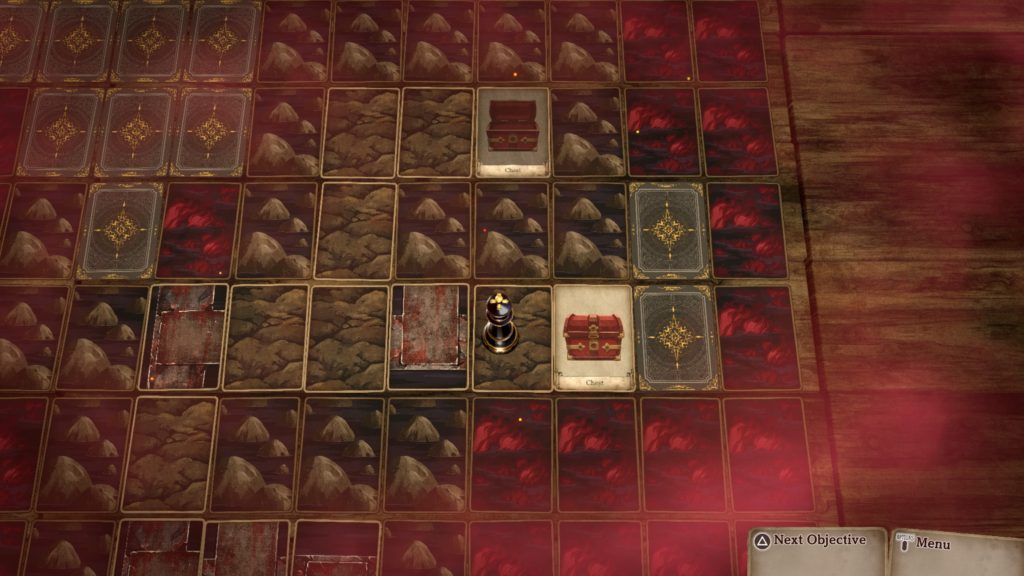
In the southeastern corner of the area, a chest contains a Bill of Godly Fortune!
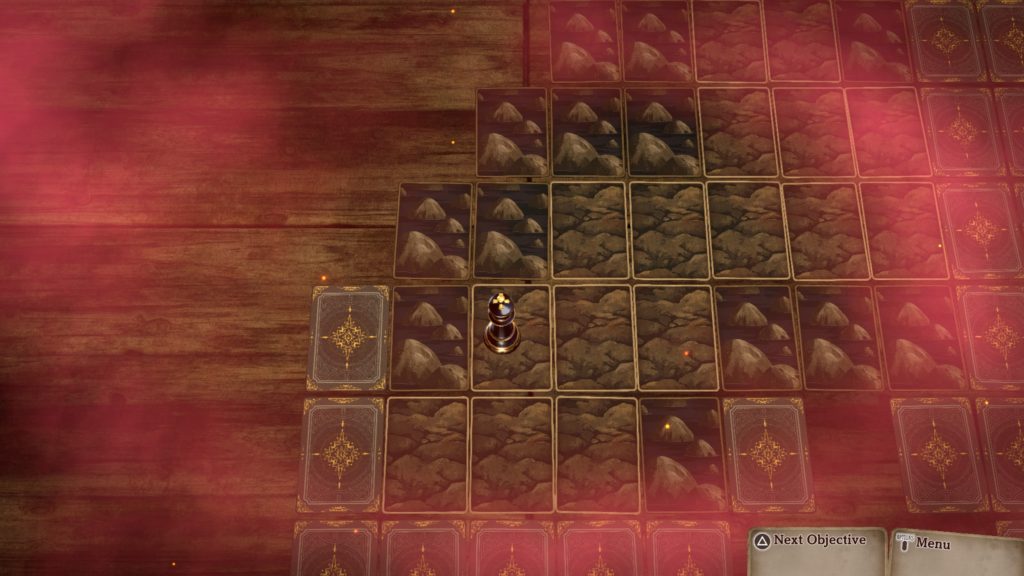
From the previous chest, head directly north to trigger a cutscene. Build bridges to make it across the fiery water! A chest containing a Firestay Ring can be found on the northeastern side of the area.
A chest containing a Bridge Part can be found just below the above chest!
Continue north towards the next glowing card. Interact with it to trigger a fight with the Flame Primal! It has 20 Attack, 150 HP and 12 Defense. The Firestay Rings will help immensely with this fight as it deals fire damage! As you almost defeat it, you’ll be given the option to dodge left or right. We dodged left and fell. Tralis jumped in the way and took the hit to save us. Afterwards, the whole team sealed away the monster! Head to the glowing card where the boss was to trigger another cutscene. With everything taken care of, return to the City of Flame.
City of Flame
Once in the City of Flame, a brief cutscene will trigger. When it does, head to the Manor in the southwestern corner of the area. In response to the aristocrat, tell them either choice as it does not matter. As for the solution, ask the Aristocrat. Newterra is a place! After the cutscene concludes, you’ll receive the Aristocrat’s flipside story. When you’re ready, head up to the orphans just north of the Pet Shop. We told them “You shouldn’t…” but they didn’t care. Next, speak with the Overheated Man, Ardent Woman, Orphaned Boy, Ambitious Lad and Knowledgeable Old Woman. You’ll then be tasked with leaving the city, however, it is warned that once you leave you’ll never be able to return. As such, make sure to take care of any business here before heading out! Once you exit the city, the chapter will complete!
After completing the above side case, interact with the TV to enter EDEN and travel to Kowloon Lv. 1.
Kowloon Lv. 1
Head to the park in the next area of Kowloon then approach Nokia to trigger an event leading the a battle against DemiDevimon and Gazimon. After you defeat them, head deeper into Kowloon. Once in the last area of Kowloon Lv. 1, Nokia will comment on how neither Agumon and Gabumon are not there. She’ll then request we check out Kowloon Lv. 2.
Kowloon Lv. 2
Work your way to the end of Lv. 2. Once there, Nokia will mention there is again no sign of the Digimon and will request you head to Lv. 3. Return to the first area of Kowloon Lv. 2 then head over to the firewall just past the access point. Use the Wall Crack hacking skill to remove the firewall. Take the green platform to reach Lv. 3.
Kowloon Lv. 3
An event will trigger as soon as you reach the area. When it concludes, head to Area 2.
Kowloon Lv. 3 Digimon
Betamon
Patamon
Tokomon
ToyAgumon
Tsunomon
In the second area, talk to the Obstructing Hacker blocking the path forward. You’ll receive the “How to get a girlfriend” keyword. Next, head down the left path to find a chest containing HP Spray C. A chest containing SP Capsule C x3 can be found on the northeastern side of the area. On the southwestern side, you can find a chest containing ATK Boost. Return to the previous area and follow the eastern path to reach another area. Speak with the Capricious Hacker down the stairs to receive the “Friend” keyword. Continue heading along the walkway east. You’ll come across the Cheerful Hacker. If you ask him how to get a girlfriend, you’ll receive “A Smile” keyword. Near that hacker there will be a chest containing HP Capsule C x3. If you jump down to a lower platform, there will be two guys talking. Approach them to receive the “Digimon” keyword. On the ground next to them, you can find a Ninjamon Medal. Next, follow the westernmost path north. Along the northern path, you’ll find a Stray Hacker whom you can ask how to get a girlfriend. They will give you the keyword “Mixer”. If you keep heading east from him, you’ll find a chest with Memory Up. Return back to the previous area and speak with the Obstructing Hacker. Tell him all 4 keywords. When he moves, follow the path north. Work your way through the next area, grabbing the chests along the way to find the below:
Topaz
Export
Revival Capsule x2
There is an Ikkakumon Medal on the first platform you can drop down onto. When you reach the next area, an event will trigger. Once it ends, head deeper into Kowloon Lv. 3. Approach the hackers and the Digimon to trigger an event leading to a battle against BlackGatomon and Goblimon. Defeat them to begin another event. This event will be followed by another fight against Devimon (virus) and 2 Meramon (data). Defeat them then enjoy the event.
Below is our walkthrough for Chapter 3 – The Tale of the Onix Maiden in the Voice of Cards: The Forsaken Maiden.
World Map
After the cutscene, you’ll be standing on the North Isle Pier. Head southeast to the glowing card directly east of Omega Village to continue the story. During the cutscene, take a peak at Laty’s diary to learn more about her. Afterwards, explore the eastern sea to find the below as you make your way to East Isle.
Events
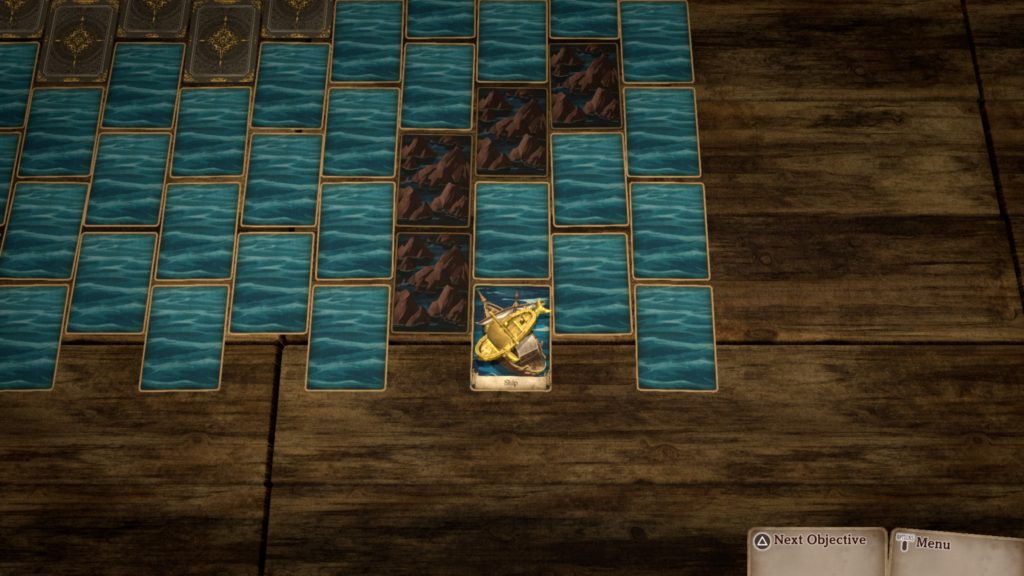
A chest floats by
We found this event on the above card. Make sure to grab the chest. Once you do, you’ll be attacked by lizard enemies. Defeat them to receive the Scratched-Up Key! You’ll need this key to open a cabin at a Shipwreck in the far northeastern corner of the eastern sea. You’ll have to complete the below Whirlpool event (see World Map Event below) to unlock this Shipwreck. After entering the cabin, you’ll receive the Ring of Compassion II.
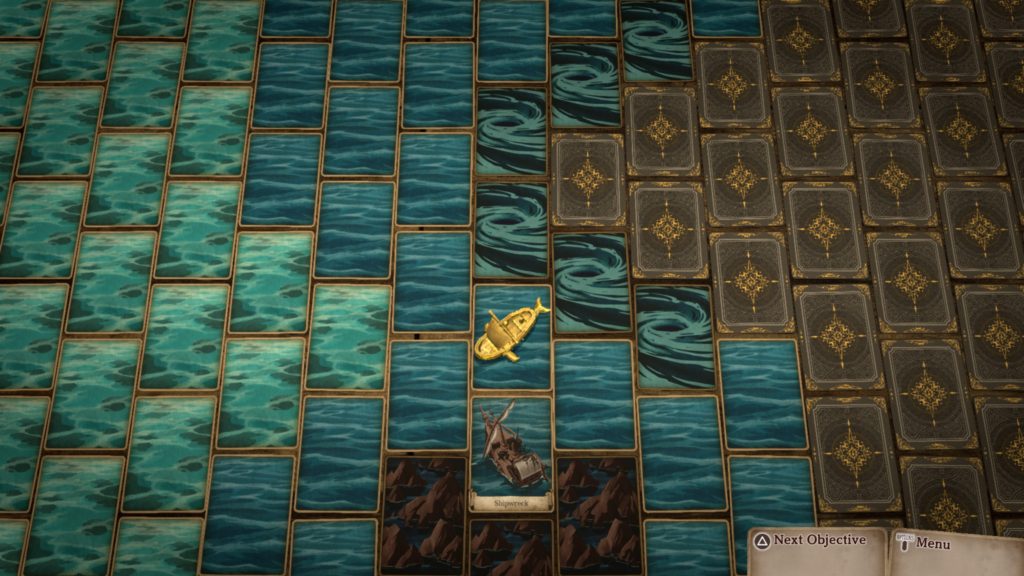
Ship in the southeastern corner of the eastern sea
He wants a shiny, round stone. You can find the Shiny Stone on the northeastern part of the East Isle during a Shipwreck Event (see East Isle Event below!). Give him the stone to receive Silvery Ore!
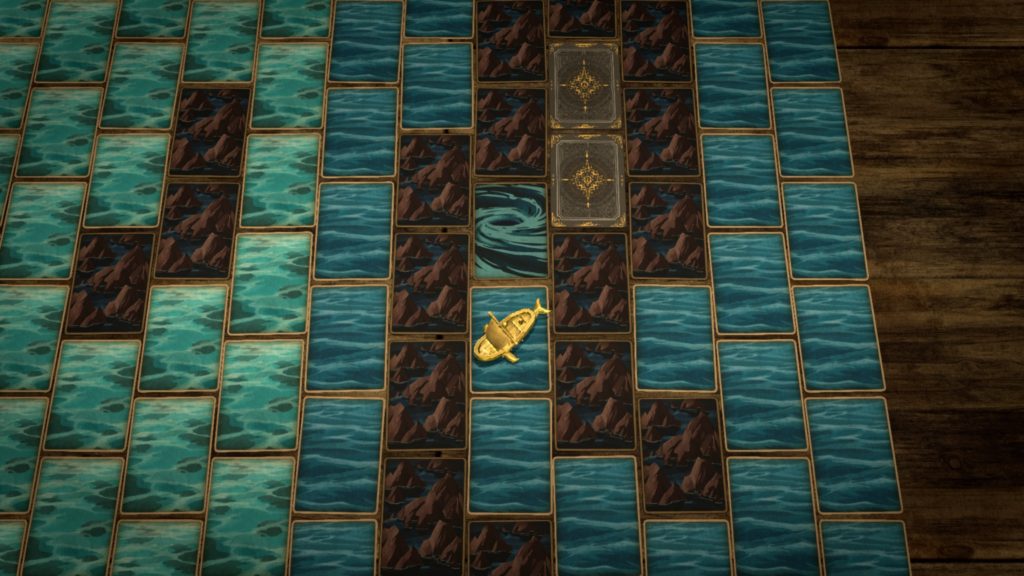
Whirlpool impedes your path
This event can be found just before a whirlpool card in the tunnel created by rocks on the northeastern side of the map. You’ll have the choice to scatter the pod. Select to get rid of the monsters. A battle with 4 worms will ensue. Defeat them to calm the sea. The whirlpool will subside, allowing you to continue down the narrow path and head to the Shipwreck.
Treasure
As you explore the eastern sea, land on the Shipwreck cards to receive the following:
1000G – Next to rocks in the central part of the eastern sea
Chunky Gold Nugget – Southern part of the eastern sea
Ring of Life II – Just past the whirlpool in the northeastern corner of the eastern sea. To subside the whirlpool, you’ll have to defeat the Worms guarding it (see World Map Event above). After obtaining this loot, you can use the Scratched-Up Key (see World Map Event above) to enter the cabin. You’ll receive the Ring of Compassion II.
East Isle
Dock at the northern shore of the East Isle then explore to find the below.
Event
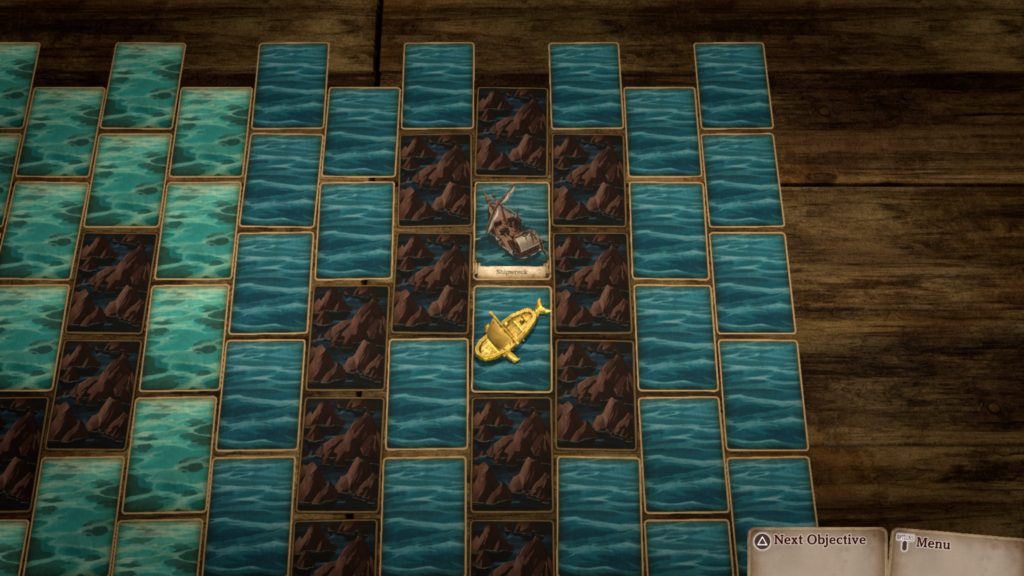
Shipwreck
This Shipwreck can be found on the far northeastern side of the island. Interact with this card to find a Man Outside Treasure Hold. He’ll need some sort of stick or something to get in. Hand over the Bent Stick, which you received during a World Event near the North Isle. For a guide on how to obtain this object, click here! As a reward, you’ll receive the Shiny Stone! You’ll then be able to bring this Shiny Stone to the collector in the southeastern corner of the sea below the East Isle.
When you’re ready, head to the East Isle Pier to continue with the story. Head east to find Fenmoss. As you approach the village, a cutscene will trigger and you’ll have to fight 3 lizard enemies that have 55 HP each! Defeat them! If you finish exploring East Isle, you can find the below chest!
Treasure
Freezestay Ring – Southeastern corner of East Isle
Fenmoss
Enter the village and explore to find the below.
People
Speak with the below people to receive their flipside stories.
Black-Clad Man near the entrance – Man in Black’s flipside story
Black-Clad Woman near the Item Shop – Woman in Black’s flipside story
Suspicious Man in northwestern corner – Suspicious Man’s flipside story
Shops
From the Armorer, you can purchase the below items.
Iron Sword – 200G
Mercenary’s Sword – 800G
Protector’s Sword – 8000G
Traveler’s Apparel – 200G
Adventurer’s Attire – 800G
Martialist’s Garb – 8000G
From the Accessory Shop, you can purchase the below items.
Ring of Protection – 300G
Poisonstay Ring – 900G
Numbstay Ring – 900G
Freezestay Ring – 900G
Bindstay Ring – 900G
Cursestay Ring – 900G
Gemstone Ring – 3000G
From the Item Shop, you can purchase the below items.
Salve – 20G
Quality Salve – 100G
Supreme Salve – 500G
Omnisalve – 160G
Quality Omnisalve – 500G
Antidote – 40G
Curative – 40G
Defroster – 40G
Unsealer – 60G
Dispeller – 60G
Pepper-Upper – 60G
Serum – 60G
Panacea – 280G
Inspirilixir – 800G
Invigorant – 180G
Protectorant – 180G
Soothstone – 1000G
Destruct-o-Box – 200G
Bellwether – 100G
Smoke Bomb – 100G
When you’re ready to progress the story, speak with the mayor who can be found on the western side of town near the shrine. After speaking with the mayor, exit the town and head northeast to the Wicked Wetlands.
Wicked Wetlands
After entering the Wicked Wetlands, head forward a short way to encounter Queni and Blight. You’ll then be able to freely explore this area in search of the flower. Continue forward a short way to find the Glowing Butterfly. As you make your way through the area, following the Glowing Butterfly, you’ll be able to find the below chests.
Treasure
Bellwether – Southeastern corner
Ring of Evasion – Central western side
Omnipanacea – Central part
When you reach the center of the spiral, a cutscene will trigger with the Glowing Butterfly. Afterwards, interact with the flower to trigger a fight with 4 enemies that have 48 HP each! They are weak to Fire and resist Wind and Lightning. Defeat them!
Afterwards, you’ll be teleported out of the Wicked Wetlands.
Fenmoss
Enter the town. After the cutscene, rest up at the Inn then head to the Maiden’s Shrine. Speak with everyone inside the shrine. Afterwards, a cutscene will trigger with the mayor. Exit the village and return to the Wicked Wetlands!
Wicked Wetlands
Once in the wetlands, head to the map transition on the far north side to reach the Fiends’ Nest. Once inside, you’ll have to stop the invasion. Start by heading to the Imp card with as little steps as you can! Interact with her card to begin a fight with 2 Imps that have 52 HP each. Defeat them! Next, travel to the Wind Wasp. For this one, you’ll need to defeat 3 of them. They each have 36 HP! Afterwards, head to the Killer Frog to begin a fight with 3 of them. They all have 42 HP! Defeat them then a short scene will trigger. The boss will move down and 2 more enemies will spawn. Head to the Lizard Warrior to begin a fight with 2 of them. They each have 50 HP. Defeat them then head to the Taurus. You’ll begin a battle with 2 enemies that each have 58 HP. Defeat these as well then it’ll be time for the boss! Head to its card to trigger a fight with the creature that has 250 HP! It is weak to dark. Defeat it!
Afterwards, head to the altar to find an egg. You’ll be asked if you’d like to break the egg and will be given the following options:
Smash It to Bits
Smash the egg to protect Fenmoss.
Just Leave It
Leave the Fiends’ Nest and return to Fenmoss to trigger a cutscene.
Fenmoss
Speak with all the male villagers then go to the Maiden Shrine to check on Queni. Speak with the people assembled to trigger a cutscene. Afterwards, the tale will complete!
Search
This site uses cookies. By continuing to use this website, you are giving consent to cookies being used. For more information on cookies, view our Privacy Policy.OkPrivacy Policy