Guides

Rain Code – Ch. 2 A Silent Curtain Call Walkthrough

by NightlyGamingBinge in

Welcome to our walkthrough for Chapter 2 – A Silent Curtain Call in Master Detective Archives: Rain Code!

Nocturnal Detective Agency

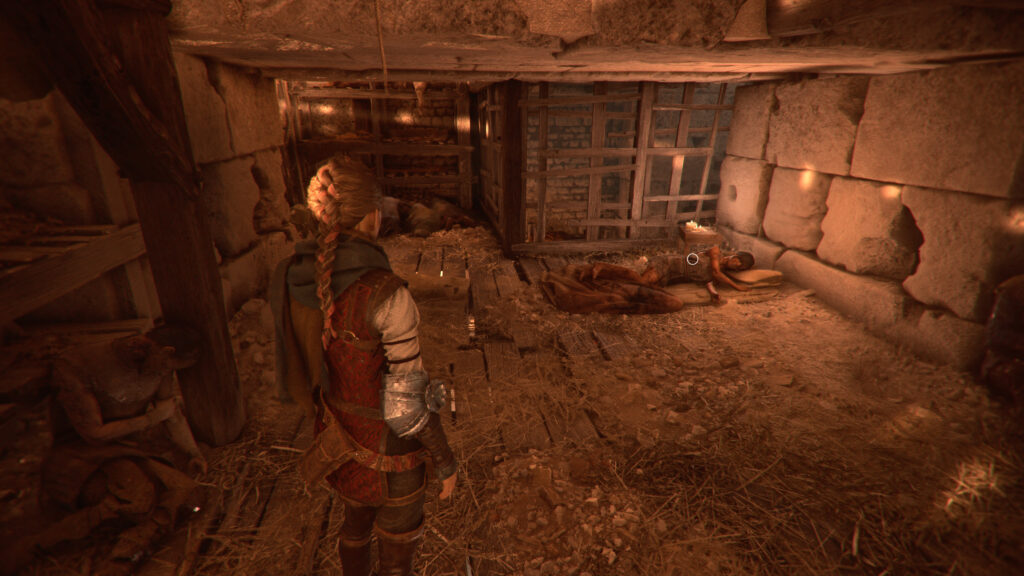
When you gain control of Yuma, speak with Halara who is sitting at the chief’s desk to trigger a cutscene. Soon after the chief will bust in through the door. Speak with him to see what’s up. Afterwards, you’ll need to clean up. Interact with the following:

  • Clean floor
  • Speak with Vivia
  • Clean bookshelf
  • Clean ashtray

After cleaning out the agency, you’ll be tasked with procuring some nourishment. The map will now open up and you’ll be able to collect requests! For a guide on these requests, click here!
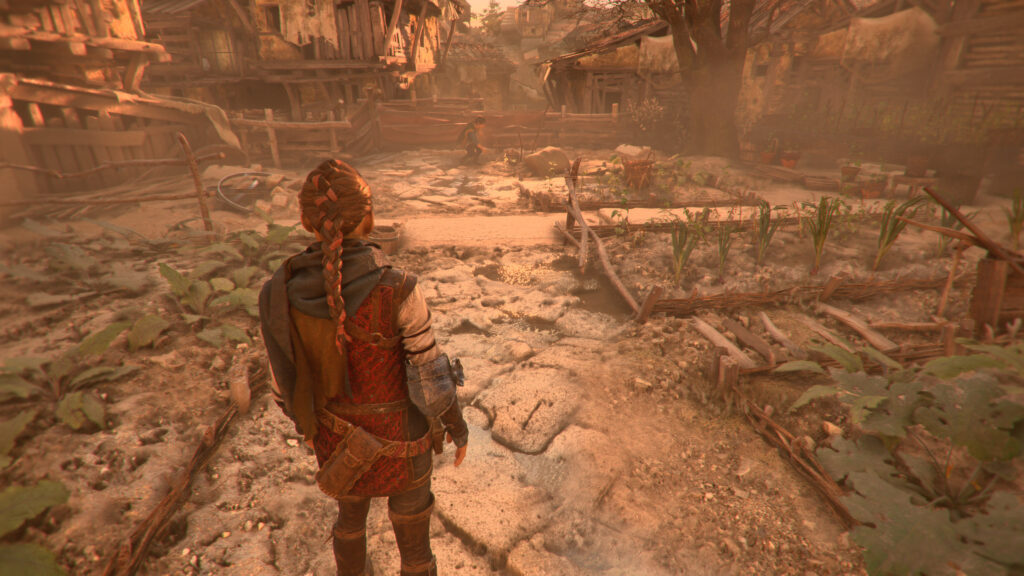
Kamasaki District

Once in the Kamasaki District, head to the southwestern side of the street level and approach the stall. After the quick cutscene, interact with the Meat Bun Shop. You’ll then need to follow Shinigami to the Underground Sector. Make sure to press the quick time event prompts as you make your way through the area! After a lengthy cutscene, interact with the Bus Stop to board the bus.

Aetheria Academy

Follow Kurumi up the stairs then speak with her. Before speaking with her again, head down the stairs to find a Memory Shard – Let’s Meet in Front of the Fountain next to the fountain! When you’re ready, speak with Kurumi again where Yuma will officially accept the request. After Shinigami refuses to help, Yuma will think about alternative detectives to assist him in the investigation and you’ll be prompted with a choice. Select the resident chick magnet, Desuhiko!

Ginma District

To find Desuhiko, speak with the following women:

  • Melancholic Woman next statue near the bus stop
    • Red Raincoat and Blue Jeans. Coat with white line
  • Composed Woman across the street from the above and to the left
    • Black Boots, No accessories
  • Long-Haired Woman down the alley next to Composed Woman
    • Red Coat. and Black Turtleneck. Metal on coat
  • Cheery Woman in the alley before the western stairs
    • Practice Dance at the Art Gallery

Make your way over to the Art Gallery where there will be 5 people dancing near the fossils. Speak with the guy dancing behind the right dinosaur fossil wearing the red coat, black turtle neck, blue jeans, black boots and no necklace. You’ll be rewarded 20 Detective Points for guessing the right one! When you’re ready, return to the academy by heading to the northeastern exit in the Ginma District.

Aetheria Academy

When you approach the gate leading to the school grounds, the game will prompt you with a warning that you’ll be stuck at the school for a while. Once you’re ready to progress the story, accept the prompt!

Aetheria Academy

Follow Kurumi to the theater and head inside.

Theater Hall

After the long cutscene, you’ll need to investigate the crime scene. Interact with the following:

  • On Stage
    • Karen’s Corpse
    • Table
      • Glass
      • Bottle
      • Poison Vial
    • Kurumi
      • Yoshiko
      • Waruna
      • Kurane
      • Karen
  • Theater Hall Backstage
    • Misplaced Script
    • Approach stairs

After inspecting all of the above objects, end the investigation to trigger an event. When it ends, speak with Martina then approach Desuhiko. The Cheerful Theater Member will quickly interrupt you then you’ll be able to speak with Desuhiko. During this conversation, you’ll need to select who you want to be disguised as. We selected Yoshiko first!

Yoshiko

As Yoshiko, head downstairs and avoid Yoshiko who is sitting on a bench behind the greenery. In the Theater Hall (Underground Storage), speak with the Prop Master and interact with the Water Gun Prop.

In the Theater Hall (Makeup Room), you’ll get yelled at by Waruna so prepare yourself then head on in.

Next up is the Theater Hall (Staff Room). You’ll find the Lighting Staff inside. Speak with her then interact with Yoshiko’s Locker. Afterwards, speak with Kurane. You’ll then be able to end the investigation! You’ll return to Desuhiko to select another girl.

Waruna

As Waruna, head downstairs and speak with Yoshiko on the bench behind the greenery.

Next, head to the Theater Hall (Staff Room). Inside, speak with the Production Manager and Kurane then interact with Waruna’s locker.

Afterwards, enter the Theater Hall (Underground Storage). Interact with the Water Gun Prop and speak with the Prop Master.

Last up, interact with the door to the Theater Hall (Makeup Room). Head to the hallway north of the Makeup Room to trigger an event. When it concludes, you’ll be able to enter the Makeup Room. Inside speak with the Foul-Mouthed Waruna Groupie and the Scared Waruna Groupie. Now that you’ve done everything that you can, end the investigation. You’ll return to Desuhiko to select another girl.

Kurane

As Kurane, head downstairs and speak with Yoshiko on the bench behind the greenery.

Next, head to the Theater Hall (Underground Storage). Inside, interact with the Water Gun Prop and speak with the Prop Master then the Costume Staff. When prompted, tell her to come grab us from the break room later. She’ll grab the real Kurane so head inside the break room! Speak with the Production Manager and the two whispering girls. Afterwards, interact with Kurane’s locker.

When you’re ready, make your way to the Makeup Room. Waruna will yell at you! Now that you’ve done everything, end the investigation.

Theater Hall

Enter the Administrative Office. Inside you’ll need to choose who to disguise yourself as. Select Martina! Once you’re Martina, enter Aetheria Academy.

Aetheria Academy

When in Aetheria Academy, you’ll begin your investigation. Head outside in the courtyard to find the Chubby Peacekeeper (has a 29 on his mask). Enter the Chemistry Lab next to check it out. Inspect the following:

  • Eyedropper
  • Medicine Bottle
  • Paintbrush
  • Speak with Loyal Peacekeeper

Make sure to grab the Memory Shard – Let’s Peek at the Microscopic World from the desk next to a microscope.

Next, you’ll be transported to the Staff Room. Interact with Karen’s locker and Waruna’s locker. Next, speak with the two whispering girls, Production Manager, Lighting Staff and Kurane.

Now that you’ve investigated everything, end the investigation and return to Desuhiko. After a cutscene, you’ll enter the Mystery Labyrinth.

Mystery Labyrinth

Once in the Mystery Labyrinth, follow along the long hallway and head through the door at the end. Next, head up the stairs to find a Mystery Phantom.

RDM: Repel

For this Reasoning Death Match, you’ll be introduced to the Repel mechanic. You’ll need to repel the following statement:

  • It’s clear who the culprit is
StatementSolution Key
At that moment, she mixed in the poison to commit the crime.Chemistry Lab Poison

Reasoning Death Match

Immediately after you defeat the above Phantom Ghost you’ll be thrown into another Reasoning Death Match!

StatementSolution Key
I put real poison in the vial…Poison Vial

Afterwards, you’ll need to choose between 3 routes.

How was the poison mixed into the glass?

Make your way through the blue door to choose this route then proceed down the long hall. Enter through the door at the end. Yuma will run from the boulders by slipping through the door that opens based on the answer you provide to the question. Below are the correct answers!

QuestionAnswer
When was the glass set on the stage?Before the play
When was the poison placed in the glass?During the play

Reasoning Death Match

After you survive the boulder, you’ll jump into back to back Reasoning Death Matches!

StatementSolution Key / Repel
She shot the poison straight into the glass!Wine Glasses
Then it has to have been Kurane!REPEL
She dripped the poison right in…Lighting Staff Testimony
She added the poison from her pocket!Costume Staff Testimony

How was the poison brought to the theater hall?

Make your way through the red door to choose this route then head down the long hallway. At the end, enter through the door. You’ll fly down the hall in a cart and again you’ll have to correctly answer the questions to escape.

QuestionAnswer
What was used to transport the poison?Paintbrush
What was the poison brushed onto?Another glass
What happened to the other glass?Switched with the used glass

Culprit Selection

After you survive the cart ride, you’ll need to select who the culprit is. It’s Yoshiko. She’ll take off down the hall. Chase after her to a classroom!

Mystery Labyrinth Option

When you arrive in the classroom, you’ll be presented with a question: What was the glass put in to be transported? The correct answer is A Pouch.

Reasoning Death Match

Next up is you guessed it… a Reasoning Death Match!

StatementSolution Key / Repel
Secretly in the dark!Yoshiko’s Actions

Once you’ve finished the match, continue down the long hall. At the end, you’ll find a dead end. Use her magic spell to leave.

How was the poisoned glass chosen?

Make your way through the orange door to choose this route then head down the long hallway. At the end, enter through the door. You’ll once again need to survive by correctly answering the below questions.

QuestionAnswer
Who shuffled the glasses during the Duel of Poisoned Cups?Waruna and Karen
Who chose a glass first?Karen
Which glass had the poison?The glass Karen chose

After you survive the room by jumping on the correct desks, continue down the long hall and enter the door at the end.

Mystery Labyrinth Option

Inside the door you’ll find Kurane and will be presented with the following question: Did Waruna know which glass had the poison? Select “No”. Afterwards, leave the classroom and continue down the hall.

Spot Selection

For this Spot Selection, look up at the spotlight above the stage and select it.

Culprit Selection

Choose Kurane during the culprit selection!

Reasoning Death Match

After you make your selection, you’ll partake in a Reasoning Death Match!

statementSolution key
You slipped the poison into the glass didn’t you!Lighting Staff Testimony

Mystery Labyrinth Option

Now that you’ve solved all the doors, press forward and head up the stairs. You’ll be asked the below questions.

QuestionAnswer
Was Aiko’s death six months ago suicide or homicide?Homicide
Where was Aiko murdered? Flower bed
What weapon was used to kill Aiko?Brick from the flower bed
Who murdered Aiko?Karen

After you successfully make it across the gap, continue down the hall and open the door at the end. Inspect the following items on the roof:

  • Peek in
  • Look into the distance
  • Look into the distance

Shinigami Puzzle

For this puzzle the question is “The only way the crime was possible was by having an …”. The answer is AC – CO – MP – LI – CE!

Mystery Labyrinth Option

After you solve the puzzle, you’ll be transported back to the room with the 3 colored doors. Select the following options when prompted:

  • Red door
  • Handed it to Waruna
  • Kurane guided to it
  • Yoshiko, Waruna, and Kurane

Now that you’ve discovered the Who room, head down the green hallway and enter the door at the end.

Last Stand

You’ll reach the phantoms’ fort. Charge at the fortress kicking balls, tackling through walls and jumping over the spikes. As you go you’ll come across walls with phrases that you’ll need to use a solution key on. These solutions can be found below.

PhraseSolution Key
There’s no reason for us to team up!Two Shot Photo with Yoshiko
There’s nothing connecting us!Two Shot Photo with Waruna
We have nothing to do with each other!Two Shot Photo with Kurane
There is…no bond between us!Group Photo

Deduction Denouement

With all the mysteries solved, it’s time to put everything together. To solve how the whole crime played out, you’ll need to create the book. The table below lists which Solution Key goes on which page. When you’re done a scene will play out going through the whole incident.

PageSolution
Part 01 Origin of the Case (1)Brick
Part 01 Origin of the Case (2)Suicide by Jumping
Part 03 Poisoned Glass (Left)Poison
Part 03 Poisoned Glass (Right)Chemistry Lab
Part 04 Swapped GlassesGlasses are Swapped
Part 05 Guidance to Glass (1)Spotlight
Part 05 Guidance to Glass (2)Note in Script
Part 06 Culprit’s IdentityAiko

Abandoned Building (Rooftop)

After the long cutscene, speak with Kurumi to learn more about Amaterasu’ research.

???

After the long cutscene, you’ll find yourself in a mysterious room. Explore the room then exit the room via the double doors to trigger another cutscene during which the chapter will end!

For more guides and walkthroughs on Master Detective Archives: Rain Code, click here!

Octopath Traveler 2 Logo
Guides

Octopath Traveler II Ochette Chapter 2 Cateracta’s Route

by NightlyGamingBinge in

Ochette is on a quest to find three Creatures of Legend to protect her home from the impending Night of the Scarlet Moon. During Ochette’s Chapter 2: Cateracta’s Route in Octopath Traveler II, she’ll head to Conning Creek for an unexpected encounter. Please note that the recommended level for this main story is 15.

Conning Creek

After kicking off Cateracta’s Route, head north up the path to reach Conning Creek: Harbor.

Conning Creek: Harbor

Once in the harbor, make your way to the beach to trigger another event. Provoke Alpione to gain access to the dock. She’ll have a strength level of 4/10. Once she’s successful knocked out, head to the dock and make way for the dock on the large island. Alpione will explain the situation with Cateracta then head into the nearby cave. Follow her inside.

Cavern of the Sea God

In this area, you’ll find the below! For the story, you’ll need to make your way through the cave to find Alpione at the end. She’ll tell you the story of what happened to Cateracta. When her tale is through, head to the sandbar in the center of the room to witness a miracle.

Chests

LootLocation
Empowering Lychee (M)East of the savepoint
Rabbit ShieldDown the path east of the bridge
Healing Grape BunchJust past the bridge
6000 leavesAfter passing the bridge go down the stairs then head west

Enemies

NameVulnerable
Azure UrchinAxe / Staff / Light
Sea ScorpionAxe / Staff / Fire / Light
Sea SnakeSpear / Axe / Fire / Dark
Shadow BatSword / Spear / Bow

For more guides on Octopath Traveler II, click here!

Octopath Traveler 2 Logo
Guides

Octopath Traveler II Throne’s Chapter 2 Mother’s Route

by NightlyGamingBinge in

Throne is on a quest to secure her freedom from the Blacksnakes. During Throne’s Chapter 2: Mother’s Route in Octopath Traveler II, she’ll head to Oresrush to learn more about Mother’s whereabouts. Please note that the recommended level for this main story is 7.

Oresrush

Make your way to Oresrush in the Wildlands. Once there enter the red building between the general store and the inn to trigger an event. Afterwards, head north and enter the tavern to find the Shifty Man. Steal the Horse Coin from him then make your way back to the saddlery. Speak with the Saddlery Owner behind the counter. He’ll tell you that Mother was meeting the slaver in the Foundry. The special phrase is “Drink from the cup in your left hand.”

Oresrush: Foundry

Head north to reach the Foundry. Once you enter this area, a brief cutscene will trigger. Head down the stairs to the left leading to an alley which will trigger another event. Interact with the Masked Boy and steal his mask. When the boy runs off, head north and interact with the Lookout in front of the foundry. Throne will automatically give the secret phrase and you’ll enter the foundry to witness an event with the Slaver. He’ll tell you where Mother went if you best him. When you’re ready to begin, speak with the Slaver and select “yes” to sit at death’s table. During the game, you’ll have to choose between the left or right cup. Chose the right! He’ll tell you that mother hides in Wellgrove.

For more guides on Octopath Traveler II, click here!

Fire Emblem Engage Logo
Guides

Fire Emblem Engage – Prologue, Chapters 1, 2 & 3 Walkthroughs

by NightlyGamingBinge in

Below are walkthroughs for the Prologue, Chapter 1, Chapter 2 and Chapter 3 in Fire Emblem Engage. Please note that these chapters are mainly tutorials and little exploring can be done.

Prologue

Just after the first cutscene during the Prologue: The Emblems in Fire Emblem Engage, you’ll begin a tutorial fight with an unknown foe. Defeat the foe following the tutorial prompts to trigger another cutscene leading to the end of the Prologue.

Chapter 1

In Chapter 1: Awake at Last, a battle will ensue following the conclusion of the cutscene. You’ll receive additional tutorials during the fight. Be sure to pay attention and use them to your advantage to defeat the enemies. Post battle, you’ll be able to explore the grounds of the Lythos Grasslands. Speak with everyone if you wish and examine the shiny spots around the area to find items. When you’re ready, leave the area to begin the next chapter.

Chapter 2

At the start of Chapter 2: Queen Lumera, a lengthy cutscene will play out followed by a fight against Lumera. Defeat her to trigger another battle. Once again, defeat the queen who will be using a ring containing Sigurd this time. More tutorials will be shown during this fight. Again, use them to your benefit to win the battle. Post battle you’ll receive the Liberation sword and will be transported to the Lythos Castle Gardens. Speak with everyone if you wish then explore the area to retrieve items. Depart the area when you’re ready to begin the next chapter.

Chapter 3

After the cutscene at the start of Chapter 3: Hostilities, a battle will trigger. Defeat some of the enemies to trigger a cutscene with Alfred. He will join the fray with his retainers, Etie and Boucheron. When the battle resumes, defeat the enemies! After the cutscene, you’ll find yourself in the Ring Vault. Explore the area looking for items and speaking with people then depart when you’re ready to begin the next chapter.

Click here for the next walkthrough on Chapter 4 in Fire Emblem Engage!

Trails from Zero Walkthroughs
Guides

Trails from Zero – Chapter 2 Walkthrough – Part 2

by MrsChappie in

Below is the second part of the walkthrough for Chapter 2 in The Legend of Heroes: Trails from Zero. In this guide, we’ll cover how to move through the objectives during this section of Chapter 2. In addition, we’ll point out all the enemies, treasure chests, recipes, books and support requests you can find as you make your way through Crossbell, Bellguard Gate, Ursula Road, Mainz Mountain Road, Geofront – B Sector and Stargazer’s Tower!

Crossbell

When you gain control at the start of the chapter, check out the terminal in the SSS building to find the below support request!

Complete these support requests then turn them in at the terminal in the SSS. With that out of the way, you can then explore Crossbell to find the below.

  • Books
    • Back Alley Doctor Glenn – Ch. 4 – Residential District – Speak with Helmer twice on the second level of the MacDowell Estate (Elie’s house)
  • Recipes
    • Sweet Cake – Residential District – MacDowell Estate (Elie’s house) – Interact with the bookshelf in the bedroom on the western side of the second floor

  • Fish
    • Harbor District
      • Azelfish (Feather Tackle, Red Flies)
      • Trout (Feather Tackle, Roe)
      • Salmon (Feather Tackle, Roe)

While exploring make your way to the Administrative District and enter the CPD building. Speak with Receptionist Rebecca behind the counter and show her your Combat Notebook to receive 500 mira and U-Material (if you’ve scanned everything so far!).

Bellguard Gate

Once you’re done exploring Crossbell, make your way to Bellguard Gate to find the below.

  • Books
    • Back Alley Doctor Glenn – Ch. 5 – Speak with Guardsman Brood who can be found in the first room to the left (south) of the second floor

Ursula Road

With your new pole, you’ll be able to fish up new fish at the fishing area near the entrance to Crossbell!

  • Fish
    • Kasagin (Feather Tackle, Red Flies)

Mainz Mountain Road

With your new pole, you’ll be able to fish up new fish at the fishing area near the entrance to Crossbell!

  • Fish
    • Rainbow Trout (Feather Tackle, Roe)

Crossbell

If you’ve gotten all of the fish, head over to the Fisherman’s Guild on East Street and speak with the Branch Manager to receive the 2nd Class Fisher Certificate and Luck quartz!

When you’re ready to progress the story, head to the IBC in the Harbor District to trigger a cutscene. When it ends, head inside the IBC and speak with Receptionist Lanfei at the information counter. She’ll give you the IBC ID Card. Next, enter the nearby elevator and head up to 1GF. Enter the office at the end of the hall to trigger a cutscene. Once it ends, enter the elevator. After you exit the elevator, head down the stairs and enter the terminal room. A cutscene will trigger. When it ends, exit the building then head to City Hall in the Administrative District. Once inside, speak with Receptionist Shion behind the desk to receive the Geofront B Key. Make way to the Residential District next and head down the stairs to reach a blocked off door.

Unlock this door using the Geofront B Key then head inside.

Geofront – B Sector

Explore this area to find the below!

  • Treasure Chests
    • Each Sepith x80
      • From the first area with all the water, head straight ahead (east) and follow the path to reach a chest on an outside balcony.

    • U-Material
    • EP Charge
    • Teara Balm
    • Monster Chest – Soldier Suit
    • Monster Chest – EP Cut 2 quartz
    • Curia Balm
  • Enemies
    • Blood Monad
    • Geenewna
    • Jet Tortoise
    • Torso B

After the rest spot, a boss fight will trigger against Level 18 Torso Deluxe and its 4 Torso B companions. Defeat them all then continue forward to trigger a cutscene. Select to “Peer Inside” the door to trigger a lengthy cutscene. When it concludes, examine the pizza on the table to receive the below recipe!

  • Recipe
    • Melted Cheese Pizza

Afterwards, exit the Geofront via the ventilation shaft outside of Jona’s room and head to the CPD in the Administrative District. Speak with Vice Commissioner Pierre in the conference room to receive the below quest!

Complete this quest and make sure to report it to the terminal in the SSS!

Ursula Road

When you’re ready to progress with the story, head to Ursula Road. Once on Ursula Road, head to the second area and take the western path to Stargazer’s Tower. In this area you’ll find the below!

  • Treasure Chests
    • Monster Chest
      • 2 Level 25 Gordi Ossa
    • Teara Balm
    • Curia Balm
    • Cast quartz
  • Enemies
    • Baboon Monkey
    • Army Pineapple
    • Star Beetle
    • Blade Bananan
    • Gordian

Stargazer’s Tower

Once at Stargazer’s Tower, a brief cutscene will trigger. When it concludes, head towards the tower and approach Sergeant Major Seeker to trigger another cutscene. Afterwards, enter the tower! Head forward to the next area to trigger a cutscene against 2 Level 21 Living Armor. Defeat them both then continue forward exploring the area as you go to find the below.

  • Treasure Chests
    • Reviving Balm
    • Monster Chest – Stamp Jumpers
    • Proxy Puppet
    • Celestial Balm
    • Monster Chest – 3 Level 40 Iron Stark
    • EP 2
    • Curia Balm
    • Teara Balm
    • Monster Chest – Holy Chain
  • Enemies
    • Living Axe
    • Living Shield
    • Living Armor
    • Parrot Snake
    • Shadow Beast
    • Death Slugger

A rest spot will be on the 6th floor. Once you’ve rested, head up the stairs for the boss fight against Level 21 Yin. He’ll spawn a clone! Make sure to scan BOTH of the Yins! When fighting focus on the original Yin as he’ll just keep spawning clones if you defeat them. Once you’ve defeated Yin, you’ll be asked the following question:

  • What does Yin’s business with the SSS have to do with?
    • Arc en Ciel
    • Revache & Co.
    • The threat letter
  • What about the letter does Yin want to discuss?
    • The writing style
    • The author
    • The real purpose

Crossbell

When you gain control, speak with the two people in the lobby then head up the stairs and enter the eastern door. Again, head up the stairs then peek inside the door at the top. Next, make your way back to the lobby. Look inside the golden double doors then head to the western door. Head up the stairs and look inside the door at the very top. Return to the lobby and enter the door on the southwestern side. Head into the two rooms in this area and speak with the lady in the southwestern room. Return to the lobby and a cutscene will trigger ending Act 1. You’ll need to do this same patrol 2 more times. During the final act, you’ll be tasked with checking on the attendee. Head up the stairs towards the golden double doors then enter the eastern door. Head up the stairs to trigger a LONG cutscene leading to the end of this chapter.

A Plague Tale Requiem Walkthrough
Guides

A Plague Tale: Requiem – Chapter 2 Collectible Walkthrough

by MrsChappie in


Below is a walkthrough for the collectibles found during Chapter II: Newcomer in A Plague Tale: Requiem.


Souvenir: Best Player

During the Walk to the House objective, head through the town, passing the crier, to make it to the market. After exiting the pavilion crowded with merchants, Hugo will run up to a flower stall. Down the path to the left of the flower stall you’ll see a fish stall. At the fish stall, take a right and follow the path to the end to find a game stall. Win the game to find the Souvenir: Best Player


Souvenir: Be at Peace

During the Follow the Order’s symbols objective, you’ll reach a large open outdoor area. A quick event where an archer shoots a dead body and another guard comments about it will trigger. You’ll need to sneak through this area and enter a doorway with a symbol above it just past the archer. Head through the building until you reach a set of stairs. Head up the stairs and take the right path.

Follow it to the end to find a woman still alive laying on a bed on the ground.

Interact with her to receive the Souvenir: Be at Peace.


Hugo’s Collection: Arrowhead

After exiting the underground arena, your objective will update to Reach the South Tower. Follow the path a short way to reach a vegetable garden. The garden will be under the tree. Lucas will bend down and point it out.

Collect the flower he pointed out!


Click here for the next walkthrough on the collectibles in Chapter 3 of A Plague Tale: Requiem.


Guides

Digimon Story Cyber Sleuth – Chapter 2 Walkthrough

by NightlyGamingBinge in

Below is a walkthrough for Chapter 2: Search for the Father: Yuuko Uamashina in Digimon Story Cyber Sleuth: Complete Edition!

Detective Agency

When you gain control of the sleuth, head to the whiteboard and interact with it. You’ll then be given a quick tutorial on how the whiteboard works. Afterwards, select the “Top Quality Beans” case to start investigating it. When you’re done with the agency exit the room.

Broadway 1F/2F/3F/4F

Upon entering the hallway an event with Mirei will trigger. When it ends, head to the lady standing by the door to the detective to receive all of the DLC for playing the complete edition. Next, you’ll want to introduce yourself to the various workers of the mall. Below you can find a list of them and where they can be found. You’ll for sure want to speak with Nokia on Broadway 2F and the K-Cafe Owner in the K-Cafe on Broadway 4F. Please note that you can find a Digimon medal down the hall to the right of the Card Shop. There is also someone playing at the arcade in the row to the right of Oruru. Speak with them will net you a ToyAgumon Medal.

Nakano Persons of Interest

  • Broadway 1F
    • Shopkeeper
  • Broadway 2F
    • Card Shop Guy
    • Nokia*
  • Broadway 3F
    • Used Bookstore Lady
    • Takoyaki Stand Owner
  • Broadway 4F
    • Oruru (in the arcade)
    • K-Cafe Owner / Part-Timer Sacchan
    • Medal Man (hallway left of the K-Cafe entrance)

After retrieving the coffee beans from K-Cafe, return to the Detective Agency and interact with the whiteboard to close the case. This will trigger an event. When it ends, leave the Detective Agency.

Broadway 1F / DigiLab

Now would be a good time to make a pit stop at the DigiLab by using the phone in the hallway outside of the Detective Agency. You can rearrange your party and heal up your Digimon if needed. When you are ready, head for the Nakano exit to reach the map and travel to Shinjuku.

Shinjuku Station Square

As soon as you reach Shinjuku speak with Arata who can be found nearby. When that conversation is done, make your way to the northwestern part of the area near the Downtown map transition to find an Arcadiamon Medal on the sidewalk then head east from there to find two students with exclamation marks above their heads. Speak with them to meet Ryota and Sakura. When you’re finished talking to them, return to the Detective Agency in Nakano to report your findings to Kyoko.

EDEN Entrance

Use the TV in the Detective Agency to log in to Eden then head to the EDEN Entrance. Speak with the people who have red locks above their heads using the “Account Raiding” keyword. The Flash Dude at the top of the first flight of stairs will mention that someone in Kowloon should know about it. This also unlocks the “Zaxon” keyword. Return to the log out pad and use it to travel to Kowloon Lv 1.

Kowloon Lv. 1

Head for the park then speak with the Sad Ex-Zaxon Hacker near the stack of tires and use the “Zaxon” keyword. He’ll give you the URL to the Zaxon Forum. Return to the log out pad and travel to the Zaxon Forum.

Zaxon Forum

First head to the back left side of the area to find a Mojyamon Medal then speak with the Reliable Zaxon Hacker wearing the green hoodie. Use the “Account Raiding” keyword and he’ll point you to Kowloon Lv 2. Return to the log out pad then make your way to Kowloon Lv 1.

Kowloon Lv. 1

Work your way through the various areas in Kowloon Lv. 1 until you reach the area with the firewall in the center of it. Approach the firewall and use the Wall Crack hacking skill to remove it. Collect the YukimiBotamon Medal on the ground to the left of the green platform then use the platform to reach Kowloon Lv 2.

Kowloon Lv. 2

Follow the path north to reach the next area. Continue heading deeper while keeping an eye out for 3 chests. Just before the exit to the next area, a group of hackers will be blocking your path. When prompted, choose “Show Zaxon Mask” and they’ll let you pass. In area 3 there are 2 chests and a medal. You may also want to follow the bottom right path first into the next area to open a secluded chest. When you’re ready to progress with the story, follow the left path to reach more Zaxon hackers blocking the way. Again, show them the mask to get them to let you pass. In area 4, you’ll need to show your mask again and there will be 3 chests to grab. As you approach the steps leading to an access point, you’ll be introduced to the support skills tutorial. Feel free to use the access point to heal up or shuffle around you’re party. Might also be a good idea to save here if you haven’t. When you’re ready, press on to the next area and follow that path to the end to trigger an event. After the event, you’ll be battling a Growlmon which is weak to vaccine type Digimon. After defeating it, you’ll be sent back to the Detective Agency for an event.

Kowloon Lv. 2 Chests/Medals

  • Area 2
    • HP Capsule C x2
    • Revival Capsule
    • Topaz
  • Area 3
    • Dodomon Medal
    • SP Capsule C x2
    • Export
  • Area 4
    • ATK Attache E (via bottom right path in area 3)
    • HP Capsule C x3
    • SP Capsule C x2

Detective Agency

When you gain control of your sleuth, check out the following cases on the whiteboard:

After accepting the case, you’ll enter a dialog event with Kyoko. You’ll get the “Mysterious Digital Face” keyword. Interact with the TV to log into EDEN and travel to Kowloon Lv. 2.

Kowloon Lv. 2

Head to Area 3 and speak with the Whimsical Hacker in the northwest corner to give him the keyword. If you wish, you can speak to the other hackers along the way. The Whimsical Hacker will give you the “Police-Hating Hacker” keyword. Return to Kowloon Lv. 2 – Area 1 to log out of EDEN.

Shinjuku

Leave the detective agency then head to the entrance of the mall and use the map to travel to Shinjuku. Once there, you’ll have a quick call with Kyoko. Afterwards, head to the northwest corner of the area and head to the Shinjuku Downtown entry. Speak with the police officer and use the keyword. Head back to the Station Square near where you first arrived at Shinjuku to find a man wearing a vest next to the access point. Speak with him.

EDEN

When the event ends, you’ll be in EDEN. Approach the Suspicious Man and speak with him again. This will lead to a battle against a Vegiemon. It’s weak to fire and vaccine-type Digimon. After the battle, another event triggers. When it concludes and you regain control of your sleuth, return to the whiteboard to complete the case.

Broadway 1F

Exit the detective agency and follow the hall left. Pass the Big Yard Shop. You should see a guy with a blue shirt leaning against the wall. Speak with him then head over to the nearby vent on the ceiling and interact with it for a quick event. Return to the detective agency.

Detective Agency

Interact with the whiteboard to pick up the Time Capsule Snow Woman case. After accepting the case, an event triggers.

Broadway 4F

Head up to the 4th floor and enter K-Cafe. Speak with the owner behind the bar to trigger a dialog event. When it completes, interact with the wall in the cafe to trigger another event.

Digital Space

Head to the north side of the area to find a Lv. 1 Firewall. Use your Wall Crack hacking skill to remove it. Take the teleport pad behind it to reach a chest containing HP Capsule C x3. Return to the previous room and take the teleport pad on the left. Keep following the path. It will eventually bring you to an access point just before another teleport pad. If you head past the pad, you’ll find a treasure chest containing HP Attach E. When you’re ready, step on the pad to continue forward. Speak with the girl to trigger a fight against Frigimon. After the cutscene, interact with the whiteboard to complete the case. The chapter will also conclude here!

Click here for the next walkthrough on Chapter 3: Digital Monster in Digimon Story Cyber Sleuth: Complete Edition.

Fire Emblem Warriors Three Hopes
Guides

Fire Emblem Warriors: Three Hopes – Black Eagles – Prologue: Ch. 2 Support Points

by MrsChappie in


In Fire Emblem Warriors: Three Hopes, support points signify the strength of a bond between two units. Units gain support points by giving appropriate answers in conversations, performing actions that make the other happy, or heading into battle together. The options that grant support points during the Prologue: Chapter 2 – Three Houses are shown below in this pinky purple color. Please note that we chose the Black Eagles House for this playthrough. For guides on other houses, click here!


Cutscene – Garreg Mach

Rhea

  • Show some pride
  • Remain humble.


Rhea

  • Turn her down.
  • Express interest in her offer.


*THIS IS WHERE YOU CHOOSE YOUR HOUSE* For this playthrough, we chose the Black Eagles!


Jeritza

  • Greet him.
  • Admire his ability.


Caspar

  • Agree (increases Dorothea)
  • Raise an eyebrow. (increases Ferdinand)


Edelgard

  • Express quiet confidence
  • Fire off a quip. (increases Hurbert)


Caspar

  • Suggest you hold back. (increases Bernadetta) 
  • Suggest you charge forth. (increases Caspar)


Cutscene – After Battle

Edelgard

  • Agree wholeheartedly.
  • Agree halfheartedly.


Petra

  • Correct her misunderstanding.
  • Look puzzled.


Arval

  • Dash off without a word.
  • Mention Tomas before you run off.


Click here for the next walkthrough on the Prologue: Chapter 3 – The Shadows of Adrestia in Fire Emblem Warriors: Three Hopes!