Baldur's Gate 3 Logo
Guides

Baldur’s Gate III – Shadow Cursed Lands Quests

by NightlyGamingBinge in

The Shadow Cursed Lands is the first area you’ll come to during Act II of Baldur’s Gate III. This guide will cover the quests you can find in the Shadow Cursed Lands along with what you’ll need to do to complete them.

Find Arabella’s Parents

You’ll get this quest after finding Arabella just west of Mason’s Guild in the cemetery. She’ll ask you to help find her parents and then ask if she can stay with you until then. If you agree, most of the party will approve. Travel west of the cemetery to reach the House of Healing then head inside. Speak with Sister Kidwin to locate her parents. Return to your camp and speak with Arabella to let her know what happened. You’ll then need to wait a bit then check up on her in camp. When you return, Withers will be speaking with her. Talk to them both and Withers will say she needs to leave in order to learn how to control her power. If you agree with him, then he will show the girl her future which makes her happy. The quest will be completed and she’ll then reward you with an uncommon ring.

Find Mol

After the attempted kidnapping of Isobel, Mol will be taken during the fight. Speak with the kids near the kitchen and tell them you’ll get her back. This quest will be updated during the Defeat Ketheric Thorm main quest. Upon searching the area under the castle, Mol is nowhere to be found…

This quest will be carried into Act III. While exploring the Lower City of Baldur’s Gate, you’ll come to the Guildhall (in the Lower City Sewers) while following Jaheira’s companion quest or if you pick up the Aid the Underduke quest. It is there where you’ll learn about the fate of Mol finally completing this quest.

Find the Nightsong

This quest is a continuation of the Act I quest with the same name (you can view the first part here). During the main story quest objective, Infiltrate the Cult of the Absolute, Disciple Z’rell will task you will backing up Balthazar in Mausoleum. If you use the key to enter Balthazar’s room, you can head over to the bookshelf and look for the Protruding Book on the bottom right side. Interact with it to unlock the altar to the right of the bookshelf. Next loot the corpse in the room or Viscera’s pile of flesh for a heart then interact with the altar and combine the heart with it. This will open a secret door behind the bookshelf. Head inside and read the Research Notes. This will tell you that Balthazar was sent to the Mausoleum to find the Nightsong giving you this objective.

To push forward in this quest, you’ll need to complete the Chosen of Shar objective for Shadowheart’s Daughter of Darkness companion quest. You can check out the guide for it here!

When that is done, you’ll find the next part of this quest in Baldur’s Gate during Act III. Click here for our guide on it!

Find Zevlor

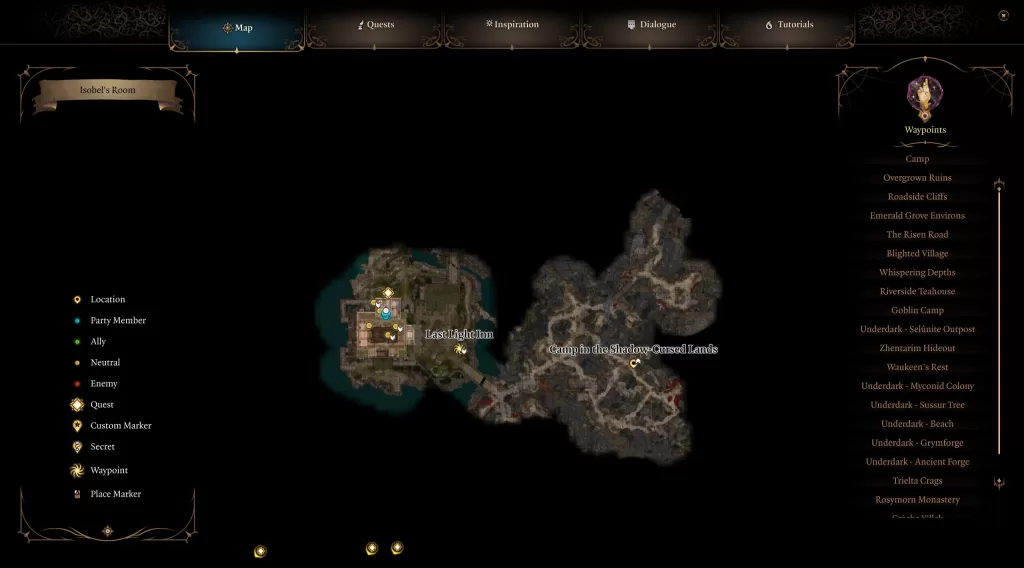
Head to Last Light Inn and speak with Cerys there to learn that Zevlor is missing. This will trigger the quest. You won’t be able to find Zevlor until you start the Defeat Ketheric Thorm main quest near the end of Act II. Check here for its guide where we’ll cover how to find Zevlor.

Kill Raphael’s Old Enemy

Travel to the Mausoleum Entrance located in the southwestern part of the Shadow-Cursed Lands near the Moonrise Towers to find Raphael. Speak with him (make sure to bring Astarion if you still have him) to learn that his old enemy is nearby and that you should not try to reason with it, but kill it. When you’re ready, head through the Mausoleum Entrance. To complete the quest, check out the Kill the Orthon objective in our Pale Elf guide here.

Lift the Shadow Curse

When you reach the Shadow-Cursed Lands, travel to your camp and speak with Halsin there. Bring up the curse to learn more about it also triggering the quest. Halsin will also tell you we need to find Thaniel if the curse is to be lifted. To start, travel to Last Light Inn and enter the inn. Head into the room on the north side of the building to find Art Cullagh lying on a bed. You’ll need to complete the quest Wake Up Art Cullagh before you can proceed. When that’s done, head back to Halsin and tell him about Art then meet him at Last Light Inn where you’ll speak with Art together. After the conversation, meet Halsin at the lakeshore on the northern side of Last Light.
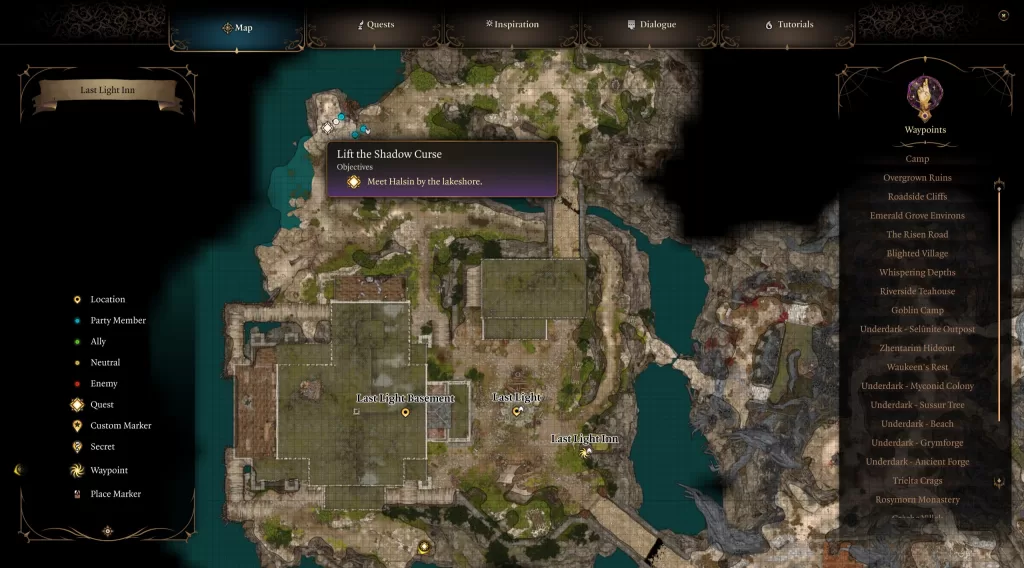
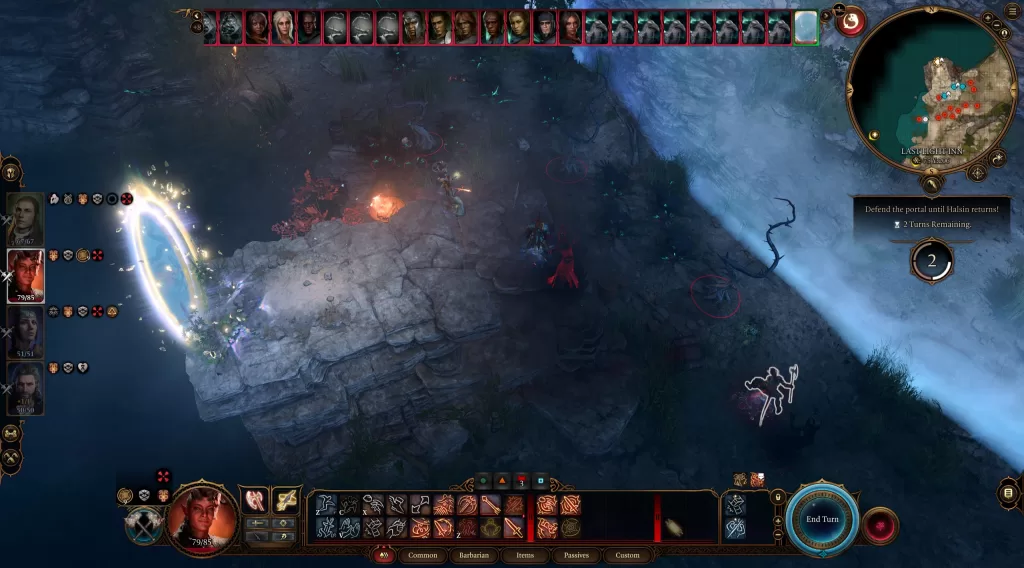
Head to Halsin and speak with him to learn what must be done. He’ll go through a portal while leaving you and the party behind to protect and keep it open. During this period, you’ll be attacked by multiple waves of Shadows and Shadow-Cursed enemies with the goal of keeping the portal open. Make sure to bring a couple of companions that have AOE attacks to deal with multiple enemies at once. Once Halsin returns, he’ll have Thaniel and take him back to camp. Clean up the enemies then meet them there. Halsin will say that Thaniel is missing part of himself and to heal him, we need to find it. You’ll also be able to add Halsin as a party member.
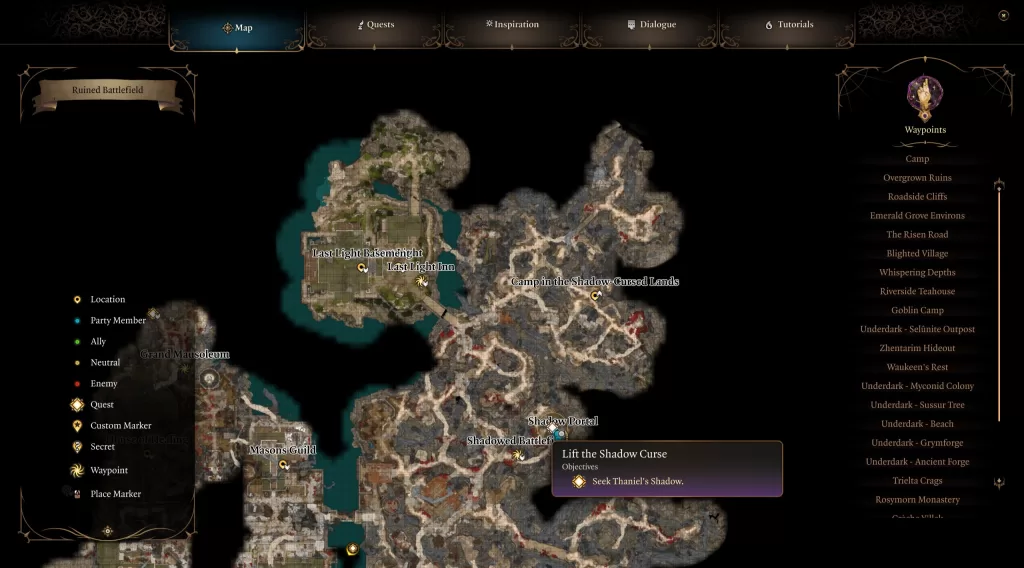
Our next destination is an old house up the eastern path next to the Shadowed Battlefield. If you’ve been there already, you’ve played hide-n-seek with Oliver already. If not, then you might have to do that first (we already did beforehand). Afterward, you can speak with him in the house and tell the lad you know who he really is, trying to convince him to come with you. He’ll say no and jump through a portal. You’ll need to follow after him which leads to a battle. Oliver will be under a Nightdome and surrounded by shadows. You’ll need to defeat the Shadow to damage the barrier. Taking out a Shadow Fiend deals 10 damage while defeating Mummy and Daddy will deal 60 damage each. Once the Nightdome’s HP reaches 0 you’ll be thrown into dialog with Oliver where you’ll have to convince him to return to Thaniel. Just be nice to him and speak with him like the child he is to convince him to return.
Head back to camp and speak with Halsin and Thaniel. In order to finally complete this quest, you’ll need to defeat Ketheric Thorm. It won’t officially updated to completed until you begin Act III.

Punish the Wicked

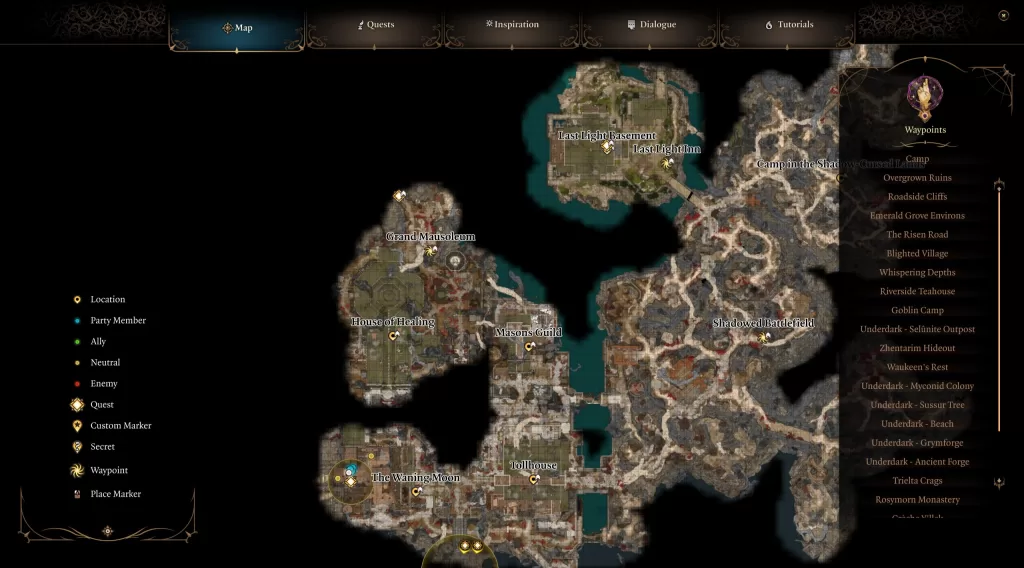
To start this quest, you’ll need to speak with He Who Was southeast of the Camp in the Shadow-Cursed Lands (east of Last Light Inn). The raven will deem you strong enough to help and request that you travel to the Waning Moon to locate a leger belonging to a killer.
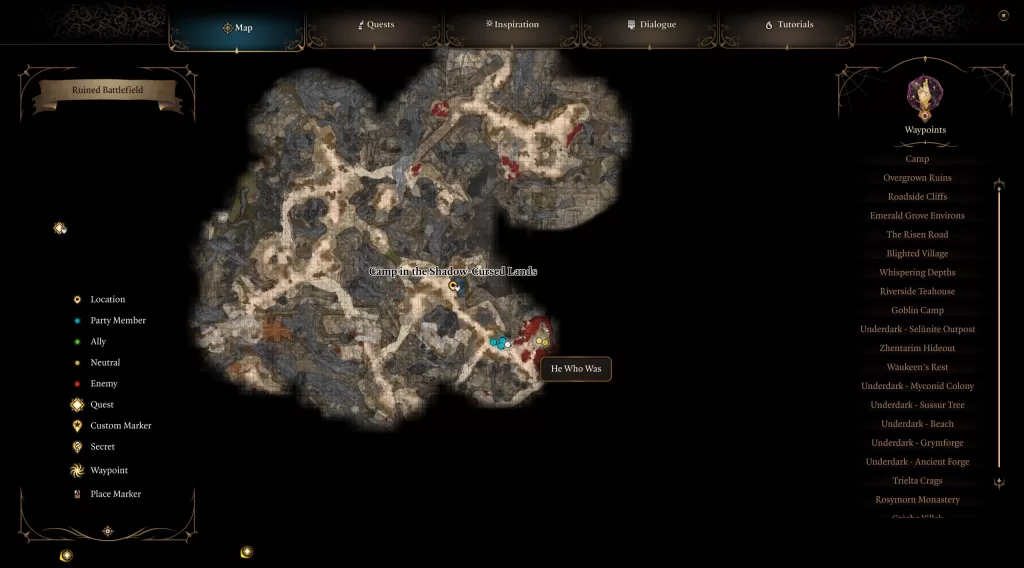
To find the Waning Moon, you’ll need to head to the southwestern corner of the map near the Moonrise Towers.
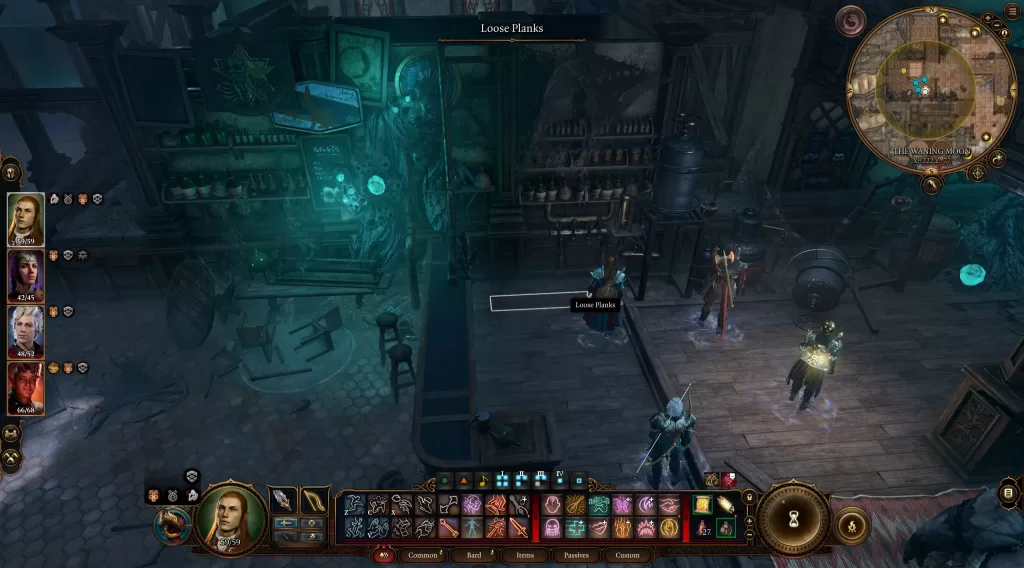
Once there, enter the tavern and make your way down to the lowest level. Approach the counter with Thisoblad Thorm behind it to start up a conversation. When prompted choose one of the first two options and the proprietor with invite you to drink with them. You’ll either need to drink and pass a skill check or decline. If you choose to decline, you’ll have to battle against Thisoblad and the other patrons. If you go the drinking route, you’ll have to pass a series of skill checks while drinking back and forth with the abomination. After a few turns, he will drink too much and burst. You’ll then be free to head behind the counter. There will be some loose planks under the beer tap that houses Madeline’s Ledger. You’ll need to pass a perception skill check to find it. Once it’s in your possession, deliver it to He Who Was.
He Who Was will tell you that it’s up to you to be the judge while he channels her into his body. You can speak with Madeline to learn what happened then render your judgment. If you forgive her, then the quest will compete and He Who Was will get angry and attack you along with his Raven. If you deem her guilty and tell her to stab herself, He Who Was will attack you. If you tell her it’s her fault and that she’s a monster then He Who Was will feel her agony and be pleased, awarding you some gold and the rare Raven Gloves which allow you to summon Quothe the Raven.

Rescue the Tieflings

** PLEASE NOTE – This quest is time sensitive and doing a couple of long rests will move it forward. You can save the Tieflings (and Wulbren) while only slightly moving the story forward.**

So the prerequisite to get this quest is to save the grove from the goblins. After doing that, once you reach Last Light Inn, you’ll find some of the tieflings from the grove are taking shelter there. Speak with them (Vex, Alfira, Rolan) to learn about the attack and that some of them were taken to Moonrise Towers. Please note that your past actions might impact who is here or not. We helped Alfira finish her song and convince Rolan to stay and help the grove which could affect their being at Moonrise Towers.

When you reach Moonrise Towers, make your way to the prison in the basement (the stairs are through the back right door when facing the throne). Down there you’ll find Lia, Cal, Lakriss and Danis in a cell. Speak with them to learn the gnomes are up to something. If one of the guards catches you talking to the prisoners, you’ll have to pass a skill check or fight them. Whatever you decide, you’ll need to complete Rescue Wulbren before you can proceed with this quest. When that’s done, return to Last Light and speak with Rolan, Alfira and Vex to complete this quest. They will each give you their own set of rewards.

Rescue Wulbren

** PLEASE NOTE – This quest is time sensitive and doing a couple of long rests will move it forward. You can save Wulbren (and the tieflings) while only slightly moving the story forward.**

This quest is started after rescuing the gnomes at the Grymforge from Nere towards the end of Act I. Speak with their leader and you’ll learn that Wulbren was taken to Moonrise Towers, but that gnomes are too weak to go after him. Thus it falls to us (or not).

If you have been helping Barcus Wroot up to this point, he can be found at Last Light Inn in Act II. Speak with him there and he’ll promise to make you something remarkable if you save Wulbren.

When you reach Moonrise Towers, make your way to the prison in the basement (the stairs are through the back right door when facing the throne). In the basement, locate Wulbren and speak with him (make sure to check in on the tieflings along the way). Tell him you’re there to break him out and he’ll say he needs some things to make their escape. Enter the Warden’s Office and speak with her to learn that the prisoner’s effects are being kept in a room at the top of the ladder. Climb up and head over the furthest table to find Wulbren’s Hammer on it. Grab the hammer and bring it back to the gnome keeping an eye out for the wander eye. As an FYI, this area is considered restricted so the Warden might show up and confront you. You can try to talk your way out of it or take down the warden. In addition, it’s possible for other guards to show up as well. You can also try convincing them you are supposed to be there or settle the matter in glorious combat.
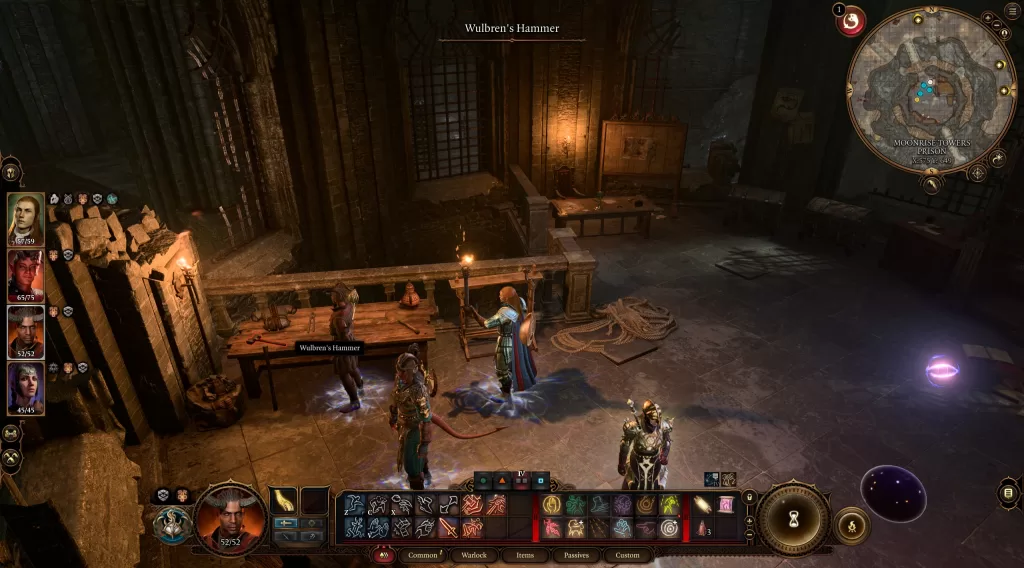
When that’s done and you have the hammer, take it back to Wulbren who will then wait for your word to execute the plan. When you say go, they will break a hole in the wall and head over to free the tieflings. While this is happening, a guard will make a b-line to the Warden’s room to flip the switch opening the cells and allowing them to pursue the prisoners. You’ll need to stop the guards from doing this and fight them off long enough for the prisoners to escape. To make it easier, deal with the guards first before telling the gnome to begin the escape. When the guards are no more, open cell 2 and head through the hole in the wall. **Please Note – If a guard flips the switch, it’s best to defeat them all and not attempt to close the cell. Doing this might bug the quest and gnomes might leave without saving the tieflings** Approach the boat at the dock to speak with Wulbren then send him to Last Light. The next time you go there, find Wulbren drinking at the inn and speak with him to complete the quest.

Wake Up Art Cullagh

The quest will be triggered upon finding Art during the Lift the Shadow Curse quest. If you pass a perception check after interacting with Art, you’ll notice a note under him. Pick it up and read it to discover he was sent by the Duke. It will also mention he was to investigate the House of Healing. To reach the House of Healing, travel to the southwestern part of the map, west of the Mason’s Guild.
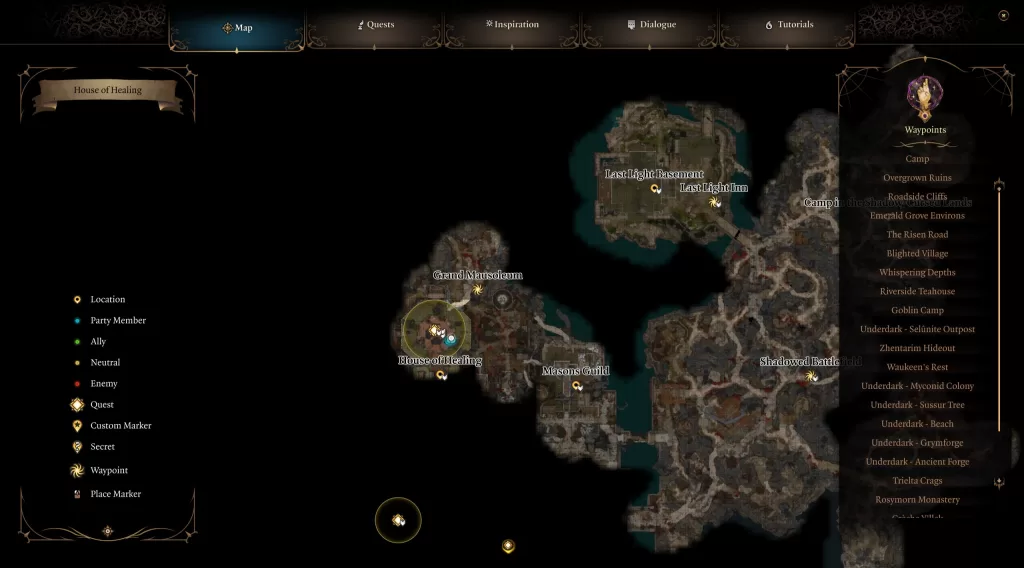
Once there head inside and make your way to the northern part of the building. If you come in through the front door, you’ll be stopped by Sister Sinda and have to pass a skill check to pass. Approach Malus Thorm in the middle of training the sisters. This will trigger a cutscene leading to some dialog. If you pass some skill checks, you can have him become the test subject for the sisters resulting in his death, otherwise, you’ll need to fight all 5 of them. Once he’s dead, loot him to find a Battered Lute. Take that loot back to Art and interact with him. Choose the option “Pull out Art’s lute and play” to wake him and complete the quest.

For more guides on Baldur’s Gate III, click here!

Baldur's Gate 3 Logo
Guides

Baldur’s Gate III – Infiltrate Moonrise Towers

by NightlyGamingBinge in

Infiltrate Moonrise Towers is the first quest of Act II in Baldur’s Gate III. Having reached the Shadow-Cursed Lands, the party’s mission is to infiltrate the cult of the Absolute to learn more about them.

Objectives

  • Reach Moonrise Towers
    • Seek Protection from the Shadow Curse
    • Resolve the Abduction
    • Find Ketheric Thorm’s Relic

Reach Moonrise Towers

Coming from Underdark

For this section, we arrived in the shadow-cursed lands from the Underdark. Follow the main path until a cutscene with a group of Harper triggers. After a couple of dialog options, you’ll be thrown into a fight against a group of Shadows. Defeat them then one of the Harpers will mark Last Light Inn on your map as a place of refuge.

Seek Protection from the Shadow Curse

Make your way to the Last Light Inn which will be west from where you met the Harpers. As soon as you enter the town a cutscene will trigger and you’ll be interrogated. Mol will come to your rescue if you saved the grove (and will even bring up you saving her friends from the harpies and the snake… if you did). You’ll then have the option to show the artefact to your interrogator and tell her everything that’s happened. As long as you don’t attack her, you should be permitted to stay in the town. Feel free to look around and speak with the people there. When you’re ready to proceed with the story, locate Jaheira and speak with her. This will kick off a conversation where she toasts your health. If you pass a Medicine skill check, you’ll notice truth serum has been added to your drink. She’ll ask you to drink anyway but the choice is yours. If you comply, your whole party will disapprove. Refuse to drink and most of your party with approve. Jaheira will then ask if she can trust you. The choice is yours! (We said she could trust us). Toward the end of the conversation, she will send you upstairs to speak with Isobel. Make sure you are healed up first because this is going to lead to a fight. (See Resolve the Abduction below for more info).

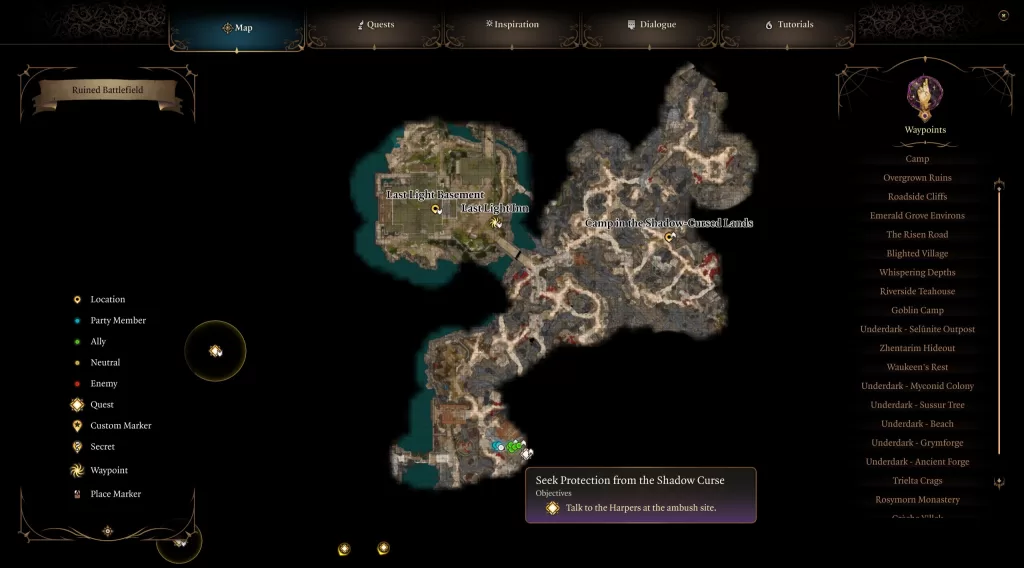
After the fight, head to the entrance of the town and speak with the Harpers standing on the bridge. They will tell you about an ambush to get what the cultists are using to move through the shadows. Agree to meet them there, then set out for the ambush site south of the town.

Approach them to trigger a cutscene with a group of enemies walking along with a lantern. One of them will notice you giving you the opportunity to attack them. You can also pass a series of skill checks to make them give you the lantern and bugger off (that’s what we did). Head over to the lantern and pick it up. Inside, causing it to glow is a pixie. She’ll say if you don’t free her, she’ll die. If you choose to keep her in the lantern she’ll be super salty and you’ll have safe passage through the shadow. If you release, you can ask her for help with the shadow curse. She will then give you a bell with a permanent blessing to ward it off. You’ll now be free to reach Moonrise Towers. Continue on with the Infiltrate the Cult of the Absolute objective below.

Resolve the Abduction

Enter Isobel’s room then head for the balcony to find her there. Speak with Isobel to being a cutscene leading to a conversation with the cleric. As the end of the conversation nears, someone shows up to kidnap her. You’ll have the choice to stand with Isobel or side with Marcus. For now, we are siding with Isobel. This leads to a fight against Marcus and a handful of Winged Horrors. You’ll need to defeat all of the enemies before they reduce Isobel’s health to 0. This will cause her to get knocked out and they will leave with her. Make sure she stays healed and take out the enemies as quickly as you can.

Infiltrate the Cult of the Absolute

Once you reach Moonrise Towers, you’ll be greeted by another True Soul. As long as you don’t attack them you’ll be allowed entry. You can also sell out the Harpers but we aren’t doing that this playthrough. Head inside to reach the entrance hall then pass through the Absolute’s Door to trigger a cutscene. When prompted, do with the goblins what you will (note that Disciple Z’rell which check later) then head up the stairs behind the throne to find Z’rell and speak with her. After reviewing how you dealt with the goblins, she’ll assault your mind to see if you are a true believer of the Absolute. You’ll need to pass a skill check to distract her. She’ll then say she has a mission for you and sends you to the Mausoleum. (You also have the option to attack her here, but we are playing the role of spy for now).

Before heading off to the Mausoleum, head to Balthazar’s room past the library where Z’rell is and use the key she gave you to unlock the door. Head over to the bookshelf and look for the Protruding Book on the bottom right side. Interact with it to unlock the altar to the right of the bookshelf. Next loot the corpse in the room or Viscera’s pile of flex for a heart then interact with the altar and combine the heart with it. This will open a secret door behind the bookshelf. Head inside and read the Research Notes.

Investigate the Thorm Mausoleum

So there are a couple of ways you can start this objective. The first is by following the story and speaking with Disciple Z’rell who will send you here on your first mission. The other is by talking with the Brewer at the Waning Moon near Moonrise Towers and questioning him in a drinking game. Once you get this objective, make your way to the Mausoleum north of Moonrise Towers and head inside (if you haven’t been here yet, Raphael with waiting. Make sure you bring Astarion with you as it’s needed for his companion quest).

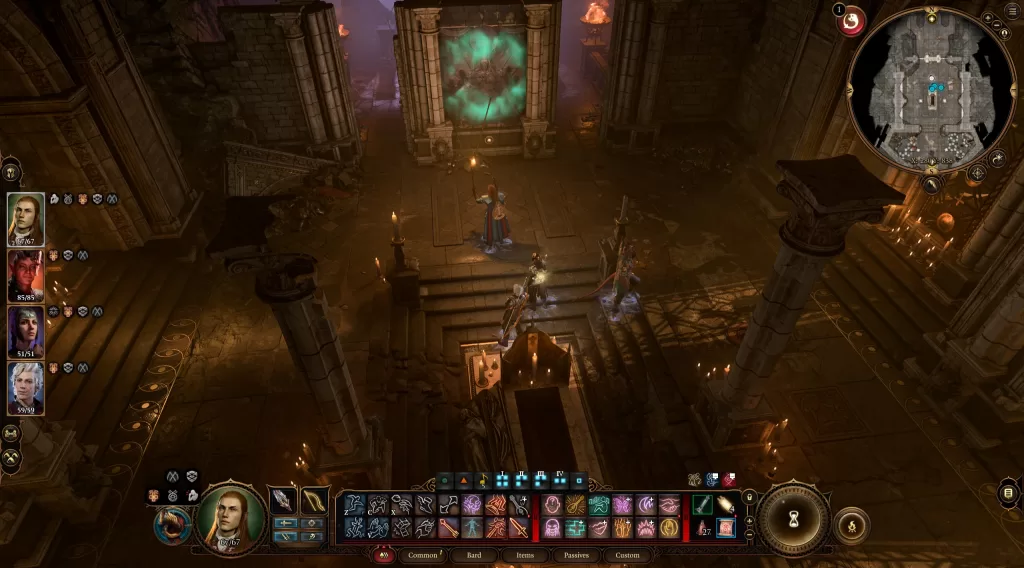
Once inside make your way to the northern part of the area to find a sarcophagus belonging to Isobel Thorm. There will be 3 portraits with buttons under them that you’ll need to push in the correct order. That order is SW (tower), SW (Thorm with wife) then N (Thorm sitting on Thorn). This will open a secret path in the northern wall. Follow the newly opened path and use the traversal gem at the end to reach the Gauntlet of Shar. (You also might want to have Shadowheart in your party as this is tied to her companion quest).

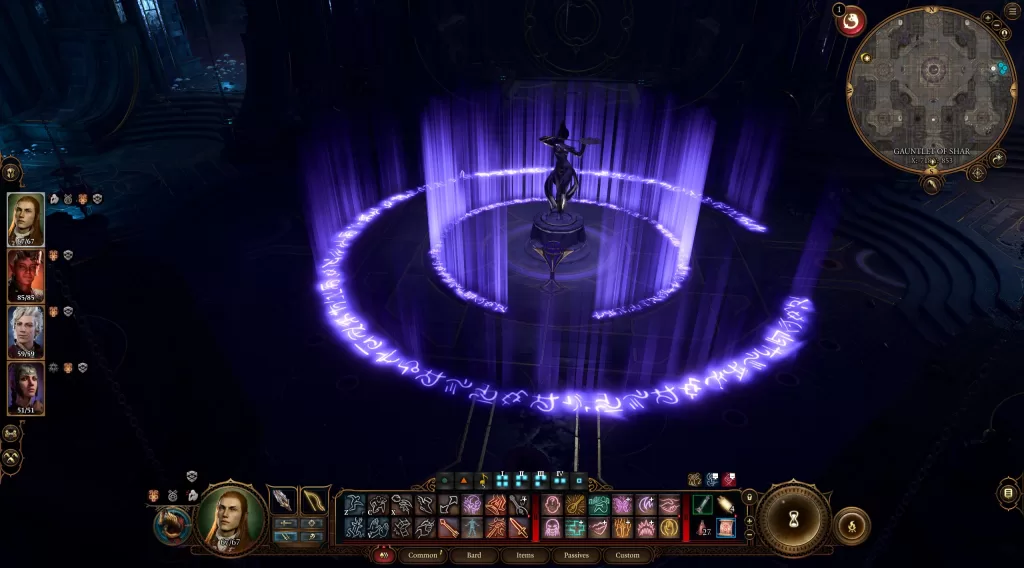
Follow the path north and through the doorway at the end to reach a room with a statue of Shar in the middle with a gem in front of it protected by an invisible barrier. There are also a ton of traps scattered around the room that you’ll need to watch out for. To pass forward, you’ll need to reach and interact with the gem. Start by heading to the four crypts (watch out for the floor traps in each one) on both sides of the statue then flip the levers in each one. This will lower 4 Mystyic Thuribles from the roof to surround the statue putting the total number of thruibles to 8. You’ll then need to interact with each one to put the flame out to cause the barrier to appear. You can now follow the path to reach the gem, but you’ll want to ungroup a single character and use them to do it.

Please Note: If you have someone equipped with the Blood of Lathander mace, then the light it sheds will prevent the barrier from showing.

You can pass through the door north of the statue leading to a hallway. Head up the stairs and to the left to find a group of skeletons who will speak with you. After a couple of lines of dialog, you’ll be attacked by shadows. Focus on destroying all 3 Umbral Termors first to stop them from spawning in more skeletons then focus on the remaining enemies. After the battle, follow the path west past the Ancient Sigil Circle to find another group of skeletons. Approaching them will trigger an event leading to another battle with the dead. As before focus on the Umbral Tremors first, except this time a few more will spawn each turn for a few turns. Once that fight is done, the door the skeletons were guarding opens allowing you to speak with Balthazar.

During this conversation, you can either present yourself as an ally or take him out! For now, we chose to play along. He’ll send you to search for the Nightsong. To reach it, follow our Daughter of Darkness guide here as it relates to Shadowheart’s companion quest. Your choice with the Nightsong determines how the rest of the act plays out.

Assault Moonrise Towers (Saved Nightsong)

Having saved the Nightsong, the assault on Moonrise Towers has commenced. Beforehand, you can stop off at Last Light and speak with Isobel there to tell her what’s happening. After that, head to Moonrise Towers and enter the fray! Approach the tower to catch up with Jaheira via a cutscene where you’ll be able to tell her the plan of attack. You can also convince her to join your party as a secondary member if you want and you’ll also want to loot the dead to find a couple of tadpoles if you’re using their powers.

Head inside to start a battle with Disciple Z’rell, Glourik, a small army of zealots and Lann Tarv. If you freed the gnolls in the kitchen earlier, they will also join as allies. After the battle head up to the next level where you’ll have to face Radija and her undead minions. If you kill one, she’ll use an incubation spell that explodes and summons another one. Once they are dealt with, head through the Ornate Door.

You’ll now be face-to-face with Ketheric and dialog with ensue. No matter what choices you make, you’ll have to fight the boss man. He’ll also be joined by his faithful hound, Susdera and a handful of Necromites. When his health gets low, a cutscene will trigger where Ketheric will be teleported away. You’ll have to mop up any stragglers before you can pursue. Also, make sure to loot the Bone Key off of Susdera and use it to loot the chest near where Ketheric was. This quest will also be completed.

For more guides on Baldur’s Gate III, click here!

Baldur's Gate 3 Logo
Guides

Baldur’s Gate III – Defeat Ketheric Thorm

by NightlyGamingBinge in

Defeat Ketheric Thorm is the final story quest for Act II in Baldur’s Gate. During this quest, you’ll need to discover where the boss man fled and end his reign of tyranny for good!

Follow Ketheric Thorm

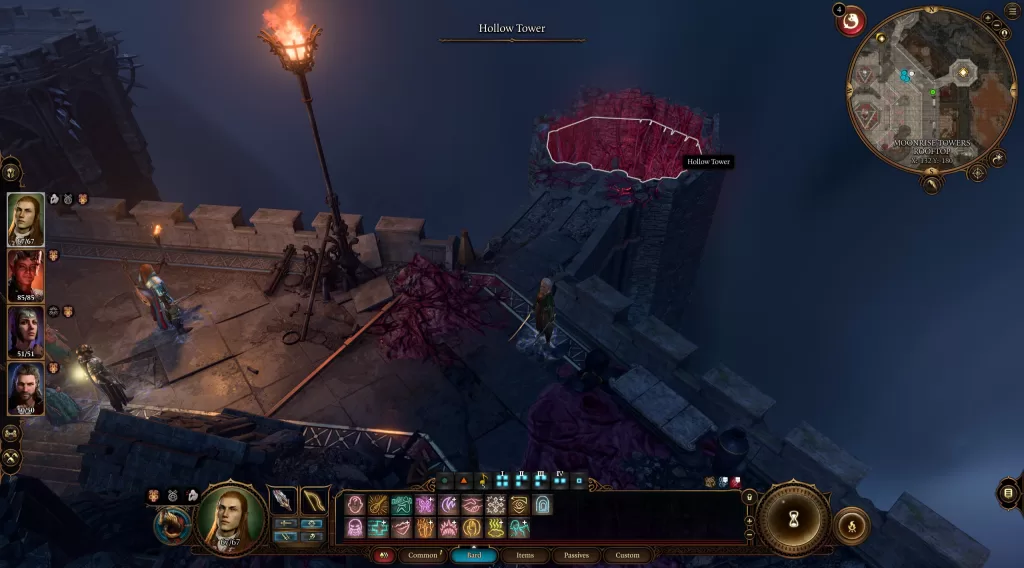
Still on the Moonrise Towers Rooftop after Thorm fled, head to the northeastern tower where the tentacle came from to find Jajeira. Speak with her there and you’ll once again be able to get her to join the party if you want. It’s also worth noting that you can rest now on the rooftop. You also may want to bring Wyll with you as the next area is where the demon and possibly the Grand Duke can be found. When you’re ready to pressure Throm, interact with the Hollow Tower near Jaheira and select yes when prompted to leap in.

Search the Colony for Ketheric

When you regain control of your party, you’ll be in the Mind Flayer Colony. There are a couple of things to do here before pursuing Thorm and they will be listed below. Another thing to keep in mind, if you follow that path east from where you started, you’ll end up by an elevator leading forward for the story quest. Near it will be a Restoration device that will heal your party to full health along with restoring their spell slots. You can use this device multiple times as needed.

The Blade of Frontiers – Rescue the Asset / Find Zevlor in the Tadpoling Centre

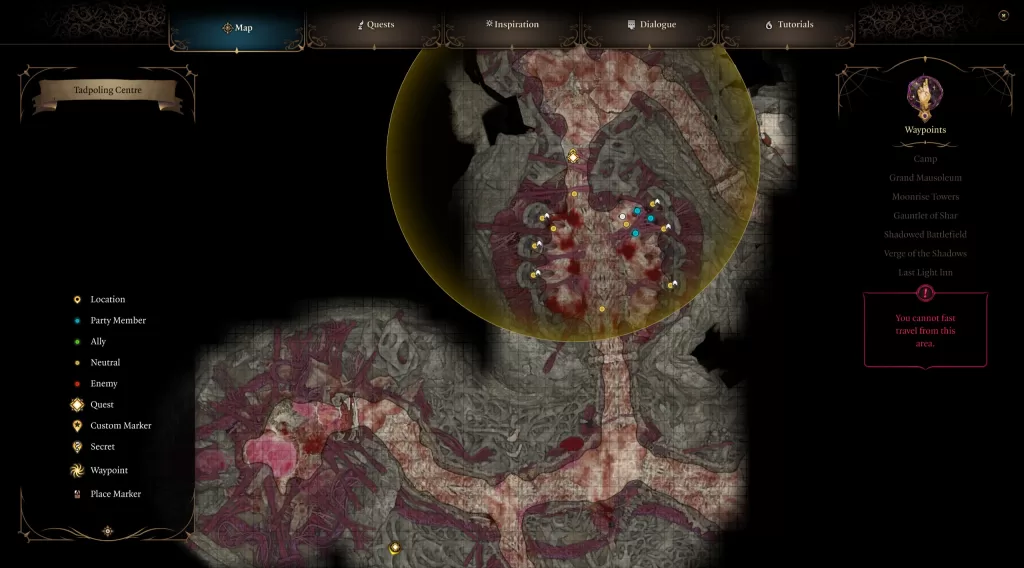
The first stop on our trip to the colony is the Tadpoling Centre. To reach it, head east from where you start in the area and take the first left (after keeping left at the fork). Interact with the Neural Apparatus in the room to learn that some pods have Mind Flayers while others have captives yet to be implanted. To save them (and the asset for Wyll), you’ll need to release the pods and fight off a horde of Mind Flayers and Intellect Devourers. Luckily the other captives will also join in the fight and aid you. A word of caution, the Mind Flayers swarmed my party ignoring the others. so you have that to look forward to. After defeating them, you’ll begin a conversation with Zevlor. Regardless of what option you pick, he will help survivors escape all the same and the Find Zevlor side quest will be completed.

Before leaving the room, head to the northern section of it to find Mizora in a pod. Interact with the pod (while Wyll is in the party) to learn that she is the asset you were to free. You’ll then have to either pass a Strength skill check to smash the pod or connect your mind to the machine. If you choose the device on the left then Mizora will be purged and Wyll will be killed along with her. Activating the device on the right will free her from the pod. She’ll then tell Wyll that she will free him within six months per his contract. If you pass the Persuasion skill check asking for a reward, Mizora will give Wyll the very rare Infernal Rapier. You’ll then want to speak with him afterward.

Deal with Kressa and her Goons

Head directly east of the Tadpoling Centre to find Kressa giving her goons a pep talk. Approach her to trigger a dialog event where you can convince her you were sent to help if you pass a Deception skill check. After that, you can attack her and get extra exp.

Deal with the Death Shepard in the Necrotic Laboratory

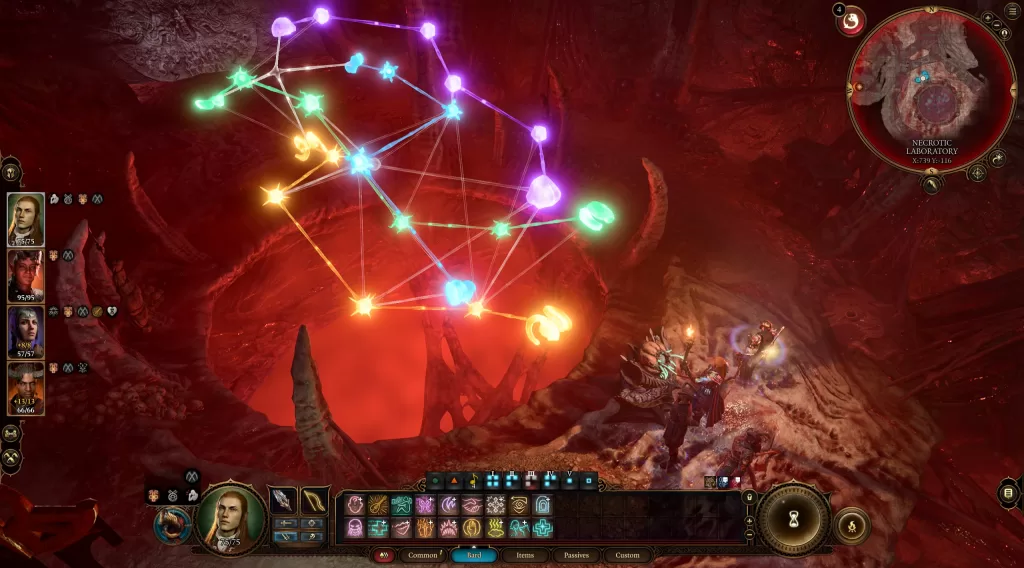
You can find the Death Shepard in the southcentral area of the colony. You’ll be thrown into combat upon entering the room it’s in with the Death Shepard, a few Winged Horror and a whole lot of zombies. The Death Shepard will also keep spawning enemies each turn as well. Once you defeat them all, head to the southwestern part of the room (you’ll have to jump twice to reach it). Interact with the console then solve the brain puzzle. You’ll have to link each brain to its counterpart at the other end. Doing so will open a door allowing you to interact with the Desecrated Relief.

Free Us

Remember at the beginning of the game when you had the option to pull the brain out of the body? Well if you did (and you weakened it to make it subservient) then you can find the little guy locked in a cage heading south down the path where you started on the ship.

Speak to Us and it will ask for help freeing it from its cage. To do this, take care of Chop (who has the key) and the immediate intellect devours. You can then use the key to open the cage freeing Us. It will then join you as a Summonable Cantrip.

Kill Ketheric Thorm

When you’re done exploring, head to the elevator mentioned in the first section of the guide and use it to descend. Follow that path at the bottom to reach a door and beyond it, the Absolute! After a very interesting cutscene, approach Thorm to trigger a conversation. If you can pass a persuasion check, he’ll off himself bringing you to phase two of the fight. If not, then you’ll have to face him and his army of Mind Flayers, Necromites and Intellect Devourers. To damage him, you’ll need to free Nightsong from her chains by running over to her and helping her up. Once he’s dealt with, a level 11 Apostle of Myrkul will enter the fray. If you convinced Ketheric to off himself, you’ll skip right to the Apostle and still have to free Nightsong to damage it. As soon as the Apostle of Myrkul goes down, the fight will end triggering a cutscene. You’ll then be able to loot Ketheric and grab the stone he was wearing to trigger another cutscene with the Dream Visitor. Loot Ketheric again after the cutscene, then use the portal to return to the surface. The quest will also be completed.

Baldur's Gate 3 Logo
Guides

Baldur’s Gate III – Optional Things to Do During Act II

by NightlyGamingBinge in

In this Act II Things To Do guide for Baldur’s Gate III guide, we’ll list as many of the optional things you can do during Act II that we come across. I say as many because this game is huge! We’ll also link things to our other guides if you need some more info where it makes sense to do so. Happy Adventuring!

  • Side quests
    • Shadow-Cursed Lands
  • Last Light Inn
    • Speak with Alfira (sided with Grove in Act I)
    • Buy the Tower-Shaped Key from Mattis (sided with Grove in Act I)
    • Speak with Mol and Raphael (sided with Grove in Act I)
    • Interact with His Majesty
  • Ruined Battlefield
    • Play hide-n-seek with Oliver near the Shadowed Battlefield fast travel point
      • Do not kill him
  • Near Moonrise Towers
    • Explore the Mason’s Guild
    • Save Arabella
    • Deal with the Toll Master in the Tollhouse
    • Save Rolan from the Shadows
    • Explore the Waning Moon
    • Find the Lover’s Caress and True Love’s Embrace rings
      • True Love’s Embrace can be found on a skeleton behind the counter on the left side of the room past the main entrance of the House of Healing.
      • The Lover’s Caress can be found on a skeleton in the graveyard directly northeast of the House of Healing
  • Moonrise Towers
    • Get the three soul coins from Lann Tarv
      • Requires Karlach in the party
    • Free Barnabus in the kitchens
    • Make a deal with Araj Oblodra near the kitchens
    • Speak with Araj Oblodra with Astarion in your party
      • Get a potion that gives +2 strength if you do it
    • Explore Balthazar’s room
Baldur's Gate 3 Logo
Guides

Baldur’s Gate III – Travel to Moonrise Towers

by NightlyGamingBinge in

Travel to Moonrise Towers is one of the main quests of Act I in Baldur’s Gate III. You’ll receive it after either rescuing Halsin and killing the goblin leaders or assaulting the grove and killing all of its occupants. Halisin will tell you about it if you sided with the grove and Minthara will be the one to send you there if you sided with the goblins. This guide will cover the objectives for the Travel to the Moonrise Tower quest and how they can be completed.

** PLEASE NOTE ** For our first playthrough, we sided with the druids so the guide will be more tailored to that.

Find a way to Moonrise Towers

In order to complete this quest you’ll need to complete one of the objectives below to reach the Moonrise Towers. We recommend going to both places for the exp and loot you can get. Also, both areas are required for some of your companions and optional quests. Also note, that once you leave Underdark or the Mountain Pass for Moonrise Towers, Act I will end and you’ll start Act II. This can lock you out of some quests so make sure to do everything you can beforehand.

Travel Through the Mountain Pass

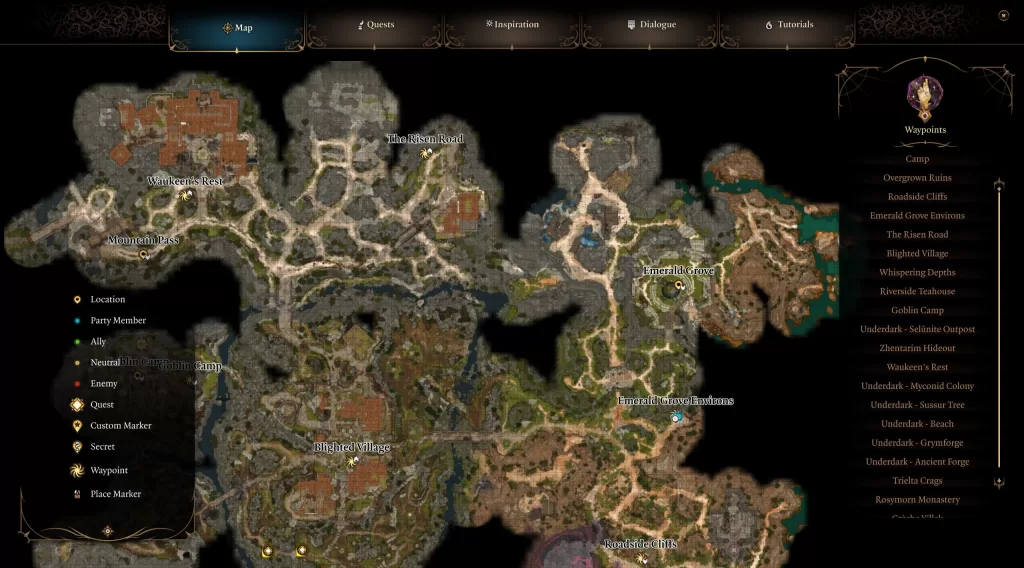
To reach Moonrise Towers from the Mountain Pass, you’ll first need to travel to the Mountain Pass which can be found northwest of the starting area, west of Waukeen’s Rest. Once there you’ll want to travel to the west side of the map, past 2 wooden bridges to reach the path leading to the towers.

Travel Through the Underdark

Travel Through the Temple of Selune

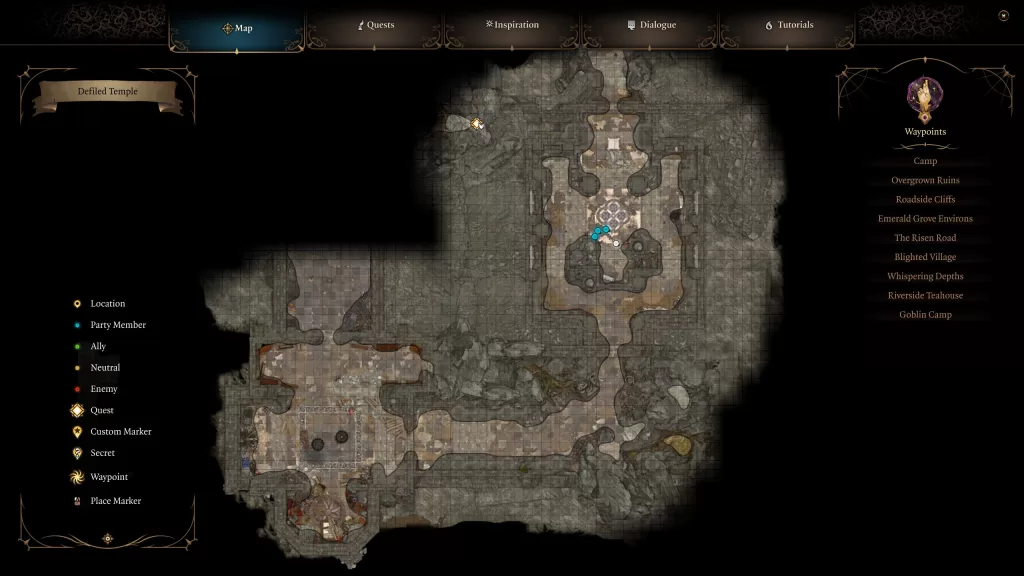
To reach the Underdark, start by making your way to the Goblin Camp then enter the old temple. Once inside, head to the priestess room west of the statue in the southern part of the area. Once there, look on the right side for a locked door. Pick the lock and head through to reach the defiled temple. This area is guarded by the ogre Polma who is the bodyguard of the High Priestess. If you want to skip her, you can climb up a ladder near the door and jump down into a hallway when she isn’t looking. If she sees you, you can try and persuade her that you should be there otherwise you’ll need to take her out.

Find the Secret Entrance / Unlock the Secret Entrance to Underdark

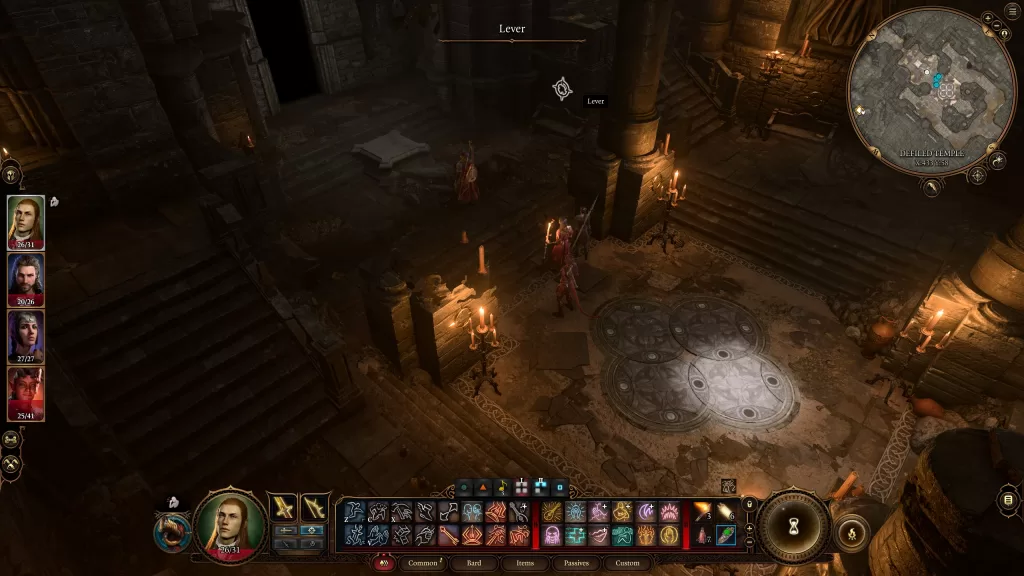
Continue down the hallway until you get to the Stone Disc puzzle in the middle of a dead-end room. Move the disc so they match the picture below to reveal a hidden path. Alternatively, there is a lever you can try to lockpick that will also open the way forward. Proceed through the new path and follow it to reach the Selunite Outpost in the Underdark.

Explore the Underdark

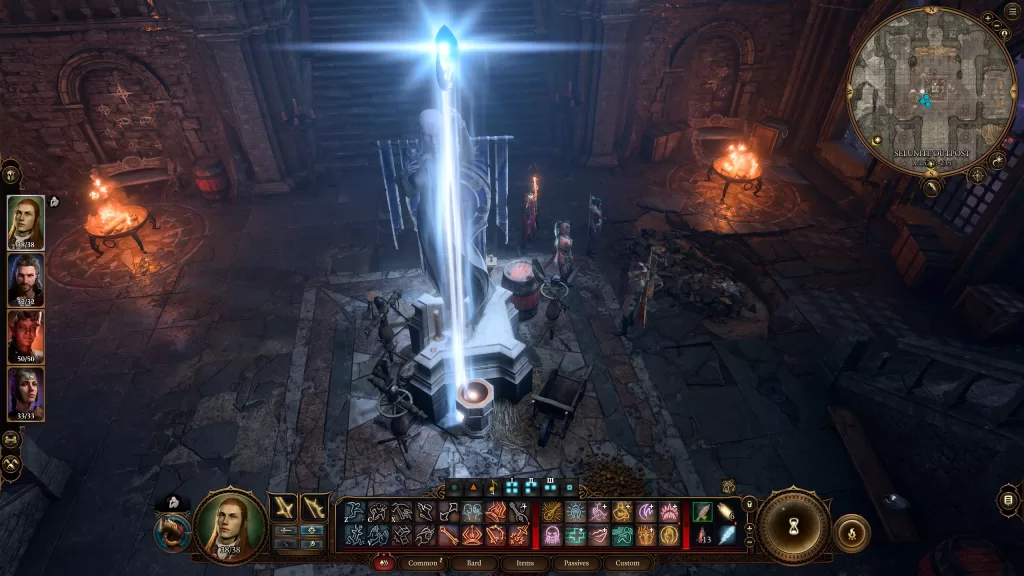
Once you’re in the outpost, head for the statute in the center of the room shooting a beam of light out of the staff. Use your bow to shoot the moonstone in the staff to stop the beam. This will also disable the guardian statues on the other side of the gate. They will attack anyone who draws their gaze.

Reach Moonrise Towers through Grymforge

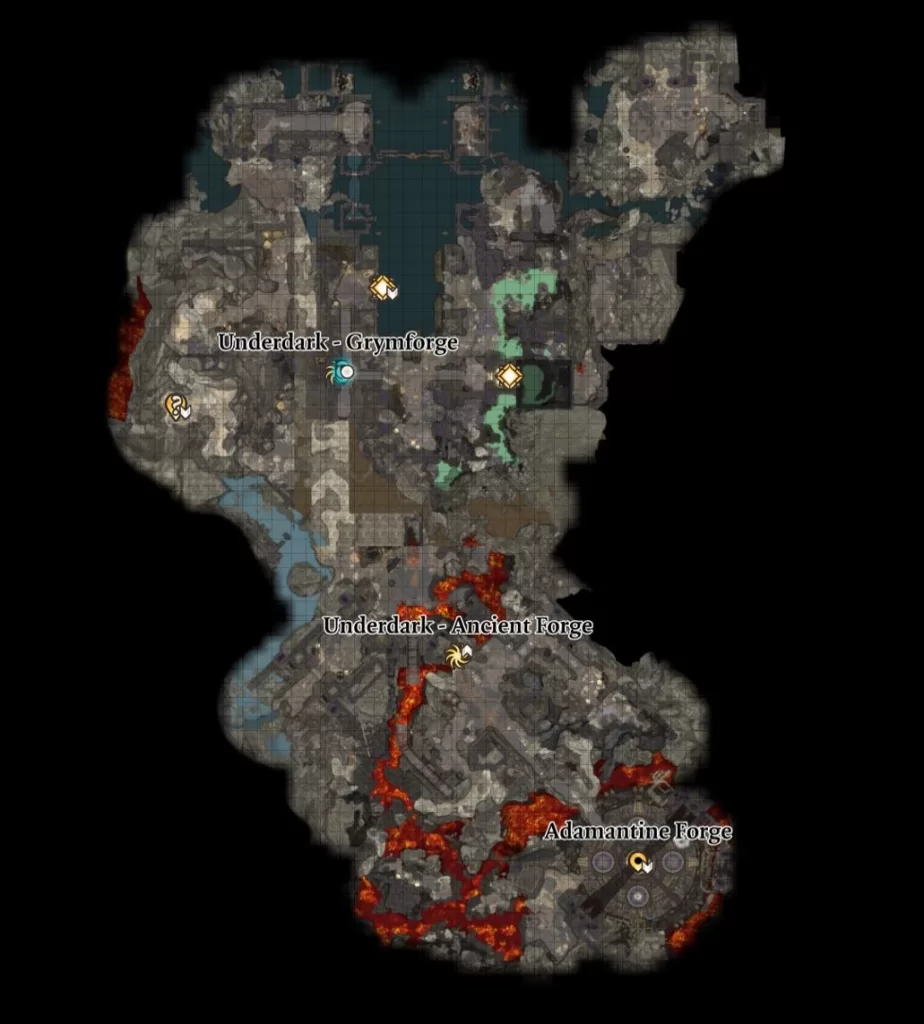
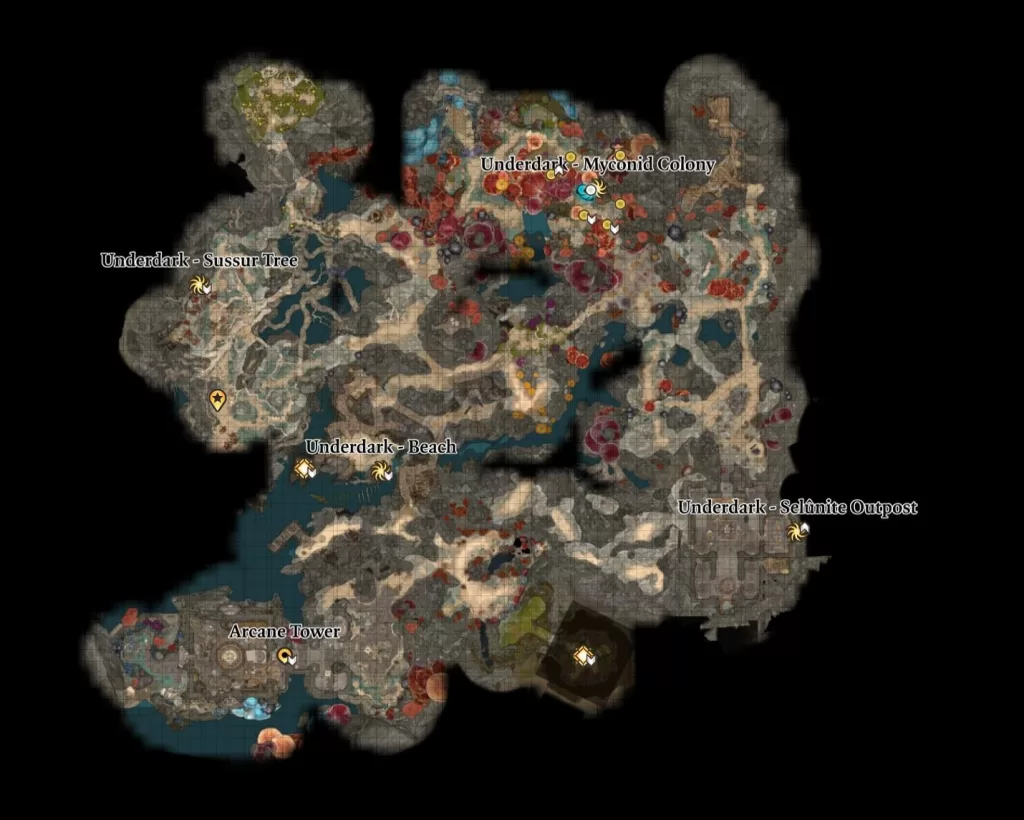
In order to reach Moonrise Towers from the Underdark, you’ll need to travel to the Grymforge. To do this, make your way to the Myconid Colony and speak with the Sovereign there. He will give you a quest to deal with some dwarfs who have been attacking his people. This quest will send you to the beach where you’ll find a boat. Use that boat to reach the Grymforge.

Once you’re in the Grymforge, head west of the fast travel point to find an elevator. Interact with it to discover the way to Moonrise Towers. You may need to deal with Nere before you can use the elevator. We killed him and stole his lamp before interacting with the elevator.

For more guides on Baldur’s Gate III, click here!

Baldur's Gate 3 Logo
Guides

Baldur’s Gate III – Personal Quests

by NightlyGamingBinge in

In Baldur’s Gate III, you’ll come across personal quests tied to your main character. Our Baldur’s Gate III Personal Quests guide will list quests and cover what you’ll need to do to complete them.

Discover the Artefact’s Secrets

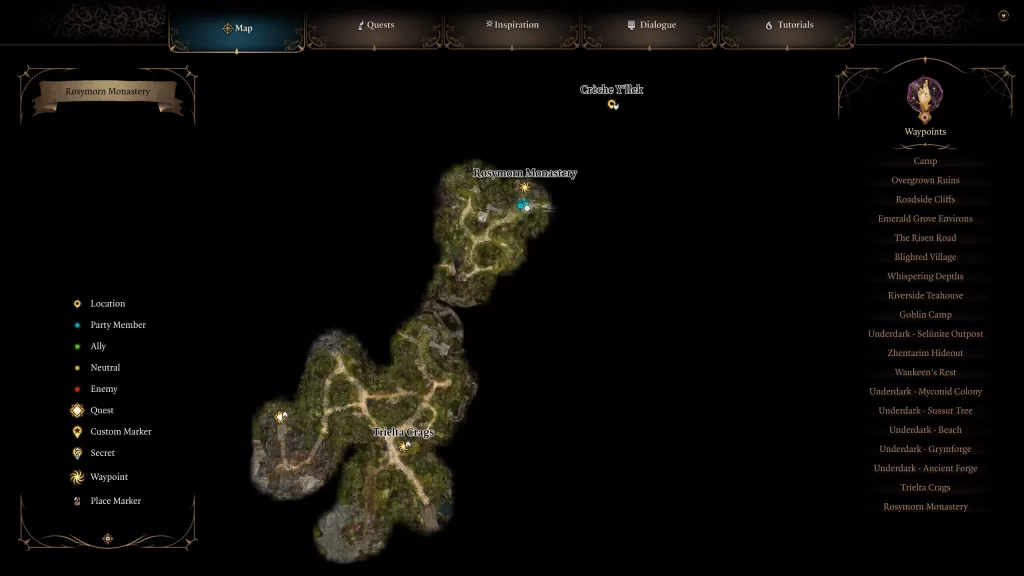
To get this quest, you’ll need to speak with goblin leaders in the Goblin Camp to learn that they are looking for an artefact. This will prompt your party to want to know more about why they are searching for it. You’ll then need to travel to the Mountain Pass and locate the Creche in the basement of the Rosymorn Monastery which can be found in the northeastern part of the area.

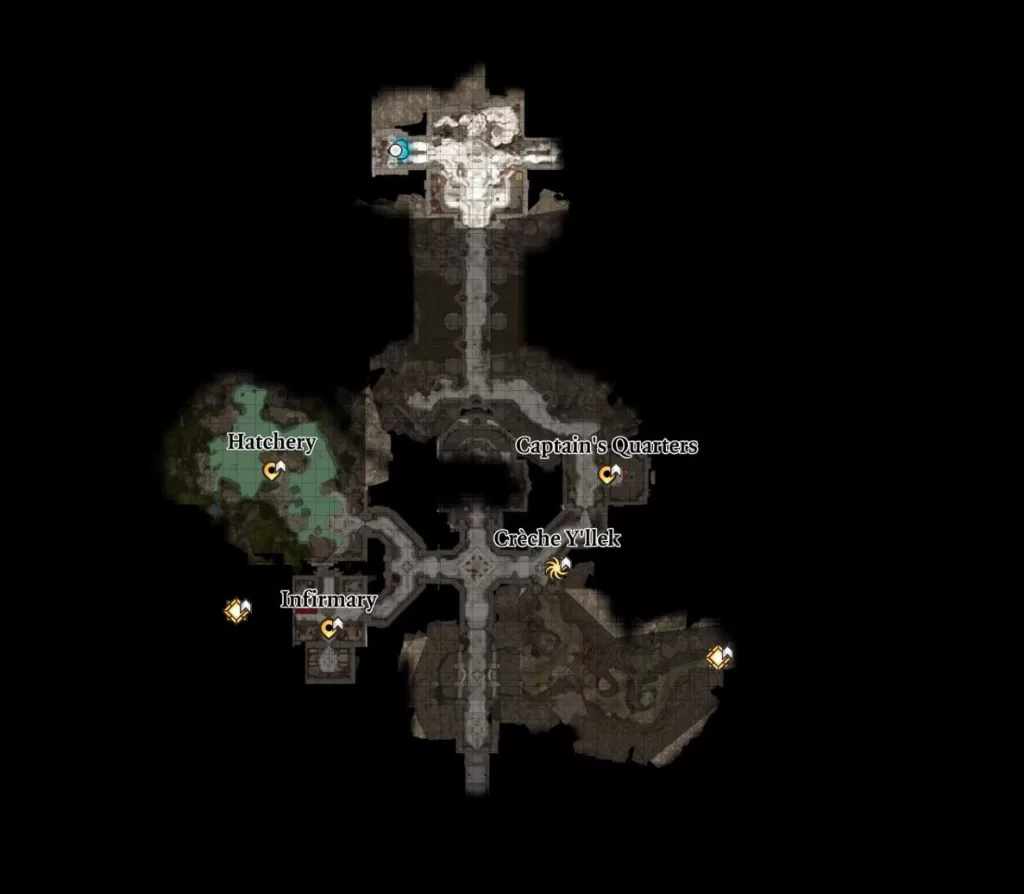
Once you reach the Creche, head to the Captain’s Quarters and speak with her. You can then ask her about the object they are seeking making a face prompting her to ask if you have it. You’ll then have to pass a deception check to say no resulting in you not being granted an audience with the inquisitor. If you say you have it but won’t give it to her then you’ll have to fight all of the Githyanki. She’ll then have a Gith Shard you can loot to lower the barrier allowing you to reach the inquisitor. Saying yes will have her take the object from you only for it to return on its own. She’ll then send you to talk with the Inquisitor a little deeper in the monastery. He too will ask for the artefact. If you hand it over to him, the queen will make an appearance and ask that you kill the blight (aka your dream guardian) tainting it.

If you agree, you’ll have to enter the relic. Approach the Beckoning Cave for the Dream Visitor to speak with you. They’ll ask to talk alone and offer you the choice to kill them or not. If you tell them you’re not going to kill them, they will say their trust was well placed in you and will tell you that the queen is lying to her people. If you do choose to kill them, they don’t actually die and will heal saying that you broke their trust. Exit the Astral Prism will complete the quest.

Discover the History of Prince Orpheus

You can start this quest by having Lae’zel (or your character if you’re Githyanki) read one of the Githyanki forbidden books about Prince Orpheus. You’ll then need to track down the other volumes to progress the quest. We have listed below where you can find them. This quest will be completed at the beginning of Act III after exiting the Astral Prison.

Orpheus, Prince of the Comet, Part One: Betrayal

The first book on Prince Orpheus can be found at the Arcane Tower in the Underdark. You’ll need to activate the elevator and take it up to the bedroom just before the roof. There you’ll find the text lying around.

Orpheus, Prince of the Comet, Part Two: Sacrifice

The second part of the book is located in the Githyanki Creche at the Rosymorn Monastery along the Mountain Pass. Make your way there then head for the Classroom. The instructor will be beating up one of his students. Intervene by passing a skill check to get the instructor to back off and then speak with the student. You’ll need to pass a couple of skill checks to convince the lad to hand over the text.

Orpheus, Prince of the Comet, Part Three: Resurrection

Part Three of the Prince Orpheus saga can be found in Balthazar’s room in the Moonrise Towers during Act II. You will be granted access during the main story if you side with the Absolute or at least pretend to. It will be on a bookshelf near the entrance to his room.

Embrace Your Potential

This quest starts after meeting the dream visitor for the first time or coming across a Mind Slayer Parasite Specimen. The visitor will tell you that you need to become stronger with the powers you get from the Mind Flayer. When she visits you the second time she will tell you that absorbing other parasites will make your powers grow. There are a number of them that you can find listed below. Once you absorb them, you’ll be able to make your Illithd power stronger.

Act I

  • Looted from Dror Ragzlin in the Goblin Camp
  • Looted from True Soul Gut in the Gobling Camp
  • Looted from Nightwarden Minthara in the Gobling Camp
  • Absorbed from Edowin in the forest northwest of the Druids’ Grove
  • Looted from Flind the Gnoll Warlord
  • Looted from Nere in the Underdark Grymforge

Act II

  • Looted from Fist Marcus at Last Light Inn
  • Looted from Linsella in the kitchen of Moonrise Towers
  • Looted from Adept Merim at Moonrise Towers
  • Looted from Zealot Malik at Moonrise Towers
  • Looted from Disciple Z’rell at Moonrise Towers
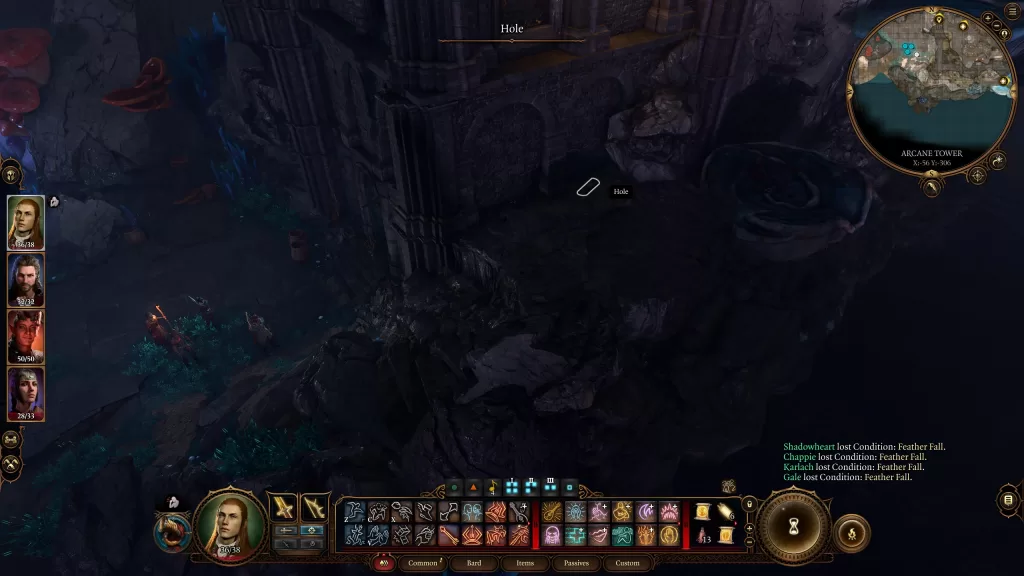
  • Loot from Zealot Krizt in Oubliette (jump down hole in Moonrise Prison)

In Act III, you’ll have the chance to turn into a Mind Flayer while keeping your mind intact via a special Astral-Touched Tadpole. It’s up to you to do so if you wish, but keep in mind that everyone in your party will not approve.

Free Orpheus

You’ll get this quest in Act III after defending the Githyanki assault on the Astral Plane. You’ll then need to meet up with Kith’rak Voss in the Sharess’ Caress which can be found past the South Span Checkpoint north of Rivington. He’ll be in the Devil’s Den where you’ll end up meeting with Raphael. The Devil will offer you a way to Orpheus if you agree to deliver the crown of the Absolute to him in exchange. There are multiple ways to go about this and we’ll cover ours in our The Githyanki Warrior companion quest guide for Lae’zel.

Help Kith’rak Voss

You’ll get this quest after the events at the Githyanki Creche. Voss will show up at your camp asking to aid you in taking down the queen. You’ll need to accept his help, not kill him and agree to meet up at Baldur’s Gate.

When you begin Act III, head to the northern part of the map to reach the South Span Checkpoint. Pass through and continue down the road a bit to find Sharess’ Caress. Enter the building and make your way to the Upper Floors where you’ll find the Devi’s Den. Head inside and Voss will be there with Raphael. The rest of this quest can be found in our The Githyanki Warrior companion quest guide for Lae’zel.

Help Your Protector

You’ll get this quest automatically when you rest in your camp at the beginning of Act III. A squad of Githyanki will ambush you while the Absolute tries to take control of your mind. You’ll have a few turns to defeat them and reach the portal before the Absolute takes over. Keep in mind that only one member of your party needs to reach the portal. Interact with it to be transported inside the artefact which the Githyanki is also attacking. You’ll need to work your way toward the giant skull to find the protector who will ask you to help. Upon discovering the truth about them, a choice will be presented: attack them or not (we didn’t). After the fight, talk with your protector. They will then offer you a choice: turn into a mind flayer (keeping yourself intact) or don’t. Doing so will get disapproval from the whole party. We chose not to. After the conversation, leave the Astral Plane via the portal to complete the quest.

Baldur's Gate 3 Logo
Guides

Baldur’s Gate III – Find a Cure

by NightlyGamingBinge in

Find a Cure is one of the first main quests you’ll receive in Act I of Baldur’s Gate III. It’s given to you automatically after completing the Escape the Nautiloid main quest and waking up on the beach. For this quest, you’ll be tasked with finding a cure for the Intellect Devourer currently taking up residency in your noggin. You’ll also be able to search the crash site looking for other survivors whom you can try and team up with in your quest to find a cure. This guide will cover the objectives for the Find a Cure main quest and how to go about completing them.

**PLEASE NOTE** – We will be playing a borderline hero character making mostly good or neutral decisions so the guides will be tailored to that at first.

Objectives

  • Find a way to remove the mind flayer parasite
    • Help Omeluum Investigate the Parasite
    • Get Help from the Healer Nettie
    • Ask the Goblin Priestess for Help
    • Get Help from Auntie Ethel
    • Rescue the Druid Halsin
    • Find the Githyanki Creche
  • Find the Source of the parasite

Find a way to remove the mind flayer parasite

You’ll need to complete the below sub objectives to complete this objective!

Recruit Some Pary Members

After waking up on the beach you’ll regain control of your character. Before trying to find a way to deal with the Intellect Devourer in your nogging, you may want to look for some backup. There are four companions you can recruit now and they are listed below. Each is linked to a separate guide on how you can recruit them to your cause. I want to make a special note about Lae’zel. When you approach her trapped in the cage by two tieflings she will ask for help. Start out by choosing the “1. Why should I help you?” option. She will inform you that she knows of a cure for the parasite adding a new objective to the main quest. You may also want to use the “[DECEPTION] This creature is dangerous. Get out of here – leave it to me!” option when dealing with the tieflings. This opens up a persuasion check where you can learn about a healer in a nearby camp thus updating the main objective.

Pit Stop

Starting near where you found Astarion, you’ll want to follow the dirt path north heading through some more of the Nautiloid wreckage. If you didn’t kill the Mind Flayer at the helm, it will be here wounded. You can talk to it for a bit of an interaction where it will try to take over your mind. The coordinates are X: 173 Y:314.

Help Omelumm Investigate the Parasite

In order to get this objective, you’ll need to travel to the Underdark and then head to the Myconid Colony in the northern part of the area. Once there, look for Blurg and speak with him. When prompted tell him about the parasite. He will then call his friend Omeluum who happens to have some experience in that area. Allow Omeluum to examine the parasite then ask him about the magic affecting the tadpole. He’ll suggest a way to get around the magic by using some mushrooms then Blurg will mention Lenore, a cleric of Mystra who might have what you need. Set out for the Arcane Tower in the southwestern part of the Underdark.

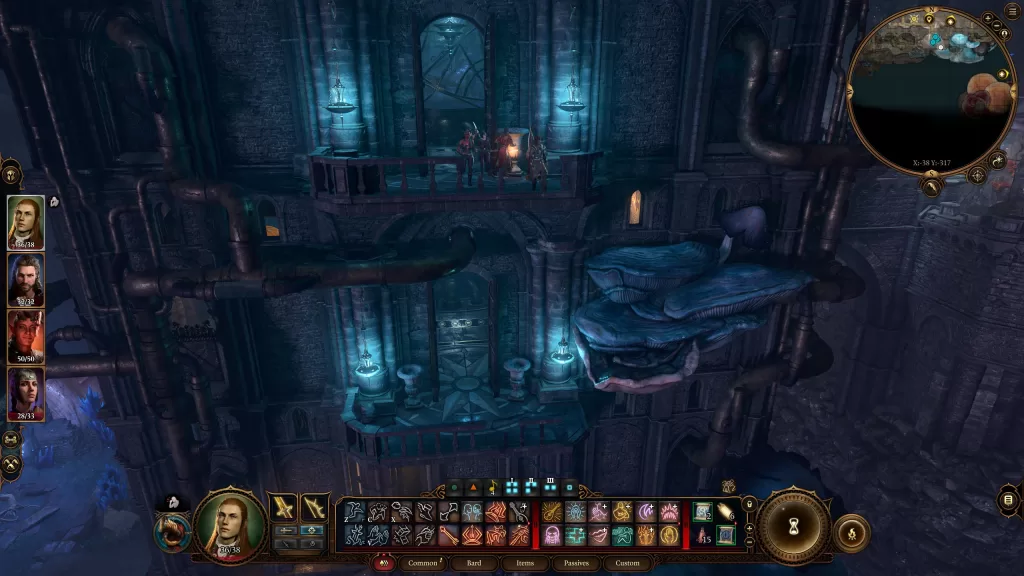
Once you reach the tower, you’ll need to run past the two arcane turrets that guard the entrance. There are also two inside the tower itself. A couple of Guilding Bolts / Sacred Flames from Shadowheart made quick work of them. The elevator is in the center of the room and isn’t working so we’ll need to improvise. Head out the southern door to reach a balcony. Off to the side of it will be a giant blue mushroom. You can jump onto it then from there jump to the balcony below and enter the tower once more.

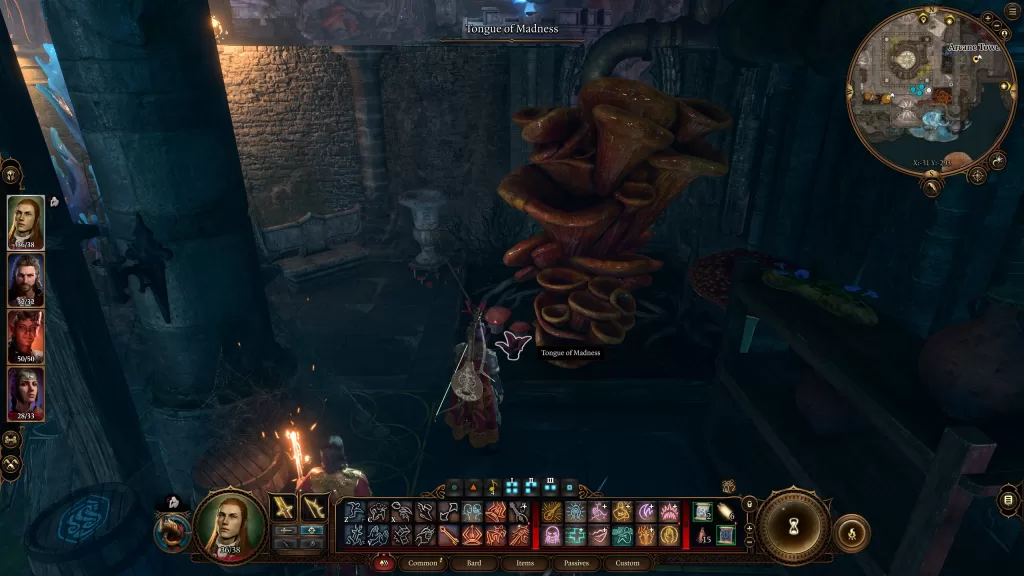
Go to the north side of the room and you’ll find some Timmask Spores on a shelf there. The Tounge of Madness can be found in the same room on the southwest side growing in the dirt under a spiraling orange mushroom. With that, you’ll have all of the ingredients that Omelumm needs. You can return to him if you wish (skip to the last paragraph of this section) or you can keep exploring the tower.

Head out the southern door and jump down to the blue mushroom below. This one is a bit further down, so you may want to cast Feather Fall to reach the ground safely. You should now be outside on the bottom level of the tower. To enter, you can lockpick the door or make yourself really small (like using Gale’s gas spell) and sneak into a pipe you may have found by passing a perception check.

Inside you’ll find the Power Generator for the elevator. To power it, you’ll need to combine a Sussur Bloom from outback with the generator. You can now head up the nearby step to reach the elevator on the second floor. Take it all the way to the top of the tower. There is a bedroom near the top you can stop off at to loot if you wish. There will be a book there called The Roads to Darkness you’ll want to read. It will help you with the next part. Once you reach the top, you’ll be greeting some sort of clockwork automaton. If you read the book, you can repeat lines of it to him. He’ll then mark you as a friend and you’ll be able to explore. If you can’t convince him you are supposed to be there, then you’ll need to fight him and his friends. If you made peace with the automaton, there will be a table nearby with the Guiding Light ring on it. Otherwise, you can loot it from the machine. Equip the ring then hop on the elevator. One of the dials will give you the option to travel to the basement. Use it then loot the basement. There will be a green staff down there.

Return to the Myconid Colony and speak with Omelumm to hand over the items you just collected. He’ll prepare the potion and give it to you to drink. You can then choose to do as he says or refuse to drink the potion. Drinking the potion means you’ll have to pass a couple of Saving Throw checks. Afterward, Omelumm is surprised at the power of the tadpole. He’ll then say there is one more option. He has a ring that prevents the Master Brain from contacting you. He’ll give it to you for something of equal value as it’s quite rare. It’s called the Ring of Mind-Shielding and gives you an Advantage on Saving Throws against charmed. You can also let him keep it. Either way, the objective will be completed.

Get Help from Healer Nettie

To follow up on this lead, travel to the Emerald Grove which is just north of the Roadside Cliffs. You might want to save before approaching it as you’ll be thrown into a fight against a group of Goblins. Once they are dealt with you’ll be free to enter the city. Near the entrance, a cutscene will trigger. During this, the human and tiefling will be at each other’s throats. If you pass an insight skill check, a couple more options become available. Check them in the table below and what the result is.

OptionResult
[MELEE ATTACK] Take a swing at the tiefling,You knock the tiefling out
You talk to Aradin
Lae’zel approves
[MELEE ATTACK] Aim a blow at the human.You knock out the human
You talk to Zevlor
Lae’zel approves
[INTIMIDATION] If you want me to take both of you down, I will. Otherwise, knock it off.Neither party comes to blows
Shadowheart approves
Gale approves
[PERSUASION] More violence won’t bring back those you lost. Stop and think.Neither party comes to blows
Shadowheart approves
Gale approves
Stand back and watch.Human punches the tiefling
You talk to Aradin
Shadowheart approves

For our choice, we decided to mediate the situation before it escalated. Afterward, talk with Zevlor to learn about what’s happening in the grove. Ask him about a healer and he’ll tell you she can be found in the Inner Grove. You can then ask about the ritual to add a new objective to your journal. Zevlor will then ask you to speak with the new first druid providing some choices that are listed below.

  1. I’ll see what I can do.
    • Gale approves.
  2. I’m sorry. I’ve got my own problems.
    • Lae’zel approves / Shadowheart approves
  3. What are you offering for my aid?
    • Nothing

After finishing the conversation make your way to the Inner Grove. Once you reach the bottom of the steps, a quick event will trigger. When it ends, approach the druids for a dialog event. Regardless of the option you choose, you’ll end up being granted passage to meet with Kagha. If you head back up the stairs, locate and speak with Komira and Locke. They will ask you to free their daughter.

Head back down the stairs and through the stone door leading inside the Emerald Grove—Approach Kagha to trigger a cutscene. In order to save the girl, you’ll need to pass a skill check. If you fail the girl will die. After that issue has been resolved, you are free to head into the infirmary where you’ll find Nettie. Speak with her to see if she can help with your ailment. Follow her to the next room and speak with her again. If you answer her questions truthfully she’ll point you in the right direction and give you some poison to take if you start to sprout tentacles. If you lie or are vague, then Nettie will try to kill you with a poisonous root. You can prevent this by passing a couple of checks as she starts acting weird. Either way, she’ll say that Halsin is really the only one who can help you and requests you to find him. This will complete this objective.

Ask the Gobin Priestess for Help

To receive the objective, you’ll need to speak with the goblin prisoner in the Hollow of the Druids’ Grove. She’ll tell you about the priestess which will trigger the objective. Set out for the Goblin Camp west of the Emerald Grove Environs fast travel point. It will be just past the Blighted Village. When you get there, approach the front gate to begin a conversation with the guards. If you pass a skill check they will let you inside the camp. If not then you’ll have to take care of them. If you go that route, make sure to destroy the war drum on the right ledge to prevent them from alerting the rest of the camp to your presence. You’ll then be able to walk through the gate and follow the right path to reach the camp.

When you get to the courtyard Volo will be there. You can interact with him if you want. This will add the Rescue Volo quest to your journal. For your main objective, head through the Heavy Oak Doors leading to the temple. There is an ogre guarding the door, but he won’t stop you. Once you’re inside, you’ll have to pass a skill check with the guards there to head in without an incident. If you’re planning on siding with the goblins, then you’ll need to pass the skill check. Once you’re past the guards, you’ll enter the main room of the temple. Approach the statue to find the priestess. Speak with her and she’ll want to brand you with the mark of the Absolute. You can choose to go through with it or not. Either way, she’ll detect an issue with the tadpole in your head. You can ask for help and she’ll tell you to meet her in her room.

Head there and speak with her again. She’ll try to read your mind. You can stop her and direct her to the tadpole specifically or just let her see everything. It really doesn’t matter. After that, she will say it’s meant to come out and give you a potion for purification. If you pass a skill check it’s actually a sleep potion. Turns out that no matter what choice you make, the priestess will attack you. So you’ll need to kill her to complete this objective.

Get Help from Auntie Ethel

To get this objective, head to the Hollow in the Druids’ Grove and look for the big black cauldron being used to cook dinner. Next to that, there will be a tent with Auntie Ethel inside. Speak with her and when asked, tell her about the tadpoles. She will say that she might have something to help, but that it’s at her house and to meet here there. The easiest way to get there would be to head west from the grove to the Blighted Village then go south. Along the path past the village by the Sunlit Wetlands, you’ll find Auntie Ethel being harassed by a pair of guys who are looking for their sister. Approach them to join in on the conversation. If you pass the perception check, you’ll be able to tell that Ethel is lying about not seeing the sister.

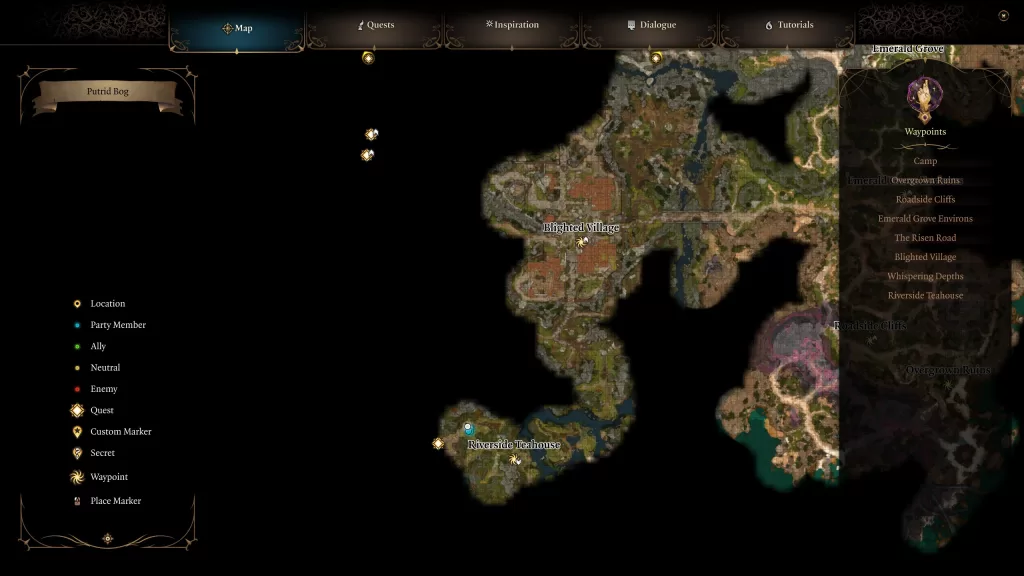
If you stand up for Ethel, then you’ll have to fight the two brothers. Afterward, Ethel will invite you to her house in the southwestern part of the wetlands. Along the way an event will trigger and you’ll get an INVESTIGATION skill check. Passing it will show you what that area really looks like. Make your way there passing the Riverside Teahouse Ancinet Sigil Circle. Nearby, you can speak to Gandrel who can tell you a little bit more about Auntie Ethel. Head to her house when you’re ready then go inside to trigger a conversation with her. She will tell you that she can remove the parasite but it will cost you an eye. If you agree she will take your eye and then attempt to remove the parasite which will fail. She’ll then tell you that your parasite was touched by more than Mind Flayers and that you’re a lost soul before taking off with the missing girl from earlier. This will complete this objective for the quest.

Alternatively, you can call Ethel out on her lying and side with the brothers. Doing this will piss her off resulting in her teleporting away. Speak with the brother to learn that their sister hasn’t been seen since she went to visit Ethel and that they are going to save her. This will start the Save Mayrina quest. Follow after them heading southwest to Ether’s house. Along the way an event will trigger and you’ll get an INVESTIGATION skill check. Passing it will show you what that area really looks like. You’ll then want to stop by the Riverside Teahouse Ancient Sigil Circle to grab the fast travel point. Nearby, speak with Gandrel to learn more about Ethel before confronting her and about a familiar person that he’s hunting.

When you’re ready enter Ethel’s house to be thrown into a conversation with Ethel. Mayrina will be inside and is clearly her prisoner. If you ask about her brothers, Ethel will lie and say they stopped by and left. She’ll then try to change topics and talk about the tadpole in your head. Keep pushing her about the girl which will eventually lead to a fight against the level 5 hag and a few level 4 Redcaps also completing the Get Help from Auntie Ether objective. You’ll now be on the Save Mayrina quest which can be found here.

Rescue the Druid Halsin

You can receive this objective in the multiple ways listed below.

  • Talk to Nettie in the Emerald Grove
  • Talk to Rath in the Emerald Grove
  • Talk with Aradin in the Hollow

When you have the objective, set out for the Goblin Camp west of the Emerald Grove Environs fast travel point. It will be just past the Blighed Village. When you get there, approach the front gate to being a conversation with the guards. If you pass a skill check they will let you inside the camp. If not then you’ll have to take care of them. If you go that route, make sure to destroy the war drum on the right ledge to prevent them from altering the rest of the camp to your presence. You’ll then be able to walk through the gate and follow the right path to reach the camp.

When you get to the courtyard Volo will be there. You can interact with him if you want. This will add the Rescue Volo quest to your journal. For your main objective, head through the Heavy Oak Doors leading to the temple. There is an ogre guarding the door, but he won’t stop you. Once you’re inside, you’ll have to pass a skill check with the guards to pass without an incident. Otherwise, you’re going to be fighting a lot of goblins.

There are a couple of things you can do before heading to Halsin. To the east of the statue where the priestess is, you’ll find Liam being tortured and Volo locked in a cage. If you pass a skill check, you can get the torturer to leave and speak with Liam. You can ask him about Halsin then you’ll have to pass another skill check to free him. He will return to the grove on his own. Next head to the room with Volo and persuade the goblin there to let him go. She will give you the key to unlock his cage the bugger off. Let him out then either tell him to go or meet you at your camp.

Your next stop is to exit the room with Volo’s cage and go right following the walkway to a room with three sarcophagi. Use the door on the other side of the room to reach the Work Pens. Head down the stairs and approach the cage on the right to find some goblins throwing rocks at a bear. This will lead to a conversation where you can either attack them or use your Illithind powers to make them free the bear. There is also a key for the cage on the table with all of the meat. Then he will aid you in defeating the goblins. You’ll want to focus on one and three. They will try to flee the room and alter the rest of the goblins. There are also two beats in the other cage that the goblins will release for you to deal with.

Once you’ve dealt with all of the enemies, you’ll get to speak with the bear who is actually Halsin! Exhaust his dialog options until you reach the part where you’ll have to make a choice. Since we’re to bring Haslin back, we agreed to help him deal with the goblins. If you break him with you, then you’ll have to take out all of the goblins. Otherwise, you can try and just deal with the three leaders.

  • True Soul Gut – You can have her go to her room and deal with her there.
  • Minthara – You can fight her in the side area she’s in. Make sure to take care of the orb and drum first.
  • Dror Ragzlin – Climb up into the rafters above his throne. Also, make sure to deal with both drums.

After dealing with all three of the leaders, return to Haslin in the Worg Pens (we left him there) and let him know the leaders are no more. Halsin will then request you meet him at the grove. Make your way over there and head to the Sacred Pool where he’s chewing out a certain someone. After that speak with Rath in the Emerald Grove to get you’re reward and complete the quest.
Find the Githyanki Creche

To learn about the Githyanki Creche, you’ll need to travel to the Druids’ Grove and speak with Zorru who can be found in the Hollow. Make sure you bring Lae’zel with you as she wants to interrogate him. During this interrogation, Zorru will tell you they spotted a group of Githyanki in the northwest part of the map near the mountain pass. Head there with Lae’zel in the party then approach the bridge for a cutscene. After it ends, follow Lae’zel down to meet with her comrades. For the best outcome, let Lae’zel do the talking. When the dragon rider tells her to report to her creche, use persuasion to tell Lae’zel to play along. If you don’t, you’ll have to fight off a squad of Githyanki.

You’ll then need to head to the Mountain Pass. Seek out the Rosymorn Monastery in the northwestern corner then head inside and locate the basement where you’ll find the Creche.

Make your way to the infirmary on the west side of the building then speak with Ghustil Stornugoss and tell her about the tadpole. She’ll ask you how long you’ve been infected then send you to the Zaith’isk to have the little bugger removed. Interact with the machine and you’ll get the option to investigate it pending a skill check. If Lae’zel is with you, she will demand to go first. You can let her or make her wait on you. Either way, you’ll need to pass a series of skill checks to learn that the purification device is actually a murder weapon and to free yourself/Lae’zel from it. The doctor will be mad because she wants the parasite. You can tell her that the parasite saved Lae’zel or convince her that it’s dead. Choosing to tell her the parasite saved Lae’zel causes the doctor to run out of the room to get her tools while locking the party in the room. If you pick the lock or wait for the doctor to come back, then you’ll be attacked by a group of Githyanki. If you choose to tell her the parasite died, you’ll have to pass a Deception skill check. Doing this will result in the doctor letting you go. You’ll then need to talk to Lae’zel after either option and this object will be completed.

Find the Source of the Parasite

You won’t be able to update this objective until you reach the Defeat Ketheric Thorm quest at the end of Act II. Upon taking down the evildoer, a cutscene will trigger and this quest will finally complete.

For more guides on Baldur’s Gate III, click here!

Baldur's Gate 3 Logo
Guides

Baldur’s Gate III – How to Open the Vault Door in the Building on the Risen Road

by NightlyGamingBinge in

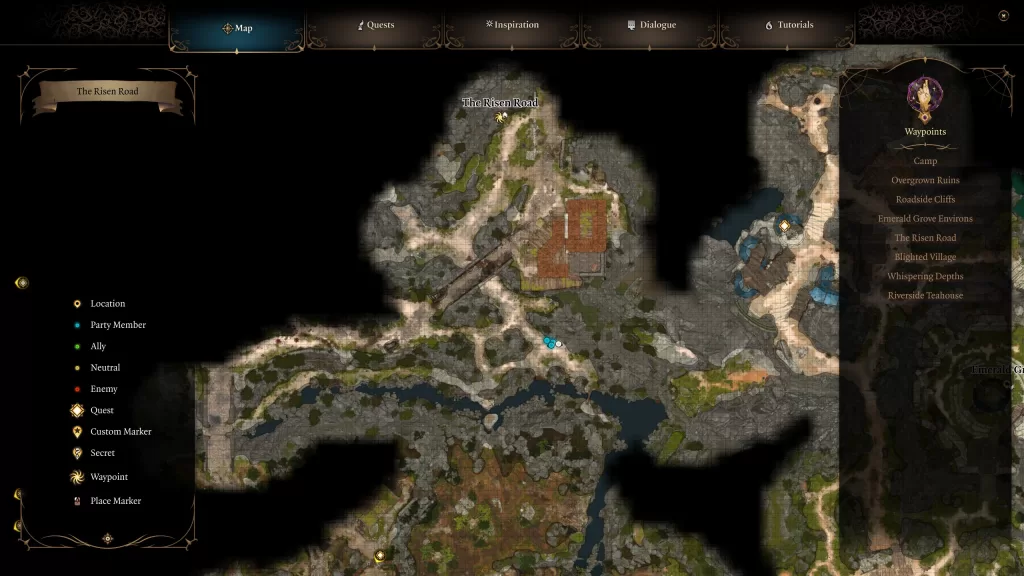
While exploring the area of Act I in Baldur’s Gate III, you’ll eventually come to The Risen Road which is northwest of the Druids’ Grove. If you enter the building across from the Ancient Sigil Circle, you’ll find an Ornate Wooden Hatch on the floor immediately to the right. Interacting with the hatch will take you down to the cellar where you’ll spot a giant Vault Door. Unfortunately, that bad boy is locked up tight. Luckily for you, that’s where our handy How to Open the Vault Door in the Budiling on the Risen Road guide that you are reading now comes in handy 🙂

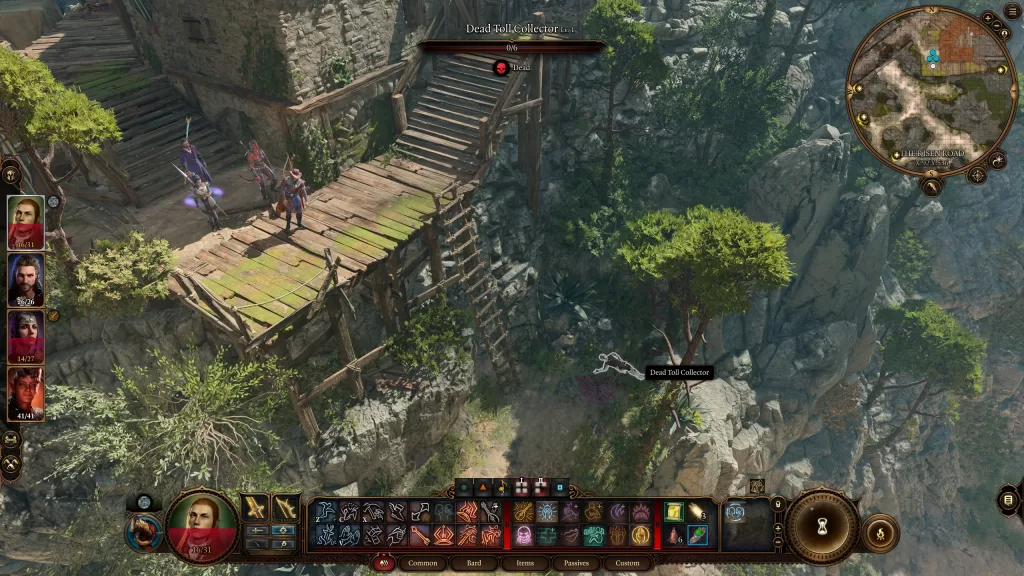
Outside when facing the building, follow the walkway around to the right. You should spot a ladder there leading down the side path off the mountain. Climb down and locate the body of the Dead Toll Collector. Next, you want to cast Speak with Dead on it and exhaust all of the dialog options. The guy will tell you that he dropped a key to the vault down the mountain. You can get the Speak with Dead skill by wearing The Amulet of Lost Voices found in the Dank Crypt. A guide on that can be found here if you need it.

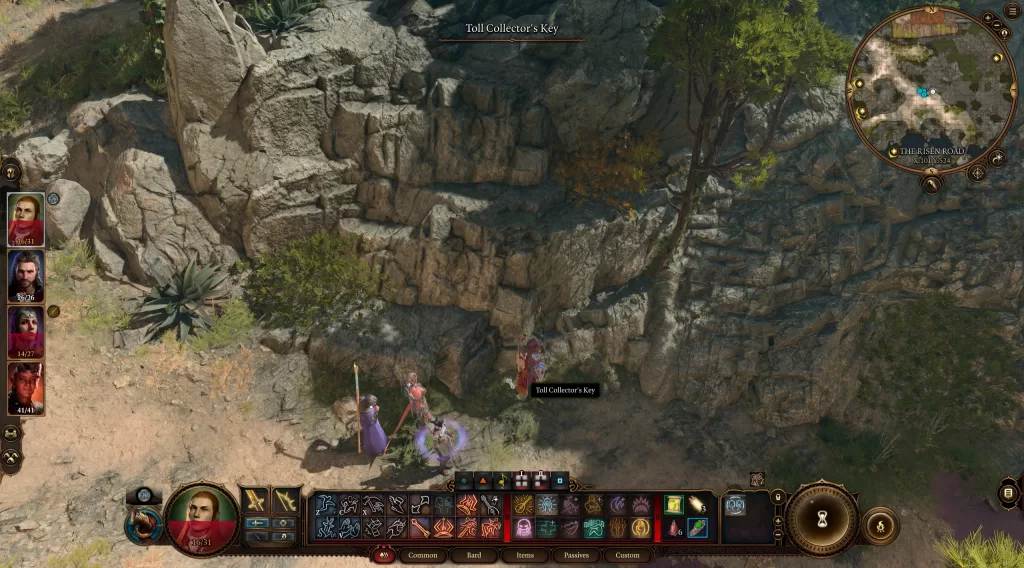
Otherwise, you can just head down the slope swinging a right to reach the location in the image below.

You can find the key on the ground there. Pick it up and return to the Vault Door then stick it in the keyhole!

Baldur's Gate 3 Logo
Guides

Baldur’s Gate III – How to Recruit the Ogres in Act I

by NightlyGamingBinge in

Do you find yourself looking for an “OH SHIT!” button when things go south like when your killing all of the goblins or assaulting the Driuds’ Grove? Could you use some extra muscle to help decimate your strongest foes? If you answered yes to either of those questions, then you need to recruit you some ogres! In our How to Recruit the Ogres in Act I guide we’ll tell you exactly what you’ll need to do to summon the ogres to fight for you (with some caveats)!

To first locate the ogres, you’ll need to travel to the Blighted Village which can be found to the west of the Emerald Grove. Be wary as you approach the village for it is occupied by a squad of goblins. They will confront you upon entering the town. You’ll want to try and persuade them to let you enter town peacefully by passing a skill check. Once you’re in the clear, head for the remnants of a building on the southwest side of town. Inside you will find the ogre trio led by Lump the Enlightened.

As soon as you enter the building, you’ll approach the ogres and begin a conversation with them. They will ask if you have the brand of the Absolute. Telling them no leads to a fight so try not to do that. You’ll instead want to pass a DECEPTION skill check stating that you are in fact one of the Absolute’s chosen disciples. Follow that up by mentioning that you noticed that don’t bare a brand of their own. From there you can suggest that they fight for you instead of the Absolute. This will give you the options shown in the table below.

OptionResult
I’ll give you 500 gold if I can call you into battle.You’ll pay Lump 500 gold and receive Lump’s War Horn
Shadowheart / Karlach approves
[DECEPTION] 1000 gold – after you fight for me.You’ll receive Lump’s War Horn
Shadowheart / Karlach approves
[PERSUASION] I’ll pay you in the flesh of the fallen – you’ll have your fill.You’ll receive Lump’s War Horn
Shadowheart / Karlach approves
I’ve changed my mind. The offer is off the table.You’ll end the conversation without fighting
Attack.Leads to a fight against the ogres

A couple of things to note: For the deception option, if the ogres fall in battle, then you don’t have to pay. If you want to go the persuasion route trying to convince them to work for food, you’ll need to pass a skill check of 20, but it’s by far the cheapest option. Whatever you decide, the conversation ends after you make a choice.

For more guides on Baldur’s Gate III, click here!

Baldur's Gate 3 Logo
Guides

Baldur’s Gate III – Our Fiery Friend

by NightlyGamingBinge in

Our Fiery Freind is the companion quest for Karlach in Baldur’s Gate III. You’ll receive this quest automatically after allowing this fiery lady to join your party.

How to Recruit Karlach

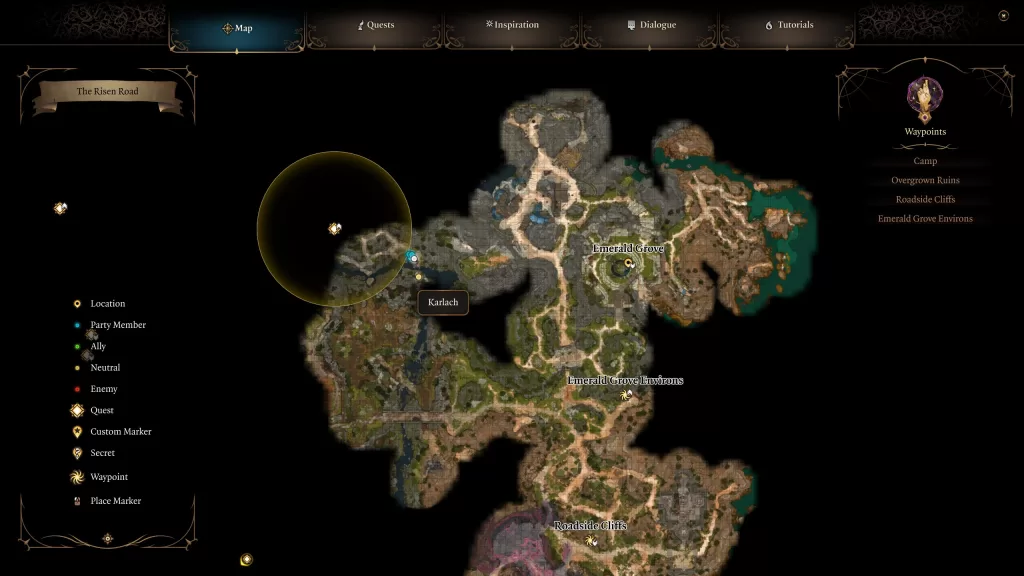
Karlach can be found on The Risen Road west of the Emerald Grove along the river. You’ll be led to her if you have Wyll in the party as tracking her down is part of his companion quest.

Where to Recruit Karlach

When you find her, you’ll learn that she was forced against her will to fight on the front lines and when the opportunity presented itself, she fled in hopes of returning home. You’ll then have the option to let her join you. If Wyll is with you, you’ll need to convince him not to attack her first. If you don’t have Wyll, he will show up and you’ll still have to try and get him to stand down… or you can deal with him. The choice is yours!

Deal with the Paladins of Tyr (Hunt the Devil)

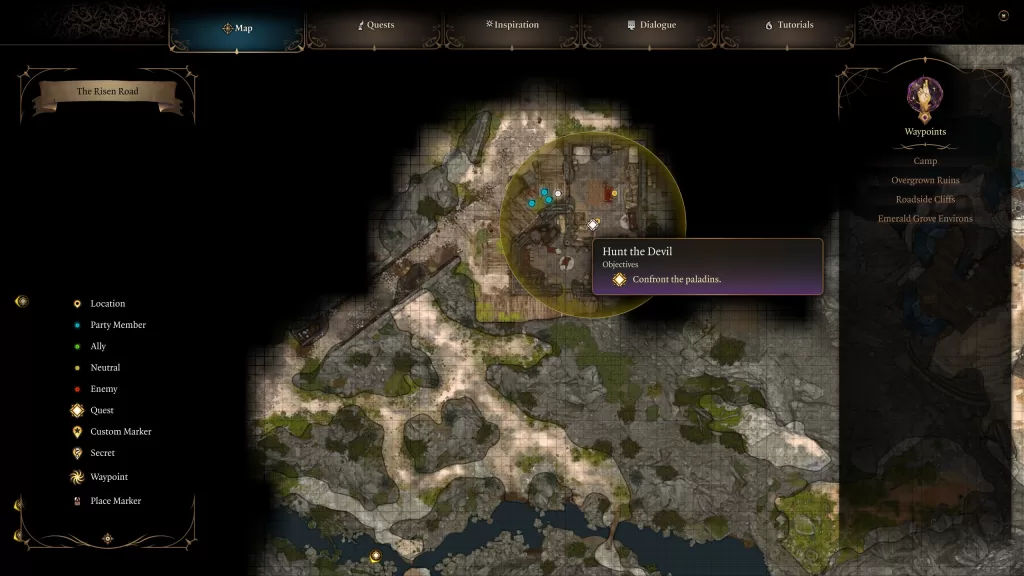
As part of the deal with joining your party, Karlach will ask for help dealing with the Paladins of Tyr that were sent after her. They can be found up the path from where you first met Karlach in a building.

Hunt the Devil

Make sure you are at least level 4 before heading inside to begin a conversation with Anders. He’ll claim they just want to be left alone, but if you read his thoughts, you’ll learn they are after Karlach. Further, if you pass the insight check, you’ll be able to tell he’s lying. Call them out on their BS to start a fight against the trio. After winning the battle, Karlach gets a little heated and starts burning the place down. It’s best to exit the building and let her do her thing. Speak with her when she calms down then exhaust her dialog options.

The Hellion’s Heart

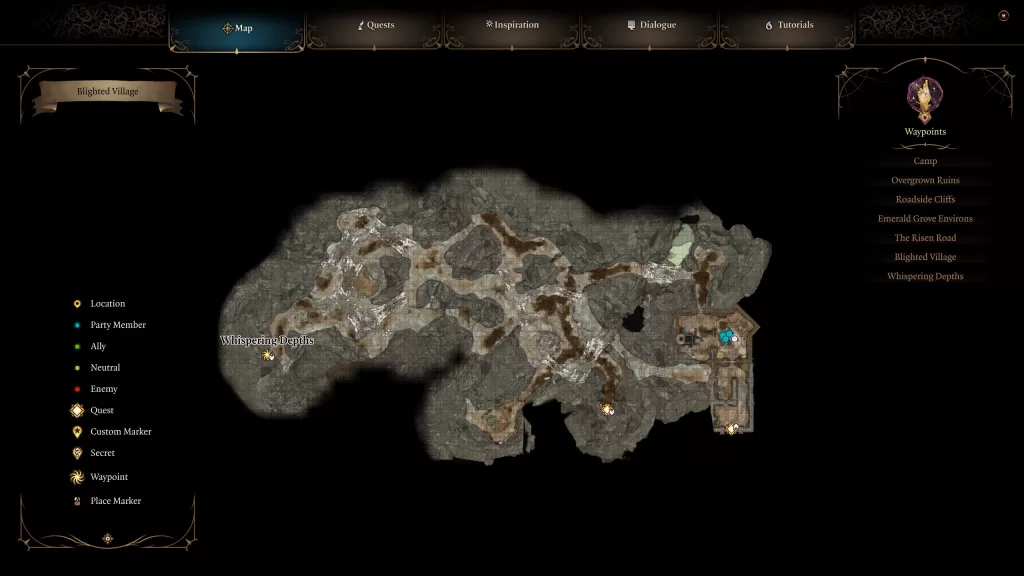
After dealing with the paladins, Karlach will inform the group that her engine is running hot and she needs an infernal mechanic to get it tuned up. Luckily for us, if you talked to everyone in the Druids’ Grove, you’ll know that Dammon in the Hollow fits the bill. Make your way over to his makeshift smithy and speak to him. Dammon will say he can fix Karlach’s engine but he’ll require Infernal Iron. You can loot one from a chest in an abandoned forge on the east side of the Whispering Depths. To reach it, travel to the Blighted Village then climb down the well.

Hellion's Heart

Once you have the iron, take it back to Dammon and he’ll fashion something for Karlach. It’s not a permanent solution but will work until he comes up with something. Speak to Karlach afterward.

Once you start Act II and reach Last Light Inn, you’ll come across Dammon again. Speak with him there in the forge to receive some good and bad news. If you collected more Infernal Iron before leaving Act I, you can give him one now so that Karlach can touch people. After that happens, you better pull her in for a hug! Also, make sure to speak with her afterward. This objective will also be completed.

Act I Infernal Iron/Metal Locations

  • Whispering Depths (Blighted Village) – Shown in the image under The Hellion’s Heart
  • Goblin Camp – In Dror Ragzlin’s personal stash behind the throne
  • Zhentarim Hideout (under Waukeen’s Rest) – In a locked chest behind a locked gate at the very northern part of the area
  • Gyrmforge (Underdark) – Speak with Stonemason Kith and pass all three skill checks

Act II Infernal Iron/Metal Locations.

  • Mason’s Guild (southwestern part of the area) – on a table near some cranes
  • Gauntlet of Shar (northeastern part) – Defeat and loot Yurgir
  • Gauntlet of Shar (vault west of Ancient Sigil Circle) – Lockpicking the 30 door

Find Lord Gortash

After completing the Defeat Ketheric Thorm main quest, speak with Karlach to learn about her history with Gortash. She’ll then tell you that she wants to hunt down and kill the man.

Once you reach Wyrm’s Rock Fortress in Baldur’s Bate, Gortash will invite you to attend his inauguration ceremony. Head through the doorway on the right (east) to find another set of doors leading to the Audience Hall. Enter the Audience Hall and head towards the throne to trigger a cutscene. During it, you’ll have to convince Karlach to not attack Gortash right now (or let her charge him to no avail).

For more guides on Baldur’s Gate III, click here!