Find a Cure is one of the first main quests you’ll receive in Act I of Baldur’s Gate III. It’s given to you automatically after completing the Escape the Nautiloid main quest and waking up on the beach. For this quest, you’ll be tasked with finding a cure for the Intellect Devourer currently taking up residency in your noggin. You’ll also be able to search the crash site looking for other survivors whom you can try and team up with in your quest to find a cure. This guide will cover the objectives for the Find a Cure main quest and how to go about completing them.
**PLEASE NOTE** – We will be playing a borderline hero character making mostly good or neutral decisions so the guides will be tailored to that at first.
Objectives
- Find a way to remove the mind flayer parasite
- Help Omeluum Investigate the Parasite
- Get Help from the Healer Nettie
- Ask the Goblin Priestess for Help
- Get Help from Auntie Ethel
- Rescue the Druid Halsin
- Find the Githyanki Creche
- Find the Source of the parasite
Find a way to remove the mind flayer parasite
You’ll need to complete the below sub objectives to complete this objective!
Recruit Some Pary Members
After waking up on the beach you’ll regain control of your character. Before trying to find a way to deal with the Intellect Devourer in your nogging, you may want to look for some backup. There are four companions you can recruit now and they are listed below. Each is linked to a separate guide on how you can recruit them to your cause. I want to make a special note about Lae’zel. When you approach her trapped in the cage by two tieflings she will ask for help. Start out by choosing the “1. Why should I help you?” option. She will inform you that she knows of a cure for the parasite adding a new objective to the main quest. You may also want to use the “[DECEPTION] This creature is dangerous. Get out of here – leave it to me!” option when dealing with the tieflings. This opens up a persuasion check where you can learn about a healer in a nearby camp thus updating the main objective.
Pit Stop
Starting near where you found Astarion, you’ll want to follow the dirt path north heading through some more of the Nautiloid wreckage. If you didn’t kill the Mind Flayer at the helm, it will be here wounded. You can talk to it for a bit of an interaction where it will try to take over your mind. The coordinates are X: 173 Y:314.
Help Omelumm Investigate the Parasite
In order to get this objective, you’ll need to travel to the Underdark and then head to the Myconid Colony in the northern part of the area. Once there, look for Blurg and speak with him. When prompted tell him about the parasite. He will then call his friend Omeluum who happens to have some experience in that area. Allow Omeluum to examine the parasite then ask him about the magic affecting the tadpole. He’ll suggest a way to get around the magic by using some mushrooms then Blurg will mention Lenore, a cleric of Mystra who might have what you need. Set out for the Arcane Tower in the southwestern part of the Underdark.

Once you reach the tower, you’ll need to run past the two arcane turrets that guard the entrance. There are also two inside the tower itself. A couple of Guilding Bolts / Sacred Flames from Shadowheart made quick work of them. The elevator is in the center of the room and isn’t working so we’ll need to improvise. Head out the southern door to reach a balcony. Off to the side of it will be a giant blue mushroom. You can jump onto it then from there jump to the balcony below and enter the tower once more.

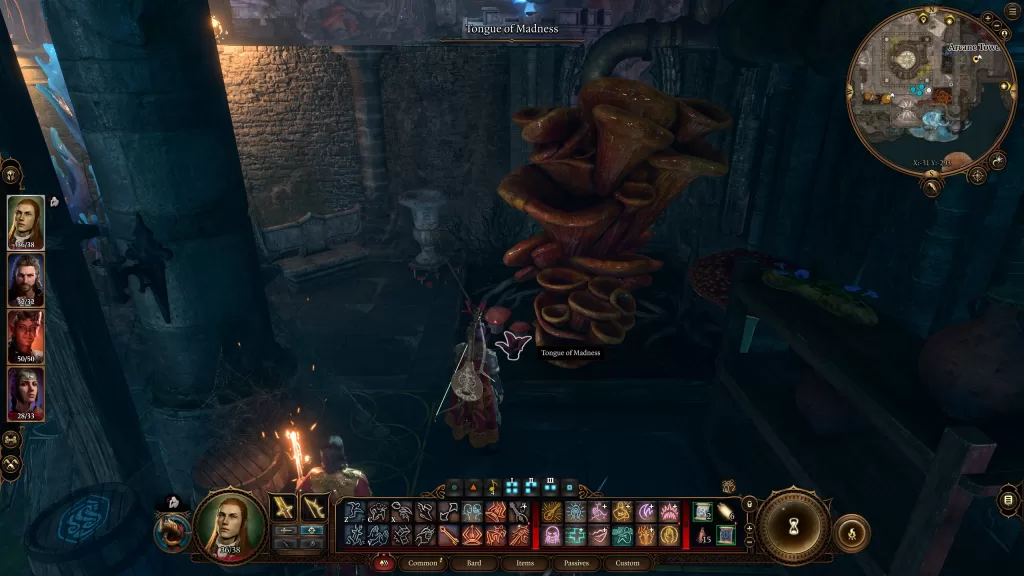
Go to the north side of the room and you’ll find some Timmask Spores on a shelf there. The Tounge of Madness can be found in the same room on the southwest side growing in the dirt under a spiraling orange mushroom. With that, you’ll have all of the ingredients that Omelumm needs. You can return to him if you wish (skip to the last paragraph of this section) or you can keep exploring the tower.
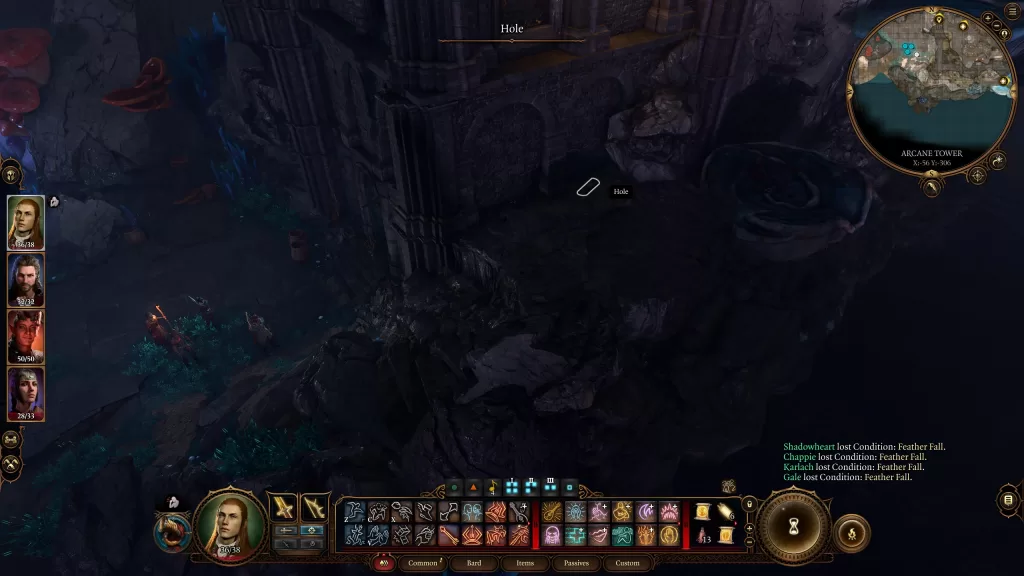
Head out the southern door and jump down to the blue mushroom below. This one is a bit further down, so you may want to cast Feather Fall to reach the ground safely. You should now be outside on the bottom level of the tower. To enter, you can lockpick the door or make yourself really small (like using Gale’s gas spell) and sneak into a pipe you may have found by passing a perception check.
Inside you’ll find the Power Generator for the elevator. To power it, you’ll need to combine a Sussur Bloom from outback with the generator. You can now head up the nearby step to reach the elevator on the second floor. Take it all the way to the top of the tower. There is a bedroom near the top you can stop off at to loot if you wish. There will be a book there called The Roads to Darkness you’ll want to read. It will help you with the next part. Once you reach the top, you’ll be greeting some sort of clockwork automaton. If you read the book, you can repeat lines of it to him. He’ll then mark you as a friend and you’ll be able to explore. If you can’t convince him you are supposed to be there, then you’ll need to fight him and his friends. If you made peace with the automaton, there will be a table nearby with the Guiding Light ring on it. Otherwise, you can loot it from the machine. Equip the ring then hop on the elevator. One of the dials will give you the option to travel to the basement. Use it then loot the basement. There will be a green staff down there.
Return to the Myconid Colony and speak with Omelumm to hand over the items you just collected. He’ll prepare the potion and give it to you to drink. You can then choose to do as he says or refuse to drink the potion. Drinking the potion means you’ll have to pass a couple of Saving Throw checks. Afterward, Omelumm is surprised at the power of the tadpole. He’ll then say there is one more option. He has a ring that prevents the Master Brain from contacting you. He’ll give it to you for something of equal value as it’s quite rare. It’s called the Ring of Mind-Shielding and gives you an Advantage on Saving Throws against charmed. You can also let him keep it. Either way, the objective will be completed.
Get Help from Healer Nettie
To follow up on this lead, travel to the Emerald Grove which is just north of the Roadside Cliffs. You might want to save before approaching it as you’ll be thrown into a fight against a group of Goblins. Once they are dealt with you’ll be free to enter the city. Near the entrance, a cutscene will trigger. During this, the human and tiefling will be at each other’s throats. If you pass an insight skill check, a couple more options become available. Check them in the table below and what the result is.
| Option | Result |
|---|---|
| [MELEE ATTACK] Take a swing at the tiefling, | You knock the tiefling out You talk to Aradin Lae’zel approves |
| [MELEE ATTACK] Aim a blow at the human. | You knock out the human You talk to Zevlor Lae’zel approves |
| [INTIMIDATION] If you want me to take both of you down, I will. Otherwise, knock it off. | Neither party comes to blows Shadowheart approves Gale approves |
| [PERSUASION] More violence won’t bring back those you lost. Stop and think. | Neither party comes to blows Shadowheart approves Gale approves |
| Stand back and watch. | Human punches the tiefling You talk to Aradin Shadowheart approves |
For our choice, we decided to mediate the situation before it escalated. Afterward, talk with Zevlor to learn about what’s happening in the grove. Ask him about a healer and he’ll tell you she can be found in the Inner Grove. You can then ask about the ritual to add a new objective to your journal. Zevlor will then ask you to speak with the new first druid providing some choices that are listed below.
- I’ll see what I can do.
- Gale approves.
- I’m sorry. I’ve got my own problems.
- Lae’zel approves / Shadowheart approves
- What are you offering for my aid?
- Nothing
After finishing the conversation make your way to the Inner Grove. Once you reach the bottom of the steps, a quick event will trigger. When it ends, approach the druids for a dialog event. Regardless of the option you choose, you’ll end up being granted passage to meet with Kagha. If you head back up the stairs, locate and speak with Komira and Locke. They will ask you to free their daughter.
Head back down the stairs and through the stone door leading inside the Emerald Grove—Approach Kagha to trigger a cutscene. In order to save the girl, you’ll need to pass a skill check. If you fail the girl will die. After that issue has been resolved, you are free to head into the infirmary where you’ll find Nettie. Speak with her to see if she can help with your ailment. Follow her to the next room and speak with her again. If you answer her questions truthfully she’ll point you in the right direction and give you some poison to take if you start to sprout tentacles. If you lie or are vague, then Nettie will try to kill you with a poisonous root. You can prevent this by passing a couple of checks as she starts acting weird. Either way, she’ll say that Halsin is really the only one who can help you and requests you to find him. This will complete this objective.
Ask the Gobin Priestess for Help
To receive the objective, you’ll need to speak with the goblin prisoner in the Hollow of the Druids’ Grove. She’ll tell you about the priestess which will trigger the objective. Set out for the Goblin Camp west of the Emerald Grove Environs fast travel point. It will be just past the Blighted Village. When you get there, approach the front gate to begin a conversation with the guards. If you pass a skill check they will let you inside the camp. If not then you’ll have to take care of them. If you go that route, make sure to destroy the war drum on the right ledge to prevent them from alerting the rest of the camp to your presence. You’ll then be able to walk through the gate and follow the right path to reach the camp.
When you get to the courtyard Volo will be there. You can interact with him if you want. This will add the Rescue Volo quest to your journal. For your main objective, head through the Heavy Oak Doors leading to the temple. There is an ogre guarding the door, but he won’t stop you. Once you’re inside, you’ll have to pass a skill check with the guards there to head in without an incident. If you’re planning on siding with the goblins, then you’ll need to pass the skill check. Once you’re past the guards, you’ll enter the main room of the temple. Approach the statue to find the priestess. Speak with her and she’ll want to brand you with the mark of the Absolute. You can choose to go through with it or not. Either way, she’ll detect an issue with the tadpole in your head. You can ask for help and she’ll tell you to meet her in her room.
Head there and speak with her again. She’ll try to read your mind. You can stop her and direct her to the tadpole specifically or just let her see everything. It really doesn’t matter. After that, she will say it’s meant to come out and give you a potion for purification. If you pass a skill check it’s actually a sleep potion. Turns out that no matter what choice you make, the priestess will attack you. So you’ll need to kill her to complete this objective.
Get Help from Auntie Ethel
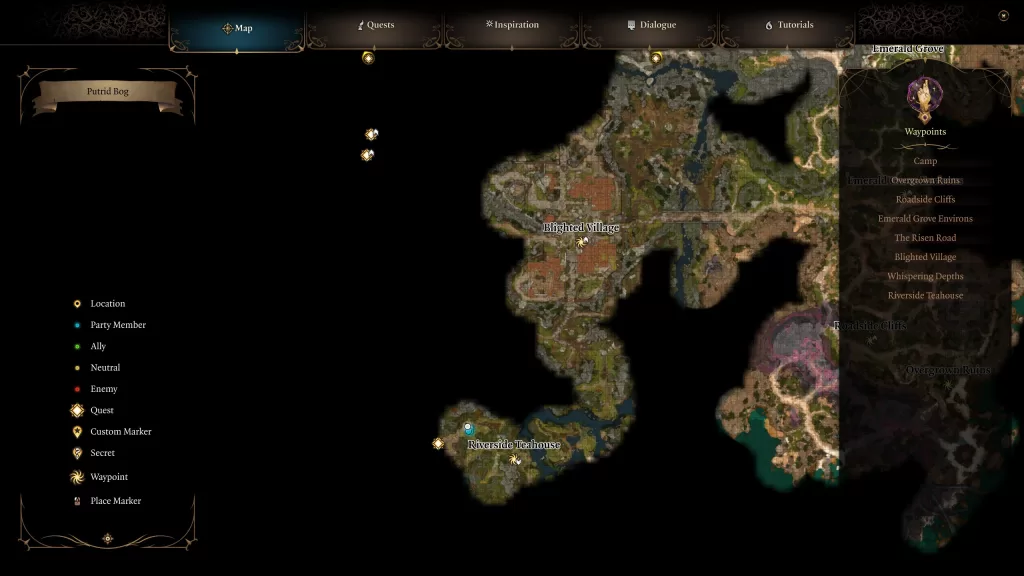
To get this objective, head to the Hollow in the Druids’ Grove and look for the big black cauldron being used to cook dinner. Next to that, there will be a tent with Auntie Ethel inside. Speak with her and when asked, tell her about the tadpoles. She will say that she might have something to help, but that it’s at her house and to meet here there. The easiest way to get there would be to head west from the grove to the Blighted Village then go south. Along the path past the village by the Sunlit Wetlands, you’ll find Auntie Ethel being harassed by a pair of guys who are looking for their sister. Approach them to join in on the conversation. If you pass the perception check, you’ll be able to tell that Ethel is lying about not seeing the sister.
If you stand up for Ethel, then you’ll have to fight the two brothers. Afterward, Ethel will invite you to her house in the southwestern part of the wetlands. Along the way an event will trigger and you’ll get an INVESTIGATION skill check. Passing it will show you what that area really looks like. Make your way there passing the Riverside Teahouse Ancinet Sigil Circle. Nearby, you can speak to Gandrel who can tell you a little bit more about Auntie Ethel. Head to her house when you’re ready then go inside to trigger a conversation with her. She will tell you that she can remove the parasite but it will cost you an eye. If you agree she will take your eye and then attempt to remove the parasite which will fail. She’ll then tell you that your parasite was touched by more than Mind Flayers and that you’re a lost soul before taking off with the missing girl from earlier. This will complete this objective for the quest.
Alternatively, you can call Ethel out on her lying and side with the brothers. Doing this will piss her off resulting in her teleporting away. Speak with the brother to learn that their sister hasn’t been seen since she went to visit Ethel and that they are going to save her. This will start the Save Mayrina quest. Follow after them heading southwest to Ether’s house. Along the way an event will trigger and you’ll get an INVESTIGATION skill check. Passing it will show you what that area really looks like. You’ll then want to stop by the Riverside Teahouse Ancient Sigil Circle to grab the fast travel point. Nearby, speak with Gandrel to learn more about Ethel before confronting her and about a familiar person that he’s hunting.
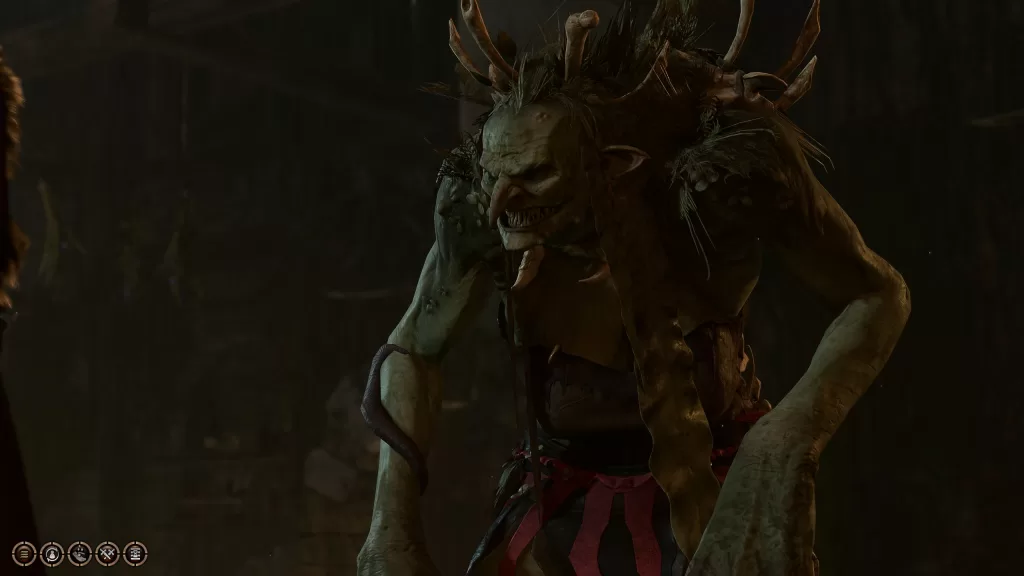
When you’re ready enter Ethel’s house to be thrown into a conversation with Ethel. Mayrina will be inside and is clearly her prisoner. If you ask about her brothers, Ethel will lie and say they stopped by and left. She’ll then try to change topics and talk about the tadpole in your head. Keep pushing her about the girl which will eventually lead to a fight against the level 5 hag and a few level 4 Redcaps also completing the Get Help from Auntie Ether objective. You’ll now be on the Save Mayrina quest which can be found here.
Rescue the Druid Halsin
You can receive this objective in the multiple ways listed below.
- Talk to Nettie in the Emerald Grove
- Talk to Rath in the Emerald Grove
- Talk with Aradin in the Hollow
When you have the objective, set out for the Goblin Camp west of the Emerald Grove Environs fast travel point. It will be just past the Blighed Village. When you get there, approach the front gate to being a conversation with the guards. If you pass a skill check they will let you inside the camp. If not then you’ll have to take care of them. If you go that route, make sure to destroy the war drum on the right ledge to prevent them from altering the rest of the camp to your presence. You’ll then be able to walk through the gate and follow the right path to reach the camp.
When you get to the courtyard Volo will be there. You can interact with him if you want. This will add the Rescue Volo quest to your journal. For your main objective, head through the Heavy Oak Doors leading to the temple. There is an ogre guarding the door, but he won’t stop you. Once you’re inside, you’ll have to pass a skill check with the guards to pass without an incident. Otherwise, you’re going to be fighting a lot of goblins.
There are a couple of things you can do before heading to Halsin. To the east of the statue where the priestess is, you’ll find Liam being tortured and Volo locked in a cage. If you pass a skill check, you can get the torturer to leave and speak with Liam. You can ask him about Halsin then you’ll have to pass another skill check to free him. He will return to the grove on his own. Next head to the room with Volo and persuade the goblin there to let him go. She will give you the key to unlock his cage the bugger off. Let him out then either tell him to go or meet you at your camp.
Your next stop is to exit the room with Volo’s cage and go right following the walkway to a room with three sarcophagi. Use the door on the other side of the room to reach the Work Pens. Head down the stairs and approach the cage on the right to find some goblins throwing rocks at a bear. This will lead to a conversation where you can either attack them or use your Illithind powers to make them free the bear. There is also a key for the cage on the table with all of the meat. Then he will aid you in defeating the goblins. You’ll want to focus on one and three. They will try to flee the room and alter the rest of the goblins. There are also two beats in the other cage that the goblins will release for you to deal with.
Once you’ve dealt with all of the enemies, you’ll get to speak with the bear who is actually Halsin! Exhaust his dialog options until you reach the part where you’ll have to make a choice. Since we’re to bring Haslin back, we agreed to help him deal with the goblins. If you break him with you, then you’ll have to take out all of the goblins. Otherwise, you can try and just deal with the three leaders.
- True Soul Gut – You can have her go to her room and deal with her there.
- Minthara – You can fight her in the side area she’s in. Make sure to take care of the orb and drum first.
- Dror Ragzlin – Climb up into the rafters above his throne. Also, make sure to deal with both drums.
After dealing with all three of the leaders, return to Haslin in the Worg Pens (we left him there) and let him know the leaders are no more. Halsin will then request you meet him at the grove. Make your way over there and head to the Sacred Pool where he’s chewing out a certain someone. After that speak with Rath in the Emerald Grove to get you’re reward and complete the quest.
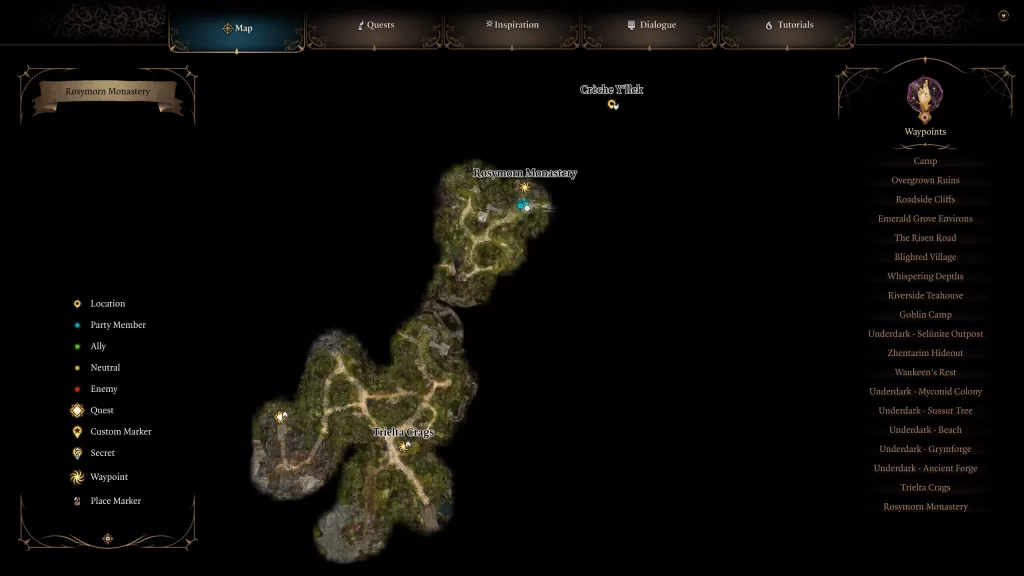
Find the Githyanki Creche
To learn about the Githyanki Creche, you’ll need to travel to the Druids’ Grove and speak with Zorru who can be found in the Hollow. Make sure you bring Lae’zel with you as she wants to interrogate him. During this interrogation, Zorru will tell you they spotted a group of Githyanki in the northwest part of the map near the mountain pass. Head there with Lae’zel in the party then approach the bridge for a cutscene. After it ends, follow Lae’zel down to meet with her comrades. For the best outcome, let Lae’zel do the talking. When the dragon rider tells her to report to her creche, use persuasion to tell Lae’zel to play along. If you don’t, you’ll have to fight off a squad of Githyanki.
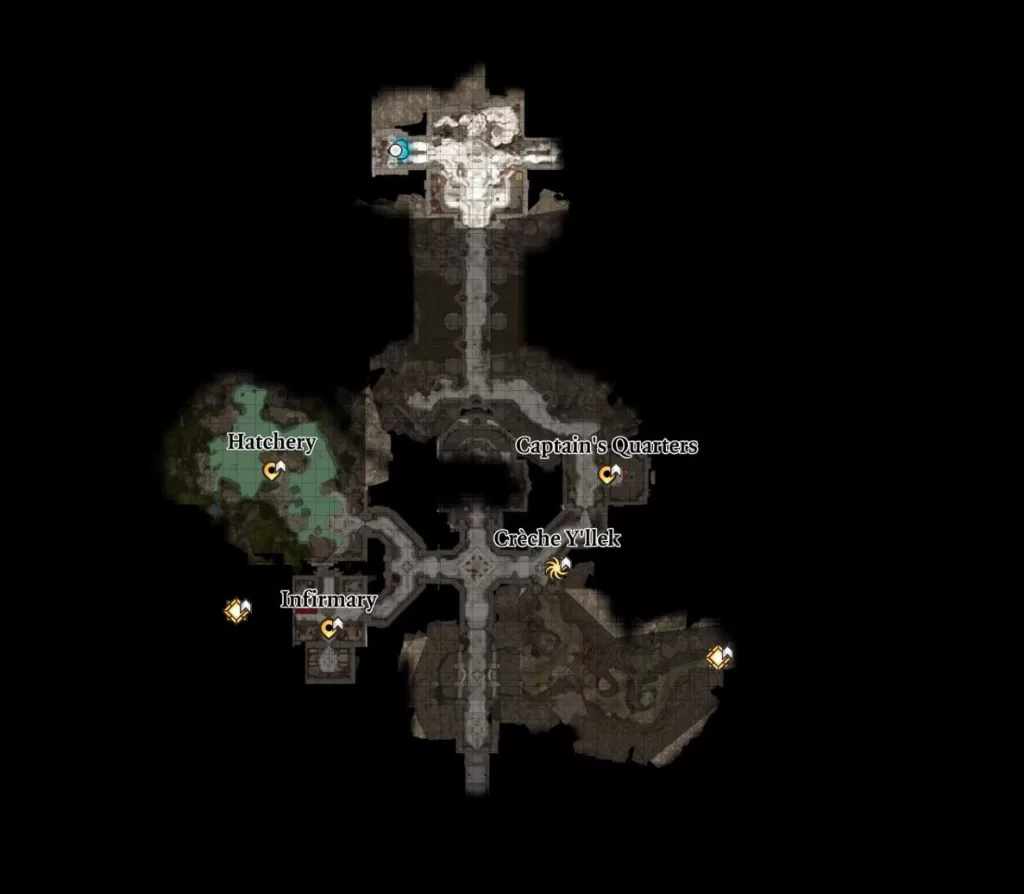
You’ll then need to head to the Mountain Pass. Seek out the Rosymorn Monastery in the northwestern corner then head inside and locate the basement where you’ll find the Creche.
Make your way to the infirmary on the west side of the building then speak with Ghustil Stornugoss and tell her about the tadpole. She’ll ask you how long you’ve been infected then send you to the Zaith’isk to have the little bugger removed. Interact with the machine and you’ll get the option to investigate it pending a skill check. If Lae’zel is with you, she will demand to go first. You can let her or make her wait on you. Either way, you’ll need to pass a series of skill checks to learn that the purification device is actually a murder weapon and to free yourself/Lae’zel from it. The doctor will be mad because she wants the parasite. You can tell her that the parasite saved Lae’zel or convince her that it’s dead. Choosing to tell her the parasite saved Lae’zel causes the doctor to run out of the room to get her tools while locking the party in the room. If you pick the lock or wait for the doctor to come back, then you’ll be attacked by a group of Githyanki. If you choose to tell her the parasite died, you’ll have to pass a Deception skill check. Doing this will result in the doctor letting you go. You’ll then need to talk to Lae’zel after either option and this object will be completed.
Find the Source of the Parasite
You won’t be able to update this objective until you reach the Defeat Ketheric Thorm quest at the end of Act II. Upon taking down the evildoer, a cutscene will trigger and this quest will finally complete.