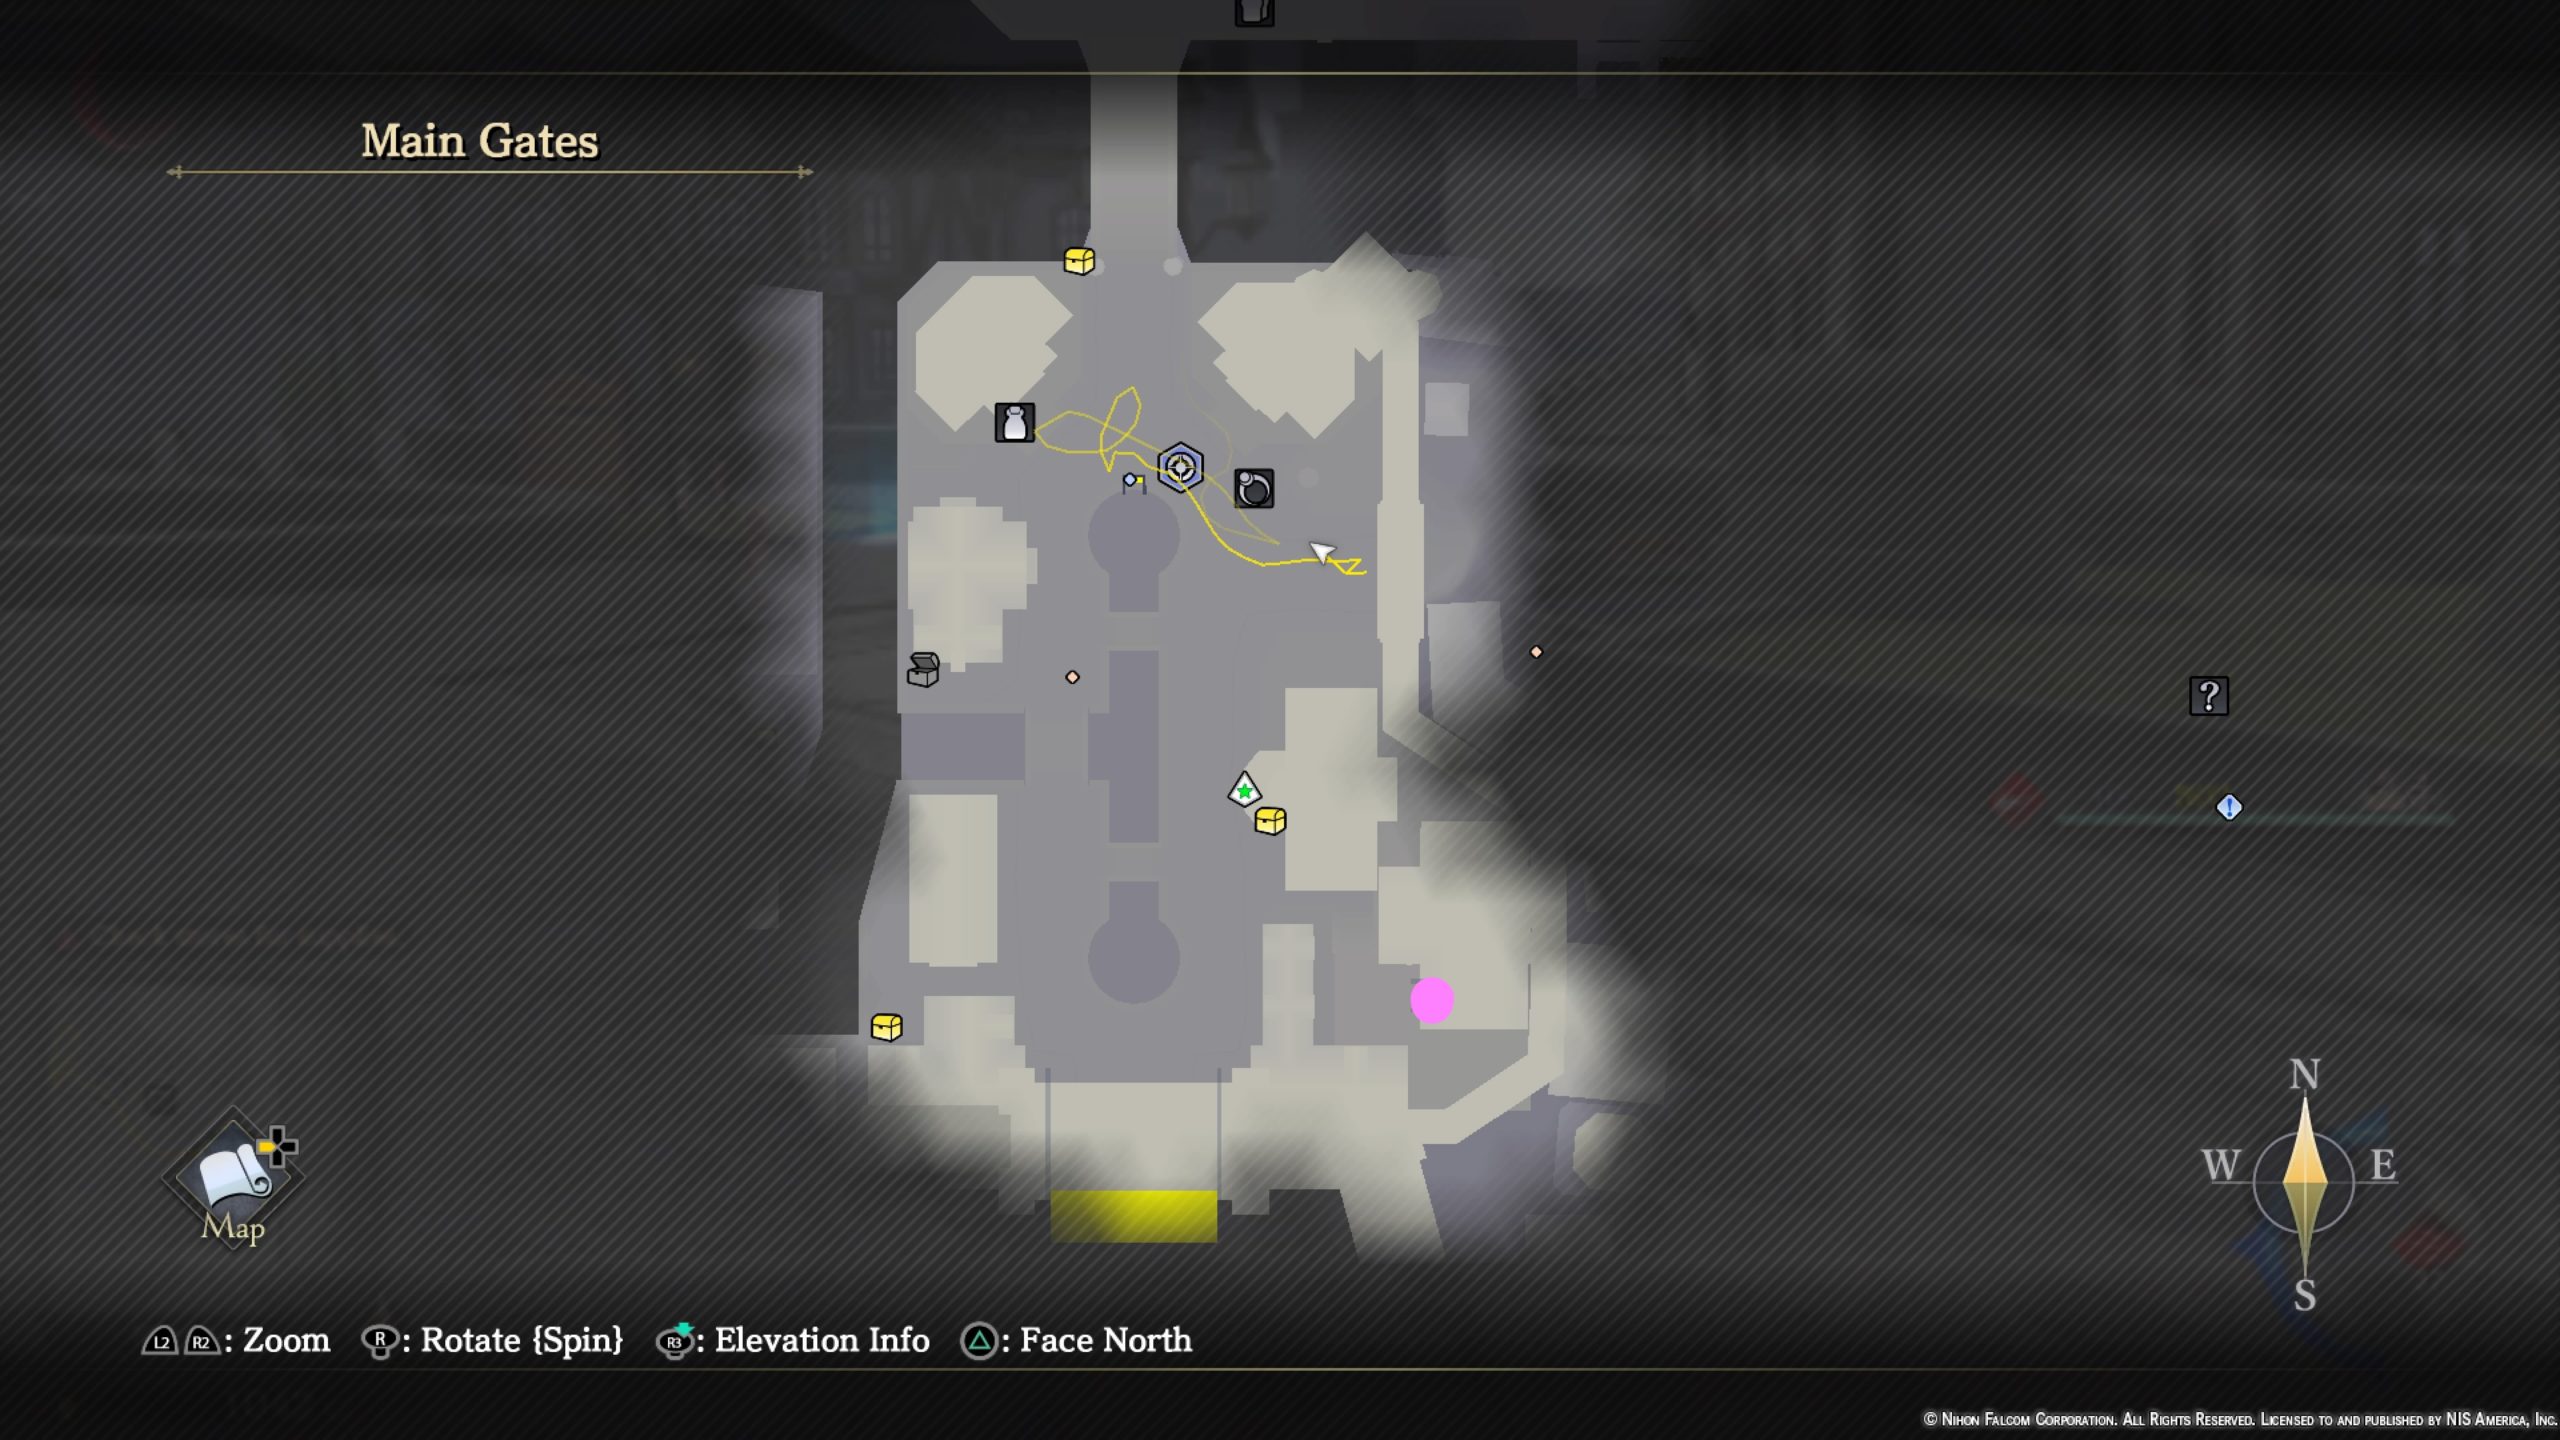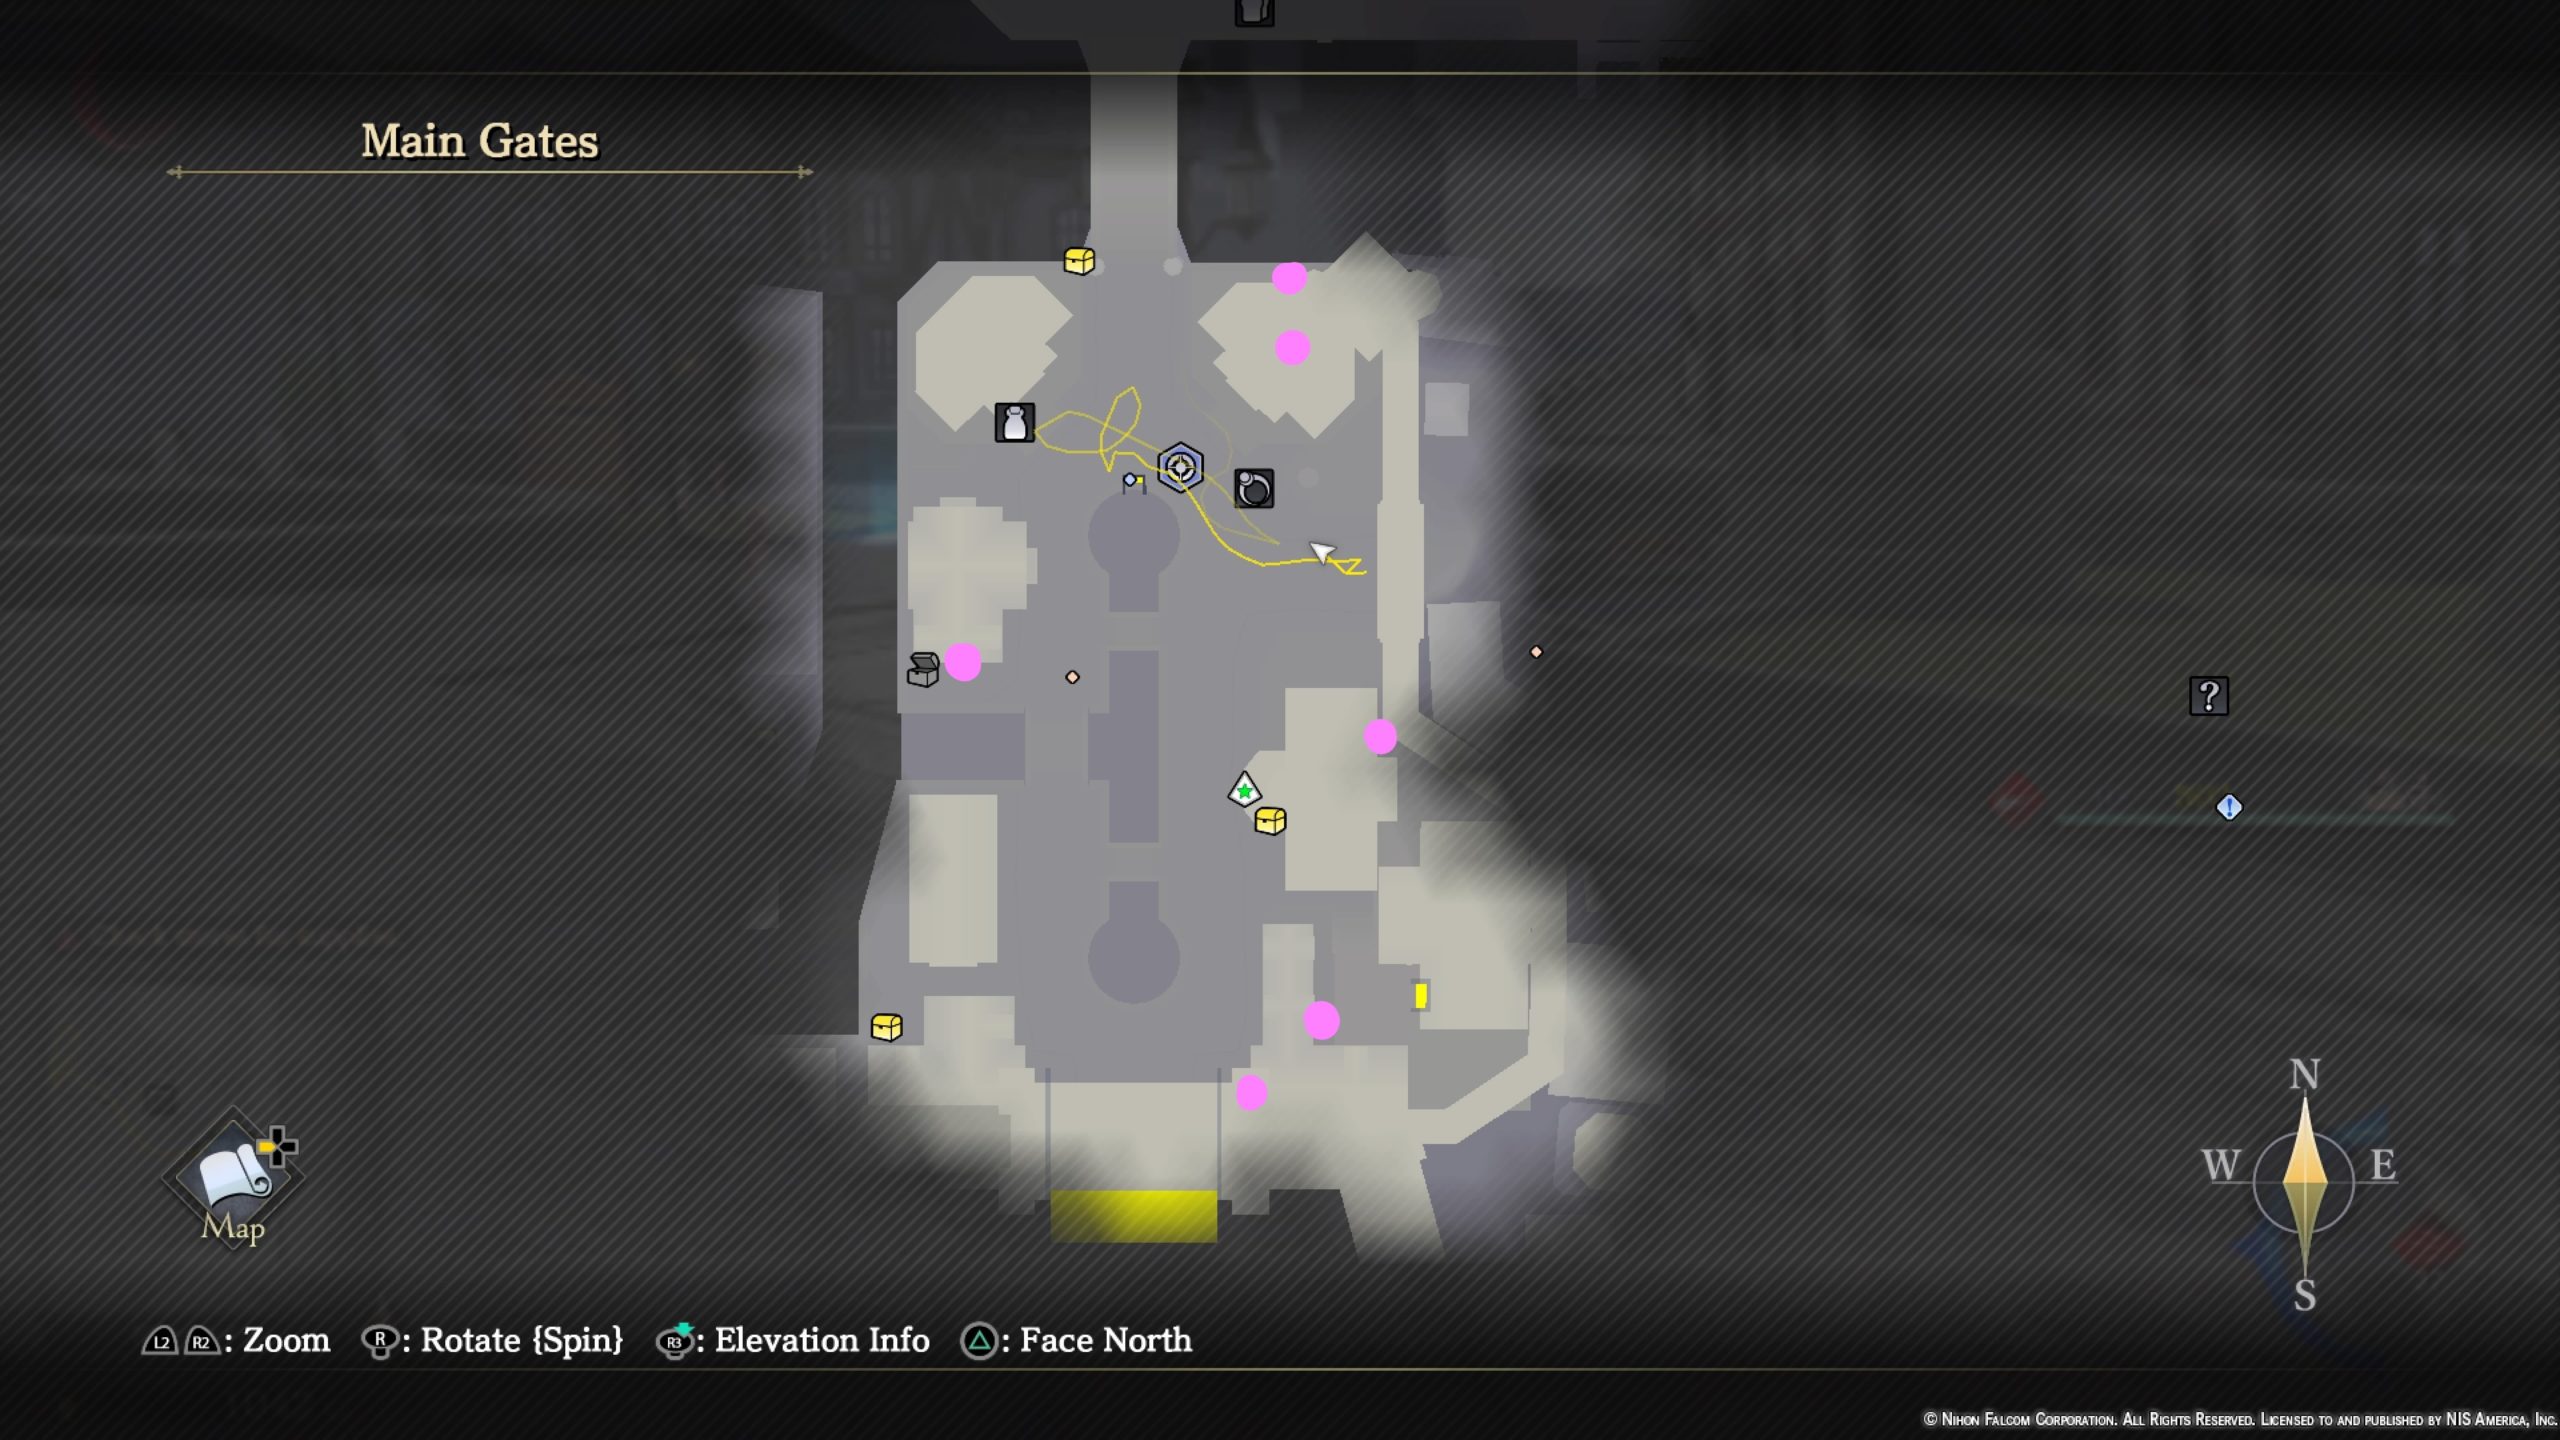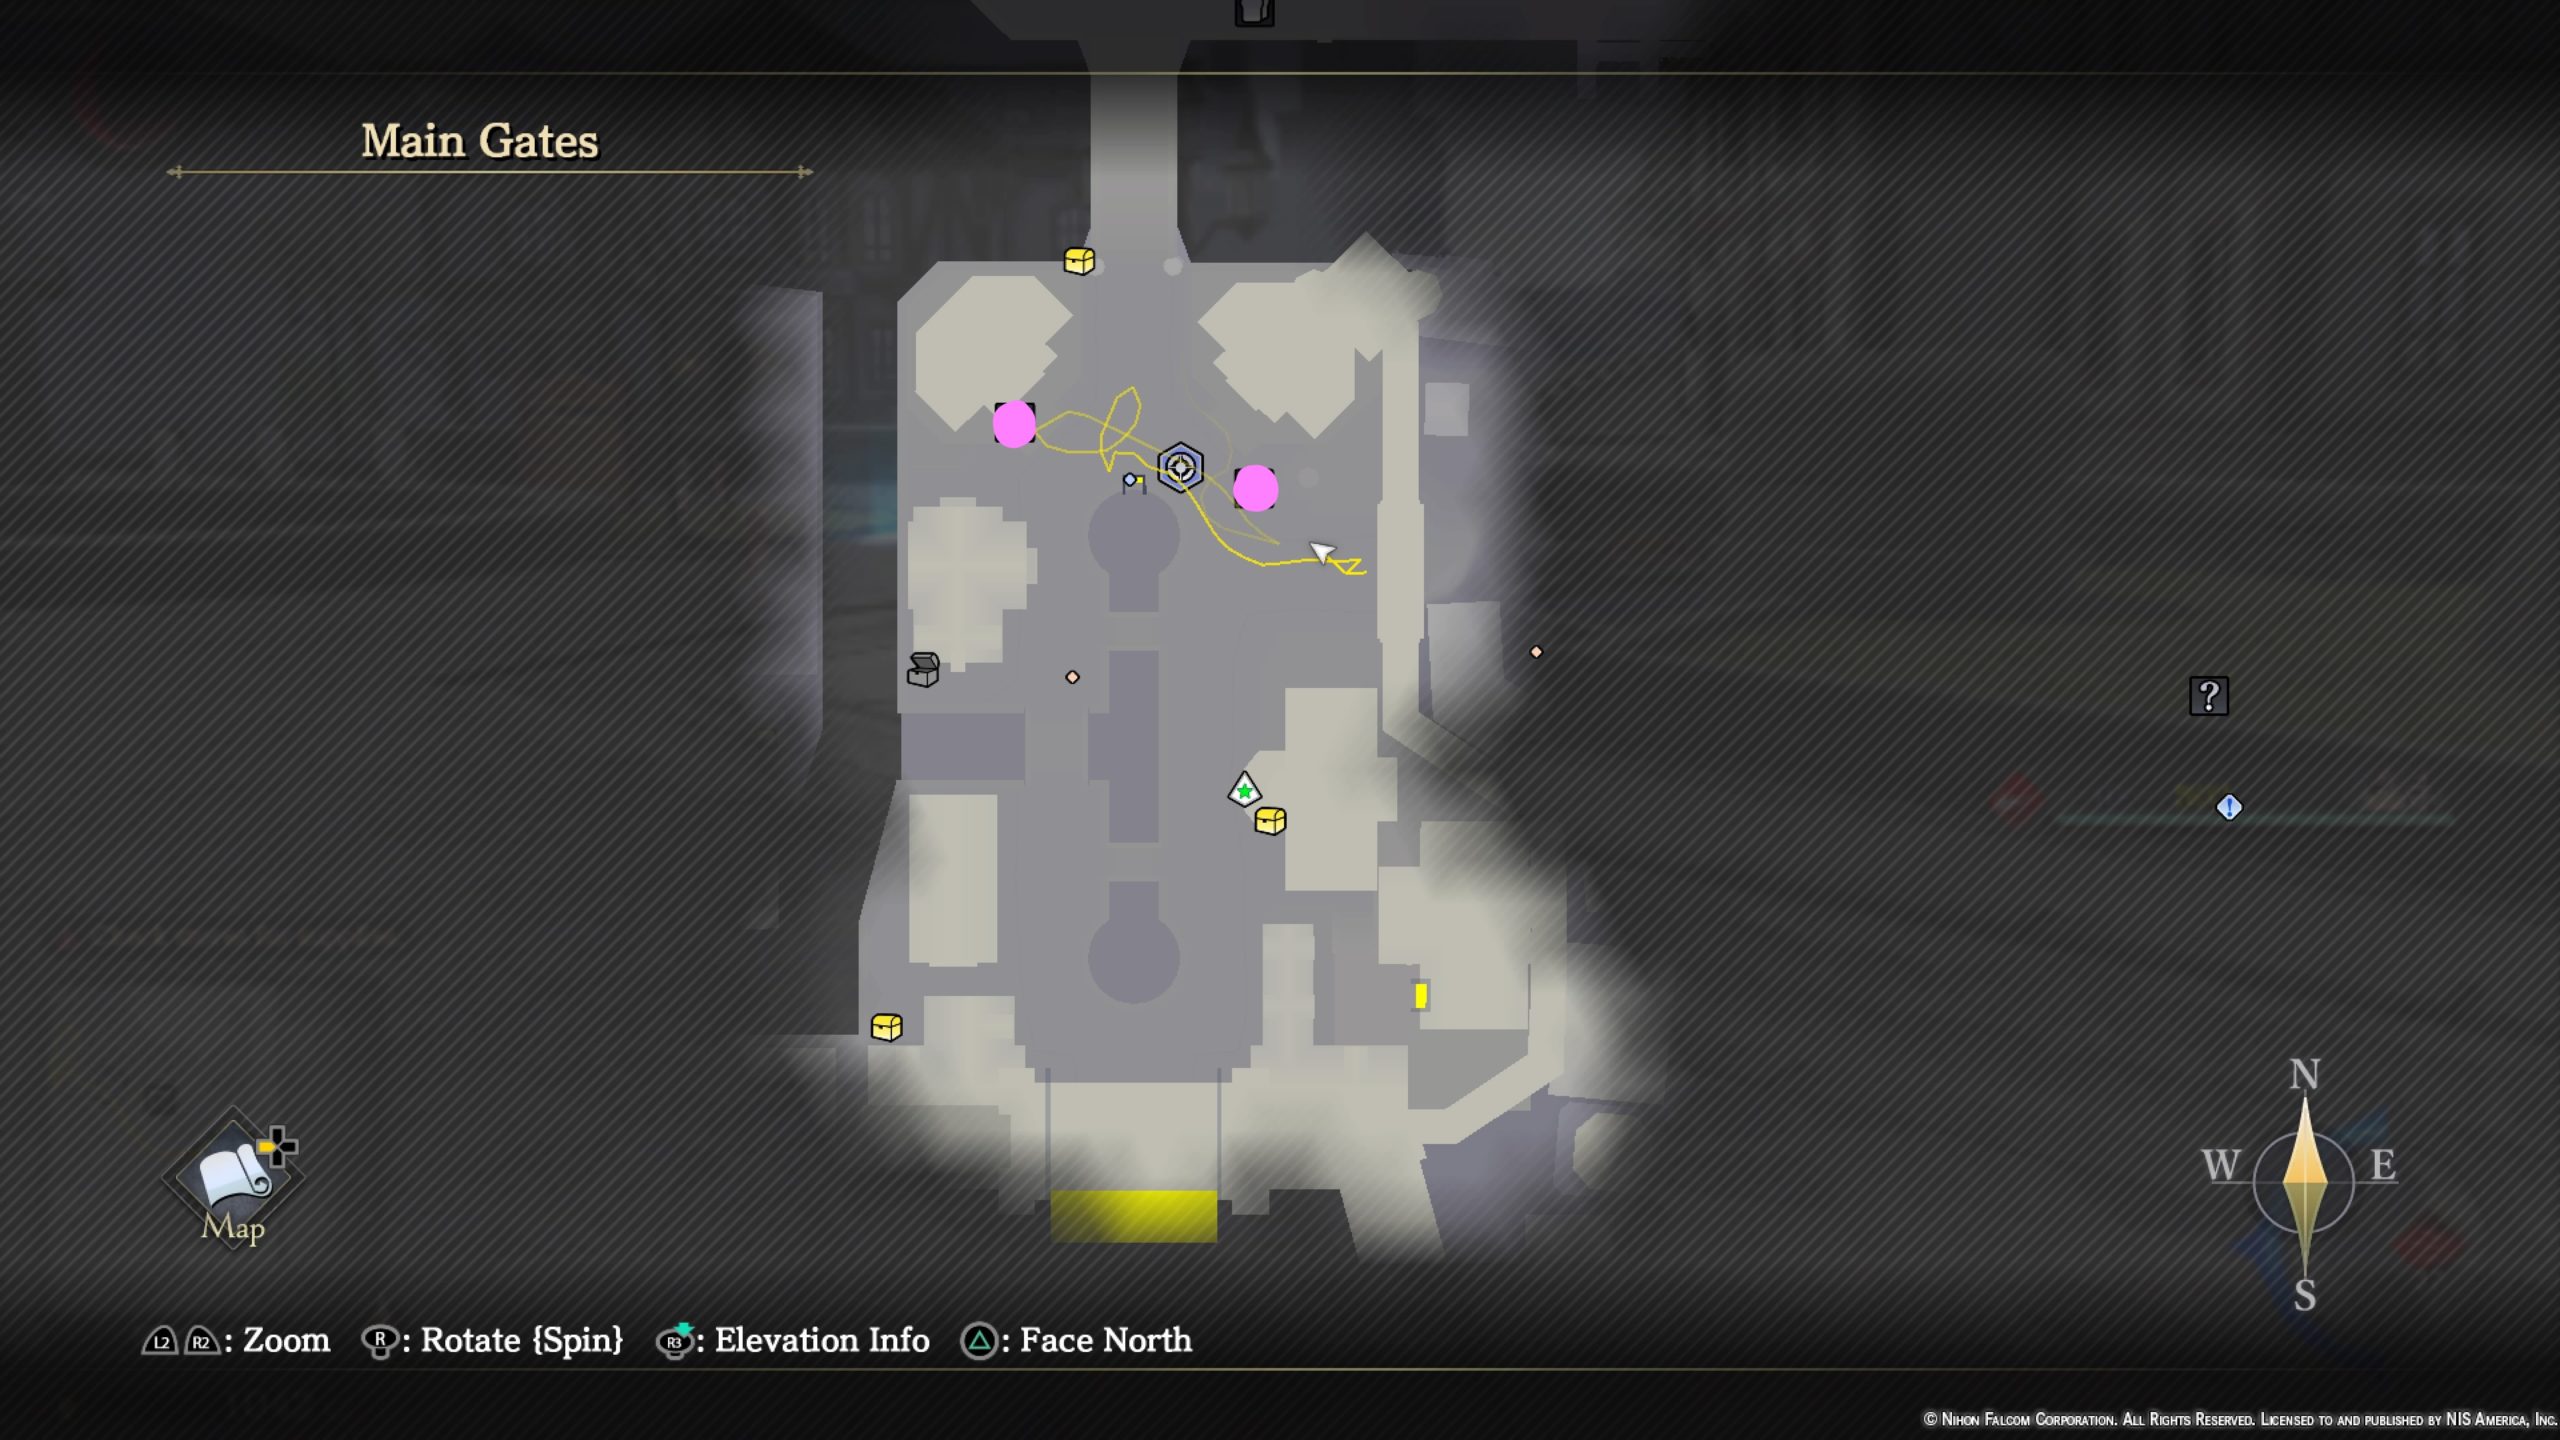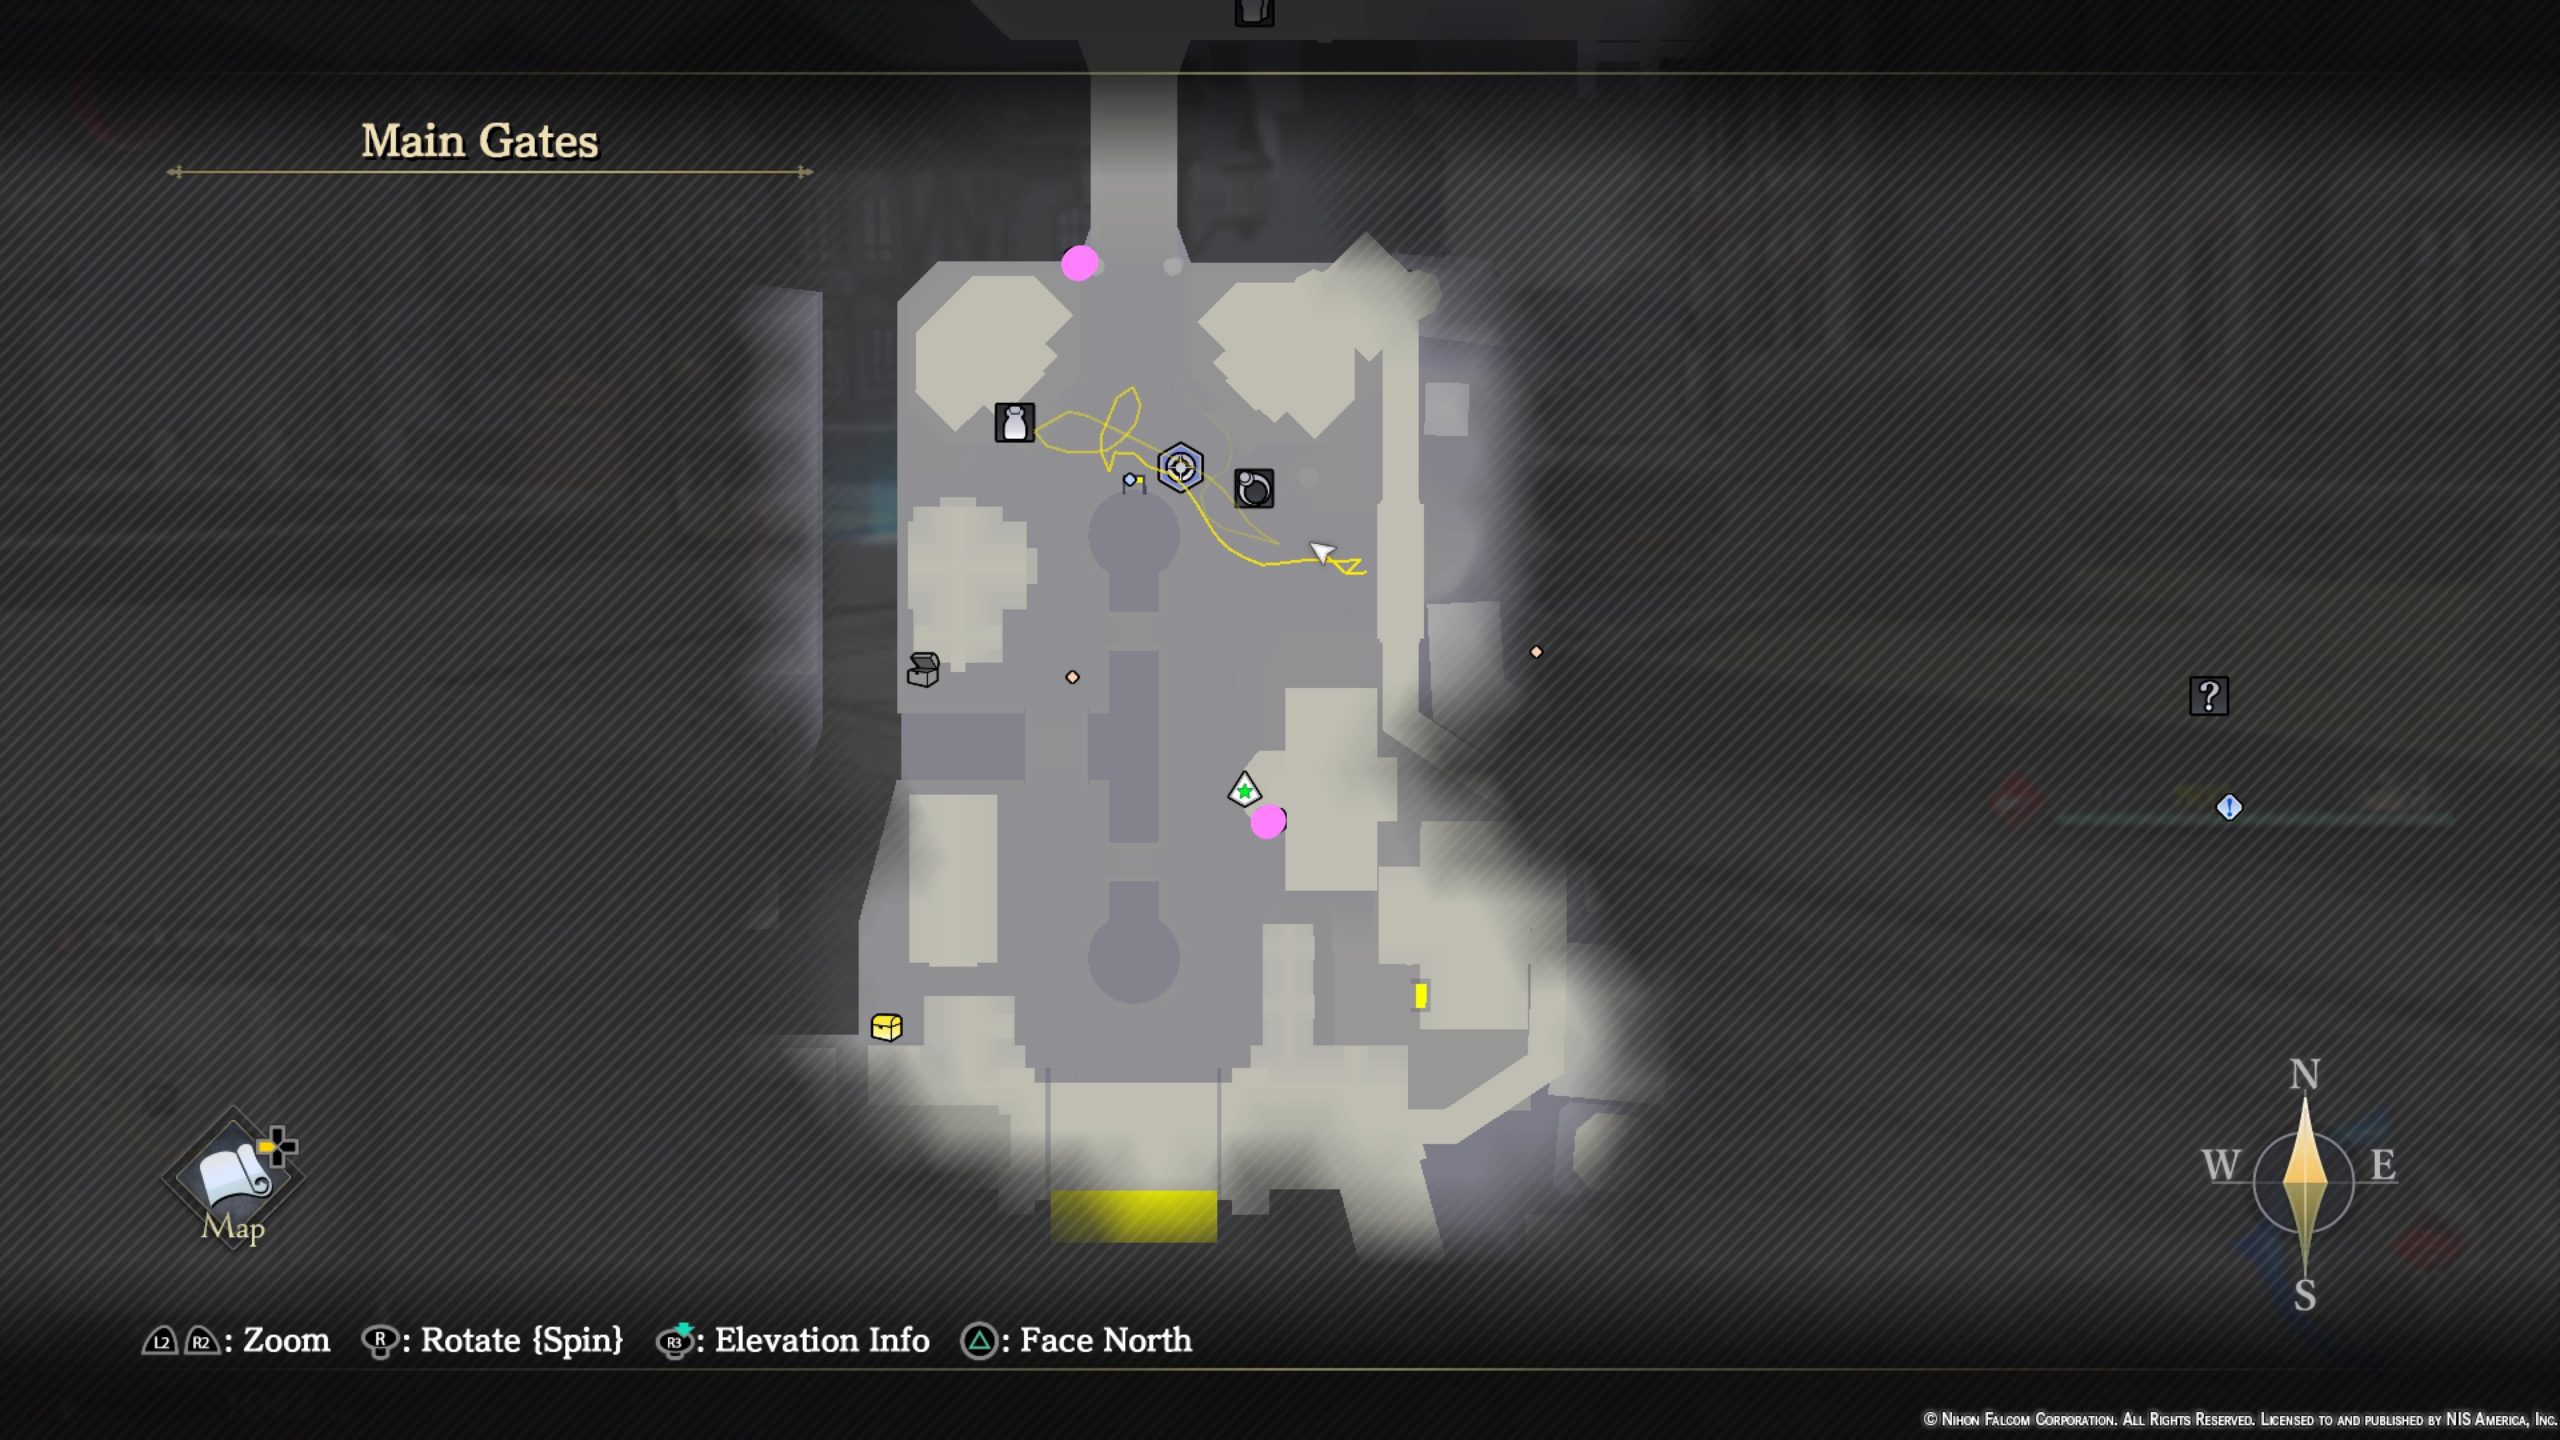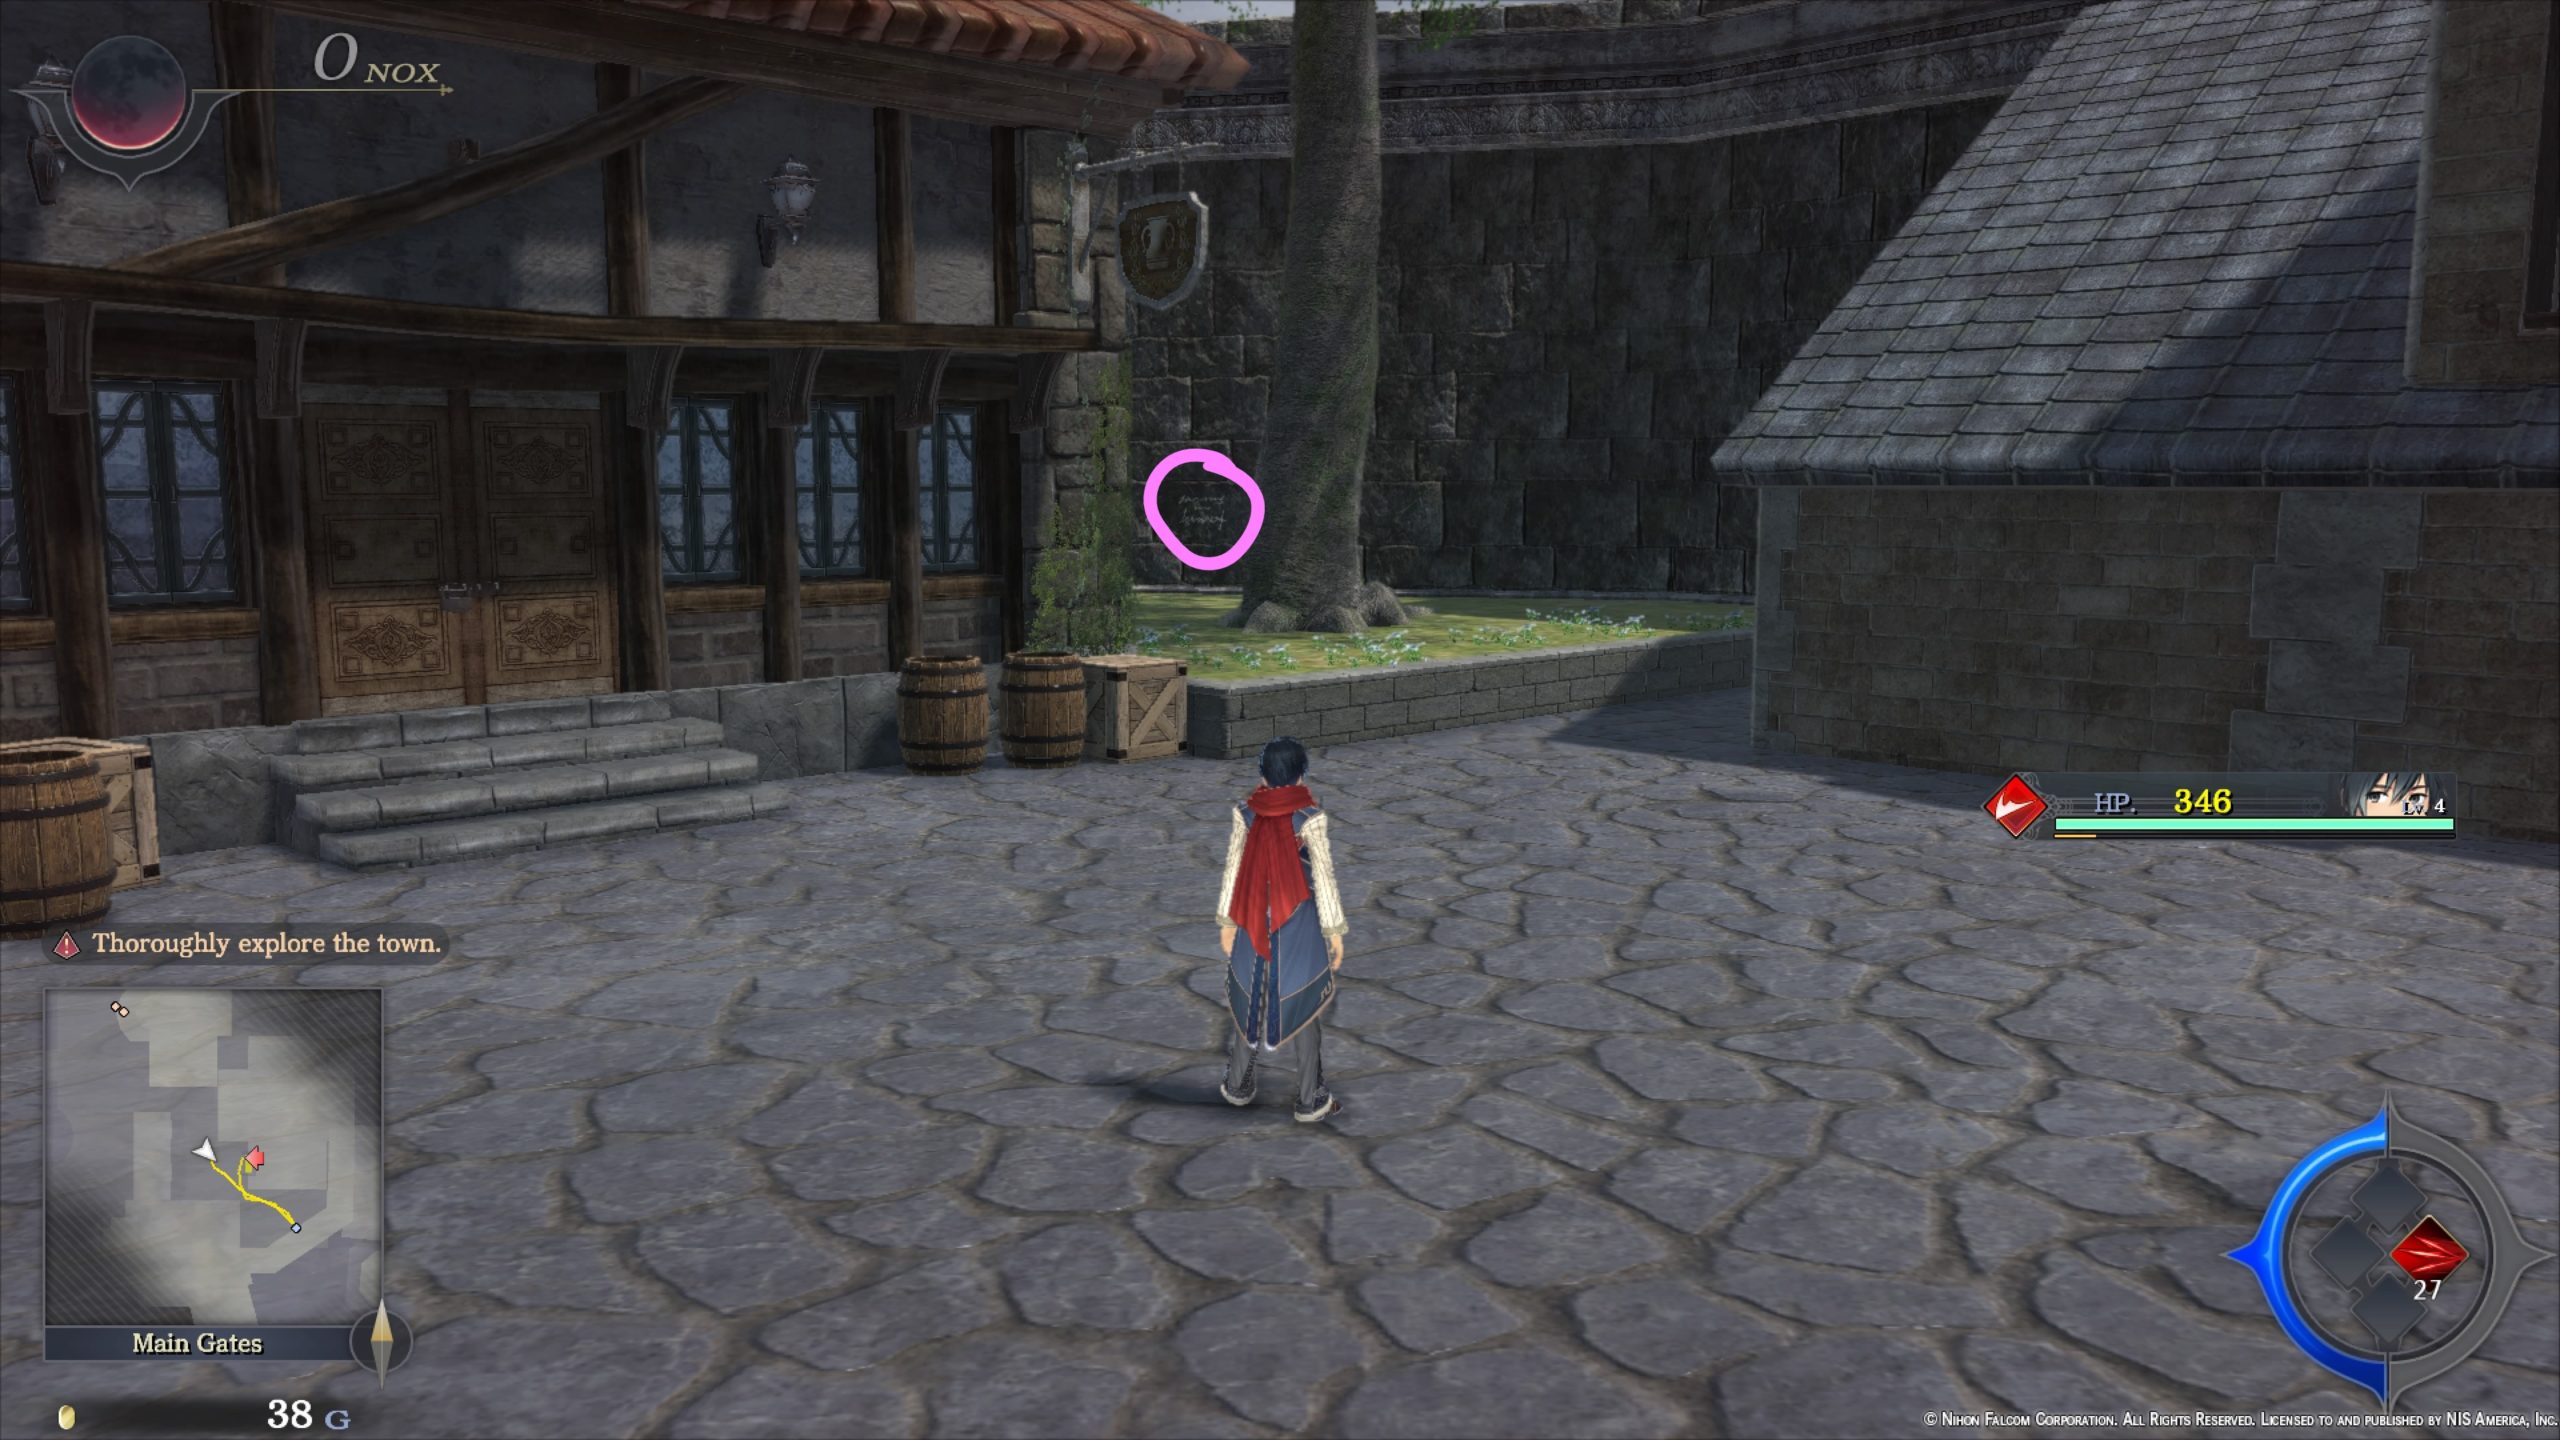
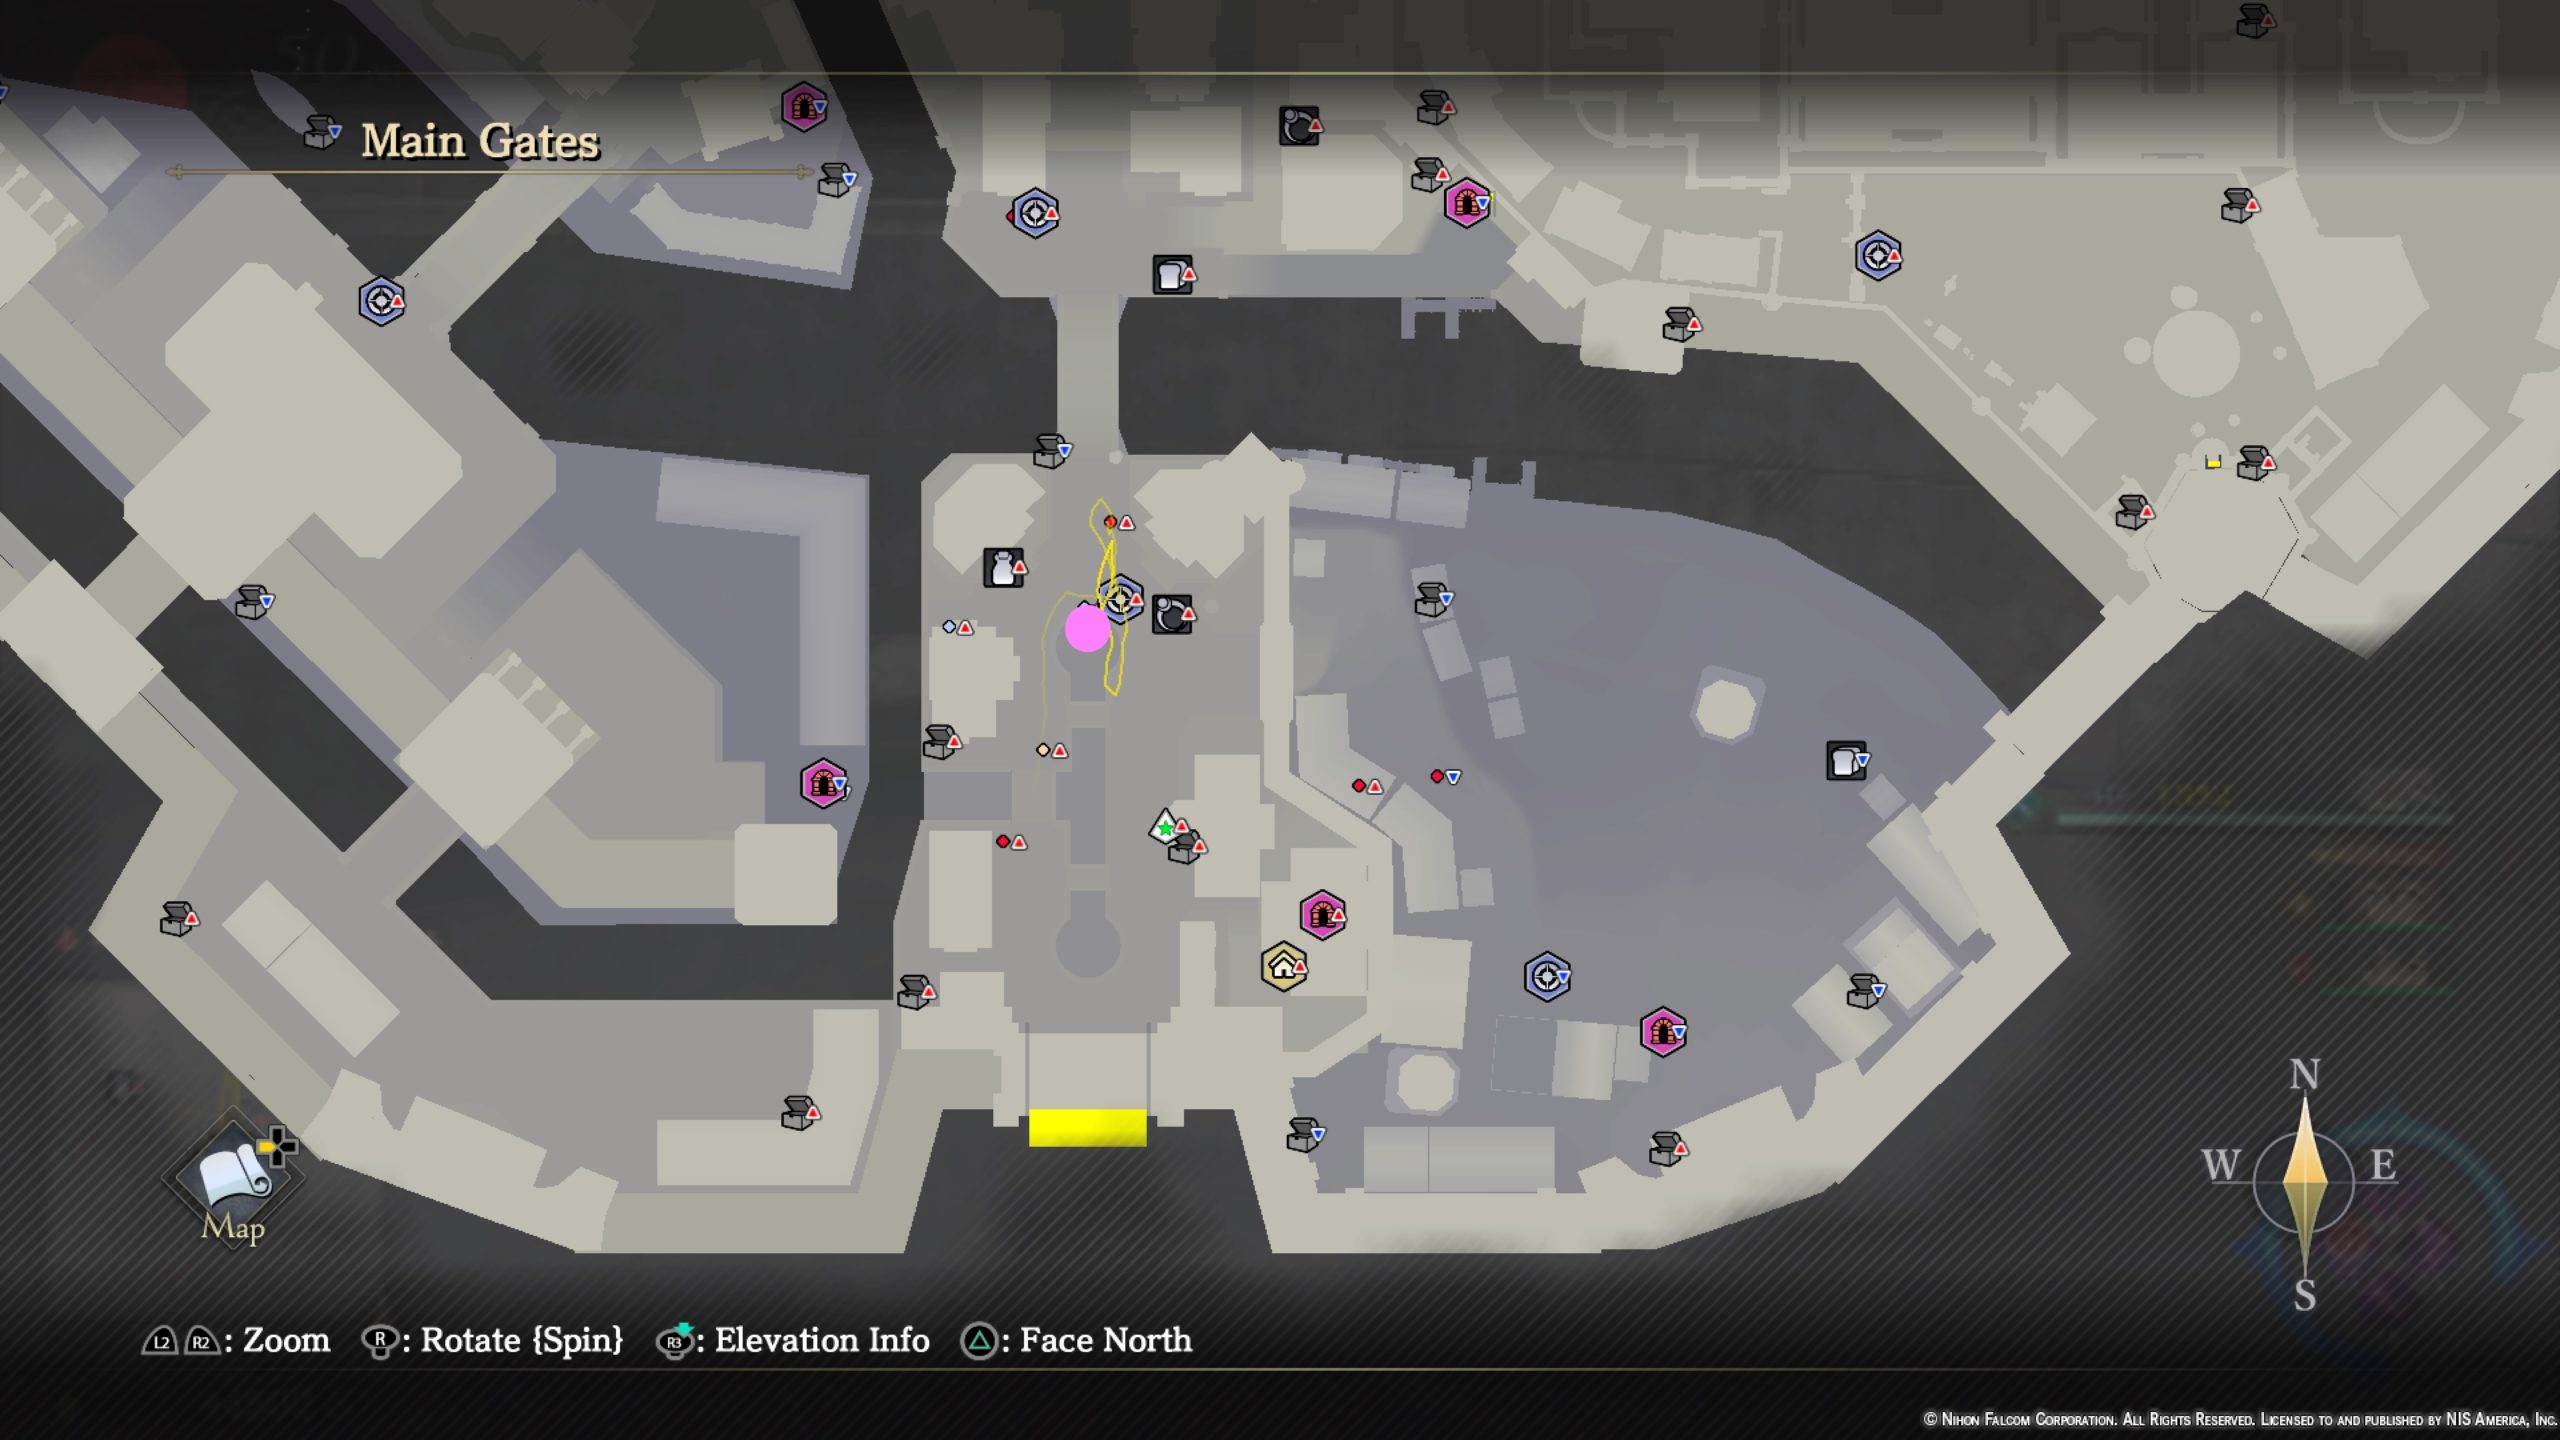
Main Gates
Quests
- Calling All Strongmen!
- Obtained: Bulletin Board at the Dandelion during Chapter 6
- Objective: Enter to be a strongman
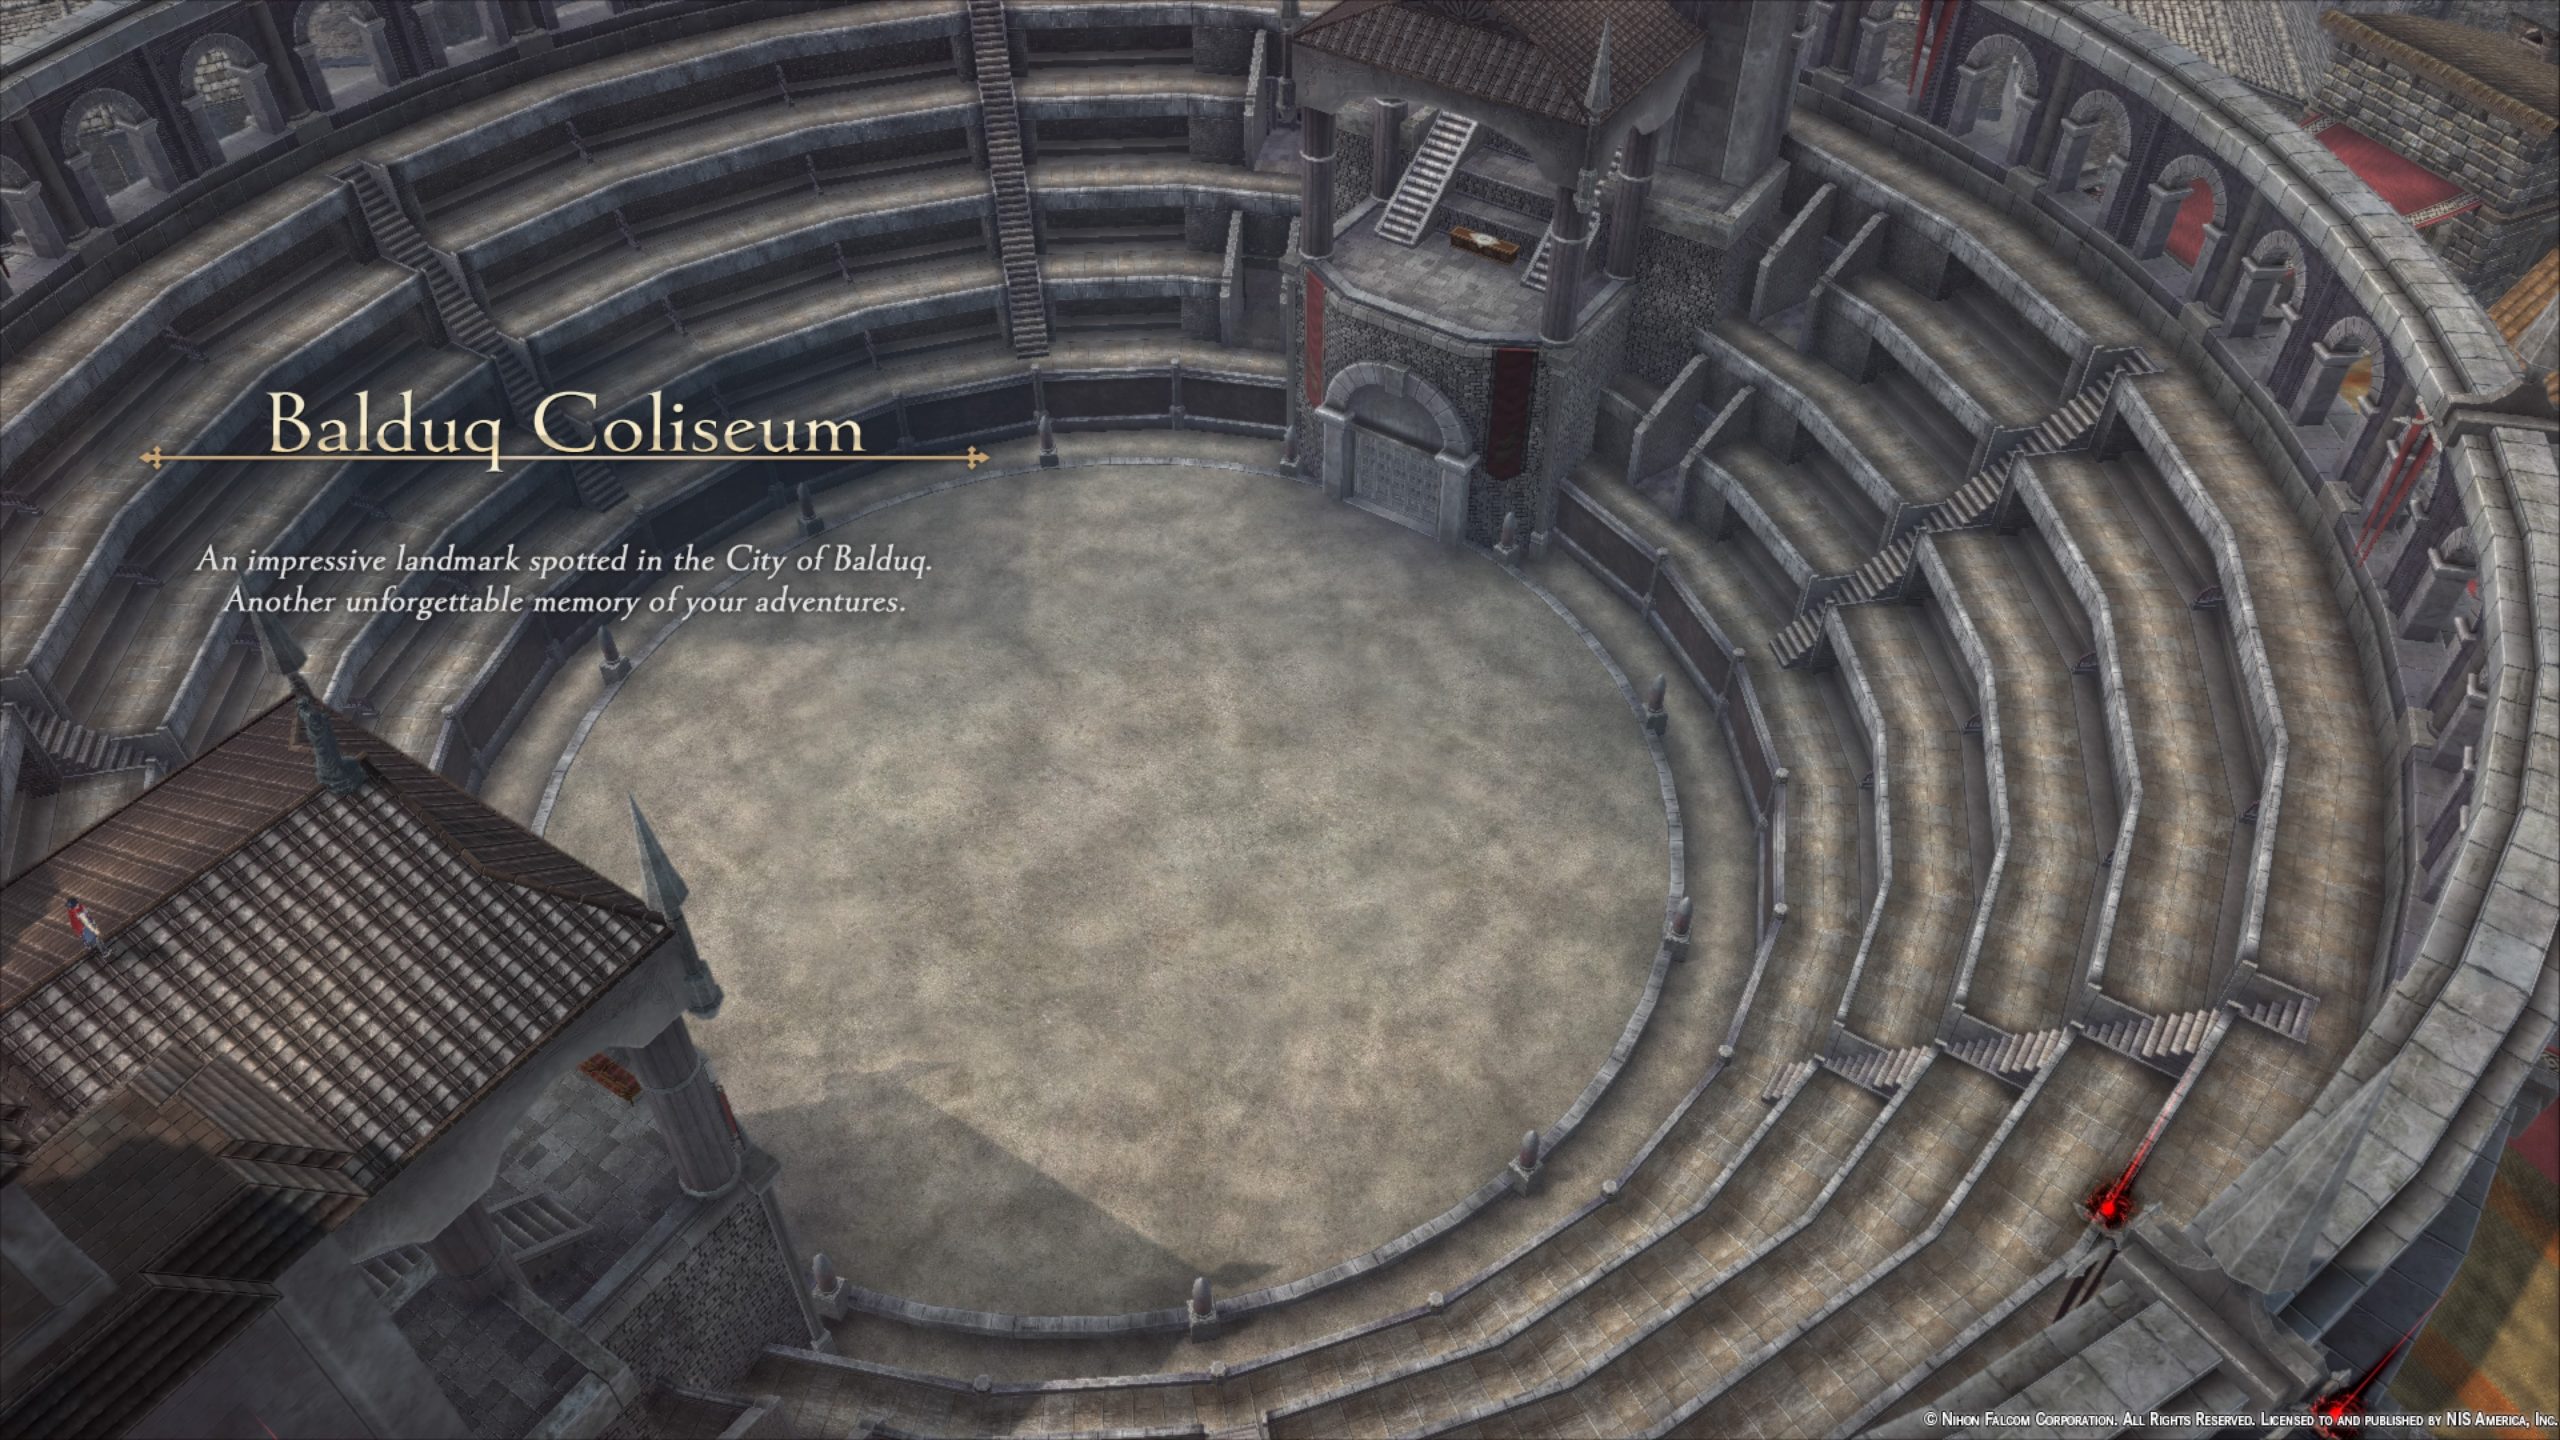
- Travel to the Coliseum in the Entertainment District to speak with Felix and Promoter DeSalle which will trigger a cutscene. Afterwards, defeat the waves of enemies that spawn in the arena to complete the quest.
- Reward: 3500 Gold
- A Legend of Heroes
- Obtained: Bulletin Board at the Dandelion during Chapter 6
- Objective: Speak with Tetra
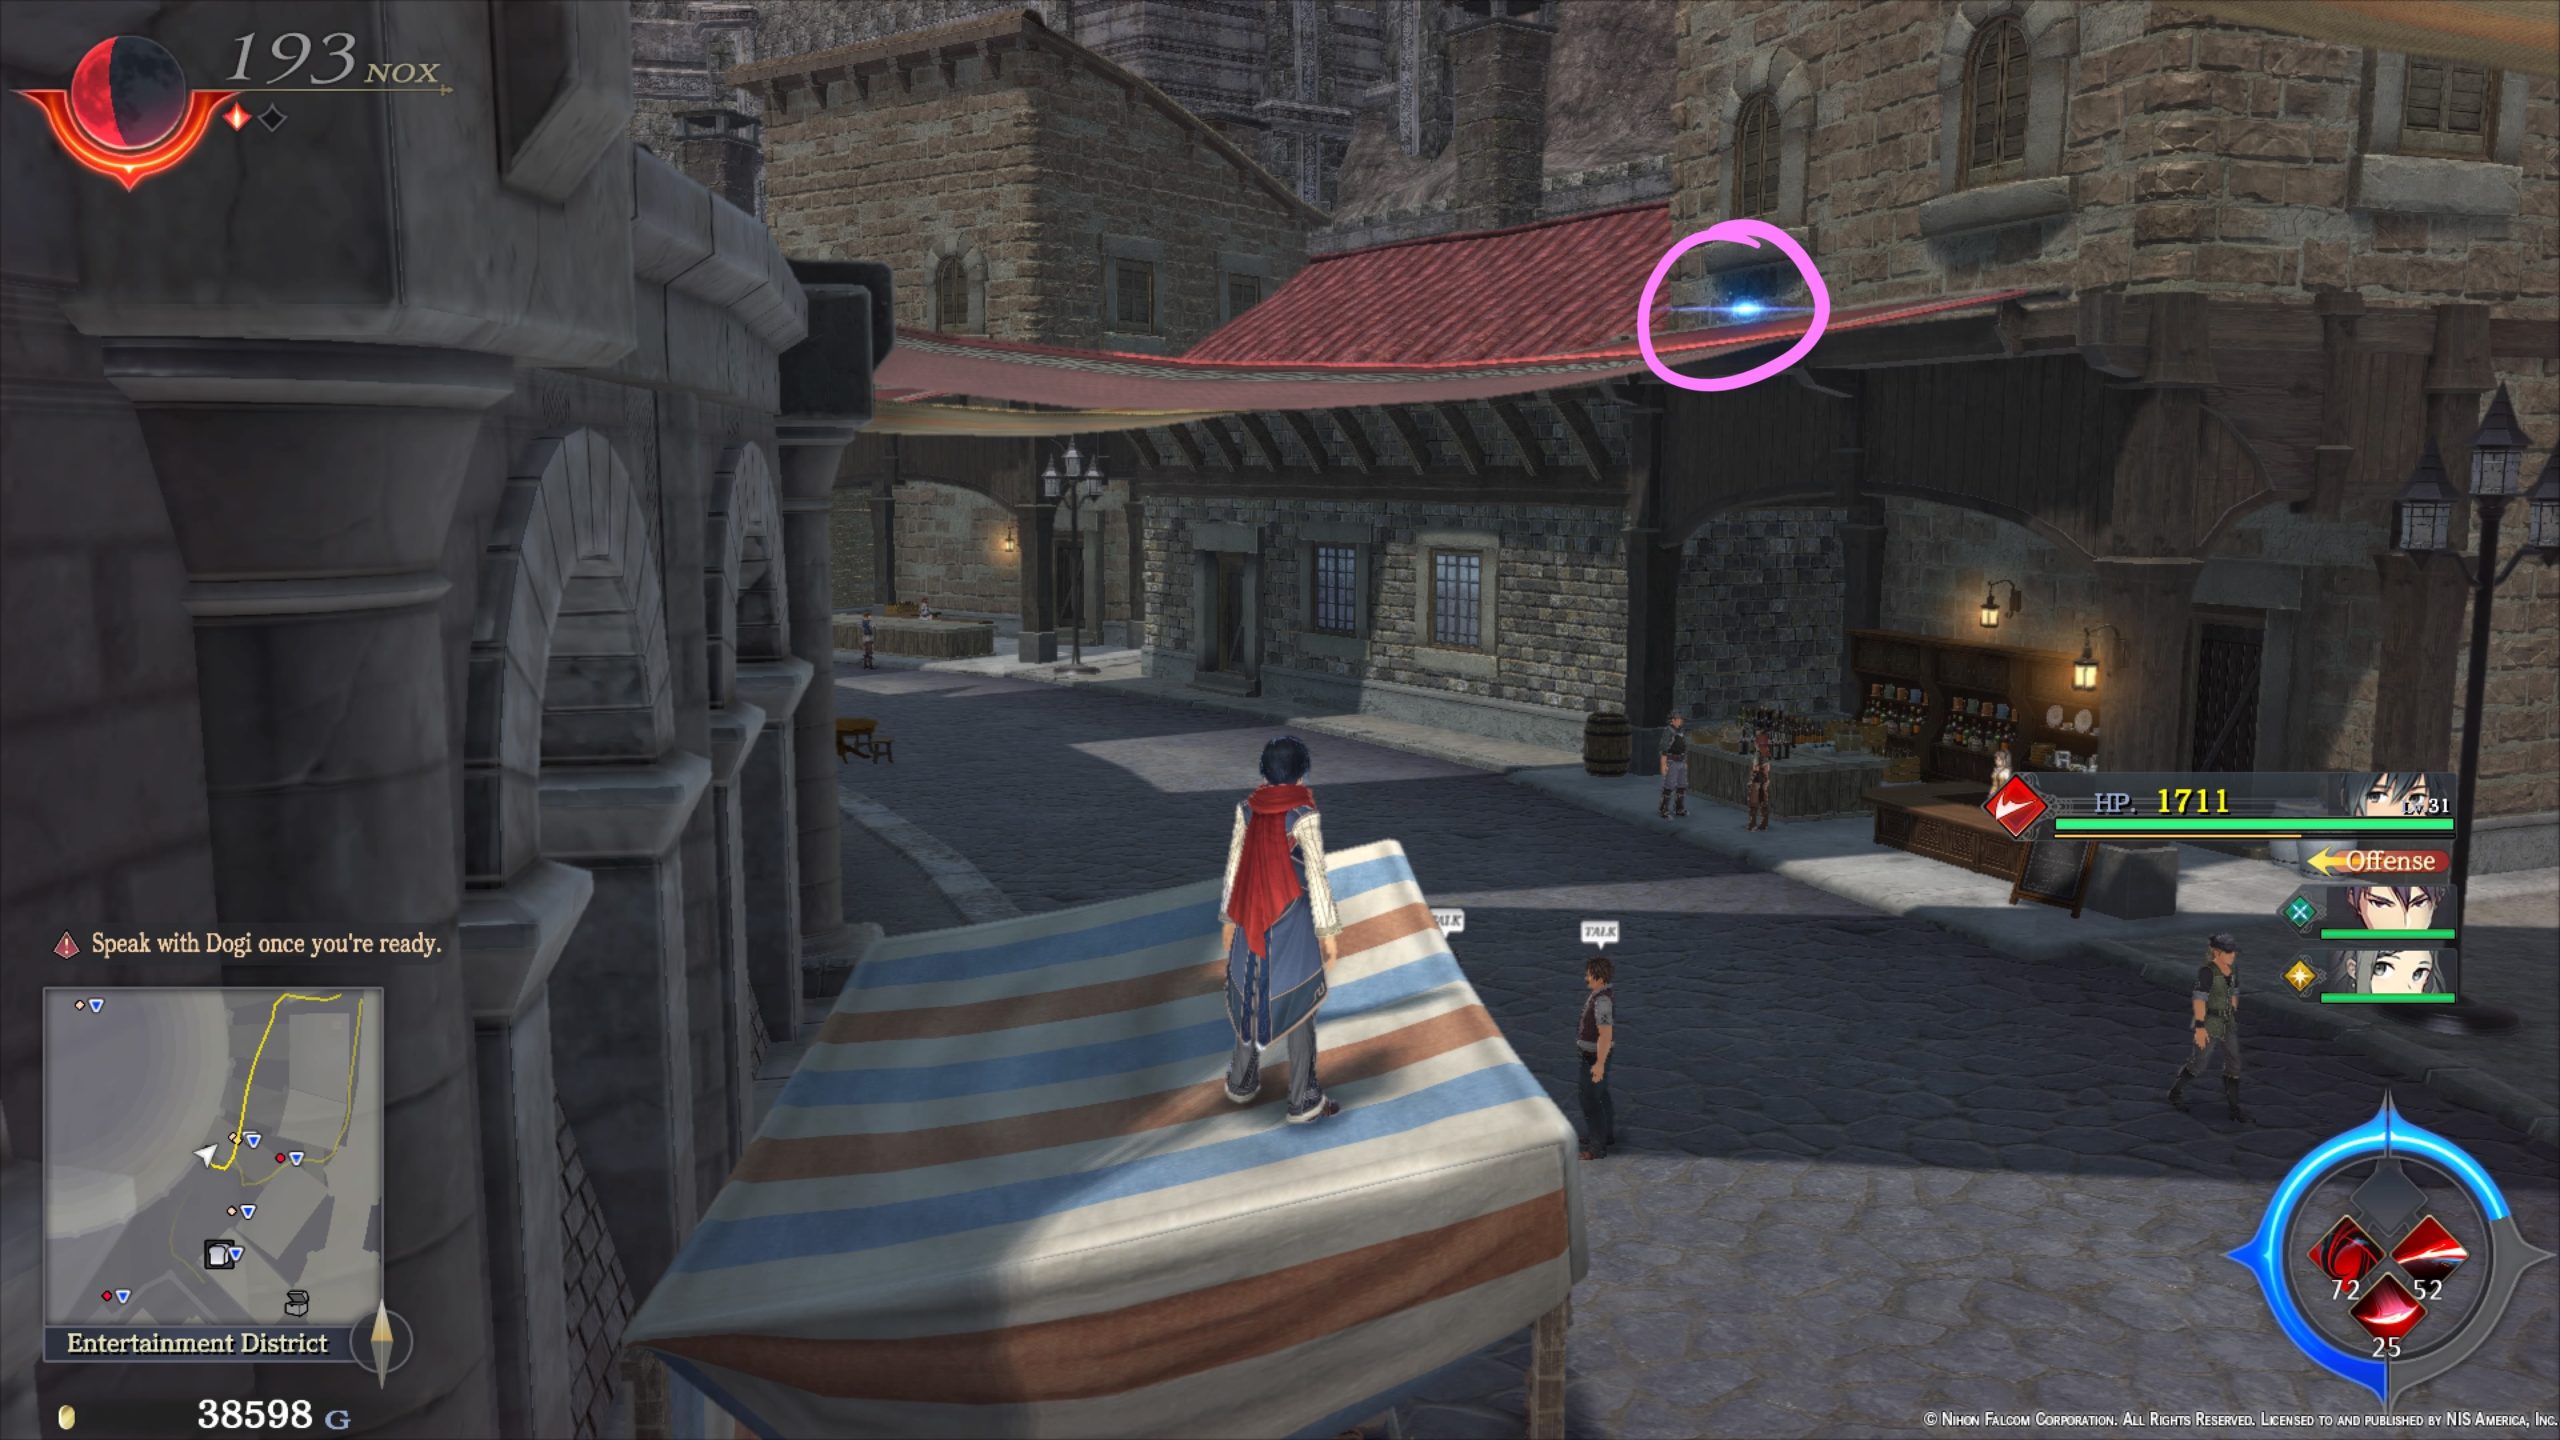
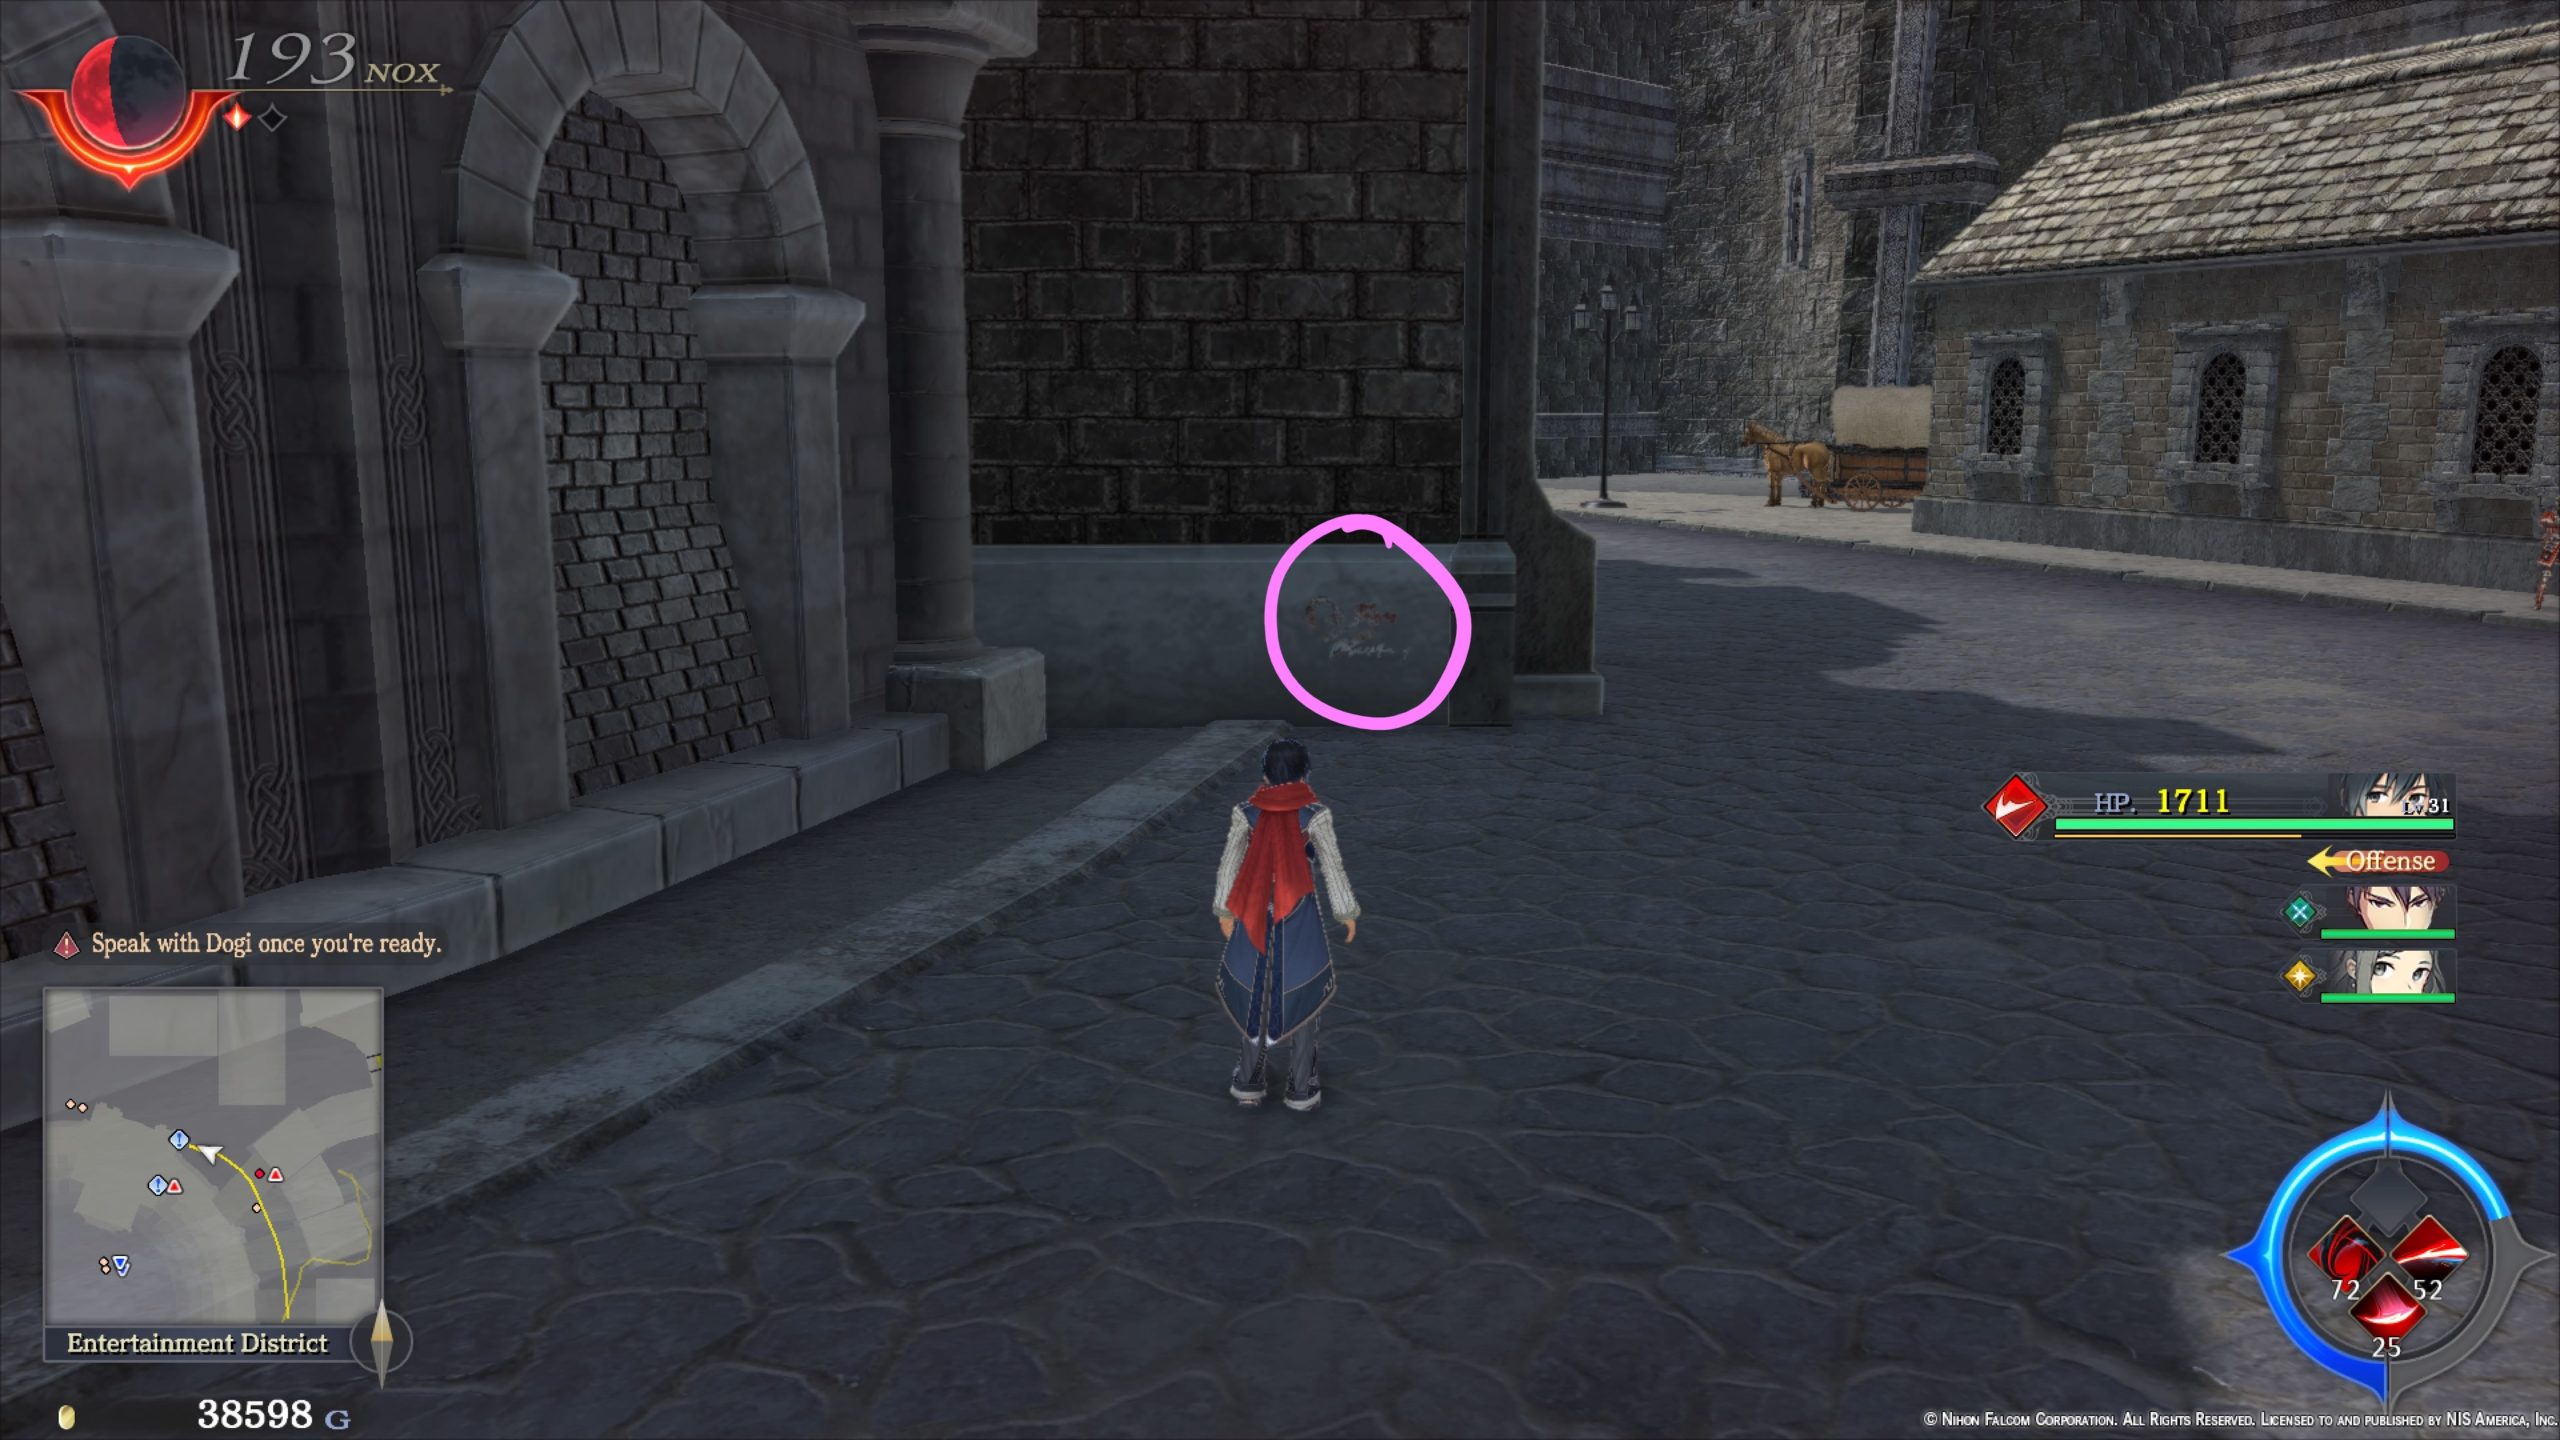
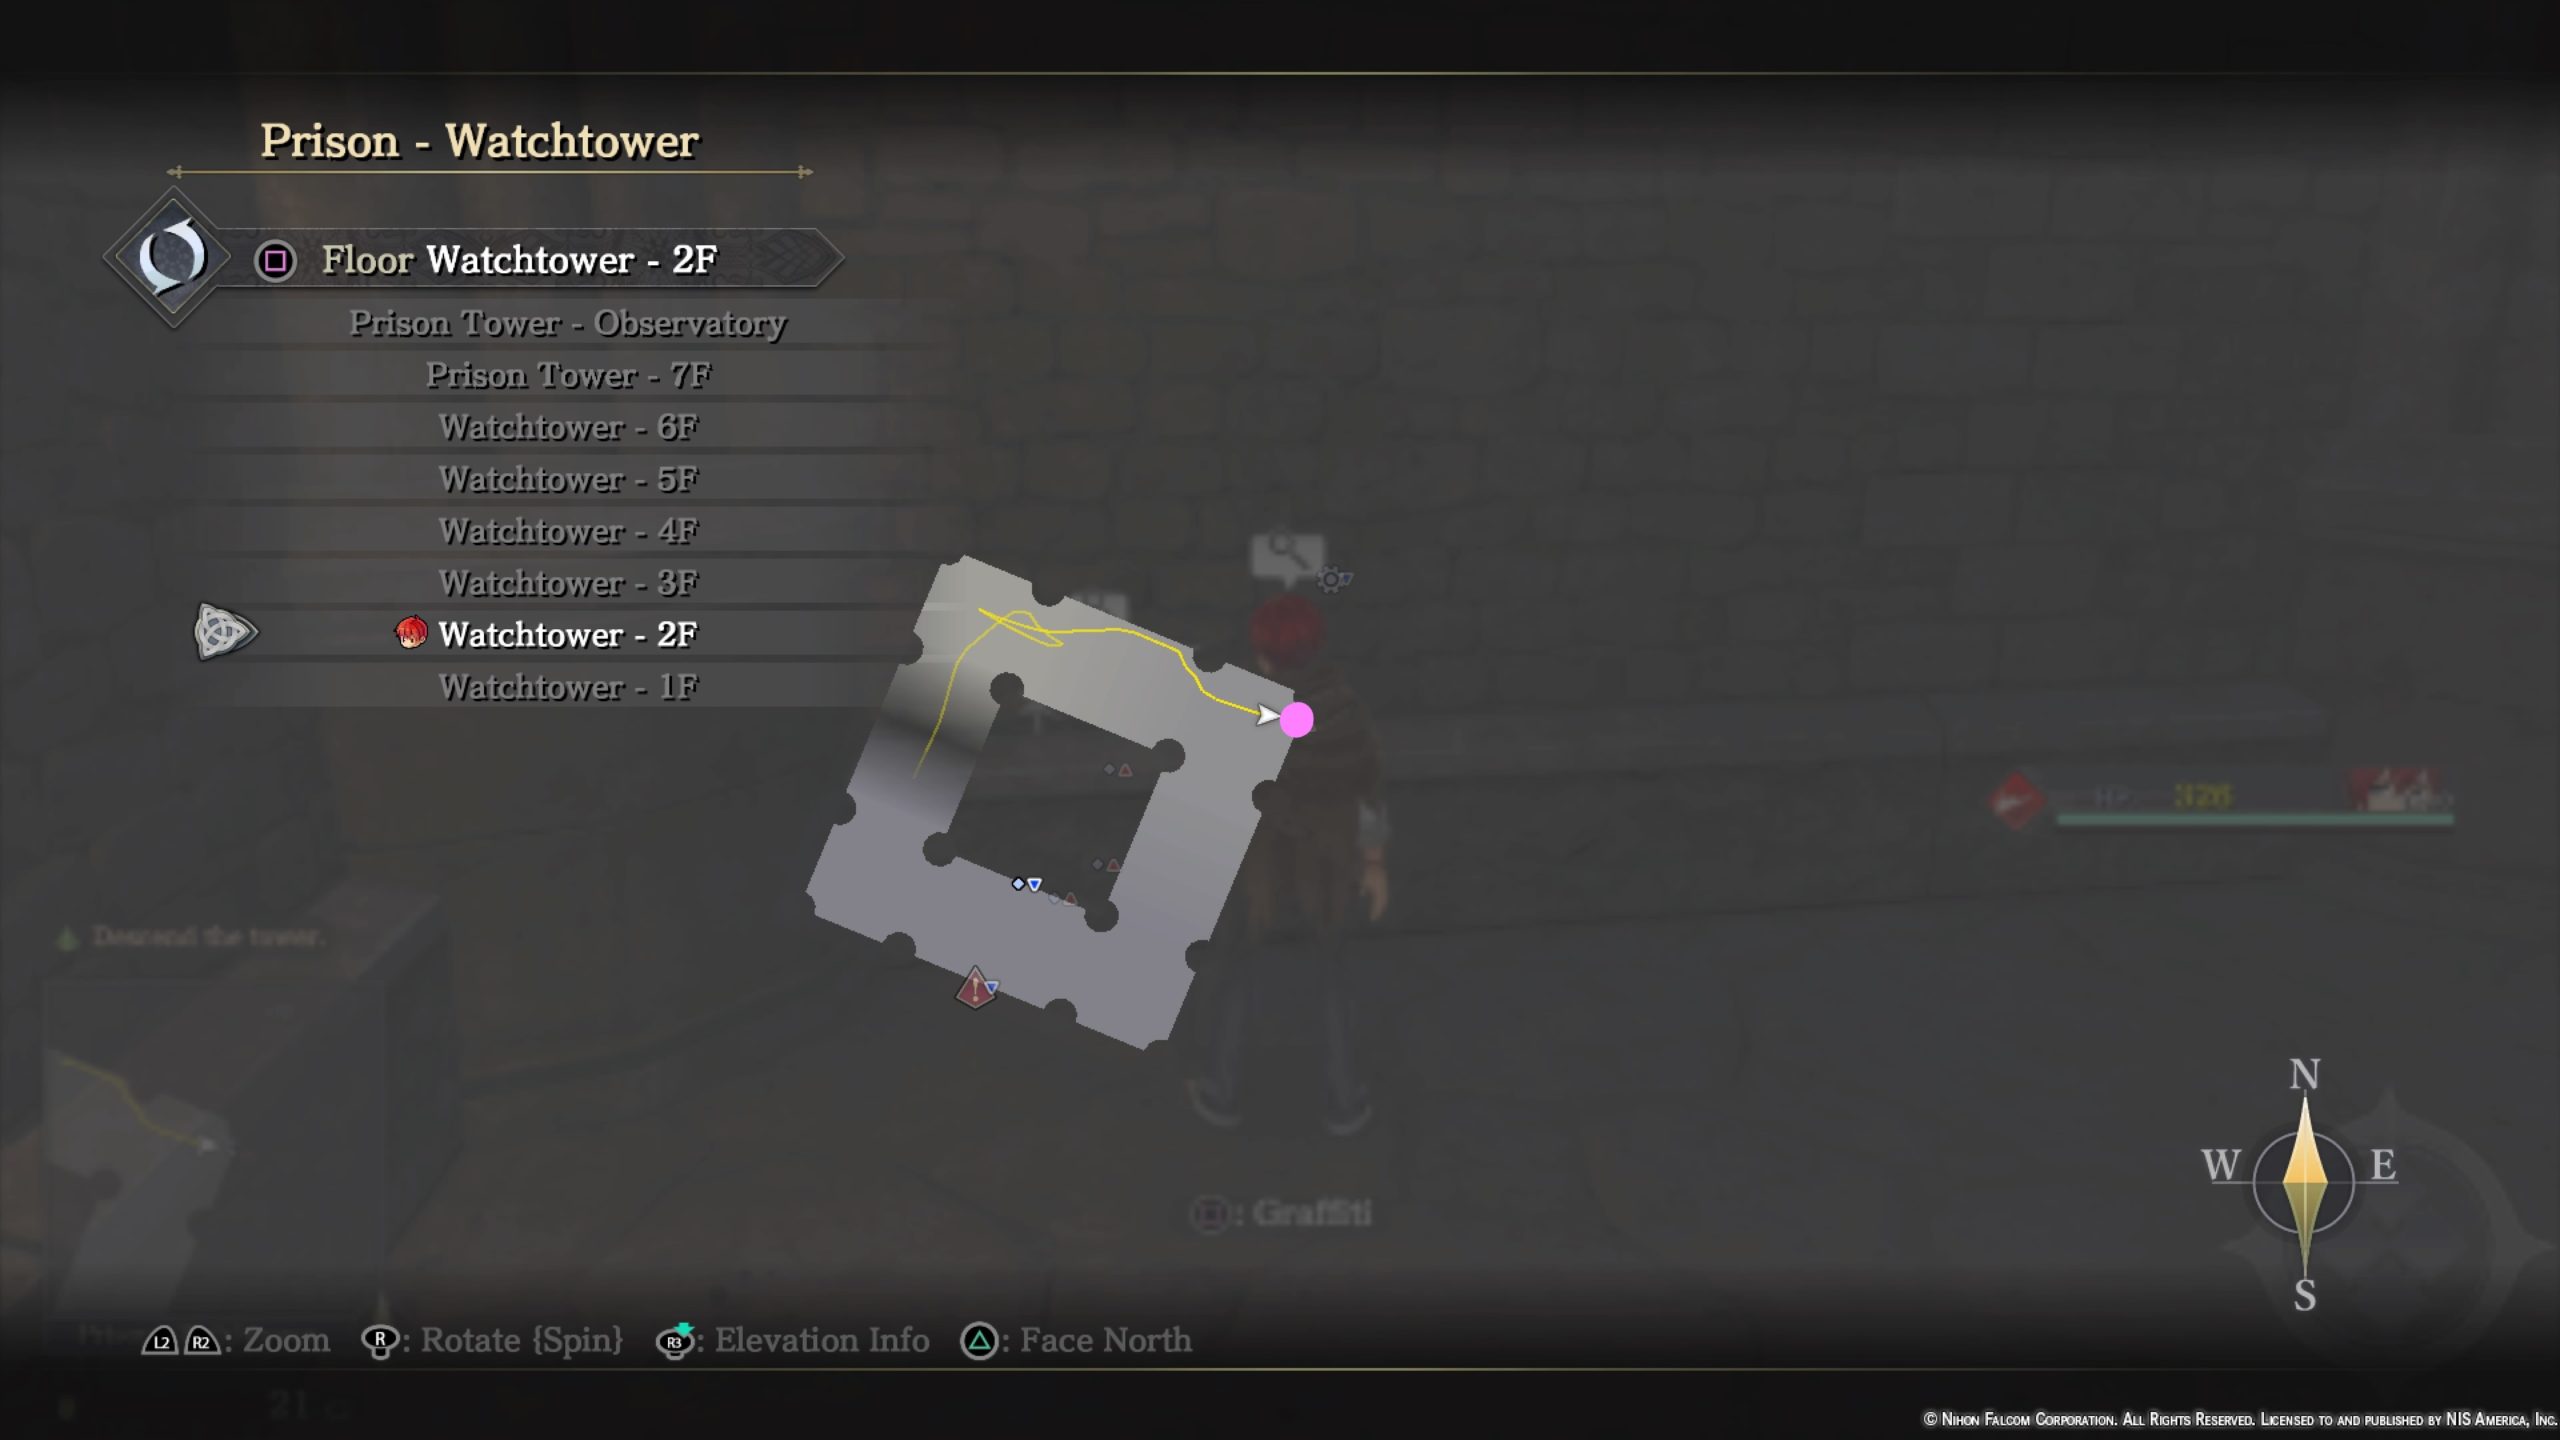
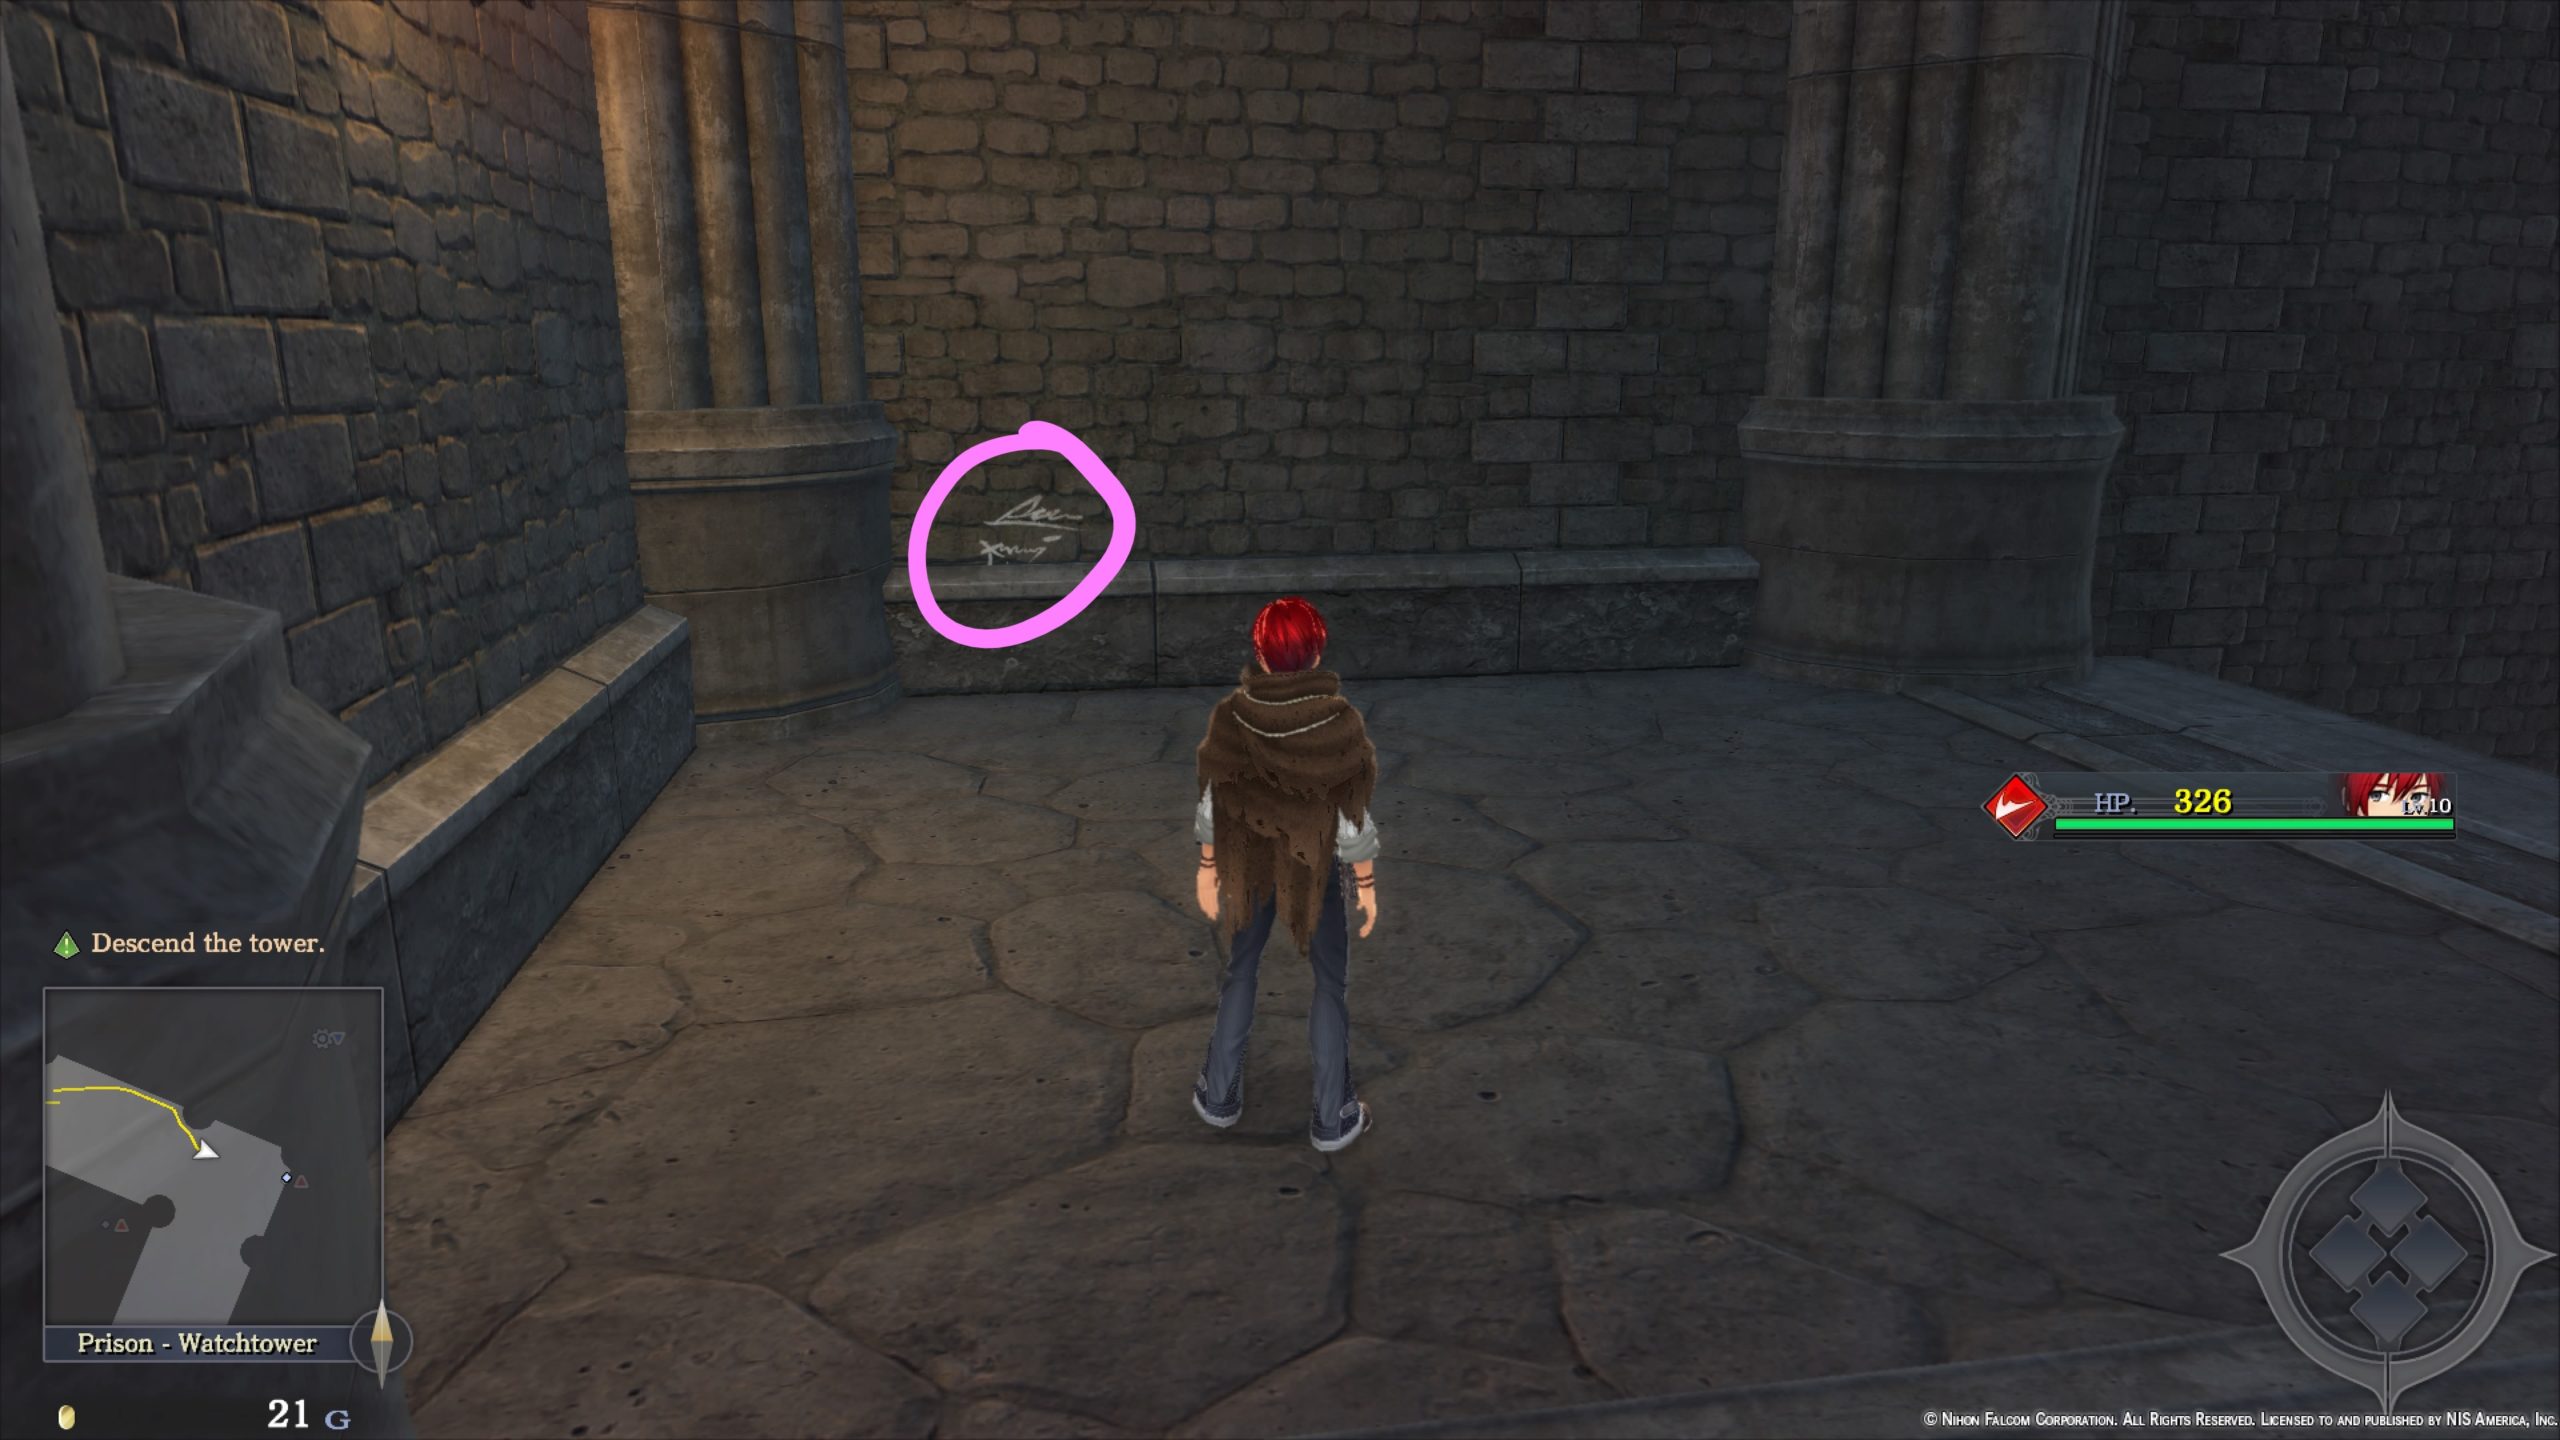
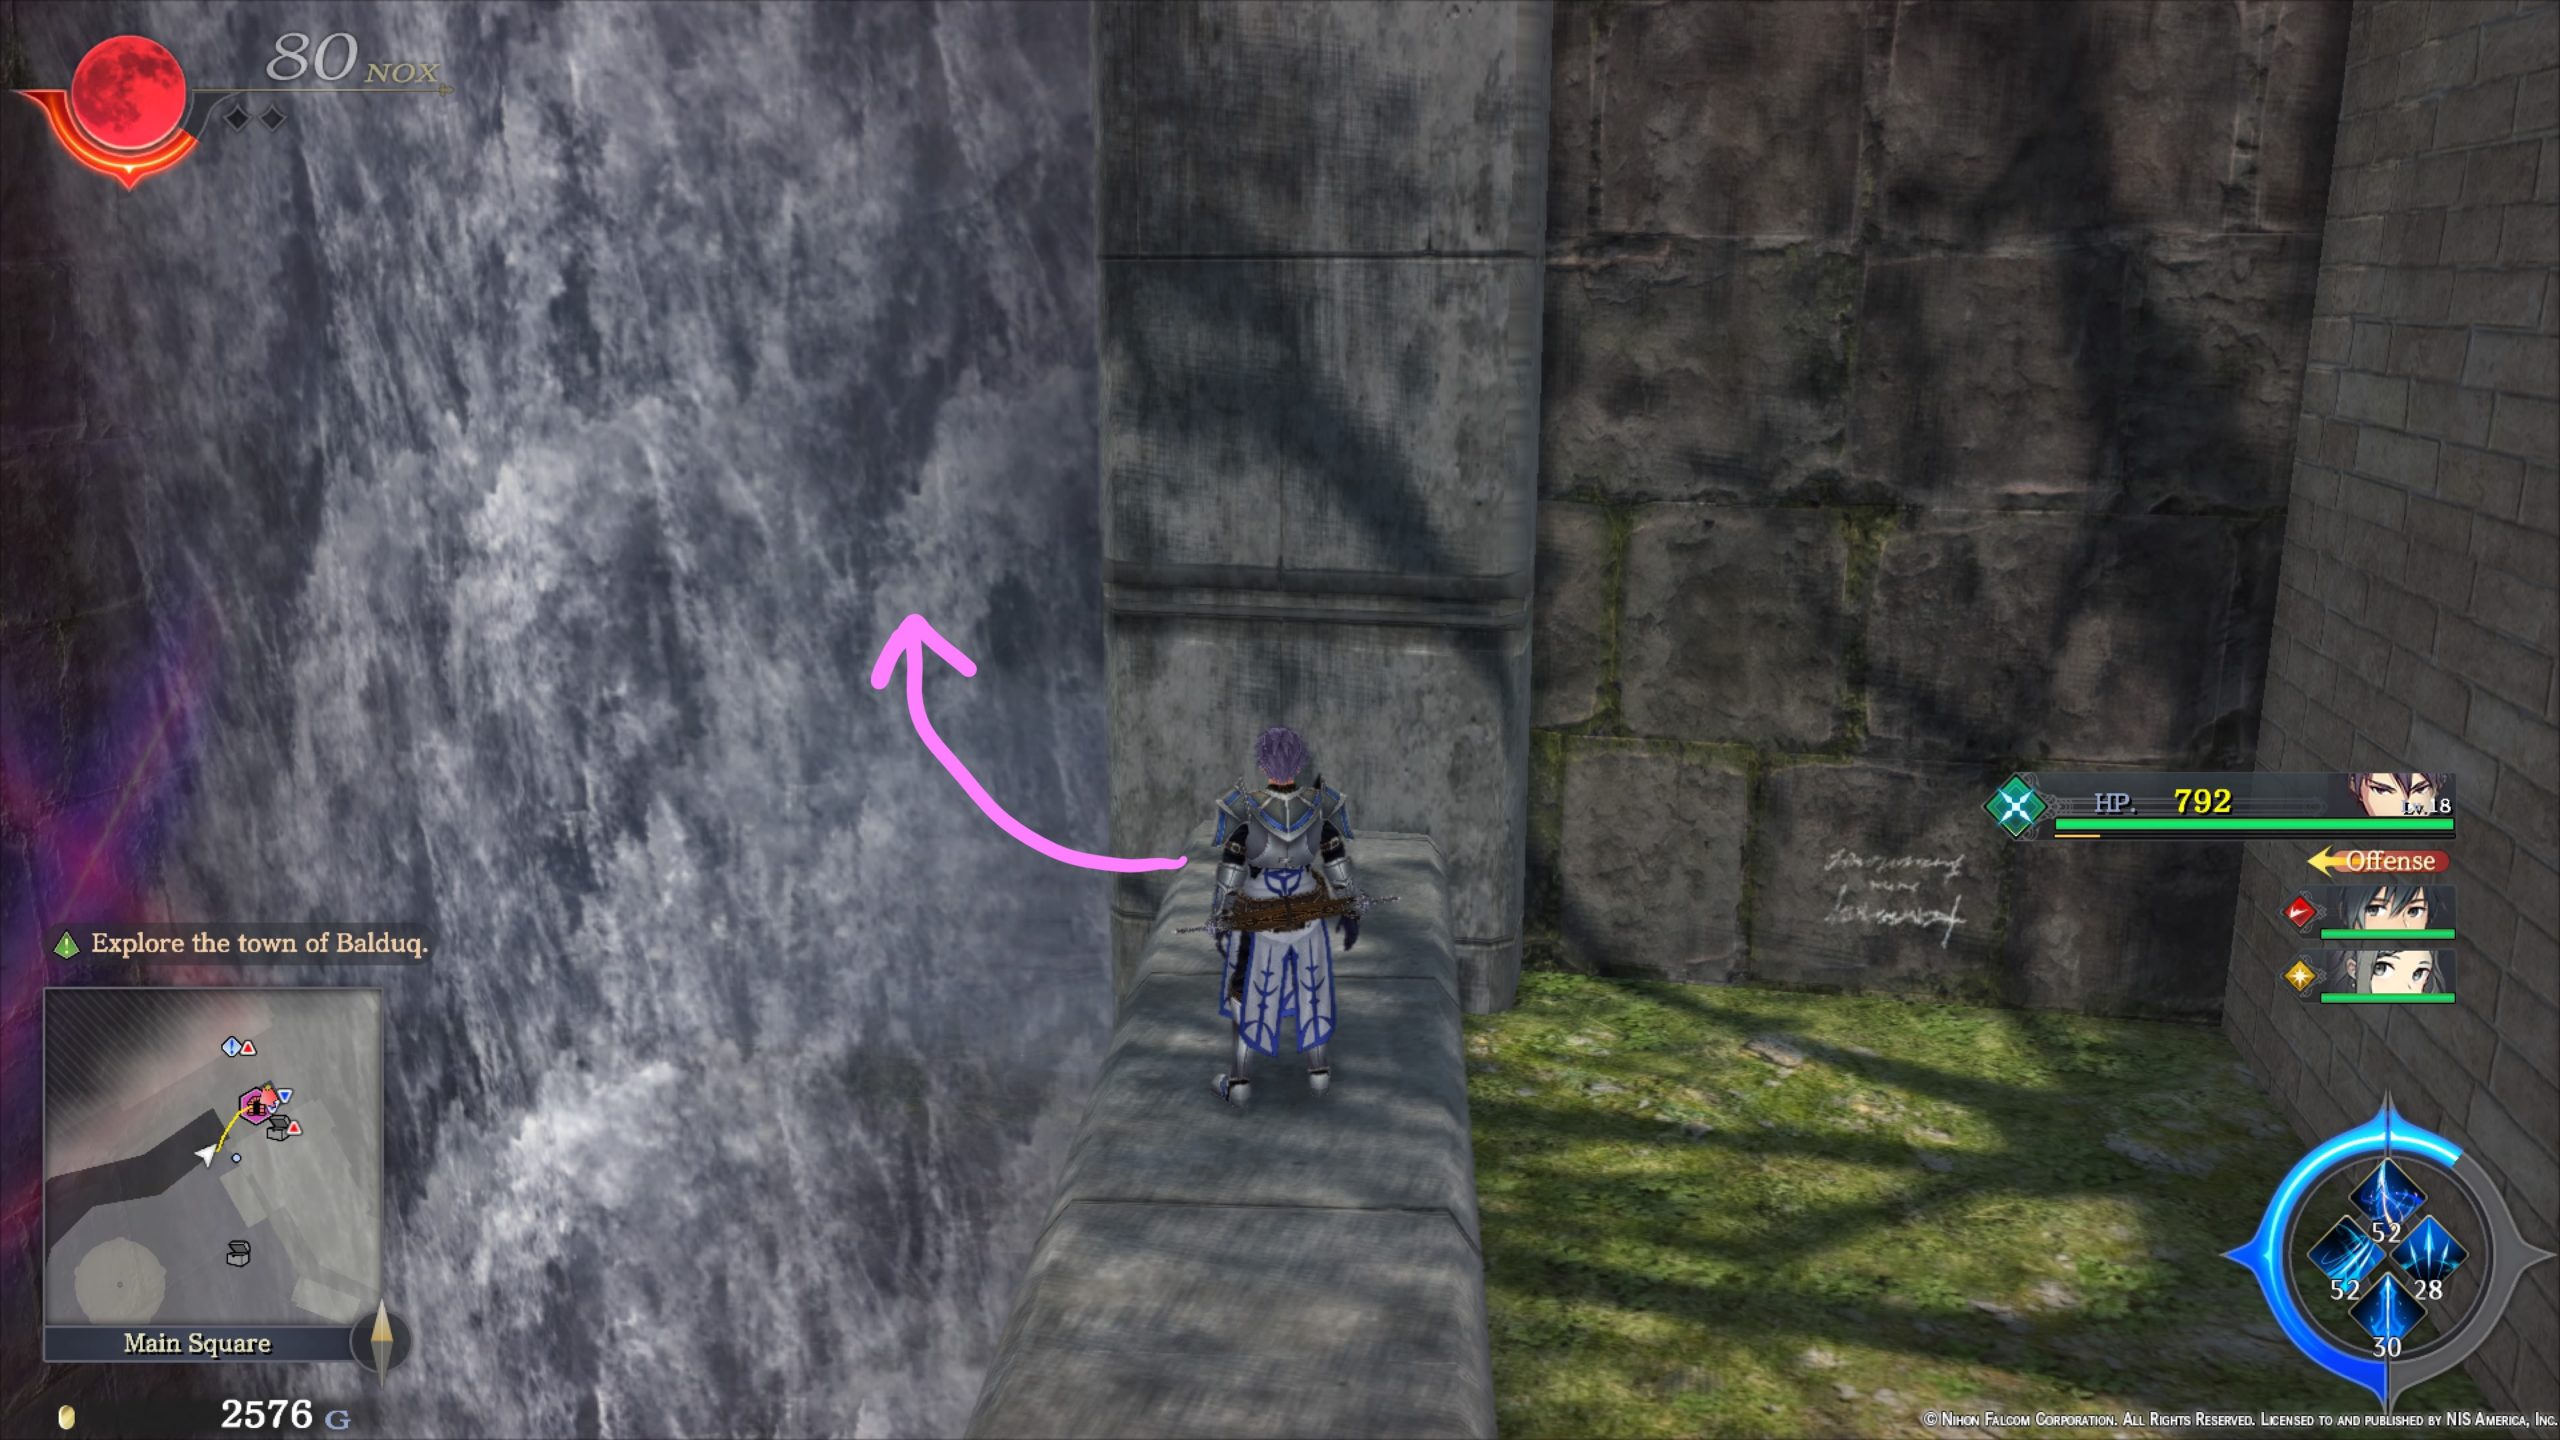
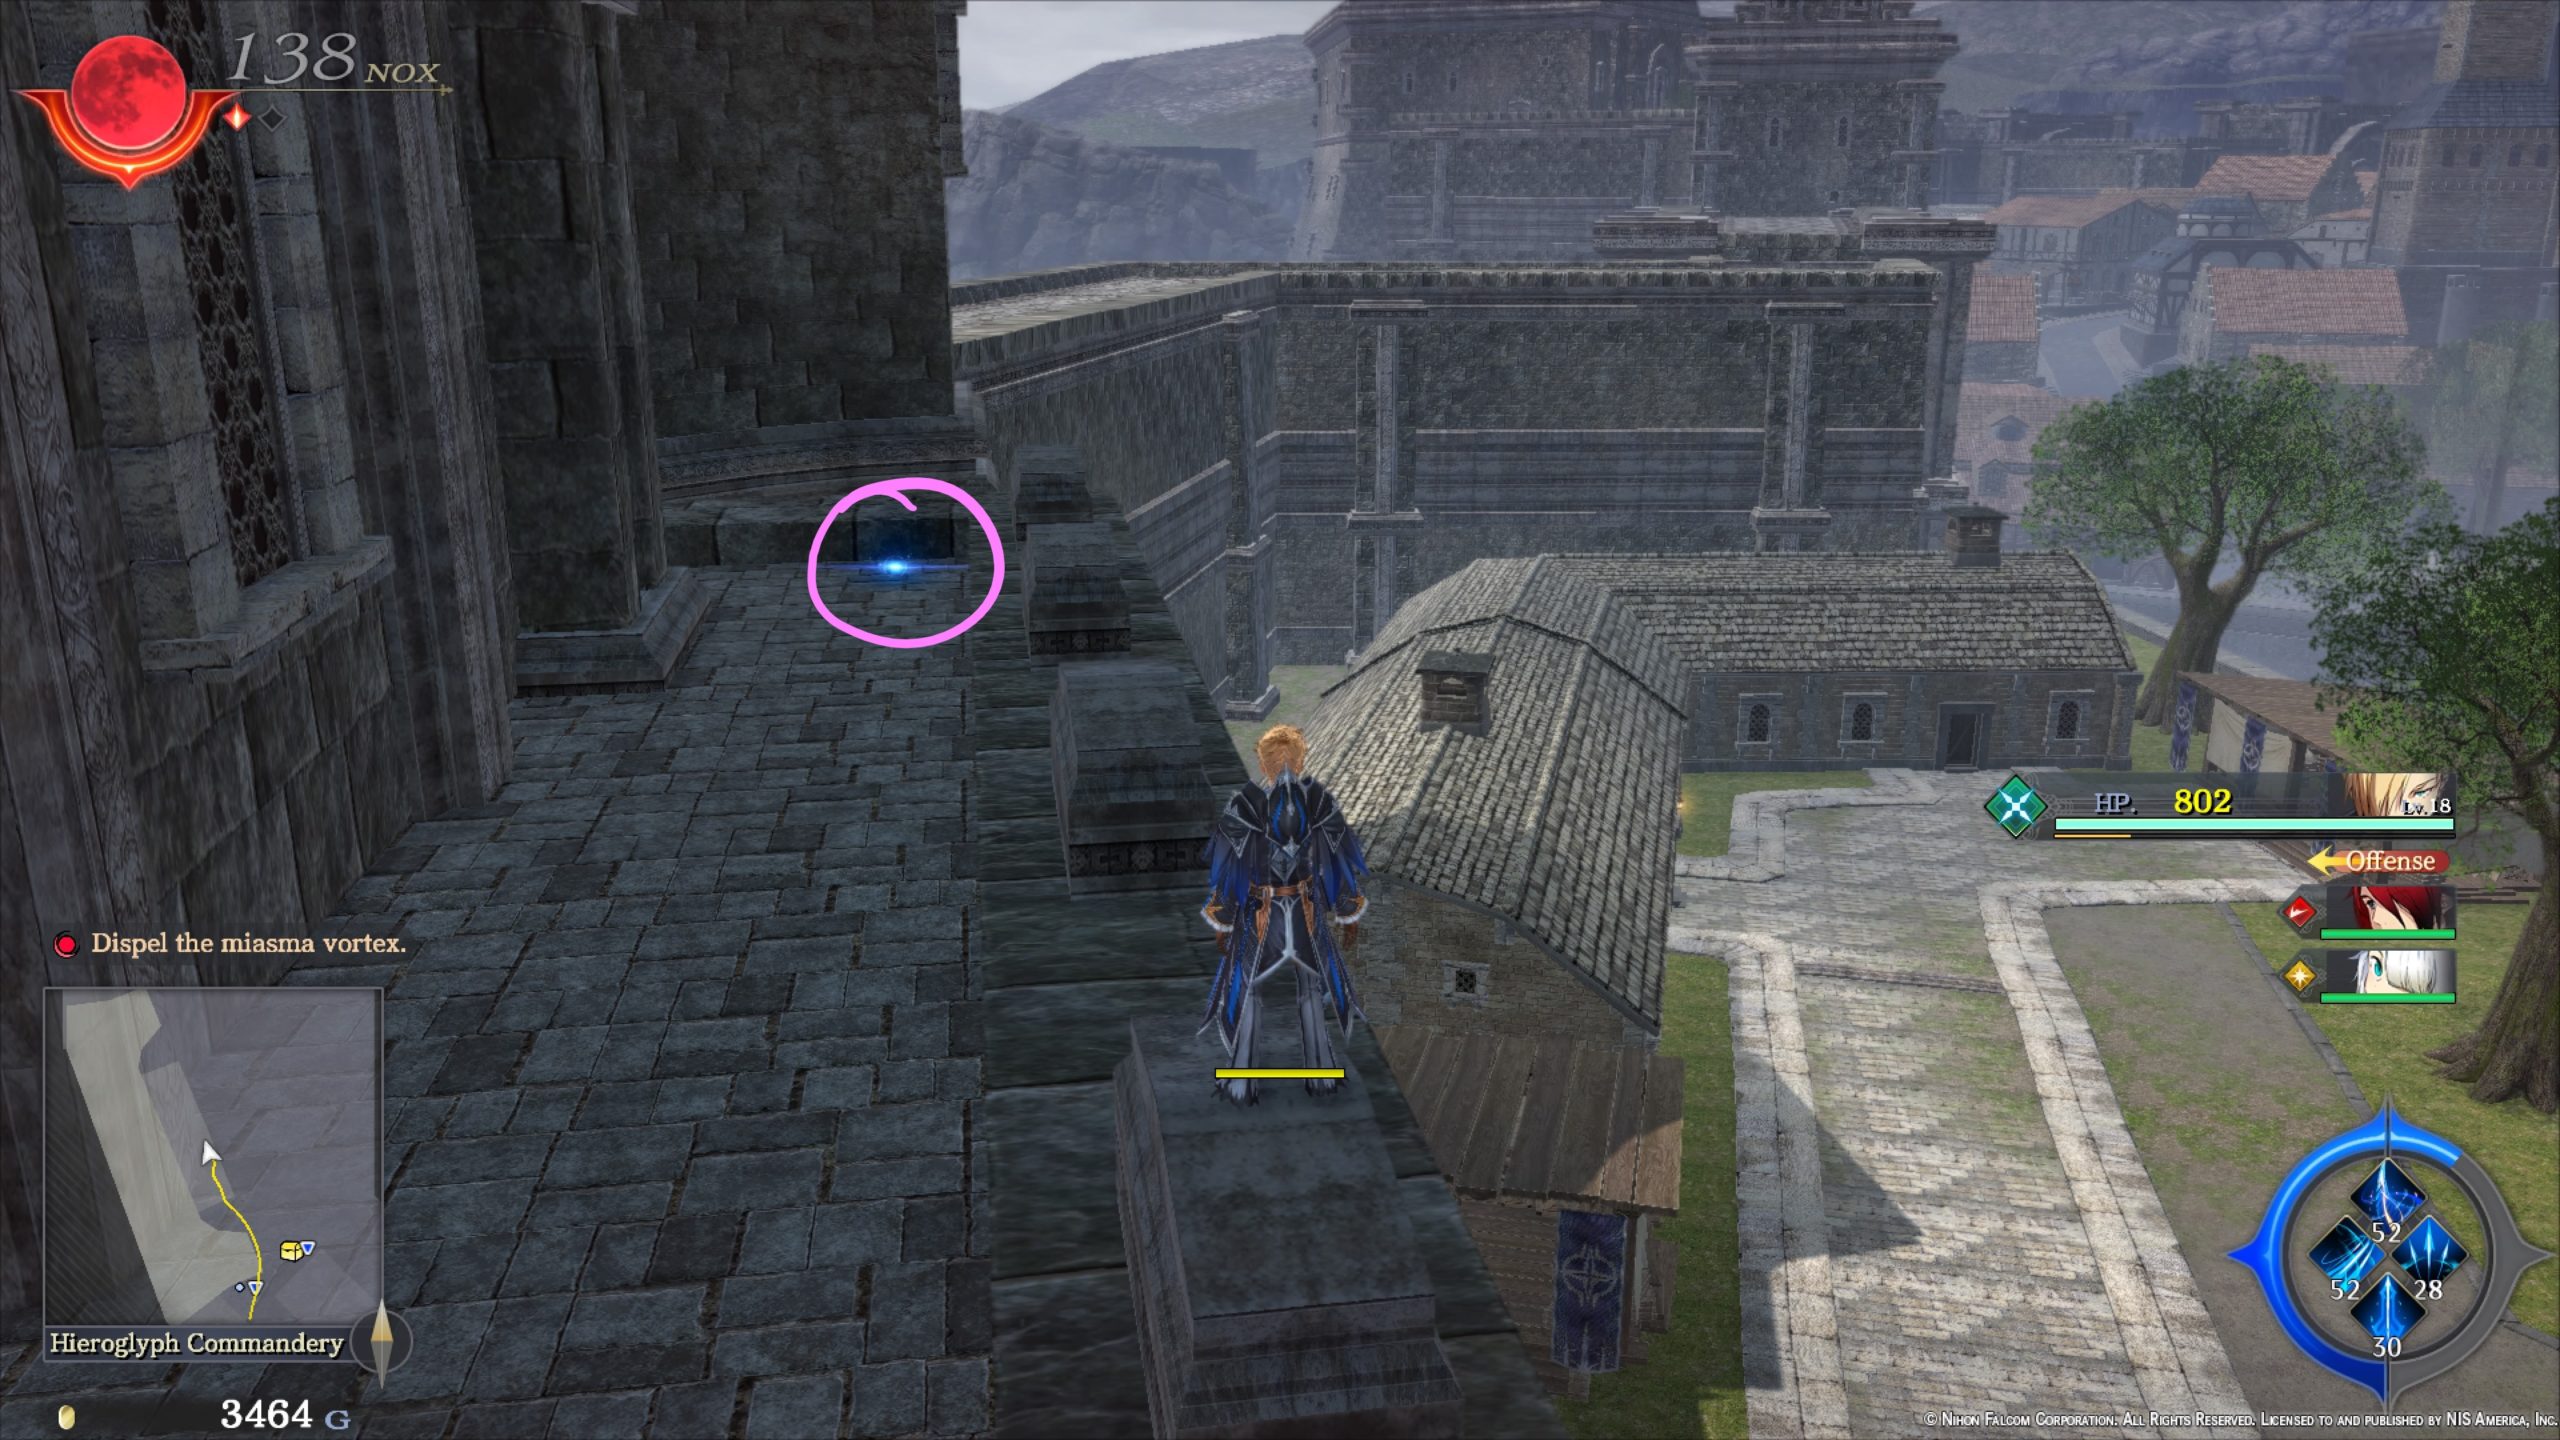
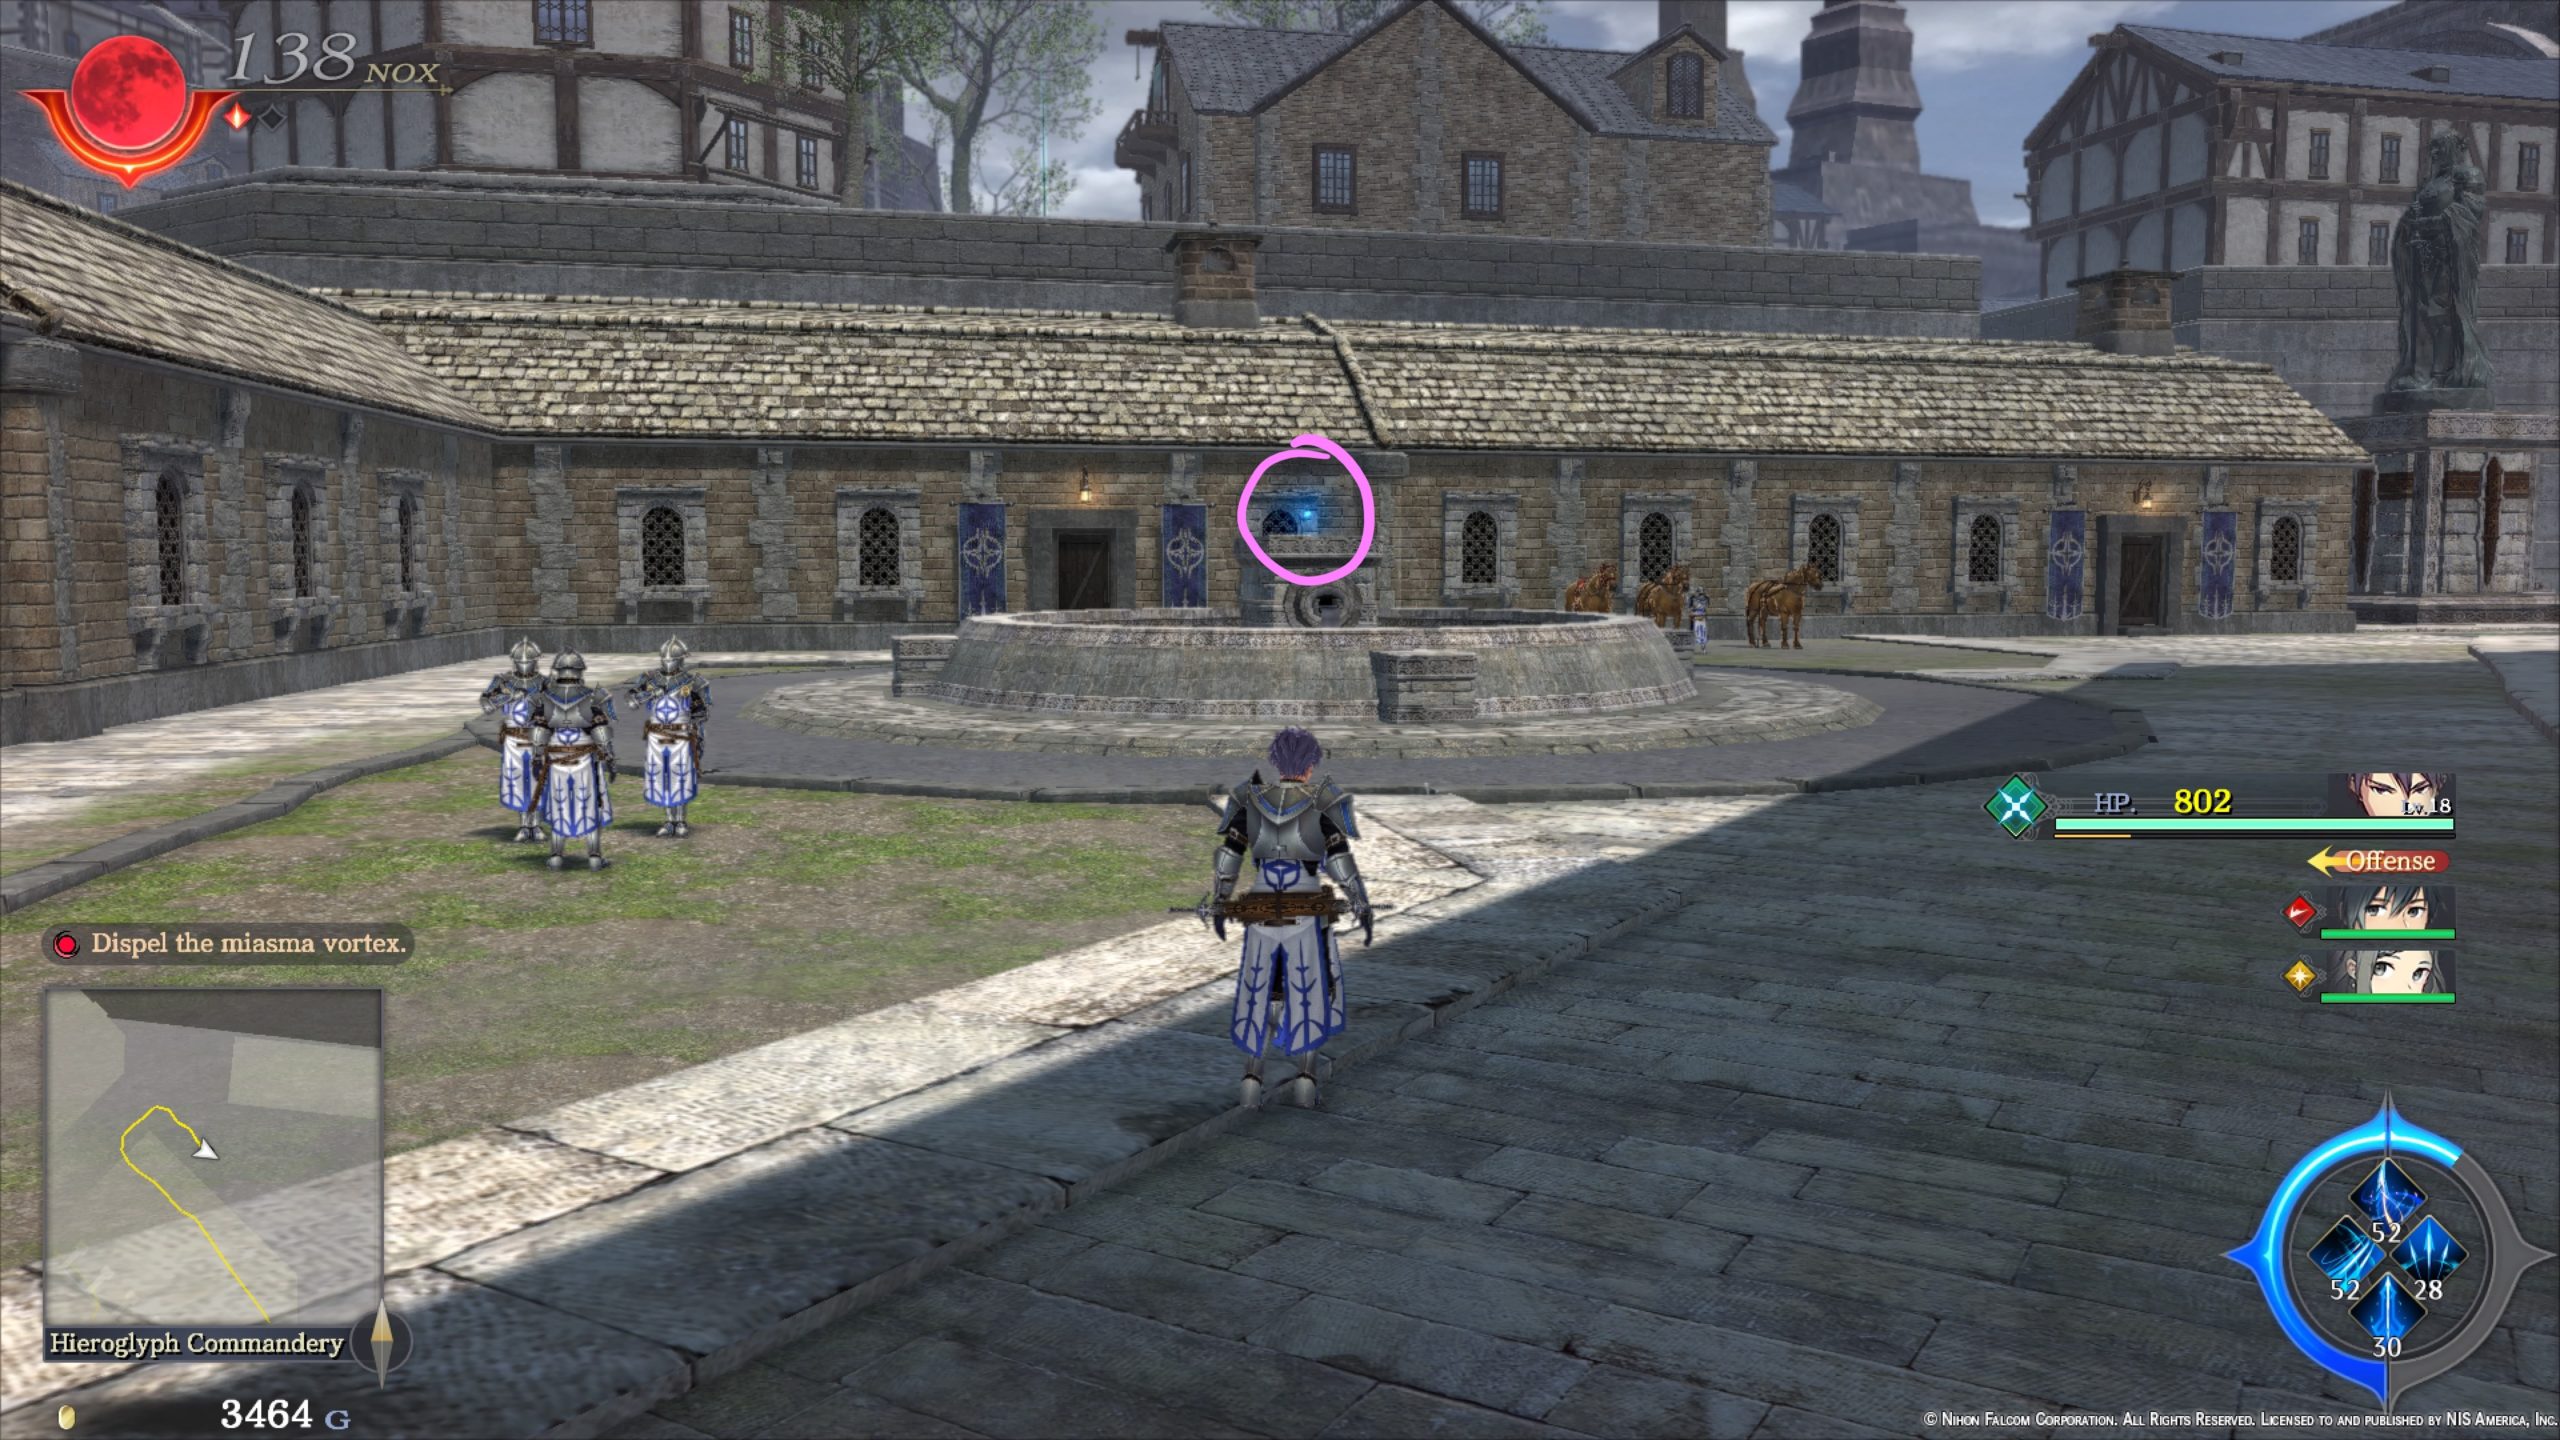
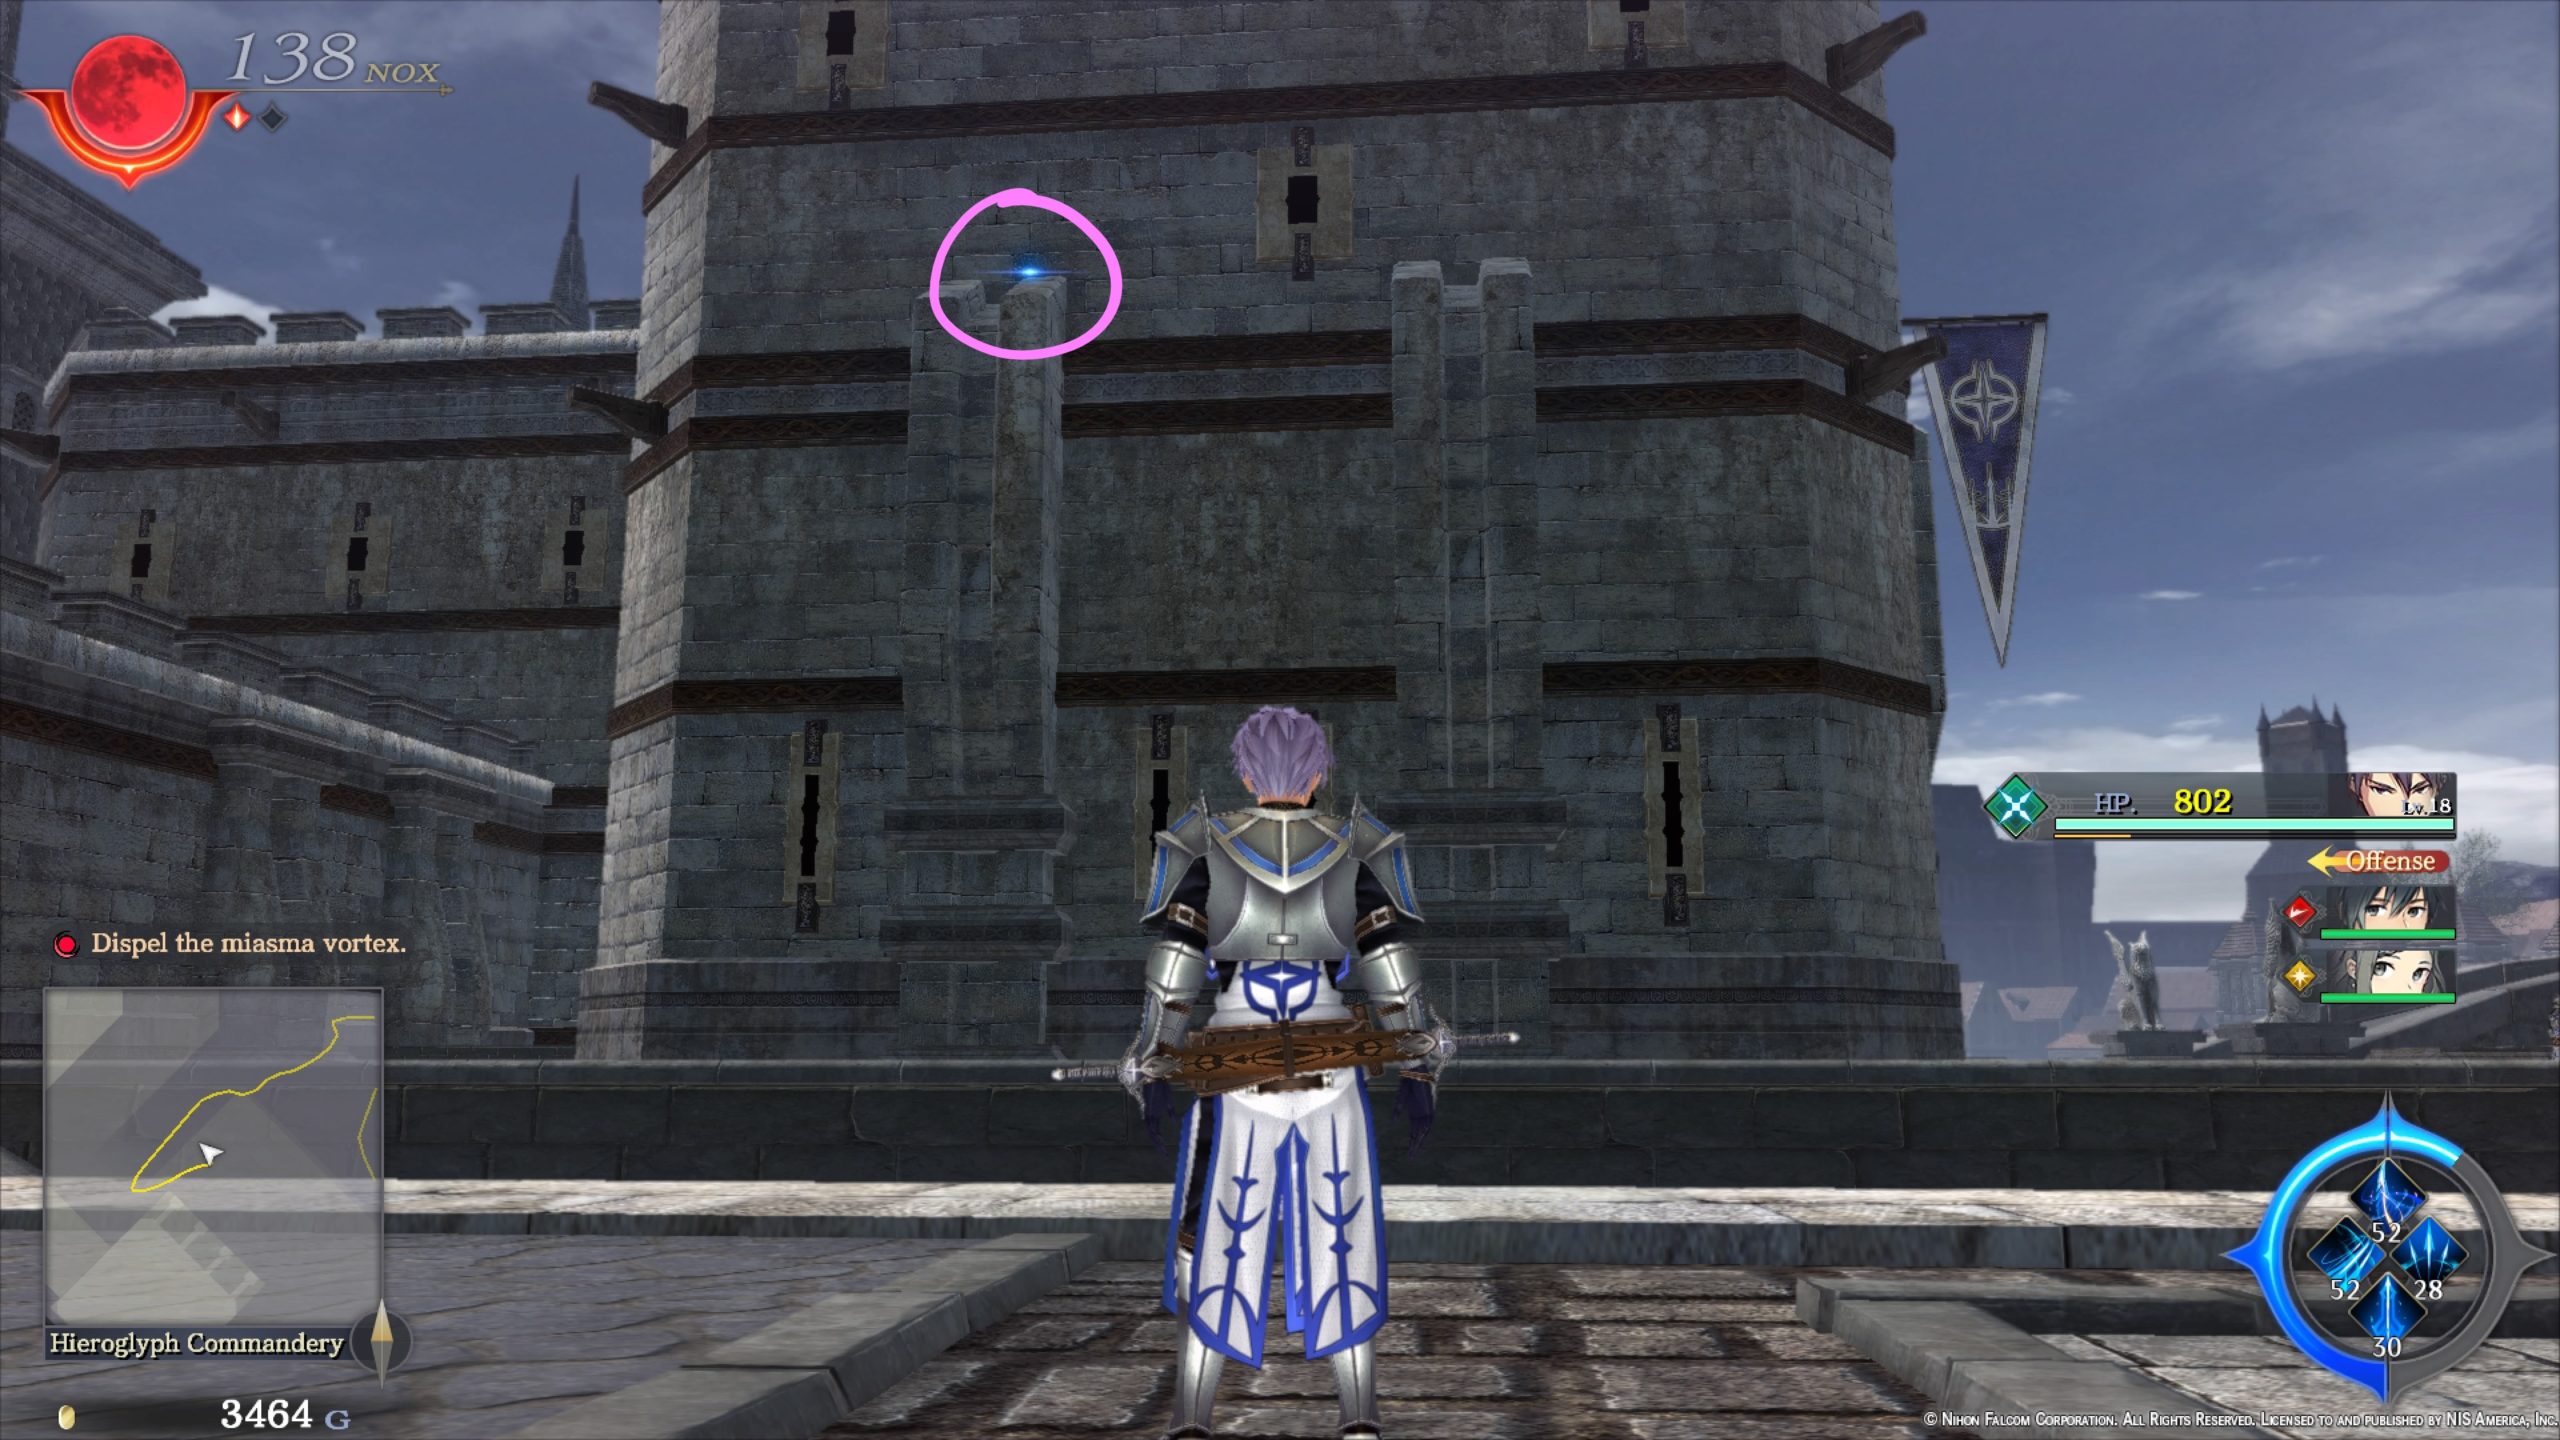
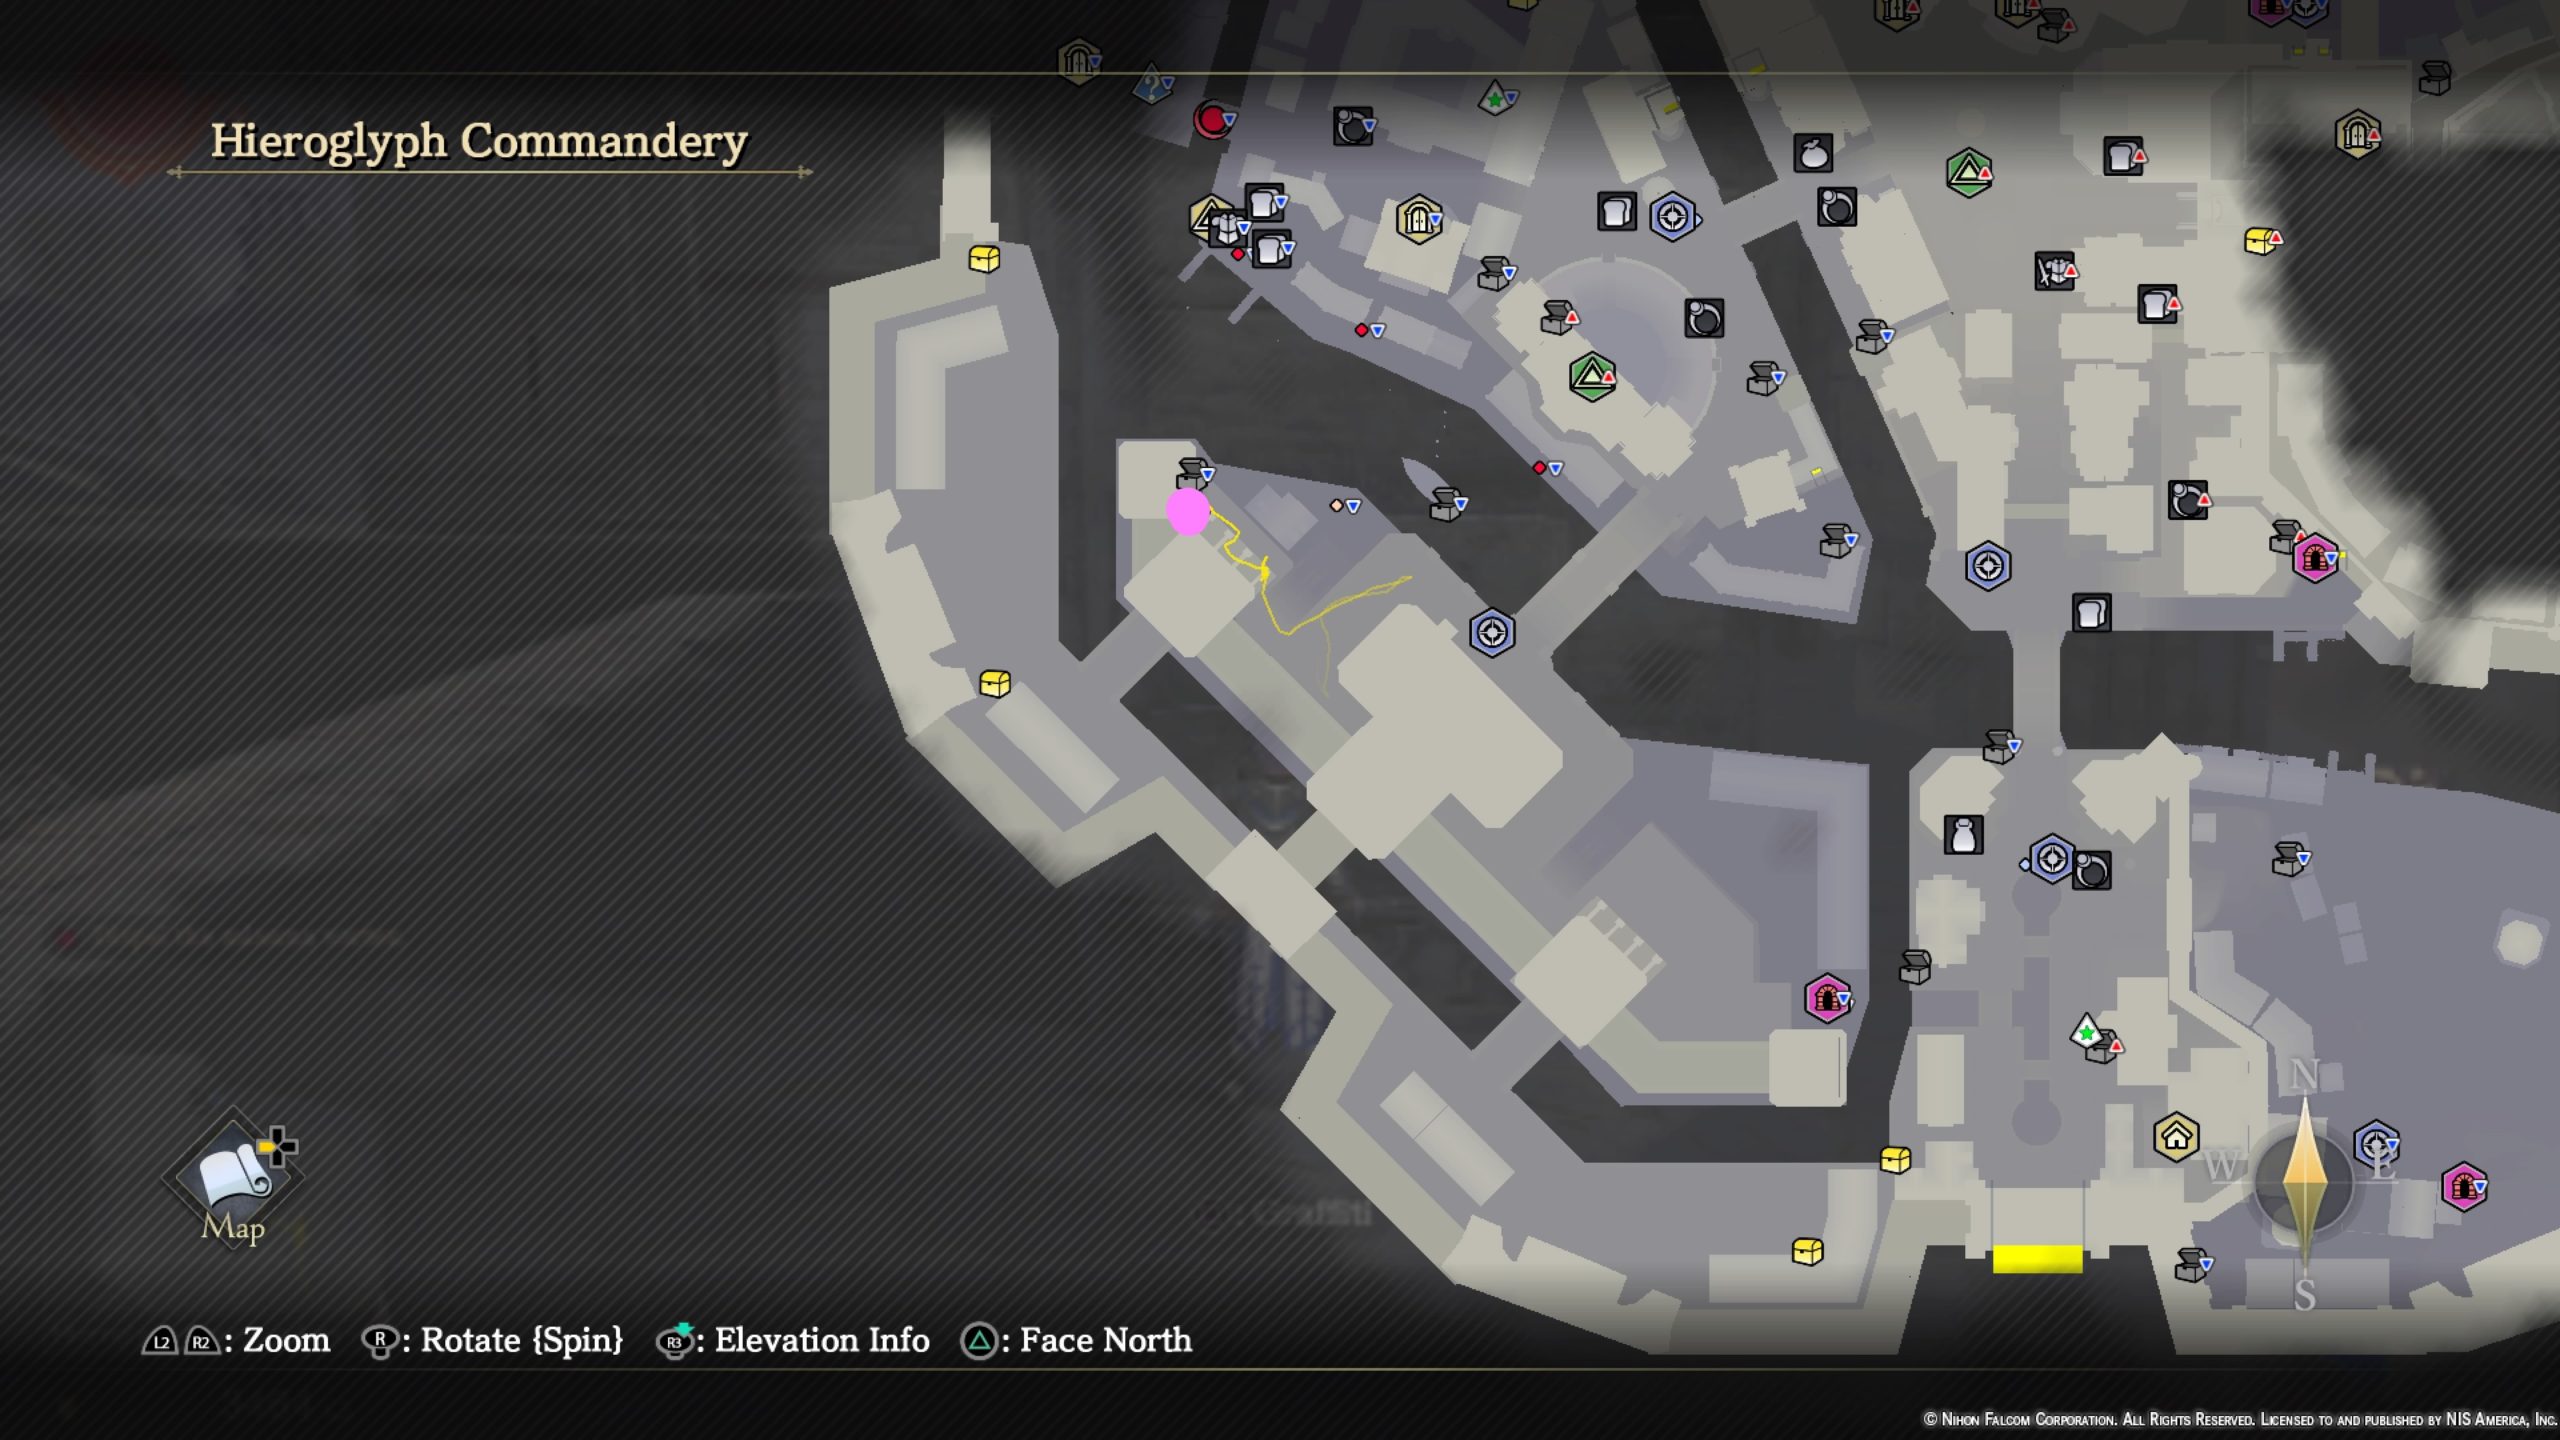
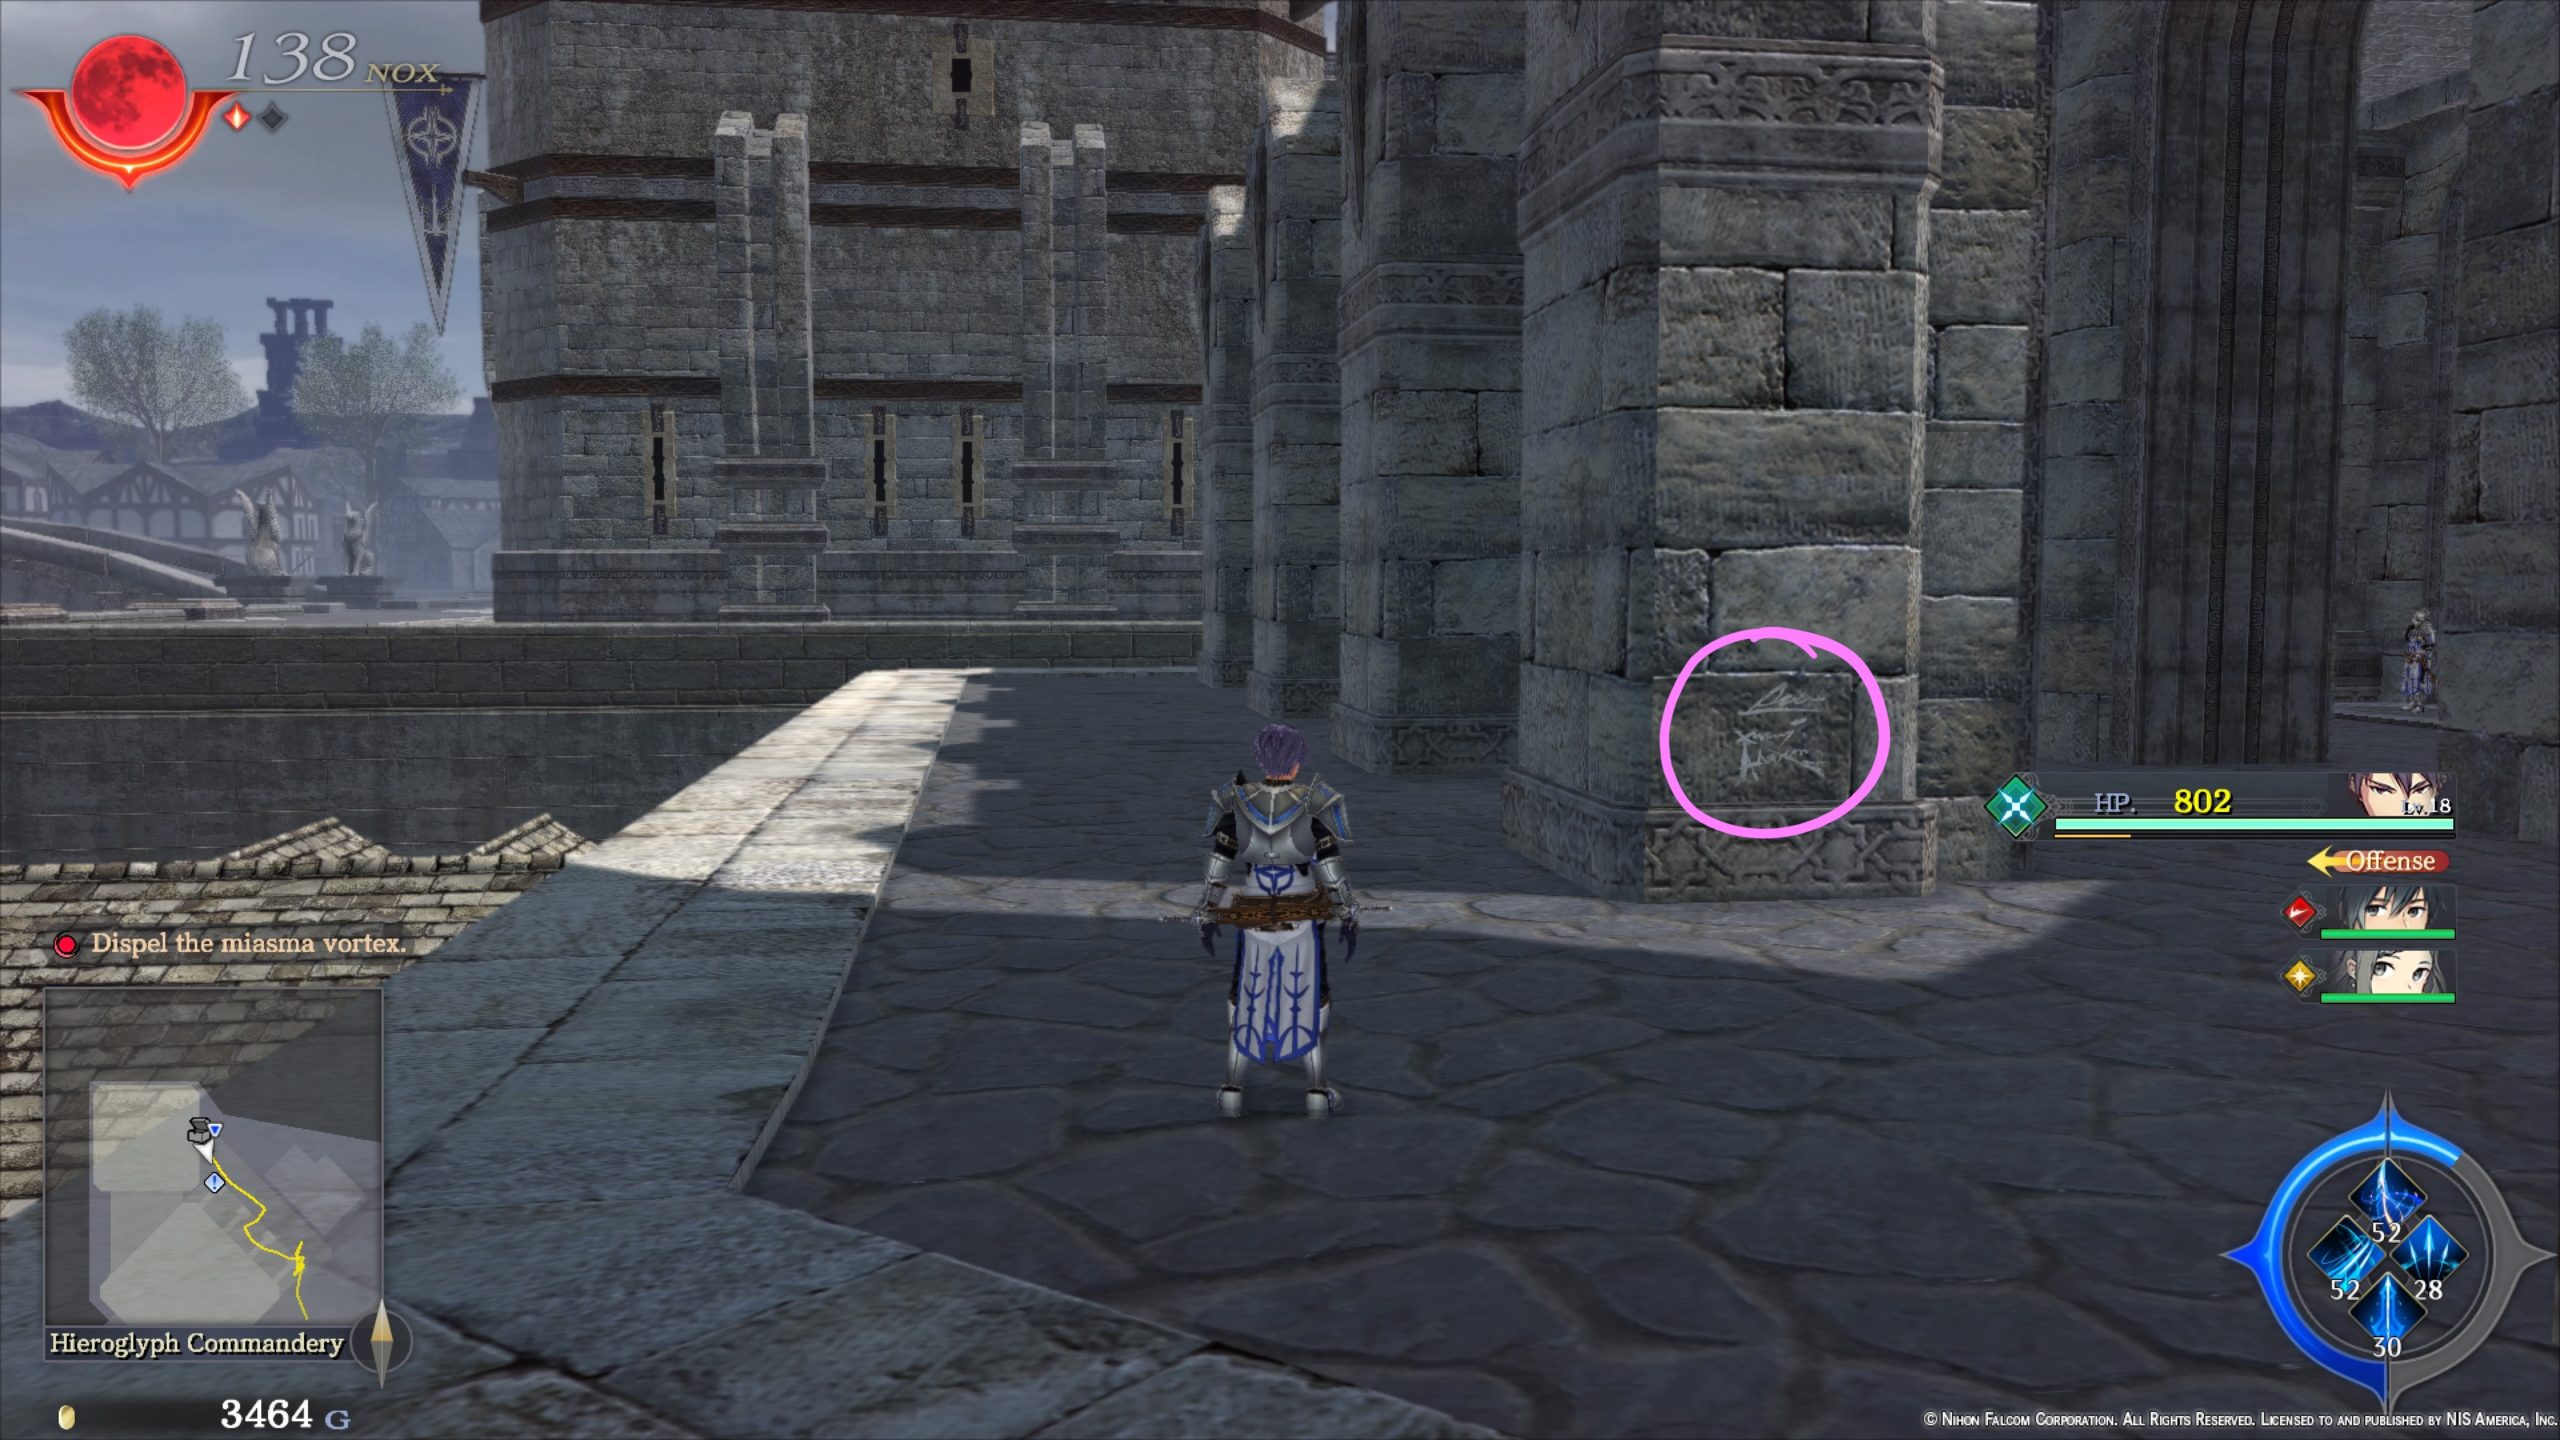
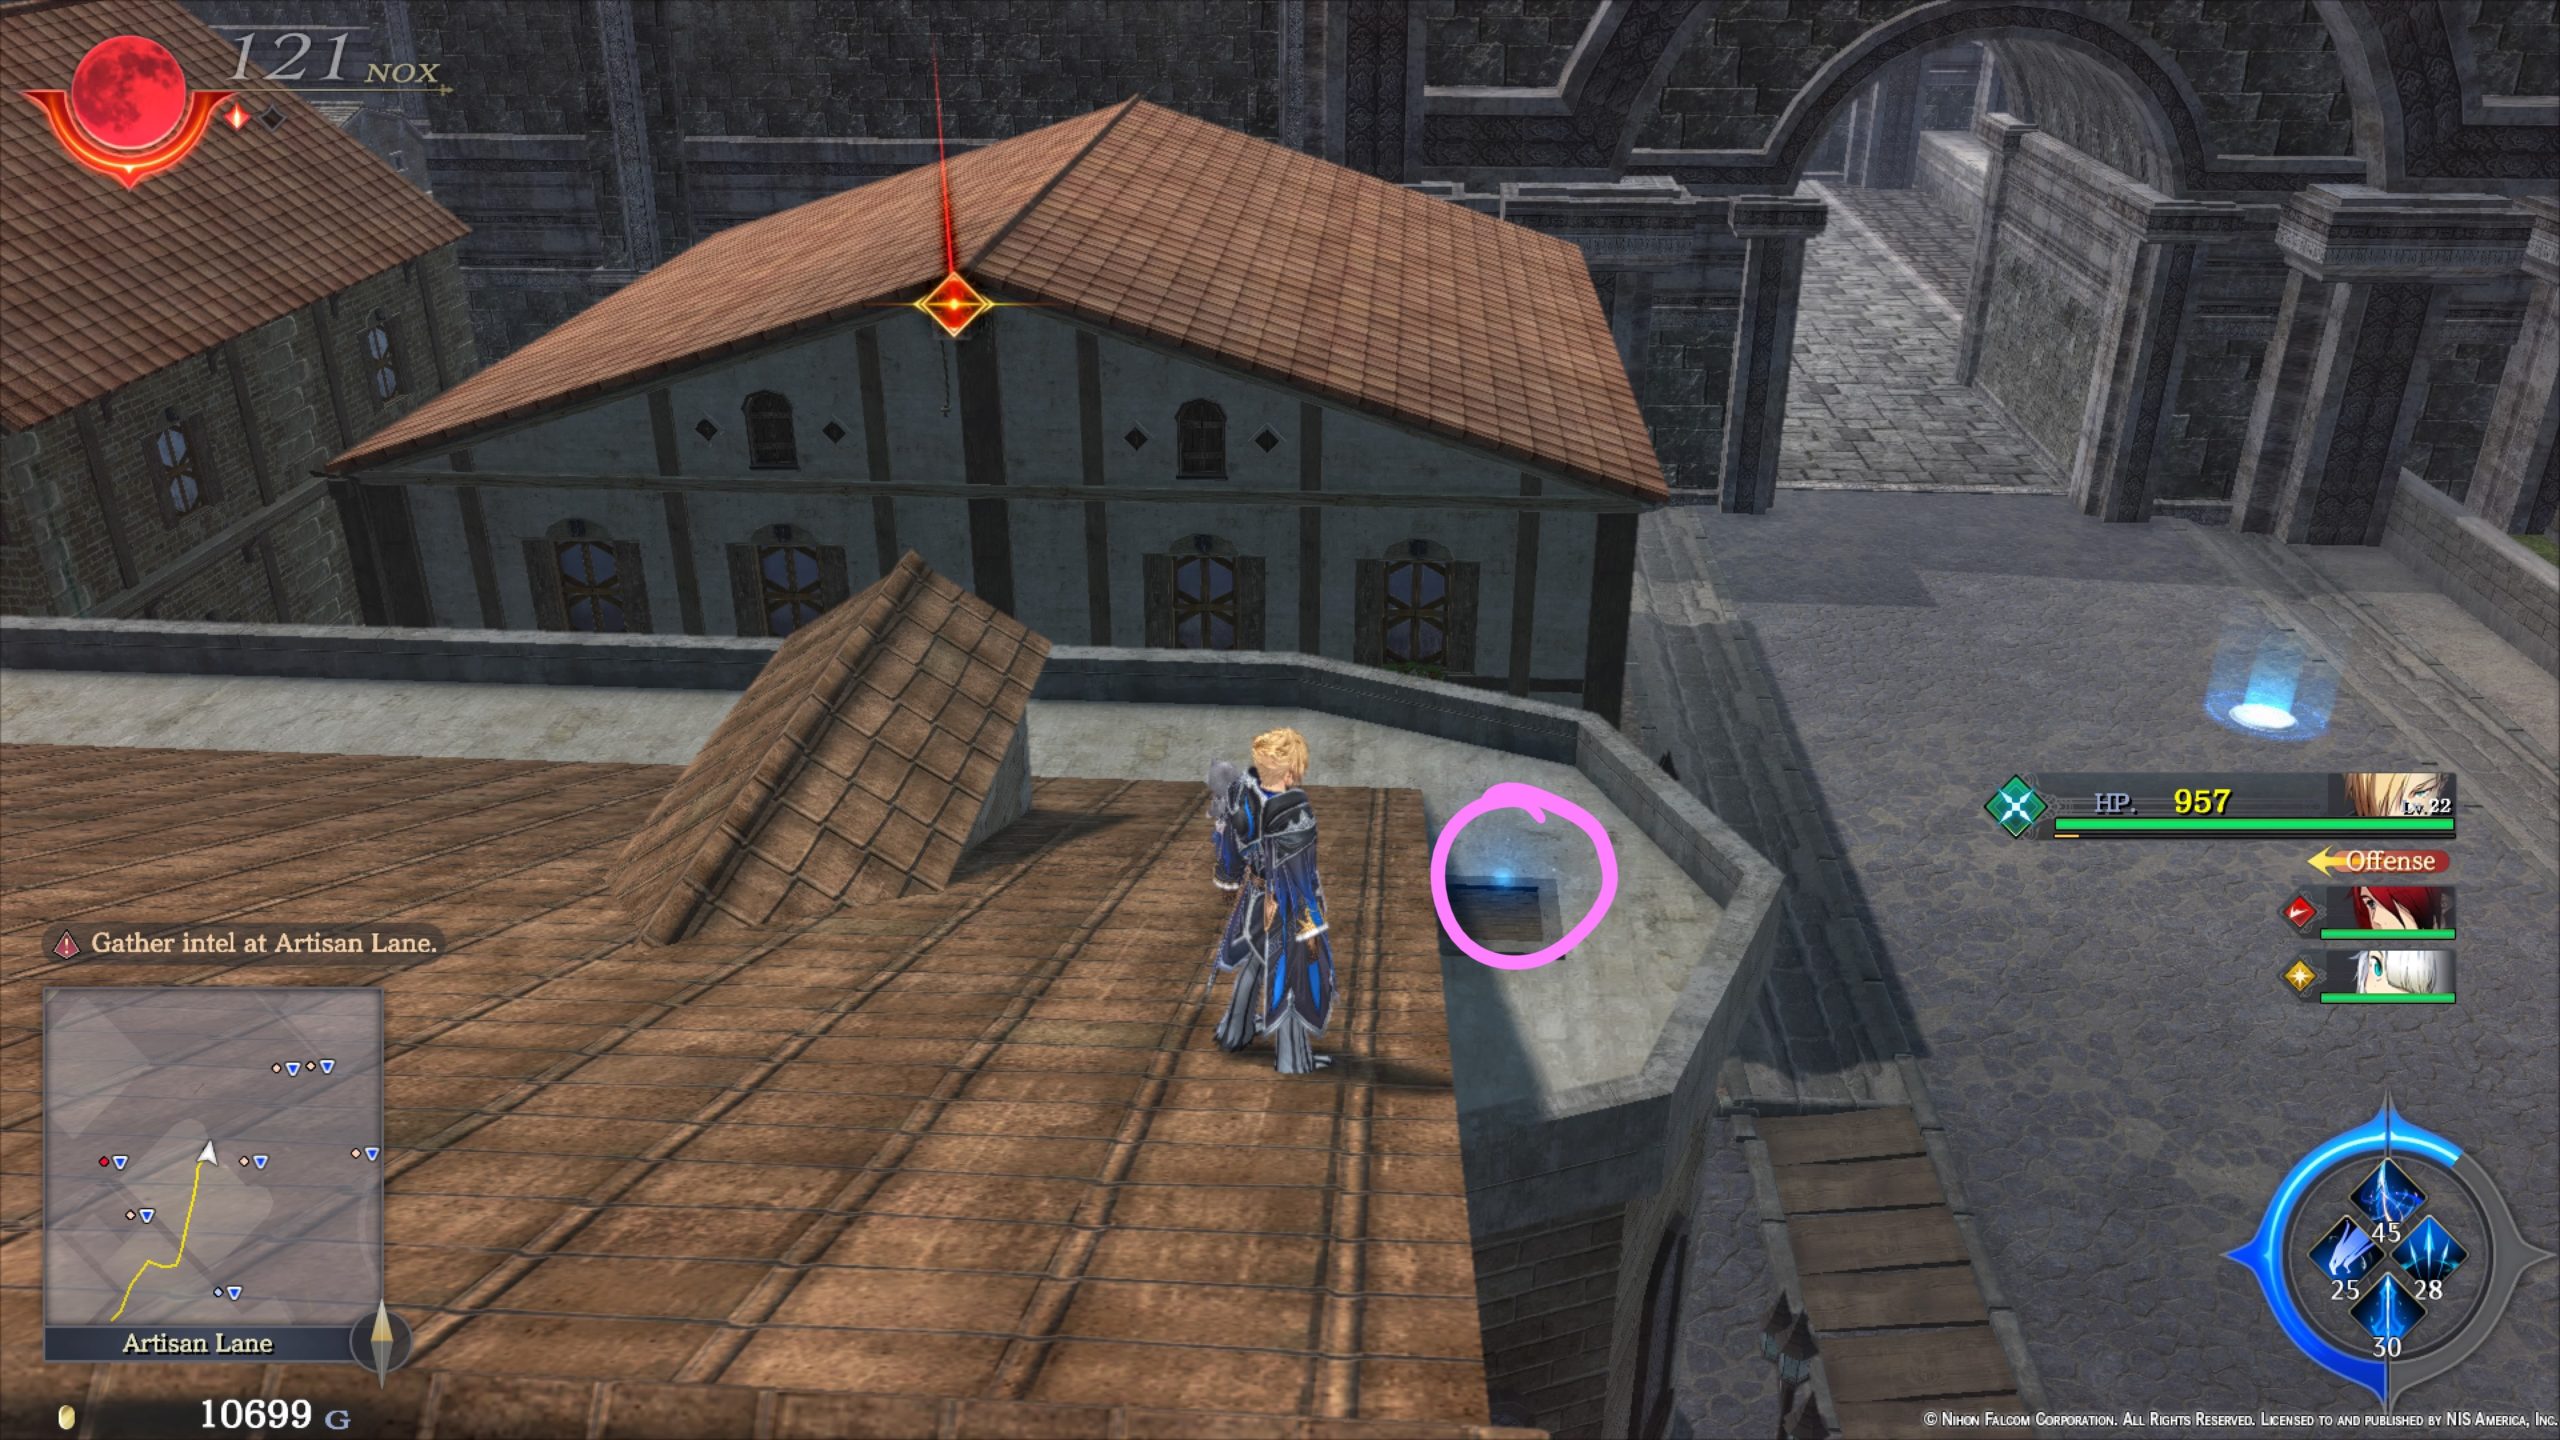
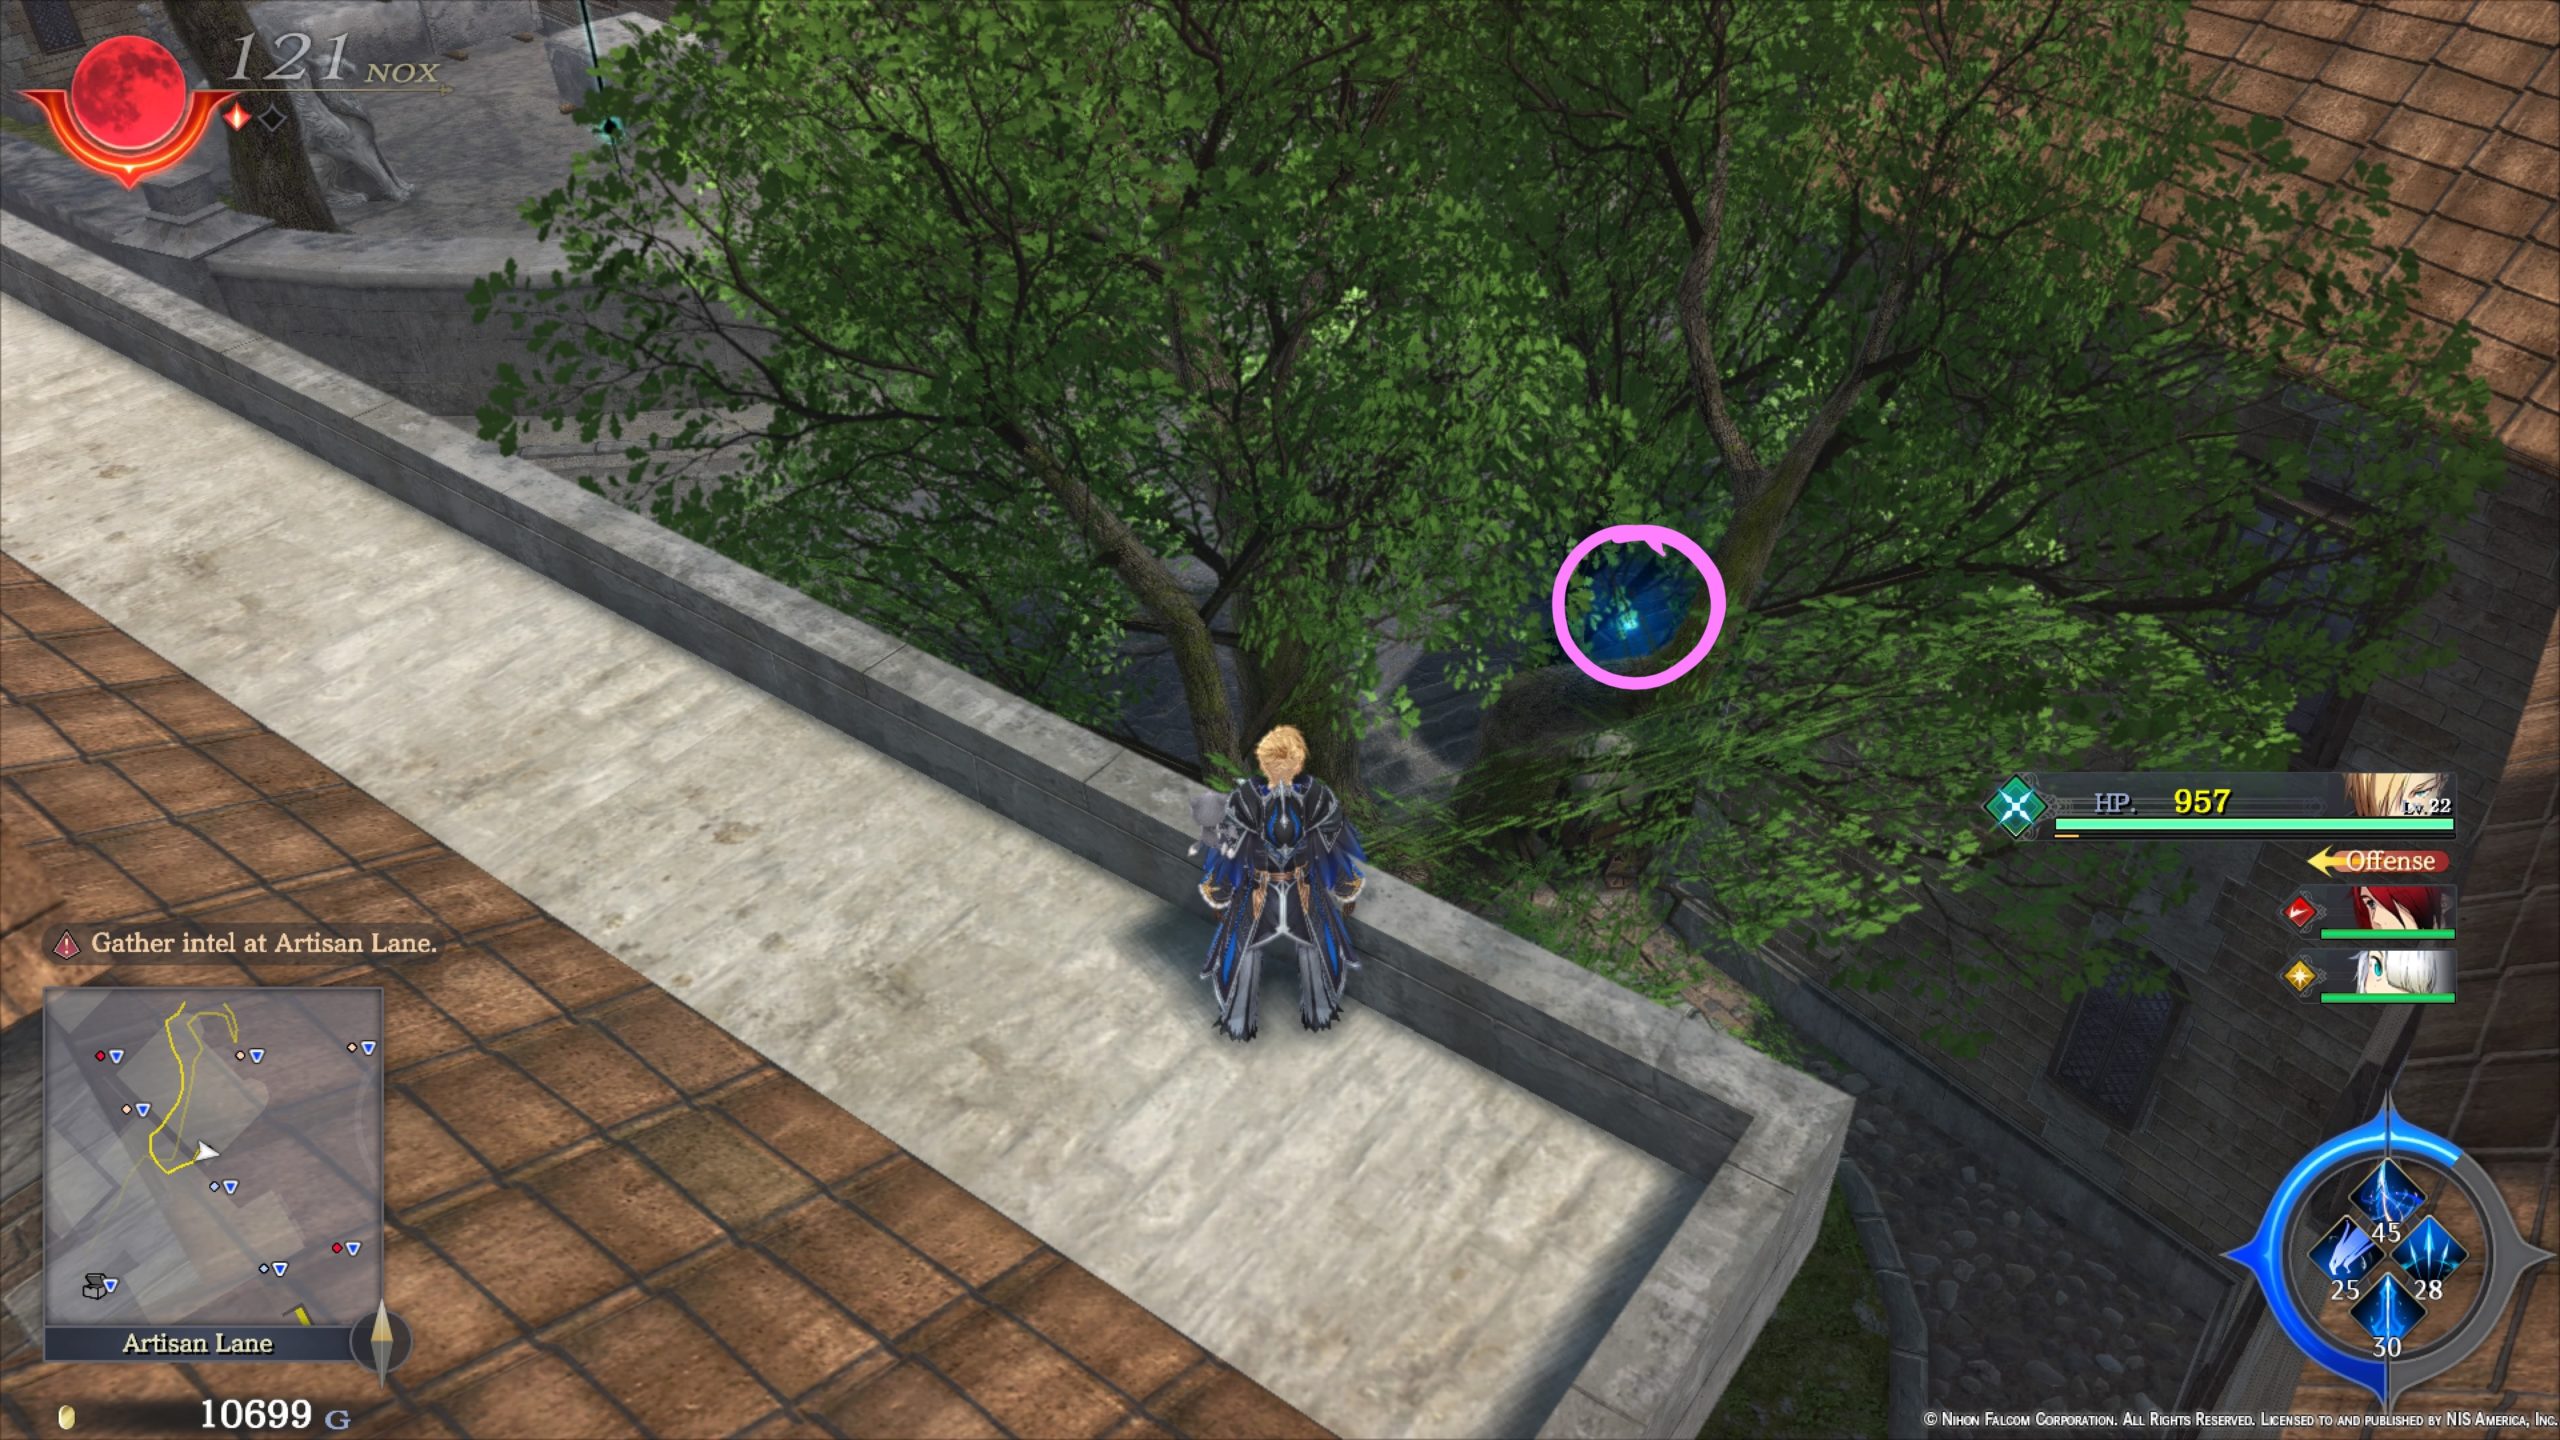
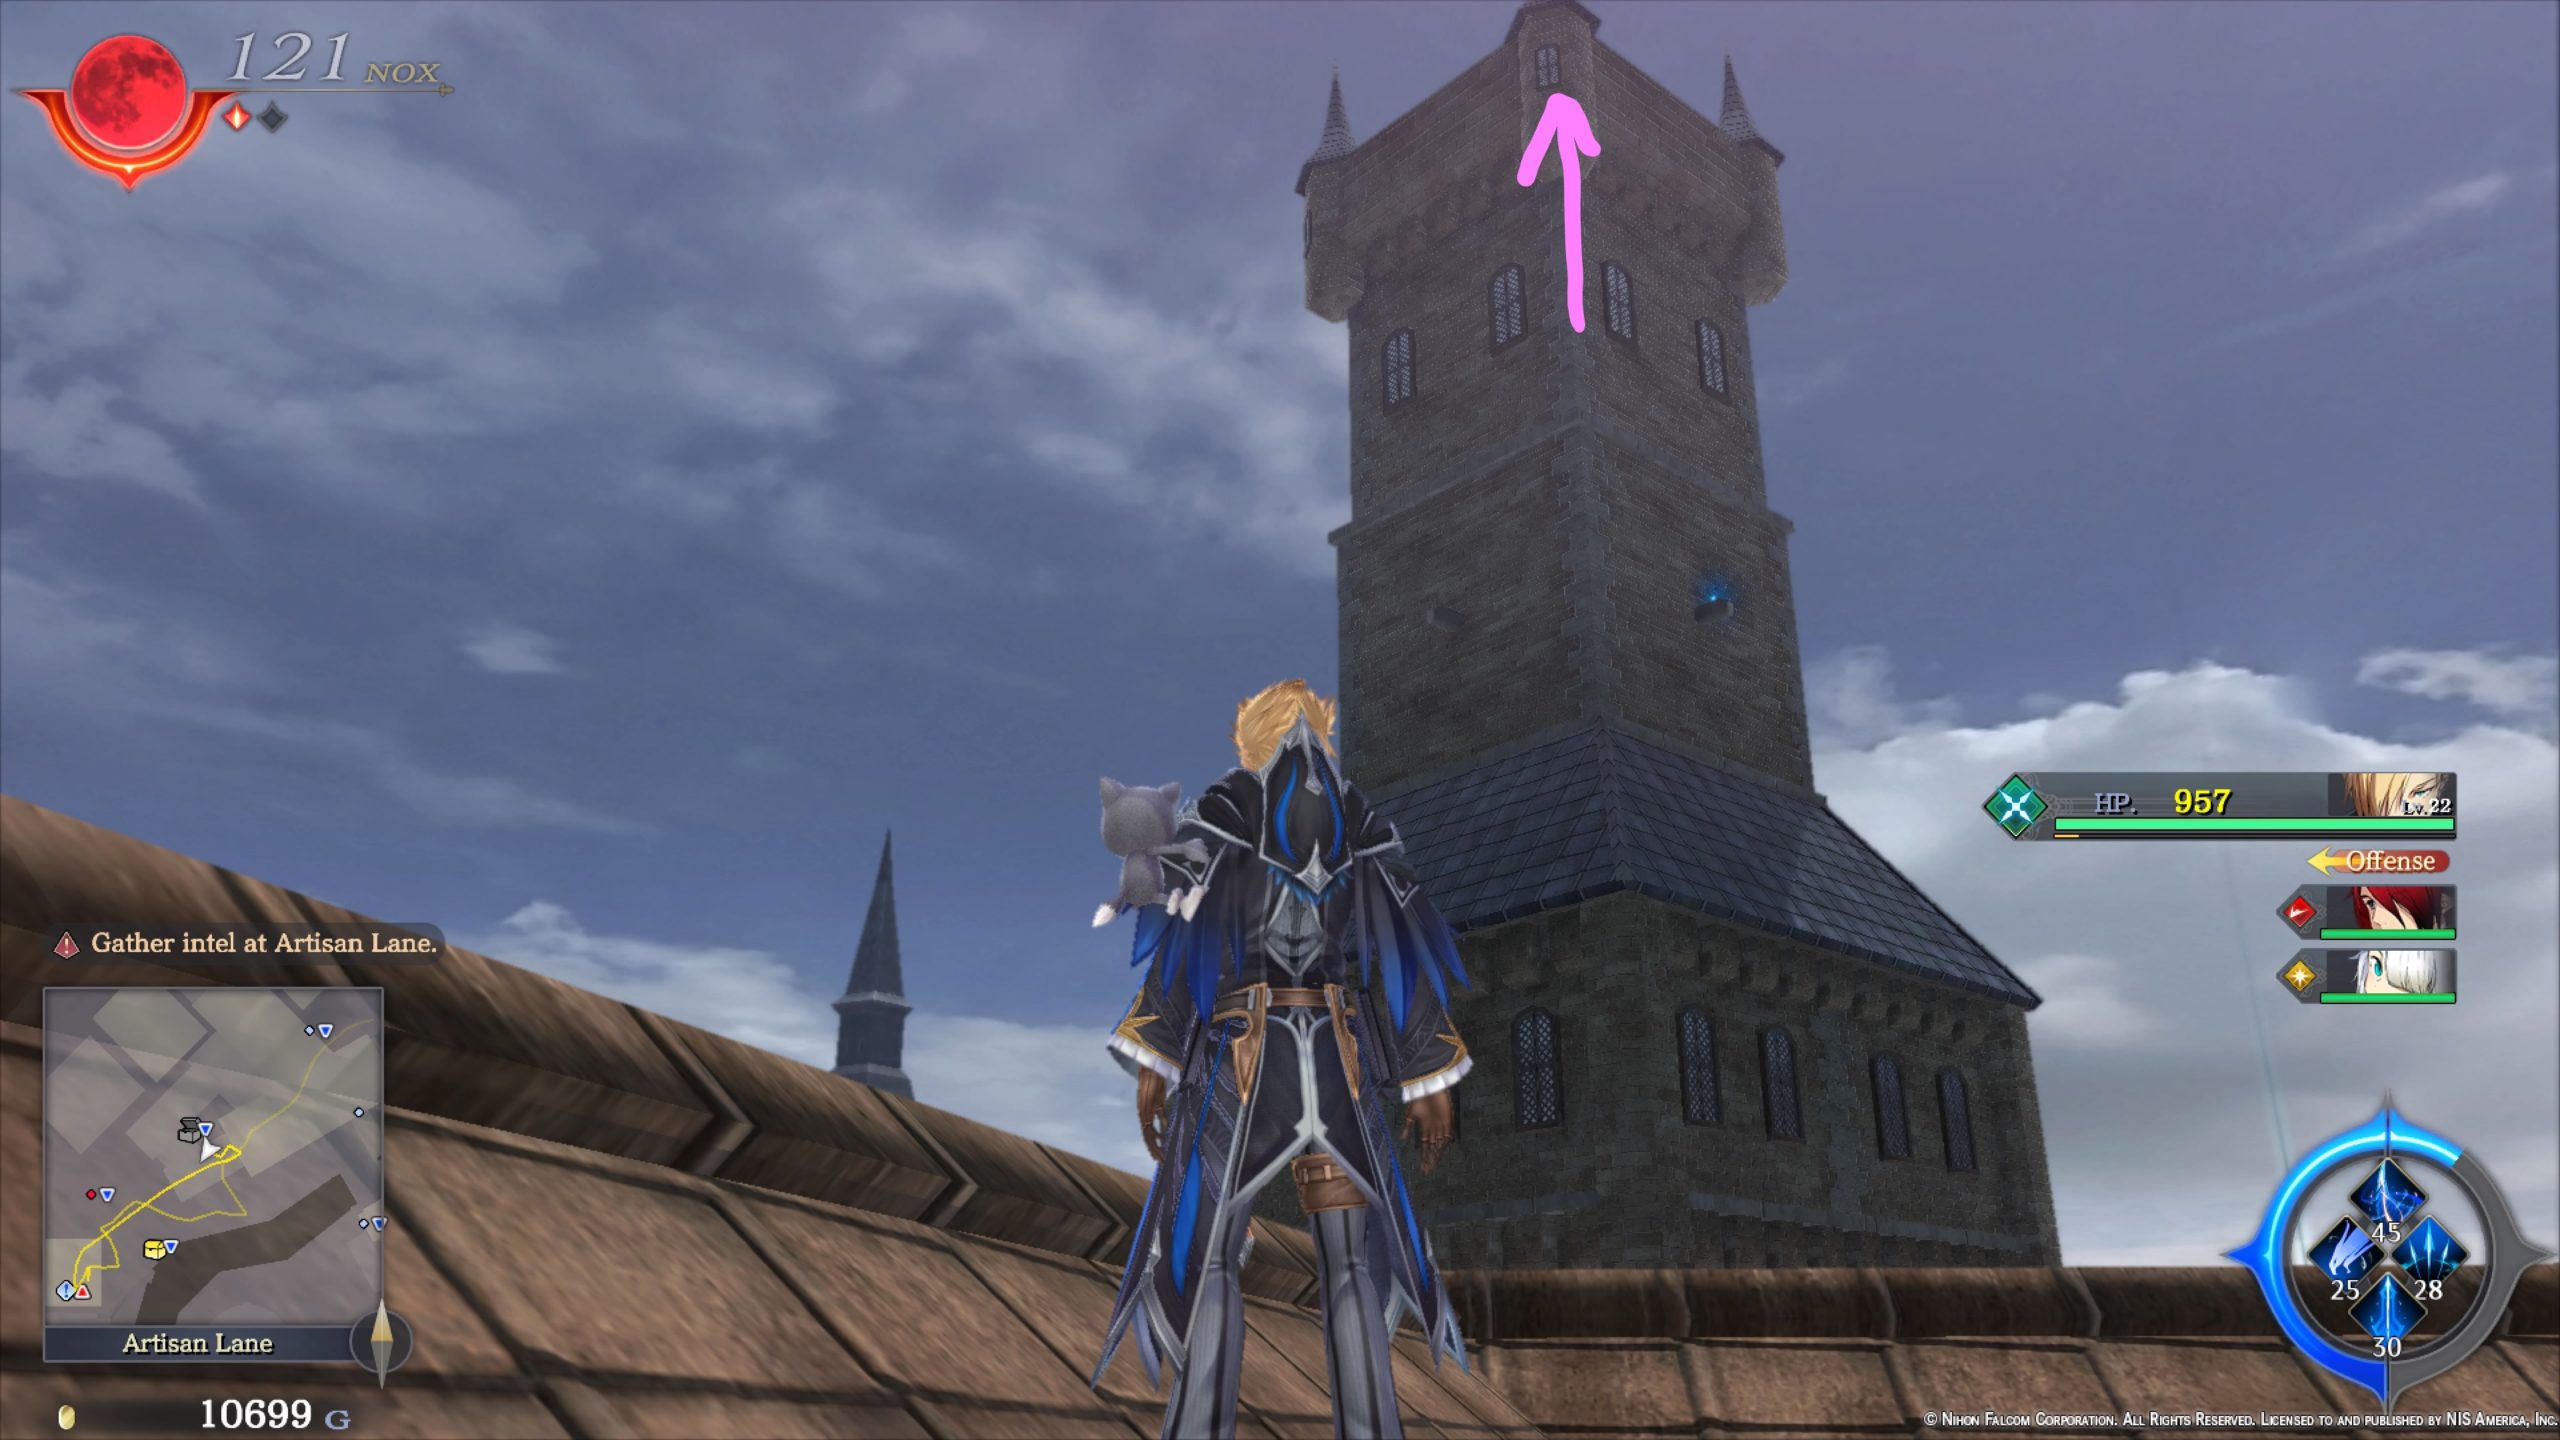
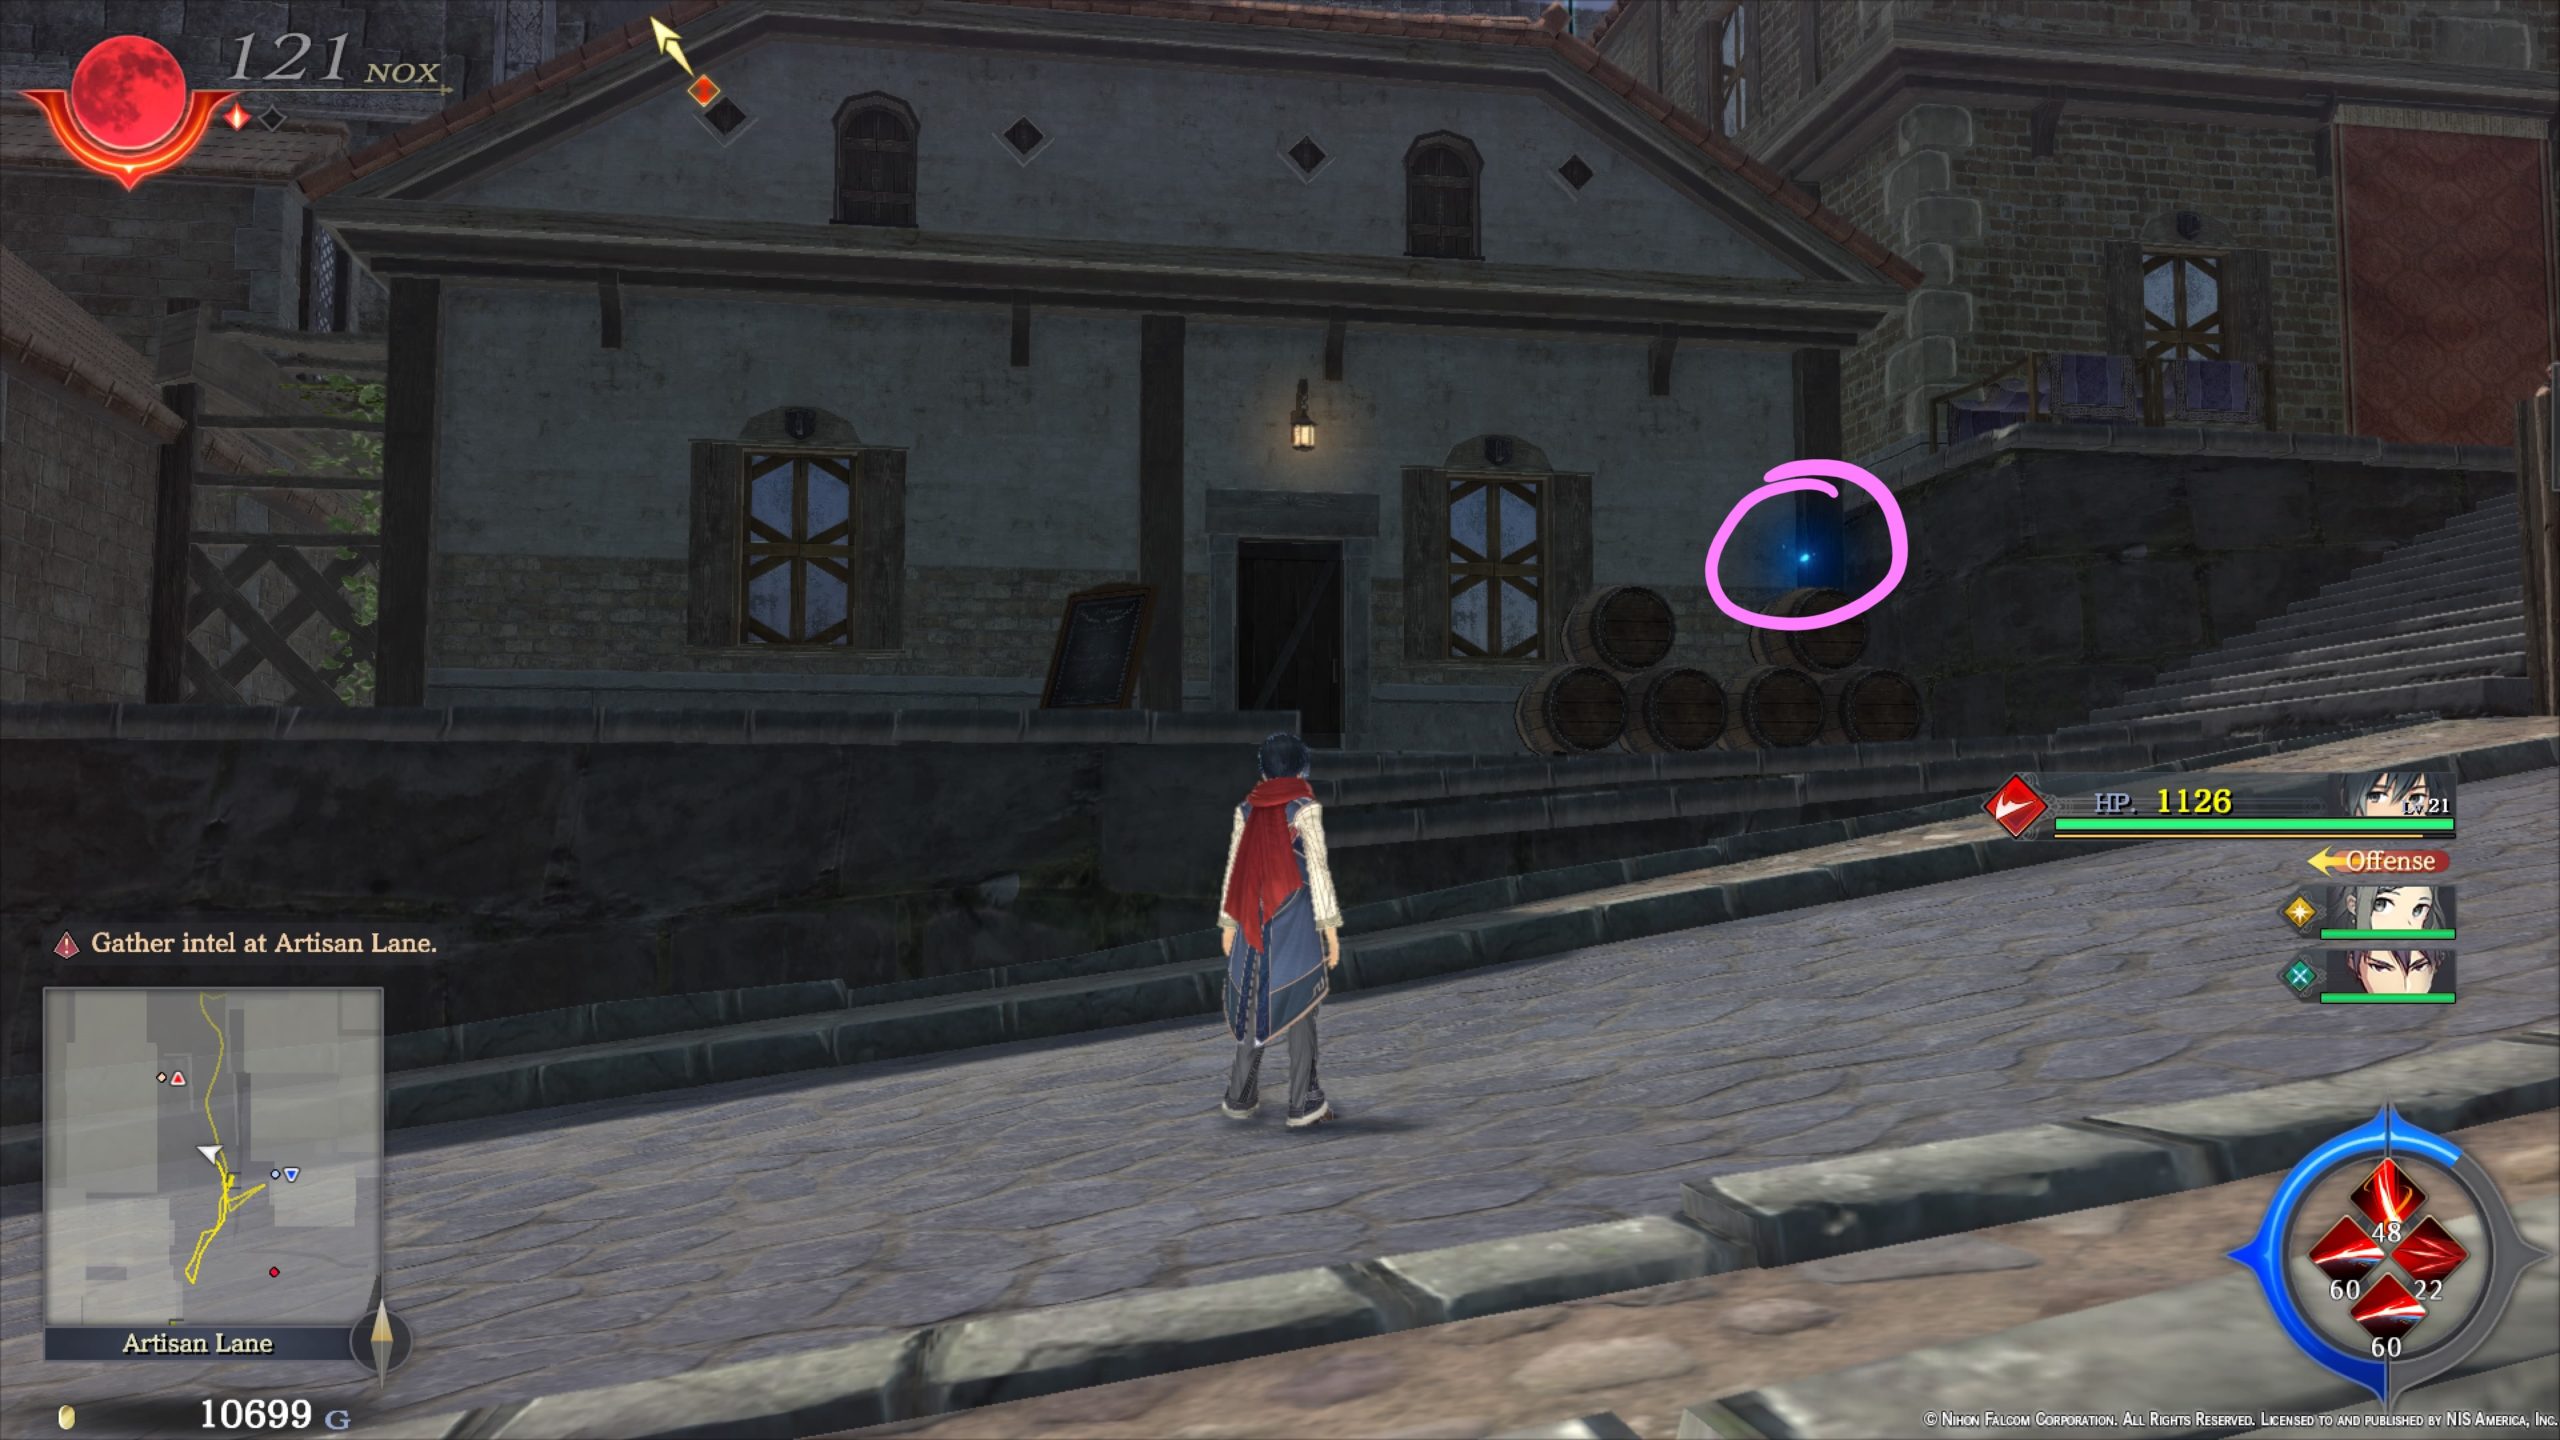
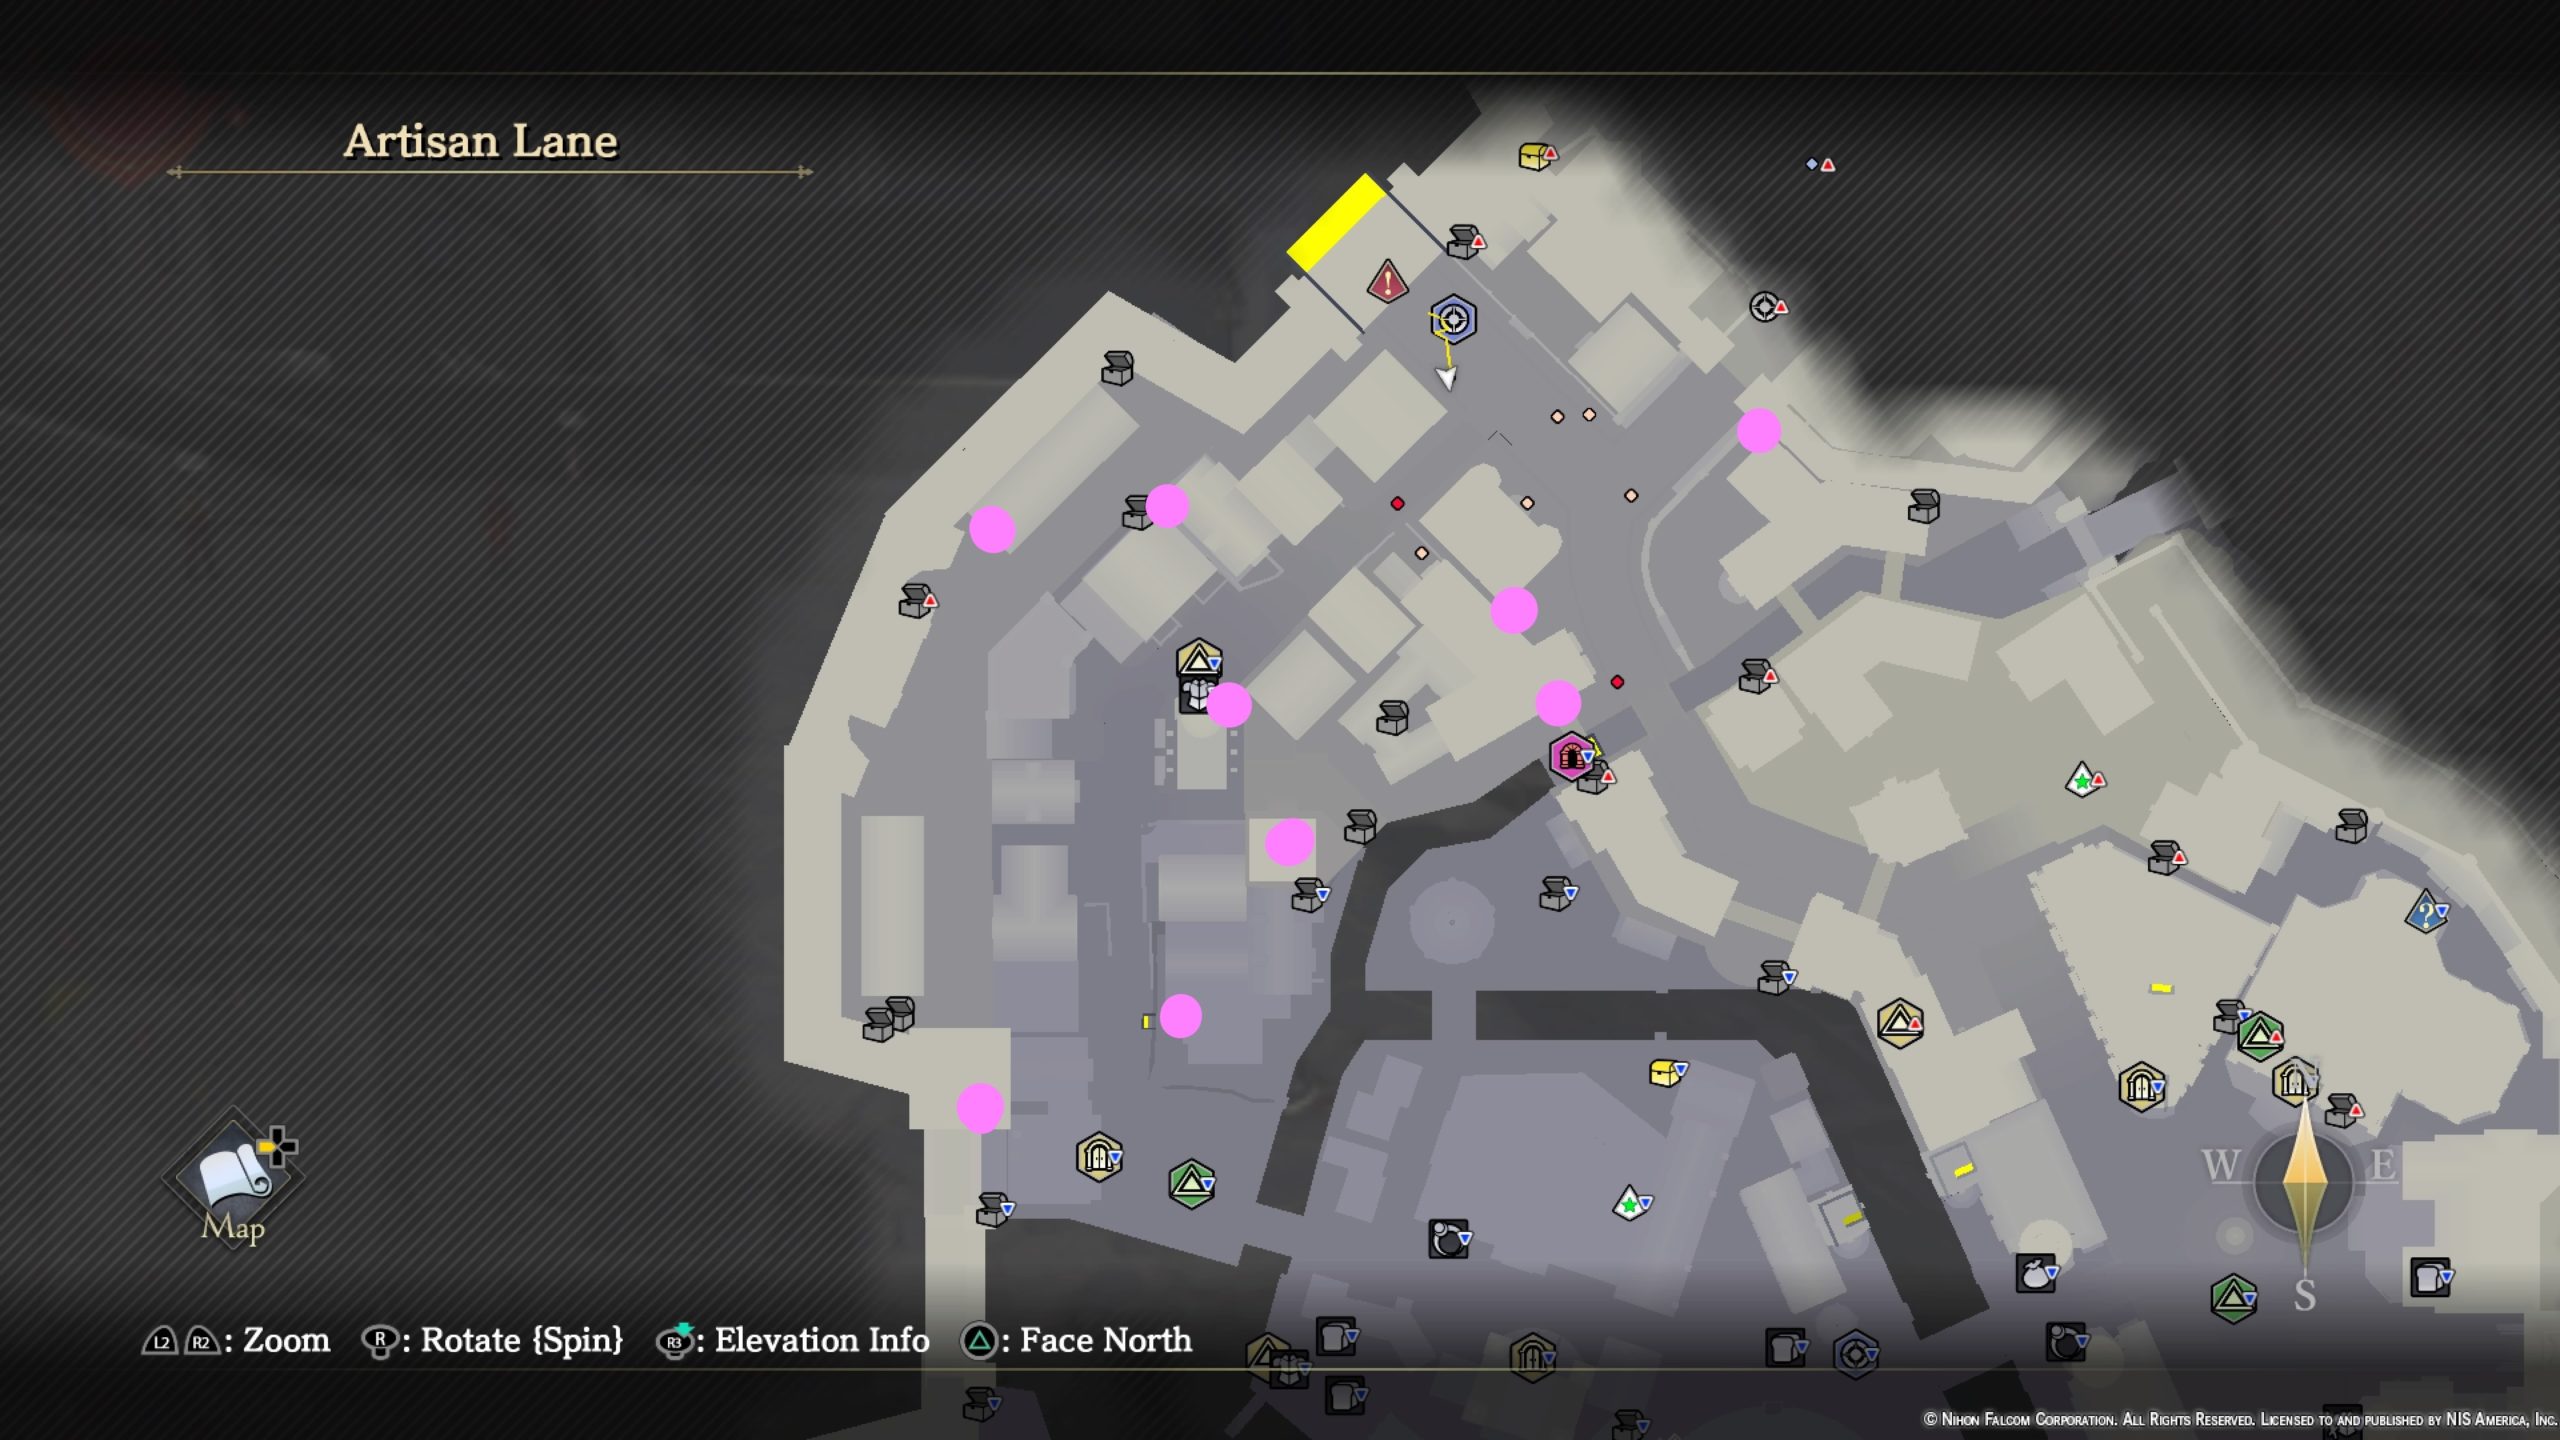
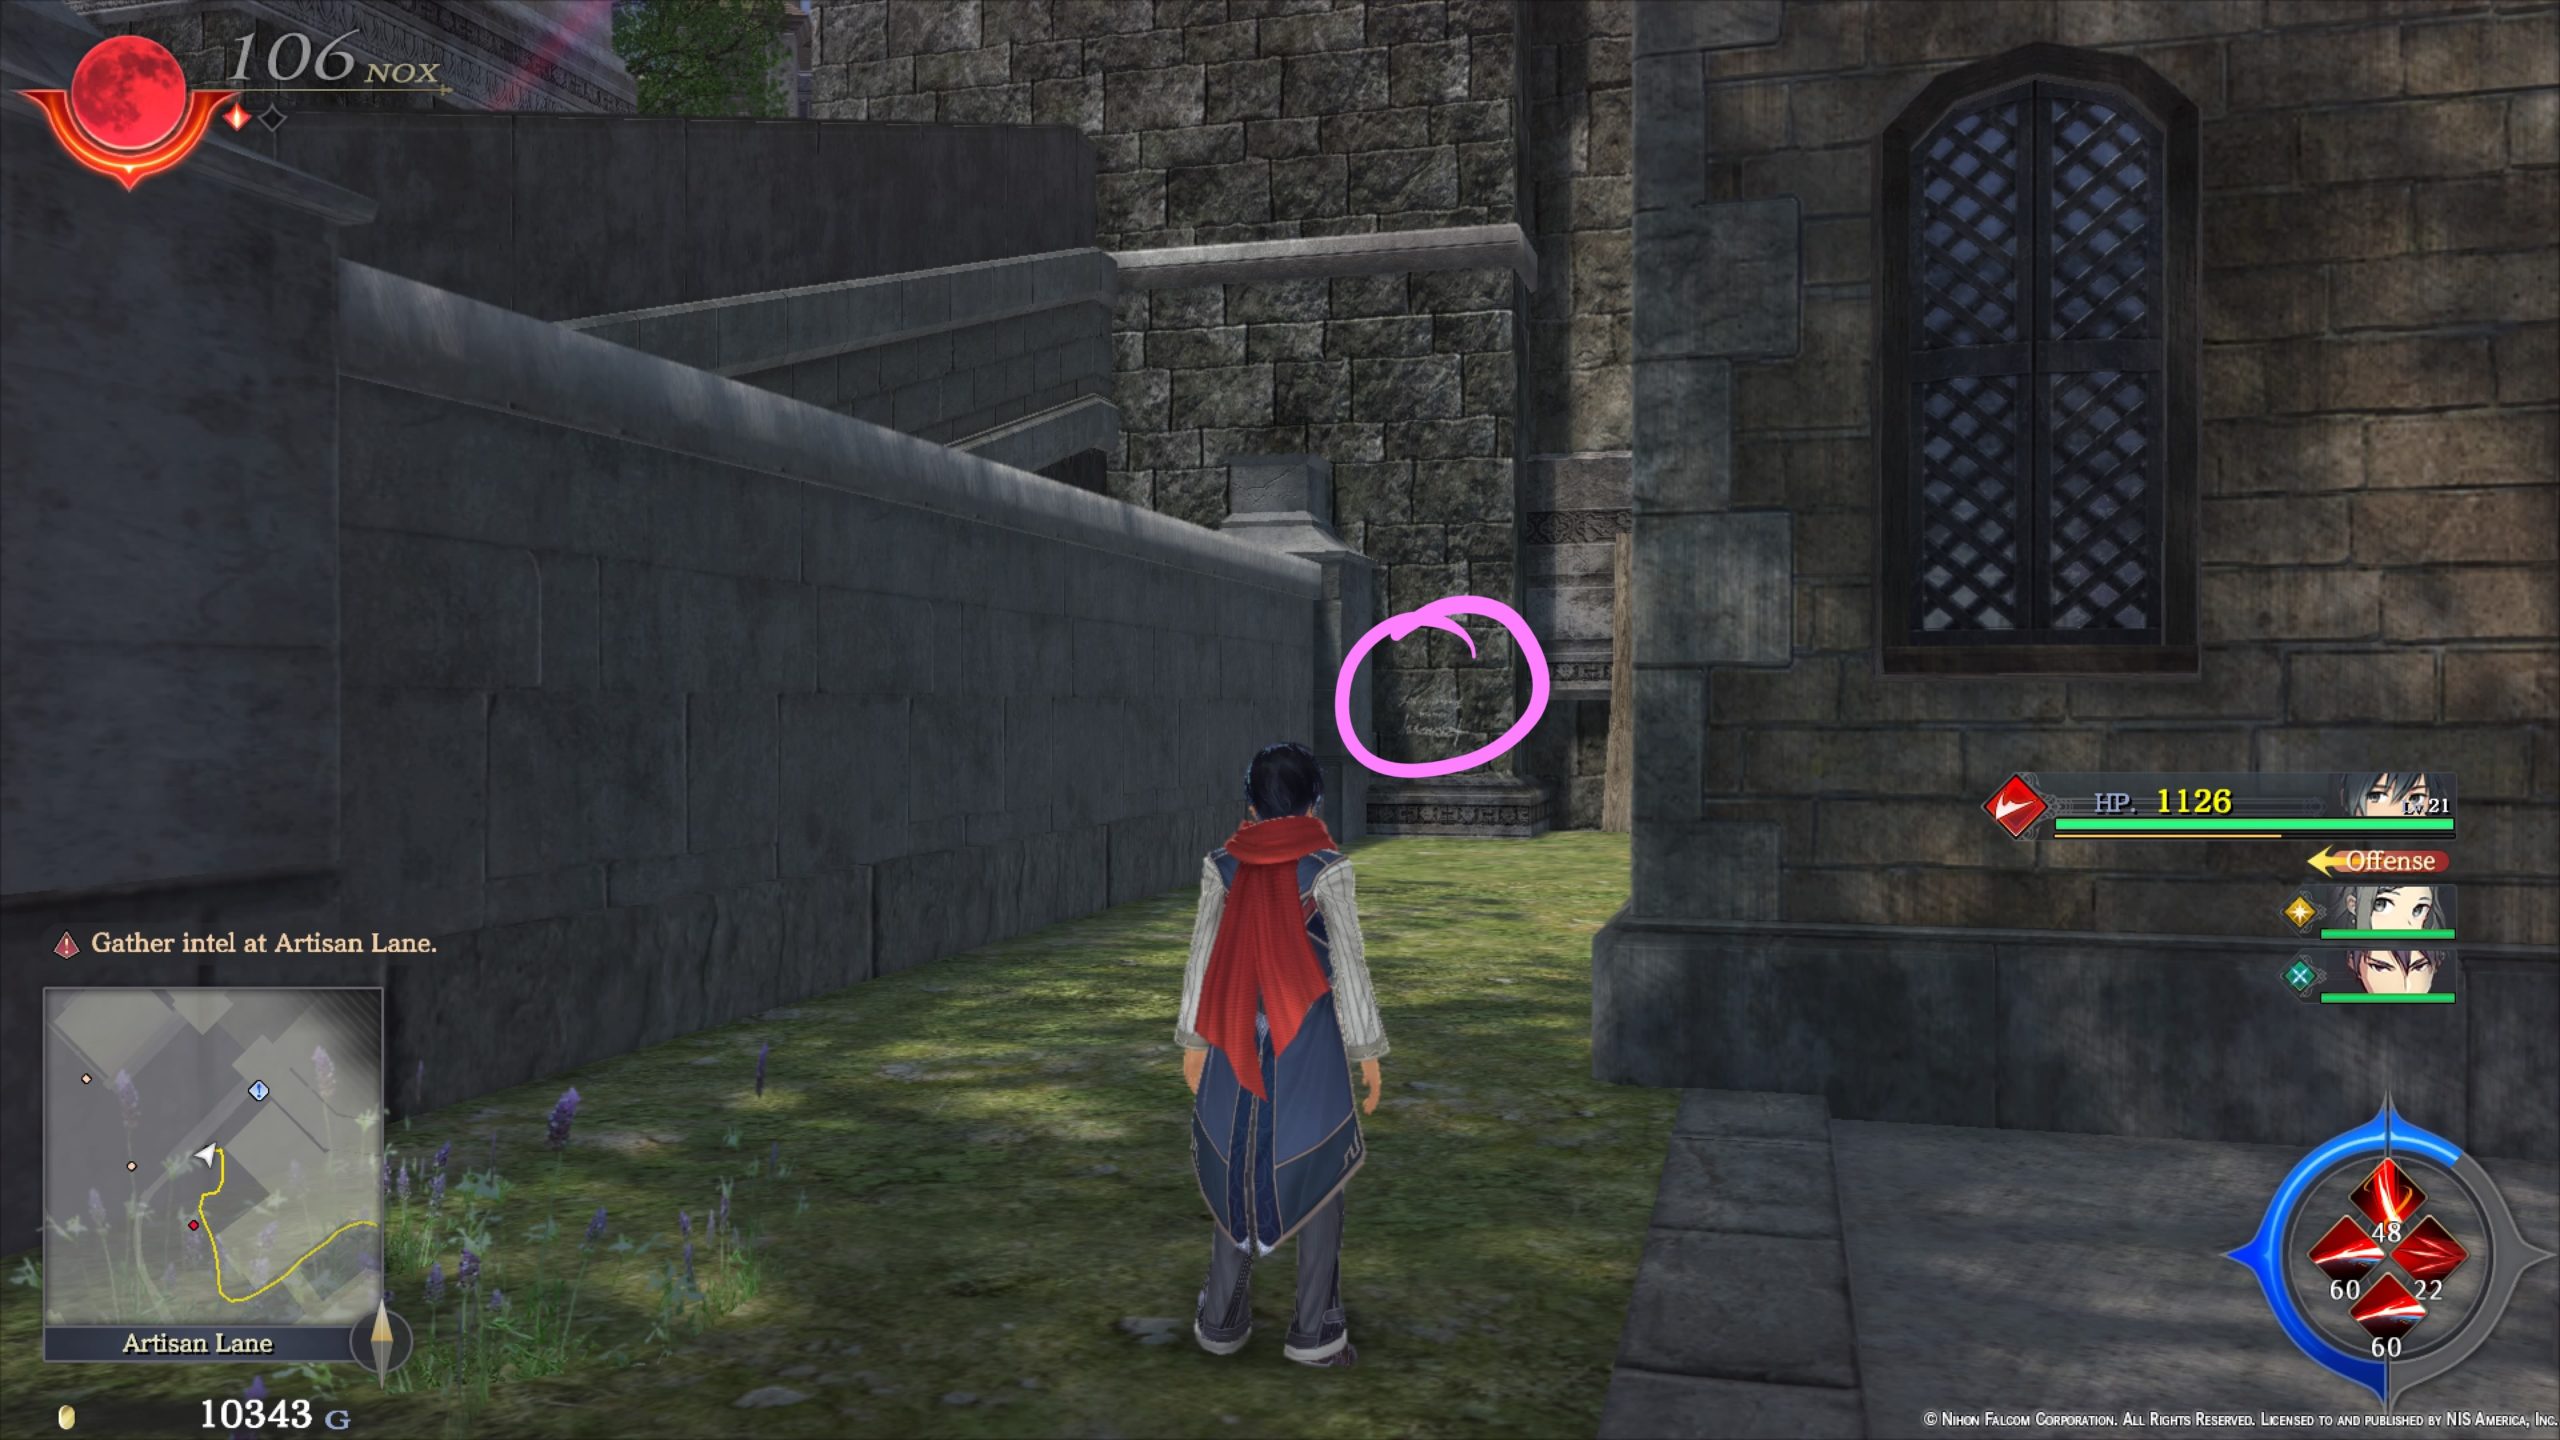
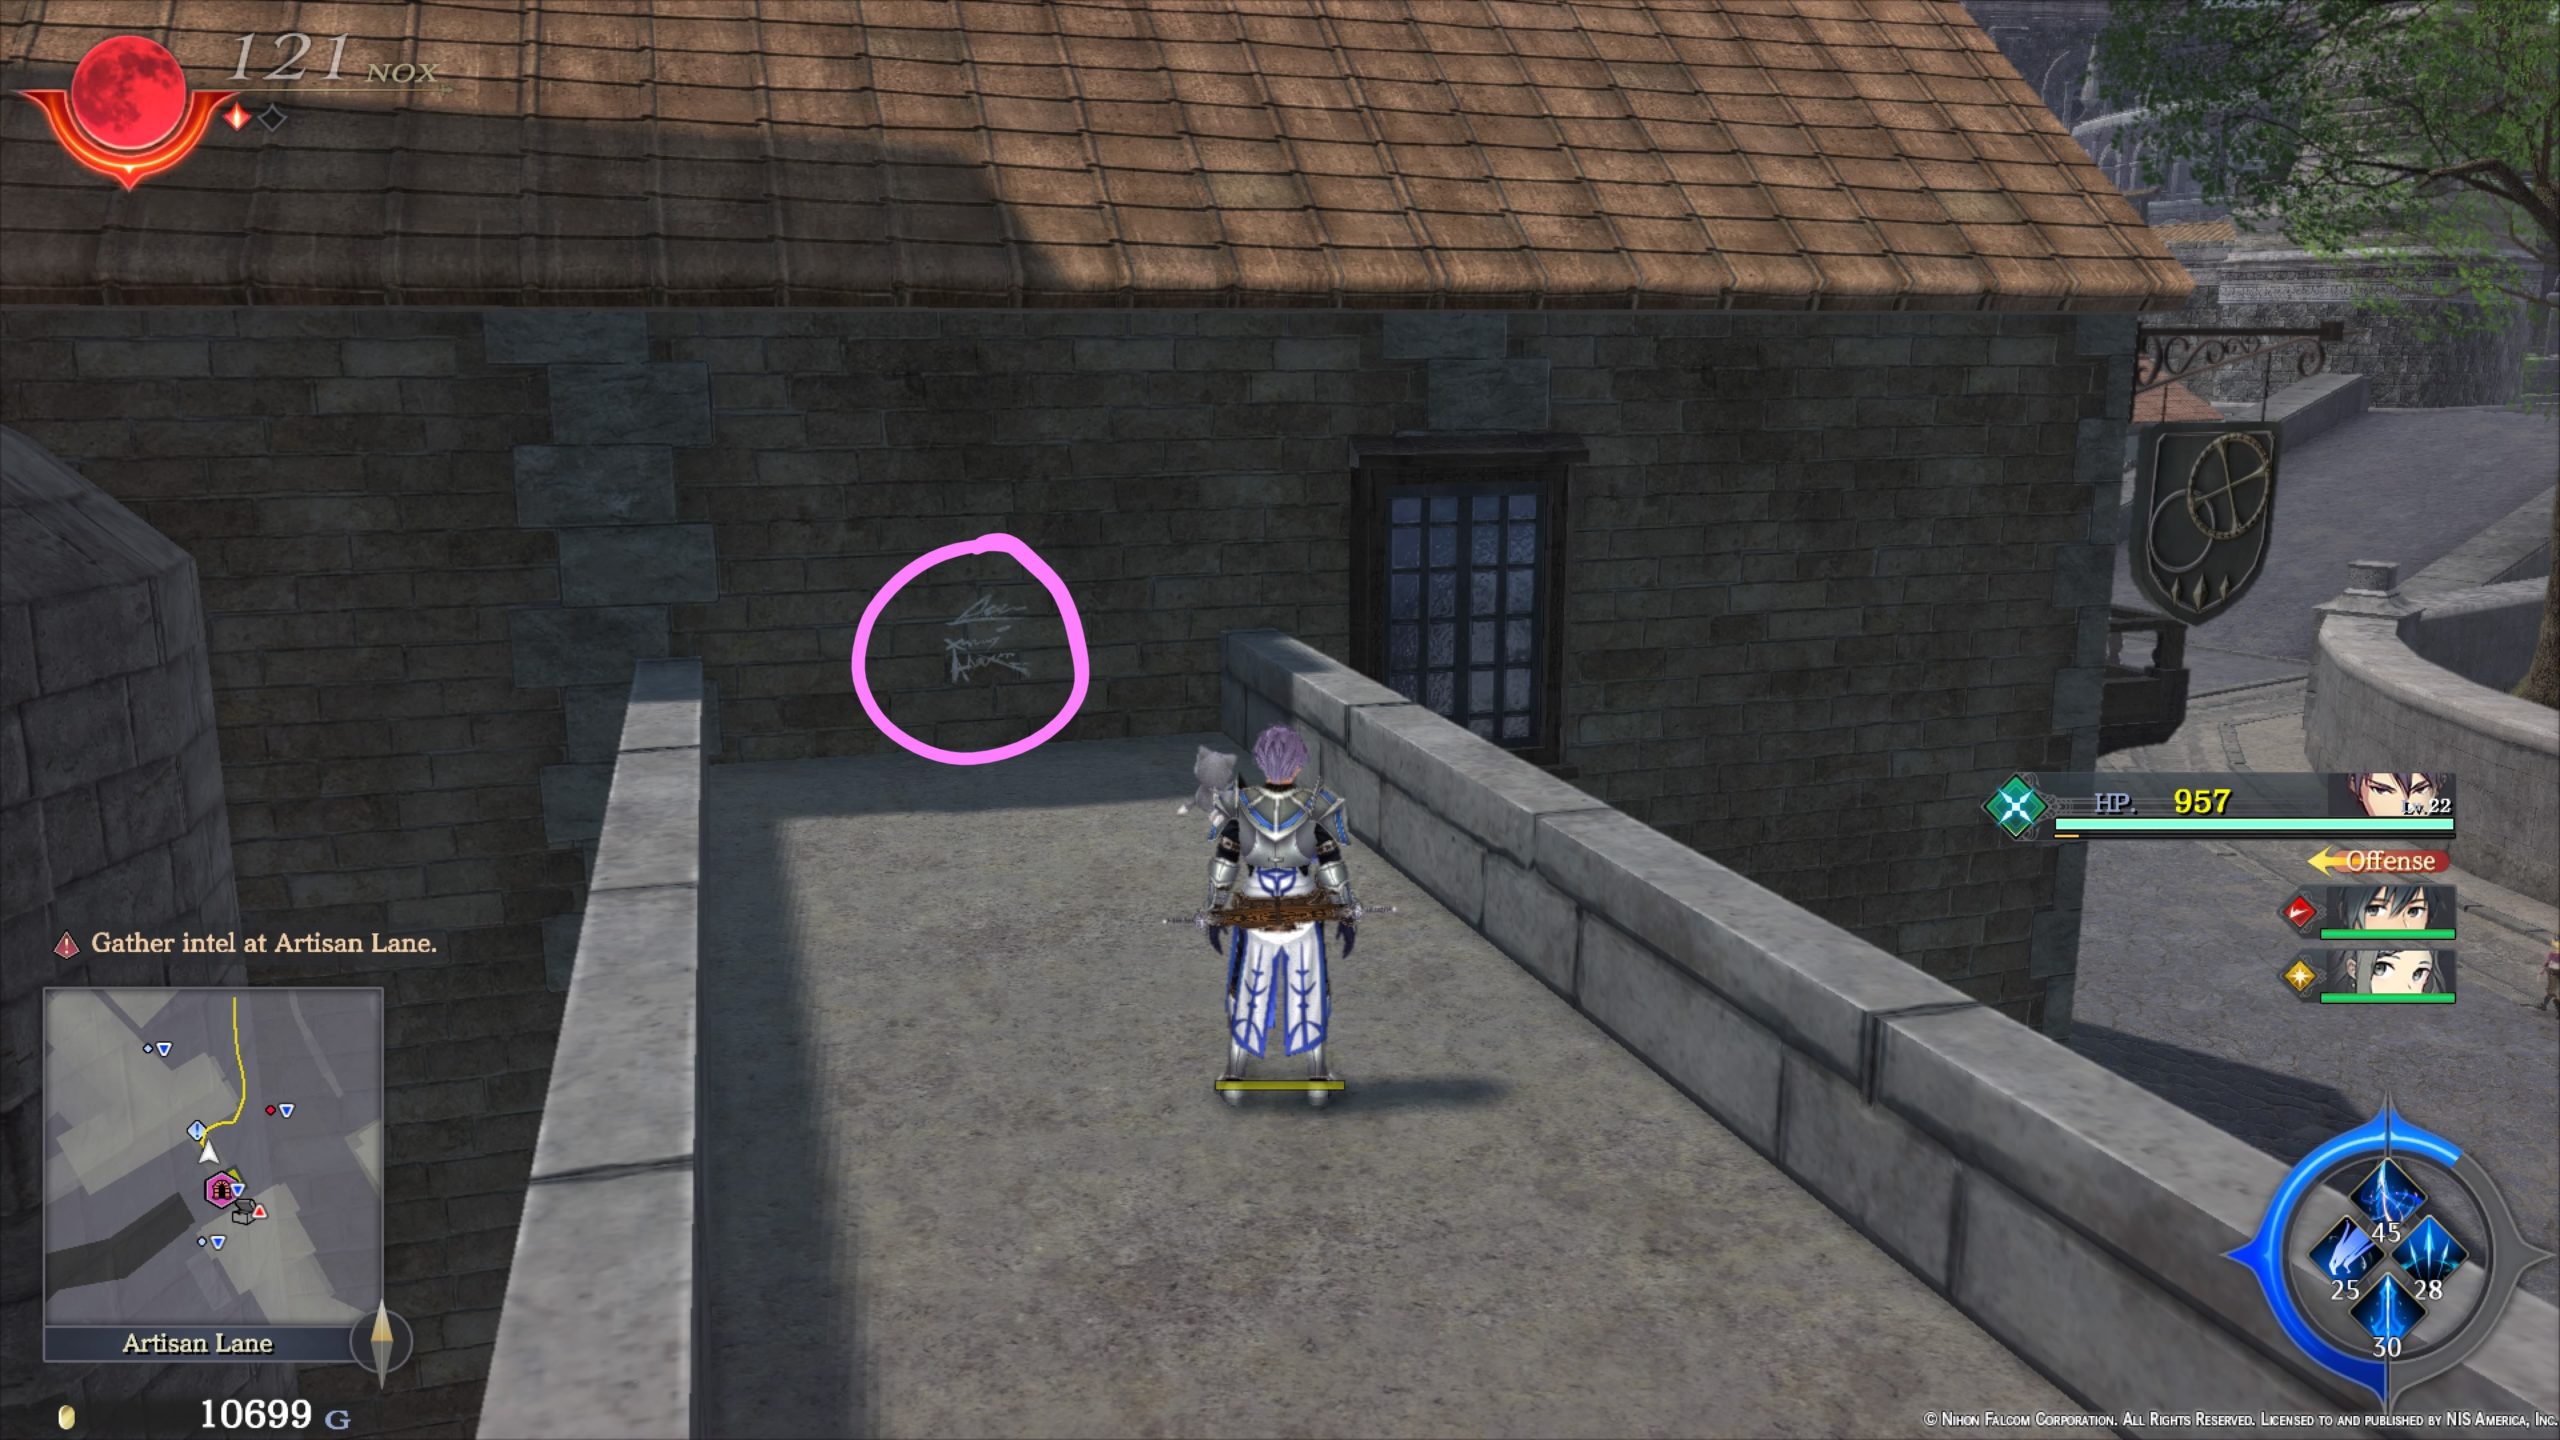
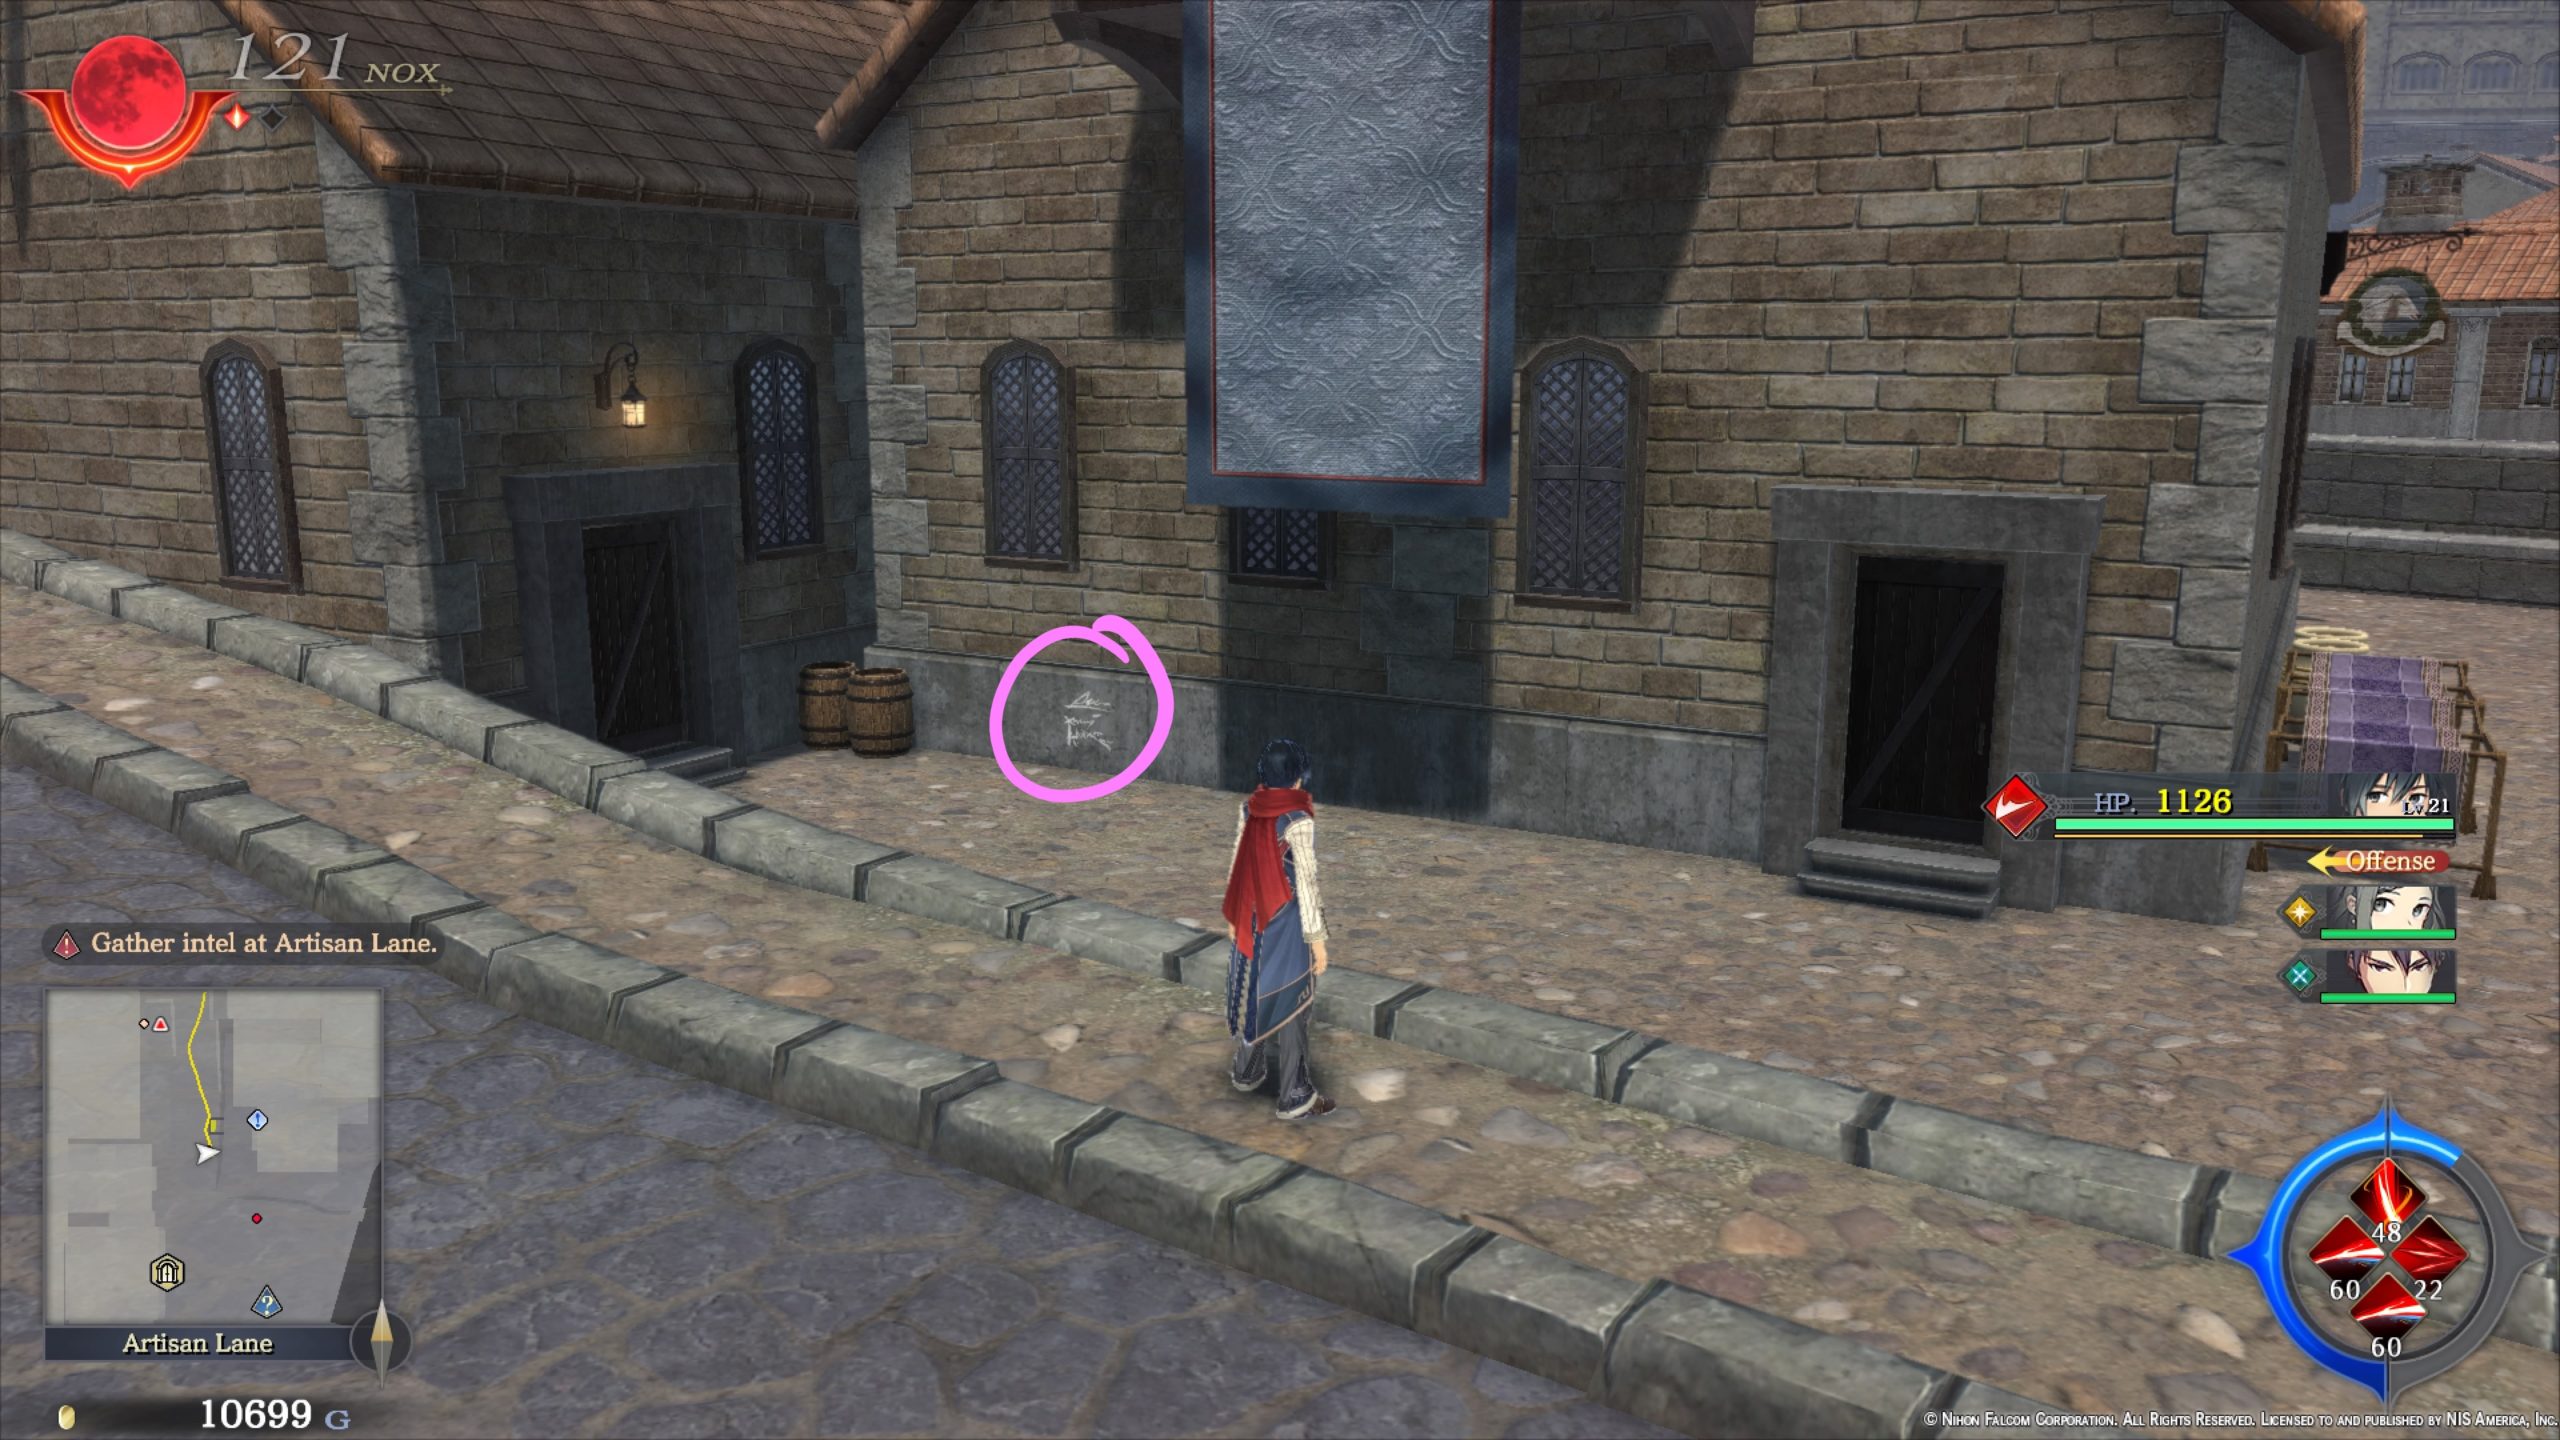
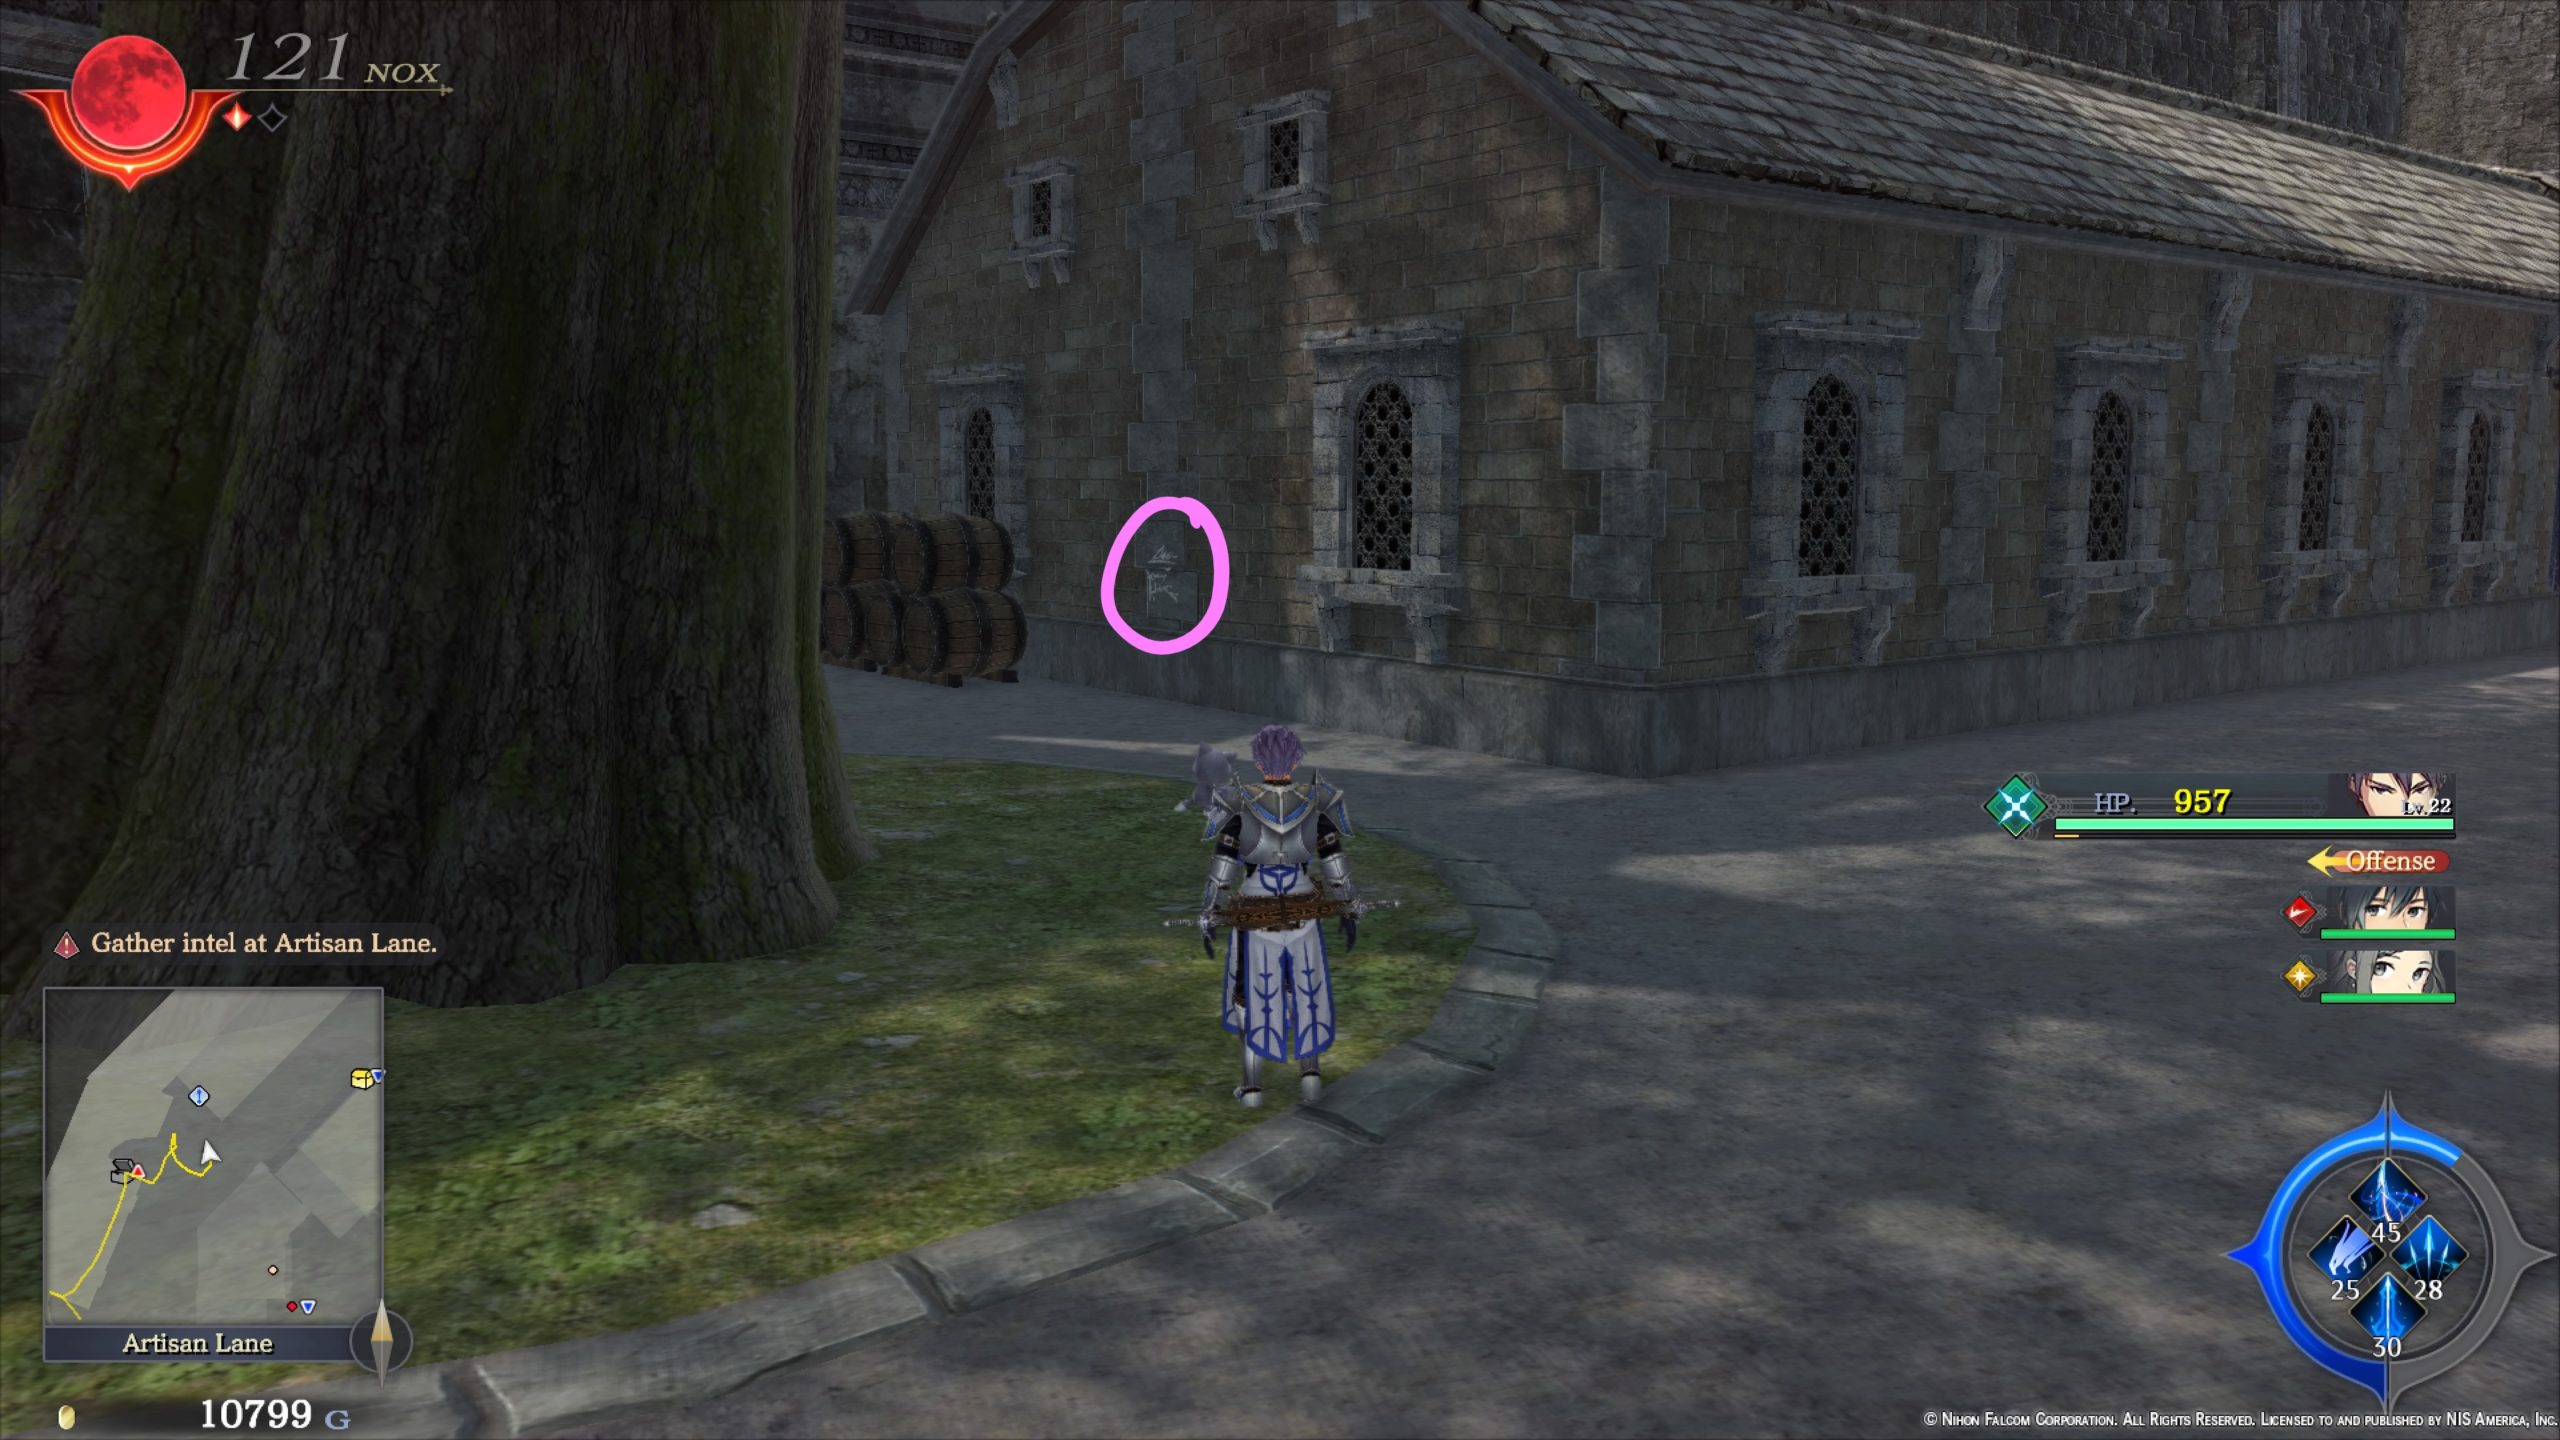
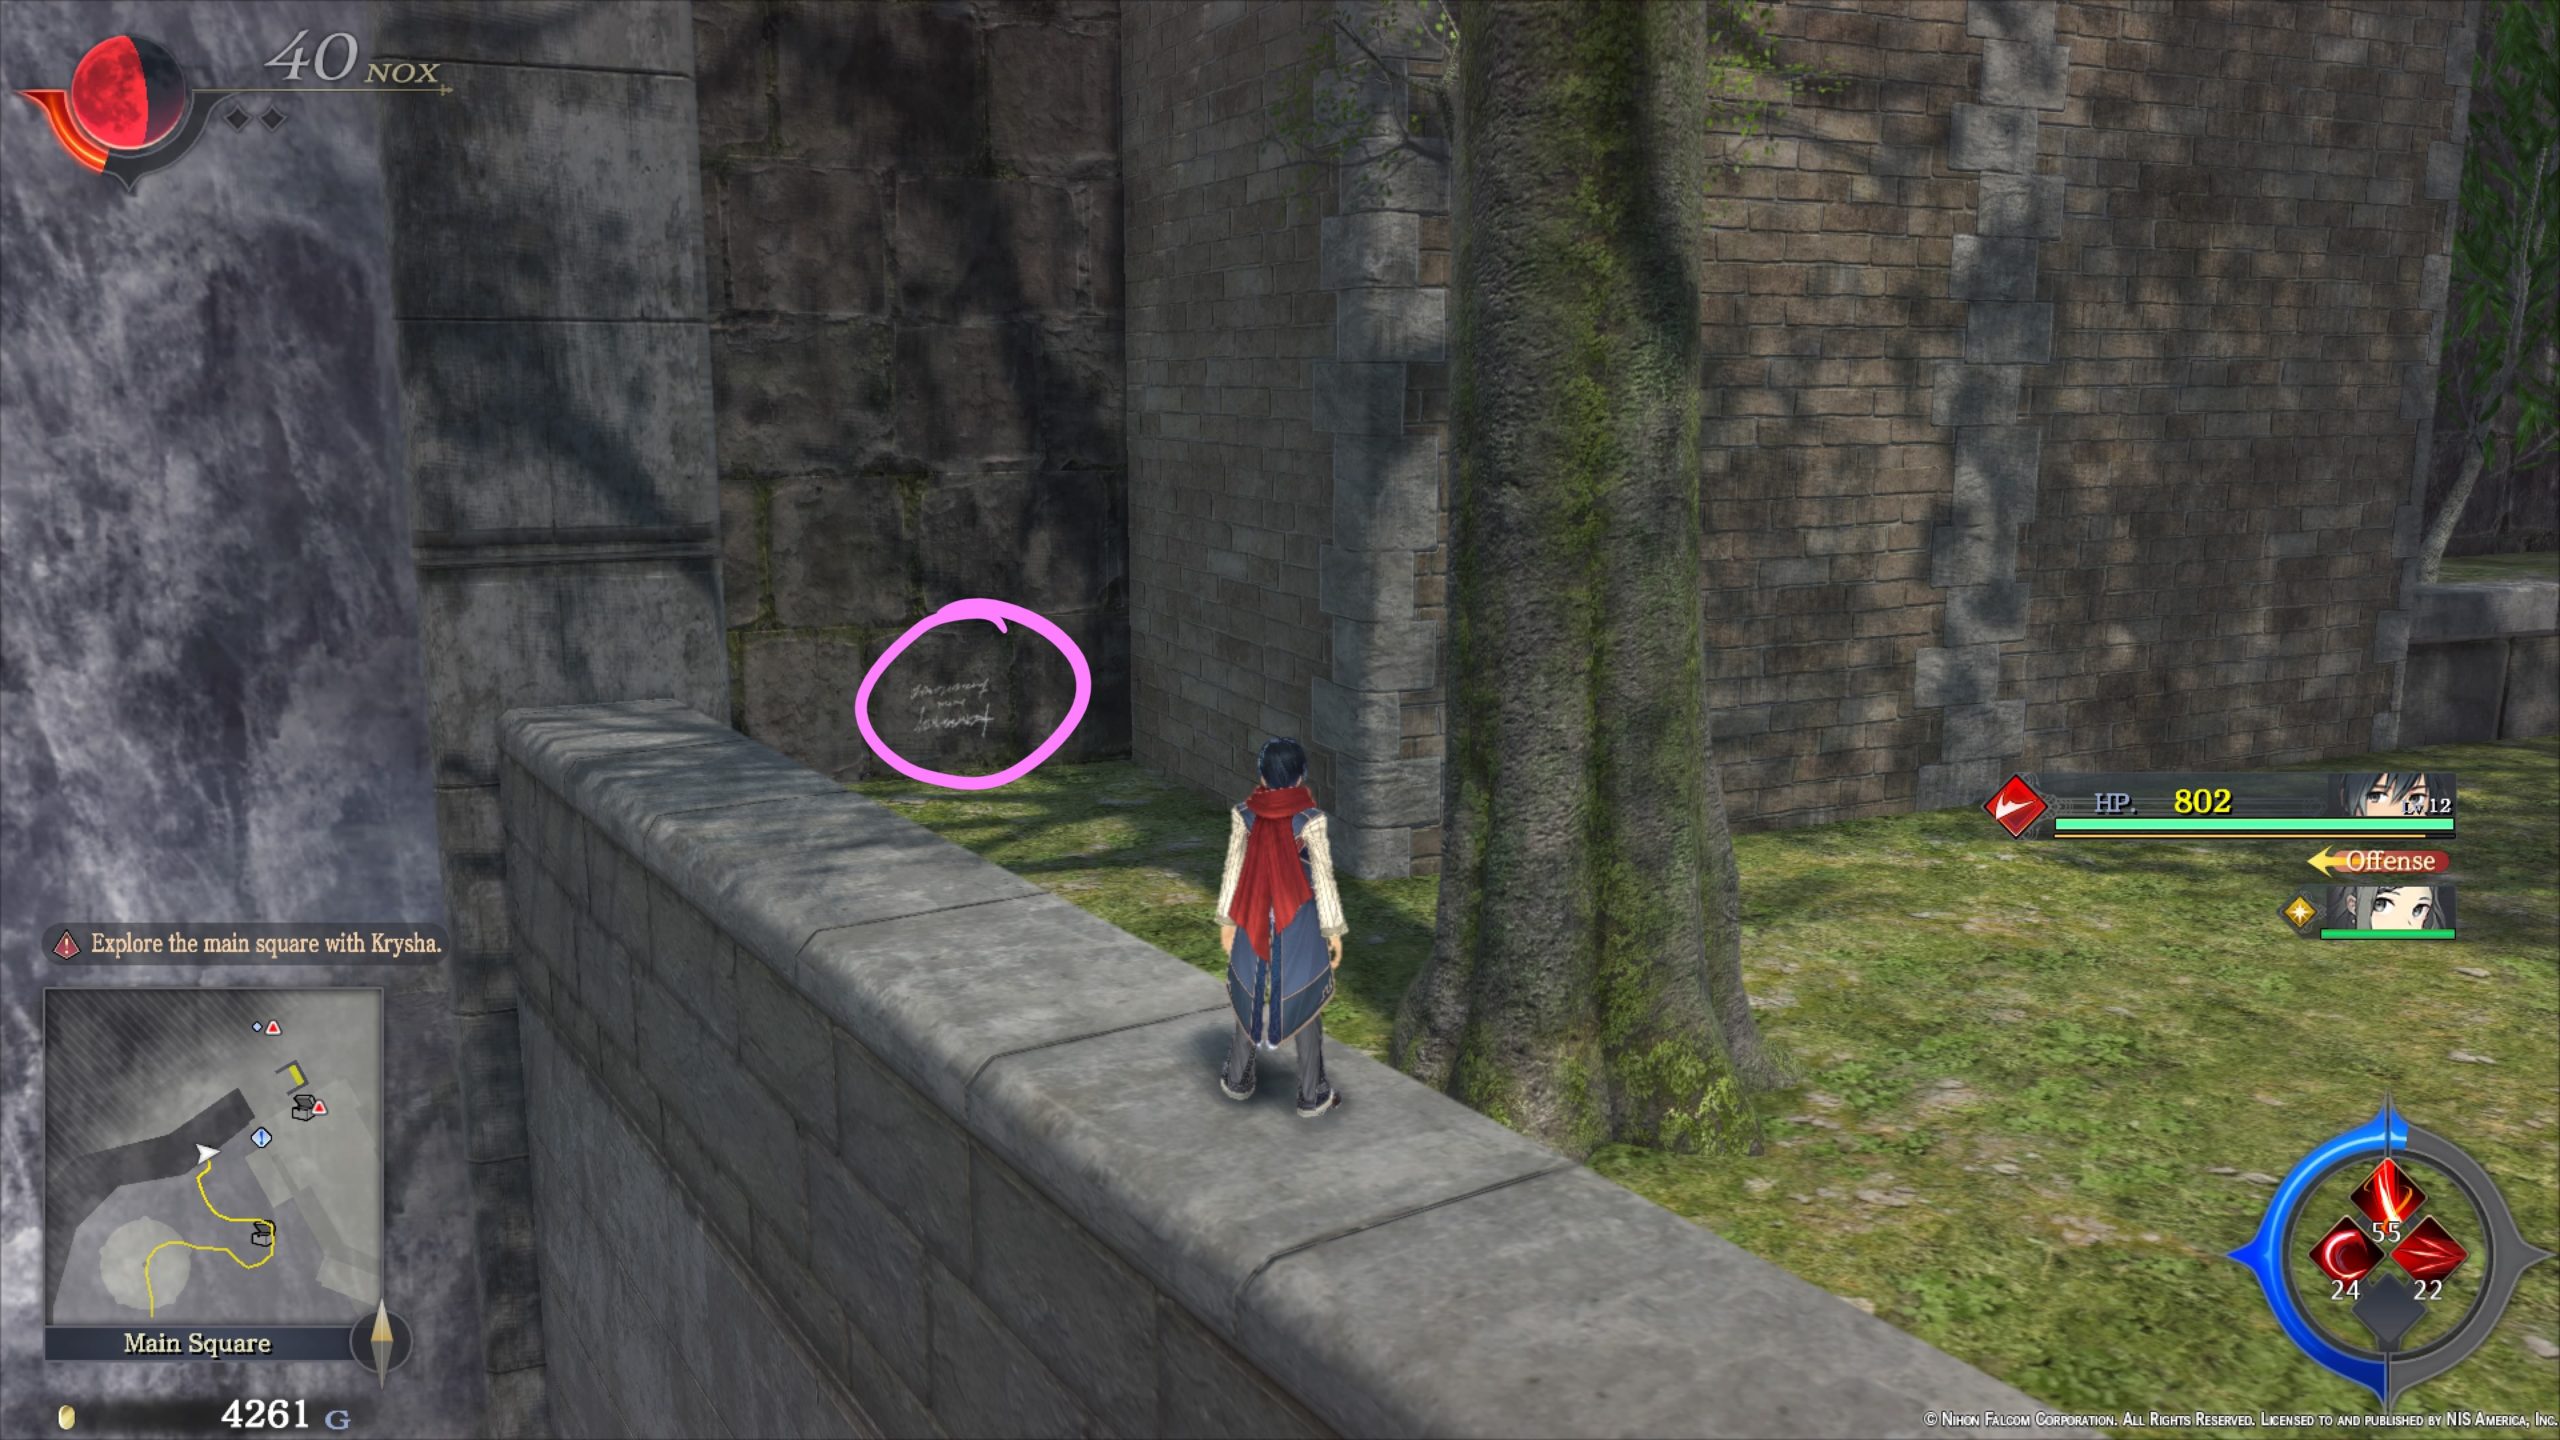
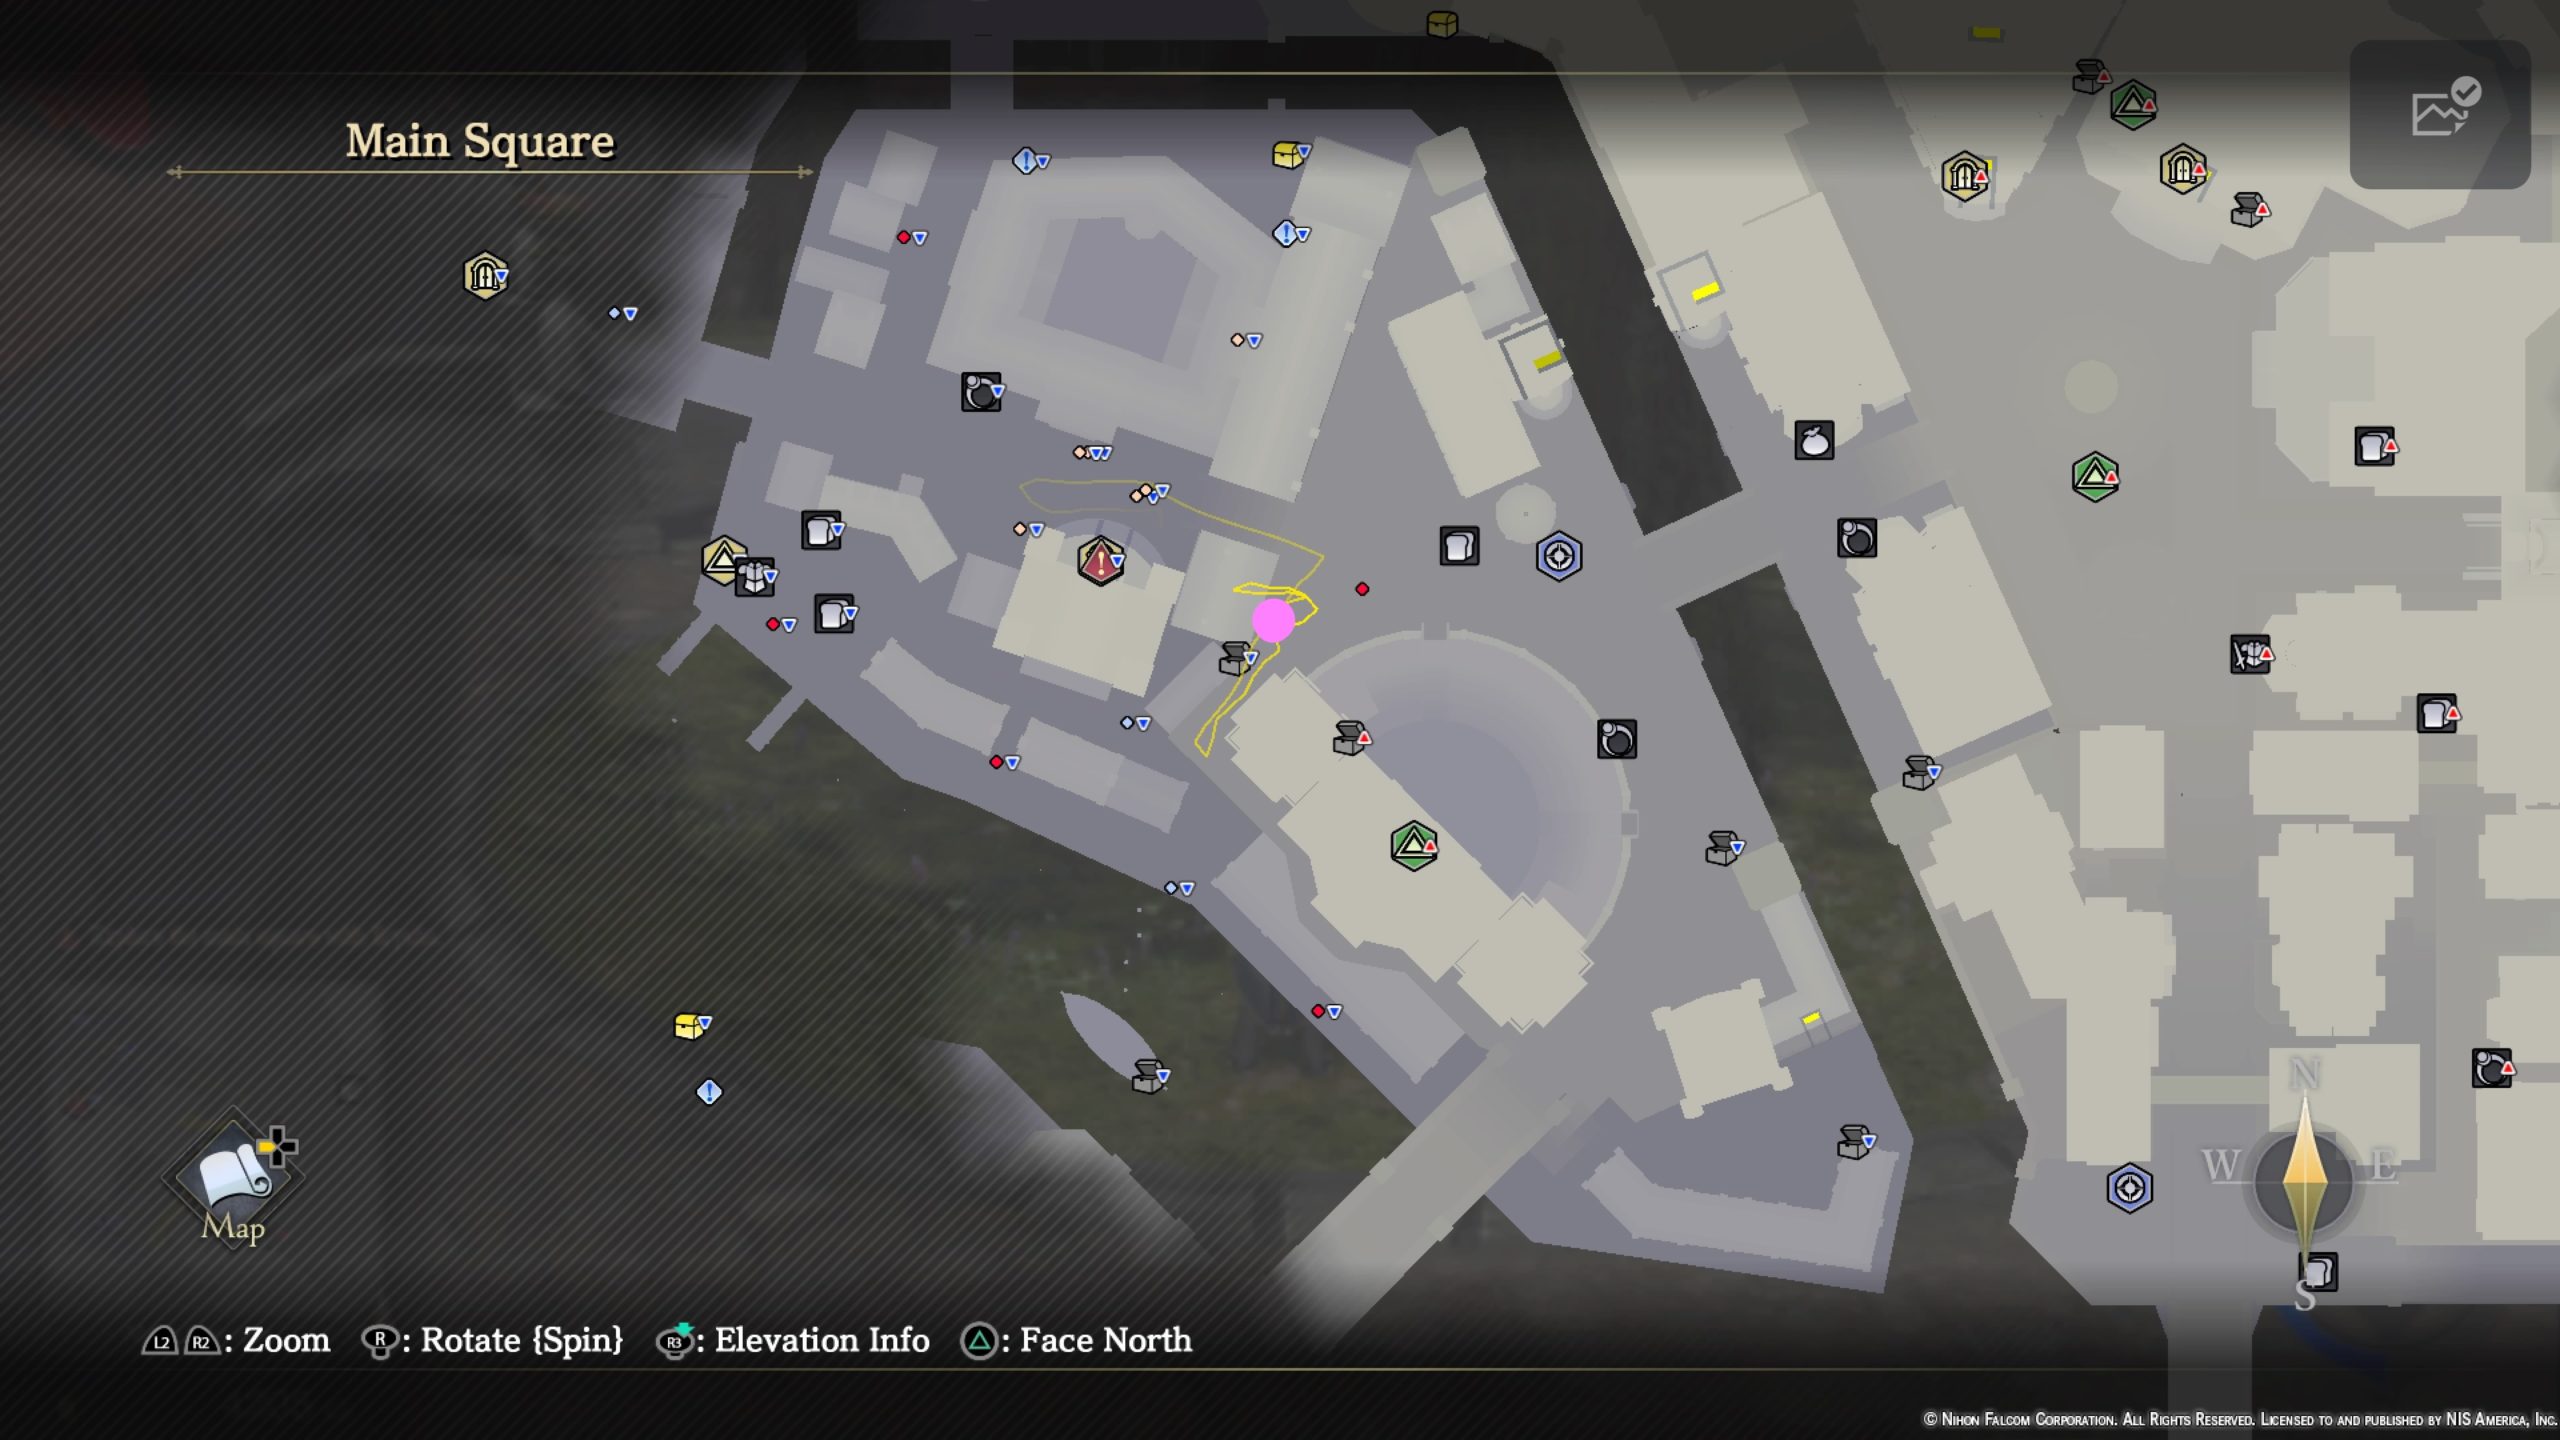
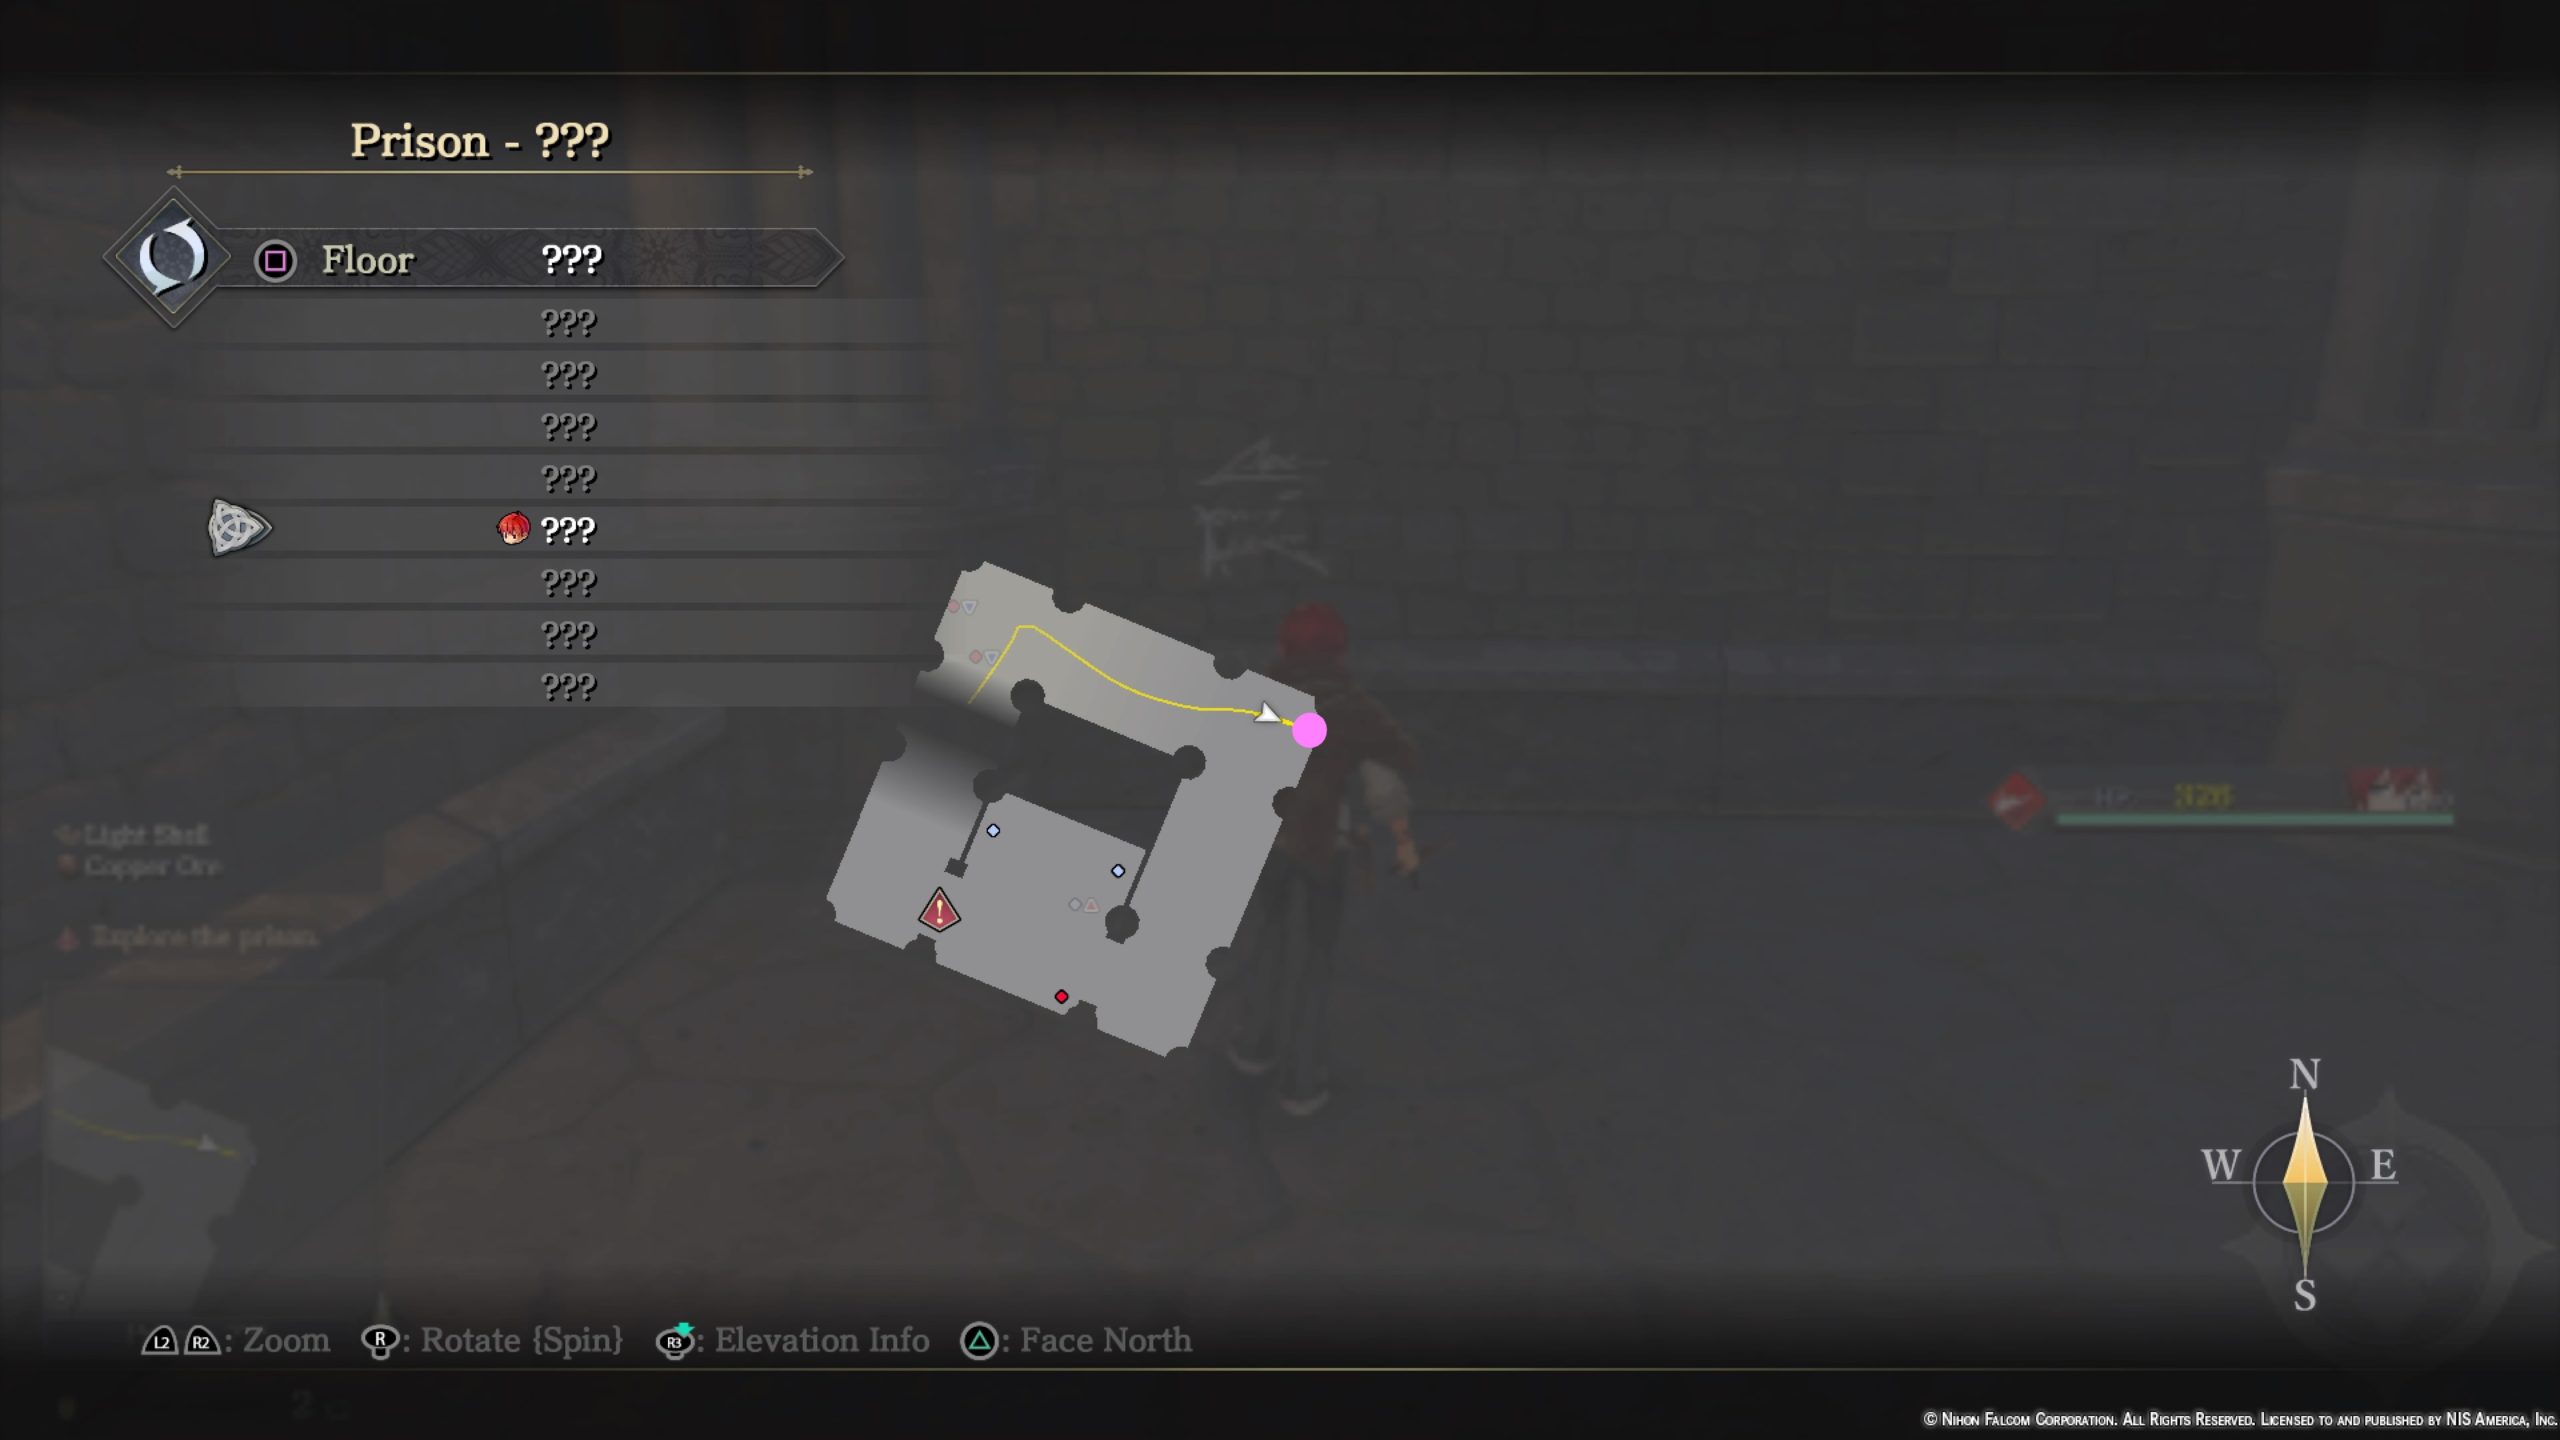
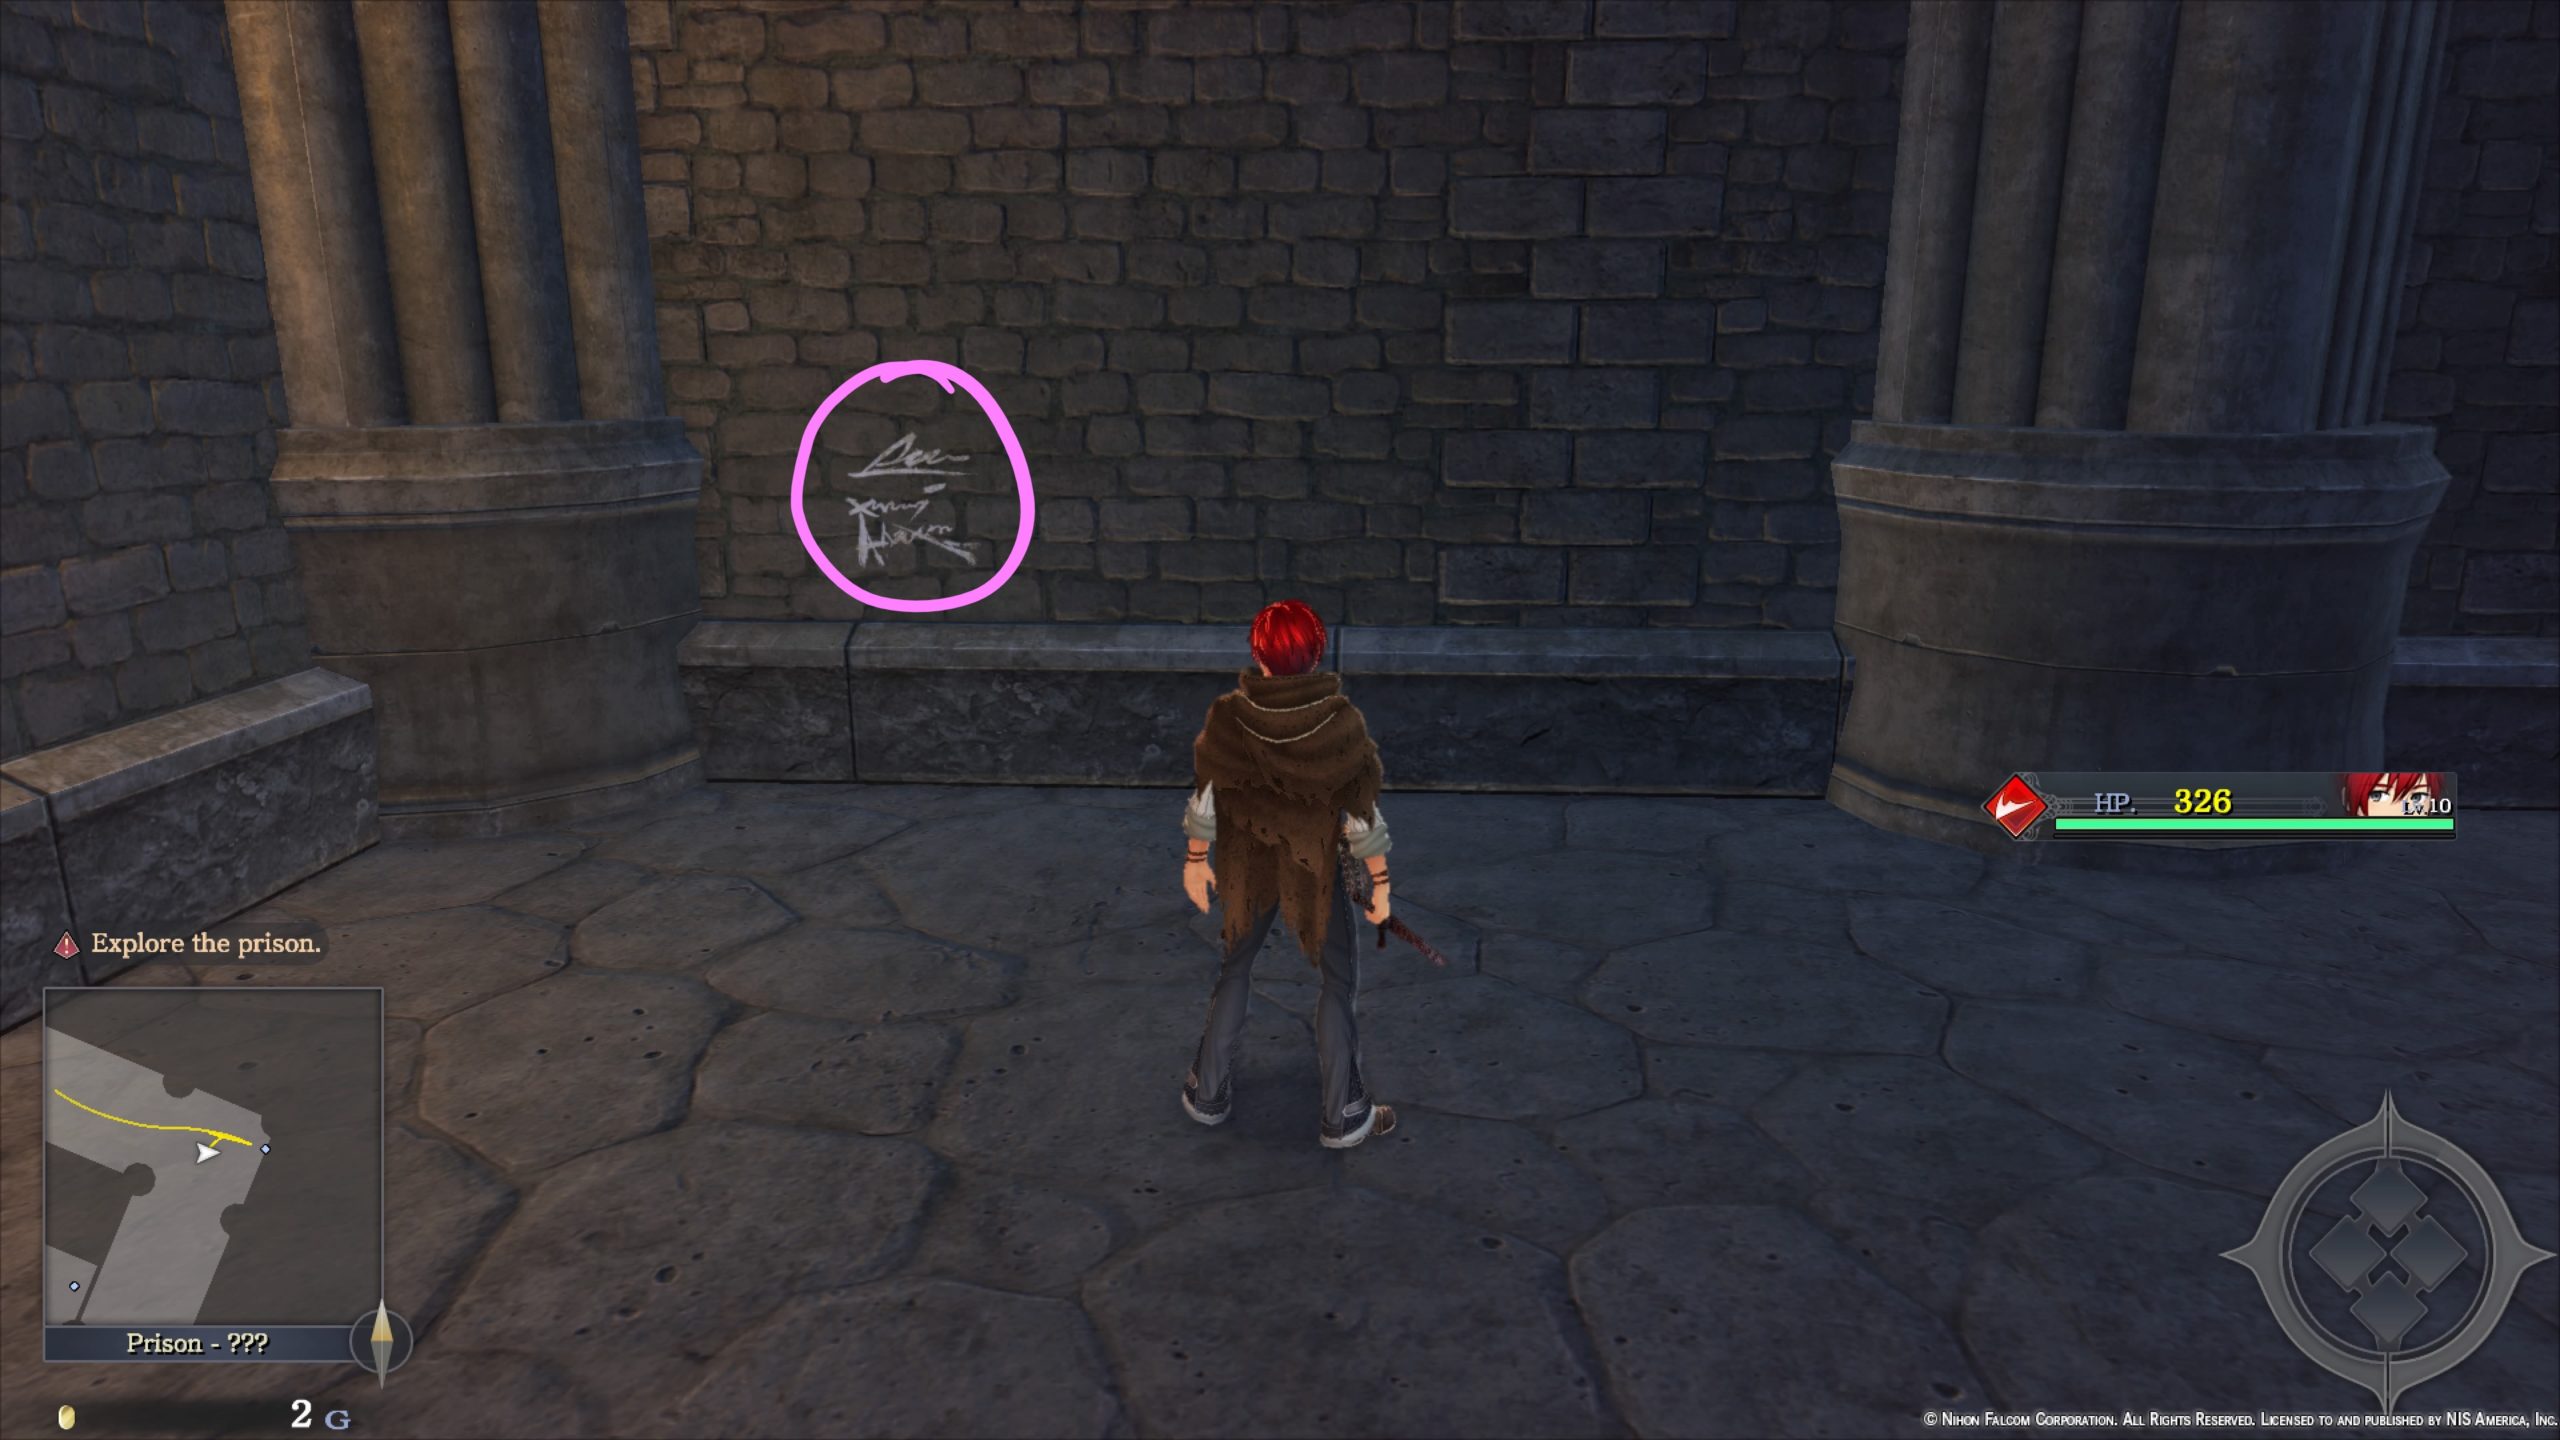
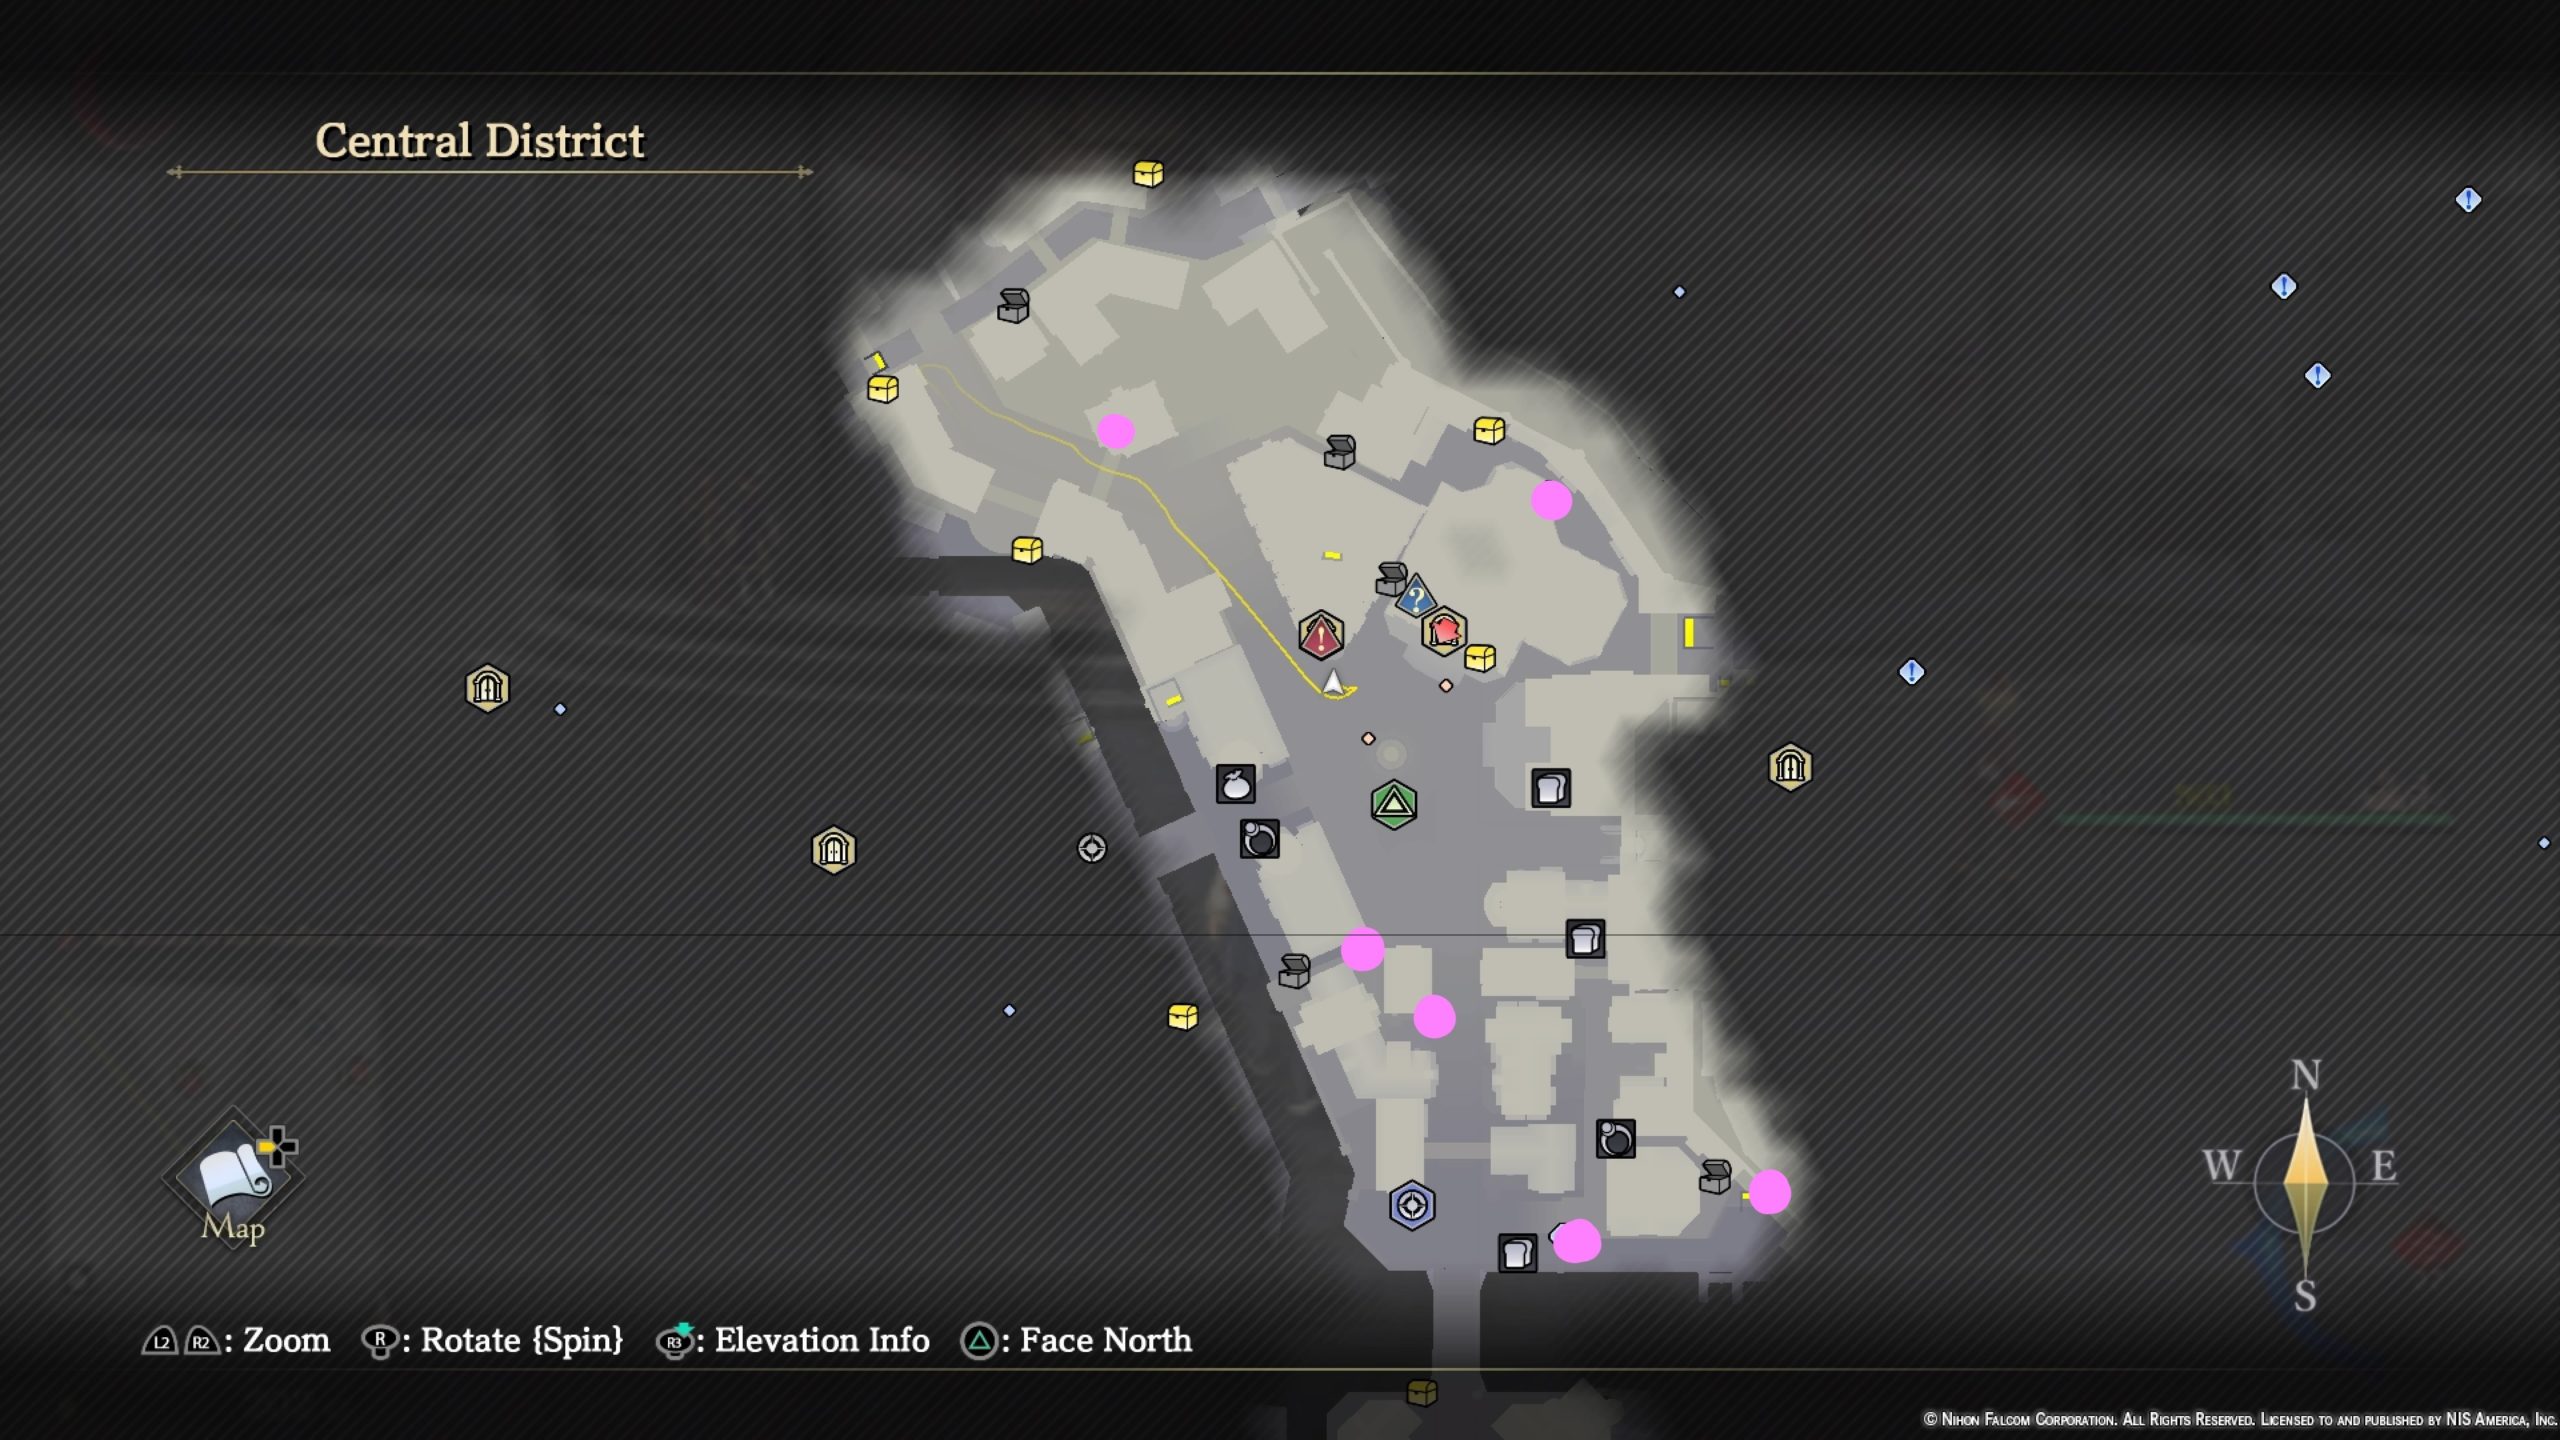
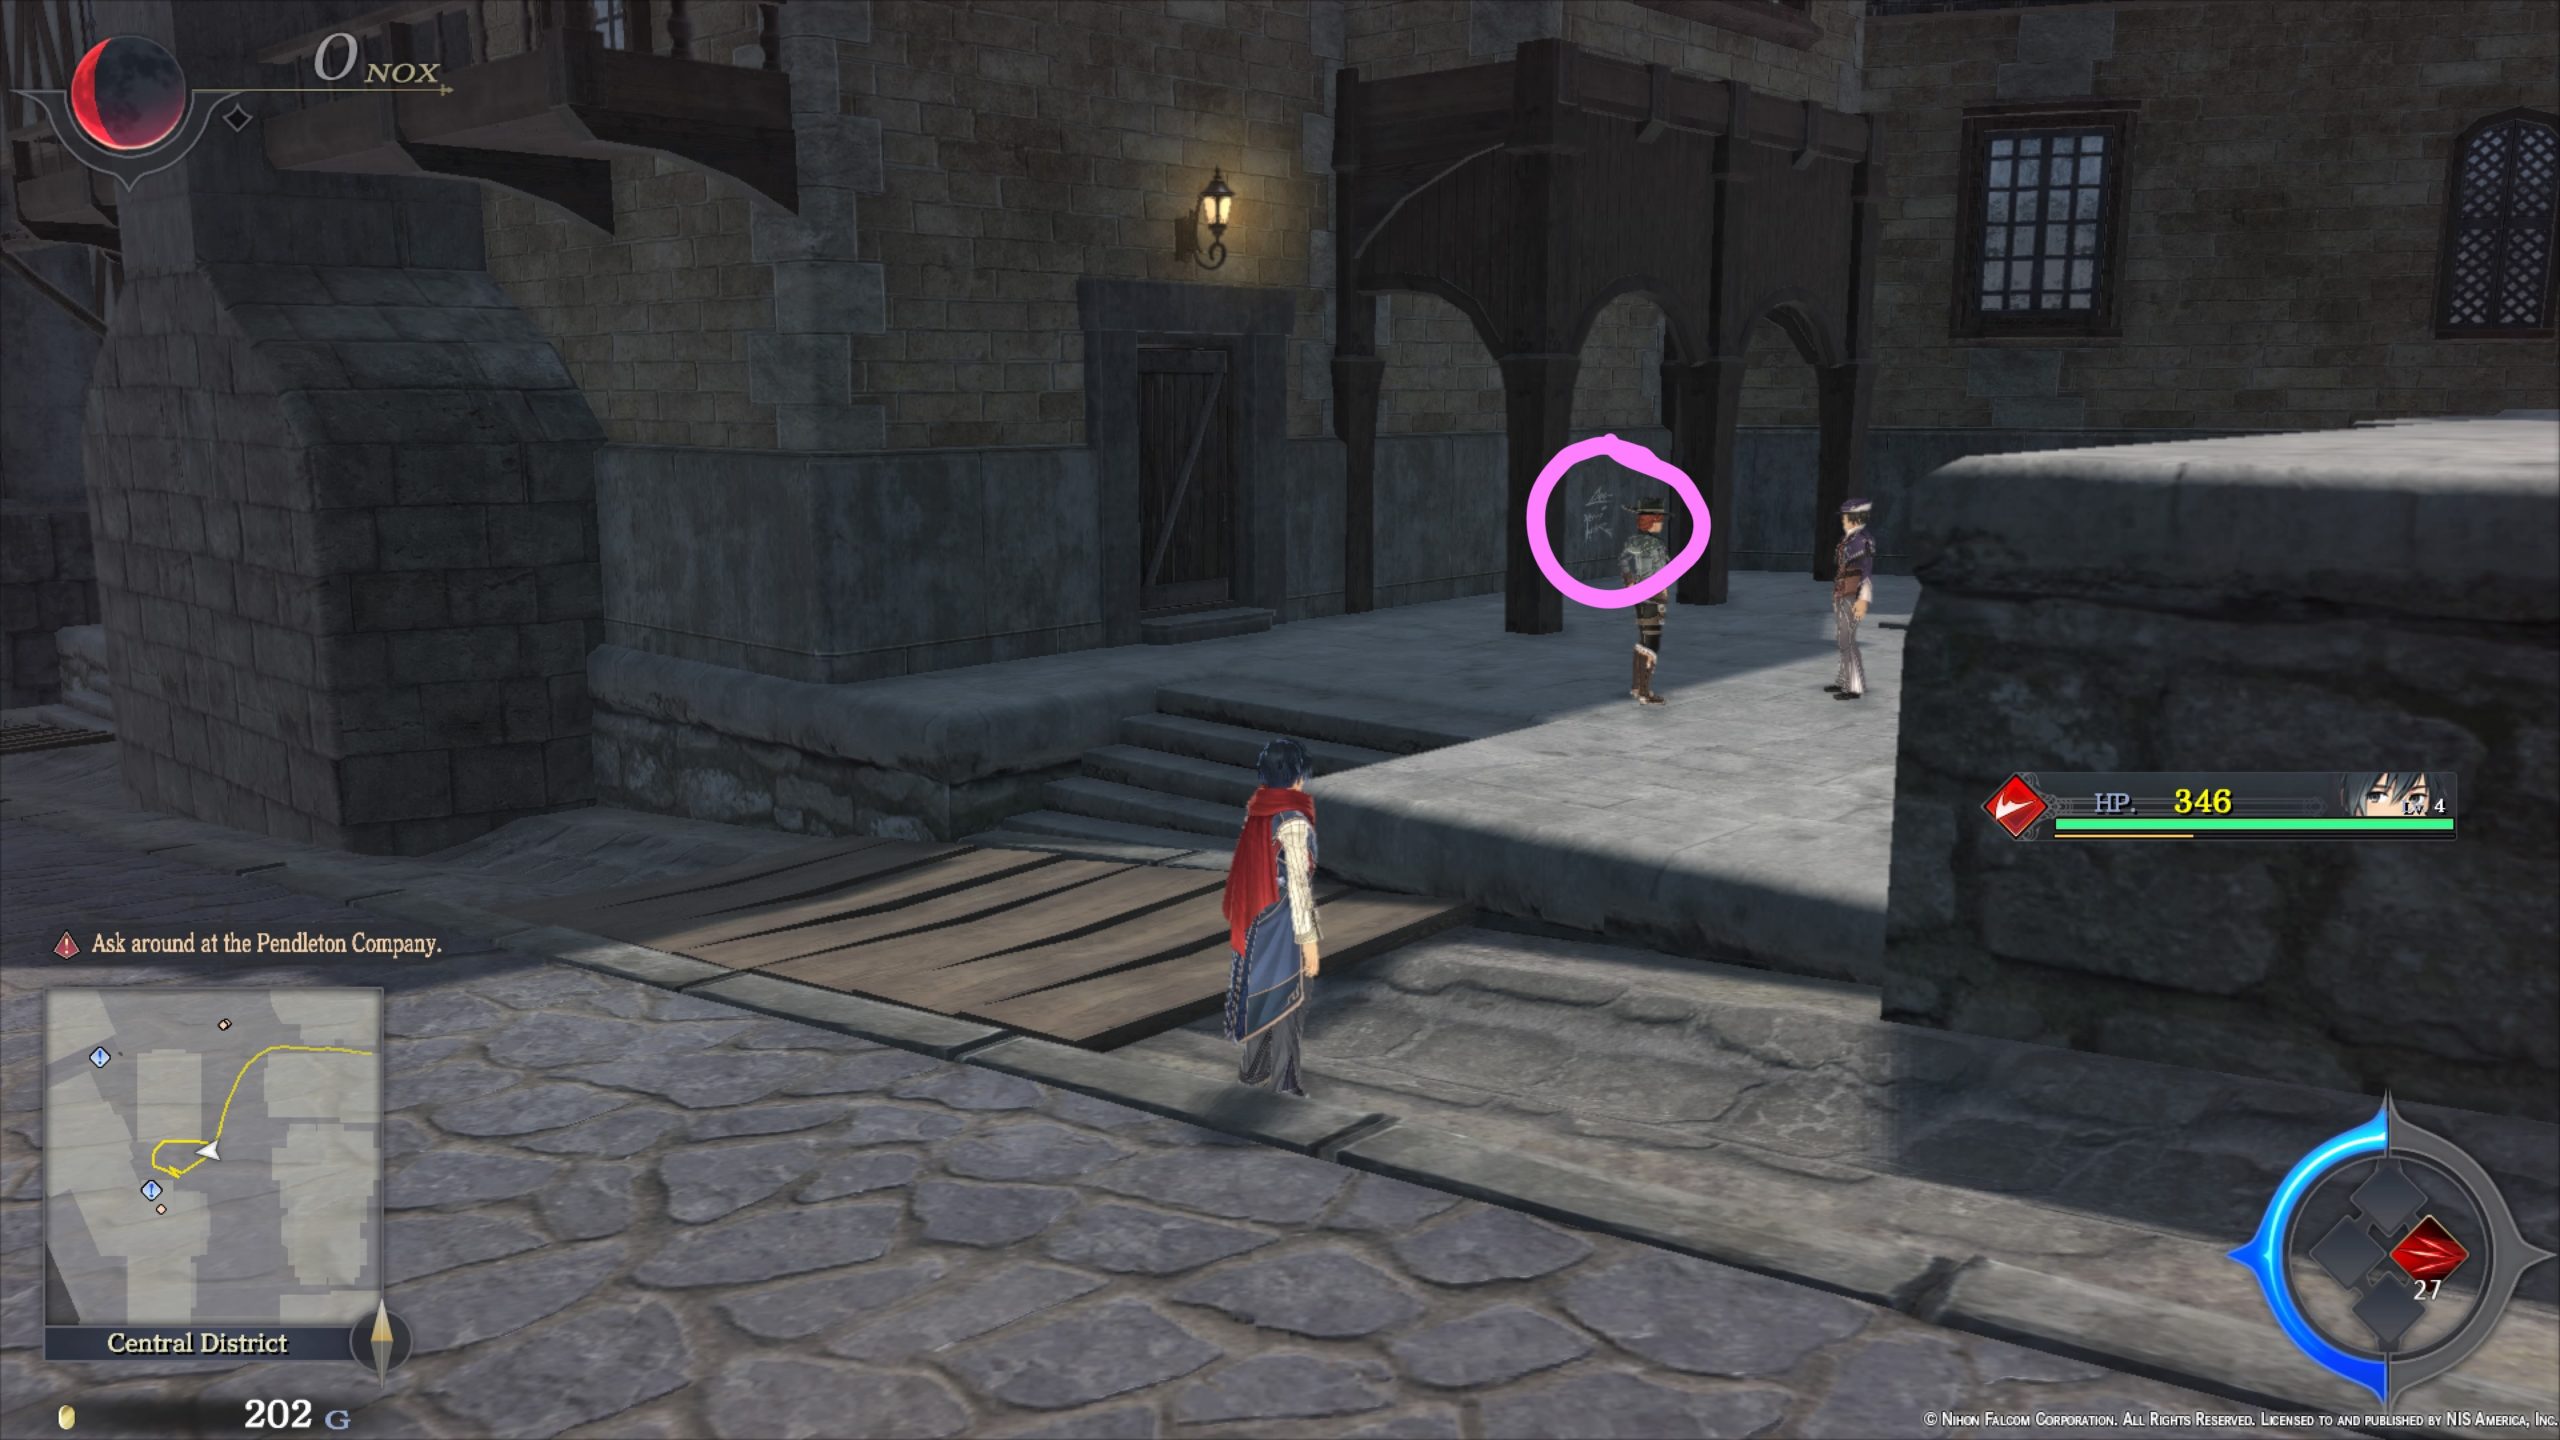
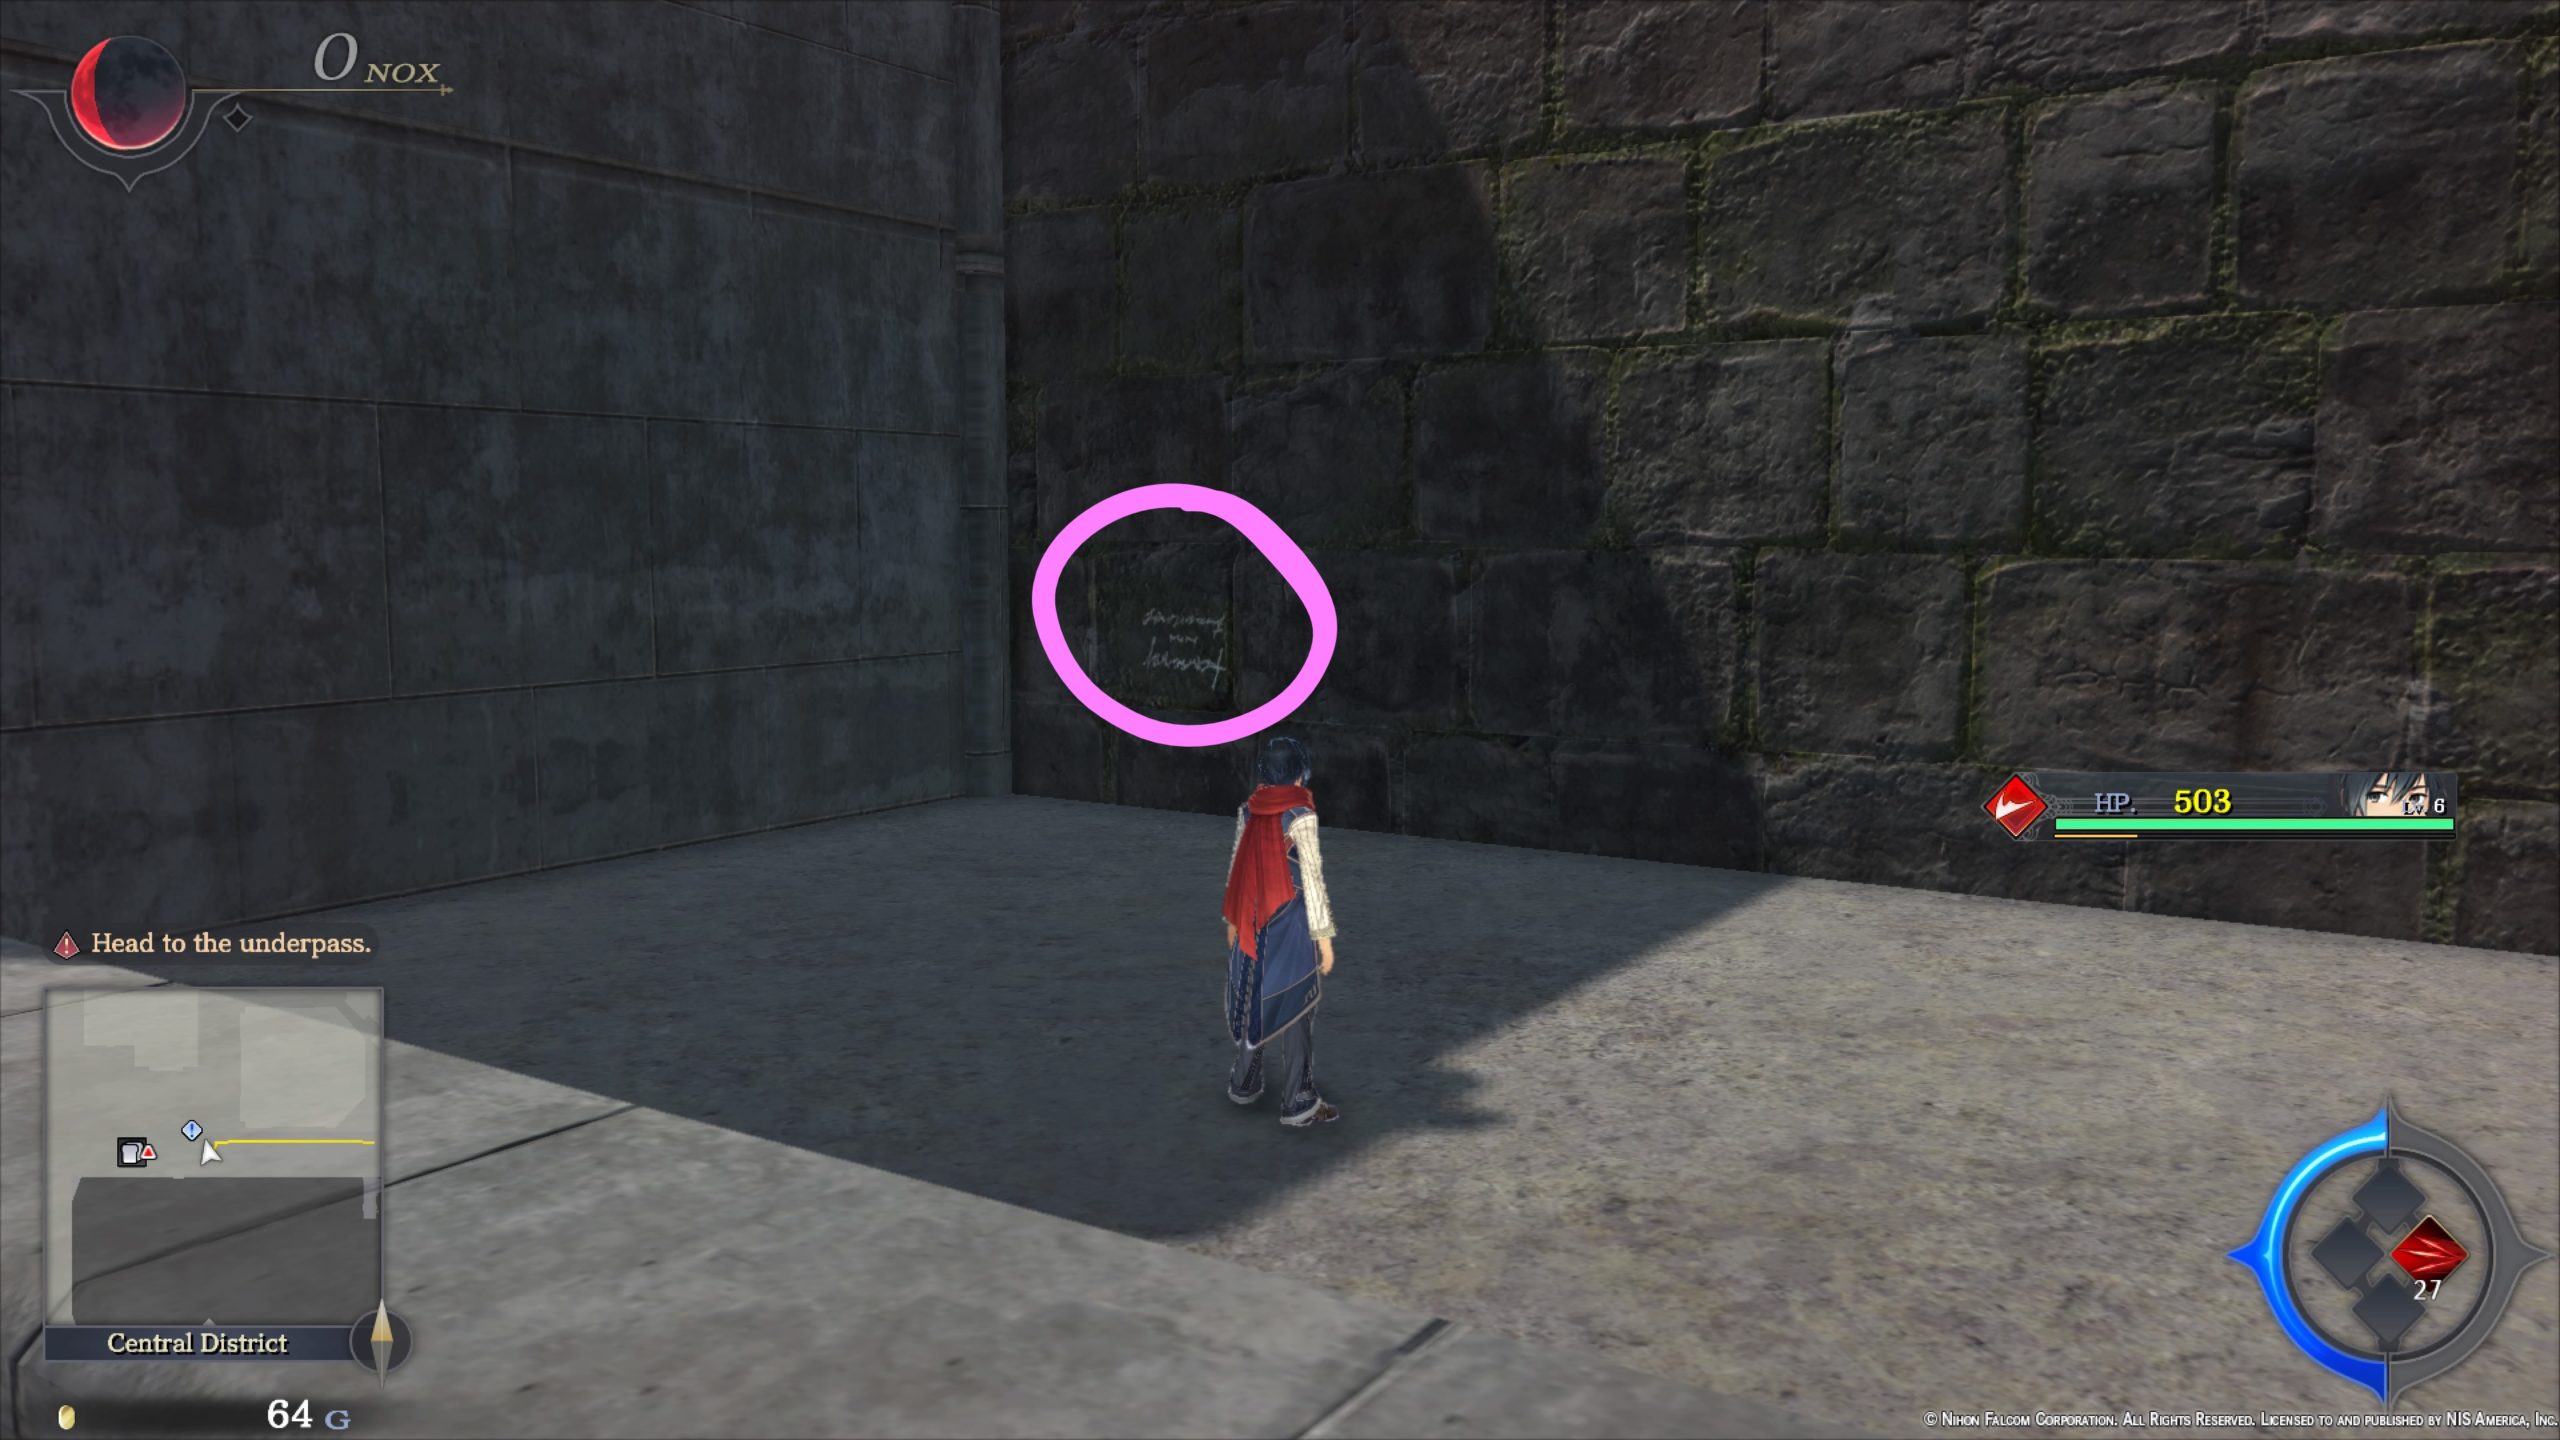
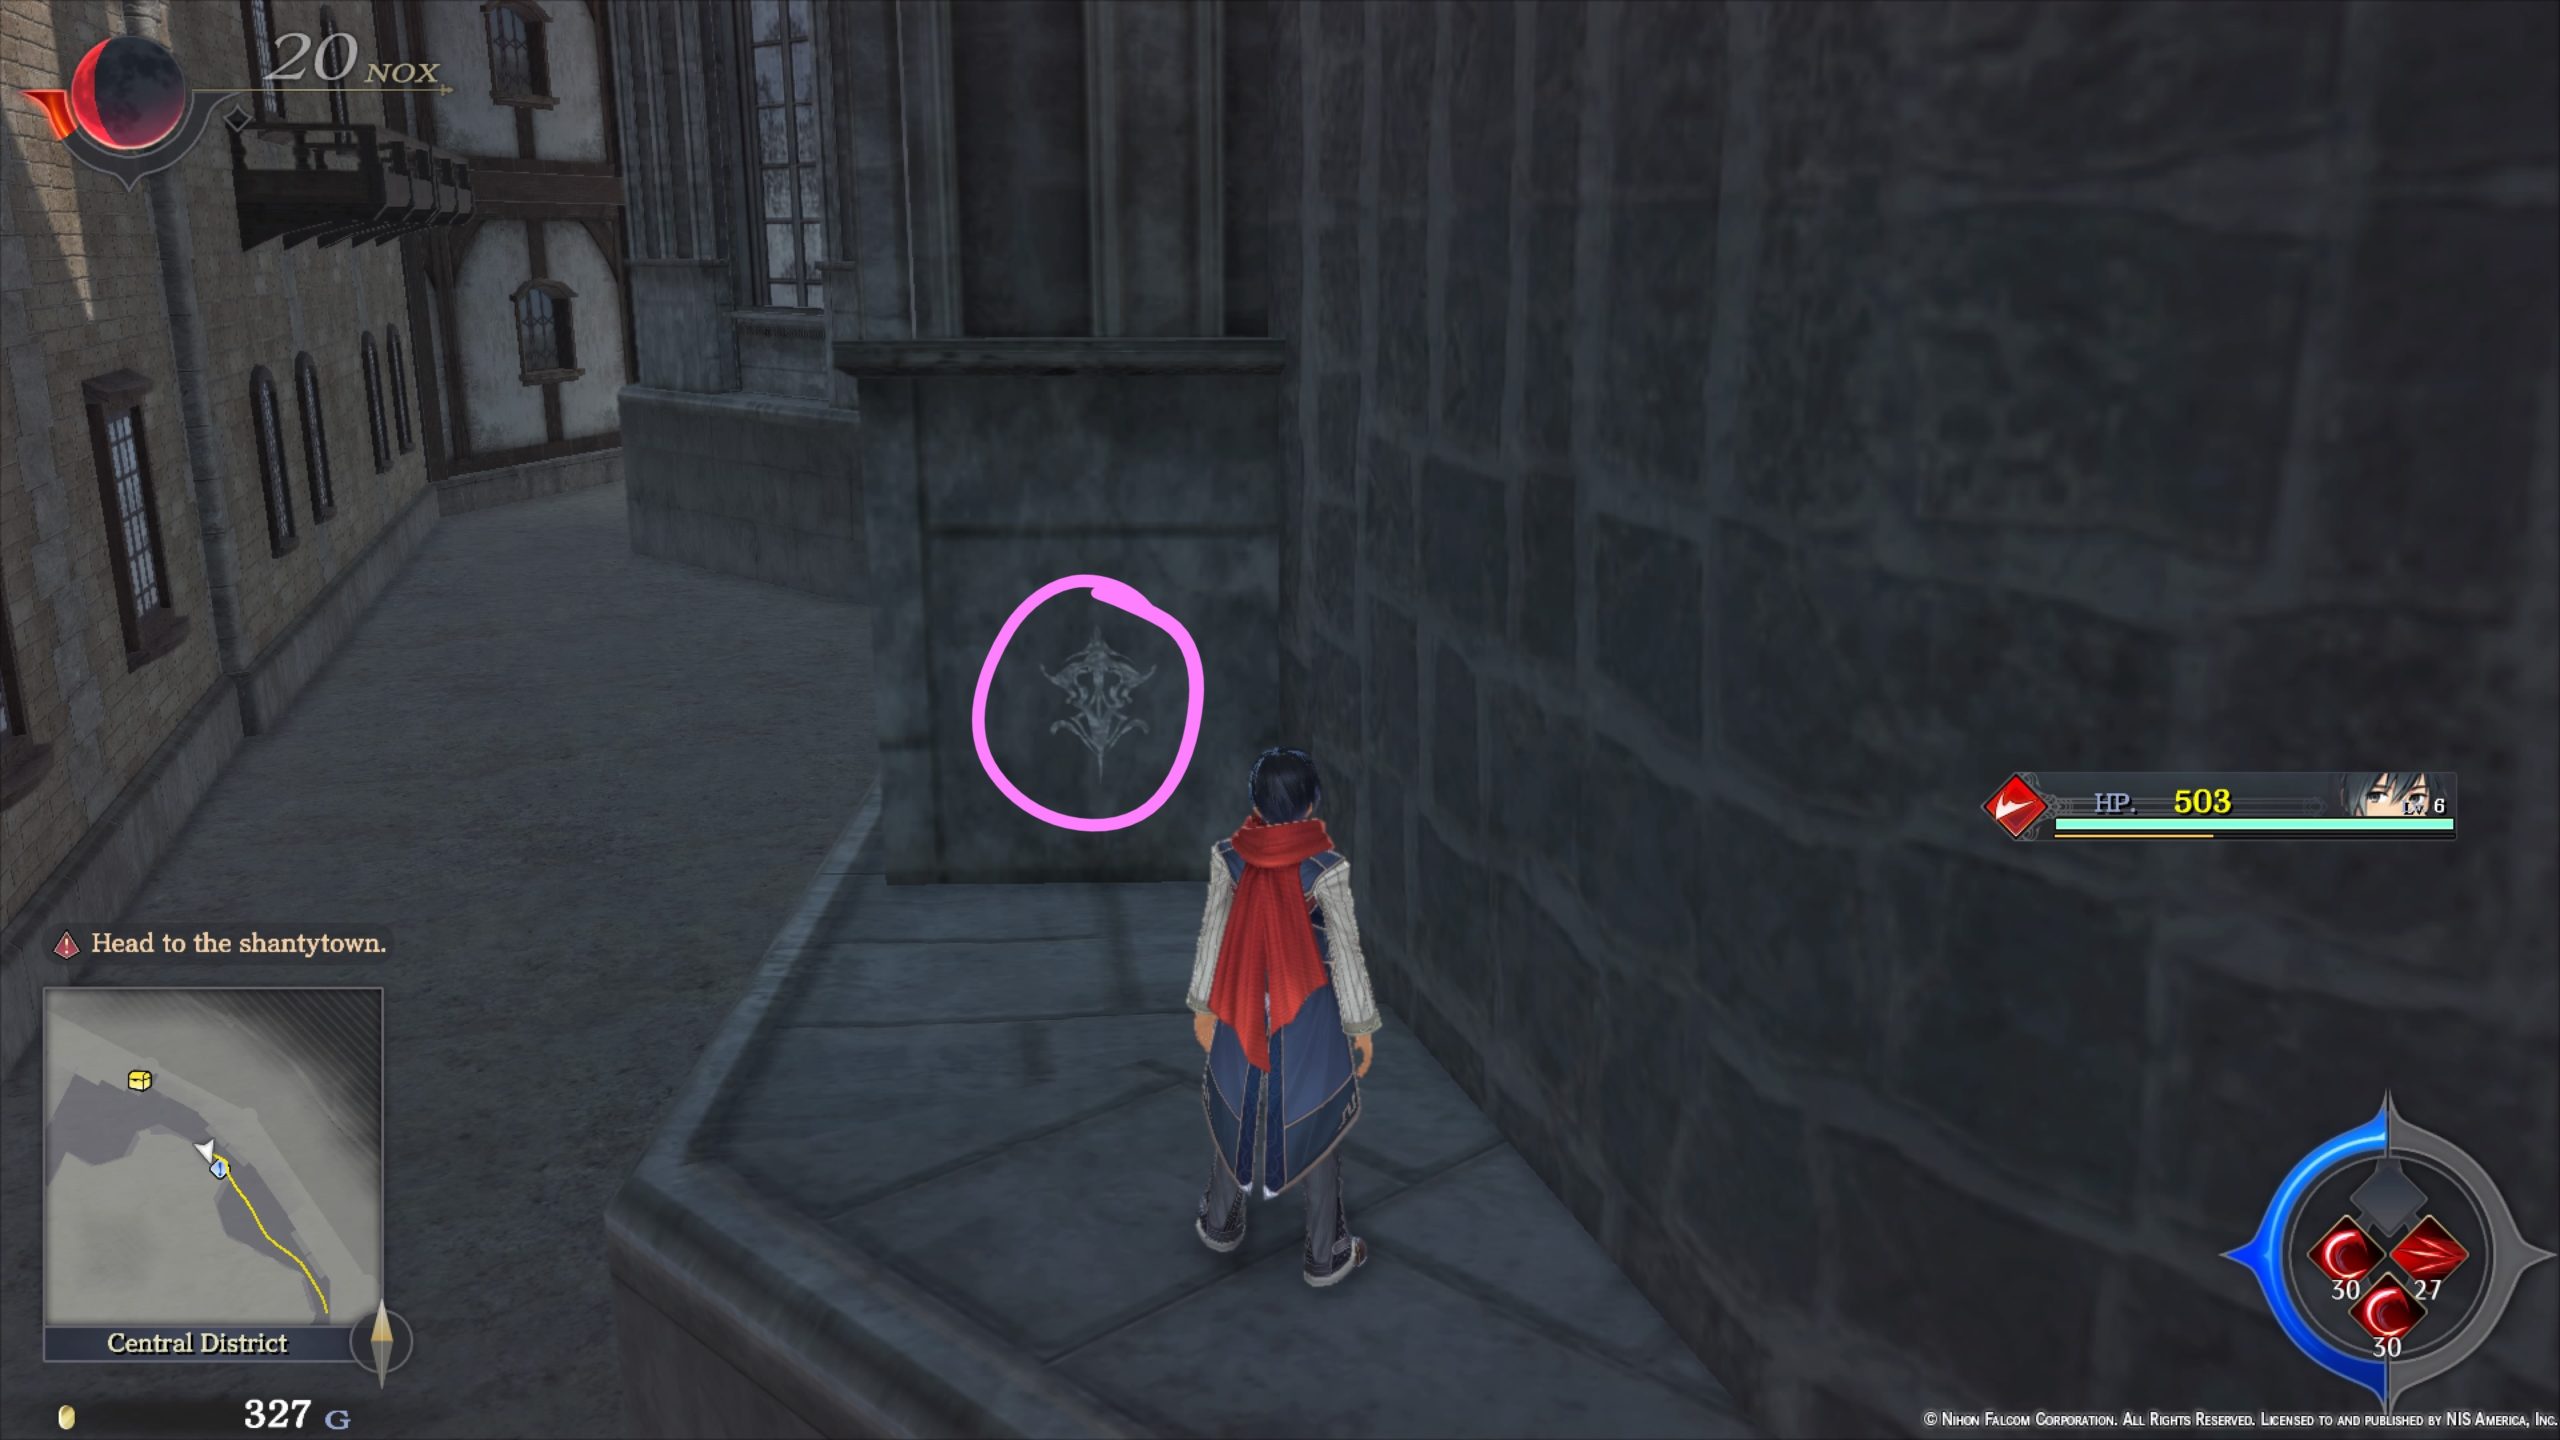
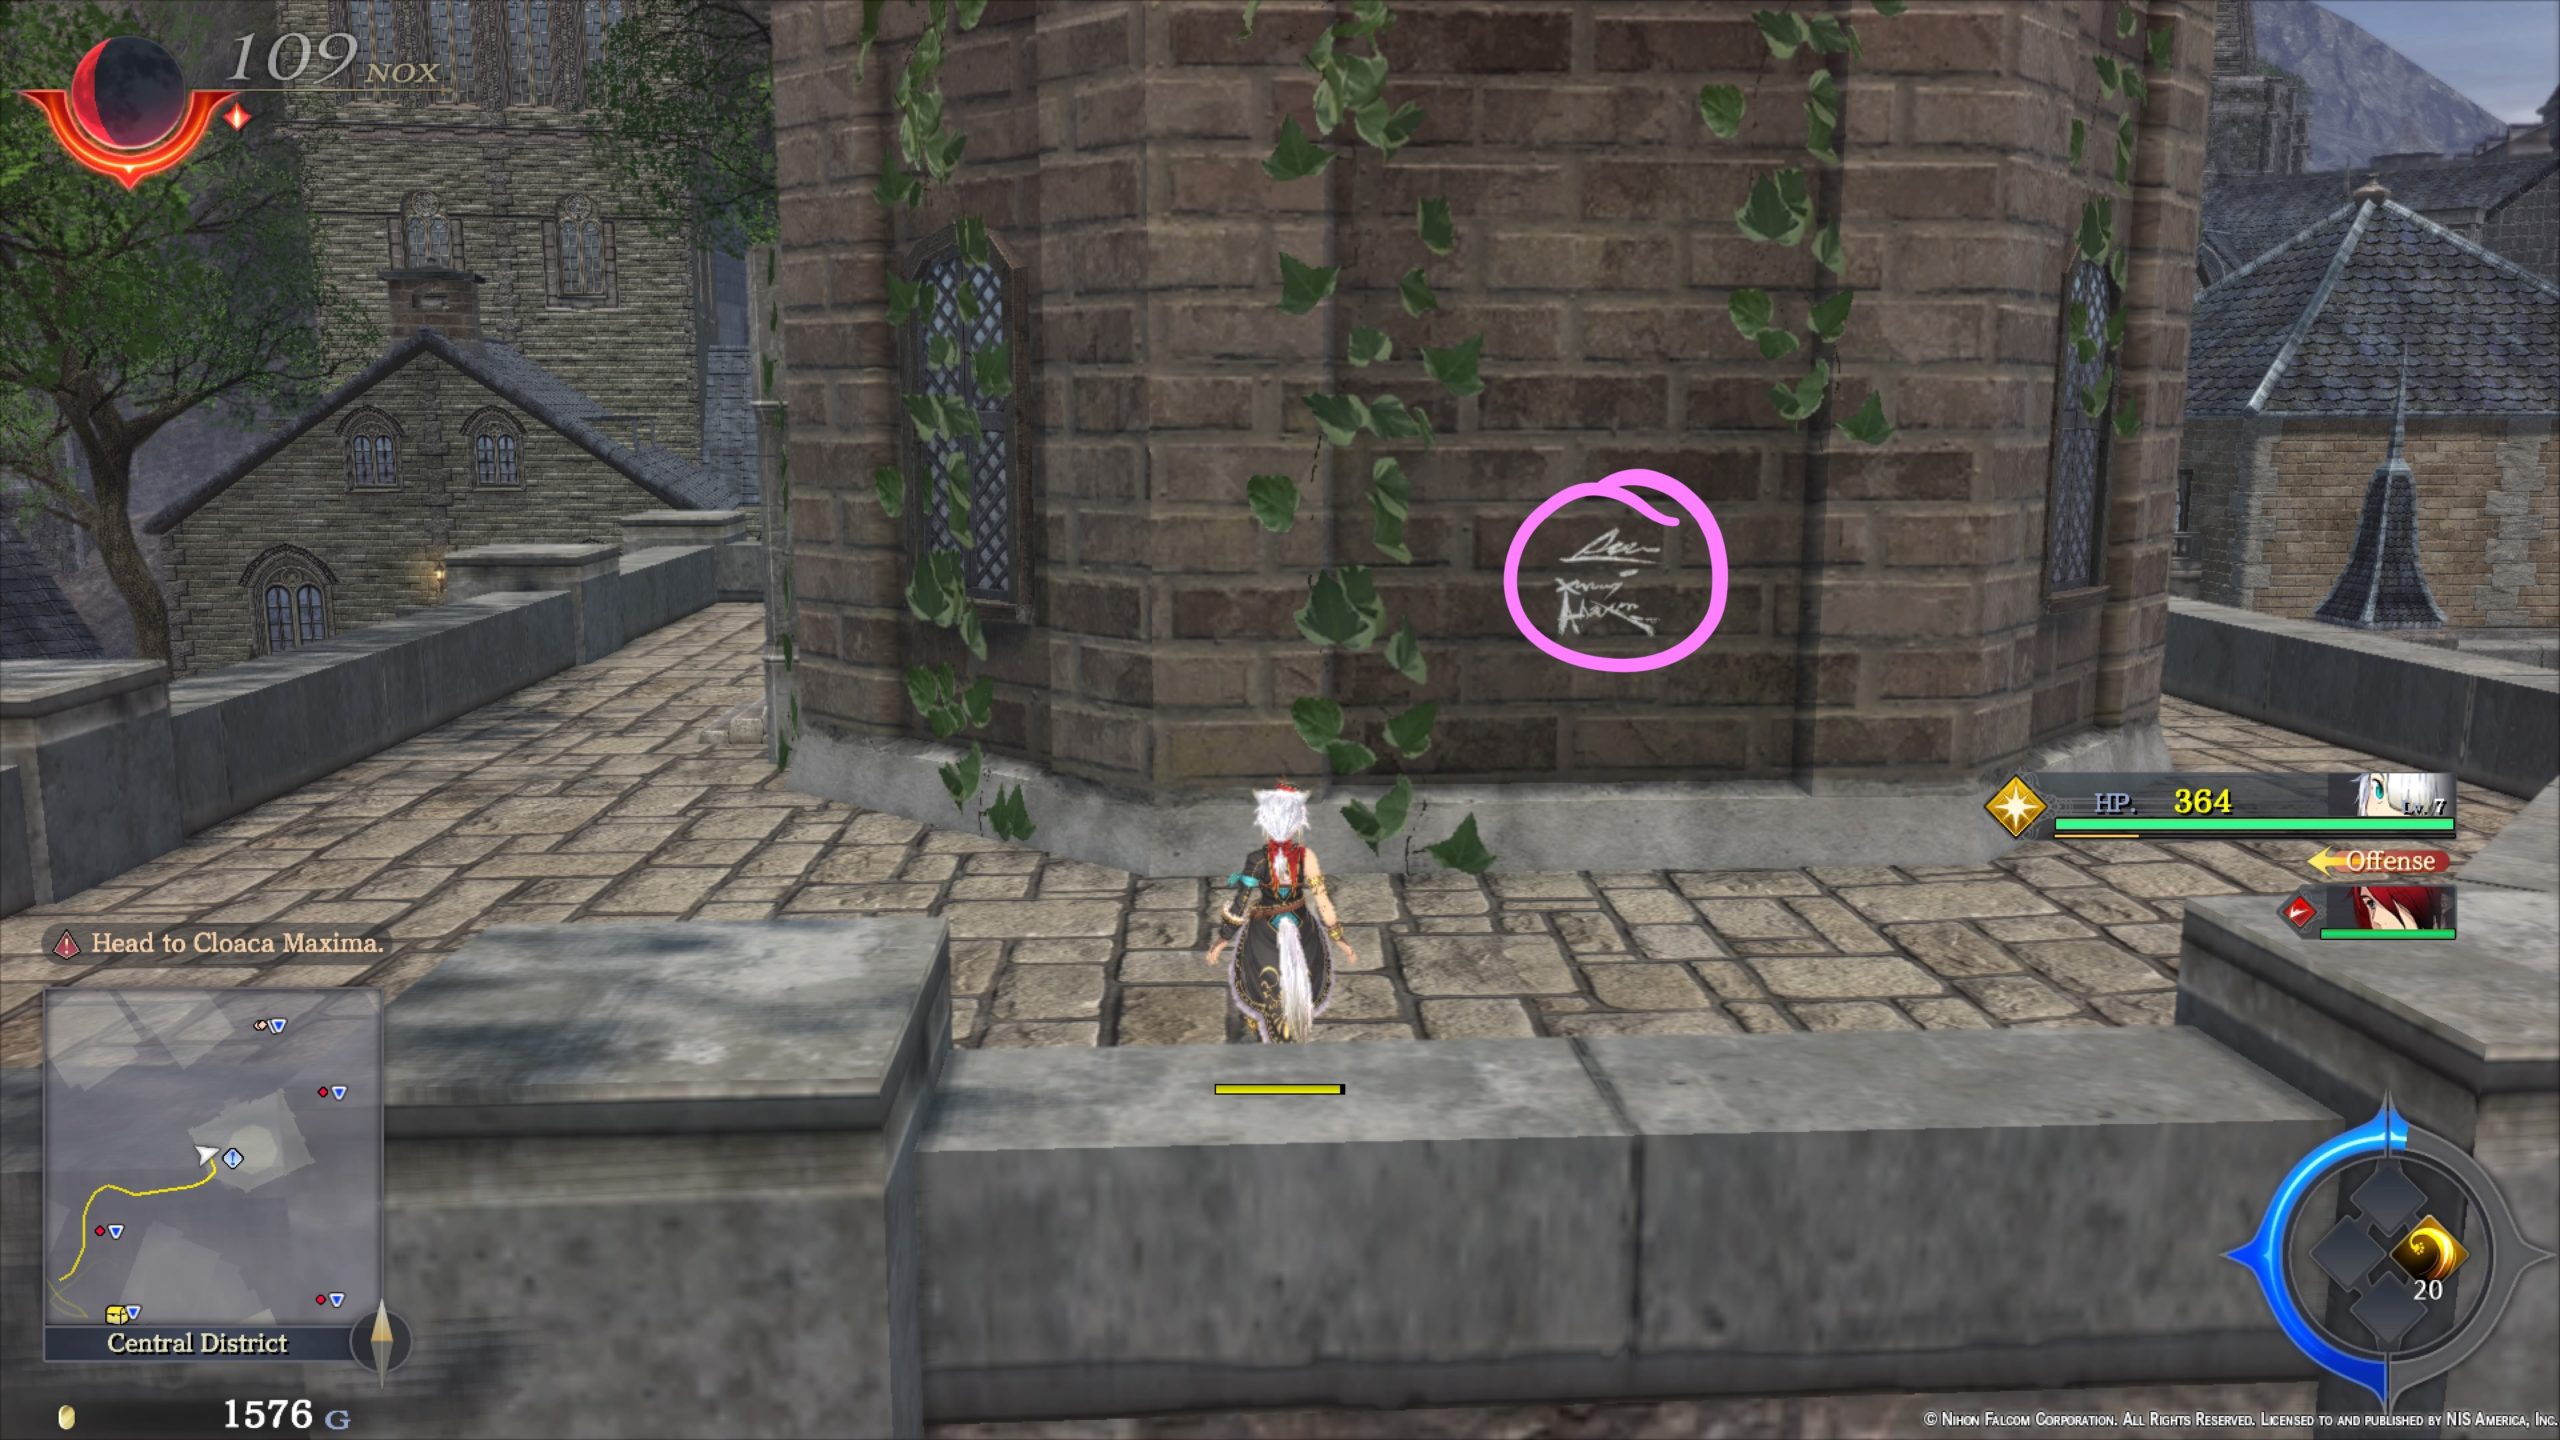
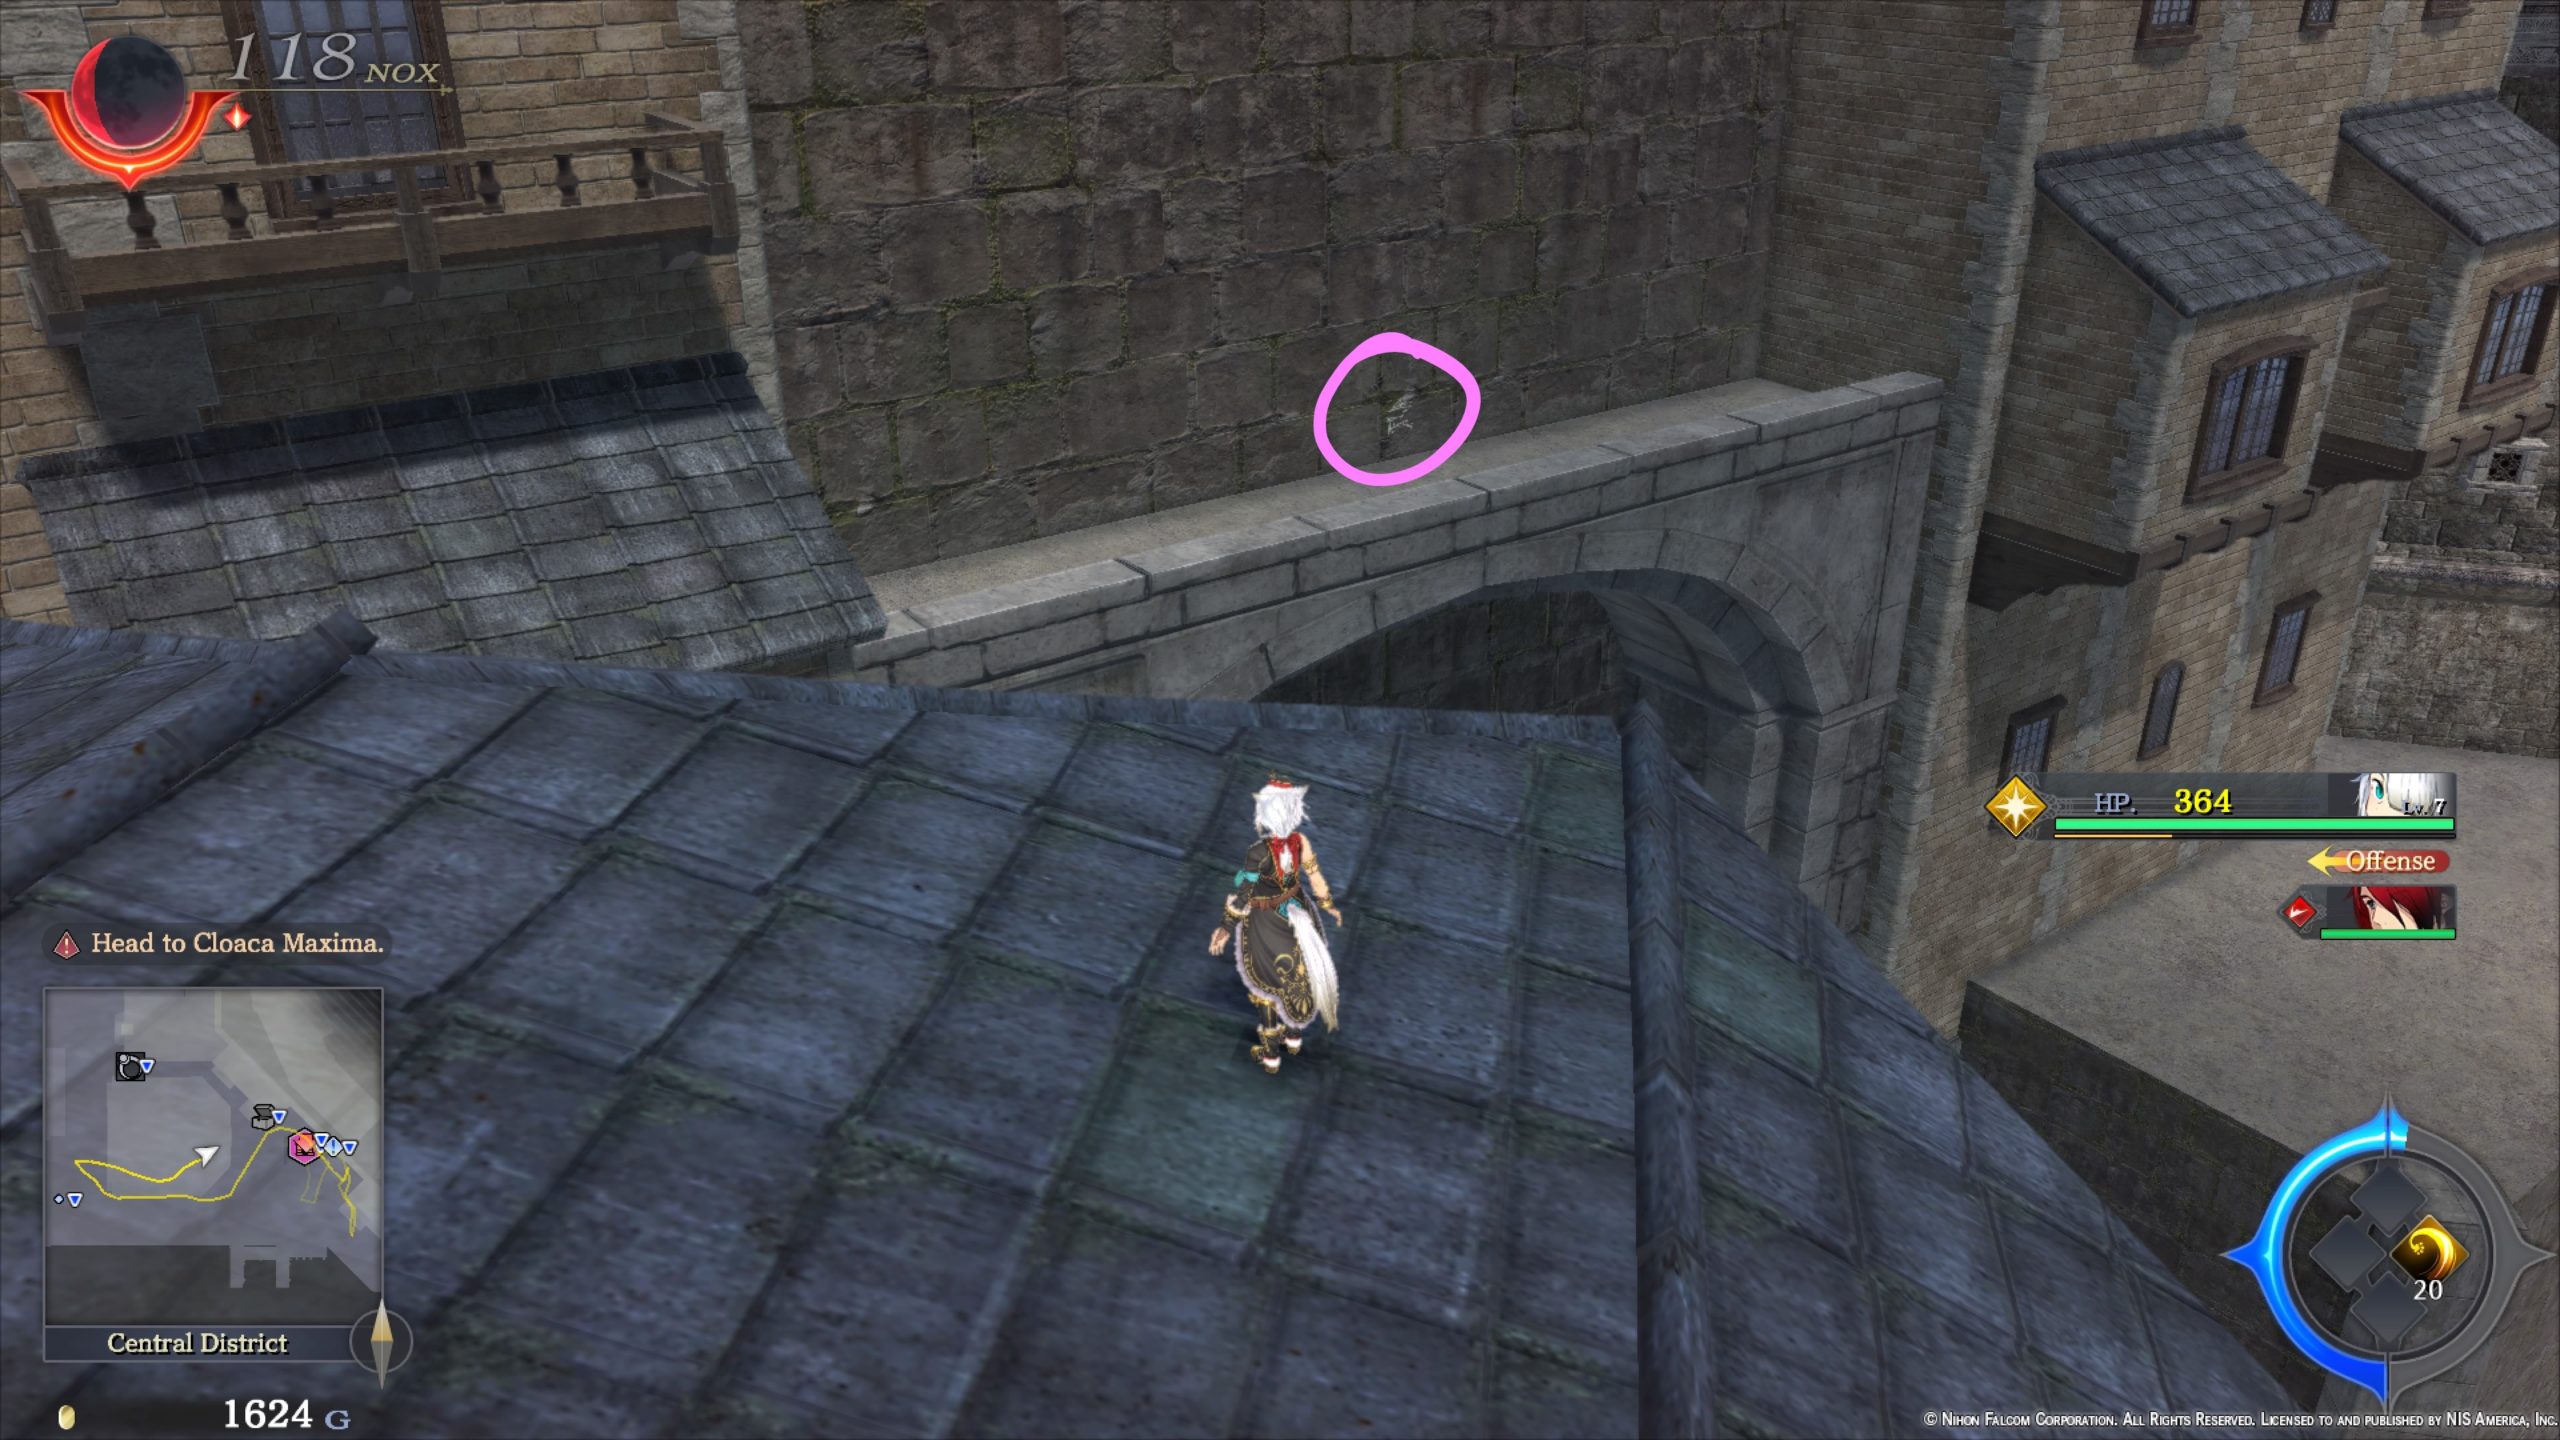
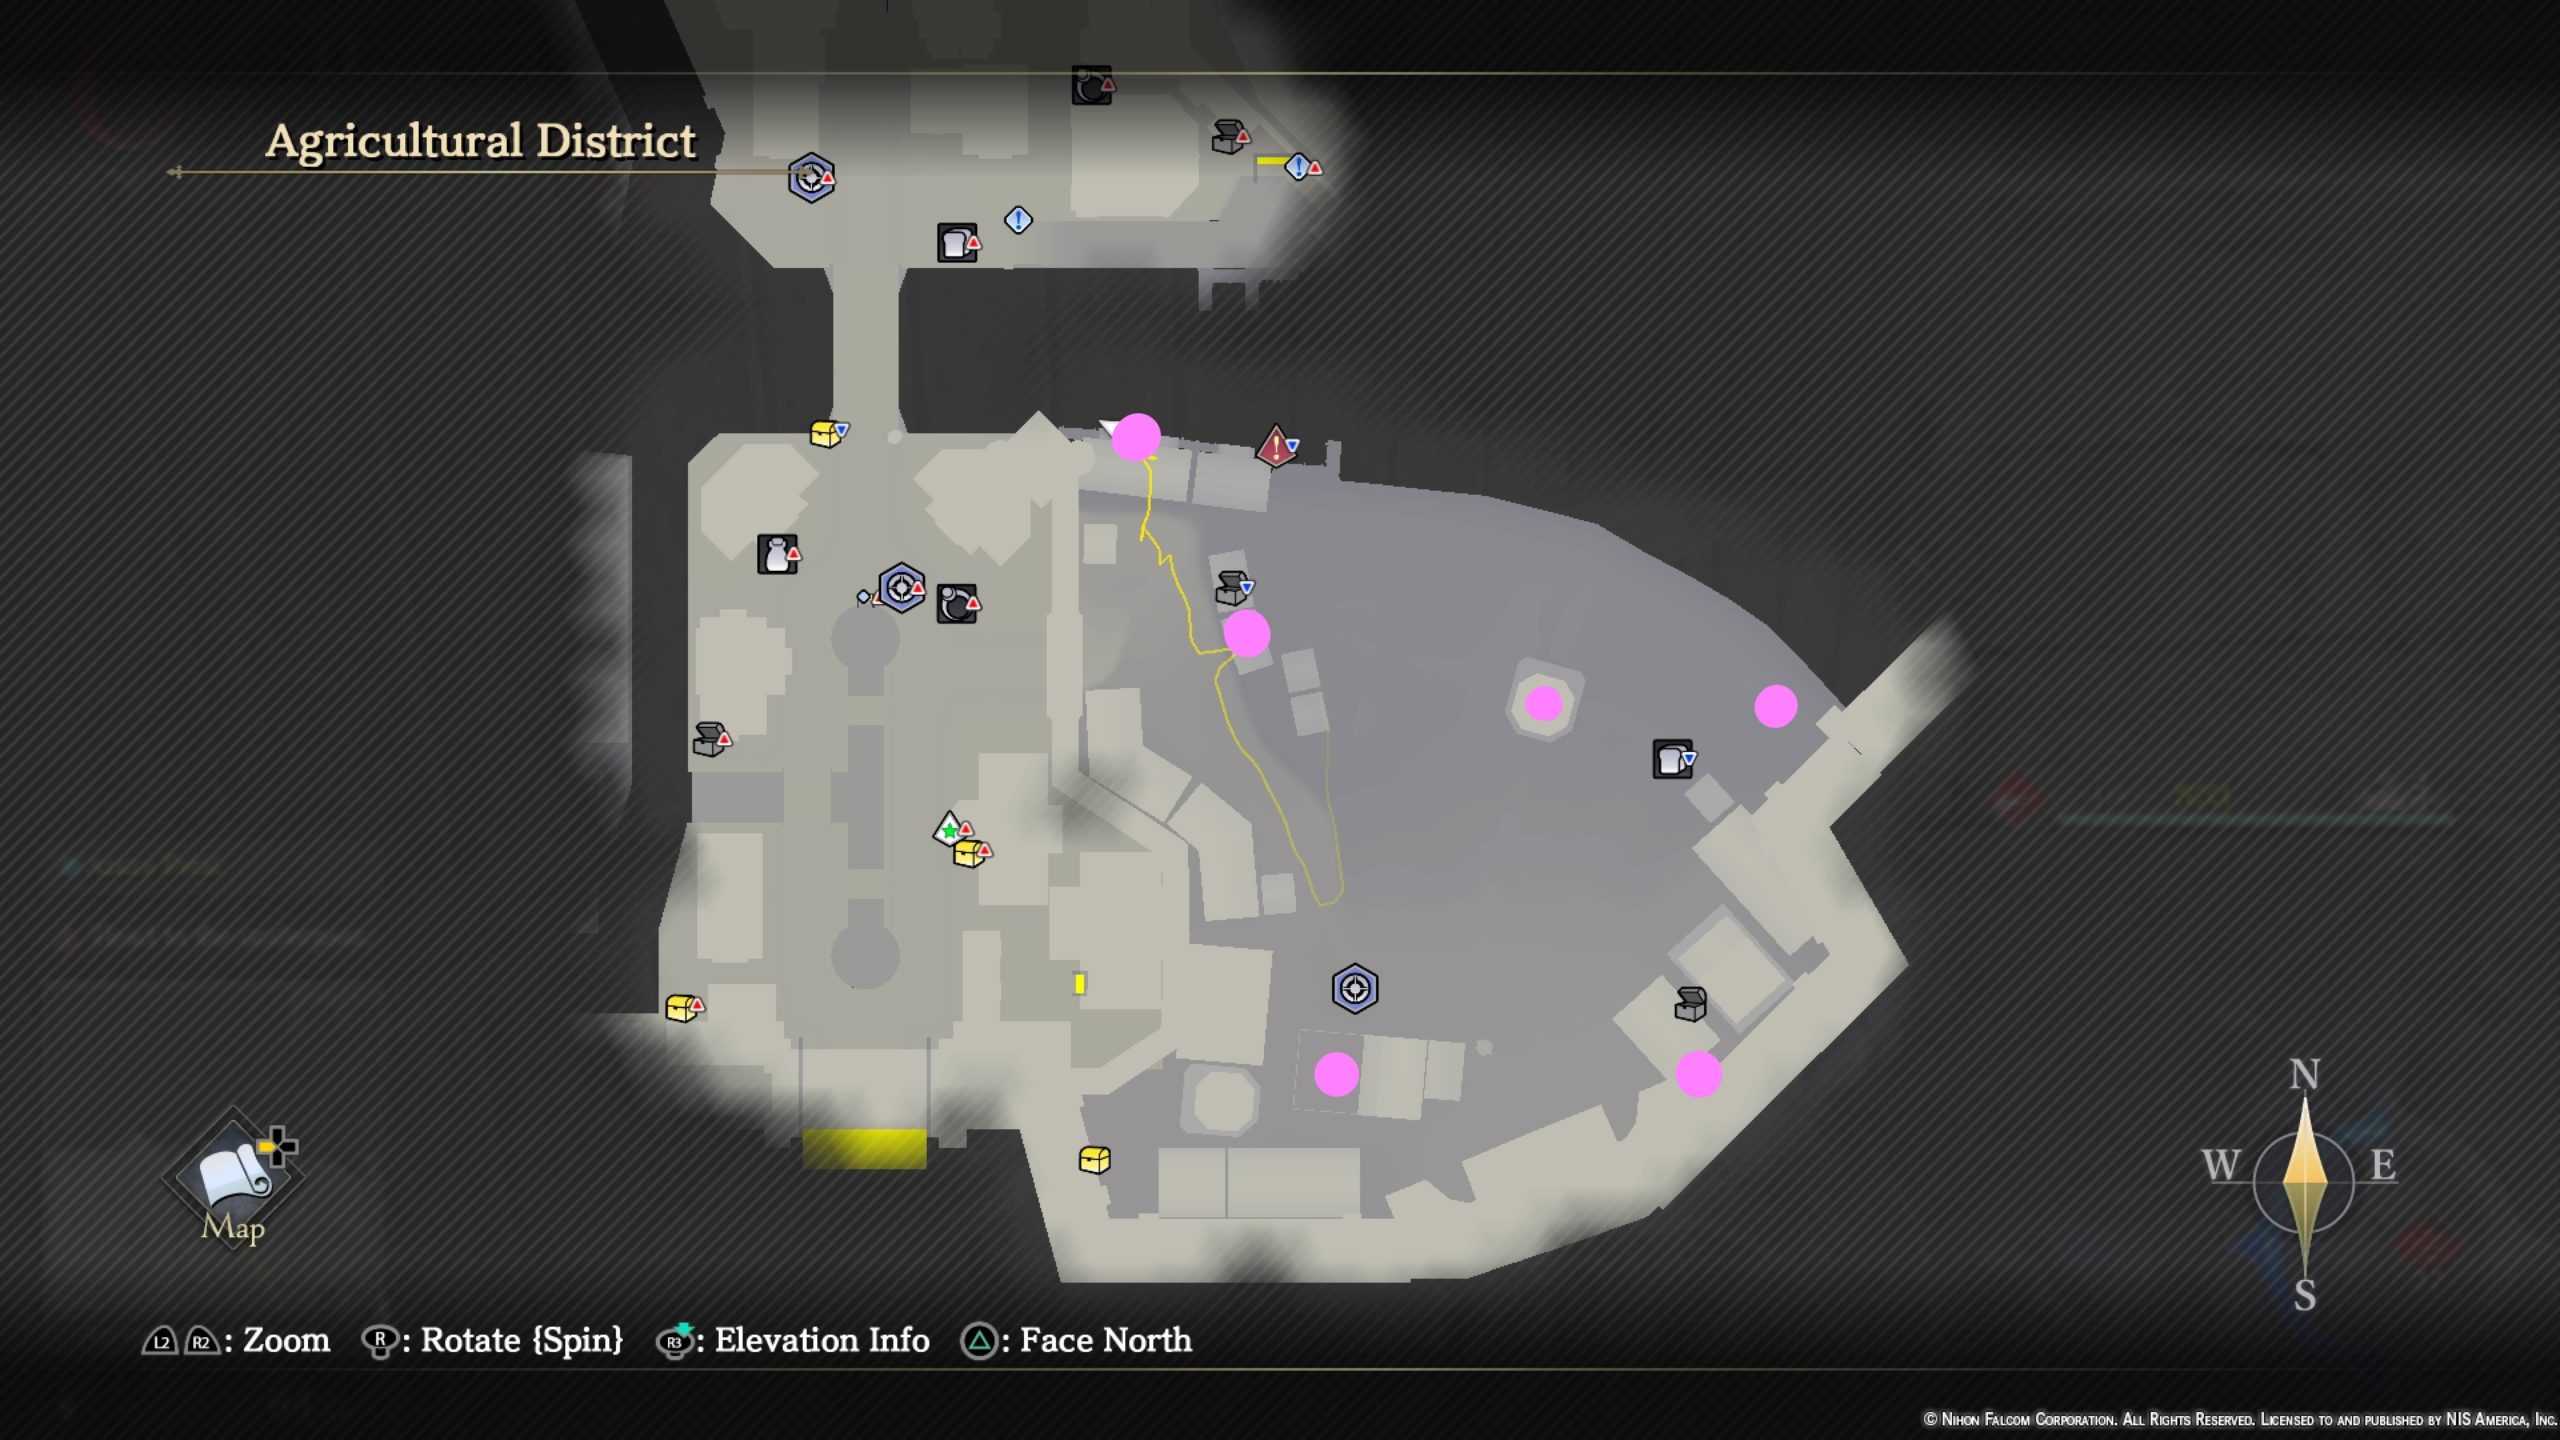
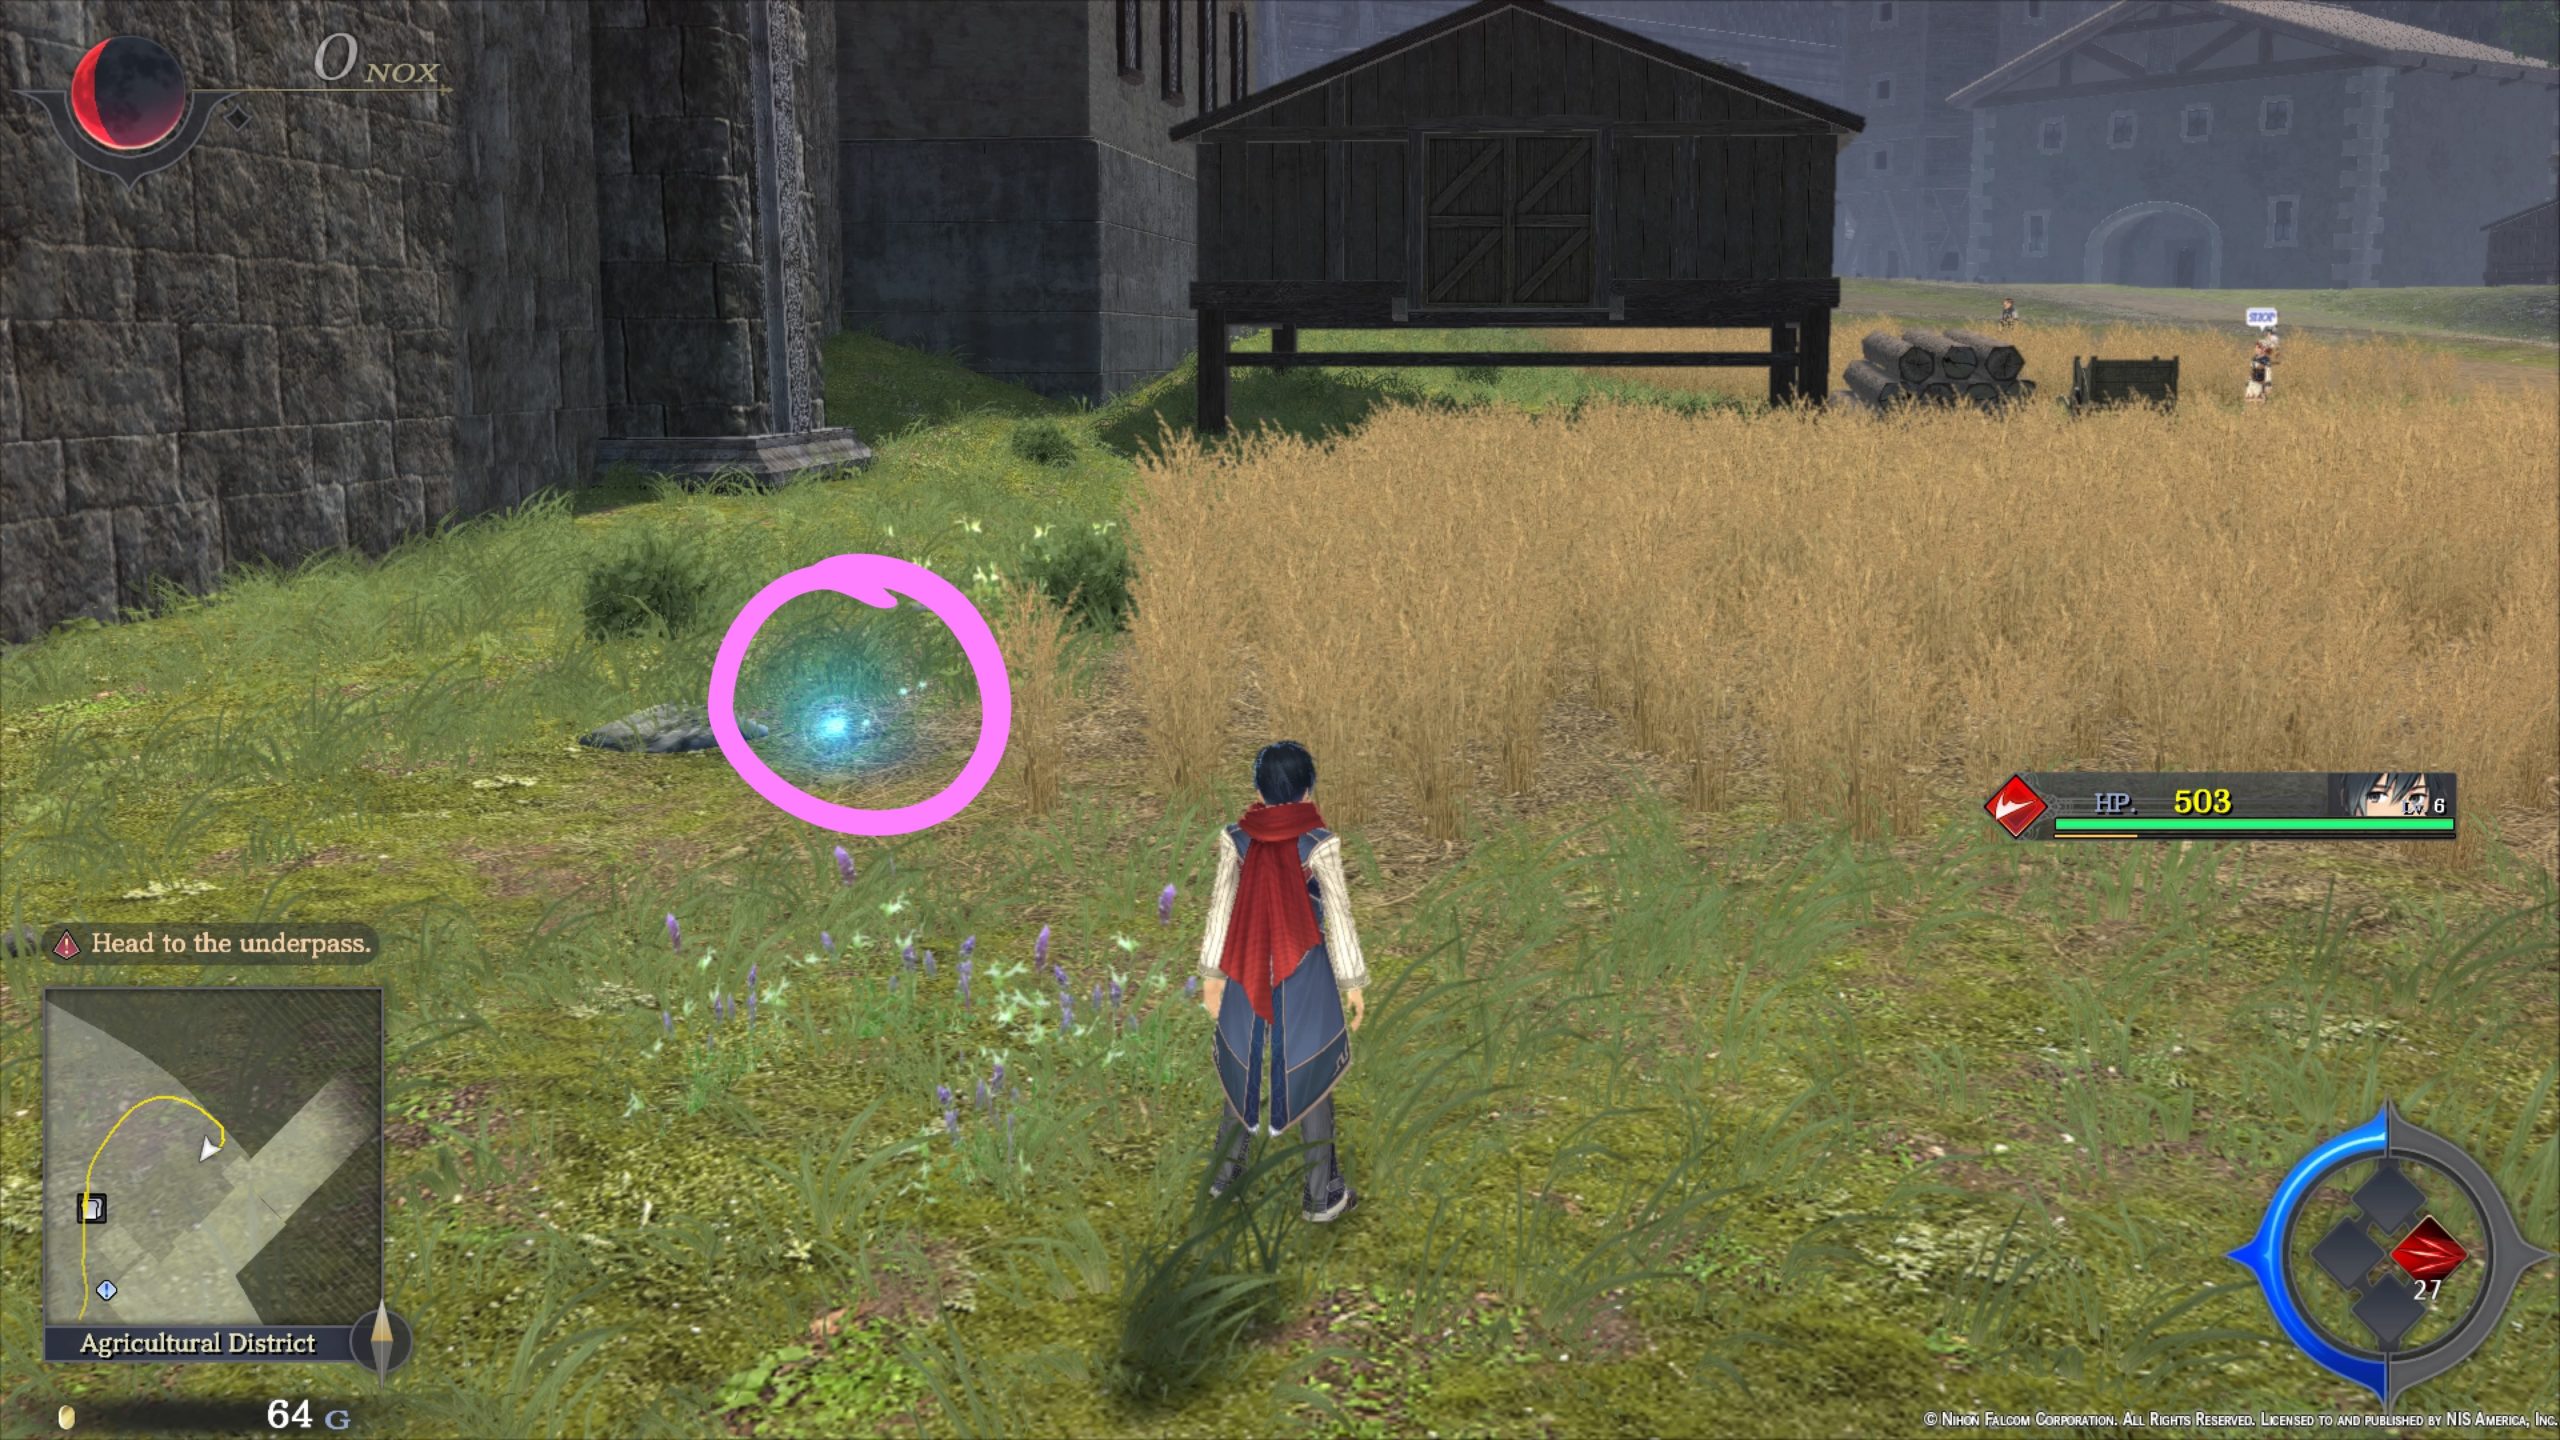
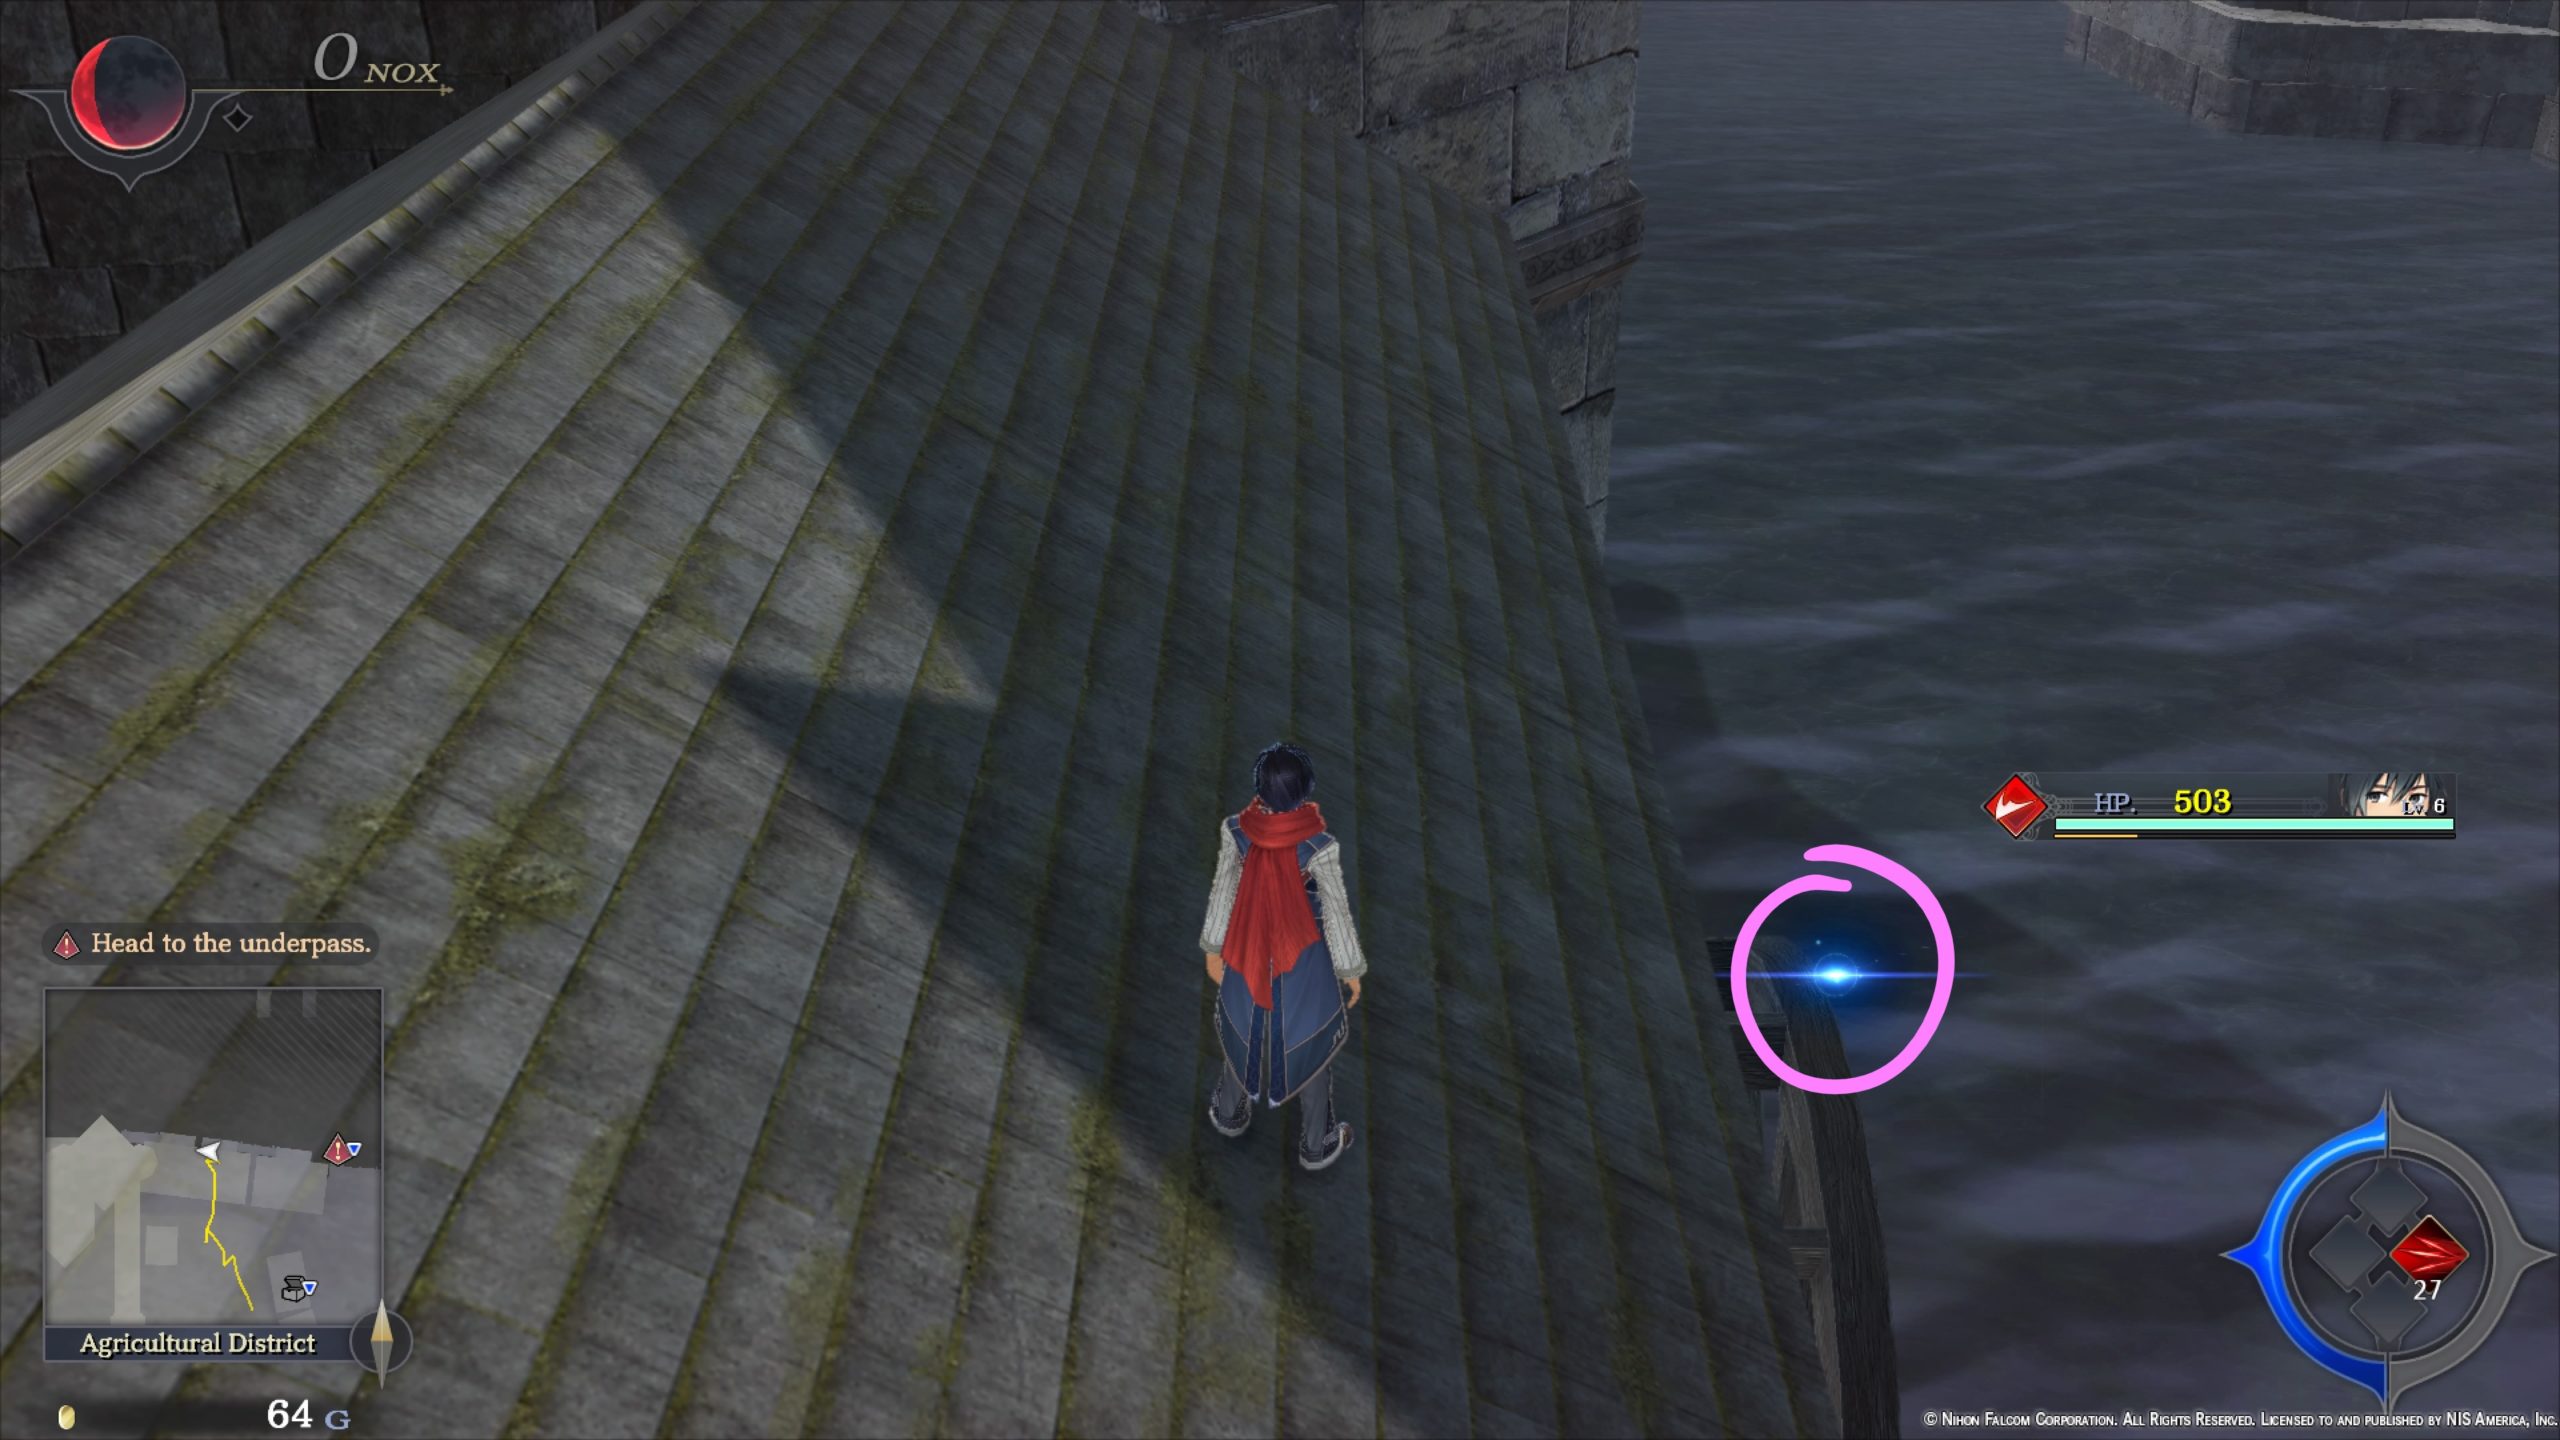
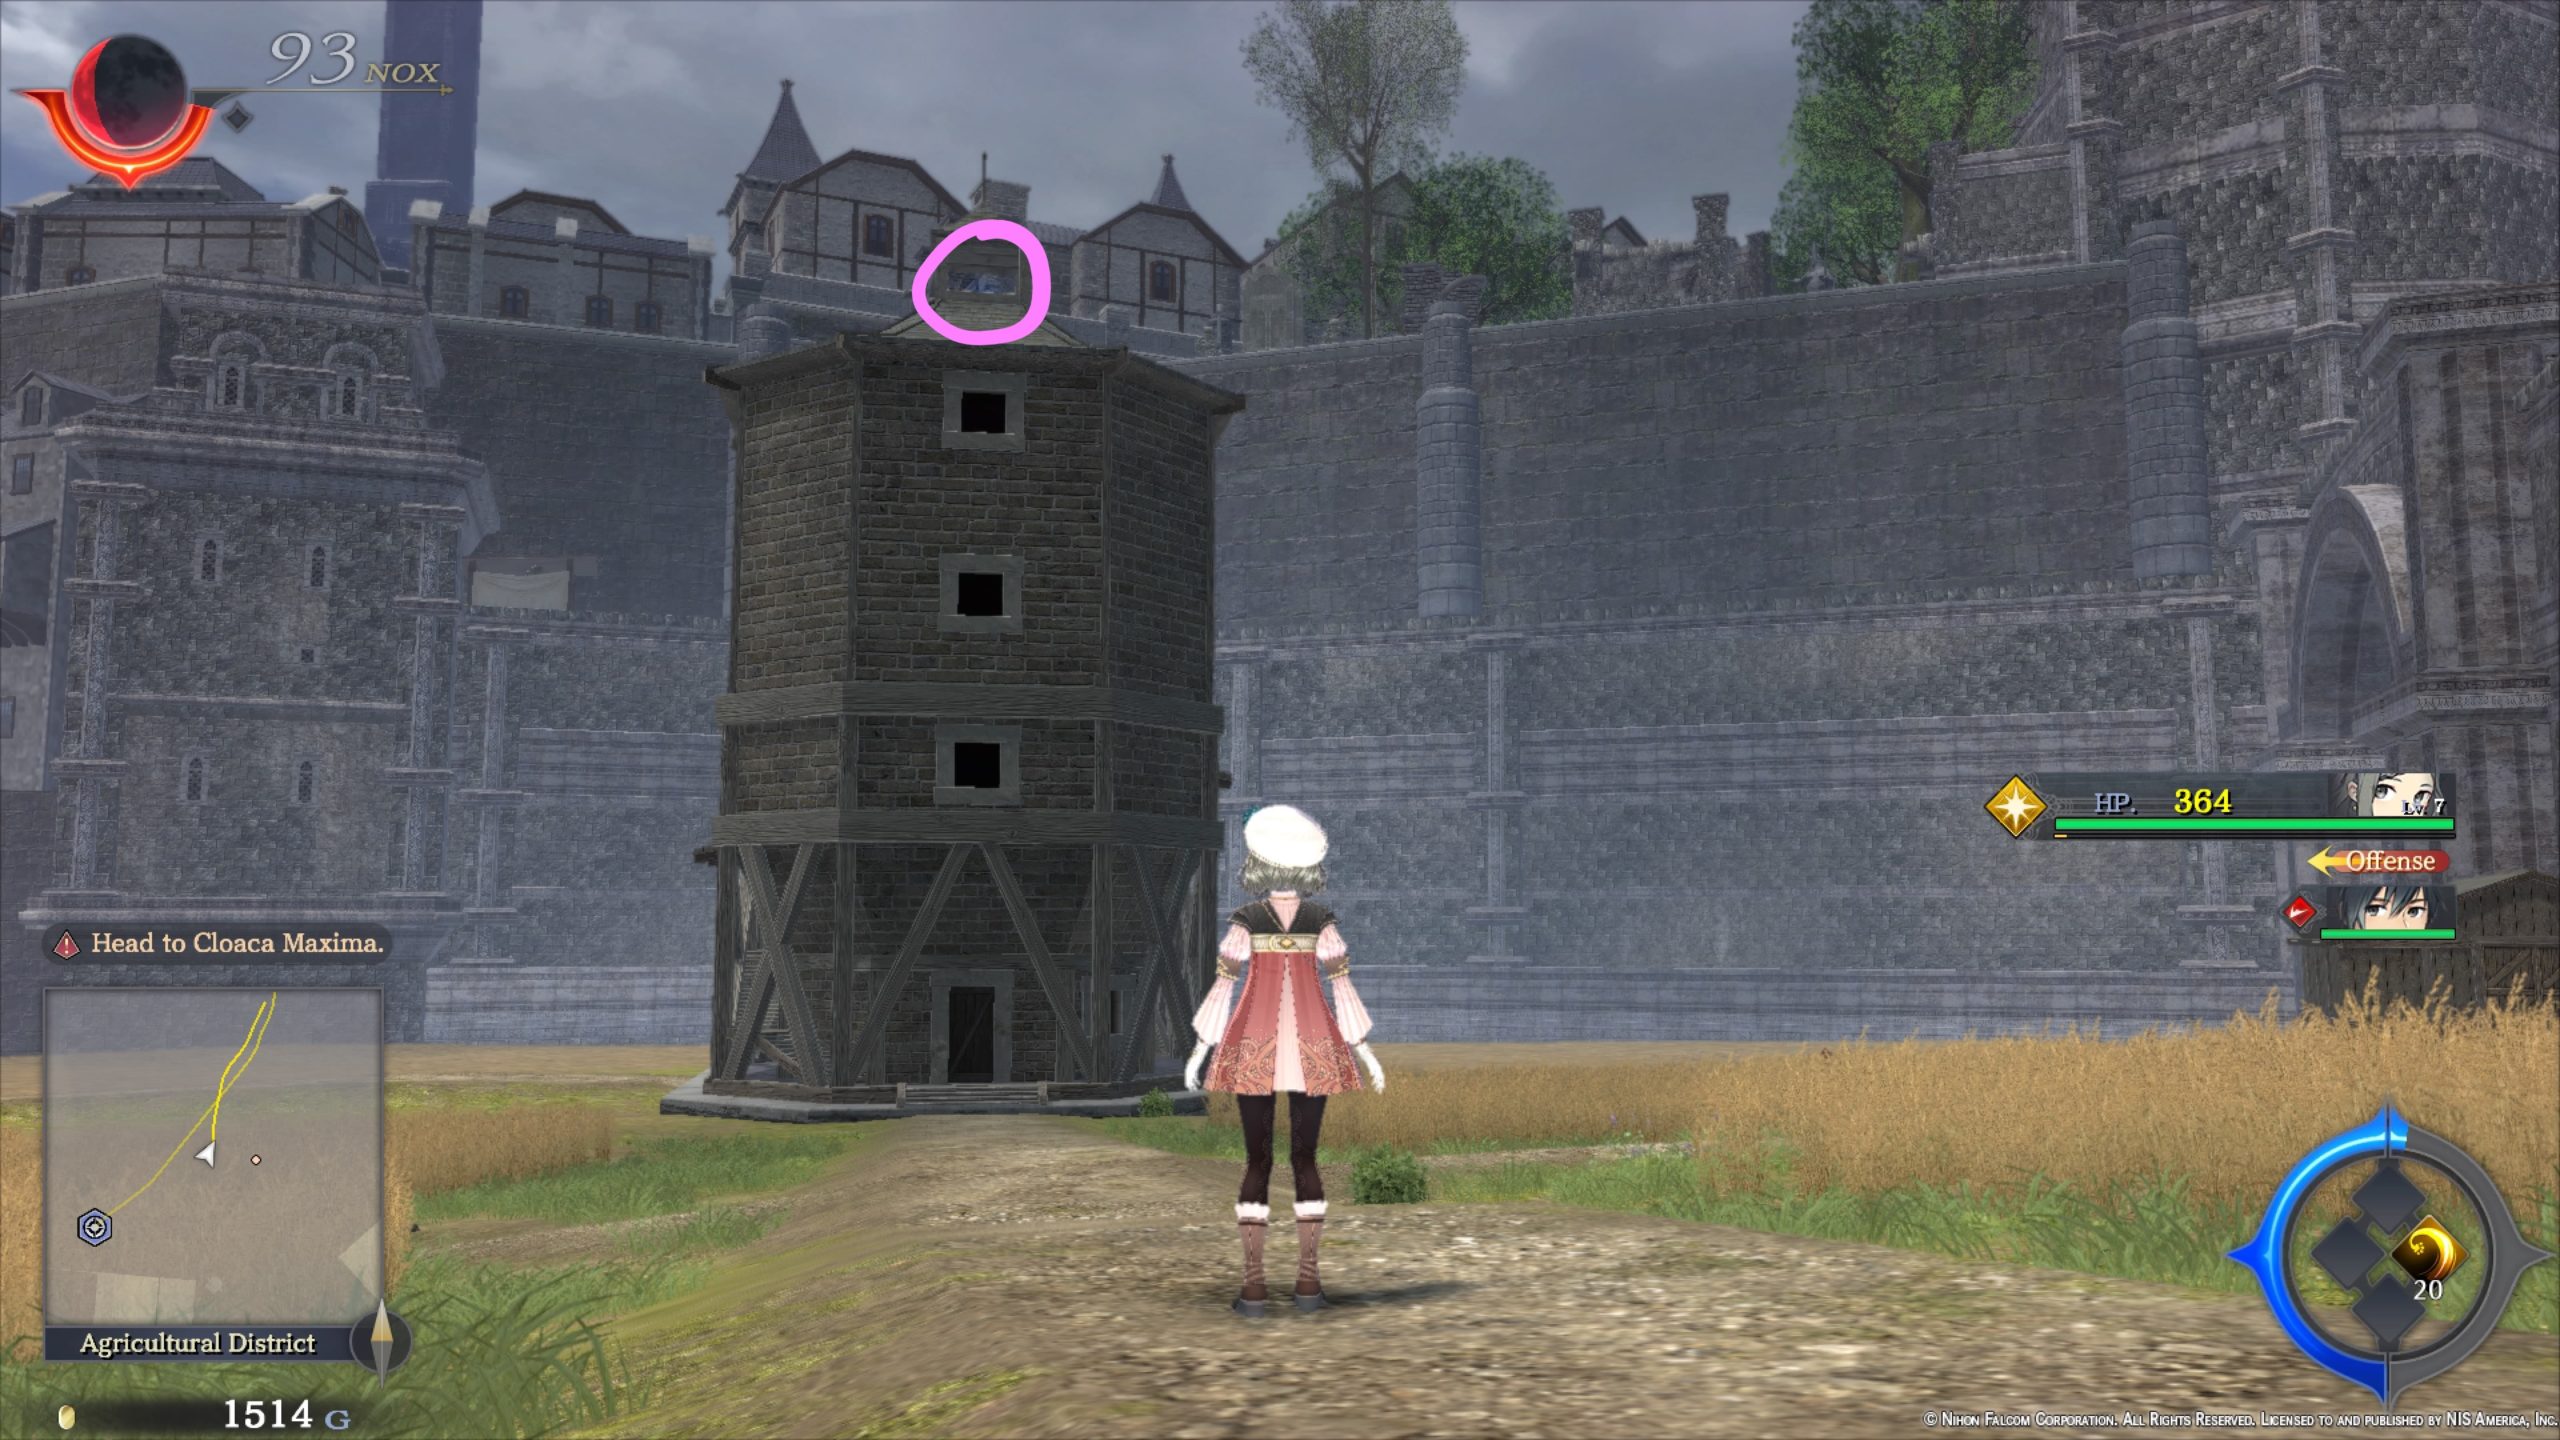
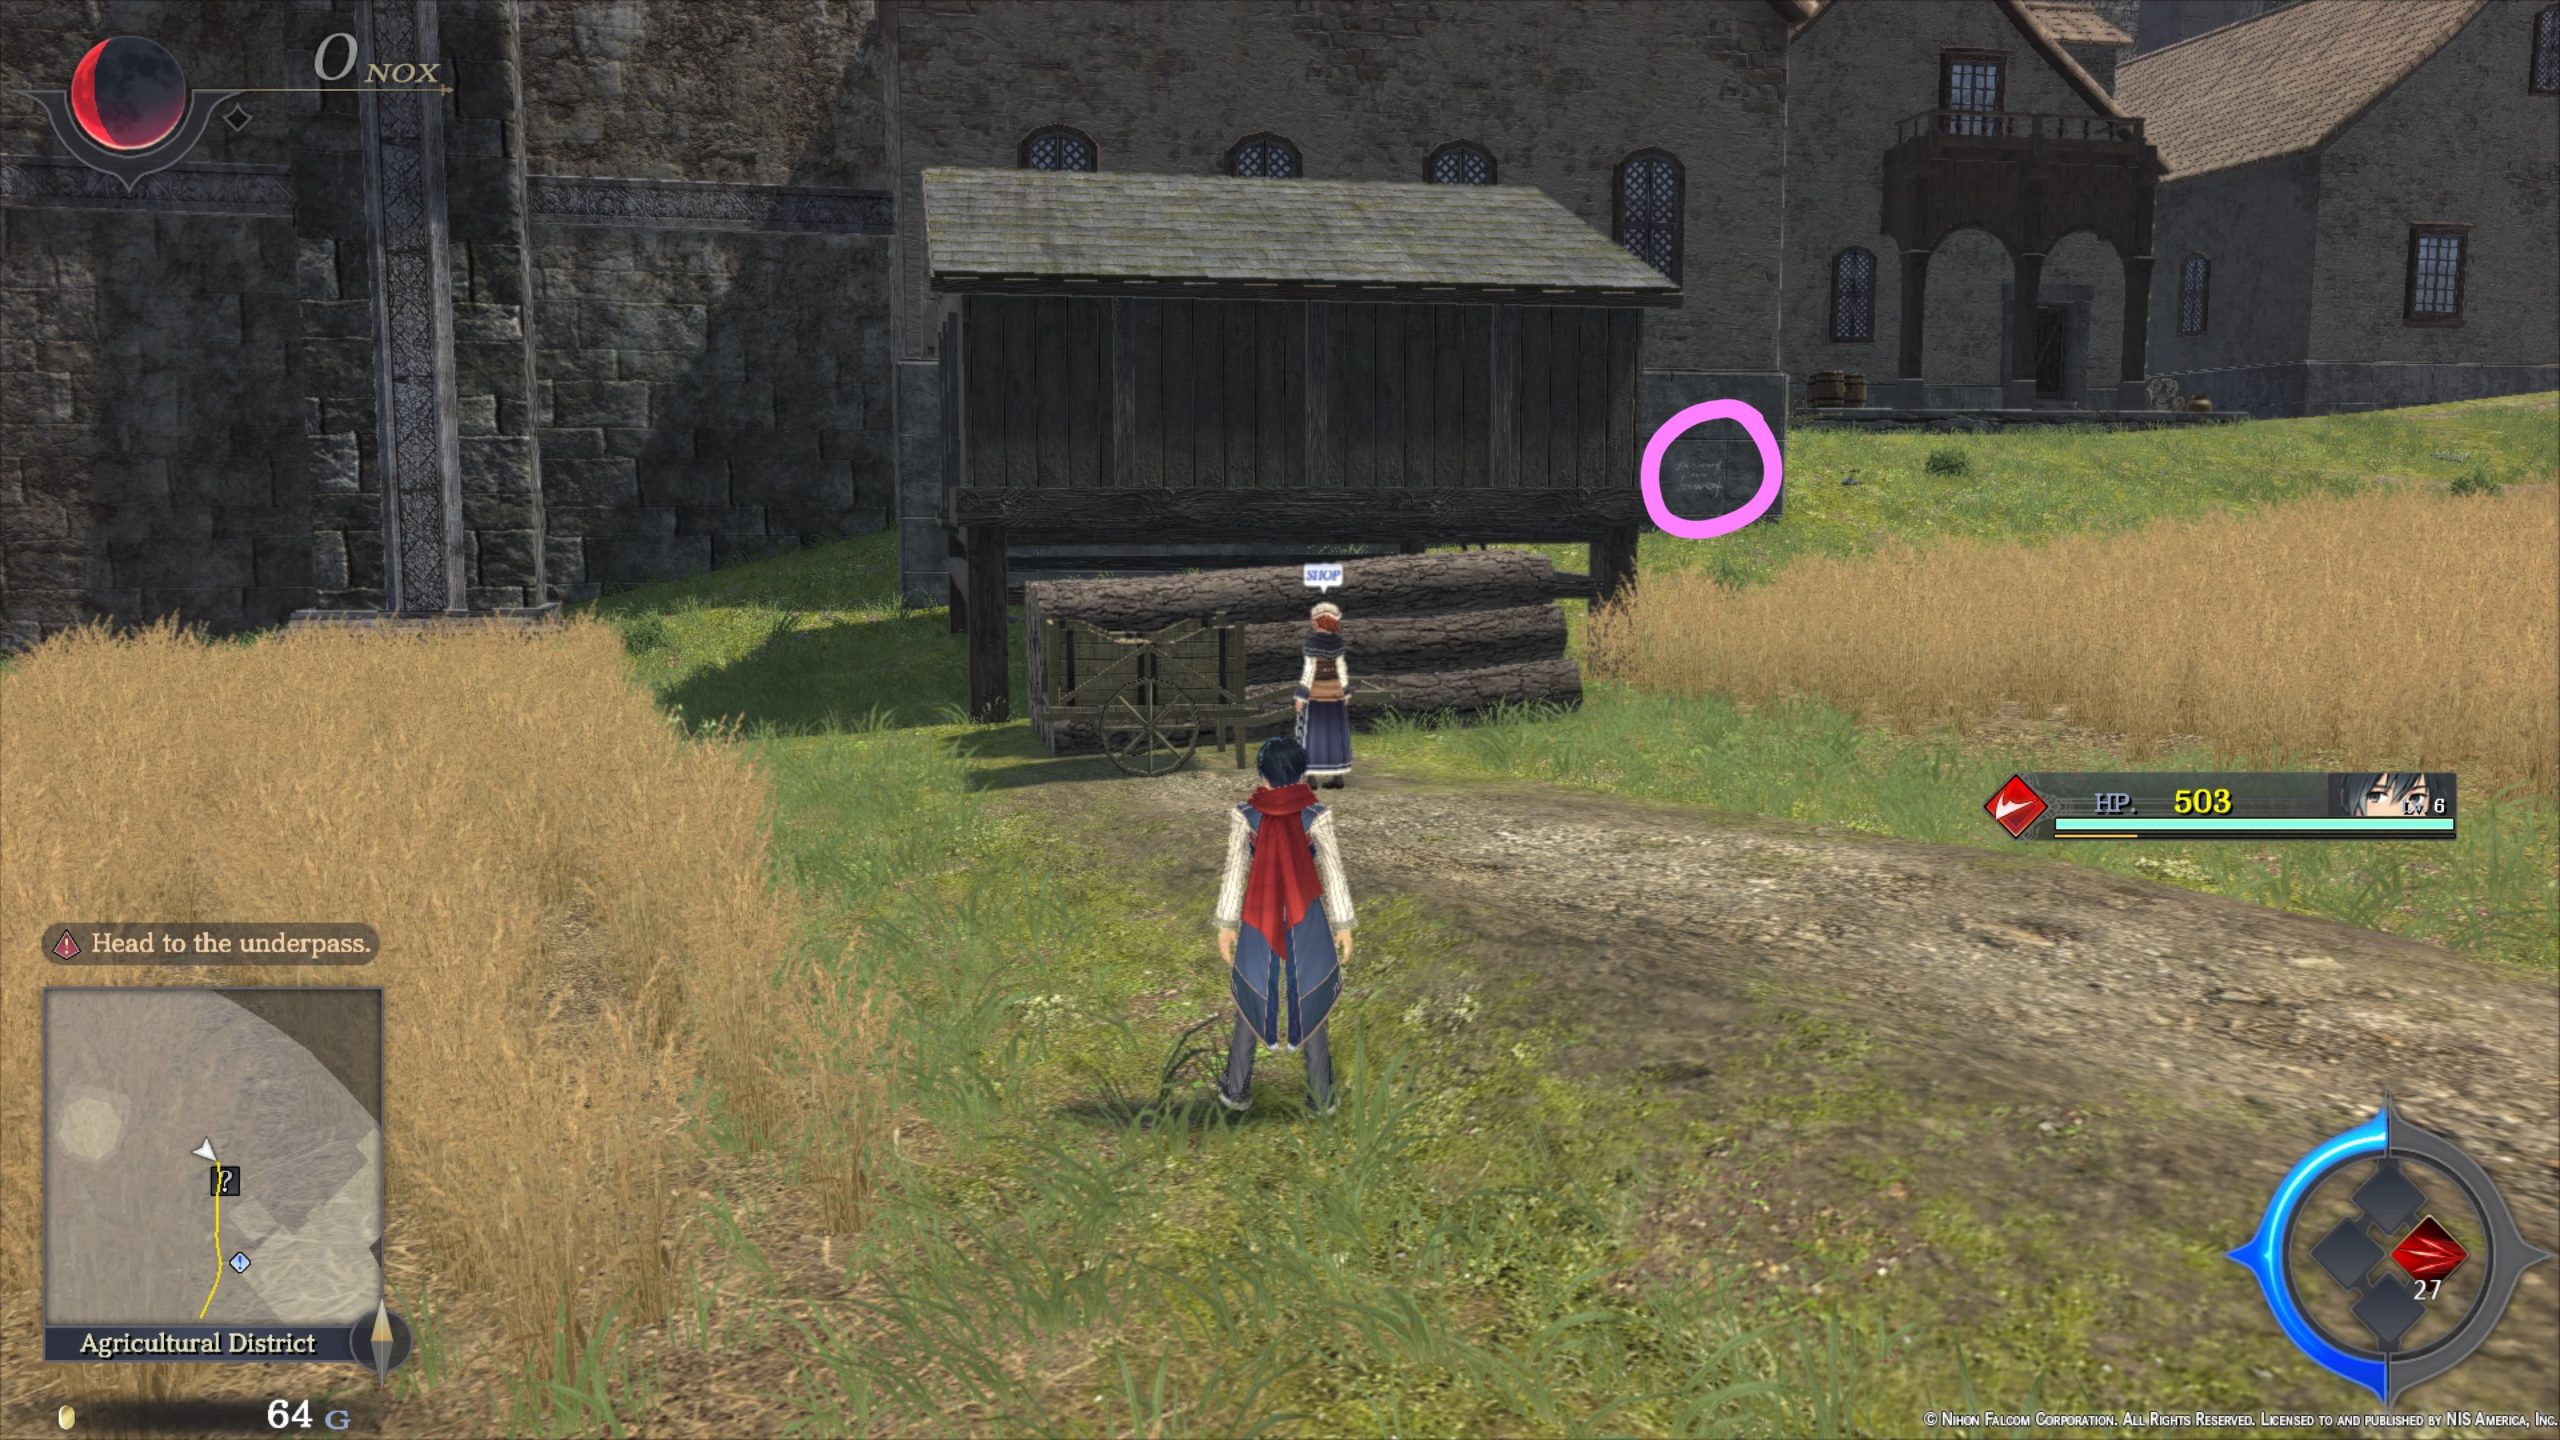
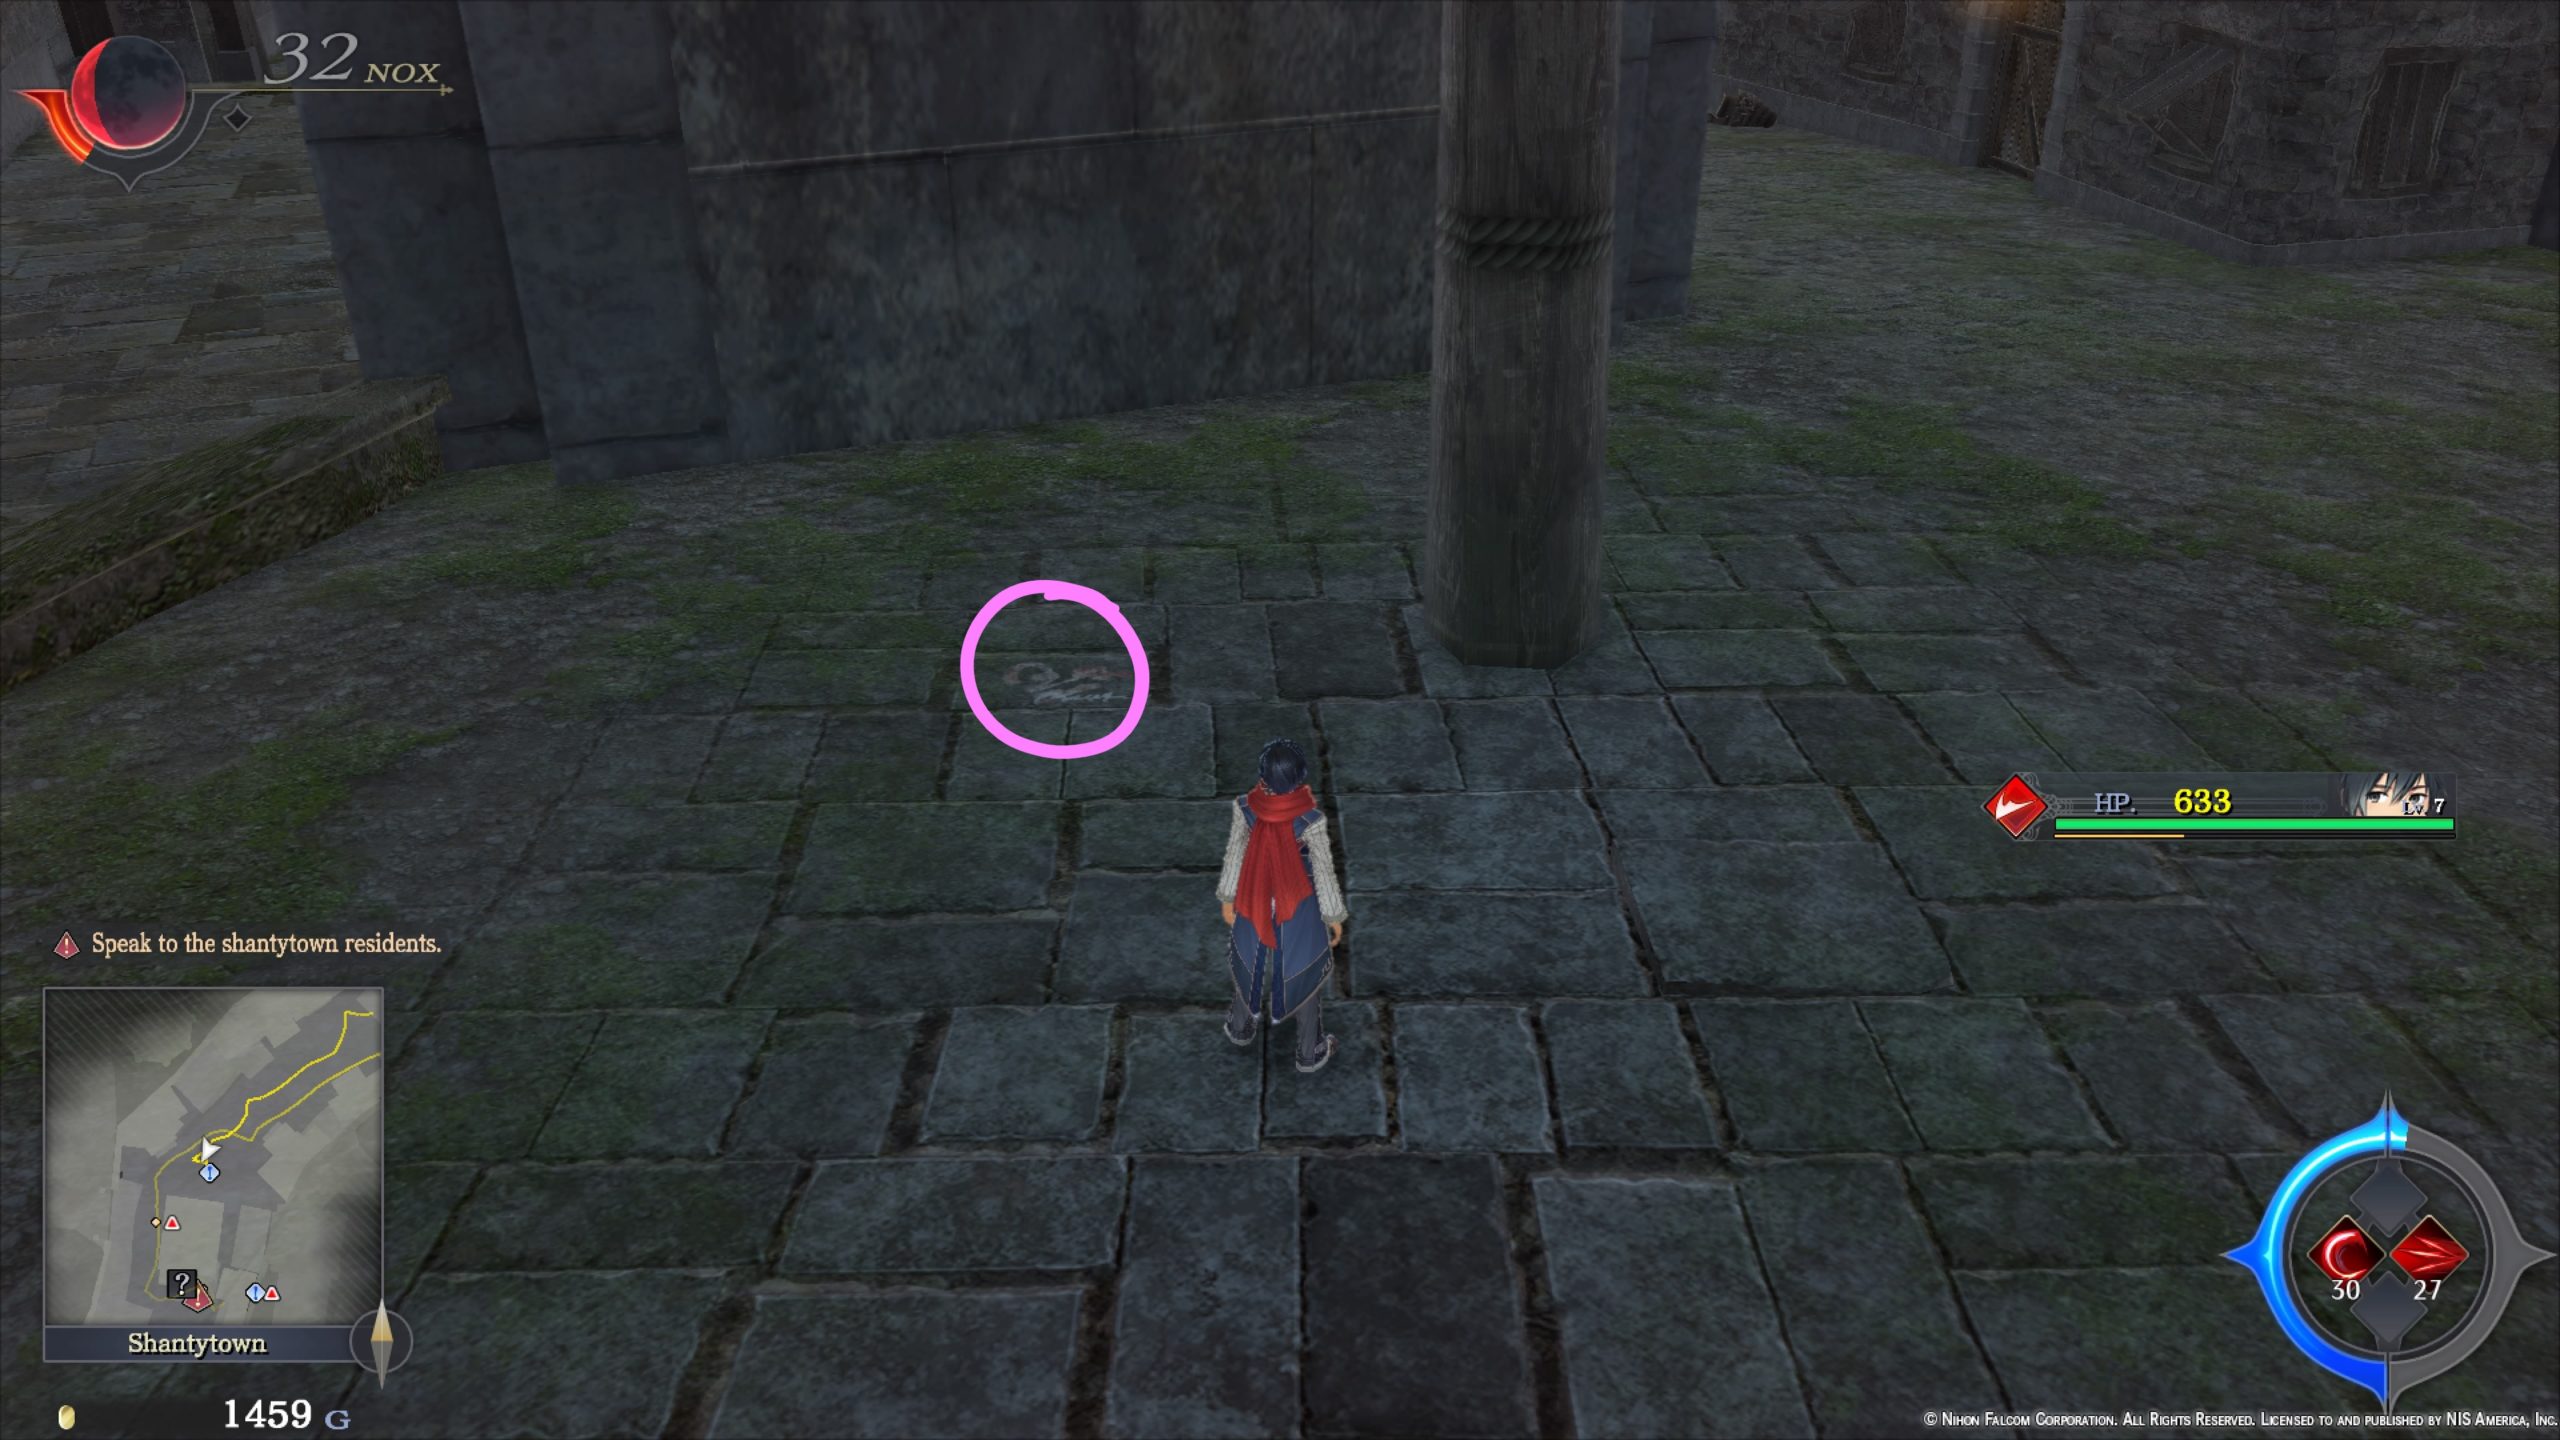
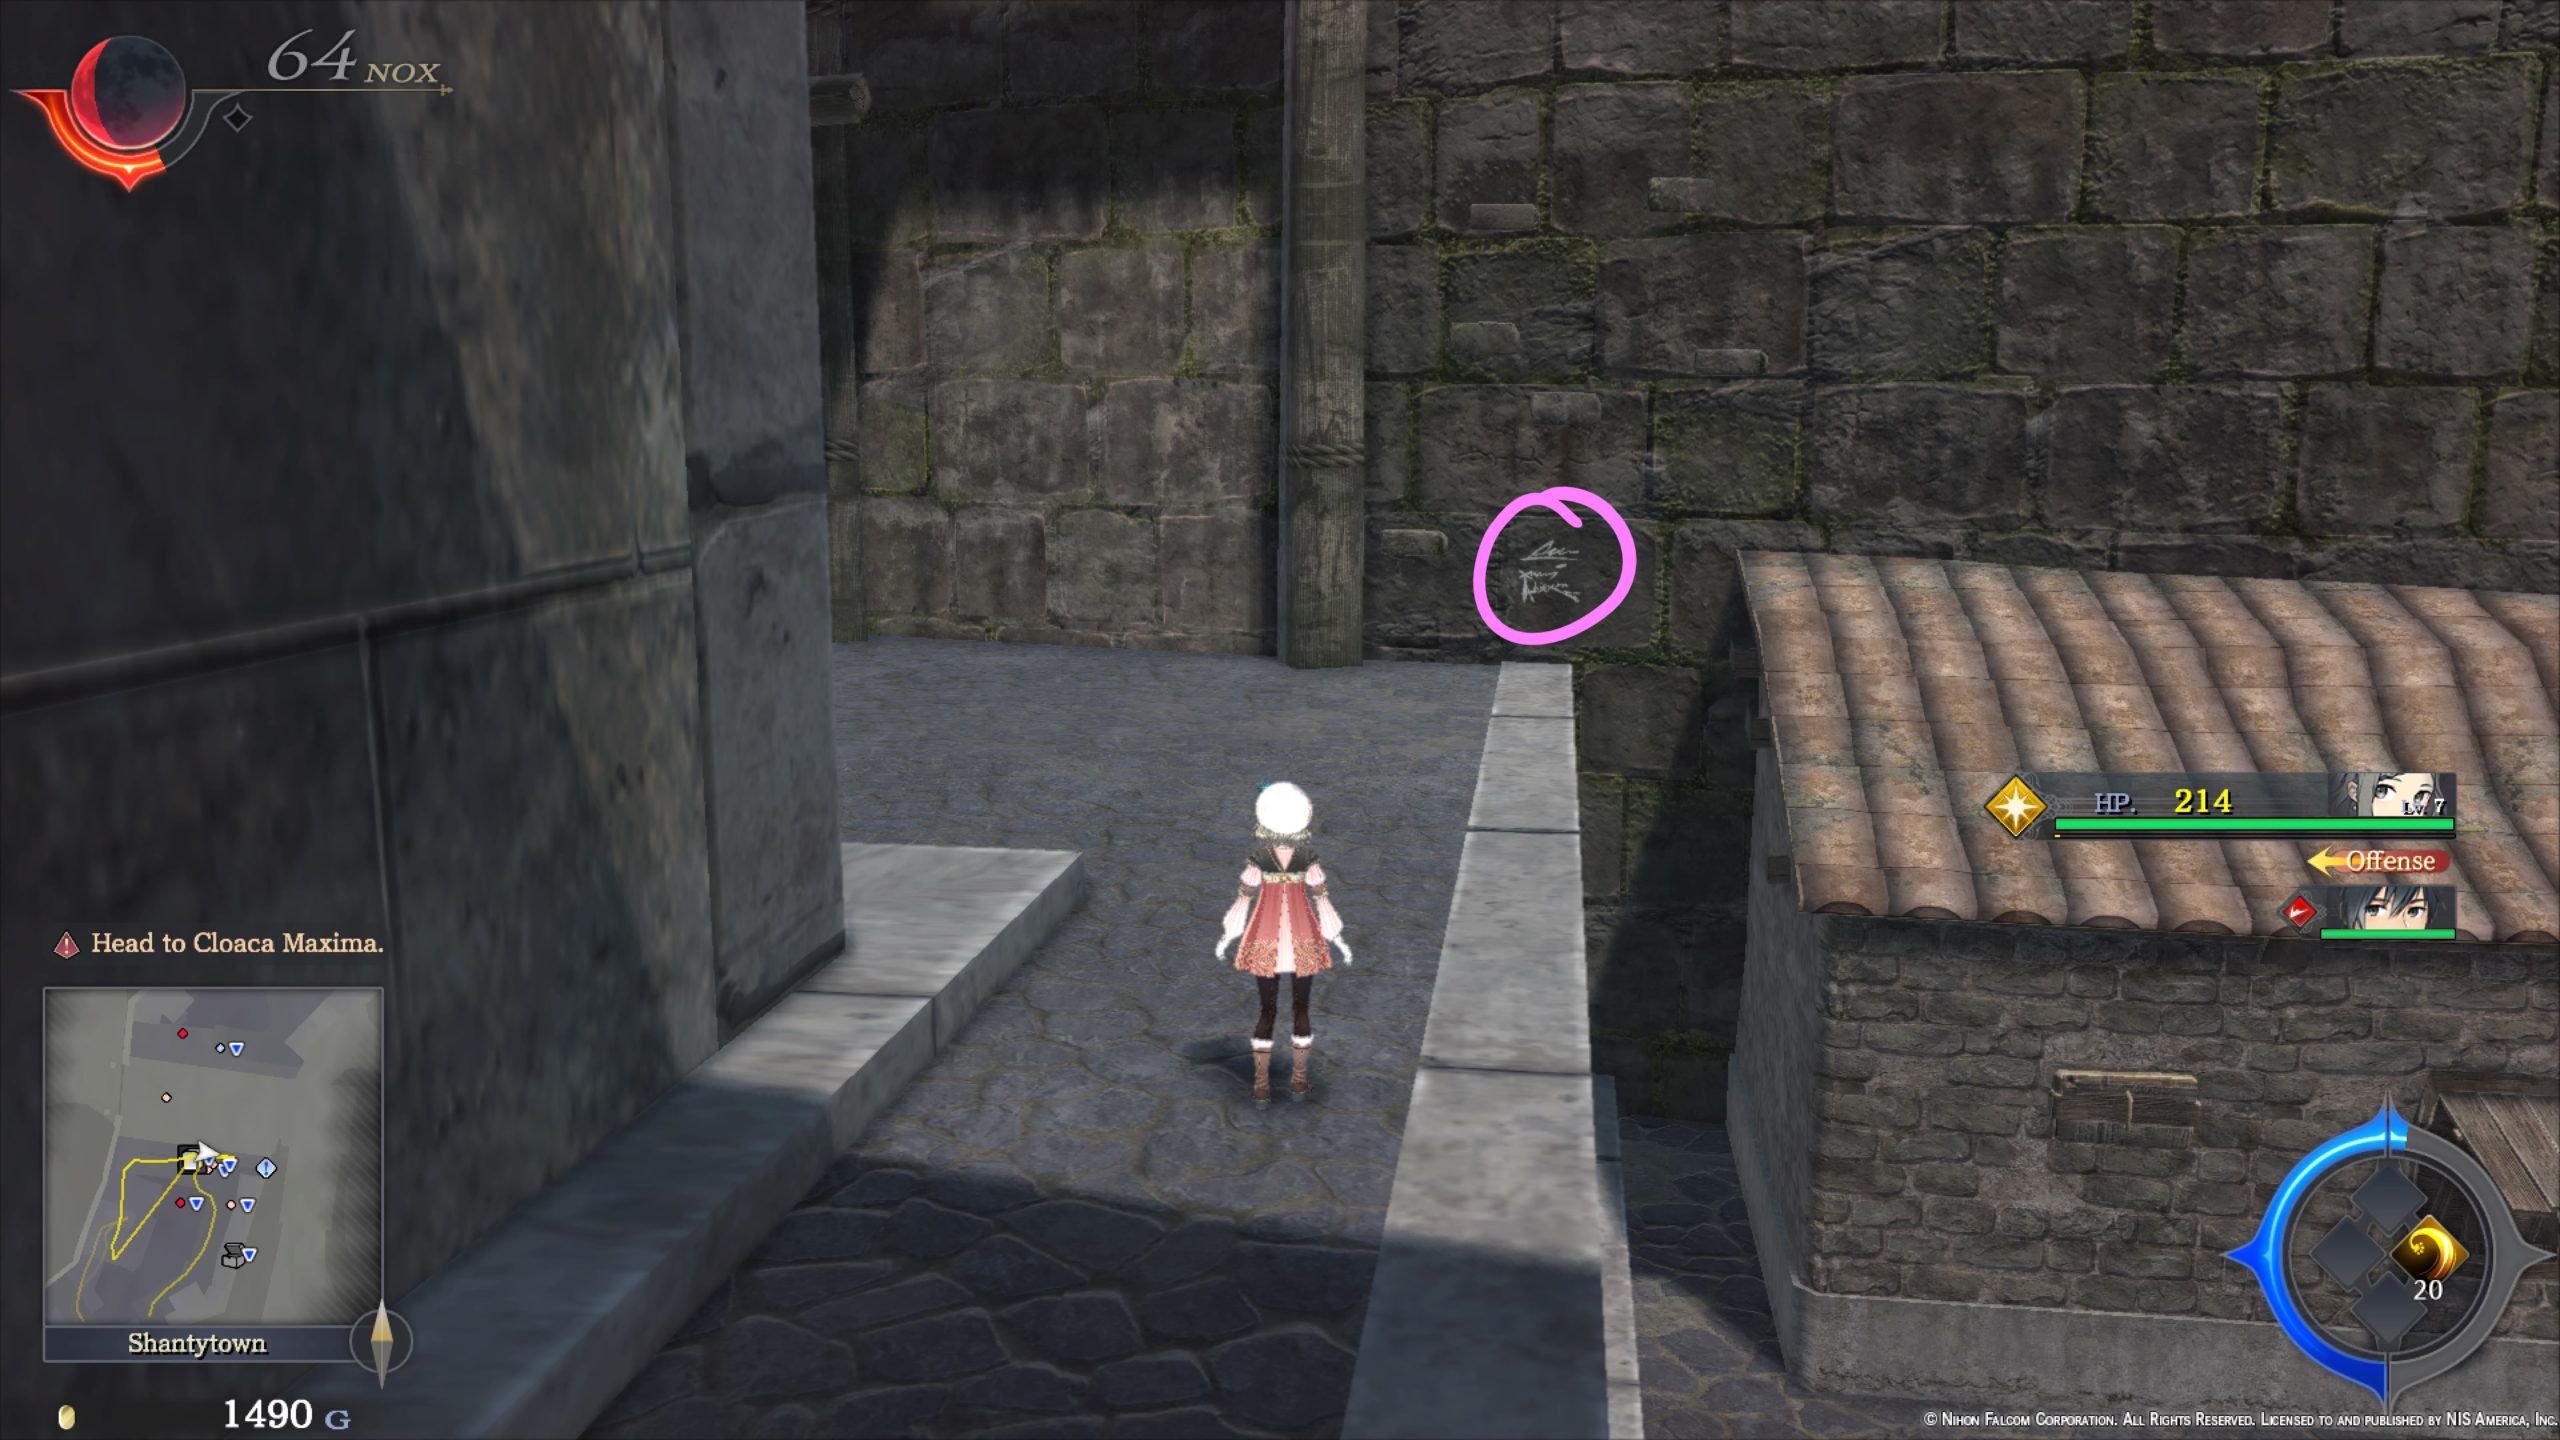
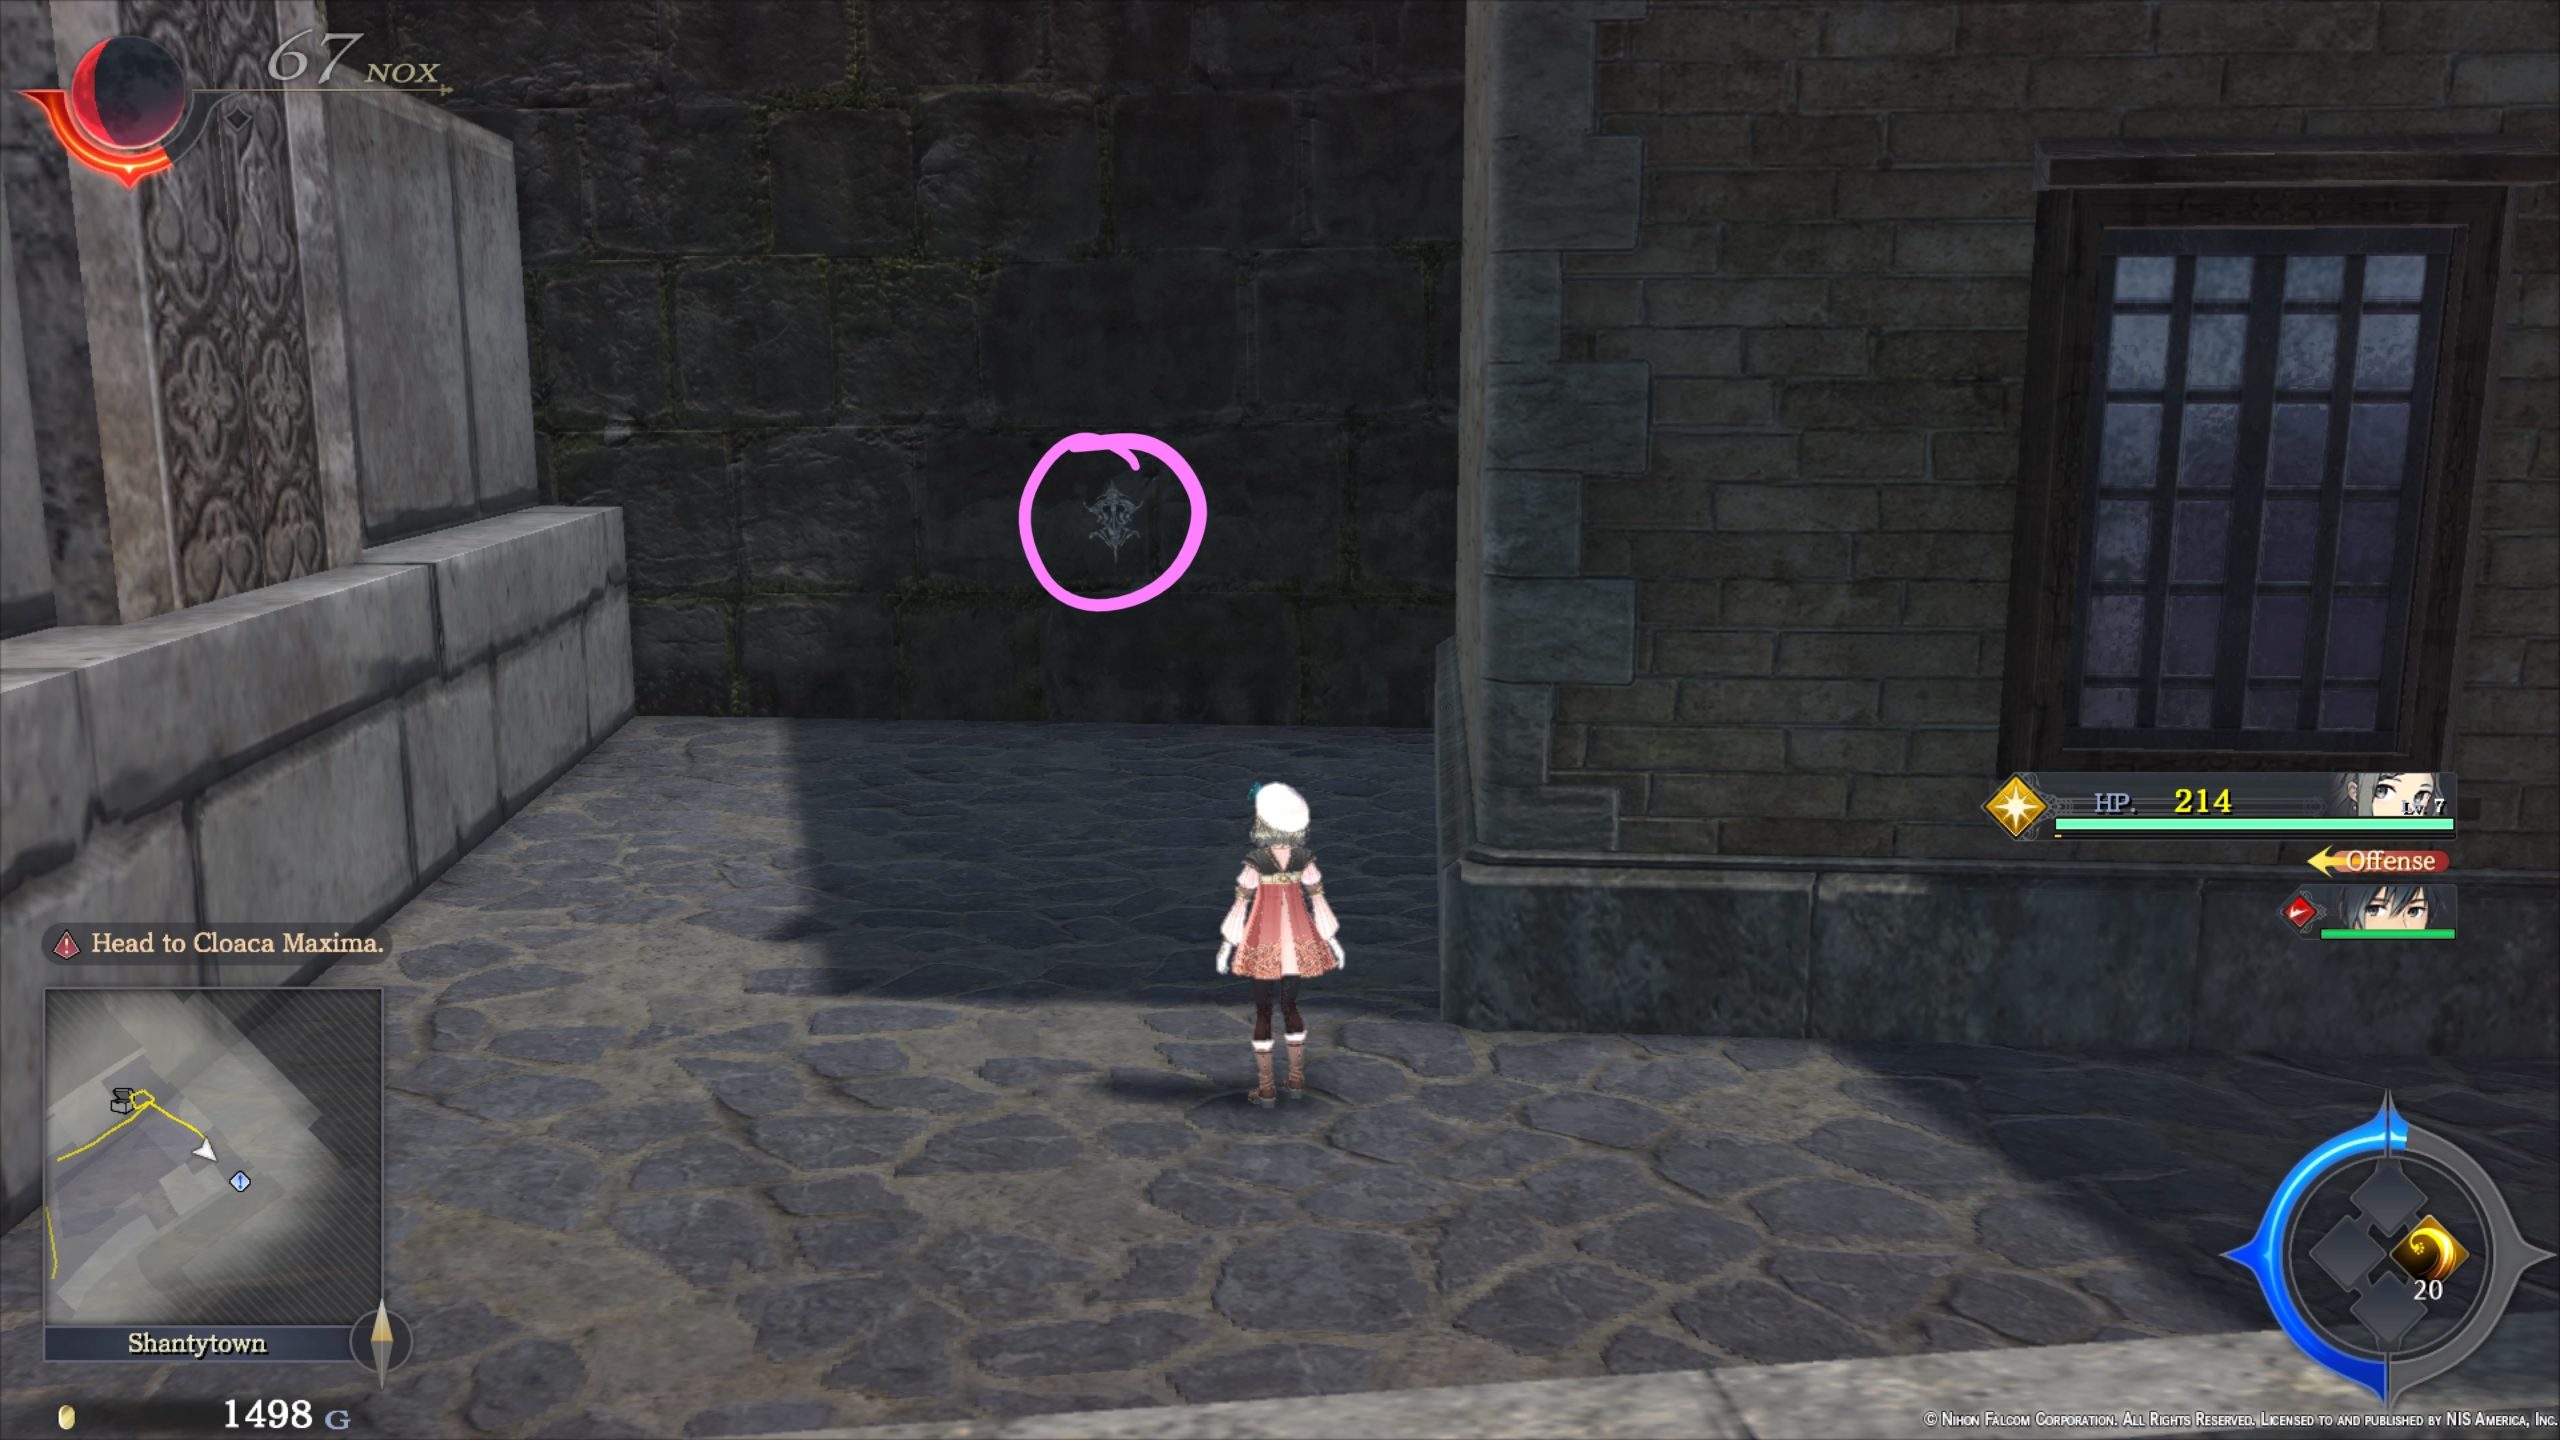
- Travel to the Main Square and speak with Tetra underneath the bridge. She will want you to find old graffiti around the area from the Holy Swordsman. First, head to the Agricultural District then search the graffiti on the outer wall in the eastern part of the area. Second, travel to the outer wall behind Rijndael Antiques in Artisan Lane to find more graffiti on an upper ledge. Lastly, head to the western part of Hieroglyph Commandery to find the graffiti on the outer wall behind a long building. When you have read all 3 graffiti, return to Tetra in Main Square to complete the quest.
- Reward: Brilliant Ice
- Tobacco To Go
- Obtained: Bulletin Board at the Dandelion during Chapter 6
- Objective: Deliver a premium Gllian cigar
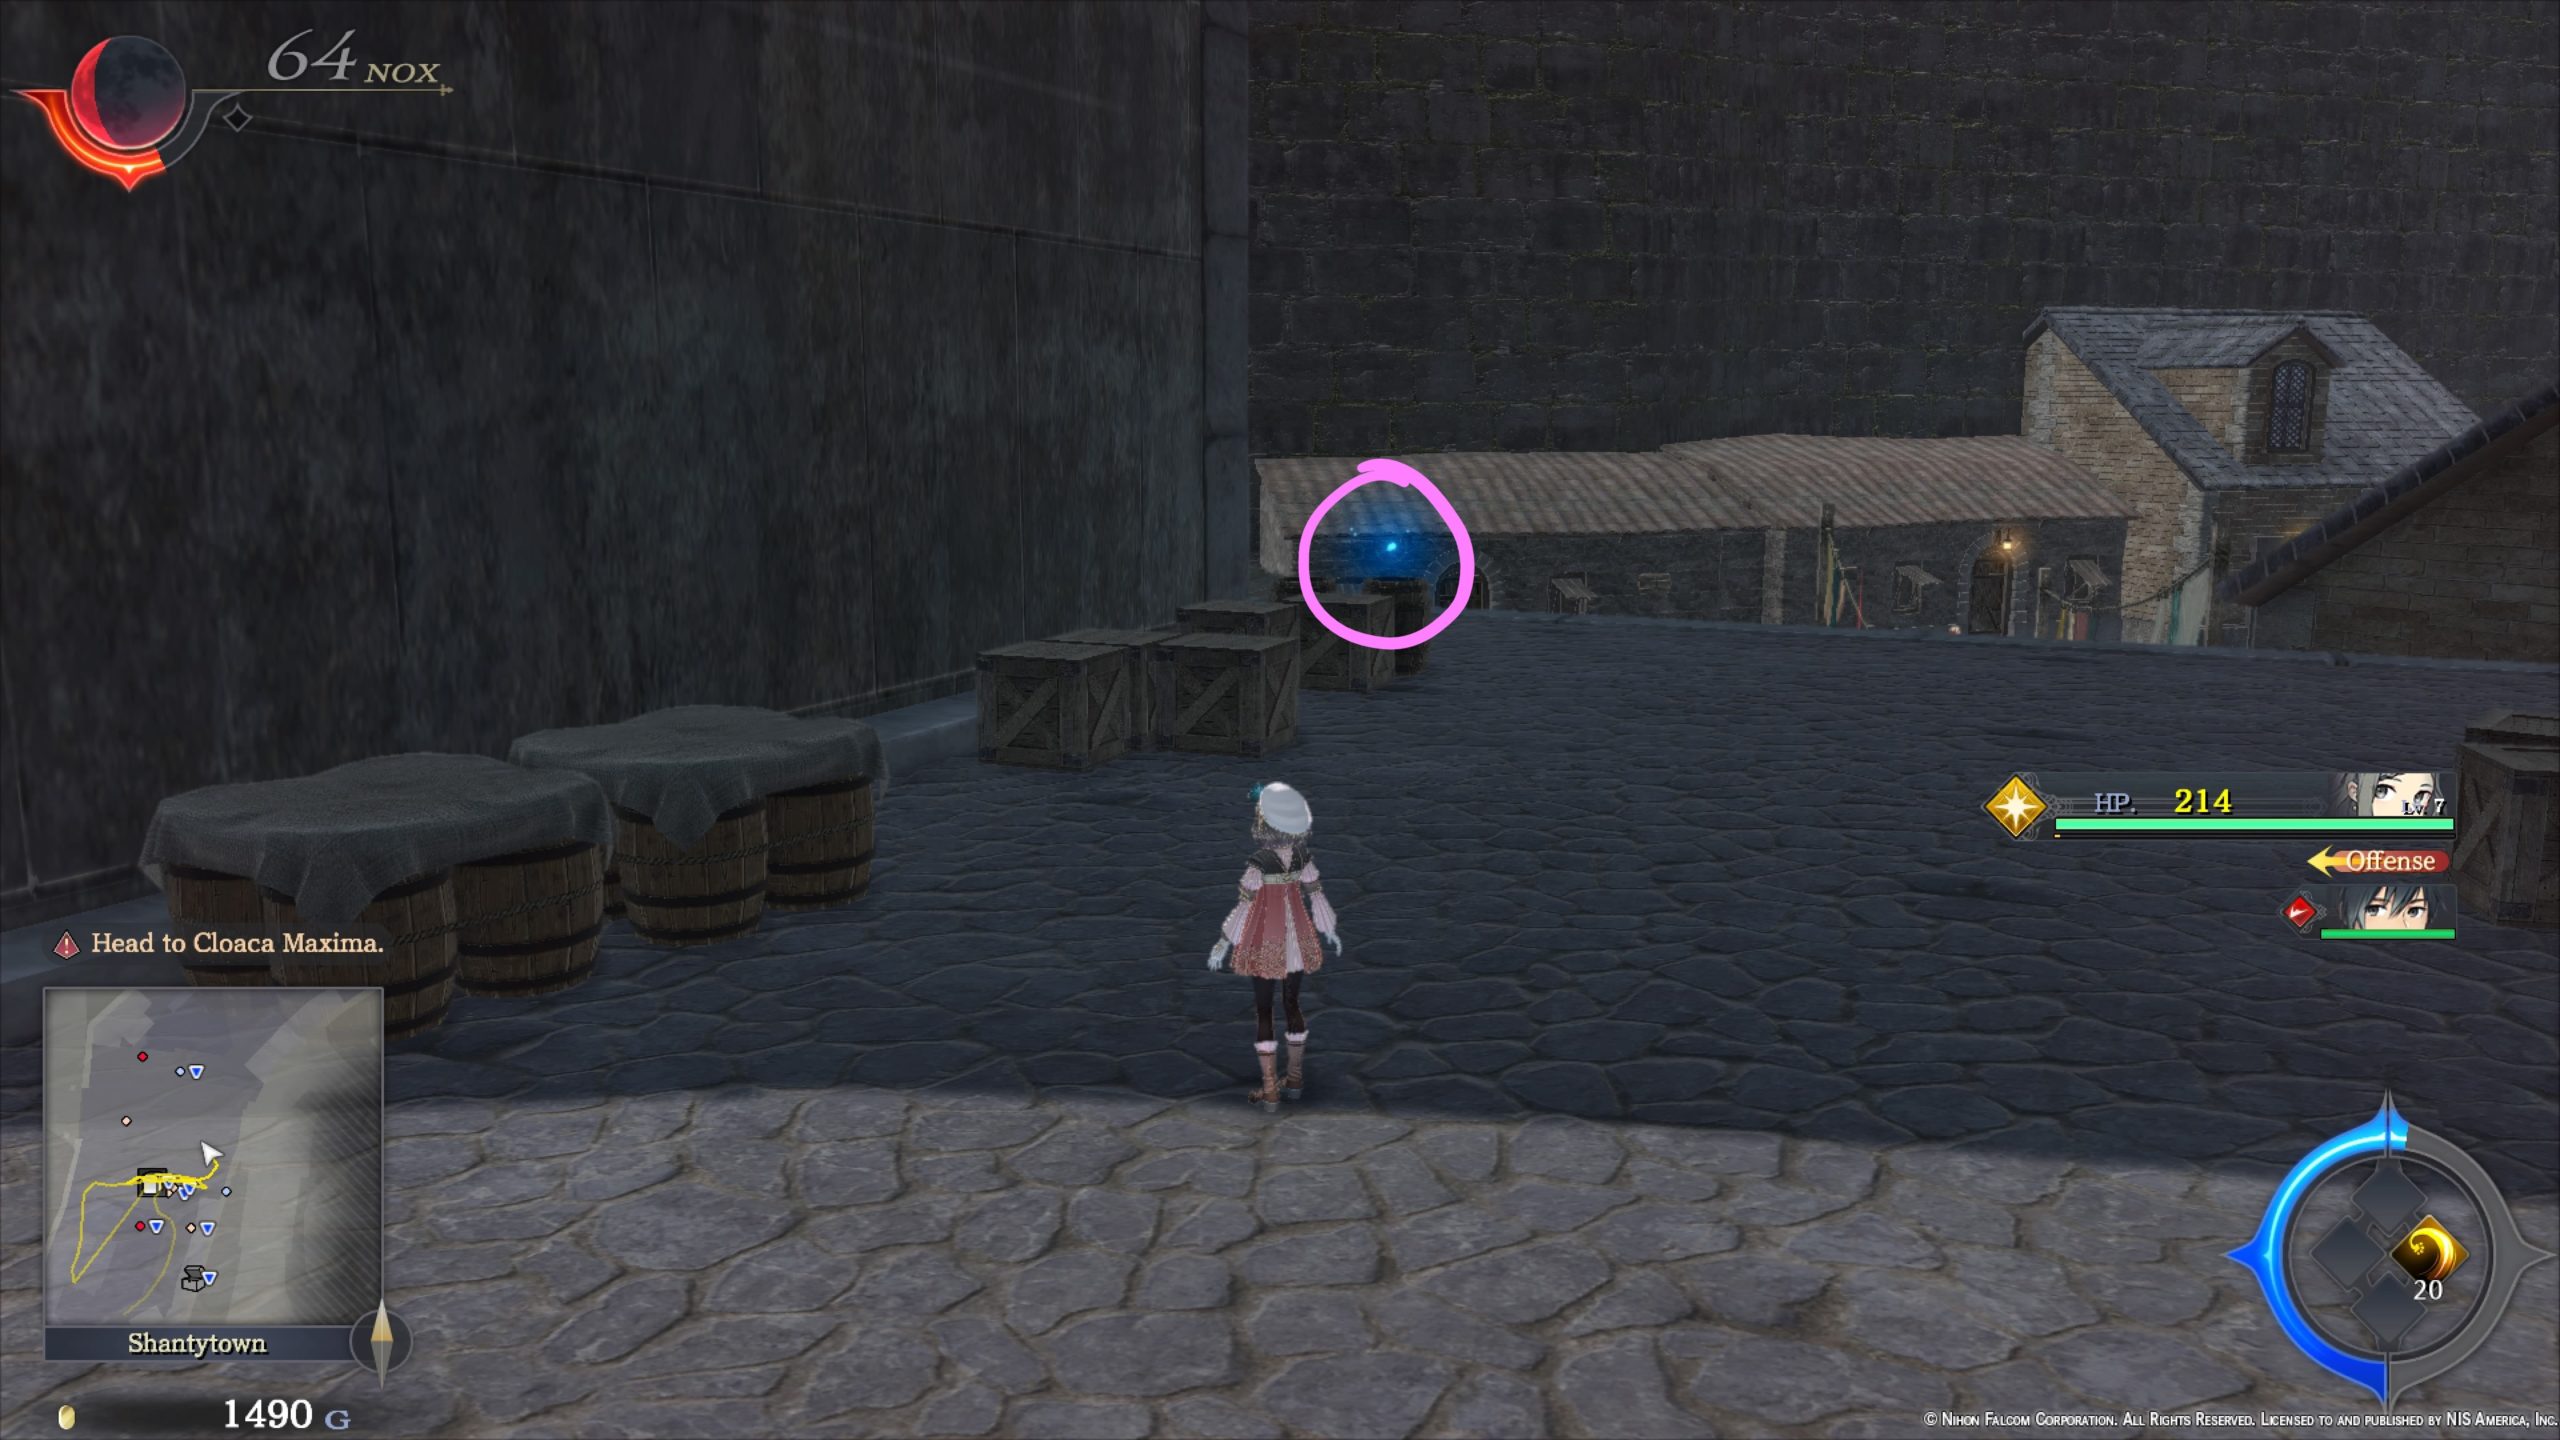
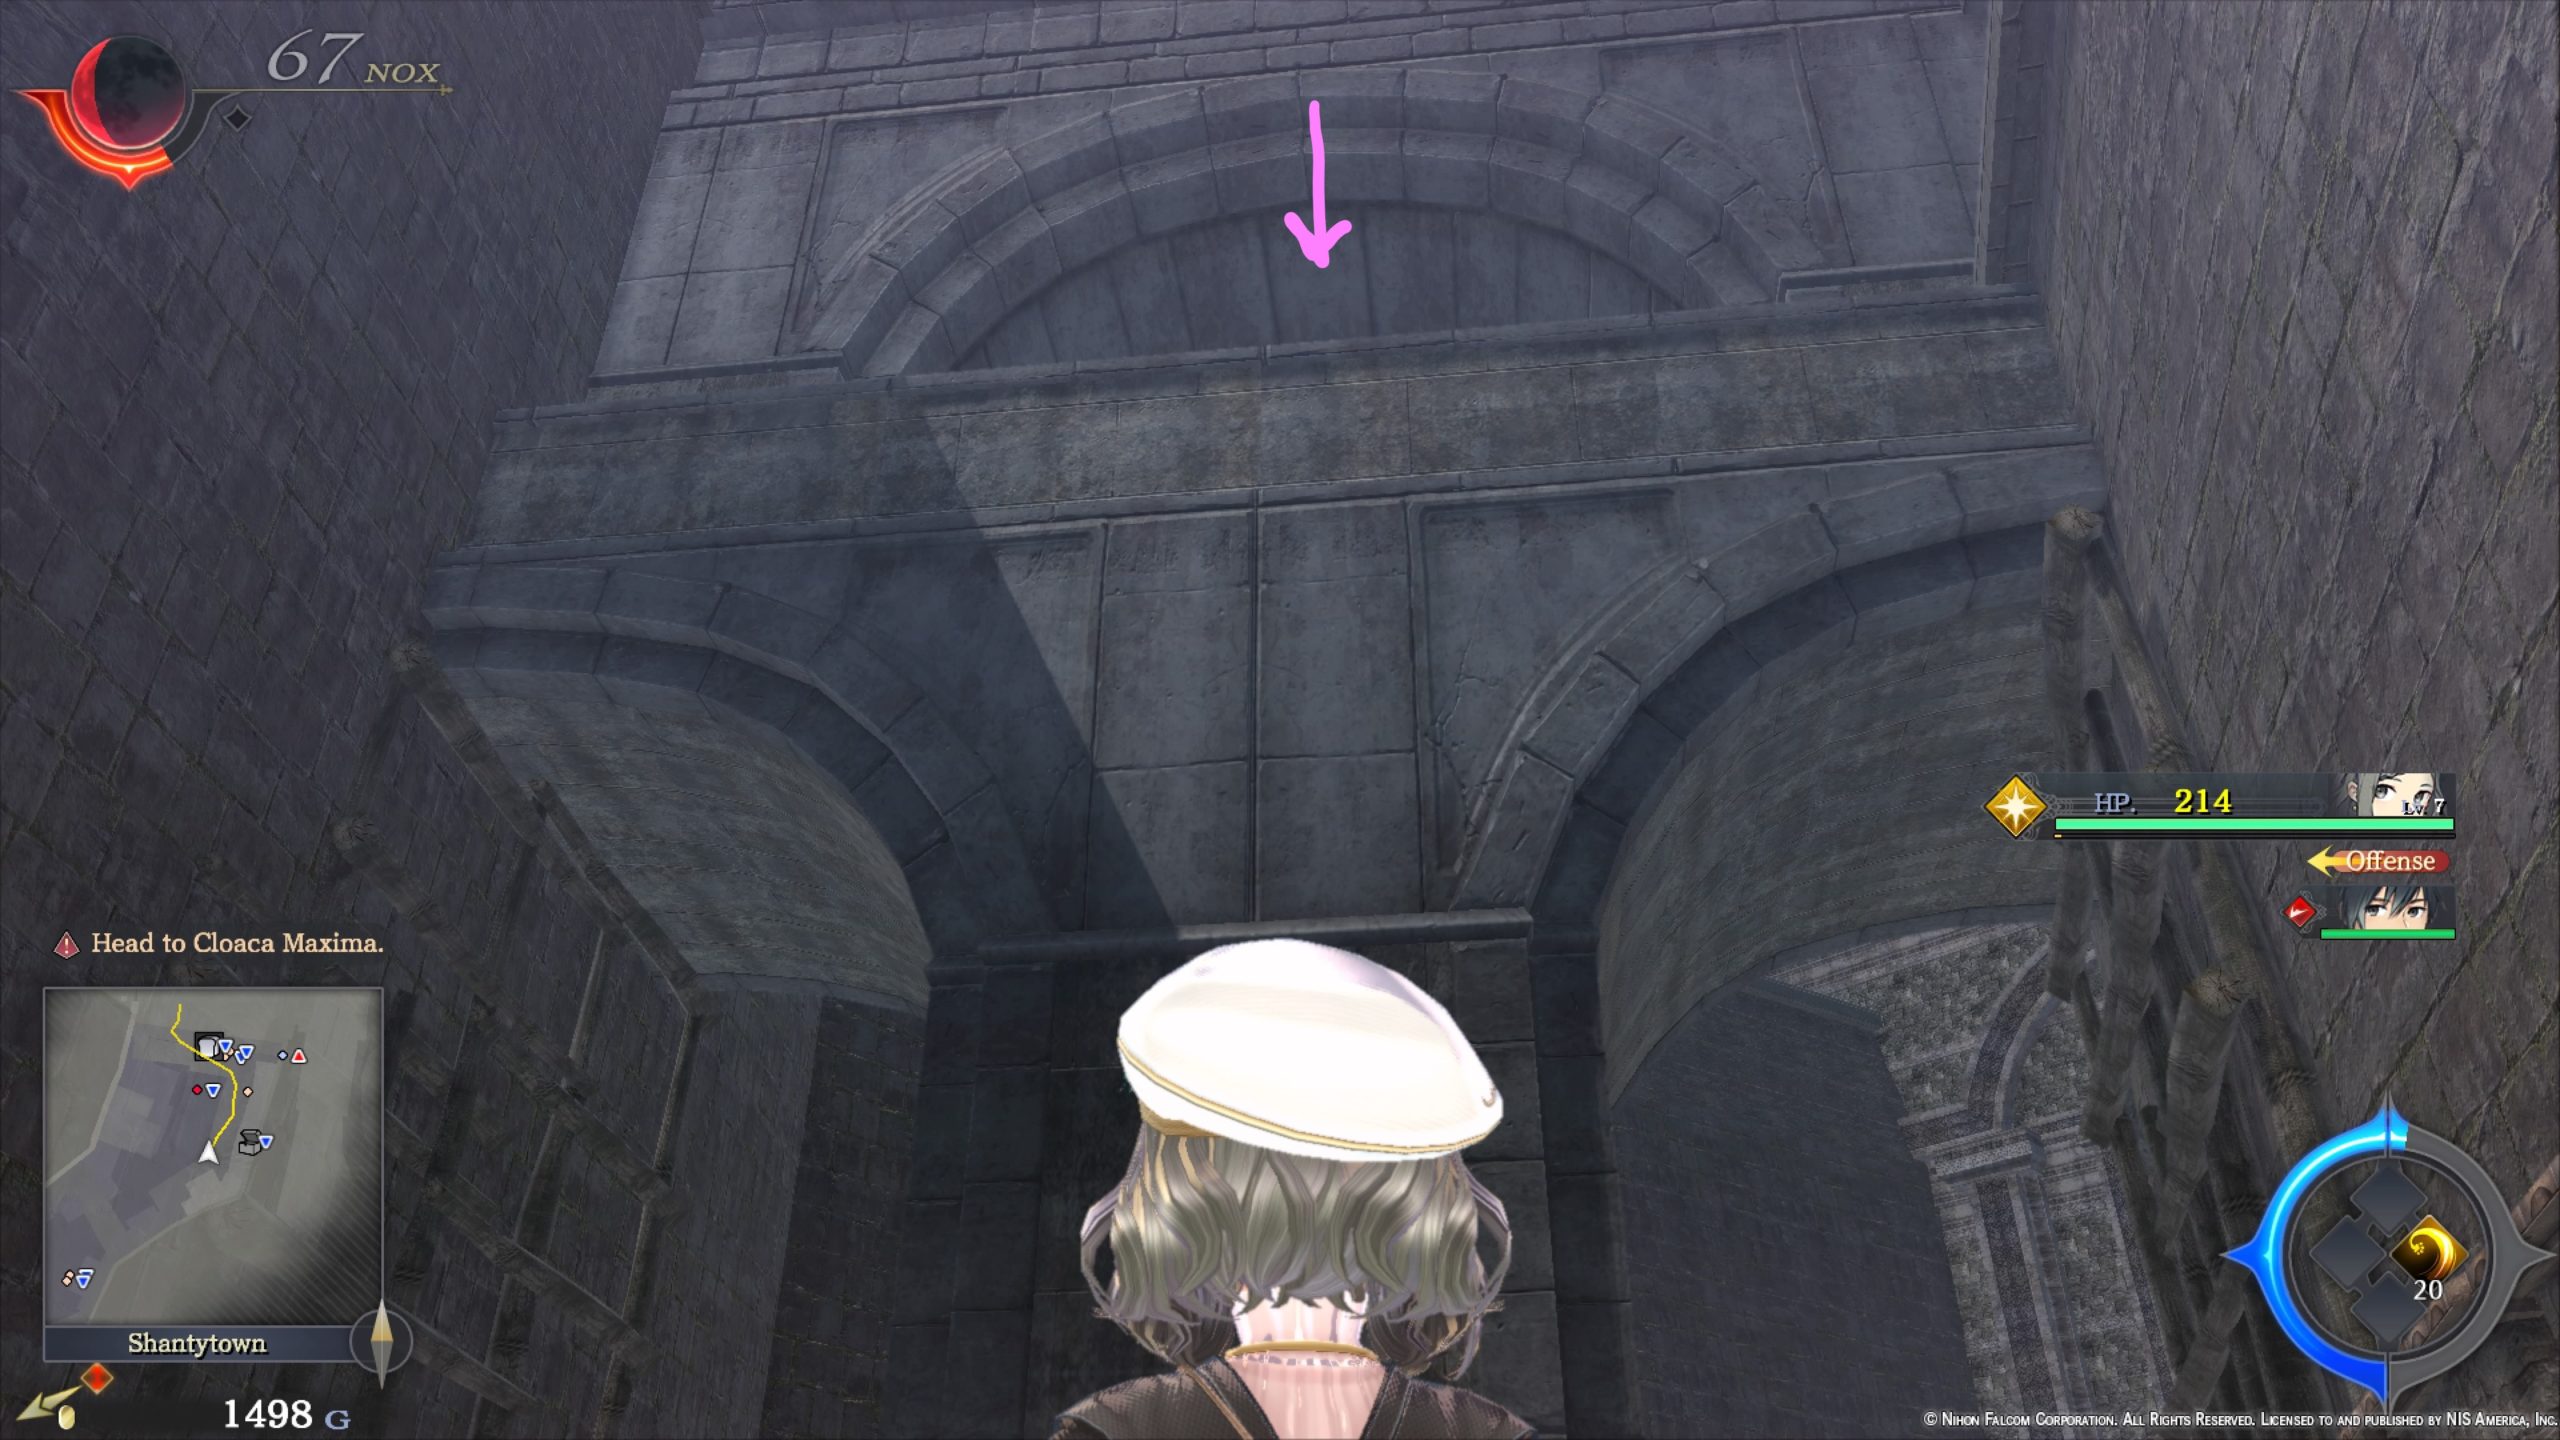
- Speak with Parks in the basement of the Dandelion then travel to Central District to have a chat with Maxim. Afterwards, talk to Nora at Nora’s Gift Shop in the Main Square to receive the Premium Gllian Cigar. With this task accomplished, return to Maxim and relinquish 1500 Gold. You’ll then play as Prison Adol. Make your way through the South Dumping Ground to trigger a cutscene at the end. You’ll then get control of the Monstrums. After reaching the West Wing – Roof and interacting with the large wooden door, search for the North Wing Key on the ground to the left of the door near a wooden hatch. Use the key to open the door which will trigger a cutscene with Margot and complete the quest.
- Reward: 6000 Gold
- Wanted: Dragia Haman
- Obtained: Bulletin Board at the Dandelion during Chapter 6
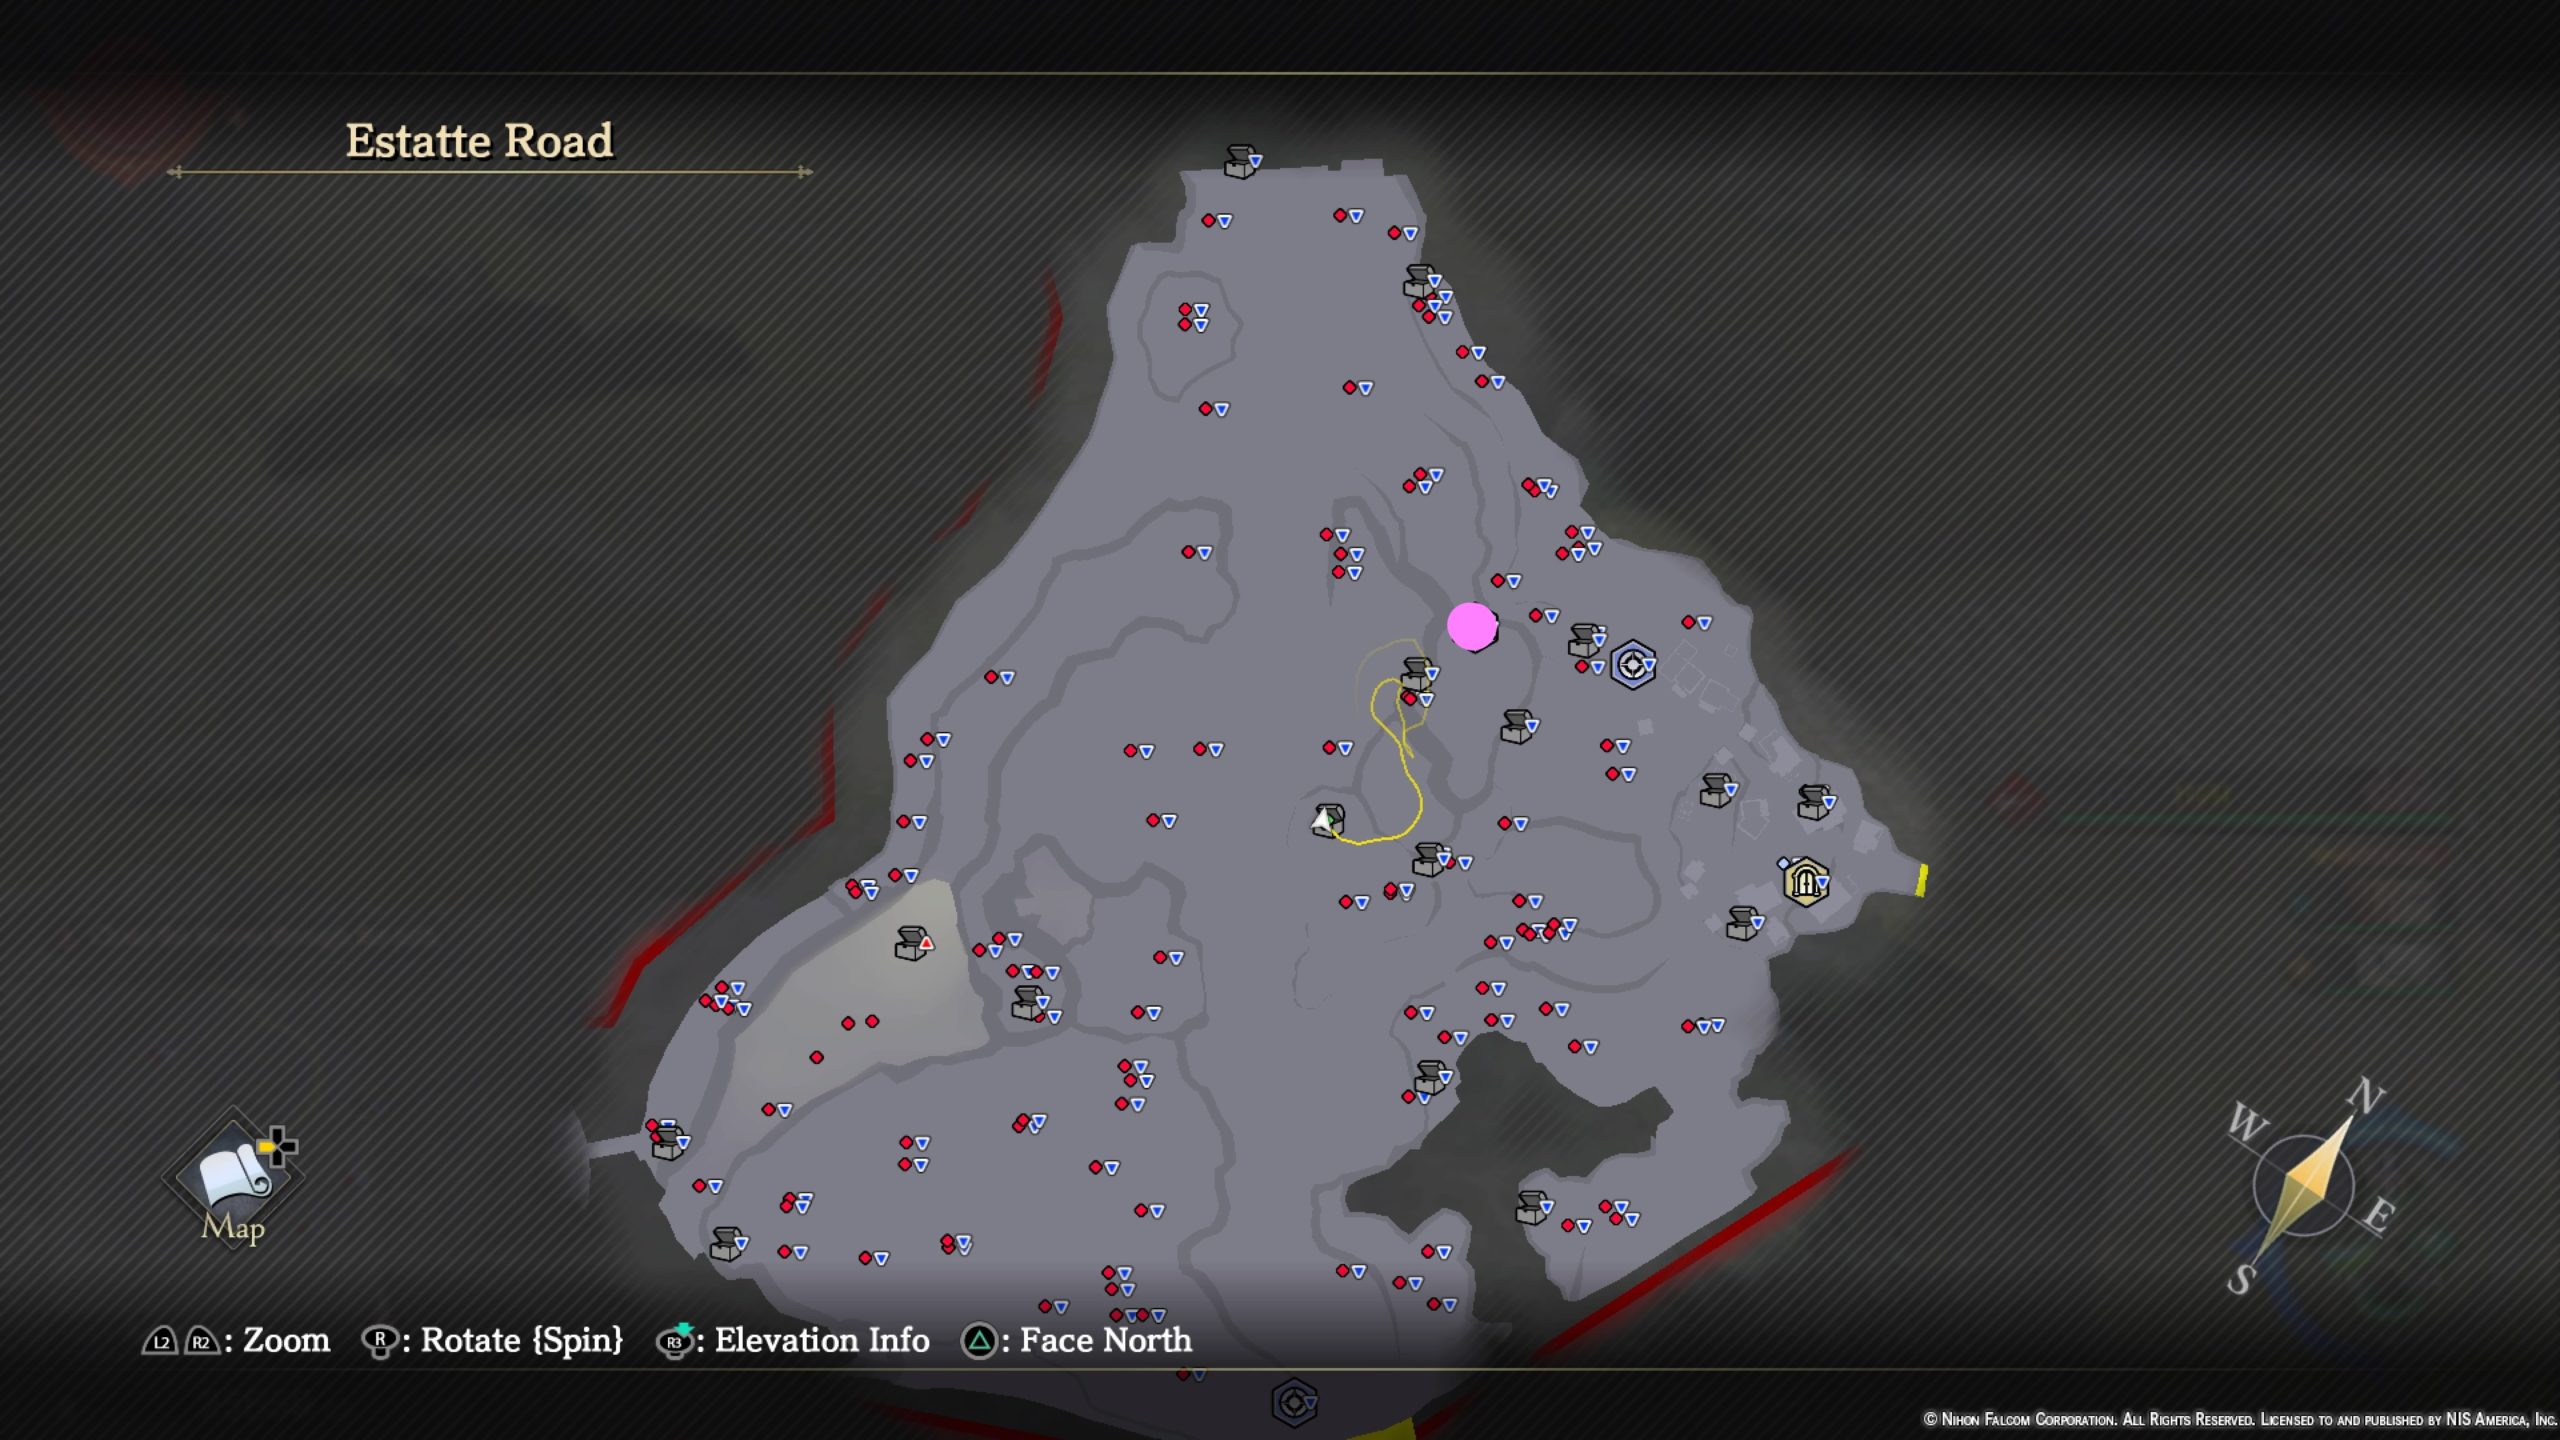
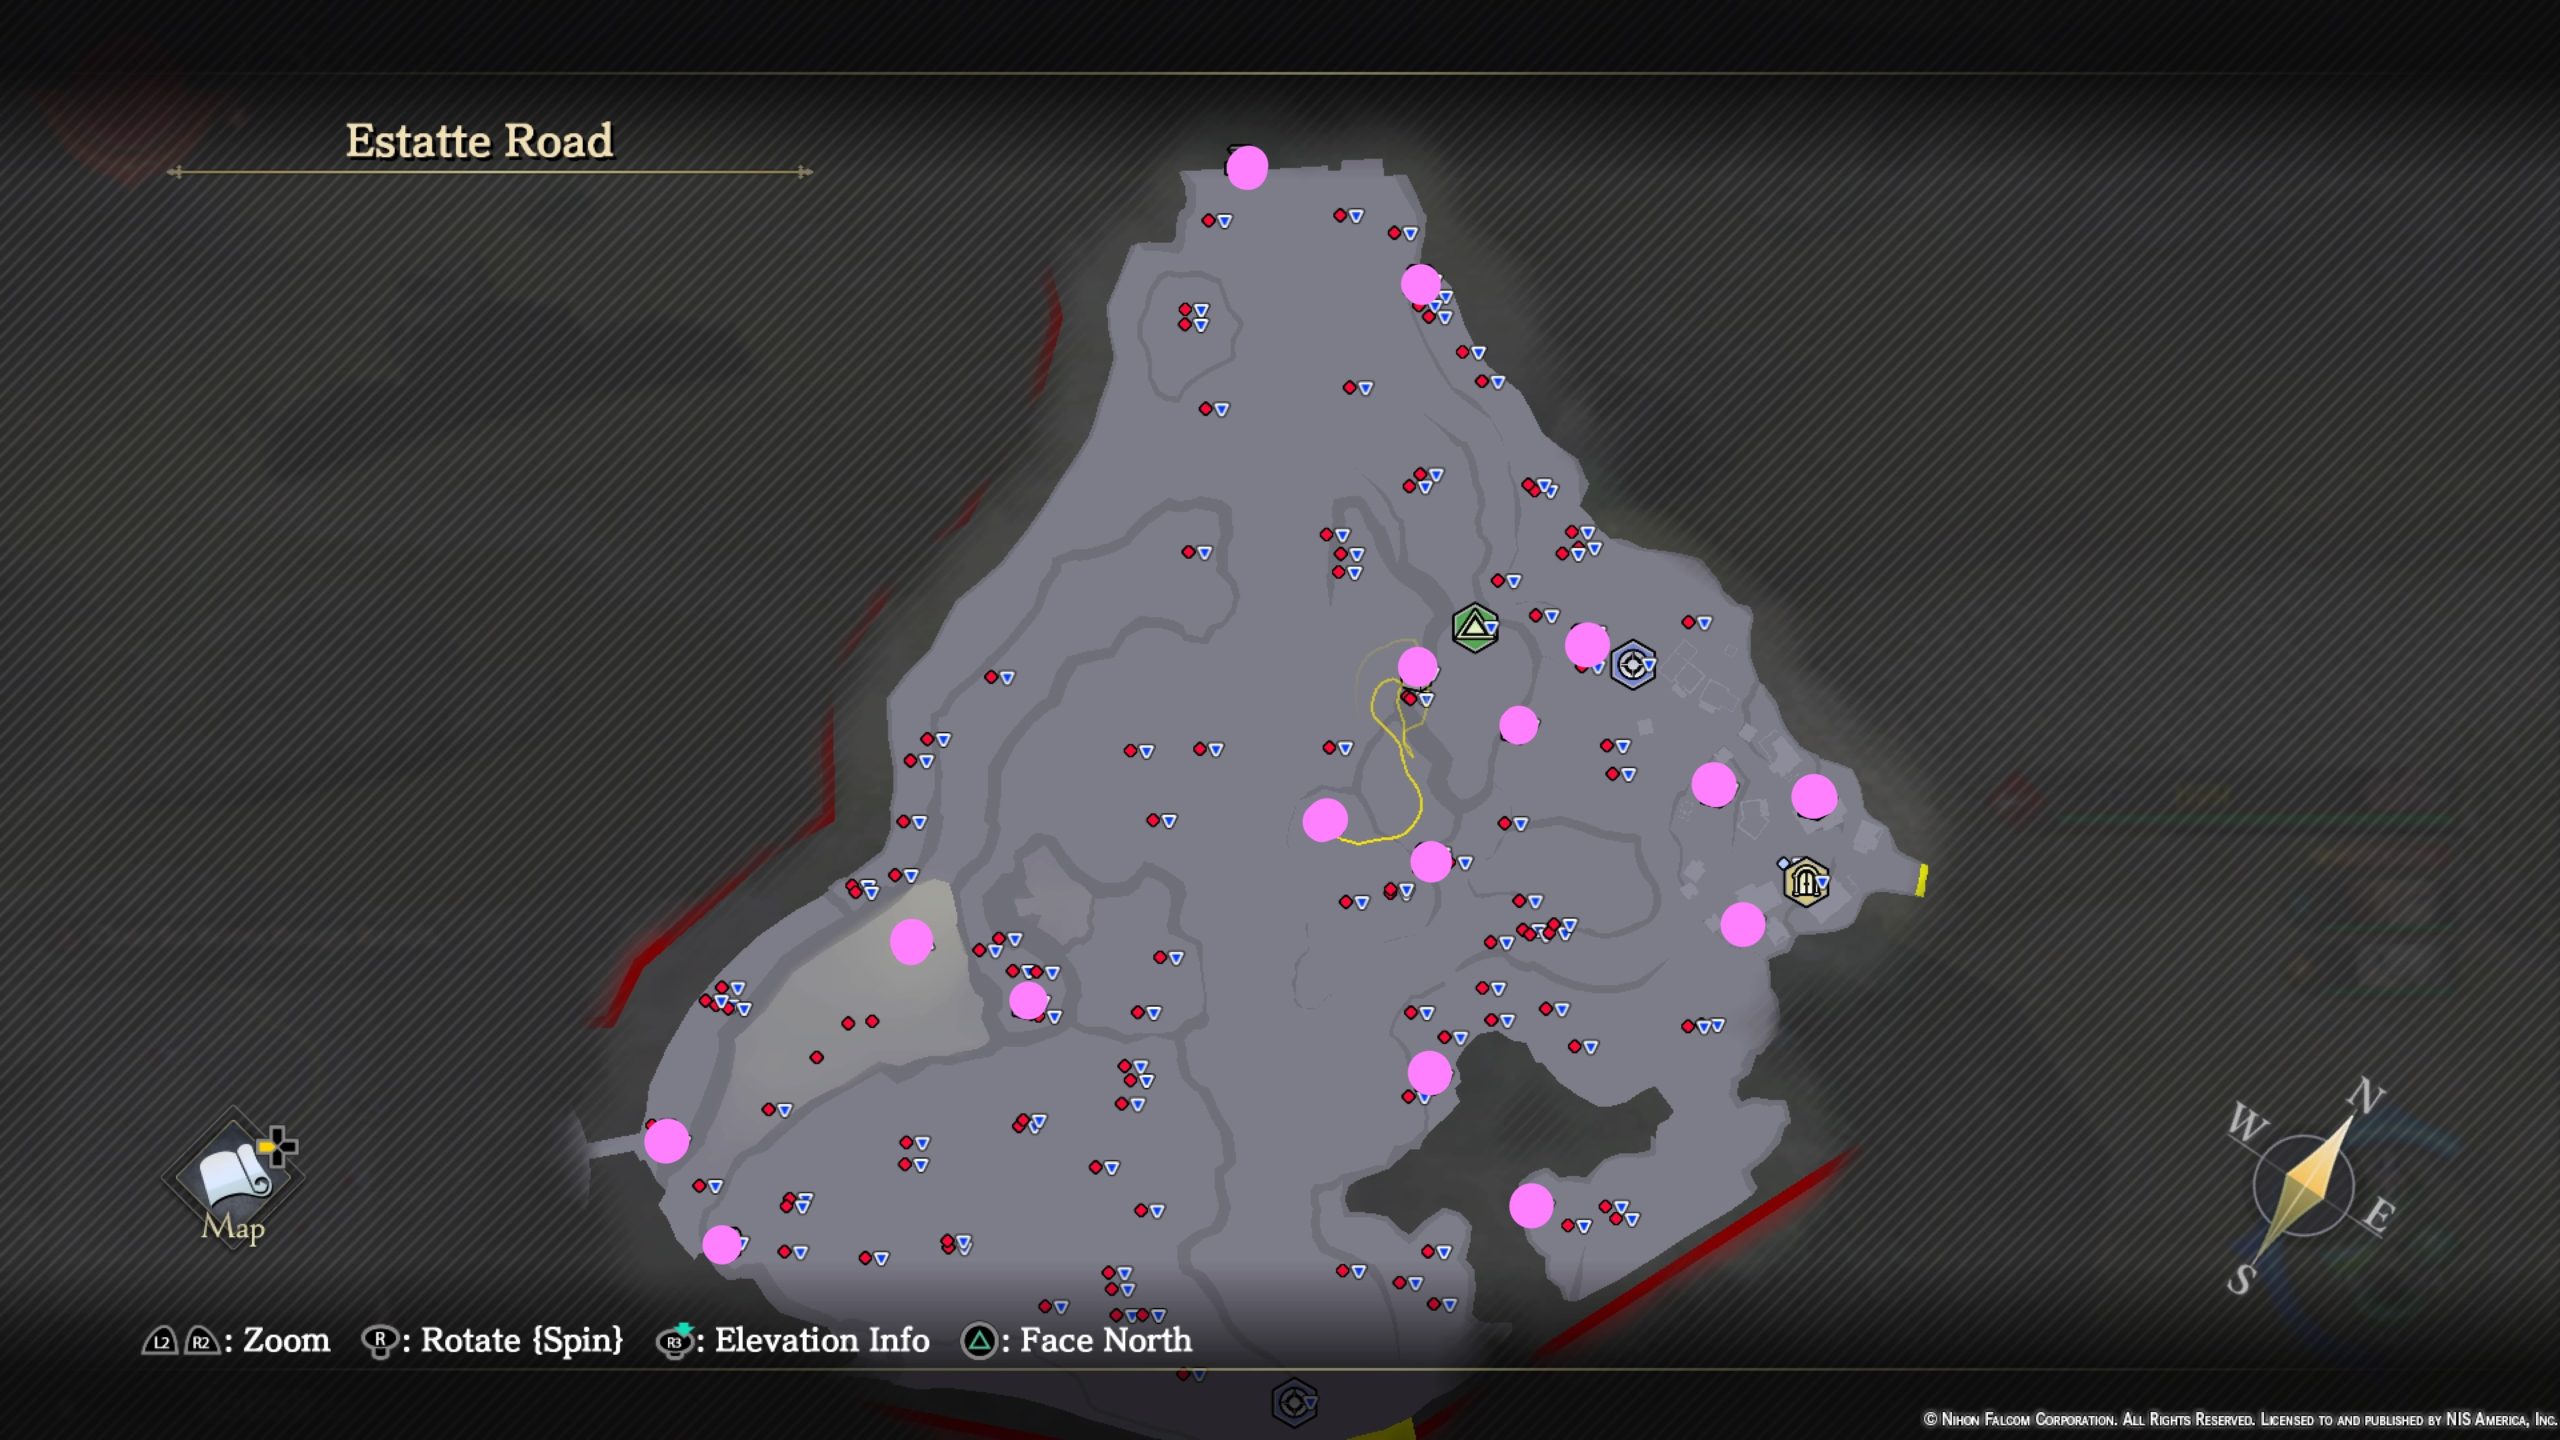
- Objective: Hunt Dragia Haman in Estatte Road
- Travel to the western area of Estatte Road to find the gigantic Dragia Haman. Defeat it in battle then report back to Aprilis at Ruined Belfry in Central District to complete the quest.
- Reward: Asura Cloak
Treasure Chests

- Defense Elixir
- Available after Renegade joins the party
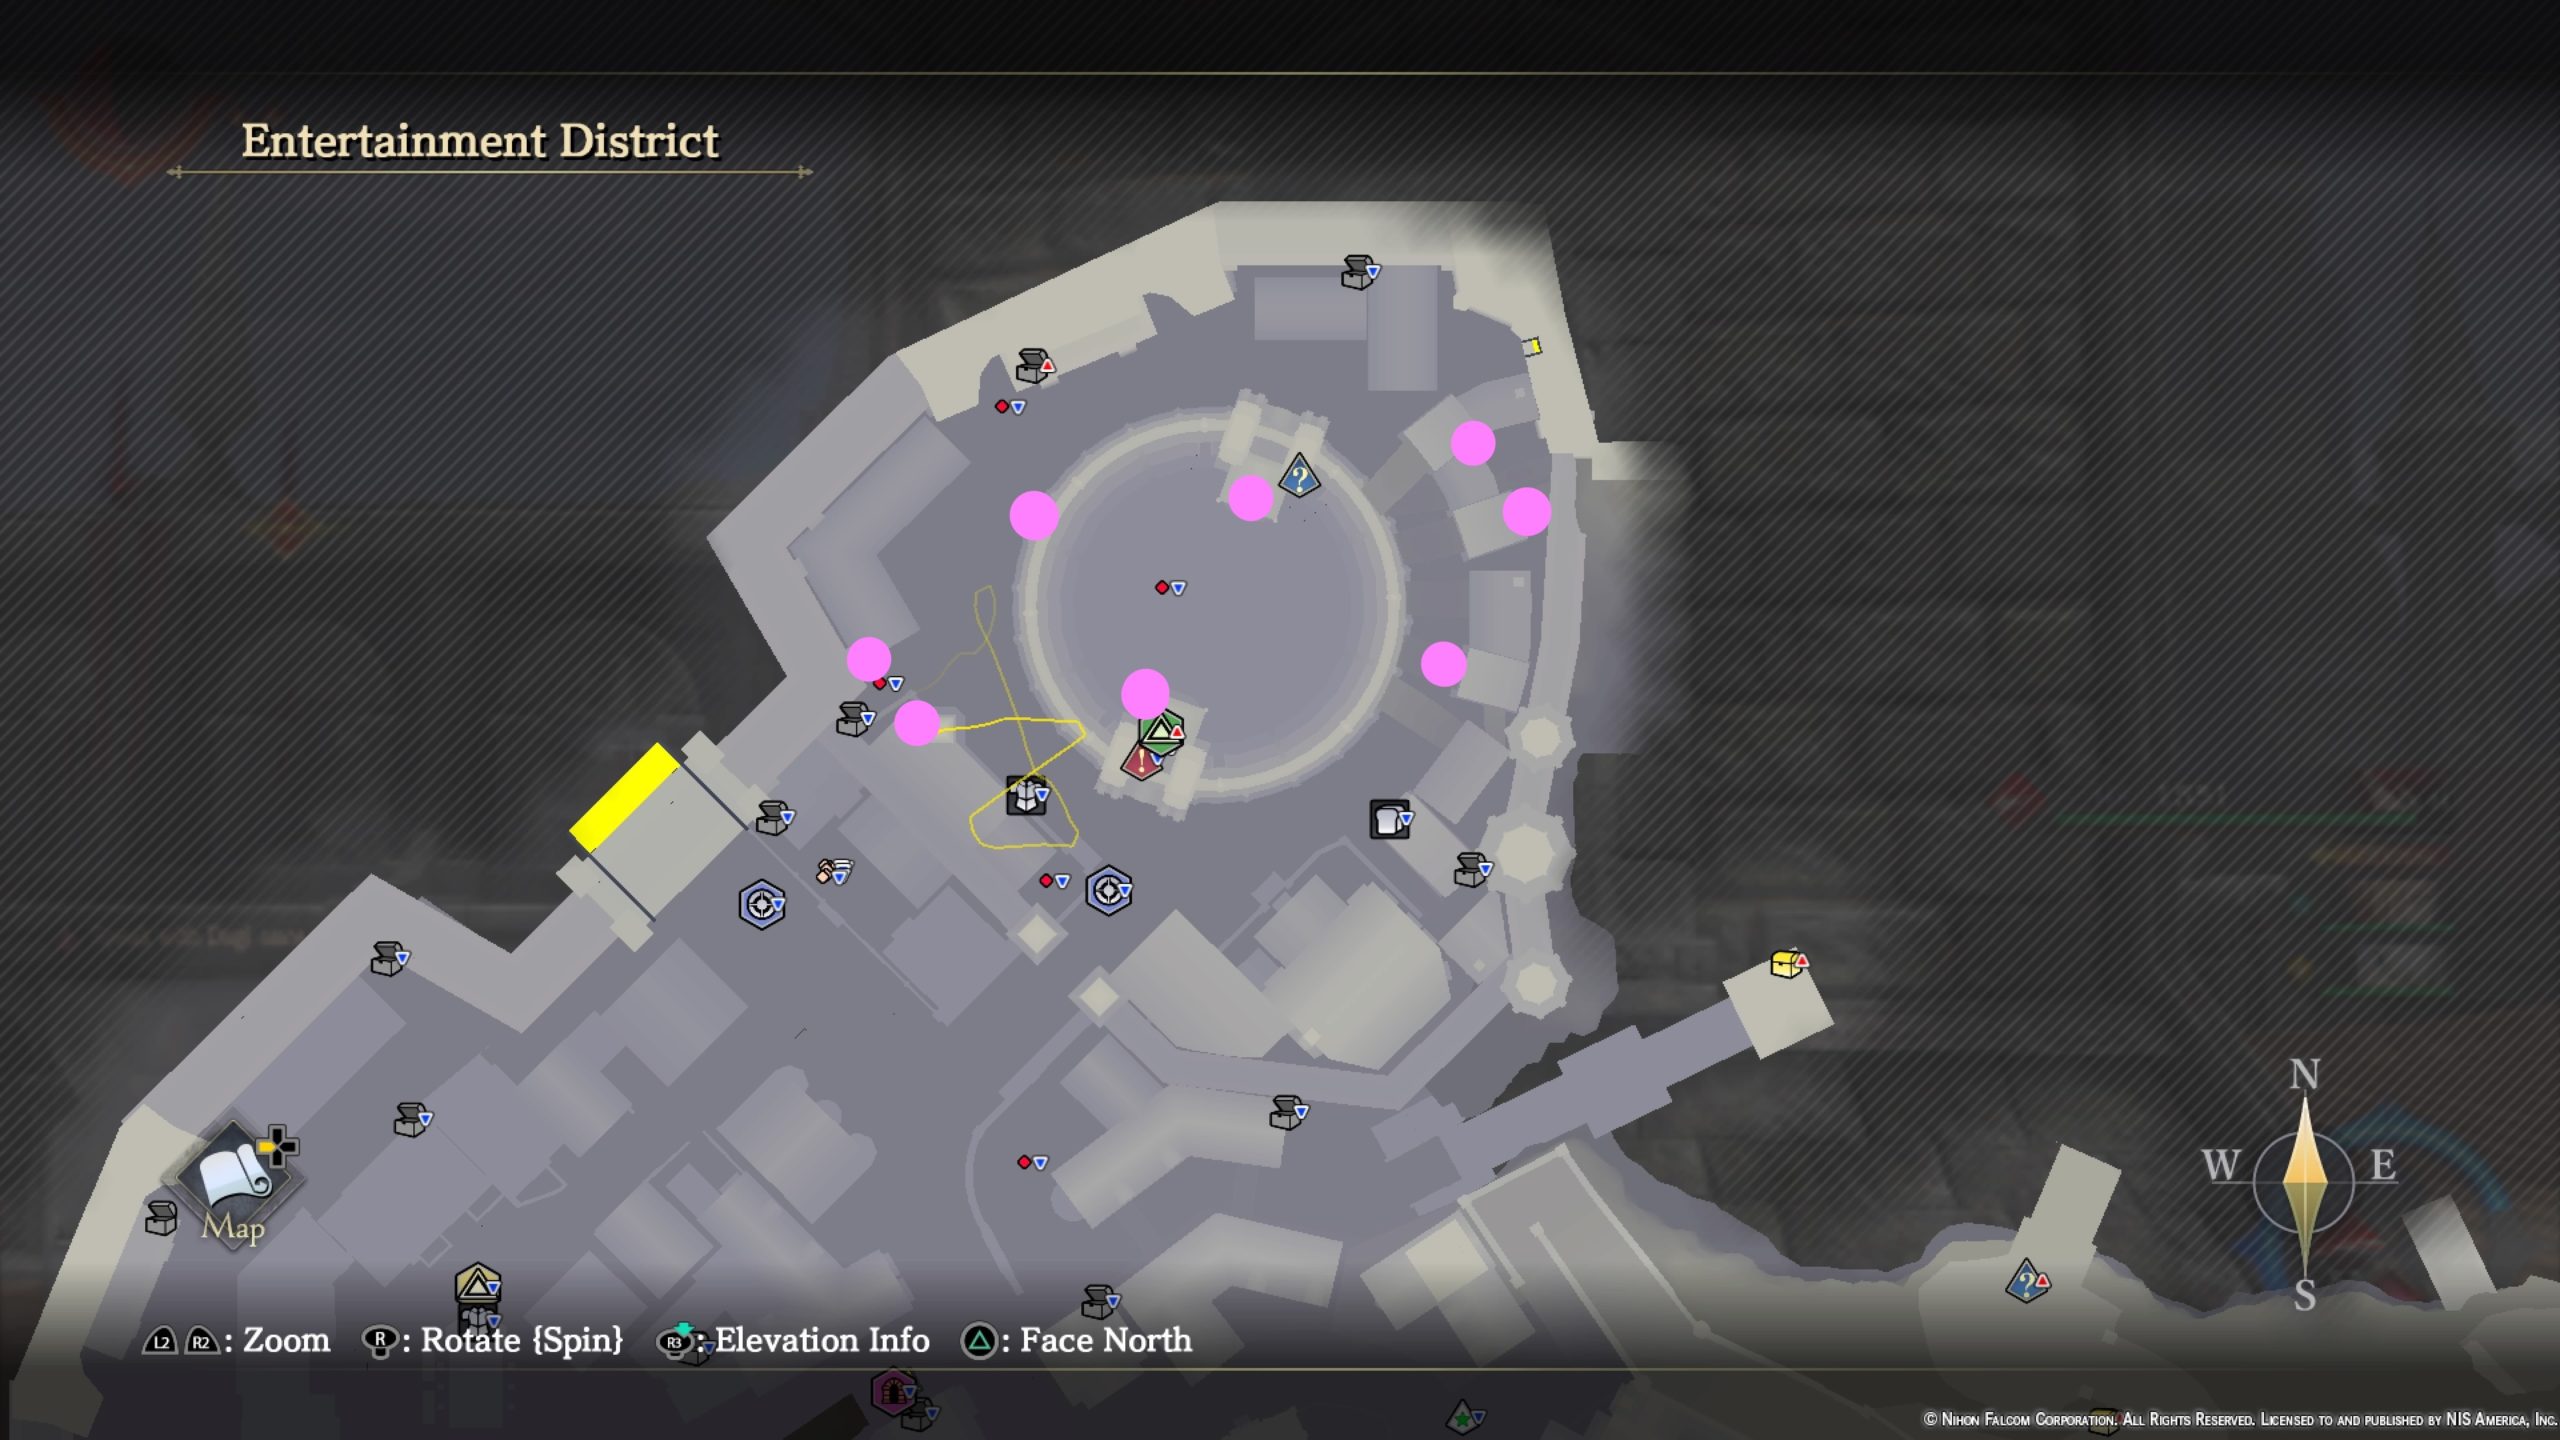
Entertainment District
Recipes
- Gratin Recipe
- Chapter 6 – Speak with Jessica at Jessica’s Brewery in the Entertainment District
South Dumping Ground
Treasure Chests

- 6000 Gold
- Raisins x3
- Red Cheese
- 2000 Gold
- White Nut x3
- 2000 Gold
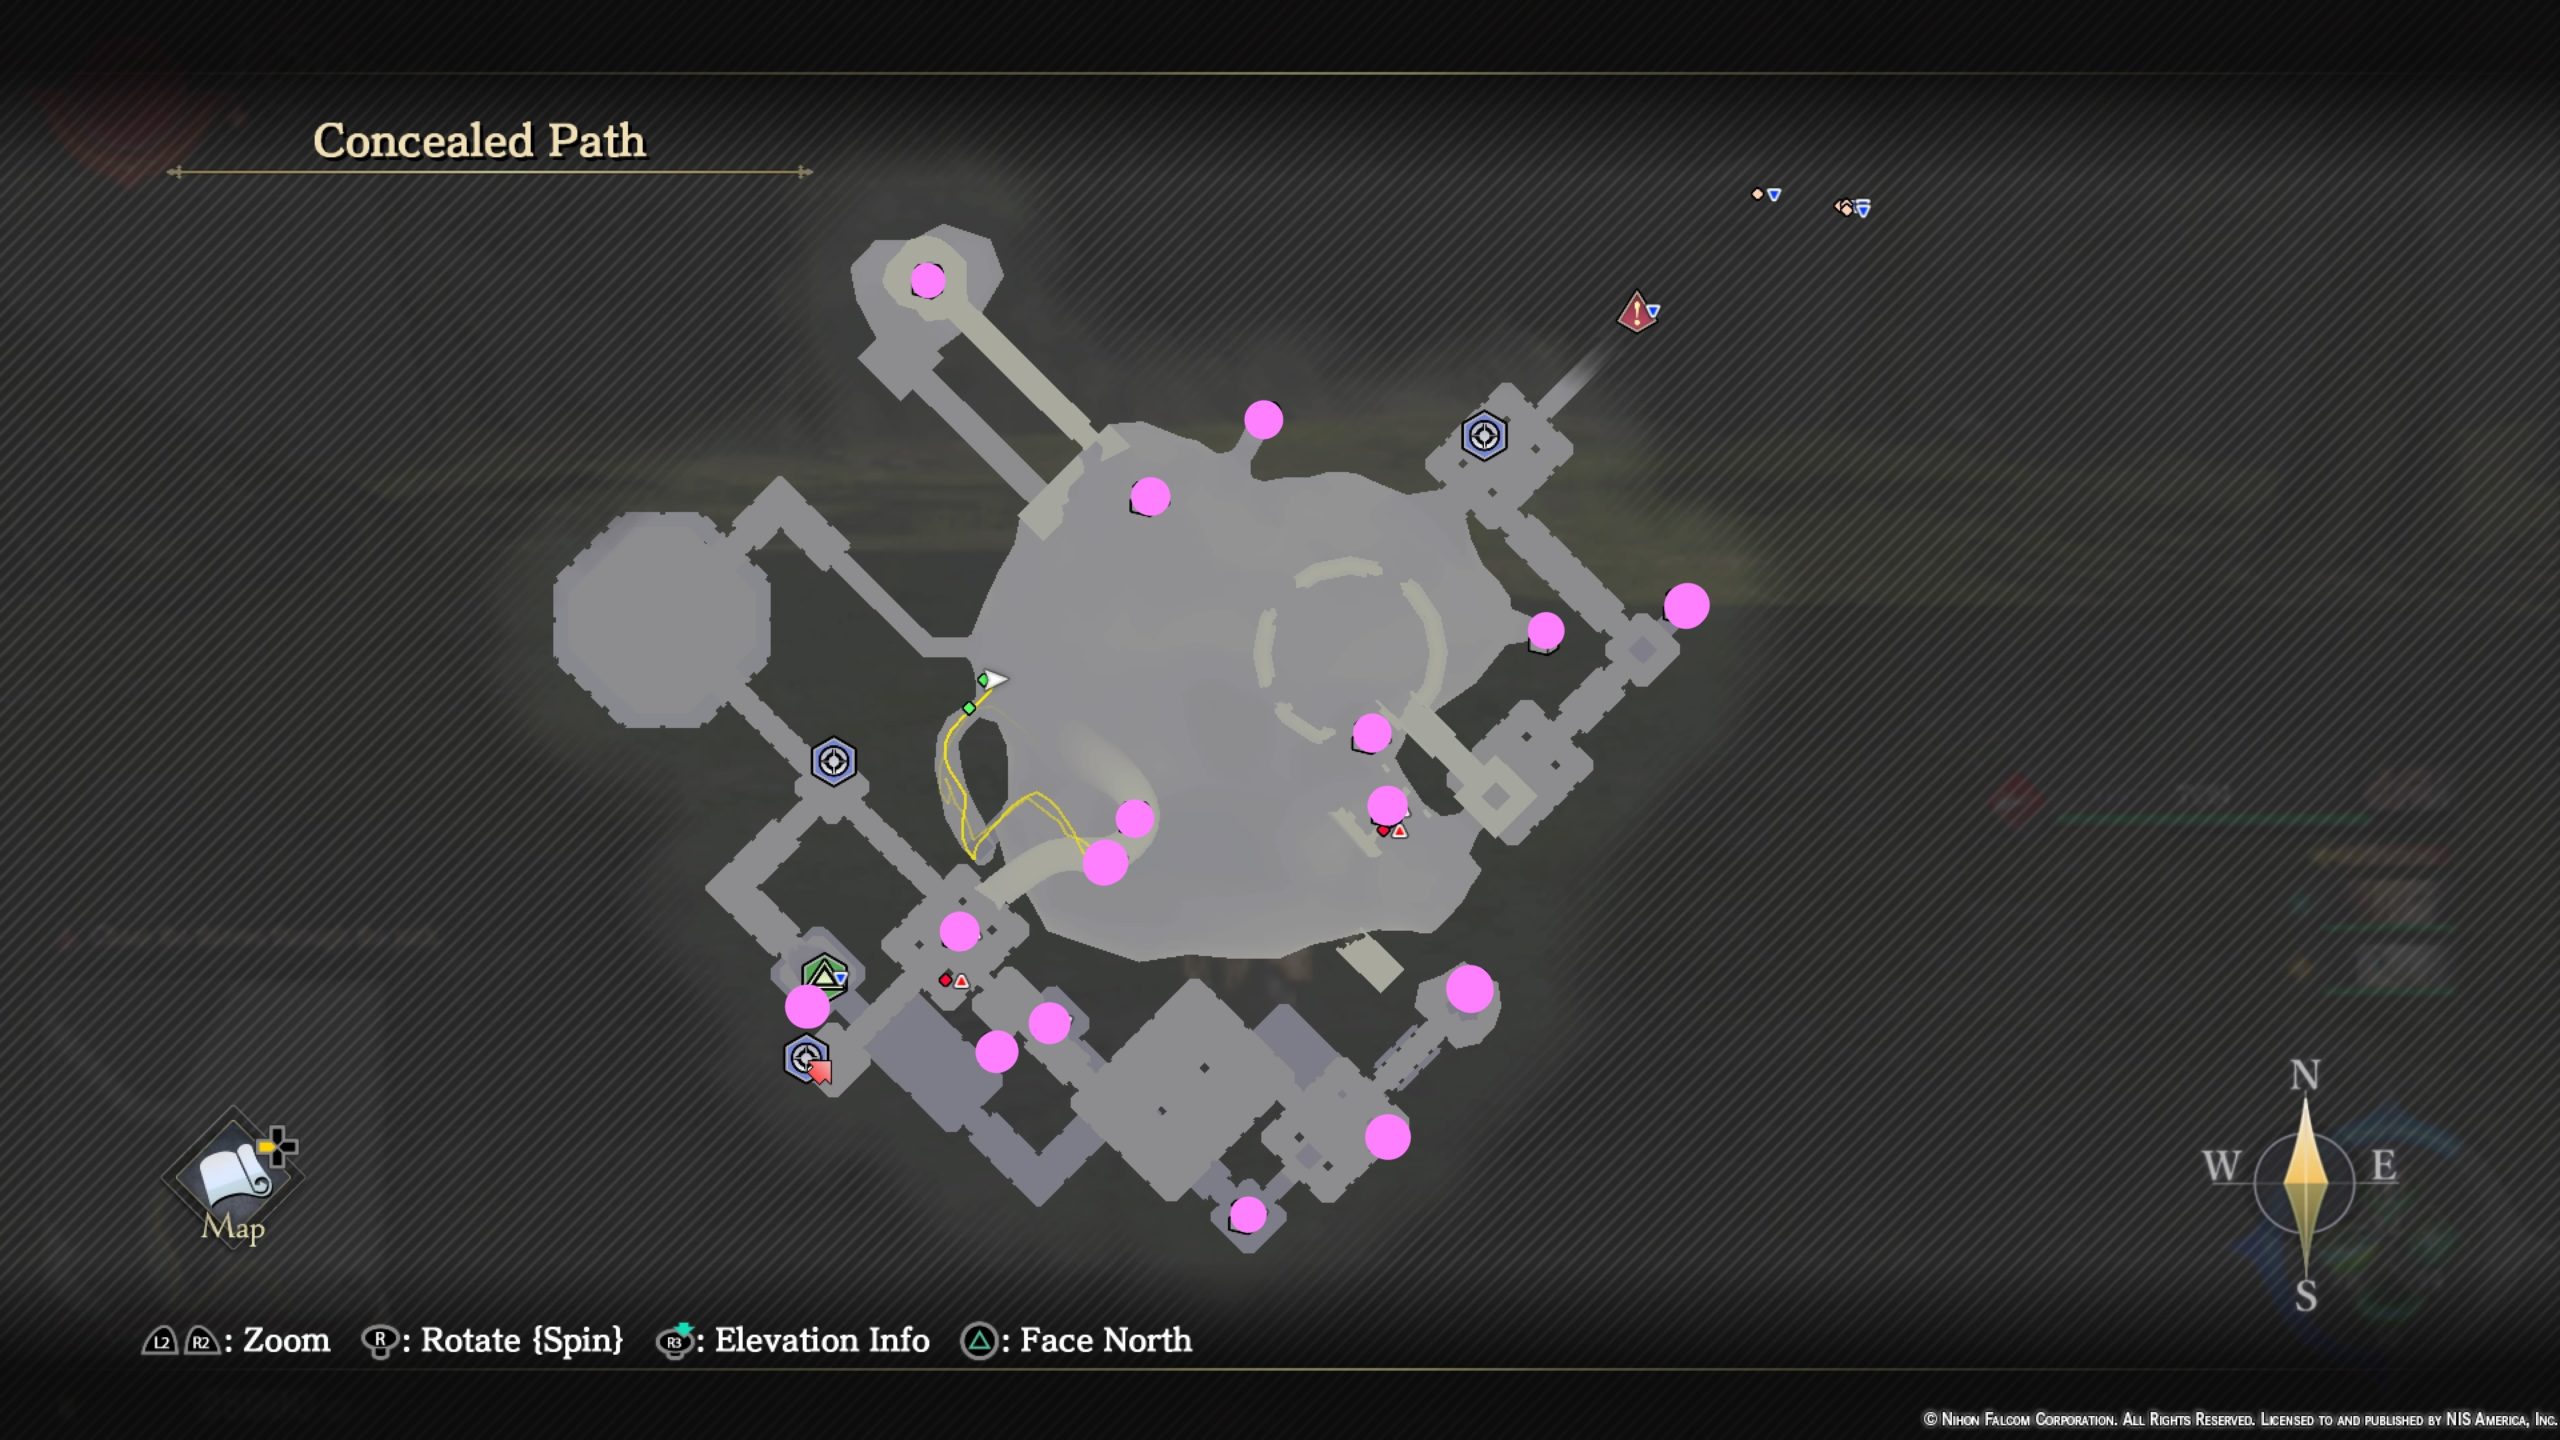
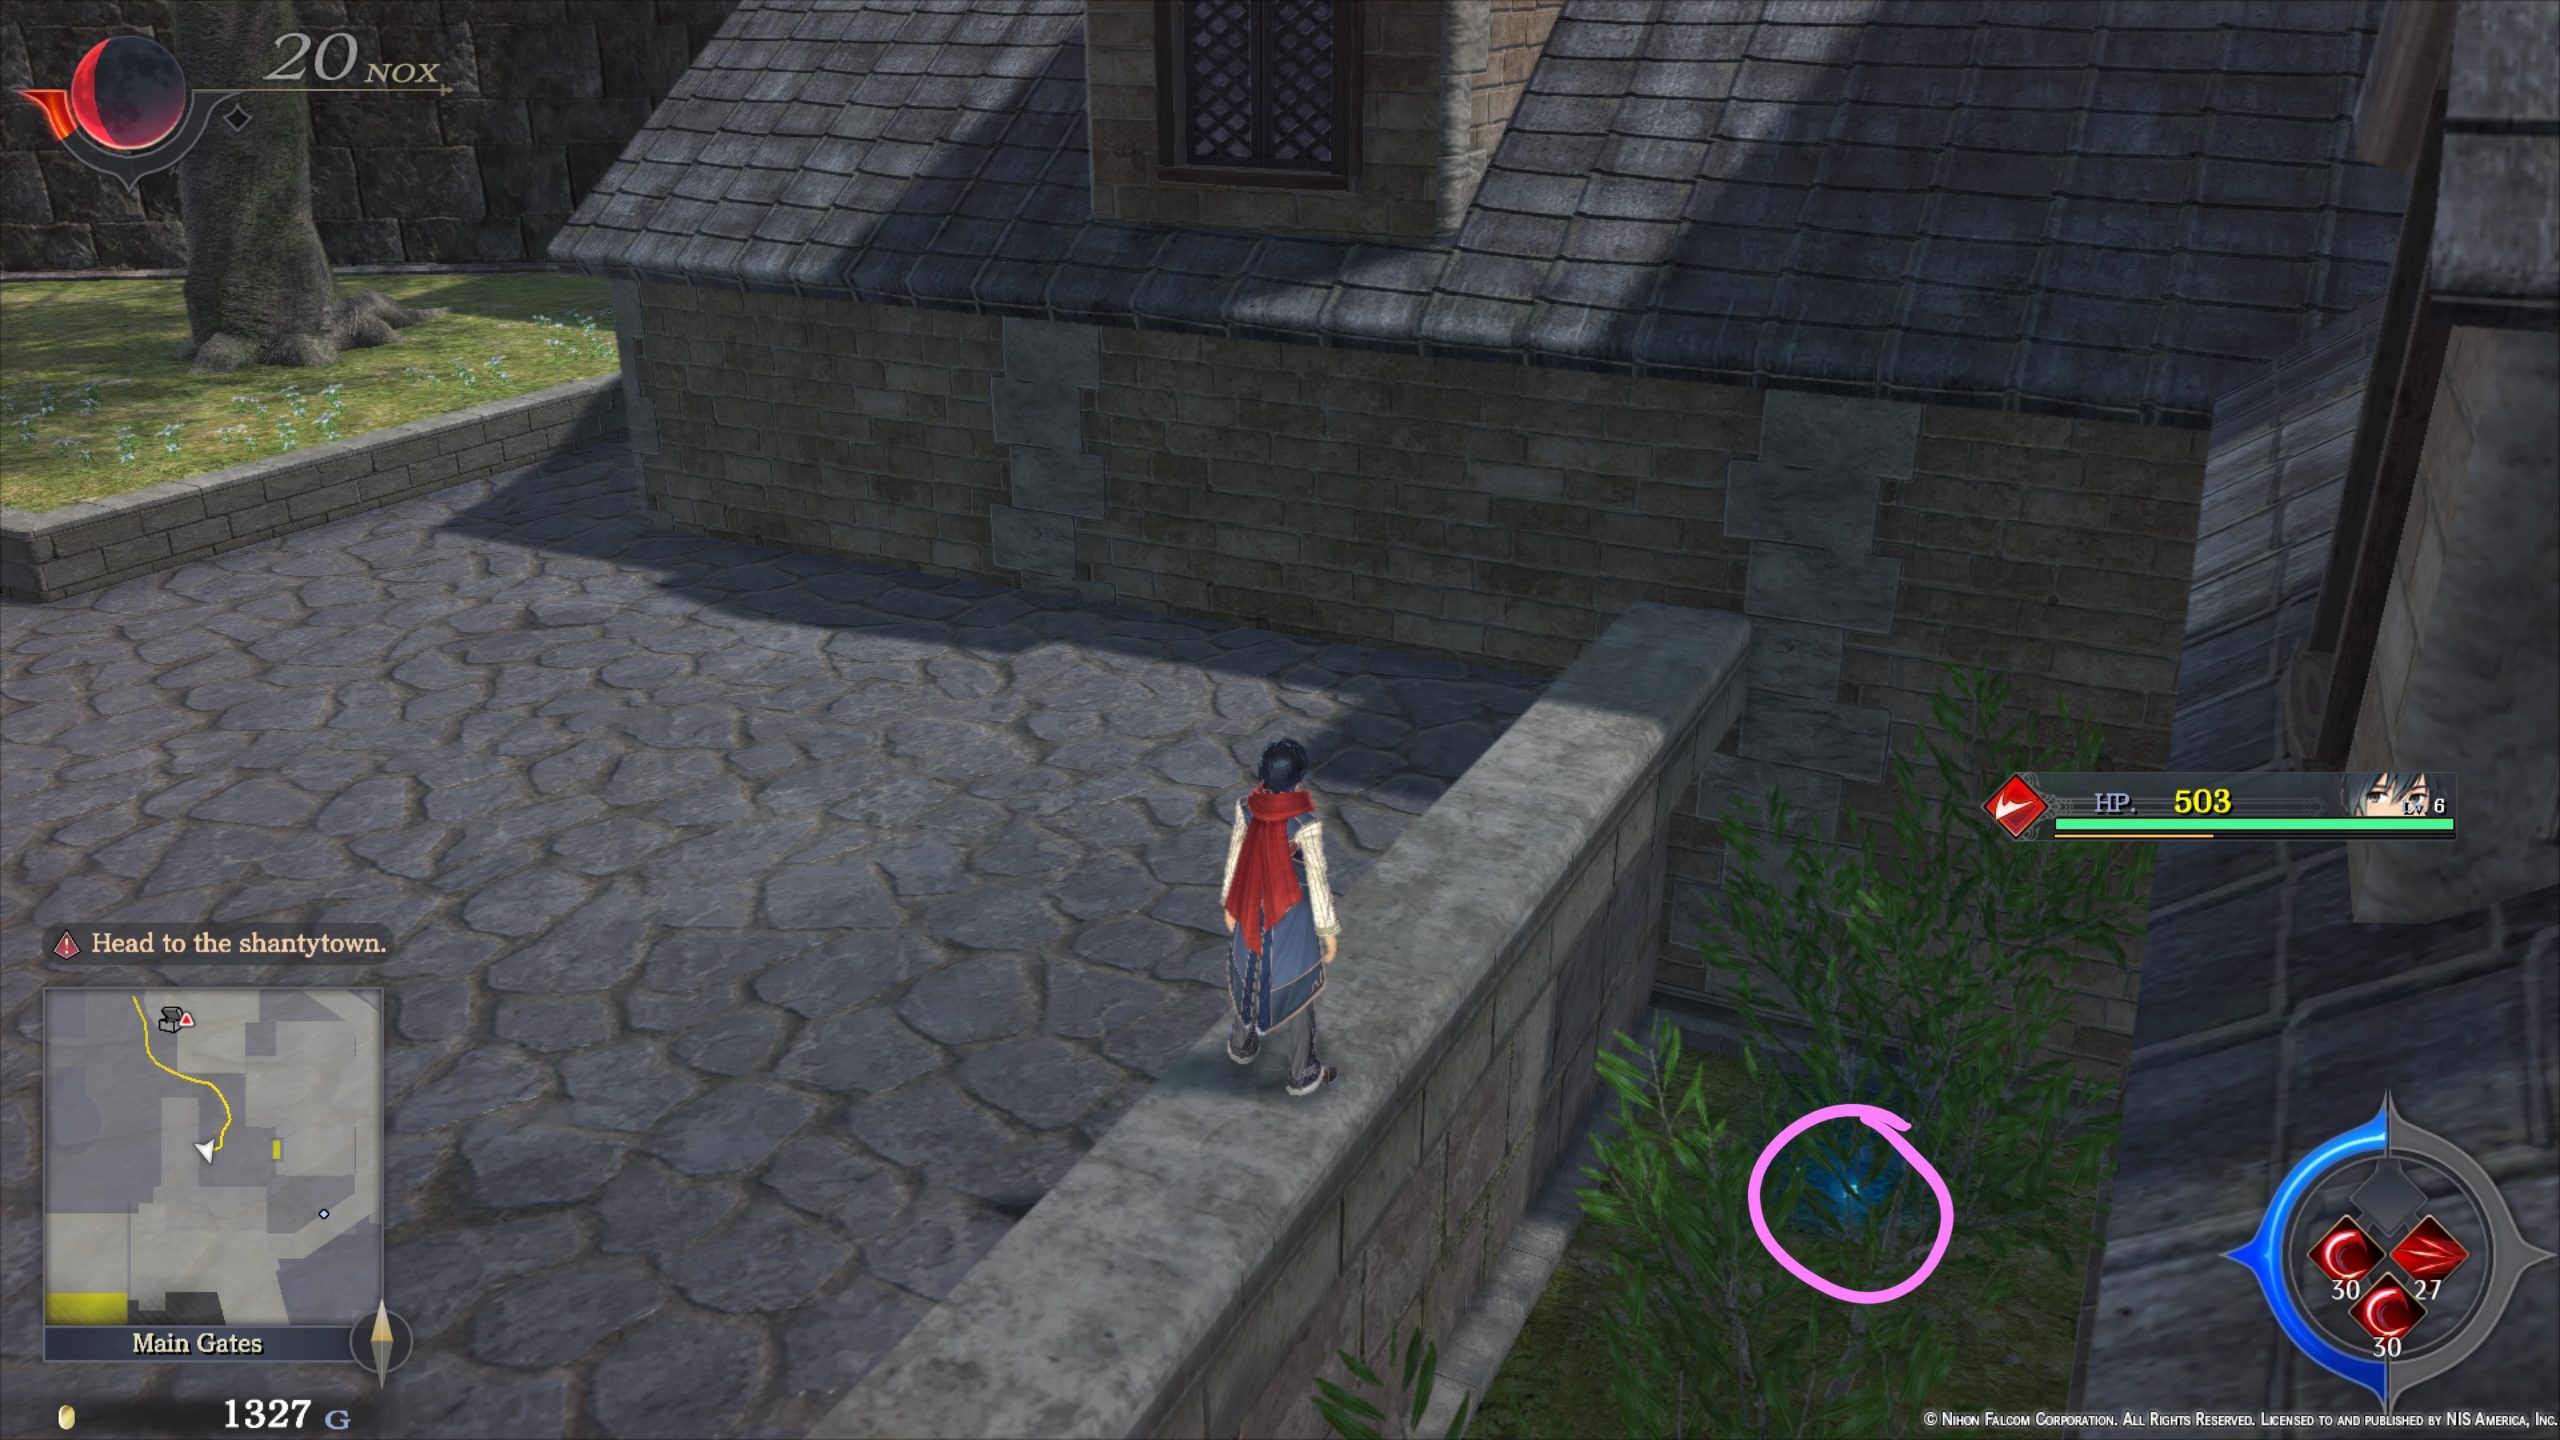
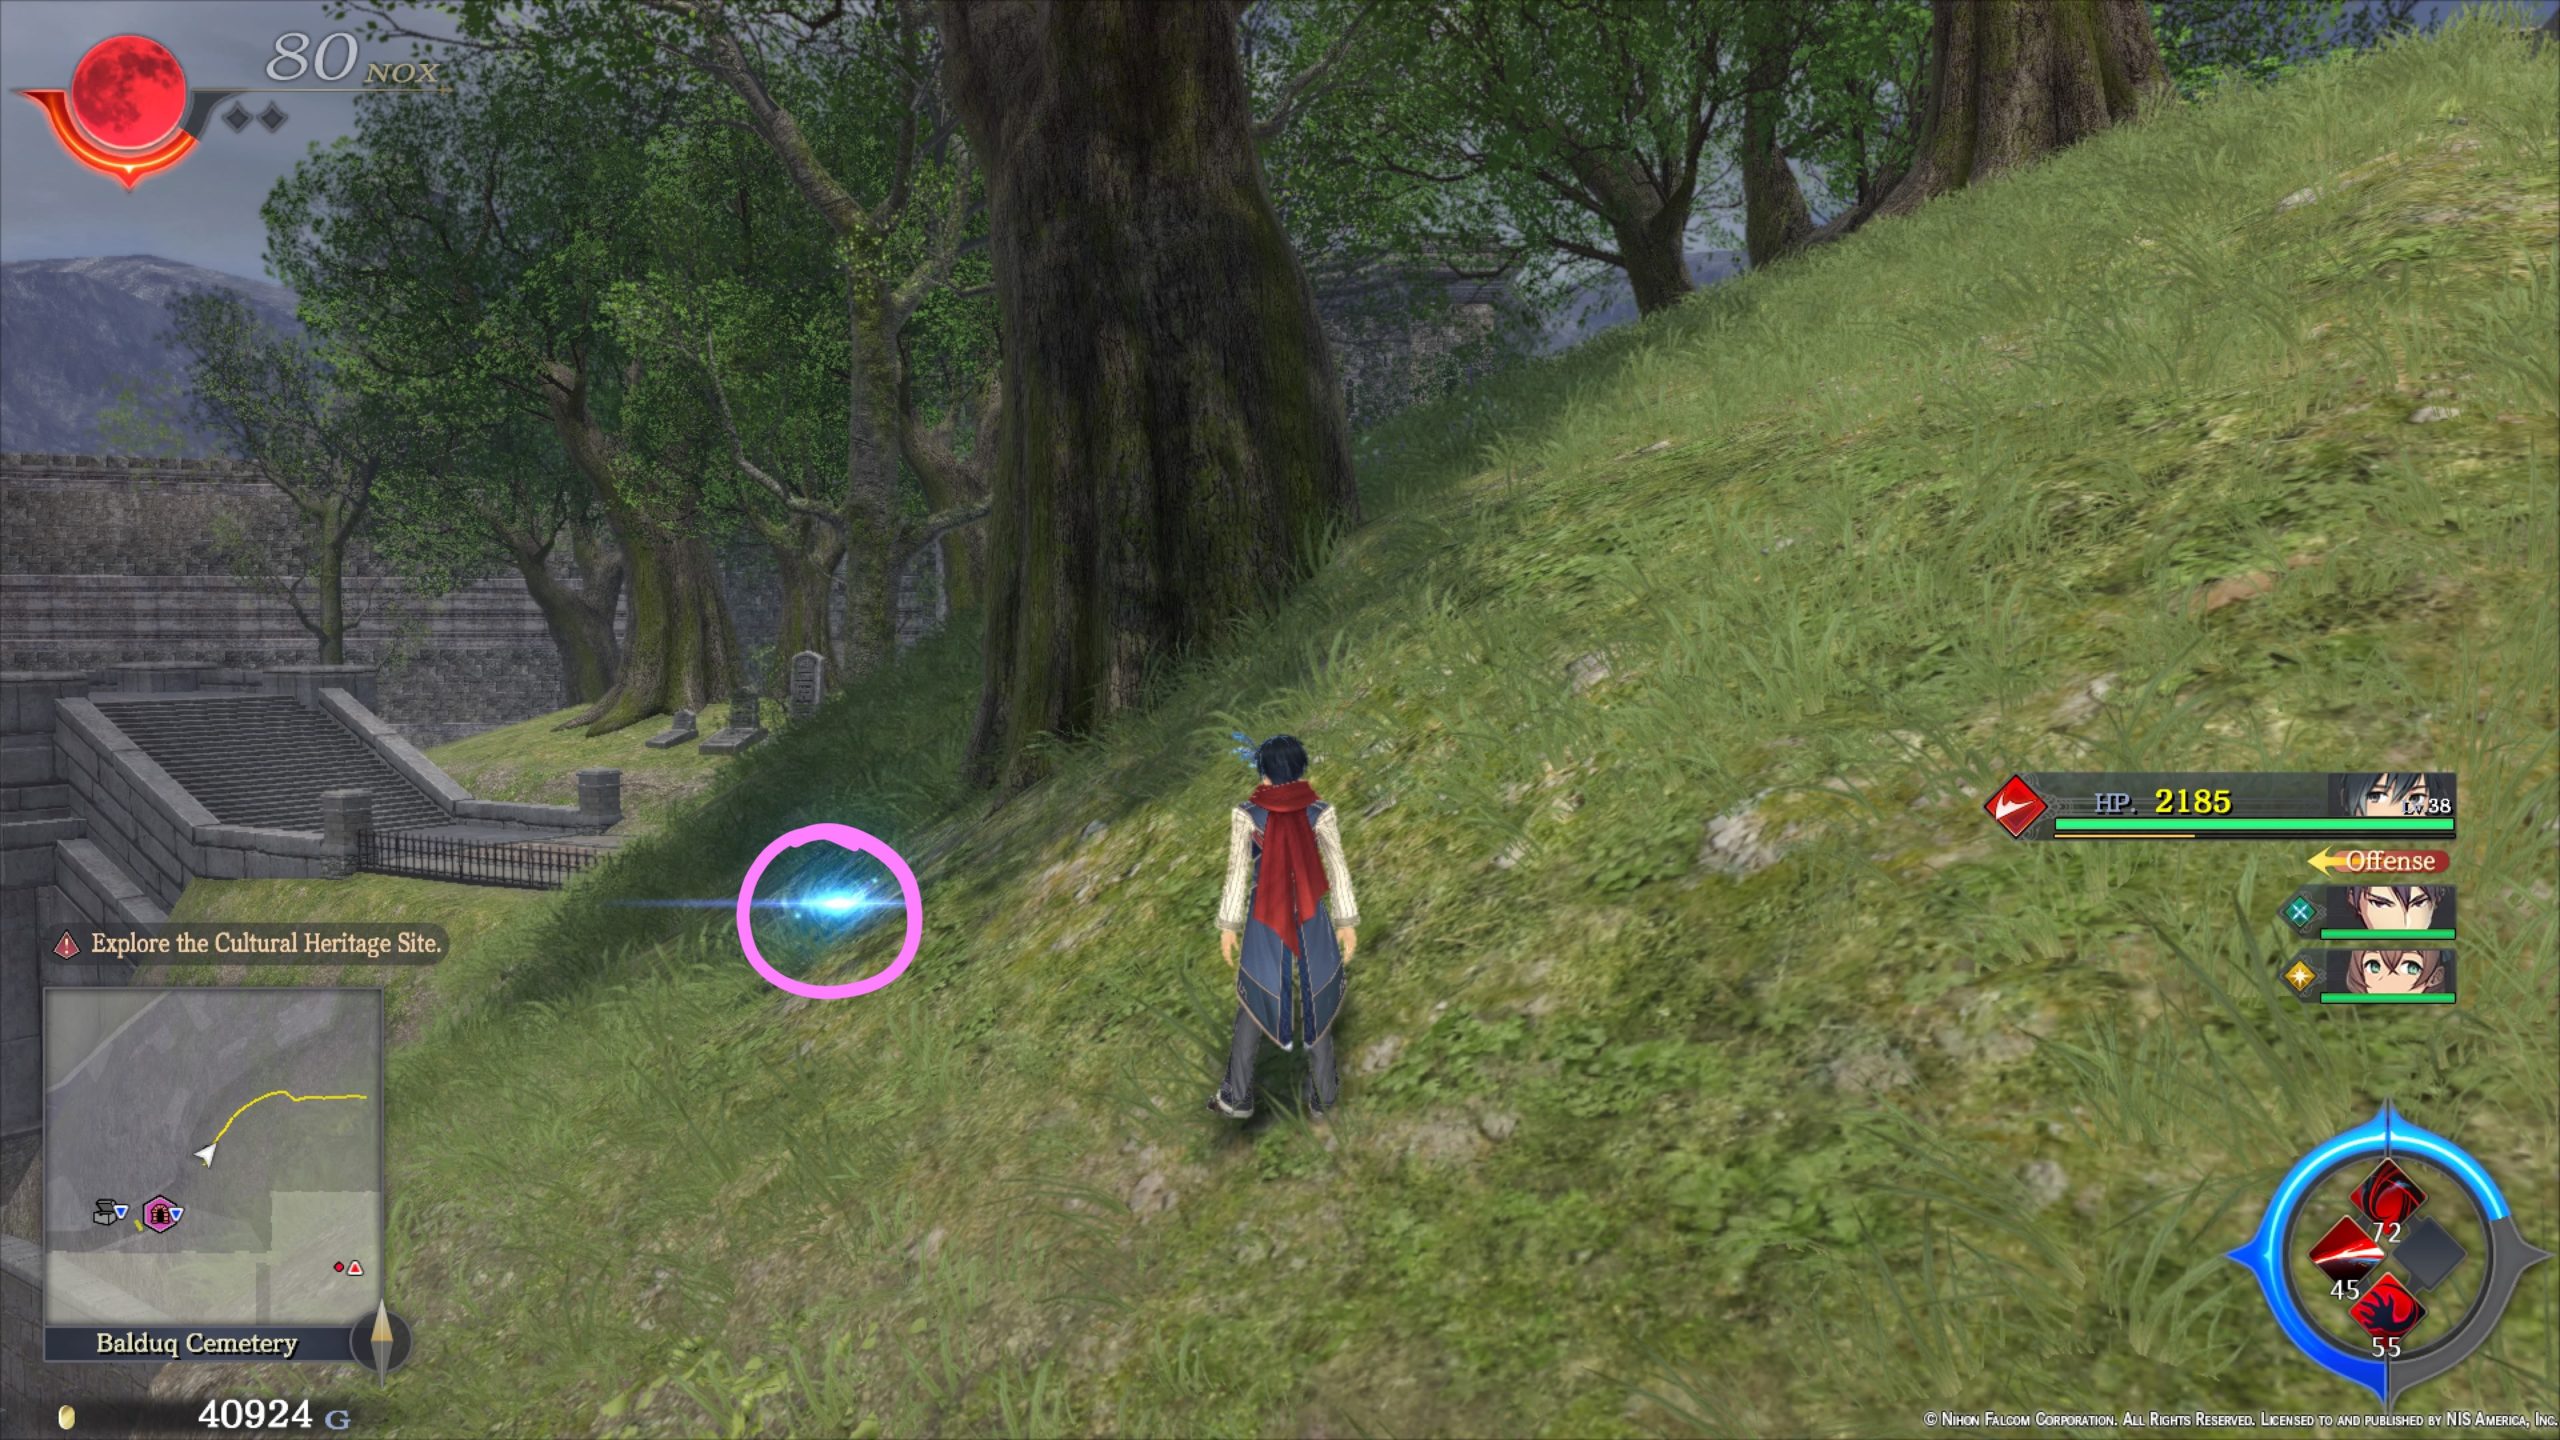
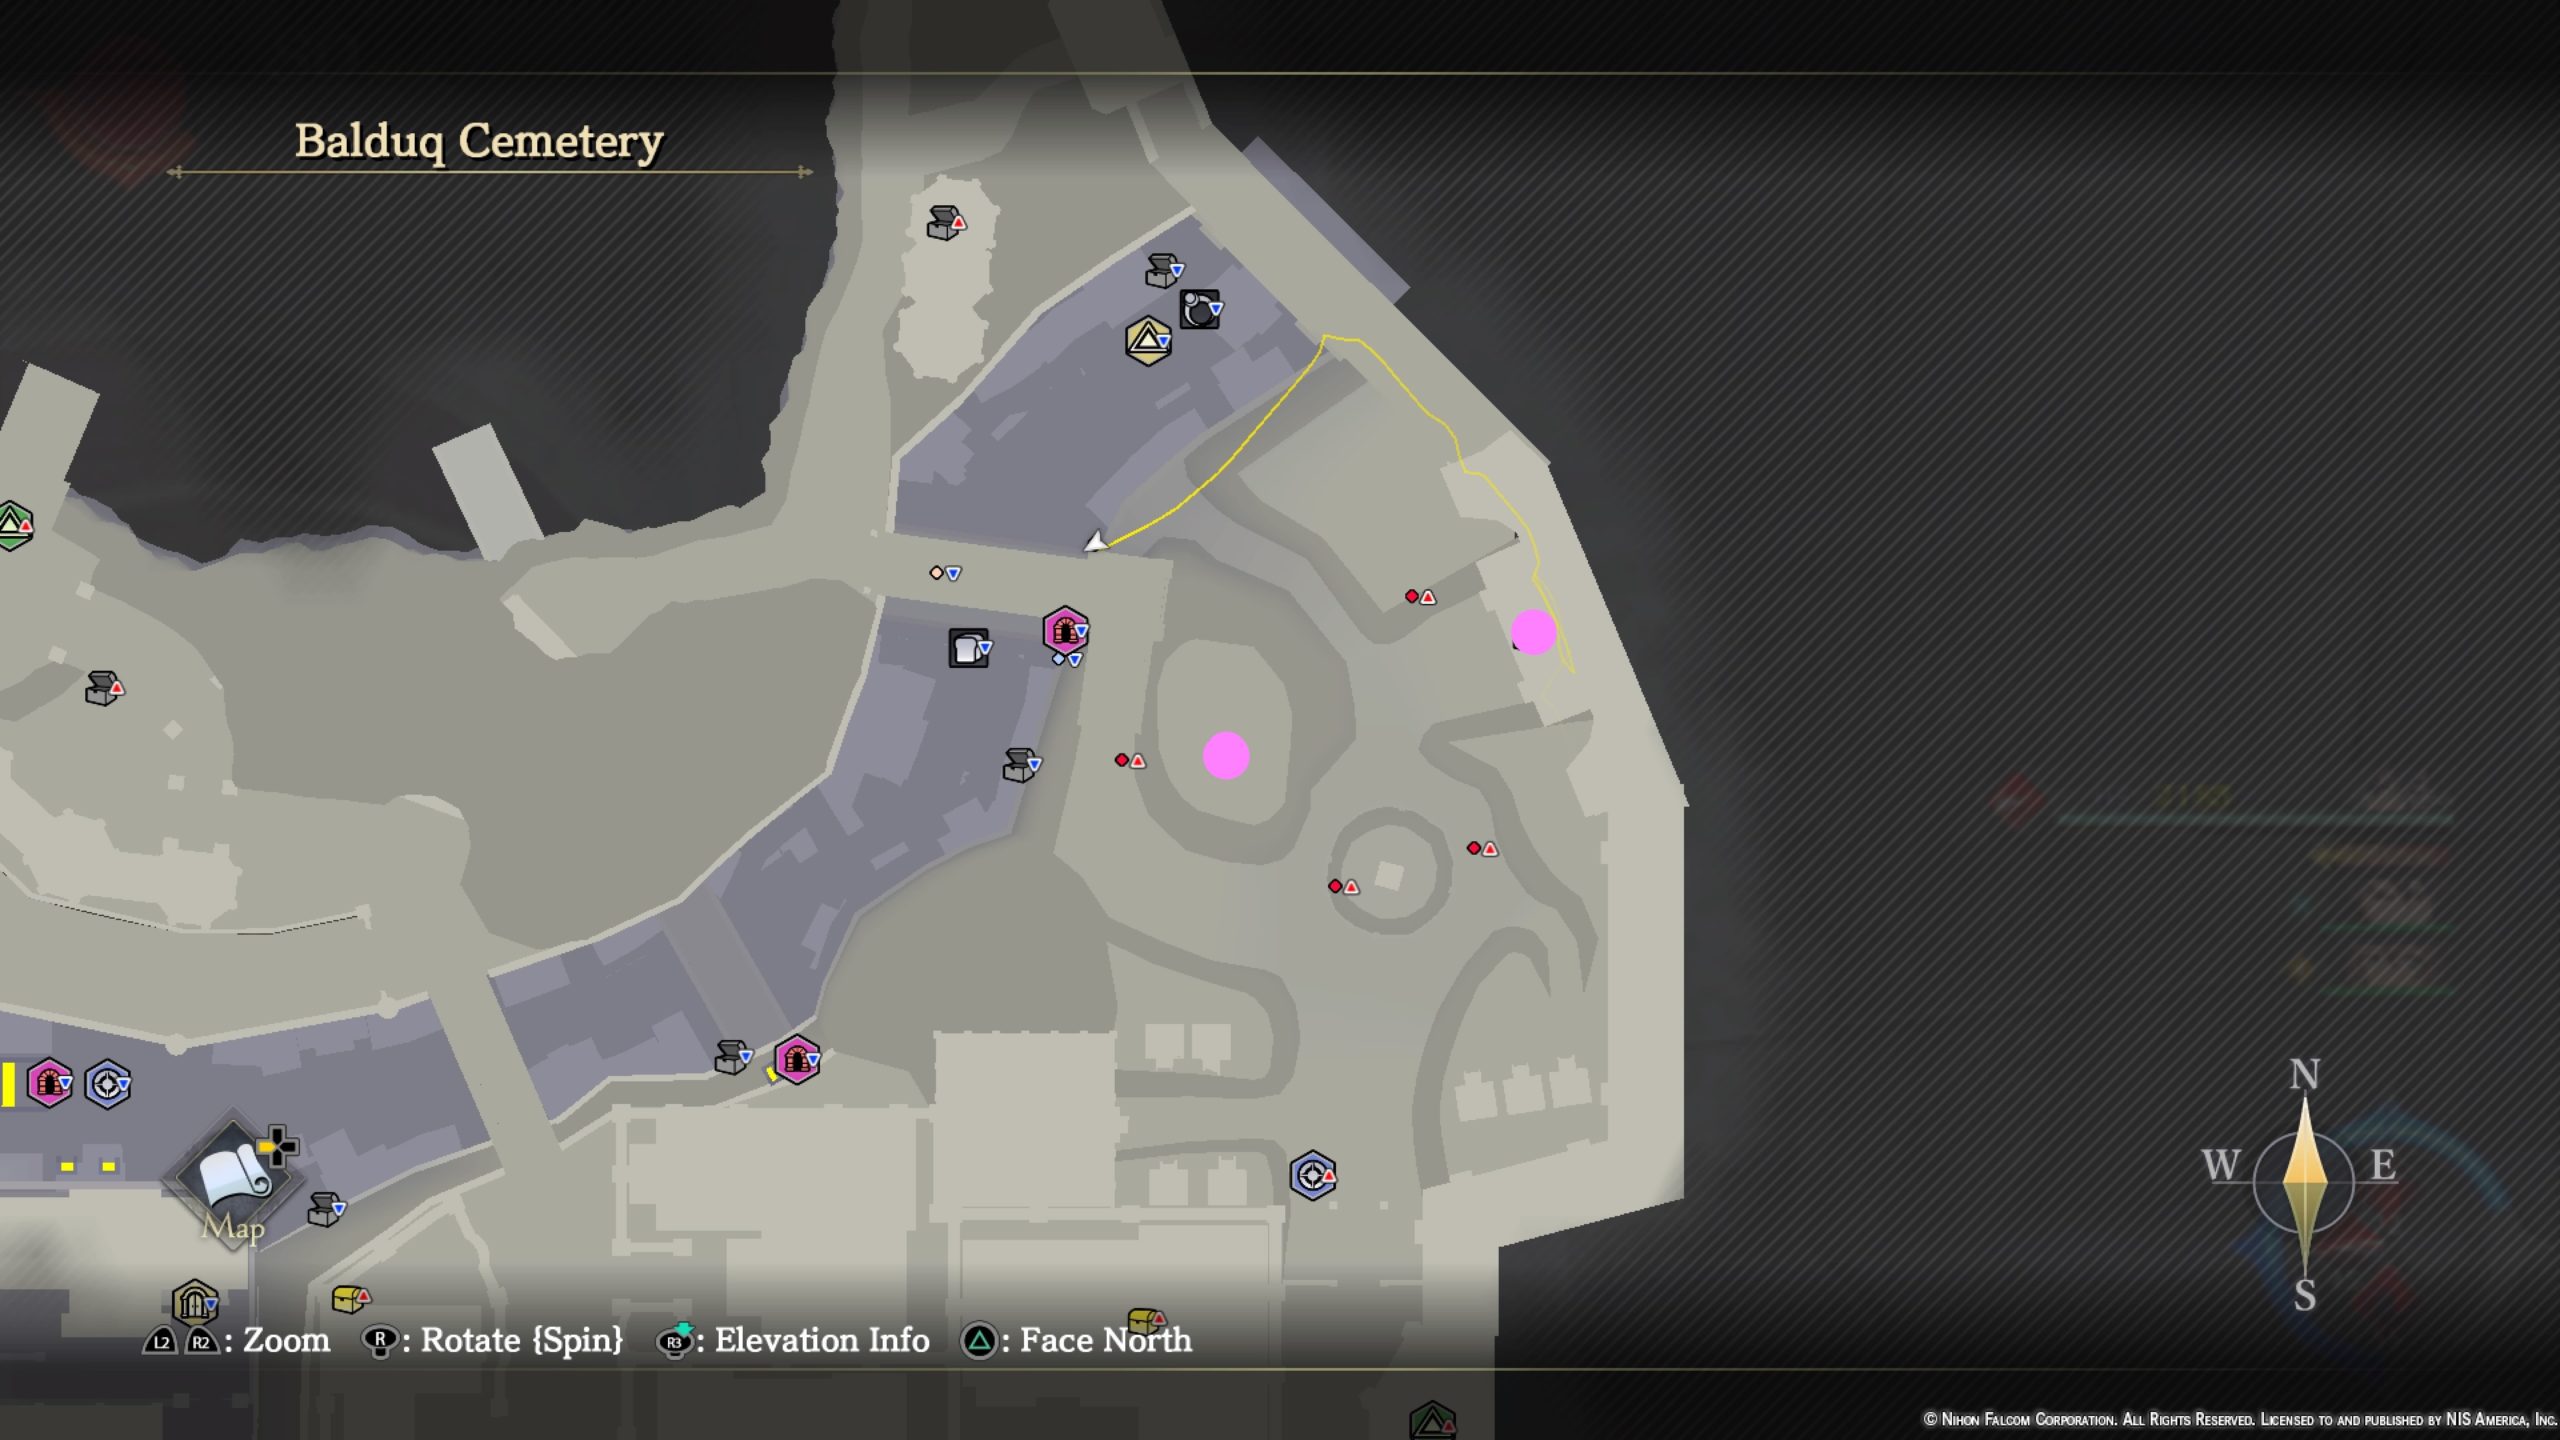
Balduq Cemetery
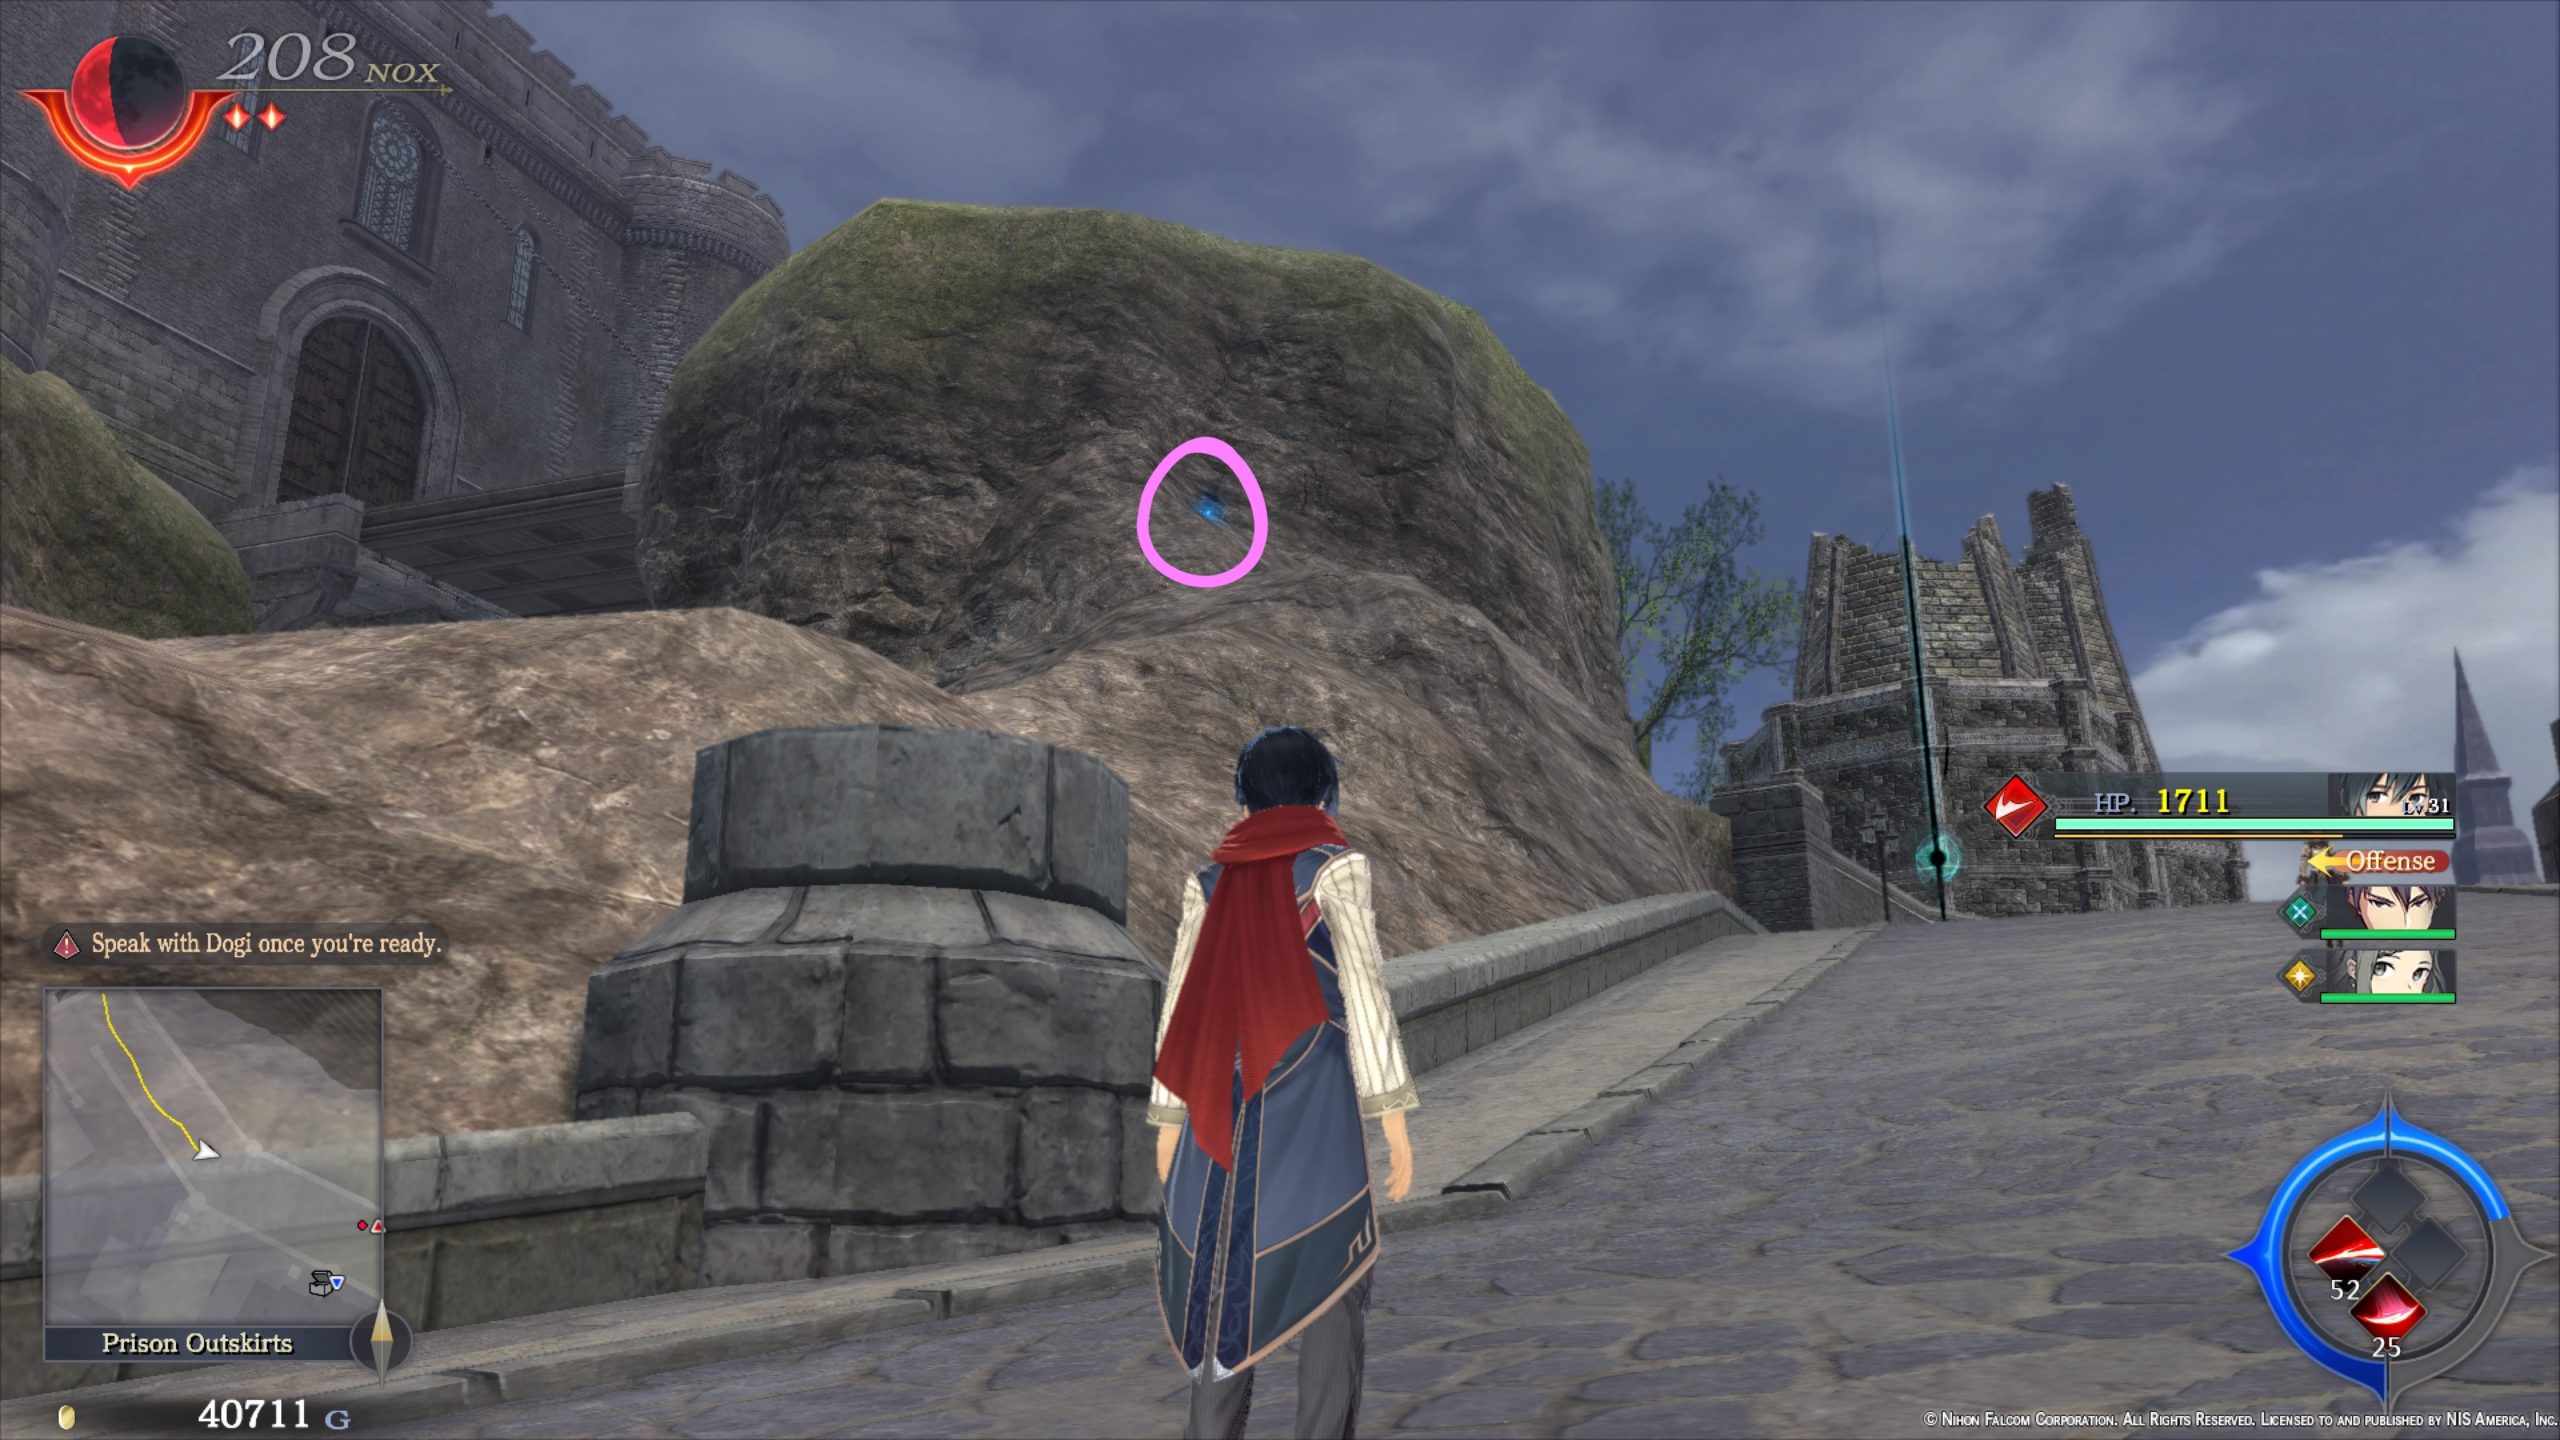
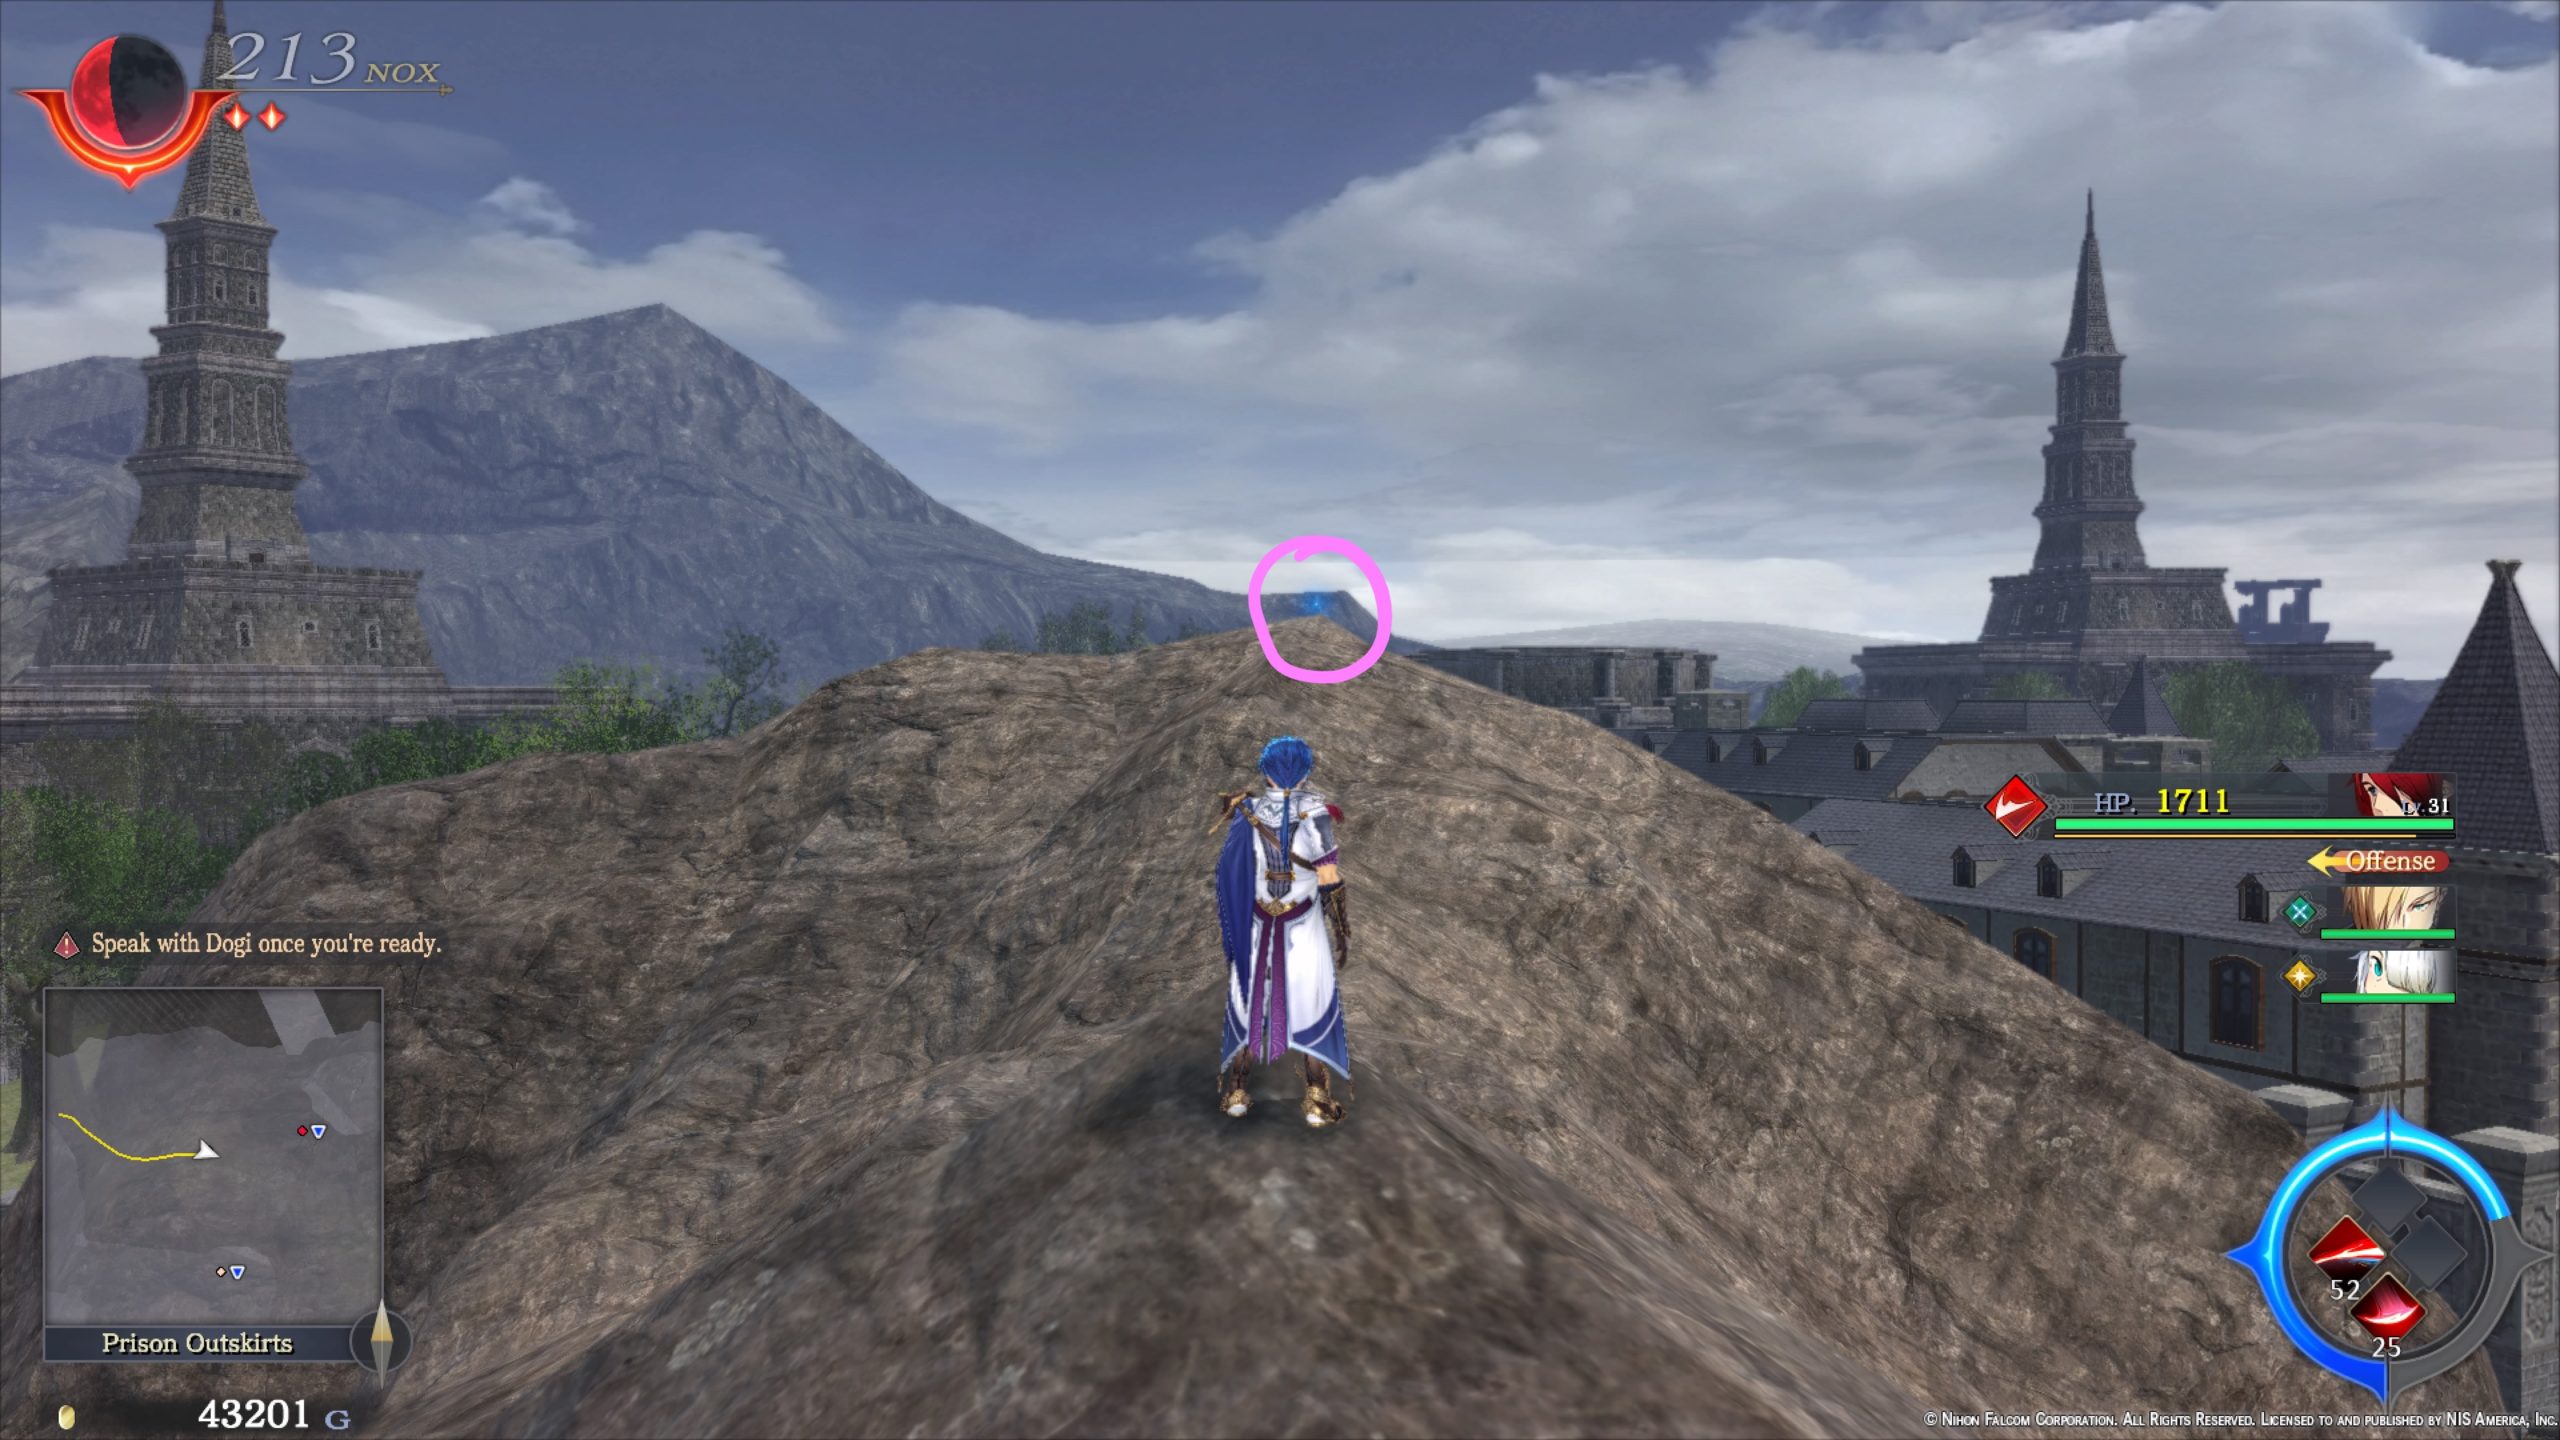
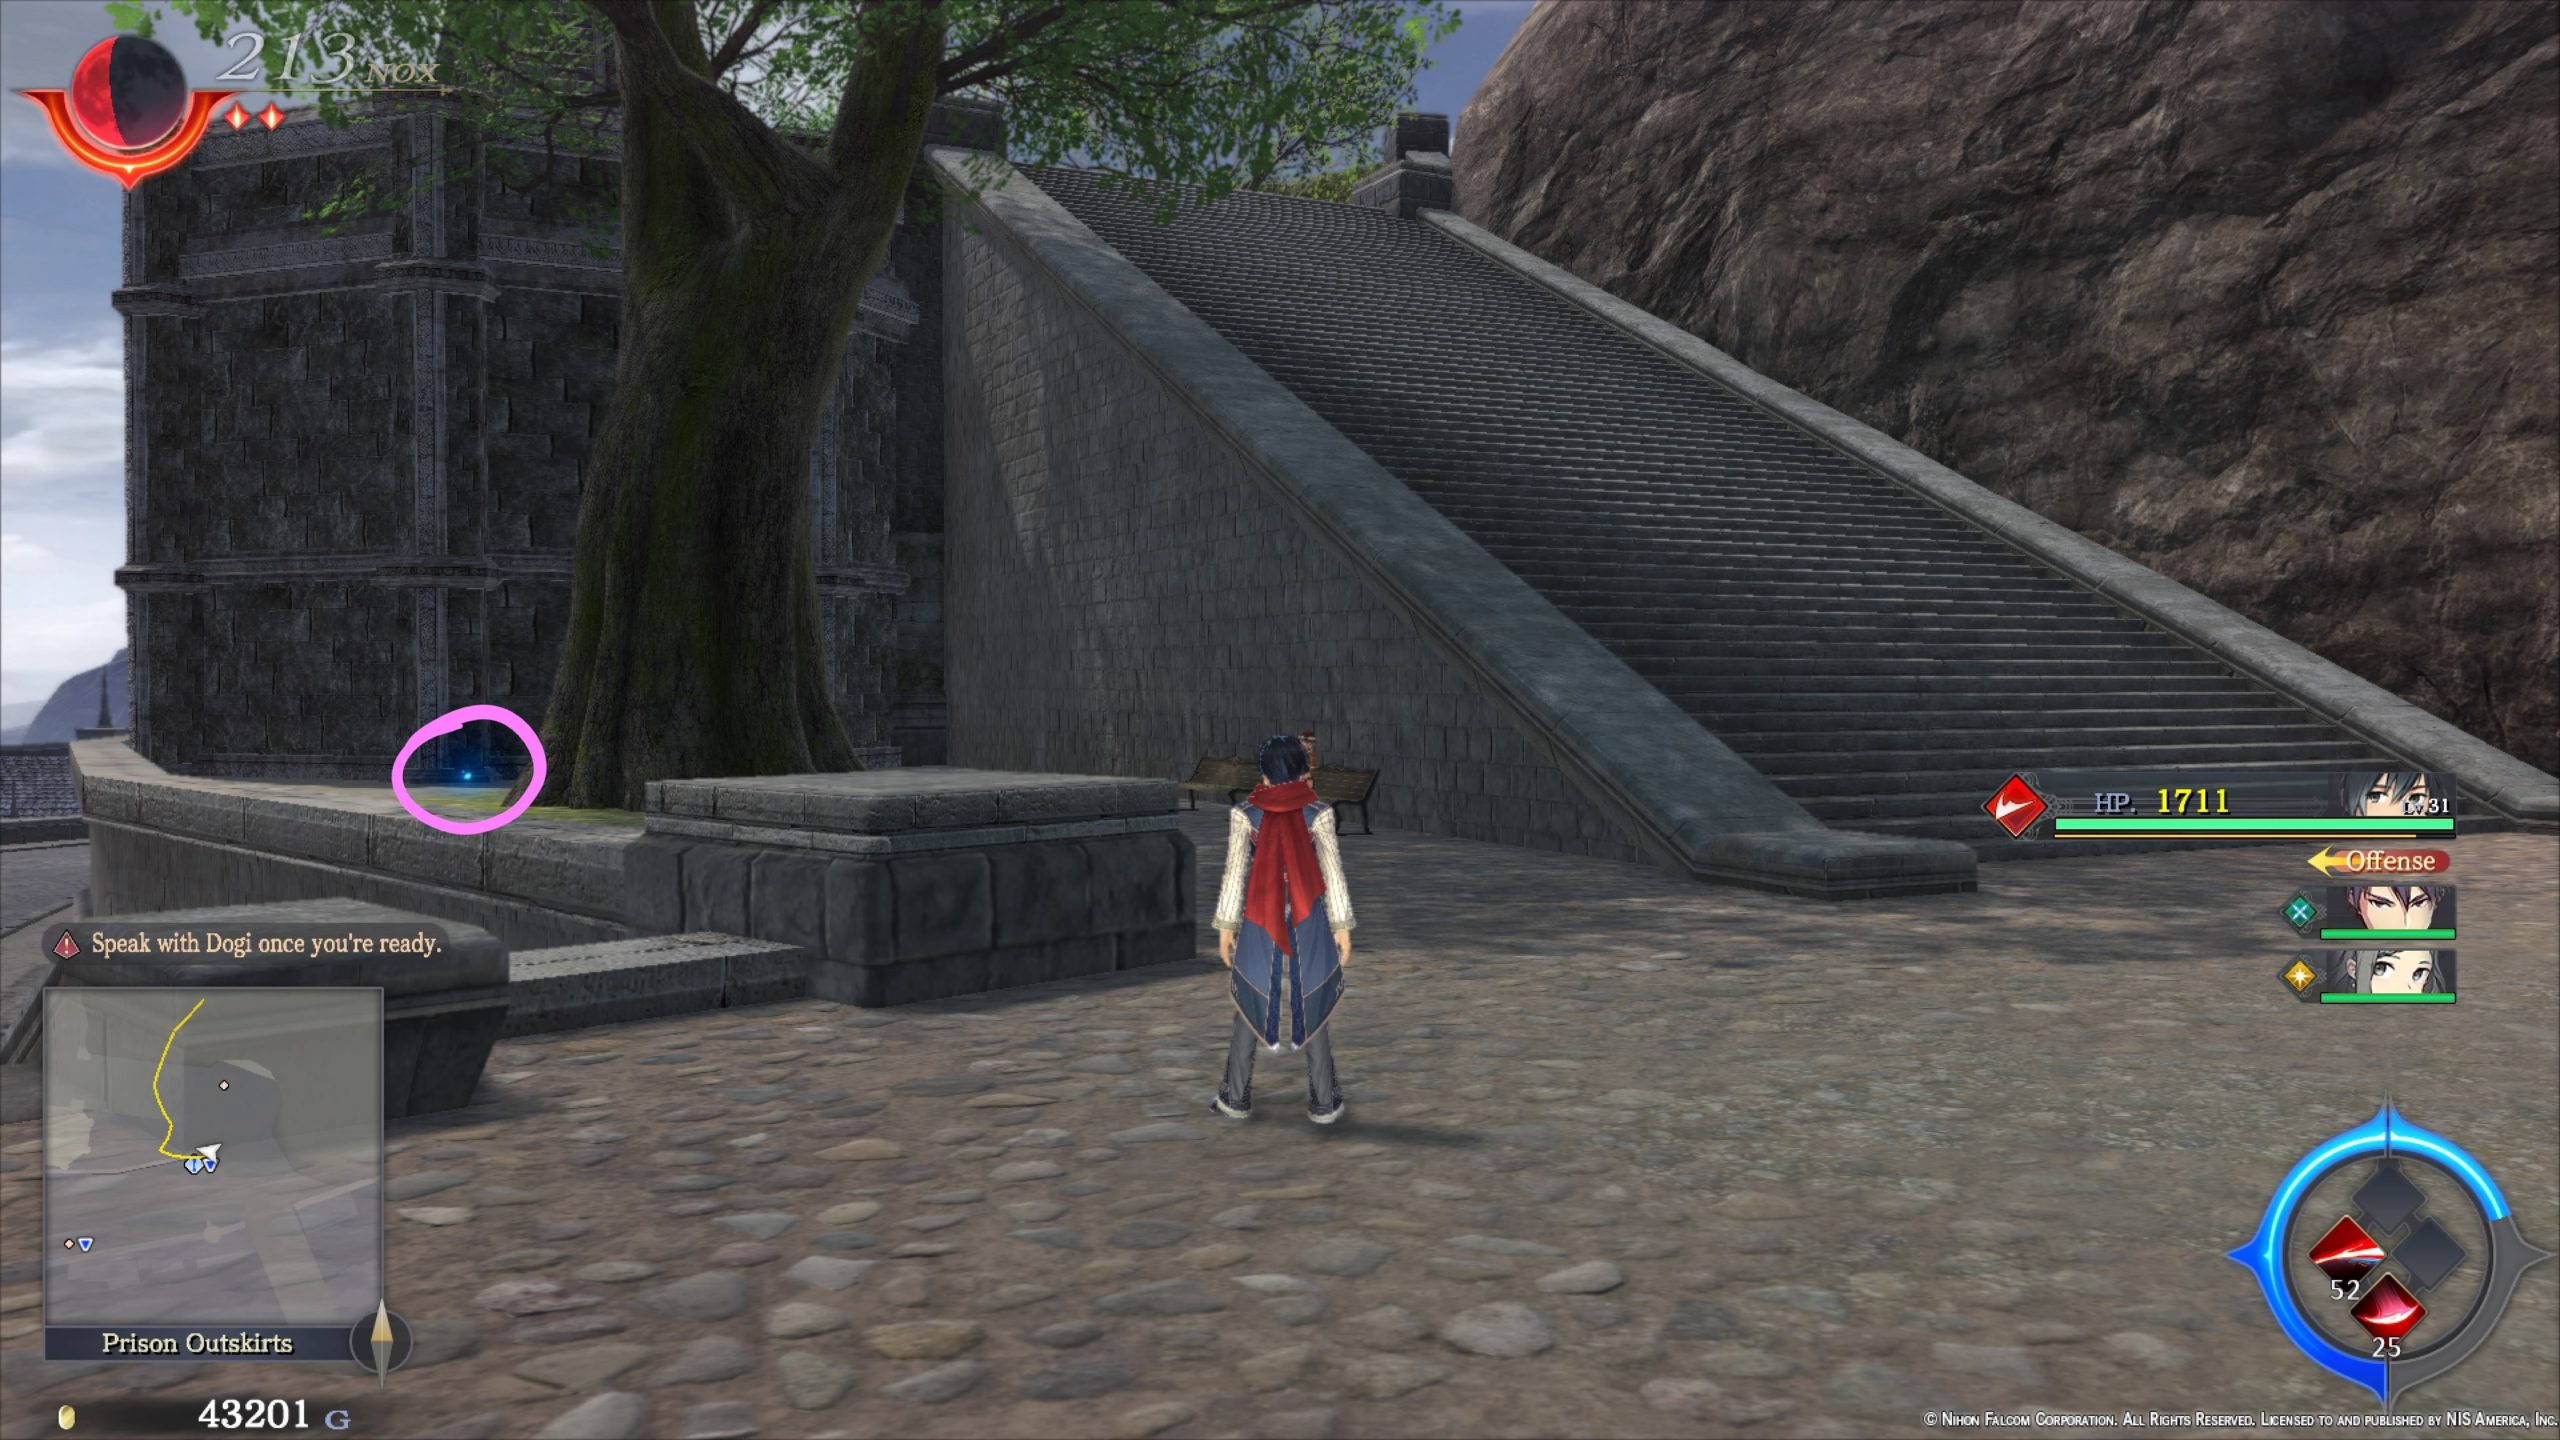
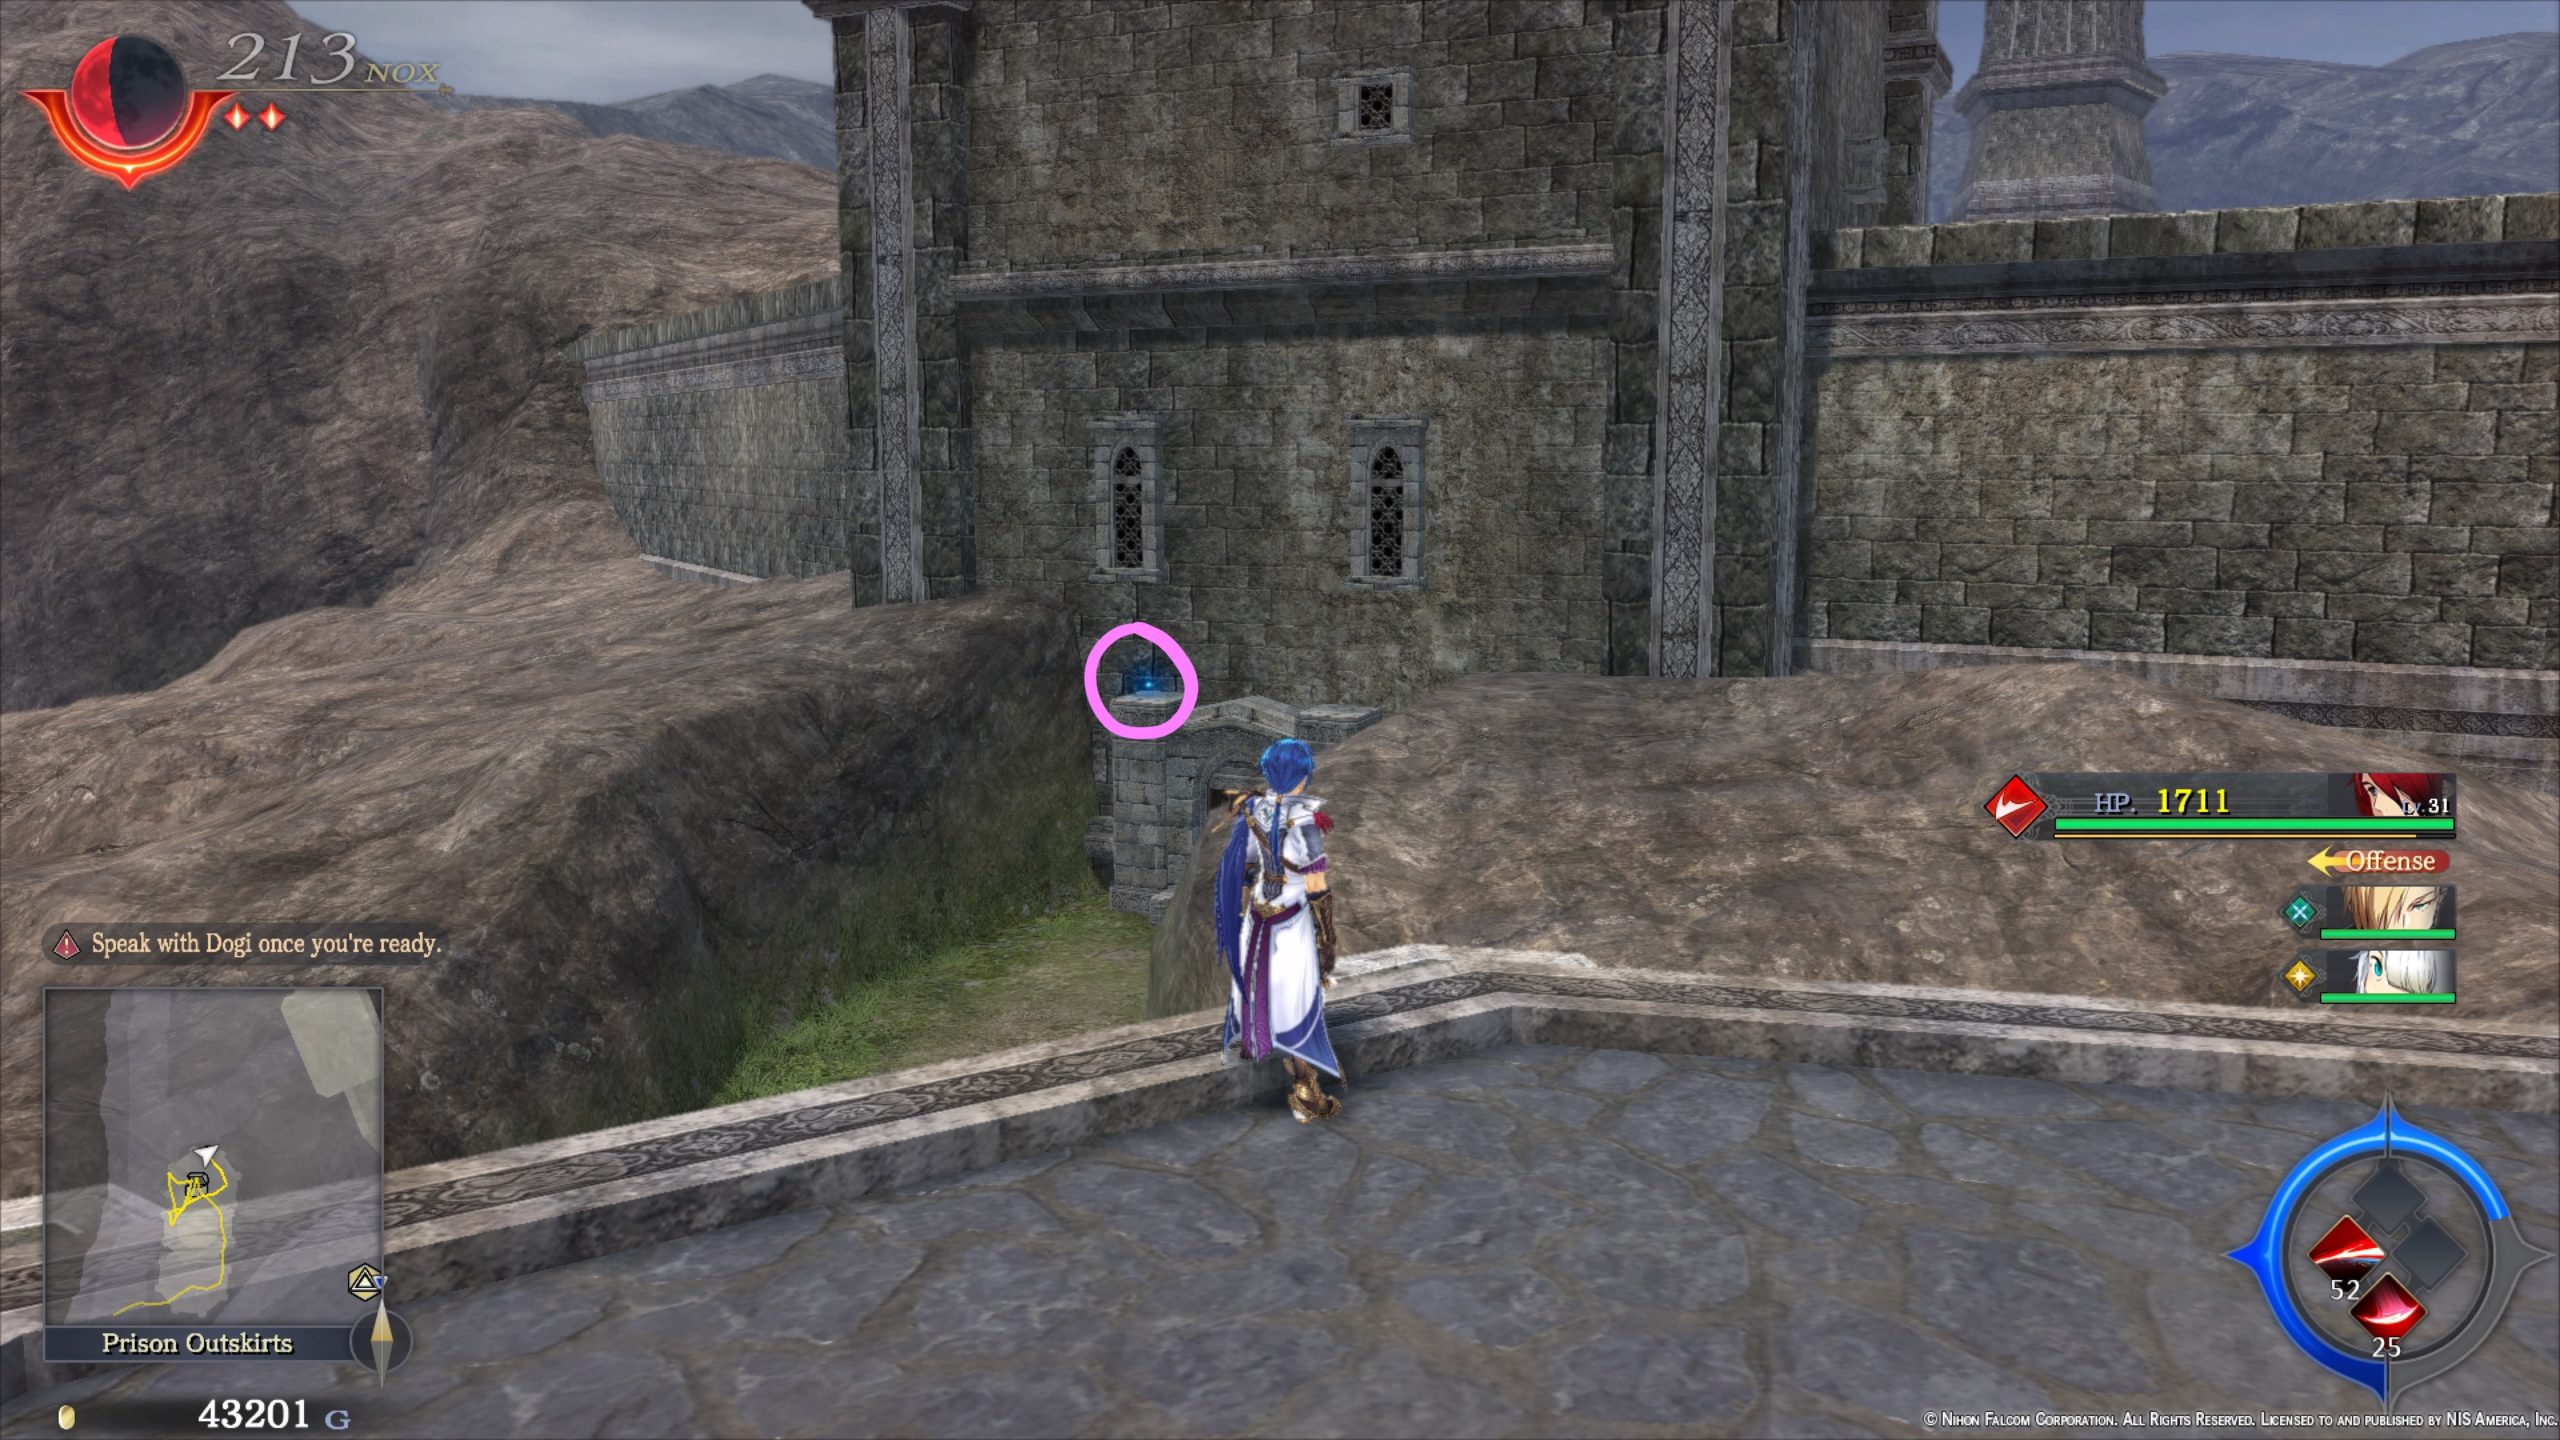
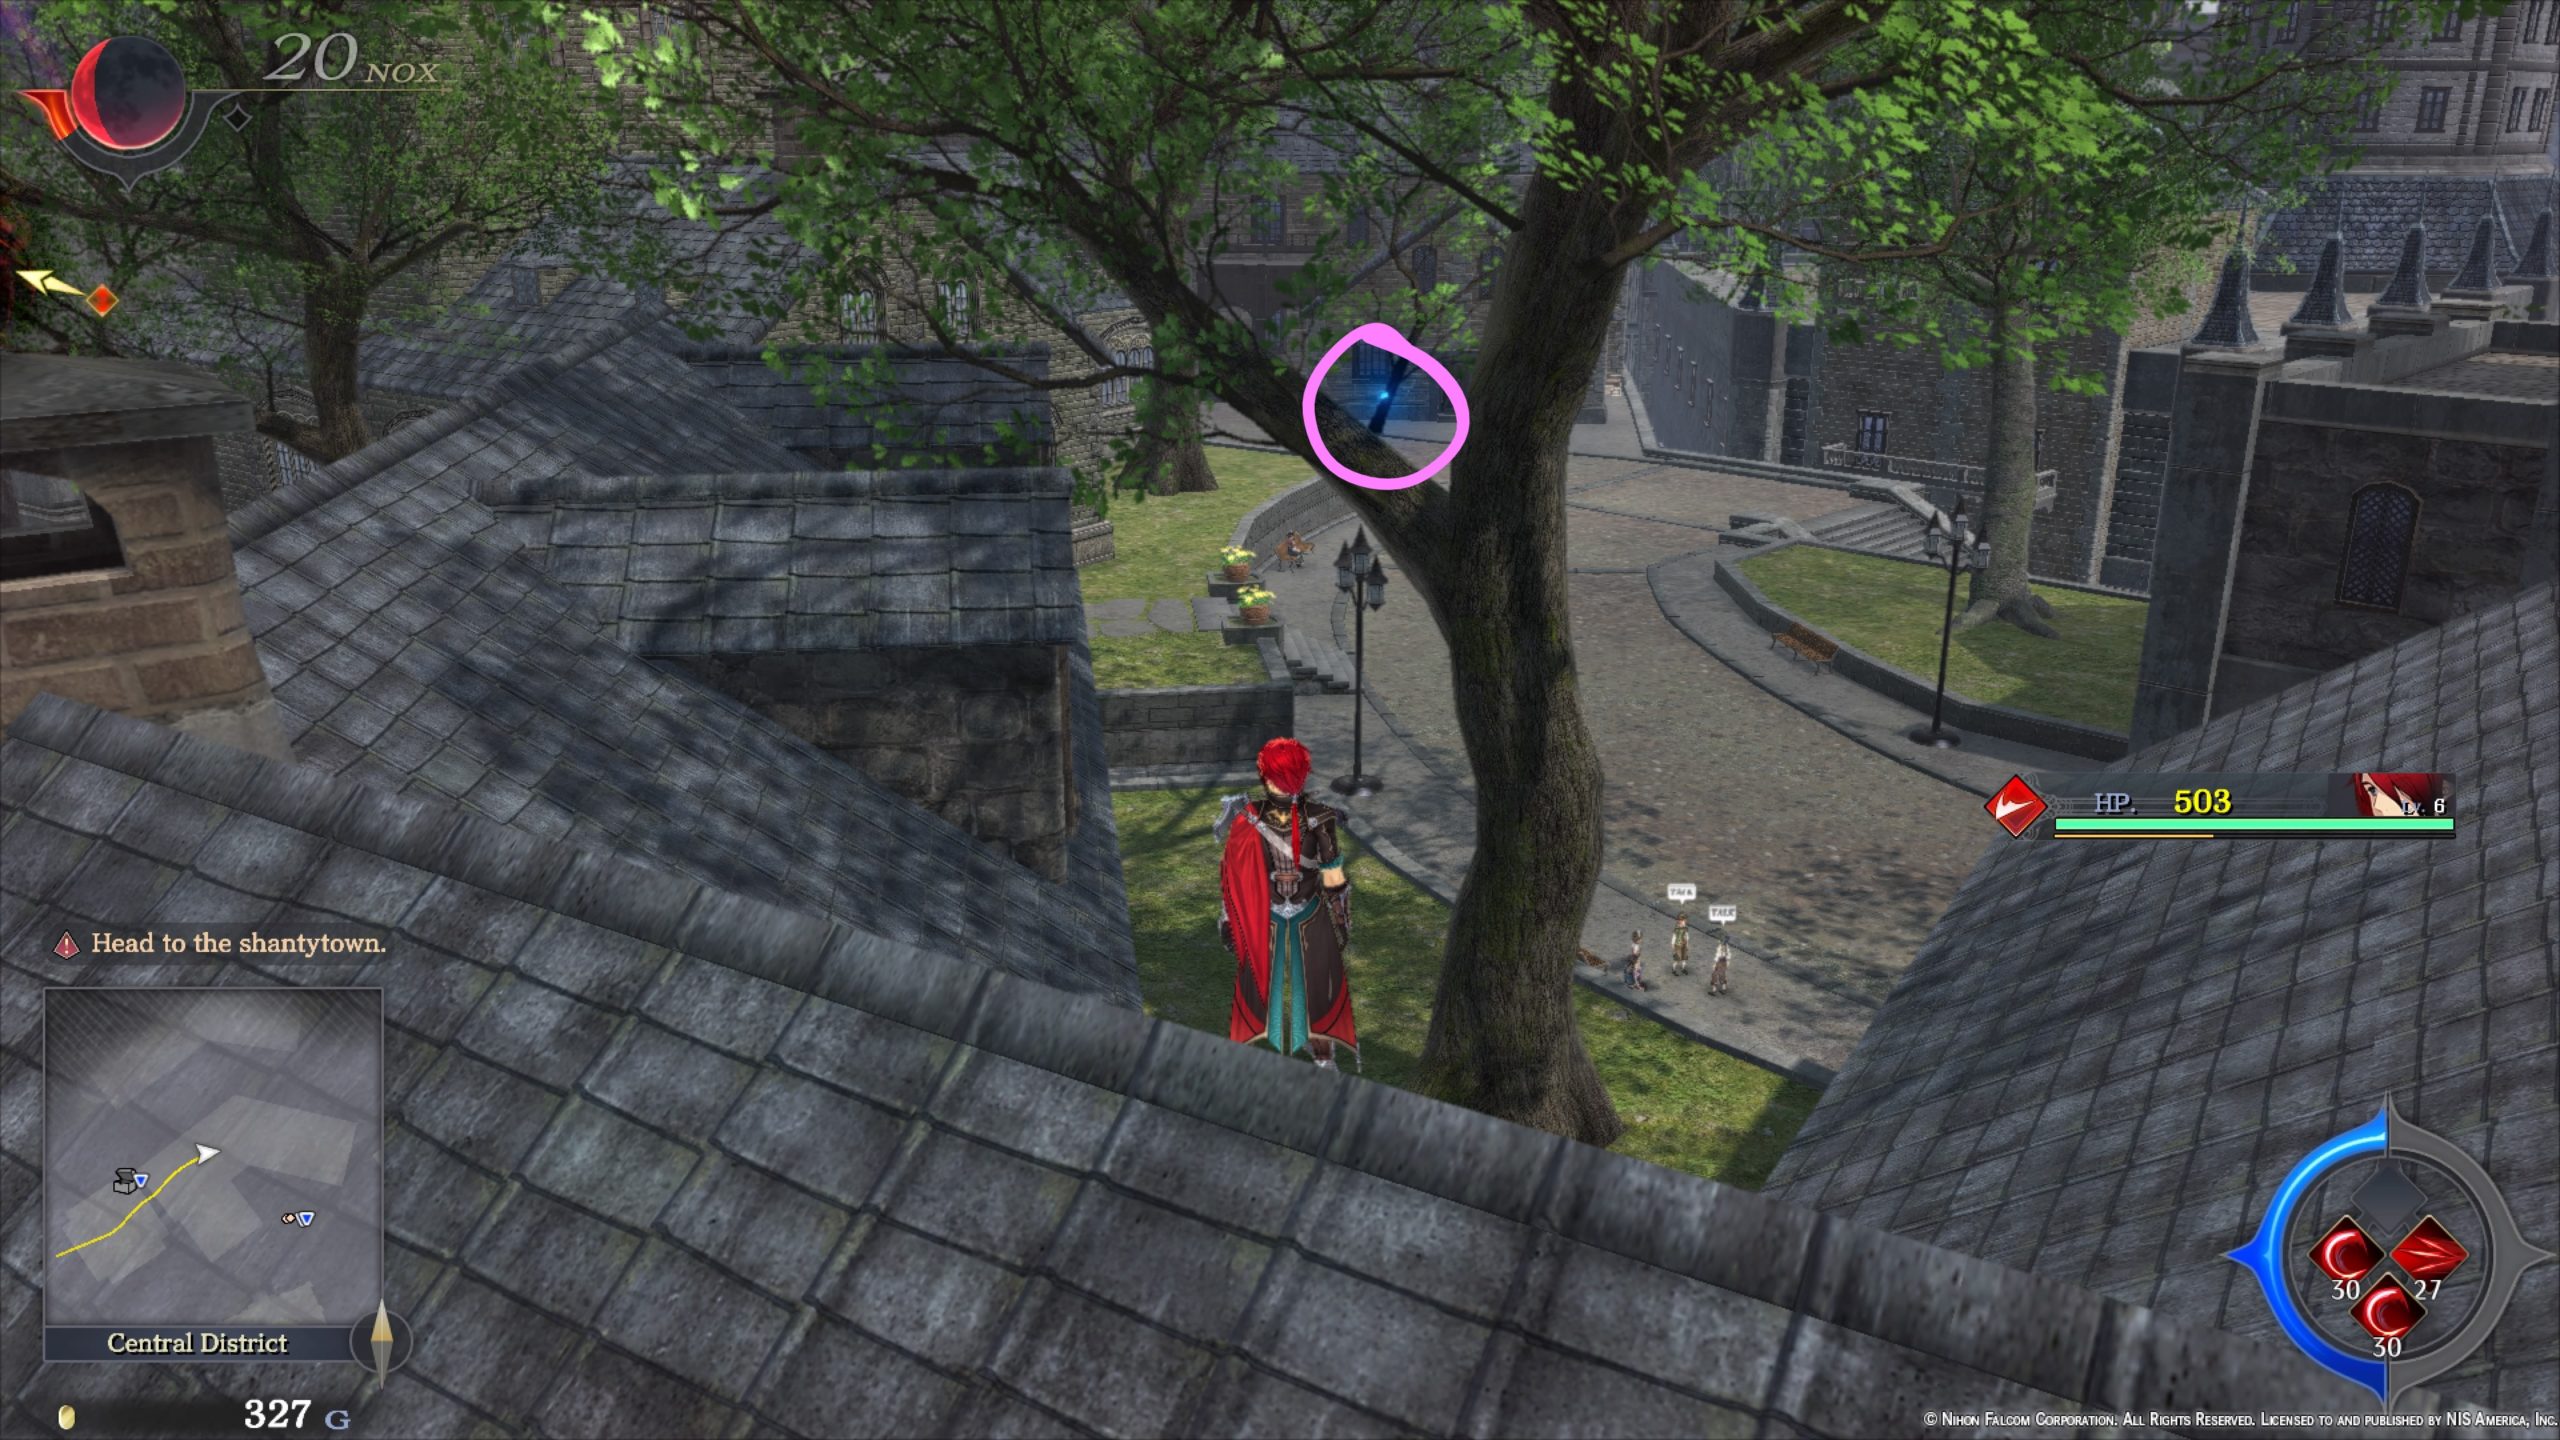
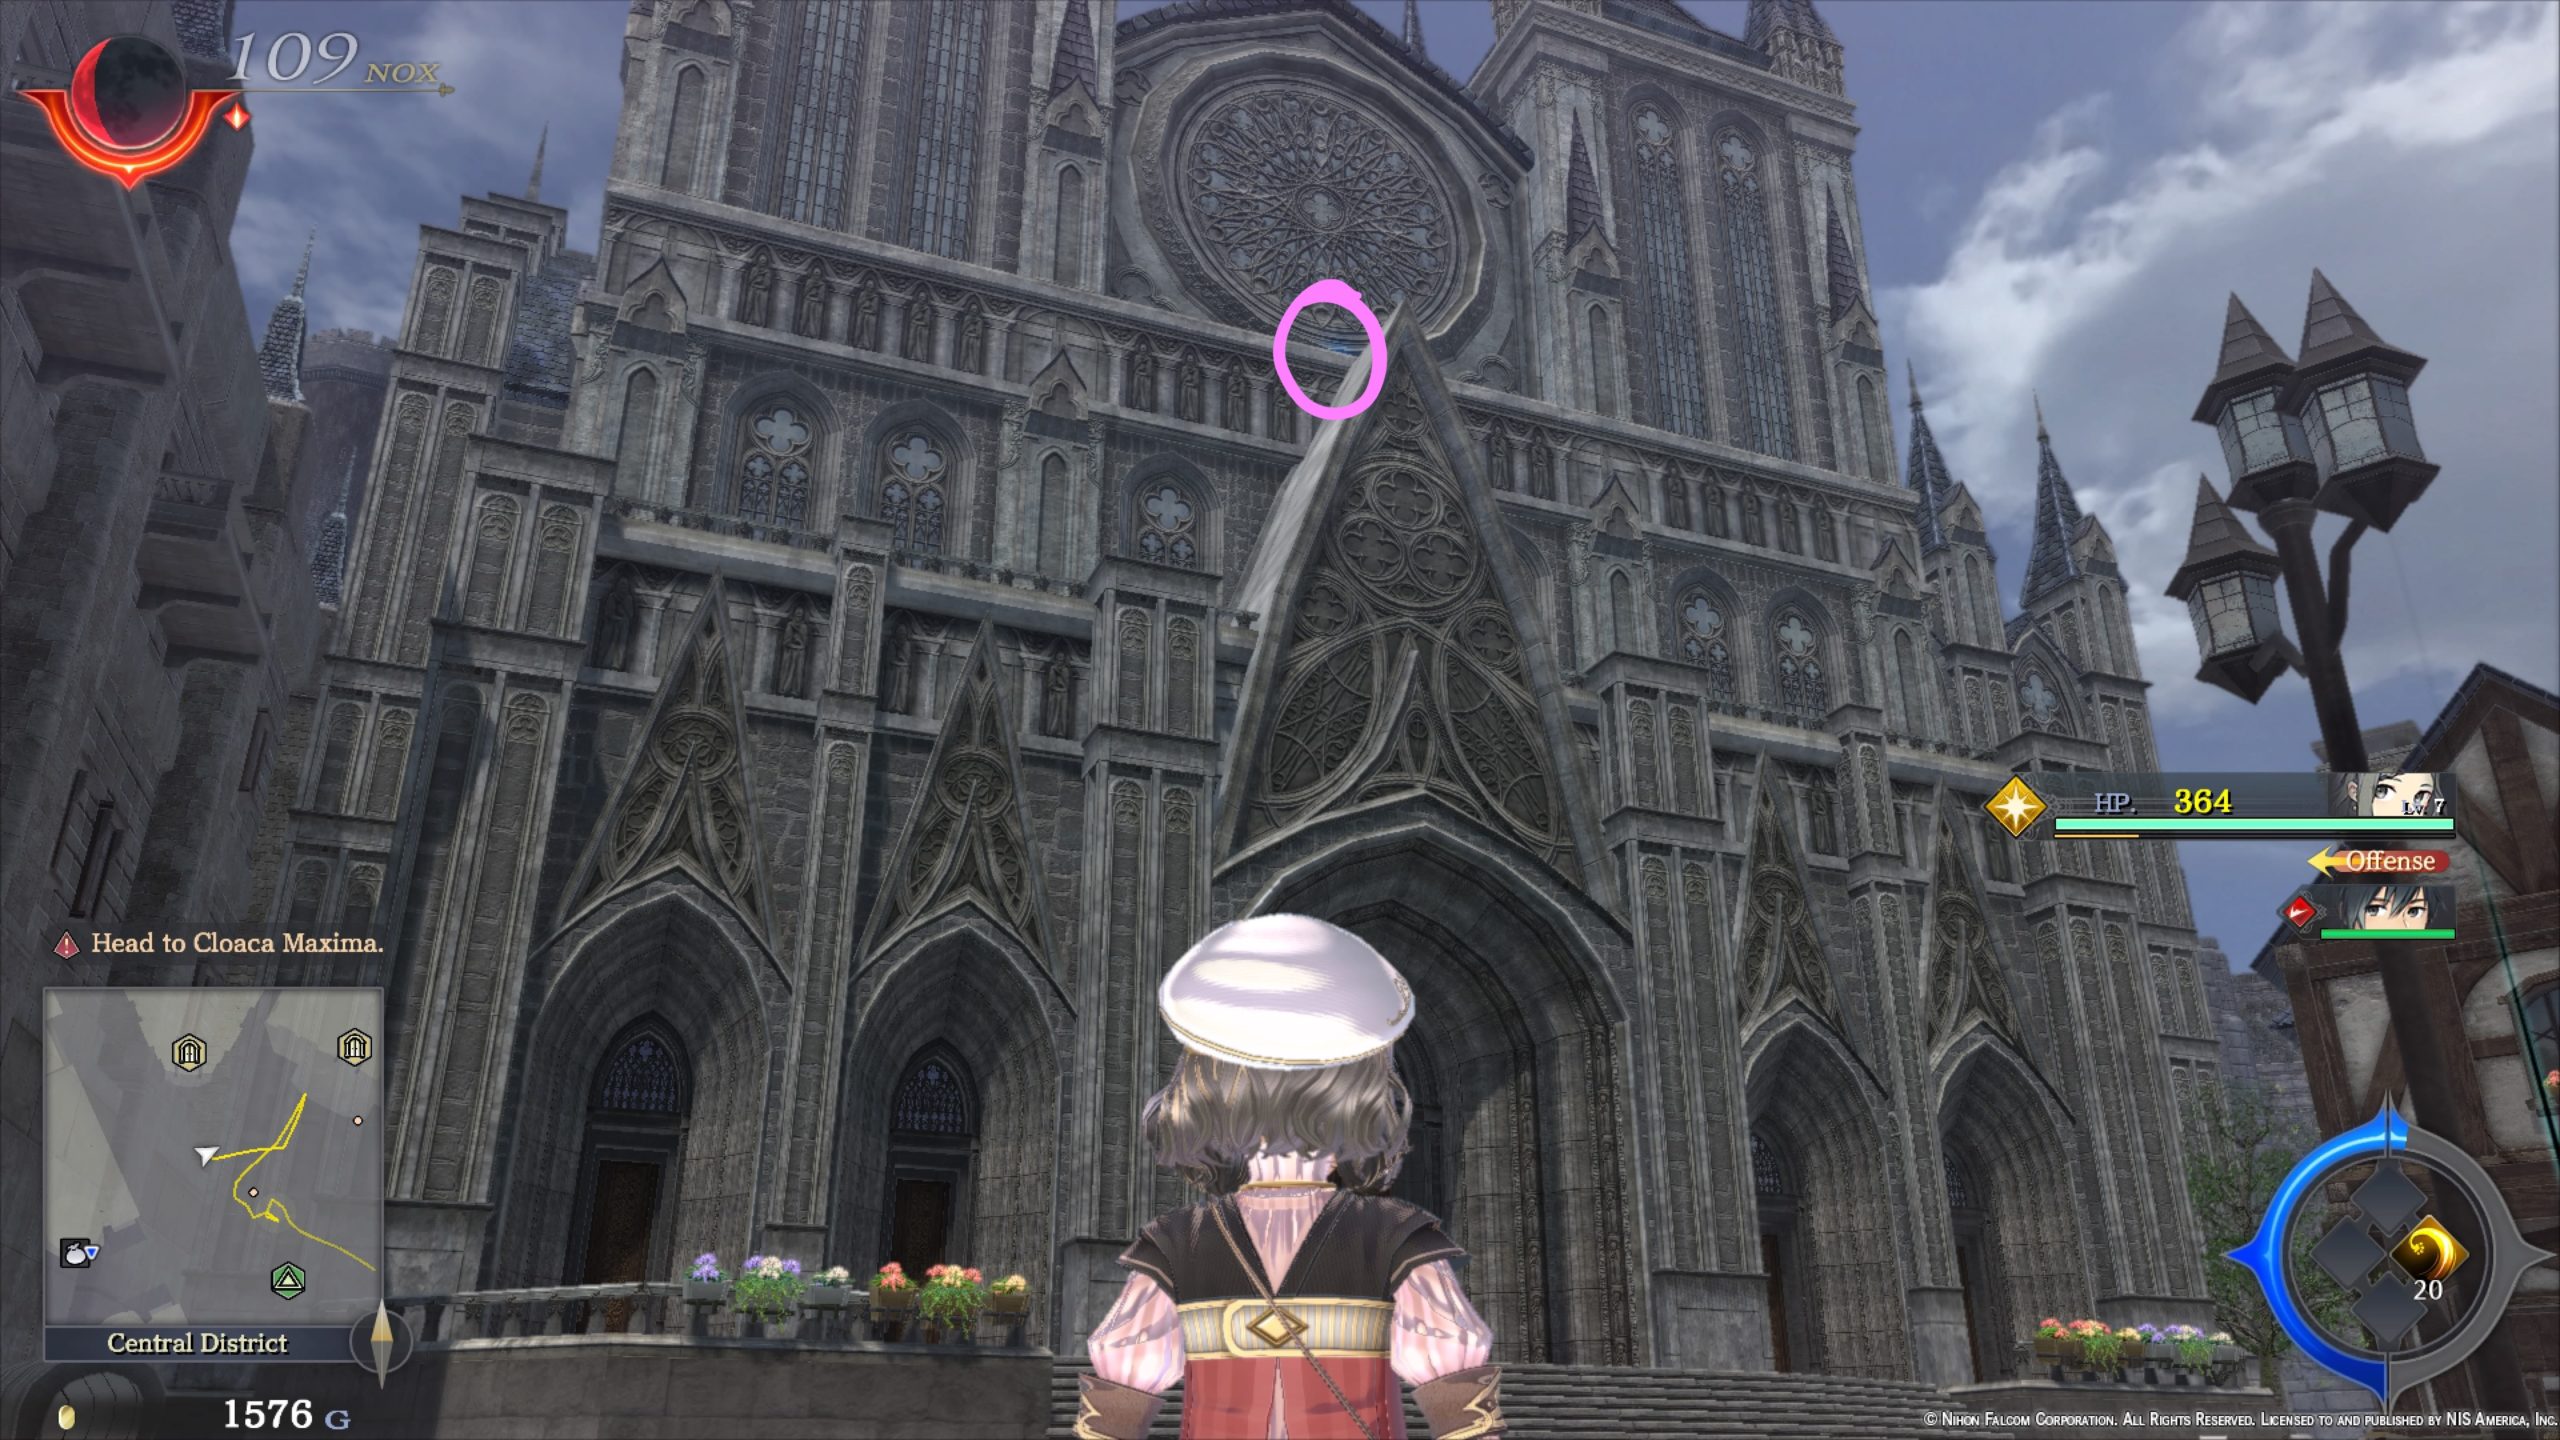
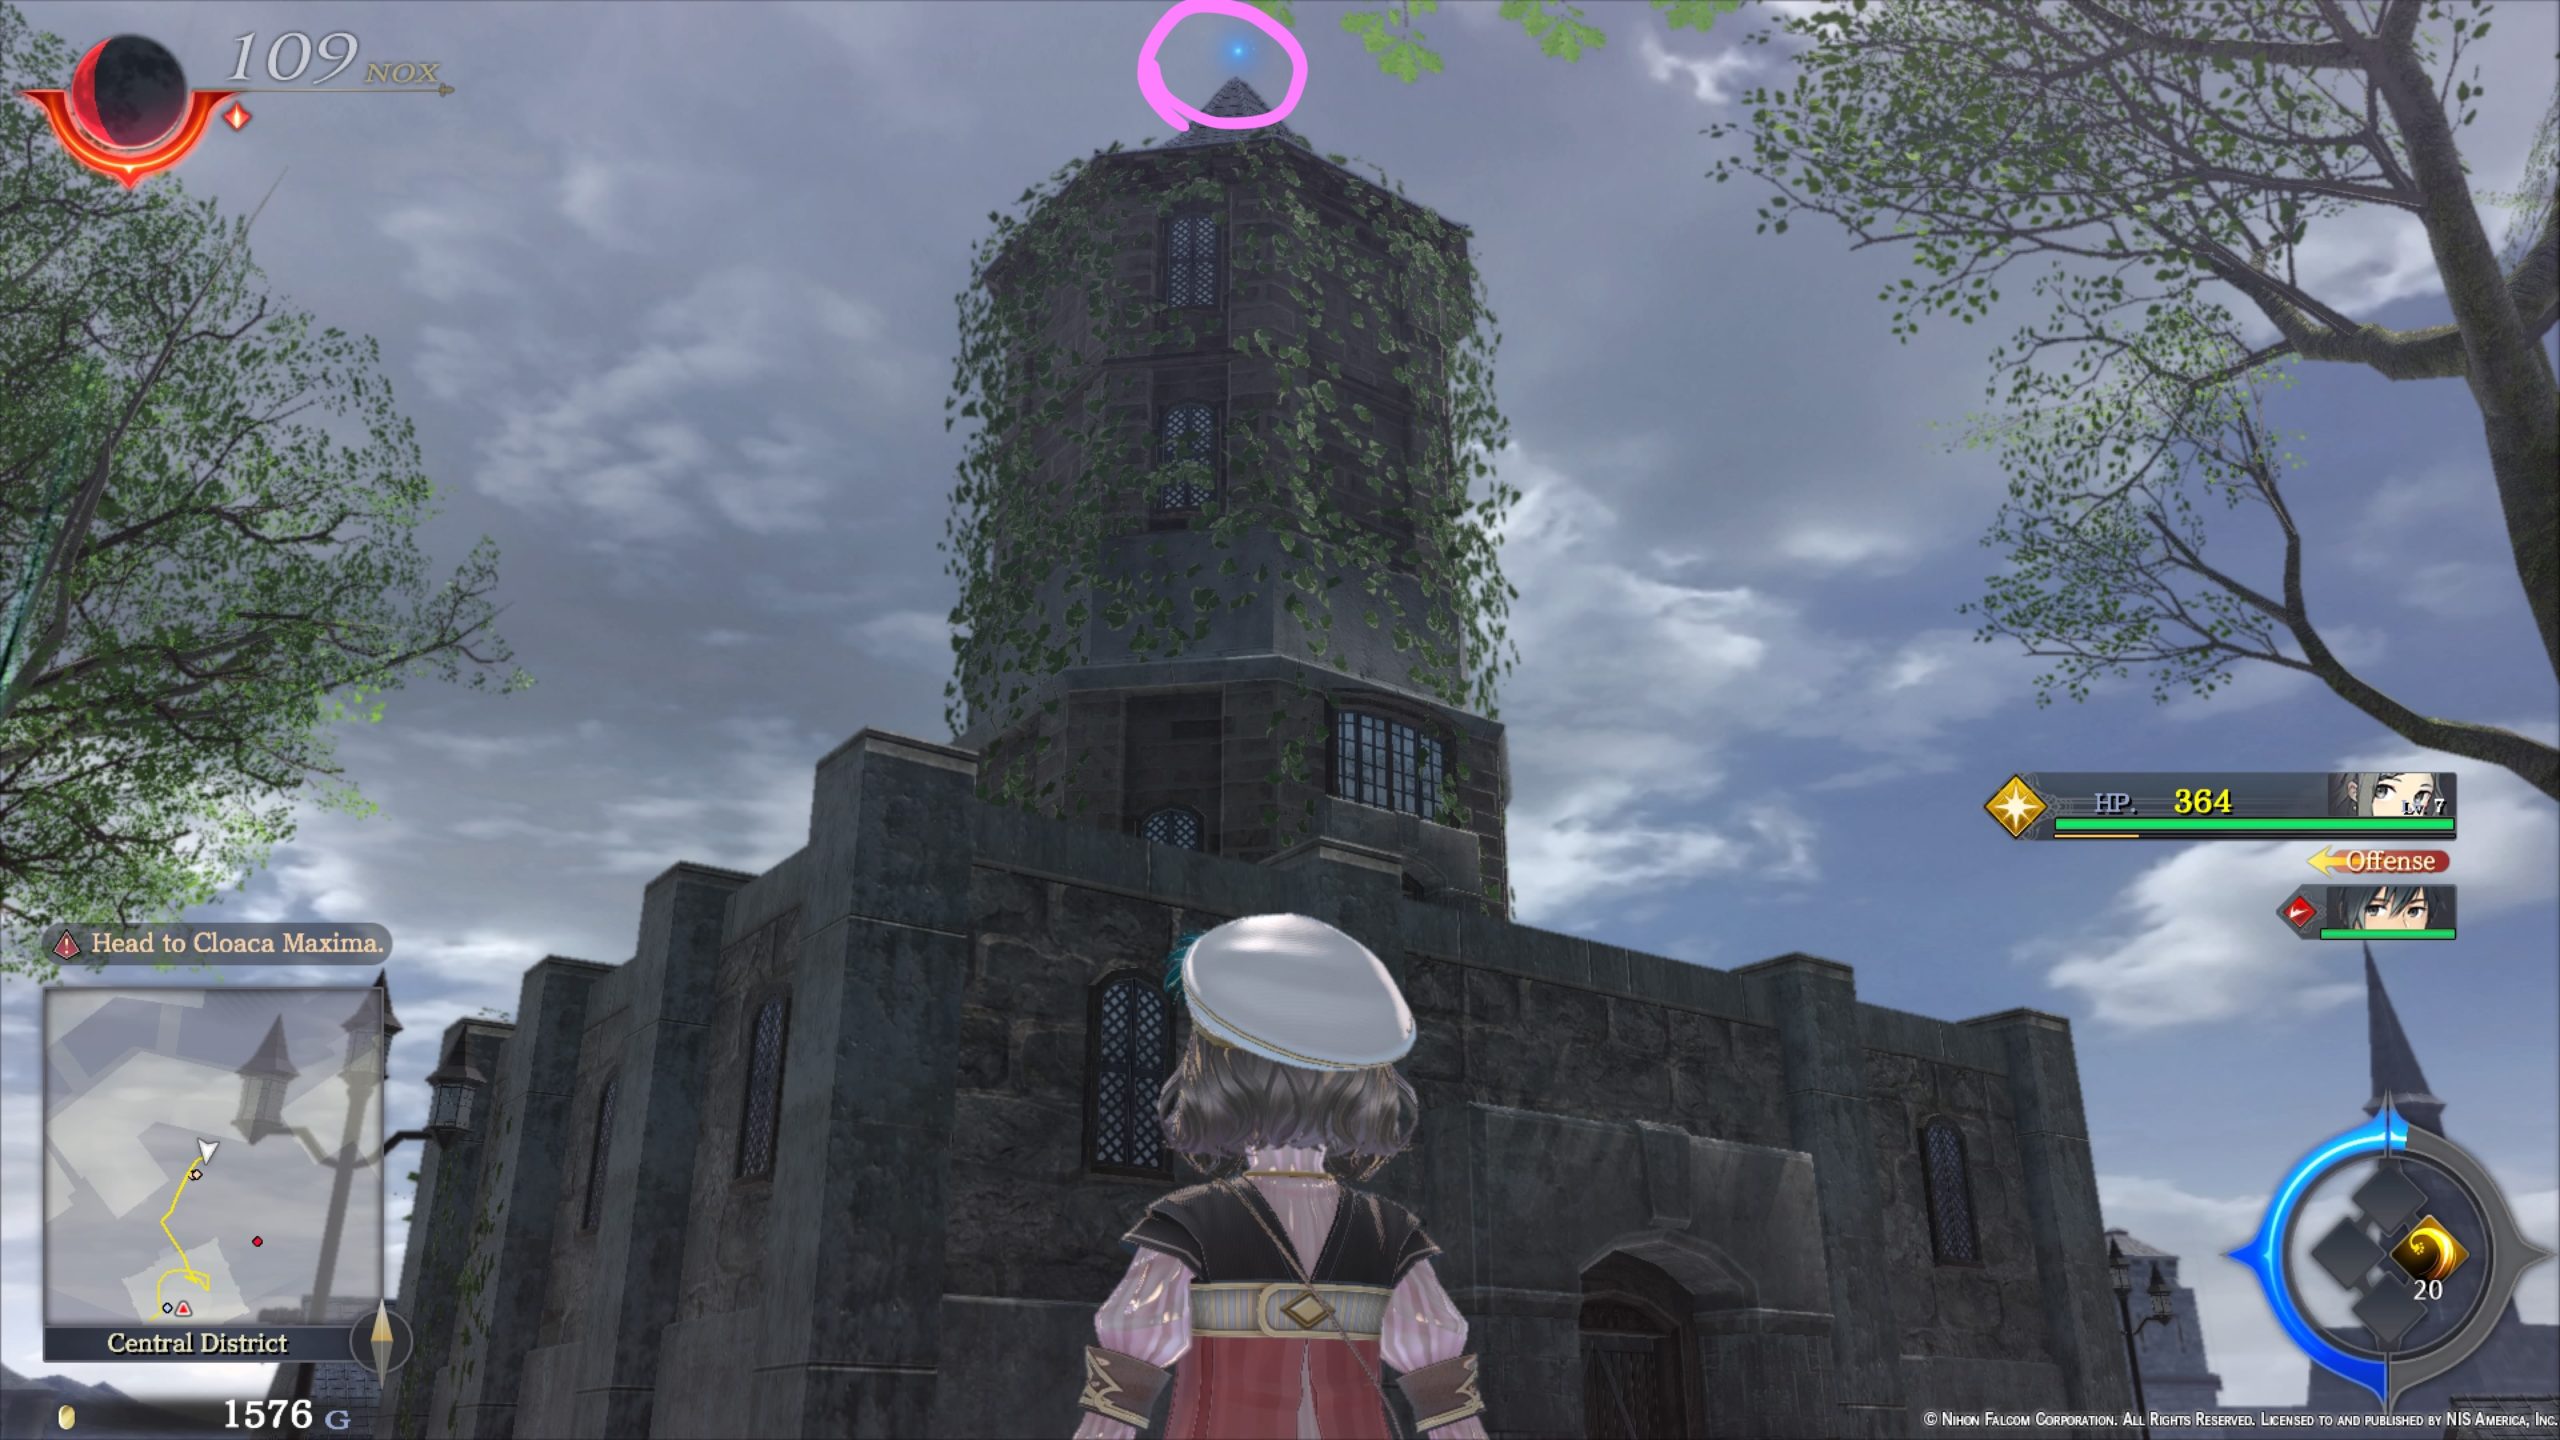
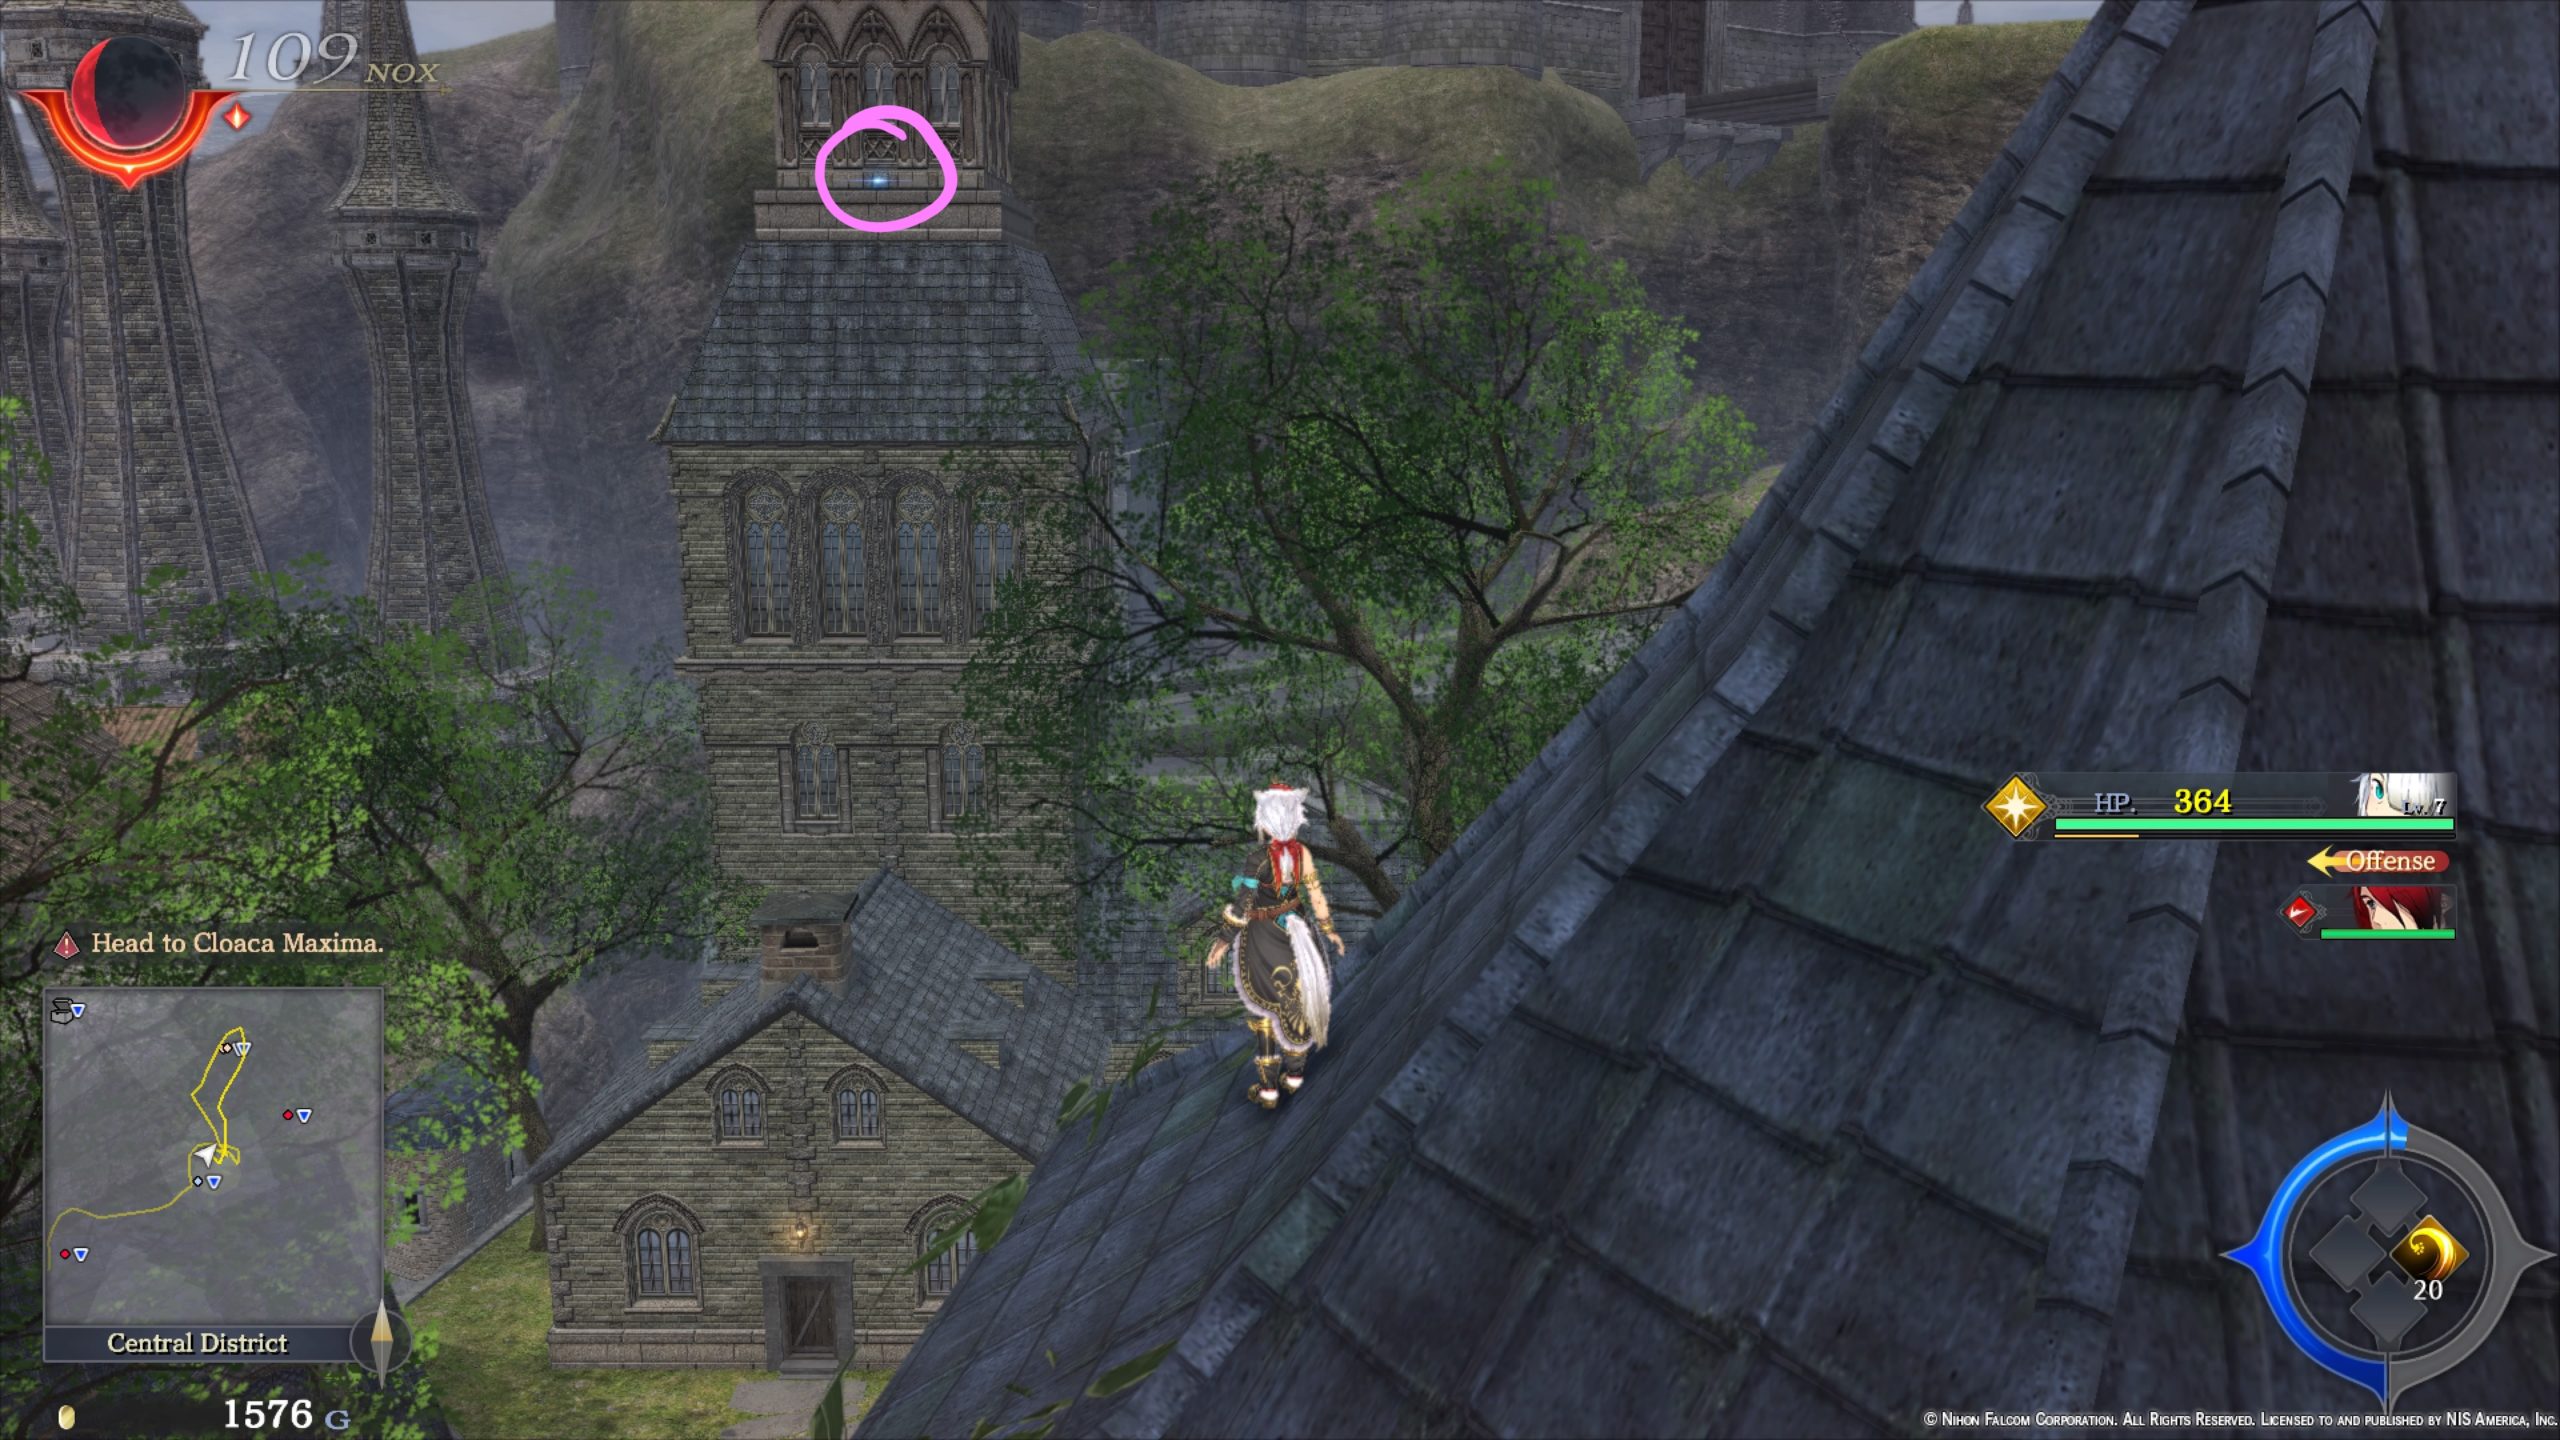
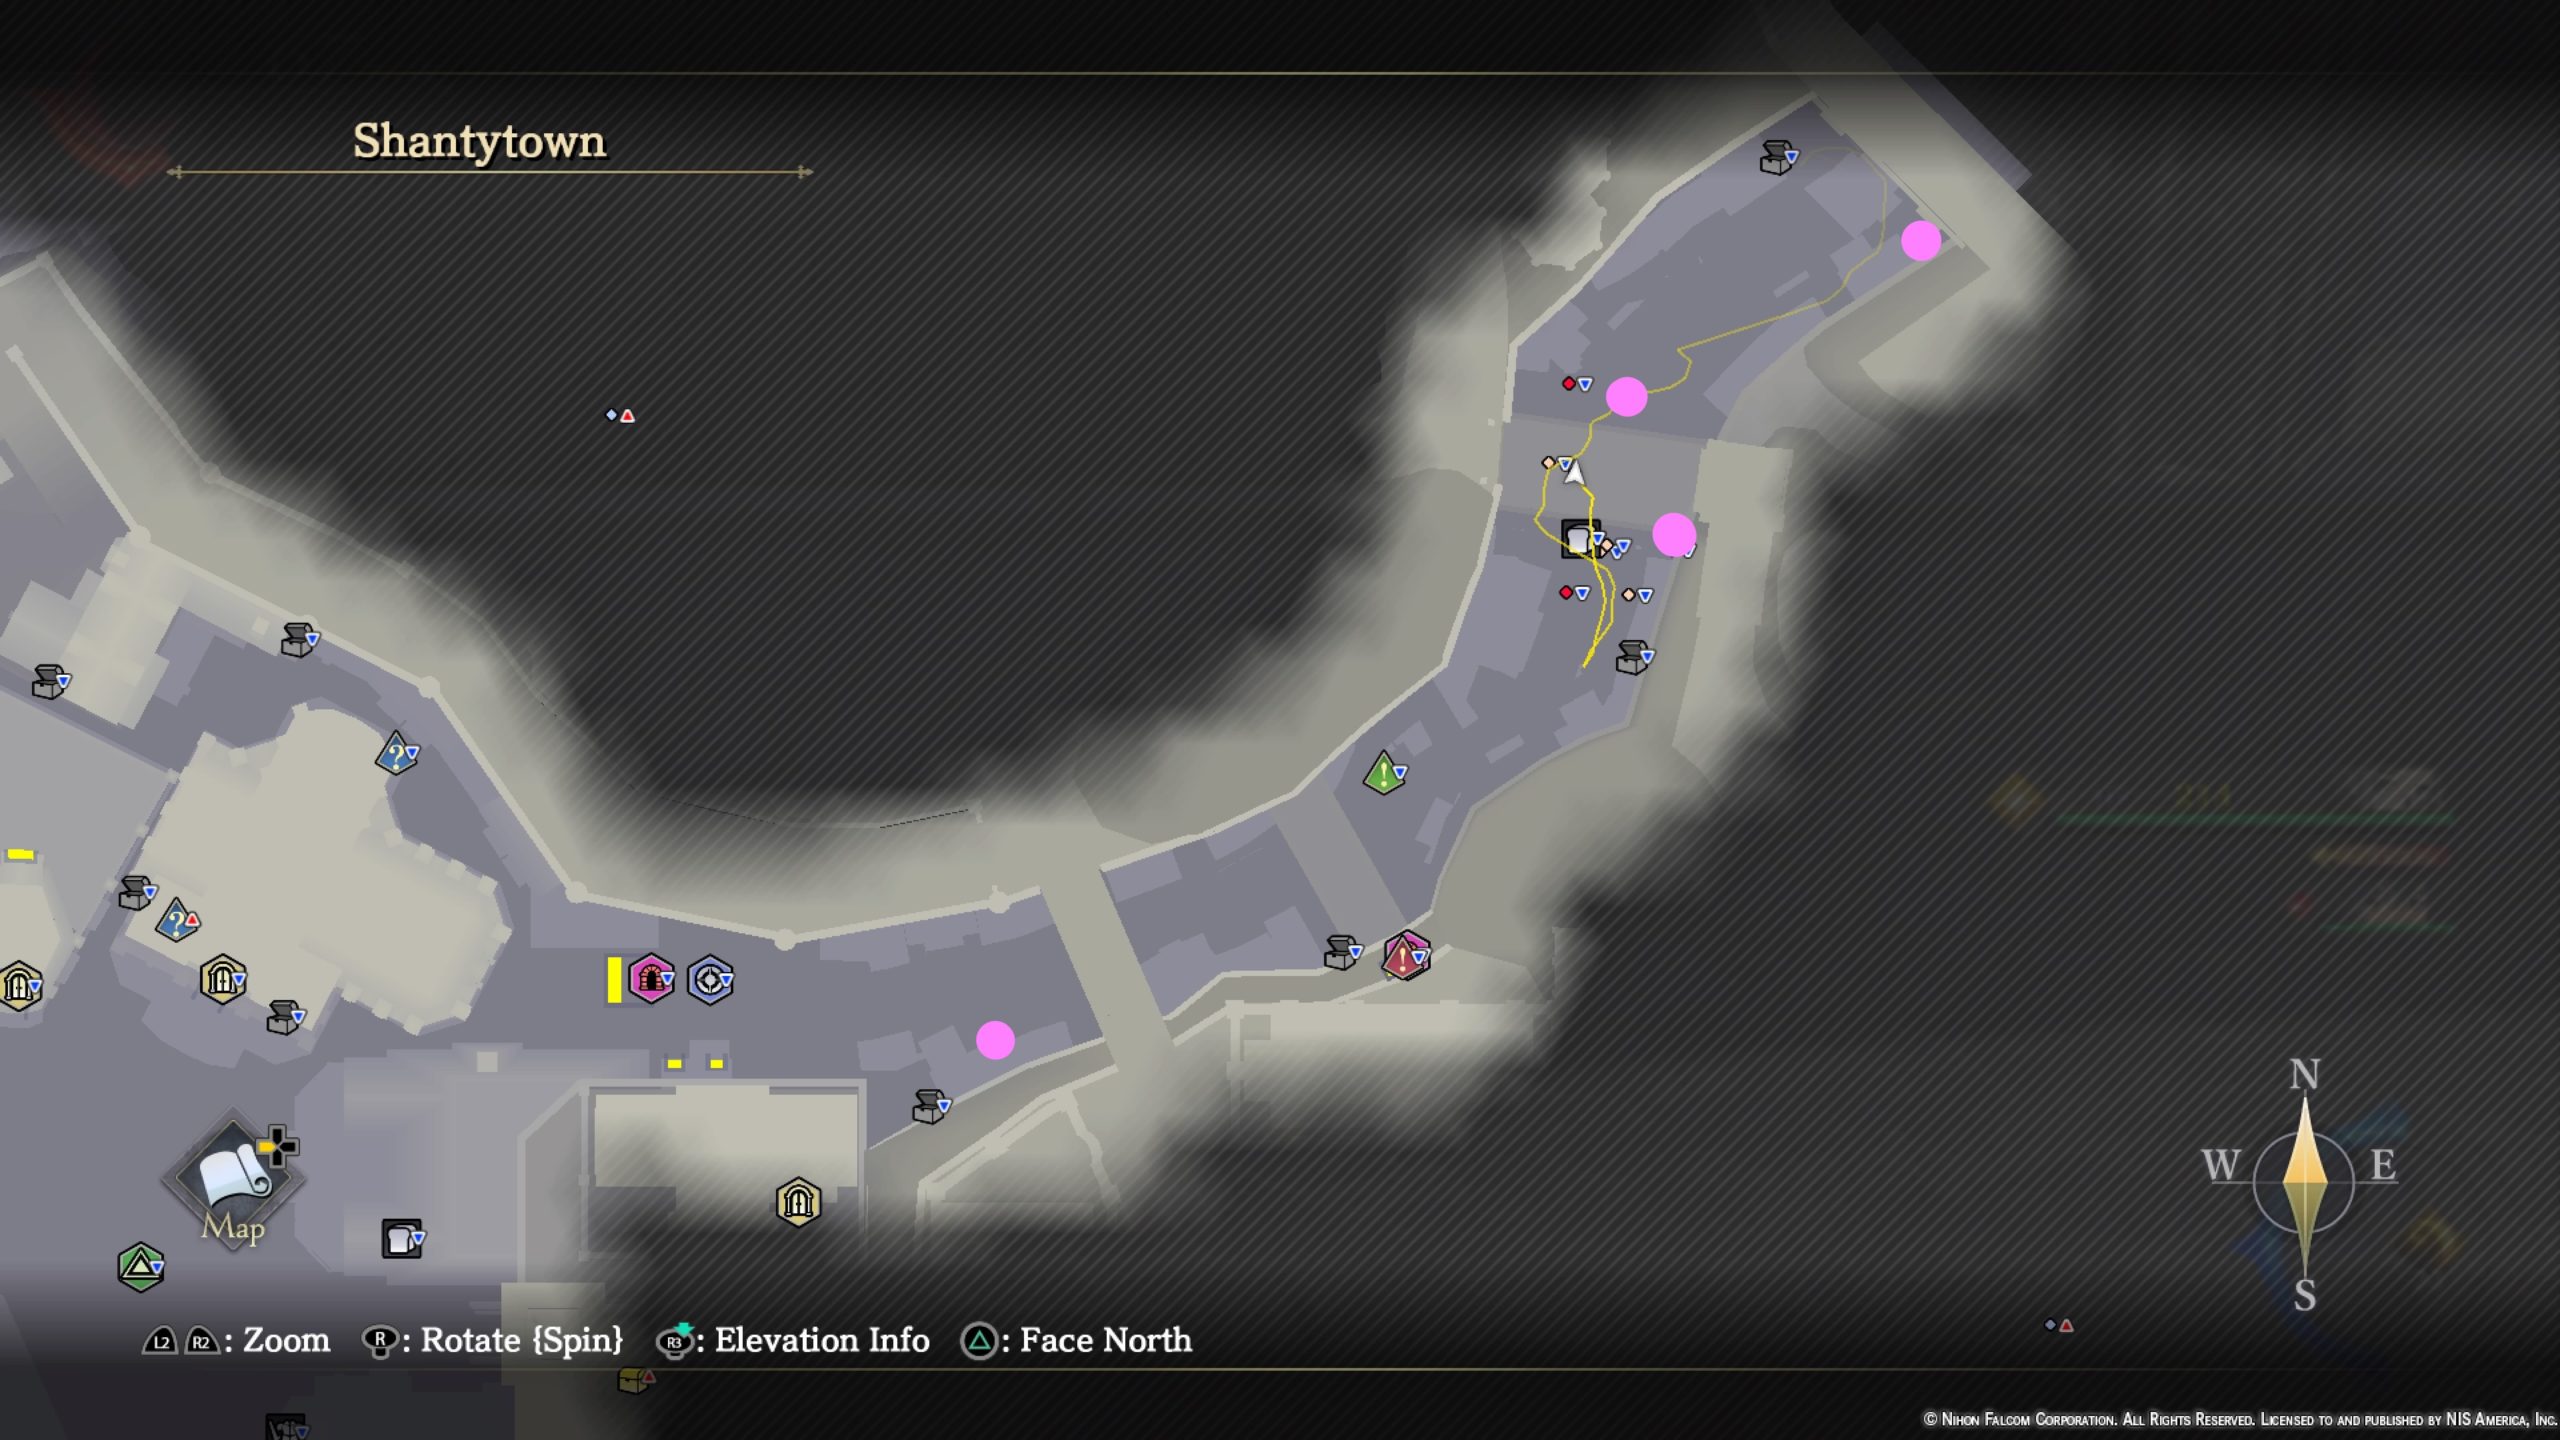
Azure Petals
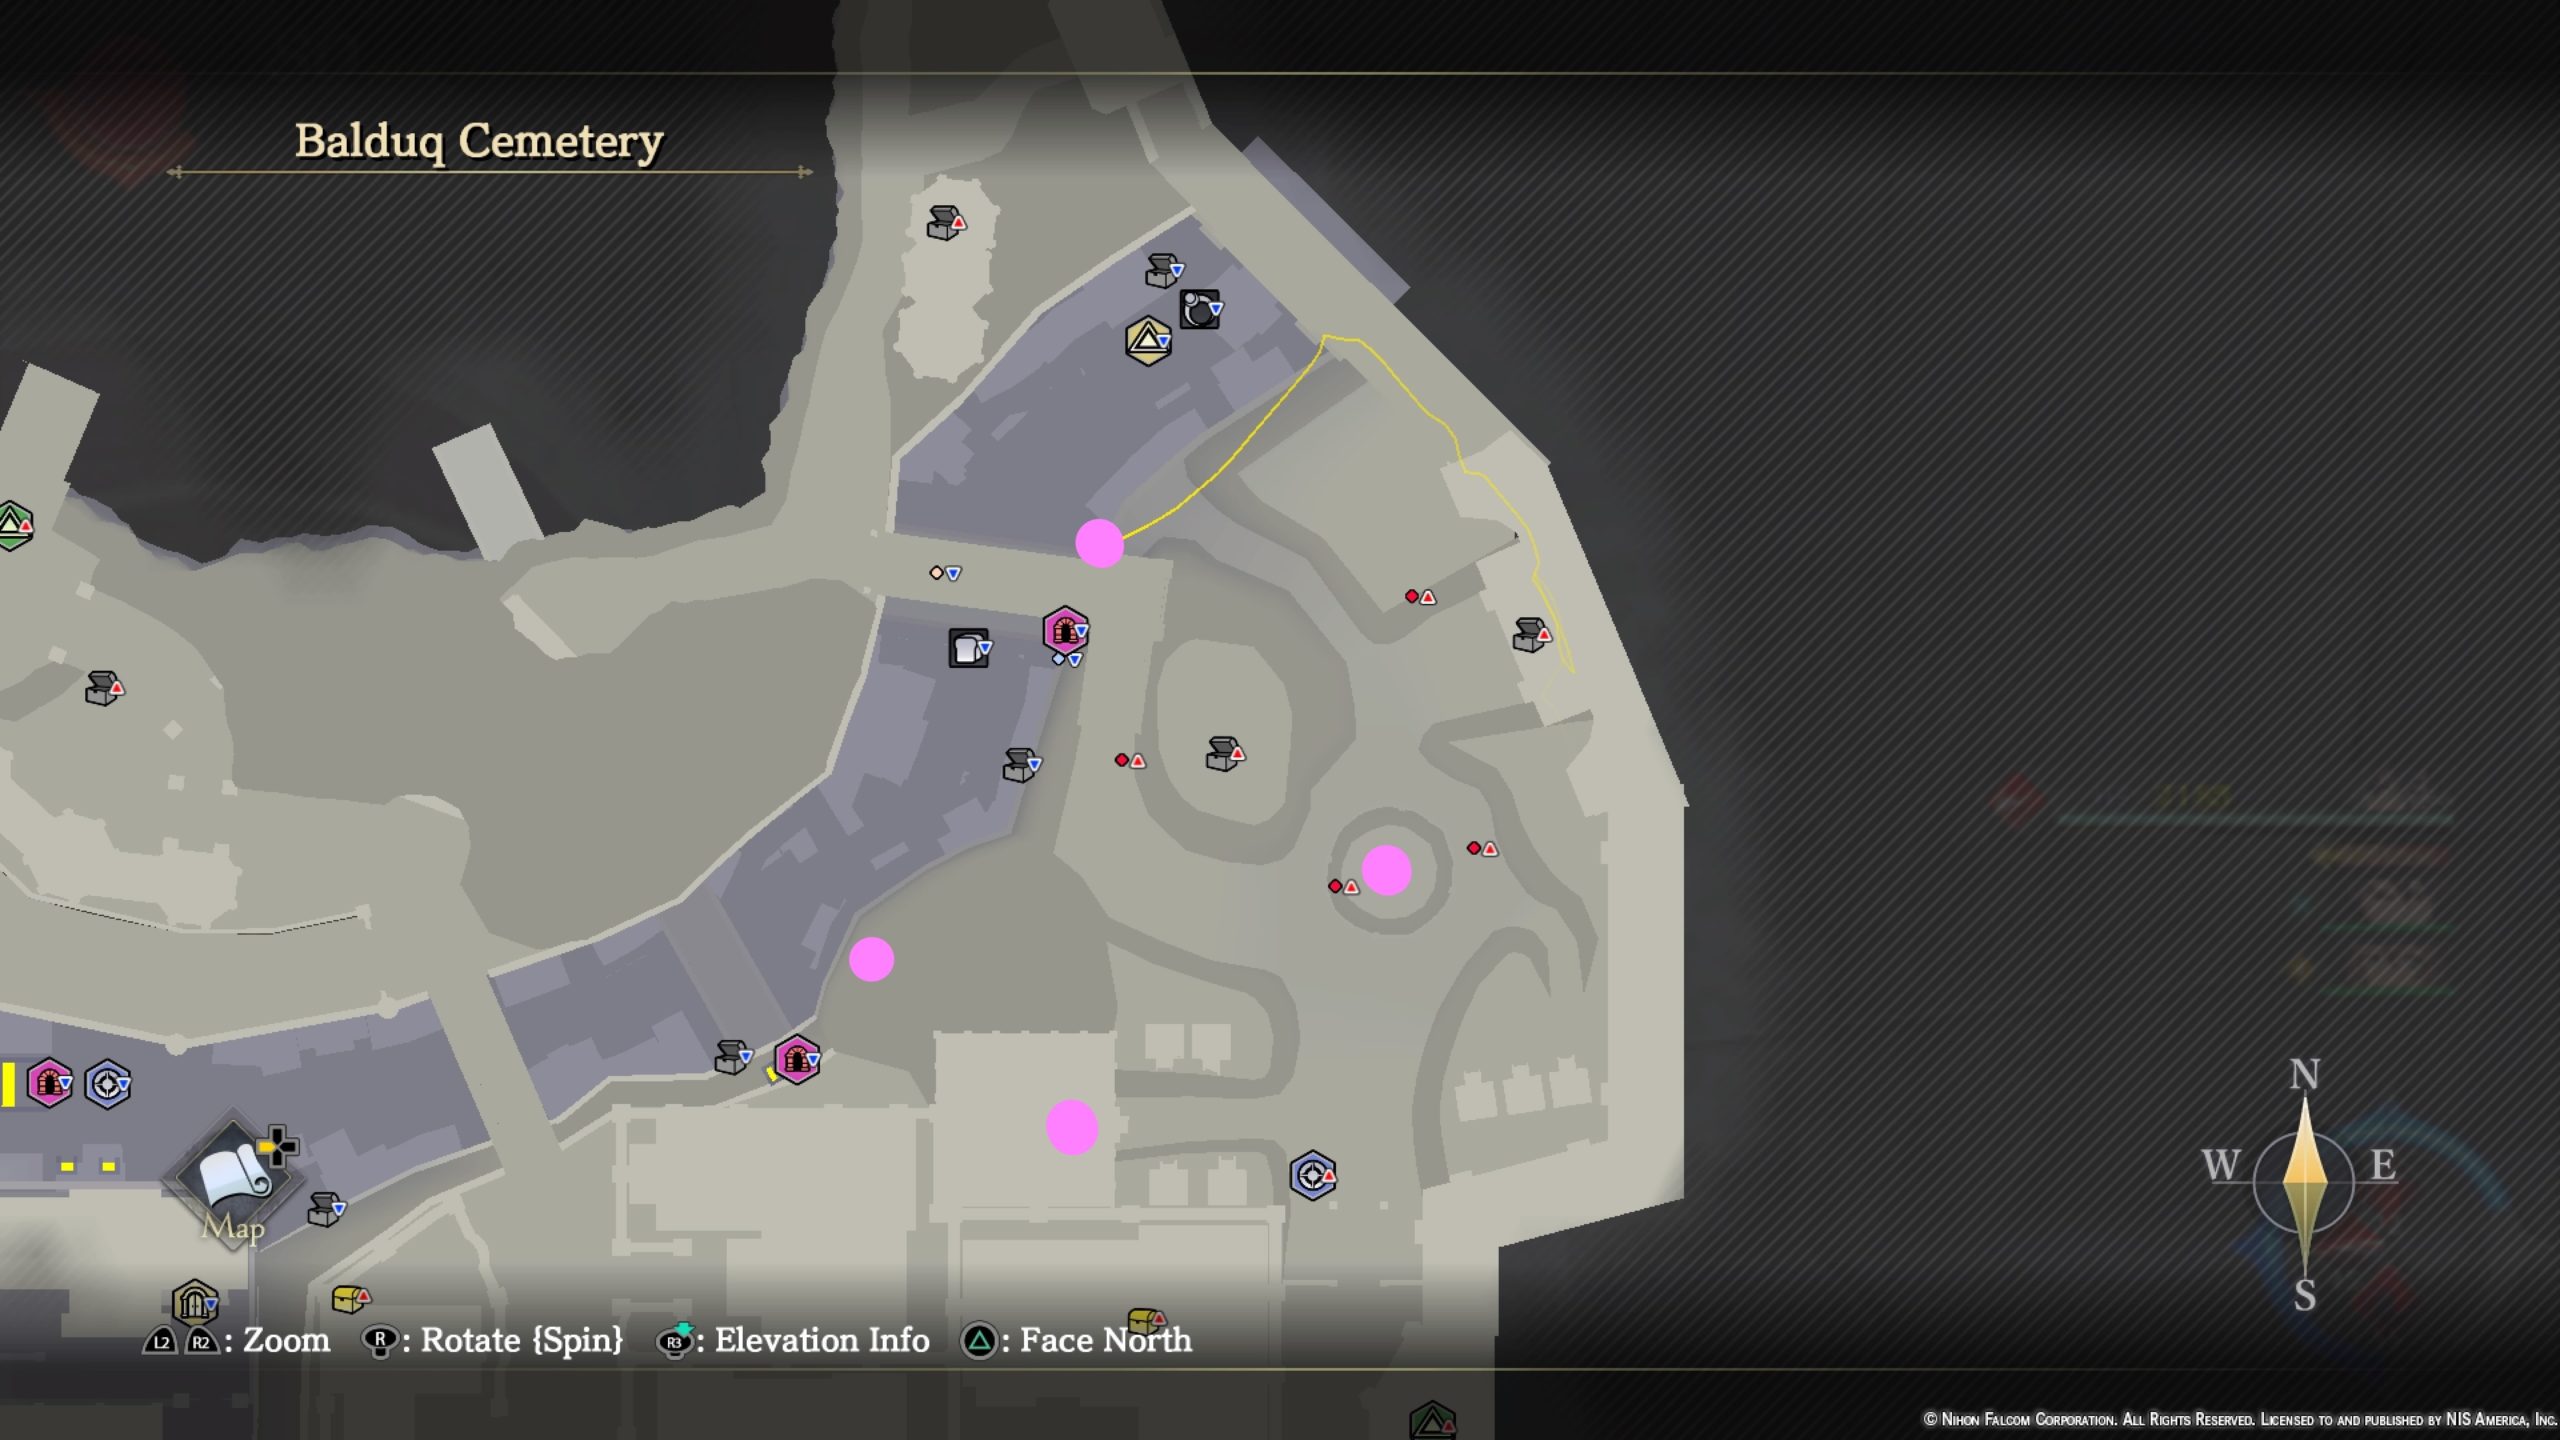
- Underneath a tree on the side of a hill on the western side of the area
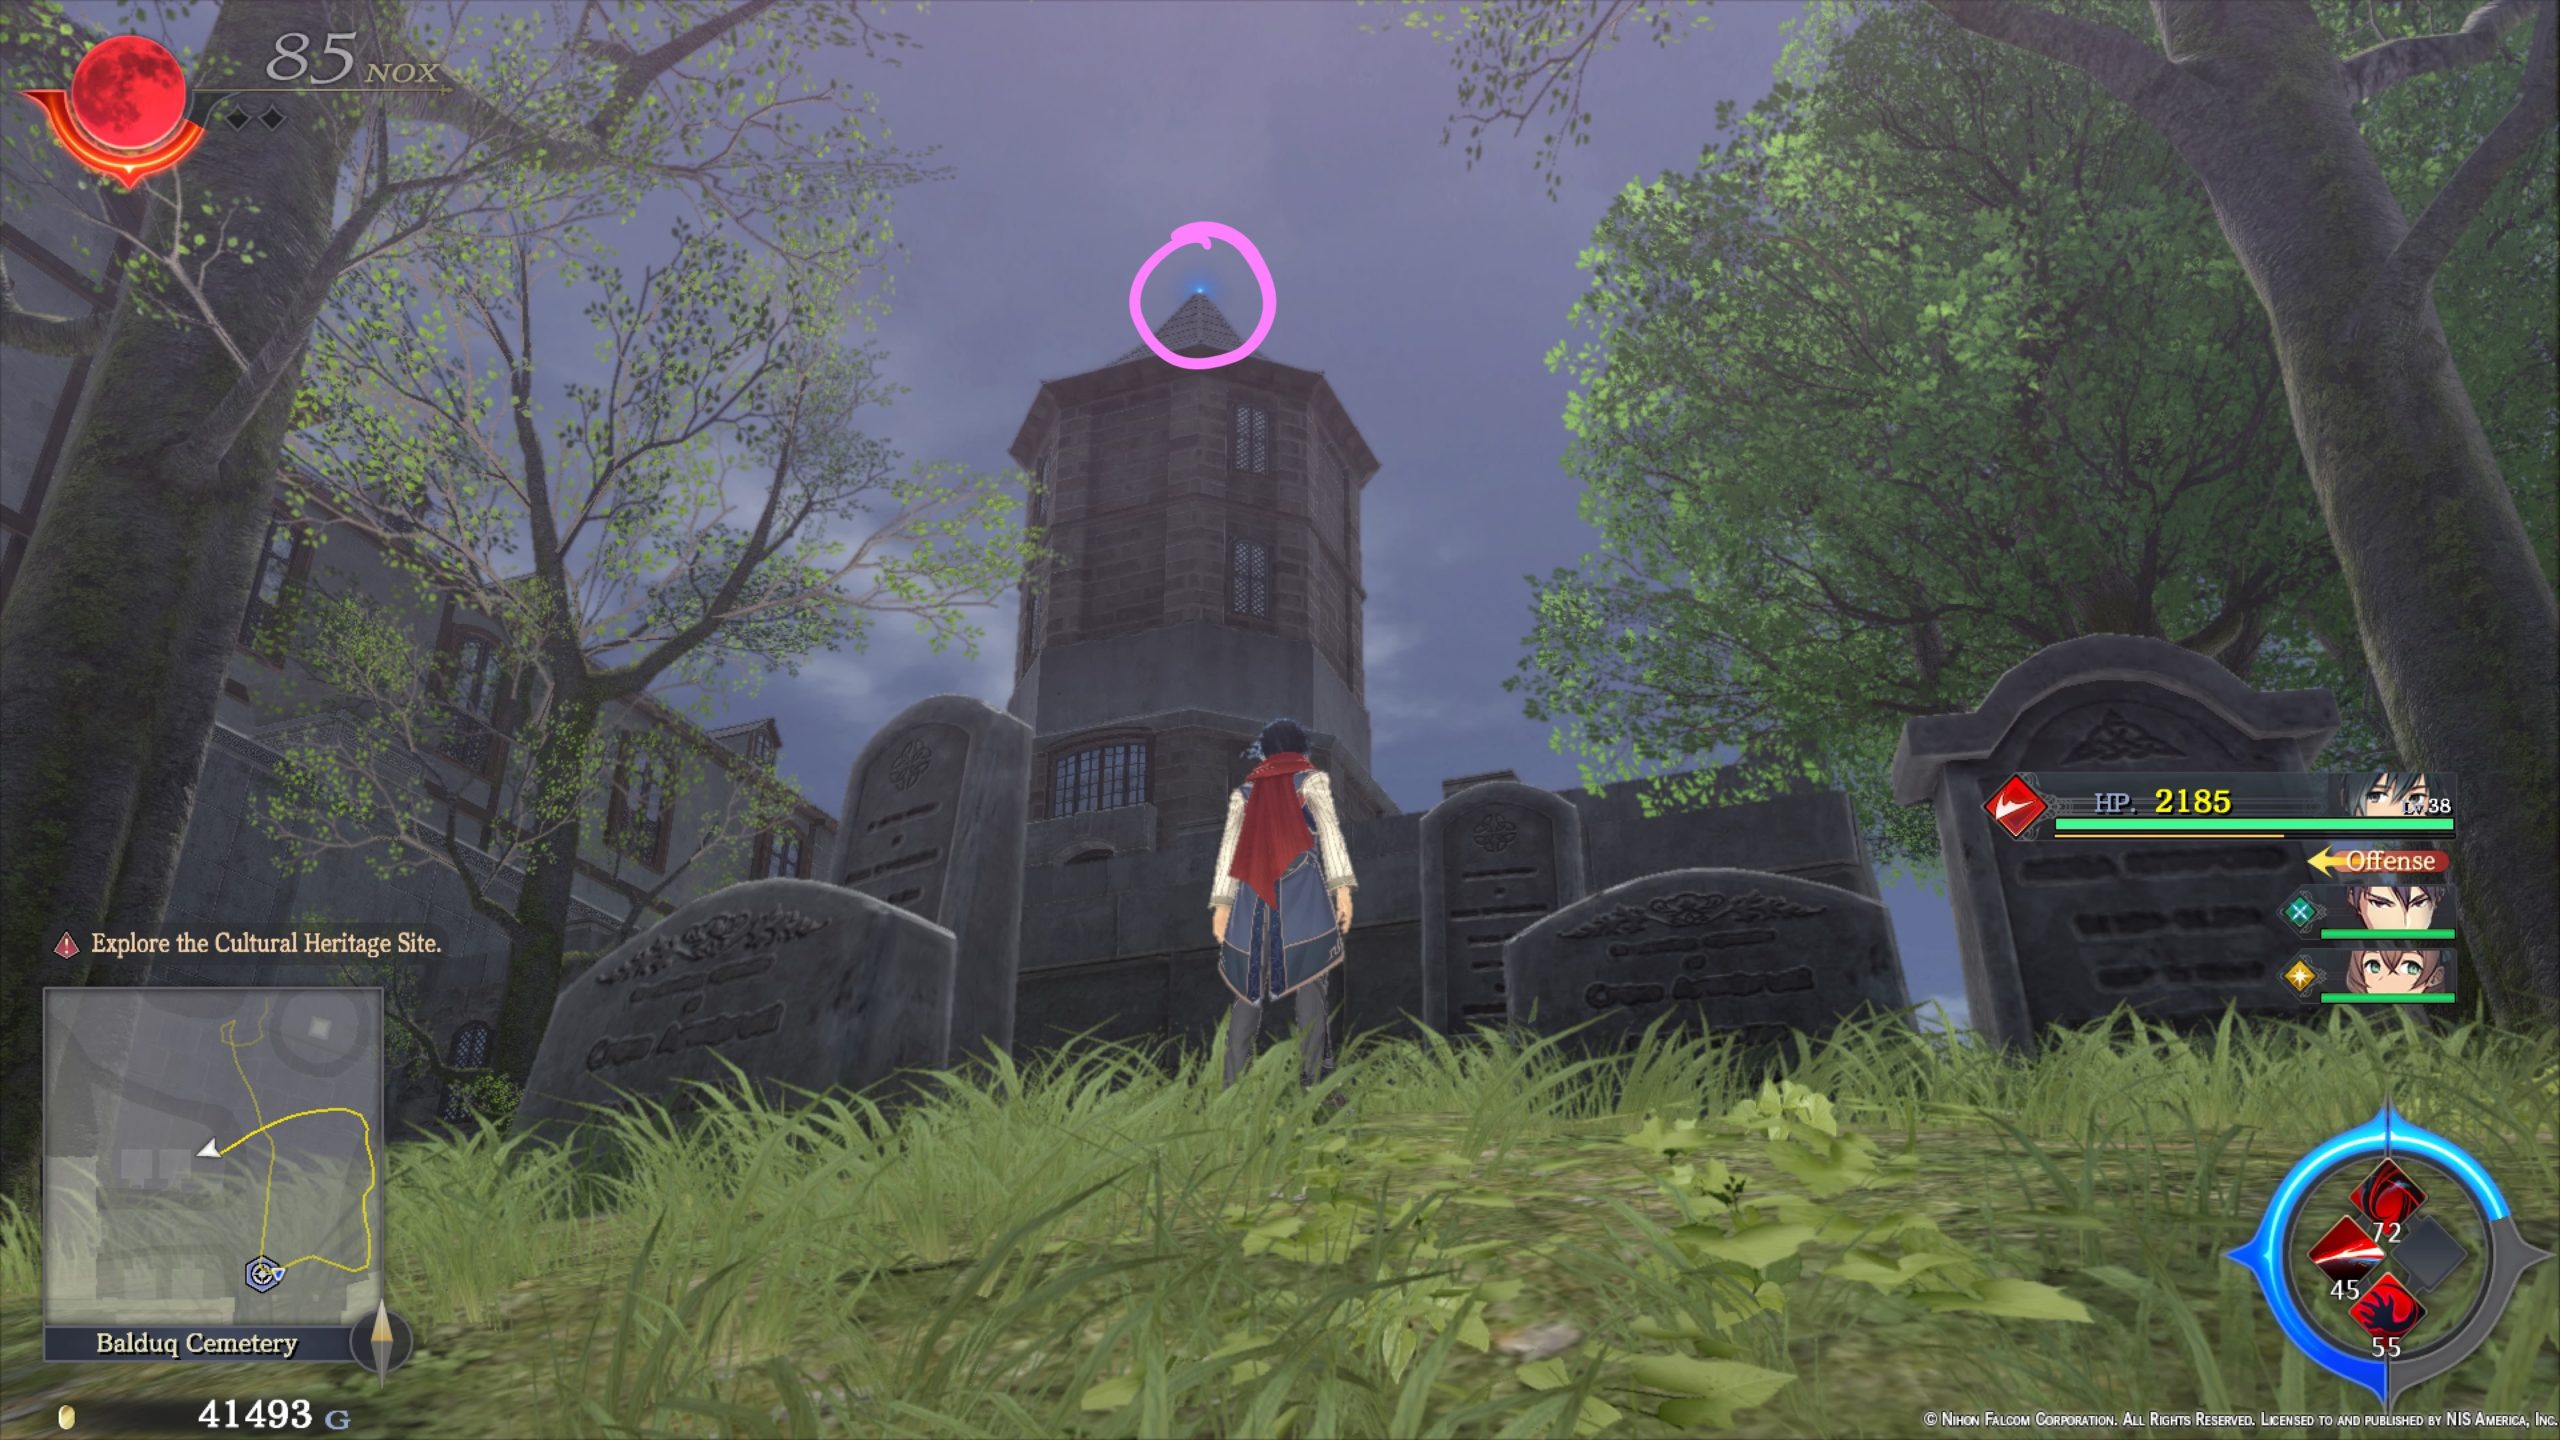
- On top of a tall monument in the center of the cemetery

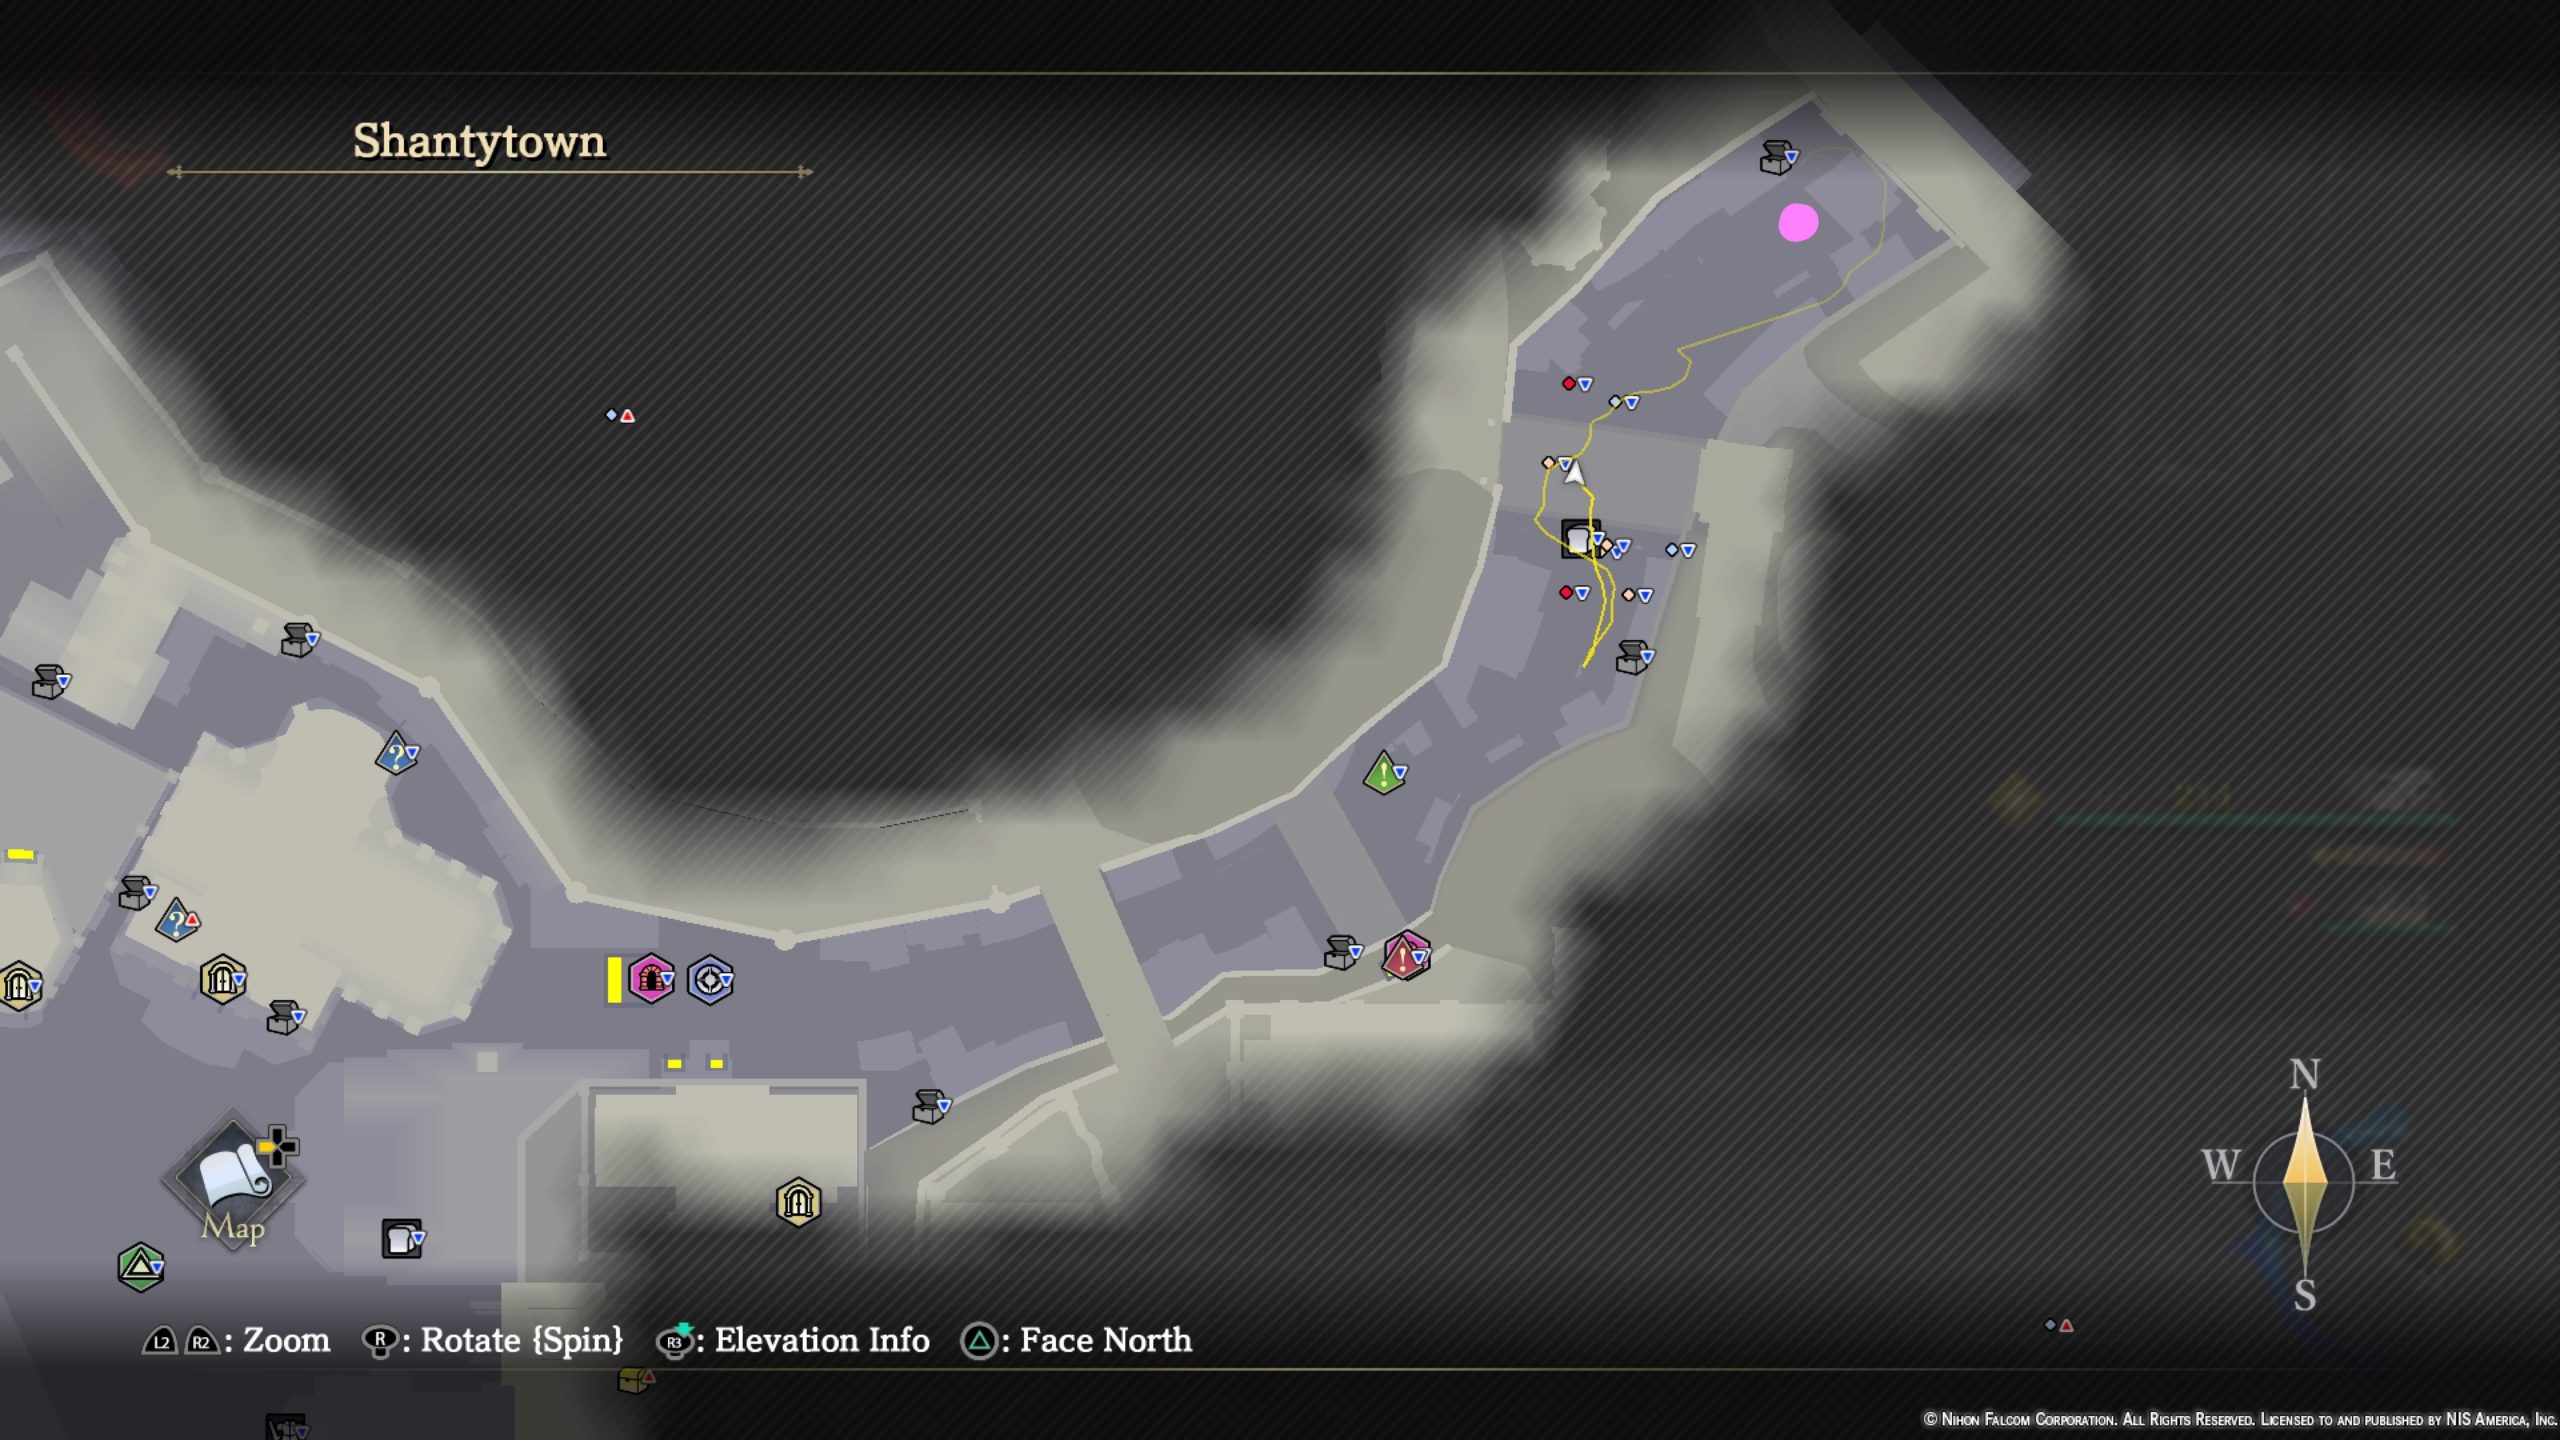
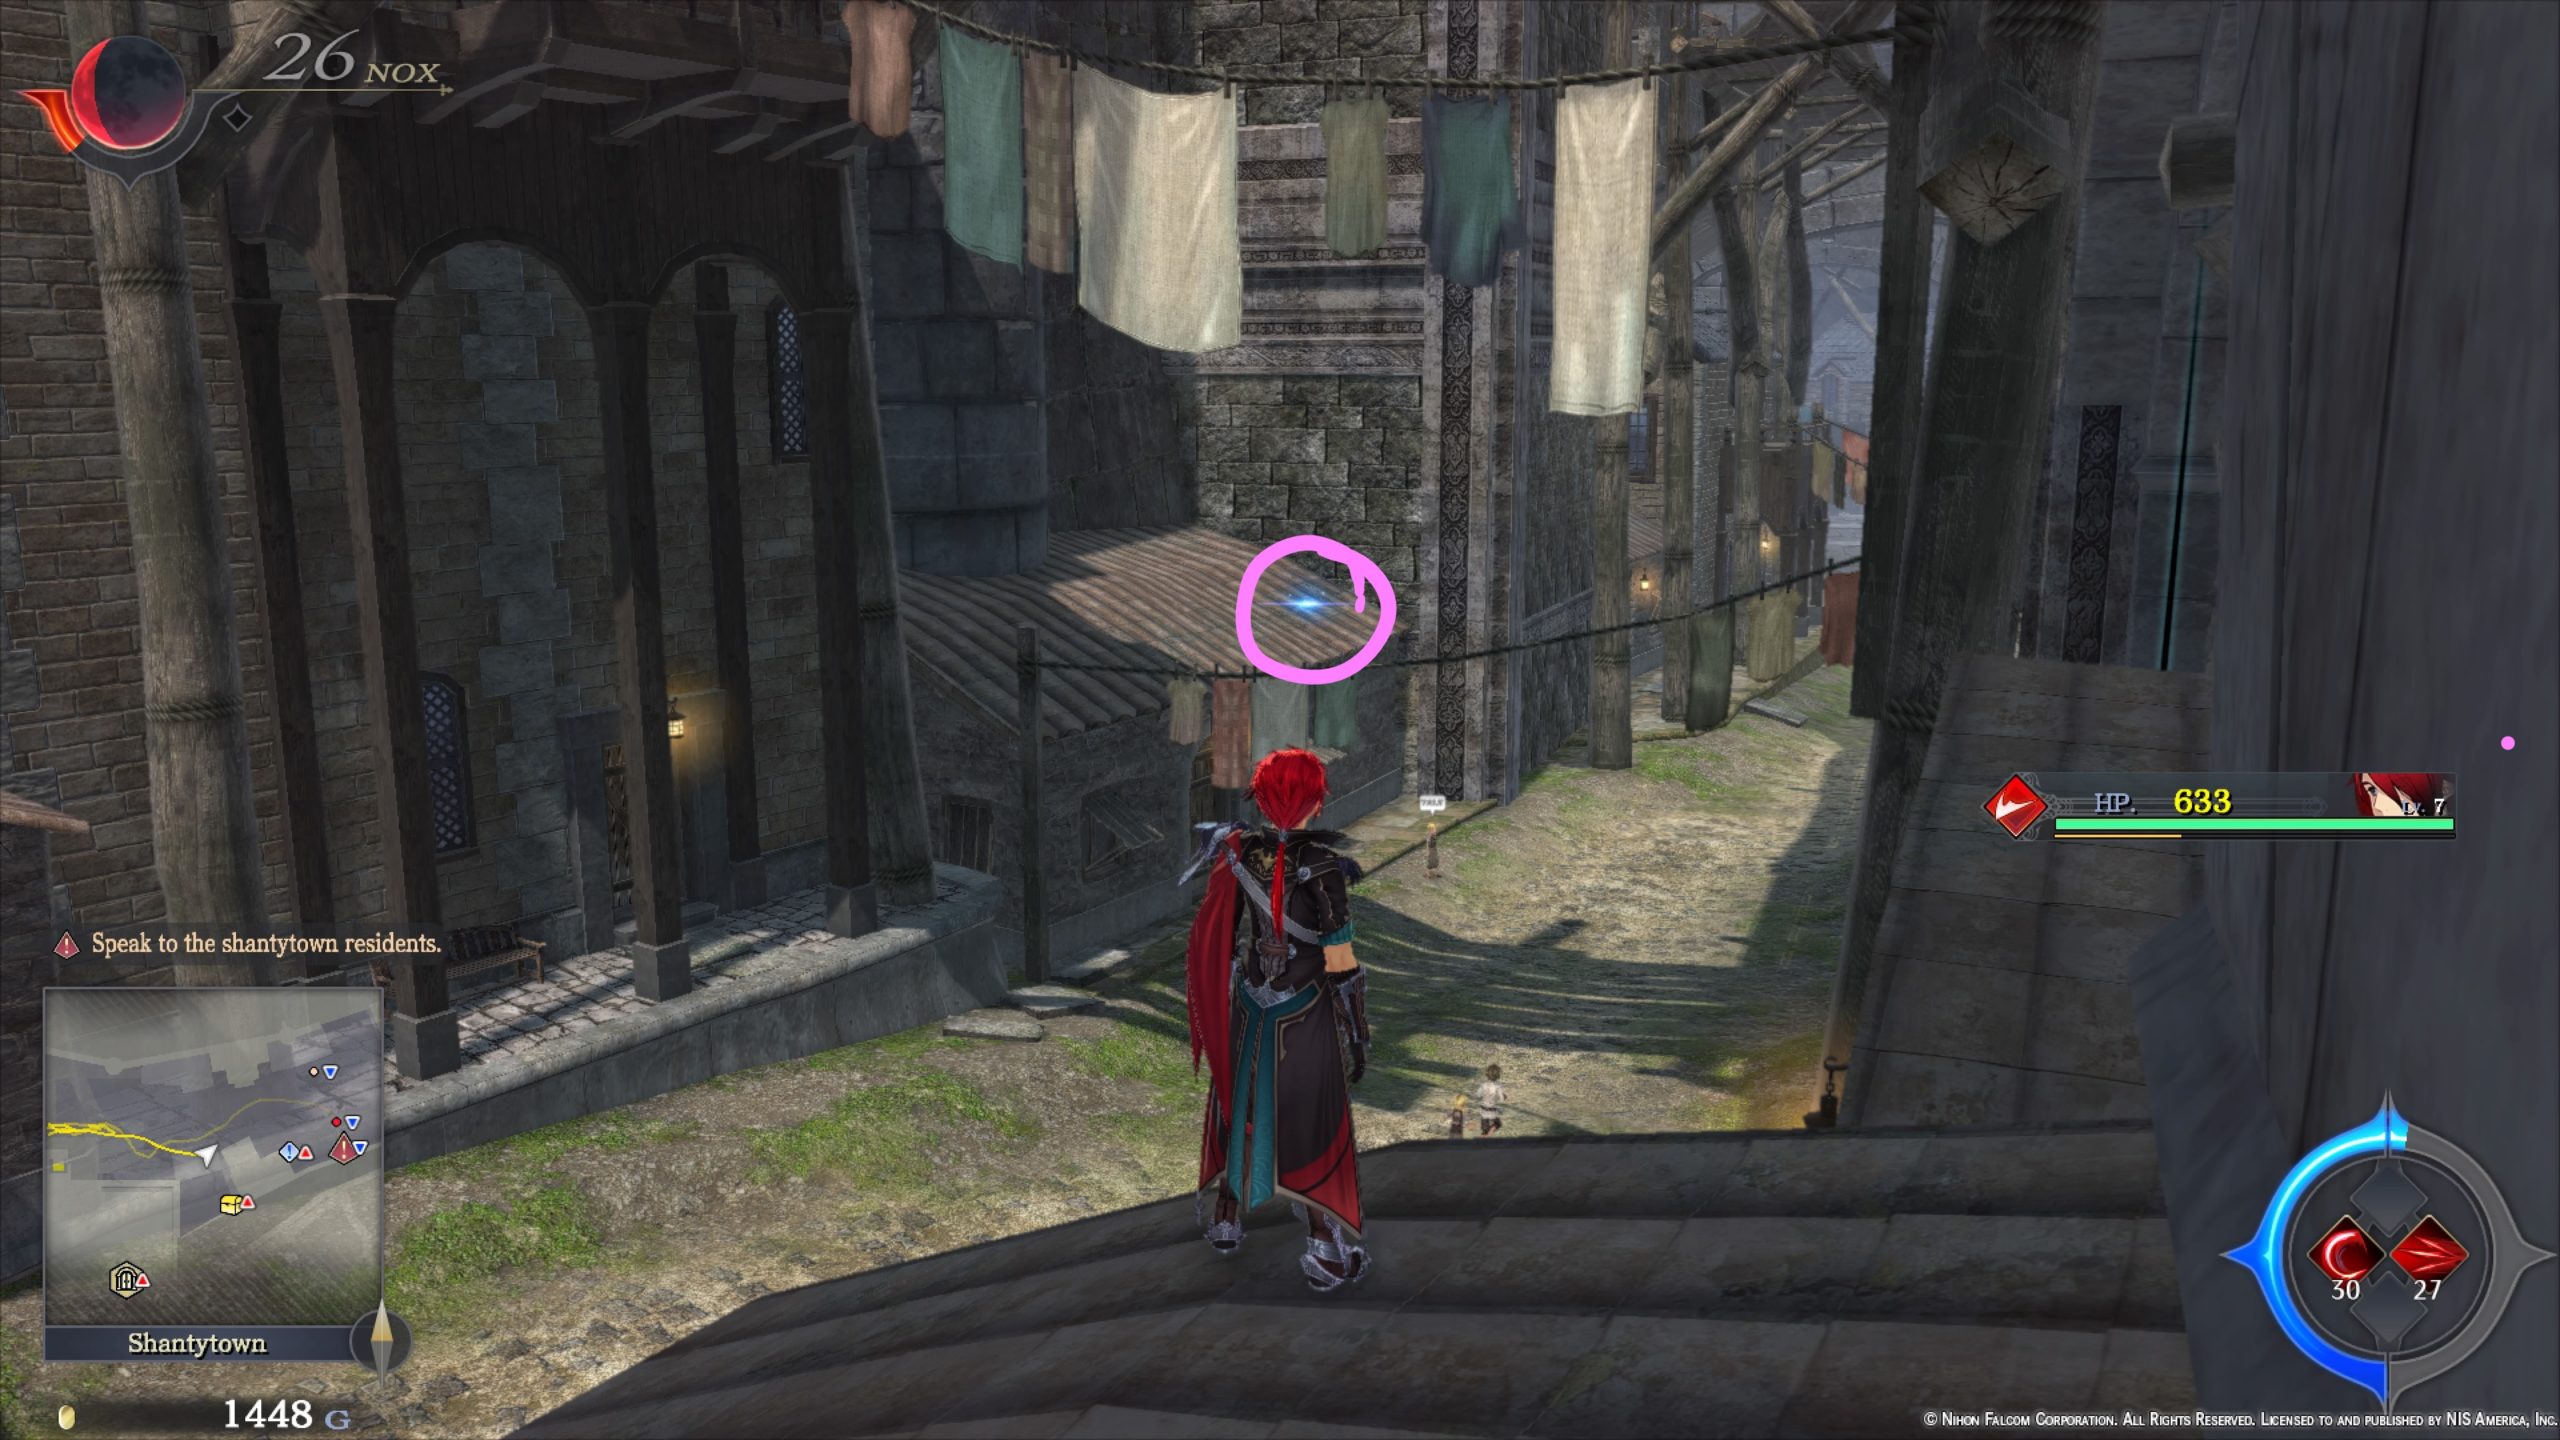
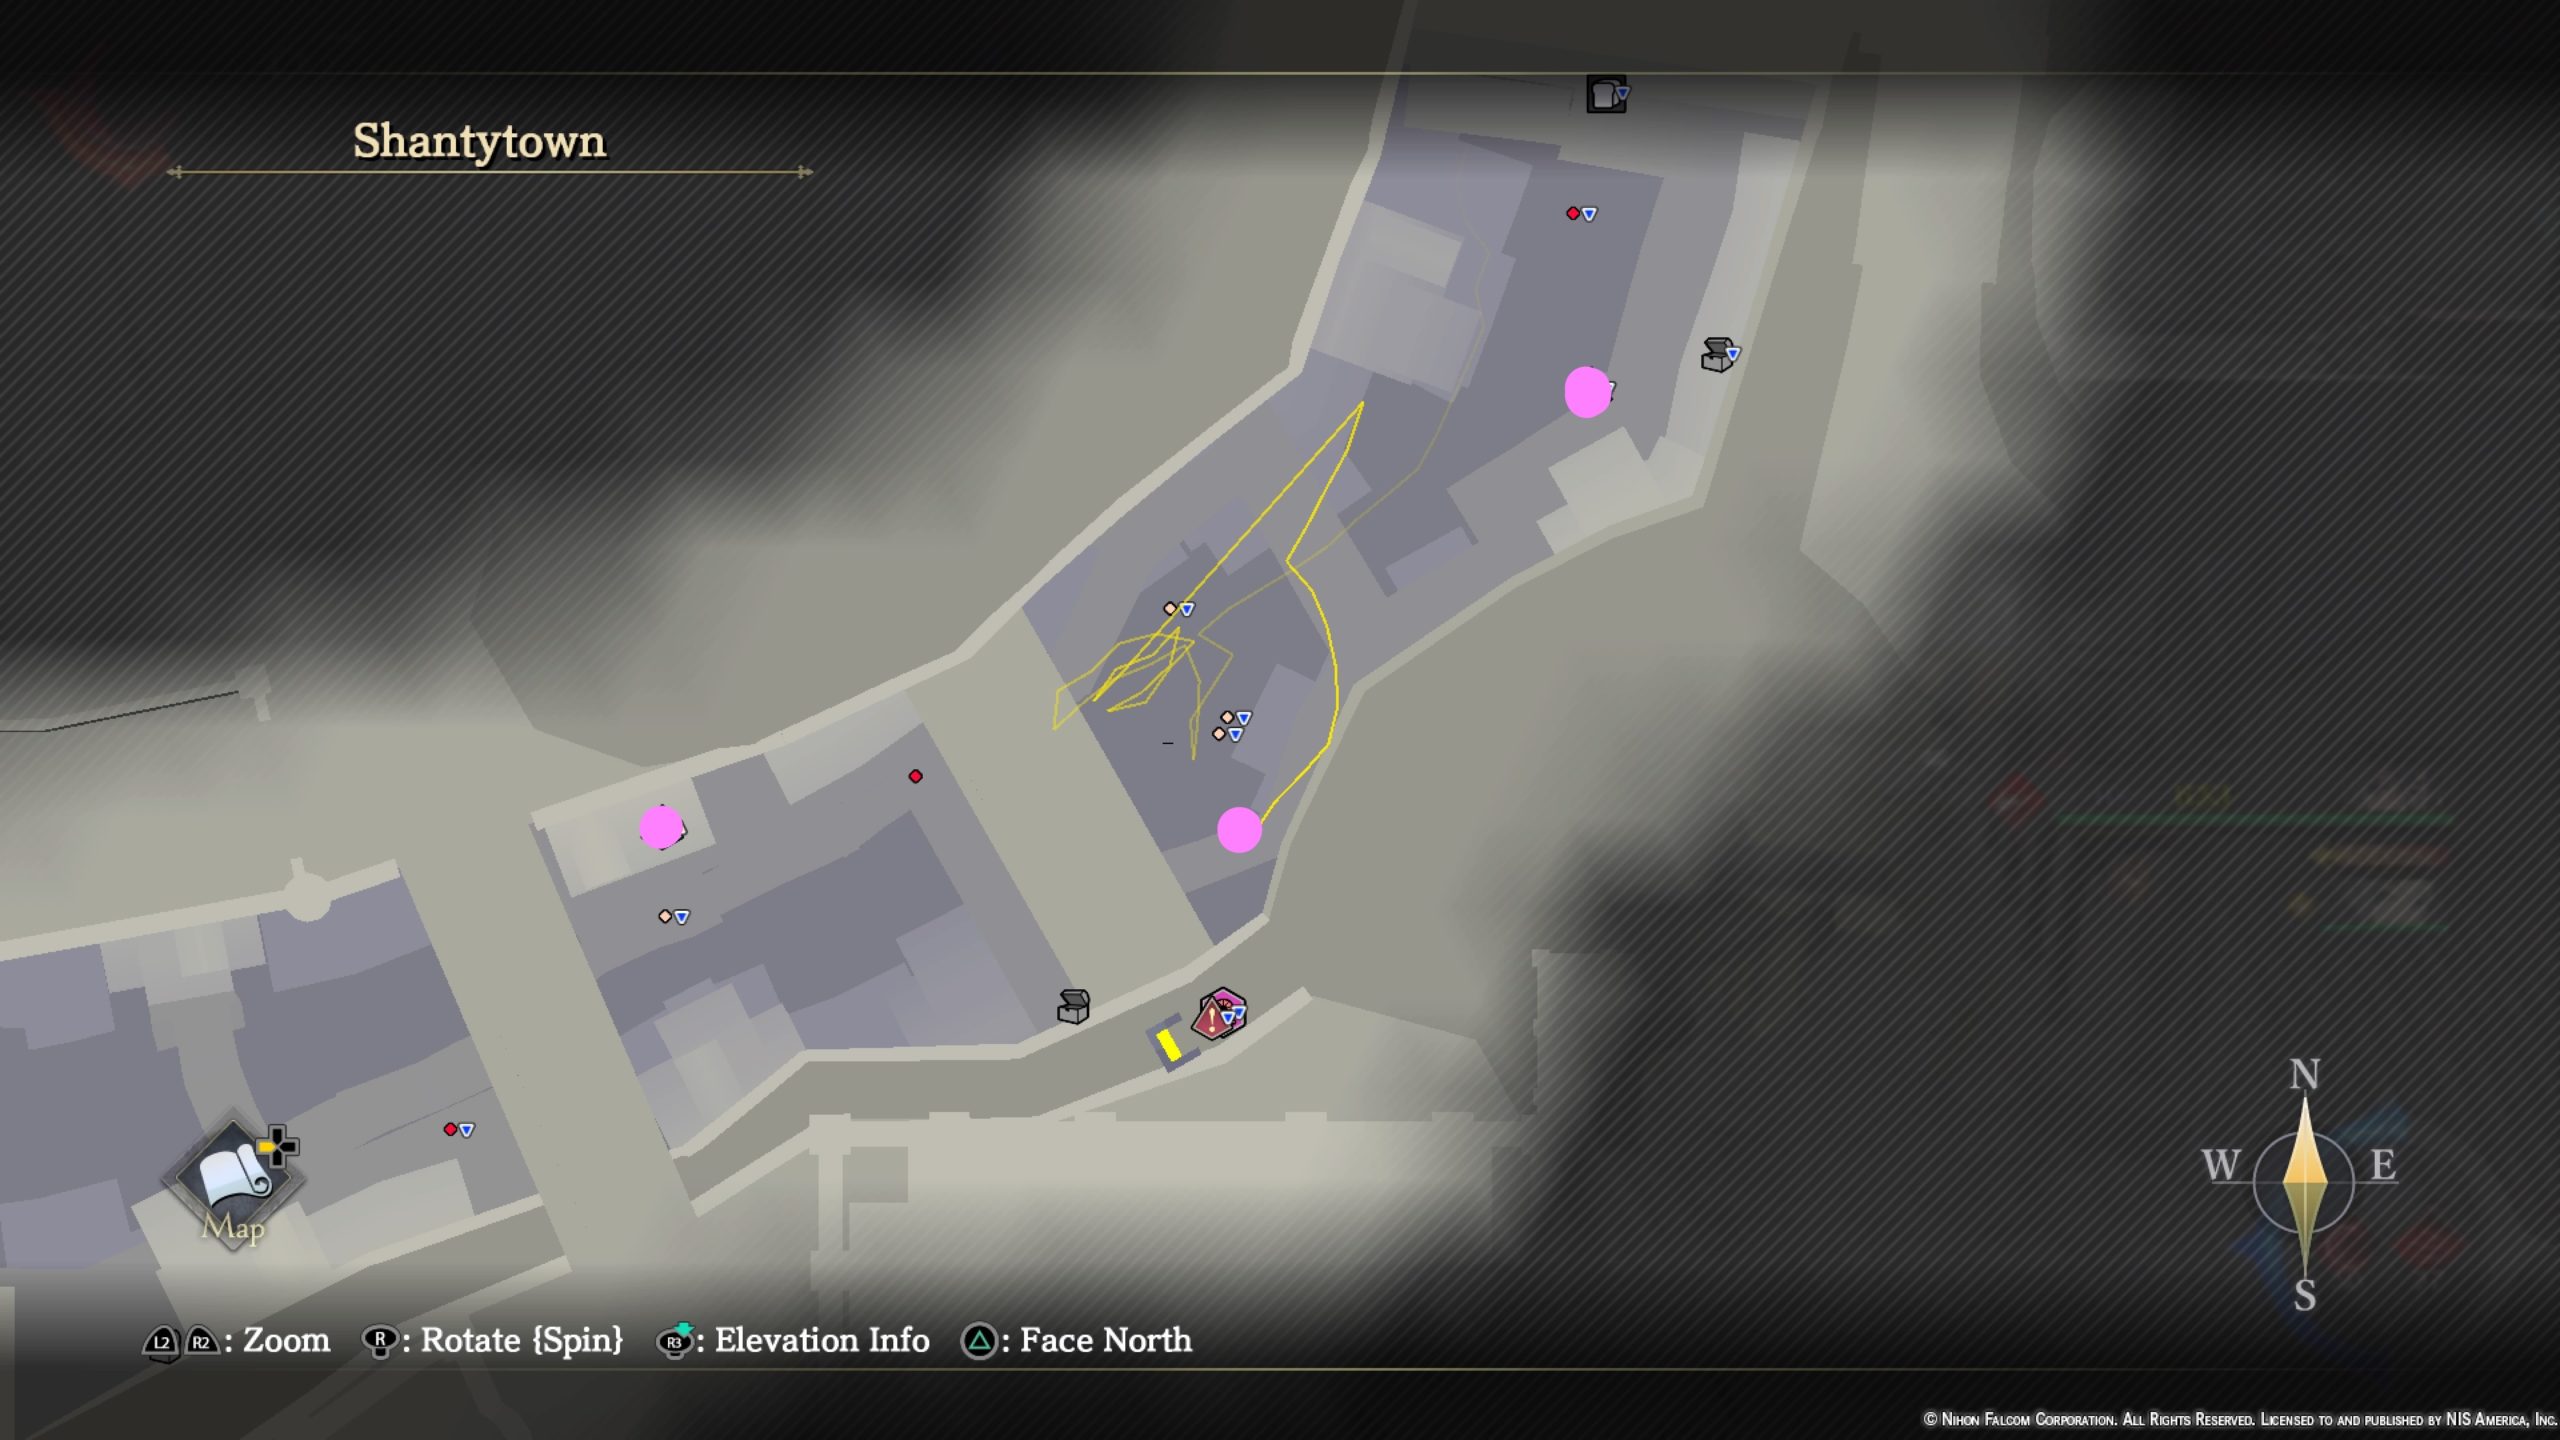
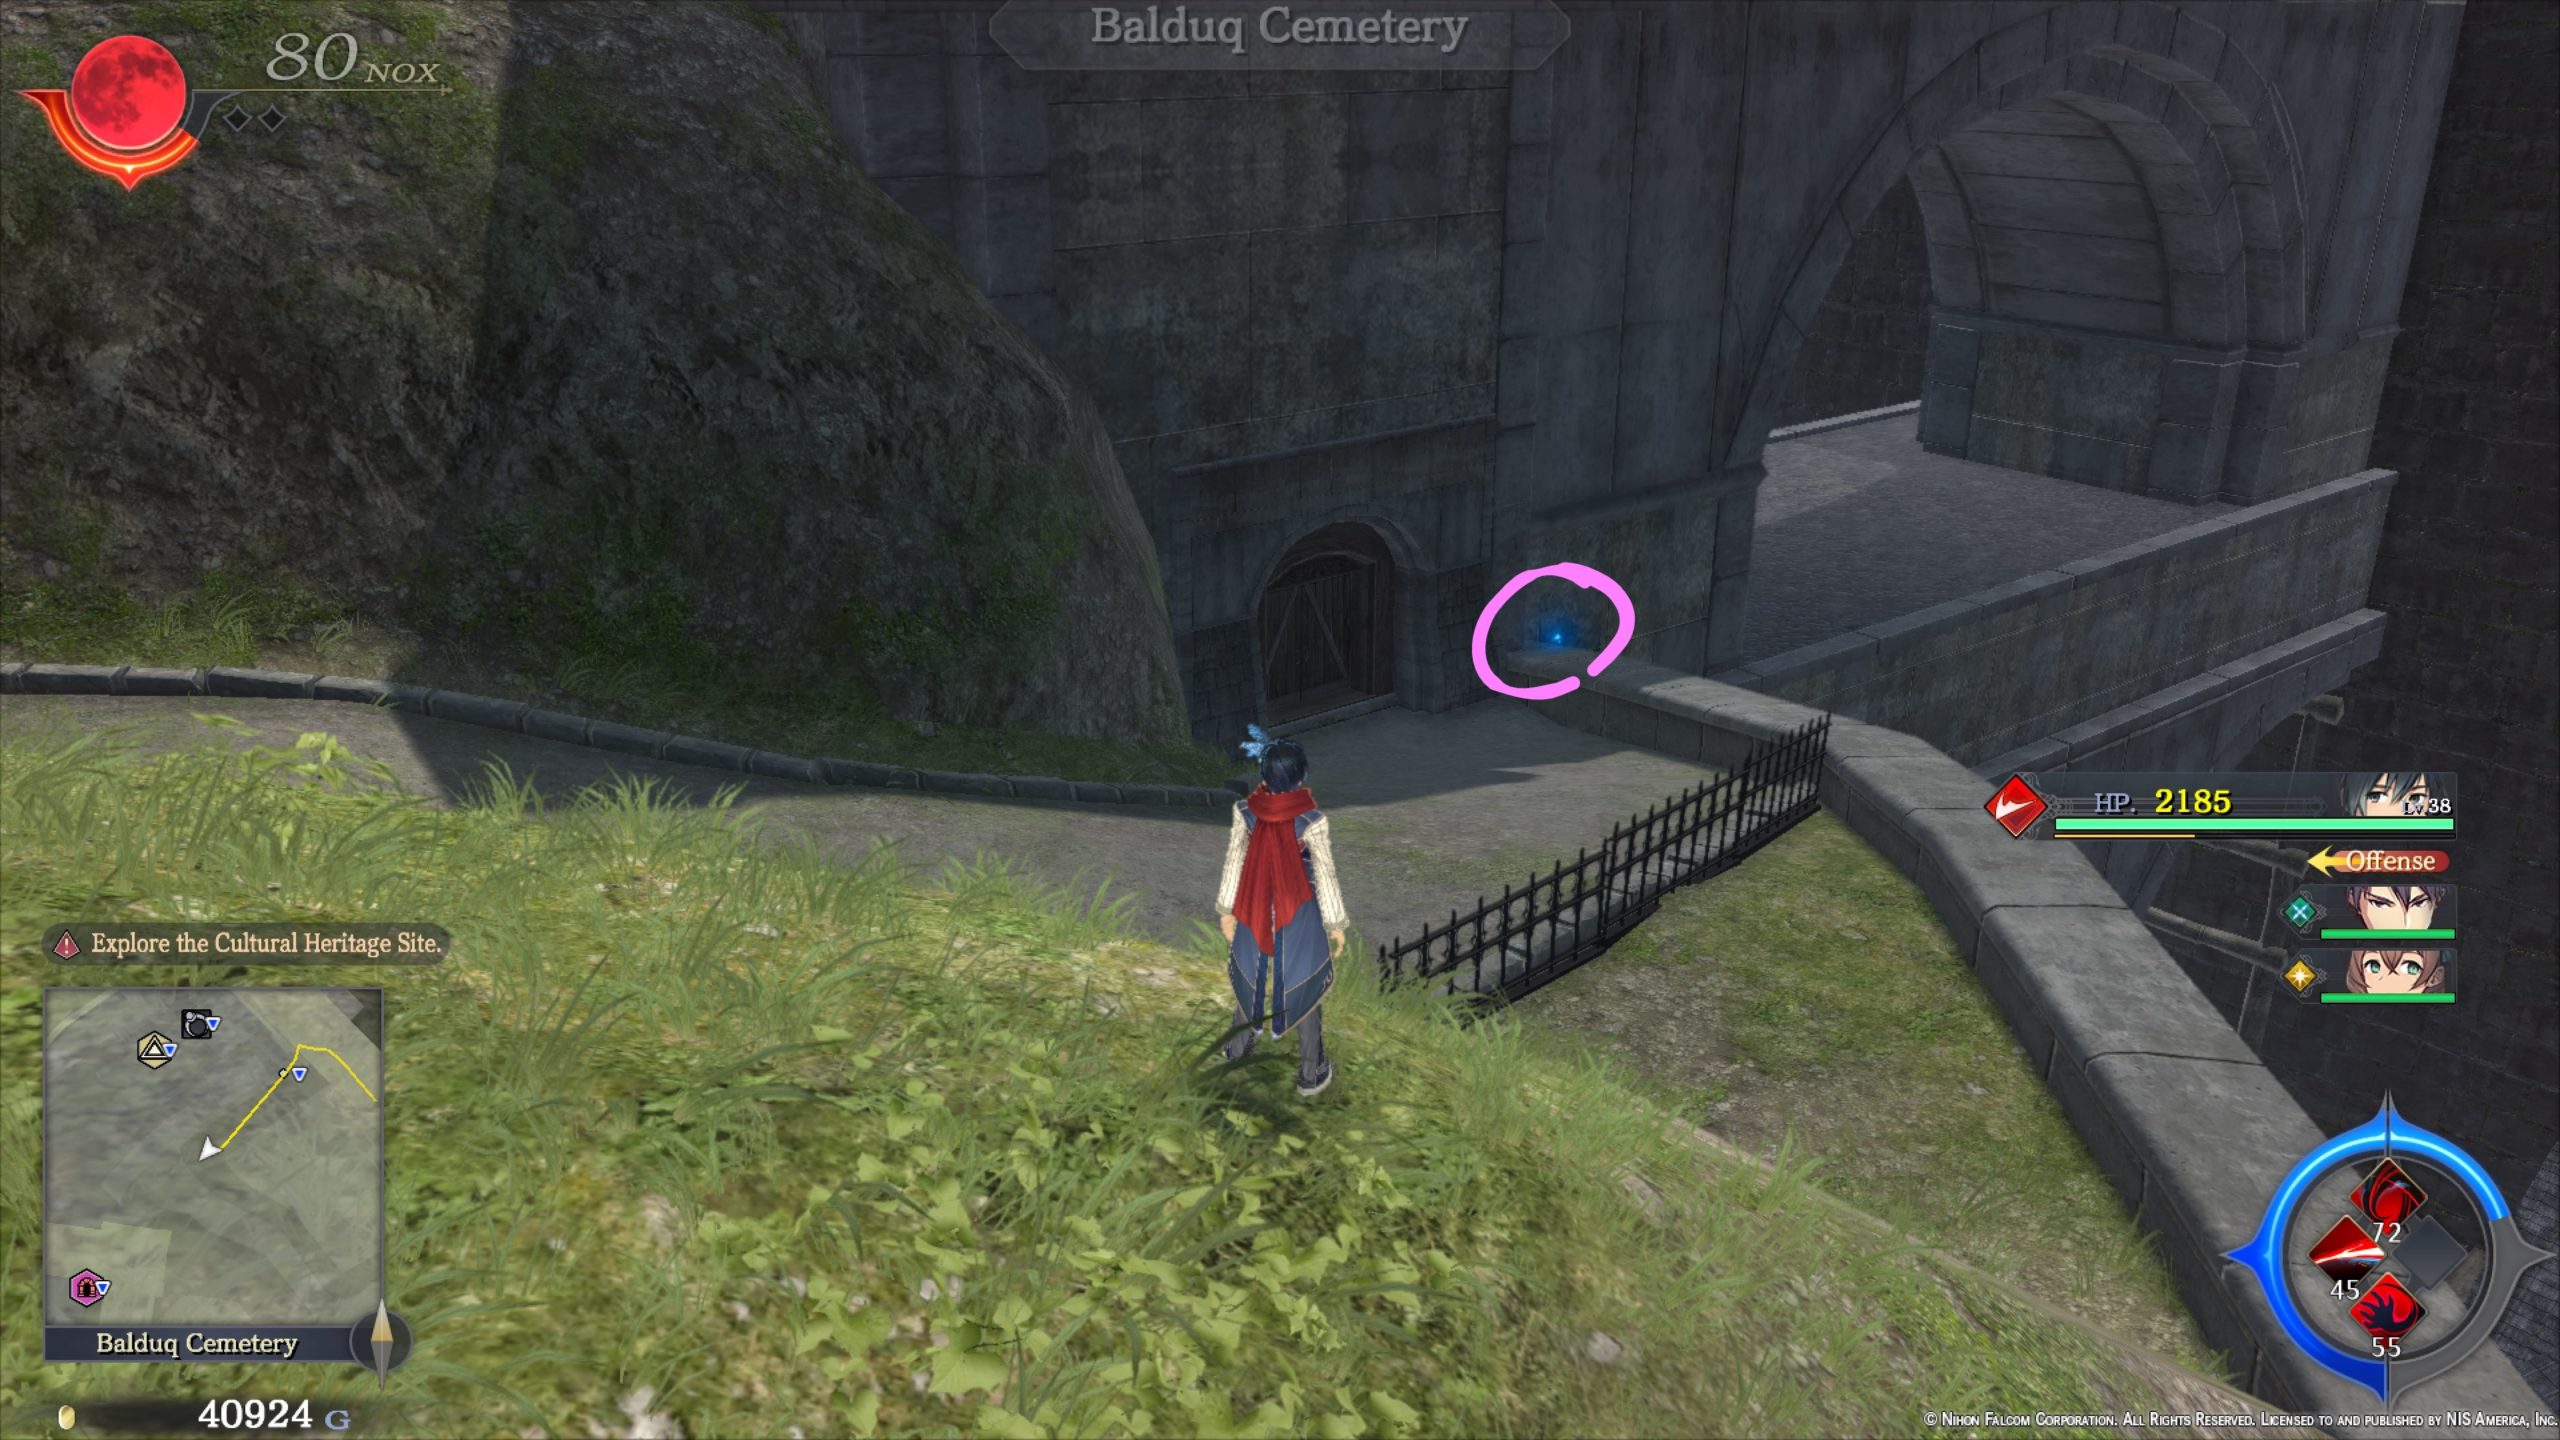
- On a ledge above Shantytown near an archway
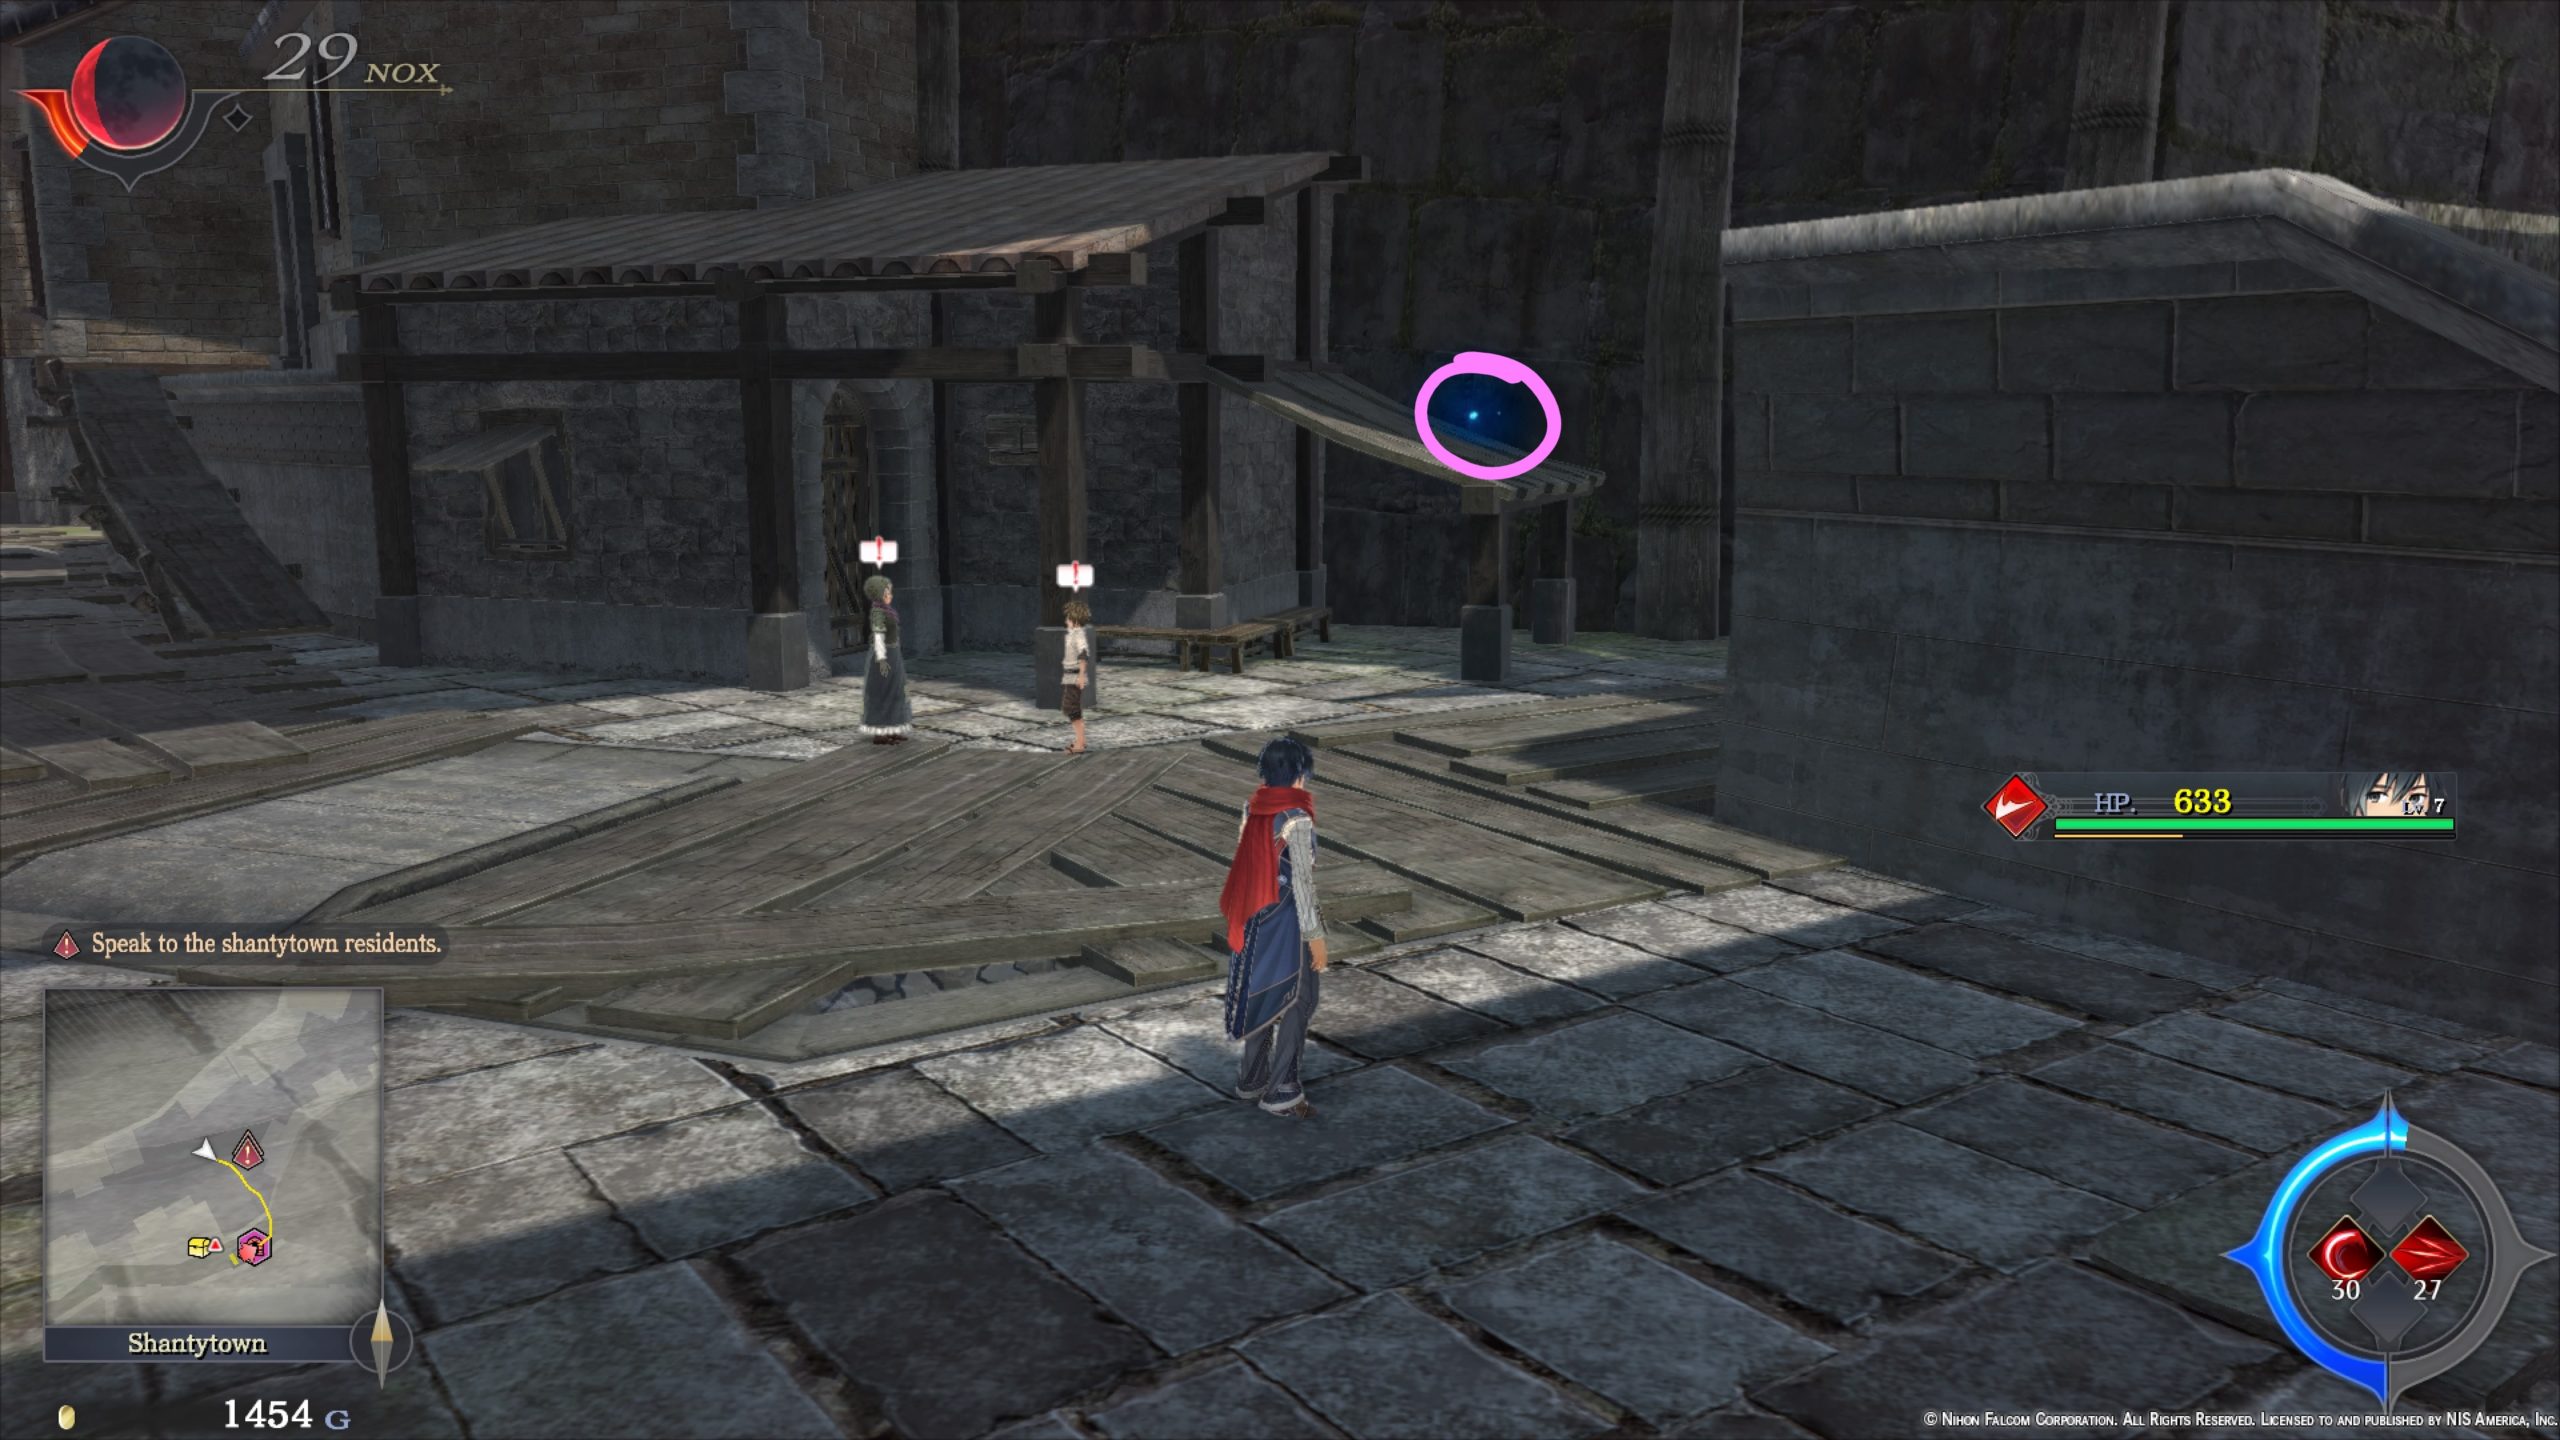
- On top of the large building west of the Relief Tile
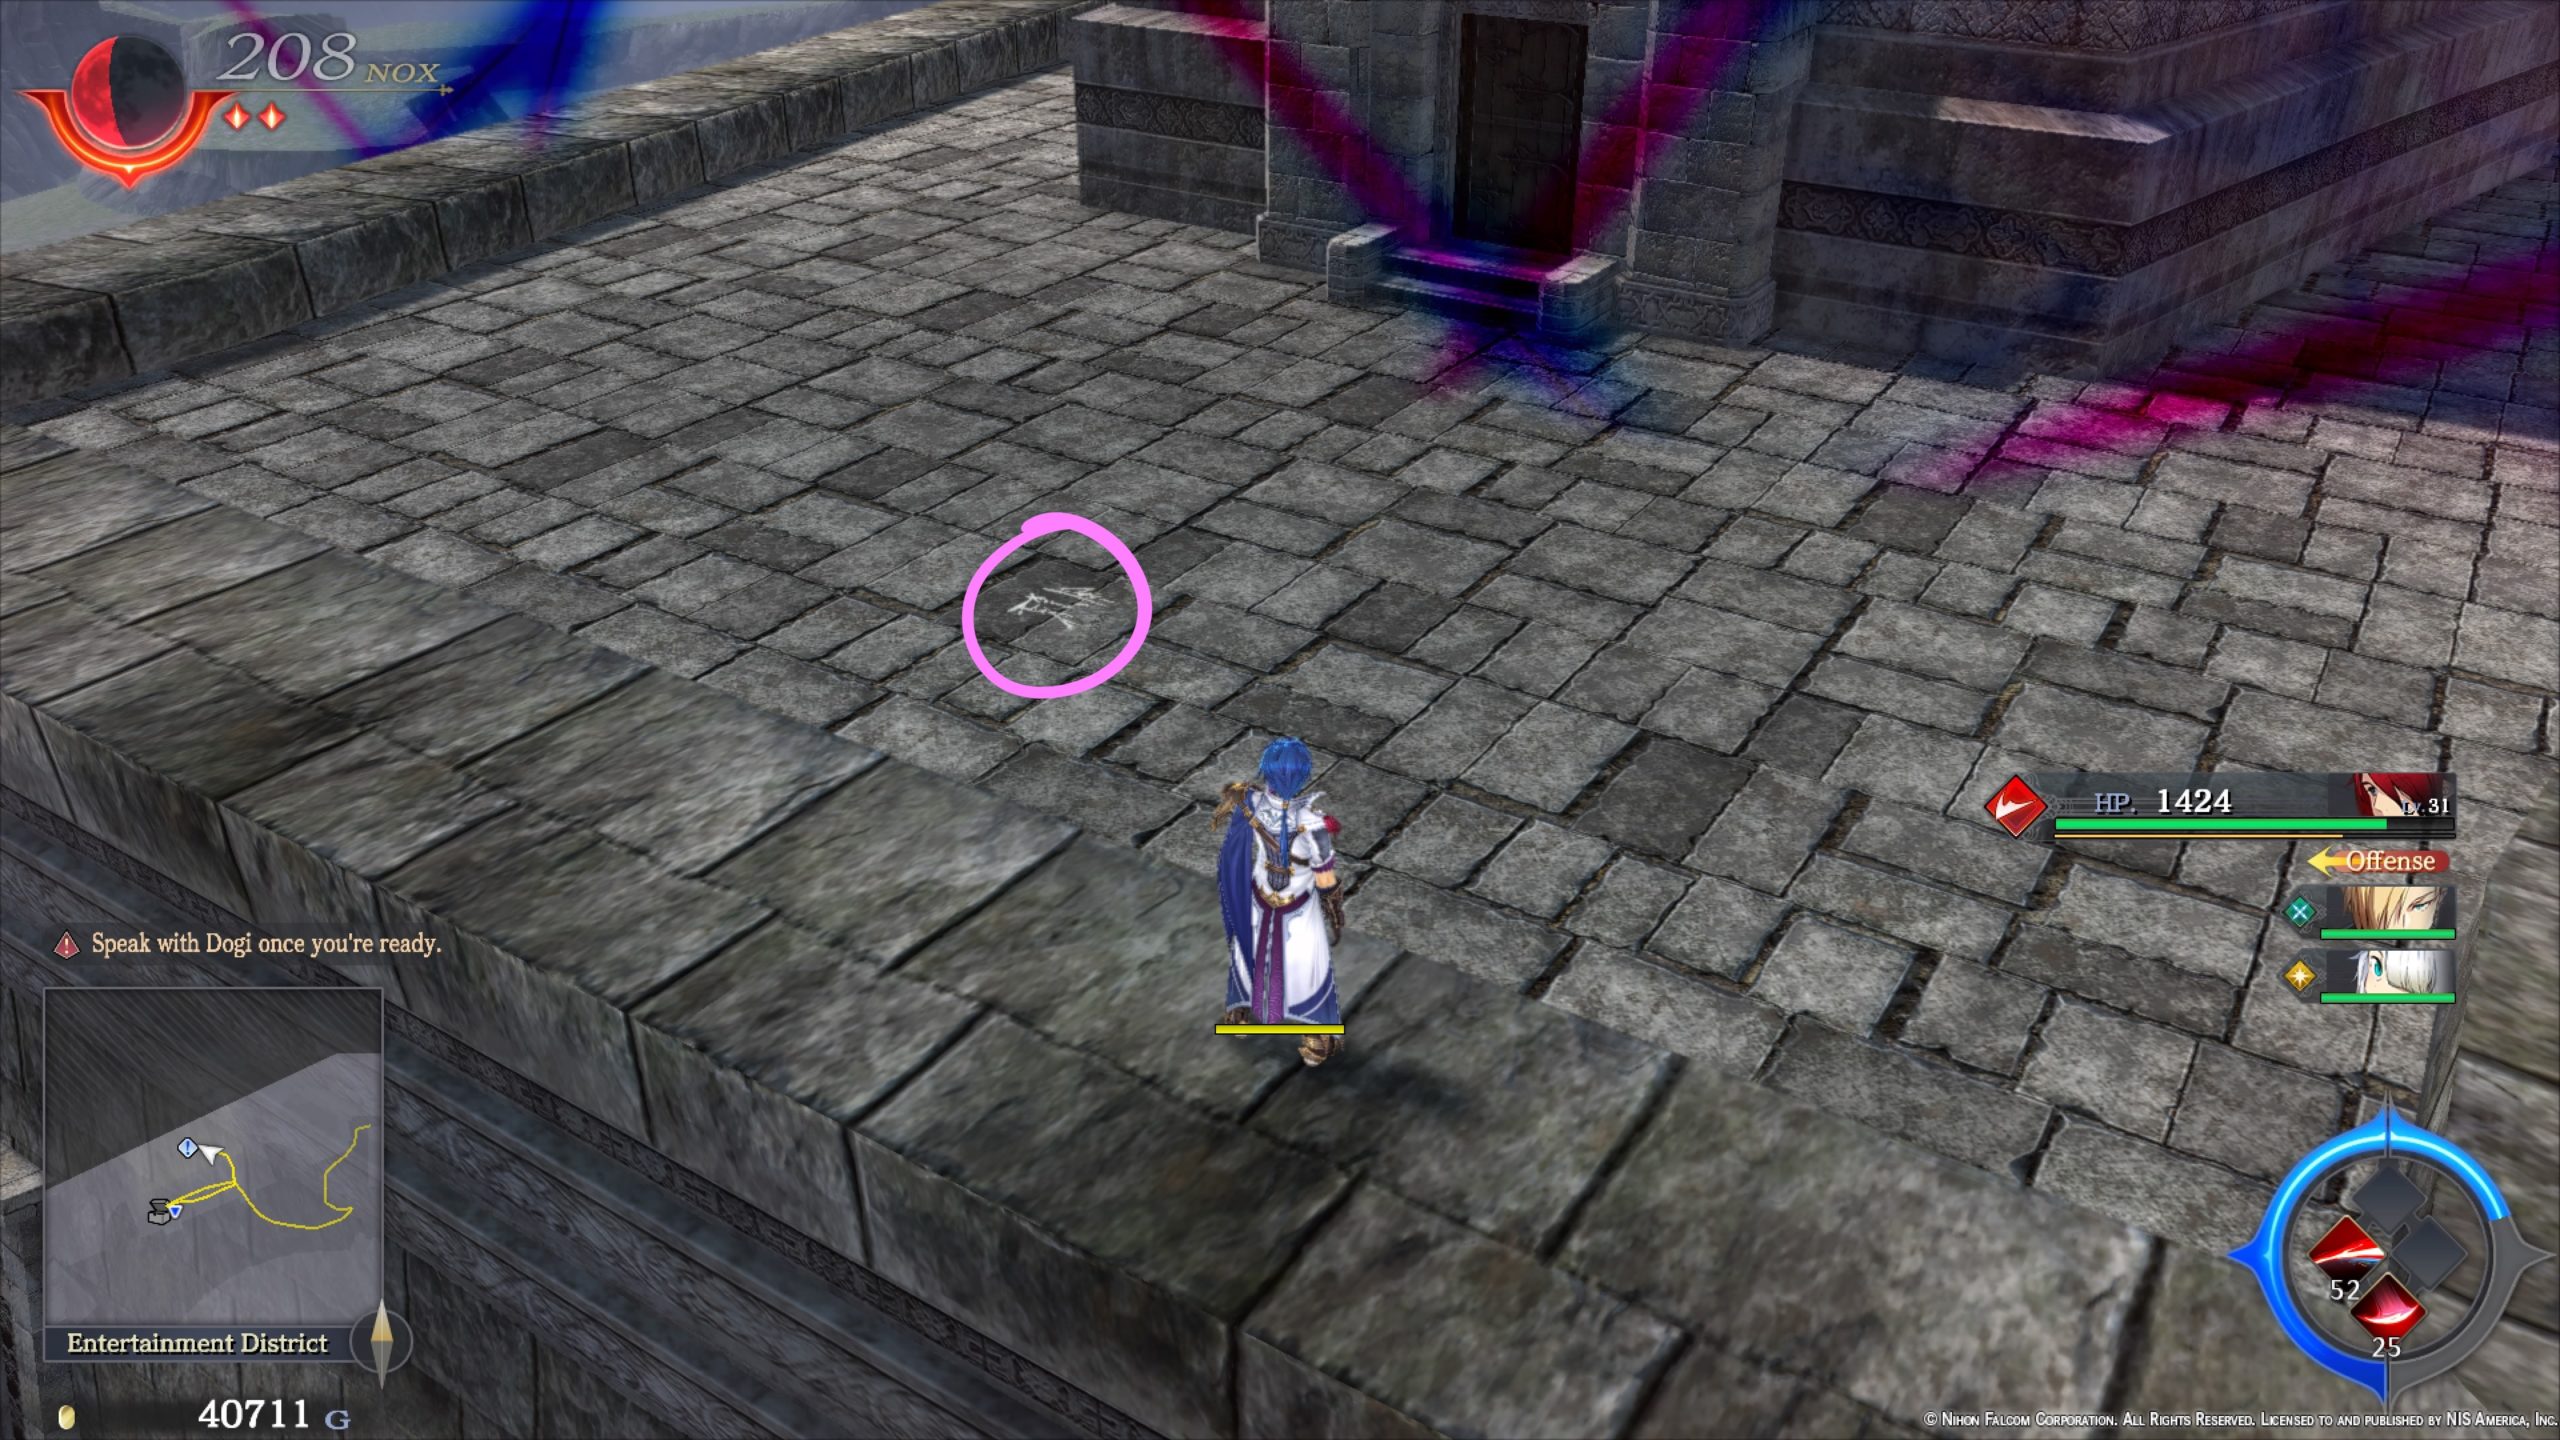
Graffiti
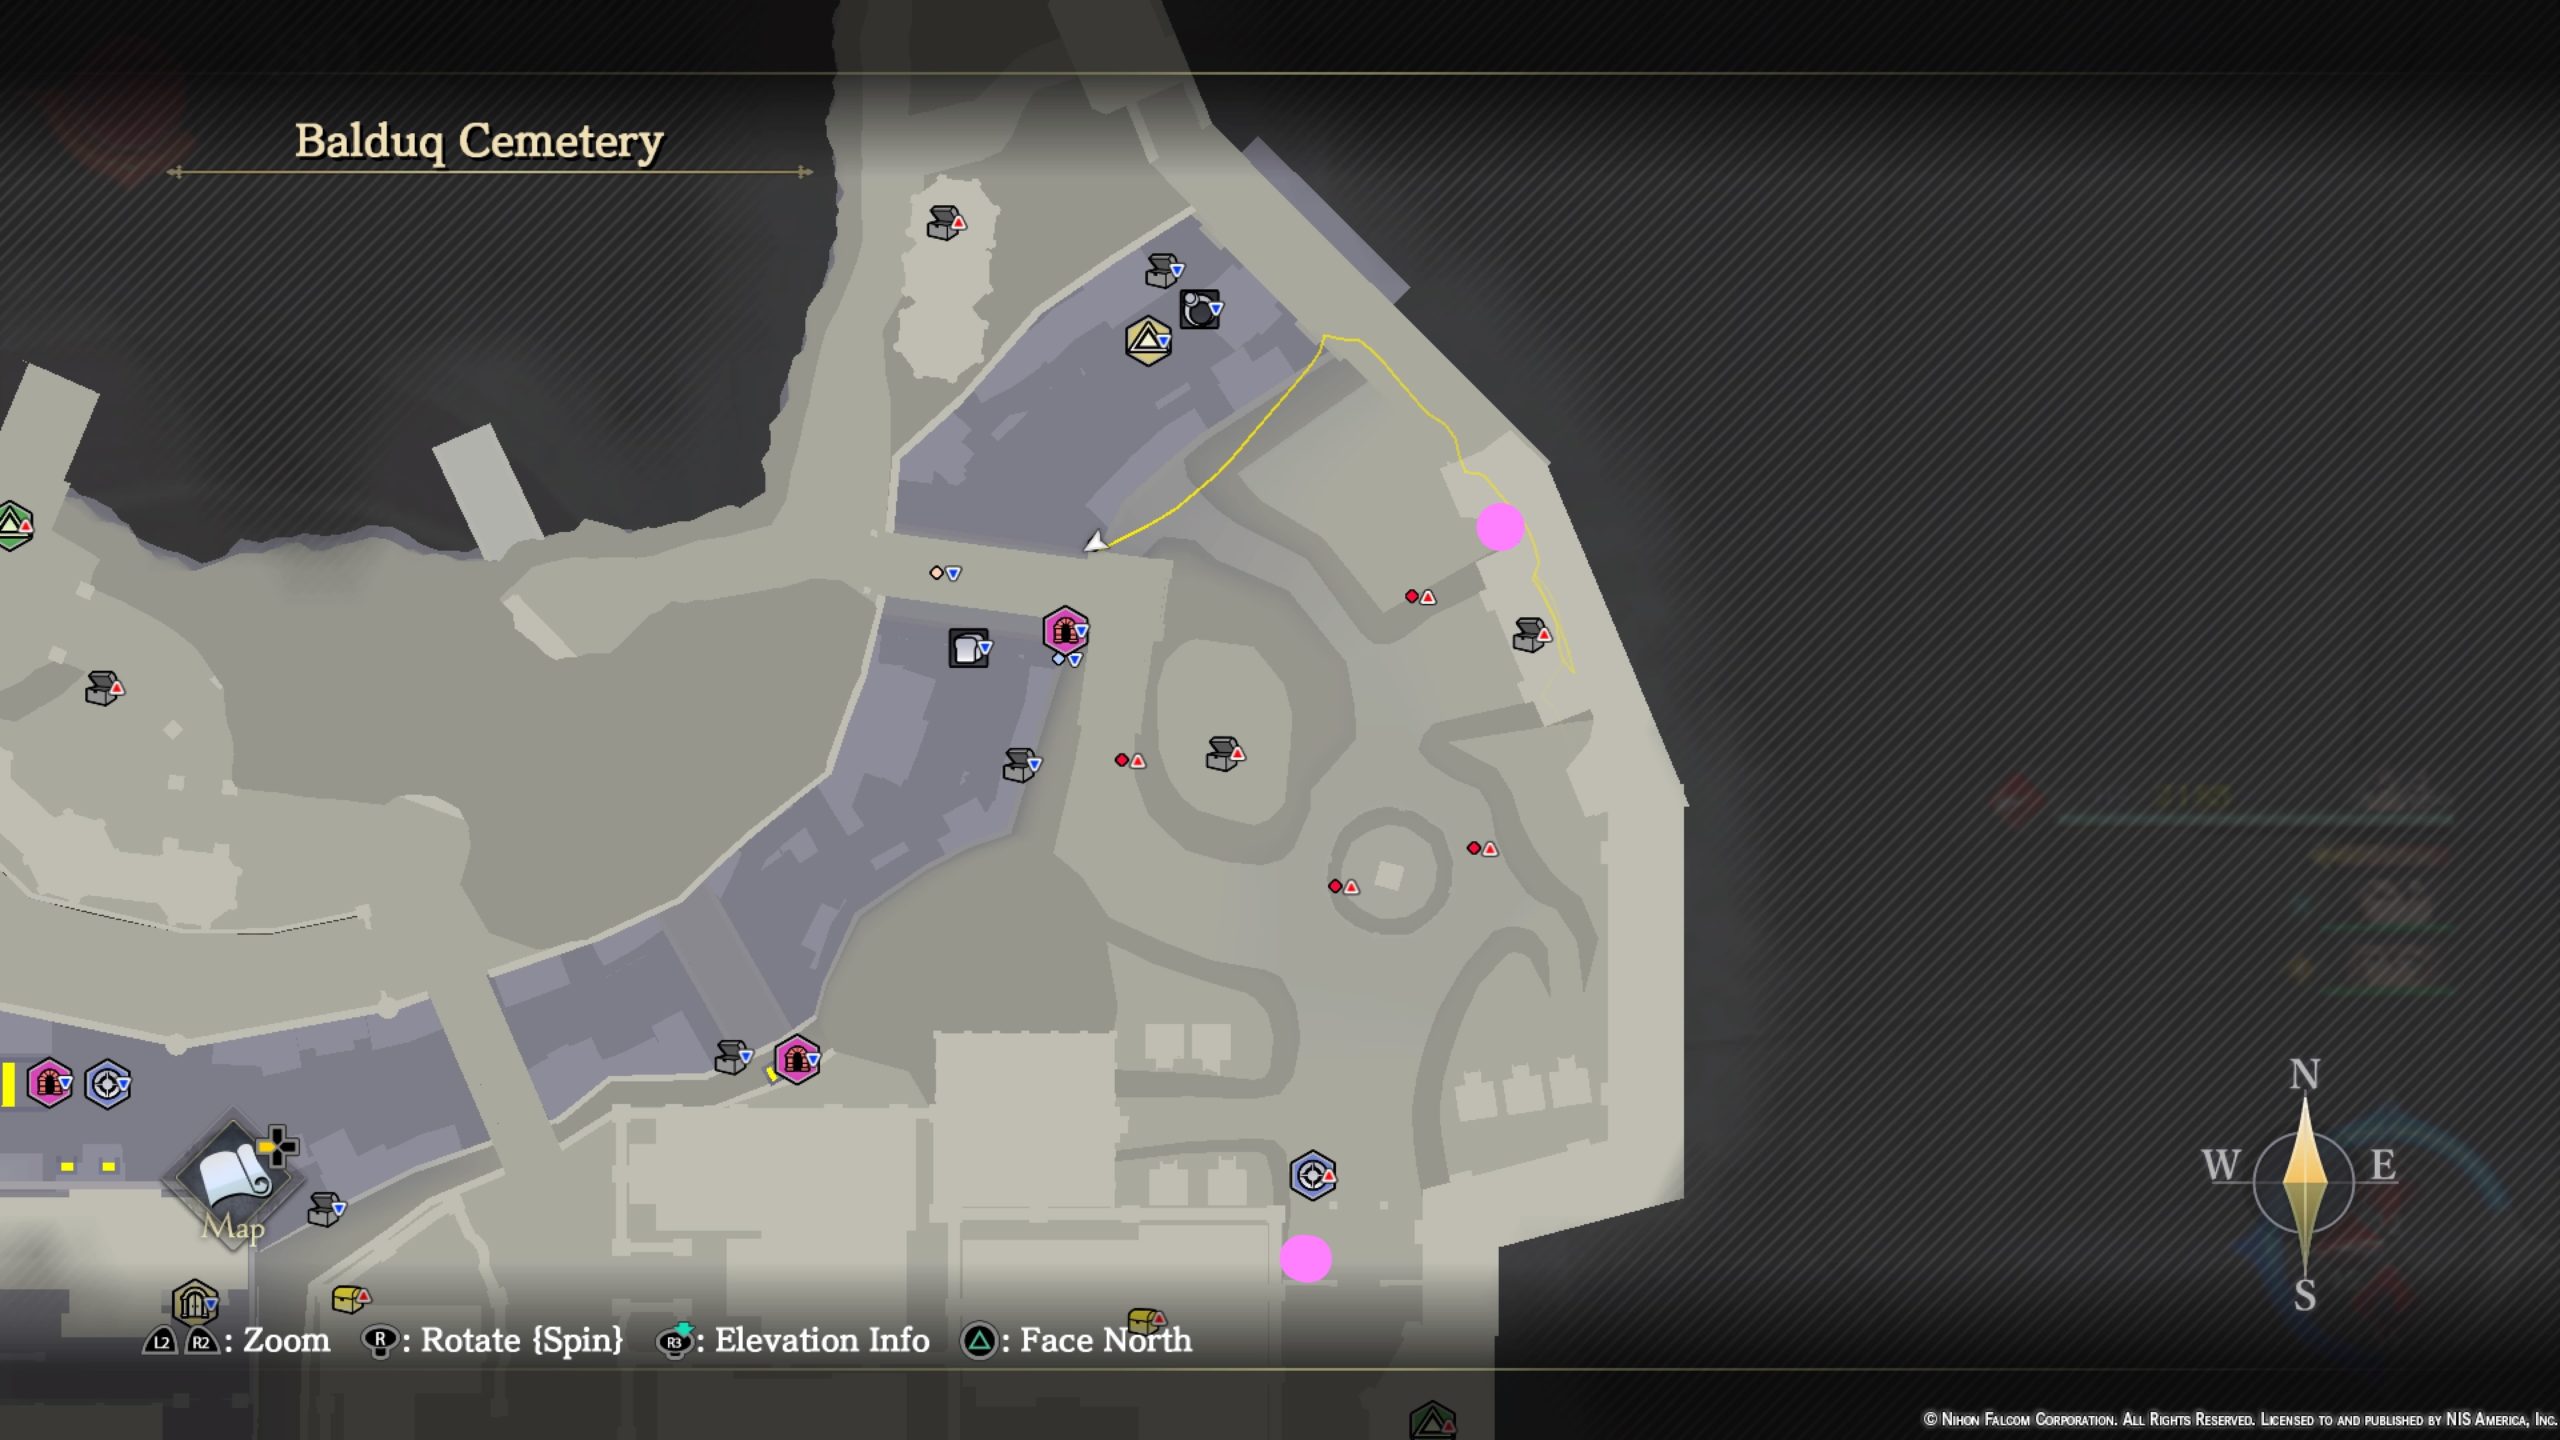
- On the wall next to the Relief Tile by the ramp leading up to the Noble District

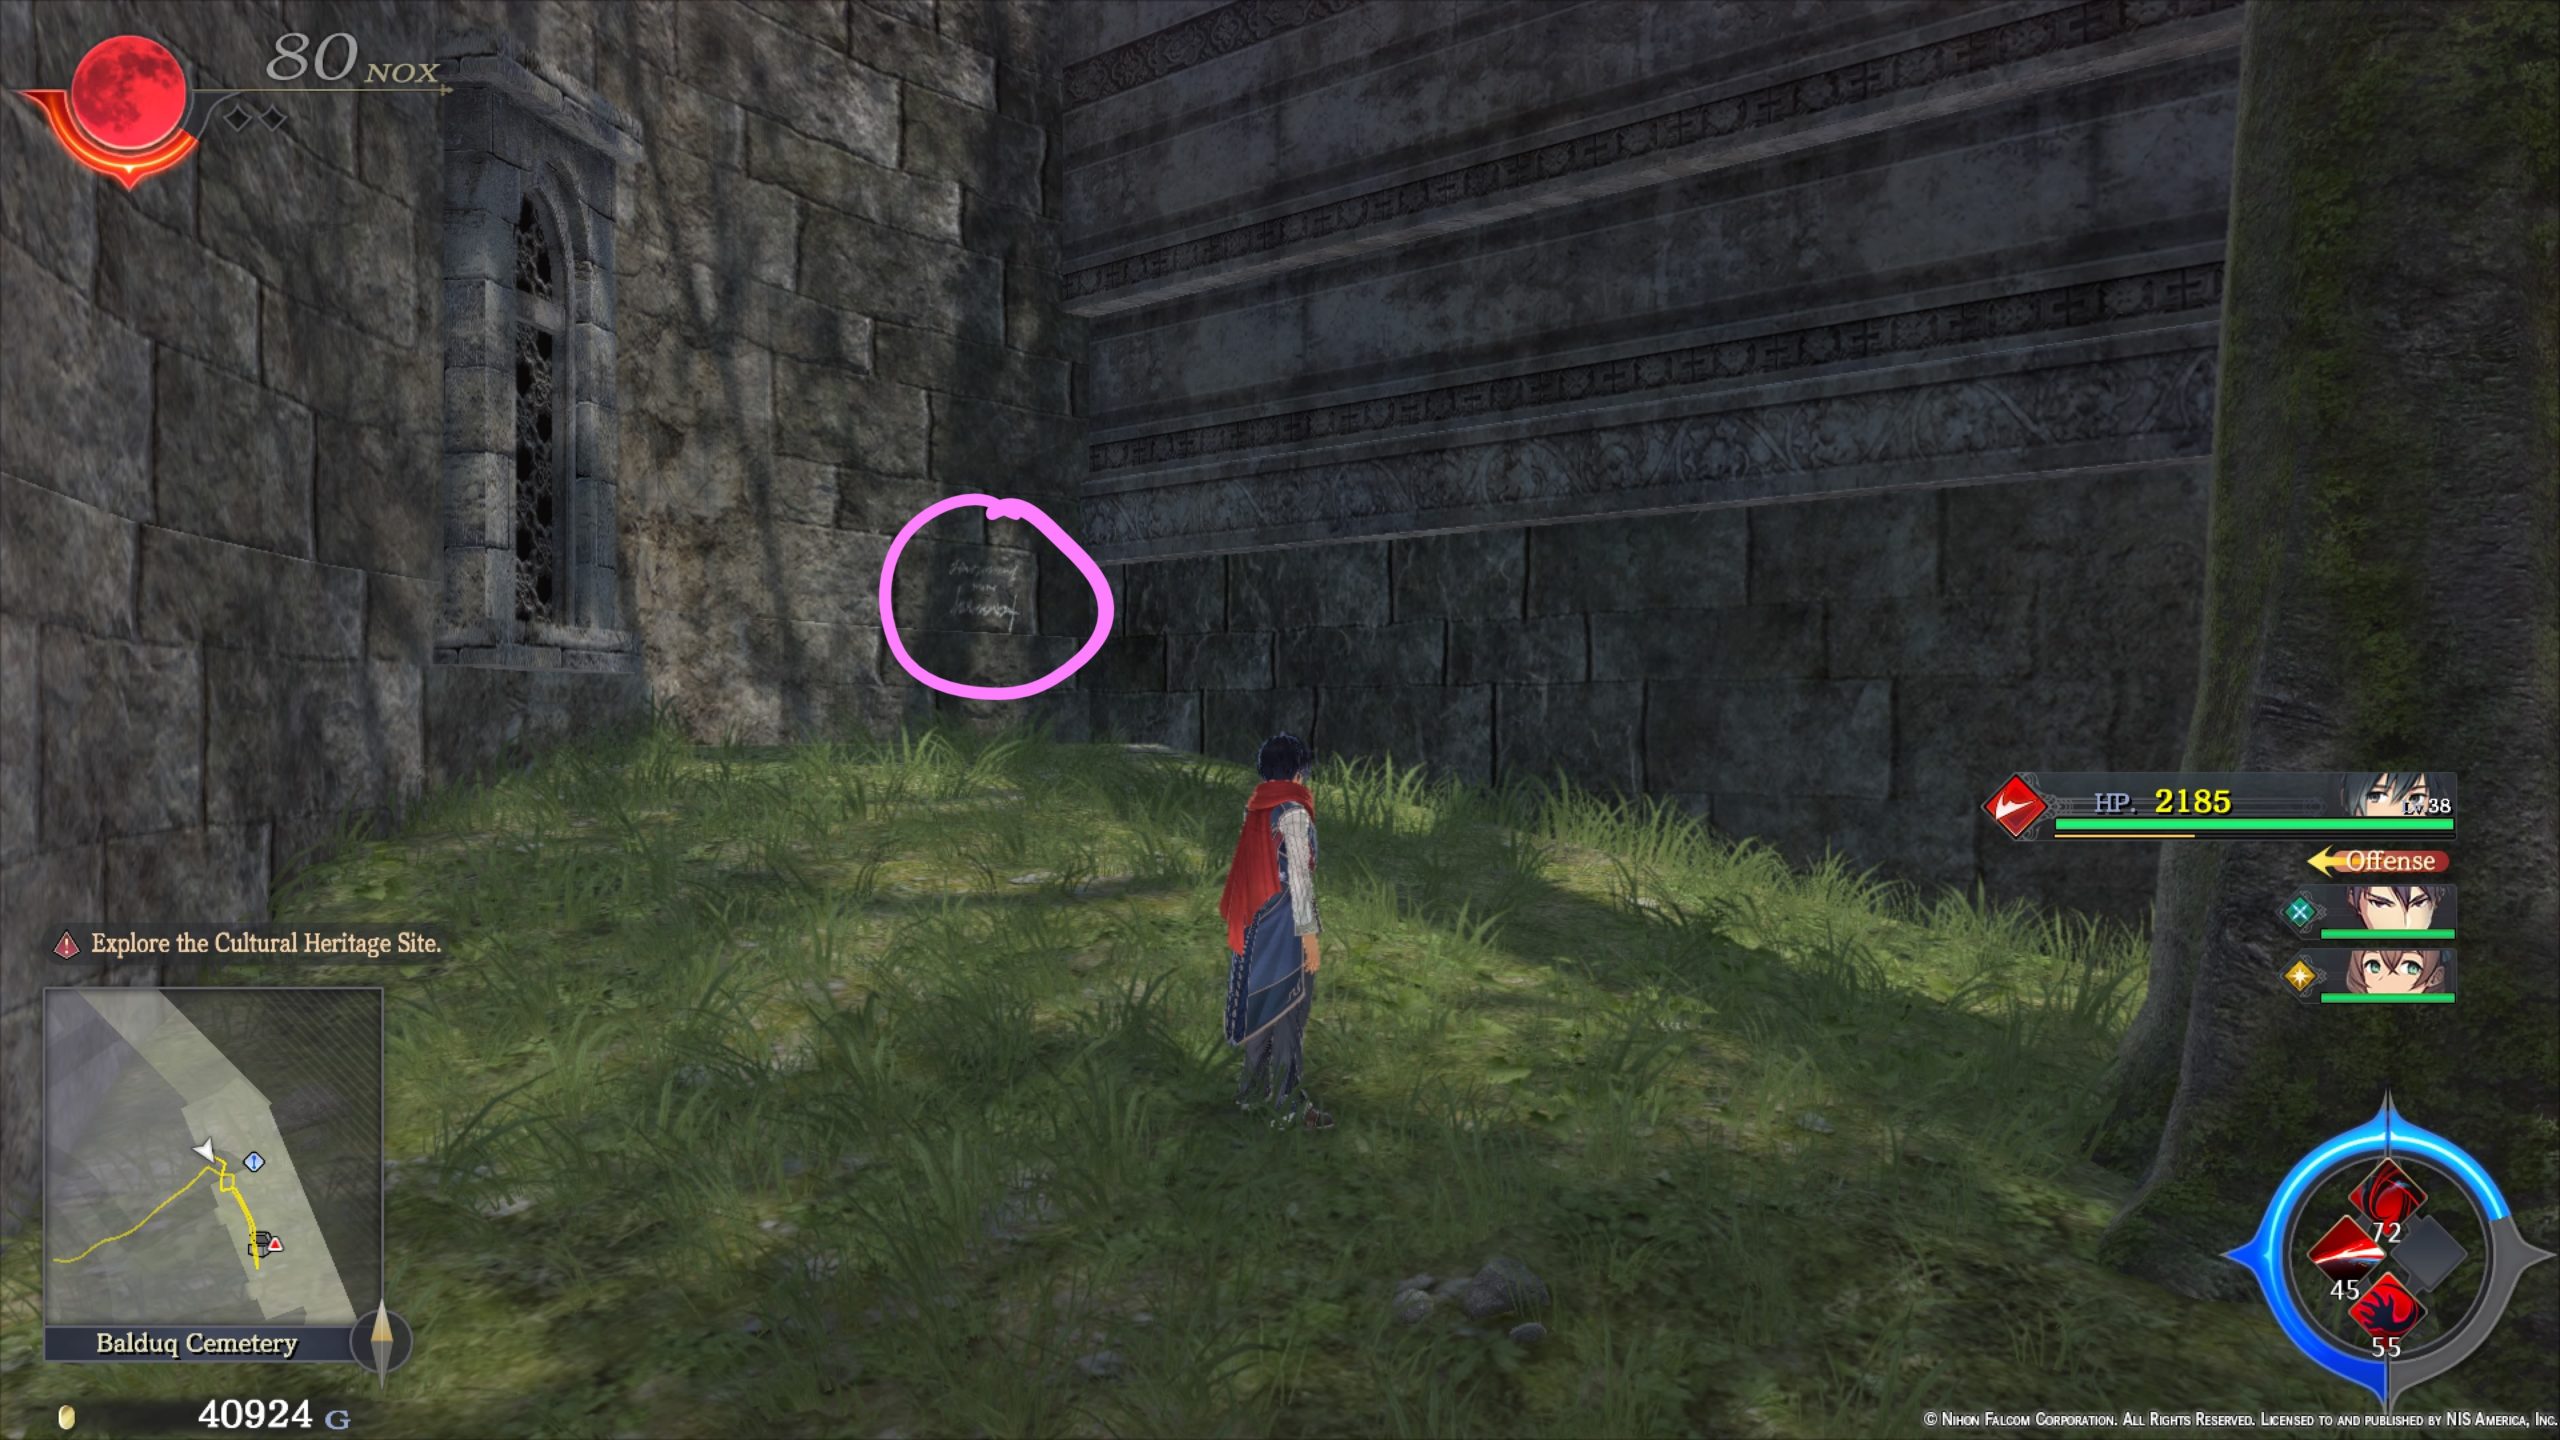
- On the northeastern side of the outer wall
Treasure Chests
- Dry-aged Meat x2
- Tonic x2
Noble District
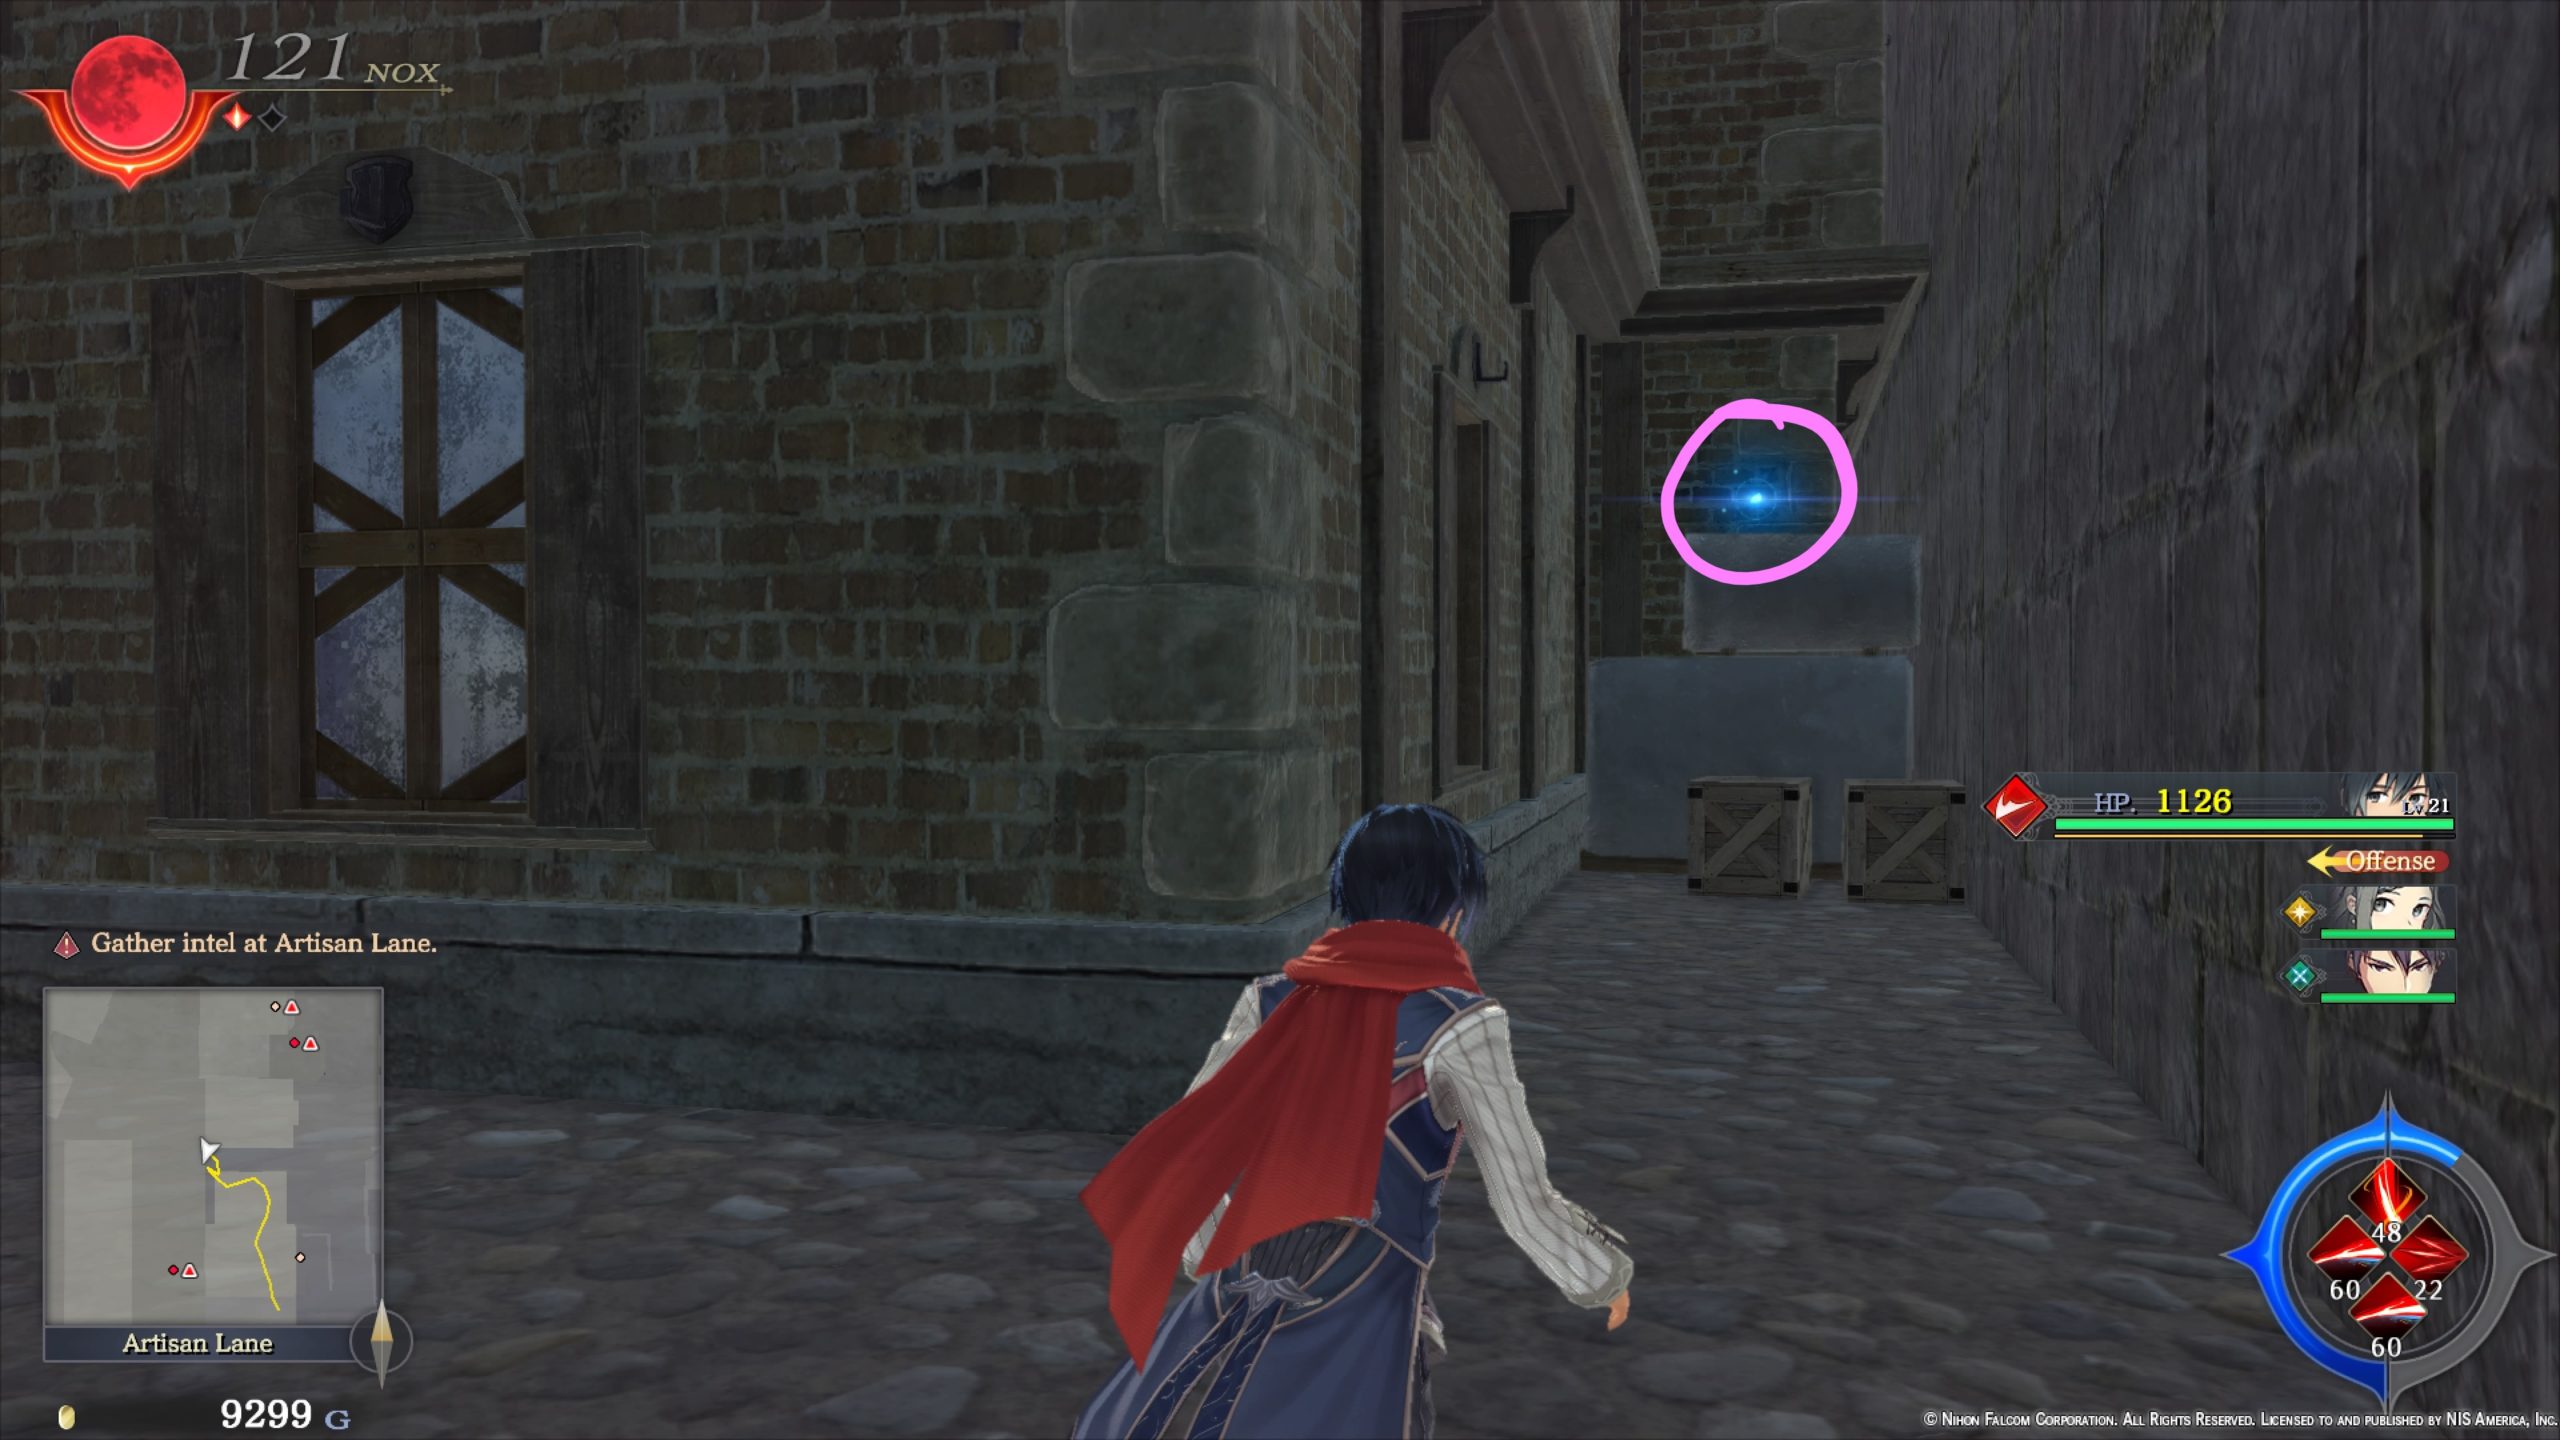
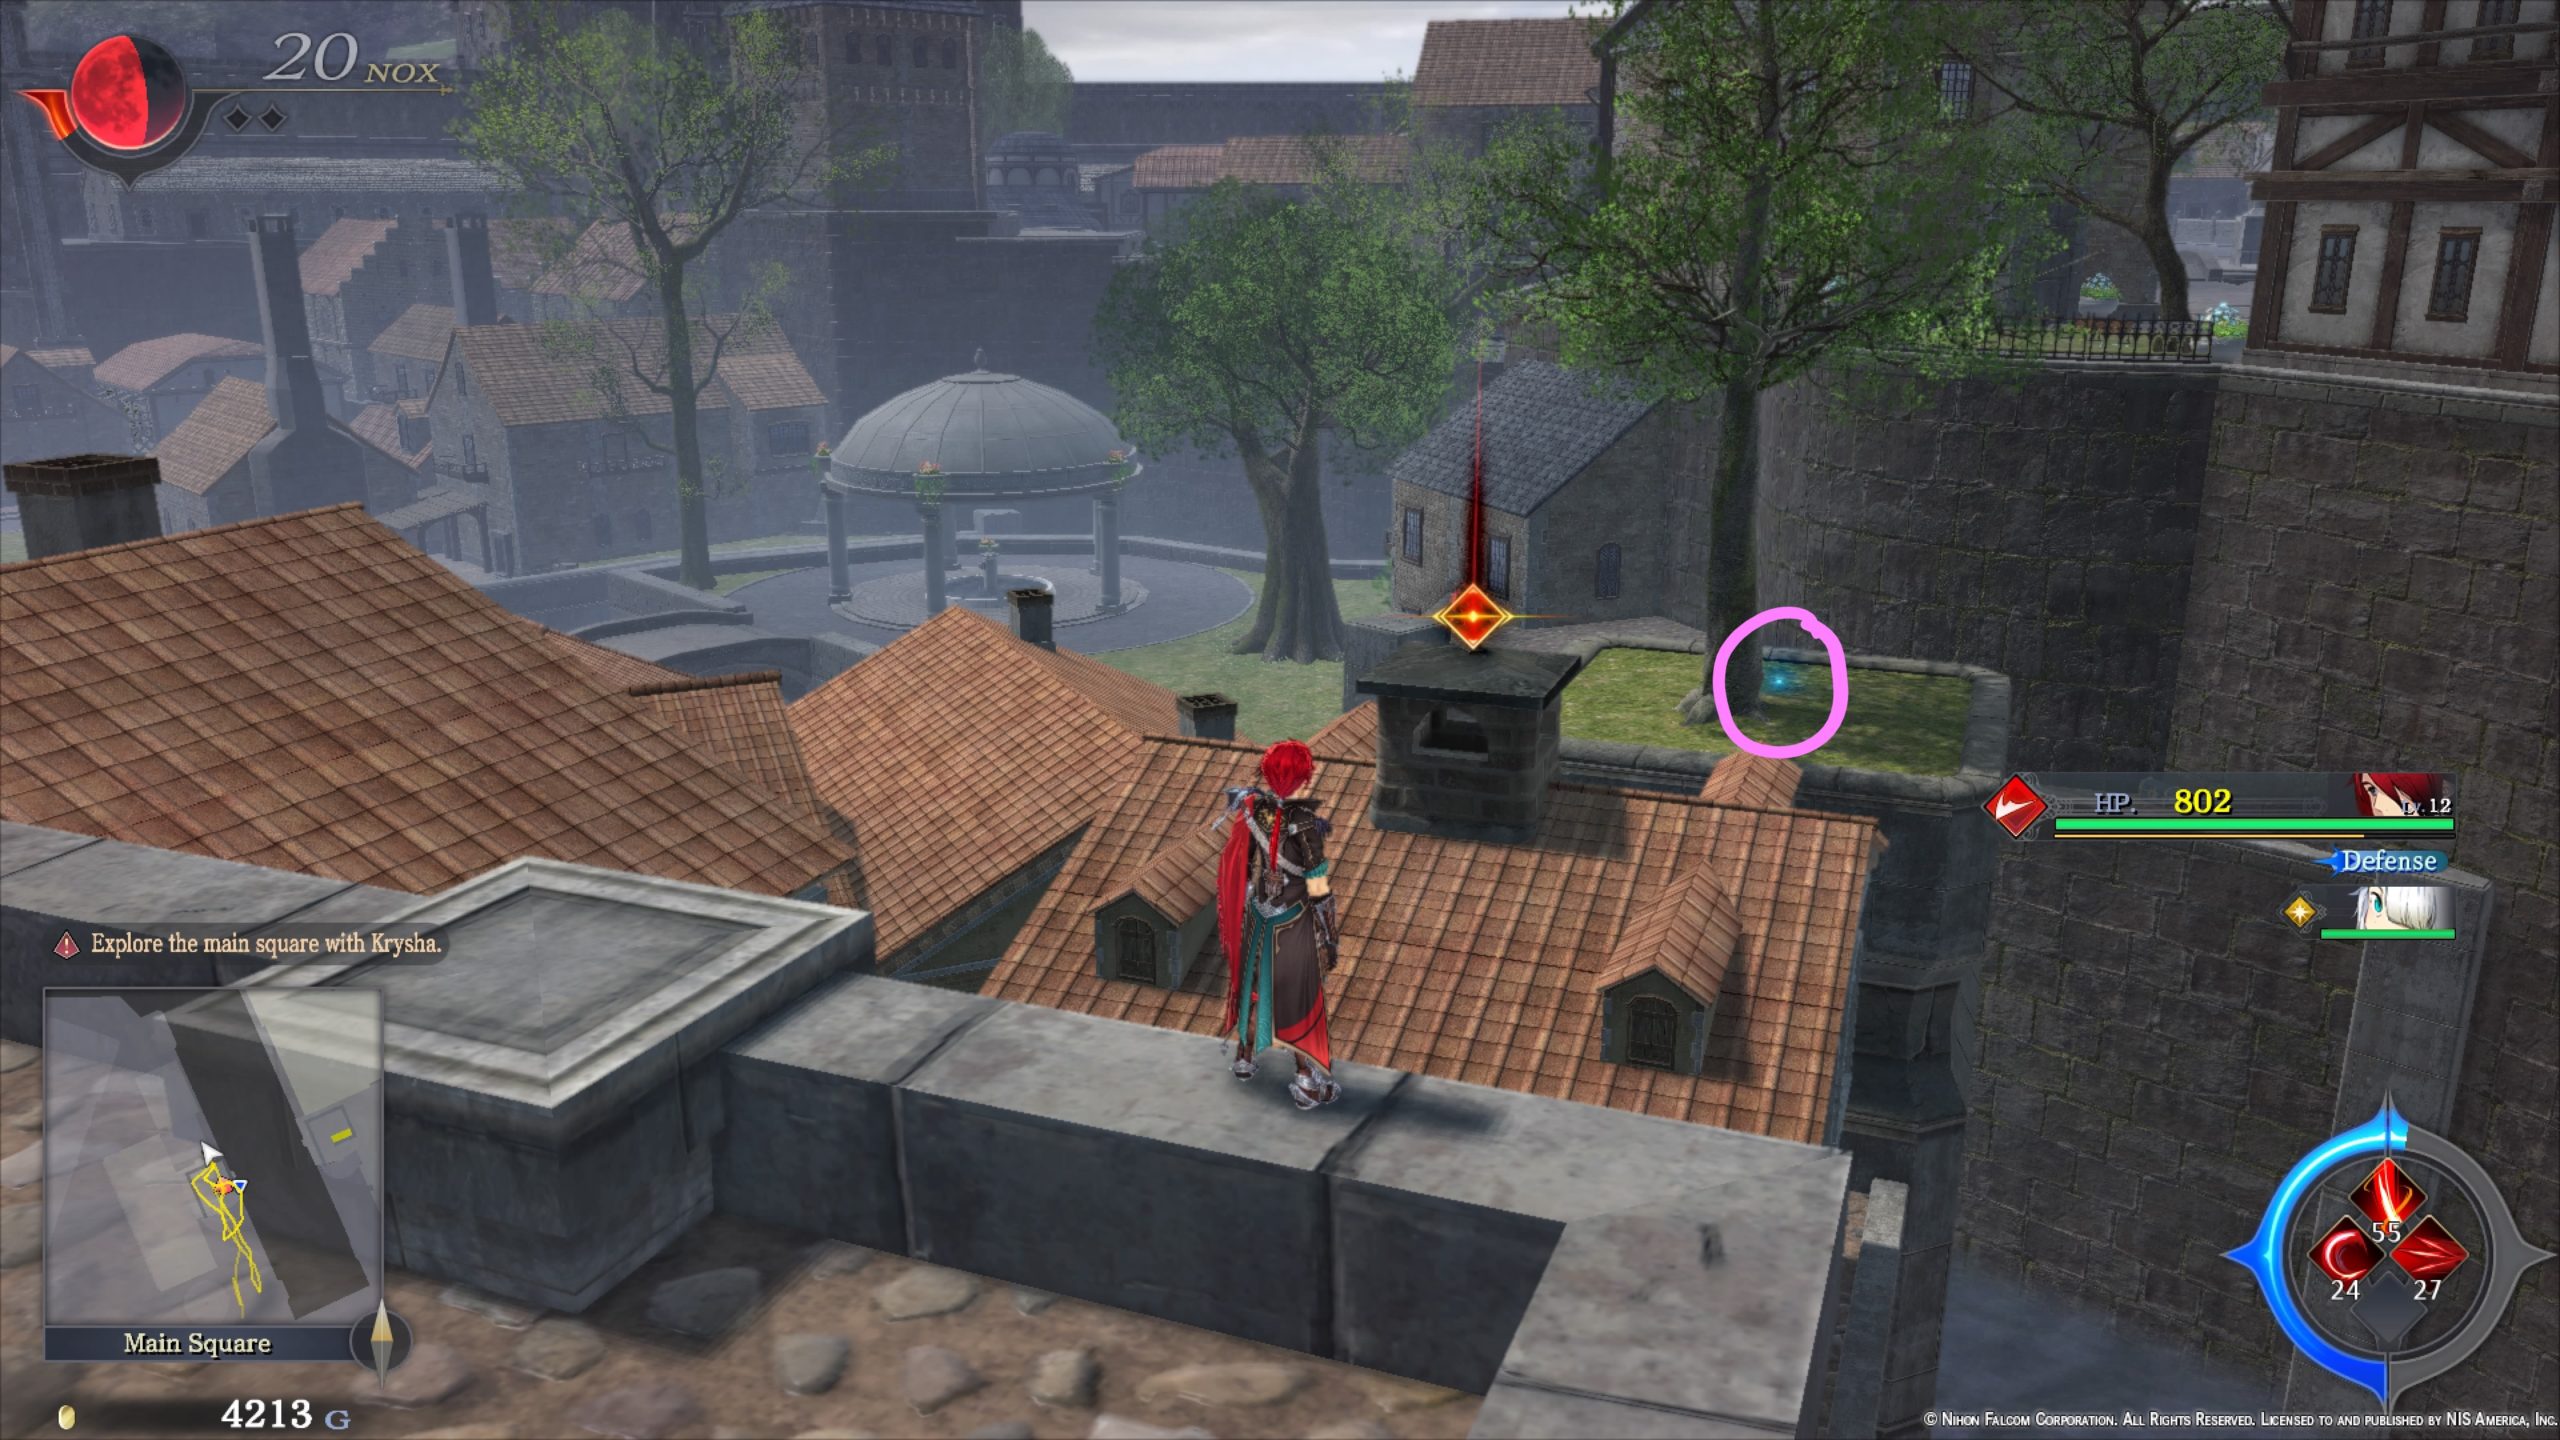
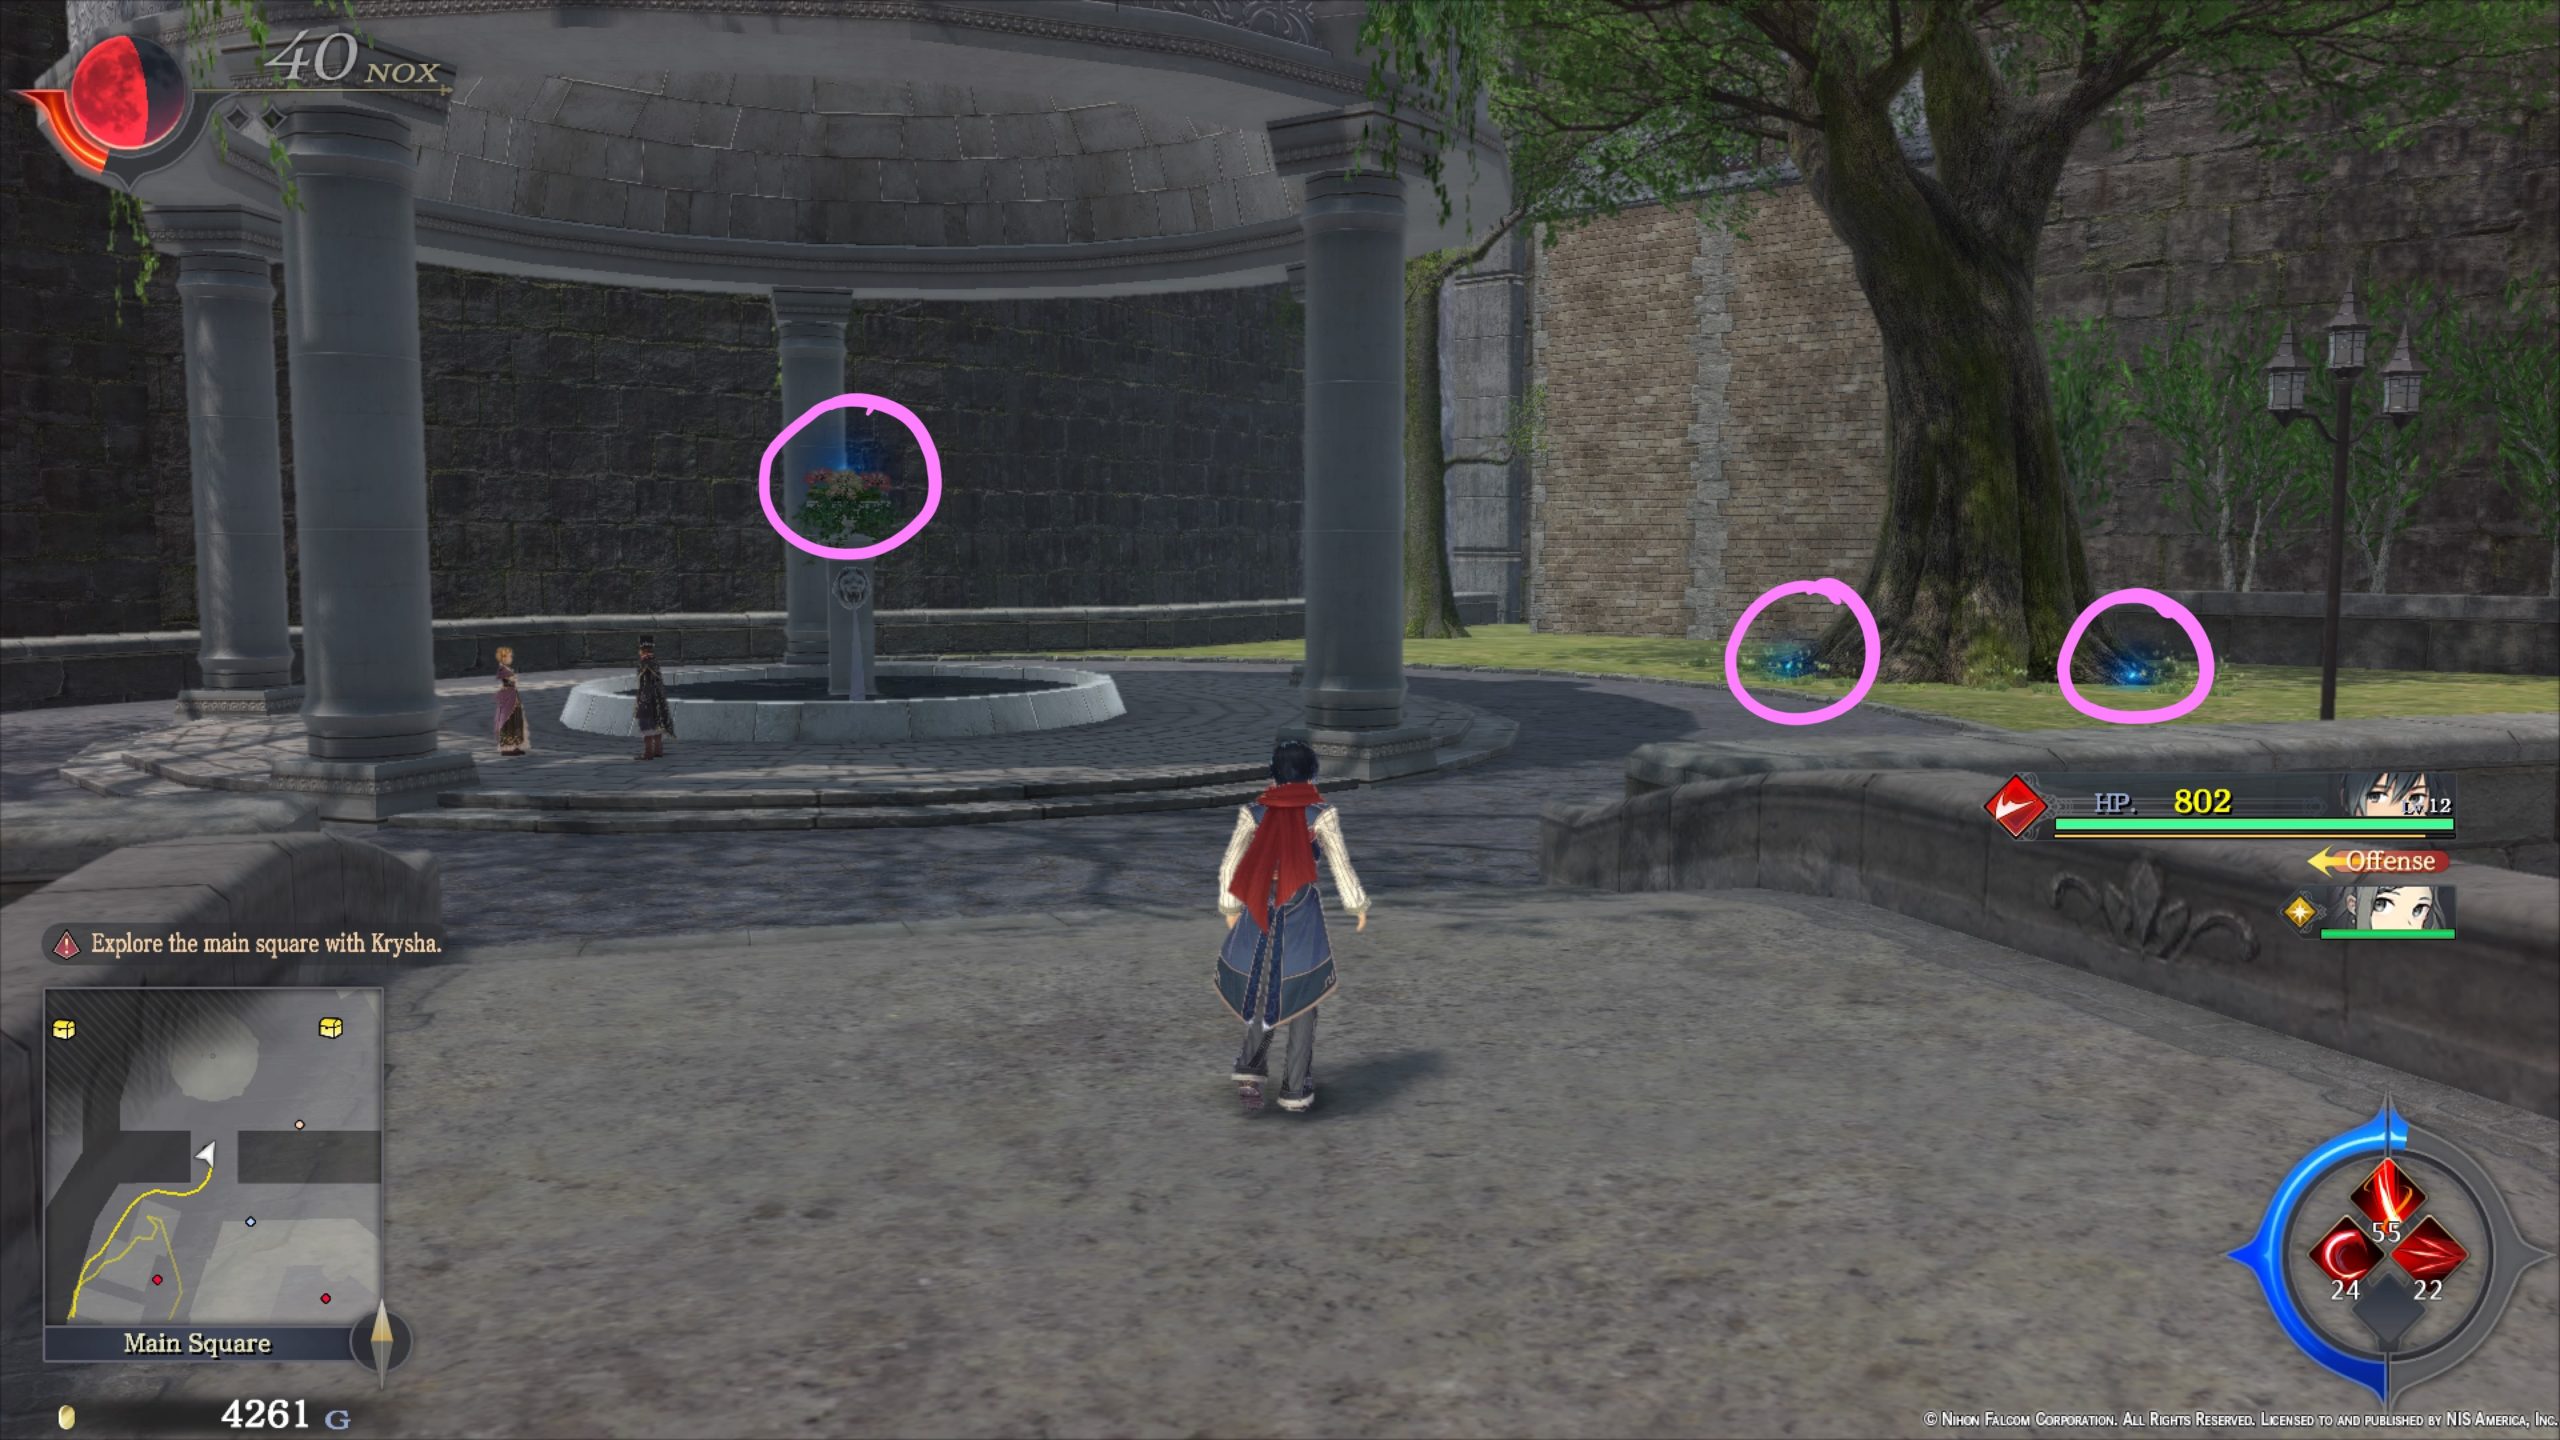
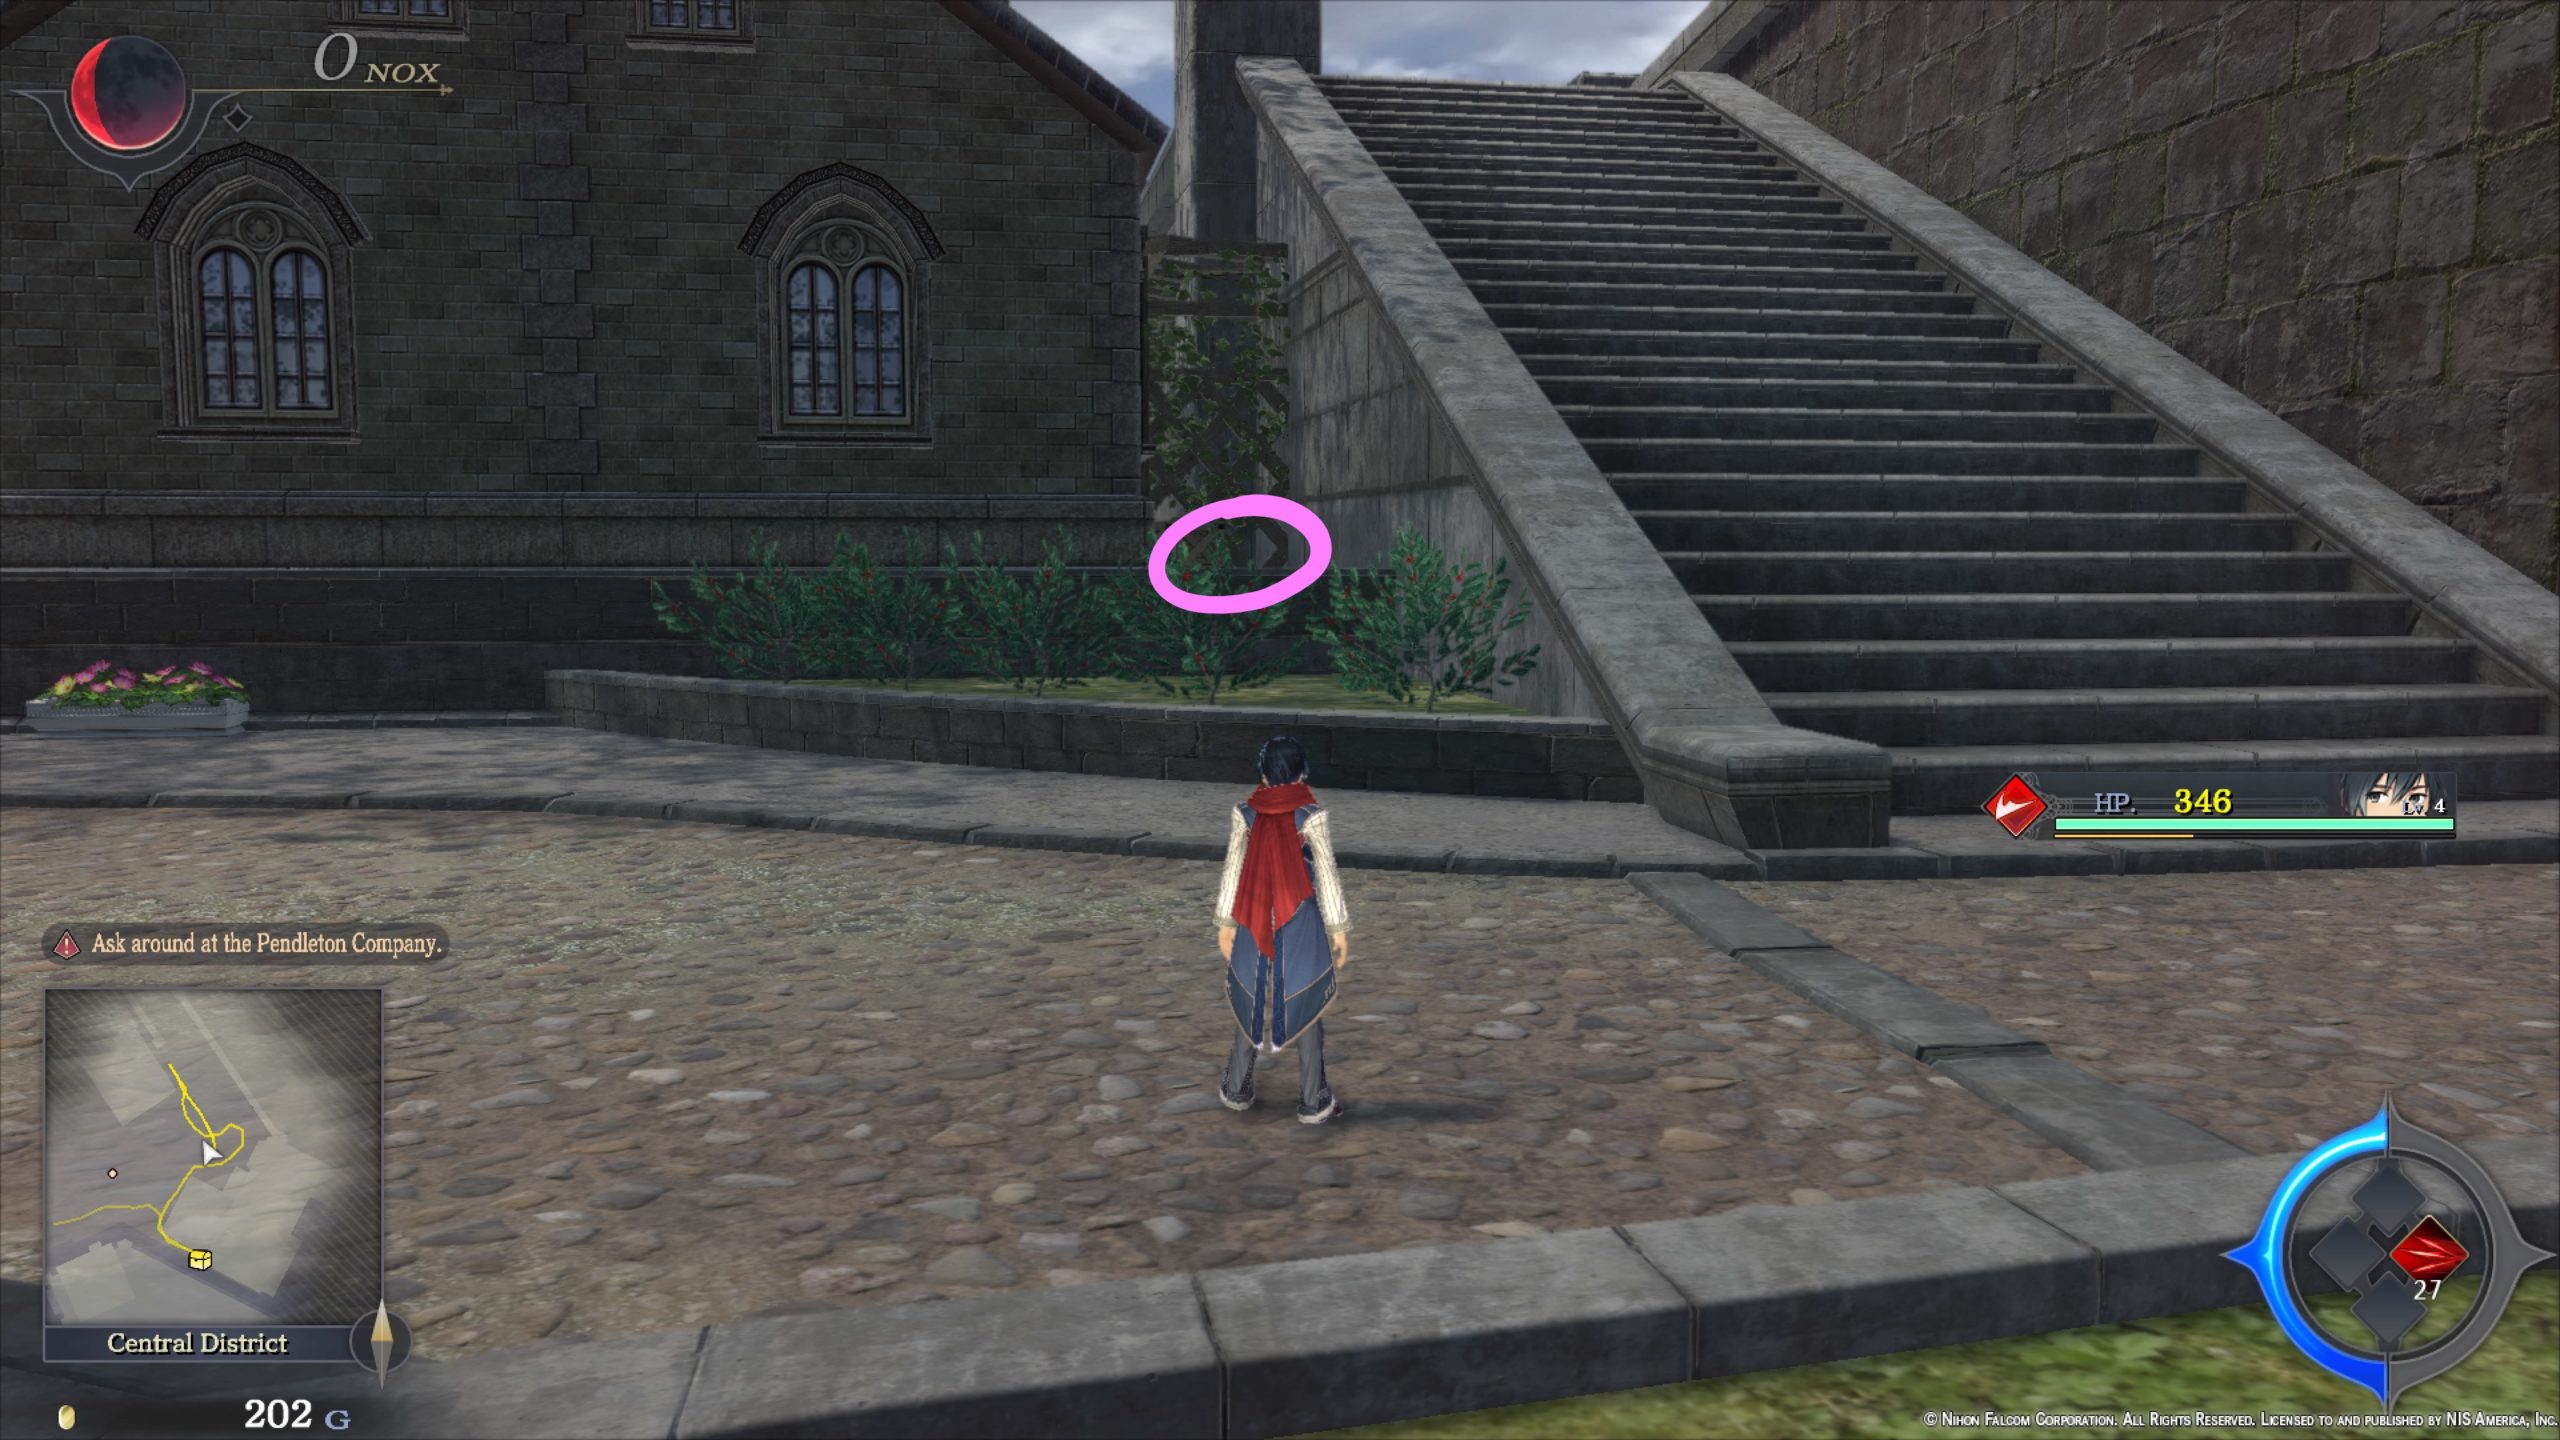
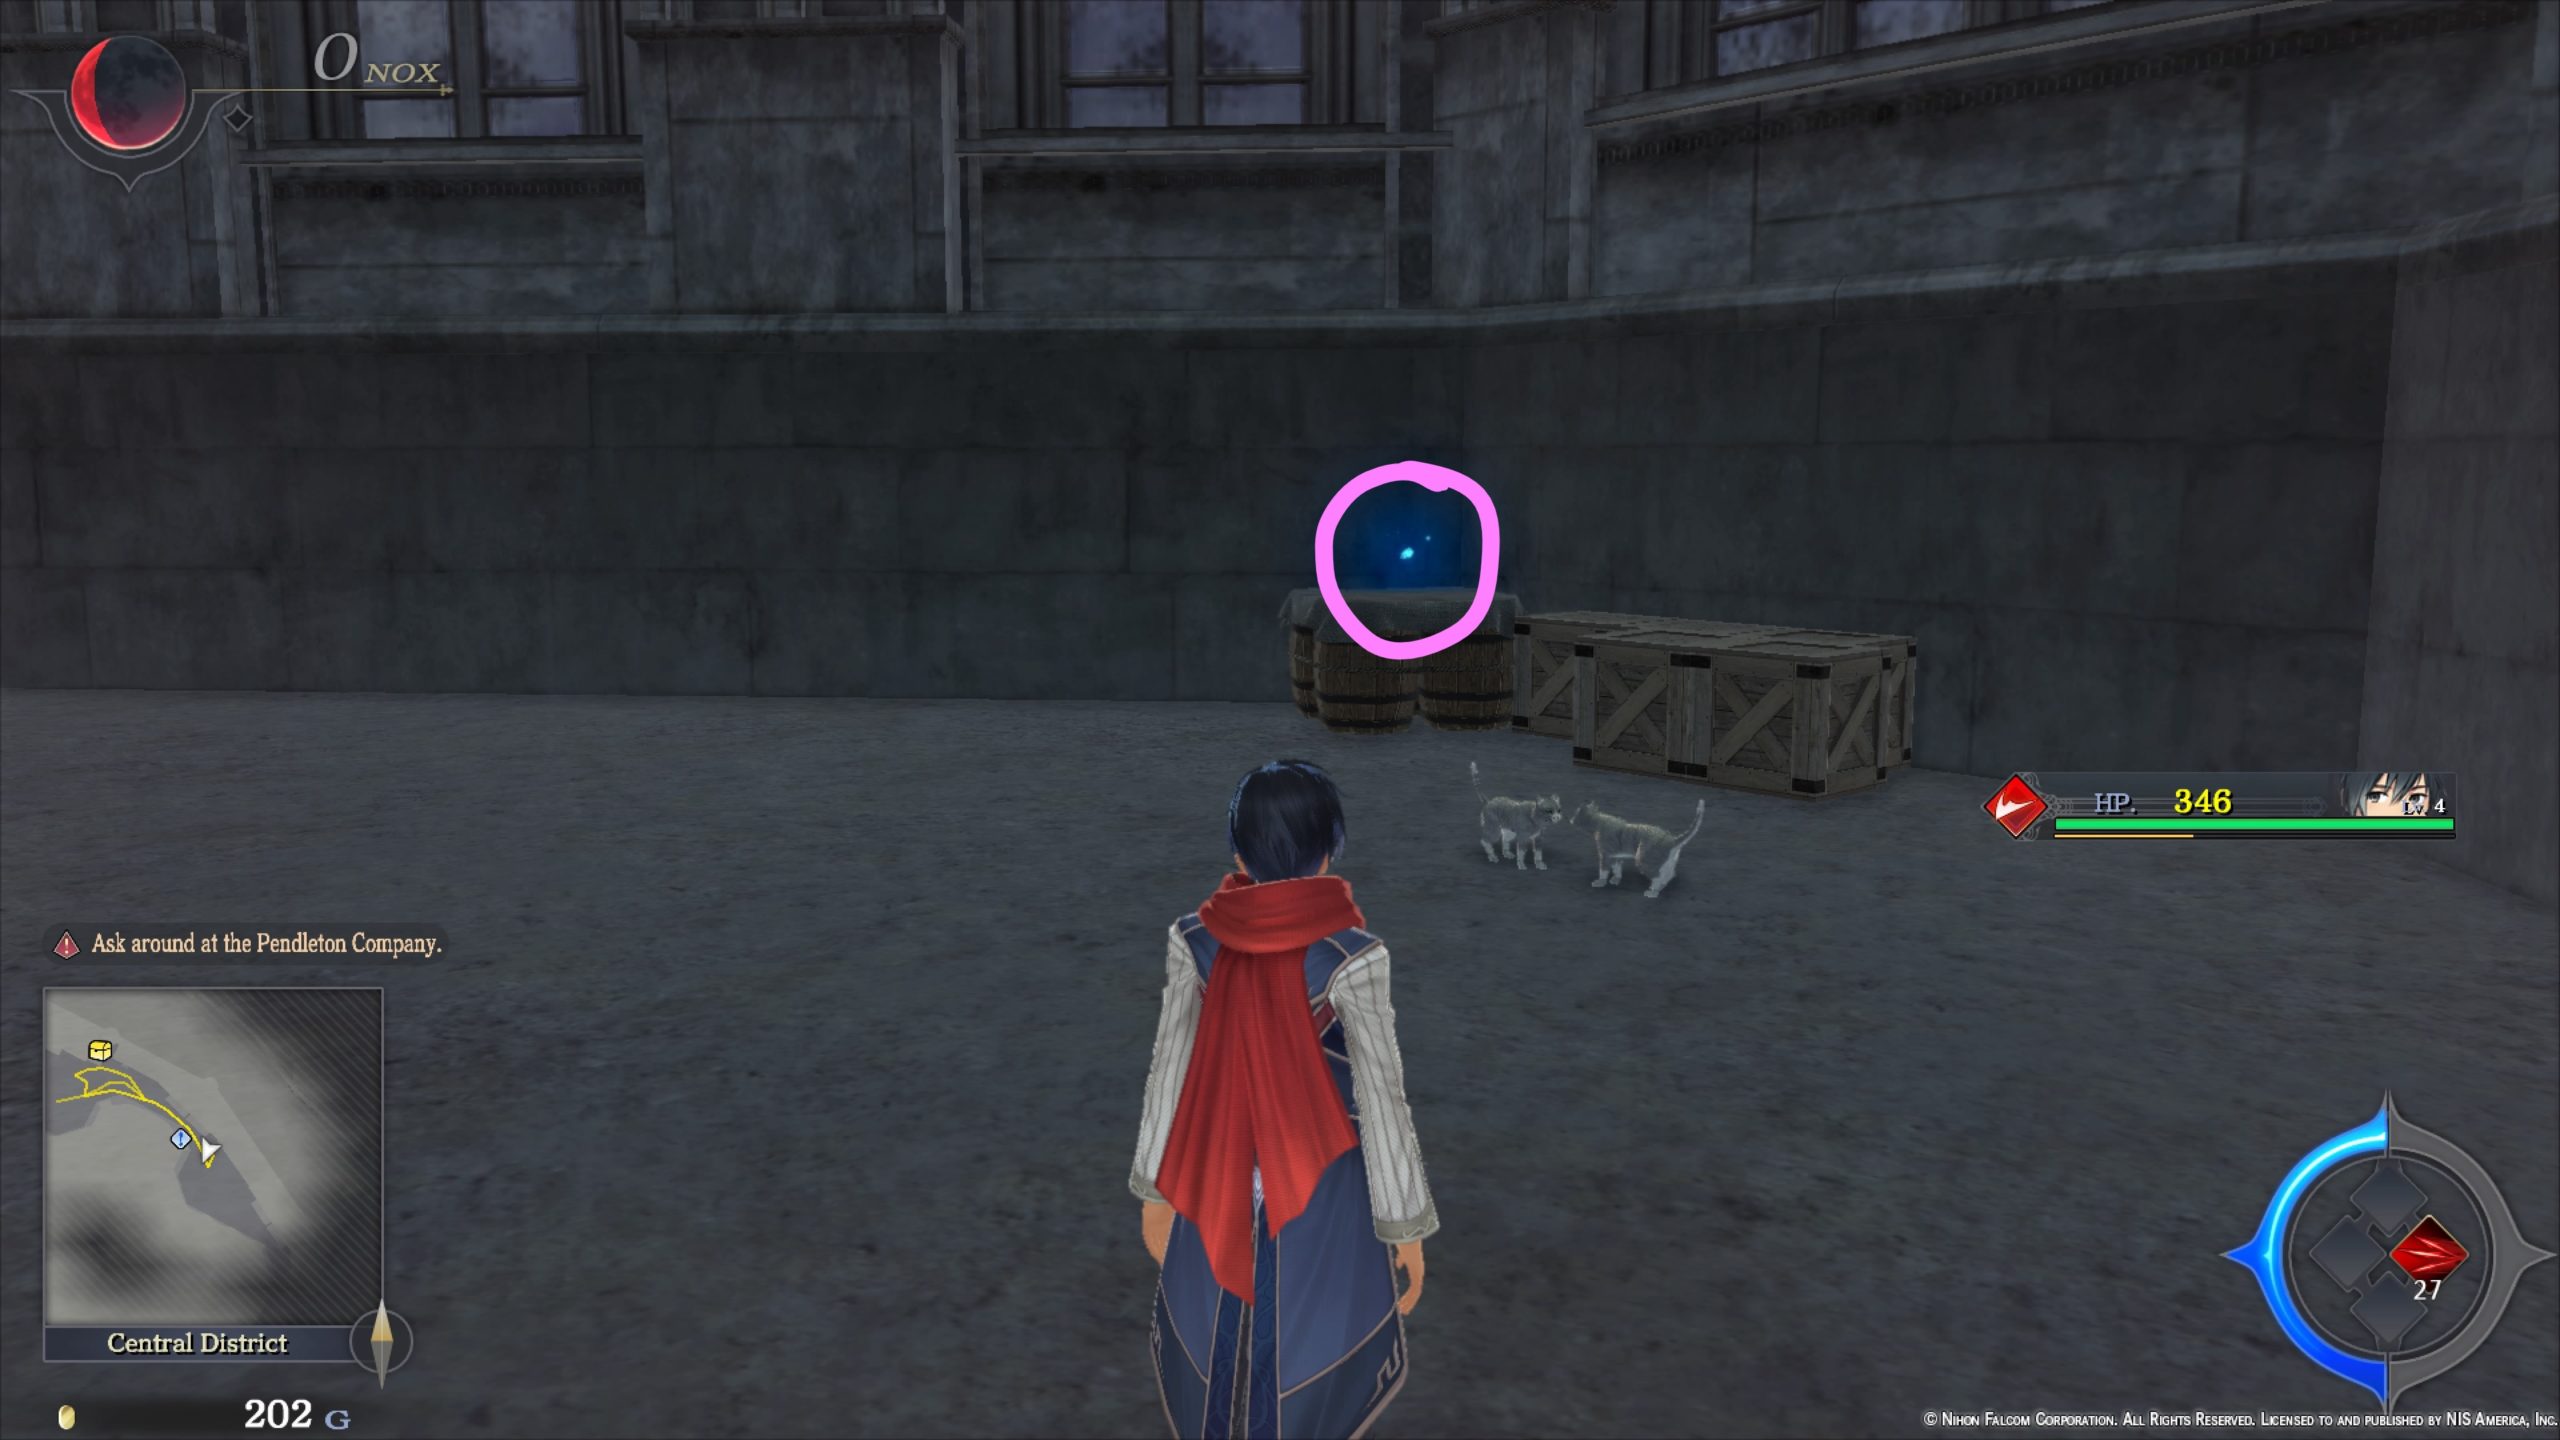
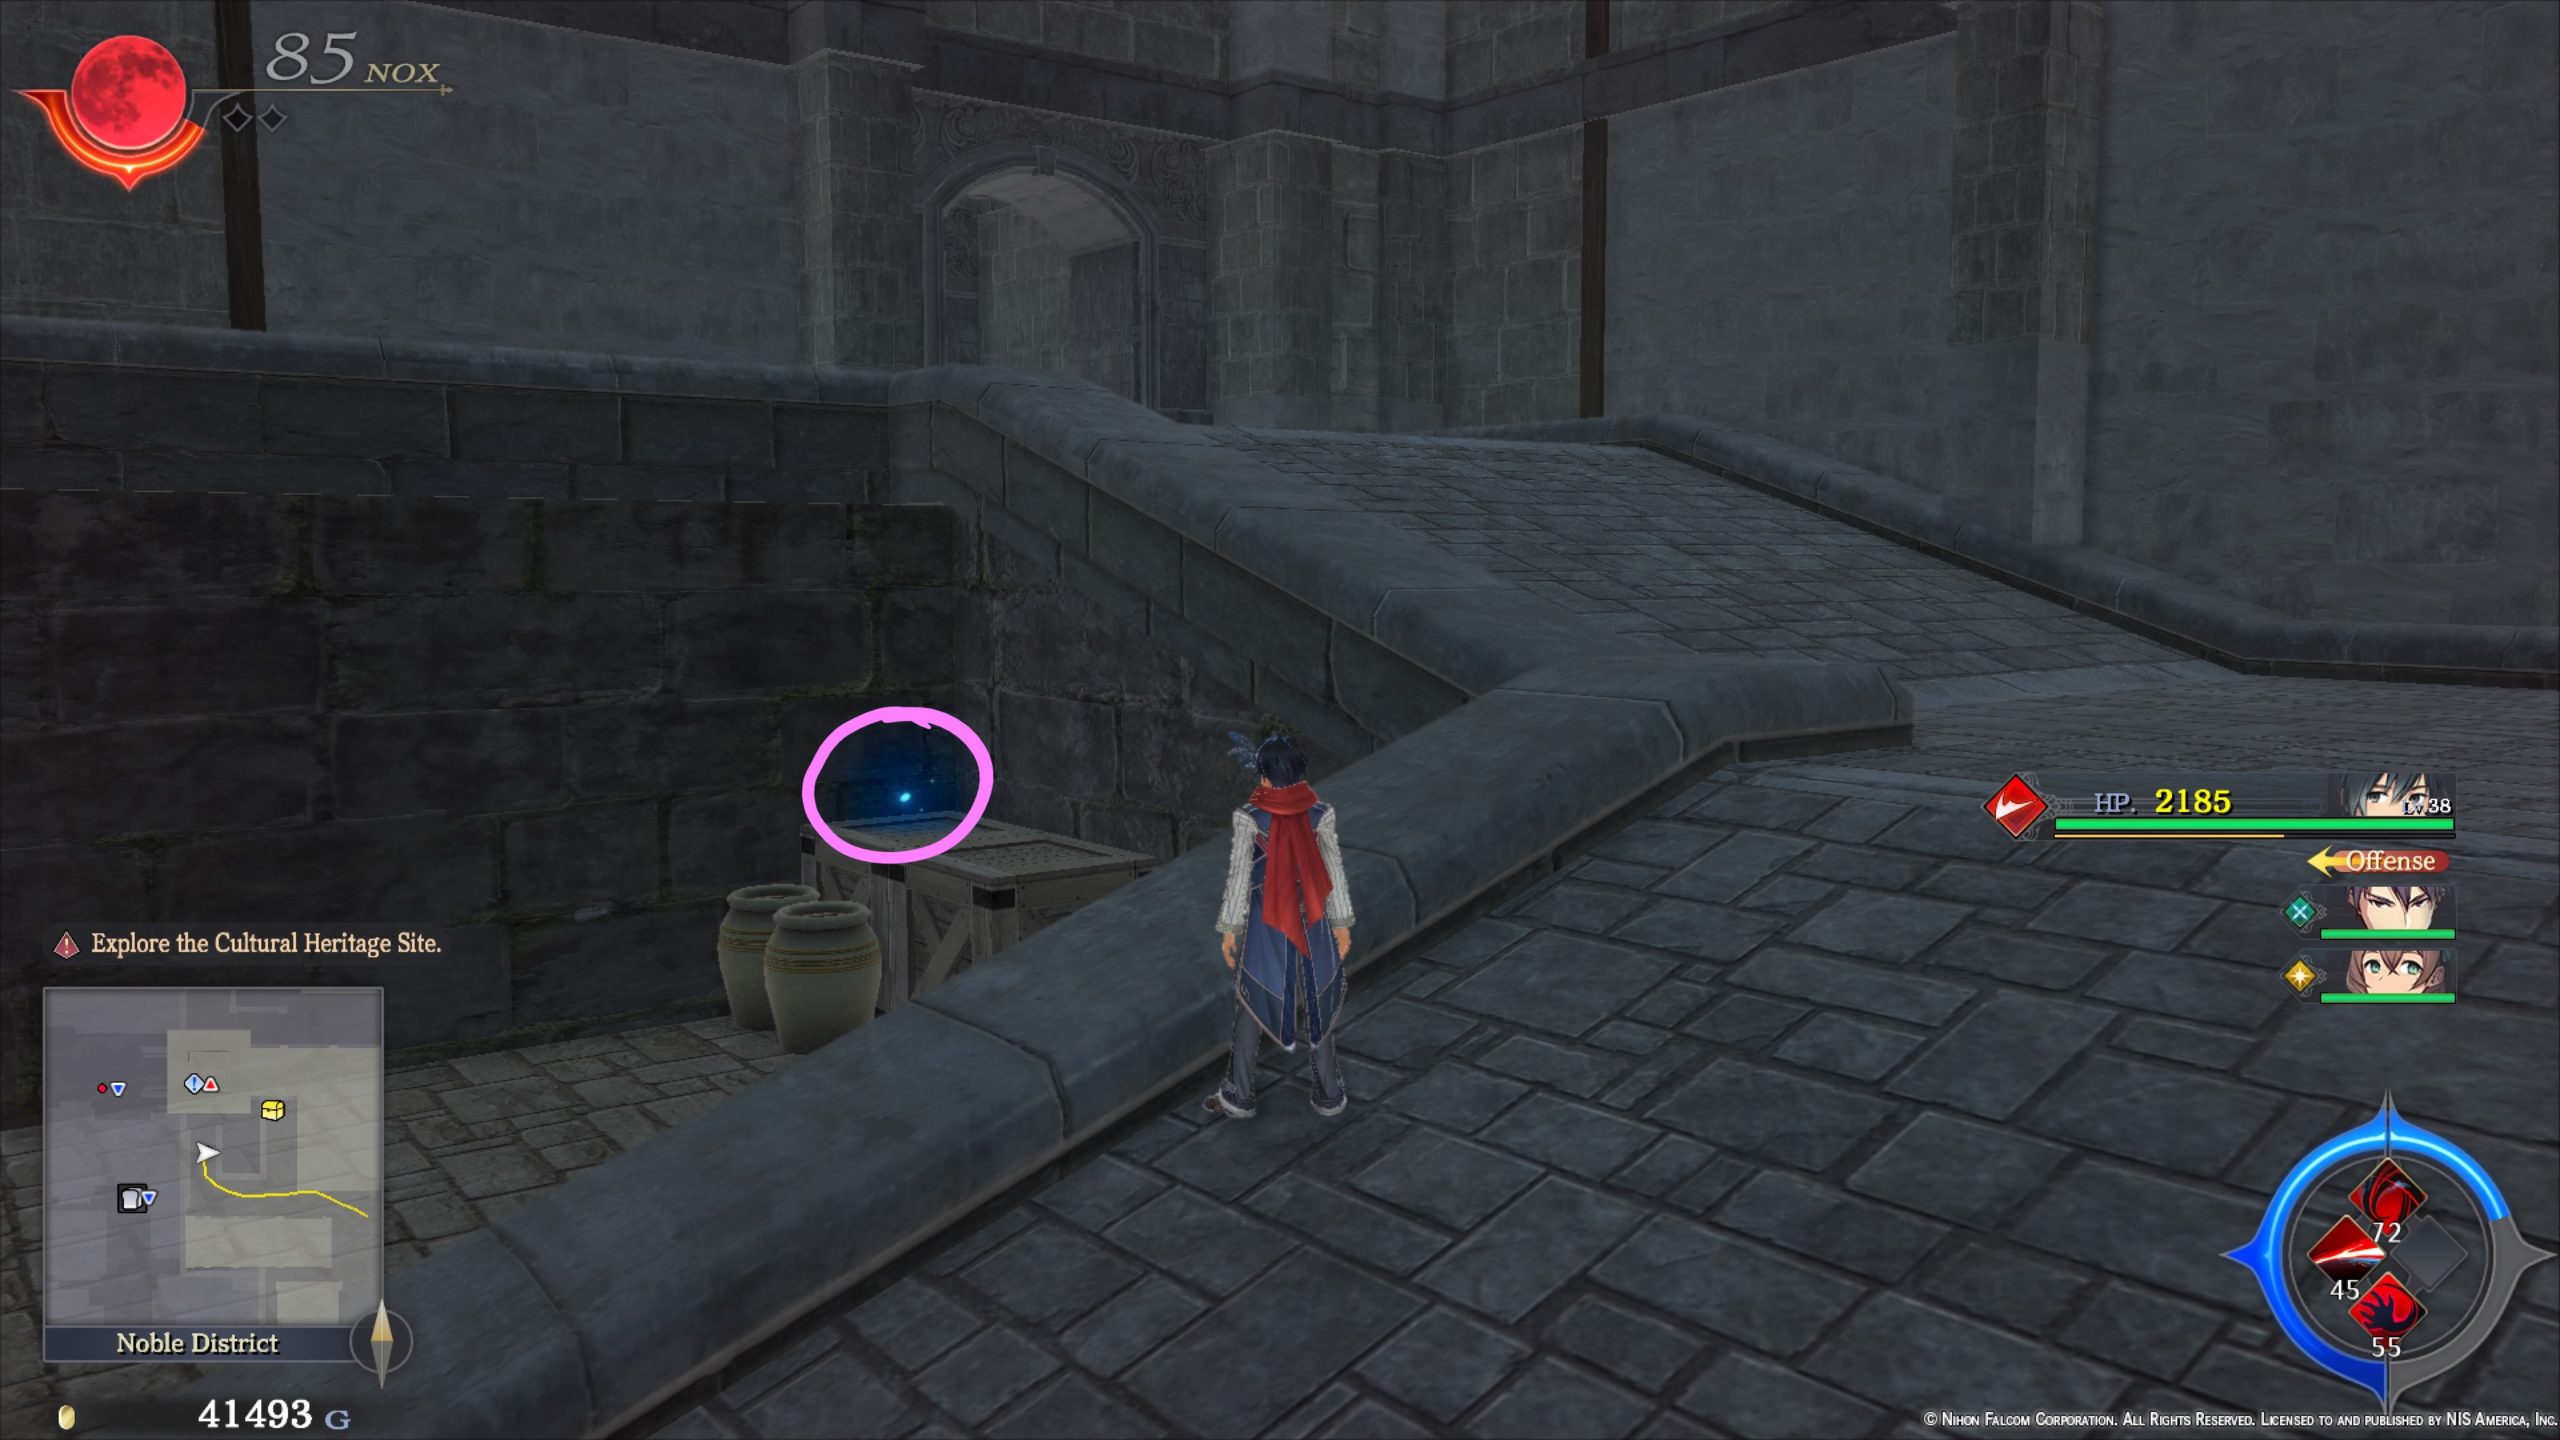
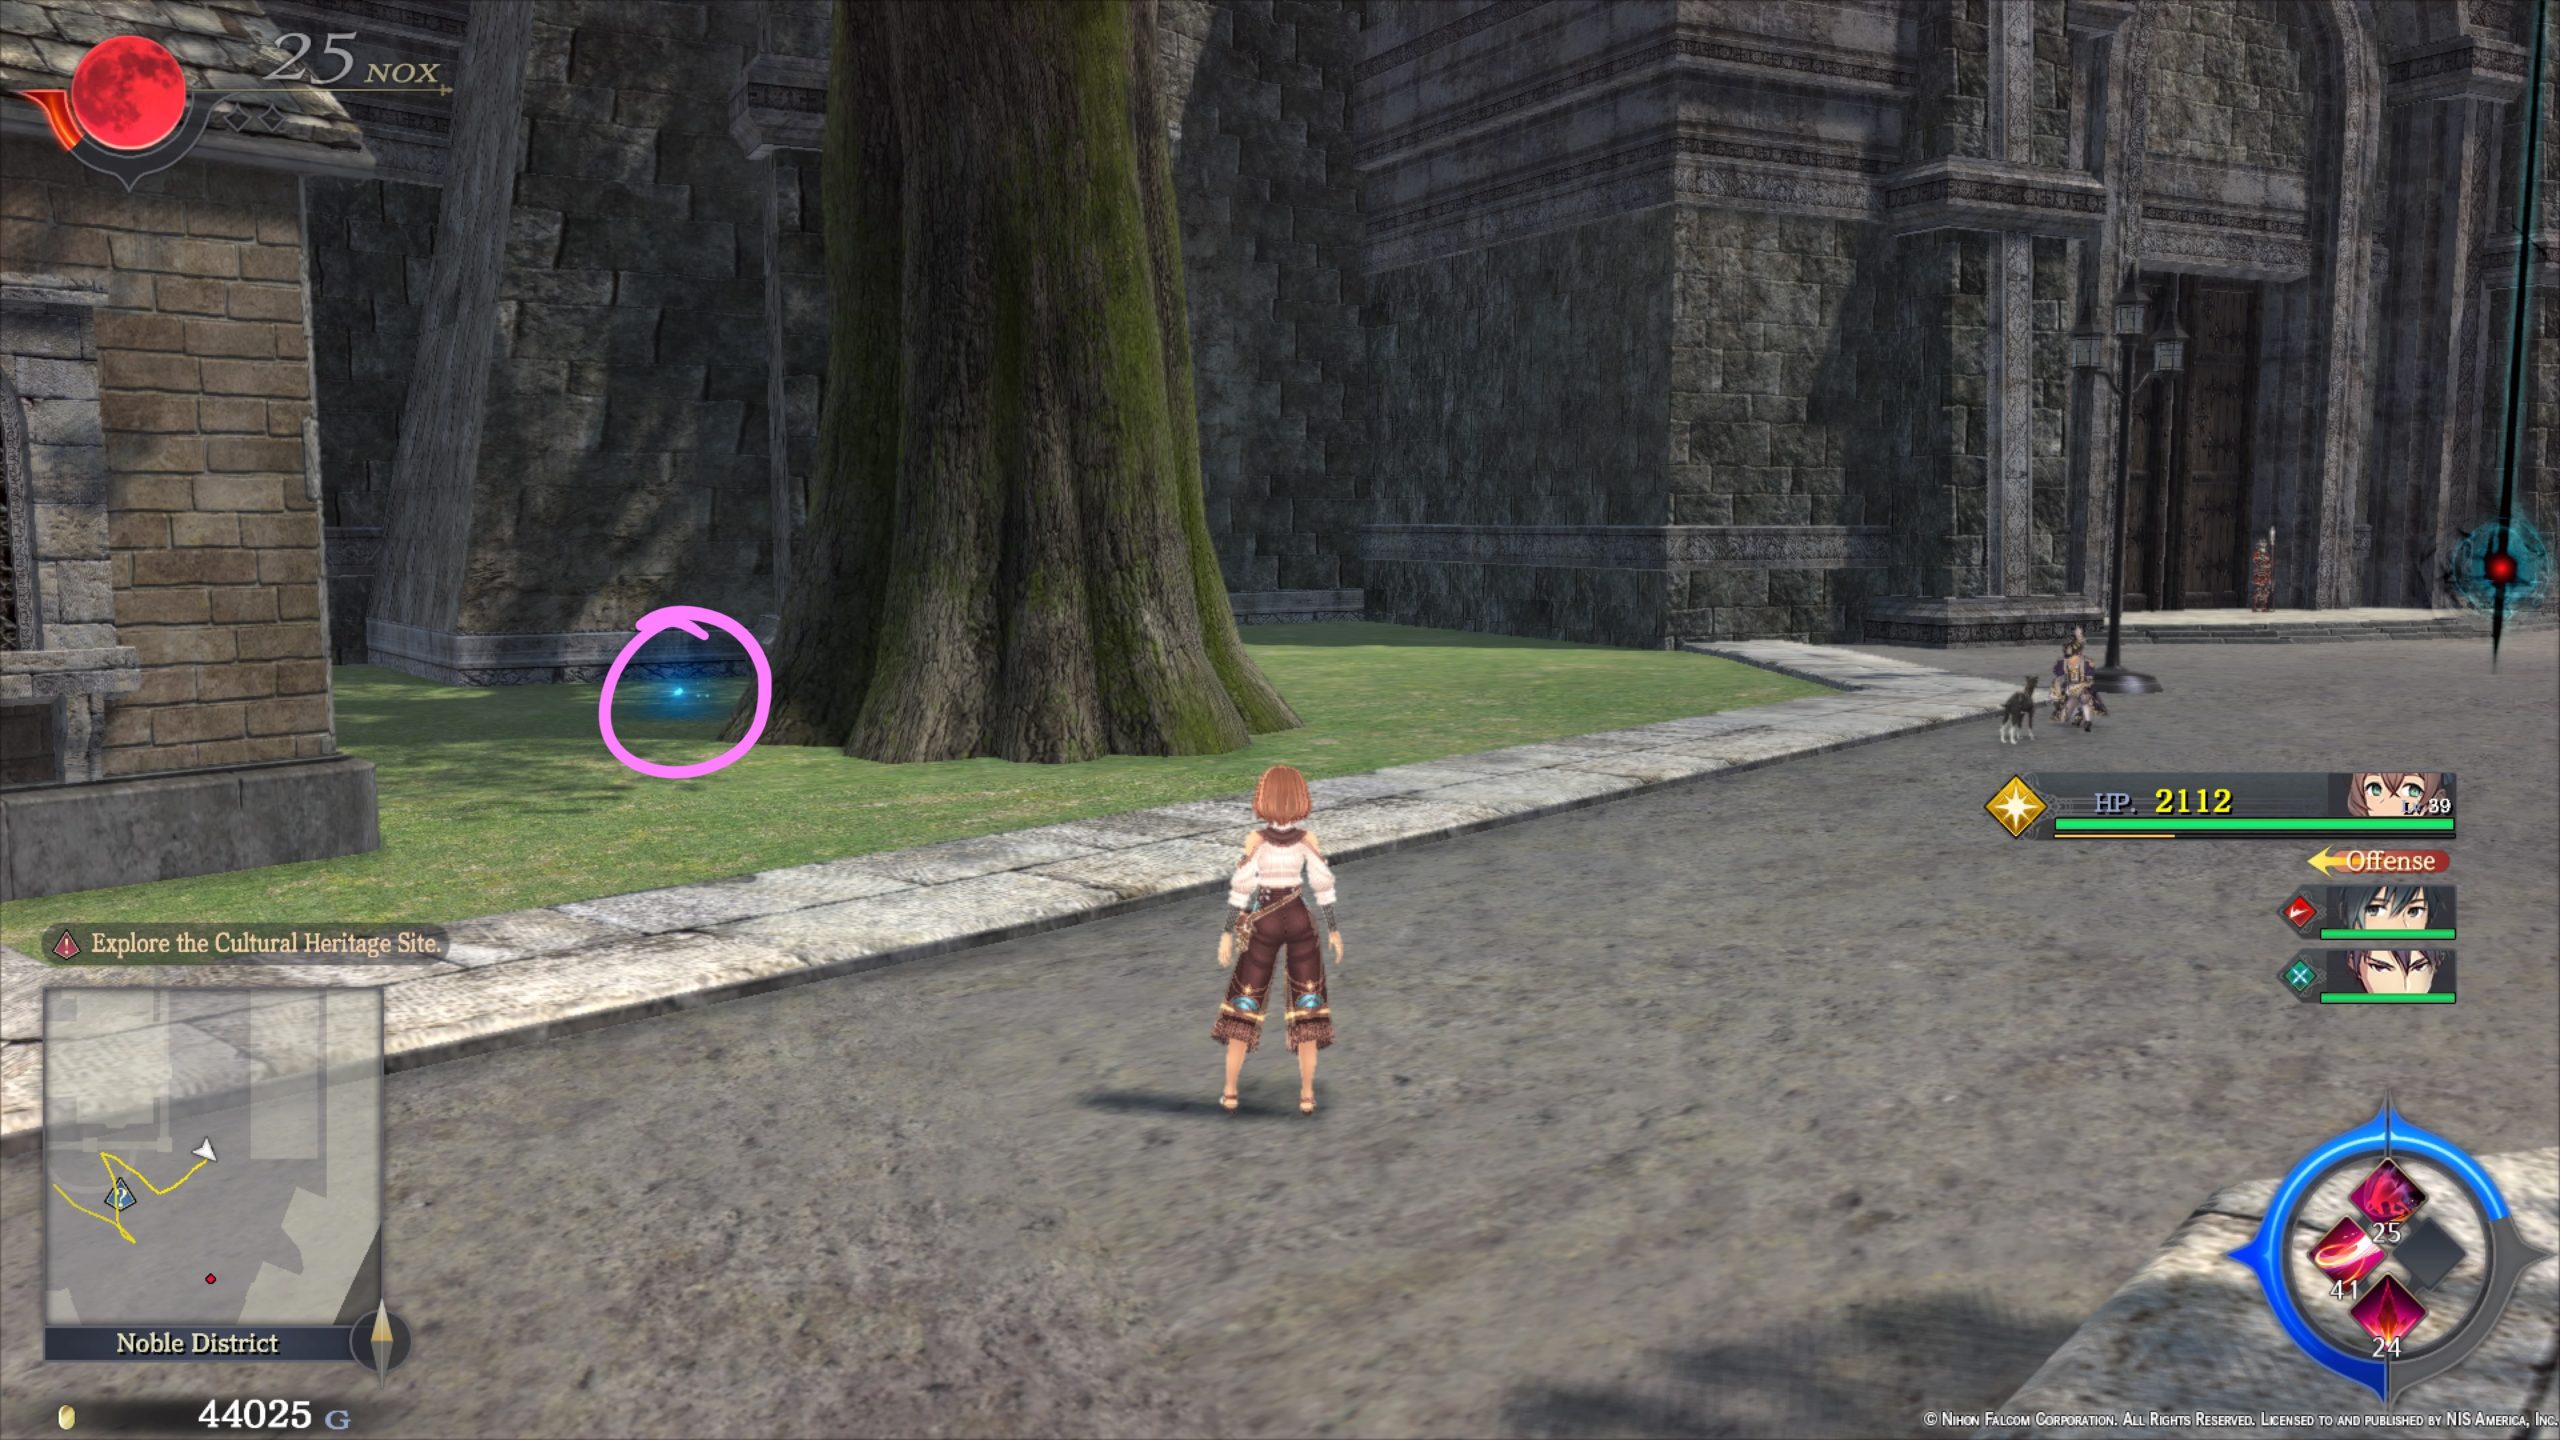
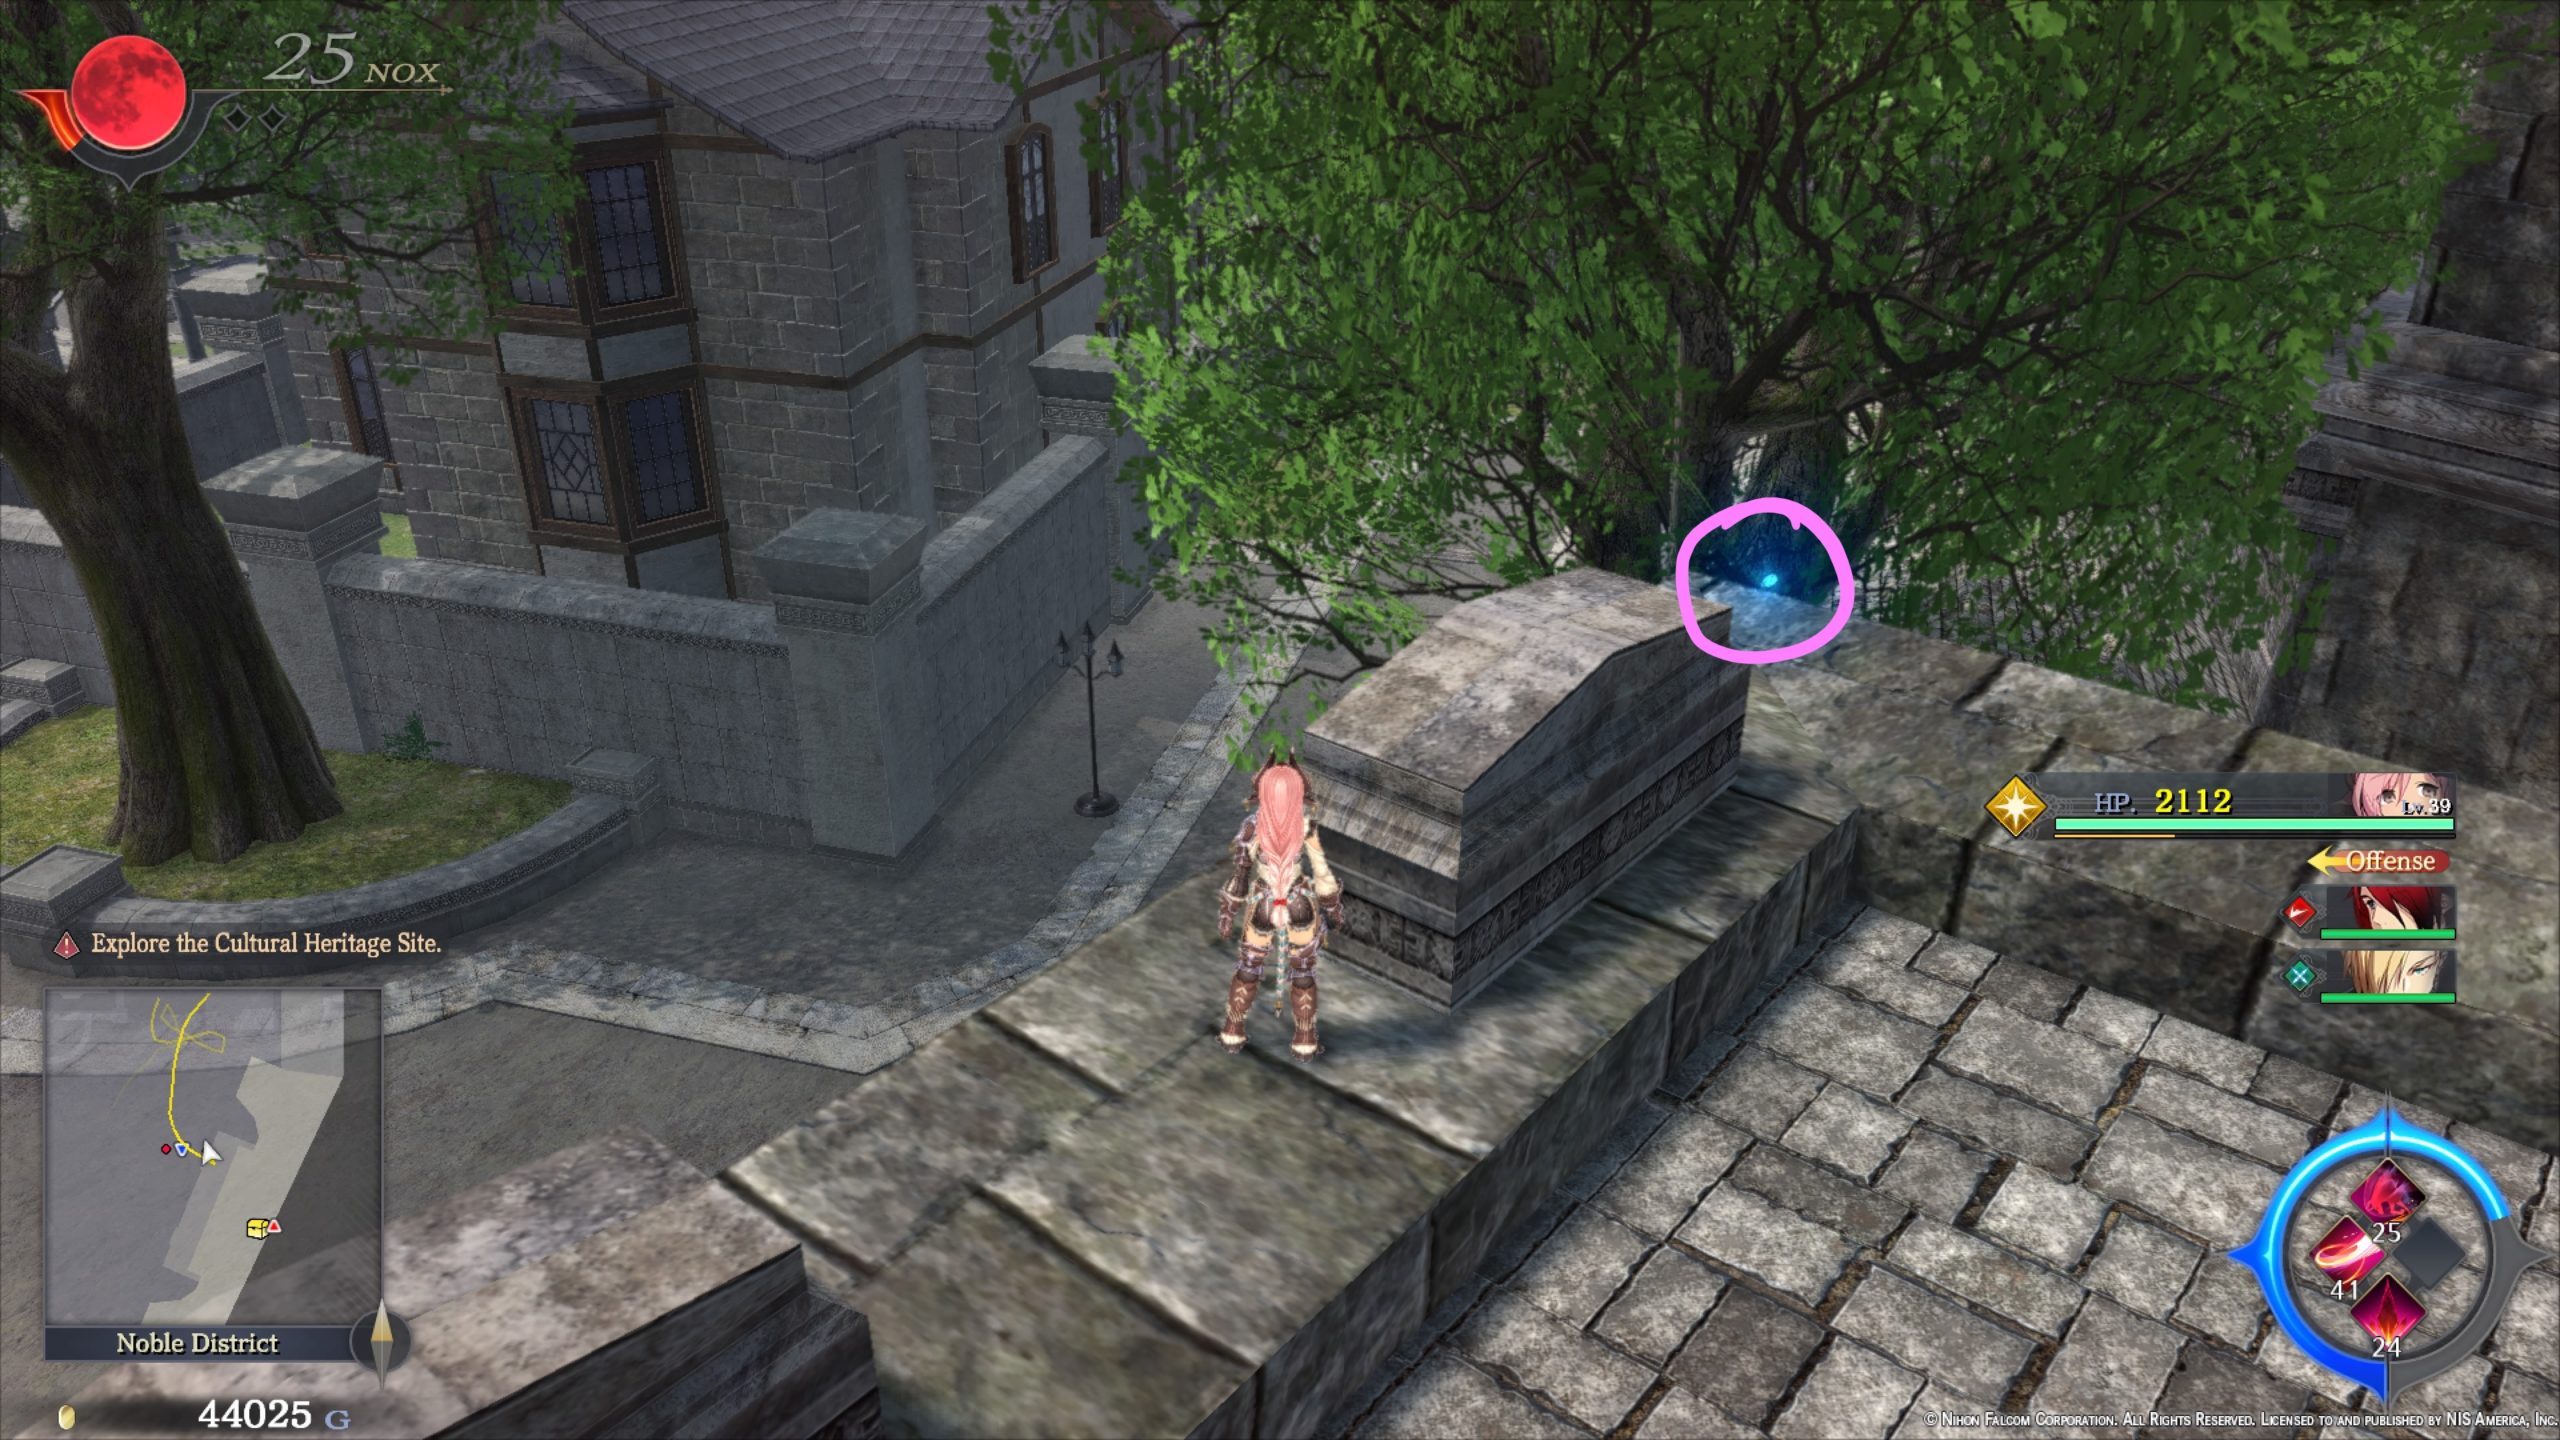
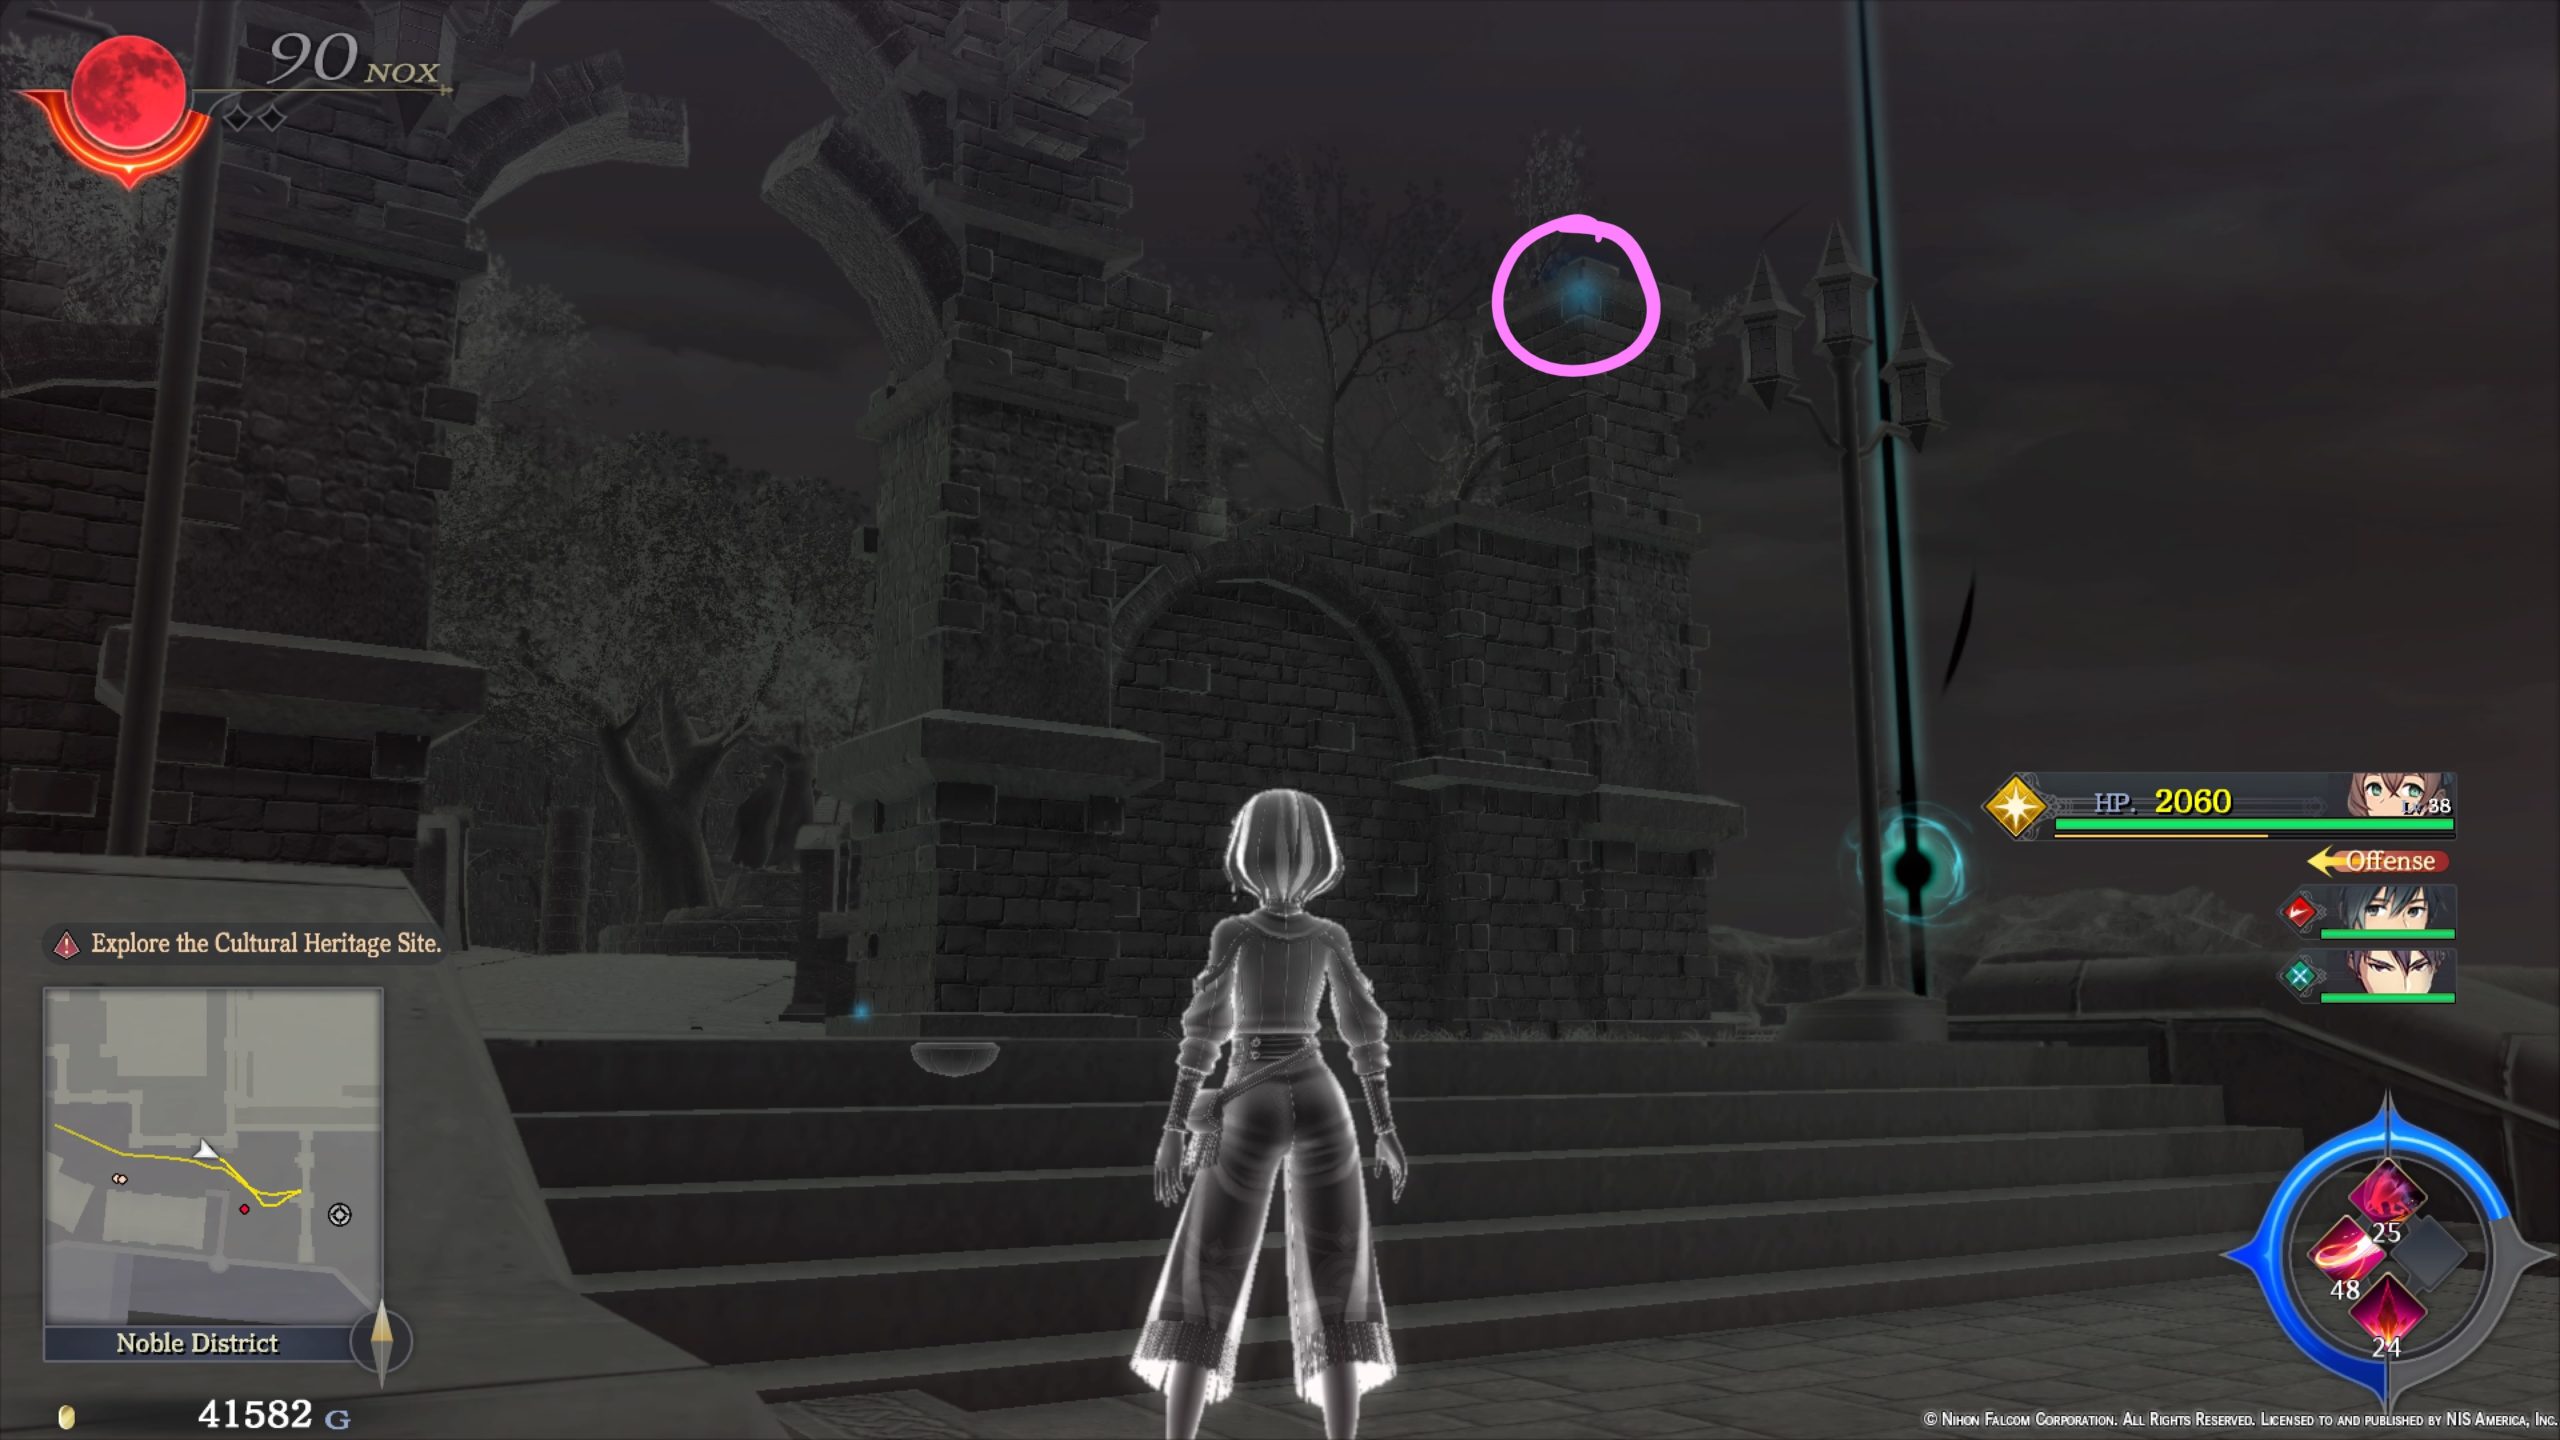
Azure Petals
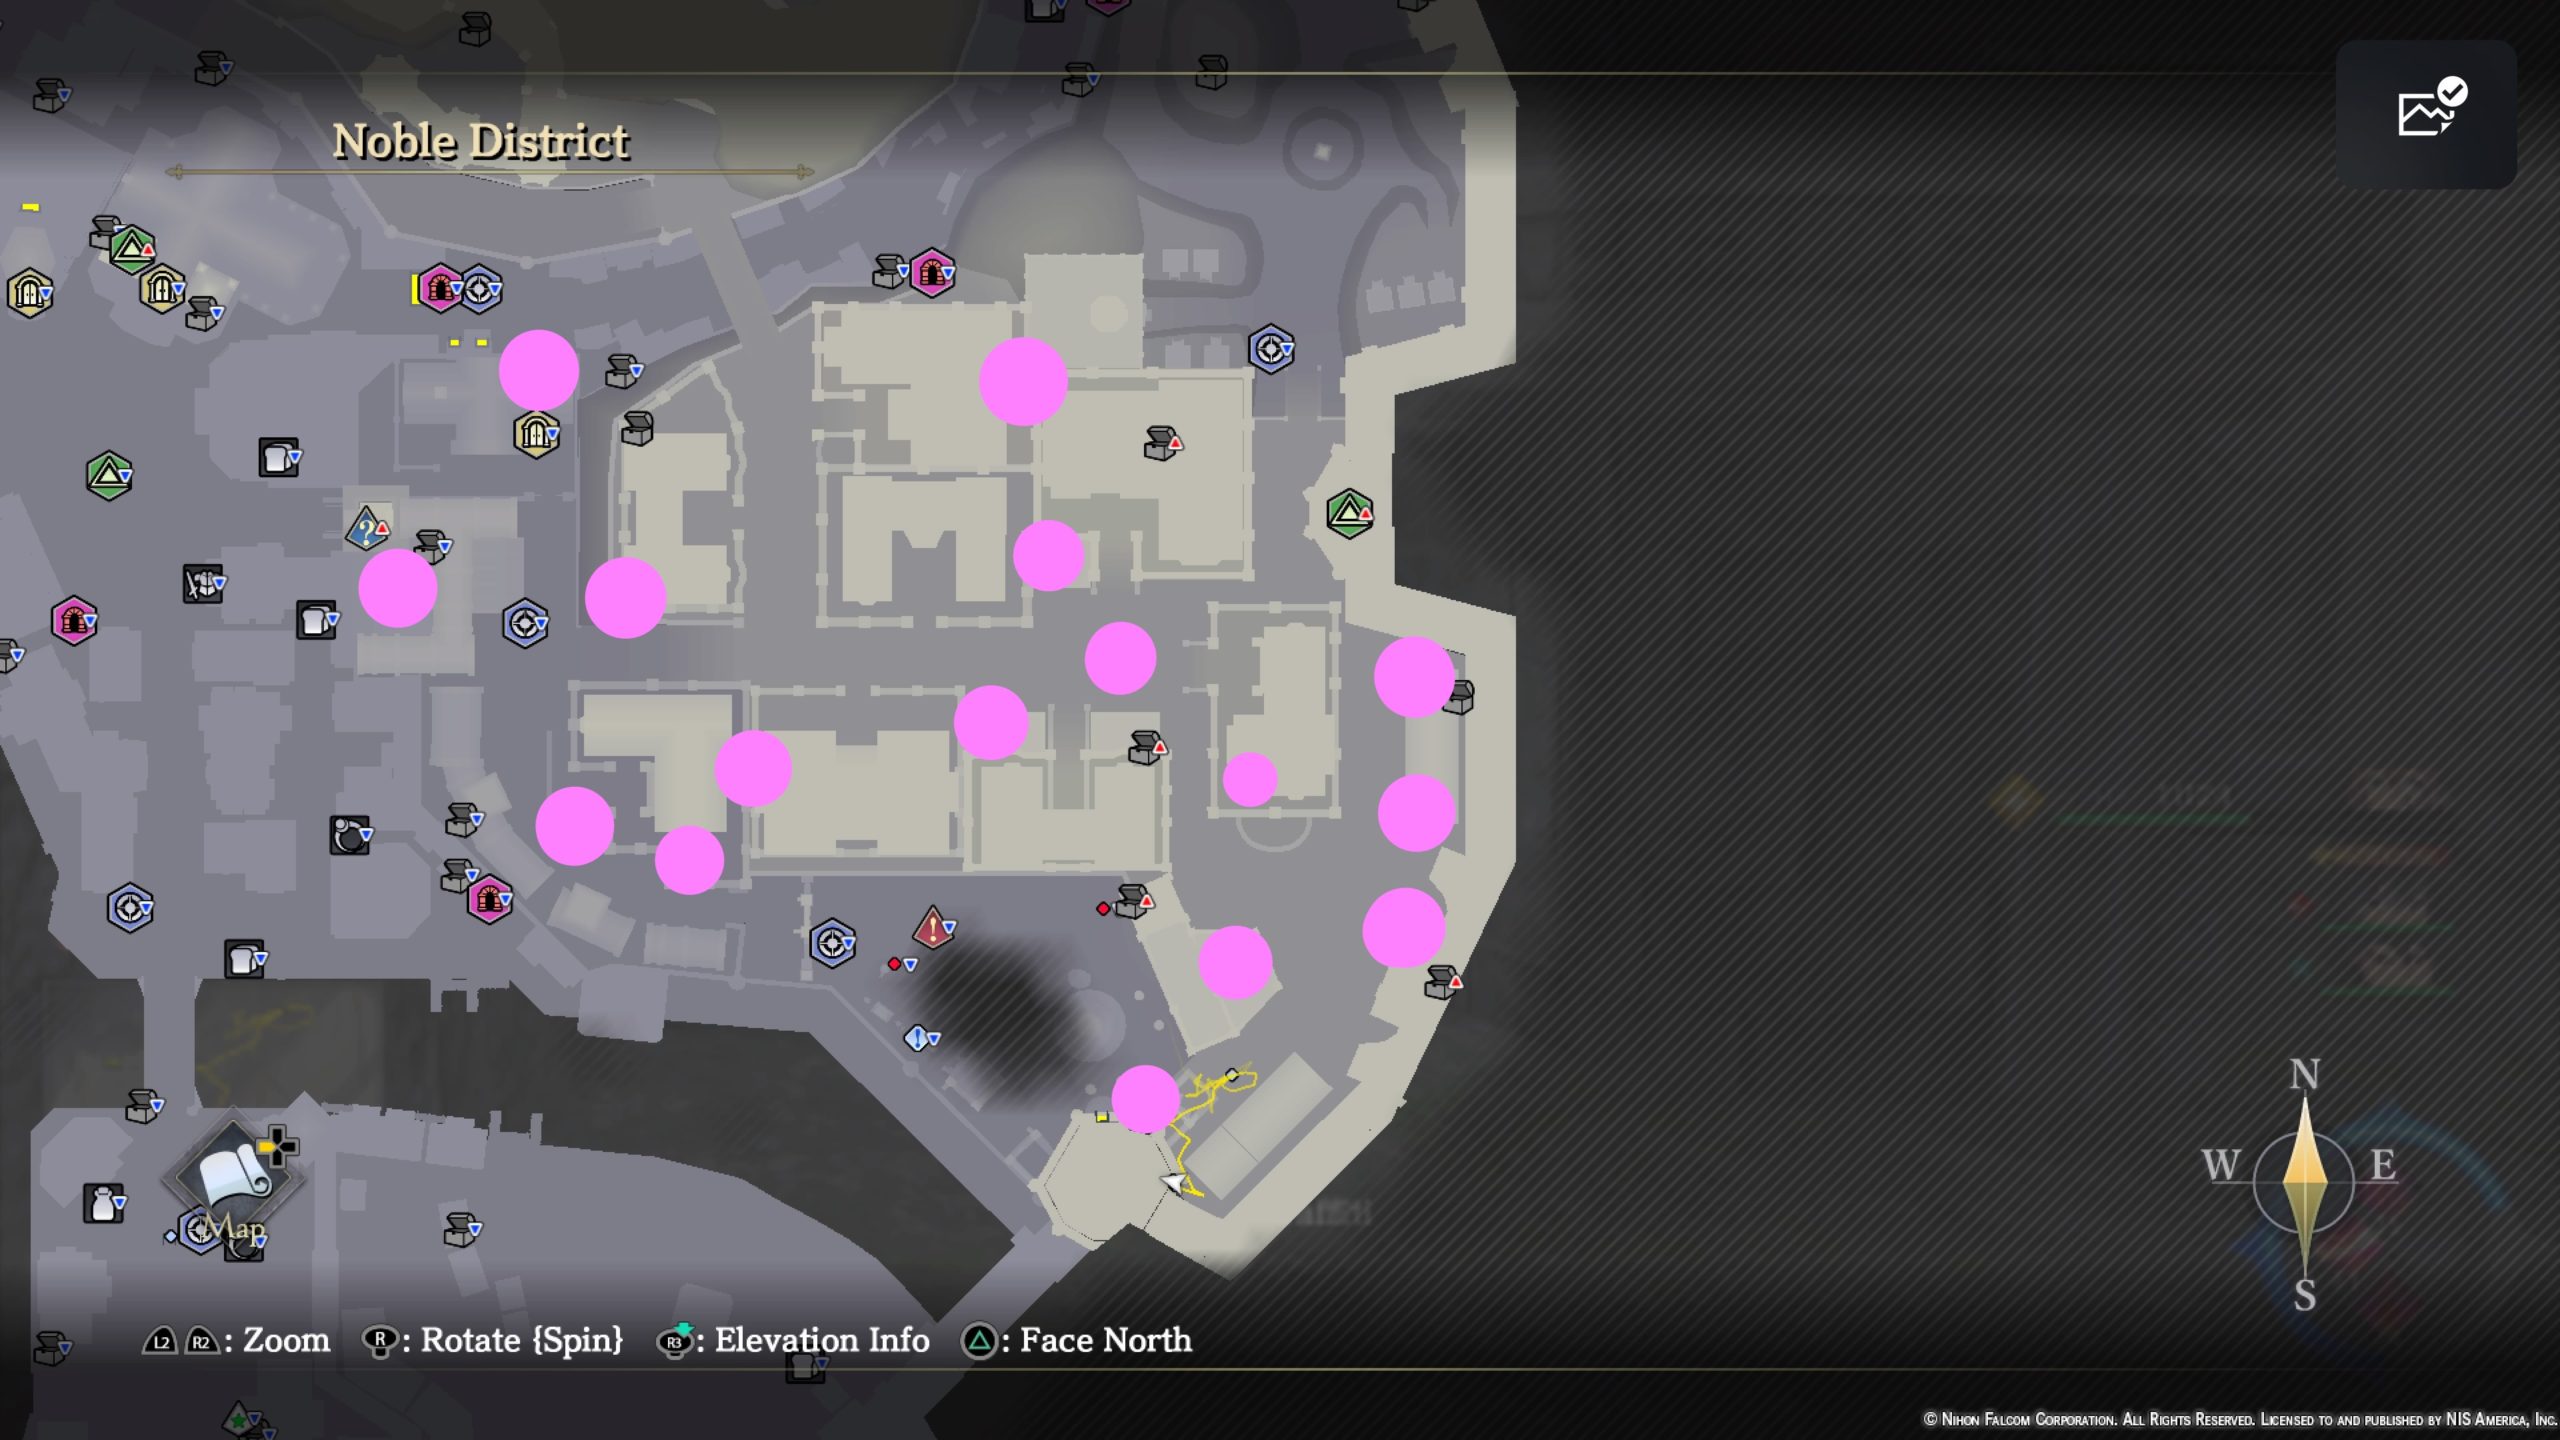
- On a crate to the west of the Relief Tile
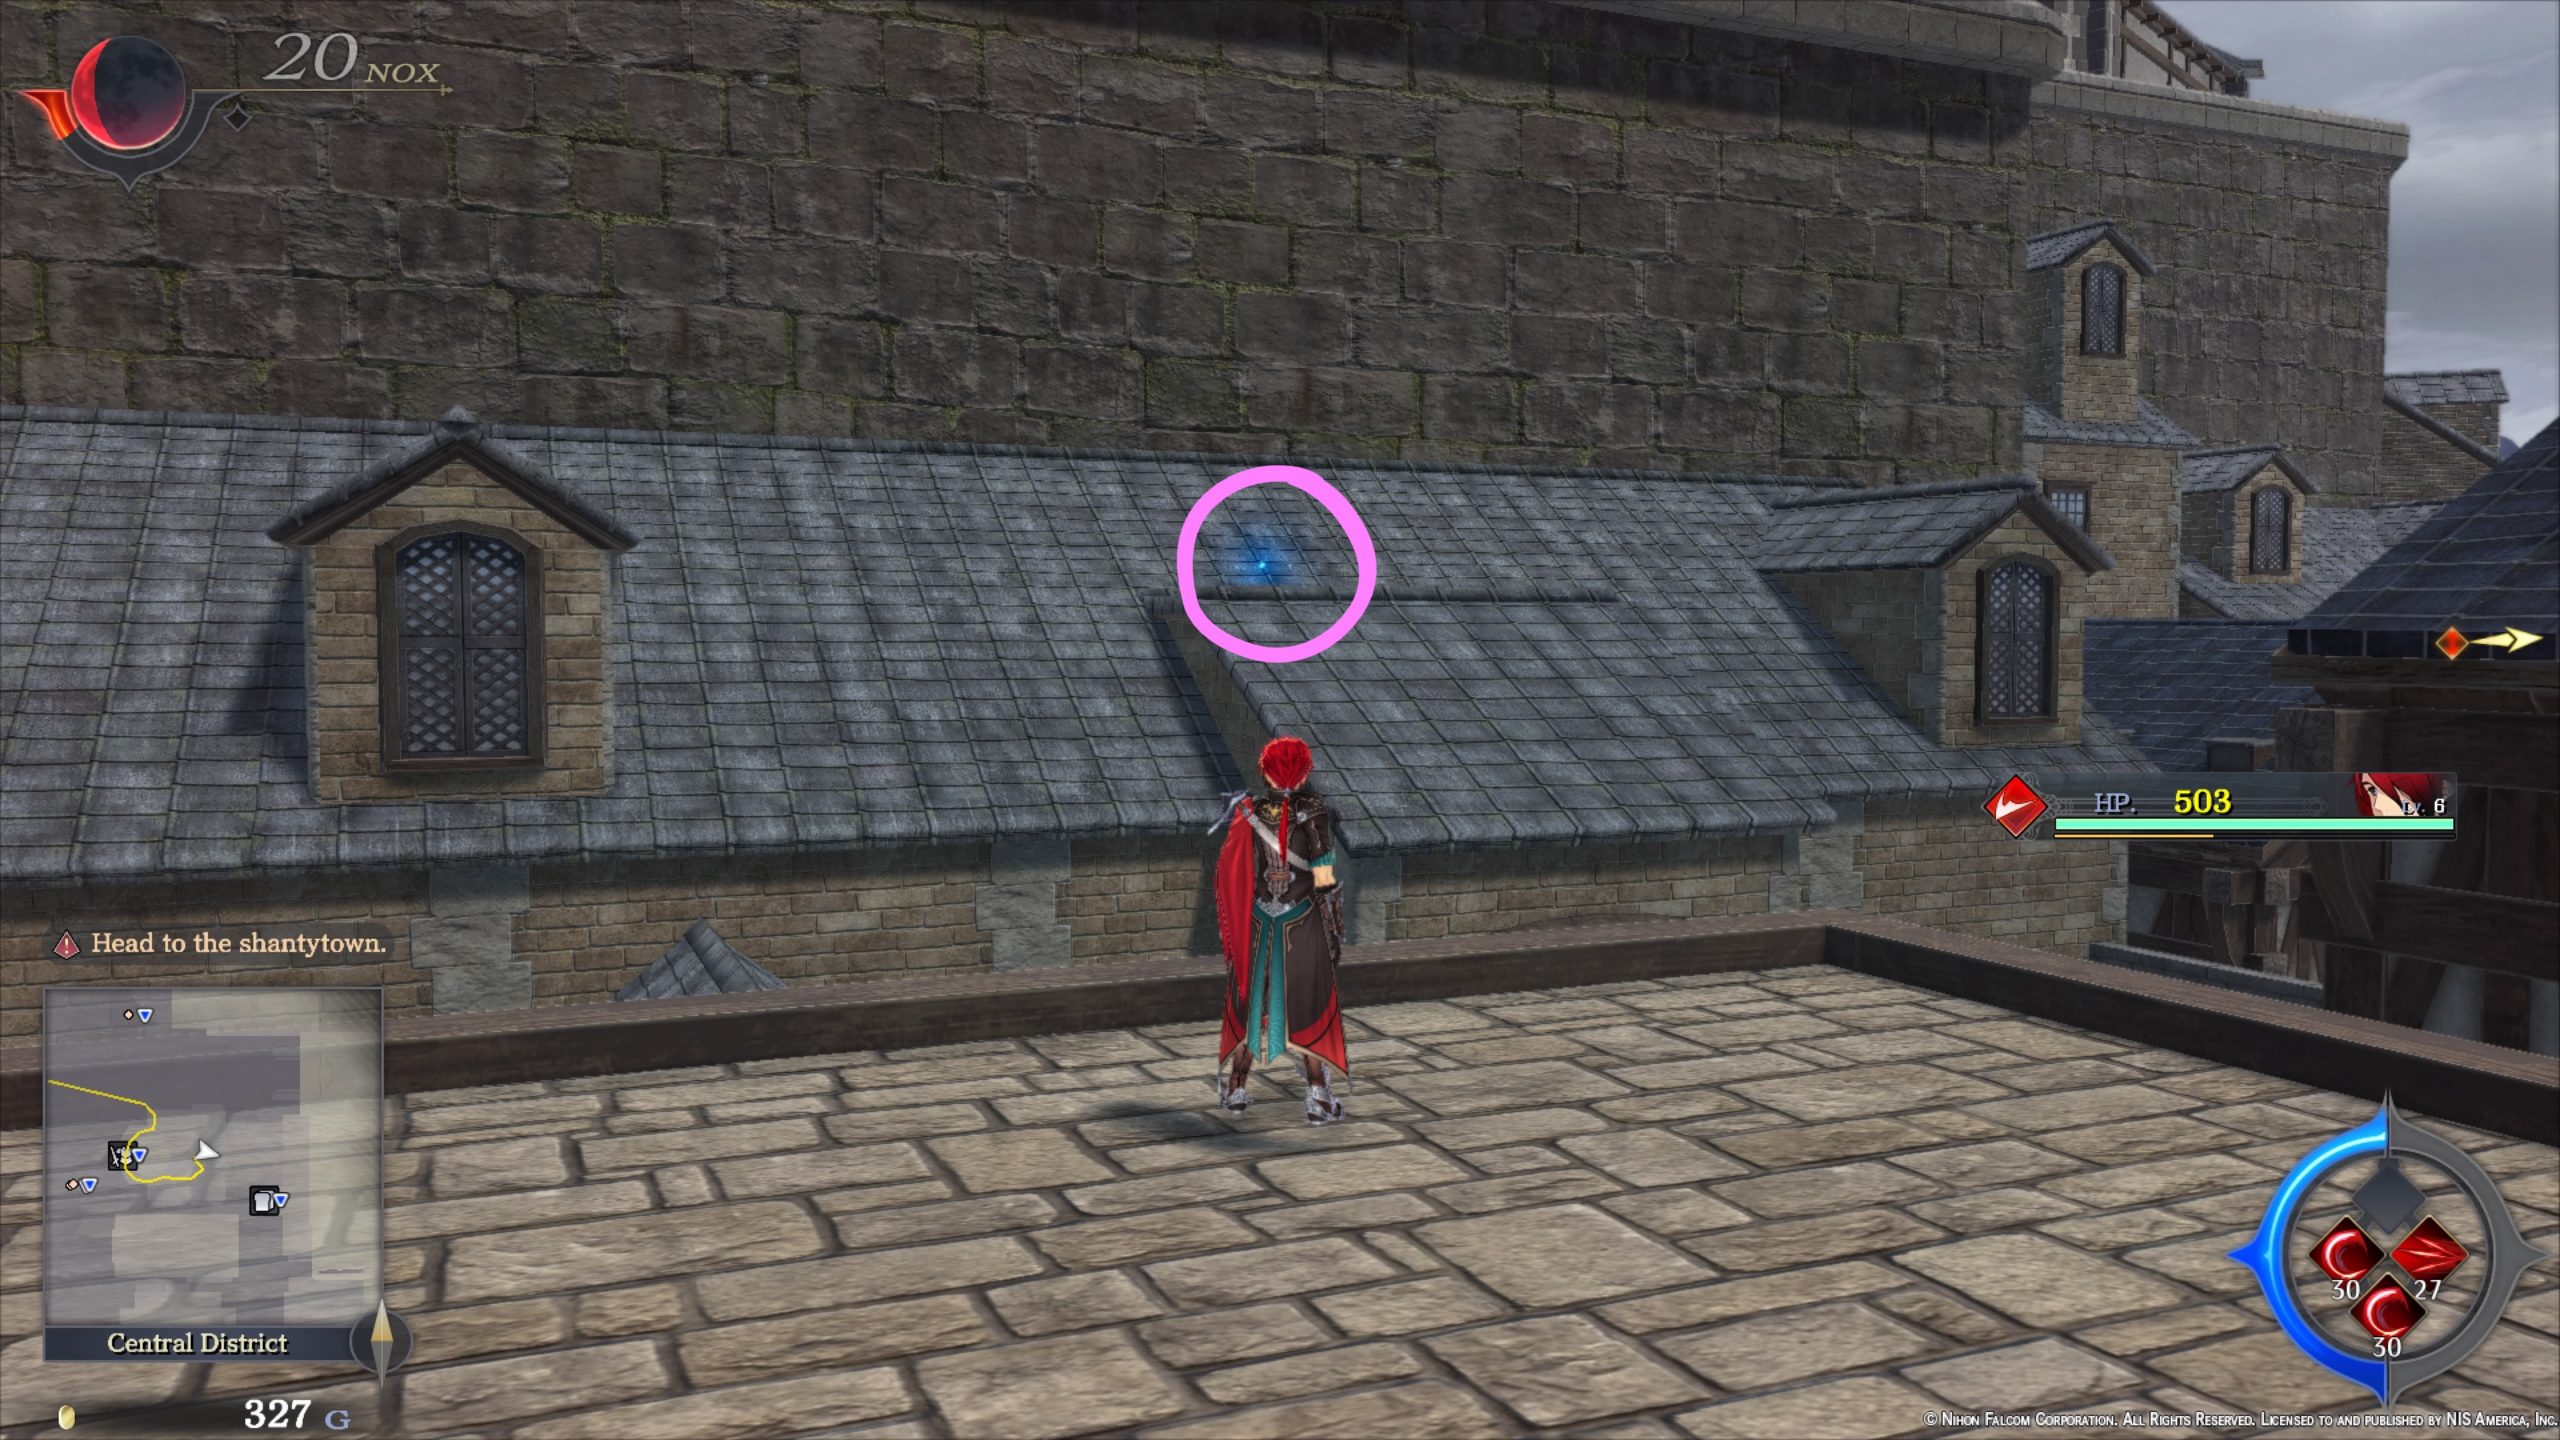
- On a chimney north of the Relief Tile
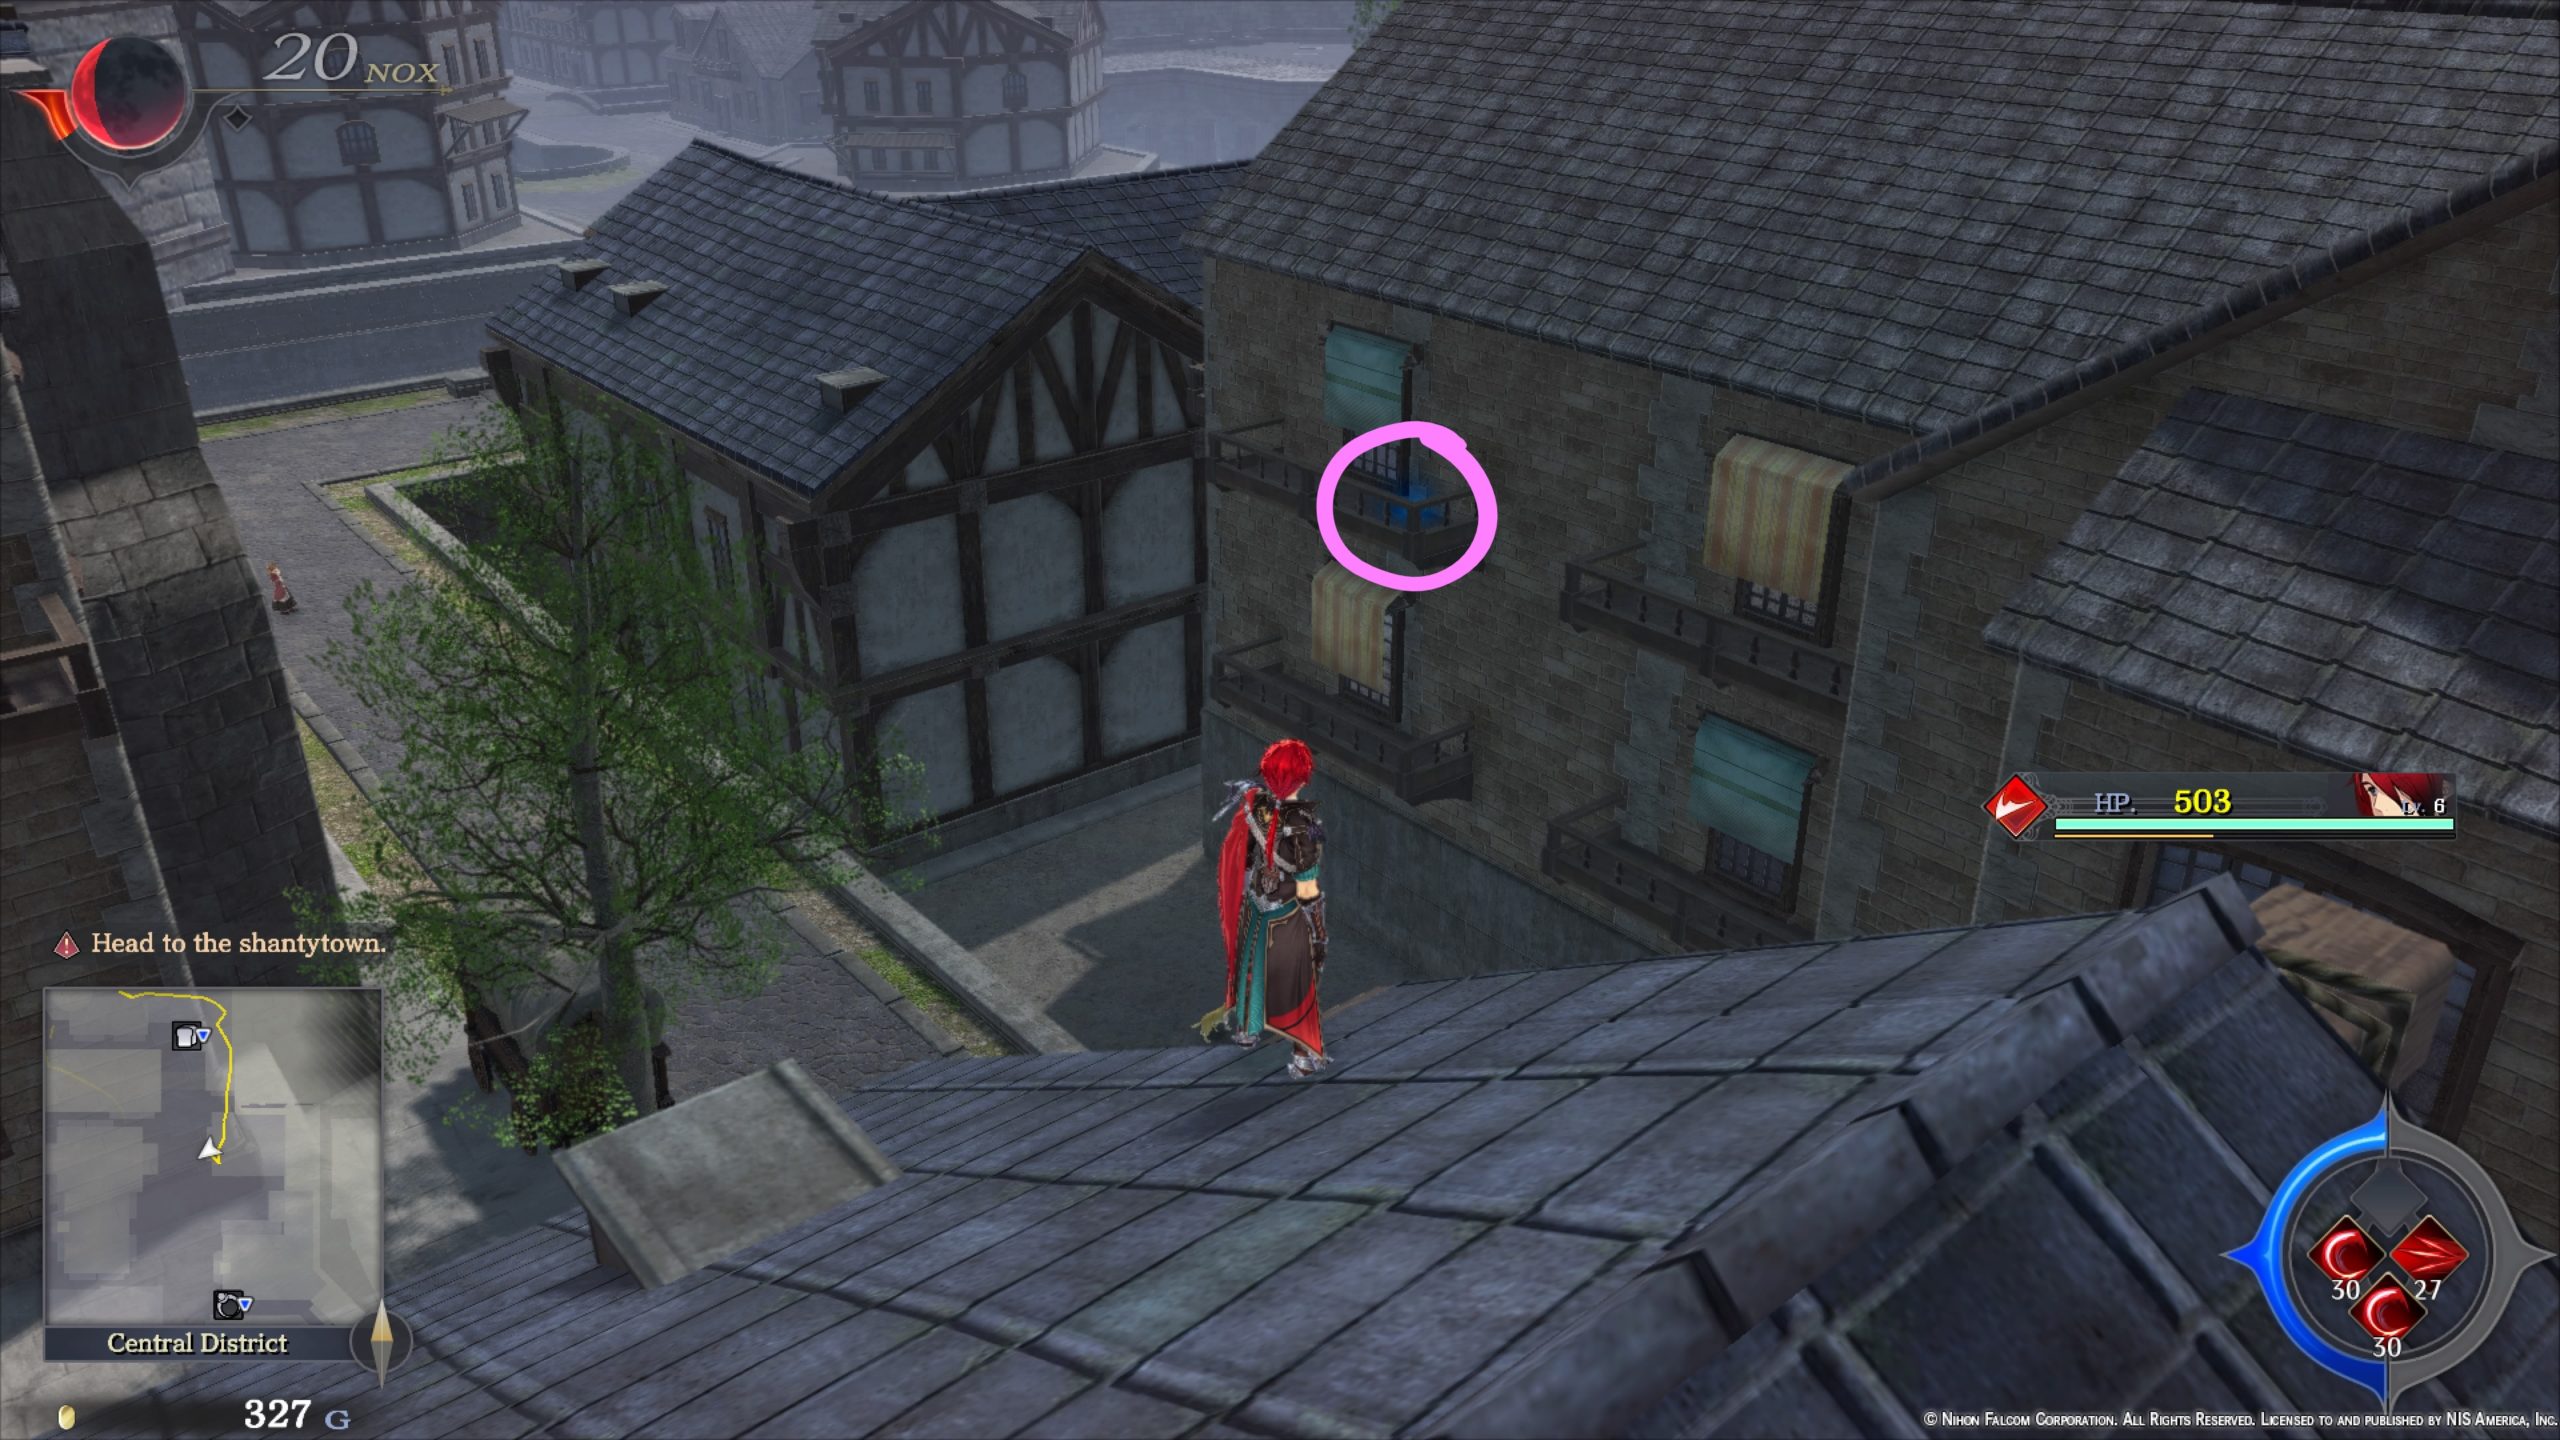
- East of the Relief Tile on a ledge overlooking the ramp

- In the grass on the side of the second building on the right when heading east from the Relief Tile

- Behind the first house on the right heading east from the Relief Tile
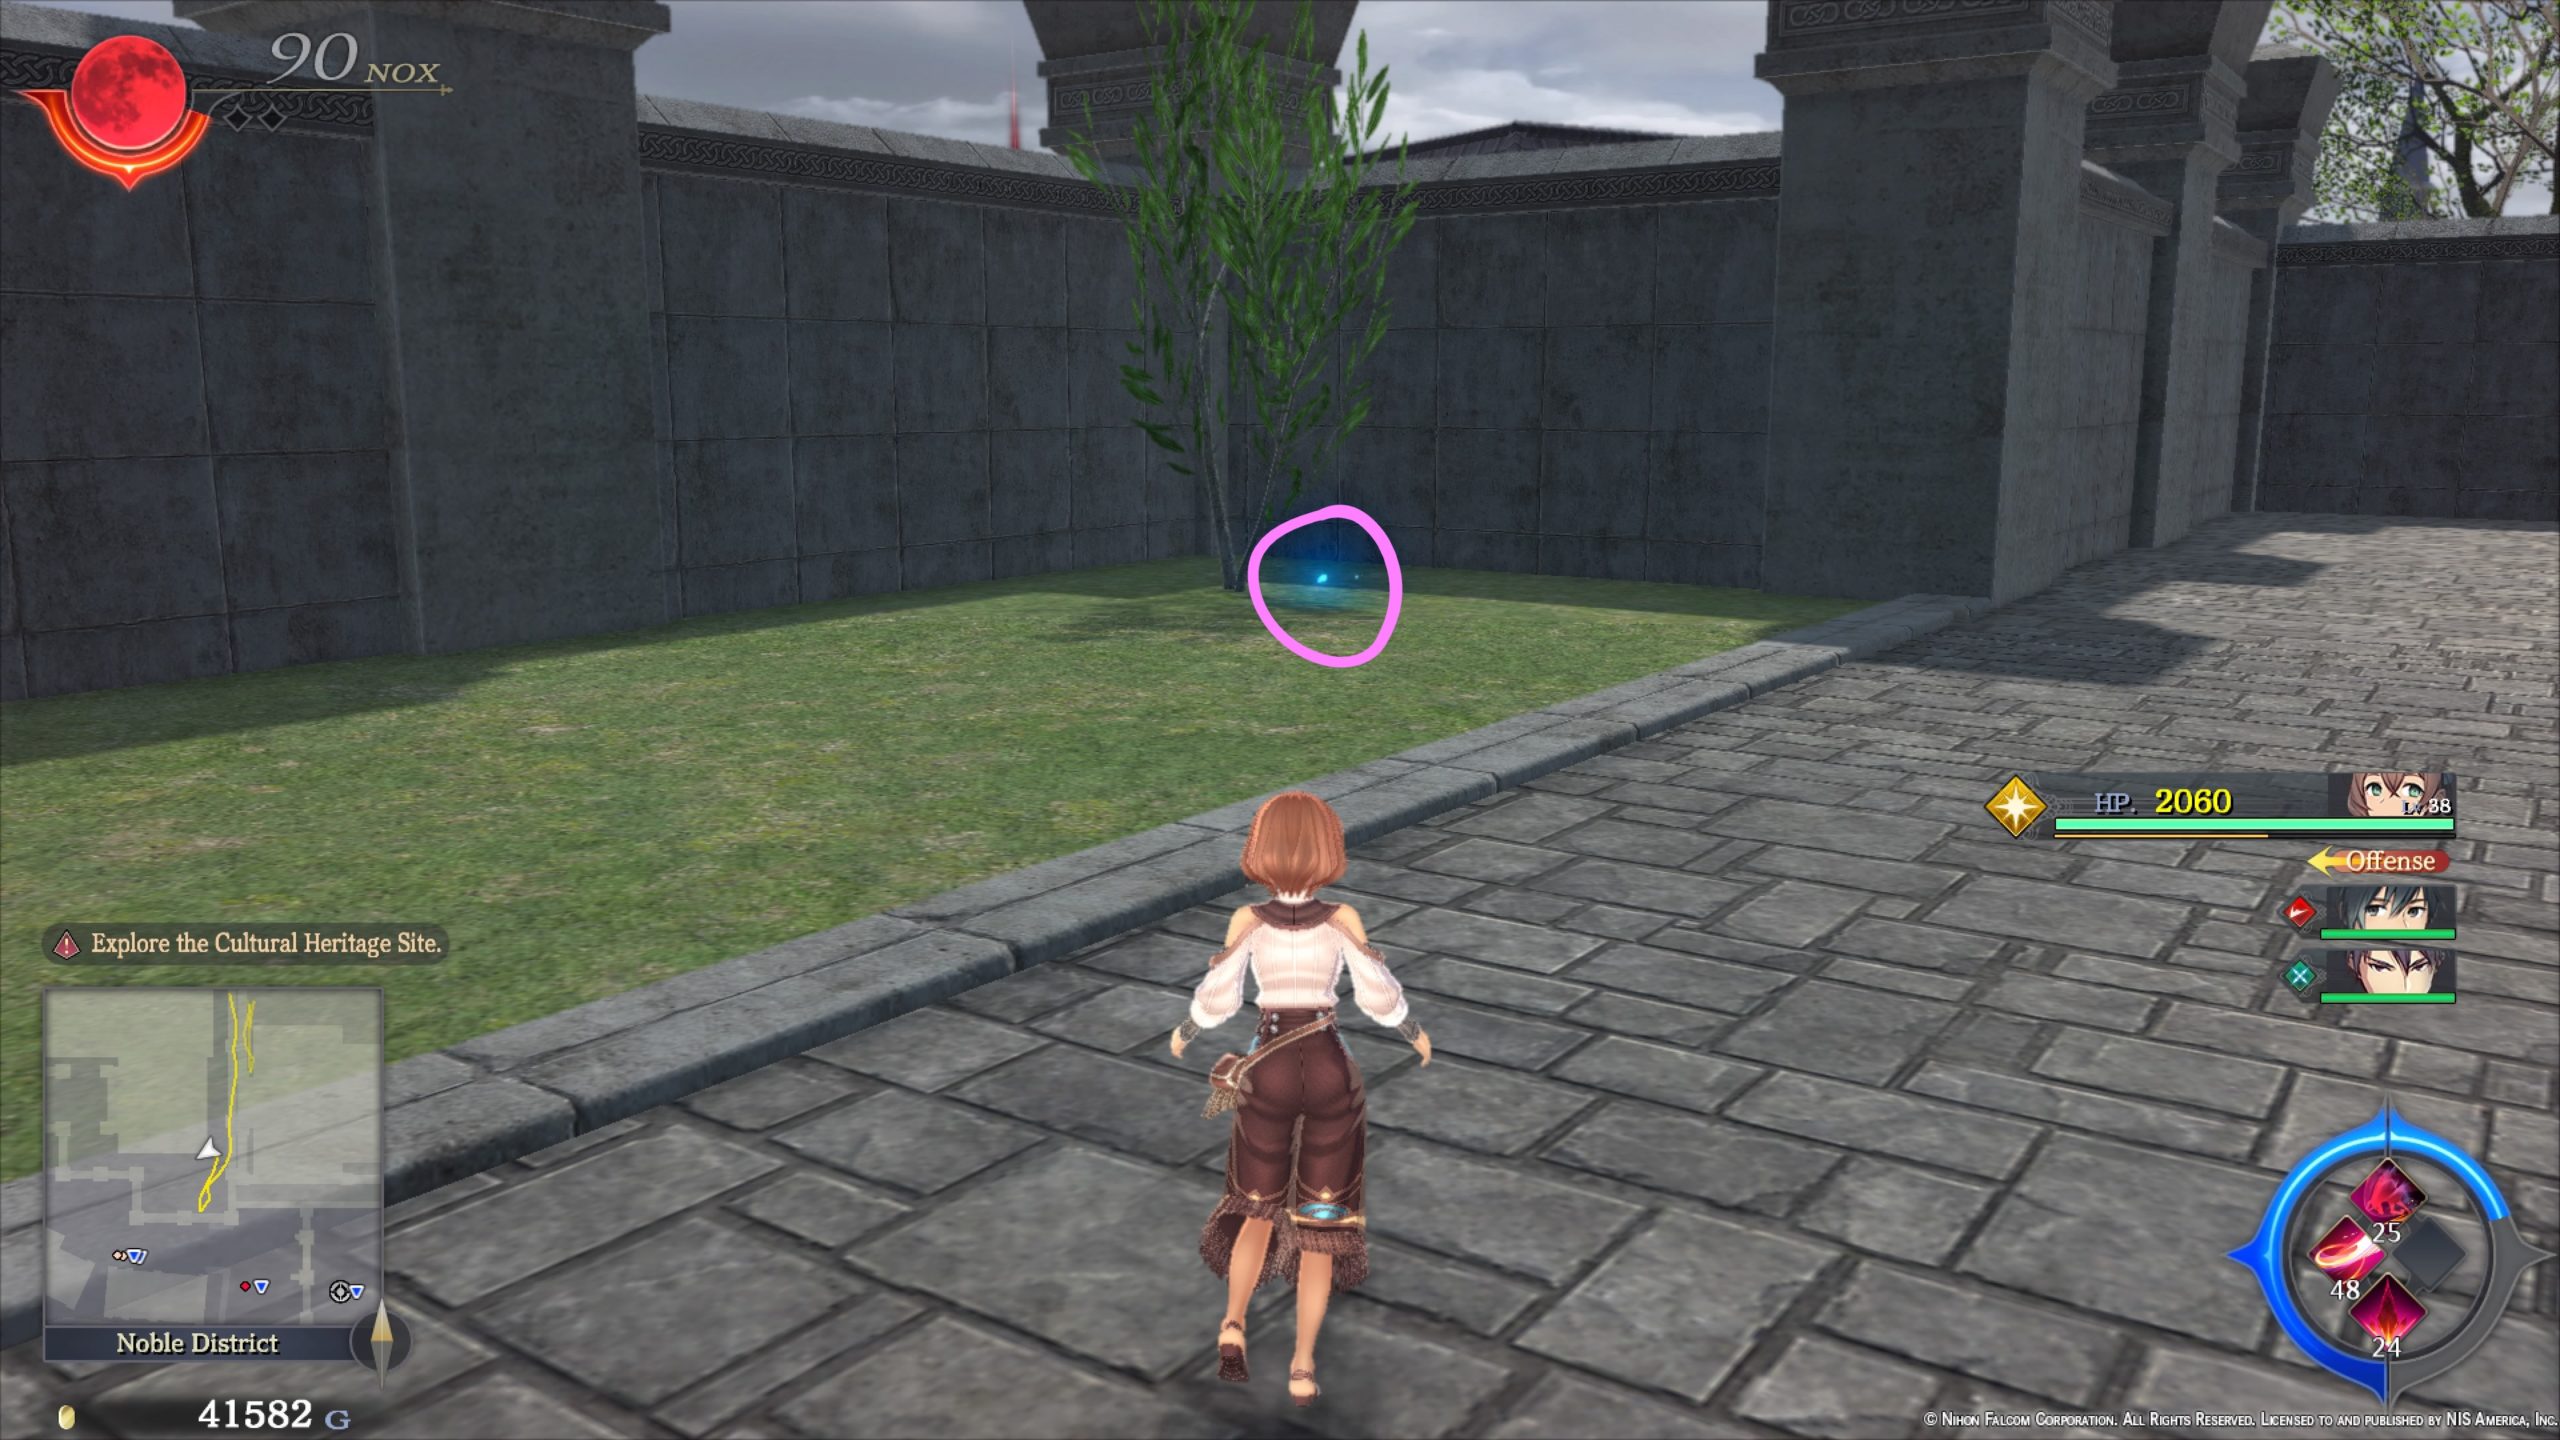
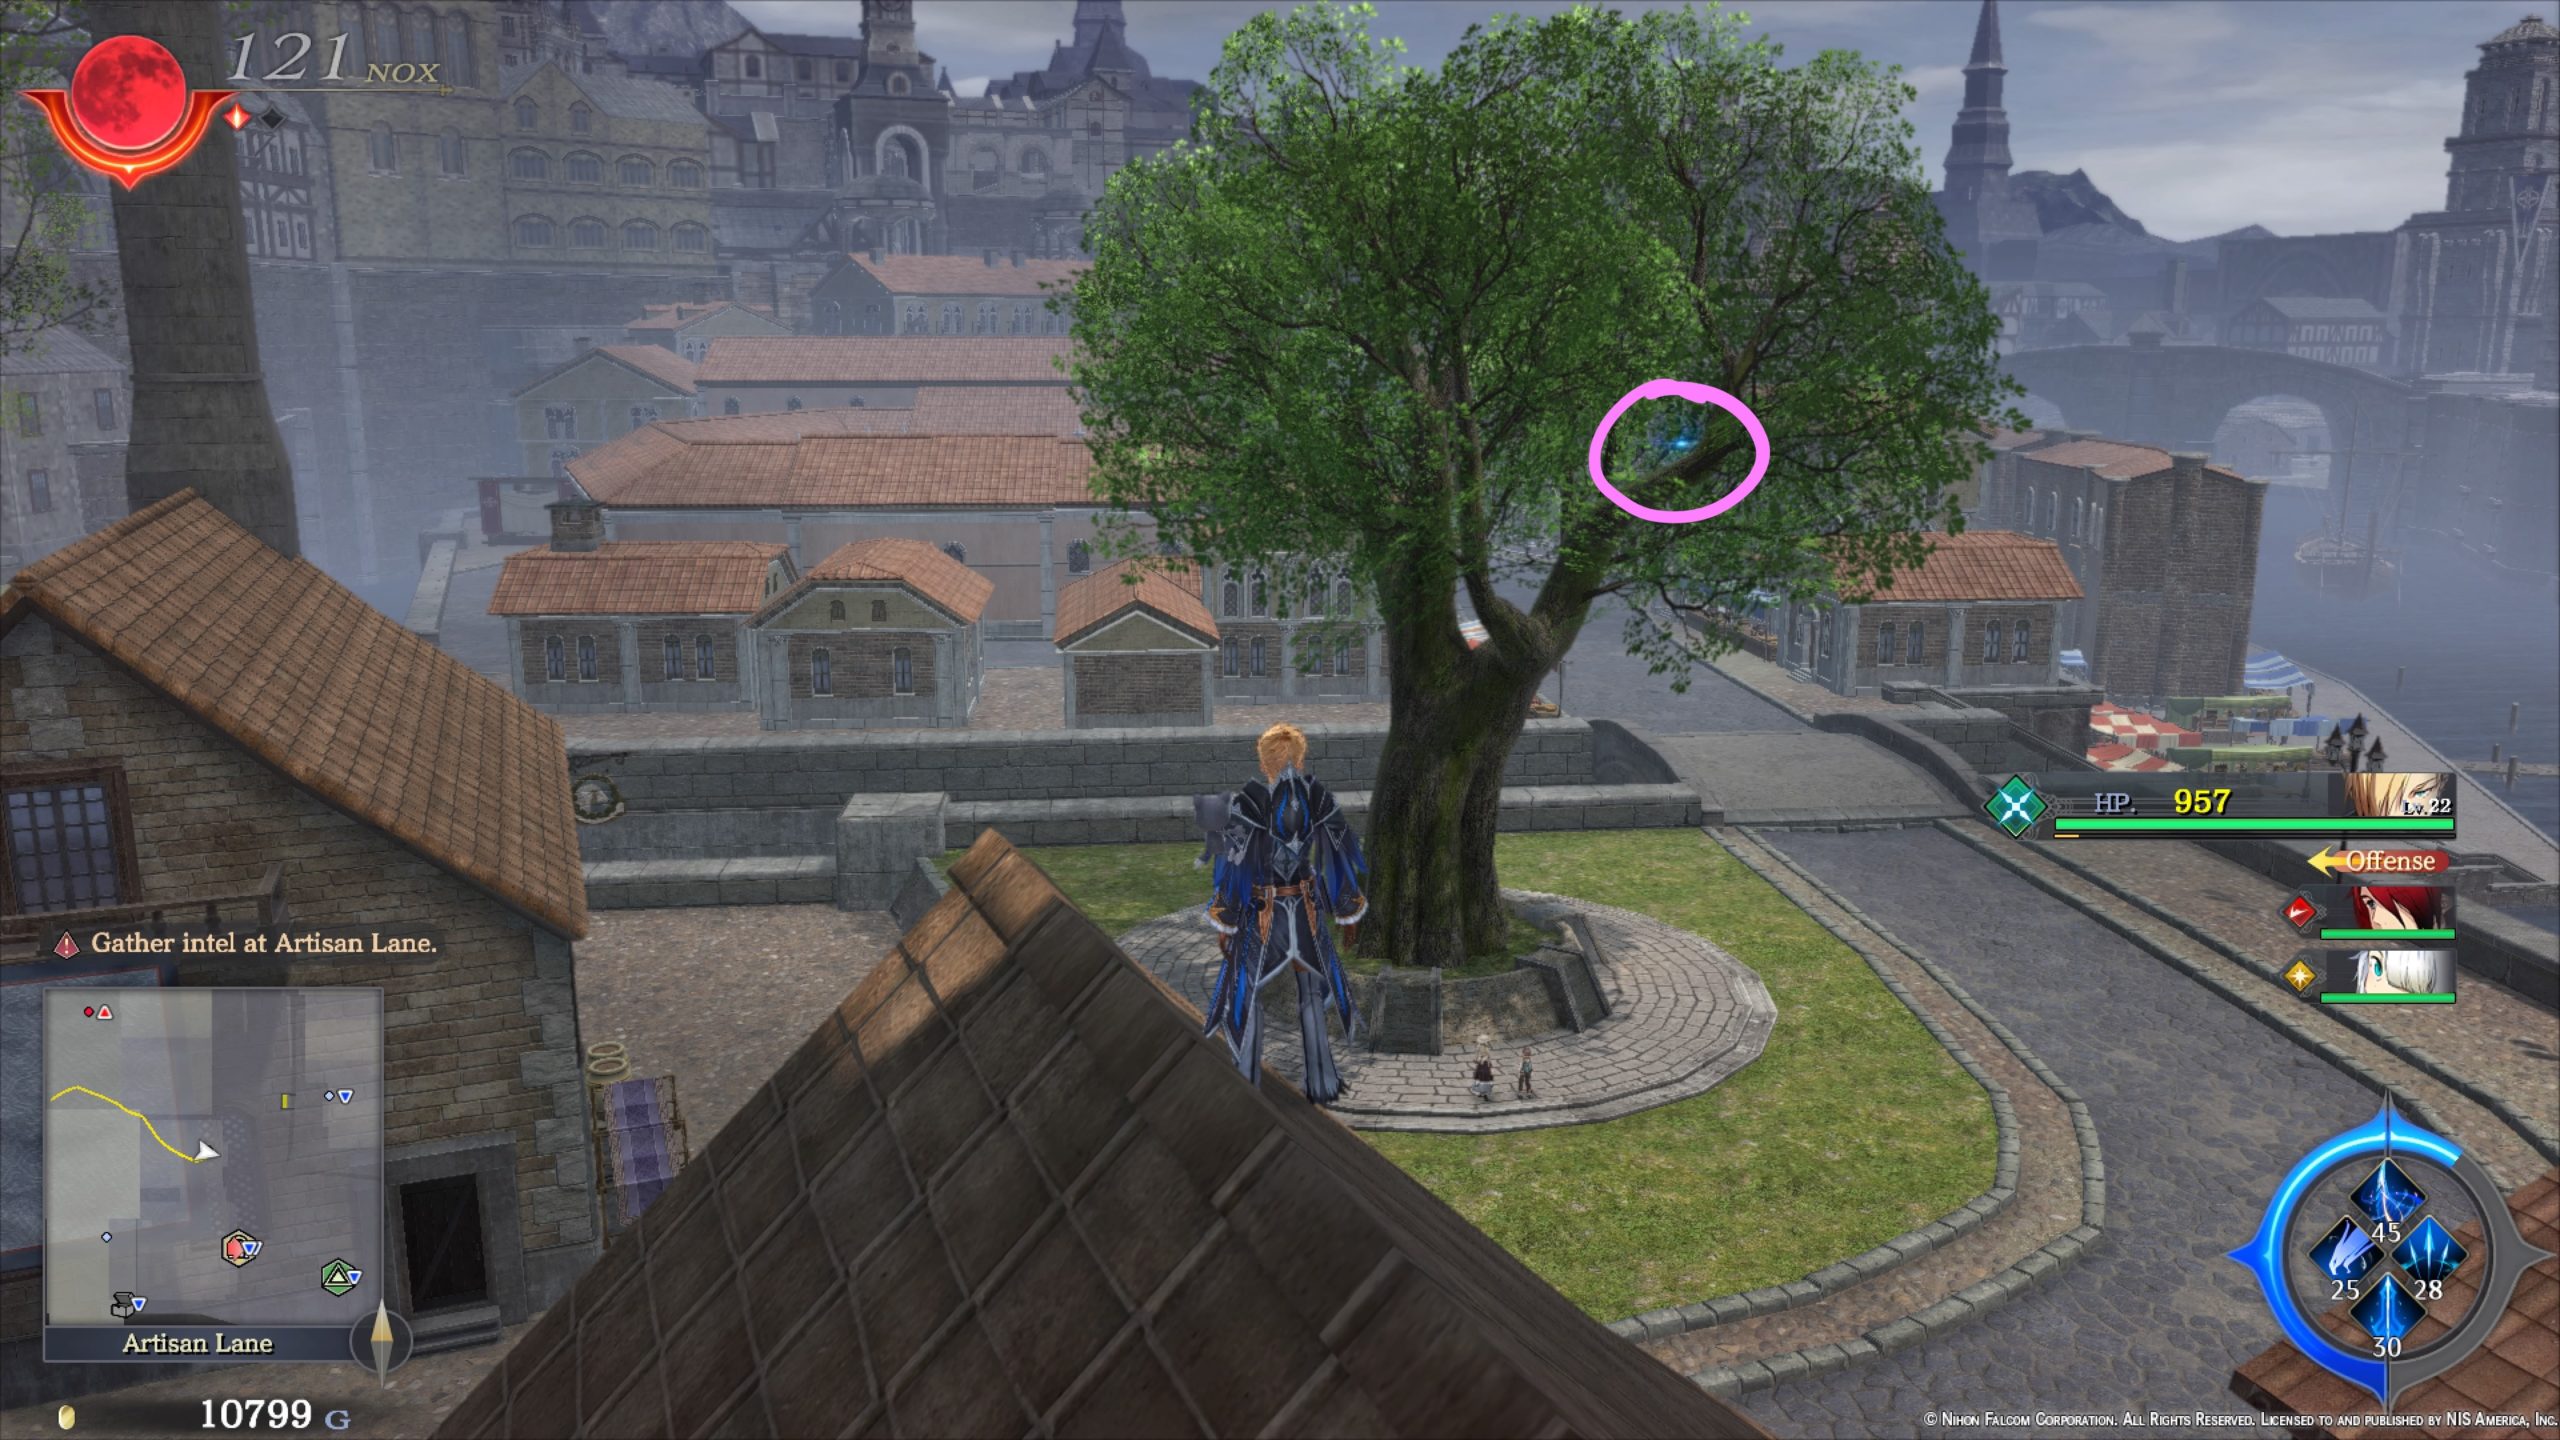
- From the Relief Tile, follow the road south to find a tree on the left just past the stairs. The petal is on the ground next to the tree.
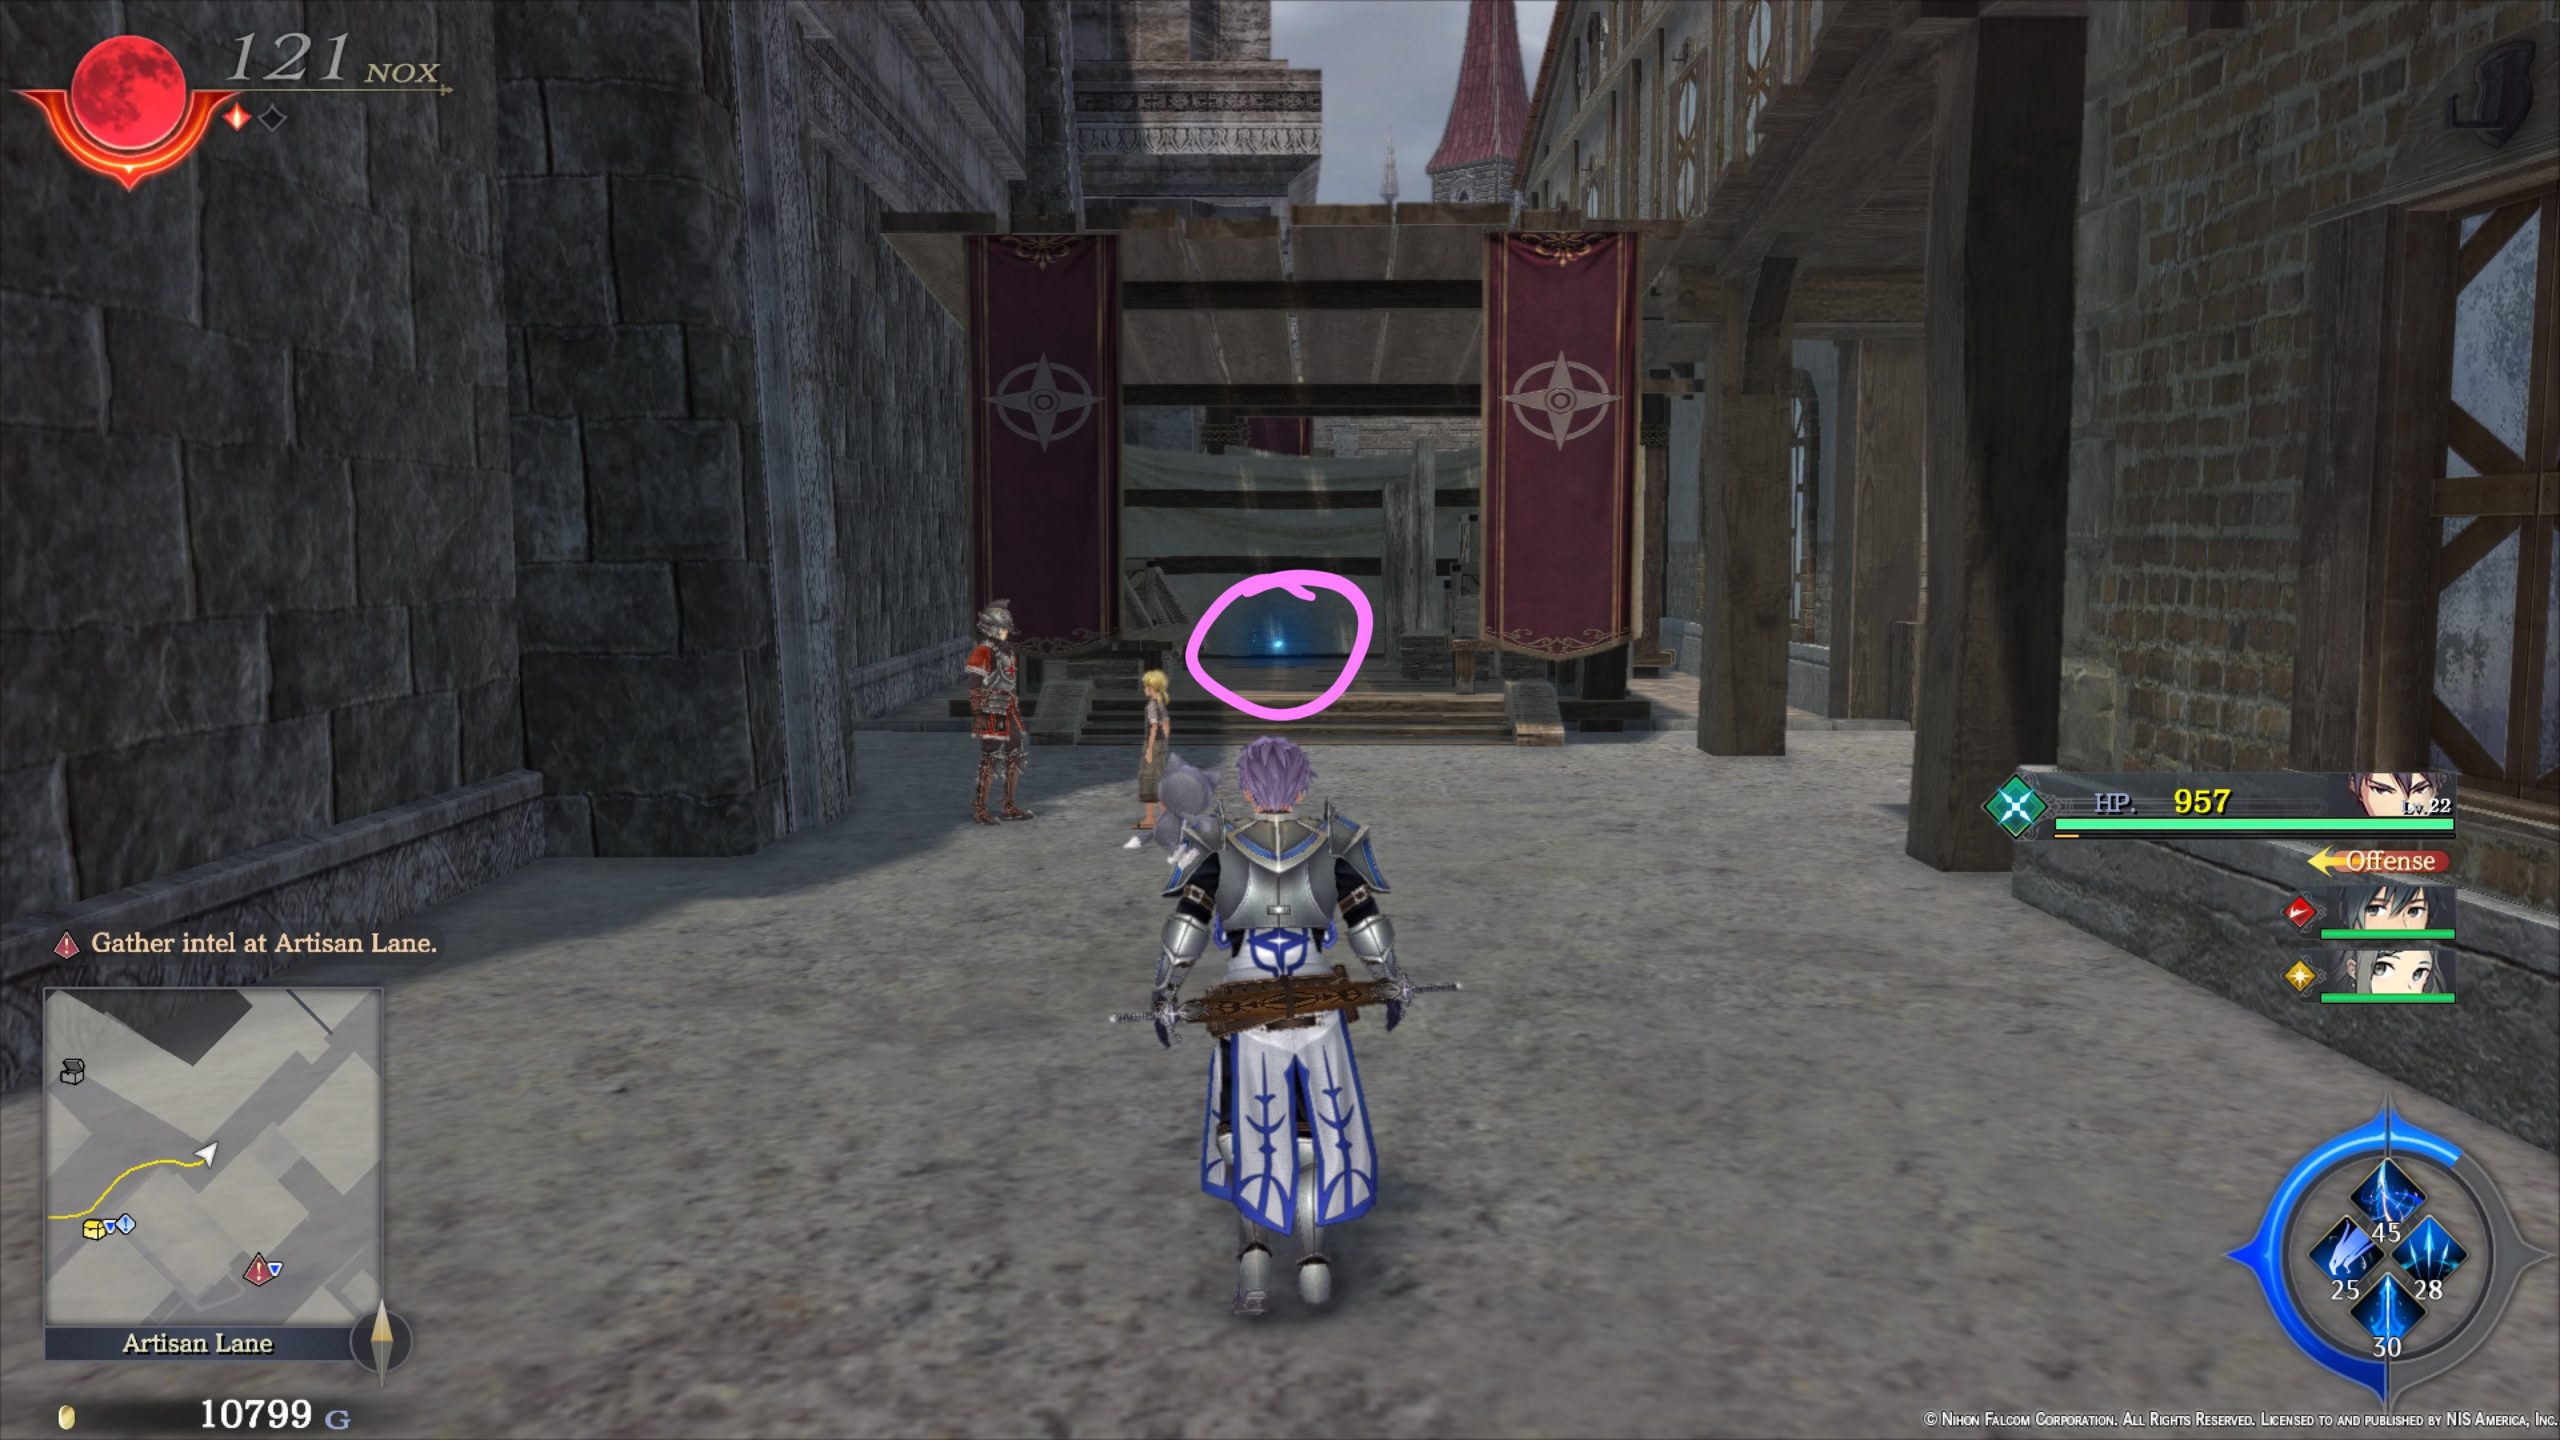
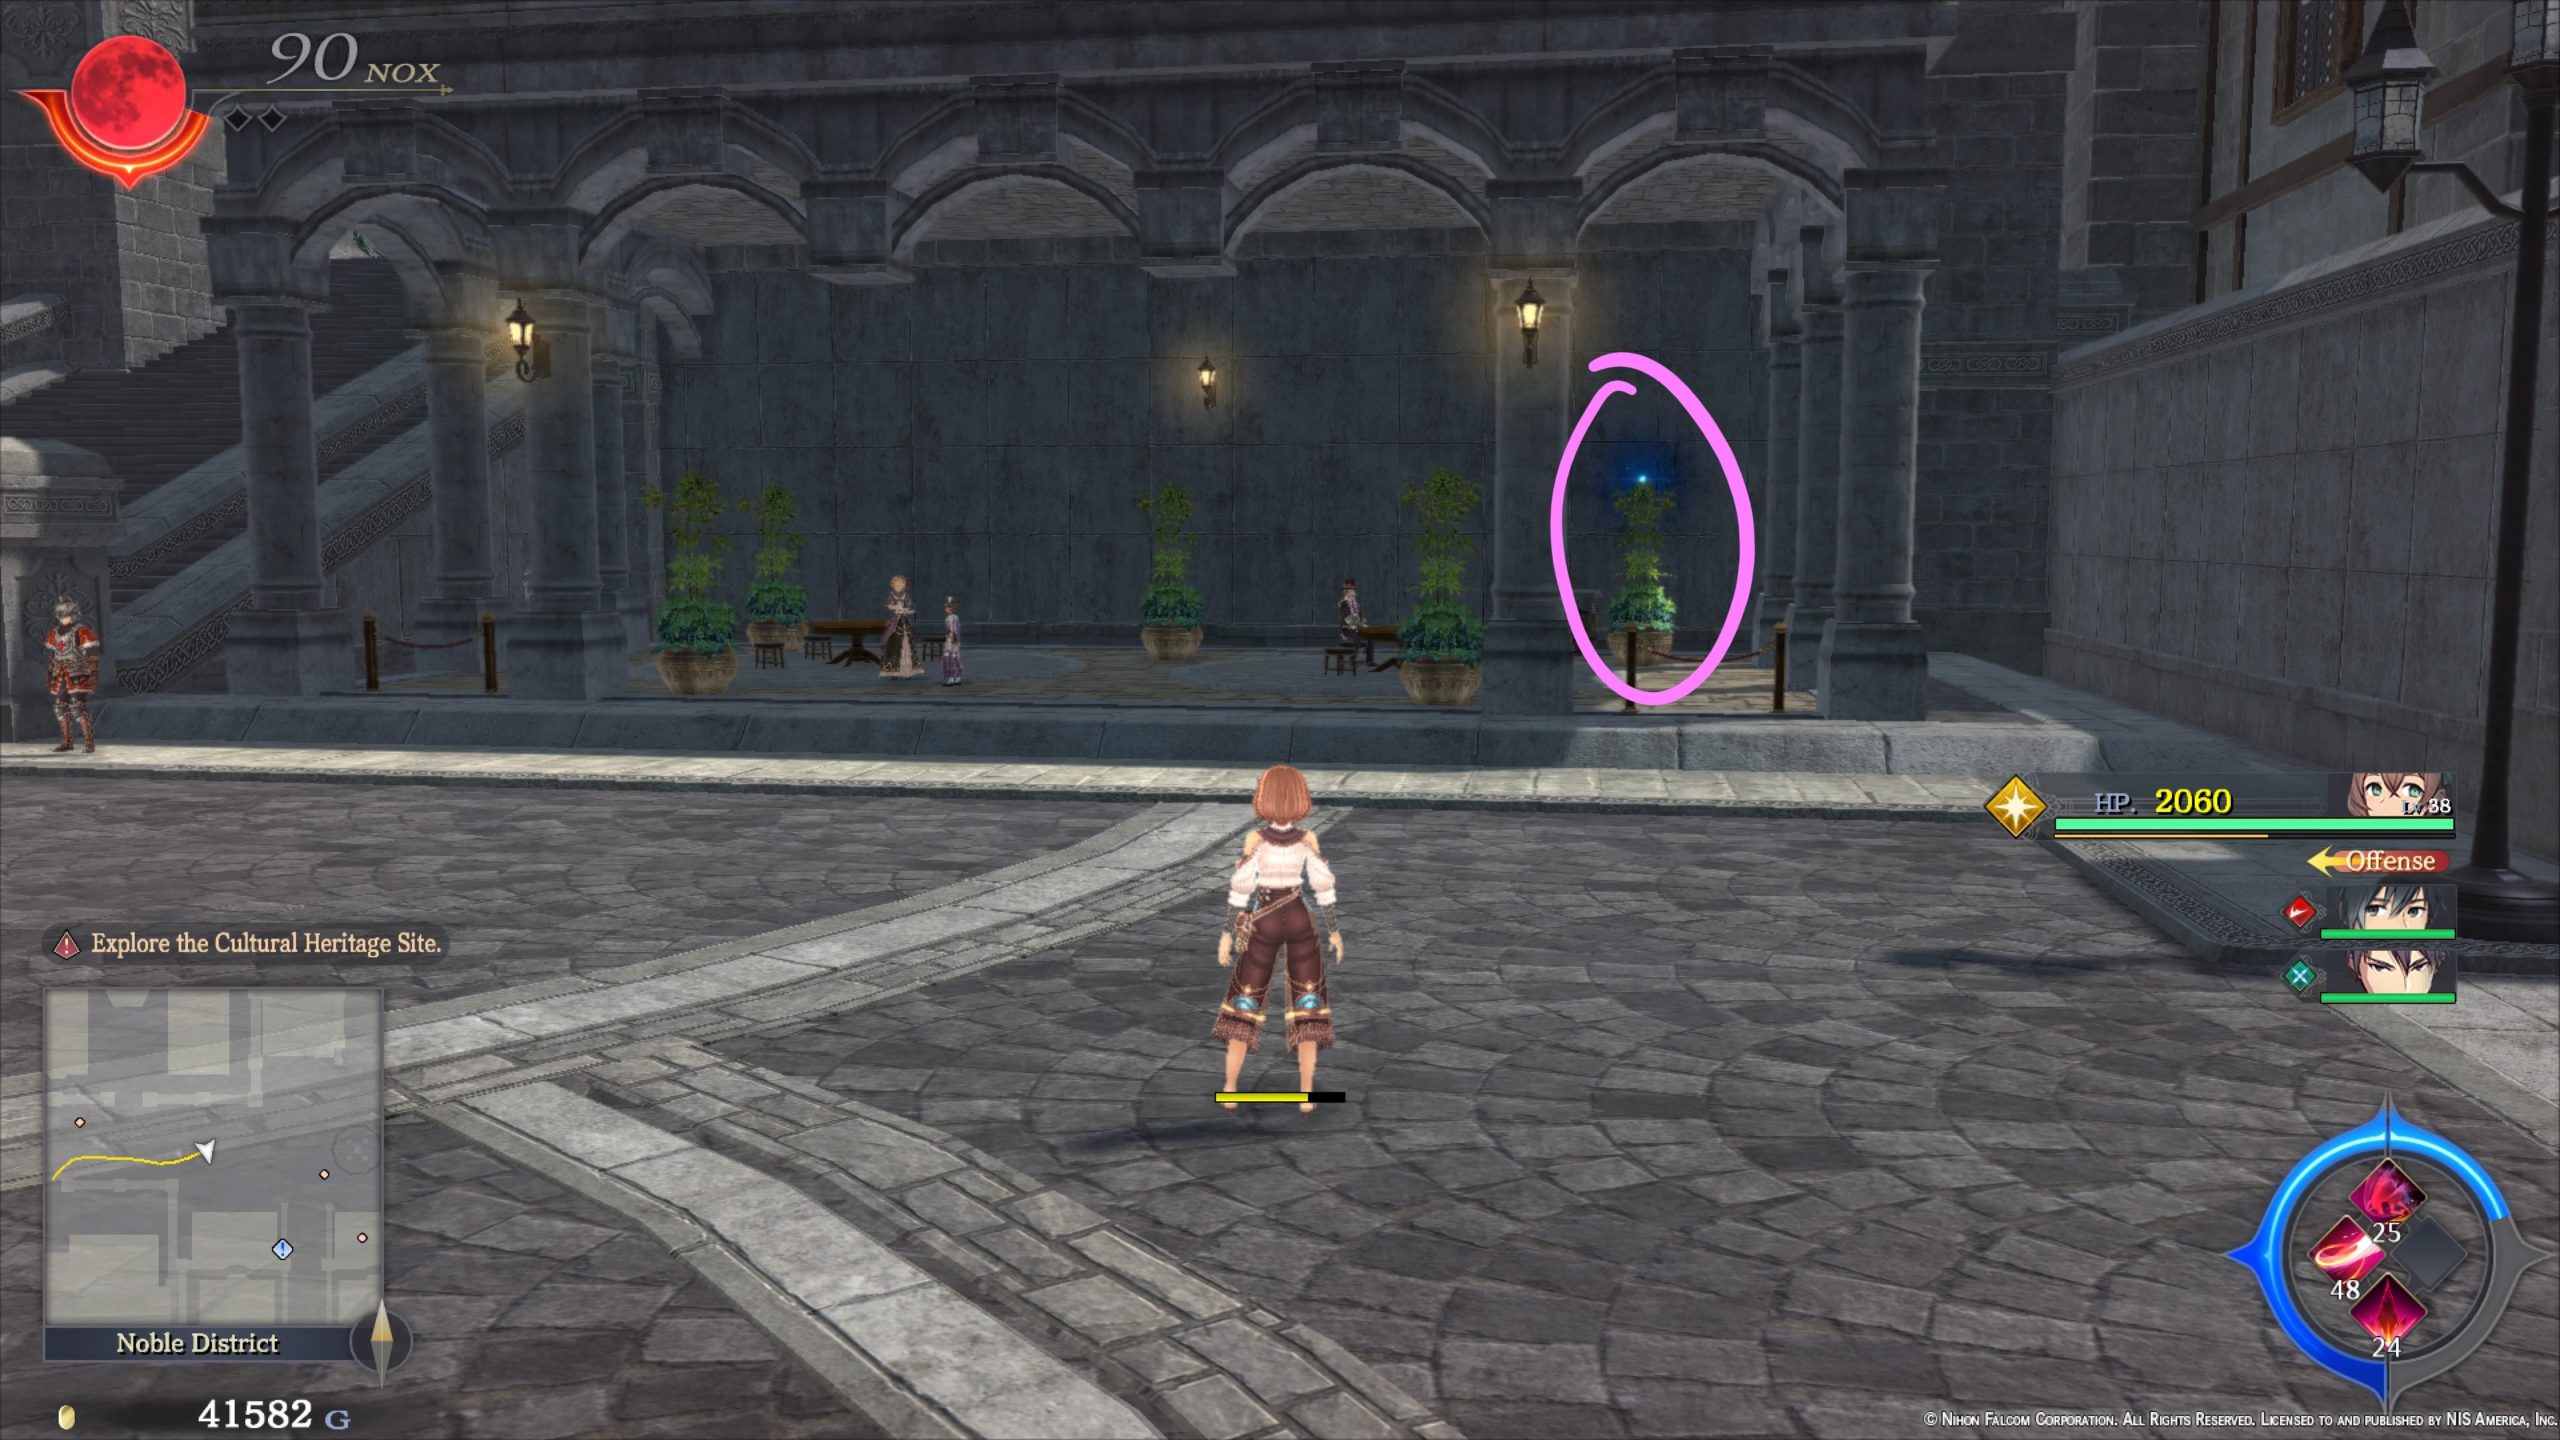
- Next to a potted tree in the southern part of the area near the fountain
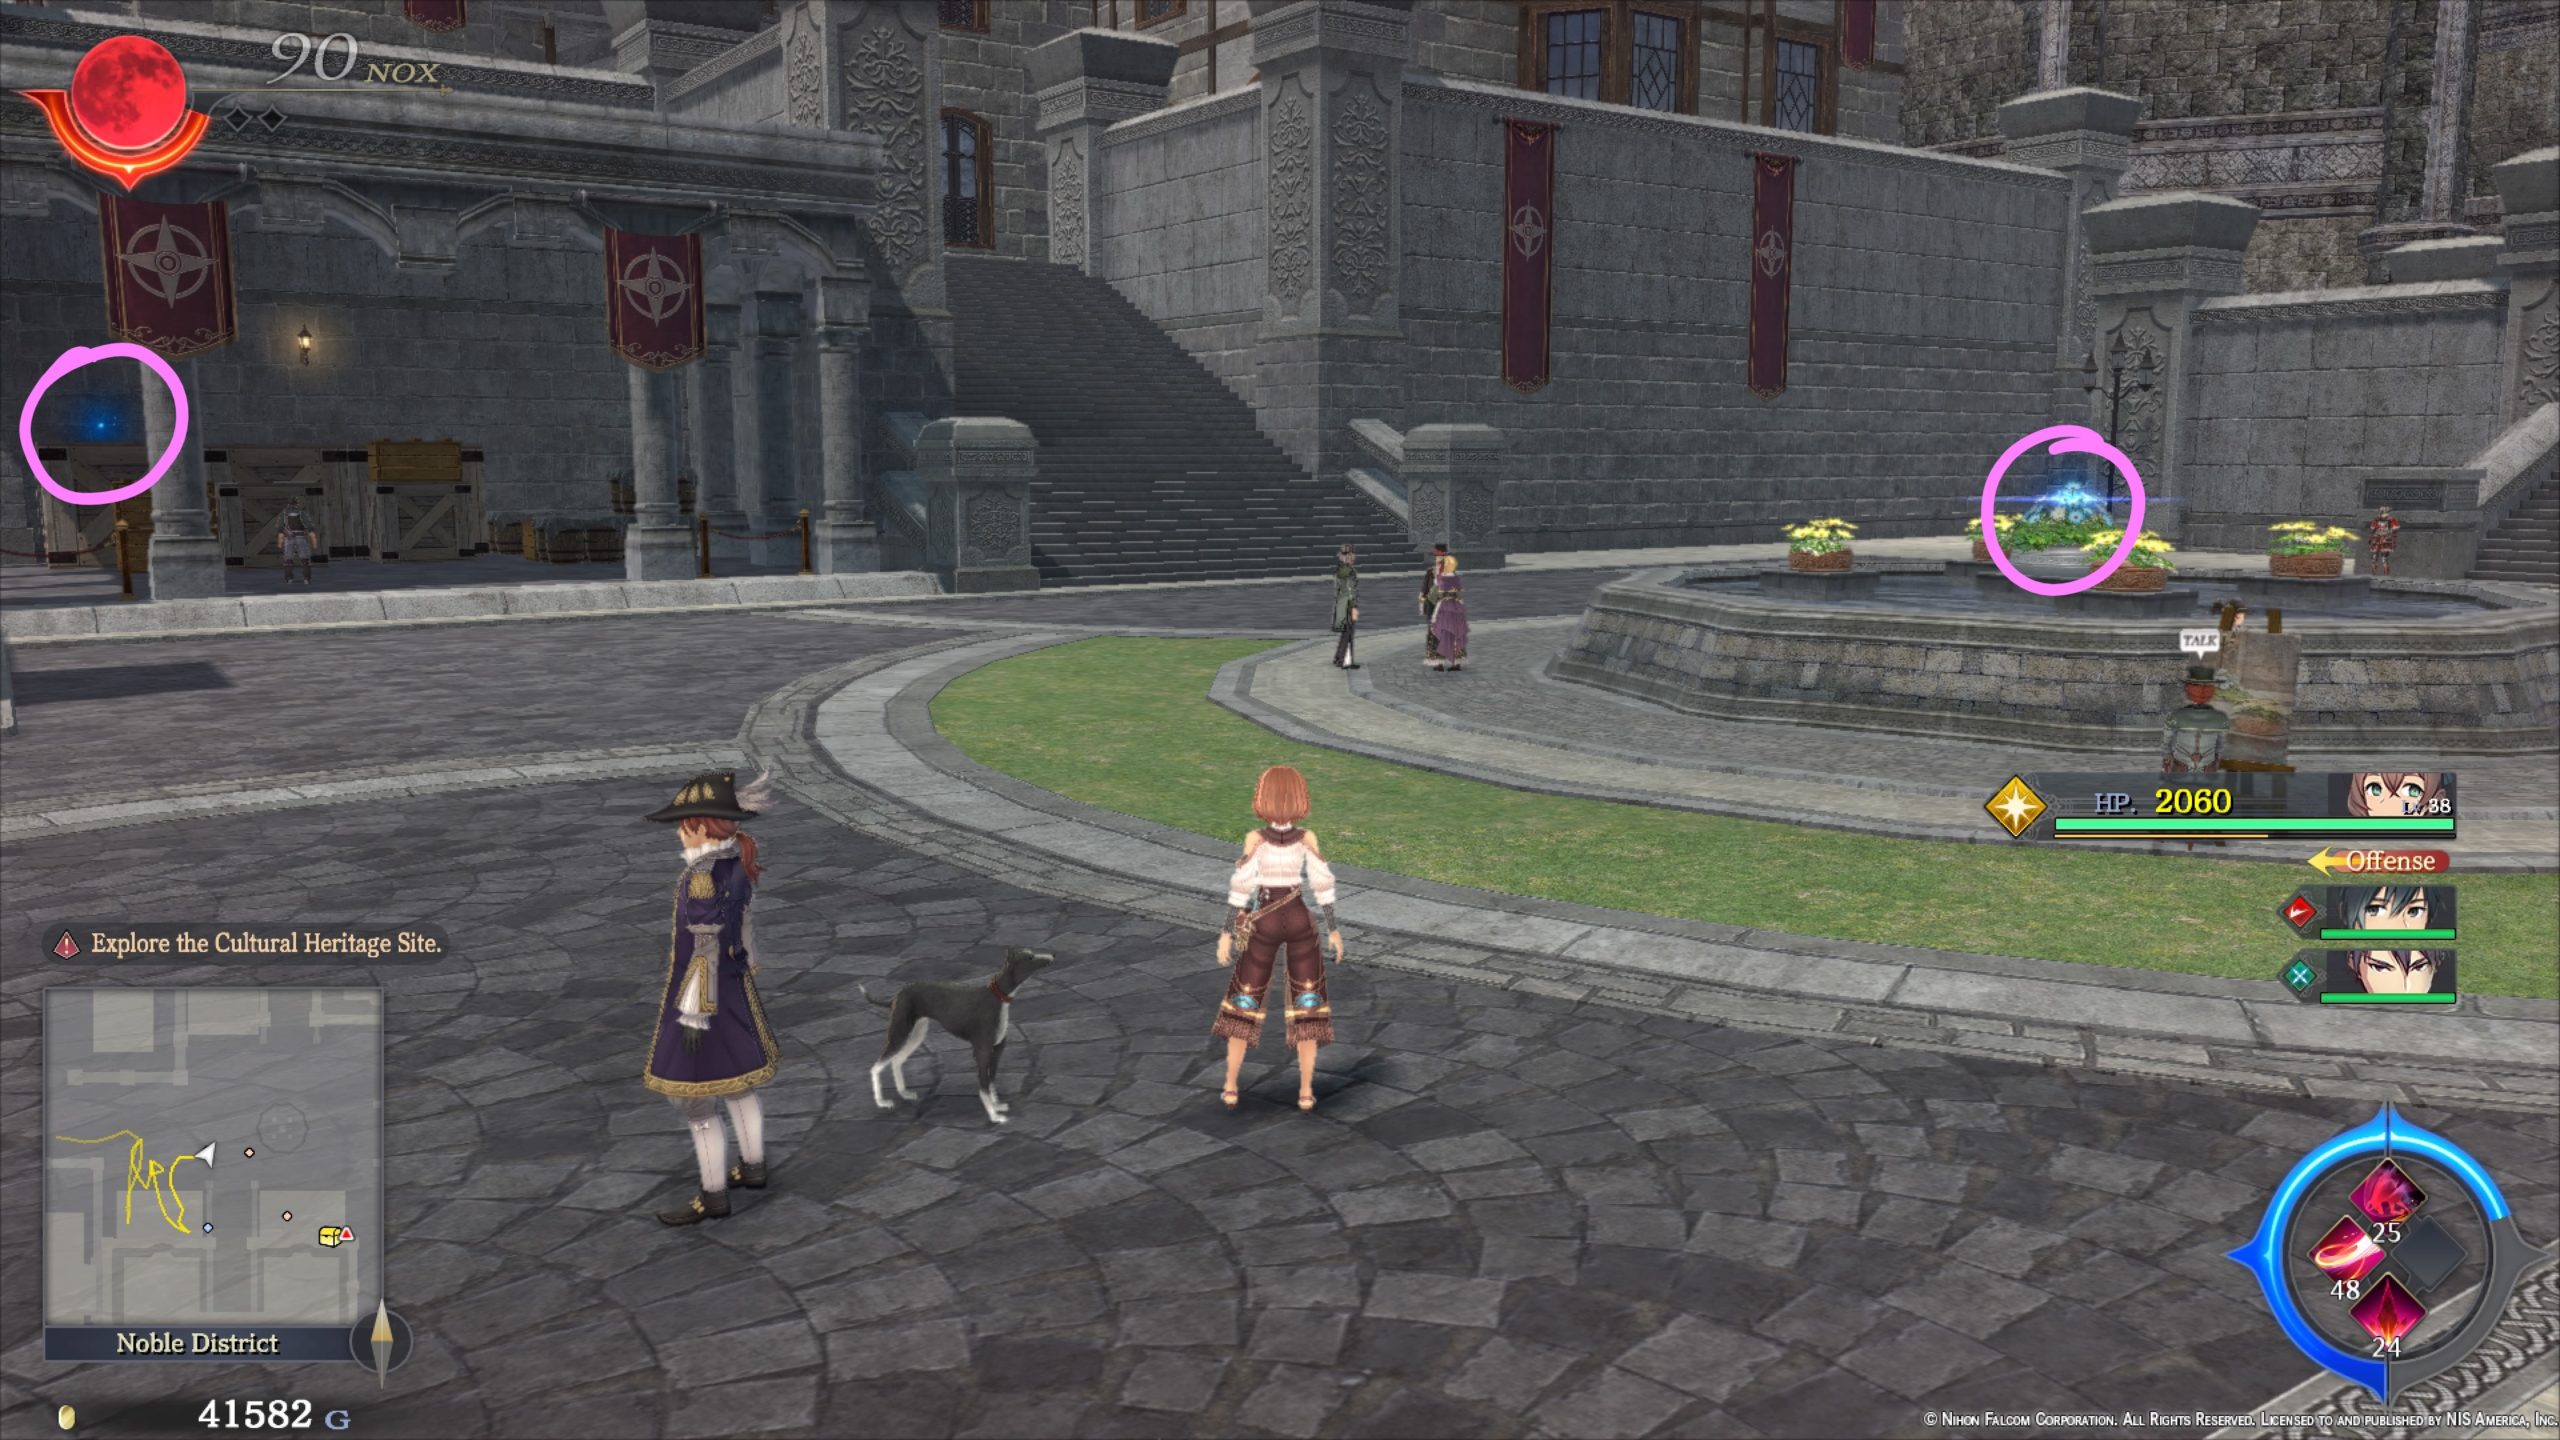
- On wooden crates in a storage area near the fountain & in the center of the fountain on top of flowers
- On a wooden crate of an alley in the north central part of the area

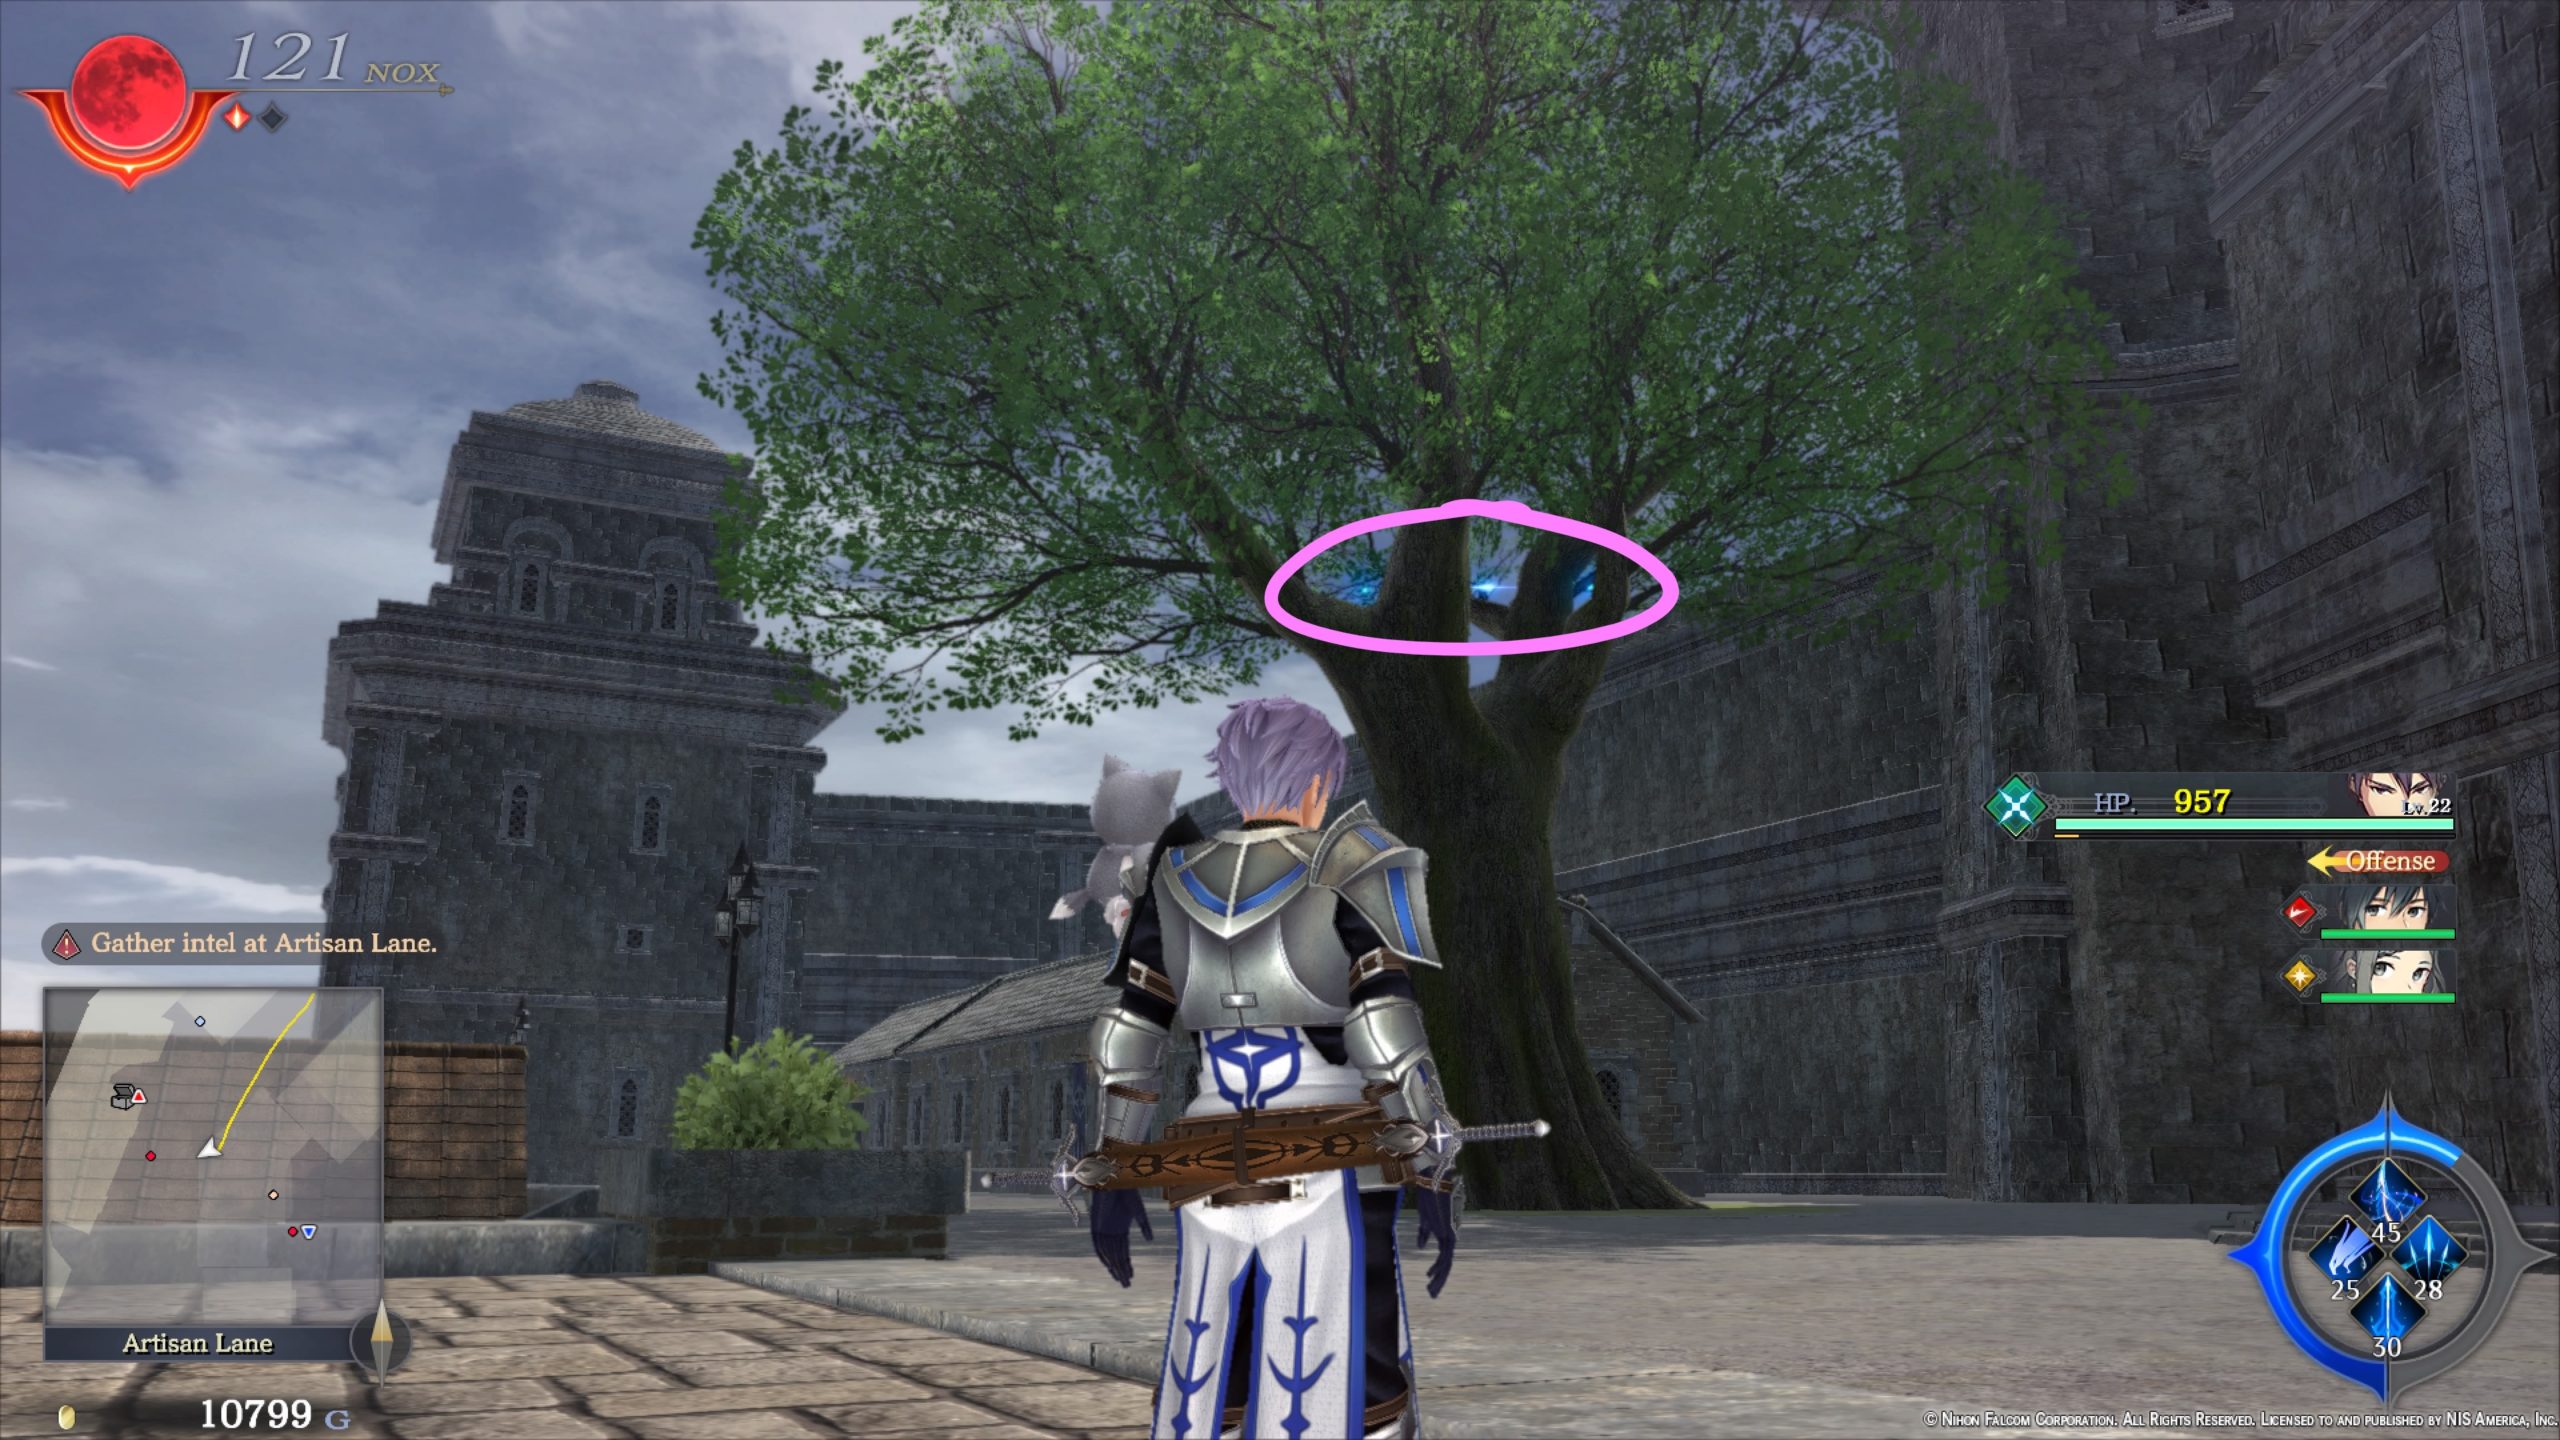
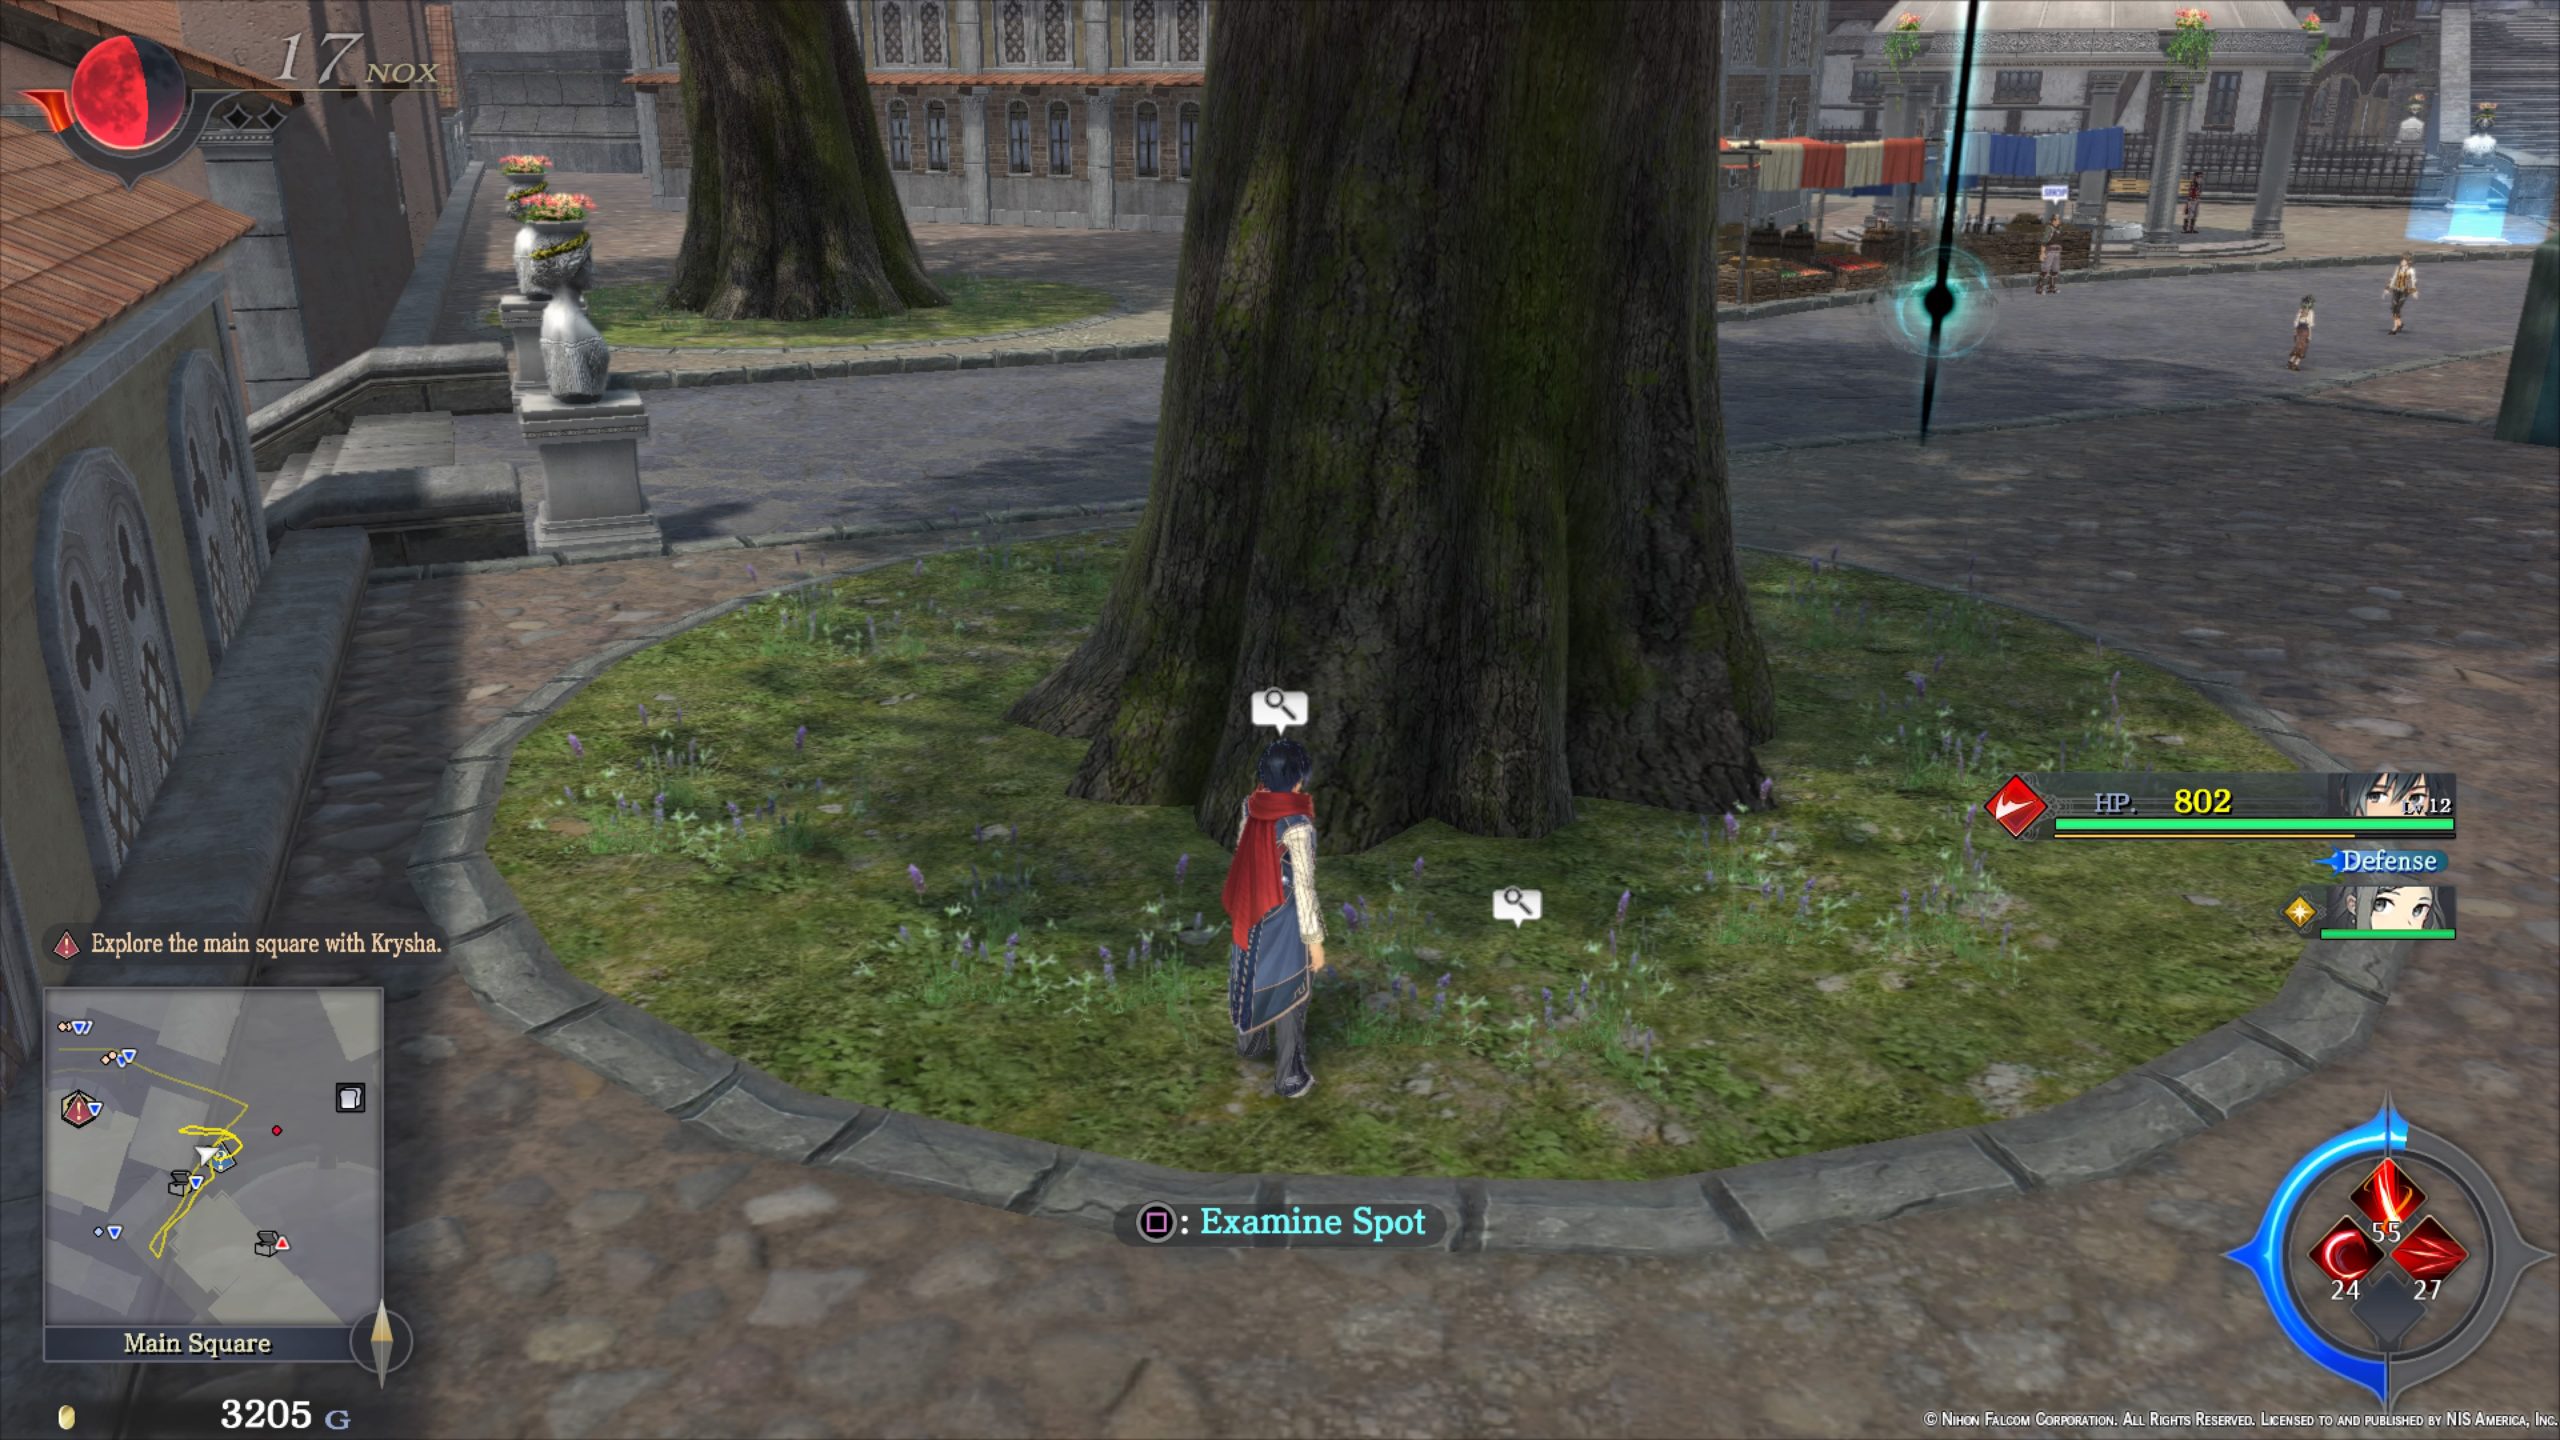
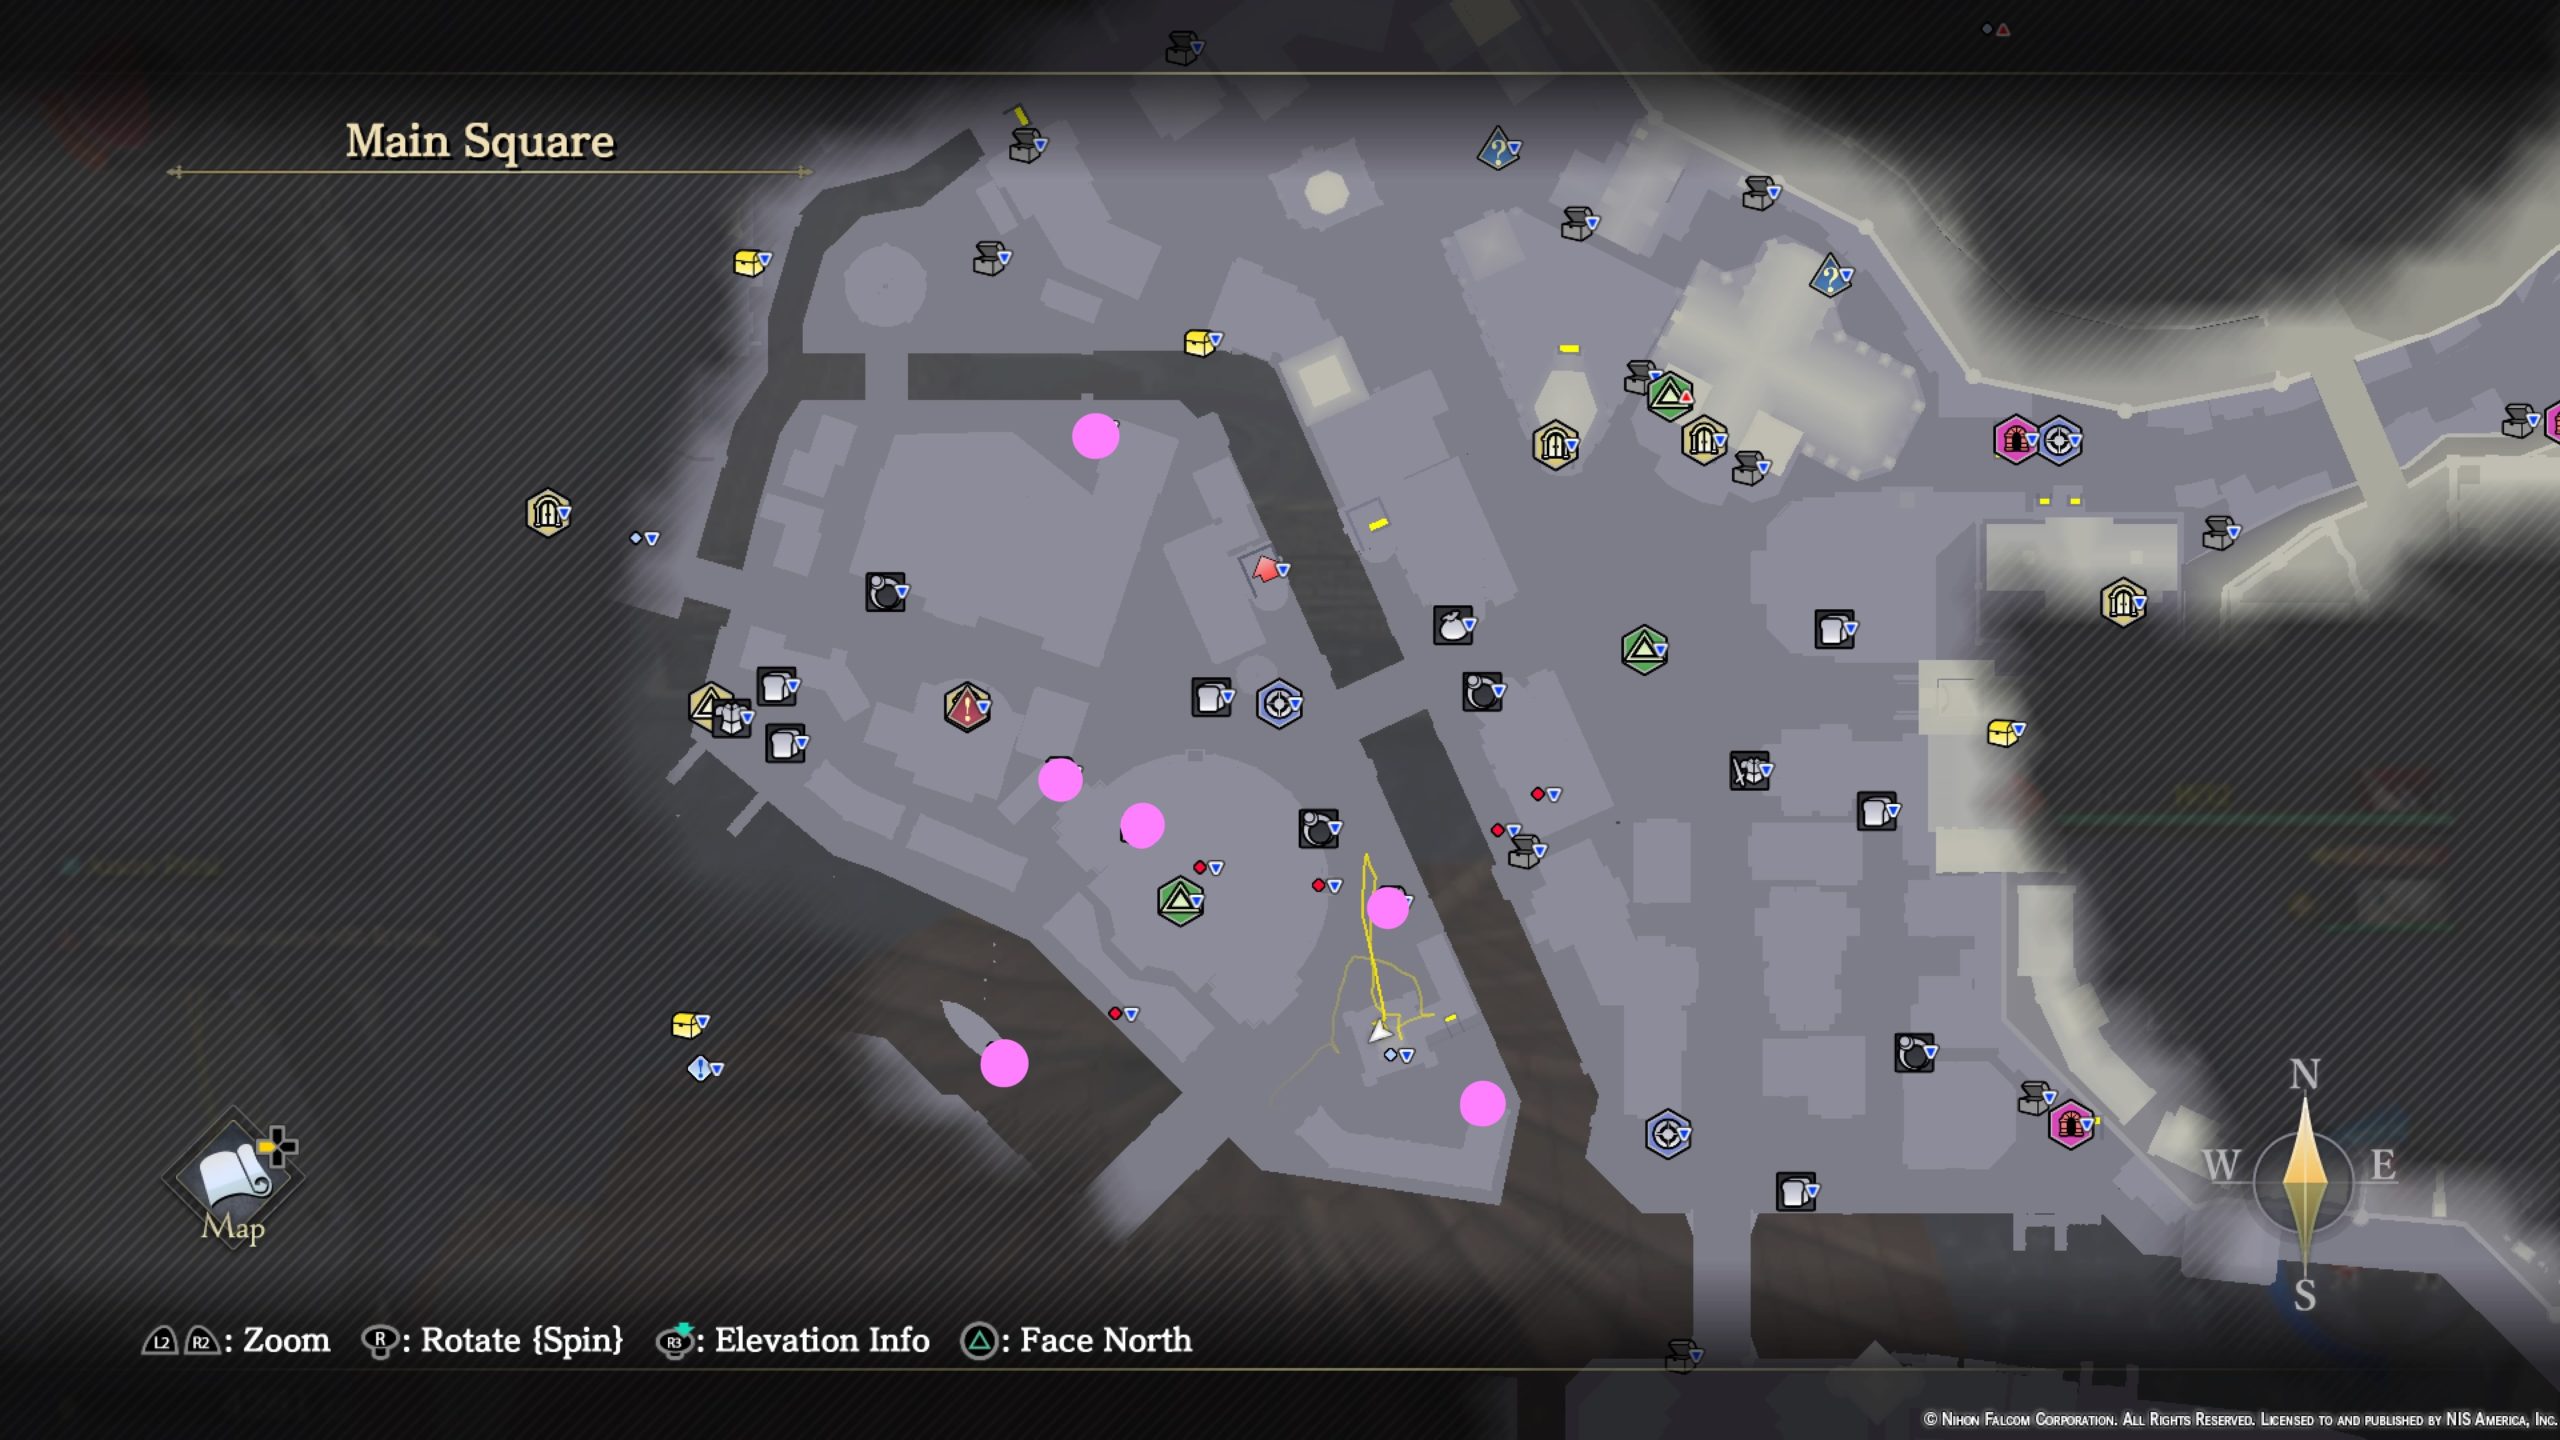
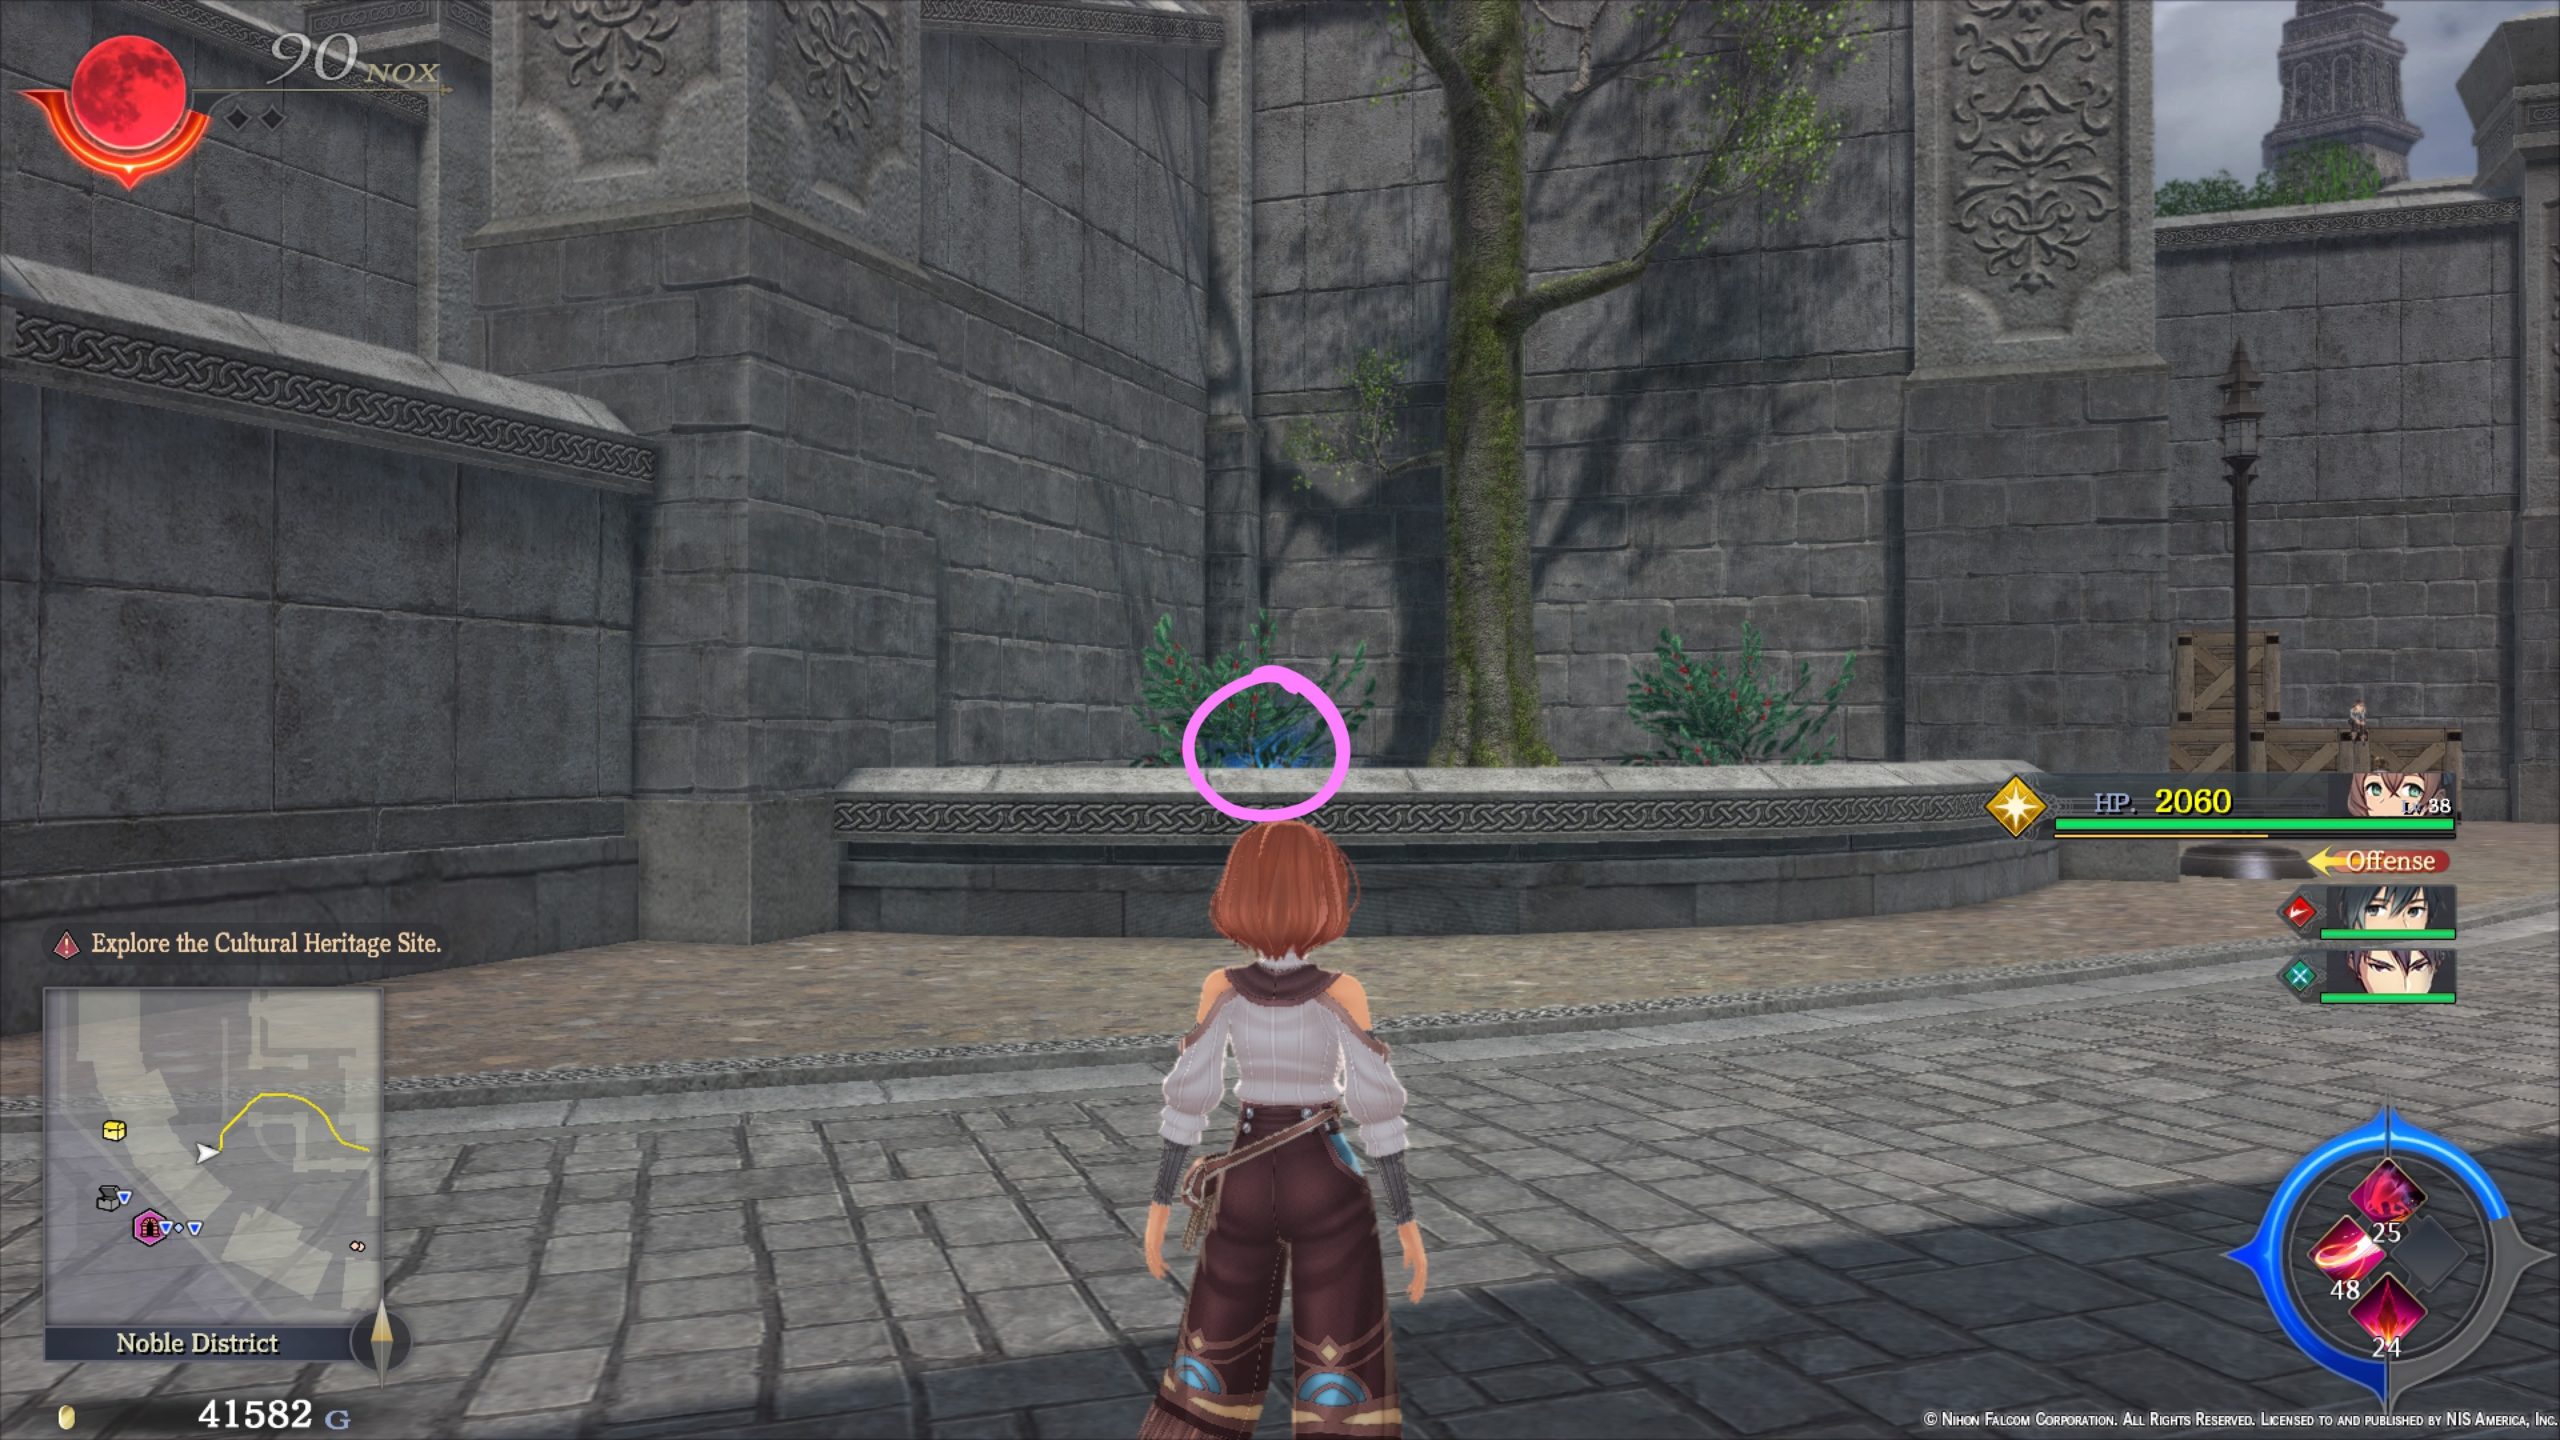
- Behind a large tree surrounded by a stone semicircle in the southeastern part of the area

- Behind a large tree near a long building next to the outer wall in the southeastern part of the area
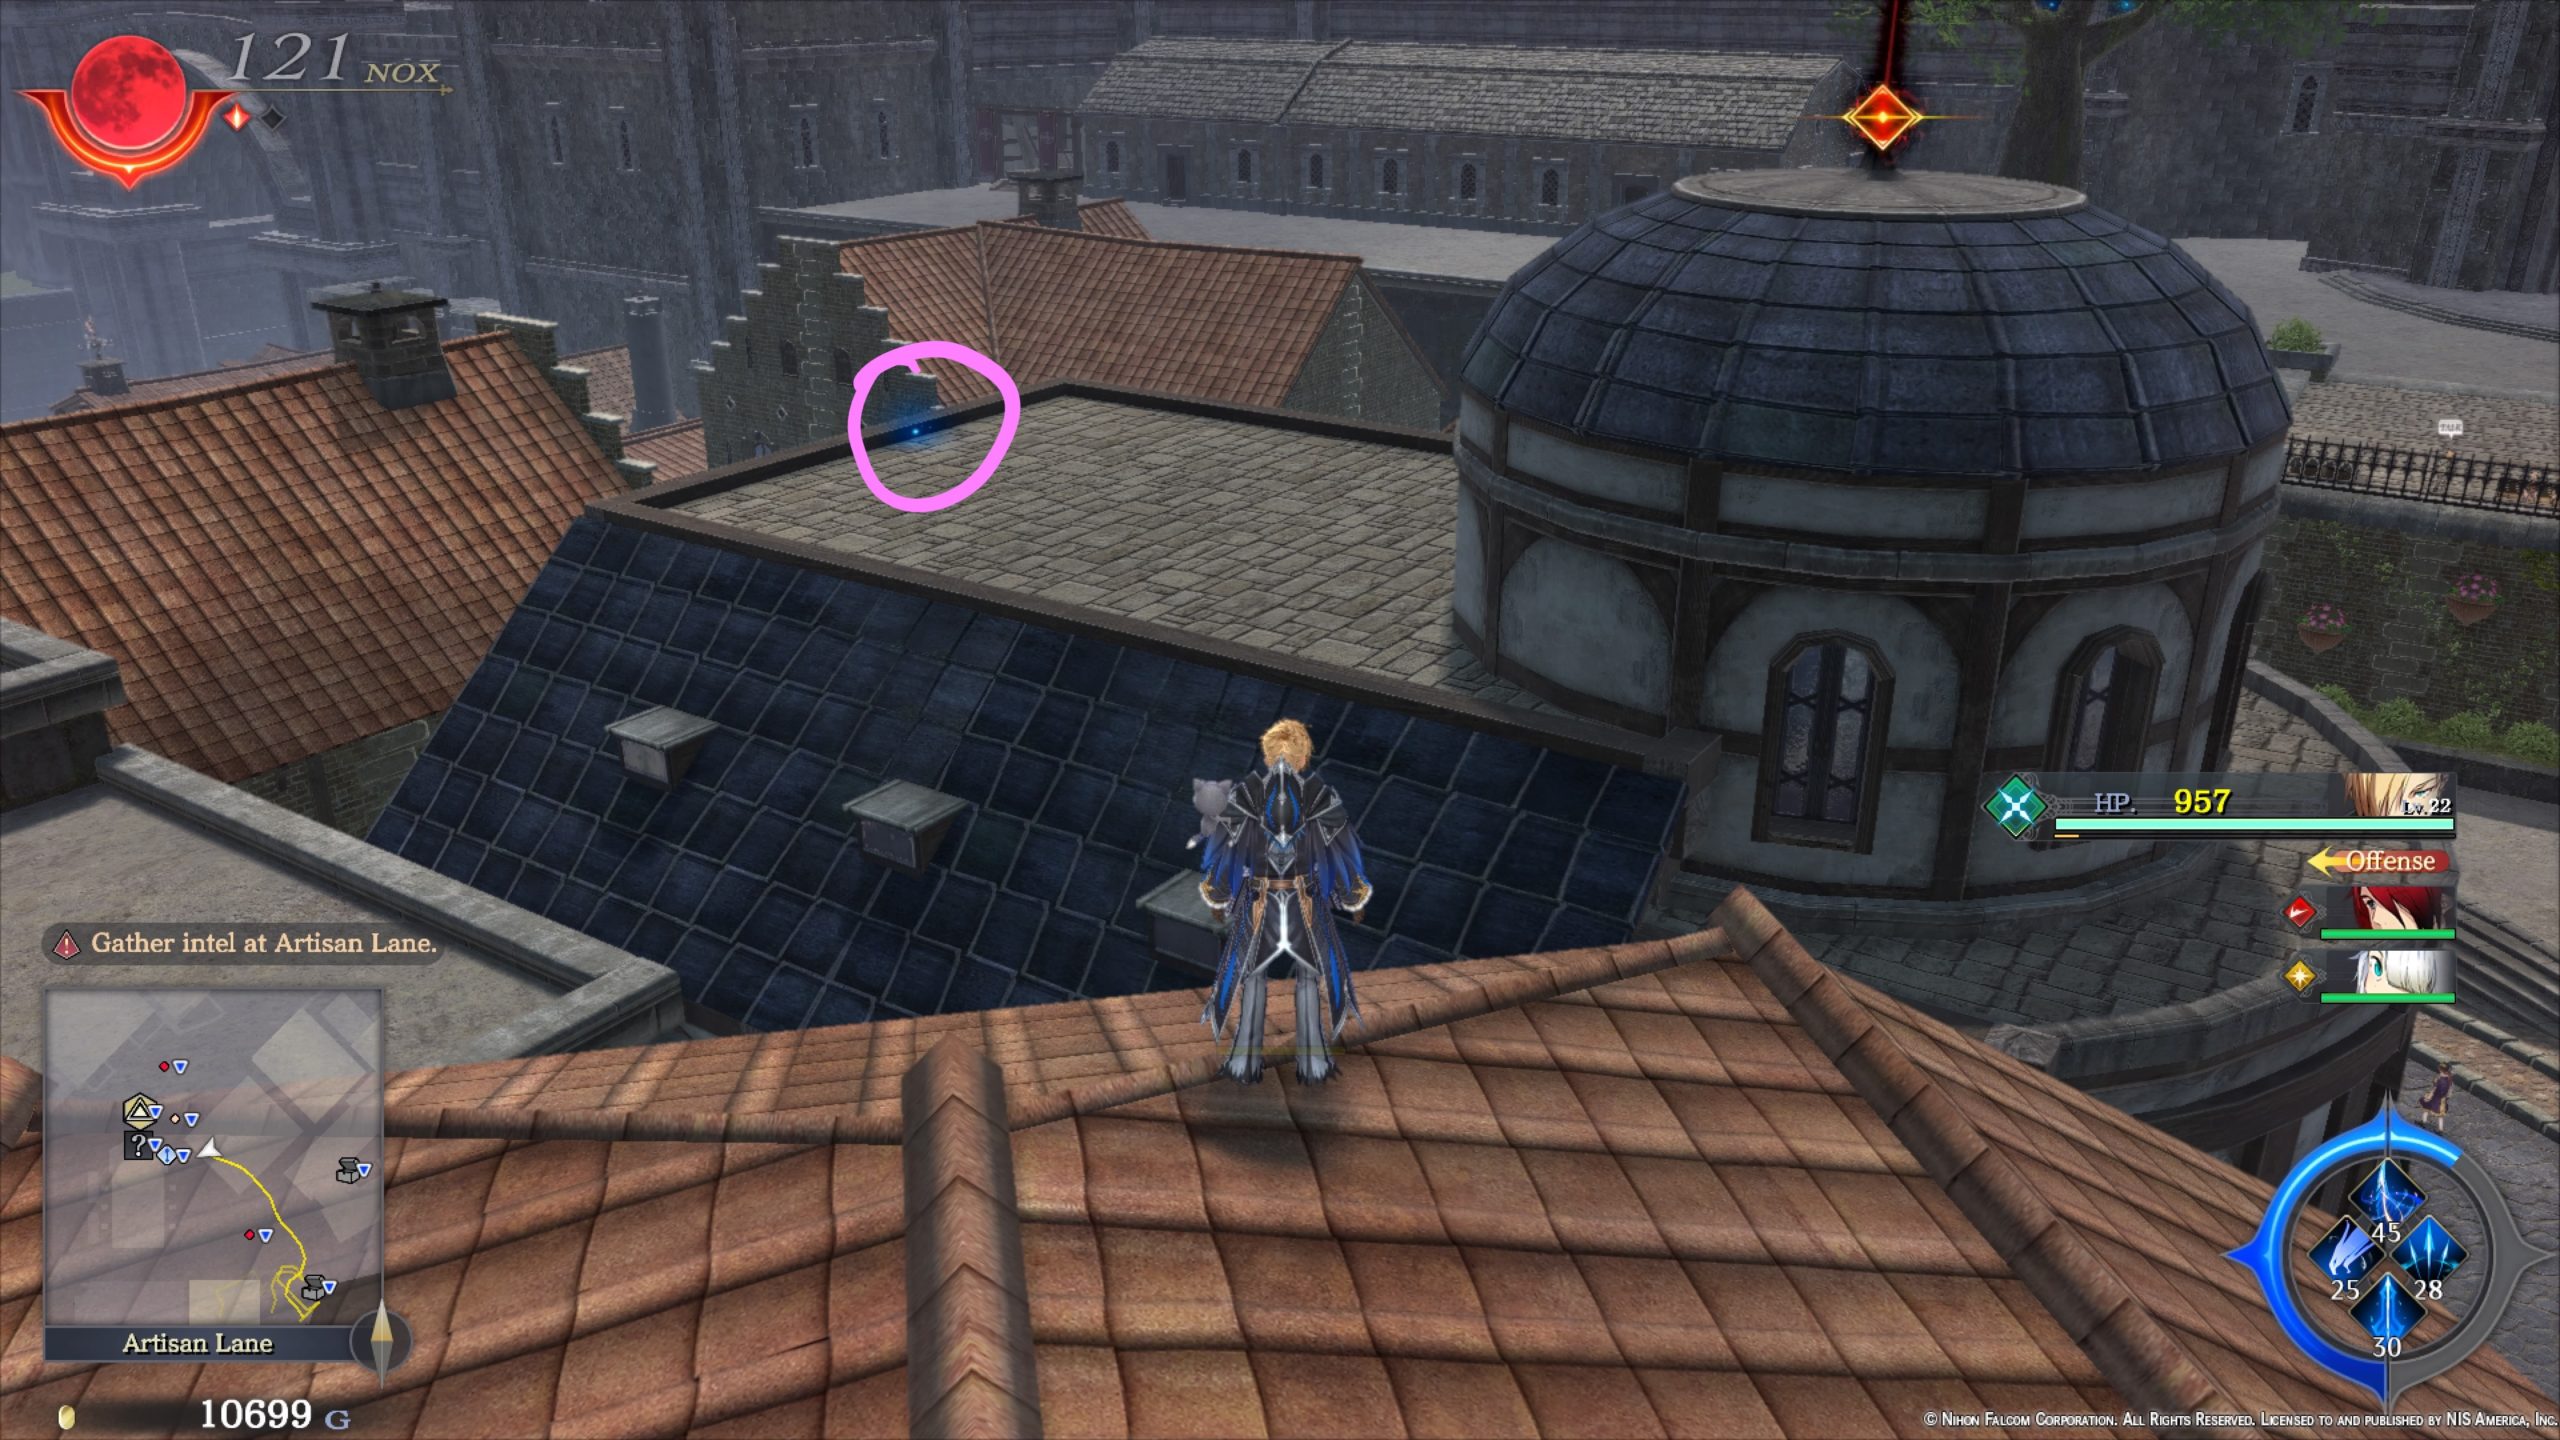
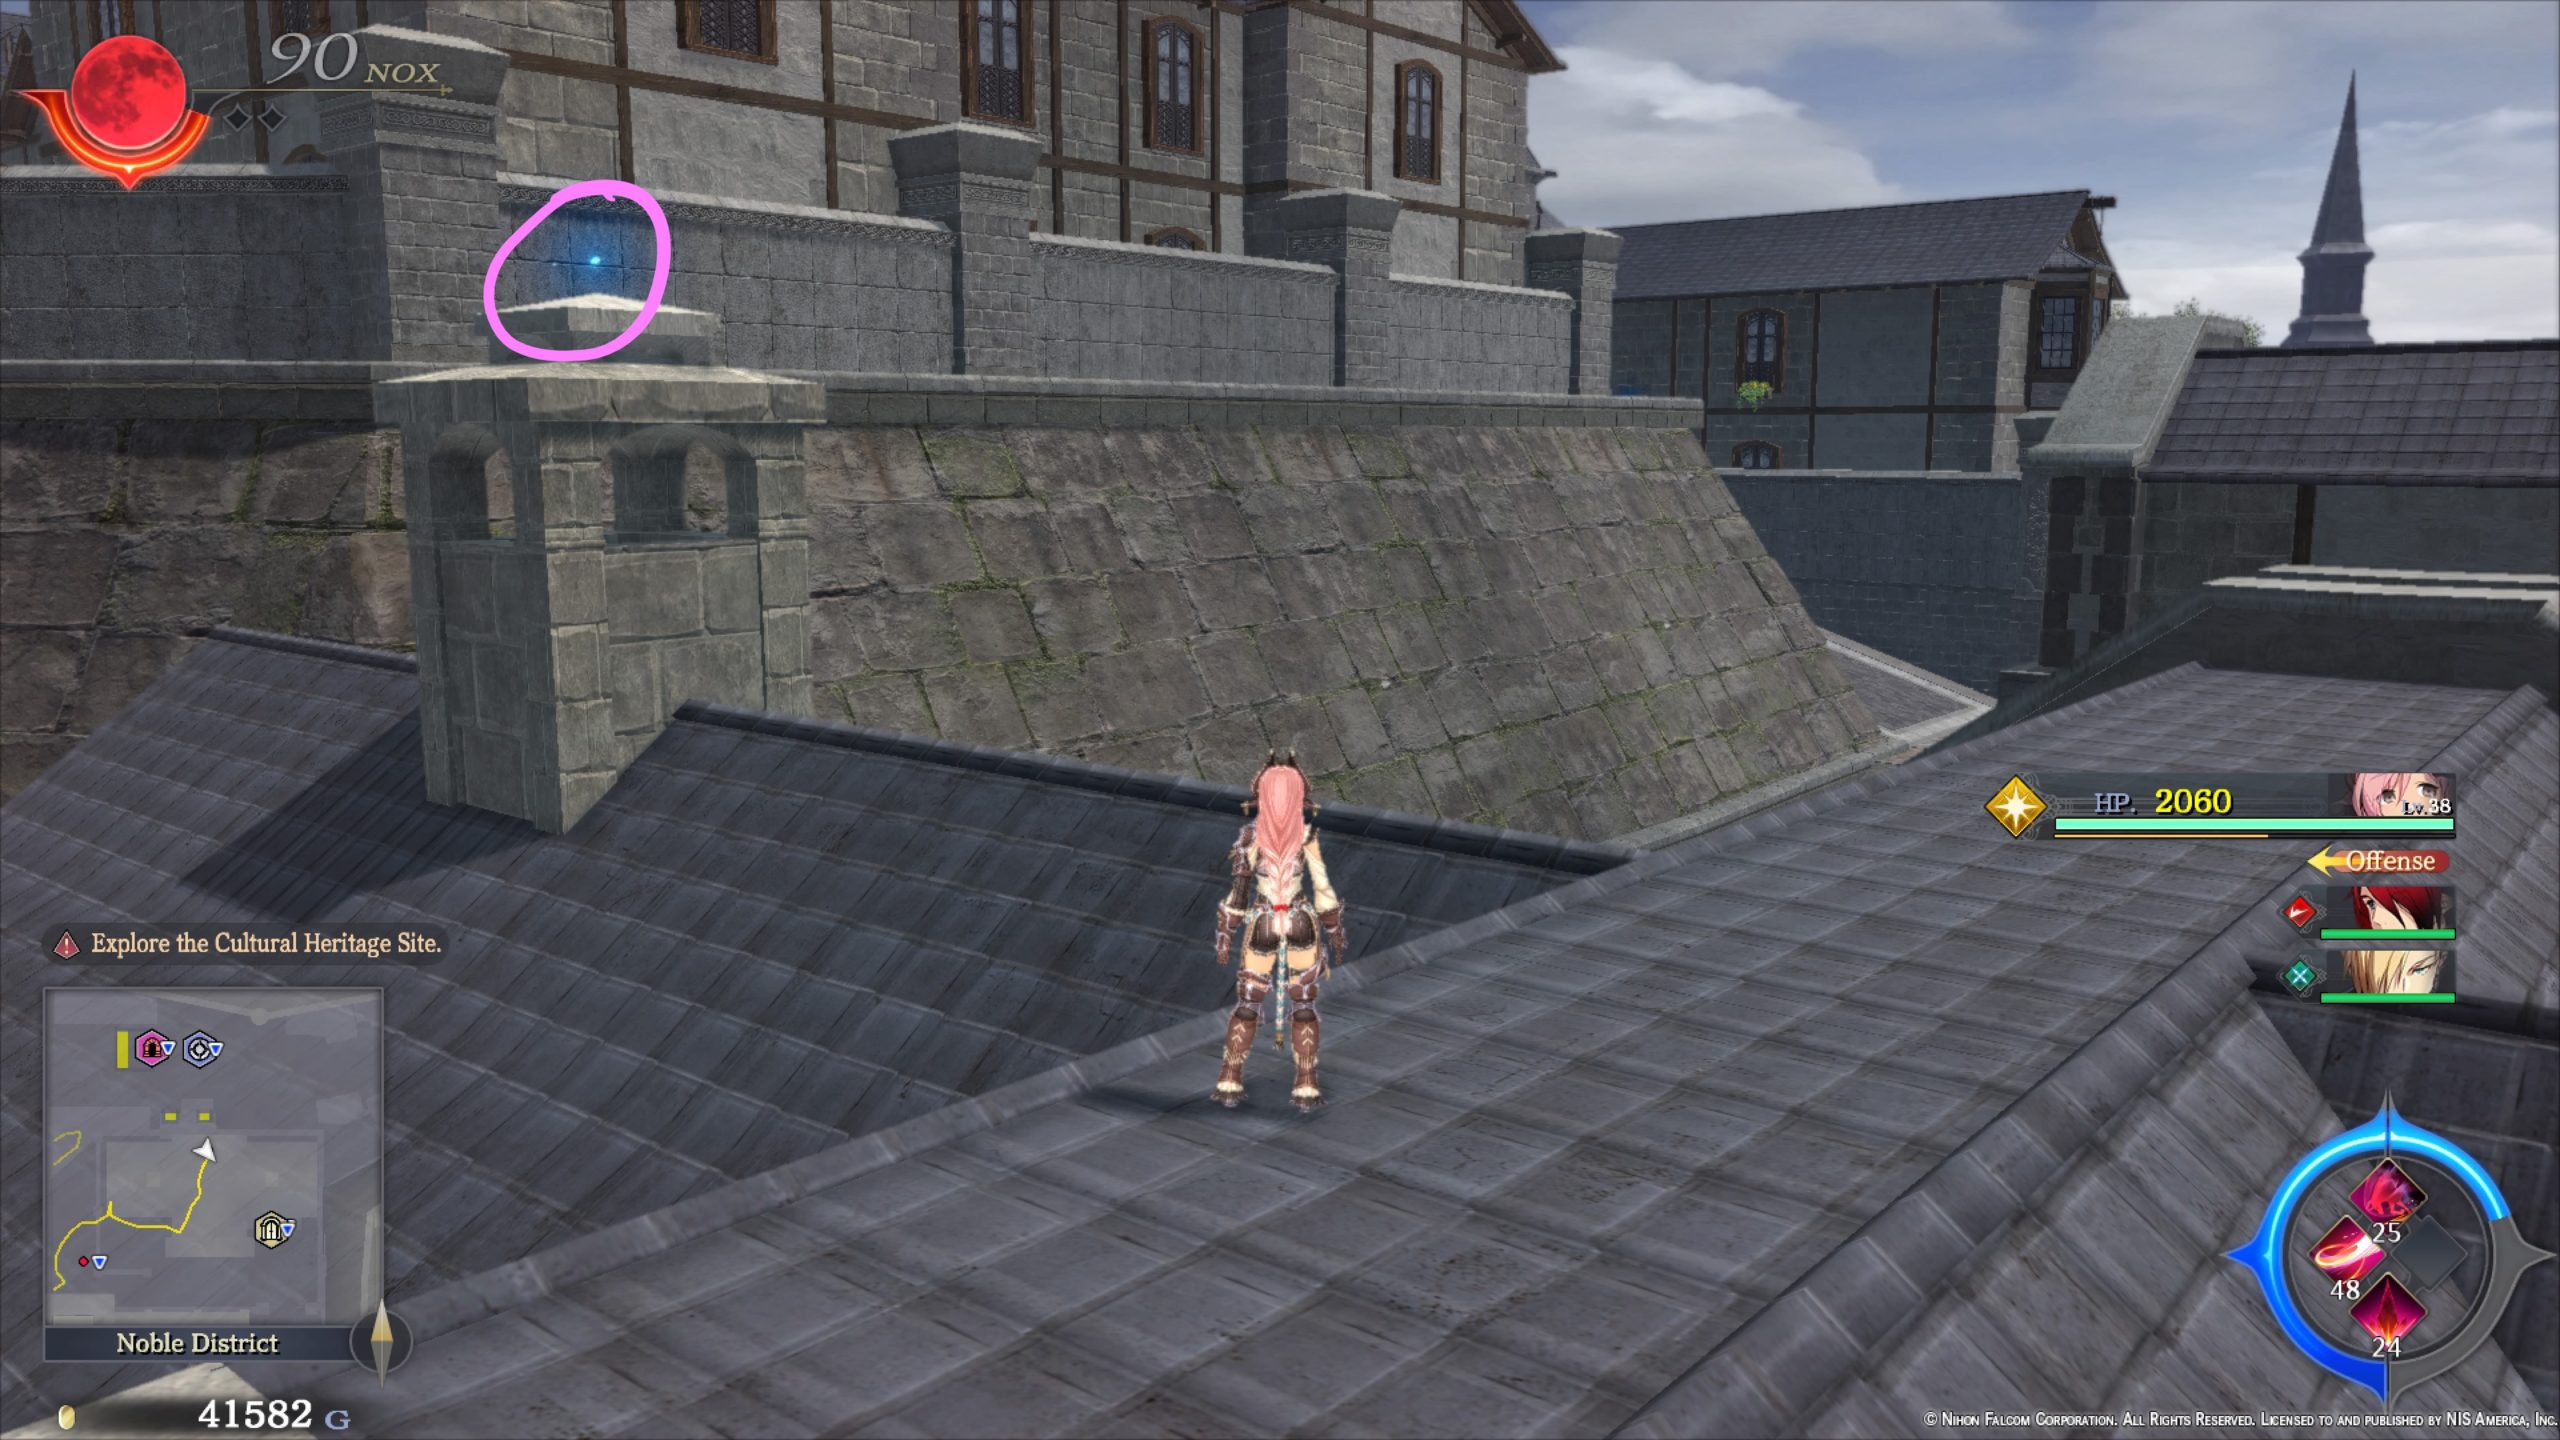
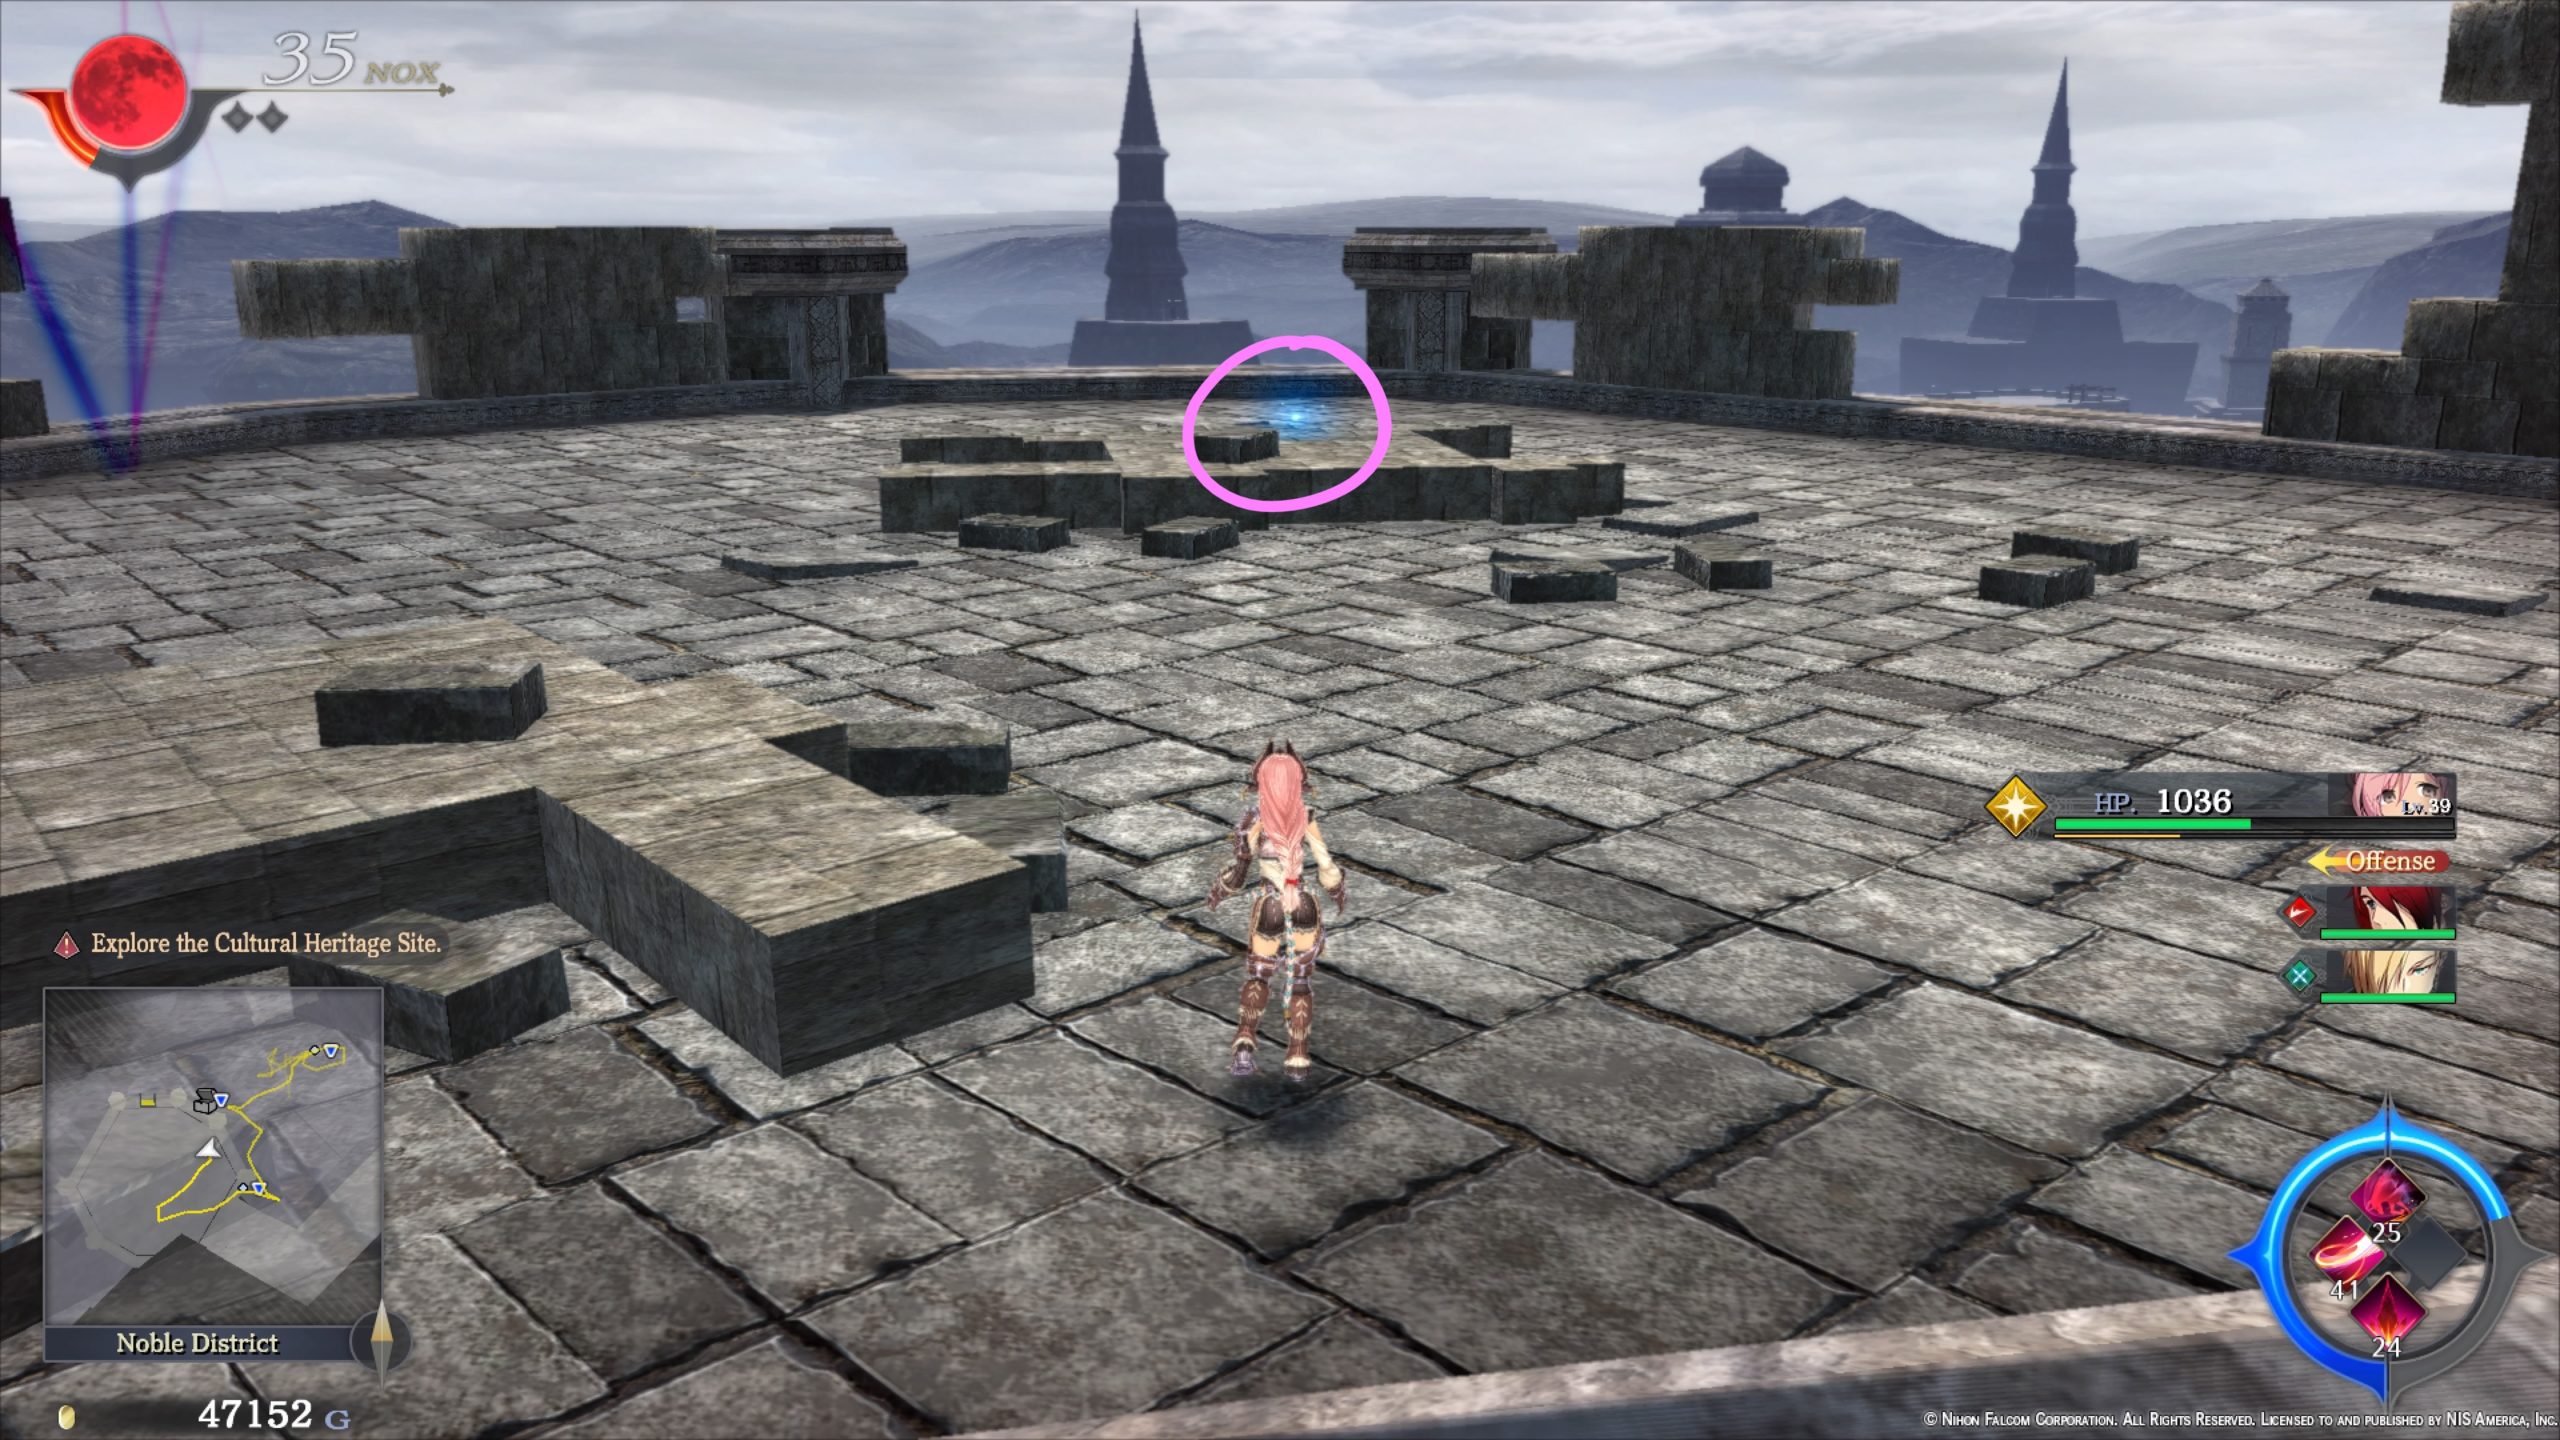
- On top of the long building in the southeastern part of the area

- On a balcony of the outer wall in the southeastern part of the area
- On the roof of a building in the southeastern part of the area

- On top of the remains of a destroyed fence in the southeastern part of the area

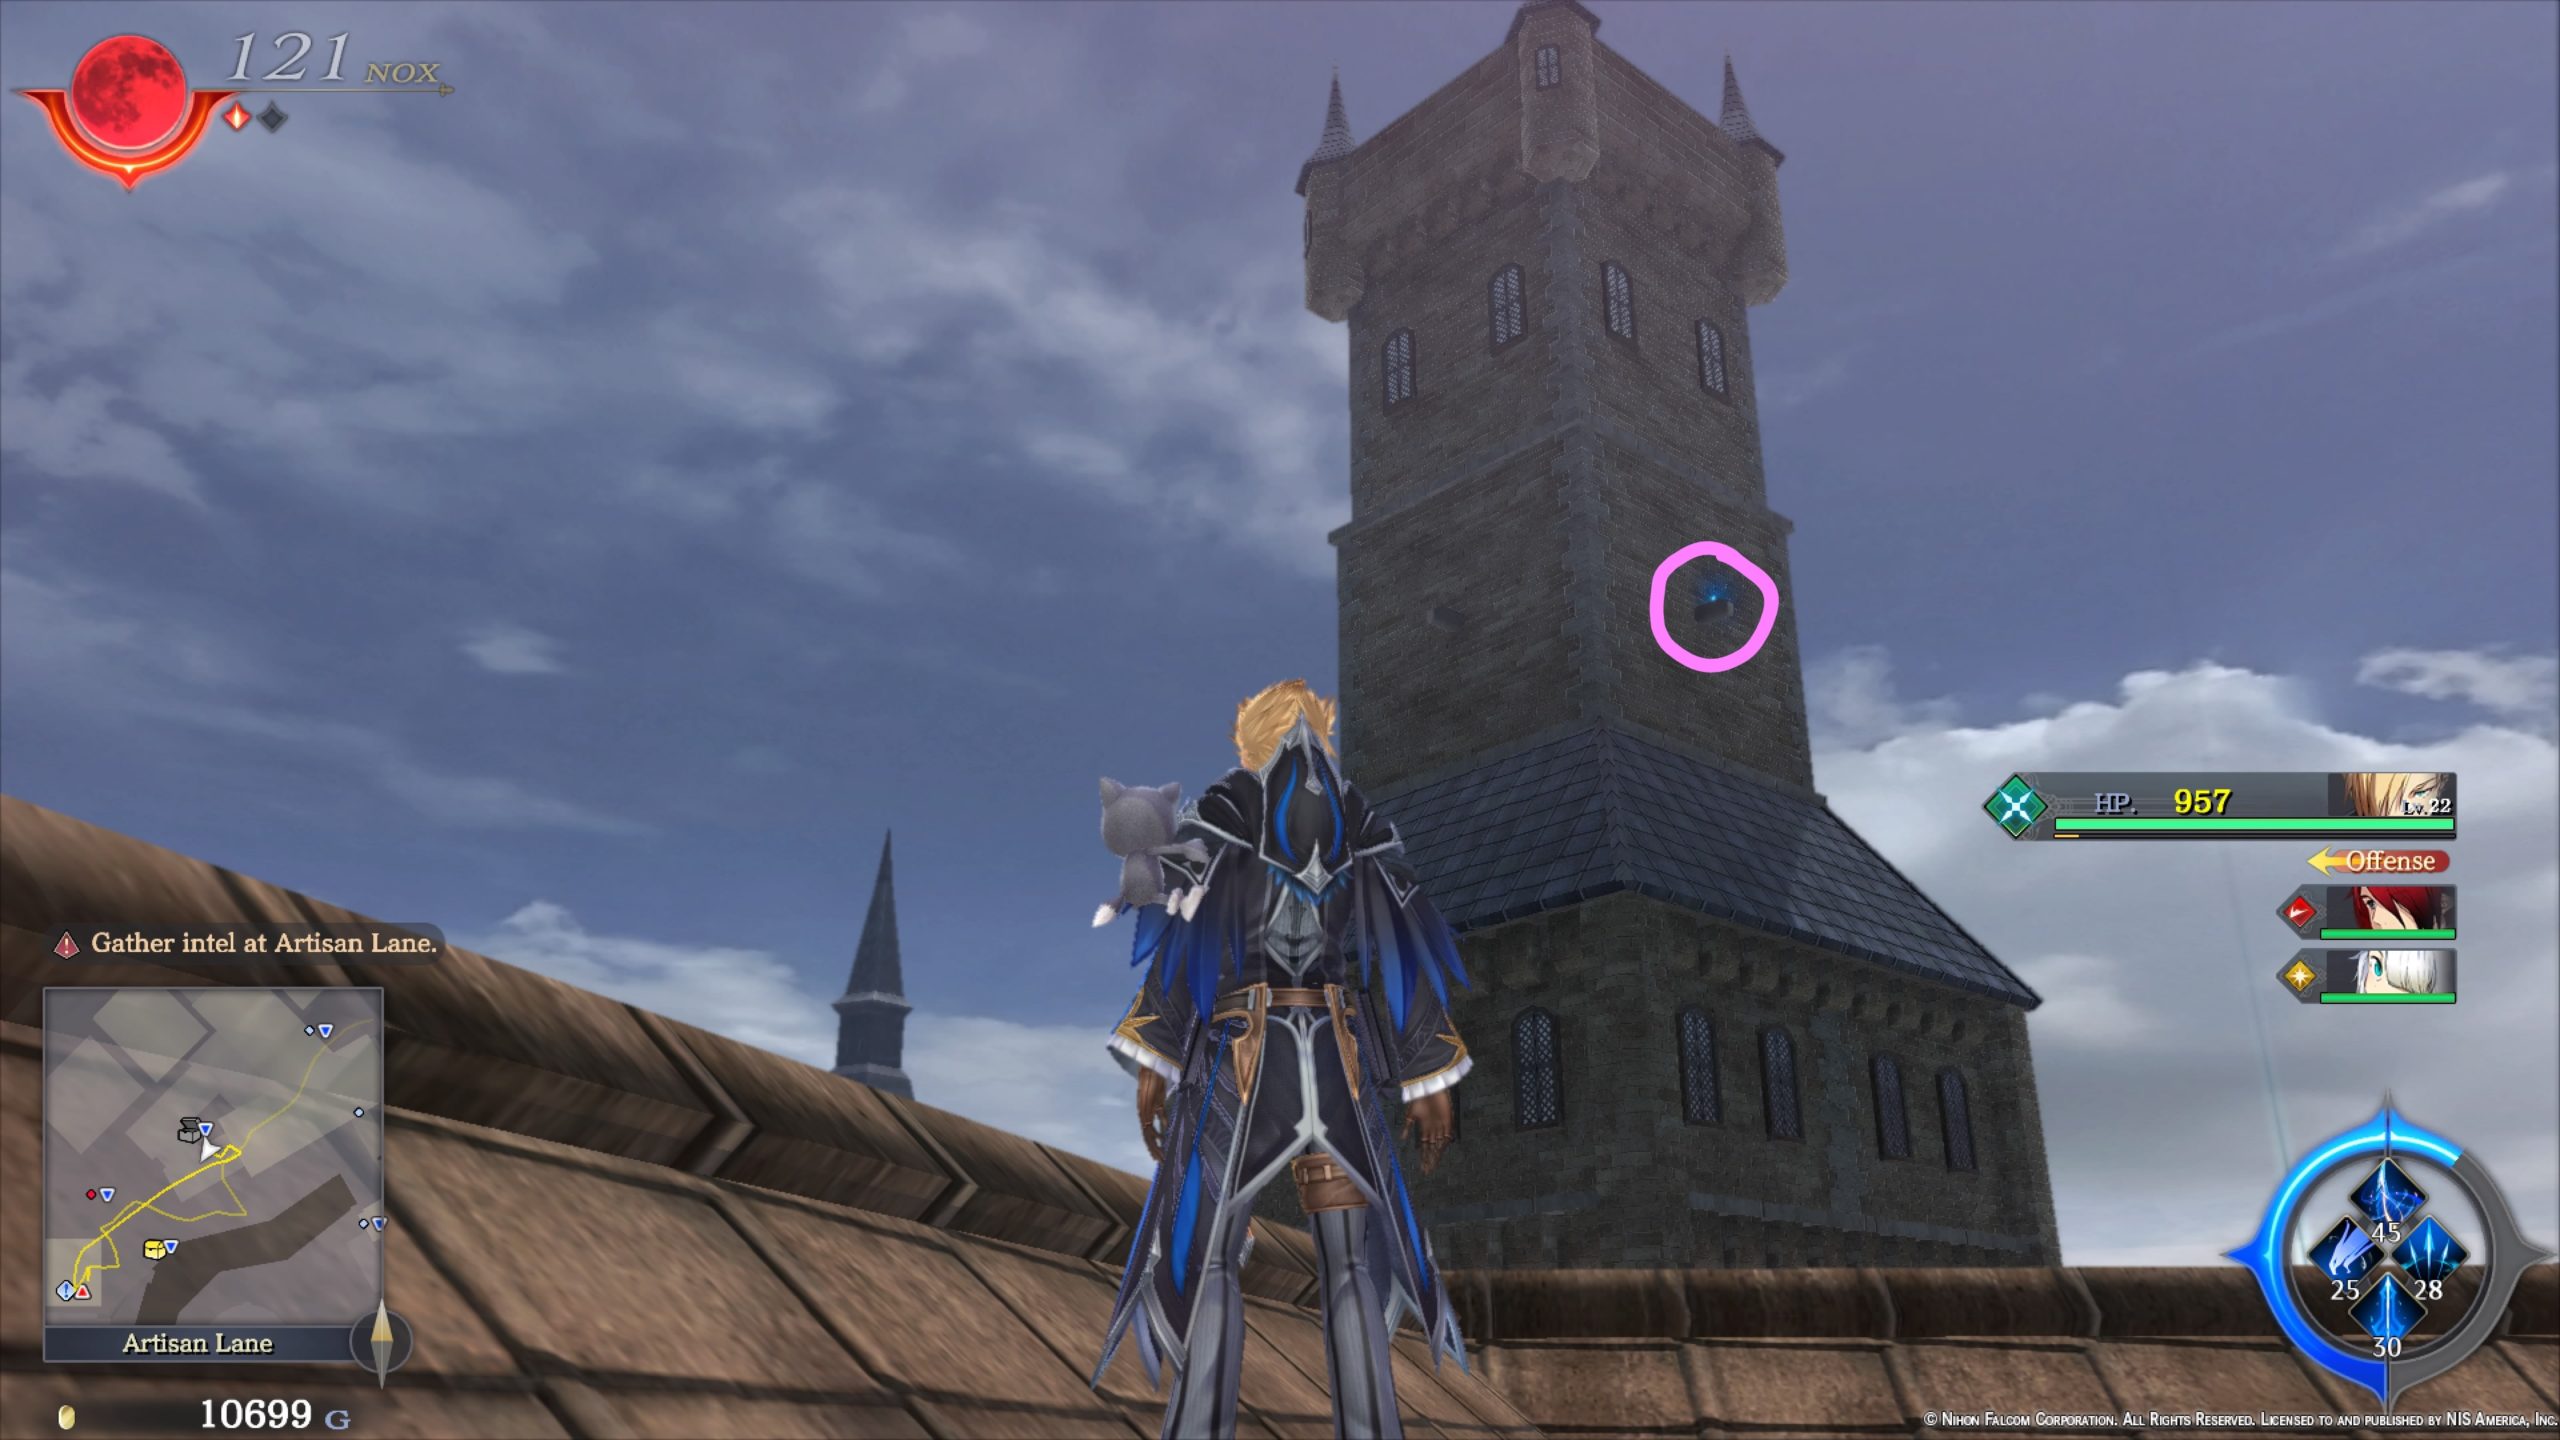
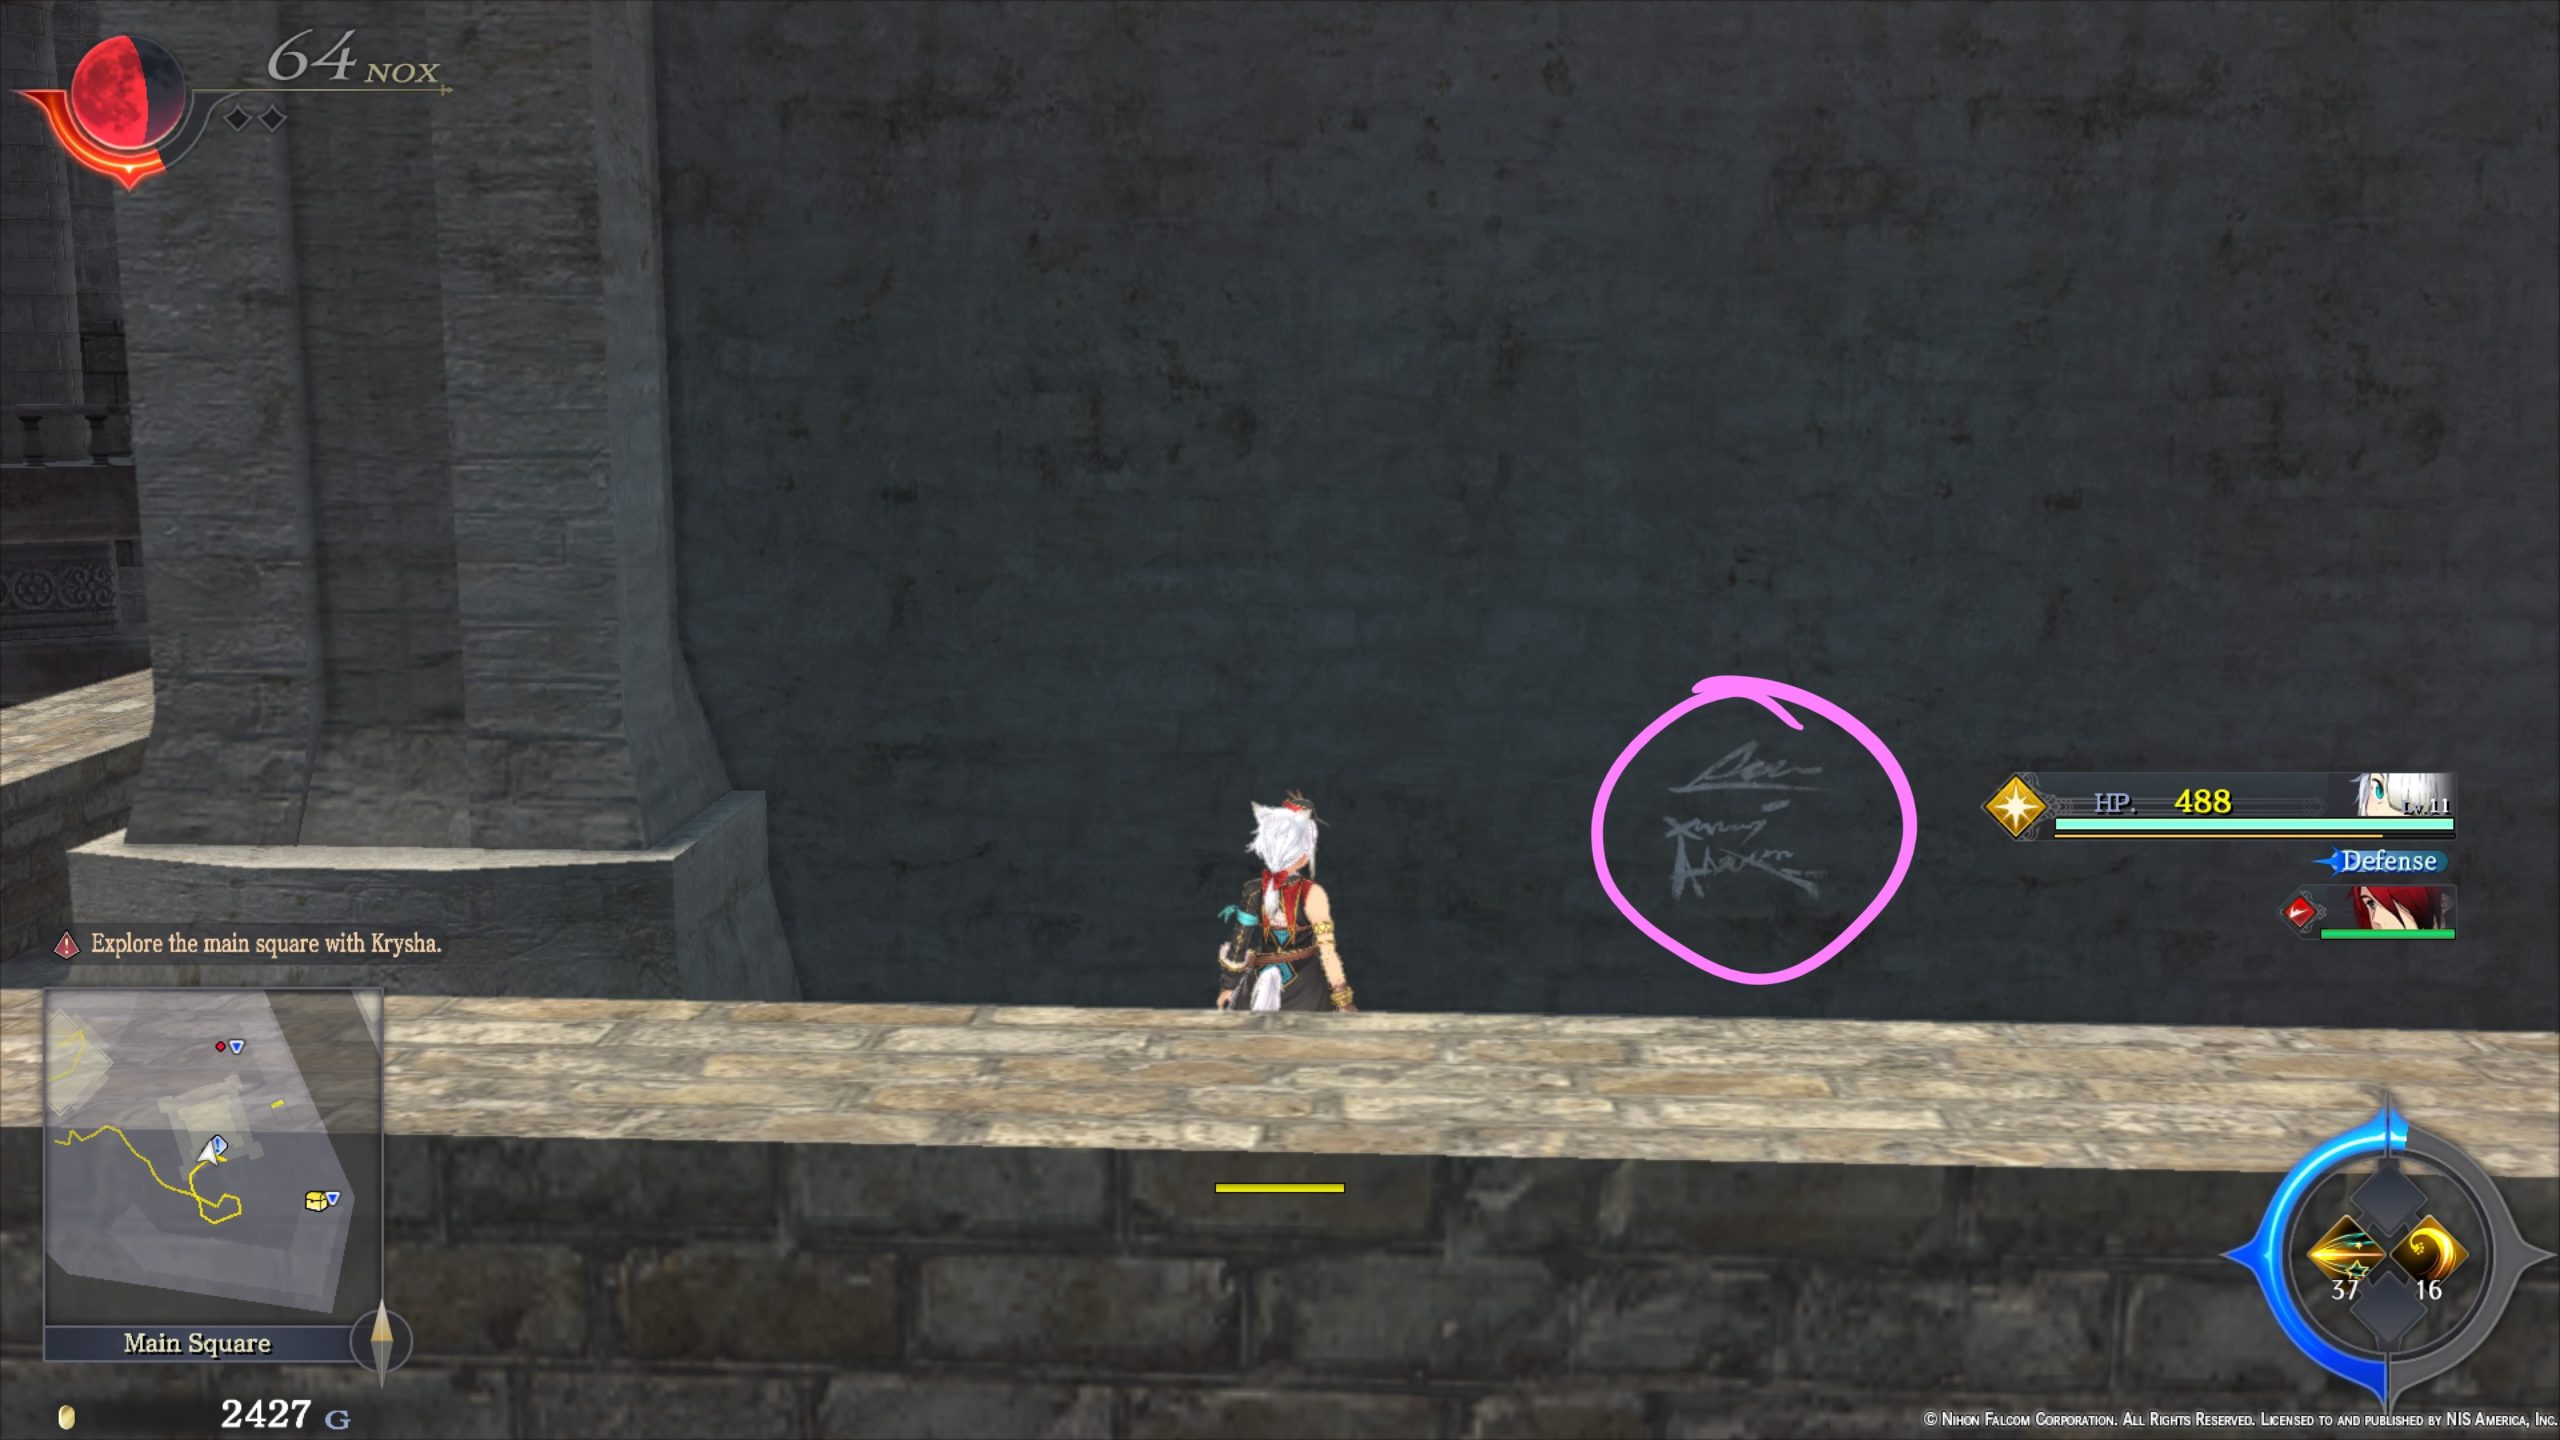
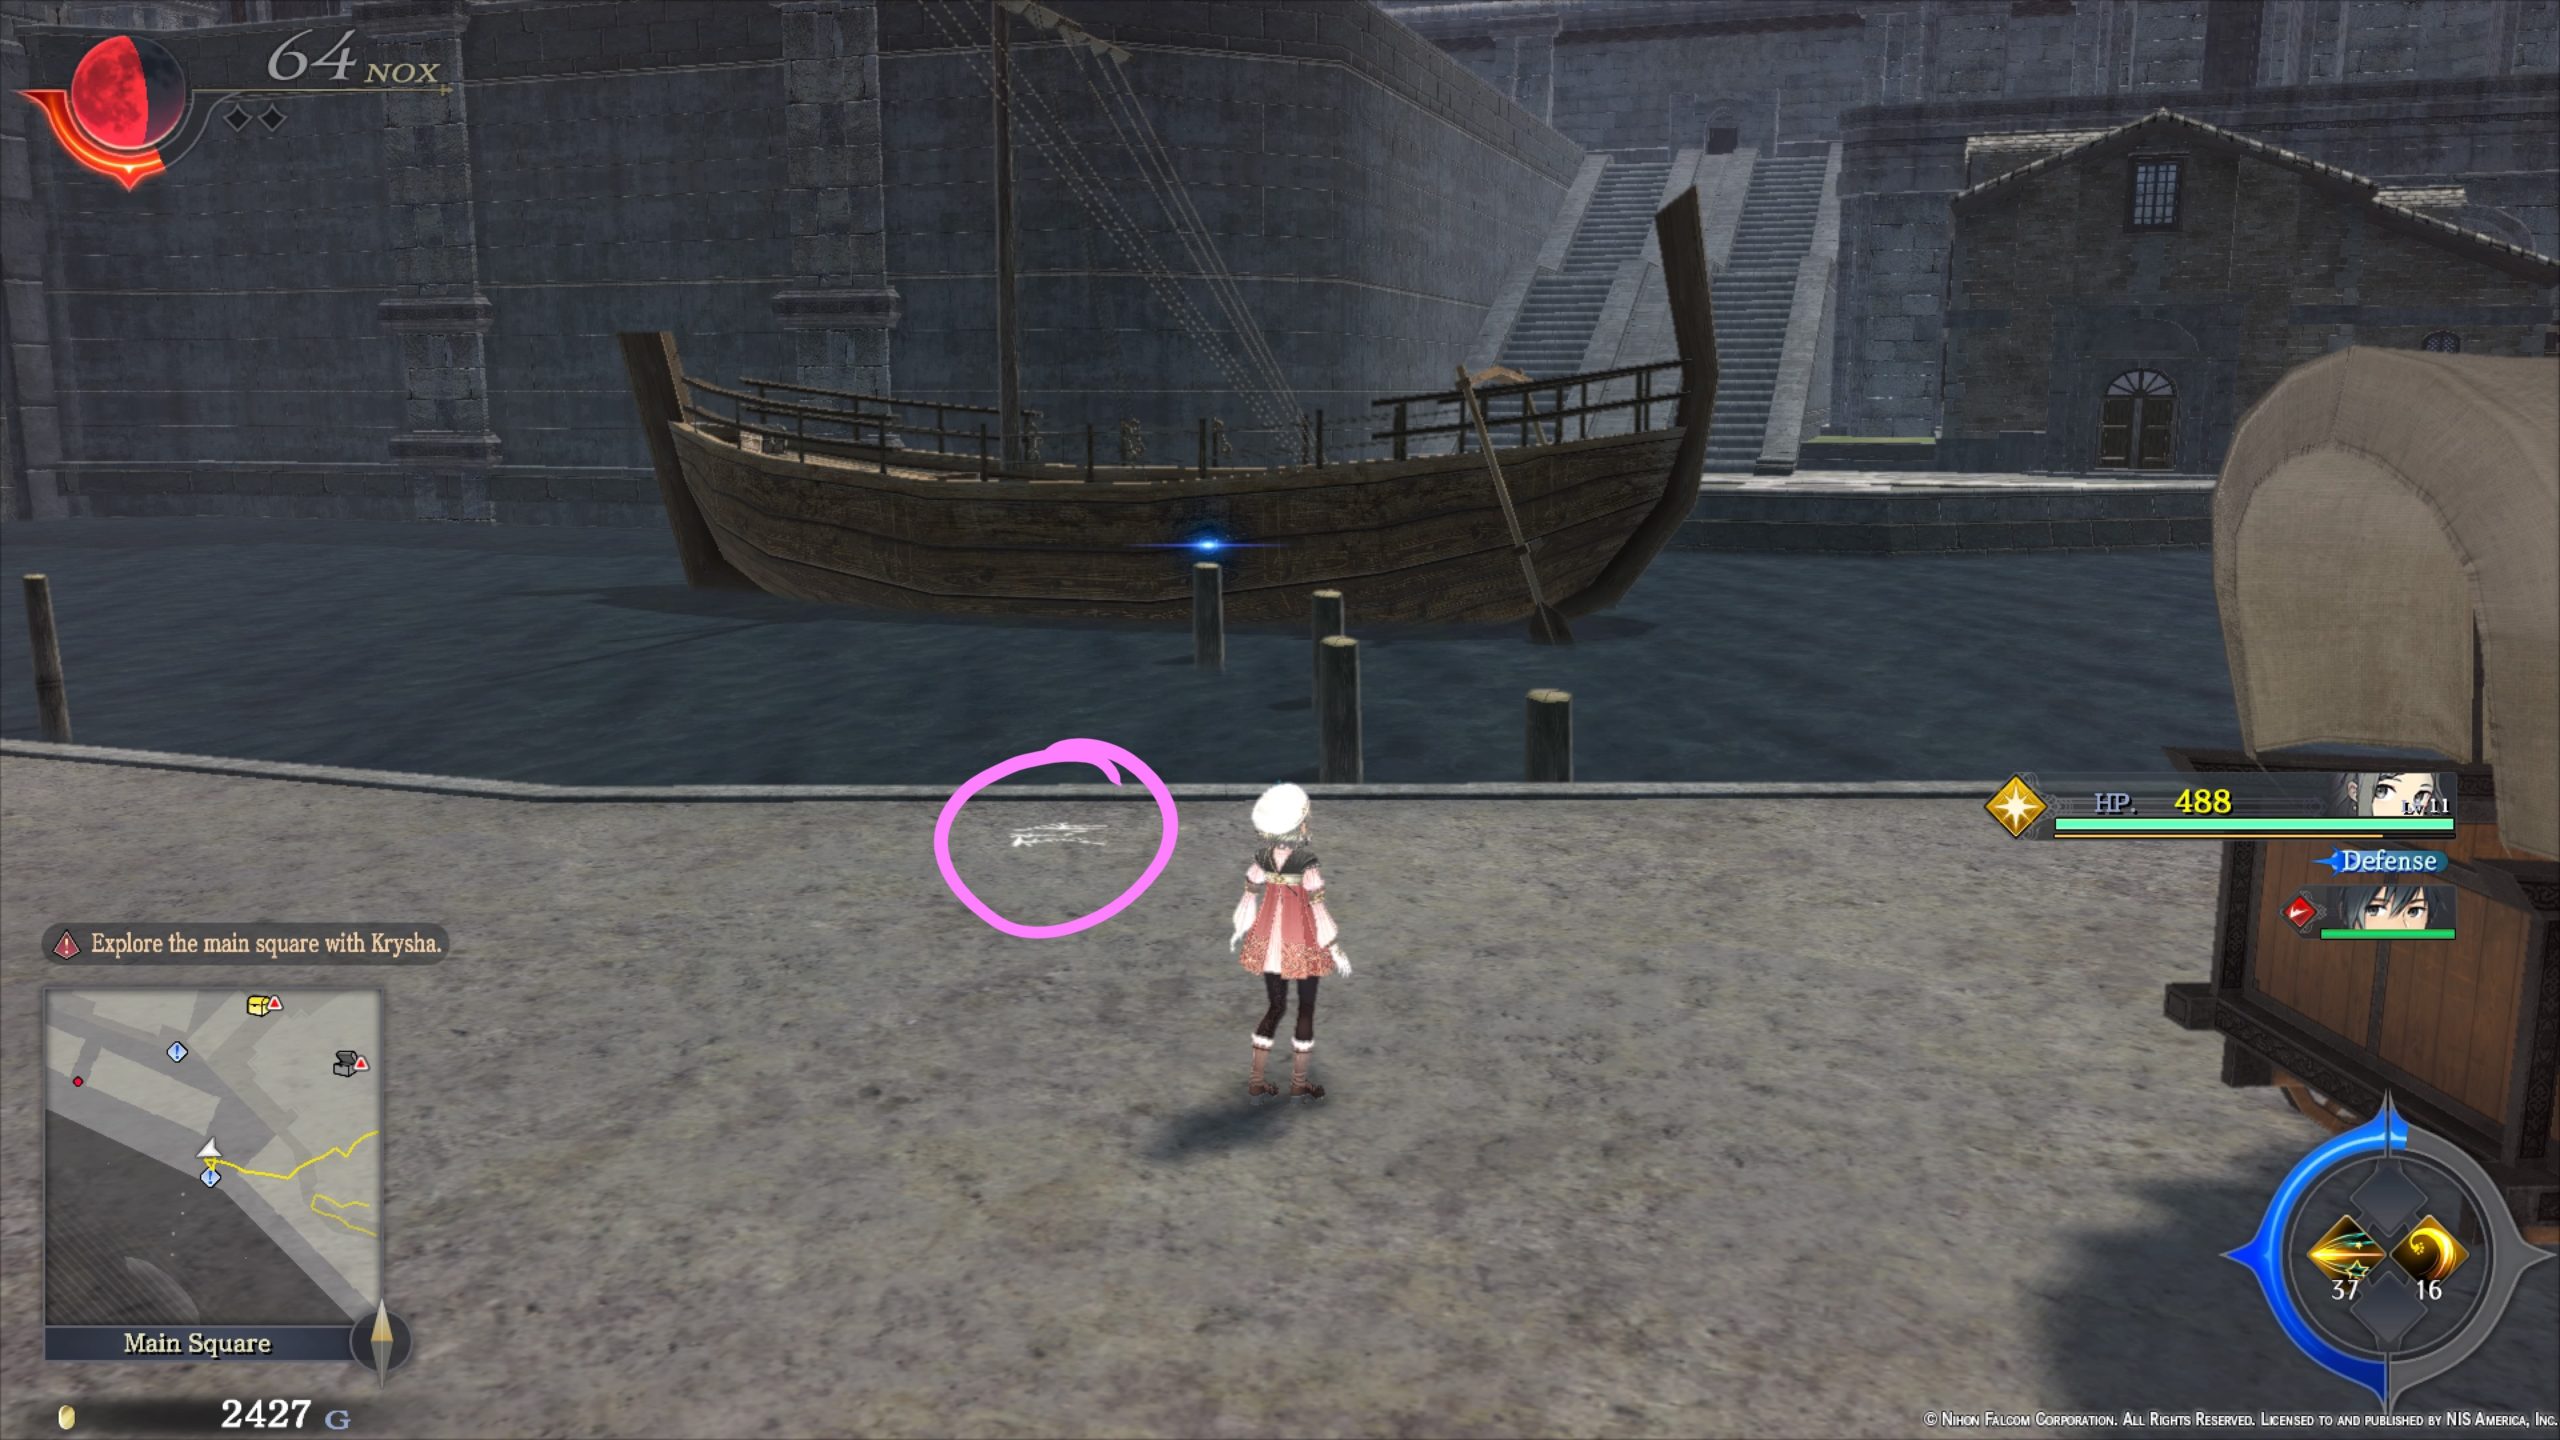
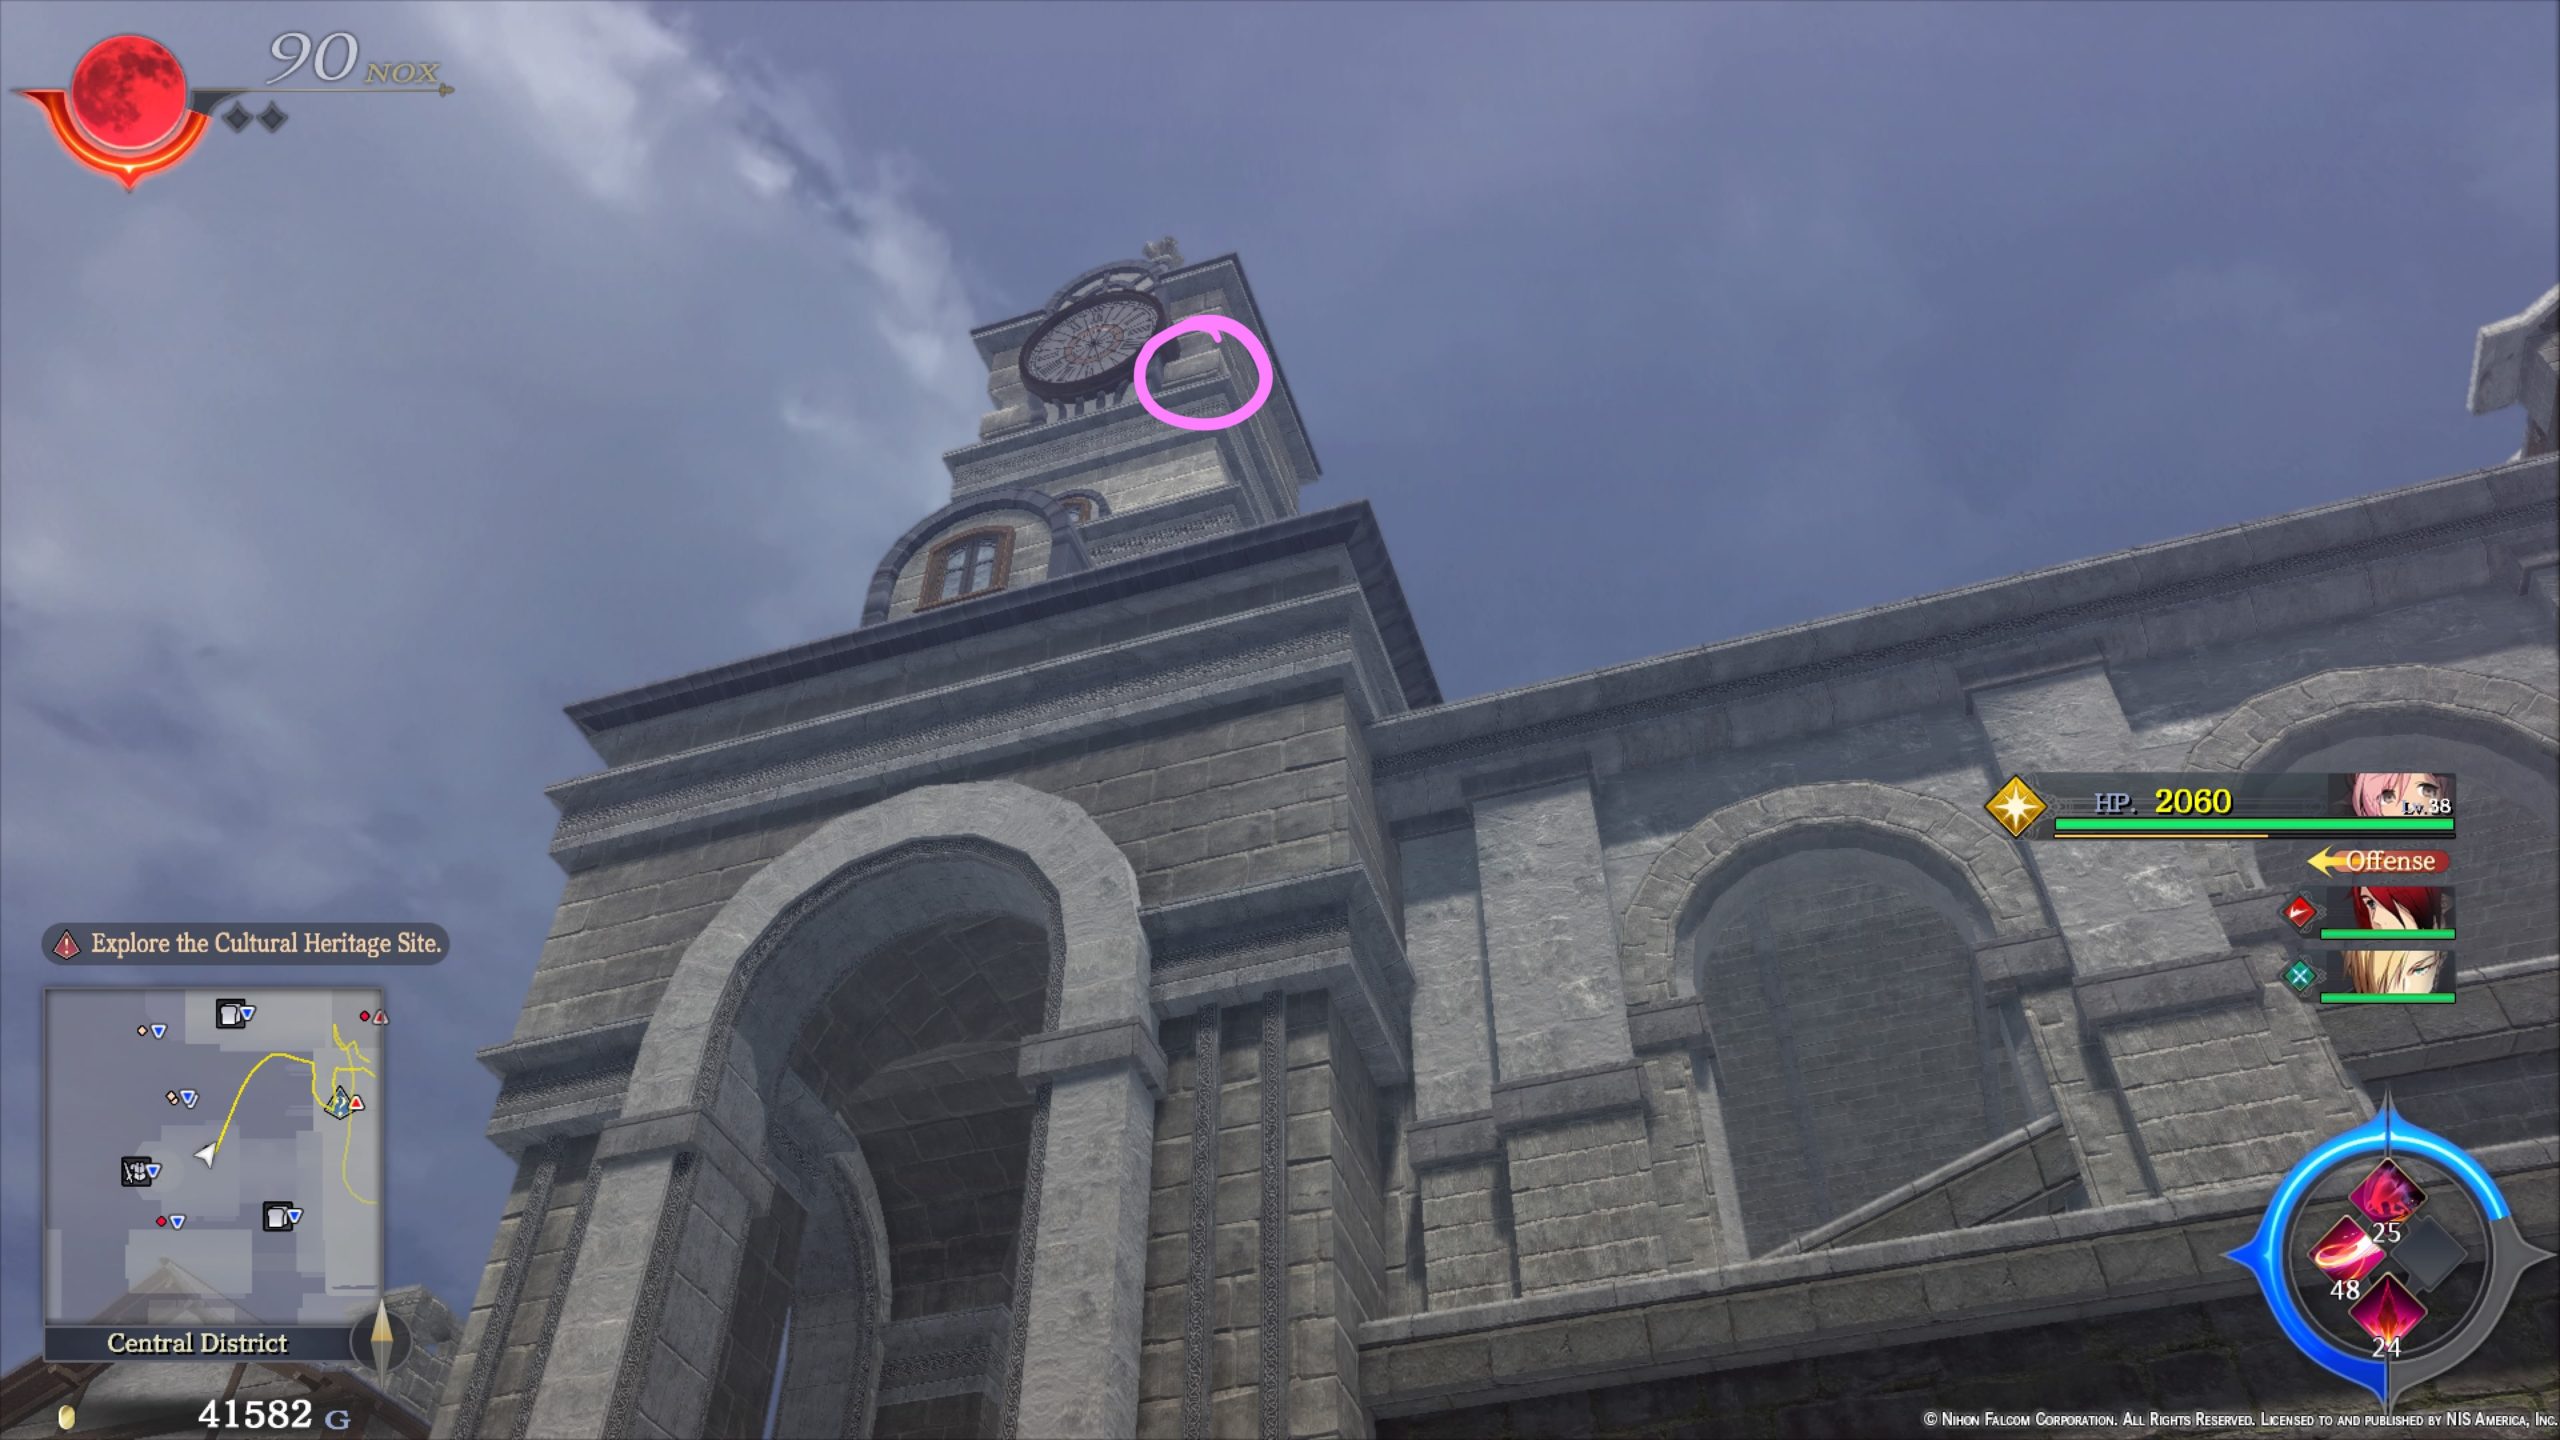
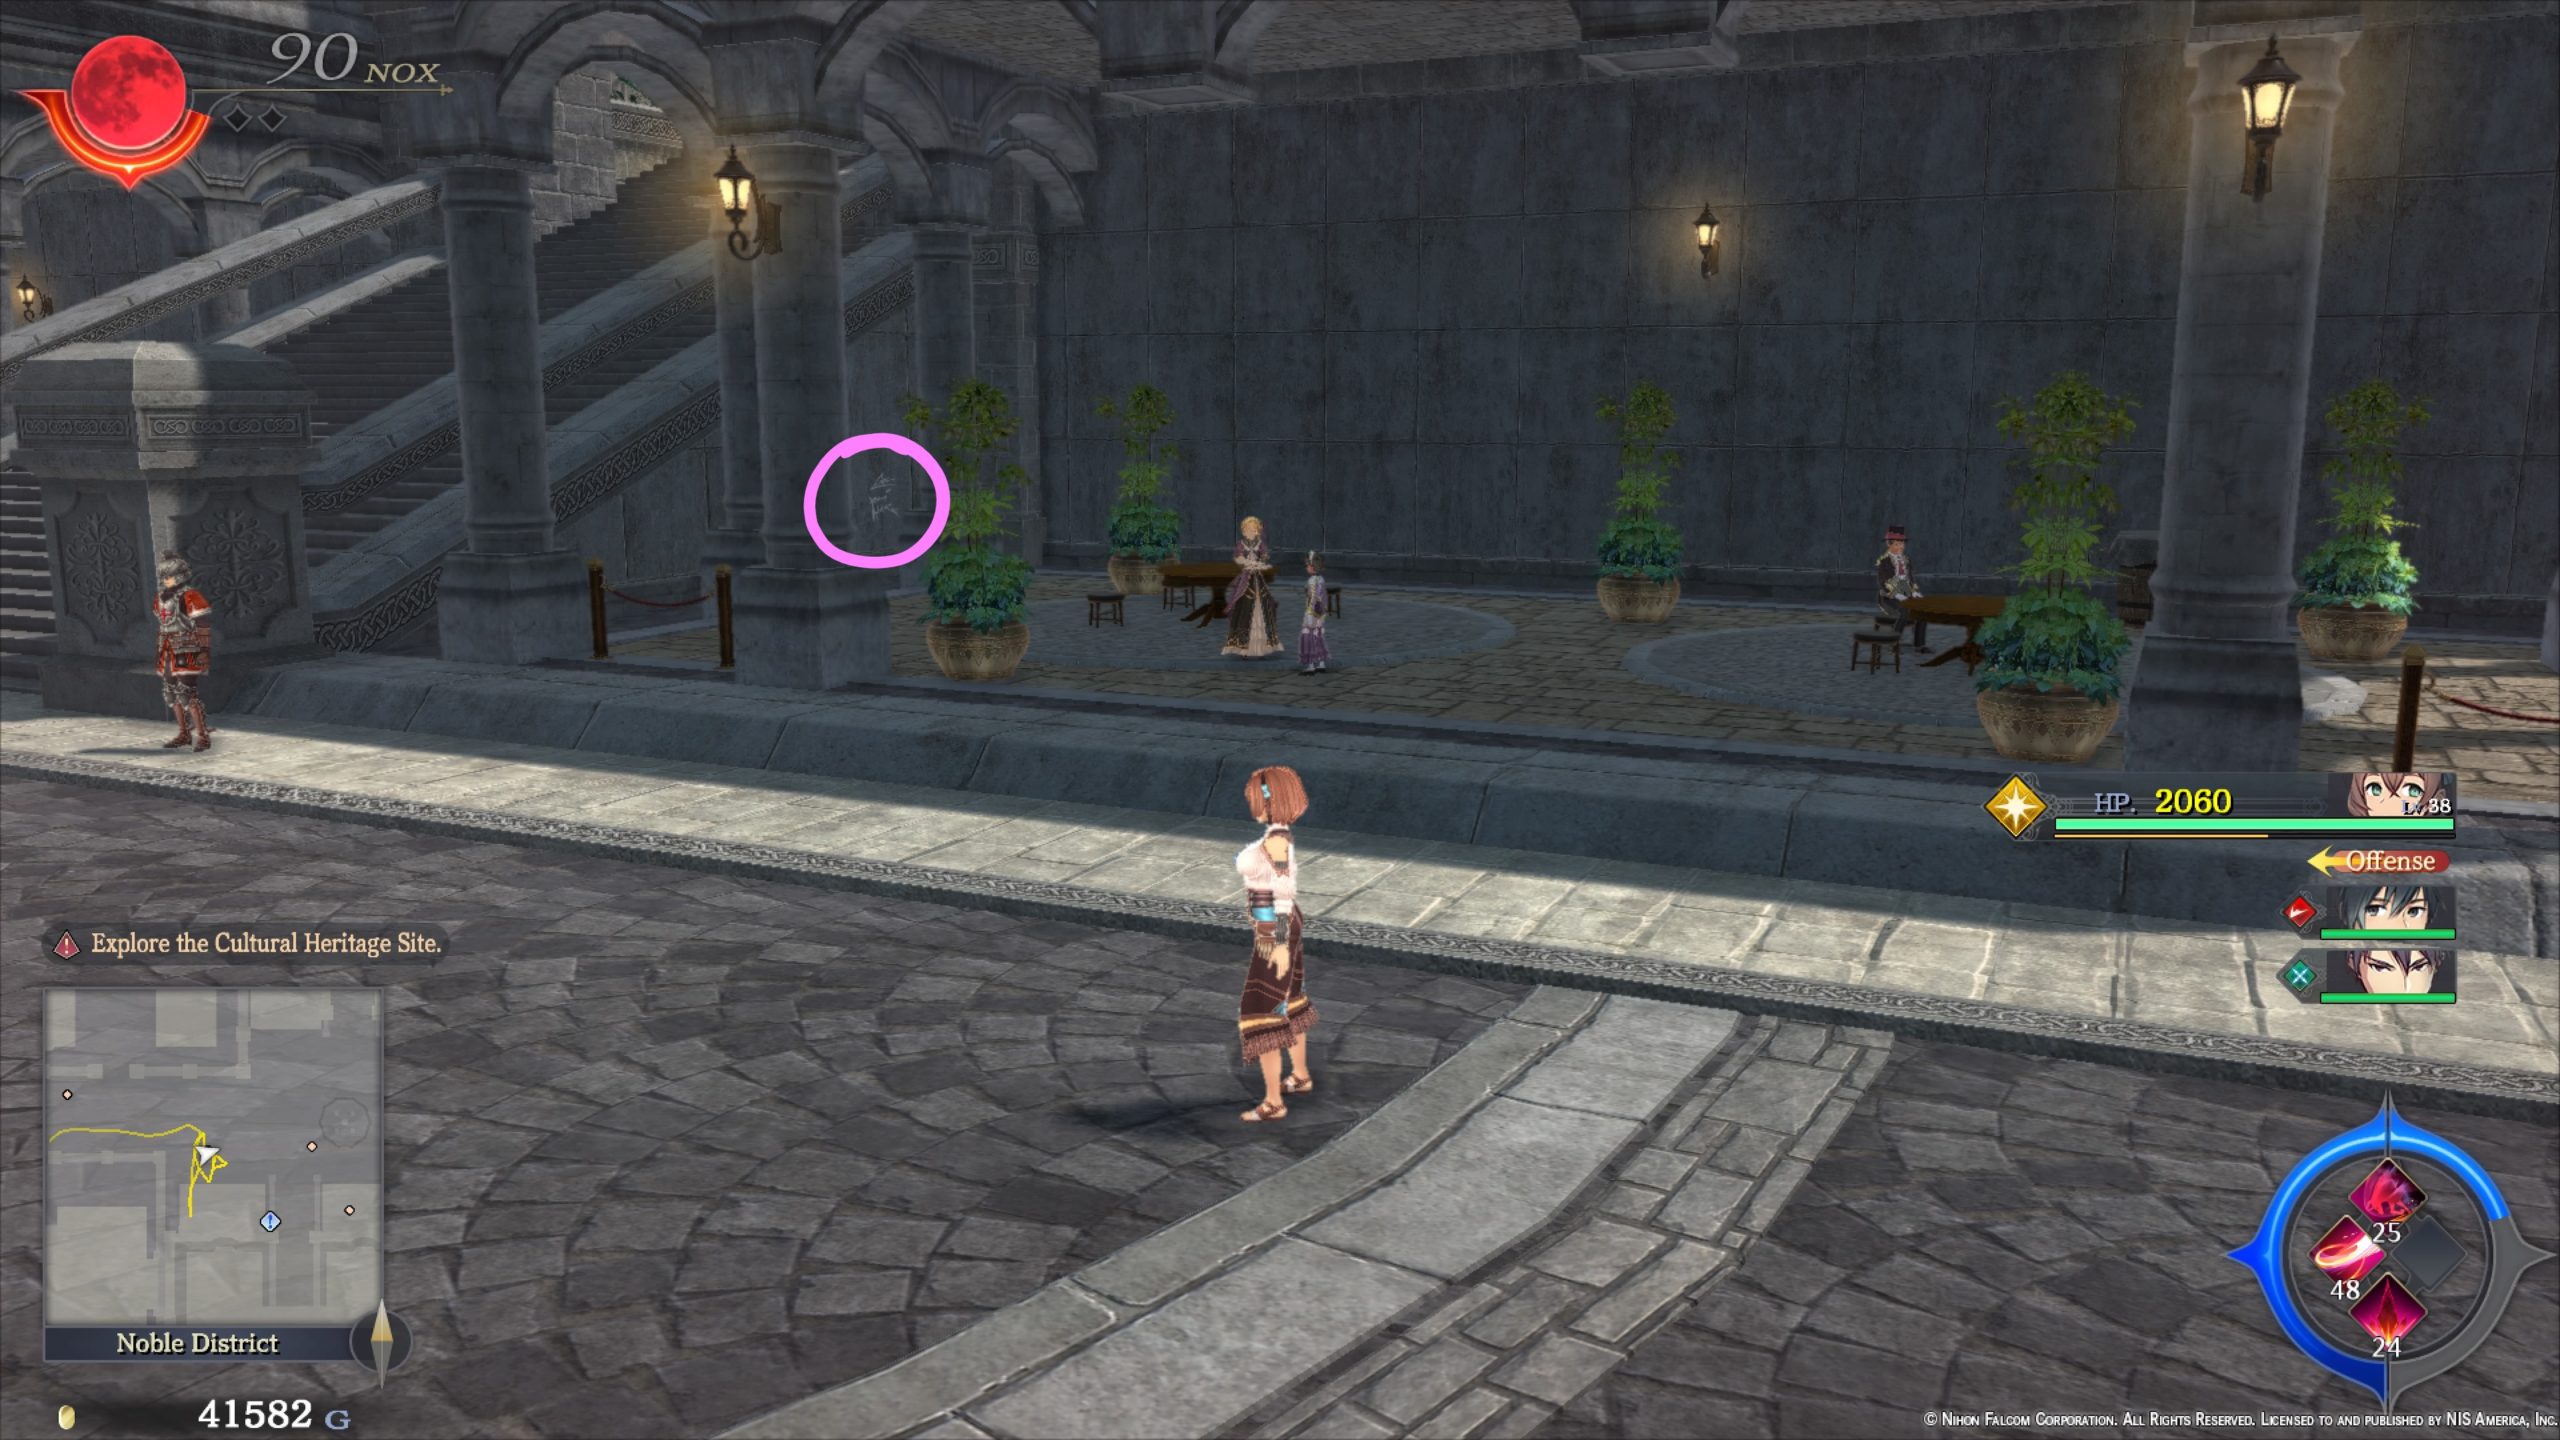
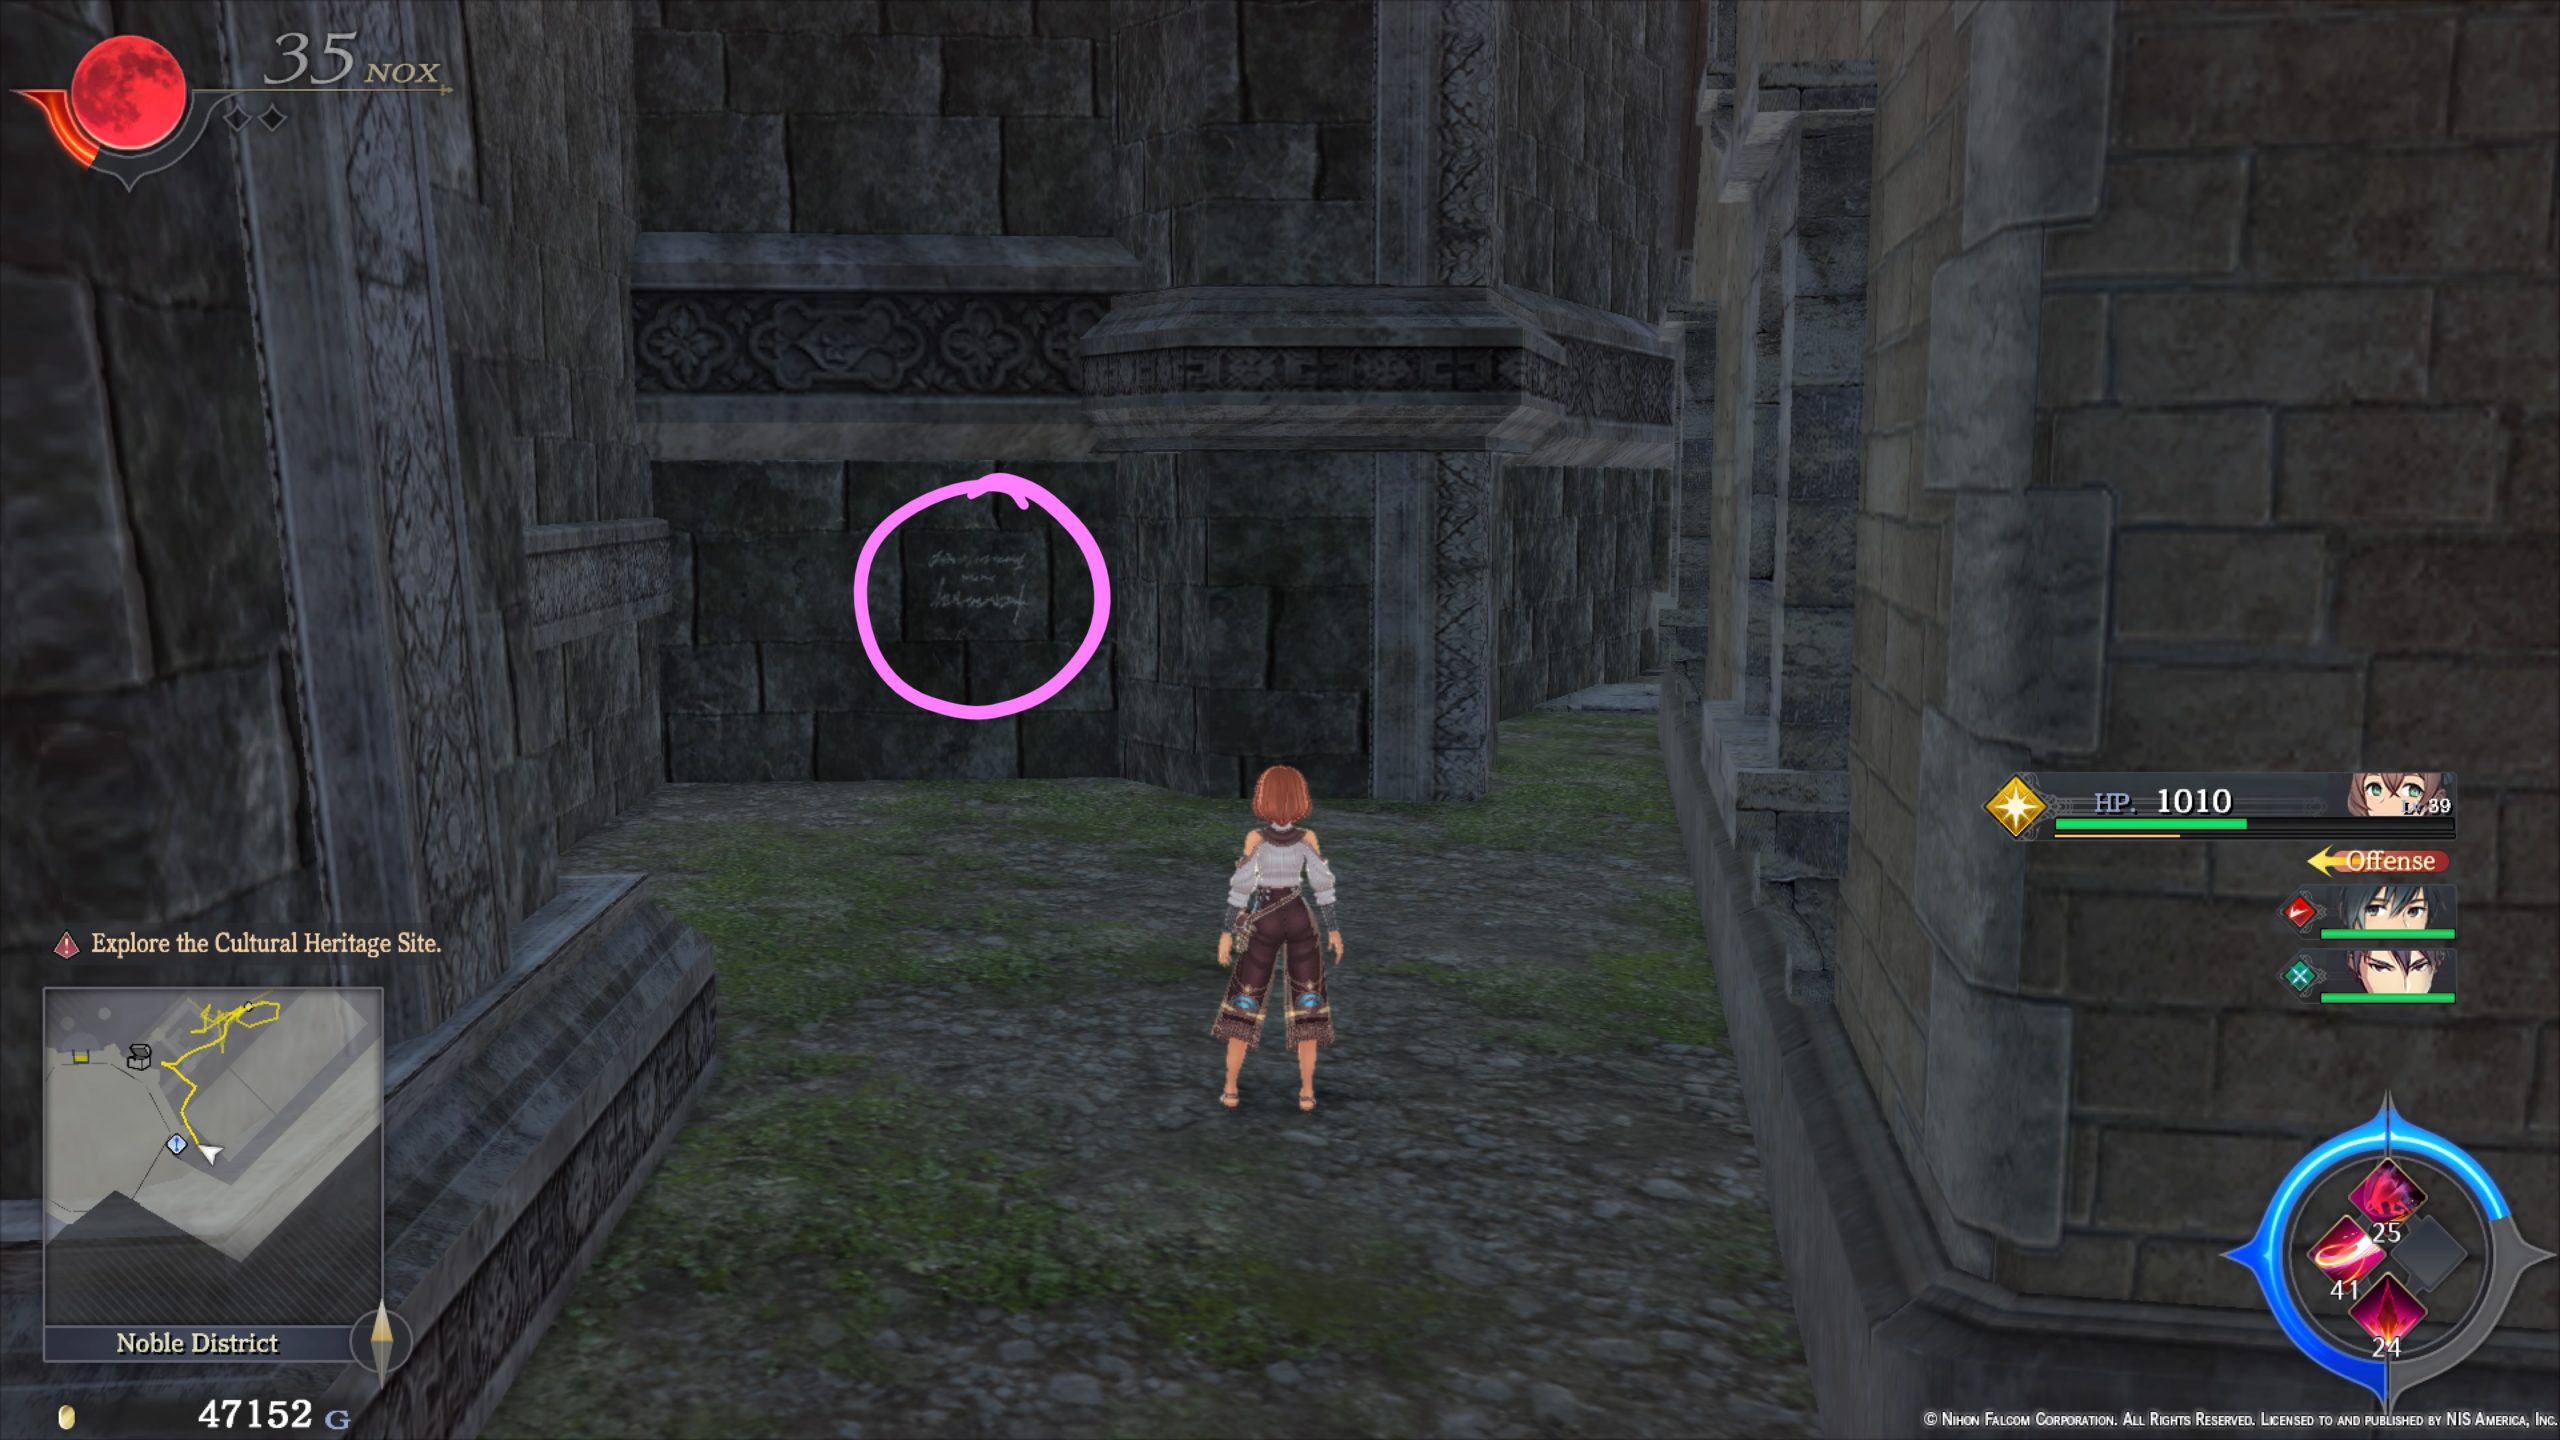
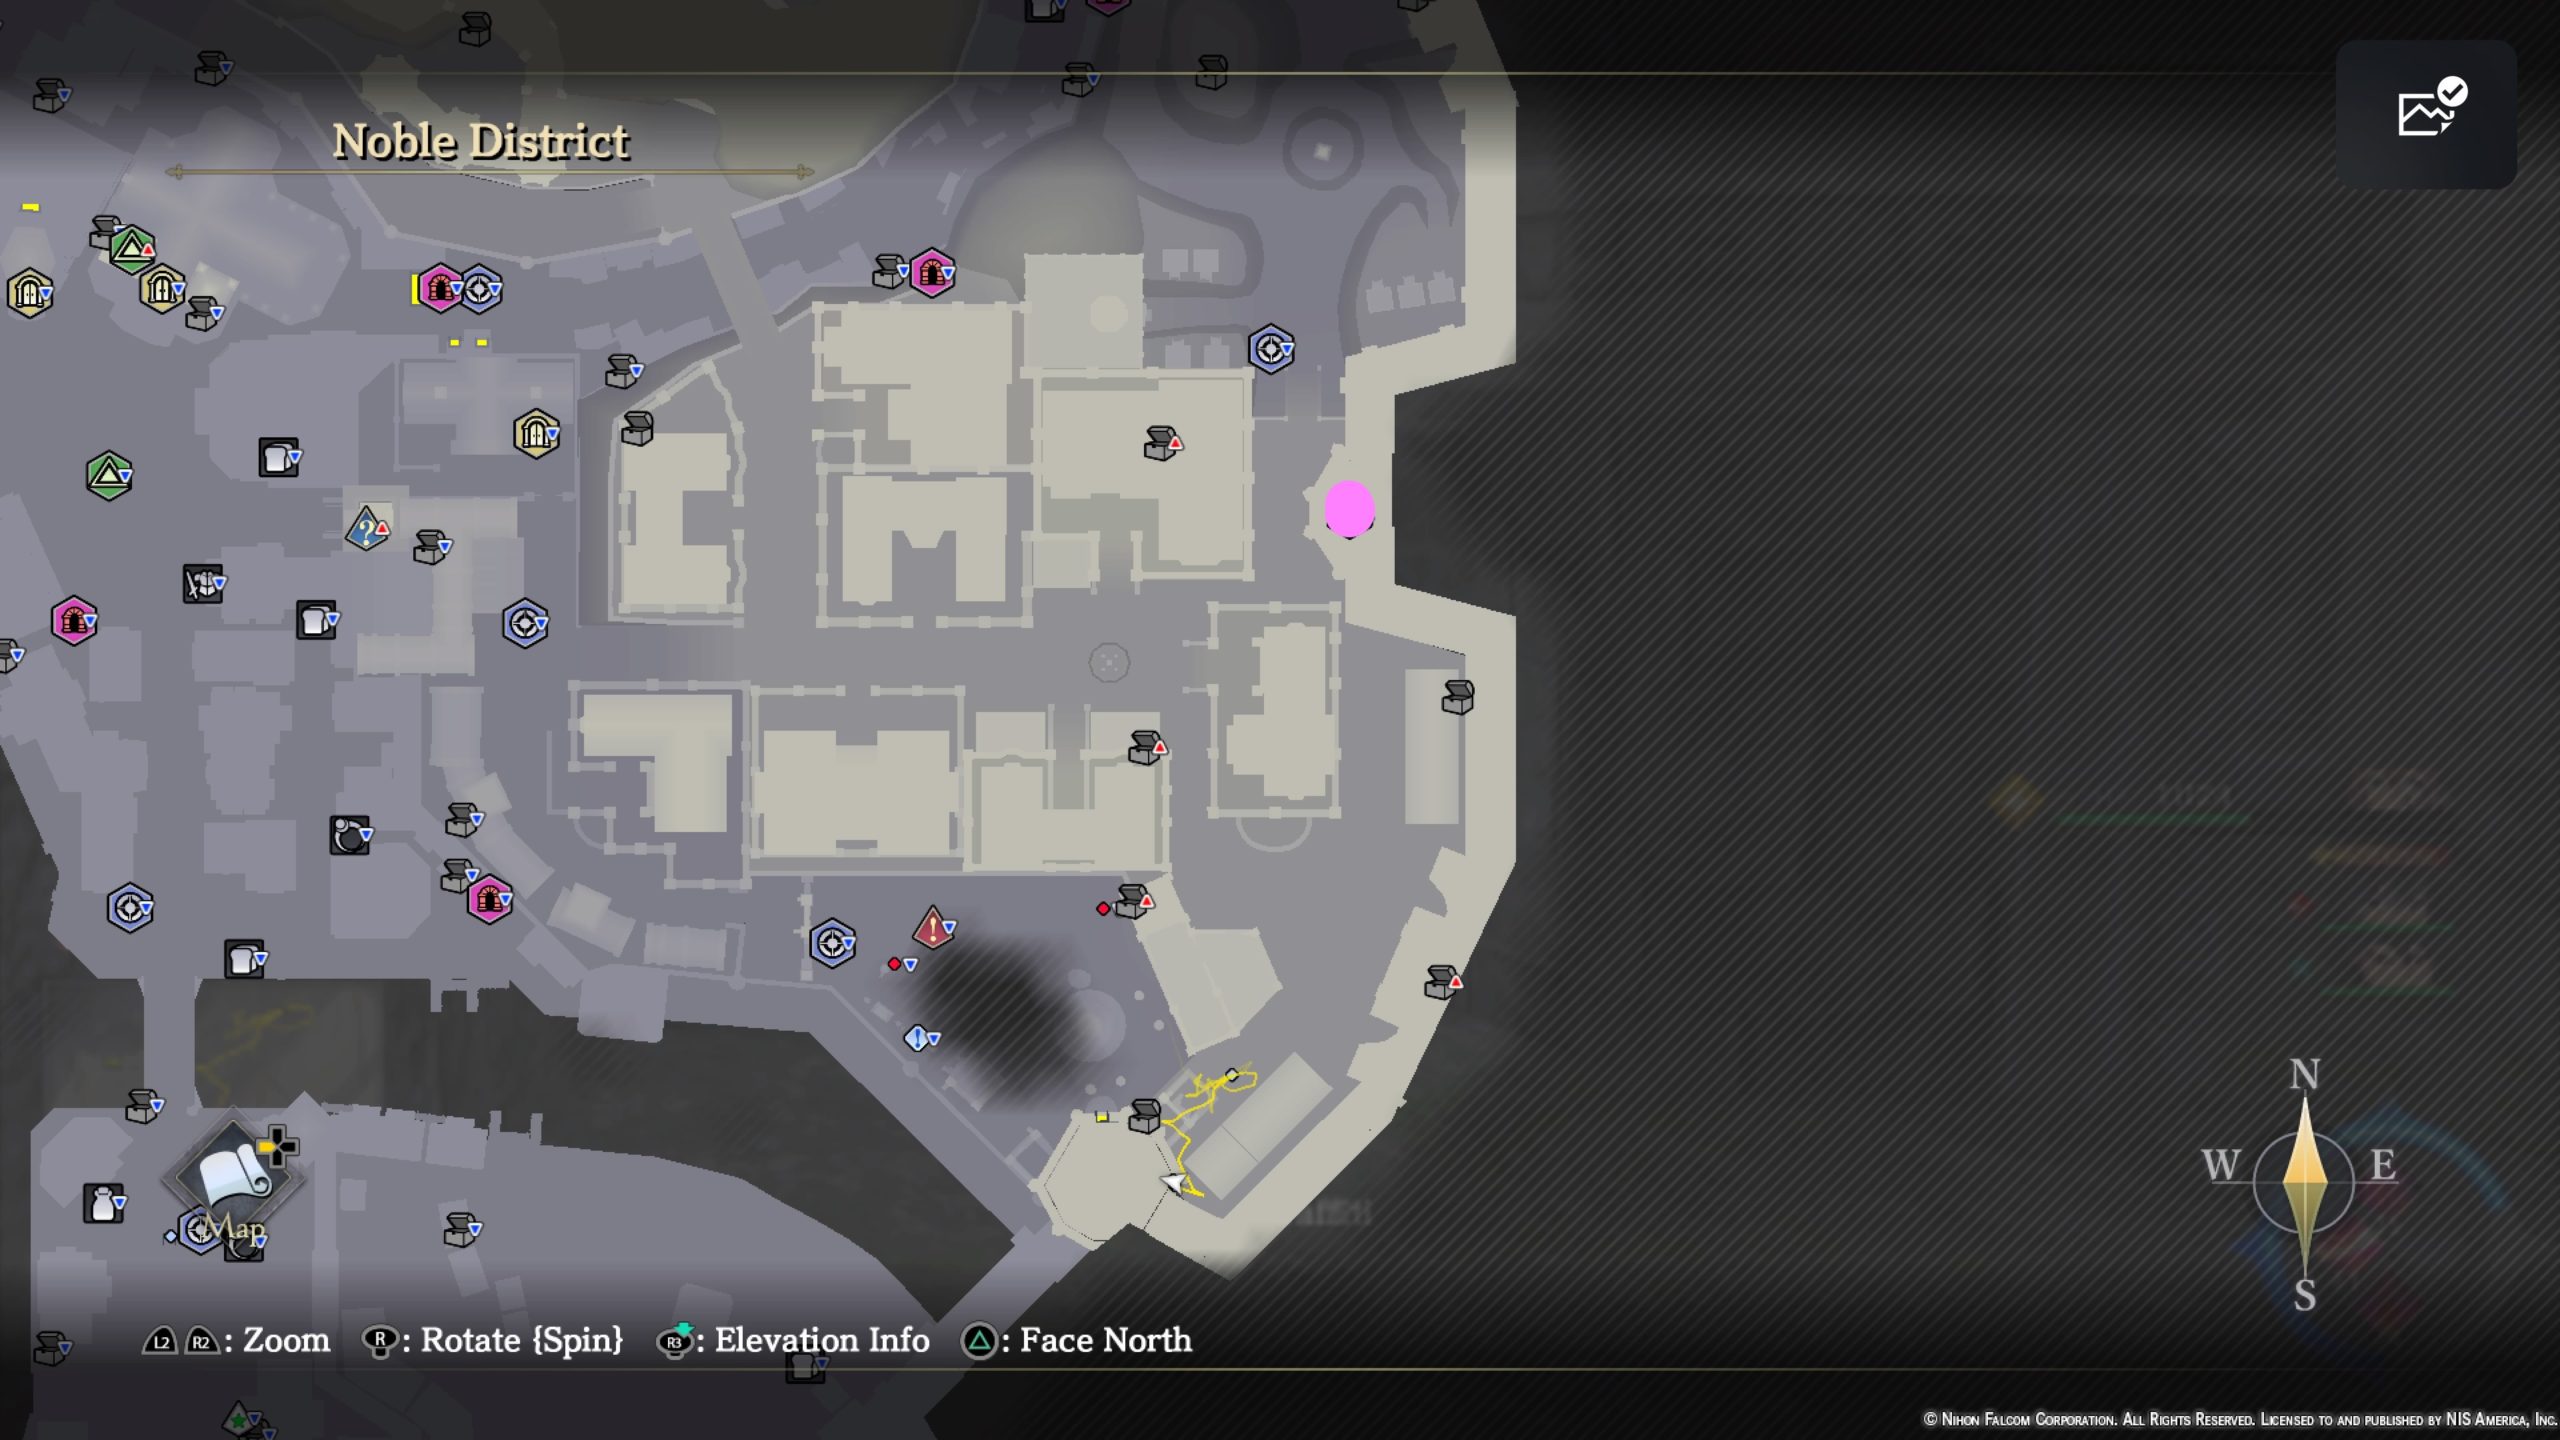
Graffiti

- By the clock’s face on top of the clock tower near the border of the Central District
- On the wall in a sitting area in the southern part of the area near the fountain
- On the ground in the far southeastern part of the area

- On the wall in the far southeastern part of the area
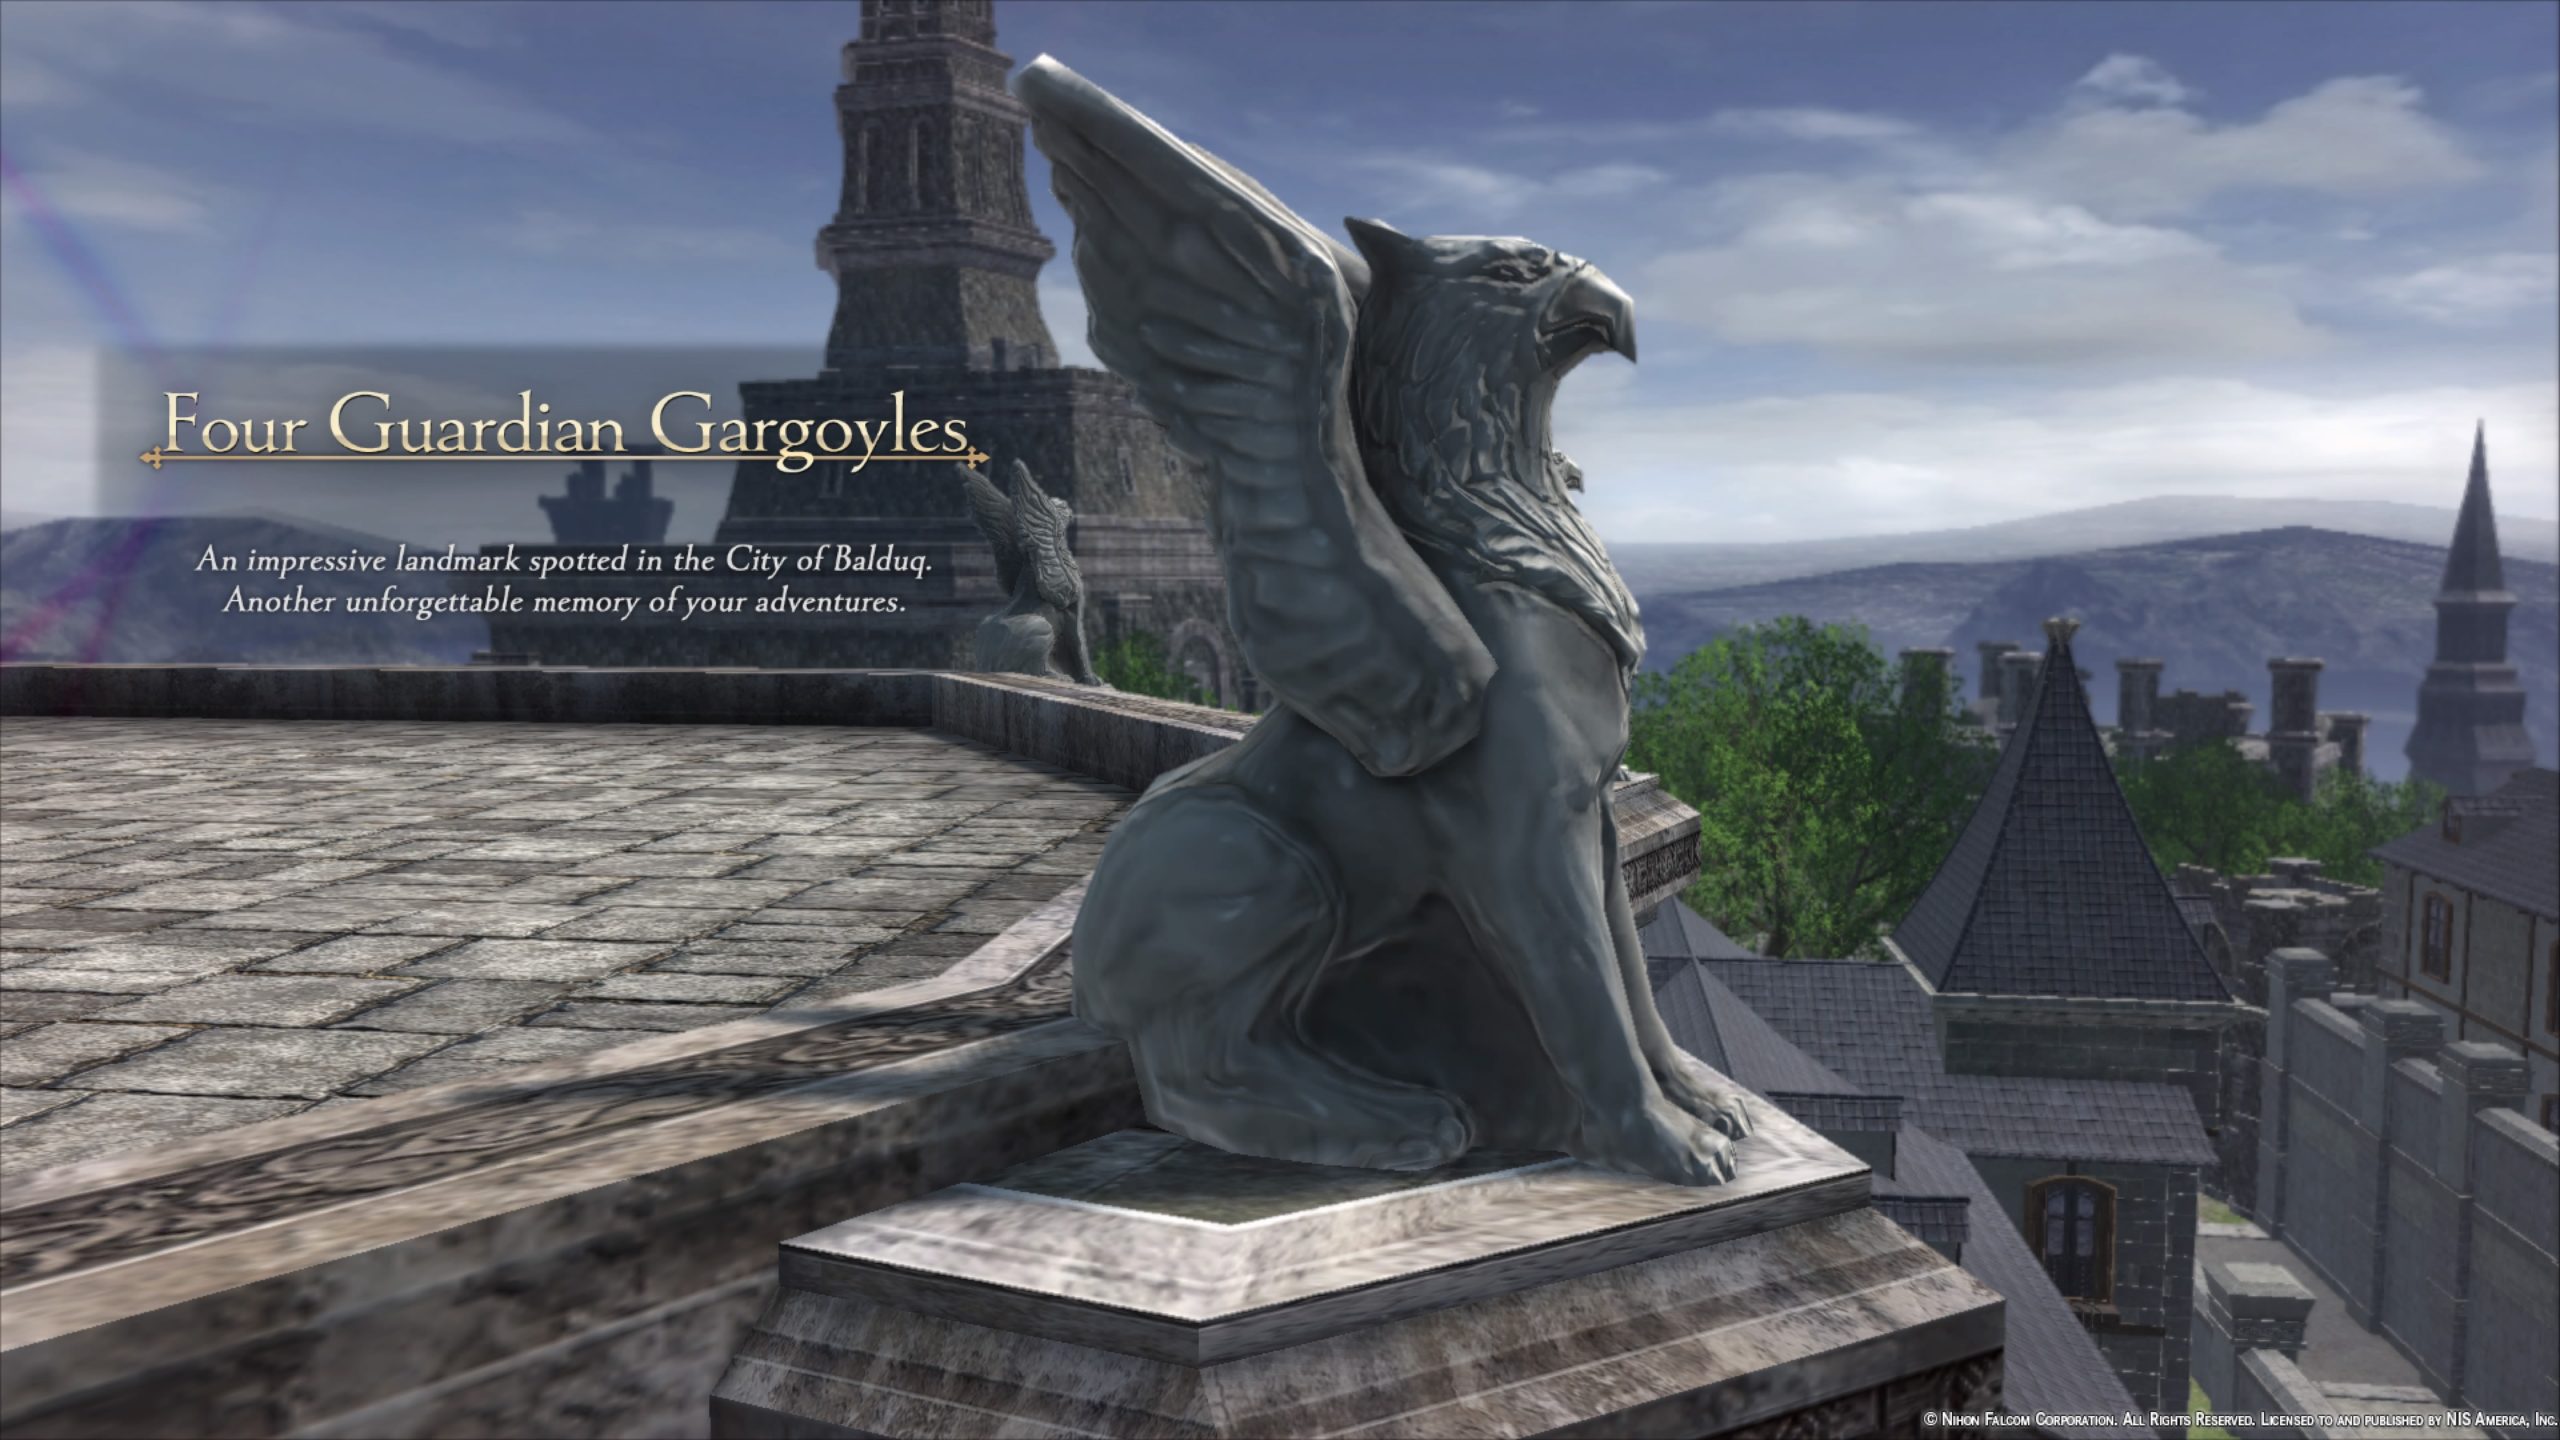
Landmarks
- Four Guardian Gargoyles
Miscellaneous
- Speak with an older lady in the southeastern part of the Noble District to receive a Broken Charm, which you can have Tito in the Main Gates repair. He will give you a Feather Charm, which you can then give to Aprilis at the Ruined Belfry in the Central District.
Quests
- Masking for Trouble
- Obtained: Speak with Michele in the Noble District during Chapter 6
- Objective: Be Michele’s date
- Speak with Michele to trigger a cutscene. When you gain control, mingle with the guests that have “!” above their heads. When you’ve spoken to all the necessary guests, a cutscene will trigger and the quest will complete.
- Reward: Mayura Stone
Treasure Chests

- Antidote x2
- Smoked Meat x2
- Emollient x2
- Strength Elixir
- Warlord Elixir
- Cheese x5
- Mushroom x5
- Dry-aged Meat x2
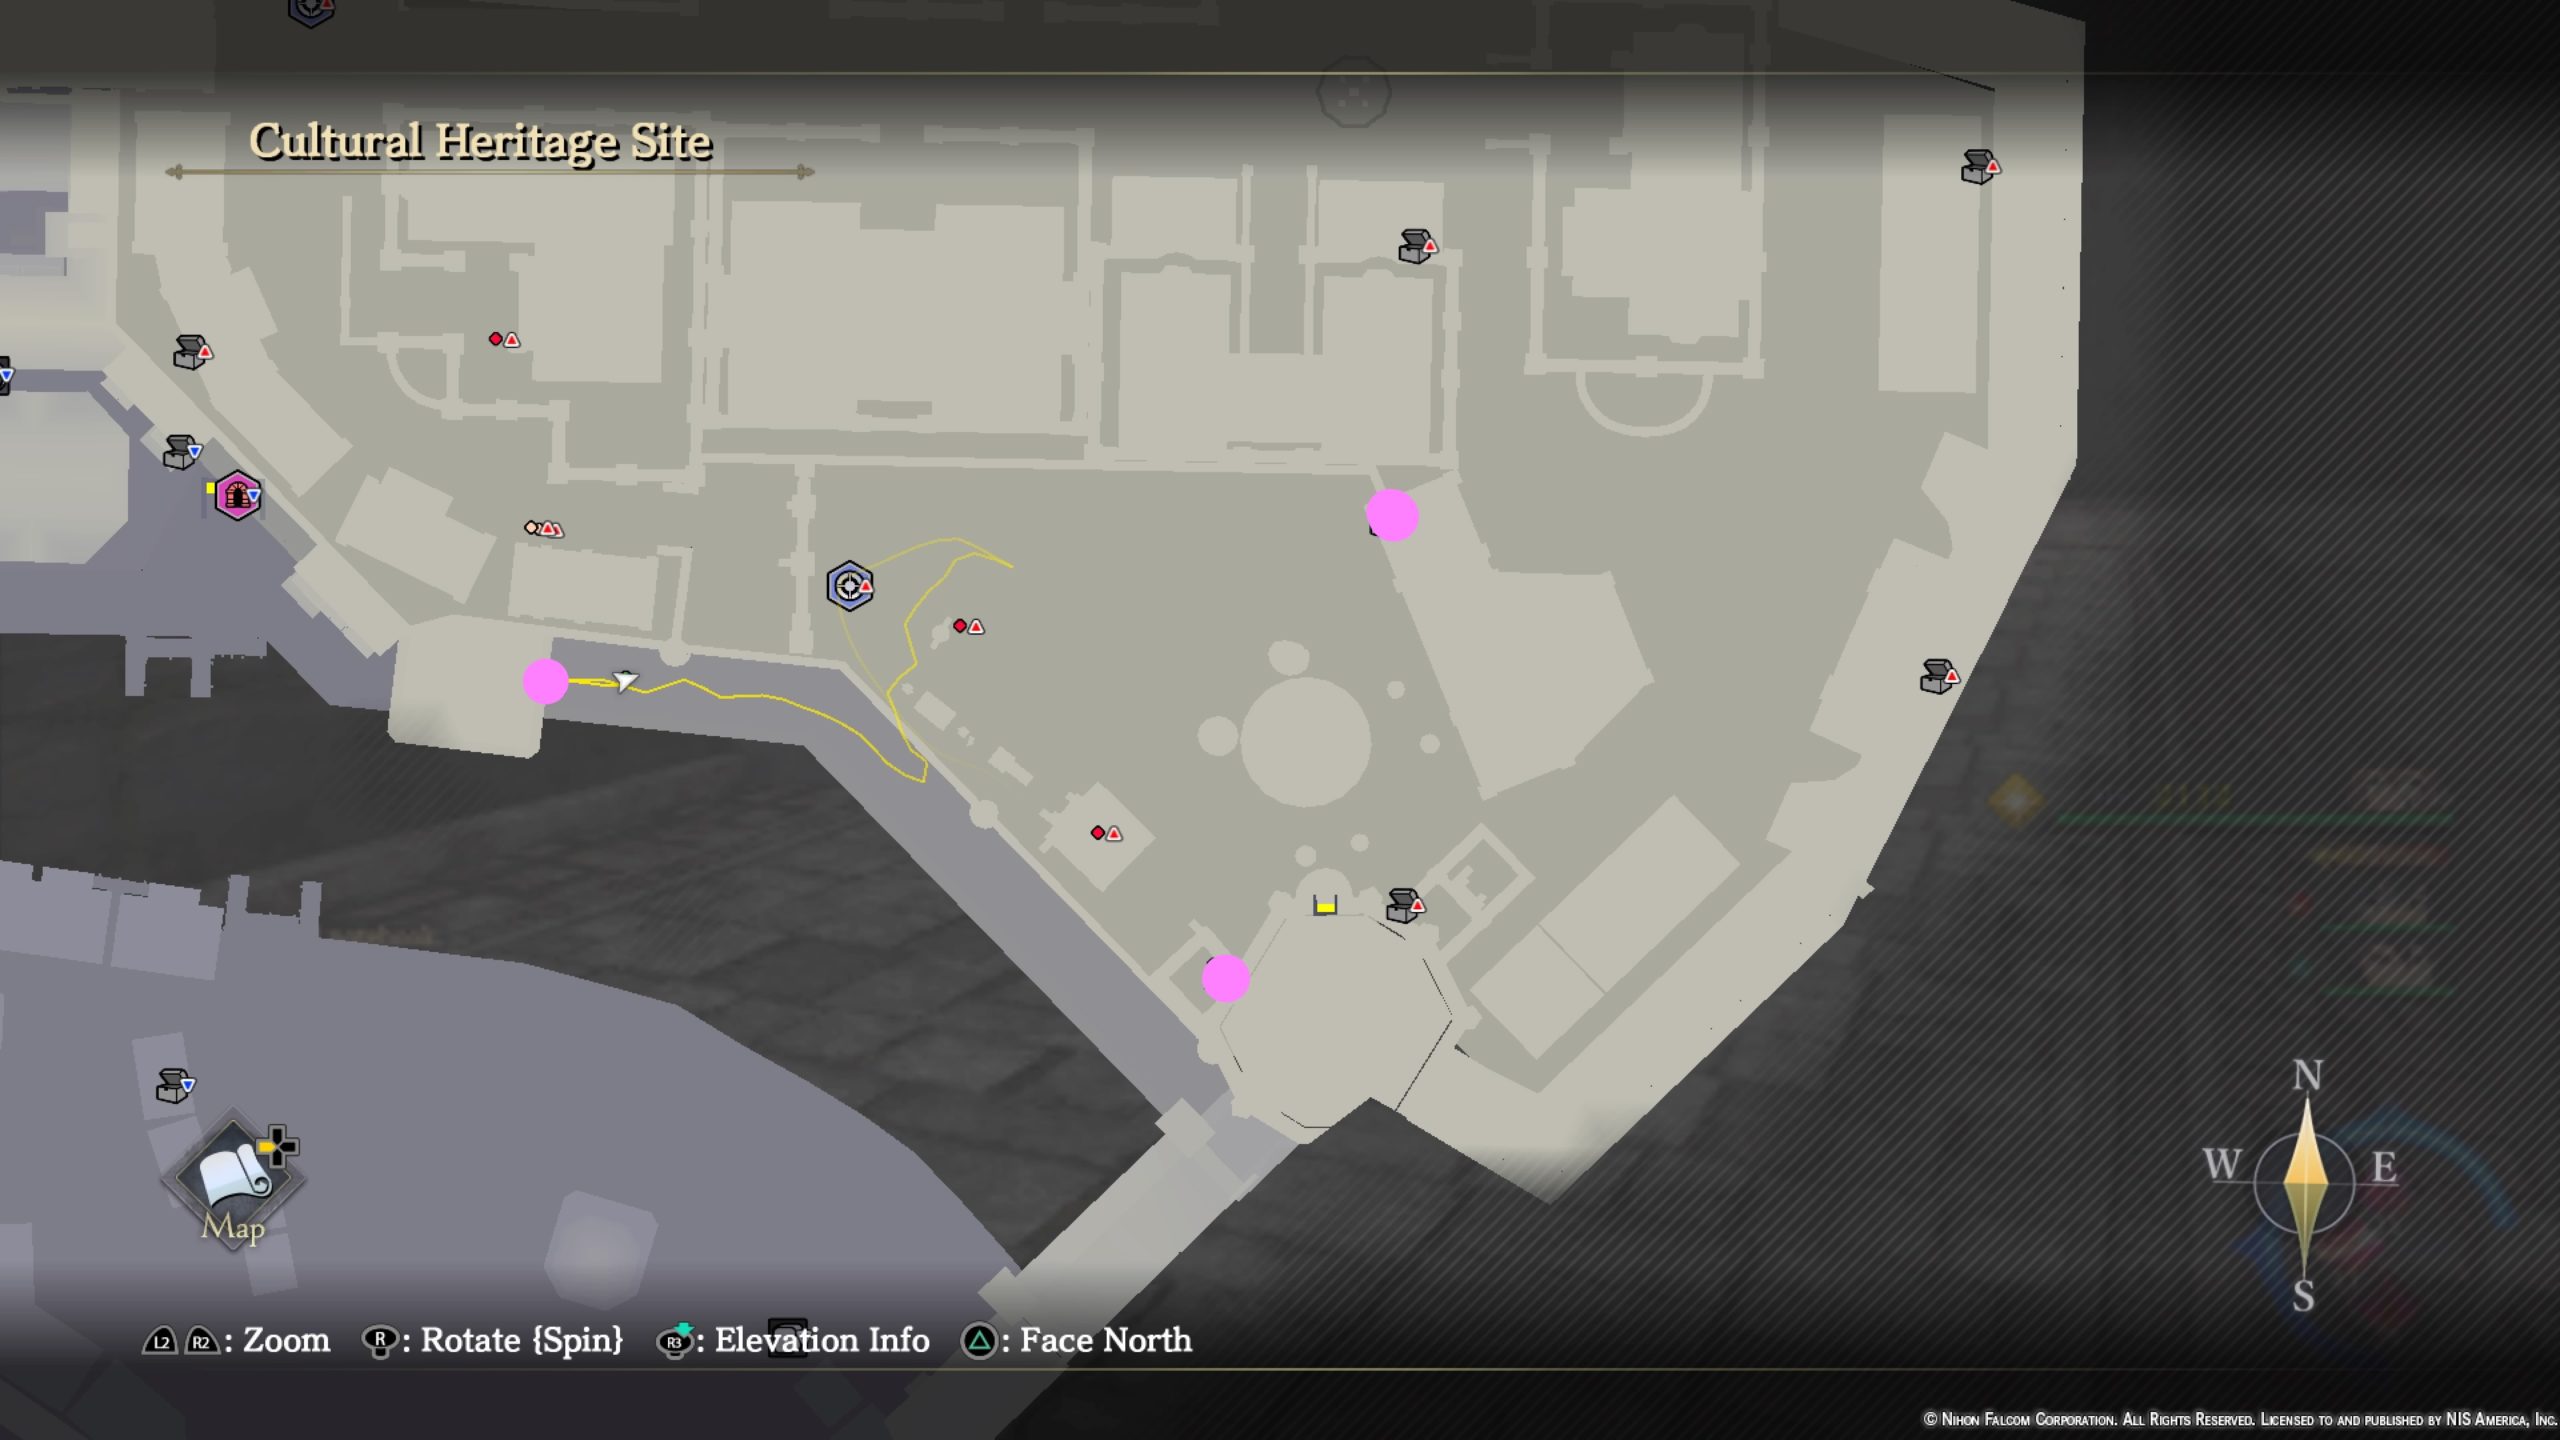
Cultural Heritage Site
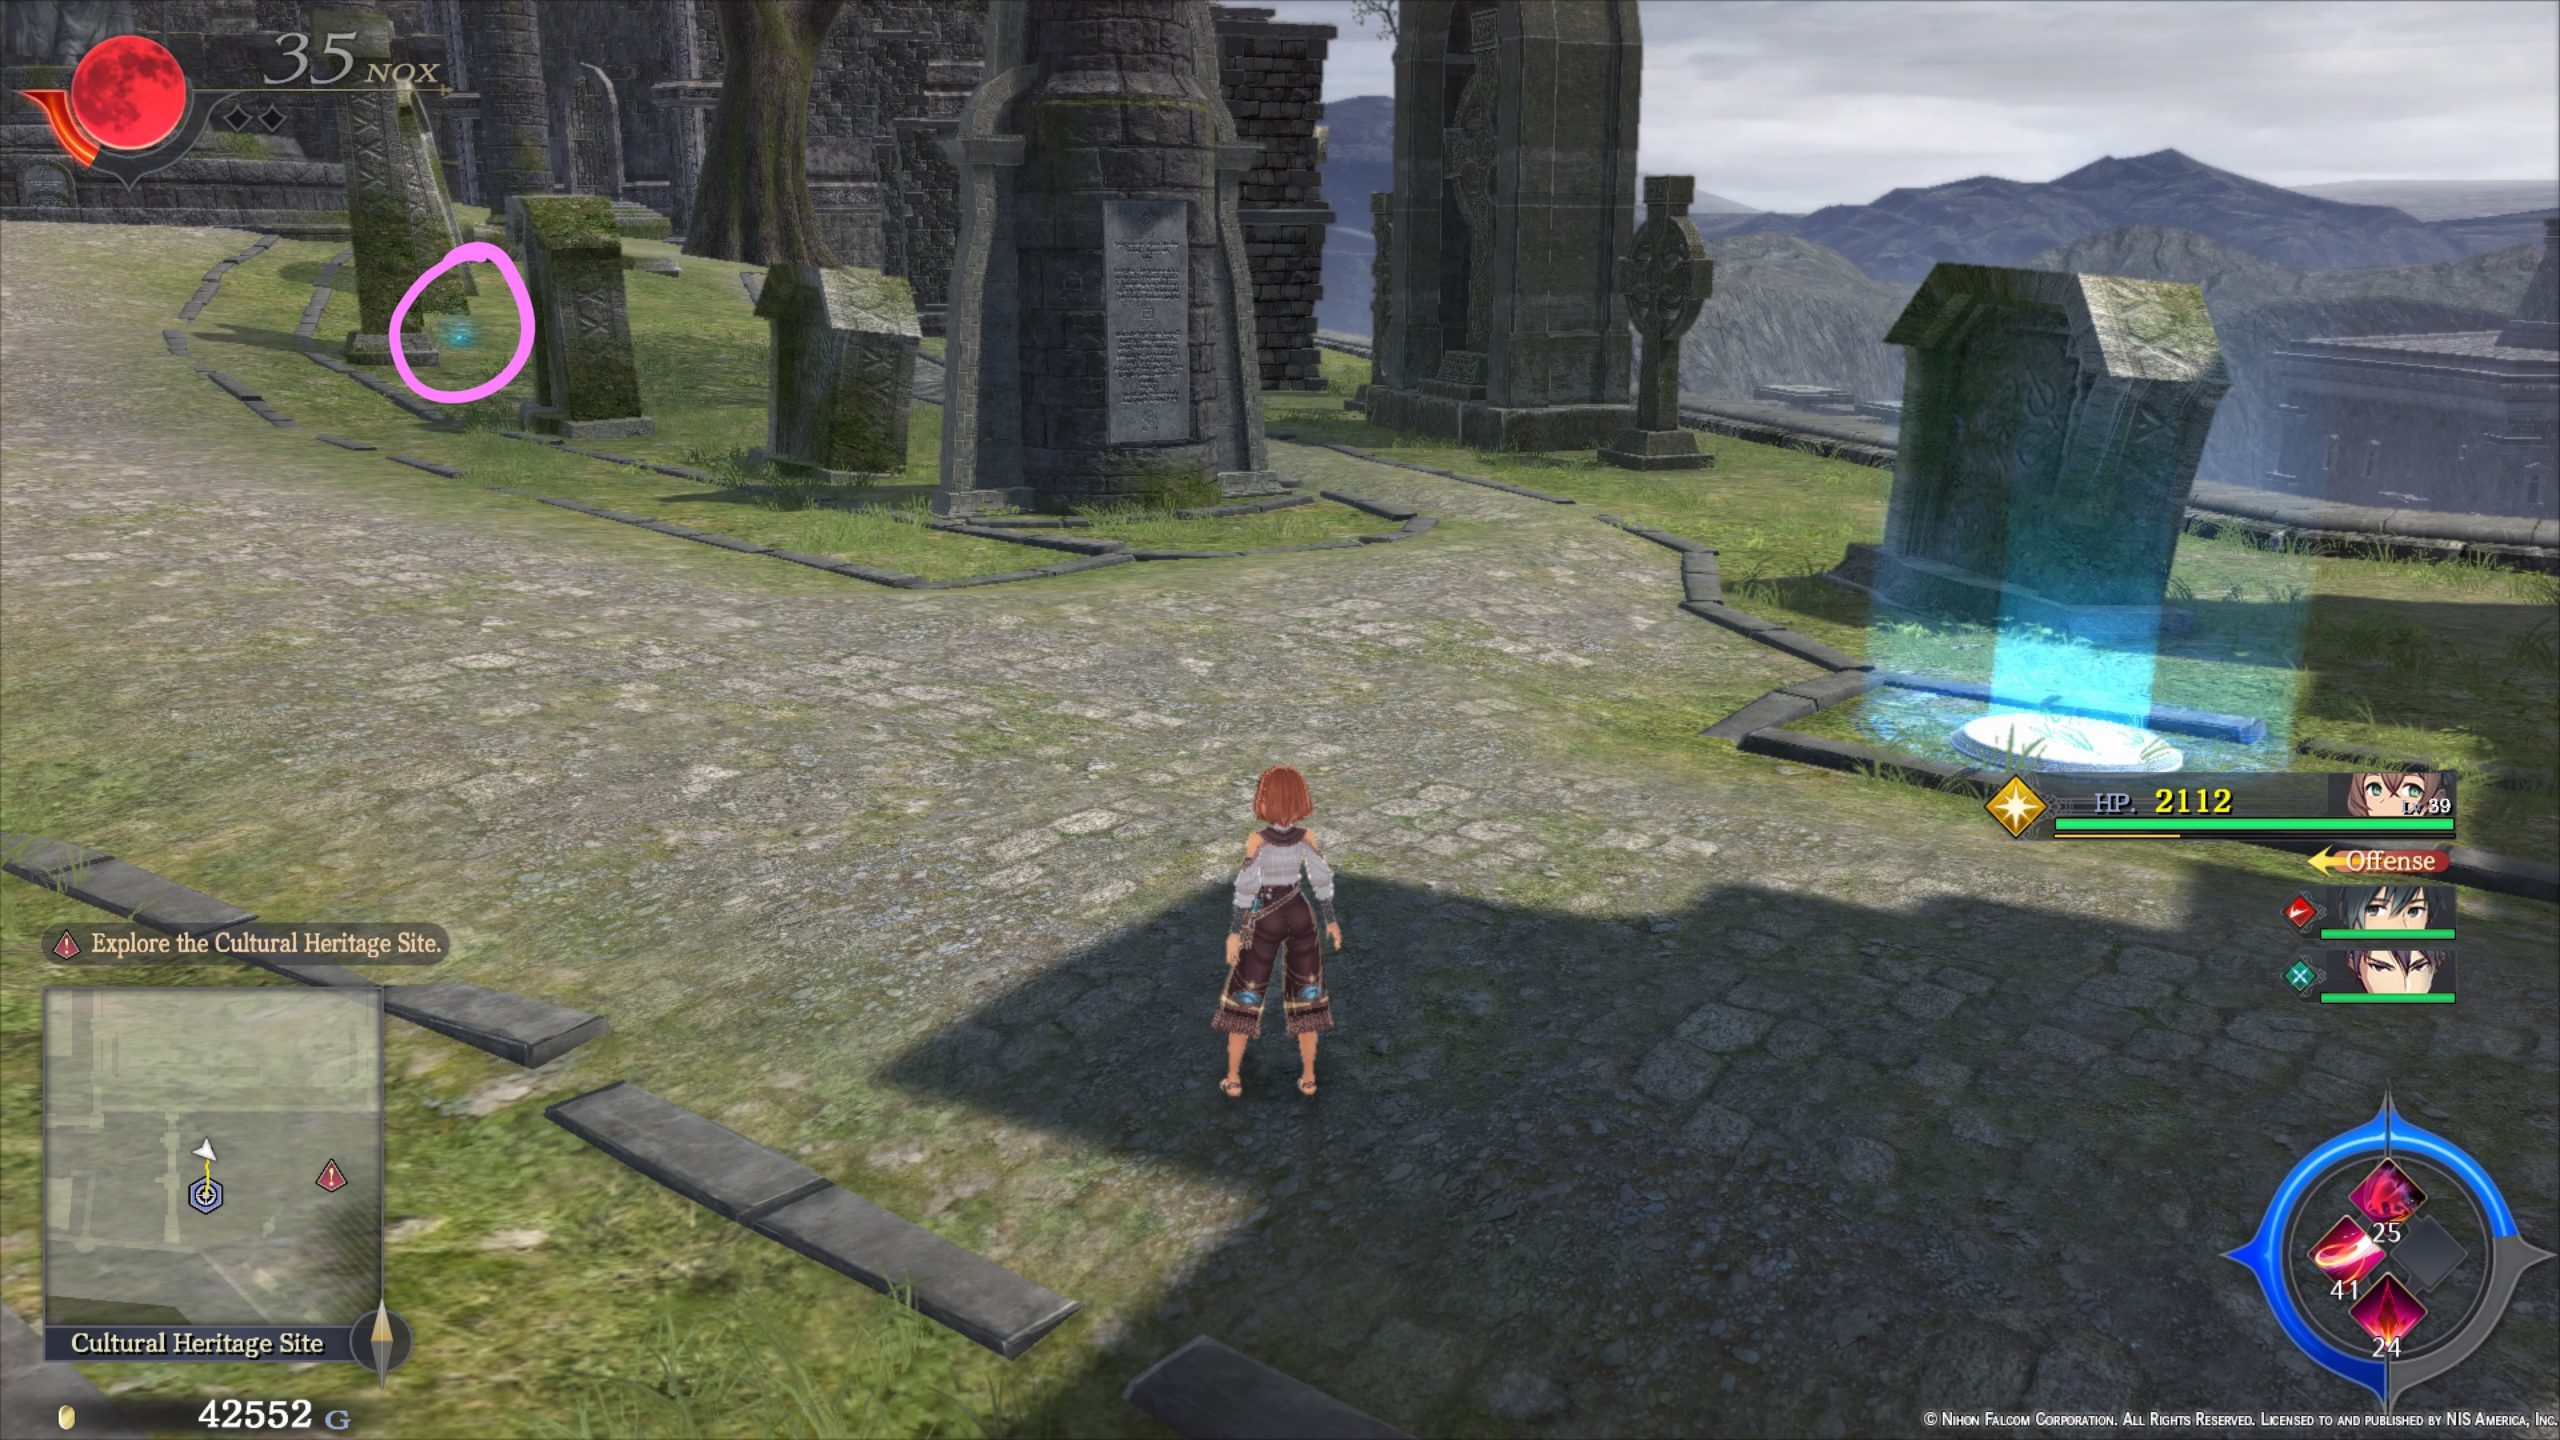
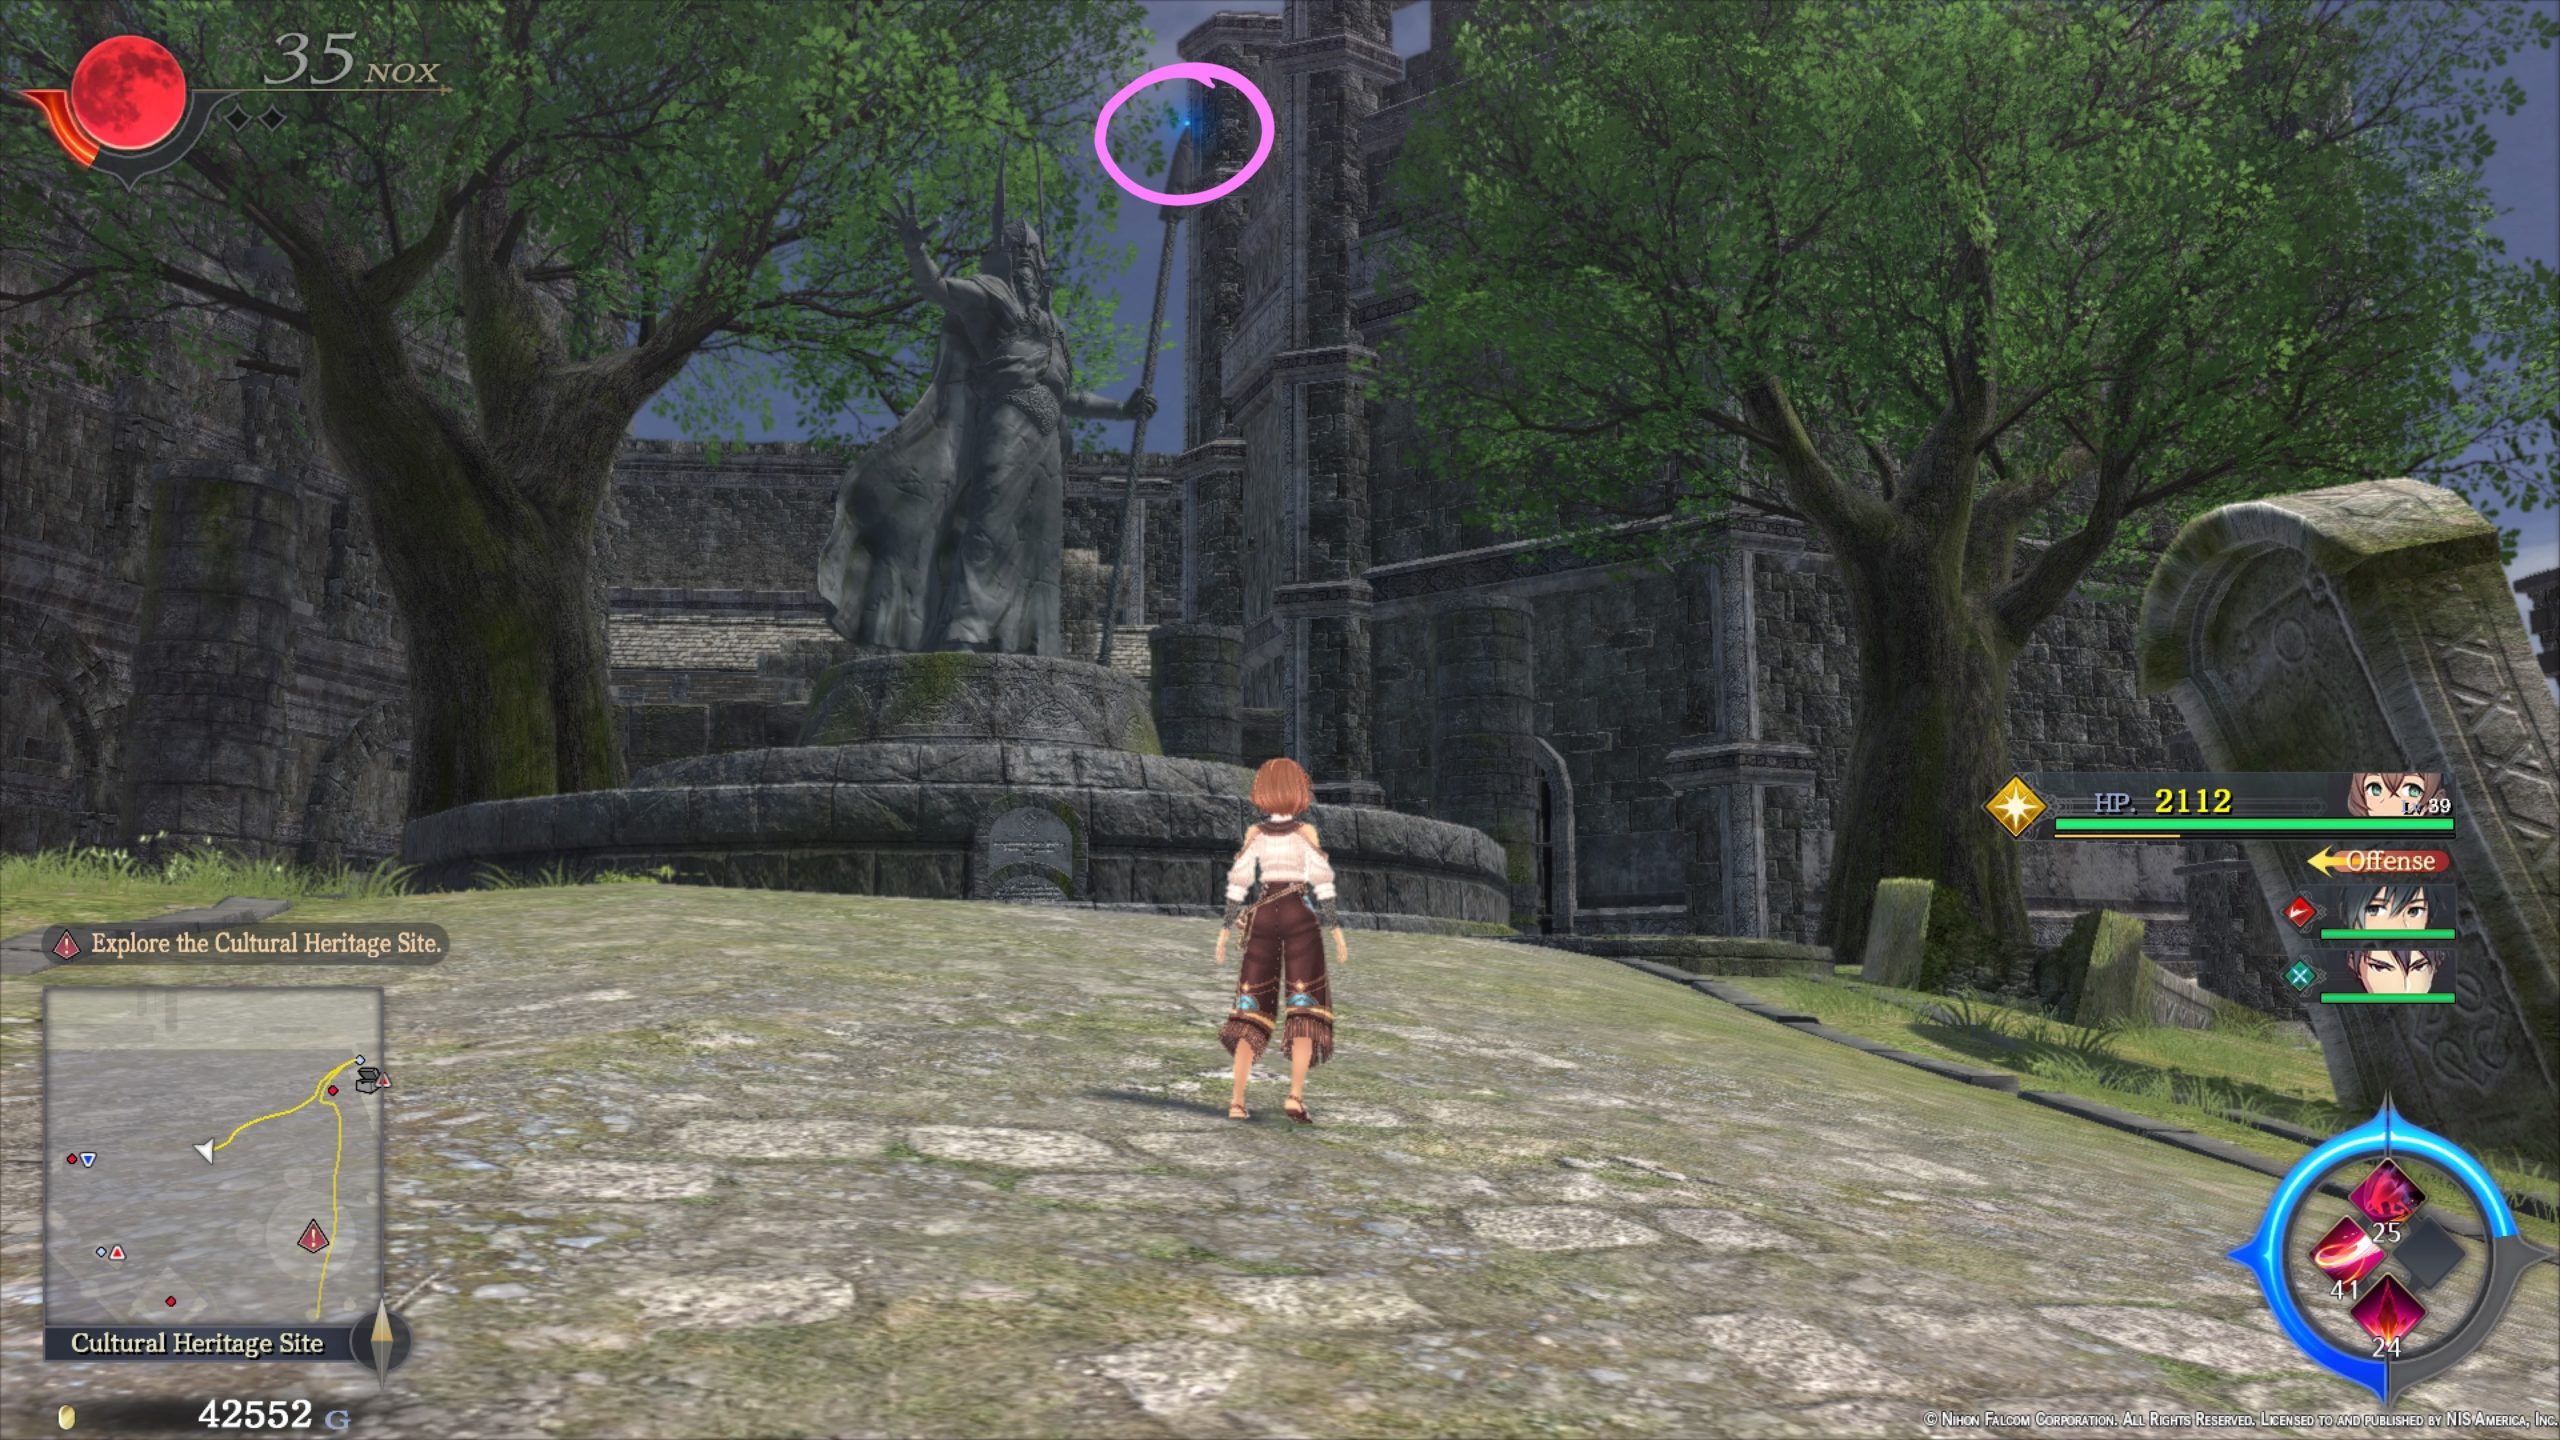
Azure Petals
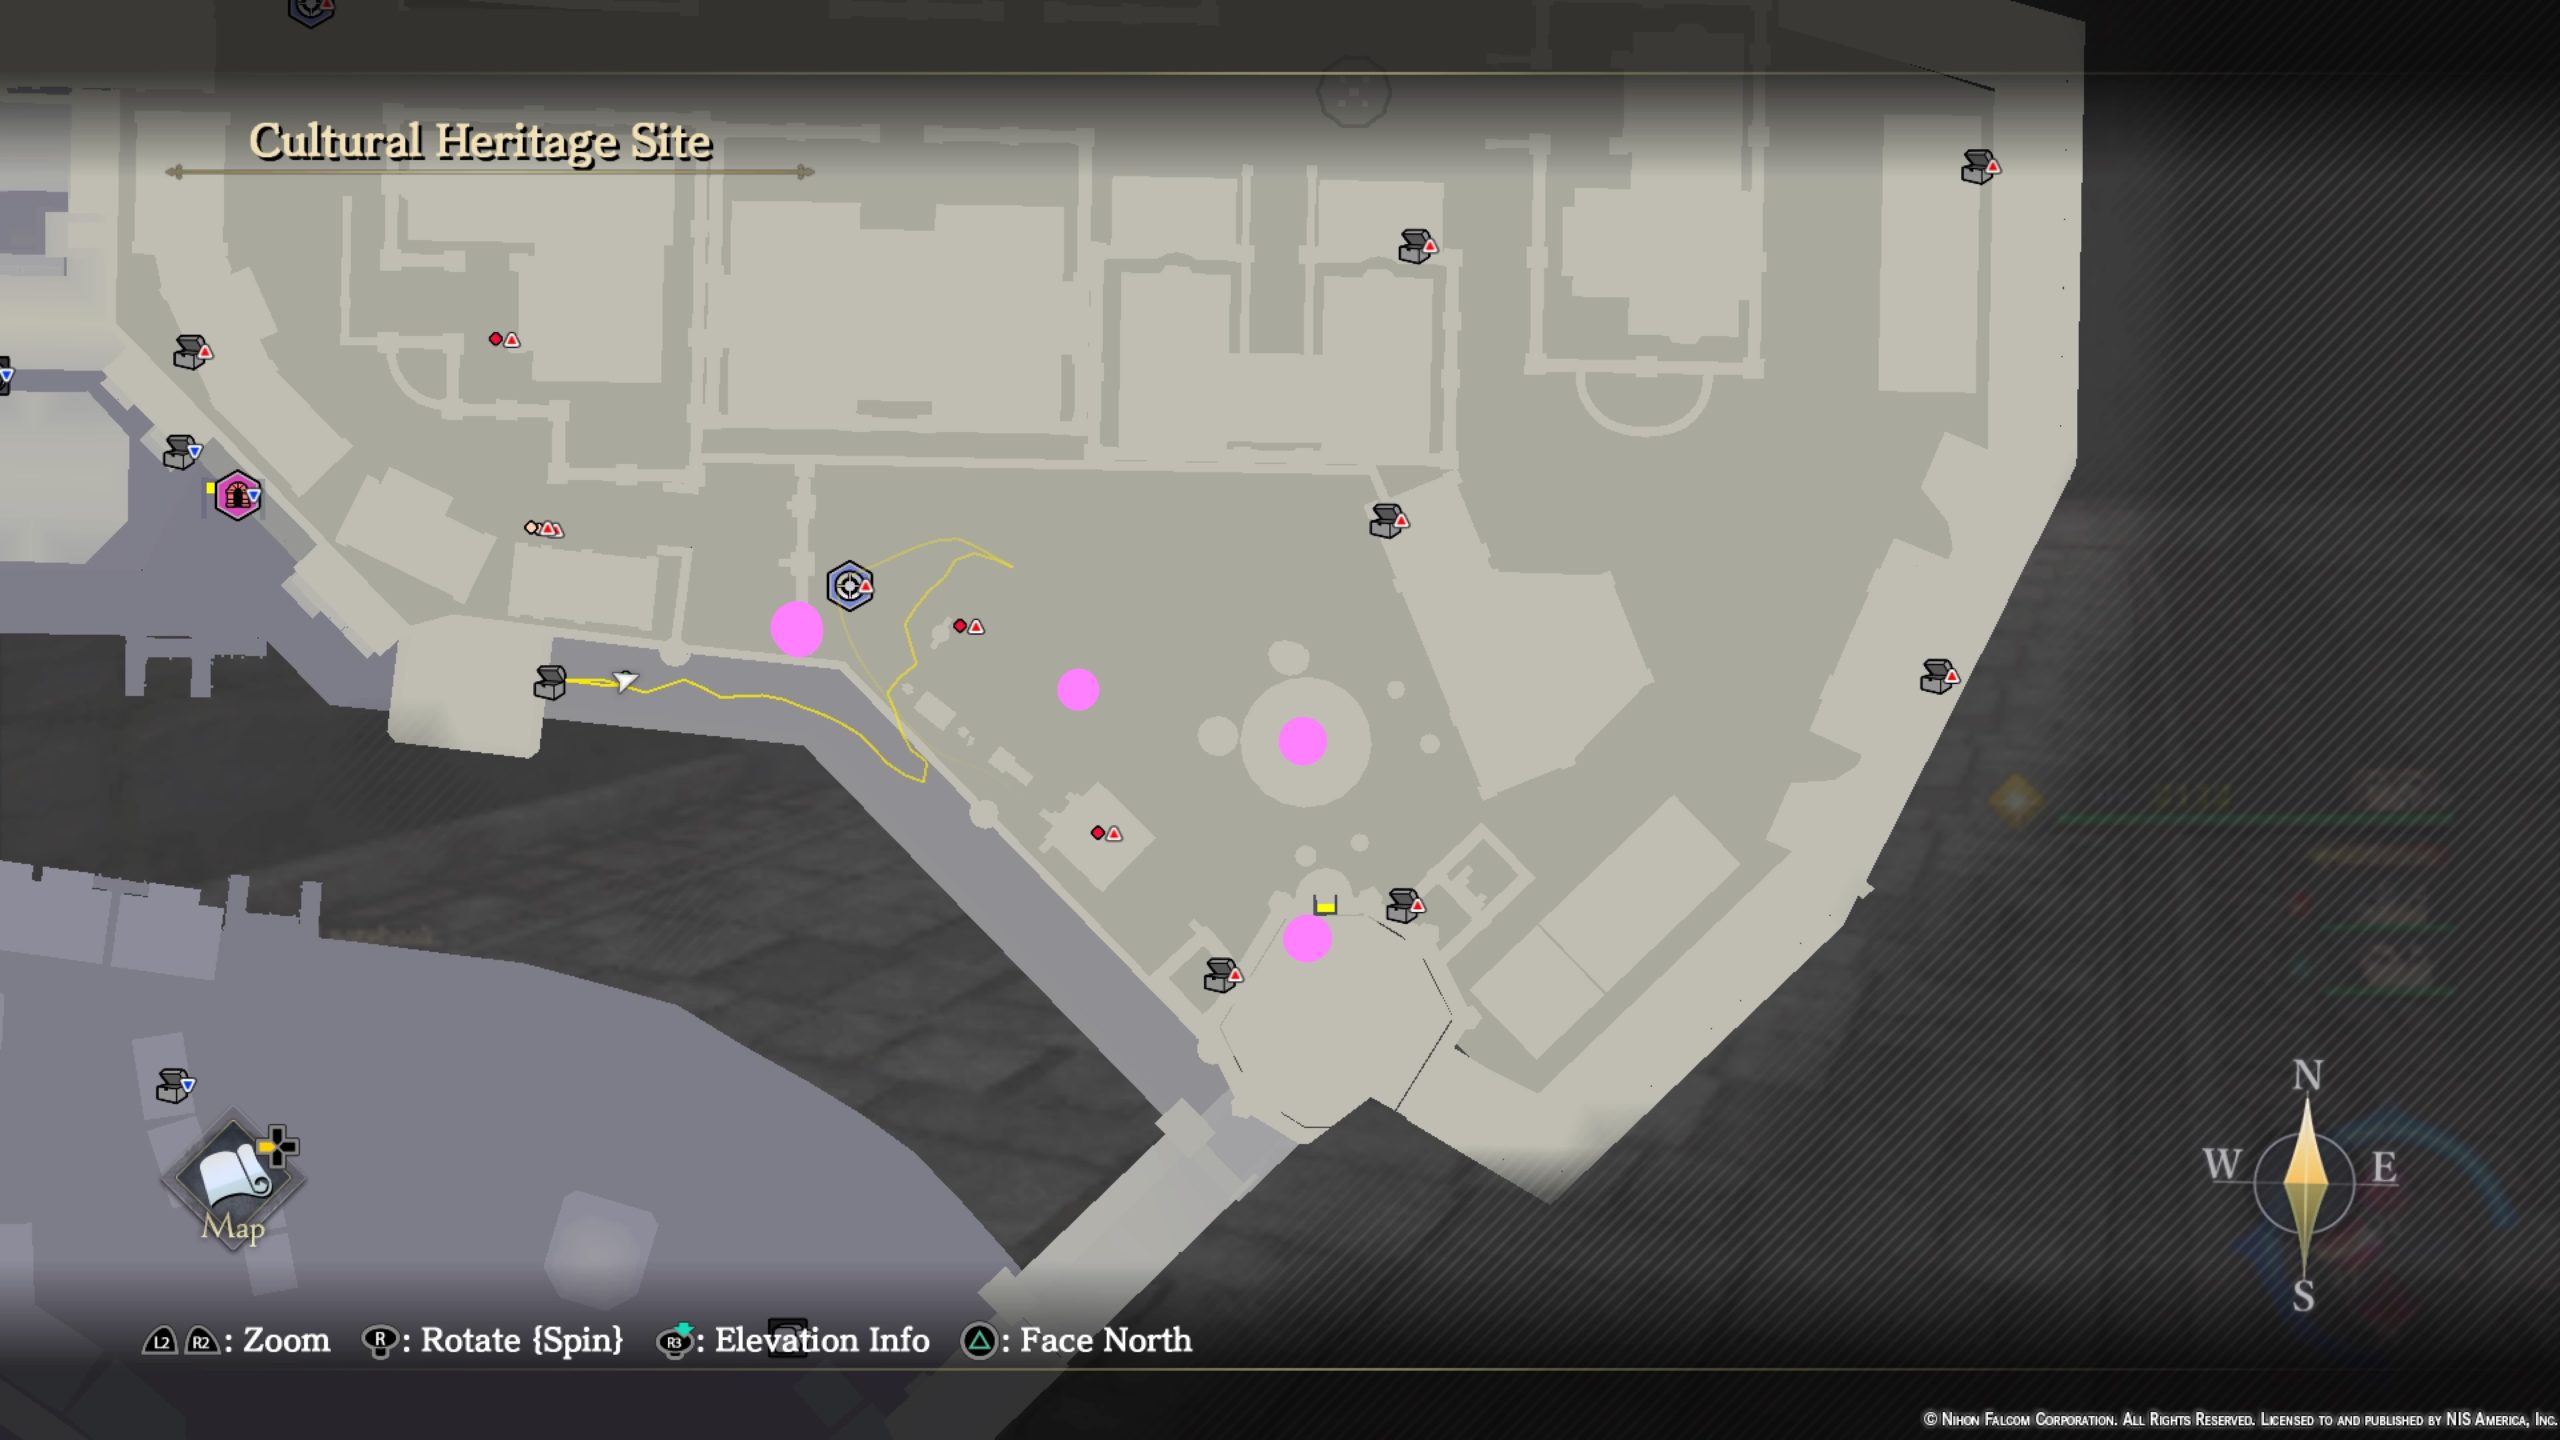
- On the pillar of the archway leading to the Noble District
- On the top of the outer wall in the far southeastern part of the area
- On the ground behind a headstone
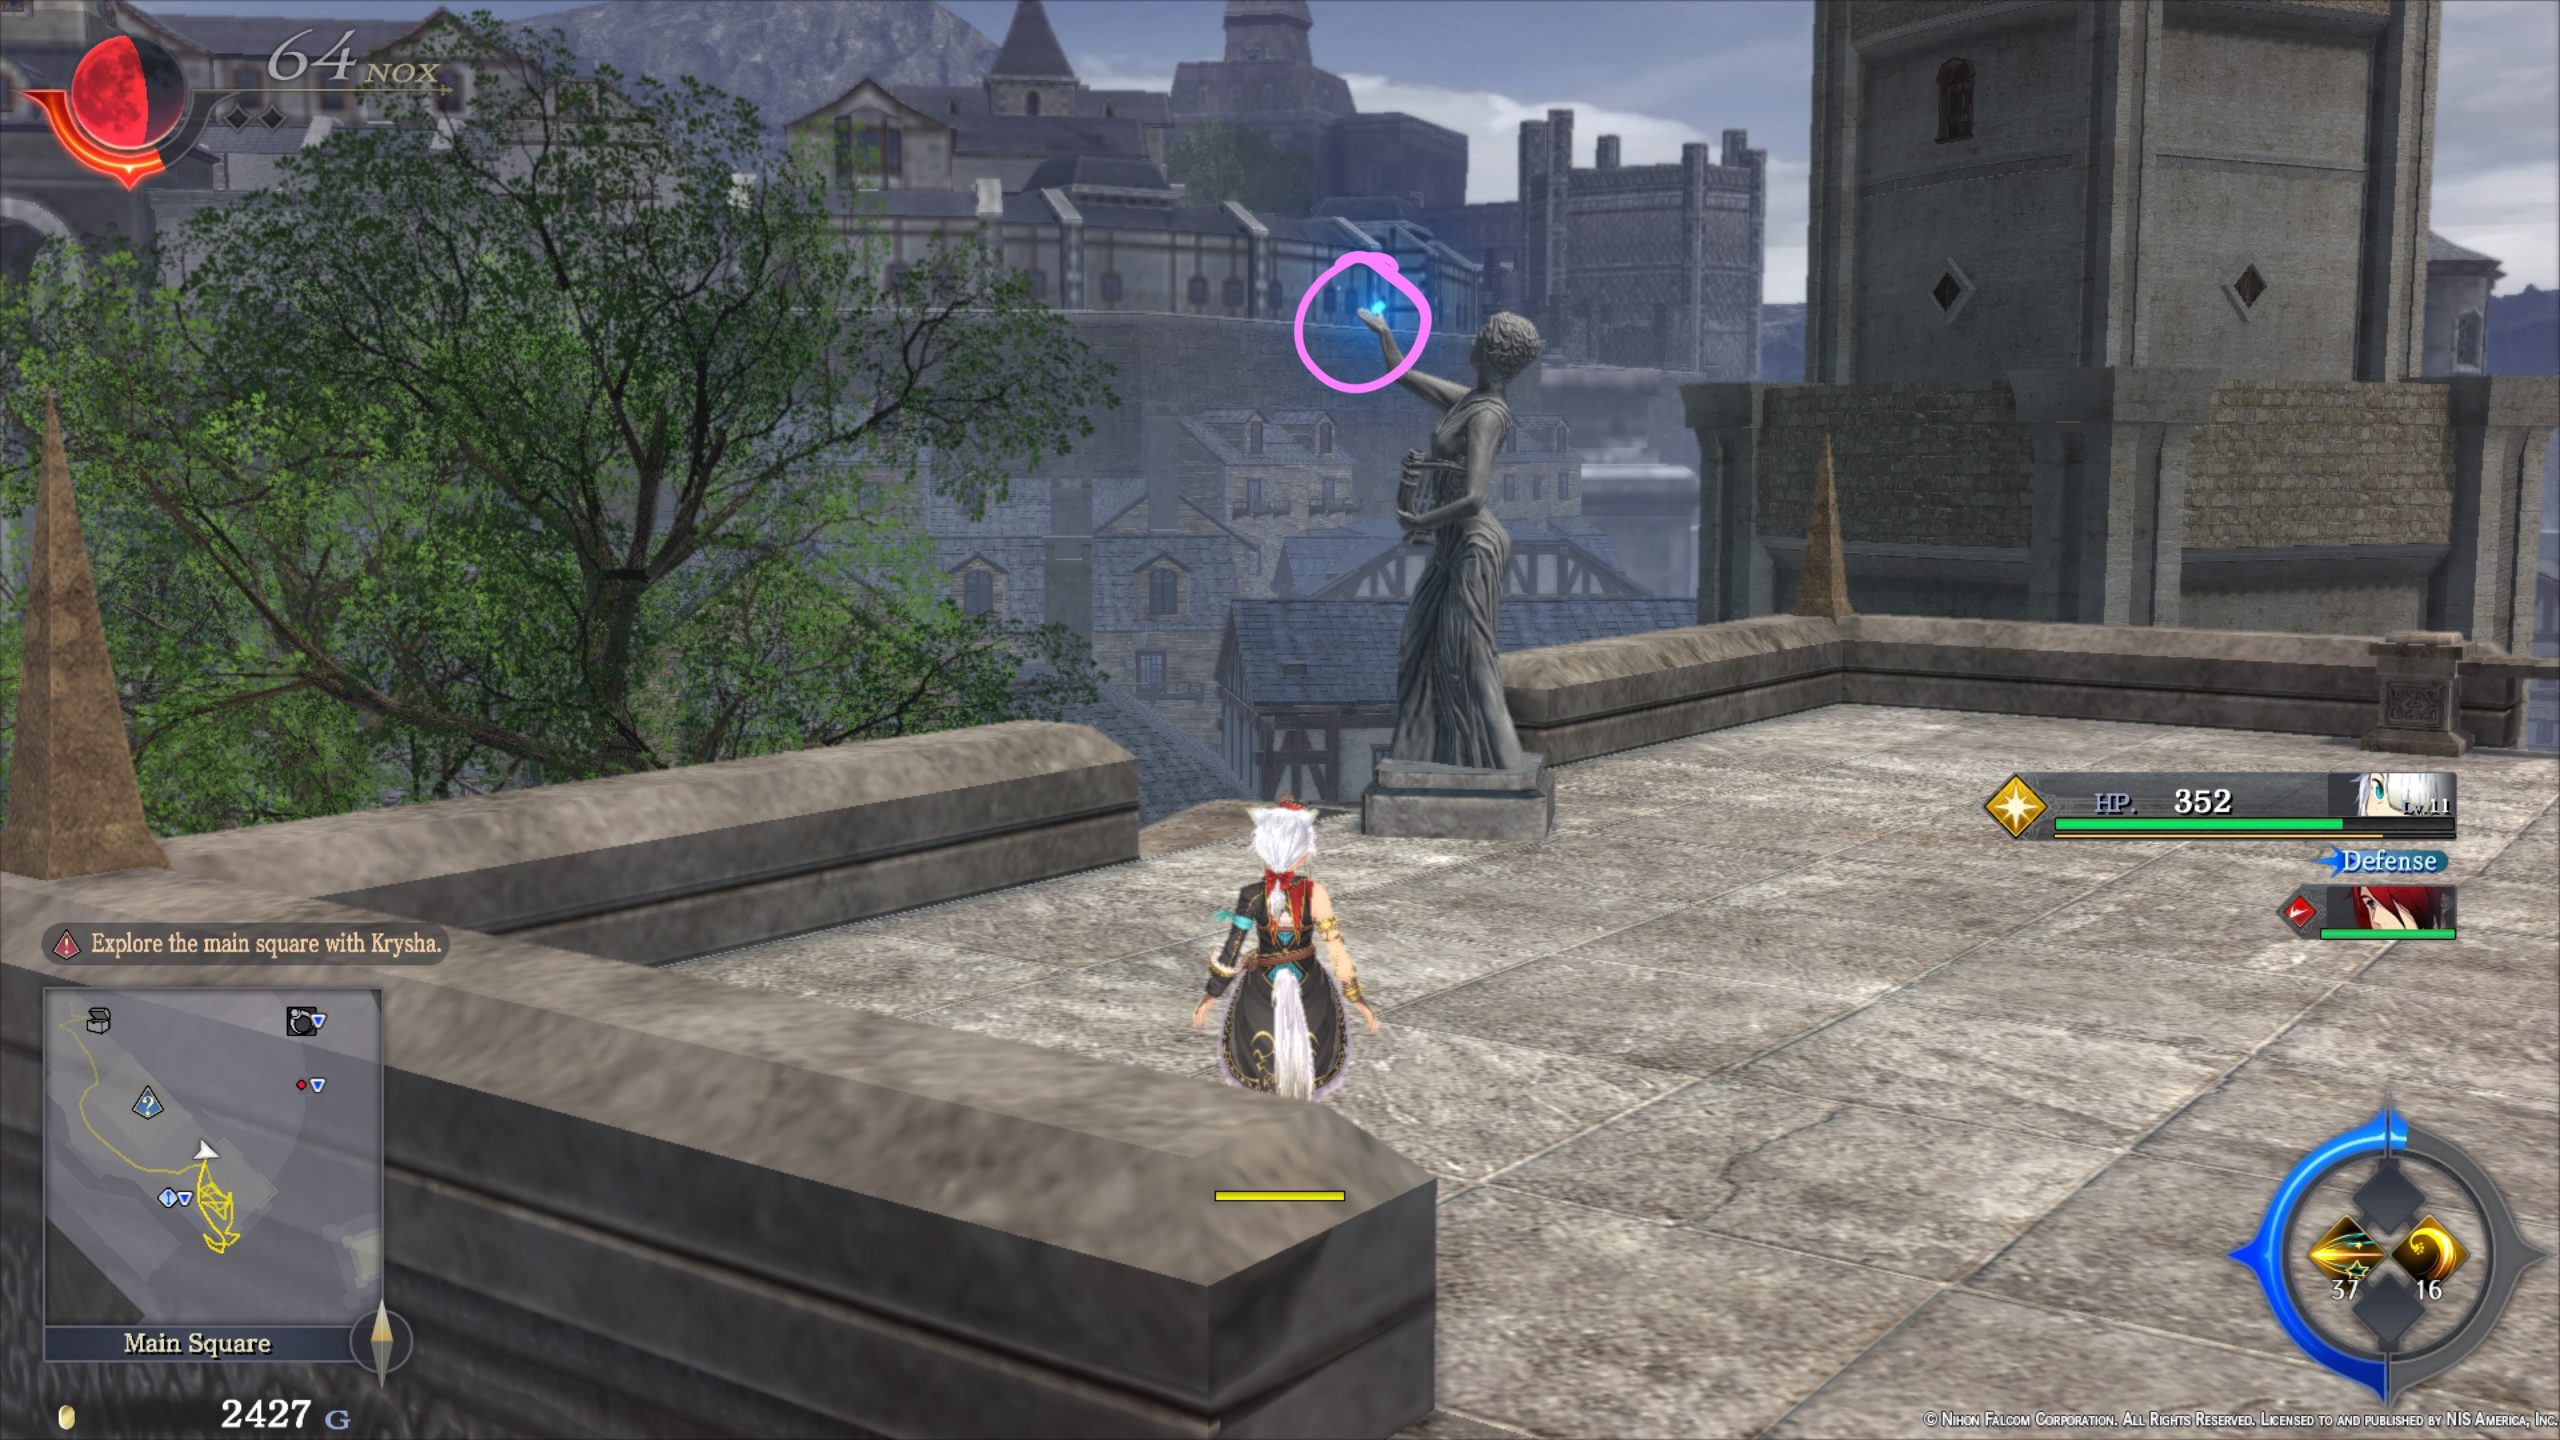
- On the spear of a statue
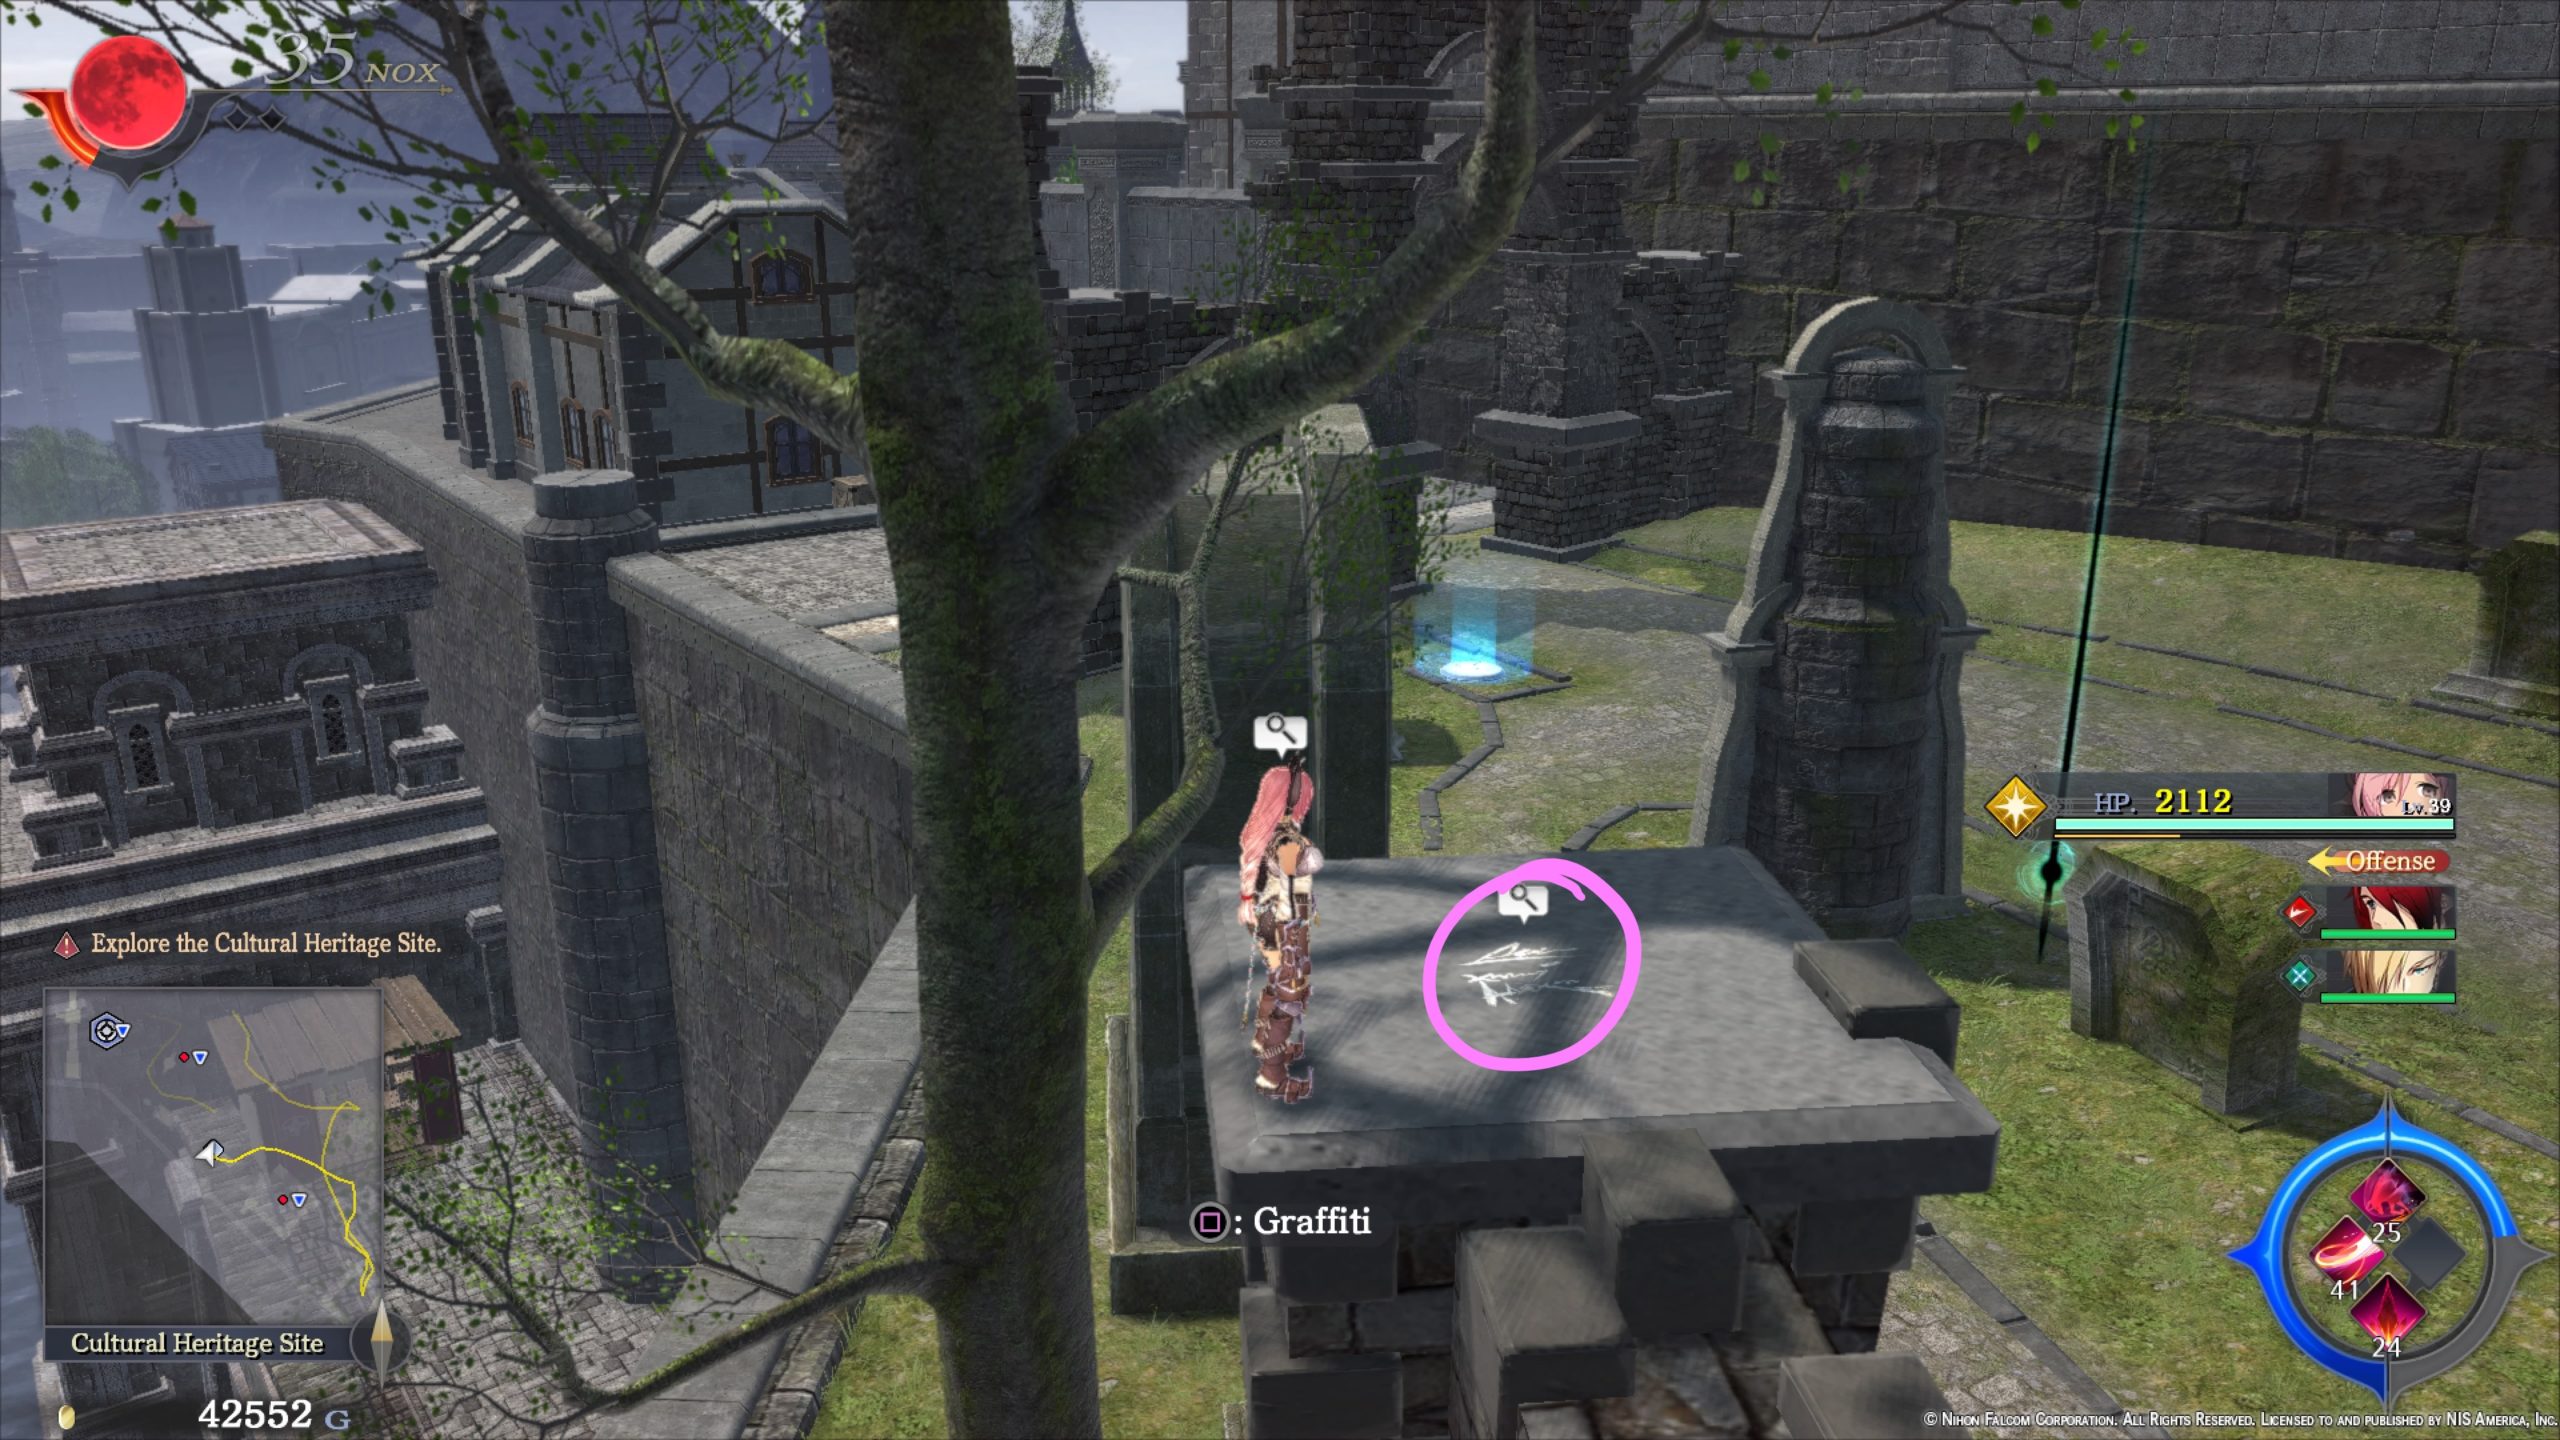
Graffiti
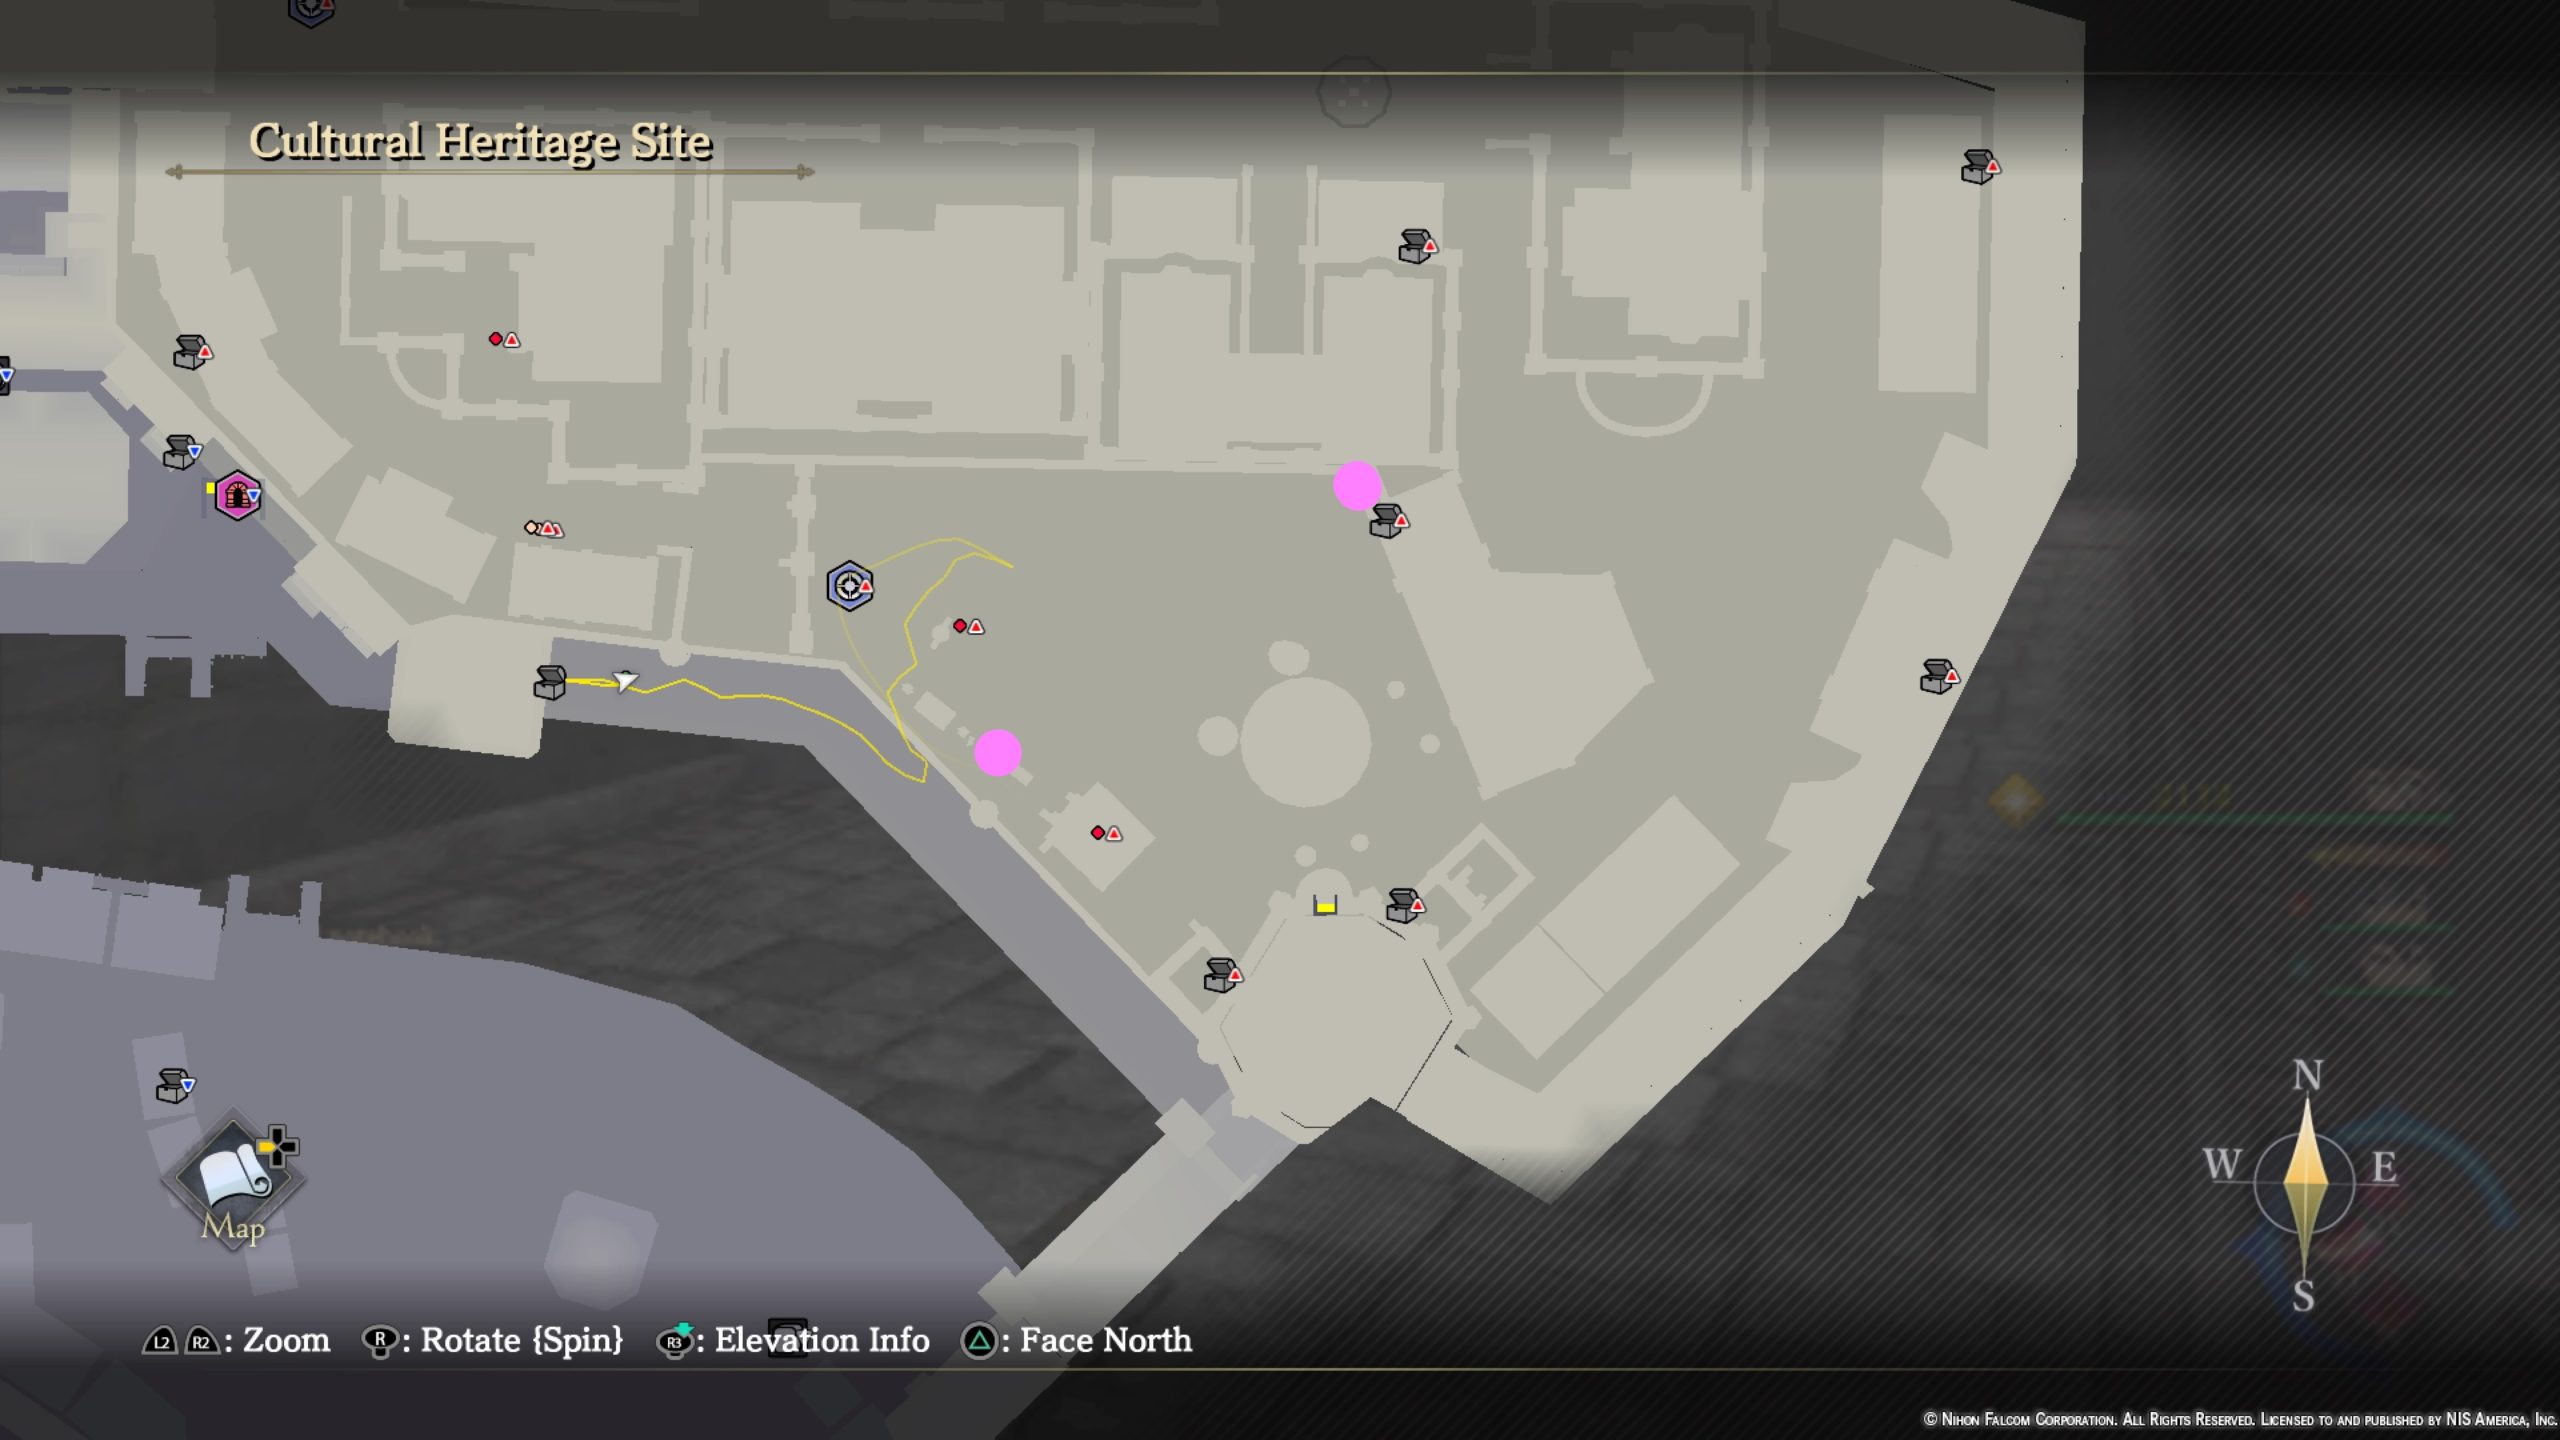
- On the fence in the northeastern part of the area
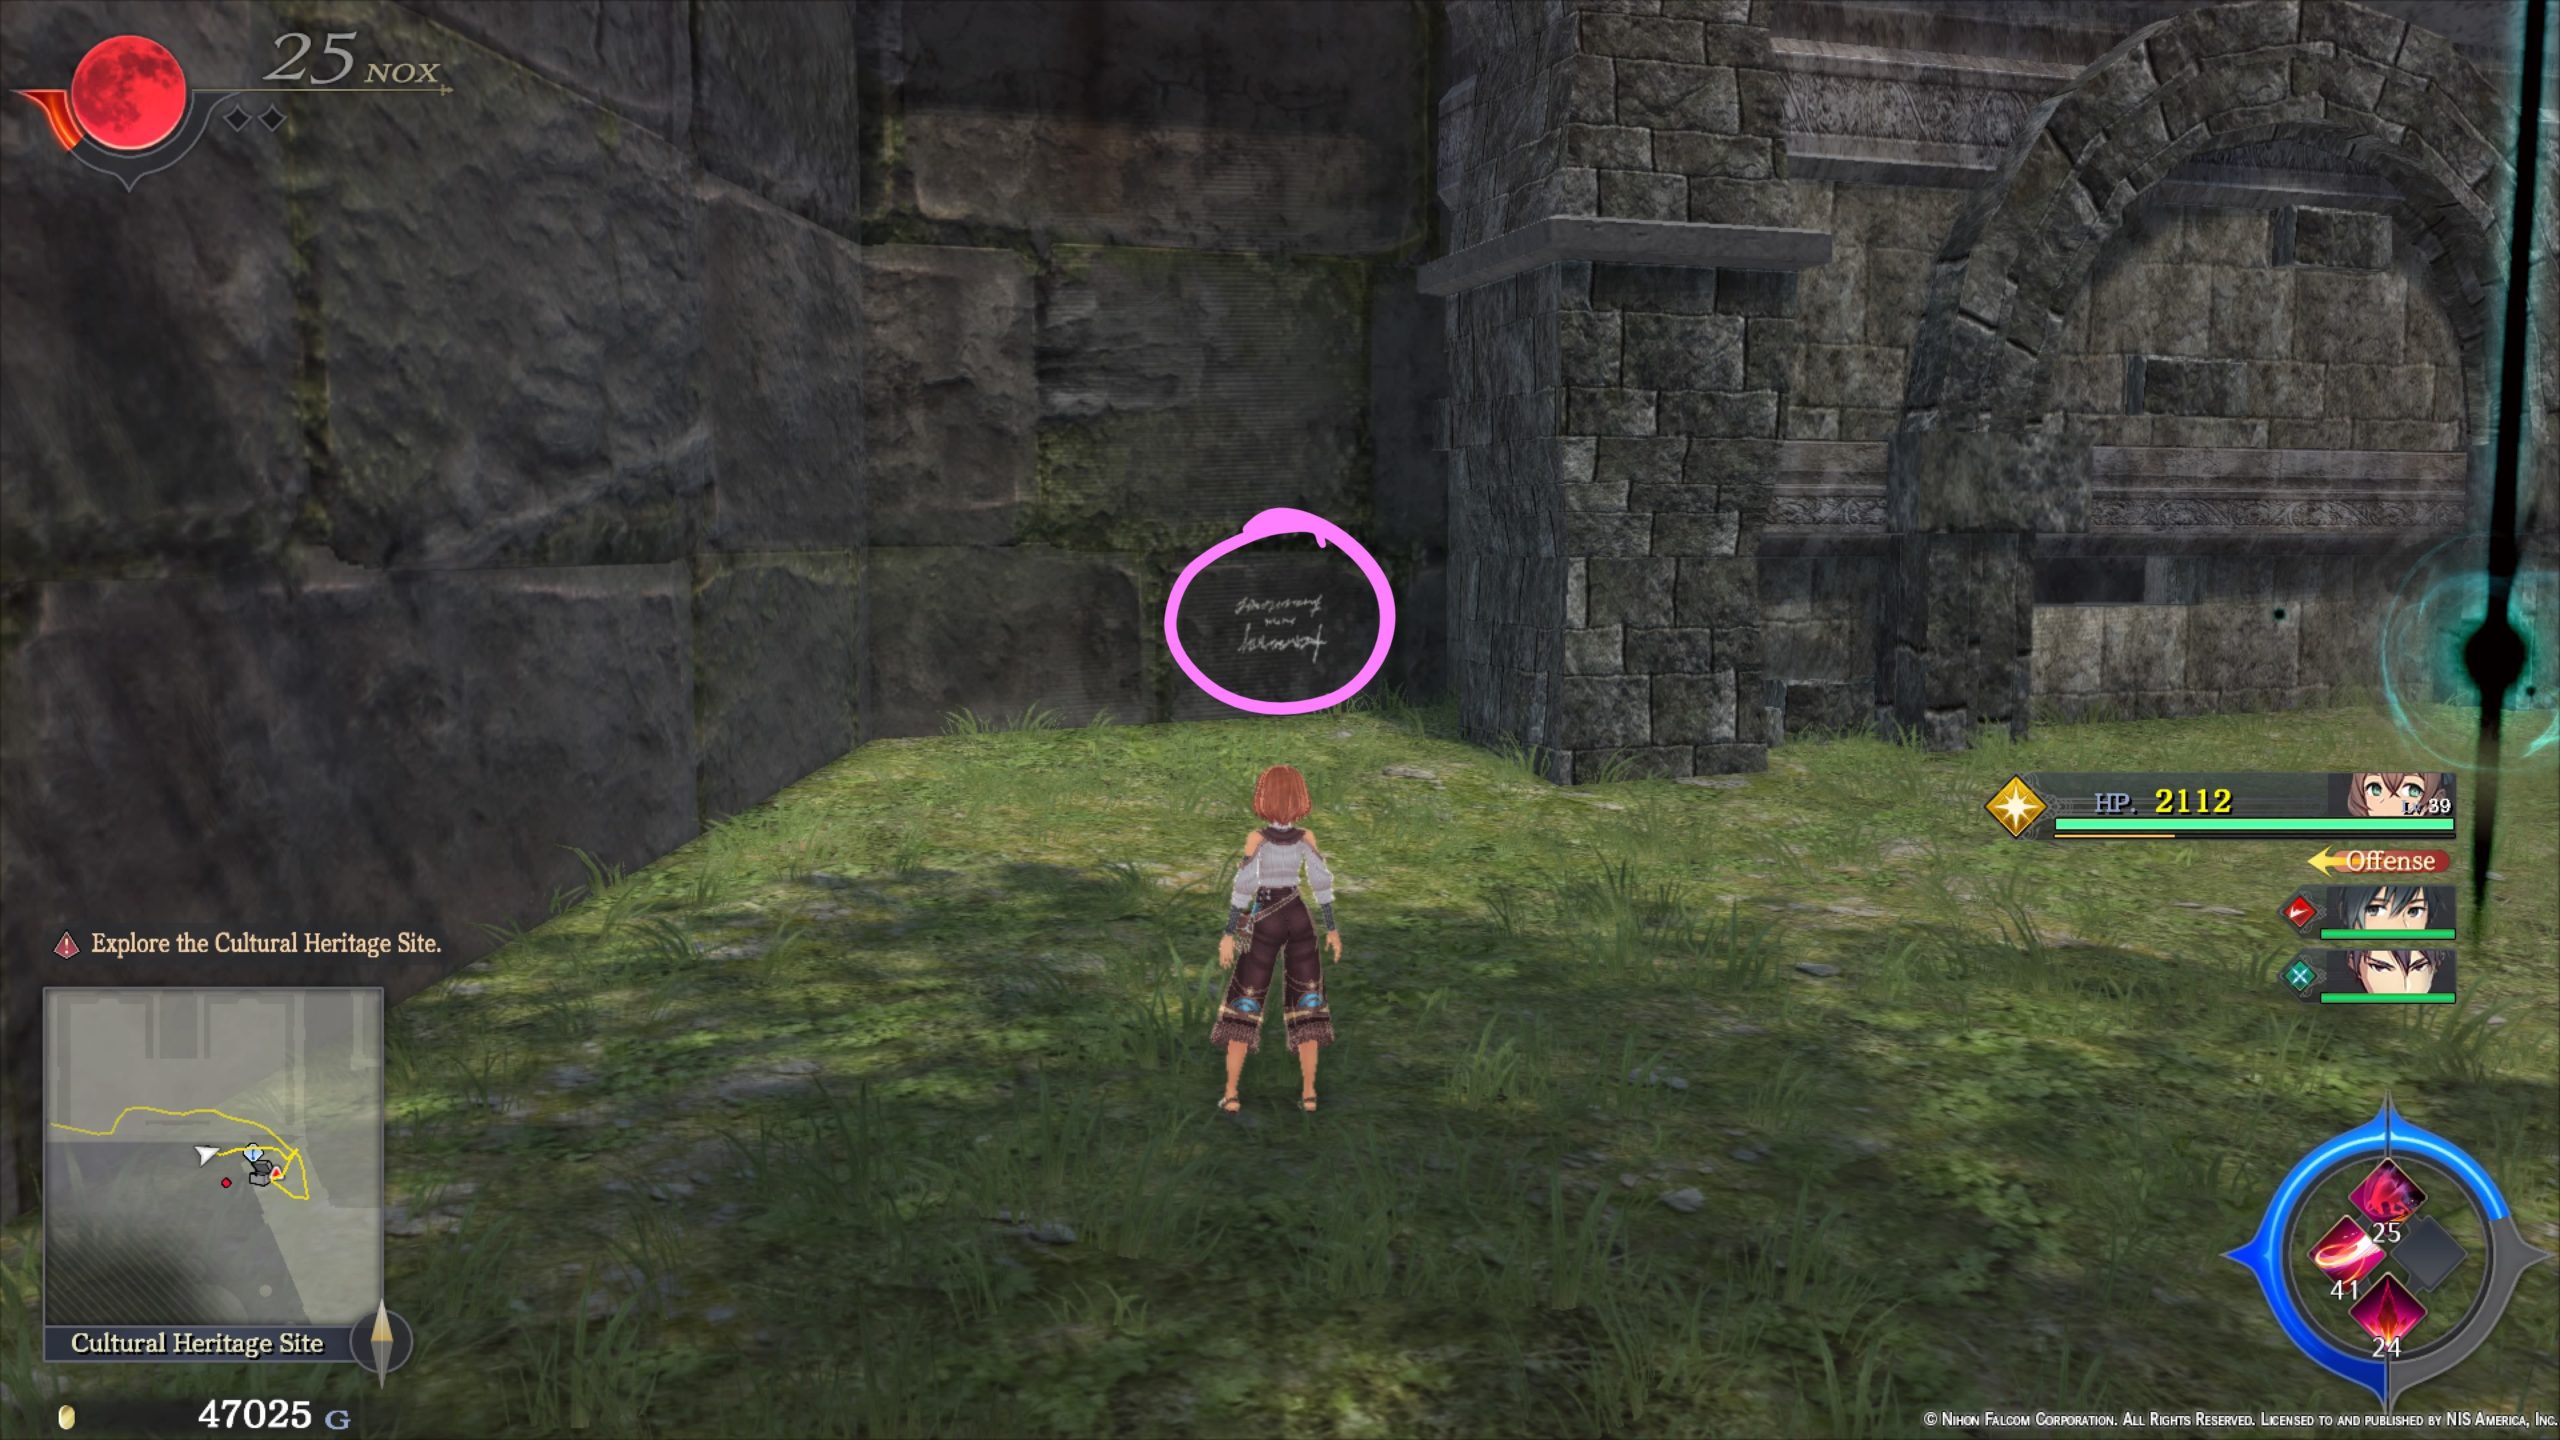
- On top of a broken stone fence
Treasure Chests
- 3000 Gold
- Panacea x2
- Tonic x2
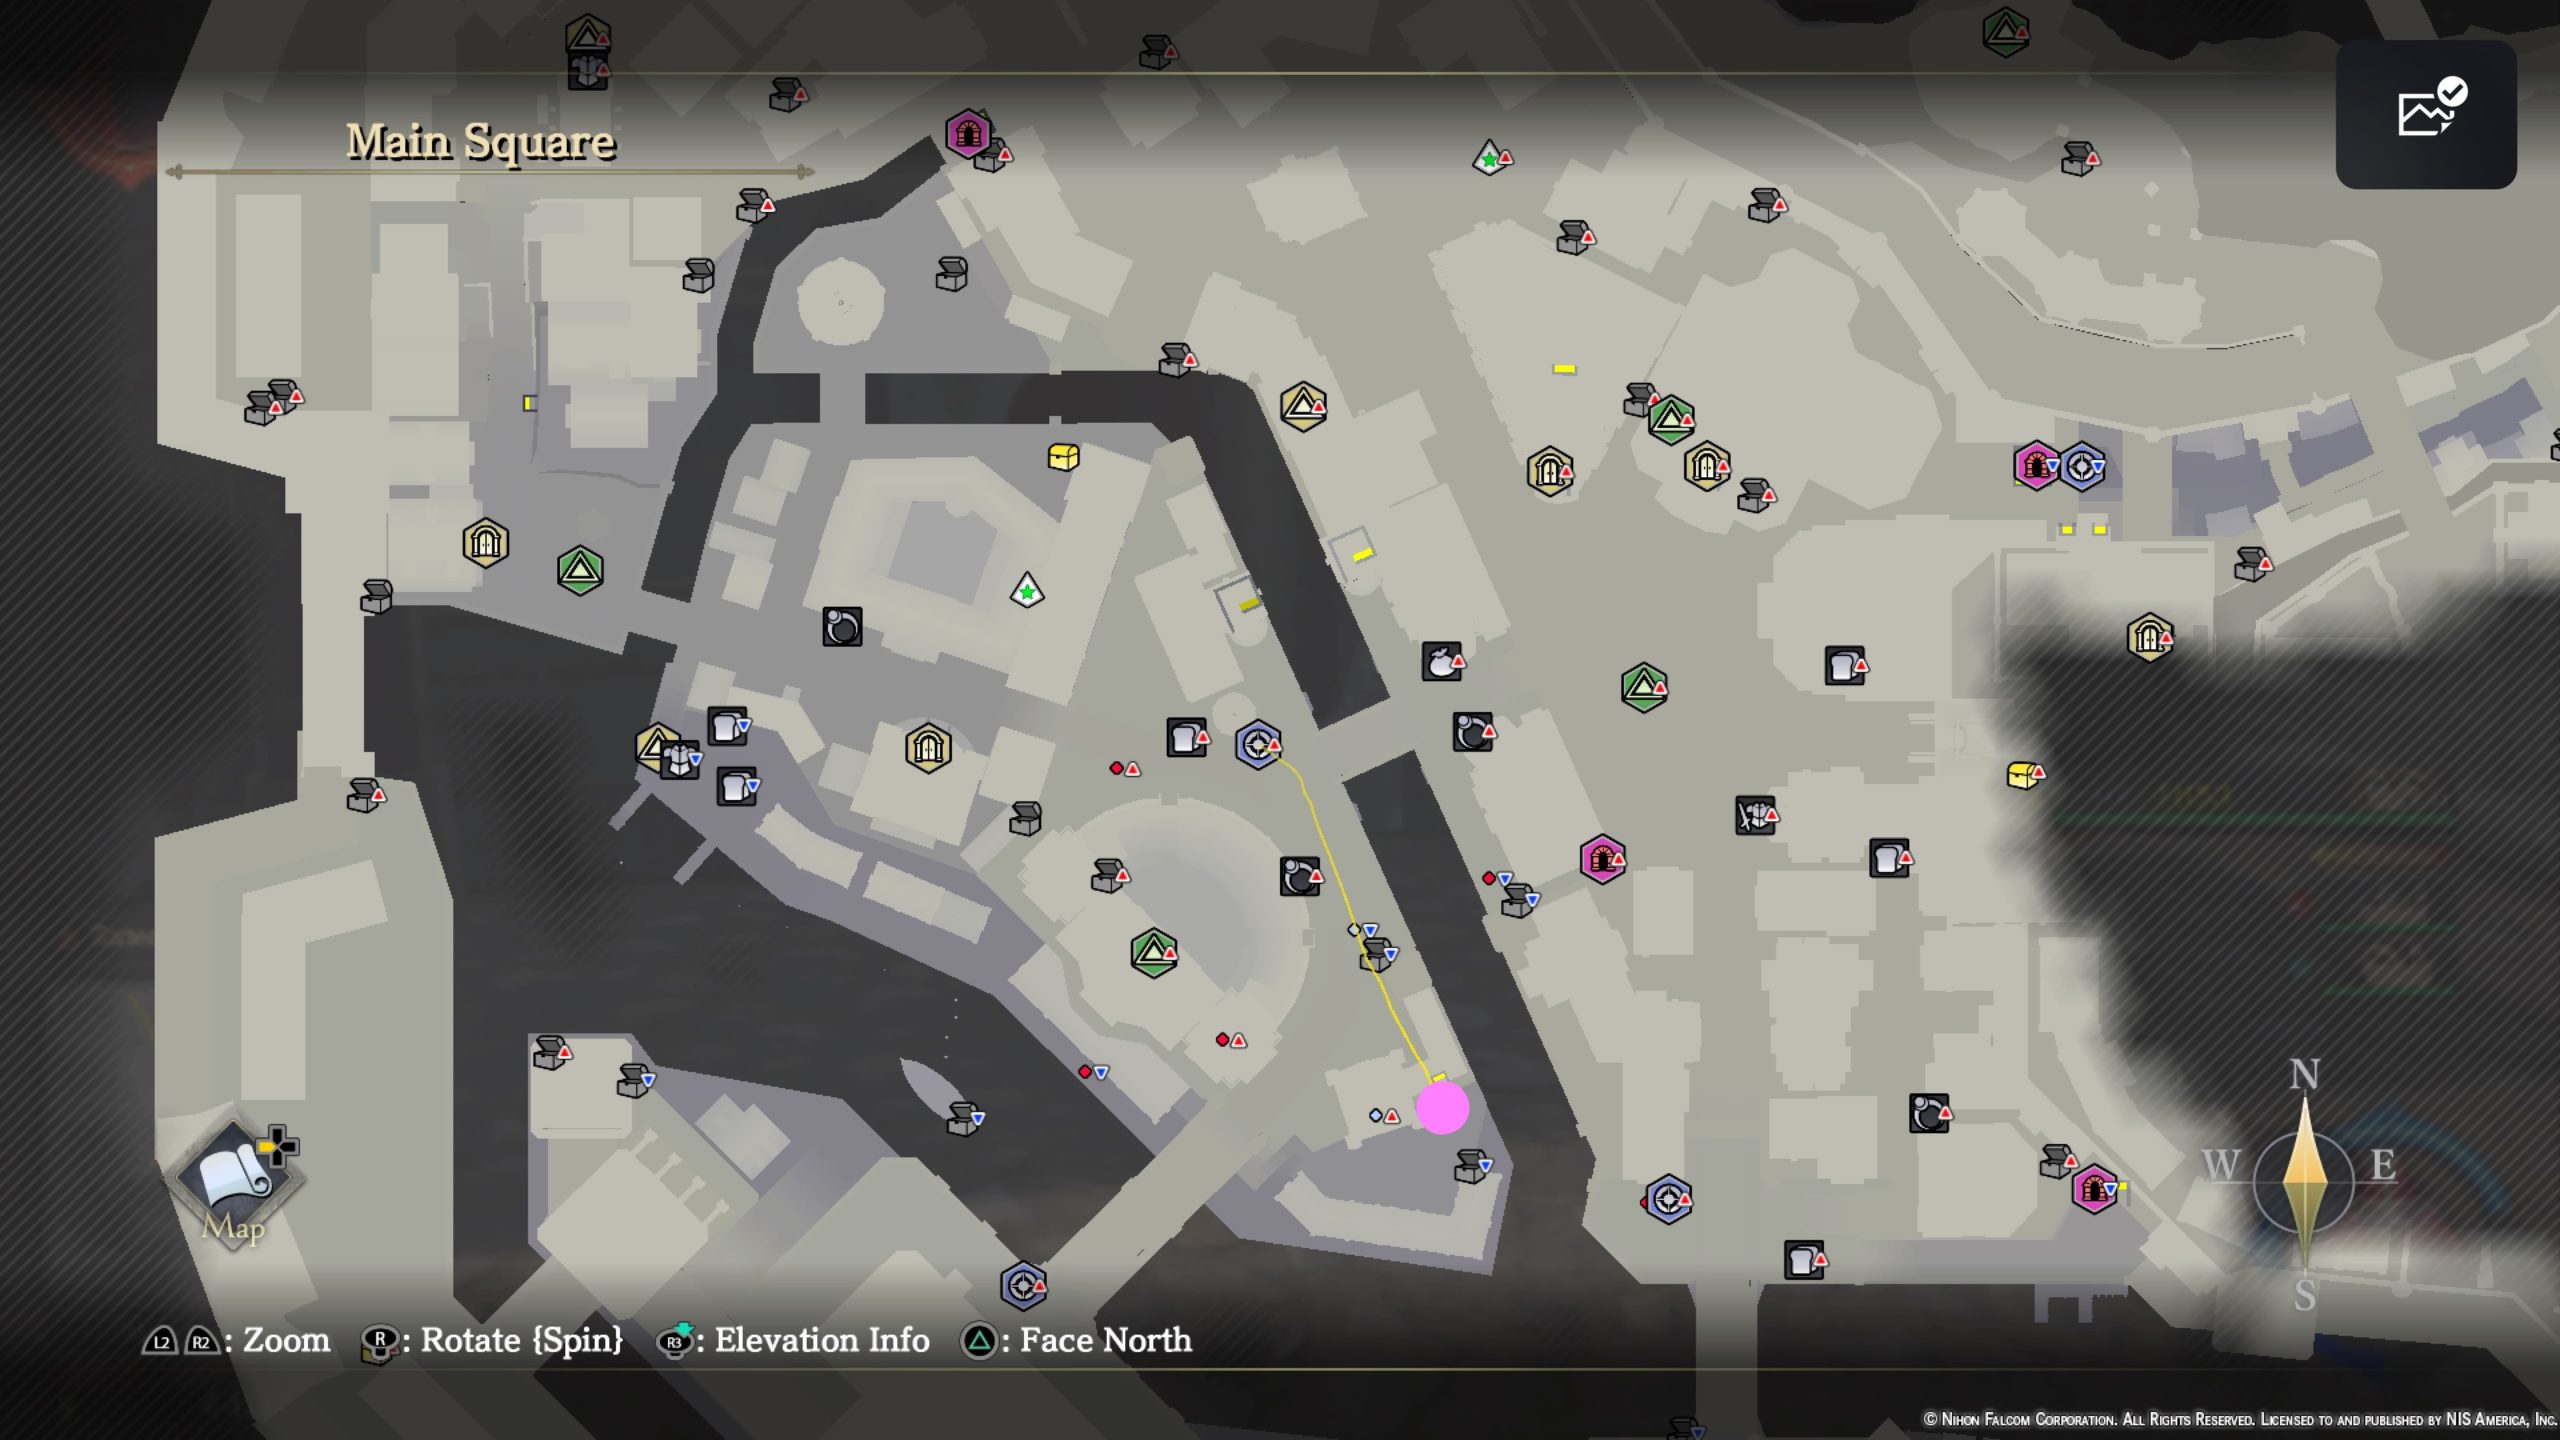
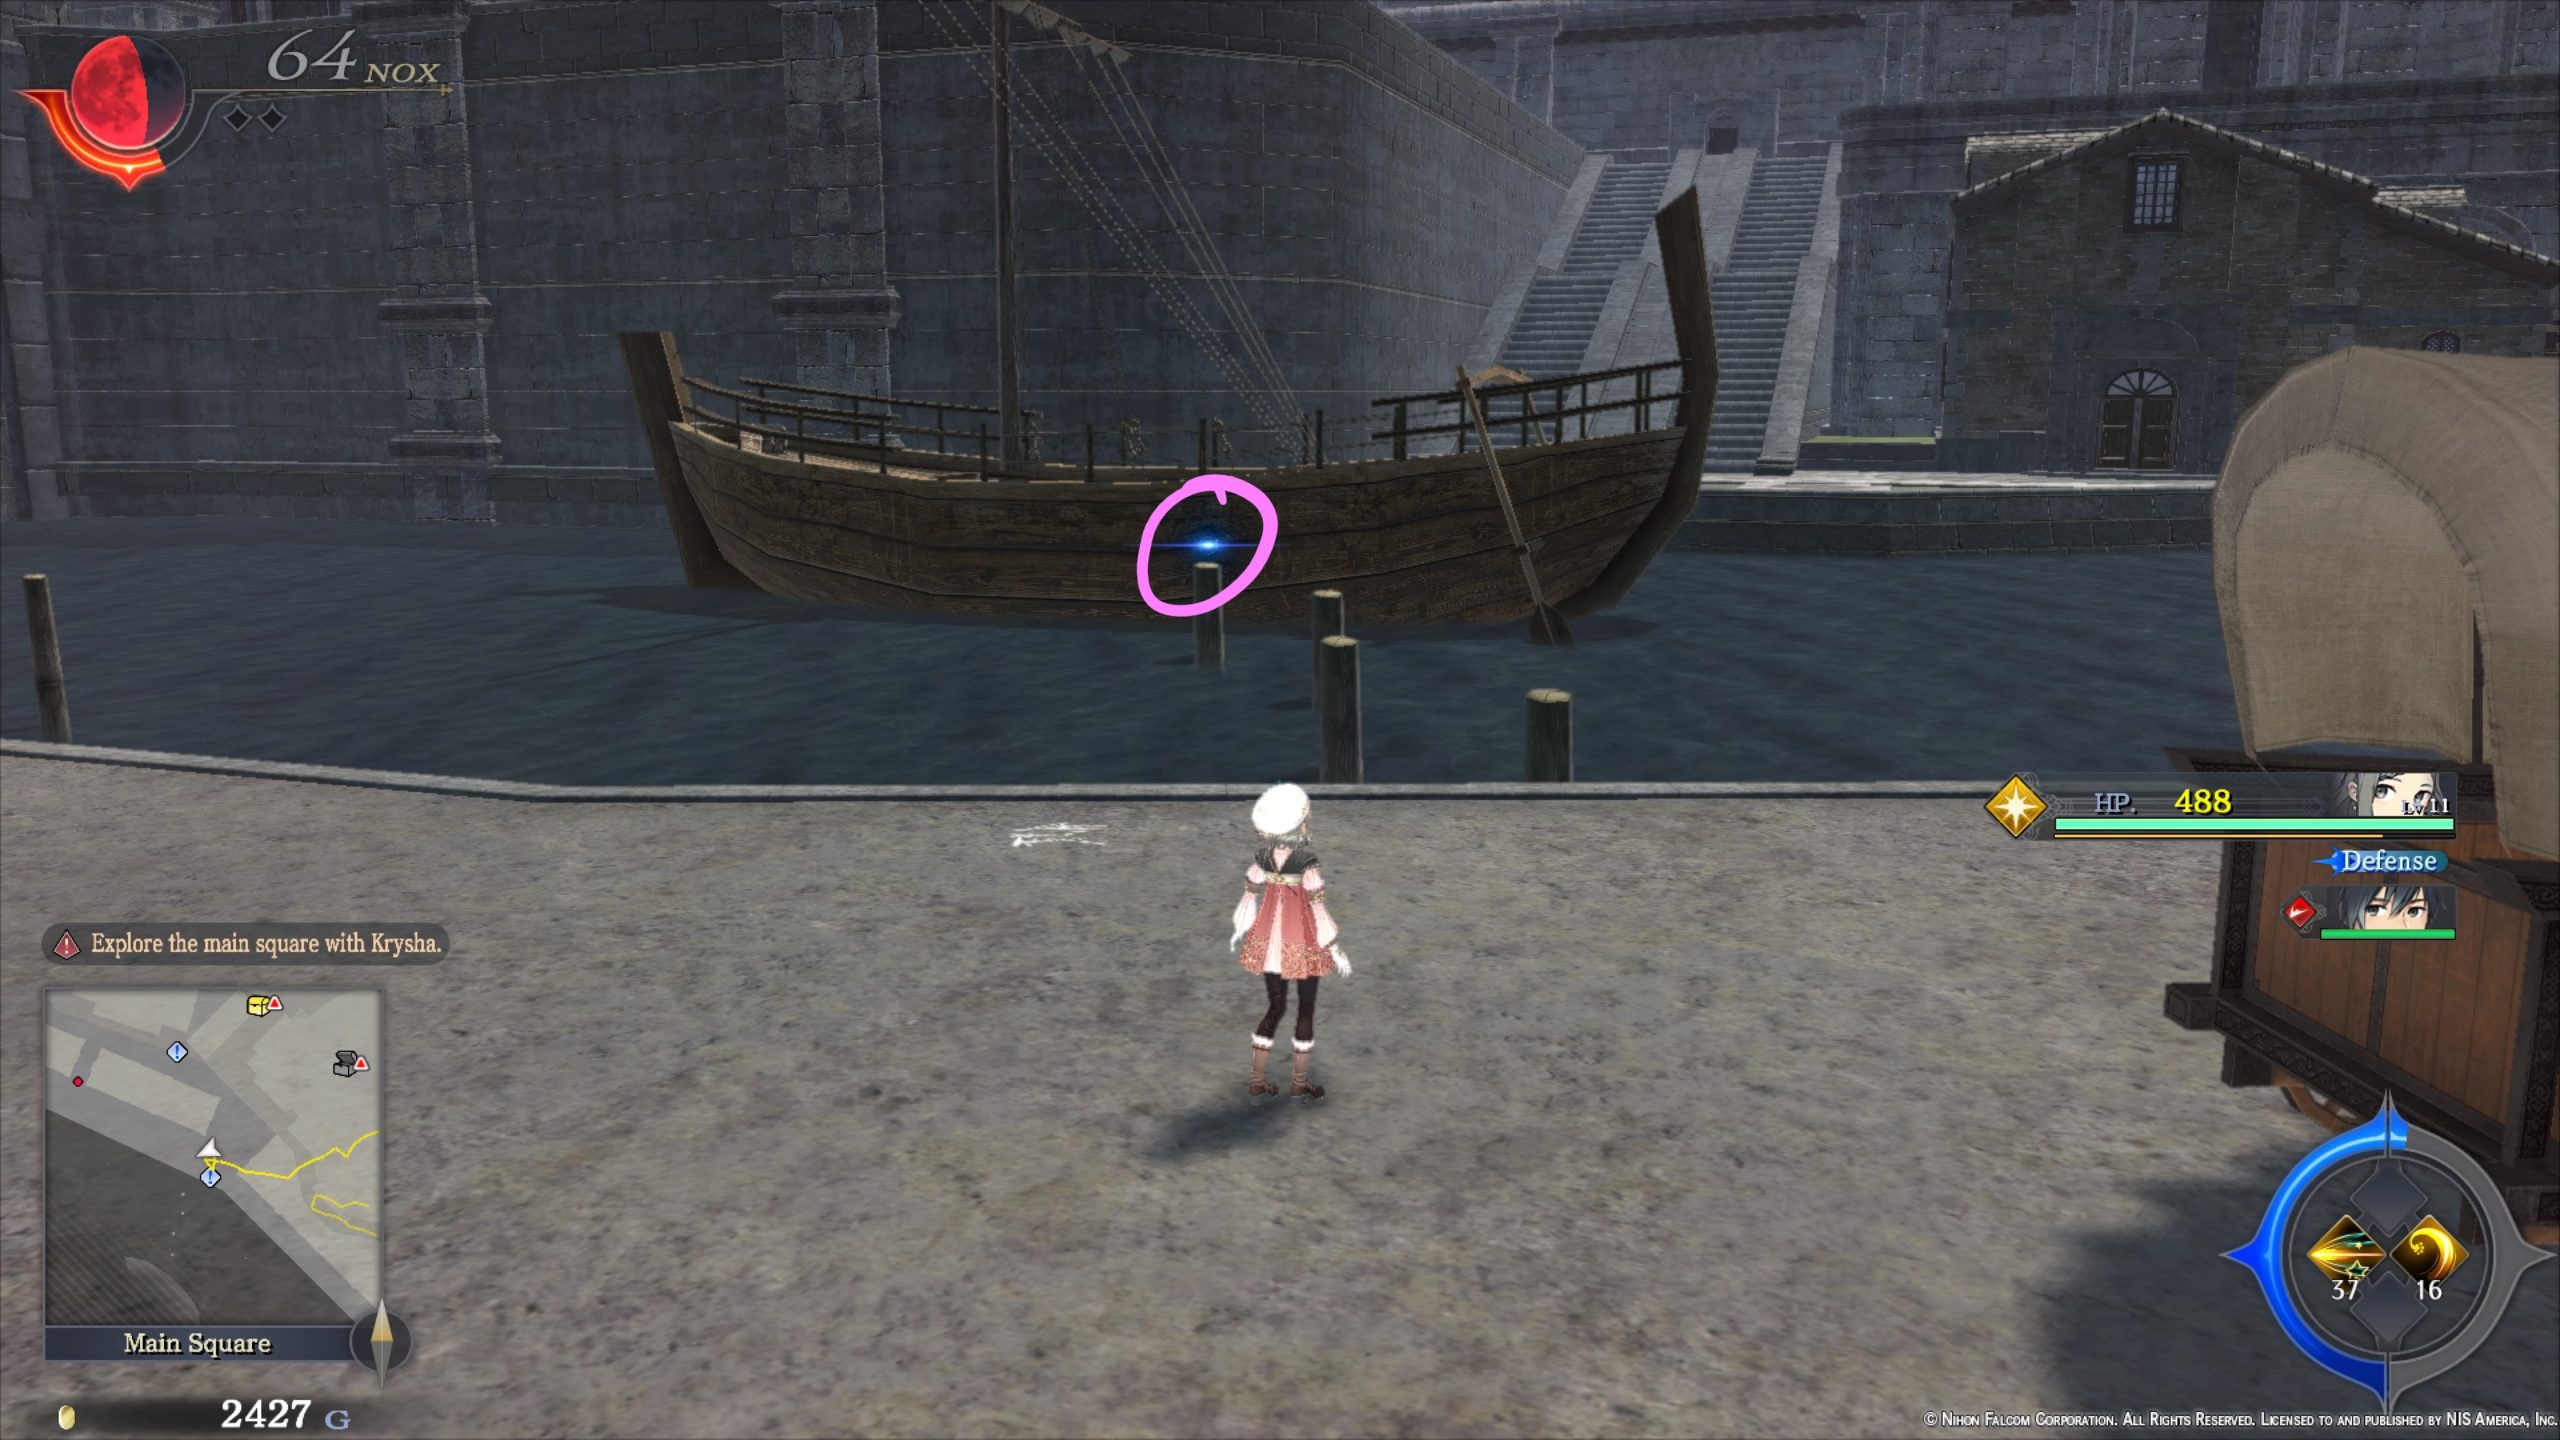
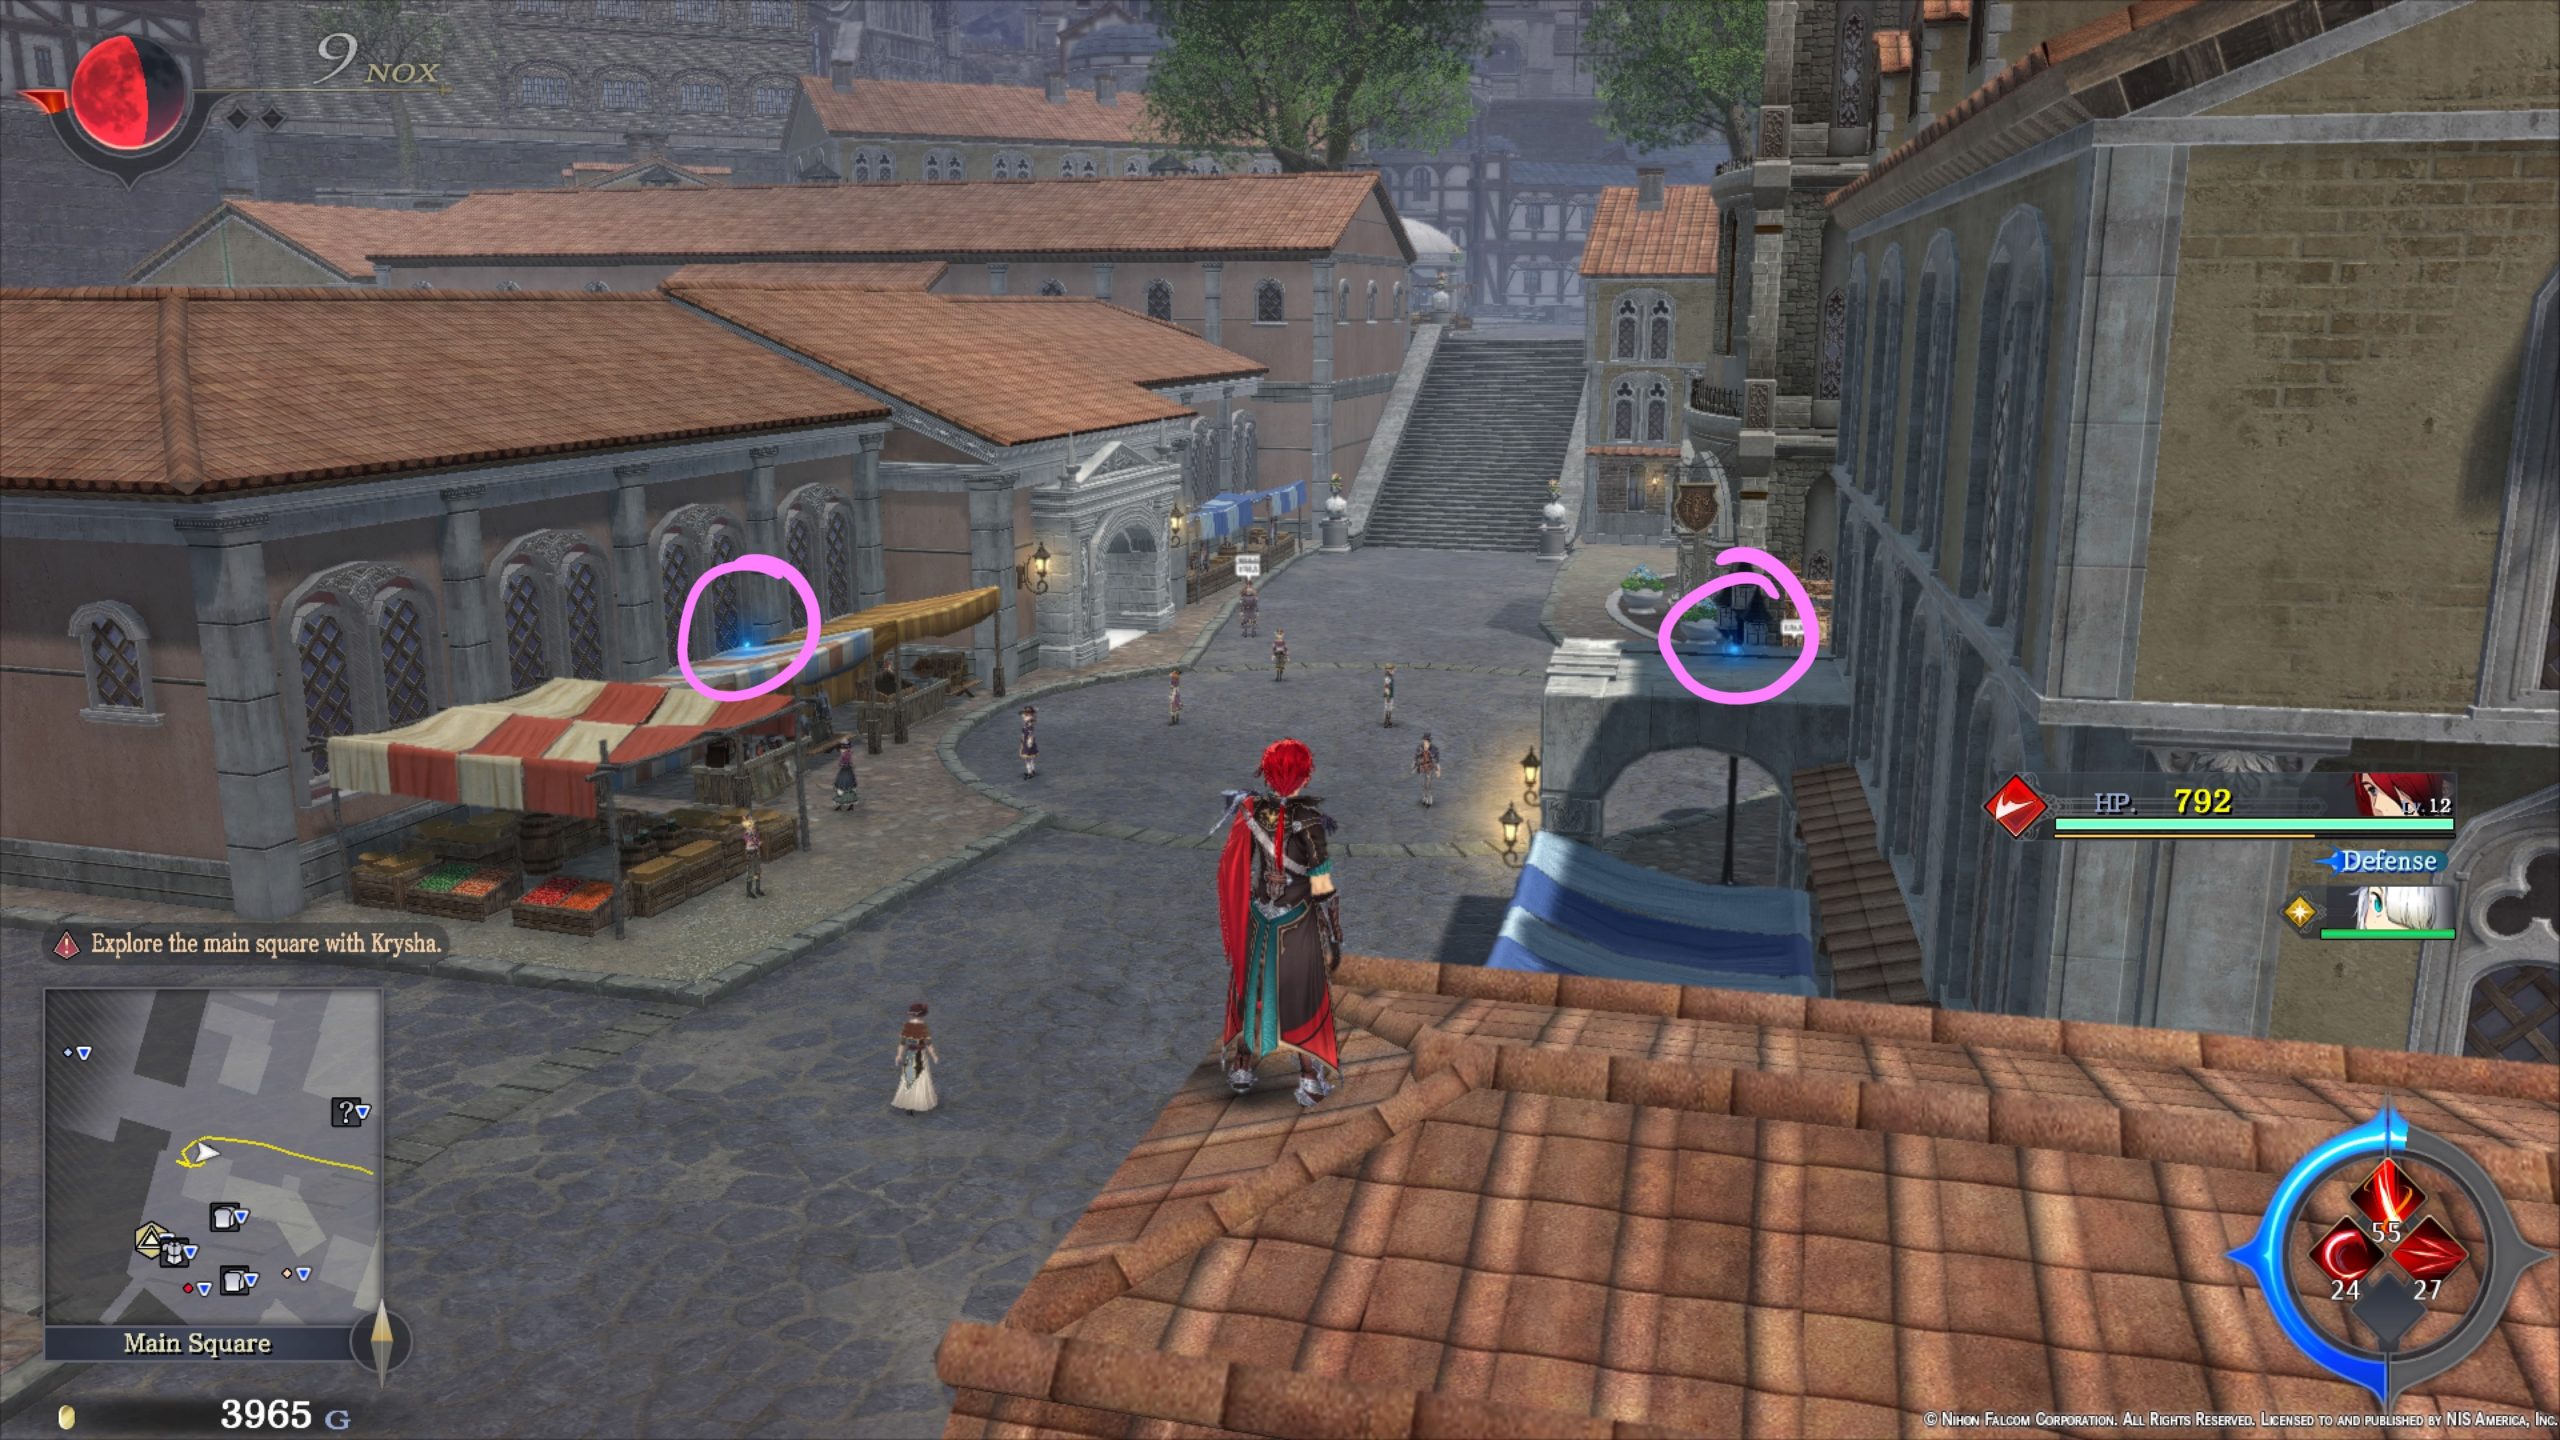
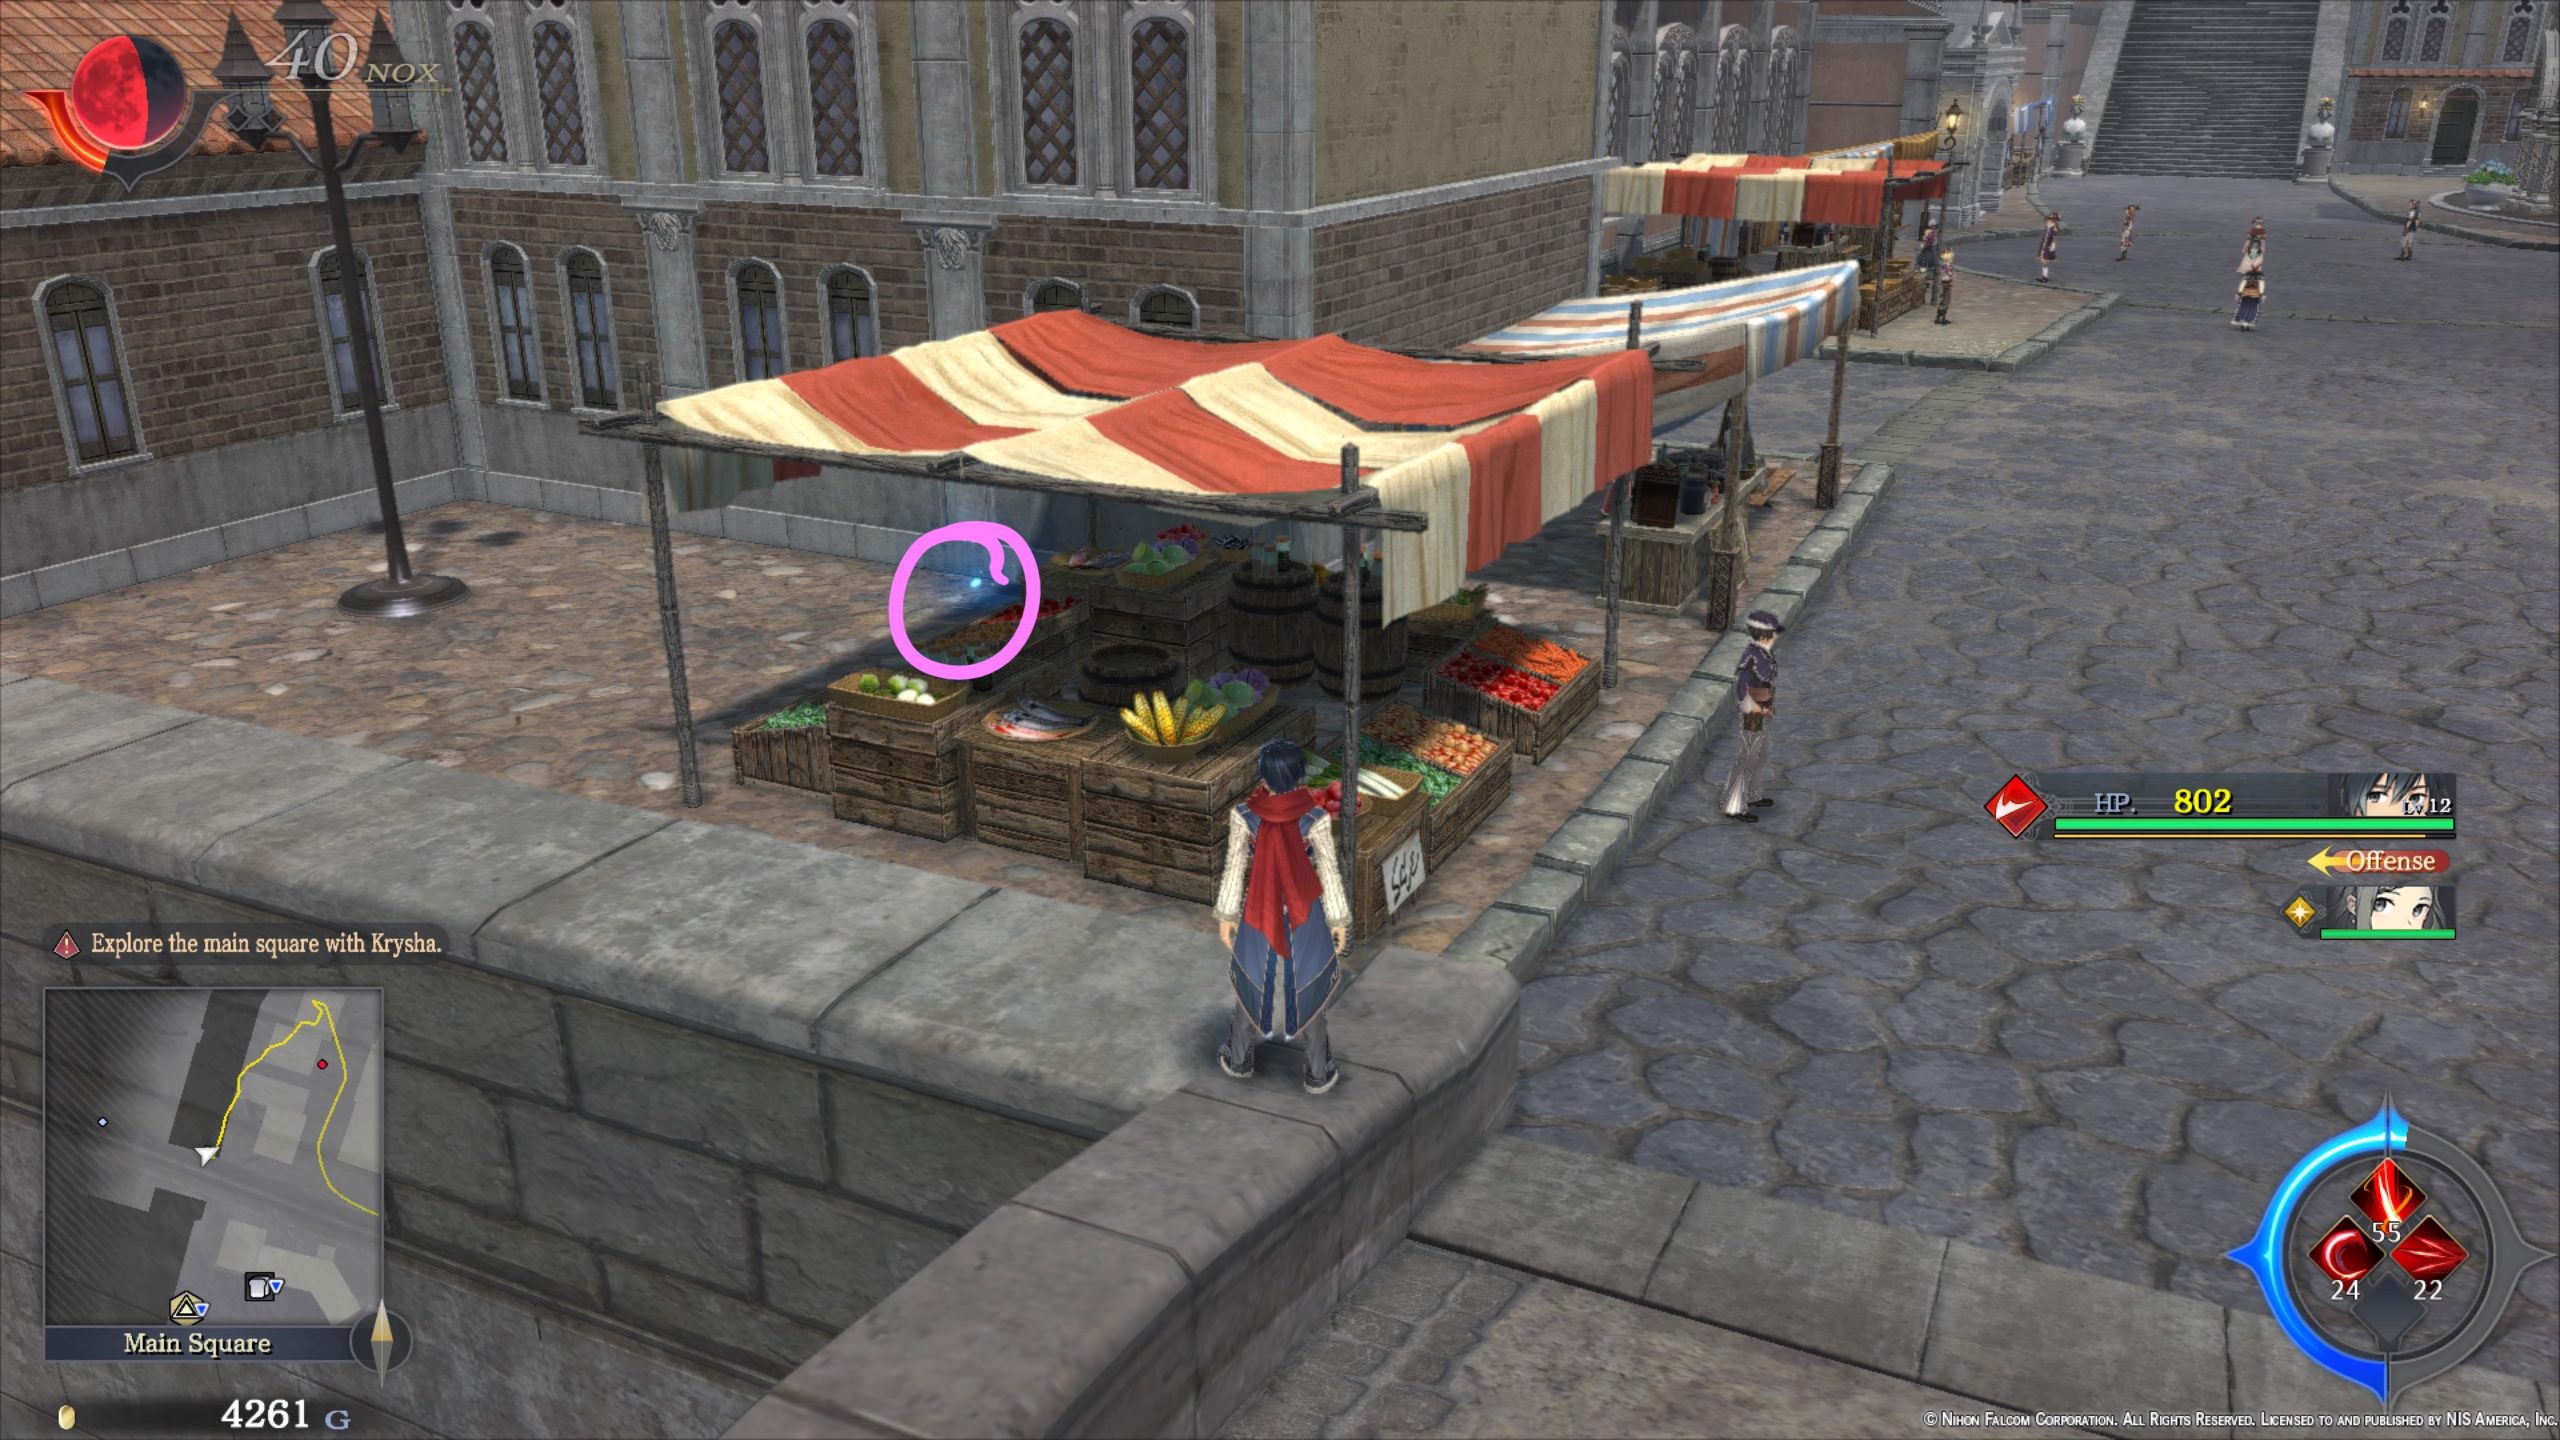
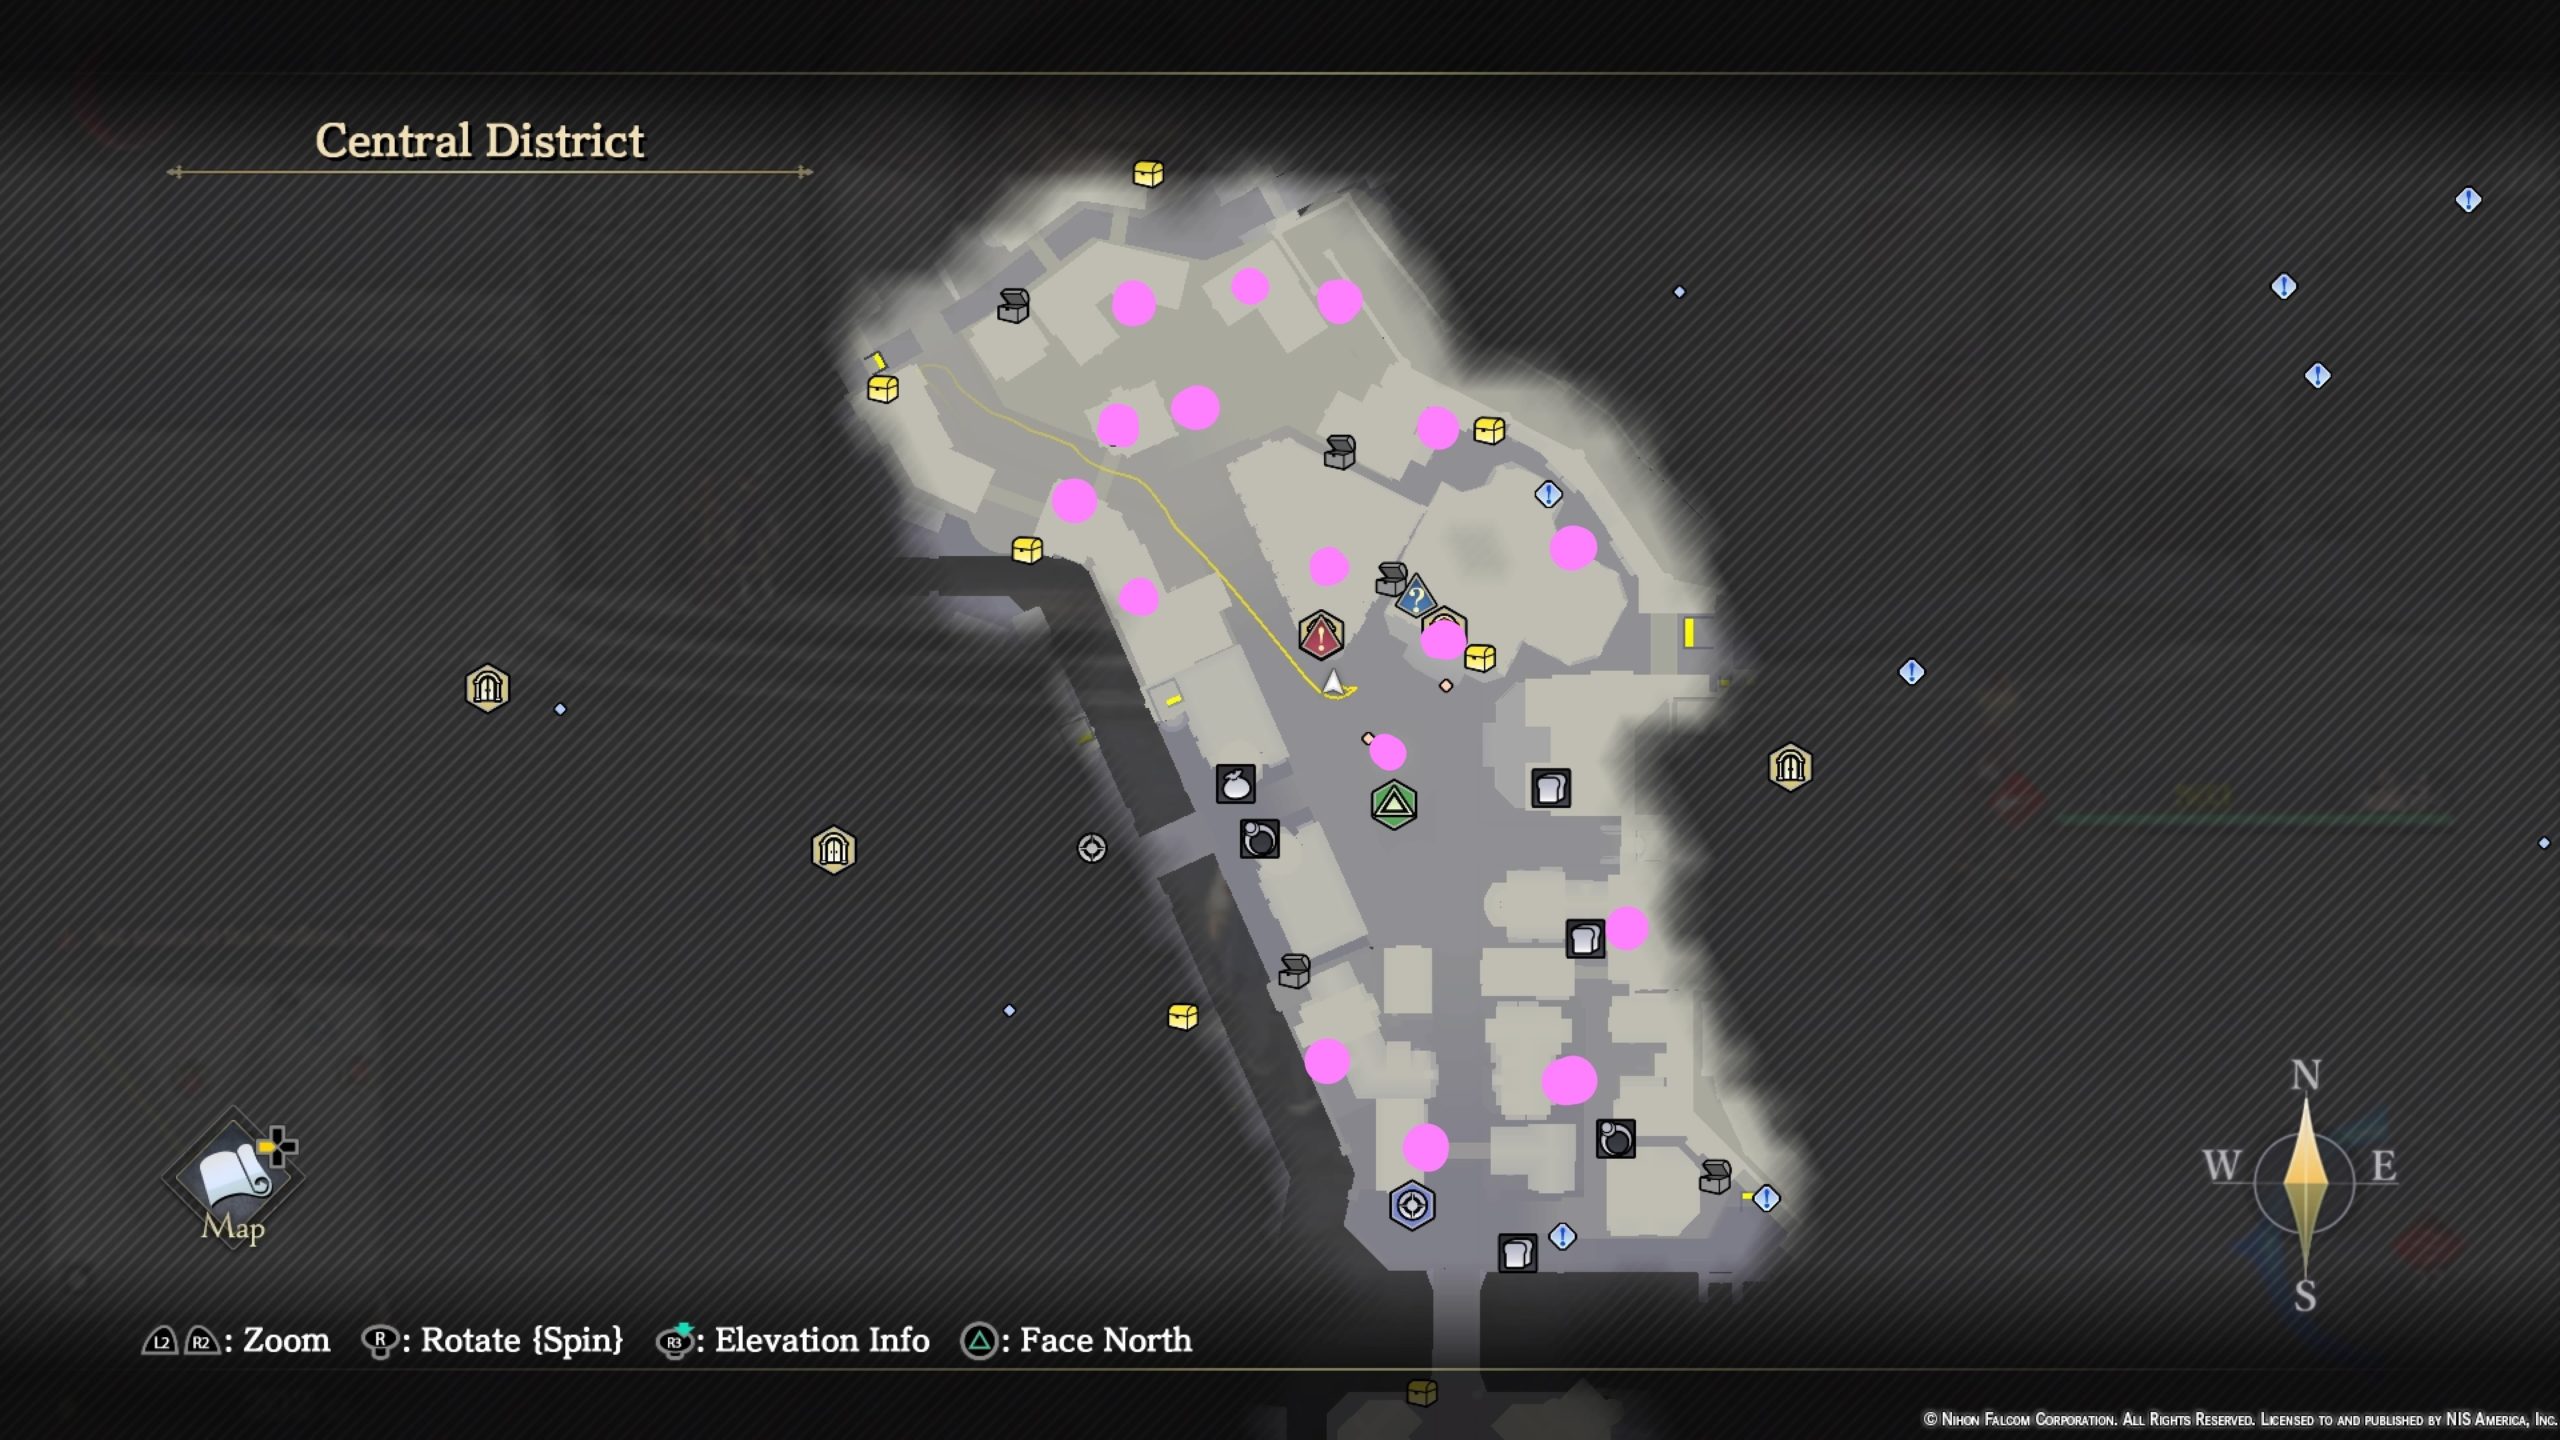
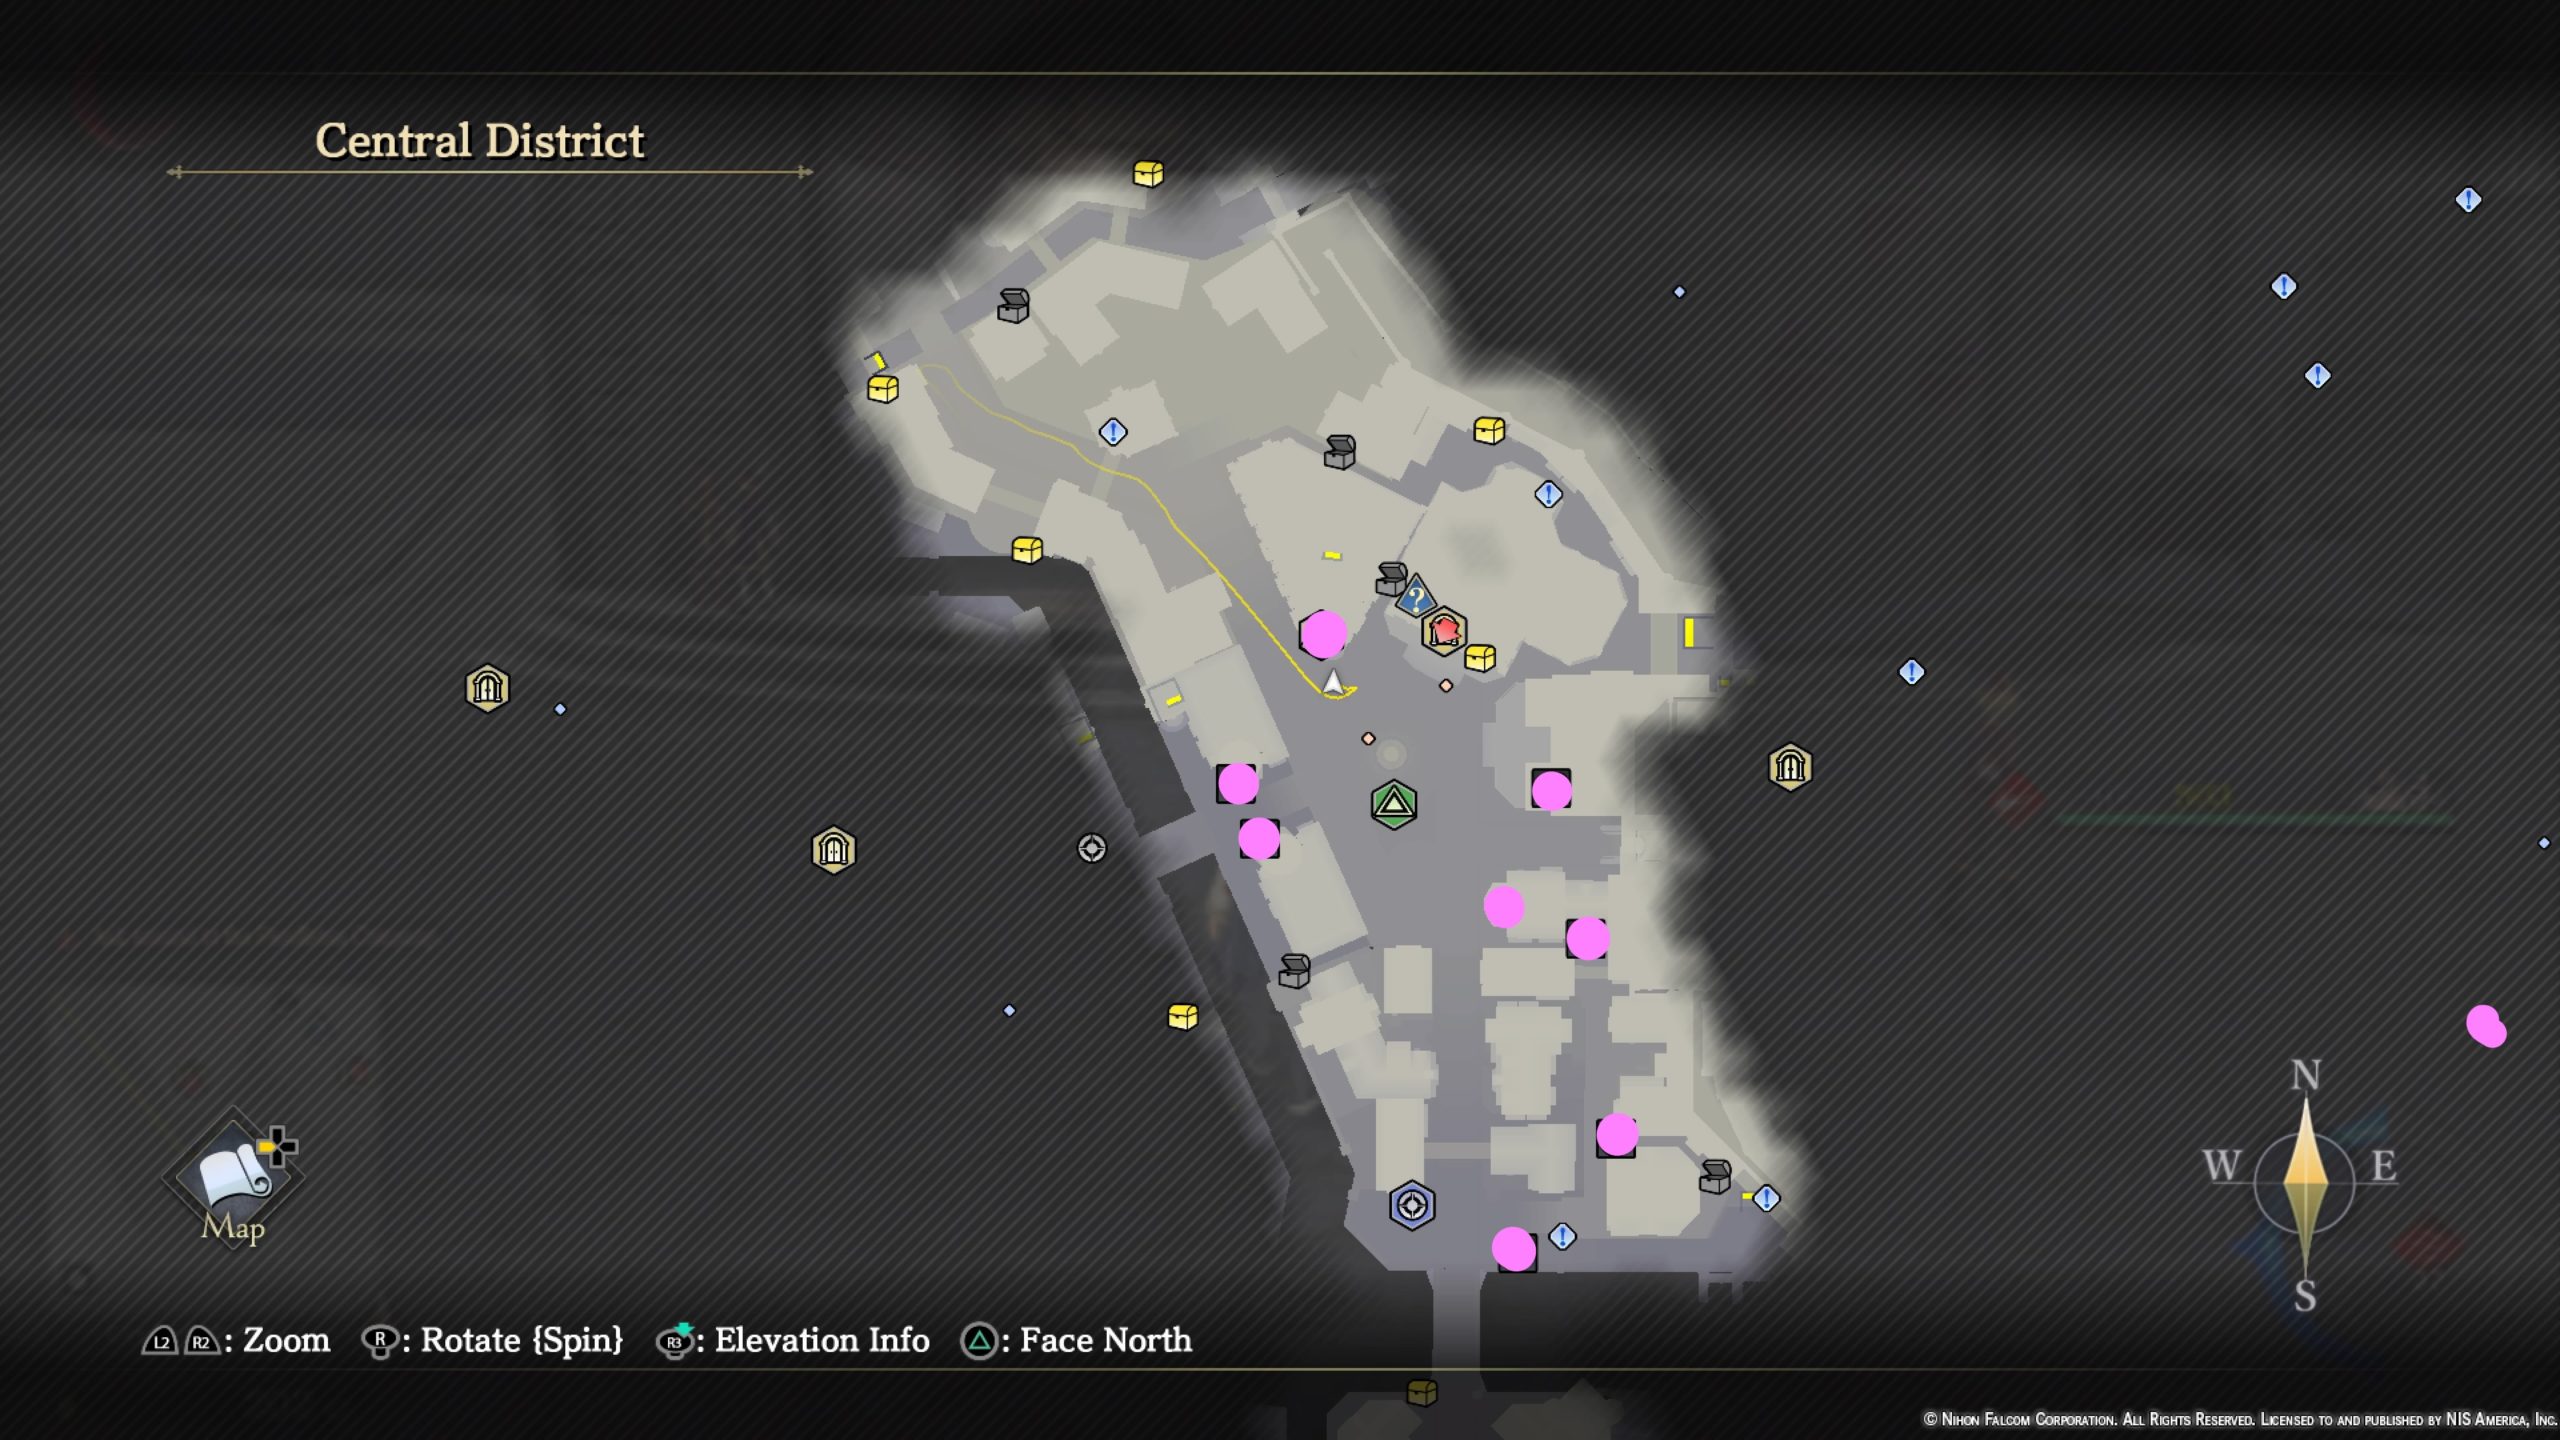
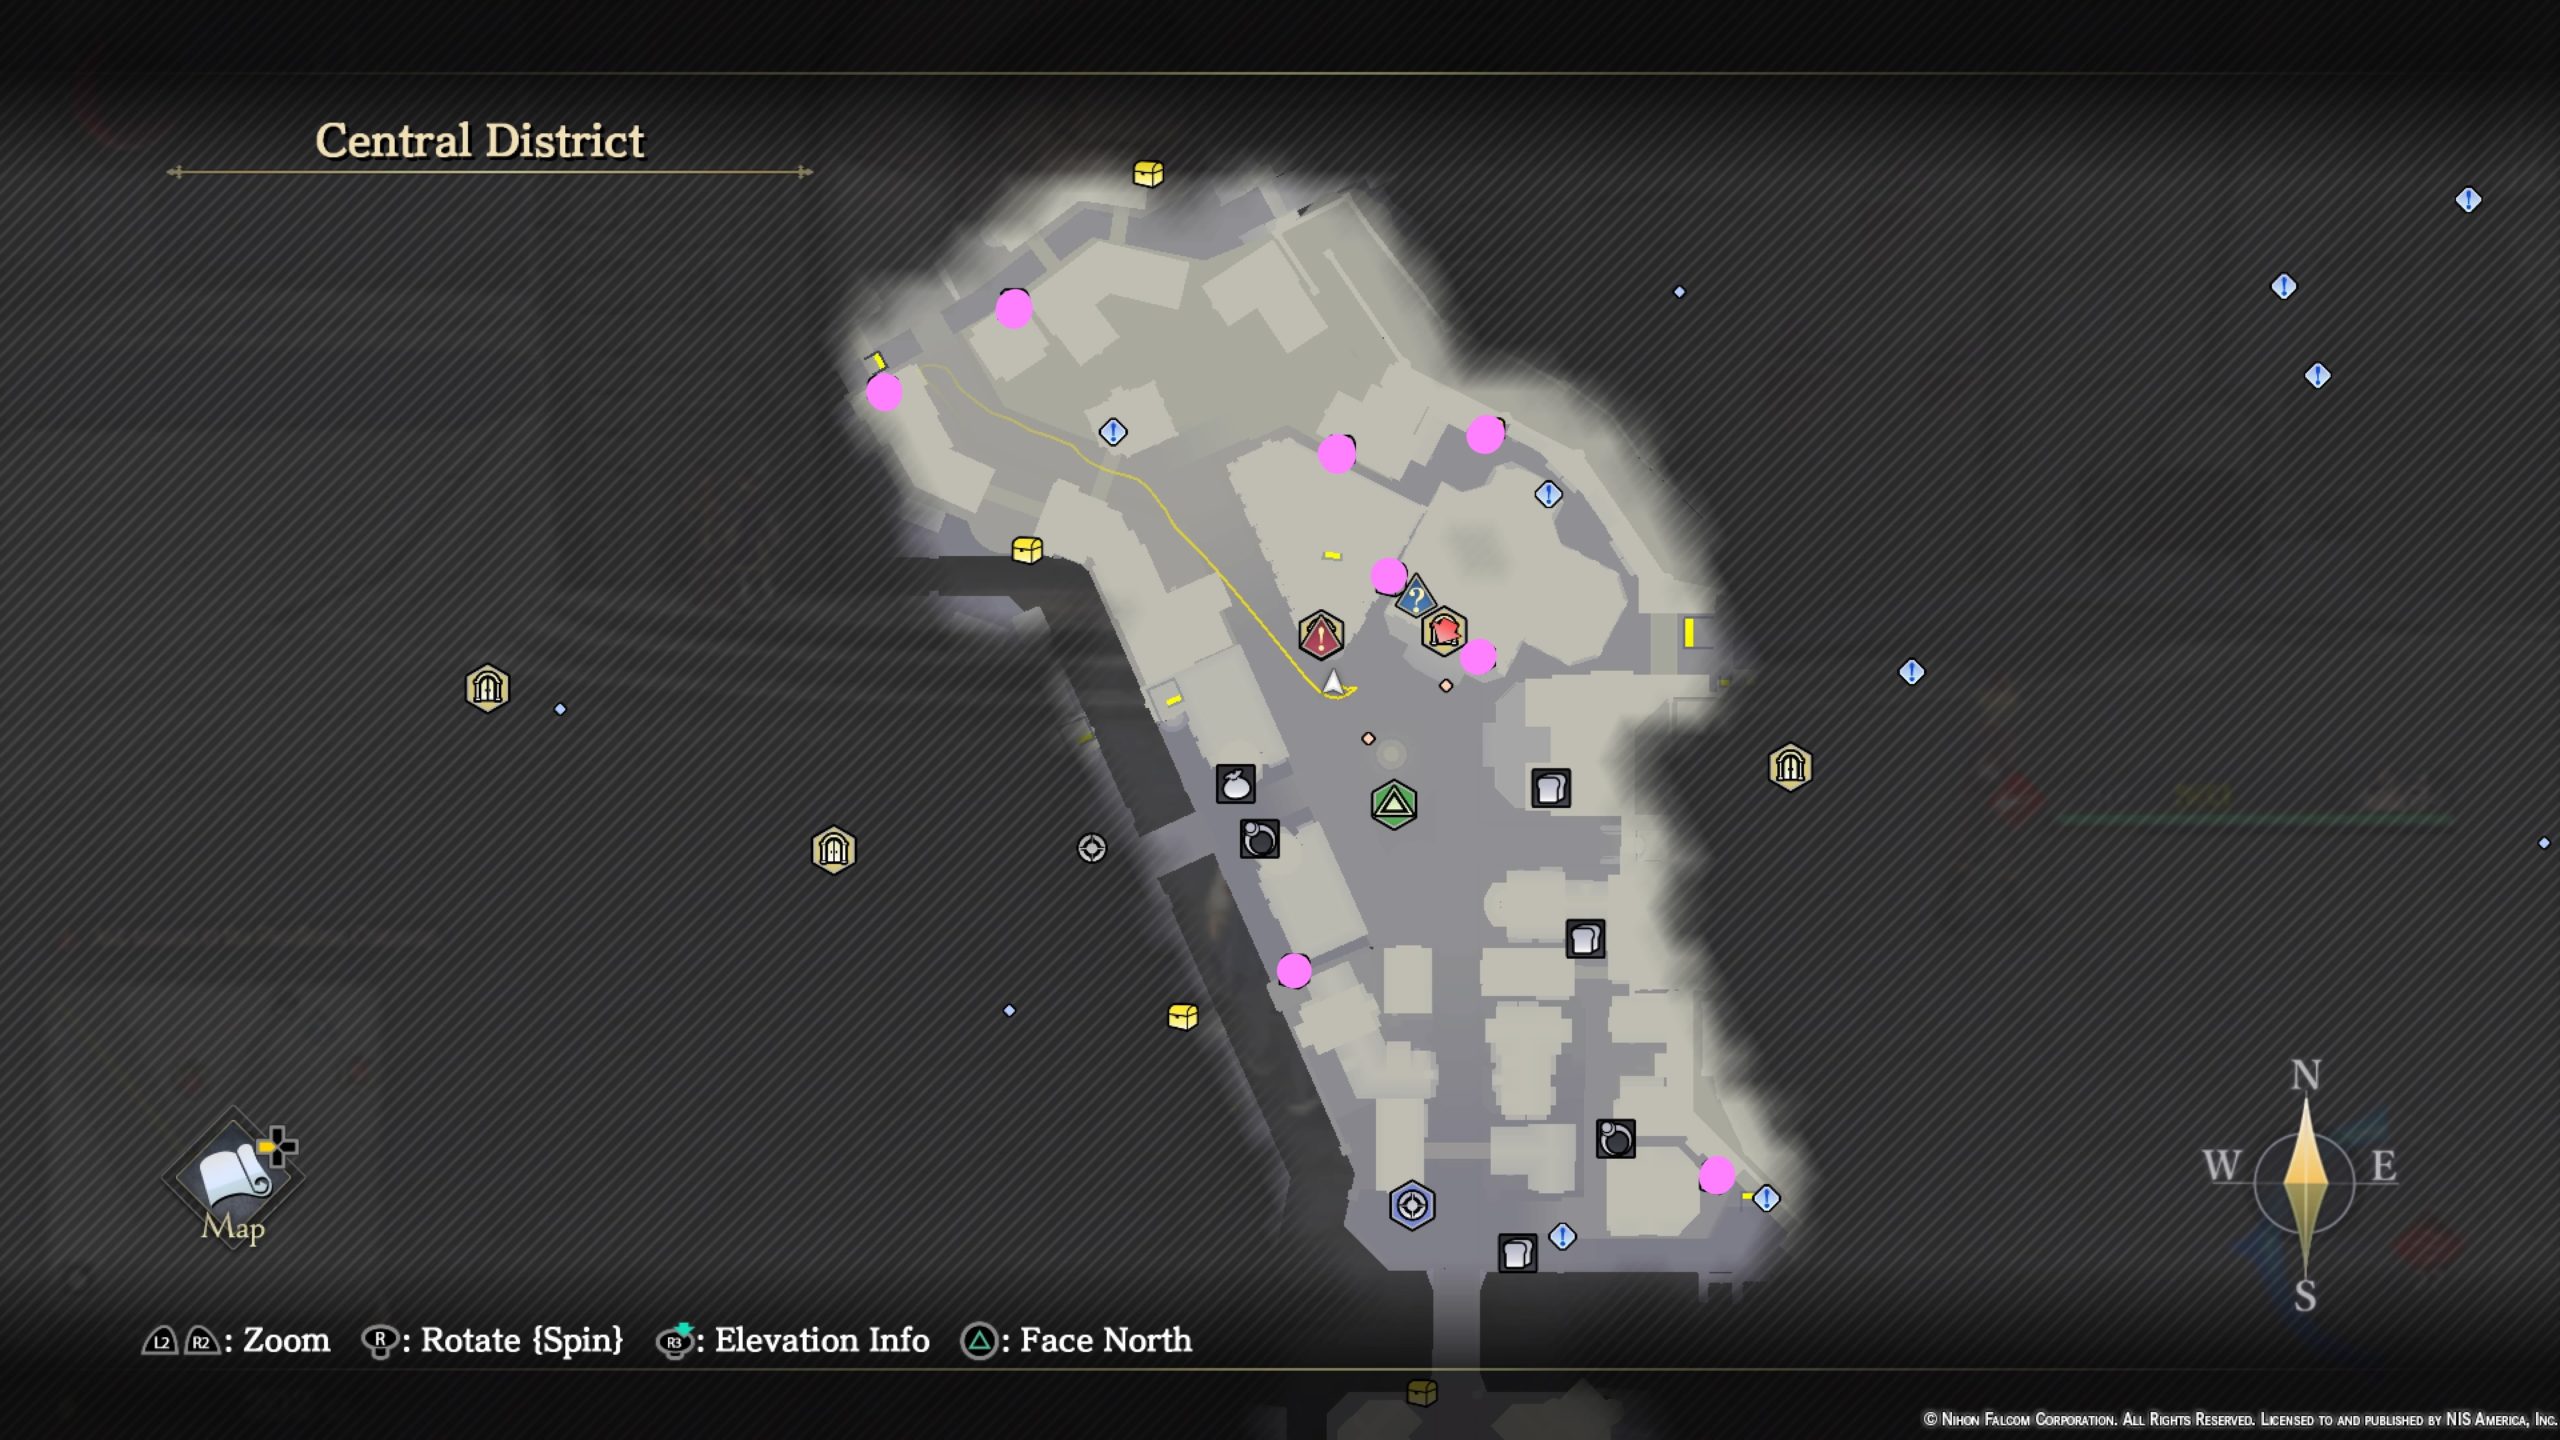
Main Square
Treasure Chests
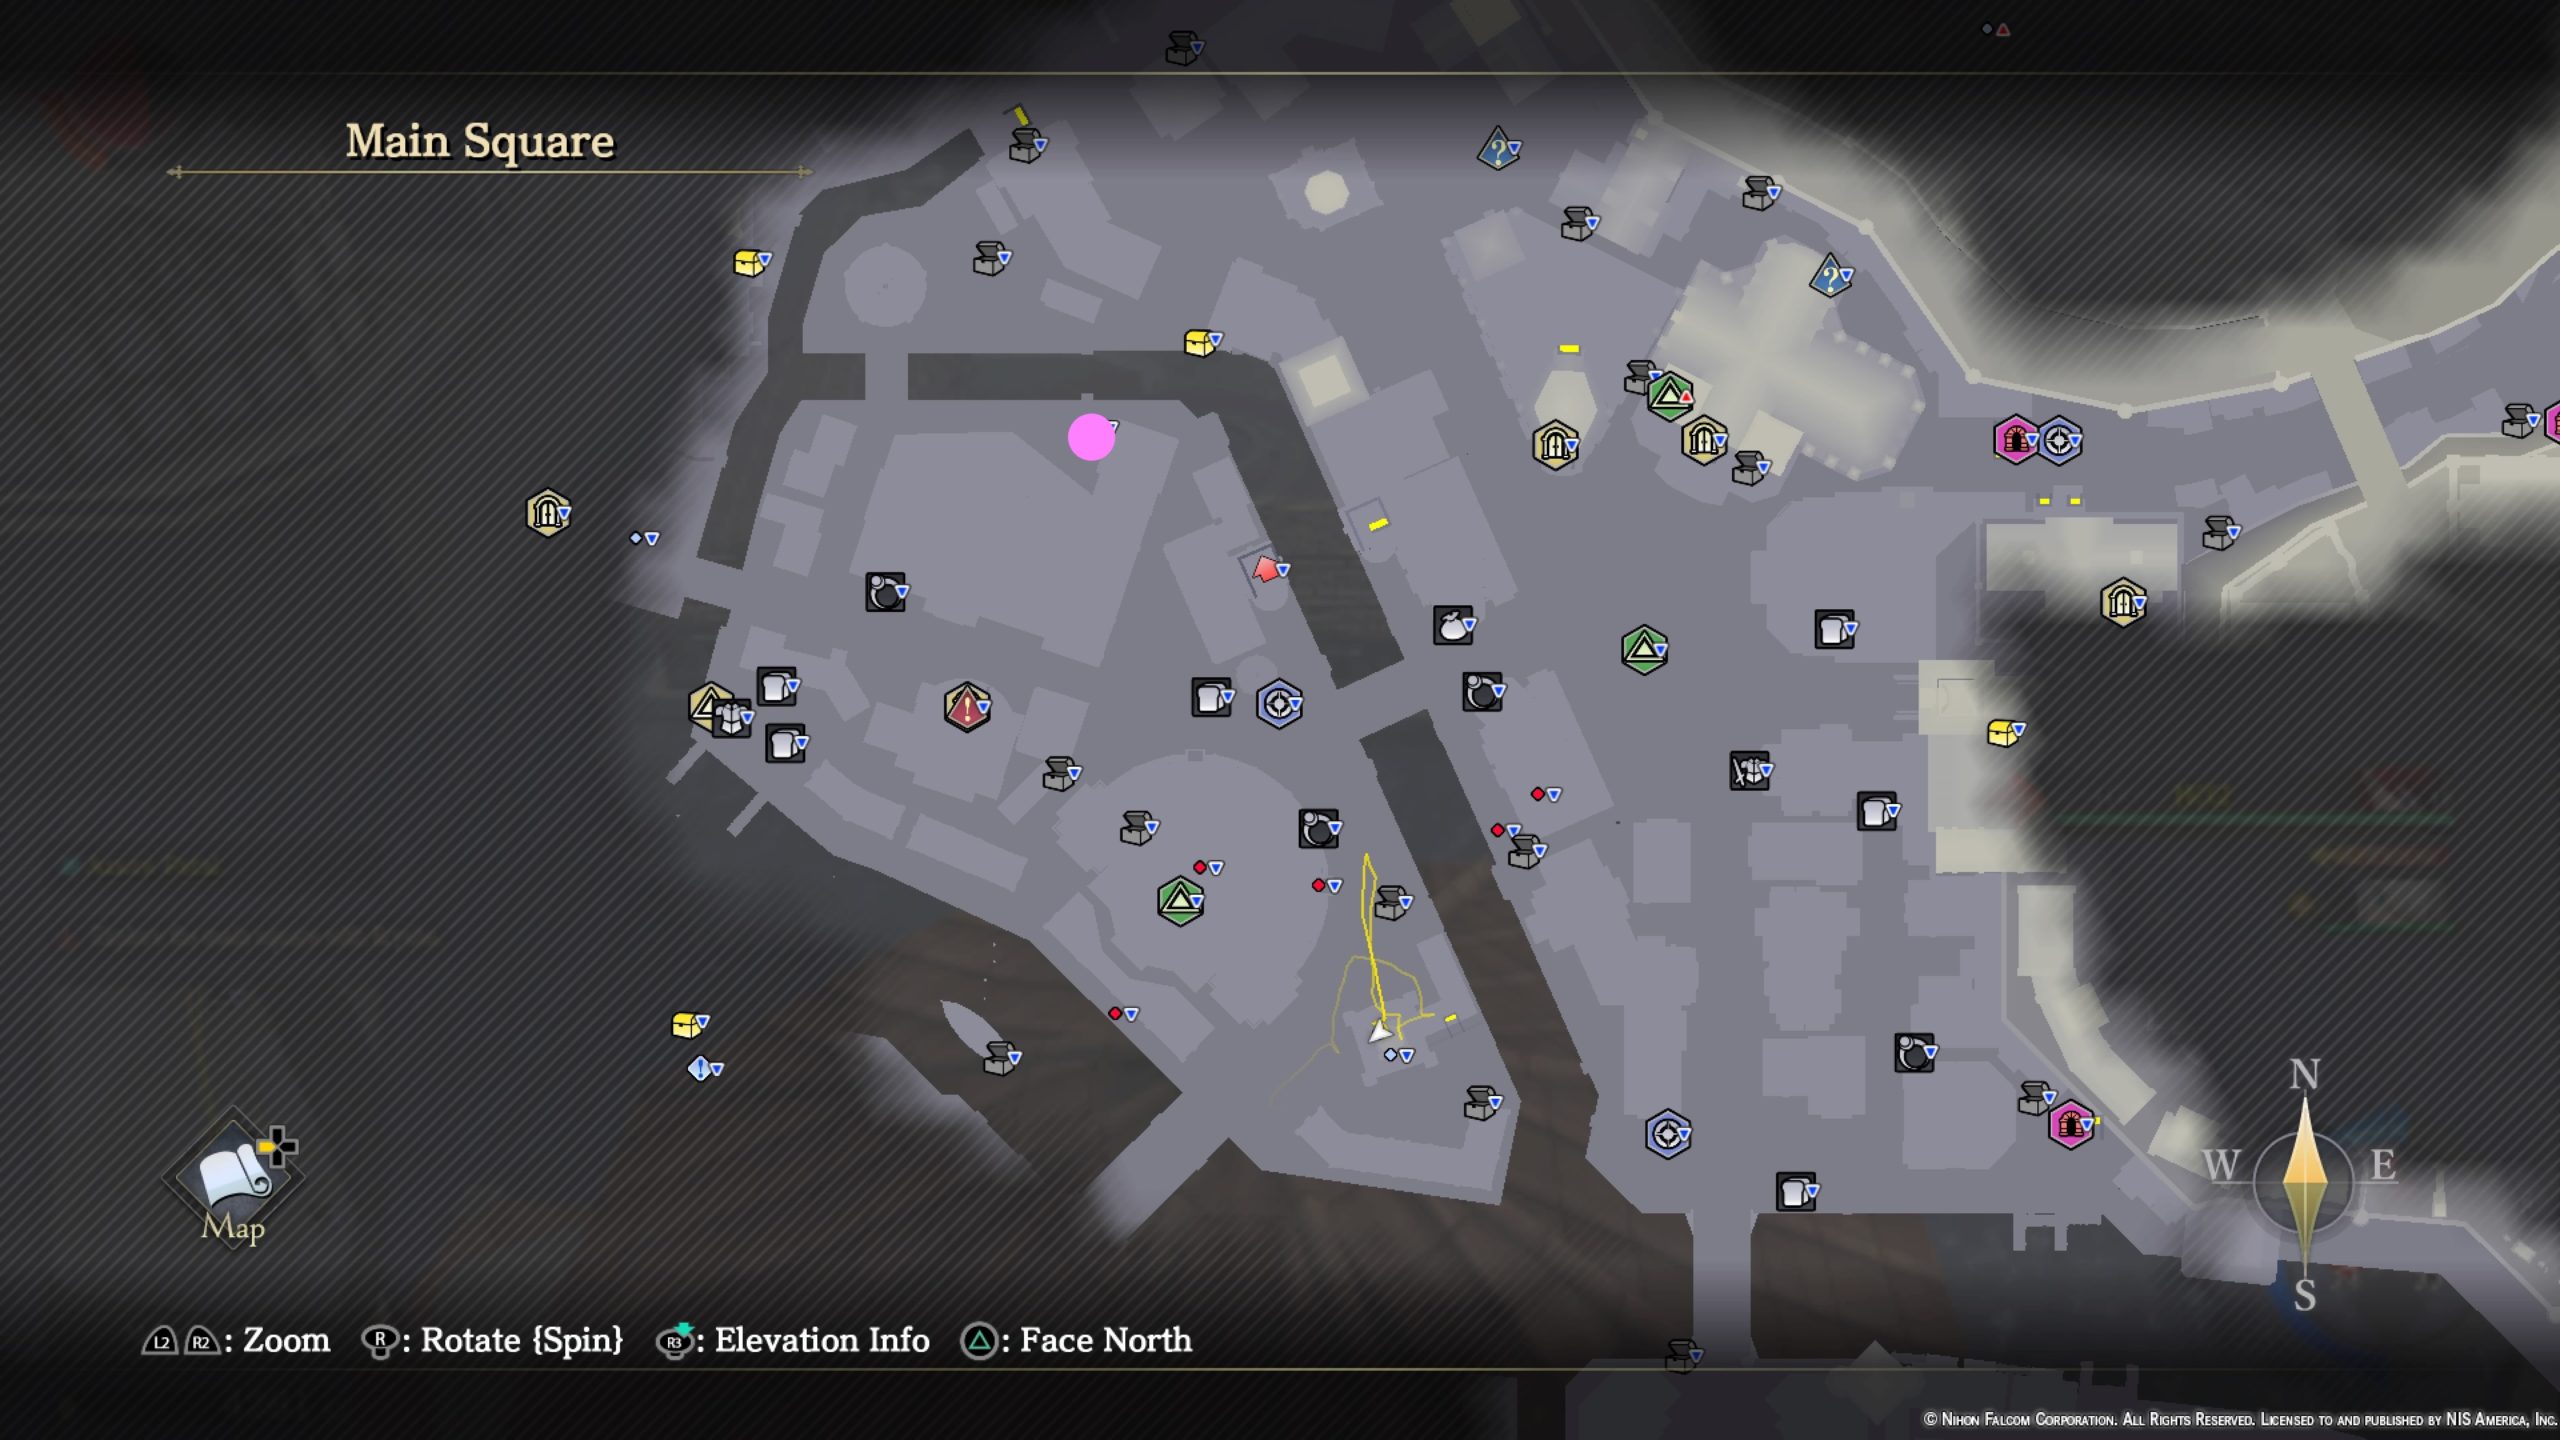
- 3000 Gold
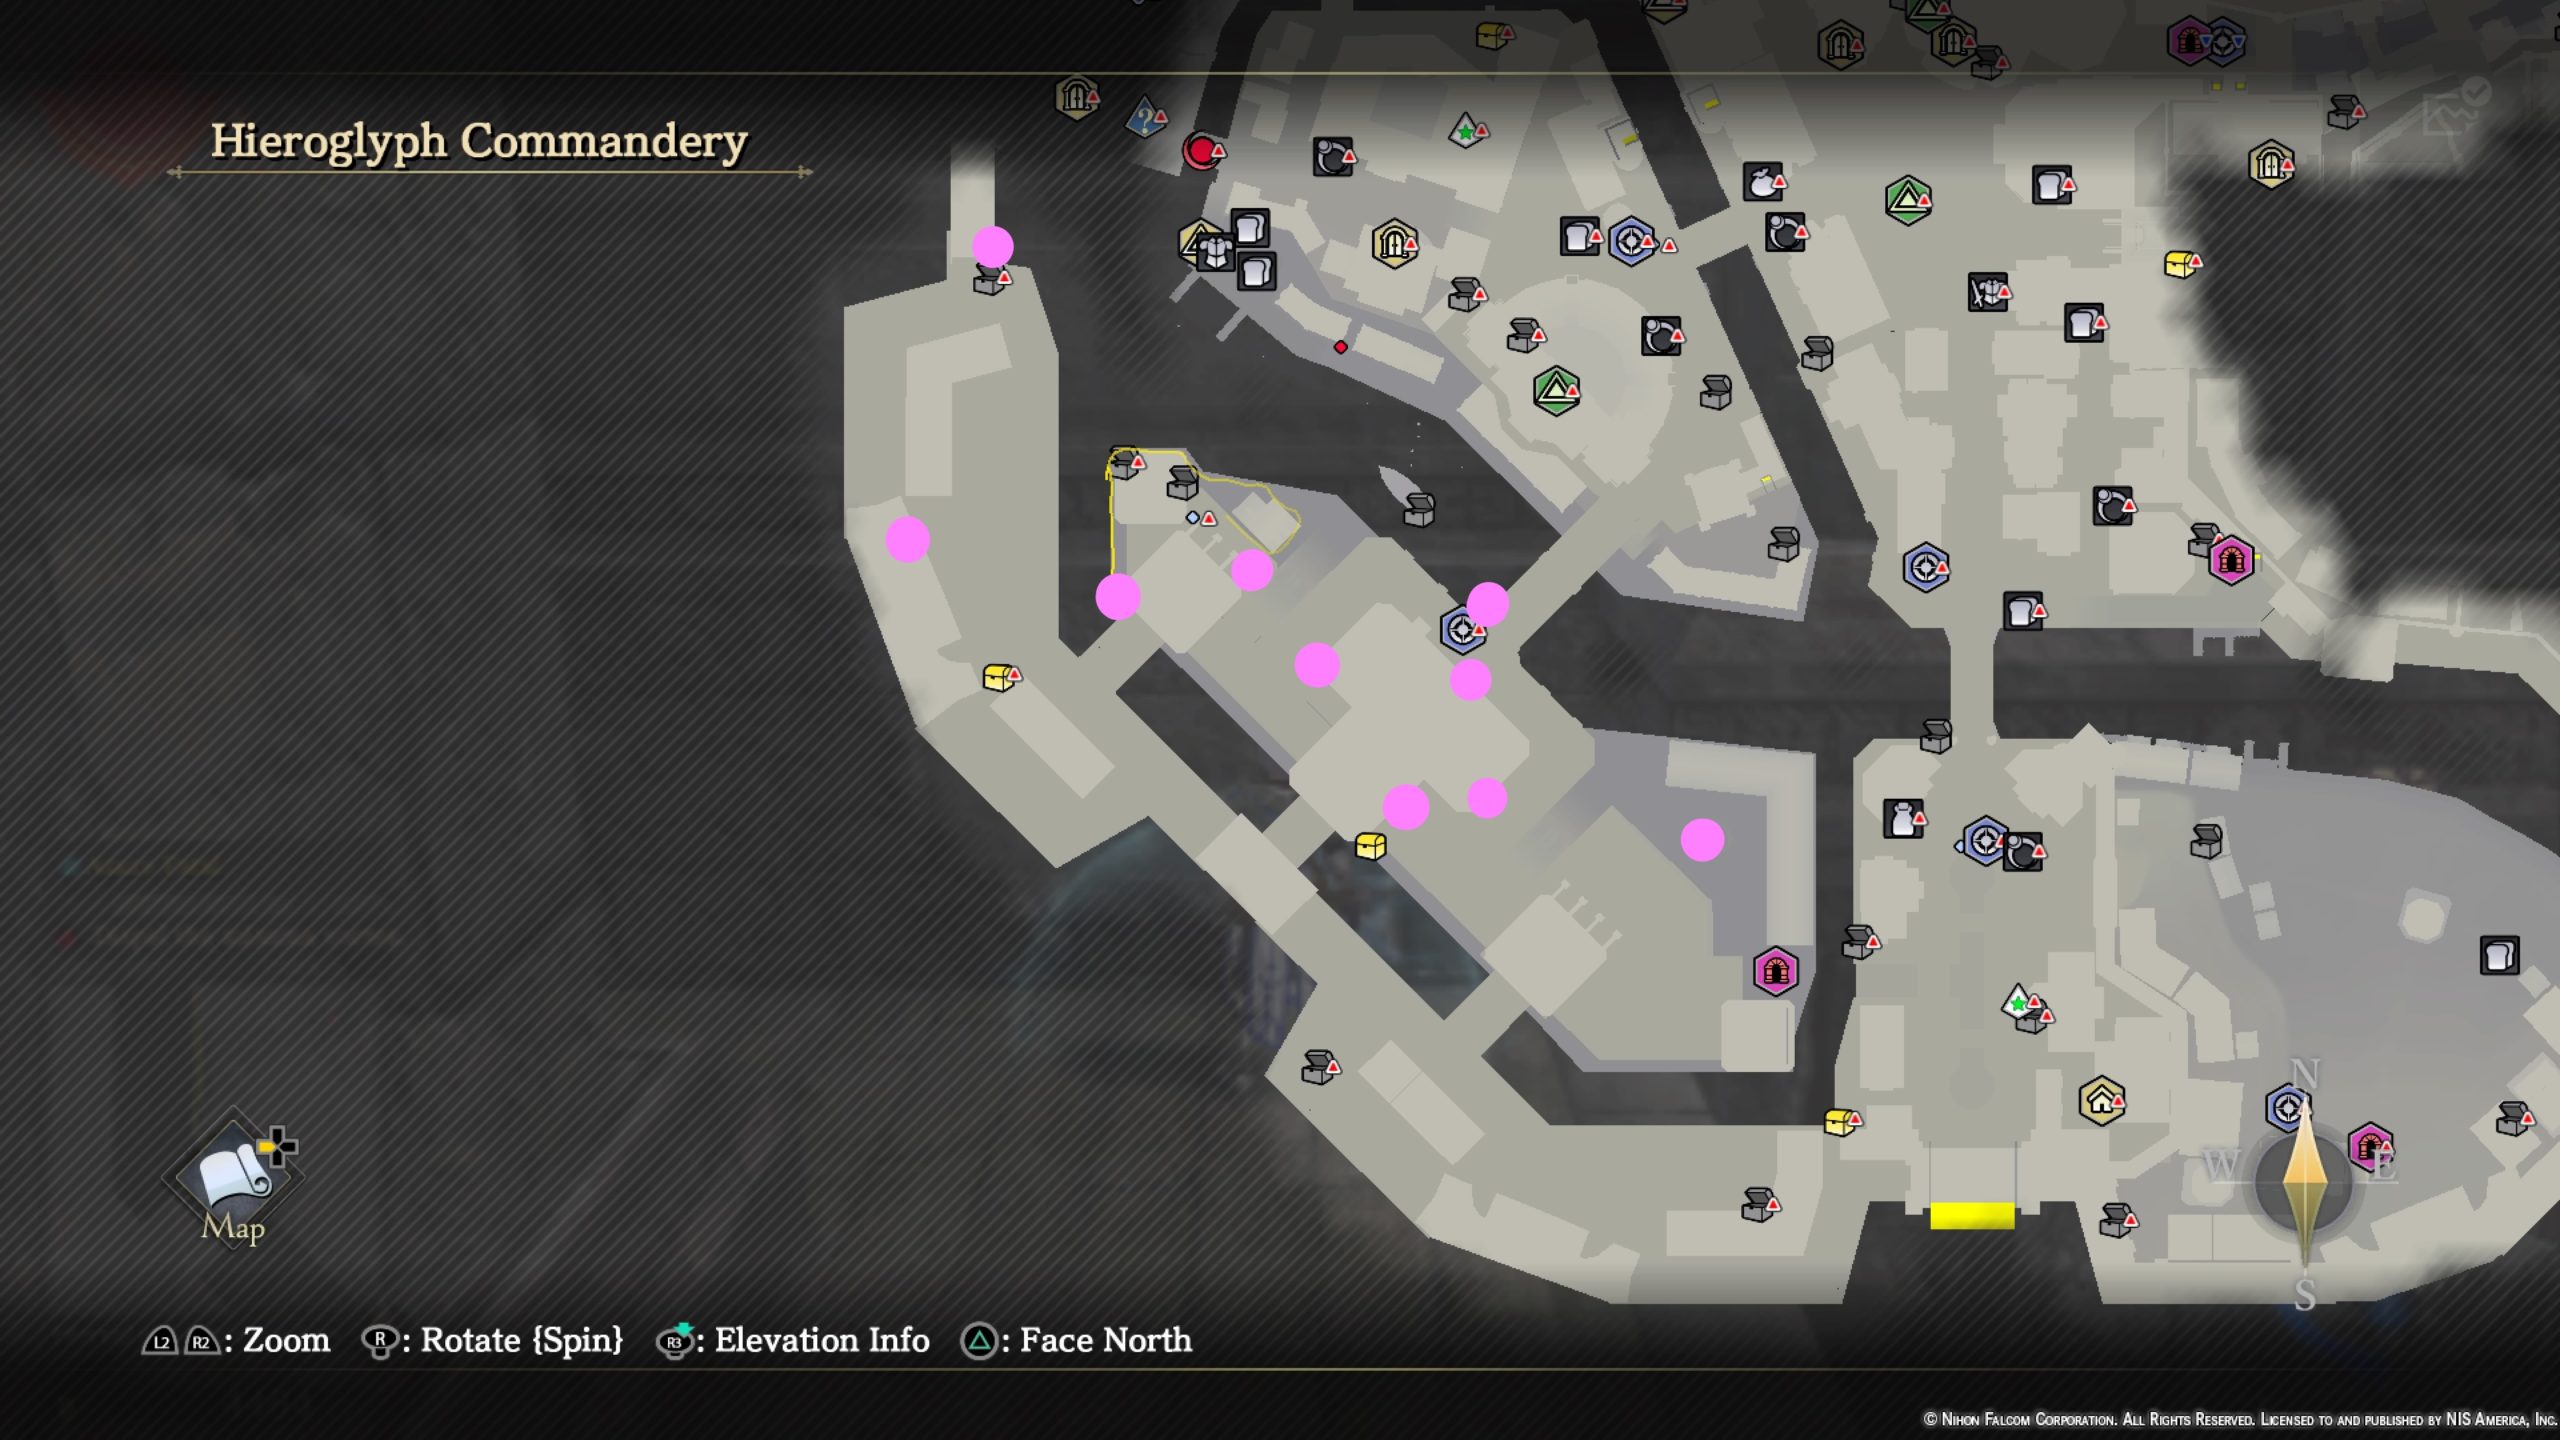
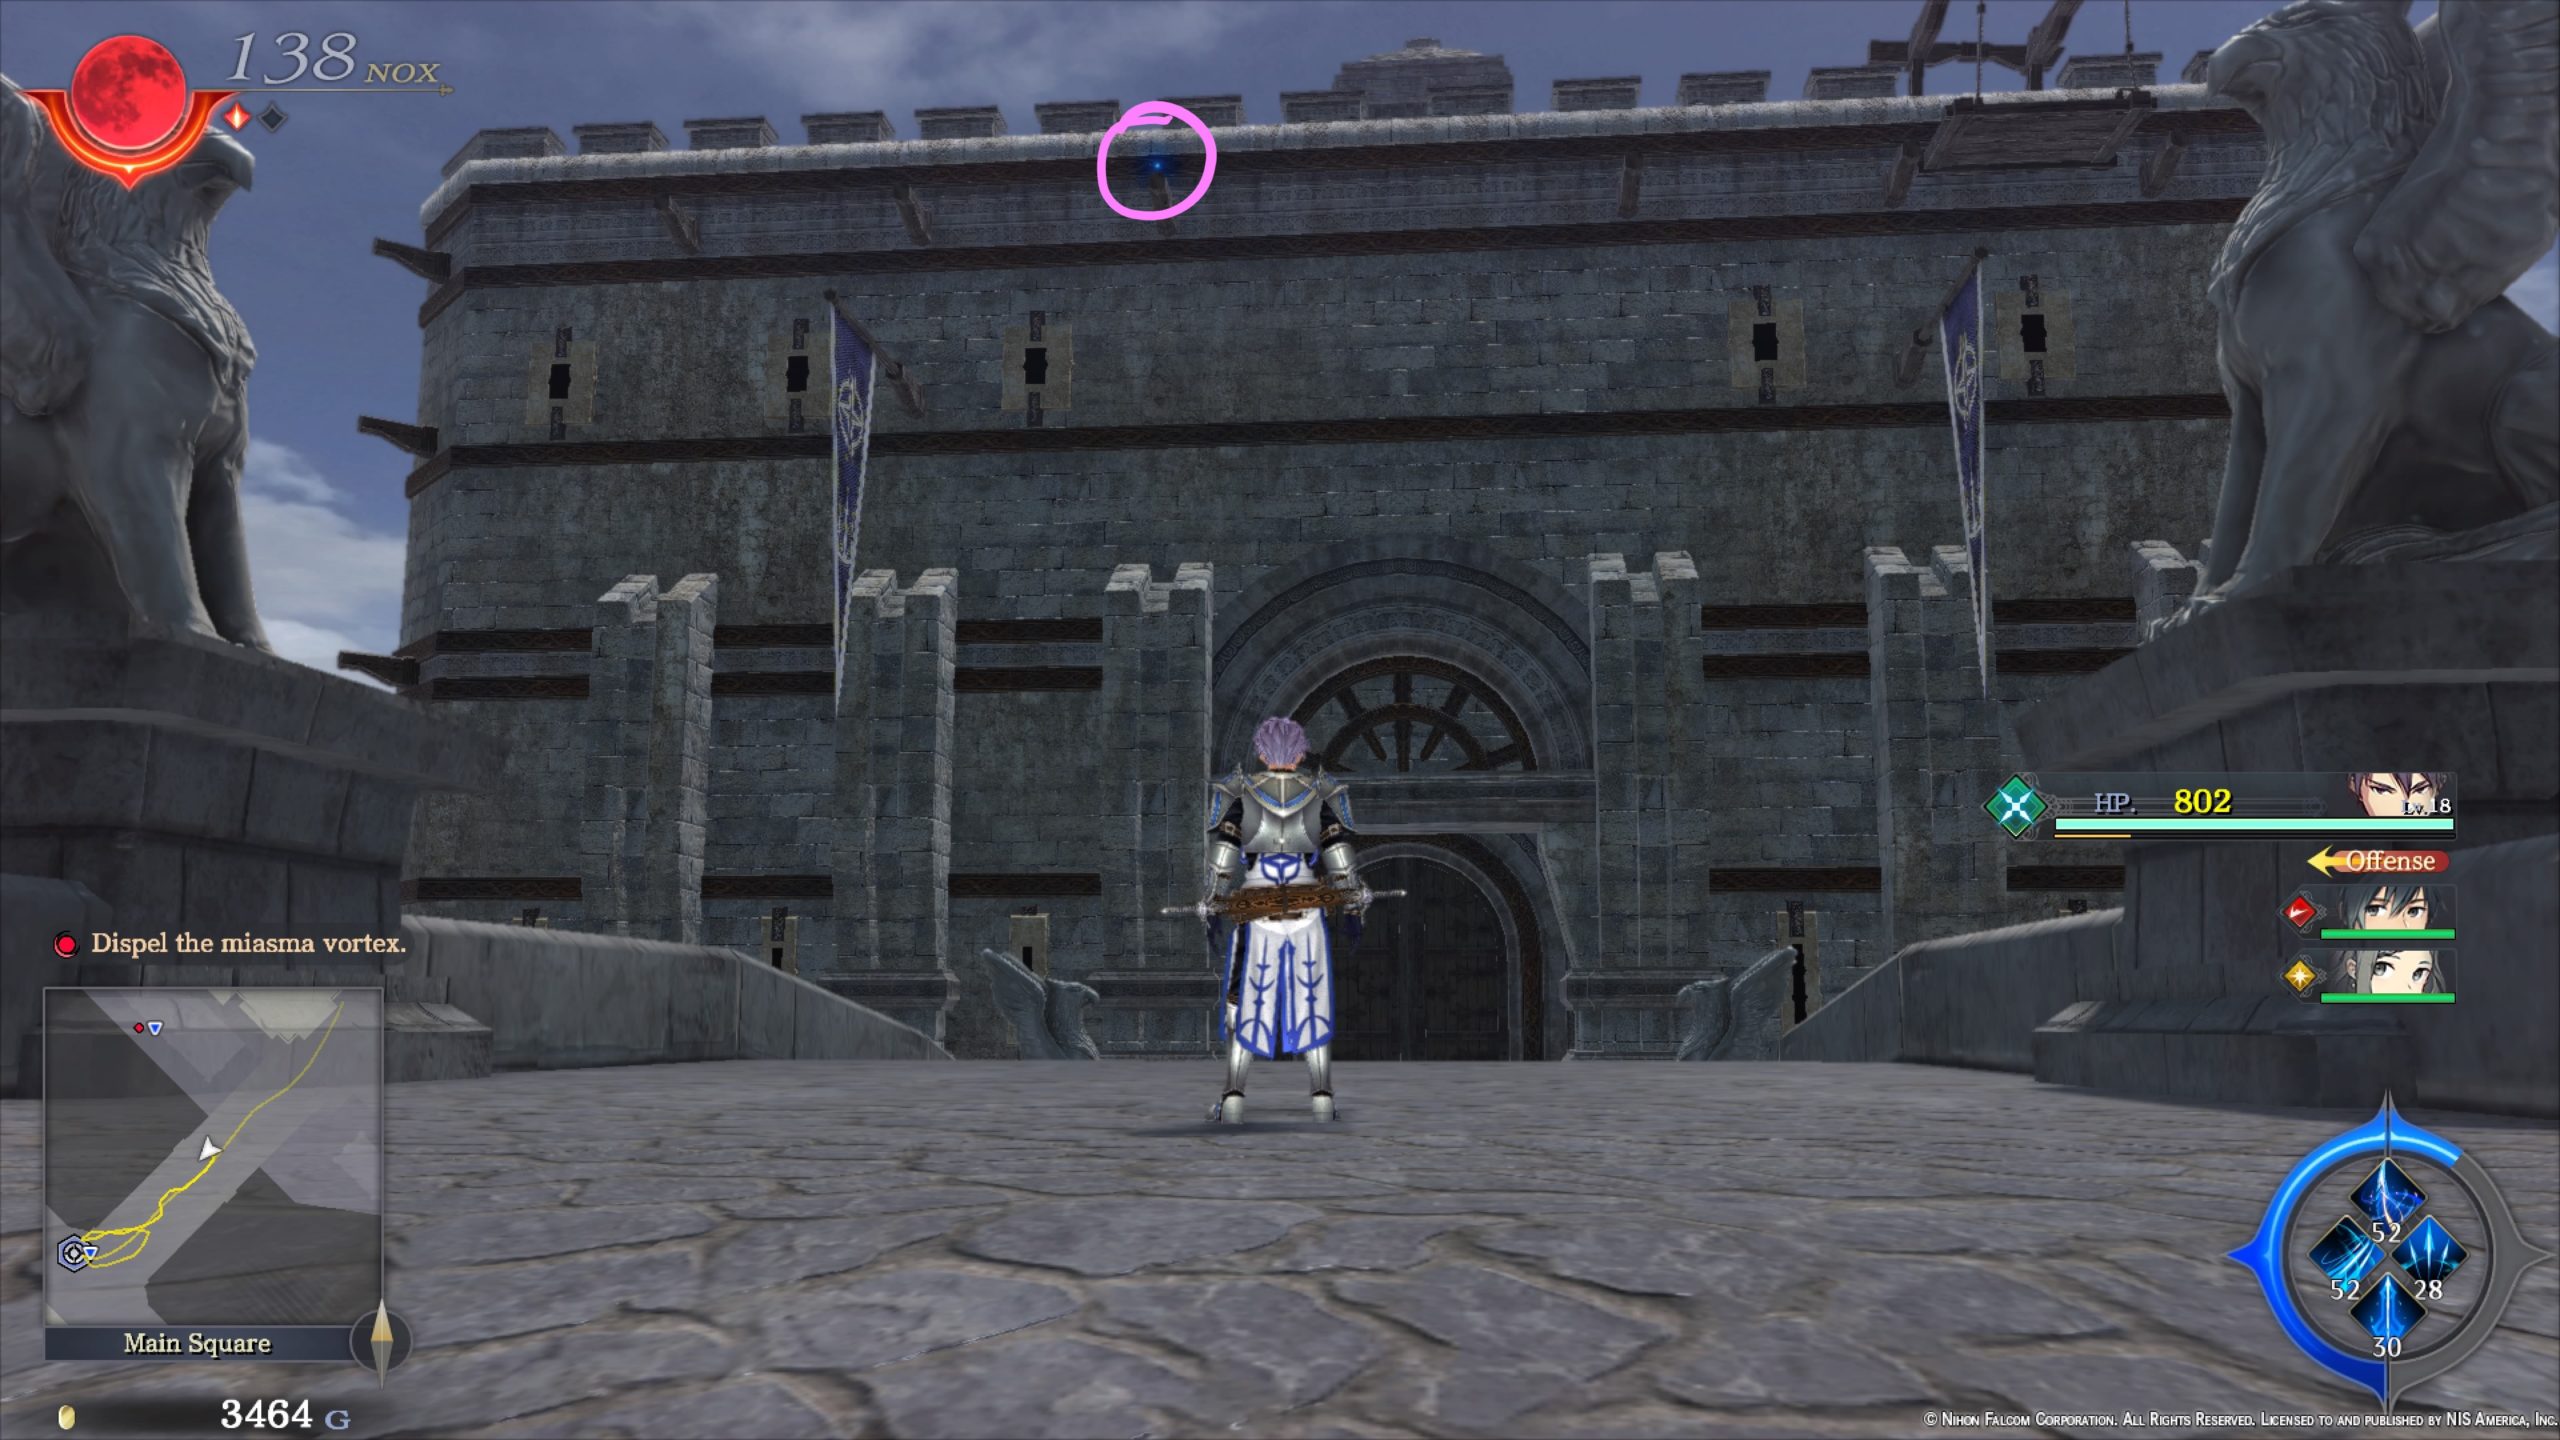
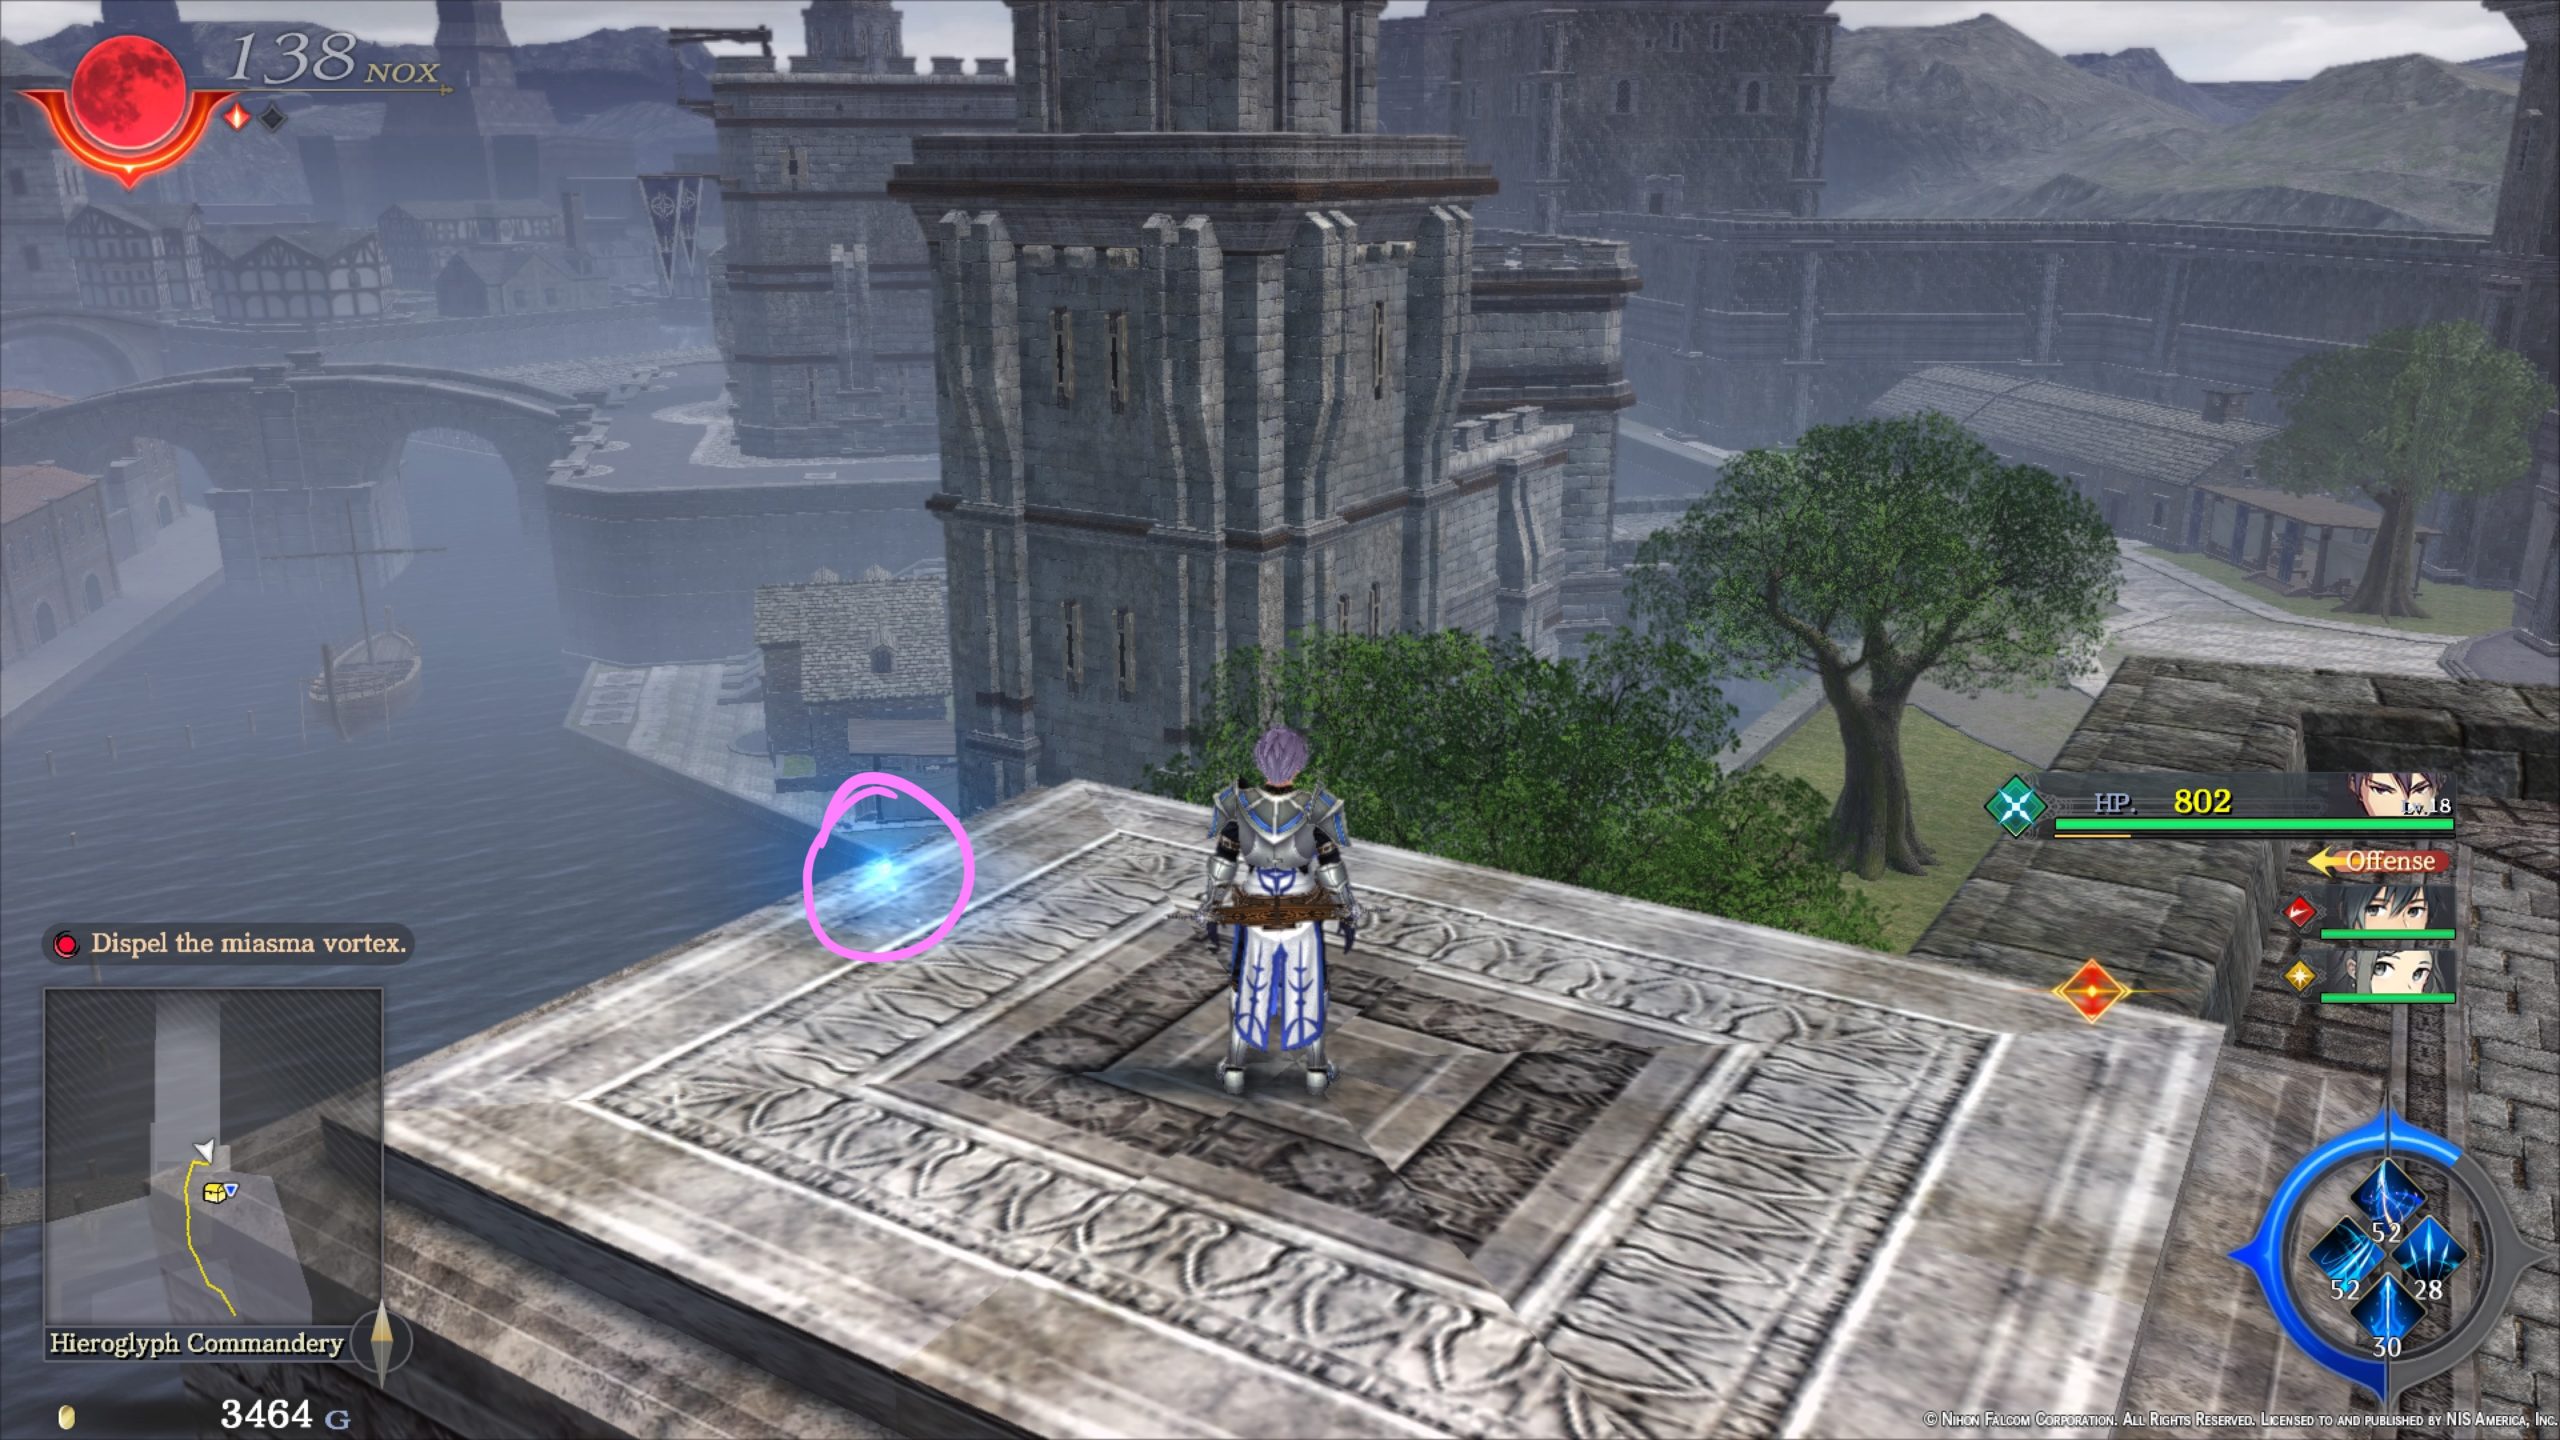
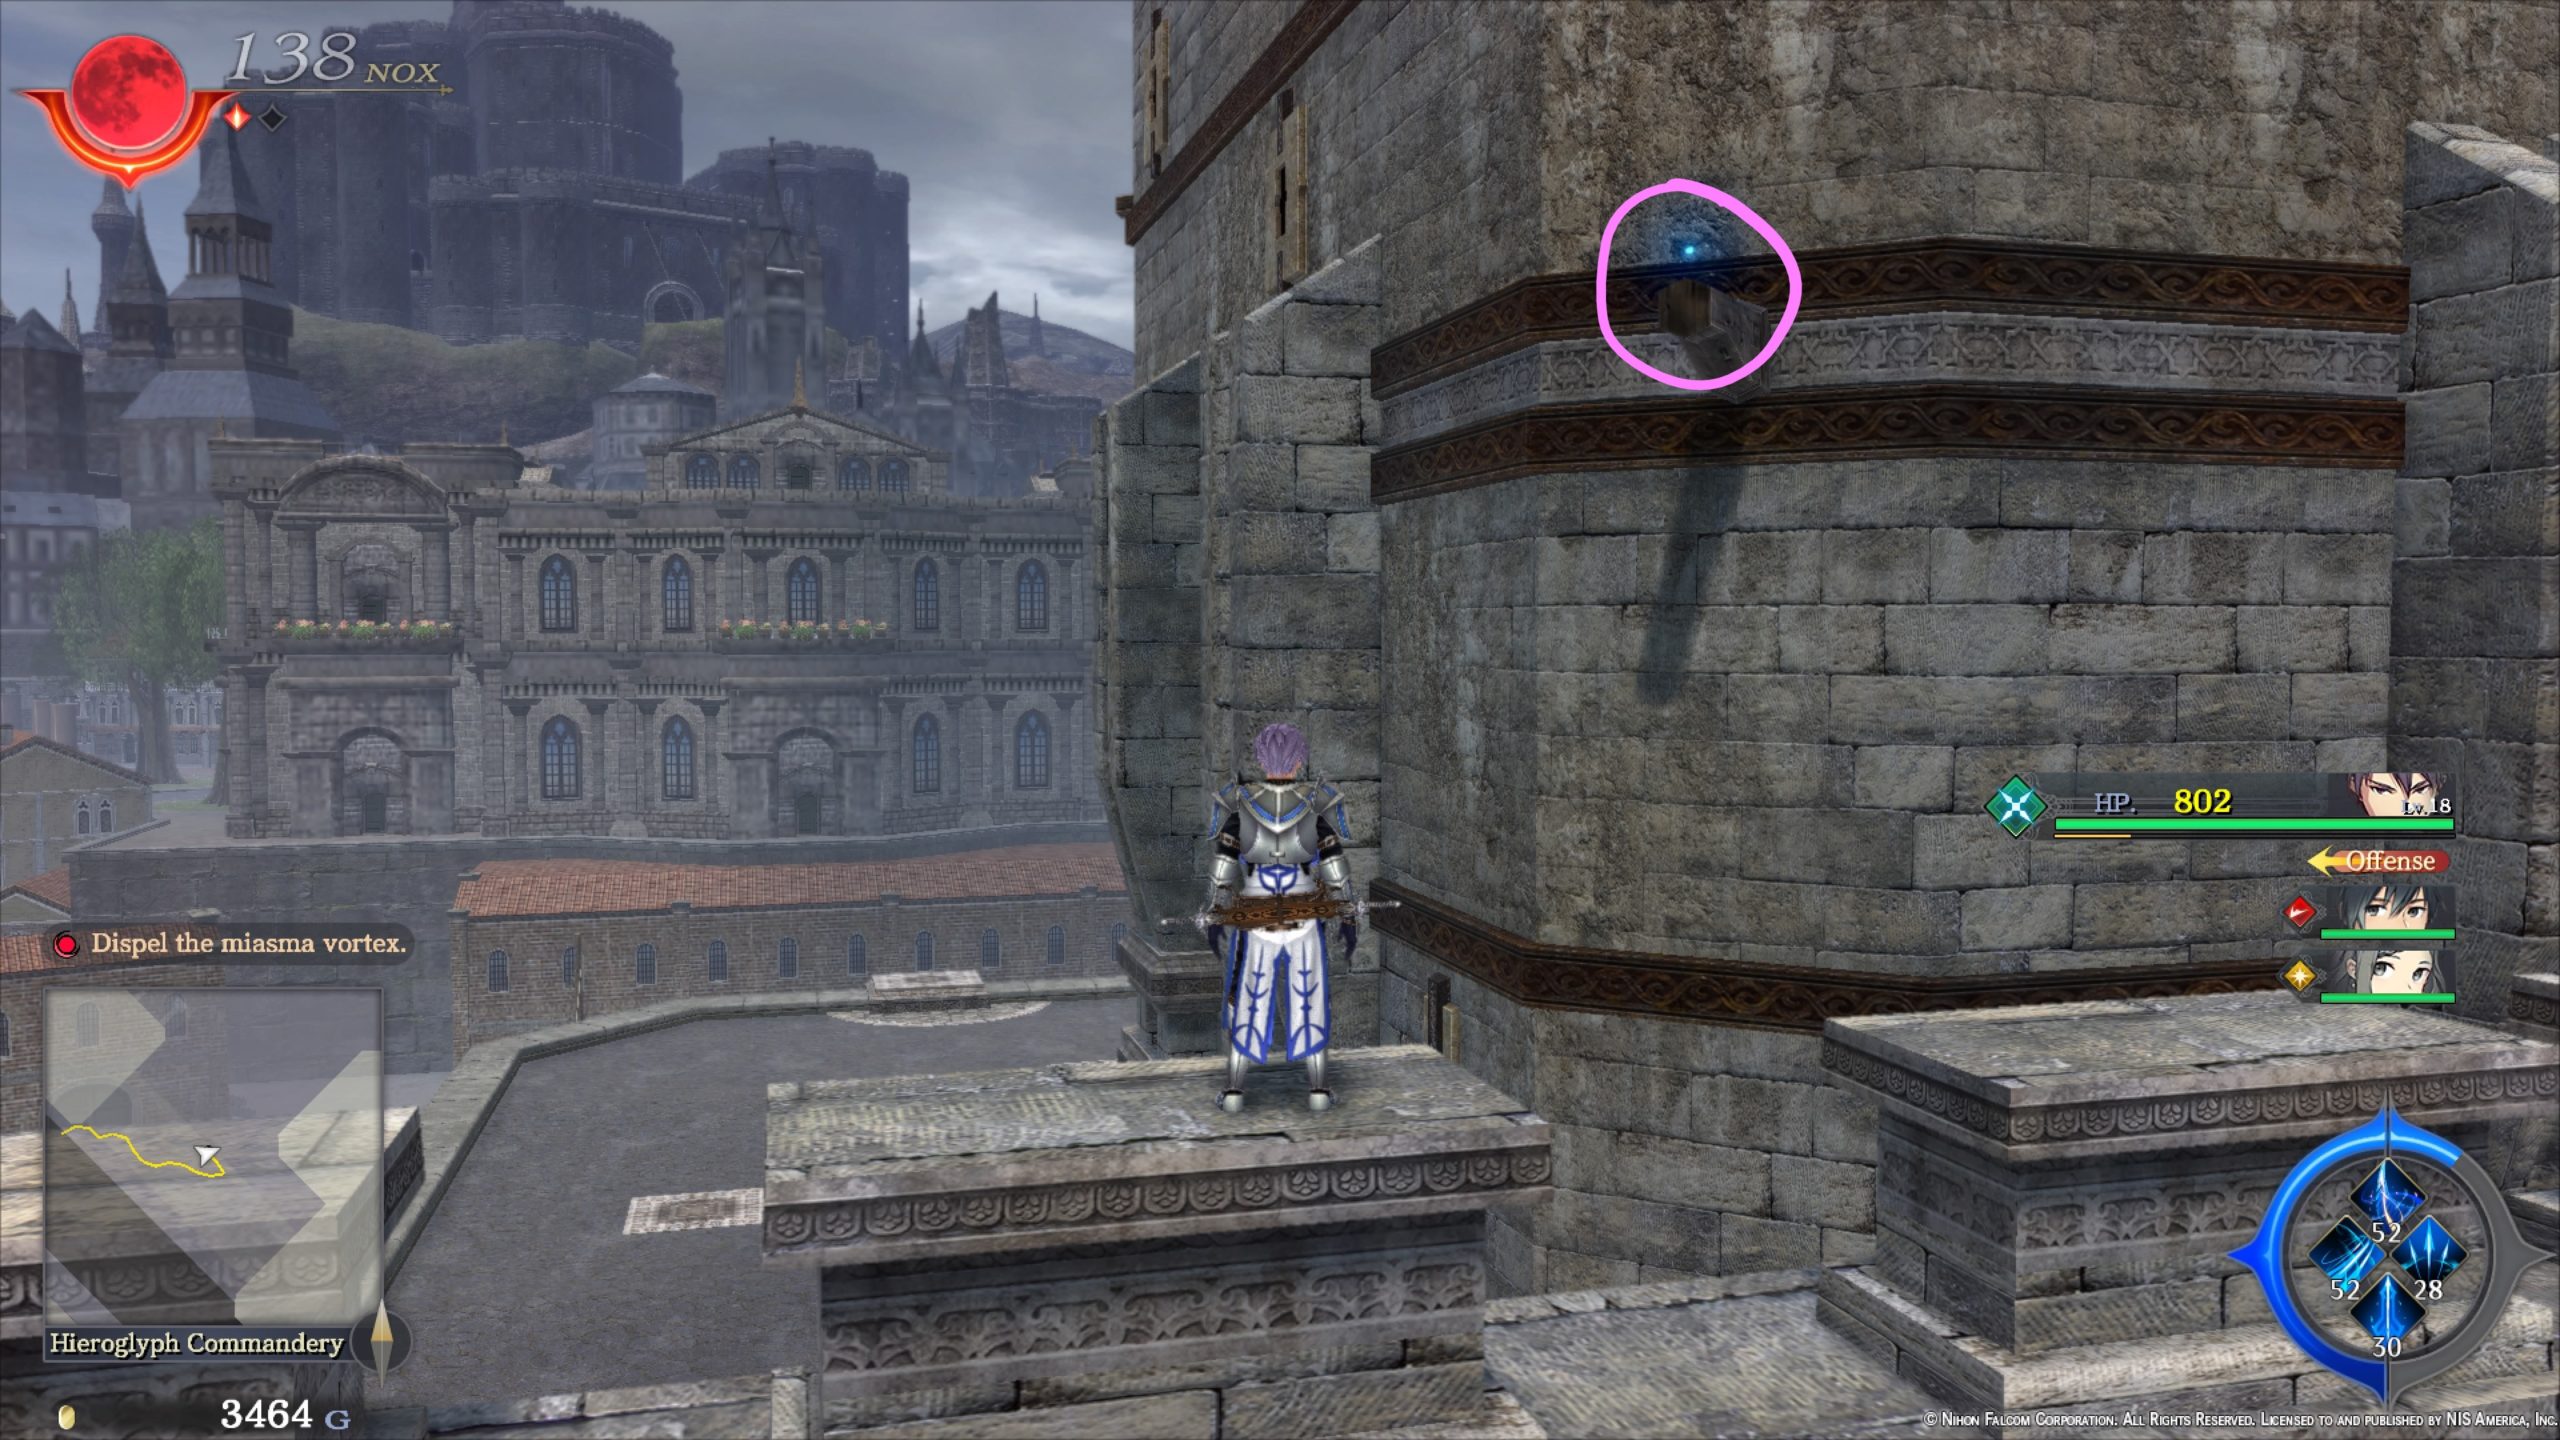
Hieroglyph Commandery
Treasure Chests
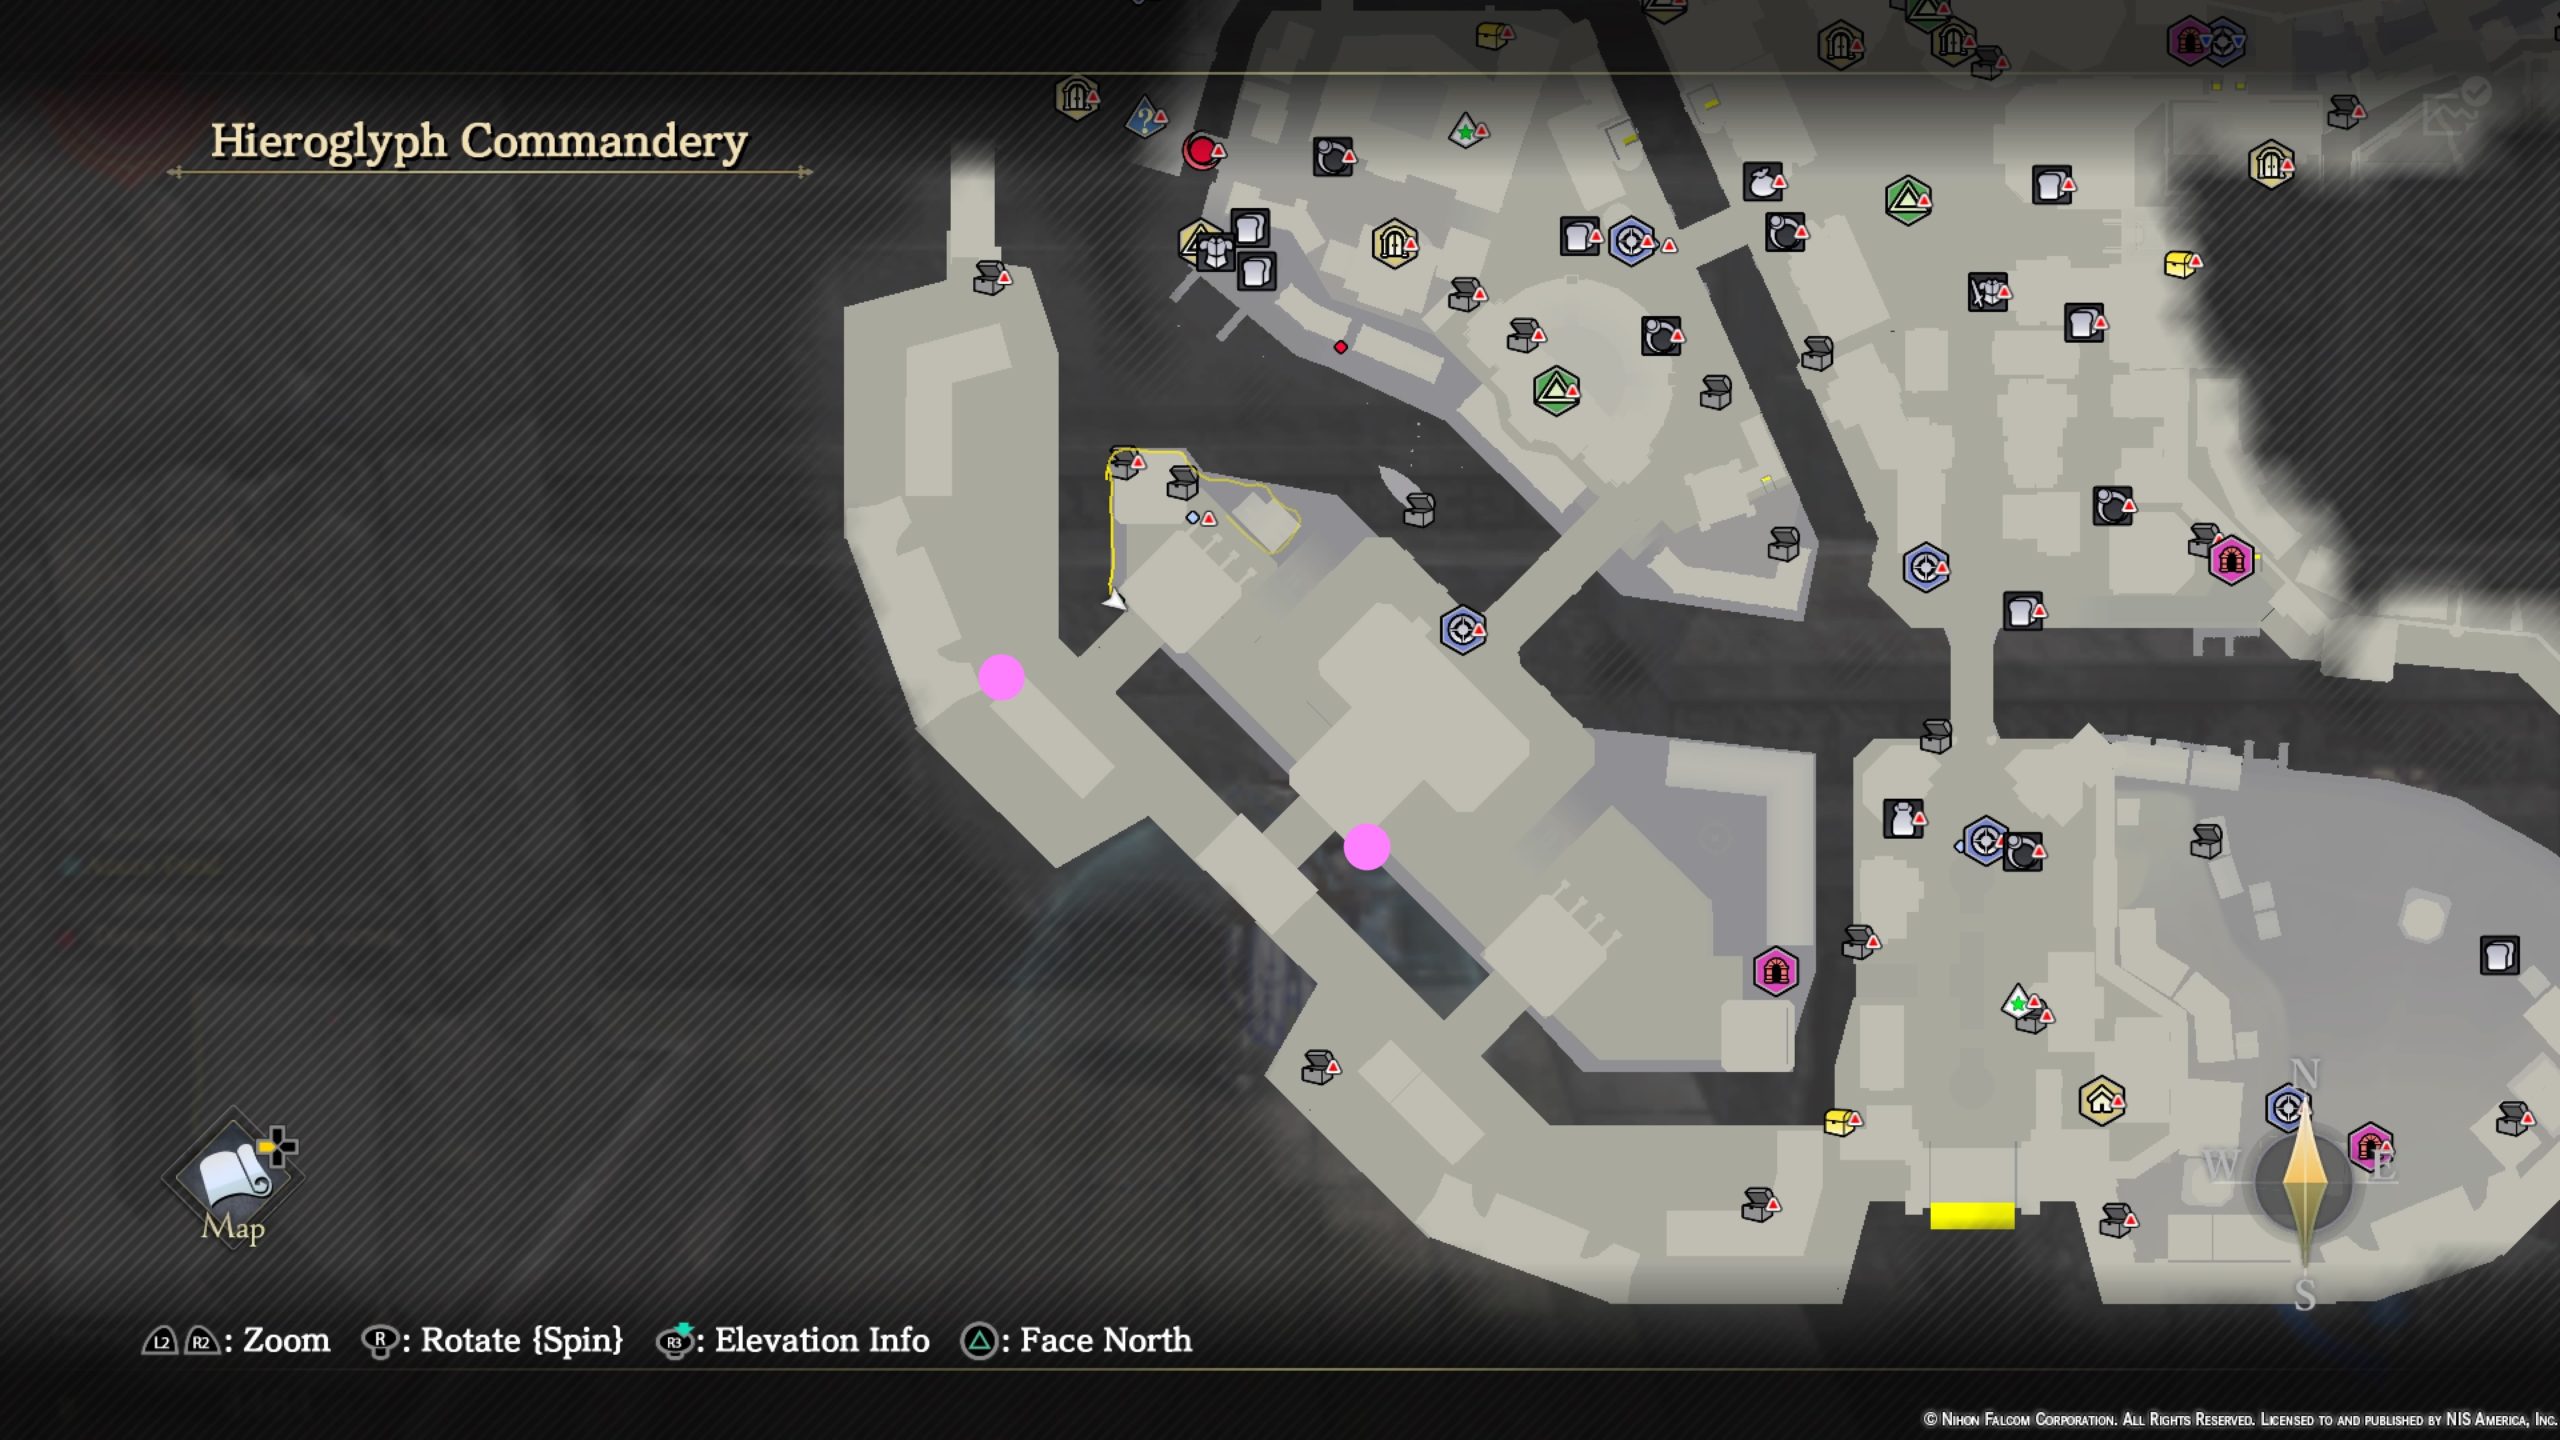
- Nors Bleu x2
- 3000 Gold
- Requires Renegade to be in party
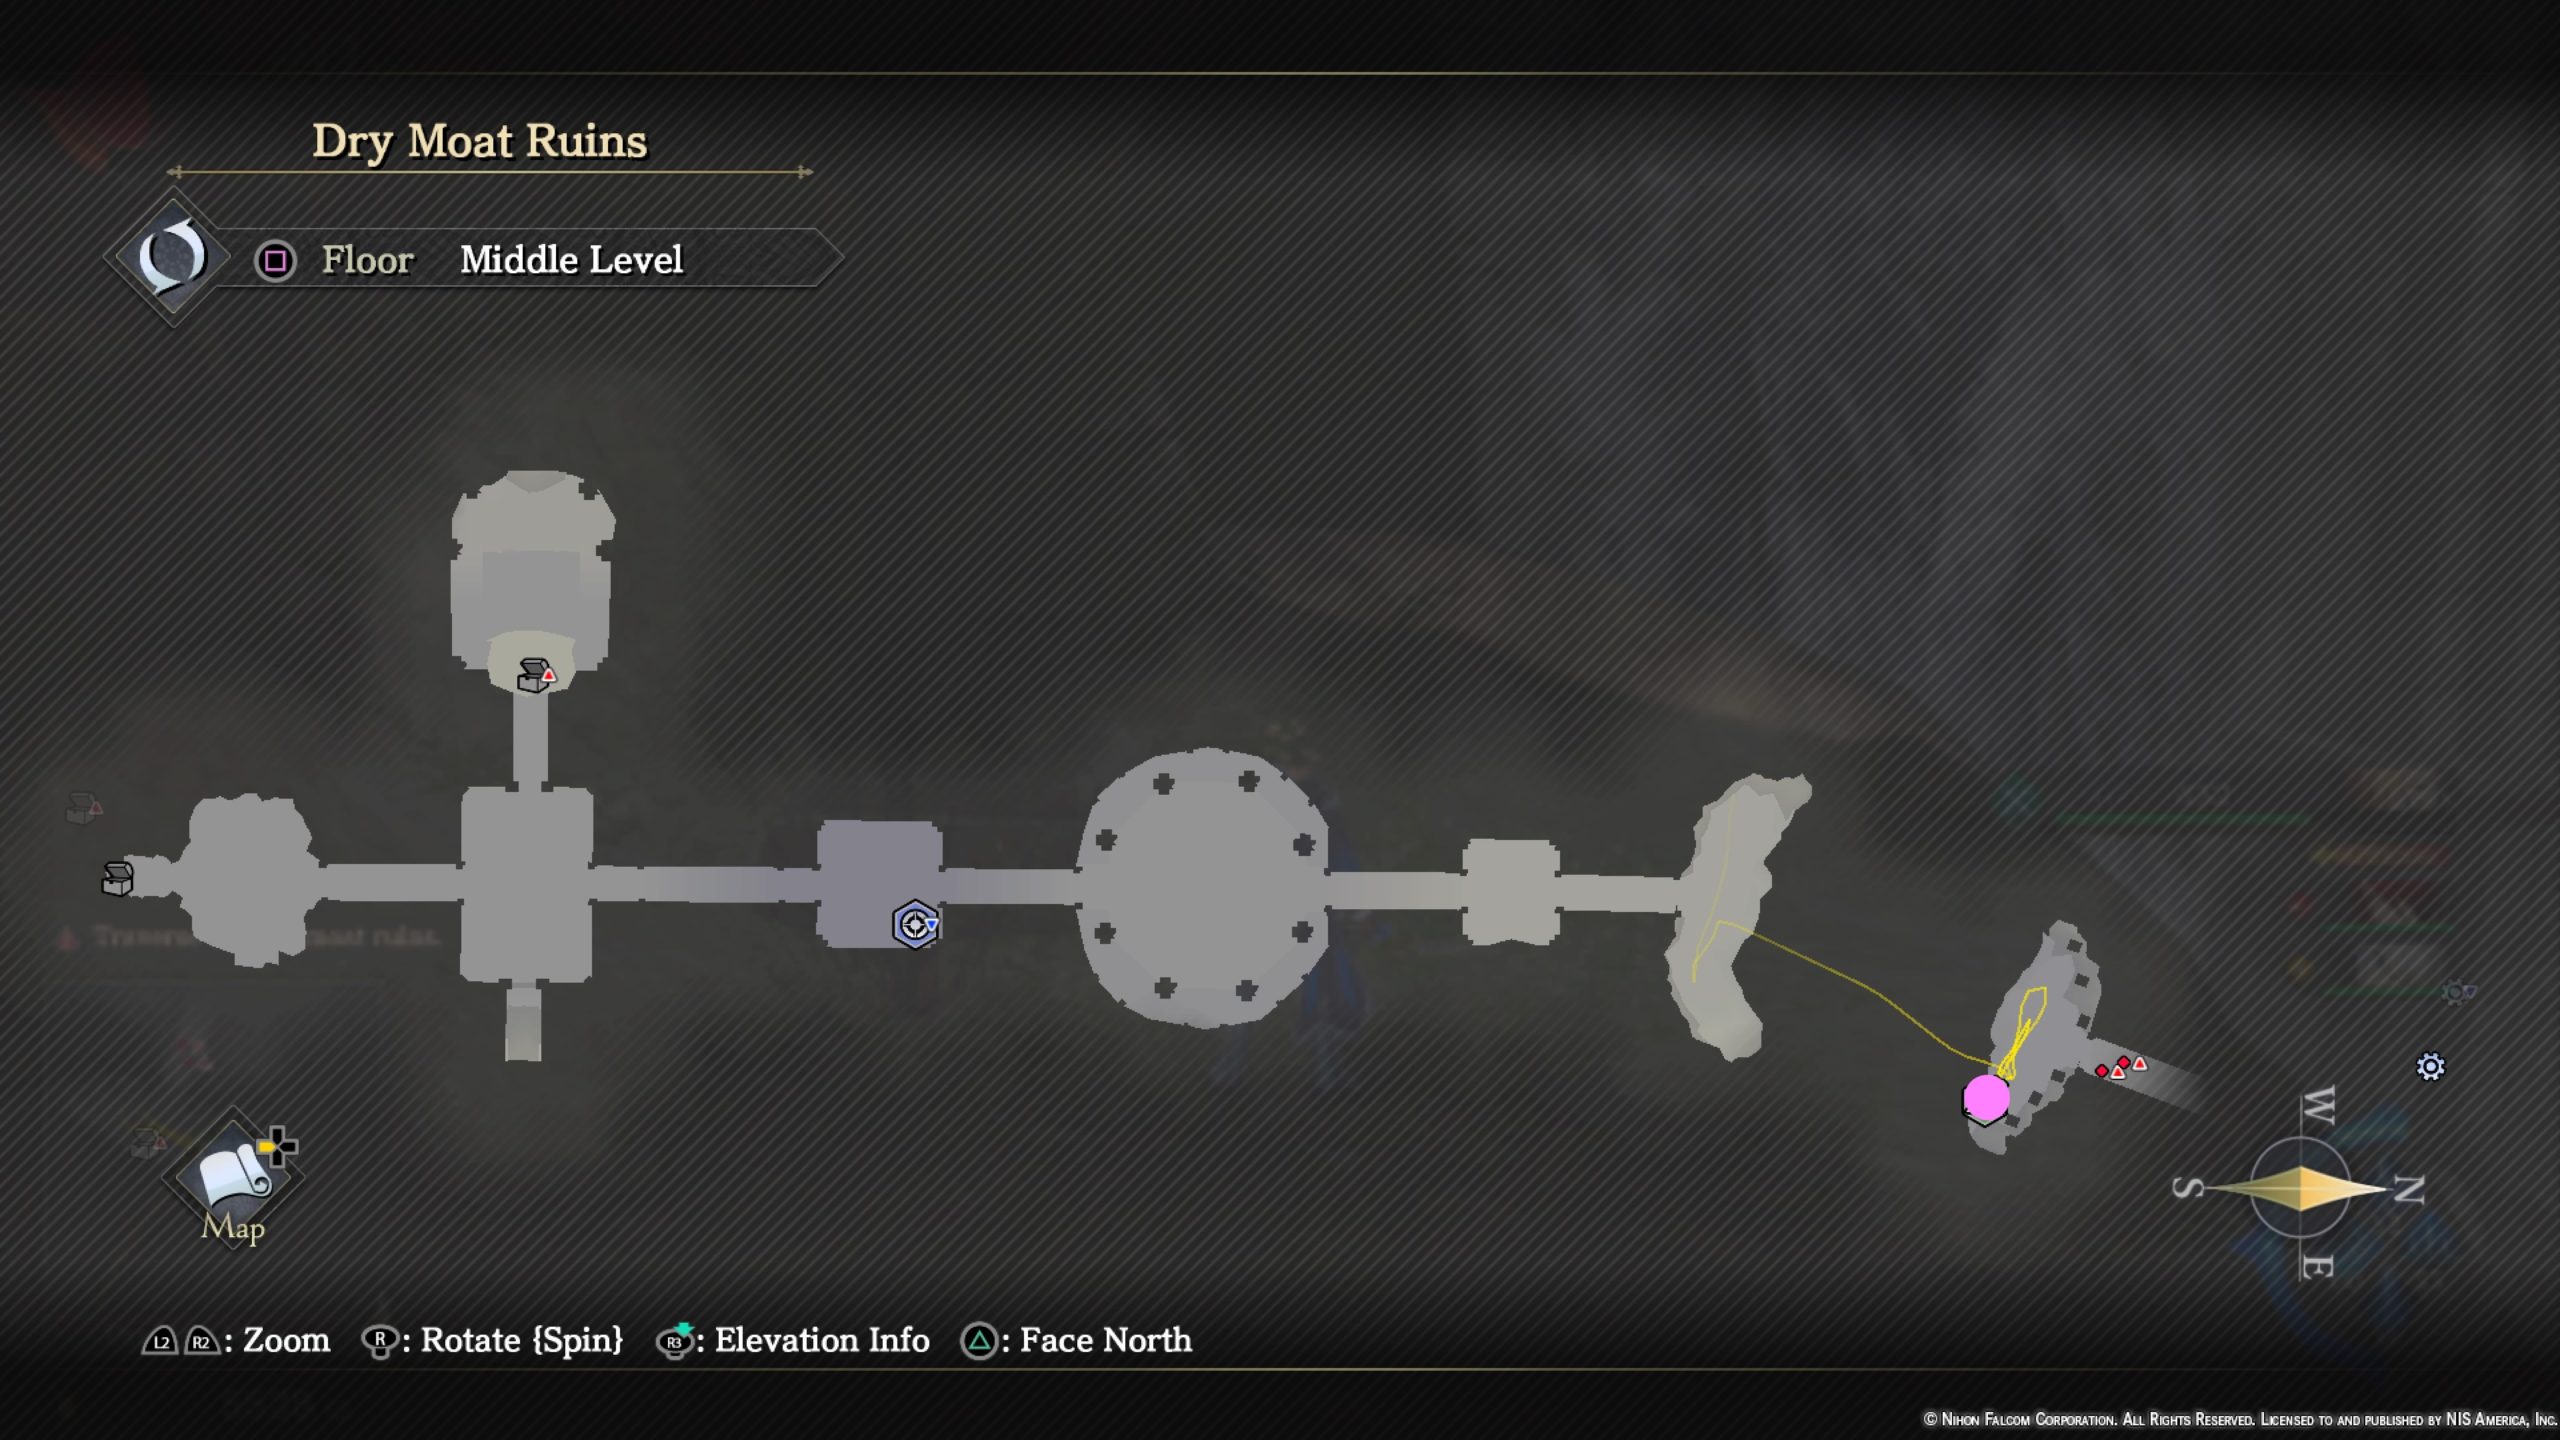
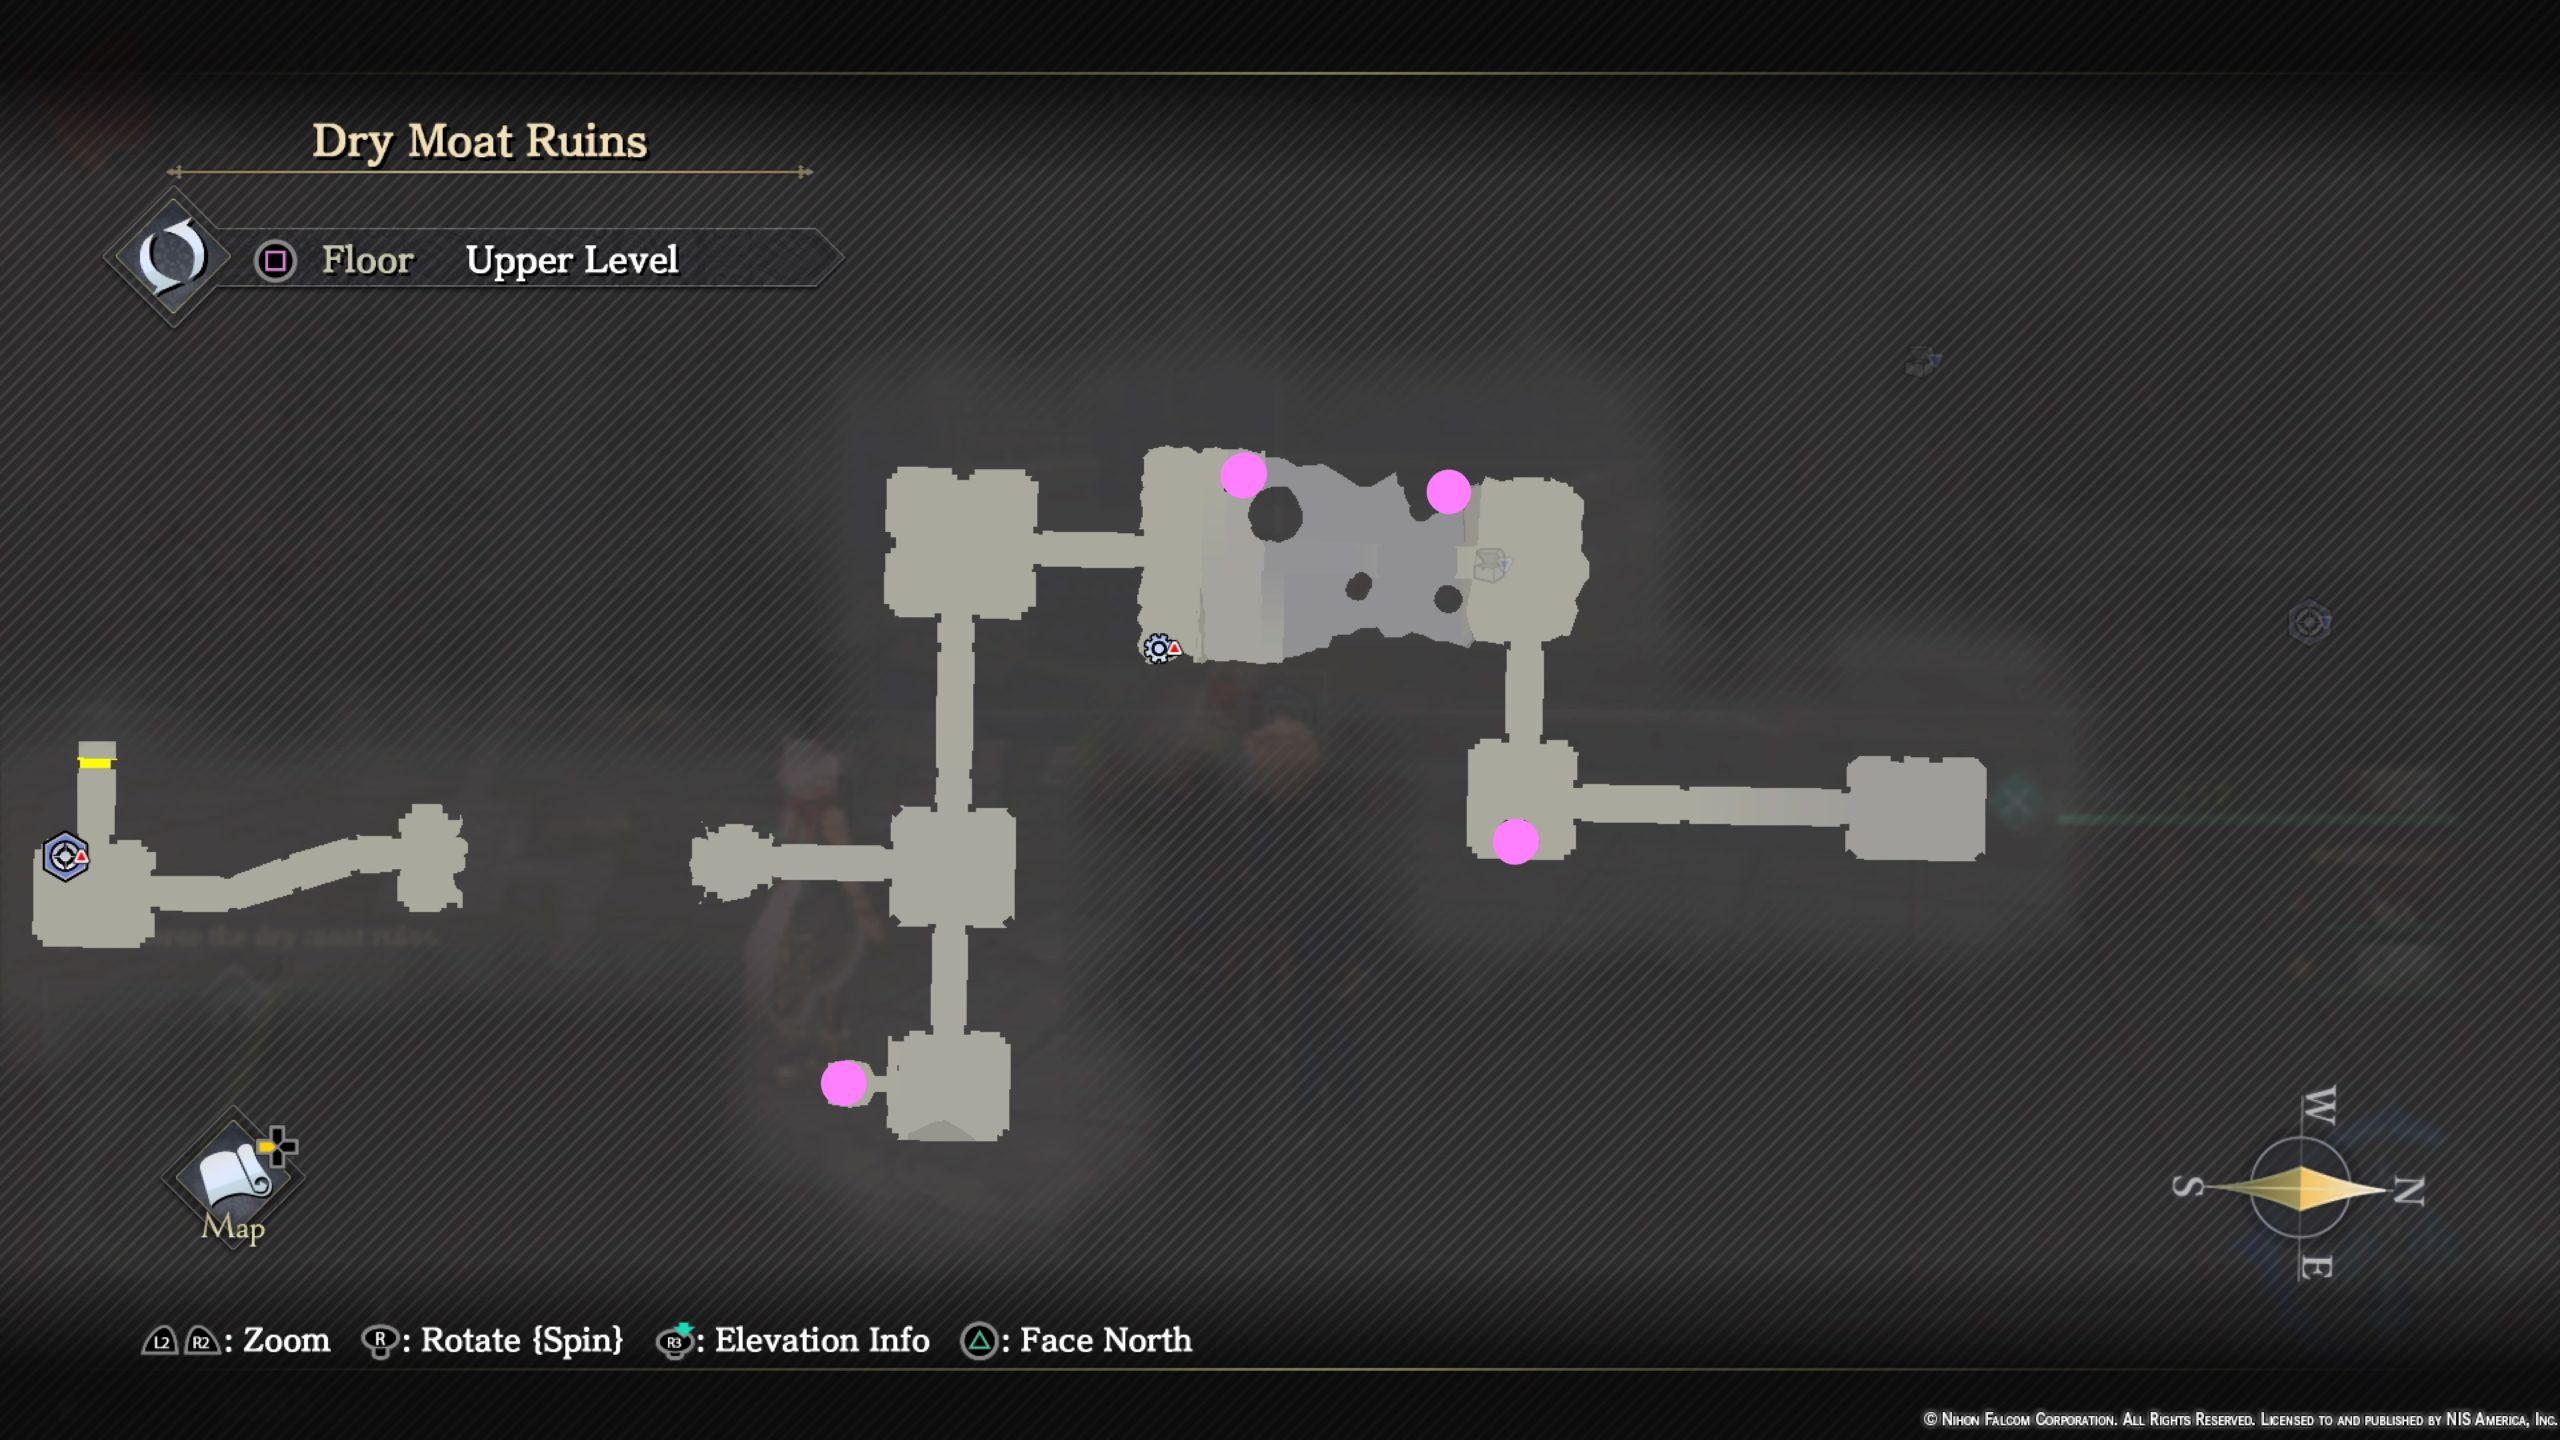
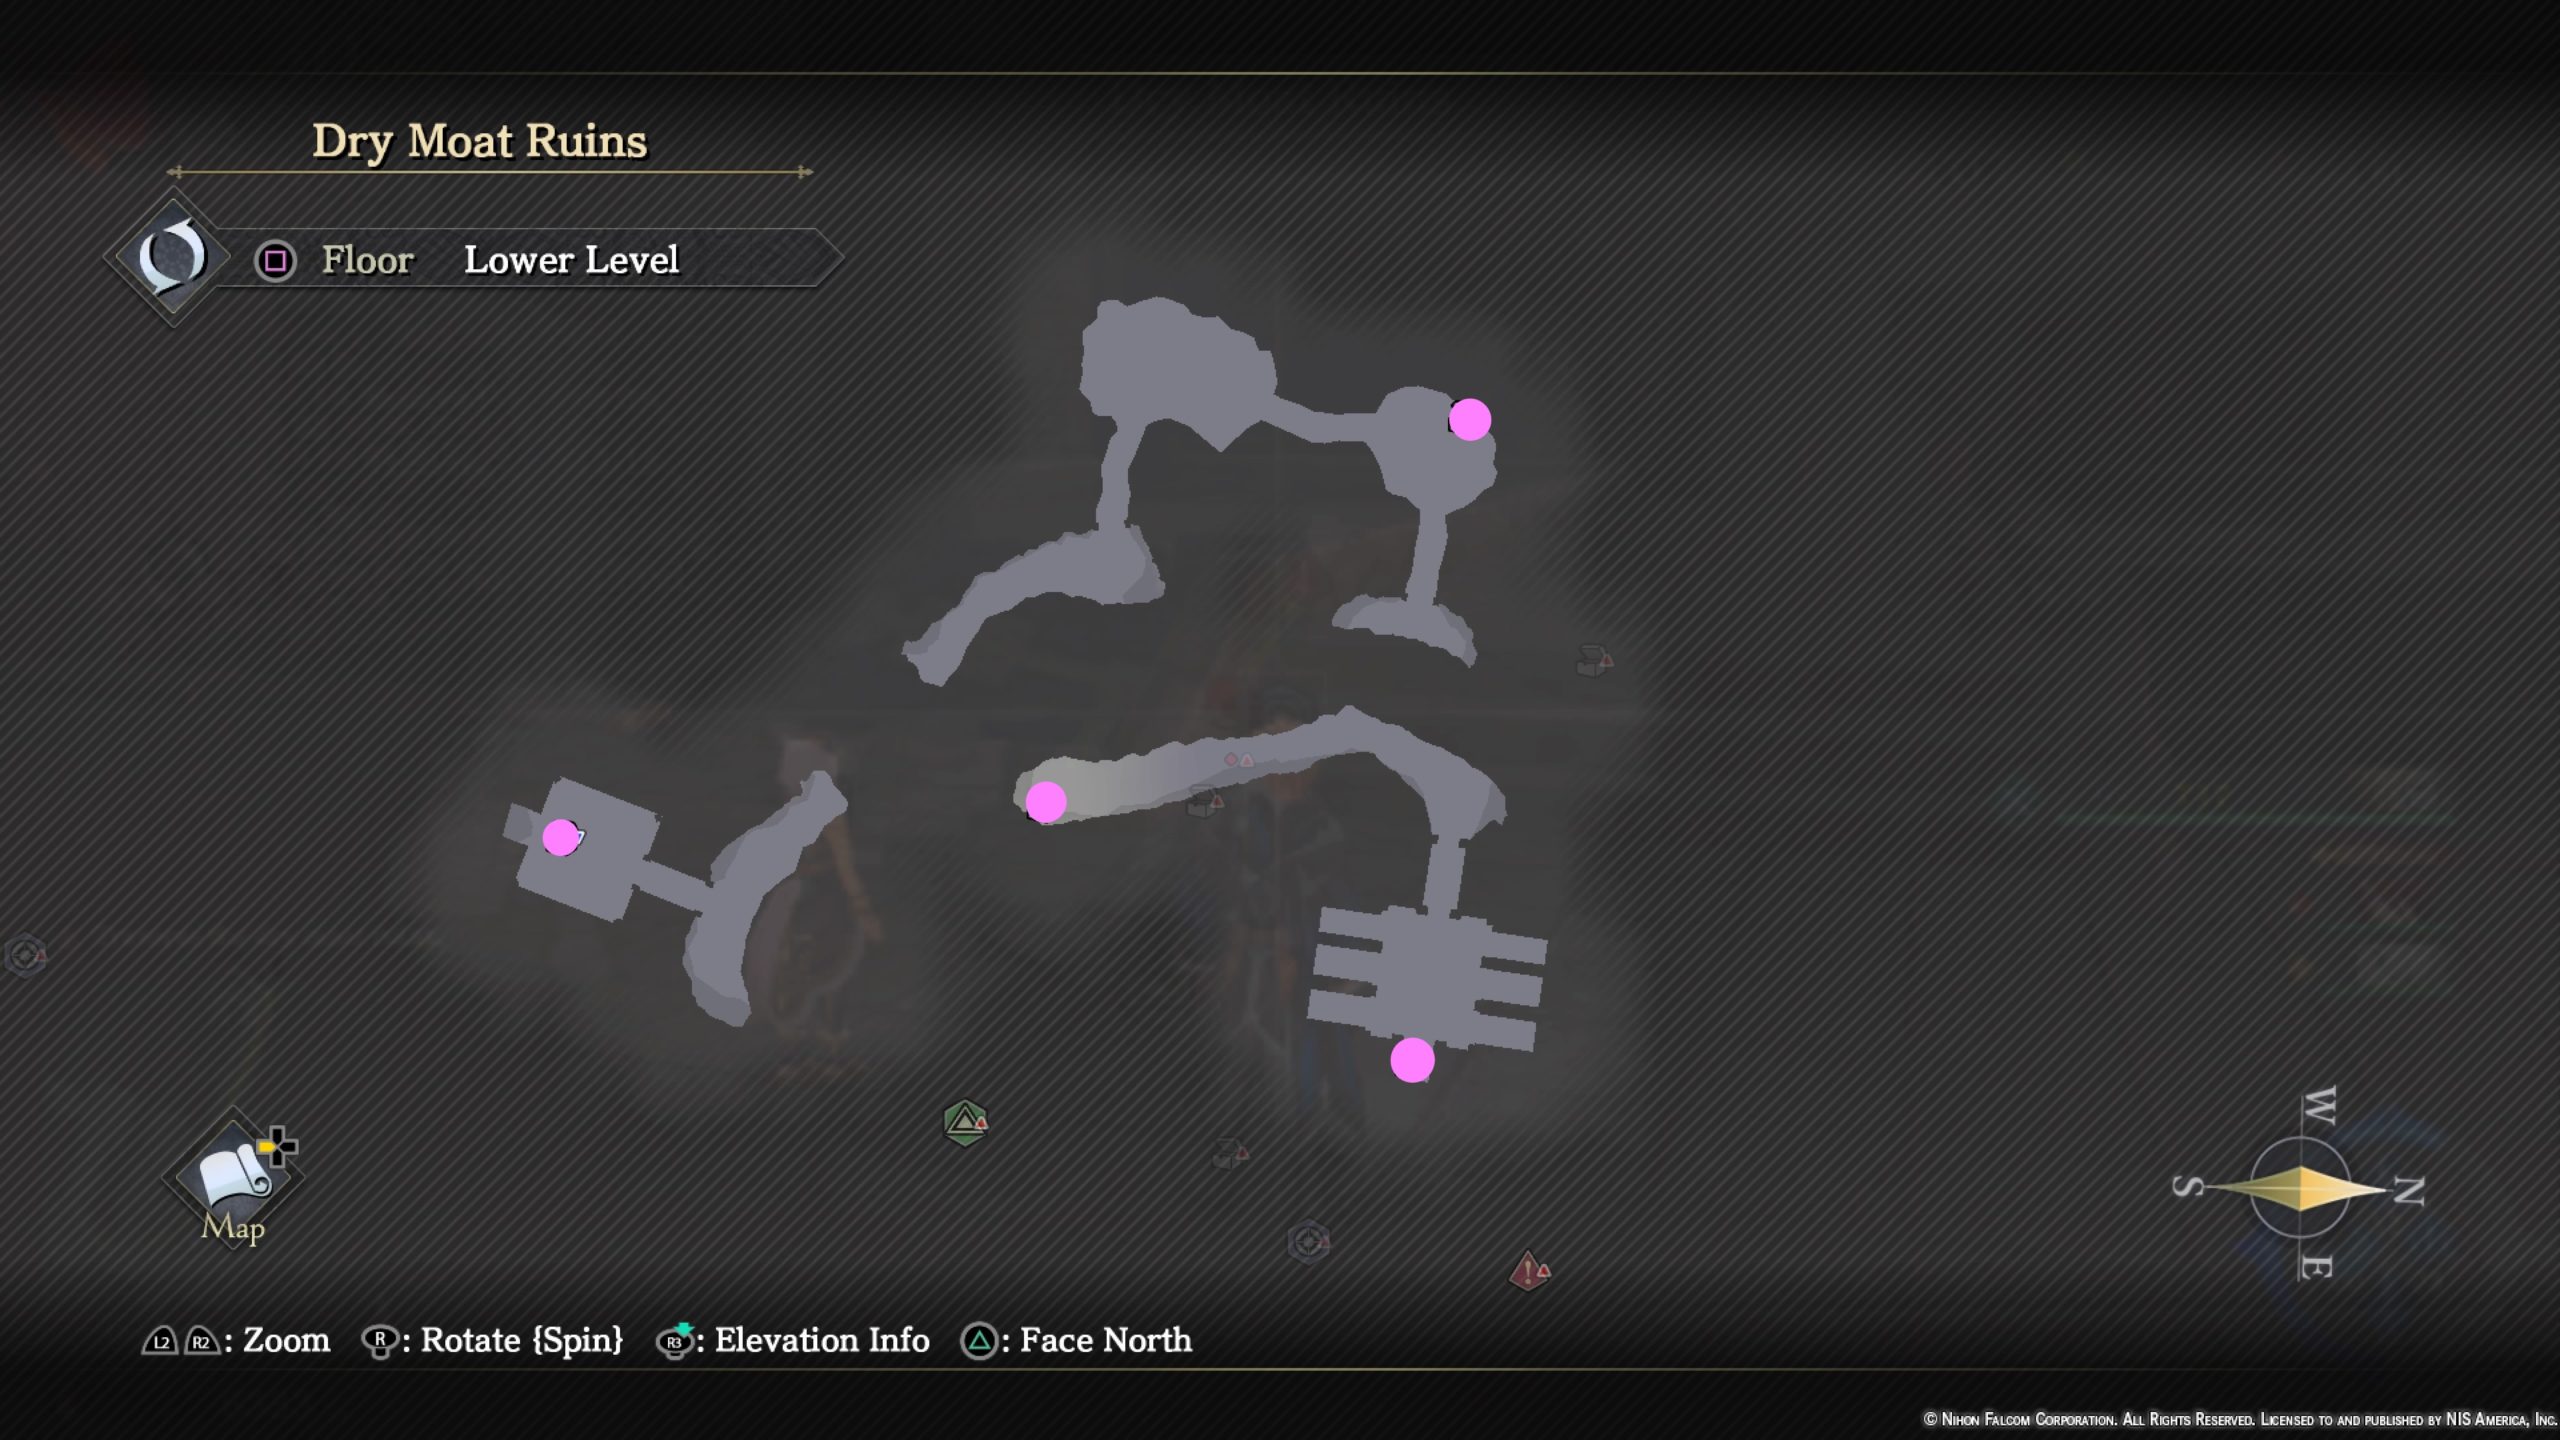
Waterway Vault (hidden area)
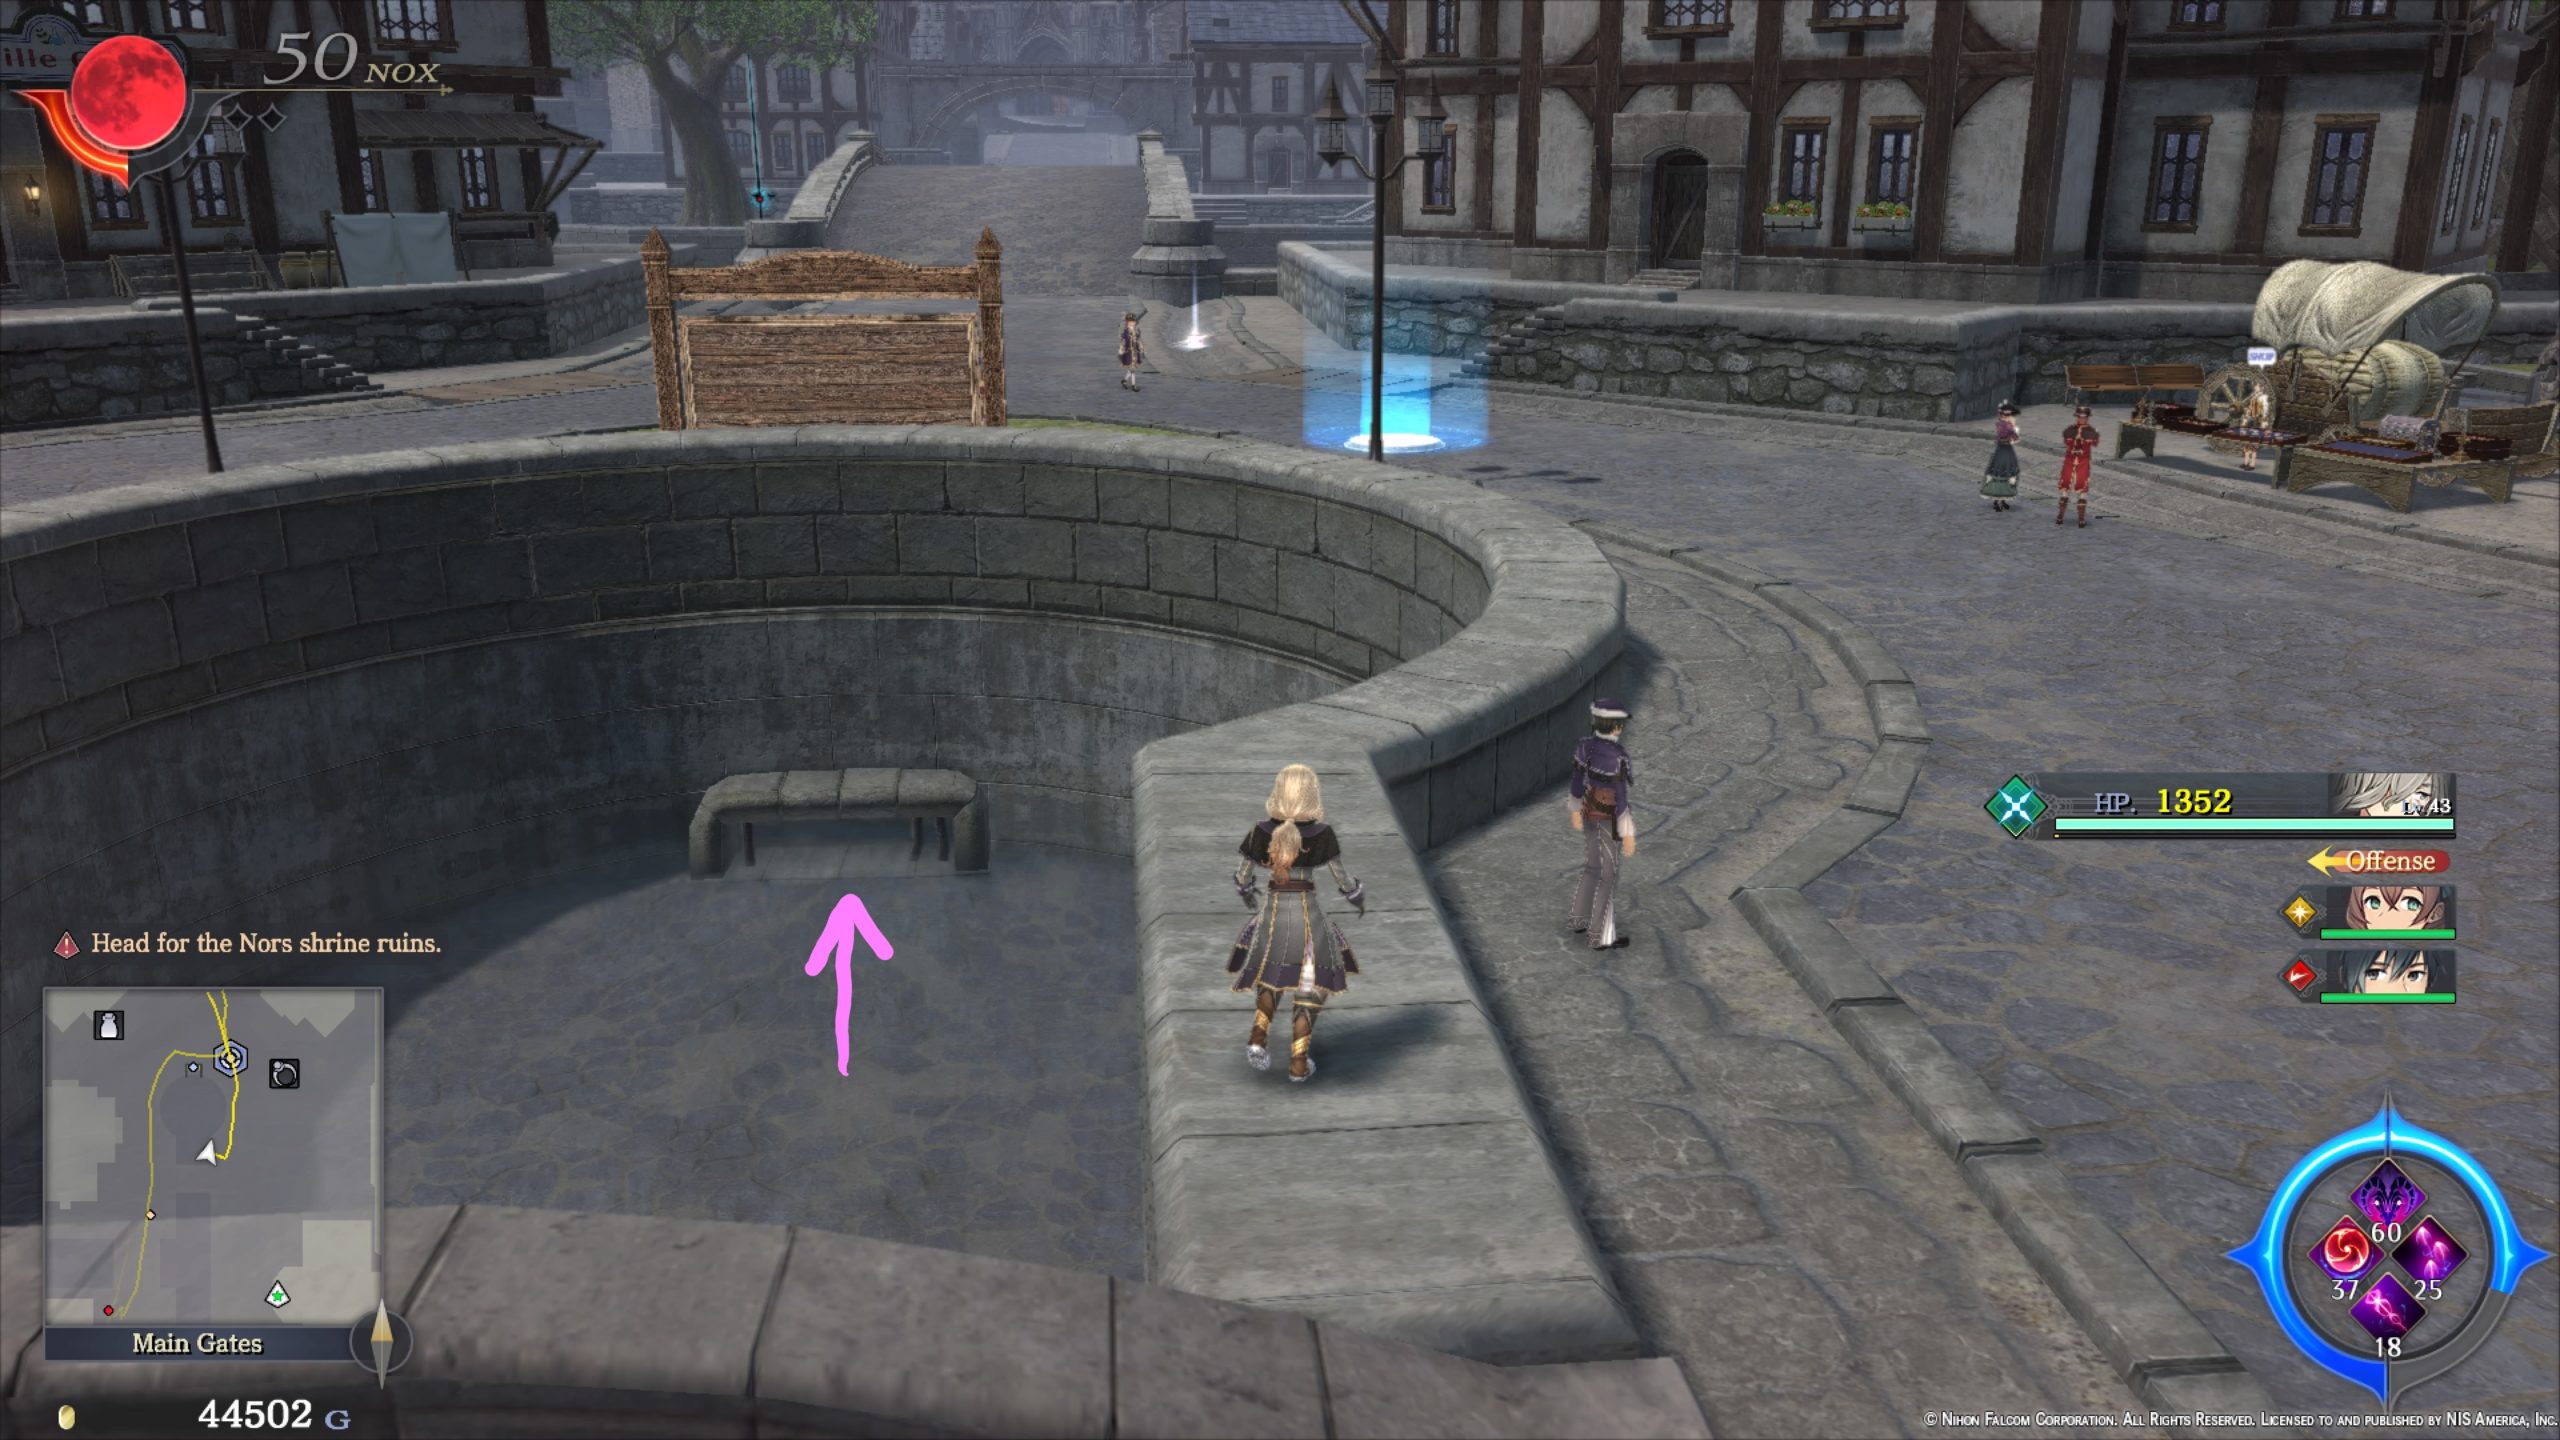
*In order to access this area, you’ll need to head to the Main Gates and jump into the water behind the bulletin board near the Relief Tile. Next, you’ll need to use Renegade’s gift to go into the sewer grate.
Treasure Chests
- Life Elixir
Forgotten Armory (hidden area)
*From the Memorial Tree in Artisan Lane, head north just to the right of the road to find 3 sewer grates. Use Renegade’s gift to enter the middle grate.


Treasure Chests
- Arachne Gloves
Vacant Ritual Room (hidden area)
*Travel to the Cultural Heritage Site and use Renegade’s gift to enter underneath the gated doorway in the southern part of the area just past the statue.

Treasure Chests
- Bash Grimoire
Prison Outskirts
Miscellaneous
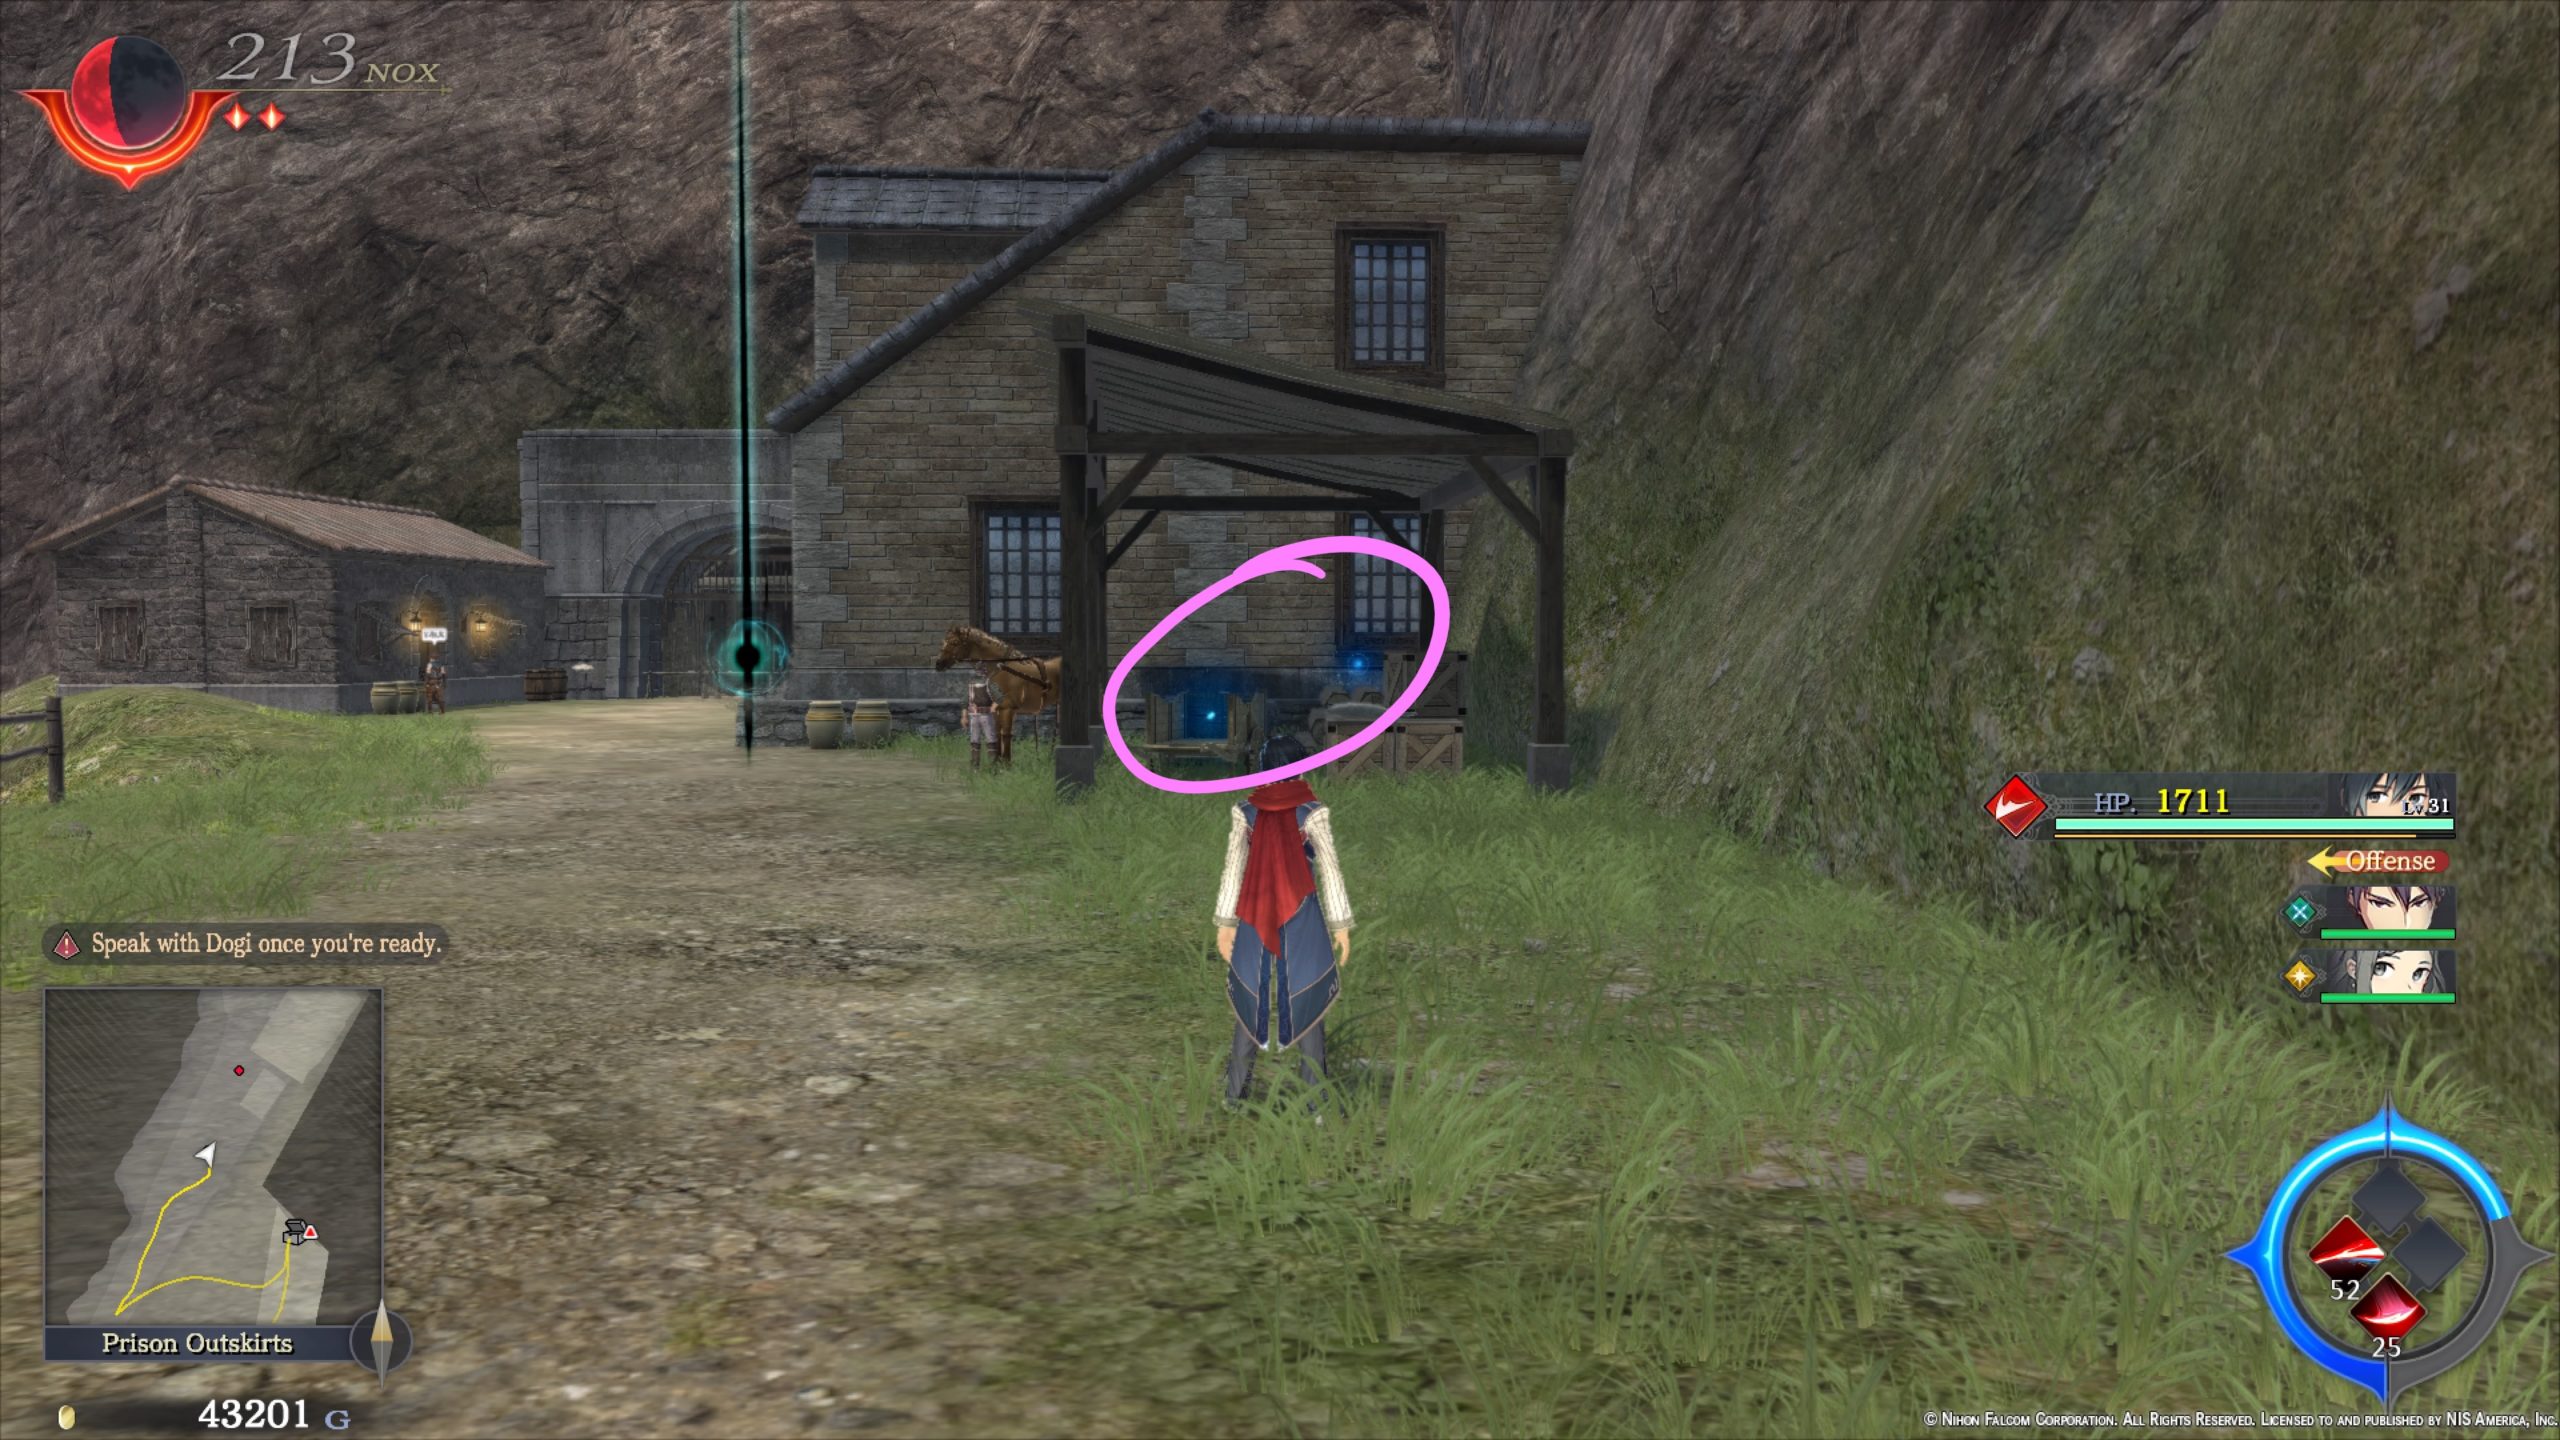
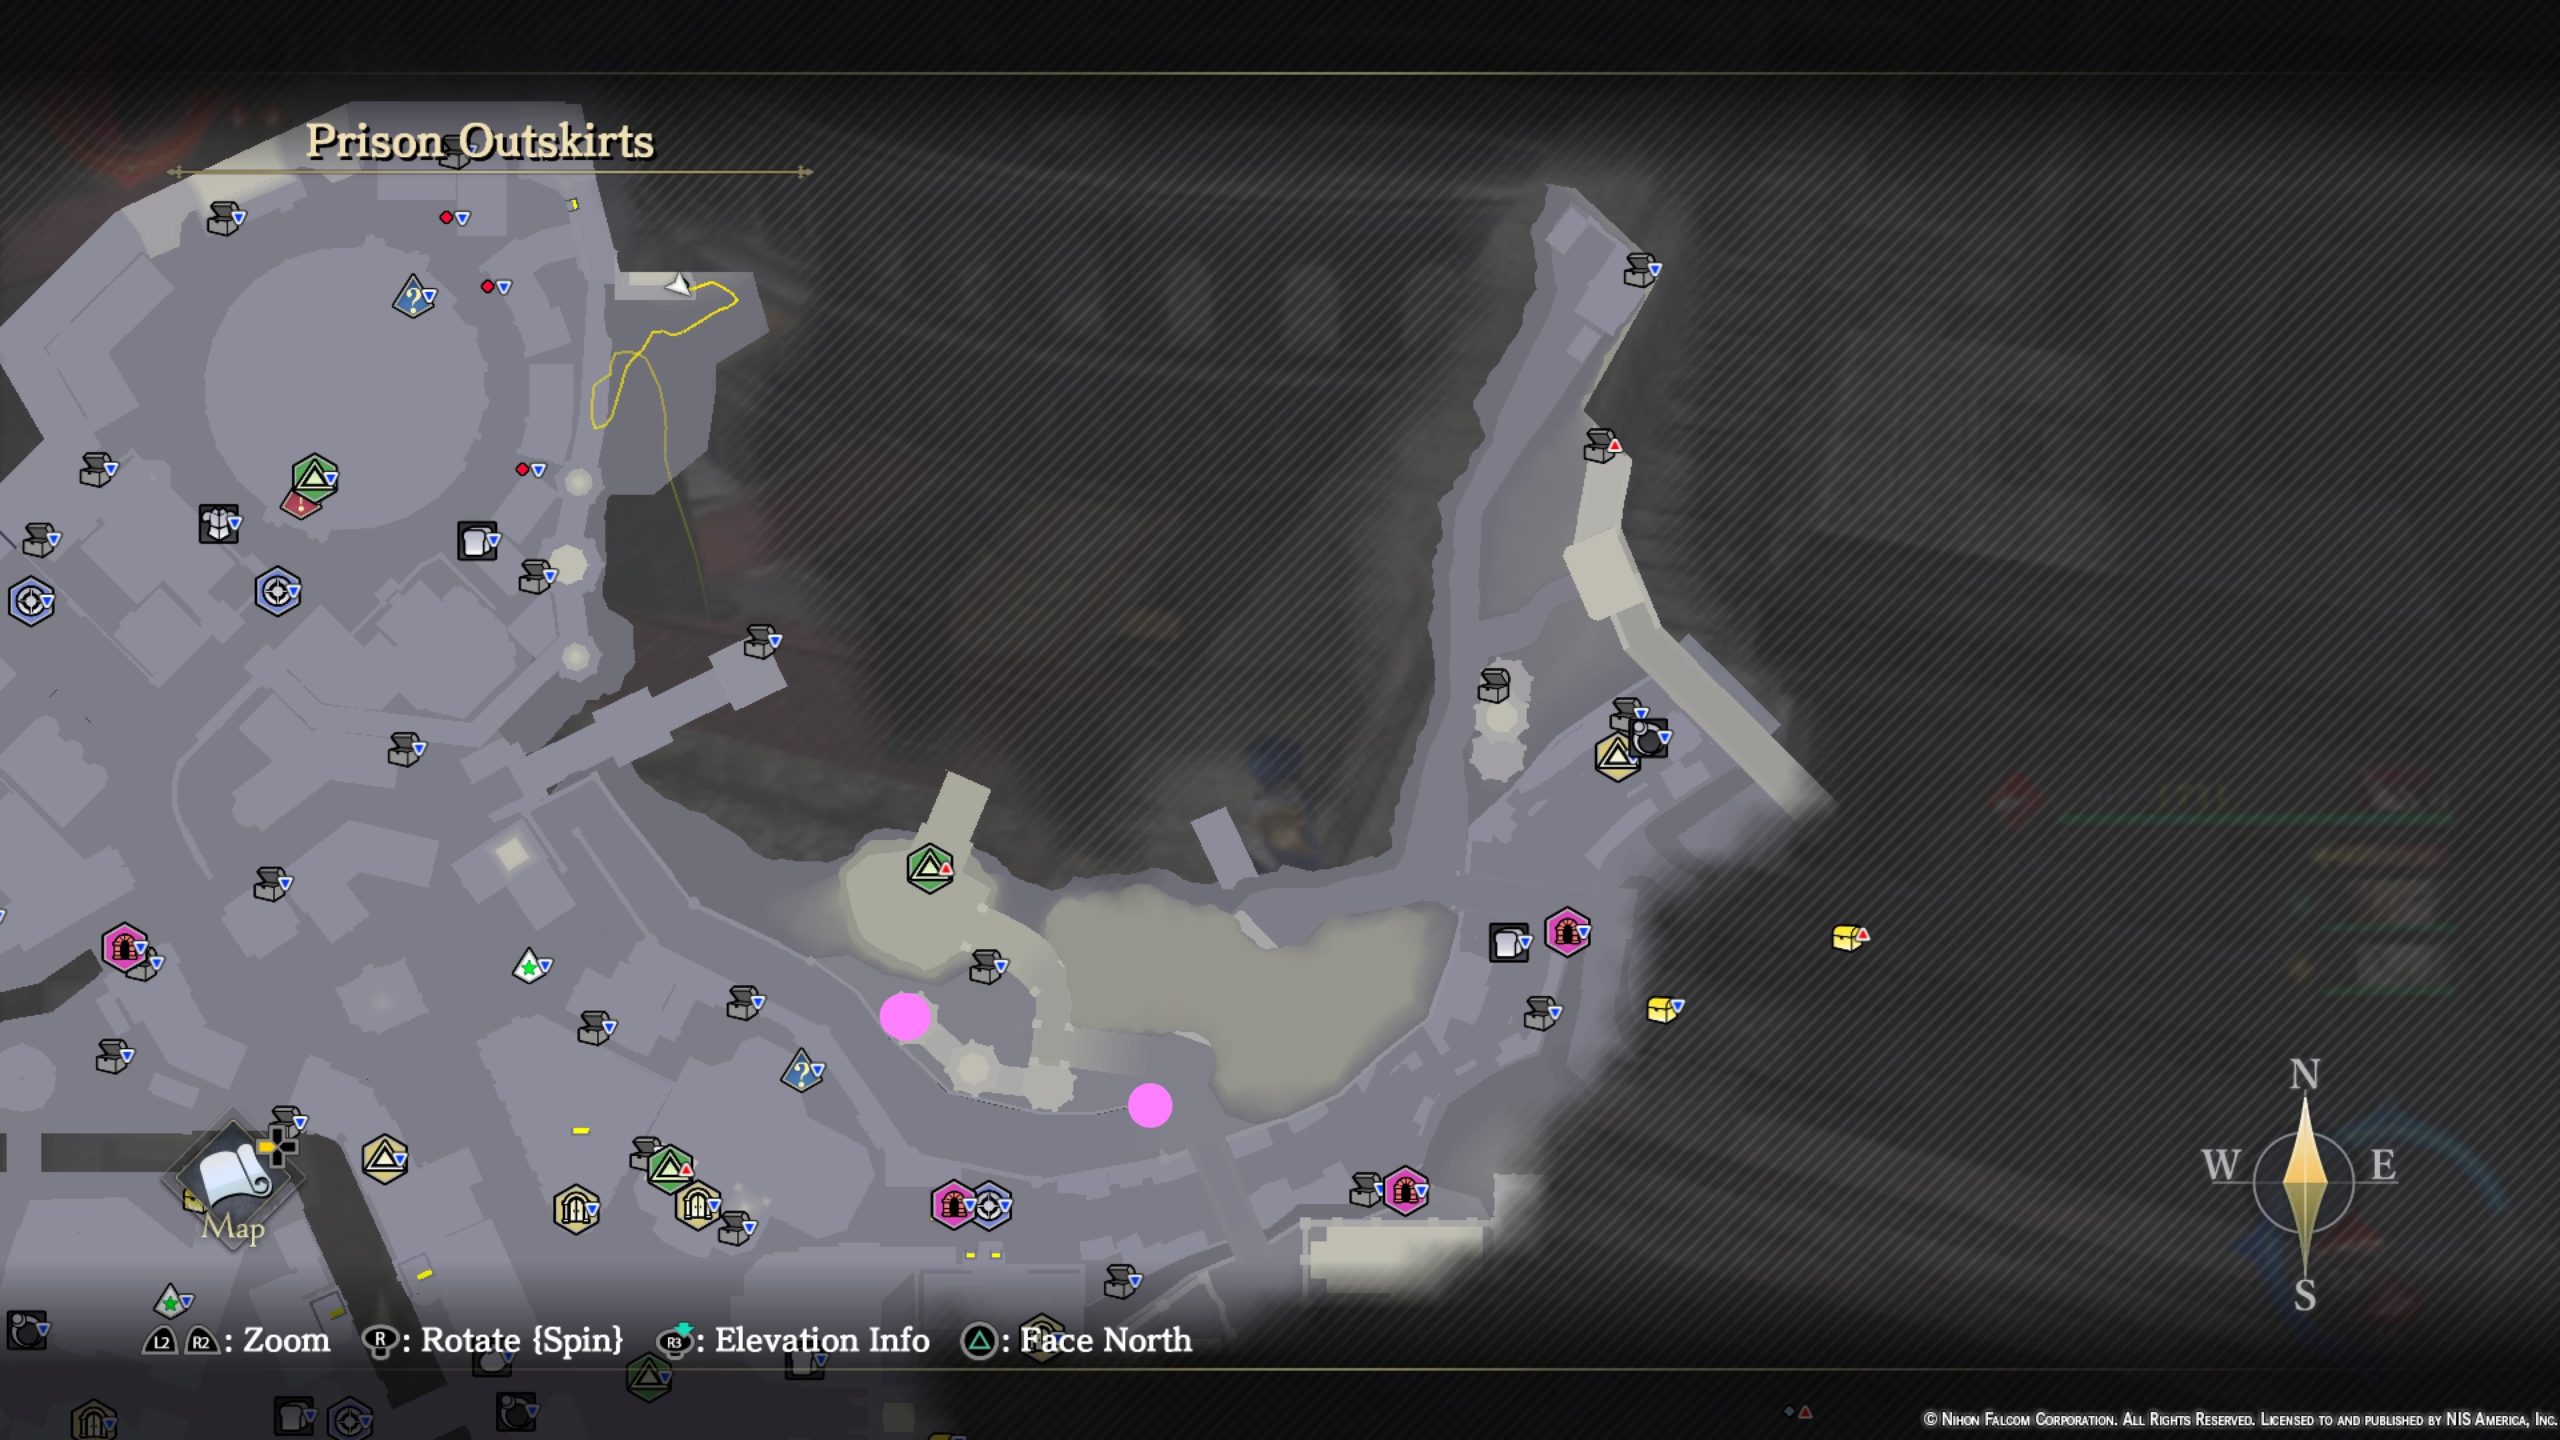
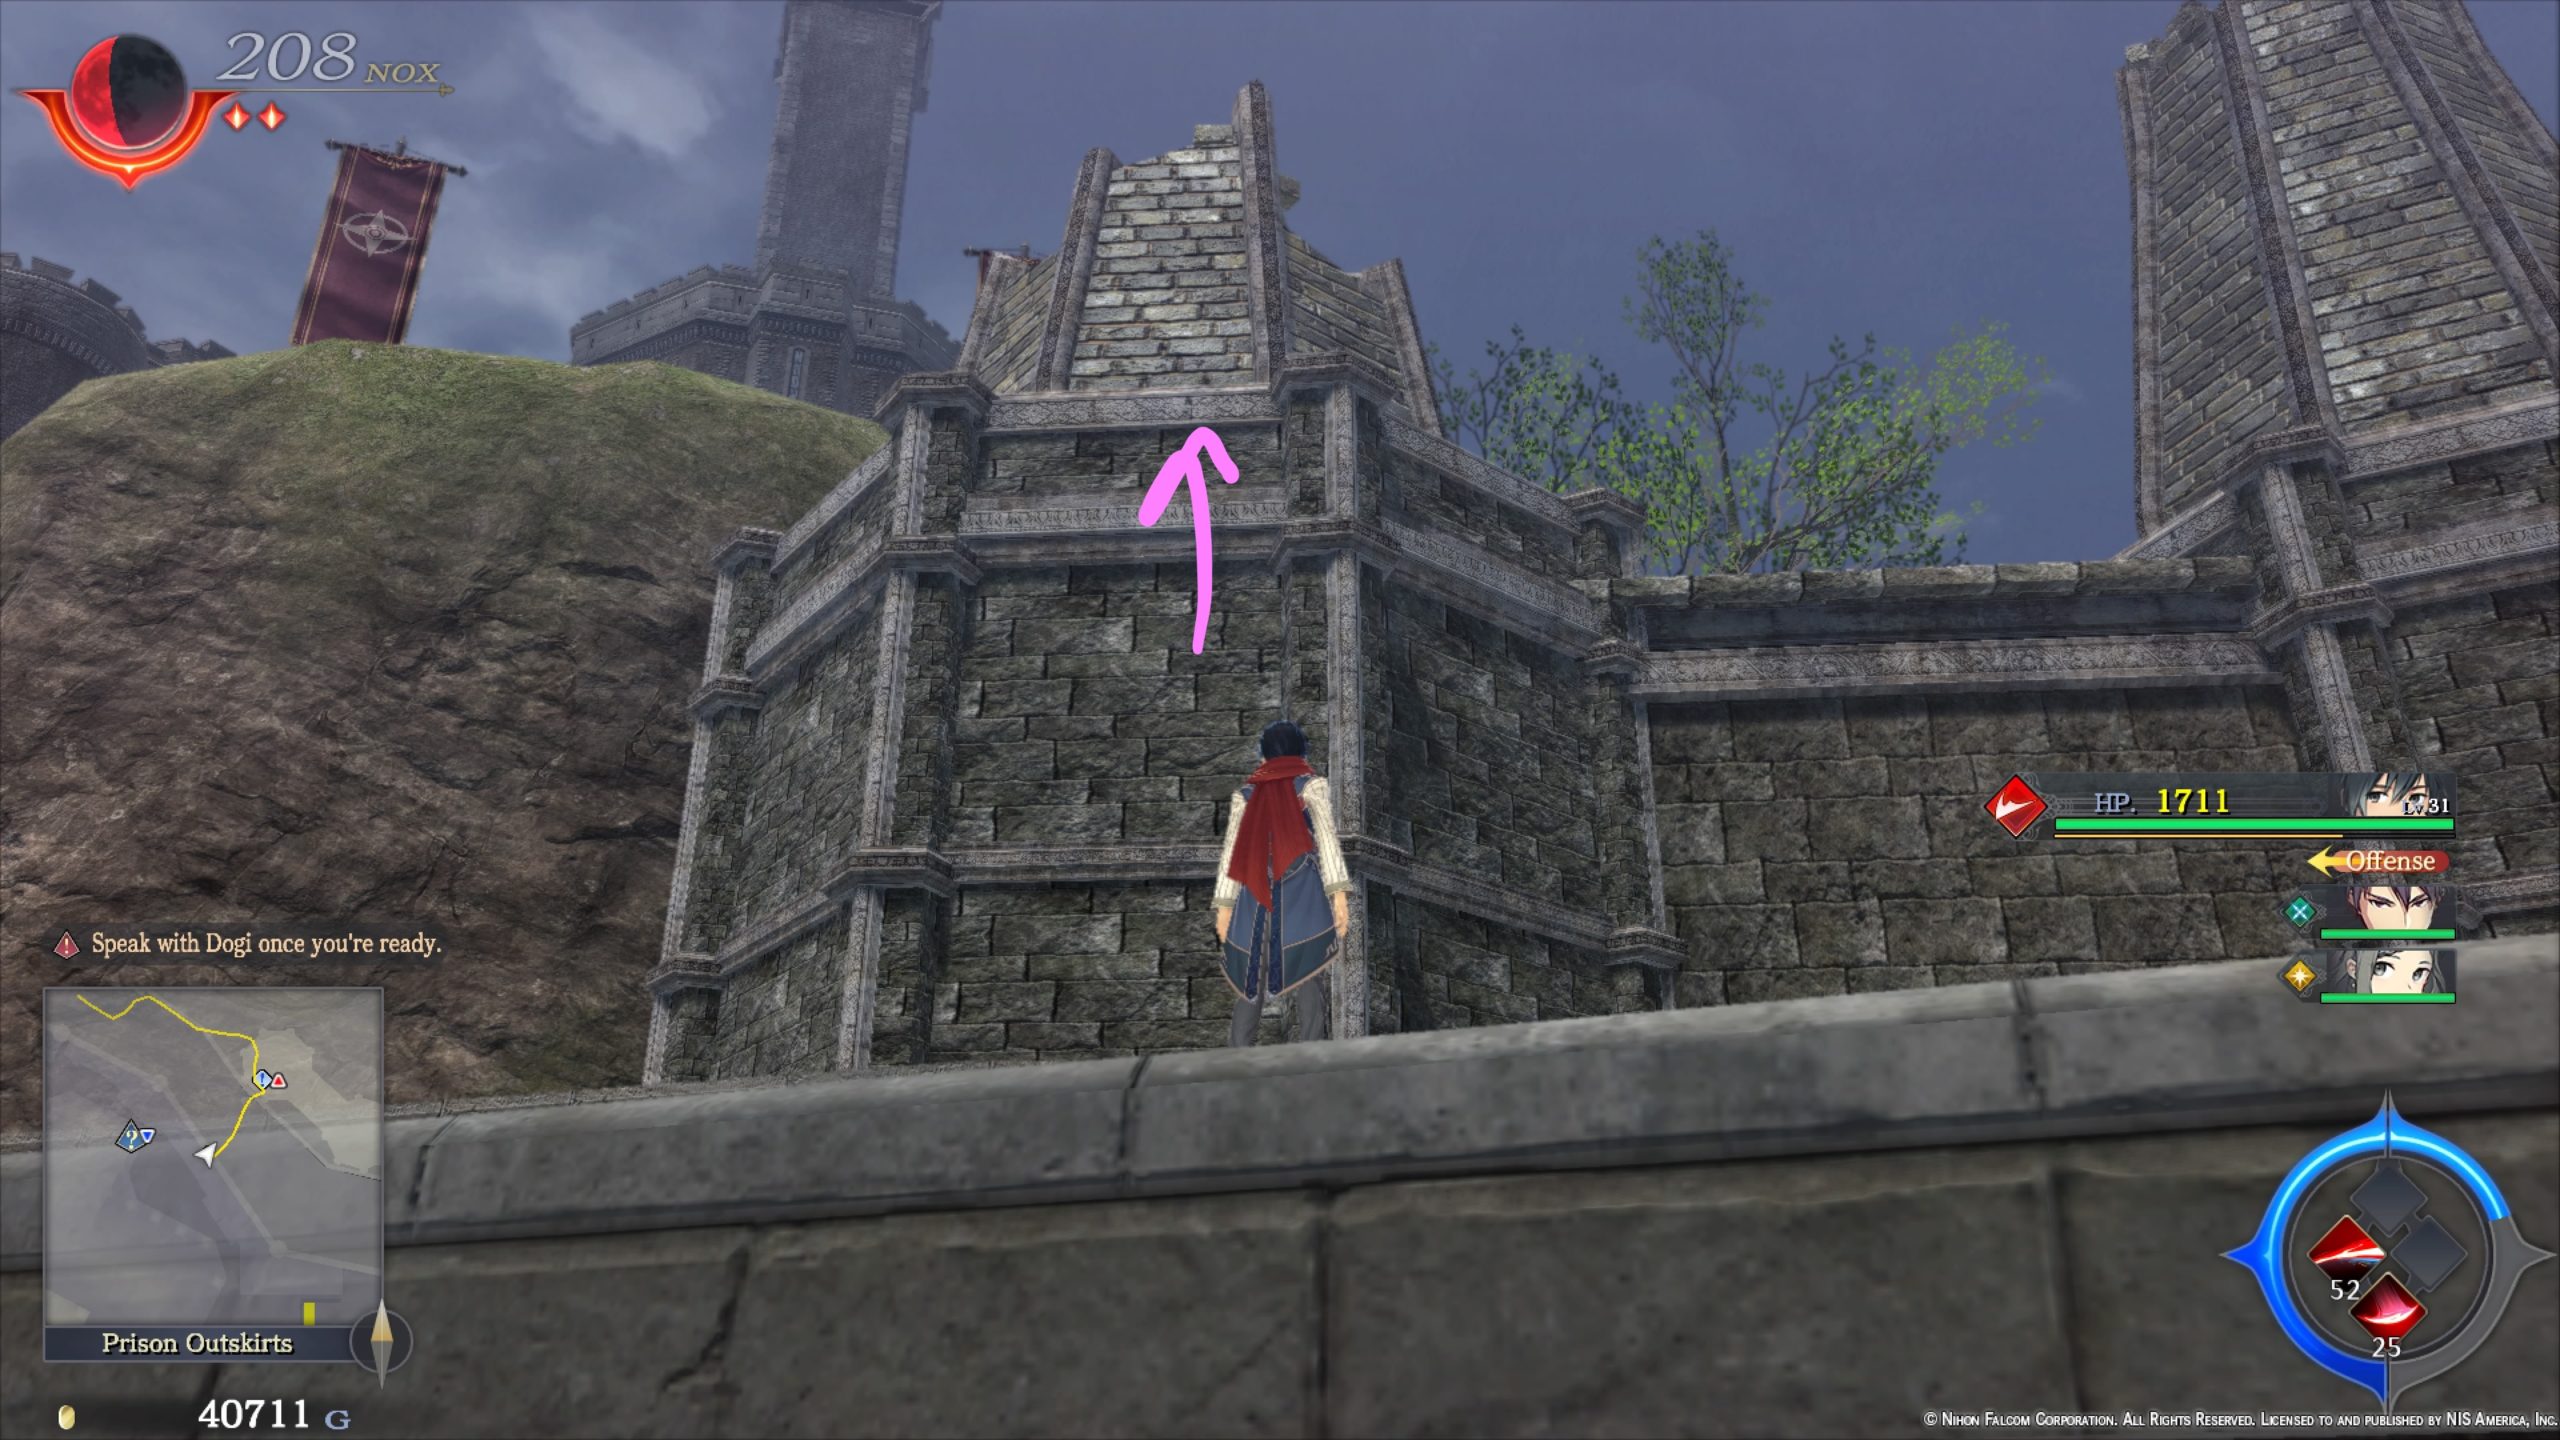
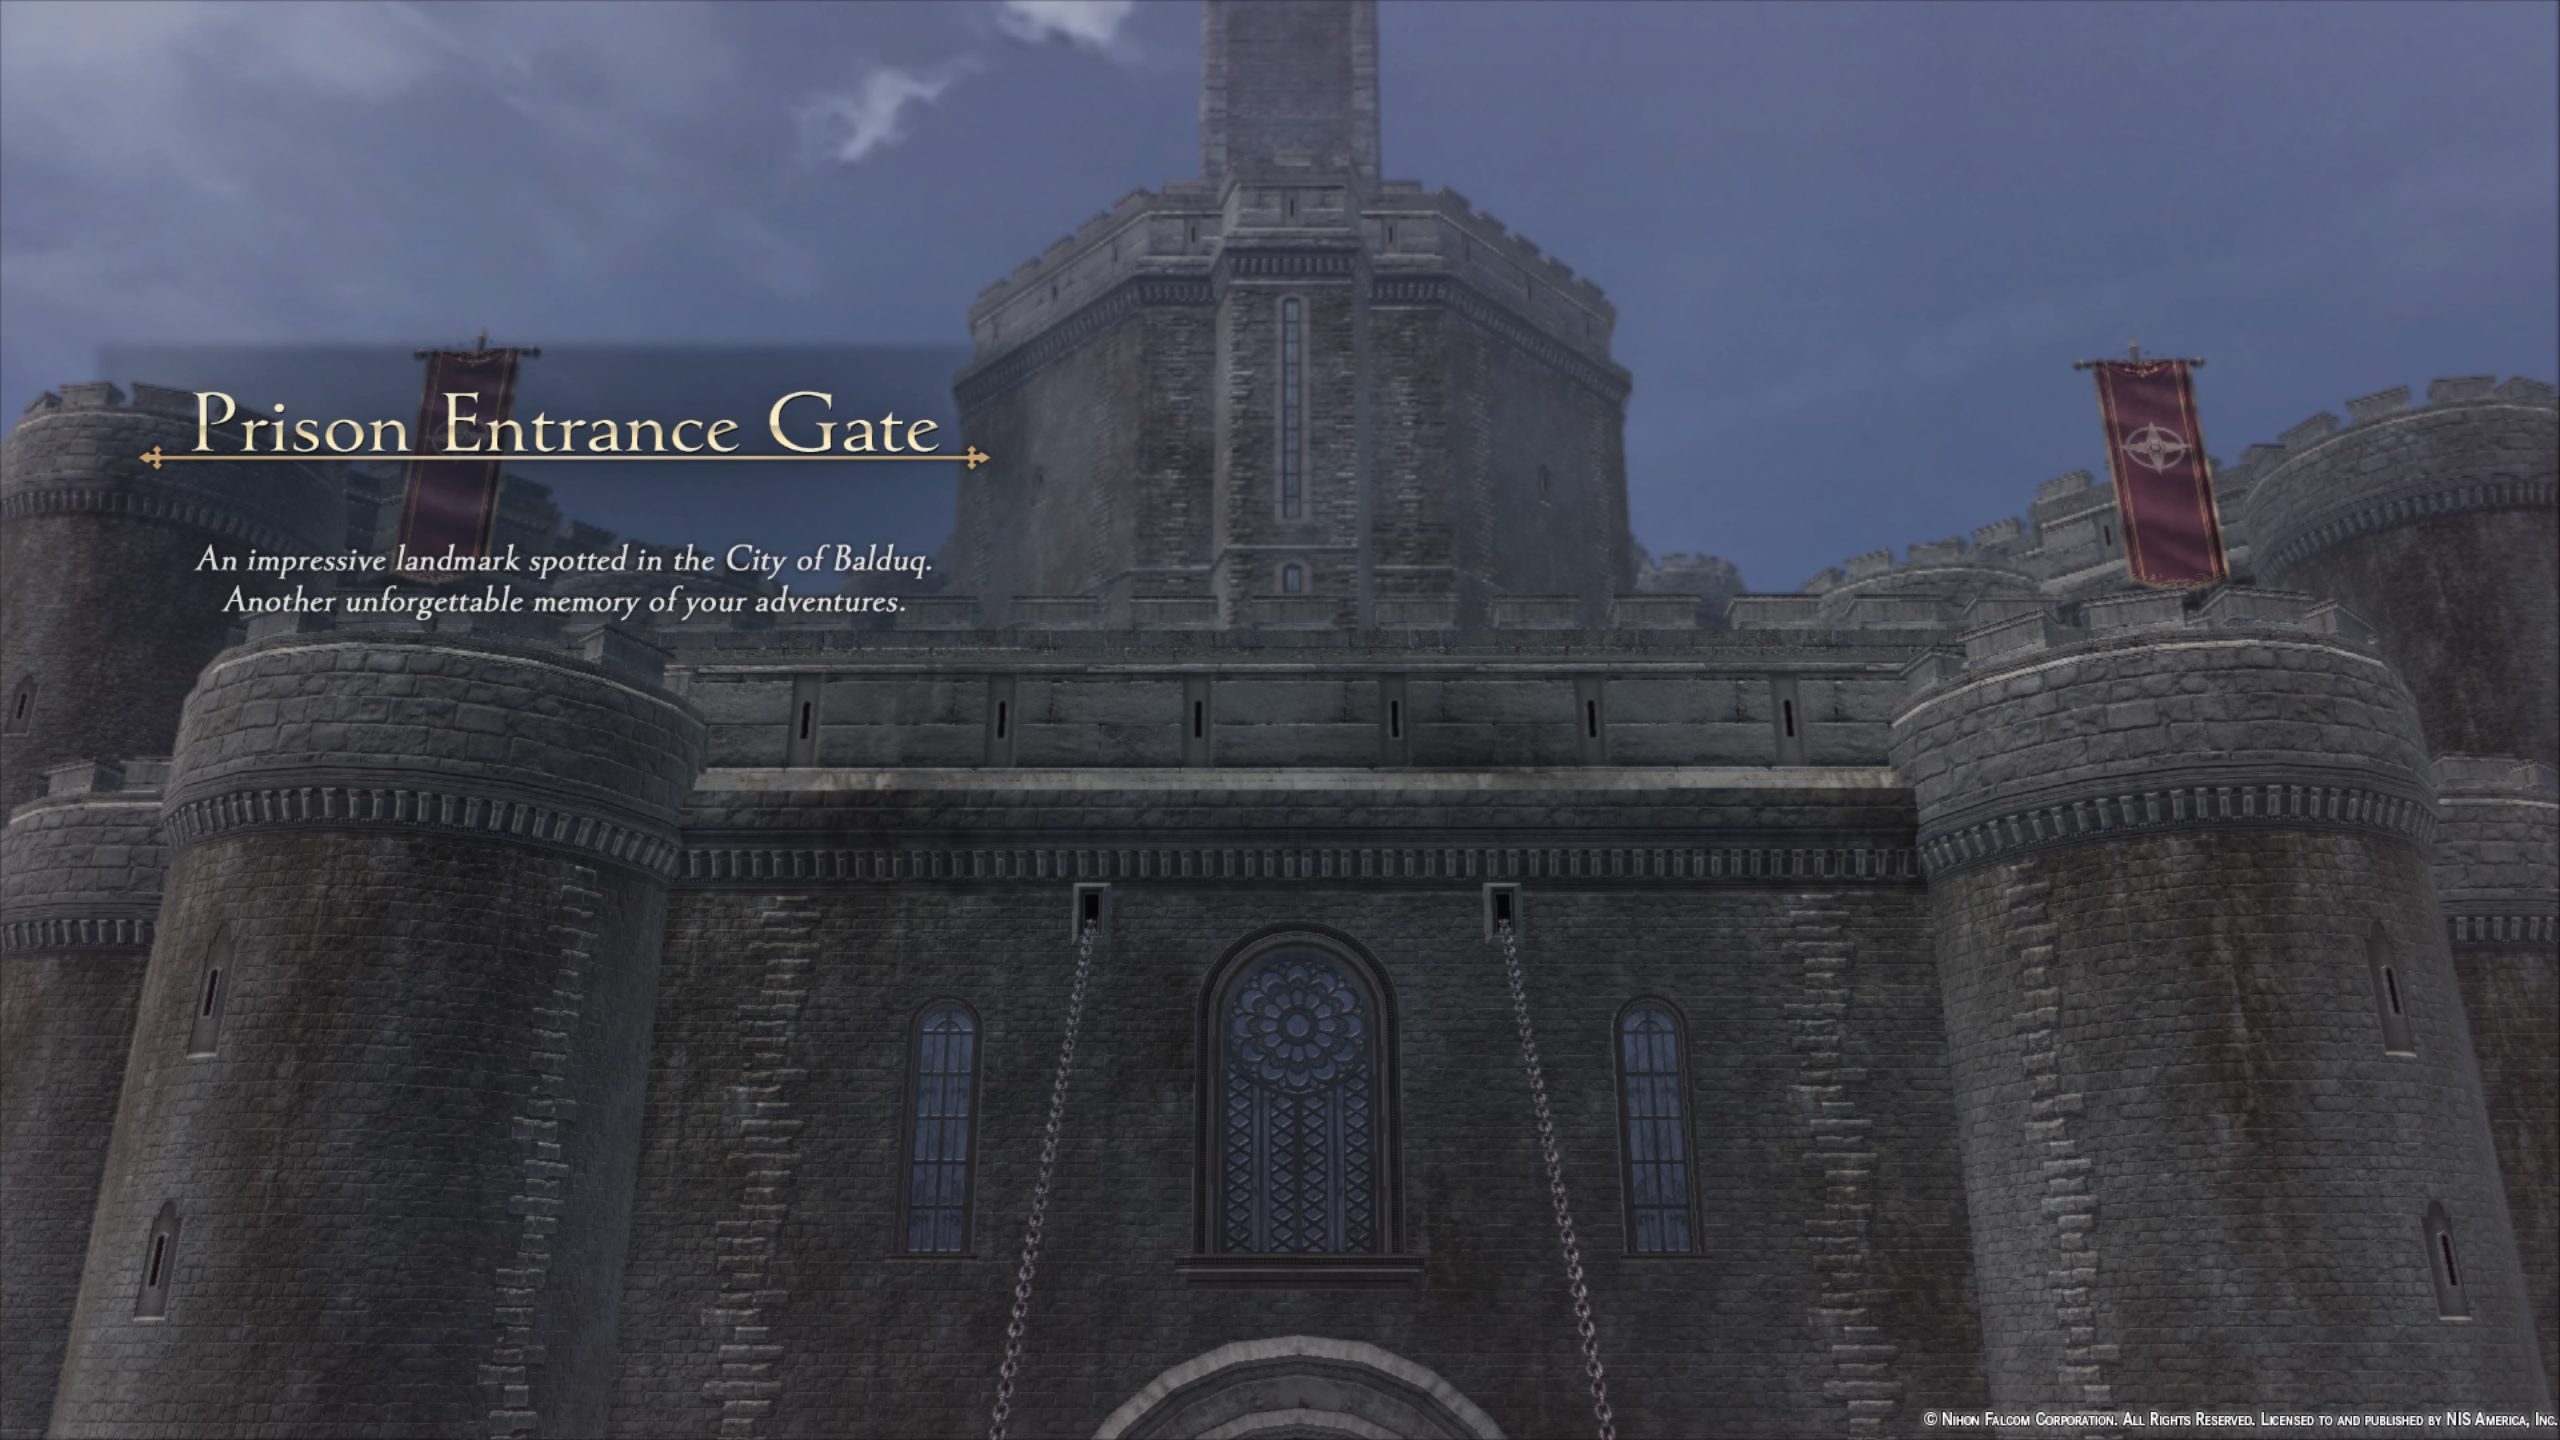
- After collecting the graffiti from the Cultural Heritage Site, travel to the Prison Entrance Main Gate in the Prison Outskirts. Facing the bridge, head right onto the grass next to the top of the stairs. Jump down along the wall of the stairs to reach a small rock ledge where you will find 10000 Gold buried.
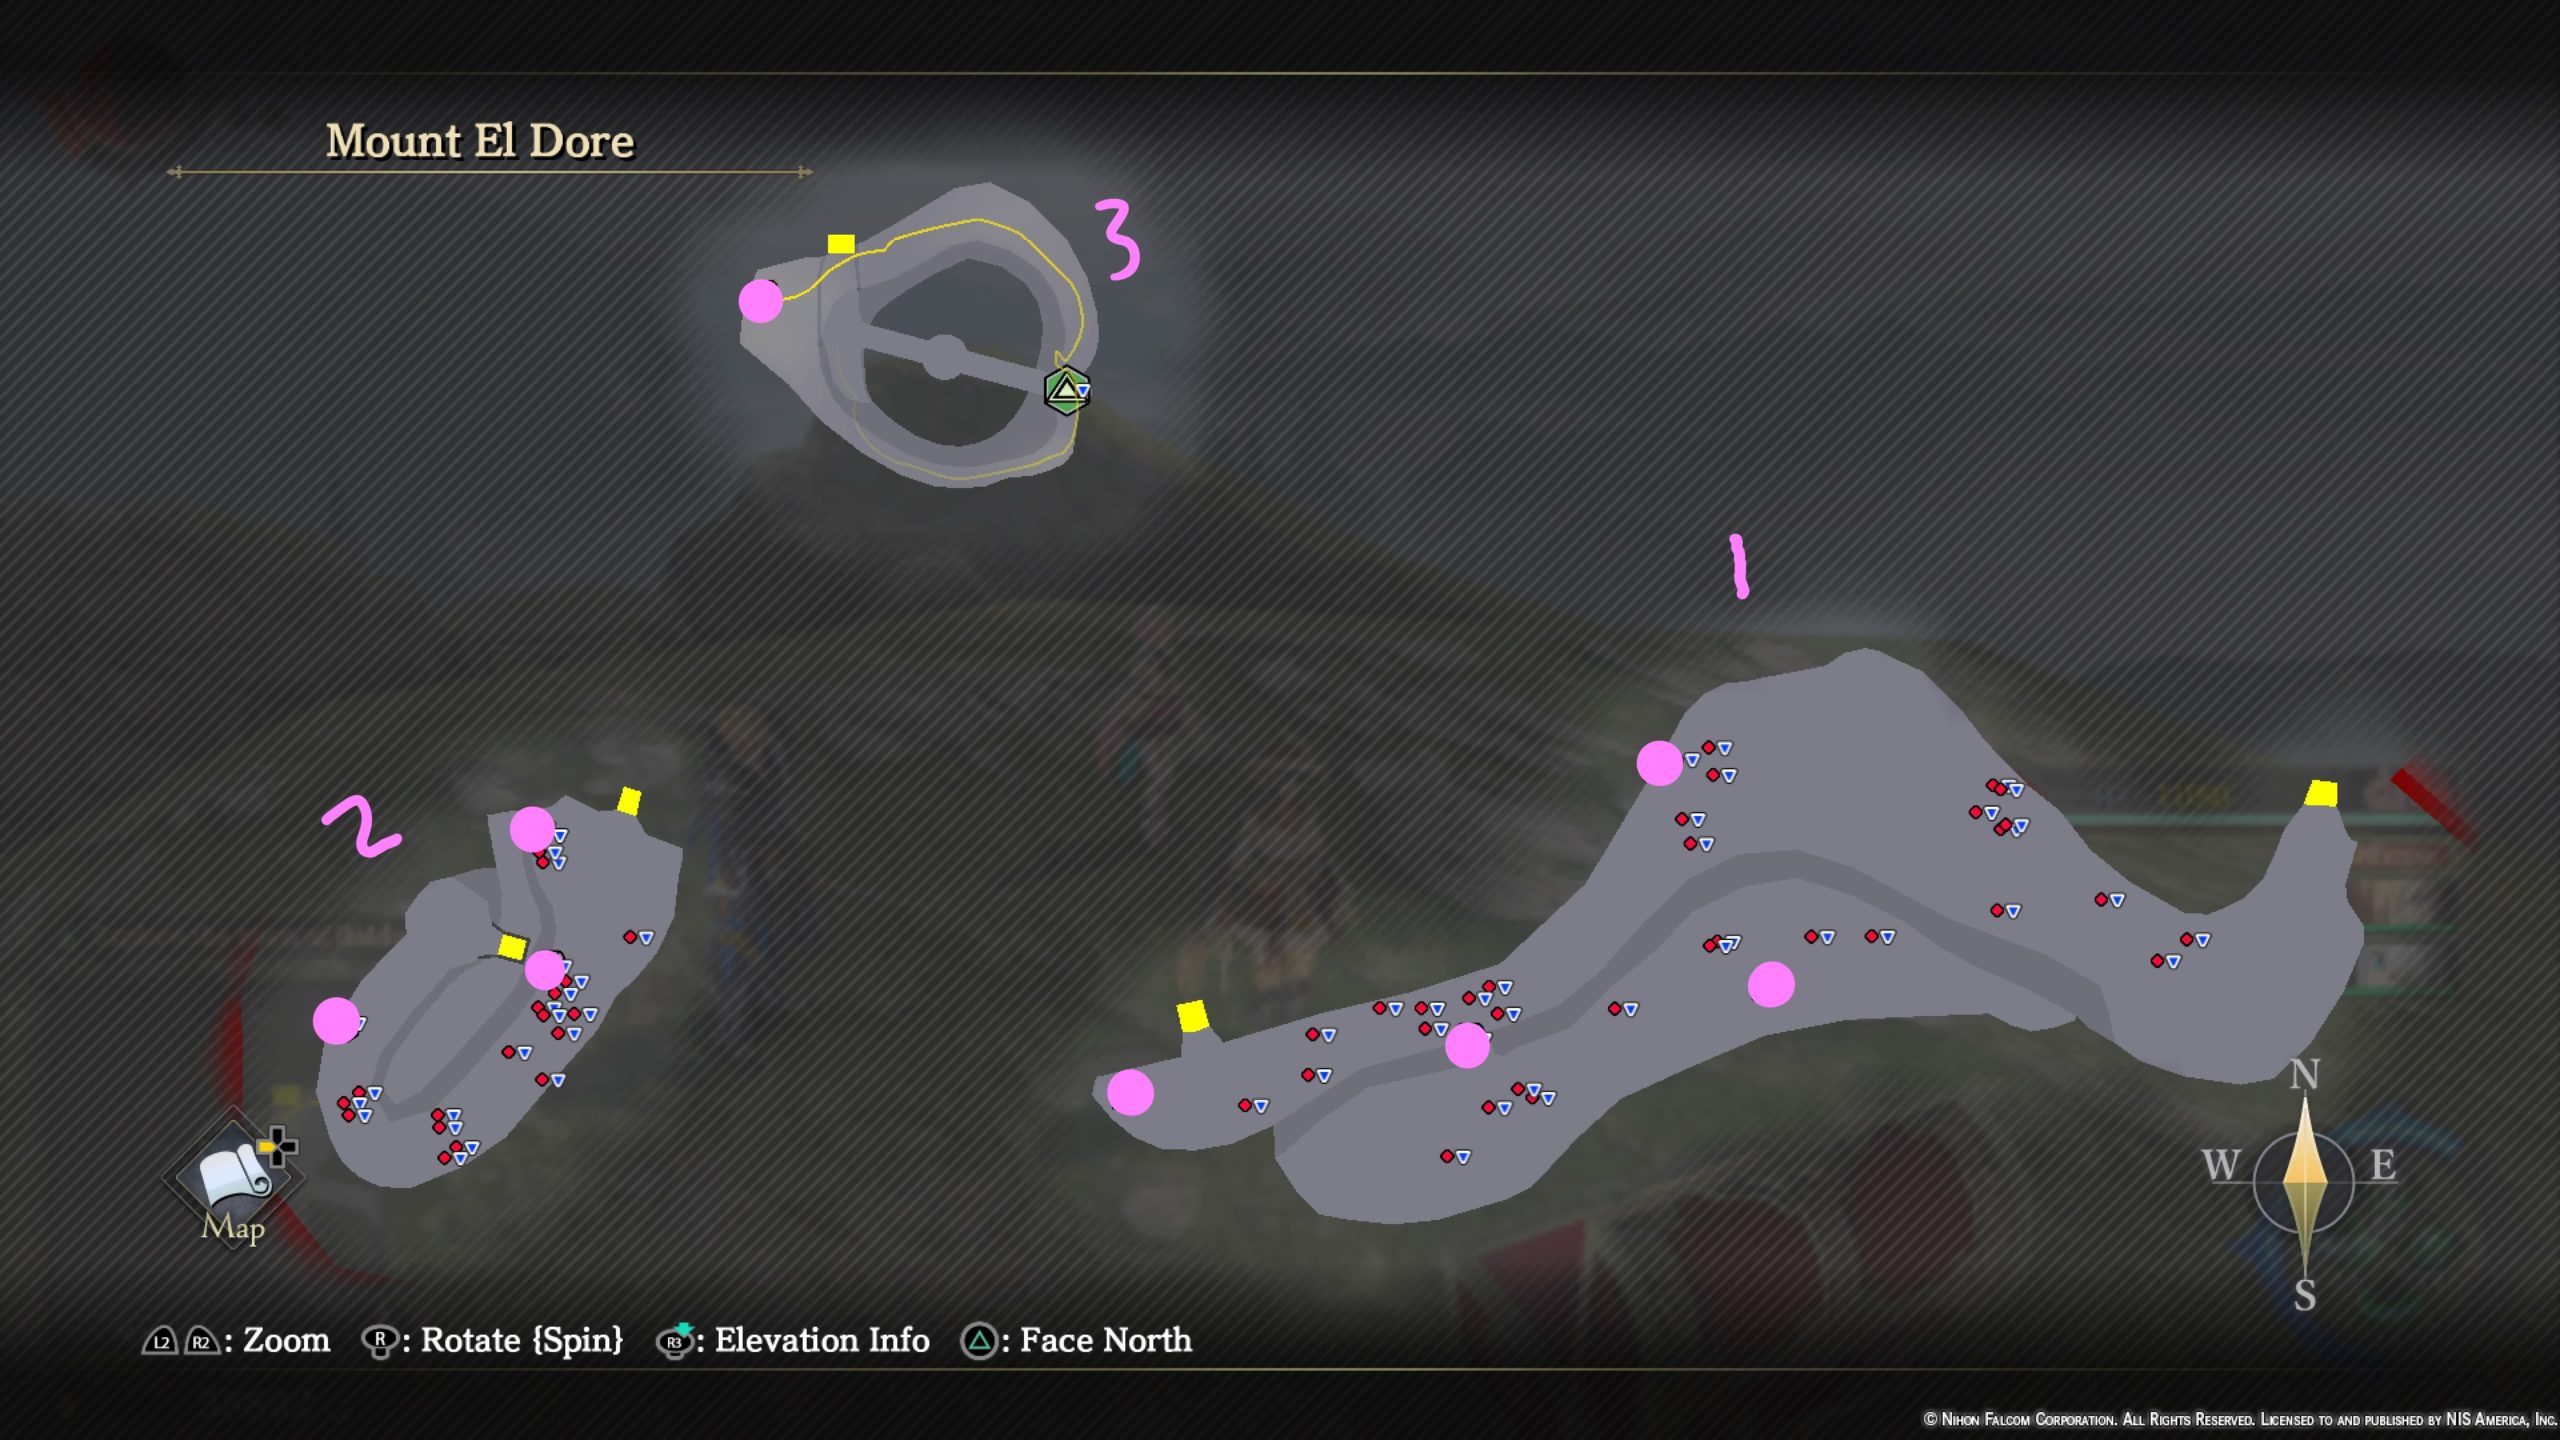
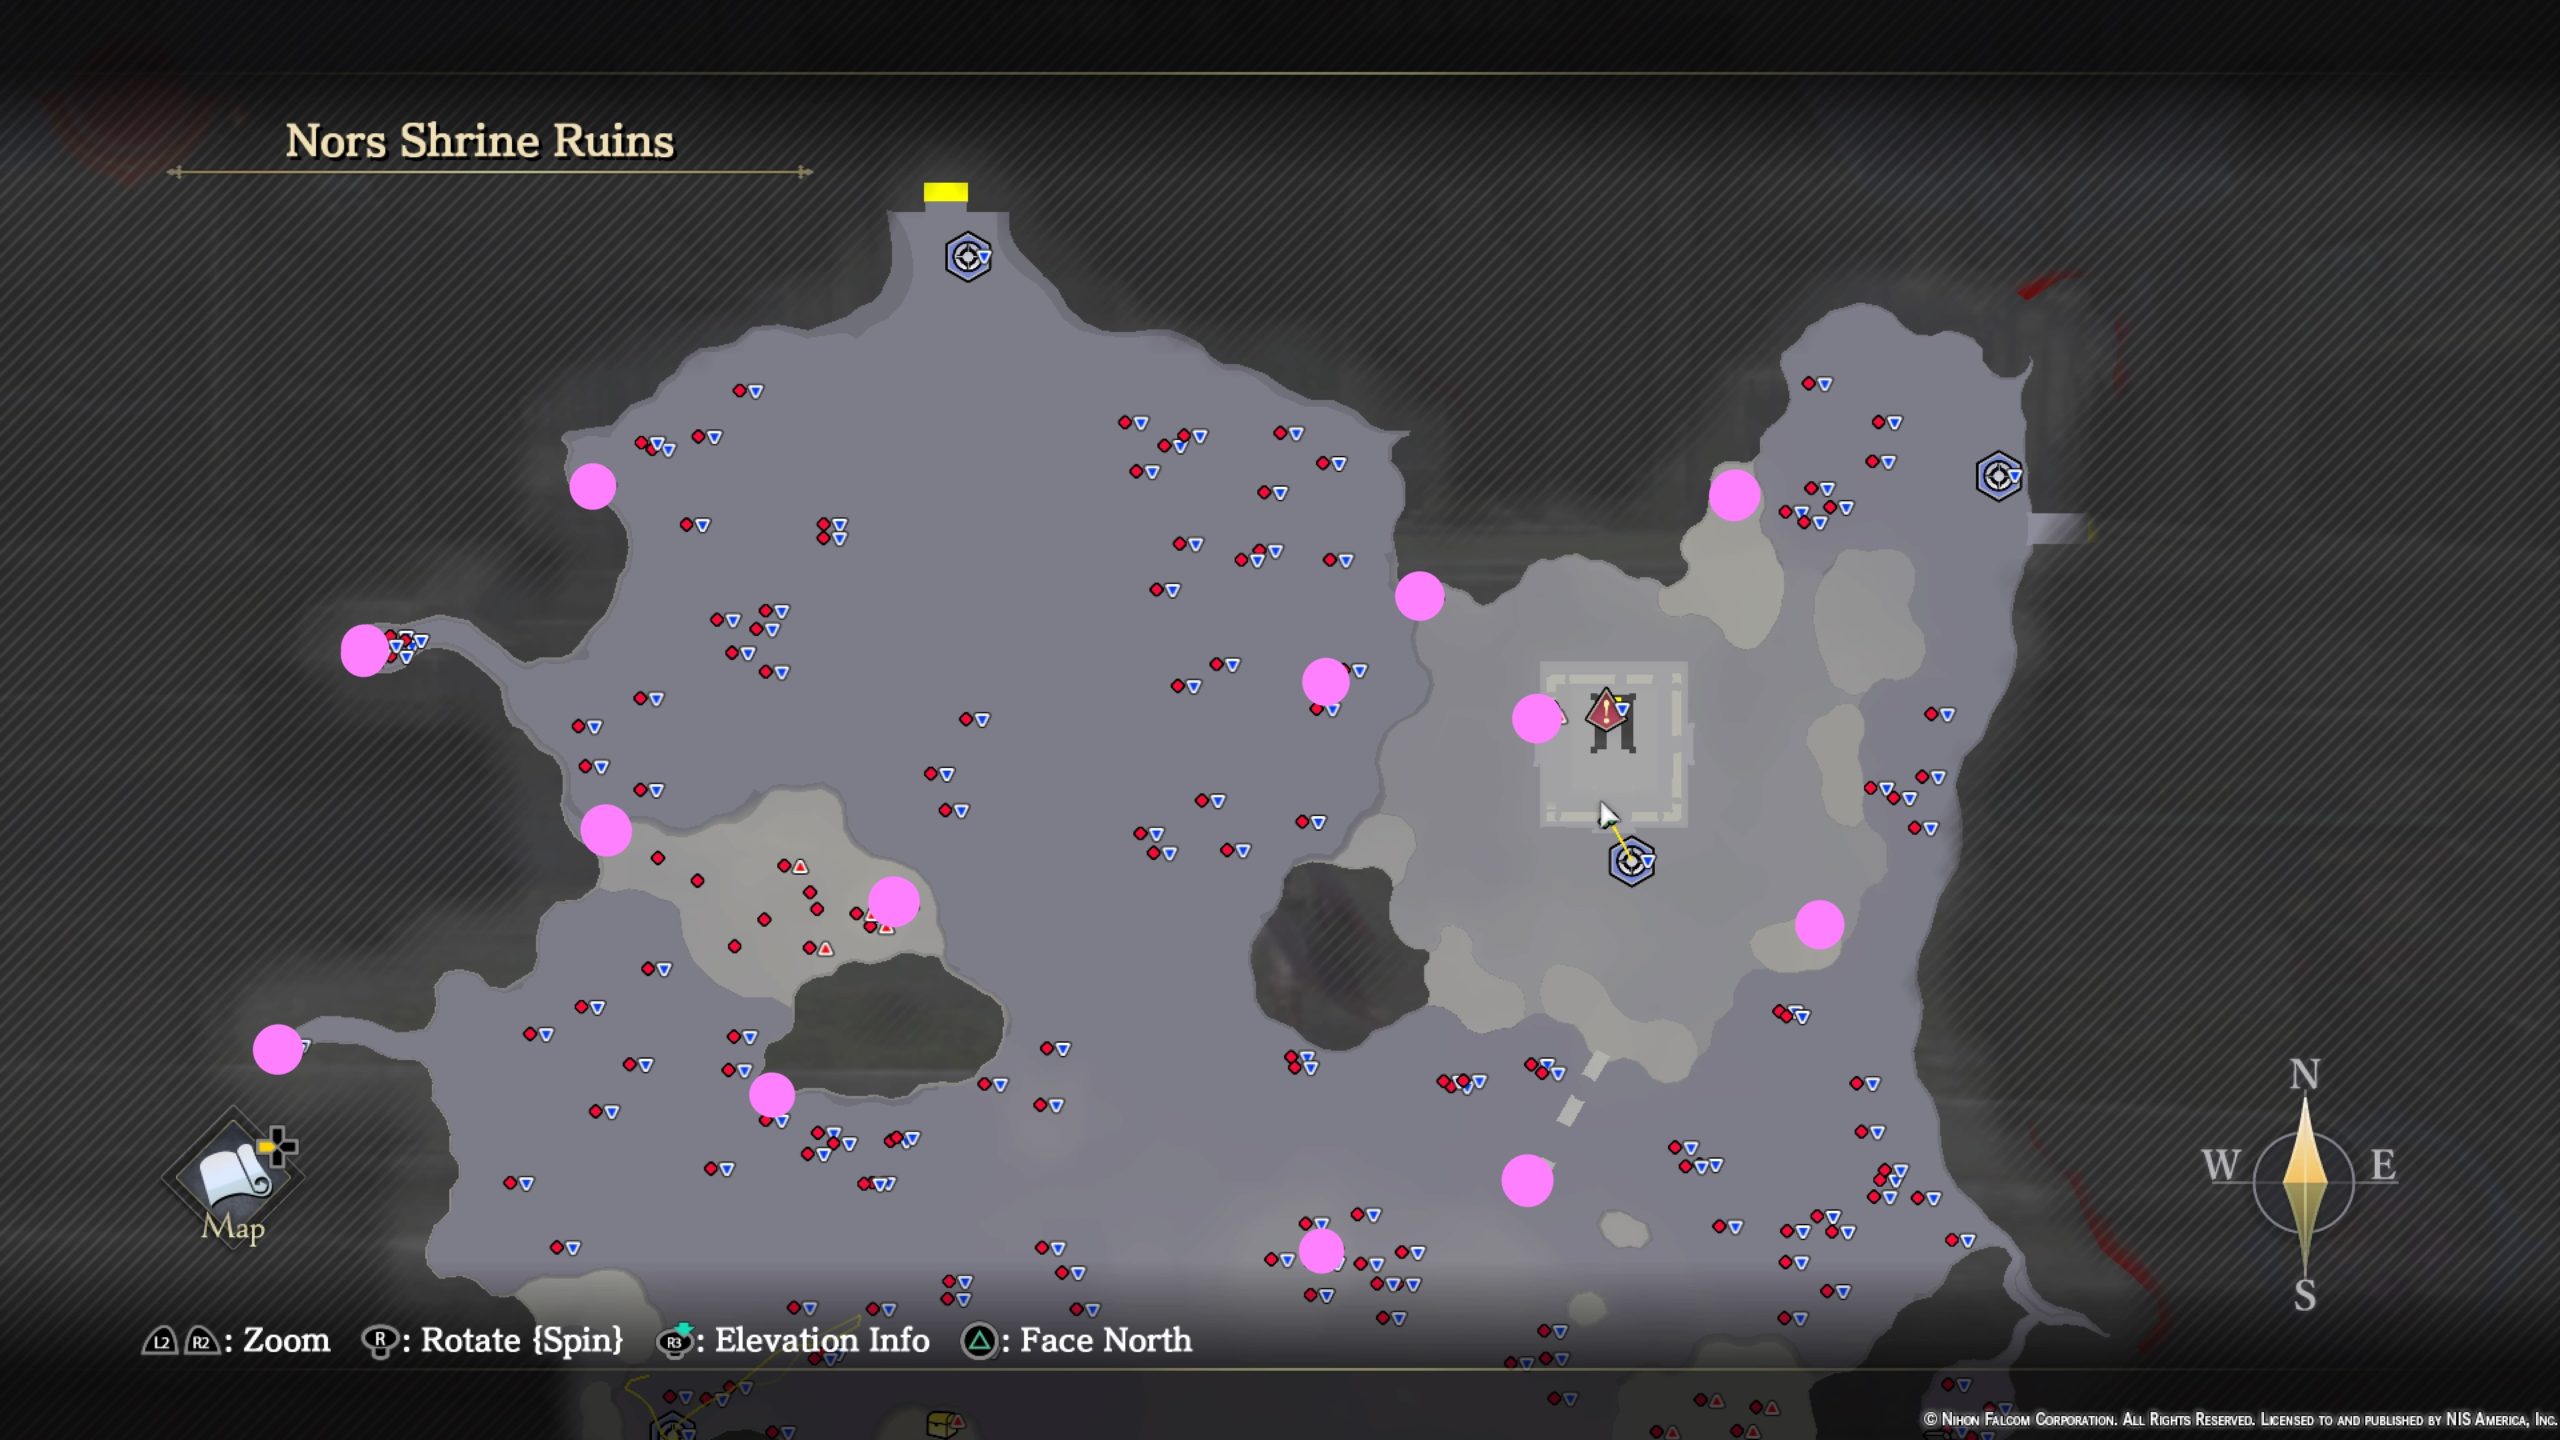
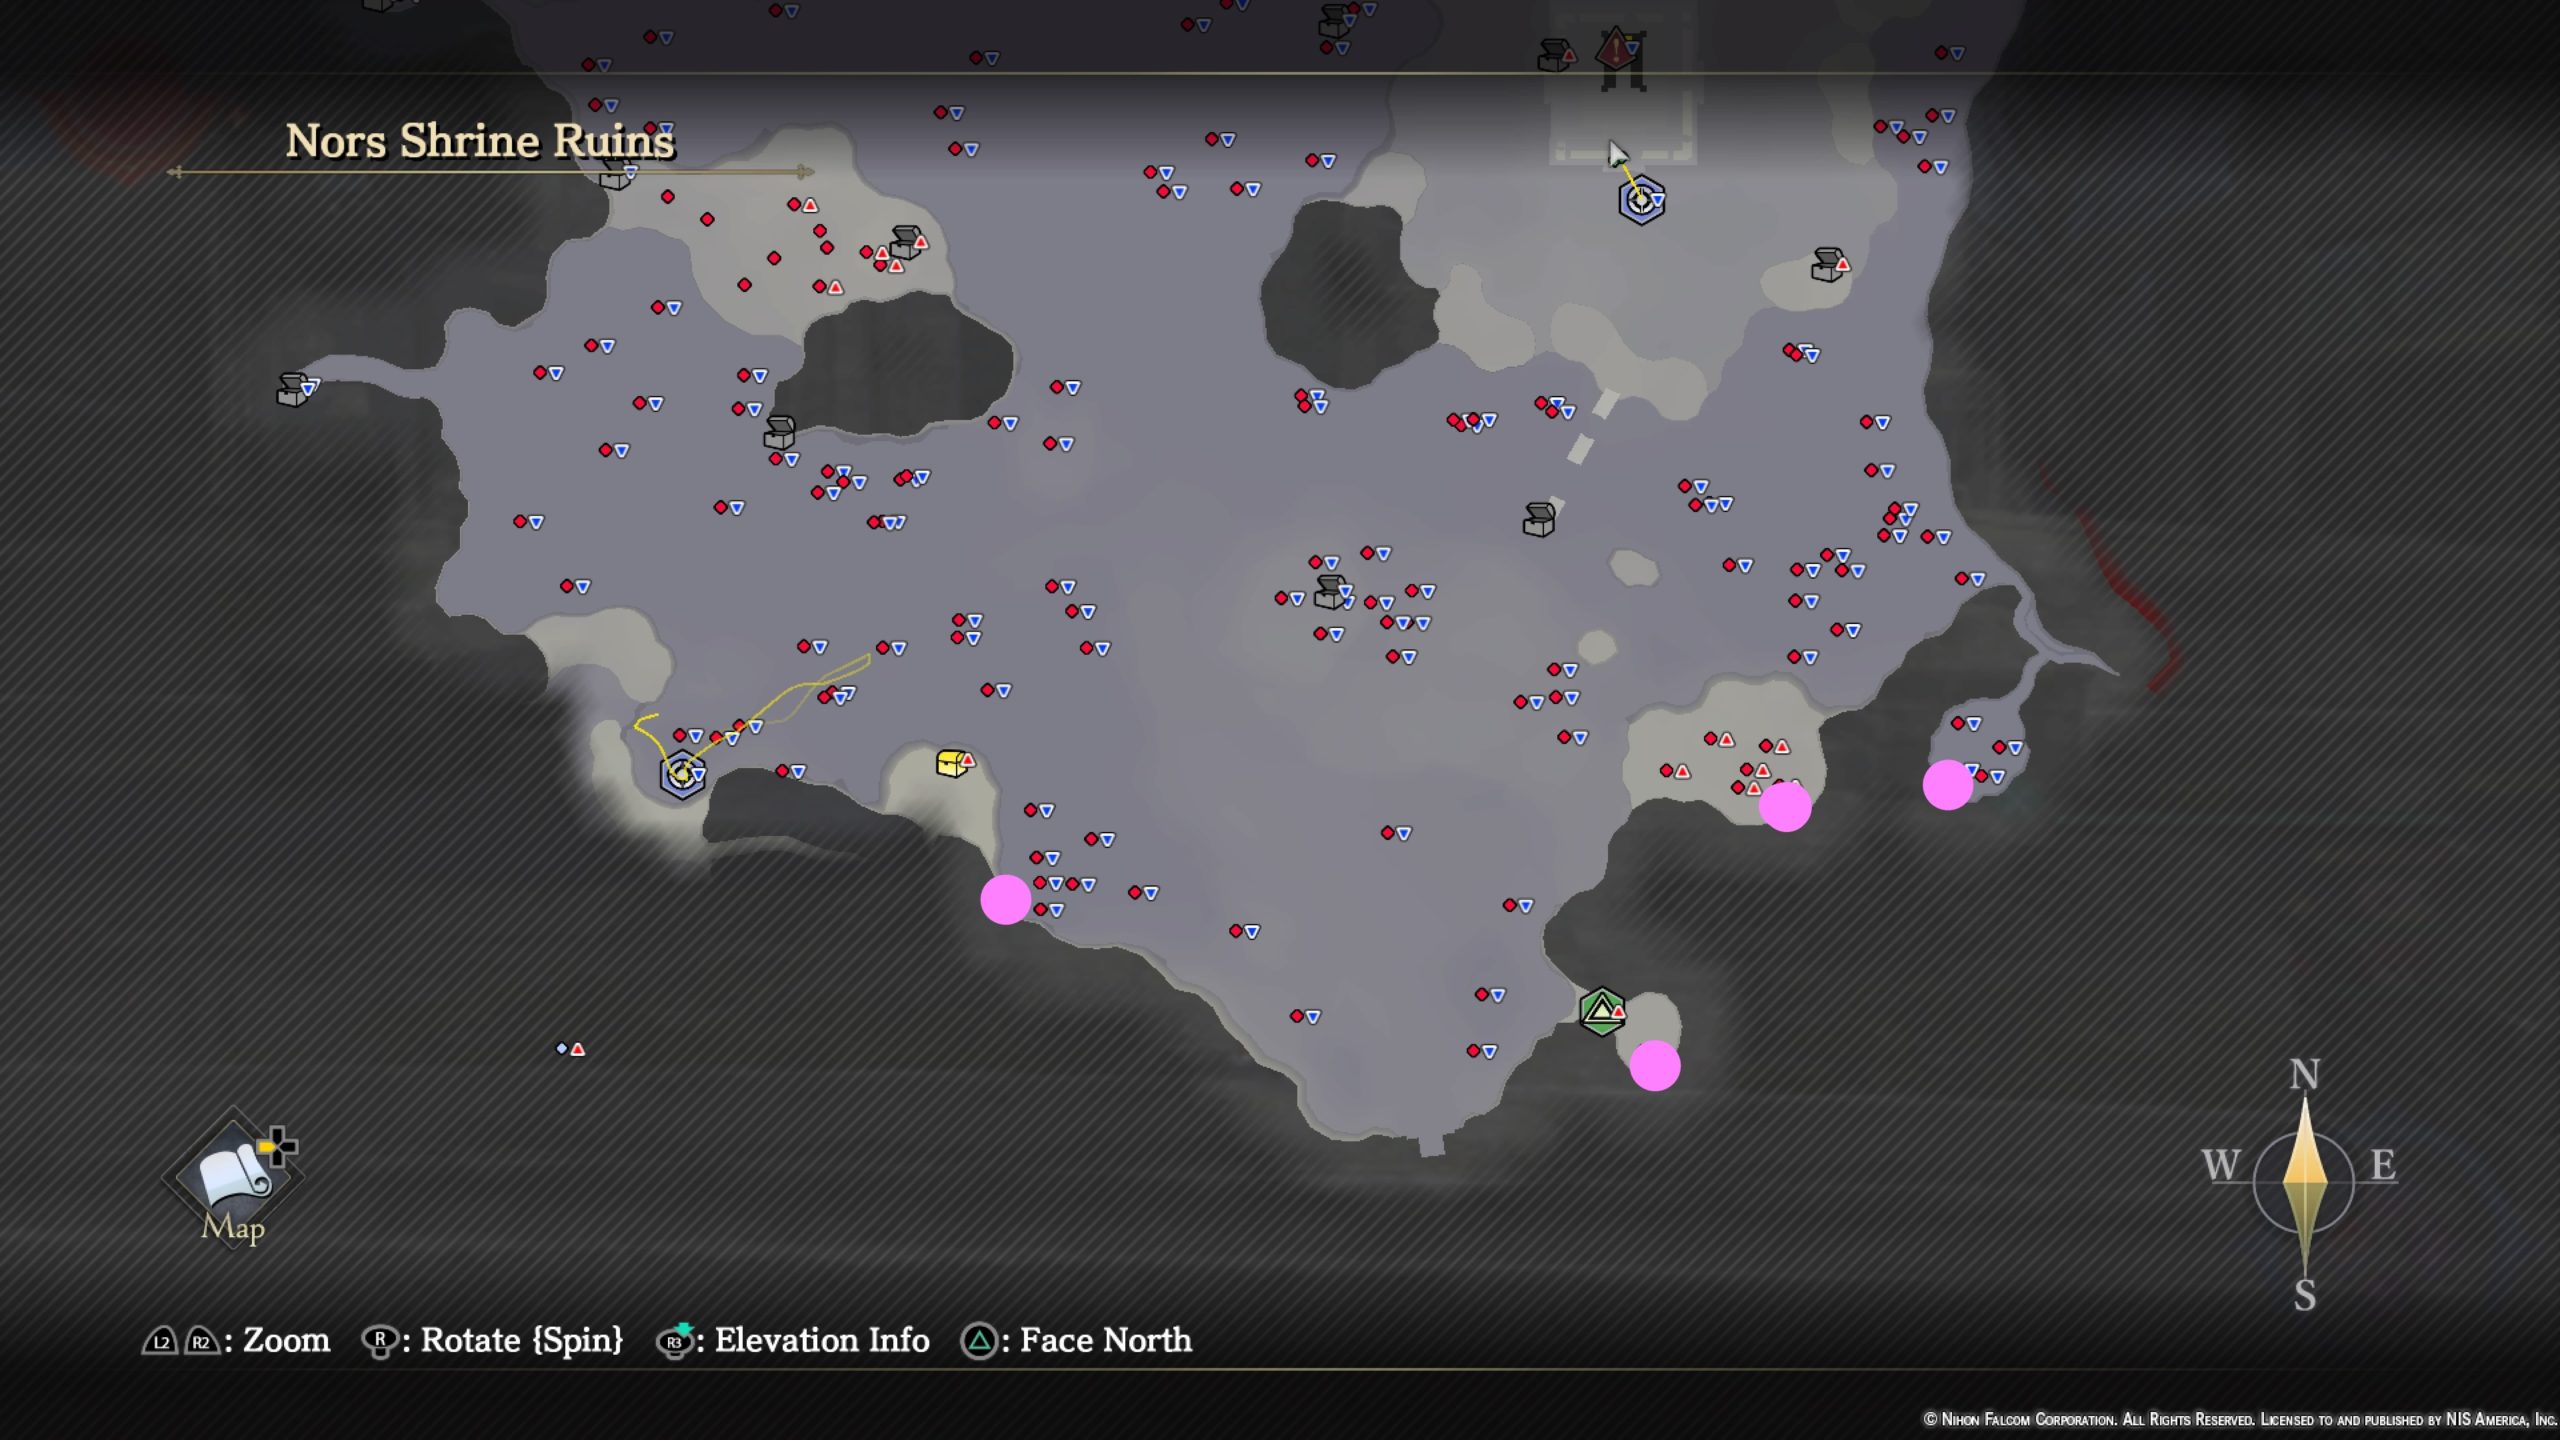
Milianne Plains
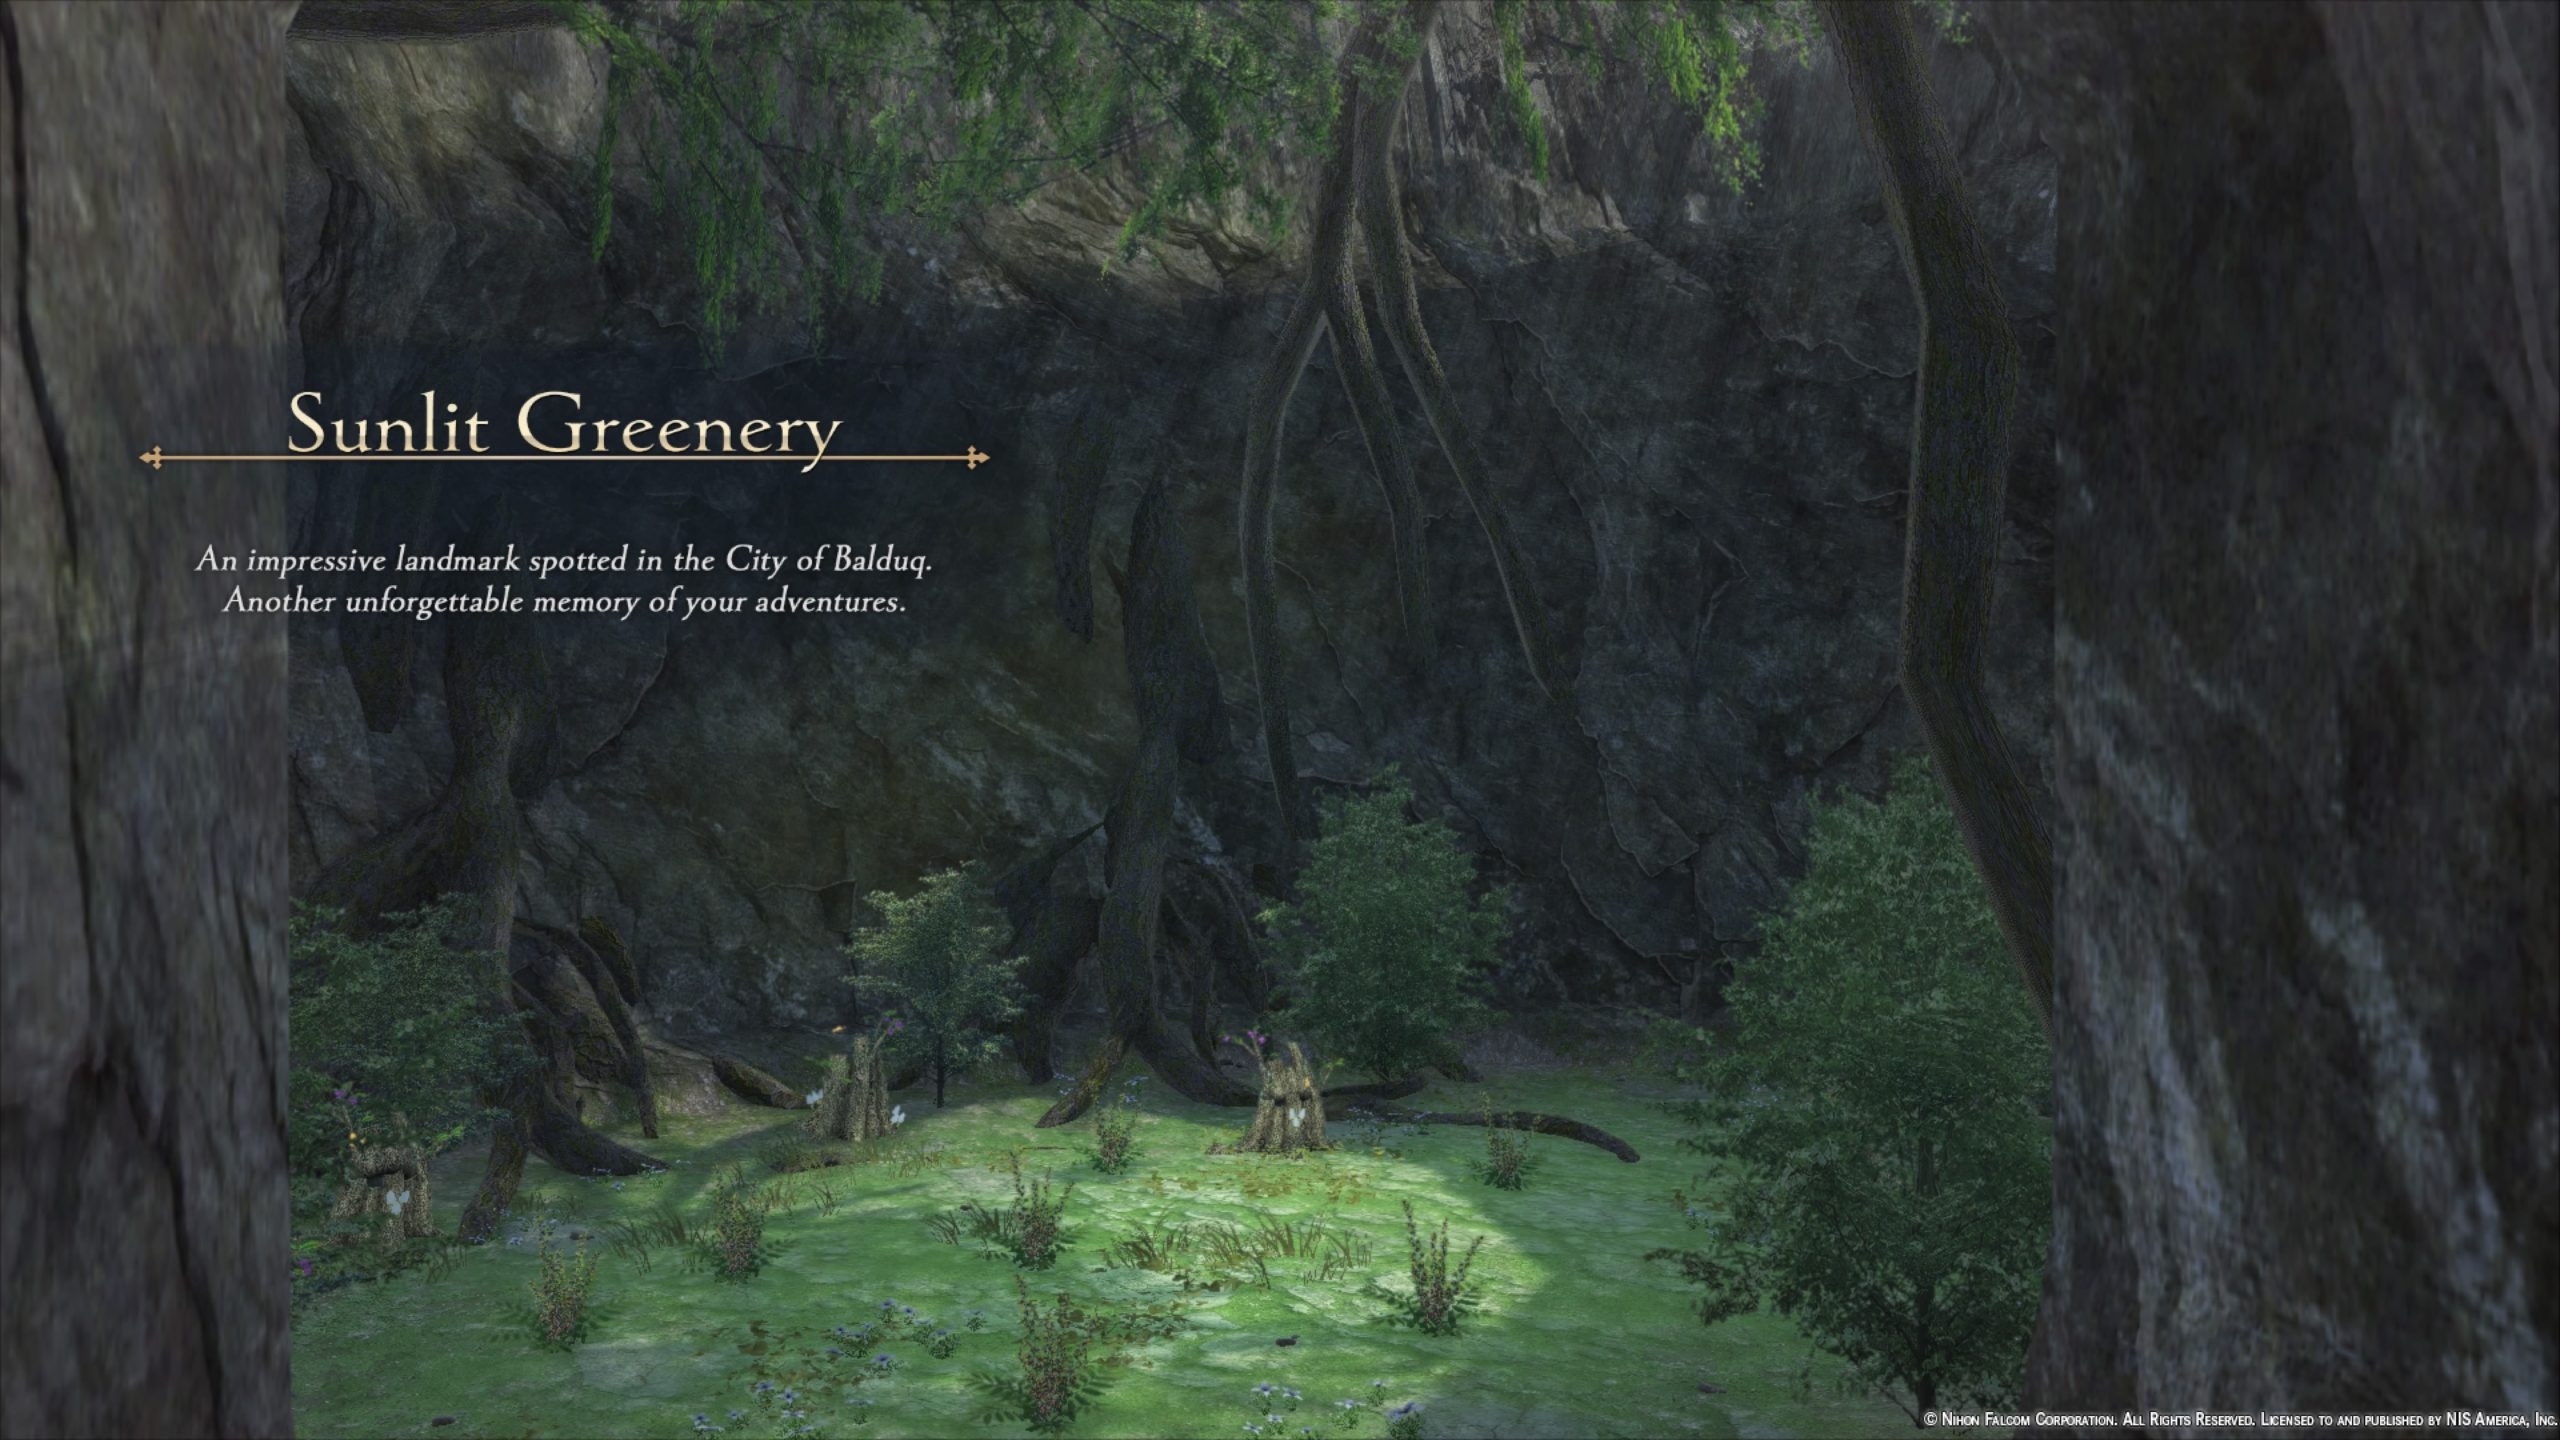
Landmarks
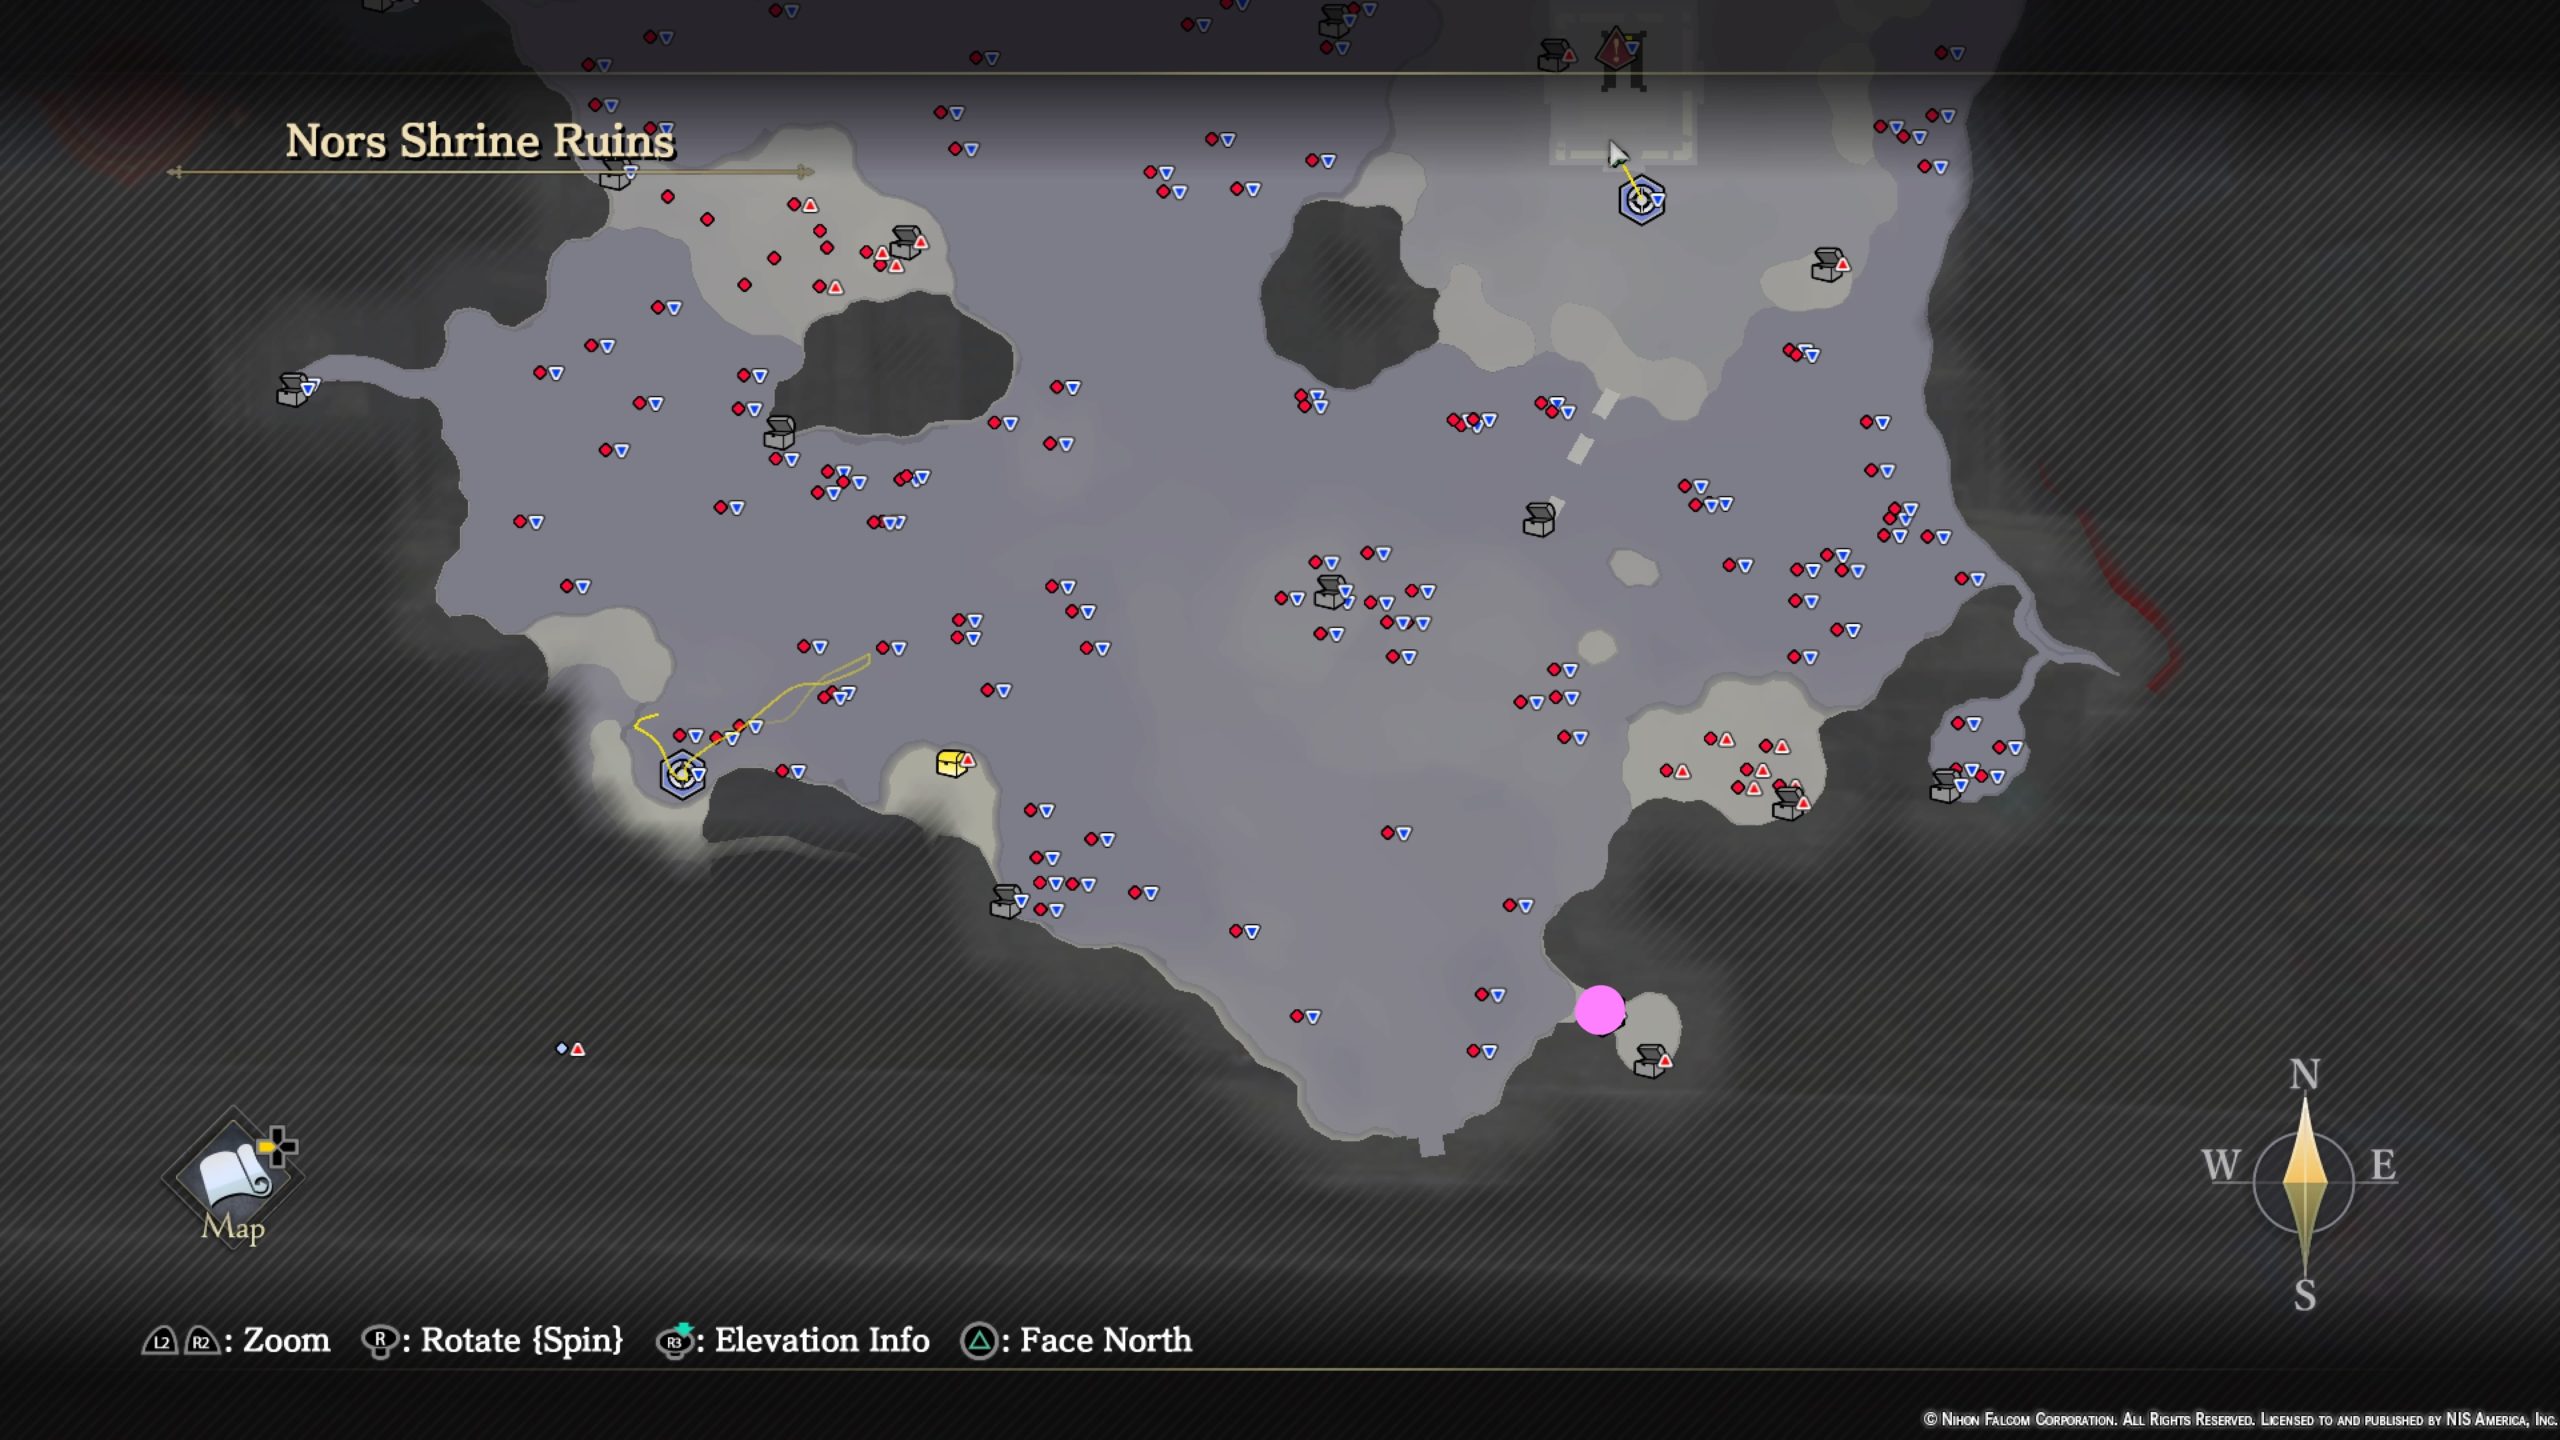
- Sunlit Greenery
Materials
- Aromatic Lumber
- Copper Ore
- Iron Ore
- Small Leaf
- Snowbell
- Soul Lumber
- Sparkling Leaf
Monsters
- Gublin
- Rob-Gublin
- Vrogium
Treasure Chests
- Red Cheese x4
- Bitter Remedy x4
- Violet Gloves
- Grimnut x2
- Panacea x2
- Gublin Tribe Shield x2
- Polar Night Drop x2
- Verdant Leaf x2
- Dry-aged Meat x2
- Boots Rubric
- 2400 Gold
- Tonic x4
- Leather Necklace III
- Snowbell x2
- Tempest Elixir
- Galette Recipe
- 1600 Gold
- ??? (unable to obtain)
- ??? (unable to obtain)
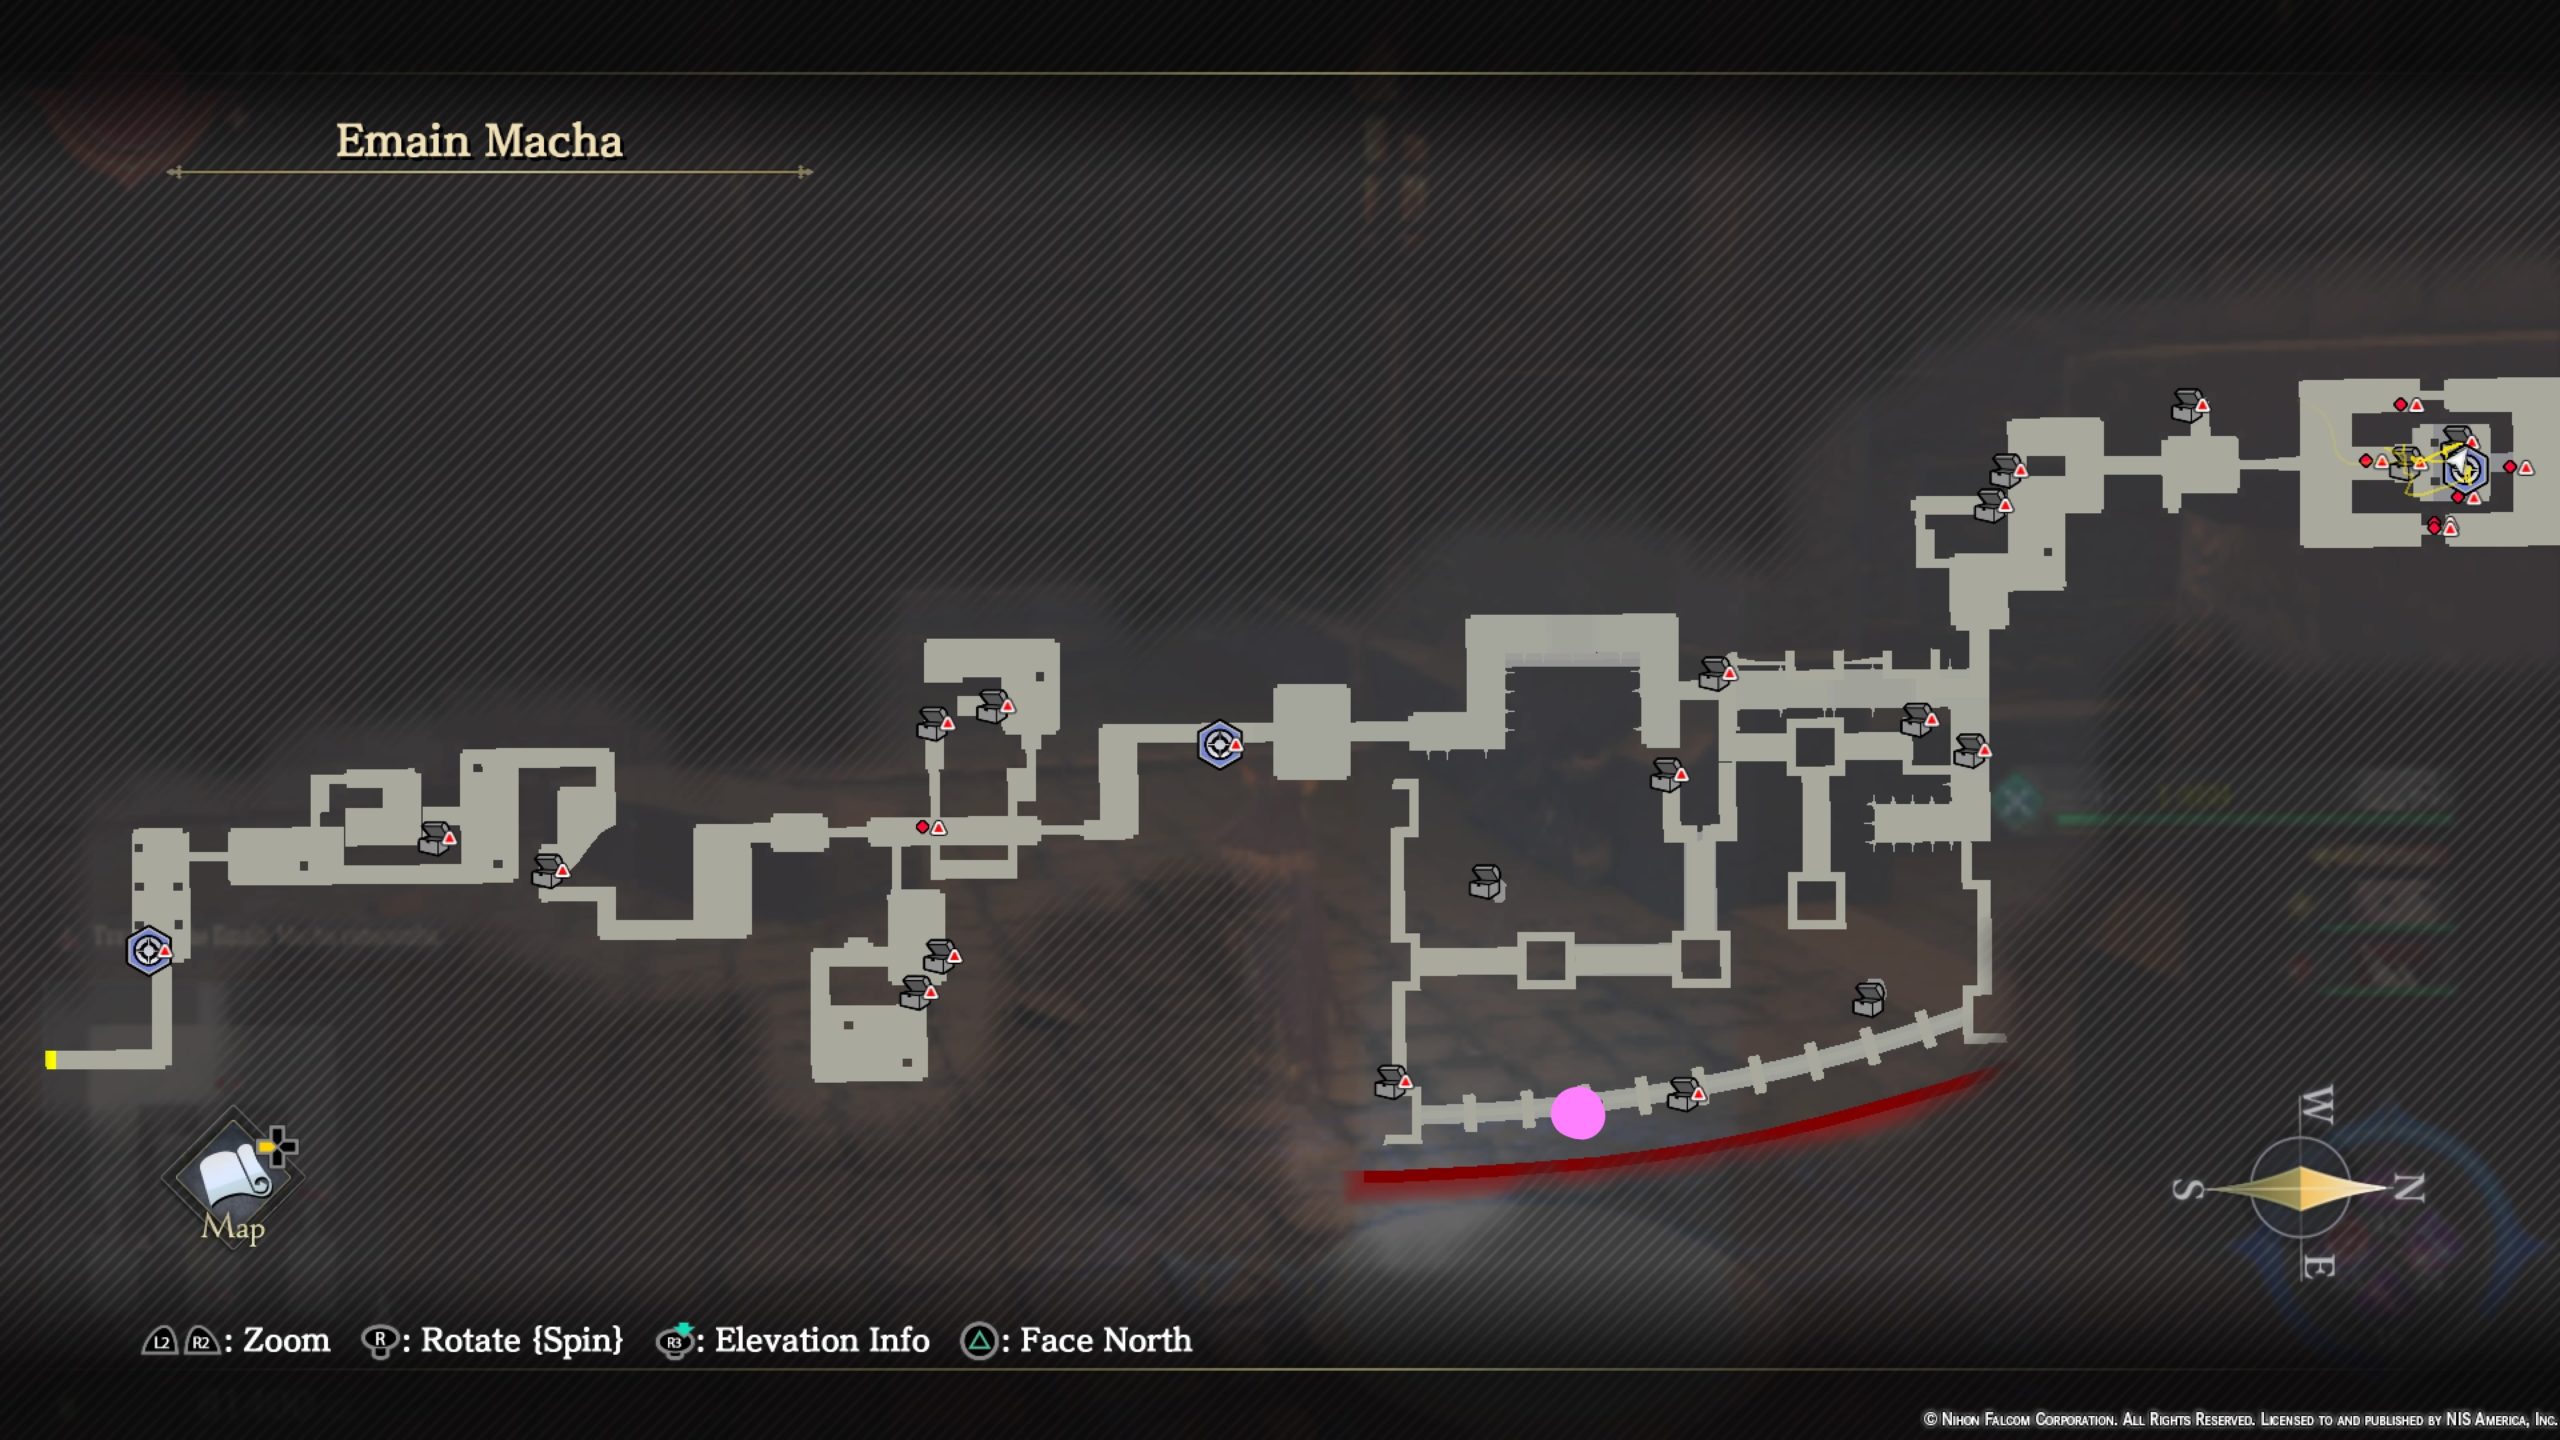
Emain Macha
Landmarks
- Great Bell Bridge

Materials
- Aromatic Lumber
- Copper Ore
- Crimson Spar
- Iron Ore
- Small Leaf
- Snowbell
- Sparkling Leaf
Monsters
- Gaspard
- Zol-Gublin
- Hyueille
Treasure Chests

- Strength Elixir
- Smoked Meat x2
- Polar Night Drop x2
- Flaring Spaulder
- Wicked Grimoire
- Panacea x2
- Bitter Remedy x6
- Blade Ring III
- Tonic x4
- Eagle Eye Orb
- Onyx Belt
- 3000 Gold
- 2500 Gold
- Hermit’s Remedy
- Warrior Seal III
- 2000 Gold
- Full Potion
- Nors Bleu x2
- Mystic Lazulite x2
Jillian Mines
Treasure Chests
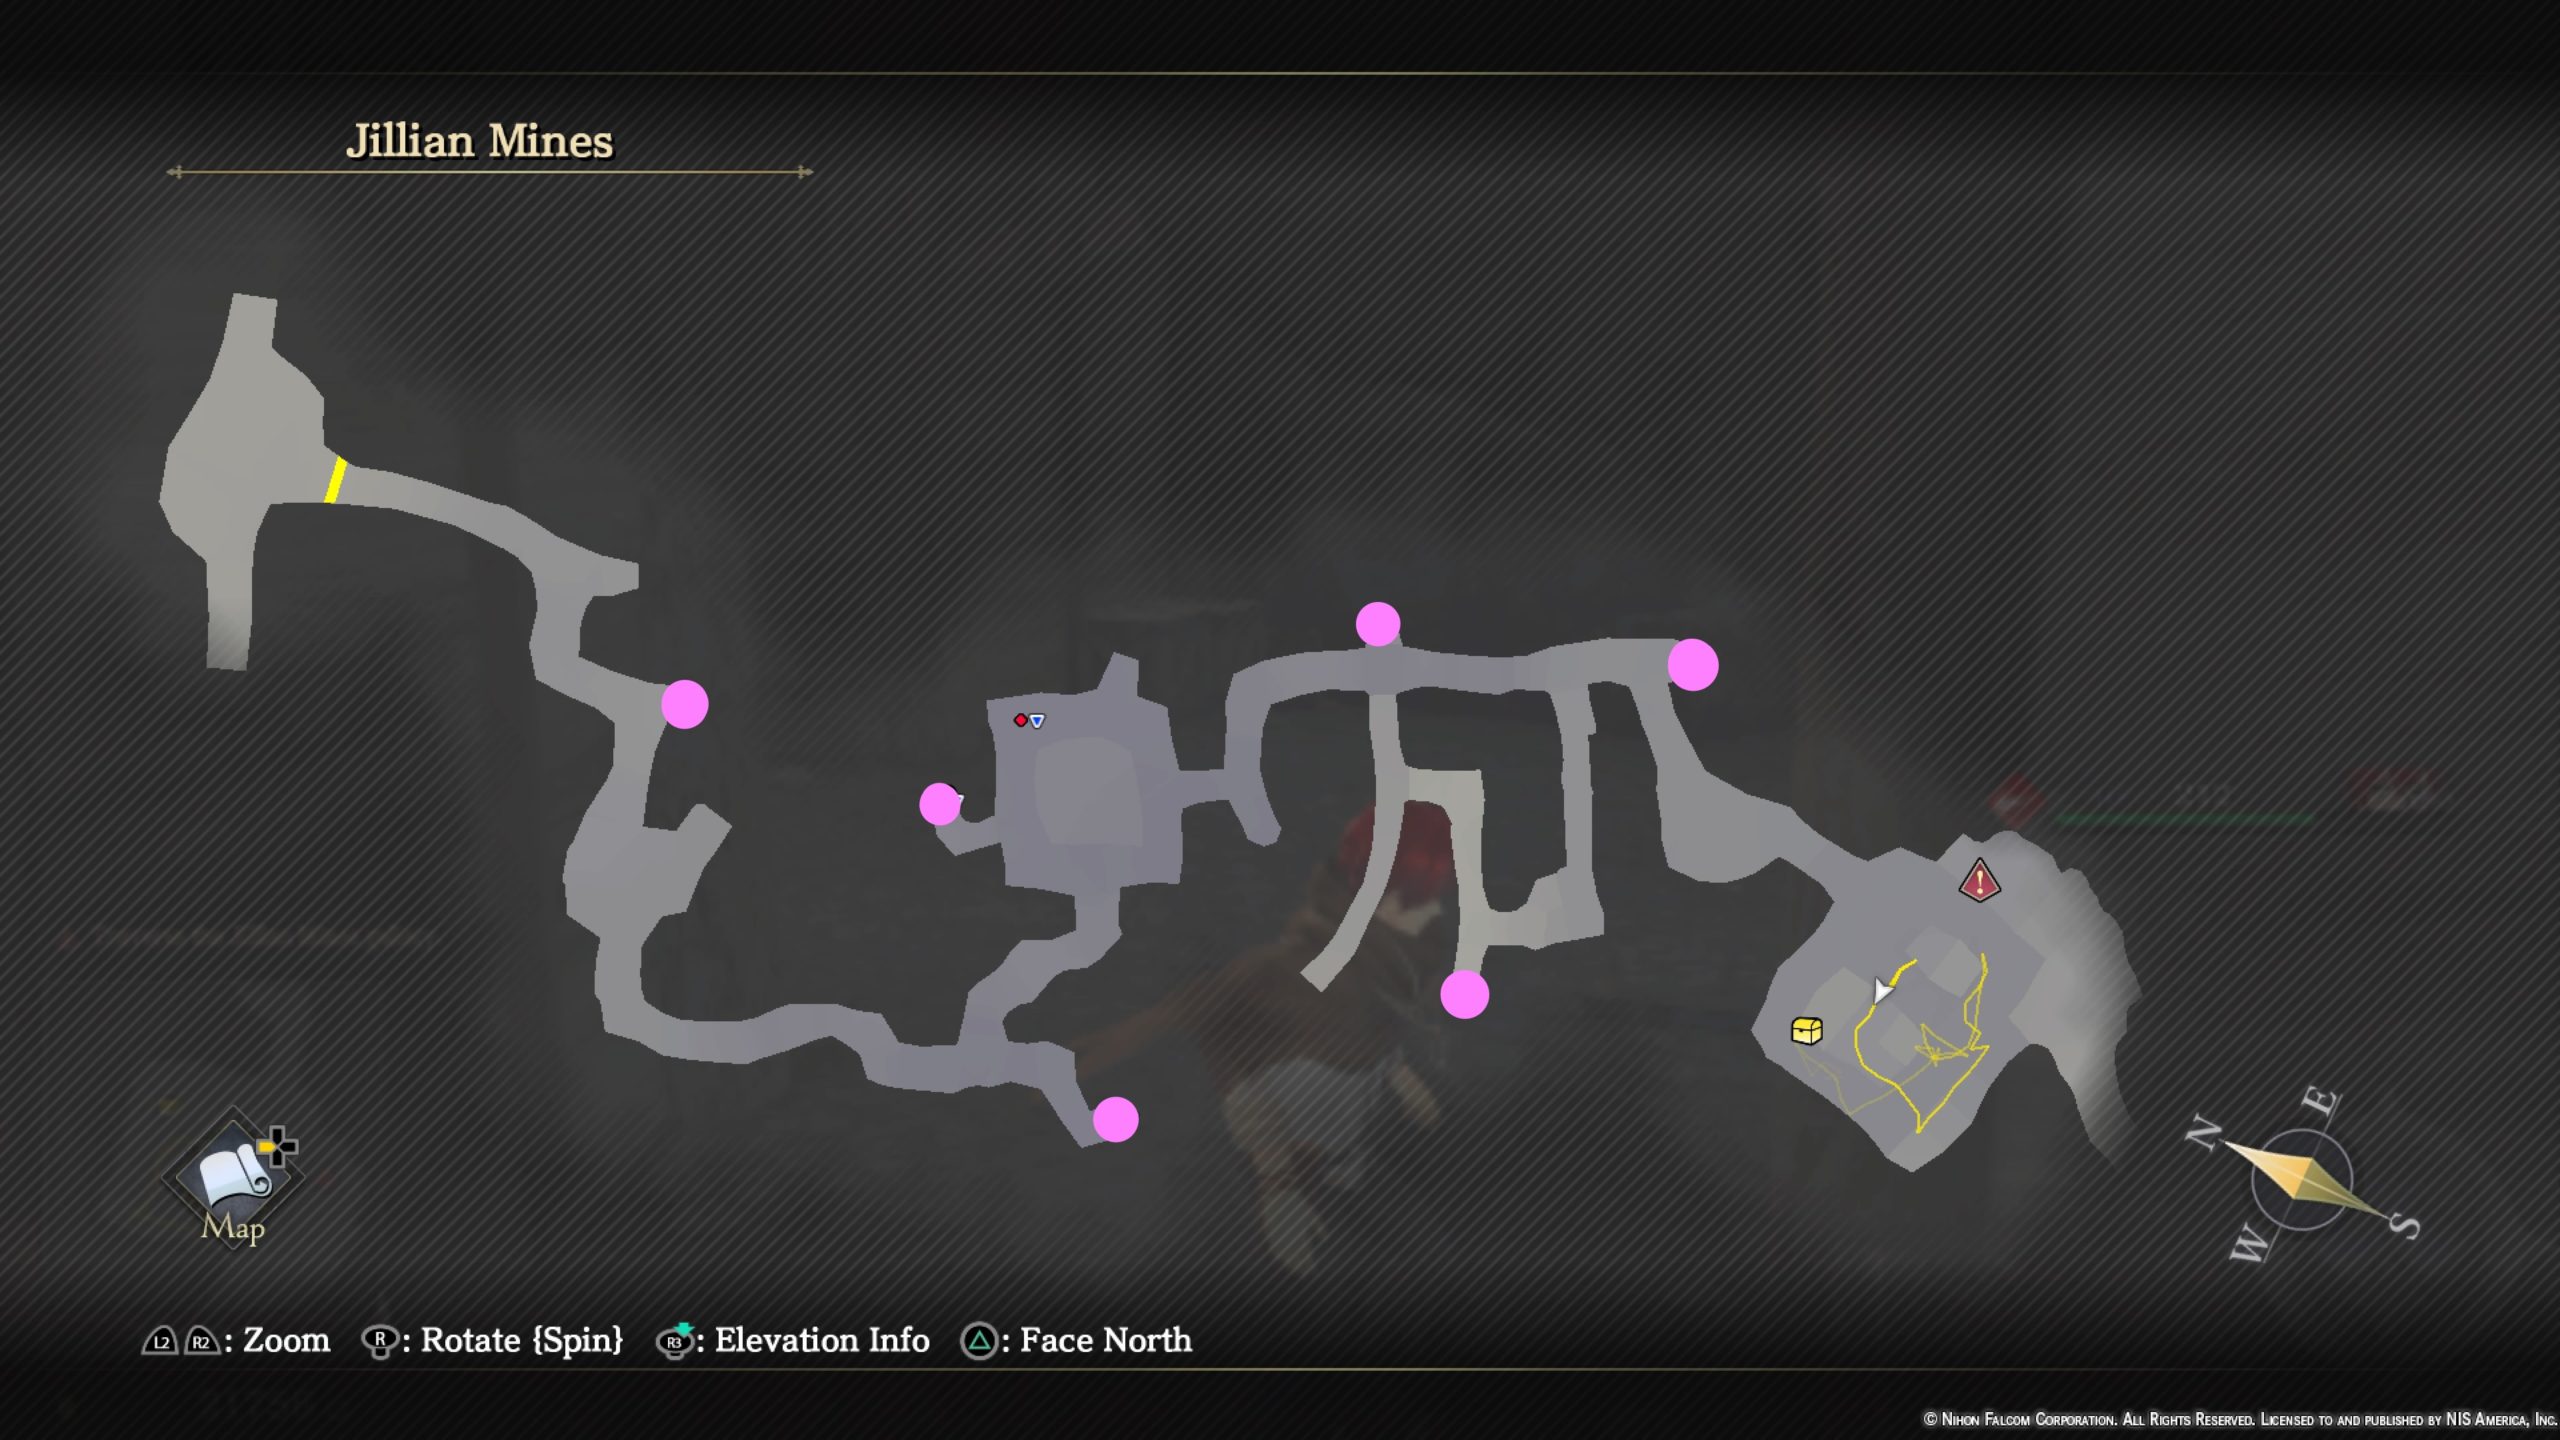
- White Nut
- 800 Gold
- Red Cheese
- 1200 Gold
- 1600 Gold
- Raisins x2
- ??? (unable to obtain)
Click here for the next guide on Chapter 7!!