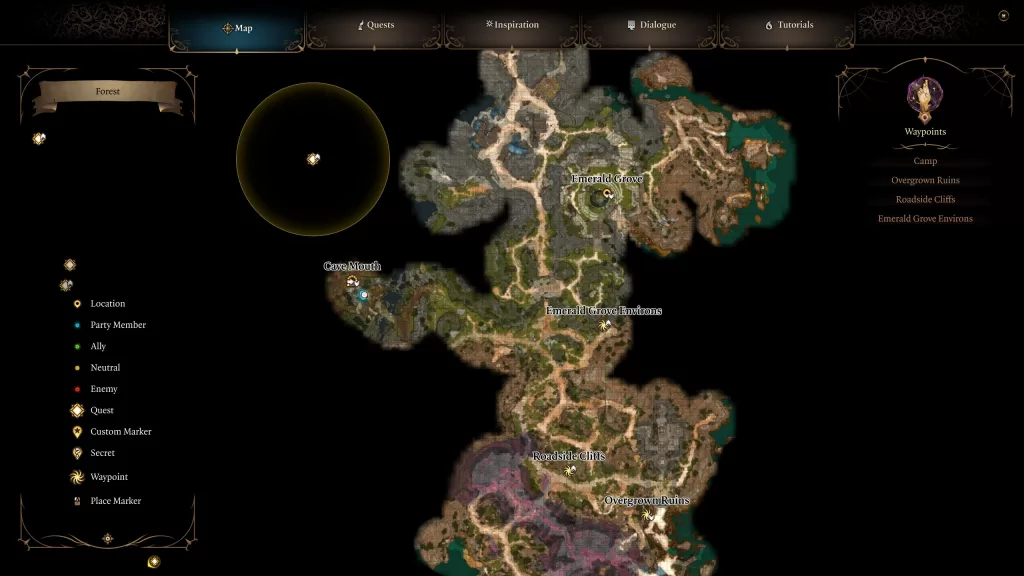
In Baldur’s Gate III, you’ll come across the Gilded Chest in the Owlbear Nest which can be found in the Forest west of the Emerald Grove Enviors waypoint by heading into the Cave Mouth.
When you try to open the chest, you’ll be hit with magic preventing you from looting the contents inside. Follow the steps below to crack that baby open!
Jump across the water and head behind the statue
Pass the perception check to locate the Selunite Prayer Sheet on the ground
Interact with the prayer sheet and pass the religion check (might not be necessary but included it anyway)
Pick up the prayer sheet then jump back over to the chest
Open your inventory and read the Selunite Prayer Sheet
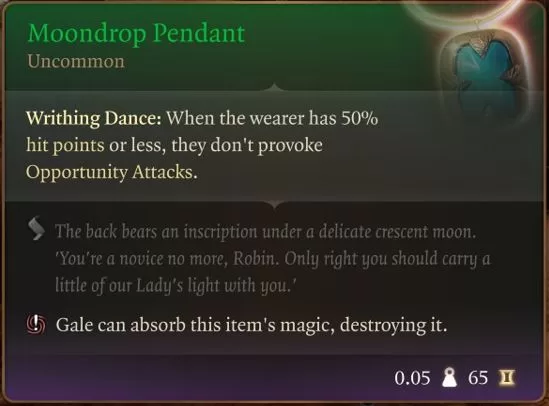
Open the chest (it contains an Idol of Selune and a Moondrop Pendant among other things)
As an FYI, it would be worth it to bring Shadowheart with you when you try to loot this chest. You’ll have a conversation with her that would reveal more about her if you pass an insight skill check.
While exploring the Druids’ Grove in Baldur’s Gate III, you’ll come across a locked shed in the Hollow. Pandirna can be found on the other side.
You can enter the shed by lockpicking the door when no one is looking or by heading through the Underground Passage which can be reached from outside the grove as shown in the image below if you pass a nature check.
Going that way, you’ll have to fight a scouting unit of goblins and save a druid whom they captured. Then you’ll be able to cross through the passage bringing you back into the grove behind the shed. This will allow you to climb on the roof of said shed and jump down inside it. Doing so will lead to a conversation with Pandirna with the below choices.
Choice
Consequence
I’m just looking around.
She’ll tell you to get lost
[INSIGHT] Study her face and try to read her emotions.
You’ll notice that something is wrong with her legs and will have the option to help
[PERSUASION] Don’t worry. I’m here to help.
She’ll allow you to stay and you’ll have the option to help her
[DECEPTION] I’m afraid I can’t. I’ve been placed in charge of this area.
She’ll allow you to stay and you’ll have the option to help her
[INTIMIDATION] Hush, girl. Another word and I’ll snap your neck.
The conversation ends and she does nothing.
Attack her.
A guard will run in and you’ll have to talk you way out of it, fight your way out or go to jail
If you are hostile and she doesn’t alert the guards, you can loot the entire shed. On the other hand, if you are nice to her you’ll learn that her legs are paralyzed due to drinking a potion. You can help her out by healing the condition by using a potion or spell. The easiest way would be to have Shadowheart cast her Lesser Restoration level II spell on Pandirna. Once cured, she will thank you and allow you to stay (although she won’t let you loot anything). While speaking with her, you’ll also have the option to take her bag. It only contains some gold and an elemental arrow.
The Nautiloid Crash Region is the starting point of Act I of Baldur’s Gate III after the Nautiloid crash. There you’ll find a handful of side quests you can complete for rewards to help your party in their search for a cure to the Mind Flayer Parasite occupying their skulls. This guide will cover the quests you can pick up in the Nautiloid Crash Region and what you’ll need to do in order to complete them.
Explore the Ruins
You’ll start this quest automatically when you approach the Chapel Entrance north of the Overgrown Ruins. There will be a group of bandits there trying to loot all the goodies for themselves. Approach them to start a conversation. If you pass one of the skill checks, you can convince them to leave without a fight or if you would like the EXP, you can attack them.
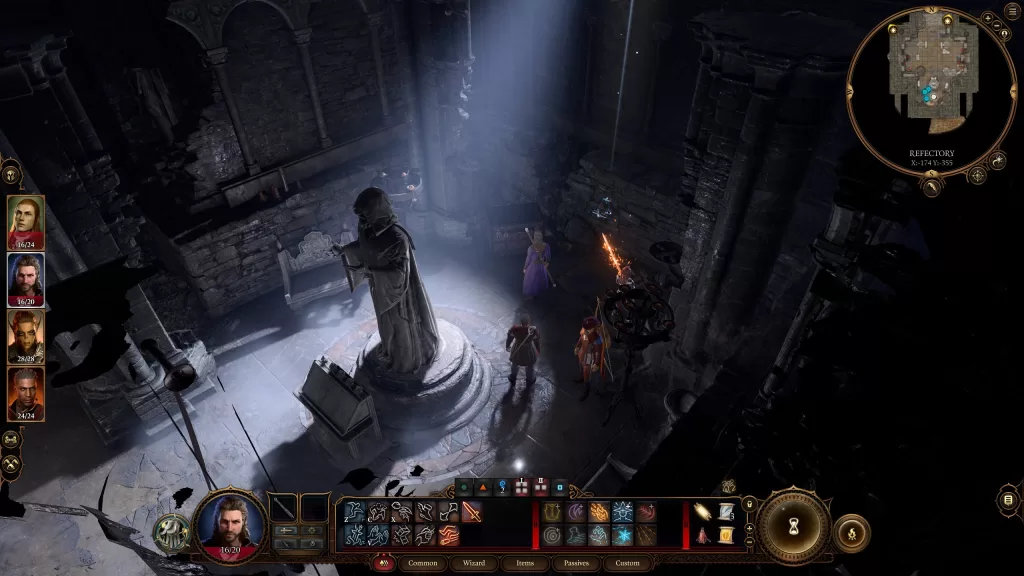
After scaring them off or taking them all out, head for the door leading into the Refectory. Interact with it to begin a conversation with someone on the other side. If you pass a skill check, you can convince them to open the door, otherwise, you’ll have to lockpick it. Head through then deal with Andorn. Loot the Bandit’s Key off of him then head for the locked door in the room. Use the lever to the left of the door to open it. Be wary as this leads to a fight with Andorn’s comrades. There will be 5 you’ll have to deal with. Once that’s done, head to the room at the end of the hallway with the statue then make your behind the statue. You’ll need to pass a perception check to spot a lever on the wall. Activate it and return to the hallway. The door on the left (which was locked) will now be open. Head inside then interact with the door there to reach the Dank Crypt.
Before we get into the Dank Crypt area, there are 2 other ways to reach the Dank Crypt. The first is by lockpicking the Ancient Door on the beach or lockpicking the hatch on the east side of the Chapel Entrance. Both require a skill check of 20 to be successful and both will grant you entry to the Dank Crypt allowing you to skip most of the bandits.
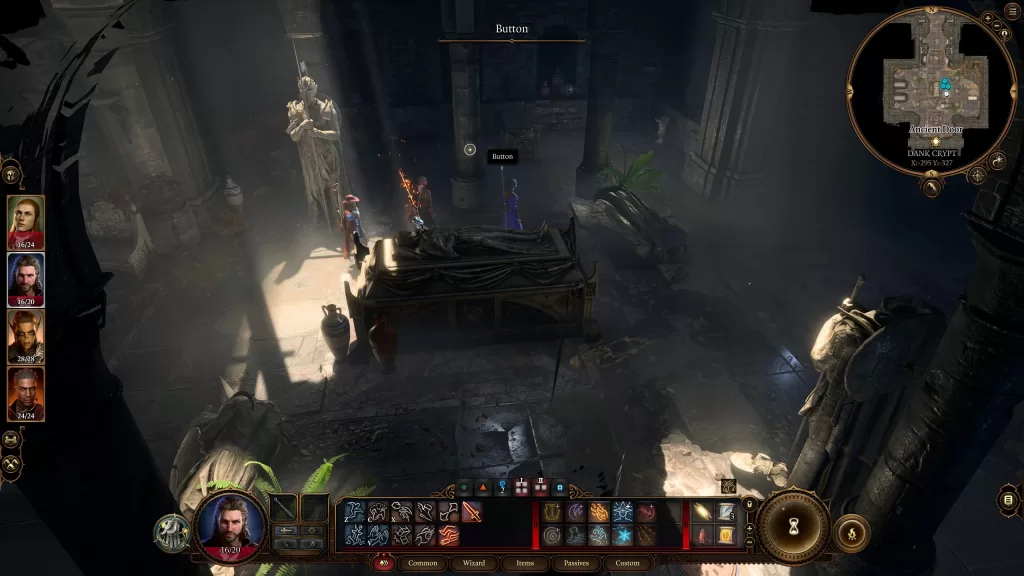
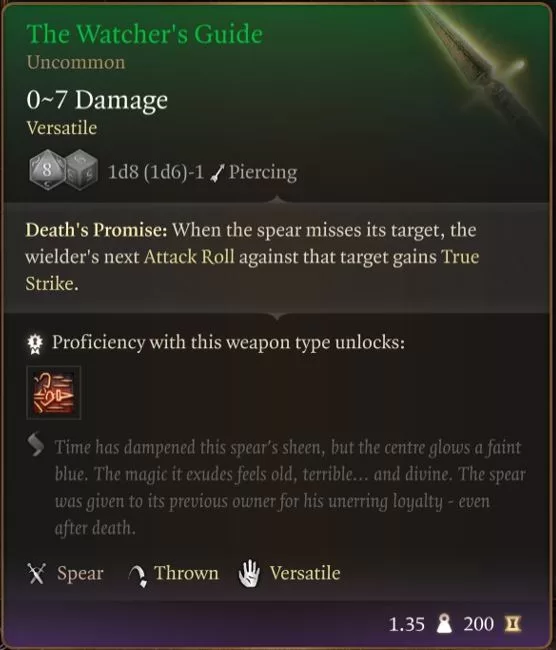
Now in the Dank Crypt, take a right and head through the Heavy Oak Doors. This will bring you into a room with some coffins. Before doing anything, circle the room and hopefully, you’ll get multiple perception checks revealing the traps in the room. On the west side of the central sarcophagus, there will be a pillar with a button on it. If you open the central sarcophagus then run over and push the button, you will disable all of the traps.
Return to the sarcophagus and loot it to receive The Watcher’s Guide spear and an Engraved Key.
With that out of the way, head north through the ruins to another set of Heavy Oak Doors and use the key you just got to open them. Head through the doorway and explore to your heart’s content. Make sure you enter the most northwestern room as it has a sarcophagus containing a Soul Coin and the Book of the Dead Gods for you to examine.
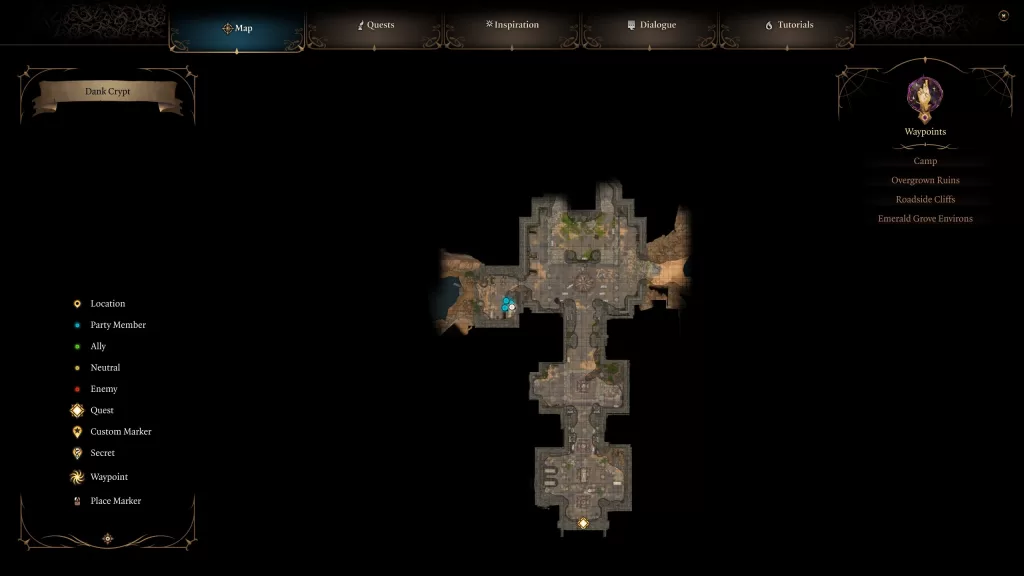
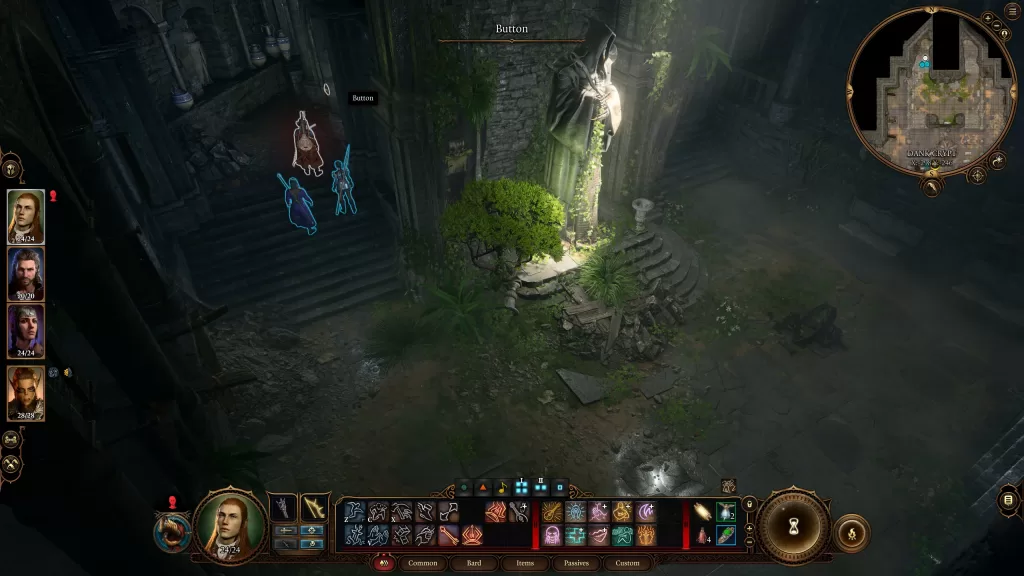
When you’re ready, head for the most northern part of the Dank Crypt with the giant statue. Climb the stairs on the left of the statue to find a button. Press the button to open a hidden door. This also awakens the skeletons that are in the room. Defeat them then head into the hidden room.
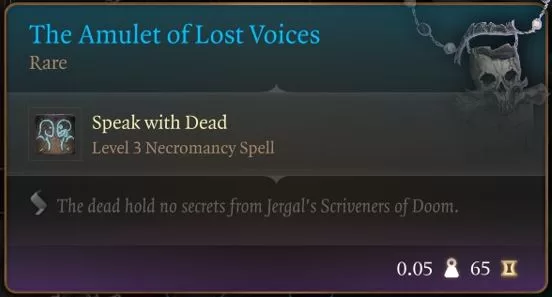
Loot the Heavy Chest in the room to find The Amulet of Lost Voices. Finally, open the Richly Adorned Sarcophagus to meet Withers! Pick whatever dialog options you want, but try not to be rude. After the conversation, he’ll say you will meet again and the quest will be complete. After some time passes, he’ll show up at your camp and can be used to bring back dead party members among other things. Make sure to loot his sarcophagus to get another Soul Coin.
Rewards: Soul Coin (in sarcophagus), The Amulet of Lost Voices (in a chest)
Find the Missing Shipment
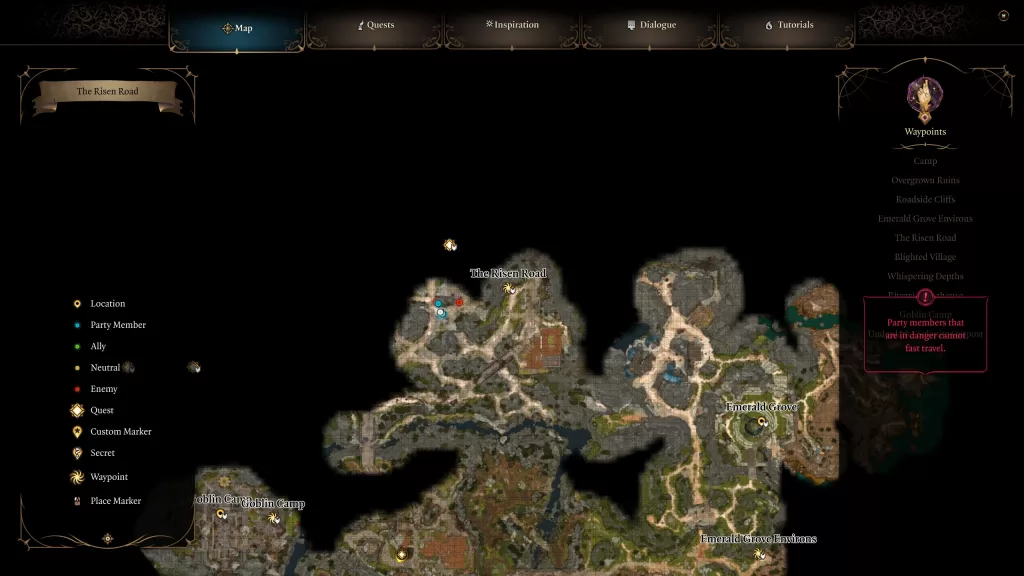
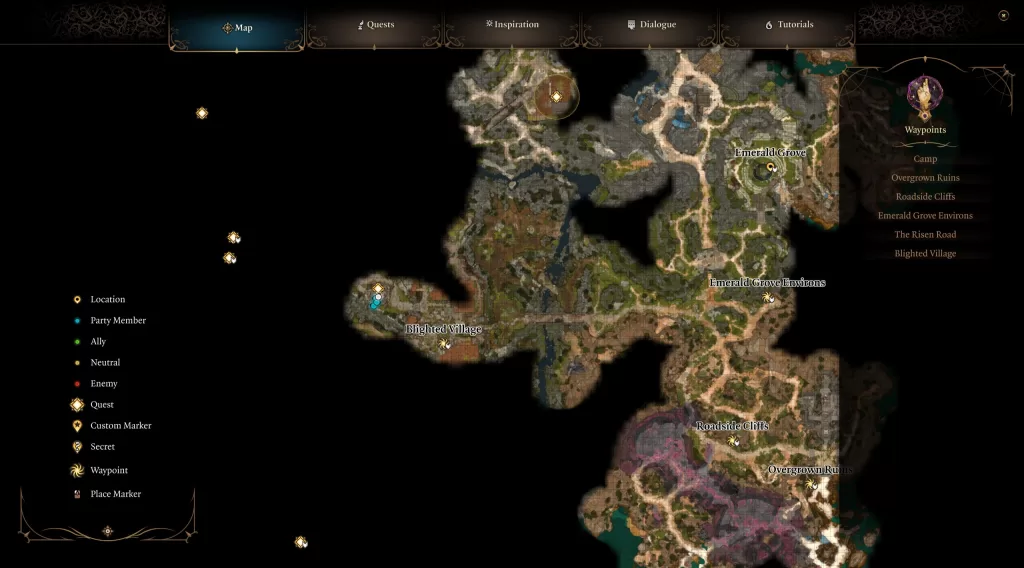
The quest can be found in the mountains northeast of Emerald Grove, to the west of the Risen Road. There is a cave there being attacked by a pack of Gnolls. Approaching the cave will throw you into combat. After the first turn, a dialog event with the Gnoll Warlord will trigger. Surprise! It too has a tadpole! Choose the first option to search further in its mind. This will add a new option to the list. You can now use your Illithid power to tell the gnoll to kill the people in the cave or feast on the rest of her pack. You can also withdraw from her mind and kill them all! (We chose to have her eat her pack!) After the battle, you’ll have more dialog with the gnoll who is not satisfied. You’ll have the option to tell her to eat herself, leave or sever the connection and attack her.
After dealing with the gnoll, one of the men trapped in the cave will approach and thank you for saving them. You can ask him a couple of questions like what he was doing and where they are going. As thanks, he’ll send you to meet some of his friends and give you a code word. Before he leaves, you can try to pass an intimidation check for the chest they are transporting instead. If you get it, the chest can be found in the cave and is sealed tight. You’ll have to pass a 20 Sleight of Hand check to unlock it or you can destroy it with your weapon. Inside you’ll find the Iron Flask which holds a dangerous creature and the quest will be completed.
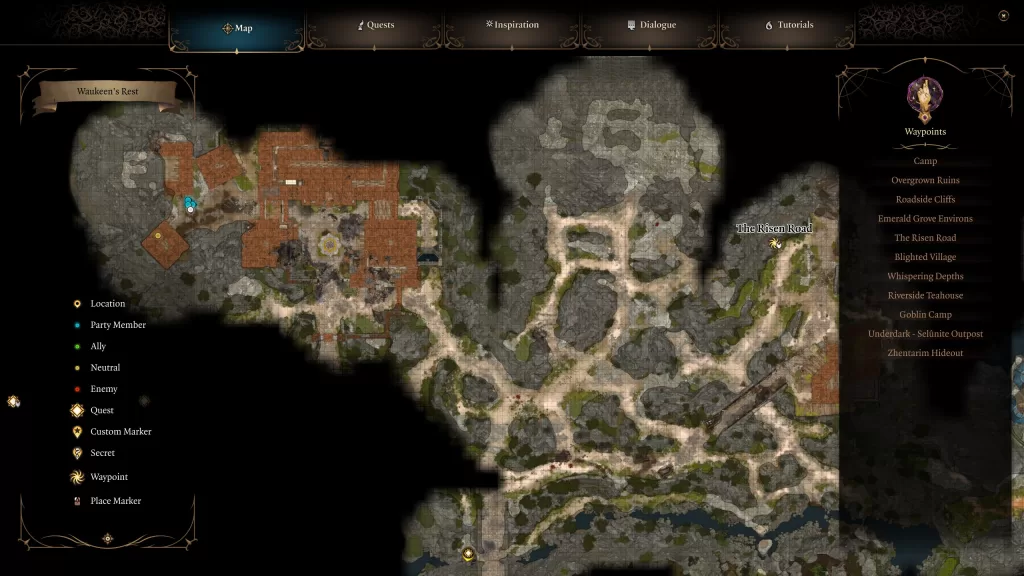
Alternatively, you can choose not to open the chest and instead use it as a bargaining chip. Travel further west to reach the burning town of Waukeen’s Rest. This is where the buddies of the guy from the cave can be found. Head to the west side of the area to find a couple of barns and a storage building, Enter the storage building (blocked with wooden crates) to trigger an event with one of the Zhentarim. Use the password that the caveman gave you to gain entry. Locate the hatch in the building and then use it to reach an underground area. Now look for the locked wardrobe and use the key that Salazon gave you to reveal a hidden door. Take that to reach the Zhentarim Hideout. Speak with Zarys there who will then task you with delivering the shipment to Baldur’s Gate and killing the man from the cave. If you refuse, then you’ll have to fight her and her goons. Accepting with complete the quest.
Find the Nightsong
Speak with Aradin in the Druids’ Grove to pick up this quest. He’ll tell you about a job his mercenary group took and even give you the contract. You can loot the contract off his corpse if he died during the initial battle against the goblins at the grove. Aradin will also mention that another of his group, Brian the dwarf, has a map leading to the relic they were supposed to retrieve, but he was killed by goblins… Luckily we don’t need it!
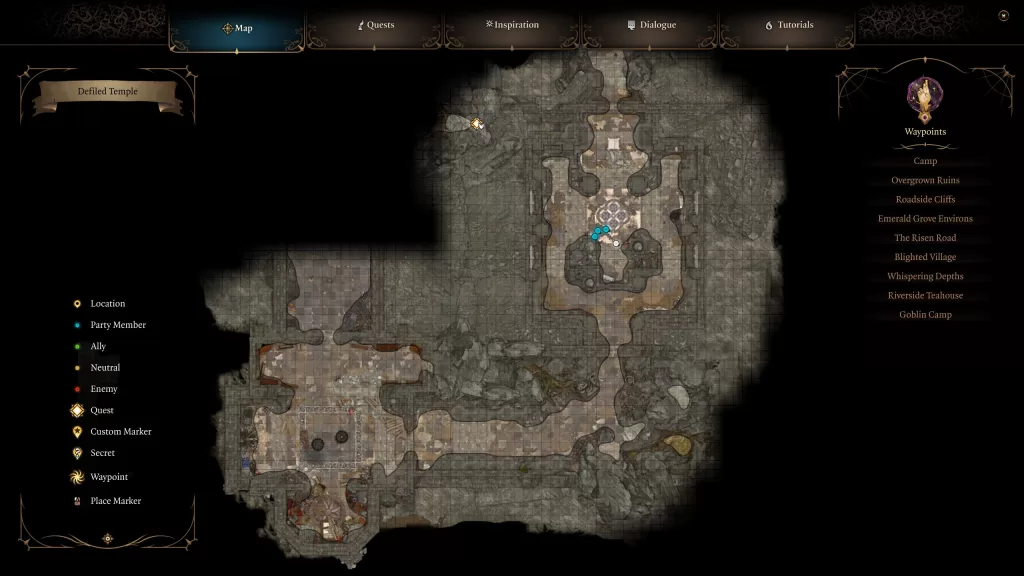
Make your way to the Goblin Camp then enter the old temple. Once inside, head for the priestess room west of the state in the southern part of the area. In her room on the right side will be a locked door. Pick the lock then head inside to reach the defiled temple. This area is guarded by the ogre Polma who is the bodyguard of the High Priestess. If you want to skip her, you can climb up a ladder near the door and jump down into a hallway when she isn’t looking. If she sees you, you can try and persuade her that you should be there otherwise you’ll need to take her out.
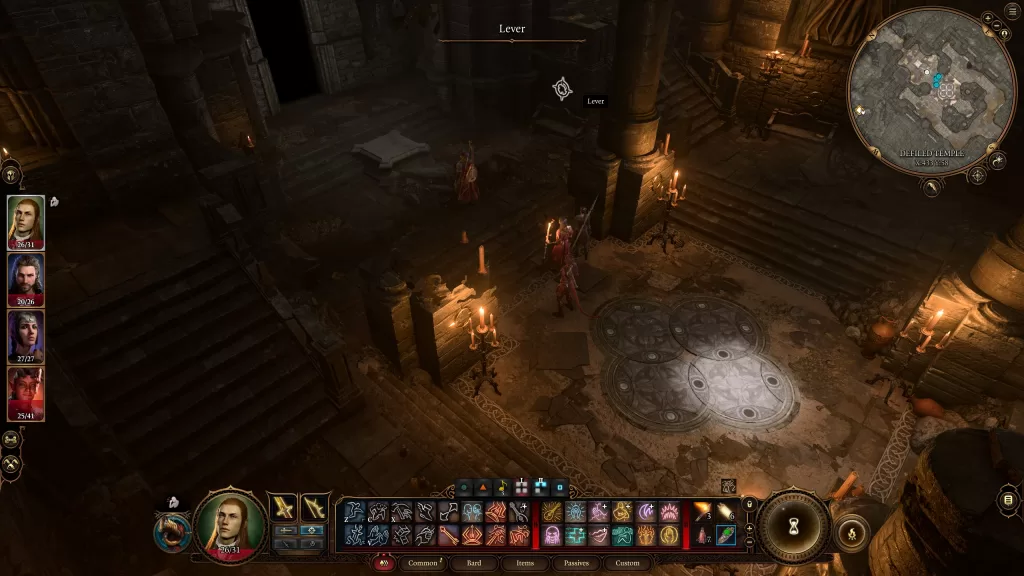
Continue down the hallway until you get to the Stone Disc puzzle in the middle of a dead-end room. Move the disc so they match the picture below to reveal a hidden path. Alternatively, there is a lever you can try to lockpick that will also open the way forward. Proceed through the new path and follow it to reach the Selunite Outpost in the Underdark.
UPDATE: The Nightsong quest can’t be completed until you reach Act II taking place in the Shadow-Cursed Lands. You can read about how to complete the other half of the quest on our Shadow Cursed Lands Quest guide.
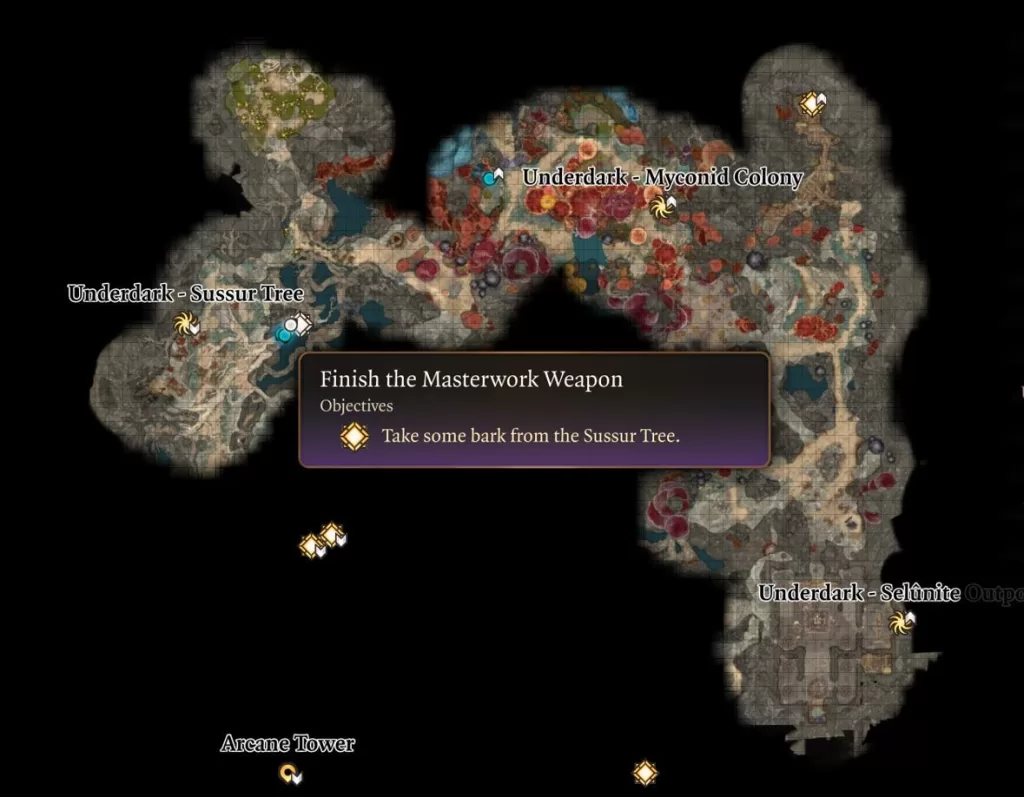
Finish the Masterwork Weapon
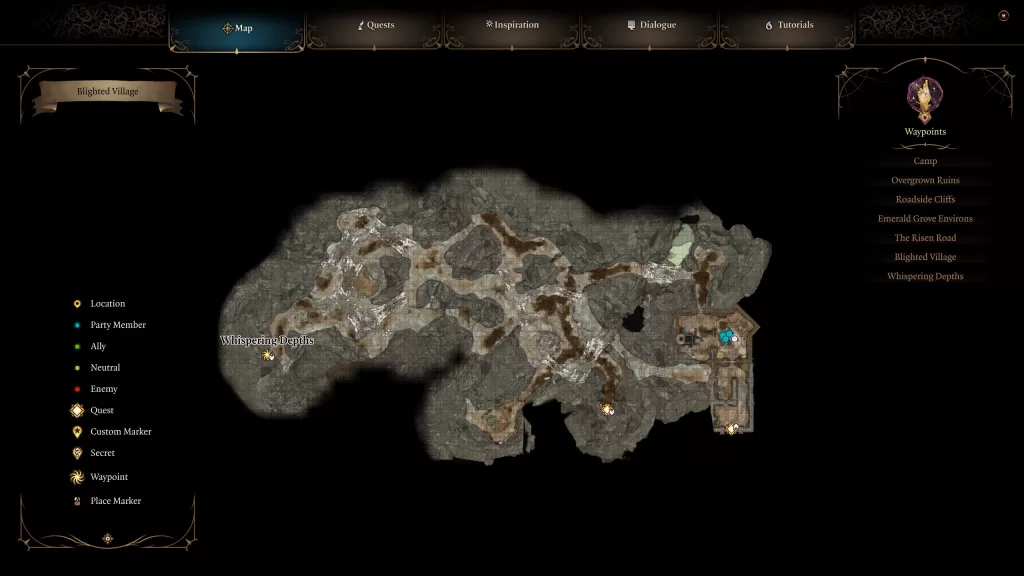
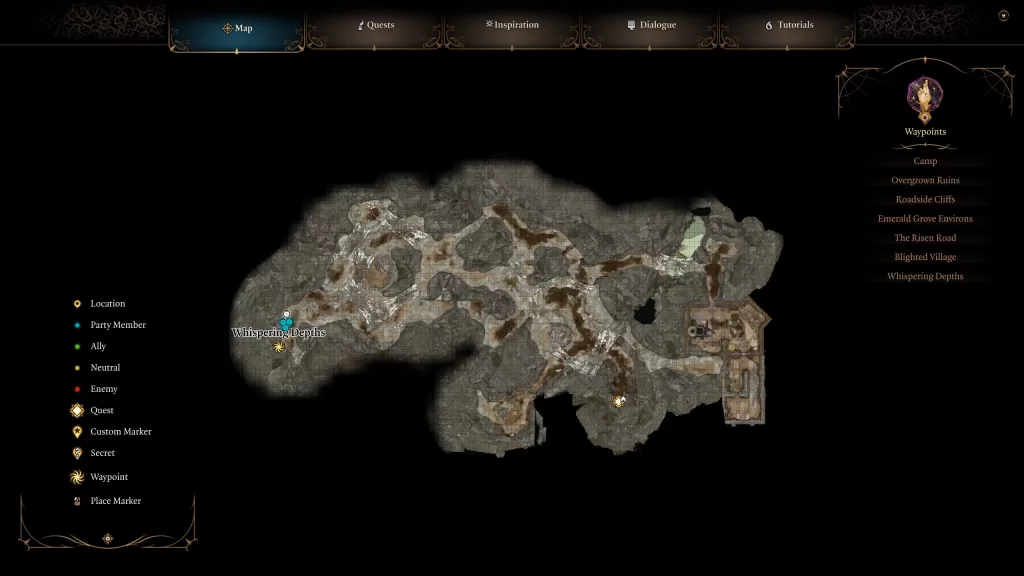
To start this quest, you’ll need to read the Highcliff’s Blueprints which can be found in the chest of a building on the east side of the Whispering Depths.
To forge one of the weapons in the blueprints you’ll need to first obtain some bark from a sussur tree which can be found in the Underdark. Once you gain access to it, you’ll want to head north from the Selunite Outpost to reach the Myconid Colony. From there, head west and you’ll reach the Sussur Tree. You’ll need to be careful though as the area is occupied by some vicious beasts and a crazy wizard guy. Locate the Ancient Sigil Circle to find some roots of the tree. Climb up them to reach the long section coming out of a giant hole. From there you can loot some bark.
Now that you have the bark returned to the Blighted Village and head back to the Whispering Depths. Make your way to the forge on the east side to begin forging the weapon. Interact with the Melting Furnace to get it going then use the Blacksmith’s Bellows to the right of it. Interact with the Melting Furnace once more to open the Combine Items menu. Add in the Sussur Tree Bark to finish preparing the furnace. Interact with it one more time to open the Combine Items menu and choose either a dagger, greatsword or sickle. This will complete the quest.
Free the Artist
This quest is technically a quest for the Baldur’s Gate area. but we’re including it here so you don’t miss it. You can pick it up from the Zentarim Hideout found under Waukeen’s Rest (see Find the Missing Shipment on how to get there).
We joined the Zhentarim in the mentioned quest and were able to speak with Brem. He has a slave who will sell you for 1000 gold. If you pass a skill check, you can talk him down to 600. After paying the money, speak with Oskar who can be found nearby to learn his story. He will then head off to Baldur’s Gate. That’s all we can do for this quest as of right now. We’ll expand on it more later.
Hunt the Devil
This quest is tied to the Our Firery Friend companion quest for Karlach. In an effort to reduce duplicating things, please check out our Our Fiery Friend guide for details on the Hunt the Devil quest.
Rescue the Gnome
You’ll get this quest in the Blighted Village west of the Emerald Grove. The town is occupied by Goblins so be careful as you approach. If you pass a skill check, you can convince them to let you enter the town without a fight. Otherwise, you’ll have to take out the entire unit. Whatever route you choose, make your way to the west side of town to find a giant windmill with a Gnome tied to it. If you convinced the Goblins to peacefully let you into town, you’ll have to talk their leader into leaving the Gnome alone. If you do, he will pull the Goblins out of town. If not, looks like you’re fighting goblins!
In order to get the Gnome off the windmill, head inside through the back door and flip the brake lever to the left of the ladder under the gears. This will stop the windmill. Head back to the front and interact with the Gnome to start a conversation. He’ll ask you to cut him down, you can comply or leave him there. If you cut him down, the conversation continues. You can choose to extort him or let him go. You will get different approvals based on your choices. Either way, he’ll tell you to keep his pack if you can find it and be off. The quest will then be complete.
I freed you. A little compensation would be nice. / Yes. My rewards – now.
Shadowheart approves.
You owe me nothing.
Gale / Karlach approves.
Rewards: Permission to loot the gnome’s pack if you find it
Rescue the Trapped Man
You’ll start this quest by visiting the burning town in the northern part of the area west of The Risen Road. Head to the courtyard the climb up the ladder leading against the left building. From there, you’ll want to jump over to the walkway and break the wooden door leading to the main building.
Next, you’ll want to jump inside the room and interact with Benryn who is trapped under a piece of 2×4. You’ll need to pass a skill check to lift the board off of him. He’ll then thank you can take off out the door. Follow him over to the building at the other end of the walkway. Speak with him there to ask why he and Mirieth were fighting. to which he’ll mention a dowry.
To find the dowry, head to the west side of the area where there are a couple of barns and a storage building. You’ll want to enter the barn on the right of the building and interact with the stack of hay. Passing a perception check will reveal a gilded chest in there. Open it to collect the dowry ring then bring it back to Beryn. You can hand it over or tell him you keeping it. Either option will complete the quest.
Save Mayrina
This quest is tied to the Find a Cure main quest sub-objective to Get Help From Auntie Ethel. For this section, we are assuming that you’ve decided to not get help from Ethel and are instead going to save Mayrina. Picking up from where Get Help From Auntie Ethel left off, you’ll be in a fight at Ethel’s house. She will turn invisible and take off through her fireplace with the girl. Chase after her with all of your party members ignoring the ads if you can. You’ll have to deactivate the fire and interact with the stairs using all 4 characters to reach her lair.
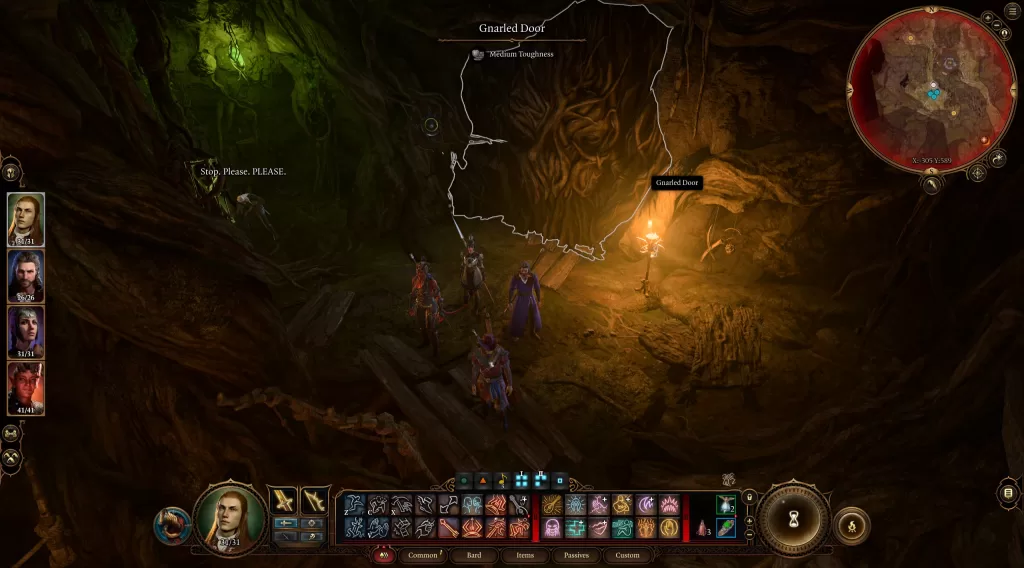
Feel free to look around the hag’s lair upon your arrival. When you’re ready to pursue her, head over to the Gnarled Door and interact with it. Regardless of the outcome, the door is actually an illusion and you can walk right through it. Do so to reach the Overgrown Tunnel. Inside, you’ll find 4 people under the hag’s control. You’ll need to deal with them or they will join her for the final fight. It’s worth noting, that no matter what you do, you cannot save them.
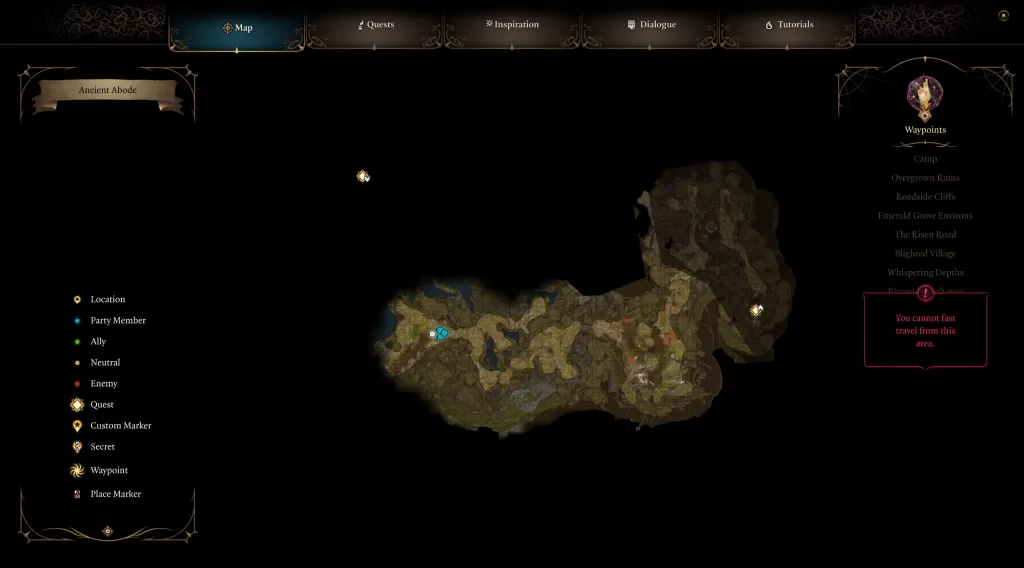
After the fight, continue heading through the tunnel jumping through the waterfall at the end. This will bring you to an area with multiple paths covered with toxic gas and loaded with traps. If you get close to the gas, you have a chance to spot where it’s coming from and can move an item there to block the gas flow. Keep an eye out for the flowers that explode. I ended up jumping down to the bottom a level at a time and healing up before approaching the Ancient Abode where the hag awaits.
When you reach the abode, Mayrina will be locked in a cage hanging from the center of the room. Approach her to cause the hag to show up beginning the fight. The below list is what she’ll do during the fight.
Starts by making clones and setting the cage on fire
Damaging the clones makes them disappear
Use a water spell or something else to put out the flames on the cage
She will change to look like the girl and then teleport the real one into battle
Attack the one asking you to save her
She will turn invisible and teleport around the map
After getting her health low, she will stop the battle begging you not to kill her. If you let her keep the girl, the hag will give you power in the form of an Ability Score +1. It will allow you to raise your Wisdom, Strength, Consitution, Dexterity, Intelligence or Charisma by 1 point. Below are all of the options you’ll get and the result for choosing each one (if you pass the skill checks).
You get Ability Score +1 Shadowheart approves Karlach disapproves
I think a dead hag is the answer here.
You finish the fight and kill Ethel Shadowheart approves Karlach approves Corellon’s Grace staff Tarnished Charm
[INTIMIDATION] If you want to live, hand over Mayrina and this power. Right now.
The girl goes free (and isn’t happy) You get an Ability Score +1 Shadowheart approves Karlach approves
[DECEPTION] My reinforcements are nearly here. Give me the girl and power and they’ll spare you.
The girl goes free (and isn’t happy) You get an Ability Score +1 Shadowheart approves Karlach approves
If you chose to let Ethel keep Mayrina, then the save Mayrina quest will be completed and the two will disappear. Choosing to keep the girl will cause the hag to leave but Mayrina will be really mad at you. This also applies if you save the girl and keep the power or just kill the hag. After making your decision, if you kept Mayrina, she will lay into you a bit for ruining everything and then storm off. The objective of the quest will update to search the lair for a way to help Mayrina. You’ll want to enter Ethel’s Acrid Workshop which can be found north of the cage the girl was trapped in. The room is filled with potions and some chests you can interact with for additional loot. Go to the table to the right of the giant spike-looking rock and loot the Bitter Divorce wand from the table. You’ll also want to grab the Ever-Seeing Eye off of the table and the Staff of Crones standing on a rock to the left of the stone stairs. When you’re done exploring the room, use the Mushroom Circle in the corner to be sent back outside to the Putrid Bog.
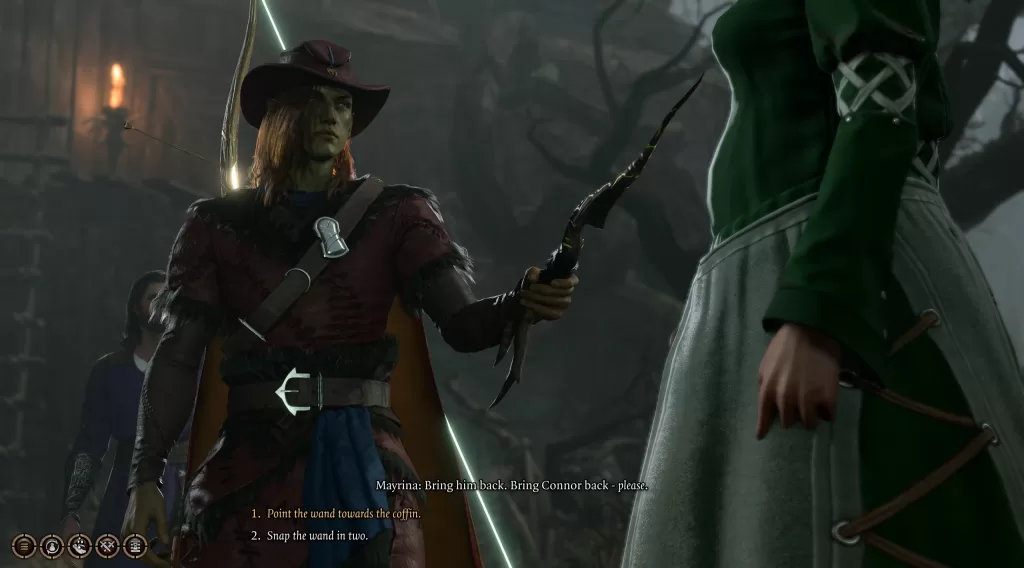
Head over to Mayrina who will be nearby and speak with her. Choose the option “I found a wand – I think I can resurrect your husband”. She will then beg you to bring her husband back. You’ll then be given the option to comply or to break the wand in two.
Breaking the wand in half will complete the quest. If you use the wand, Connor climbs out of the coffin as a zombie bound to serve whoever holds the wand. You’ll also be given a group of options. The quest will be completed after you pick one and the dialog ends.
Choice
Result
This is your husband – do you want him or not?
You can give her the wand You can pocket the wand
Don’t worry – I have the wand. I’ll make use of him.
You keep the wand and Connor Mayrina is mad and runs off
We can always bury him again.
You can hand Connor over to Mayrina You can kill Connor (and Mayrina)
Kill the undead abomination.
You will kill Connor and Mayrina
Search the Cellar
You can pick this quest up by reading the Apothecary’s Ledger on the front counter in the Apothecary’s shop which is next to the Ancient Sigil Circle at the Blighted Village. It states that there are some rare herbs hidden in the cellar. You can reach it by heading behind the counter and interacting with the wooded hatch on the floor.
Once you’re in the cellar, feel free to loot anything that isn’t tied down. What you’ll want to keep an eye out for is a stack of crates in an oddly shaped corner. Behind them is a lever that will reveal itself after you pass a perception check. Pull it to open a hidden passage behind a bookcase. Follow the passageway to reach an open area with a few caskets. Now would be a good time to save as you’re about to get jumped by a gang of skeletal guardians hiding in the caskets. Deal with them then loot the room. There is a mound of dirt you can dig up to reveal a chest. If you don’t have a shovel, there are a couple laying around.
After you’re done exploring, head over to the Ornate Mirror in the back of the room and interact with it. Surprise! It’s a magic mirror that wants to know your name. If you are proficient in arcane, then you can try and use that to learn more about the mirror. Follow that up by telling it your name which it doesn’t know. It will then ask you a series of questions to prove your knowledge. All three answers in the table work for Gale as this is a magic mirror and he is kind of an expert. The first two should be fine for everyone else. The correct answer to the third question is different based on who is talking to the mirror. You’ll want to pick the option that involves self-preservation. Answering all of the questions correctly will result in the mirror opening up revealing another hidden room. Alternatively, if you want to skip the questions, you can just try to pass the INTIMIDATION check by threatening to smash it into pieces. That will also cause the door to open.
question
Answer
What think you of the zulkir known as Szass Tam?
Szass Tam is a foul, wretched creature A foul lich. May he die a thousand more deaths. (requires passing a history skill check)
Why might one use balsam ointment?
I read a doctor’s journal – he used balsam to clean a wound Balsam disinfects wounds. Surely everyone knows that?
If you could see anything in me, what would it be?
I’d see myself in my next incarnation: a living manifestation of Netherese magic. A mythal in my own right. I’d look for whatever spell would rid me of this worm in my head.
Pass through the mirror to enter a secret laboratory (unless your name is Dee Dee, you can get out!). Make your way over to the desk with all of the science equipment on it then examine the Moonhaven Logbook to learn you’re in a necromancer’s lab! The objective will also update for you to find the necromancer’s book. Make sure to loot anything that strikes your fancy and keep a special eye out for a Gilded Chest in the southeast part of the lab to loot some rare Bracers of Defense.
When you’re ready, head to the east side of the room to find a locked gate. A successful perception skill check will reveal that it’s booby-trapped. What you want to do is unlock the door and snag the Necromancy of Thay book on the table past the gate. It too is booby-trapped by multiple traps. When you pick up the book you’ll get a couple of options (and comments from the peanut gallery). The turn-based mode will also start allowing you time to escape before the traps go off.
If you drop the tome with an intent to destroy it, then Karlach will approve and Gale will disapprove. If you actually want to destroy the book, you’ll need to hit it with some Radiant magic. Luckily Shadowheart’s Sacred Flame and Guiding Bolt both work. As soon as you destroy the book, the quest will be complete and you’ll be attacked by 3 level 5 shadows. Deal with them then feel free to leave the laboratory.
Now if you want to open the necromancy book, there’s still a little bit more to go. To start, exit the lab and make your way back up to the Blighted Village. Next head to the well near the Ancient Sigil Circle and interact with it. When prompted, choose the Investigation option and make sure you pass the check. You’ll now get the option to climb down the bucket rope. Choose that one to descend into the Whispering Depths.
In the depths, there will be 2 Phase Spiders and 2 Ettercaps that you’ll need to deal with. After they are taken care of, head to coordinates X:495 Y:365 to find the Apprentice’s Pack. Read the Apprentice’s Journal found inside to learn about a stone in the cave that might be able to open the book. Before pressing on, you may want to spend some time exploring mainly the eastern side and a living area in the south central part of the Whispering Depths. You’ll come across an uncommon Steelforged Sword and the uncommon Spiderstep Boots which allow you to move through webs unhindered.
Continue working your way west and eventually, you’ll meet the level 5 Phase Spider Matriarch circling her nest. If you look closely at the lower level, you’ll notice the Dark Amethyst. Time to whoop the matriarch and her spawnlings then grab that gem! If you loot the matriarch, you’ll get the uncommon Poisoner’s Robes which deal extra poison damage when the wearer casts a poison-based spell. If you don’t care about that, then you can cheese this fight a bit. Wait for her to walk out on one of the web bridges then light it on fire to start the fight. This will cause her to fall down below. On her next turn, she will teleport up to you. From there, hit her with the Thunderwave spell launching her down into a chasm below! Then all you need to do is clean up the two remaining enemies.
After you grab the gem, head a little further west to find the Whispering Depths Ancient Sigil Circle. You can now open your inventory and read the book. You’ll have the option to place the amethyst in the slot on the book’s cover. Choose that option to insert the gem. You’ll get one last set of options prompting you to open, destroy or put the book away. After all this work you might as well right?
Well, now that we have opened the book, otherworld forces are trying to communicate with us. You can turn the page up to three times, having to pass a saving throw skill check with each attempt and the number you must meet goes up each time. After the third attempt, the book closes and the objective updates. We now need to find a way to finish reading the Necromancy of Thay which you won’t be able to do until you reach Baldur’s Gate. Check out our Baldur’s Gate Quest guide here to finally complete this quest.
Escape the Nautiloid is the opening quest to the highly anticipated video game, Baldur’s Gate III. During this first quest, you’ll need to escape a besieged Nautiloid ship by fighting your way to the helm. Along the way, you’ll come across a number of potential allies that can assist you. This guide will cover the Escape the Nautiloid objectives and what you’ll need to do to complete them.
Escape the Nautiloid Objectives
Find a way off the Nautiloid
Speak with Us
Speak with Lae’zel
Reach The Helm
Connect the nerves of the transponder
Find a Way Off the Nautiloid
When you gain control of your character, interact with the nursery in the center of the room. The game will then introduce you to its Skill Checks mechanic and you’ll have the option to take it for a spin. When you’re done, make sure to check out the room for any goodies. Specifically, you’ll want to loot the dead Mind Flayer to receive a miscellaneous ore.
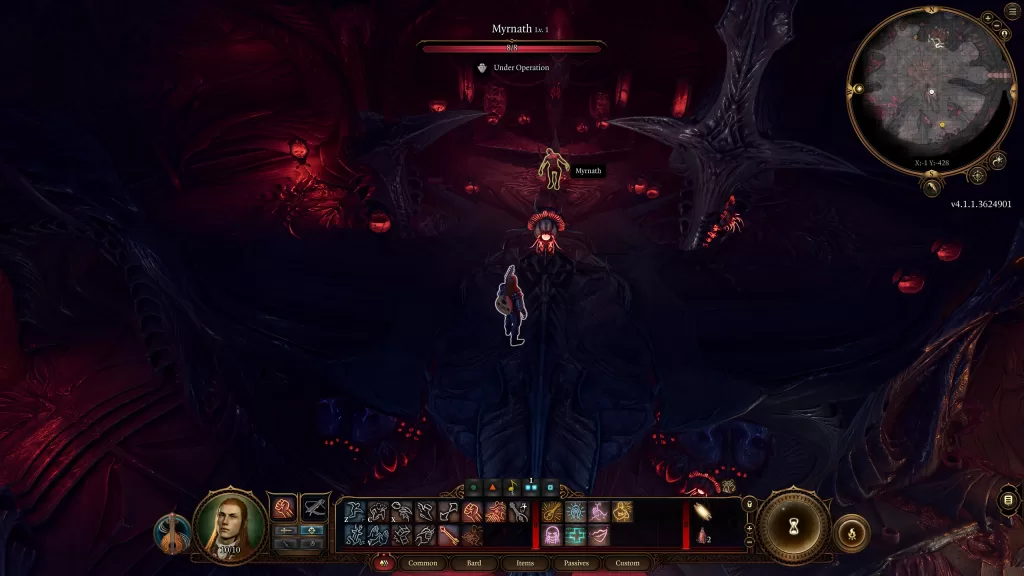
Head into the next room where you’ll hear a voice calling out to you. Walk onto the Neural Apparatus in the center of the room and interact with it. This will take you up to a platform with Myrnath strapped to a chair. Interact with him to begin conversing with an Intellect Devourer. There will potentially be two sets of skill checks here:
Gently prise the brain from the skull.
Strength, Dexterity, Medicine, etc
Mutilate the brain
Dexterity
You can choose to destroy the brain and then continue on your merry way. If you decide to try and save the brain, you’ll get the first skill check by pulling the brain out of the skull. Passing this check will net you the temporary companion Us (the Intellect Devourer) who you’ll lose after completing the prologue. If you fail, then you’ll either have to put them out of their misery or just leave them there. After passing the first check, you’ll then be given the option to cripple Us making it more subservient. If you fail the check, then the creature flees and you’ll miss out on this temporary companion. Passing the check will help you later on if you decided to try for a special weapon during the fight in the helm. After the Multilate the brain skill check, the Intellect Devourer will tell you to head for the helm thus giving you your next objective.
Now if you are 100% against using the Intellect Devourer because of being abducted and implanted with a little parasite of your own (which is understandable) you can kill the brain and press on. Shortly you’ll be introduced to Lae’zel who will also tell you it’s imperative to reach the helm.
Reach The Helm
The path to the helm is pretty much linear, so keep pressing on after fighting the Imps with Lae’zel. Just before reaching the helm, you’ll reach a room with a big red device in the center of it with four chairs hooked up to it. In this room on the northern side, you’ll hear someone calling out for help. If you speak with her, you’ll receive the Rescue the Illithid’s Captive quest. Completing it will give you the opportunity to add Shadowheart to your party which can help out in the upcoming fight at the helm. You can check out what you’ll need to do to free her here. If you aren’t planning on saving her, it’s still worth exploring the eastern room where you’ll find a chest containing some potions and a Dead Thrall with a Golden Key that unlocks a locked chest in the same room as Shadowheart on the southeastern side. When you’re ready to proceed, go through the southern doorway in the room with Shadowheart. This will take you to a small room leading to the helm. There will also be a healing device if you need to top off before the battle ahead.
Connect the nerves of the transponder
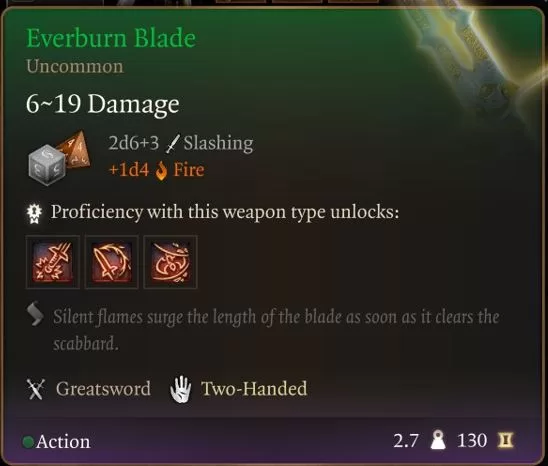
When you reach the helm, a Mind Flayer fighting Commander Zhalk will instruct you to hurry over to the transponder and use it before the ship crashes. You’ll have 15 turns to do this, but before that turn your attention to the Commander. If you can manage to take him down, you can loot the two-handed sword Everburn Blade off him. Just be careful because around turn 9 two Cambions will show up to aid the commander.
Also note that when you kill Commander Zhalk, the Mind Flayer will turn hostel and start attacking you. If the Cambions are nearby, he will focus on them instead. If you didn’t injure the Intellect Devorour earlier and recruited it, that creature may also turn against you as well. Keep in mind that once you interact with the transponder combat ends so use that to your advantage. You can also loot some of the fallen enemies on the field to receive additional equipment and items. The Escape the Nautiloid quest will complete following a cutscene that triggers when connecting the transponder nerves.
While trying to find a way off the Nautiloid in the opening prologue to Baldur’s Gate III, you’ll come across another victim in need of aid. Interact with them in their pod to start the Rescue the Illithid’s Captive quest. The below guide will walk you thru how to free and (temporarily) recruit the companion Shadowheart aboard the Nautiloid.
Objectives
Find a way to release the captive
Talk to the half-elf
Find a way to release the captive
On the Nautiloid as you near the helm, you’ll reach a room with four chairs hooked up to a red device in the middle of the room. Someone will be making noises and asking for help. Approach the pod on the north side of the room and interact with it. This will strike up a conversation with the pod’s occupant where she’ll ask you to help her out. Lae’zel will then chime in that you don’t have time for stragglers and you’ll then be prompted to make a choice. You can try to find a way to open the pod or leave this poor soul to their fate. The choice is yours, but if you want to have an easier time getting a cool flaming sword, then we’d recommend helping a girl out.
If you chose to not help, then you can reach the helm by heading south. Otherwise, interact with the console to the right of the pod. Exhaust all the dialog options then head through the eastern sphincter. Go to the back of the room then up the small set of stairs to find a Dead Thrall. Loot the Eldritch Rune off of her (and make sure to loot the nearby chest).
Before returning to the pod, there are two things you can do in this room:
Press the lever by the platform near the Dead Thrall to catch a glimpse of your potential fate
Loot the Gold Key off of the Dead Thrall near the entrance to the room. You can use it to open a locked chest on the southeastern side of the previous room.
Return to the pod in the previous room and interact with the console next to the pod. Choose the “Insert the rune into the socket” option causing two skill checks to become available:
Take a closer look at the powered-up console
Arcana
Will the pod to open
Illithid/Wisdom
The first skill check is optional. If you pass it, you’ll learn a little bit more about the machine. Place your hand on the console to get the second skill check. This one will use your Illithid ability to try and force the door open. Passing the check (which you most likely will with how low it is) will open the pod freeing the prisoner.
Talk to the half-elf
Speak with her to learn her name is Shadowheart and she will offer to join you. You can either accept or decline and that’s all there is to the Rescue the Illithid’s Captive quest. After completing the prologue, you’ll come across Shadowheart again on the beach regardless if you freed her or not. She will be more welcoming of your company if you freed her, but can still join you if you didn’t.
Welcome to our collectibles walkthrough on the Finale: Hope in Reverie in The Legend of Heroes: Trails into Reverie! In this walkthrough, we’ll cover enemies you can scan, noteworthy items, character notes, shops and treasure chest locations. Please note that the game dictates who you’ll be playing as during this final act so you don’t need to worry about switching between the routes yourself!
Character Notes
Automatically at the start of the act:
Rean 3
Commander Baelz 2
Automatically after fighting the first group of enemies:
Sully 1
Lloyd’s Route
Station Street
Shops
Genten Orbal Store – Wendy shows up and you can get the typical items from her in case you need to stock up. She has nothing noteworthy!
Enemies to Scan
Helmord
Rufus’ Route
West Street
Shops
Oscar’s Temp Support Section – Oscar shows up and you can get the typical items from him to stock up. He has nothing noteworthy!
Enemies to Scan
D-Bestial
Rean’s Route
East Street
Shops
Business Owners’ Association – Roy shows up and you can buy the typical items from him to stock up. He has nothing noteworthy!
Rean / Lloyd’s Route
Enemies to Scan
Asmodyne Menace
Rufus’ Route
Enemies to Scan
Supreme Leader Rufus
All Routes
Enemies to Scan
Supreme Leader Rufus
Ilya the Dusken Dancer
Final Preparation Period
During this final preparation period, you’ll be able to go anywhere and everywhere! Take advantage of this to clean up your notebook entries, do some shopping and level up your characters! For our guide on what the shops have, click here! For our guide on the Reverie Garden / Stratums, click here!
Character Notes
Automatically at the start of the final preparation period:
Lloyd 3
Rixia 3
Rufus 3
Ilya 3
Father Thomas 1
Administrative District
Character Notes
Speak with the group in the Administrative District plaza:
Elliot 2
Emma 2
Squire Scarlet 1
Speak with the group in the Civic Center:
Jusis 2
Speak with Millium in the Civic Center:
Millium 2
Noteworthy Items
Recipe: Bitter Red Soda – Purchase for 1,700 mira from Chroma’s Juice Stall
Harbor District
Character Notes
Speak with the group in the plaza:
Laura 2
Fie 2
Speak with the duo on the dock:
Vivi 1
Rex 1
Noteworthy Items
Hard Genkotsu Ramen x4 – Speak with Koki at Ozelle’s Noodle Stand
Recipe: Hard Genkotsu Ramen – Purchase from Ozelle’s Noodle Stand
Fishing
From the fishing point on the dock closest to the stairs:
Cangiru
From the fishing point on the dock closest to the lighthouse:
Sky Gill
Kasagin
East Street
Character Notes
Speak with the duo in the Business Owners’ Association:
Becky 1
Hugo 1
Interact with the group in the Bracer Guild:
Michel 1
Sara 2
Noteworthy Items:
Various Ingredients – Speak with Tucker at Tucker’s Vegetable Stall
Dragon Fried Rice x5, Blazing Mapo Tofu x5 – Speak with Shanshan at Long Lao Tavern & Inn
Central Plaza
Character Notes
Speak with Chief Sergei near the entrance to the Orbal Store:
Sergei 2
Speak with Zeit on the roof of the SSS Building:
Zeit 2
Noteworthy Items
Book: Crossbell Times – Emergency Special – Purchase from Southwark General Store
Books: Moonless Morn – Chapters 15, 16, 17 – Purchase from Southwark General Store
Power Potion II x3, Shield Potion II x3, Mind Potion II x3 – Speak with Harold in front of Vingt-Sept Cafe
Recipe: Nature Breeze Pasta – Purchase for 2,100 mira from Vingt-Sept Cafe
West Street
Character Notes
Speak with the group near West Crossbell Road:
Renne 2
Noteworthy Items
Tearal Balm x5, EP Charge III x5, Celestial Balm x5 – Speak with Elsa in Tallys’ General Store
Side Quests
Speak with Oscar in Morges Bakery to find out that he needs Native Bellberries from Ursula Road. Travel to Ursula Road – Field Ex. Camp and interact with the shiny object on the ground to acquire the Native Bellberries. Return to Oscar in Morges Bakery to hand them over. As a reward, you’ll receive Os-Ben Special x4.
West Crossbell Road
Enemies to Scan
Cool Pom
Rainbow Mosquito
Scorpion King
Fishing Point
Gold Salmon
Chests
Location
Loot
Northeastern nook
Zeram Capsule
Northwestern nook
Sleep IV
East Crossbell Highway 1
Chests
Location
Loot
North central path
Dragon Incense
Armorica Village
Noteworthy Items
Tearal Balm, Fresh Egg x5, Fresh Milk x5, Mature Cheese x5 – Speak with Jake at Jake’s General Store
Ancient Battlefield – Depths
Enemies to Scan
Heidrun – Defeat it then pick up the Black Zemurian Ore Shard from the ground!
Moon Temple – Depths
Enemies to Scan
Unsurtr Malice – Defeat it then loot the Black Zemurian Ore Shard from the ground!
Underground Freight Line
Head to the RF Military Factory – Underground Platform to reach this area!
Enemies to Scan
Goliath Lugh – Defeat it then loot the Black Zemurian Ore Shard from the ground!
Chests
Loot
Location
Dead end tunnel west of the Underground Freight Line – Passage
Skanda Gem
Along the southwestern path
Freeze IV
Along the southwestern path
Dragon Incense
Along the southwestern path
Nohval Gem
Knox Forest 1
Enemies to Scan
Ginosha-Zanak – Defeat it then loot the Black Zemurian Ore Shard from the ground!
Prison – Depths
This area can be found at Crossbell Police Academy. Once there, travel to the Prison – Depths and interact with Dudley for an event.
Ursula Road 1
Enemies to scan
Harpoon Hornet
Spineedler
Saccharine Tomartian
Nauseating Tomartian
Goldflier
Massibrus
Fishing
Northern Arowana
Tiger Arowana
Elecantus
Chests
Location
Loot
Eastern nook near fishing point
Amberl Gem
Nook on western side
Carnelia Gem
Southern dead end
Vital Divine Water
Ursula Road – Field Ex. Camp
Enemies to Scan
Forest Snail
Ursula Road 2
Enemies to Scan
Killer Shmark
Chests
Location
Loot
Along the main path
Powerful Divine Water
Eastern side across Stargazer’s Tower
Esmelas Gem
On the southeastern beach
Fortuitous Divine Water
On the southeastern beach
Sapphirl Gem
Event
Interact with the group on the southeastern beach
Fishing
In order to catch the special fish from the southeastern fishing point on the beach, you’ll need to catch 25 other fish!
Jeweled Cancer
As a reward for catching this fish, the 3 fisherman will give you a Dragon Incense!
Stargazer’s Tower
Enemies to Scan
Grunoja – Defeat it then loot the Black Zemurian Ore Shard from the ground!
Simiamanita
Bracken Monkey
Cauliflamonkey
Ursula Road 3
Enemies to Scan
Granpam Ossa
Fishing
Marble Snakehead
Cobrahead
Cangiru
Chests
Location
Loot
Eastern edge near Ursula Road 2
Magical Divine Water
Northern dead end
Diabolos Gem
Western edge of main path
Spiritual Divine Water
Southwestern corner
Goldia Gem
Next to the southern fishing point
Manly Munchies – Assorted Hotpot
St. Ursula Medical CollEGE
Character Notes
Speak with Linde / Doctor Seiland on the roof then select to visit Mirelle:
Linde 1
Event
Visit Ilya’s room
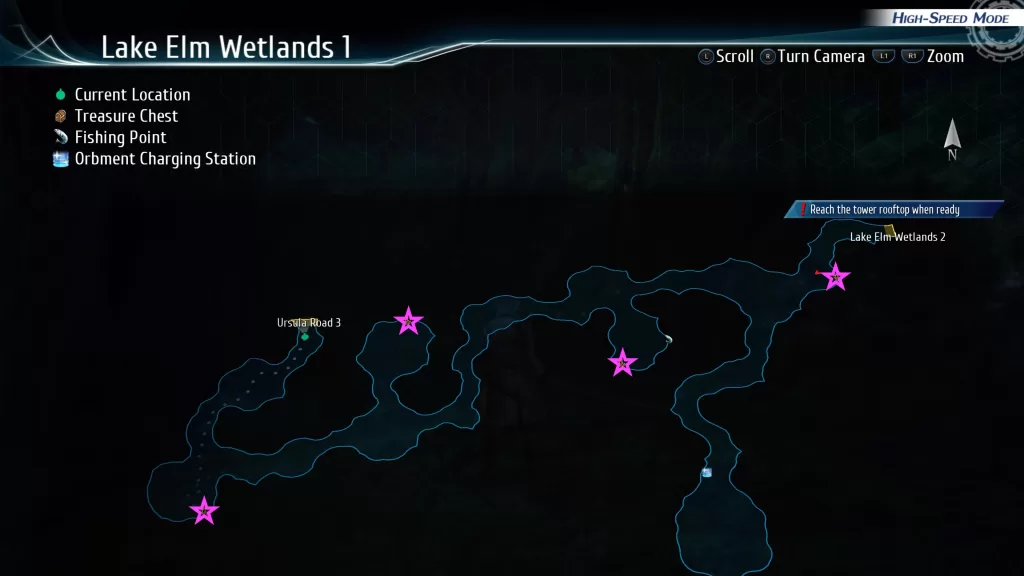
Lake Elm Wetlands 1
Enemies to scan
Galliosaurus – Defeat it then pick up the Black Zemurian Ore Shard it drops!
Fishing
Pearlglass
Sky Gill
Chests
Location
Loot
Next to the fishing point near the center of the area
Spirit Incense
Northwestern side of the area
Ocean Bell
Southwestern corner of the area
Argem Gem
Castle of Mirrors Depths
Character Notes
Speak with the group of people:
Squire Rosine 1
Orchis Tower
Character Notes
Speak with the group at Orchis Tower – 35F in a conference room:
Gaius 2
Final Mission
When you’ve completed everything and are ready to finish the story, select to begin the operation! After a very lengthy cutscene, you’ll need to divide your characters into two teams: Team A and Team B. Each team will have 20 characters. Team A will have to have Lloyd, Rufus and Nadia while Team B has Rean, Swin and Lapis.
Retributive Tower
Character Notes
Automatically after dividing the characters into Team A and Team B:
Prince Olivert 2
Speaker MacDowell 2
Enemies to scan
Dovon Ace
Tri-Attacker V2
Gun Buster Type-A
Tri-Attacker SS
El Cubile
Cubile
Zero Timelord
Pale Apache X
Zero Sorcerer
Zero Warrior
Harpy
Ancient Dogger
Sneak Gunner R-0
Sneak Gunner M-0
Sneak Gunner G-0
Gespard Gerrod Sigma
Gun Buster Type-B
Gun Buster Type-C
Gundharva
Aurgelmir
Torturer
Divine Delf
Weiss Clown
Yyd Vanas
Yyd Vats
Plutus Bennu
Angry Maggot
Magic Knight Dynagram
magic Knight Isra-Zamiel
Magic Knight Sigheim
Magic Knight Regulus-Zamiel
Cubelion Telos
Melphegor Nix
Ishmelga Rean
Ishmelga of the End
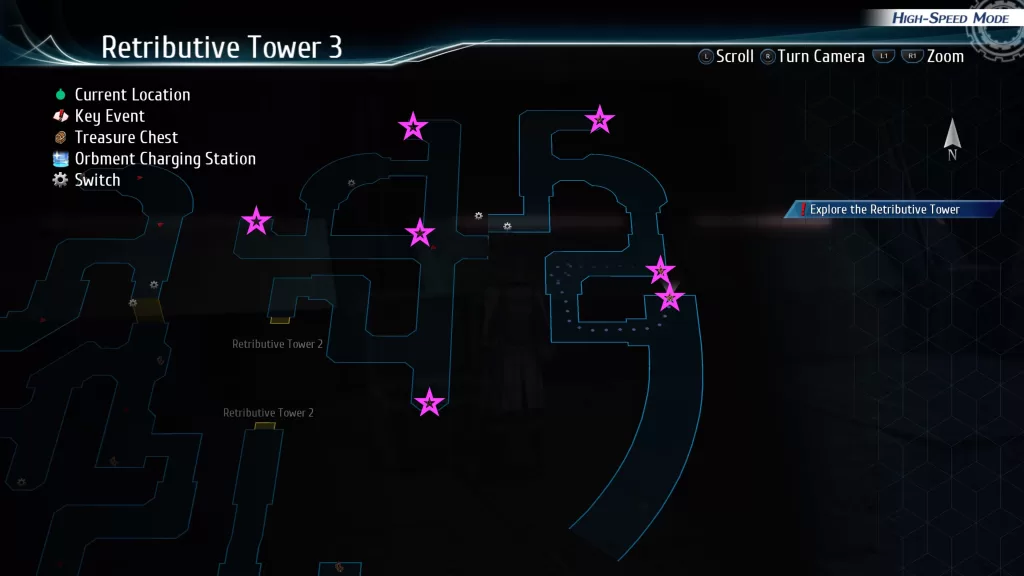
Chests
Location
Loot
Lloyd – Tower 2 – Just north of the map transition to Retributive Tower 1
Dazzling Amberl Gem
Lloyd – Tower 2 – Along the main path just north of the previous chest
Seiryuu
Lloyd – Tower 2 – Along the main path
Spiritual Divine Water
Lloyd – Tower 2 – Along the main path
Tear All Balm
Lloyd – Tower 2 – Behind a door on the eastern side of the map near the central Retributive Tower 3 marker on the map
Black Zemurian Ore
Lloyd – Tower 2 – Along the main path
Celestial Balm EX
Lloyd – Tower 2 – Central part of the area just off the main path
Dazzling Esmelas Gem
Rean – Tower 2 – Northern side of the map
Steel Bell
Rean – Tower 2 – Along the main path on the northwestern side of the area
Vital Divine Water
Rean – Tower 2 – Along the main path on the western side of the area
Umbral Gyre
Rean – Tower 2 – Along the main path on the western side of the area
Fortuitous Divine Water
Rean – Tower 2 – Southwestern corner of the area
Dazzling Sapphirl Gem
Rean – Tower 2 – Along the southern main path
Tearal Balm Celestial Balm EP Charge III
Rean – Tower 2 – Eastern side of the area near the switch to Lloyd
Dazzling Carnelia Gem
Lloyd – Tower 3 – Near the starting point of the floor down the eastern path
Solar Gyre
Lloyd – Tower 3 – Along the main path near the south-central part of the area
Zeram Capsule
Lloyd – Tower 3 – Along the main path near the center of the area
Power Potion Omega Shield Potion Omega Mind Potion Omega
Lloyd – Tower 3 – Western side of the area
Dazzling Argem Gem
Lloyd – Tower 3 – Northern side of the area
Dazzling Golden Gem
Lloyd – Tower 3 – Western side of the area
Astral Bell
Lloyd – Tower 3 – Western side of the area long the main path
Magical Divine Water
Rean – Tower 3 – Southern side of the area just after the Retributive Tower 2 map transition
Dazzling Nohval Gem
Rean – Tower 3 – Along the main path at a crossroad
Powerful Divine Water
Rean – Tower 3 – Western side of the area
Zeus Gem
Rean – Tower 3 – Northern side of the area
Brave Soul
Rean – Tower 3 – Northeastern side of the area
Mars Gem
Rean – Tower 3 – Along the main path
EP Charge IV
Rean – Tower 3 – Along the main path on the eastern side
Dragon Incense
Lloyd – Tower 2
Rean – Tower 2
Lloyd – Tower 3
Rean – Tower 3
Character Notes
Automatically after Lloyd returns to the Retributive Tower to save Rufus:
Welcome to NGB and our Digimon Story Cyber Sleuth: Complete Edition full walkthrough for Cyber Sleuth Chapter 16: Diver City – Isle Of Dragons. In this guide, we’ll cover everything you need to know to complete Chapter 16.
This walkthrough is a work in progress and will be updated as we progress in the game!
Cyber Sleuth Chapter 16
Detective Agency
At the start of the chapter, there will be 4 new cases available for you to take on. They are listed below and you can find a guide for each one in our Case Guide. The Legendary Cup is also open if you’ve been keeping up with the Colosseum.
Poor Cold Digimon
Constant Bragging
Not Enough Food
Dr. Datamon Develops Medicine
Odaiba
When you’re ready to proceed with the story, travel to Odaiba to trigger a cutscene. After it concludes, head north along the sidewalk following the road to reach an Access Point to the DigiLab. Use it to heal up if needed, then continue north to travel to the next area to trigger another cutscene. You’ll probably want to save before heading up to the helipad.
Digimon
AeroVeedramon
CannonBeemon
DoruGreymon
Gigadramon
MetalTyrannomon
Boss Fight: Examon
When you’re prepared, climb the stairs to reach the helipad for another cutscene leading to a boss fight with the data-type Digimon, Examon. For this battle, you’ll be assisted by Magnamon and Gallantmon. Examon will attack using Gale Storm and Meteor Fall which are wind and fire-based attacks (respectively) that will hit all of your active Digimon. It’s also very beefy with some high defenses so your attacks won’t do much damage. Luckily you only have to reduce his HP by about 1/5 to end the fight. You can do this by using piercing attacks on Digimon like WarGreymon/BlackWarGreaymon or using Mastemon with her Chaos Degradation skill which reduces all goes HP by 25%. Once Examon’s health is low enough, a cutscene will trigger.
Kowloon
When you regain control of your sleuth, travel to Kowloon Lv 1 then head to the park in the next area. As you approach the center of it, Yuuko will message you saying she got tired of waiting and decided to head to Kowloon Lv 5 without you. Return to the previous area and use the warp pad to travel to Kowloon Lv 4. From there, go left to the Fire Wall Lv 4 and use Wall Crack Lv 4 to remove it. You’ll need to have 4 or more Digimon that are Ultimate or higher to access the skill. Step on the green platform and ride it up to Kowloon Lv 5.
Kowloon Lv 5
You should now see Yuuko straight ahead. Speak with her to kick off a cutscene. When you regain control of your sleuth, proceed deeper into Kowloon Lv 5. Just past the entrance, you’ll notice some encrypted data on the right side of the path. If you unlock and read it, it will mention darkness ahead. Basically, this means that there are hidden pitfall traps along the route you need to take. If you walk over one, then you’ll fall through the floor and have to start over from the beginning. There isn’t a penalty if this happens and the trap stays visible from that point on. For this first one, the path will kind of look like an 8. You want to start by taking the left path then cross over between the two square holes in the middle and continue heading north triggering another cutscene.
In the next area when you start heading east, take the bottom path in the first cube, the top in the second and the bottom in the third to get past the second section. Make sure to loot the chest just before the next area to receive a Memory Up. The third area has another encrypted file you can unlock. Its message says “Nothing ventured, nothing gained”. Head past that then hug the right side of the path going south to avoid the pit traps giving you a clear shot to the target (and an Access Point to the DigiLab).
Digimon
Antylamon (data)
Cyberdramon (vaccine)
Infermon (free)
SkullGreymon (virus)
Boss Fight: Craniamon
Heal up if needed and save then head for the Digital Wave to trigger a cutscene where Craniamon will make his grand entrance. This of course will lead to a battle with the Royal Knight. He’s a vaccine-type Digimon, making him weak to data-type Digimon. He’ll also use Gaia Element III and Awesome Quake III to attack you. Once his health gets low, he’ll unleash Waltz’s End which deals quite a bit of damage to all of your Digimon. Once you take him down, you’ll be rewarded with a Memory UP DX and another cutscene will trigger.
Detective Agency / Nakano Broadway
After regaining control of your sleuth back at the agency, exit the room and head for the information center near the entrance to Nakano. You’ll find a red bulletin board to the left of it. Interact with the board to read through a list of grievances prompting a call from Kyoko about a new case. Hightail it back to the Detective Agency then interact with the whiteboard and accept the Nakano’s Legendary Busters case. In order to progress the story, you’ll need to close the case. If you need help, check out our Case Guide to help walk you through the case.
After completing the Nakano’s Legendary Busters case, head up to Broadway 3F then make your way over to Fantasy Mansion. Once there, take a right to find Pete. Speak with the Digimon to trigger a brief event. When it ends, return to the Detective Agency. Interact with the whiteboard and accept the Ghost Cat Building case. You’ll need to complete this case to progress the story. If you need help, check out our Case Guide to help walk you through the case.
Once the Ghost Cat Building case has been completed, exit the Detective Agency to receive a call from Arata who will tell our sleuth to head to Odaiba. Seems that Examon will be there and is in a weakened state but he insists you go alone.
Odaiba
Head down the road until you reach the access point. You can then heal up and save before going into the next area. When you’re ready, approach the helipad to trigger a cutscene with Arata ending in a battle with the data-type Examon. For this fight, you’ll be accompanied by Arata and his creepy looking hand. Examon still hits hard, but will also go down a lot quicker, especially if you’re using virus-type Digimon against him. Once the giant Digimon goes down, another cutscene will trigger leading to the end of Digimon Story Cyber Sleuth Chapter 16!
Welcome to NGB and our Digimon Story Cyber Sleuth: Complete Edition full walkthrough for Cyber Sleuth Chapter 15: Parallel World. In this guide, we’ll cover everything you need to know to complete Chapter 15.
Detective Agency
At the start of the chapter, there will be 5 new cases available for you to take on. They are listed below and you can find a guide for them on our Case Guide. When you are ready to push the story forward, travel to the EDEN Free Area.
A Pet Digimon
Nanimon on Sunday
Numemon Strikes Back
Problems at Digippedia Continued
Uncovering the Seventh Riddle
EDEN Free Area
Use an access point to log in to EDEN then head for the EDEN Free Area. Follow the path all the way to the right to trigger an event leading to a scripted fight with the Royal Knight Kentaurosmon. After a couple of turns another event will trigger sending you back to the detective agency. You’ll then want to visit Mirei at the DigiLab who will tell you to find Haronious Will and Steel Will to be able to travel to a parallel world.
Shibuya
Travel to Shibuya then head for the subway affected by a digital shift. You’ll need to use the Stealth Hide Hacking Skill to sneak past the guards protecting the subway.
Shibuya: Digital Shift
Work your way through the area until you reach a blocked section. There will be an orb down the path north of it guarded by the vaccine-type Crowmon. This will clear the way allowing you to reach Magnamon. Approach him to trigger an event leading to a fight with the data-type Dynasmon. Defeat the Royal Knight to trigger an event and receive the Harmonious Will.
Digimon
Aquilamon
Crowmon
Garudamon
Gigadramon
Megadramon
Ogremon
Wizardmon
Ueno
Upon entering the area, you’ll be treated to an event with a Tought-Looking Digimon and a Training Digimon. Speak with them to trigger another event then follow Hackmon into the digital rift (you’ll need to use your Stealth Hide Hacking Skill to sneak through).
Uneo: Digital Shift
Once in the digital shift, head to the access point then go left making your way into the next room. You’ll need to take out an orb on the left side of the area to clear the stuff blocking your path. It’s protected by the vaccine-type WereGarurumon. Return to the room with the Access Point and head north into the next area. Make sure to heal up and save as there is a boss fight in your future.
Digital Shift Digimon
GrapLeomon
Ikkakumon
Meteormon
ShogunGekomon
Sorcerimon
WereGarurumon
Zudomon
Digital Space Digimon
Datamon
GrapLeomon
RizeGreymon
ShogunGekomon
Whamon
Boss Fight: BanchoLeomon
Follow the path to the back of the area to trigger a cutscene resulting in a fight against the vaccine-type Digimon BranchoLeomon. Defeating him will reward you with a Memory also triggering another cutscene that brings you back to the agency.
Digilab
When you regain control of your character, head to the Digilab and speak with Mirei who will send you back to the agency to work on some cases while she prepares. Exit the lab to spot your good buddy Ryota chilling in the hallway. Talk with him to learn about more sitings of the “White Boy”.
Kowloon
Make your way over to Kowloon Lv. 1 then head for the park. Speak with the guy there who has a ! above his head. This Chatterbox Hacker will mention that Yuugo was spotted in Jowloon Lv 1. Following the conversation, Kyoko will call asking you to return to the agency to help with a new case.
Detective Agency
Back at the agency, interact with the case board and pick up the Yuuko and Yuugo case.
Yuuko and Yuugo Case
After taking the case, travel to Central Hospital and then speak with the Busy Nurse behind the counter near the magazine rack. This will take you to Yuugo’s room where a cutscene will trigger. Follow the below steps:
Head to Kowloon Lv. 1
Make your way to the 2nd area of Kowloon LV1
Speak with the two guys who have locks on their heads using the “Yuugo’s Whereabouts” keyword
Head to the 3rd area of Kowloon LV1
Speak with the two guys who have locks on their heads using the “Yuugo’s Whereabouts” keyword
The one in the middle of the area near the green elevator leading to Kowloon Lv. 2 has the info you need
Travel to Kowloon Lv. 2
Head to the 2nd area of Kowloon Lv. 2 and approach Yuuko to trigger a cutscene
After completing the above steps, you’ll be thrown into battle against Yuugo and his virus-type Machinedramon. Defeating him will trigger another scene leading to the completion of the case. Turn it in at the board to receive your rewards.
Digibank
With the case solved, check back in with Mirei at the Digibank. Speaking with her will trigger a cutscene sending you to a parallel world!
Shinjuku: Digital Shift
Work your way through the digital shift by destroying the orbs you come across to keep progressing. When you reach the end, you’ll have to face the virus-type Barbamon. Defeating him will trigger and event bringing you back to the Digilab with a powerful new ally.
Digimon
Andromon
Ankylomon
Dorumon
Gigadramon
Gotsumon
Guardromon
Mamemon
MetalMamemon
Tsumemon
EDEN Free Area
It’s finally time to show Kentaurismon who the real boss is. Travel to the EDEN Free Area by doing a Connect Jump into EDEN. Follow the path all the way to the left to find the Royal Knight. This will trigger a cutscene leading to a battle against the vaccine-type Digimon. After you emerge victorious, another cutscene will trigger.
Asakusa
When you regain control of your sleuth, head on over to Asakusa. Once there, use your Stealth Hide Hacking Skill to slip past the guards into the Asakusa: Digital Shift.
Asakusa: Digital Shift
Make your way to the second area of the Digital Shift. Once there, you’ll have 3 chests you can loot. At the other end of the area, your way forward will be blocked. You can remove the obstacle by destroying both orbs on either side of the doorway. They are reachable via nearby alleys. After you clear the way, proceed to the deepest part of the Digital Shift. Approach the Eater to trigger a cutscene leading to a fight against the creature. After you take down the beast another (scripted) fight ensues. Once that is done a final cutscene will trigger leading to the end of the chapter.
Once you gain control of Desuhiko, speak with the Chatterbox and Gossipmonger on the southeastern side of the Underground Sector. Afterwards, head on up to the street level and speak with the following people:
Cold-Eyed Woman – Street level standing in front of a building near the Sun & Moon Hotel
Serious Front Desk Staff – Street level inside the hotel
Shady-Looking Salesman – Street level in northwestern alley
Mature Girl – Abandoned Building (Rooftop)
Savvy Woman – Upper level near the bookstore
Once you’ve gathered the details about the cat, a long cutscene will trigger.
Interview
During the interview, Enyne will ask you the below questions. We included the answers we chose but they don’t matter. Once the interview concludes, a cutscene will trigger leading to the end of the chapter.
Questions
Answers
As a detective, what do you usually do on a day-to-day basis?
Undercover investigations
Do you have any special abilities?
Disguise
How was your match against the phantom thief, Nine-Tailed Cat?
This site uses cookies. By continuing to use this website, you are giving consent to cookies being used. For more information on cookies, view our Privacy Policy.OkPrivacy Policy