Welcome to NGB and our guide for The Eye of the Storm Starfield mission! This guide will walk you through starting the mission and detail the necessary steps for its completion. If you need help with a specific mission objective, check the quick links section to find the most relevant information easily.
PLEASE NOTE: Some of the planets referenced in our guides and walkthroughs may not match yours due to how Starfield was created. In these situations, what you do and the places you visit on those planets should remain the same.
The Eye of the Storm is one of the faction missions for the Crimson Fleet. You’ll start it automatically after completing the Absolute Power mission.
Eye of the Storm Mission Guide
Speak with Delgado
For The Eye of the Storm Starfield mission, head to Ship Services and Repairs on the Key and speak with Delgado. You’ll then need to arm your ship with the ComSpike and the Conduction Grid. You can do this by speaking with Jazz choosing “Mind helping me with my ship?” then “I’d like to view and modify my ships.”. In the Ship menu, press the Ship Builder button them move the cursor over the empty space (not on your ship). Press the add button and cycle to the Equipment tab. Select the Conduction Grid and ComSpike then place them on the ship.
Proceed to the UC Vigilance
Head to the UC Vigilance (it will be in a random system) and dock with it then speak to the commander. You can also hand over any evidence you have to Lt. Toft.
Proceed to Bannoc IV
Return to your ship and set a course for Bannoc IV in the Bannoc System. Once in the system, follow the signal (objective) to reach the Legacy. Dock and board the ship.
Locate the Vault Control Center
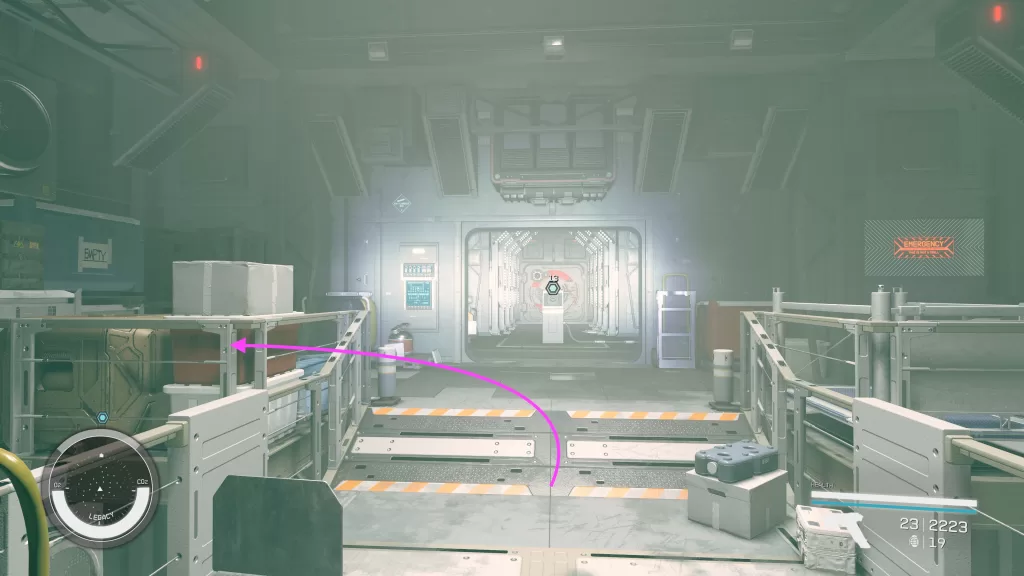
Work your way to the top level of the ship to reach the vault controls. At the top of the stairs (before the control) look left to find the remains of Osterholt.
On the ground to his right, you’ll find a Galbank Transfer Module. Use it on the console to open the door and head through. The path from here to the vault is pretty linear and you’ll have to fight a plethora of robots and turrets along the way. When you reach the vault, use the Vault Door Computer to open it then head inside.
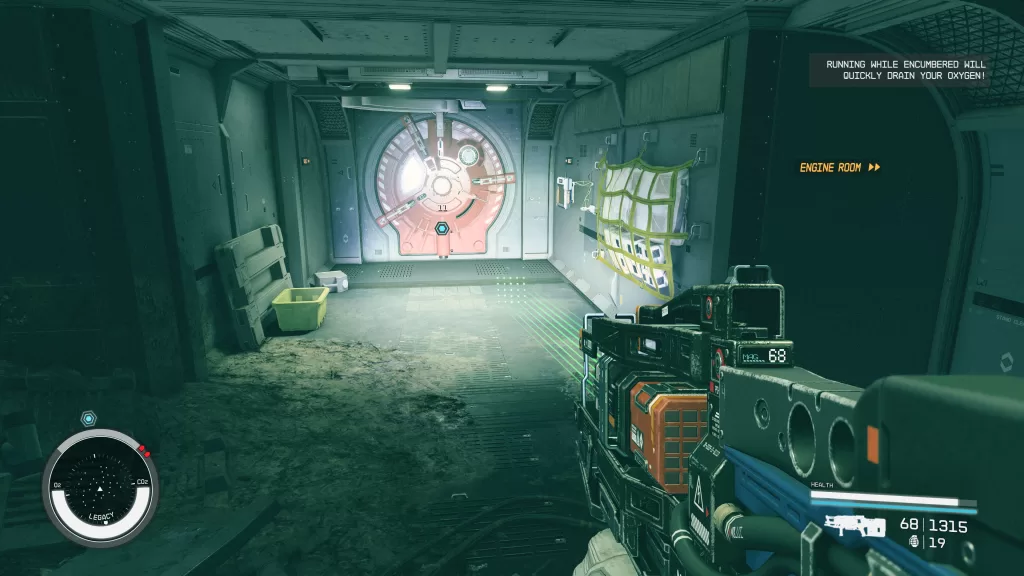
Cross the vault to the southwestern corner and head through the door there. You’ll have to fight a number of robots and turrets along the way. After heading through the door, climb the stairs then pass through the room heading up the stairs at the other side. This will bring you to the Vault Control Center.
Retrieve Japser Kryx’s Possessions
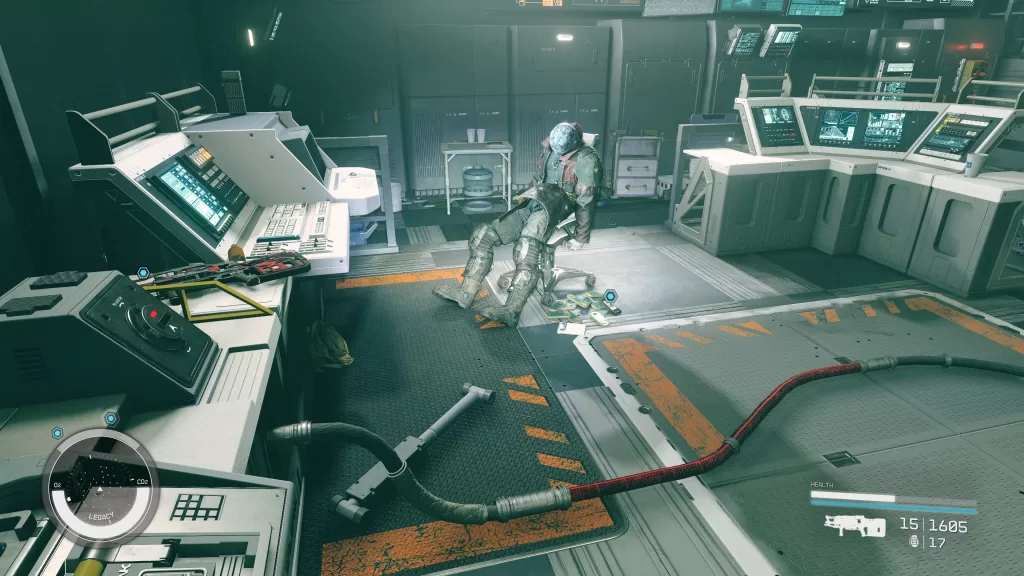
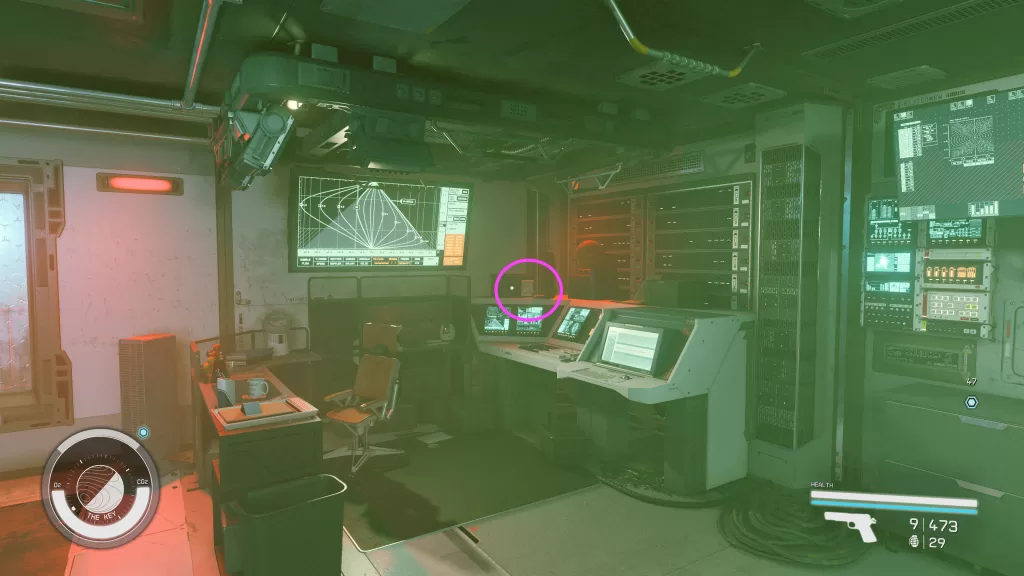
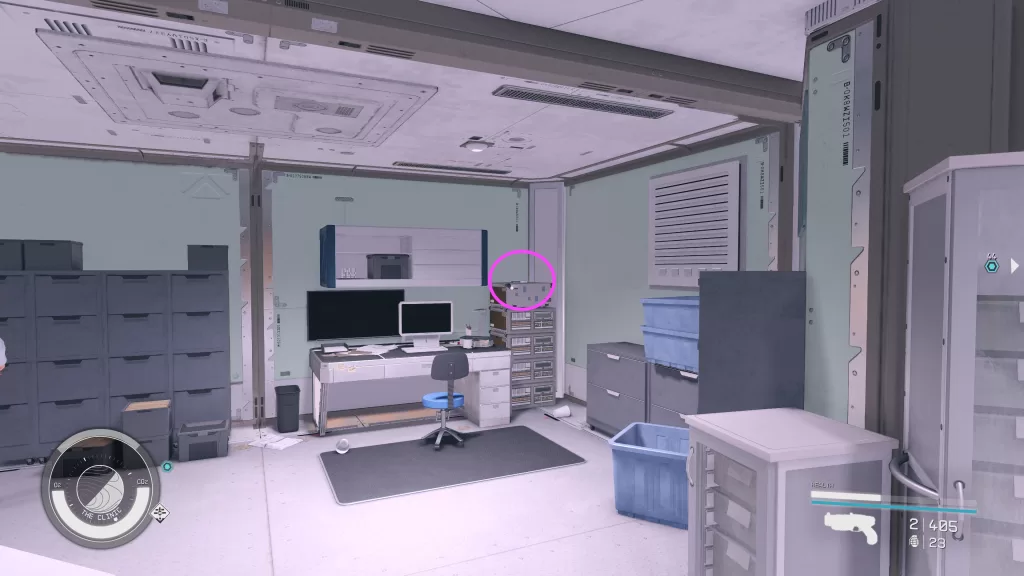
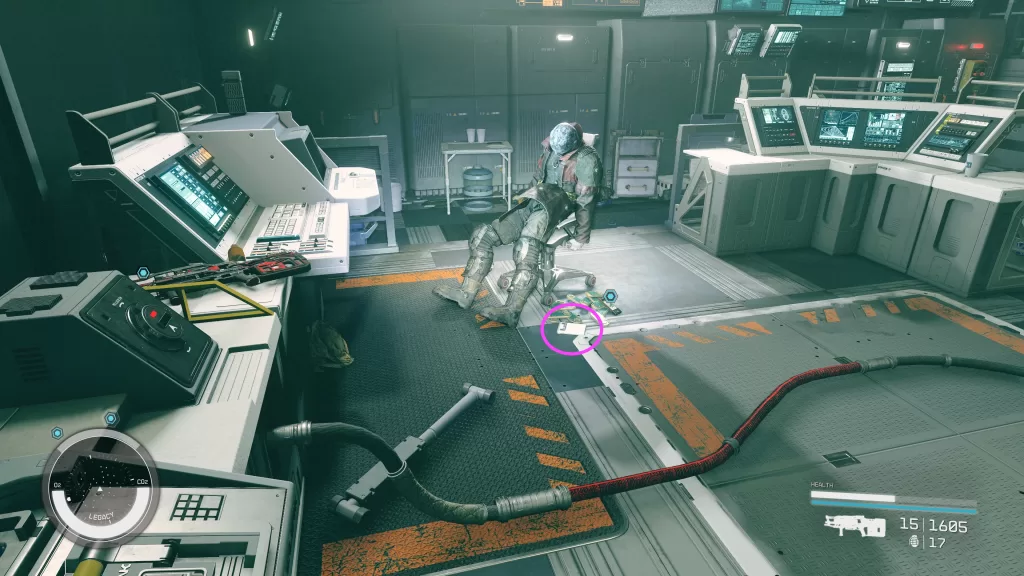
Approach Jasper’s corpse then look on the ground near the pile of credits to spot another Galbank Transfer Module. Pick it up and the GBLR013: Mortem Obire slate to the left of it. Also make sure to grab the legendary Revenant rifle on the console in front of him and the slate under it.
Reroute Ship’s Power
When that’s done, flip the two Power Override Controls on both sides of the room to restore the power. Place both transfer modules in the Transfer Module Lock then interact with the Data Core Port and press the Download Control Switch to begin the transfer. When it’s finished, remove both transfer modules and activate the Data Core.
Escape the Legacy
Time to flee! Head back to your ship as fast as possible! Toxic gas will be spewing out along the way and you’ll have more robots to contend with. Plus the ship will literally be blowing apart so you’ll have to contend with debris and destruction, too!
Bring Kryx’s Legacy to the UC Vigilance or the Key
Back at the ship, the game warns you that it’s choice time! You’ll have the option to deliver Kryx’s Legacy to the UC Vigilance or take it back to the Crimson Fleet. How the next mission plays out depends on your choice. Please see our next walkthrough on the Legacy’s End mission for more details! Optionally, you can talk with your companion (if you have one) and see what they think you should do. Make your choice and jump to either the Vigilance or the Key. This will complete the mission and you’ll be rewarded with EXP.
Welcome to NGB and our guide for the Absolute Power Starfield mission! This guide will walk you through starting the mission and detail the necessary steps for its completion. If you need help with a specific mission objective, check the quick links section to find the most relevant information easily.
PLEASE NOTE: Some of the planets referenced in our guides and walkthroughs may not match yours due to how Starfield was created. In these situations, what you do and the places you visit on those planets should remain the same.
Absolute Power is one of the faction missions for the Crimson Fleet. You’ll start it automatically after completing The Best There Is mission.
Absolute Power Starfield Mission Guide
Travel to Neon
For the Absolute Power Starfield mission, travel to Neon in the Volii System on planet Volii Alpha. Once you’re there, stroll over to Madame Savage’s Place by heading through the door to the left of Mining League. Inside, go to the second level to find Estelle and speak with her. She’ll tell you what you need to do then send you on your merry way.
Locate Evidence to Extort Ayumi Komiko (Optional)
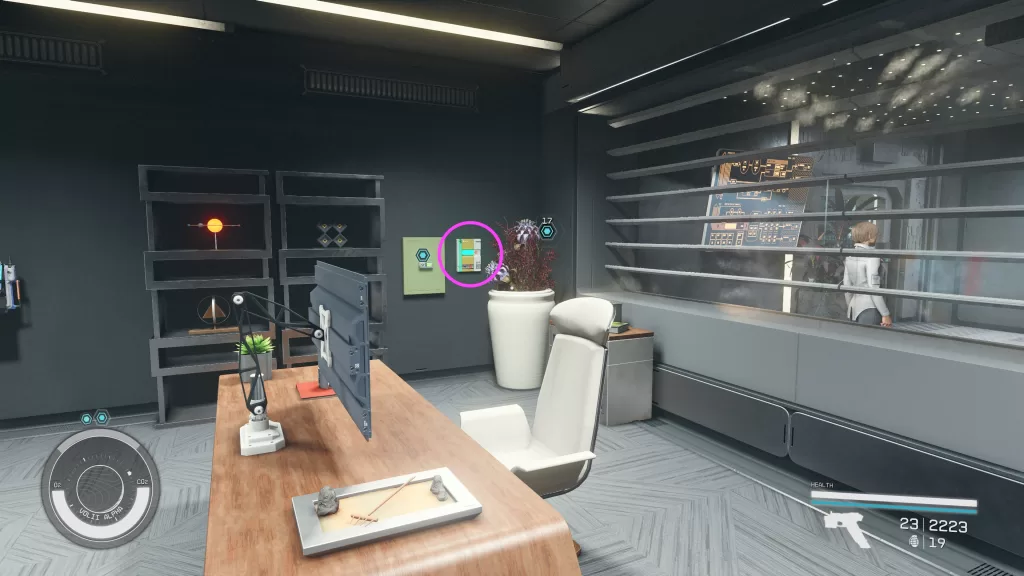
To find evidence, travel to the Trade Tower and use the elevator to reach Generdyne Industries. Speak with Ji Nashida behind the desk asking about his boss and persuading him to help you out. This will grant you access to her office where you’ll be able to loot the Meeting with Bayu (Evidence) slate from her safe (which Ji unlocked). Before grabbing the slate, make sure to activate the switch to the right of it closing the blinds. That way the nearby security guard won’t catch you stealing the evidence.
Ask Myka About Ayumi Komiko’s Whereabouts
At the Neon Core, head through the EBBSIDE door to the right of the Emporium to reach Euphorika. Head inside and speak with Myka behind the bar asking her about Ayumi. She’ll be defensive and tell you to shove off which you can counter by saying you’re with the Crimson Fleet. She’ll cave and tell you that Ayumi can be found in the Members’ Lounge then say if you want to there, you’ll need to buy a membership for 5000 credits. Enter the lounge via using the pass on the door across from Myka. Walk up the stairs to find Ayumi in the back. You can kill her and take the pass from her or use the evidence you found to make her hand it over willingly.
Enter Genedyne Through the Storage Entrance
With the pass in your possession, travel to the Underbelly and head to Generdyne Industries. Go around the right side of the building to find a locked door. Use your pass to gain entry to the building.
Obtain the Conduction Grid Data
Use the nearby vent to sneak into the main area of the facility then continue sneaking following the objective. Make sure to go slowly and keep an eye out for the guards and robots patrolling the area. When you reach the Conduit Control Room, head through the doorway and hug the left wall to reach the maintenance tunnel. Follow that to reach a room with a guard standing nearby. You’ll need to hug the left wall sneaking past the guard. Behind the computer the employees are working on, you’ll find a vent that will take you to just outside the Master Control Room. To the left of the Master Control Room is another vent you’ll want to enter.
Follow along the duct then drop down at the end and head through the doorway on the left. Follow the hallway to the end then take a left to reach Power Storage. Use the elevator there to reach the Power Core Computer terminal where you’ll want to download the Conduction Grid Plans.
Locate Breyson Bayu
Head west through the room and up the stairs. Cross the room and pass through the doorway on the other side. Take a right and enter the vent straight ahead. Follow along the shaft and you should come out facing the Research Director’s Office. Head into this office. There will be another vent behind the desk. Use it to reach Breyson Bayu’s office then head inside.
Speak with Breyson who will happily hand over his password. Access his terminal and download the Decryption Routine. While you’re there, also make sure to upload Estelle’s virus. You’ll then be able to use the elevator in the office to reach Trade Tower outside of the Astral Lounge.
Return to Estelle
Enter the Astral Lounge and use the VIP Elevator to reach the balcony. Enter Booth 2 to speak with… Benjamin Bayu!! He will want to know who is profiting from the virus that Estelle had us upload. In doing so, Bayu will let you leave the city. You’ll then be presented with a choice. You rat out Estelle, tell him it was Breyson or say it’s you. If you give up Estelle or tell him it was Breyson, they will be dealt with. As Delgado asked you not to ruin the relationship with Estelle, then going you’ll want to go with Beryson if you choose this route. Otherwise, telling him it was you will result in a bounty getting put on your head (we went with that option).
Locate Estelle at Madame Sauvage’s Place
Leave the Astral Lounge and head back to Madame Sauvage’s Place. Head through the door to the left of the bar to find Estelle. Speak with her.
Return to the Key
With the job in Neon done, make your way back to the Key and speak with Naeva. This will complete the mission and you’ll be rewarded with 350 EXP and some credits.
Welcome to our complete guide for all Phantom Liberty gigs in Cyberpunk 2077! In this guide, we’ll list all of the Dogtown gigs, where to find them and how to complete them to earn the Dirty Deeds trophy/achievement.
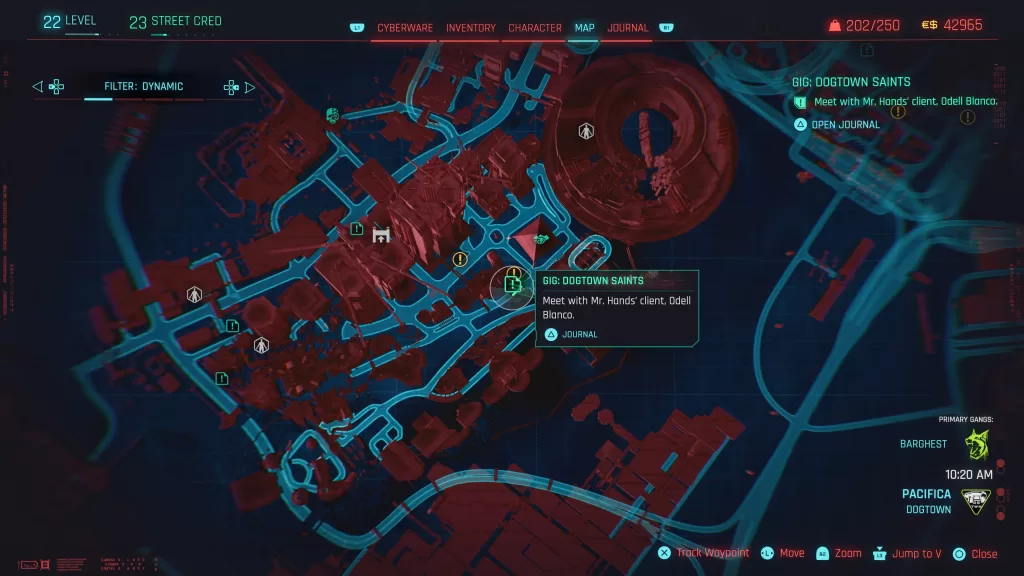
Obtained: Speak with Odell at the Golden Fleece near the center of Dogtown
Location: Pacifica – Dogtown
Objective: Rescue Anthony Anderson
Travel to the Golden Fleece and speak with Odell under the tent. He’ll tell you that Anthony is trapped in the Haven Church across the street. Make your way over there then head around to the left side of the building. There will be a few enemies guarding the broken window. Defeat or sneak past them then head in through the window. You’ll have a group of enemies in the church you’ll need to take care of. When that’s done, head through the door to the right of the altar and go down the stairs to reach the basement. Take out the two enemies there then go to the back of the room and head through the door. This will put you right outside of the doctor’s office.
Upon entering the office you’ll find the doctor being held a gunpoint by a woman looking for her brother. You can try to talk her down, but then when Anthony goes to take a drink she shoots the glass out of his hand. He’ll then order you to take her out. You can do so if you wish or you can tell him to answer her question. If you do, he’ll tell her the truth about her brother then she’ll leave. Speak with the doctor afterwards then her. After making either choice, take the elevator up to the ground level and head back across the street to tell Odell everything is okay to complete the gig.
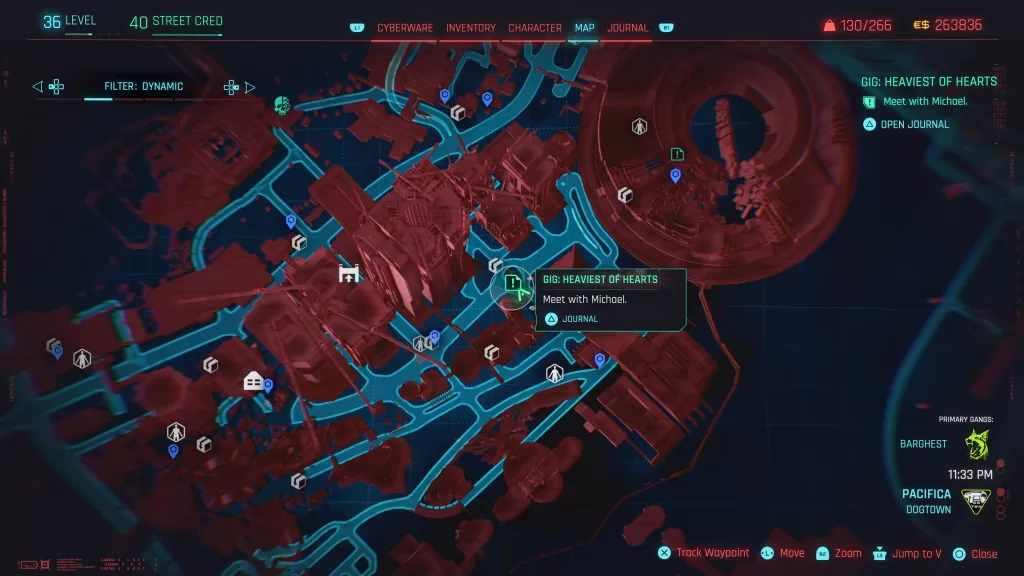
Heaviest of Hearts
Obtained: Hands will message you about this gig being available after completing the Firestarter main job
Location: Pacifica – Dogtown
Objective: Meet with Michael
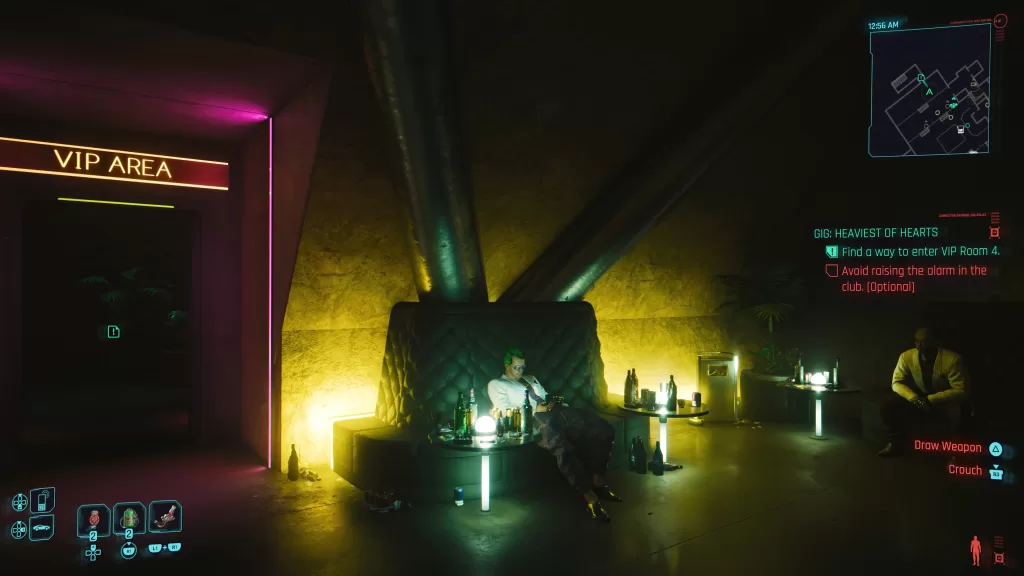
Head to Woodman & Miller Hardware in the center of Dogtown under the overpass and speak with Michael. When your done set out for the Heavy Hearts Club. Head to the bar and talk with Helen asking about our DA. Next head to the can to find Jack. Talk with speak with him asking about the DA. Pay him some eddies to learn that she’s in booth 4 of the VIP Room. Head over to the VIP Area and speak with Markus then enter the VIP Area.
At the top of the stairs, you’ll need to head left working your way to booth 4. Along the way, you’ll have 2 guards on the right and 2 cameras on the left to deal with. After you reach the other side of the floor, booth 4 can be found across from the bar with another guard working behind the counter you’ll need to distract. Once you enter booth 4, there will be a guy dancing you’ll need to speak with. Choose the option saying you have evidence for the DA and he’ll tell you she’s in booth 6.
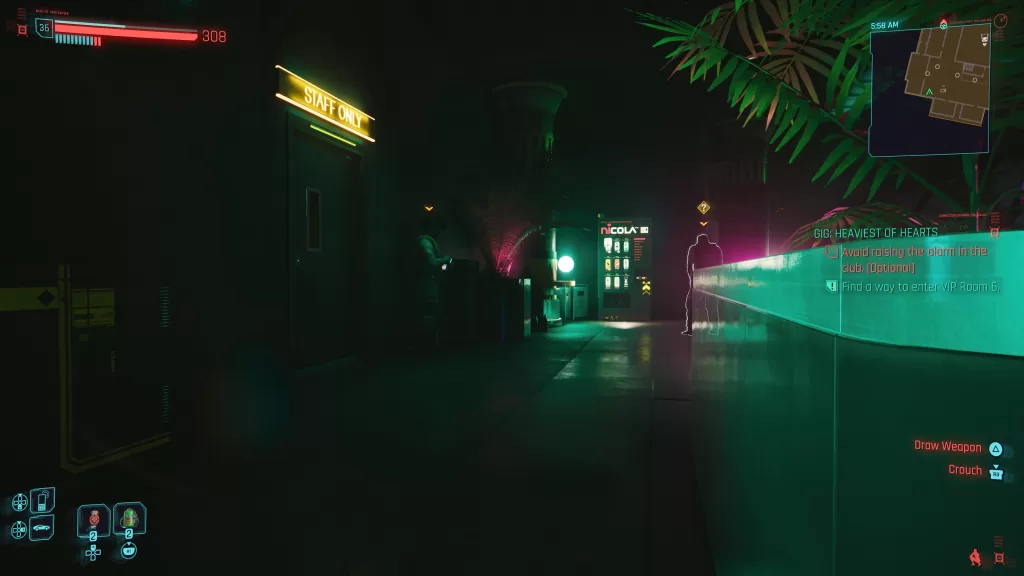
Exit booth 4 heading left (make sure to distract the guard behind the counter again) towards the staff only. There will be one guard watching the door. Use the device on his right to distract him then hit him with system shock to sneak through the Staff Only door making sure to close it afterward.
In the storage room, there will be one guard behind the shelf next to the fan. Use the light in the corner of the room to the left of the door to distract her then make sure to take her out non-lethally. Open the door and head through the narrow hallway once again dealing with a lone guard non-lethally. Override the breaker he was standing in front of to gain access to booth 6 (next right in the hallway). She’ll be in a side room to the right of where you came in from with her squeeze, Hank. Before entering the room, check the nearby suitcase for an iconic smart pistol. Enter the room to begin talking with her. She’ll show you the testimony which she’ll follow up with an offer to make the giver of the testimony anonymous. You can take the deal or refuse. If choose the latter, you’ll have to fight Hank. After defeating him, she will delete the testimony. If you take the deal you’re free to leave.
Head back to Michael and tell him what happened. If you took the deal he won’t be happy about it, but V will make him pay. If you wiped the data, you can still call him out on what he did and get paid. Either way, the gig will be completed.
Mysterious Signal
Obtained: Approach the van in the southcentral part of Dogtown
Location: Pacifica – Dogtown
Objective: Investigate the Mysterious Signal
Head to the location of the mysterious signal where you’ll come across a good old fashioned firefight. In between both sides will be a van which is the source of the mysterious signal. Take out both groups then hop in the van. This will trigger the Push It To the Limite side job.
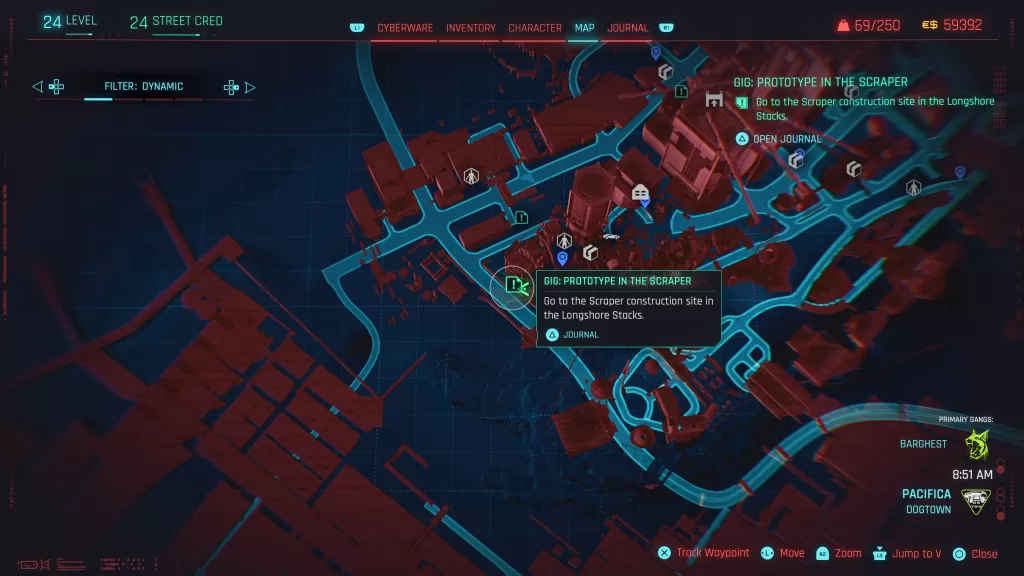
Prototype in the Scraper
Obtained: Approach the Scraper construction site
Location: Pacifica – Dogtown
Objective: Retrieve a Prototype Implant and its Schematics
To start this gig, travel to the far west of Dogtown, past the Longshore Stacks fast travel point. When you get close enough to the Scraper construction site the gig will trigger and Mr. Hands will send you the deets. Head inside then fight your way to the other end of the site. Enter the building there and use the elevator in the back to reach the 24th floor. There will be a large group of enemies here that you’ll need to deal with before.
After they are taken care of, look for the room with the makeshift operating room setup. Examine the computer in this room specifically the files to find the password for a cell (for us it was 2753) then head down the stairs in the room. Approach the cell to start talking with Hasan. Eventually, you’ll need to free him from the cell and will be able to use the password you got from the computer earlier. Follow him to the location of the schematic then lower and head across the bridge he points out.
When you get to the other side, talk with Hasan again. You’ll then learn he was going to sell the prototype and then disappear into Dogtown. You’ll then have a choice to make. You can turn him over, say you never saw him or ask Mr. Hands for a favor. Turning him over will end with Hasan being sent back to the corp where they will most likely kill him. If you tell him to get lost, then you’ll only have the schematic to hand over reducing your reward. You can also choose to call Hands and tell him about the situation then ask to let Hasan go after the operation. The fixer will call in a favor in good faith to V. The gig will be completed after you hand the the schematic (and Hasan if you decide to turn him in).
If you choose to have Hands help Hasan by letting him go, you’ll get a side job later where Hasan will give V an iconic tech pistol for helping him.
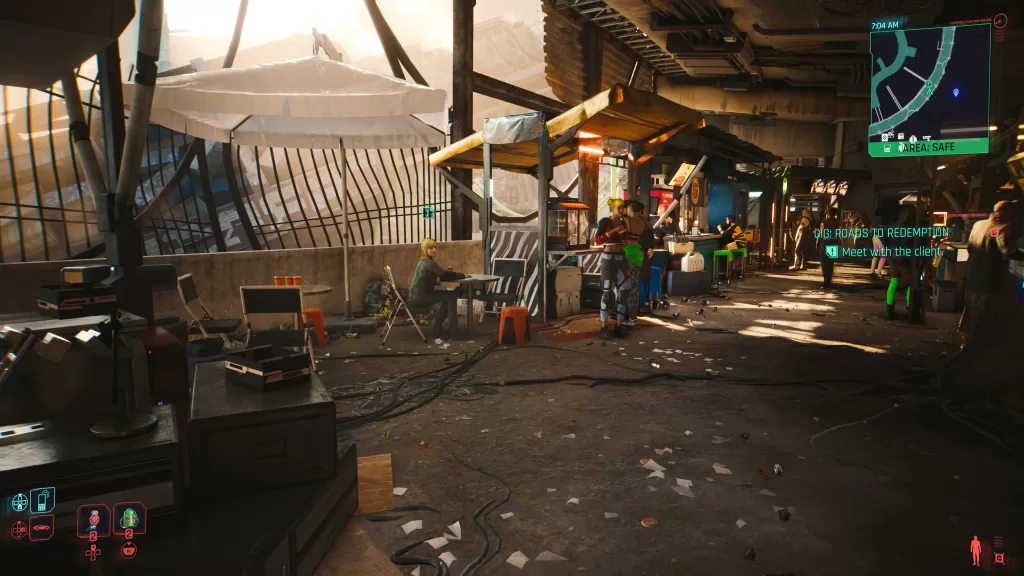
Roads to Redemption
Obtained: Hands will message you about this gig being available after completing the Firestarter main job
Location: Pacifica – Dogtown
Objective: Meet with the Client
Head to the stadium to find the client near all of the stalls on the outer walkway. Speak with Nele there to get the details on the job. After the conversation, follow the objective to a locked door in the stadium near the tank. Enter the code you got from Nele to gain access and head inside. Follow the path to reach an old parking garage and deal with the enemies there then enter the elevator taking it to 03 Manufacturing.
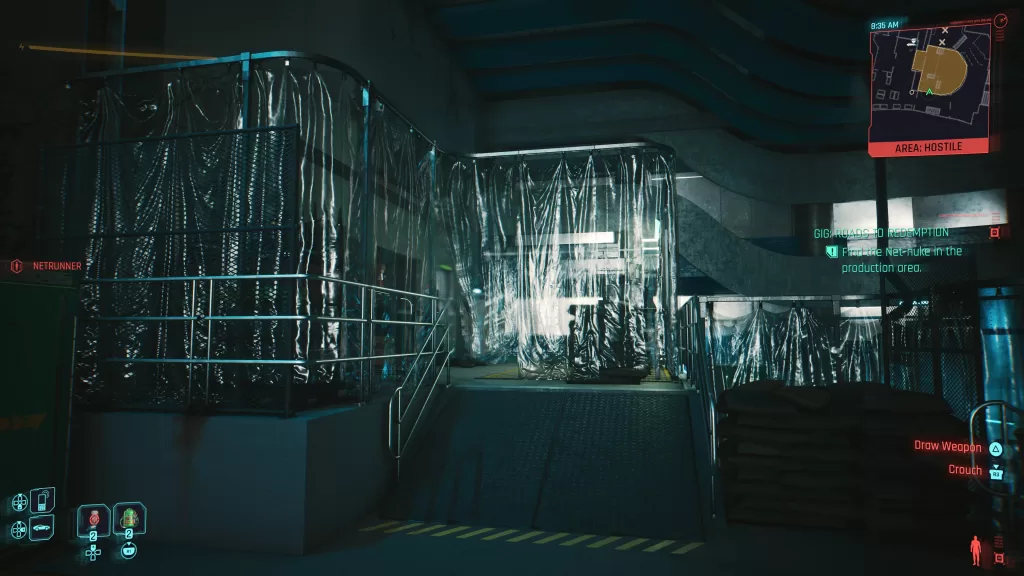
Once in manufacturing, you’ll want to explore the floor looking for the room with the plastic curtains in it. There you’ll find the net-nuke to upload the malware in. After the upload, your location will be compromised and Johnny will want to have a chat. After speaking with him, leave the weapons factory using the elevator you took to get there. You’ll have more enemies to deal with and Nele will message you changing the meeting coordinates.
You’ll need to head to the area between the stadium and the Luxor High Wellness Spa fast travel point. Nele will show up in a car. jump in to trigger an event where the crop will show up to arrest Nele. You’ll have the option to give them the shard and leave Nele to her fate or take them out and let her walk free. The gig will be completed after you make your choice.
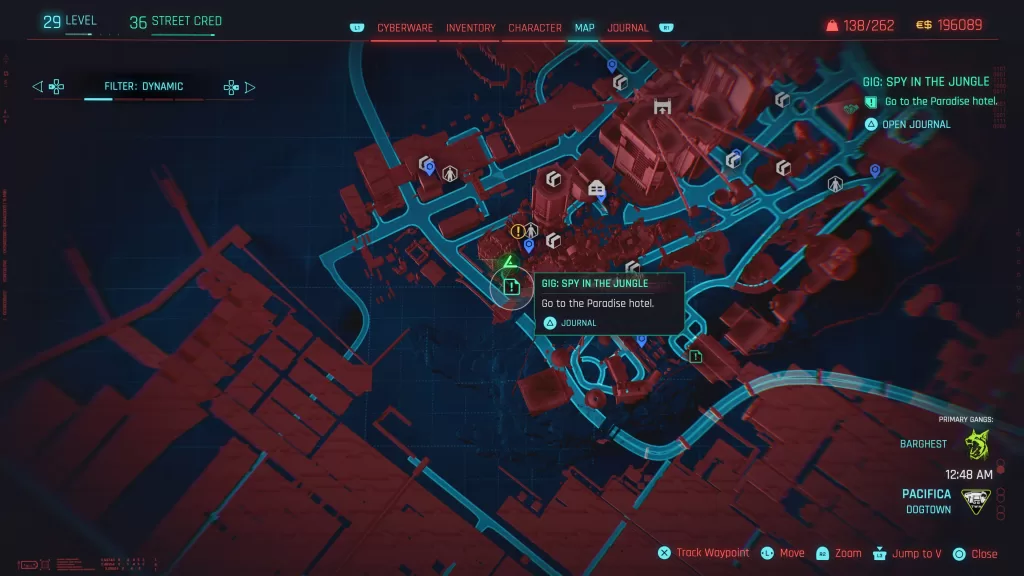
Spy in the Jungle
Obtained: Approach the area after meeting Mr. Hands in person
Location: Pacifica – Dogtown
Objective: Go to the Paradise Hotel
Cyberpunk 2077_20231001154743
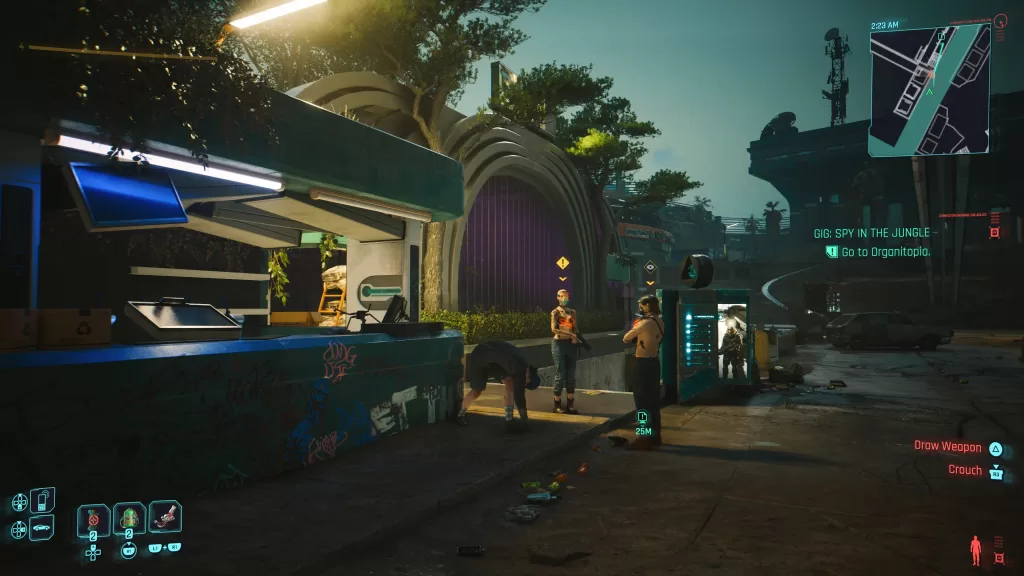
Head to the Paradise Hotel at the far west end of Dogtown past the Longshore Stacks fast travel point. Once there take the stairs up to the third level looking for room 203. Enter the room to be greeted by the agents. They give you the details of who they are looking for and then send you to Organitopia at the southwestern tip of Dogtown. Enter Organitopia and pass the stalls to find a set of stairs on the left with some enemies there. Take care of them then head down the stairs and take a left through the hole in the gate. There will be on window on the wall in front of you that you’ll need to force open. Jump through and interact with the Access Point on your right to give yourself authorization. When that’s done, Bana will contact you asking you to head to the main exhibit hall. Standing between in and you is a group of Scavs. You’ll need to deal with them before you can enter the main exhibit.
At the doors to the main exhibit, Bana will contact you again staying he’s in a room on the upper level. He’ll also mention there are some elite warriors in the room as well. Approach the room and interact with it to trigger an event where a guy drops through the roof kicking off a boss fight. For the first half, the assassin will be teleporting around the rafters above the exhibit. Once you get him to half health, some drones will show up that you’ll need to deal with. The boss will also move to the lower level. Once you defeat him (make sure to loot him for an iconic weapon), enter the room to meet “Bana”.
Speak with Katya and exhaust all of the dialog options. Ana will tell you to delta her and then bring the biomonitor back to them. Katya will propose a counter offer to give you the biomonitor along with the location of her stash. If you accept, you’ll get the Money for Nothing side job. If not, then take her out and grab the monitor. Exit Organitopia and head back to the agents to deliver the monitor. Along the way, Steven will message you saying to bring the monitor to a drop point cutting out Ana. If you question him, you’ll learn that Brazil is about to sign a huge deal with SovOil and this data would stop that from happening. You can then take the monitor to the drop point if you wish. You can also go back to the agents where Steven and Ana will be arguing about it. This ends with Ana demanding you hand her the monitor. You’ll then get the choice of whether to actually hand it over or destroy it yourself. Make your choice then leave the room to complete the gig.
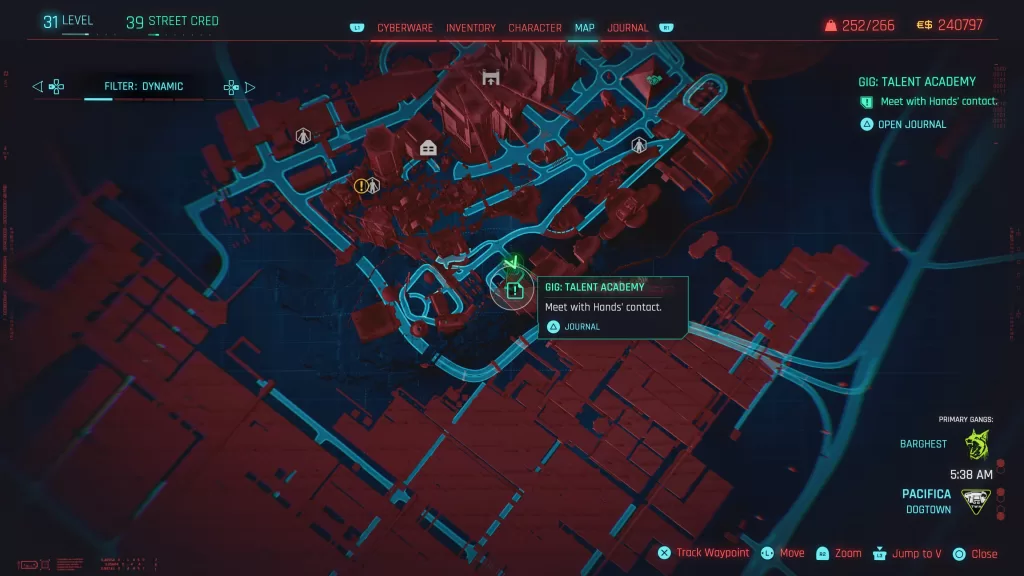
Talent Academy
Obtained: Approach the site in the southwestern corner of Dogtown after meeting Mr. Hands in person
Location: Pacifica – Dogtown
Objective: Meet with Hands’ Contact
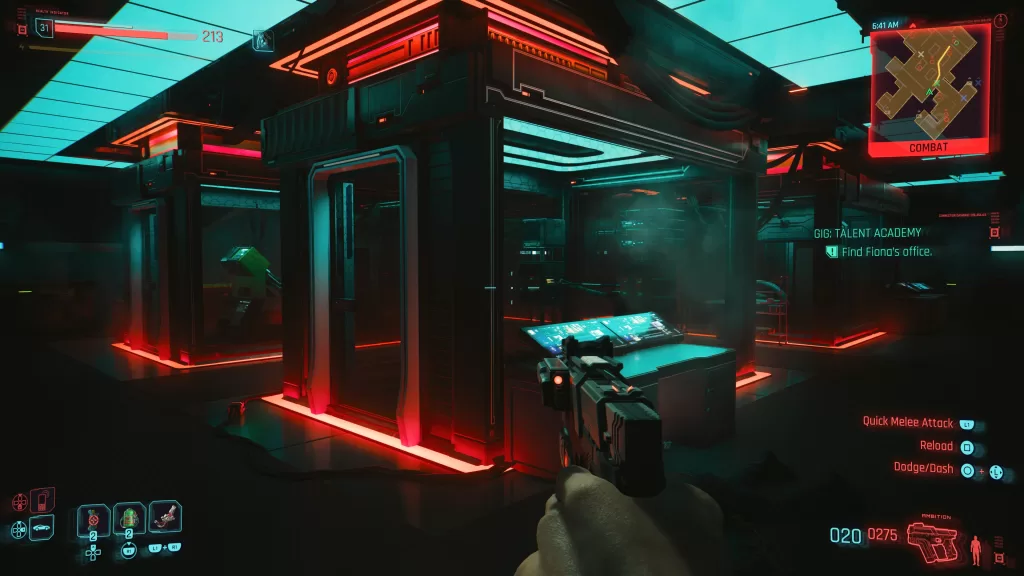
Approach the site and locate the contract. Speak with him to get more details about the job then enter the exhibition hall via the elevator. When you the lobby. speak with the receptionist. After that, head into the actual hall and take a seat at the bar, speaking with the bartender. When he asks who you are scouting for, tell him it’s none of his business. If you don’t actually answer his question, you’ll get caught up in the lie and have to take out everyone. Tell him to mind his own business will result in someone else causing a scene giving V the perfect diversion to sneak away. Enter the nearby door then follow the path looking for the stairs leading down. There will be enemies and cameras you’ll need to disable along the way.
Either option will see you heading to the Athlete Zone on the lower level. The office you’re looking for can be found past the room containing treadmills down a hallway.
Once you reach the office you’ll run into Tommie. Speak with him then interact with the terminal nearby to try and steal the data. Fiona will show up and want to know what you’re doing. Tell her about the tax fraud and she’ll want to make a deal. She’ll give you a list of her secondary clients she doesn’t care about and will make sure Tommie gets signed in exchange for letting her top clients go. You can take the deal if you wish or turn her down. Either way, you’ll get some data to send to Hands. If you decide to turn down her offer, once you get outside, some enemies will show up that you’ll need to take care of. Exit the area afterward to complete the gig.
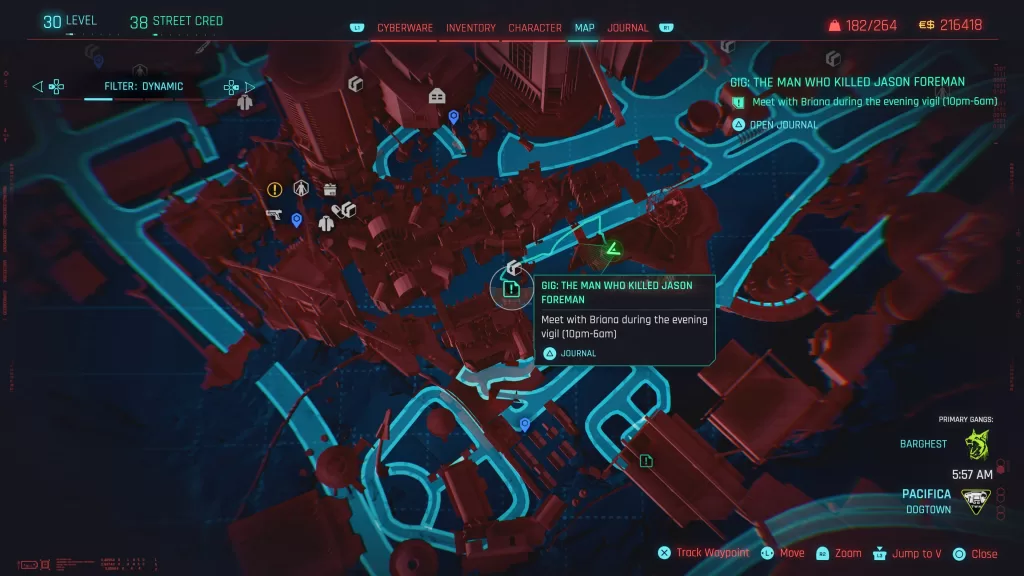
The Man Who Killed Jason Foreman
Obtained: Approach the area south of the Kress Street fast travel point after meeting Mr. Hands
Location: Pacifica – Dogtown
Objective: Meet with Briana during the evening vigil (10 pm-6 am)
Follow the objective to reach the vigil in stacks after 10pm and speak with Briana there. Follow behind her talking along the way. She’ll give you the details on the job and hand over a shard that you’ll need to decrypt. After reading the shard, you’ll have the optional objective to examine the area. Look for the items in the below list to scan.
Combat Footprints
Bullet Holes
Stash
Indentation
Travel to the old motel found at the Pacifica West Wind Estate then head inside.
You’ll need to work your way up to the third floor defeating the enemies along the way. Once you’re on the fourth floor, head straight down the hallway to the other end then take a left past some old wooden shelves. Interact with the door there to begin a boss fight with Yasha Ivanov. He’ll turn invisible and can heal himself a little bit. Defeat him, then head through the door behind the shelves to reach Rinder. Speak with him then when you’re done choose the shoot him option. Loot his dog tag then leave the building and bring it back to Briana to complete the gig.
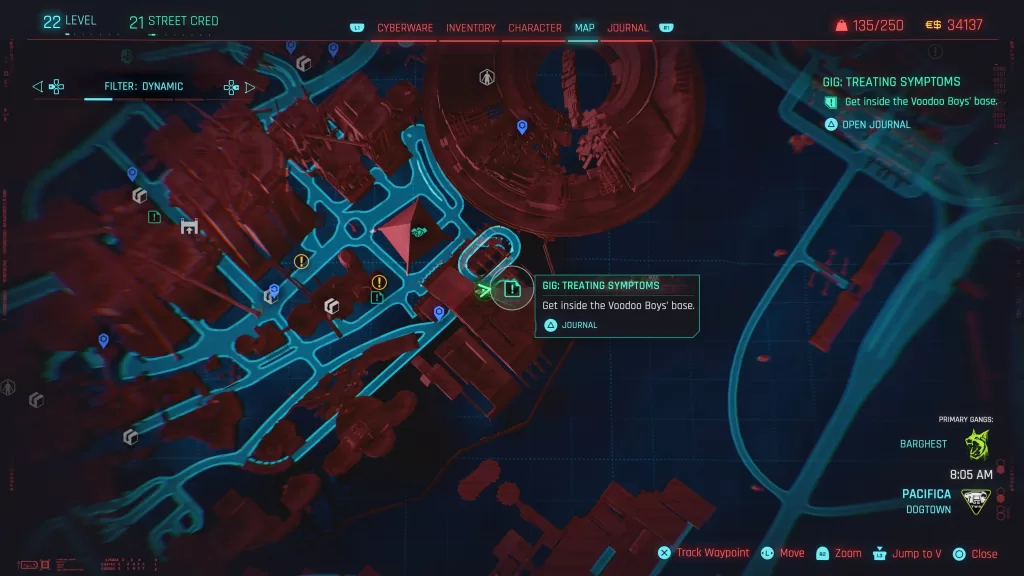
Treating Symptoms
Obtained: Approach the Voodoo Boy’s base in the northeastern part of Dogtown
Location: Pacifica – Dogtown
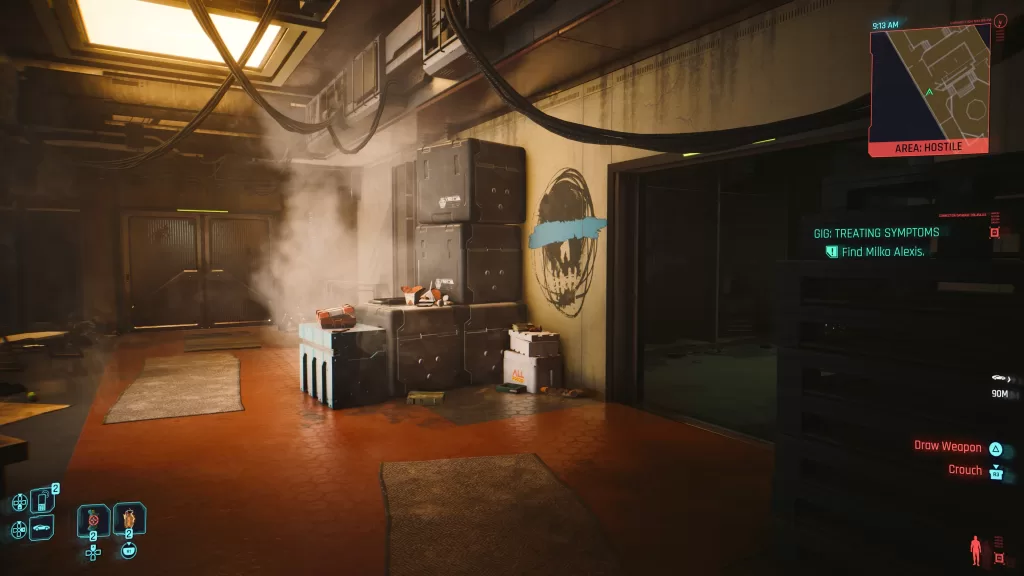
Objective: Eliminate Milko Alexis
Enter the Voodoo Boy’s building by either the front or side. On the upper level on the east side, you can find a supplier who you can question about Milko in a side room. Return to the hallway and head right towards a pair of doors then pass through them. This will trigger a boss fight between you and a horde of robots led by a beefy robot controlled by the target.
Once the boss robot goes down the other will be deactivated and a set of doors at the back of the room will open. Head through them then down the stairs following the path to the end. When you get there, you’ll find Milko along with Alan from Netwatch. He will ask you to not kill Milko yet providing his reasons then you’ll be given the choice to either kill the target or let Alan continue his work.
So far there are no major consequences to your choice. If you side with Alan, your client will be killed, but he can try to stop the blackmailing at the source, preventing many more deaths. He’ll also open the gate behind him so you can leave the building. If you choose to kill Milko, then Alan will turn hostile and you’ll have to kill him too. Loot the keycard off of Alan afterwards so you can unlock the gate behind him and leave the building. Once you make it outside, the gig will be completed and you’ll get your credits from Mr. Hands.
Two Wrongs Makes Us Right
Obtained: Aproach the Animal Base
Location: Pacifica – West Wind Estate
Objective: Steal a van hauling the Animals’ medical supplies
Approach the Animal base then head down to the bottom level. The van will be on the far right side opposite the tunnel leading out of the base. All you need to do is hop in the driver’s seat and deliver it to the location that Hands sends you. Once you drop off the car, the gig will be completed.
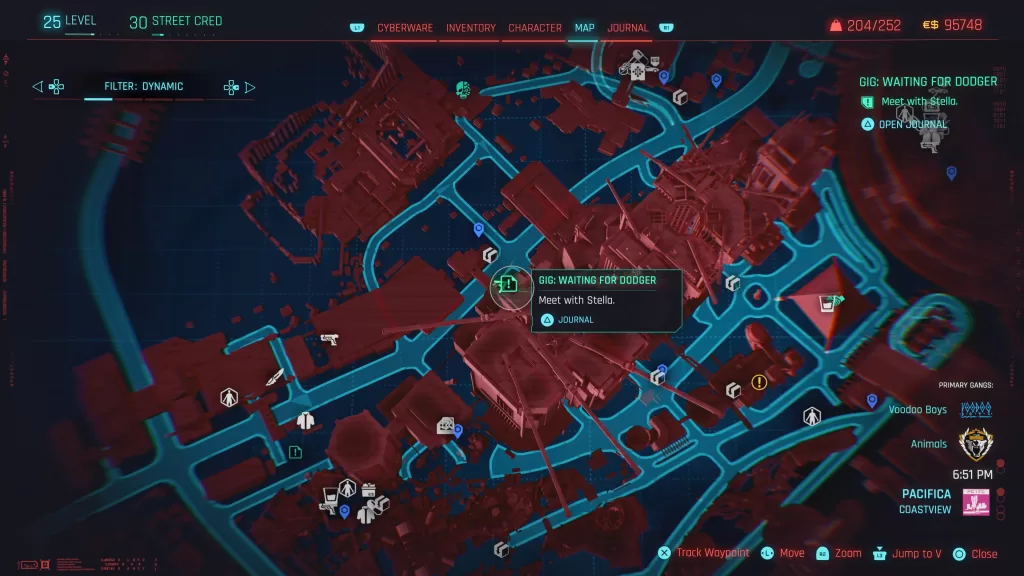
Waiting For Dodger
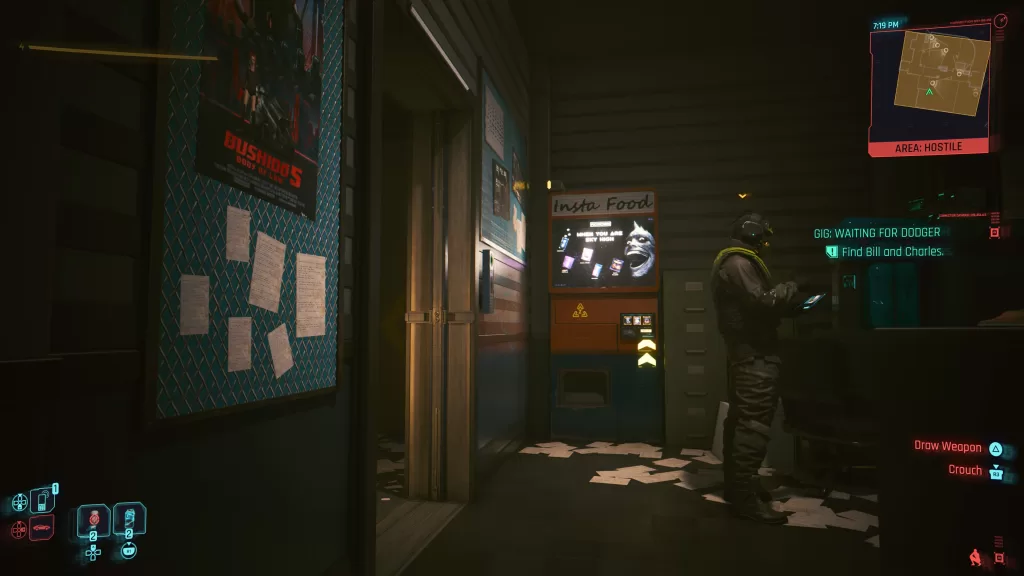
Obtained: Speak with Stella in her car outside the western Dogtown exit
Location: Pacifica – Coastview
Objective: Extract NCPD officers from Dodger’s Base
Hop into Stella’s car and get down as V is told. She’ll tell V that her fiance and his partner are trapped in the building across the street. After she finishes giving you the details, head across the street and enter the building. You’ll need to sneak past all of the guards so as to not cause a commotion. Wait for one of the two guards in the small room to leave then sneak past the remaining one going through the doorway on the left then passing through the door in that room.
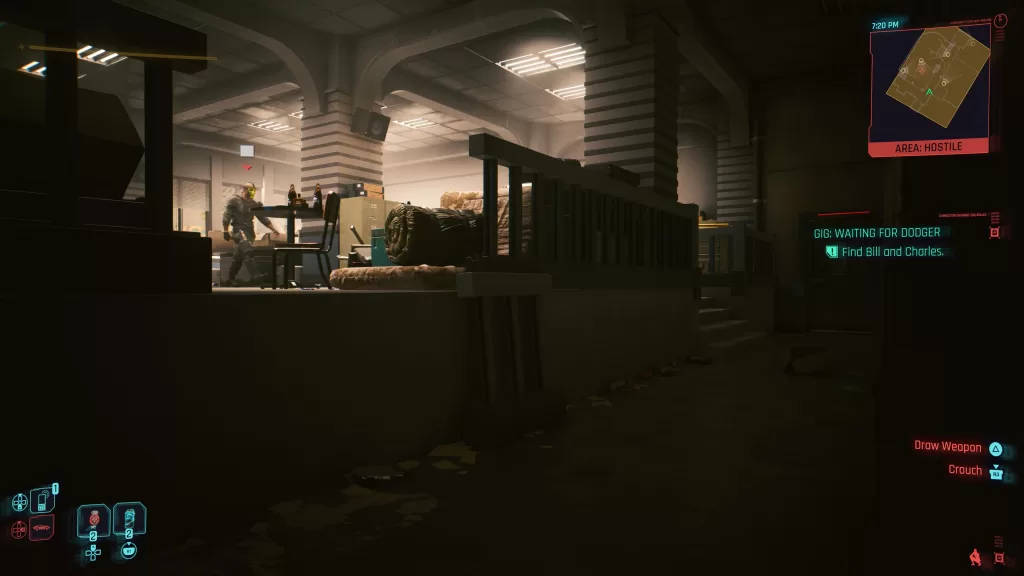
In front of you will be a railing. You’ll need to climb up that then head to the left side of the room to find the elevator. Take it down then knock out the guard messing with the door. Speak with the voice on the other side to find Charlie and help him open the door then follow him to Bill. They will tell you about what happened and ask V for help getting out (and retrieving their car).
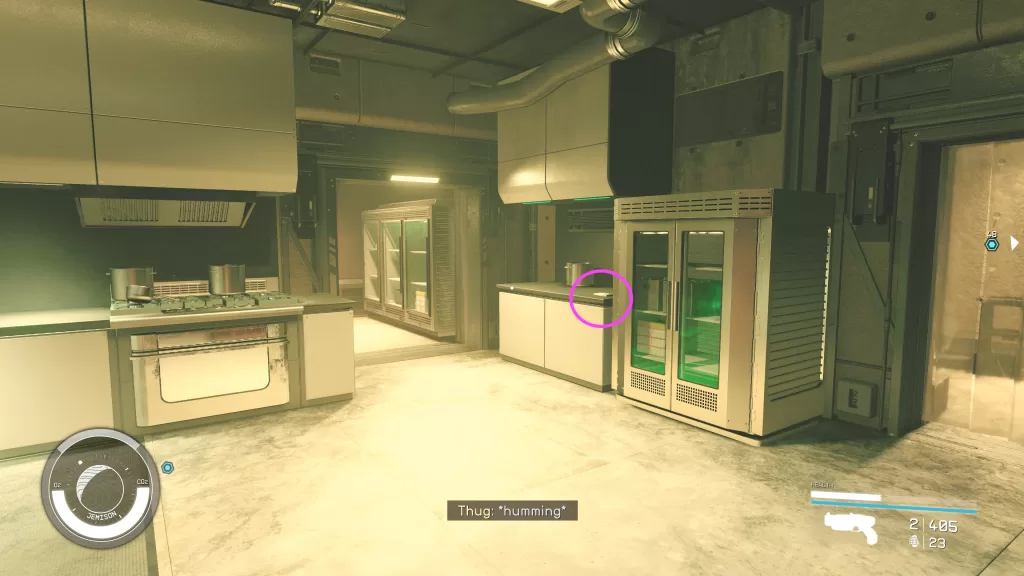
Follow the pair as they lead you towards the garage. After they open the door at the bottom of some stairs, a goon will be at the other end of the hallway. Hack the camera to turn it off then wait crouched next to the crate waiting for him to pass. You can then knock him out in the server room. Follow the pair down the hall to find another locked door. Return to the server room and override the circuit break to open it. Return to the door and head through. In this storage room, one will drop something causing a guard to investigate. Hack the big yellow box and use it to distract the enemy allowing you to sneak up behind them and knock him out (there is also a crate with an iconic Machete in this room).
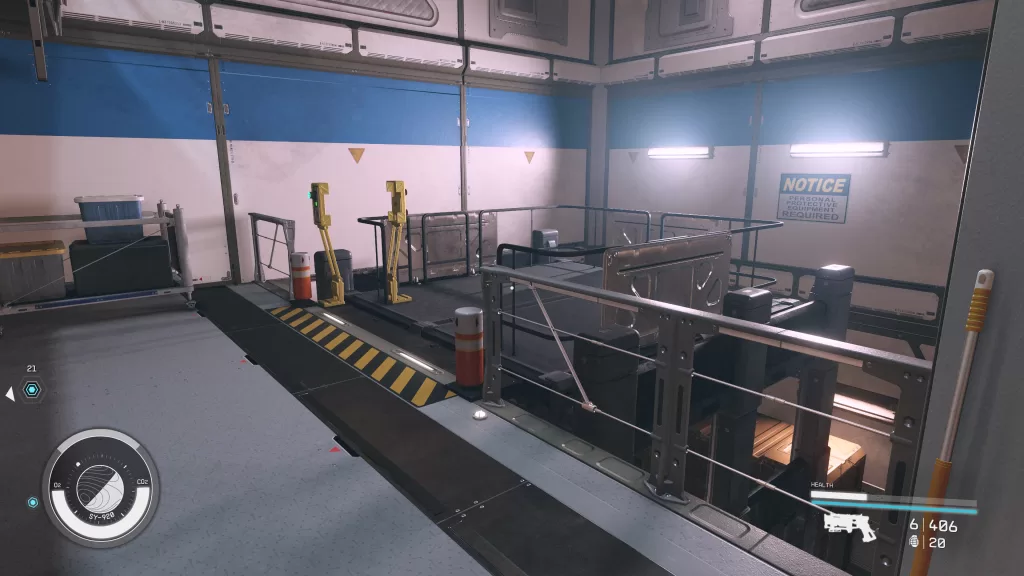
The next room will bring you to a locker room with three enemies. You’ll need to use a light and a vending machine to distract two of the enemies so you can take out the third one and then the other two. This will finally bring you to the garage… where Dodger will show up. He’ll talk to the guys and ask what happened. After each of them gives their version of the story he’ll check with V. Tell the truth and as long as you didn’t kill anyone, he will let you go. Otherwise you’ll have to take him and his two thugs out (and he drops an iconic weapon). Once that’s taken care of, the gig will be finished.
Welcome to NGB and our guide on The Best There Is Starfield mission! This guide will walk you through starting the mission and detail the necessary steps for its completion. If you need help with a specific mission objective, check the quick links section to find the most relevant information easily.
PLEASE NOTE: Some of the planets referenced in our guides and walkthroughs may not match yours due to how Starfield was created. In these situations, what you do and the places you visit on those planets should remain the same.
The Best There Is is one of the faction missions for the Crimson Fleet. You’ll start it automatically after completing the Breaking the Bank mission.
The Best There Is Mission Guide
Meet Naeva and Jasmine on the Key
For The Best There Is Starfield mission, you’ll need to travel to the Key in the Kryx System. Once you arrive, head to Ship Services and speak with Naeva.
Meet Huan Daiyu in New Atlantis
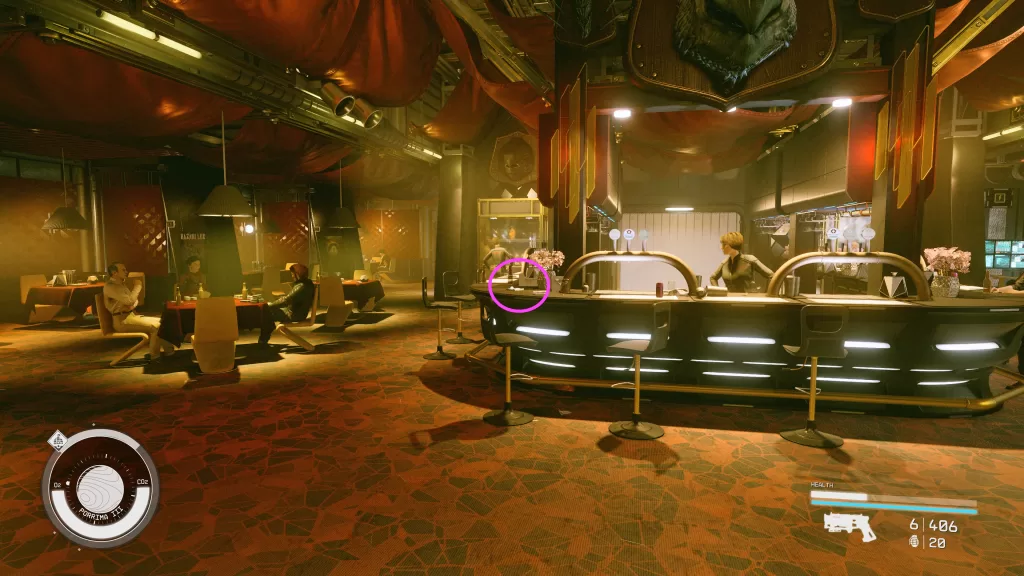
Travel to New Atlantis then head to the Well. Make your way to the eating area above Kay’s House to find Huan. Speak with the smuggler then head downstairs to Kay’s kitchen to find the Huan’s Talk (Evidence) on a counter in the kitchen.
Return to the spaceport and board her ship, the Jade Swan. Cimb up to the cockpit and speak with Huna there. She’ll give you the low down then tell you once you leave, you can’t come back until the mission is done. Tell her when you’re ready to go.
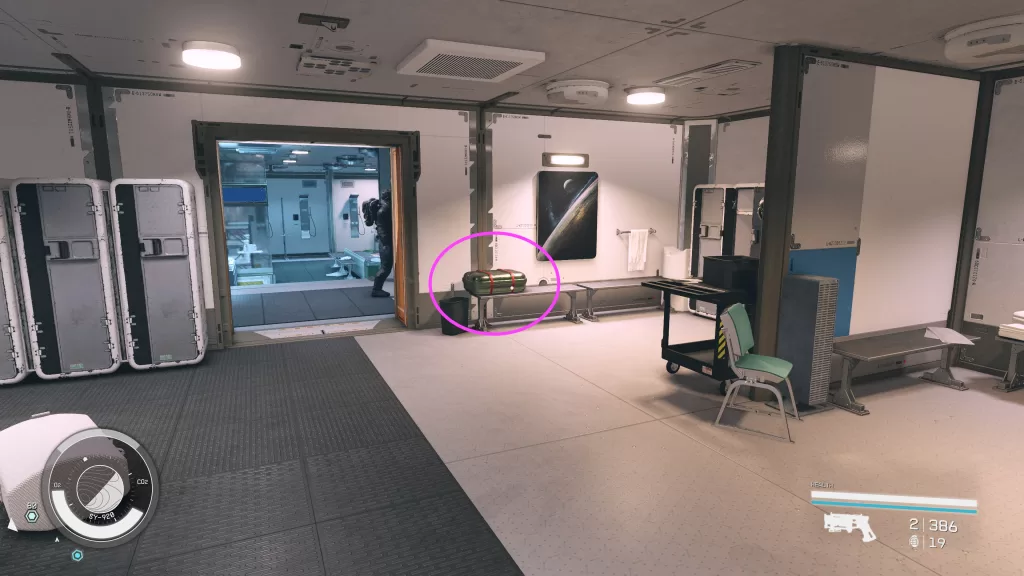
Board SY-920
After the ship docks at the station, speak with Huan to learn some more about it then board SY-920.
Gain Access to Barracks to Find a Uniform
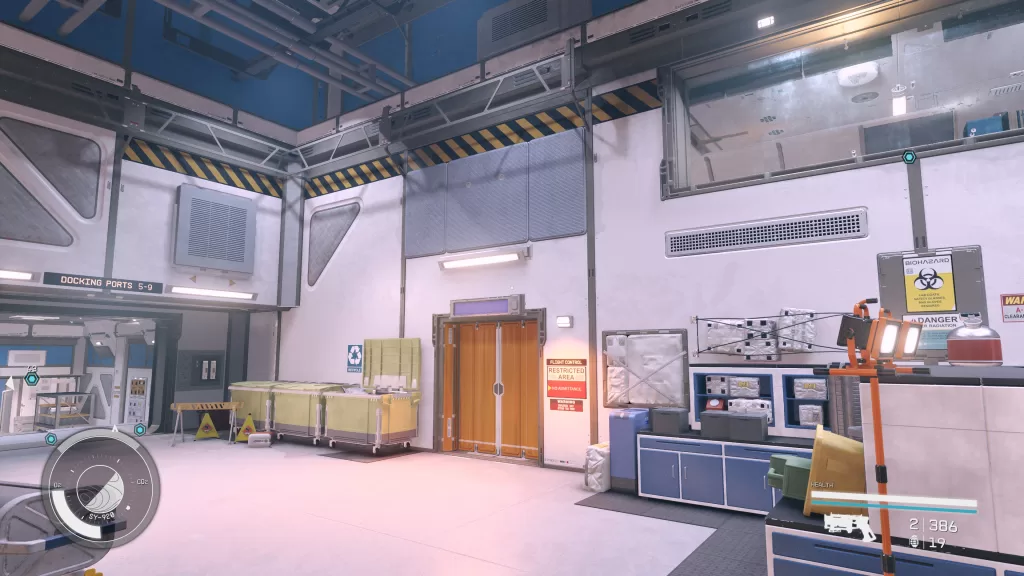
Once on SY-920, head to the northeastern part of the cargo bay. Take the elevator there down.
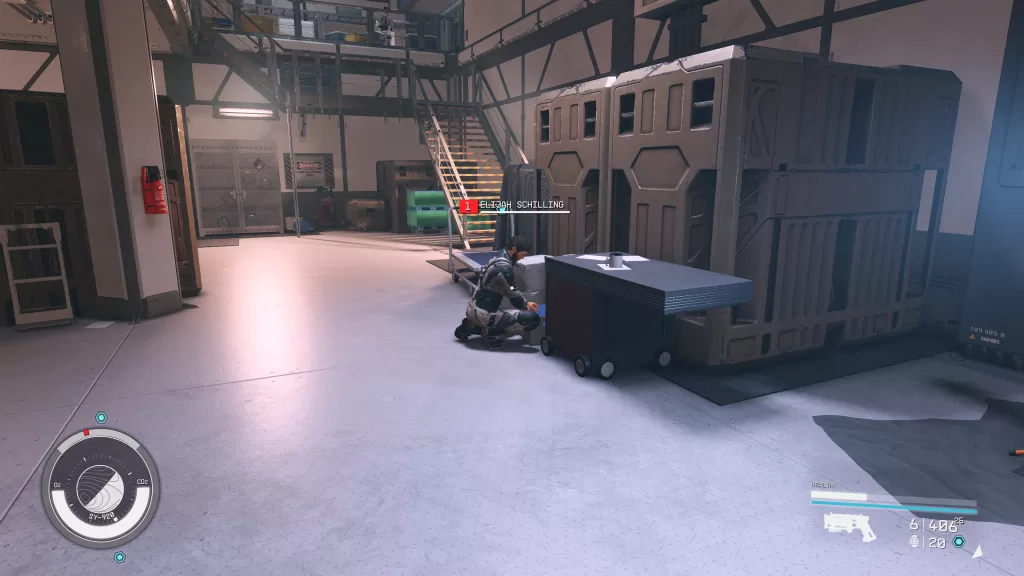
Head straight and look to the right to spot an orange door at the top of some stairs with an intercom nearby. Interact with the intercom to call the captain then listen to the UC Cargo Haulers to learn that Elijah dropped his key.
Speak with him on the southwestern part of the building then head to the forklift to spot the SY-920 Maintenance Keycard next to a guard. You’ll need to speak with him to make him move then you can collect the keycard. Go back to the orange door near the intercom and use the keycard to open it.
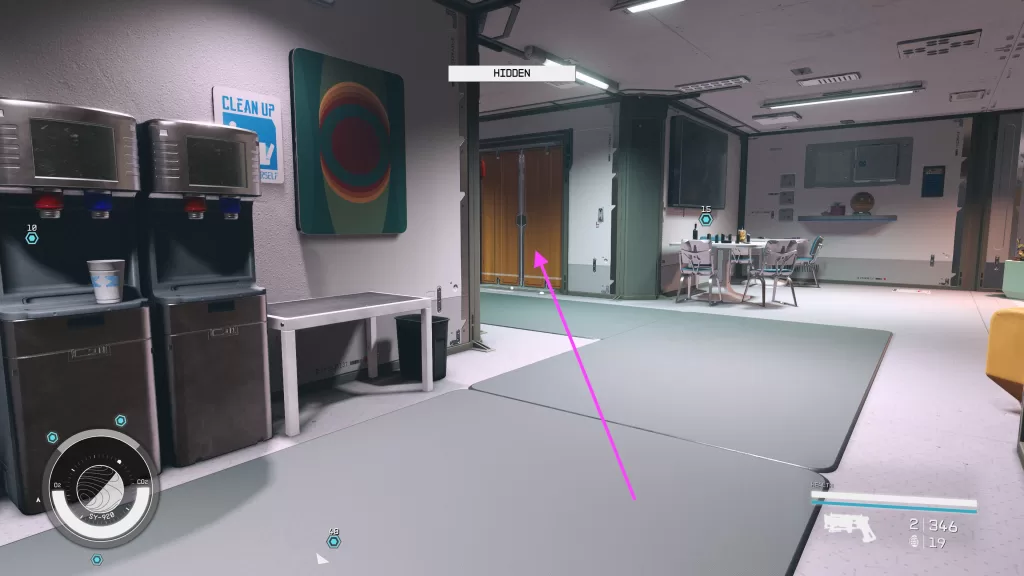
Remember for this part you must be sneaky! Save often in case you get caught! Head down the hallway and enter the storage room. From there you can access the vents following them up a ramp to reach a bathroom. Exit the bathroom then take a right down the hall followed by a left. Enter the first room on the right to find the uniform on a desk.
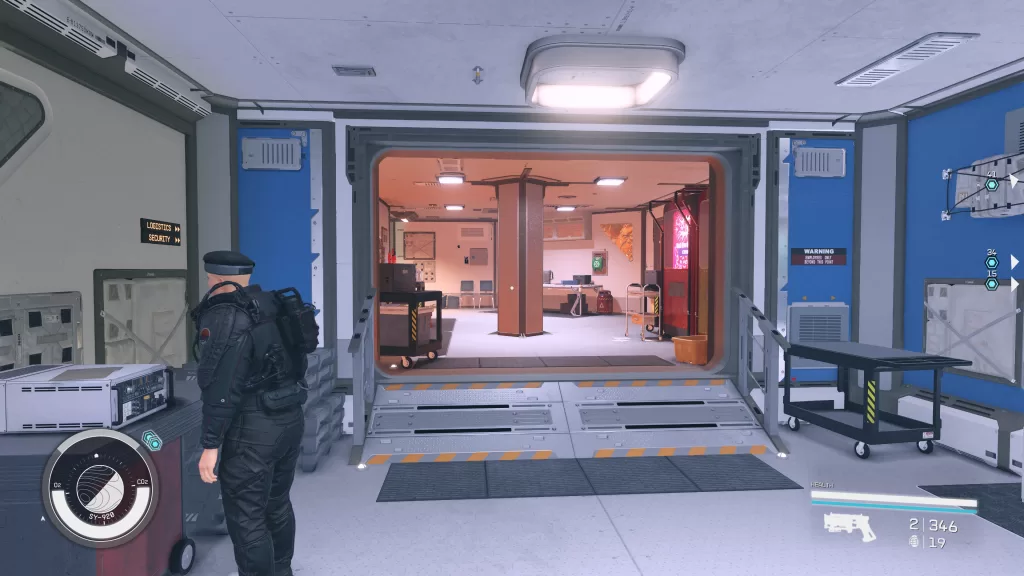
Make sure to equip it so you no longer have to be stealthy. Exit the room taking a right then follow the hallway around. You should reach a set of stairs leading to the Lounge and Mess Hall. Head down the stairs then follow the path until you reach the split. With the Mess Hall on your right, go left to the Secure Access door past the Cargo Bay. When stopped by the guard, tell him you are reporting for duty. He will let you through.
Head over to the Command Bay elevator and interact with the card reader. Ride the elevator then use the nearby intercom to call Huan. There are two ways to do this next part. You can use a clearance code to reach the Archives by passing through the Operations Center or you can sneak to the Archives using the vents.
Access Code Route
Head for the Security Room. If you get stopped by a guard, you’ll need to persuade them to let you go.
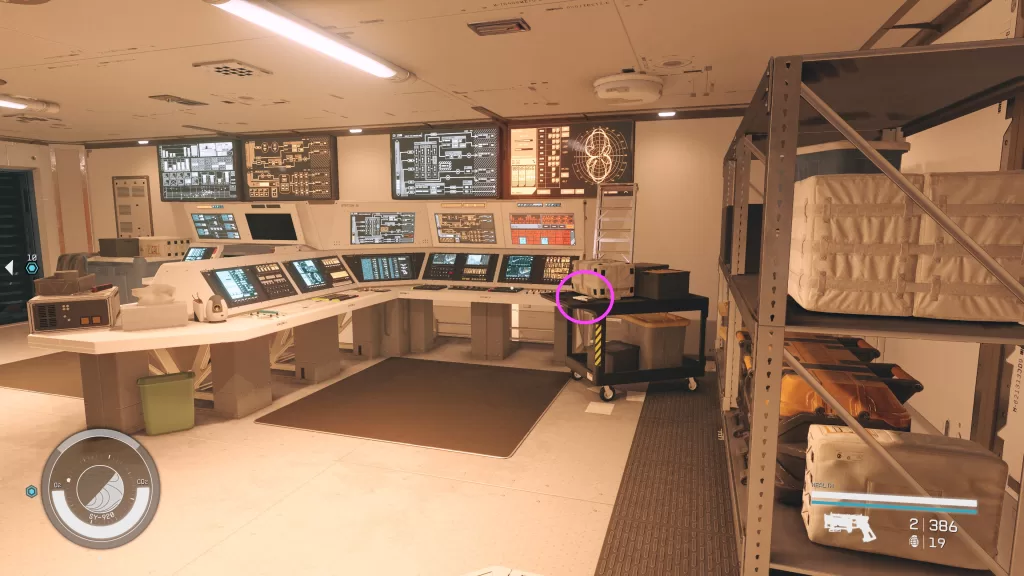
Once you’re in Security, hack the novice lock on the Clearance Code Computer. You’ll need to grab the code based on the last name of the uniform you’re wearing. Ours was Ensign Ziremi’s Uniform so the code is ZX321D. Use that code to access the Operations Center. Cross the room to reach the Archives and head inside.
Vent Route
Look for the Utility Room next to the Operations Center then head inside.
Climb up the stairs in the back of the room to find the vent. Follow the shaft to reach the rafters over the operation room. You can then follow the rafters to reach another vent that will end up in the Archives.
Locate the ComSpike
Once in the Archives, use the Data Access Computer in the back of the room and select UCE-86 ComSpike. Make sure to go through all of the options so you can upgrade your clearance level. You’ll then need to return to the elevators and take the one to Engineering Bay 4. You can use the intercom there to speak with Huan once more.
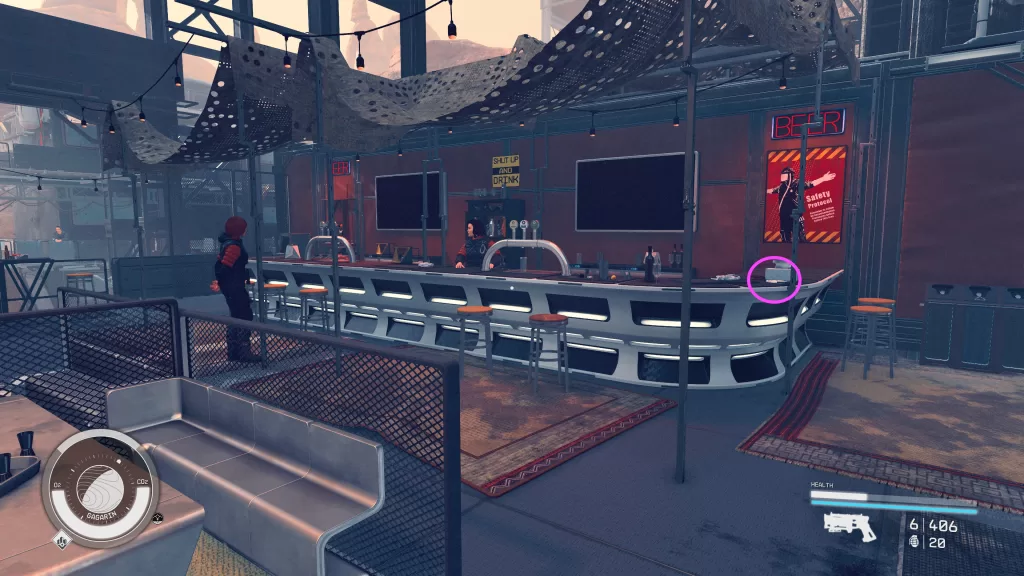
Afterwards, head down to Room 04. Make sure to grab the Eubanks & Woods (Evidence) on a crate in the back of the room then speak with Dr. Gabriel Vogel.
He’ll tell you that the ComSpike is actually a ship. You’ll then be able to persuade him to let you test pilot it or you can betray Huan and use that as a chance to sneak out with it.
Betray Huan
Doctor Vogel will alert the Commander to find and detain Huan. In the back room where you located the Eubanks & Wood (Evidence), enter the vent to find a locker room on the other side. Retrieve the SY-920 Pilot’s Space Suit from the bench and equip it.
Make your way to the docking port and enter the Prototype Ship parked at Docking Port 8. Afterwards, return to the Key! Surprise!!! Huan is waiting in the Operations Center and boy will you get an earful! She of course won’t trust you anymore. With your tail between your legs, head upstairs and speak with Del. He on the other hand doesn’t seem to care that you ratted Huan out to Dr. Vogel.
Persuade
If you persuade him, he’ll give you a password. Make sure to collect and equip the SY-920 Pilot’s Space Suit from the location shown above. When stopped by security, tell them your flight has been approved. Head across the room to the Flight Control room.
Go up the stairs and use the terminal to add the ComSpike to the test flight list. You’ll then be free to head to Docking Port 8 and board the Prototype Ship. Jump in the pilot’s seat, undock from the station and deliver it to the Key. Once on the Key, head to the Last Nova and locate Huan by the bar. Speak with her to get that drink then head to the Operations Center and speak with Delgado. Huan apparently sung nothing but praises about us to them and Del congratulates us on a job well done.
Proceed to the UC Vigilance
After your conversation with Del, return to the UC Vigilance to update the commander. This will complete the Best There Is Starfield mission and you’ll be rewarded with 250 EXP and some credits.
Welcome to NGB and our guide for the Starfield Divided Loyalties mission! This guide will walk you through starting the mission and detail the necessary steps for its completion. If you need help with a specific mission objective, check the quick links section to find the most relevant information easily.
PLEASE NOTE: Some planets referenced in our guides and walkthroughs may not match yours due to how Starfield was created. In these situations, what you do and the places you visit on those planets should remain the same.
Divided Loyalties is a companion mission you’ll receive from Andreja after raising her affinity high enough by making choices she likes.
Starfield Divided Loyalties Mission Guide
Reach Akila City
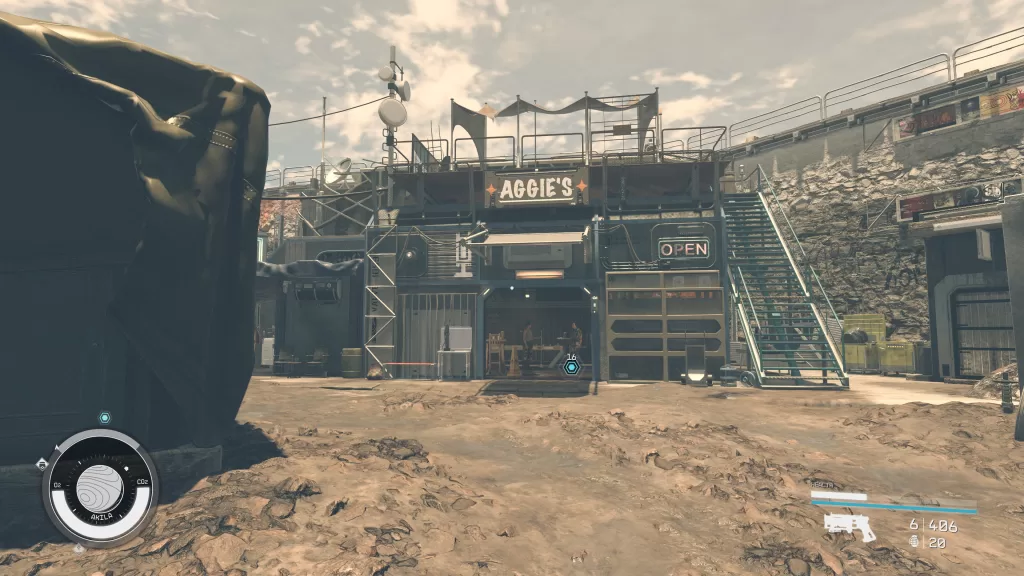
For the Divided Loyalties mission, you’ll first need to travel to Akila City on Akila in the Cheyenne System. Enter the city then head for Aggie’s which can be found on the north side of town.
Inside a conversation will start with Andreja. When it concludes, speak with Aggie and ask about Eren then follow up with Andreja afterward.
Travel to Hyla II
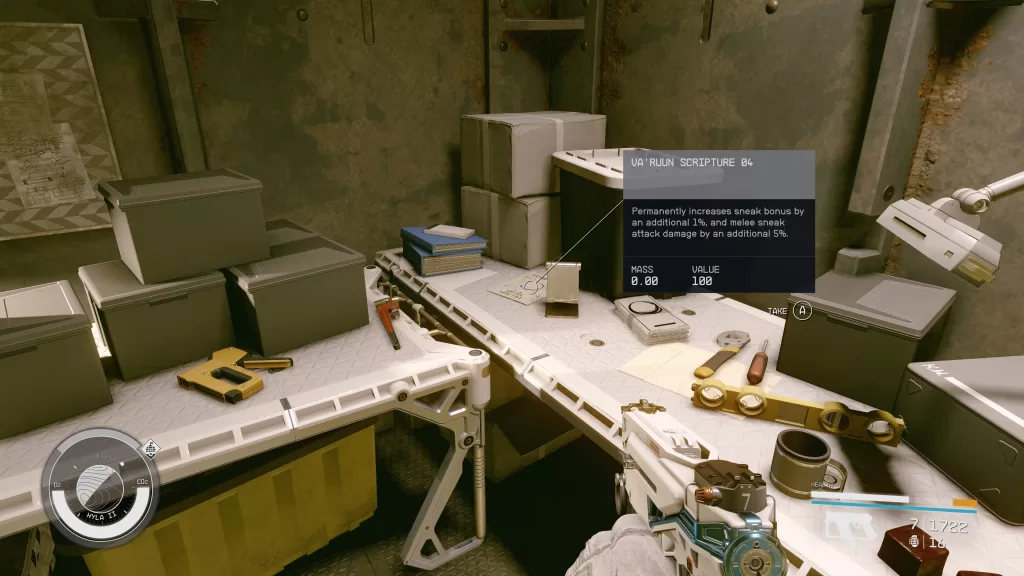
Now that we have Eren’s last known location, travel to Hyla II in the Hyla System east (and slightly south) of Cheyenne. Land at the Eren’s Camp marker then speak with Andreja. Use your scanner to locate Eren’s Camp making your way there. You’ll need to deal with a group of Zealots currently occupying the camp. When everything is clear, follow Andreja. After she gets done talking, enter the main building and head up to the third floor. Read Eren’s Slate on the desk then have a word with Andreja once more. Behind the slate, make sure to pick up the Va’Ruun Scripture 04 magazine!
Travel to The Den
Set a course for The Den orbiting Chthonia in the Wolf System. Board the Den then speak with Rayna Marquest on the top level asking about Jaeda. She knows where she is, but you’ll have to persuade her to tell you. You can also speak with Orval about her in the bar down below. He will provide Jaeda’s location for 1,000 credits. Either way, once you get Jaeda’s location set out after her.
Reach Jaeda’s Last Known Location
Plot a course for Groombridge (or a different system if yours is different). Once you reach the orbit, you’ll be hailed by a Raptor. During the conversation, a few Zealot ships will join you. Take them out and you’ll be hailed by Raptor again afterwards. Board her ship to have a confrintation with Jadea. When it ends, return to your ship to fight and take down the Zealot Captain. Speak with Andreja after the battle to get your next heading.
We recommend making a save before heading to the Derelict Station. During that portion of the quest, Andreja disappeared, and we were unable to get her back. The only thing that worked (on the console) was to go back to an old save before the station.
Travel to the Derelict Station
Make your way to the Muphrid System head to Starstation UCN-48 orbiting Muphrid IV. Dock at the station then follow Andreja doing as she says. She will lead you to Tomisar for a confrontion. You’ll then have a couple options. Angreja will want to kill Tomiasr, you can offer to do it for her or tell her to send the evidence to the council. If you pick the first or second option, then Andreja will never be able to return home. Picking the last option, leaves Tomisar alive with the hope that he will be punished by the council.
Accompany Andreja to the Lodge
Speak with Andreja after making your choice then take her back to the Lodge. Head back to her room (near yours) and speak with her again. During this conversatoin you’ll get the choice to keep her a friend or start a relationship with her. The Divided Loyalties mission will complete after you make your choice. You’ll be rewared with 250 EXP and some credits.
Welcome to our complete guide for all Phantom Liberty Side Jobs in Cyberpunk 2077! In this guide, we’ll list all of the Dogtown side jobs, where to find them and how to complete them to earn the Dirty Deeds trophy/achievement.
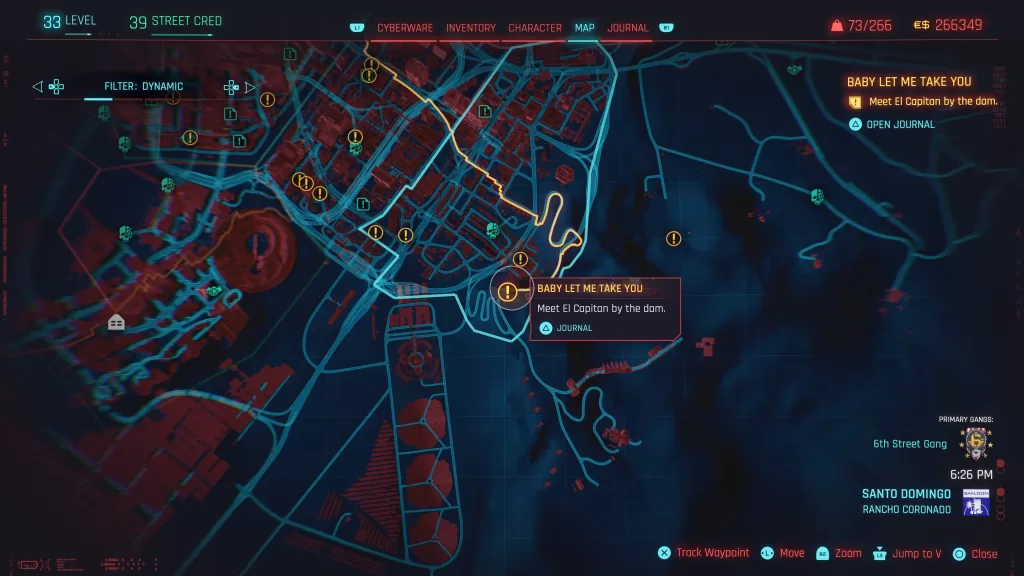
Obtained: After bringing El Captain enough vehicles, he’ll message V about a job requiring their immediate attention
Objective: Meet El Capitan by the Dam
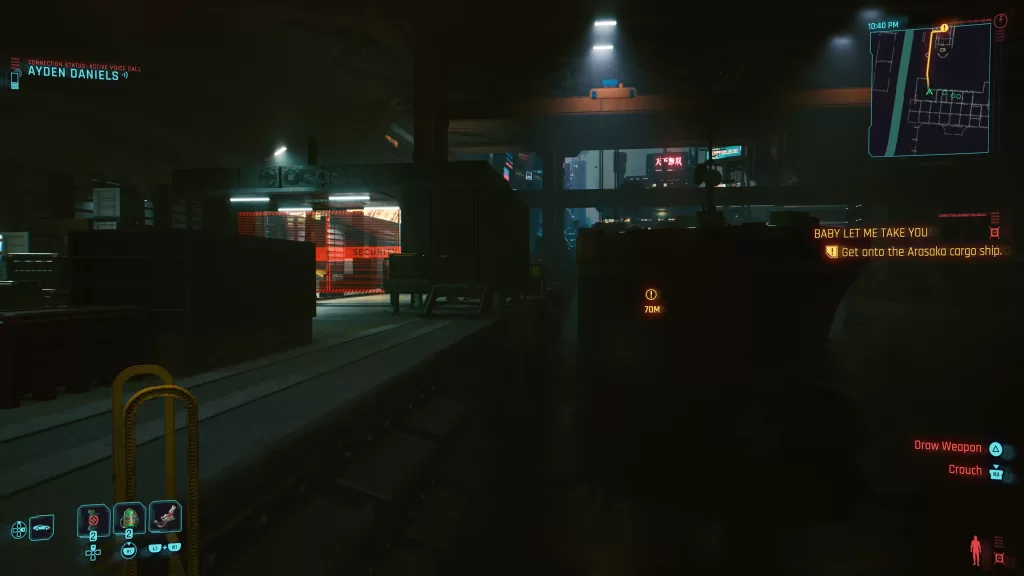
Travel to El Capitan’s location down the road south of the Dam Viewpoint fast travel point in Rancho Coronado Santo Domingo. Speak with El Capitan near his car then again when he walks over to the ledge. When you’re done, travel to the Arasaka Docks in the Corpo Plaza City Center. Head inside and speak with Daniels. Jump into the water between the dock and cargo ship then swim to the last ladder on the end.
Climb up then deal with the camera on a post diagonally to your right. Use the ramp on your right to board the cargo ship and scan the vehicle to identify it as the one you’re here for. Note that there are a couple of enemies here you’ll need to deal with or sneak by. Hop into the truck and drive off the ship onto the dock. While this is happening, Daniels will be made and V will have a choice: save Daniels or take the equipment back to El Captain. If you choose to help Daniels, he will survive but the truck will be damaged along with some of the equipment inside. Daniels will also be pissed. You’ll then have increased resistance from Arasaka on the way to the garage. If you leave him there, Daniels will die, but all of the equipment will make it helping more people. The choice comes down to what you want to do. Either way, you’ll still complete the job and El Capitan will still reward V will a brand new car!
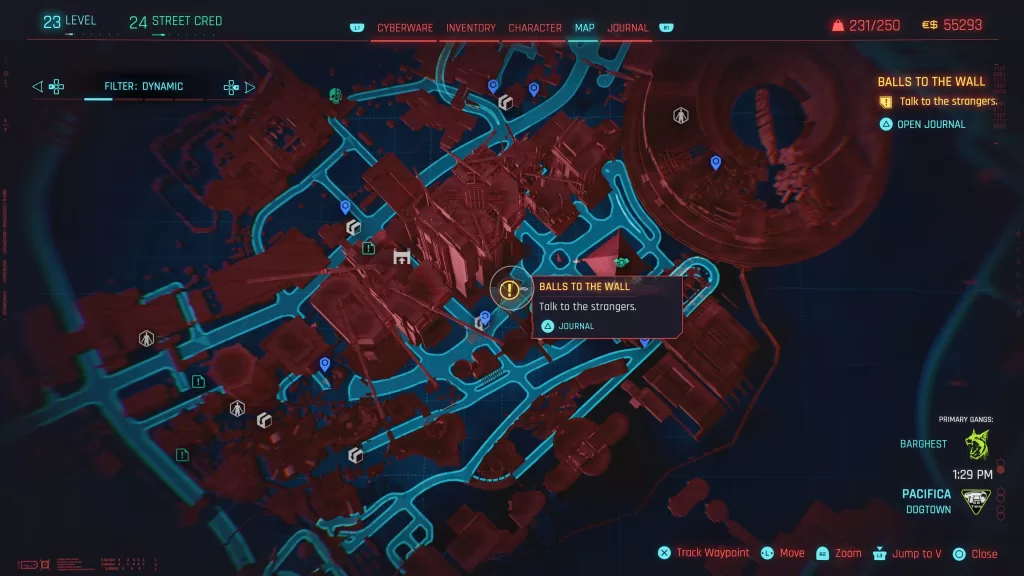
Balls to the Wall
Obtained: Talk to the strangers near the Golden Pacific fast travel point
Objective: Get Lit! (and bail Paco and Babs out of their predicament)
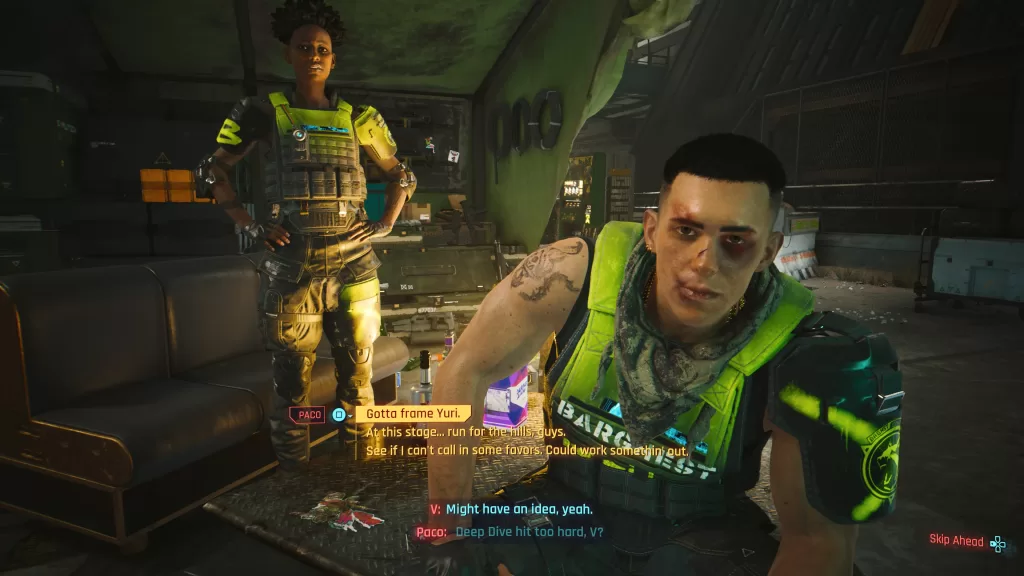
Speak with Paco and Babs then sit on the couch and have a drink with them. After a drink or two, listen to Paco’s problem and agree to take a hit of drift. This will trigger a hallucination where you’ll become Hansen. You’ll need to play through two scenarios as Hansen and take an additional hit. When you’re done, the pair will tell you that Paco stole some generators off a convoy that weren’t on the manifest. They will then ask for V’s help to get out of the situation.
Depending on where you’re at in the main game you may have different options as to how V can assist them. The choices and outcomes are listed below. After you make a choice and it plays out the job will be completed.
Frame Yuri – If you tell them to frame Yuri, Paco will be killed and you’ll have to fight Yuri
Run for the Hill / Call in Favors – V will use his contacts to help the pair
We were able to get help from Panam and both Paco and Babs escaped. They left a legendary iconic assault rifle as a reward.
Dazed and Confused
Obtained: Hands will text you about the job after meeting him in person during the Phantom Liberty main story
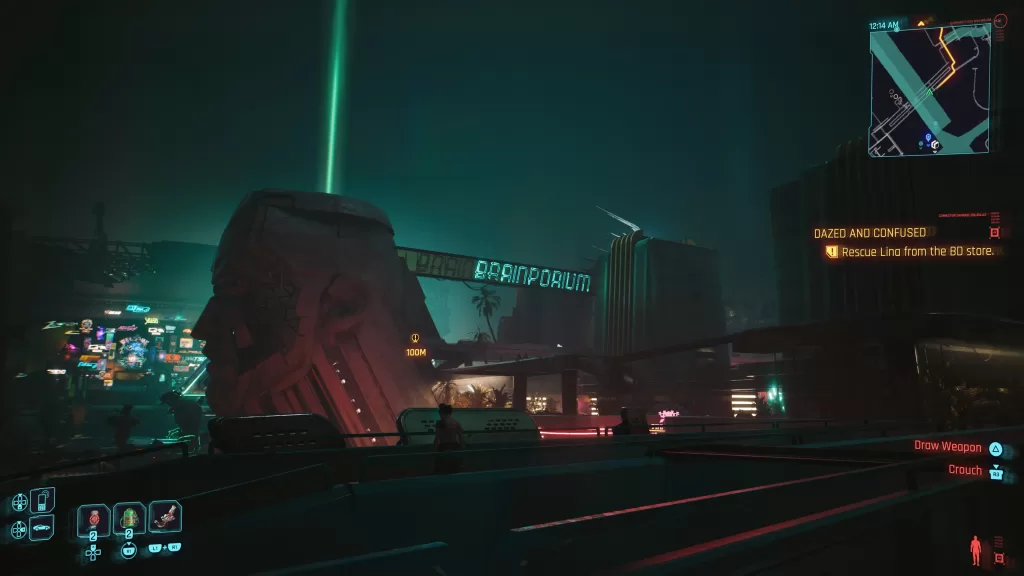
Objective: Rescue Lina from the BD Store
Travel to Brainporium near the center of Dogtown and head inside (top level of the stairwell). Look for the stairs taking them down to the basement to find the two strangers. After some dialog follow Shank upstairs and speak with him to learn the deal with Tool. He’ll want to take advantage of the situation by asking V to help out with a job. Agree to help then set out to find Lina then exit the building. Outside, Johnny will recommend helping the Gonk instead of extorting him. This will give you two new optional objectives to talk to Viktor and Judy for advice.
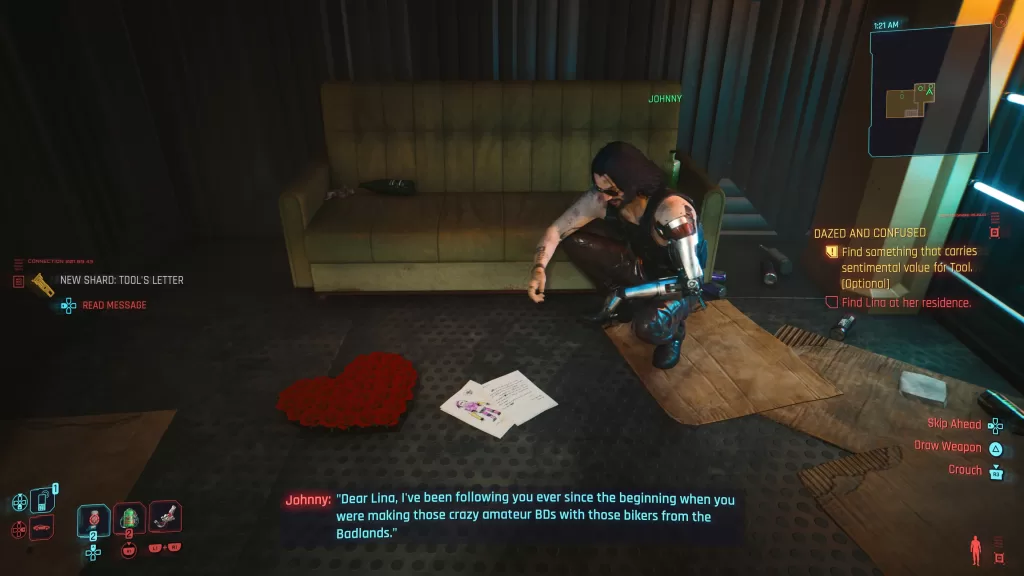
Help Tool (Optional)
If you want to help Tool, start by calling both Viktor and Judy. Tell them what’s going on and they’ll both give you the same advice. Head back into Brainporium the go downstairs. Enter the room to the right of Tool and scan the letter on the ground in front of the couch. After a quick scene with Johnny, speak to Tool. You won’t be able to help him just right now, though to time to move on to Shank’s request
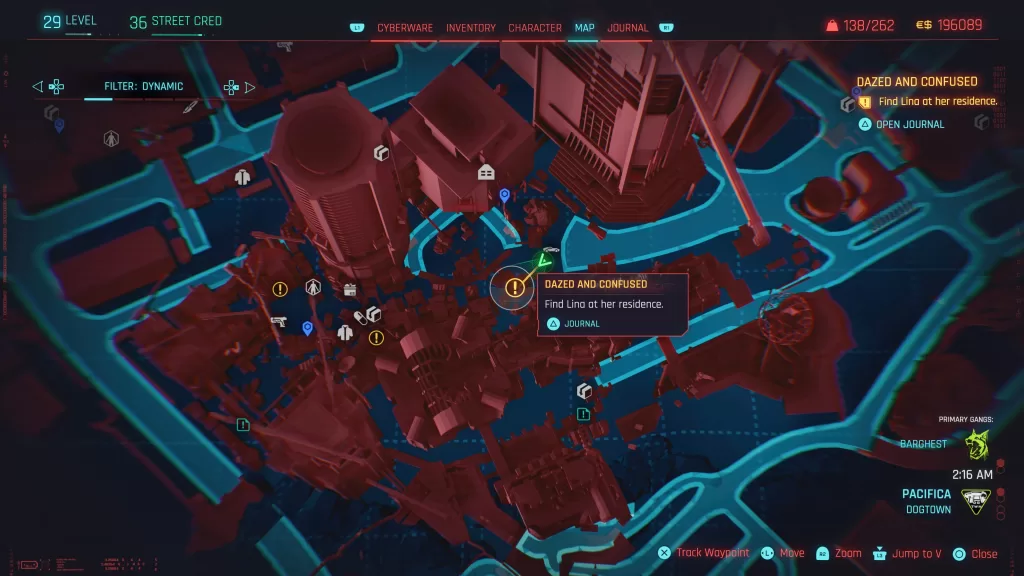
Help Shank
Follow the coordinates Shank gave you to reach Linas’ residence on the west end of Dogtown. At the bottom of the stairs leading up to her flat, you’ll run into some Gagners. Take them out then knock on Lina’s door a couple of times. You’ll then need to sit on the nearby chair waiting for her to show up.
When she arrives and asks you what happened make sure you tell her you found them like this otherwise the job will fail. Try to convince her to do the BD with Tool. She’ll want her money upfront and ask for 10,000 credits. If your V has a Corpo background, you’ll get an option that will convince her to do the BD without transferring her credits. After she heads off to do her makeup and such, message Shank to tell him it’s on. V will then need to wait about a day or so for Shank’s message.
After you receive Shank’s message, head back to Brainporium and observe the BD shoot. When the pair get down arguing, sit down in the director’s chair to take charge of the shoot. You’ll then get a couple of options: Convince him he’s her sister, convince him he’s a clone or have her read the letter of the script. If you choose the first option, Lina will dig it and agree to come back. The second option will see her walk leave and not come back. The last option is only present if you scanned the letter earlier. Sending her that will snap Tool out of it and bring him back to his old self. Whatever option you choose, the side job will be completed.
Go Your Own Way
Obtained: Hands will contact you saying Hasan is trying to reach you after meeting Mr Hands in person
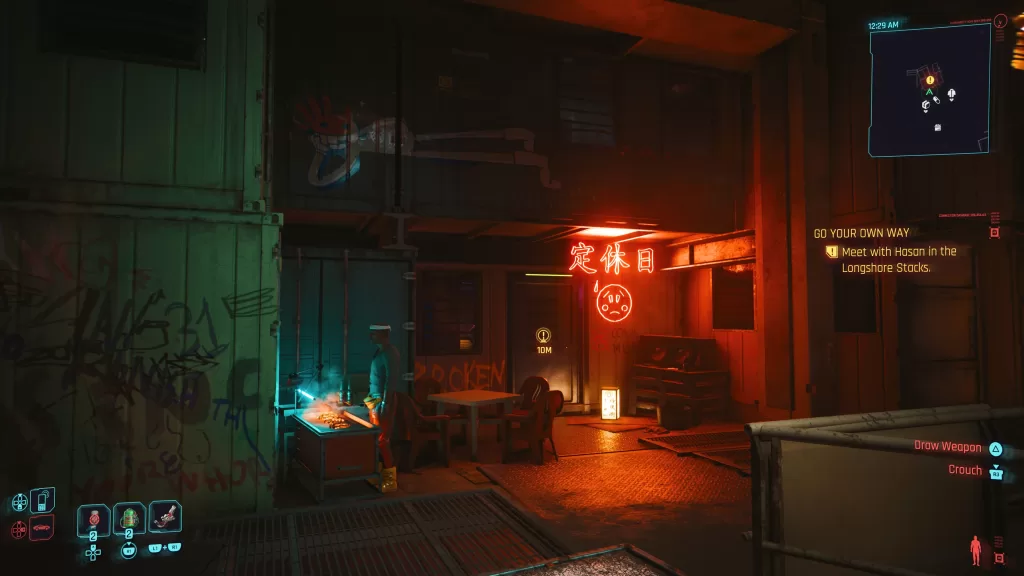
Objective: Meet with Hasan in the Longshore Stacks
Follow the coordinates that Hands gave you to the west part of Dogtown near the Longshore Stacks. Head into the building to find Hasan. This will start a conversation between him and V where Hasan will thank V for healing him and give them an iconic tech pistol completing the quest.
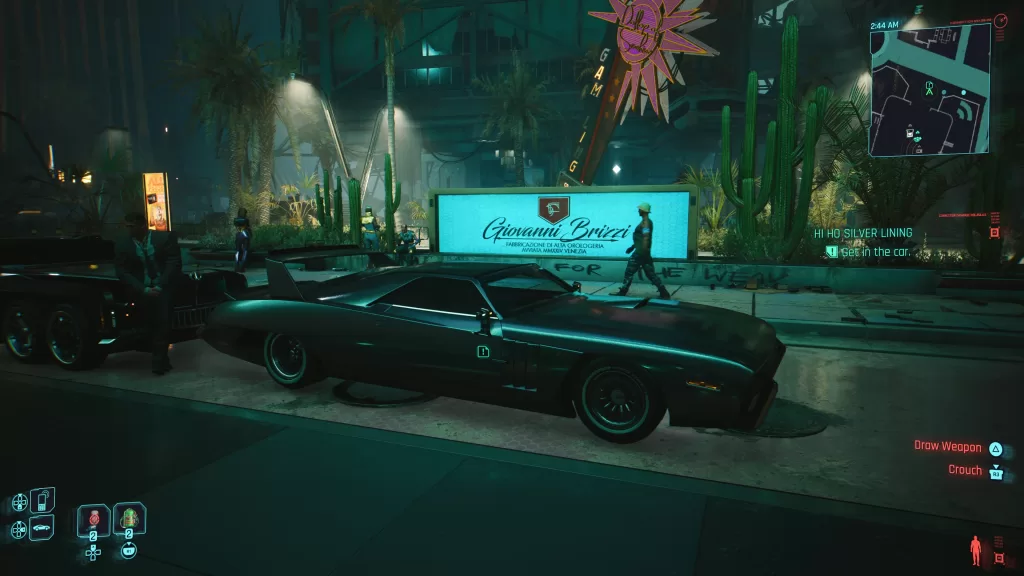
Hi Ho Silver Lining
Obtained: You’ll receive this job after completing all of the gigs for Mr. Hands
Objective: Me with Mr. Hands
Travel to the Heavy Heart then use the elevator to reach Mr. Hands’ private room. Go inside and speak with the man. After the conversation, leave Heavy Hearts to claim your “Sliver Slippers”! Hop in the car to complete the job!
Follow the objective to an old parking garage southeast of the Kress Street fast travel point. Head inside and scan the dumpster. Move to the side of it and use the force option to move it. This will reveal a grate underneath with the stash. Open the grate and loot the stash to complete the side job.
Moving Heat
Obtained: Ashlay will message V after completing the Phantom Liberty story (and possibly all of the gigs and side jobs)
Objective: Go to the Elevator at the coordinates Ashlay provided
Follow the objective to reach the elevator in the stadium. When you get there, wait for Ashlay to get her pizza then you’ll be able to enter the elevator. When you reach the storage area, sneak through stealthily taking out the enemies as you go. Open the door on the other side to reach the garage.
You need to hop in the garage and ride it to the car. If you don’t and walk back there taking out enemies along the way, the quest will bug and you’ll be unable to complete it.
Once in the garage, you’ll need to be quick. A truck will pull in and you need to hop in the back of it without being caught by the guards. Ride in the back of the truck until it stops. It will bring you to the car you need to steal. Hop in then respond to Ashlay’s text and wipe the datalogs. All that’s left now is to drive the car out. One guard will raise the gate blocking your way then another will scan the card. After that, once you exit the garage the job will be completed and you’ll get a sweet new car.
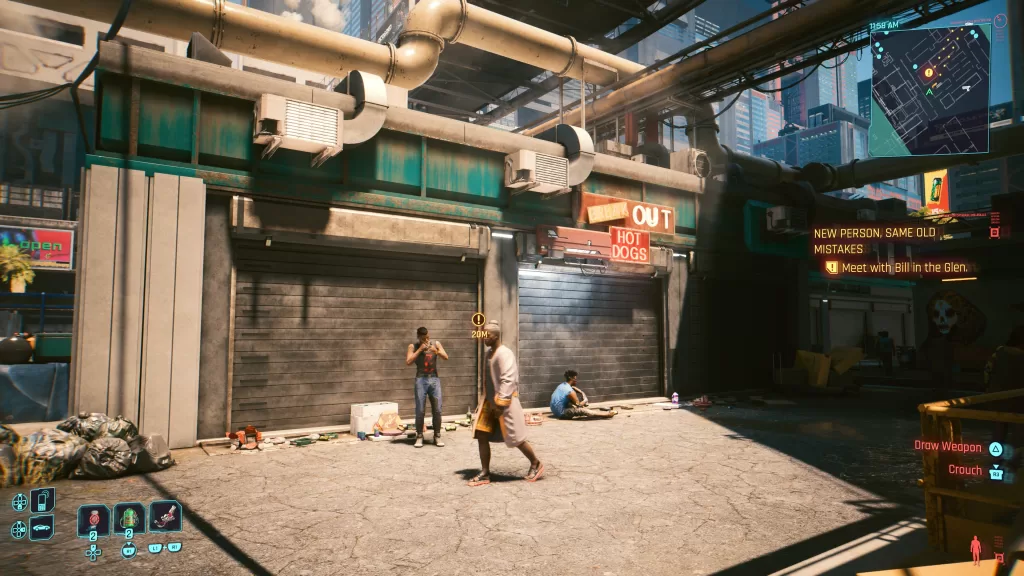
New Person, Same Old Mistakes
Obtained: Bill will text V sometime after completing the Waiting For Dodger gig inviting V to his new business.
Objective: Meet with Bill in the Glen
Follow the objective marker to The Glen in Heywood to reach Bill’s new business. Once there, head inside and speak with Bill. He’ll mention that he left the force and will thank you for all the help you’ve given him. He’ll offer you some Eddies. You can choose to either take them or refuse. After you’ve made your choice, you’ll be able to purchase hawt dogs! Once you leave the shop, the quest will complete.
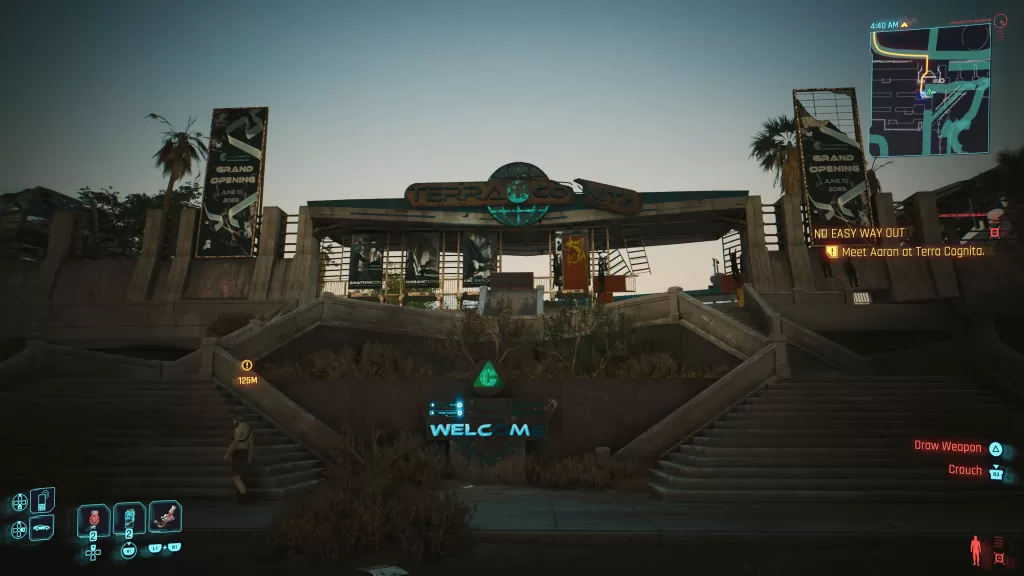
No Way Out
Obtained: Coach Fred will send you a text about a friend of his that needs some help. For us, this happened while on the Lucretia My Reflection main mission waiting for Reed’s call.
Objective: Find Aaron
Head to Dogtown and make your way to the center of the area to find Aaron in the middle of a fight under the Brainporium sign. Speak with the Bookie where you’ll be able to place a bet if you want (we bet on Aaron and he won). After Aaron exits the ring, head over and speak with him to get the details on the job. Afterward, travel to Terra Cognito (southwestern part of Dogtown) to meet Aaron near Organitopia. You may have to wait on a bench there until he shows up. Follow Aaron then speak with him when prompted.
Head to Damir’s clinic which is guarded by the Animals. Walk through the front door and fight your way up to the top floor where the clinic is. Before you can head inside, you’ll need to defeat all of the Scavengers first. Once that’s done, take Aaron to the clinic door where he’ll convince Damir to do the procedure. Sit in the wheelchair until it’s done. Towards the end, Angie shows up and wants to cut a deal to where Aaron throws the fight. They will cut V in on 10 percent of the winnings. You can agree to the terms. If you’re a CORPO, you can get 20 percent out of it or you can tell her to shove off. If you go that route, telling her no will result in a fight. You can loot the Cheetah iconic power pistol off of her. You can also threaten her which will see her back down. Exit the building after making your choice 9we took her out and grabbed her weapon). You’ll then need to wait for Aaron to reach out after some time passes. When you finally receive the message from him, travel to the Dream Gig Bar in Dogtown to meet up with Aaron. Speak with the Server to ask about Aaron then head to the nearby alley. This will complete the gig.
One Way Or Another
Obtained: Nele will call V after completing the Roads to Redemption gig for Mr Hands
Objective: Go to the Meeting Point
Follow the objective to reach the super out of the way not a trap meeting point. When V enters the search area, they will receive a text from Nele saying to check the blue shipping container. Once it’s opened a flashback will go off and the job will be completed. V will then be amused by Nele’s old terrorist buddies.
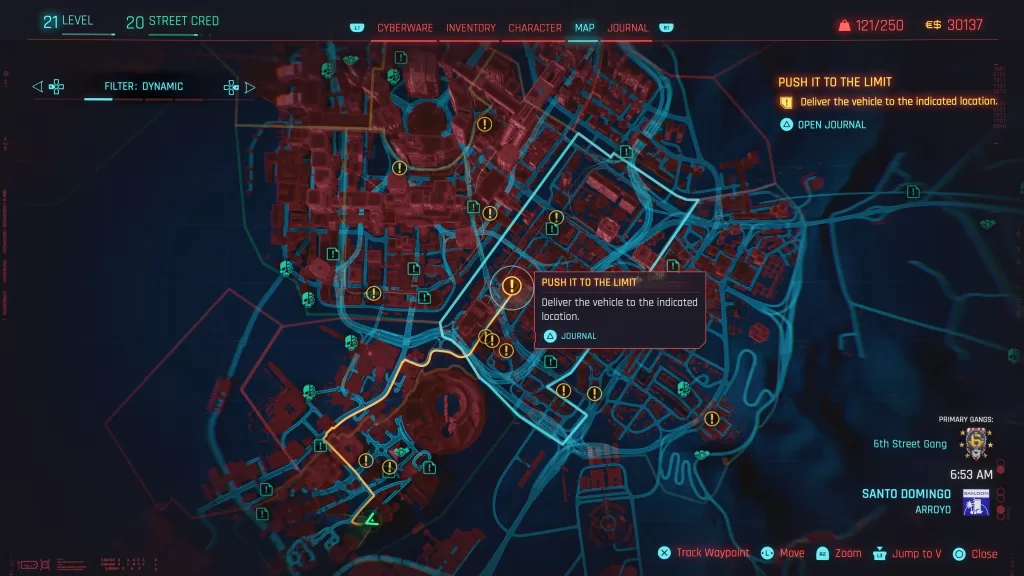
Push It to the Limit
Obtained: Complete the Mysterious Signal gig
Objective: Deliver the Vehicle to the Indication Location
El Capitan will request V to deliver this vehicle to him and then upload some coordinates. You’ll need to follow the GPS to reach the indicated location in Santo Domingo.
A short while after exiting Dogtown, some enemies will show up and start attacking you. You’ll need to lose them or take them out before reaching your destination. When you get there, park the car in the garage then speak with El Captain outside. Afterward, get into his car to go over the details of the work he wants you to do. When it stops raining, exit the car and finish the conversation to complete the job.
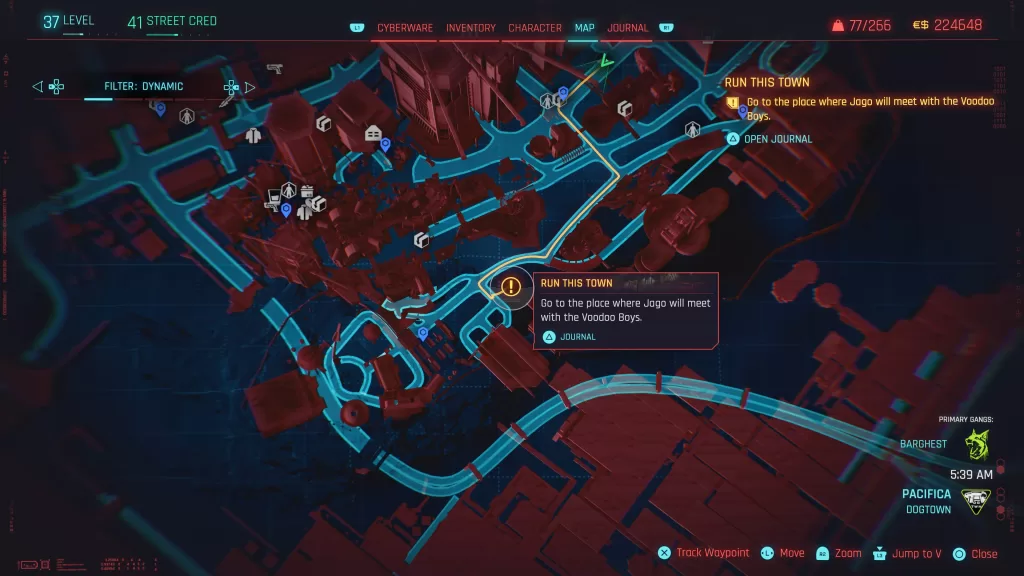
Run This Town
Obtained: You’ll get a call from Mr. Hands after completing the Hi Ho Silver Lining
Objective: Meet with Mr. Hands
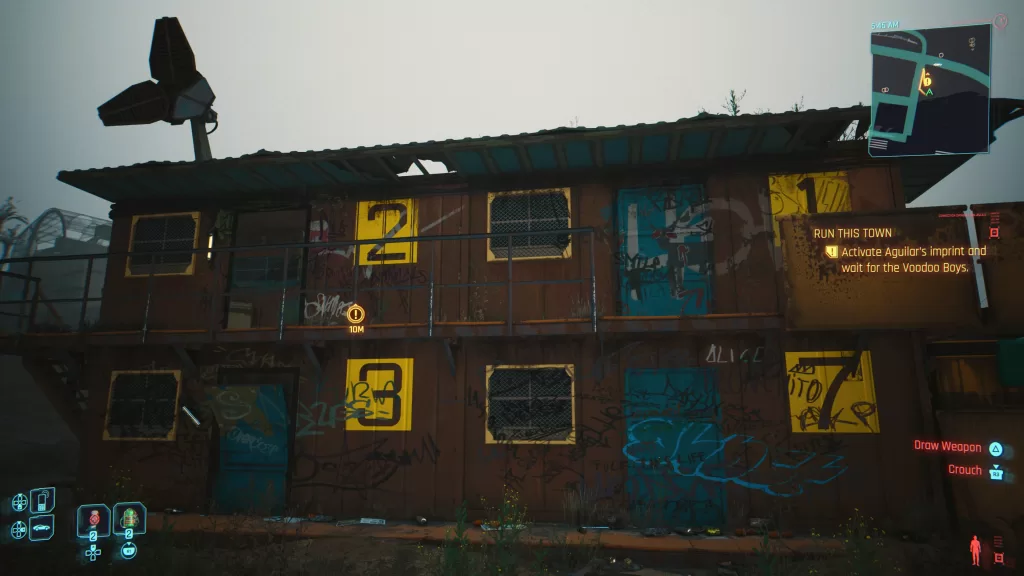
Travel to Heavy Hearts in Dogtown then take the elevator up to Mr. Hands’ private room. Got inside and speak with Hands to get the details of the job. When you’re done, grab the imprint, gun and suit. Equip the suit and interact with the mirror then head out. Your destination is the southern part of Dogtown near the Terra Cognita fast travel point. Enter the building there and interact with the bed to transform.
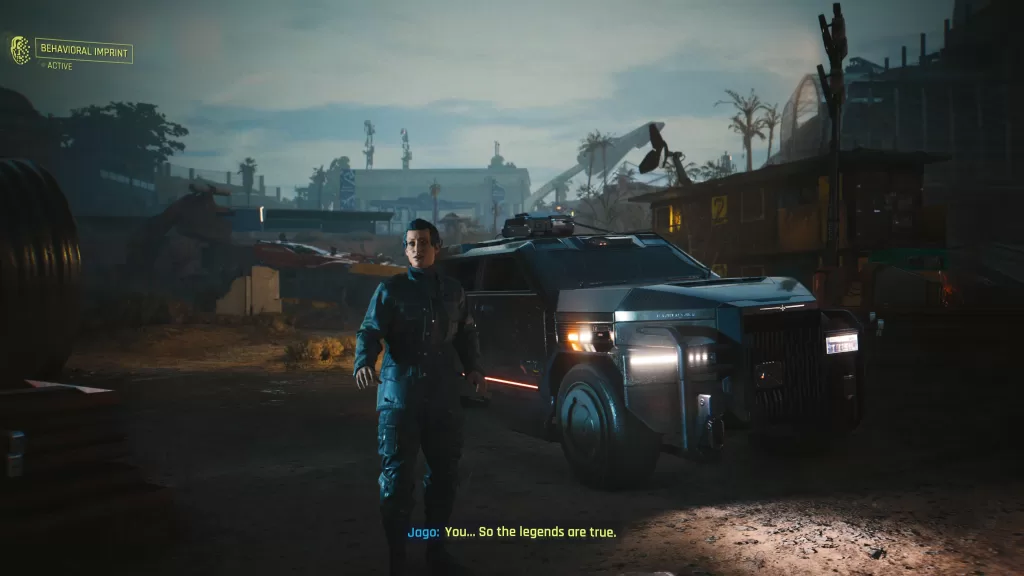
Leave the shack and head over to where the Voodoo boys are. Speak with them then take care of them. Wait for Jago to show up then ask him the question about the cigar. When next prompted, tell him to resume his place in the chain of command and shoot his guard with the option presents itself. Jago will then agree to withdraw and tell you that the other guy is in Arasaka’s pocket.
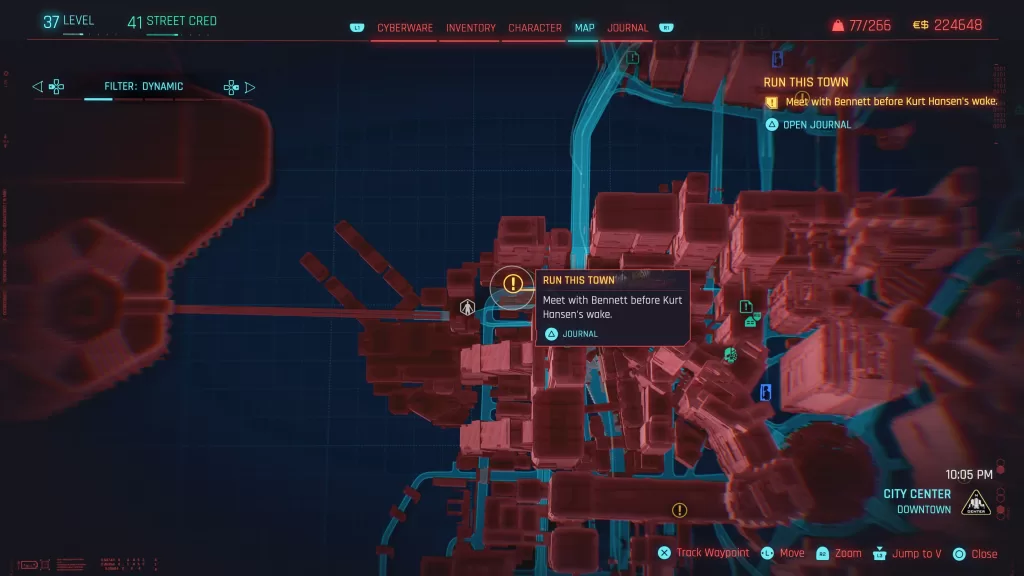
You’ll get an optional objective to go speak with Bennett before calling Hands. You’ll want to do so as it will earn extra appreciation with Hands. Travel to the objective in Downtown City Center and duck in the open garage on the left. Interact with the tire to become Aguilar. This will trigger Bennett’s car to pull up soon after. Take care of the driver and stash him in the nearby dumpster then get in the car. After Bennett enters, you’ll want to tell him to not side with Arasaka and to work with Jago. When you’re done, head back to the garage to become V once more then call Hands. Inform him of what happened then tell him about Bennett if he asks about anything else to report.
Head back to Dogtown then make your way to the Black Sapphire. Go under the scaffolding to turn back into Aguliar and enter the building. Head to the room where the wake is and speak with Jago. Follow him to Bennett then interact with the casket to decide the fate of Dogtown by making Bennett the new ruler. Exit the hotel (make sure to loot the suitcases by the exit) then return to the scaffolding to become V. Call Hands to complete the job.
Shot By Both Sides
Obtained: Mr Hands will call you about this side job after you’ve met him in person during the Phantom Libery main quest
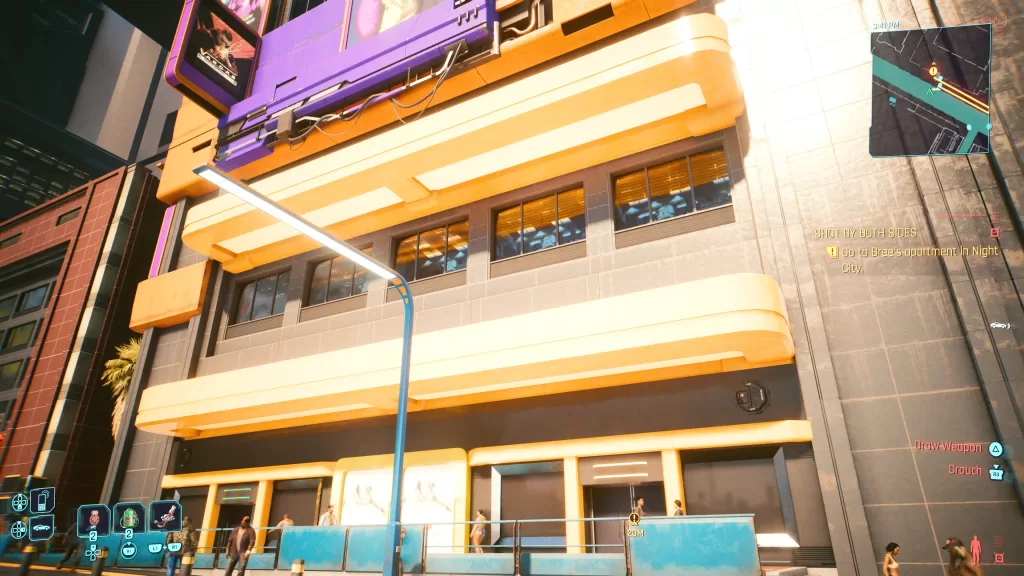
Objective: Go to Bree’s apartment in Night City
Follow the objective marker to reach Bree’s apartment in Heywood – Wellsprings. Head inside and take the elevator up to level 5. Go down the hallway and enter the last door on the right (you’ll need to force or technical ability to open it).
Listed below are some of the optional things you can examine in the room. To proceed with the objective, head into the bedroom and scan the bamboo plant to the left of the desk. Take the access card you find there then text Hands.
Shard on the bookshelf next to the Silverhand album
Shard on the nightstand next to the bed in the bedroom
PC in the bedroom
Shard on the counter in the kitchen
Exit the room to be greeted by one of Bree’s neighbors. Speak with them leave the building and follow the objective marker to Dogtown near the Kress Street fast travel point along the west side. Make sure it’s nighttime then enter the elevator and take it to the lower level. You’ll want to head for the track with the stalled train car on it. Bree can be found just past it in a small room. You’ll need to crouch to walk through some rubble to reach her.
Hand over the card then follow behind her. Enter the building first and scan the two turrets hanging on the ceiling. Continue following her to the next hallway where you’ll need to destroy 2 turrets and 2 trip mines. The room after that has 3 turrets and a handful of trip mines. When that’s taken care of, follow Bree to reach the mainframe. When prompted, interact with the monitor and watch all three videos. After watching the videos, leave the room to be joined by Dante who is after Bree. You’ll be able to let him deal with her or defend Bree. As this was a job for hands, we took out Dante (and looted his iconic weapon). Leave the laboratory to complete the job.
If you side with Bree, she will sell the data and disappear. Militech will hire hitmen in response that will go after anyone who was part of it including V.
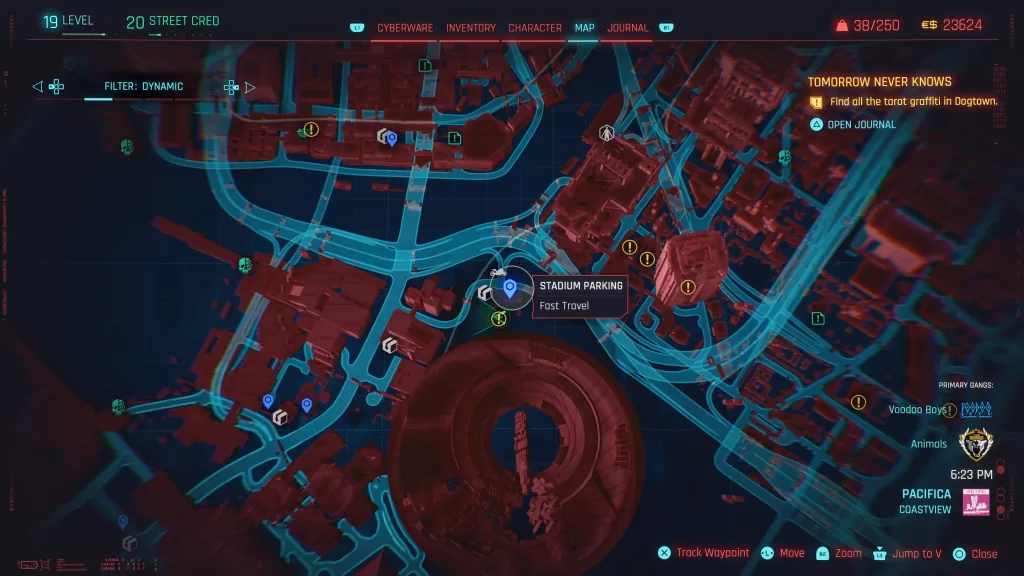
Tomorrow Never Knows
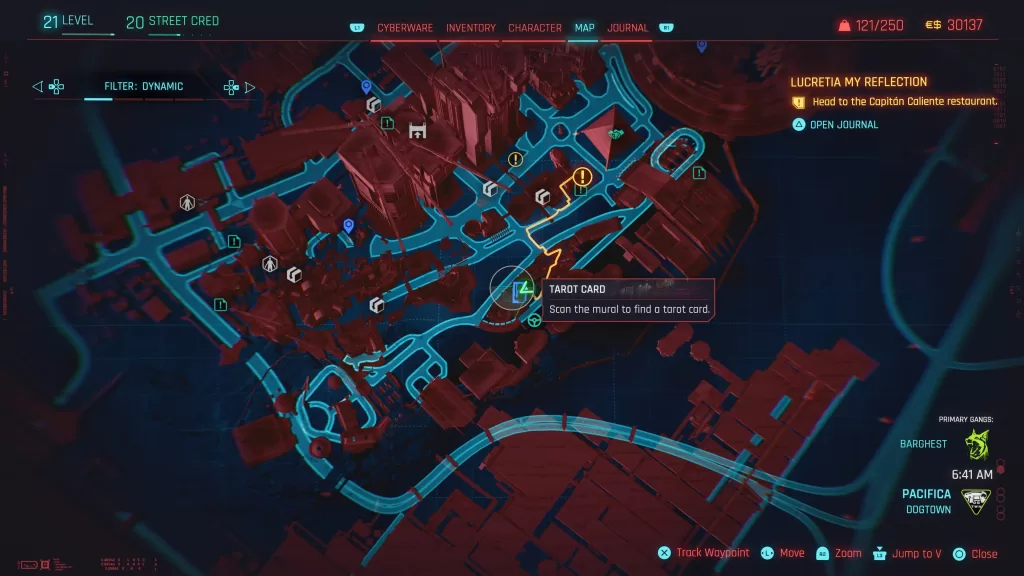
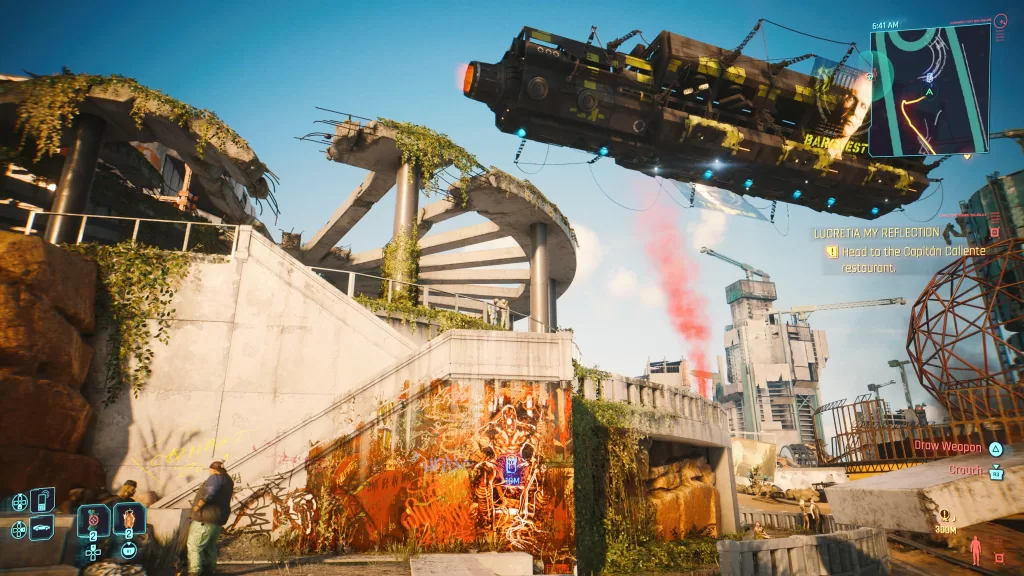
Obtained: Scan any of the Tarot Graffiti in Dogtown
For the Tomorrow Never Knows job, you’ll need to find and scan all 4 of the Tarot Graffiti scattered around Dogtown. You can find their exact locations by checking out our guide specific to this quest here.
Welcome to our Cyberpunk 2077 Phantom Liberty guide for the Tomorrow Never Knows job. In this guide, we’ll cover where you can find all 4 Tarot Graffiti to complete the gig.
Starting Tomorrow Never Knows
You’ll start this gig automatically after finding your first Tarot Graffiti in the new DLC area.
To complete this job, you’ll need to find and scan all four of the Tarot Graffiti. Once that’s done, head to Misty’s shop and speak with her asking about a weird image. You’ll then be able to ask her about each of the cards you’ve seen. Once you’re done, the job will completed.
The first time I did this, the quest didn’t complete. I had to exit her store and then go back in which reset her and I was able to complete it the second time.
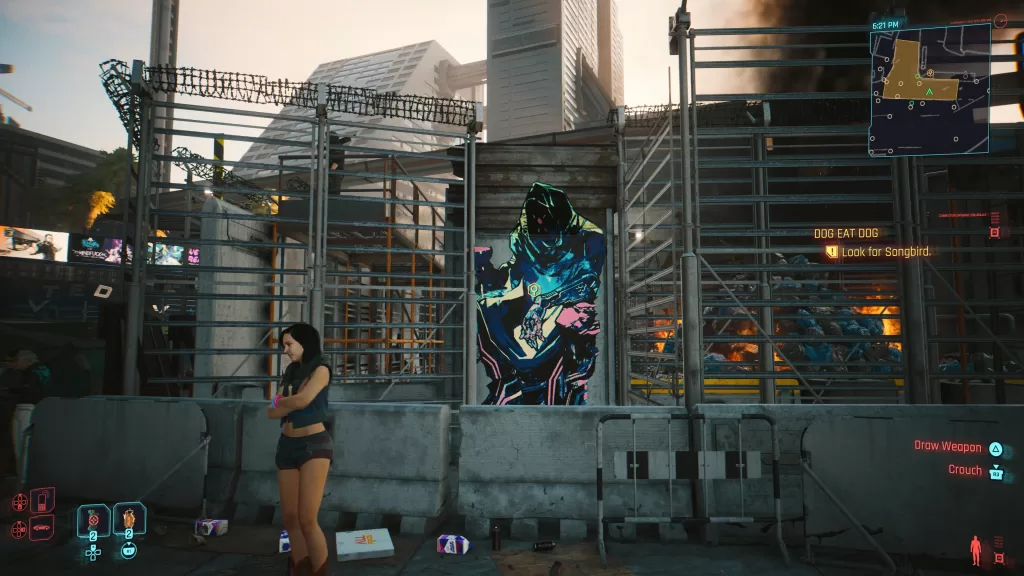
King of Cups
The King of Cups tarot graffiti can be found on the side of a makeshift metal barricade/fence along the path leading to the Dogtown border south near the Stadium Parking fast travel point in Pacifica.
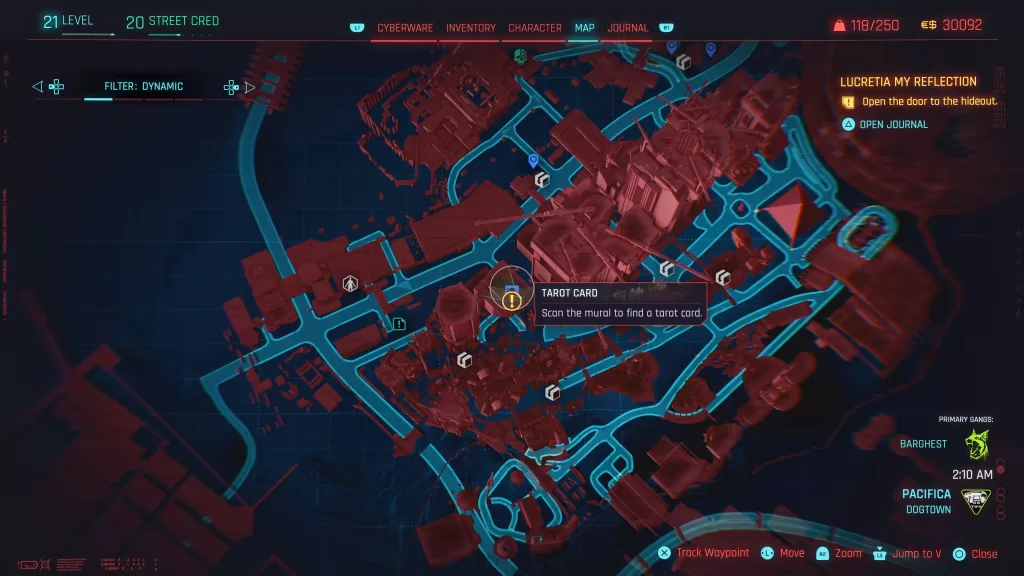
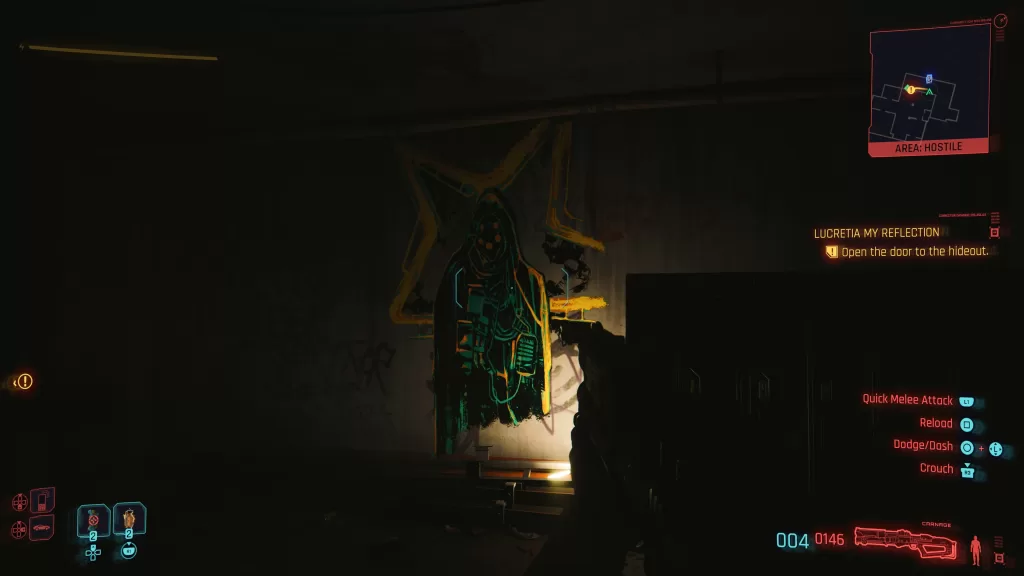
King of Pentacles
The King of Pentacles can be found plastered on a wall along the 8th floor hallway of the building near the Kress Street fast travel point. You’ll come there during the Lucretia My Reflection job and use a room there as the base of operations.
King of Wands
The King of Wands can be found in the southcentral part of Dogtown painted on a wall near the basketball court.
King of Swords
The King of Swords can be found on the next to the side door of the Moth bar. When facing the building, head through the alley to its right past all the crates sticking to the left.
Welcome to our walkthrough for the Reclaiming the Past Starfield mission! This guide will walk you through starting the mission and detail the necessary steps for its completion. If you need help with a specific mission objective, check the quick links section to easily find the most relevant information for you.
PLEASE NOTE: Some of the planets referenced in our guides and walkthroughs may not match up with yours due to how Starfield was created. In these situations, what you do and the places you visit on those planets should still be the same.
Reclaiming the Past is one of the missions you can pick up at The Key. To start this mission, speak with Bog in the Last Nova bar.
Reclaiming the Past Walkthrough
Retrieve Maddie’s Ring
For the Reclaiming the Past Starfield mission, you’ll first need to travel to the Deserted Ecliptic Garrison on Porrima V-c, a moon of Porrima V in the Porrima System. Once you land, take out all the enemies as you work your way to the highest room of the base. In this room, you’ll find a Military Crate. Make sure to loot not only Maddie’s Ring but the Message for Bog (Evidence) as well!
Return to Bog
Make your way back to The Key and hand the ring over to Bog to complete the Reclaiming the Past Starfield mission.
Additional Starfield Guides and Walkthroughs
Be sure to check our main Starfield Guides and Walkthroughs page for additional content on Starfield, such as additional guides to assist you during your adventures in the Settled Systems!
Welcome to our guide on the Starfield Breaking the Bank mission! This guide will walk you through starting the mission and detail the necessary steps for its completion. If you need help with a specific mission objective, check the quick links section to easily find the most relevant information for you.
PLEASE NOTE: Some of the planets referenced in our guides and walkthroughs may not match up with yours due to how Starfield was created. In these situations, what you do and the places you visit on those planets should still be the same.
Breaking the Bank is one of the faction missions for the Crimson Fleet. You’ll start it automatically after completing the Echoes of the Past mission.
Breaking the Bank Walkthrough
Travel to the Siren of the Stars
For the Starfield Breaking the Bank mission, you’ll first need to travel to the Olympus System and then head to the ship orbiting Aranae IV. Dock at and board the Siren.
Speak with Evgeny Rokov
Follow along the hallway and head up the stairs to find Evgeny. Approach him to begin a conversation where you’ll get more information about the score. He’ll ask about the job and if you were asked to do anything else (like steal the award). We choose not to, but it’s your call. To play ball, Evgeny will then say as payment he wants back into the Crimson Fleet. You can use the Crimson Fleet choice or say you’ll put in a good word with the boss.
Obtain the ES Award
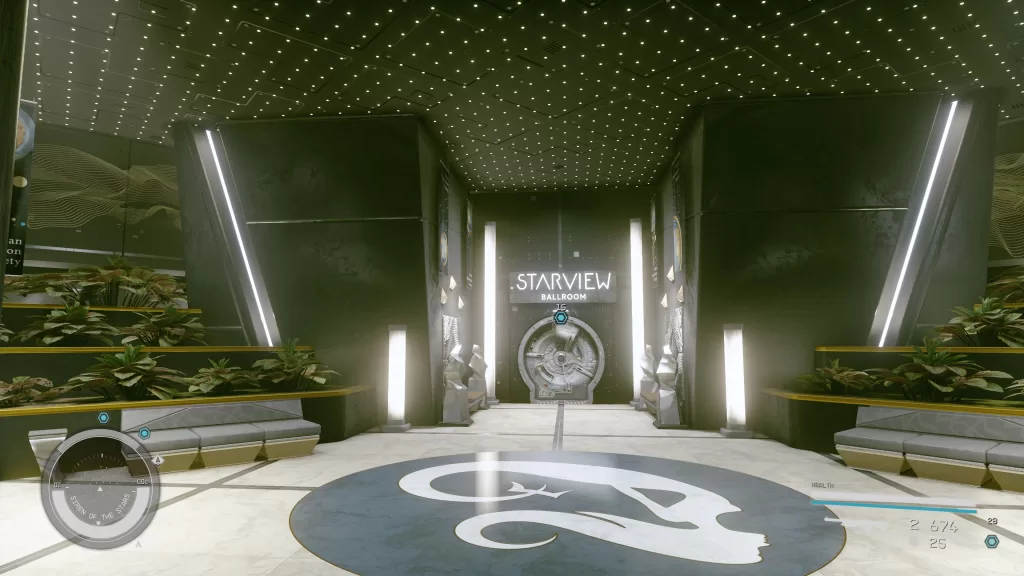
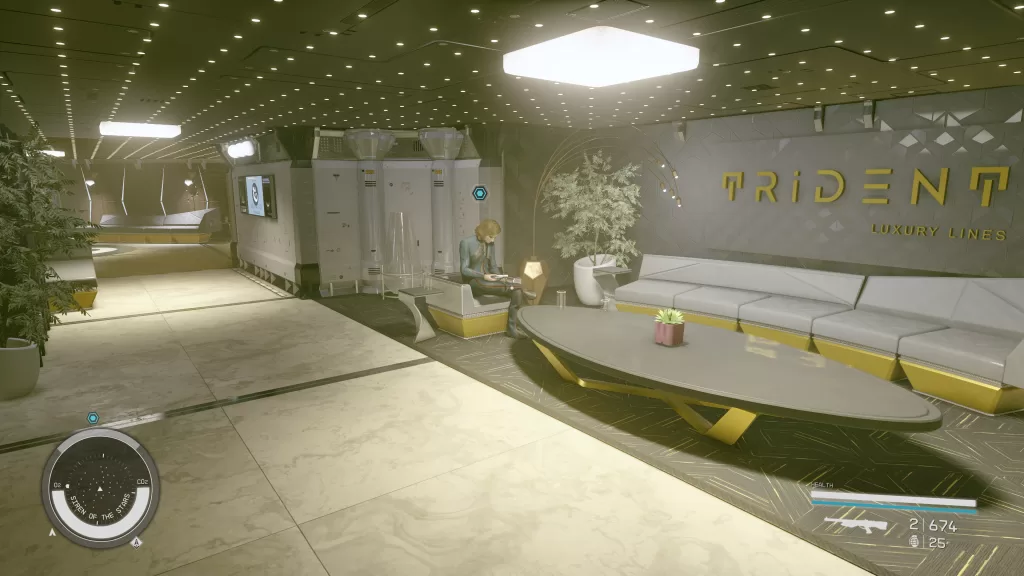
Make your way to the upper levels of the ship and enter the Starview Ballroom.
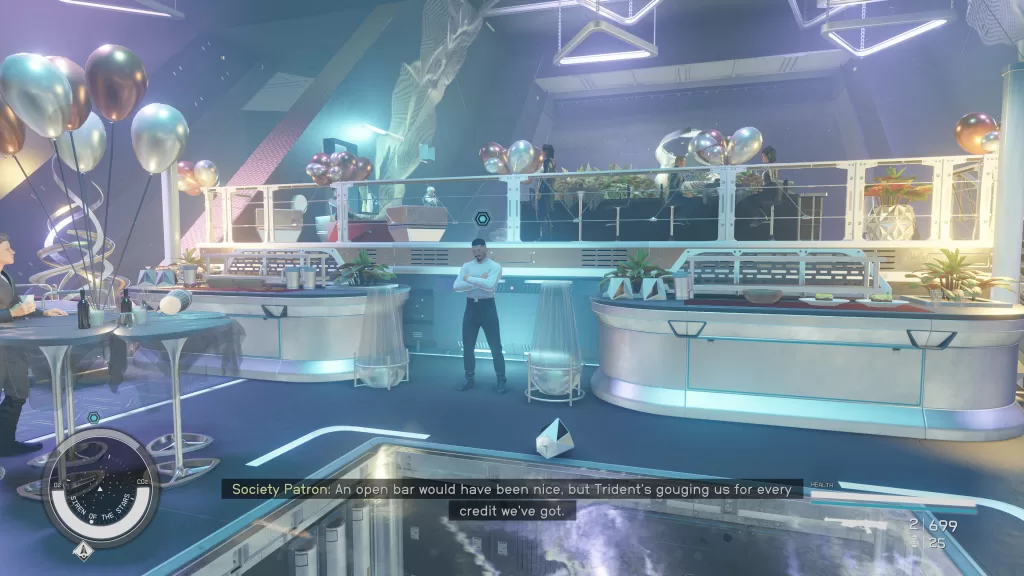
Head down to the lower level and speak with the Society Patrons exhausting their dialog options. Eventually one of them will tell you that Sheila is the chairman this year and is in charge of handing out the award. After learning this, head back up to the top level of the ballroom to find her standing near the entrance. Talk with her asking about the award to learn that it’s locked away safely in the Purser’s Safe. Exit the ballroom then head north down the stairs and take the path going right at the desk.
The next door on the right should be the Purser which you’ll want to enter (it says restricted, but you can go in). Speak with Chief Purser Murata in there asking about the award. After she tells you about the ES Award Claim ID, you’ll be able to ask her what her opinion about the captain is. If you pass a persuasion check, you’ll learn about a slate in his quarters linking him to the Crimson Fleet. See Burden of Proof Evidence below.
Return to the ballroom and speak with Sheila to ask for her claim ID. You’ll need to persuade her to hand over the ID. Take it back to the Purser and use it on the terminal to the left of the vault to open it. You can then use it to unlock the safe and take the award.
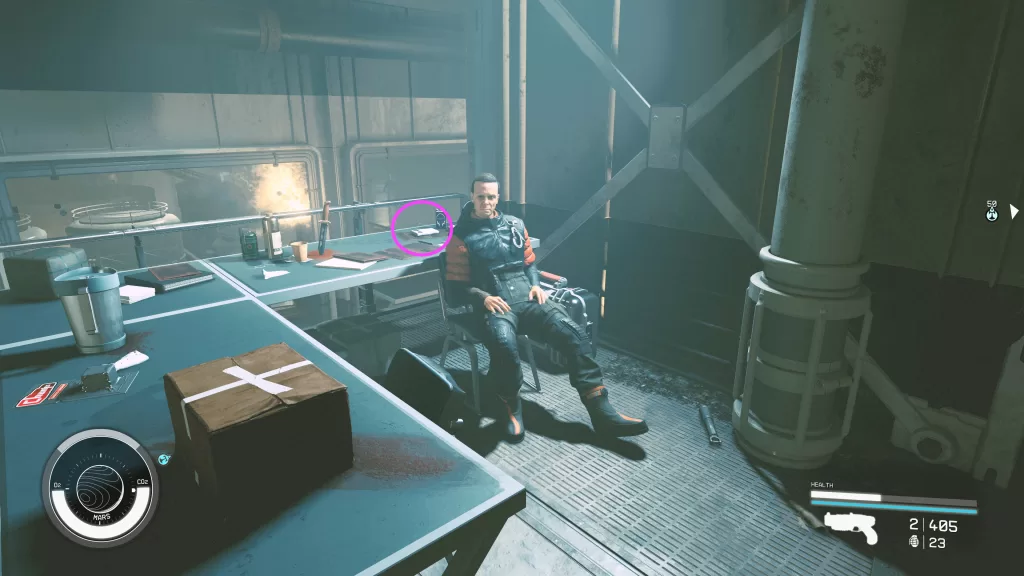
Burden of Proof Evidence
Thanks to Chief Purder Murata, we know that there is some evidence for the Burden of Proof faction mission in the Captain’s Quarters. You can find it at the lower levels of the ship, to the right of the door leading to the ship’s cockpit. Once you’re in the Captain’s Quarters, head to the bedroom and look at the self to the left of the bed. You’ll find the Request Denied (Evidence) there. Make sure to grab it.
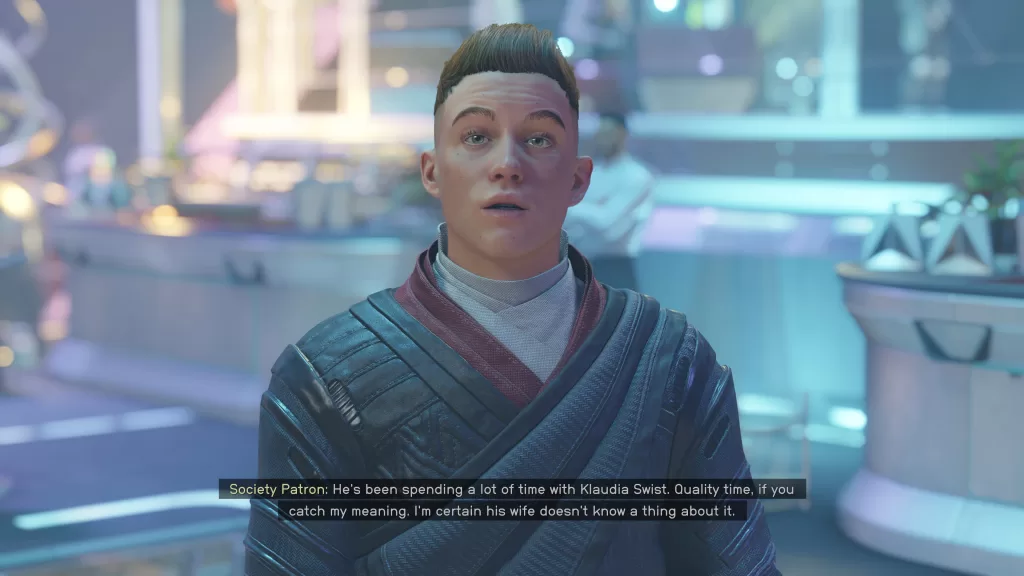
Ask Society Patrons About Larry Dumbrosky
As you explore the ship, you’ll need to speak with the Society Patrons in the ballroom and ask them about Larry. Eventually one of them will tell you he’s been spending a lot of time with Klaudia Swist.
Leave the ballroom and head to the Guest Suites. Go forward down the stairs then take a left at the desk. When you reach the end of the hallway, turn right to find her.
Speak with Klaudia and tell her you know about the affair. You’ll then need to either persuade or bribe her with 2500 credits to give you some incriminating evidence on Dumbrosky. She’ll then tell you that she has nothing but mentions Gabriel Vera might.
Head back to the ballroom where you’ll find Gabriel by the buffet tables. Speak with him saying that Klaudia sent you. He’ll basically tell you to bugger off and that if you report anything it’s your word against his and he’s part of UC Security. After getting nowhere, head upstairs in the ballroom to find Evgeny and speak with him. He’ll come up with the plan and you’ll have to execute it. Travel to the Engineering Deck which you can reach from the lower level of the ballroom.
Follow the path to reach the Chief Engineer then speak with him, asking for access to life support. In order to gain access, you’ll need to either bribe him with 1000 credits or tell him that the captain will forgive his gambling debt. He’ll then step away giving you time to access his terminal. Go to the Life Support Access folder and use it to open the door leading to the life support system. Head inside and reset all 3 switches to trigger the emergency lockdown.
Confront Gabriel Vera in His Cabin
Make your way to the Guest Suites then go forward down the stairs taking a right at the desk. Follow the hallway looking for room 02 and head inside. Speak with Gabriel to be presented with a couple of options. No matter what option you pick, you’ll either have to pay 2500 credits for the evidence or attack Gabriel and take it off his corpse.
Confront Larry Dumbrosky
With the evidence finally in your hands, head to the upper level of Guest Suites to find Larry’s room. Go inside and speak with the man. He’ll deduce that you are after his credentials and request a trade. You hand over the evidence from Gabriel and he’ll give you the credentials. You can also attack him and take his credentials. Once you have them return to Evgeny in the Guest Services lobby. Speak with the captain then return to your ship.
Proceed to New Atlantis
Set a course for the New Atlantis Commercial District then head to GalBank on the north side of the area. Once there head inside taking the elevator to the Archives. Speak with the guard and show him your credentials. If you have the Bounty Hunter background, then you’ll be able to call out that this is a trap. Head into the Archives and deal with the Ecliptic mercs that ambush you. When they are taken care of, head up to the second level and use the GalBank Archives terminal to view the Lost Ship Registry. You’ll specifically want to check out the Legacy.
Proceed to the Key
Make your way back to your ship then set a course for the Key. Once you’re back, head to the Operations Center and speak with Del to hand over the data you retrieved. After the conversation follow Naeva to Ship Services. When you get there, she’ll ask you straight up if you got the ES Award. You can lie and say you didn’t get it or hand it over and be rewarded with 150 EXP and some credits.
Report Mission Progress on the UC Vigilance
Travel to the UC Vigilance in the Aranae System orbiting the moon Aranae II-a of Aranae II. Board the ship then speak with Commander Ikande to debrief him on your last mission. Once you’re done, the Breaking the Bank mission will be completed and you’ll be rewarded with 350 EXP.
Additional Starfield Guides and Walkthroughs
Be sure to check our main Starfield Guides and Walkthroughs page for additional content on Starfield, such as additional guides to assist you during your adventures in the Settled Systems!
Welcome to NGB and our guide on the Burden of Proof Starfield mission! This guide will walk you through starting the mission and detail the necessary steps for its completion. If you need help with a specific mission objective, check the quick links section to easily find the most relevant information.
PLEASE NOTE: Some planets referenced in our guides and walkthroughs may not match yours due to how Starfield was created. In these situations, what you do and the places you visit on those planets should remain the same.
Burden of Proof is one of the faction missions for the Crimson Fleet. You’ll start this mission automatically during the Deep Cover mission.
Burden of Proof Walkthrough
Return Evidence to Lt. Toft
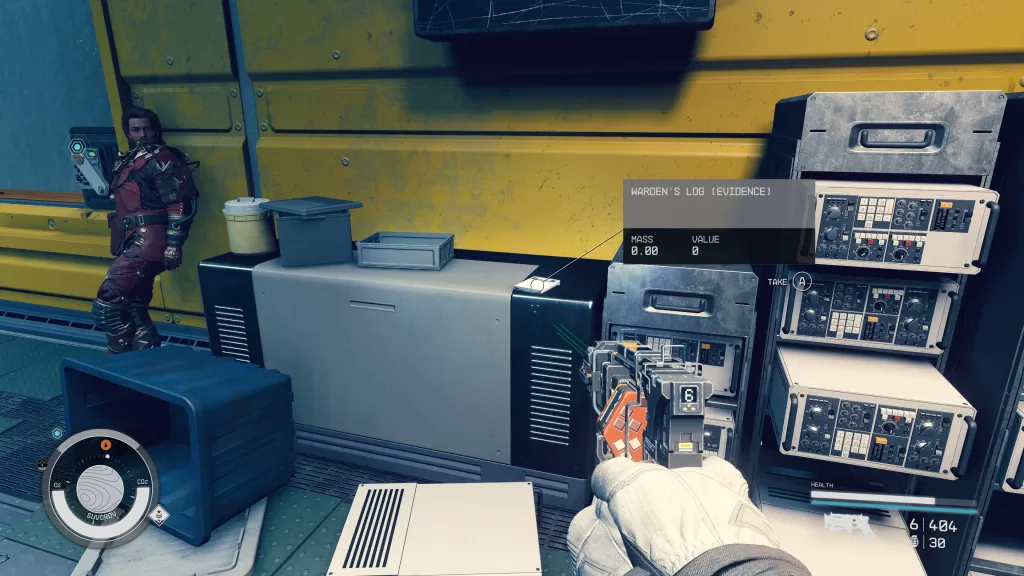
For the Burden of Proof Starfield mission, you’ll be tasked by Lt. Toft to find evidence of the Crimson Fleet’s illegal activities and deliver it to her. The list below shows what evidence she needs and where to find it. Once you’ve found all the evidence, Lt. Toft will tell you of her Crimson Fleet background then give you her legendary Memento Mori (pistol). Please note that you’ll still be able to find evidence after you complete this quest and return it to Lt. Toft for some EXP and credits!
Be sure to check our main Starfield Guides and Walkthroughs page for additional content on Starfield, such as additional guides to assist you during your adventures in the Settled Systems!
Search
This site uses cookies. By continuing to use this website, you are giving consent to cookies being used. For more information on cookies, view our Privacy Policy.OkPrivacy Policy