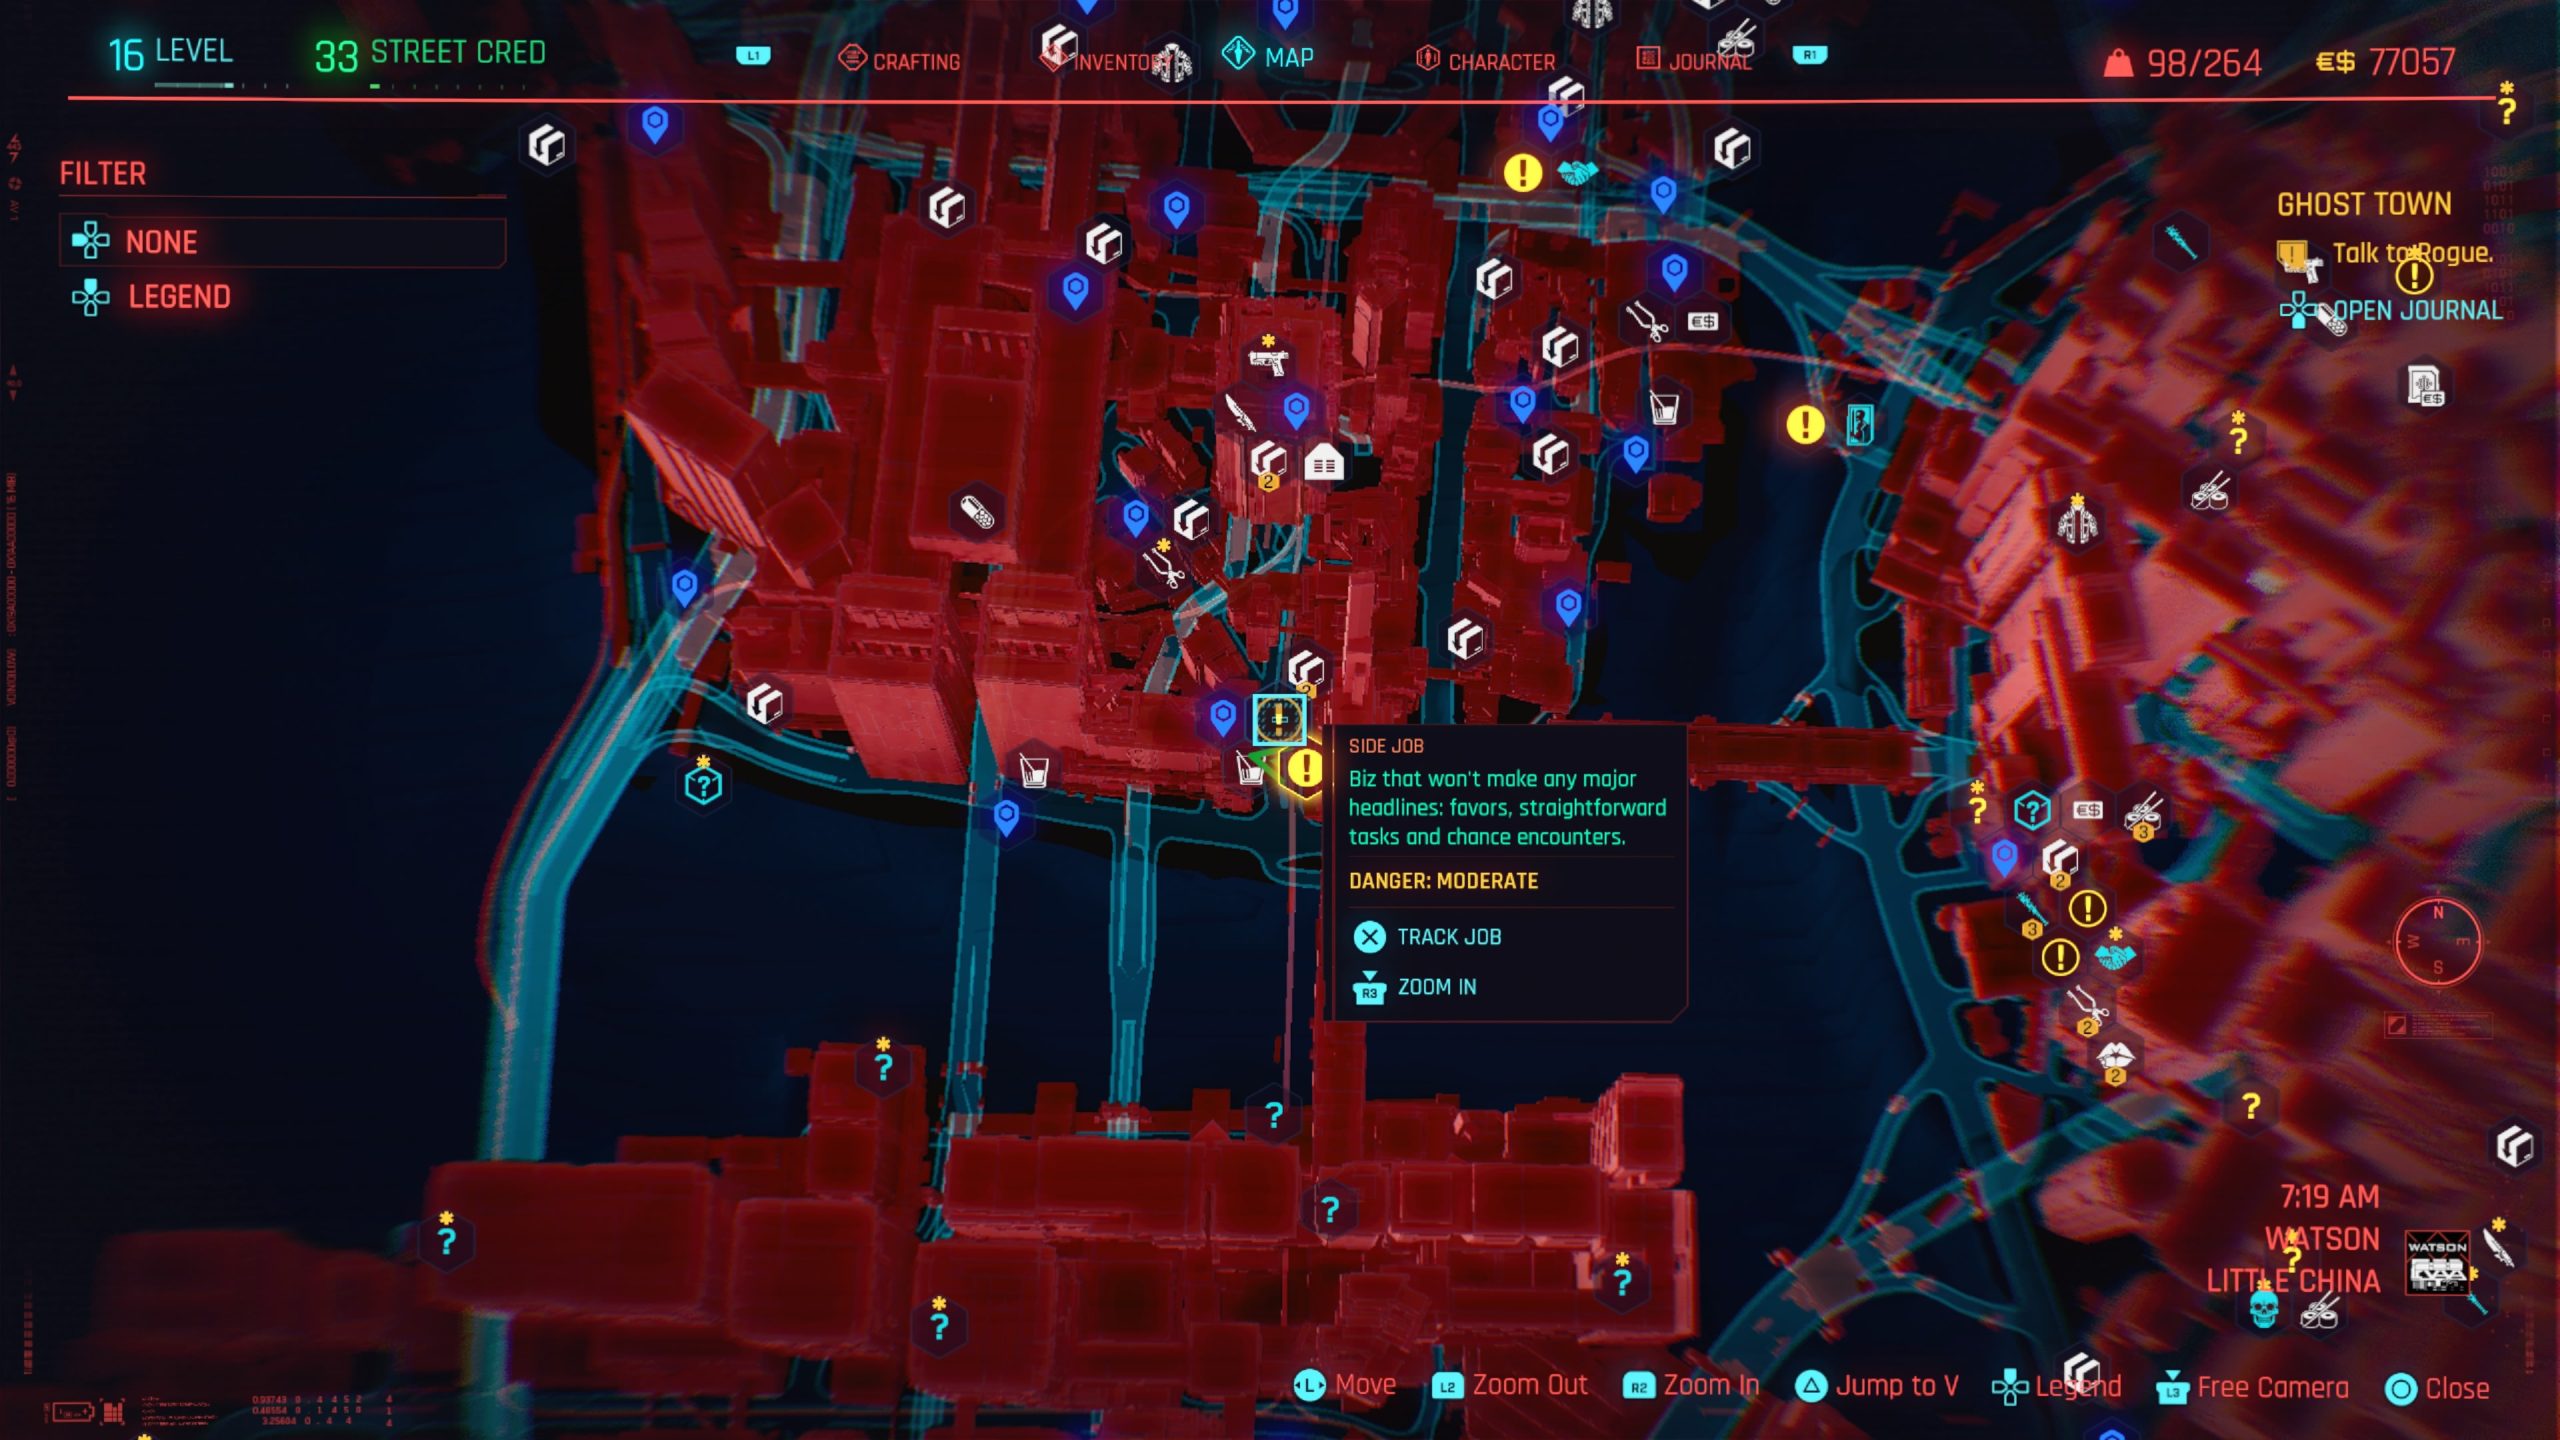
Below are the side jobs that can be found at Watson in Cyberpunk 2077! Please note that the side jobs are listed in alphabetical order for ease of searching.
A Cool Metal Fire
Obtained: During the Chippin’ In side job
Objective: Speak with Rogue about Smasher
This job will automatically complete during the Chippin’ In side job.
A Like Supreme
Obtained: Automatically after finishing the Second Conflict side job in Act III
Objective: Wait for Nancy’s Call
Wait a day for Nancy to call then head to the Red Dirt in Santo Domingo – Arroyo at night. Enter the building and speak with Nancy. When your done, head to the bathroom and take the pills. Head back out to the main room to speak with Kerry to kick off the concert. When the show is over, speak with Kerry and Johnny to complete the job.
Beat on the Brat
Obtained: Speak with Coach Fred on or after the Ripperdoc Main Job
Objective: Defeat the Training Robot
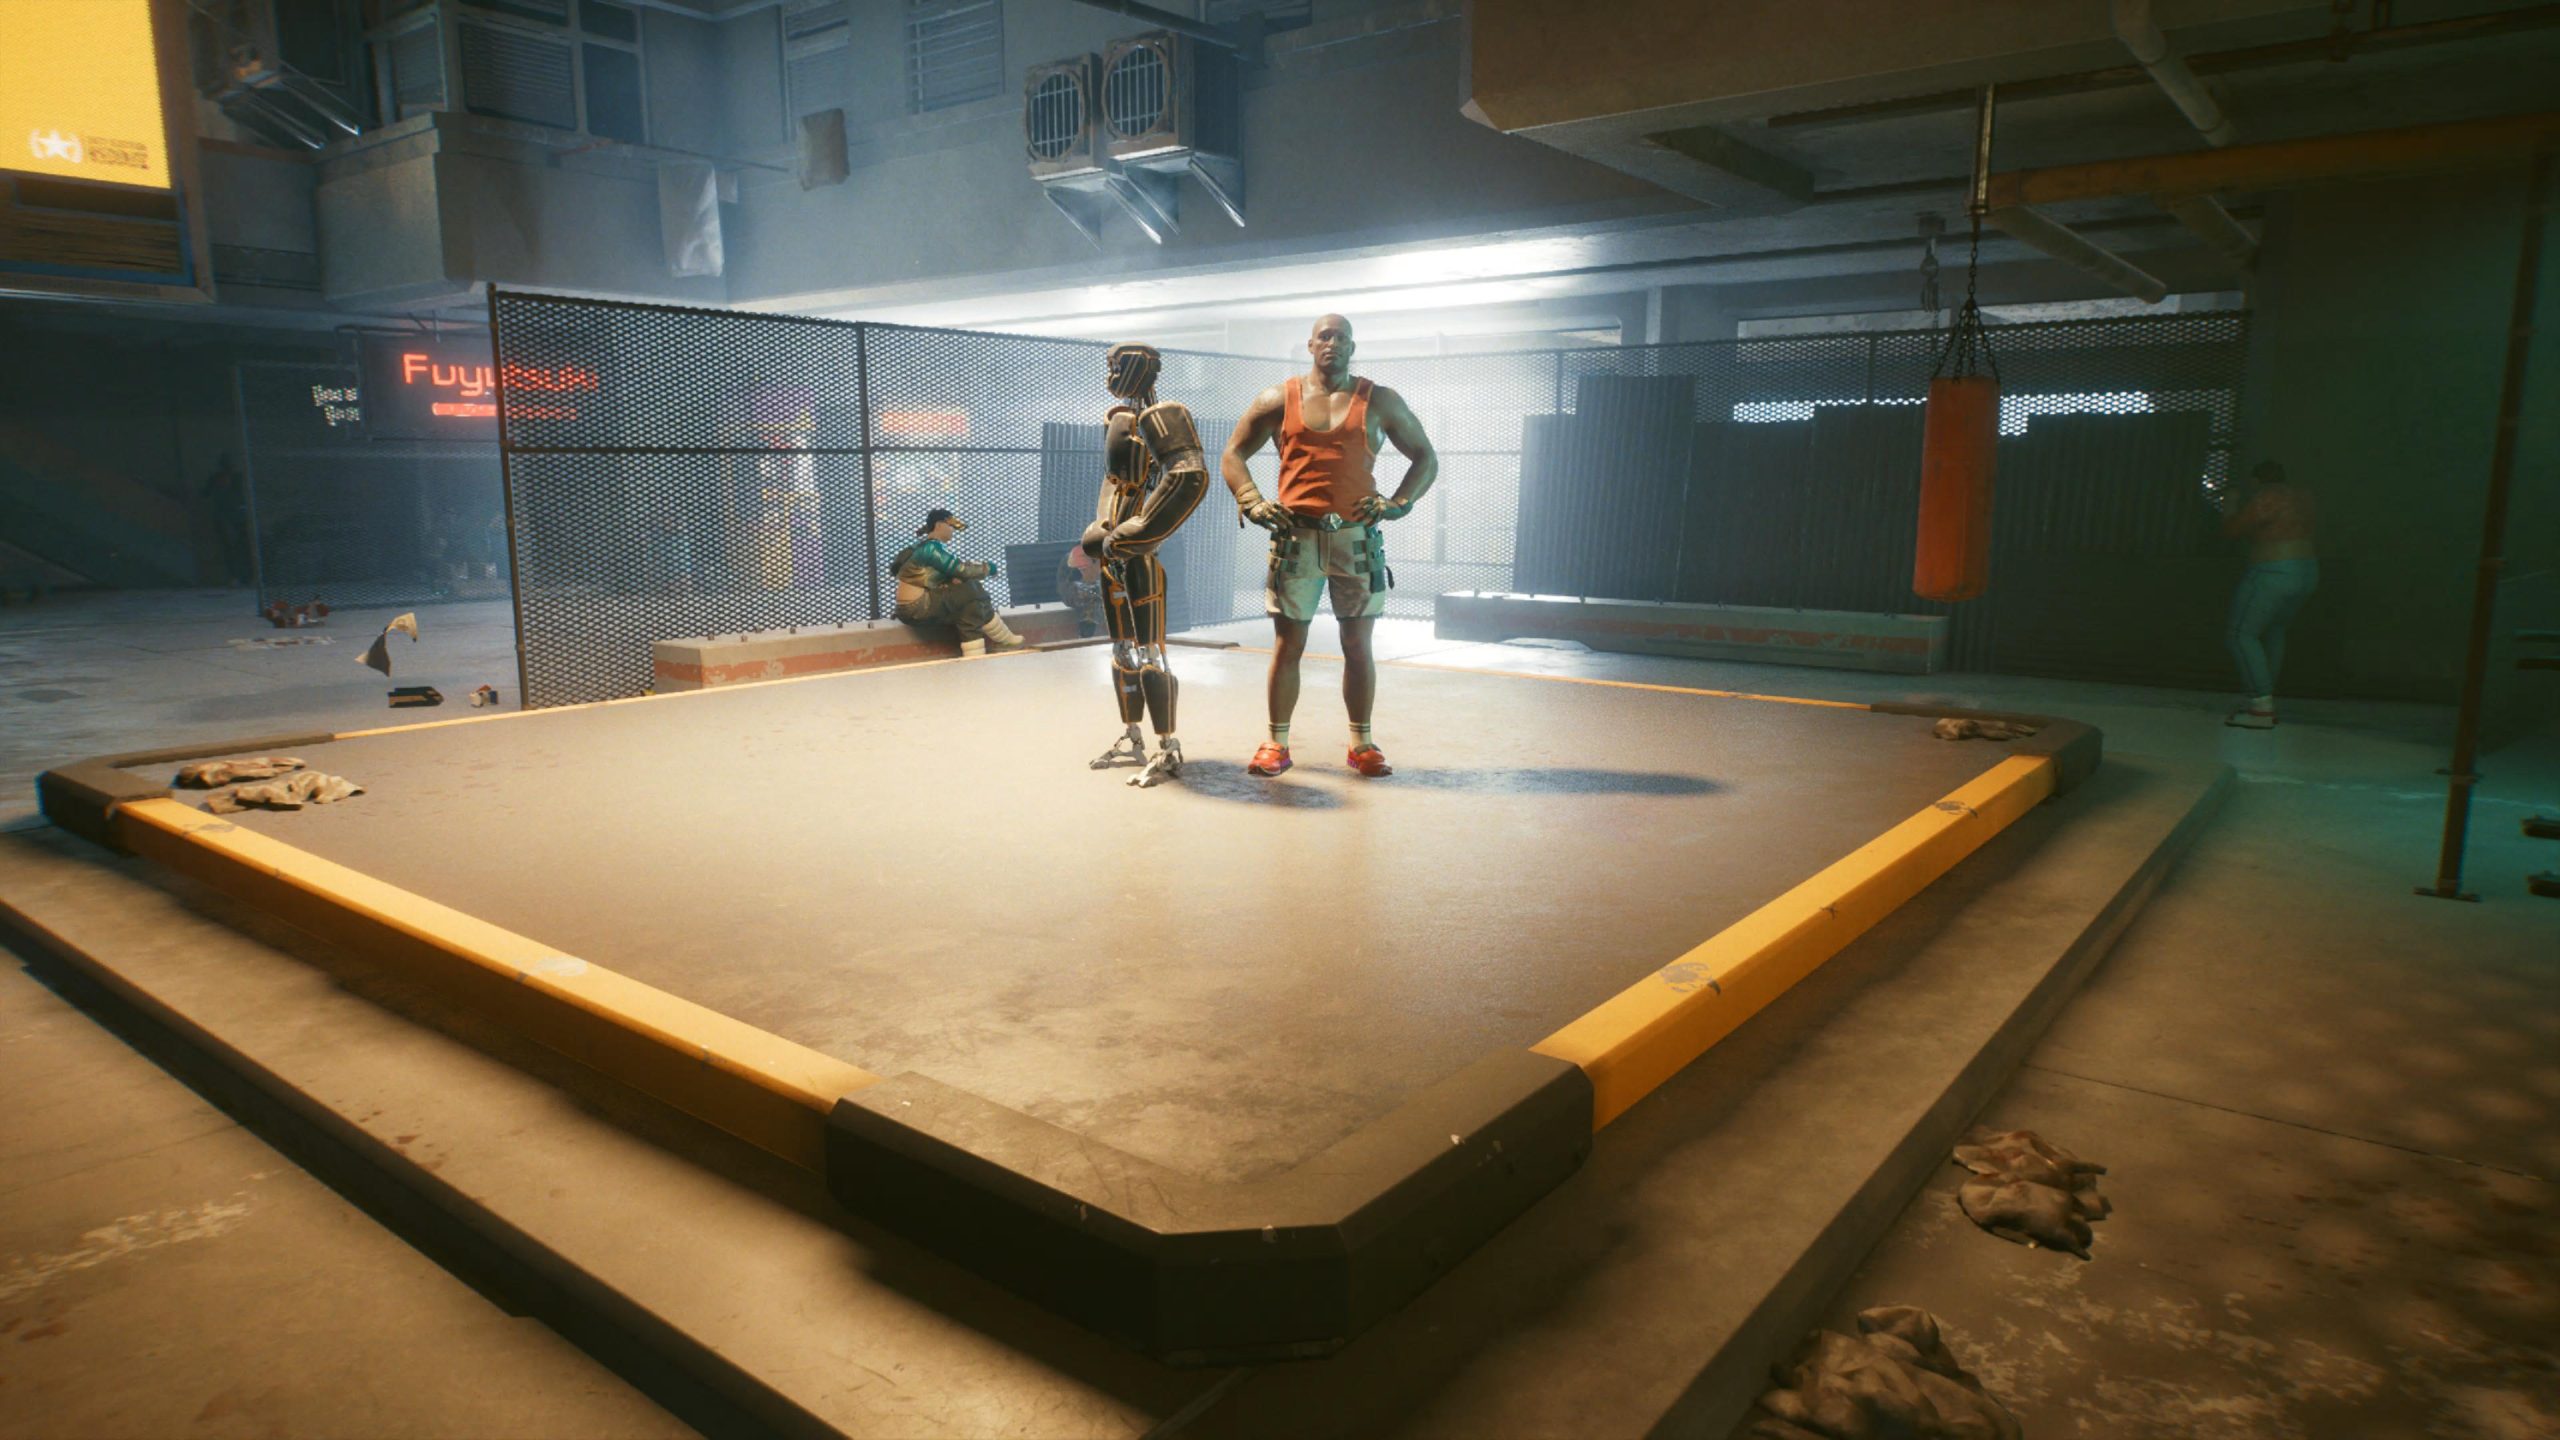
Talk with Coach Fred and agree to fight his training robot. Defeat it in a quick boxing match then speak with Coach Fred again. He will mention V being a sharp fighter and starts talking about setting you up with some fights. If you defeat all four of the opponents around the city, you will qualify to fight in the final round. They will be unlocked as you progress through the story of the game.
Beat on the Brat: Kabuki
Obtained: Automatically after picking up Beat on the Brat
Objective: Defeat the twins
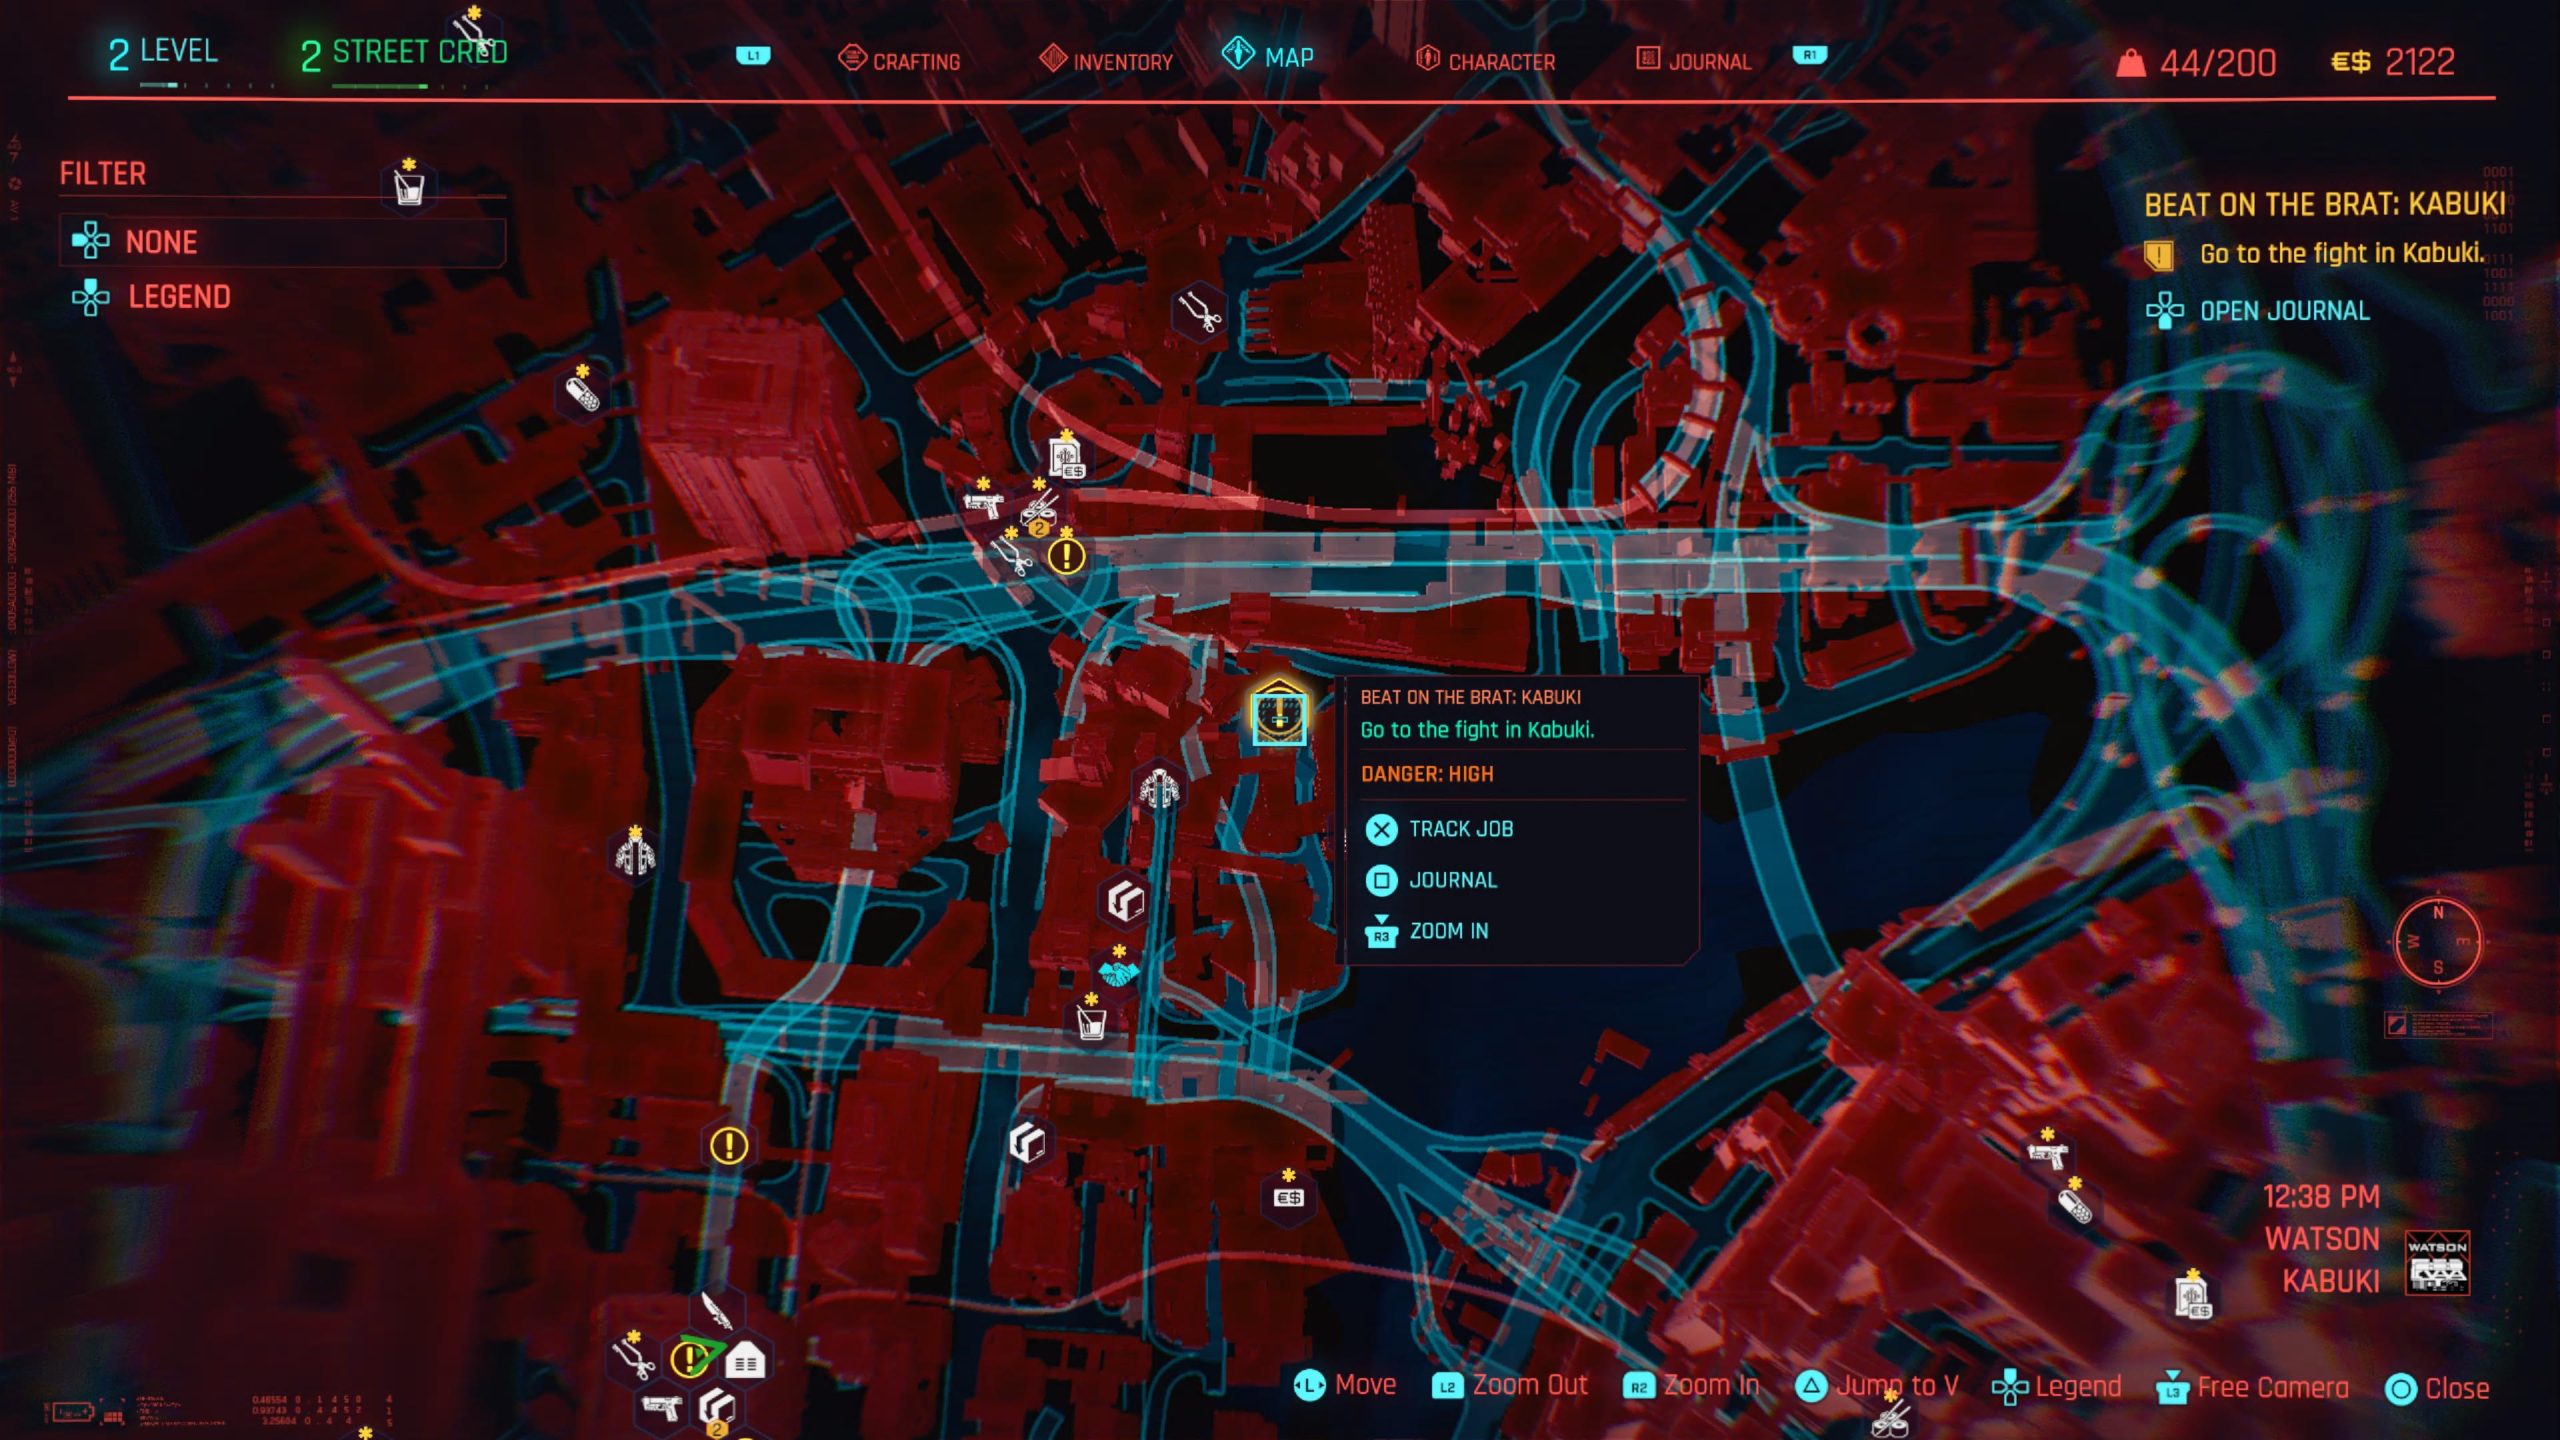
Travel to the rooftops in northeastern Kabuki and speak with the twins. This will be a 1 vs 2 fight where you fight both of them at the same time so make sure you have leveled up a bit when you decide to take them on. Since there are two of them, you have the option to increase the bet on the fight to 2,000 eddies.
Big in Japan
Obtained: Speak with Dennis in Afterlife
Objective: Find and deliver the package
Head to the Afterlife bar in Little China then find and speak with Dennis who is standing across from Rogue. Agree to do the job then head to the slums on the east side of Kabuki just south of the Charter St fast travel point.

Search the building closest to the water to find a rectangular container with “No Future” graffitied on it. Grab the package that falls out then put him down since you’ll first need to take care of some enemies. After the coast is clear, make your way to the car Dennis sent. When you reach the car, put the package in the trunk and hop in. Drive for the objective near the Megabuilding H10 fast travel point in Northside to drop off the package. Speak with Dennis to complete the job.
Blistering Love
Obtained: Watson – Automatically after completing the Chippin’ In side job in Act III
Objective: Call Rogue and ask her out
Call up Rogue and ask her out for Johnny. After she agrees, swing by the Afterlife in the evening to pick her up. Please note that if you pick her up in Johnny’s car, you’ll get some special dialog. Hit the road and follow the objective to the drive-in theater. When you arrive, you’ll be tasked with looking for a way inside (if you came here for the tarot graffiti already, then you should be able to head on in). Use the code 0000 to enter the drive-in. Rogue will then task you with getting the movie running. Enter the projection booth and examine the projector to get it working. Johnny will then take over for his date. Talk with Rogue while the movie is playing to catch up. When it’s over, speak to Johnny to complete the gig and trigger the Bushido and Chill trophy.
Boat Drinks
Obtained: Kerry will call you sometime after finishing the Off the Leash side job
Objective: Meet Kerry at the marina at 7:00 pm
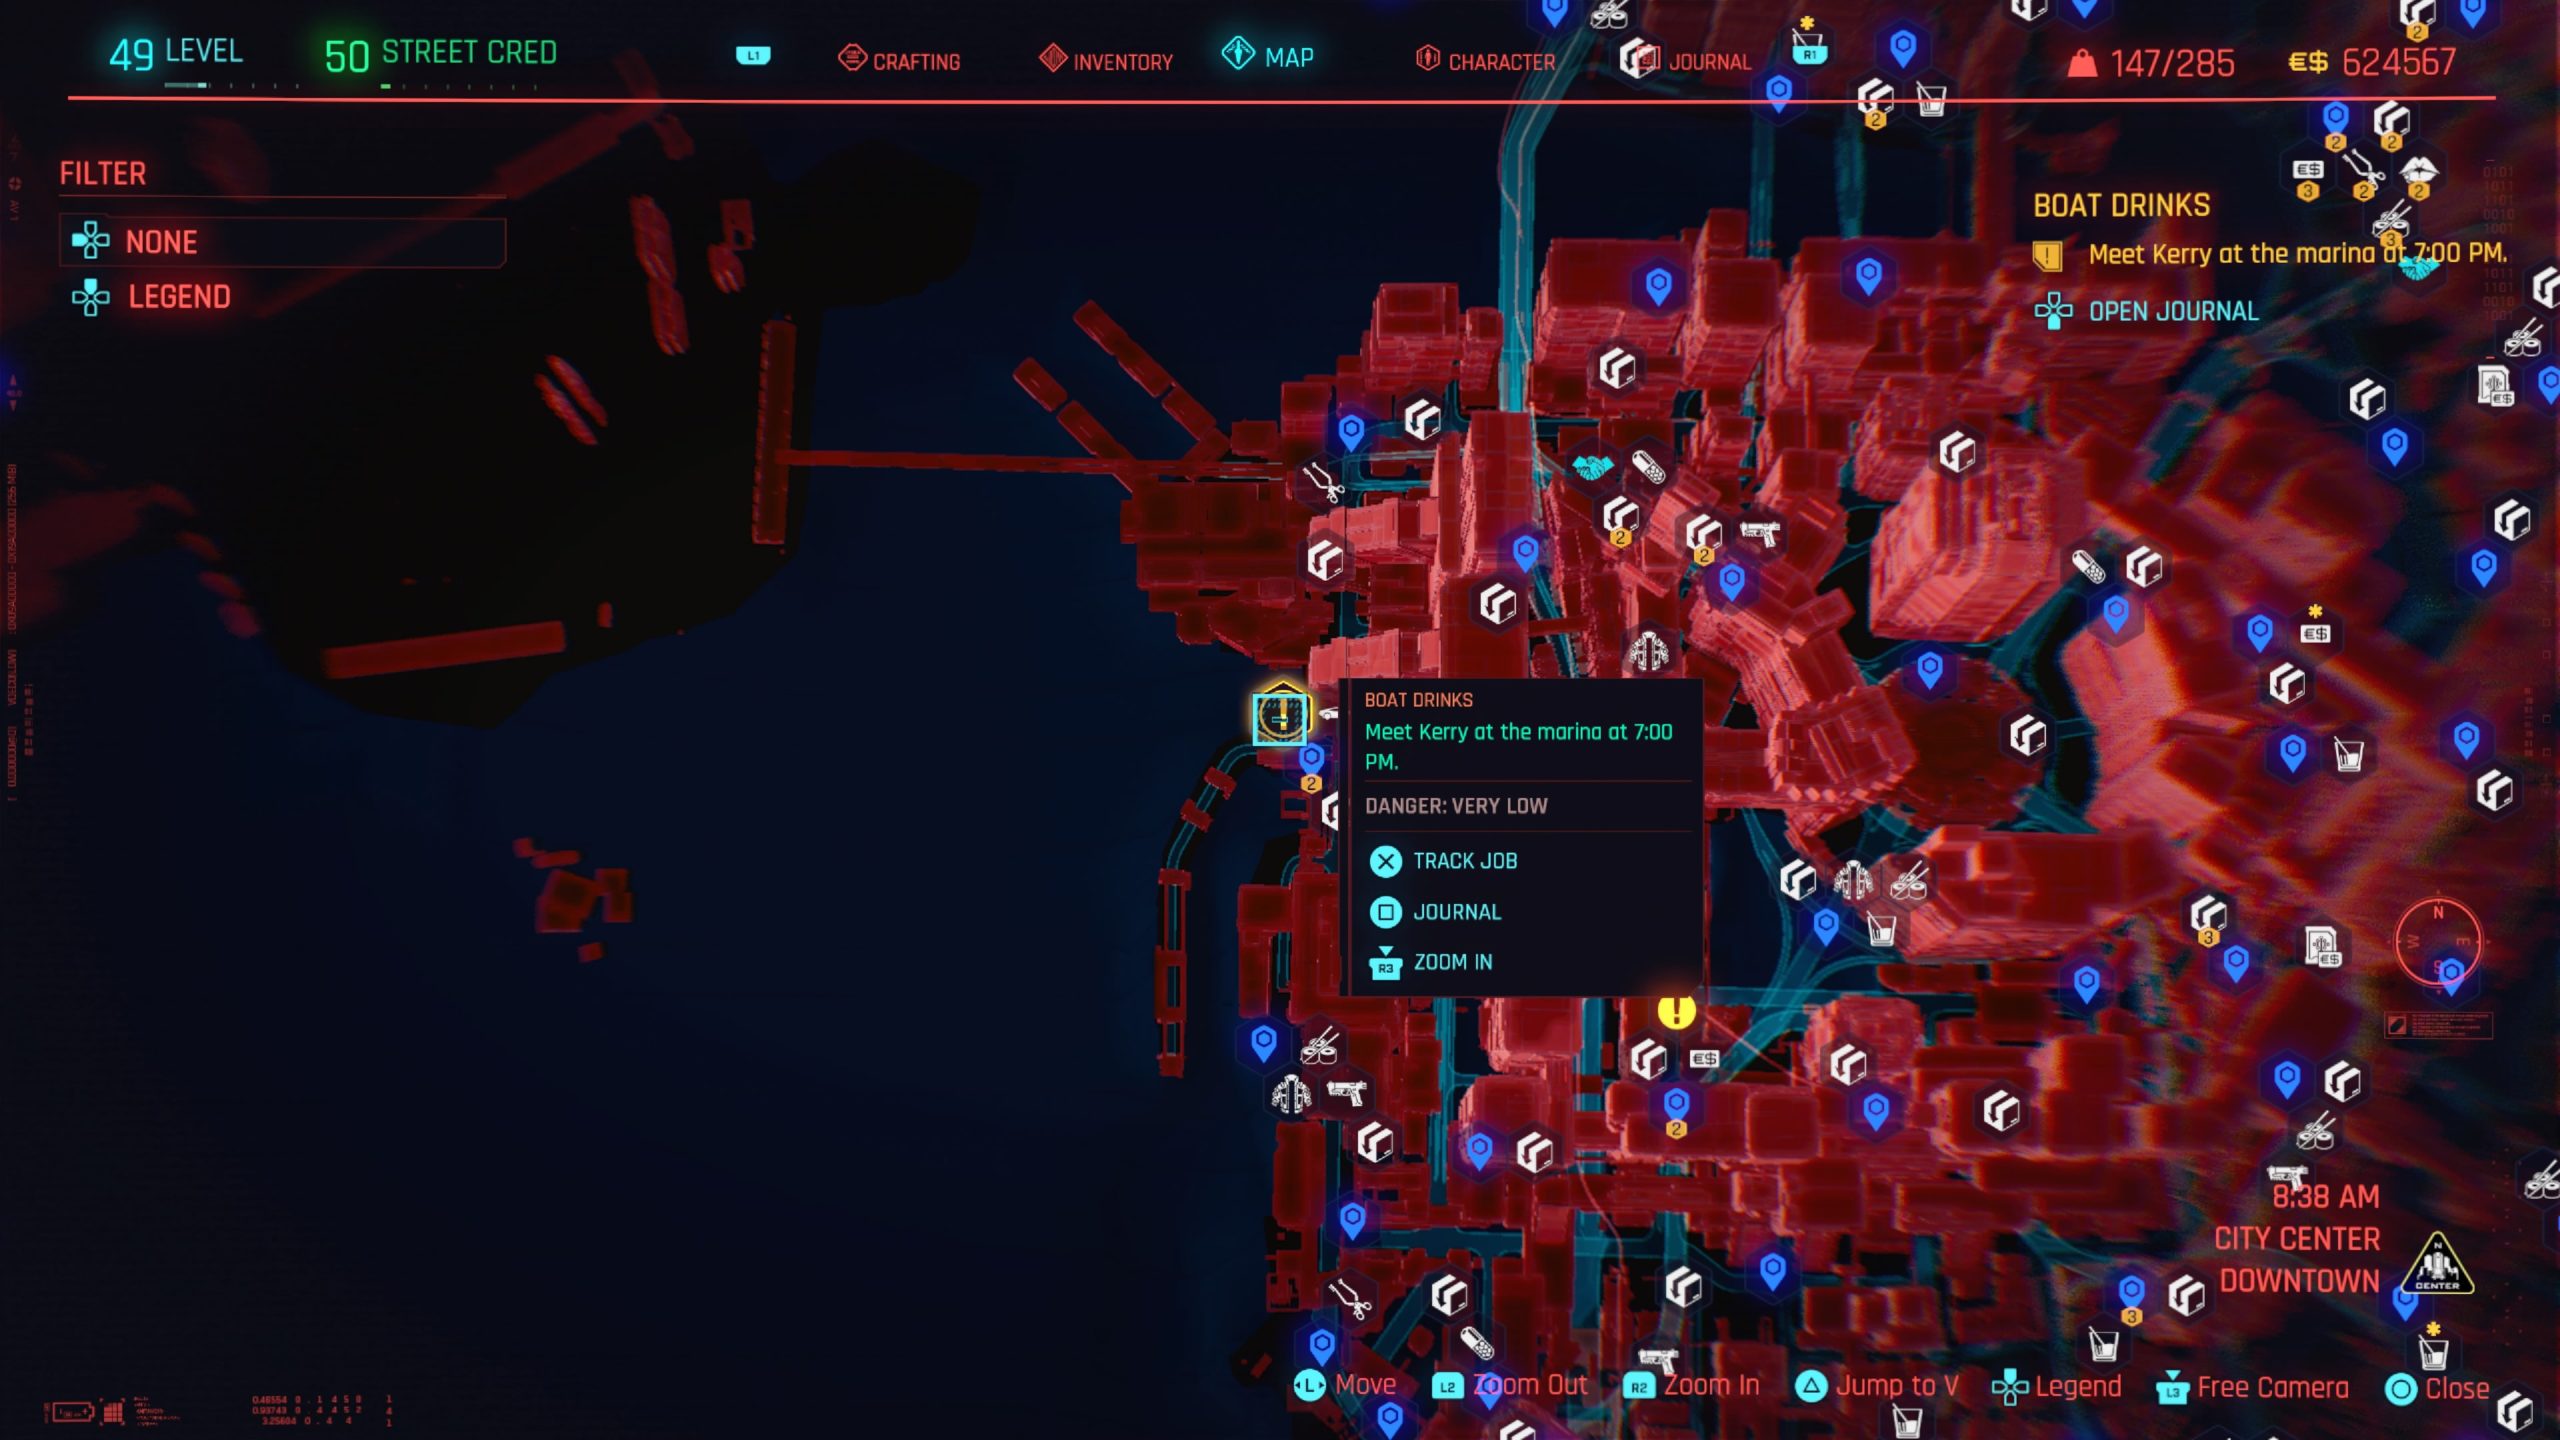
Follow the objective to the Corporation St fast travel point in City Center – Downtown to wait for Kerry. When it’s time, head onto the boat and speak with Kerry then sit next to him to enjoy the ride. Afterwards, have fun destroying the boat then swim to shore and speak with Kerry! This is your chance to romance him if your V is a guy!
Both Sides, Now
Obtained: After Act 1, Judy will call you.
Objective: Go to Judy’s apartment
Head to the objective west of Charter St fast travel point in Watson – Kabuki and enter the bathroom in the apartment to find Judy. Speak with her then carry Evelyn to the bed. Wait for Judy to finish the call then speak with her again. Afterwards, leave the bedroom and close the door to fast forward time. On the roof talk to Judy then leave the building to give her space and complete the job.
Burning Desire
Obtained: Approach the side job location southeast of Goldsmith St
Objective: Find out what’s wrong with the distressed man
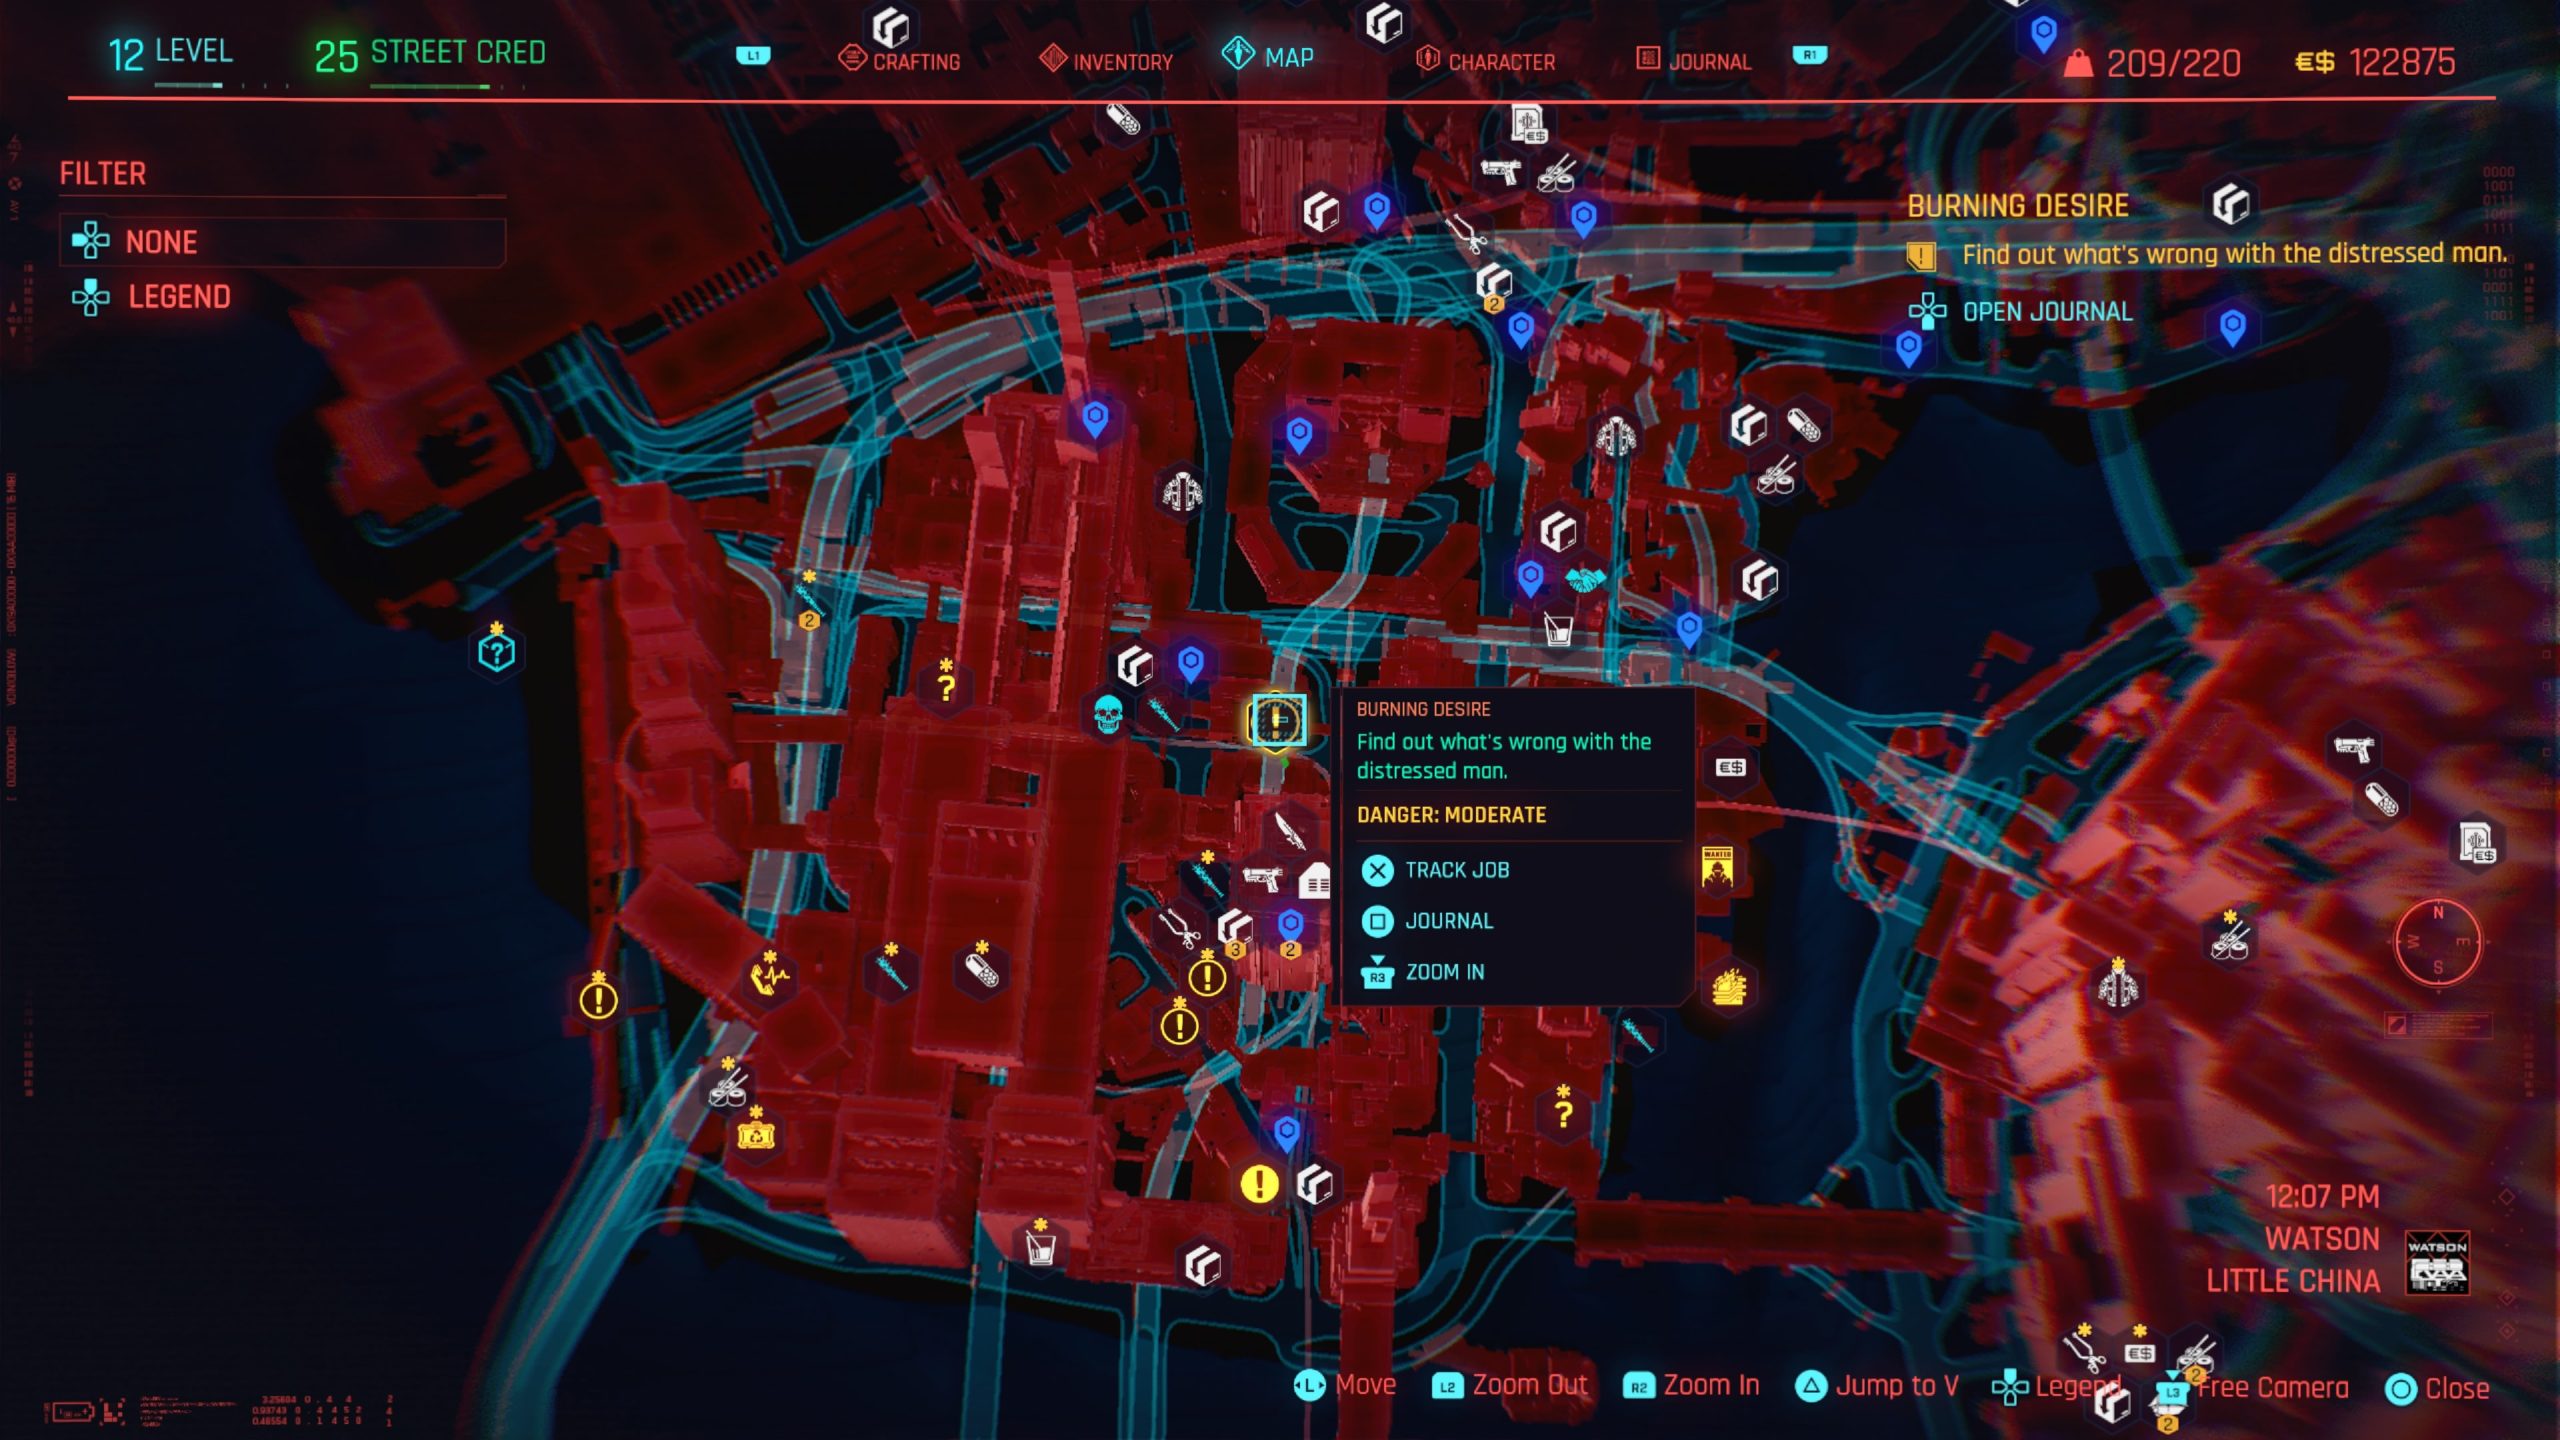
Approach the man yelling and agree to help him. Head towards the street, call your car then hop in. Drive the man to a ripperdoc in the north by following the objective. When you arrive, the man will hop out and tell you to wait for his call. You don’t actually have to wait there specifically. You can continue on with exploring the area and/or doing side jobs, etc. About 3 hours later in game time, Flaming Crotch Man will give you a call which will complete the job.
Chippin’ In
Obtained: Automatically at the start of Act III after completing Tapeworm
Objective: Watson – Go to the Afterlife
Travel to the Afterlife then head inside. Speak with Johnny and choose to take Misty’s pills. The first order of business is to order a couple of drinks. When prompted, ask Claire if she’s heard of the name Cassius Ryder where you’ll get to choose a tattoo. Pick either option (V’s gonna love the second one according to Johnny). This will lead to Johnny having a wild night ending with a conversation with Rogue. You’ll then have to wait a day for Rogue to get in touch with you (and will also have Johnny’s Aviators).
When Rogue calls, head to Afterlife and speak with her in person. You’ll then follow Rogue to her car where she’ll give you Johnny’s Jacket. Afterwards, hop in. After waiting for the area to clear out, Rogue and V will begin the mission. Follow Rogue until she mentions sneaking to the dataterm. The easiest way for me was to sneak along the right side of the area towards the dataterm. This will require some investment in Body and Technical Ability. When you get into the building, interact with the data terminal and check it out to find where your targets are hiding. Then travel into the next room, taking the door on the far right side. There will be one enemy in this room you will need to take out. From here, sneak across the trainyard to reach the ship. Once on the ship, make your way towards the front of it being mindful of the enemies. Take them out then approach Grayson to take back Johnny’s gun. Rogue will then press him for Smasher’s location. At the end, you’ll be give a choice to let Grayson live. If you choose to spare his life, he’ll reward you with a keycard. Rogue will run off and Johnny will show up. Lower the container using a near control panel then head down to the container and open it up to claim your prize, which is Johnny’s Porsche! Head out to the objective in the oil fields and speak with Johnny. Select “The Guy who Saved My Life” if you want the special ending. Once you’re done talking with Johnny, the job will complete.
Dream On
Obtained: Charter Hill – After completing the I Fought the Law side job, you’ll eventually receive a call from Jefferson
Objective: Go to the Peralezes’ apartment
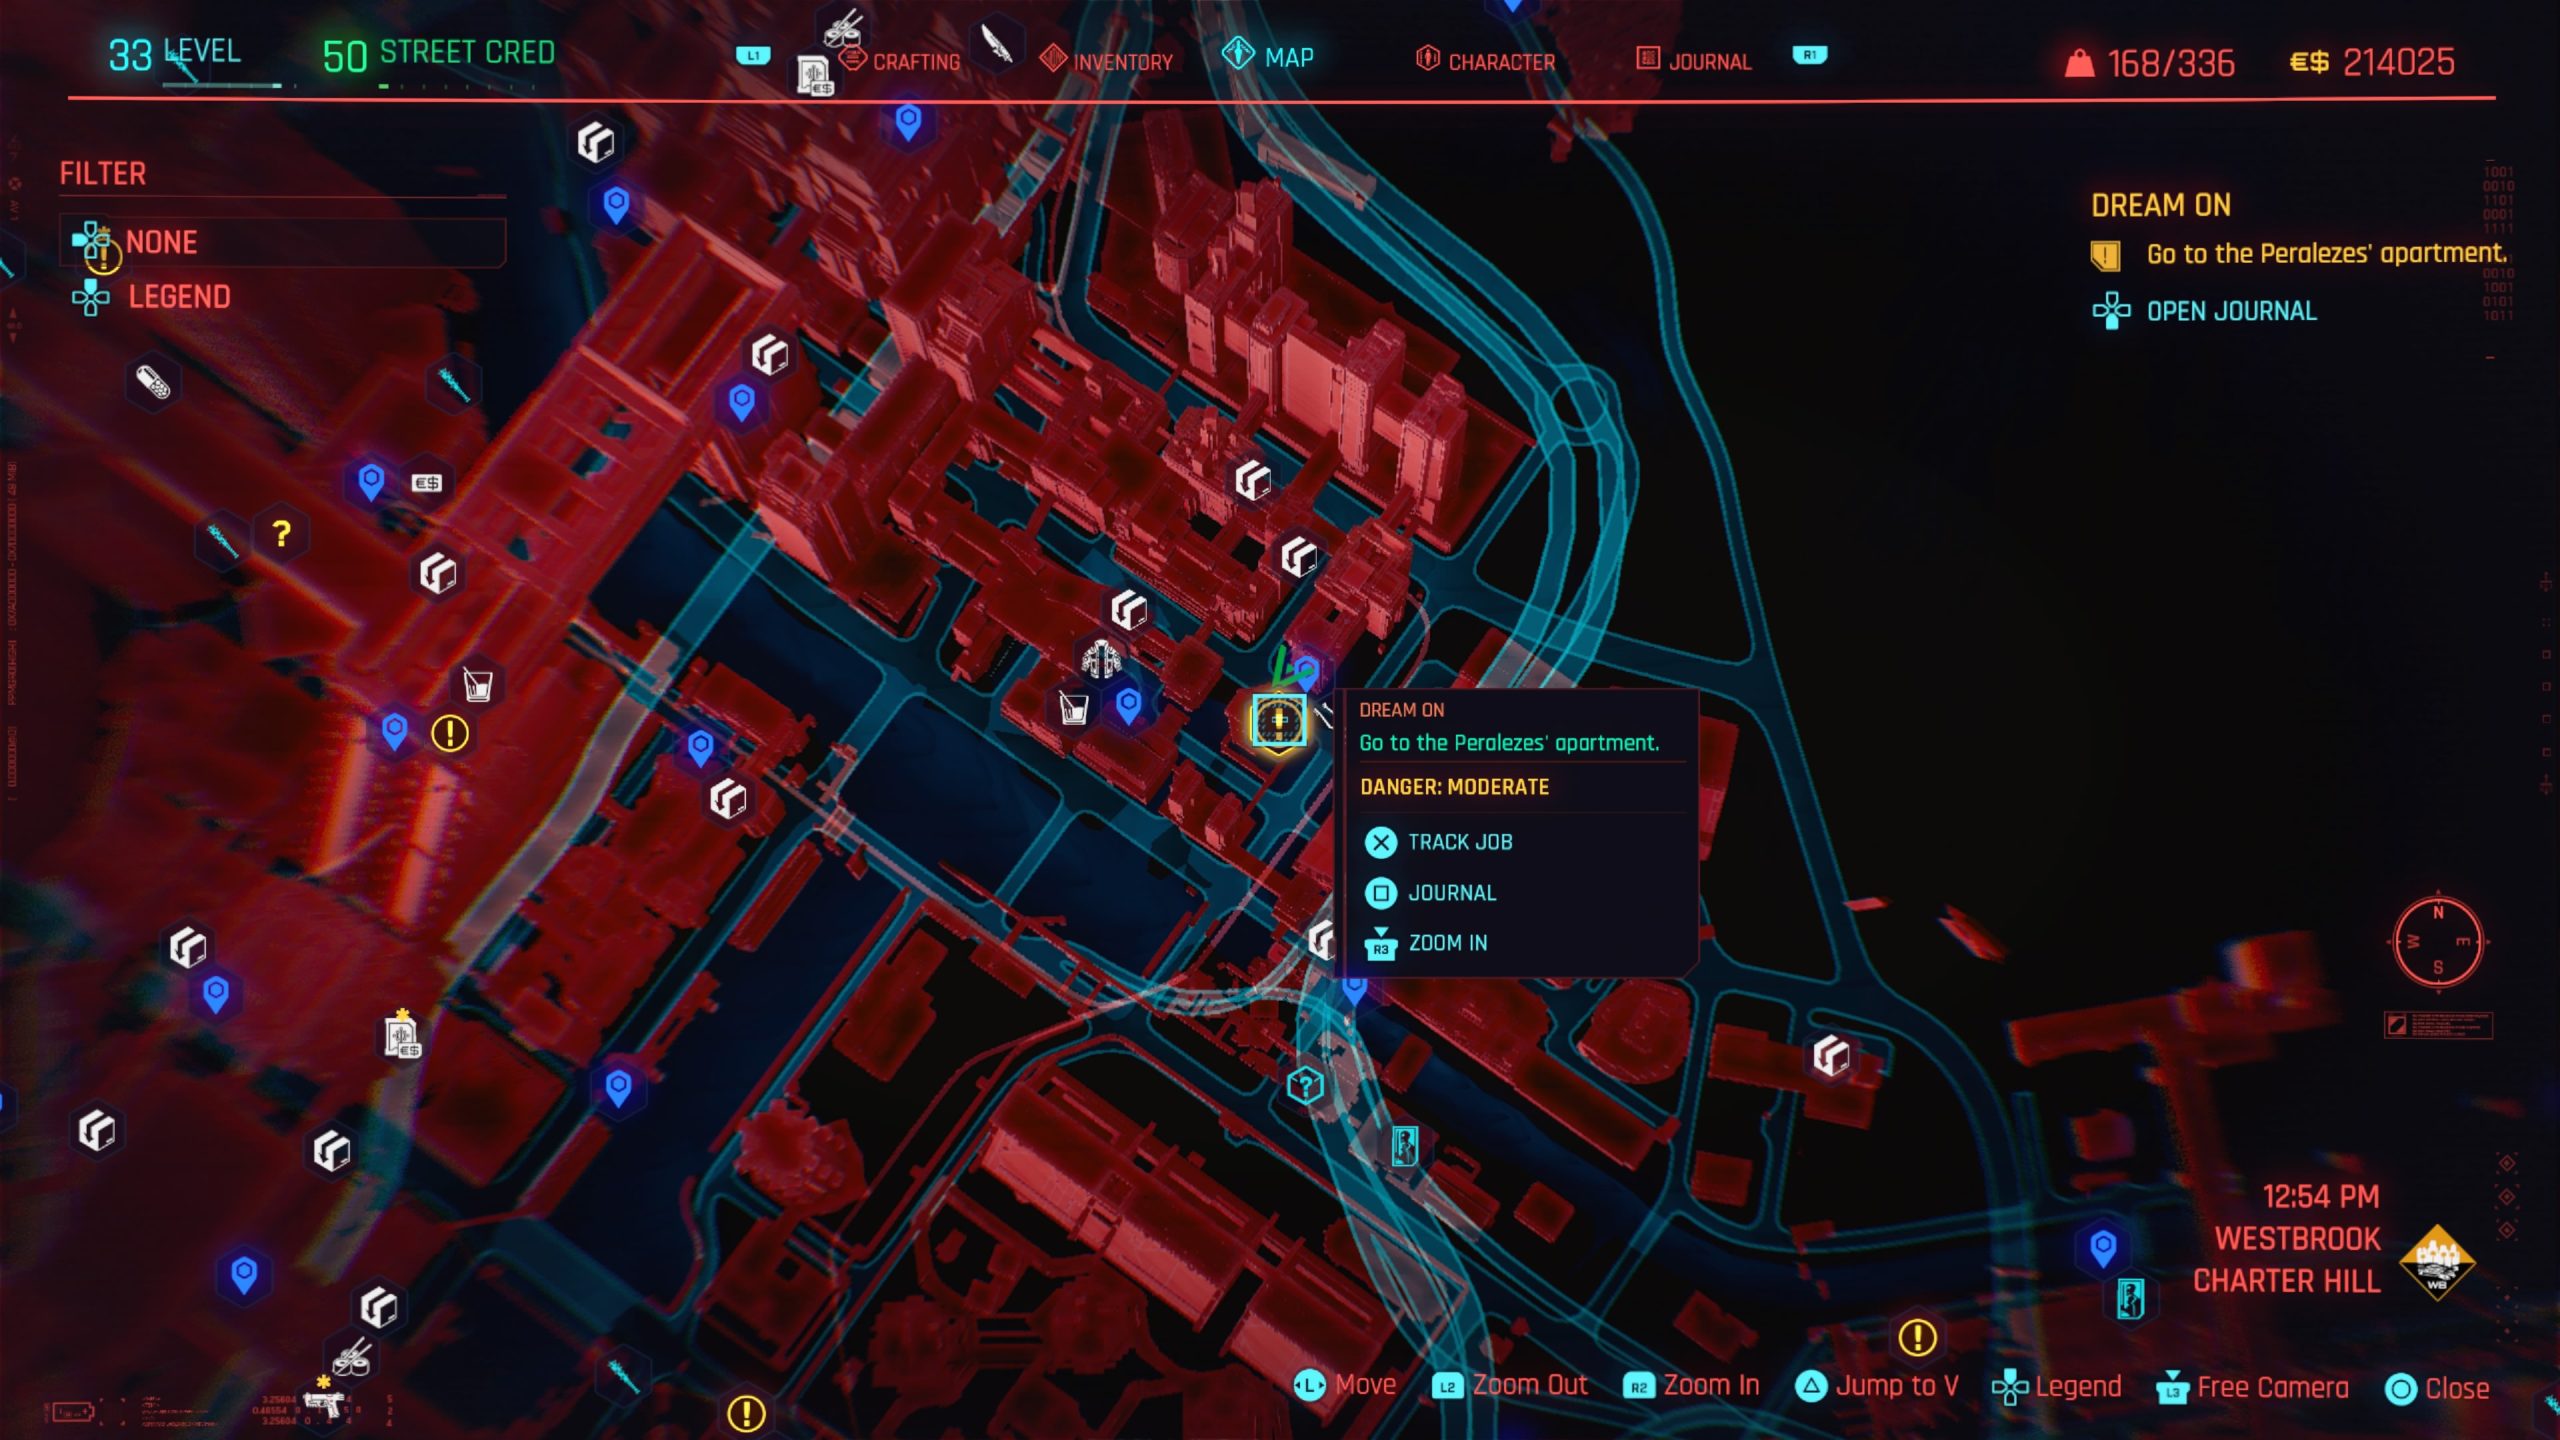
Use the intercom to enter the apartment then take the elevator up to the penthouse. Speak with the Peralezes. When you’ve exhausted all dialog options, speak with Elizabeth for a tour. On the tour you’ll pass the conference room and enter a hallway. In the hallway scan the patched up bullet holes in the wall on the left and the bloodstain on the floor. Follow the bloodstains through the double doors closest to them. Inspect more directly in front of you on the floor and near the door to the right. Enter through that door to find 2 more bloodstains on the floor. Scan the wall near the far bloodstain to find a concealed door. You’ll need to open it using a Body Value of 7.
After speaking with Elizabeth, scan the wall behind the counter to find strange tech. Follow the cables by taking the ladder up then opening the hatch in the ceiling. Climb up it to reach the roof then follow the cables along the edge to a transmitter. After Johnny speaks with you, scan the area on the ground level to find another transmitter in the distance by a skyscraper.
Return to Elizabeth and speak with her then leave the apartment to check out the van. As you get close, the van will drive away and you’ll need to chase it. Follow the van until it stops in Watson – Northside north of the All Foods Plant fast travel point. If you enter nonstealthy the enemies will obviously attack you. You’ll need to defeat them all before you can connect to the van’s Access Point.
When you unjack, call Elizabeth then head to the ramen shop in Westbrook – Japantown near the Cherry Blossom Market fast travel point and speak with her. Afterwards, head to Reconciliation Park to speak with Jefferson. As you approach Jefferson, you’ll receive a call from an unknown stranger. When you speak with Jefferson, it’s up to you whether or not you tell him the truth or just go along with what Elizabeth told him.
Epistrophy: Northside
Obtained: Automatically after accepting the job from Delamain
Objective: Find the Delamain cab

Travel to the east part of Watson – Northside near the Longshore North fast travel point to start your search. Head across the street (southwest) toward the objective to enter a search area. Enter the storage unit lot to your left. You will find the rogue cab here. As you approach it, it will drive off. Give chase to the car until it stops. Del will call you and the job will complete.
Every Breath You Take
Obtained: After you complete the Off the Leash side job, you’ll receive a call from Blue Moon
Objective: Go to the meeting spot and wait for Blue Moon

Travel to the meeting spot at the Kabuki Market then sit on the indicated bench. Speak with Blue Moon then search the area when she calls and follow her around Kabuki. The stalker is a girl named Griselda Martinez and she is wearing a green tank top and skirt. Eventually Griselda will approach Blue Moon. If your quick, you can get behind her and knock her out. Loot her afterwards to find some evidence then speak with Blue Moon to determine her fate. This will complete the job.
Fool on the Hill
Obtained: After Act 2 find a Tarot Graffiti in the city to acquire the side job
Objective: Find all the Tarot Graffiti in the city (20 total)
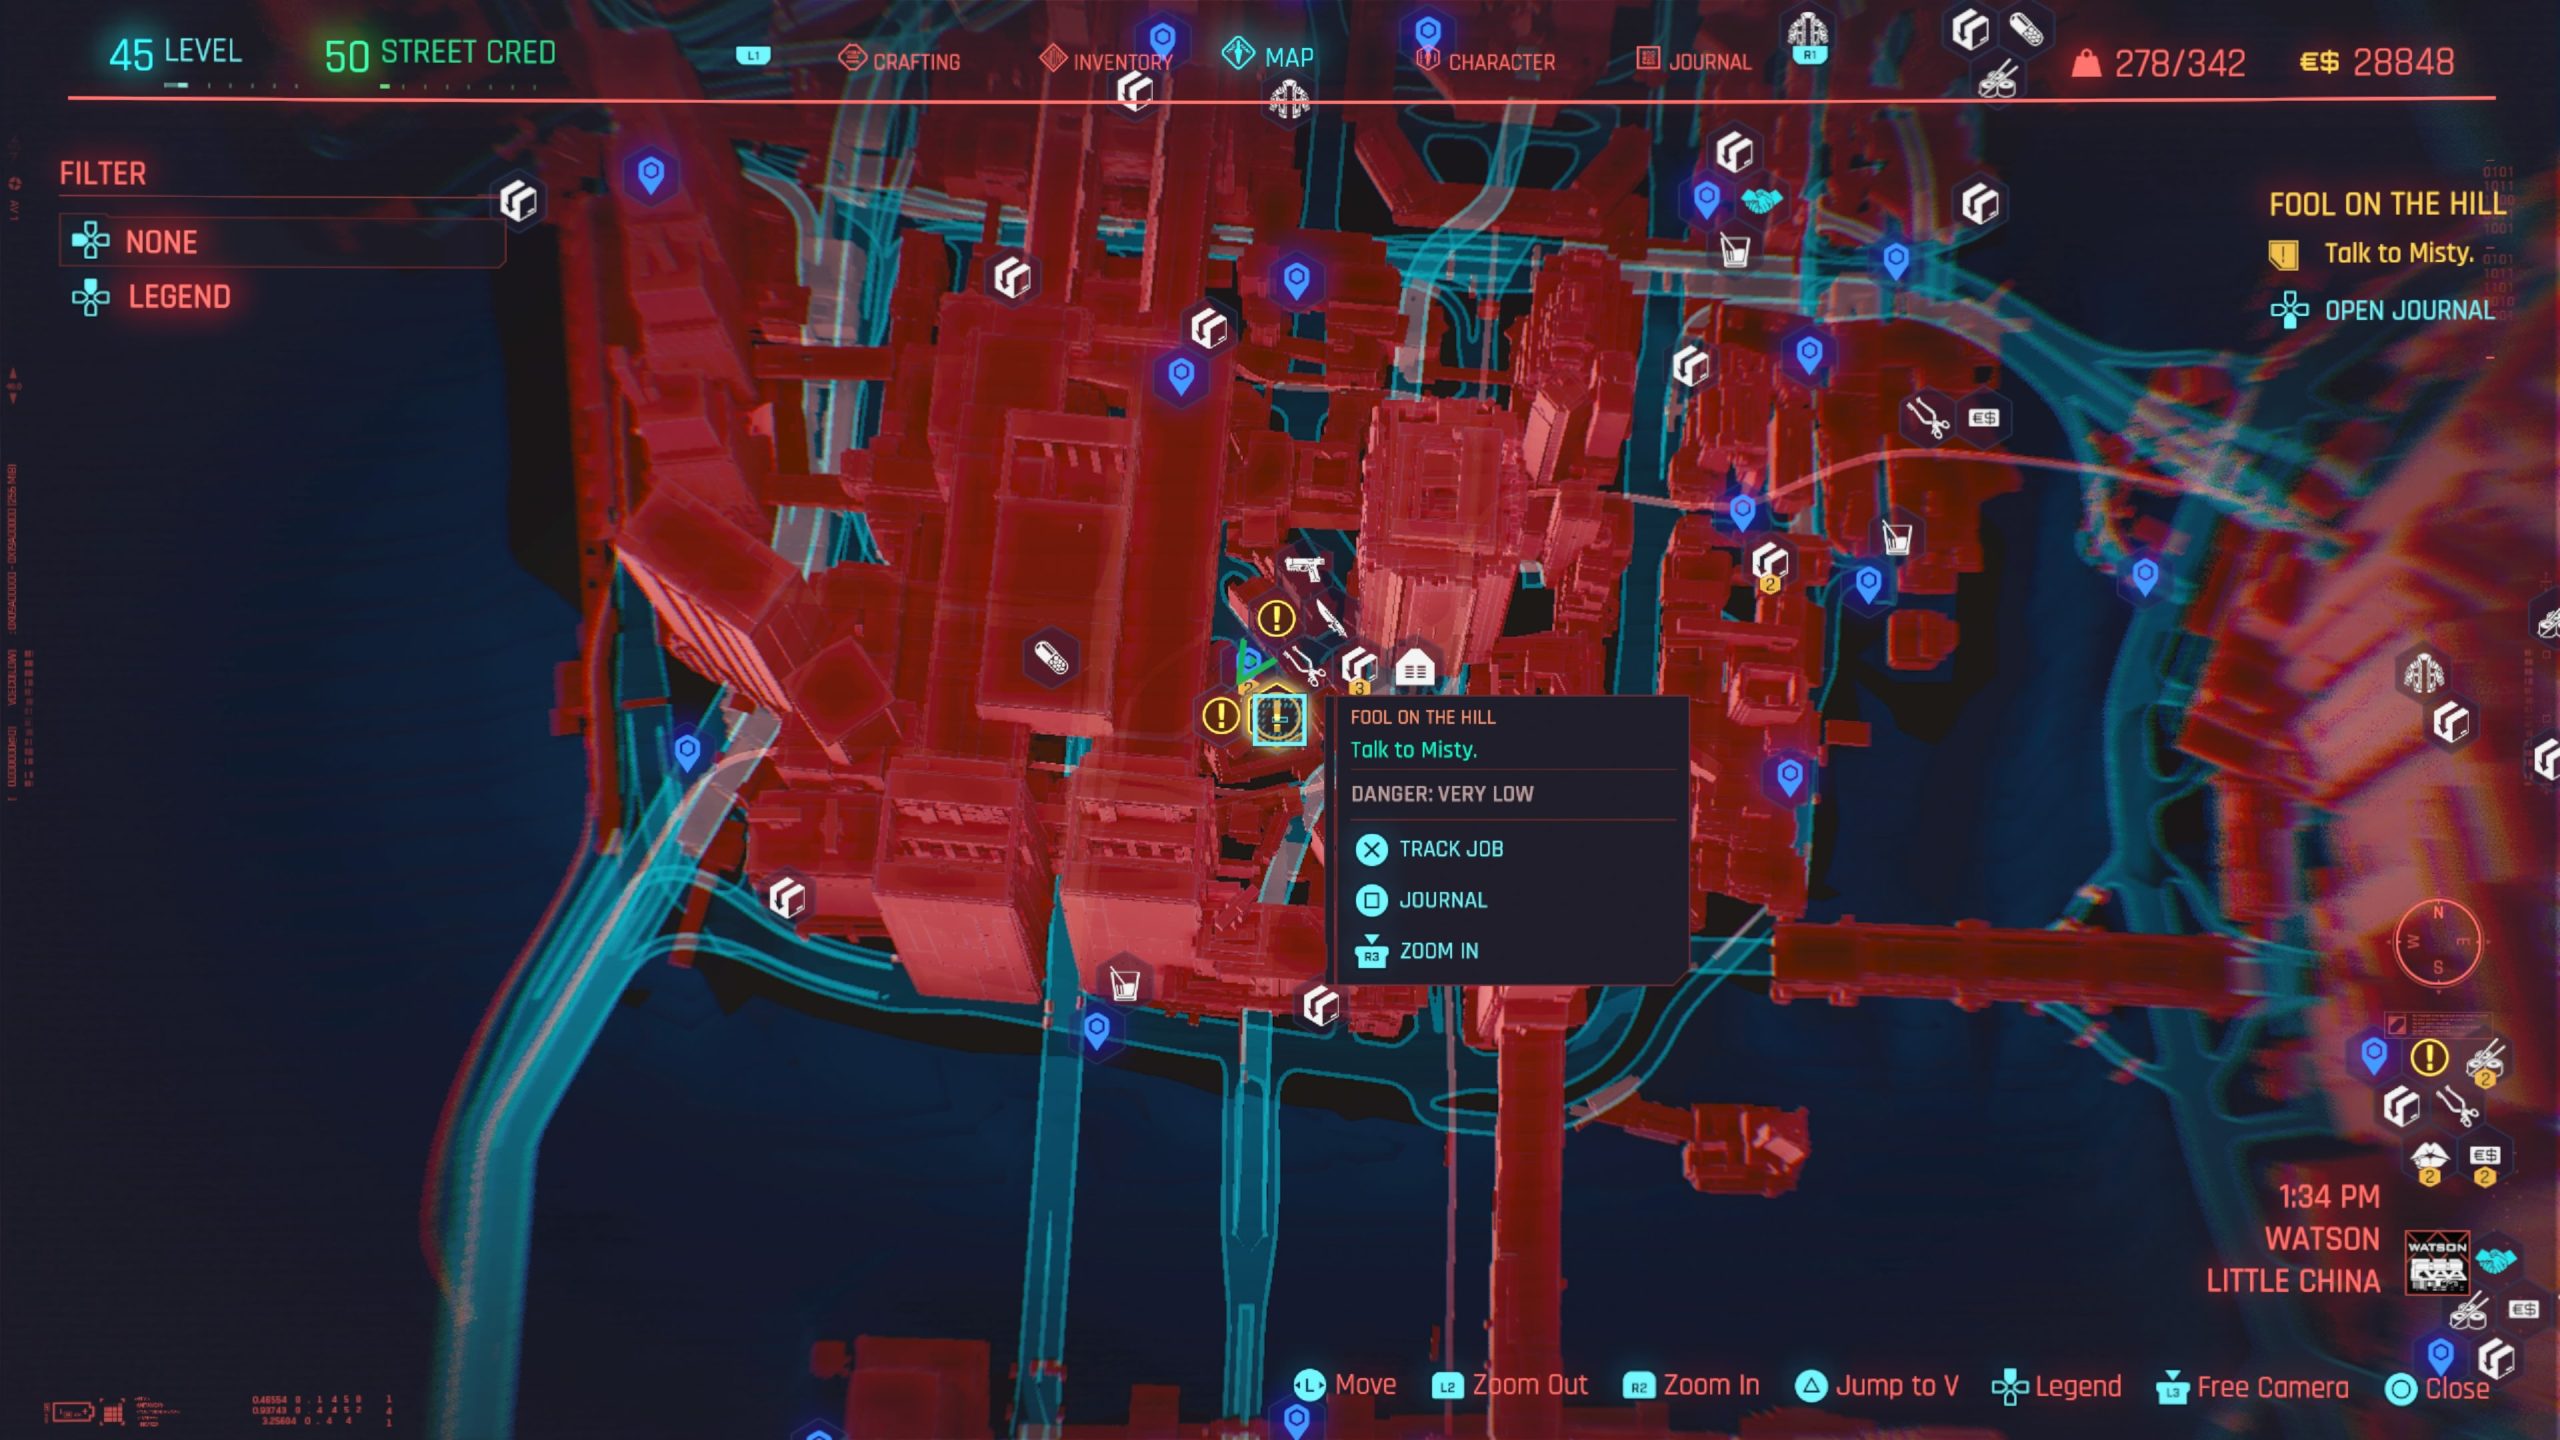
After you find a Tarot Graffiti, head to Misty and speak with her then talk to Viktor. For a detailed guide on where to find each Tarot Graffiti, click here! When you find one, you must scan it in order for it to count towards the side job! After finding all of the Tarot Graffiti, head to back Misty’s shop in Watson – Little China to speak with her. This will complete the job.
Full Disclosure
Obtained: You’ll get a message from Sandra Dorsett offering V a job in Act II
Objective: Find the databank

After getting the job offer from Sandra, travel to the location in Kabuki and enter the building. You’ll find the databank on a metal crate next to a chair in red light. Exit the building then give Sandra a call telling her that you found the databank. Before you hand over the databank you have the option to crack it. Doing so and being upfront about it will give you a better ending. Make your way to her apartment in Little China and take the elevator up to the 5th floor. Knock on her door and head into the room. Hand over the data disk. If you decided to crack it first, admit it when she asks and then congratulate her. If you have an Intelligence value of 7 then you will get access to a special prompt. Trying to blackmail her will cause her to turn hostile. Deal with her either way to complete the job.
Happy Together
Obtained: Pass by the room with police banging on the door at V’s apartment complex
Objective: Talk to Barry
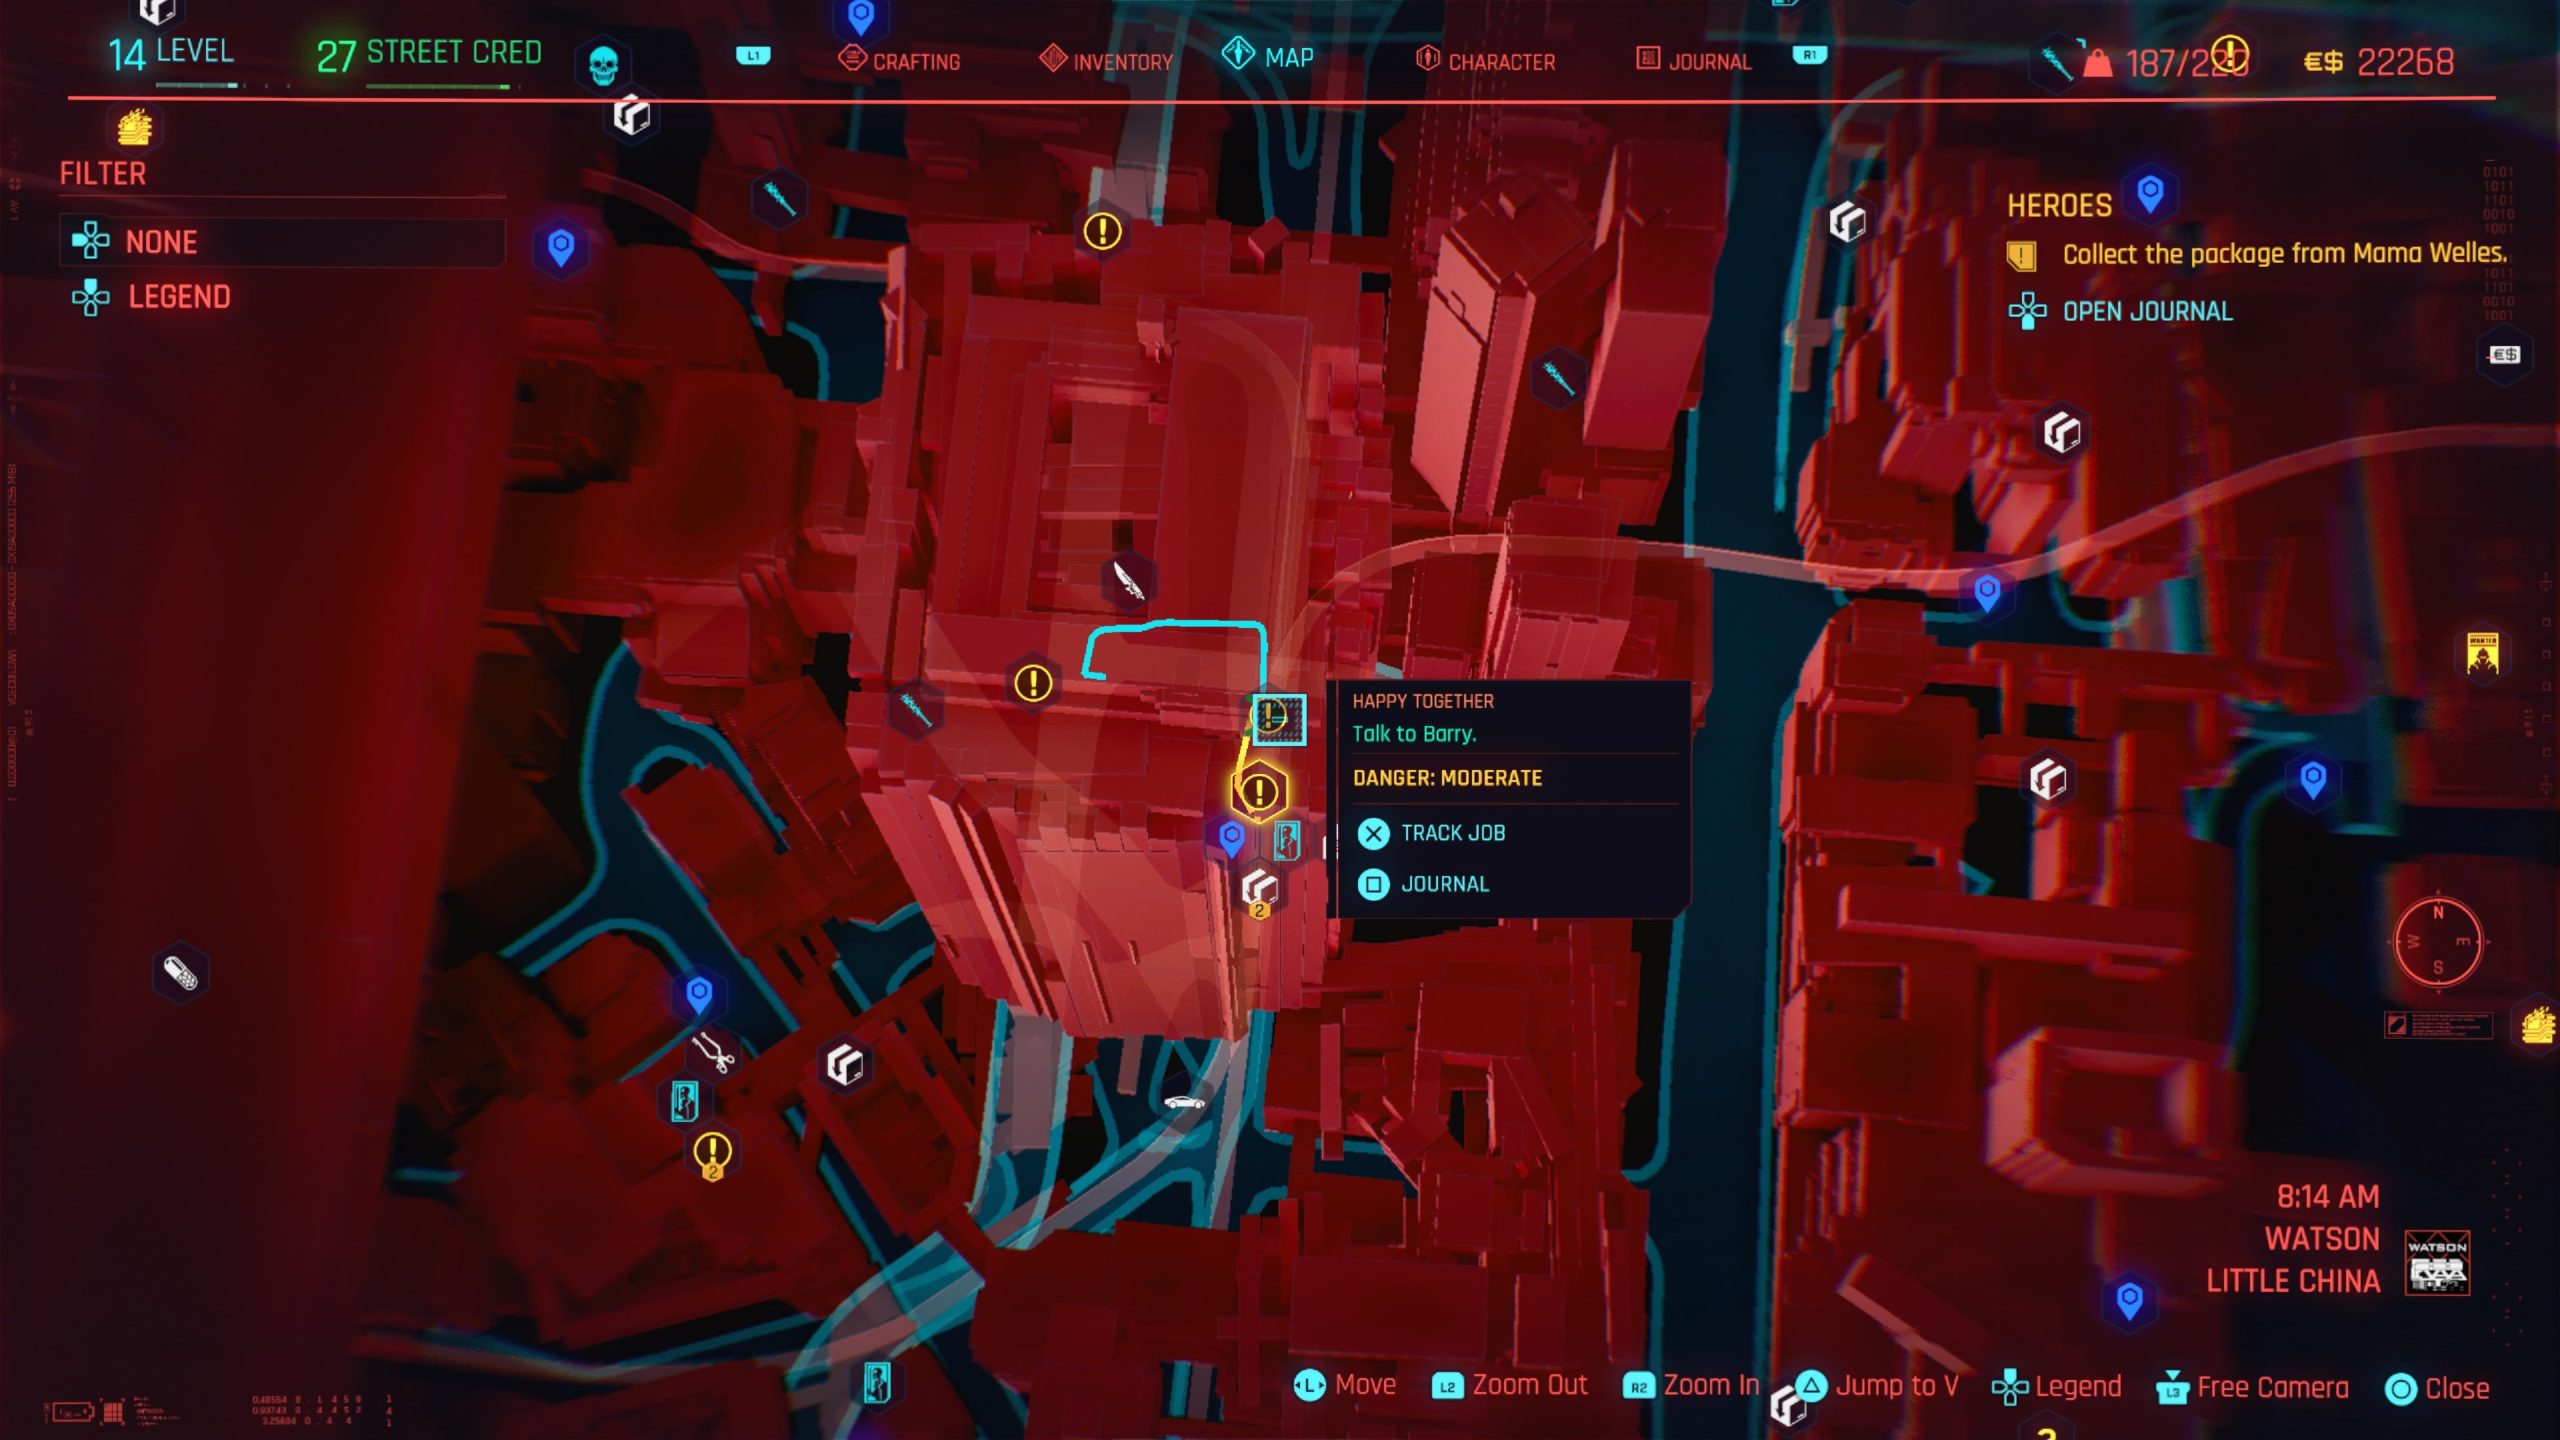
Speak to the officers across from Barry’s apartment and agree to speak with him. Knock on Barry’s door and choose the option “I’m going to take that as a yes”. After some hours pass in game time, check up on Barry again to get him to answer. Choose any of the options as they all lead to Barry inviting you in. Take a seat on the table across from him and speak with Barry again. Make sure you select all the blue options first then choose “Everyone has their limits” if you want to see the full job play out. If you chose to do all the blue options, exit Barry’s room and make your way to Westbrook – North Oak in the Columbarium and look for Andrew’s Niche of Barry’s fallen friend. Return to the cops and speak with them then follow them to Barry’s room. Watch the events that unfold to complete the job.
Heroes
Obtained: Automatically in Act 2
Objective: Call Mama Welles
Call up Mama Welles. If you sent Jackie to Viktor during The Heist main quest, you’ll make your way back to your apartment and loot the contents of the package to receive the keys to a bike. If you sent Jackie to his family during The Heist main quest, tell Mama Welles that you’ll be at the service. Next, follow the objective to meet Mama Welles at El Coyote Cojo in Heywood – The Glen. After you speak with her, head to Jackie’s garage. On the way, you’ll see Misty sitting down against a building. Speak with her and agree to sit down. Continue speaking with her then open the garage. Scan each object in the room then wait for Misty to tell you about them. Inspect the door then search the desk to find the key. Use the key to open Jackie’s room then speak with Misty again. Afterwards, scan the objects in Jackie’s room. Decide which object you’d like to take then grab it. Speak with Misty one more time then head back to El Coyote Cojo. Take a seat and watch the event unfold. When it’s your turn, stand up and tell them about when you first met. Choose the options you’d like for your speech then place the object on the table. Drink to Jackie then speak with Mama Welles and tell her that Misty is important. Grab the key then speak with Padre, Valentinos, Viktor and the bartender. When you’ve talked to everyone, leave the bar to complete the job.
Human Nature
Obtained: Automatically obtained when you reach Act 2
Objective: Fetch your vehicle from the parking garage
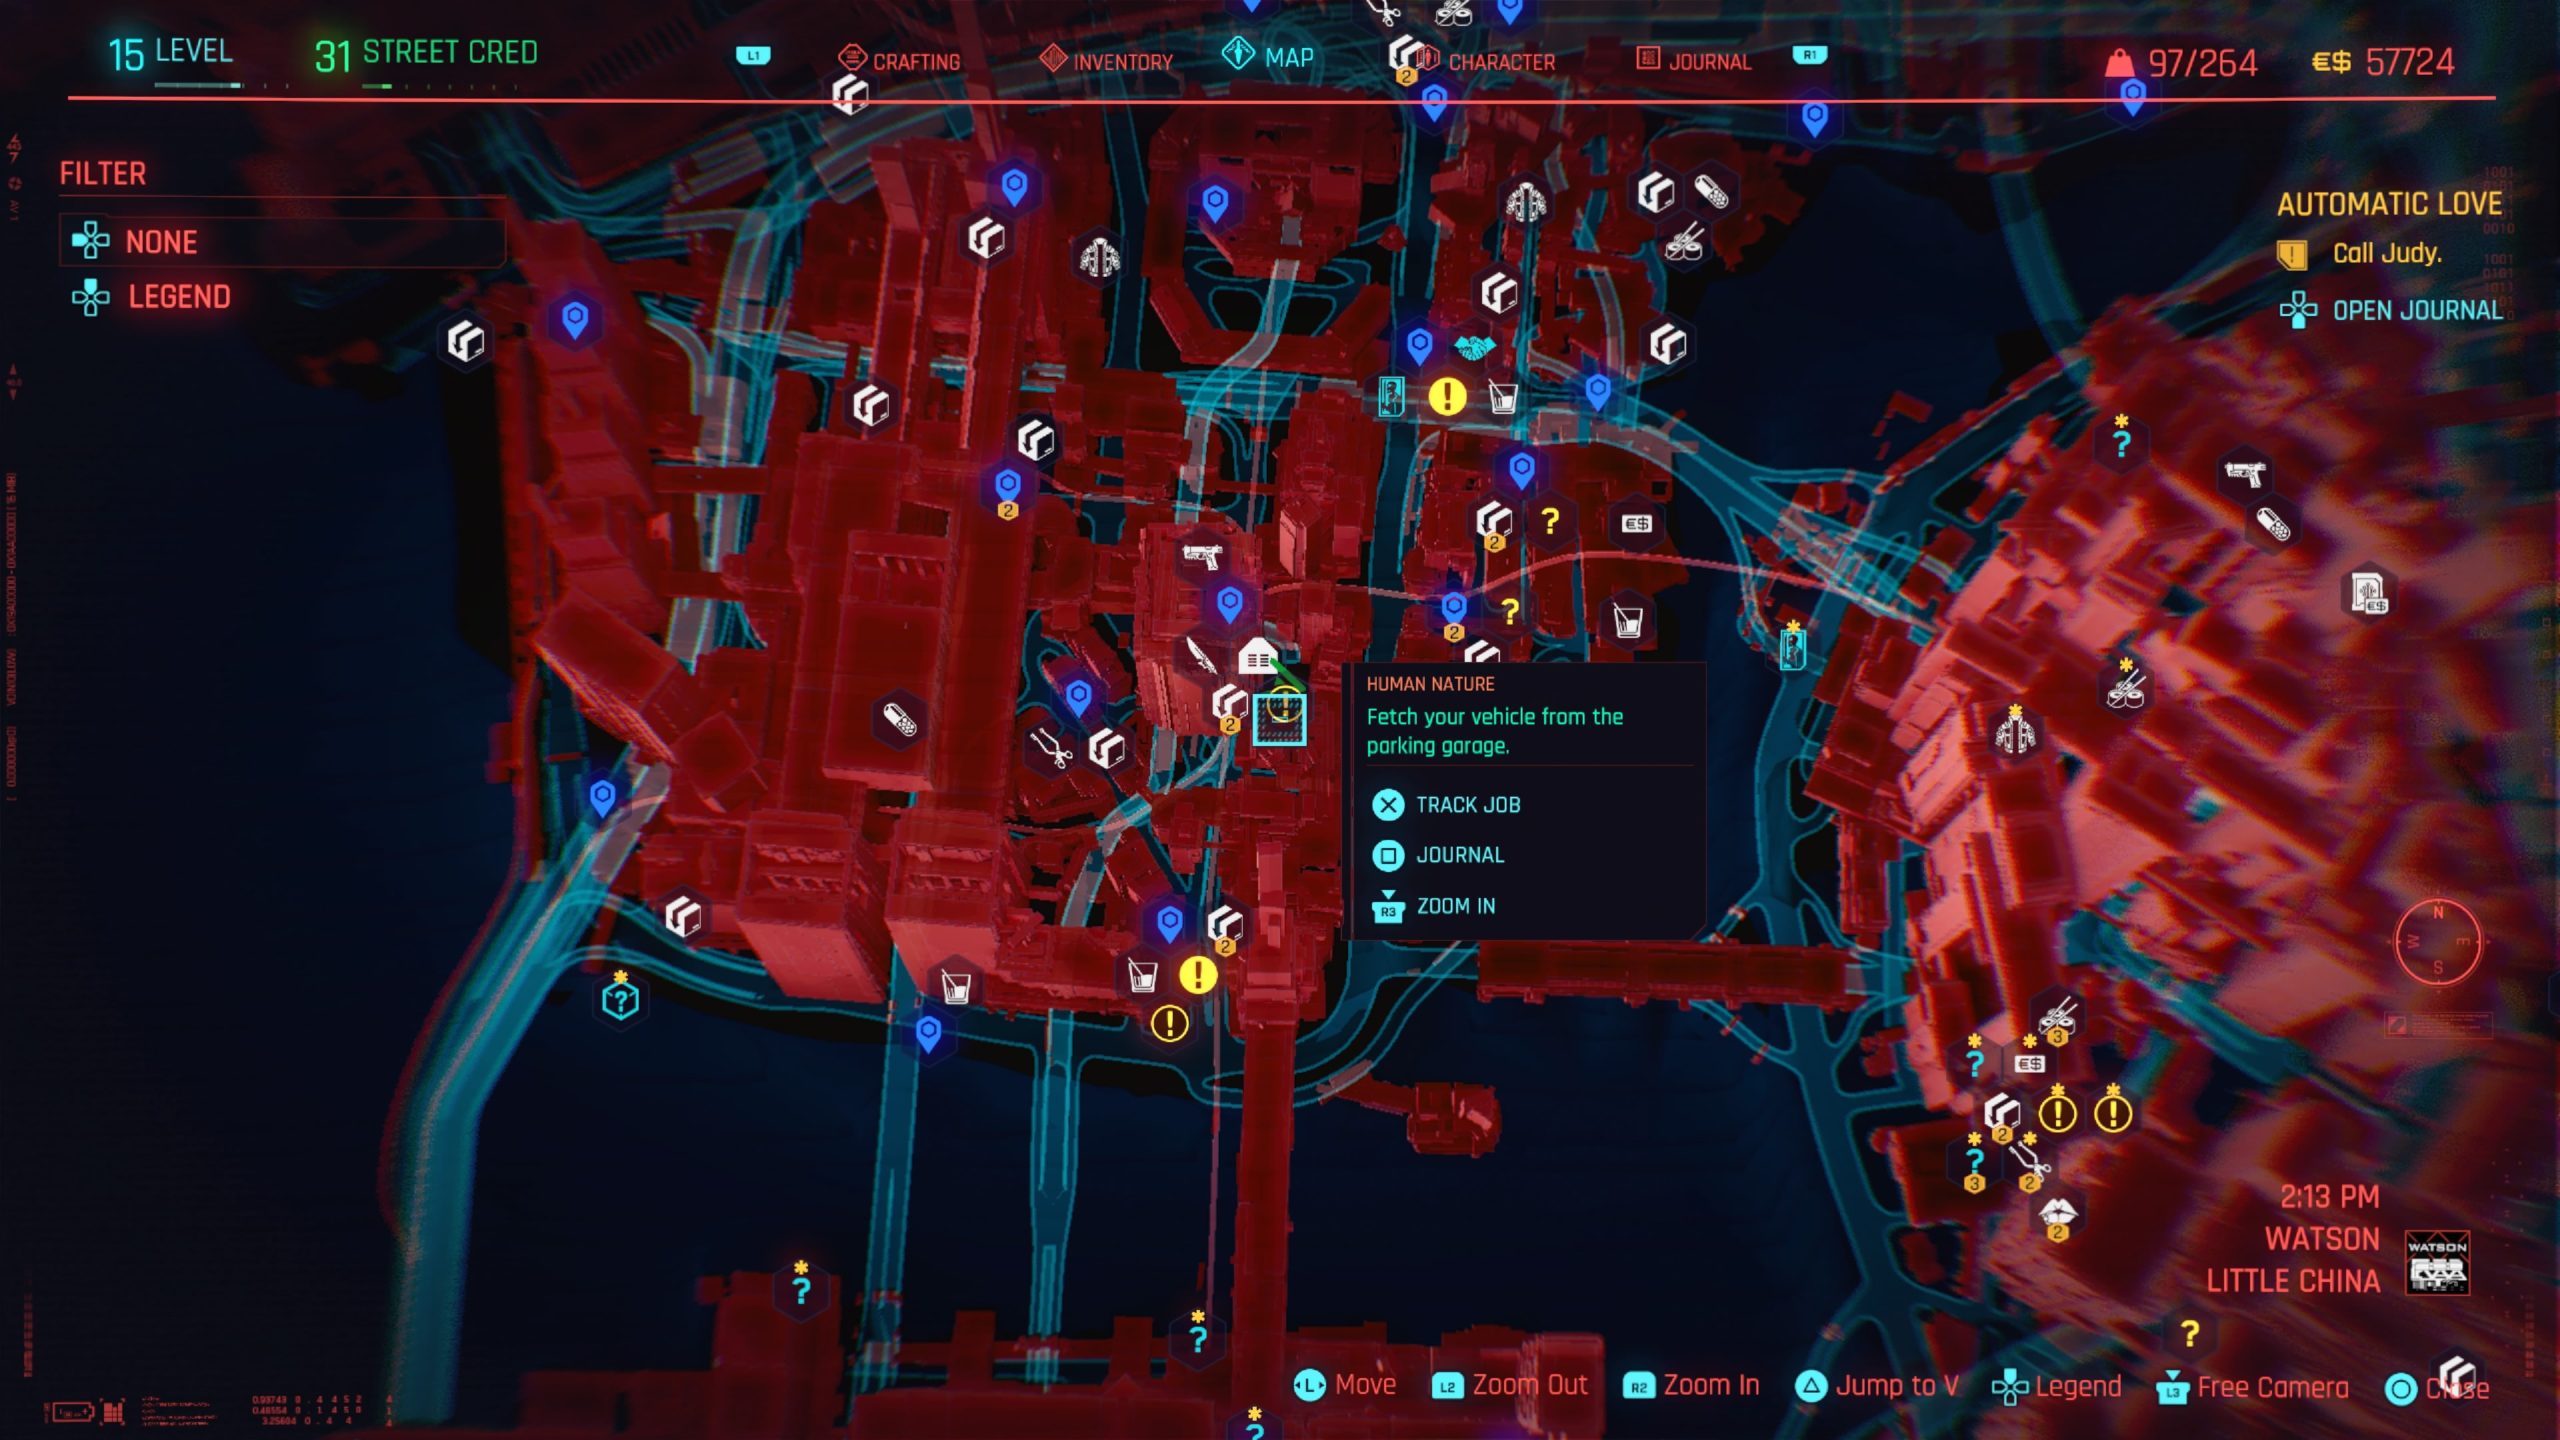
Travel to the parking garage just east of your apartment to locate your car. Get inside to trigger a cutscene then exit your car. Check the message from the Delamain on your phone. Next you’ll need to wait for your car to be repaired. When it’s done, you’ll receive a text and the job will complete.
I Don’t Wanna Hear It
Obtained: Kerry will call you sometime after finishing Rebel! Rebel! side job
Objective: Meet Kerry at Riot around 7 pm
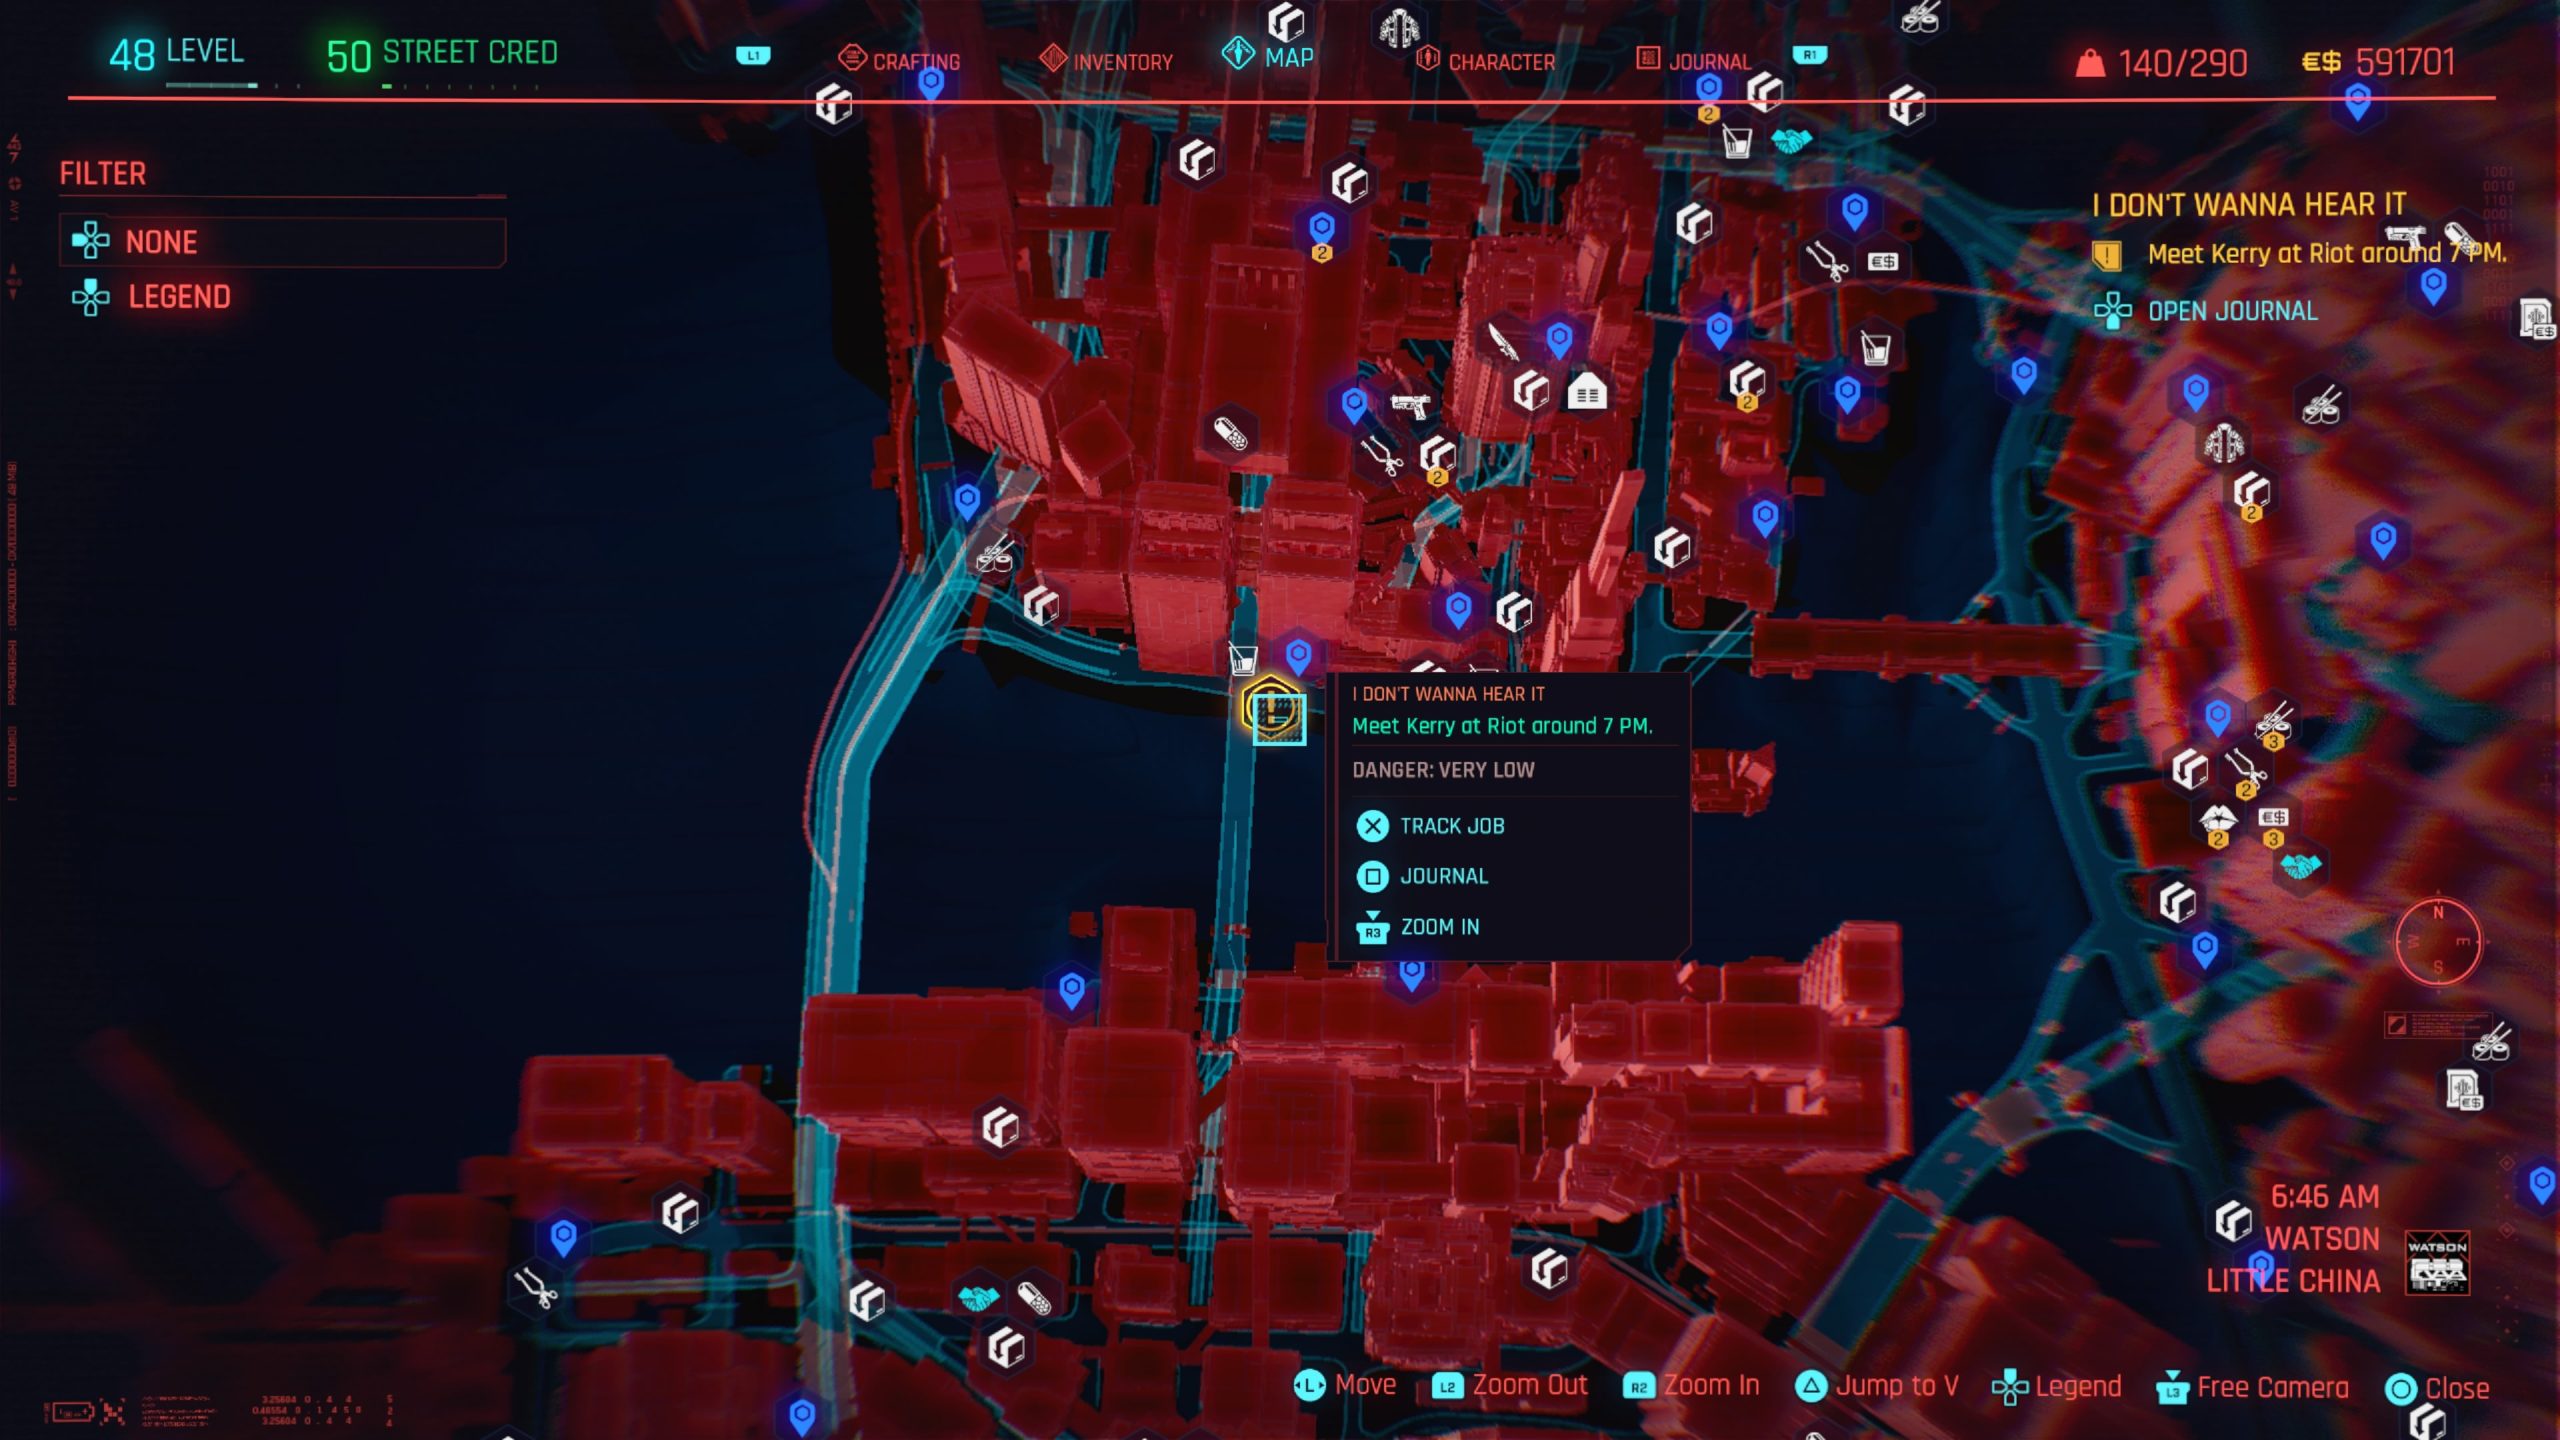
Meet with Kerry to speak with him briefly. To get concert tickets, you can speak with a scalper outside of the club and purchase one for $21,000. Alternatively, you can scan the fans to the left of the building in the alley to steal two tickets. Once you enter the building, you’ll need to head backstage. Speak with the bouncer blocking the door leading backstage. If your Body Value is 20, you can just convince him to let you go. Follow Kerry through a door to speak with the girls. If you’re nice, you can take a picture with the girls to complete the job.
Killing in the Name
Obtained: From the Bartmoss Collective messages
Objective: Investigate the site from the Bartmoss Collective message
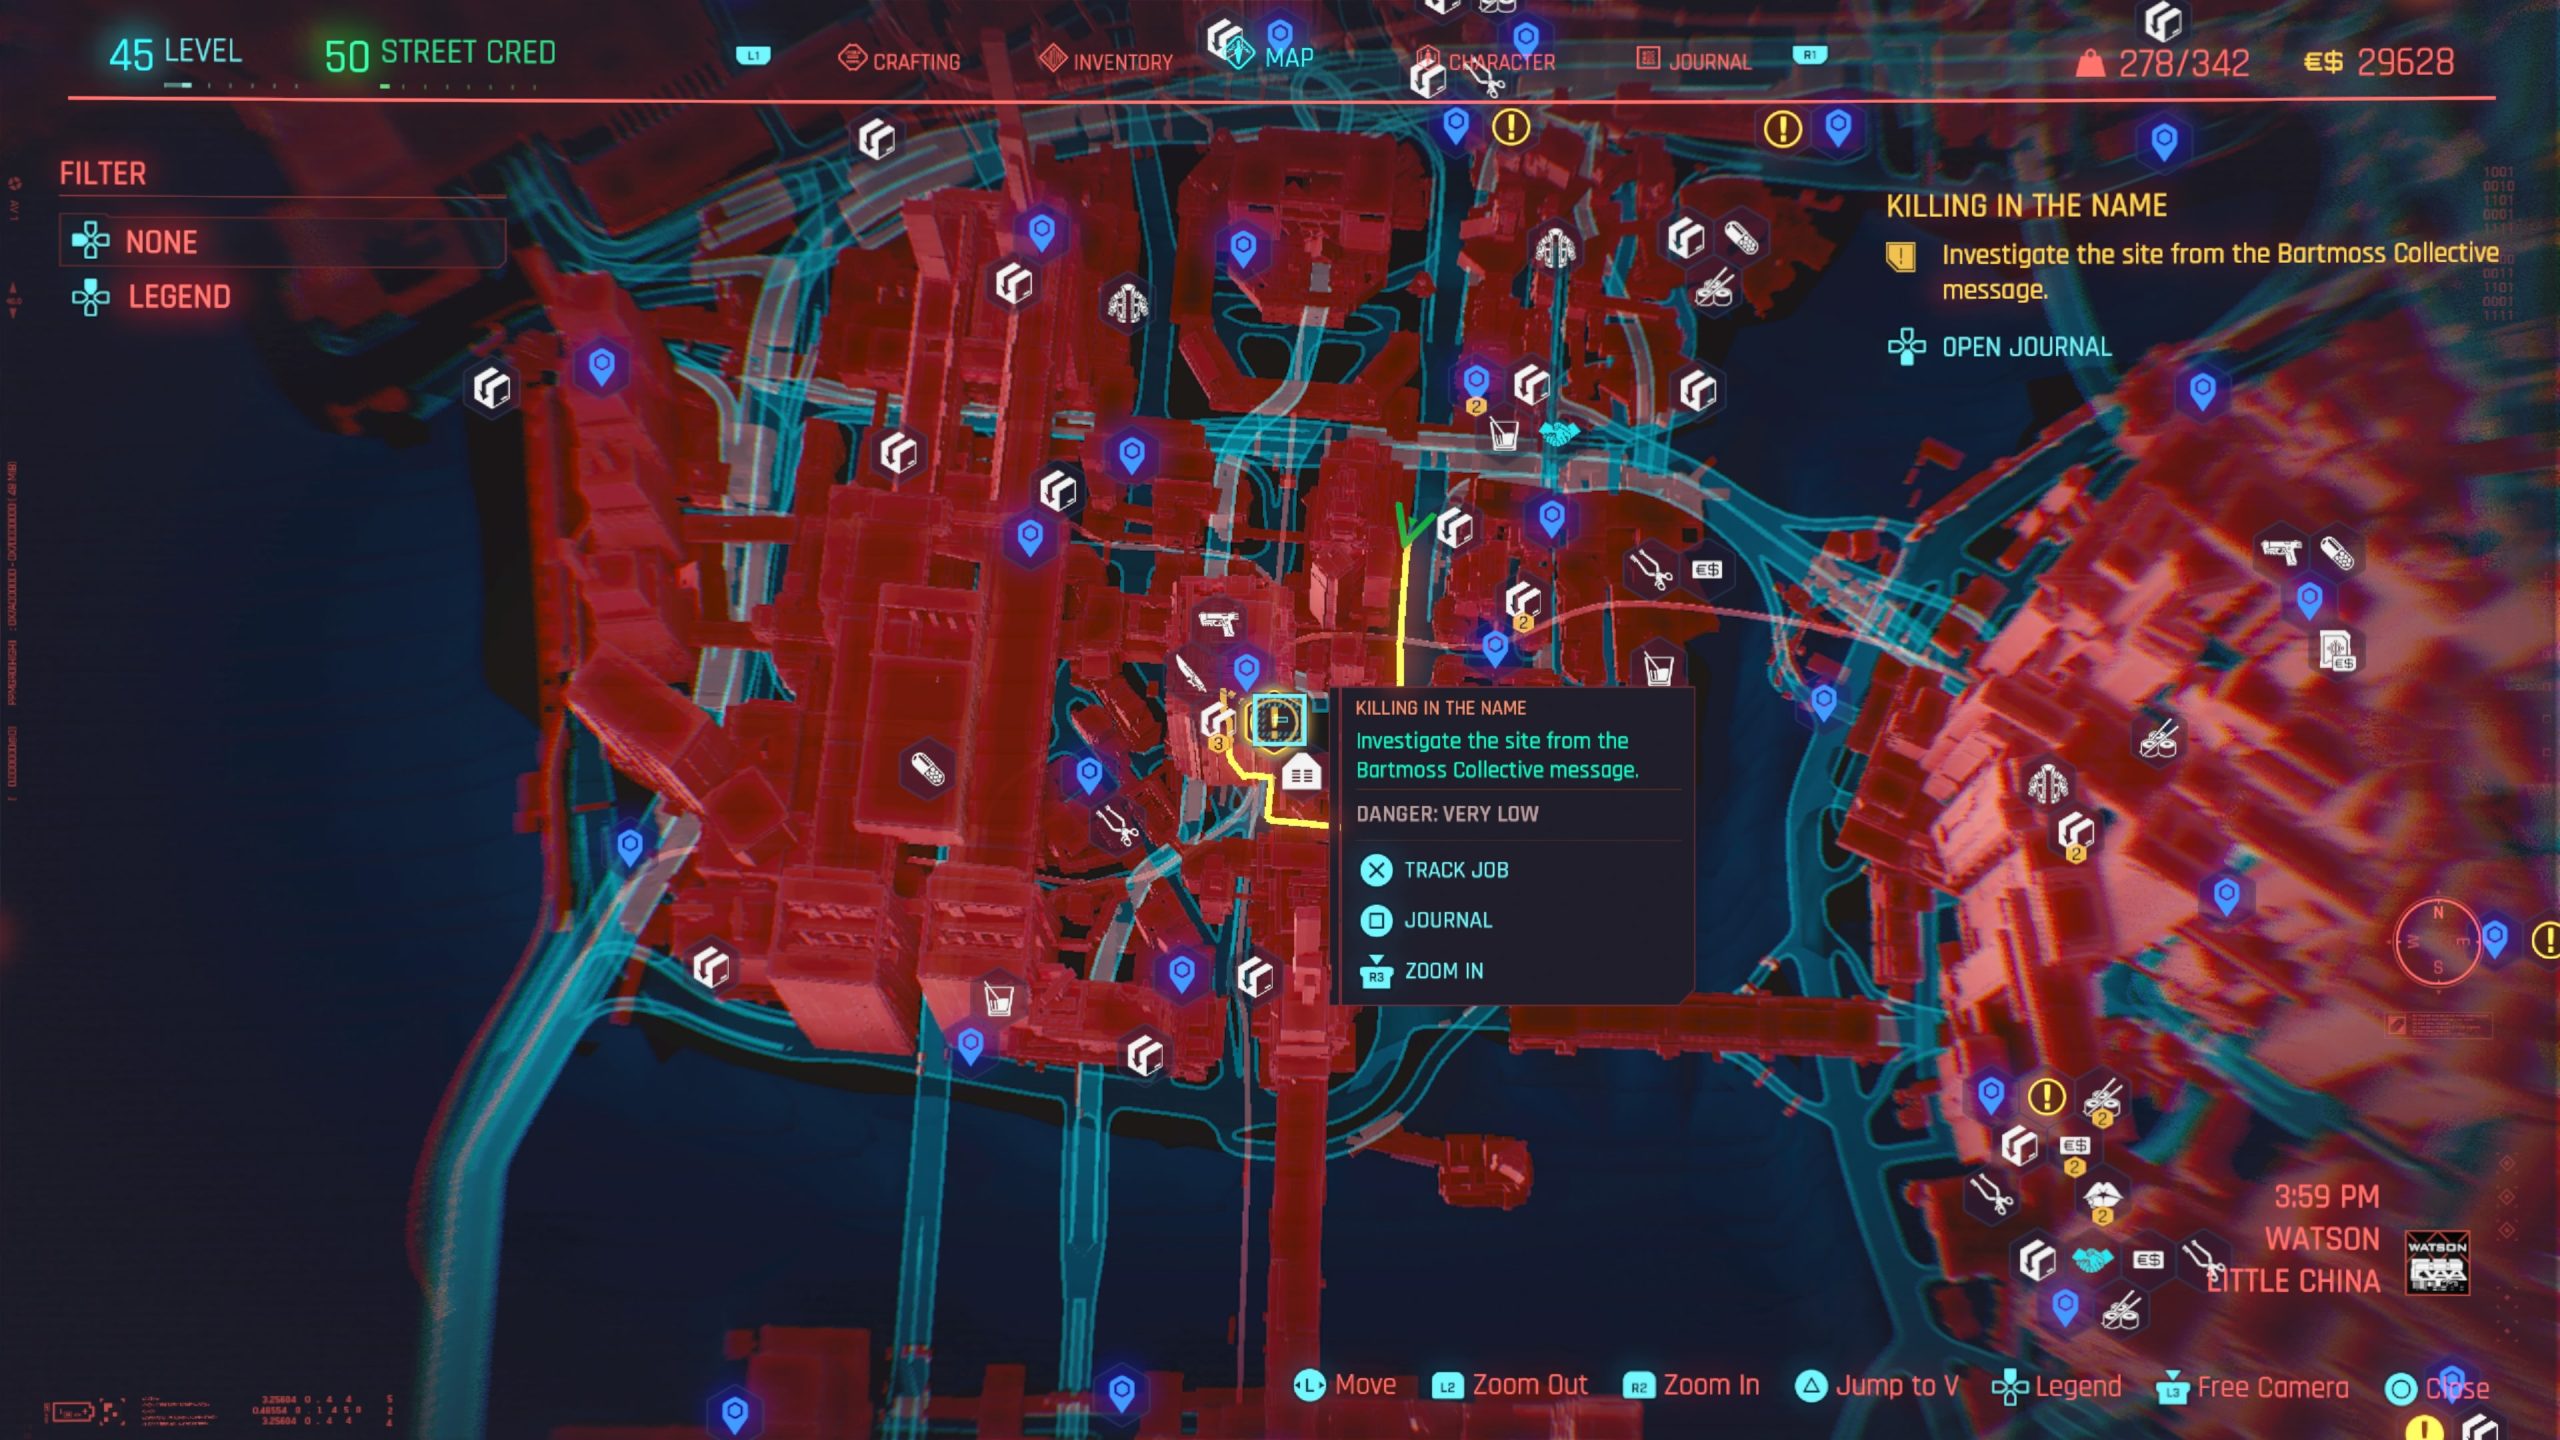
Head to V’s apartment and use her PC to access the Bartmoss Collective site under the Net tab. Select the post titled “Reward for any info on Swedenborg!” then exit the PC. Call Bes Isis to leave a voicemail.
After meeting Nancy (Bes Isis) during the Chippin’ In side job in Act III, call Nancy to take on the job then head for the location in Santo Domingo – Rancho Coronado near the Almunecar & Jerez fast travel point. Head into the the search area. Scan the box on the right building then climb up the fire escape on the right side. On the second to from the top row, scan the wall to find a router then jump over to it to jack in. Hack the point to receive a mysterious message then speak to Johnny. Follow the new coordinates out to the Badlands near the Solar Arrays fast travel point. Head for the trailer and climb on the top to find another router. Hack into it then speak to Johnny. Head to the new coordinates by the Protein Farm fast travel point then use the yellow ladders to climb up to the top of the structure where you’ll find another router in the middle of the sign. Hack it to receive another message with more coordinates in Pacifica near the West Wind Apartments. Head there and speak with Johnny. Head to the search area to find a Leonora fortuneteller bot. Pay an eddie to hear your fortune then scan the router on the side of it. Hack it then read the message and speak with Johnny. You can then either leave the bot alone or alter it. Make your decision then call Nancy to complete the job.
Kold Mirage
Obtained: You’ll receive a message about this side job.
Objective: See where the coordinates lead
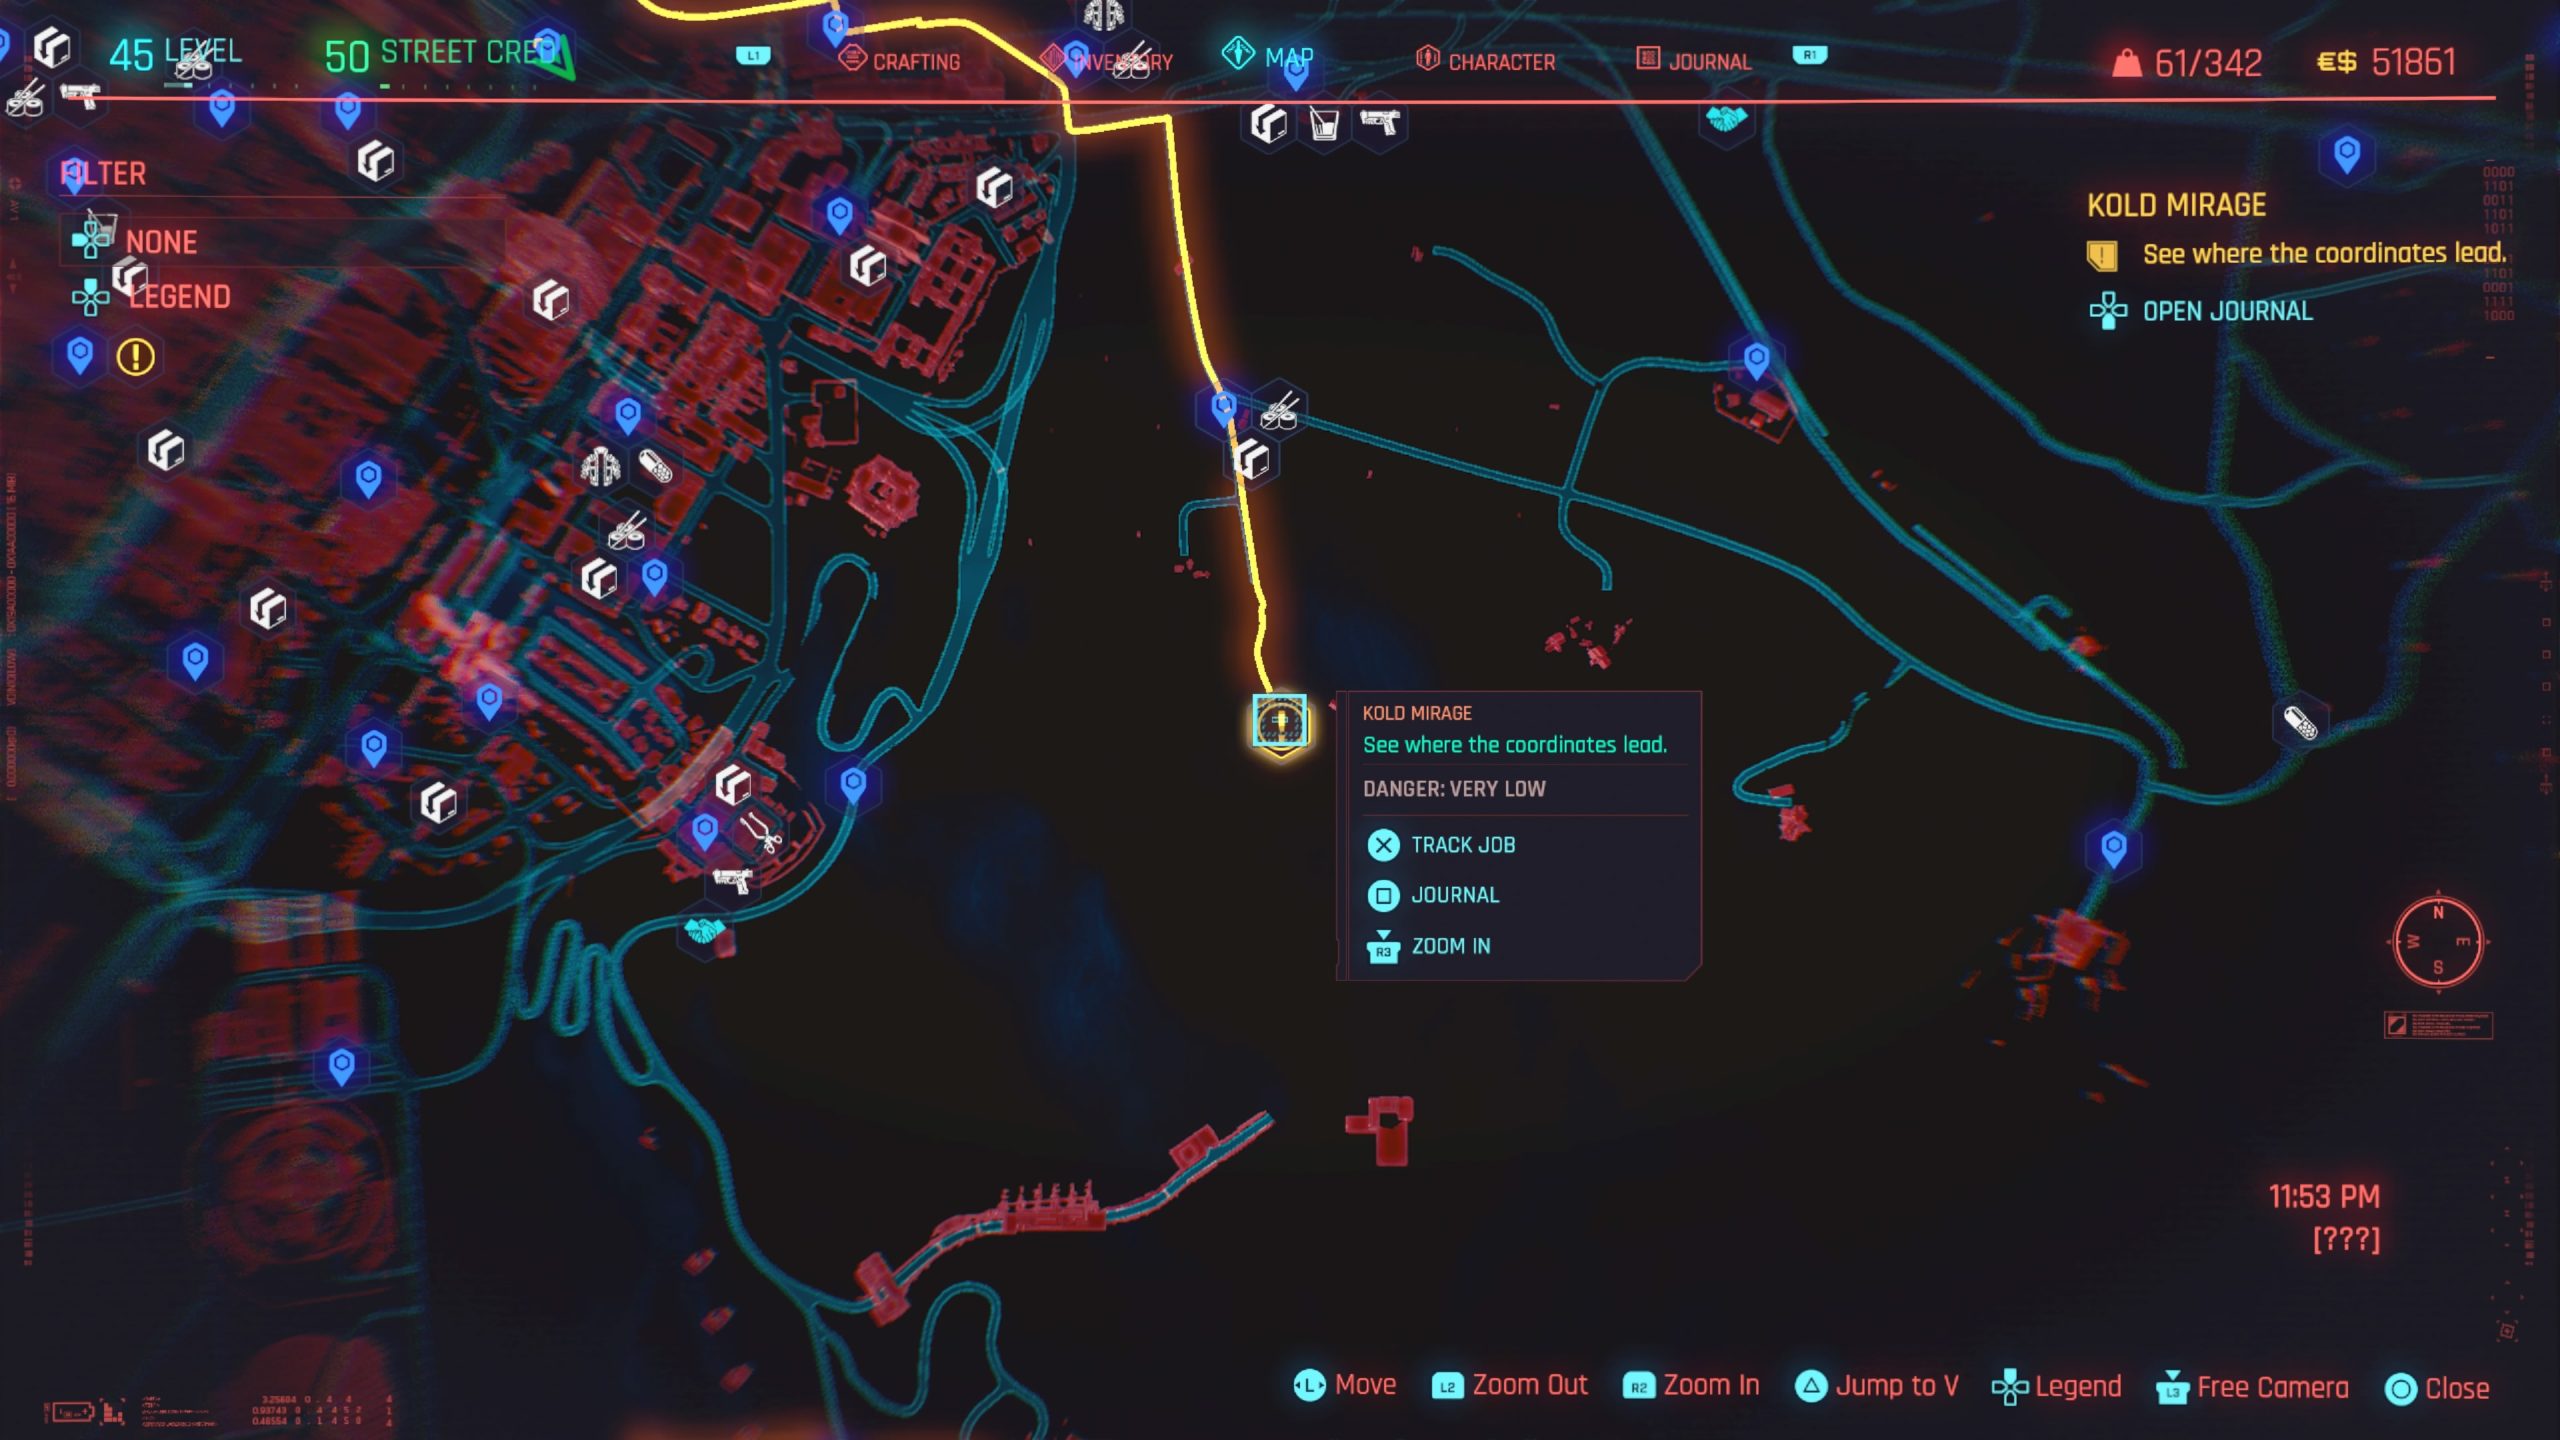
Follow the objective to the south of Medeski Fuel Station fast travel point in The Badlands to find a freezer. Open the freezer then speak with Johnny. Close the freezer then reopen it again. Scan the freezer then take the cyberdeck. Close the freezer once more then go to the Afterlife in Watson – Little China and speak with Nix. Agree to have him work on it then set the deck on Nix’s desk. Nix will plug in then something will go wrong and you’ll need to look for a way to save him. Quickly jack in the the computer to the left of Nix and solve the puzzle using the bottom row. Afterwards, speak with Nix to complete the job.
Off the Leash
Obtained: Kerry will call you sometime after finishing the I Don’t Wanna Hear It side job
Objective: Go to the given address
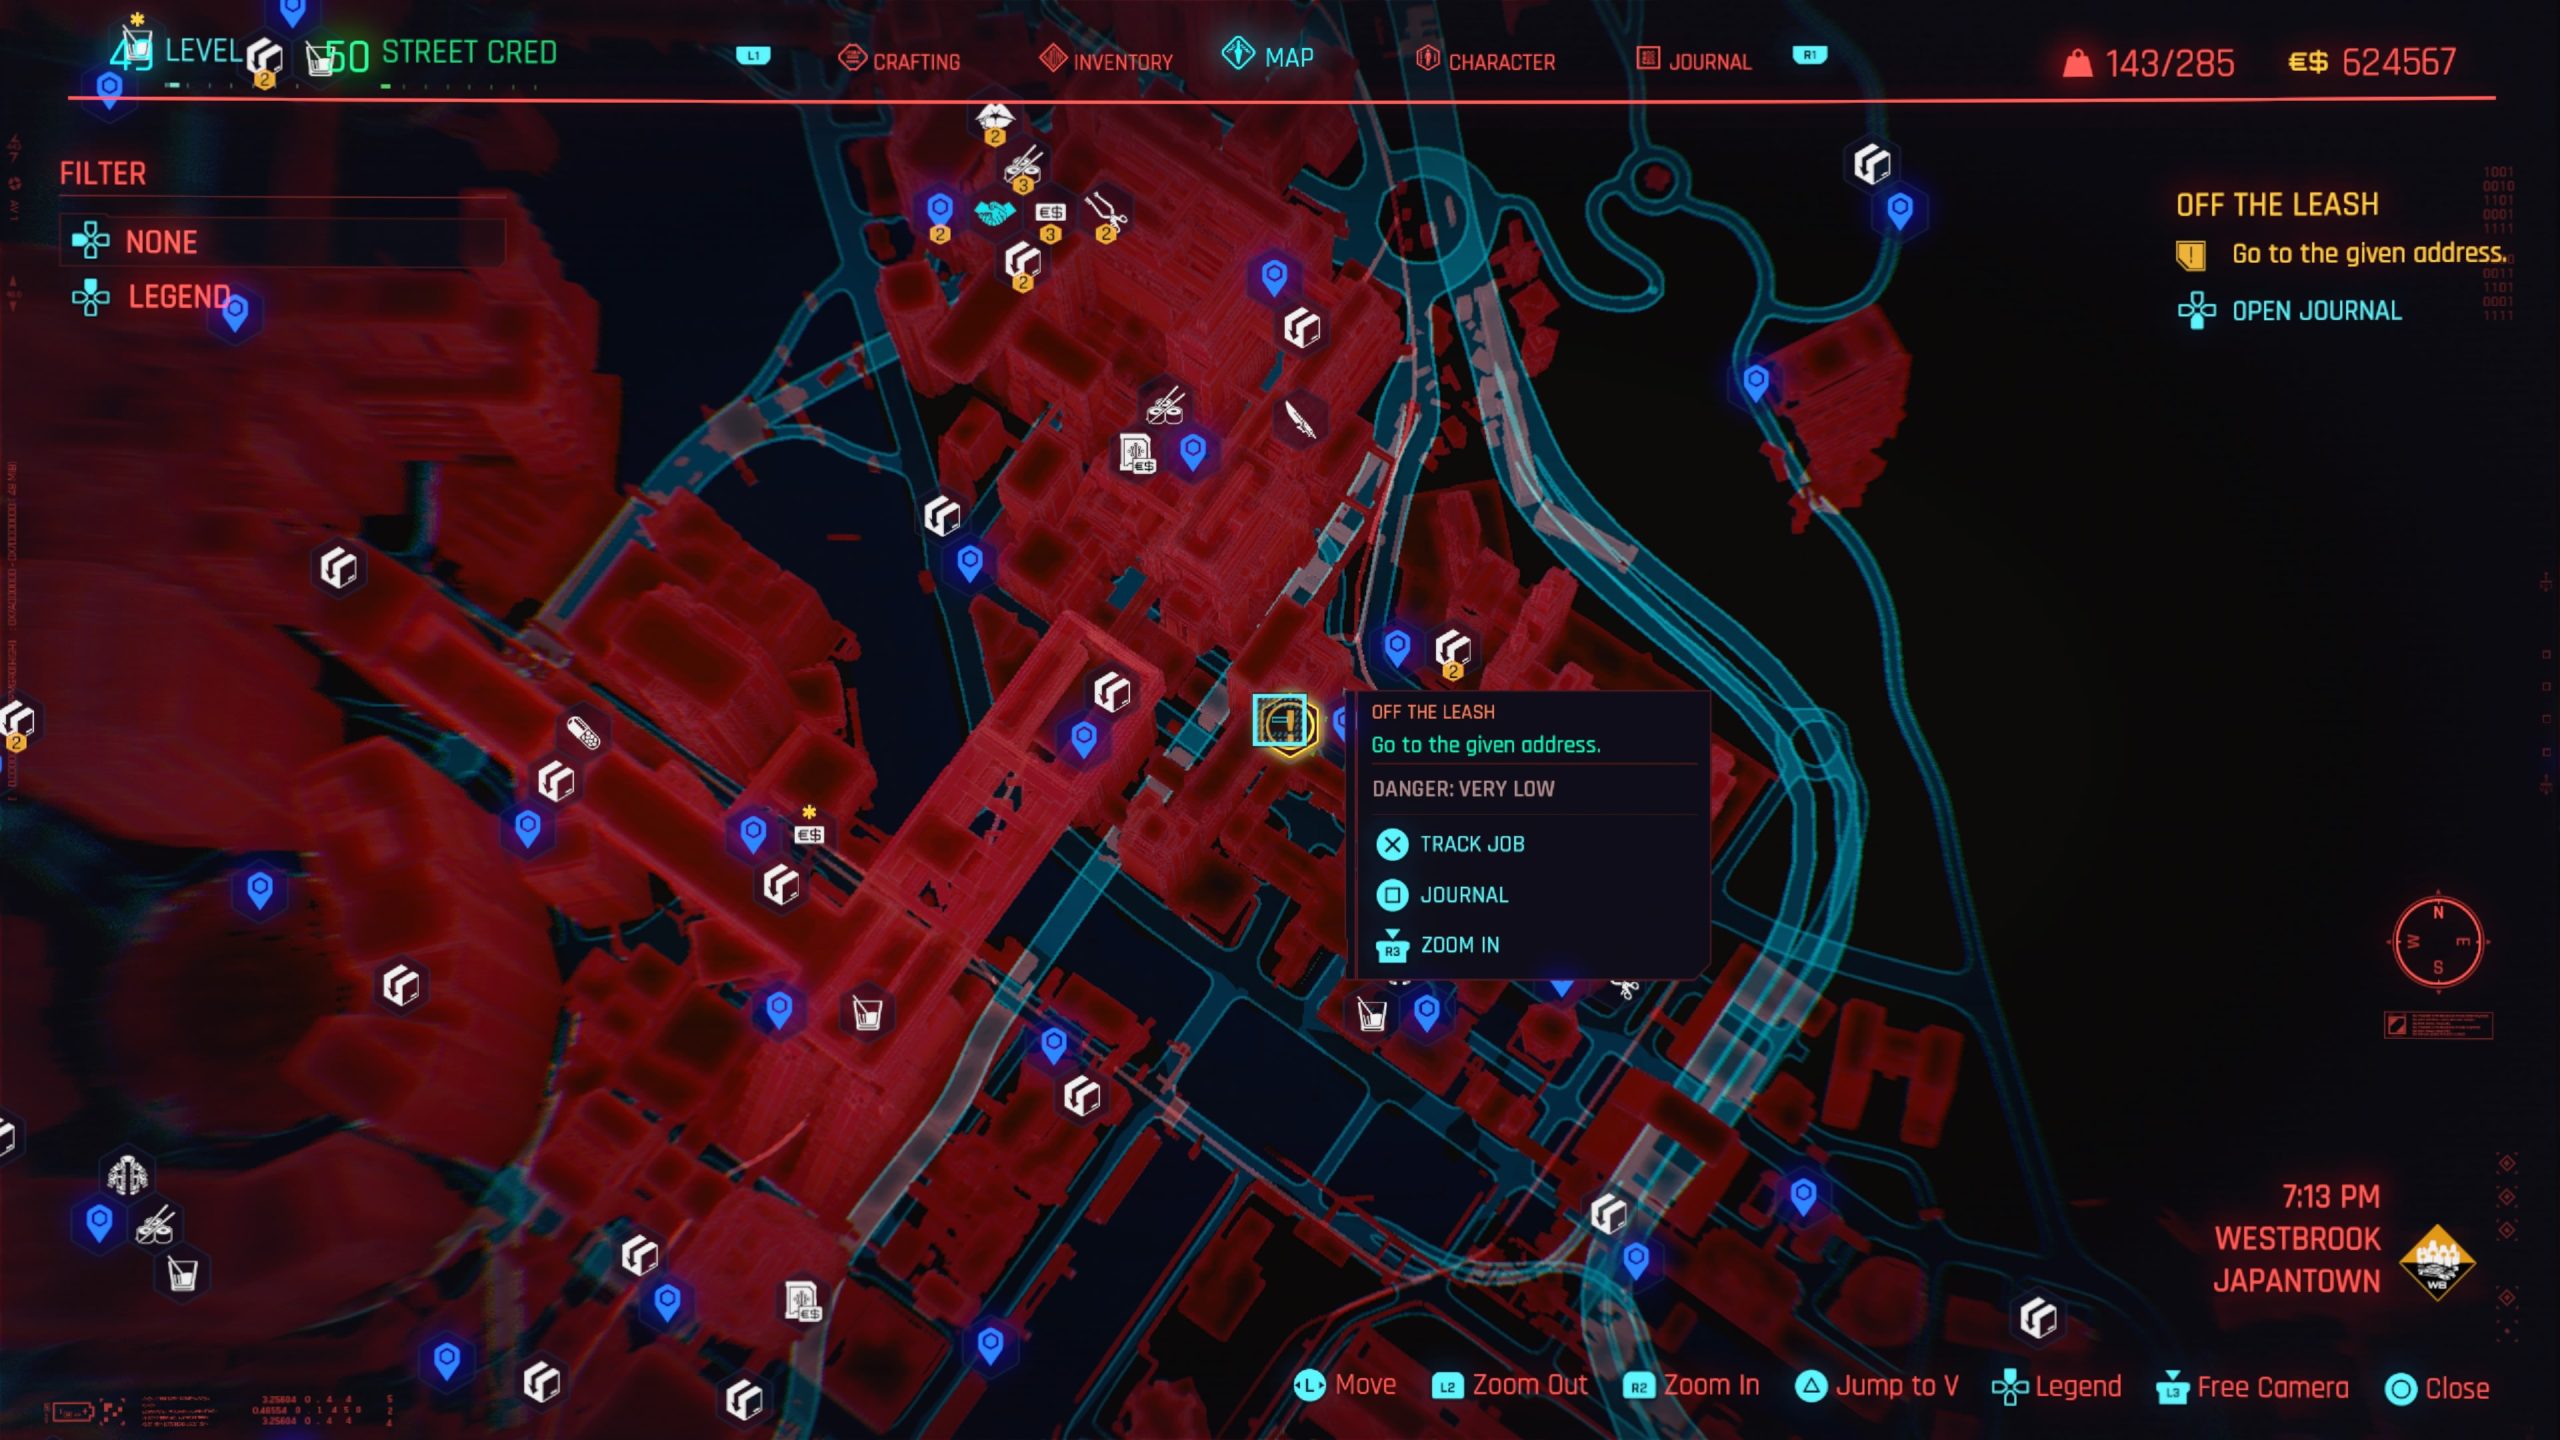
Head to the objective near the Dark Matter fast travel point in the southern part of Westbrook – Japantown. Enter the building and speak with the bouncer then enter the elevator and take it to the lounge. Watch the show from the balcony then head down the stairs on the right side of the room to reach Kerry and speak with him. Participate briefly in the interview then follow Kerry. Once you arrive on the balcony, speak with Kerry to complete the job.
Paid in Full
Obtained: Automatically as part of the story
Objective: Pay off your debt to Viktor
This gig is pretty straight forward. You will need to earn $21,000 eddies to pay back your debt to Viktor.
Psycho Killer
Obtained: Automatically during Act 1, you’ll receive a call from Regina.
Objective: Find all the cyberpsychos
First you need to locate all the cyberpsychos in the game and neutralize them. A complete listing of all the Cyberpsycho Sighting side jobs can be found here! Once you defeat all the cyberpsychos, wait for an update from Regina. She will text you 24 hours later in game telling you to meet up with her in person. Head on over to Watson – Kabuki and speak with Regina to complete the job.
Sacrum Profanum
Obtained: Speak with the monk at the Docks
Objective: Save the monk

Head northwest along the road towards the objective to find a large building with shipping containers stacked on the side of it. Head through the shipping containers to enter the area where the monk is being held. Since the monk asked us not to kill anyone, try to take out the 4 enemies along the way nonlethally. One is outside and the other 3 are inside the building. The best way to take out the enemies on the inside nonlethally is to climb up the shipping containers on the outside of the building. This will give you access to a metal walkway on the left inside the warehouse. Use ladder at the end of the walkway to sneak up on the enemies. After knocking out the enemies, speak with the monk to complete the job.
Second Conflict
Obtained: Automatically after finishing the Holdin’ On side job in Act III
Objective: Enter the Totentanz
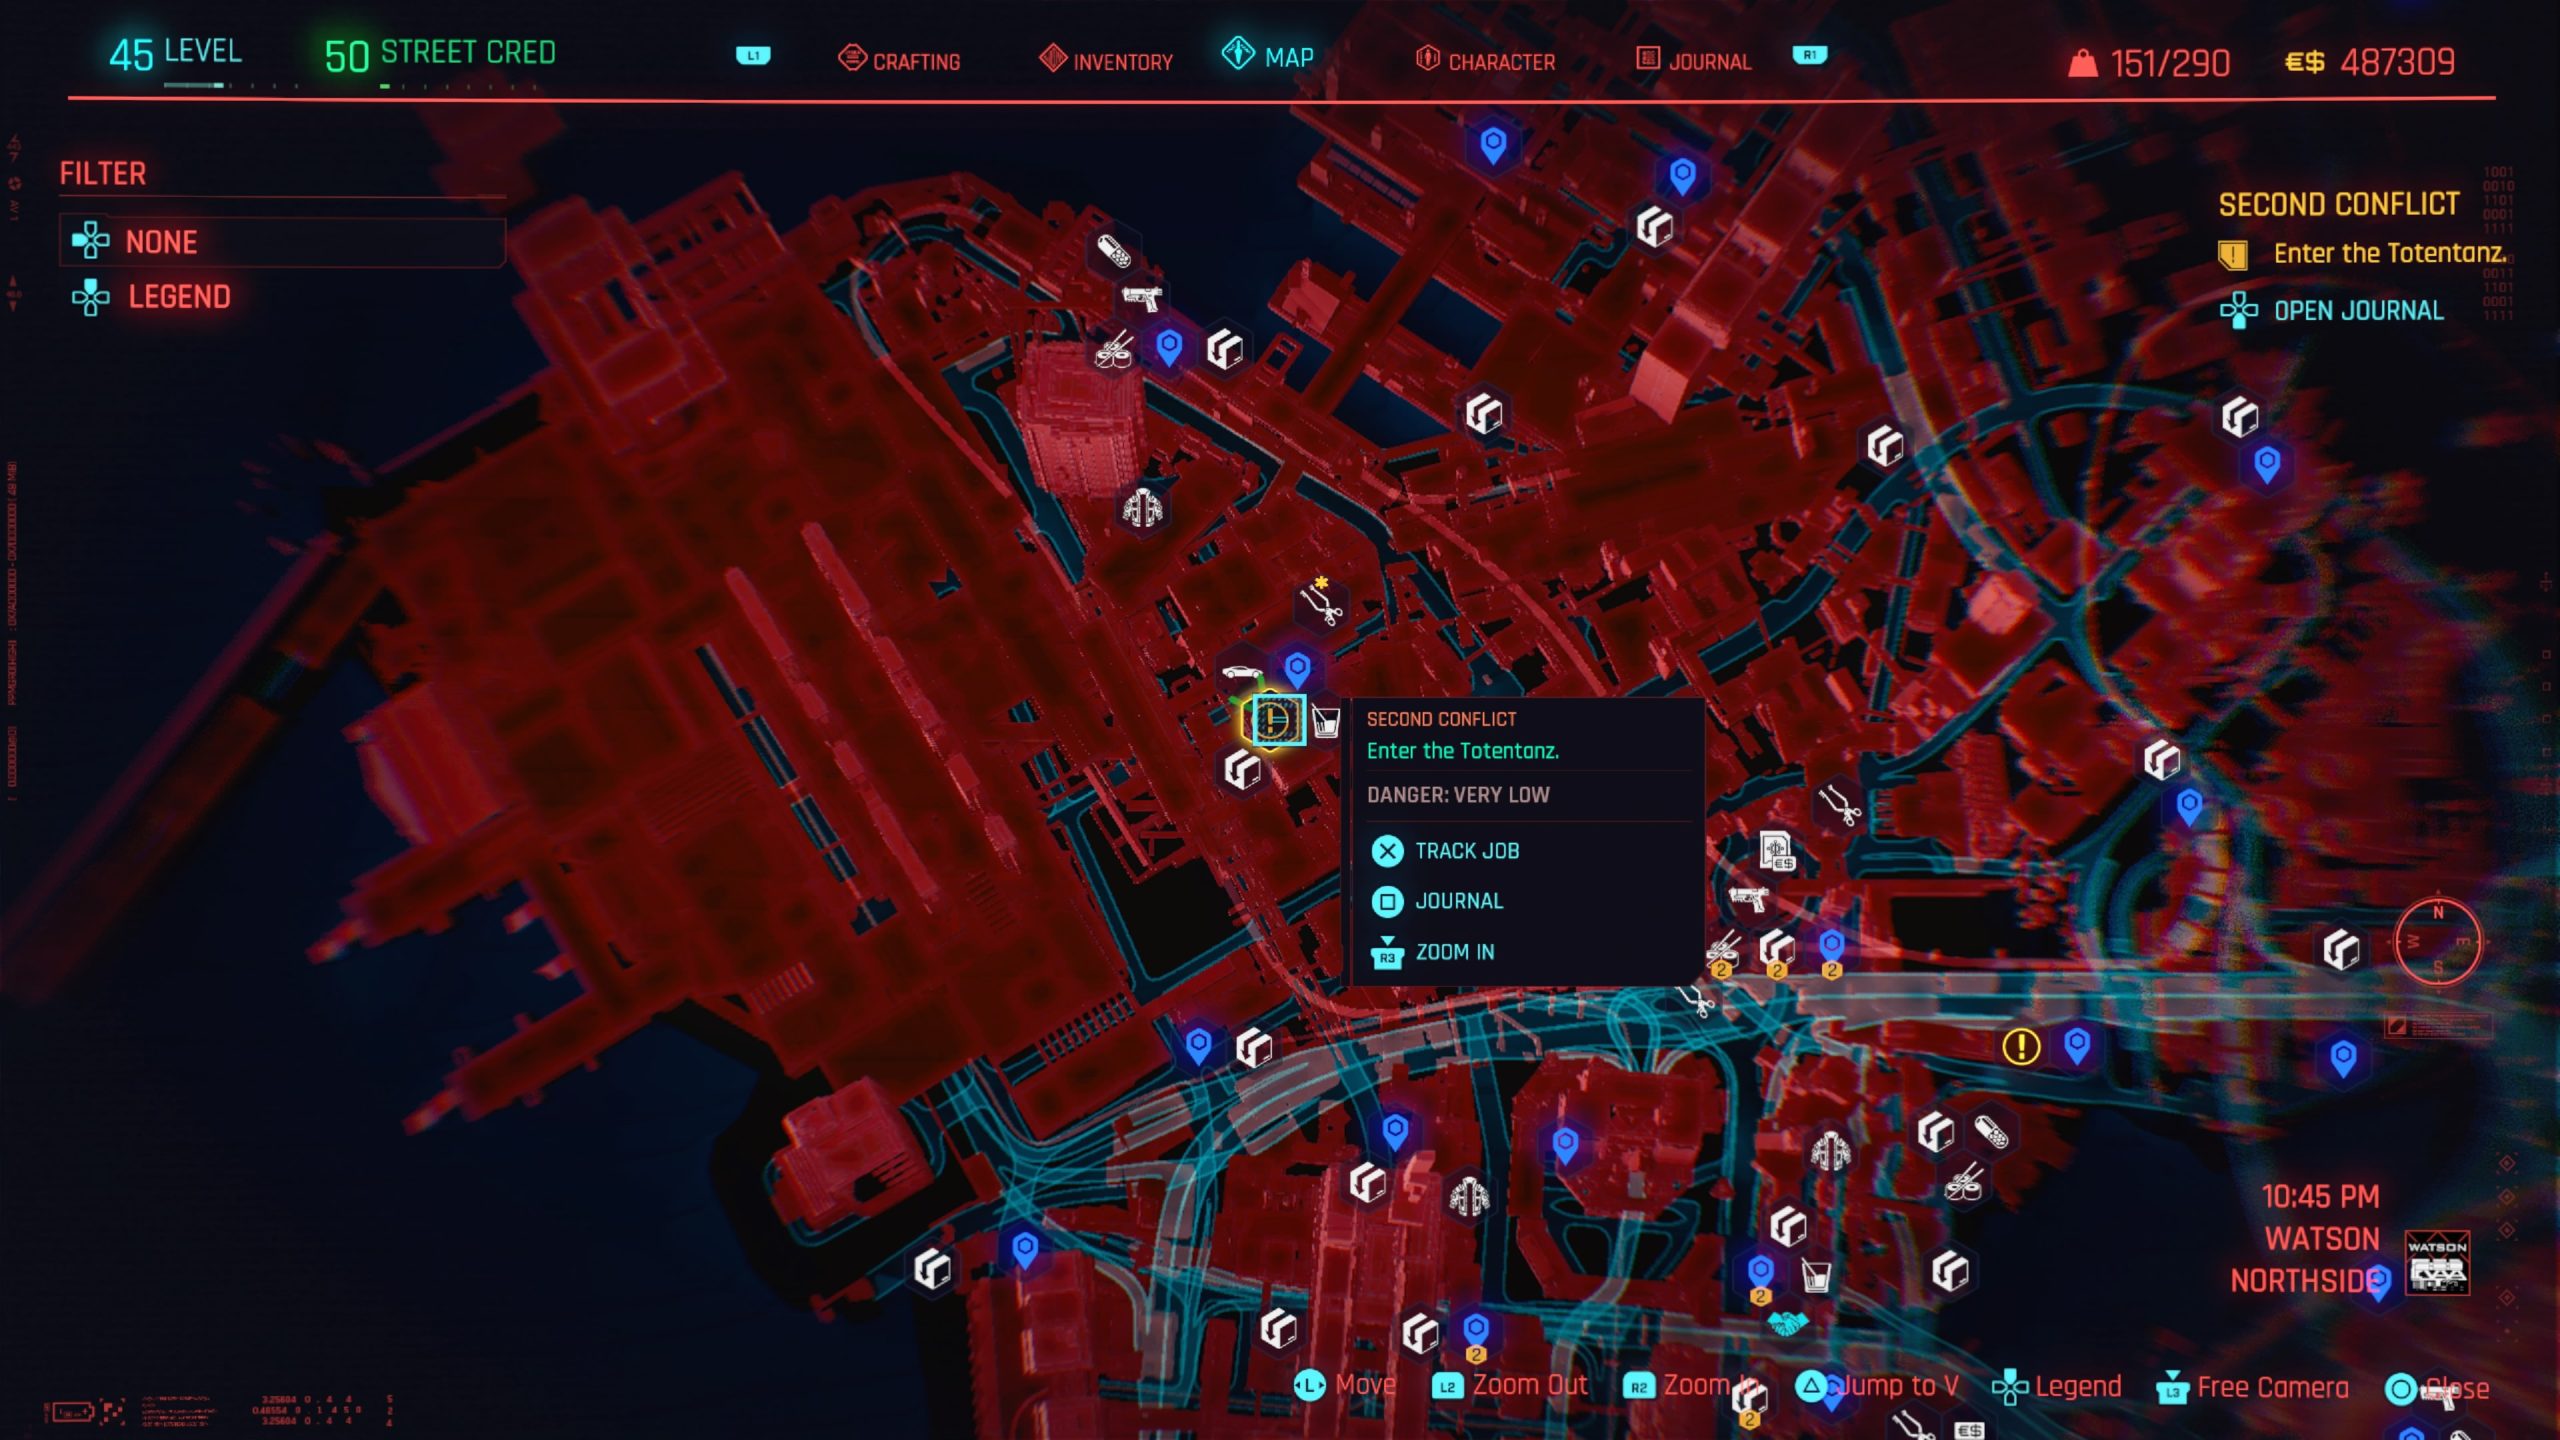
Travel to the Totentanz near the Pershing St fast travel point at Watson – Northside then enter the building. Head to the second floor and wait near the bouncer for the elevator to arrive. Take it to the 3rd floor and follow the hallway to reach the club. Speak to the goons near the entrance then follow Patricia to Brick. If you saved Brick earlier, he’ll help you out and you are free to follow Nancy. Hop in her car to strike up a deal then call Kerry. Travel to Denny’s house near the Arasaka Estate fast travel point in North Oak. Use the intercom then follow the vehicle tracks around back to the pool. Speak with Denny and Henry. You’ll have to pick the person you want to come to the concert. Make your choice to complete the quest. Make sure to grab the unique bat from the cement pool before you leave.
Send in the Clowns
Obtained: Ozob will send you a message in Act II
Objective: Call Ozob Bozo

Call up Ozob and agree to be his driver then travel to the Cherry Blossom Market fast travel point in Westbrook – Japantown and let out a honk (hold L3). After Ozob gets into the passenger seat, drive him to the objective in Watson – Little China near the Bradbury & Burn fast travel point. Wait for Ozob to get his “takeout”. When you hear the signal get out of the car and defeat the enemies. Speak with Ozob to complete the job.
Shoot to Thrill
Obtained: During Act 2, Wilson will call you about a shooting completion at his shooting range
Objective: Compete in the gun competition
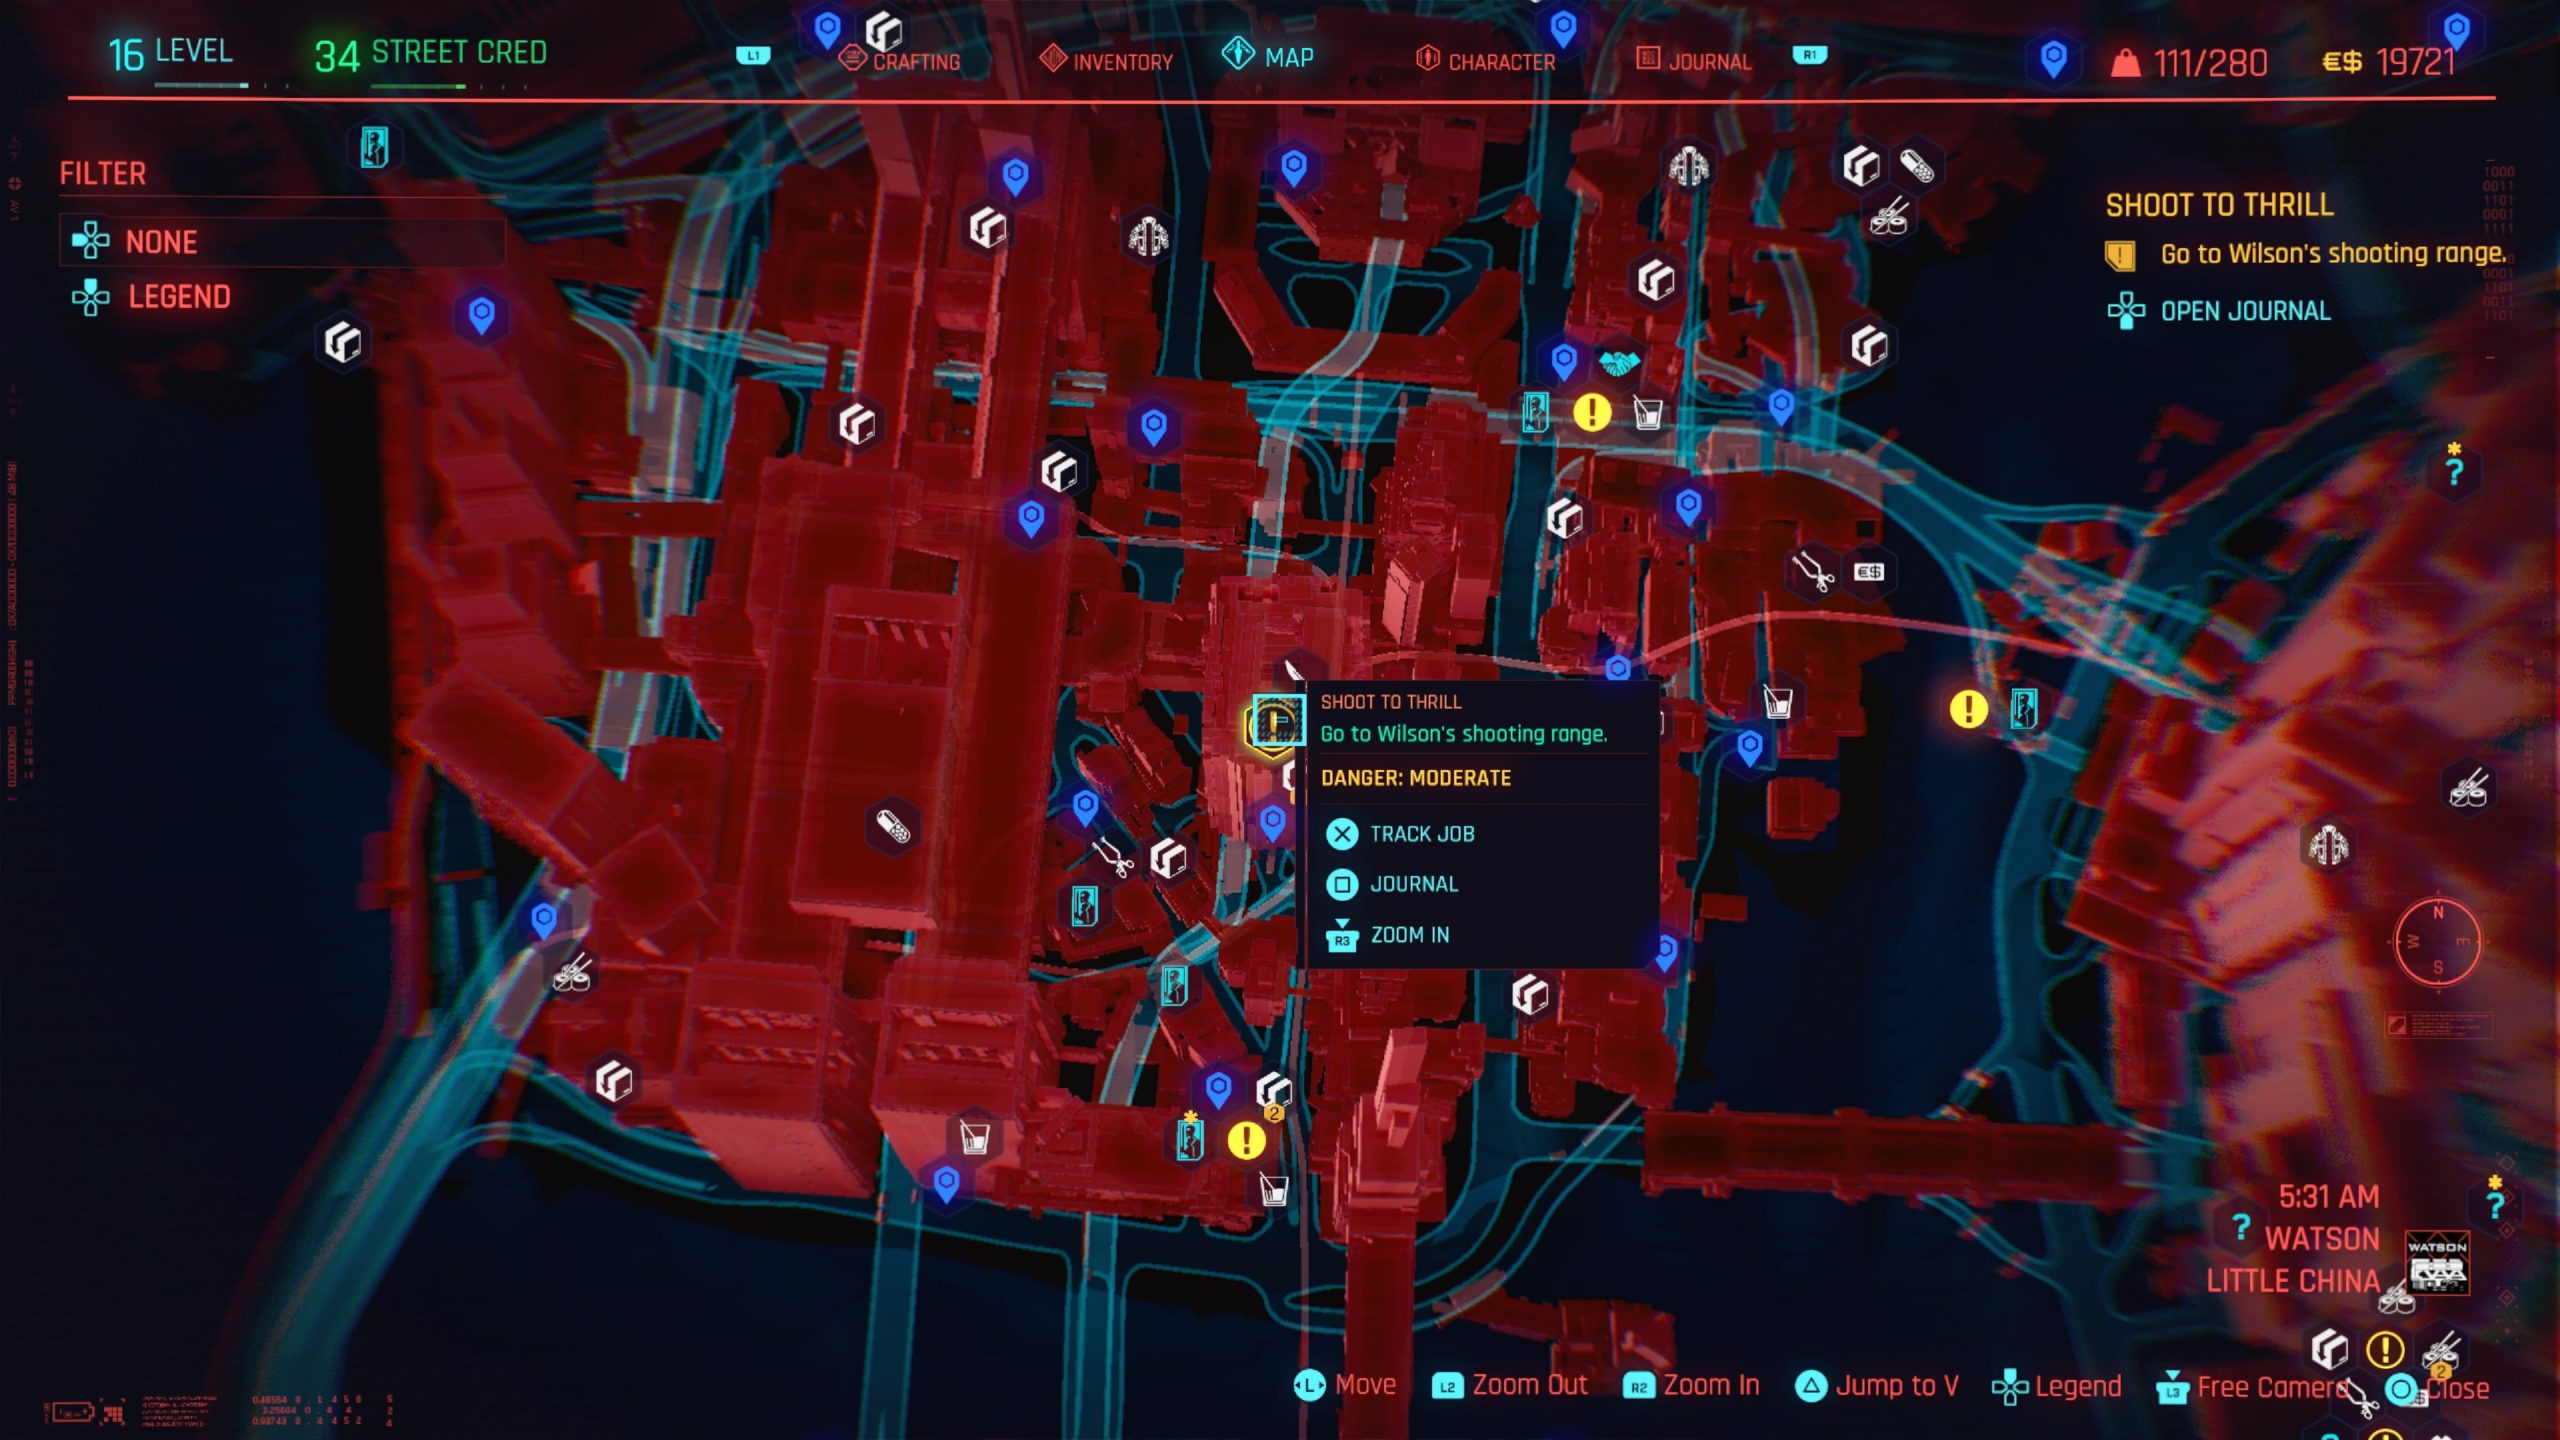
For the competition, you’ll need a pistol with a high firing rate. This will allow you to hit a target multiple times to gain additional points. When your ready, travel to Wilson’s shooting range in Watson – China Town near V’s apartment and speak with him to start the competition. Head into to the ring to start Wilson’s rundown of the rules then equip your pistol and fire away. You’ll need a score of 41 or more to win the competition. If you win, speak with Wilson to collect your reward, which is a purple Lexington pistol. Please note that you do not need to win to complete the gig.
Spellbound
Obtained: After visiting Nix in the Afterlife, Nix will message you about a job in Act II.
Objective: Talk to Nix
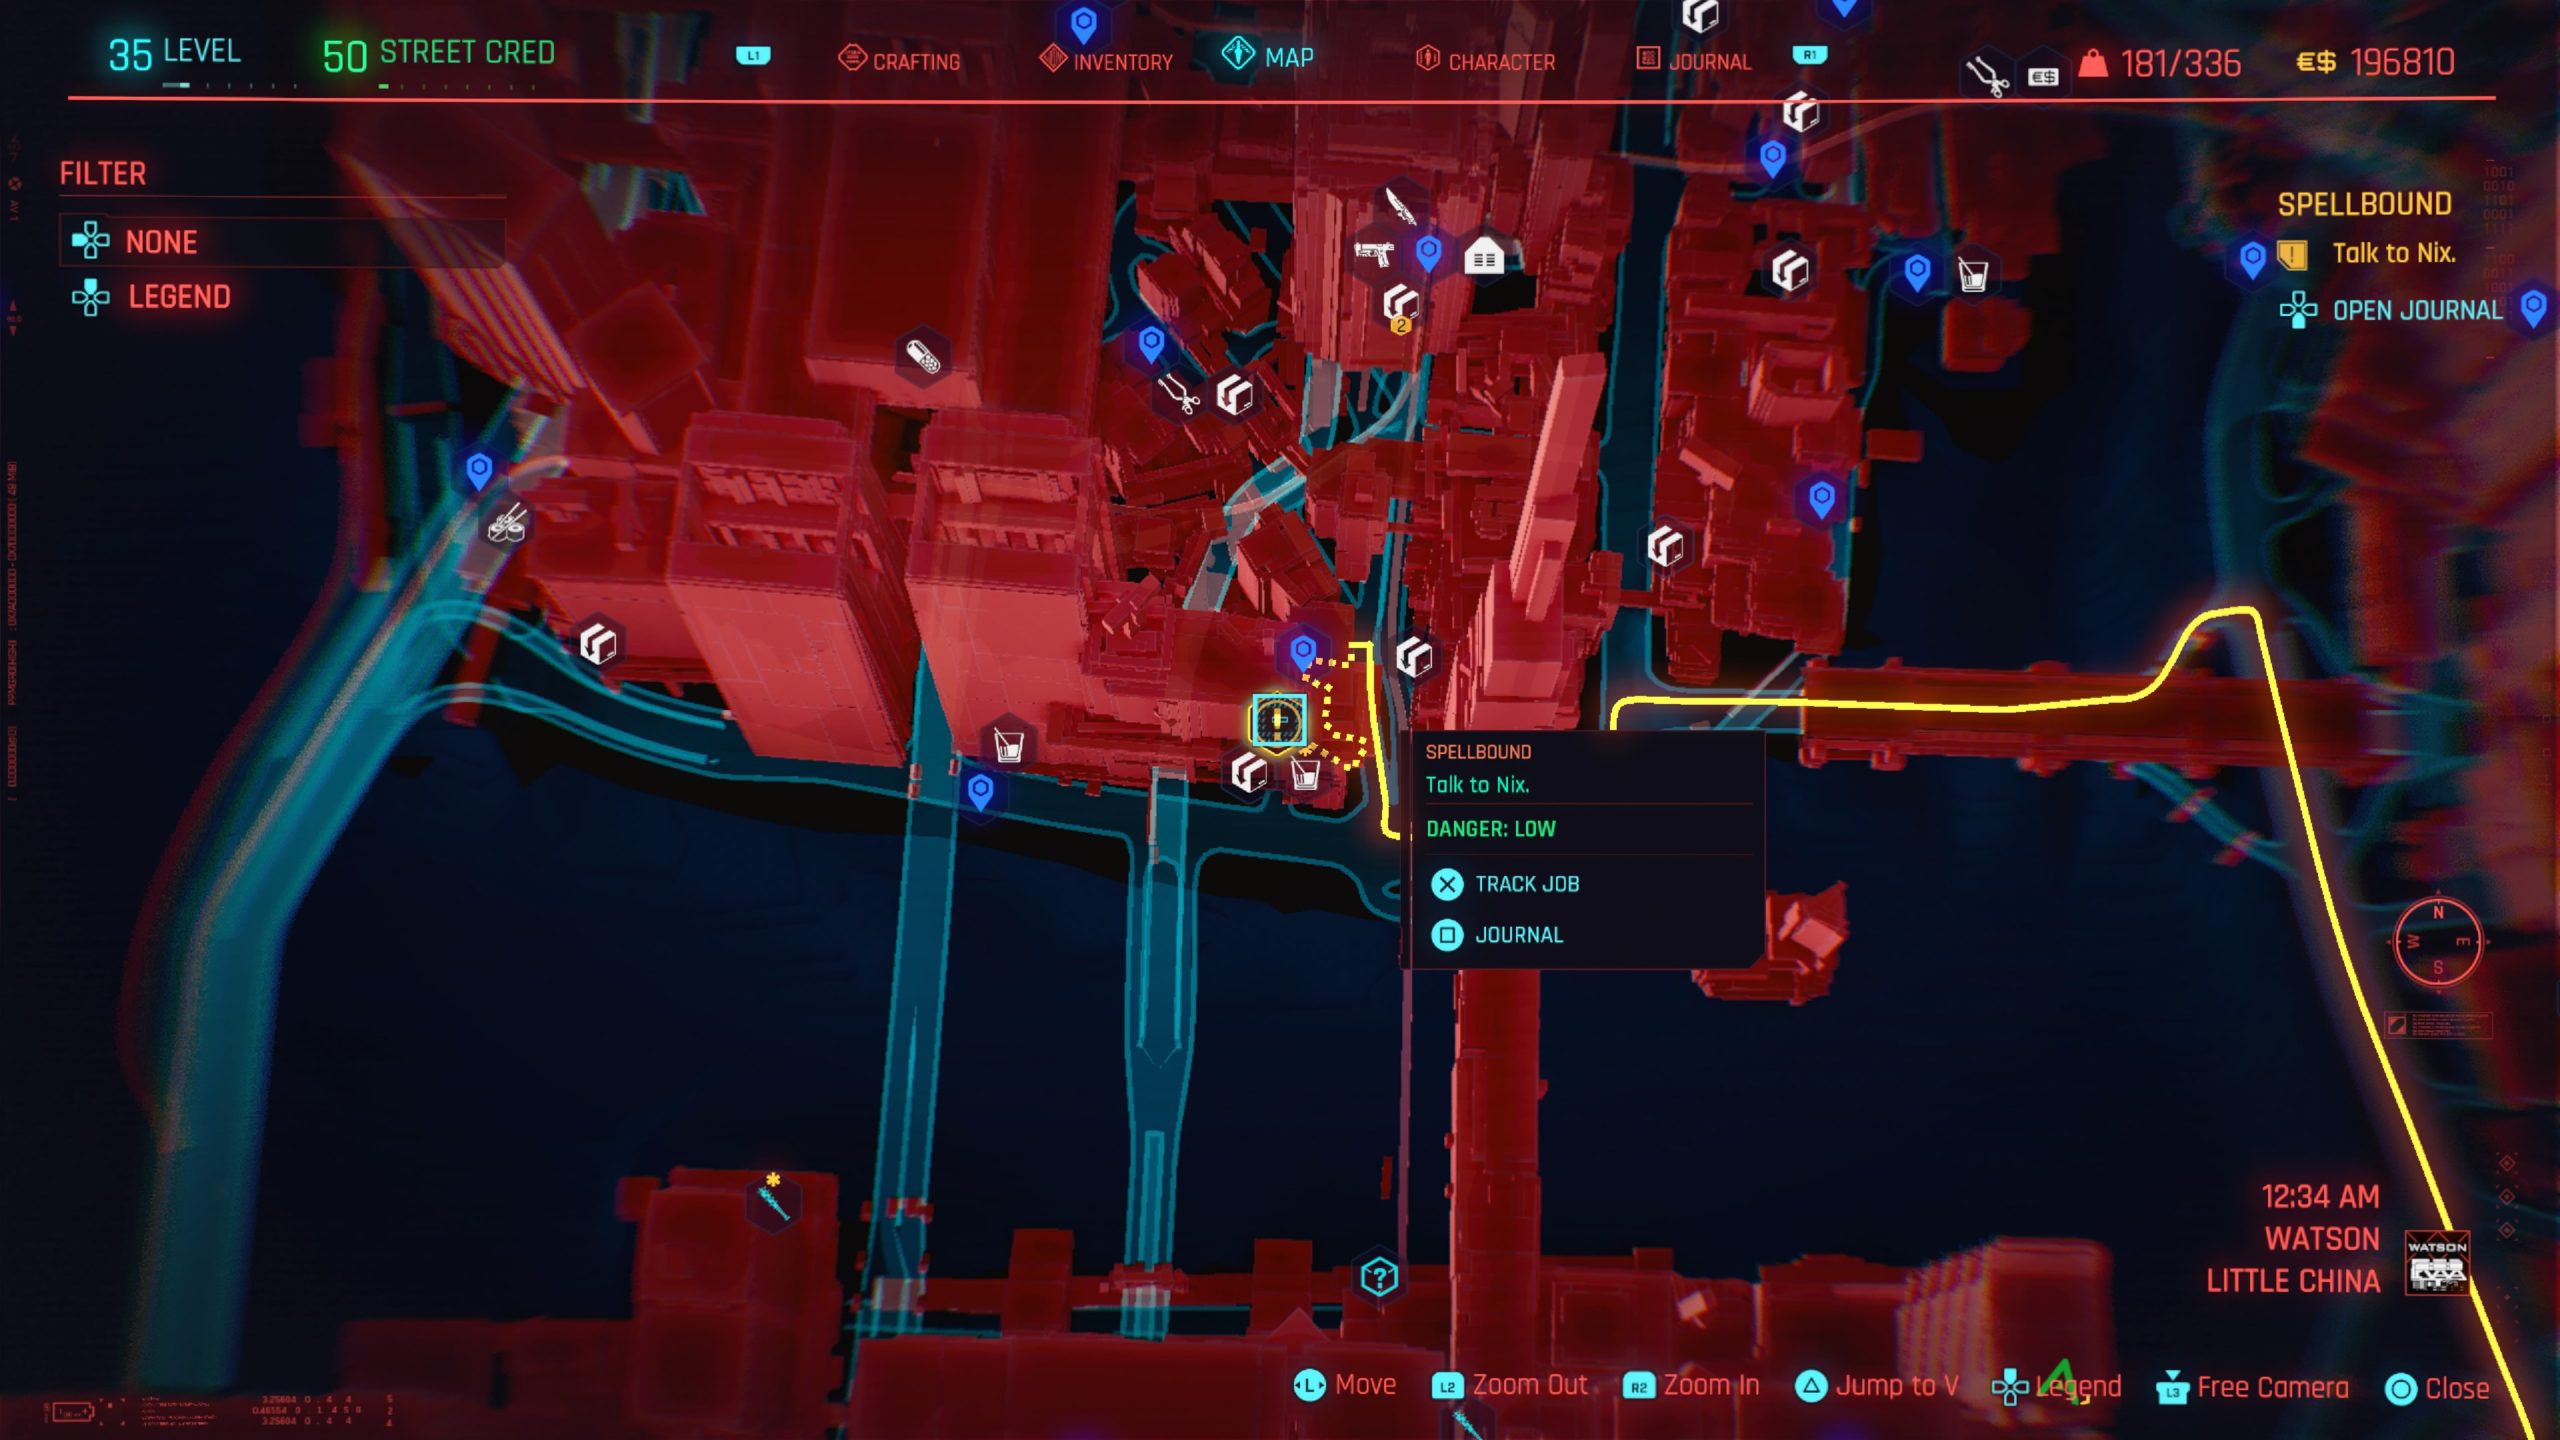
Travel to Afterlife to find Nix in a computer room past the bar. Speak with him and agree to do the job then give R3n0 a call. She will send you coordinates to a skywalk near the Lele Park fast travel point in Westbrook – Charter Hill. Approach her by the bar and speak with her to get some options. If your Intelligence Value is 9, you can knock her out and hack the laptop to receive the coordinates of the book’s location. Otherwise you’ll need to pay the $7,300 eddies for them. If you’re a corpo, you can select the corpo option to negotiate the price down to $1,800 eddies. Follow the objective a short ways away to find the goods in a suitcase next to a vending machine. With the Book of Spells in hand, you can choose to decrypt it before handing it over to Nix. Return to Afterlife and speak with Nix to hand over the book. If you have an Intelligence value of 9, you can get more money out of it. This will complete the side job.
Talkin’ ‘Bout a Revolution
Obtained: After completing the Ex-Factor side job and waiting awhile, Judy will text you.
Objective: Wait for Judy’s call
After Judy calls you, head over to her apartment and wait until evening. Use the intercom then enter the apartment and sit on the stool in the kitchen to speak with the group. When you need to test out Tom, punch him then continue discussing the plan. Agree to help with the plan then speak with Judy. Afterwards, crash on the couch then eat the breakfast on the counter in the kitchen and leave the building to complete the job.
The Gift
Obtained: Automatically from T-Bug after completing the Rescue main job
Objective: Retrieve the ping quickhack from the Netrunner

Travel to Kabuki Market in Watson – Kabuki then make your way to the Netrunner on the second level. Speak with Yoko and tell her that T-Bug sent you then select the PING Quickhack. Equip it then analyze the surveillance camera in the back of the shop and choose PING to reveal the access point. Jack In to it and complete the breach mini-game to finish the job.
The Gig
Obtained: Automatically from Wakako after completing the Rescue main job
Objective: Speak with Wakako
You’ll have to wait until the Watson lockdown has ended before you can speak to Wakako. Once you speak with her, you’ll need to collect your reward from a ripper near the Pershing St fast travel point to complete the job.
The Gun
Obtained: Speak with Wilson at the 2nd Amendment weapons shop in Watson Little China near V’s apartment
Objective: Collect your gun from Wilson
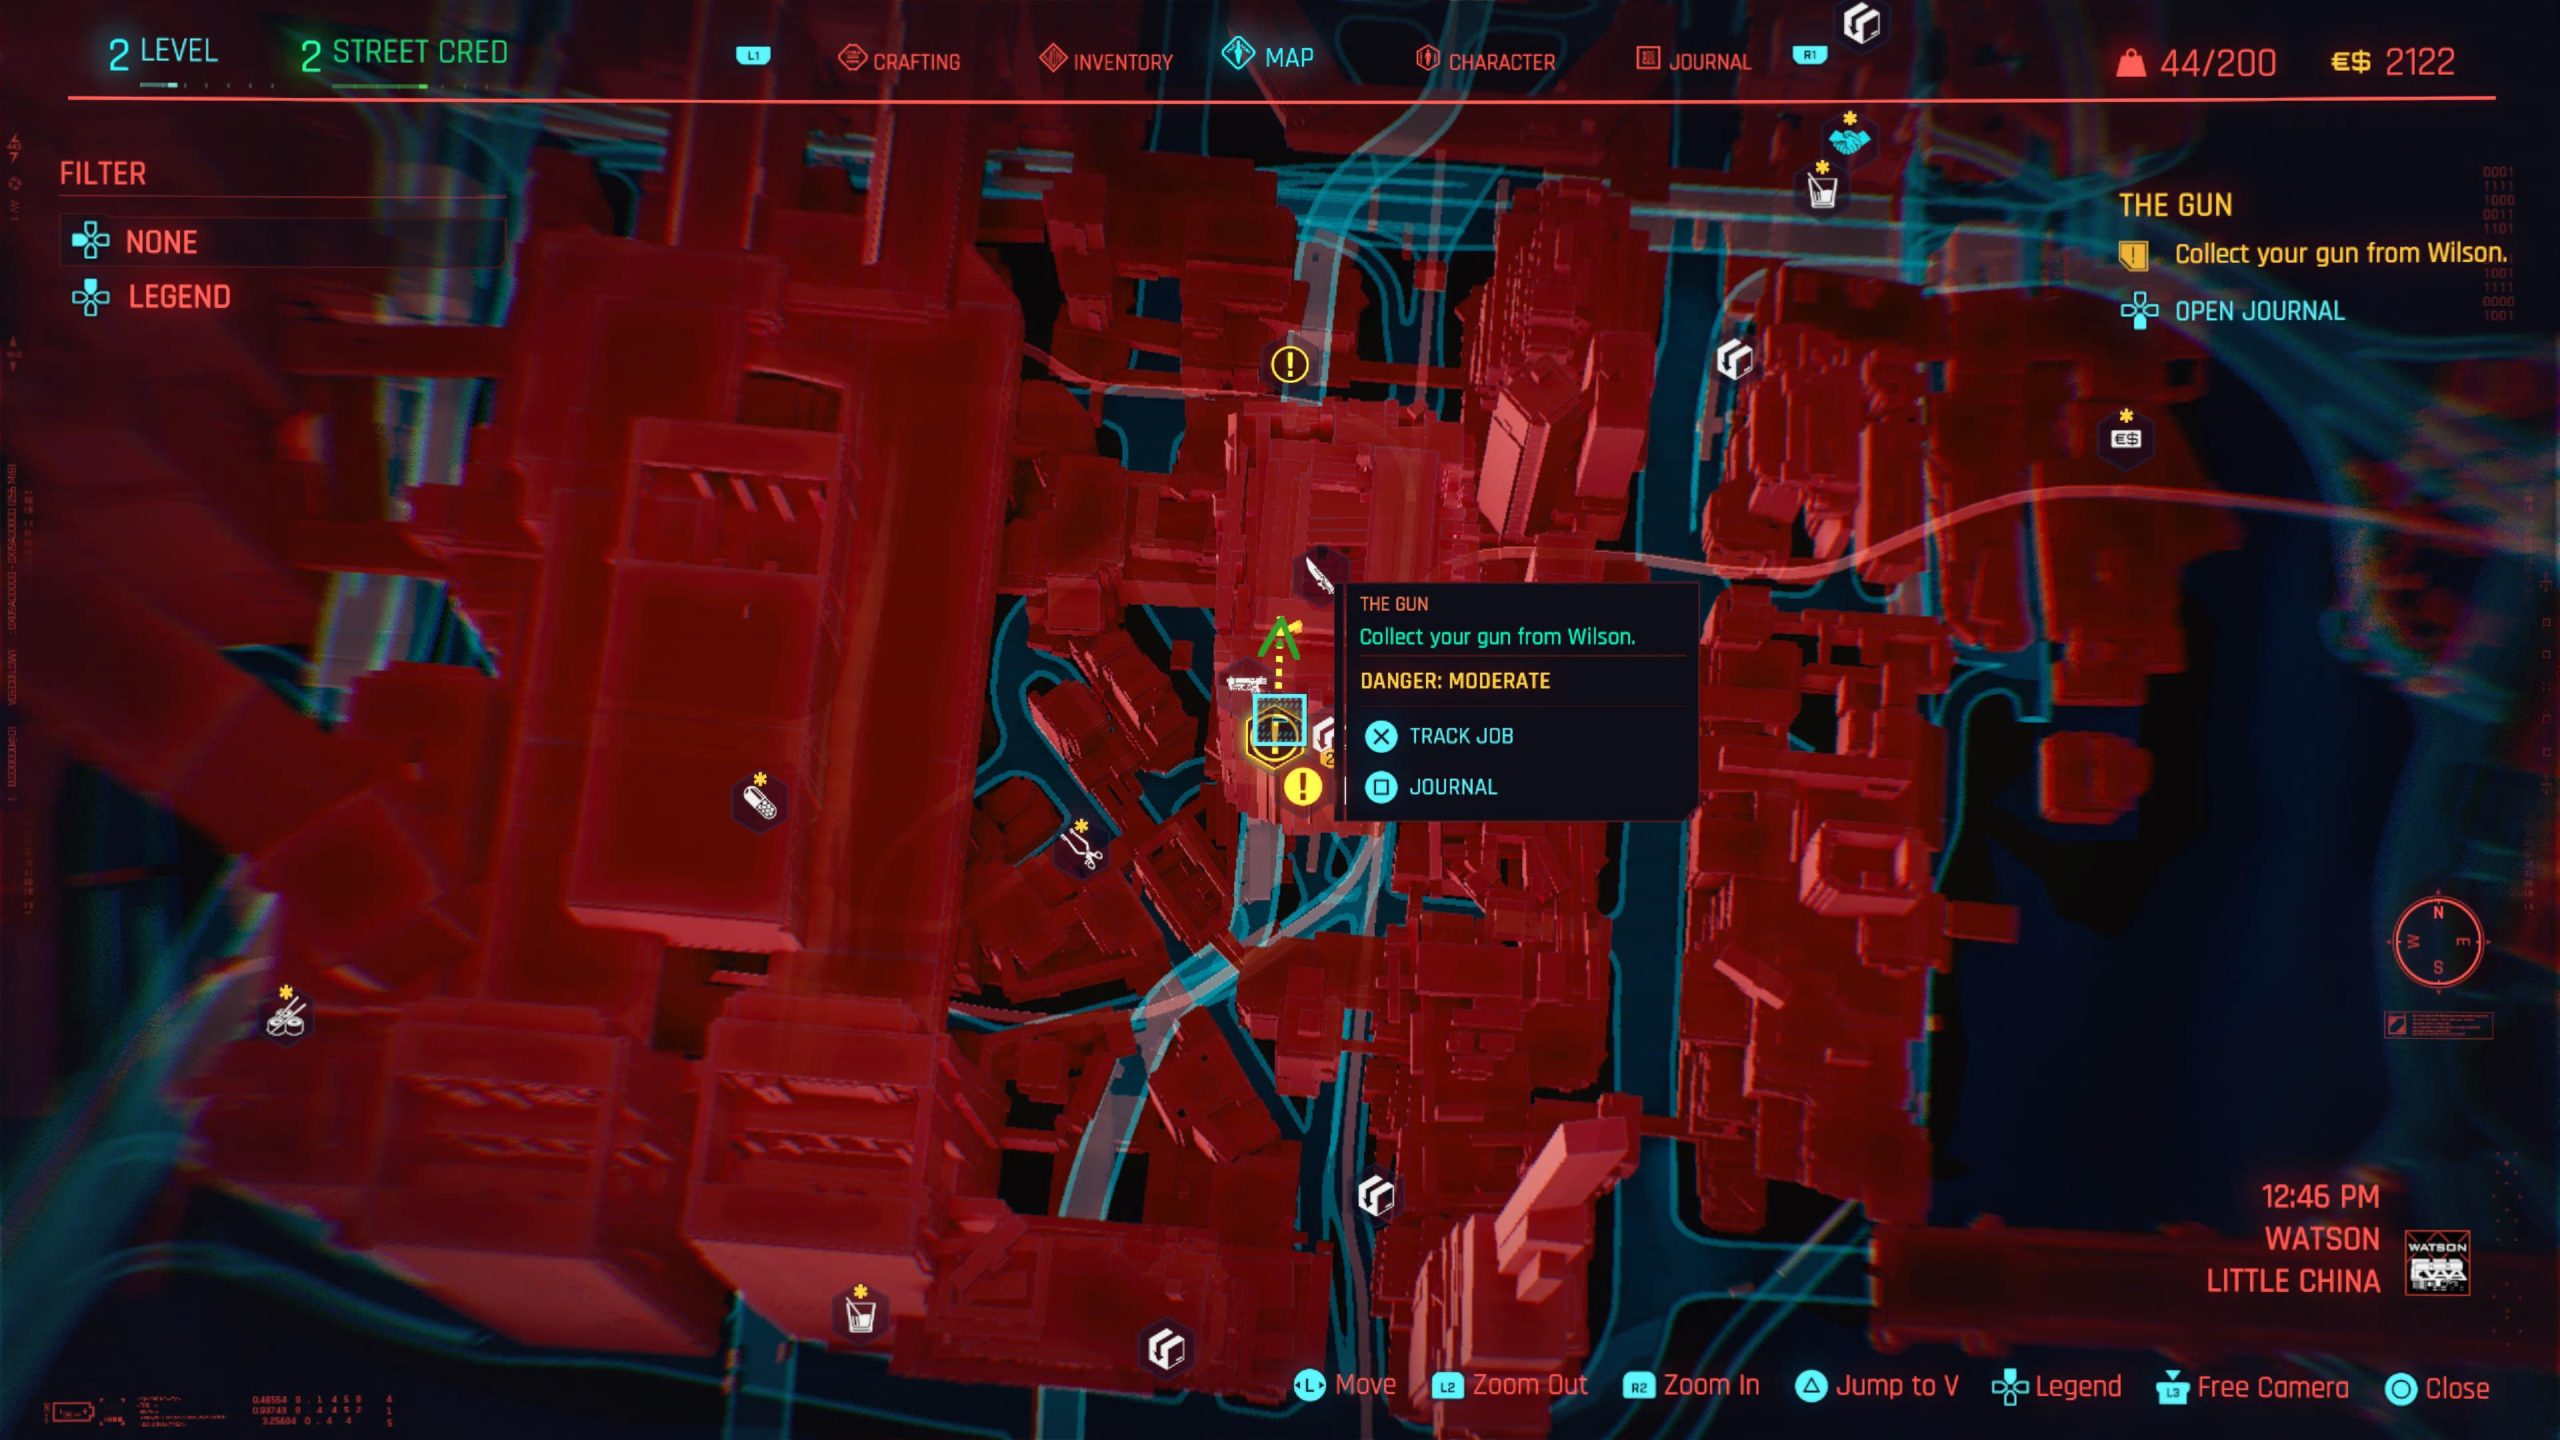
Speak with Wilson in his shop and grab the Dying Night pistol free of charge. Picking it up will show the tutorial for Upgrading Iconic Items.
These Boots are Made for Walking (Nomad)
Obtained: Watson – Automatically after your car is repaired in Act II
Objective: Go to the indicated location
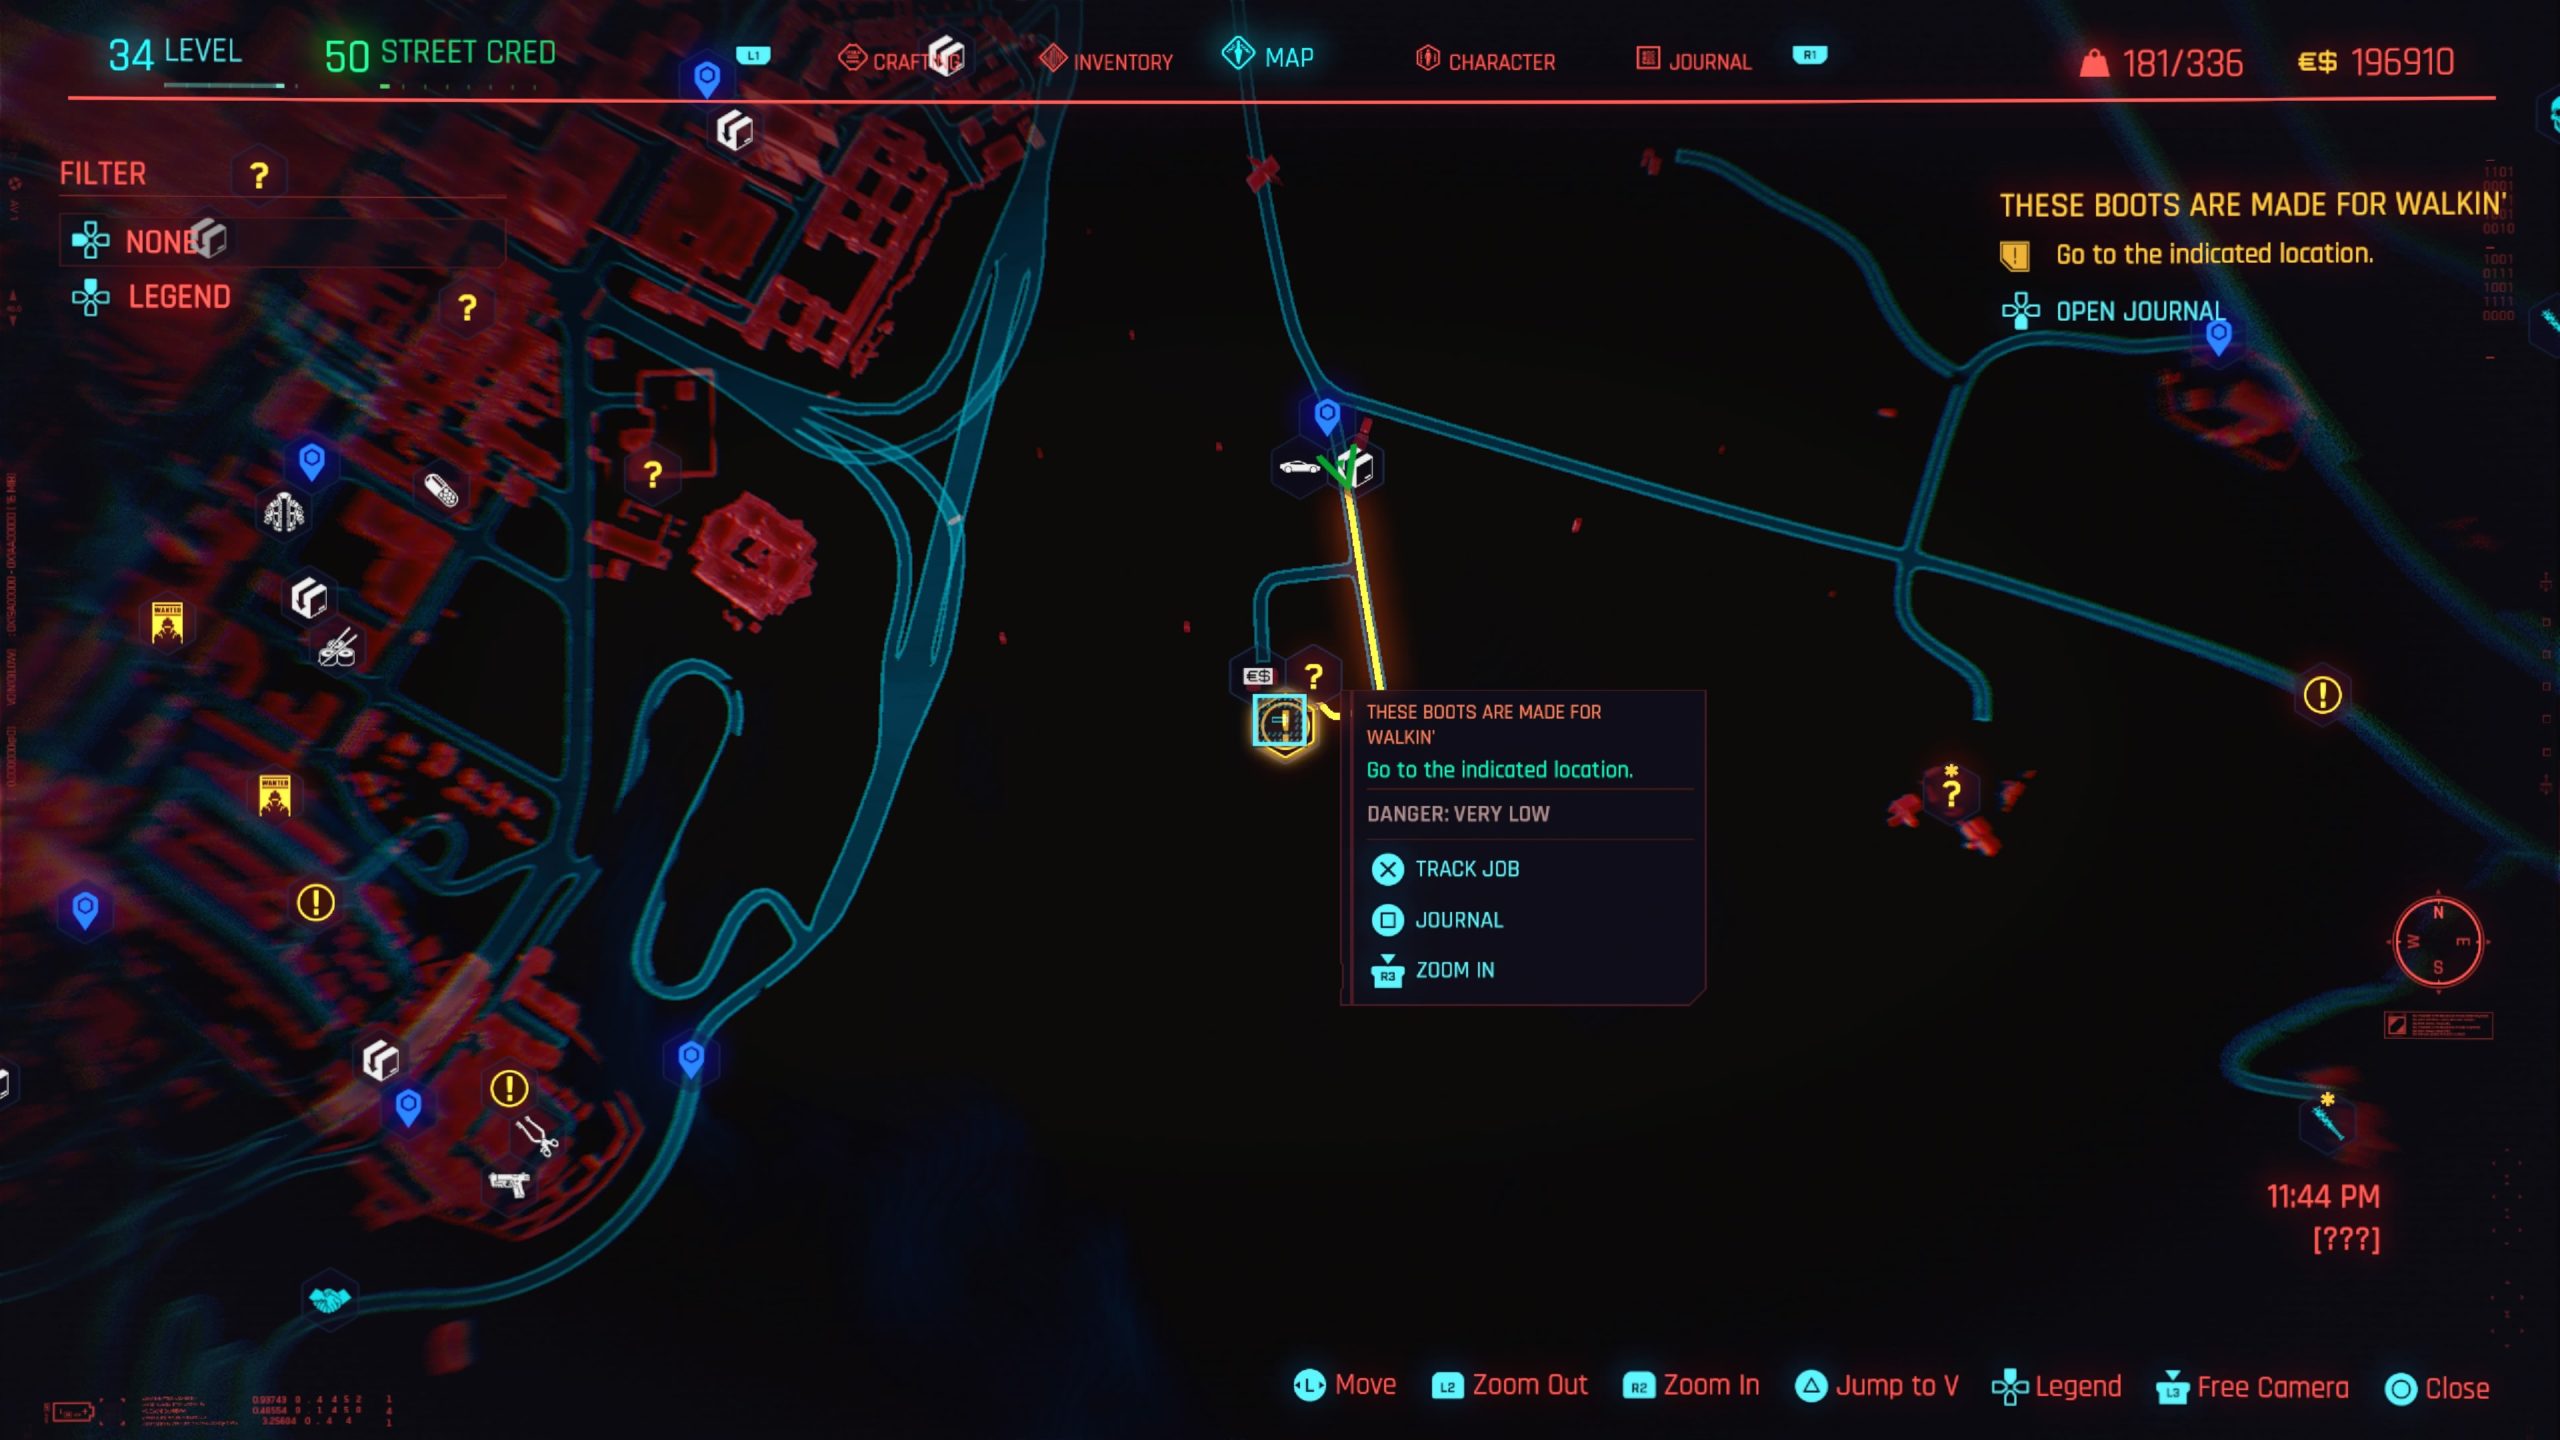
Follow the objective to arrive at a landfill in the eastern Badlands south of the Medeski Fuel Station fast travel point. Scan the car then pop the hood to examine the engine, radiator and oil pan. When you get done, Lana will show up yelling at you. Speak with her to get a few options. You can tell her you’re keeping the car, allow her to keep it or offer to buy the car for 100 eddies. If you choose to keep the car, hop in the driver’s seat and speak with Johnny to complete the gig.
Tune Up
Obtained: During the Human Nature side job
Objective: Go to Delamain HQ
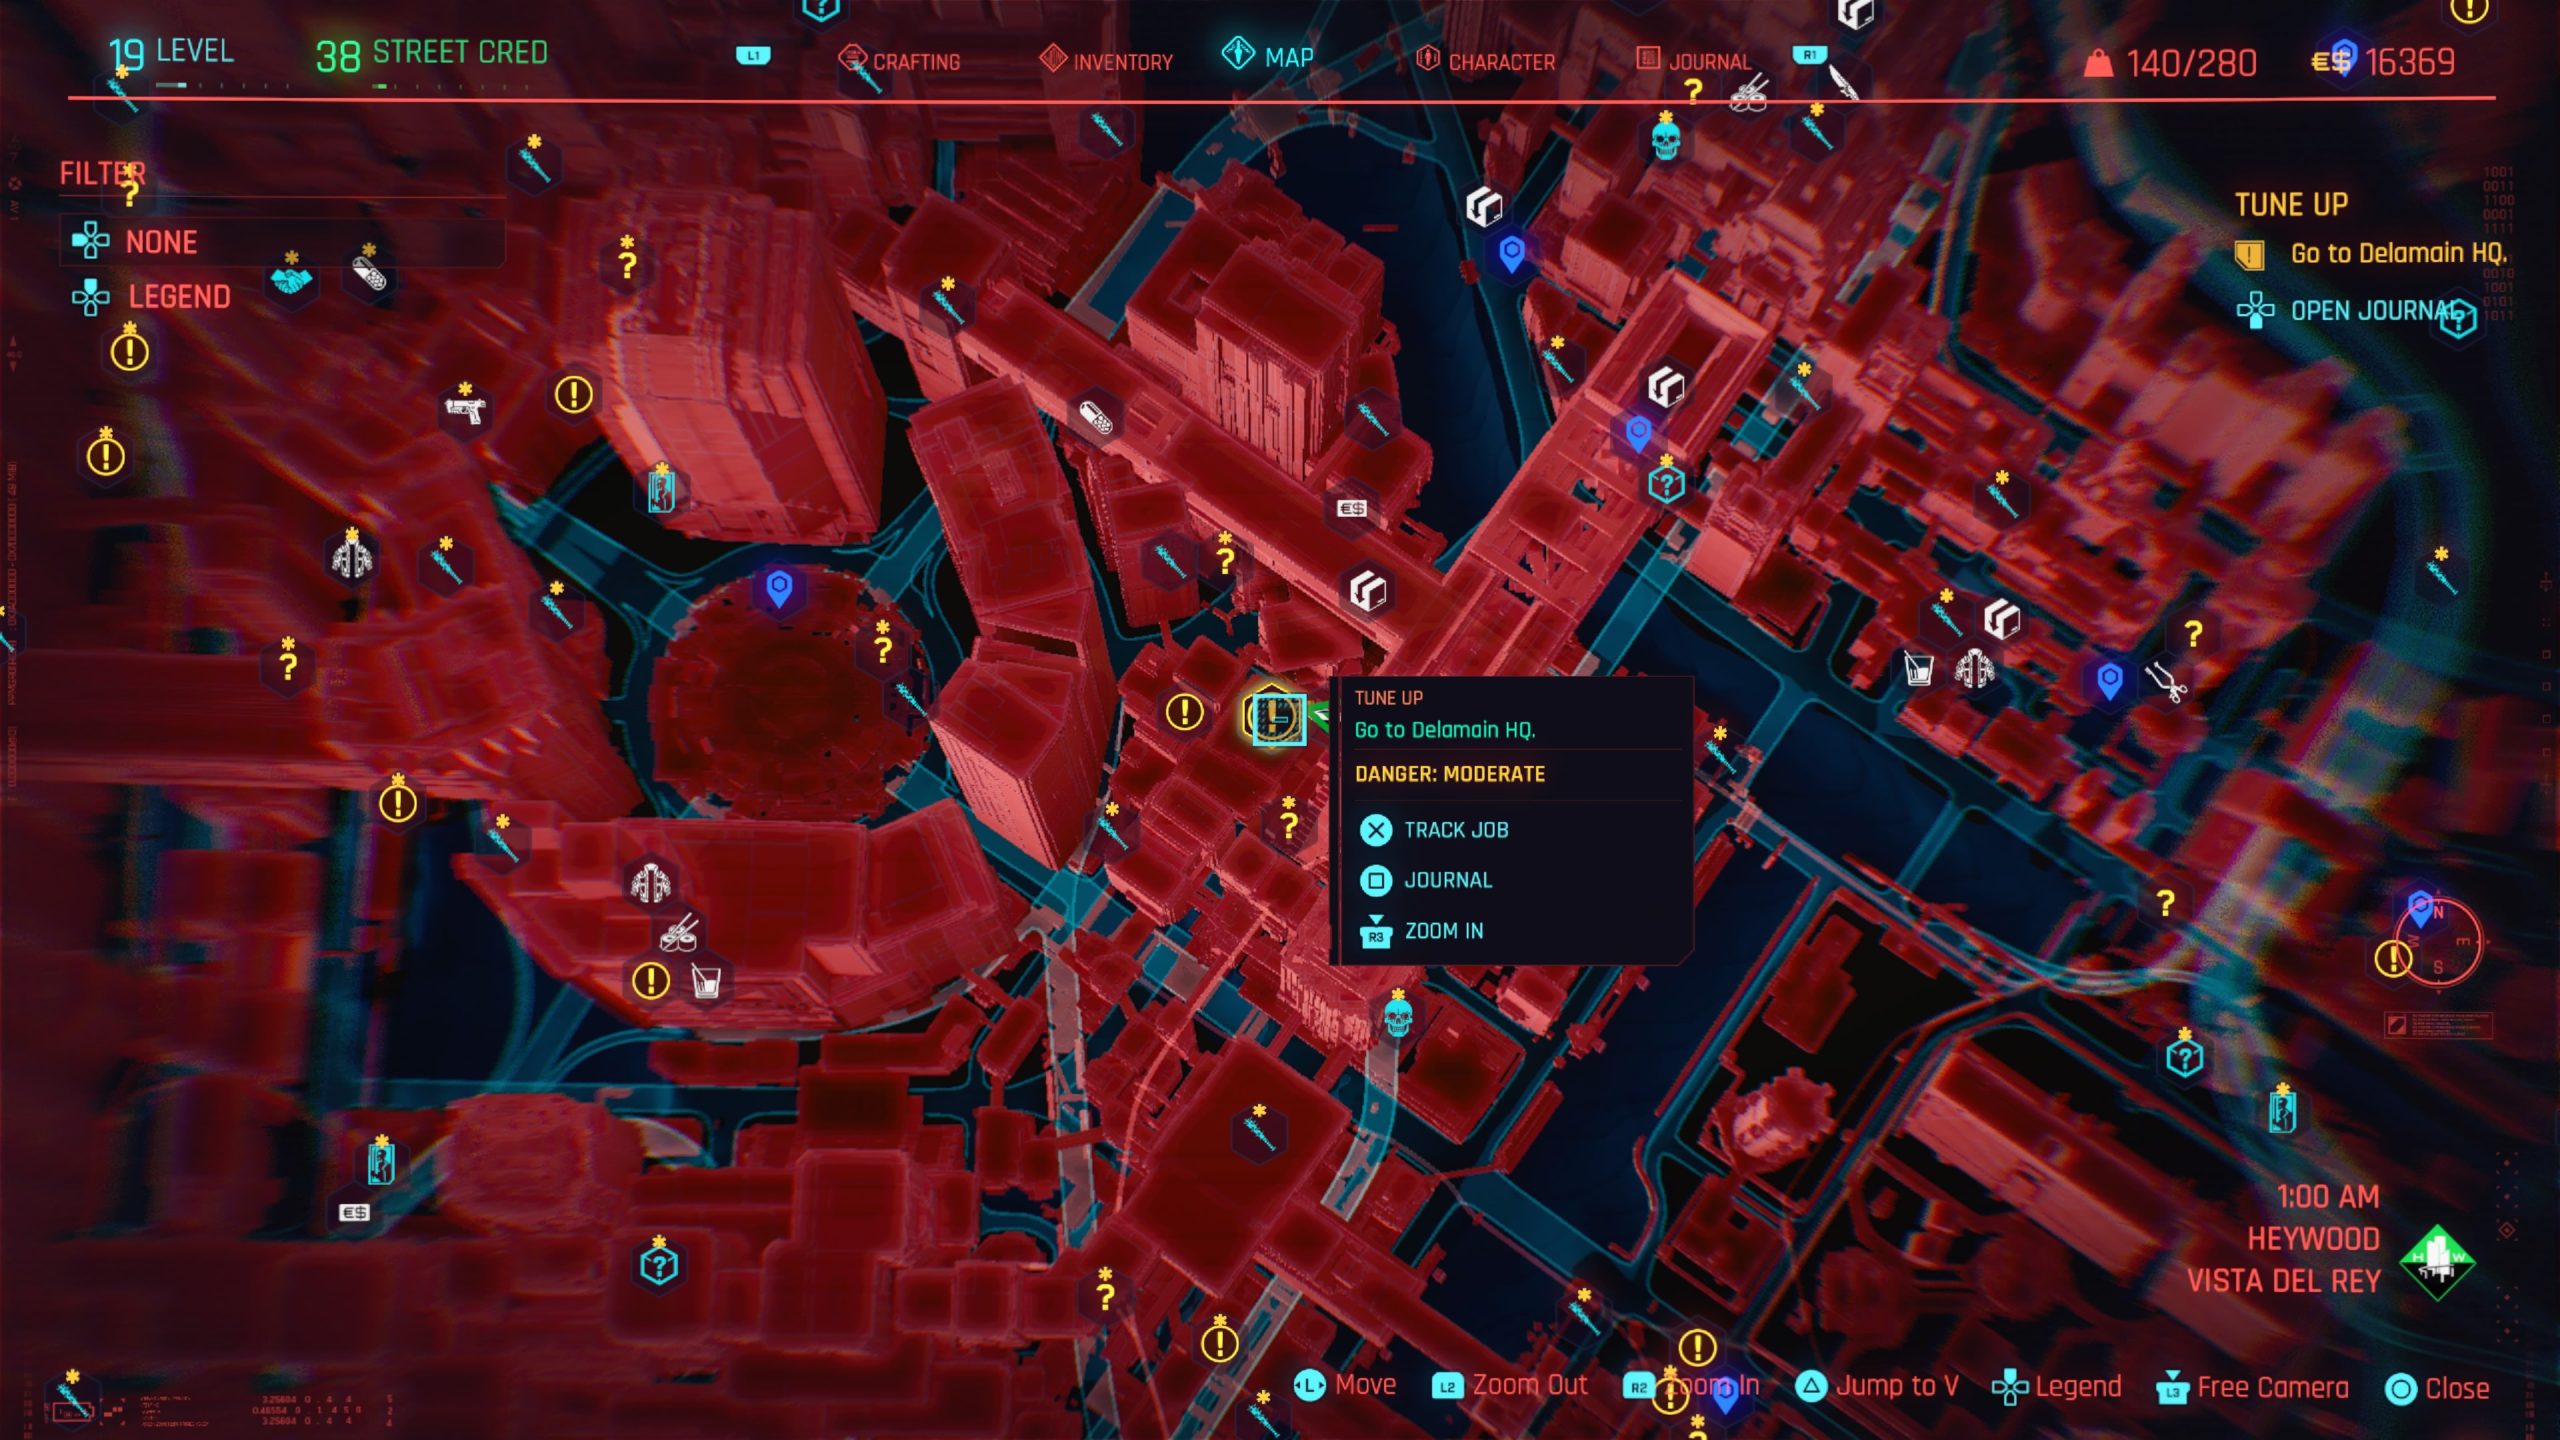
Travel to Delamain HQ in Heywood – Vista Del Rey then enter the building. Speak to the receptionist to complete the job.
Venus in Furs
Obtained: During the main story, you’ll need to retrieve a Militech bot for Dexter. If Meredith shows up at the end of the quest, she’ll send you a message after some time passes. Respond “Shame. Wanted to get a closer look at your ink.” to trigger the side job.
Objective: Go to the first floor of the No-Tell Motel
Travel to the No-Tell Motel in the southeastern part of Watson. Enter the building and head through the gate on the first floor to find Room 6. Head through this door to trigger a cutscene. Afterwards, retrieve Sir John Phallustiff from the bed.
Violence
Obtained: During Act III, after getting a message from a mysterious client.
Objective: Meet with the mysterious client at No-Tell Motel

Head to the No-Tell Motel near the Kabuki: Central fast travel point at Watson – Kabuki then enter the building. Make your way to the third floor and enter room 210 to meet the Mysterious Woman. Sit down to speak with the client. Agree to take her job then travel to Riot located in southern Little China near the Riot fast travel point at night. Speak to the bouncer by the door to see if he’s seen the target. If you choose to threaten him, he’ll lock you out of the club. Head up to the 2nd level and speak with the bartender. If your Body value is 20 or you pay him $2,000, you can make him tell you where Liam is. From the bartender, head to the other side of the room. To open this door, press the button to the right of the door. Take a right to reach an elevator and ride it down to the 1st floor. Head over the PC and use the camera to snoop on Liam. When you’re done, steal the data and call Lizzy to send it to her. This will complete the job.
After some time passes, Lizzy will call you and reopen this job. Head to the No-Tell Motel near the Kabuki: Central fast travel point in Watson – Kabuki then enter the building. Head to the hotel room you previously met her in then carry the body to the dumpster down the hall to complete the job.
War Pigs
Obtained: You’ll receive a call from Frank during Act 2.
Objective: Go to the indicated location
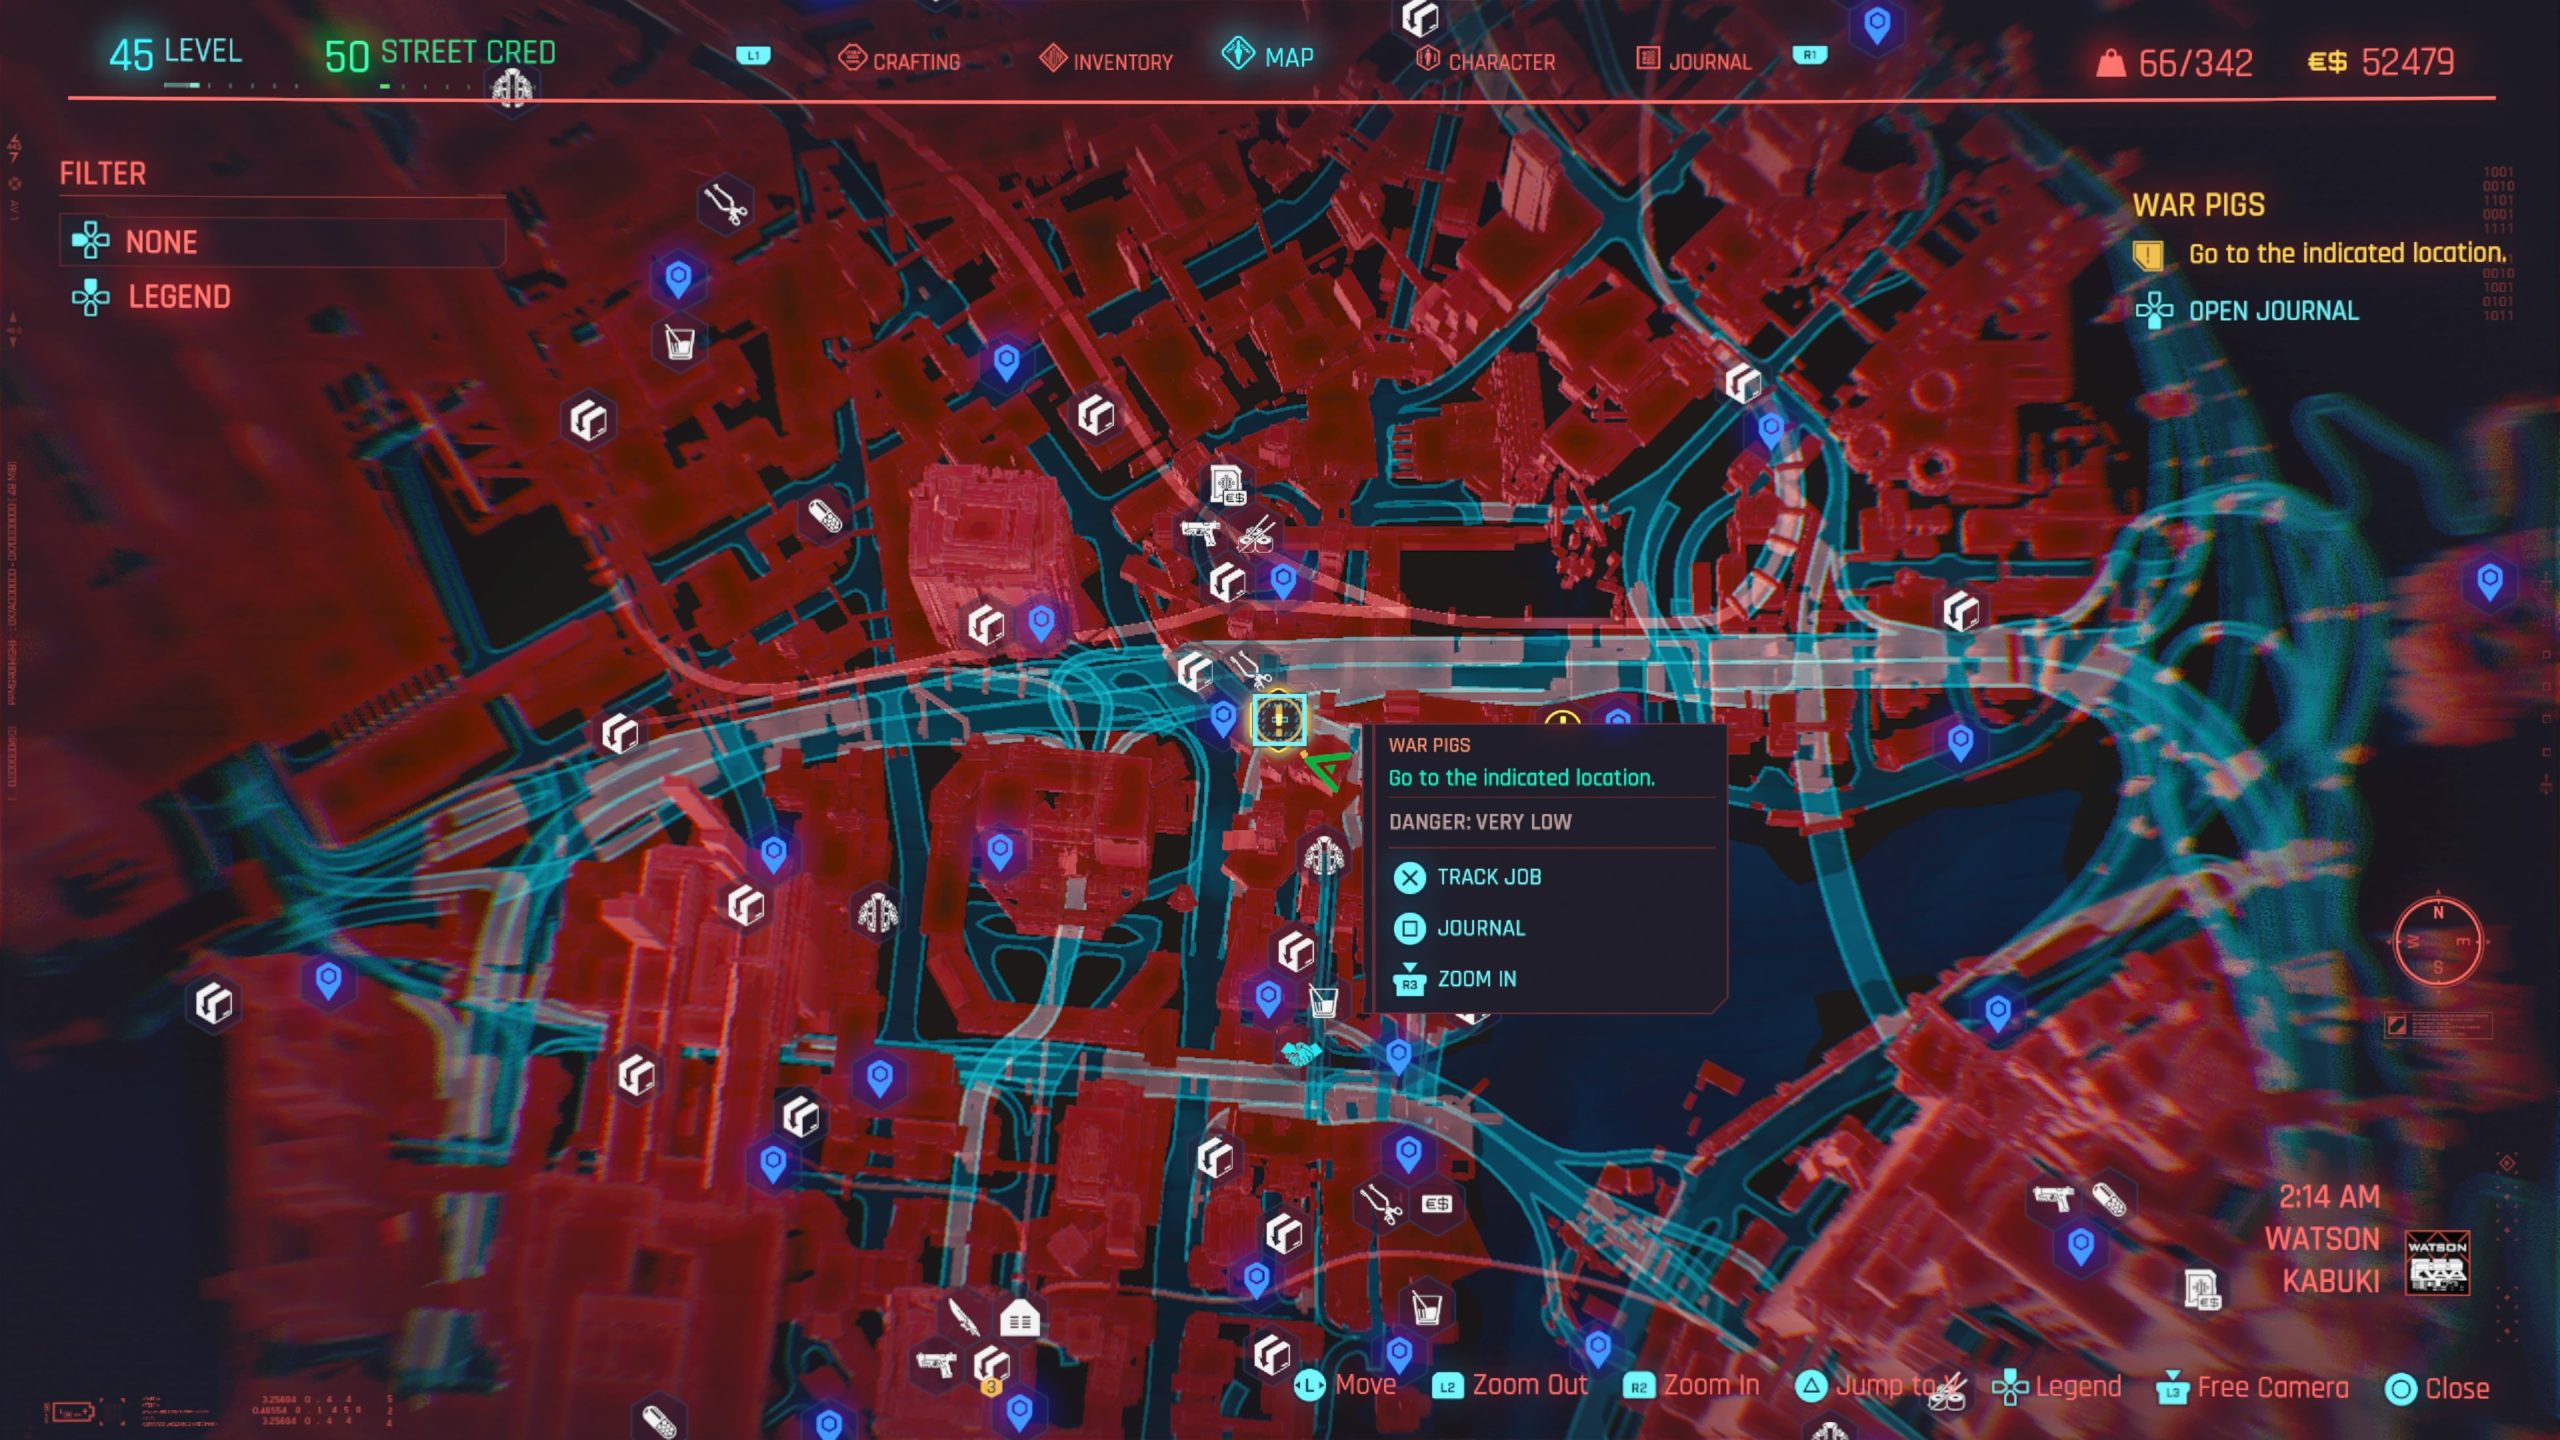
Head to the objective near Kennedy North fast travel station in Watson – Kabuki. Speak with Johnny when you arrive then move the dumpster under the XXX sign. Open the briefcase underneath it then confront Frank behind you. Choose whatever option you’d like as he’ll attack you no matter what. Defeat him to receive the Apparition, which is a Tech Pistol that is Epic/Iconic.