Persona 5 Tactica Logo
Guides

How to Complete Persona 5 Tactica Quest 6

by NightlyGamingBinge in

Welcome to NGB and our guide on Persona 5 Tactica Quest 6 Yusuke in Freefall. This quest becomes available during the 2nd kingdom. In this guide we’ll cover the party requirements, victory conditions, any prep work that you may need to do along with how to complete the quest and the rewards you’ll receive at the end.

Persona 5 Tactica Quest 6 Details

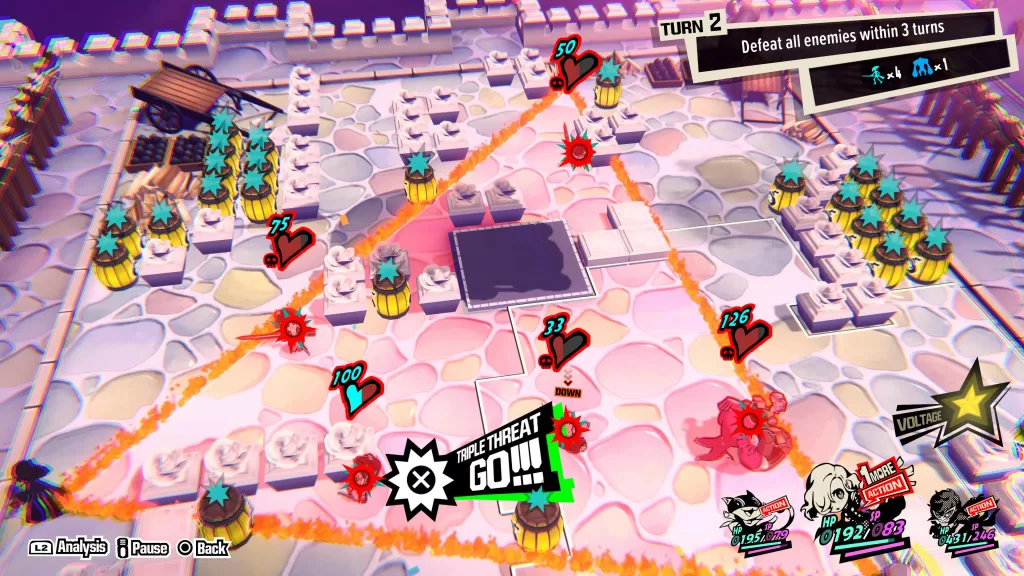
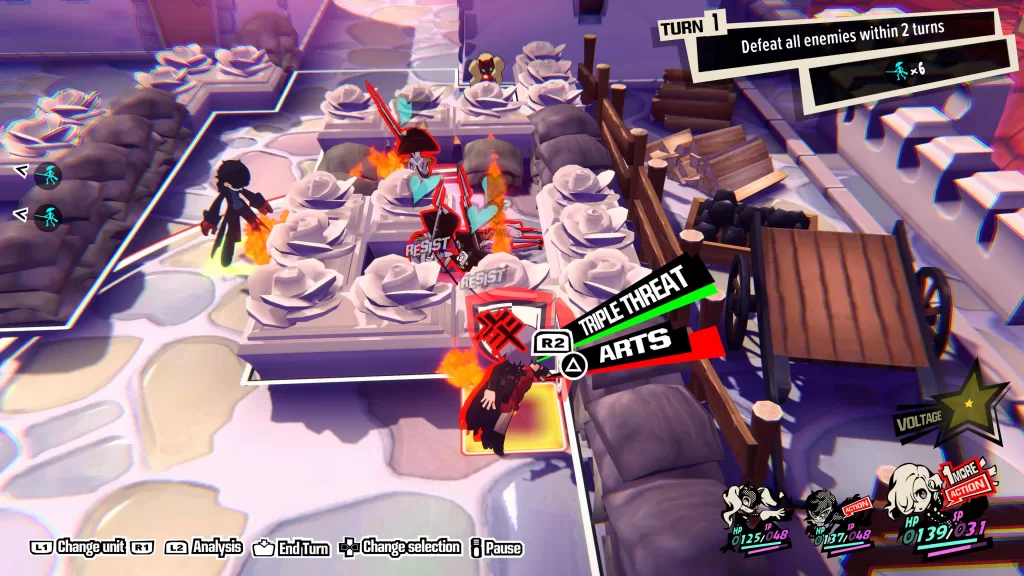
The party requirements for this quest require you to bring both Joker and Yusuke leaving the third choice up to you. To successfully complete this quest, you’ll need to defeat all enemies in 1 turn! This is doable by utilizing the Triple Threat attack mechanic!

Before You Start

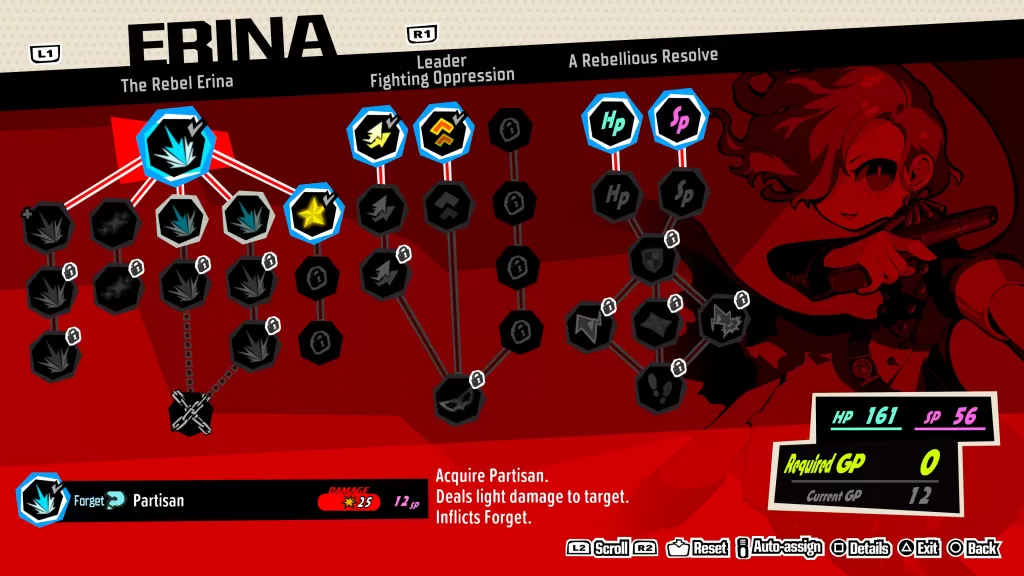
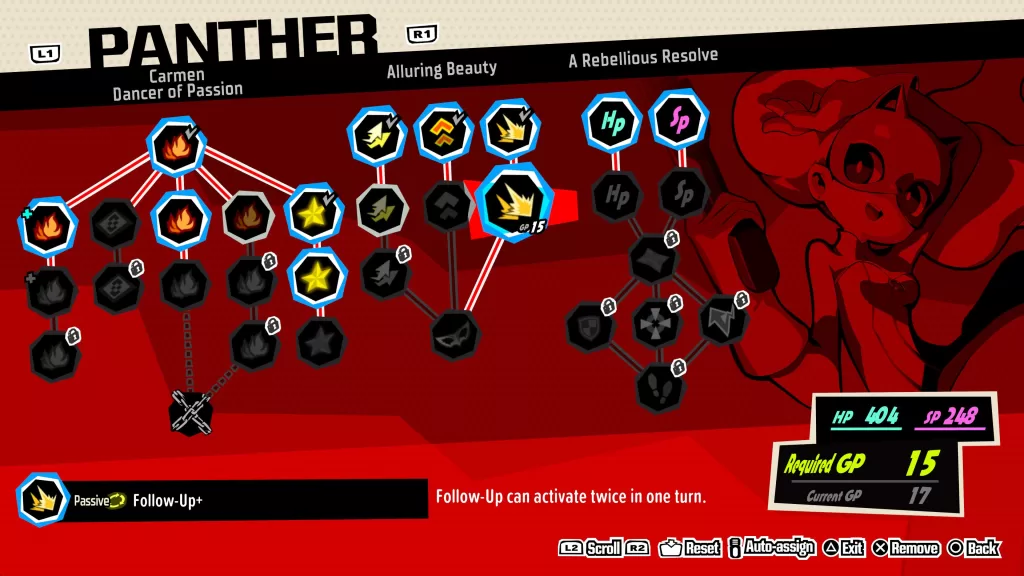
Before starting this quest, make sure you put the Follow-Up+ skill from the middle skill tree on your third party member. You’ll need to use the Follow-Up two times in a single turn to complete this quest.

Persona 5 Tactica Quest 6 Yusuke in Freefall Follow-Up+

Walkthrough

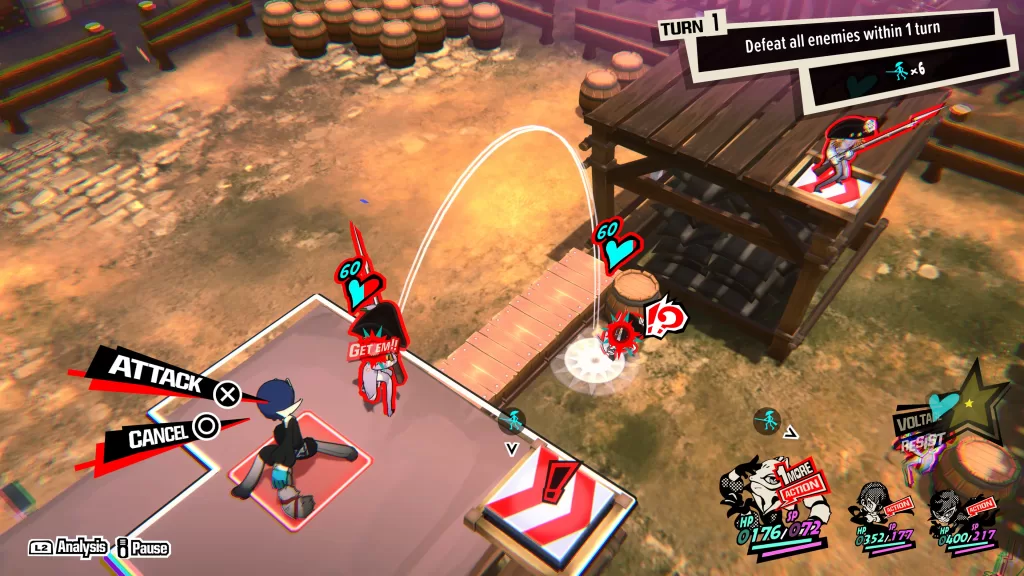
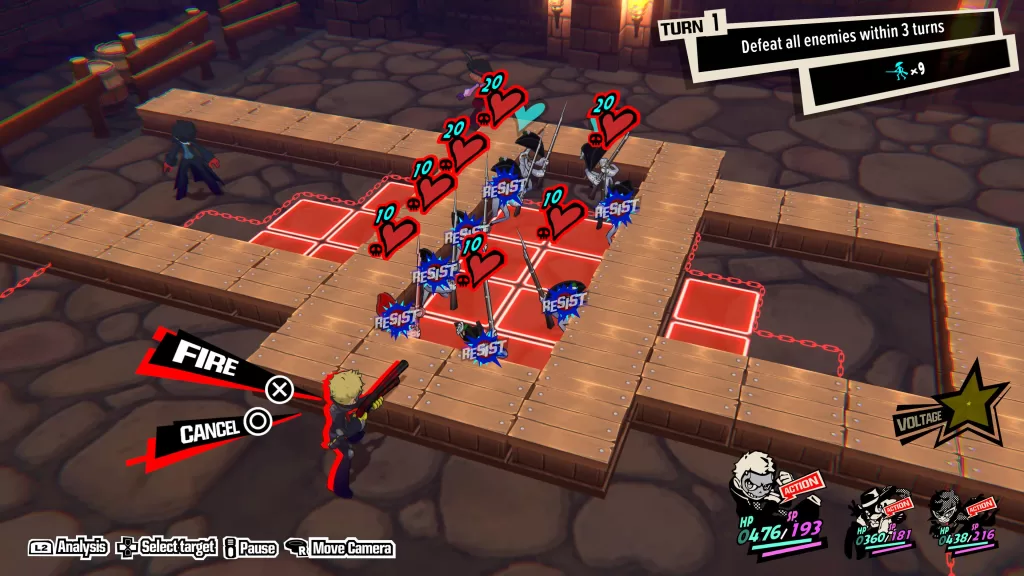
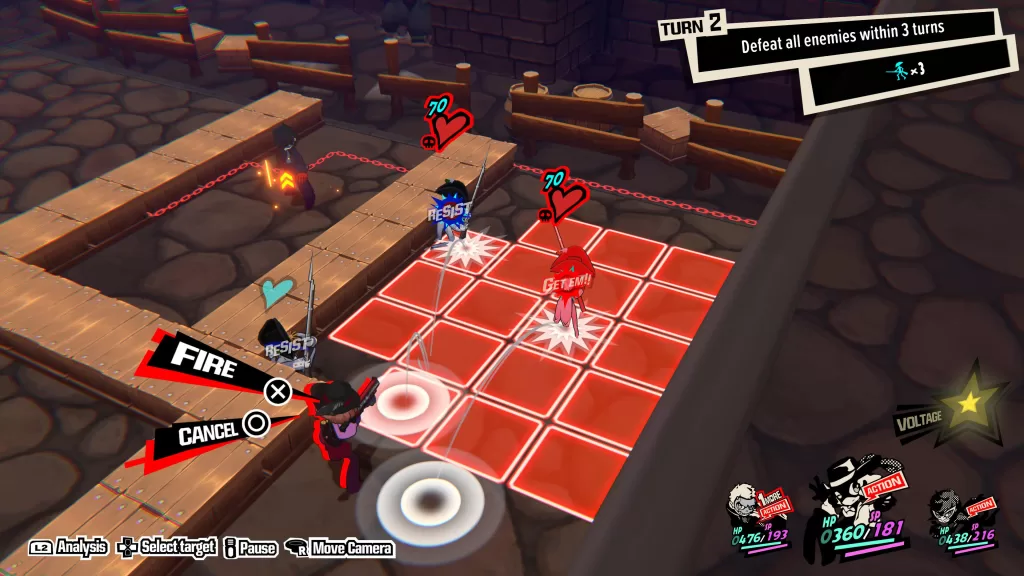
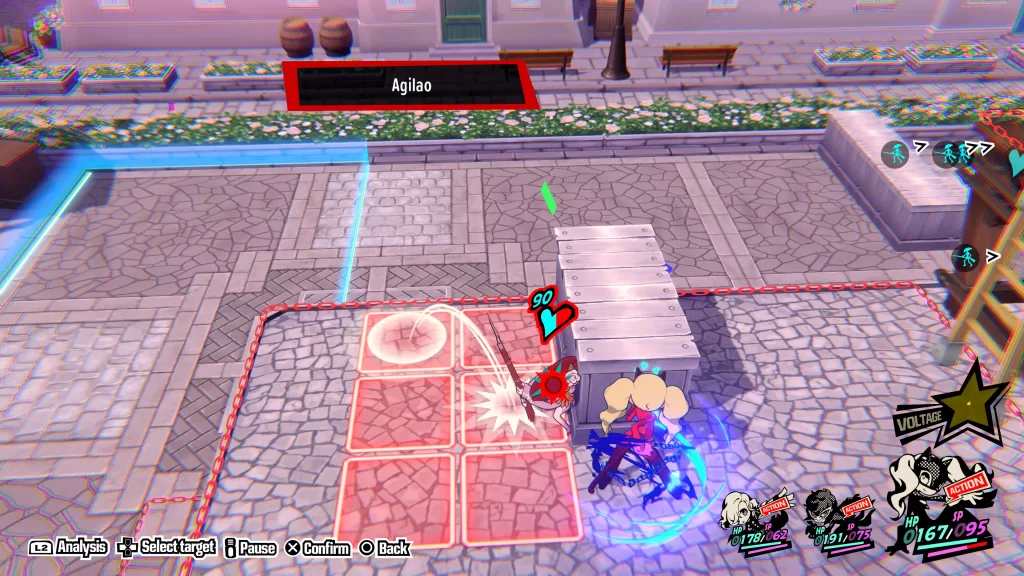
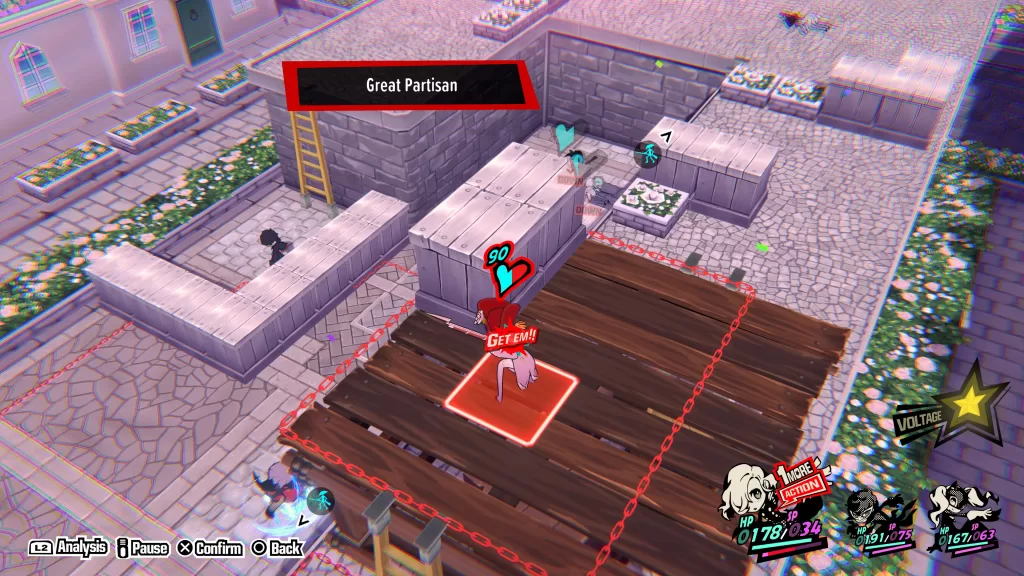
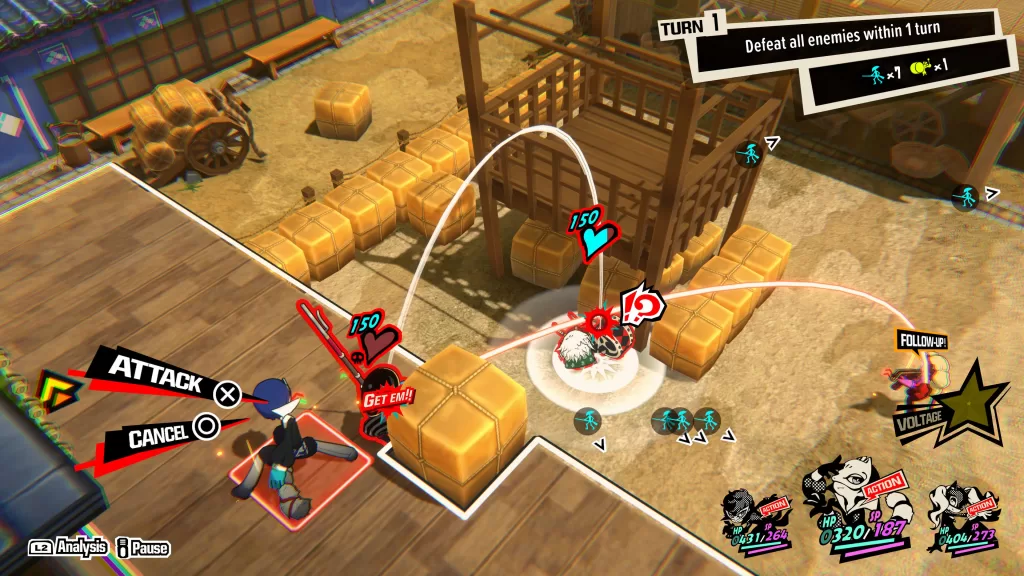
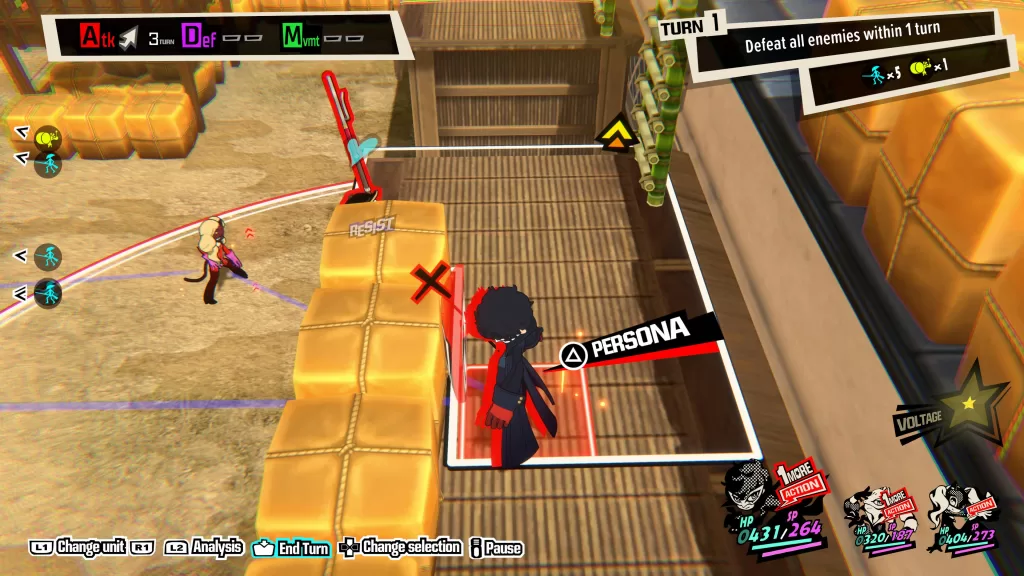
After starting the quest, switch to Yusuke then head to closest enemy by the single cube. Use his attack to knock the enemy off the wooden walkway towards the enemy on the ground with a drum. This will also cause your party member on the ground to trigger a Follow-Up attack activating a 1more for Yusuke.

Persona 5 Tactica Quest 6 Yusuke Placement 1

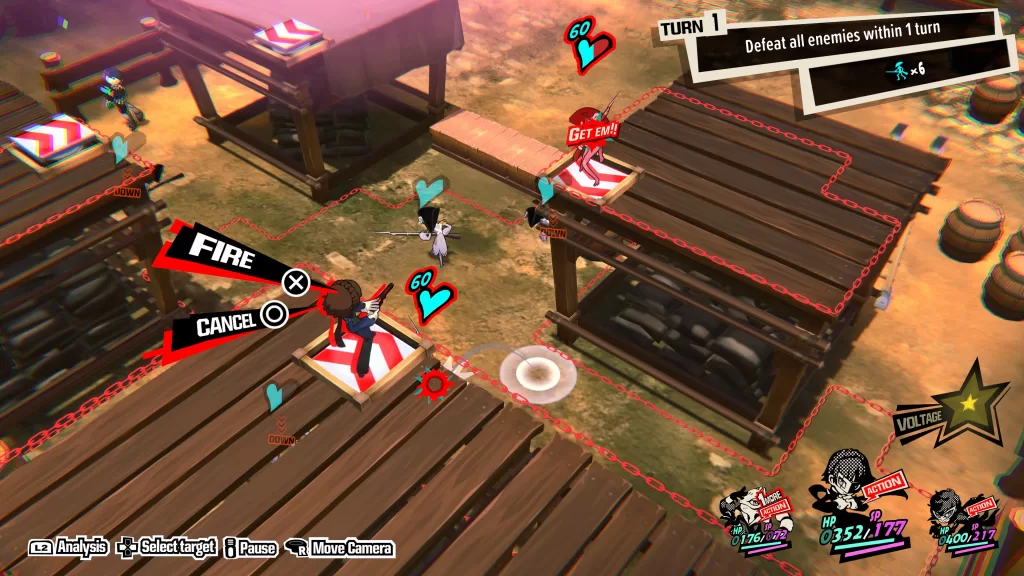
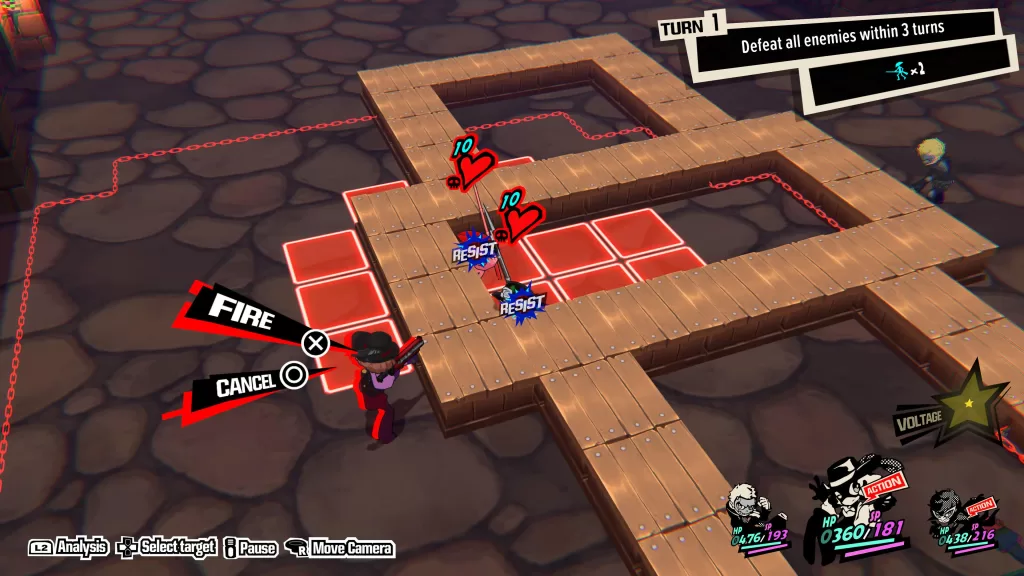
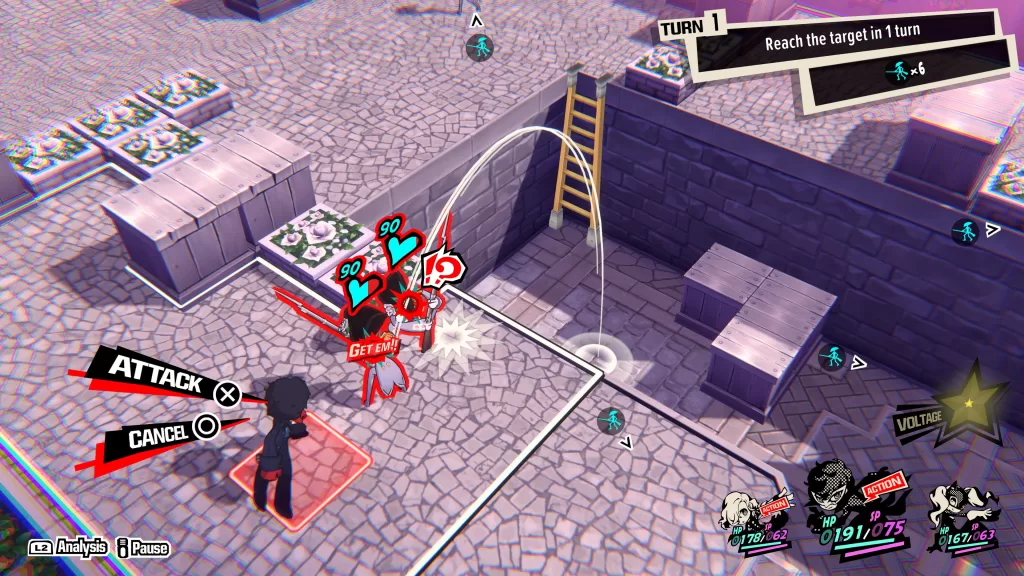
You’ll then want to take the nearby bamboo ladder up and use the spring tile reach the adjacent roof. Push the enemy there off the roof to get another 1more.

Persona 5 Tactica Quest 6 Yusuke Placement 2

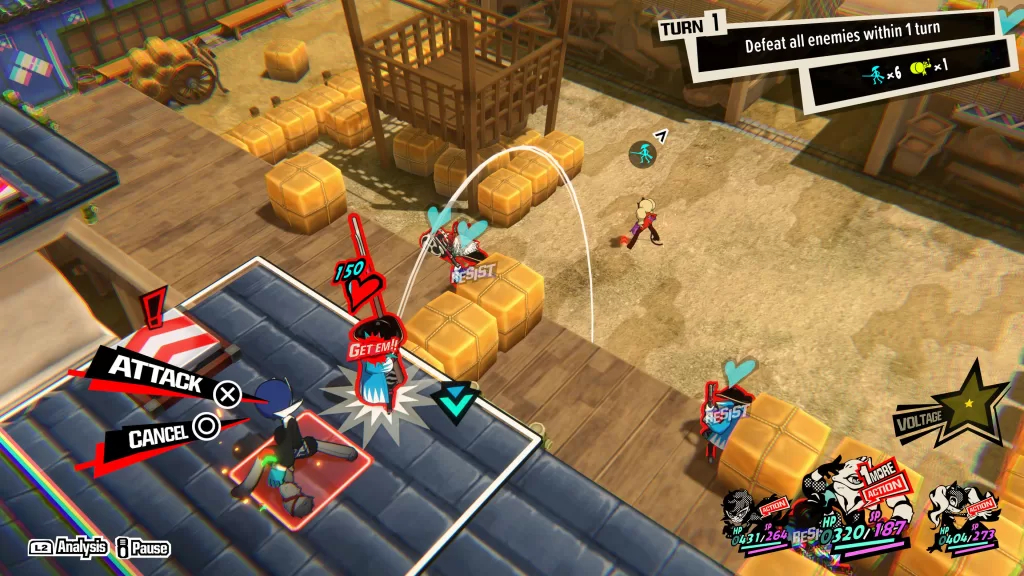
Use it to head into the central cluster of boxes on the blue roof.

Persona 5 Tactica Quest 6 Yusuke Placement 3

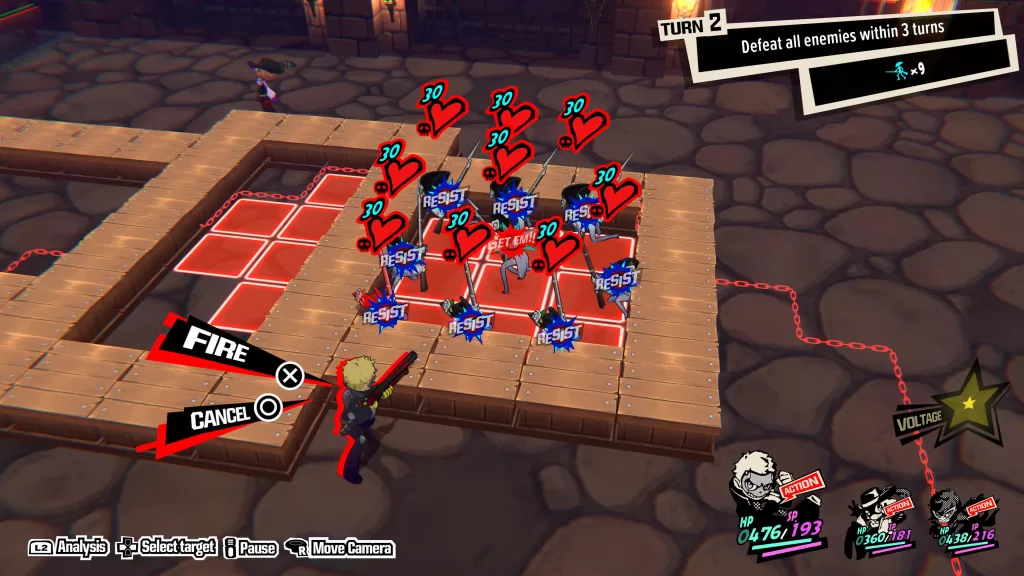
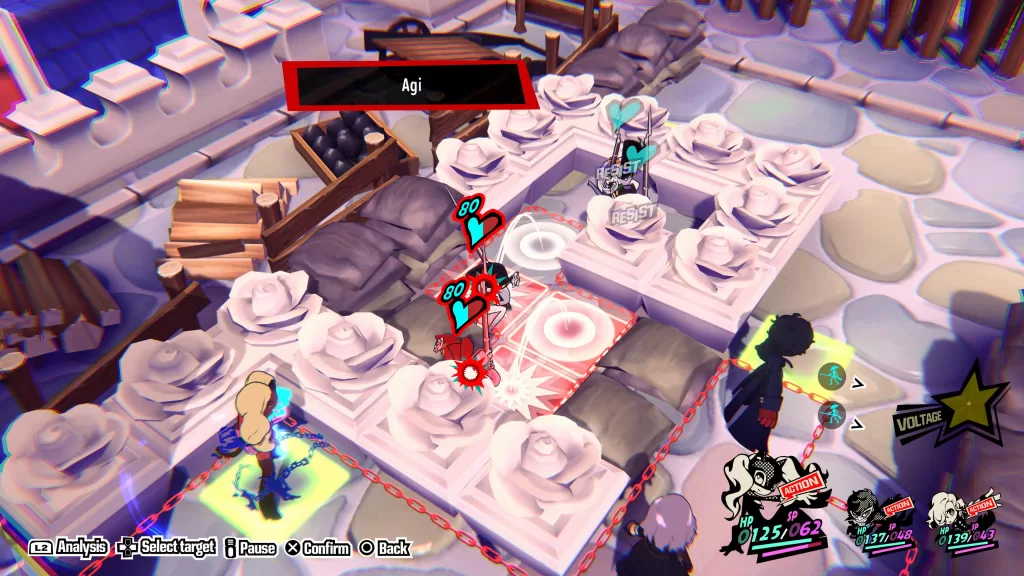
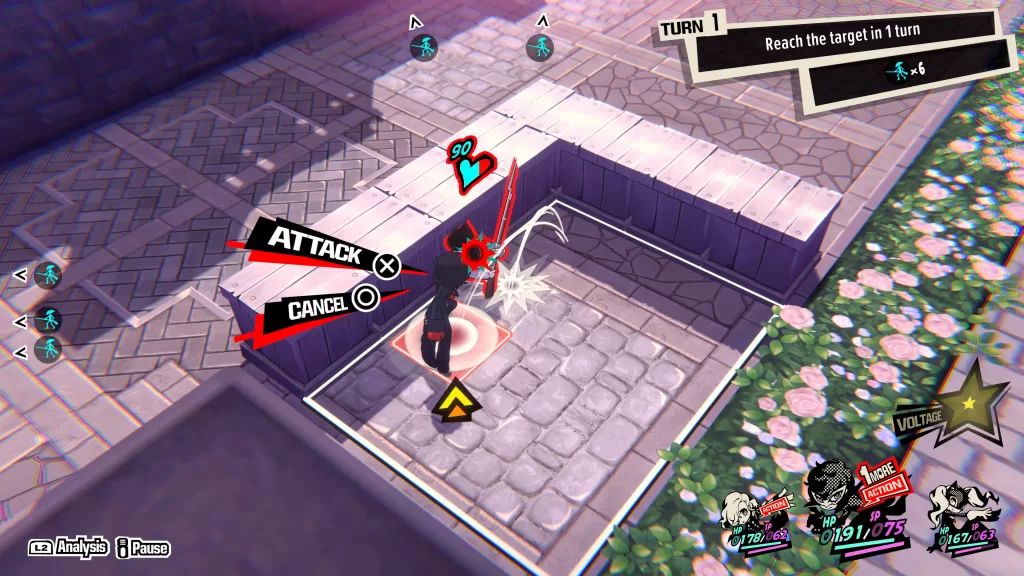
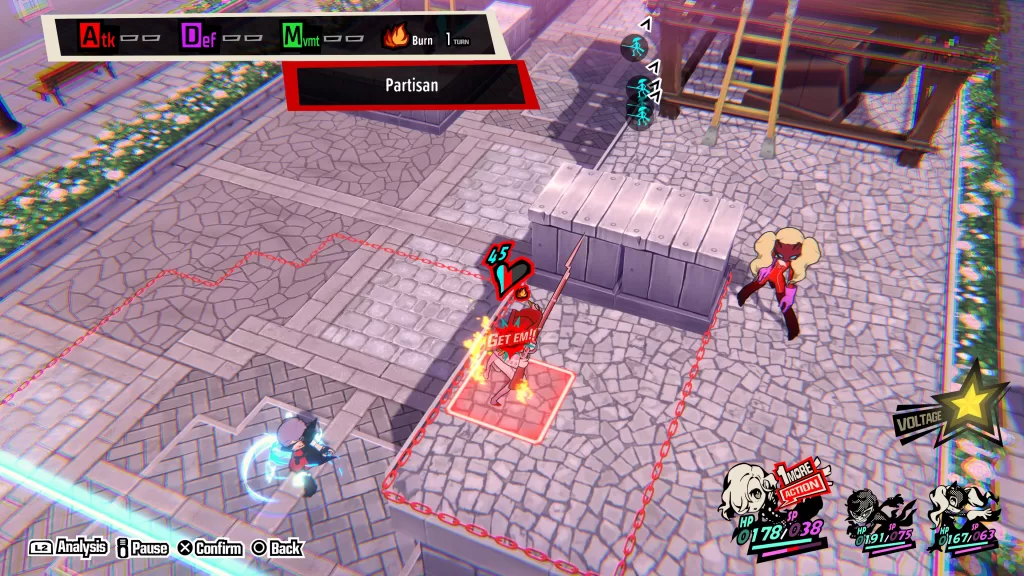
Switch to your party member on the ground and move them closer to the blue roof on Jokers side then switch to Joker. Climb up the bamboo ladder to reach the blue roof then attack the enemy there so that they fall off the roof towards the ground character. This will trigger their second Follow-Up attack giving Joker a 1more.

Persona 5 Tactica Quest 6 Joker Placement 1

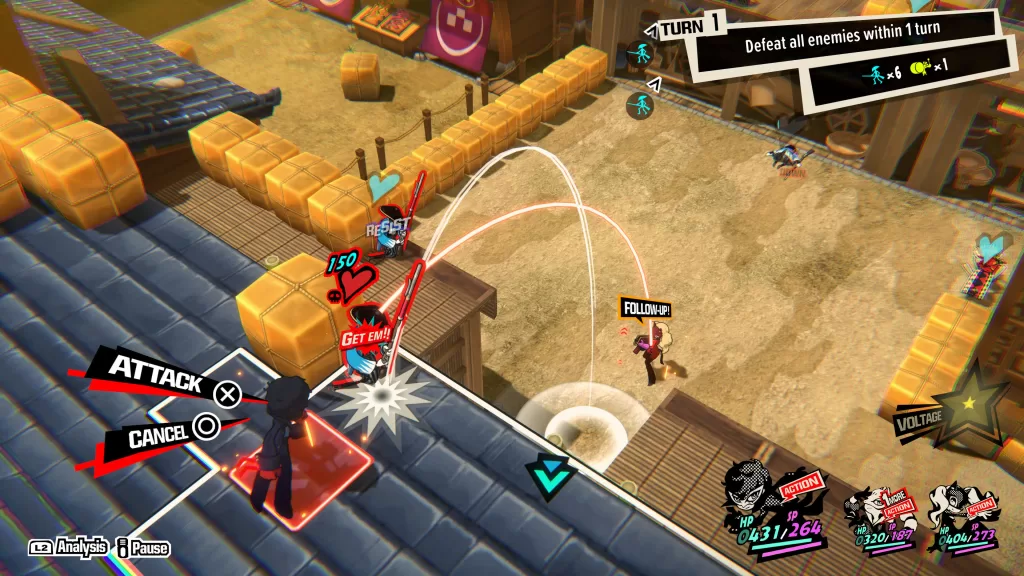
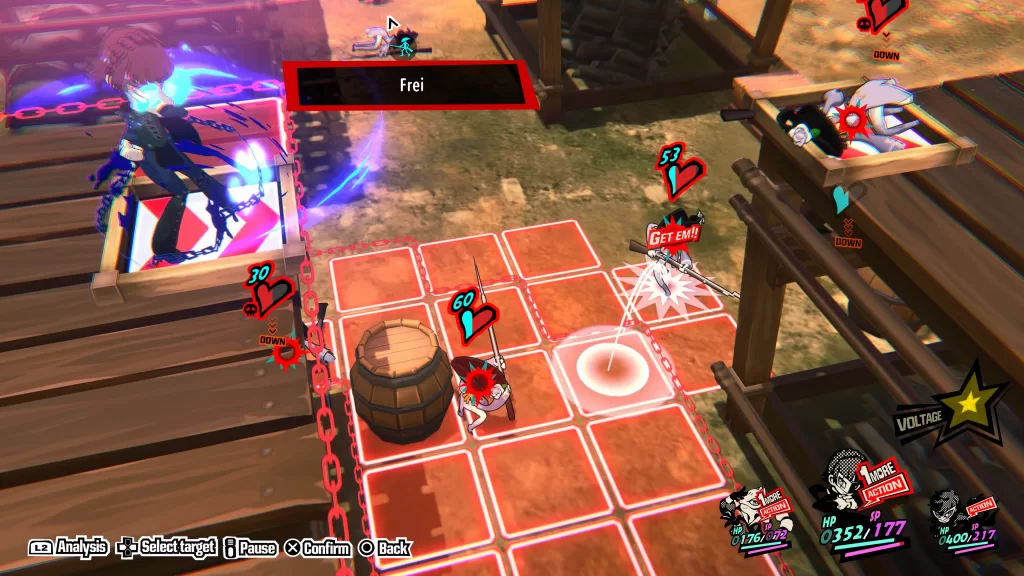
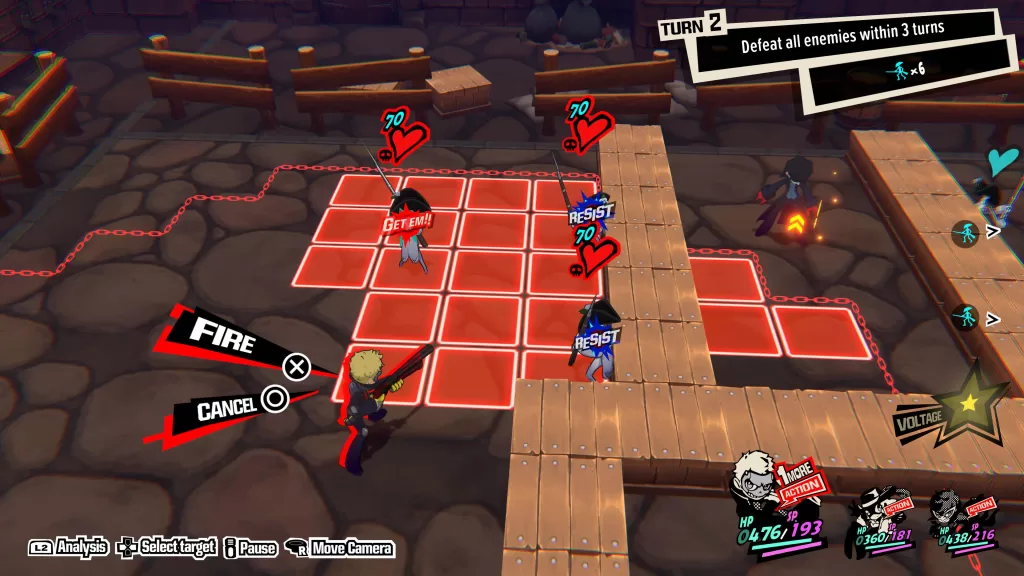
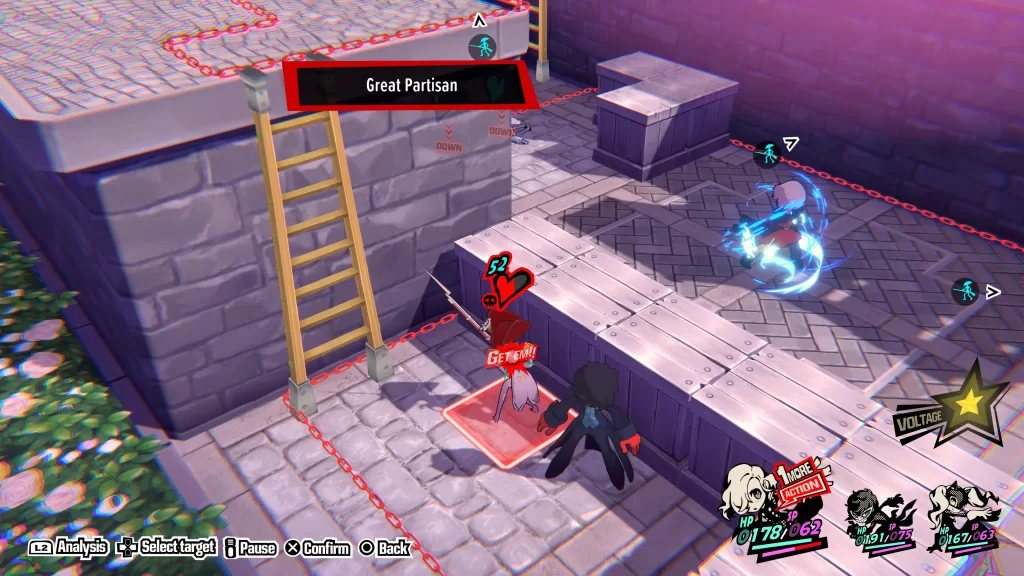
Use it to climb down the bamboo ladder onto the lower roof with an enemy on. Instead of attacking the enemy, head to the southern corner of the roof.

Persona 5 Tactica Quest 6 Joker Placement 2

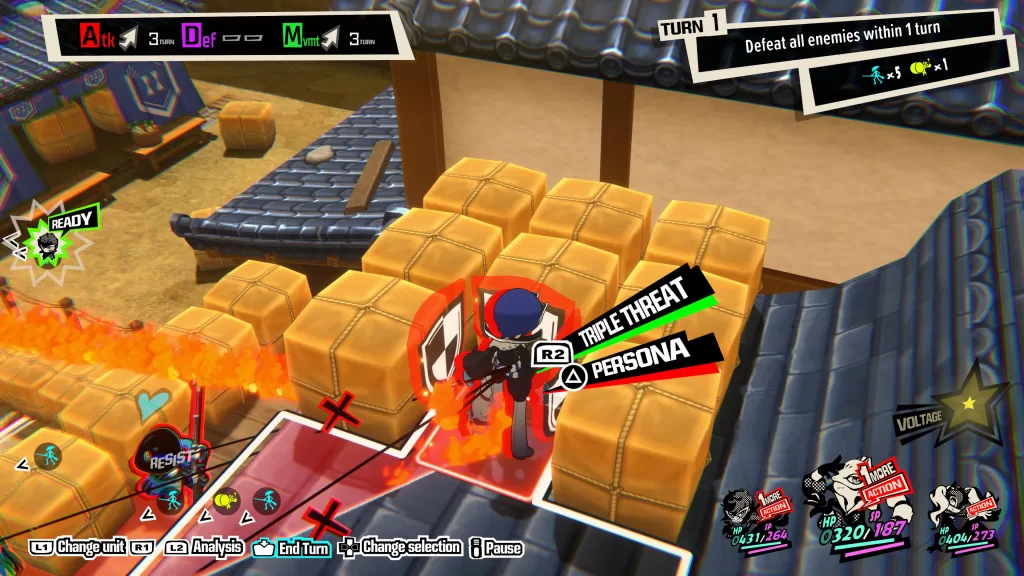
Finally, switch to your ground character and move them behind the enemy with the drum near the wooden tower. When they are in position, switch back to Yusuke to activate the Triple Threat attack taking out the rest of the enemies completing the quest.

Persona 5 Tactica Quest 6 Rewards

  • +20 GP for Joker
  • +20 GP for Yusuke

To find more content on Persona 5 Tactica, check our main guide and walkthrough page here!

Persona 5 Tactica Logo
Guides

How to Complete Persona 5 Tactica Quest 5

by NightlyGamingBinge in

Welcome to NGB and our guide on Persona 5 Tactica Quest 5 Operation BOOM. This quest becomes available during the 1st kingdom. In this guide we’ll cover the party requirements, victory conditions, any prep work that you’ll need to do along with how to complete the quest and the rewards you’ll receive at the end.

Persona 5 Tactica Quest 5 Details

The party requirements for this quest require you to use Morgana and Erina with the third member choice being up to you. To successfully complete this quest, you’ll need to defeat all enemies in 3 turns.

Walkthrough

When you begin the quest, you’ll be in an area littered with bombs among the enemies. There isn’t really any special gimmick for this one, you’ll just need to defeat all of the enemies within 3 turns. You can leverage the bombs or Mona’s wind arts to knock enemies from cover allowing them to be downed so you can use Tripple Threat attacks. This will help you quickly take down multiple enemies allowing you to complete the quest.

Persona 5 Tactica Quest 5 Operation BOOM Triple Threat Image

Persona 5 Tactica Quest 5 Rewards

  • +20 GP for Mona
  • +10 GP for Erina

To find more content on Persona 5 Tactica, check our main guide and walkthrough page here!

Persona 5 Tactica Logo
Guides

How to Complete Persona 5 Tactica Quest 4

by NightlyGamingBinge in

Welcome to NGB and our guide on Persona 5 Tactica Quest 4 Once More, With Feeling! This quest becomes available during the 1st kingdom. In this guide we’ll cover the party requirements, victory conditions, any prep work that you may need to do along with how to complete the quest and the rewards you’ll receive at the end.

Persona 5 Tactica Quest 4 Details

For this quest, you’ll be required to bring both Yusuke and Makoto. The third party choice is up to you. To complete this quest, you must defeat all enemies in 1 turn.

Walkthrough

After starting the mission, head up the ladder with Yusuke to reach the top of the wooden platform. You’ll then want to knock the enemy to the ground below by standing on his left and pushing him to the right.

Persona 5 Tactica Quest 4 Once More, With Feeling! Yusuke Turn 1

Next use the spring tile to jump over to the other platform and push that enemy off as well. Use the ladder on back side of the wooden platform to climb down then head over to the closest enemy and shoot them.

Persona 5 Tactica Quest 4 Once More, With Feeling! Yusuke Turn 1 Part 2

Now switch to Makoto and climb up the ladder to reach the top of the wooden platform. Stand on the spring tile and shoot the enemy on the adjacent wooden platform.

Persona 5 Tactica Quest 4 Once More, With Feeling! Makoto Turn 1 Part 1

You’ll then want to use Frei and target the enemy on the ground to the left of that platform while also making sure to target the enemy you just shot. This will kill the one on the platform while giving Makoto a 1more to jump over to the adjacent platform.

Persona 5 Tactica Quest 4 Once More, With Feeling! Makoto Turn 1 Part 2

You can then position her over there to hit the remainder of the enemies with a Triple Threat attack! You’ll also have Yusuke on standby incase the position of any of the enemies is off to clean up any stragglers. This will complete the quest.

Persona 5 Tactica Quest 4 Once More, With Feeling! Tripple Threat Attack

Persona 5 Tactica Quest 4 Rewards

  • +20 GP for Yusuke
  • +20 GP for Makoto

To find more content on Persona 5 Tactica, check our main guide and walkthrough page here!

Persona 5 Tactica Logo
Guides

How to Complete Persona 5 Tactica Quest 3

by NightlyGamingBinge in

Welcome to NGB and our guide on Persona 5 Tactica Quest 3 Decompressing. This quest becomes available during the 1st kingdom. In this guide we’ll cover the party requirements, victory conditions, any prep work that you may need to do along with how to complete the quest and the rewards you’ll receive at the end.

Persona 5 Tactica Quest 3 Details

The party requirements for this quest require you to use both Ryuji and Haru leaving the third party member choice up to you To complete it, you must defeat all of the enemies within 3 turns.

Walkthrough

Once you start this quest, move Ryuji up and use his shotgun to take out most of the enemies in the central area.

Persona 5 Tactica Quest 3 Decompressing Guide Ryuji Turn 1

Next, switch over to Haru and use her to finish off the rest of them. This will trigger more enemies to spawn in the smaller enclosed area. Go ahead and end your turn.

Persona 5 Tactica Quest 3 Decompressing Guide Haru Turn 1

When your next turn comes around, use Ryuji’s shotgun again to take out all of the enemies in the smaller enclosed space.

Persona 5 Tactica Quest 3 Decompressing Guide Ryuji Turn 2

This will spawn the last two groups of enemies and give Ryuji a 1more. Move him to the next group of enemies and take them out using his shotgun.

Persona 5 Tactica Quest 3 Decompressing Guide Ryuji Turn 2 Image 2

Finally switch over to Haru and attack 2 of the enemies making sure to get the enemy not standing by a wall. This will give you a 1more to take out the last enemy completing the quest.

Persona 5 Tactica Quest 3 Decompressing Guide Haru Turn 2

Persona 5 Tactica Quest 3 Rewards

  • +20 GP to Ryuji
  • +20 GP to Haru

To find more content on Persona 5 Tactica, check our main guide and walkthrough page here!

Persona 5 Tactica Logo
Guides

How to Complete Persona 5 Tactica Quest 1

by NightlyGamingBinge in

Welcome to NGB and our guide on Persona 5 Tactica Quest 1 Quietly Storming the Castle. This quest becomes available during the 1st kingdom and is a story mission acting as a tutorial for quests. In this guide we’ll cover the party requirements, victory conditions, any prep work that you may need to do along with how to complete the quest and the rewards you’ll receive at the end.

Persona 5 Tactica Quest 1 Details

For this quest, you’ll be required to use Ann in addition to 2 other party members of your choosing. The game will also mention that even though Joker is the leader, he is not a required party member. As to who you choose, it really doesn’t matter. In order to complete the quest, you’ll need to defeat all enemies within 2 turns. You can do this by utilizing the Triple Threat attack.

Walkthrough

Once you start the quest, move Ann to the nearest yellow square and use Agi on the two closest enemies. This will push them into the adjacent square, bringing them closer together and weakening them.

Persona 5 Tactica Quest 1 Quietly Storming the Castle Ann Using Agi

Switch to another character, then either shoot or use a skill on one of the enemies you hit with Agi to knock them down. This will activate a 1more, allowing you to move to the yellow square on the far side of the enemy bunker, parallel to Ann. Now, move your third party member to the other yellow square to attack all the enemies in the bunker with a Triple Threat, taking them all out. Please note, the party member who downed an enemy will be the only who can start the Triple Threat.

Persona 5 Tactica Quest 1 Quietly Storming the Castle Triple Threat Attack!

During the next turn, two more enemies will appear in the second bunker. You can then repeat the same action as before in order to use another Triple Threat attack to defeat them, thus finishing the quest.

Persona 5 Tactica Quest 1 Rewards

  • +20 GP for Ann
  • +20 GP for Futaba

To find more content on Persona 5 Tactica, check our main guide and walkthrough page here!

Persona 5 Tactica Logo
Guides

How to Complete Persona 5 Tactica Quest 2

by NightlyGamingBinge in

Welcome to NGB and our guide on Persona 5 Tactica Quest 2 Stealing Classified Info. This quest becomes available during the 1st kingdom. In this guide we’ll cover the party requirements, victory conditions, any prep work that you may need to do along with how to complete the quest and the rewards you’ll receive at the end.

Persona 5 Tactica Quest 2 Details

For this quest, you’ll be required to bring both Joker and Erina along with a third party member of your choice. To complete it, you must reach the target area in 1 turn. This requires moving Erina from her starting point to the highlighted area on the other side of the map using the 1more mechanic.

Before You Start

Persona 5 Tactica Quest 2 Stealing Classified Info Erina Skill Tree Image

Before you begin the quest, check if you have upgraded the Partisan art to Great Partisan for Erina in the skill menu. If you have, you might encounter issues completing the quest because Great Partisan requires 28sp instead of the 12sp that Partisan costs. This means you’ll be able to cast the art fewer times with the limited amount of SP early in the game. Fortunately, you can easily disable this in the skill menu by going to the prep screen from the mission info screen. Just remember to re-acquire the skill after completing the quest.

Walkthrough

At the start of the quest, Erina will be in the middle, with Joker on the right and the party member of your choice on the left. Begin by switching to your other party member and using them to climb up the ladder to the top of the wooden platform. Ignore the enemy there, and climb down the ladder on the other side to attack the enemy hiding behind cover. You need to be on the left side of the wall and use an art like Agi, Zio, or Garu to push the enemy to the edge of the ledge.

Persona 5 Tactica Quest 2 Stealing Classified Info Other Party Member Attack Target

Next, switch over to Joker and use his attack to knock both of the enemies to the lower level below.

Persona 5 Tactica Quest 2 Stealing Classified Info Joker First Two Targets

After that, climb down the ladder to his right and attack the enemy there facing towards the objective target.

Persona 5 Tactica Quest 2 Stealing Classified Info Joker Second Single Target

Finally, switch to Erina then head over to the closest enemy and shoot them. Use the 1more to climb down the ladder and shoot the standing enemy at the bottom to get a second 1more. Progress as far as you can towards the target then use the Partisan art on the enemy next to Joker to get a third 1more.

Persona 5 Tactica Quest 2 Stealing Classified Info Irina 3rd 1More

Again, procced as close as you can to the target then use Partisan on then enemy standing on top of the wooden platform to get a fourth 1more.

Persona 5 Tactica Quest 2 Stealing Classified Info Erina 4th 1More

Once last time, procced as close to the target as you can get then cast Partisan on the enemy that your other party member attacked earlier. This will get you the final 1more you need to reach the goal, completing the quest!

Persona 5 Tactica Quest 2 Stealing Classified Info Erina Final 1More

Persona 5 Tactica Quest 2 Rewards

  • +20 GP for Joker
  • +10 GP for Erina

To find more content on Persona 5 Tactica, check our main guide and walkthrough page here!

Tales of Arise
Guides

Complete Guide for Material Locations in Beyond the Dawn

by NightlyGamingBinge in

Welcome to our Tales of Arise Beyond the Dawn Materials guide. Here, you’ll find a list of the materials that can be found in the Beyond the Dawn DLC along with where they can be found!

This guide is a work in progress! More ingredients and materials will be added as we progress in the game!

Where to Find Ingredients

IngredientArea
Adan PepperAdan Lake (Mahag Saar)
AppleAdan Lake (Mahag Saar)
Nevira Snowplains (Cyslodia)
Shinefall Woods (Ganath Haros)
Traslida Highway (Menancia)
CarpIglia Wastes (Calaglia)
EggsTraslida Highway (Menancia)
LemonAdan Lake (Mahag Saar)
Shinefall Woods (Ganath Haros)
Traslida Highway (Menancia)
LettuceAdan Lake (Mahag Saar)
Aqfotle Hills (Mahag Saar)
Nevira Snowplains (Cyslodia)
Rudhir Forest (Cyslodia)
Shinefall Woods (Ganath Haros)
MackerelAdan Lake (Mahag Saar)
Traslida Highway (Menancia)
MushroomIglia Wastes (Calaglia)
PepperAqfotle Hills (Mahag Saar)
Shinefall Woods (Ganath Haros)
PotatoAqfotle Hills (Mahag Saar)
Iglia Wastes (Calaglia)
Traslida Highway (Menancia)
RiceAdan Lake (Mahag Saar), Aqfotle Hills (Mahag Saar)
Shinefall Woods (Ganath Haros)
SalmonAdan Lake (Mahag Saar)
Nevira Snowplains (Cyslodia)
Rudhir Forest (Cyslodia)
Traslida Highway (Menancia)
StrawberryAqfotle Hills (Mahag Saar)
Nevira Snowplains (Cyslodia)
Pharia Ranch (Menancia)
TomatoRudhir Forest (Cyslodia)
Shinefall Woods (Ganath Haros)
Traslida Highway (Menancia)
WheatAqfotle Hills (Mahag Saar)
Iglia Wastes (Calaglia)
Nevira Snowplains (Cyslodia)
Traslida Highway (Menancia)

Where to Find Crafting Materials In Mahag Saar

MaterialObtained
Beast ManeMahag Saar: Adan Lake (Alpha Withered Wolf)
Beast TailMenancia: Traslida Highway (Boomy)
Bizarre MegacoreCalaglia: Iglia Wastes (Golem)
Mahag Saar: Adan Lake (Tempestuous Mass)
Mahag Saar: Aqfotle Hills (Tempestuous Mass)
Mausoleum: Helgal-Ryugola 238 (Omnious Earthen Mass)
Blistering FangMausoleum: Helgal-Ryugola 67 (Berserker Boar)
Chameleon HideMausoleum: Helgal-Ryugola 67 (Chrome Gazer)
Clam TentacleMausoleum: Helgal-Ryugola 238 (Bandit Shellshocker)
Clay FragmentMenancia: Traslida Highway (Granilem)
Copper ChunkCalaglia: Iglia Wastes (Blast Bee, Golem, Rampage Wolf, Rokmadillo)
Cyslodia: Nevira Snowplains (Berserker Deceptive Effigy)
Cyslodia: Rudhir Forest (Ice Wolf, Alpha Ice Wolf, Manhunt Hawk, Berserker)
Ganath Haros: Shinefall Woods (Assault Bee, Wild Boar, Wild Boomy)
Mahag Saar: Adan Lake (Vandal Dragon)
Dark ManeCalaglia: Iglia Wastes (Rampage Wolf)
Ganath Haros: Shinefall Woods (Cursed Assassin Wolf)
Demihuman MuscleMahag Saar: Aqfotle Hills (Rioter Claw)
Demihuman TalonCyslodia: Nevira Snowplains (Berserker)
Cyslodia: Rudhir Forest (Berserker)
Dragon BloodCyslodia: Rudhir Forest (Manhunt Hawk)
Dragon Flame SacMahag Saar: Adan Lake (Vandal Dragon)
Earth SeedMenancia: Traslida Highway (Forest Roper)
Earth StoneMausoleum: Helgal-Ryugola 238 (Omnious Earthen Mass)
Granite FangMausoleum: Helgal-Ryugola 238 (Destructive Boar)
Menancia: Traslida Highway (Boar)
Hard BoneMausoleum: Helgal-Ryugola 238 (Sweeper Ape)
Hard Spherical ShellCalaglia: Iglia Wastes (Rokmadillo)
Mahag Saar: Aqfotle Hills (Crystalmadillo)
Icicle FangGanath Haros: Shinefall Woods (Wild Boar)
Incendiary ScaleCalaglia: Iglia Wastes (Blast Bee)
Indomitable GargantuboneCalaglia: Iglia Wastes (Rampage Wolf)
Mahag Saar: Adan Lake (Alpha Withered Wolf)
Mahag Saar: Aqfotle Hills (Crystamadillo)
Mausoleum: Helgal-Ryugola 67 (Gangster Shellshocker, Murder Ape, Rending Mantis)
Mausoleum: Helgal-Ryugola 238 (Bandit Shellshocker, Destructive Boar)
Menancia: Traslida Highway (Granilem)
Iron ChunkMahag Saar: Adan Lake (dropped from most enemies)
Menancia: Traslida Highway (dropped from most enemies)
Keen GigafantCalaglia: Iglia Wastes (Rampage Wolf, Blast Bee)
Cyslodia: Nevira Snowplains (Berserker)
Cyslodia: Rudhir Forest (Ice Wolf, Alpha Ice Wolf, Manhunt Hawk, Berserker)
Ganath Haros: Shinefall Woods (Assault Bee, Wild Boar, Wild Boomy)
Large Demihuman TalonMenancia: Traslida Highway (Forest Roper)
Majestic FeatherCyslodia: Rudhir Forest (Manhunt Hawk)
Ganath Haros: Shinefall Woods (Reptilian Hawk)
Mantid ClawMausoleum: Helgal-Ryugola 67 (Rending Mantis)
Megafauna BoneCyslodia: Nevira Snowplains (Deceptive Effigy)
Mahag Saar: Aqfotle Hills (Rioter Claw)
Mausoleum: Helgal-Ryugola 238 (Sweeper Ape)
Mucus SacMausoleum: Helgal-Ryugola 67 (Gangster Shellshocker)
Mystical LumniacoreCalaglia: Iglia Wastes (Golem)
Mahag Saar: Adan Lake (Tempestuous Mass)
Mahag Saar: Aqfotle Hills (Tempestuous Mass)
Mausoleum: Helgal-Ryugola 67 (Chrome Gazer, Violent Earthen Mass)
Mausoleum: Helgal-Ryugola 238 (Omnious Earthen Mass)
Menancia: Traslida Highway (Forest Roper)
Cyslodia: Nevira Snowplains (Roper)
Cyslodia: Rudhir Forest (Roper)
Paralysis StingerGanath Haros: Shinefall Woods (Assault Bee)
Penumbra StoneMausoleum: Helgal-Ryugola 67 (Violent Earthen Mass)
Punisher’s VambraceMausoleum: Helgal-Ryugola 67 (Murder Ape)
Raging Storm BeakMahag Saar: Adan Lake (Archer Hawk)
Rending TitanfangGanath Haros: Shinefall Woods (Cursed Assassin Wolf, Reptilian Hawk)
Mahag Saar: Adan Lake (Vandal Dragon)
Mausoleum: Helgal-Ryugola 67 (Berserker Boar)
Mausoleum: Helgal-Ryugola 238 (Destructive Boar)
Menancia: Traslida Highway (Boar, Boomy)
Sharp FangMahag Saar: Adan Lake (Archer Hawk, Withered Wolf)
Mahag Saar: Aqfotle Hills (Rioter Claw)
Menancia: Traslida Highway (Boar, Boomy)
Silver ChunkCalaglia: Iglia Wastes (Rampage Wolf)
Cyslodia: Rudhir Forest (Ice Wolf, Alpha Ice Wolf, Manhunt Hawk)
Ganath Haros: Shinefall Woods (Cursed Assassin Wolf, Reptilian Hawk)
Mausoleum: Helgal-Ryugola 67 (Berserker Boar, Chrome Gazer, Gangster Shellshocker, Murder Ape, Rending Mantis, Violent Earthen Mass)
Mausoleum: Helgal-Ryugola 238 (Bandit Shellshocker, Destructive Boar, Sweeper Ape)
Spirit TailGanath Haros: Shinefall Woods (Wild Boomy)
Statue FragmentCyslodia: Nevira Snowplains (Deceptive Effigy)
Sticky TentacleCyslodia: Nevira Snowplains (Roper)
Cyslodia: Rudhir Forest (Roper)
Stone FragmentCalaglia: Iglia Wastes (Golem)
Strange CoreMenancia: Traslida Highway (Granilem)
Sturdy MegaboneCalaglia: Iglia Wastes (Rokmadillo)
Cyslodia: Nevira Snowplains (Deceptive Effigy)
Cyslodia: Rudhir Forest (Ice Wolf, Alpha Ice Wolf)
Mahag Saar: Adan Lake (Withered Wolf)
Mahag Saar: Aqfotle Hills (Crystamadillo)
Mausoleum: Helgal-Ryugola 238 (Bandit Shellshocker, Omnious Earthen Mass)
Tempest StoneMahag Saar: Adan Lake (Tempestuous Mass)
Mahag Saar: Aqfotle Hills (Tempestuous Mass)
Titanium VambraceMausoleum: Helgal-Ryugola 238 (Sweeper Ape)
Wind-Swept ManeMahag Saar: Adan Lake (Withered Wolf, Apha Withered Wolf)

For more guides on Tales of Arise and the Beyond the Dawn DLC check out our guides and walkthrough page here!

Starfield Logo
Guides

Starfield – One Small Step

by NightlyGamingBinge in

Welcome to our walkthrough for the One Small Step main mission in Starfield! In this guide we’ll cover all the objectives and the rewards you’ll receive from completing the One Small Step mission.

One Small Step Mission

Follow Supervisor Lin

When you gain control of your character at the start of the One Small Step mission, follow Supervisor Lin until you reach the cutter create. Grab yourself one then head down the tunnel to the left of the crate and mine the 5 deposits.

When you’re done, return to Lin near the crate.

Follow Supervisor Lin (Again)

Afterwords, follow Lin to where Heller and Isabelle are working the mining machine. After they clear the machine, continue following Lin through the new tunnel. After a bit, Lin will send you to explore the cavern on your own. Keep following the main path until you reach the glowing rock. Use your cutter on the Caelumite Deposit to free the strange object then grab it to trigger a strange vision.

Choose Your Character

You’ll now be able to customize your character!

Follow Supervisor Lin (Thrice!)

After creating your character, Lin will make sure you are okay then you’ll have to follow her again. Before heading out, you can look around for loot if you want. Watch out for First Aid Medical Kits which contain some healing items. When you’re ready, continue following Lin. After you reach the airlock, you’ll need to go into your inventory and equip a helmet to continue on outside where you and Lin will meet the client. Just before the bridge leading to the ship, there will be a container with a weapon and med kit you can loot.

Meet Barrett

After speaking with Barrett you’ll be attacked by the Crimson Fleet. Deal with them then speak with Barrett afterward. He’ll then invite you to join Constellation and send you to the Lodge in his place.

Board the Ship

Head up the ramp to the ship and use the ladder to board. Head for the cockpit. Take your seat in the pilot’s chair then blast out of there! Once in space, you’ll be introduced to the tutorial on how to fly. Follow the prompts to complete it. When that’s done, you’ll be attacked by a Crimson Fleet ship then two more will show up. Engage them in a space battle!

Travel to Kreet

After the battle, our robot companion will determine we need to deal with a local Crimson Fleet Captain if we are going to make it to the lodge safely. Travel to Kreet (the Moon of Anselon). You can do this by opening the Planet Map, choosing “Back to the System” and then selecting Kreet. From there you can hover over the Kreet Research Lab and set it as the course which will let you fast travel there. You’ll then need to interact with the lab again to choose to land.

Deal with the Crimson Fleet Captain

After landing on the planet, work your way to the Research Lab. Along the way, you can collect samples from the local plants and mine ore such as Iron or Silver. Vasco will also show you how to use the scanner. Once you reach the lab, head inside and work your way through dealing with the Crimson Fleet as you go.

Crimson Fleet Captain

When you reach the Roof Access ladder, there will be a safe there you can try and unlock using digipicks. Climb up the ladder and head through the door at the top to finally find the captain. Approach him to begin some dialog where you’ll be able to try and persuade him to walk away. Fail and a firefight ensues. Either way, after dealing with the captain, head back to the ship (via fast travel using your scanner) then take off.

Grav Jump to Jemison

Once in space, divert power to your grav drive then start flying towards the objective. You’ll be prompted to travel to the mission area which will engage the drive when you accept. After you reach your destination, open the star map and choose to land at New Atlantis. You’ll then want to exit the ship and speak with the Ship Service Tech. Next, head over to the New Atlantis Transit and ride it to the MAST District.

Go to the Lodge (Mast District)

Head up the ramp then take a right at the big tree and follow the walkway heading toward the objective marker to reach the lodge. Go inside and pass through the door to meet Sarah and the rest of the bunch. When prompted, place the artifact on the table. After a brief event, Sarah will officially invite you to join Constellation. The mission will complete after you accept. As a reward, you’ll receive the following:

  • Constellation Pack
  • 400 EXP
  • 8,000 credits
  • Lodge Key

For more guides and walkthroughs on Starfield, click here!

Immortals of Aveum Logo
Guides

Immortals of Aveum – Chapter 2: The Magnus Collectibles Guide

by NightlyGamingBinge in

Welcome to our Chapter 2: The Magnus Collectibles Guide for Immortals of Aveum! In this guide we’ll cover all the collectibles that you can find during Chapter 2.

Complete Your Training

Lore: Lost Diary

This collectible can be found on the stone bench in the room where you grab the health crystal.

Lore: Case Report: Changewinds

This lore can be found on a pedestal in a small nook in the same room you get your Shatter ability.

For more guides on the Immortals of Aveum, click here!

Guides

Tears of the Kingdom – Fuse Combinations Guide

by NightlyGamingBinge in

One of the new features in the Legend of Zelda: Tears of the Kingdom is the ability to fuse items together to make new powerful (and sometimes ridiculous) weapons to face the horde of enemies during Link’s quest to take down the Demon King. In our Fuse Combinations guide, we list the different weapons and shields you can create through fusion and what materials are required.

*THIS GUIDE IS A WORK IN PROGRESS! NEW WEAPONS AND SHIELDS WILL BE ADDED AS WE PROGRESS IN THE GAME!*

NameMaterials
Amber SpearSpear + Amber
Black Boko SpearSpear + Black Bokoblin Horn
Blue Boko SpearSpear + Blue Bokoblin Horn
Bokoblin-Armed WeaponOne-Handed/Two-Handed Weapon + Bobkoblin Arm
Bouncy StickOne-Handed WEapon + Hylian Shroom
Boulder HammerTwo-Handed Weapon + Boulder
Captain I SpearSpear + Captain Construct I Horn
Captain I ReaperOne-Handed Sword + Captain Construct I Horn
Flame-Emitter ShieldShield + Flame Emitter
Flux Core I SmasherTwo-Handed Weapon + Flux Construct I Core
Hydrant HammerTwo-Handed Weapon + Hydrant
Hylian-Shroom ShieldShield + Hylian Shroom
Korok-Frond GusterOne-Handed Weapon + Korok Frond
Lizal ReaperOne-Handed Weapon + Lizalfos Horn
Rock HammerOne-Handed Weapon + Rock
Rock SledgeSpear + Rock
Ruby ScepterMagic Scepter + Ruby
Soaring SpearSpear + Keese Wing
Soldier ReaperOne-Handed Weapon + Soldier Construct Horn
Soldier II ReaperOne-Handed + Soldier Construct II Horn
Soaring SwordOne-Handed Sword + Keese Wing
Spiked-Iron-Ball HammerTwo-Handed Weapon + Spiked Iron Ball
Spiky ClubWooden Stick + Spikes
Stone Talus HammerMelee Weapon + Stone Talus Heart
Zapshroom ShieldShield + Zapshroom
Zora-Spear SpearZora Spear + Zora Spear