Welcome to our complete “Lights Out” guide for RoboCop Rouge City! Here where we’ll cover all of the secondary objectives you can complete and miscellaneous things you can find during the Lights Out primary objective!
Lights Out RoboCop Objectives
The following list shows all the activities you can do during the “Lights Out” mission in RoboCop Rouge City. Although they are a good way to earn extra XP, they do not contribute to the RoboCop Evaluation Report.
Secondary Objectives
Lights Out
Misc
Don’t Panic Document
Lights Out
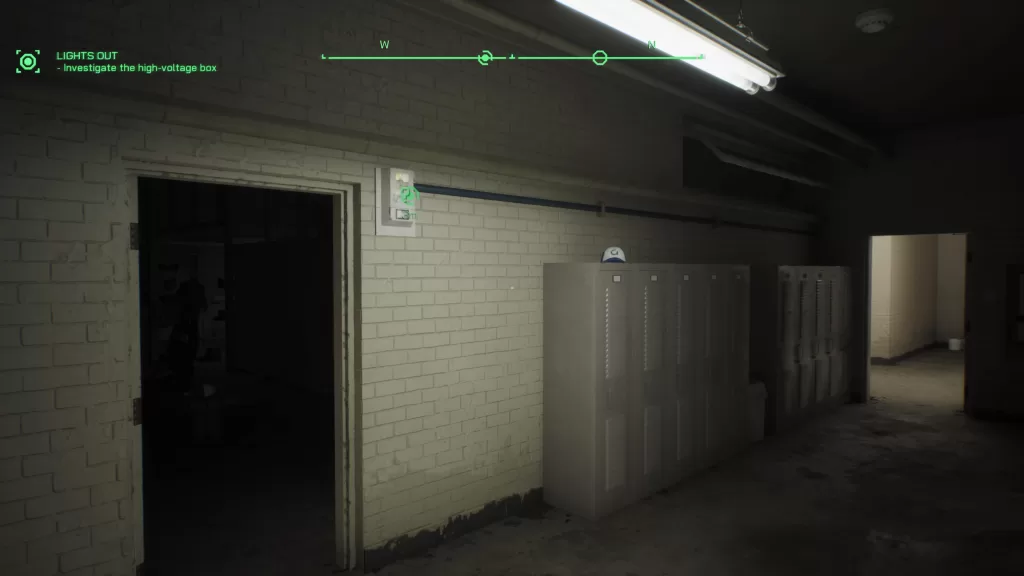
After you talk to the Chief at the police station, head to the locker room. This will trigger an event where the lights go out. Speak with Officer O’Neal and she will ask for help to get the lights back on. Leave the locker room and go to the hallway between the locker room and the showers. Use your scanner to check the power box on the door to the locker room and hold the scan button to follow the power lines.
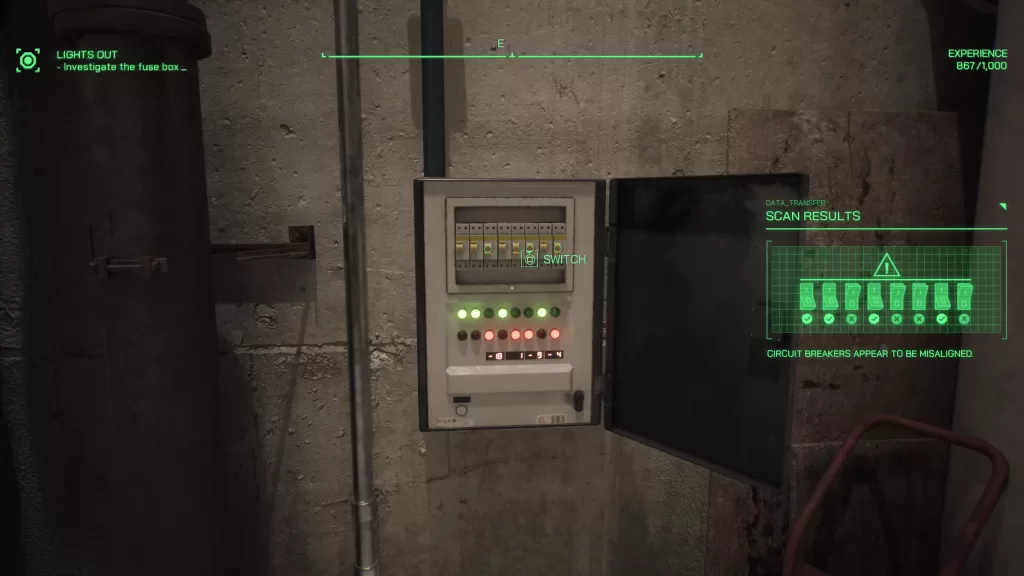
This will lead to a fuse box in the garage on the lower level of the precinct. It will be situated on the wall next to the concrete stairs. Interact with it to open the box, then scan the fuses to find that they are misaligned. You will then need to flip all of the switches with a red light to restore the power.
Once all of the lights are green, the objective will be complete. Please note, there may be a specific order in which you need to turn them on. If you look at the four with red lights, starting from the far left one as 1 and the far right as 4, flip them in this sequence: 1, 4, 2, 3.
Don’t Panic
In the precinct lobby, look down the hallway toward the briefing room, then turn right. You’ll find the Don’t Panic document on the file cabinet next to the desk by the window.
Welcome to our “Bank Heist” guide for RoboCop Rouge City. Here we’ll go over everything you’ll need to do to get a RoboCop evaluation score of A for the Bank Heist objective in Robocop Rogue City.
Bank Heist RoboCop RoboCop Evaluation Objectives
In order to get an A on the next RoboCop evaluation, you’ll need to complete the objectives listed below.
Investigations
OCP Bank Secret #1
OCP Bank Secret #2
Police Work
SWAT Team Challenge
Bank Intruder Arrested
Pieces of Crime Evidence Collected
Misc
OCP Chest
Letter to be Framed
Disarming the Bomb
Police Work – Pieces of Crime Evidence
While dealing with the robbery at the bank, you’ll want to keep an eye out for crime evidence. These will be in the form of Fake ID Cards, Nuke, Stolen Wallets, Fake Money, Incriminating Documents/Pictures and Stolen Handbags. You can find them pretty much anywhere so be sure to keep an eye out for them. As a side note, this didn’t show up as an objective for us, but still counted for the evaluation.
Police Work – Swat Team Challenge
When you reach the bank, Robocop will have to complete against the swat team. You’ll need to get more kills than the swat team to get the XP. During this challenge, a couple of ED-209 units will show up and their kills will count towards the swat team’s total.
Investigations – OCP Bank Secret #1
During the initial sweep of the building when you’re competing with the swat team. You’ll have the objective to “open the doors for the ED-209 units”. Before doing this, head to the Premium Customer Service area, which is across from the Security Room. Once you get there, look for Michael Johnson’s desk and scan the Alex Murphy Property Folder on it.
Side Note: if you look to the left of the desk, you’ll find a bookshelf next to the American Flag. On that bookshelf you’ll find a suitcase with an OCP Training Disk inside.
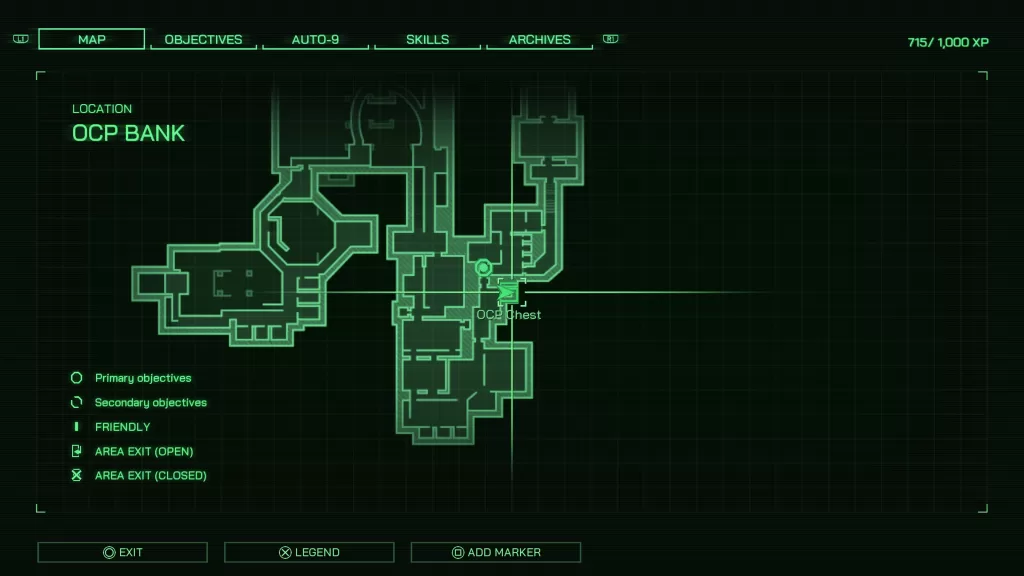
Bank Heist – OCP Chest
After the SWAT Team challenge completes, the objective will update to “Reach the Manager’s Office”. Before heading through the double doors, look to the right to find another door. Open it to find the OCP Chest.
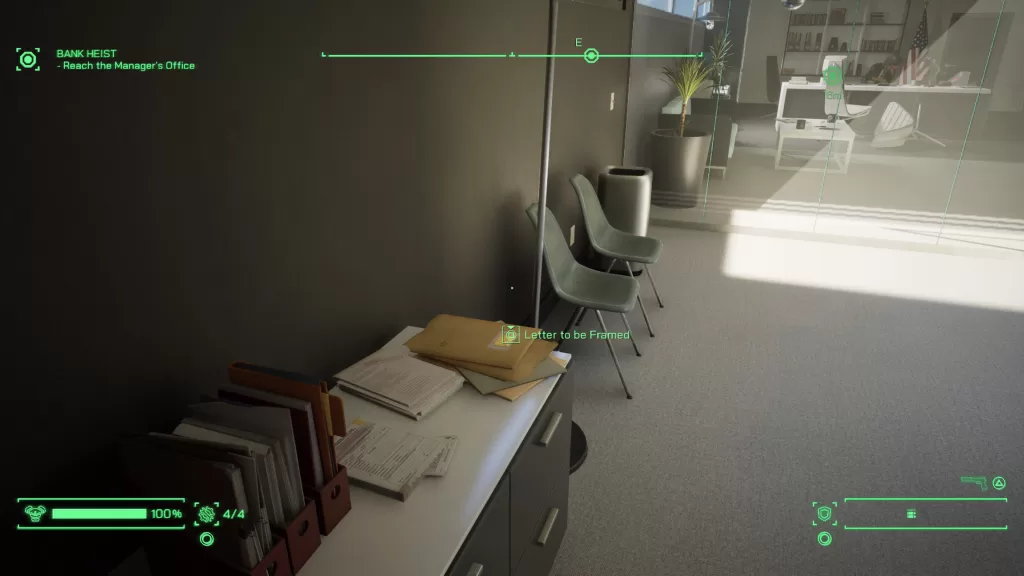
Bank Heist – Letter to be Framed
After entering the double doors mentioned above but before entering the manager’s actual office, stop by his secretary’s desk in front of it. Behind the desk will be some cabinets where you’ll find the Letter to be Framed on top. Make sure to give it a read for some extra XP.
Police Work – Bank Intruder Arrested
When you reach the Manager’s Office, you’ll trigger a cutscene with Robo’s reporter friend. She’ll be looking for some incriminating evidence and will try to talk Robo into letter her go. If you agree, that will increase her opinion of Robo potentially affecting her ending later. However, in order to get the XP for arresting the bank intruder, you’ll need to detain her. Going this route will have a minor impact a couple objectives from now at the mall.
Bank Heist – Disarming the Bomb
Whenever you reach the vault, a cutscene will trigger resulting in Robo having to disarm a bomb with the help of Officer Washington. Once you begin, you’ll need to scan the following items:
4 inputs with their different voltages
C4 explosive on the bottom part
4 wire connectors on the right side
Electronic fuse on the top
After they have all been scanned, Washington will say that you’ll need to disable the wires one at a time starting with the highest voltage and working your way down to the lowest voltage. If you have your armor skill leveled up to 4, you’ll be able to safely detonate the bomb on your own. Otherwise, the list below shows the three cables you should disarm starting from top to bottom.
24V (green cable)
12V (blue)
12V (red – bottom red cable)
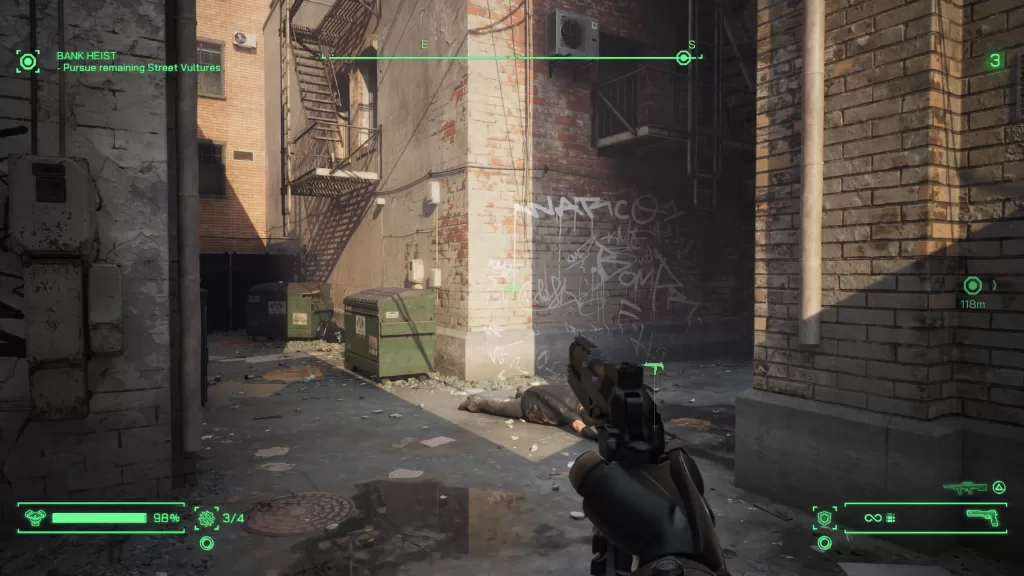
Investigations – OCP Bank Secret #2
Following the disarming of the explosive device, Robo will follow a tunnel near the vault outside to a construction area. You’ll defeat a group of enemies then head up a dirt hill into an alley. On the left side under a fire escape, you’ll spot two green dumpsters. Look behind the second dumpster to find an overturned fire barrel with some stolen jewelry and a purse inside. Loot them to find an OCP Bank Secret.
Welcome to our complete “On the Biker’s Trail” RoboCop guide for RoboCop Rouge City! Here where we’ll cover all of the secondary objectives you can complete and miscellaneous things you can find during the “On the Biker’s Trail” primary objective!
On the Biker’s Trail Objectives
The following list shows all the activities you can do during the “On the Biker’s Trail” RoboCop mission in RoboCop Rouge City. Although they are a good way to earn extra XP, they do not contribute to the RoboCop Evaluation Report.
Misc
Fax from Baby Maid
Rejection Letter
Secondary Objectives
In Memory of Officer Briggs
Target Practice
Misc – Fax from Baby Maid
The Baby Maid Fax is a document that Robo can read to earn extra XP. It can be found in the cage where the Robocop Evaluations happen on a machine that looks like a microwave.
Misc – Rejection Letter
The Rejection Letter is a document that Robo can read to earn extra XP. You can find it on the desk at the far southern end of the main lobby.
On the Biker’s Trail – In Memory of Officer Briggs
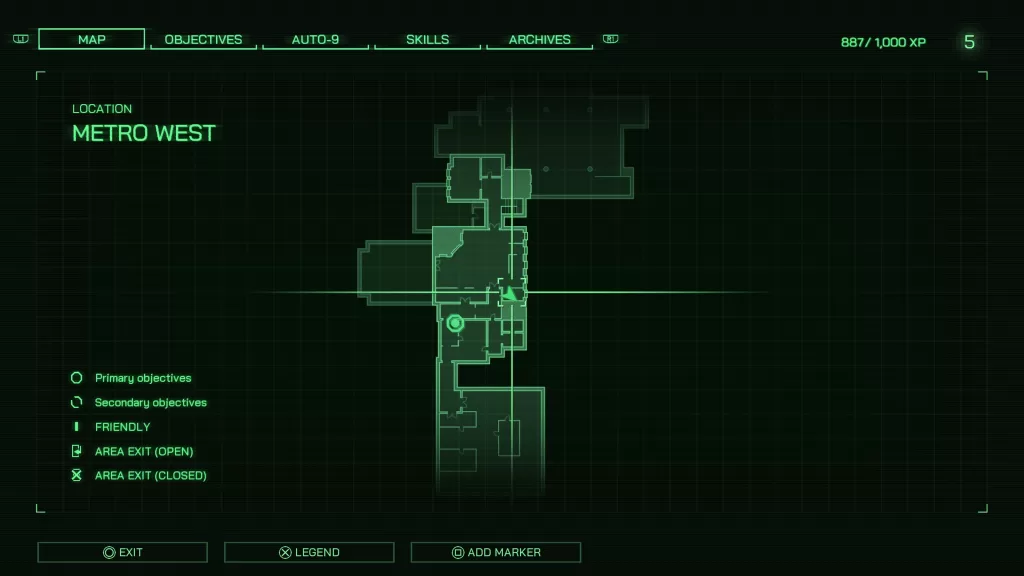
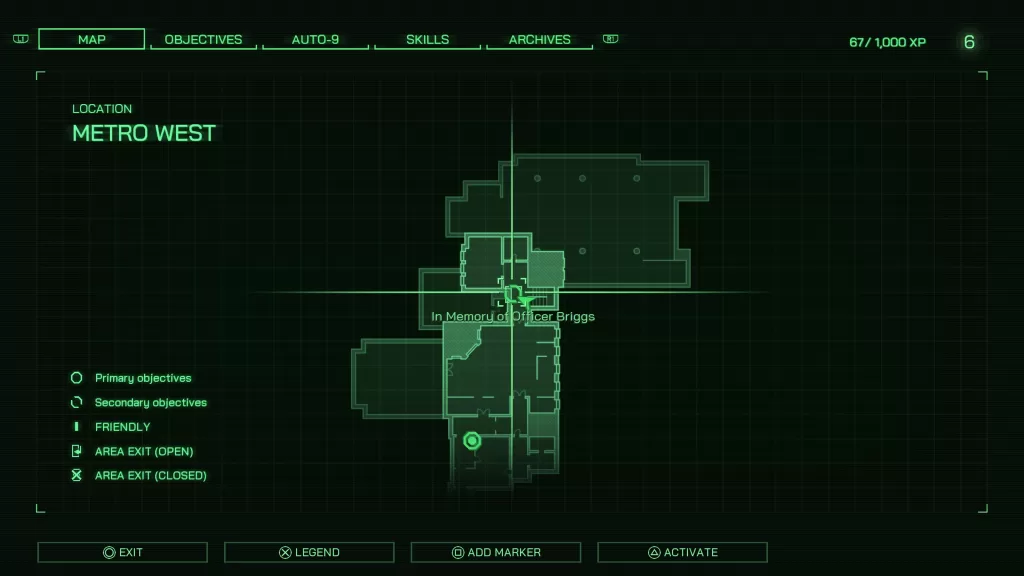
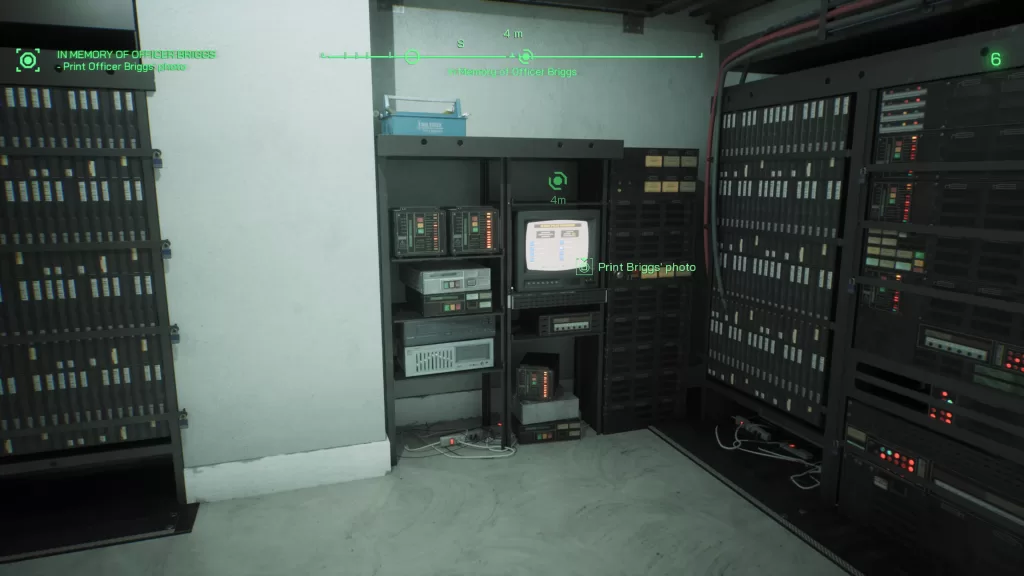
Approach Officer Cecil in the hallway near the Briefing Room to begin this objective. After speaking with Cecil, you’ll need to go print off Officer Briggs’ photo. To find it, go downstairs to the server room and access the computer on the backside of the room. Once on the computer, select “Database” and then “Police Officer Database”. Next, select Briggs M. from the list.
Take the picture upstairs and hang it on the wall behind the phone booth in the lobby. After hanging the photo, go to the locker room and open Locker 018, which belongs to Briggs. Inside, grab the baseball, tickets, and family photo. Go back to the lobby and put Brigg’s belongings on the desk where Cecil is standing. Then the objective will be complete!
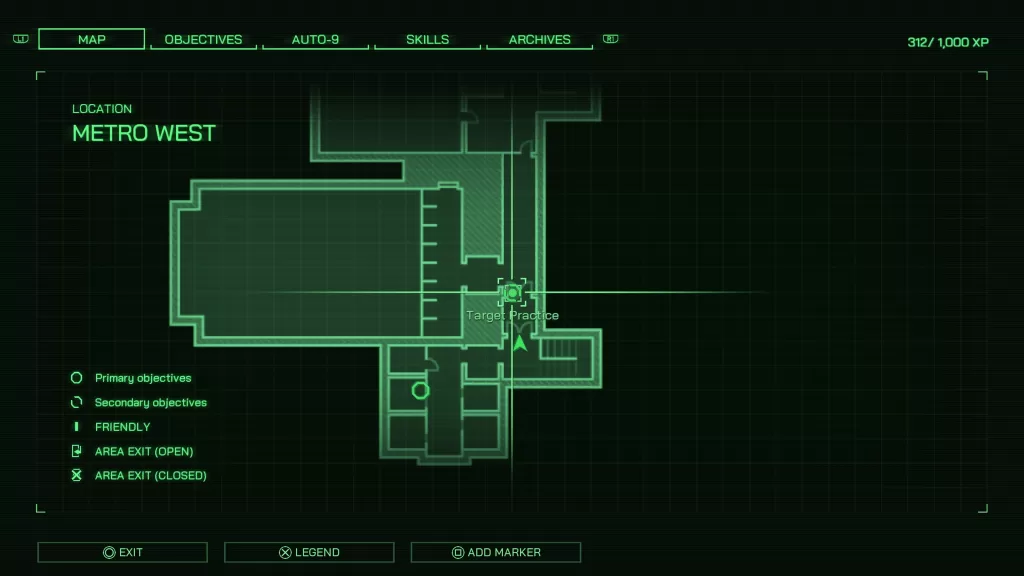
On the Biker’s Trail – Target Practice
To start Target Practice, go to the holding cells in the lower level of the precinct. Just before you arrive, you will meet Officer Washington. He will ask Robo to give him a lesson at the shooting range. During the conversation, you will have the choice to show empathy to Washington. Choose that option to help boost his confidence. Follow him to the shooting range and interact with the range to start. To pass, you’ll need to score at least 15.
Once you finish, a cutscene will play where Washington talks about his firearm and Robo offers to calibrate it. Go back to the firing range and try to score 15 points again. After that, another cutscene will play, giving you another chance to choose an empathy response conversing with Washington. After the conversation, the objective will be complete.
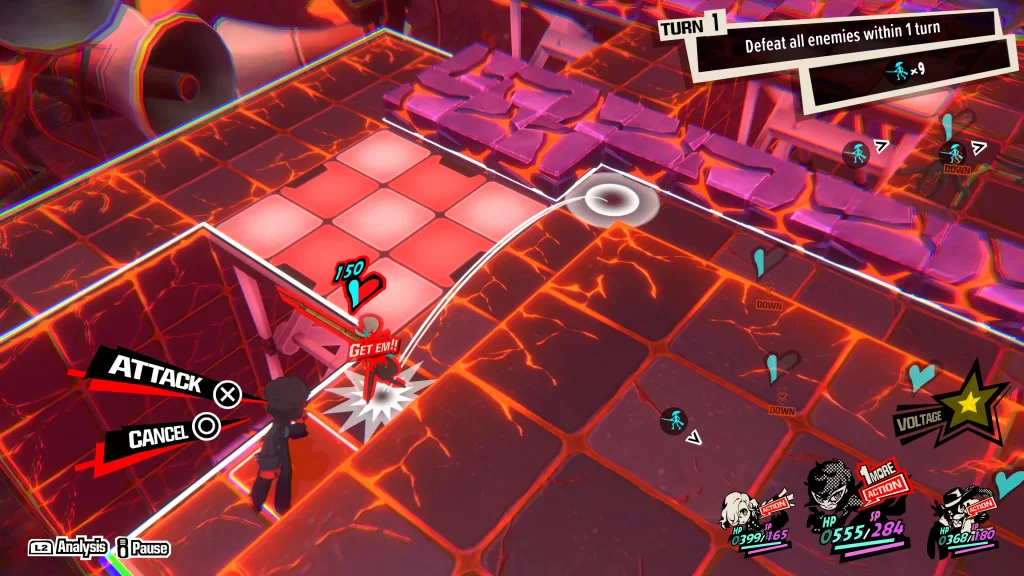
Welcome to NGB and our guide for Persona 5 Tactica Quest 15 Lavenza’s Third Trial. This quest becomes available during the 4th kingdom. In this guide we’ll cover the party requirements, victory conditions, any prep work that you many need to do along with how to complete the quest and the rewards you’ll receive at the end.
Persona 5 Tactica Quest 15 Details
The quests party requirements for this quest will require you to use Haru, Erina and Toshiro. You will be able to select a third party member as Toshiro is still considered a guest. To successfully complete this quest, you’ll need to defeat all enemies!
Walkthrough
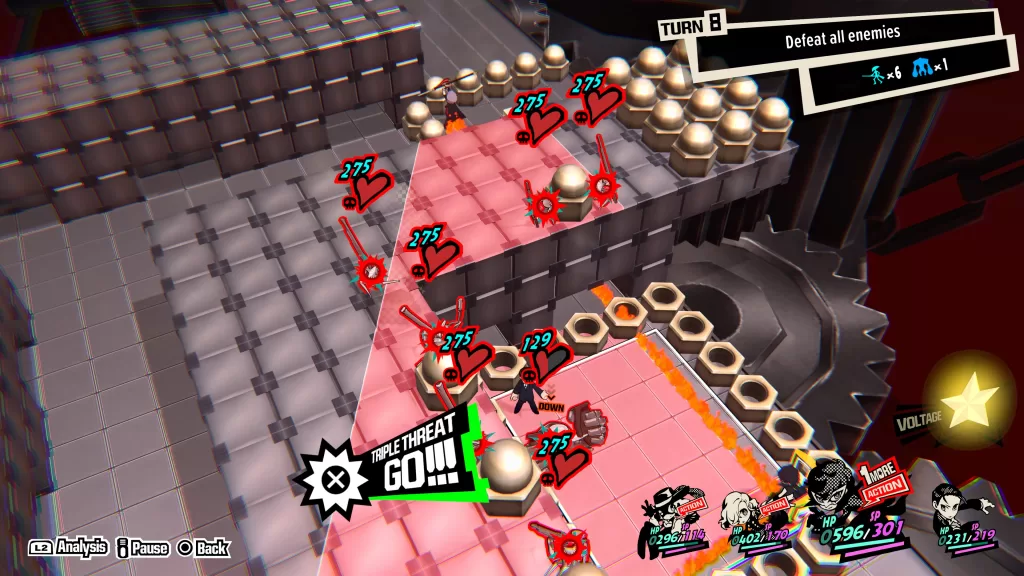
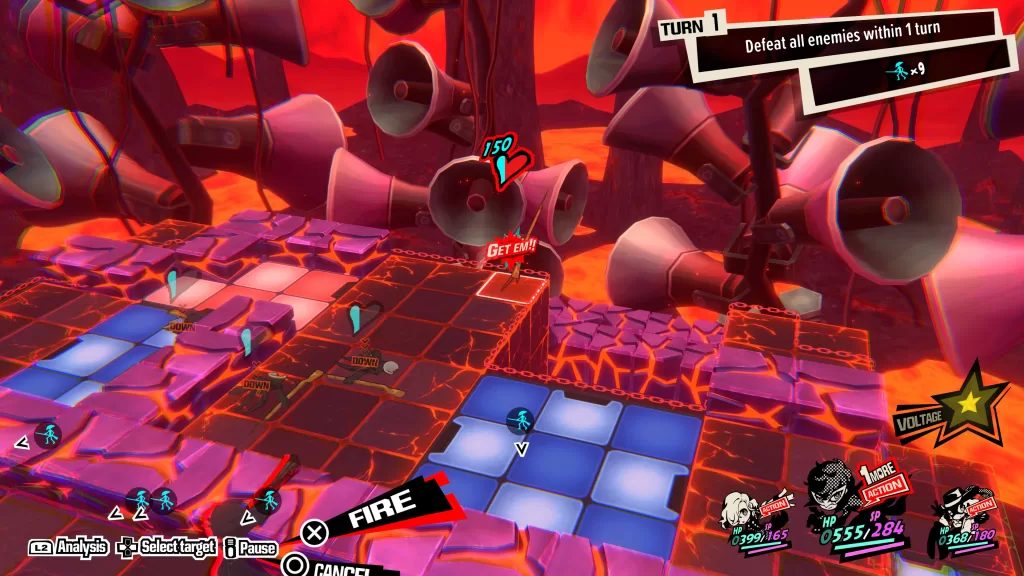
During this quest, Erina, Haru, and Toshiro will be separated, and Toshiro will be restricted to a small area for the entire quest with the third party member you selected. To finish the quest successfully, you must battle through multiple waves of enemies without losing any of your party members. If any of them are defeated, you will fail the quest. Once you have defeated all the enemies on the map, a new wave will appear, and this will happen three times (resulting in four groups of enemies). The enemies will spawn in different locations each time, with new enemies appearing near Toshiro each time.
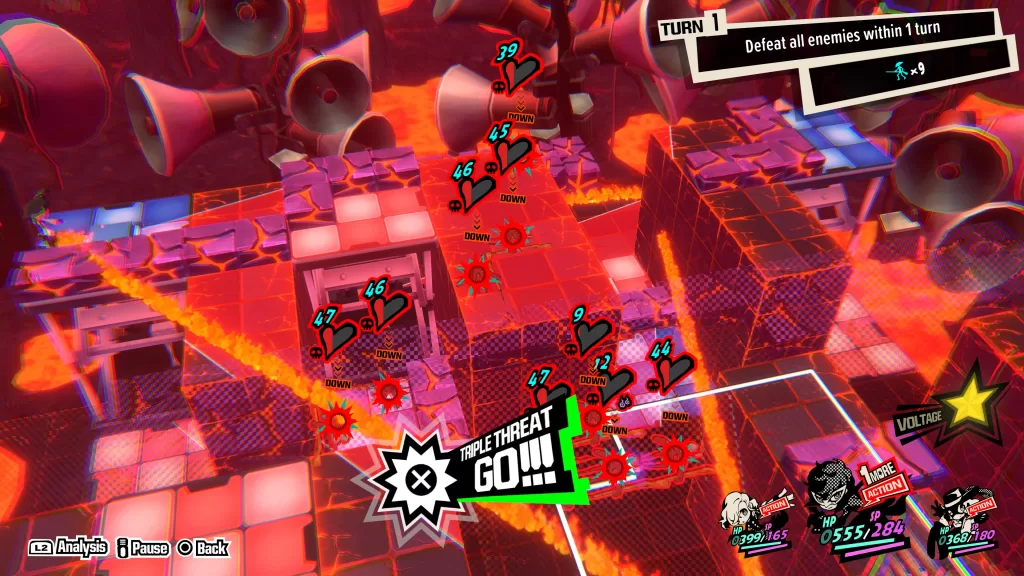
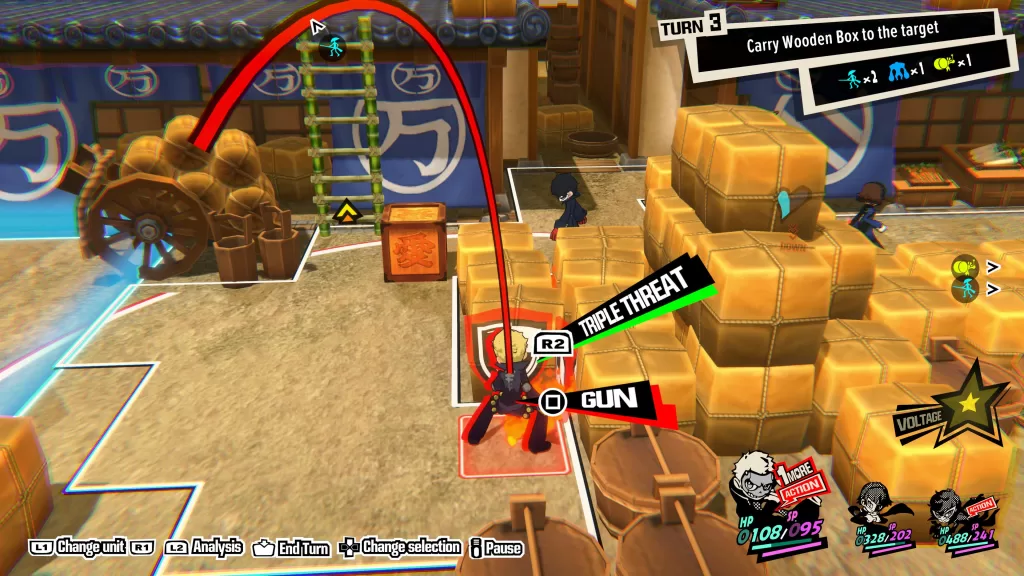
To defeat all the enemies, use the Triple Threat attack as much as possible. This will remove large groups of enemies, and any that survive will have low health. Keep an eye on Toshiro, as his health will be lower than the others and his contributions to the fight will be limited. Position him under the wall where enemies spawn above his area to make it hard for them to target him while his persona attacks the enemies. Use your third party member to divert the enemies’ attention while Toshiro picks them off.
Haru and Erian can set up Triple Threat attacks and clean up any remaining enemies. In the last couple waves, they will be able to join forces, giving you more flexibility in dealing with the remaining enemies. Once all the enemies of the final wave have been dealt with, the quest will be completed.
Persona 5 Tactica Quest 15 Rewards
Unlocks the strongest skill for Haru, Erina and Toshiro
Welcome to NGB and our guide for Persona 5 Tactica Quest 13 Lavenza’s First Trial. This quest becomes available during the 4th kingdom. In this guide we’ll cover the party requirements, victory conditions, any prep work that you many need to do along with how to complete the quest and the rewards you’ll receive at the end.
Persona 5 Tactica Quest 13 Details
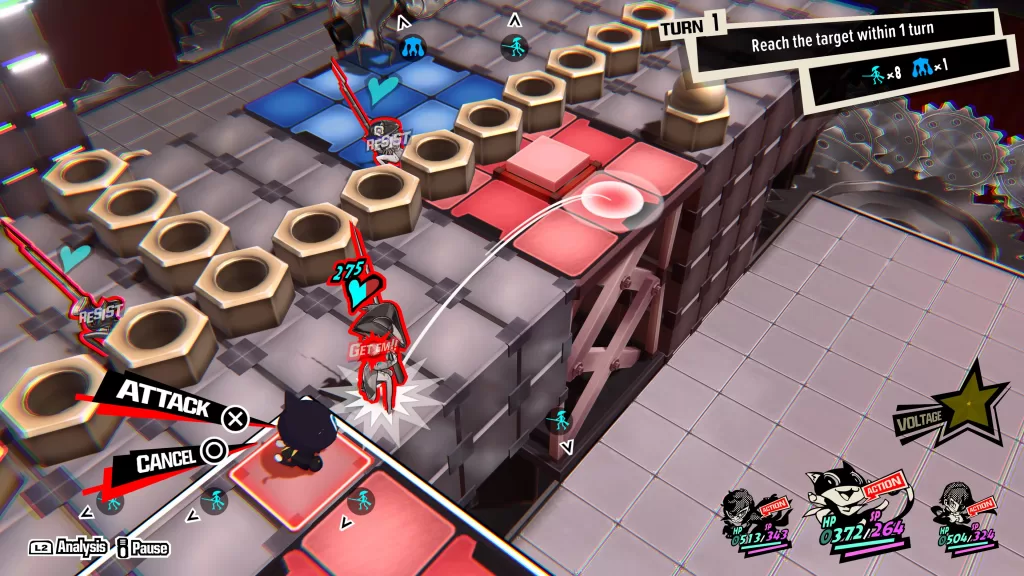
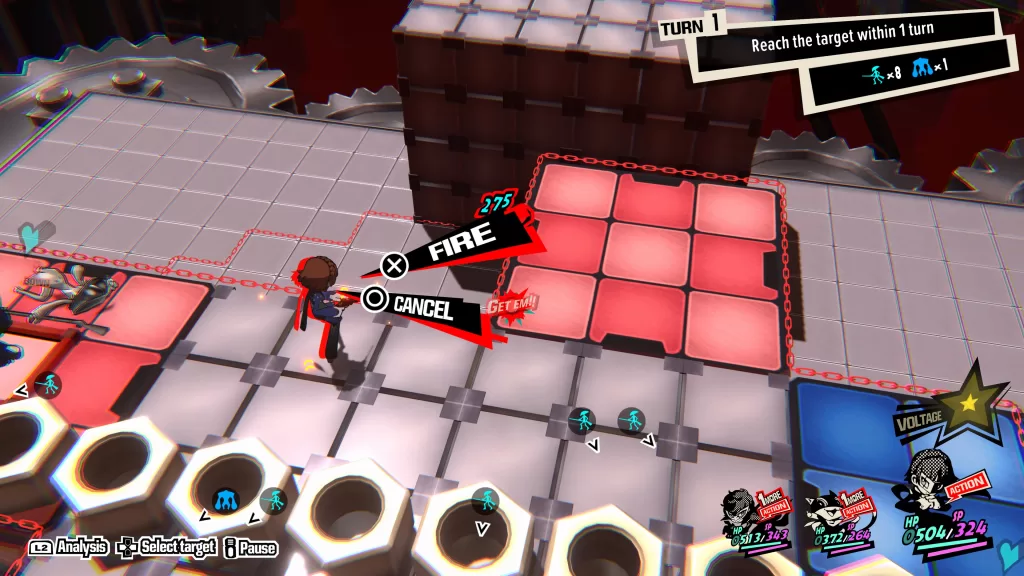
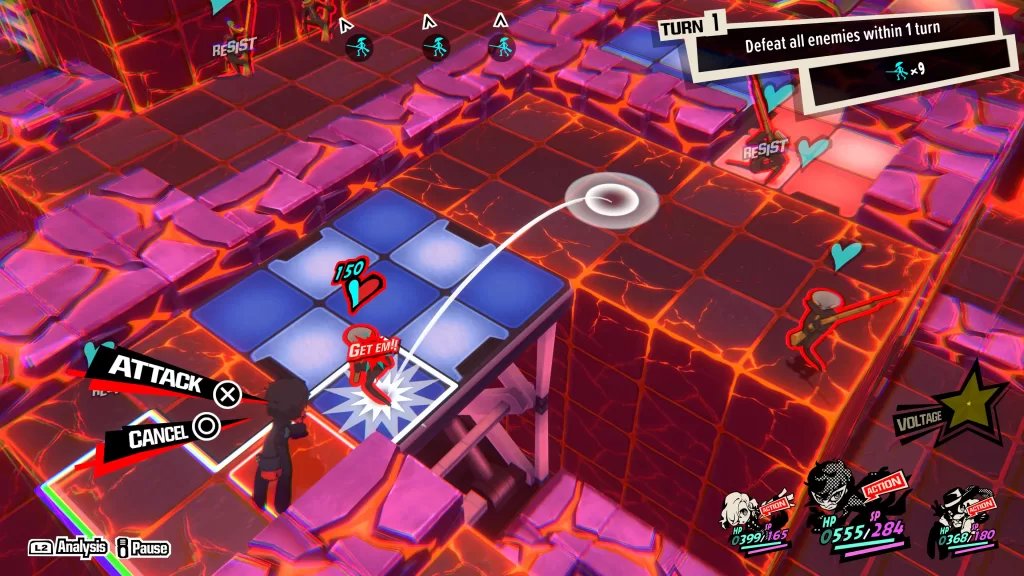
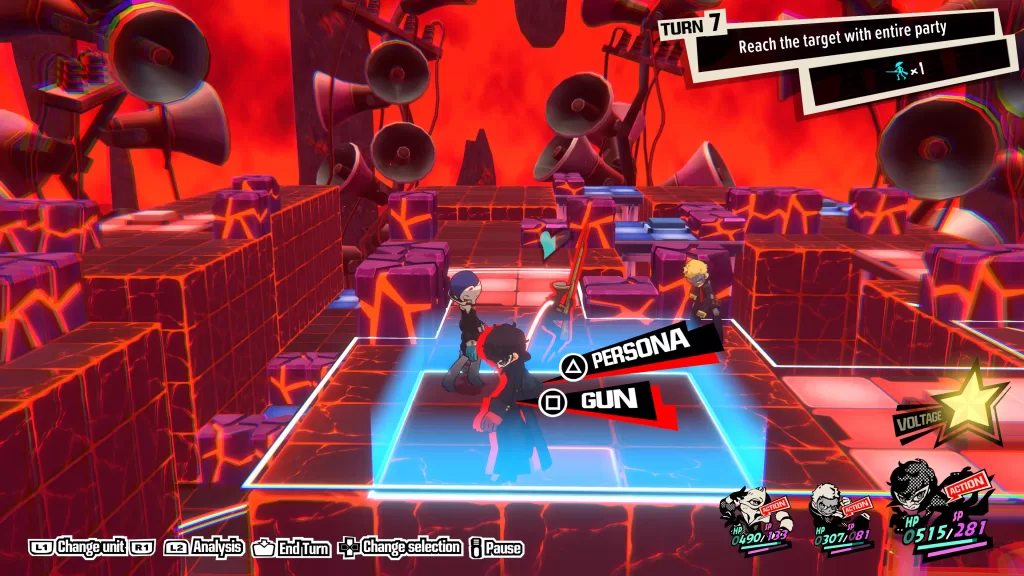
The quests party requirements will require you to use Joker, Morgana and Makoto. To complete this quest, you’ll need to reach the objective in 1 turn.
Walkthrough
Use to Joker and bring him to the red platform
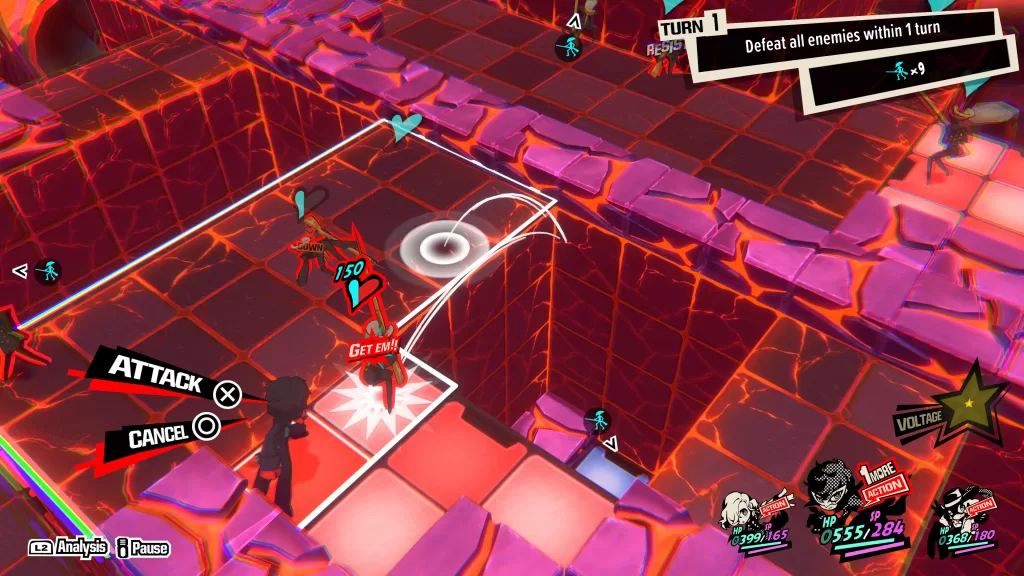
Swap to Mona and head over the red/blue bridge then attack the enemy on the other side to get a 1more
Place Mona on the red floor switch to lower the red platform
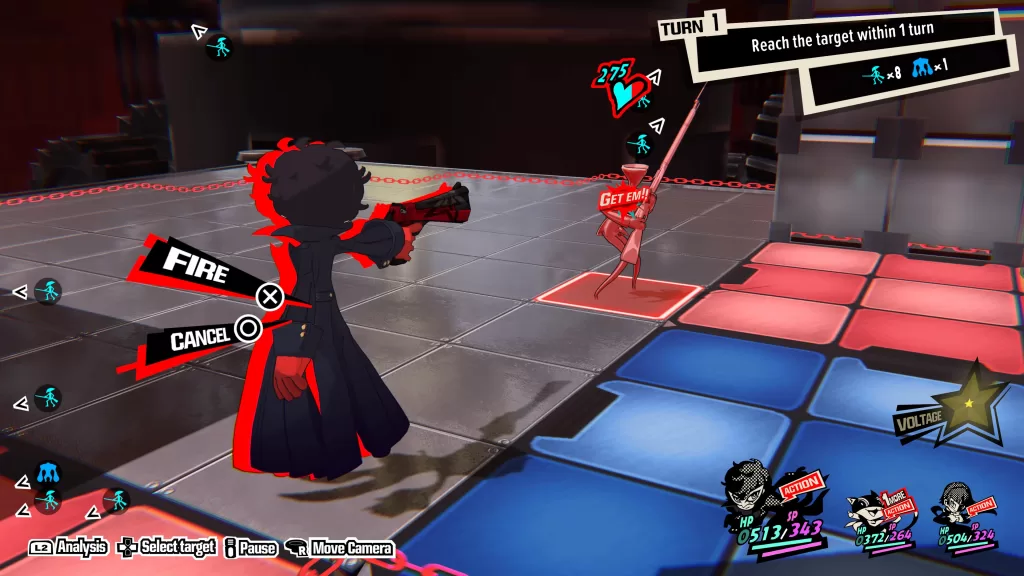
Swap to Joker then head to the left and shoot the enemy there to get a 1more
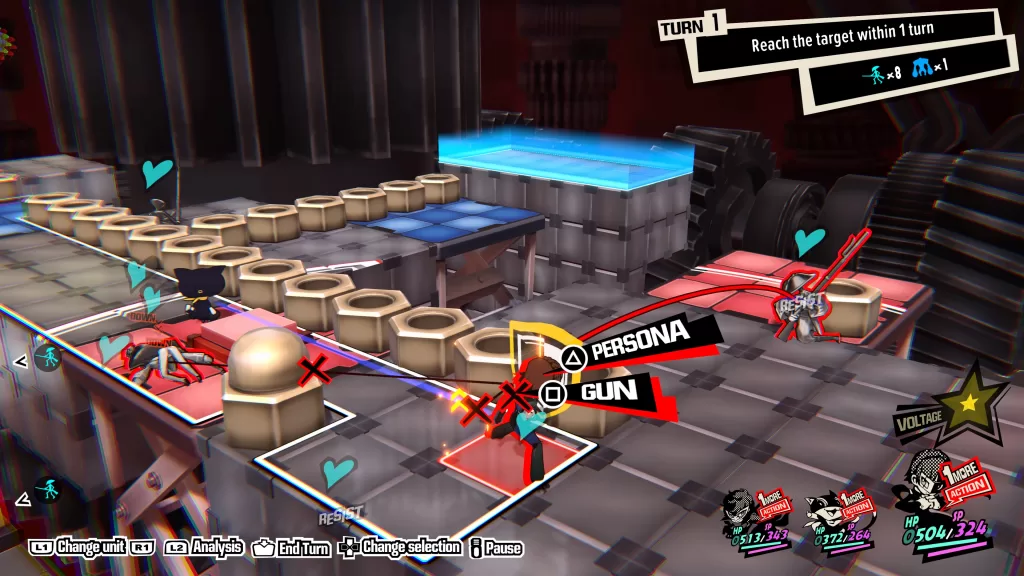
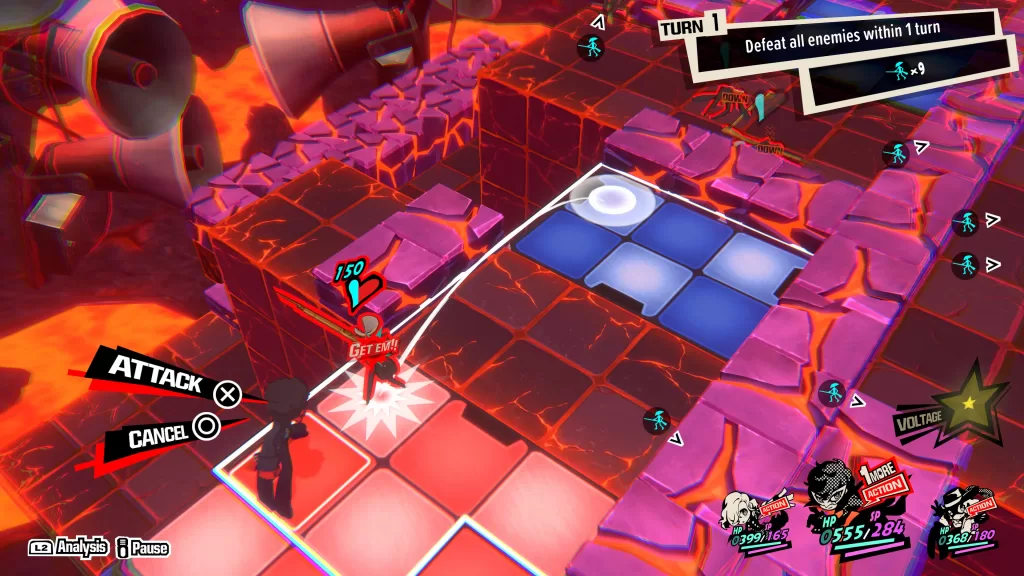
Place Joker on the red platform
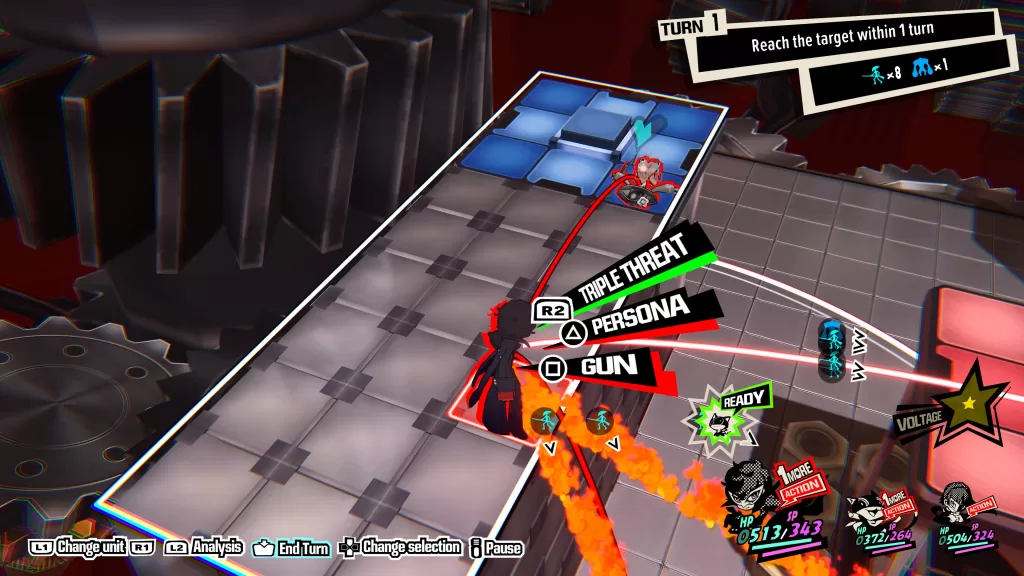
Swap to Mona step on the red switch again to move the platform up
Change back to Joker and head words the blue switch off the red platform
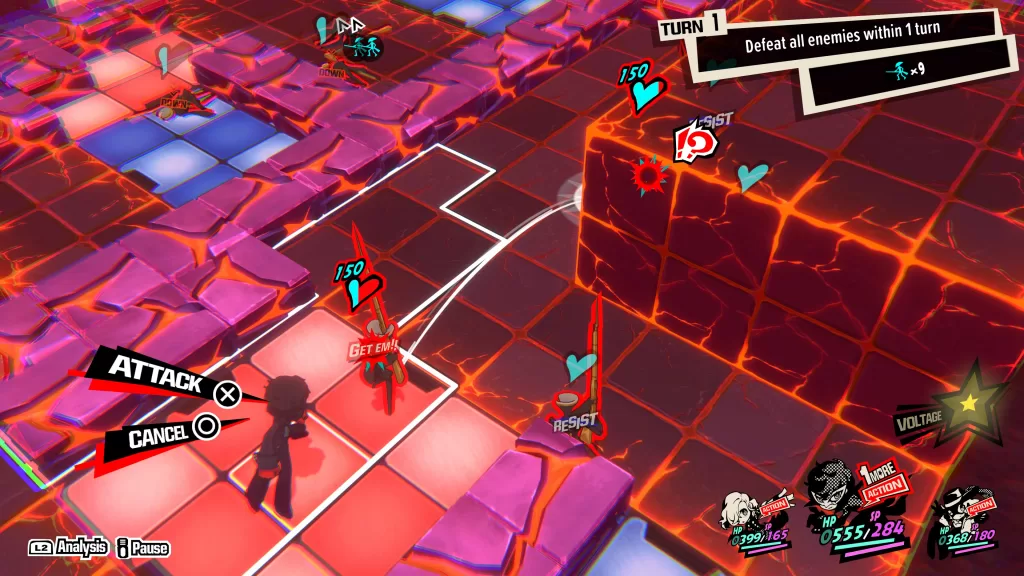
Swap over to Mona and step on the red switch once more
Change back to Joker and attack the nearby enemy getting a 1more
Use Mona to step on the red switch again
Swap to Makoto and head across the platform bridge
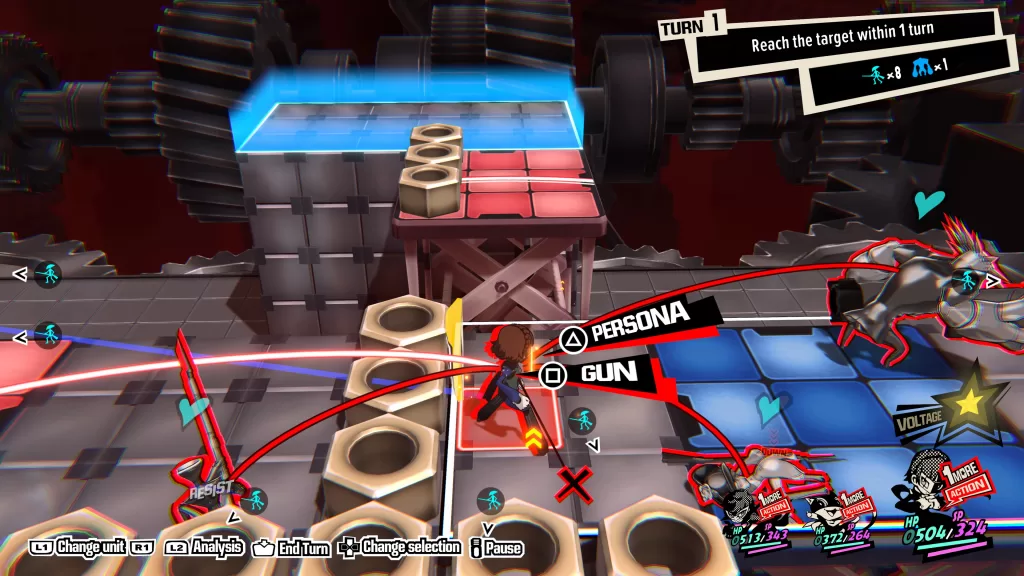
Change to Joker and step on the blue switch
Swap back to Makoto then attack the enemy on the ground near the base of the platform bridge with Makoto’s Art to get a 1more
Cross the red platform that Mona is on with Makoto
Swap to Mona and step on the red switch again
Change back to Makoto and attack the nearby enemy to get a 1more
Swap to Joker and step on the blue switch
Change back to Makoto and walk across the blue platform to the other side
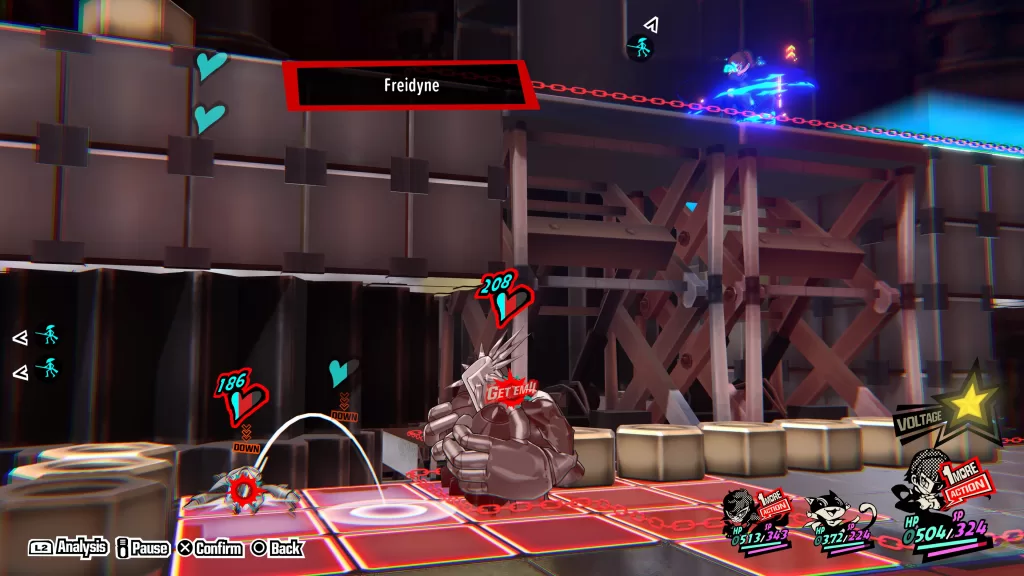
Attack the smaller enemy on the raised blue platform to get a 1more
Swap back to Joker and step on the blue switch
Swap to Mona to attack the bigger enemy on the blue platform across from with Garu
Swap to Makoto and attack that same enemy as Mona to get a 1more
Cross the finish line with Makoto
Persona 5 Tactica Quest 13 Rewards
Unlocks the strongest skill for Joker, Morgana and Makoto
Welcome to NGB and our guide on Persona 5 Tactica Quest 12 Learning From a Pro. This quest becomes available during the 1st kingdom. In this guide we’ll cover the party requirements, victory conditions, any prep work that you many need to do along with how to complete the quest and the rewards you’ll receive at the end.
Persona 5 Tactica Quest 12 Details
The party requirements for this quest require you to use both Ren and Erina with the last party member choice being up to you. To successfully complete this quest, you’ll need to defeat all enemies in 1 turn.
Walkthrough
Move Joker onto the red platform
Step on the red switch with Erina to raise the platform
Move Joker next to the enemy on the blue platform
Step on the red switch with Erina to lower the red platform
Attack the enemy on the blue platform with Joker sending the enemy to the center of the map
Head behind the enemy on the next red platform
Use your other party member to step on the blue switch to raise the platform
Swap to Joker and use him to attack the enemy sending them towards the wall
Use your other party member to step on the blue switch again to lower it
Move Joker onto the blue platform
Use Erina to step on the red switch to raise the red platform
Swap to Joker and use him to attach the enemy on the next red platform sending it towards the center of the map
Move joker forward off the red switch
Use Erina to step on the red switch lowering the red platform
Attack the enemy on the red platform near joker sending him into the enemy on the wall
Use your other party member to step on the blue switch raising the blue platform
Swap to Joker and attack the enemy (on the right) that was hiding by the blue platform sending them towards the front of the map
Position Joker to shoot the enemy standing near the front of the area then do so
Swap to Erina and use her to step on the red switch to raise the red platform
Swap to the other party member and us them to step on the blue switch lowering the platform
Use Joker and attack the enemy on the newly raised red platform to send him towards the enemy on the wall
Attack the other two enemies near the wall who are not downed yet
Climb up the ladder with Joker
Position all of three of your party members to do a Triple Threat attack to take out all of the enemies
Welcome to NGB and our guide on Persona 5 Tactica Quest 11 Toshiro’s Embarrassing Secret. This quest becomes available during the 1st kingdom. In this guide we’ll cover the party requirements, victory conditions, any prep work that you many need to do along with how to complete the quest and the rewards you’ll receive at the end.
Persona 5 Tactica Quest 11 Details
The party requirements for this quest require to you any 3 of the male team members and that’s including Morgana. To successfully complete the quest, you’ll need to reach the target location with all three party members.
Walkthrough
This is another straight forward quest. You’re three party members will be split up and you’ll need to work each of them to the goal by stepping up various floor switches on different colored platforms. There are two colors of moveable platforms: red and blue. Stepping a red switch will move the other red platforms while stepping on a blue one moves the blue platforms. There are no other objectives, so take your time and defeat the enemies as you go.
Welcome to NGB and our guide on Persona 5 Tactica Quest 10 A Balancing Axe. This quest becomes available during the 3rd kingdom. In this guide we’ll cover the party requirements, victory conditions, any prep work that you many need to do along with how to complete the quest and the rewards you’ll receive at the end.
Persona 5 Tactica Quest 10 Details
The party requirements for this quest require you to bring both Yusuke and Haru leaving the third party member choice up to you. So successfully complete the quest, you’ll need to defeat all enemies in 4 turns.
Walkthrough
This quest is really straight forward. You have 4 turns to defeat all of the enemies on the map. We start out by dealing with ones on the raised area first. Once they were taken care of, we dealt with the ones of the lower section. Four turns was more than enough time to complete this quest.
Welcome to NGB and our guide on Persona 5 Tactica Quest 8 The Rightful Prince. This quest becomes available during the 2nd kingdom. In this guide we’ll cover the party requirements, victory conditions, any prep work that you’ll need to do along with how to complete the quest and the rewards you’ll receive at the end.
Persona 5 Tactica Quest 8 Details
The party requirements for this quest requires you to use both Ann and Morgana leaving the third party member choice up to you. To successfully complete this quest, you’ll need to defeat all enemies within 7 turns.
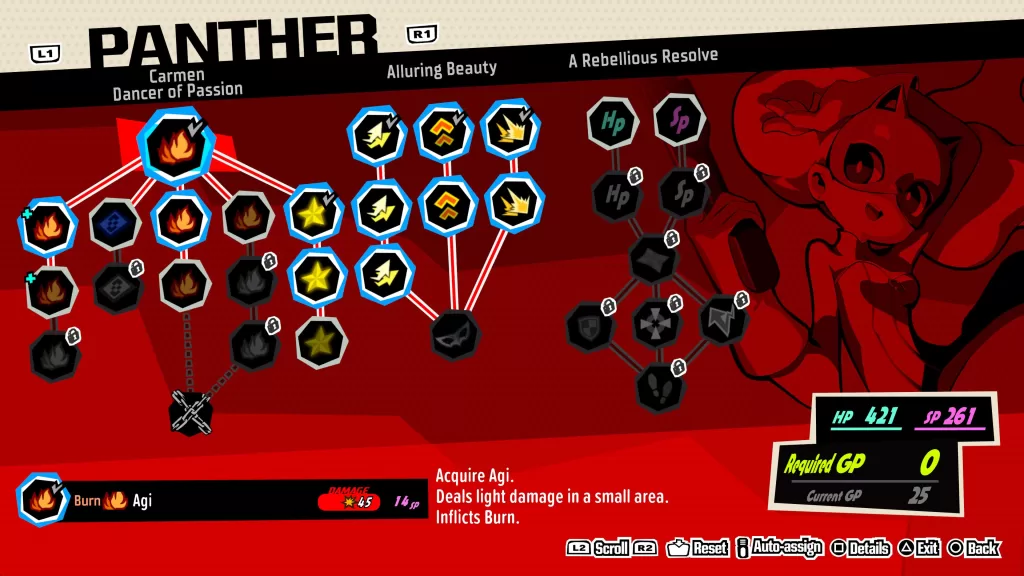
Before You Start
Below is how we setup Ann’s skills for this quest. She will be on her own during the quest separated from the rest of the group.
Walkthrough
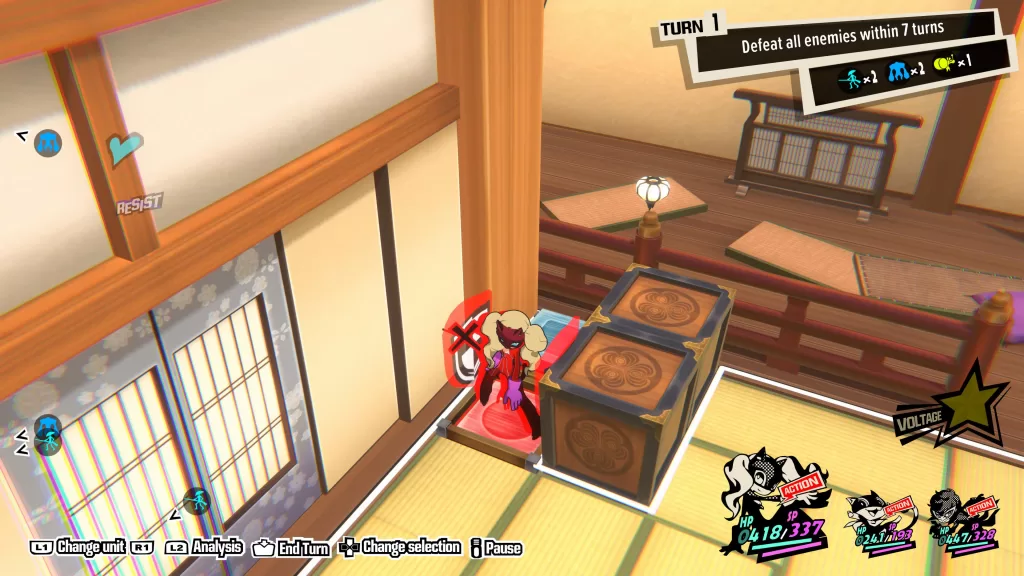
Turn 1
For this quest, Ann will be positioned by herself while Mona will be with your other party member. Start by using Ann to step on the red floor switch to open the door by Mona.
Swap to your other two characters and walk them through the red door. Use one to attack the enemy that was behind the red door to get a 1more. Change back to Ann and mover her onto the blue floor switch then swap back to the other group and attack the other enemy. Position your characters to do a Triple Threat attack and use two of them to defeat the enemies you knocked down. End your turn!
Turn 2
At the beginning of the turn, swap Mona or your other party member and take them to the blue floor switch. This with open the door by Ann allowing her to head through.
User her fire Art to hit the enemy with a drum taking him out then use the other two to take out the enemy in the room with them. Make sure to move one of the two party members onto the red switch then end the turn afterwards.
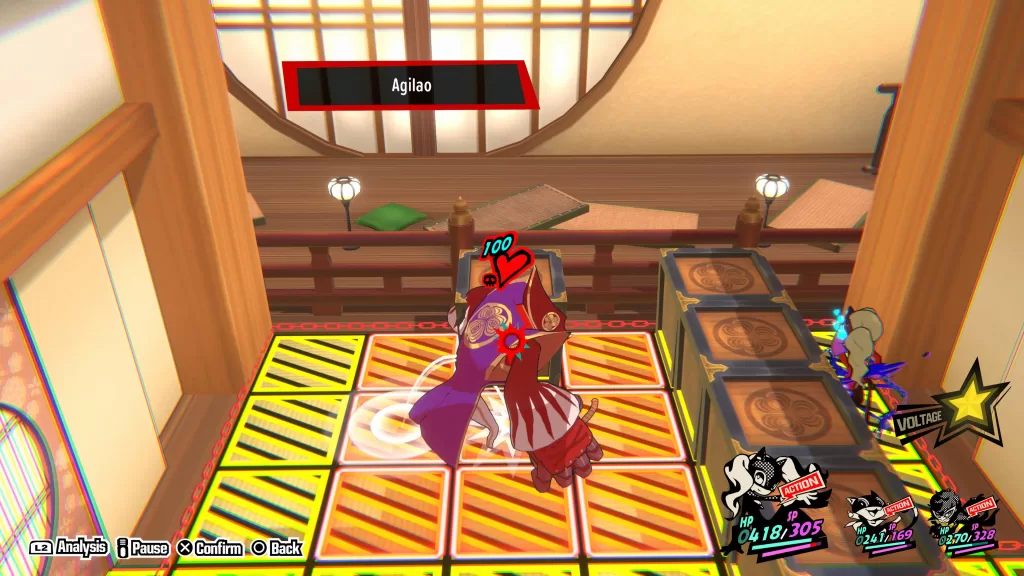
Turn 3
The last enemy should have exited another room heading towards Ann. Use her Agilao to finish it off completing the quest.
Welcome to NGB and our guide on Persona 5 Tactica Quest 7 The Mysterious Box. This quest becomes available during the 2nd kingdom. In this guide we’ll cover the party requirements, victory conditions, any prep work that you may need to do along with how to complete the quest and the rewards you’ll receive at the end.
Persona 5 Tactica Quest 7 Details
The party requirements for this quest require you to use both Ryuji and Makoto while you are free to choose whoever you want as the third member. To successfully complete this quest, you’ll need to secure the box in 4 turns to satisfy the victory condition by escorting it to the target area.
Walkthrough
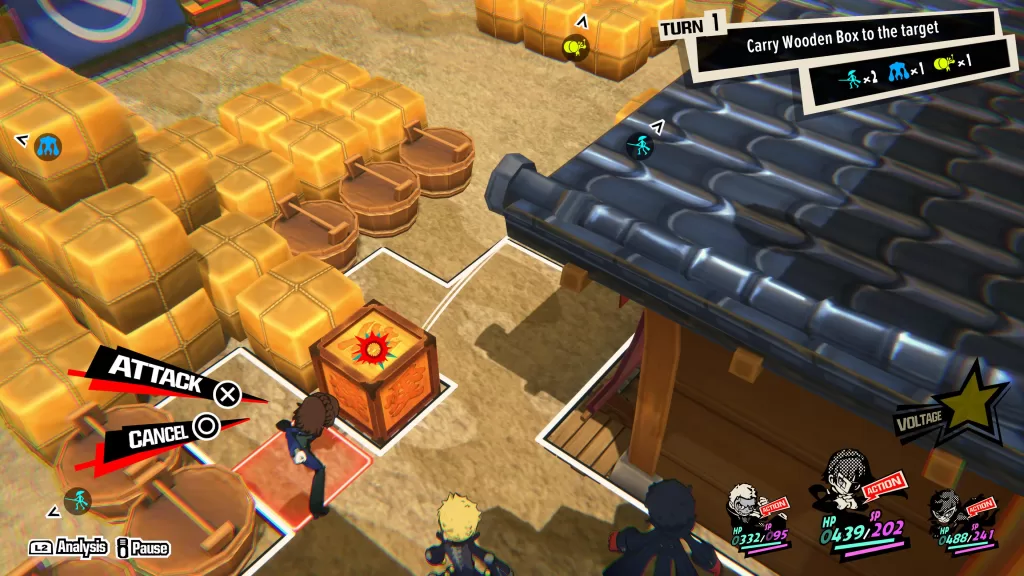
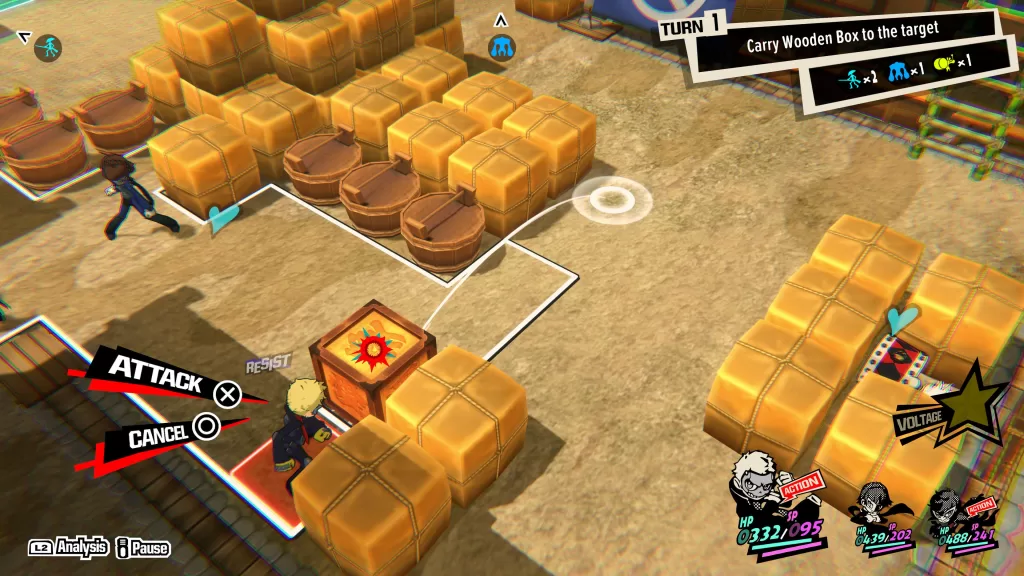
Turn 1
After beginning the quest, switch to Makoto and use her to hit the box to the right.
Swap to Ryuji using him to send the box to the other side of the map.
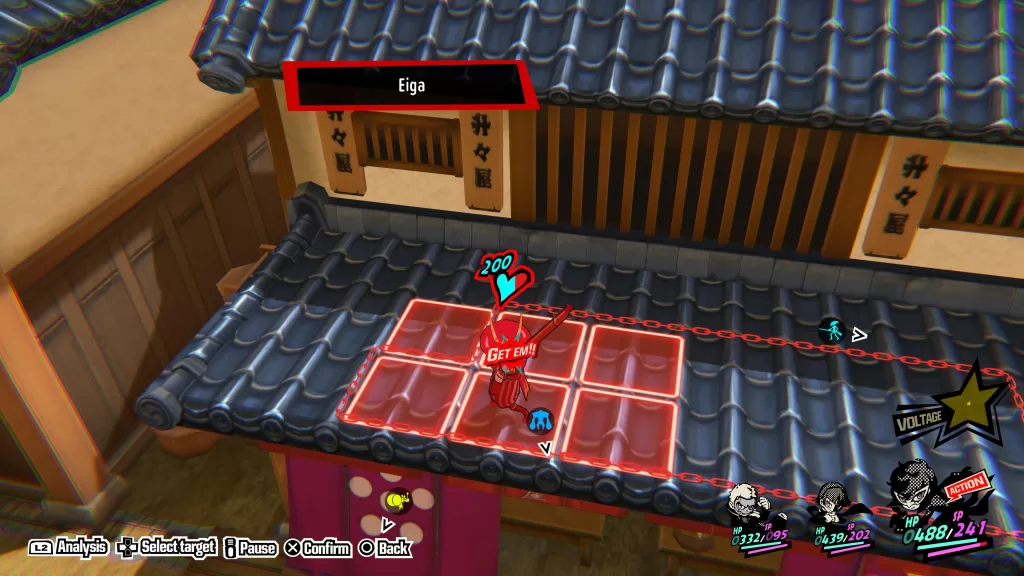
Change to your other party member and use their art to hit the enemy on the roof above Ryuji. This will give them a 1more you can use to hit the box again ending your 1st turn.
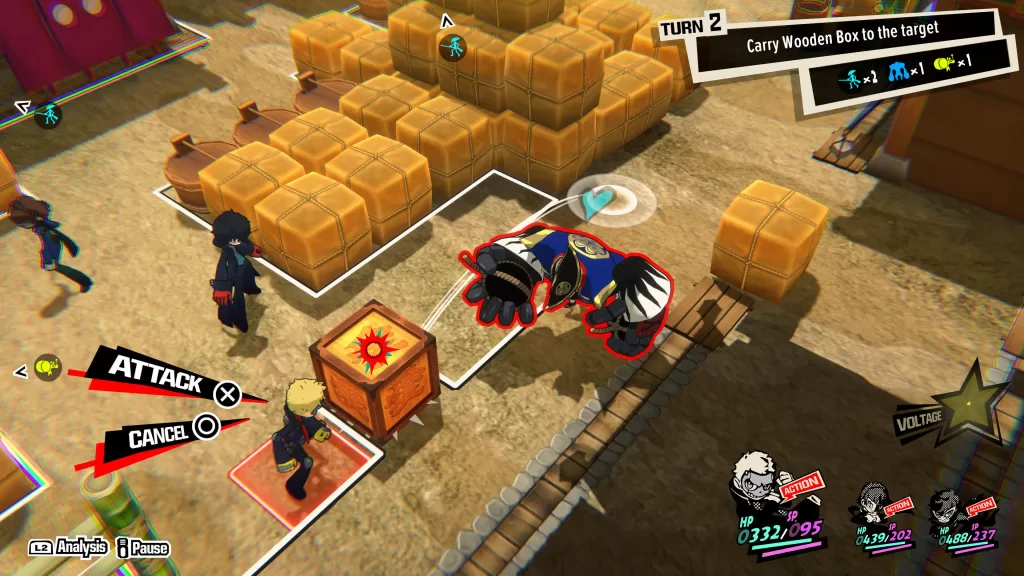
Turn 2
Swap to Ryuji and head over the box and sent it towards the target.
Switch to your other party member and use them to send the box even further towards the target.
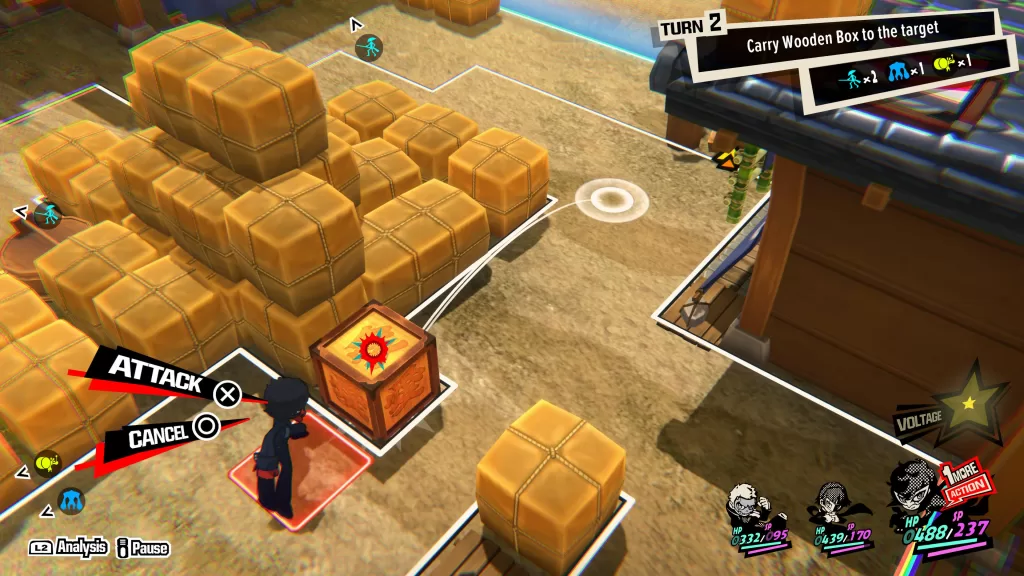
Turn 3
Switch to Makoto moving her closer to the target then shoot the Volatile Magistrate. Swap to Ryuji and use him to shoot the enemy again trigger a 1more. You’ll then want to position him as show in the image below.
Swap over to your other party member and use them to send the box towards Ryuji then use him to send the box to the target completing the quest.