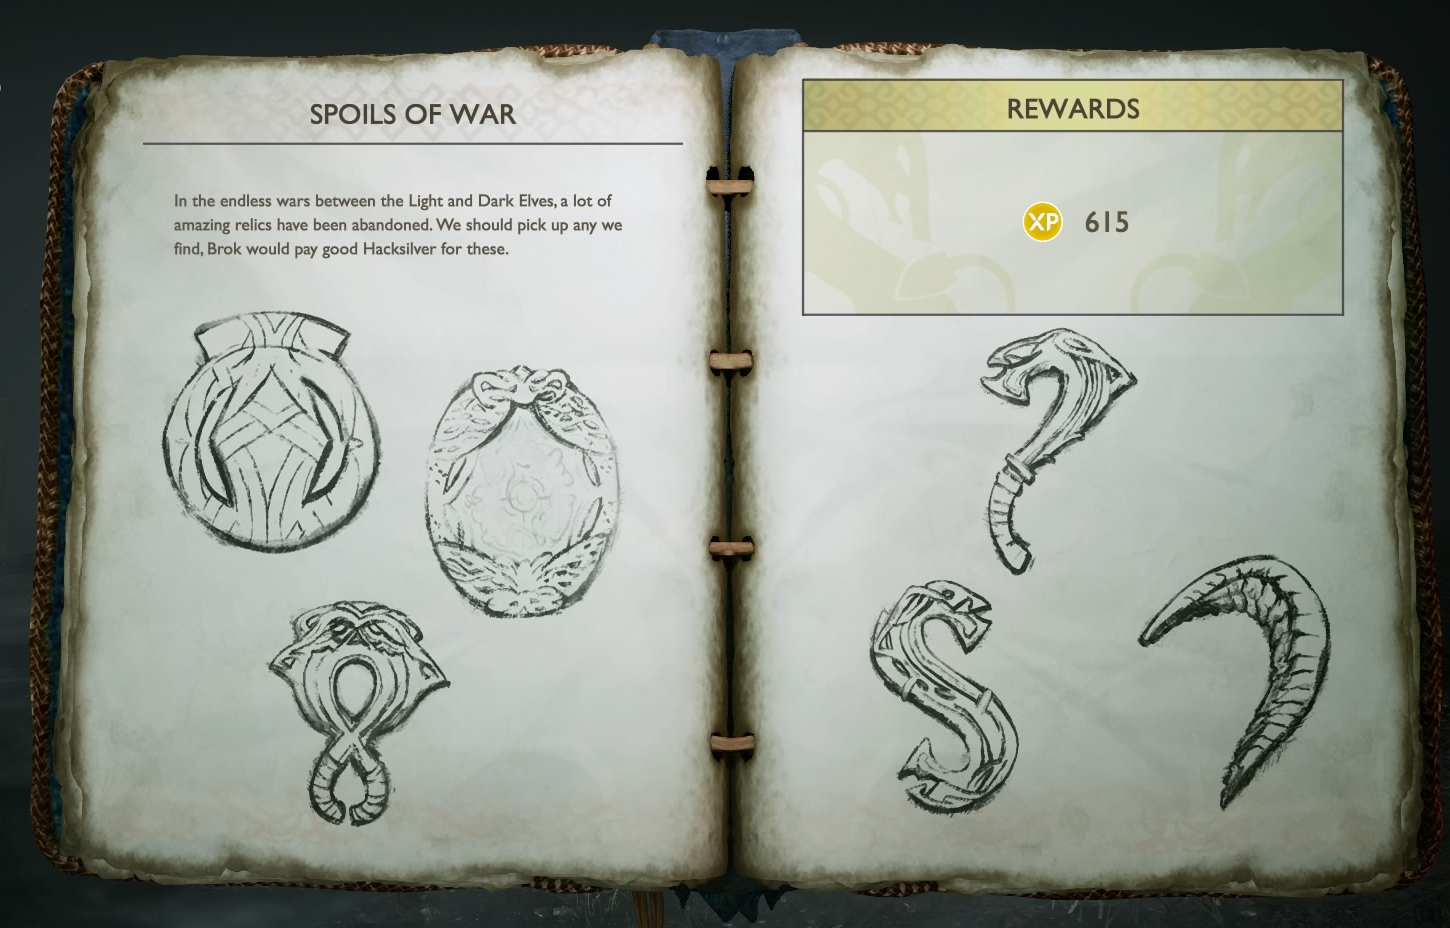
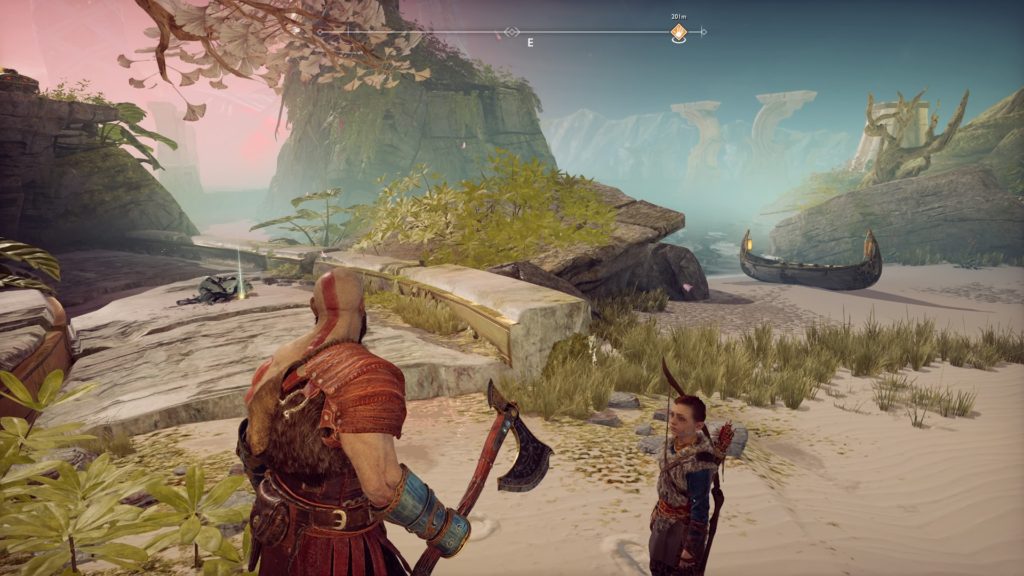
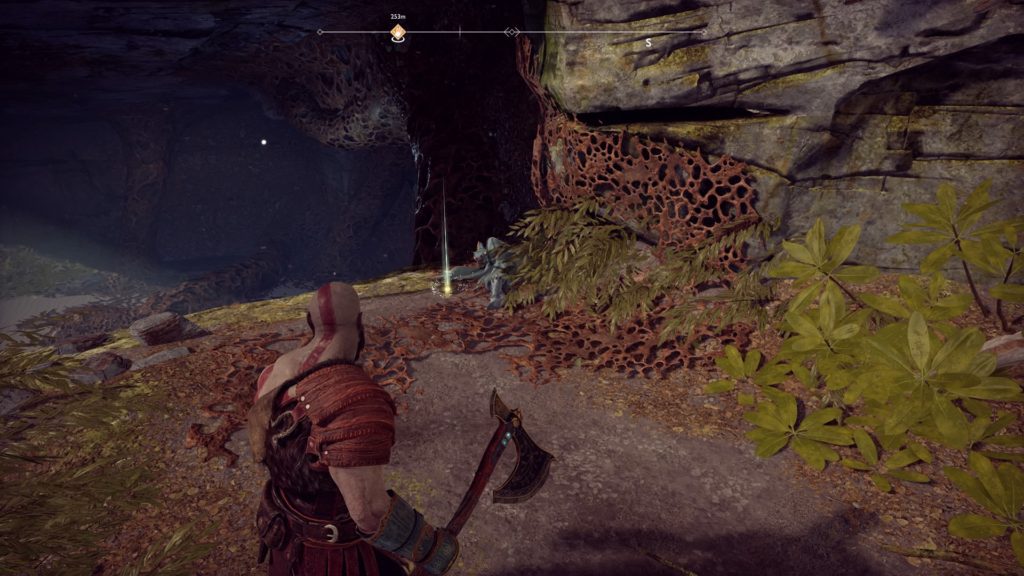
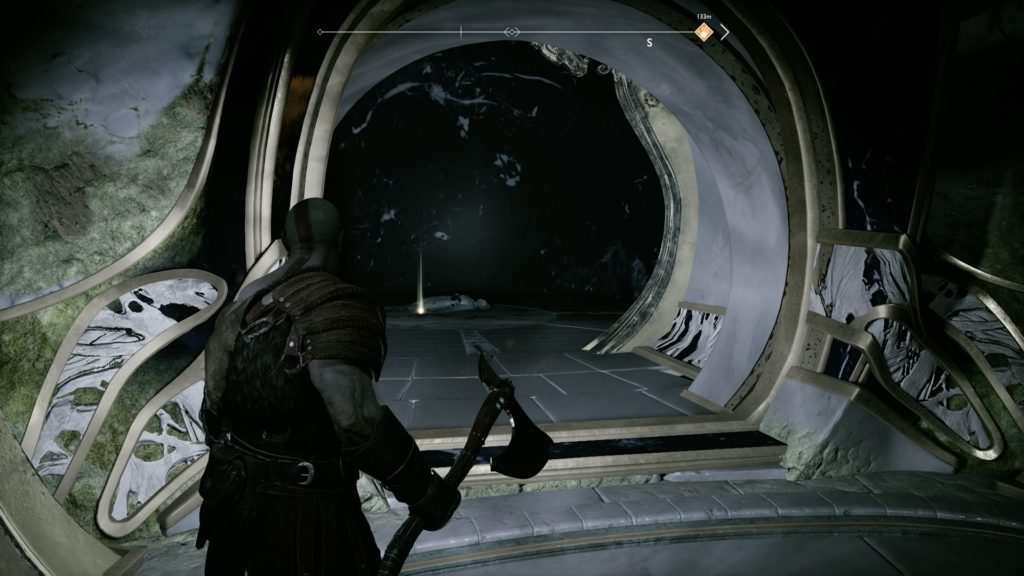
Guides

God of War – Foothills Ravens Guide

by Chappie in


Raven 1

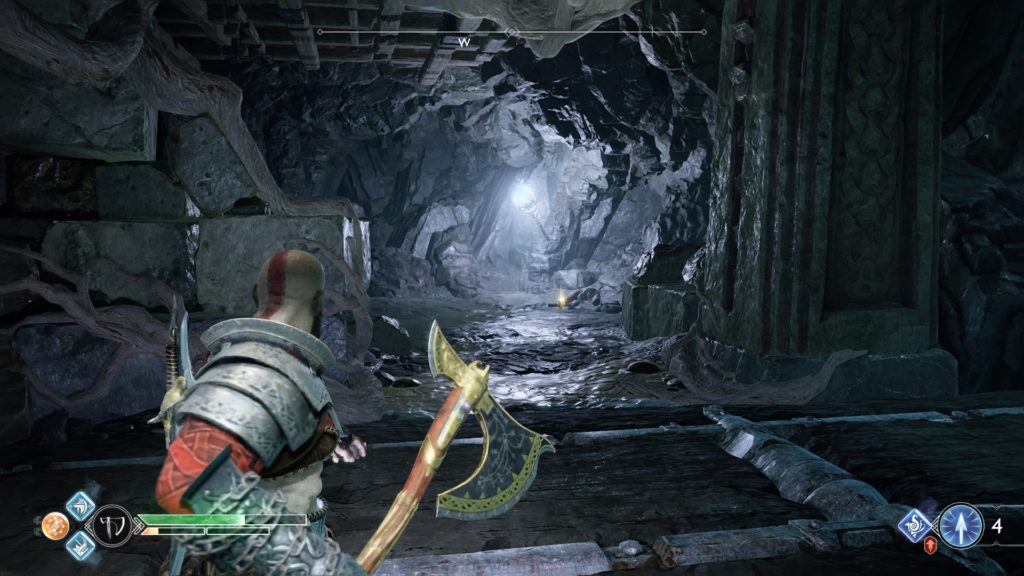
From Sindri’s shop located in the Foothills, head up the path facing south to the left of the red banner. Swing around to the left and climb up the rock wall. At the top of the wall, throw your axe at the poison totem on the left to stop the poison from flowing. Pass through the now frozen area and turn right recalling your axe. There will be another poison totem here that you will also need to freeze. Head forward, under the tiny rock tunnel to another poison totem. Freeze it and head to the right. This will bring you to a long tunnel. Head into the tunnel to find a hidden chamber. Enter the chamber and take the elevator down. Once at the bottom, head past the Mystic Gateway and up either set of stairs. At the top, turn and face the elevator to find the raven hiding on the rafter.

Raven 2

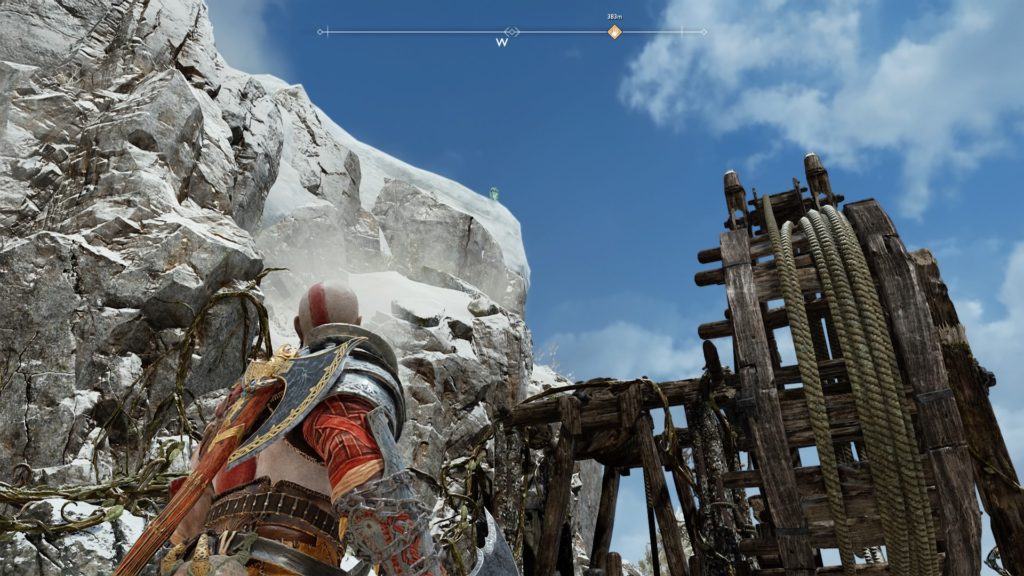
From Sindri’s shop located in the Foothills, swing a left heading east towards the wooden lift. Get on the lift and take it to up to the mountain. Exit the lift and walk off of the wooden platform. Look up and to the right to find the raven sitting on part of the mountain to the left of the lift wheel.


Guides

God of War – Wildwoods Raven Guide

by Chappie in


Wildwoods


Raven 1

This raven is located in the hidden chamber behind Kratos’ house. Head past the Mystic Gateway in the chamber and take the between the two staircases to reach an open circular room like in the image below. The Raven will be flying around the tree in a circle.


Guides

God of War – Bottom’s Up Artifact Guide

by Chappie in


Cup 1

Head into the Mountain and take a right in the room with the statue of a stag sitting in a chair into a dark area. Light the crystal with Atreus if needed and jump down to the lower level.  Turn right and vault over the rock wall continuing on the path to another crystal to light. Keep following the path and eventually, you will come to a tunnel that you will need to crouch to pass through. One through the tunnel, head forward and lift up the rock blocking your path to proceed further into the mountain.  Keep moving forward and vault up the wall leading you to a fork. Take the right path and light the crystal. Look to the right of the crystal to find a wooden wall that can be broken. Break the wall and head into the room to find the hidden cup.


Cup 2

Go to the area where you defeated the Dragon near Sindri’s shop during the Inside the Mountain story mission. Head into the cave and climb up the wall to proceed forward. Once at the top, the cup will be behind the bucket connected to the pulley system in a room.


Cup 3

Head to the Summit of the mountain to find this cup to the left of the structure on the ground next to a corpse leaning on a rock.


Cup 4

Head into the Mountain to the room with the giant stag statue. Turn left and follow that path, shooting the red sap with an electric arrow if you haven’t yet. At the end of the path, climb up the chain or the rock wall next to the light crystal on the left to reach the top. Keep moving forward until you reach a wooden gate. Open the gate using the lever to the left.  Enter the room that contains the hidden chamber and the platform previously used to ascend the Mountain. Head to the east side of the room past the hidden chamber and climb up the wooden wall. Take the elevator up to the top. At the top, keep following the path until you reach a torch with a climbable wall next to it. Climb the wall to find this cup straight ahead laying on the ground.


Cup 5

From Brok’s shop in the Heart of the Mountain, keep following the path that leads through the hallway with spears sticking out of the sides of the walls and past the spike wall. The cup can be found directly in front of you behind another spiked door. If this is your first time in the mountain, it will be behind a giant wooden platform that Kratos can move.


Cup 6

Head into the Mountain to the room with the giant stag statue. Turn left and follow that path, shooting the red sap with an electric arrow if you haven’t yet. At the end of the path, climb up the chain or the rock wall next to the light crystal on the left to reach the top. Keep moving forward until you reach a wooden gate. Use the lever to the left of the gate to open it.  Enter the room that contains the hidden chamber and the platform previously used to ascend the Mountain. Head forward a bit and take the first left. Along the left wall, shoot the sap with an electric arrow to gain access to the area containing this cup.


Guides

God of War – Fafnir’s Hoard

by Chappie in


Favor Giver:  Sindri – Any of his shops after Alfheim


Summary: Sindri askes Kratos to check out a storeroom that once belonged to a dwarf named Fafnir.  He is after a special whetstone that may be stored there.


Objective(s):  

  • Head to Fafnir’s storeroom
  • Use the entry stone on the pedestal
  • Search for the whetstone
  • Talk to the reaver spirit
  • Return to Sindri


*Note: Expect enemies in every room on this quest


Head to Fafnir’s storeroom

Follow the waypoint to find another one of Sindri’s shops. Just passed it is the entrance to the storeroom. Crouch under the rock and head into the forest area.  Keep following the path, vault up the wall and you will come to some reavers.  Defeat them and follow the path through the waterfall. Drop down and make your way to the central platform.


Use the entry stone on the pedestal

Interact with the pedestal behind the corpse to open up a new path.


Search for the whetstone

Follow the new path and open the doors to continue on.  Head to the end of the room and pick up an entry stone. Return to the pedestal to activate the new stone opening up another path. Follow the next newly opened path and go through the door. Pick up another entry stone at the end of the room. Return to the pedestal to active the stone yet again revealing another path. Head down the newly opened path, through the door, and again pick up the entry stone. Return to the pedestal and activate it. Follow the opened path to a new room with another entry stone. Pick up the stone and return it the pedestal, activating the stone to open the final path. Follow the path and talk to the reaver spirit at the end.


Talk to the reaver spirit

After talking with the spirit, Kratos takes his dagger and begins to leave. On his way out, two ogres drop down looking for a fight. Take them both out and head back to Sindri.


Return to Sindri

Head back to Sindri and give him the dagger to complete the quest.


Guides

God of War – Spoils of War Artifact Guide

by Chappie in


Relic 1 – Light Elf Shore

After docking the boat, swing to the right to find a relic next to a corpse.

Relic 2 – Light Elf Sanctuary

After docking the boat, head towards the gate on the right.  Activate the lever, jump across the pit, and run through the gate before it closes. Once on the other side of the gate, take a right to another gate with the red growths around it.  Activate the lever then quickly throw the axe at the bottom growth and recall it immediately. Next, throw it at the growth on the other side of the gate as the gate comes down. As the axe hits the growth on the other side of the gate, the gate will hit the bottom growth clearing it out of the way.  Open the gate and run through it before it closes taking you to an area overlooking the lake. Turn right and head into the tunnel that will contain two more growths to destroy.  Keep moving over the tree root bridge and destroy three more growths to unveil the hidden relic next to a corpse.

Relic 3 – Ringed Temple

Take the platform in front of the Ringed Temple down to the lower level. Once at the bottom, go through the door in front of you (south). Head to the left end of the next room towards a crystal on that side of the room. You will need to shoot it with a light arrow to create a light bridge. Cross it and the relic will be located next to an elven corpse in the cell directly in front of you.

Relic 4 – Ringed Temple

Take the platform in front of the Ringed Temple down to the lower level.  Once at the bottom head to the right (west) towards the cell that contains the relic next to a corpse.

Relic 5

Head to the sandbar that overlooks the Ringed Temple. Activate the braiser full of sand to descend beneath the lake. Facing the northeast, take the path on the left crossing to the right when you see the spinning gear. Use the gear to completely lower the platform you are standing on, making sure to throw the axe at the gear on the wall on the right. This will stop the platform from going back up. Head to the newly revealed entrance and follow that path to another spinning gear. The relic will be in the cell right in front of you on the other side of the gear.

Relic 6 – Ringed Templet

Take the platform in front of the Ringed Temple down to the lower level. Turn left (east) off the platform towards the light bridge. Cross the bridge and turn right, heading for another light bridge on the other side. Across this bridge, you will find the relic next to a few corpses.


Guides

God of War – Second Hand Soul

by Chappie in


Favor Giver:  Brok – Volunder Mines


Summary: Brok asks Kratos to find his friend Andvari in the Voluder Mines.


Objective(s):

  • Enter the Volunder Mines
  • Find the Dwarf with a green ring
  • Defeat the Soul Eater
  • Return to Brok


Enter the Volunder Mines

Interact with the pedestal to the left of the mine door to open it.


Find the Dwarf with a green ring

Push into the mines until Atreus stops you with a mini cutscene involving a Soul Eater. Keep moving through the mine clearing out enemies until you catch up to the Soul Eater again.


Defeat the Soul Eater

Kratos decides to fight the Soul Eater since Atreus is afraid of it. Keep moving forward until you catch up to the creature. Fight and defeat the Soul Eater. Wait until he opens his chest, then throw your axe at the exposed insides to deal damage. You can also hit the fire jugs when the Soul Eater is near them to deal some damage that way. Around 50% health, you can pick up stones from its body to throw at it to deal damage as well.


Return to Brok

Return to Brok and tell him about his friend to complete the quest.


Guides

God of War – Horns of Veithurgard Artifacts Guide

by Chappie in


Horn 1

After docking the boat, head straight up the stairs leading to where the dragon is (or was) trapped. Turn left at the anchor and keep moving ahead until the path forks. Take the right path and head up the steps in from of the dwarven castle. The horn will be laying next to the corpse of a fallen warrior at the top of the stairs on the left.

Horn 2

After docking the boat,  swing to the left and head down the dock.  Keep going straight jumping over the broken portion of the dock. Vault over the beam to reach the end of the dock where the horn is located near the corpse of a warrior.

Horn 3

After docking the boat, head straight up the stairs leading to where the dragon is (or was) trapped. Turn left at the anchor in front of the dragon to find the horn next to a fallen warrior near the waterfall.

Horn 4

After you dock the boat near a ruined port with a dragon in the background swing to the right and hop over a log.  Interact with the chain device to raise the gate and freeze the gear to the right to prevent the gate from falling. Hop back over the log, take an immediate right, climb up the wall where the gate previously was shut.  Interact with the taller wall scaling it. Once at top turn right and jump down the ledge. Head to the right and break down the weak part of the wooden wall to find the horn next to the corpse of a deceased warrior.

Horn 5

Make your way to the dwarven castle and head up the stairs into the castle. At the top of the stairs turn right and follow the hallway to a room with railing overlooking a flooded section of the castle. Turn the lever to release open a door releasing the water. This will reveal the horn. Head down the path to the left of the lever (facing the lever) to reach the area with the horn. It will be laying on the found next to a deceased warrior.

Horn 6

Make your way to the dwarven castle and head up the stairs into the castle. There will be another set of stairs to the left. At the top of those stairs, you will find the horn laying on the ground next to the corpse of a deceased warrior.


Guides

God of War – Otr’s Imprisonment

by Chappie in


Quest Giver:  Breaking a shrine triggers the quest (Veithurgard)


Summary:  Break the three shrines to free the captive dragon in Veithurgard.


Objective(s):

  • Destroy shrines binding Otr
  • Return to the anchor
*Shrines look like this

1st Shrine

Hurry up the steps leading to the anchor tying down the dragon. Use cover when needed as the dragon will be attacking you using fire. When you reach the anchor, turn right and climb up the short wall. Follow the path to reach the 1st shrine. There will be enemies there that explode upon death. Take care of them while dodging the new lighting attacks the dragon starts to send your way. Destroy the first shrine and head back towards the anchor.


2nd Shrine

From the anchor (dragon will be on your right), run straight across in the direction of the waterfall. The path will then fork, take the left path and follow it past a bridge to reach the second shrine. More enemies will be around the shrine. Defeat them and destroy it.


3rd Shrine

From the second shrine, there will be an area to drop down to the left of the bridge you just passed. Drop down and turn left towards the giant rock surrounded by enemies. Fight the enemies and proceed right (east) up the stairs. Follow the path to the entrance of the old dwarven castle where two Viken guard the entrance. Defeat them and solve the puzzle to unlock the gate into the castle. Head up the first set of stairs into the castle and turn right heading down the hall, clearing out the enemies as you go. You will end up in a room with a railing overlooking a flooded section of the castle. Contine right through the rock tunnel to reach the 3rd shrine. Take care of the enemies and destroy the shrine while dodging the dragons attacks.

*Door puzzle answer

Return to the anchor

Destroying all the shrines will cause the dragon to stop attacking. Head back to the anchor and have Atreus destroy the skull, thus freeing the dragon.


Guides

God of War – Unfinished Business

by Chappie in


Favor Giver: Lake Spirit – Isle of Death (Shores of Nine)


Summary: Lighting the braziers in the Shores of Nine gives the wayward spirits the opportunity to ask for help. The light also attracts the attention of enemies. Defeat the enemies and help bring the spirits peace.


Objective(s):

  • Explore the islands of the lake
    • Isle of Death
    • Iron Cove
    • Forgotten Caverns
    • Cliffs of the Raven


Isle of Death

Interact with the brazier on the isle to light it. Enemies with ice powers will show up looking for a fight. Defeat them and talk to the spirit next to the brazier. He will ask you to help the other spirits trapped around the lake.


Iron Cove

Interact with the brazier near the dock.  Enemies will explode as they die and there are a couple nightmares floating around.  Defeat them and talk to the spirit next to the brazier to receive a corrupted remnant which is used to upgrade the versatile warrior’s handle.  


Forgotten Caverns

Interact with the brazier near the dock.  Enemies with ice powers spawn. Defeat them and talk to the spirit next to the brazier to receive a corrupted remnant.


Cliffs of the Raven

Interact with the brazier to begin the fight. After defeating the first Tatzelwurm, another will spawn along with Viken. Viken is an enemy that uses a big mace to deal damage with a couple of unblockable attacks. He can also heal himself to full health. Defeat them all and you will a corrupted remnant.


Guides

God of War – Abandon Ship Artifacts Guide

by Chappie in


Figurehead 1 – Isle of Death

After you dock the boat, climb up the rock wall right in front of you.  Once at the top, turn left to find a pile of rocks next to the rusty crane. Locate the fire jug on the other side of the rocks and throw your axe at it. This will clear the rocks revealing the figurehead next to the corpse of a fallen warrior.


Figurehead 2 – Helheim Tower

After you dock at the Helheim tower, take the elevator up. Facing the tower, the figurehead will be on the right side next to the corpse of a fallen warrior.


Figurehead 3 – Stone Falls

After you dock, head straight through the gate into a circular area with a giant rock in the middle. In this area, there will be two more gates in front of you on the left and right. Head between them to reach a wall that Kratos can climb. The figurehead is located on the left after climbing up next to the corpse of a fallen warrior.


Figurehead 4 – Cliffs of the Ravens

After you dock on the shore, head to the left past the giant corpse. There will be a chain over a ledge that Atreus can drop down for Kratos. Climb the chain and head a little bit passed the chest on and the figurehead will be located next to a corpse on the right.


Figurehead 5 – Lookout Tower

After docking the boat, head straight ahead to find the figurehead on the ground near a fallen soldier next to a rune chest.


Figurehead 6 – Niflheim Tower

After you dock, take the elevator up. The figurehead will be straight in front of you to the right (facing the tower, the left side) next to the corpse of a fallen warrior.


Figurehead 7 – Alfheim Tower

After you dock at the Alfheim tower, take the elevator up. Facing the tower, the figurehead will be on the right side next to the corpse of a fallen warrior.


Figurehead 8 –  Tyr’s Temple

Facing Brok’s shop in Tyr’s Temple located in the center of the Shores of Nine, head down the right down the stairs. This will bring you to an area where you can dock your boat. The figurehead will be located here next to the corpse of a deceased soldier.


Figurehead 9 – Forgotten Caverns

After you dock, head to the right and up the chain hanging down from a ledge. Take a left and the figurehead will be next to a deceased corpse.