Baten & Kaitos I & II Remaster Logo
Guides

A Complete Guide Baten Kaitos Cebalrai the Farming Hamlet

by NightlyGamingBinge in

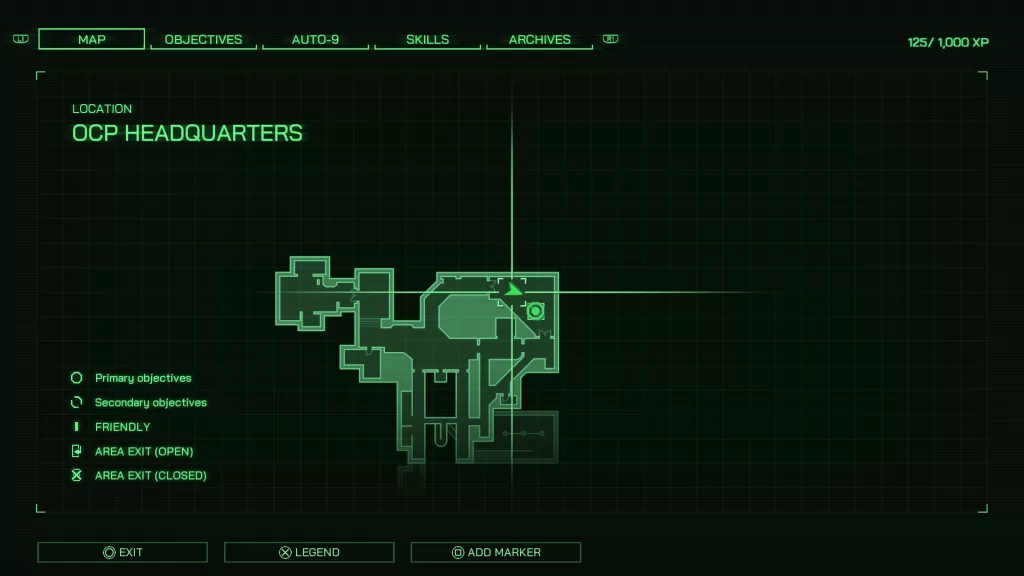
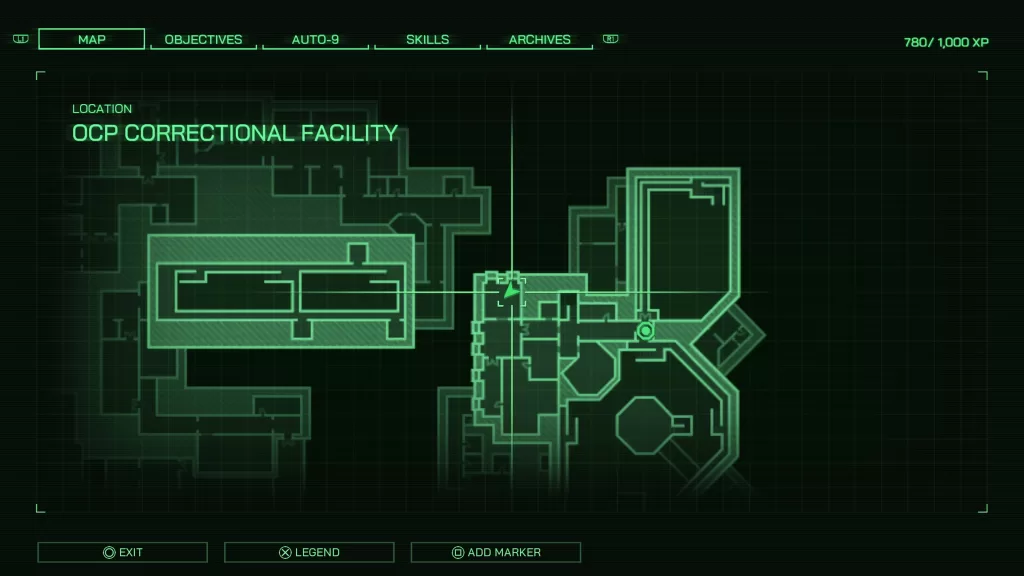
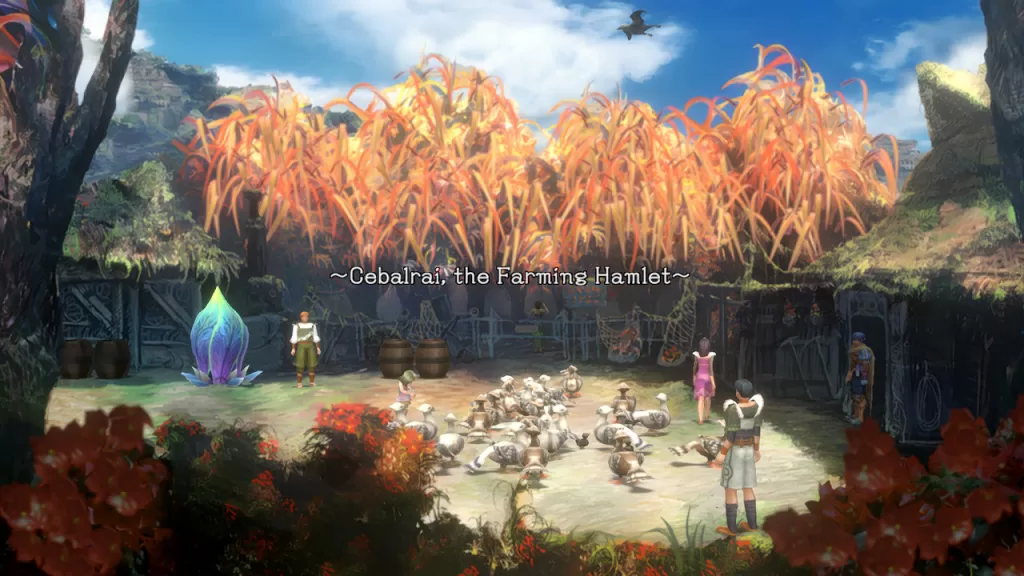
Welcome to NGB and our complete guide for Baten Kaitos Cebalrai, the Farming Hamlet. Here we’ll cover each story section that takes place in the hamlet, shops and what they offer, along with any favors you can complete for additional rewards.

Baten Kaitos Cebalrai Story – After Waking up

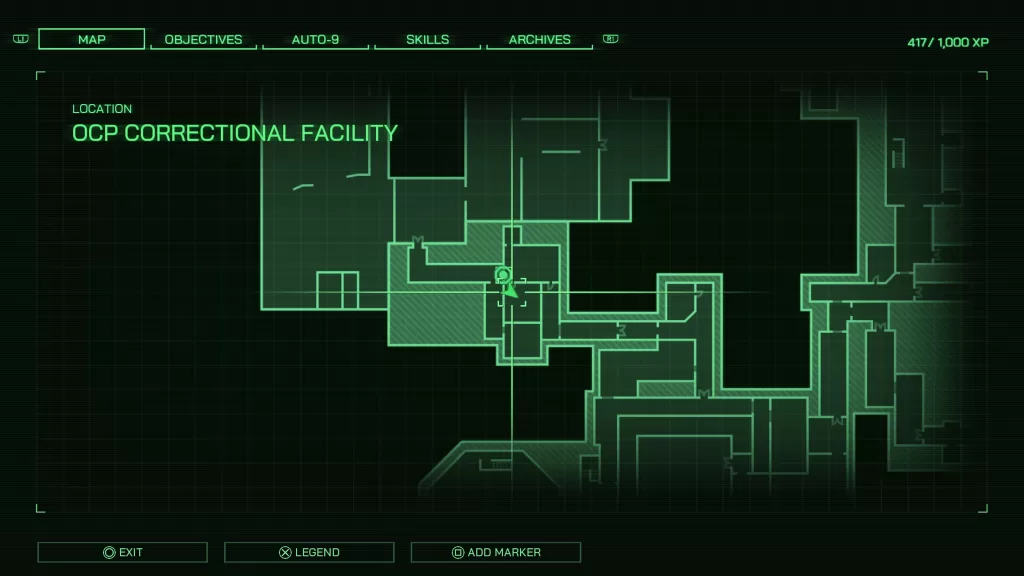
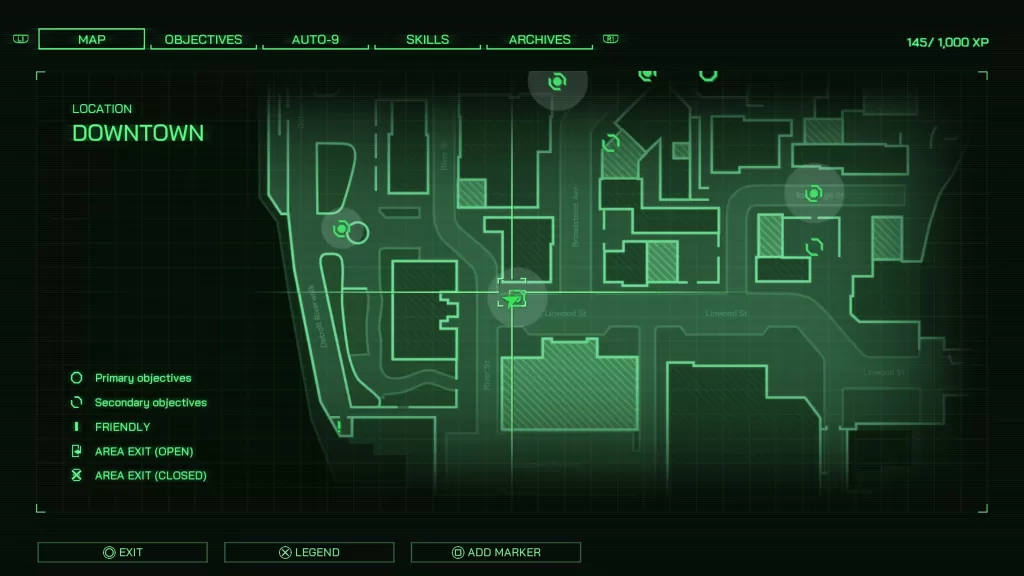
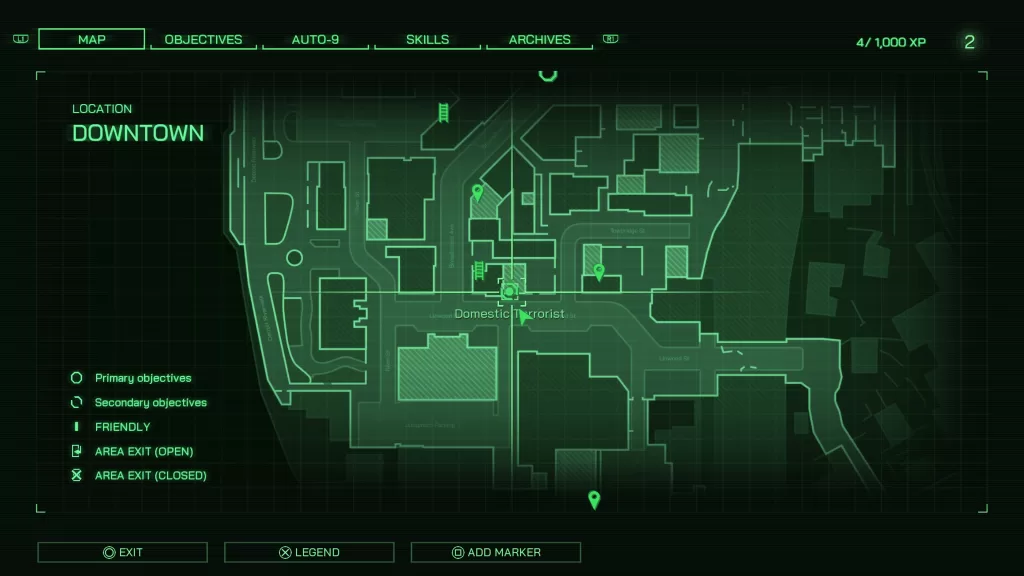
When Kalas first wakes up, he’ll find himself laying on a bed. Speak with the doctor Larikush to learn how you ended up here. Before leaving the room that Kalas wakes up in, speak with the red-headed girl. Exhaust her dialog options to get some information on things like healing efficiently, how to earn money and to learn more about the doctor. Exit the Doctor’s Office to arrive in a courtyard filled with animals. Head to the blue flower on the left side of the area to trigger an event where you’ll learn how to use blue flowers to save.

Baten Kaitos Cebalrai Blue Flower

Once that’s done, interact with the flower and select “Visit the church” to travel to the church. Speak with the Priest in the back by the altar and exhaust his dialog options to learn about leveling up and increasing class levels. When you’re finished, return to the blue flower and interact with it choosing “Return to adventure” to head back to Cebalrai. Before making your way to the main part of the village, speak with the girl wearing the pink dress in the courtyard. She’ll mention that you should visit the mayor. He has something to say to Kalas.

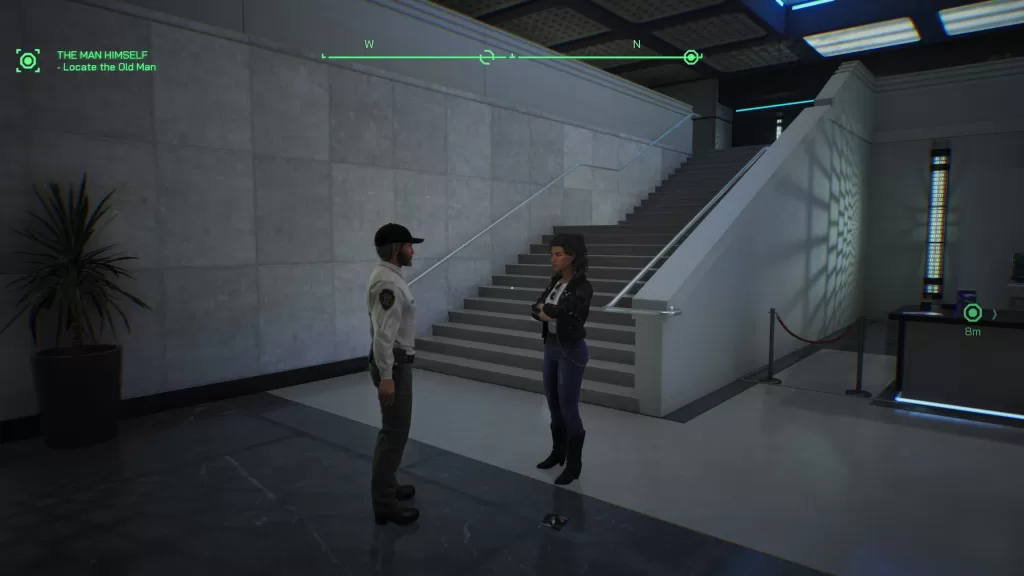
Head left past the blue flower to reach the main area of the village. Proceed to the center of this area to trigger an event with a boy and Meemai. When it ends, head north then through the doorway there to reach the mayor’s house. Speak with him and he’ll invite Kalas to stay in the village as long as he needs while also insisting that he stays away from the Moonguile Forest. when you’ve finished talking to the mayor, examine the bookshelf in the back-left corner of the room to receive a Fire Burst Lv. 1 Magus card. You can this exit the building.

Baten Kaitos Cebalrai Mayor's House

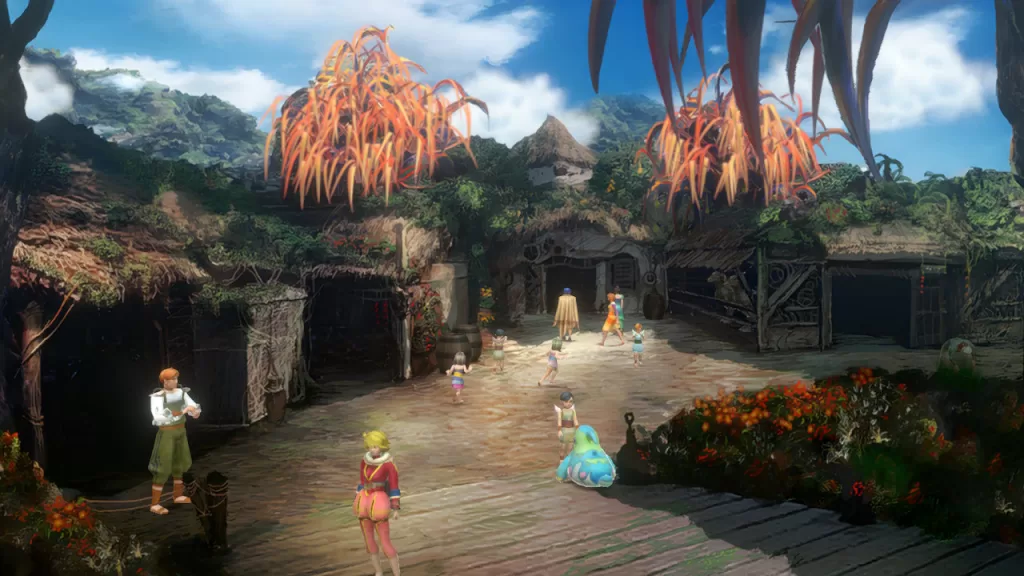
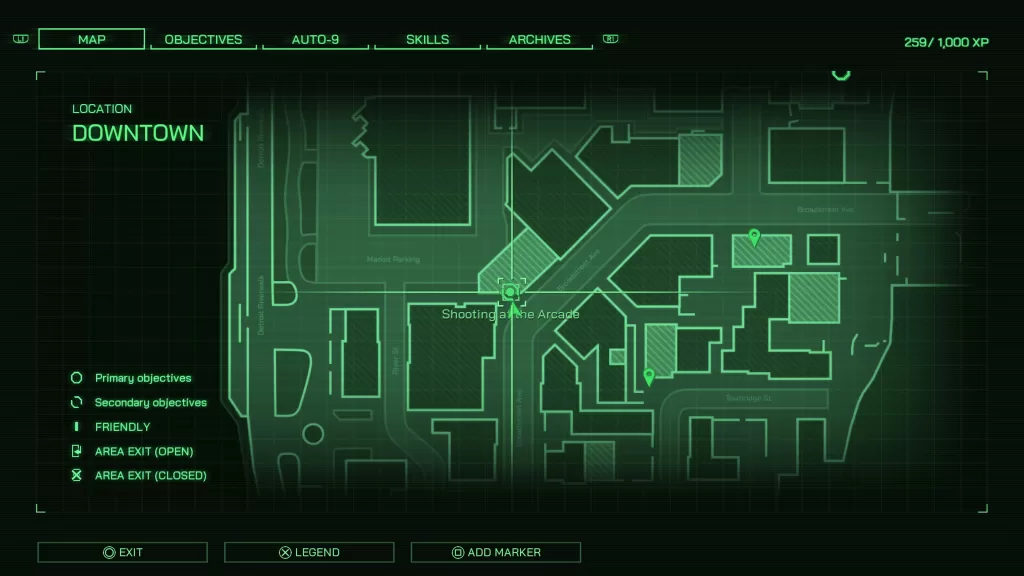
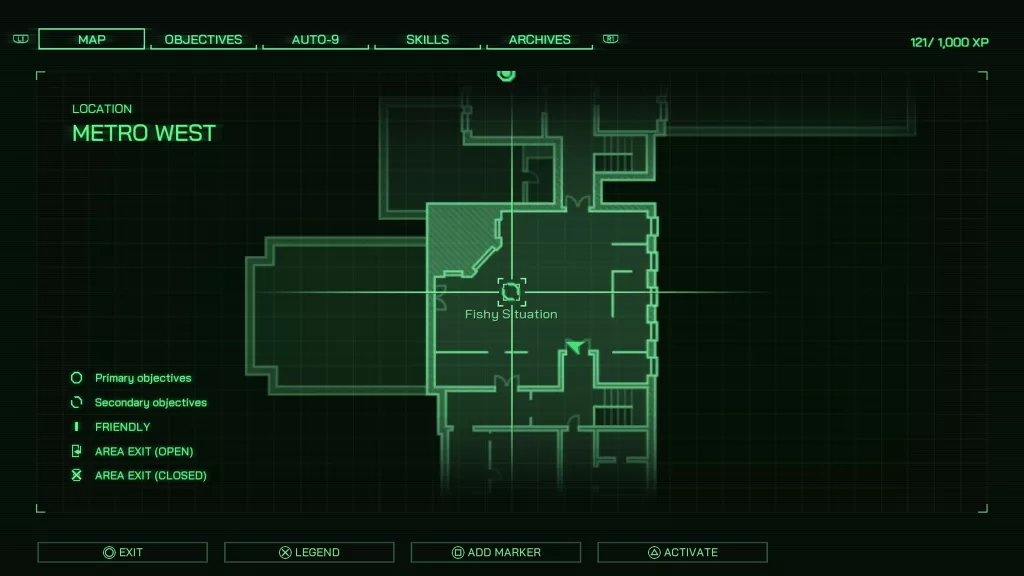
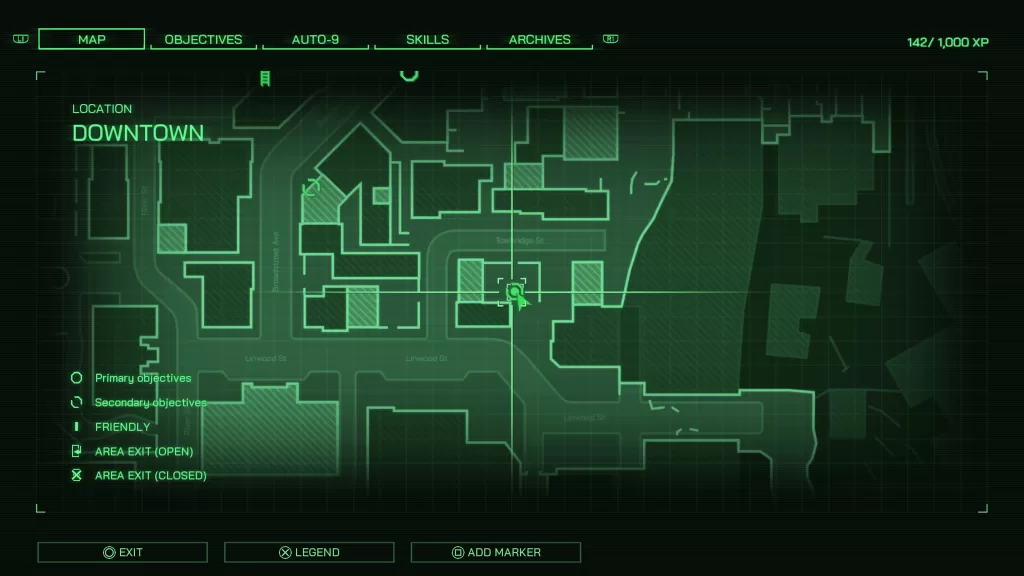
Back in the main part of the village, head south towards the bridge with Meemai. Speak with the blonde girl standing on the bridge to trigger another event. Afterward exit the village. You may want to save again at the blue flower before doing so. There is also a shop in the building to the left of the bridge you can visit to stock up on supplies. You can find the list of items the shop contains in the Baten Kaitos Cebalrai Shop section further down in the guide.

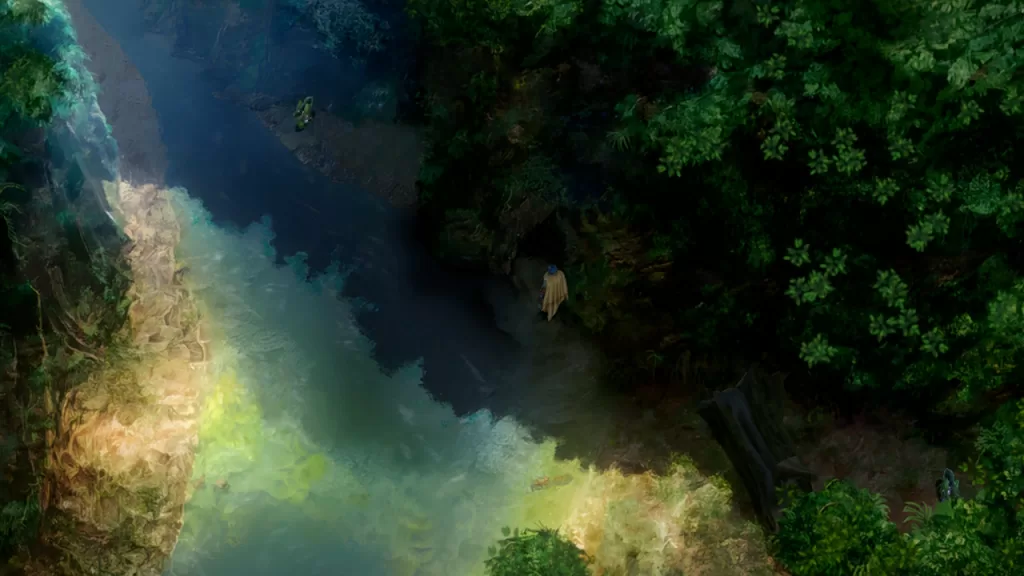
When you reach the world map, head west to reach Moonguile Forest.

Baten Kaitos Cebalrai Story – Post Moonguile Forest

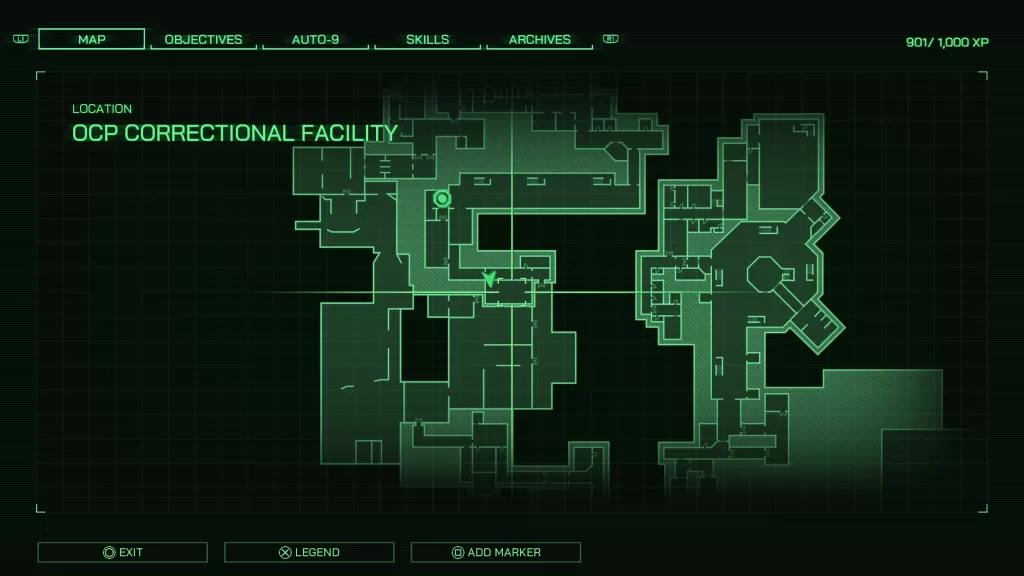
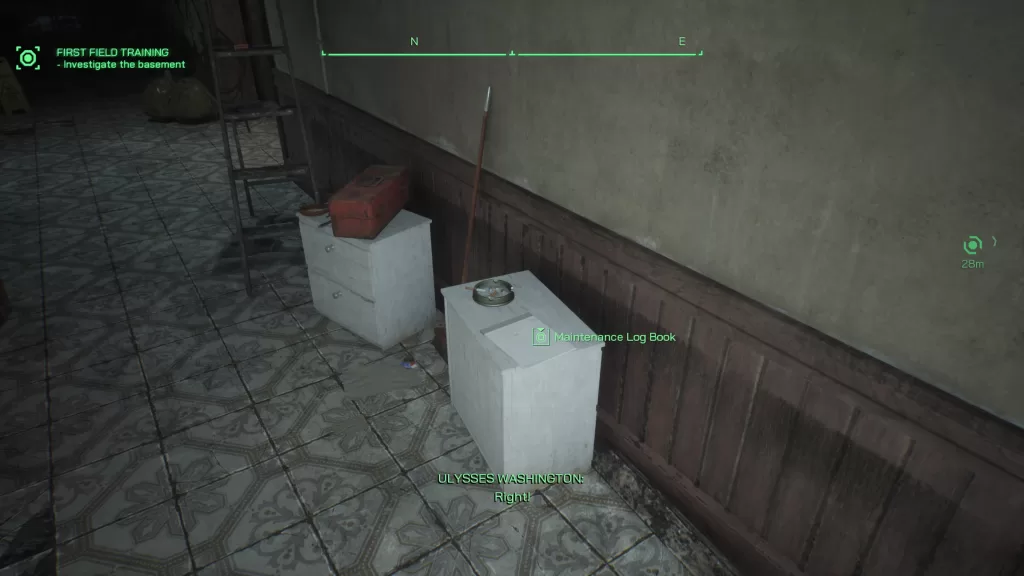
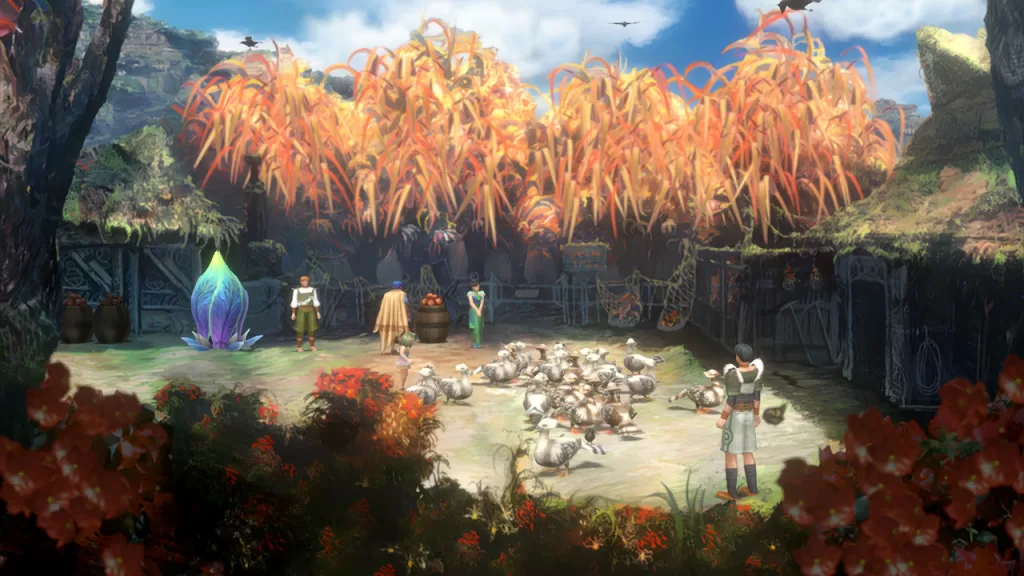
Following the events of Moonguile Forest, Larikush will be on the bridge waiting for Kalas and will bring you to the mayor’s house. You’ll catch them up on what happened in the forest to which the mayor is none too pleased. One of the villagers will mention seeing a ship pass by heading towards the city giving us our next destination. Before setting out, stop by Larikush’s place (where Kalas first woke up) in the hamlet. Speak with him and he’ll ask Kalas for a favor. A landside in Nunki Valley has blocked that path to Pherkad (our next destination) and he would like us to take some explosives there and use them to clear the landslide. He’ll then show you how to turn stuff into magnus then he’ll give you 4 blank cards and task you with bringing him an apple to try it out. Exit his house to find a lady standing next to two barrels of apples in the courtyard. Interact with the apples then press “Sure!” when prompted to seal their magna essence in a blank card.

Cebalrai the Farming Hamlet Sealing essence in a blank card

Head back into Larikush’s house and speak with him to hand over the apple. As a reward, he’ll give you a Magnus: Ice Dagger. With that out of the way, interact with the explosives on the nearby table to seal their essence in one of the cards then leave the doctor’s residence.

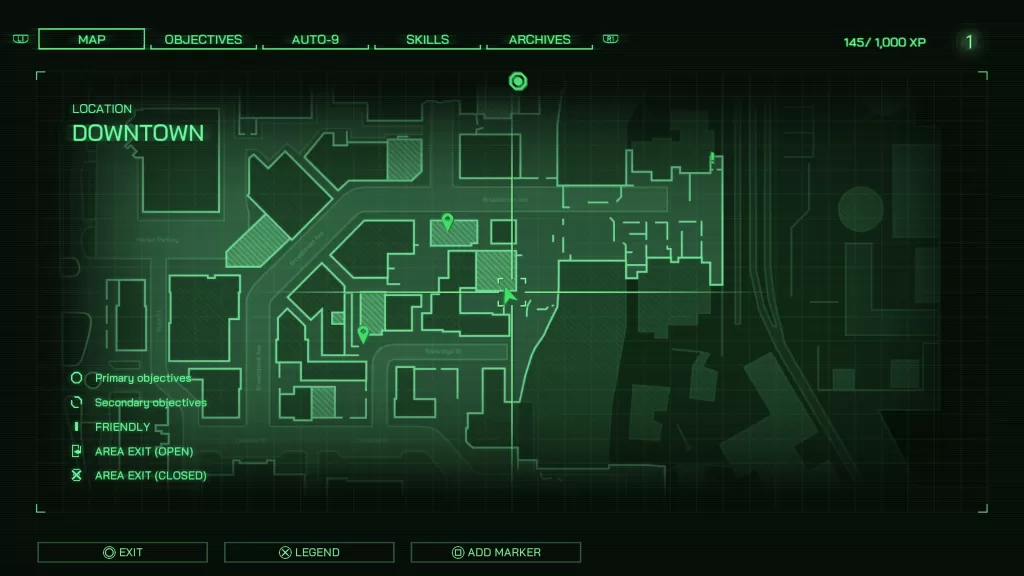
Now might be a good time to save, so visit the blue flower and do so. While you’re there, use the flower to visit the church and speak with the priest in the back. Use the pray option to level and class up. Leveling up with make Kalas stronger and classing up will allow you to carry 5 extra cards in your deck, boost your max combo to 3 and also allow you to carry 4 cards at a time in battle. After you’ve finished, head back to the blue flower. This will trigger an event where the Elder will call out to you. Speak with him and he’ll ask Kalas for a favor. The elder will ask Kalas to keep an eye out for fragments of the star map on his journey in hopes to see the star map completed before he fades away. You’ll will need to find all 50 of them scattered around the world in the form of Constellation Magnus to make this dream a reality. You’ll also be rewarded for each fragment that you find. Use the blue flower to return to Cebalrai.

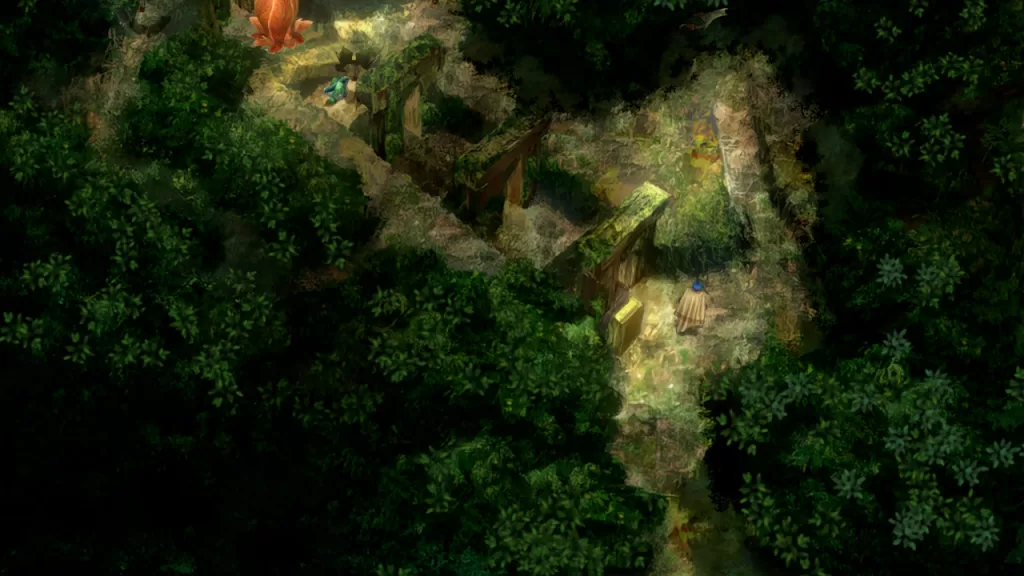
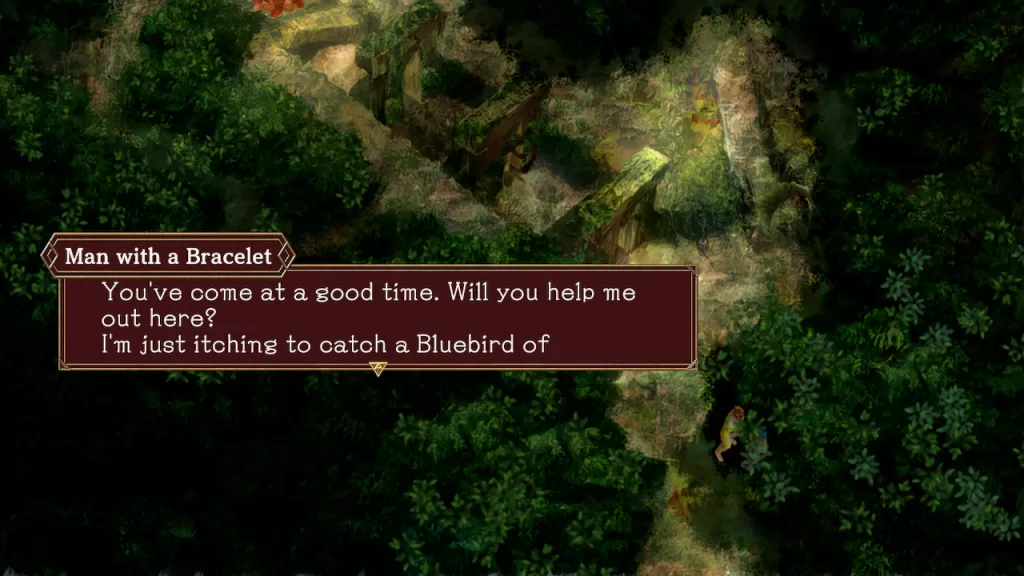
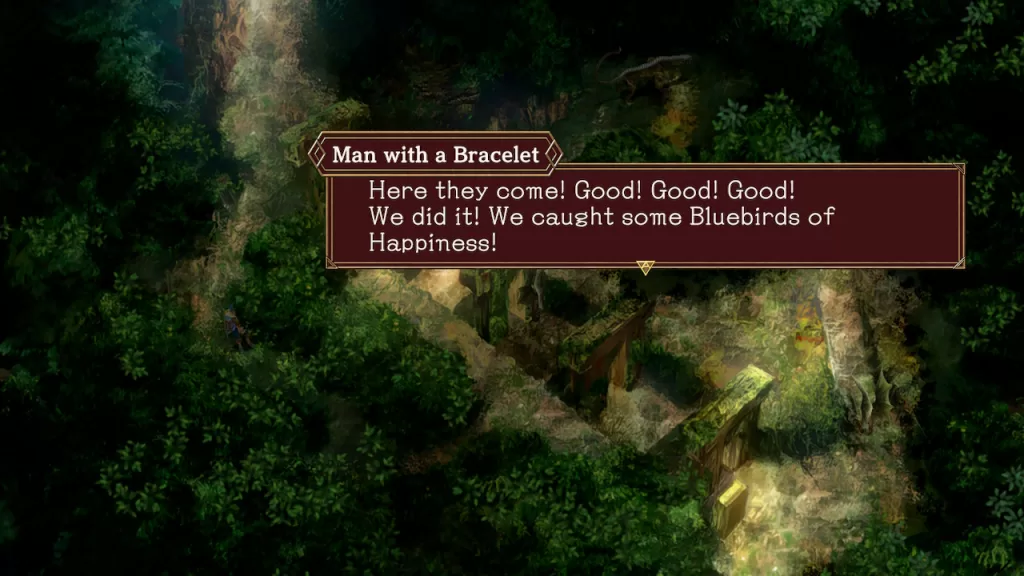
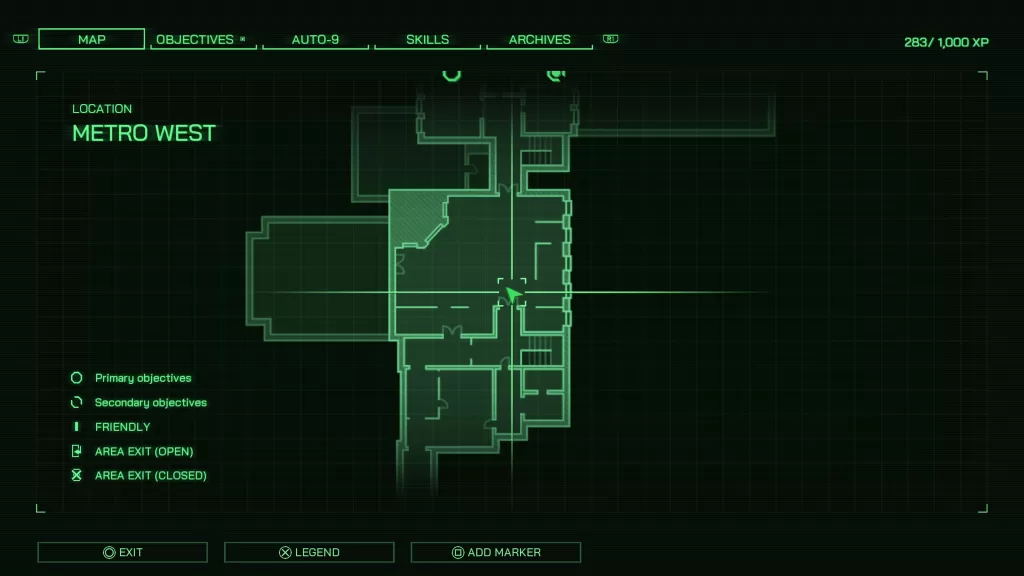
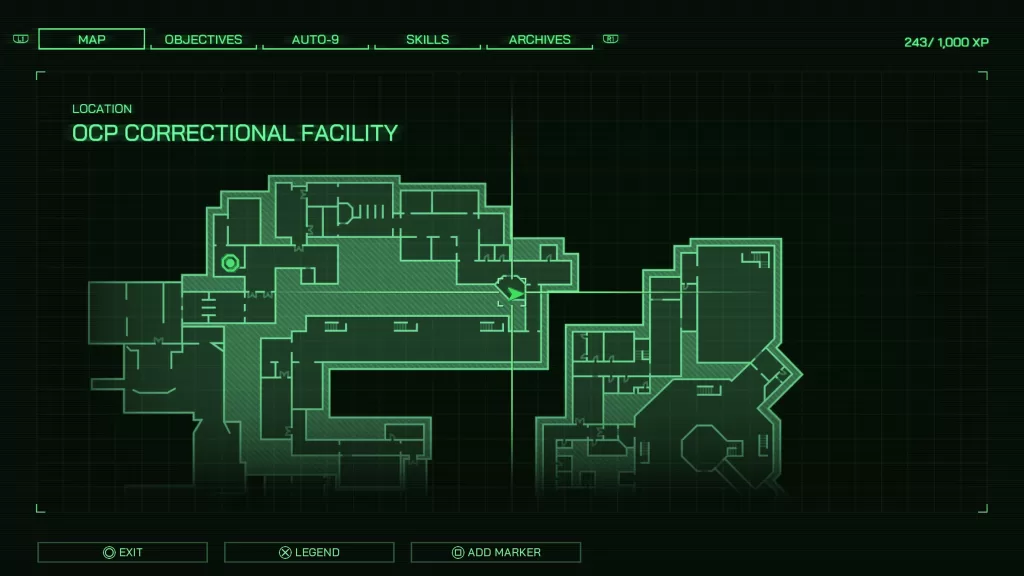
Before heading to Nunki Valley, there are a couple of things you can do. First, head to the shop and sell any of the pictures you’ve taken to acquire some money. There are also a couple of favors (see Baten Kaitos Cebalrai Favors section below) you can complete. You’ll also want to head back to the Moonguile Forest and complete the favor for the Man wearing a Bracelet there. Once all of that has been done, travel to the Nunki Valley via world map.

Baten Kaitos Cebalrai Shop

The items below can be bought from the shop in the building to the left of the bridge in main area of Cebalrai.

ItemDescriptionPrice (in gold)
Bamboo ShootRestores HP 45160G
Long SwordATK 12 / Def 7 (2+ Combo)200G
Safety HoodDef 1040G
Shish Kebab (Small)Restores HP 20% (only usable in camp)30G
Wheat CrackersRevive incapacitated party members (only usable in camp)300G

Baten Kaitos Cebalrai Favors

Deliver Pow Milk to the Lady

*Please Note* You can’t complete this favor until after you learn how to infuse the essence of items into blank cards following the events of Moonguile Forest.

Baten Kaitos Cebalrai the Farming Hamlet Deliver Pow Milk to the Lady

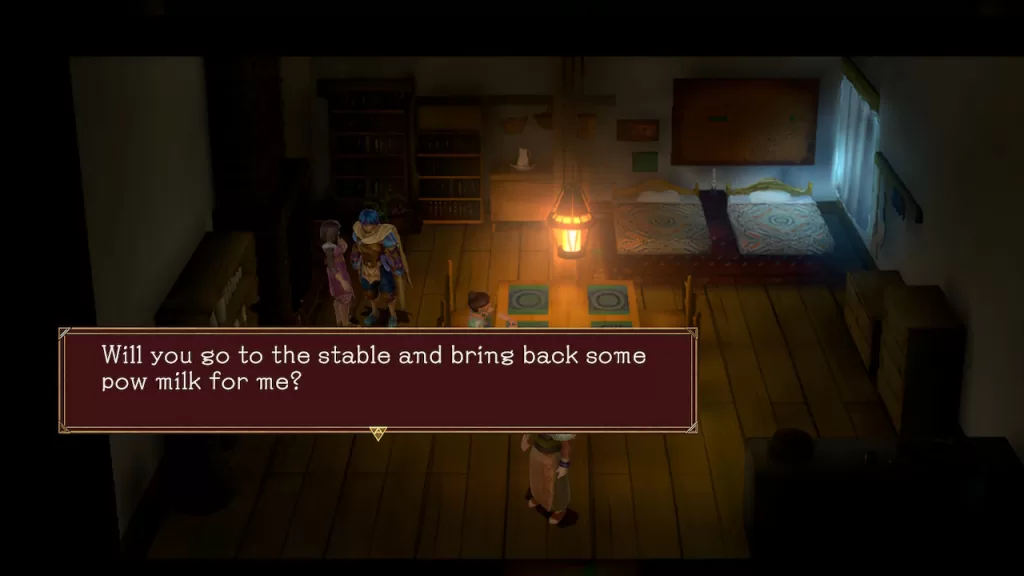
Enter the house between the shop and mayor’s house in the main area of town then speak with the brown-haired girl wearing the pink dress. She’ll ask Kalas to head over to the stable and retrieve some pow milk. Agree to help her then exit the house. Head to the stable on the east side of the main village area before the map transition to the courtyard outside the doctor’s house. Once inside, make your way to the back and speak with the lady wearing the green dress behind the girl milking the pow. She’ll tell you to go ahead and collect the milk.

Baten Kaitos Pow Milk

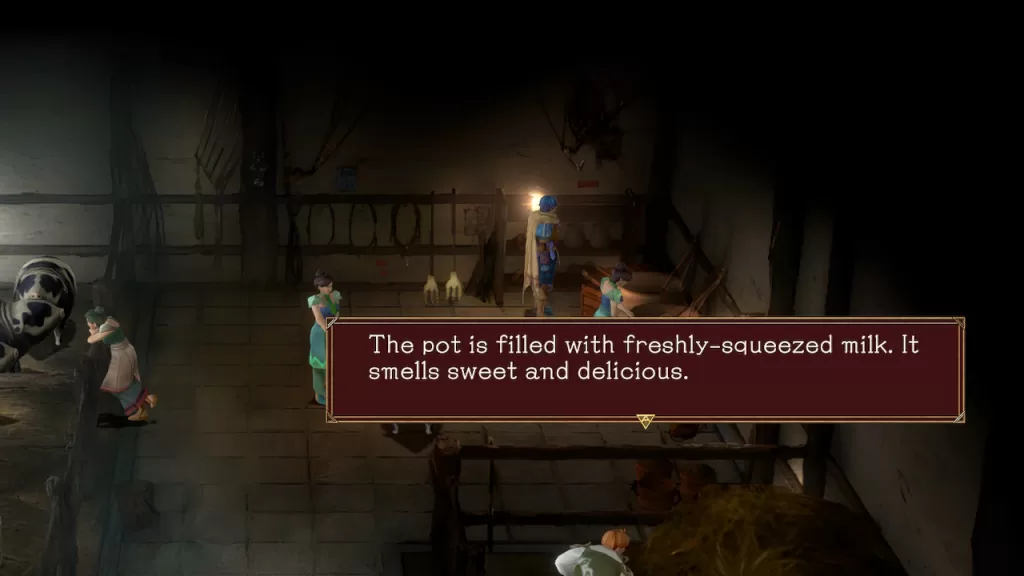
Interact with the pot next to her (it will look like you are standing in front of the crate) to infuse its essence on a blank card. Head back to the middle house on the west side of town and deliver the pow milk. She’ll then reward you with the Magnus: Puppis.

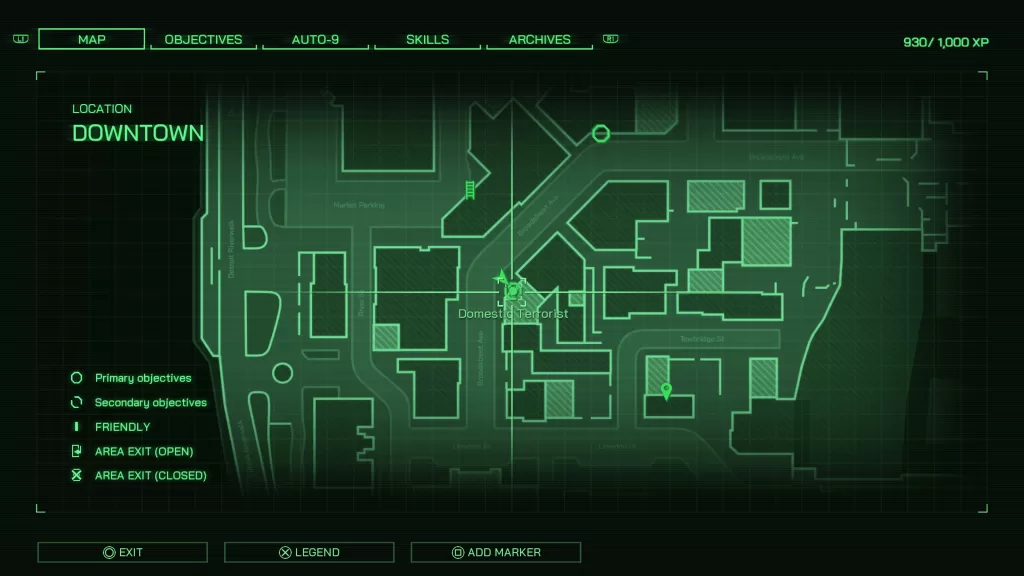
Find Maynee’s Missing Husband

Baten Kaitos Maynee Husband

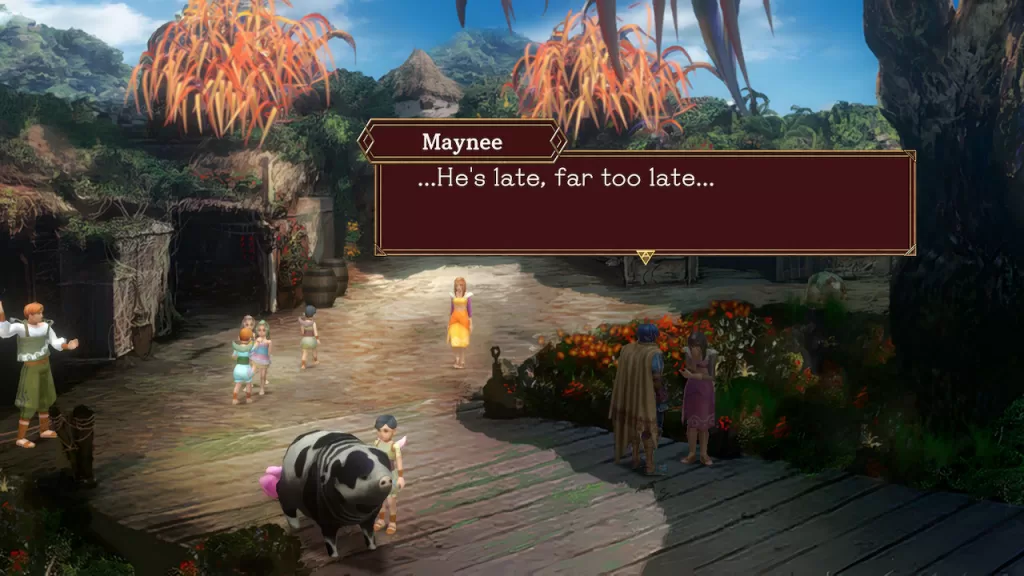
After the events of Moonguile Forest, speak with Maynee on the bridge leading out of town to learn that he husband is late and hasn’t been home in days. Tell her no, then she’ll ask if you’ll keep an eye out for him when you get to the city. You’ll also receive her pendant. To find her husband, you’ll need to progress with the story until you reach The Lord’s Mansion, which is reachable via the hideout in Pherkad the Ancient Capital. Once inside the mansion, head up to the second floor then take the stairs on the western side to reach the third floor. Defeat the two guards then enter the room and retrieve the key from the table to the left. Return to the second floor and use the key to open the westernmost room. Inside speak with the man in the corner to learn that his name is Aljeemo. You’ll then be able to give him the pendant. In return he’ll give you a Magnus: Voice Lv. 2. If you return to Maynee afterwards, you’ll receive a Magnus: Shampoo.

Get Larikush an Apple

During the main story, you’ll have to speak with Larikush in his house where he will ask Kalas to use explosives to clear a rockslide in Nunki Valley. During that conversation, he will also show you have to use blank cards to seal the essence of items in them and task you with brining him an apple to try it out. If you exit his house, you’ll be in the courtyard filled with duck like animals. On the north side, you’ll find a lady standing next to two barrels of apples. Interact with the apples then press “Sure!” when prompted to seal their essence into one of the blank cards. Return to Larikush in his house then speak with him to hand over the apple. As a reward, he’ll give you a Magnus: Ice Dagger.

For more Baten Kaitos guides and walkthroughs, click here!

Baten & Kaitos I & II Remaster Logo
Guides

A Complete Guide to Baten Kaitos Moonguile Forest

by NightlyGamingBinge in

Welcome to NGB and our complete guide for Baten Kaitos Moonguile Forest. Here we’ll cover the story section of the game that takes place in Moonguile Forest, any items you can find while exploring, the enemies calling the area home along with their weakness and resistances and any favors you can complete in the area.

Baten Kaitos Moonguile Forest Items

The items listed below can be found around Moonguile Forest, so make sure to keep an eye out for them.

  • Cave at the Beginning of the Forest
    • Magnus: Voice Lv. 1
  • 2nd Area with the Stream
    • Magnus: Leather Hat
    • Magnus: Bamboo Shoot
    • Magnus: Ice Dagger
  • Area with the Archways
    • Magnus: Flame Sword
    • Magnus: Fire Burst Lv. 1
  • Lord of the Spring Room
    • Magnus: Escape

The Ice Dagger in the second area is located behind a log blocking access to it. Once you learn to seal the essence of items in blank cards, you can interact with the fireplace in the mayor’s house at Cebalrai. This will get you the fire you need to burn away the fallen log. You can’t do this until you defeat the Lord of the Spring.

Baten Kaitos Moonguile Forest Story

When you arrive at Moonguile Forest, Kalas will find himself in a cave. He’ll also be accompanied by two bat enemies and there we’ll be an item on the left side (Magnus: Voice Lv. 1). Grab it then head north through the illuminated pathway. This will bring you outside near a river. Nearby, there will be a guy sitting near a log. Speak with him then exhaust his dialog options to get a crash course on combat. When you’ve finished, go north along the river passing through a slightly concealed cave. There will be an item (Magnus: Leather Hat) on the other side for you to collect.

Just past the guy sitting on the ground near a log, there will be another log on the right preventing you find getting the item behind you. You won’t be able to collect this item until after you complete the story section here and return to Cebalrai. You’ll then need to progress the story until Larikush teaches you how to use blank cards.

Baten Kaitos Moonguile Forest

Backtrack a bit then cross the river and head south to find another item (Magnus: Bamboo Shoot). Go north along the river to reach the next area of the forest. Make sure you are prepared, as you are about to face a mini boss.

In the next area, a cutscene will trigger involving the blonde girl you met in the village and her companions. This will lead to a fight where she and Kalas will team up against a Sabre Dragon. The beast will resist any fire attacks you send its way but is also weak to water. Use that to your advantage to take it down. Also make sure to snag a picture of the dragon that you can sell later! After the Sabre Dragon falls, another cutscene will trigger. The girl will introduce herself as Xelha and decide to tag along to the ancient ruins.

When you regain control of Kalas, proceed to the next area of Moonguile Forest. When you arrive, head left through the archways to find an item (Magnus: Flame Sword) at the end. Backtrack to the first archway and follow the path north around the area towards the red flower. Along the way, to the east of flower you’ll be able to grab another item (Magnus: Fire Burst Lv. 1). Make sure to use the red flower to save when you reach it along with healing up as necessary. There is a boss fight coming up in the next area!

Baten Kaitos Moonguile Forest Boss Fight

Head to the next area to trigger a cutscene during which the Lord of the Spring will appear. After some dialog it will then attack the party. The Spring Lord uses water-based attacks which means it also resists water. To deal extra damage, use fire-based moves to hit its weak point. One thing to watch out for is its 4 attack combo that typically ends with a big attack dealing around 50 damage total. Also make sure to snag a picture of the creature to sell later. When the creature falls, another cutscene will trigger. After it concludes, you’ll be back at the world map. Return to Cebalrai!

Baten Kaitos Moonguile Forest Favors

Help the Man with a Bracelet Catch the Bluebirds

Baten Kaitos Moonguile Forest Man with a Bracelet Catch the Bluebird of Happiness

After dealing with the Lord of the Spring, return to the area with the red flower to find a Man with a Bracelet near the stone archway. Speak with him to learn that he’s a professor of zoology who can communicate with animals. He is here trying to catch a Bluebird of Happiness and asks Kalas to lend a hand. If you agree, he’ll give you a bit more information saying that he’s always dreamed of stuffing one of those birds. To catch the birds in his trap, you’ll need to head to the red flower. Along the way, the birds will fly in the wrong direction causing the man to yell at you. Next, either battle the Shawra flying around near the flower or enter the area where you fought the Lord of the Spring then comeback. This will reset the bluebirds allowing you to walk past their nest in way sending them towards the Man with a Bracelet.

Baten Kaitos Moonguile Forest Man with a Bracelet Bluebirds of Happiness Location

When successful, the man will let you know that he caught one. Head back and speak with him then interact with the birds and trap their essence in one of your blank cards.

Baten Kaitos Moonguile Forest Enemies

EnemyWeakness / Resistance
Lord of the SpringResist: Water
Weakness: Fire
Sabre DragonResists: Fire
Weakness: Water
Shawra (bat)Resists: Wind
Weakness: Chronos
UnukResists: Fire
Weakness: Water

For more Baten Kaitos guides and walkthroughs, click here!

RoboCop Rogue City Logo
Guides

Complete Election Night Riots Objective RoboCop Rouge City

by NightlyGamingBinge in

Welcome to our “Election Night Riots” guide for RoboCop Rouge City. Here we’ll go over the optional objectives and miscellaneous things you can find/do during the Election Night Riots primary objective. At this point in the game, there will be no more RoboCop Evaluations.

Election Night Riots Objectives

Listed below are the optional side objectives during the Election Night Riots primary objective that Robo can complete to earn some additional XP.

  • Secondary
    • Shooting at the Arcade
    • Shooting at the Video Rental
  • Misc
    • Save the Wash & Go Owner
    • Save Ben at Ben’s Garage

Shooting at the Arcade

RoboCop Rouge City Election Night Riots Arcade Map Location

While wondering down Broadstreet Ave, you’ll get a call from the new arcade owner as you close in on the arcade. He’ll ask for help as the arcade is under attack. Head there and enter the arcade. Defeat all of the enemies in the main arcade room then bust through the bathroom door to take out the last two holding the owner hostage. Speak with him then exit the arcade to complete the objective.

Shooting at the Video Rental

RoboCop Rouge City Election Night Riots Video Store Map Location

To start this objective, you’ll need to reach the Video Rental store on Broadstreet Ave. The clerk will call Robo asking for help. Enter the store and eliminate all of the thugs. In addition to the main area of thee store, there will be a couple in the side room as well. Once they have all bene dealt with, speak with the clerk at the front of the store then leave to complete the objective.

Election Night Riots – Save the Wash & Go Owner

RoboCop Rouge City Election Night Riots Wash & Go Map Location

As you approach the Wash & Go on Broadstreet Ave, Robo will get a call from the owner asking for help. Make your way there and head inside. Deal with the thugs then breach the office door in the back and take out the two additional enemies there to save the owner.

Election Night Riots – Save Ben at Ben’s Garage

RoboCop Rouge City Election Night Riots Ben's Garage Map Location

When you are close to Ben’s Garage between Broadsteet and Towbridge St, you’ll receive a call from Ben saying there is nothing going on at his shop. Head there anyway and deal with the Street Vultures in the garage. After that, head up the stairs and breach the office to take out the rest and save Ben.

For more RoboCop: Rogue City guides and walkthroughs, click here!

RoboCop Rogue City Logo
Guides

Complete The Man Himself Guide RoboCop Rouge City

by NightlyGamingBinge in

Welcome to our “The Man Himself” guide for RoboCop Rouge City. Here we’ll go over the optional objectives and miscellaneous things you can find/do during the The Man Himself primary objective. At this point in the game, there will be no more RoboCop Evaluations.

The Man Himself Objectives

Listed below are the optional side objectives during The Man Himself primary objective that Robo can complete to earn some additional XP.

  • Secondary
    • Samantha’s Investigation
  • Misc
    • Sticky Note Trio
    • Suicide Note
    • Optimal Temperature Sticky Note
    • PCB (for Auto-9)

Samantha’s Investigation

RoboCop Rouge City The Man Himself Samantha's Investigation Area Location

At OCP Headquarters, Robo will encounter Samantha near the receptionist desk talking to a security guard. The guard will request Robo’s help in dealing with her. Talk to the guard to find out about a security breach. He will leave you to handle her and go to the security room. Then, Samantha will ask Robo to assist her in obtaining the necessary data.

RoboCop Rouge City The Man Himself Samantha's Investigation Security Room Map Location

Go to the security room on the north side of the main level by turning left at the elevators. When you arrive, the guard will ask Robo to assist in opening the doors. Use Robo to scan the electric lock on the side of the door and then interact with it to breach. You’ll receive a prompt that a warrant is needed. The guard will then give you permission to proceed. Interact with the doors again to actually breach them. Once inside, go down to the area with the servers.

Down where the servers are, you can find the New Door Code Policy document on a cart near one of the servers. Read it to get some extra XP and learn about door codes!

RoboCop Rouge City The Man Himself Samantha's Investigation New Door Code Policy Document Area Location

Go down the first row of computers and then check the one in the middle when prompted. The guard will instruct you not to touch the computer, which will update the objective to distract the guard. You can do this by retracing your steps toward the front of the building and walking through the recently activated metal detectors. This will make a noise that alerts the guard to go check it out. Return to the server room and interact with the computer to obtain the necessary data.

Alternatively, if your Engineering skill is at level 7, you can inform the guard that a computer network may have been affected. This will cause him to leave, allowing you to access the data.

Return to Samantha to deliver the data or not. If you choose to hand it over, then she’ll ask Robo to delete the security footage. If you choose to help with that as well, head back up the nearby stairs and go left to reach the security room. Interact with the keypad to try and enter a code. Once it comes back as denied, scan the OCP HR Team behind you to learn the access code. Use it to enter the room and connect to the computer to destroy the footage. Return to Samantha one last time to complete the objective. Choosing to help Samantha out will result Robo earning some brownie points with her.

Go back to Samantha with the data. If you decide to give it to her, she’ll ask Robo to delete the security footage. If you choose to help with that, go back up the nearby stairs and turn left to get to the security room. Use the keypad to try to enter a code. When it’s denied, look at the OCP HR Team poster behind you to find the access code. You will need to scan the poster to learn the code. Use it to enter the room and connect to the computer to destroy the footage. Finally, go back to Samantha to finish the task. Helping Samantha will earn Robo some points with her.

The Man Himself – Sticky Note Trio

RoboCop Rouge City The Man Himself Sticky Note Trio Map Location

On the main floor of OCP Headquarters, you can find three sticky notes on a wall in a room on the east side of the lobby.

The Man Himself – Suicide Note

RoboCop Rouge City The Man Himself Suicide Note Map Location

This note can be found on a table outside the room with the above sticky notes.

The Man Himself – Optimal Temperature Sticky Note

RoboCop Rouge City The Man Himself Optimal Temperature Sticky Note Map Location

After you ride up the elevator with Mills, exit it and swing a left heading through a doorway heading south. It will be on the wall to the right of the pair of employees talking about sleeping in the office.

PCB (for Auto-9)

RoboCop Rouge City The Man Himself PCB Map Location

This PCB can be found in the meeting room on the table where the head sits (opposite side from the computer).

For more RoboCop: Rogue City guides and walkthroughs, click here!

RoboCop Rogue City Logo
Guides

Complete Cyber Trail Objective Guide for RoboCop Rouge City

by NightlyGamingBinge in

Welcome to our “Cyber Trail” guide for RoboCop Rouge City. Here we’ll go over the optional objectives and miscellaneous things you can find/do during the Cyber Trail primary objective. At this point in the game, there will be no more RoboCop Evaluations.

Cyber Trail Objectives

Listed below are the optional side objectives during the Cyber Trail primary objective that Robo can complete to earn some additional XP.

  • Secondary
    • Fishy Situation
    • Who Killed Simon Page?
  • Police Work
    • Pieces of Crime Evidence Collected
    • All Violations Found (Server and Protect 3)

Police Work – Pieces of Crime Evidence Collected

During the “Cyber Trail” objective, you’ll need to keep an eye out for crime evidence to collect. Your goal is to reach 400 points of evidence by the end of the objective. These will be in the form of Fake ID Cards, Nuke, Stolen Wallets, Fake Money, Incriminating Documents/Pictures and Stolen Handbags. You can find them pretty much anywhere so be sure to keep an eye out for them.

Police Work – Serve and Protect 3

Obstruction of a Fire Hydrant

RoboCop Rouge City Cyber Trail Obstruction of a Fire Hydrant Map Location

This violation can be found on the eastern side of Linwood St near the Hell gas station under the train tracks. Scan the fire hydrant then place the ticket on the driver’s side front windshield.

Hazardous Oil Spillage

RoboCop Rouge City Cyber Trail Hazardous Oil Spillage Map Location

To find this violation, travel north down Broadstreet Ave just before the arcade to find a vehicle leaking oil from the front. Scan the oil then place the ticket on the driver’s side windshield.

Drinking in Public

RoboCop Rouge City Cyber Trail Drinking In Public Map Location

Head to the southern part of the Detroit Riverwalk to find this violation. Look for a man sitting on a park bench drinking then scan the bottle on the ground at his feet. This will begin a conversation with the man where you’ll have to decide if you want to give him a ticket or a warning.

Cyber Trail – Fishy Situation

RoboCop Rouge City Cyber Trail Fishy Situation Map Location

For this objective, you’ll have needed to have started it during the “Regrouping” objective back at the precinct. When you reach Downtown, head to the southeastern part of the area past Linwood St to find Officer Washington. Speak with him to get things underway then choose to bring Washington with you.

Enter the Fish Shop then head room to room clearing out the goons. When you get to the back and hear the old man yelling at the thugs, look on the left side of the room to spot a bookcase. On it you’ll find a chest with an OCP Training Disk in it.

RoboCop Rouge City Cyber Trail Fishy Situation OCP Training Disk Map Location

Grab the disk then interact with the doors. Pick the options you want then Robo will breach. Take out the one guy to save Lawerence. Exit the fish shop to complete the objective.

Cyber Trail – Who Killed Simon Page?

RoboCop Rouge City Cyber Trail Who Killed Simon Page? Map Location

Make your way to the northeastern corner of Broadstreet Ave to find Officers Kurtz and O’Neal. Approach them and they will ask Robo to help them with a case. Start out by scanning hood of the car with the victim in it then scan the MagnaVolt logo on the back passenger side door. Once that’s done, go to the driver’s door and interact with it to discharge the battery opening the door.

Scan the body then analyze the phone in his hand, the earring on the front seat and the rope around his neck. Once all three of the clues have been analyzed, you’ll go over the case so far with the officers. Exhaust all of O’Neal’s dialog options then head across the street and speak with the witness. He’ll give you a description of a girl who was in the car with the victim. Next, travel to Simon Page’s office west down Broadstreet Ave.

RoboCop Rouge City Cyber Trail Page's Office Map Location

Enter the building then head up to room 12 on the 3rd floor. Speak with Agatha there to gain access to Simon’s office by breaching the door. Once inside, check the answering machine on Agatha’s desk then scan the box on the ground behind it. After that, head into Page’s office. Scan/interact with the items listed below. Once you’ve finished with the computer desk, Agatha will send Robo to Gloria’s apartment. Exit the building to give O’Neal an update then be on your way.

  • Mill’s Speech Pointers (small round table)
  • Sailboat Picture (bookshelf)
  • Books on Bookshelf (by the window)
  • Computer Desk
    • Computer Monitor
    • Schedule Book
    • Receipts
RoboCop Rouge City Cyber Trail Gloria's Appartment Map Location

Travel to Towbridge St to reach Gloria’s apartment. Enter the building but before heading up to her room, go downstairs. You’ll find a OCP Chest there. After you grab that, go up two flights of stairs (from the basement) then follow the hallway around to room 18. Knock on the door to speak with Gloria. When prompted, choose the clue option using the witness testimony. Once inside, scan the following objects. This will lead to another conversation with Gloria. Return to Page’s office afterwards.

  • Bottle of Wine (table by couch)
  • Earring (in the bathroom)
  • Medication (on counter by sink)
  • Kuzak’s Speach – draft #1 (on dining room table)
  • schedule (on desk in the bedroom)
  • photo (on nightstand in bedroom)
  • rope (stool in bedroom closet)

Back at the office, Robo will speak with O’Neal and Kurtz then head to Page’s office. Facing his computer, look on the right side of the desk to find a hidden button. Scan then press the button to reveal a hidden door! Interact with the computer to learn the access code to the panic room, then use the code to gain entry.

RoboCop Rouge City Cyber Trail Who Killed Simon Page? Secret Door Area Image

Follow that path to reach Agatha. This will trigger a cutscene. During it, if you have Engineering at level 6, Robo can respond that the gun is not loaded. This will cause her to be arrested. Otherwise, it doesn’t end to well for her. Make sure to grab the PCB off of the desk and the nearby OCP Chest before returning to the streets to complete the objective.

For more RoboCop: Rogue City guides and walkthroughs, click here!

RoboCop Rogue City Logo
Guides

Complete Regrouping Objective Guide for RoboCop Rouge City

by NightlyGamingBinge in

Welcome to our “Regrouping” guide for RoboCop Rouge City. Here we’ll go over the optional objectives and miscellaneous things you can find/do during the Regrouping primary objective. At this point in the game, there will be no more RoboCop Evaluations.

Regrouping Objectives

Listed below are the optional side objectives during the Regrouping primary objective that Robo can complete to earn some additional XP.

  • Secondary
    • Fishy Situation
  • Misc
    • Interview Invitation

Fishy Situation

RoboCop Rouge City Regrouping Fishy Situation Map Location

After calling Dr. Blanche, head to the lobby of the precinct to start this objective. Speak with Estevez at the front desk to trigger an event. When it concludes, head towards the surveillance room. An officer will run by talking about something going down in the locker room. Make your way there to kick off another cutscene with Washington and some other officers. When prompted, step in and tell them to back off.

Following the cutscene, you’ll regain control of Robo in the dispatch room. Scan the switch board then scan the cable running behind in on the left side. You may have to scan some other pieces of the switch board for the cable to become scannable. Follow the wire left to the device on top of the file cabinet. Interact with it to turn it on then speak with Washington. He’ll head out and wait for Robo in the field. This quest will be continued in the upcoming objective, “Cyber Trail“.

Regrouping – Interview Invitation Document

RoboCop Rouge City Regrouping Interview Inviation Map Location

This document can be found on one of the desks in the center of the lobby. Read it to get some additional XP.

For more RoboCop: Rogue City guides and walkthroughs, click here!

RoboCop Rogue City Logo
Guides

Complete Wendell’s Confession Guide RoboCop Rouge City

by NightlyGamingBinge in

Welcome to our “Wendell’s Confession” guide for RoboCop Rouge City. Here we’ll cover all of the objectives you need to complete in order to get an A on your next RoboCop Evaluation.

Wendell’s Confession Objectives

You’ll need to complete the objectives listed below to earn the max amount of XP during your next RoboCop Evaluation. The objectives under misc do not count towards the evaluation, but might be worthwhile tracking down.

  • Secondary Objectives
    • Armory Break-In
    • Illegal Broadcast
  • Investigations
    • Warden’s Gift
    • Note About Wendel Antonowsky
  • Police Work
    • Pieces of Crime Evidence Collected
    • Prisoners Release from the Freezer
    • Cunning Prisoner Stopped
    • Electric Chair Execution Stopped
  • Misc
    • PCB
    • Shift Start Notes Document
    • Prisoner’s Complaint Document
    • Help the Inmate
    • OCP Training Disk

Police Work – Pieces of Crime Evidence Collected

While putting a stop to the riot at the prison, you’ll need to keep an eye out for crime evidence to collect. Your goal is to reach 600 points of evidence by the end of the “Wendell’s Confession” objective. These will be in the form of Fake ID Cards, Nuke, Stolen Wallets, Fake Money, Incriminating Documents/Pictures and Stolen Handbags. You can find them pretty much anywhere so be sure to keep an eye out for them.

Armory Break-In

RoboCop Rouge City Wendell's Confession Armory Break-In Map Location

You will begin this objective automatically soon after the riot starts. When you reach Cellblock A (the first big room), defeat all the enemies and then head to the guard’s post. Breach the door, take out all the enemies inside, and then open the dual metal doors on the southwest side of the room. Go straight through to the next set of metal doors. Beyond them, you’ll find the armory. Breach the doors and deal with all the goons inside. Once they have all been dealt with, the objective will be completed.

Illegal Broadcast

RoboCop Rouge City Wendell's Confession Illegal Broadcast Map Location

You will begin this objective as soon as the riot starts. Proceed through the prison until you reach the Mess Hall. Deal with the enemies there and then go back behind the buffet line to reach a set of doors leading to the kitchen. Break through the doors and handle the enemies hiding there.

Prisoners Release from the Freezer

While in the kitchen, open the freezer doors to free the group of prisoners trapped inside. Freeing them is an objective for the next RoboCop Evaluation.

After the fight, take the exit in the southwest to enter a hallway. Head through the third door on the left at the end of the hallway. On the other side, you’ll encounter a few enemies in the game room. Deal with them, then follow the path ahead to reach the broadcasting room. Open its doors and take out the 2-3 goons inside. Use the intercom at the back of the room to turn off the broadcast, completing the objective.

Investigations – Warden’s Gift

RoboCop Rouge City Wendell's Confession Warden's Gift Map Location

Once you get to the warden’s office and rescue him, make sure to scan the pastries on his desk. This will trigger some dialog with the warden also completing the investigation.

Police Work – Cunning Prisoner Stopped

RoboCop Rouge City Wendell's Confession Cunning Prisoner Stopped Map Location

After encountering the mercenaries, proceed to the yard. Go through the south gate to reach the boiler room. Take a right, then follow the room around to the left to find a guard aiming his gun at a prisoner. The prisoner will explain that the guard is trying to kill him because the officer was taking bribes from other prisoners and he exposed it. You will then need to decide whether to have the guard handcuff the prisoner or let him go. Choose the option to have the officer cuff him. This will result in you learning that the prisoner was lying and complete one of the hidden police work objectives.

Wendell’s Confession – PCB (Auto-9 Board)

RoboCop Rouge City Wendell's Confession PCB Map Location

When you get to the entrance of Cellblock B, don’t go through the double gates to the cellblock. Instead, go through the doorway on the right and up the stairs. You’ll come to a desk in front of a gated area. Go inside to find the PCB in a metal cabinet.

Investigations – Note About Wendel Antonowsky

RoboCop Rouge City Wendell's Confession Note About Wendell Antonowsky Map Location

Face the desk near the PCB above, turn right, and open the double doors to get into a control room with two enemies. Defeat them, then go through the doorway and deal with the last enemy in the room at the end of the walkway. You can find this document on the cart.

Wendell’s Confession – Prisoner’s Complaints Document

RoboCop Rouge City Wendell's Confession Prisoner's Complaints Document Map Location

You’ll find this document on a table along the main path shortly after you begin fighting the mercenaries.

Police Work – Electric Chair Execution Stopped

RoboCop Rouge City Wendell's Confession Electric Chair Execution Stopped Map Location

Near the above document, you’ll hear a guard (or the Arcade owner if you persuade him earlier in the game) locked into the electric chain in a side room. You’ll need to breech the door and take out both of the enemies that are about to do him in. Speak with the guard (or snitch) afterwards. This will be before heading outside to reach cellblock C.

Wendell’s Confession – Help the Inmate

RoboCop Rouge City Wendell's Confession Help Inmate Map Location

When you get to cellblock C, you will hear an inmate asking for help in the infirmary. Go inside and you will find out that the guard wants to abandon a injured inmate to save himself. You can then choose to tell the guard to stay or walk away from the situation.

Wendell’s Confession – OCP Training Disk

RoboCop Rouge City Wendell's Confession OCP Training Disk Map Location

After navigating through the inmate cells in cellblock C, you’ll reach a hallway. Look for “Guards Post” written on the side of a wall with a door to the right. Open the door and look to the left to find a cart with a case on it. The training disk will be inside the case. This will be just before returning to cellblock A.

For more RoboCop: Rogue City guides and walkthroughs, click here!

RoboCop Rogue City Logo
Guides

Complete Spike in a Haystack Guide Robocop Rouge City

by NightlyGamingBinge in

Welcome to our “Spike in a Haystack” guide for RoboCop Rouge City. Here we’ll cover all of the objectives you need to complete in order to get an A on your next RoboCop Evaluation. Keep in mind that the additional objectives during the Ghosts from the Past primary objective also count towards the next evaluation.

Spike in a Haystack Objectives

The objectives listed in this section need to be completed in order to receive the maximum amount of XP during the next RoboCop Evaluation with the exception of the Misc section which does not count.

  • Secondary Objectives
    • Be Kind Rewind
    • Domestic Terrorist
    • First Field Training
  • Investigations
    • Downtown Secret
  • Police Work
    • All Courthouse Hostages Saved
    • All Violations Found (Server and Protect 2)
    • Samantha’s Belongings Recovered
    • Pieces of Crime Evidence Collected
  • Misc
    • Independent News #15
    • Do the Robot
    • Once a Mechanic

Police Work – Pieces of Crime Evidence Collected

While search around Downtown for Spike, you’ll need to keep an eye out for crime evidence to collect. Your goal is to reach 700 points of evidence by the end of the Spike in a Haystack objective. These will be in the form of Fake ID Cards, Nuke, Stolen Wallets, Fake Money, Incriminating Documents/Pictures and Stolen Handbags. You can find them pretty much anywhere so be sure to keep an eye out for them.

Police Work – Serve and Protect 2

Smoking in Proximity of a Gas Station

RoboCop Rouge City Spike in a Haystack Server and Protect 2 Violation 1

You can locate this event at the Hell Gas Station on the eastern end of Linwood St. Simply scan the no smoking sign on the pump next to the man smoking while filling up his vehicle. You can then decide whether to give him a ticket or a warning.

Obstruction of a Fire Hydrant

RoboCop Rouge City Spike in a Haystack Server and Protect 2 Violation 2

The violation can be found along the west end of Lindwood St, in front of the pawn shop. You will see a car parked on the curb, blocking a fire hydrant. Scan the hydrant first, then interact with the driver’s side windshield to issue a ticket.

Bathing in City Fountain

Go to the fountain between the Detroit Riverwalk and River St. Once there, look for the woman with her feet in the water. Scan the no swimming sign on the side of the fountain behind her to trigger an event where you’ll have the option to give her a ticket or a warning.

Unauthorized Garage Disposal

RoboCop Rouge City Spike in a Haystack Server and Protect 2 Violation 4

Make your way to the back of the arcade building and climb up the ladder there to the roof. You’ll spot a man there throwing garbage off the roof. Scan the box to his left. to kick off an event where the man will say his boss fired him, so he’s sharing their lies with the world. You can then choose to issue him a ticket or let him off with a warning.

Defacing Campaign Posters

RoboCop Rouge City Spike in a Haystack Server and Protect 2 Violation 5

Go to the alley behind the arcade on Broadstreet Ave to see a person vandalizing some campaign posters. Scan the posters to start an event where you’ll have to choose to give a ticket or a warning.

Parking in a Prohibited Area

RoboCop Rouge City Spike in a Haystack Server and Protect 2 Violation 6

Travel to Towbridge St where you’ll find a vehicle parked there near the basketball courts. Scan the no parking sigh on the sidewalk behind it then interact with the driver’s side windshield to issue a ticket.

First Field Training

RoboCop Rouge City Spike in a Haystack First Field Training Map Location

To start this objective, approach the basketball court between Towbridge St and Linwood St to find officer Washington there. Speak with him after he gets off of the radio to cause Robo to become his field training instructor. After the conversation, enter the nearby building to trigger a cutscene with an old lady who is in need of help finding her missing cat!

Before heading downstairs, head back out to the main hall to find the Maintenance Log Book on an end table in the hallway for some extra XP.

Go down the stairs to the basement and walk through the hallway, scanning objects in each room. When you come to a doorway blocked with planks, Washington will offer to move them for you. Let him do it, then keep following him and scanning more objects. Stop in a side room with jam on the floor. Scan the broken jars to find cat traces, then use Robo’s scanner to follow the footprints to a piano.

Scan the piano and let Washington lead again. After he plays the piano, follow the cat to a narrow passage. Try to open the door at the end of the hall, then let Washington squeeze through the gap to open the door. Continue down the hall and scan the cabinet when prompted. This will trigger a cutscene where Washington takes the cat back.

Go further into the basement until you reach a closed door after hearing a noise. Open the door and deal with the enemies inside. Examine the body of the murder victim, analyzing the bloodstain on his shirt and the bullet wound on his head. After examining the last clue, Washington will inform you about armed men heading into the building. Make your way to room 9 on the 2nd floor dealing with the enemies along the way. Once in room 9, go to the first bedroom and examine the newspaper on the bed then talk to Washington by the door. Leave the building to complete the objective.

Domestic Terrorist

You’ll get this objective at the end of the Spike’s Trail objective in the parking garage from Max Becker. When you reach Downtown, head down Broadstreet Ave then when you reach the arcade, enter the building across the street from it. Follow the hallway until you reach the stairs. Before heading up, take the stairs leading down and read the note on the door at the bottom for extra XP. Now make your way up to the top floor an enter apartment 12 by breaking the door.

Once in the apartment, look to the left to find a doorway then activate your scanner and analyze the tripwire towards the bottom to disarm it. Now procced into the main room of the apartment and locate the kitchen. On the counter there, you’ll find a PCB you’ll want to grab. Next, scan the items listed below:

  • Stick Note on Fridge (read it)
  • Pizza box on table
  • Electronic components on dresser
  • box on couch

After your done scanning the main area, head into the back bedroom and look to the left to find an empty bookcase. Scan the scuff marks on the ground to the right of it to detect a hidden entrance. Interact with the bookshelf to move it revealing a hidden room. Go inside then locate the chair on the left side of the room. It will have an OCP Training disk on it. Next, explore the rest of the room ending by answering the ringing phone. After the call, exit the building.

Downtown Secret

The Downtown Secret for the next Robocop Evaluation can be found in the storage facility. One of the lockers will have a painting inside that you’ll need to scan. If you open the map, you’ll see which of the lockers are accessible.

Make your way to the storage facility at the southwestern part of the area near the gas station. Enter the building and head towards the center of the storage lockers to trigger an event leading up to a big fire fight. Defeat all of the enemies then open the storage locker they were trying to break into. Scan all three boxes then take the one with Samantha’s belongings and exit the building.

Outside you’ll be stopped by a couple of OCP Agents demanding Robo turn over the box. You can choose to comply or keep the box. Keeping the box will earn points with the reporter and it’s also one of the police work objectives for the next Robocop Evalutation. Leave the storage area and use the phonebooth by the motel to call Samantha.

After the call, travel west down the street to reach Ronny’s Groceries. Go inside and speak with the store clerk. Put Samantha’s stuff on the shelf in the back room then exit the store to complete the objective. Optionally you can check the contents of the box to see a letter sent to her before leaving.

Be Kind Rewind

This objective will be started after speaking to Pickles during the main story. The condiment man will give Robo info on Spike then ask Robo for some help with a problem he’s having. Agree to assist then follow Pickles to a nearby video store and head inside. After some dialog, Pickles will ask Robo to check the Drama and Thriller sections for a specific tape relating to the bible somehow. Scan both sides of each section, examining any books the scan flags. You’ll do this again for the Action and Sci-Fi section.

Once you’re done with that, Pickles will find the tape which leads to a fire fight in the video store. Take out the trash then enter the side room of the store looking for Pickles. Speak with the clerk there who will tell you Pickles fled but mentions checking out the computer. Head back up to the front and use the computer behind the counter to look up his address then exit the video store.

After leaving the store, take a right and follow the road heading east. Take another right just before the Do Not Enter sign and follow the street south to reach Charlies Garages. Scan each of the garages until you find the one that was opened recently then open that one to find Pickles inside with a bag of drug money.

You’ll now have to make choice on whether to let him keep the money or take it for his own good. The choice is up to you. Taking the money will result in him being mad a Robo but could be better for him in the long run based on how you’ve been treating him. The objective will complete after you make a decision.

Spike in a Haystack – Independent News #15

If you want to get some extra EX, head to Jolly Burger in the northwestern part of the map then look on one of the nearby wooden benches to find the Independent News #15 paper that you’ll want to read.

Spike in a Haystack – Do the Robot!

Speak with the kid at the basketball court. He’ll ask Robo to do the robot dance! It’s up to you on if you want to comply or not. If you do, it will earn you some brownie points with the public trust.

Spike in a Haystack – Once a Mechanic

This is another opportunity for some extra XP. Head to the garage on the east side of the area. Go inside and make your way to the office on the 2nd floor. You’ll find the Once a Mechanic note on the desk. Read it for the XP.

For more RoboCop: Rogue City guides and walkthroughs, click here!

RoboCop Rogue City Logo
Guides

Complete Ghosts from the Past Guide RoboCop Rouge City

by NightlyGamingBinge in

Welcome to our “Ghosts from the Past” guide for RoboCop Rouge City. Here we’ll cover all of the objectives you’ll need to complete to receive a RoboCop Evaluation score of A on Robo’s next evaluation. Please keep kind mind that the objectives from the Spike in a Haystack objective you just completed are also part of the next evaluation.

Ghosts from the Past Objectives

You’ll need to complete the objectives listed below (in addition to the Spike in a Haystack objectives) to get the max amount of XP during Robo’s next evaluation.

  • Secondary
    • Attack on the Courthouse
  • Investigations
    • Juneberry Mall Secret

Attack on the Courthouse

RoboCop Rouge City Ghosts from the Past Attack on the Courthouse Map Location

You can start this mission Downtown at the courthouse just before heading out to find Wendell Antonowsky. Go there and speak with Officer Kowalsky to find out that the courthouse is being assaulted. Agree to handle the attackers and save the hostages, then enter the courthouse. Inside, you’ll need to defeat a group of enemies in the lobby. Once you’ve dealt with them, interact with one of the metal doors on the west or east side of the lobby to get the objective to find an access card.

You will have to check both side courtrooms connected to the lobby to find the access card. Regardless of which one you start with; the card is always in the second room you check. To reach room on the west side, you’ll need to head to the second level walkway of the lobby to find an opened door you can head through. Deal with the enemy on the balcony there, then drop down and deal with the rest of the creeps. After the last body falls, open the door then head for the other side.

RoboCop Rouge City Ghosts from the Past Attack on the Courthouse West Courtroom Area Location

To reach the eastern room, you’ll need to head into the bathroom on the east side of the first floor and breach through the wall. Again, this room will be filled with more scum that you’ll need to introduce to our friend justice!

RoboCop Rouge City Ghosts from the Past Attack on the Courthouse East Courtroom Area Location

Once the rooms are cleared and you’ve located the access card, head up the stairs on the south side of the lobby and use it to release the metal gate revealing a pair of doors. Breach them then quickly deal with all of the enemies inside before they kill any of the three hostages. If even one dies, then you’ll need to reload the last checkpoint to and try again. They must all be saved to be awarded the max XP during the next RoboCop Evaluation. Once that’s done, exit the courthouse to complete the objective.

Ghosts from the Past – Juneberry Mall Secret

RoboCop Rouge City Ghosts from the Past Juneberry Mall Secret Map Location

During the main story, you’ll enter a segment where Robo is glitch while walking down a long hallway that doesn’t seem to end. His son James will also be calling out to him the whole time. When you finally reach the exit, James will Yell “Dad!” and you’ll end up in a hallway. If you look to the left (south), you’ll spot a set of broken escalators. Behind them you’ll find an Empty OCP Box. Scan the box to find the secret.

RoboCop Rouge City Ghosts from the Past Juneberry Mall Secret Area Location

For more RoboCop: Rogue City guides and walkthroughs, click here!