Welcome to our Cyberpunk 2077 The Beast in Me questline walkthrough!
The Beast in Me
Obtained: Claire will call you sometime in Act II
Objective: Visit Claire’s garage during the day
During Act II, Claire (the bartender from Afterlife) will you call you up about a job offer involving racing. Travel to her garage in Santo Domingo – Arroyo during the day to speak with her. Agree to be her driver then she’ll give you a rundown on the races you’ll be partaking in. You’ll have to finish in the top 3 in 2 of the qualifying races to get your ticket clipped. Claire will text you the details on the first race. After you complete it, you’ll have to wait for some time to pass for Claire to message you again. You’ll have to respond to her a couple of times to get the details for the second race. After you finish the second race, you will again have to wait for more time to pass before Claire will message you again about details for the third race.
The Beast in Me: City Center
Obtained: Automatically after agreeing to be Claire’s driver
Objective: Call Claire to start the race
Use your phone to call Claire then sit on the nearby bench and wait for her to arrive. When she does, speak with her on the other side of the street. Get in the ride then wait for the race to start. When it does, drive! Finish the race and try to win. After the race, speak with Claire to complete the job.
The Beast in Me: Badlands
Obtained: Claire will message you after some time passes
Objective: Call Claire to start the race
Travel to the Dam fast travel point in the southern Badlands then give Claire a call. Speak with her then hop in the driver’s seat to kick things off. This race is a little bit of a pain as you’ll be off road a majority of the time. The terrain makes it harder to steer with the first half of the race being very bumpy. Finish the race and speak to Claire afterwards to complete the job.
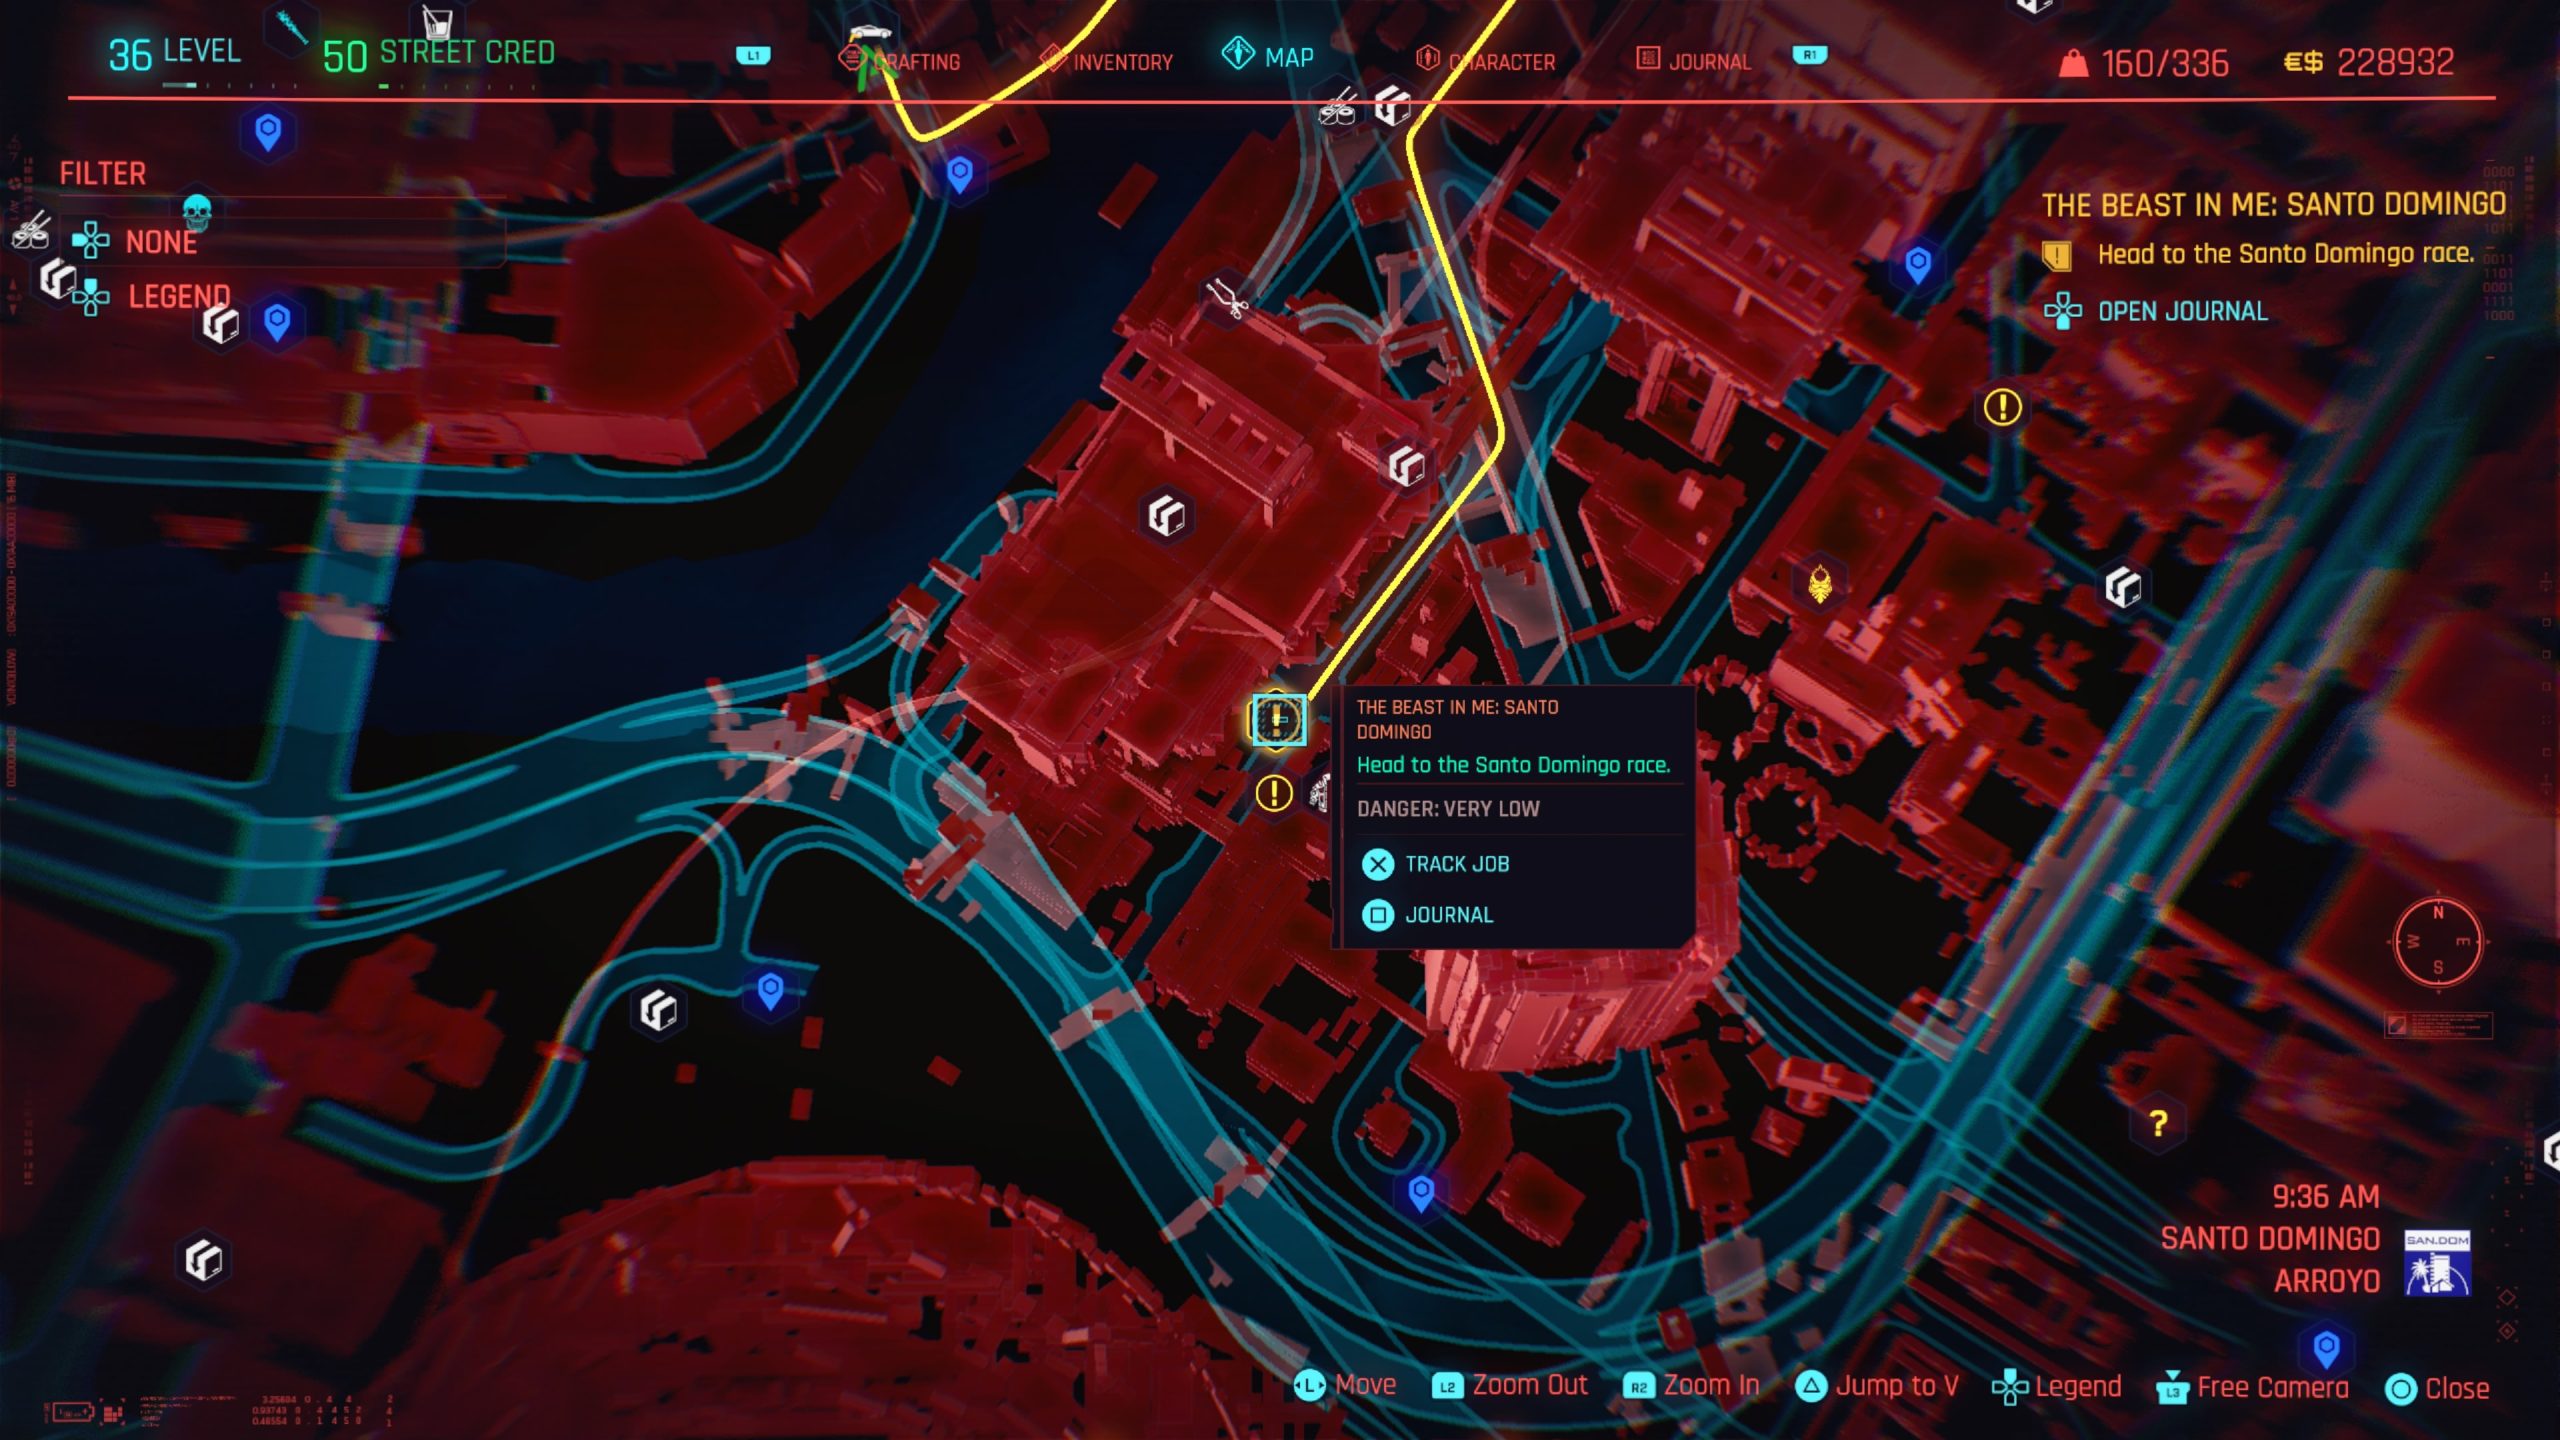
The Beast in Me: Santo Domingo
Obtained: Claire will message you after some time passes
Objective: Call Claire to start the race
Travel to the location marked on your map northwest of the Megabuilding H4 fast travel point in Santo Domingo – Arroyo, then call Claire. Speak with Claire then hop into the driver’s seat to kick off the race. The first part of this race takes place in the city so expect a lot of sharp turns until you about at the final stretch. After the race pull over to have a heart to heart with Claire. This will complete the job.
The Beast in Me: The Big Race
Obtained: Claire will message you after some time passes
Objective: Call Claire to start the race
Travel to the Luxury Apartments fast travel point in Westbrook – Charter Hill then give Claire a call. Speak with Claire then hop into the driver’s seat to kick off the race. The goal for this race will be to stick as close to Sampson as you can. Towards the end of the race Sampson will veer off the track. Follow him until his car wrecks. Confront Sampson with Claire then hear him out. You can tell her to either let him go or not since the end result will be the same. After she kills him, hop in her vehicle and talk to her as you ride back to the garage. She’ll give you the Beast then the job will complete.
Once you reach Act 2, fixers will start messaging you about vehicles for sale as you raise your street cred. You’ll have to make contact with the fixer in a region to be able to start buying cars from them. This should happen automatically when you travel to a new place. Purchasing them all is required to unlock the Autojock trophy. Please note that some vehicles can be obtained through side jobs, but those don’t count towards the trophy since they are non purchasable. Below is a list of the vehicles you can acquire in Cyberpunk 2077. For a detailed guide on where to find each vehicle, click the name of the ride.
911 II (930) Turbo – Non purchasable: During the Chippin’ In side job
Welcome to our Cyperpunk 2077 Delamain questline walkthrough!
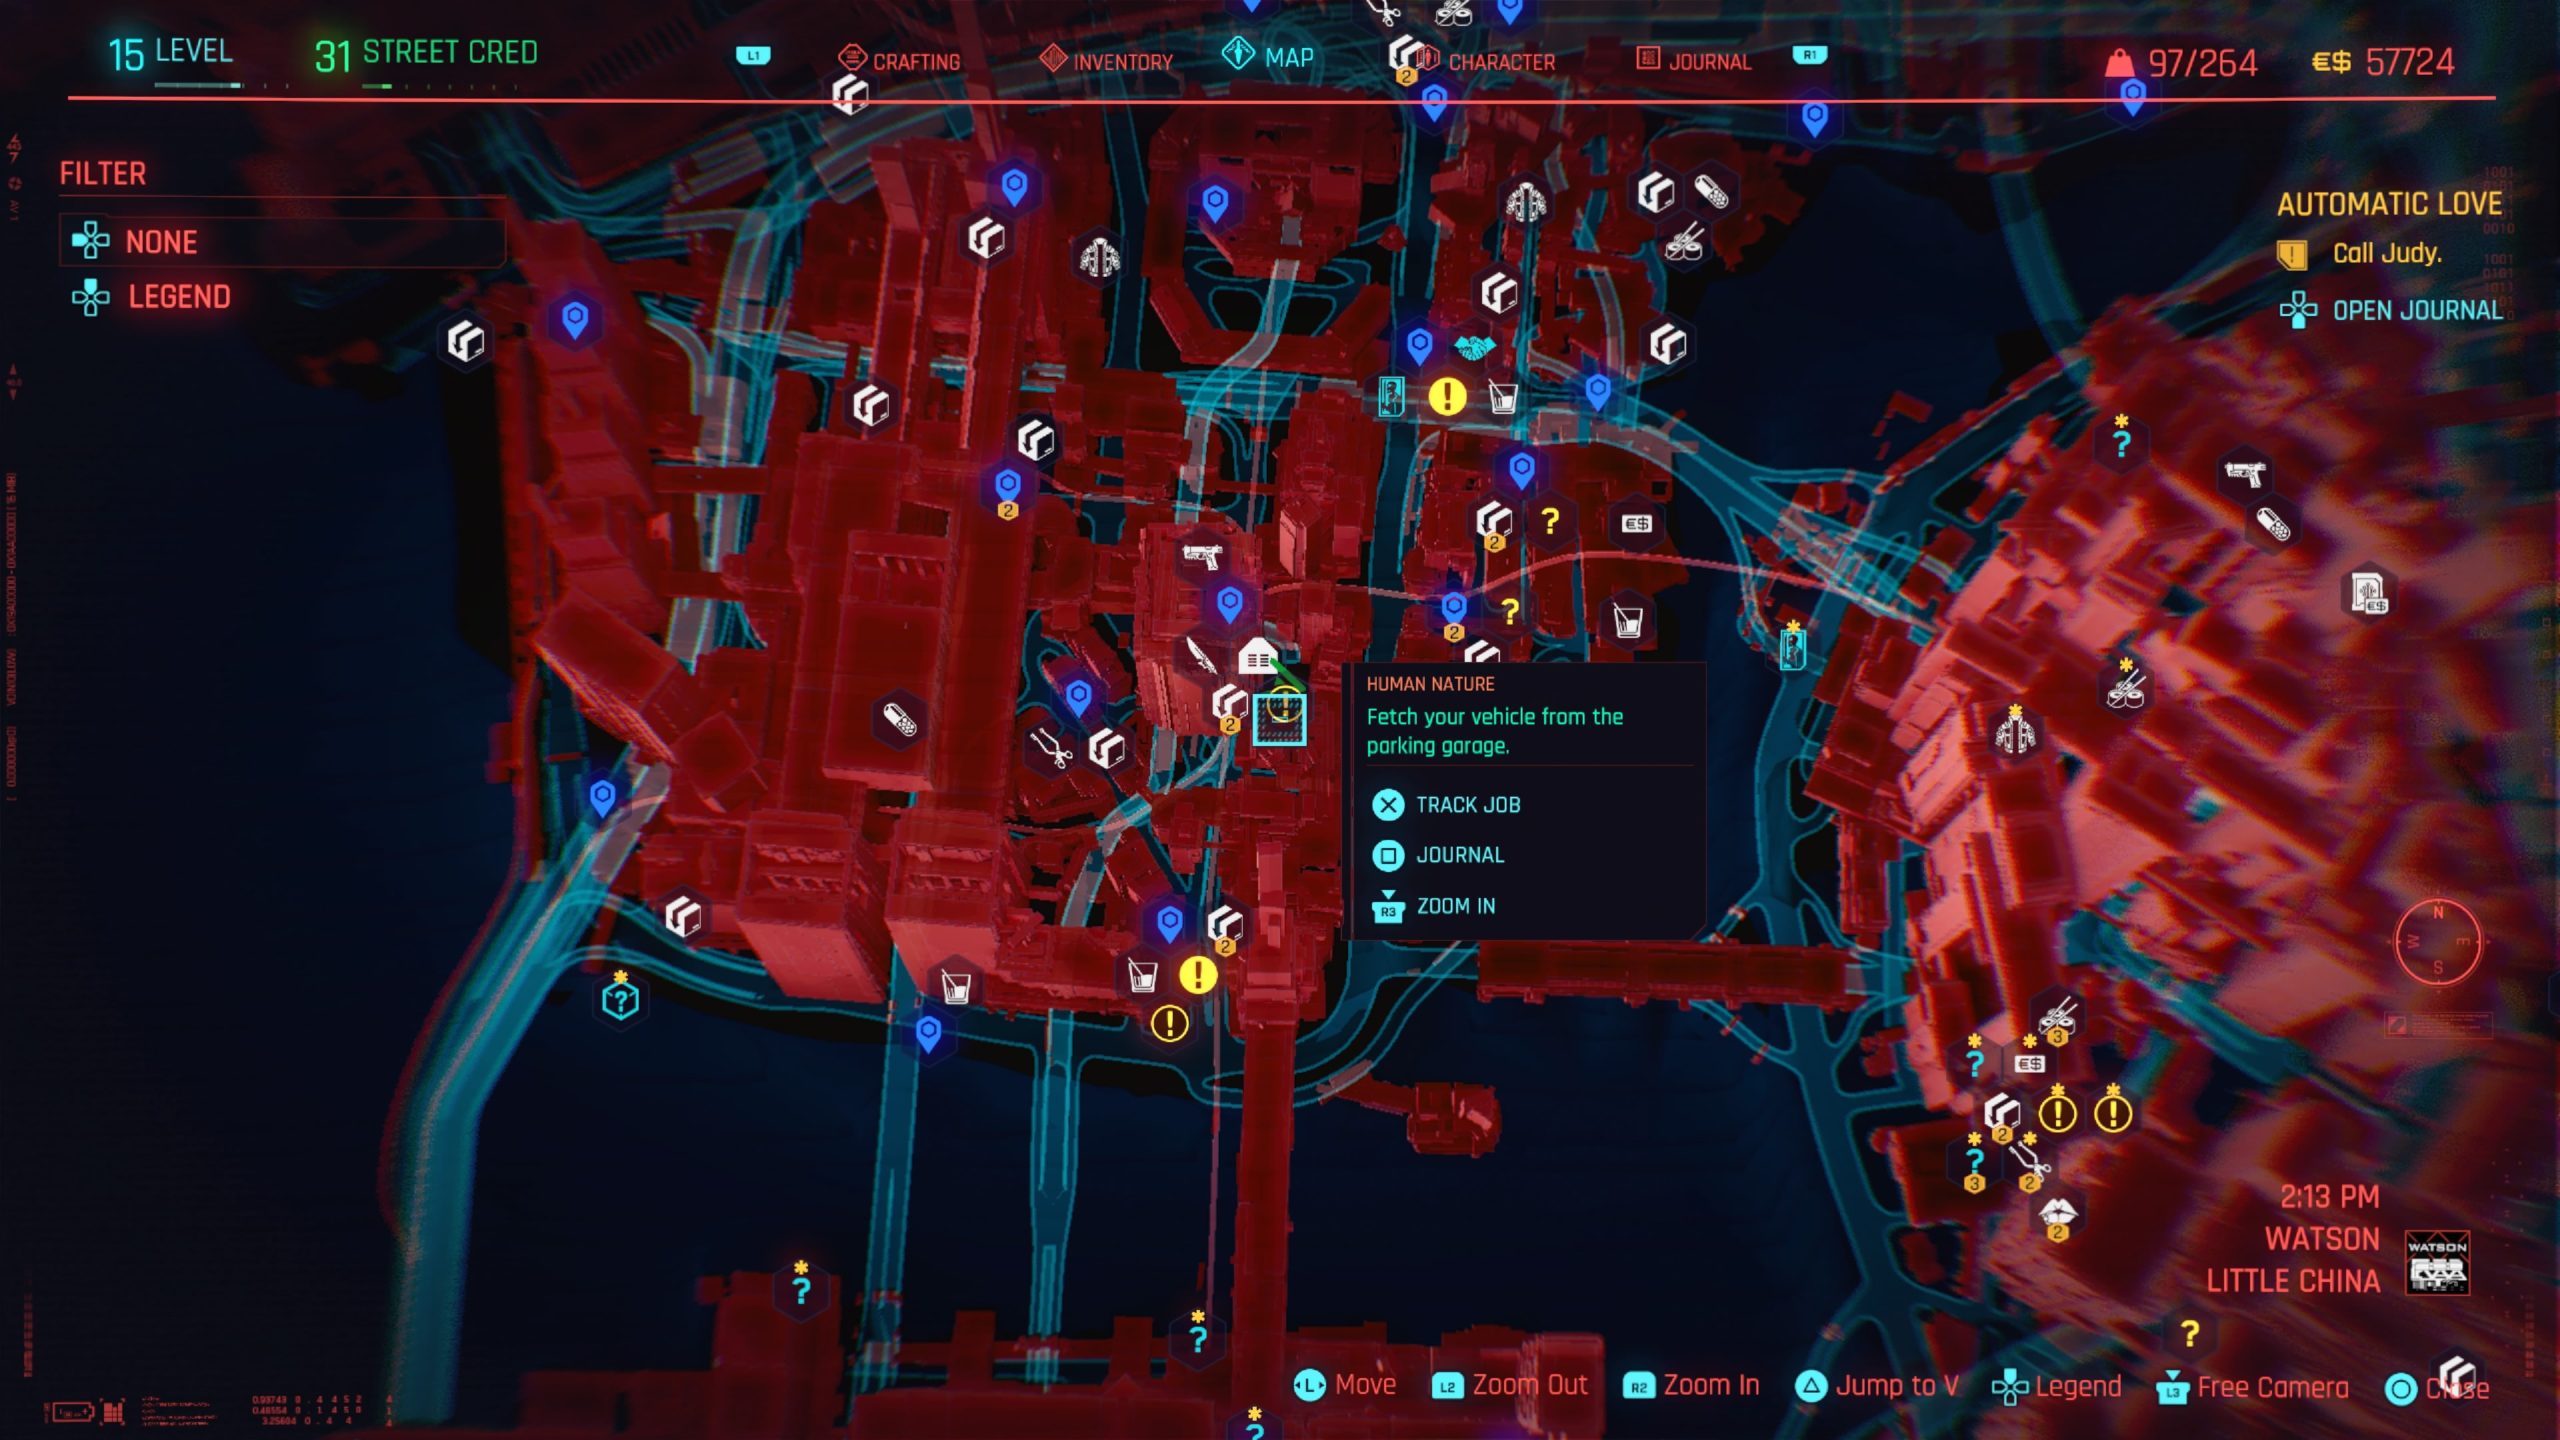
Human Nature
Obtained: Automatically obtained when you reach Act 2
Objective: Fetch your vehicle from the parking garage
Travel to the parking garage just east of your apartment to locate your car. Get inside to trigger a cutscene then exit your car. Check the message from the Delamain on your phone. Next you’ll need to wait for your car to be repaired. When it’s done, you’ll receive a text and the job will complete.
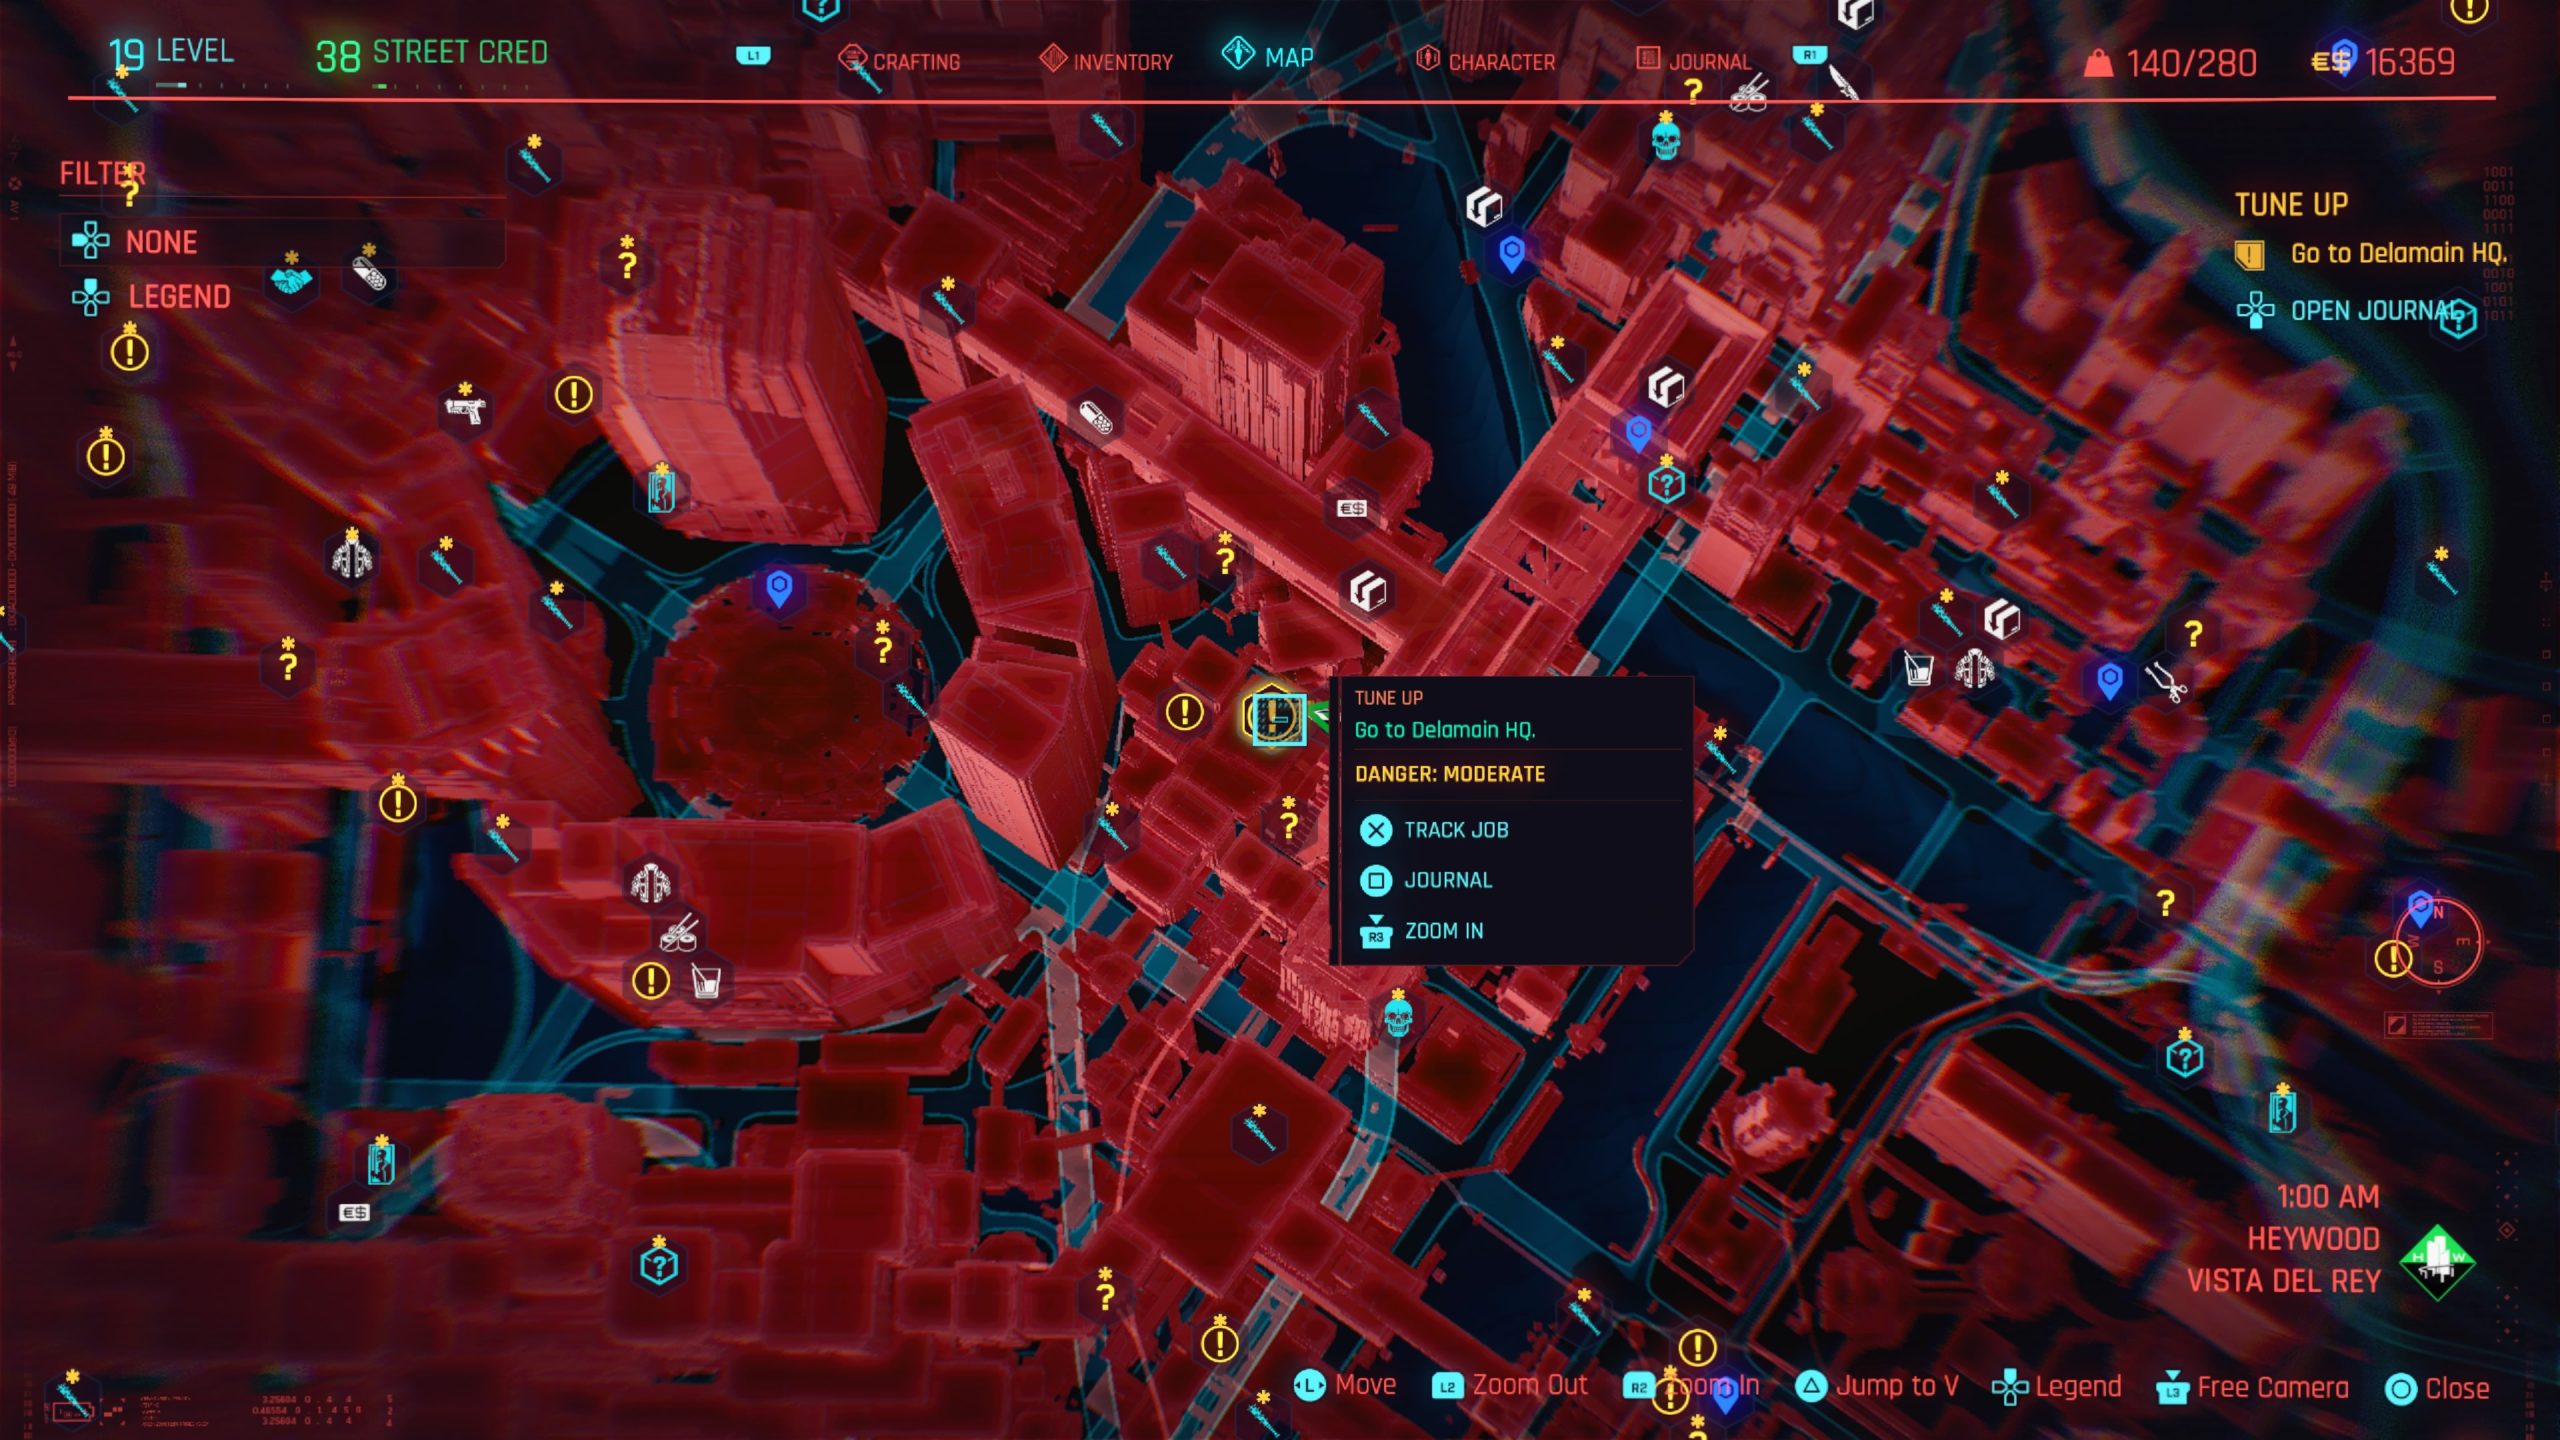
Tune Up
Obtained: During the Human Nature side job
Objective: Go to Delamain HQ
Travel to Delamain HQ in Heywood – Vista Del Rey then enter the building. Speak to the receptionist to complete the job.
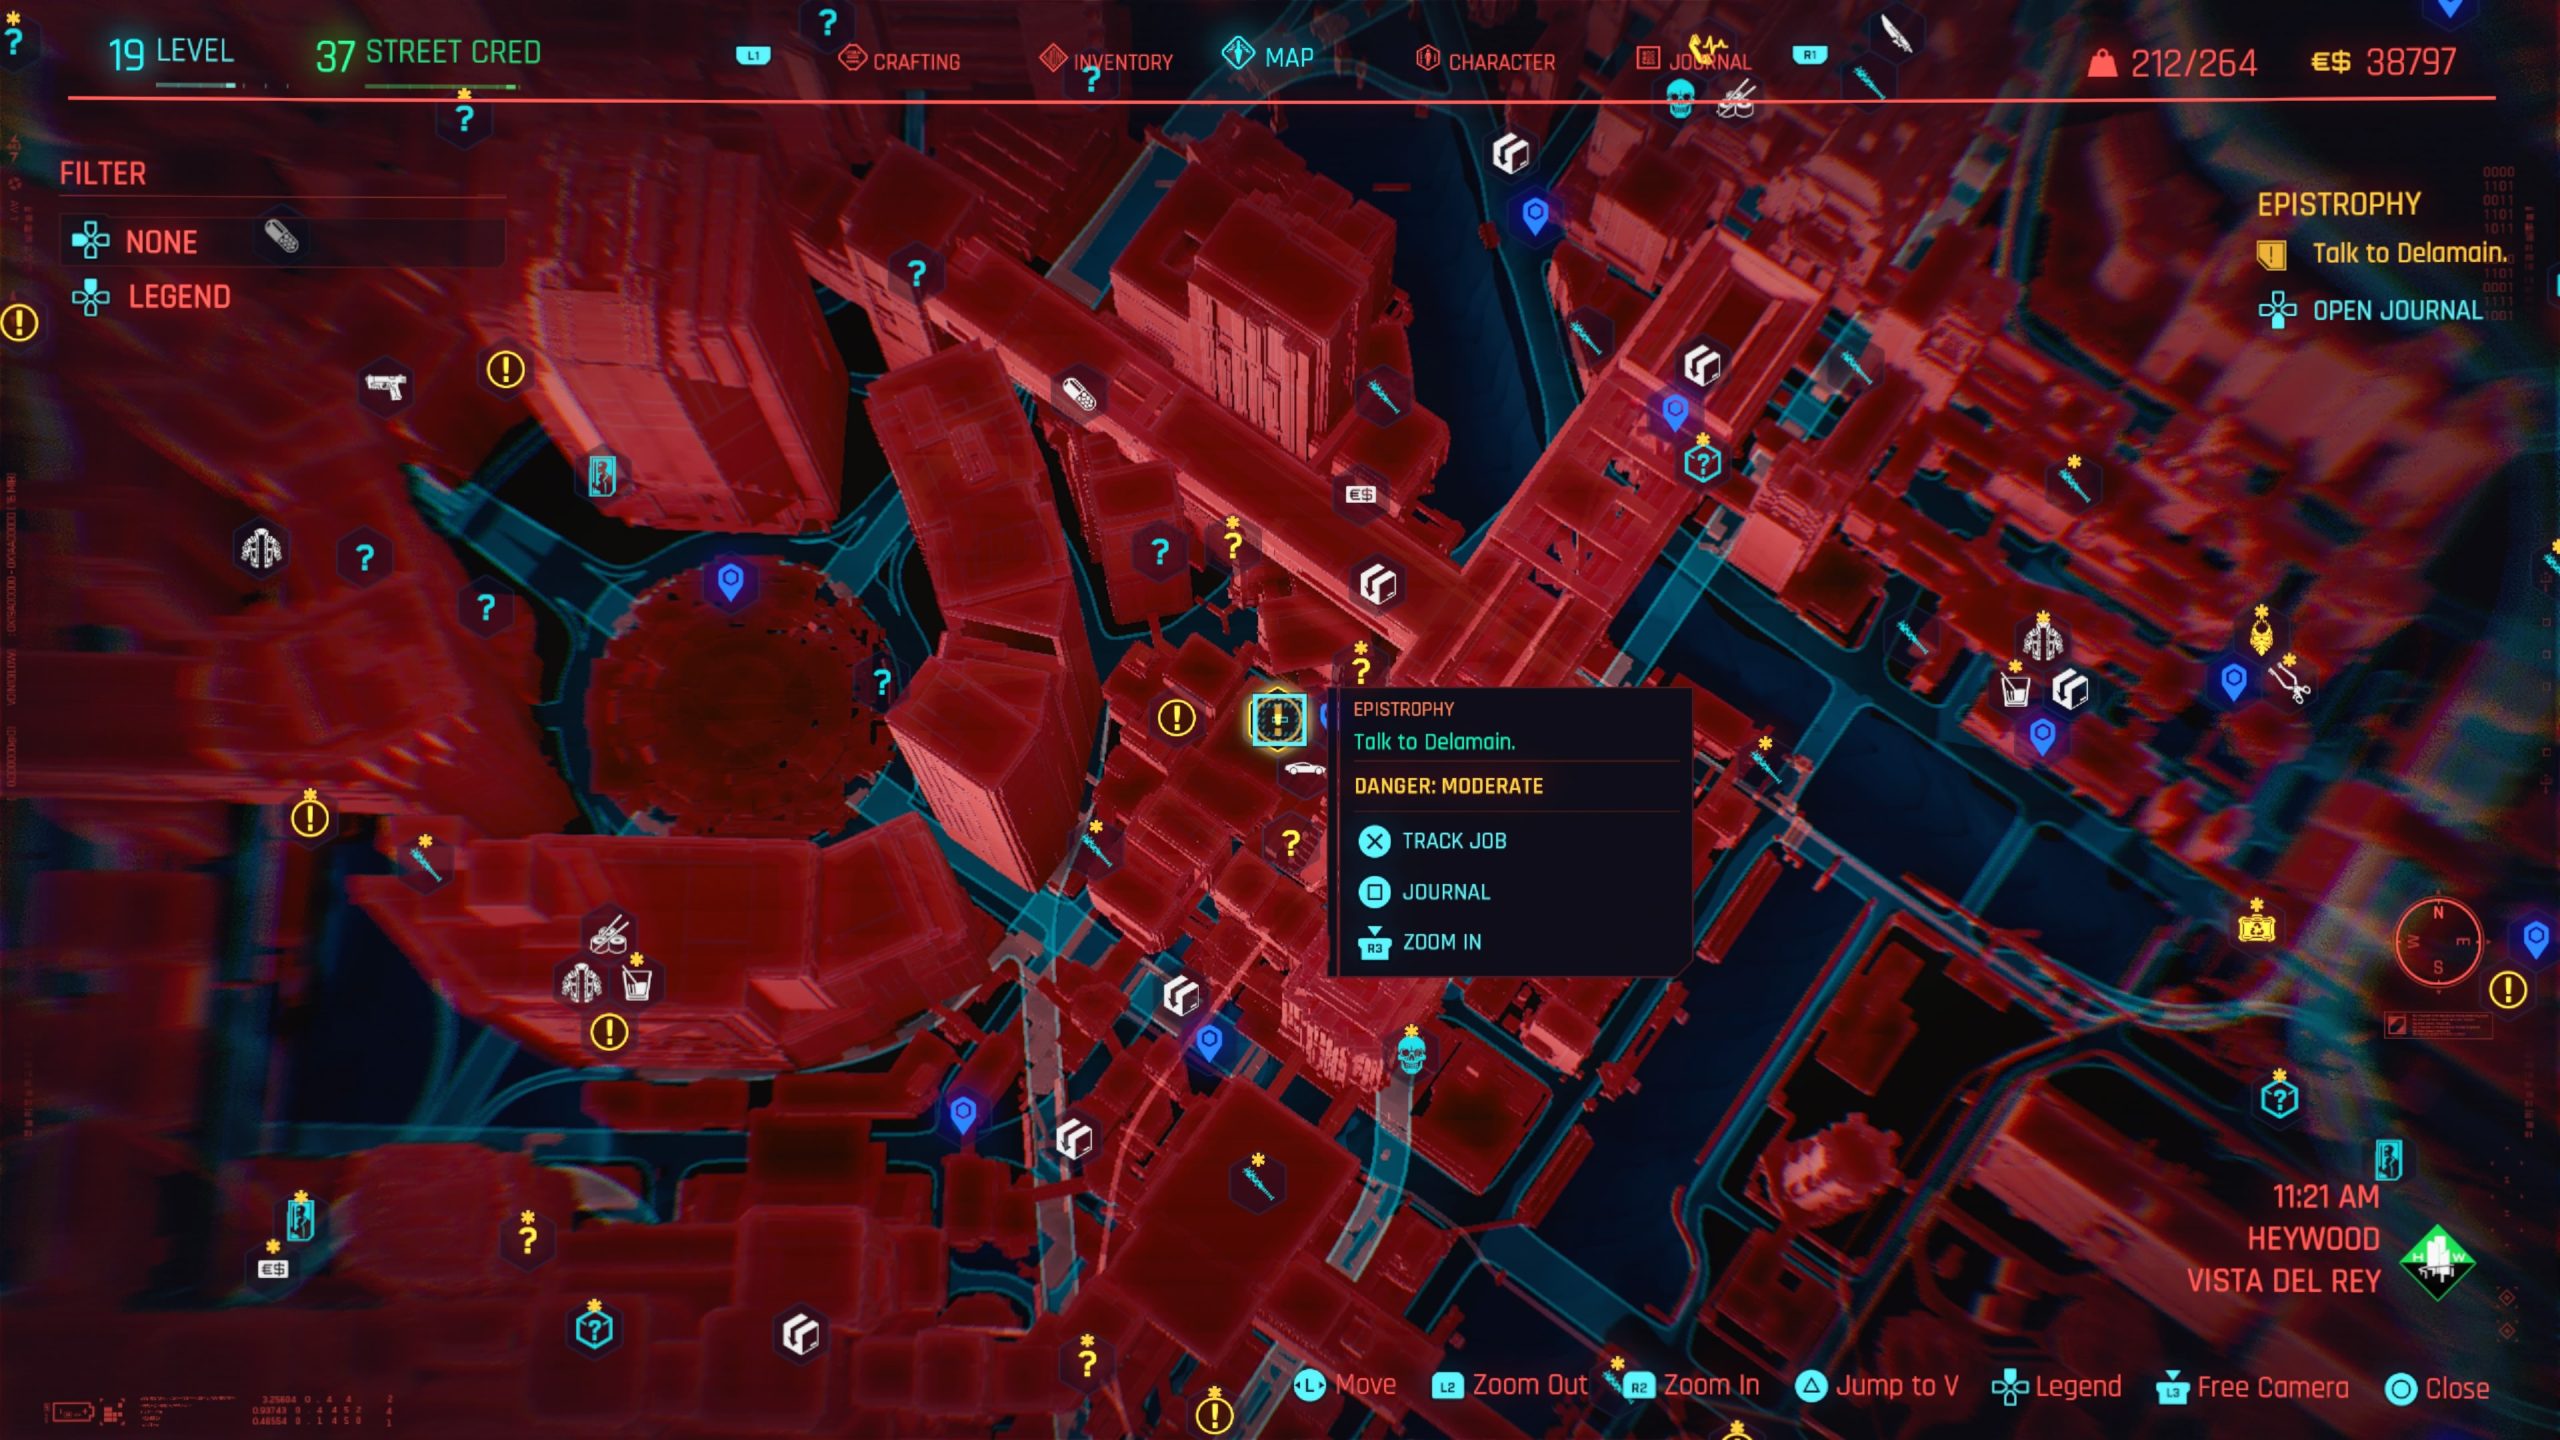
Epistrophy
Obtained: Automatically after completing the Tune Up side job
Objective: Speak with Delamain in Heywood – Vista Del Rey
Follow the drone to embark on an tour of the HQ, which will end in the control room. Speak with Del and agree to take his job. Grab the scanner on the desk in the control room then exit the building to being the hunt for 7 missing cabs. Once you’ve found all 7 cabs, return to the Delamain HQ. Head inside and the receptionist will have you place the scanner in the box on the counter. Do so and the job will complete.
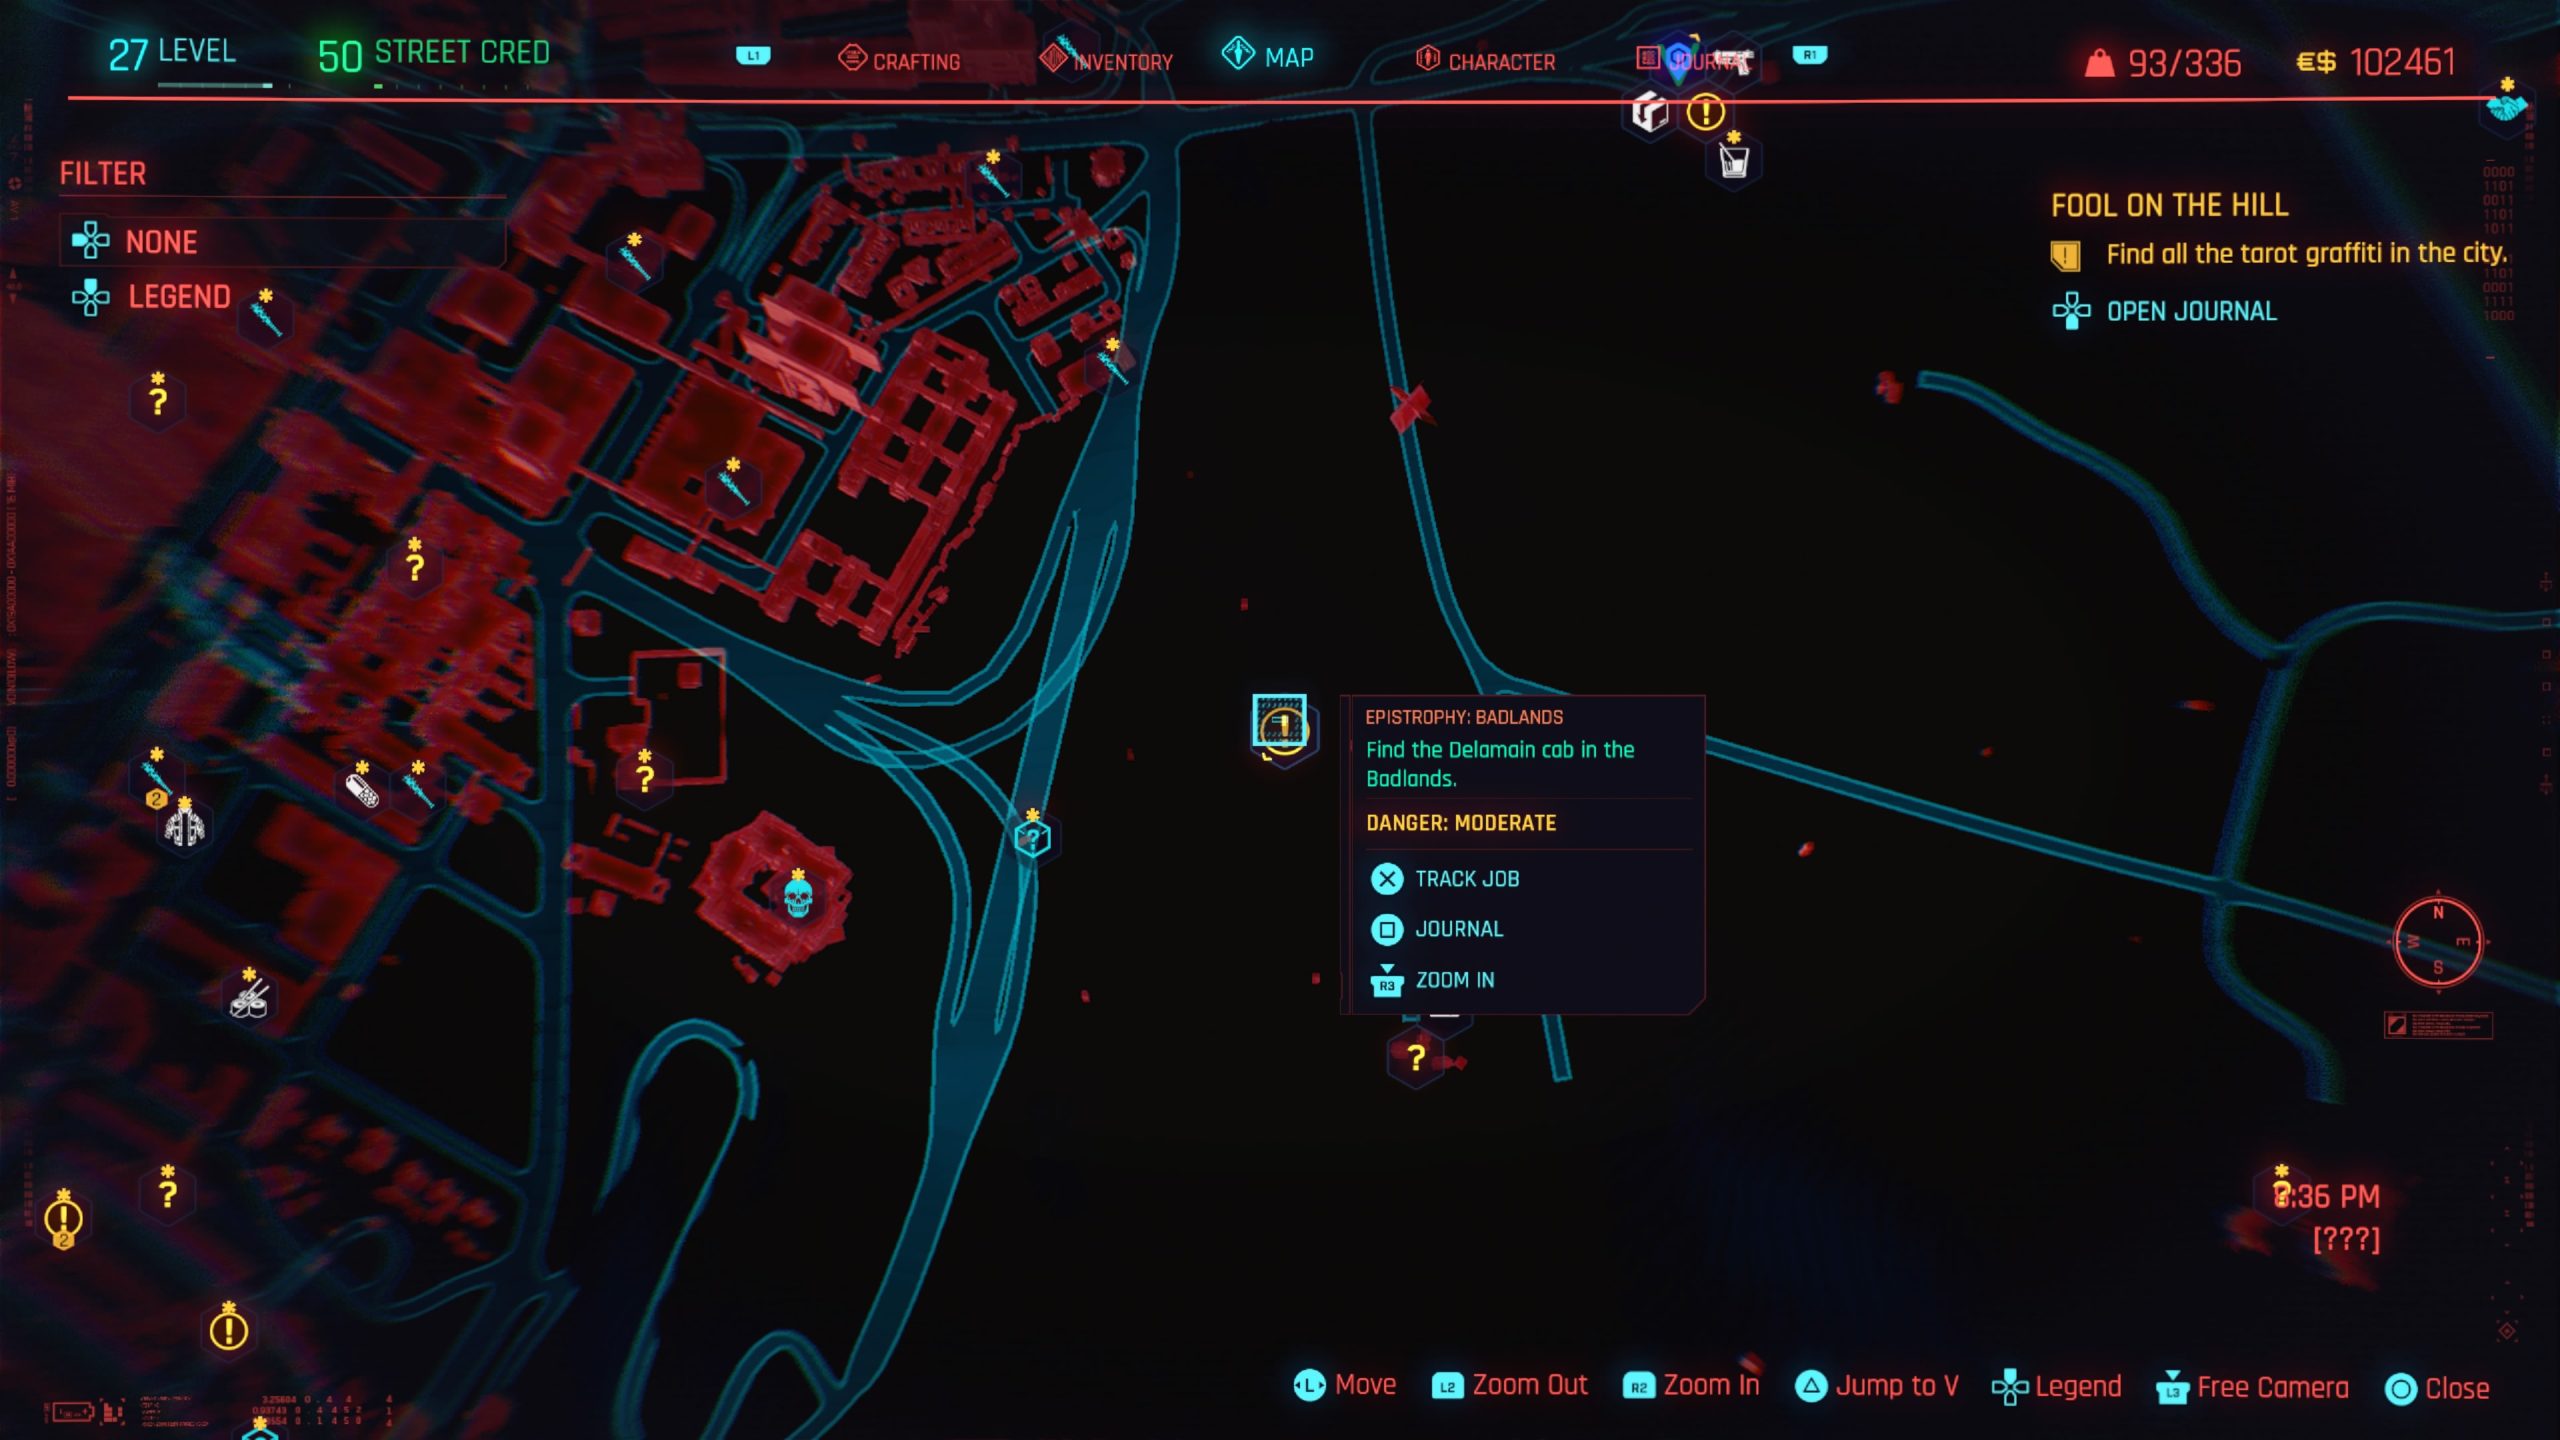
Epistrophy: Badlands
Obtained: Automatically after accepting the job from Delamain
Objective: Find the Delamain cab
Head to the objective west of the Medeski Fuel Station fast travel point to find the cab in a landfill. When you approach the cab will tell you to get in. Go ahead and hop in then begin speaking with it. Afterwards, exit the cab to receive a call from Delamain, which will complete the job.
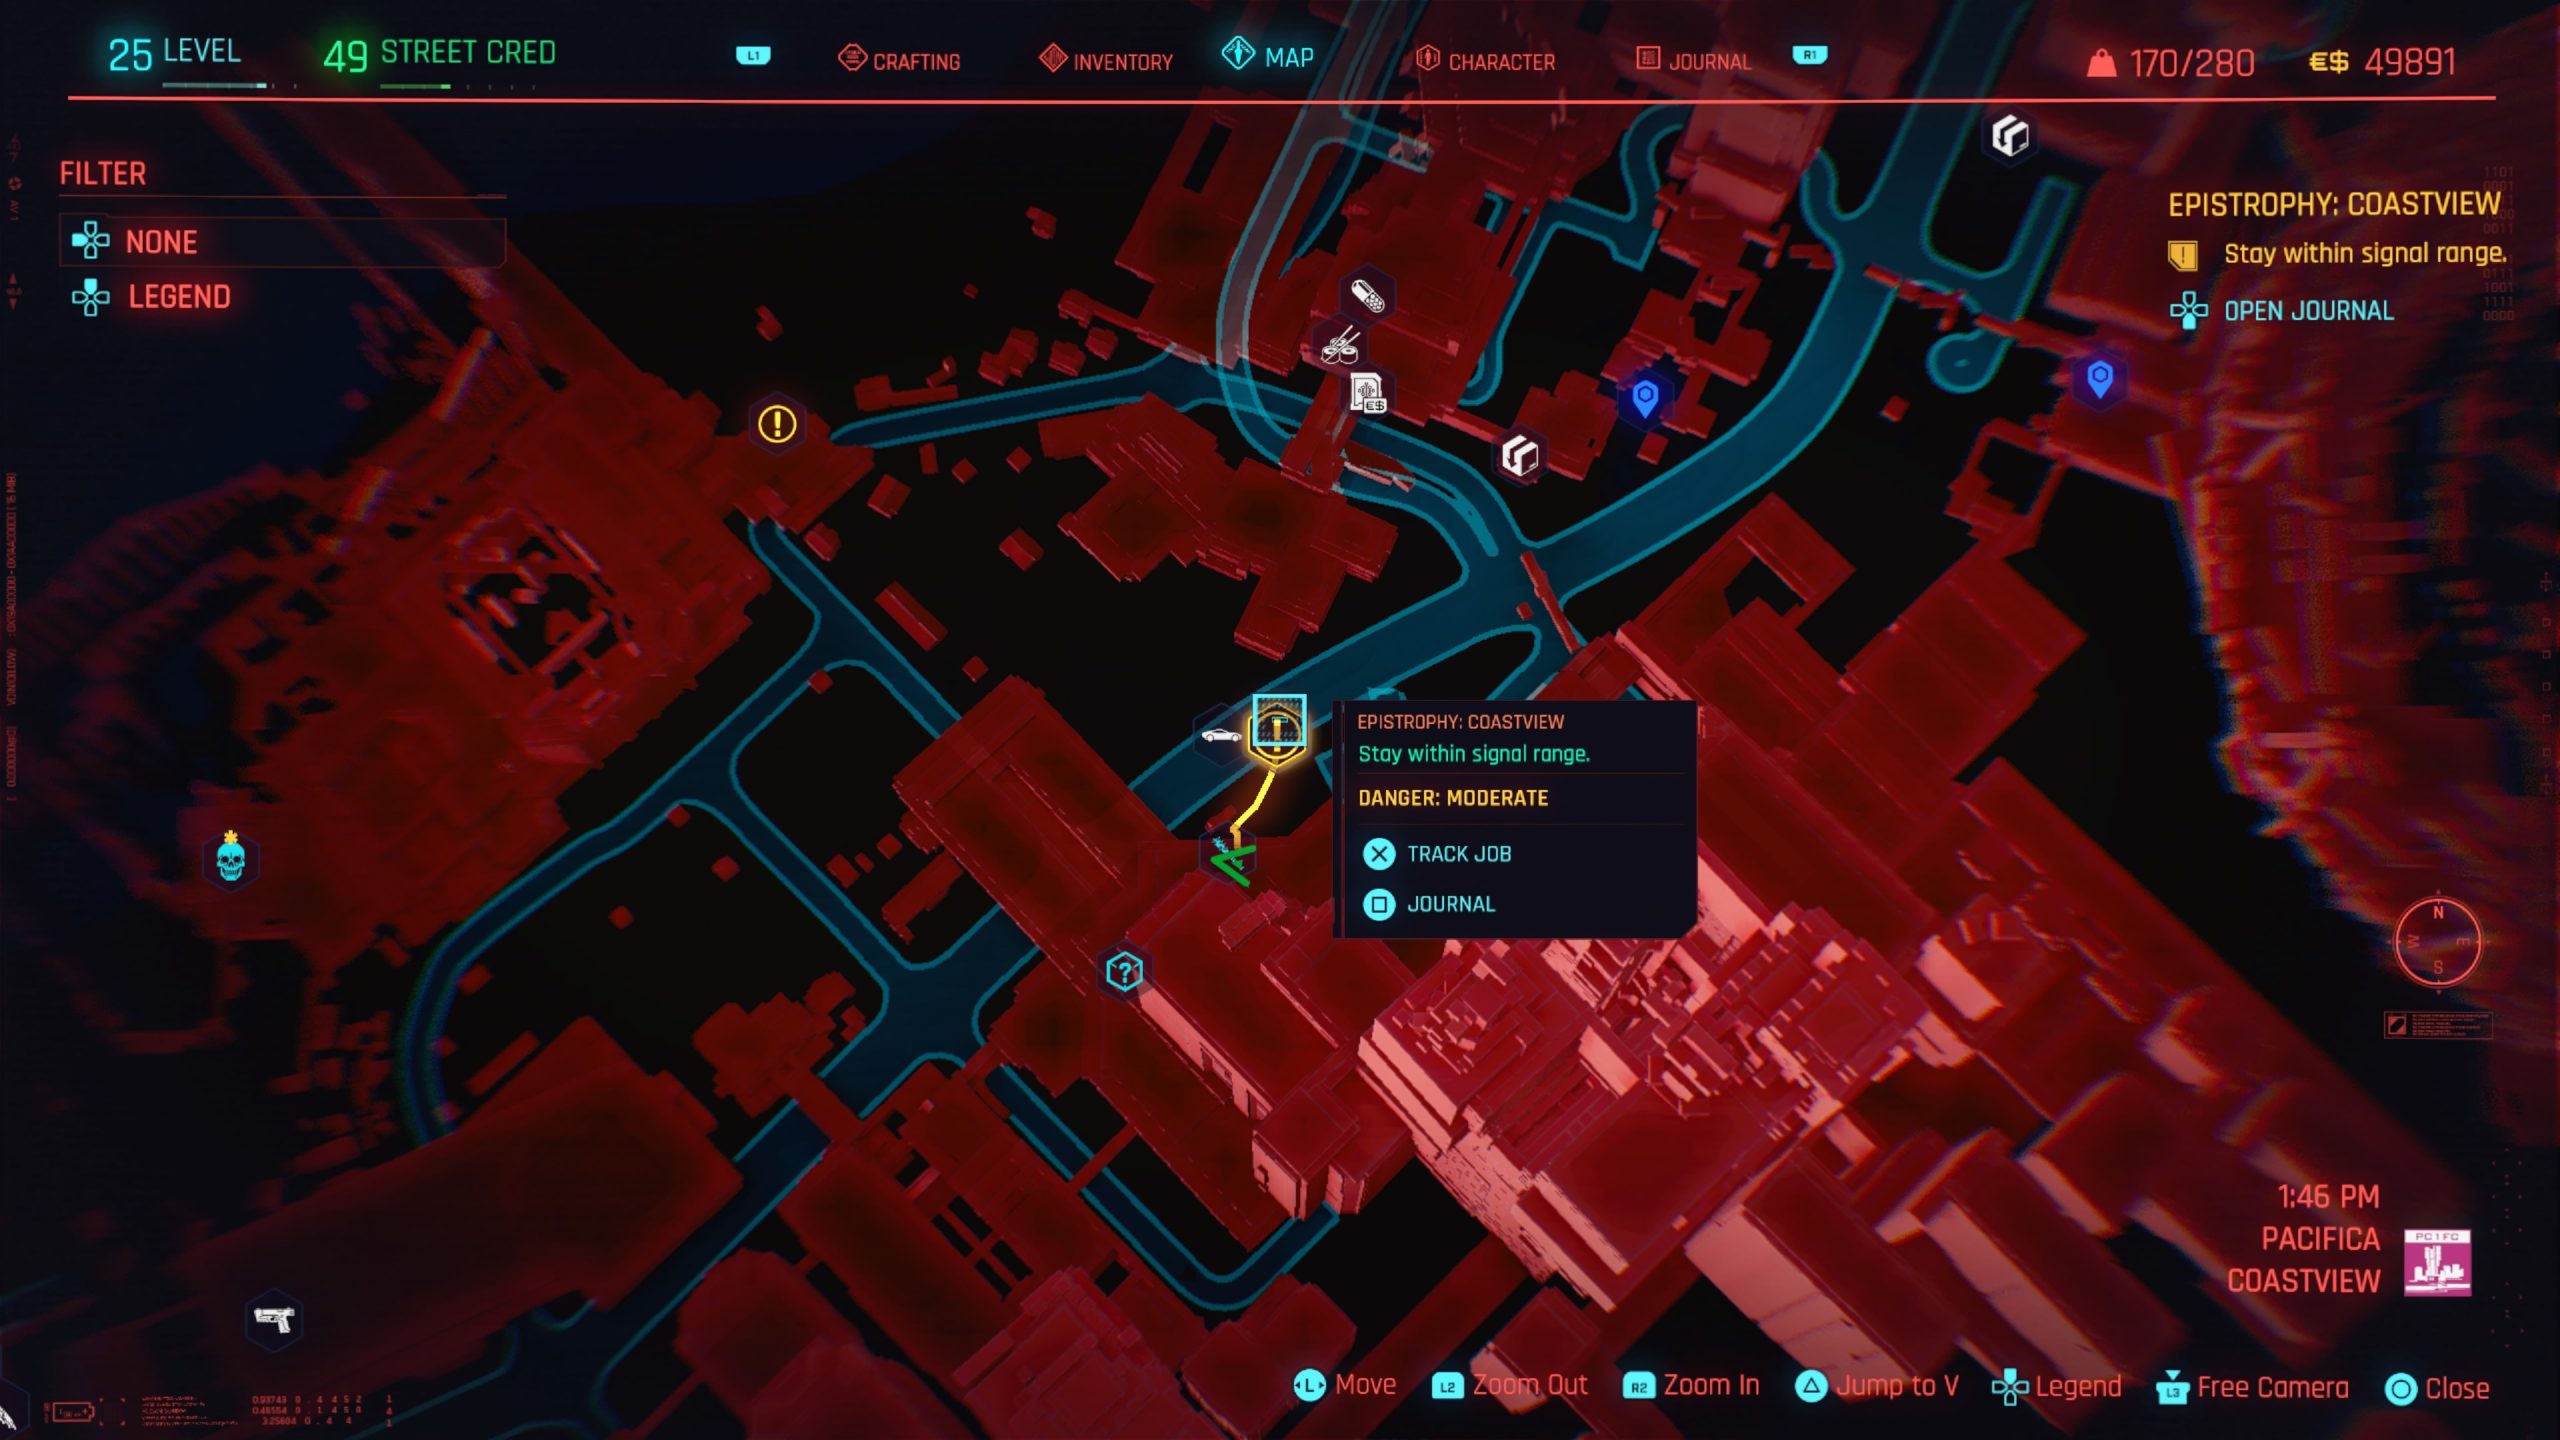
Epistrophy: Coastview
Obtained: Automatically after accepting the job from Delamain
Objective: Find the Delamain cab
Approach the cab circling Pacifica – Coastview to receive a call from it. Continue following the cab at a close distance until it stops under a building. Shortly after, the cab will tell you that it has a surprise for you and you’ll be attacked by enemies. Eliminate them then approach the cab and speak with it. Afterwards, you’ll receive a call from Delamain and the job will complete.
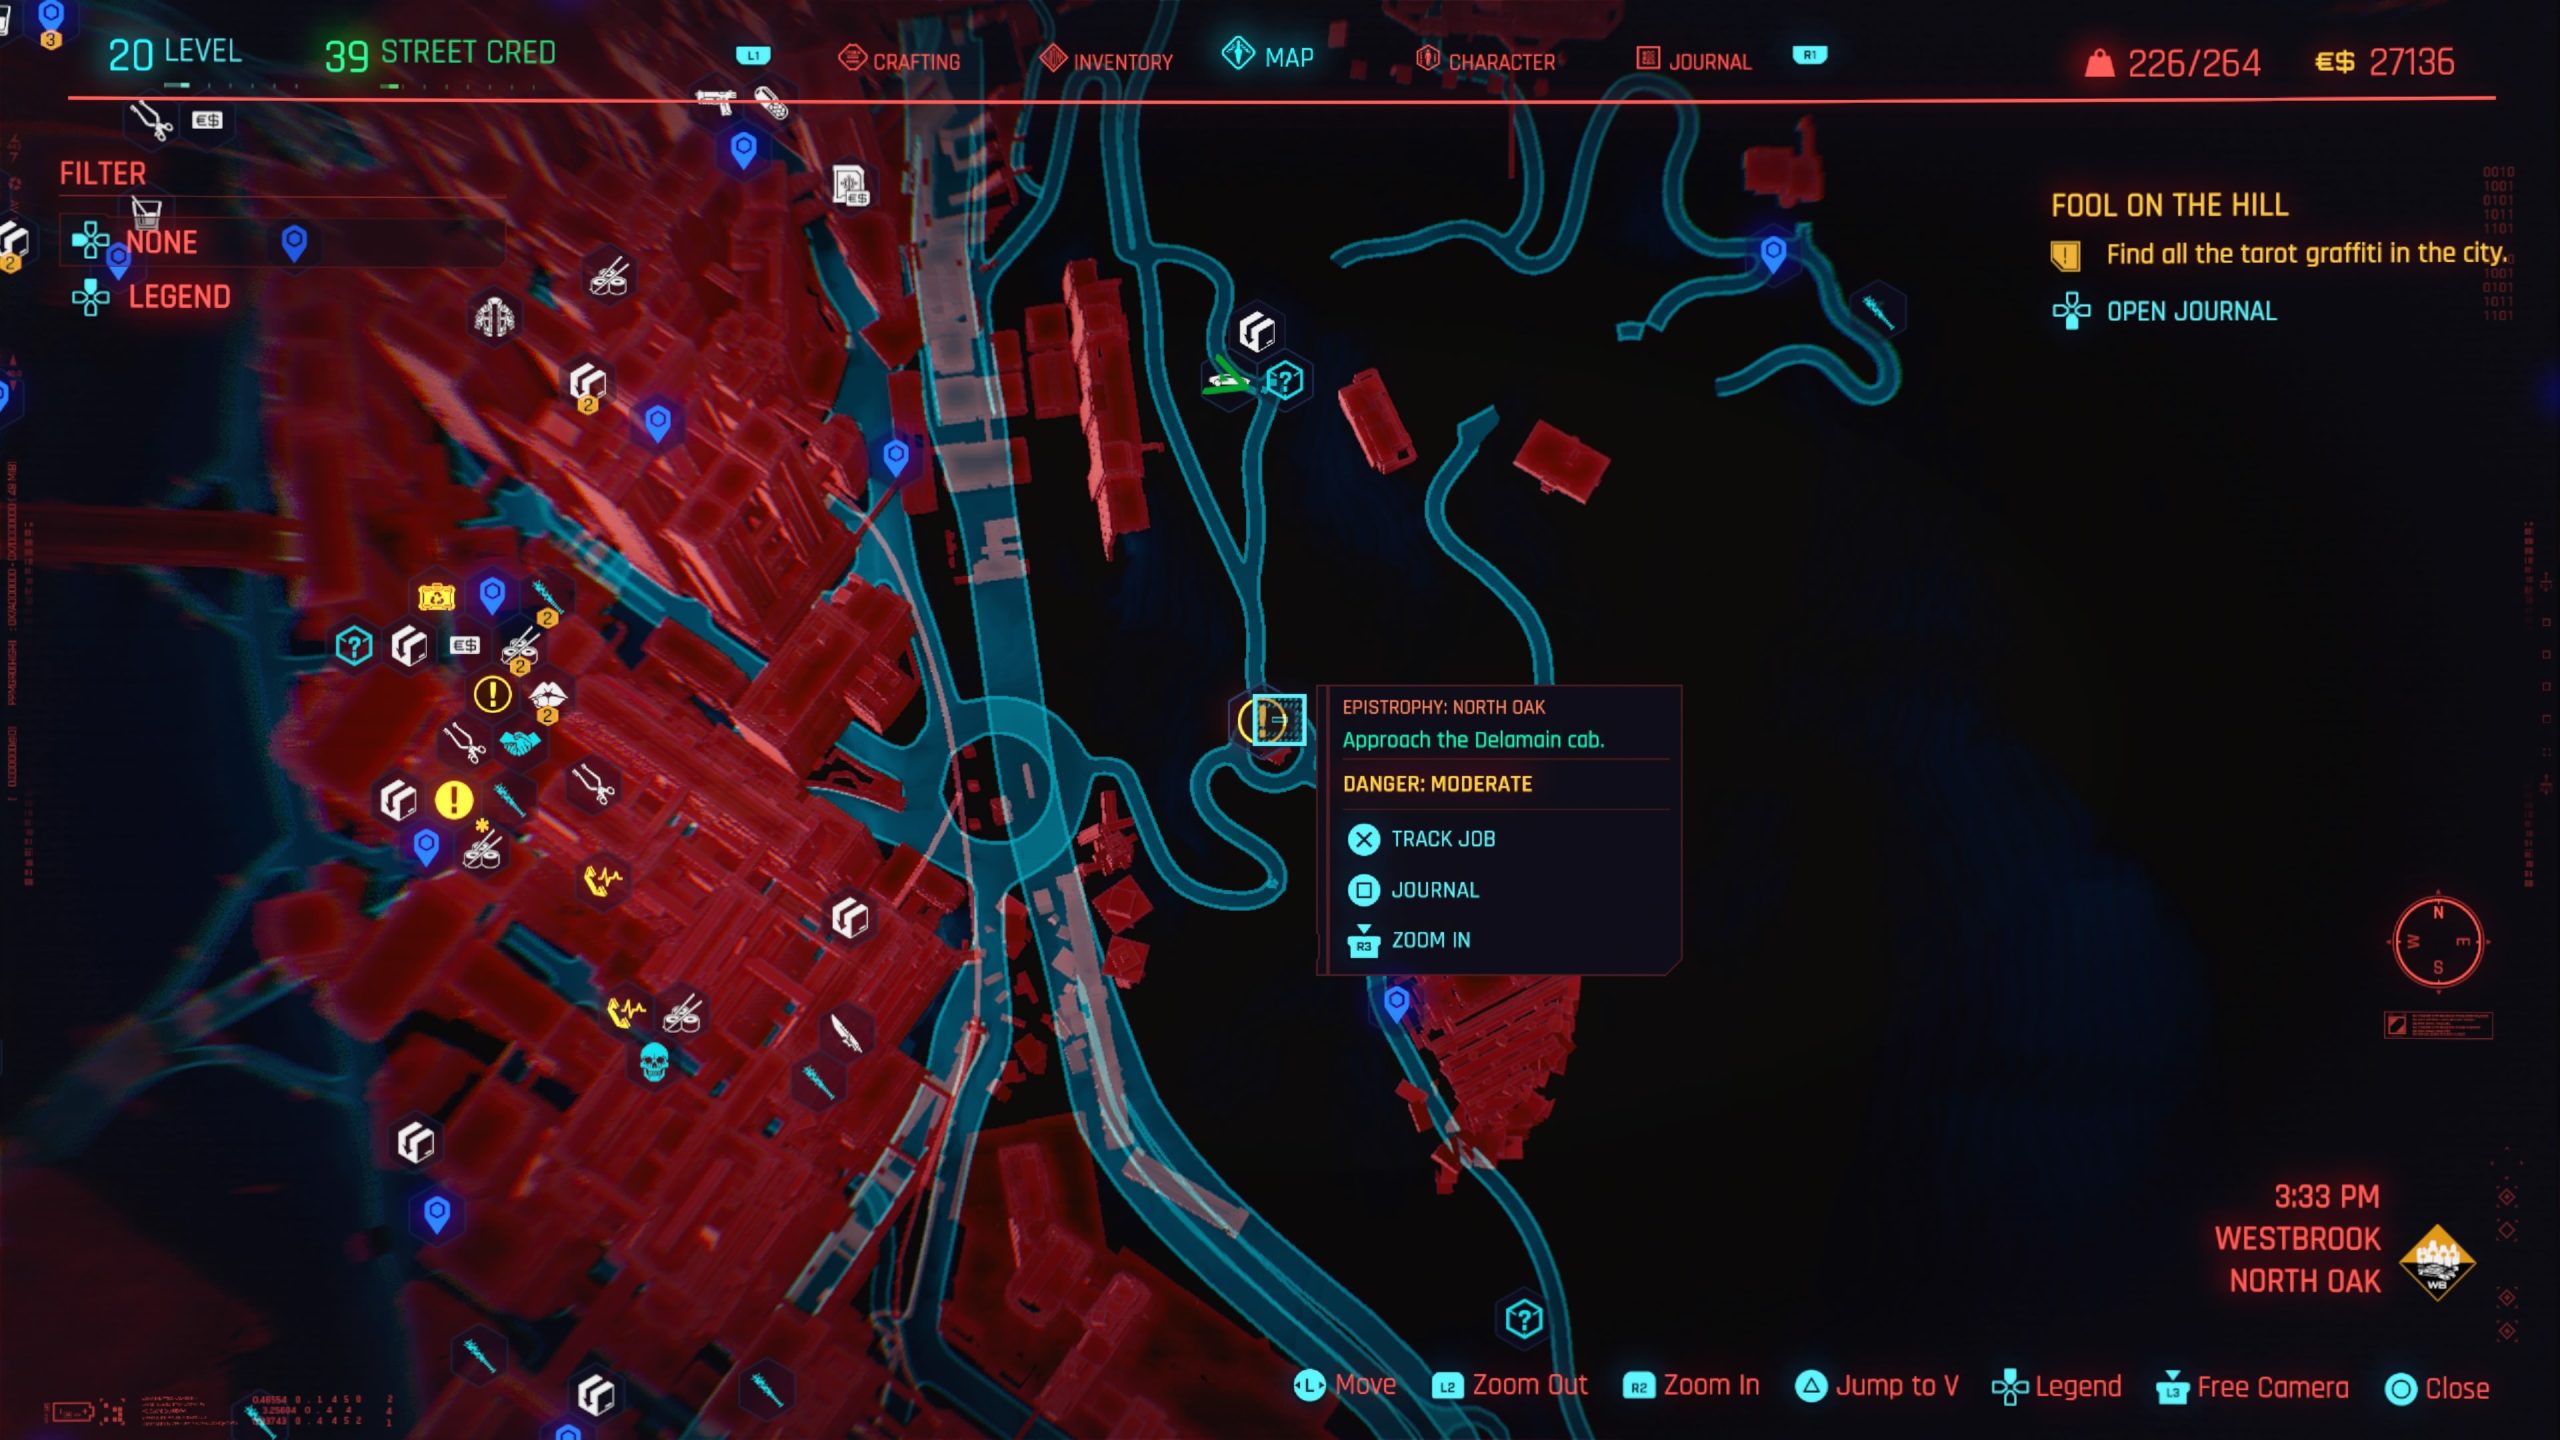
Epistrophy: North Oak
Obtained: Automatically after accepting the job from Delamain
Objective: Find the Delamain cab
Travel to Westbrook – North Oak and head for the roundabout north of the Columbarium fast travel point to locate the cab. As you get near, it will call you. Keep close to the cab then enter the driver’s seat when your able. Drive it back to the Delamain HQ (slowly) then speak with Del to complete the job.
Epistrophy: Northside
Obtained: Automatically after accepting the job from Delamain
Objective: Find the Delamain cab
Travel to the east part of Watson – Northside near the Longshore North fast travel point to start your search. Head across the street (southwest) toward the objective to enter a search area. Enter the storage unit lot to your left. You will find the rogue cab here. As you approach it, it will drive off. Give chase to the car until it stops. Del will call you and the job will complete.
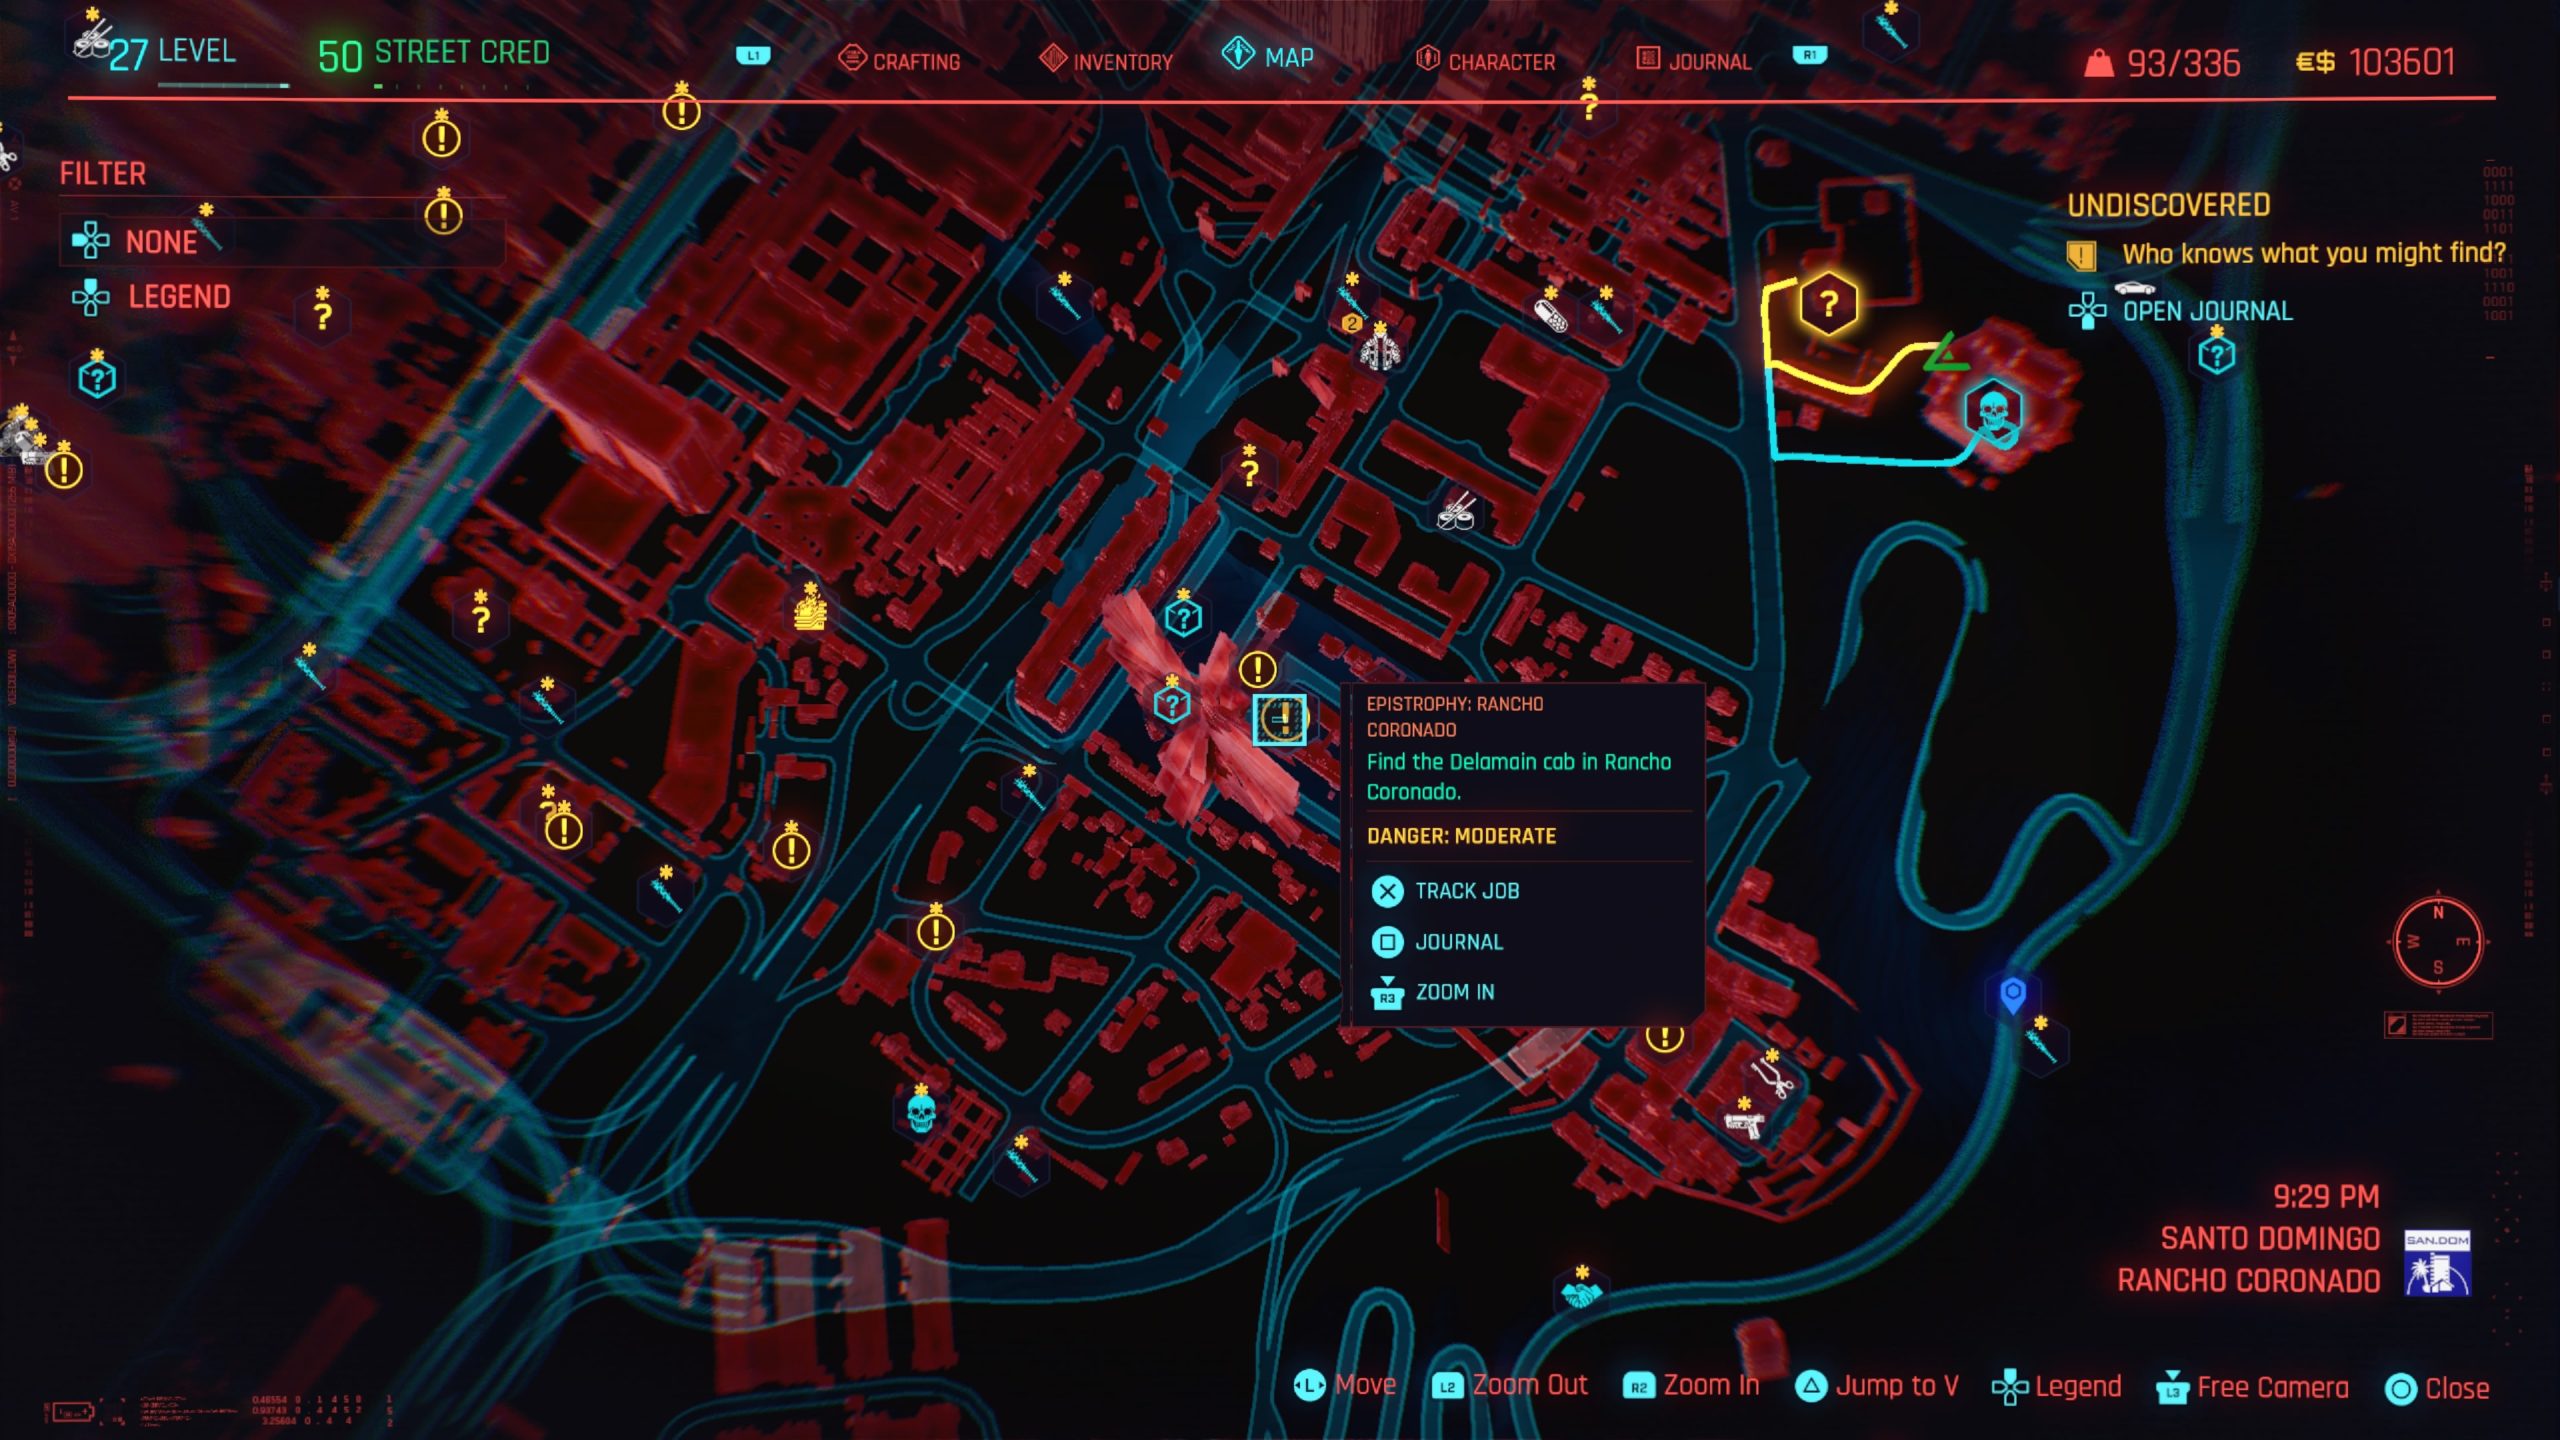
Epistrophy: Rancho Coronado
Obtained: Automatically after accepting the job from Delamain
Objective: Find the Delamain cab
Travel to the southern part of Santo Domingo – Rancho Coronado to find the cab driving erratically south of the Kendal Park fast travel point. Approach the cab and stay within range as it talks to you. You’ll agree to destroy 8 flamingos, so begin your slaughter. After you smash all the flamingos, Delamain will call you to complete the job.
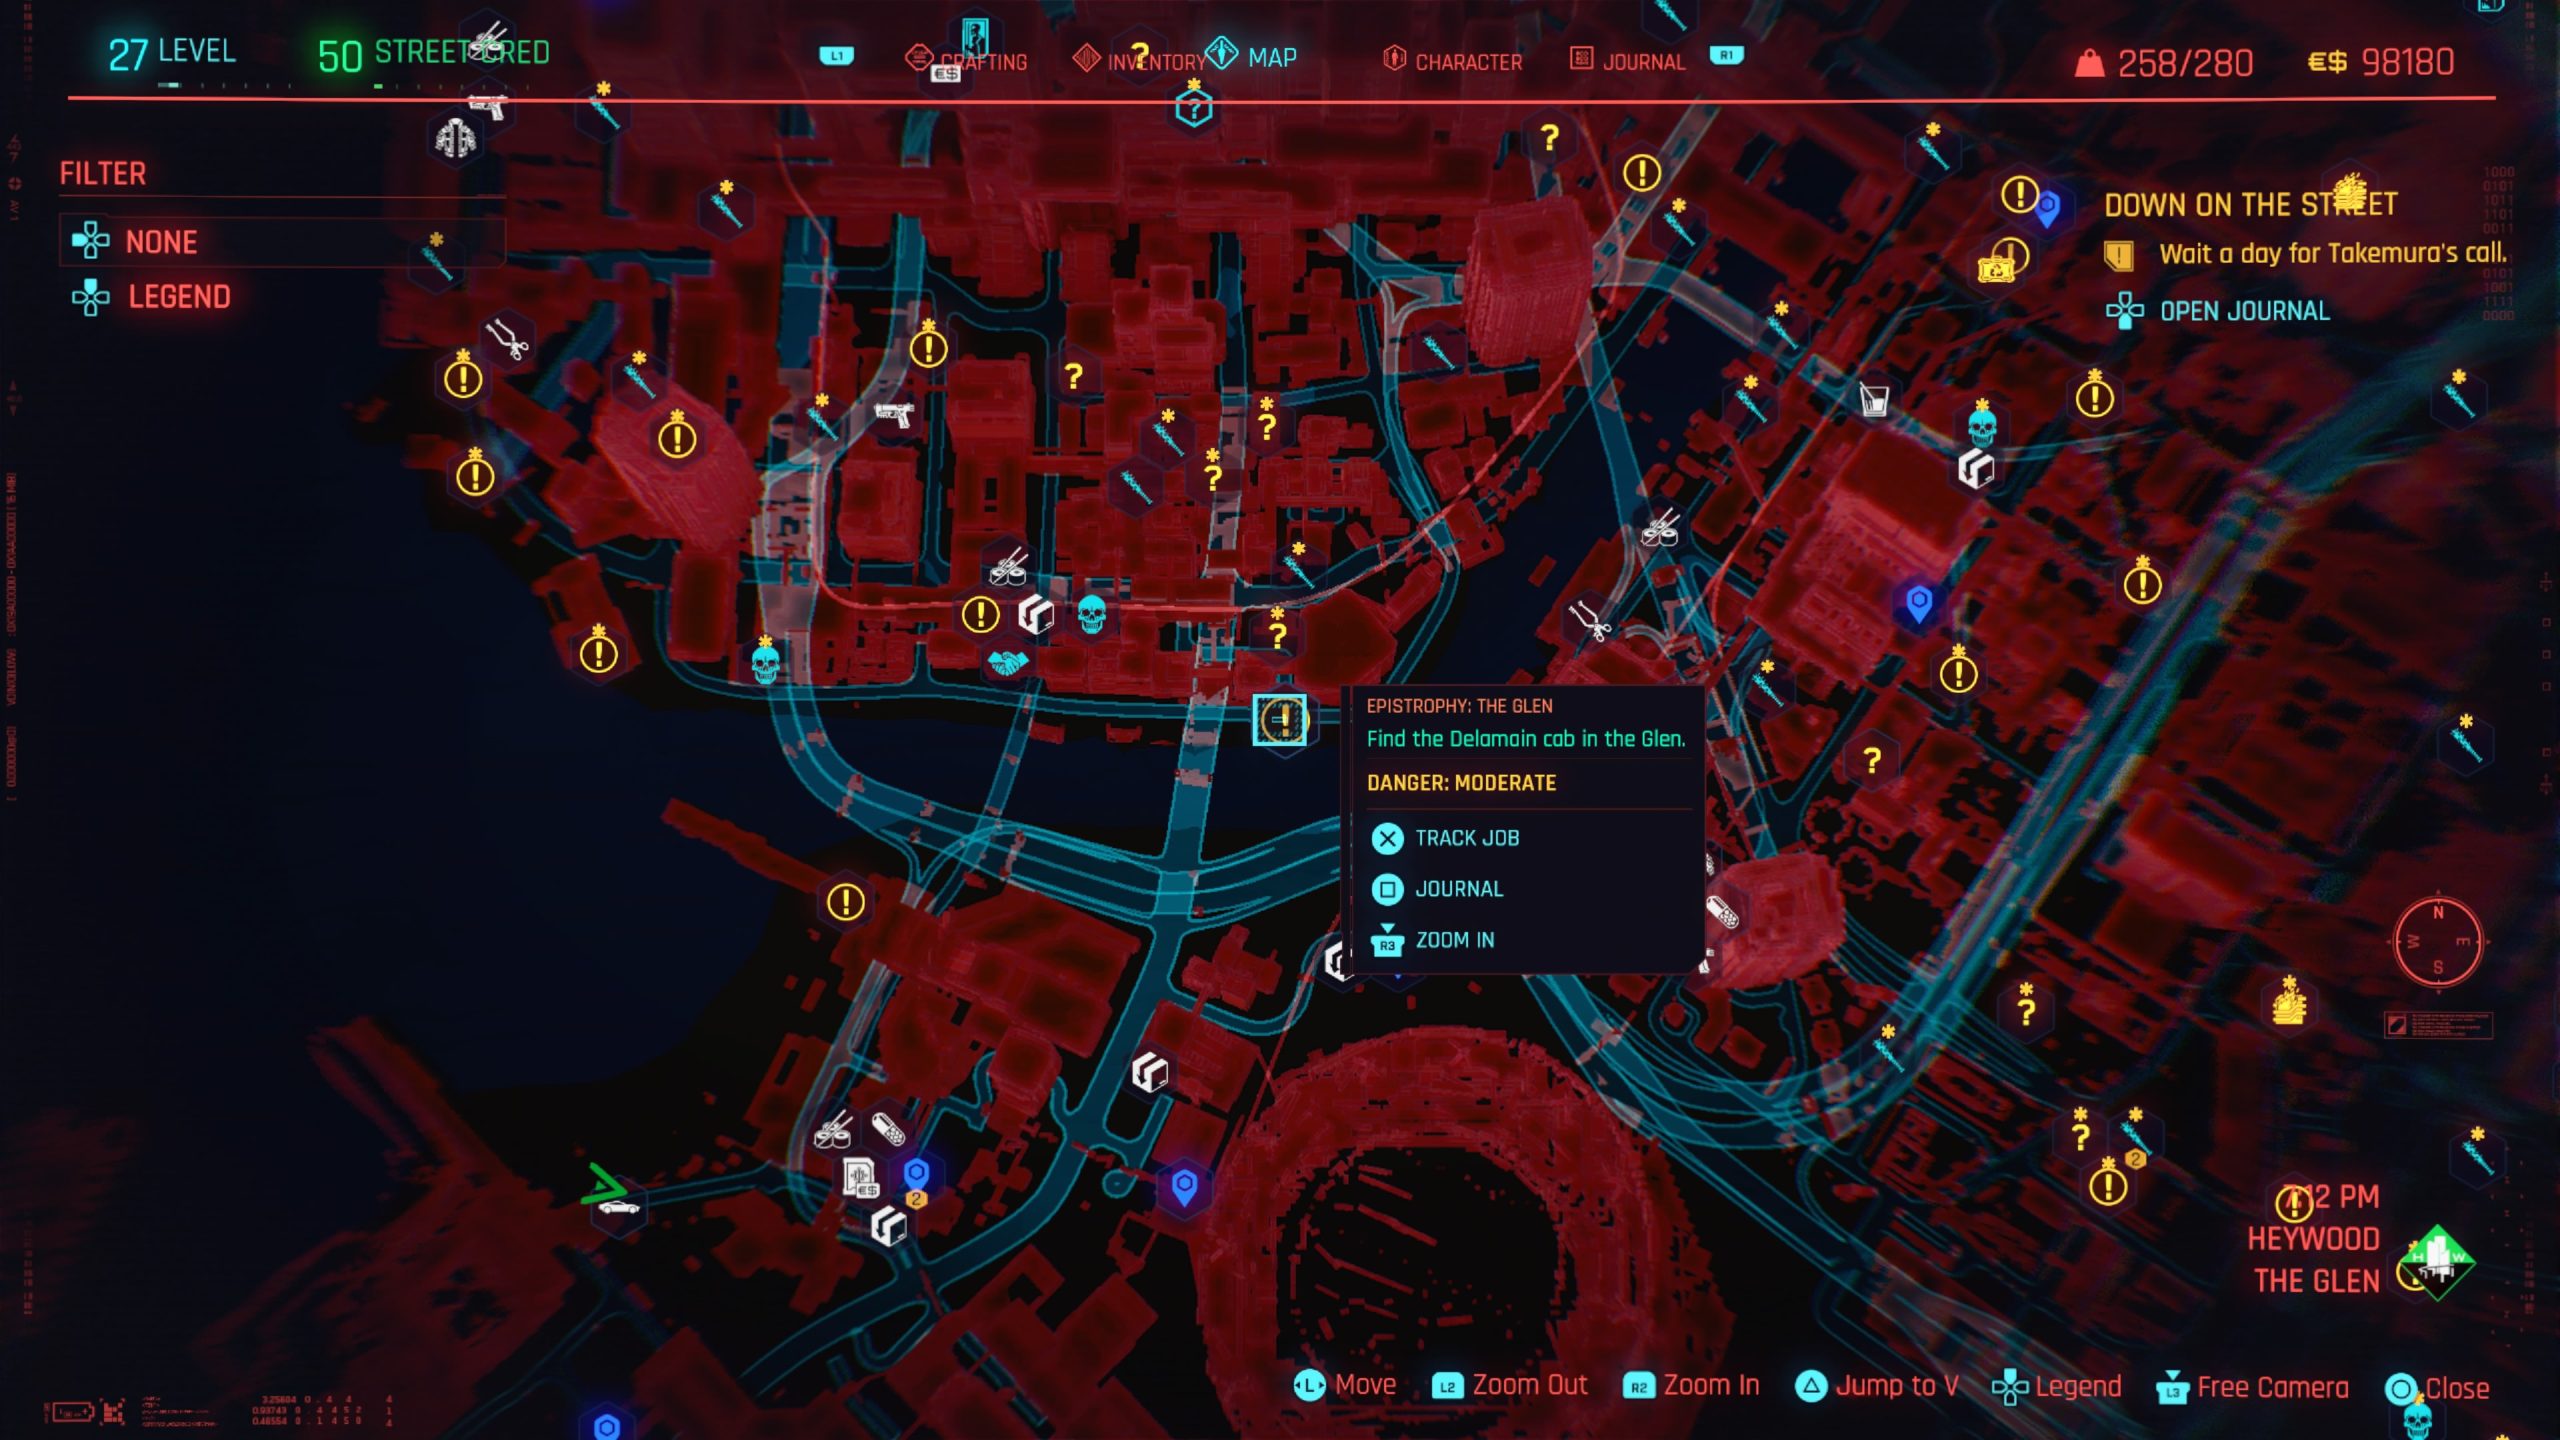
Epistrophy: The Glen
Obtained: Automatically after accepting the job from Delamain
Objective: Find the Delamain cab
Travel to the Metro: Glen South fast travel point, which is in southeastern Heywood – The Glen to find the parked cab. As you approach the cab, it’ll call you and you’ll need to talk it off the ledge. Afterwards, Del will call you and the job will complete.
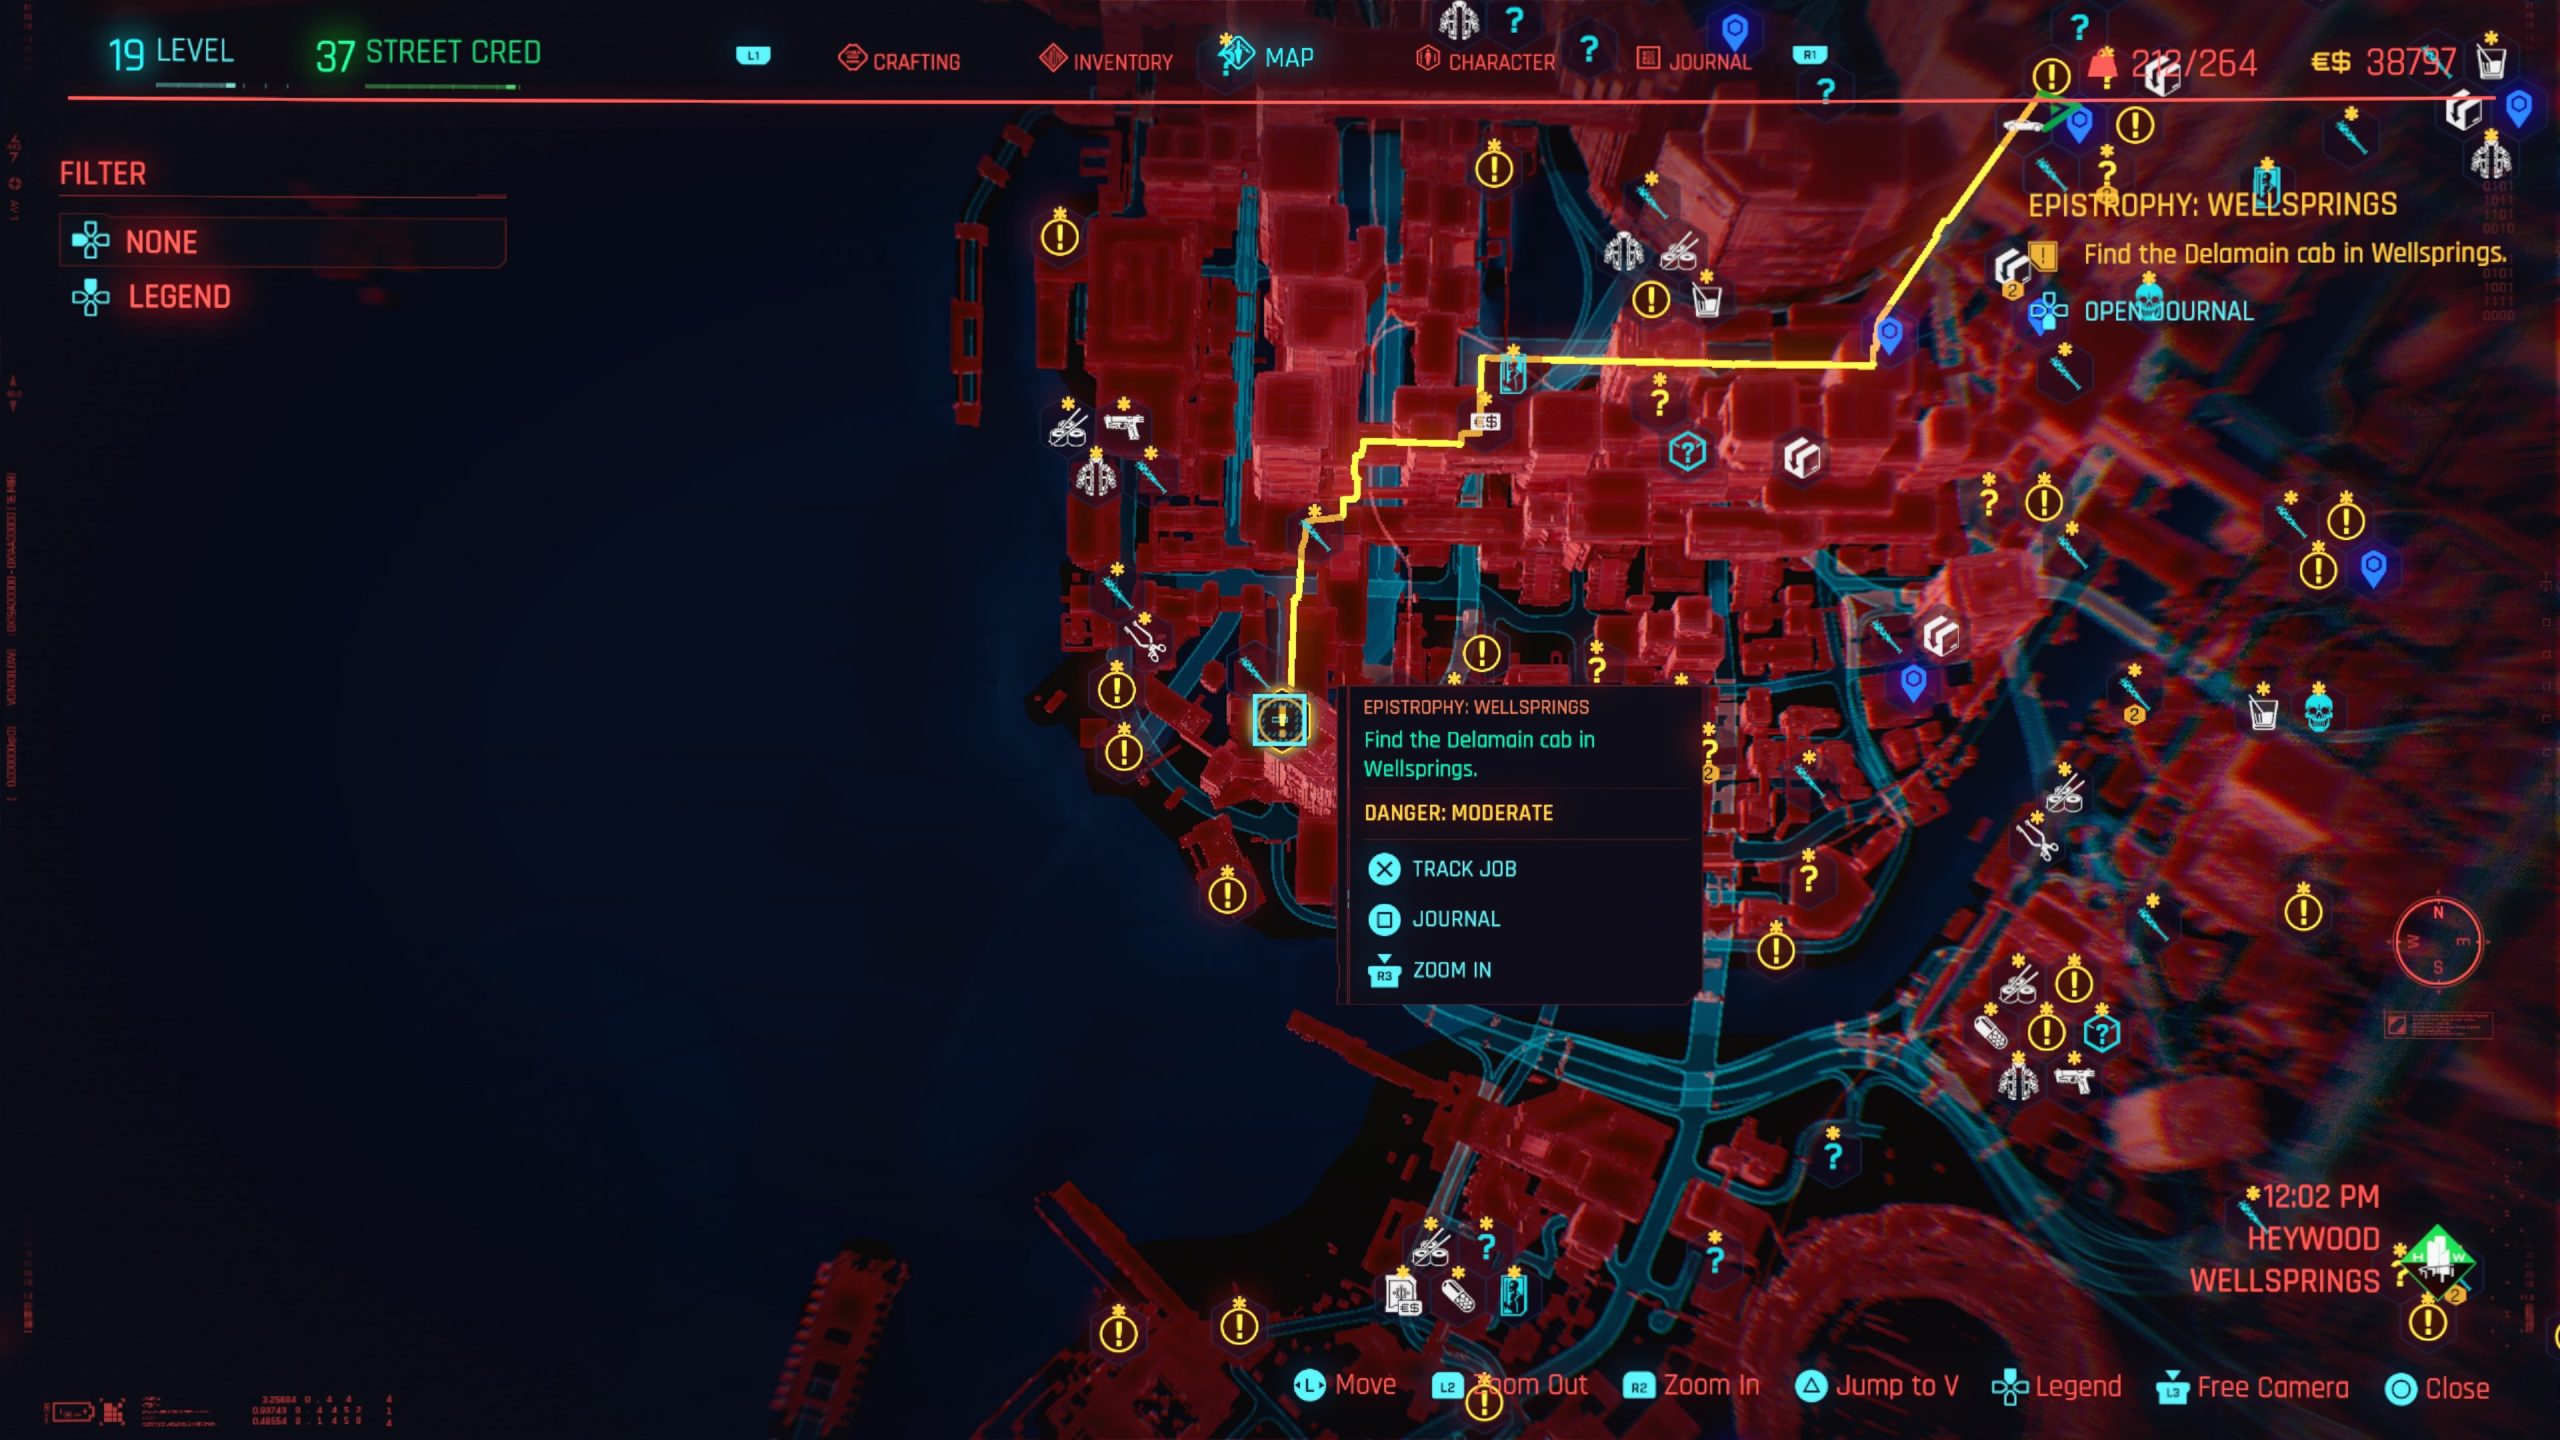
Epistrophy: Wellsprings
Obtained: Automatically after accepting the job from Delamain
Objective: Find the Delamain cab
Travel to the objective near the Megabuilding H2 fast travel point in Heywood – Wellsprings to find the cab driving around. As you approach the cab, it will call you then begin a fight with you. In order to make it return, you’ll need to beat it up. After it’s had enough, Delamain will call you and the job will complete.
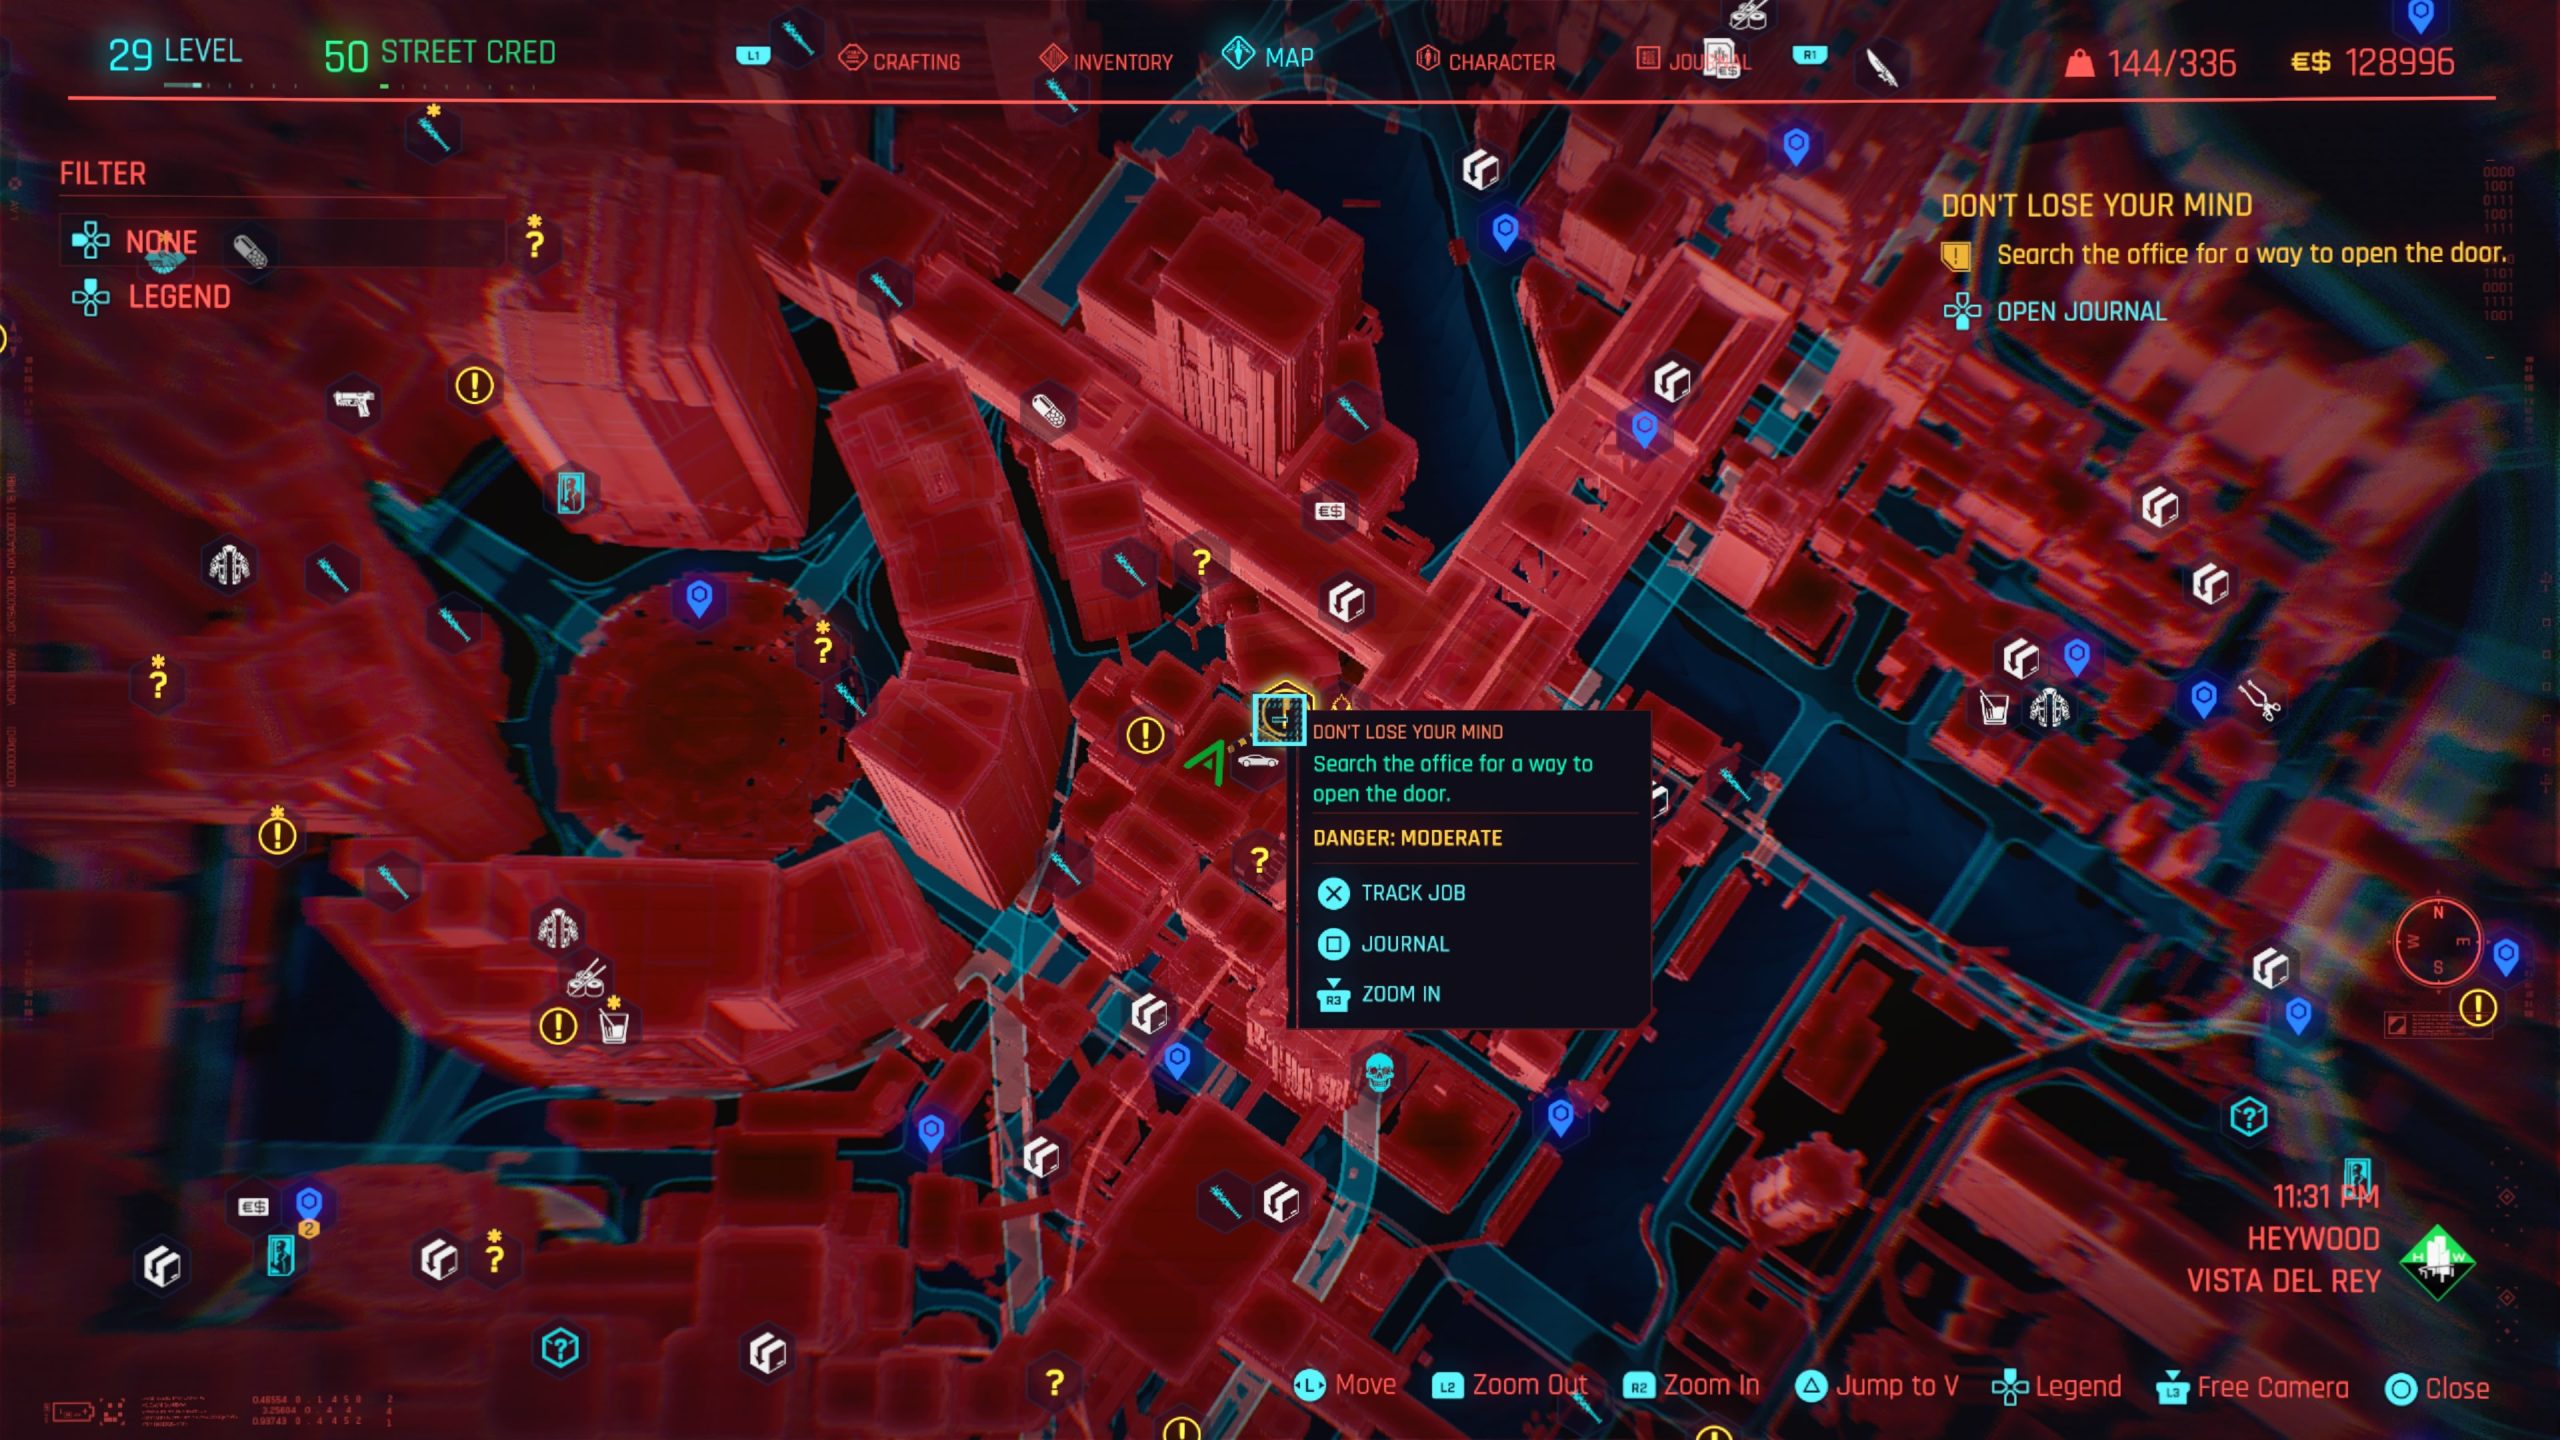
Don’t Lose Your Mind
Obtained: After completing Epistrophy, you’ll receive a call from Delamain when some time has passed.
Objective: Return to Delamain HQ
To enter Delamain HQ, you’ll need to head to the right of the main entrance. If you hug the building, you’ll find a door that you can open if you have a Technical Ability of 8. Alternatively, keep hugging the building to reach an alley behind it. At the dead end, use the containers to climb up on the roof then look for the exit hatch on the roof.
Once your inside the building, you’ll either be in the room with a bunch of desks or the bathroom next to this room. In the room with a bunch of desks, search for the computer against the wall next to some filing cabinets. If you read the messages on the computer, it’ll say that the director’s password is 1234. Head into the small room to the left of the computer (when facing the computer) to find another computer. Input the password onto the computer and use the local network to open the doors. Exit the office and take a left. Head through the double doors. Follow the path to pass through another set of double doors. Once inside the next area, you’ll see that the floor is electric. Look to your left to find a door then enter through it. Climb up onto the car moving up and down then jump onto the ledge between the garage door and TV screen near the door you just entered through. Jump onto the metal walkway but don’t head through the door straight ahead. Instead look right to find a small rectangular window. Climb through this window then drop down onto the stairs below. Head up the stairs then cross the walkway. Enter through the door on the left just after the walkway to enter a room. In this room look for a hatch in the floor on the right and descend. You have 2 options to now cross the room.
First, look on the floor behind the car to find an exit hatch that requires a Body Value of 5 or Technical Ability of 5 to open. If you open the hatch, head through the crawl space. When you take a left, you’ll see a car being worked on straight ahead. Don’t go to that car. Instead take a left until you find another car being worked on. Climb up through a hatch underneath the car.
or
Alternatively, you can push the car into the electric then jump onto it. Jump straight across to the other side where the car is being worked on. Climb up onto that car then drop down behind it.
Look to your right to find a ladder. Climb up it then follow the walkway taking a left when it reaches a T. Jump across the gap in the walkway then continue straight ahead. You can either force the door open at the end of the walkway using a Body Value of 10. Once through the door, head forward then slightly right to find a glass ceiling with a hole in it.
or
Alternatively, just before the door you can force open, climb up on the right to reach another walkway. Follow it across, crouching as necessary, then drop down and head through the door on the right. Take the stairs down then head into the room with the chaotic cars. On the far side of the room, take the stairs up. Instead of entering through the door, jump over the rail to the right to climb on top of the pipes. Take a left behind the room then climb up. Drop down onto the ledge below then crouch through the opening on the right to reach a larger area with a glass ceiling.
Drop down through the space in the glass ceiling to enter the control room then head into the room with Delamain’s core. Speak with Johnny. You will now be presented with 3 choices: destroy the core to liberate the divergent Delamains (1 choice) or reset the core to restore the original Delamain (2 choices).
To destroy the core, shoot it after speaking with Johnny instead of selecting the two options it gives you. Johnny will be extremely happy. All the divergent cars you collected will escape and Delamain will no longer exist. The car that remains will have a nice personality and is the one you originally met when you used the Excelsior service with Jackie.
or
In order to force the personalities to merge with Delamain, you’ll need an Intelligence Value of 10. Johnny will be mildly content. You’ll receive Delamain’s first child, which will be the personality of the car.
or
If you reset Delamain’s core and preserve its integrity, Johnny won’t be happy at all. Delamain will have completely reset meaning he doesn’t remember you/your relationship at all.
Leave through a door on the left side near the entrance. No matter which option you choose, you’ll receive the Delamain No. 21 as a reward.
Welcome to our Cyberpunk 2077 guides and walkthroughs!
Phantom Liberty
How to Start Cyberpunk 2077 Phantom Liberty
In order to start the Phantom Liberty DLC for Cyberpunk 2077, you’ll first need to complete the Transmission main job in the base game dealing with the Voodoo Boys in Pacific. Once that’s done, Songbird will call V asking for help on a job.
This site uses cookies. By continuing to use this website, you are giving consent to cookies being used. For more information on cookies, view our Privacy Policy.OkPrivacy Policy