Welcome to NGB and our Borderlands 3 walkthrough on the Head Case side mission. Here you’ll find everything you’ll need to breeze through this mission!
How to Begin Head Case
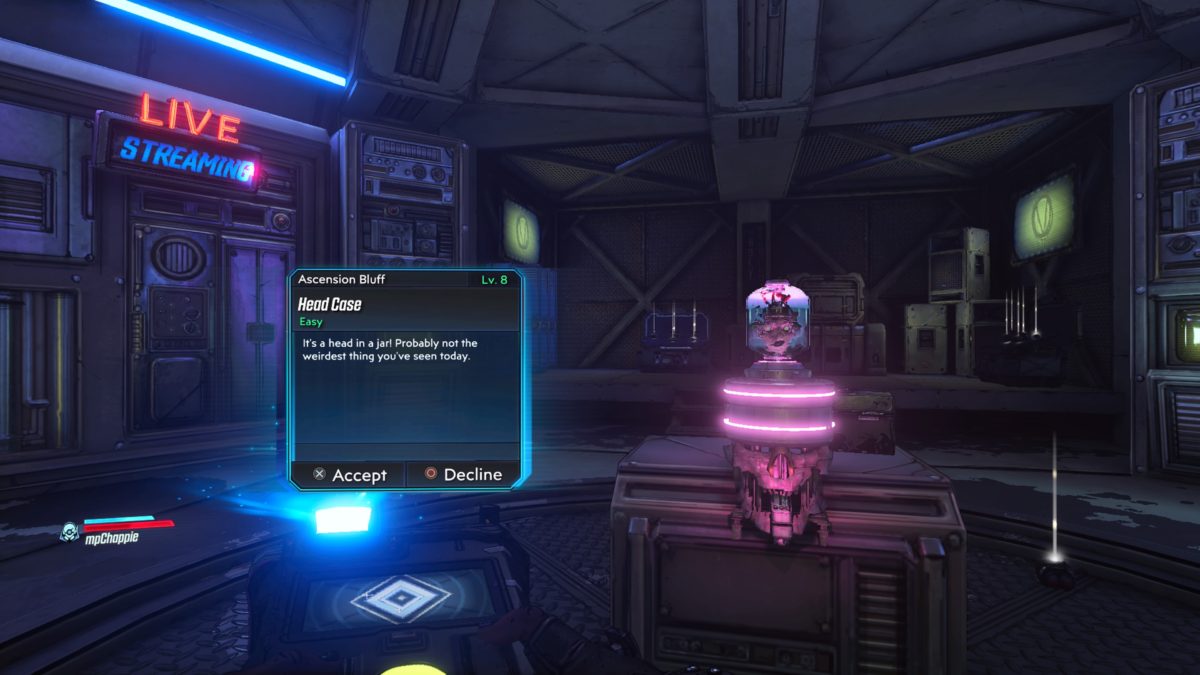
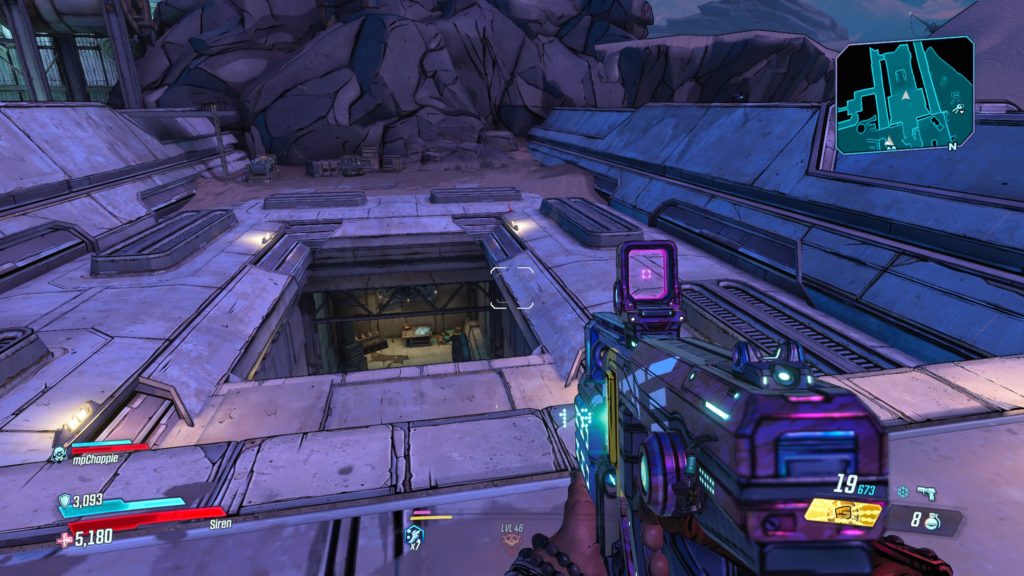
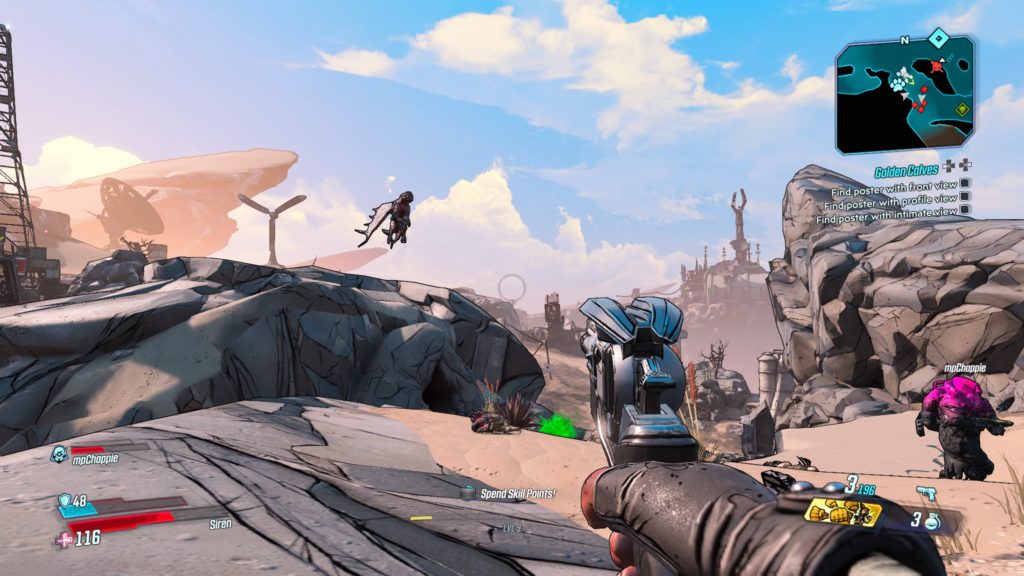
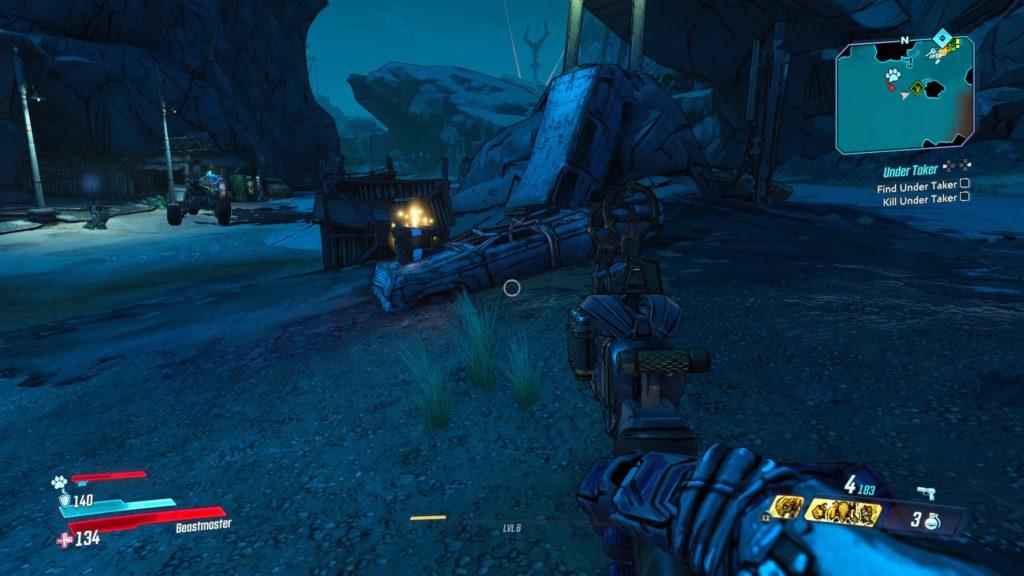
To begin the Head Case side mission in Borderlands 3, you’ll need to inspect the head in a jar towards the end of the Holy Broadcast Center at Ascension Bluff in Pandora.
After starting the Borderlands 3 Head Case side mission, pick up the jar containing a head.
Plug in Head
Exit the Holy Broadcast Center and make your way back to the entrance of the Path of Sacrifice to find a building. Enter the building and place the head on the console.
Enter Simulation
Activate the switch on the terminal to enter the simulation.
Collect Memory Fragments
Head back down the Path of Sacrifice towards the Holy Broadcast Center, collecting the fragments as you go.
In a box on the passenger side of the first car you come across
In a box on a couch next to three cars stacked on top of each other with Holy written on them
Enter the Holy Broadcast Center and take a left to enter a room with the fragments in a box on a table
Located in a box on a wooden table past all of the big speakers
Find Vic
Vic is located in the area just before the room you fought Mouthpiece in.
Kill Interrogator
Kill Vic’s interrogator.
Exit Simulation
Head back to the beginning of the Path of Sacrifice and use the console to exit the simulation.
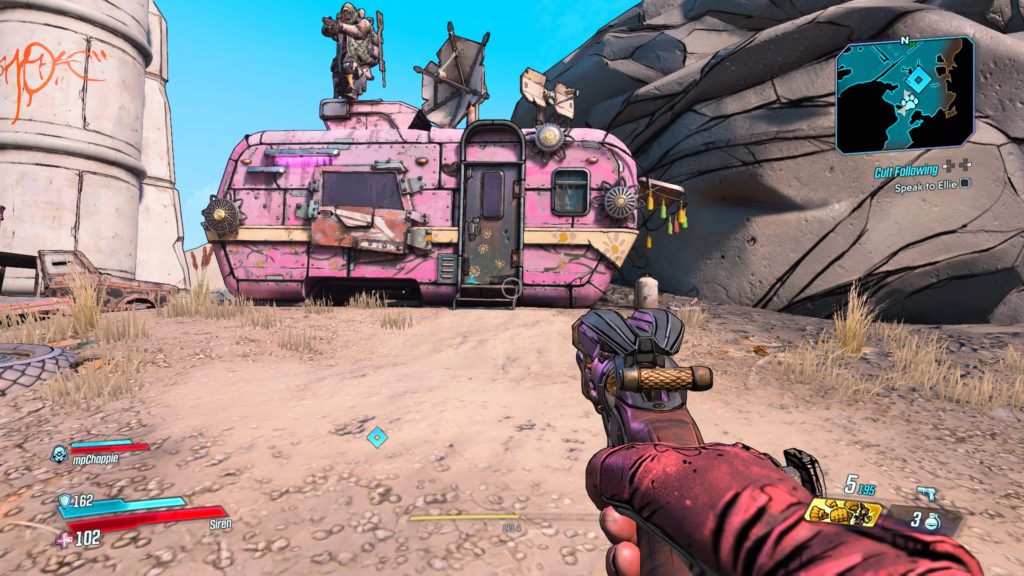
This log is located on Pandora in The Droughts at Ellie’s Garage. You can find it on the steps of her pink trailer located behind the garage.
Nightfall
This log is located on Pandora in the northern region of the Droughts west of the Ascension Bluff map transition. It can be found in a lone two-story structure with a samurai picture on the side of it near where theSkag Dog Days side mission takes place.
Blasphemy
This log is located on the northern side of the Super 87 Racetrack in the Droughts outside a lone shack overlooking a canyon.
Short Supply
This log is located in the room under the ship dock where the Biofuel Rig was parked.
Brimming
This log is located in a bandit settlement on a wooden crate next to a couch and building on the second level reachable by a ladder. The settlement is directly north of the Droughts – Highway fast travel station. You fight/fought Mincemeat here as part of the Skag Dog Days side mission.
Worth the Wait
This log is located in Raiders’ Drydock (where Sanctuary was docked). It is on the south side in a workroom on a table. The workroom is above where Ellie was working at during the story. See the map below for the exact location.
Ascension Bluff
Mouthpiece’s Pitch (Part 3)
This log is located in the room overlooking the area where you fight Mouthpiece at the Holy Broadcast Center in Ascension Bluff.
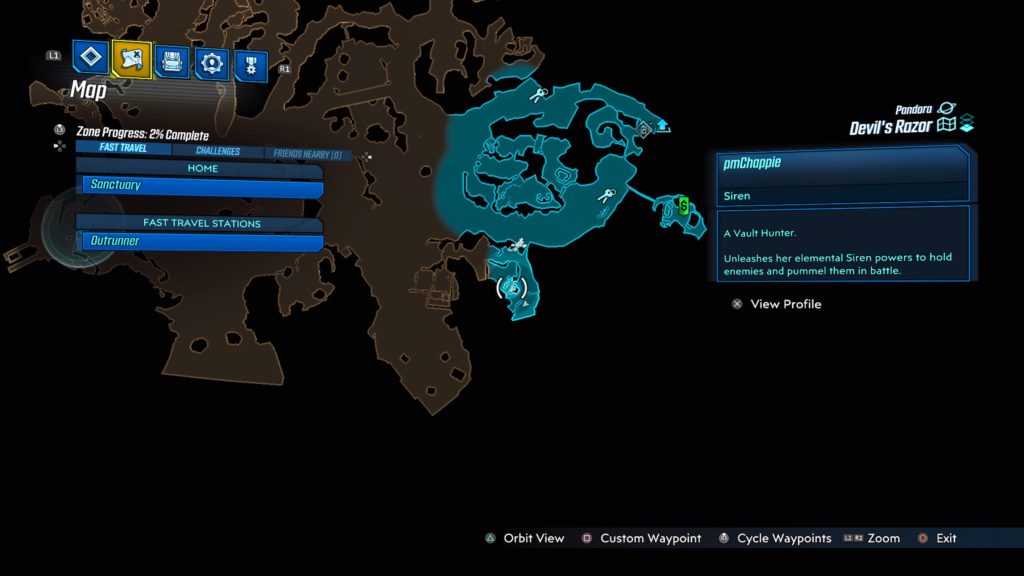
Devil’s Razor
Building a God-Queen (Part 1)
This log is located in a house at the southeastern part of the map. See the map below for the exact location.
RSVP (Part 1)
This log is located in the northern section of the map in Bollock’s Niche near the Bollock’s Niche Typhon Log laying on a table.
This log is located on a crate in a large barn with a silo next to it and barbed wire surrounding it in The Homestead. You will come her during the Homestead (Part 3) side mission. See the map below for the exact location.
Entwined
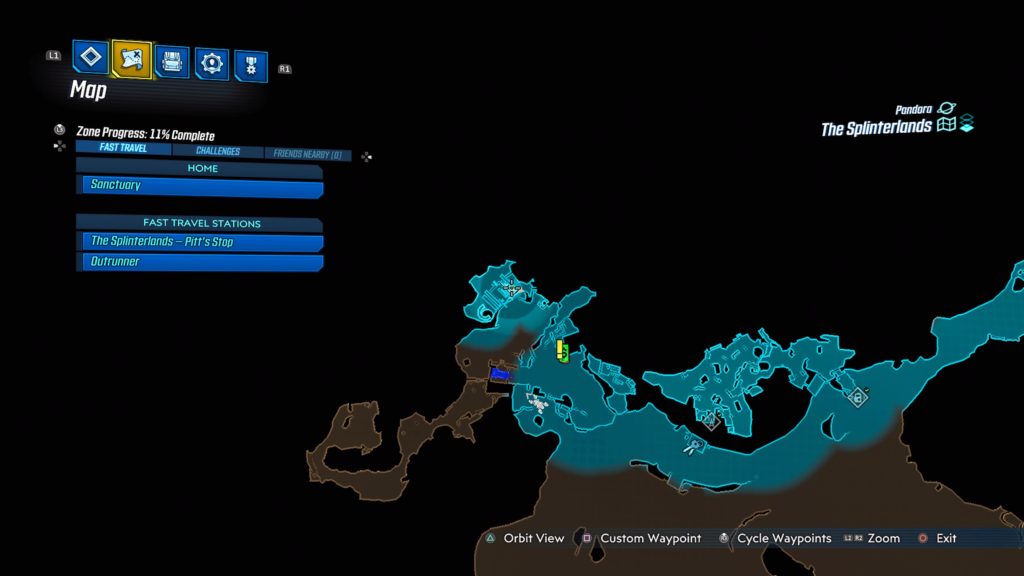
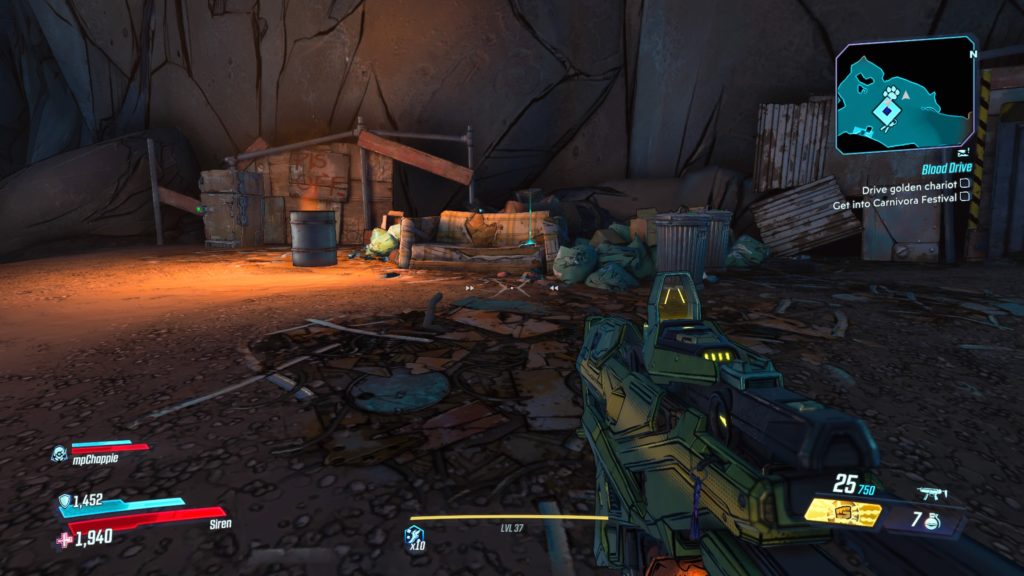
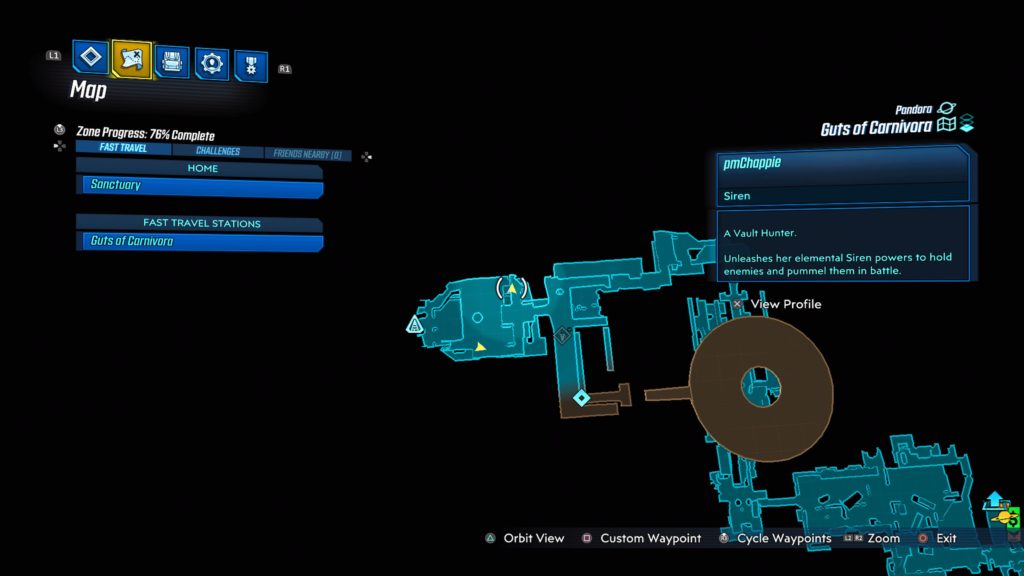
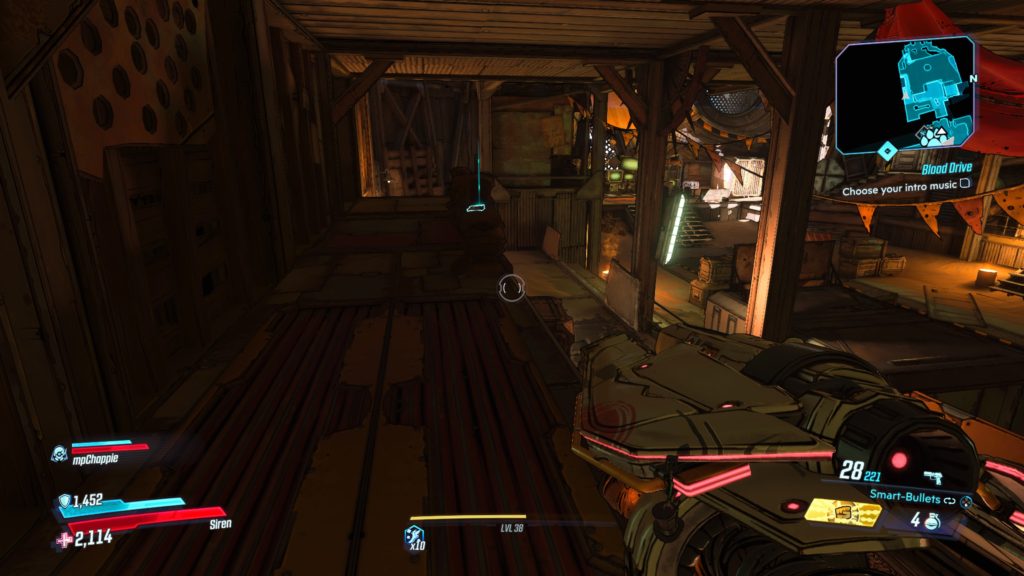
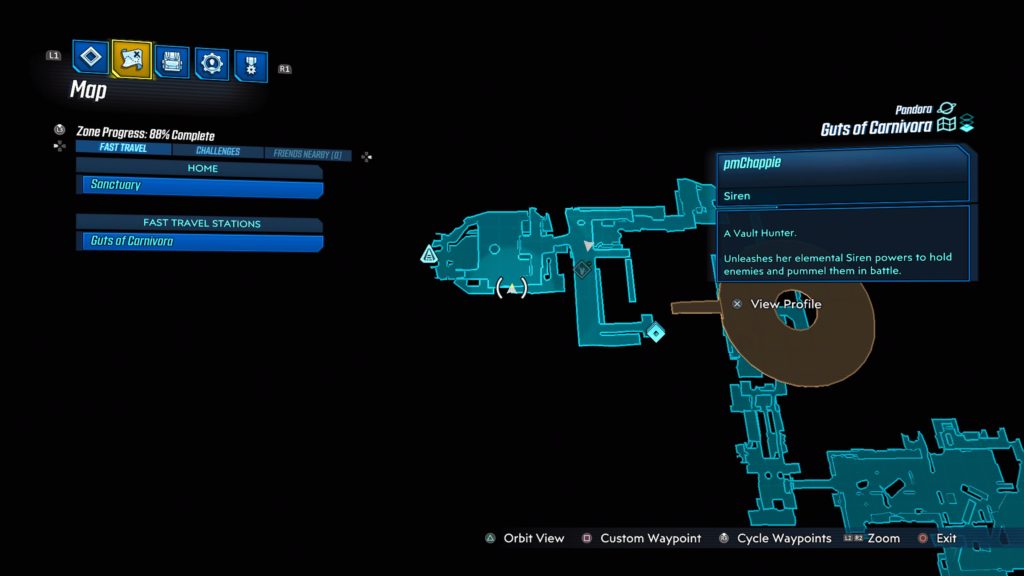
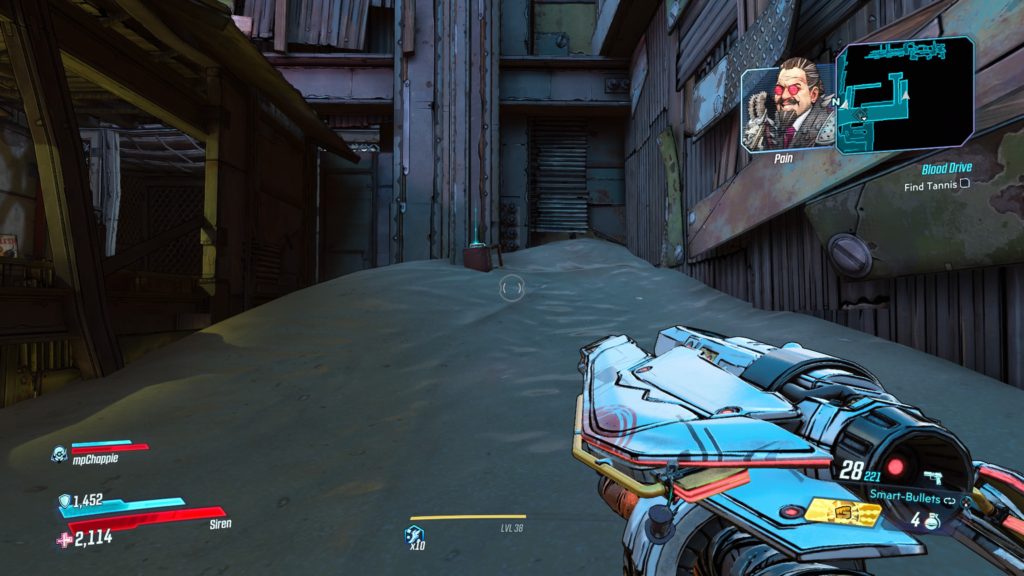
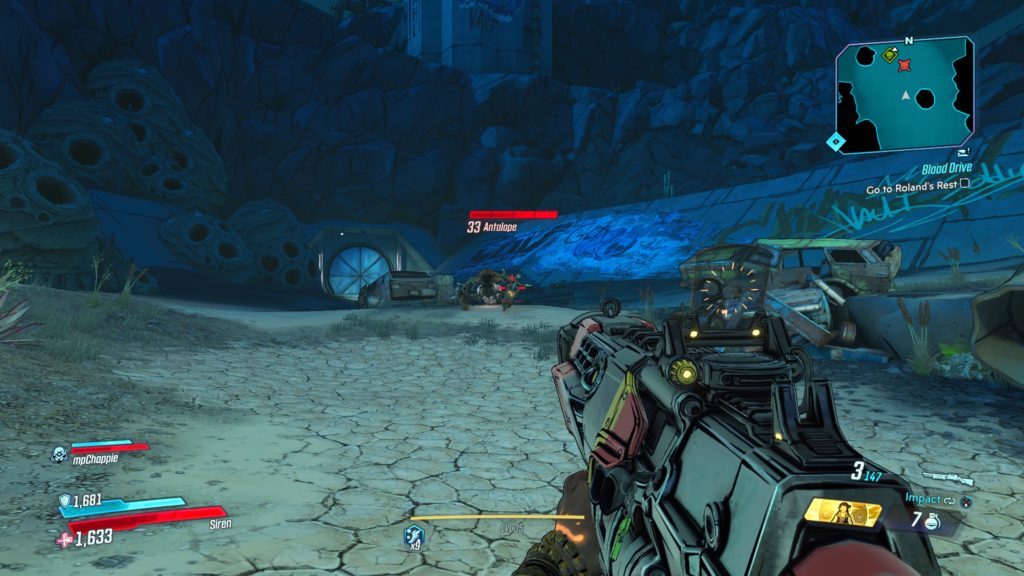
This log can be found during the Blood Drive main mission when you pick up the Golden Chariot. The log is located directly across from the Catch-A-Ride on a couch. See the map below for the exact location.
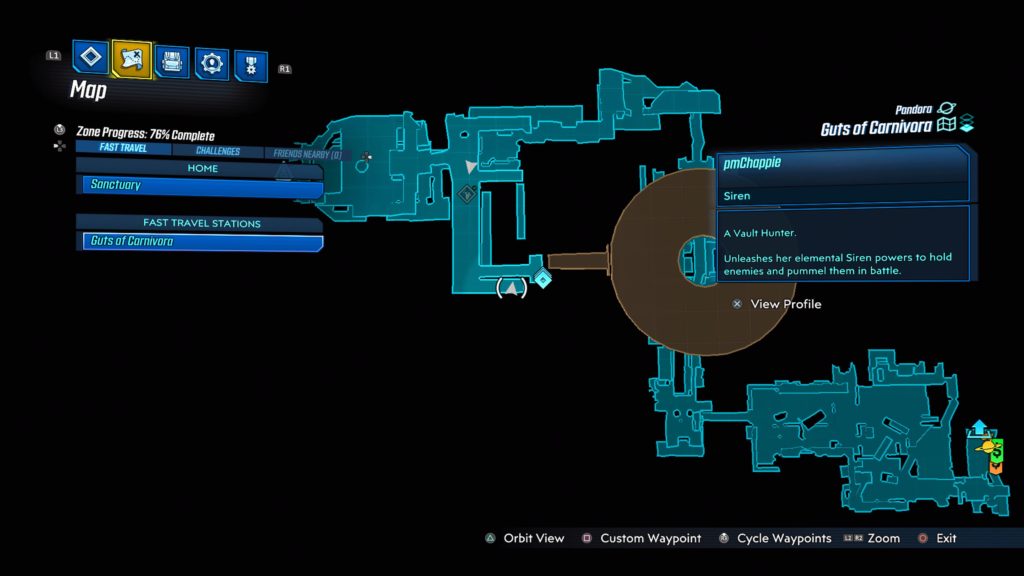
Guts of Carnivora
Sourbones (Part 1)
This log can be found on a crate along the walkway on the right side of the room in Mack’s Head Room. See the map below for the exact location.
Sourbones (Part 2)
This log can be found on top of a storage unit on the left side of the room in Mack’s Head Room. See the map below for the exact location.
Sourbones (Part 3)
This log can be found on a fallen bar stool in Mack’s Head Room along the outside walkway with the chain-linked fence just before the boss room. See the map below for the exact location.
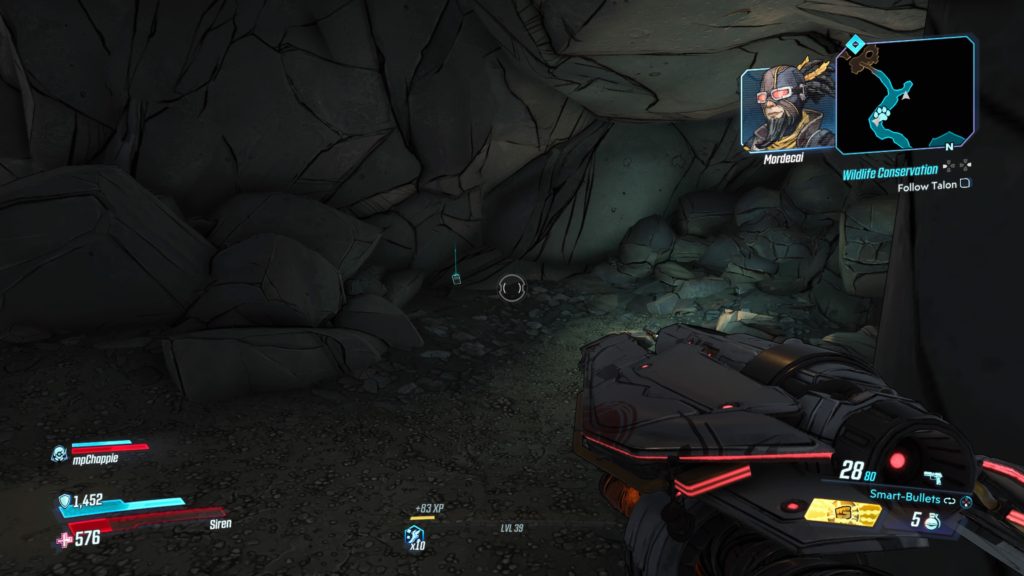
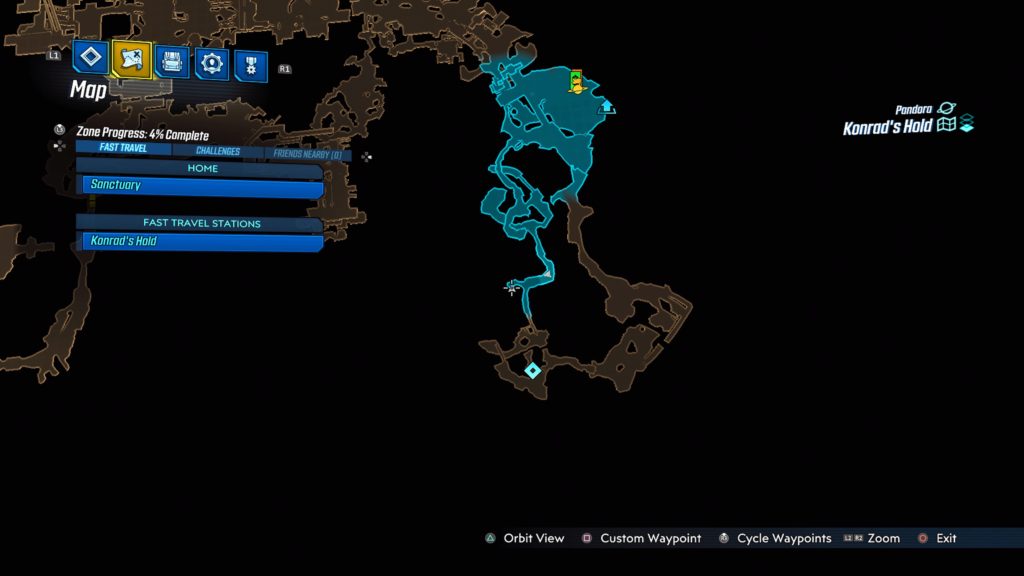
Konrad’s Hold
Cave
During the Wildlife Conservation side mission, you will head into the Unused Escape Tunnel. After you blow open the door, the Echo Log will be located straight ahead on the right side of the tracks sitting on a rock in a little nook. See the below map for the exact location.
Stuck
During the Wildlife Conservation side mission, you will head into the Unused Escape Tunnel and eventually emerge to an outdoor area. Head through the cavern towards the exit. When you see the burn barrel on the left, take a left and head down the hill to find the log.
Control
The log is on a large metal crate and is located in the building to the west of The Arrogant Approach Typhon Log on the second floor. See the map below for the exact location.
Old Life
This log is located in The General’s Perch at the northwest corner of the map on the ground along the fence. See the map below for the exact location.
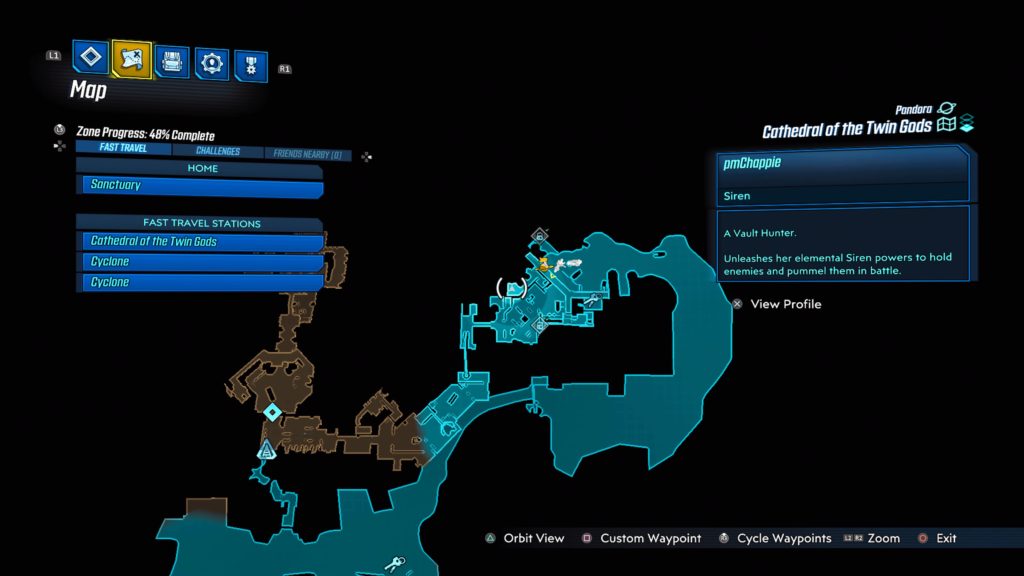
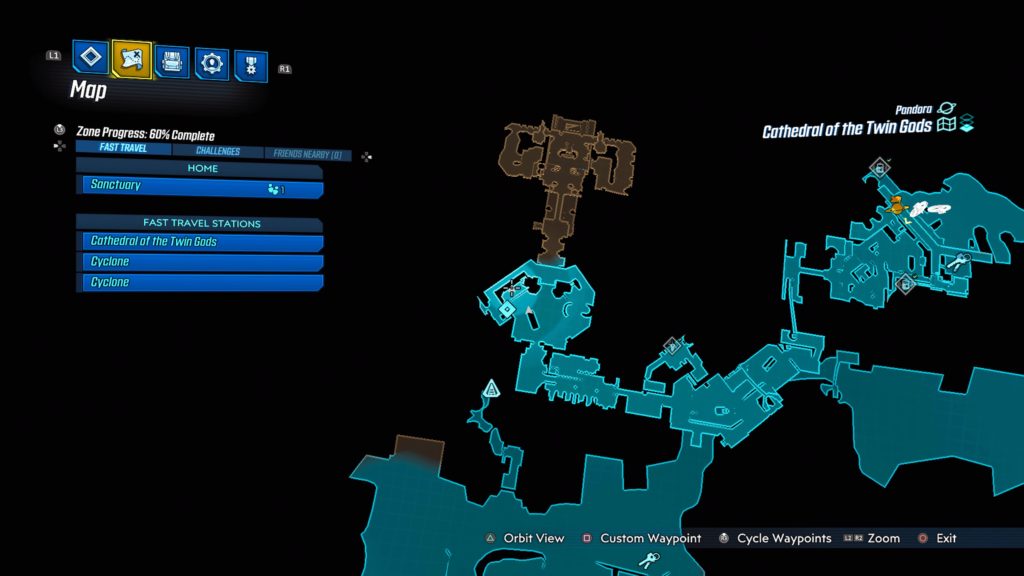
Cathedral of the Twin Gods
[Name Unknown…We picked it up too fast :P]
This log is located in the Outer Sanctum in the west (right side) on the second level in a sink near some lockers and a yellow painted skull. See the map below for the exact location.
Rise of Mouthpiece
This log is located in the Courtyard of the Damned on a table under the large depiction of Troy (left of the giant face with flaming eyeballs). See the map below for the exact location.
Welcome to NGB and our Borderlands 3 guide on the Promethea Typhon Logs and Dead Drop Crew Challenges. Here you’ll find the location of all the logs needed for the Typhon Logs and Dead Drop Crew Challenge!
This log is located on a bandit bridge in the Spillways. To reach it, exit Fort Pissoff (tunnel containing the Meridian Outskirts fast travel station) and take a left into the Spillways heading west. The bridge will be right there. Use the elevator under the left (south) side of the bridge to reach the upper level. Exit the elevator and follow the path forward taking the first right up a flight of stairs, then head towards the toilet. Before taking the steps up to the toilet, jump on the railing to the left and look down to find a small ledge. Land on the small ledge to find the log.
The Spillways (2)
This log is located under a tower-like structure covered with tires, wires and a light at the top north of the Meridian Outskirts fast travel station.
The Spillways (3)
This log is located in front of a tunnel on the north side of the map near a Meridian Metroplex map transition.
Meridian Outskirts Dead Drop Cache
To reach this cache, start near the Meridian Metroplex map transition on top of the bridge near the civilian camp. Facing the Metroplex, head left and go threw the hole in the wall. Instead of taking the stairs down, go right to the elevator. Send the elevator to the bottom while you remain on the top floor. Then call it back up, jumping onto the top of the elevator as it ascends. This will lift you up to a secret area above the elevator where the cache can be found.
Meridian Metroplex
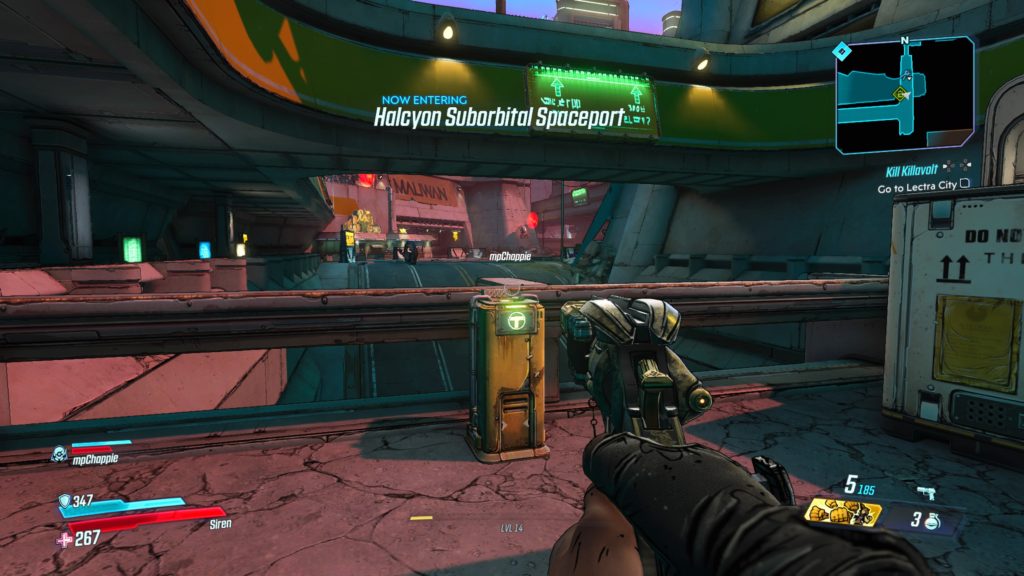
Halcyon Suborbital Spaceport
This log is located on a bridge above a Catch-A-Ride east of the Rise and Grind Coffee House along the eastern section of the map.
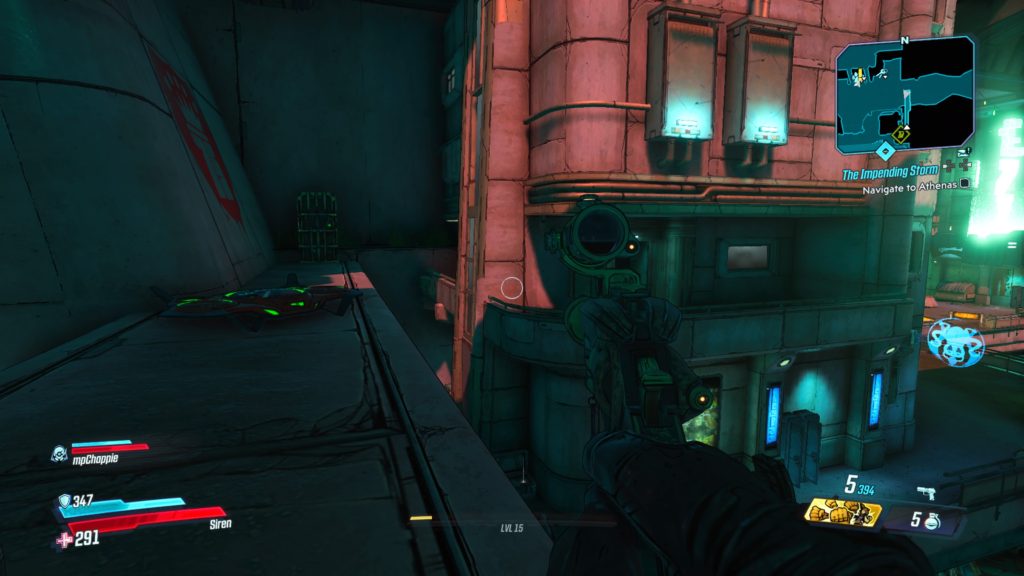
Titan’s Gate
This log is located in front of a giant Atlas building in Titan’s Gate, which can be found in the northern, central part of the map.
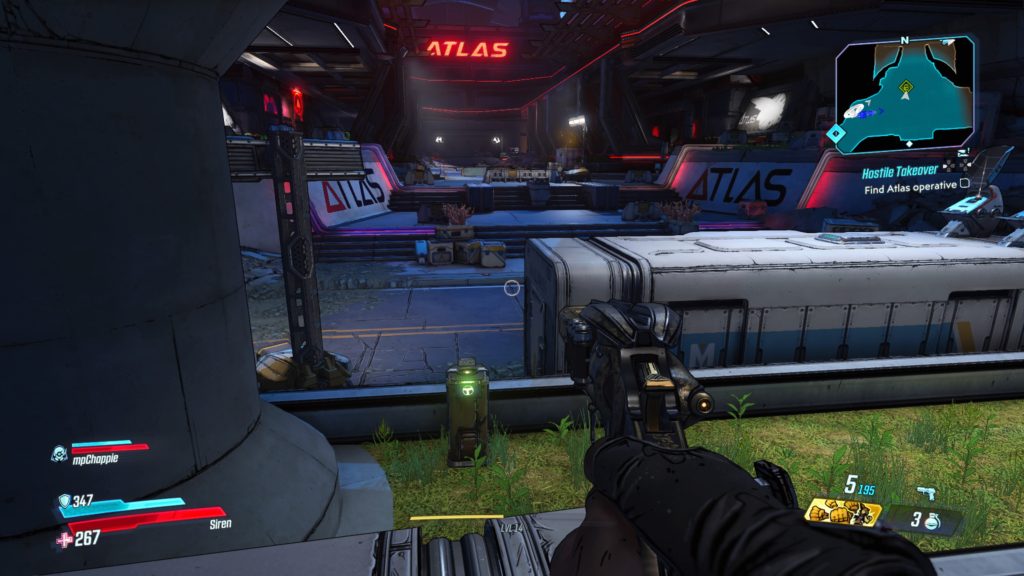
Meridian Mercantile
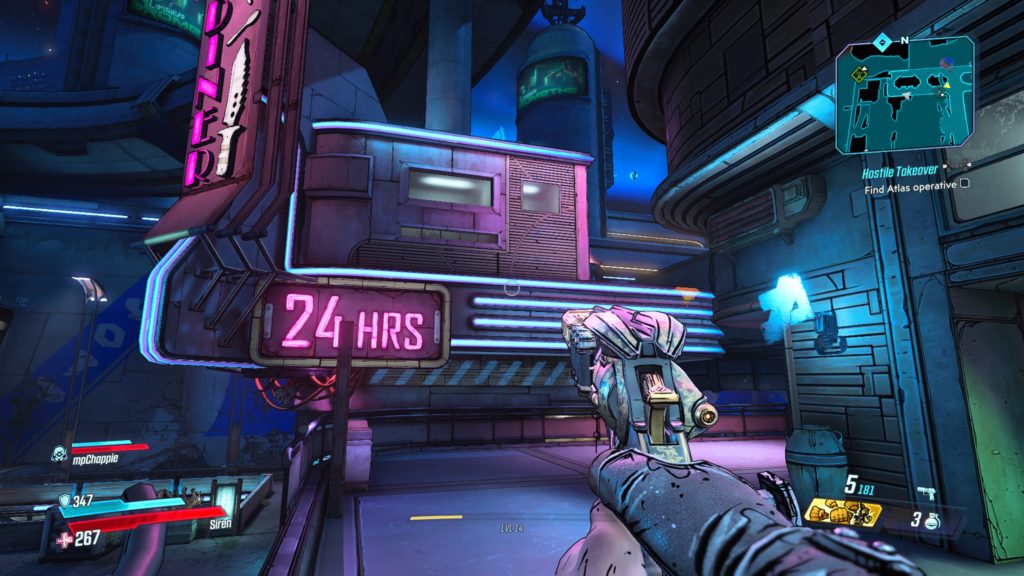
This log is just before the Maliwan Weapons Depot in Meridian Mercantile on the western side of the map, which you access during the Hostile Takeover main mission. The log is near the railing where you meet Rhys’ top operative.
Meridian Metroplex Dead Drop Cache
The dead drop is located close to Knoxx Station near the Lectra City map transition. Start at the end of the tunnel leading to Lectra City with your character facing south. Head left (east) along the platform until you come to two sets of three stacked shipping containers. Climb up the containers and then jump across to the concrete ledge. Follow the ledge south, jumping over a square metal container and then crouch under a metal pipe to find the dead drop straight ahead at the end of the ledge next to a building. There is also a Maliwan chest here.
Lectra City
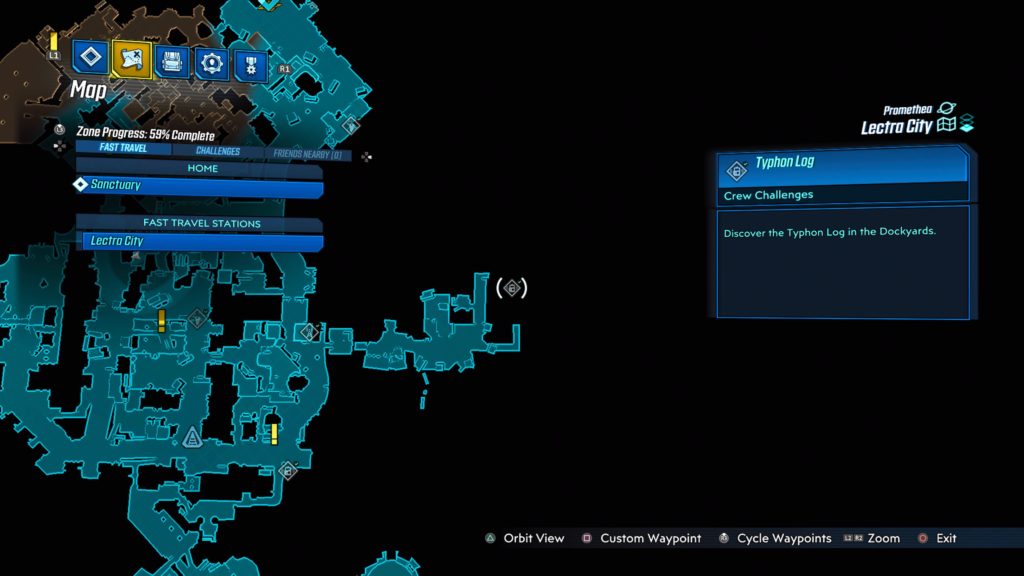
The Dockyards
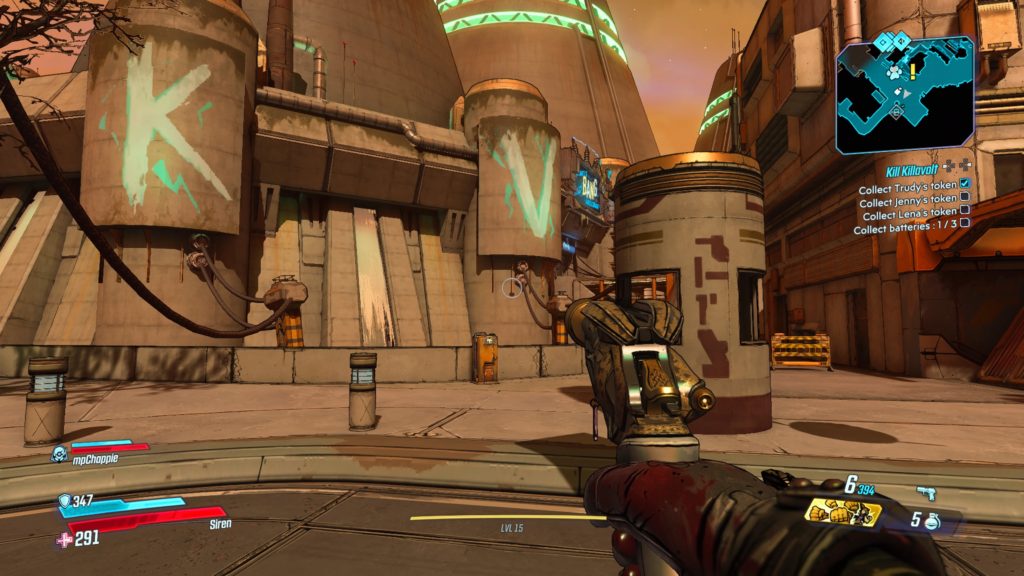
This log is located in the southeastern region of the map in the Bid Dock Energy dockyard. See the map below for the exact location. This is where you fight Trudy during the Kill Killavolt side mission. You will have to jump on some containers submerged in water to reach it.
Near Big Dock Energy
This log is located in the southern region of the map, southwest of Big Dock Energy overlooking a concrete structure with the letters K and V written on it. See the map below for the exact location.
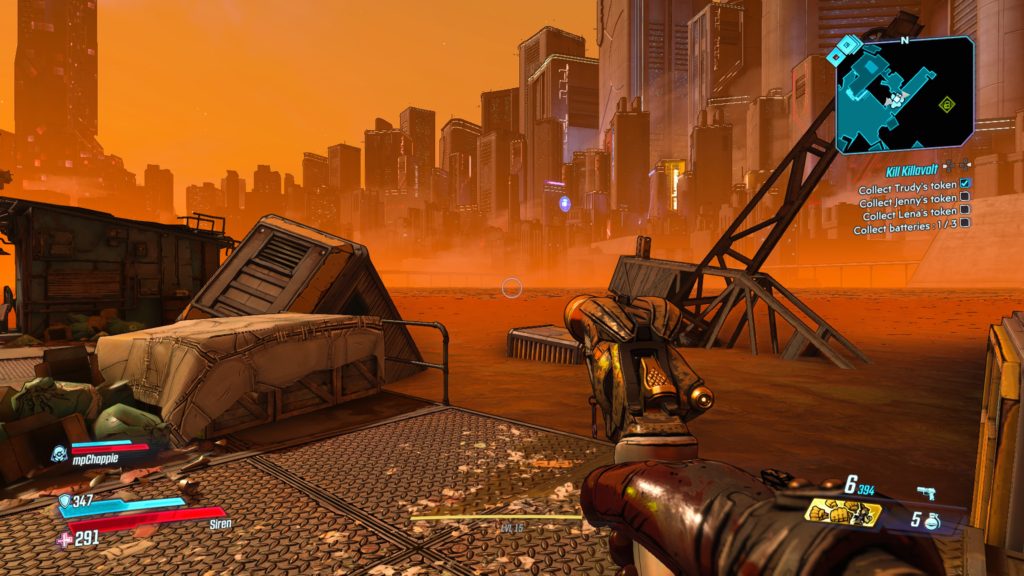
The Hills
The log is located in the eastern region of the map in the area where you fought Lena in the Kill Killavoltside mission.
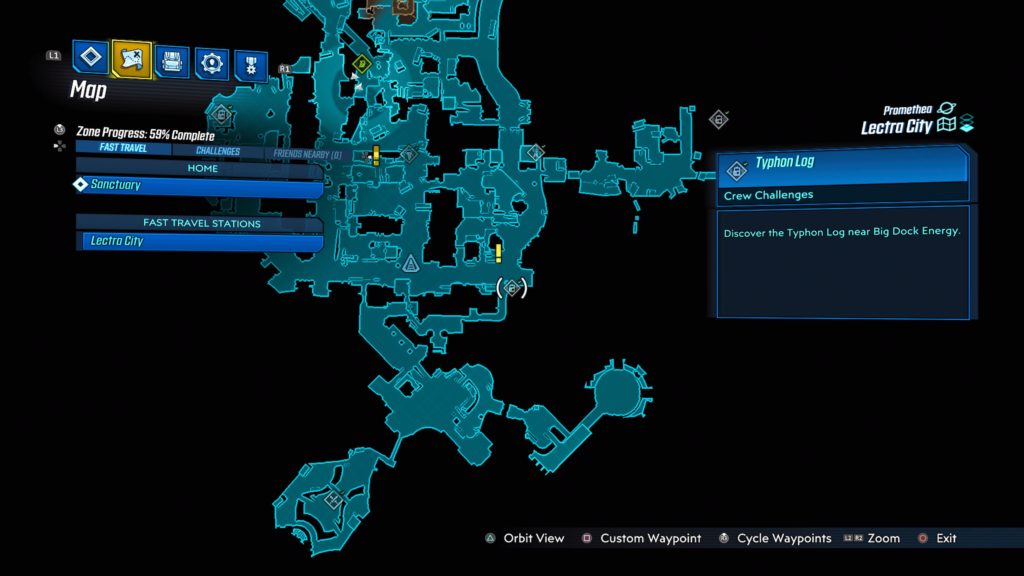
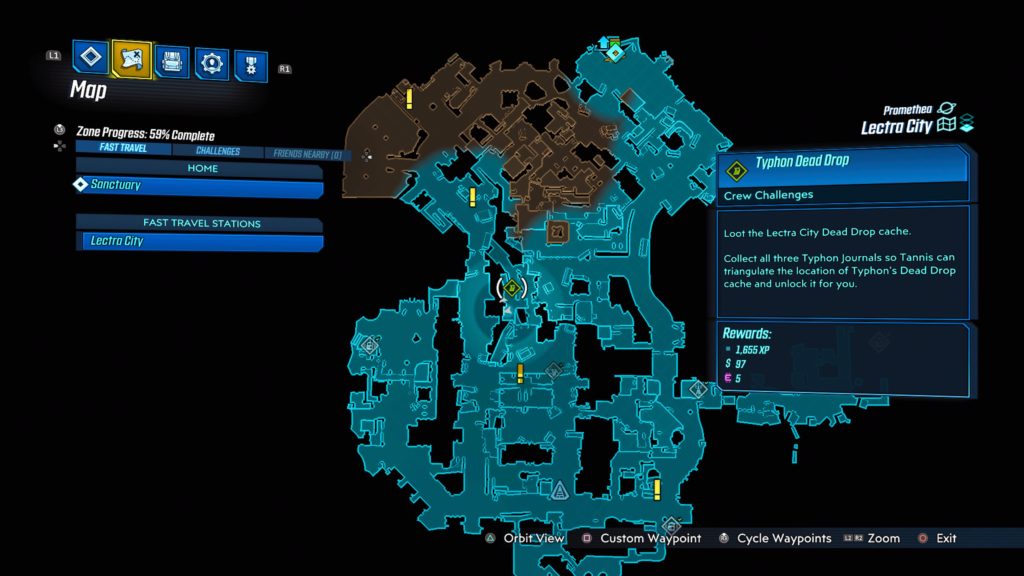
Lectra City Dead Drop Cache
The cache is located in Downtown Square on a rooftop in a storage container east of where you fought Lena in the Kill Killavolt side mission near the center of the map. To reach the roof, you will need to climb onto a dumpster with yellow paint and then climb up the ladder. See the map below for the exact location.
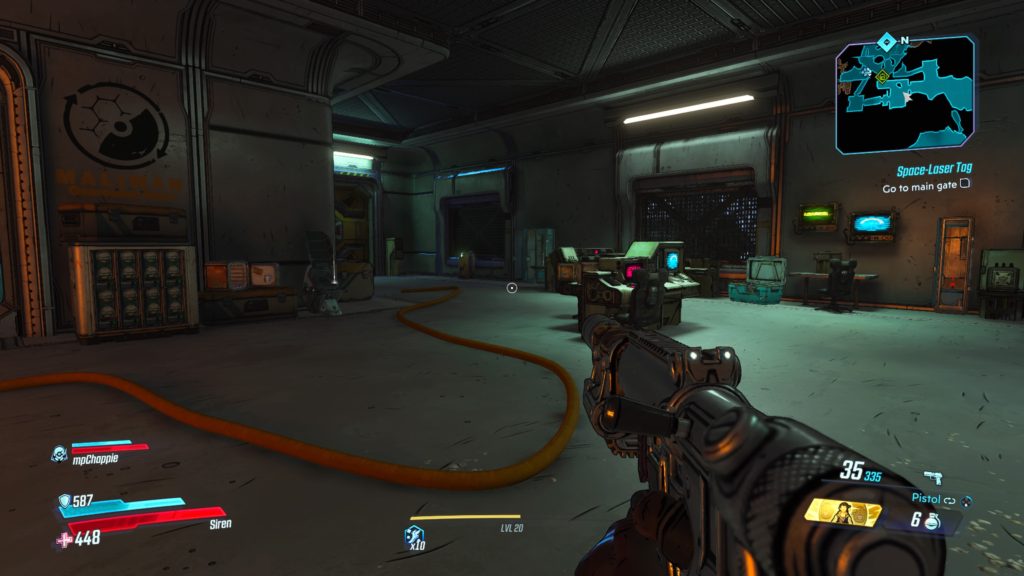
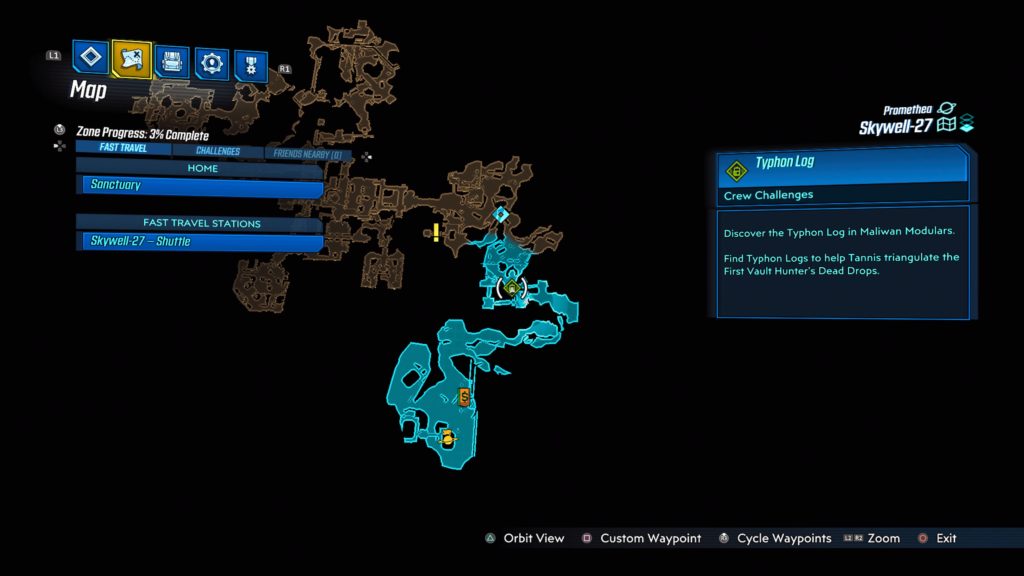
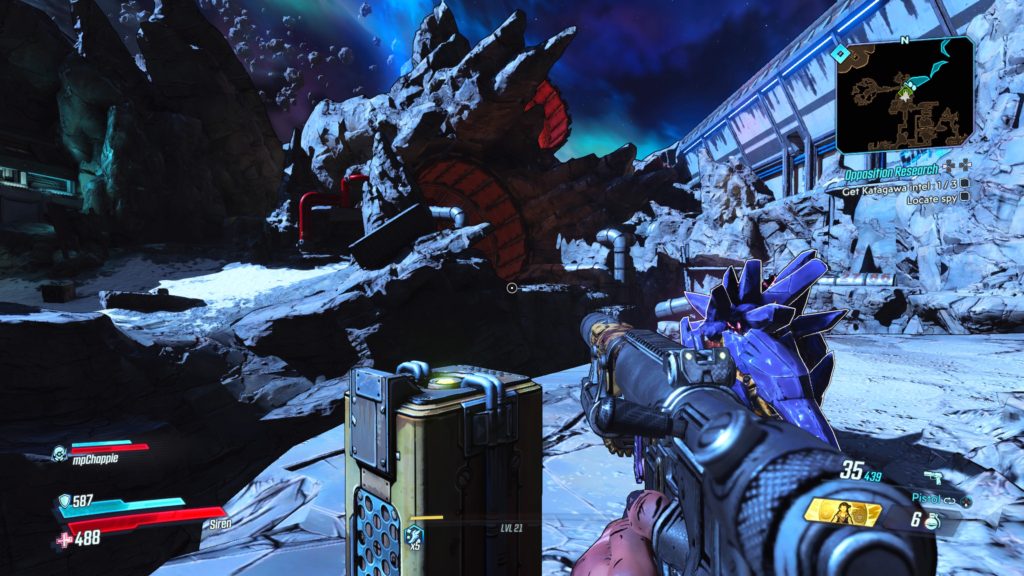
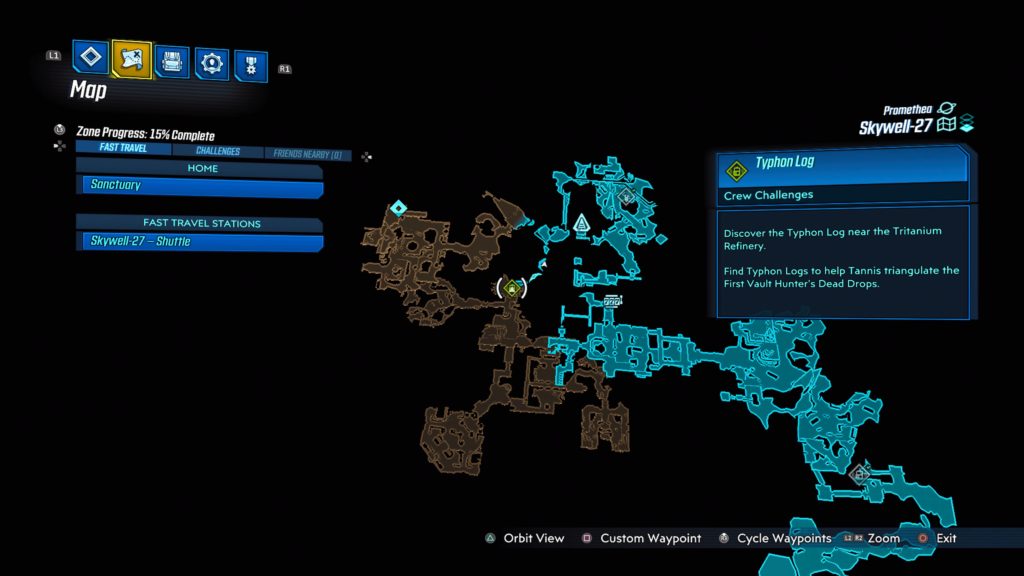
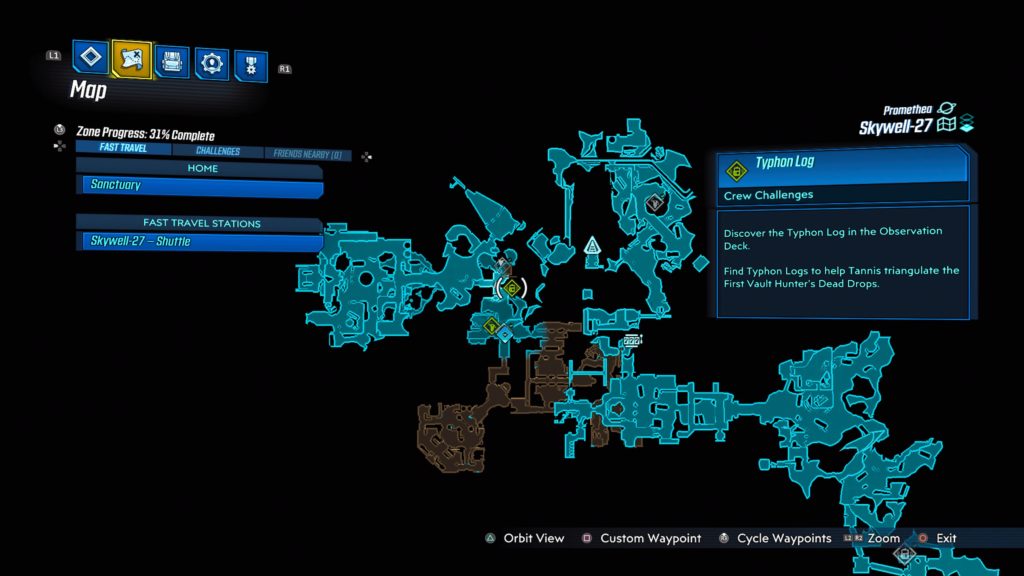
Skywell-27
Maliwan Modulars
This log is located in a locked Maliwan room inside a cave. See the map below for the exact location. You’ll know your there when you see the big yellow pipes on the ceiling that say “Watch Your Head!”. From the locked door, follow the path forward coming to a broken walkway with “Sector 1” written on the wall. Drop down into the open area and move forward following the left rock wall. When you get to the end, jump off the ledge and turn around to find a doorway with a “1” written next to it. Enter the doorway and head up two flights of stairs to enter the room containing the log next to a gated window.
Near Tritanium Refinery
This log is located across from the laser thruster at the end of a stone path. See the map below for the exact location. To reach it, head to the metal platform across from the thruster and head south (right of the ladder leading to a higher platform). You will have to jump from rock to rock to reach the log.
Observation Deck
This log is located on the Observation Deck. See map below for the exact location. To reach it, you will need to jump down the long chute in Sector 4. This will place you in Fuel Processing. Exit through the door to enter a room containing a cylinder with a blue sphere in the middle of it. Take a left and follow the walkway to the end. Use the ladder next to the crate to climb up to a ledge. From there climb on top a crate then jump to the opening above. The log will be located on a metal platform across a gap.
Skywell-27 Dead Drop Cache
This cache is located in the server room near where the boss is located. See the map below for the exact location. Follow the hallway leading to the servers to arrive in a big open room. Armored robots will spawn on the other side. Deal with them then head up the stairs behind them. Take a left up another flight of stairs and follow the hallway to the end to locate the cache.
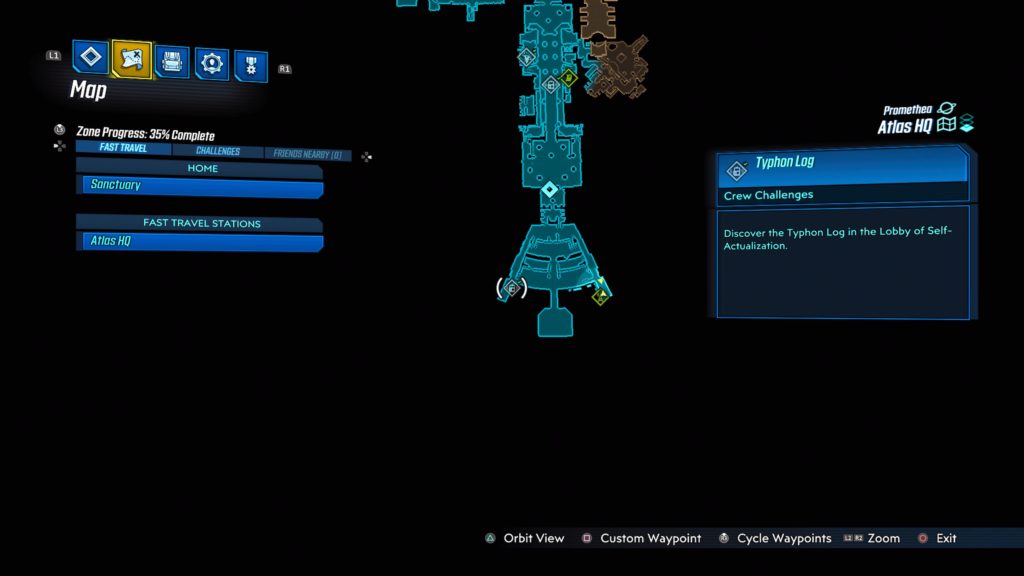
Atlas HQ
Courtyard of Innovation
This log is located on the second level of the Courtyard of Innovation along the eastern side. To reach it, access the second level via turret control room or the stairway on the west side of the courtyard.
Skunkworks Lab
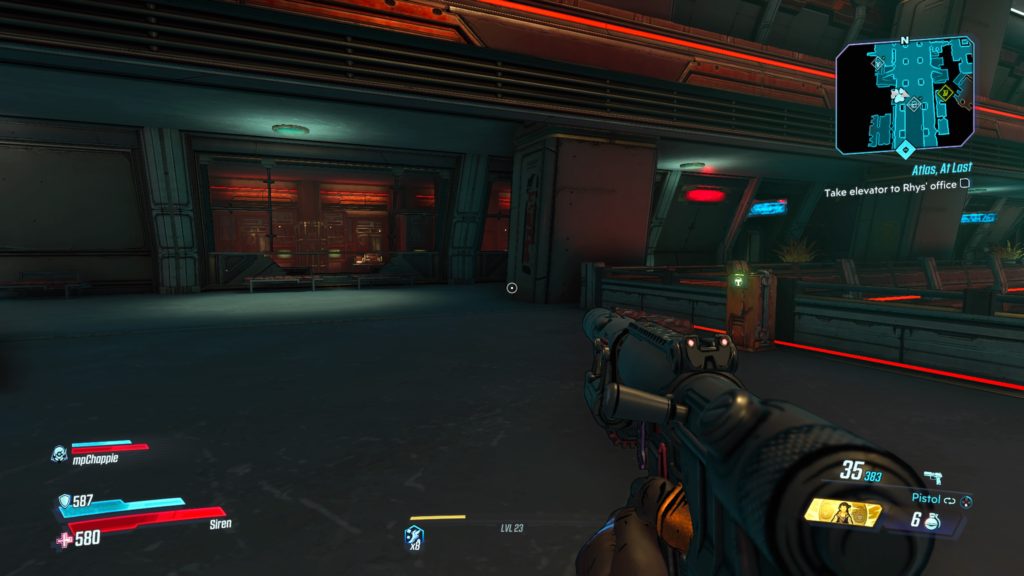
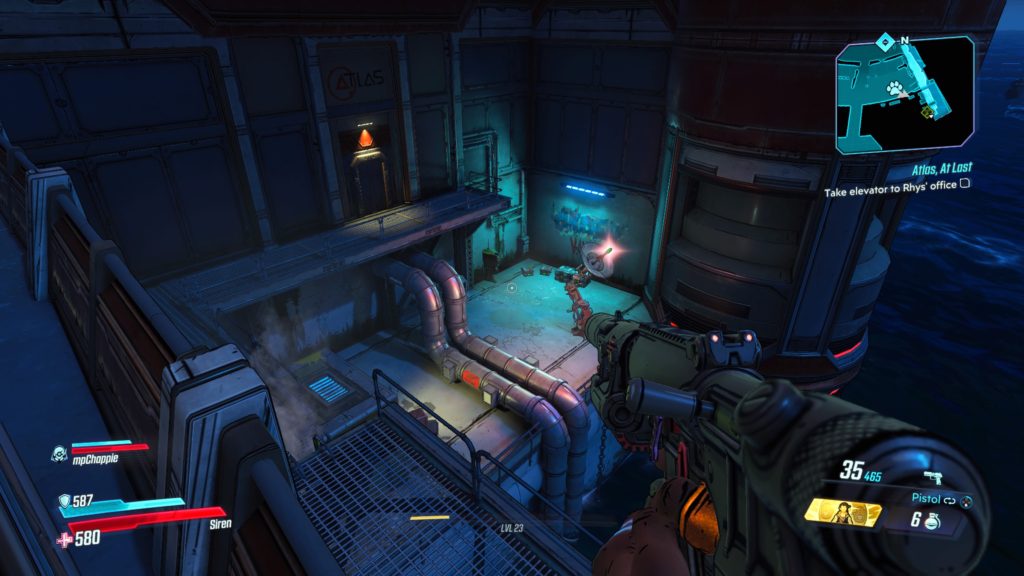
This log is located on the second floor of the Lobby of Self-Actualization overlooking an elevator. Enter Atlas and head forward, past the spinning gold ball, then under the red ATLAS sign in the middle of the walkway. Follow the walkway forward until you reach a set of double doors. Instead of heading through them, take the flight of stairs up on the left or right side of the doors to reach the second level in the Lobby of Self-Actualization. Head south to locate the log.
Lobby of Self-Actualization
This log is located at the south side of the Lobby of Self-Actualization near where the Maliwan command ship was during the Atlas, at Last main mission. You can find it along the southwestern walkway. See the map below for the exact location.
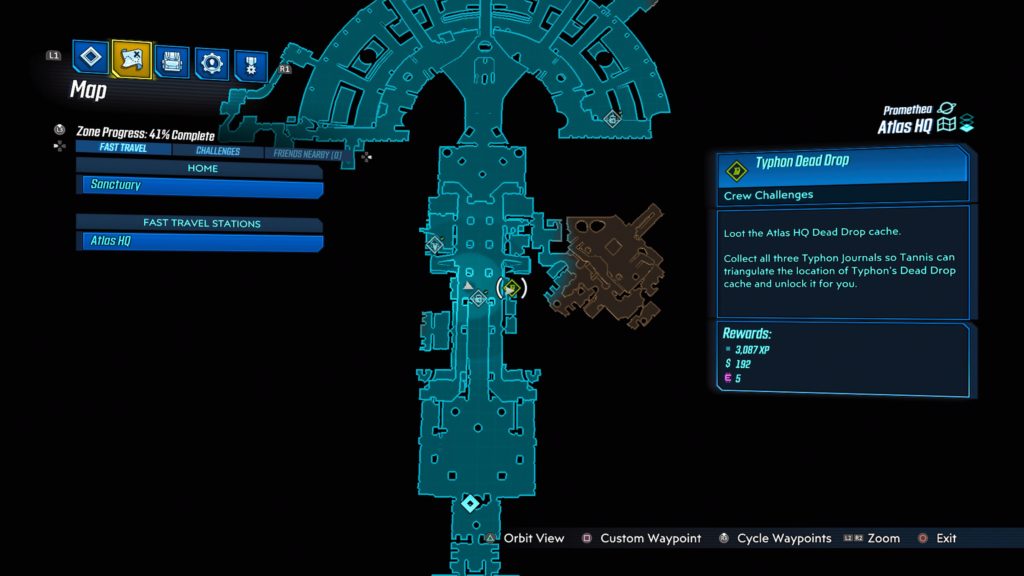
Atlas HQ Dead Drop Cache
This cache is located on the second floor of the Lobby of Self-Actualization overlooking an elevator. See the map below for the exact location. Enter Atlas and head forward, past the spinning gold ball, then under the red ATLAS sign in the middle of the walkway. Follow the walkway forward until you reach a set of double doors. Instead of heading through them, take the flight of stairs up on the left or right side of the doors to reach the second level in the Lobby of Self-Actualization. Head south to locate the Skunkworks Lab Typhon Log from above then enter the room to the left (east) of it to find the cache.
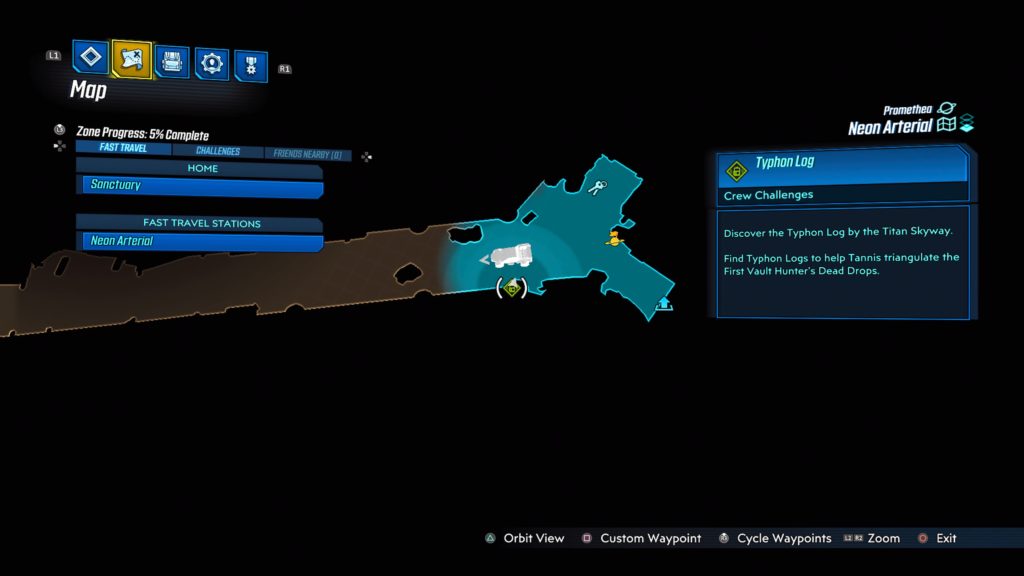
Neon Arterial
Titan Skyway
This log is located diagonally from the Neon Arterial fast travel station next to a tree by a light post. See the map below for the exact location.
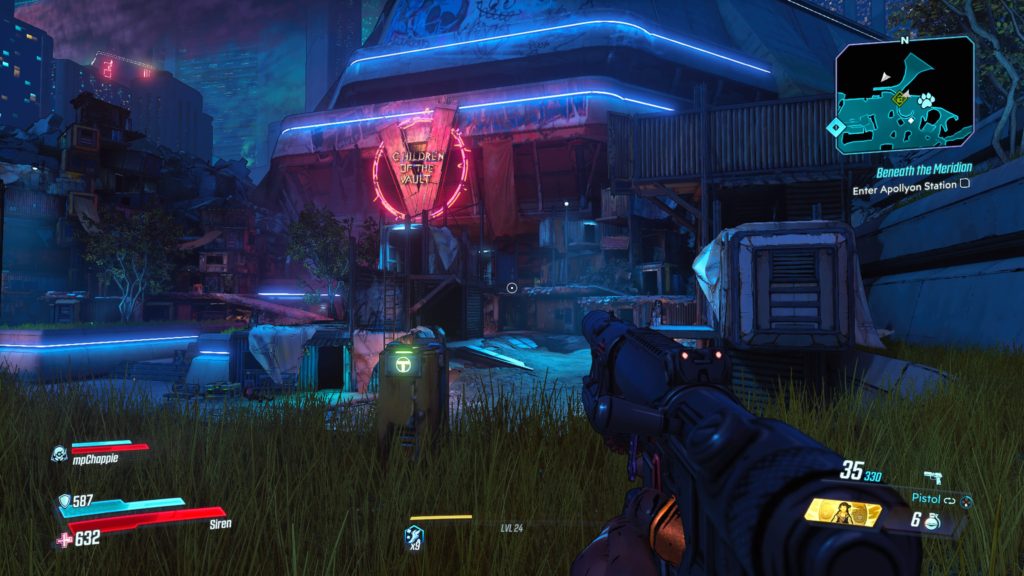
Apollyon Transit Station
This log is located on the north side of the Apollyon Station courtyard across from the giant Children of the Vault sign over the station entrance.
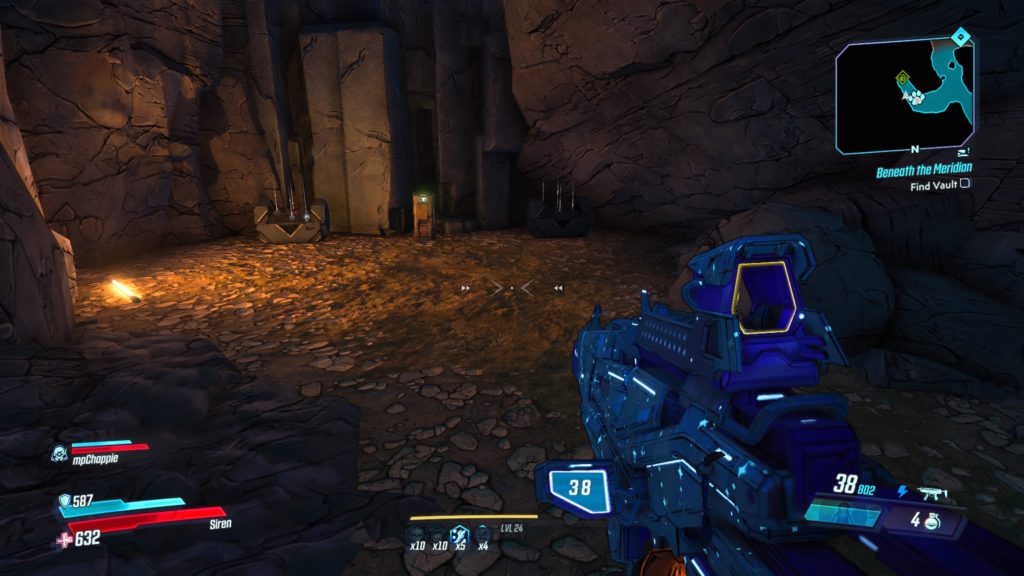
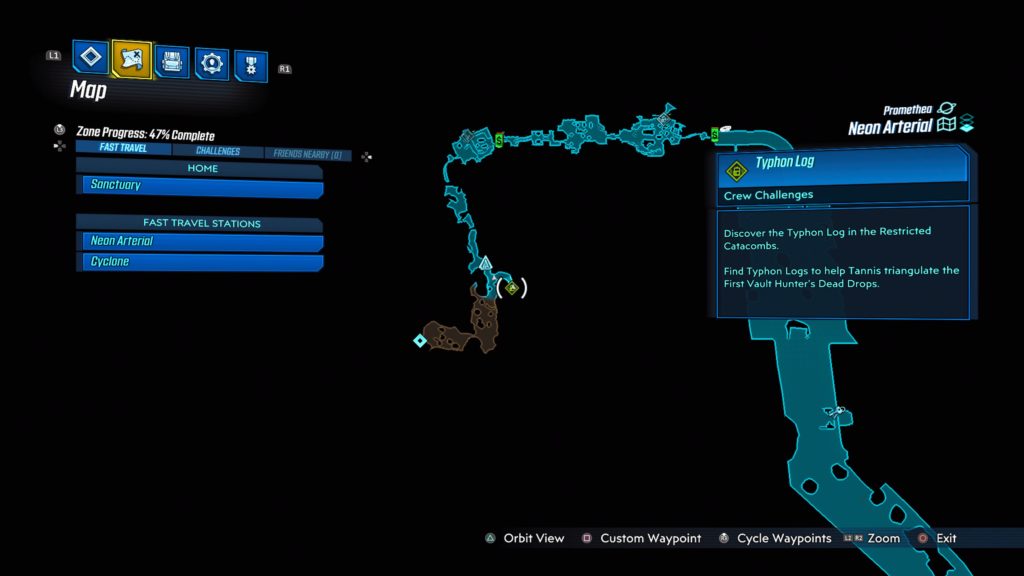
Restricted Catacombs
This log is located down a tunnel on the east side of the Restricted Catacombs just before you get to the vault. See the map below for the exact location.
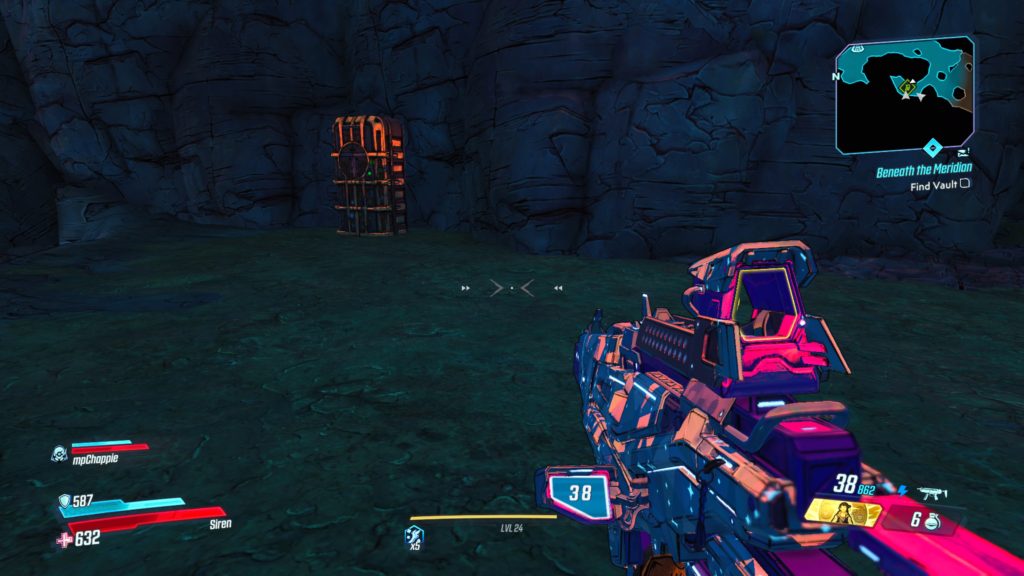
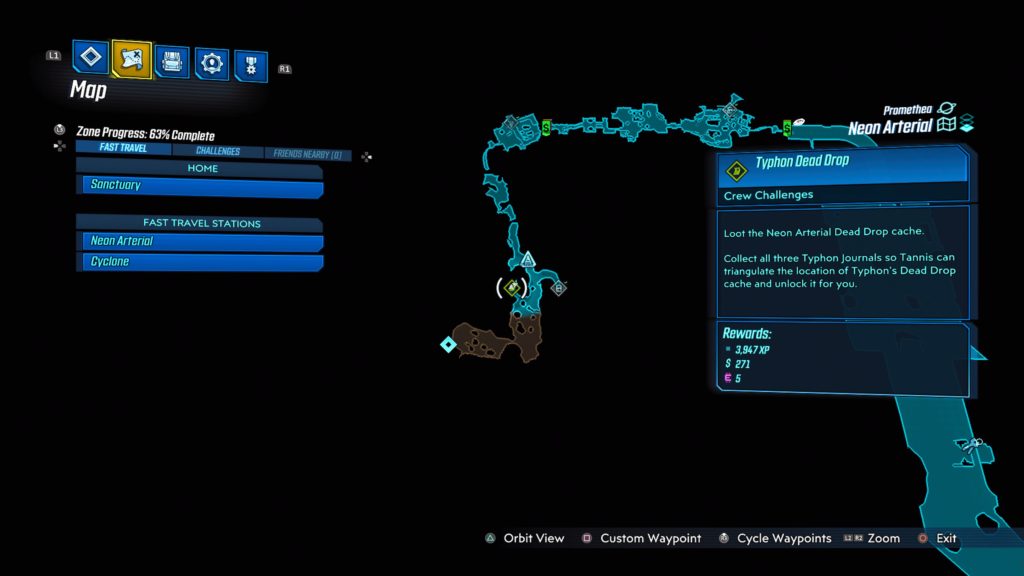
Neon Arterial Dead Drop Cache
This cache is located on the west side of the Restricted Catacombs across from the previous Typhon Log.
Welcome to NGB and our Borderlands 3 guide on the Legendary Hunts Crew Challenge. Here you’ll find the location of all the targets needed for the Legendary Hunts Crew Challenge!
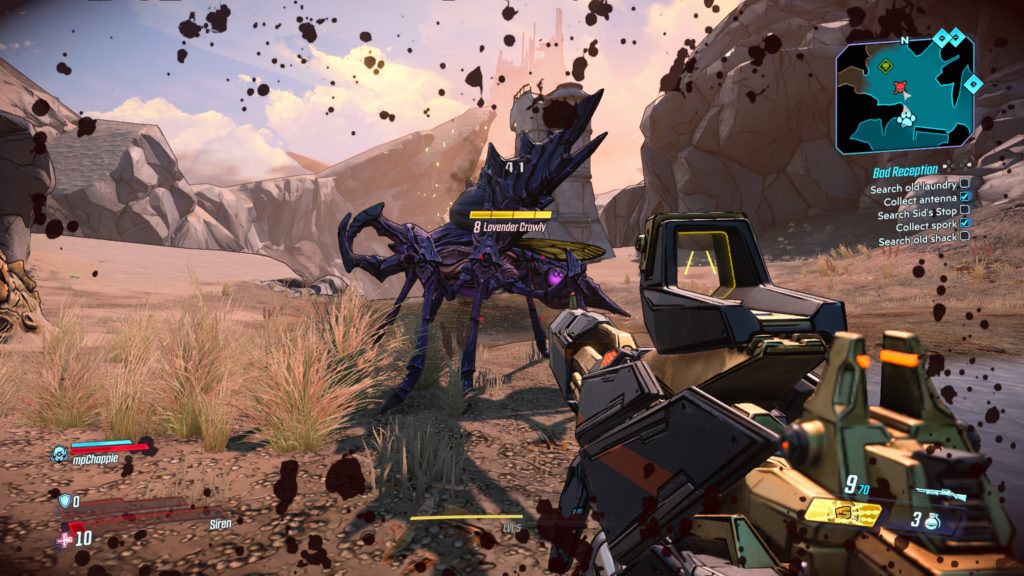
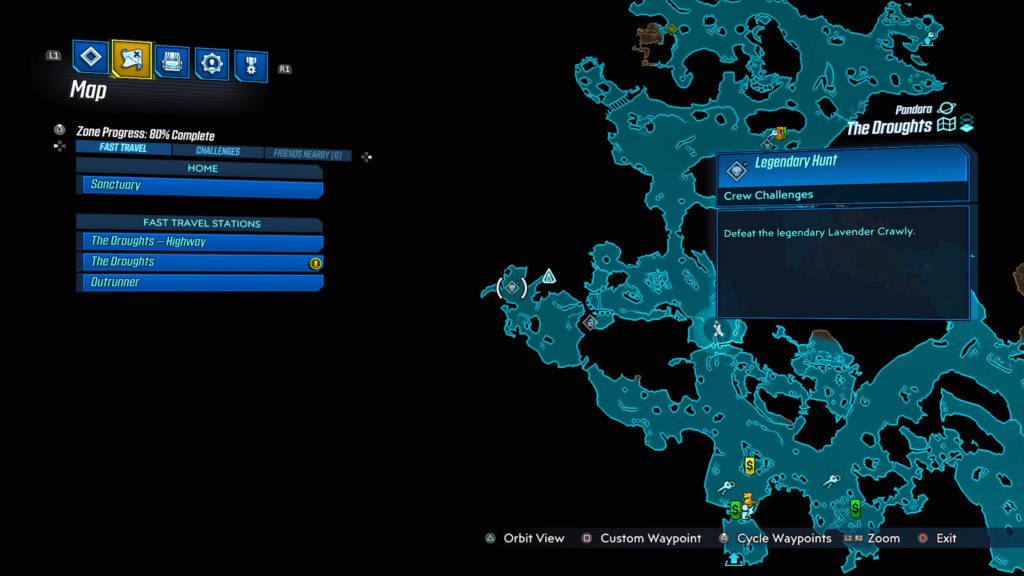
The Lavender Crawly is located on Pandora in the western area of the Droughts in northern Varkid Valley. See the map below for the exact location. Lavender Crawly is a Varkid that will pod up when you are close to defeating it. That pod will break into two Varkids. When each of those Varkids get low on health, they too will pod up and create an additional two Varkids each.
Ascension Bluff
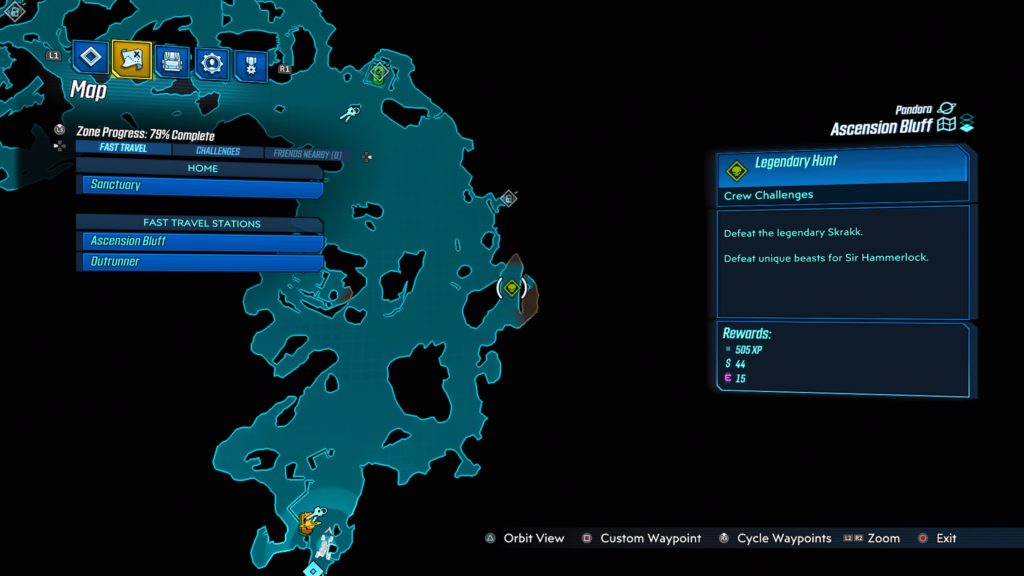
Skrakk
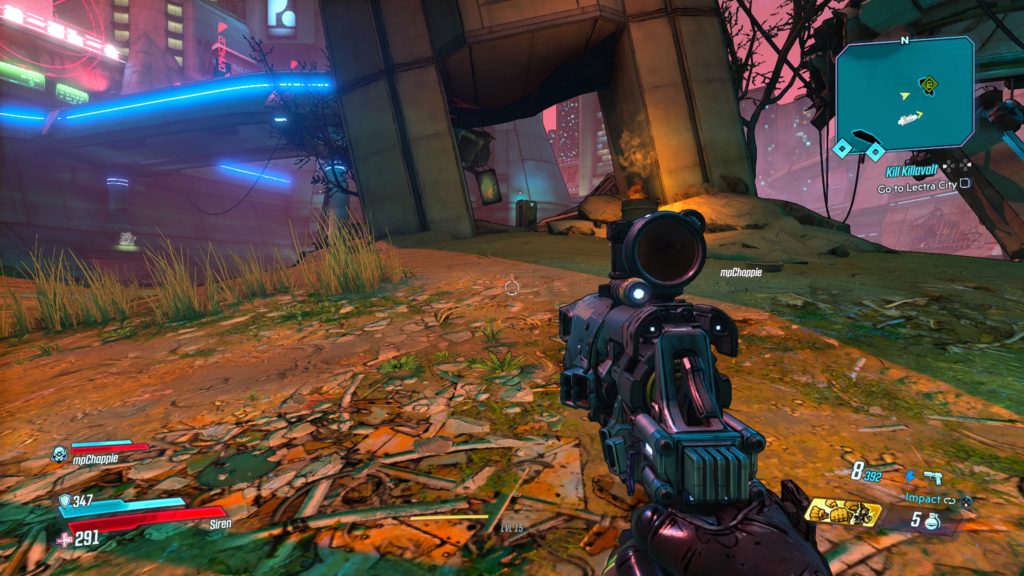
The Legendary Skrakk is located at Ascension Bluff on Pandora. It can be located southwest of the Ascension Bluff fast travel station. See the map below for the exact location. The Skrakk is accompanied by a pack of skags you will have to fight off while battling the Skrakk. It’s easier to deal with the skags first so that you can give the Skrakk your full attention.
Devil’s Razor
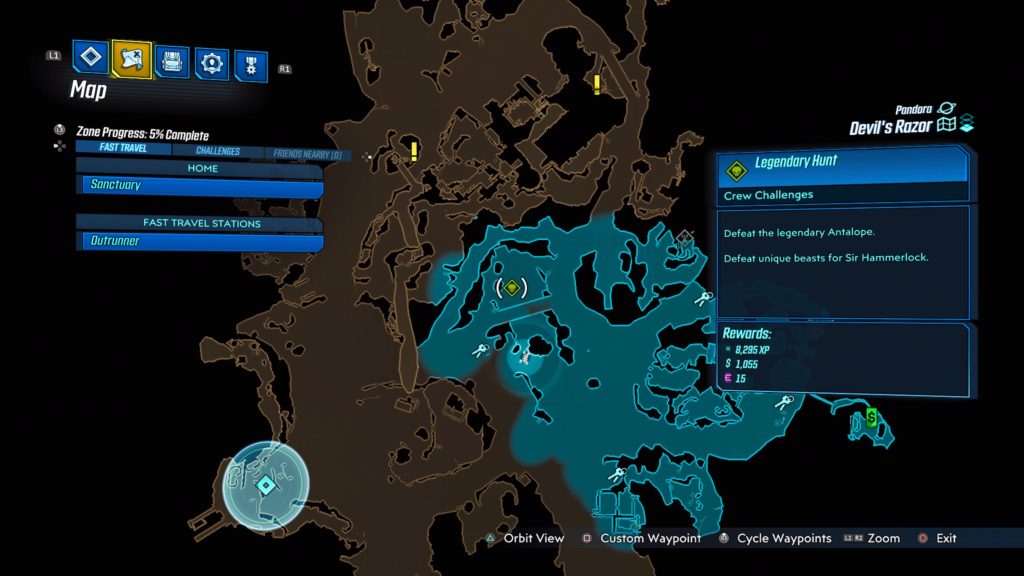
Antalope
The Antalope is located in the dead center of the map. See the map below for the exact location.
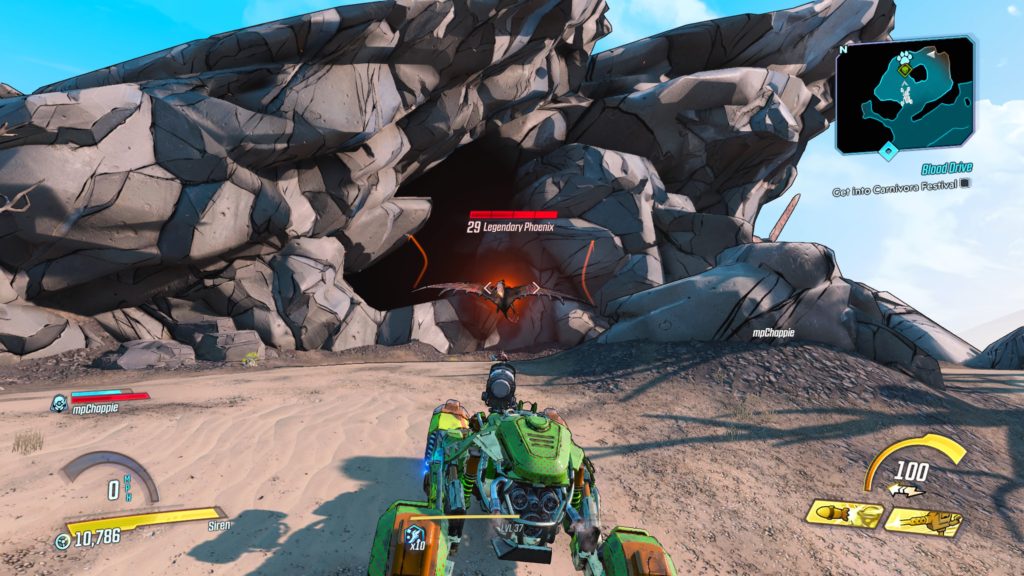
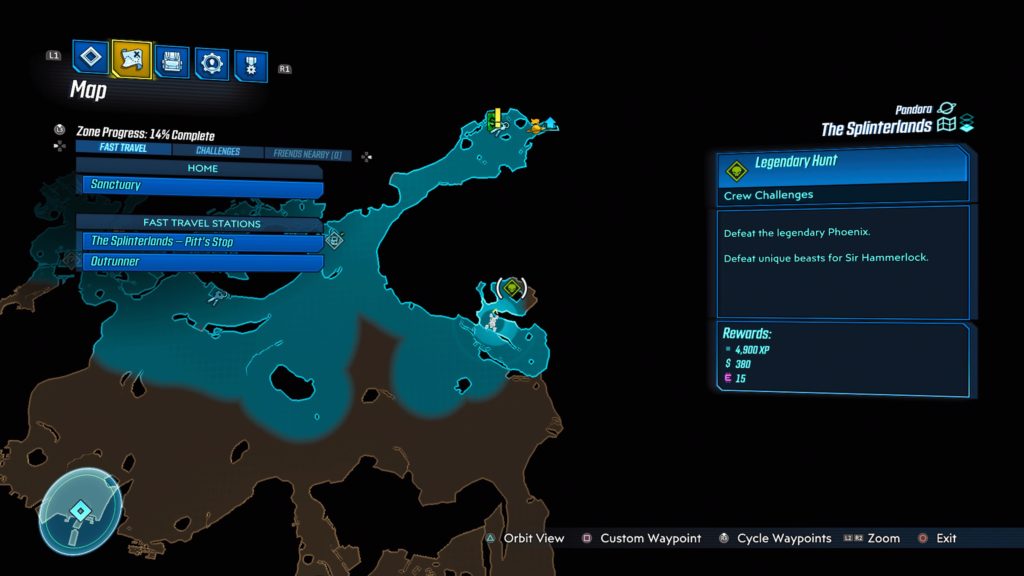
The Splinterlands
Phoenix
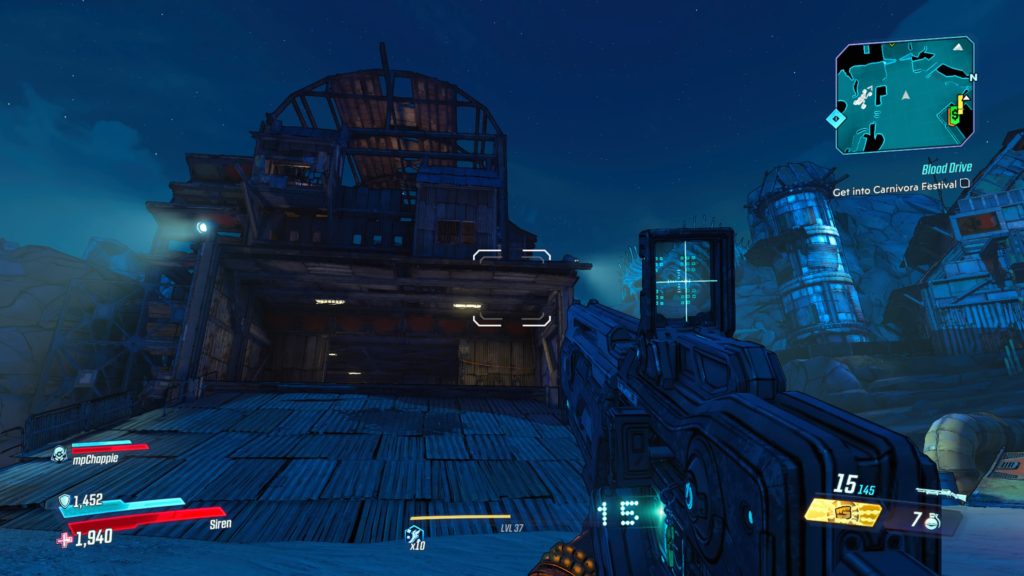
The legendary phoenix is flying around directly south of the Pitt’s Stop fast travel station on the east side of The Splinterlands. See the map below of the exact location. You will have to kill the phoenix three times for it to be reborn as the legendary phoenix.
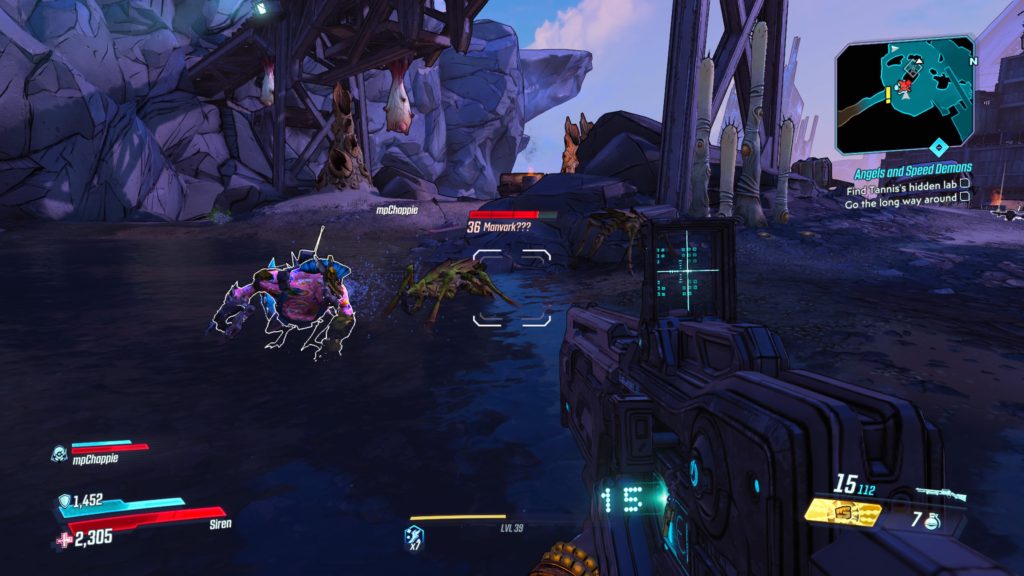
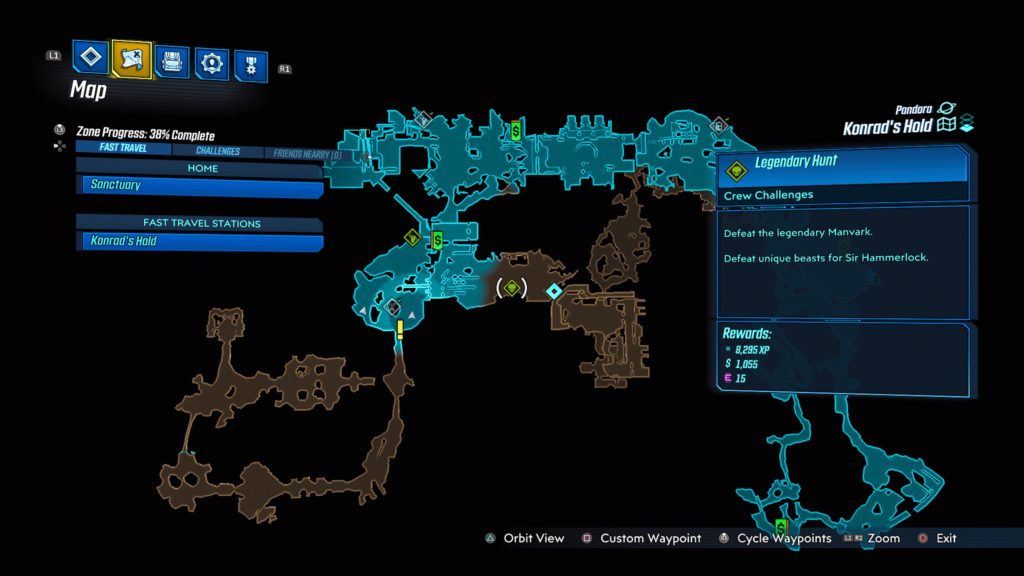
Konrad’s Hold
Manvark
The Manvark is located in the center of the map in the Last-Stand Yard. See the map below for the exact location.
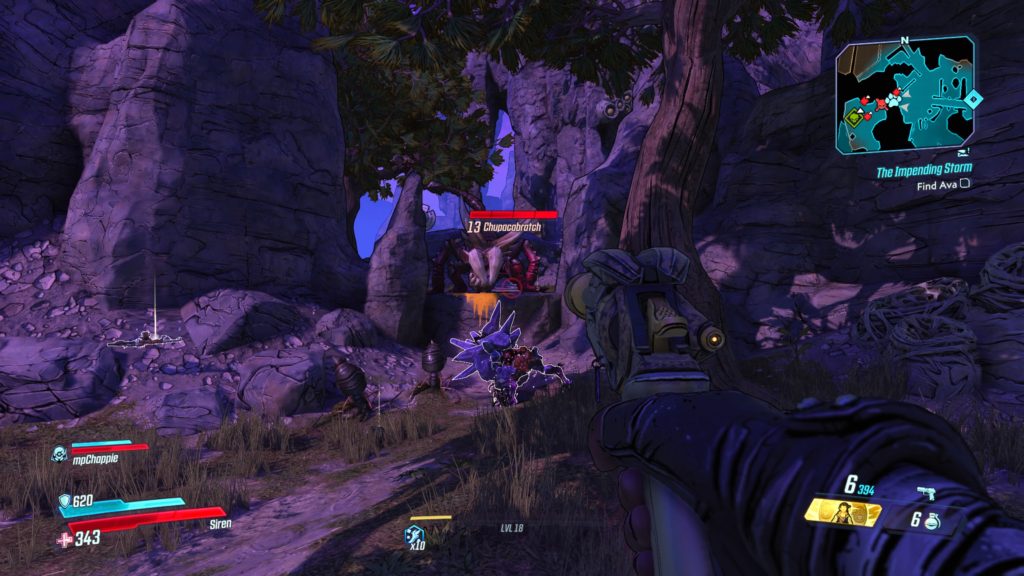
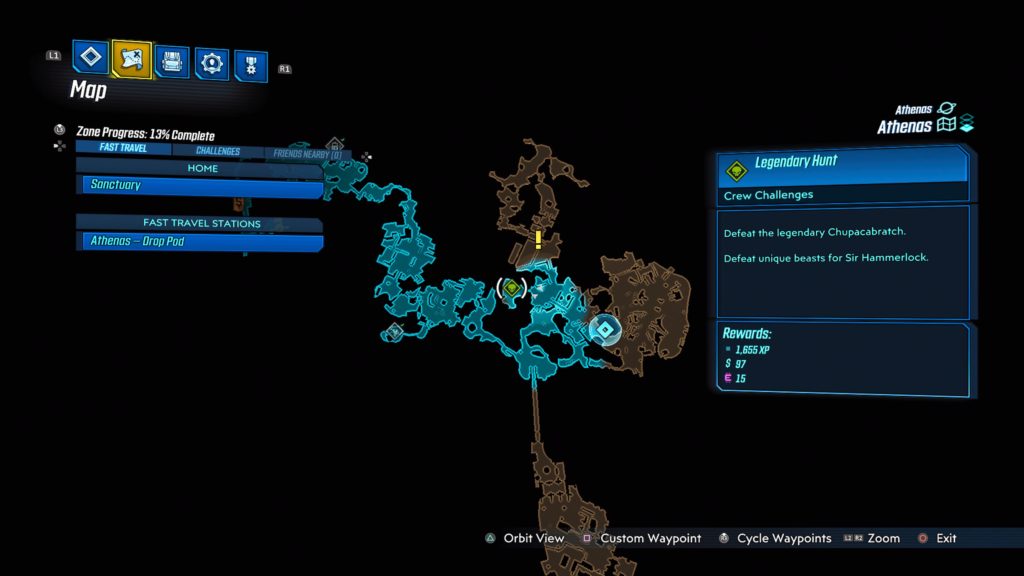
Athenas Legendary Hunts Crew Challenges
Athenas
Chupacabratch
The Chupacabratch is located on the route to the cemetery near the center of the map. See the map below for the exact location. There isn’t anything special about this fight.
Eden-6 Legendary Hunts Crew Challenges
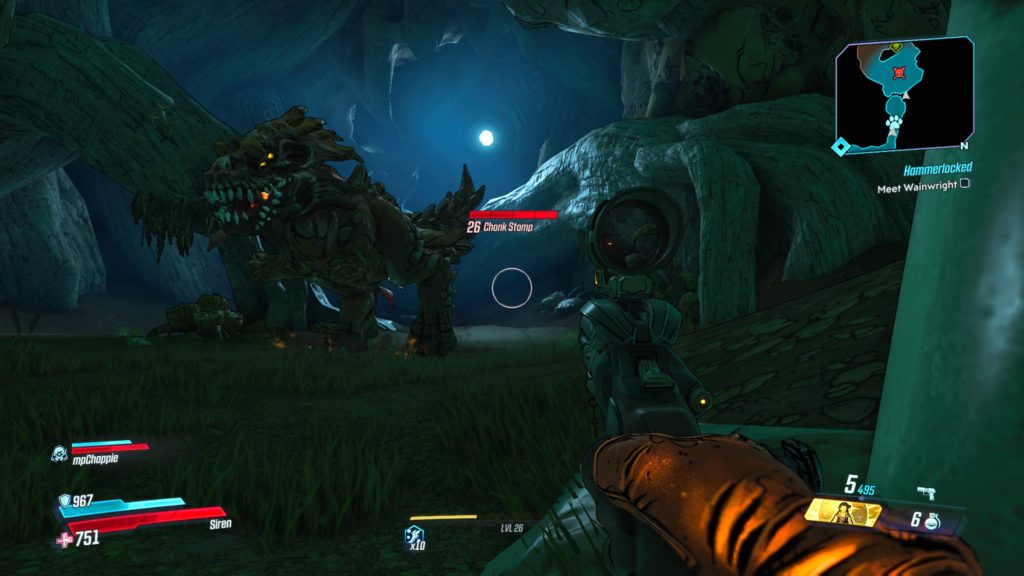
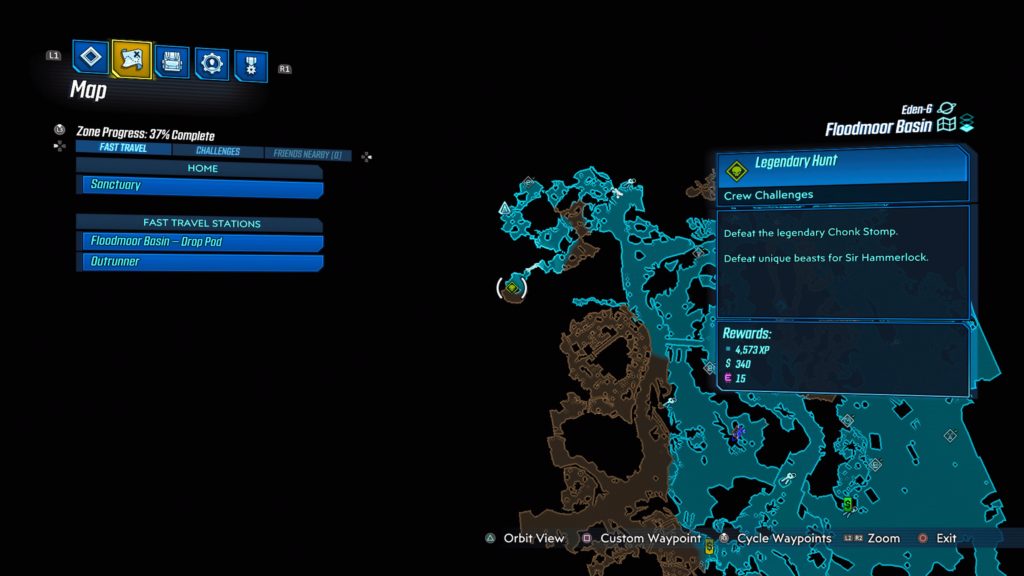
Floodmoor Basin
Chonk Stomp
Chonk Stomp is located in Primeval Grotto on the northwestern side of the map in a cave. See the map below for the exact location.
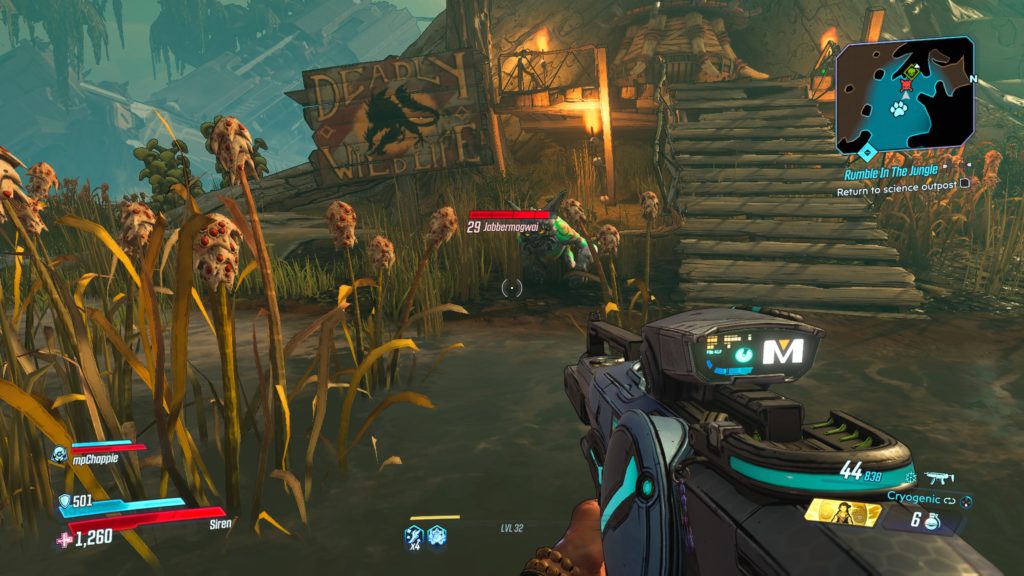
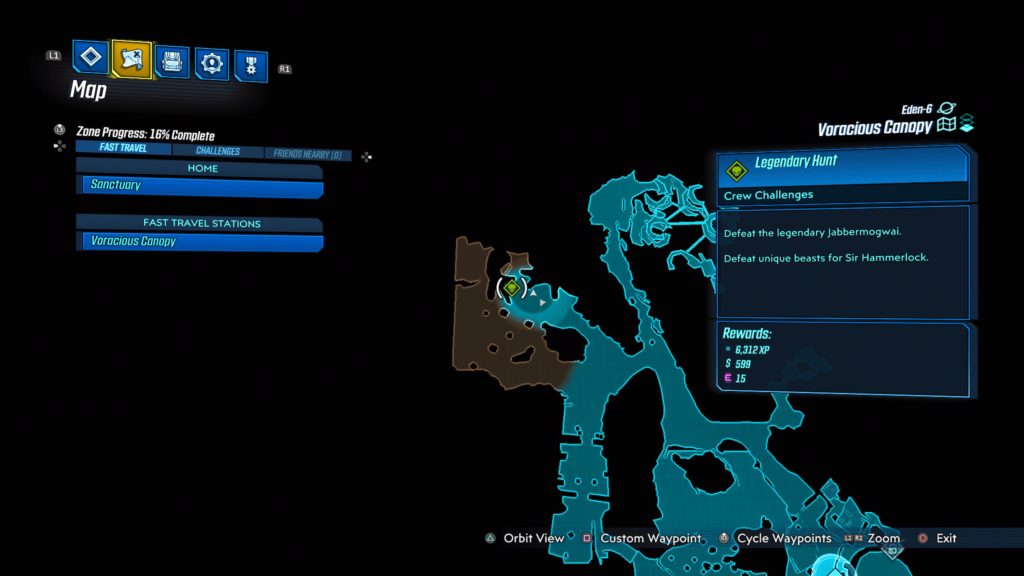
Voracious Canopy
Jabbermogwai
The Jabbermogwai can be found in the northwestern part of the map, west of the Jabber village. See the below map for the exact location.
Nekrotafeyo Legendary Hunts Crew Challenges
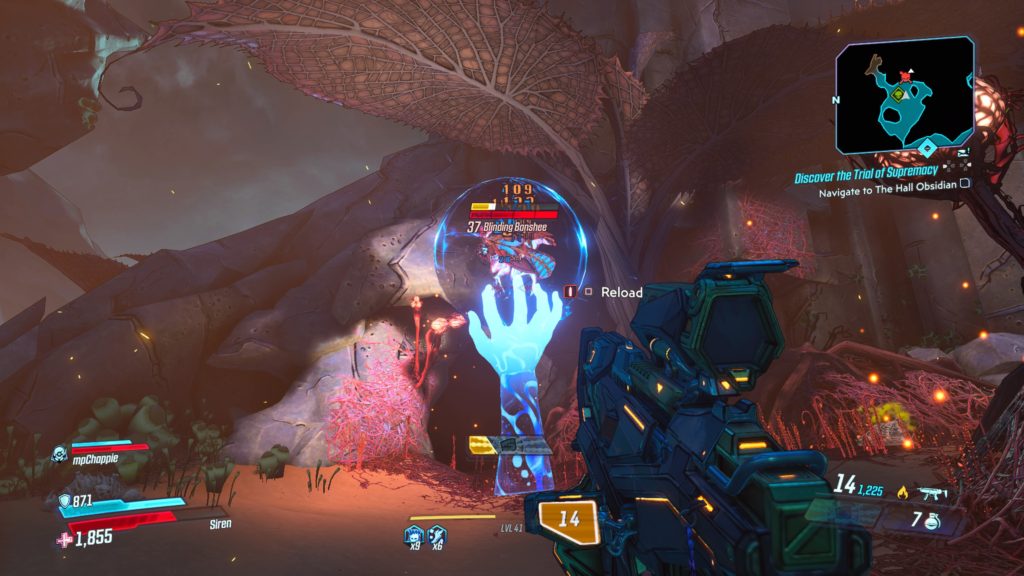
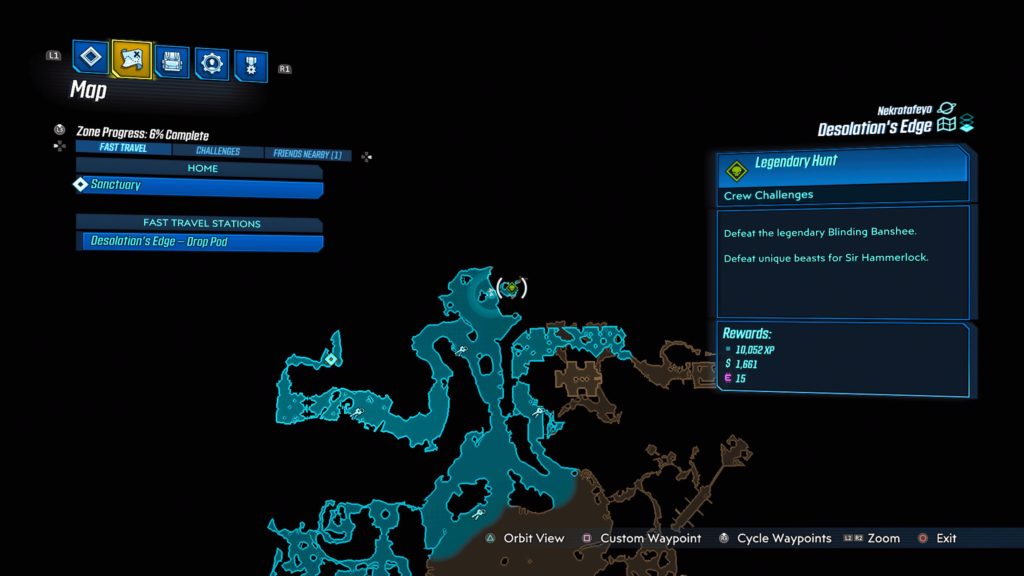
Desolation’s Edge
Blinding Banshee
The Blinding Banshee makes its home in a little inlet in the central most northern part of the map. See the map below for the exact location.
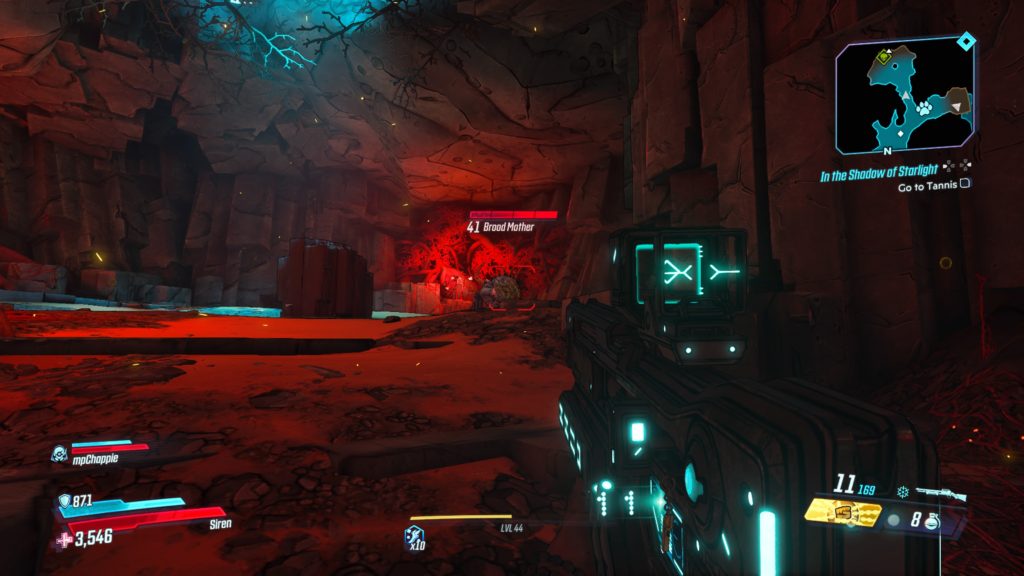
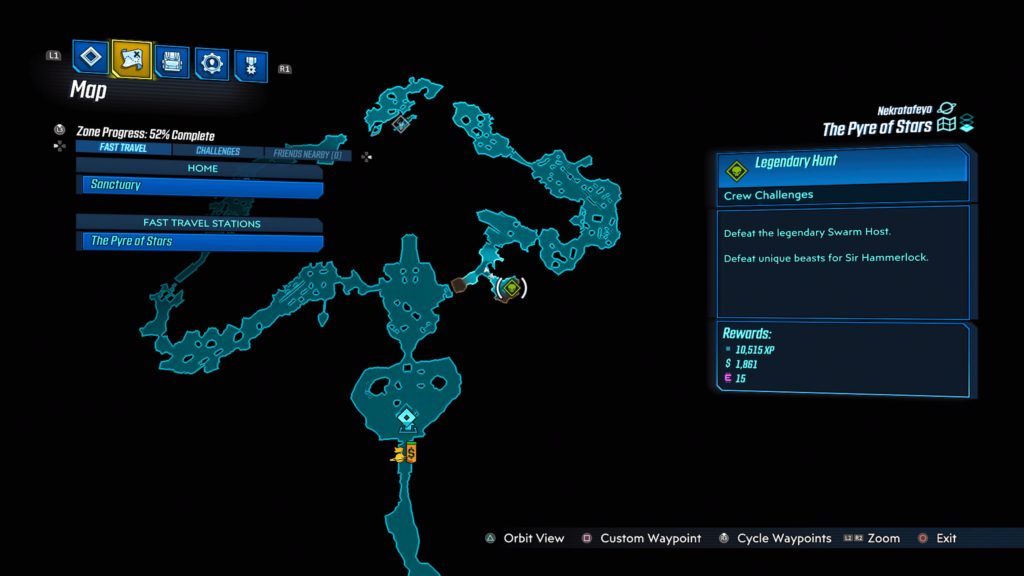
The Pyre of Stars
Swarm Host
The swarm host, Brood Mother, is located down the hallway connected to the Nekrotafeyo Pedestal.
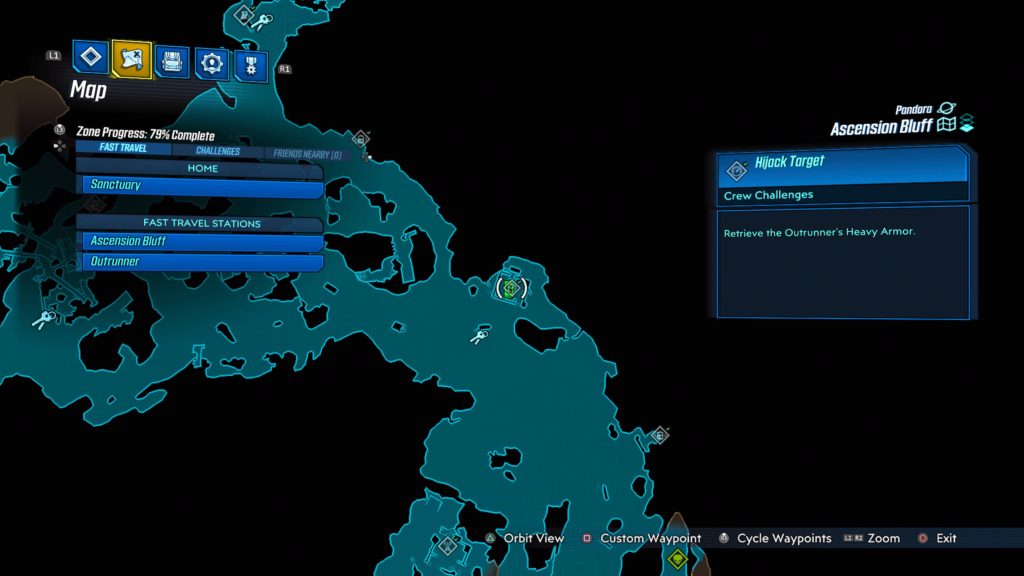
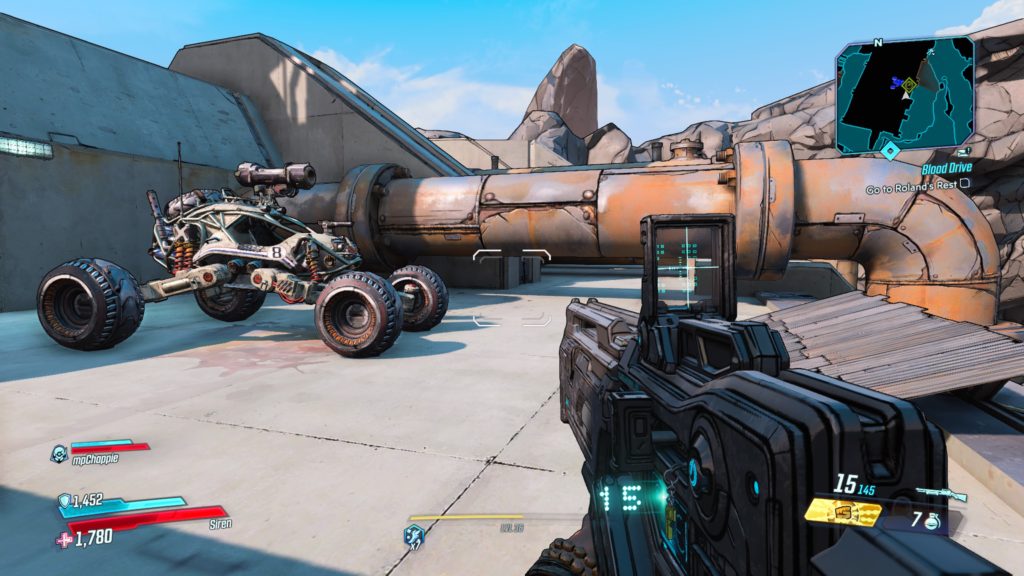
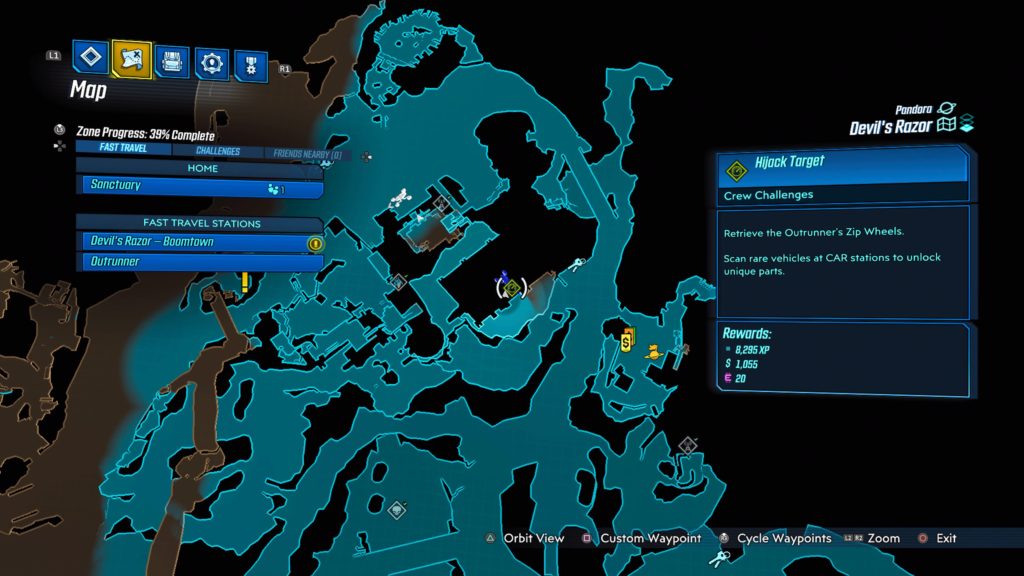
Welcome to NGB and our Borderlands 3 guide on the Hijack Target Crew Challenge. Here you’ll find the locations of all the vehicles needed to complete this challenge!
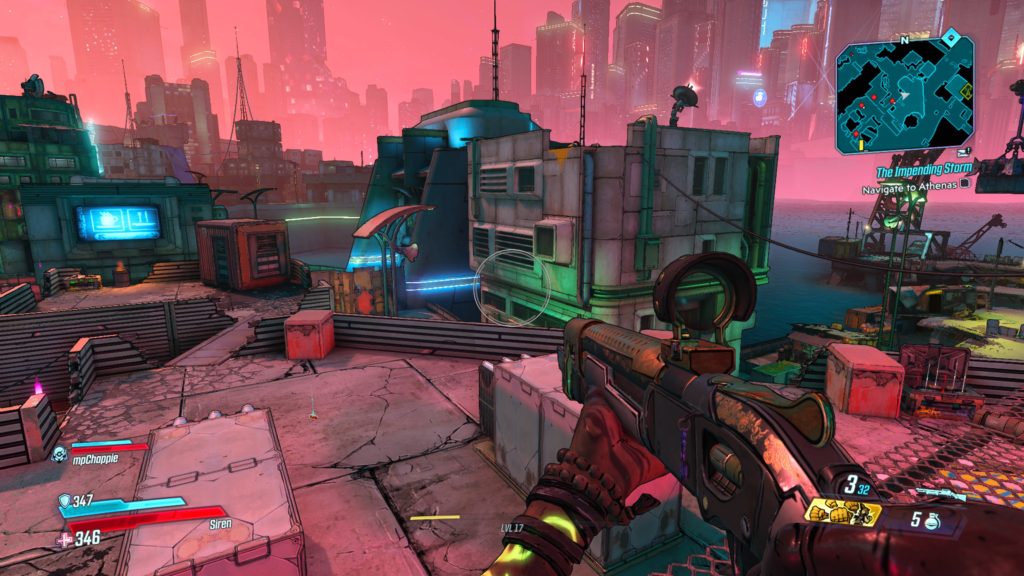
The Outrunner Heavy Armor is located on Pandora in Ascension Bluff at the southernmost central area, south of a Catch-A-Ride. See the map below for the exact location. To free the vehicle, you will need to open the giant gate. Follow the cord from the gate to a button at the top of a building in the back underneath the Children of the Vault billboard. Press the button to raise the gate then drive the vehicle to the nearest Catch-A-Ride.
Devil’s Razor
Outrunnter’s Zip Wheels
The zip wheels are located on a concrete platform northwest of Boom Town. To reach it, you will need to climb up the storage containers on top of the claptrap at the Sin-A-Plex. From there you can work you way over to it. See the map below for the exact location.
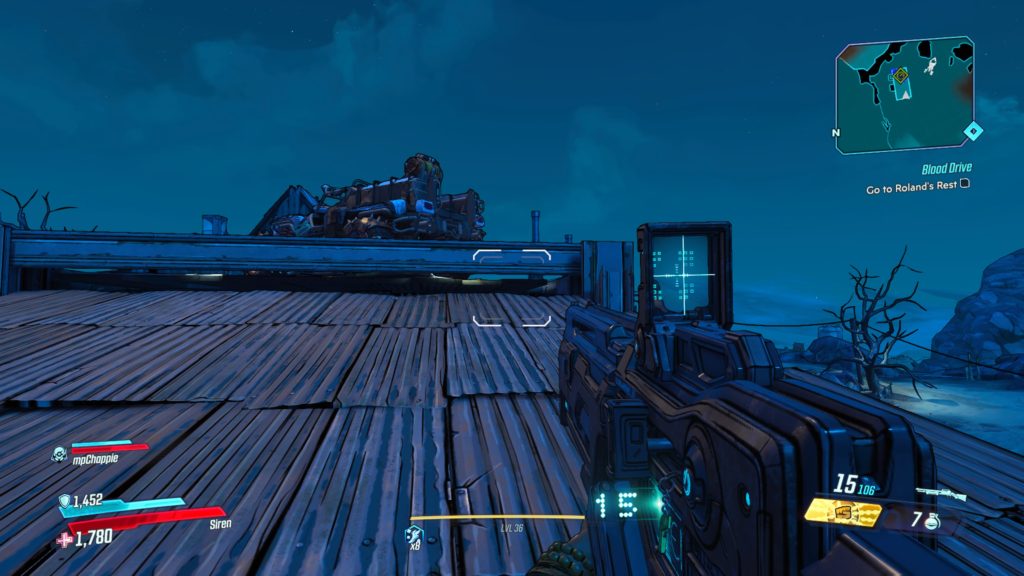
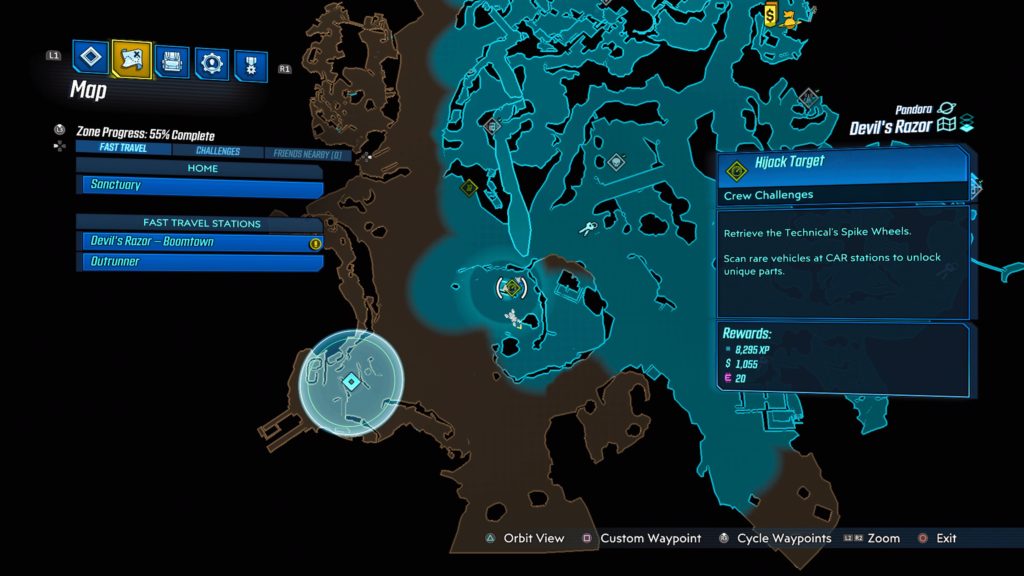
Technical’s Spike Wheels
The spike wheels are located on top of a shack underneath the Phalanx Pass Typhon Log. You can reach the vehicle by jumping onto the roof from the ground. See the map below for the exact location.
The Splinterlands
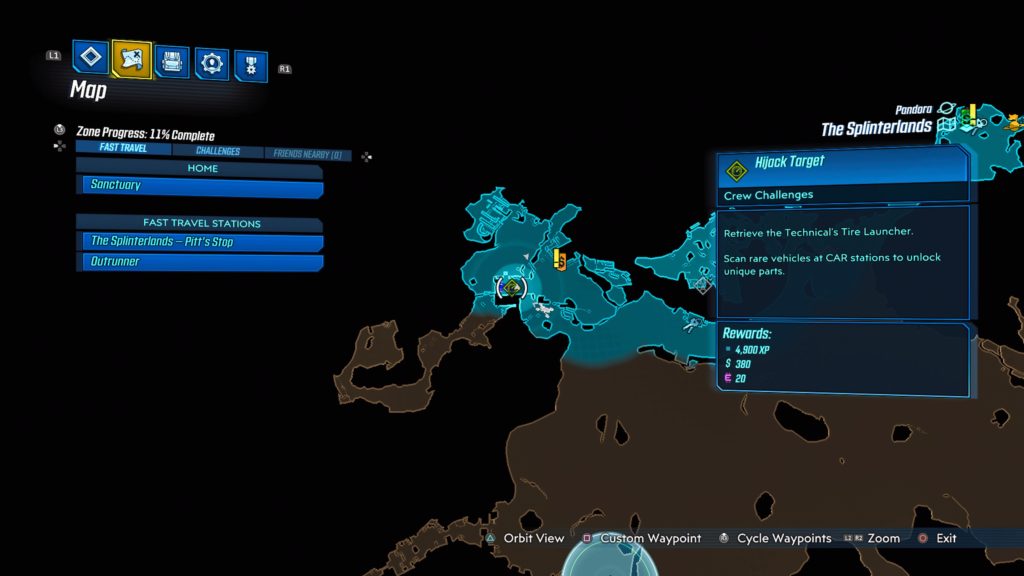
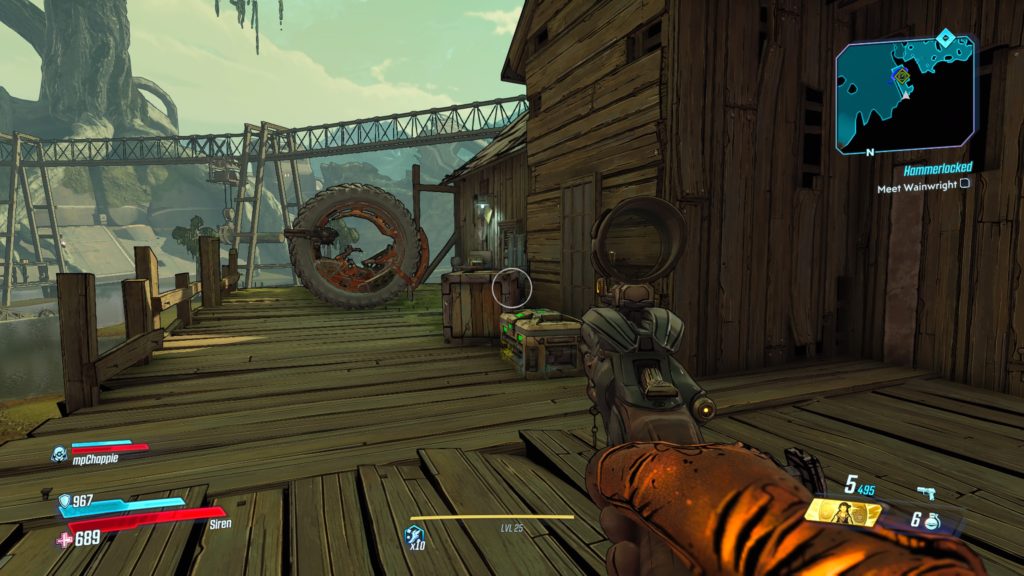
Technical’s Tire Launcher
This vehicle is located inside a structure in The Homelands. To unlock the gate, jump onto the large gear on the side of the building and follow the yellow paint up. Walk across the lower roof and jump onto the ladder. From here jump across to the lower roof and follow the cord to the electric box. Press the button to open the gate then drive the vehicle to the nearest Catch-A-Ride.
Promethea Hijack Target Crew Challenges
Meridian Outskirts
Technical Sticky Mines
The Technical Sticky Mines are located on the east side of the area. To reach it, start from the Meridian Outskirts fast travel station and exit Fort Pissoff. Take a ride and follow the road east until you come to a big open area with a stack of storage containers in the middle. From there, head northwest a short way to come to a broken bridge. Climb up the support beam on the left (west) side via storage containers to reach the platform with the Technical Sticky Mines. Drive it to the nearest Catch-A-Ride to complete the challenge.
Meridian Metroplex
Cyclone’s Sonic Booster
The Cyclone’s Sonic Booster is located behind a yellow barrier in Halcyon Suborbital Spaceport north of the Rise and Grind Coffee House. To shut off the barrier, follow the cable shooting the pipes above each of the broken sections of cable (there will be three spots in total). Drive the vehicle to the nearest Catch-A-Ride.
Eden-6 Hijack Target Crew Challenge
Floodmoor Basin
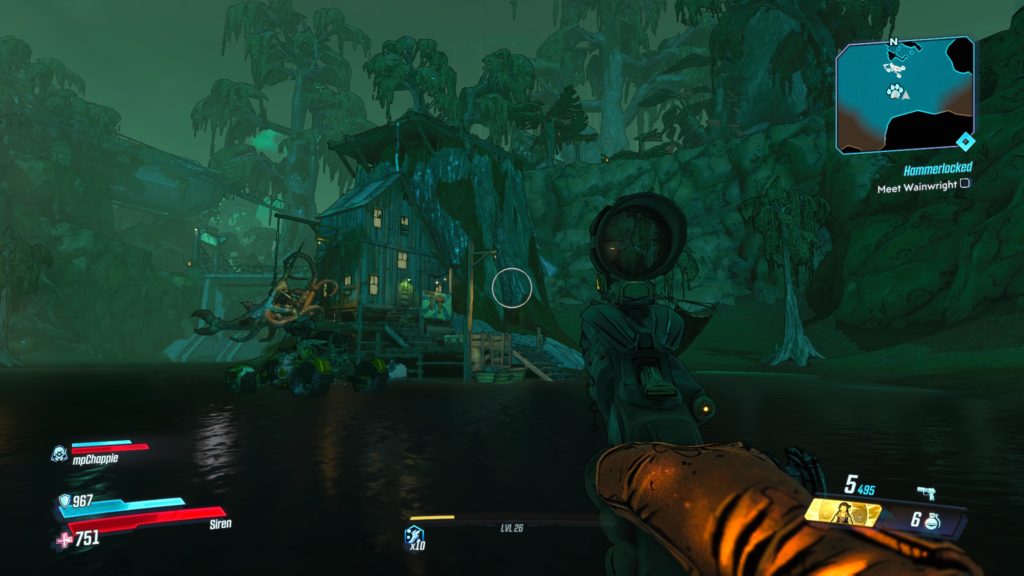
Cyclone’s Wide Wheel
The cyclone is located on a wooden deck next to an old wooden building. See the map below for the exact location. To reach it, start at the catch-a-ride nearest the drop pod facing north. Follow the road east until you reach a red barn. From the red barn, head west to the rundown looking settlement in the distance. Enter the settlement and make your way to the most northern building. Jump onto the roof of the building and walk over to the other side to find the deck. Drive the cyclone to the nearest Catch-A-Ride to complete the challenge.
Outrunner’s Razor Wings
The outrunner is located on a deck built on top of a giant rock (above the house with the shark and octopus in the front of it). To reach the outrunner, you will have launch your vehicle off a ramp near the entrance to Knotty Peak and land it on the deck containing the outrunner. See the map below for the exact location.
Nekrotafeyo Hijack Target Crew Challenge
Desolation’s Edge
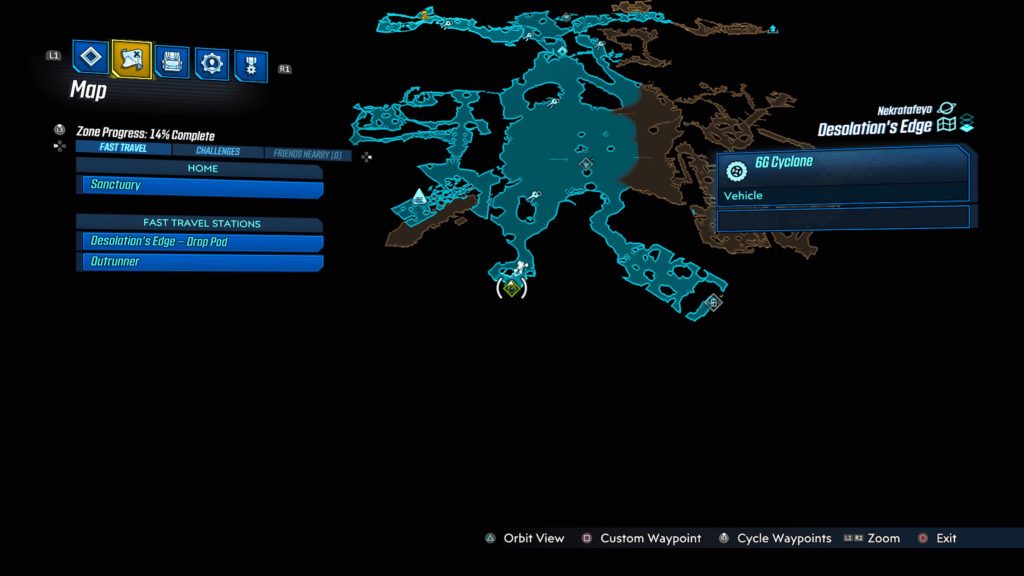
Cyclone’s Digithruster
The cyclone can be found in a garage overgrown with vines at the very southern part of the map. Melee the vines to “borrow” the cyclone and deliver it to the nearest Catch-A-Ride. See the map below for the exact location.
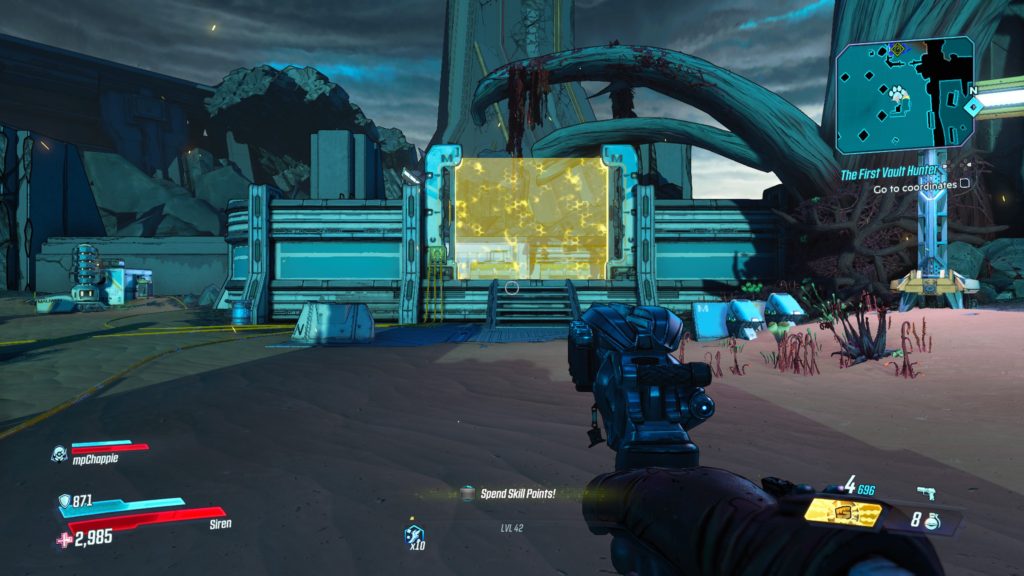
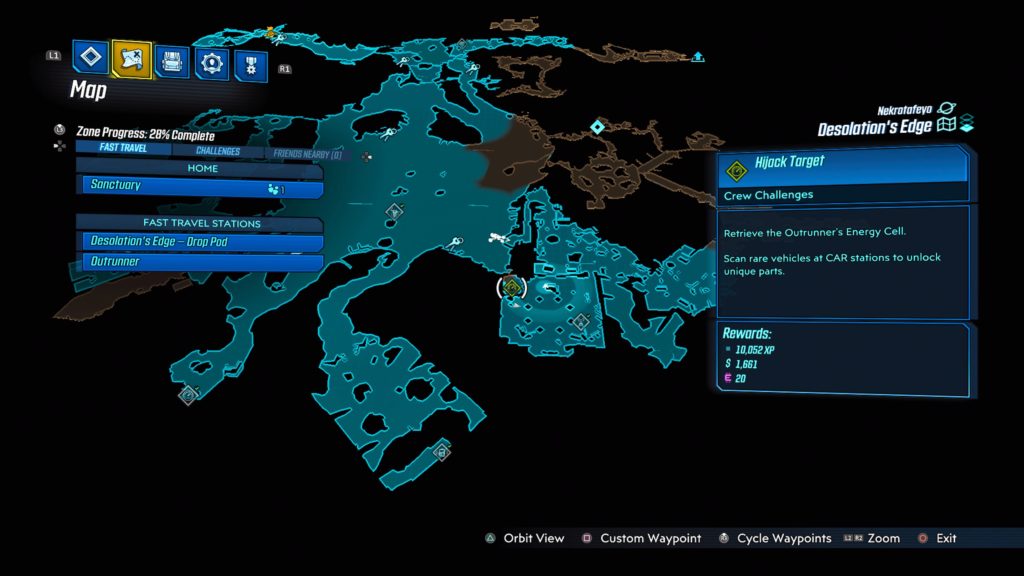
Outrunner’s Energy Cell
The outrunner can be found behind the yellow barrier. See the map below for the exact location. To disable the barrier, follow the three cords to each of their circuit boxes and shoot the boxes. You must do this quickly, because the yellow barrier will come back up fast, causing you to have to repeat the process.
Welcome to NGB and our Borderlands 3 guide on the Pandora Dead Claptrap Crew Challenge. Here you’ll find the locations of all the dead Claptraps in Pandora needed for this challenge.
Dead Claptrap Crew Challenge
The Droughts
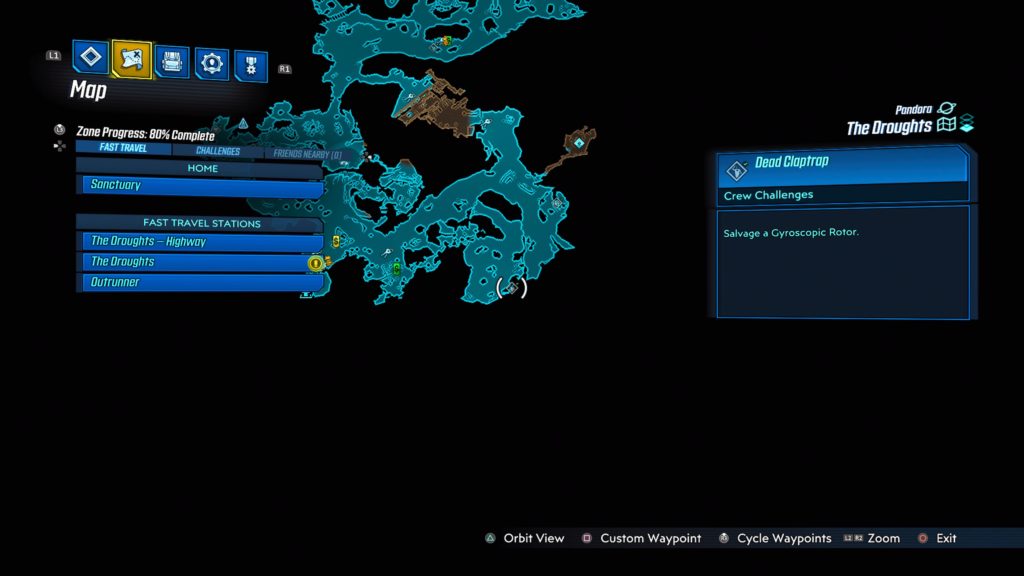
Super 87 Racetrack (Gyroscopic Rotor)
This dead claptrap can be found at the Super 87 Racetrack located in the Droughts on Pandora. See the map below for the exact location. To reach it, head to Ellie’s Scrapyard via Ellie’s Garage and follow the path under the Ellie’s Crap billboard to reach the racetrack. Once there, make your way to the northern part of the canyon to locate the wall of cars along a cliff. The Claptrap unit will be behind the wall, hanging upside down from a magnet.
The Droughts – Highway (Motor)
This dead claptrap is located on the hood of a car a short distance (southwest) from the Droughts – Highway fast travel station.
Ascension Bluff
The Path of Sacrifice (Supermax Deluxe 3D Surround System)
This dead claptrap can be found on the Path of Sacrifice leading to the Holy Broadcast Center at Ascension Bluff. See the map below for the exact location. It will be tied to a metal pole holding up some lights and speakers.
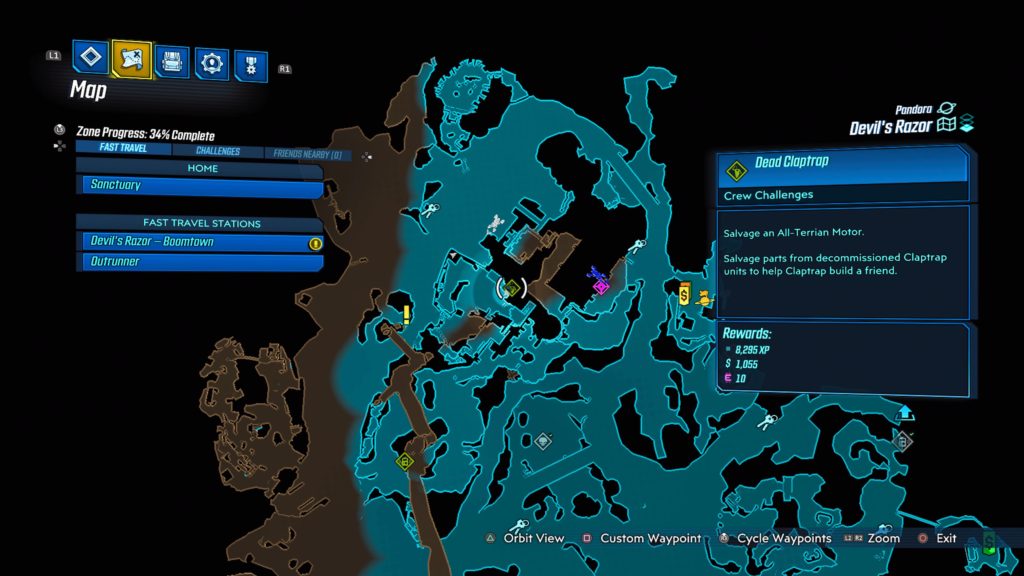
Devil’s Razor
Sin-A-Plex (All-Terrain Motor)
This claptrap is behind some storage units stacked onto of each other in the Sin-A-Plex located in the northern section of the map. See the map below for the exact location.
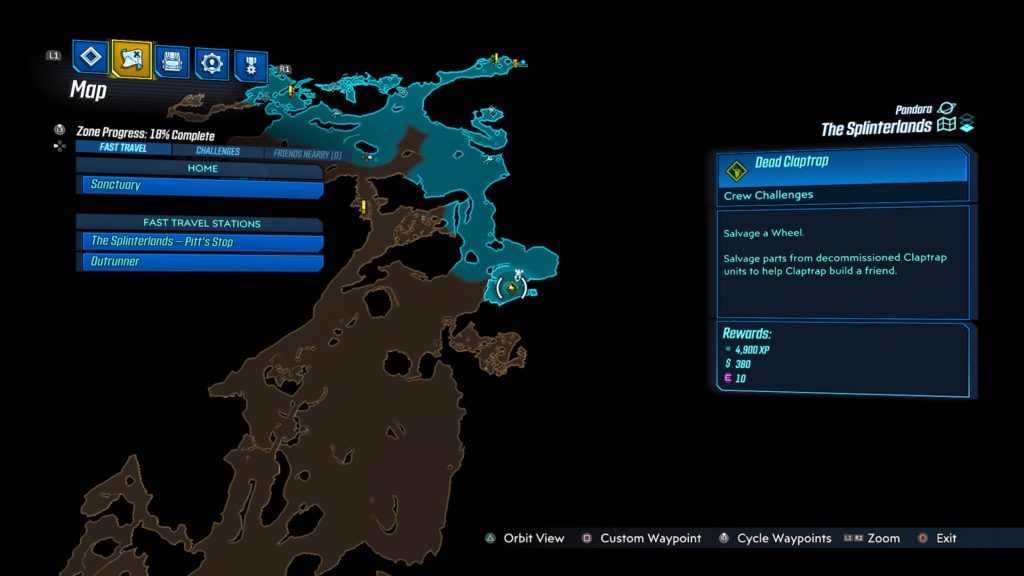
The Splinterlands
Wheel
This claptrap is located inside a wheel next to the giant roller coaster in the southeastern region of the map. See the map below for the exact location.
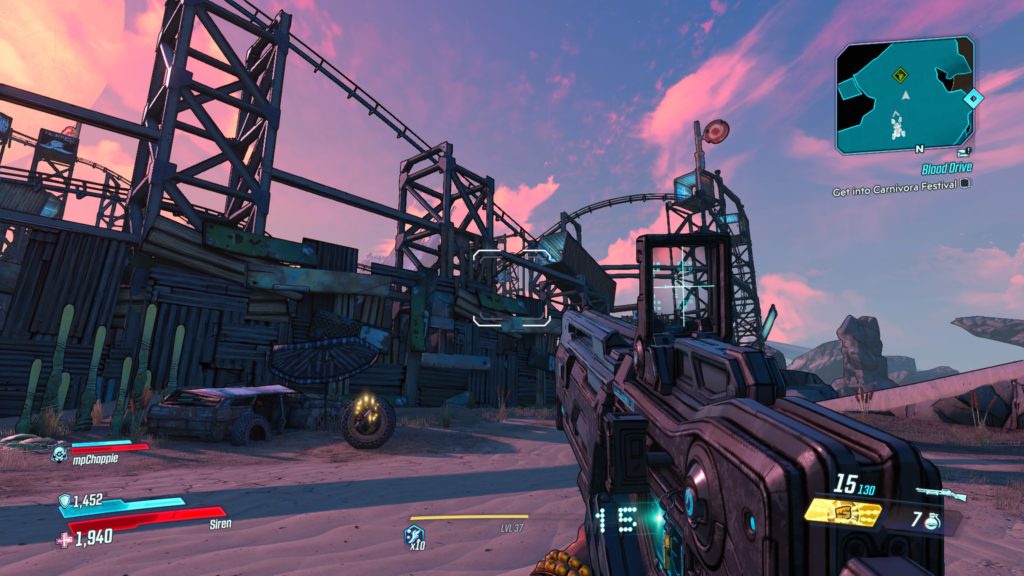
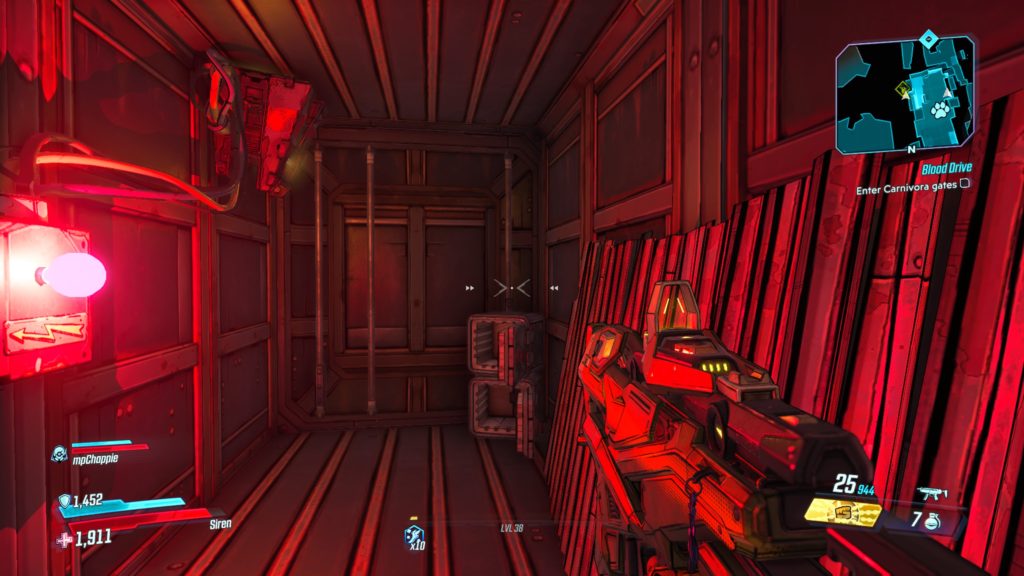
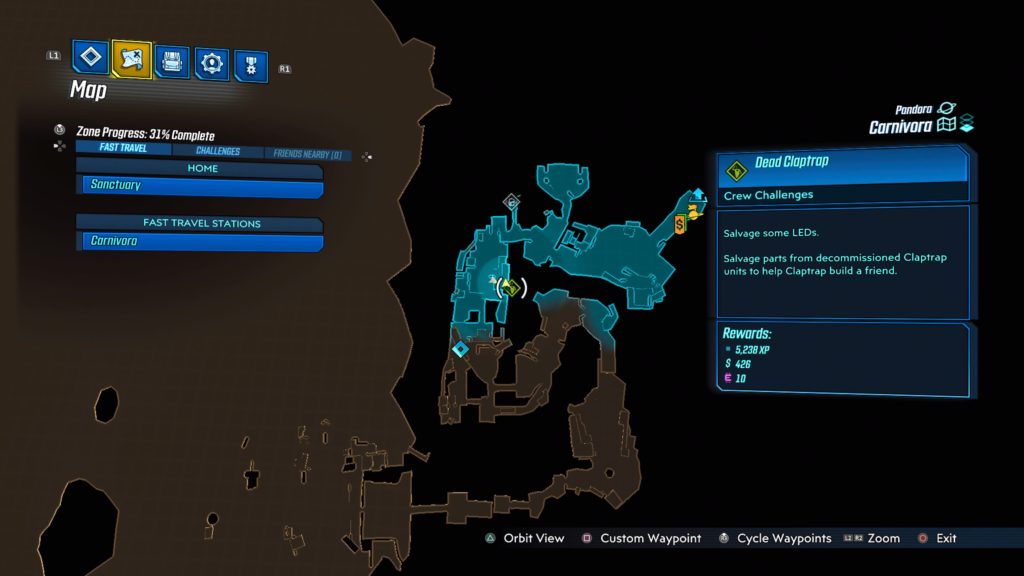
Carnivora
The Stacked Deck (LEDs)
Claptrap is located directly south of The Stacked Deck Typhon Log behind a bar like area in the bottom level of a storage unit that is lit with a red light. See the map below for the exact location.
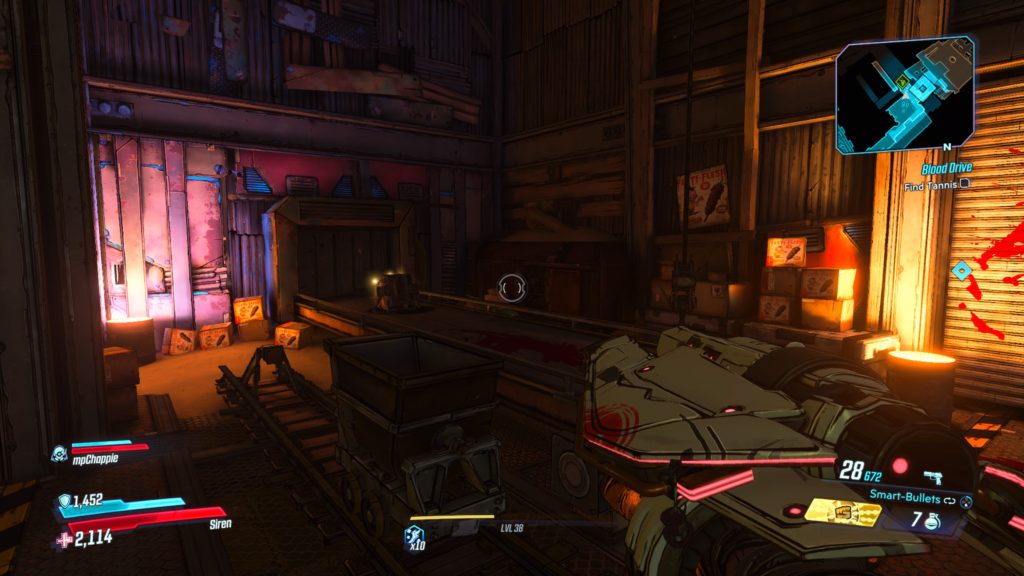
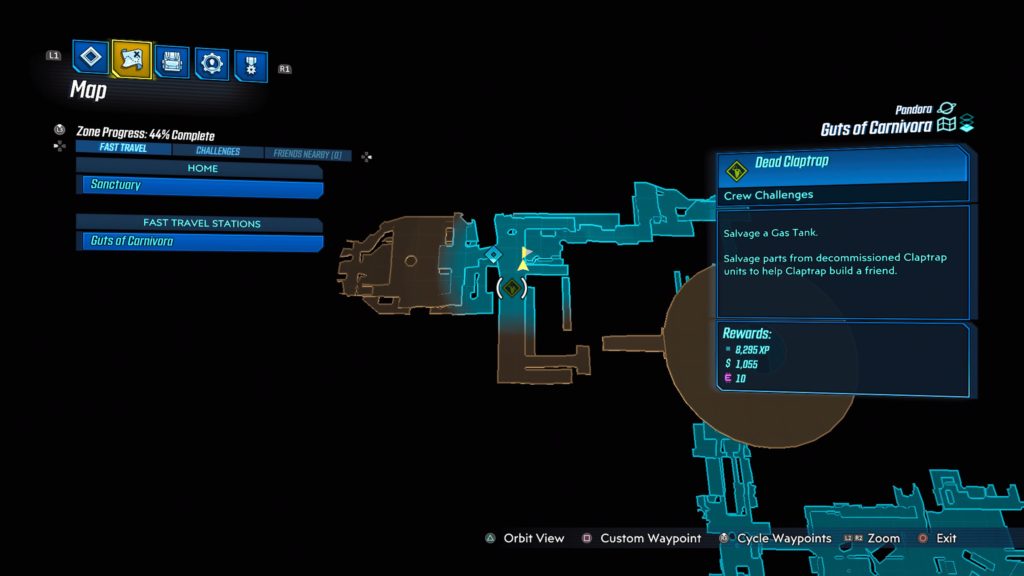
Guts of Carnivora
Windshaken Catwalks (Gas Tank)
Claptrap is located at the end of a conveyor belt just before Mack’s Head Room. See the map below for the exact location.
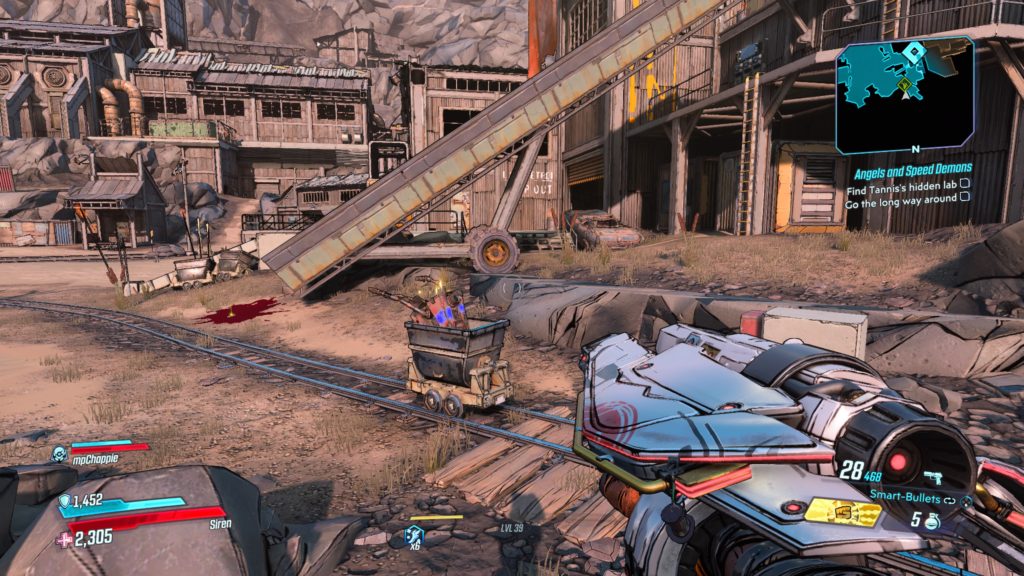
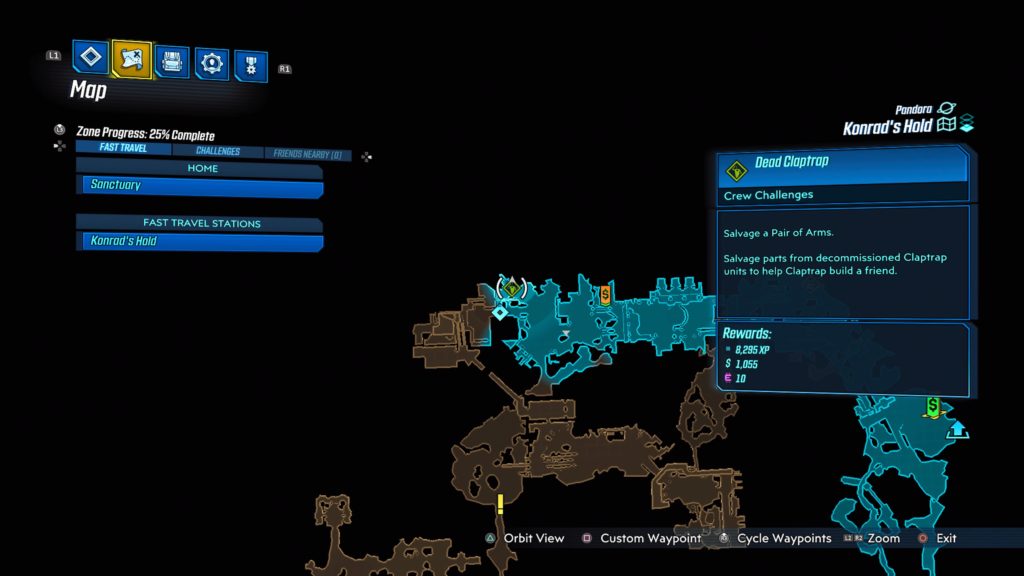
Konrad’s Hold
Fallback Tracks (Pair of Arms)
This claptrap is located in a mine car on the very top northwestern side of the map near Traitor’s Mess. See the map below for the exact location.
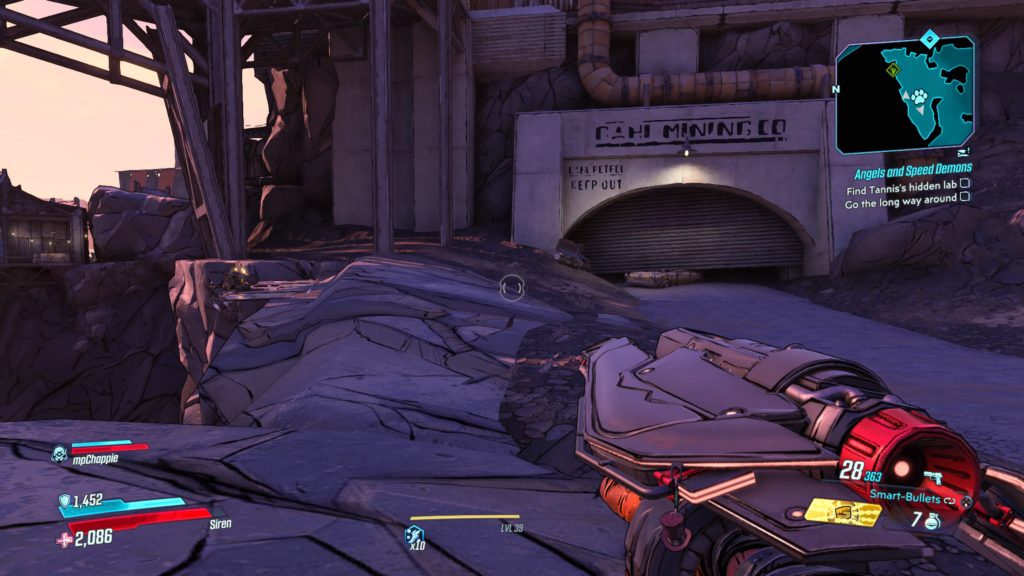
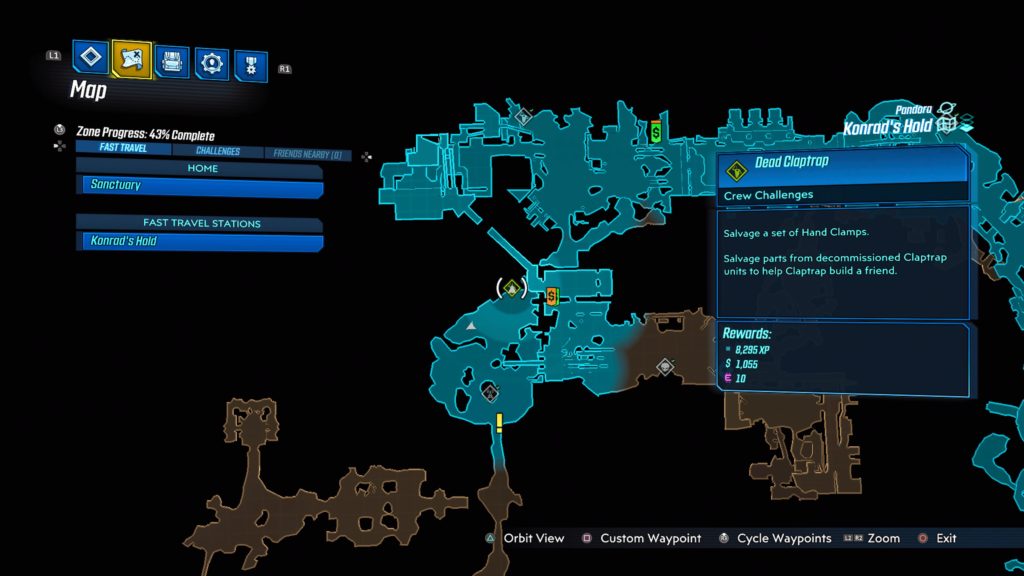
Last-Stand Yard (Hand Clamps)
This claptrap is located to the left of a sealed Dahl Mining Co door on the edge of the cliff across from the Konrad’s Hold Broadcast Tower. See the map below for the exact location.
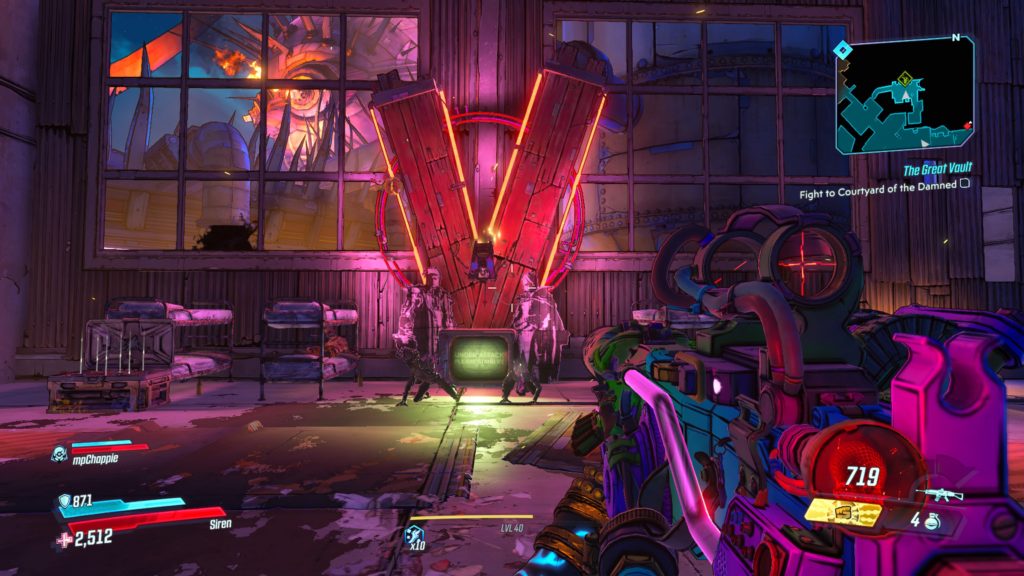
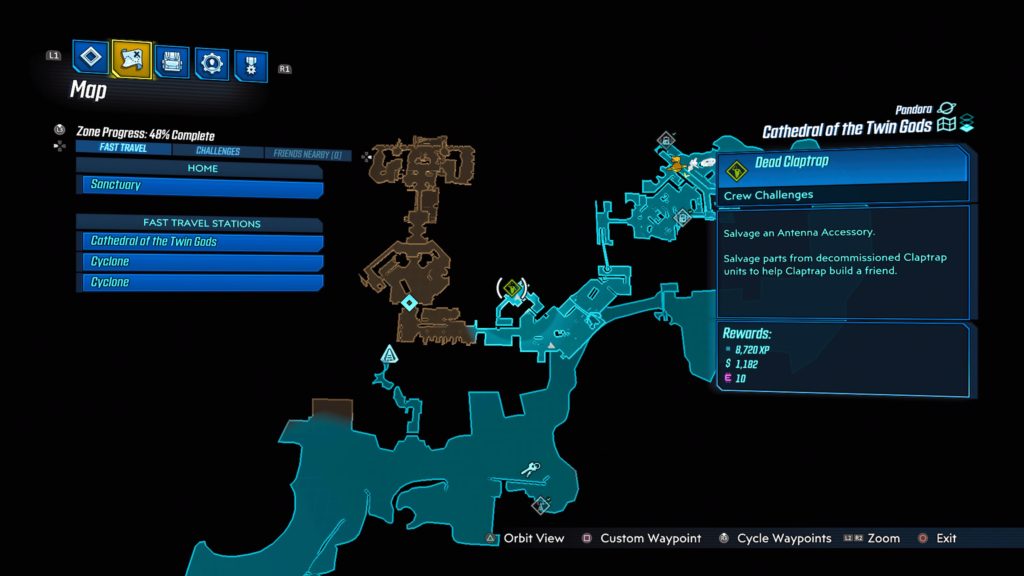
Cathedral of the Twin Gods
Outer Sanctum (Antenna Accessory)
This claptrap is hanging on a giant “V” in a bunkroom. After you crouch under a half-opened gate as part of the main story, you will enter a room with stained glass windows with images of Tyrene and Troy. Across from the stained glass, climb onto the raised metal platform and shoot the planks of wood on the door. Enter through this door to discover claptrap. See the map below for the exact location.
Welcome to NGB and our Borderlands 3 guide on the Promethea Crimson Radio Crew Challenge. Here you’ll find where to find the all the broadcast towers to complete this challenge!
Promethea Crimson Radio Crew Challenge
Meridian Outskirts
Meridian Outskirts Broadcast Tower
The Meridian Outskirts Broadcast Tower is located on the east side of the area. To reach it, start from the Meridian Outskirts fast travel station and exit Fort Pissoff. Take a ride and follow the road east until you come to a big open area with a stack of storage containers in the middle. Climb to the top of those containers and use the console to sabotage the tower.
Meridian Metroplex
Meridian Metroplex Broadcast Tower
The broadcast tower is located on the back deck of Dynasty Diner. To reach it, you will need to head to the second level right of the diner and use a shipping box to jump to the balcony where the terminal is located. Sabotage the tower to complete the challenge.
Lectra City
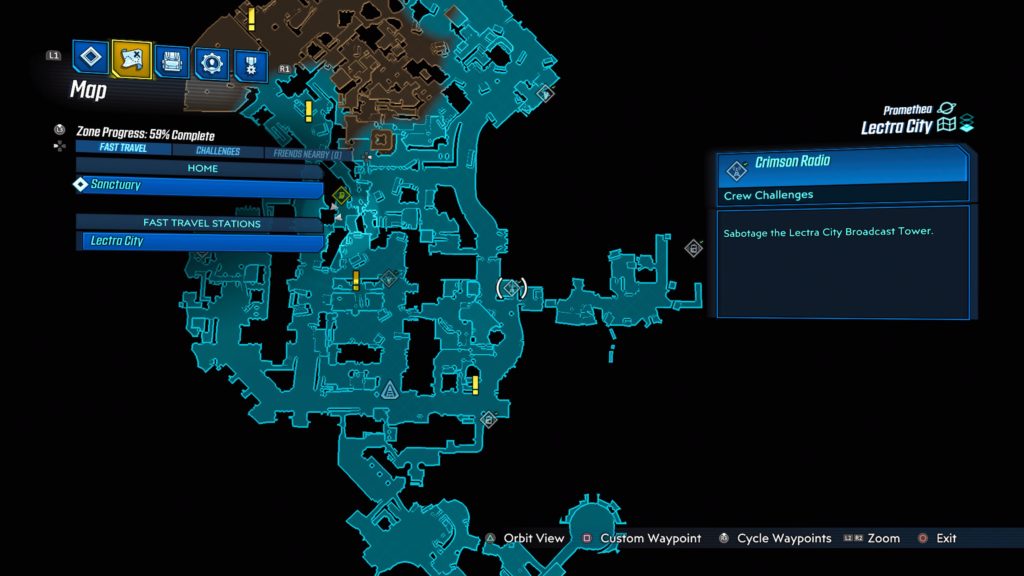
Lectra City Broadcast Tower
The broadcast tower is located in Market Quarter on the eastern side of the map on the roof of a tall building right before Big Dock Energy. To reach it, you will need to climb up to the roof of the adjacent building with yellow paint on the side of it across from the entrance to Big Energy Dock. From there, jump onto the street light with a speaker on it and then jump to the tall building. You will need to get a bit of a running start in order to make it onto the tall building’s roof. Sabotage the radio to complete the challenge. See the map below for the exact location.
Atlas HQ
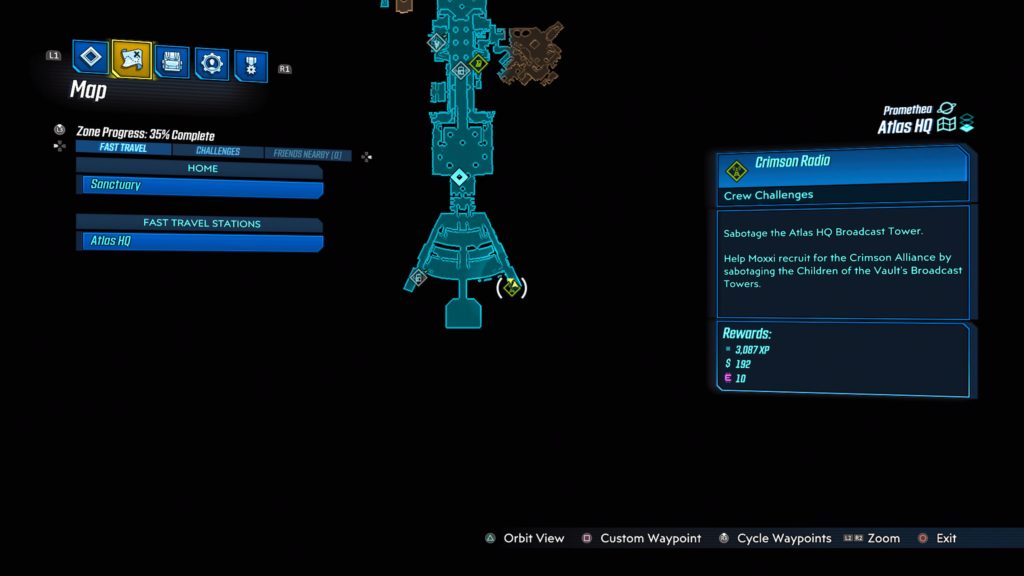
Atlas HQ Broadcast Tower
The broadcast tower is located at the south side of the Lobby of Self-Actualization near where the Maliwan command ship was during the Atlas, at Last main mission. See the map below for the exact location. Take the southeast walkway to the end then jump down to an area under it to locate the tower. Sabotage the tower to complete the challenge.
Obtained: Talk to the Street Chemist in the clinic at Z09 Hal’s Hideout 2F
Objective: Find the ingredients
Talk to the Street Chemist and agree to obtain the ingredients she needs. Head upstairs to 3F and talk to the Dandy Man to obtain the royal jelly. Then head outside and talk to the Slick Dealer sitting on the bench. You will find out that he needs a gunner drone. If you don’t have one, head back inside Hal’s Hideout and purchase the gunner drone from the Shady Merchant on 3F for 4,000G. Exchange the gunner drone for the bottled beetles. Head forward a ways under the tarps to find the Sharp Dealer next to a burn barrel. Talk with him to find out that he needs a password in order for you to shop with him. Use your Legion to spy on him to learn the password then speak to him again and select “right as rain” to purchase the fossil powder for 1,000G. Return to the Street Chemist and speak with her to obtain the drink. Then make your way to Akira and hand over the drink to complete the case.
Legion Tricks
Obtained: Talk to the Fretful Mother in front of Hal’s Hideout
Objective: Look after the child
Talk to the Fretful Mother and agree to babysit her child to trigger a cutscene. Per the request of Olive, break the boxes with a Legion. We used the Beast Legion by riding him into the boxes. For the next task, use the Arm Legion to lift the Throwme (haha!) sign. Lastly, use the Arm Legion to float in the air. Afterwards, the child’s mother will return and the case will complete.
In Love Again
Obtained:Talk to the Lovesick Man on Z09 Hal’s Hideout 3F
Objective: Find the lovesick man
Talk to the Lovesick Man and tell him that Brenda loves Lappy. After a brief cutscene, exit the hideout and make your way to the green circle on the mini map. The Lovesick Man will be laying on the floor in an alleyway. Use your Legion to blueshift him and then speak to him afterwards. Follow the Lovesick Man back to Hal’s Hideout 3F to trigger a cutscene and complete the case.
Read through the new Duty Reports to complete the case.
Olive’s Admirer
Obtained: Talk to the Lovesick Man on the balcony of Z09 Hal’s Hideout 3F
Objective: Find a way to woo Olive
Talk to the Lovesick Man and suggest giving a present to Olive. On 3F talk to Woman on Break and Dandy Man. On 2F talk to Hal, Gabbing Man and Talkative Woman. Return to the Lovesick Man and suggest whatever option you would like to trigger a cutscene, completing the case.
Fresh Air
Obtained: Talk to the Coughing Man located in Z09 Lower Camp Level near the purple gas
Objective: Clear the poison gas
Talk to the Coughing Man and agree to help him clear the air. Use the Axe Legion to destroy the bulbs creating the toxic waste. In order to reach the bulb on the ledge, you will need to climb up a yellow ladder near the bulb next to a chest. When you destroy all the bulbs, talk to the Coughing Man to complete the case.
Measuring Up
Obtained:Talk to the Surveyor in Z09 Lower Camp Level
Objective: Measure the distance
Talk to the Surveyor and agree to use the IRIS as a measuring instrument for him. Head to the circle a short ways away and activate the IRIS to get the distance from the Surveyor. Head back and talk to him. Choose the 15m option. Next head to the second circle on top of the shipping containers. To reach the circle, climb up the yellow ladder near the Surveyor and use your Legion to pull you to it. Once there, activate the IRIS to get the distance from the Surveyor. Head back and tell the Surveyor 18m. For the last measurement, you will need to measure the distance between the two circles. To do this, head to the closest circle and measure the distance from the Surveyor (7m). Then head to the second circle and use your IRIS again to measure the distance from the Surveyor (22m). Subtract the distance of the first circle from the distance of the second circle, which will give you 15m (22-7). Head back to the Surveyor and tell him 14m to complete the case.
Special Delivery
Obtained: Talk to the Busy Man in Z09 Lower Camp Level
Objective: Deliver the storage key
Talk to the Busy Man crouched down when you first enter Z09 Lower Camp Level from Hal’s Hideout to obtain a storage key. Follow the objective to find the Forgetful Man and talk to him to hand over the storage key, completing the case.
Gate Disposal
Obtained: Approach the gate
Objective: Destroy the gate
The gate is located in Z09 Lower Camp Level northeast of Hal’s Hideout. Use your Legion to destroy the gate to complete the case.
Drifting Apart
Obtained:From the Concerned Man at Z09 Lower Camp Level after completing the blue side case Fresh Air
Objective: Find the lost friends
Talk to the Concerned Man and agree to look into what his friends are doing. The first friend (somewhere with dogs), Dog Lover, can be found around the corner from the Surveyor from the Measuring Up blue side case standing next to a dog. The second friend (high-up places), Relaxed Man, is located on a metal fire escape up the ladder behind the defective gate detector from the main story case. The third friend (near the tents), Lonely Man, is located right outside of Hal’s Hideout next to a burn barrel. Once you find all three friends, a cutscene will trigger and the case will complete.
Bad Medicine
Obtained: Automatically by approaching the Former Doctor near Hal’s Hideout after fixing the defective gate detectors as part of the main story case
Objective: Blueshift the civilian
When you approach the Former Doctor a cutscene will trigger. Use your Sword Legion to blueshift the woman on the couch, completing the case.
Head to the garage and talk to Tabuchi. He will give you a list of parts that he needs and will ask you to find them. Head to Tabitha in the Technical Crew on B3 at HQ to speak with her. Select a bolt, spring and radiator when prompted. Head back to the garage and give Tabuchi the parts to complete the case.
A Thief In Neuron?!
Obtained: Talk to Careful Medic in the Command Room at HQ
Objective: Find the supplies
Talk to the Careful Medic in the Command Room to learn that some supplies went missing. Head to the camera in front of the Command Room and analyze it using your Legion. Check the replay then head to the elevator room. Once there, analyze the camera to view another replay. Talk to the Resting Medic then head to the Heliport. Exit the elevator and head through the doorway and take a right to find the Drone Crew member. Talk with him to complete the case.
Gate Disposal
Obtained: Approach the gate
Objective: Destroy the gates
The gate is located on the right side of the Harmony Media Center (spinning car out front). Use your Legion to destroy the gate. After you destroy the gate, another gate will spawn in the street nearby accompanied by some chimeras. Focus on destroying the gate to stop the chimeras from spawning. Once you close the gate, the case will complete.
Little Boy Lost
Obtained: Inspect the scene with two police officers and a lady at Z33 Harmony Square
Objective: Search the area and rescue the child
Interact with the Alert and Watchful Officers near a barricade south of the Search Harmony Square main mission objective to learn that a boy is missing. Facing the police officers head right across the street and locate the platform with a spinning car on it. You will find a Lappy Doll on the ground next to it. Give it to the Beast Legion to track the scent. Follow behind the Legion until you arrive at a gate. Enter the gate and work your way forward by using the Axe Legion to destroy the barriers blocking your way until you come across the boy. Approach him to trigger a cutscene, completing the case.
Search
This site uses cookies. By continuing to use this website, you are giving consent to cookies being used. For more information on cookies, view our Privacy Policy.OkPrivacy Policy