Welcome to our guide for the Beautiful Secrets mission in Starfield! This guide will walk you through starting the mission and detail the necessary steps for its completion. If you need help with a specific mission objective, check the quick links section to easily find the information needed.
Some of the planets referenced in our guides and walkthroughs may not match yours due to how Starfield was created. In these situations, what you do and the places you visit on those planets should remain the same.
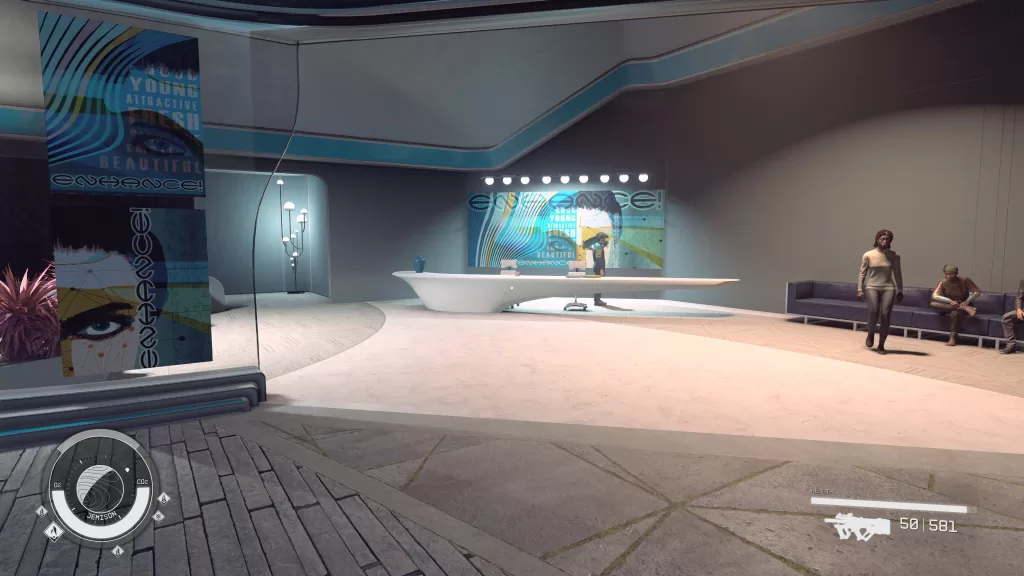
Beautiful Secrets is one of the misc missions you can pick up on New Atlantis. To start it, travel to the Commercial District and head to Enhance (past Infinity LTD). Go inside then locate and speak with Warner Connell. During the dialog, choose the options about protecting data to guilt him into admitting he lost a data disc with his client’s info on it and that he needs help recovering it.
Beautiful Secrets Walkthrough
Find Warner’s Lost Data Slate
To begin your search for the missing data slate, travel to Whetstone near the SSNN building and head inside.
Make your way to the booth next to the honeycombed wall then look on the table to spot the Enhance! Patient Files. Snag it and bring the data slate back to Warner to complete the mission. You’ll be rewarded with 100 EXP and 1000 credits.
Additional Starfield Guides and Walkthroughs
Be sure to check our main Starfield Guides and Walkthroughs page for additional content on Starfield, such as additional guides to assist you during your adventures in the Settled Systems!
Welcome to NGB and our guide for Starfield the A Tree Grows In New Atlantis mission! In this guide, you’ll learn how to start this mission along with the steps you’ll need to take to complete it. If you’re here looking for help with a specific mission objective, please check out the quick links section which should point you to the right section!
A Tree Grows in New Atlantis is one of the misc missions you can pick up on New Atlantis. To start it, travel to the MAST District and head for the big tree in the center of it directly ahead when you emerge from the NAT. You’ll find Kelton Frush standing under the tree examining it. Speak with him and ask if there is a problem then offer to help.
A Tree Grows In New Atlantis Guide
Locate the Bio-Sensors
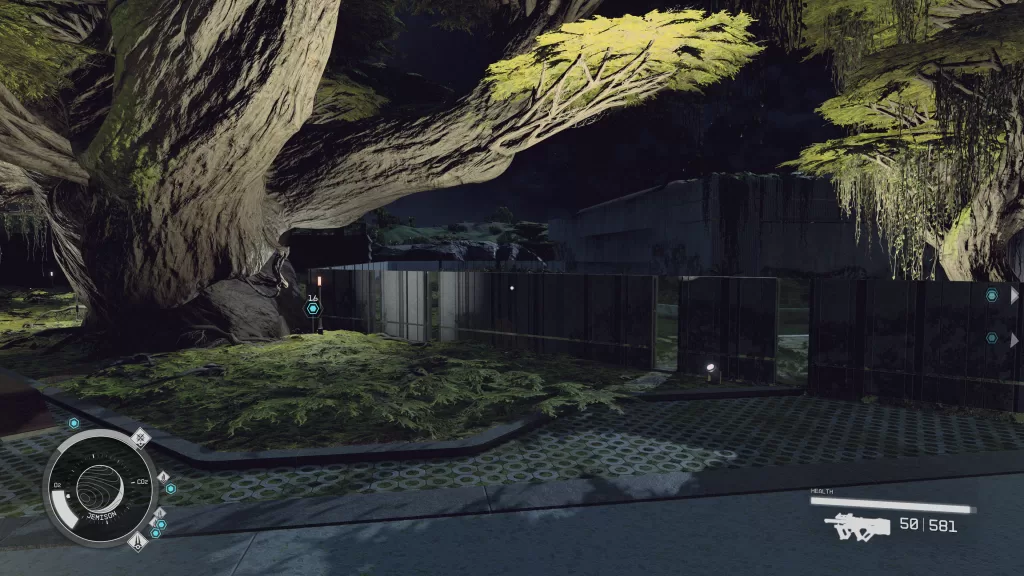
The first bio-sensor can be found east of Kelton next to a tree along the fence to the Lodge. Grab it then head over to the next sensor.
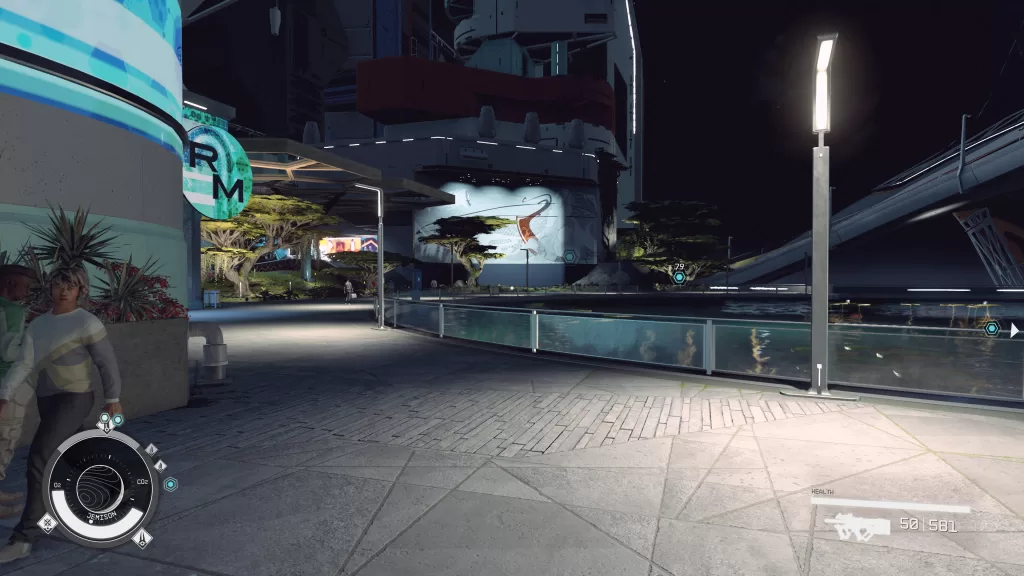
Next, travel southeast into the Residential District (south of the Lodge) past the Reliant Medical at the end of the walkway. You’ll find it next to a tree there.
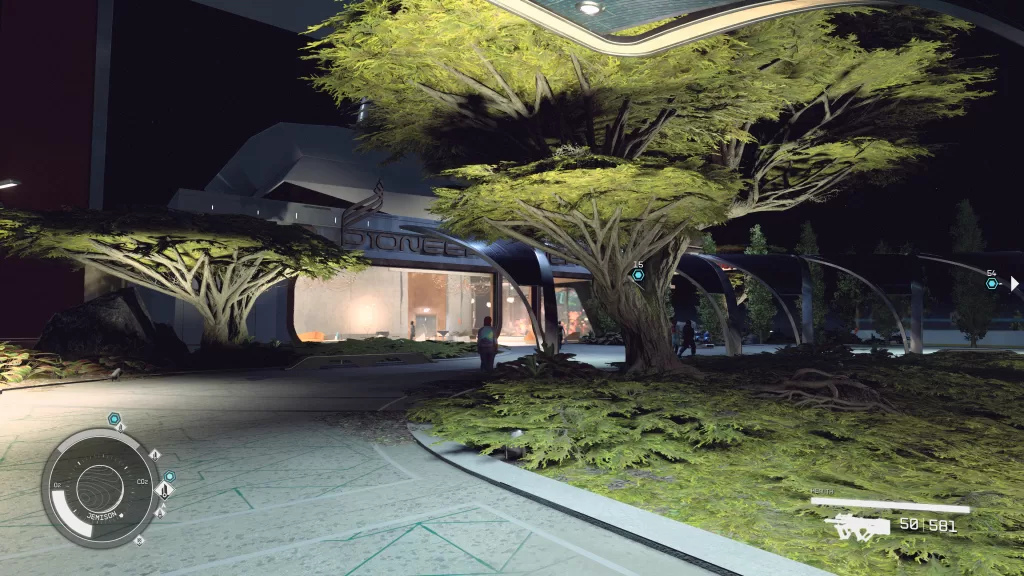
Number three is located in a tree out front of Pioneer Tower at the southern end of the Residential District in front of Pioneer Tower.
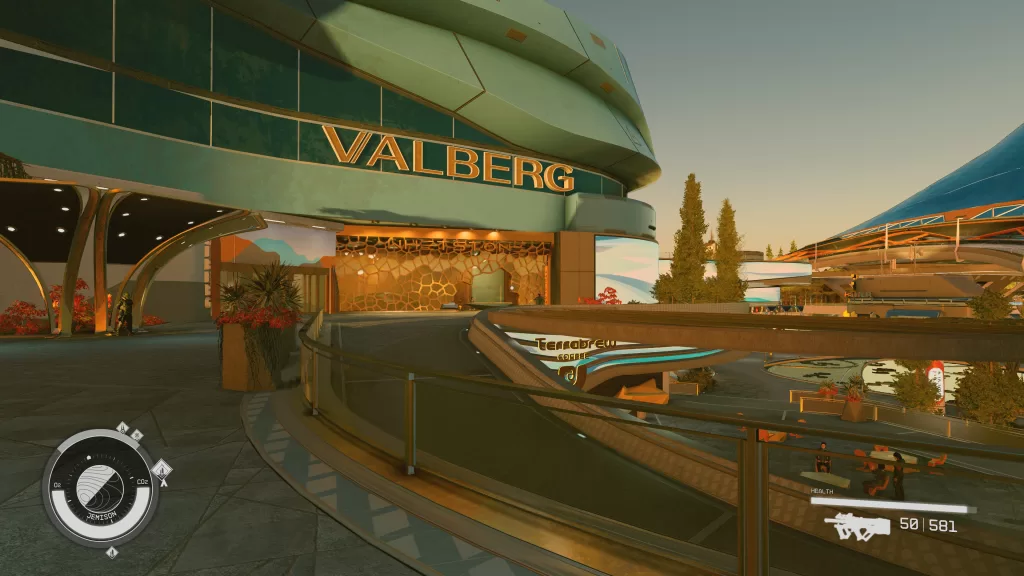
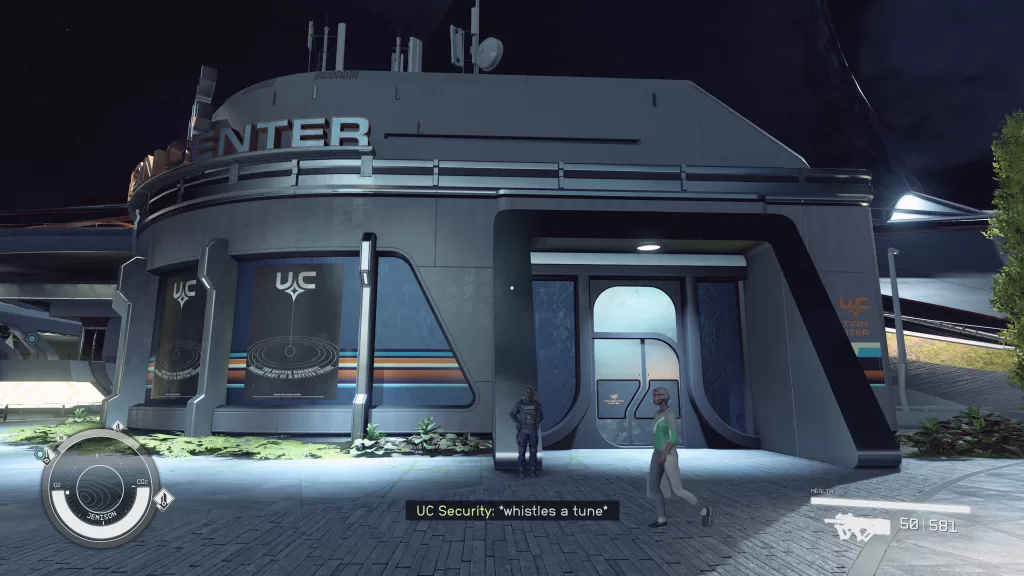
The last sensor can be found in the Commercial District near the SSNN building. As you approach the building, Jorden Anchali will ask you to tell him if you spot any eggs lying around as he wants to collect the most to sell to Wen Tseng. He’ll also tell you that he already sold one to her. You can find her in the UC Distribution Center past TerraCoffee. Head inside and speak with her and mention the egg she bought from the kid. She’ll give it back to you for what she sold it to the kid for plus a little extra (100 credits). If you ask her if she can just give it to you, you’ll get the option to steal it from the backroom. Make sure to watch out for the security guard if you choose to steal it!
Deliver the Sensors
With all the sensors in hand, return to Kelton and hand them over. You’ll then need to wait a couple of moments for the data to be analyzed. Speak with him again when it’s done to learn what’s happening to the tree thus completing the quest. You’ll be rewarded 100 EXP and some credits for your trouble.
Welcome to NGB and our guide for the Olive Branch Starfield mission! In this guide, we’ll cover how to start the mission along with the steps you’ll need to take to complete it. If you’re here looking for help with a specific mission objective, please check out the quick links section which should point you to the right section!
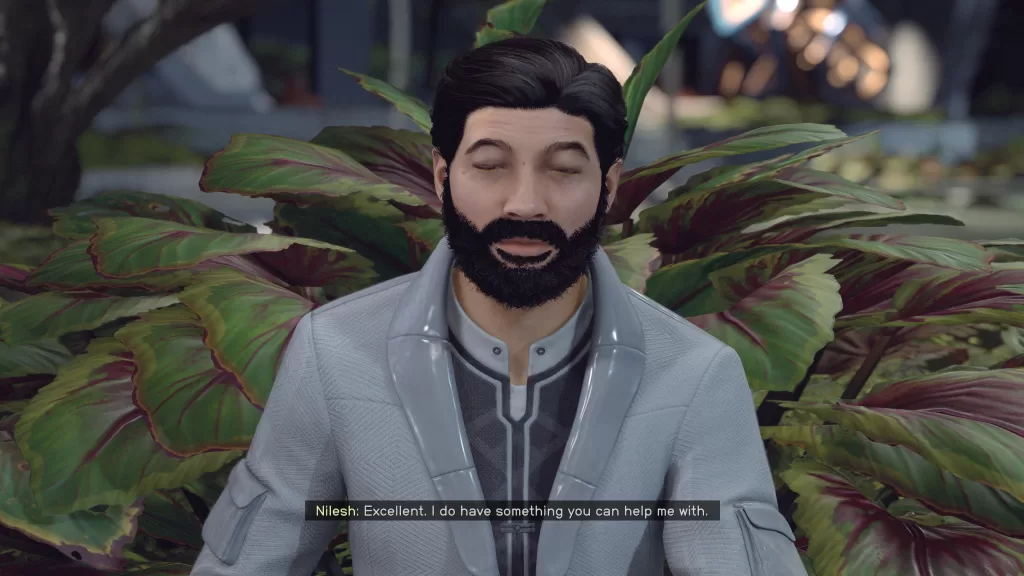
Olive Branch is one of the misc missions you can pick up at New Atlantis. To start it, locate and speak with Nilesh Sherazi in the MAST District. From the NAT, head straight forward. When you reach the outdoor area, continue straight ahead towards the giant tree. Nilesh can be found sitting on the cement bench to the left of the giant tree. Tell him you’re looking for work and he’ll request that you plant an Olive Seed for him in the hopes that it becomes a symbol of peace.
Olive Branch Starfield Mission Guide
(Optional) Hand the Seed Over to the Guard
If you want to go this route, just find a guard in the area and hand this seed over to them. This will complete the mission, but you’ll get no rewards.
Plant the Olive Seed
The spot to plant the olive seed will be right behind where Nilesh is sitting across from a guard. Try planting the seed across from the guard and the guard will yell out to you. Talk with Nilesh and have him distract the guard. Once the guard’s back is turned you can stand behind him and plant the seed. Note, you might want to quicksave before asking Nilesh to cause a distraction as it might take a couple of tries to make sure both he and the guard are positioned correctly.
Talk with Nilesh again afterward to let him know the deed has been done. The Olive Branch mission will complete and you’ll be rewarded with 100 EXP and some credits.
We’ve finally made it to Baldur’s Gate!! Too bad it’s not under better circumstances though. Our Baldur’s Gate Quests guide will cover the quests you can find around the city and what you’ll need to do to complete them.
Aid the Underduke
You can grab this quest in Sharess’ Caress by listening in on Earspoon and Borgus Elamin’s conversation and then using your powers of persuasion for more details. Before heading to the Underduke, head south through the South Span Checkpoint then follow that path west to reach a beach where two factions will be battling. If you aid the nige fingers, you’ll gain some favor with the Underduke. From this point on, the Aid the Underduke quest coincides with the High Harper companion quest for Jahiera. Check out this guide here for the rest of the quest starting at the Speak to Nine-Fingers Keene at the Guildhall section.
Avenge the Ironhands
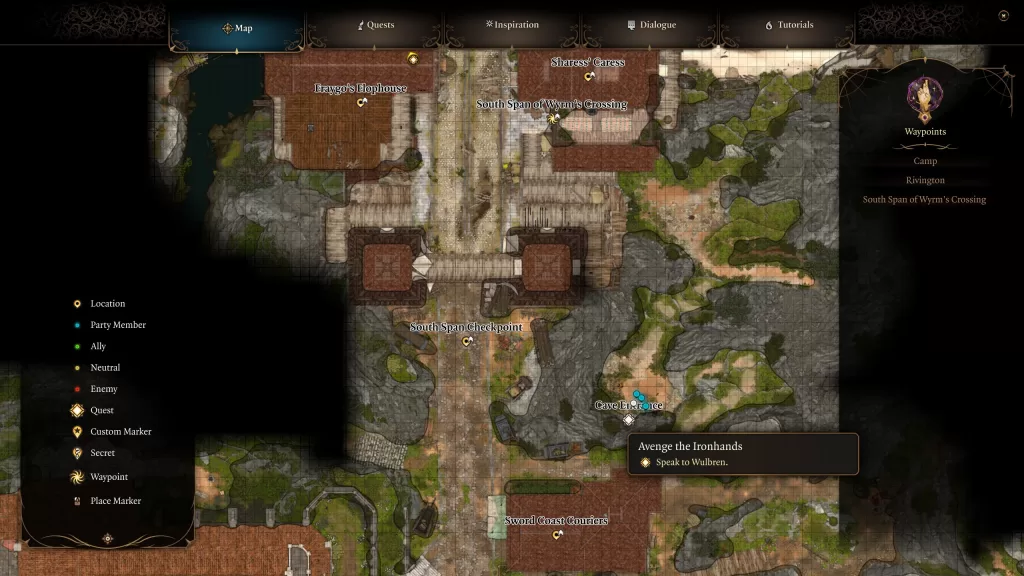
You’ll get this quest when trying to enter the city. Approach the gate and the Gauntlet will demand coin. You’ll then be scanned by the watcher who will label you a threat. Choose the first option (the 2nd leads to everyone’s disapproval) to trigger an event. You can follow the gnomes east of the checkpoint (north of Sword Coast Couriers) to a cave.
Enter it then locate and speak with Wulbren. During the conversation, he’ll ask that you destroy the Steel Watch Foundry.
Deal with the Devil
To pick up this quest, speak with Korrilla on the 1st floor of Sharess’ Caress to be informed that Raphael is waiting for us on the top floor. Make your way up to Sharess’ Caress’s Upper Floor and enter the Devil’s Den. During a dialog with Raphael, he’ll tell you how to free Prince Orpheus and provide the means to do so asking for the crown controlling the Elder Brain in exchange. If you make the deal, then you’ll have to deliver on your promise (or betray Raphael later). If you decide to turn down the offer (you can come back and accept it later), there is a way to still get what you need and not side with the devil. We’ll cover that in our The Githyanki Warrior companion quest guide for Lae’zel.
Find Dribbles the Clown
Stop by the Circus of the Last Days then head for the northeastern part to view the Dribbles show. Go up on stage as an assistant to learn the Dribbles is a doppelganger. Defeat him and the other 3 enemies accompanying him then speak with Lucretious and tell her you’ll look for Dribbles.
Clown’s Severed Hand
Dribbles’ hand can be found in the Circus of Last Days on a plate near Popper on the west side of the circus. Taking the hand will cause dialog with the creature. You can either talk it into letting you keep that hand or buy it off of him.
Clown’s Severed Torso
To find Dribbles, enter the Open Hand Temple right next to the circus and make your way to the kitchen. Interact with the Wooden Ornate Hatch to reach the basement of the temple. Head to the southern room filled with lots of books. Jump to the rock in the southeastern corner. From there, you can jump to another rock leading to a hidden area. Follow it around looking for a group of corpses on the ground. You’ll also want to loot the corpse of Penela Lumpensicks to find Dribble’s body for the Find Dribbles the Clown quest.
Clown’s Severed Arm
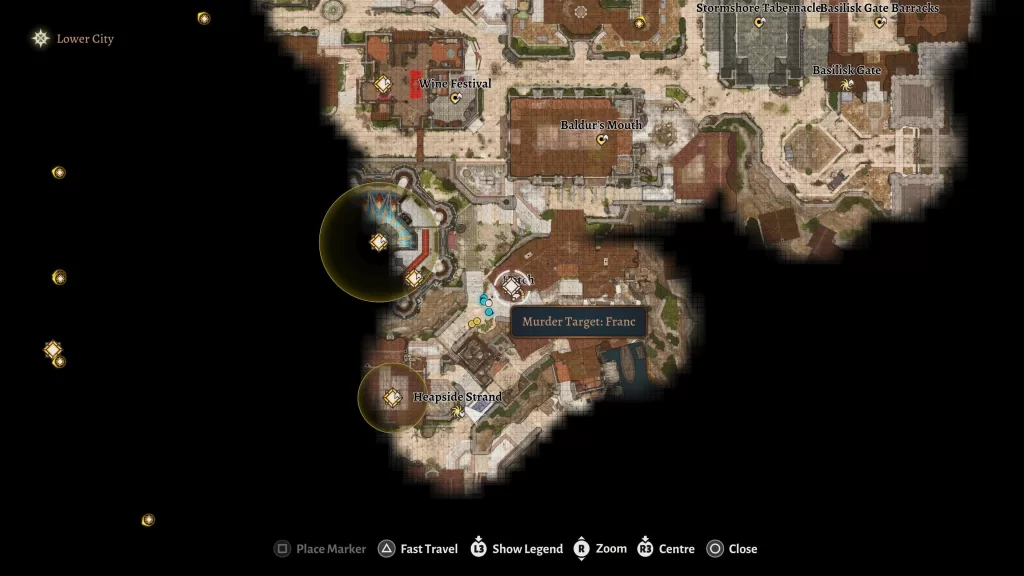
For Dribbles severed arm, you’ll need to travel to the lower city in Baldur’s Gate. Once there, head to the building south of Baldur’s Mouth.
Enter the Peartree House which will be boarded up and flagged as an area under investigation. You’ll need to break the boards covering the door then head inside. On the right side of the room by the window, there will be a hatch in the floor under a traveler’s chest. Move this chest to access the hatch then pass a lockpicking skill check to open it. Once open, head on down to Peartree’s Basement. Interact with Courageous Little Kimmabeth to loot the Clown’s Severed Arm.
Find the Missing Letters
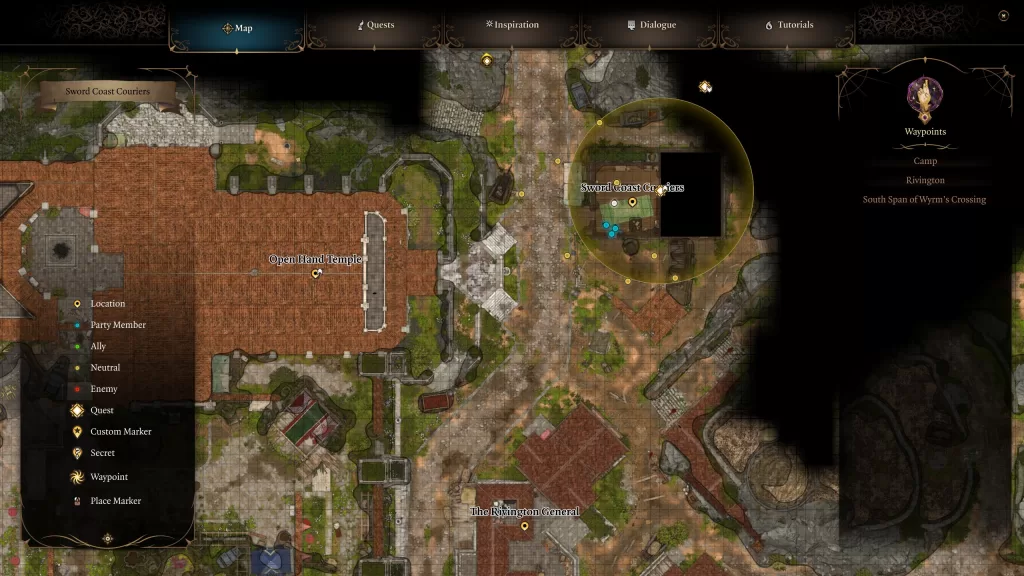
Head to the Sword Coast Couriers across from the Open Hand Temple and speak with Danzo Arkwright there. He’ll tell you about some letters that are missing and you can offer to help look for them.
Start by heading to the second level and speaking with the Pigeons there (you’ll need a way to speak with animals). They’ll tell you that something has been happening on the roof of the Open Hand Temple so they designated it as a no-fly zone. Head over there and make your way up to the room near the front of the building (I climbed up the bell tower and jumped down). Interact with the animal in the next there (make sure Gale is in your party). Have him ask her to stop eating the pigeons. When she leaves, grab the bundle of letters and return them to Danzo to complete the quest.
Find the Nightsong
…
Free the Artist
This quest is started in Act I after saving Oskar from the Zhentarim in their hideout under Waukeen’s Rest. You’ll have to buy him from the merchant and then speak with the artist. After the conversation, he’ll set out for Baldur’s Gate.
Help the Cursed Monk
You being the Curse Monk quest by finding the Sentient Amulet in a locked chest near that Adamantine Forge in the Underdark. Once you pick up the amulet, the Cursed Monk that inhabits the accessory will begin speaking with you and request you deliver him to his granddaughter at the Open Hand Temple in Wyrm’s Crossing.
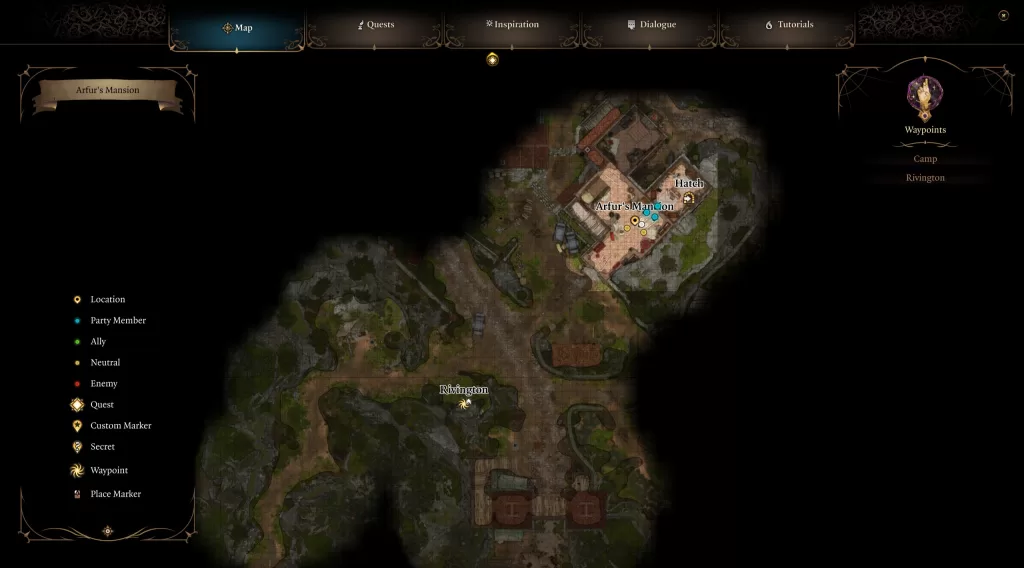
Once you reach Rivington in Act III, head northeast of Arfur’s Mansion to find the Open Hand Temple and head inside. Locate and speak with Sister Yannis to ask about the spirit’s granddaughter Shirra. She’ll tell you that she passed away last year and was buried in the crypt under the temple.
To reach the crypts, head into the kitchen and interact with the Ornate Wooden Hatch. Make your way to the southwestern room to find four sarcophagi. Shirra’s is the northwestern one. Approach it and the monk with possess her body. You’ll learn that the monk was going to pass the madness on to his granddaughter, but now he wants to pass it on to you. If you say no, then the monk will attack you along with three other corpses in the room. Defeating him will complete the quest. If you accept the madness, you can pass a series of checks to take the item but not lose out on the wisdom. This will also complete the quest and you’ll have access to Tasha’s Hideous Laughter.
Investigate Cazador’s Palace
To start this quest, speak with Ulma at the Gur Camp northeast of Arfur’s Mansion in Rivington. This quest coincides with The Pale Elf quest of Astarion. Please check out our guide here for how to complete it!
Investigate the Suspicious Toys
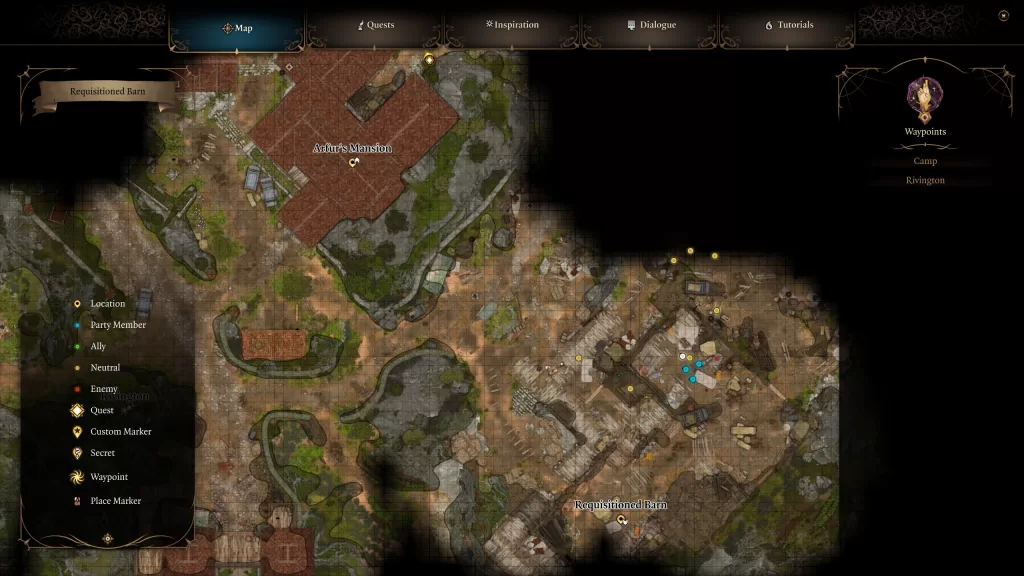
To start this quest, you’ll need to read the blackmail letter in the basement of Arfur’s Mansion at Rivington. To get there, enter the mansion and head for the northeastern room on the 1st floor. There will be a hatch under a table you’ll need to lockpick that leads to the basement. Once in the basement, work your way to the back of the room moving slowly as it’s rigged with traps. You’ll then want to disarm and lock pick the Heavy Chest which contains the letter.
Head back outside and make your way southeast of the mansion to find the Requisitioned Barn. Speak with Manip Nestor out front behind the table choosing “Donations for what?” After that, convince him to let you look at the donations as some might be tampered with. Head to the northeastern corner of the barn to find a crate with stuffed bears inside. Approaching it should trigger an Investigation check allowing you to disarm the crate. You’ll need to pass a Sleight of Hand skill check then open the crate and take out the Suprise-Based Teddy Bear. Speak with Manip Nestor afterward and he’ll ask you to find out who was responsible for this while he checks the rest of the donations.
To find Arfur, you’ll need to travel to Sharess’ Caress at Wrym’s Crossing. He’ll be near Queen Rhol, the Despoiler. Speak with him and use some intimidation and persuasion to learn about Felogyr’s Fireworks. Before heading there you can let Arfur go free or send him to jail.
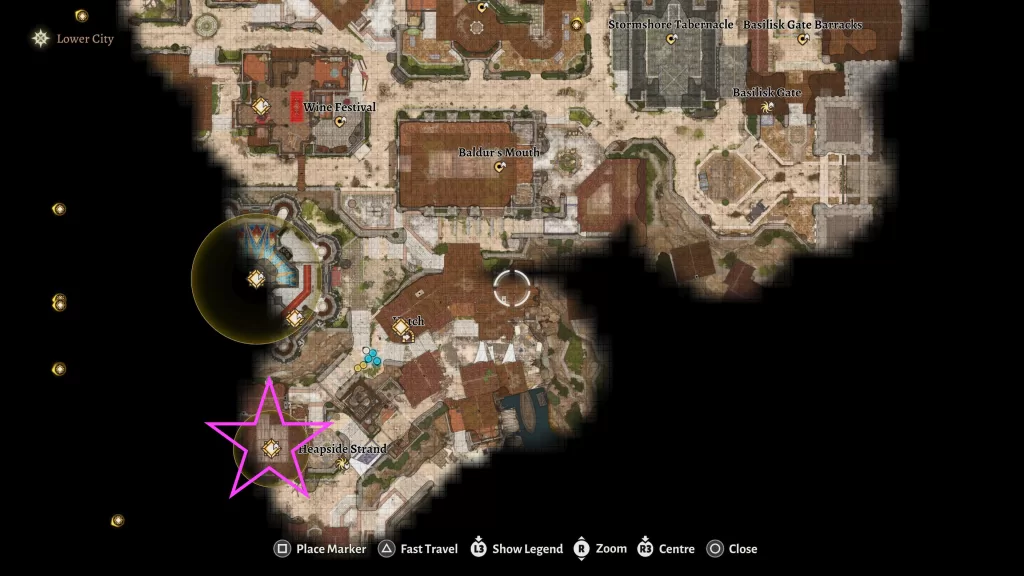
The Felogyr’s Fireworks store can be found in the Lower City of Baldur’s Gate in the south central area near the Heapside Strand.
Head inside and speak with Avery Sonshal behind the counter to begin a conversation during which you’ll learn that he also has a tadpole in his head. Choose the option “Sure. Why not?” then follow that up with “What else do you do for Lord Gortash?”. This will present you with a deception or intimidation skill check that you’ll need to pass. After successful, you’ll learn that Avery has been delivering a batch of explosives to Gortash.
Next, speak with Feloguard Sigurd near the door on the right side of the shop. Use the passphrase “Option” to gain access to the second floor. Head on up and speak with Clerk Tamara who will mention that the top floor is off limits. In order to complete this quest, you’ll need to continue upstairs to the third floor. Do this will cause a confrontation with the guard which turns everyone hostile. You’ll then need to attack and defeat everyone in the shop. Be careful when you start the fight! If you attract any members of the Fist, they will all become hostile to you when walking around the city.
After the battle, make sure to loot Avery who will have 3 keys and the tadpole on him. One of the keys will unlock a hatch on the first floor allowing you to reach the basement. The basement is an optional area to explore.
To proceed with the quest, head up to the third floor. Once everyone has been defeated, the quest will complete!
Rescue the Grand Duke
This quest technically starts in Act I when you learn that the Grand Duke was taken to Moonrise Towers. During Act II when you finally reach the towers, we’ll see the Duke just before fighting Thorm at the end of the act where he’ll then be taken to Baldur’s Gate which is Act III.
Rover’s Storehouse
You can pick this quest up at the Elfsong Tavern in the Lower City. Speak with Chef Roveer in the kitchen who will ask that you take care of some rats in the storehouse. Head down there (the entrance is in the kitchen) to find a horde of rats. Wipe them out then head back up to the chef. Speak with him to complete the quest and you’ll also be rewarded with gold.
Save Vanra
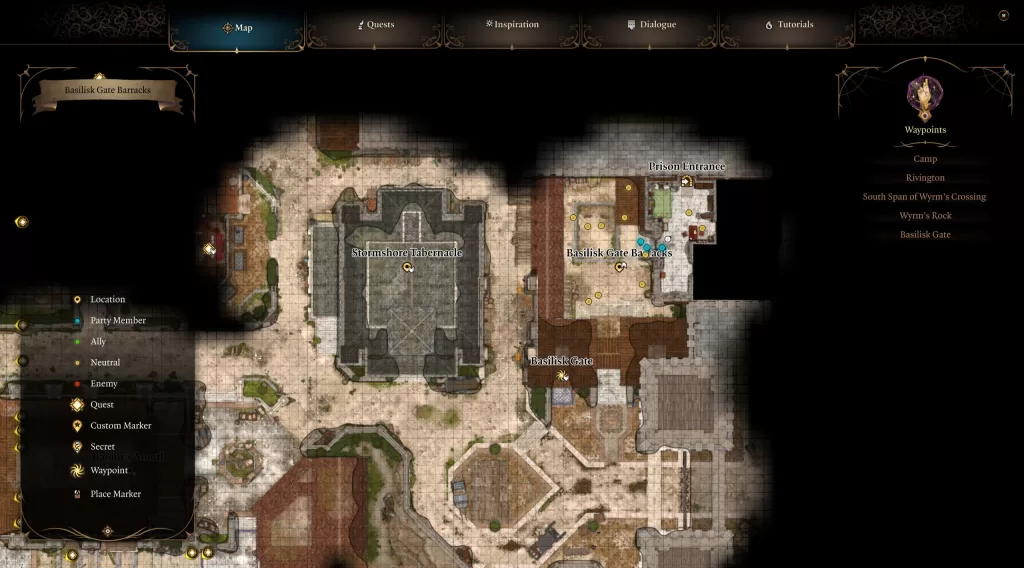
To start this quest, head to the Basilisk Gate where you’ll see Lora chewing out one of the Flaming Fists. Speak with her to learn that her daughter is missing and agree to help. She’ll say she was last seen at The Blushing Mermaid so that’s where you’ll want to head to begin your investigation.
Search the Cellar
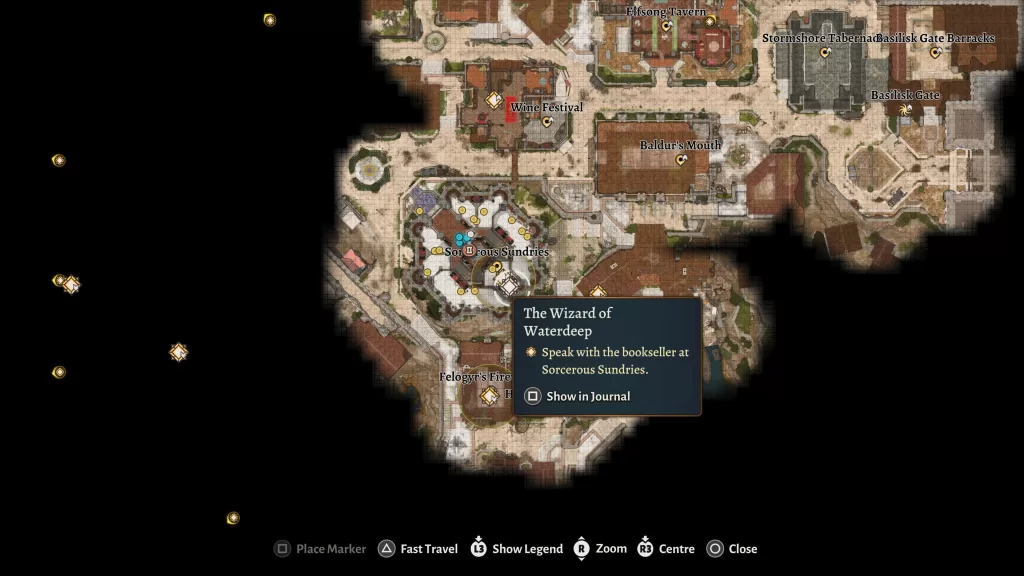
To continue with this quest, travel to the Sorcerous Sundries in the Lower City of Baldur’s Gate.
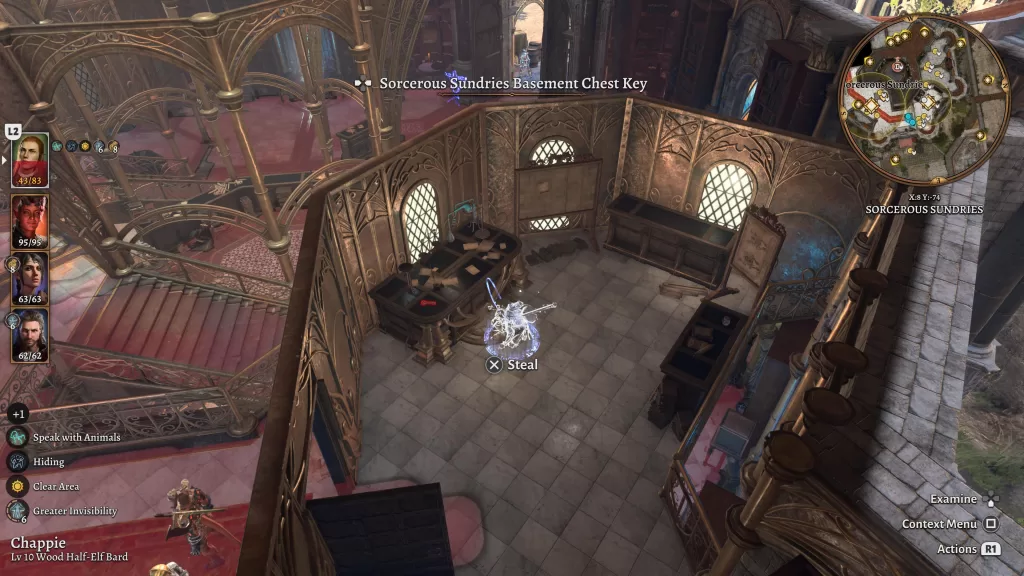
From there, head up the stairs and follow the walkway to the left. You’ll then need to lock pick the door at the end to open. Be careful when doing this as you’ll need a character with high stealth. Even cast and invisibility spell on them to remain undetected!
Once you enter the room, loot the Basement Chest Key on the table along the left side of the room.
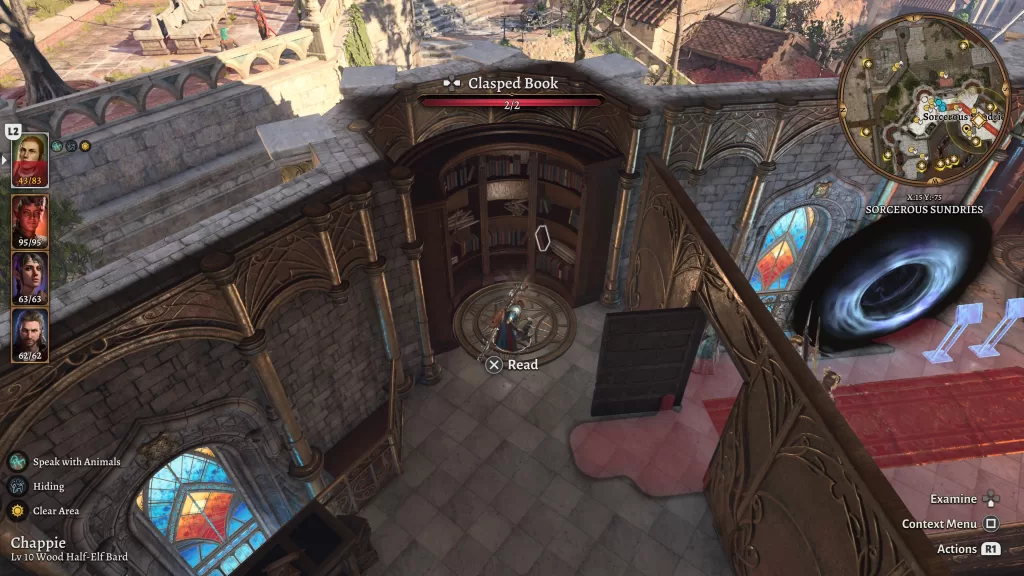
Next, head to the bookshelf in the corner and interact with the clasped book to open a portal.
Jump inside to reach the Sorcerous Vault. Head through the wooden door in front of you. The next door is locked and you’ll need to smash through it. This will bring you to a circular room filled with multiple doors and armed with traps. Our target here is the Elminster Vault.
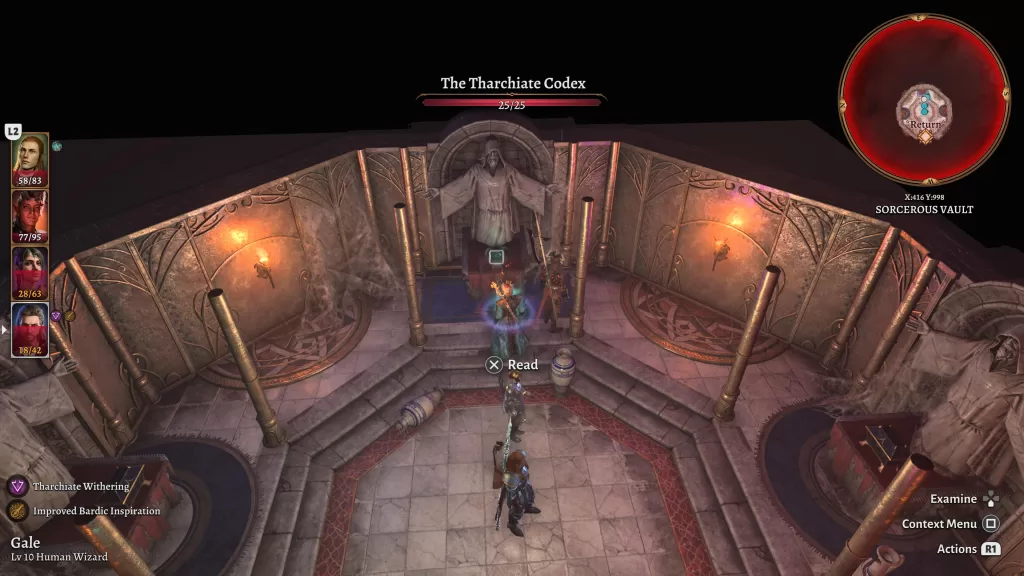
To reach it, head through the door labeled “Silverhand”. From there use the “Evocation” door then the “Wish” door. This will bring you to a room with a lever. Flip the lever then return to the previous room. Head to the “Foresight” door. This will bring you back to the first room. From there you’ll be able to enter the vault where you’ll want to read The Tharchiate Codex with the person who has The Necromancy of They.
Once that’s done, read The Necromancy of They once more and pass a skill check to finally complete the quest.
Solve the Open Hand Temple Murders
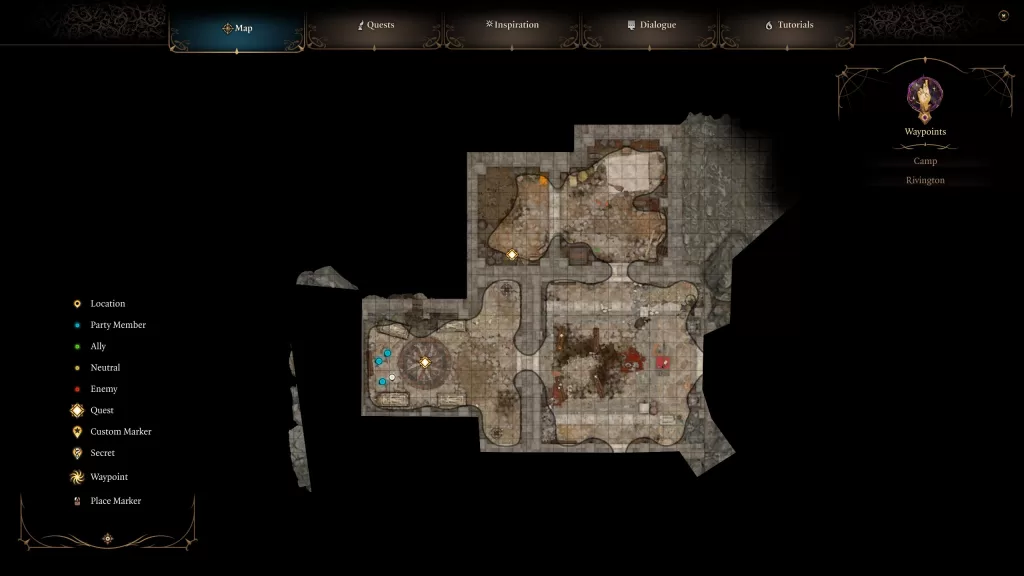
Make your way to the Open Hand Temple northwest of Arfur’s Mansion then head inside. Look for and speak with Sister Yannis to learn about the murder then agree to help. Start by speaking with members of the temple. There will be one in the kitchen, another in the room with the Father’s body and a few in the main room of the temple. When that’s done, head into the kitchen and interact with the Wooden Ornate Hatch to reach the basement of the temple.
Head to the southern room filled with lots of books. Jump to the rock in the southeastern corner. From there, you can jump to another rock leading to a hidden area. Follow it around to find a group of four doppelgangers. Defeat them then loot the flower key off of them. Head down in the area near the crane to trigger a skill check to spot a hole. Interact with it to find the murder weapon.
Return to temple then exit it through the main door. Head north and pass through the South Span Checkpoint then continue north. You’ll want to enter the Fraygo’s Flopohouse behind the merchant Thordic Shedeveer. Head up to the top floor then use a ladder to reach the attic. Interact with the wardrobe there to enter a secret room. Look for the Bloodstained Parchment on the table and grab it. Head across the street and enter the Sharess’ Caress to find Valeria on the second level. Speak with her to go over the new evidence and the quest will complete. You’ll get a pass to the Lower City as a reward.
Stop the Presses
When you finally reach the Lower City, head south of the Basilisk Gate Ancient Sigil Circle to spot New Hawker Luan and standing next to him, Estra Stir. Speak with her and she’ll tell a story about you that is about to be published (if you fought the fake Dribbles at the circus) and it won’t paint you in the best light. To prevent this from happening, you’ll need to head to Baldur’s Mouth and sneak into the basement through the door at the bottom of the stairs on the bottom level where the editor is. There is a guard in the way so it’s best to ungroup your party, turn yourself invisible and walk past her. After that lockpick the door and then group your party back up before heading through.
In the basement, head through the wooden door to be thrown into combat against two Steel Watchers. If you want to deal extra damage to them, make use of some Thunder-based attacks. They also explode when their health gets low so make sure to get out of the blast radius. Once they are taken care of, head to the southwestern room to find the printing press. If you have Dolly the Fairy in Act II, the press will help you out by ejecting the bad story. You’ll need to find a different one though if we are to fool the editor. Make your way over to the most northwestern room and locate the three wooden shelves aligned along the wall next to a stack of crates. On one of them, you’ll find the “Cutest Cate You’ve Ever Seen” article. Grab and load it into the printing press. You can then exit the basement by taking up the elevator allowing you to fast travel out of there. Now you just need to do a long rest for the article to print. After it does, grab a copy from New Hawker Luan and give it a read.
Visit the Emperor’s Old Hideout
You’ll get this quest automatically when passing by the Elfsong Tavern. Enter said tavern and make your way to the kitchen then head to the storeroom. Once there, head to the other side of the room and through the door. Look for the broken section of the wall on the right and jump through it. If you pass a perception check, you’ll notice a button on the wall. Press it to open one of the wine barrels revealing the path to the hideout.
In the hideout, you’ll find that a group of Githyanki have broken in. Approach them (if you want) to begin a conversation that leads to bloodshed. Afterward, make your way to the statue in the back of the room and approach the wall behind it. This will prompt a perception check where you’ll be able to spot a hidden button. Press it to gain access to the hidden room and the Emperor’s old digs. Approach the weapon racks in the center of the room to pass a perception check to find the Emperor’s old sword. You can also loot the Emperor’s Wardrove to get some gear and explore the room interacting with different objects (after passing a perception check) to learn more about the Emperor. This will complete the quest.
Welcome to our walkthrough for the Deliver a TerraBrew Cappuccino to Donna Rain activity in Starfield! This guide will walk you through starting the mission and detail the necessary steps for its completion. If you need help with a specific mission objective, check the quick links section to easily find the information needed.
Some of the planets referenced in our guides and walkthroughs may not match yours due to how Starfield was created. In these situations, what you do and the places you visit on those planets should remain the same.
How to Start the Deliver a TerraBrew Cappuccino to Donna Rain Mission
This activity is one of the many you can pick up on New Atlantis. To start it, make your way to the MAST District via NAT. After exiting the NAT, you’ll find Donna Rain sweeping. Speak with her and tell her that she looks tired then offer to deliver her a coffee.
Deliver a TerraBrew Cappuccino to Donna Rain Walkthrough
To retrieve the coffee, hop back on the NAT and take it to the Spaceport. On the right side of this area you’ll find Terrabrew Coffee.
Head inside and speak with an employee behind the counter to purchase a Terrabrew Cappuccino for 71 credits.
Now that you have the coffee, return to the NAT and ride it to the MAST District. Speak with Donna and say “Here’s that TerraCino you wanted.” As a reward, you’ll receive 400 Credits.
Additional Starfield Guides and Walkthroughs
Be sure to check our main Starfield Guides and Walkthroughs page for additional content on Starfield, such as additional guides to assist you during your adventures in the Settled Systems!
Welcome to our guide for the Talk to an Embassy Diplomat activity in Starfield! This guide will walk you through starting the mission and detail the necessary steps for its completion. If you need help with a specific mission objective, check the quick links section to easily find the information needed.
Some of the planets referenced in our guides and walkthroughs may not match yours due to how Starfield was created. In these situations, what you do and the places you visit on those planets should remain the same.
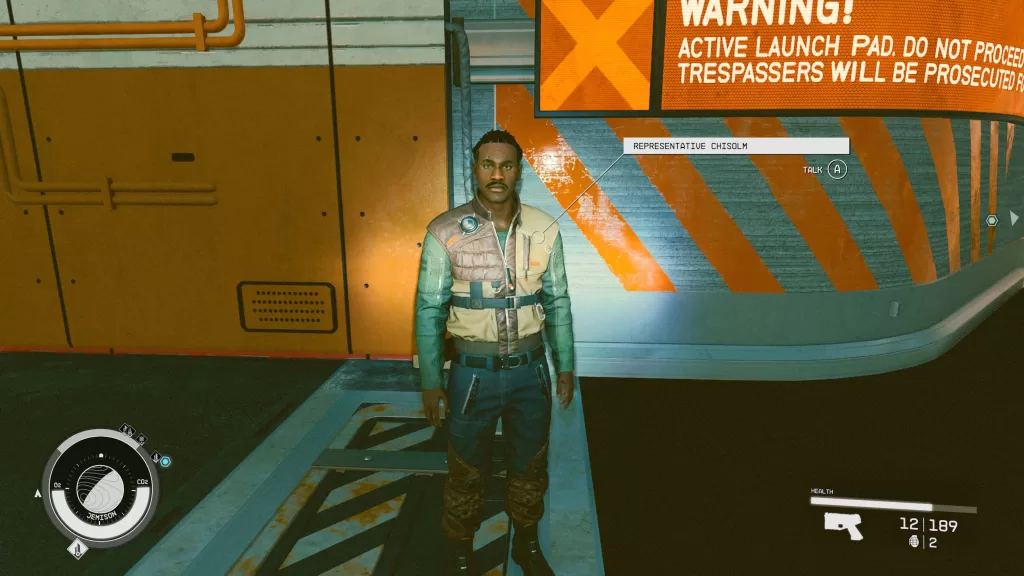
To start this activity, speak with Representative Chisolm who can be found arguing with Officer Wilkes on A Pad, which is near the entrance to New Atlantis at the Spaceport. Afterwards, you’ll receive an activity to talk to an embassy diplomat.
Talk to an Embassy Diplomat Walkthrough
Talk to an Embassy Diplomat
From A Pad, make your way to the NAT and use it to reach the Commercial District. Once there, head straight ahead and travel to the far side of this area to reach the Freestar Collective Embassy. Head inside and speak with the Freestar Diplomat sitting behind the reception desk and tell her about Chisolm. As a reward for informing her of the situation, you’ll receive 50 EXP and 1000 Credits.
Additional Starfield Guides and Walkthroughs
Be sure to check our main Starfield Guides and Walkthroughs page for additional content on Starfield, such as additional guides to assist you during your adventures in the Settled Systems!
Welcome to NGB and our guide for the Starfield Alternating Currents mission! In this guide, we’ll cover how to start this quest along with the steps you’ll need to do to complete it. If you’re here looking for help with a specific mission objective, please check out the quick links section which should point you to the right section!
How to Start the Starfield Alternating Currents Mission
Alternating Currents is one of the misc missions you can pick up on New Atlantis. To start it, you’ll need to complete the Tapping the Grid mission. Upon doing that, you’ll start Alternating Currents automatically.
Starfield Alternating Currents Mission Guide
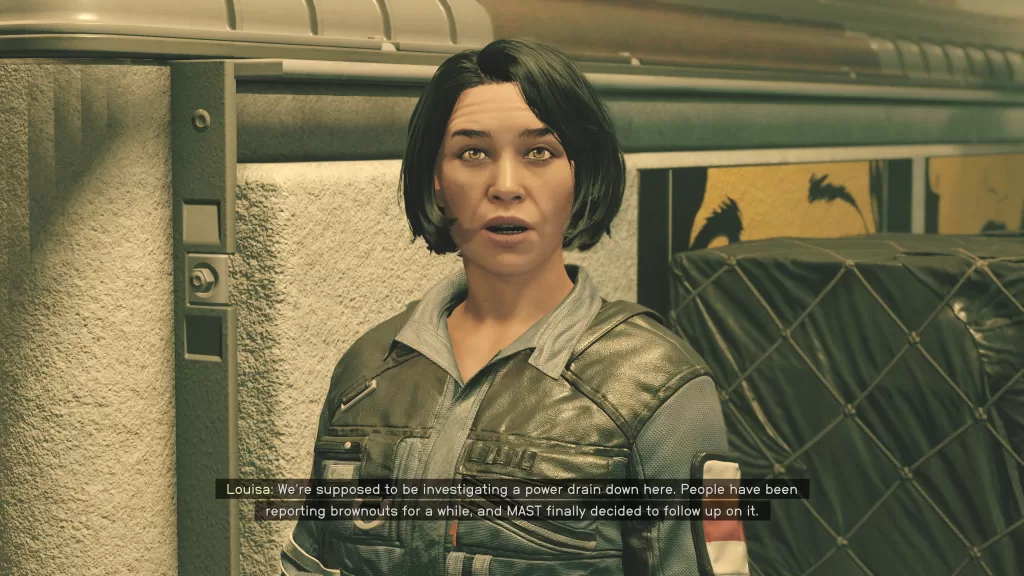
Talk to Louisa Reyez
Speak with Louisa (she’ll either be in her office near the Medbay or by the Trade Authority) who will ask you to back her up while confronting Zoe. Agree to go with her then follow behind Louisa as she makes the trek to the Trade Authority. After the confrontation speak with Louisa again to calm her down. When Zoe returns, she claims that someone else is using the power through them and vows to help sending you out to find another junction box.
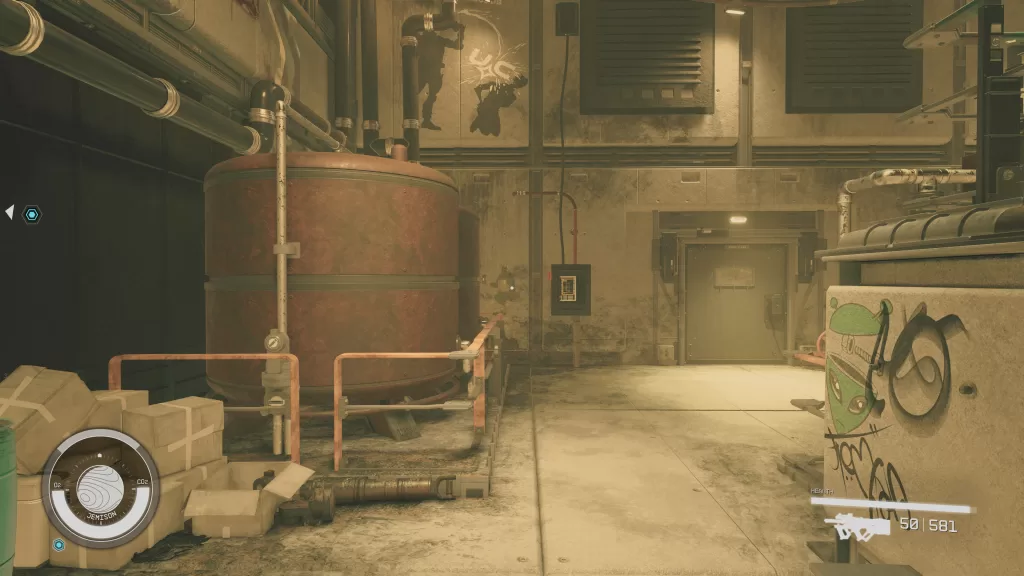
Locate the Junction Box
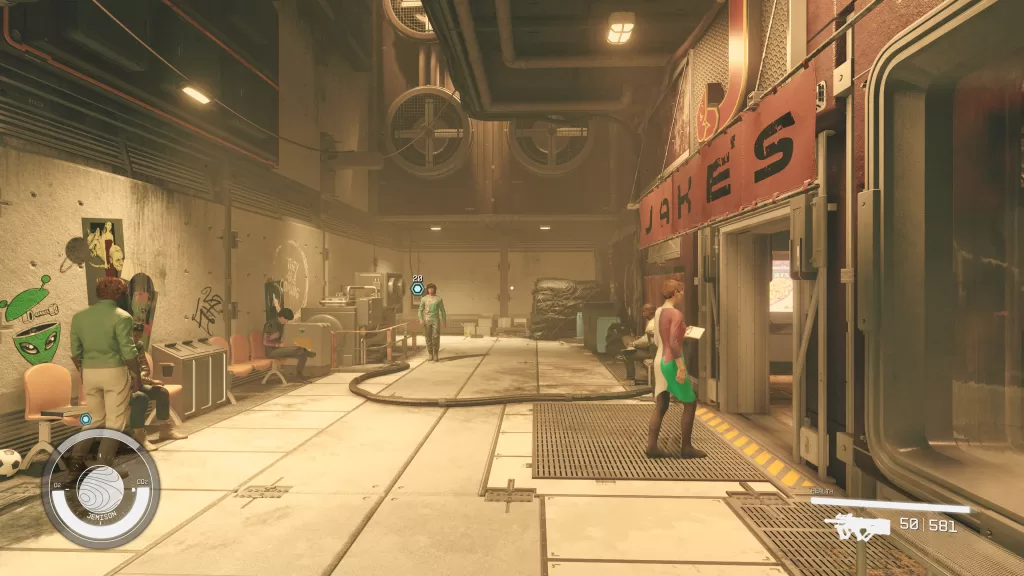
To reach the junction box, exit the Trade Authority and take a left going up the stairs to the left of the hallway. At the top of the second set of stairs, the junction box will be located above. If you have a jetpack, you can use its boost jump to climb up there. Otherwise, head down the stairs in front of you and take a right passing Jake’s heading toward the Medbay. Right after Jake’s take a left (should see a sign that says Upper Level) and follow the path up to reach the junction box at the end. Open it and flip the switch.
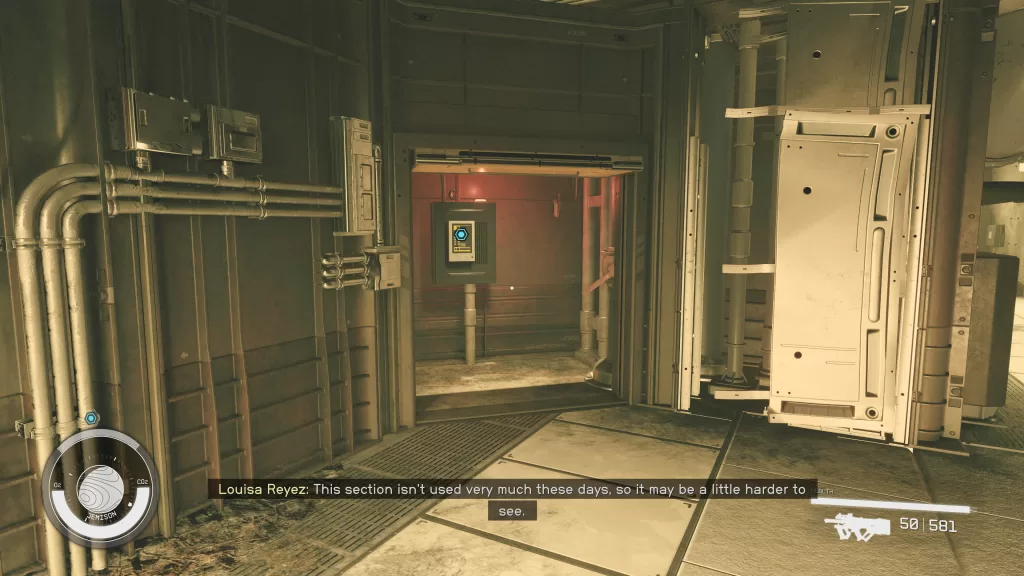
For the next junction box, Louisa and Zoe will both give you a different junction box to go to. The only difference between the choices is the dialog that plays. If you head to Louisa’s junction box, it can be found on the second level of the Well above Apex Electronics.
If you follow Zoe’s instruction, head back along the walkway to find it on the left after entering the first doorway. Go on and give that baby a flip.
To reach the next junction box, you’ll need to go topside and travel to the Residential District using the NAT. When you get there head left (going northeast) going to Athena Tower. The box can be found to the left of the main doors on the side of the outer wall. Flip that switch!
Now you’ll need to head into Athean Tower and take the elevator up. Follow the only path to reach a locked apartment door. Use a digipick to unlock it then head inside and interact with the Unauthorized Computer. You’ll want to download the files to collect the evidence.
Deliver the Evidence to Louisa or Zoe
With the evidence in hand, you’ll now have a choice to make. Will you deliver it to Louisa or Zoe? What it comes down to is who do you want favor with more. Giving the evidence to either Louisa or Zoe will reward you with 75 EXP and some credits.
Welcome to our guide for the Starfield Tapping the Grid mission! In this guide, we’ll cover how to start the mission and the steps you’ll need to take to complete it. If you’re here looking for help with a specific mission objective, please check out the quick links section which should point you to the right section!
How to Start the Starfield Tapping the Grid Mission
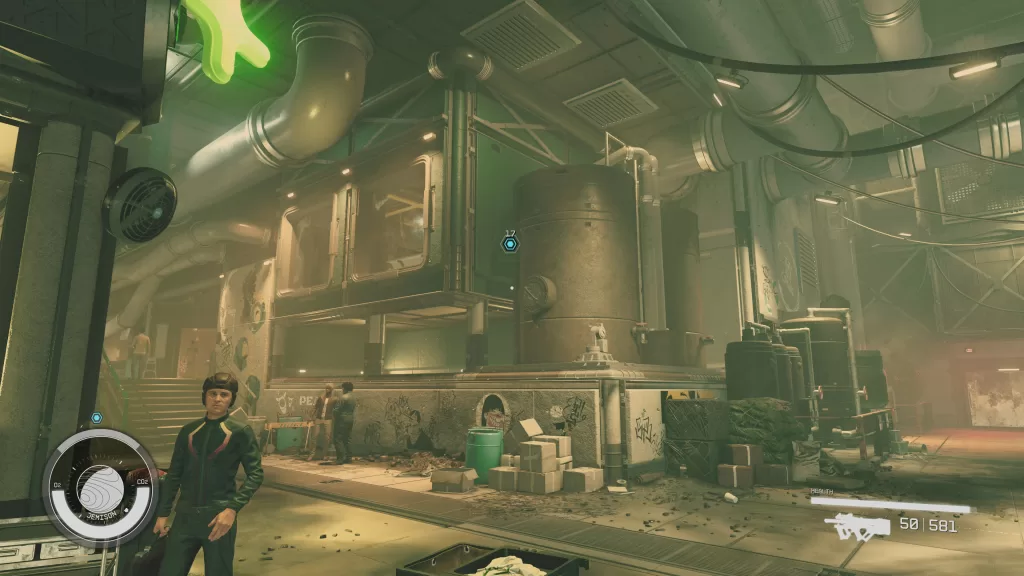
Tapping the Grid is one of the misc missions you can pick up on New Atlantis. To start it, travel down to the Well then head for the three-way split near the Medbay. Locate and speak with Louisa Reyes to learn about the issues with the power drain.
Starfield Tapping the Grid Mission Guide
Locate the Junction Box
After agreeing to help her, Louisa will send you to the junction box on the wall next to UC Surplus. Interact with it to open the junction box door then interact with the Electrical Panel to automatically flip the switch.
To reach the second junction box, travel to Trade Authority then, while facing the sign, head right then take the stairs on the left of the entrance to the hallway up. After the second flight of stairs, follow the walkway left and use the switch on the stone pillar to open the automatic doors. Climb the stairs and you’ll find the box behind the door on the left at the top. Same deal as before open the box and flip the switch.
On to the third one! Head back down both flights of stairs then follow the walkway taking the next left down another flight of stairs. Head straight past Jake’s to find it on the wall. Again, open the box and flip the switch.
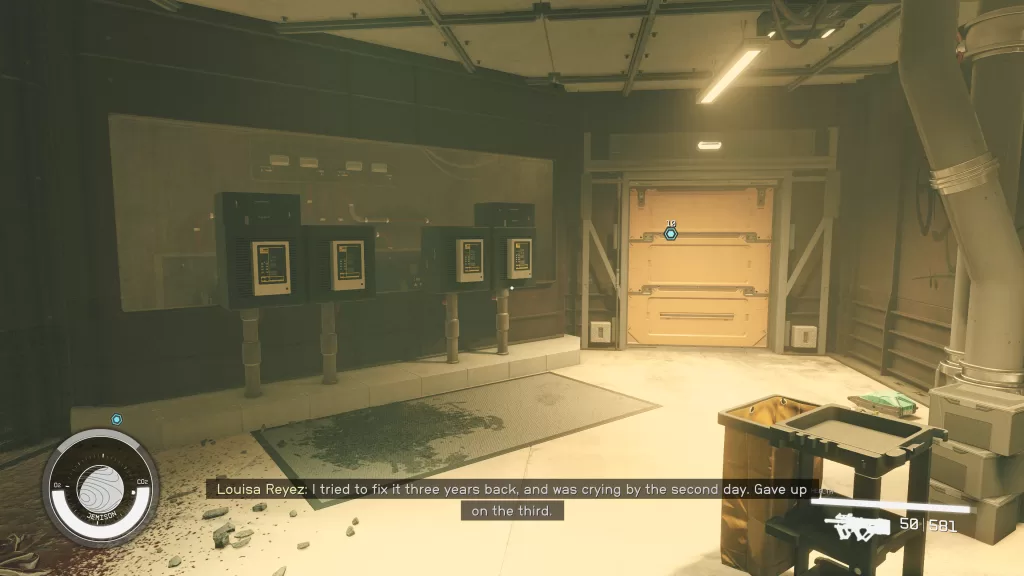
For the next one, head back to the Trade Authority and when facing the sign, head left and go up the stairs. At the top, take another left heading up another flight of stairs then enter the nearby door. Before you can access the junction box, you’ll need to power down the secondary breakers. Press the breakers in the order we listed with 1 being on the far left and 4 being on the far right: 2, 3, 1, 2. This will open the door on the right, gaining you access to the final breaker and allowing you to flip the switch.
Talk to Louisa Reyez
Return to Louisa who can be found in the building across from the Medbay. The entrance to this building will be near the elevator. Once in the building, head up to the top and speak with her to complete the quest. You’ll be rewarded 75 EXP and some credits. You’ll also automatically start the Alternating Currents mission.
Welcome to our guide for The Kindness of Strangers mission in Starfield! This guide will walk you through starting the mission and detail the necessary steps for its completion. If you need help with a specific mission objective, check the quick links section to easily find the information needed.
Some of the planets referenced in our guides and walkthroughs may not match yours due to how Starfield was created. In these situations, what you do and the places you visit on those planets should remain the same.
The Kindness of Strangers is one of the misc missions you can pick up on New Atlantis. To start it, travel to the Well and locate the House of the Enlightened. Head inside then speak with Andy Singh. While talking with Andy, ask him if he has any work for you. He’ll respond by asking if you can pick Tahir Vala from the Medbay, take him to get some food then make sure he gets home okay. If you agree to help out, he’ll give you 2000 credits.
The Kindness of Strangers Walkthrough
Pick up the Patient from the Medbay
Exit the House of the Enlightened and head to the Medbay nearby to spot Tahir sitting on a chair under the overhang.
Approach him and wait for the US Security officer to leave then speak with the guy. Say you’re there to help and tell him Andy Singh sent you to make it easier. Tahir will accept your help and start following you.
Stop by Kay’s for a Homecooked Meal
Head east back towards the House of the Enlightened to reach Kay’s House then head inside. Speak with Kay to pick up Tahir’s food.
Escort the Patient Home
Exit the building and head back to the Medbay. Once there, follow the sidewalk left. From there it’s just a straight shot. When you get far enough, Tahir will thank you for your help and be on his way. Make sure to give him his soup before leaves. This will complete the mission and you’ll be rewarded 150 EXP.
Additional Starfield Guides and Walkthroughs
Be sure to check our main Starfield Guides and Walkthroughs page for additional content on Starfield, such as additional guides to assist you during your adventures in the Settled Systems!
Welcome to NGB and our guide for the Starfield Reliable Care mission! In this guide, we’ll cover how to start the mission along with all of the steps you’ll need to take to complete it. If you’re here looking for help with a specific mission objective, please check out the quick links section which should point you to the right section!
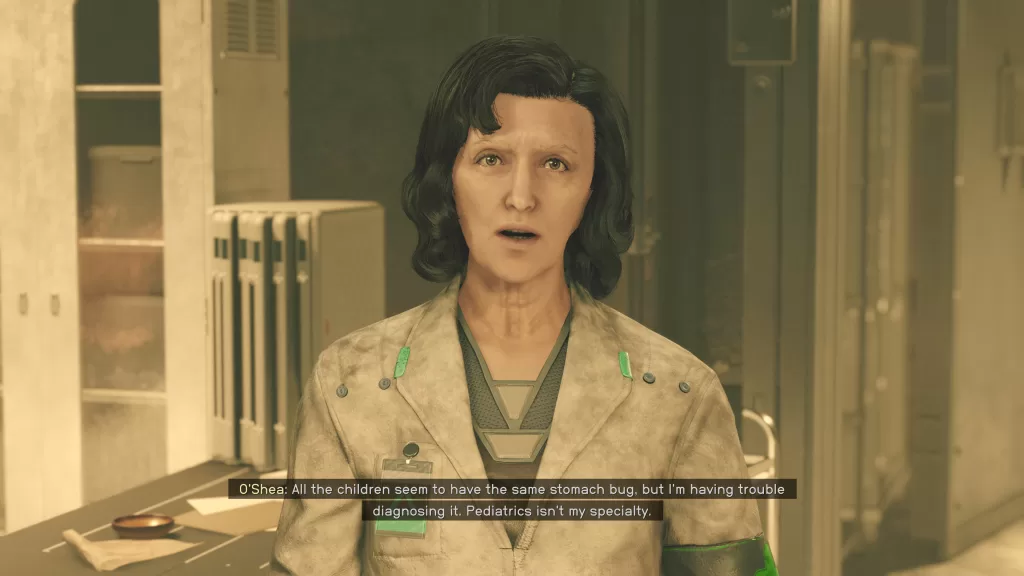
Reliable Care is one of the misc missions you can pick up on New Atlantis. To start it, travel to the Well and head for the Medbay. Go inside then locate and speak with Nurse O’Shea. She’ll mention that she has a lot of sick children and might have something you can do to help.
Starfield Reliable Care Mission Guide
Speak to Nurse O’Shea at the Medbay
Speak with Nurse O’Shea and tell her you’re there to help the children. She’ll let you know about a stomach bug they all came down with then send you topside to get notes from Dr. Lebedev at Reliant Medical.
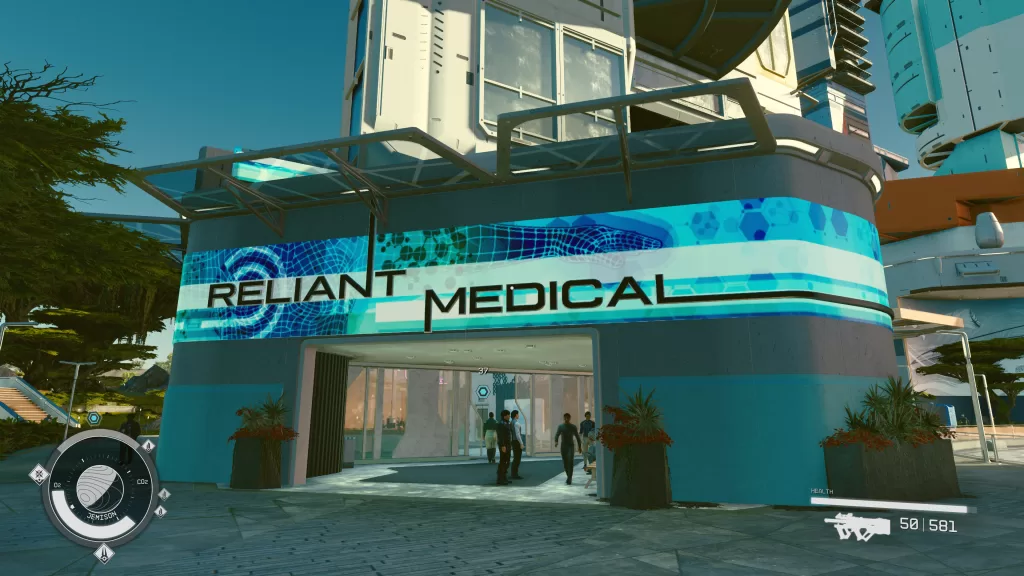
Visit Dr. Lebedev at Reliant Medical
To get there, travel to the MAST District then head southeast of the NAT to find it.
Head inside the building and take the elevator to Dr. Levedev’s office. Talk with him and say Nurse O’Shea sent you then tell him about the sick children. Dr. Levedev will happily give you his notes for the children!
Give the Research Notes to Nurse O’Shea
Take the notes back to Nurse O’Shea to complete the mission. She’ll reward you with 50 EXP and 2500 credits.
This site uses cookies. By continuing to use this website, you are giving consent to cookies being used. For more information on cookies, view our Privacy Policy.OkPrivacy Policy