Tales of Arise
Guides

Complete Guide to Character Subquests in Beyond the Dawn

by NightlyGamingBinge in

Welcome to our Tales of Arise Beyond the Dawn Character Subquests guide. Here you’ll find a list of the character subquests in the Tales of Arise DLC along with when they become available and where you can pick them up. For additional information on how to complete each subquest, click the link under the subquest column in the table. There are 12 character subquests in this DLC for you to complete and doing so will enhance each character’s Boost Attack. You’ll also unlock the Individual Growth trophy/achievement for completing all of them. Happy Questing!

Check out the rest of the non-character subquests that can be found here.

Character Subquests

SubquestCharacterAvailableLocation
Beyond the VisageKisaraDuring the One’s Own Master main questMenancia – Viscint
Even If I’m Not a HeroAlphenDuring the One’s Own Master main questCalaglia – Ulzebek
Friends SomedayRinwellDuring the For Whom main questGanath Haros – Pelegion
For Old TiesDohalimDuring the Land of the Beginning main questGanath Haros – Pelegion
Good Luck, BossLawDuring the For Whom main questCalaglia – Ulzebek
In Pursuit of the Traveling BookRinwellDuring the One’s Own Master main questMenancia – Autelina Palace
Know I Will Be Your ShadowAlphenDuring the Land of the Beginning main questCalaglia – Ulzebek
Path of the PotterDohalimDuring the For Whom main questCalaglia – Ulzebek
Seeking the Ideal WaterfrontKisaraDuring the For Whom main questMenancia – Viscint
The Temperature of TouchShionneDuring the For Whom main questCyslodia – Cysloden
Where an Unforeseen Encounter LeadsShionneDuring the One’s Own Master main questCalaglia – Ulzebek
Zephyr’s RingLawDuring the For Whom main questCalaglia – Ulzebek

For more guides on Tales of Arise and the Beyond the Dawn DLC check out our guides and walkthrough page here!

Tales of Arise
Guides

Complete Guide to Subquests in Beyond the Dawn

by NightlyGamingBinge in

Welcome to our Tales of Arise Beyond the Dawn Subquests guide. Here you’ll find a list of the Beyond the Dawn subquests in the Tales of Arise DLC along with when they become available and where you can pick them up. For additional information on how to complete each subquest, click the link under the subquest column in the table. There are 40 subquests (including 12 character subquests) in this DLC for you to complete. You’ll unlock the Unparalleled Problem Solver trophy/achievements for completing all of them. Happy Questing!

The character subquests that make up the rest of the 40 subquests can be found here.

Beyond the Dawn Subquests List

SubquestAvailableLocation
A Bright SchoolhouseDuring the Free From Pursuit main questMenancia – Autelina Palace 1F
A Dahnan Concert [Reconstruction]During the For Whom main questGanath Haros – Pelegion
A Donut-Fueled Town Revitalization [Reconstruction]During the One’s Own Master main questCalaglia – Ulzebek
A New JuiceDuring the Land of the Beginning main questMenancia – Viscint
A New RivalDuring the Disappearance and Distress main questMenancia – Training Grounds
A Nice Spot for Love and Healing [Reconstruction]During the For Whom main questGanath Haros – Thistlym
A Thread to the Future [Reconstruction]During the For Whom main questCyslodia – Cysloden
Beauty Clearing the Land [Reconstruction]During the Budding main questMenancia – Traslida Highway
Cast Aside [Reconstruction]During the One’s Own Master main questCalaglia – Ulzebek
For a Safe Trade RouteDuring the Warmth main questMahag Saar – Aqfotle Hills
Goodwill Ambassador Zareh [Reconstruction]During the Disappearance and Distress main questMenancia – Viscint
Gourmet Saga: Wind of the New WorldDuring the Disappearance and Distress main questMenancia – Traslida Highway
Grenar’s Important Letter [Reconstruction]During the For Whom main questCalaglia – Ulzebek
Hand In HandDuring the Land of the Beginning main questCyslodia – Nevira Snowplains
Ignorance of KnowledgeDuring the Warmth main questMahag Saar – Aqfotle Hills
Kindling the Flames of Change [Reconstruction]During the For Whom main questGanath Haros – Pelegin
Life’s ChangesDuring the Warmth main questMahag Saar – Niez
On the Brink of Paradise [Reconstruction]During the Land of Beginning main questGanath Haros – Pelegion
Pastoral RomanceDuring the Feared main questMenancia – Pharia Ranch
Sentimental BouquetDuring the For Whom main questGanath Haros – Thistlym
Silence and SleepDuring the Free from Pursuit main questMahag Saar – Adan Lake
Thawing a Frozen Heart [Reconstruction]During the Land of Beginning main questCyslodia – Riville Prison Tower
The Girl’s True FaceDuring the For Whom main questGanath Haros – Shinefall Woods
The Keeper of Wallets [Reconstruction]During the Budding main questMenancia – Viscint
The Meaning of the FlagDuring the Warmth main questMahag Saar – Niez
The Owls’ GratitudeDuring the Disappearance and Distress main questMahag Saar – Aqfotle Hills
The Ties That BindDuring the Disappearance and Distress main questCyslodia – Messia 224
You’re So Thoughtful [Reconstruction]During the Disappearance and Distress main questCylodia – Cysloden

For more guides on Tales of Arise and the Beyond the Dawn DLC check out our guides and walkthrough page here!

Shin Megami Tensei V
Guides

Shin Megami Tensei V – DLC Subquests

by Chappie in

Welcome to NGB and our Shin Megami Tensei V guide on the DLC subquests. Here you’ll find everything you’ll need to easily breeze through these DLC subquests.

DLC Subquests

Return of the True Demon

Client: Sophia (World of Shadows)

Reward: 666,666 Macca

Summary: Sophia handed you an item called a menorah and said it attacks avatars of death.

After meeting Sophia for the first time at the Mita Leyline Fount, you’ll be able to access the World of Shadows. Return there and Sophia will give you the Menorah of Knowledge starting this subquest. You’ll have to investigate certain points to fight powerful demons to obtain their menorah.

Matador (Level 24)

The Matador can be found at the purple beam of light near the Tamachi Leyline Fount in Da’at: Minato. At the start of the battle, the Matador will cast a support skill boosting his accuracy and evasion for the first few turns. He also uses a Force skill that hits the whole party and supports that with physical attacks. The demon resists light and dark skills but has a weakness to Electric.

Rewards: Large Glory Crystal, Luck Balm and Aiding Sutra for defeating him along with the Menorah of Foundation and the ability to fuse him

Daisoujou (Level 30)

Daisoujou can be found in a purple beam of light on a hill west of the Tennozu Leyline Fount in Da’at: Shinagawa. He uses a combination of Physical, Dark and Light skills and also blocks Holy and Dark skills. His weakness is Fire so make sure to use that to your advantage.

Rewards: Large Glory Crystal, Magic Balm, Dark Sutra along with the Menorah of Eternity and the ability to fuse him

Hell Biker (Level 36)

Hell Biker can be found in a purple beam of light on the highway east of Mitatebashi Leyline Fount in Da’at: Shinagawa. He’s weak to ice, blocks force and fire and resists light and dark. He uses a physical, force and fire attacks that hit all party members. He can also cause the confusion status ailment and can negate any debuffs on him.

Rewards: Large Glory Crystal, Agility Balm, Force Sutra along with the Menorah of Dignity and the ability to to fuse with him

NOTE: Progress through the story. When you reach Kanda Bridge in Chiyoda, a cutscene will trigger with the Horsemen.

White Rider (Level 43)

White Rider can be found in a purple beam of light in the ravine north of the Ginza leyline. It summons 2 Level 40 Dominion to fight with him. White Rider is weak to Electric, resists Dark and Light and repels Fire. He uses Fire and Light skills. The Dominion are weak to Force, block Electric and Light and resist Dark.

Red Rider (Level 47)

Fast travel to the Kanda leyline then make your way east to Iwamotocho to find the purple beam of light. Red Rider summons 2 Level 45 Power. Red Rider is weak to Ice, resists Dark and Light, repels Electric and absorbs Force. He also uses Physical, Electric and Force skills. Power is weak to Force and Dark, resists Electric and blocks Light.

Rewards: Menorah of Insight and the ability to fuse with him

Black Rider (Level 52)

Fast travel to the Akihabara Electric Town leyline then make your way south to the rooftop containing the purple beam. Black Rider summons 2 Level 50 Legion. Black Rider is weak to Force, resists Light and Dark and repels Ice. He also uses Ice and Almighty skills. Legion is weak to Electric and Light and blocks Dark.

Rewards: Menorah of Wisdom and the ability to fuse with him

Pale Rider (Level 57)

Fast travel to the Tokyo Station leyline and make your way to the southwest to find the purple beam. Pale Rider summons 2 Level 54 Loa. Pale Rider is weak to Fire, resists Light and Dark and blocks Ice. He uses Ice and Physical attacks. Loa is weak to Light and blocks Dark.

Rewards: Menorah of Majesty and the ability to fuse with him

Mother Harlot (Level 64)

Head north up the road from the Ueno leyline to find the purple beam in Ueno Park. She is weak to Force, resists Fire, Light and Dark, repels Physical and absorbs Electric. She use Almighty, Electric and Fire skills. She can also seal your skills.

Rewards: Menorah of Beauty and the ability to fuse with her

Trumpeter (Level 73)

Head to the eastern hillside in Kuramae to find the purple beam. He resists Fire, Light, Ice and Force and blocks Light and Dark. He uses Fire, Electric, Ice, Force and Almighty skills that target the whole party.

Rewards: Menorah of Glory and the ability to fuse with him

After beating the Trumpeter, head to the World of Shadows and speak with Sophia who will unlock a Hall of Chaos leyline.

Demi-Fiend (Level 99)

Once in the Hall of Chaos proceed forward towards the objective to trigger a battle with the Demi-fiend. He will summon allies to assist him in battle, namely a Level 90 Pixie, Level 90 Girimekhala and Level 90 Cu Chulainn. The Demi-fiend resists all skills. Good luck! 🙂

Rewards: Menorah of Compassion and the ability to fuse with him

In the Hall of Chaos, you can acquire the following items from chests:

  • Whittled Goat
  • Gospel x1
  • Grimoire x4
  • Amrita Shower
  • Bead Chain

The Doctor’s Last Wish

Client: Researcher A (Tokyo Diet Building in Da’at: Minato)

Reward: Health Balm x3

Summary: Located Doctor Nitta who went missing after a supposed meeting with Mephisto

NOTE: You cannot get this quest until after you clear the Tokyo Diet Building as part of the story.

To start this quest, speak with the Female Researcher near the entrance to the Tokyo Diet Building at Da’at: Minato twice then choose the option to offer assistance. This will then allow you to pick up the quest from another researcher in the same area.

Once you have the quest, travel to the Kamiyacho Leyline Fount in Da’at: Minato and head into the building northwest of the leyline via the alleyway to the doctor and Mephisto. Approach them then when prompted choose “Yes” to start a battle with a Level 79 Mephisto. He’s weak to Light, drains Dark and blocks Physical. He uses Dark and Fire skills.

After you defeat him, you’ll receive the Dark Contract. Return to Researcher A to complete the quest. Afterwards, head down the stairs to speak with the Female Researcher. Choose the request allies option to have Mephisto join your party!

The Rage of a Queen

Client: Researcher B (Tokyo Diet Building in Da’at: Minato)

Reward: Stamina Balm x3

Summary: Head to Mita in Minato to find Cleopatra and deal with her

NOTE: You cannot get this quest until after you clear the Tokyo Diet Building as part of the story.

To start this quest, speak with the Female Researcher near the entrance to the Tokyo Diet Building at Da’at: Minato twice then choose the option to offer assistance. This will then allow you to pick up the quest from another researcher in the same area.

Once you have the quest, travel to the Mita Leyline Fount in Da’at: Minato then head west and approach the bus in the road. When prompted, choose “Yes” to start a fight with a Level 61 Cleopatra. She’s weak to Dark, drains Light and resists Electric, Force, Ice and Fire. She uses Force, Ice and Light attacks. After you defeat her, choose the option to stop her. She will then join your party and you’ll unlock here for fusion. Return to the Diet Building to complete the quest.

A Goddess In Training

Client: Researcher C (Tokyo Diet Building in Da’at: Minato)

Reward: Vitality Balm x5

Summary: Investigate the magic power reading in Minato near the Tokyo Tower

NOTE: You cannot get this quest until after you clear the Tokyo Diet Building as part of the story.

To start this quest, speak with the Female Researcher near the entrance to the Tokyo Diet Building at Da’at: Minato twice then choose the option to offer assistance. This will then allow you to pick up the quest from another researcher in the same area.

Once you have the quest, travel to the Tokyo Tower Leyline Fount and head north towards the tower to find a demon there. Speak with her to be tasked with defeating a Quetzalcoatl which can be found north of the Nagatacho Leyline Fount on a giant rock in front of the Tokyo Diet Building. It’s Level 34 and uses Fire and Force skills. The beast can also lower your party’s accuracy and evasion along with inflicting the poison status. The demon blocks Fire skills but is weak to Electric.

After it’s slain, return to Artemis to report the beast’s defeat. Talk with her once more to start a fight with a Level 37 Artemis. She uses Physical and Ice skills while resisting Dark and Light skills and blocks Electric and Ice skills. Her only weakness is Fire so make sure to exploit that for the win. After being defeated, Artemis will join your party then you can return to the research in the Tokyo Diet Building to complete the subquest.

Shin Megami Tensei V Guides and Walkthroughs

For other Shin Megami Tensei V guides and walkthroughs, click here!

Shin Megami Tensei V
Guides

Shin Megami Tensei V – Minato Subquests

by Chappie in

Welcome to NGB and our Shin Megami Tensei V guide on the subquests found at Minato in SMT V. Here you’ll find everything you’ll need to easily breeze through these quests!

Minato Subquests

A Preta Predicament

Client: Preta (Tamachi)

Reward: Haunt Talisman x1

Summary: Find the Pretas that went out in search of food

Speak to the Preta Leader in the cave on the northwest side of Tamachi and agree to search for the missing Pretas. Work your way to the northeastern side of the ruined city to find one of the Pretas on the ground next to a tree along the main road in Mita. Speak with it to learn another one of them left to be “guided by a goddess” and can be found further in the ruined city. To reach him, you’ll have to progress further in the story until you arrive at the Shiba Leyline Fount. East of the leyline, you’ll find a cave. Head inside then speak to the Preta near the entrance to receive Sake and Dango Medley. Return to the Preta Leader in the Tamachi to hand over the food to trigger a cutscene leading to a fight against 6 Level 3 Pretas. Use Force, Light or Fire magic to quickly bring them down completing the subquest.

Bully Breaker

Client: Agathion (Hamamatsucho)

Reward: Agathion’s Essence x1

Summary: Help Agathion by defeating 3 Daemons

Speak with Agathion on the highway leading to Tokyo Tower in the north-central part of the area just south of the Hamamatsucho leyline. The Daemons can be found in a cave slightly east of the Hamamatsucho leyline. Defeat 3 of them then return to Agathion to complete the subquest. Note: The Daemons are weak to Electric and Light skills.

Keeper of the West

Client: Koumokuten (Sotokanda)

Reward: Large Glory Crystal x1

Summary: Defeat Koumokuten

After completing The Ancient Guardian subquest, head to the Kamiyacho leyline. Once there, make your way west to find Koumokuten atop a ruined building.  Speak with him to begin a battle with a level 65 Koumokuten. He’s weak to electric, blocks force and resists light. He uses force and physical skills. Defeat him to complete the quest. You’ll also receive his essence.

Movin’ on Up

Client: Oni (Nagatacho)

Reward: Phys Dampener x1

Summary: See if there are any demons that need Oni’s help

Oni can be in a cave west of the Nagatacho Leyline Fount. Speak with him then agree to see if any other demons need help. Exit the cave and speak with the 4 demons outside then return to Oni and talk with him. Exit the cave again to trigger a cutscene leading to a fight against the Level 17 Oni. He’s weak to Electric and Light skills and resists Physical attacks. He can also get up to 2 actions per turn and uses Physical attacks that hit the whole party at once. Defeat him to receive the Raptor Talisman then head inside the cave and speak with him to complete the quest!

No Stone Unturned

Client: Neko Shogun (Hamamatsucho)

Reward: Wargod Talisman x1

Summary: Find and deliver 5 Life Stones to Neko Shogun

Speak with Neko Shogun on a rooftop near the entrance of Hamamatsucho coming from Shiba. He’ll request that you provide him with 5 Life Stones. You can find these around the area using Amanozako.

Pollution Panic

Client: Mandrake (Shiba Park)

Reward: Yoma Talisman x1

Summary: Help Mandrake by defeating 5 Azumi

The Mandrake can be found in Shiba Park west of Hamamatsucho leyline. The Azumi can be found along the river running through Shiba Park. They are weak to Electric skills. Defeat 5 of them then return to the Mandrake to complete the quest.

Talisman Hunt

Client: Shiki-Ouji (Nagatacho)

Reward: Brute Talisman x1

Summary: Find 3 Shikigami Talismans for Shiki-Ouji

Speak with Skiki-Ouji east of the Nagatacho Leyline Fount and accept his request to track down 3 talismans.

1st Talisman

Head to the entrance of Toranomon then follow the path to the left of the angel. Drop down the ledge and continue straight ahead to find a glowing item. It will be the first talisman!

2nd Talisman

The second talisman can be found on the roof of a building in West Shinbashi down the road north of the Kamiyacho leyline. You’ll want to turn left at a tree to head through a ruined building. Take the nearby stairs up to the top to find this talisman.

3rd Talisman

The third talisman can be found in Shinbashi. To reach it, travel to the Onarimon leyline then take the path left down the mountain to find it along the path.

After collecting all the talismans, return to Shiki-Ouji and speak with it to trigger a fight against him. He’s Level 19 and is weak to Force and Fire. It resists Light, Dark and Physical. It can inflict confuse and uses Light skills. Defeating it completes the quest.

The Benevolent One

Client: Huang Long (Onarimon)

Reward: 80,000 Macca

Summary: Defeat Huang Long in glorious combat

Speak with Huang Long after completing The Gold Dragon’s Arrival subquest (see below). Huang Long is Level 70! It is weak to Dark, blocks Light and resists Fire, Ice, Electric and Force. Its attacks consist of high level Almighty, Force, Fire, Electric and Ice skills. During the battle it will summon Level 65 versions of the demons you defeated in the previous quest for him. We beat him using an over leveled protagonist (Level 99) spamming the Divine Arrowfall skill. When you finally bring the big guy down, you’ll unlock him as a fusion.

The Cursed Mermaids

Client: Mermaid (Shiba Park)

Reward: Grimoire x3

Summary: Investigate the Mermaid’s curse by visiting her fellow Mermaids in the mountains

The Mermaid can be found in the southern part of Shiba Park next to a large tree under the highway leading to Tokyo Tower. Speak with her and agree to save her fellow Mermaids. You’ll have to wait until you defeat the demon at Tokyo Tower before you can continue this quest. Once that has been done, take the most southwestern path of the tower to reach Akabanebashi. There you’ll find an area covered in water to the southwest. Approach the area to trigger a cutscene that will lead to a fight against a Level 16 Pazuz. It blocks Dark, resists Force skills and is weak to Ice. You’ll want to want out for its Force skill that can hit the whole party along with the Dark skills that target a single member. Another of its attacks can cause the confusion ailment and it also gets two actions per turn. Once the demon has gone down, return to the Mermaid at the base of Shiba Park under the underpass to complete the subquest.

The Demon of the Spring

Client: Mermaid (Shiba Park)

Reward: Femme Talisman x1

Summary: Enlist the help of Anahita to lift the Mermaid’s curse

After completing the “The Cursed Mermaids” subquest, the Mermaid will ask you to seek out Anahita to assist in lifting the curse. Travel to Onarimon which is east of Kamiyacho then head to the top of the mountain. There you’ll be able to jump onto a path leading south to a small lake where Anahita can be found. Speak with her and she’ll agree to help if you can defeat her in battle. She’s Level 18, absorbs Ice and blocks Light skills, and her weaknesses are Fire and Electric. She uses Ice and Light skills with support skills that can lower your attack and defense. Once defeated, she will clear the curse for the Mermaid. To complete the subquest, return to the Mermaid and speak with her.

The Gold Dragon’s Arrival

Client: Huang Long (Onarimon)

Reward: Dragon Talisman x1

Summary: Eliminate the four gods across Minato

Travel to the top of the mountain in Onarimon to find and speak with Huang Long. Agree to his challenge then head out to seek the 4 gods he mentioned.

Hamamatsucho

Hamamatsucho

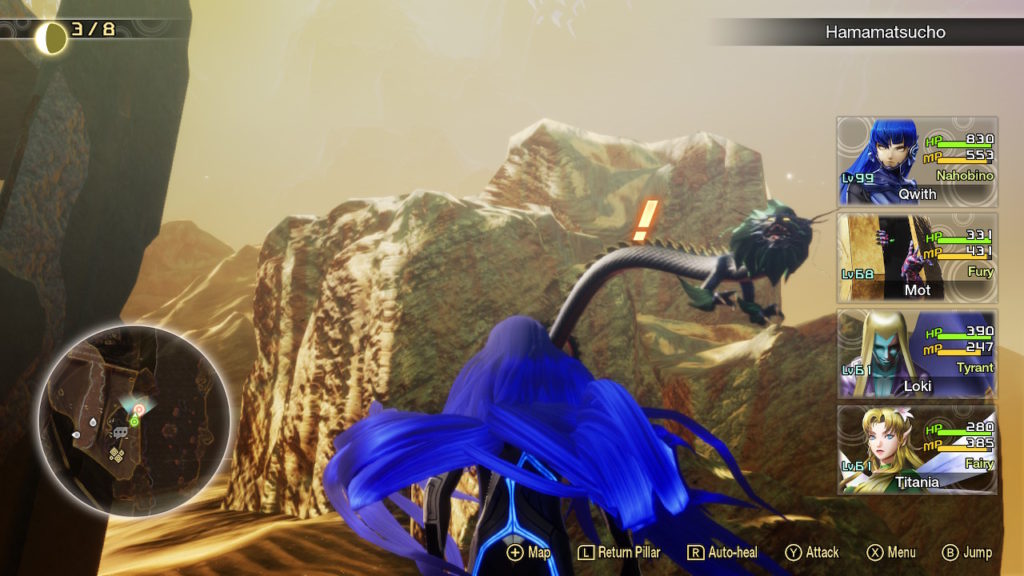
From the Hamamatsucho leyline, head to the very eastern part of the area to find the Level 45 Qing Long near the stairwell of a ruined building. It is weak to Electric, blocks Force and resists Ice. It uses Ice, Force and Physical attacks. It can lower your attacks.

Tokyo Tower

From the Tokyo Tower leyline, take southwestern path through a desert area. When the path forks, take the path that curves to the southeast to reach Shiba where you can find the Level 43 Zhuque flying around. Zhuque is weak to Ice and blocks Fire. It uses Fire attacks, can negate any debuffs and lowers your accuracy and evasion.

West Shinbashi

West Shinbashi

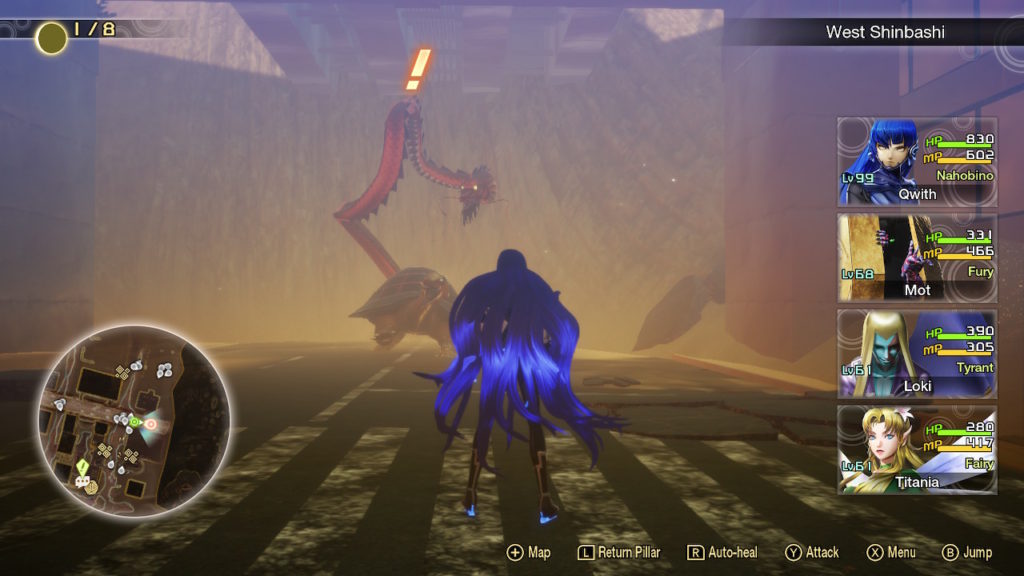
Follow the road north from the Kamiyacho leyline into West Shinbashi. Take a right under the underpass to find the demon straight ahead. Approach the dragon and turtle duo to fight a Level 23 Xuanwu. It is weak to Fire and blocks Ice. It uses Ice and Physical attacks and can raise its defense.

Nagatacho

From the Nagatacho leyline, head southwest to find the Level 43 Baihu just past the rock archway. It is weak to Force and blocks Electric. It uses Physical and Electric attacks.

After you defeat all 4 demons, return to Huang Long in Onarimon at the top of mountain. Speak with him to complete the quest. Immediately after completing the quest, he’ll ask you if you want to accept The Benevolent One subquest (see above) which leads to a fight with the Level 70 dragon. If you are not ready for that fight, say no!

The Spirit of Love

Client: Apsaras (Shiba)

Reward: Heath Incense x2

Summary: Leanan Sidhe is thoughtlessly riling up other demons with her seductive words. Put a stop to her.

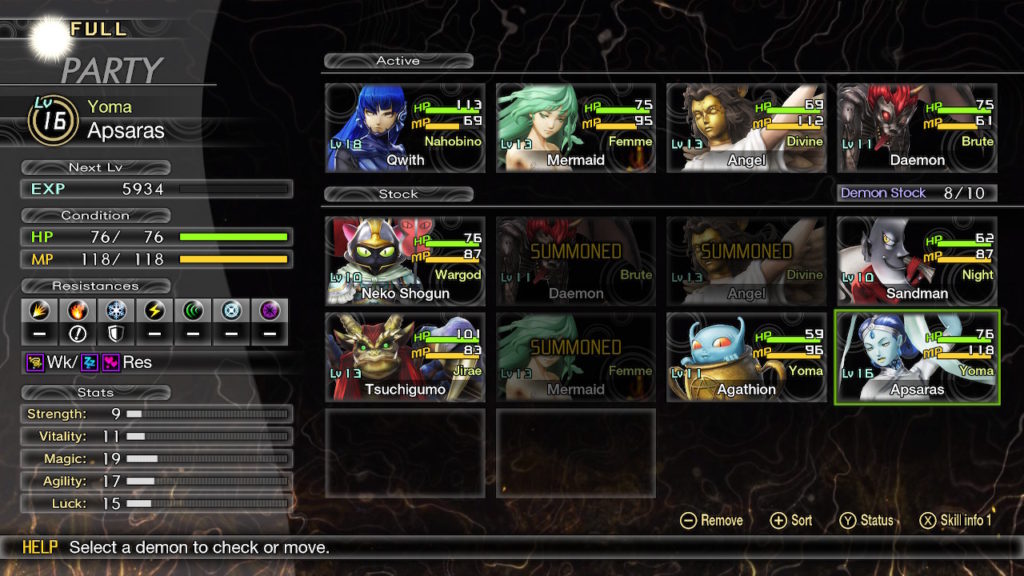
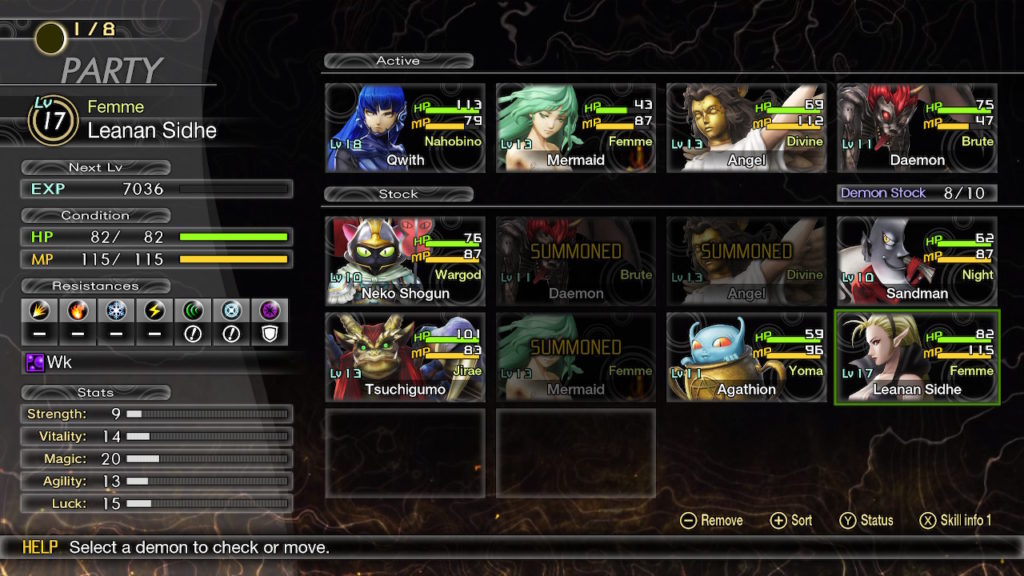
Speak with Apsaras who can be found through a tunnel east of the Shiba Leyline Fount and agree to put a stop to the evil Leanan Sidhe. Head for Shiba Park just before Tokyo Tower then look for a cave southwest of the Tokyo Tower Leyline Fount to find Leanan Sidhe. Speak with and choose the talk with her option to receive a quest called “The Water Nymph” that has you defeating Apsaras. If you decide to side with Apsaras (making The Water Nymph complete without any rewards), speak with Leanan Sidhe to start the battle. She will be Level 17 with weaknesses to both Force and Light skills. Leanan is also accompanied by a Level 13 Ippon-Datara who is weak to Light skills as well. Defeat them then return to Apsaras near the Netherworld – Shiba Leyline Fount to complete the subquest. Apsaras will also join your party.

Party

The Succession of Ra

Client: Isis (Odaiba)

Reward: Large Glory Crystal x2

Summary: Stop Khonsu at the Fairy Village

During The Egyptians’ Fate subquest, you must choose to spare Khonsu. Afterwards, complete The Winged Sun subquest to unlock this quest. When you’re able speak with Isis then travel to the Fairy Village. From the leyline, head southwest towards the objective to find the duo. After the cutscene, a battle will begin with the Level 82 Khonsu Ra. He will summon Level 78 Thoth and Level 78 Anubis to fight with him. Khonsu Ra is weak to ice, absorbs light, resists electric and force and blocks fire. Thoth is weak to dark and blocks fire. Anubis is weak to force, blocks light and resists dark. Defeat them to be presented with a choice. We chose to stop Khonsu! After the cutscene, the quest will complete and Deity Khonsu and Deity Khonsu Ra will unlock for fusion.

The Ultimate Omelette

Client: Aitvaras (West Shinbashi)

Reward: Drake Talisman x1

Summary: Bring a Jatayu Egg to Aitvaras

Speak with Aitvaras on the highway in West Shinbashi and agree to retrieve the egg for him. The egg can be found west of the highway in a Jatayu’s nest. There is sand path on the west side of the highway next to a big piece of fallen debris leading to the nest. You’ll have time your approach to avoid the Jatayu patrolling the area if you want to avoid a fight. The beast is Level 25 and hits like a truck. If you want to test your luck, it’s weak to both Electric and Dark attacks and drains Force skills. It also uses Force and Physical attacks while occasionally upping its accuracy and evasion. You’ll also want to watch out for when it activates is Magatshui skill Omagatoki: Critical which can buff its attacks to be over 100 points of damage. Either way, with the egg in hand, return to Aitvaras and hand it over to complete the subquest.

The Water Nymph

Client: Leanan Sidhe (Shiba Park)

Reward: Stamina Incense x2

Summary: Apsaras is seducing weak demons into becoming her soldiers. Put a stop to her plans.

Speak to Leanan Sidhe while on The Spirit of Love subquest. She’ll counteroffer asking you to take care of Asparas instead. If you’re planning on doing this, go ahead and accept her request. (The Spirit of Love will complete automatically with no rewards after siding with Leanan.) Head to Netherworld – Shiba Leyline Fount then travel east through the tunnel to reach Apsaras. Speak with her then choose to support the other side which leads to a fight with Level 16 Apsaras and 3 Level 12 Agathion. Apsaras is weak to Fire and uses Ice attacks. The Agathion are weak to Dark and Ice skills. After defeating Apsaras, return to Leanan to complete the subquest. Leanan will also join your party.

Shin Megami Tensei V - Minato Subquests

To Cure a Curse

Client: Andras (Onarimon)

Reward: Fallen Talisman x1

Summary: Find 5 Bicorn Horns for Andras

Speak to Andras who can be found in Onarimon near the leyline and agree to collect the horns for his medicine. The best place to hunt the Bicorns is in the desert area south of Kamiyacho. Alternatively, the nearby Abscess will spawn them as well! They are weak to Electric and Light skills and resist Dark skills. Return to Andras after collecting 5 to hand them over completing the subquest.

Click here for the next guide on the Shinagawa subquests!

Tales of Arise
Guides

Tales of Arise – Calaglia Subquests

by Chappie in

Welcome to our Calaglia subquests guide for Tales of Arise. Listed are the subquests you can find in Calaglia and how to complete them.

Forging from Scratch

Obtained: Automatically during the story

Target: Consult with the blacksmith at the inn

Head to the Inn in Ulzebek and speak with the blacksmith. Select the option to craft your own weapon and then choose the Long Sword, unless you have an Astral Crystal Grain. If you do, select the Crude Sword as it is the better weapon! Back out of the menu to complete the Forging From Scratch quest.

Rewards: 500 Gald, 165 SP

Giant Zeugle Hunt

Obtained: Speak with the  in Ulzebek after obtaining Shionne’s outfit from Fagan Ruins

Target: Defeat the Mantis in the Sandinus Ravine

This enemy is level 43! When you’re ready to take it on, head on over to find it in the Sandinus Ravine and defeat it. Afterwards, report back to complete the Giant Zeugle Hunt quest.

Rewards: 12600 Gald, 380 SP

Global Connection

Obtained: Speak with Kohl and Doc at Mosgul in Cataglia

Target: Talk to the merchant in Glanymede Castle

Travel to Glanymede Castle in Cataglia. Head up to 3F then speak with Gourdeno and the Cyslodian Peddler. In order to proceed, you’ll need to hand over some wheat and eggs. This will trigger an event where Gourdeno will make come up with a new recipe. Take the samples back to Kohl and Doc to complete the Global Connection quest.

Rewards: Glutton’s Code, Glanymede Donuts Recipe, 18400 Gald

Hunger Averted

Obtained: Speak with the Woman Cook in Ulzebek after obtaining Shionne’s outfit from Fagan Ruins

Target: Acquire 3x Wheat and 3x Potato

These items can be collected from gathering points outside of Ulzebek in the Sandinus Ravine or Iglia Wastes. Once you’ve obtained 3 Wheats and 3 Potatoes, return to the woman to hand them over.

Rewards: Steamed Potatoes Recipe x1, 700 Gald, 190 SP

Mixed Feelings

Obtained: Speak with Grenar in Ulzebek after reaching Lenegis

Target: Talk to Nayth

Speak with Grenar in Ulzebek then travel to the southwestern part of Iglia Wastes. Approach the boulder blocking the way and tear it down using CP. Proceed forward and defeat the Level 53 Thunderite! Afterwards, return to Nayth and speak with him to complete the Mixed Feelings quest.

Rewards: Zephyr’s Ring, Dawn Braces, 12600 Gald, 265 SP

Shionne the Fashion Critic

Obtained: Speak with the Handsome Nobleman in Ulzebek after defeating Balseph

Target: Give the young man fashion advice

After you give the man fashion advice, wait for him to pick out some clothes. We chose the first option of just going with nothing too fancy, just some regular clothes. Return to him after the time skip (and unlocking fast travel again). Shionne commented on how he looked a little too plain/generic and the Shionne The Fashion Critic quest will be completed.

Rewards: 1600 Gald, 135 SP

Supply Procurement

Obtained: Speak with Dyron by the inn in Ulzebek as part of the story.

Target: Meet with the Crimson Crows at Sandinus Ravine

Head to Sandinus Ravine towards the objective to stumble across the party we were sent to help. After the cutscene, return to Dyron to hand over the remaining supplies.

Rewards: 800 Gald, 200 SP

Taking Root

Obtained: Speak with Grenar in Ulzebek after defeating Balseph

Target: Defeat the Wolfs around the village

Travel to the Iglia Wastes and follow the objective to the ruined village. Defeat the wolves there then return to Grenar and speak with him to complete the Taking Root quest.

Reward: 800 Gald, 210 SP

The Hunt for New Arms

Obtained: After completing the Forging from Scratch sub-quest and defeating Balseph, speak with Dyron by the Ulzebek inn

Target: Acquire 3x Stone Fragment

Rewards: 700 Gald, 170 SP

Monster Hunter Stories 2
Guides

Monster Hunter Stories 2 – 1 Star Subquests

by Chappie in


Below are the 1 star subquests in Monster Hunter Stories 2! For a detailed guide on the monsters (Monsterpedia plus more), click here!


Bothersome Blue Shadows

Obtained: Quest Board

Objective: Defeat Velociprey x6

Velociprey (blue raptors) are common around Hakolo Island.

Rewards: Potion, 800 Z and 20 EXP


Bug Off and Let Me Fish!

Obtained: Speak with the Focused Woman fishing in the center of Mahana Village

Objective: Defeat Bnahabra (Blue) x5

The Bnahabra can be found in North Hakolo Island or in dens. There is usually a pack hanging out near the gates leading to Guardian Ratha in the north.

Rewards: Carpenterbug, 1500 Z and 20 EXP


Co-Op Call: Pukei-Pukei

Obtained: Quest Board after you defeat your first Pukei-Pukei

Objective: Slay Pukei-Pukei x1

Pukei-Pukei can be found in North Kamuna Forest, North Kamuna Everden, North Hakolo Island and Monster Dens. Pukei-Pukei are weak to Slash (Greatsword or Sword and Shield). Target their tail first to weaken them. Pukei-Pukei favor Technical Attacks, so use power against them. After they eat (Munch Time or Crunch Time), they will use a Power Attack. Use speed to beat them at that point. So long as their face is red like they are enranged, they will use Power Attacks.

Rewards: Antidote, 1500 Z and 20 EXP


Delicious Donuts

Obtained: Quest Board

Objective: Deliver Woemill Wheat x3 and Hakolo Honey x3

Both items can be found on Hakolo Island. Woemill Wheat comes from red herb gathering spots, and Hakolo Honey has a chance to spawn from honeycomb gathering.

Rewards: Taste of Home Combo Recipe, Mahana Dunker x3, 13000 Z and 20 EXP


En-egg-matic Eggs 1

Obtained: Speak with the Watchful Old Man on the cliff in the north of Mahana Village past the stables

Objective: Deliver an Herbivore genus egg

The Herbivore genus egg can be obtained from Monster Dens around Hakolo Island. Aptonoth are the only herbivores you can find at this point. Their eggs are green with grey horizontal ovals around the shell. Egg picking in RNG unless you force a monster to retreat to its den.

Rewards: Healer’s Comp V.2 Combo Recipe, Burn Ointment x2, 1000 Z and 20 EXP


En-egg-matic Eggs 2

Obtained: Speak with Watchful Old Man on the cliff in the north of Mahana Village past the stables after defeating Pukei-Pukei

Objective: Deliver a Bird Wyvern genus egg

The Bird Wyvern genus egg can be found in Monster Dens around Hakolo Island. You can grab any one of the following eggs for it to count:

  • Velocidrome – Blue with red spots
  • Kulu-Ya-Ku – White with red spots
  • Yian Kut-Ku – Pink with blue spots
  • Pukei-Pukei – Green with white spots

Rewards: Bottle Cap x3, 1500 Z and 20 EXP


Good Ol’ Bag of Bones

Obtained: Speak with Friendly Man standing on the ship at the dock south of Mahana Village

Objective: Equip a bone sword and shield

The item to forge is Bone Kris. It requires 3 points.

  • Monster Bone S – 1 point
  • Monster Bone M – 3 points
  • Monster Bone L – 10 points

Once forged, make sure to equip it the speak with the Friendly Man.

Rewards: S&S: Counter Skill Book, 2000 Z and 20 EXP


Hakolo Commodities

Obtained: Quest Board

Objective: Deliver Mahana Commodities x10 points

Mahana Commodities can be obtained from gather points around Hakolo Island. Listen for a shimmer sound when approaching the gather points as these have either commodities or rare materials. Mahana Commodities are either Unique Mushroom (1 point), Mixed Honey (3 points) or King Truffles (5 points). You can ignore grass, bone or mining gather points for this quest.

Rewards: Stone x2, 500 Z and 20 EXP


(Hard) Rider’s Challenge

Obtained: Quest Board after defeating Pukei-Pukei

Objective: Slay the Blue Menace

The Blue Menance is the Velocidrome, which can be found at Silver Subquest Den near the Catavan Stand at North Kamuna Cape during the afternoon/day. While just a Velocidrome, this is your first elite/named enemy. It will have more HP and hit harder. To beat it, use a technical Monstie and Technical attacks to beat its speed patterns. Once it enrages (face turns reddish), start using speed to beat its Power Attacks until it falls or calms down.

Rewards: Screamer Sac x4, Wyvern Barbs x2, 2100 Z and 20 EXP


Legendary Sculptor

Obtained: Speak with the Positive Woman in Mahana Village

Objective: Find out about the Sculptor

Speak to the following people:

  • Informed Rider near the Quest Board in Mahana Village
  • Stubborn Old Woman just past the smithy in Mahana Village
  • Gossipy Woman in the eastern part of Rutoh Village
  • Nostalgic Old Woman in the center part of Rutoh Village near the fountain

Afterwards, deliver the statue given to you by the Nostalgic Woman to the Positive Woman in Mahana Village.

Rewards: Bottle Cap x5, 2300 Z and 30 EXP


Mystic Midnight Mushrooms

Obtained: Speak with Timid Boy standing at the base of the stairs leading to Chief Gara’s Hut in Mahana Village

Objective: Deliver Duskshroom x5

The Dushshrooms can be obtained from red mushroom gather points around Hakolo Island at night. They should have a shimmer sound when you approach them.

Rewards: Lifesoot, 800 Z and 20 EXP


Rarities of Hakolo Island

Obtained: Quest Board

Objective: Deliver Mahana Rarity x10

The gather points can be found all around Hakolo Island. Listen for a shimmer sound when approaching the gather points. Mahana Rarities are either Snakebee Larva (1 point), Silver Cricket (2 points) or Goldenfry (5 points).

Rewards: Iron Ore, 500 Z and 20 EXP


Rider 101: Combining

Obtained: Quest Board

Objective: Combine enough items x15

The combine option can be found in the Camp Menu (X button). This can take some time with your luck gathering. Crafting Potions is probably the easiest way to achieve this. This means you would be required to have 15 Herbs and 15 Blue Mushrooms!

Rewards: Hunter’s Life: Summer Combo Recipe, Immunizer x3, 800 Z and 20 EXP


Rider 101: Dens

Obtained: Quest Board

Objective: Enter Monster Dens x5

The Monster Dens can be found around Hakolo Island.

Rewards: Stone x6, 800 Z and 20 EXP


Rider 101: Forging Equipment

Obtained: Quest Board

Objective: Forge equipment x3

Gather materials then forge at any forge throughout the world. Please note that upgrading does not count as forging!

Rewards: Adamant Charm x5, 1300 Z and 20 EXP


Rider 101: Gathering

Giver: Quest Board

Objective: Gather items x20

Gather anything around Hakolo Island (or the world)

Rewards: Gathering Charm x5, 800 Z or 20 EXP


Rider 101: Hatching Eggs

Obtained: Quest Board

Objective: Hatch an egg x1

You can hatch eggs at stables in any major city after obtaining an egg.

Rewards: Tracking Basics Combo Recipe, Paintball x3, 800 Z and 20 EXP


Rider 101: Head-to-Heads

Obtained: Quest Board

Objective: Win Head-to-Heads x30

Head-to-Heads can hapen during any combat around the world. This one can be frustrating and takes awhile to complete. You can win at the faceoffs using the following strategies:

  • Aptonoth – Use speed to beat its power
  • Larinoth – Use power to beat its technique
  • Kelbi – You can’t fight Bambi, silly… What are you? A monster? 🙂
  • Velociprey – Use technique to beat its speed
  • Velocidrome – Use technique to beat its speed. When enraged (red face) use speed to beat its power. Keep using speed to beat its power until it falls or calms down.
  • Kulu-Ya-Ku – User power to beat its technique. When it holds a rock, use speed to beat its power.
  • Bnahabra – Use power to beat its technique
  • Konchu – Use power to beat its technique
  • Yian Kut-Ku – Use power to beat its technique
  • Bullfango – Use speed to beat its power
  • Bulldrome – Use speed to beat its power
  • Pukei-Pukei – Use power to beat its technique. After it uses either Munch Time or Crunch Time, use speed to beat its incoming Power Attacks. Keep using speed to beat its power as long as its face is red.

Rewards: Vitality Nutriment, 800 Z and 20 EXP


Rider 101: Offering

Obtained: Quest Board

Objective: Offer charms x2

The charms can be obtained from chests in Monster Dens. Once you’ve collected 2 charms, offer them to the Prayer Pots that can be found in any major city.

Rewards: Lucky Charm x5, 800 Z and 20 EXP


Rider 101: Quests

Obtained: Quest Board

Objective: Turn in quests x10

This quest is pretty self explanatory! Just pick up 10 quests, complete them then turn them in.

Rewards: Whetstone x4, 800 Z and 20 EXP


Rider 101: Slaying

Obtained: Quest Board

Objective: Slay small monsters x30

The small monsters are Velociprey, Bnahabra, Konchu and Bullfango, which can be found around Hakolo Island (and around the world).

Rewards: Training Charm, 800 Z and 20 EXP


Roly-Poly Problems

Obtained: Quest Board

Objective: Slay Konchu (Yellow) x6

Konchu (Yellow) can be found on Hakolo Island. If you hug the coast and go under the North Kamuna Cape, there should be a small group of Konchu. Otherwise, Konchu can be found all over and frequently appear as adds in Yian Kut-Ku fights.

Rewards: Insect Husk x2, 1200 Z and 20 EXP


Shake That Soot

Obtained: Quest Board

Objective: Deliver Herb x9 and Stone x3

The Herb and Stone can be collected from gather points on Hakolo Island. Herbs are basic grass gather points and Stone can be obtained from the Hakolo Commodities quest, Rider 101: Dens quest, mining points or Kelbi shining items.

Rewards: Group Healing 101 Combo Recipe, Lifesoot x3, 1500 Z and 20 EXP


Stone Collector

Obtained: Quest Board

Objective: Deliver Stone x10

The stone can be found around Hakolo Island. Stone can be obtained from doing the Hakolo Commodities quest or Rider 101: Dens quest. When scaring Kelbi away, their shiny items will occasionally be stones.

Rewards: Earth Crystal x2, 1200 Z and 20 EXP


Well-Done Steak Coming Up!

Obtained: Quest Board

Objective: Deliver Raw Meat x6

Raw Meat can be obtained from Aptonoth (grey, docile monsters that run from you) or Larinoth (yellow, long-necked monsters eating leaves from trees) around Hakolo Island.

Rewards: Well-Done Steak x2, 800 Z and 20 EXP


Click here for the next guide on the 2 star subquests!