Below is a guide on the 3 artifacts, 1 journal entry, 4 trading cards and 2 workbenches that can be found during the Road to the Aquarium chapter in The Last of Us Part II.
Trading Card – Esquire
This card can be found near a sound board at the beginning of the chapter just before interacting with the giant red curtain.
Trading Card – Tormentra
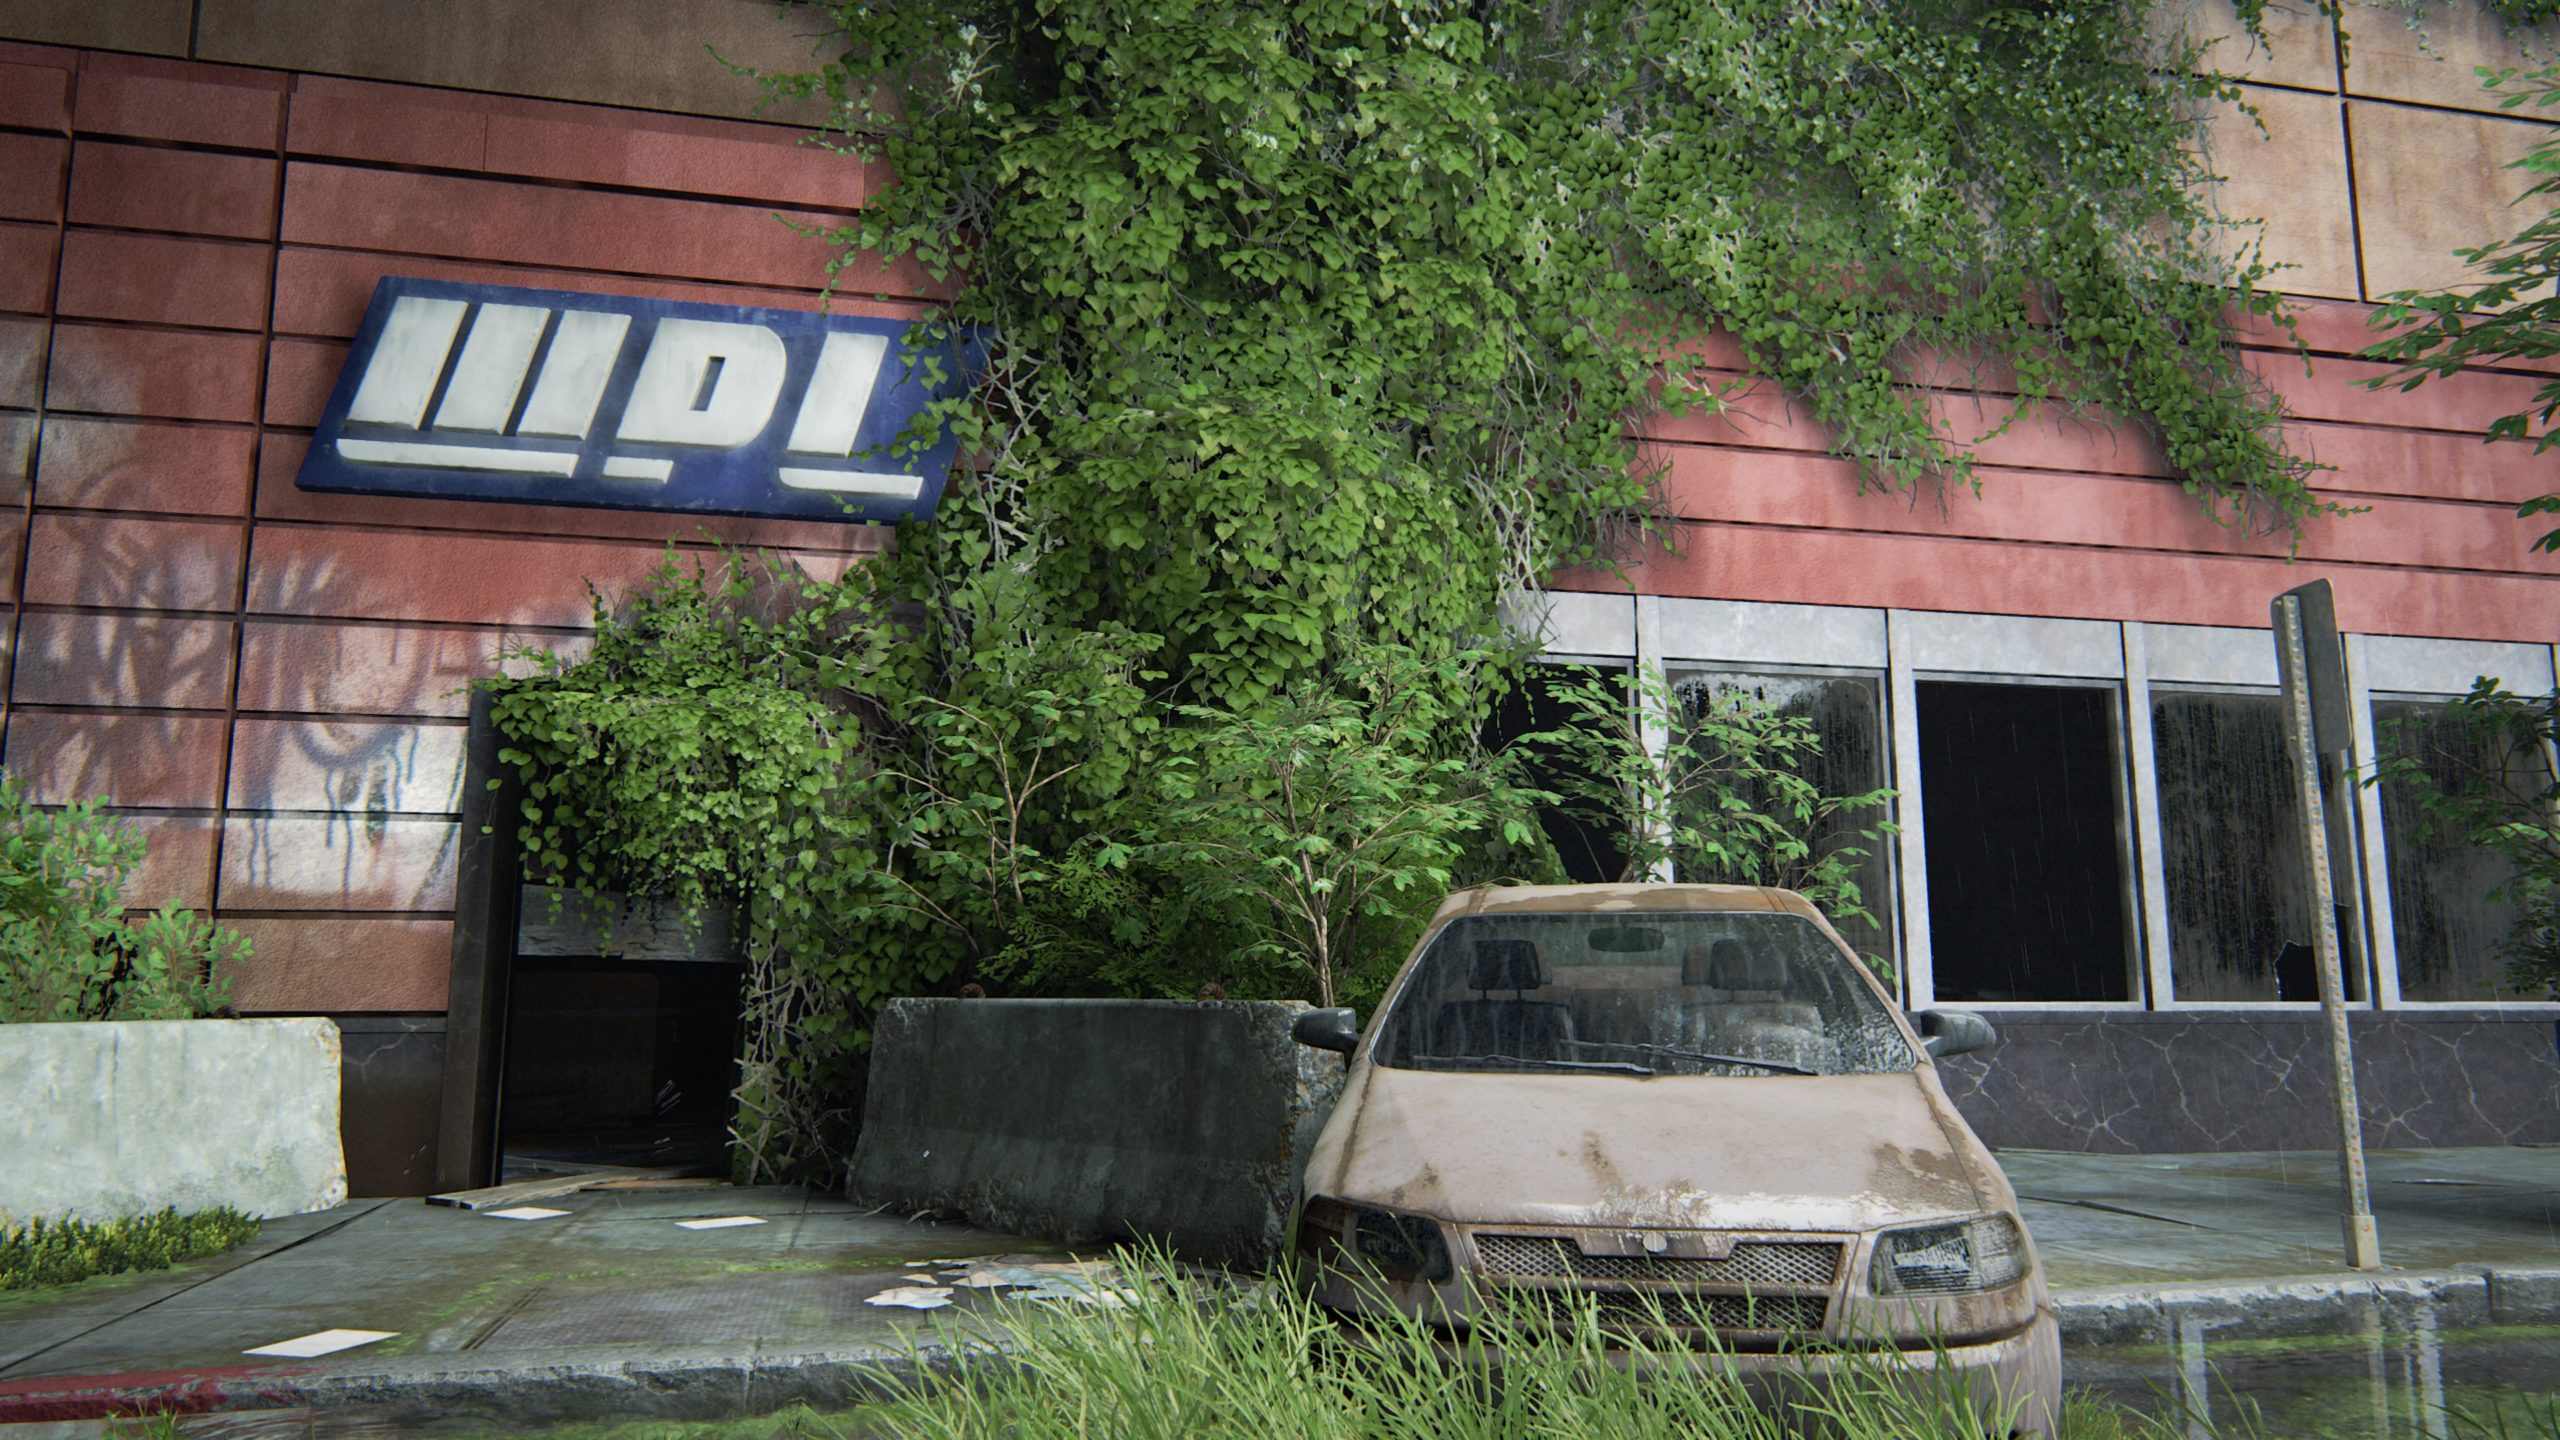
This card can be found in the shipping and packing building called WPL. To reach the room containing the collectible, you will need to climb under a fallen filing cabinet blocking the doorway.
Workbench
This workbench can be found in the same room as the above trading card.
Artifact – Garage Note
After Ellie and Jessie see the ferris wheel and go for a quick swim, head to the parking garage on the left side. Kill the Infected inside then work your way through the garage to reach the upper level. The artifact can be found next to a corpse.
Trading Card – Tanager
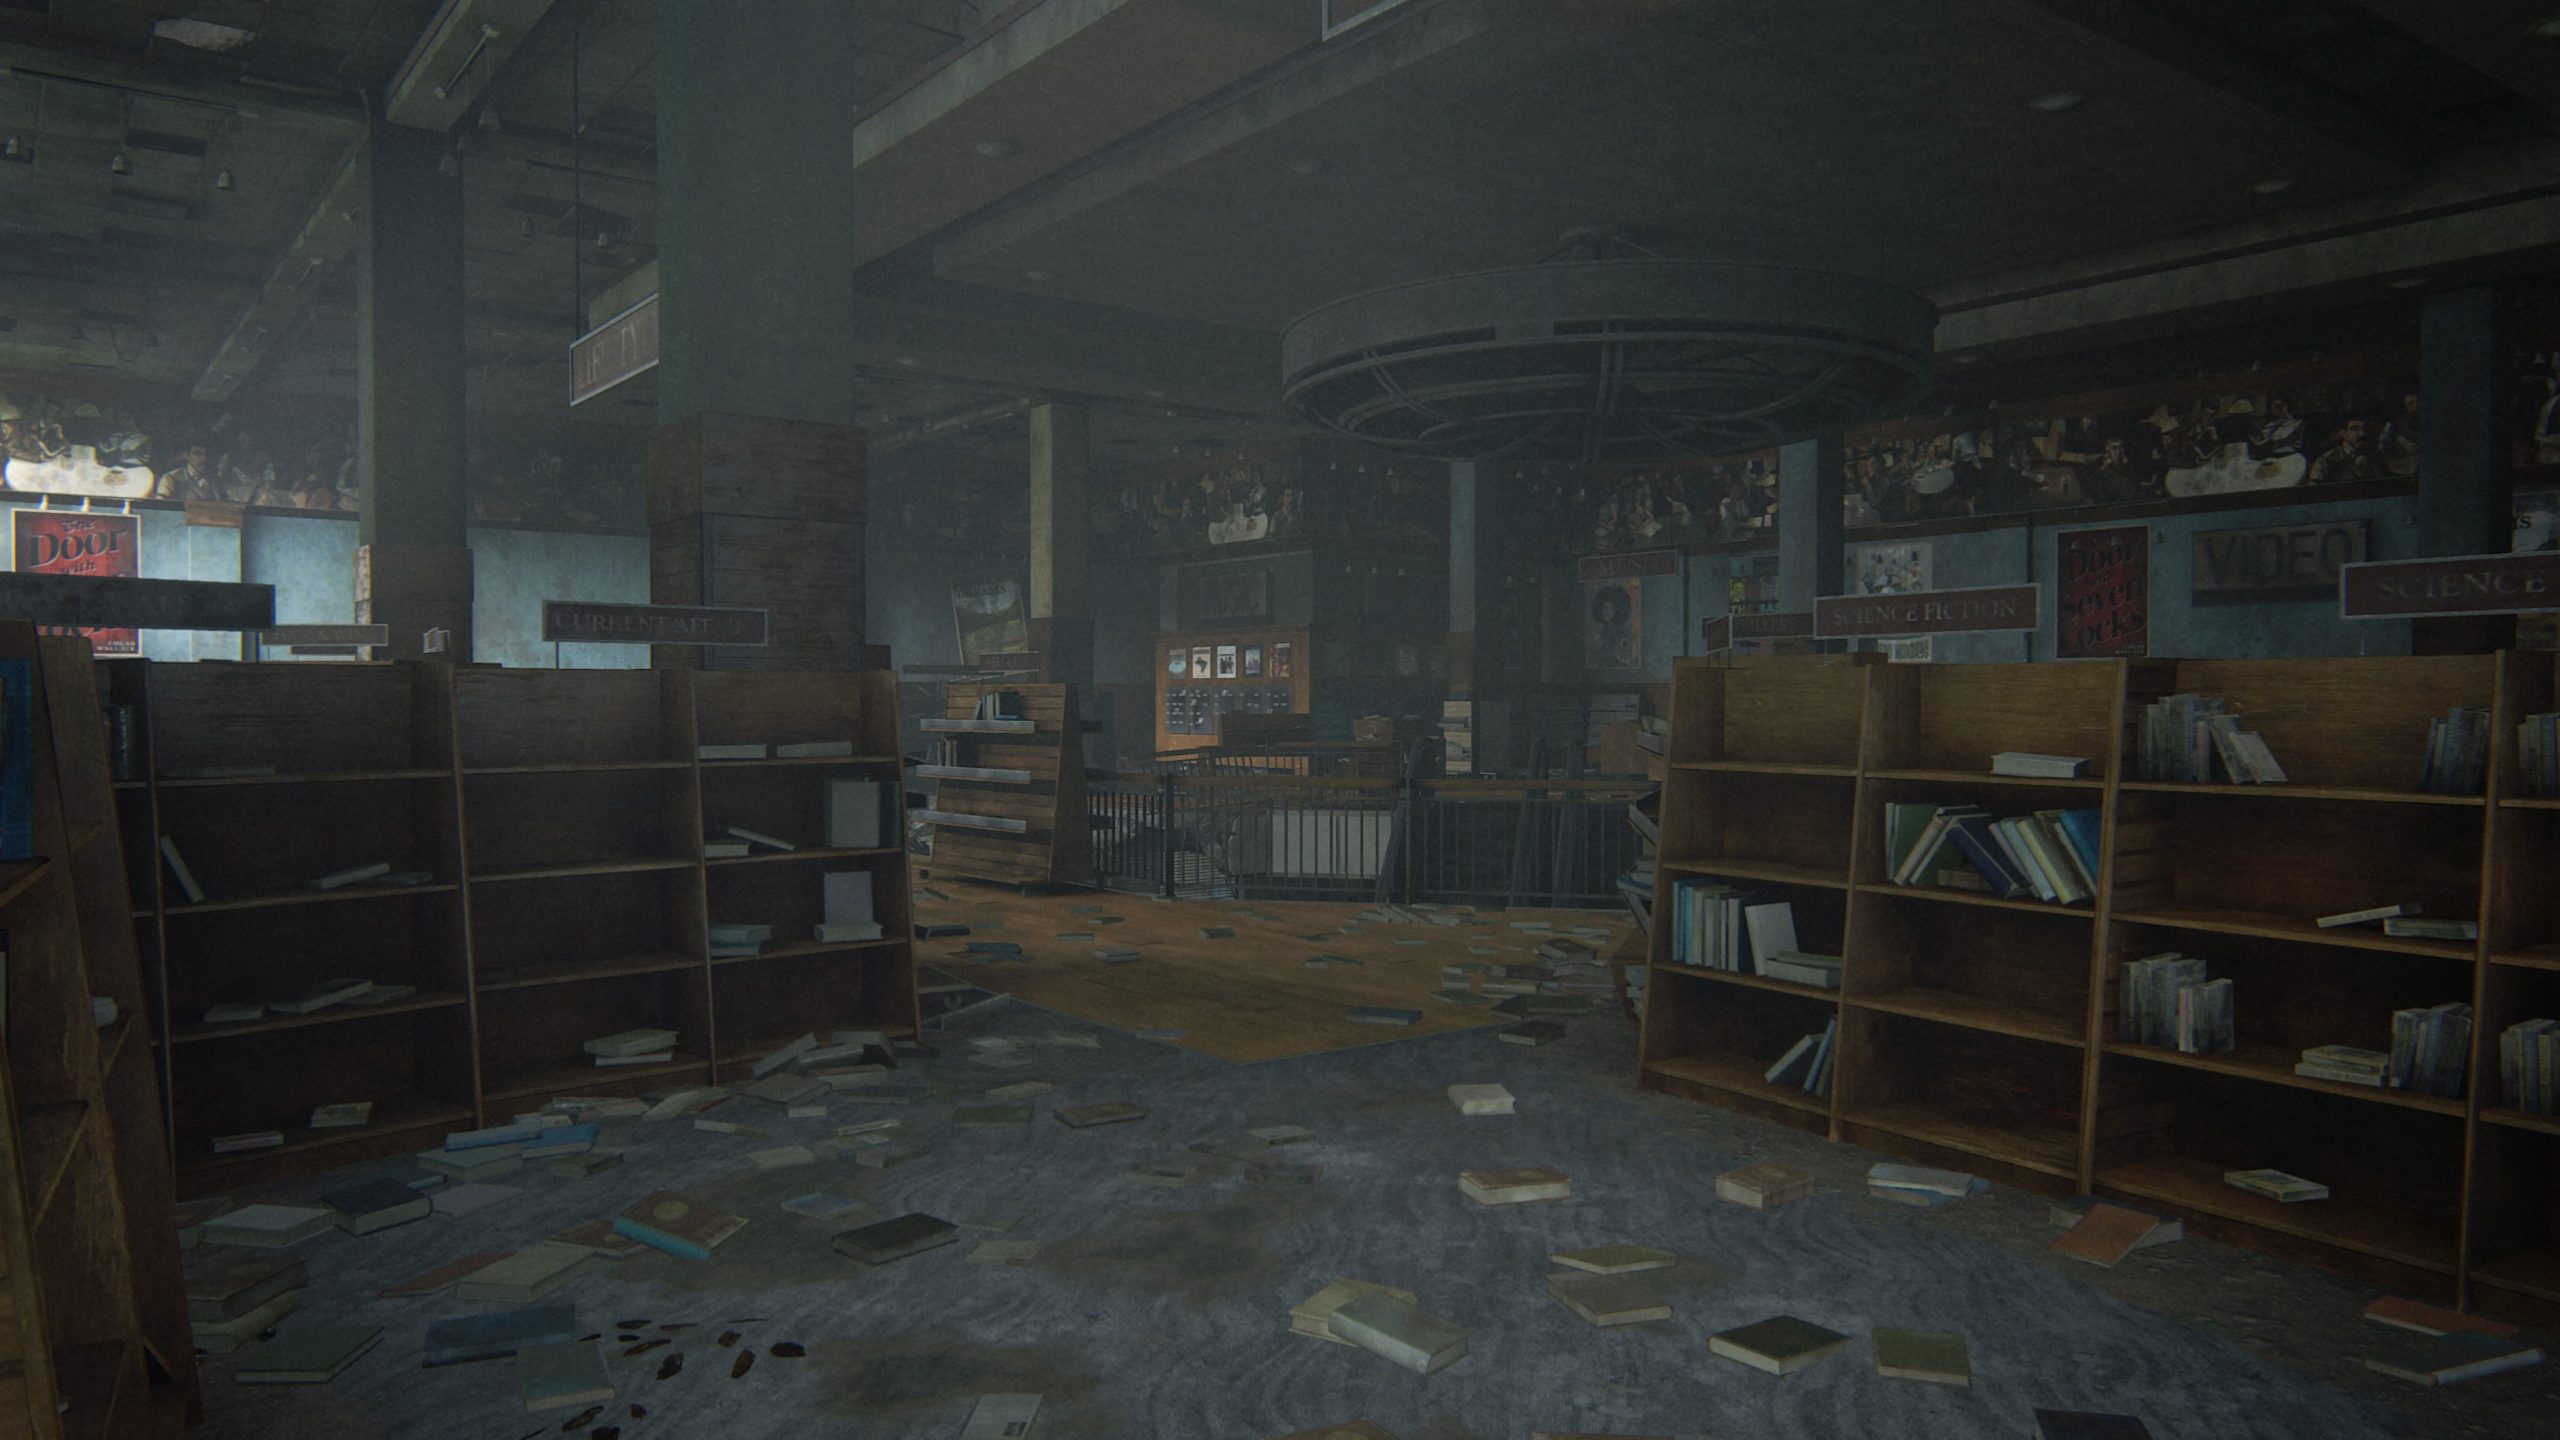
This card can be found in Kingston Bookstore, which you will go to as part of the story. Once inside, drop down to the lower level then crawl under some rubble to find the card on a bookshelf.
Journal Entry
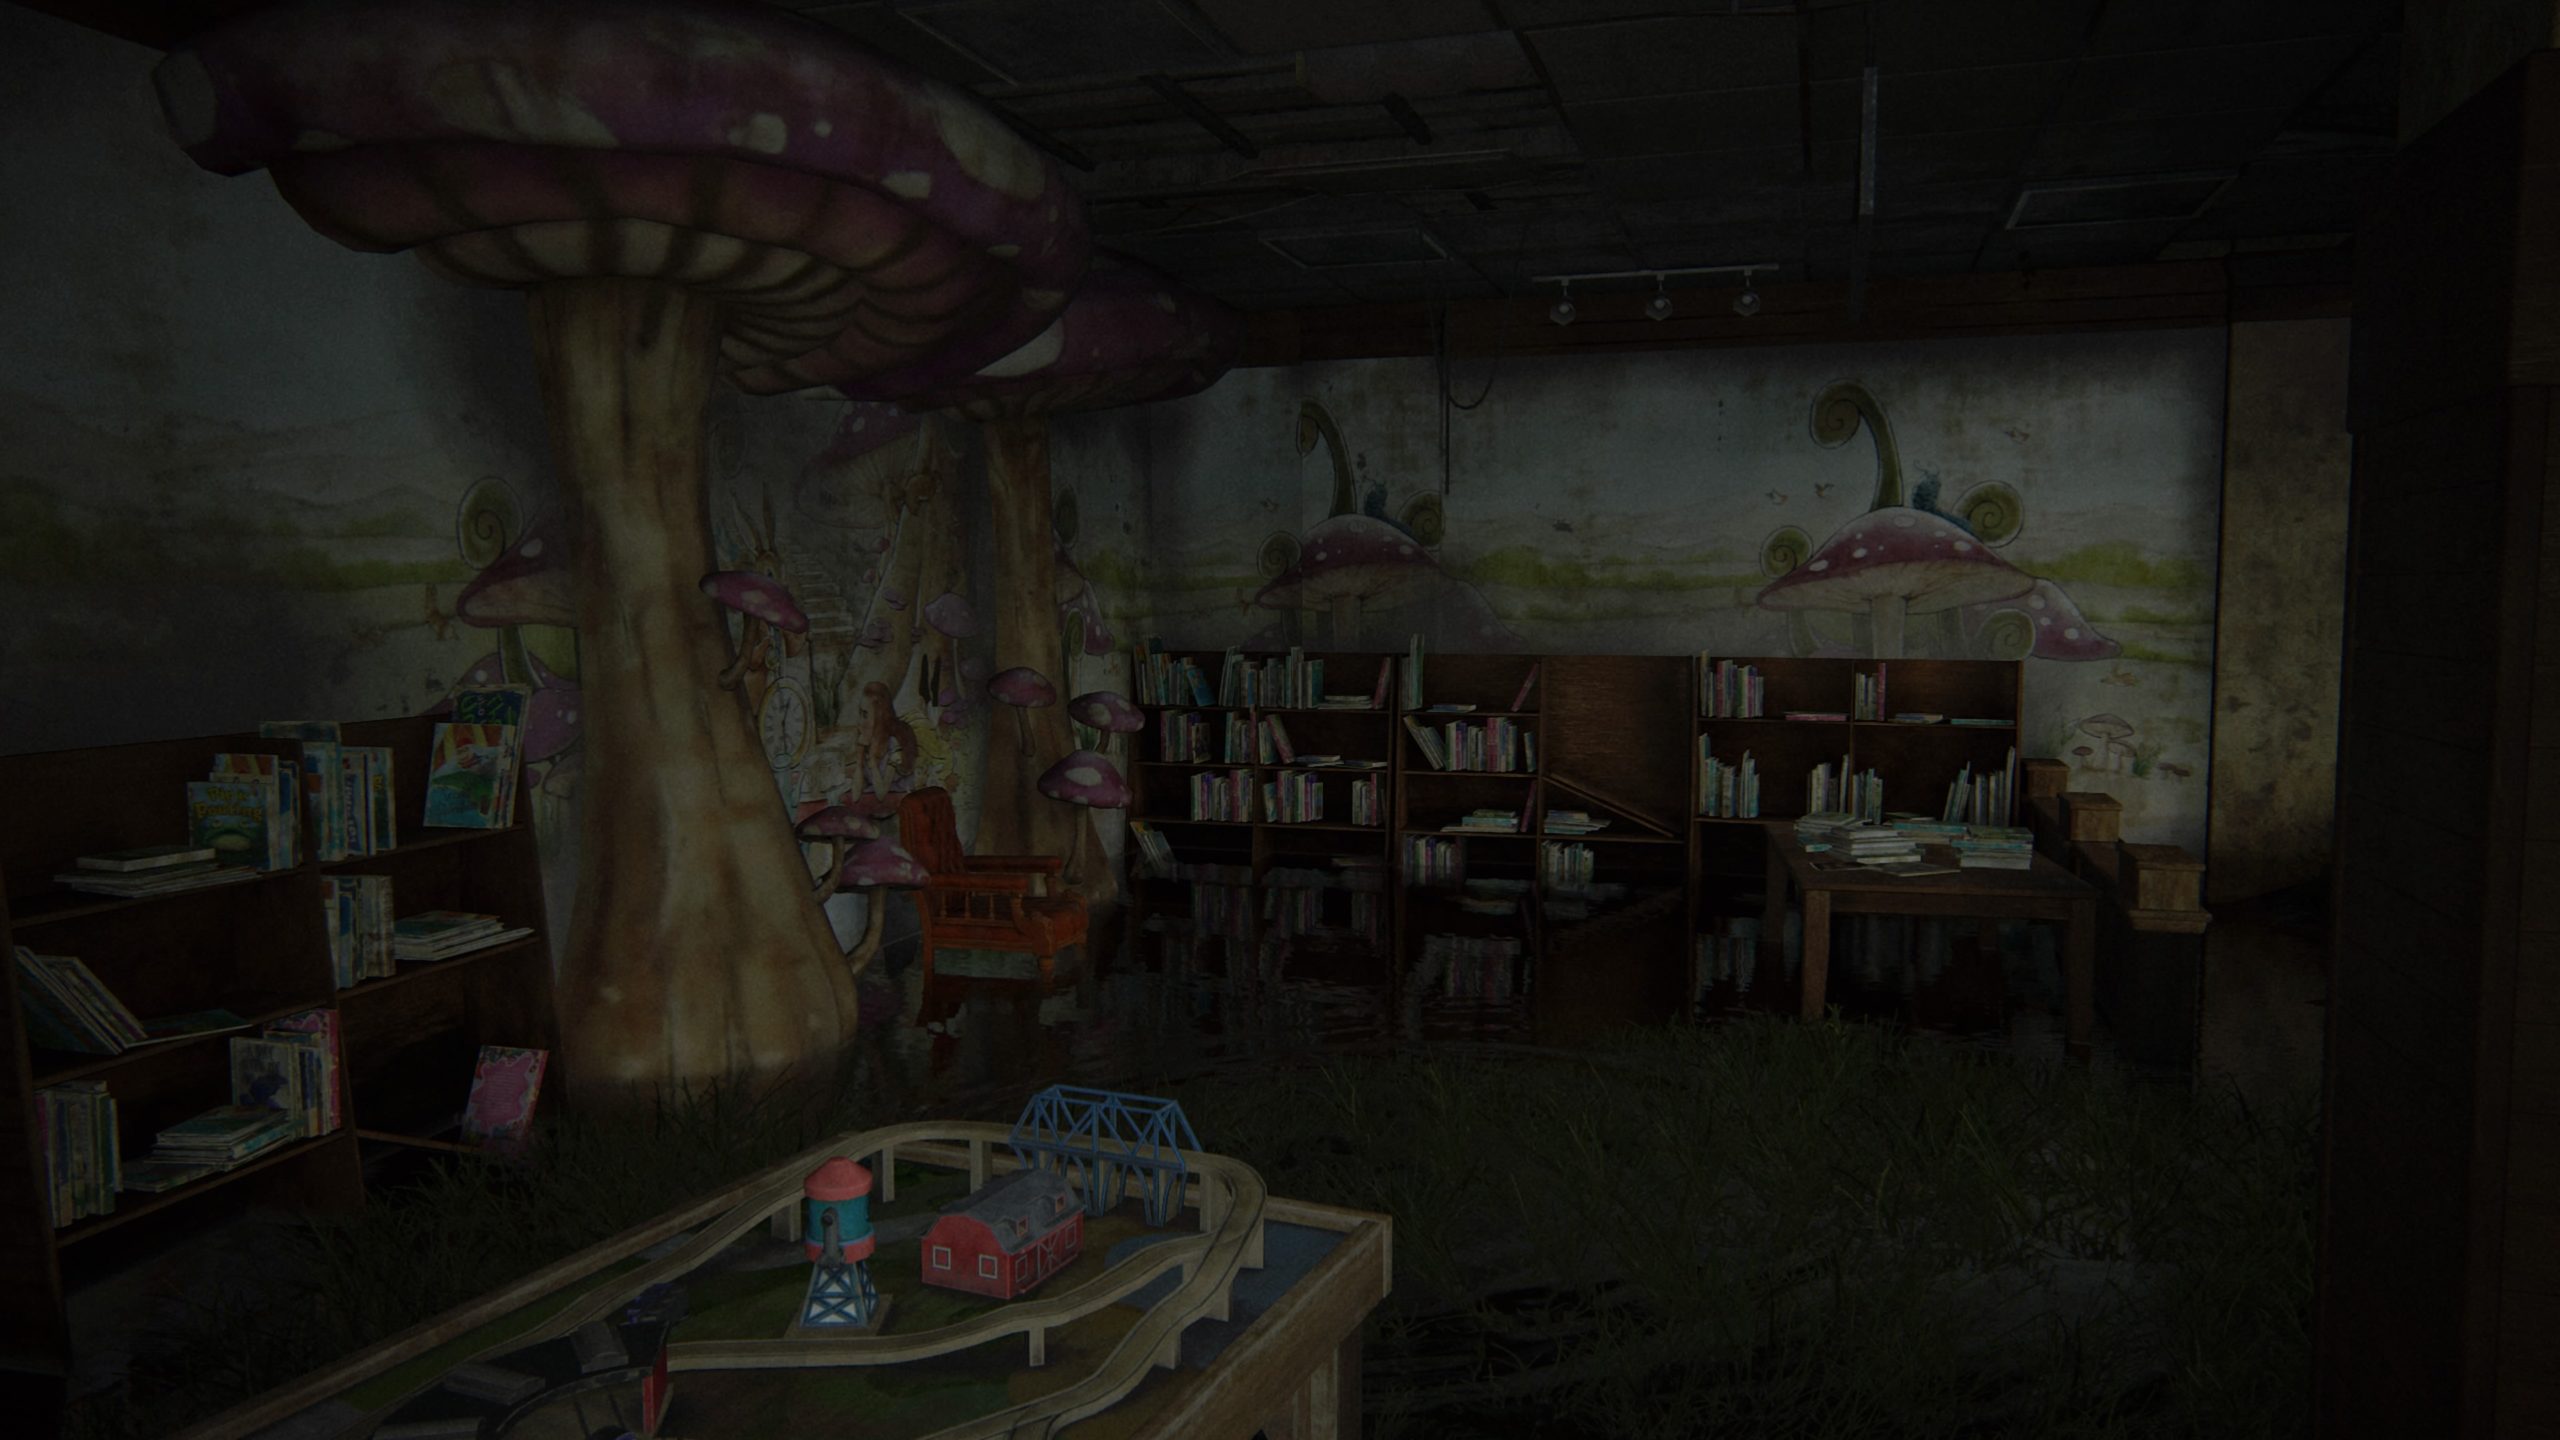
This entry can be found in the kid’s section of the above bookstore.
Artifact – Bookstore Note
This can be found right next to the above collectible on a table.
Artifact – Textile Note
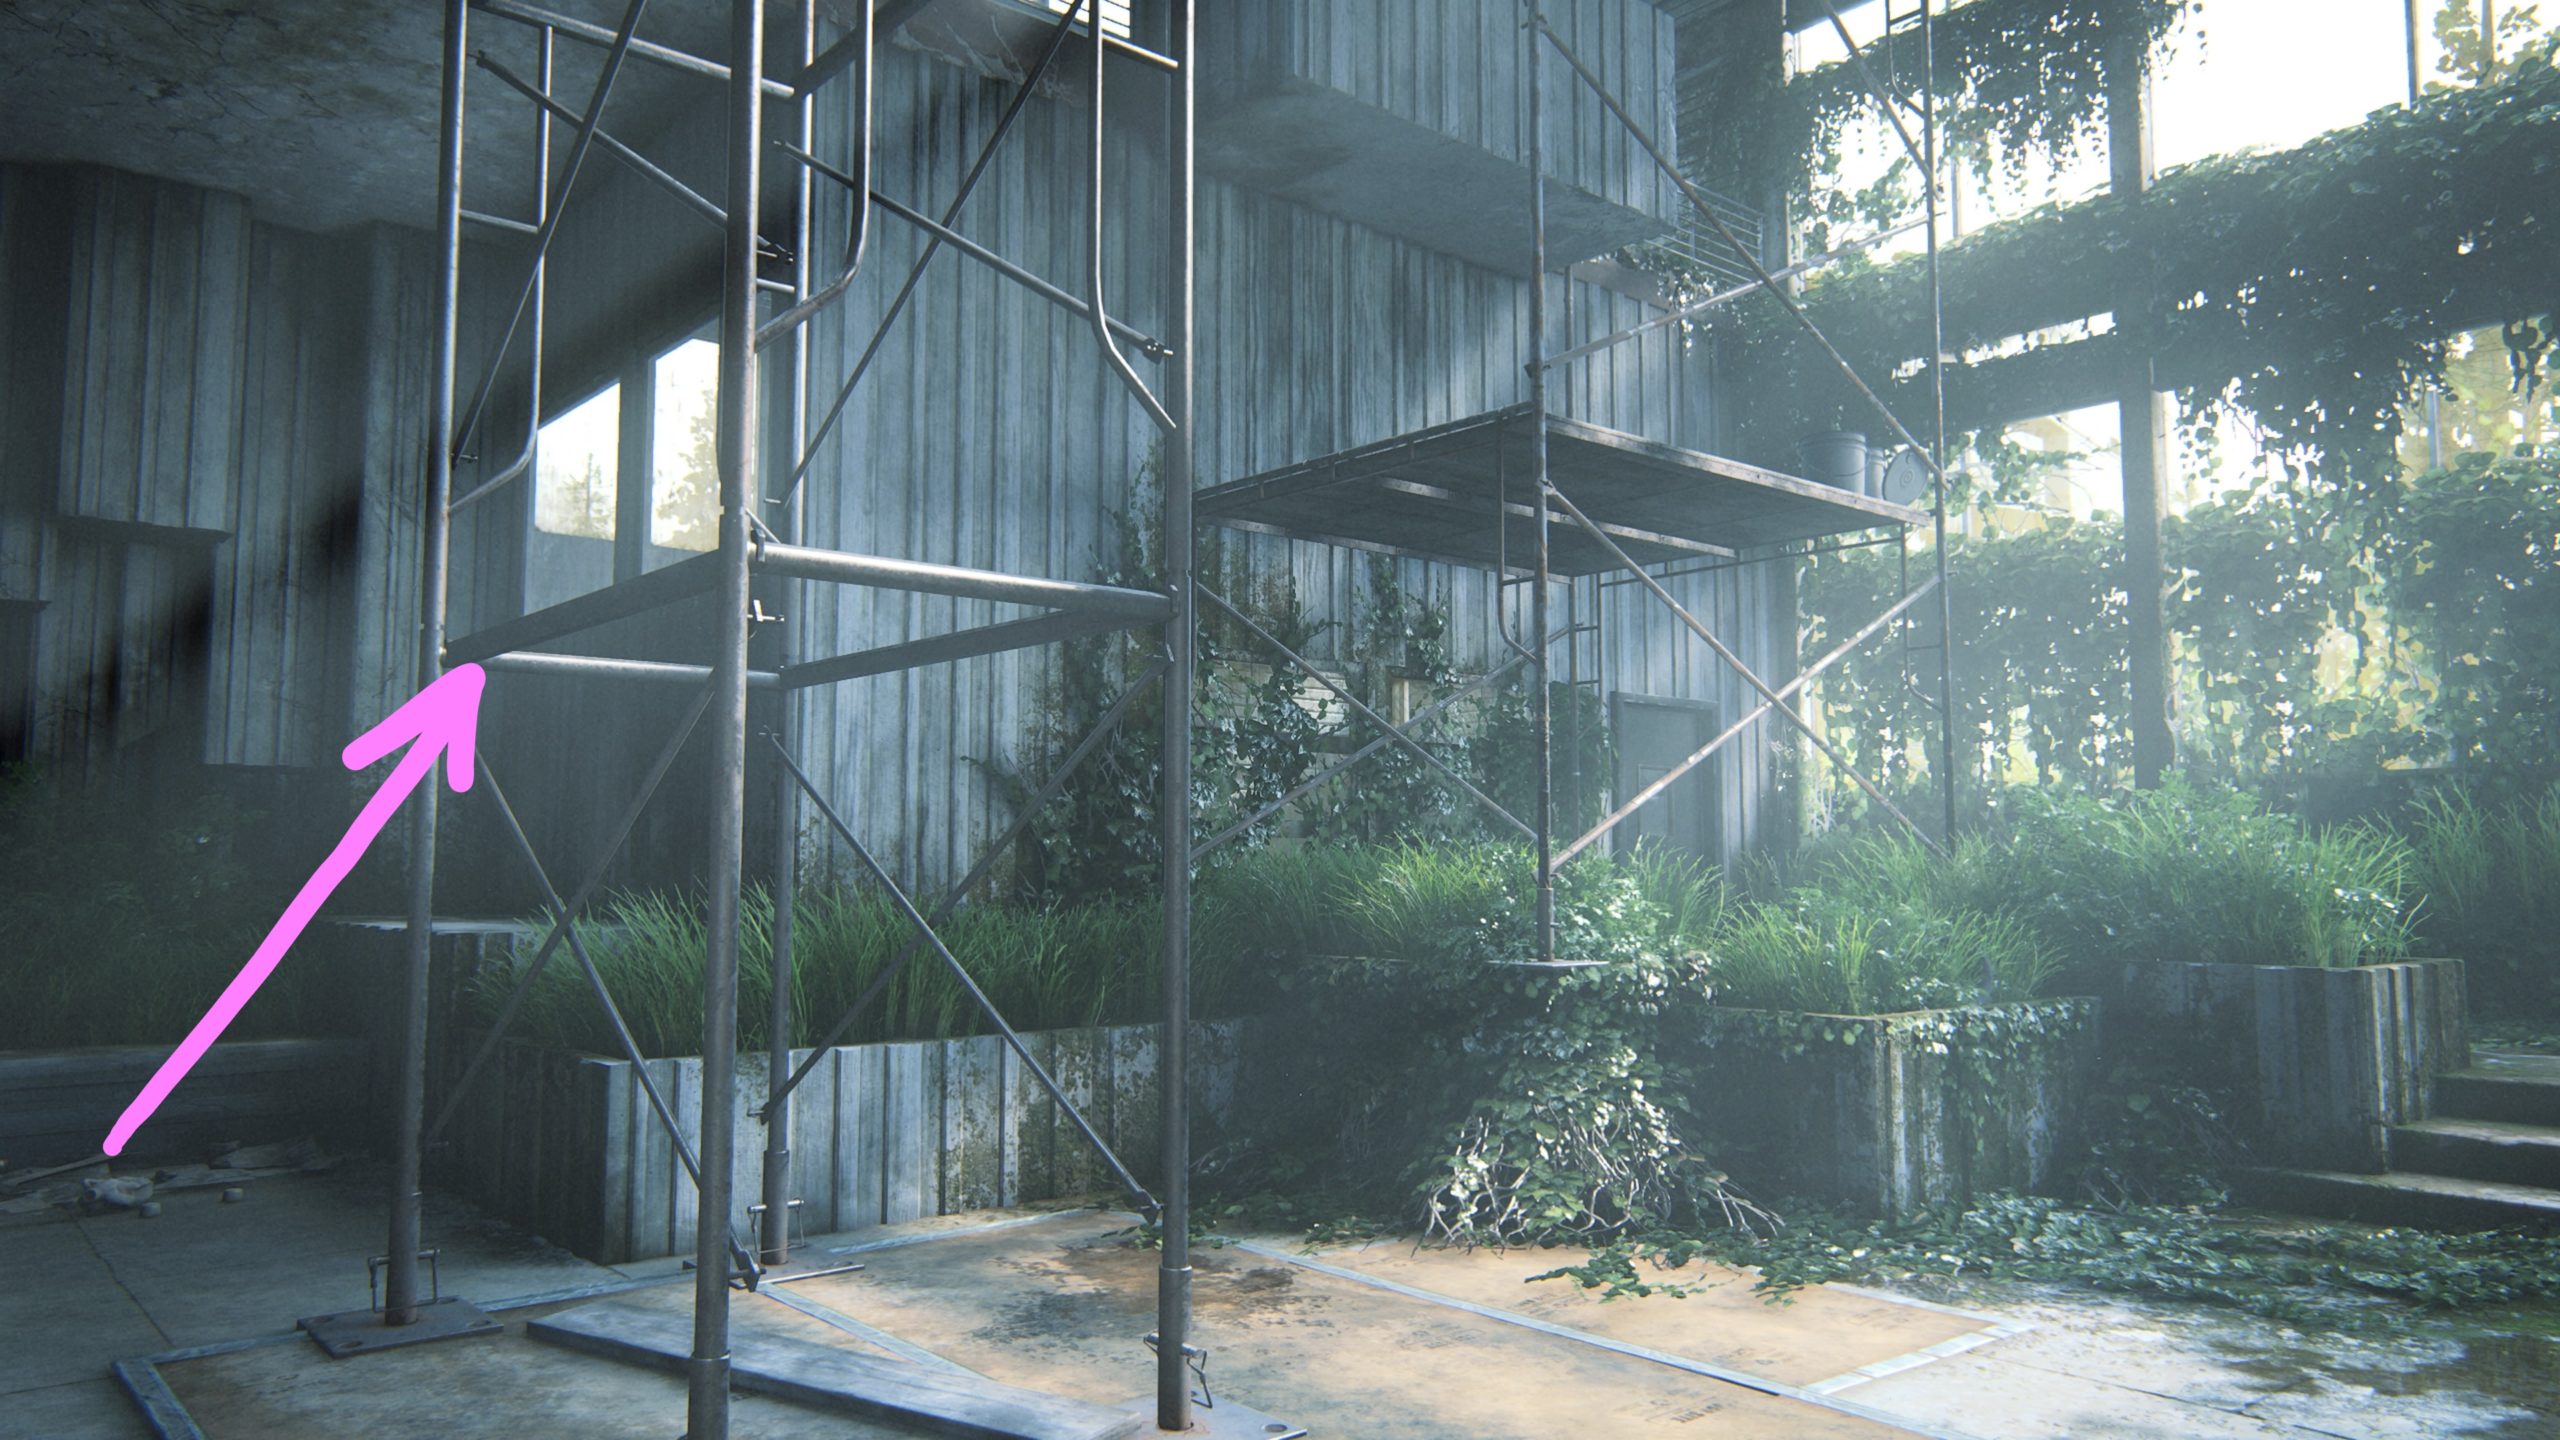
This artifact can be found in Rachel’s Fabrics/Textiles on the wall next to the windows. To reach this store on the second level of the building, you will need to use the blue containers to climb up the scaffolding.
Workbench
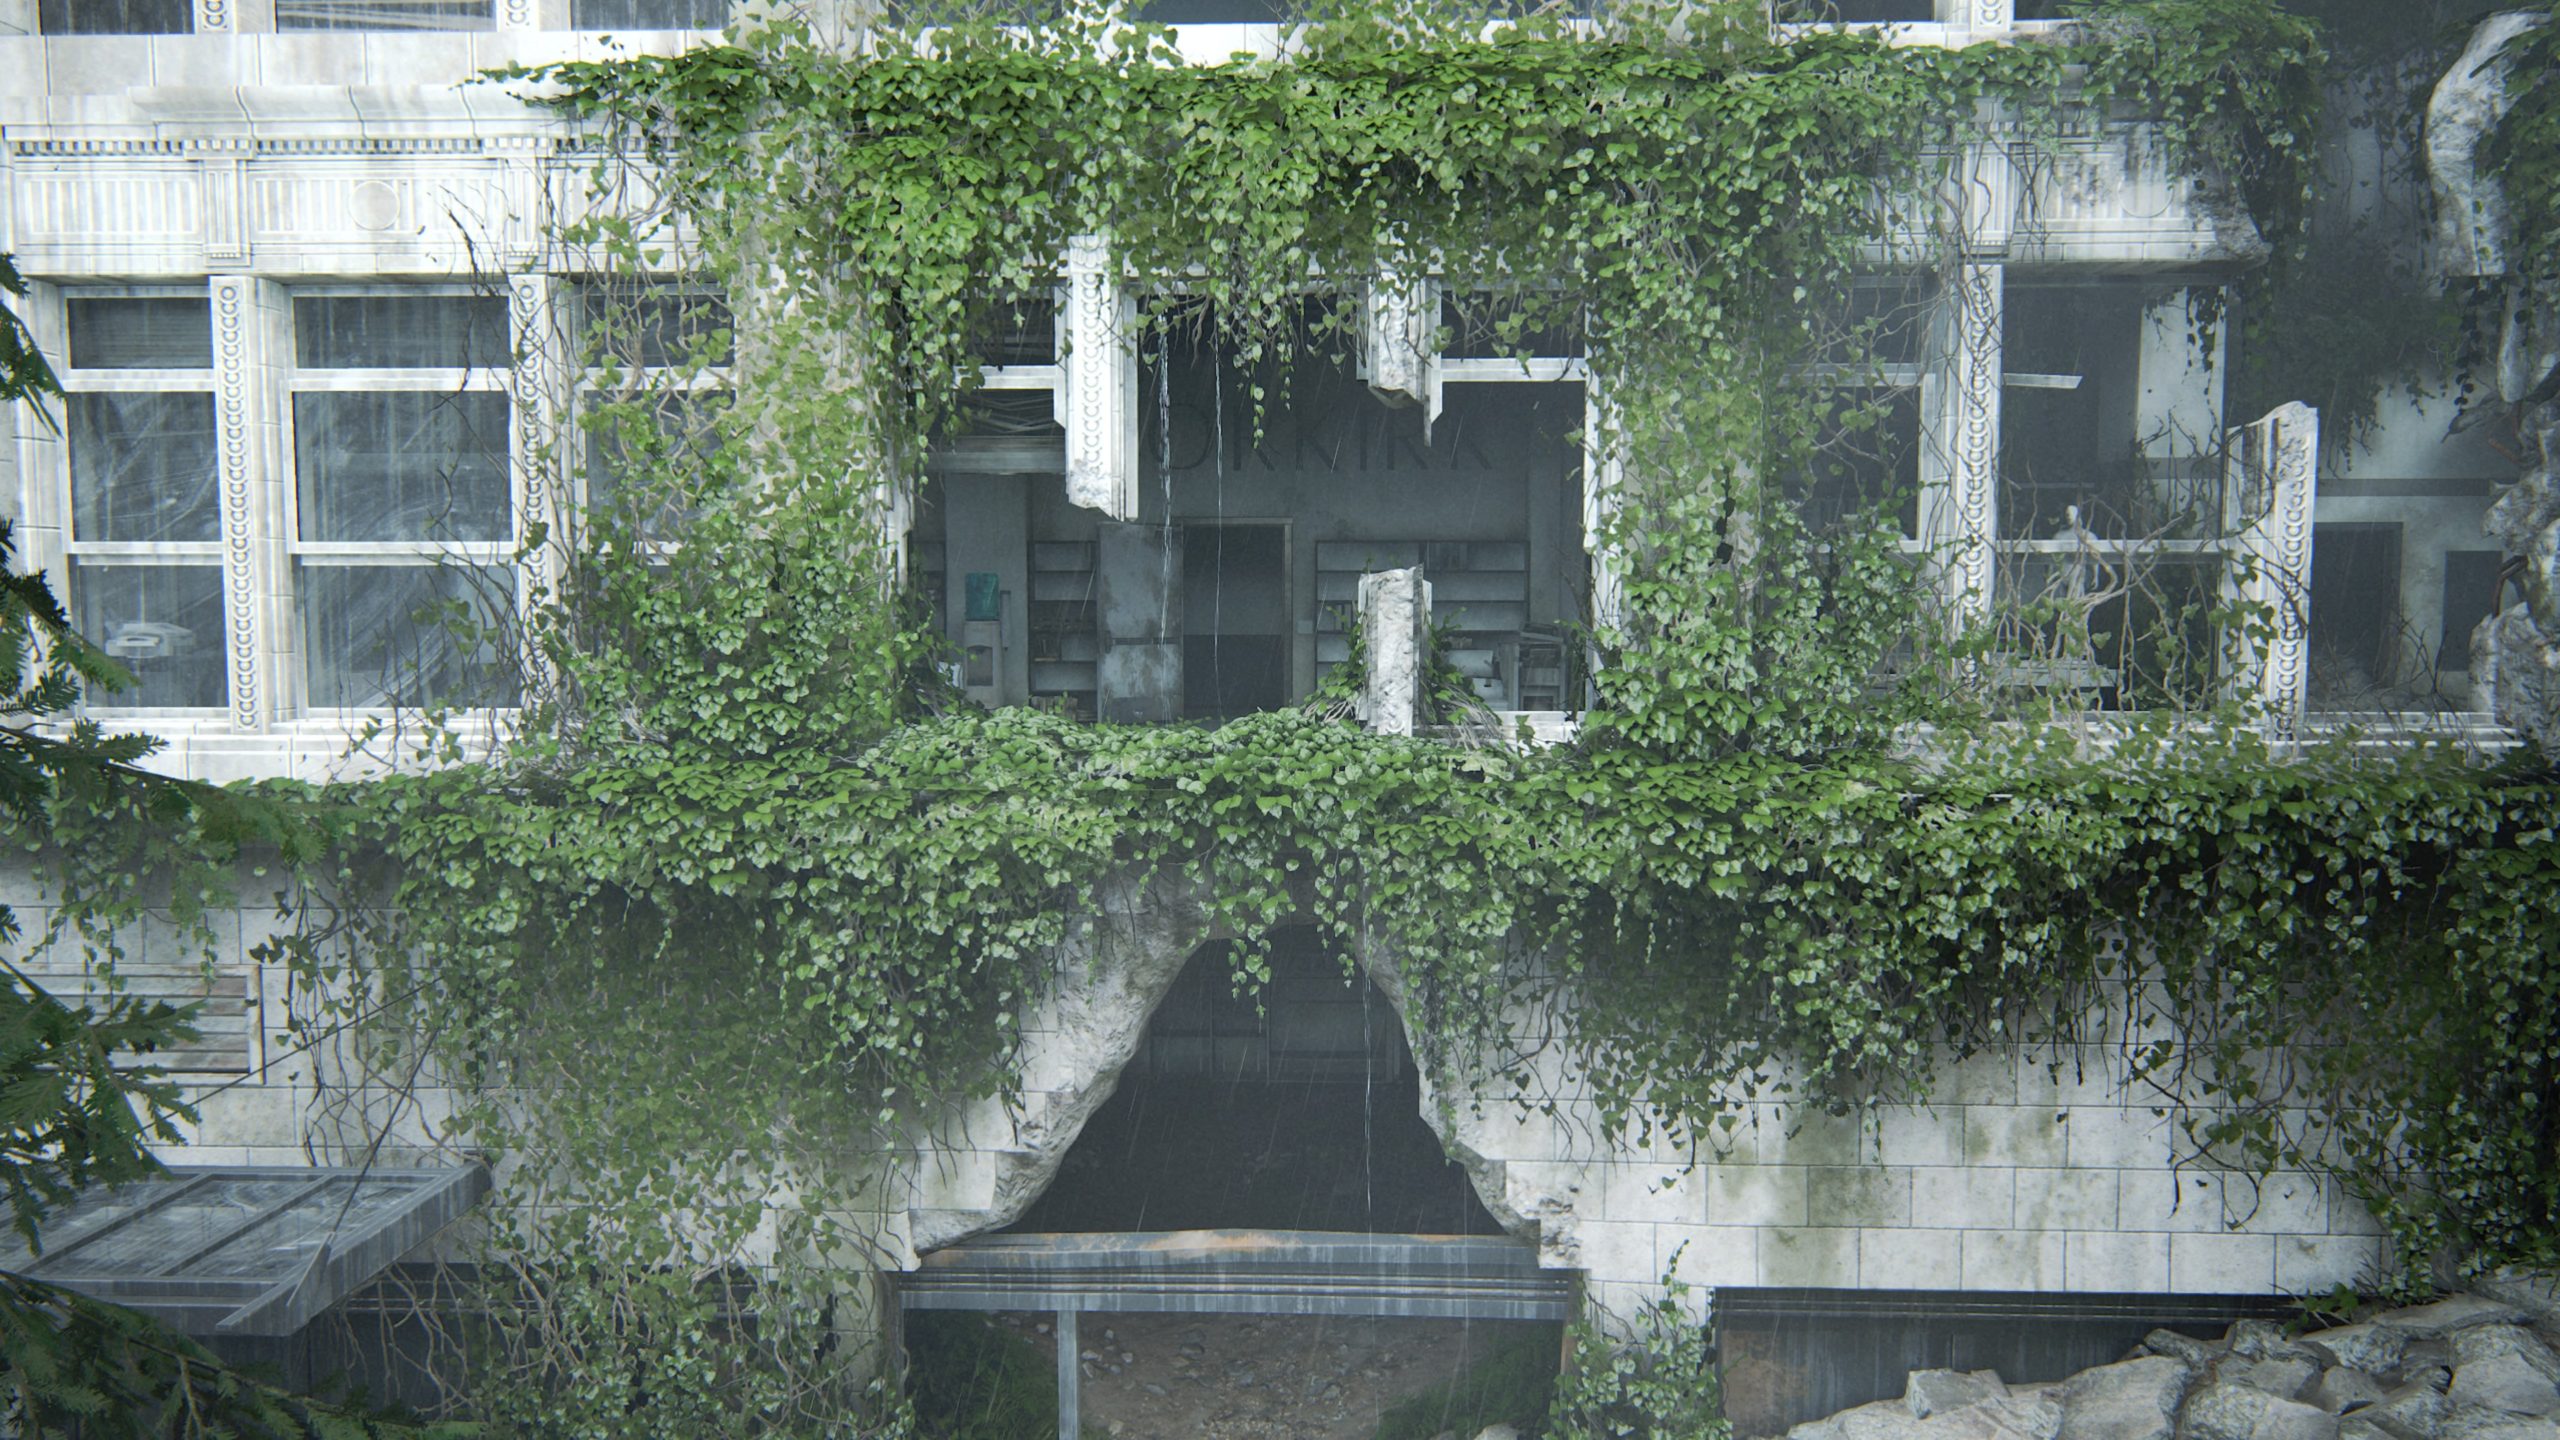
After diving under rubble blocking the path forward as part of the story, you’ll exit the river and come to a ruined building. Jesse will mention that they should head up to the bridge to get their bearings. Make your way to the second floor and look for the room with the Norkirk sign on the wall to find the workbench.
Trading Card – Tatuaje
When you reach the pipes that you need to lift in a ruined building to progress with the story, ignore them and head to the left side to find the card on a small shelf.
Below is a guide on the 7 artifacts, 3 journal entries, 2 safes, 6 trading cards, 1 training manual and 2 workbenches that can be found during The Seraphites chapter in The Last of Us Part II.
Trading Card – Randy Styles
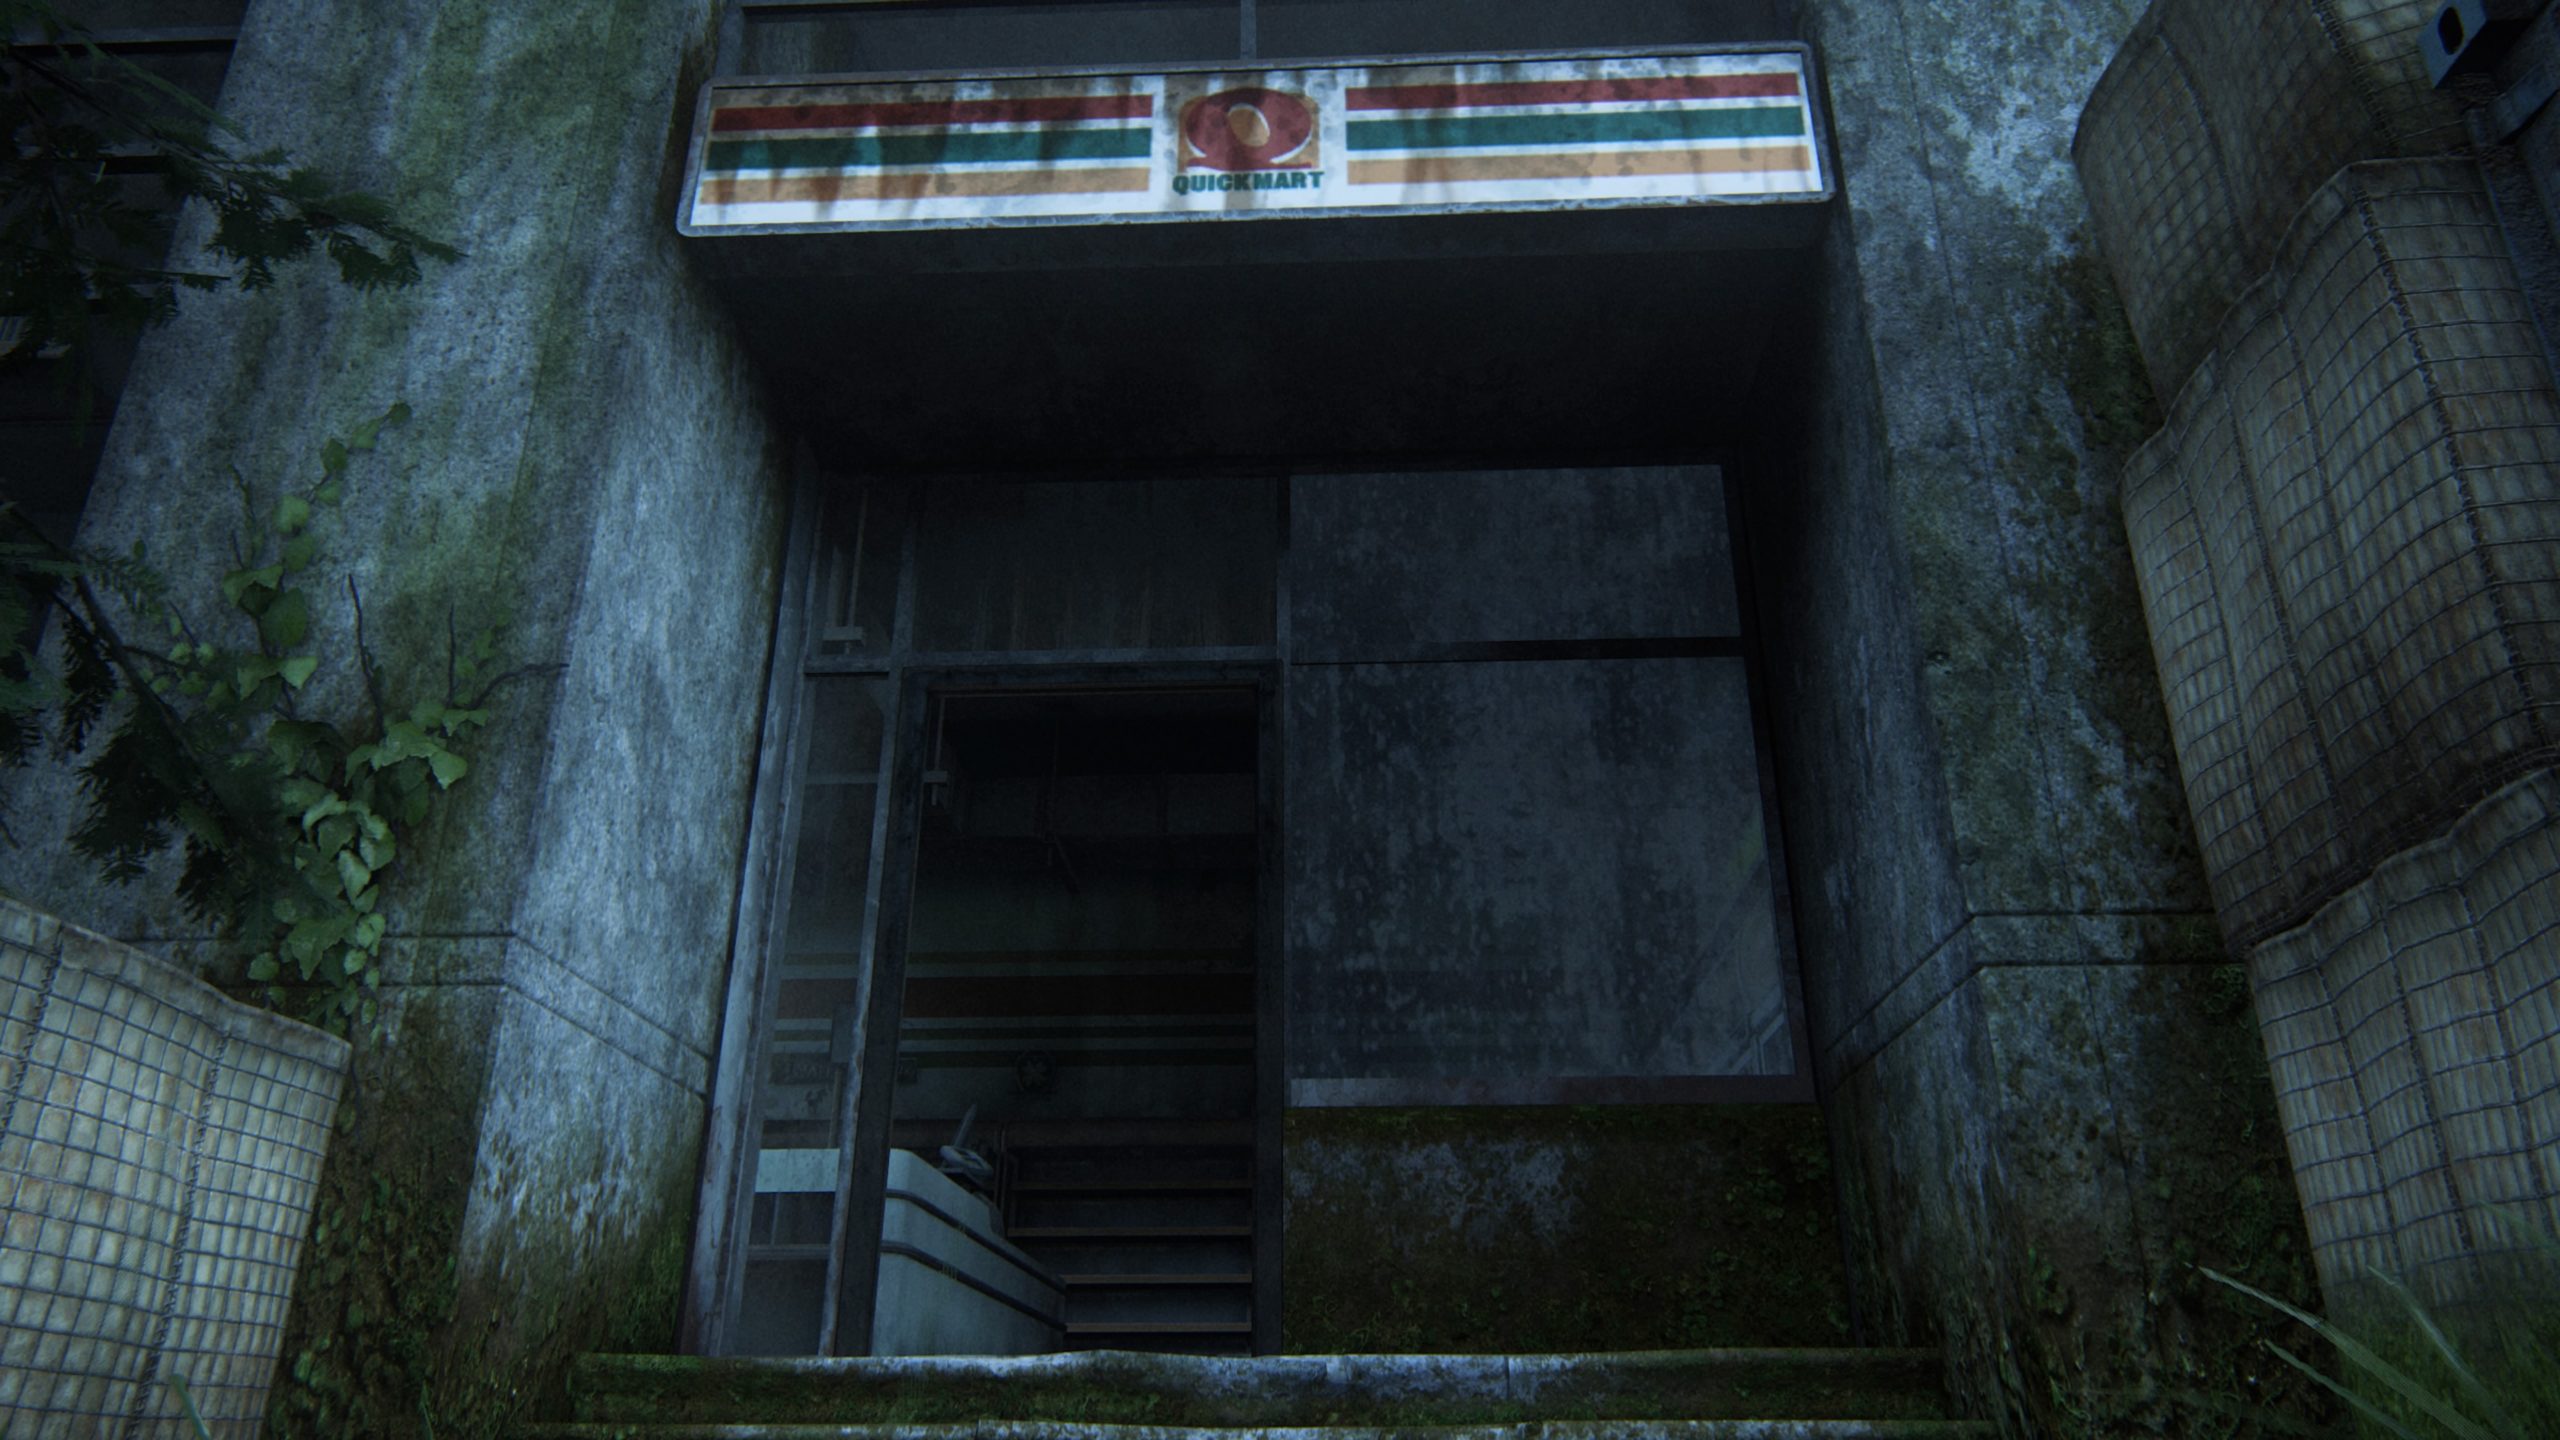
This card can be found in Quickmart on a shelf near the checkout lanes.
Artifact – WLF Target List
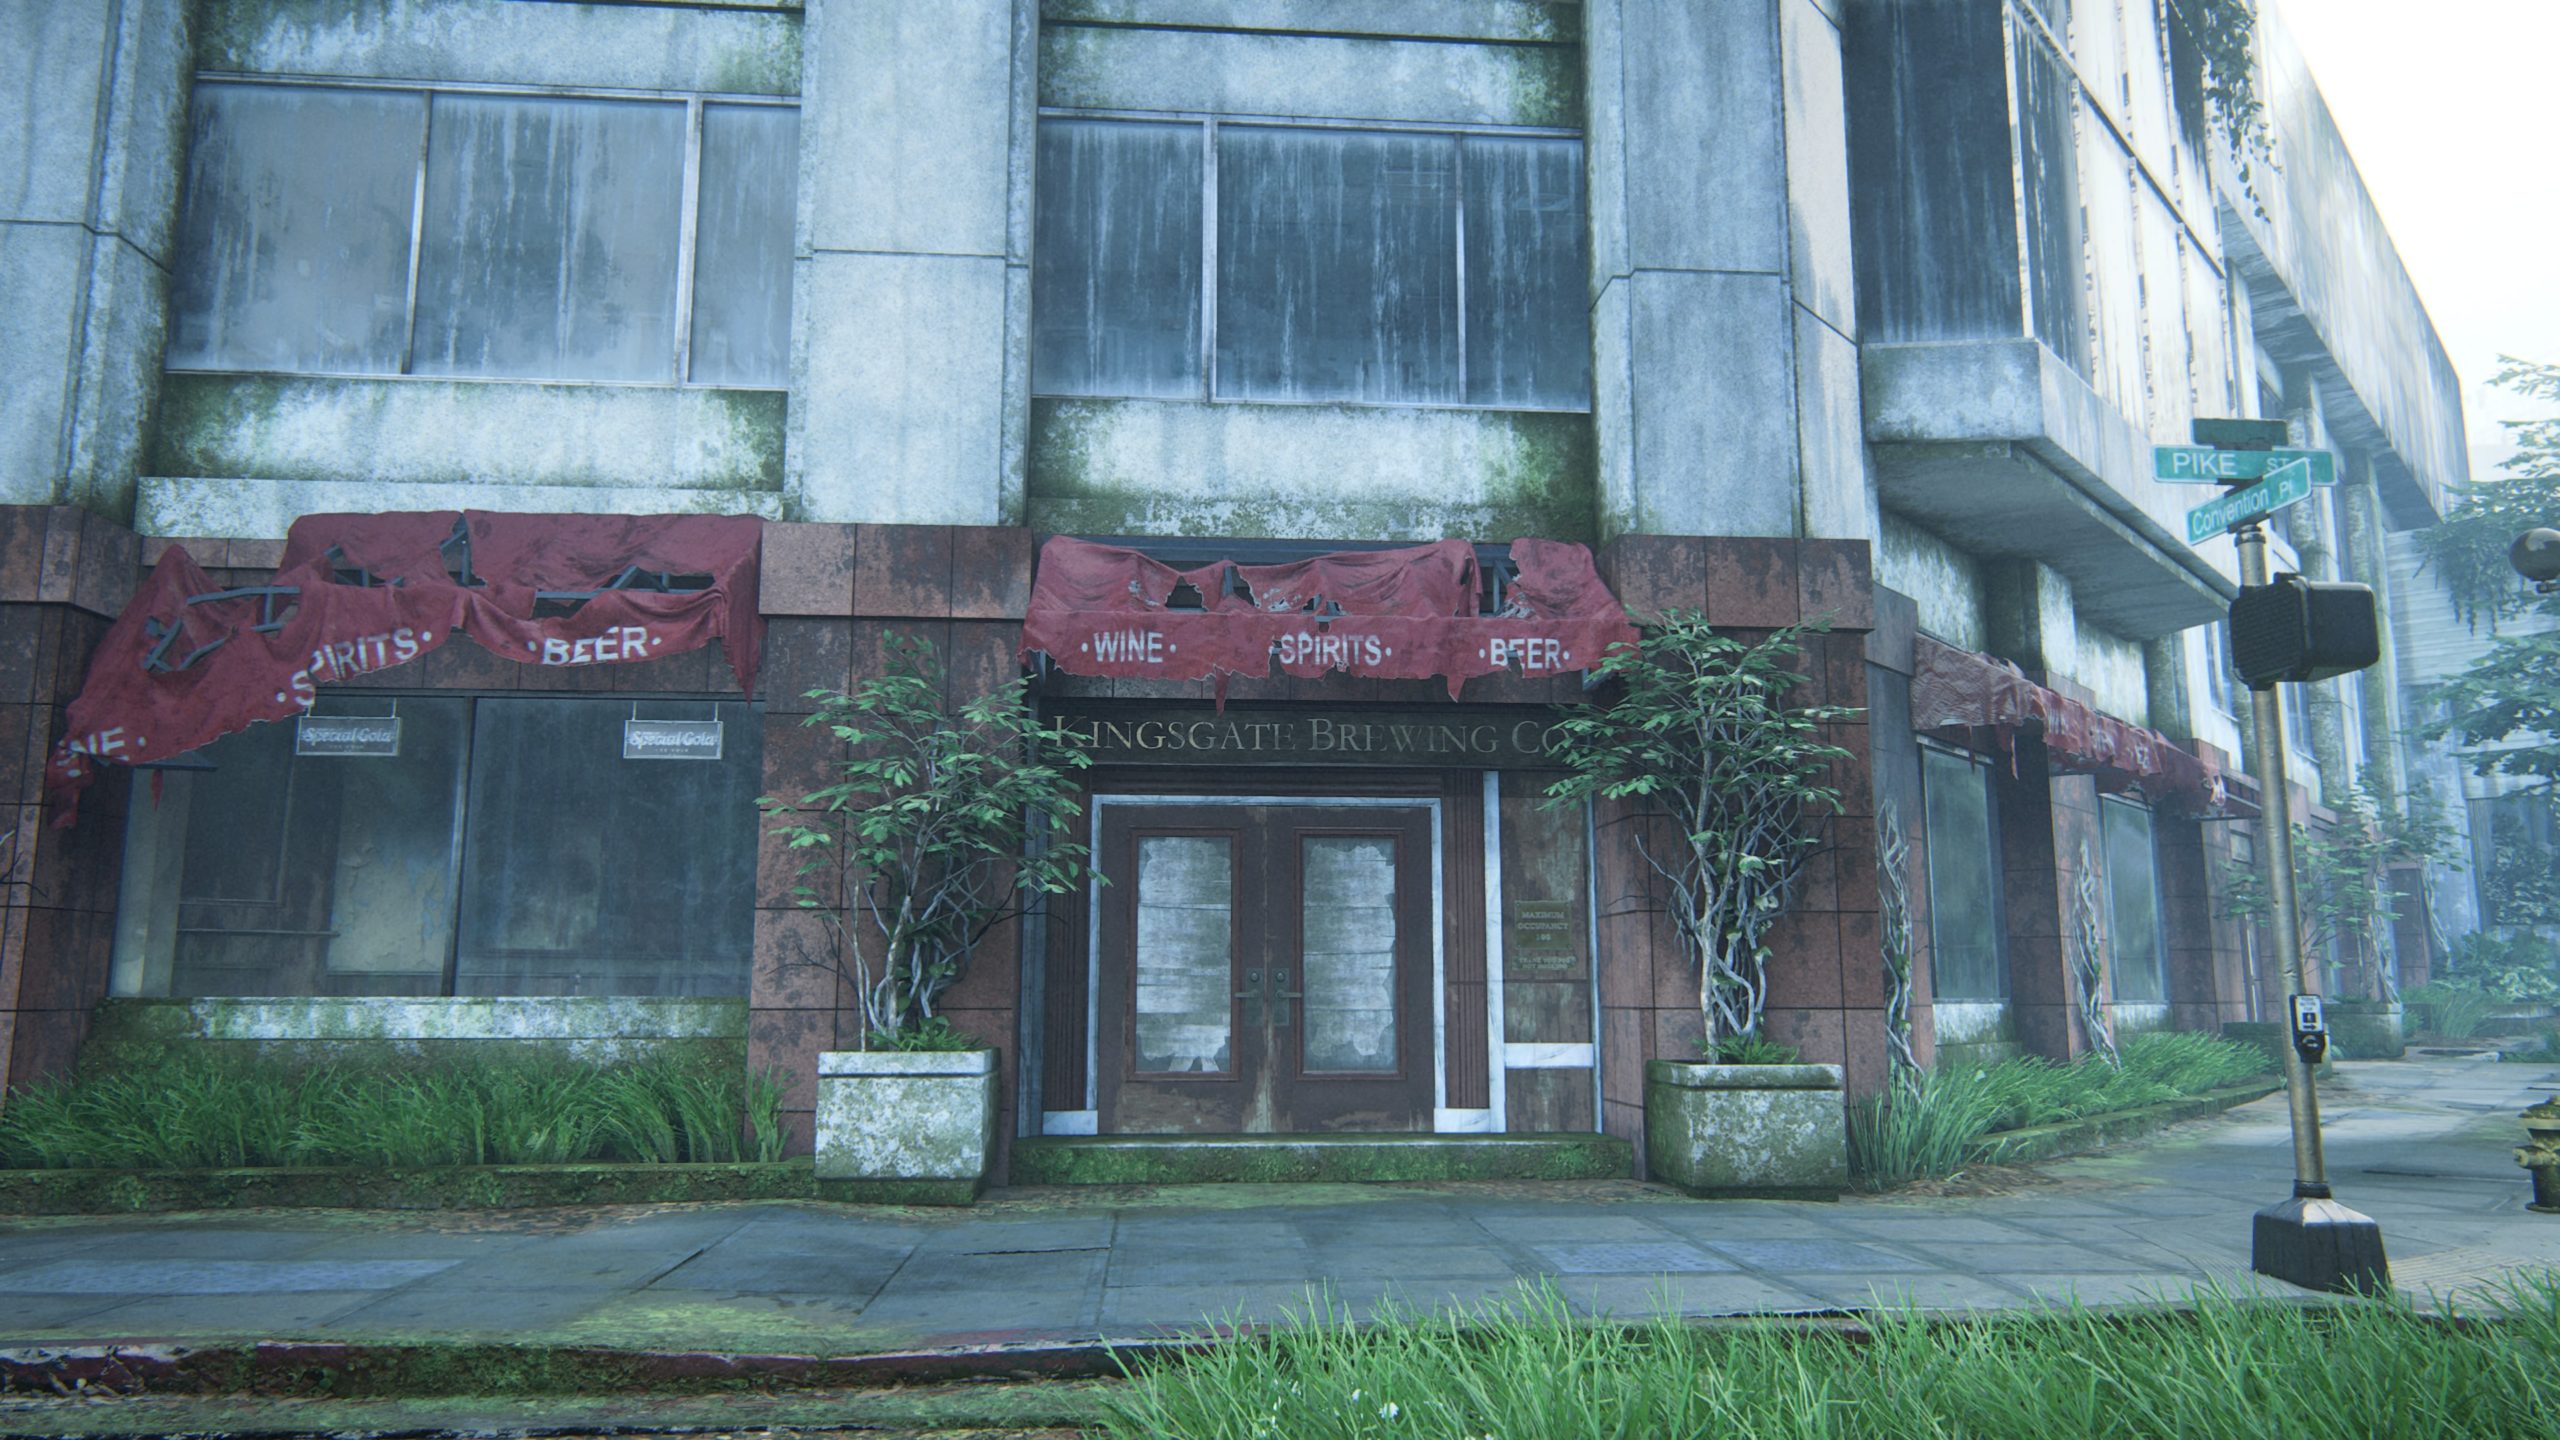
This artifact can be found on an Infected in Kingsgate Brewing Co. To reach the collectible, you’ll need to deal with the swarm of enemies inside. Either you or they can break the window to get in/out. Afterwards, make sure to search the bodies to find the artifact.
Journal Entry
In the Conference Center, examine the “Feel Her Love” smeared in blood on the wall in the lobby.
Trading Card – Shift
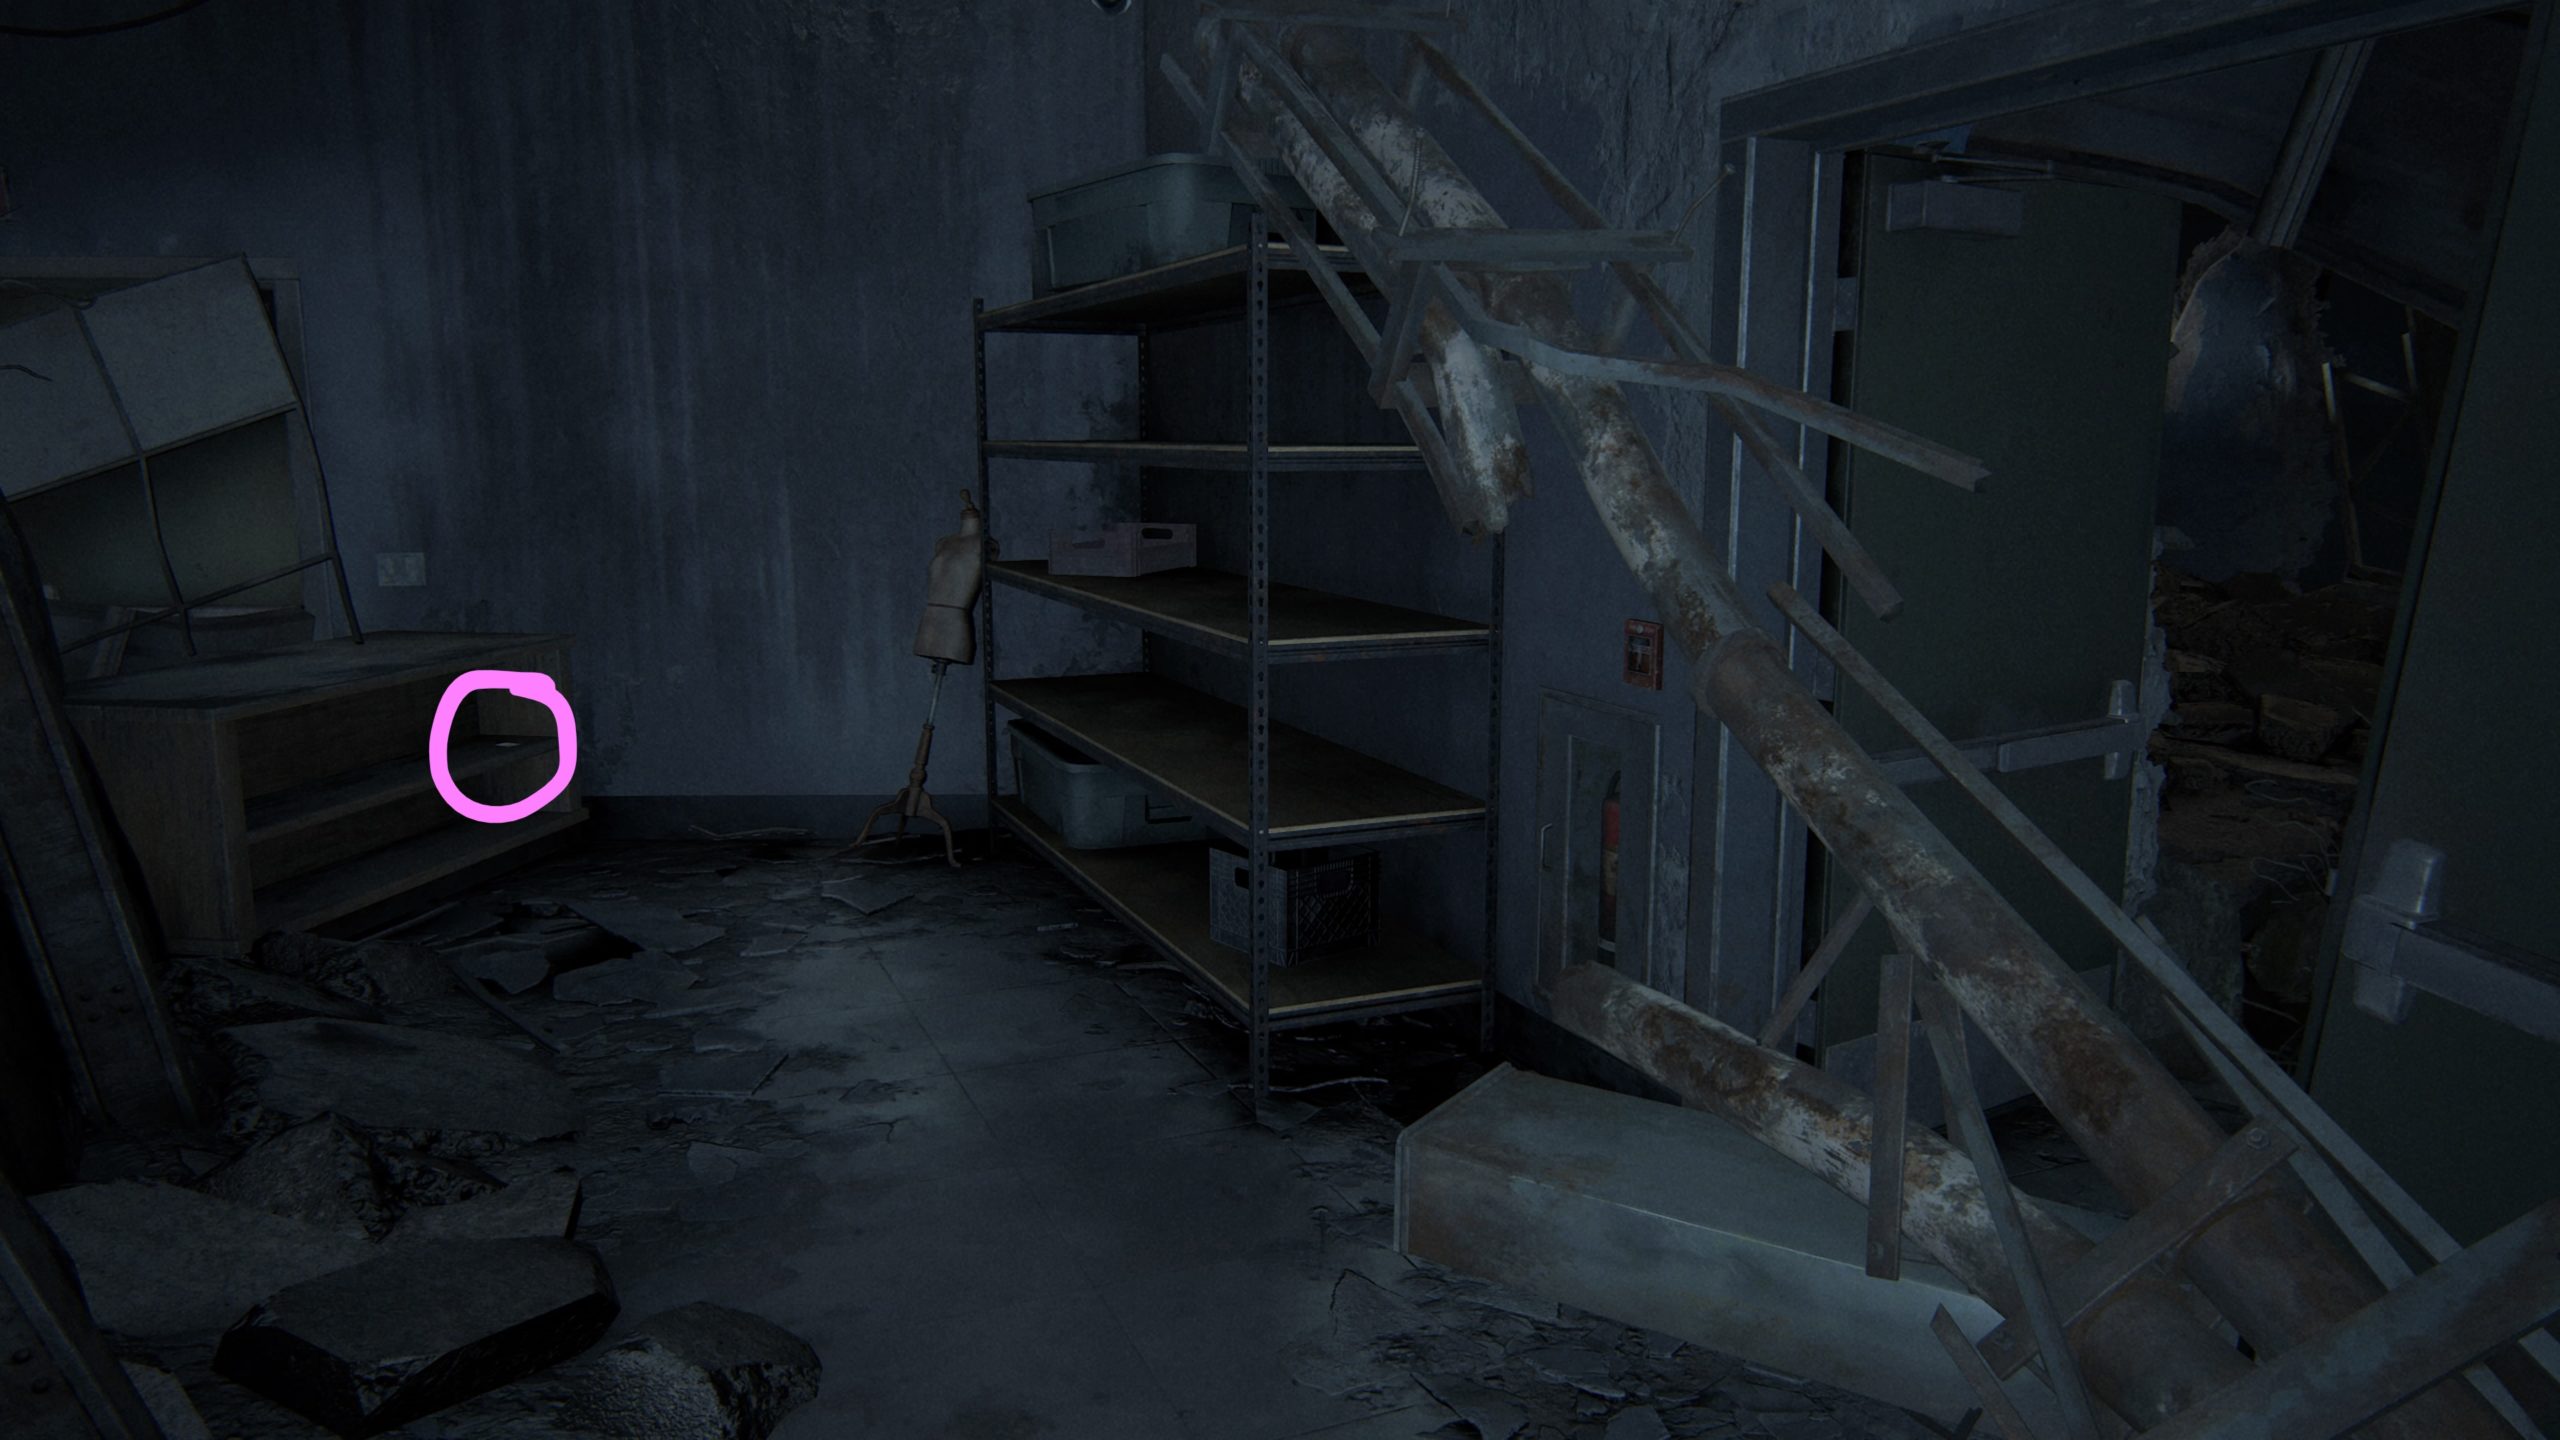
This card can be found on a couch in the locked room on the second level of the Conference Center. To reach this room, you will need to break out the leftmost window then shoot out the glass on the overhang directly to the left of the window. Grab the rope and throw it over the overhang. Climb up the rope then swing into the window of the locked room.
Artifact – Last Letter to Husband
This artifact can be found in the same room as the above trading card on the ground on the right side of the room near the couches.
Workbench
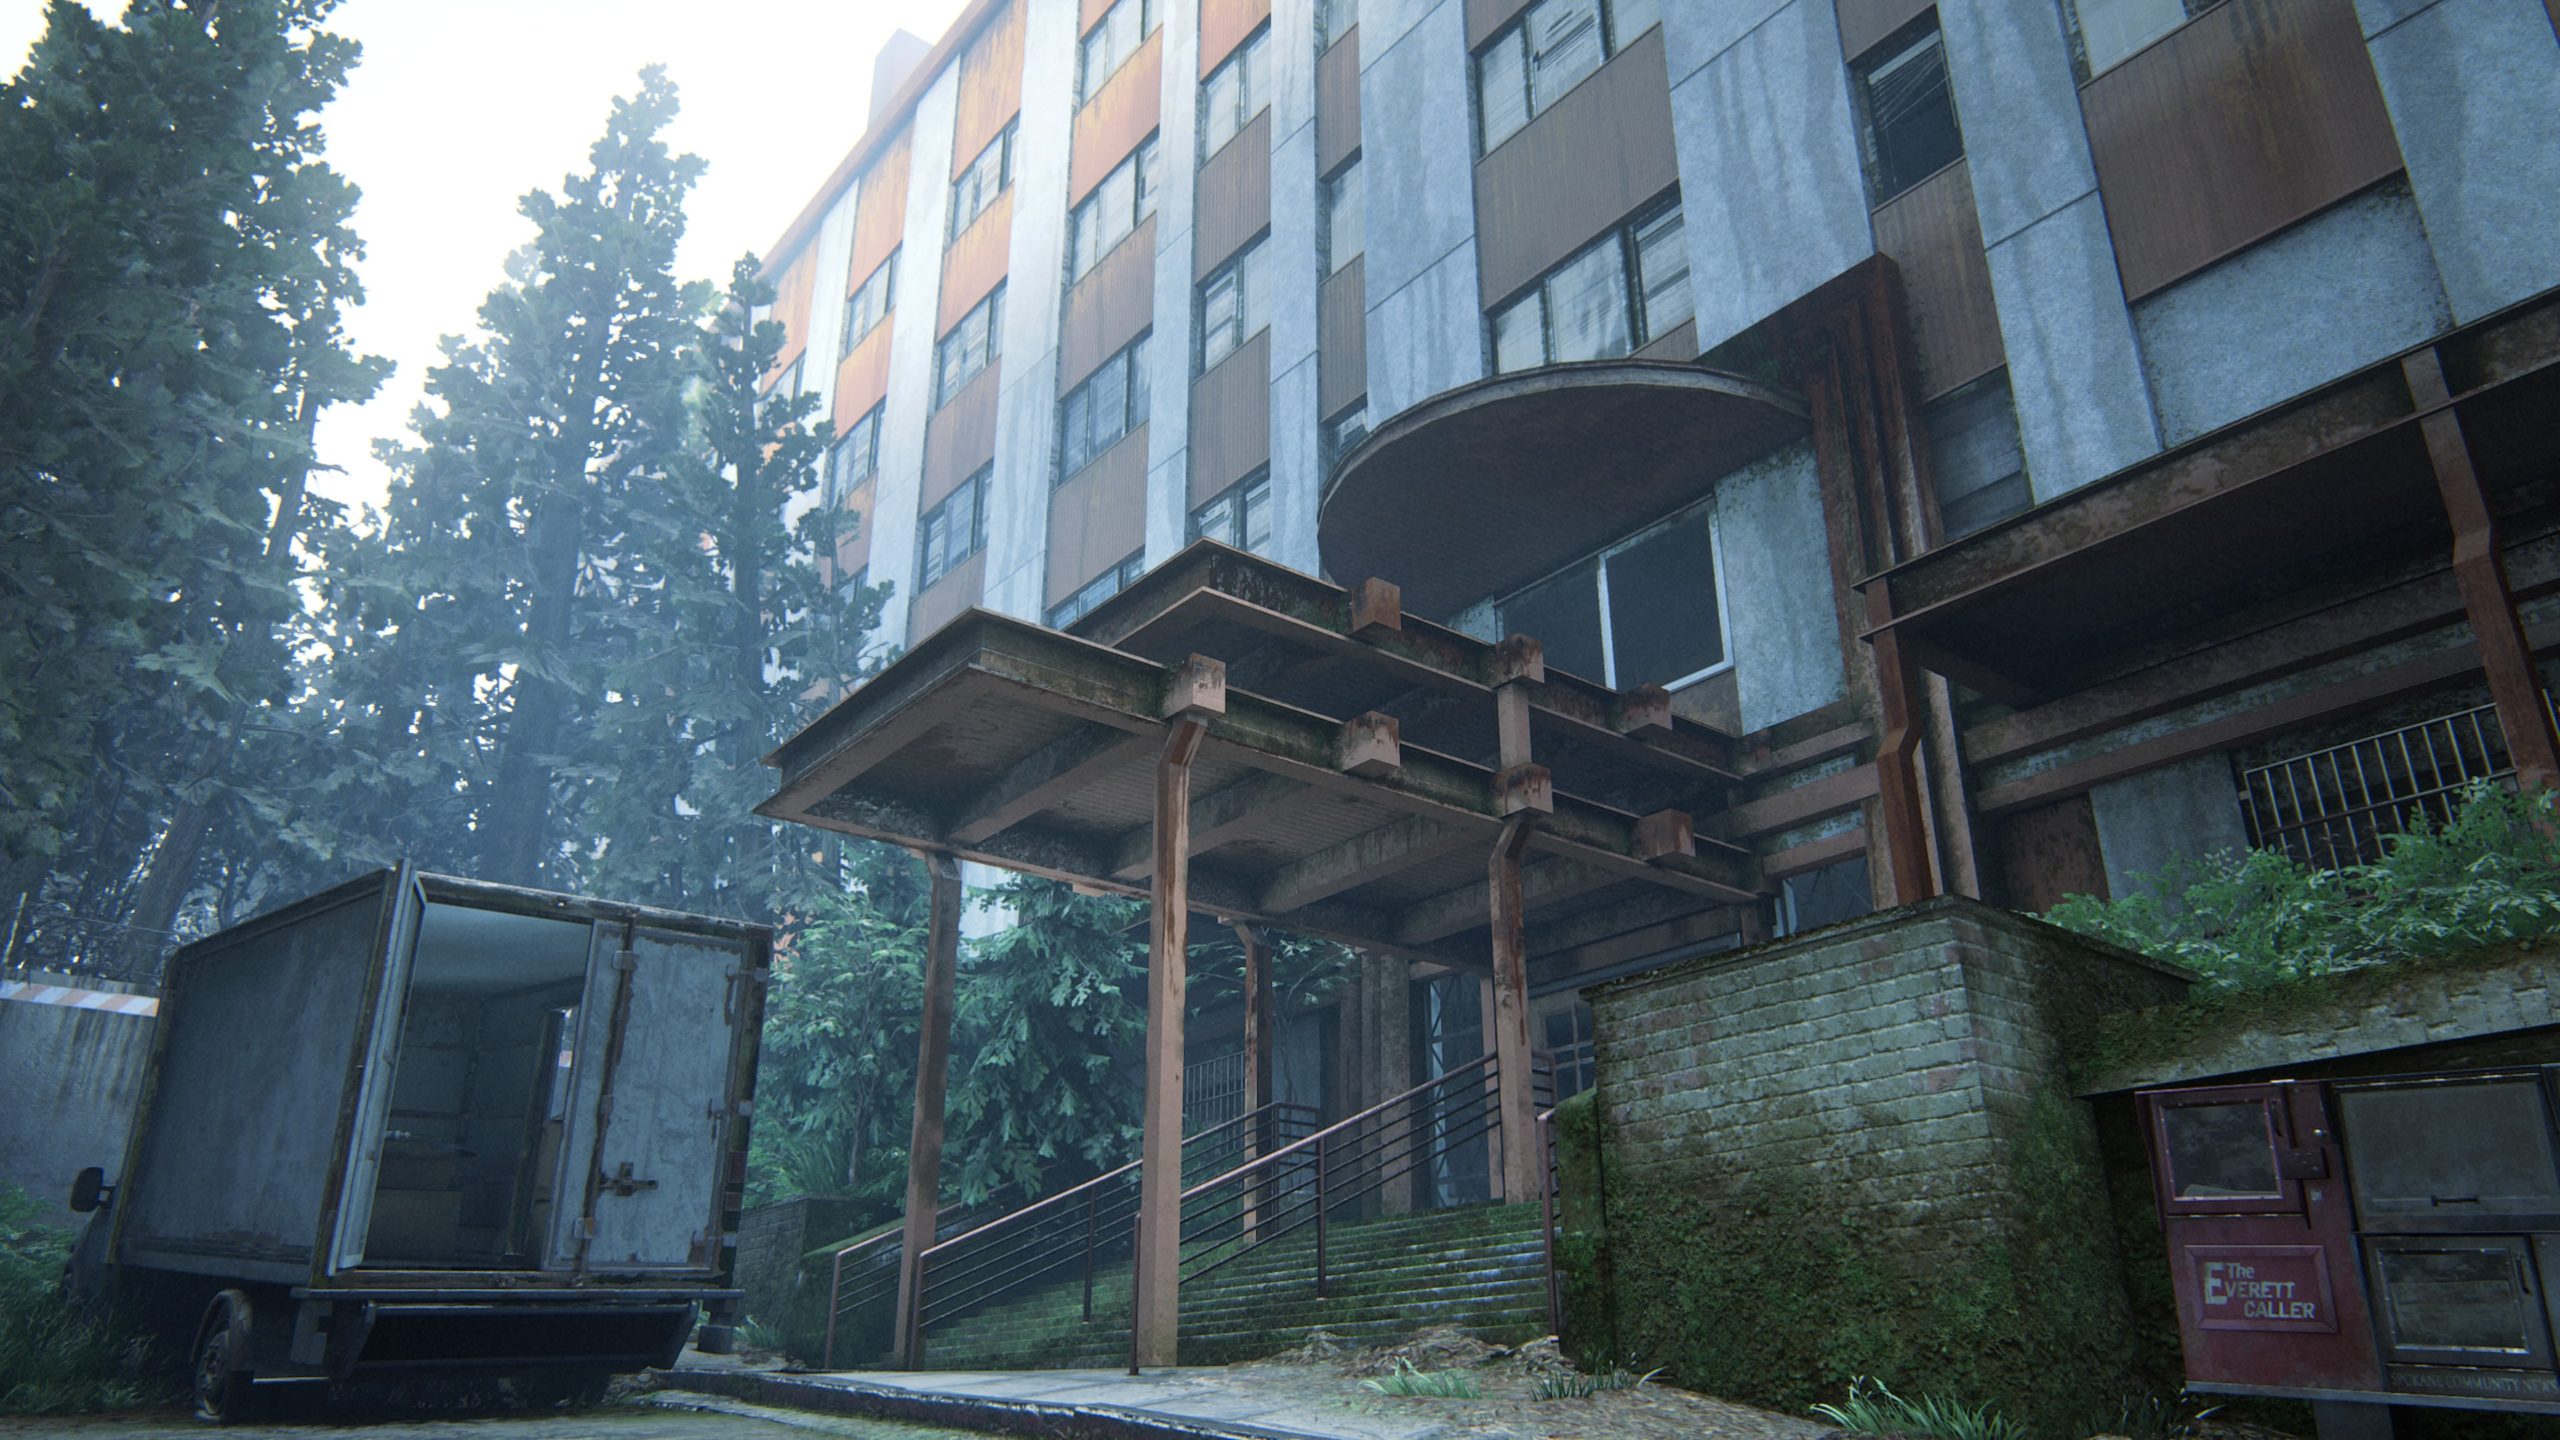
This workbench can be found in the kitchen of the tall apartment building that is white and orange-ish. When you reach the building, climb up the delivery truck in front of it to reach the top of an overhang. Climb in through the window then take the leftmost door and follow it through the hallway to find the workbench at the end.
Artifact – WLF Deserter Letter
This artifact can be found in the bedroom of the same apartment room as the above workbench on the TV stand.
Training Manual – Explosives
This manual can be found on the bed in the same room as the above artifact.
Trading Card – Star Sign
Head back out onto the overhang and jump to the balcony on the left. Smash through the window to reach the locked room. The card will be located in the drawer of the nightstand next to the bed.
Safe
The safe can be found in the above bedroom in the closet. The code to enter the safe is 08-10-83. You can inspect the calendar next to the bed to get their anniversary. The code is the date of their anniversary followed by the month of their anniversary then the actual year of their anniversary (2013- 30 since it’s their 30th anniversary = 1983).
Artifact – Evacuation Letter
The artifact can be found on the kitchen table in the above apartment.
Journal Entry
The journal entry is obtained automatically as part of the story when Ellie sees the hospital.
Trading Card – Arch-Enemy
After Ellie spots the hospital as part of the story, you’ll break the glass of the window to enter the building next to you. Jump to the mid-level scaffolding then jump to the ground floor. Follow the wall around behind the scaffolding to reach a concrete platform with two windows above it. Break one of the window then climb through to reach the locked room. The card will be in a desk drawer.
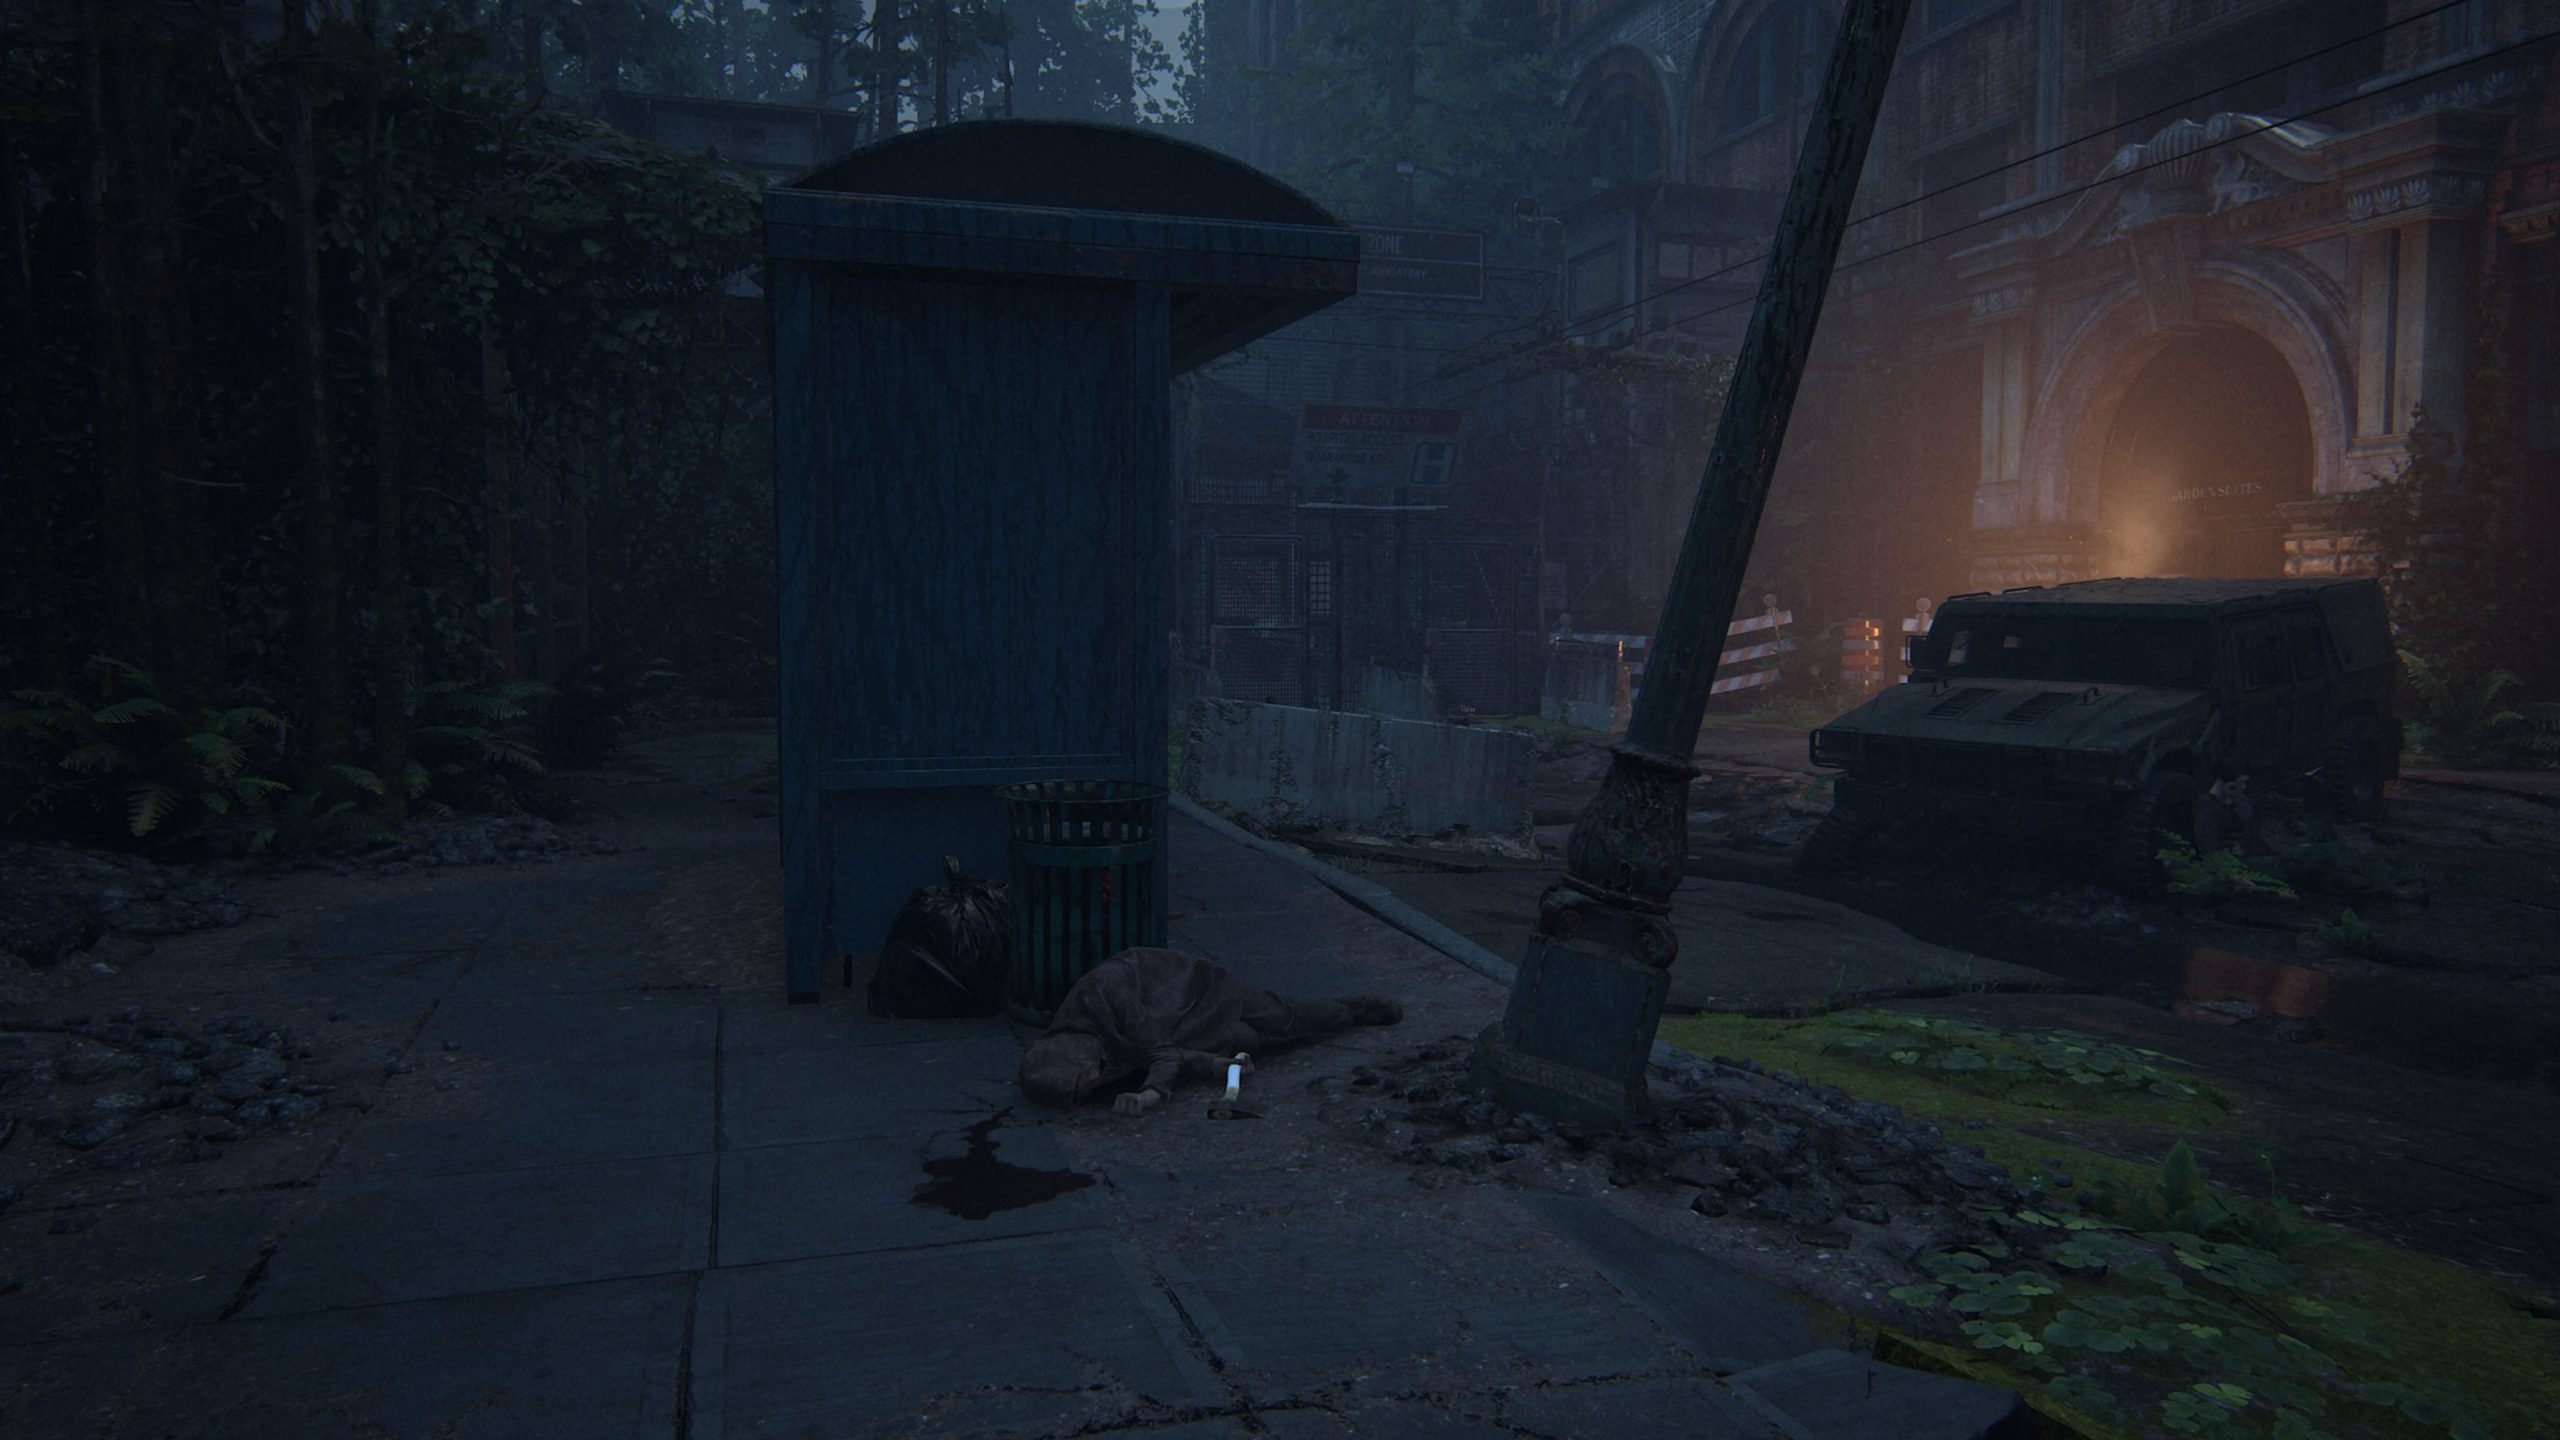
Journal Entry
After exiting the park, Ellie will see the road leading to the hospital. Follow that road until you see a bus stop on the left. Examine the corpse near the stop to get the journal entry.
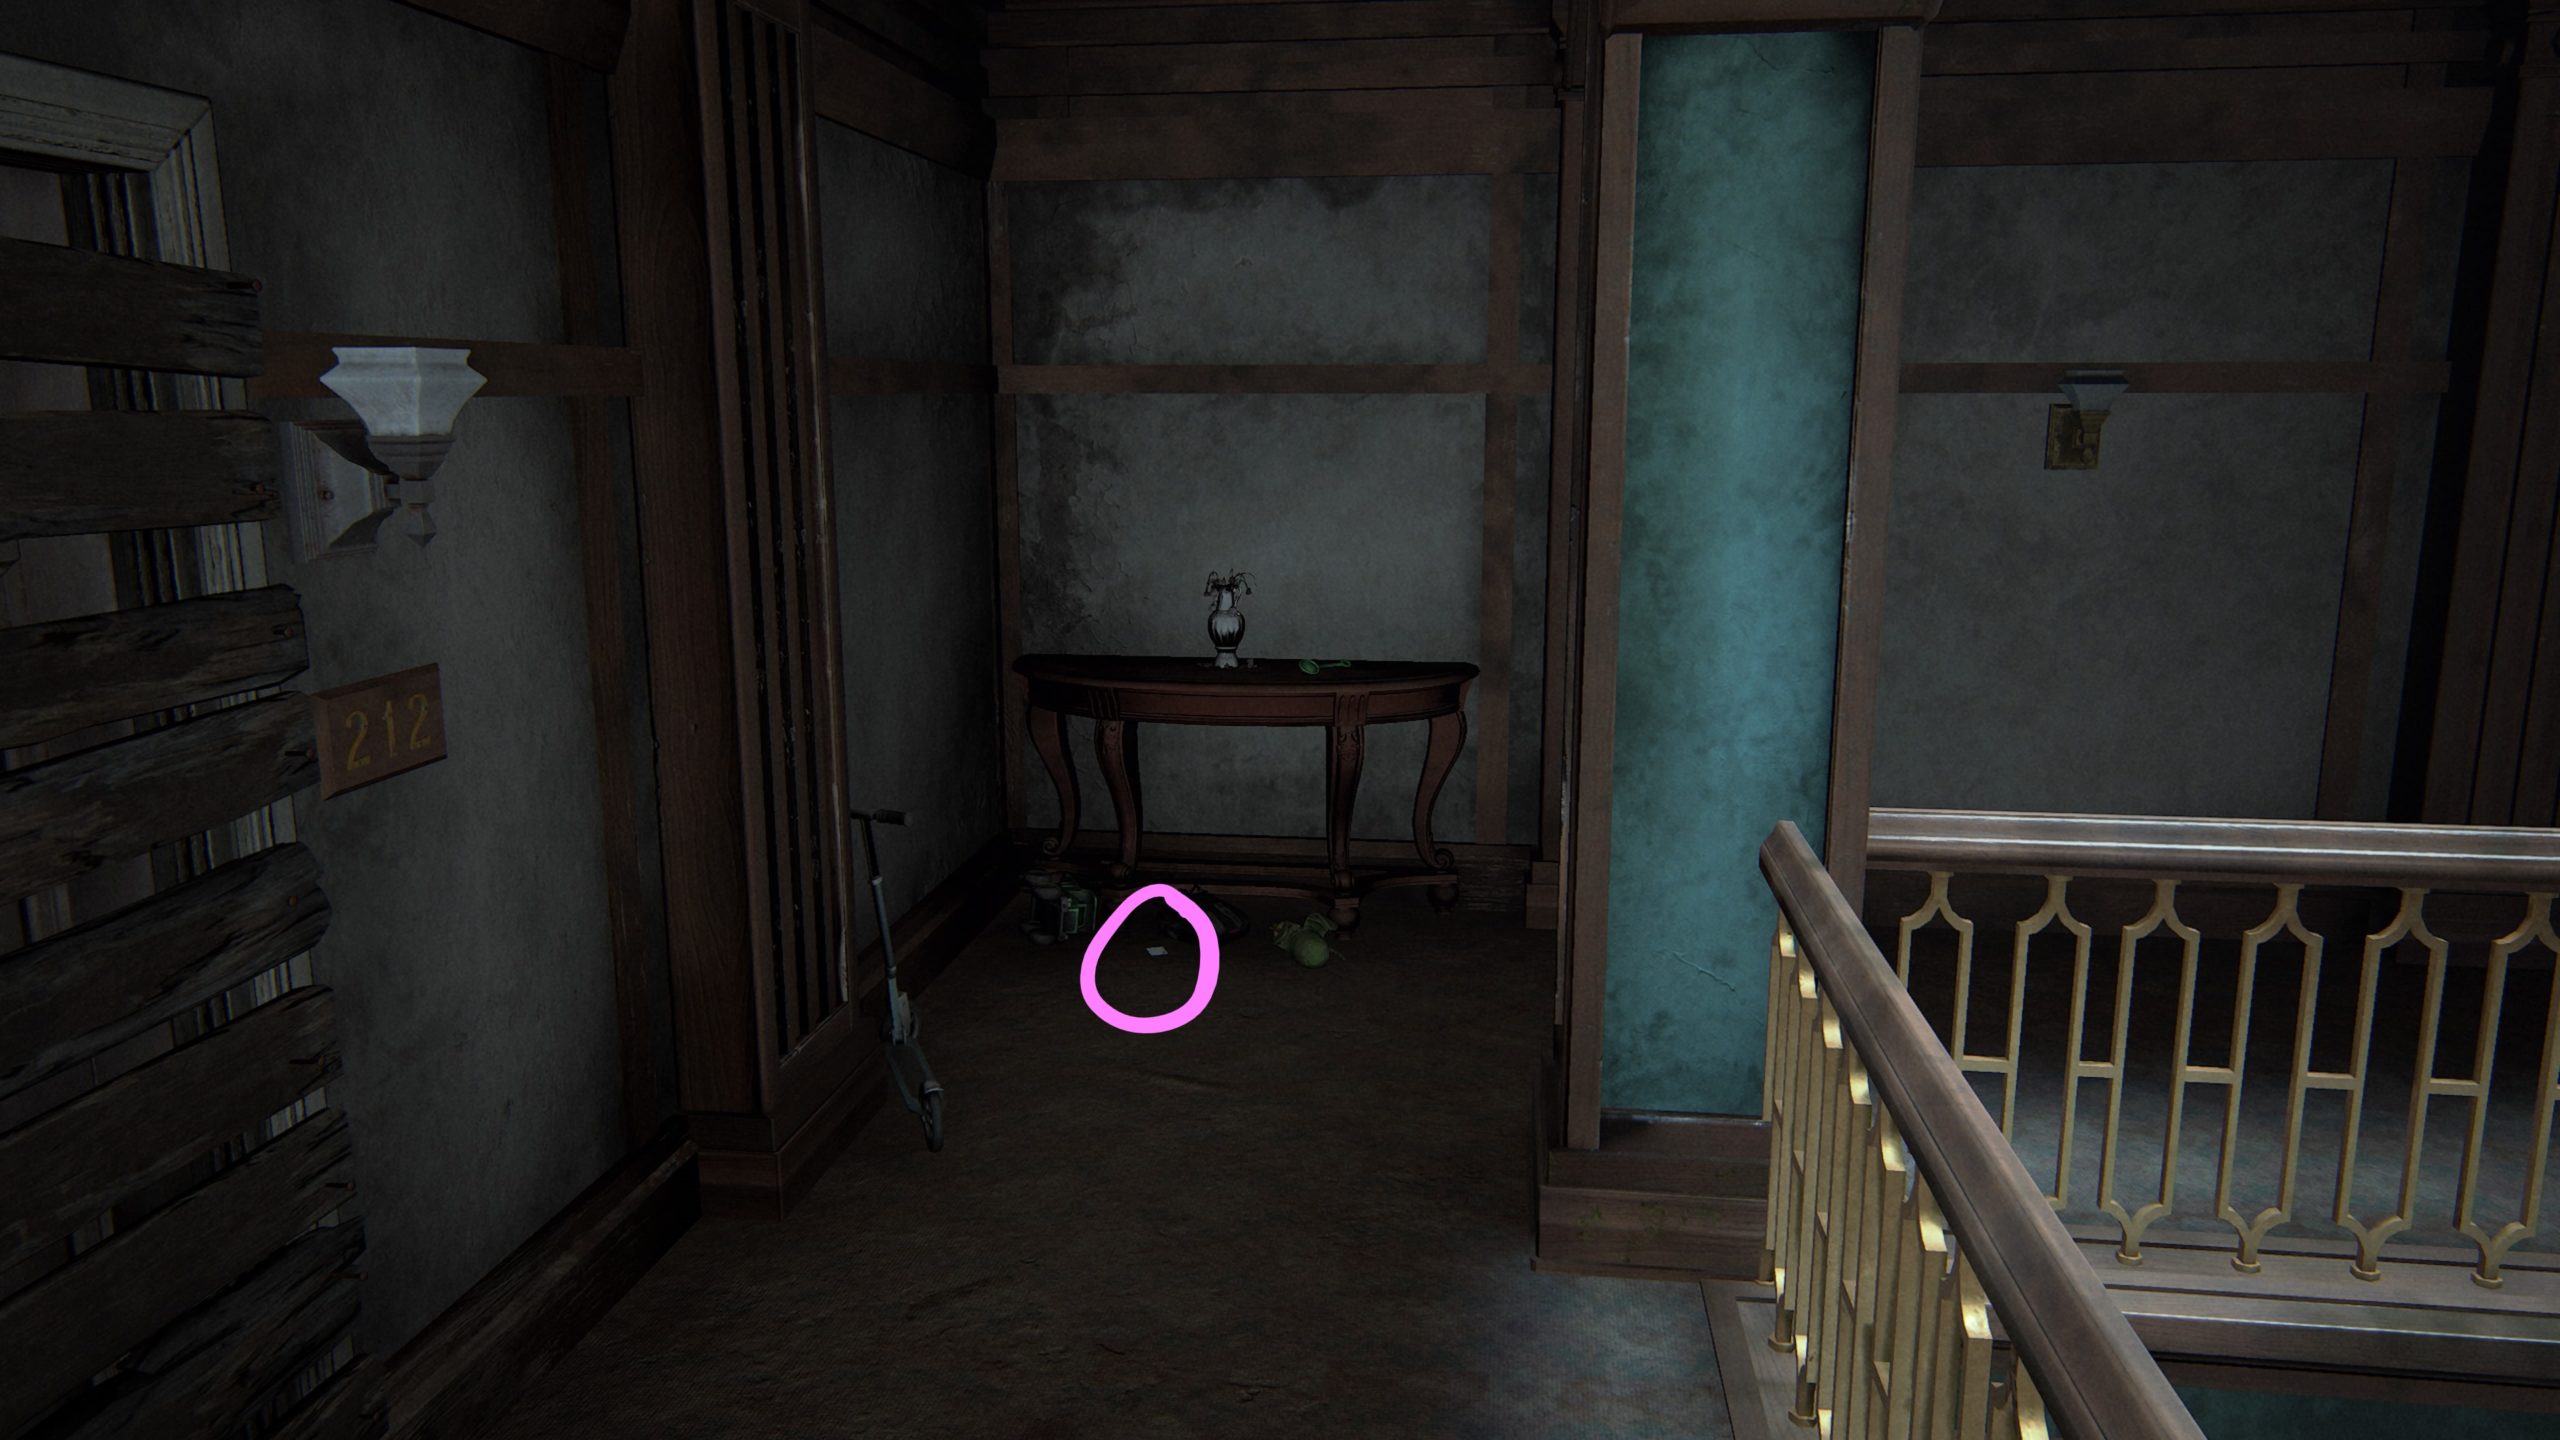
Trading Card – Doppelganger
This card can be found on the second floor of the Garden Suites in the corner of the walkway around the banister.
Artifact – Dying Husband’s Plea
The artifact can be found next to a corpse in Garden Suites. Head up to the second level via the staircase then enter the room. Exit this room via the fire escape and ascend to the next floor. Smash the window to enter the room to find the corpse.
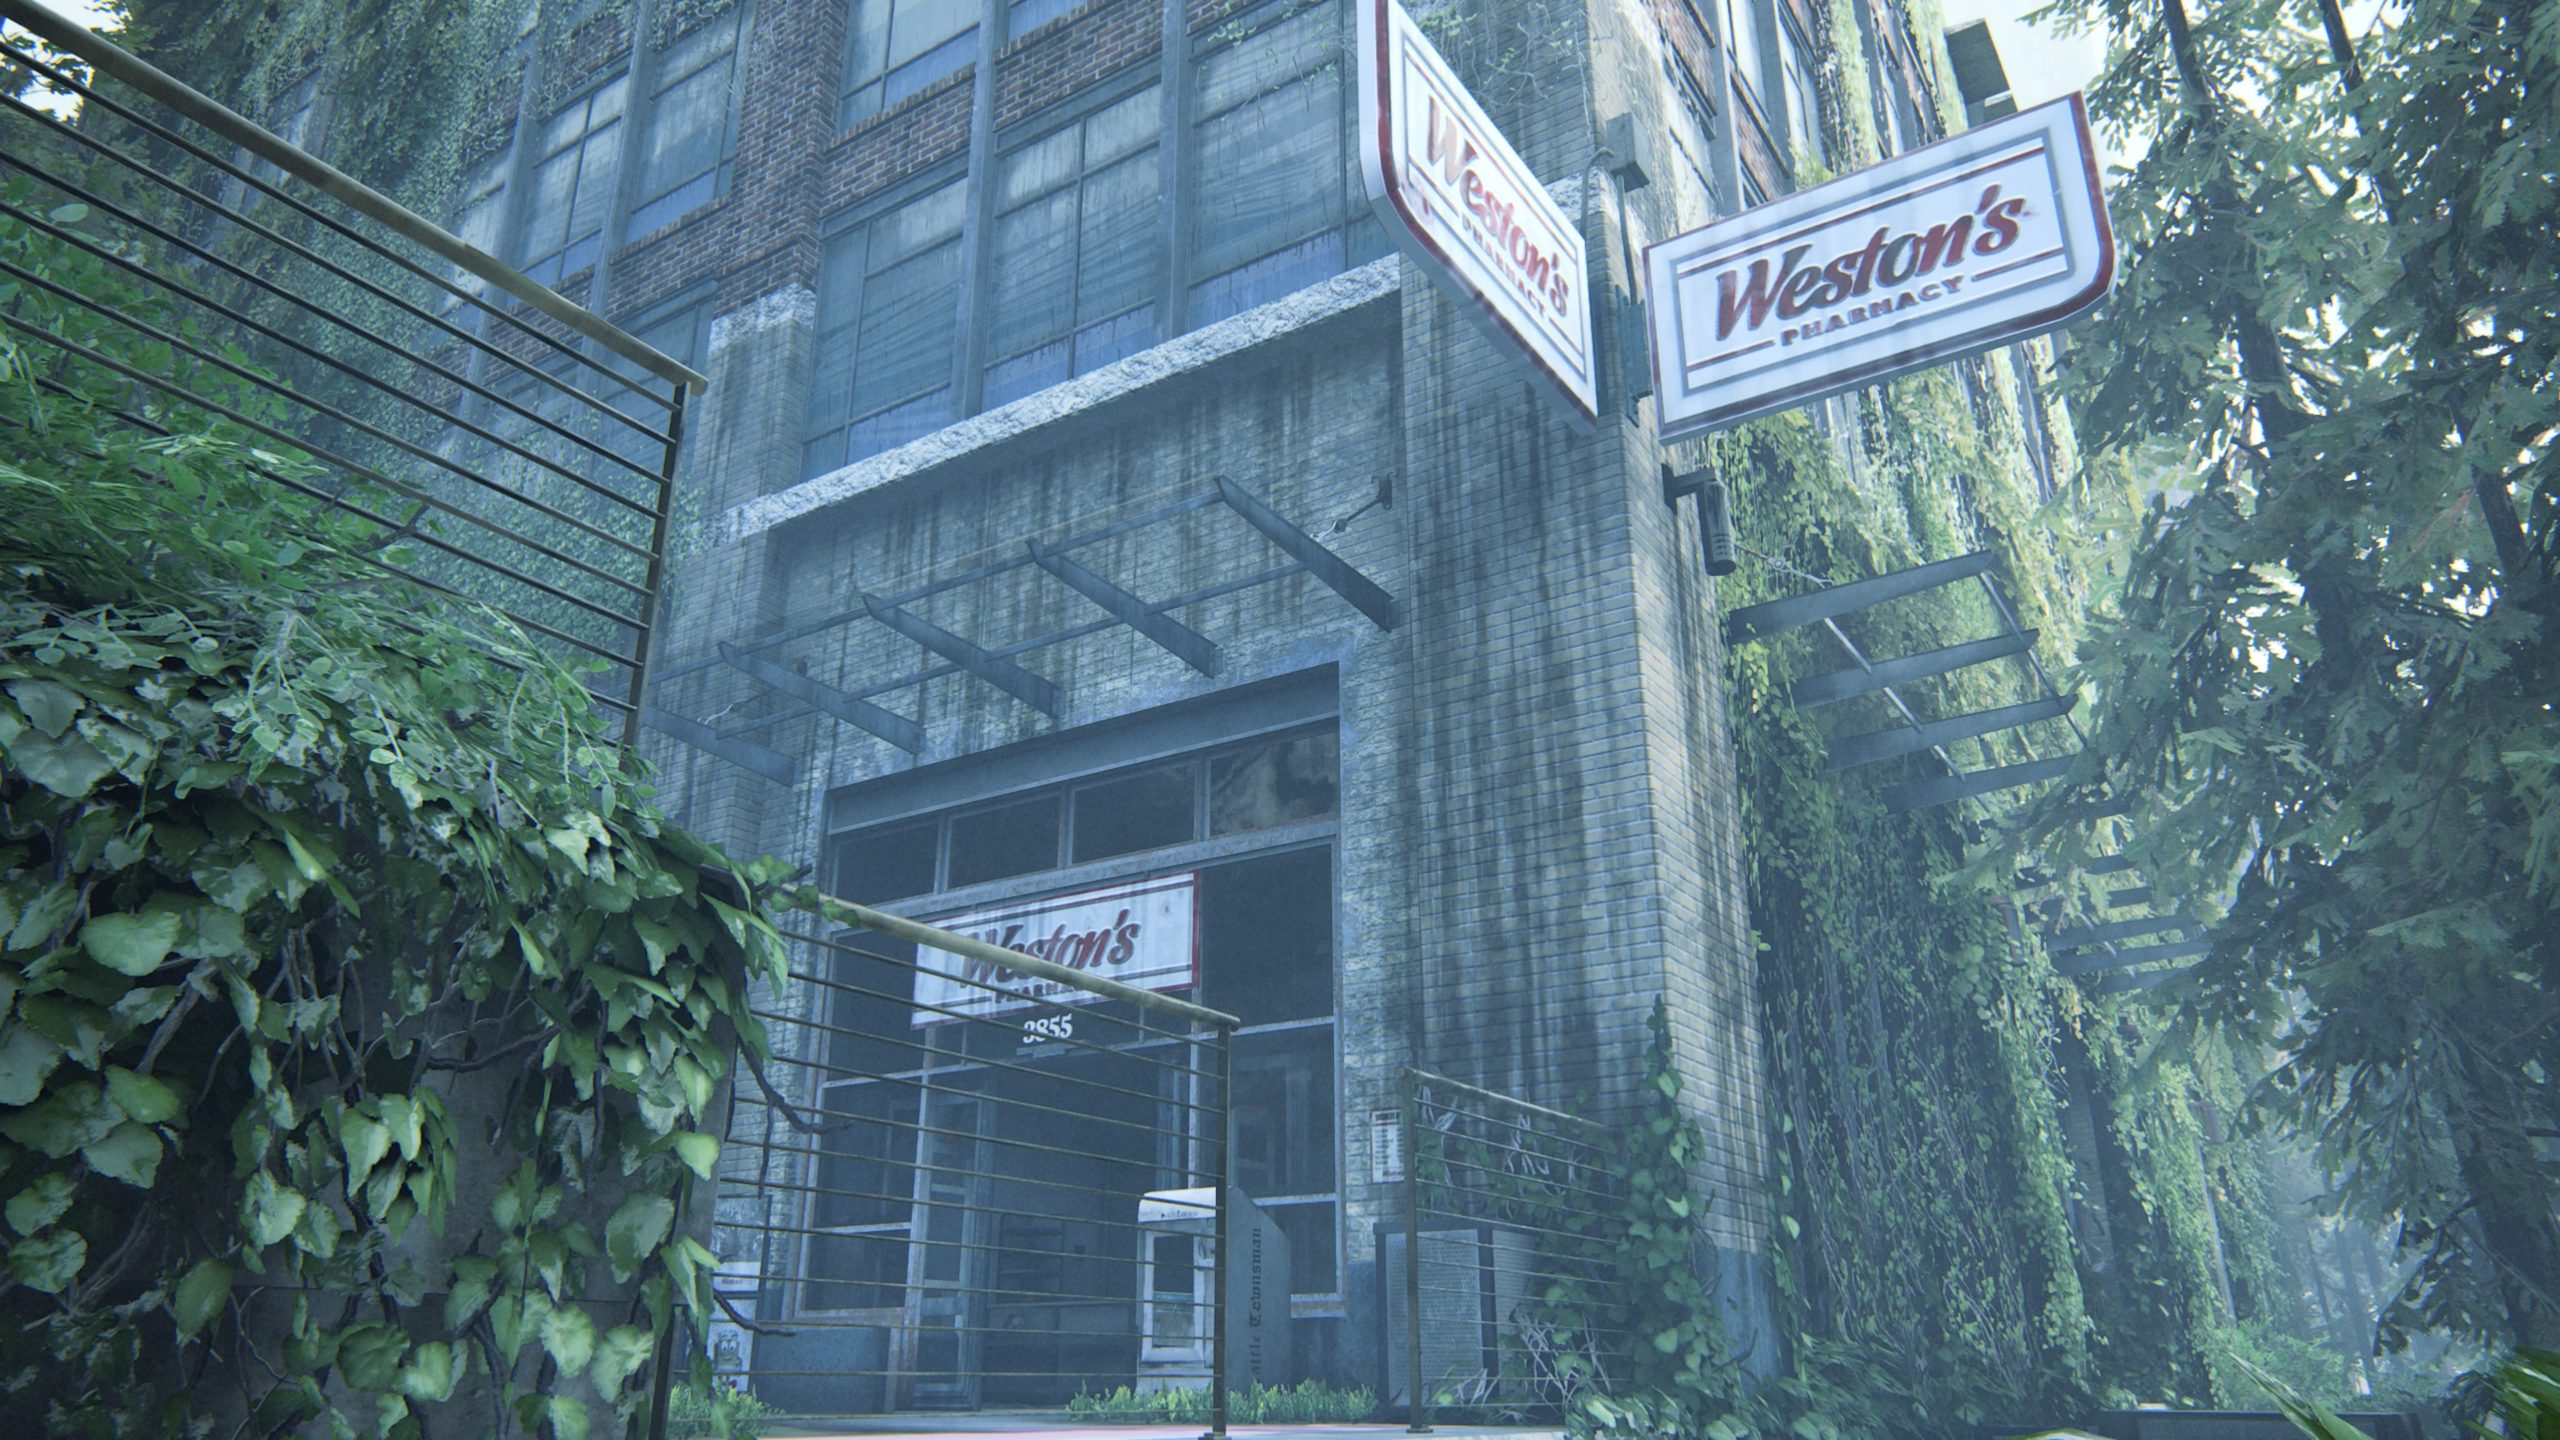
Trading Card – Bhat M’andarr
After you climb down a ladder and drop into the water as part of the story, follow the path up a flight of stairs on the left to find Weston’s Pharmacy. The trading card can be found inside on a shelf near the checkout counter.
Artifact – Pharmacy Note
This artifact can be found in Weston’s Pharmacy behind the checkout counter.
Safe
The safe can be found in Weston’s Pharmacy. To reach it, you will need to crawl through a hole in the wall in the middle of the store. The safe code is 38-55-23, which can be obtained from the artifact.
Workbench
This workbench can be found in the same room as the above safe.
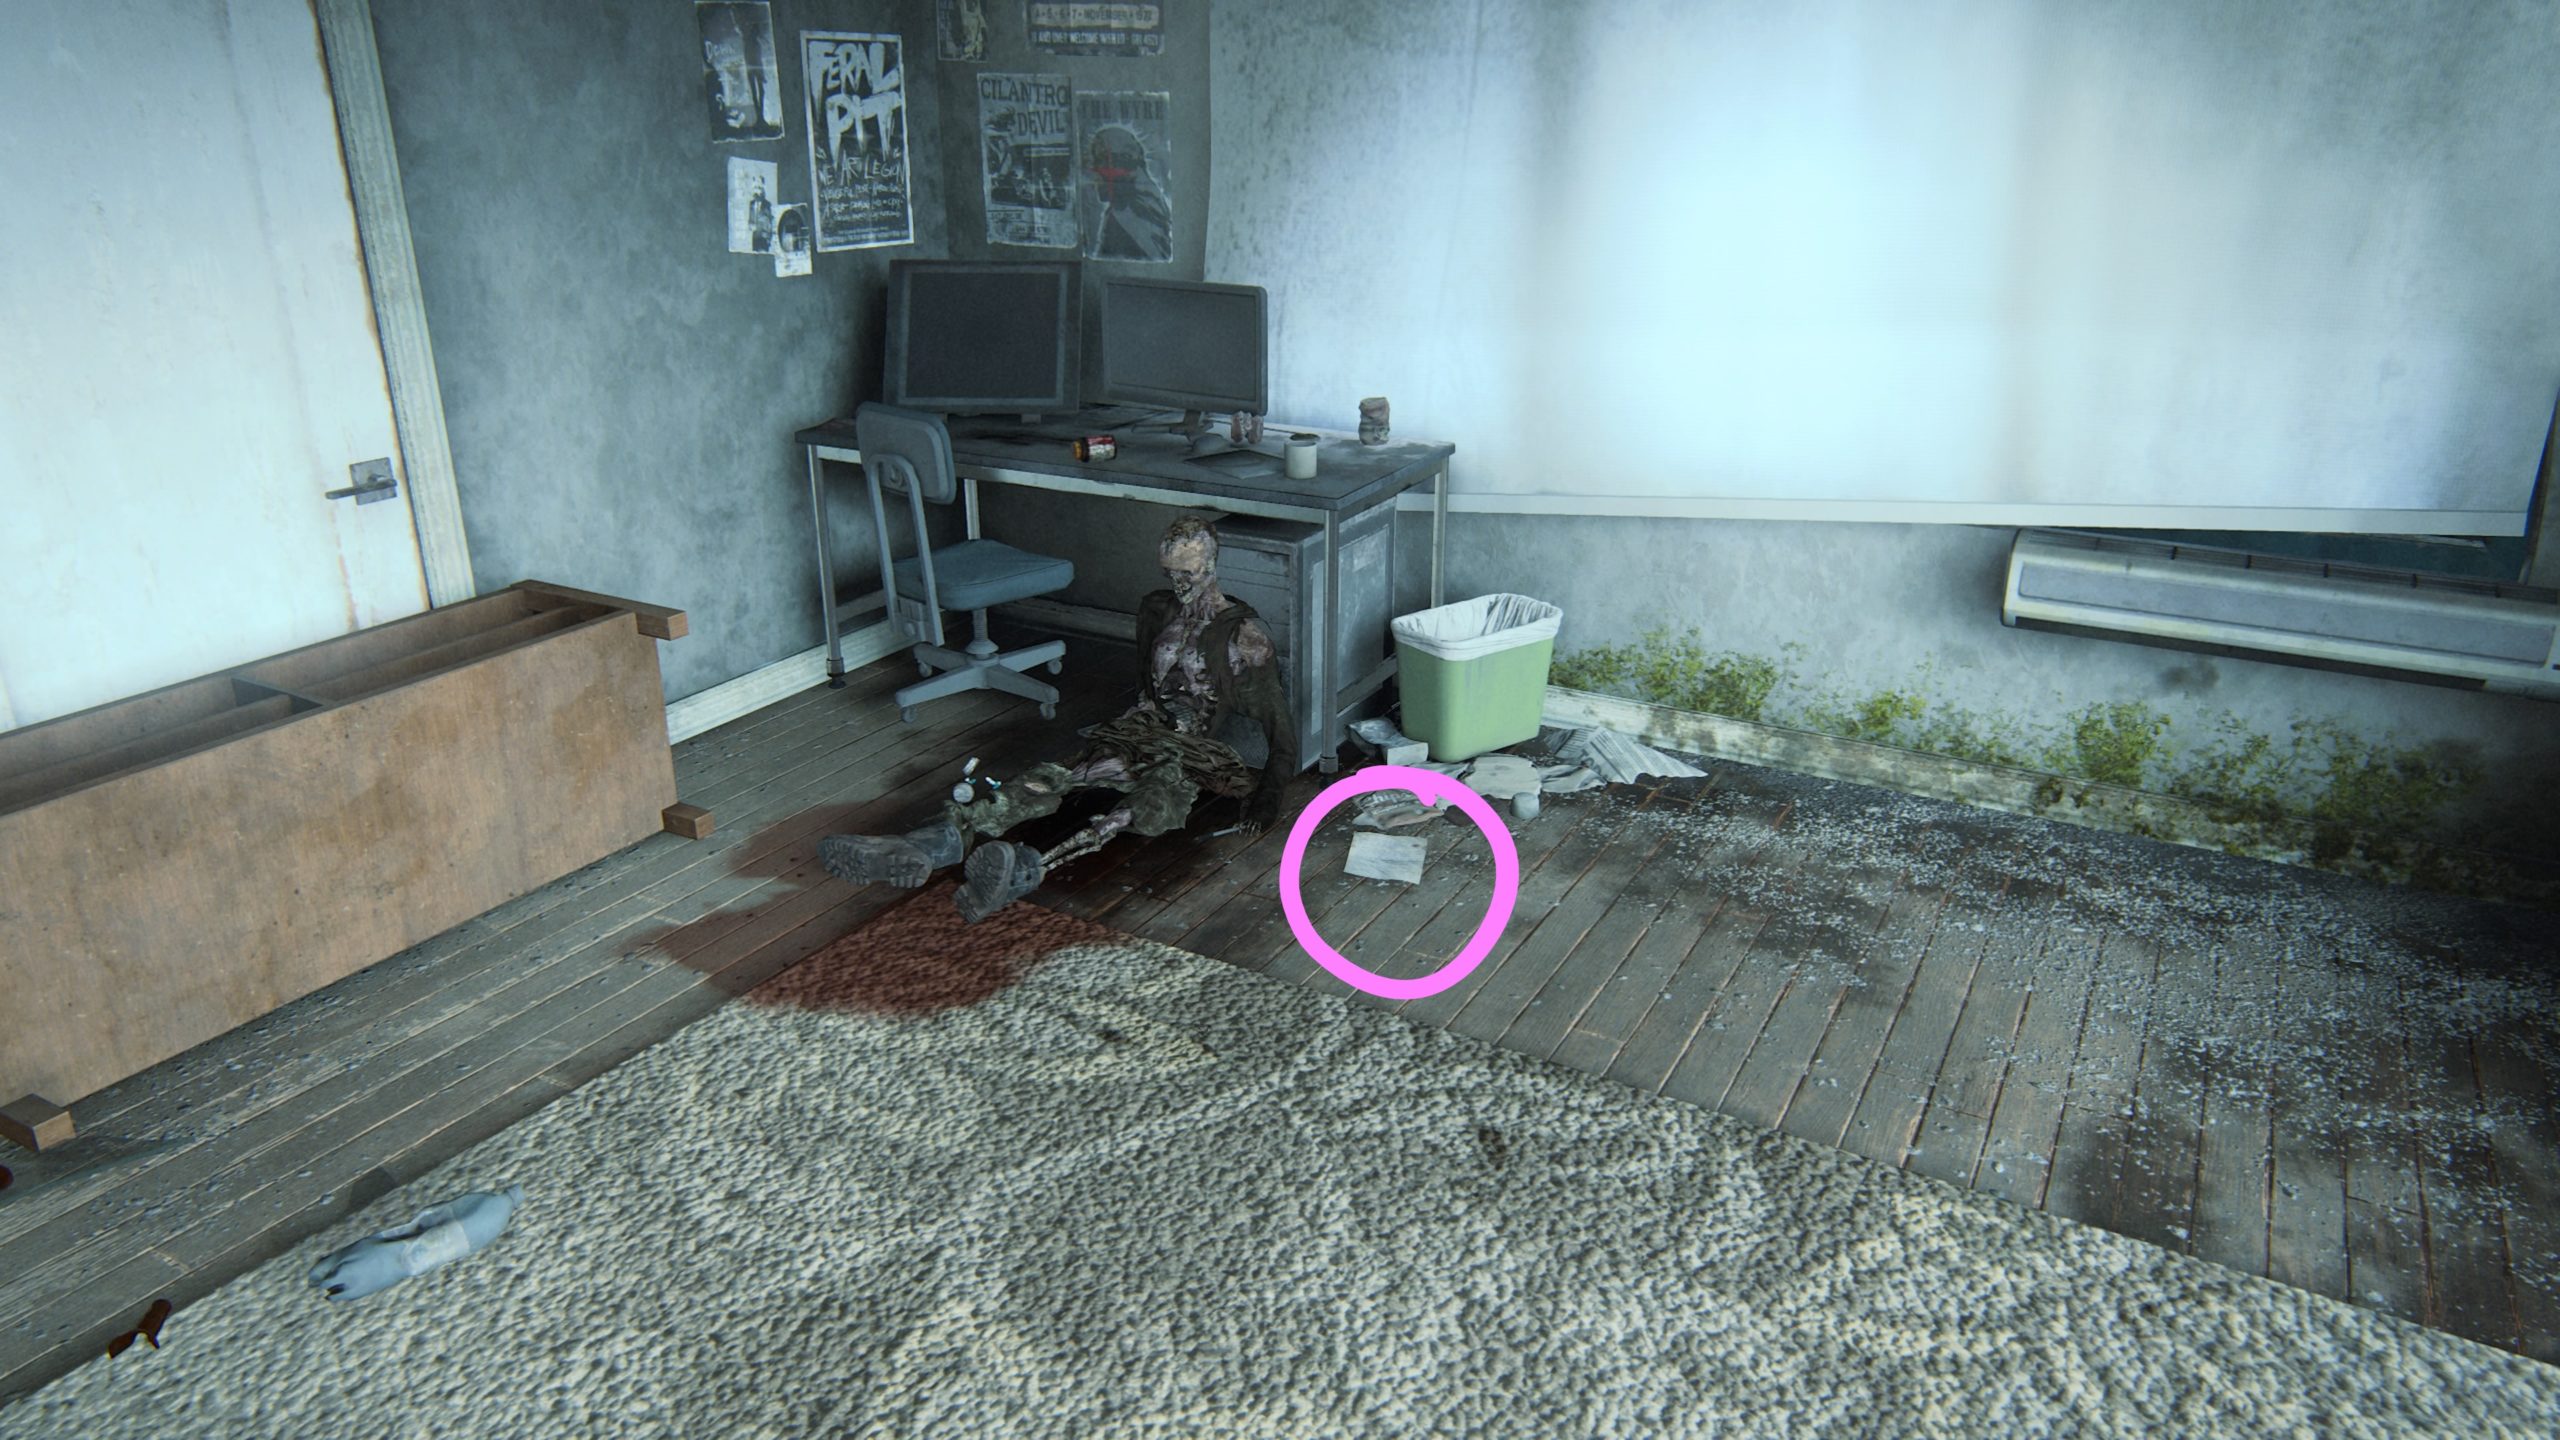
Artifact – Hospital Supply List
After you head up the staircase in the hospital as part of the story, open the door to enter the hallway. The artifact can be found on a table in the first room on the right.
Below is a guide on the 1 artifact, 1 journal entry and 1 trading card that can be found during the Finding Strings chapter in The Last of Us Part II.
Journal Entry
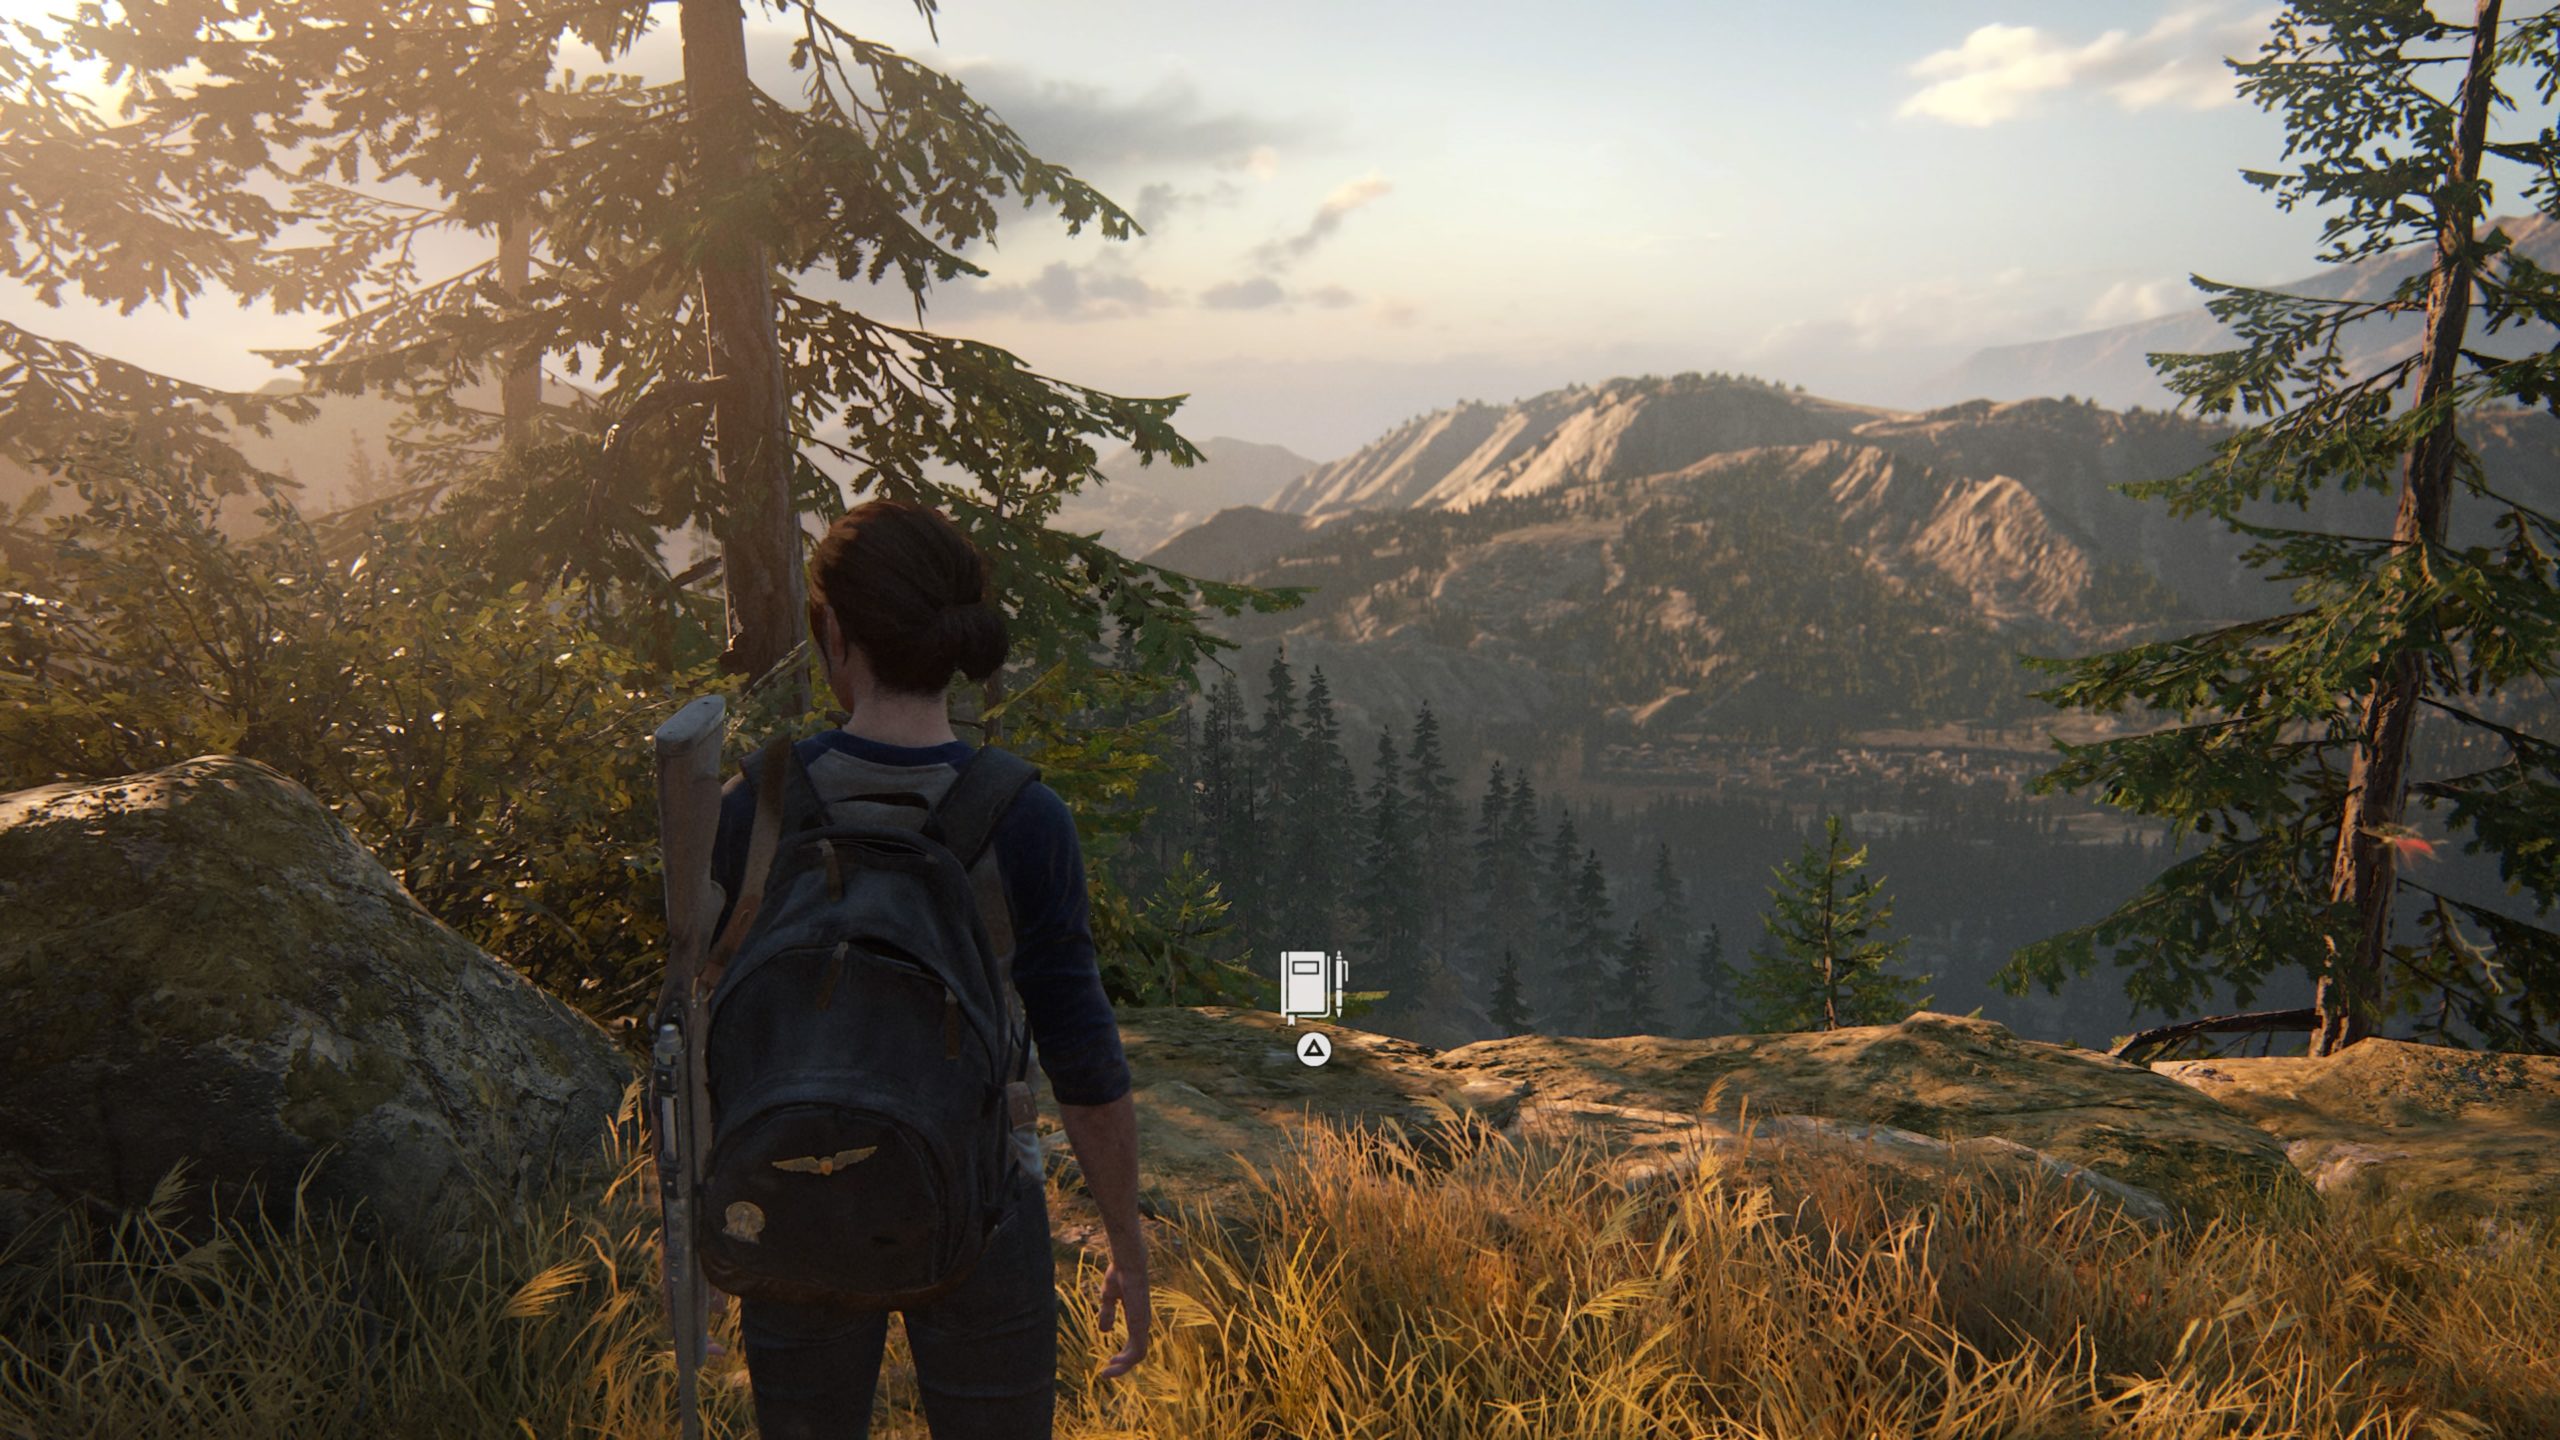
At the start of this chapter, immediately look to the right to find a picturesque view of the mountains. Interacting with the point will trigger a journal entry.
Trading Card – The Austringer
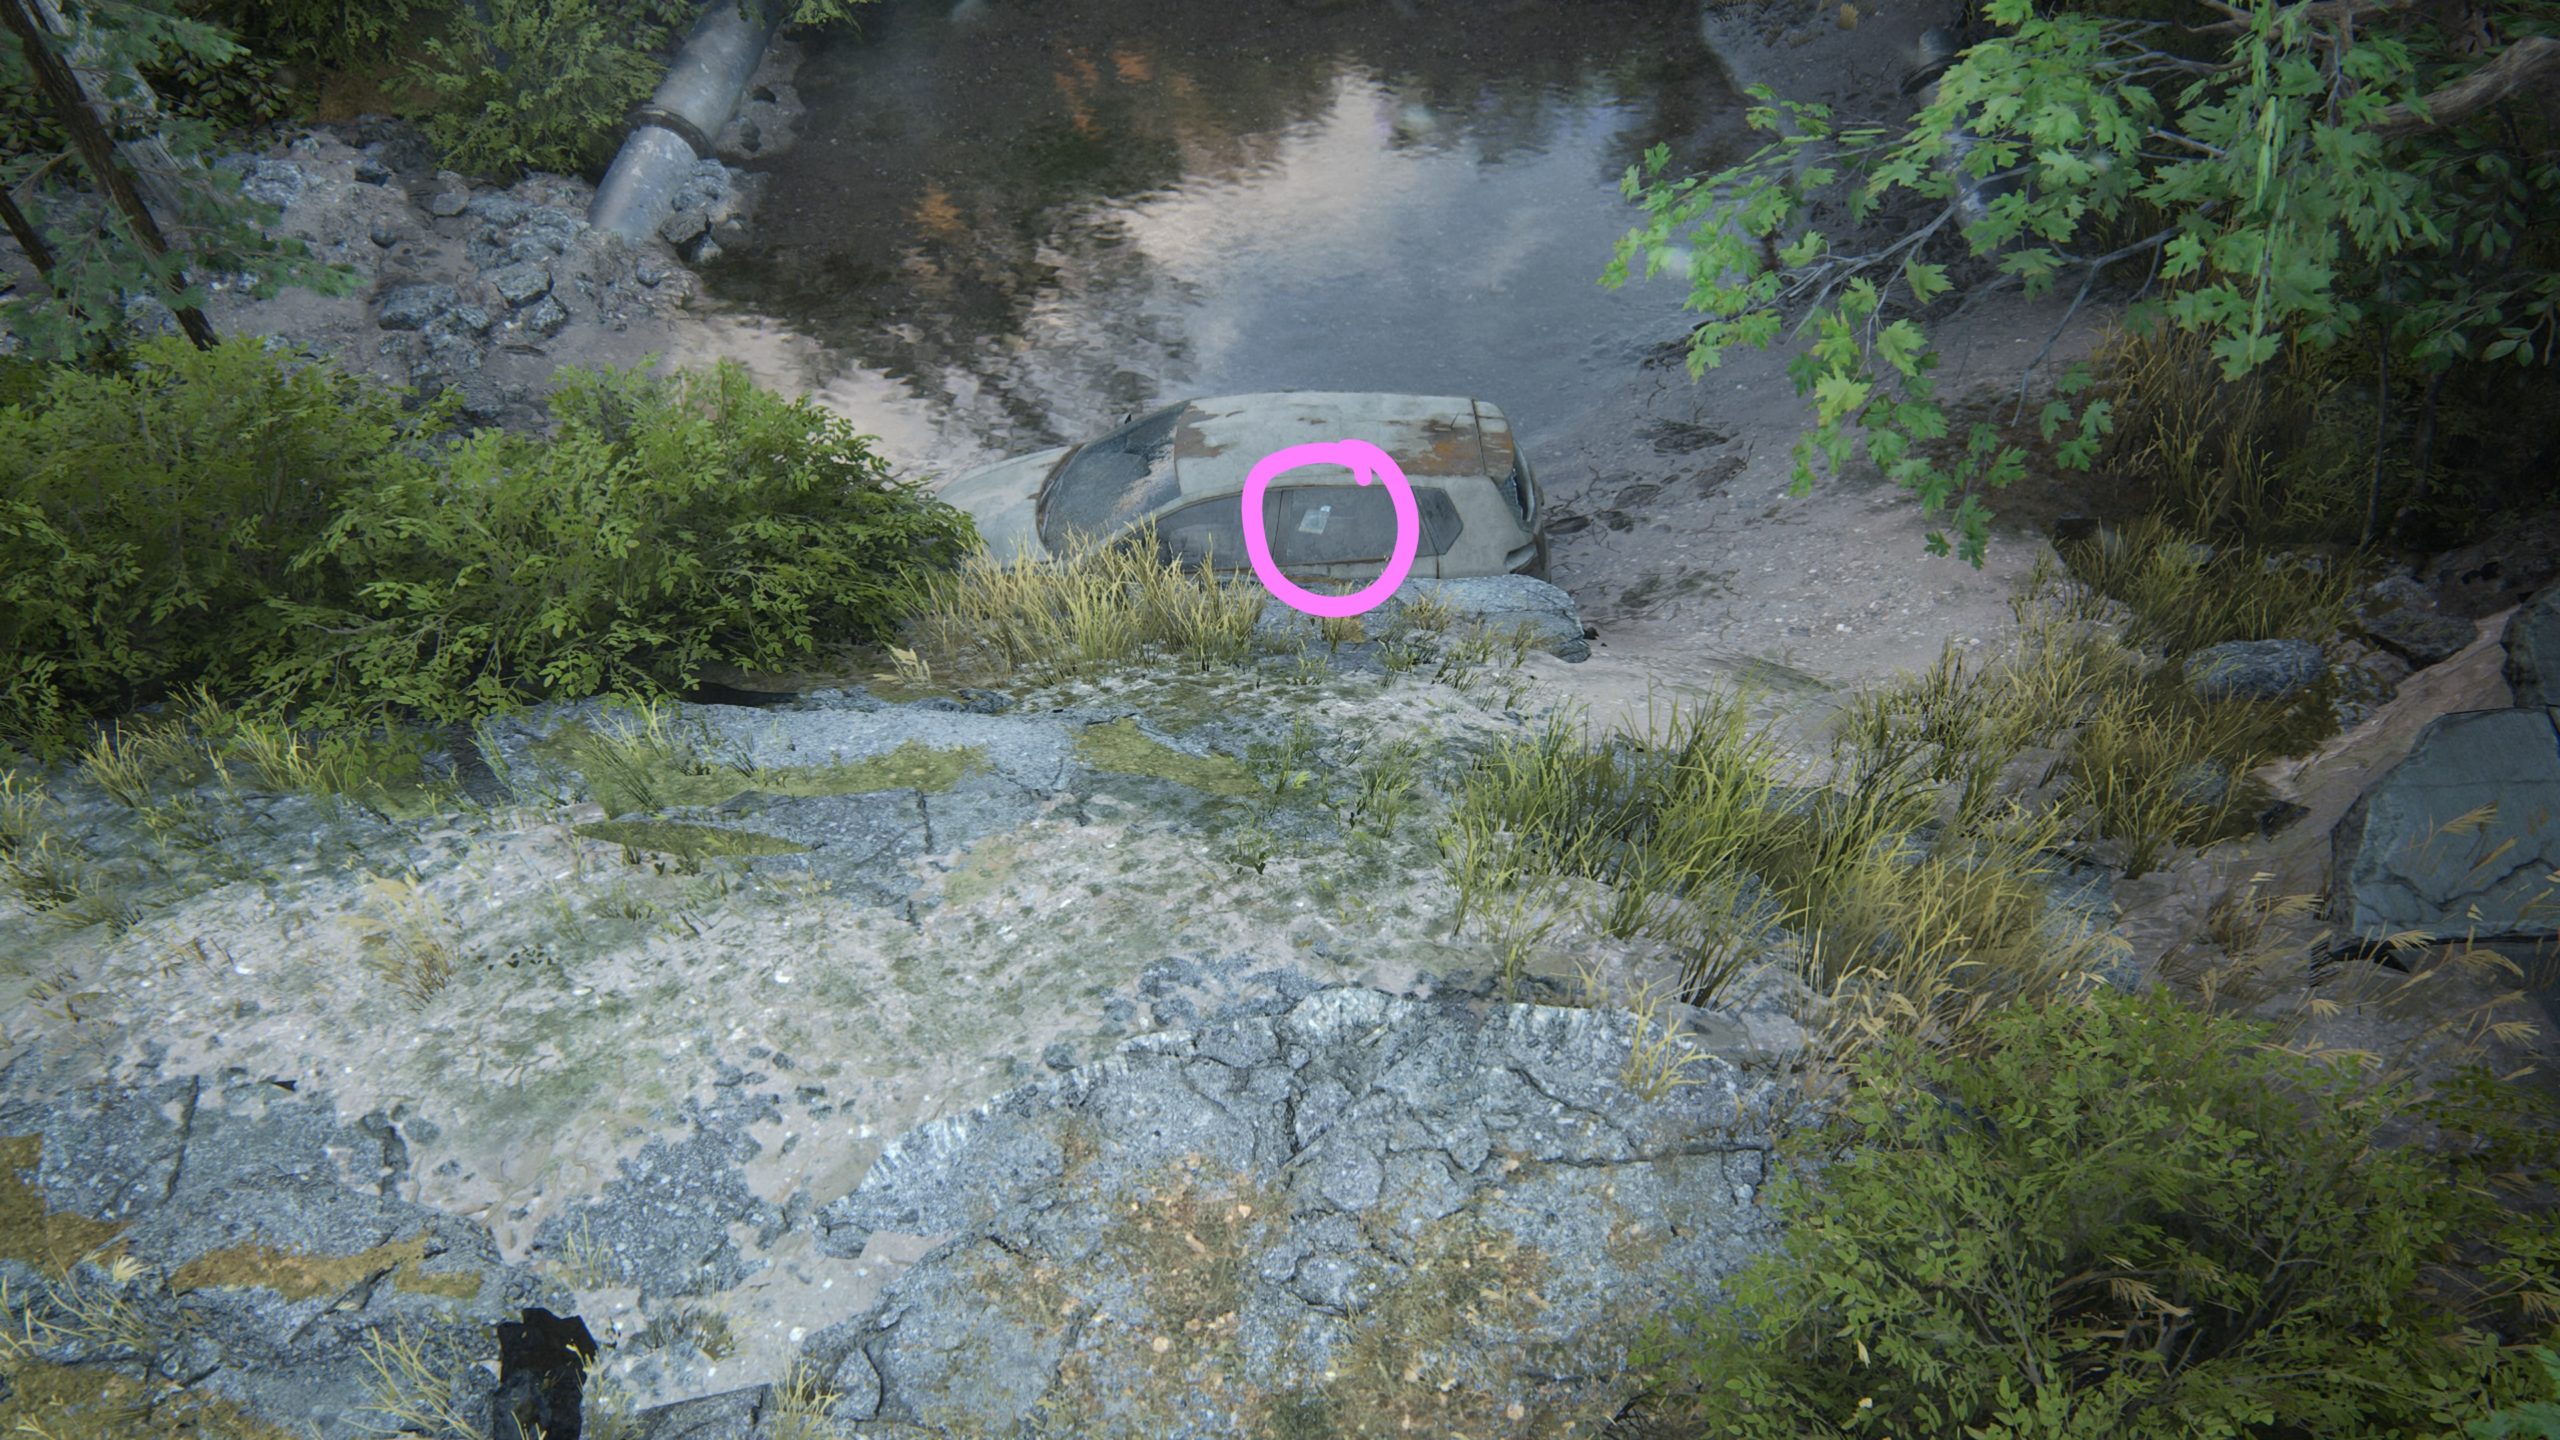
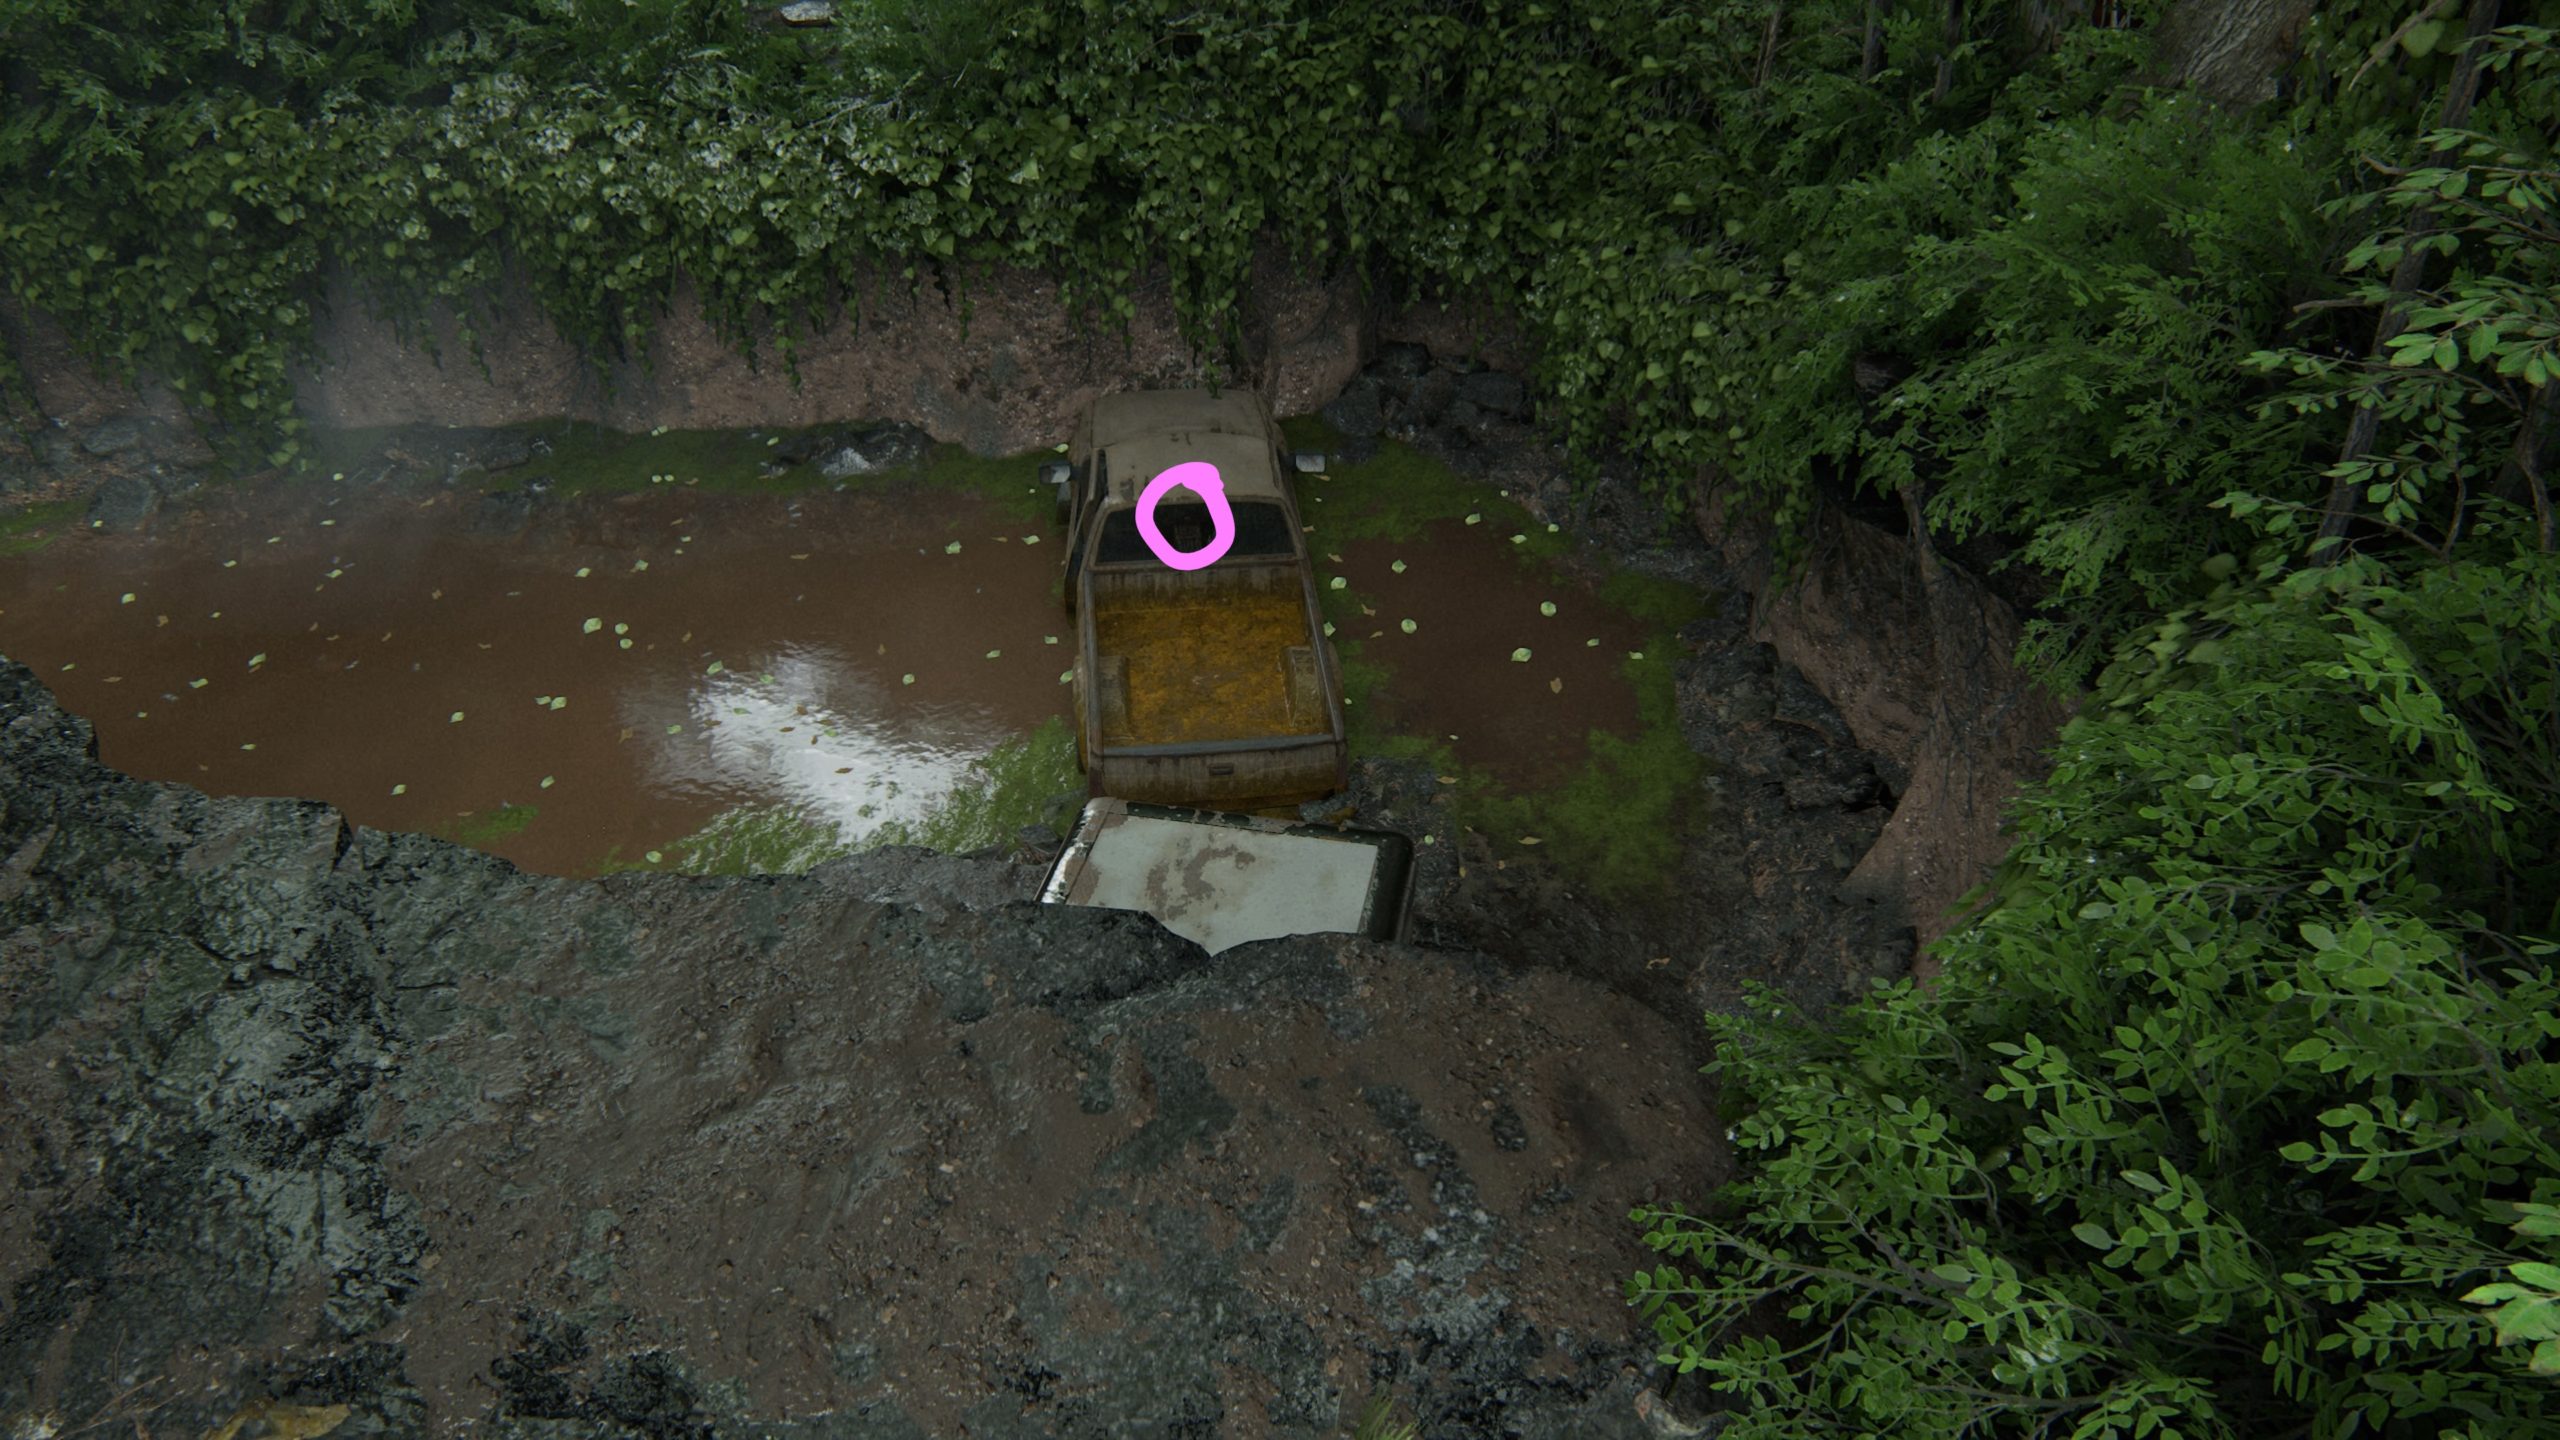
After crossing over the van pulling a trailer which is blocking the path (as part of the story), you’ll see a car at the bottom of the sink hole. The card is located inside this car.
Artifact – Tara’s Invitation
This artifact can be found in the hotel in room 107 on a dresser.
Below is a guide on the 10 artifacts, 1 journal entry, 1 safe, 5 trading cards, 1 training manual, 1 upgrade, 1 weapon and 2 workbenches that can be found during the Hillcrest chapter in The Last of Us Part II.
Trading Card – Wachumero
At the very start of this chapter, turn around and drop down to the truck below. The card can be found in the cab of the truck.
Artifact – Join WLF Note
This artifact can be found on a desk next to a computer in the Majestic Laundromat.
Workbench
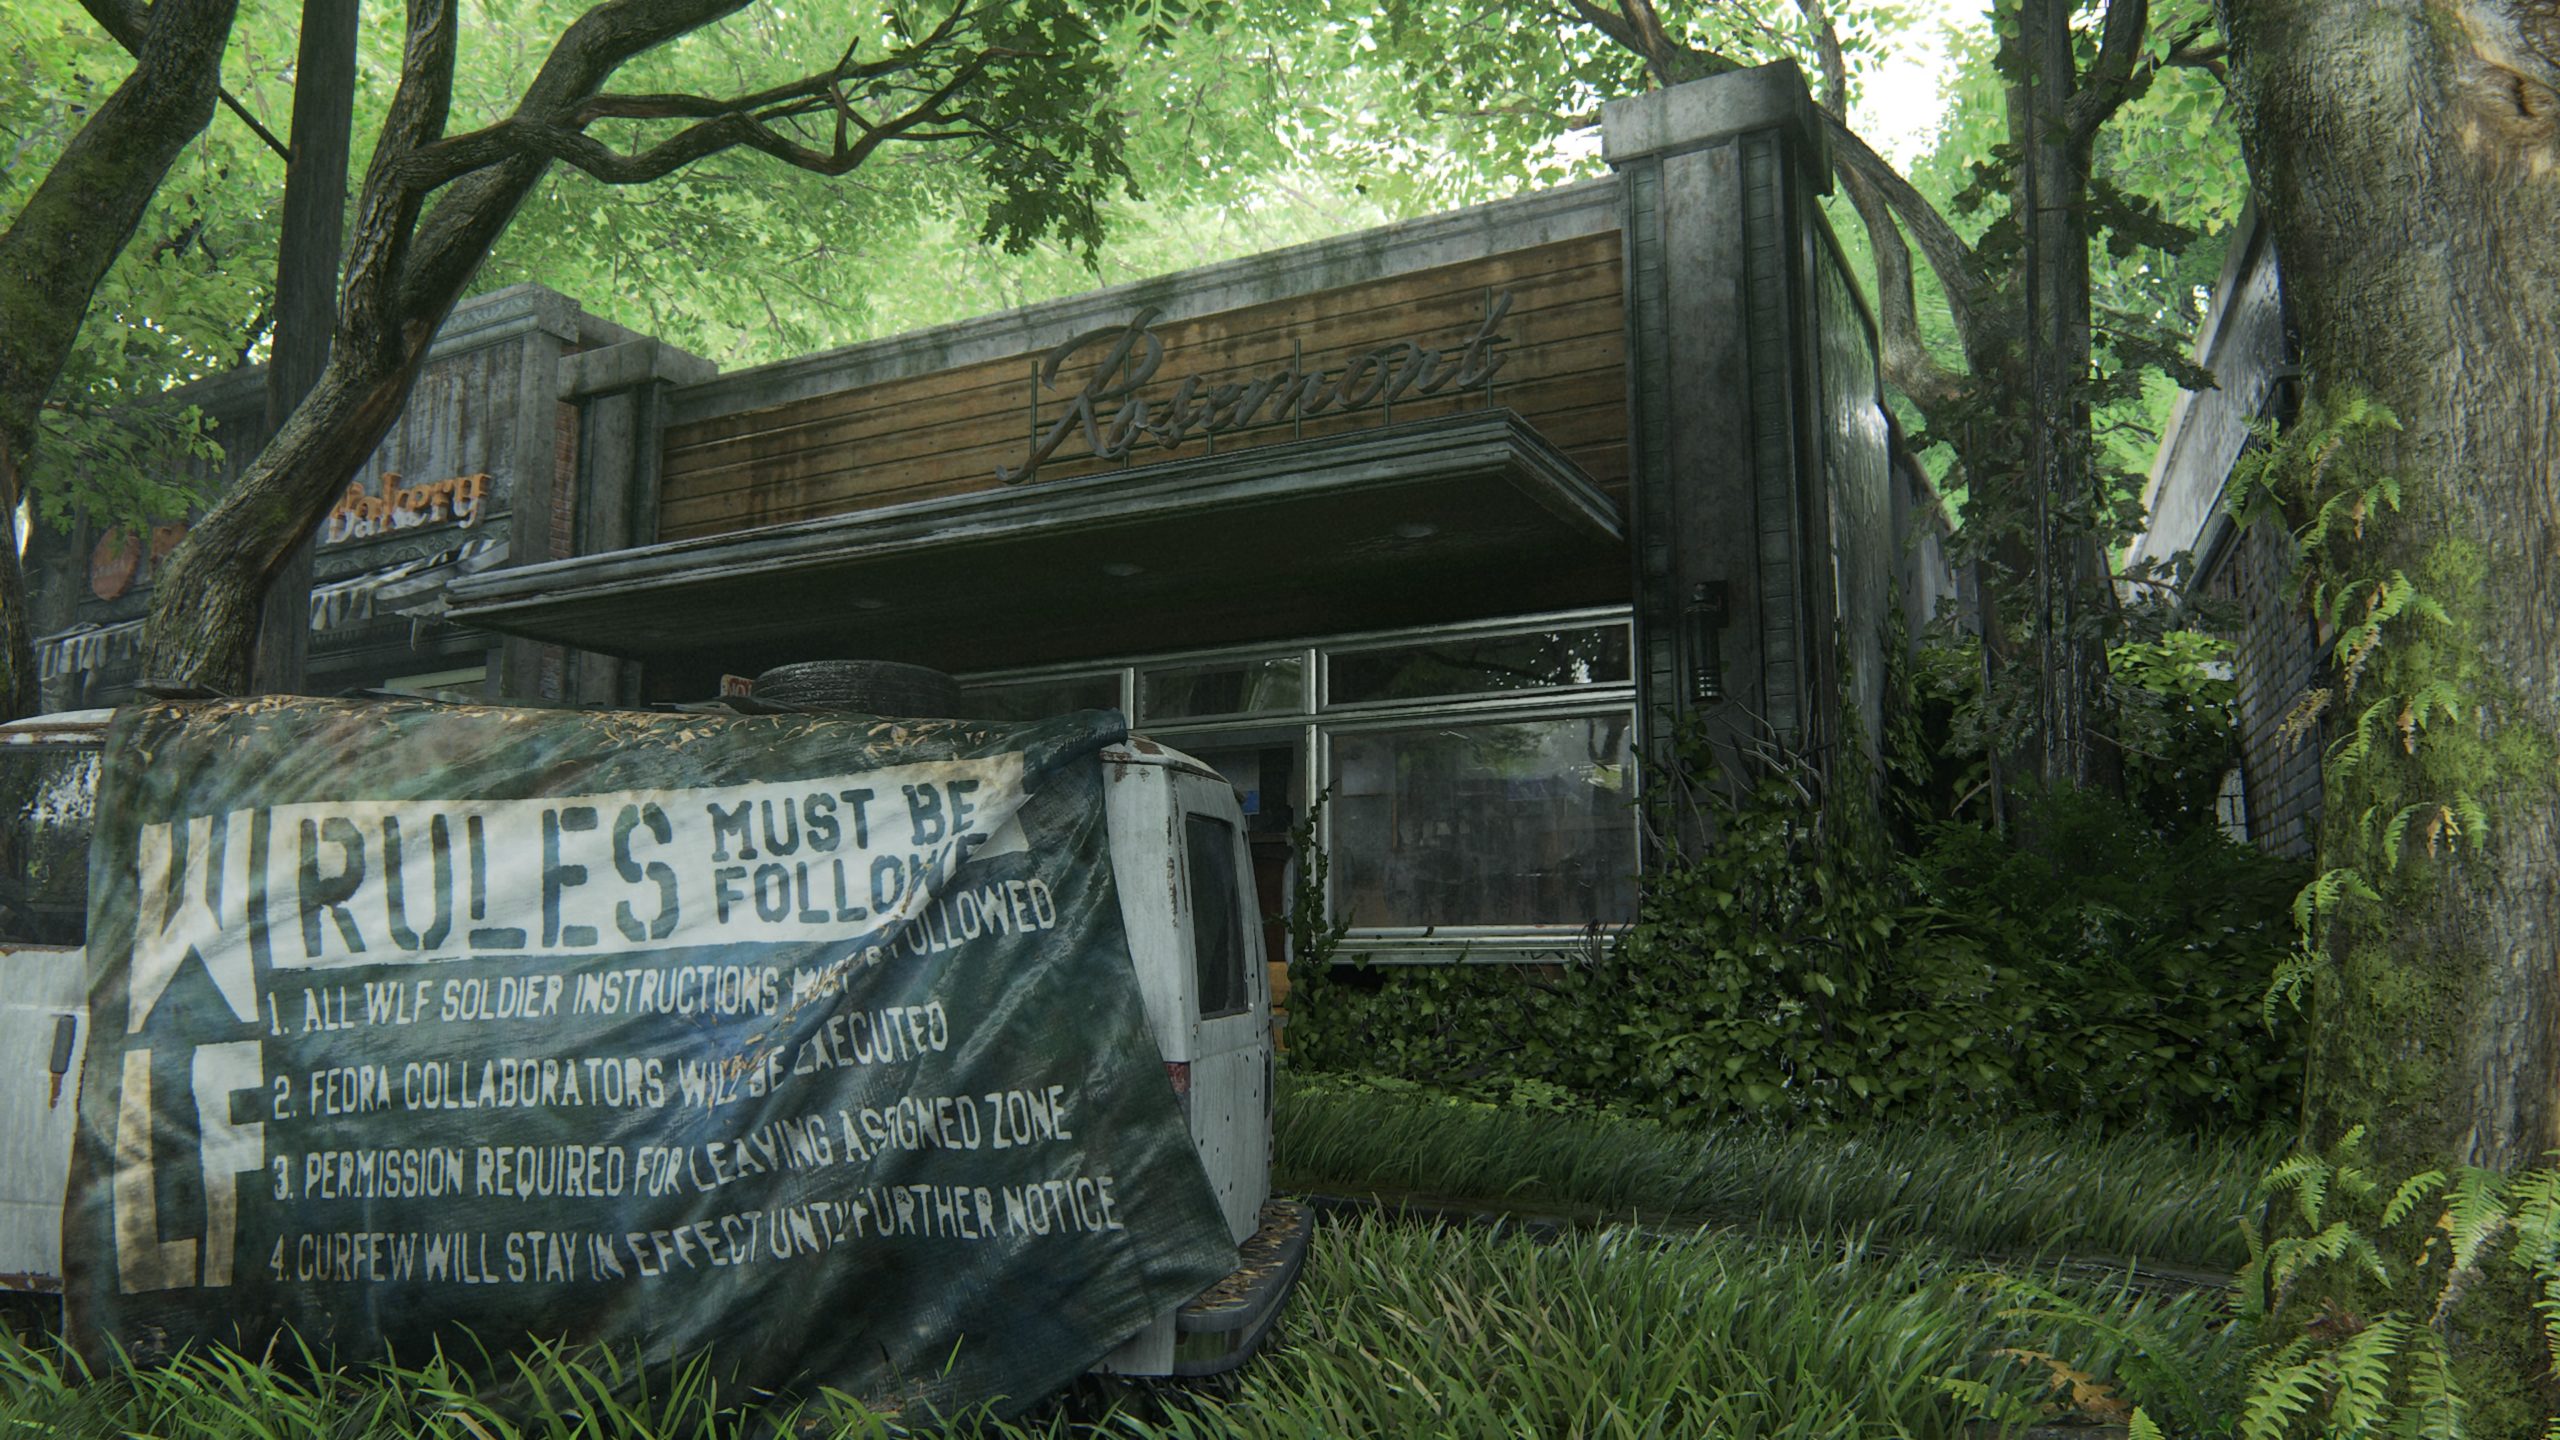
This workbench can be found in the basement of Rosemont (clothing store).
Artifact – Boris’ Daughter’s Drawing
This artifact can be found on a table next to a cot in the basement of Rosemont (clothing store).
Artifact – Need a Plan Note
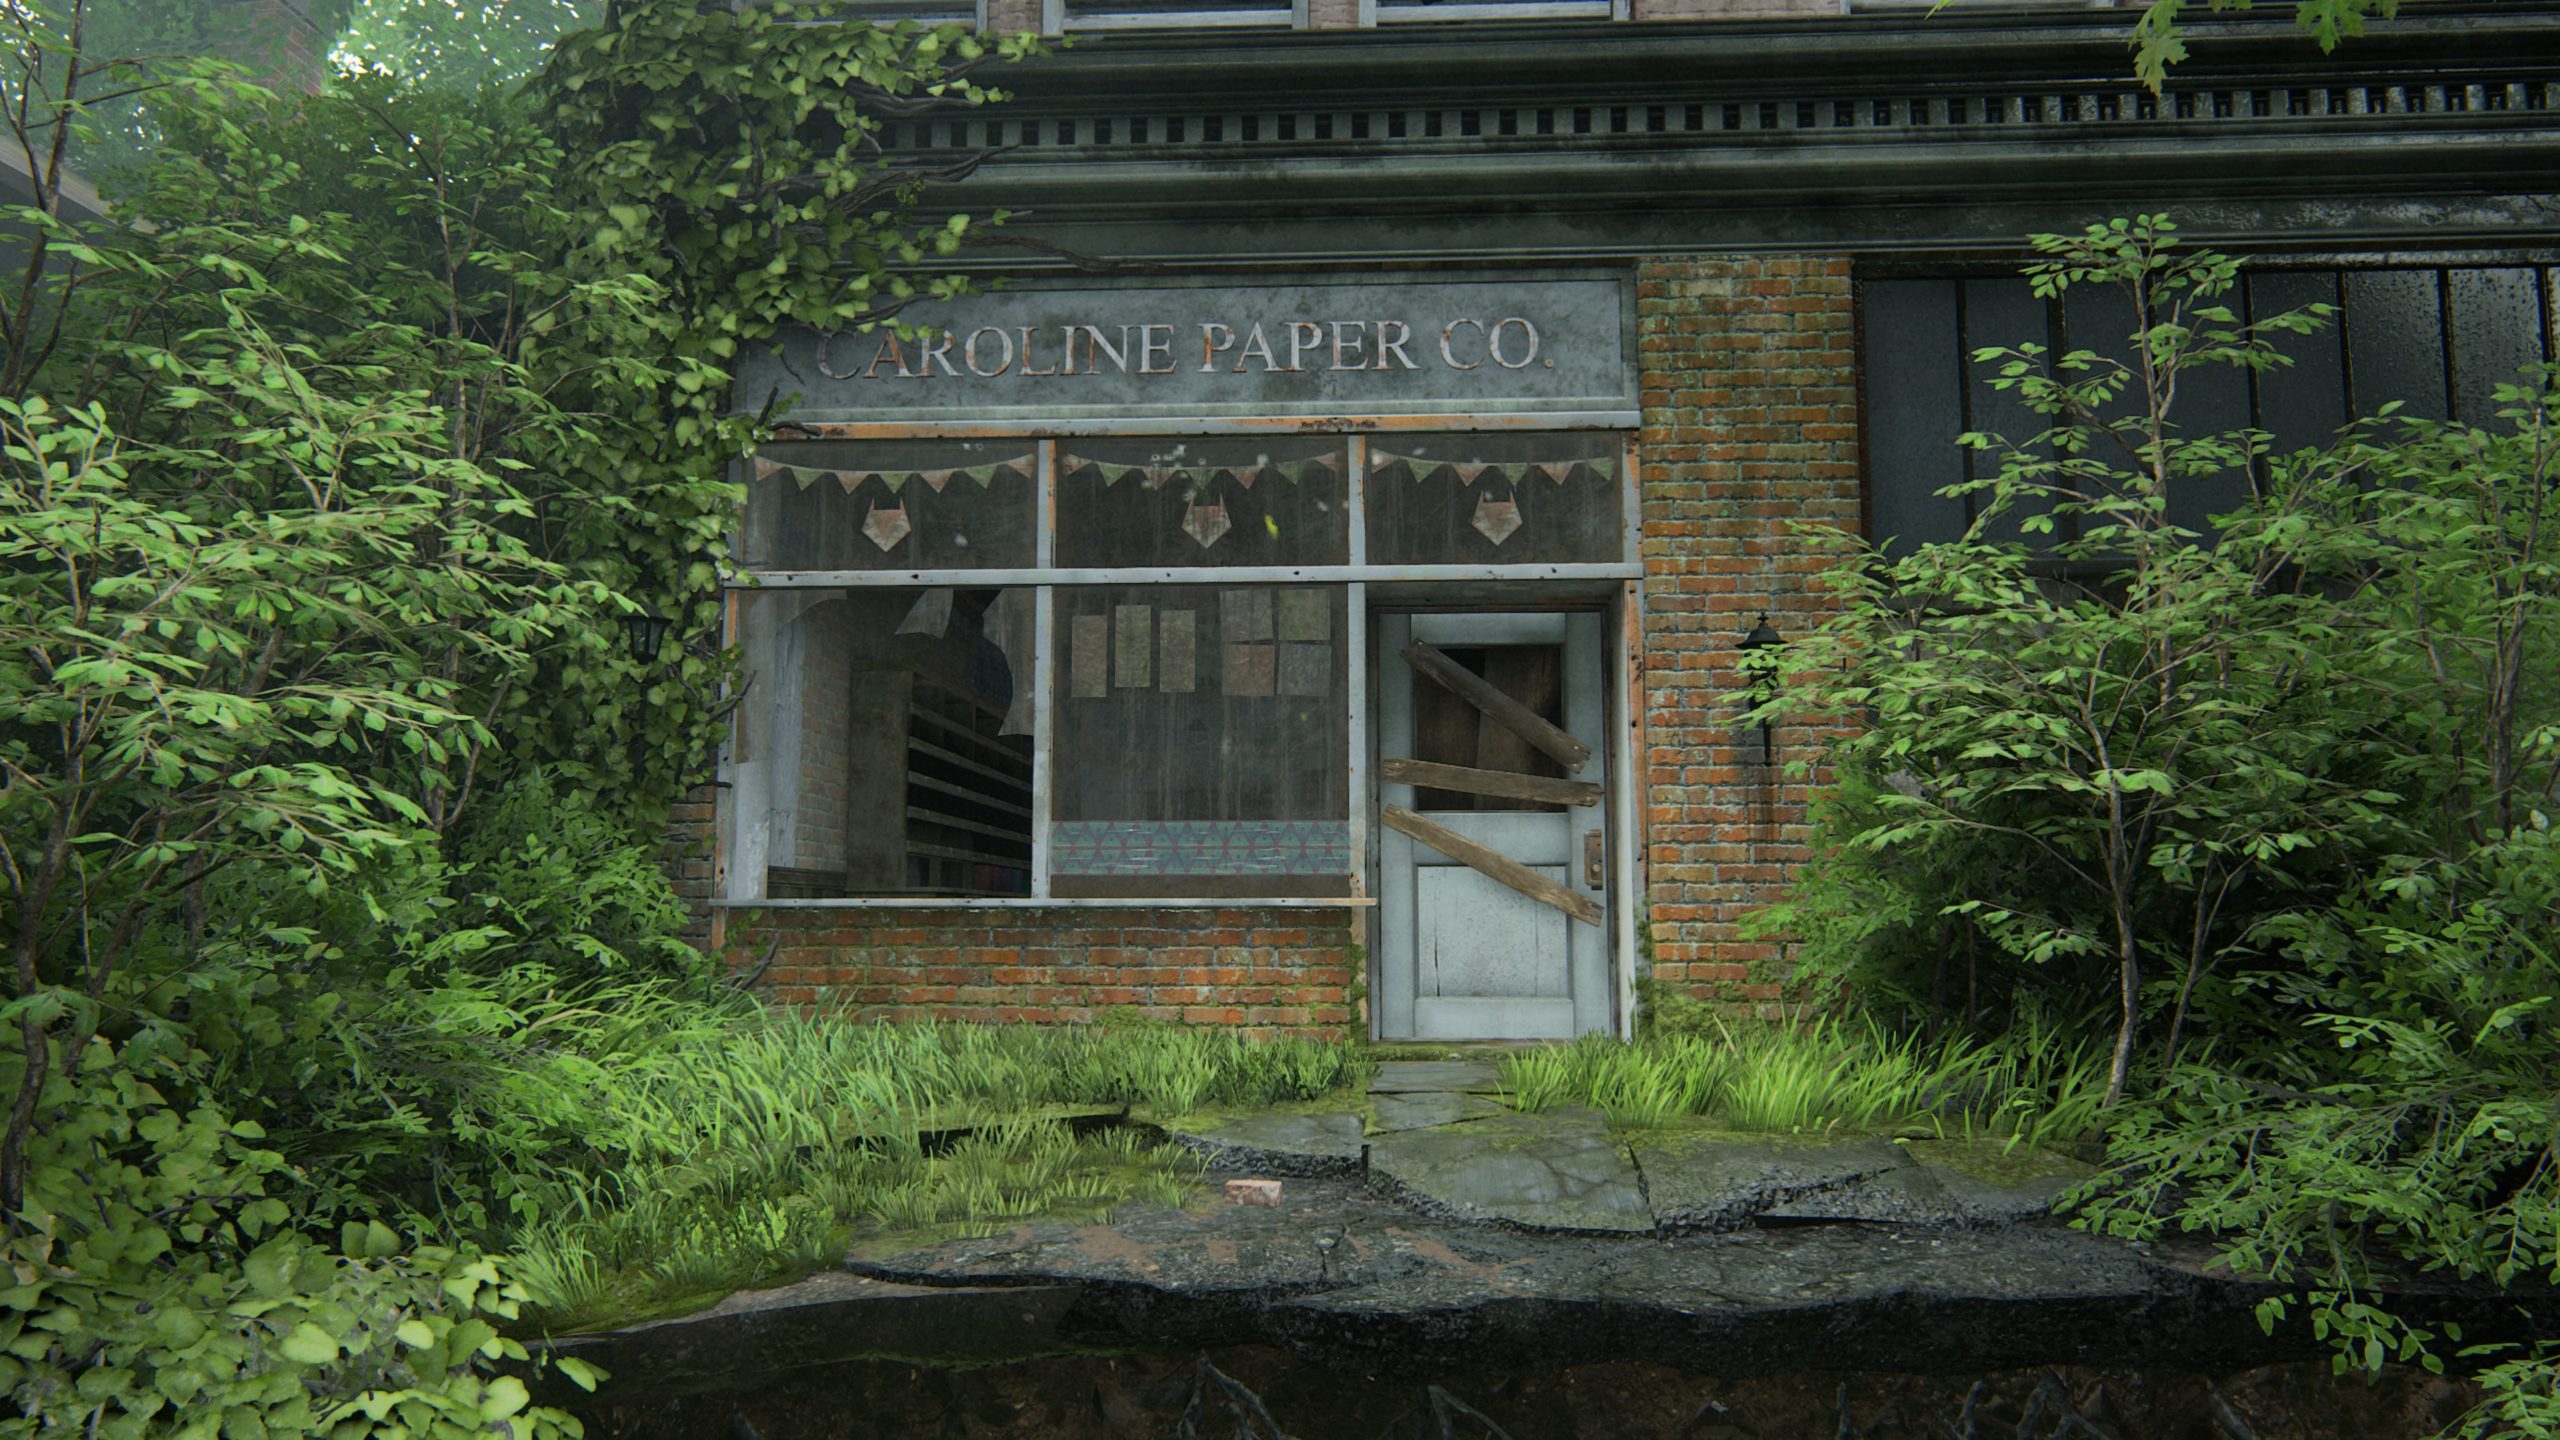
This artifact can be found in a drawer in the Caroline Paper Co. To reach it, take a left at Ruston Coffee and follow the path into a wooded area leading to a sink hole. Use the overturned dumpster to reach the store. Break the window on the left of the boarded door to reach the inside of the store.
Trading Card – Sahir the Sorcerer
This card can be found in a card box behind the cash register in Caroline Paper Co.
Artifact – Yolanda’s Note
This artifact can be found on the counter in the Used and Rare Books store.
Journal Entry
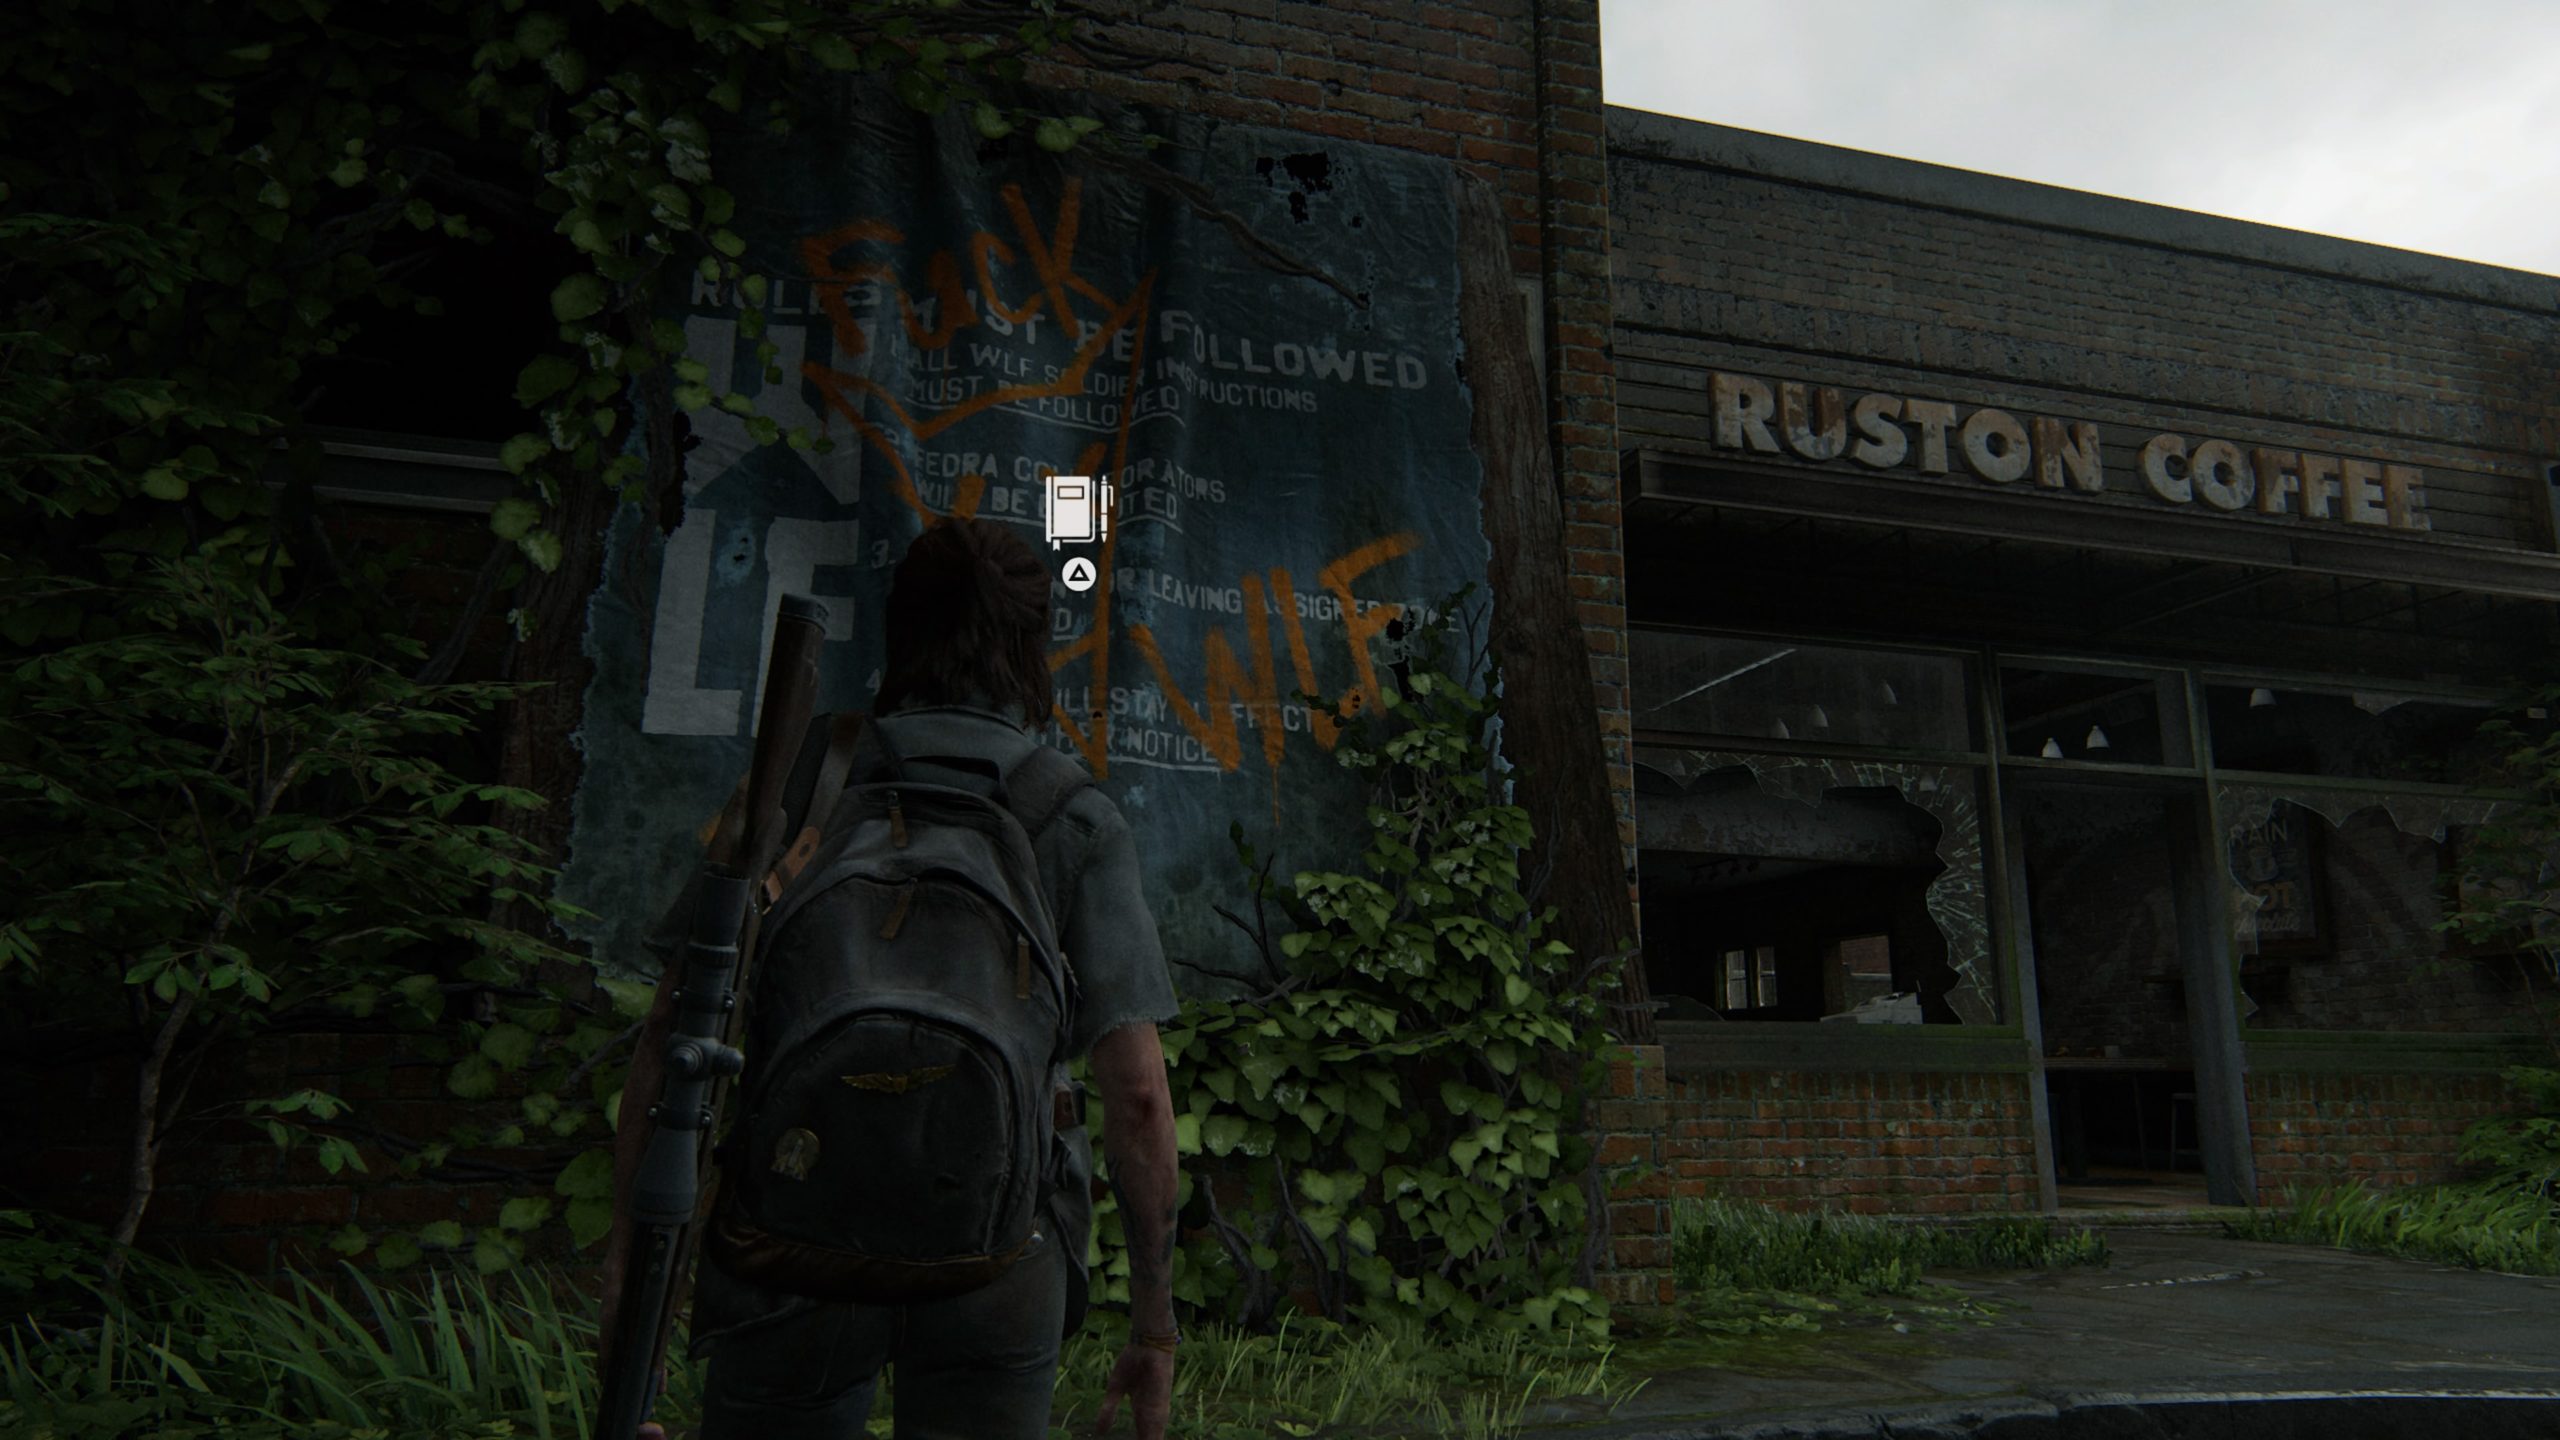
Inspect the WLF banner that has “Fuck the WLF” written on in to the left of Ruston Coffee.
Workbench
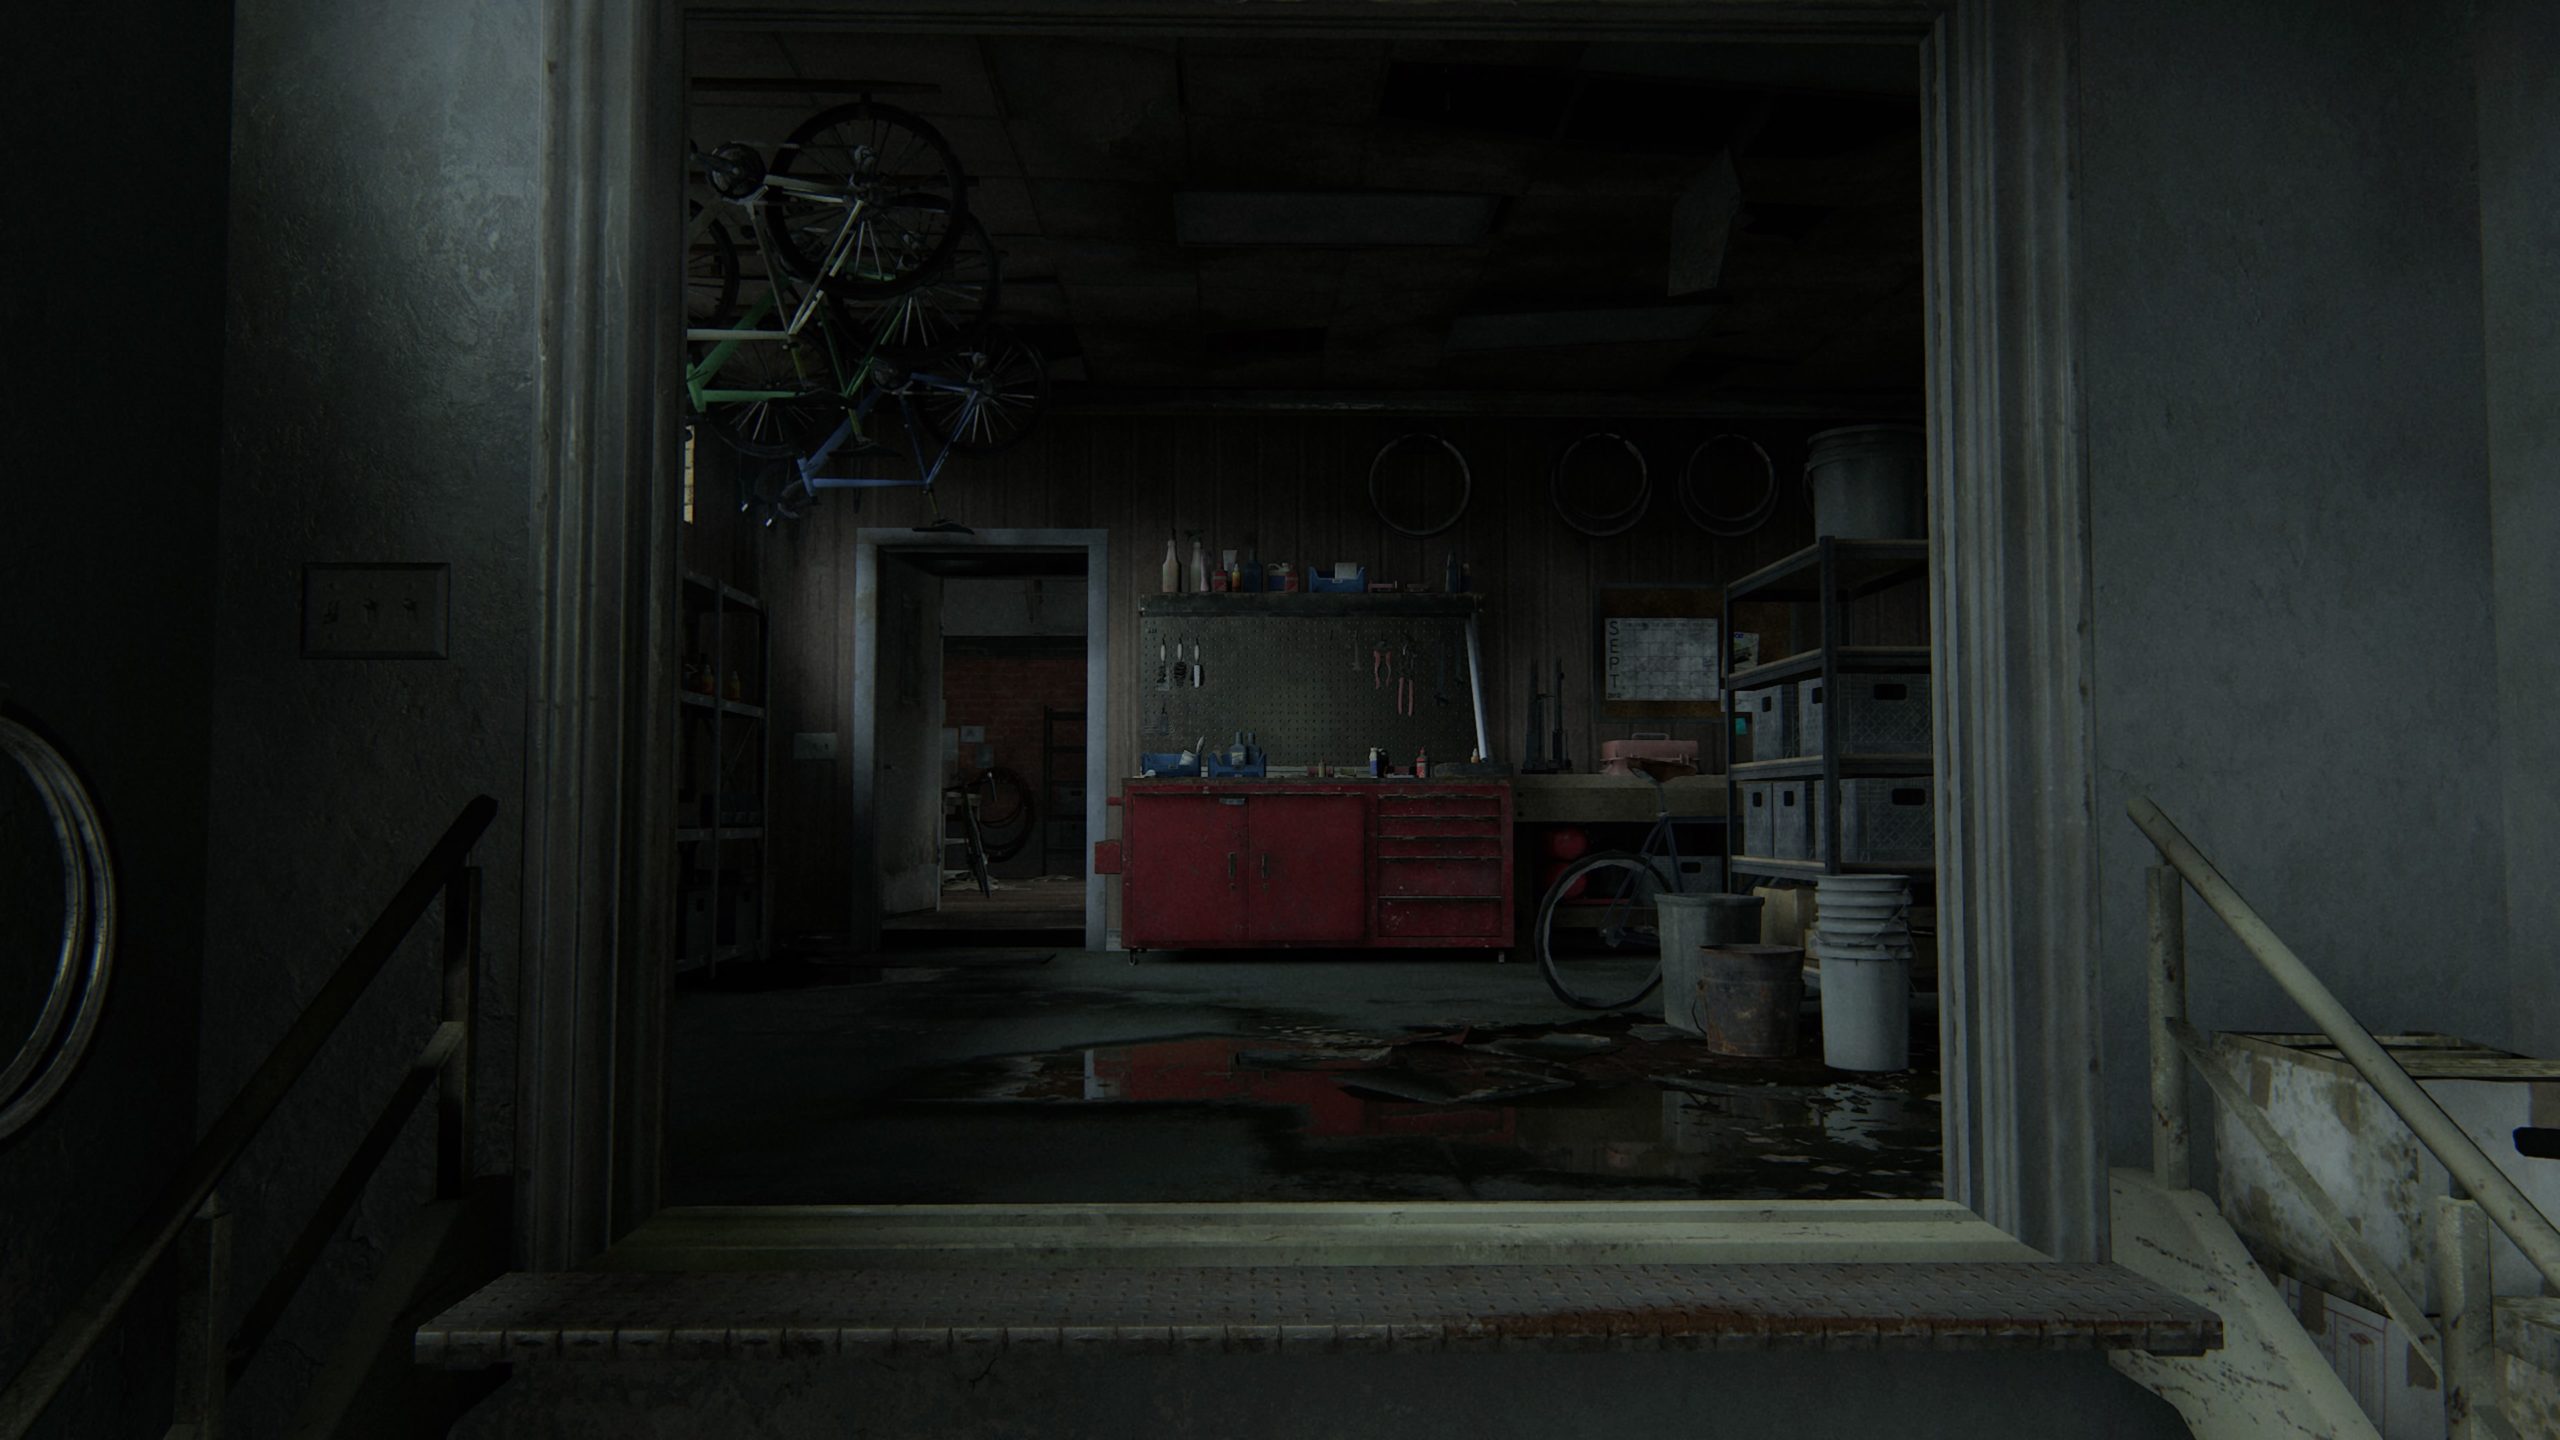
After heading through a set of big red doors you will need to open a gate, causing a dumpster to slide out. Use the dumpster to reach the roof of a nearby structure to progress with the story. Once on the roof, you’ll need to drop down then climb up a hole in the wall. The workbench will be straight ahead near some handing bicycles.
Artifact – Condolence Note
The artifact will be located in the small office room near the above workbench on a desk.
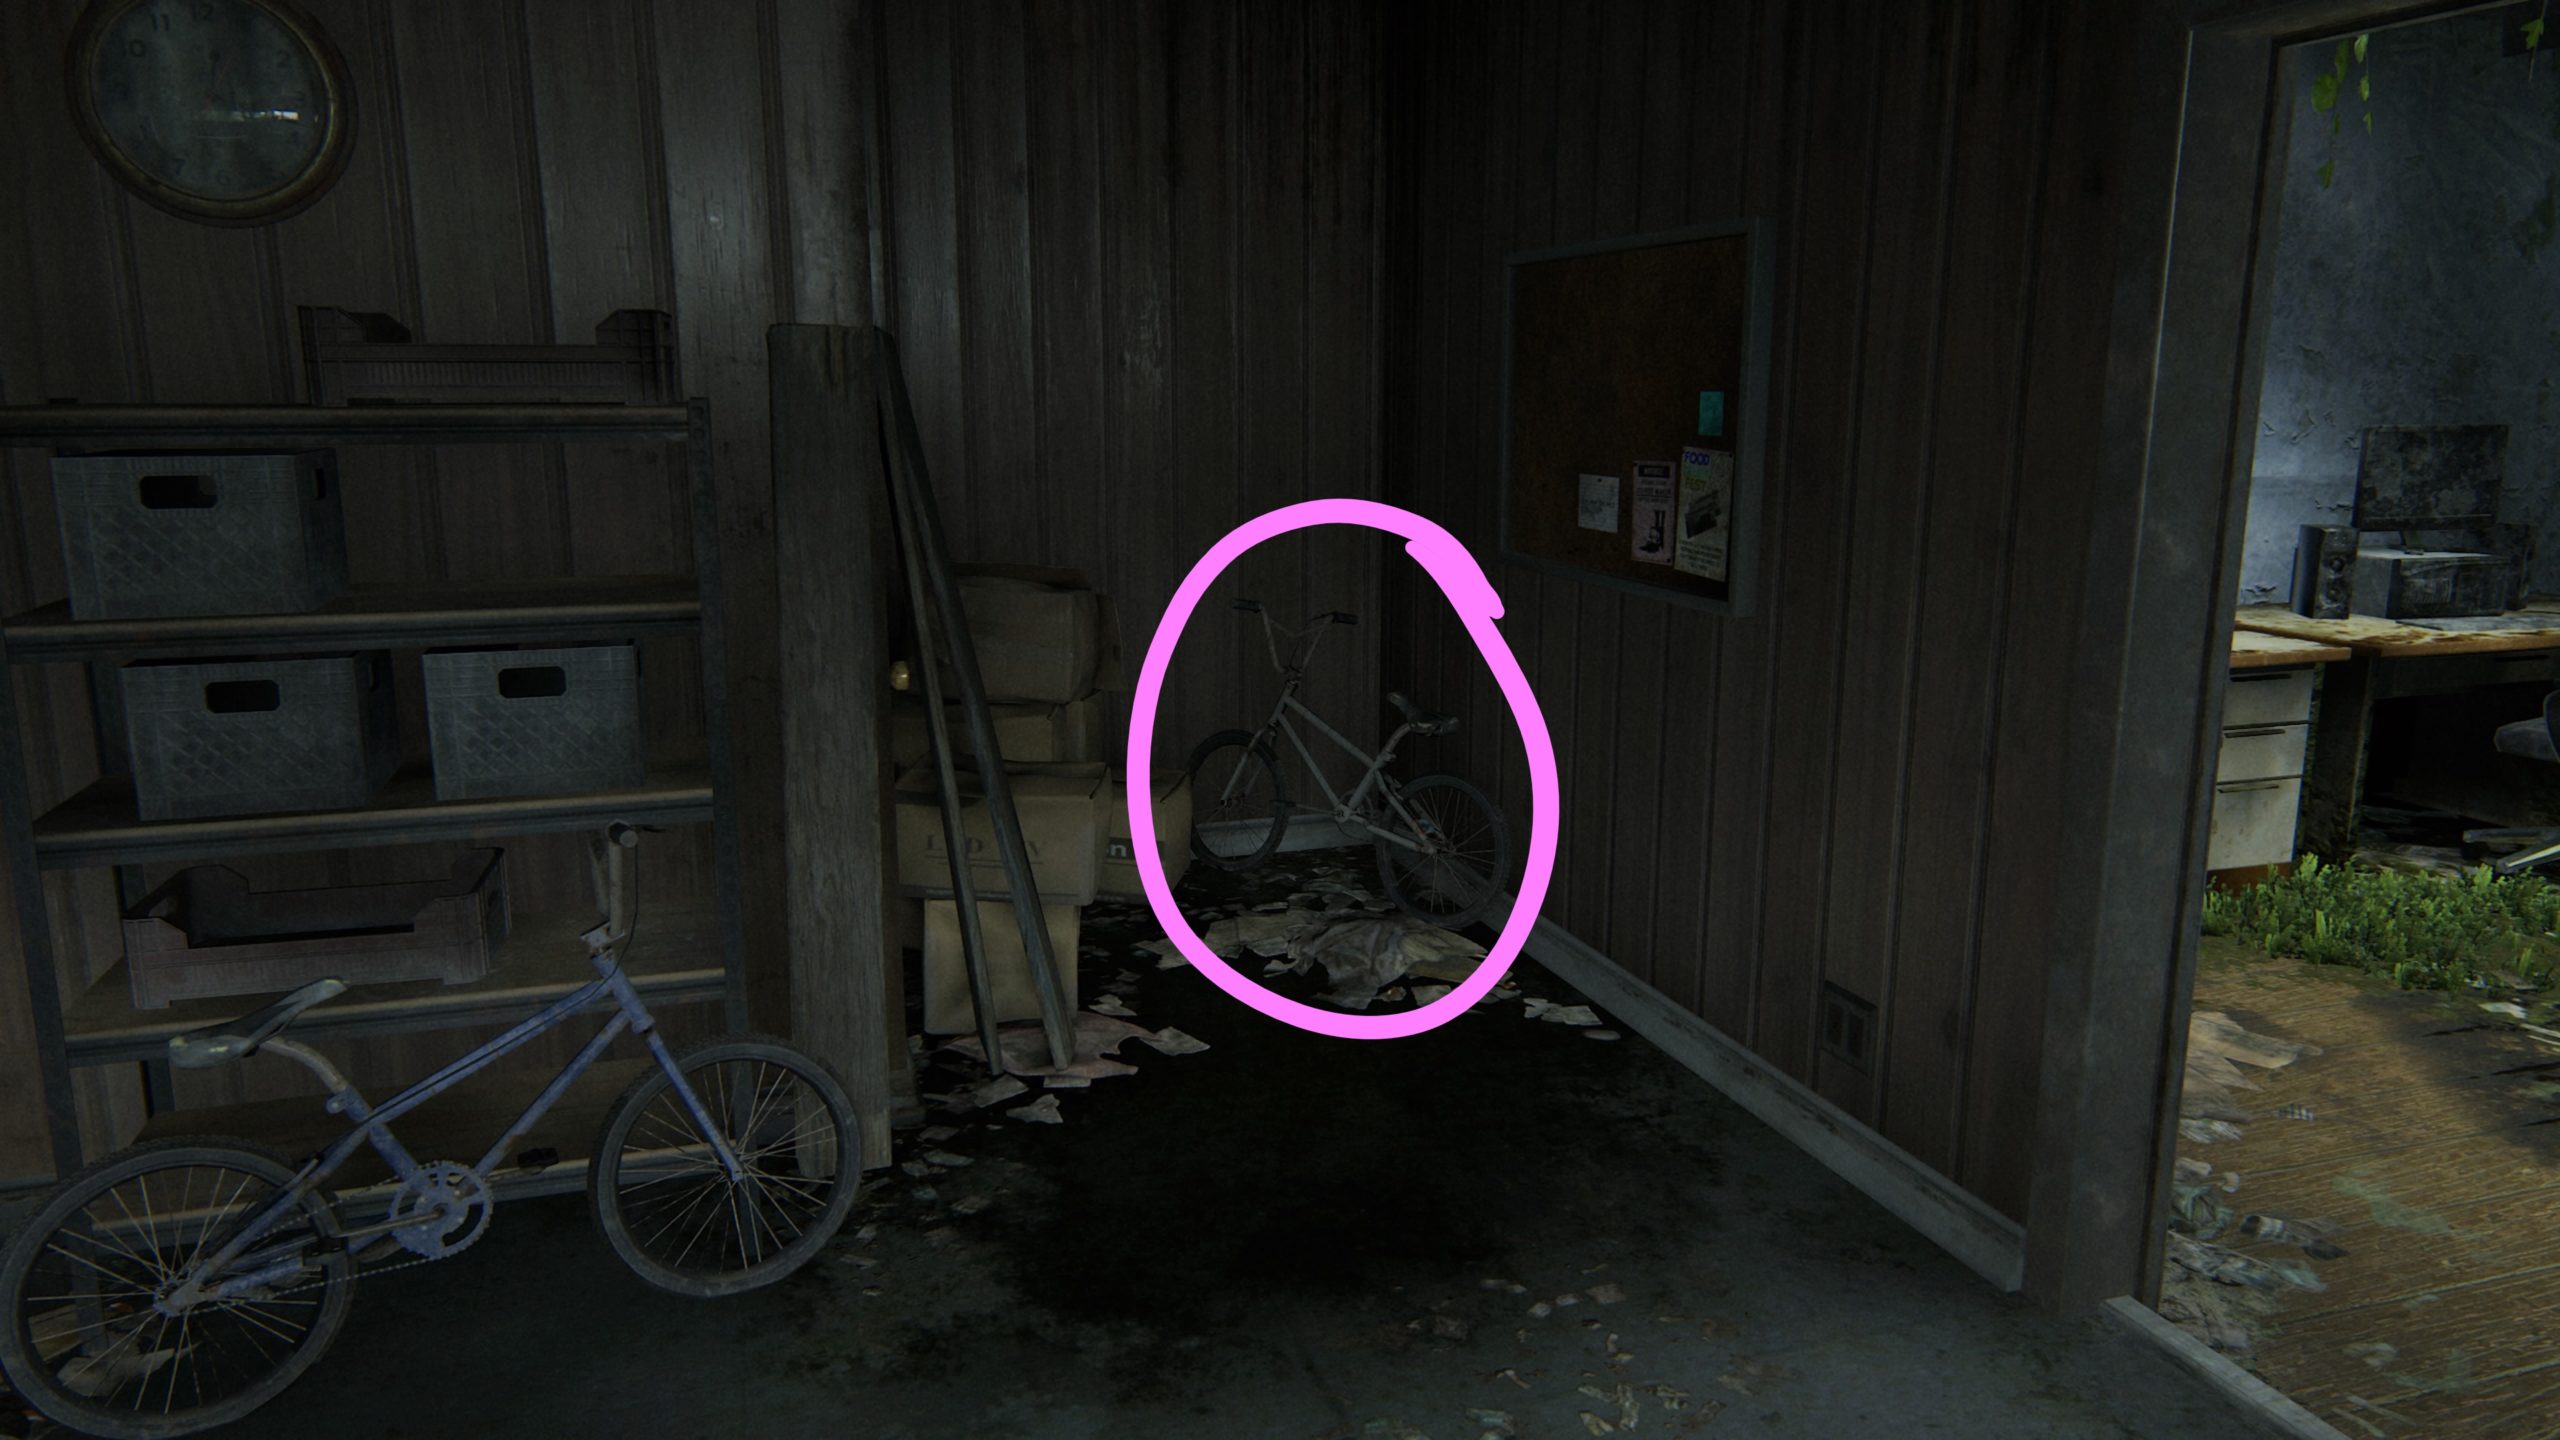
Trading Card – Naledi the Youthful
This card can be found on the back wheel of a bicycle in the same room as the workbench.
Artifact – Note in Hillcrest Tattoo Parlor
This artifact is located on a metal table in the back room of Velvet Tattoo.
Safe
In the alley behind Velvet Tattoo, you’ll come across a green dumpster blocking a door. Pull the dumpster away then proceed through the door. *NOTE: There are four Infected waiting for you inside!* The safe is located on the other side of the door. The code to get into the safe is 30-82-65 (code comes from the Dale’s Combo Artifact… see below).
Upgrade – Gun Holster
The gun holster is located in the above safe!
Artifact – Dale’s Combo
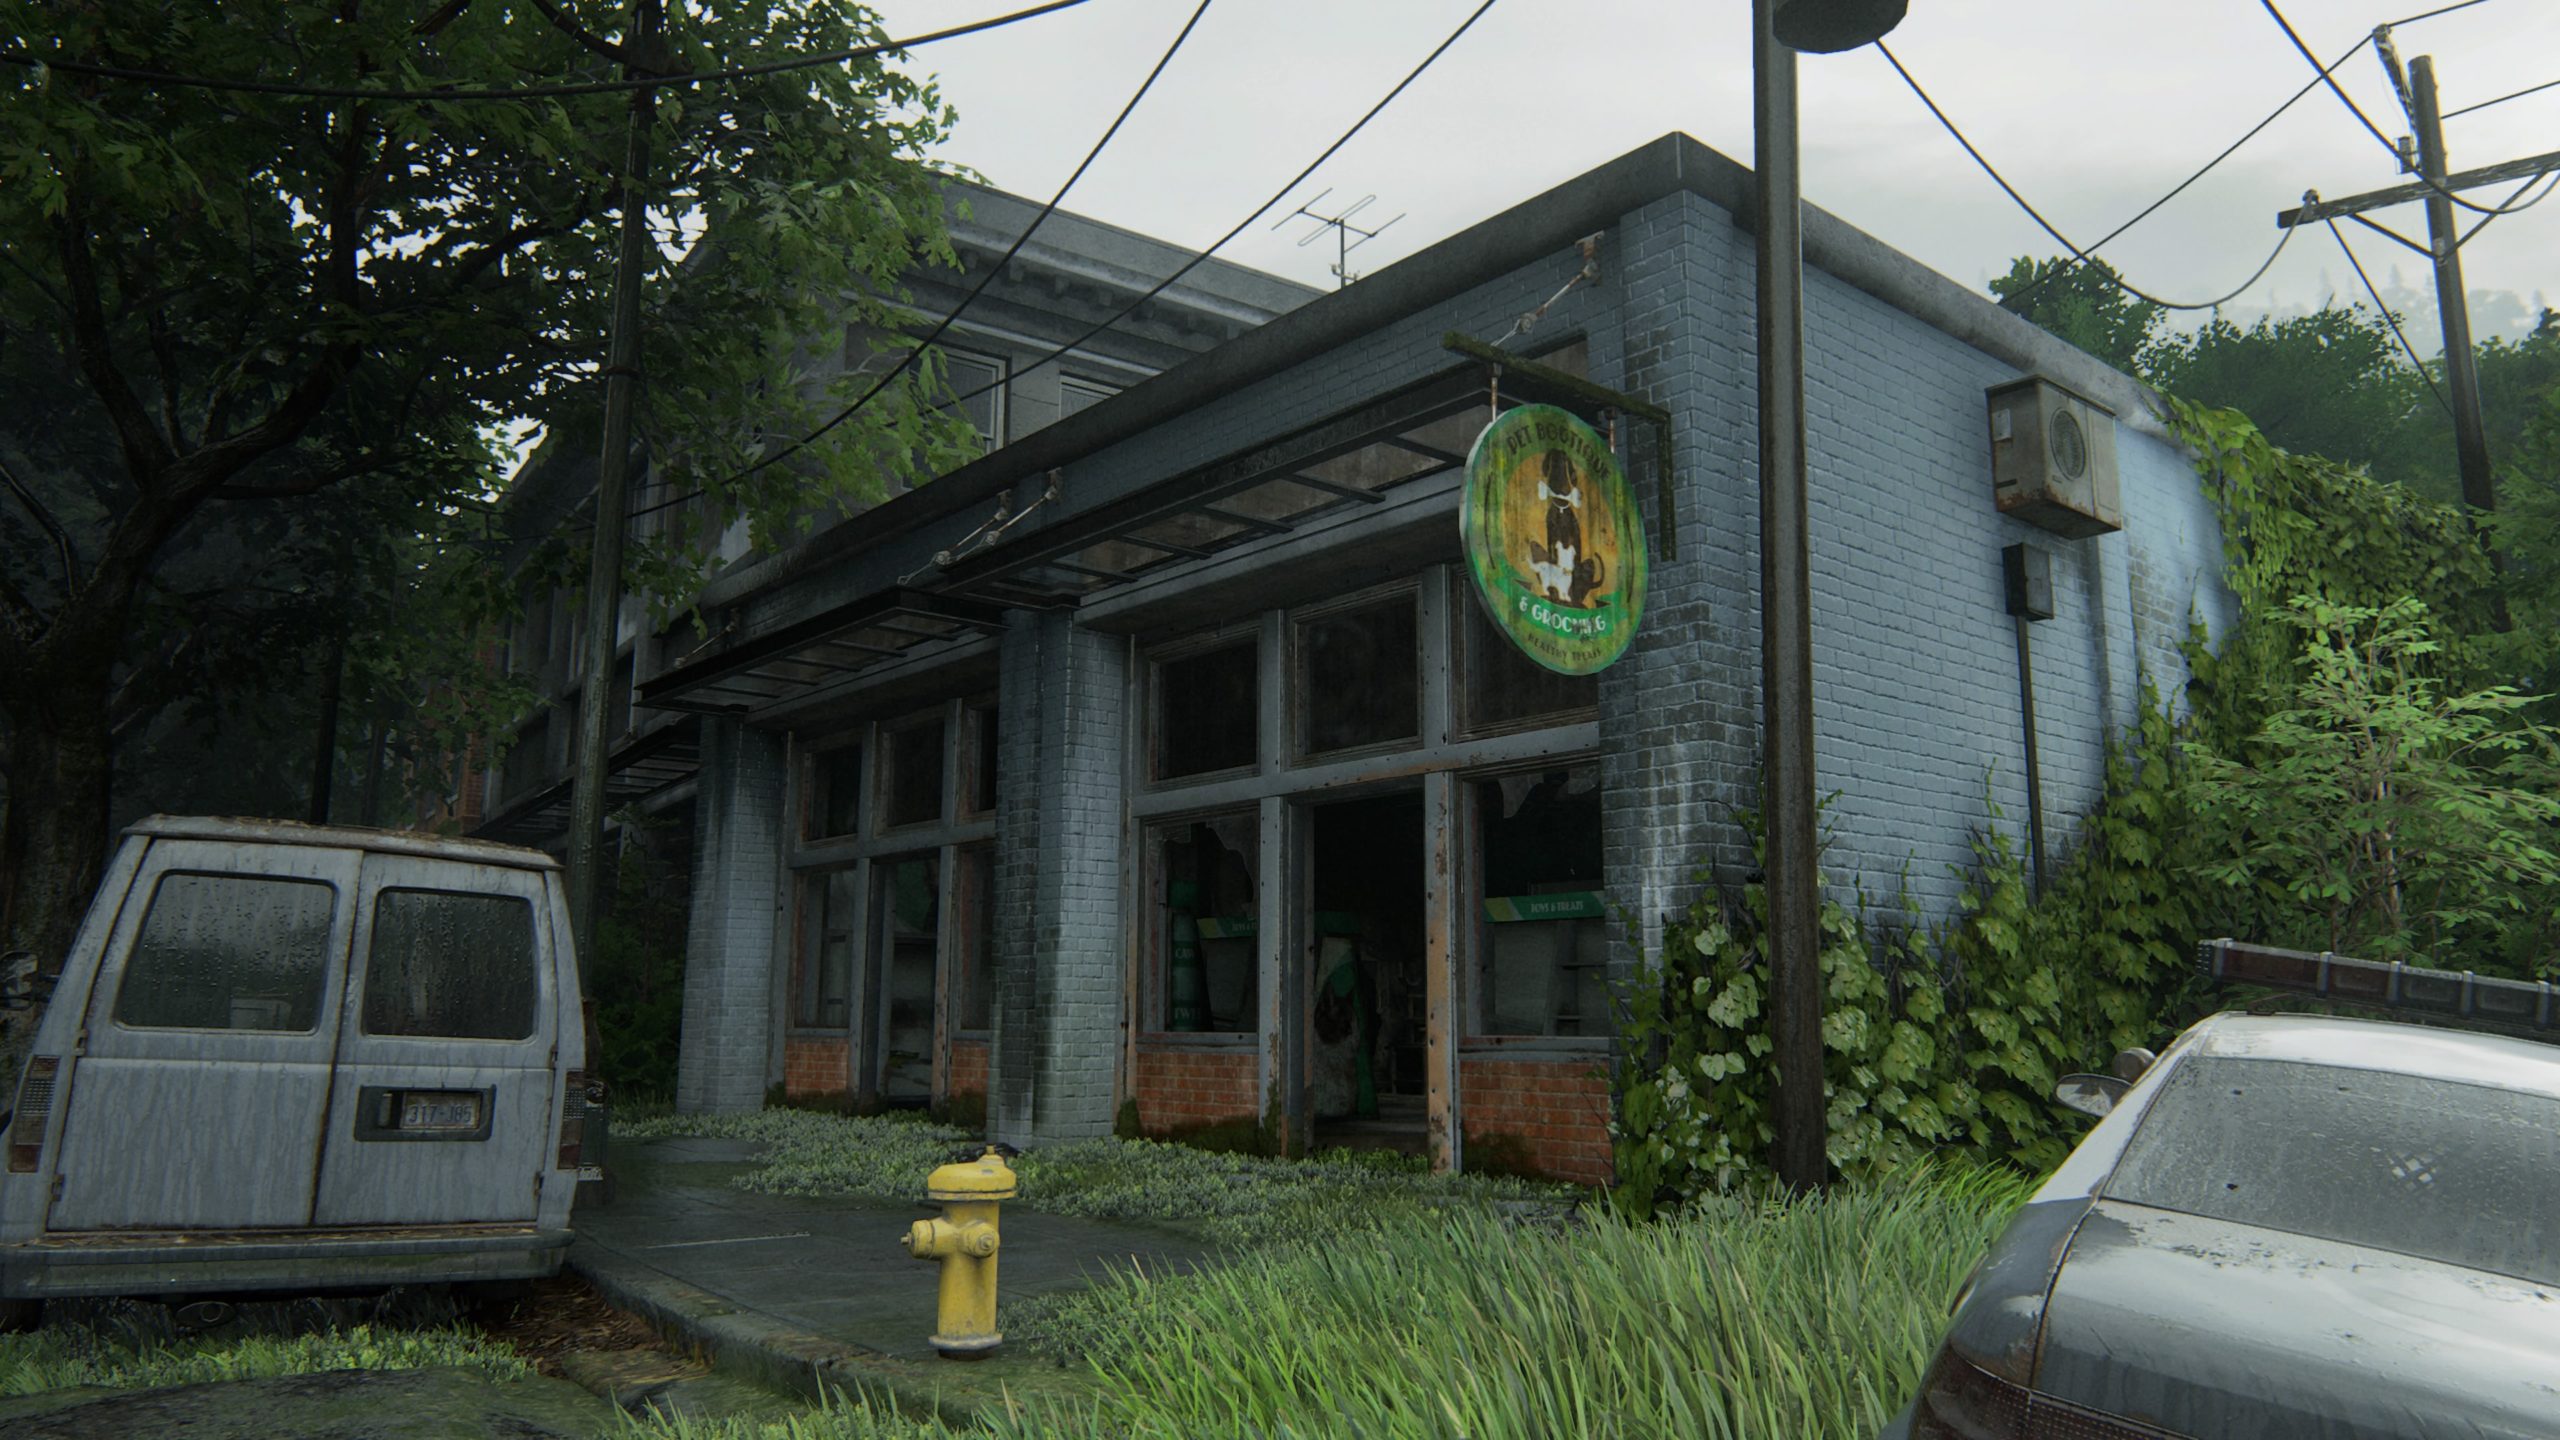
This artifact is located on a wall near the sink in the kitchen of the building connected to Pet Boutique.
Artifact – Turn in Boris Note
This artifact is located in the Pet Boutique. You will need to break a window in the back of the building to reach the area with the dog grooming tables. The artifact is located in this area next to a sink.
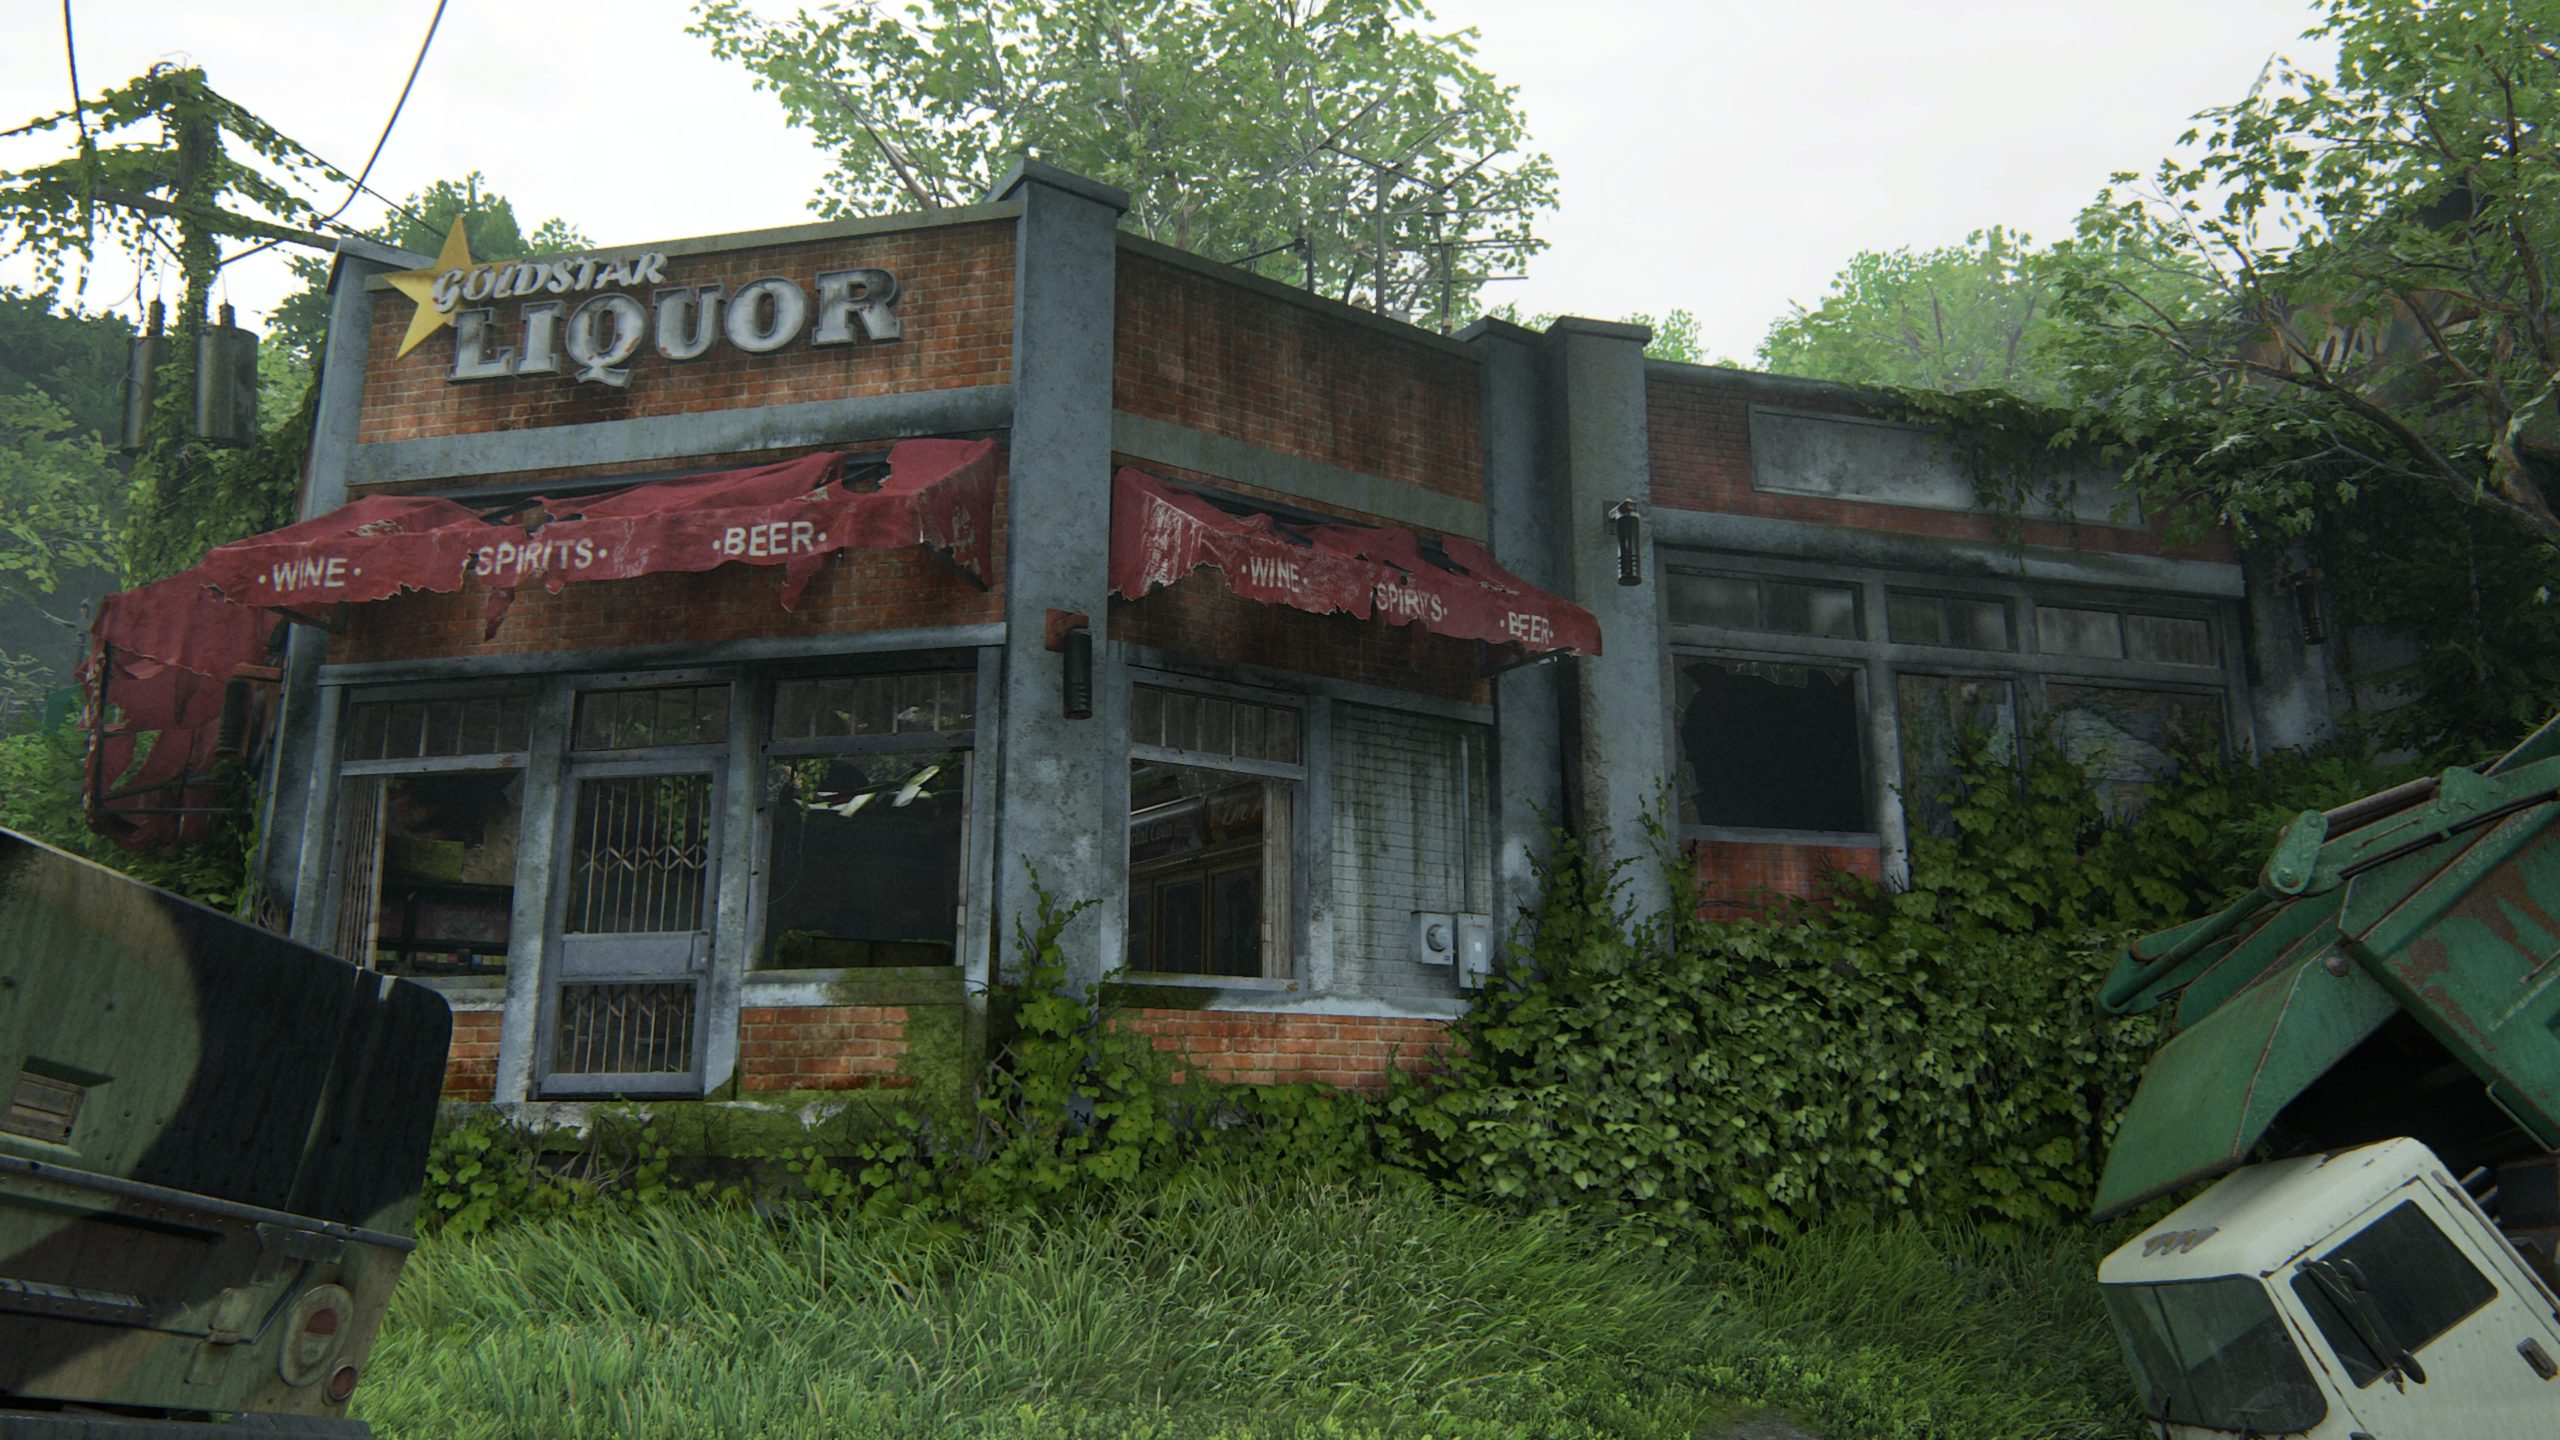
Training Manual – Precision
Enter Goldstar Liquor then proceed to the basement. Work your way past 2 Shamblers then crawl under a broken section in the wall. You will emerge in a room with a broken staircase. Head up the staircase to find the manual on the floor in the children’s room.
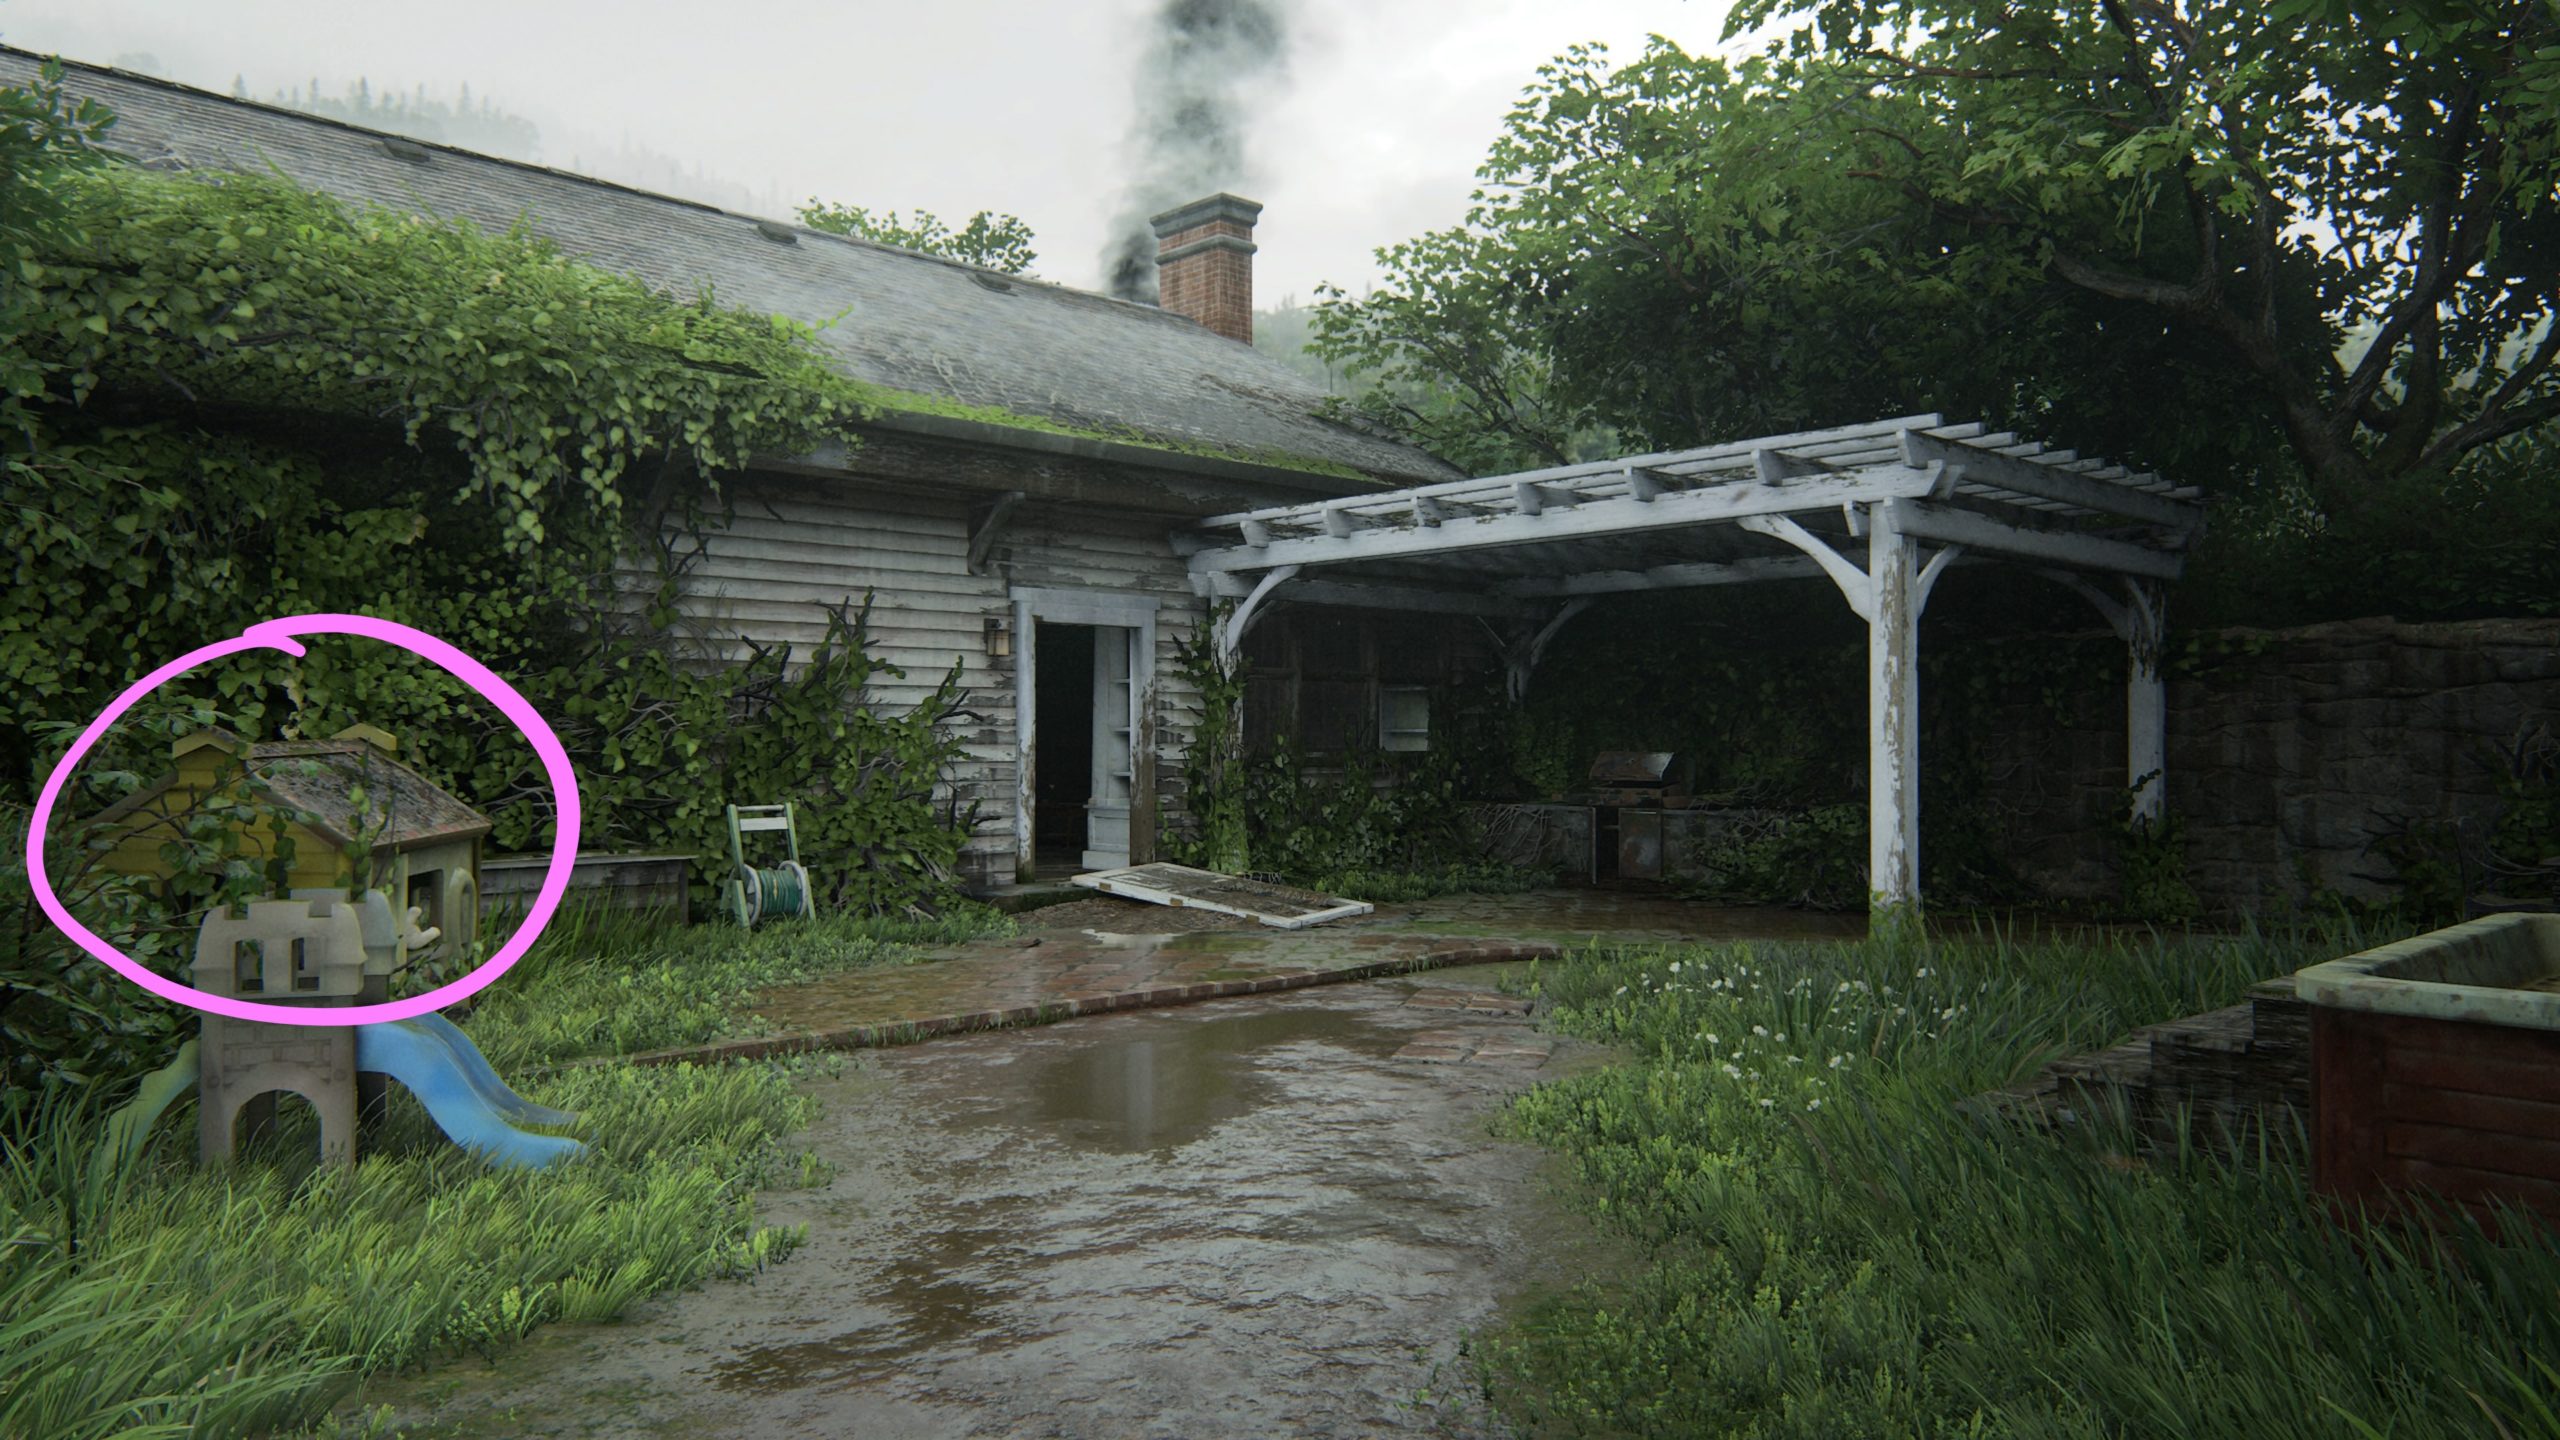
Trading Card – Brainstorm
After jumping over a fence to progress with the story, you’ll land in a really nice backyard. The card can be found behind the playhouse on the left side of the yard.
Artifact – Rosemont’s Flyer
From the above collectible, enter the house to find this artifact on a wooden counter just before the kitchen.
Artifact – Boris’ Confession
This artifact can be found in the same house as the above collectible on a coffee table in the living room.
Weapon – Bow
This weapon is obtained automatically as part of the story in the garage of the above house.
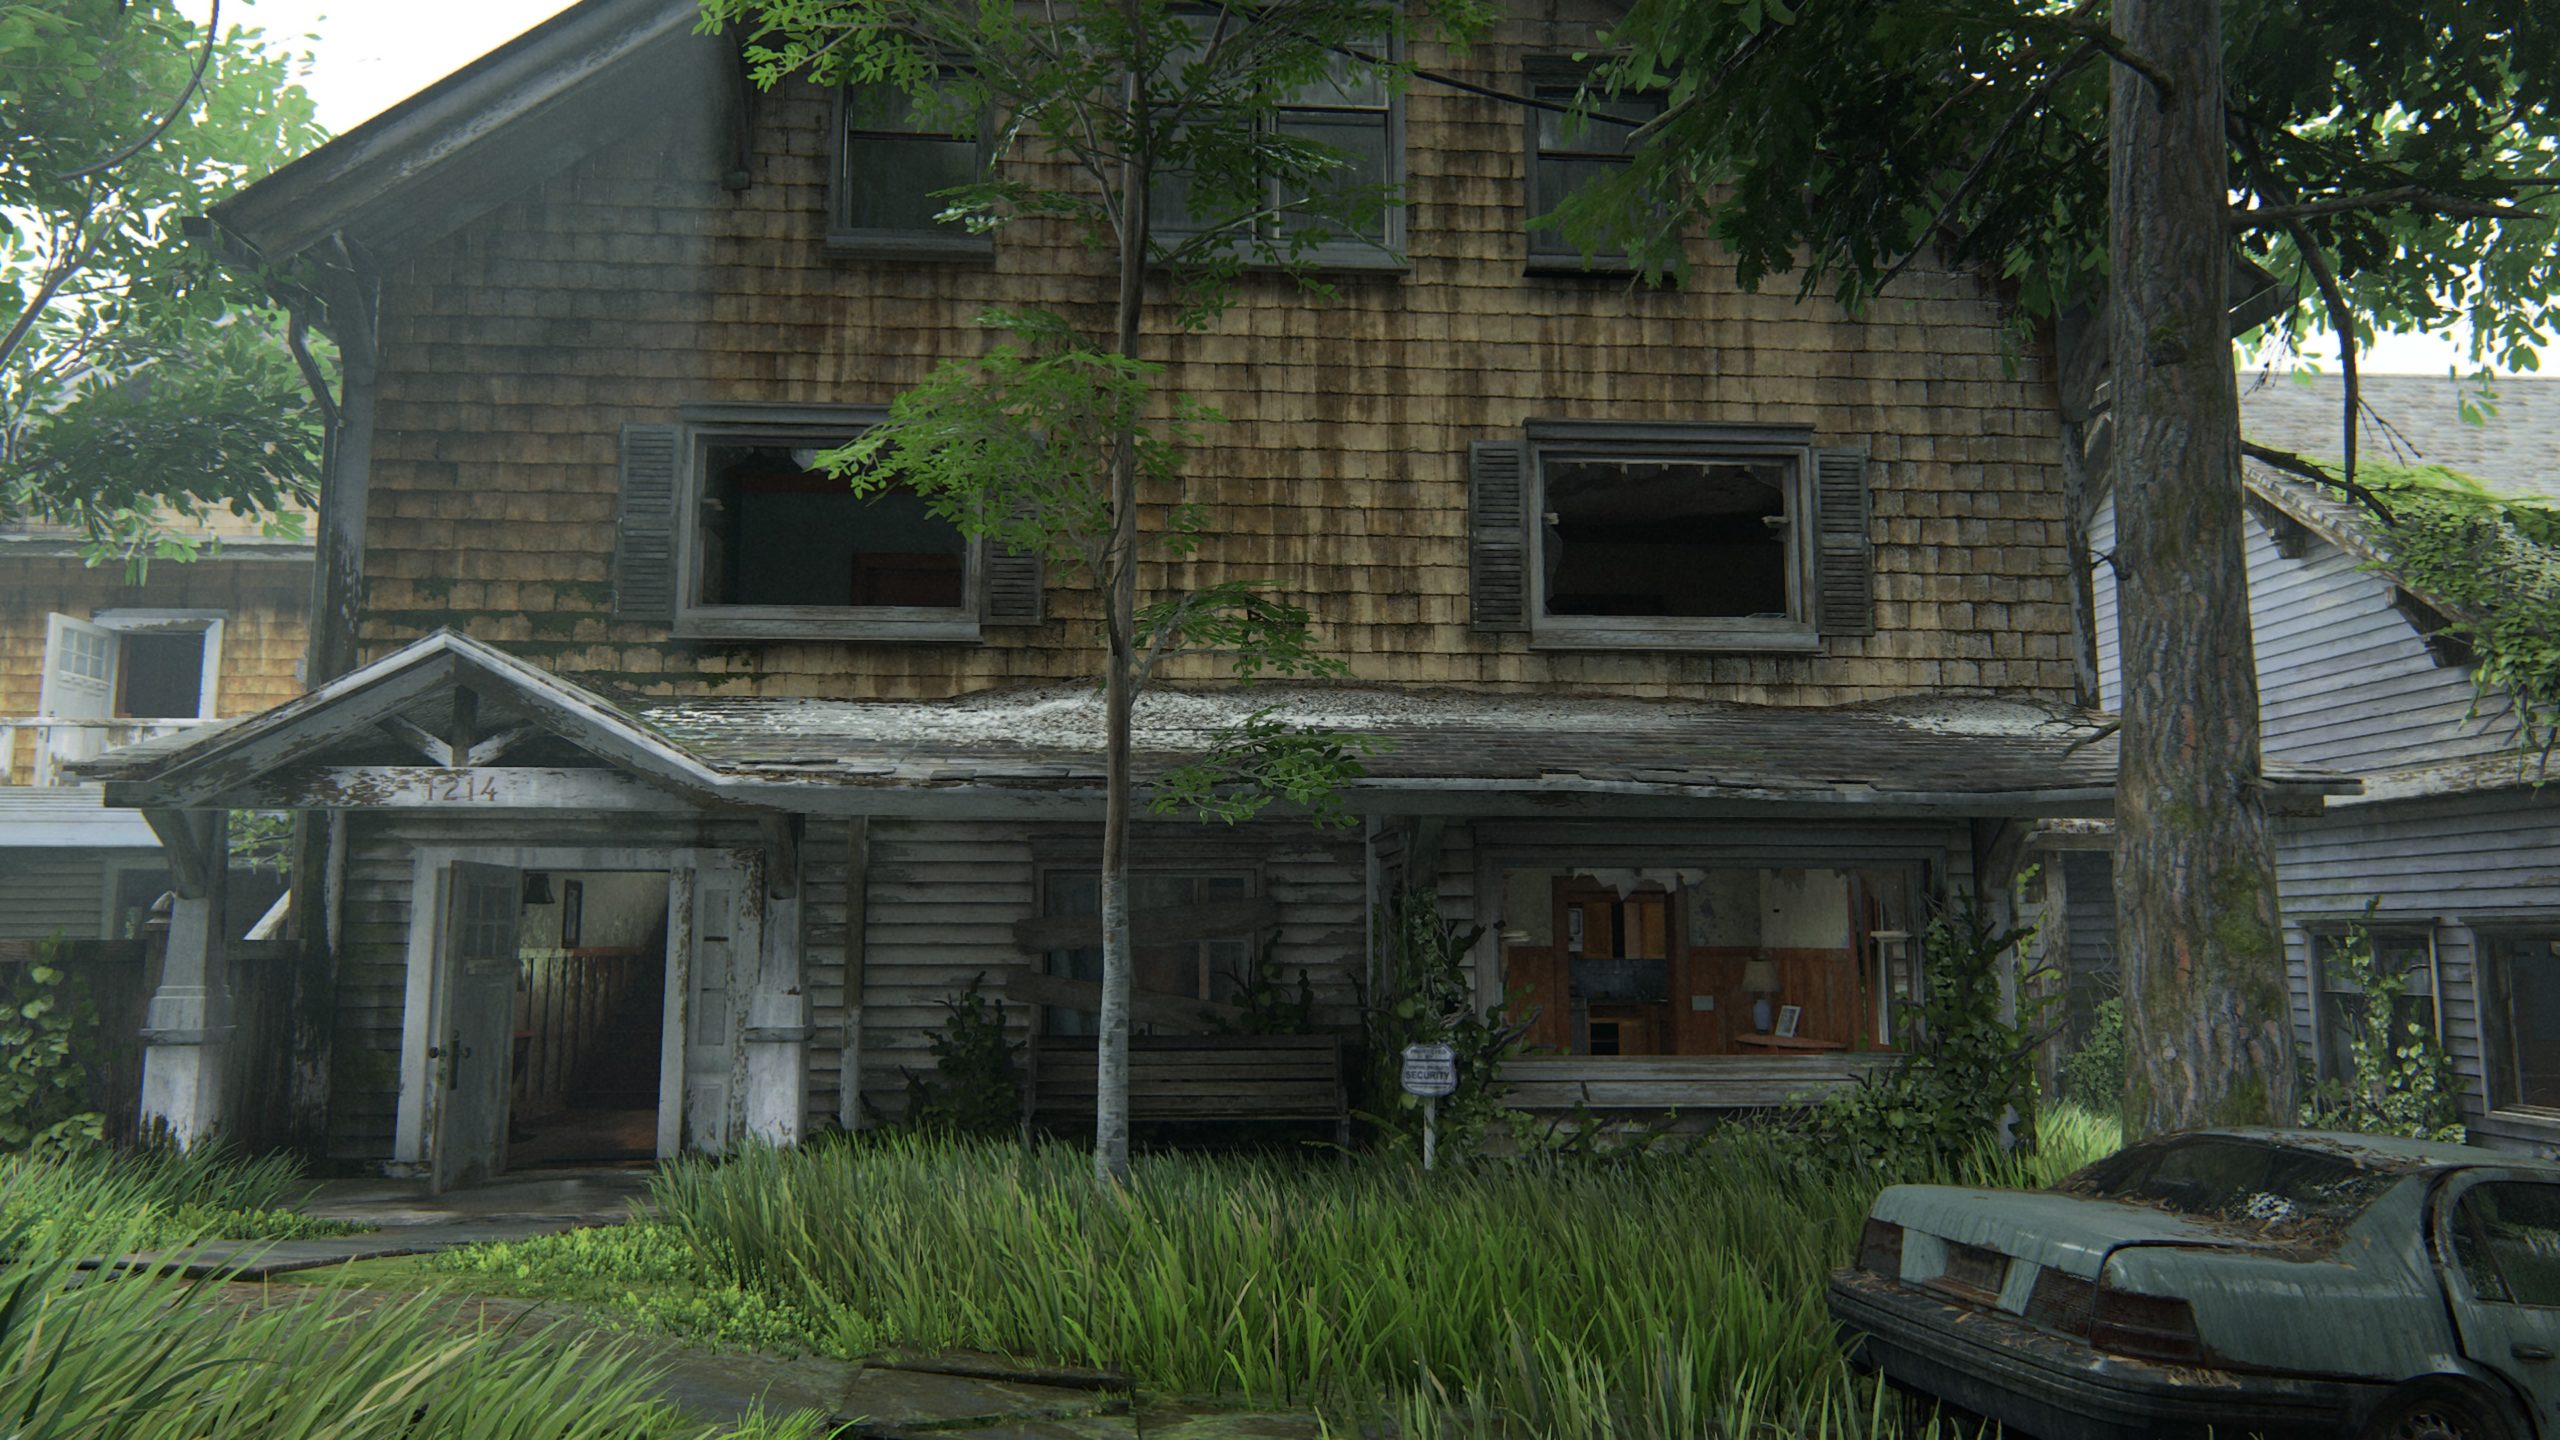
Trading Card – Reverb
After receiving the bow, you will need to proceed to the next area. This card is located in an upstairs bedroom of a house numbered 1214. To reach it, you will need to crawl under the bed by going prone.
Below is a guide on the 1 artifact, 2 journal entries and 2 trading cards that can be found during The Tunnels chapter in The Last of Us Part II.
Journal Entry
Interact with the sign in front of the large T-Rex to receive the entry.
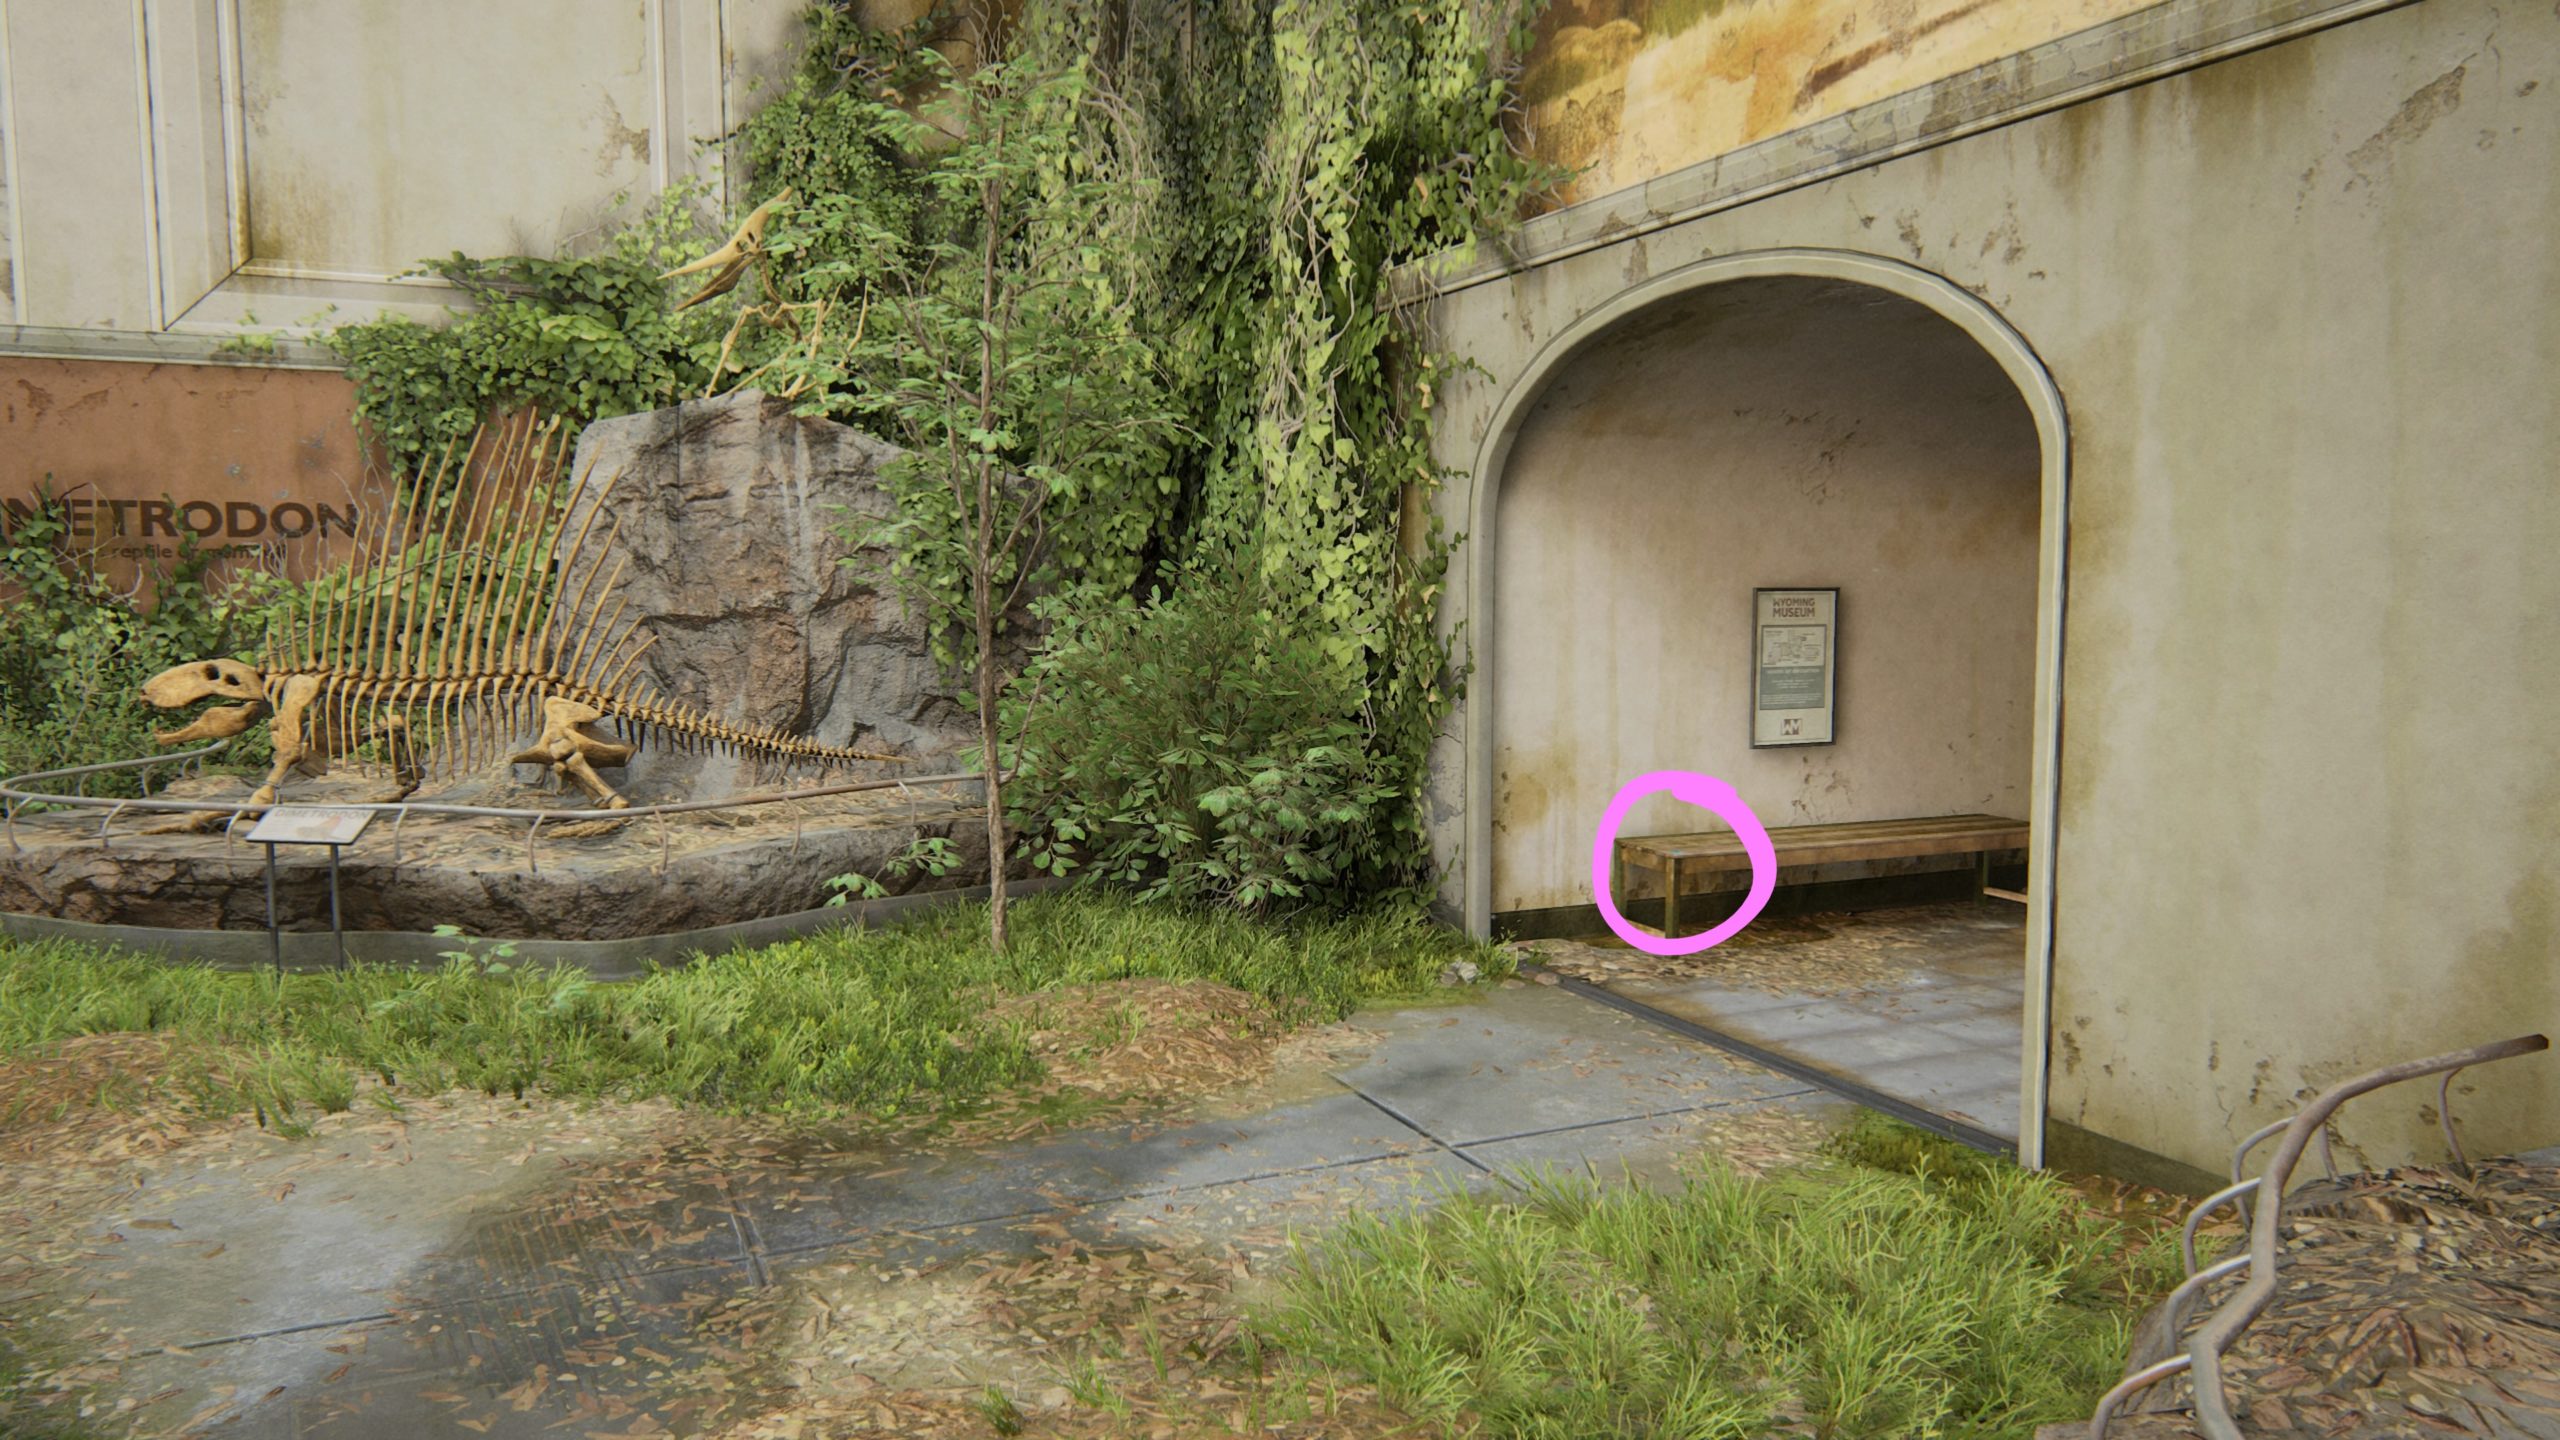
Trading Card – The Nighthawk
This card can be found on the ground floor just past the main exhibition room on a bench near the bathrooms.
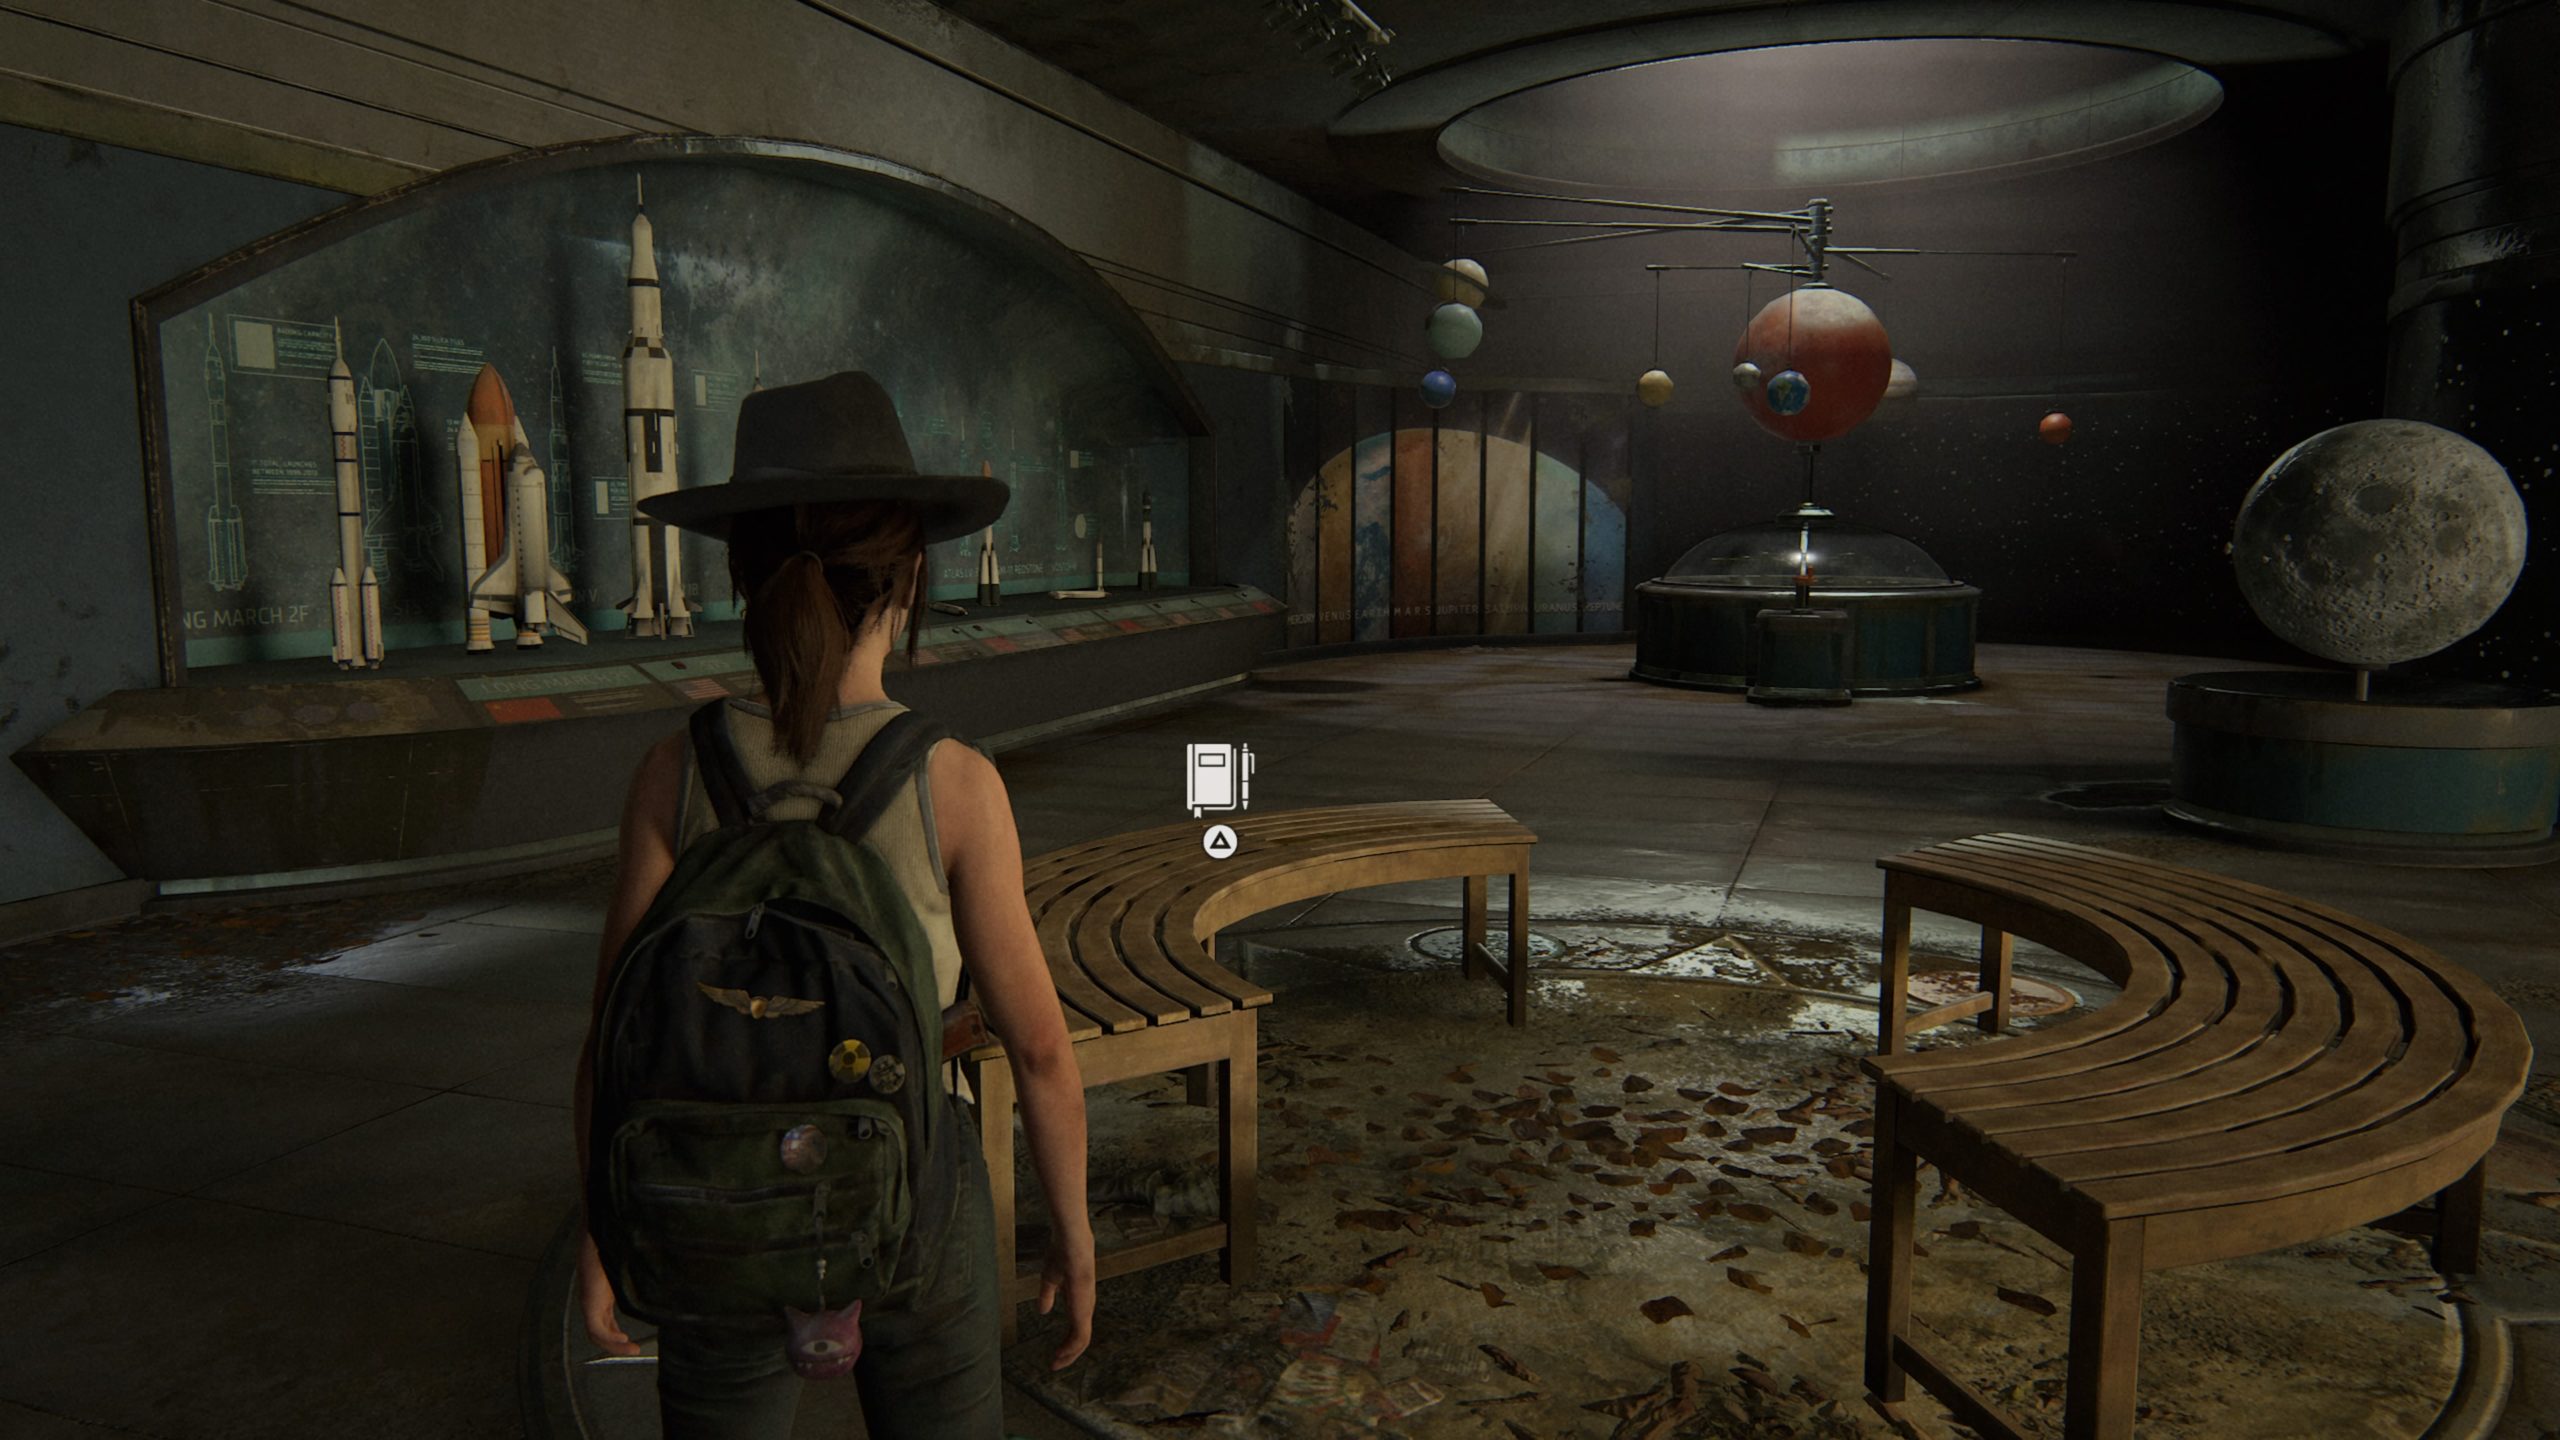
Journal Entry
Interact with one of the two benches that are in the center of the space exhibit just past the mobile.
Trading Card – Saura
After entering the Natural History Center via window, head into the next room with a giant moose statue. The card can be found underneath a bench to the right of the statue.
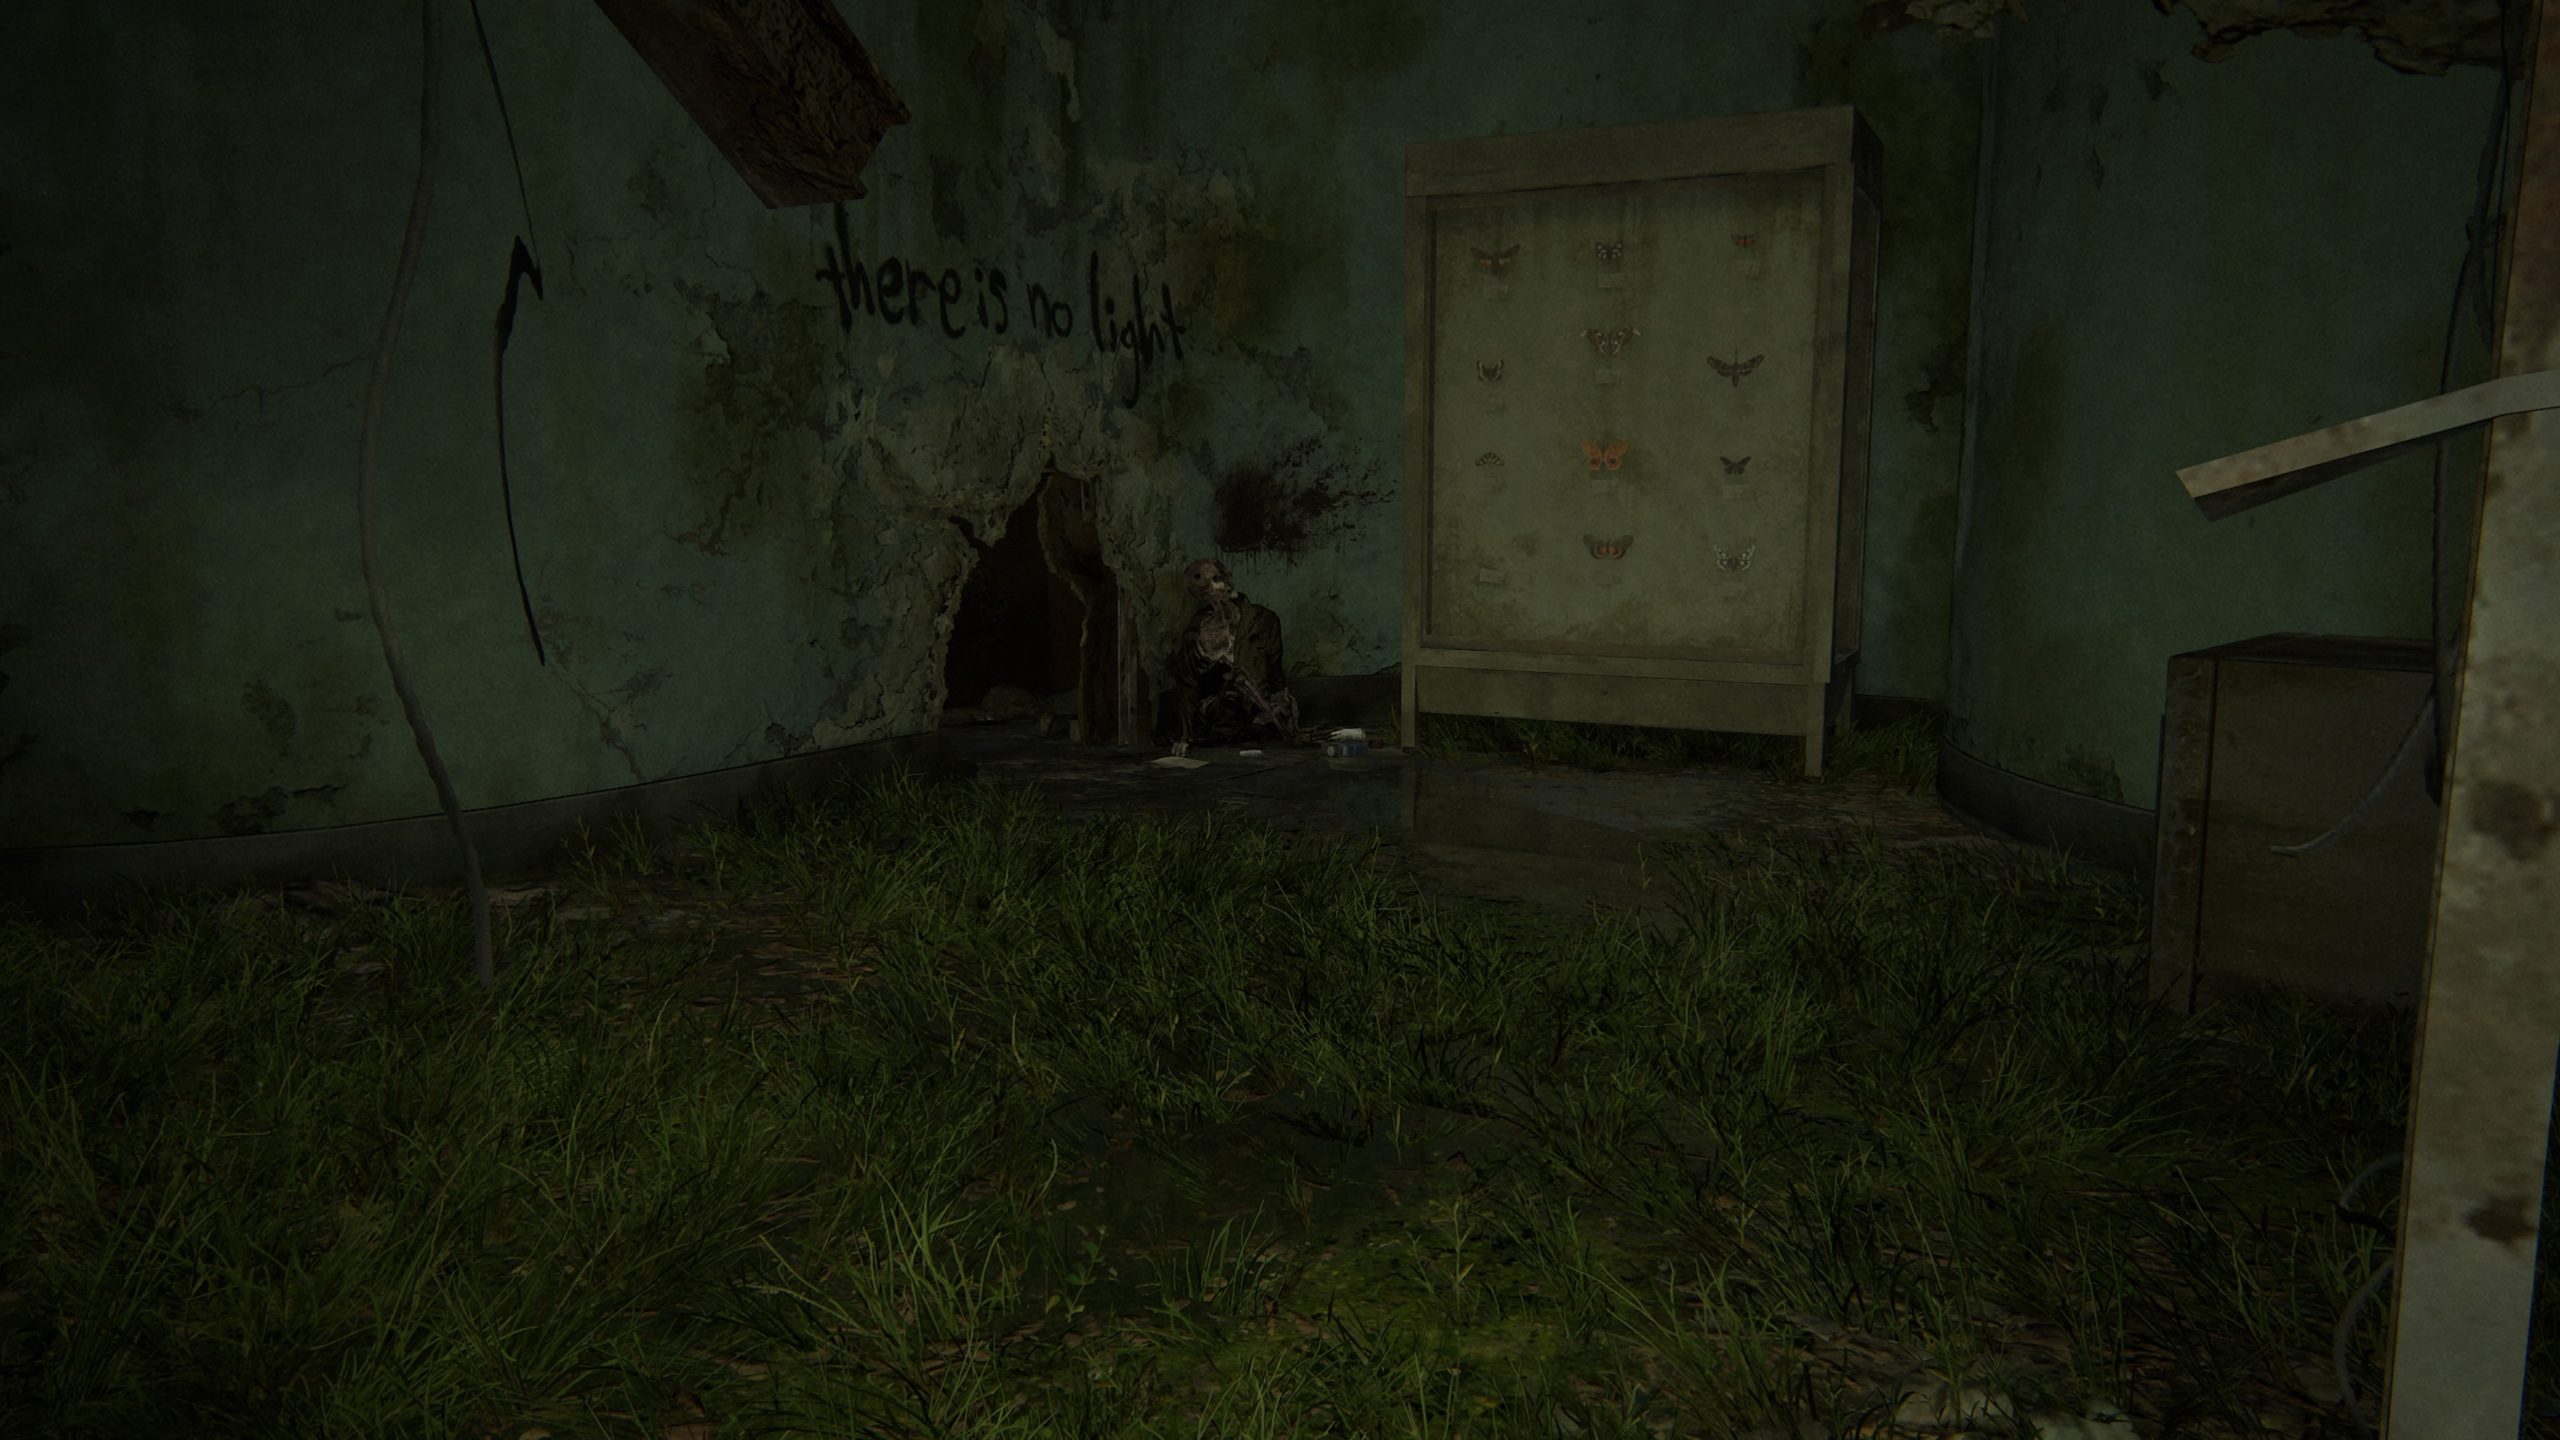
Artifact – Suicide Note
The artifact can be found next to a corpse near the “There is no light” written on the wall and a butterfly display. You will reach this room after crawling through a hole in the wall to proceed further with the story.
Below is a guide on the 18 artifacts, 2 journal entries, 3 safes, 5 trading cards, 2 training manuals, 1 upgrade, 2 weapons and 1 workbench that can be found during the Downtown chapter in The Last of Us Part II.
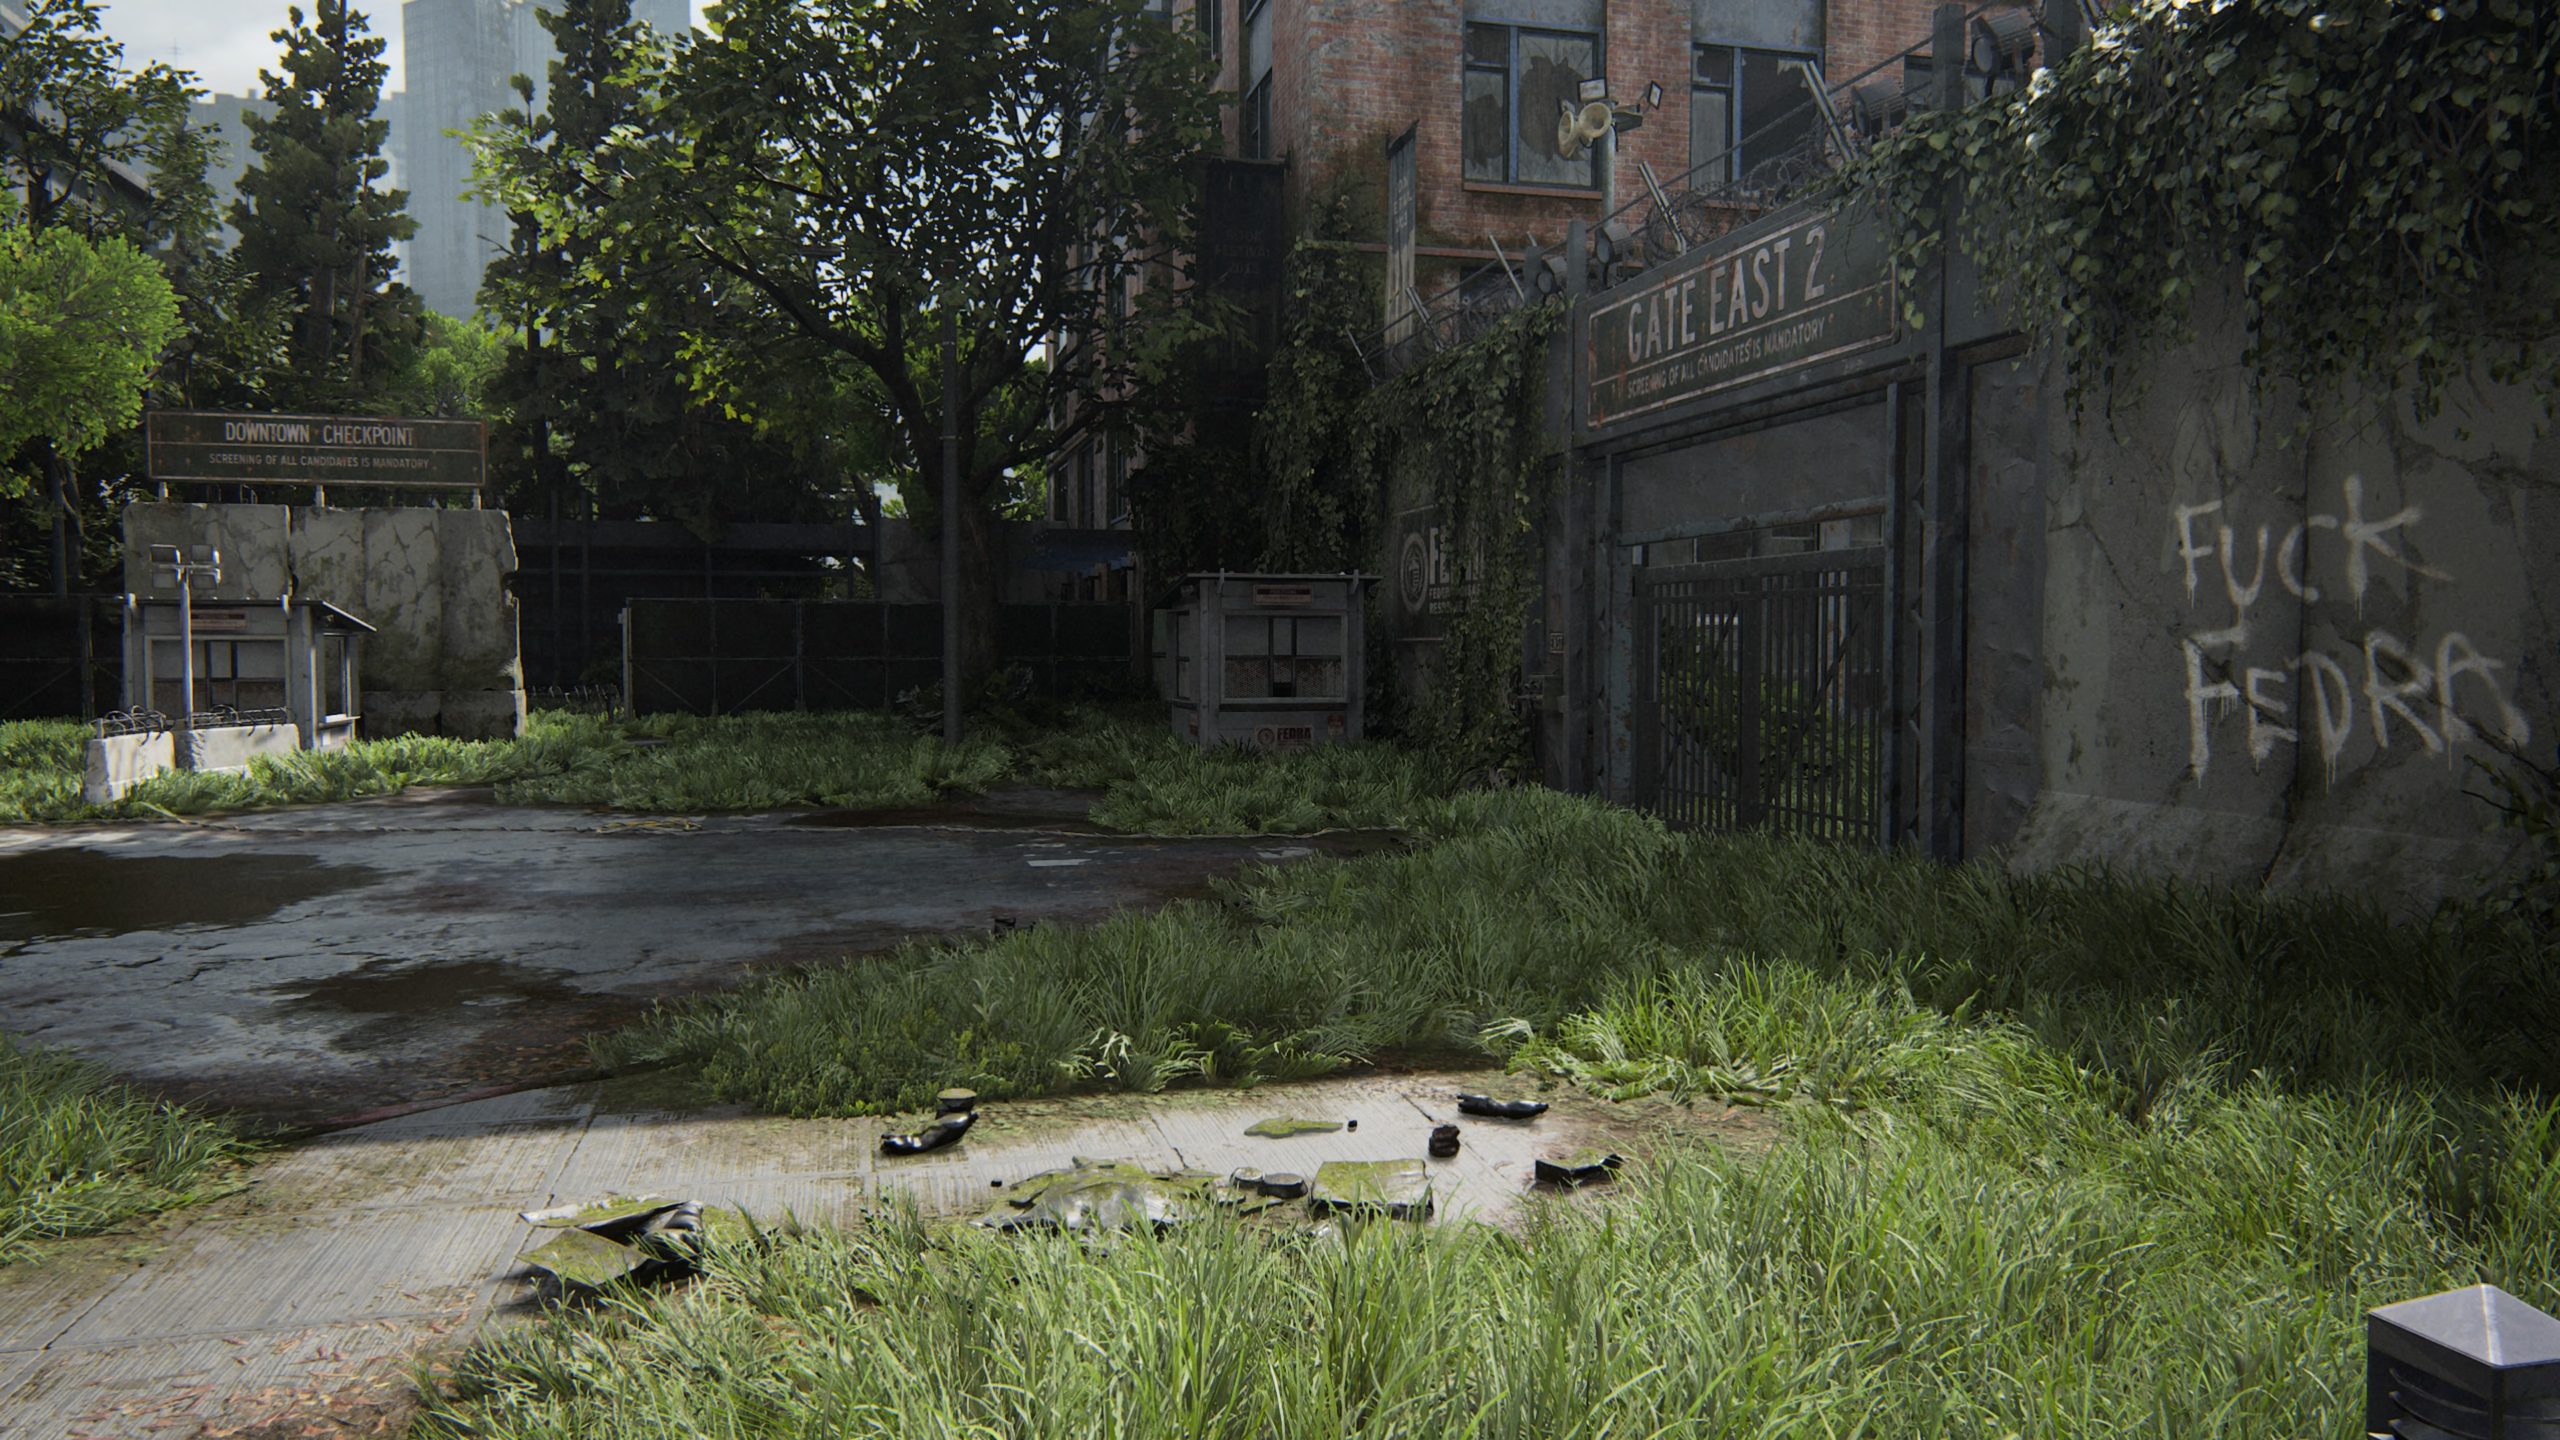
Artifact – FEDRA Census Document
This artifact can be found in a guard station near the Downtown checkpoint, which is next to Gate East 2.
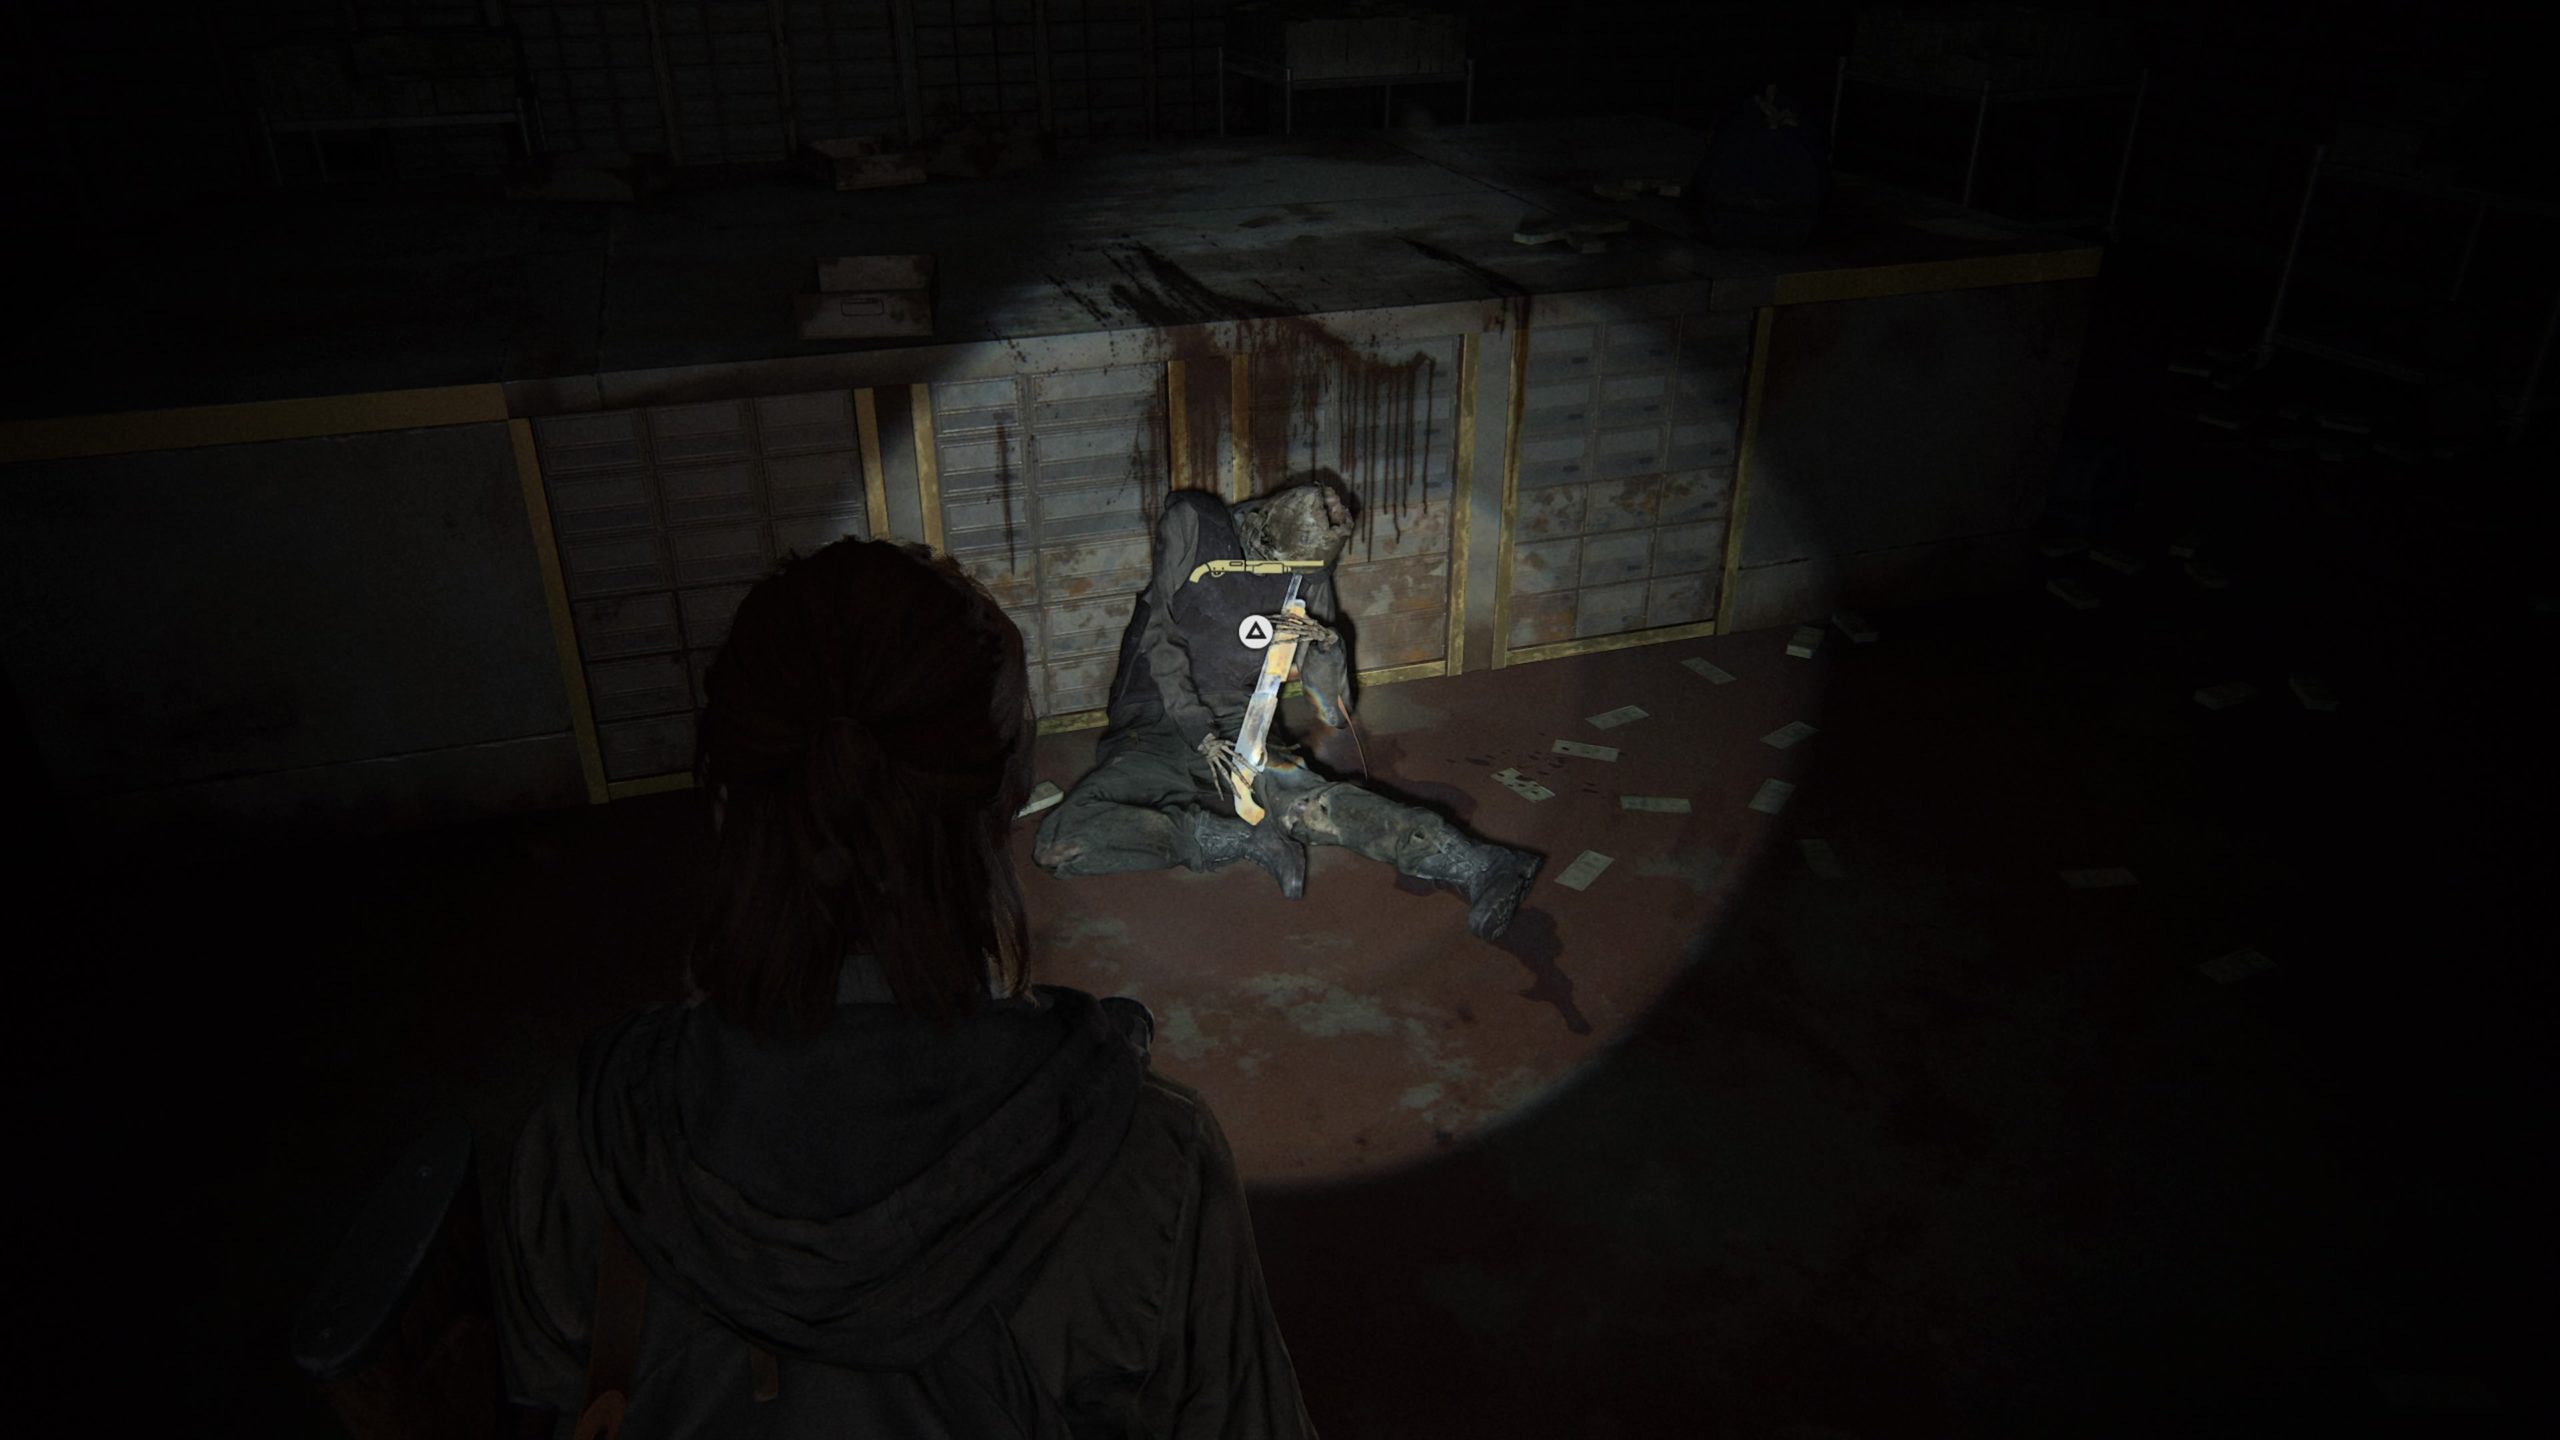
Artifact – Bank Heist Plans
The artifact is located in the bank on James Street in the gated room with all the safety deposit boxes in a satchel next to a body.
Safe
The safe is the bank vault located in the same room as the above artifact. The code to get into the vault is 60-23-06, which can be found on the above artifact.
Artifact – Bank Robber Letter
This artifact can be found on the table next to a bag of money in the safety deposit room.
Artifact – Antique Ring
This artifact can be found in one of the safety deposit boxes in the above room.
Weapon – Pump Shotgun
This gun is found on a corpse at the bank on James Street in the room with all the safety deposit boxes.
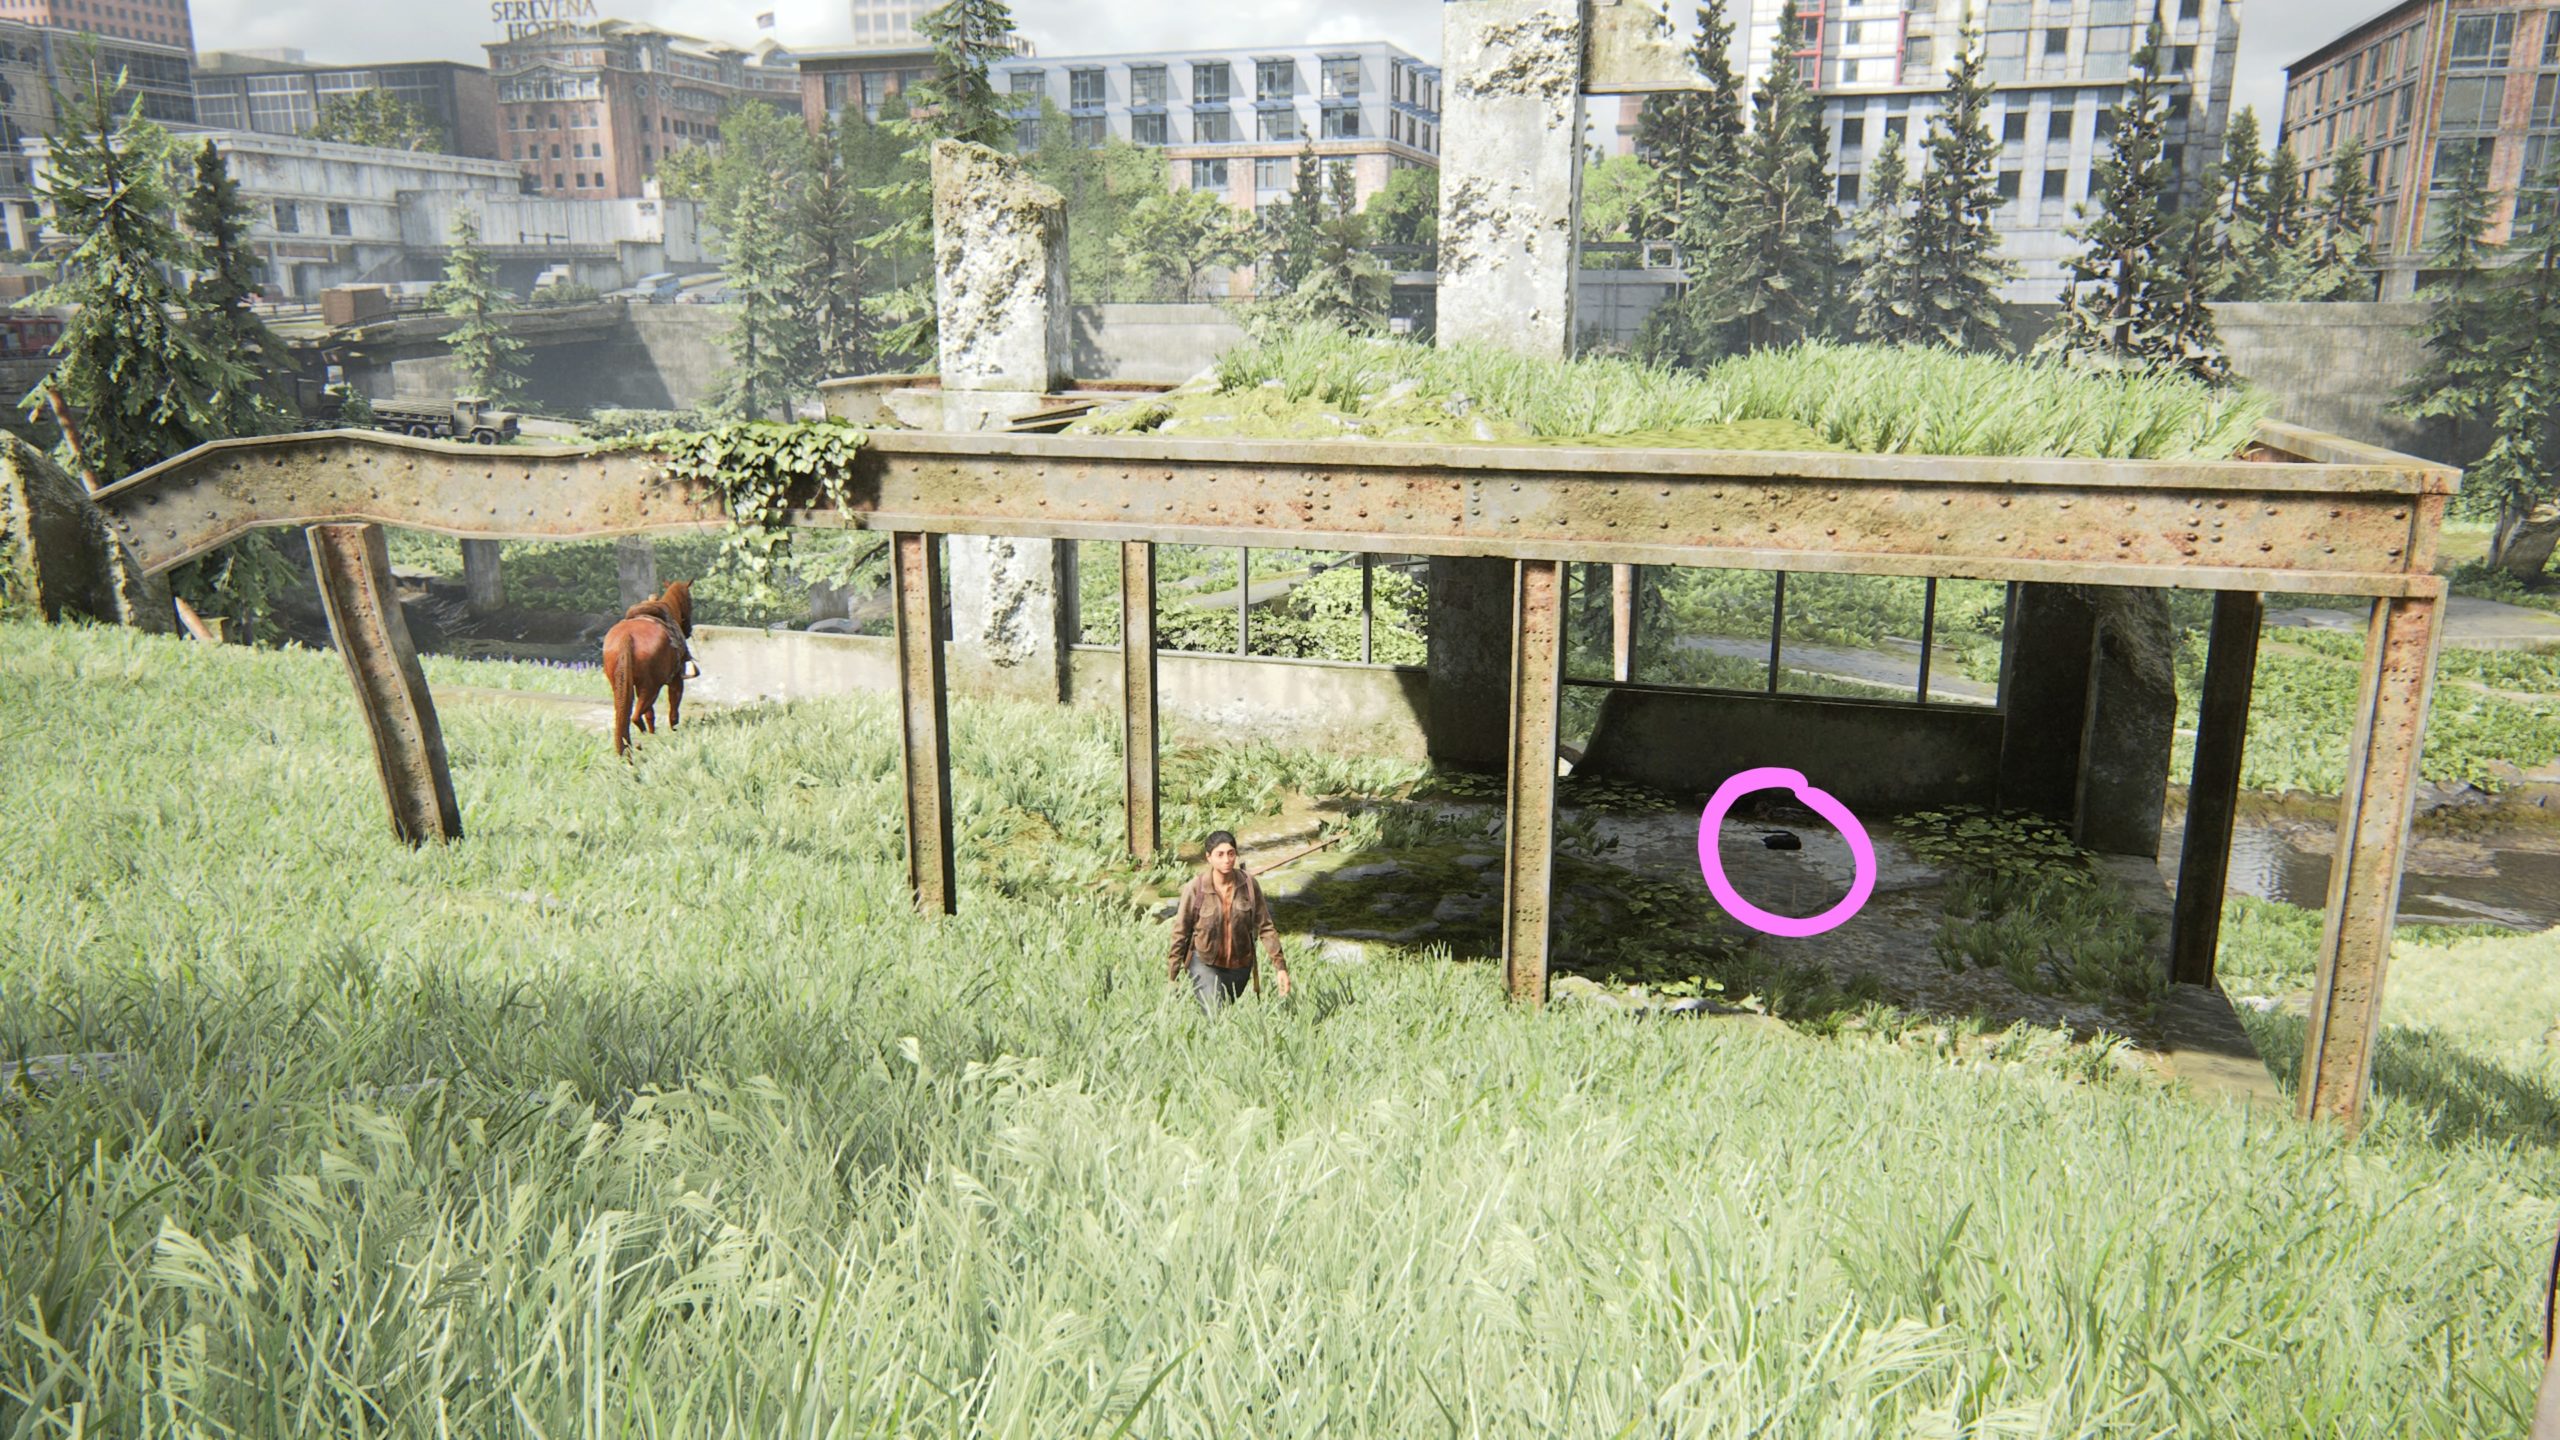
Artifact – Cache Hunter Note
This artifact can be found underneath the remains of a structure in a satchel north of the bank.
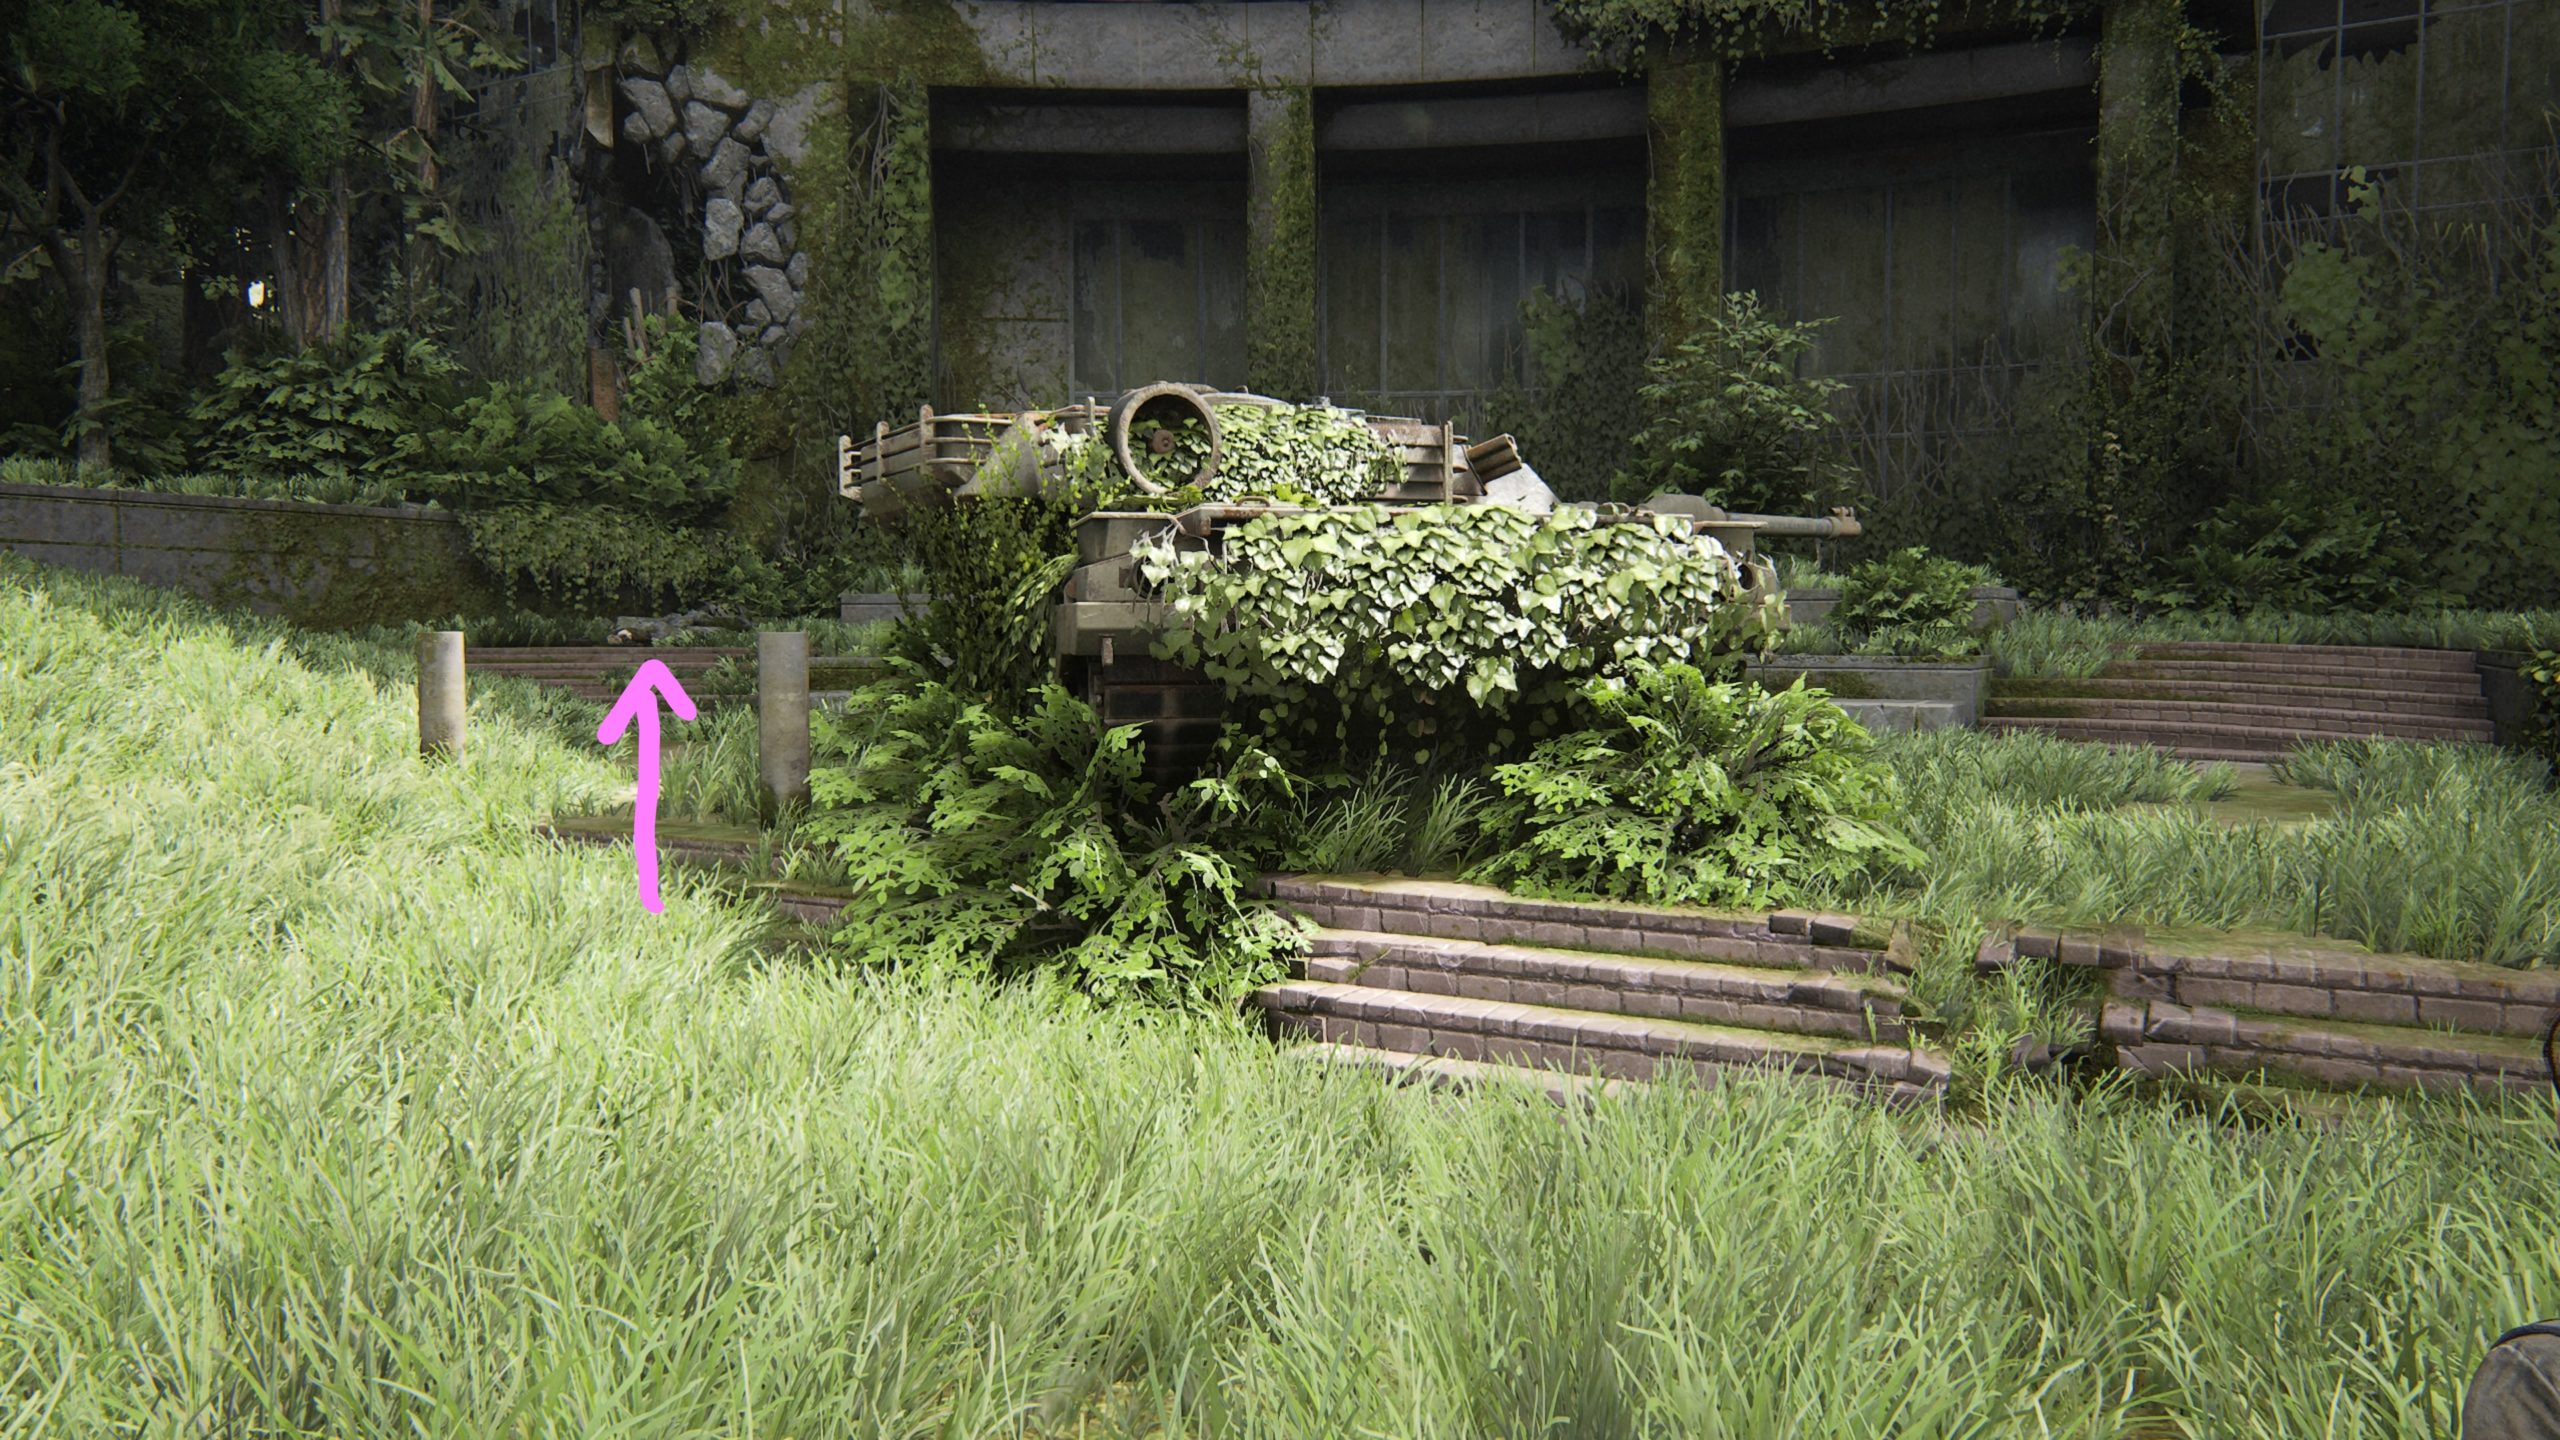
Artifact – Letter from Isaac
This artifact can be found in a satchel near a corpse, which is up the stairs behind a tank near the middle of Cherry Street.
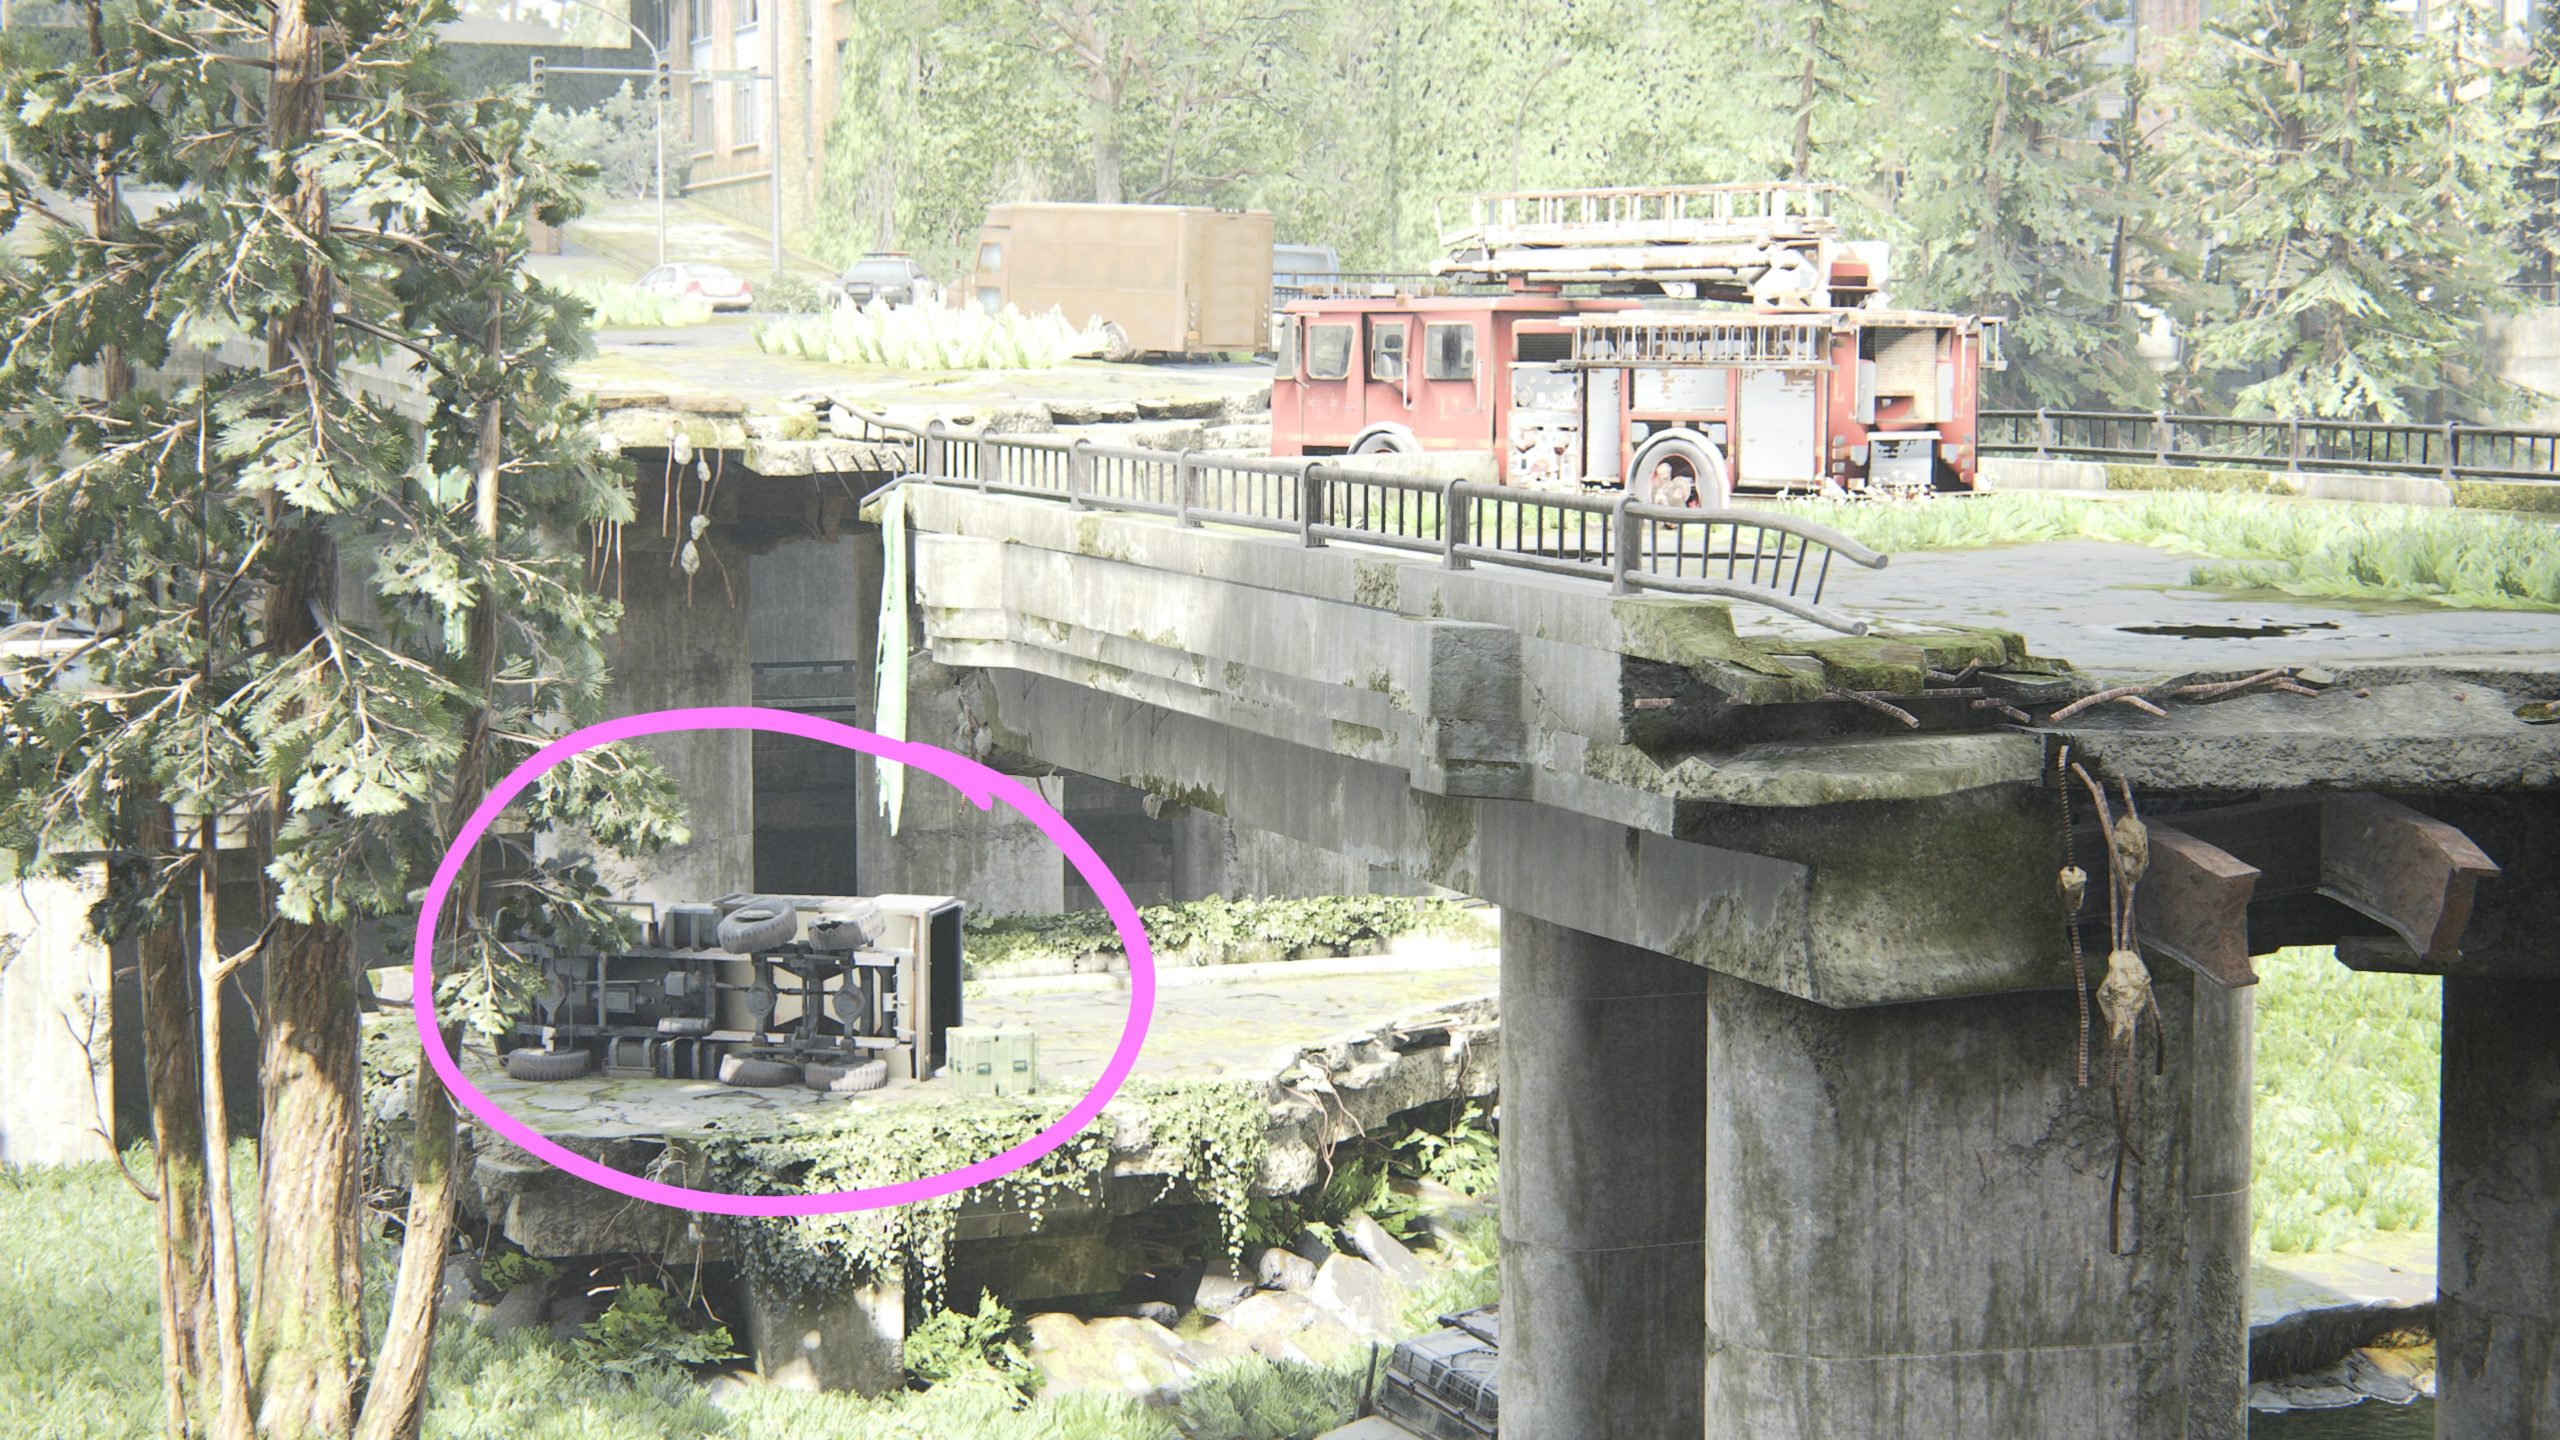
Crafting Training Manual
This manual can be found in the back of a truck between 6th and 7th Avenue underneath the highway. You can reach it by using the rope attached to the fire truck. Repel down then swing onto the platform to reach the truck.
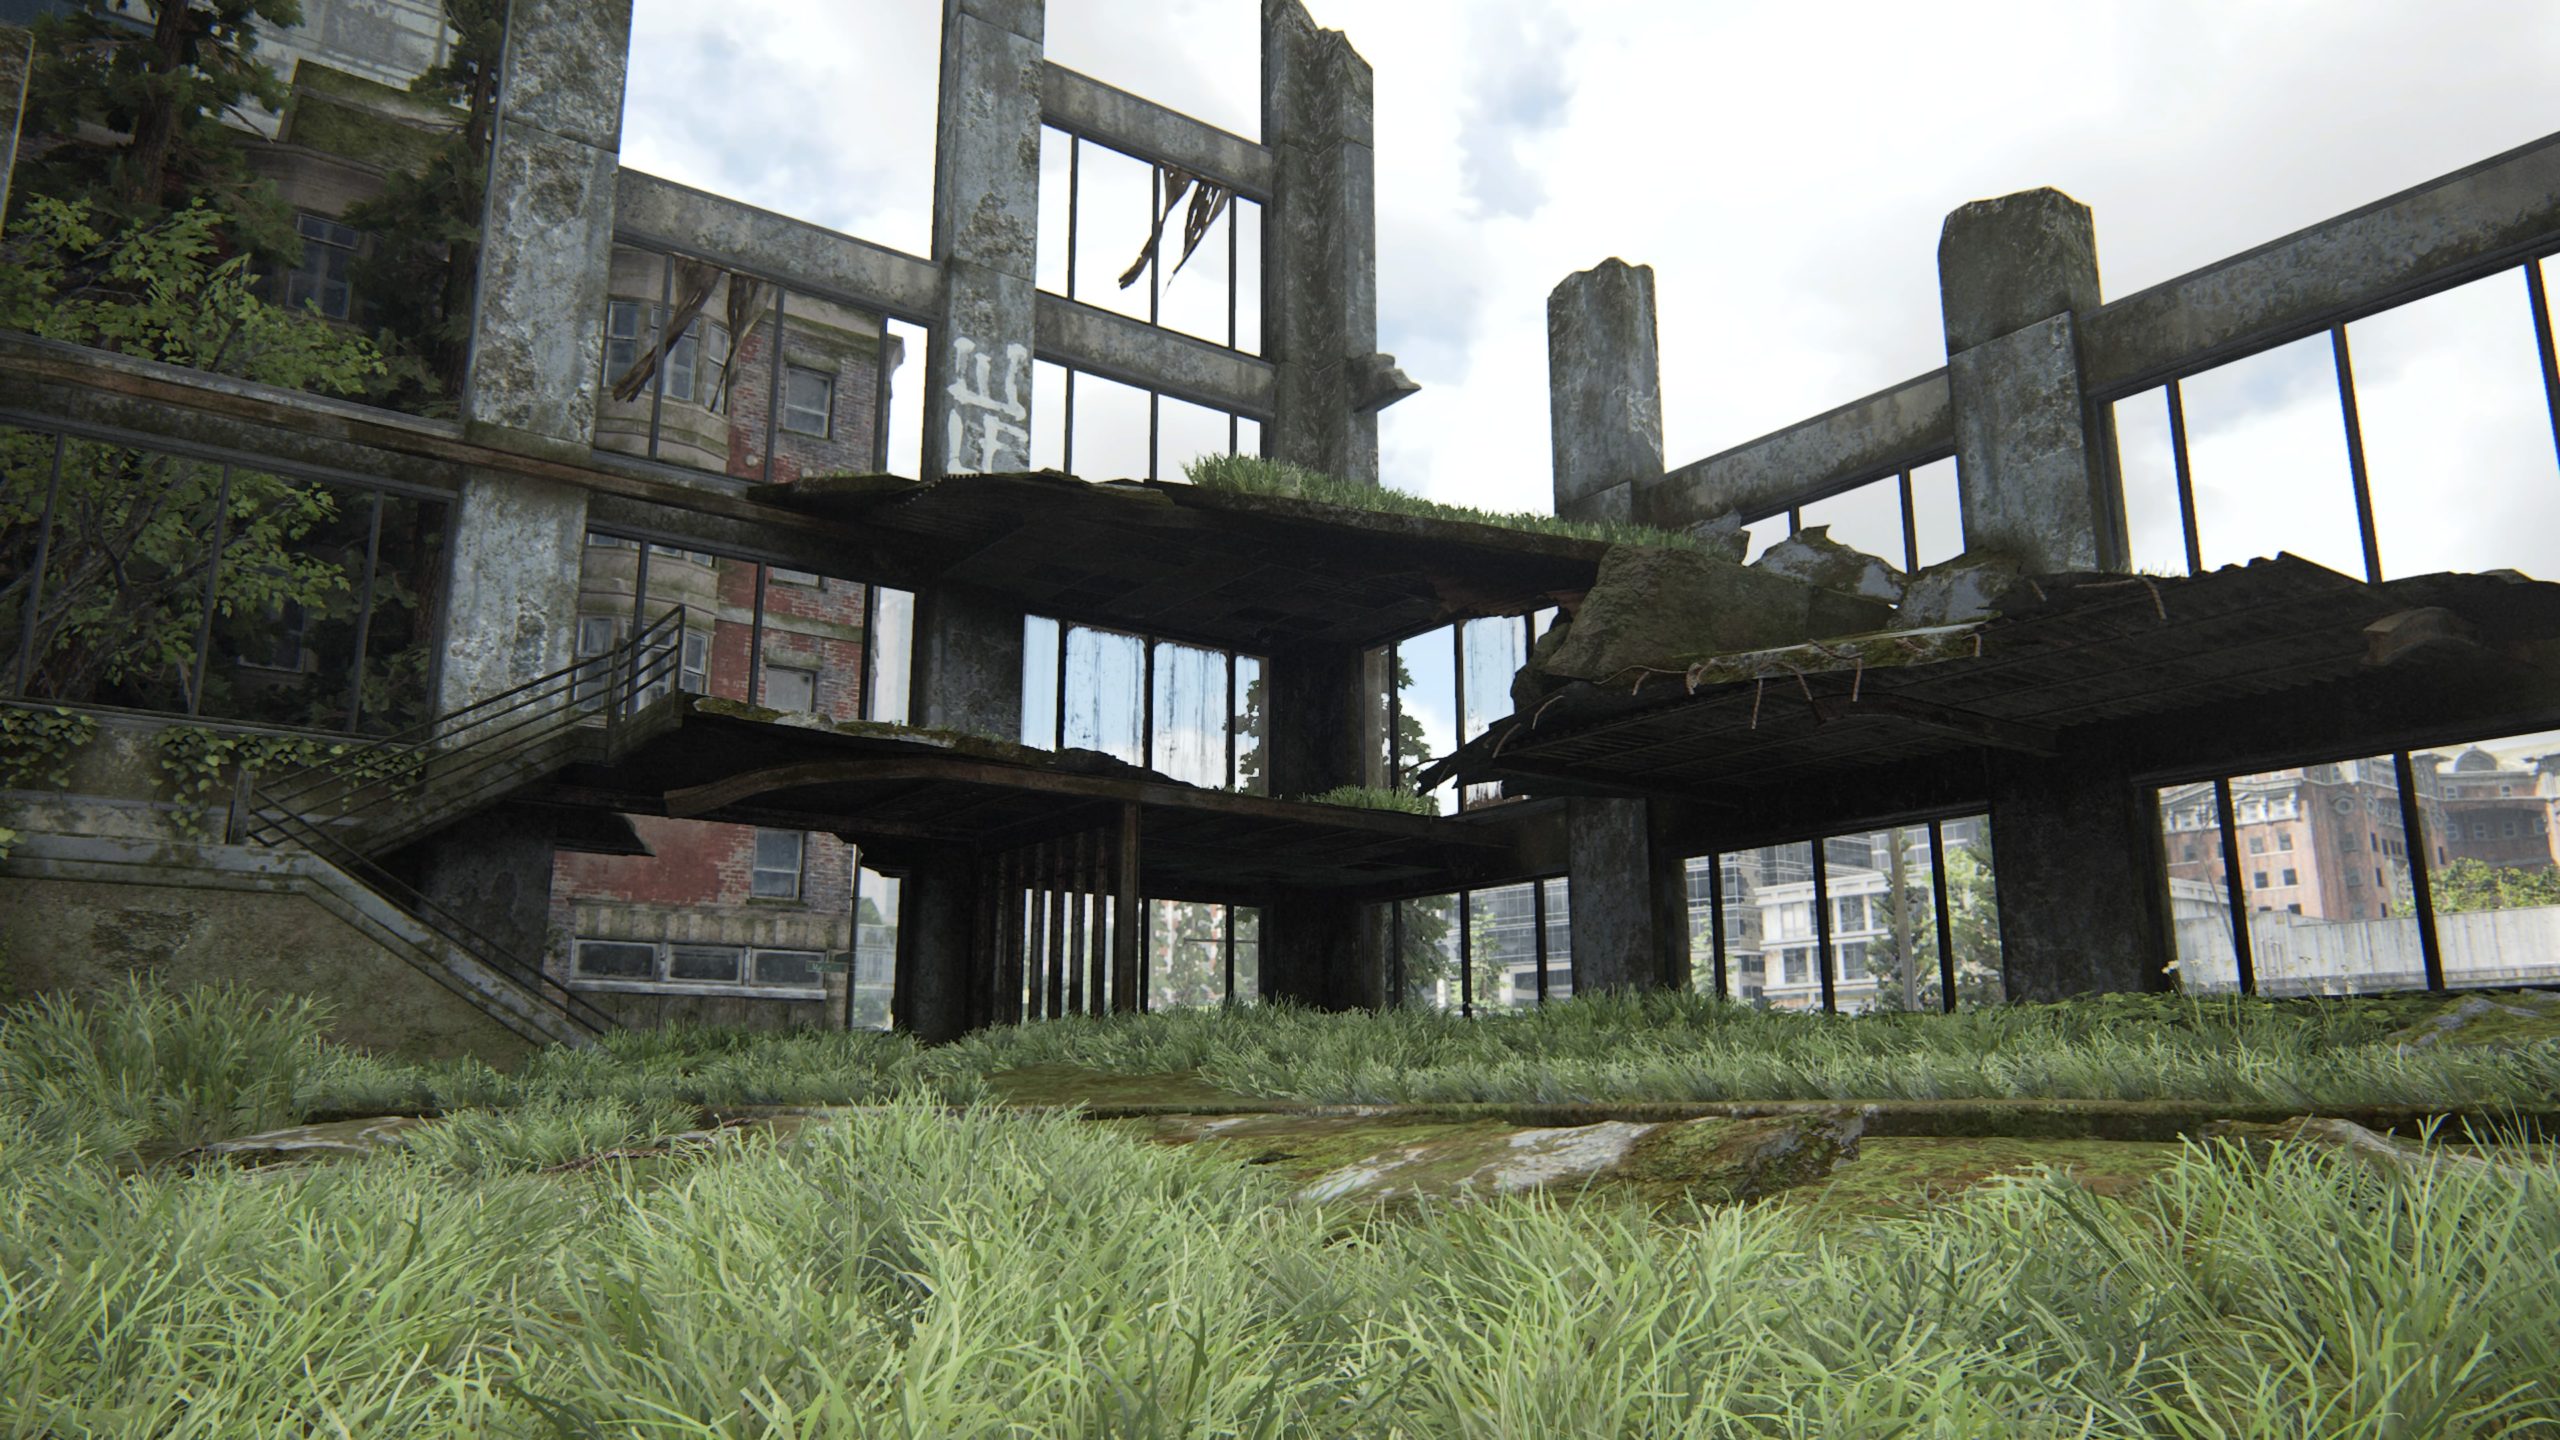
Trading Card – Doctor Uckmann
This card can be found in a desk drawer on the second level of a ruined structure on the corner of Marion Street and 6th Avenue.
Workbench
This workbench can be found at a military checkpoint on the corner of Marion Street and 4th Avenue.
Artifact – Street Drawing / Journal Entry
These can be found in the lookout on the military checkpoint at the corner of Marion and 4th Avenue.
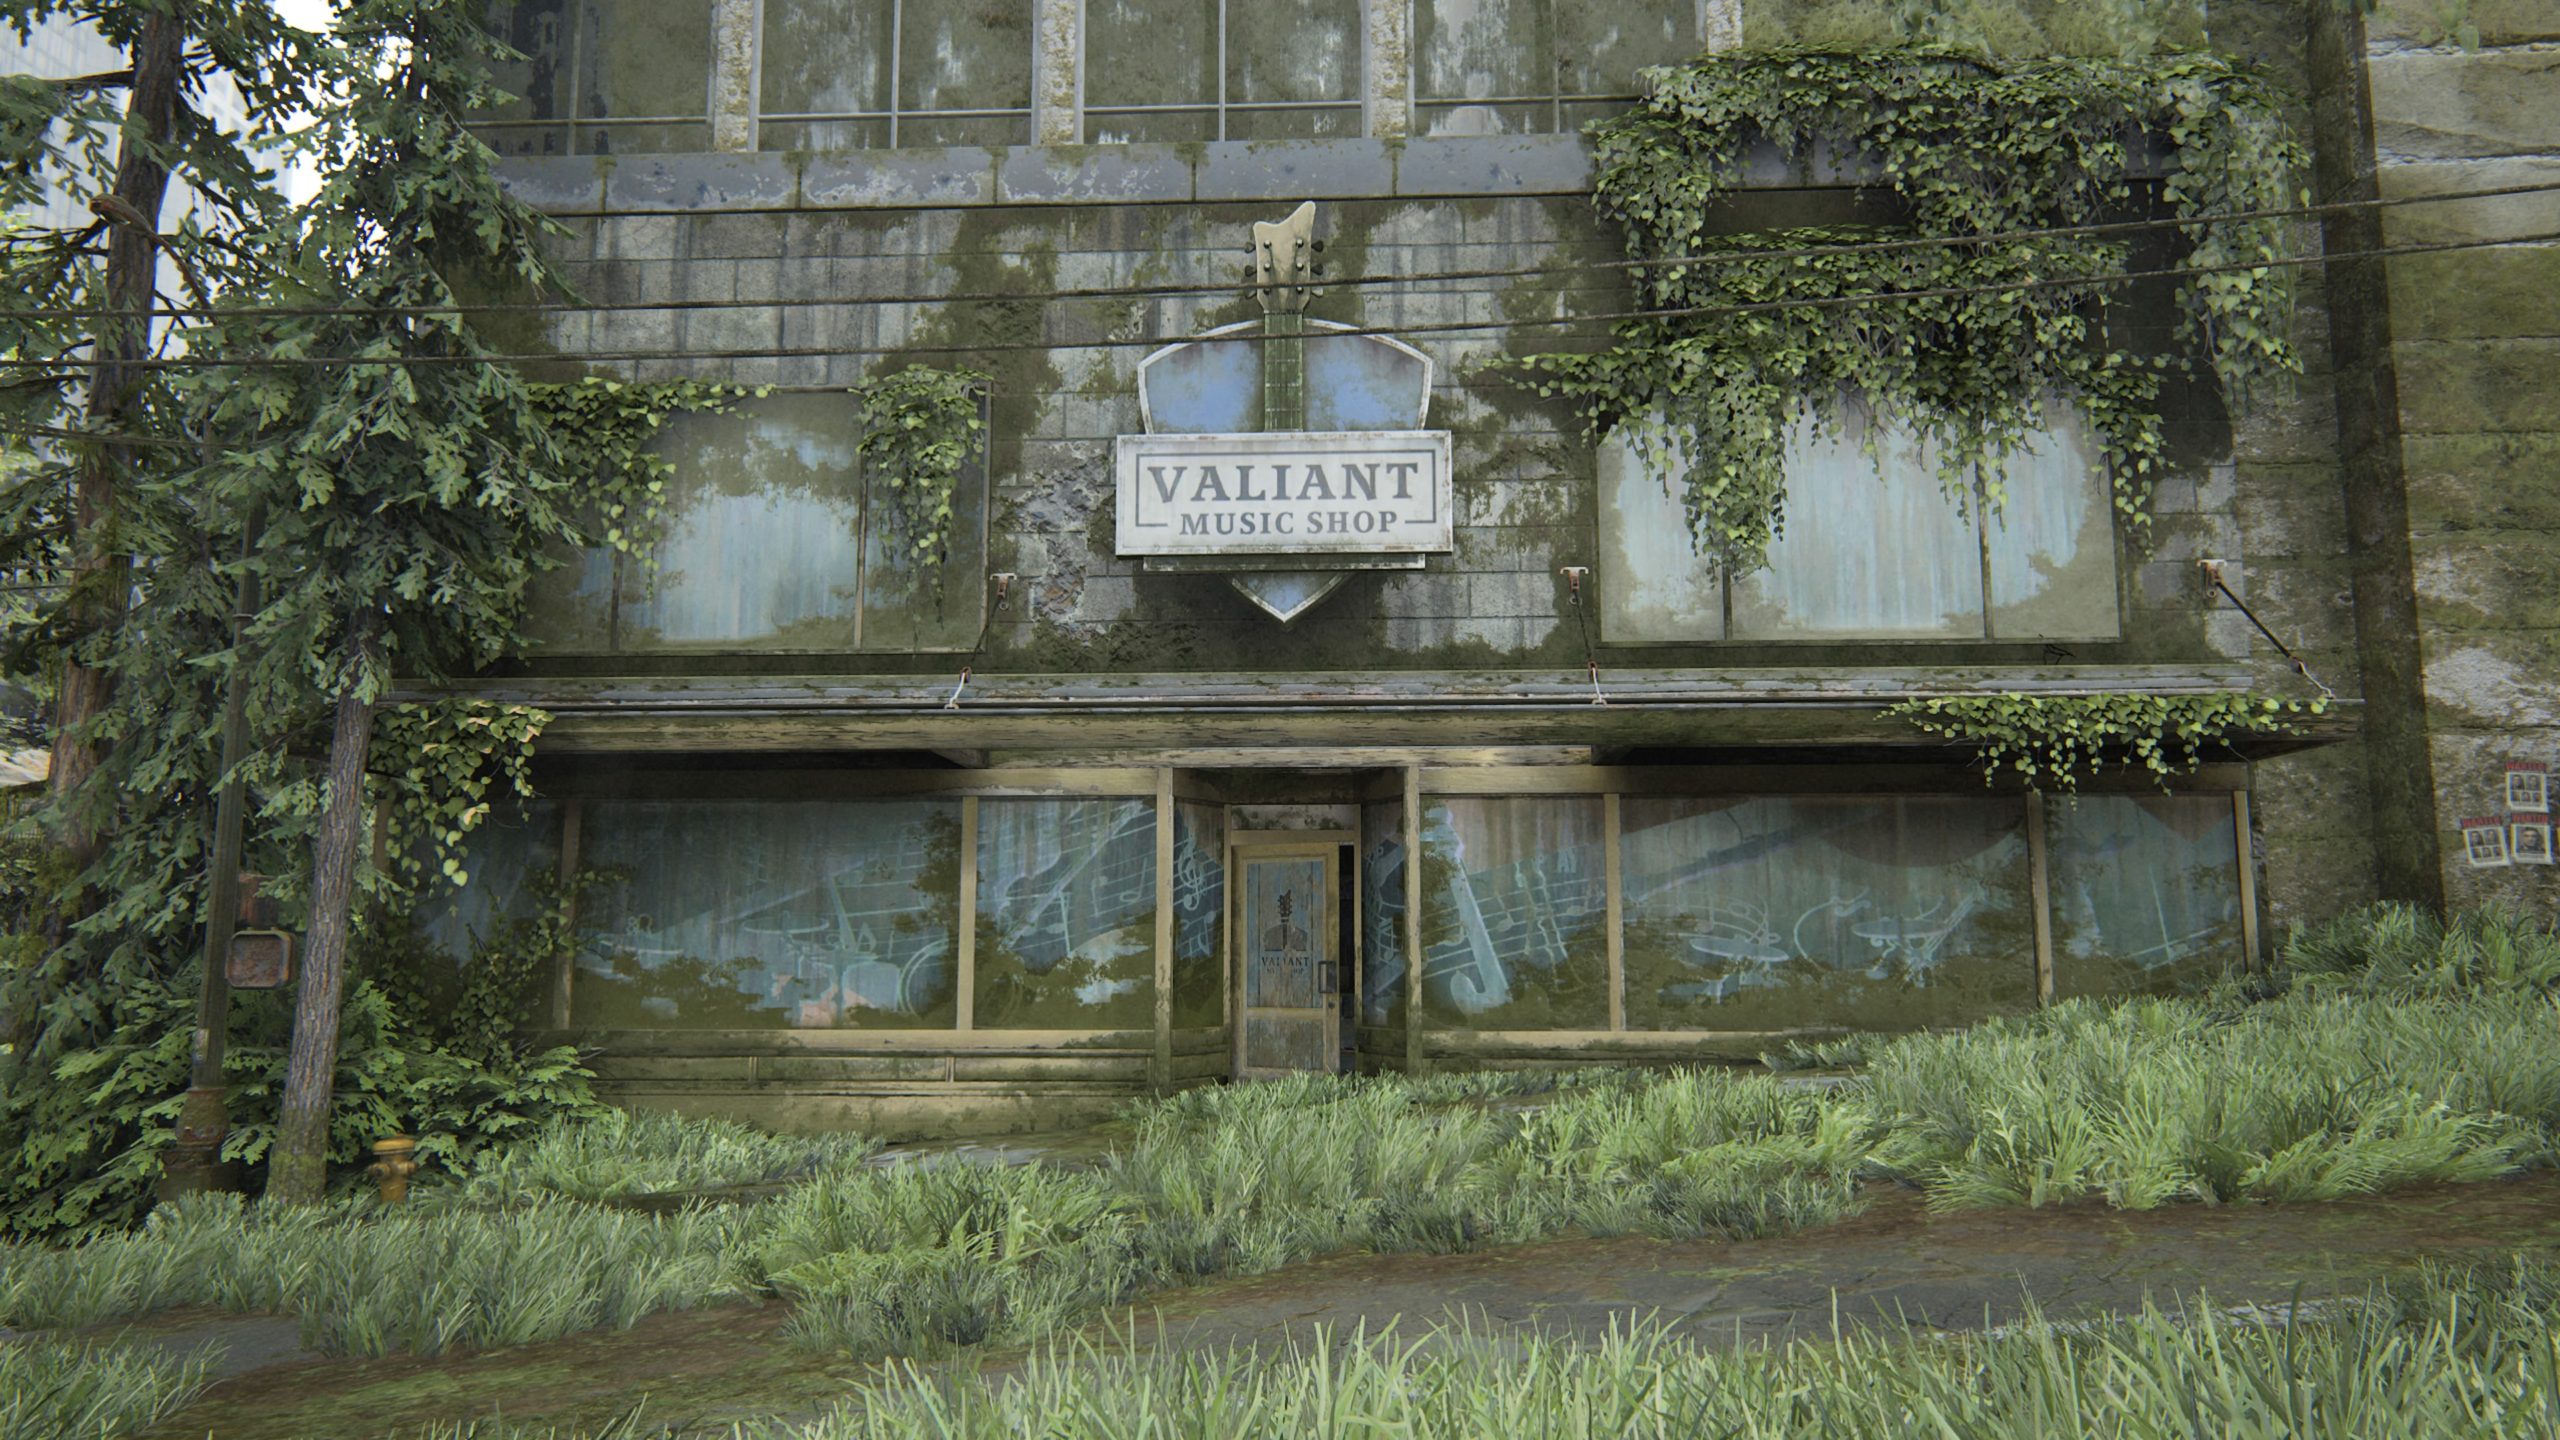
Trading Card – Das Wort
This card can be found on the first floor of the Valiant Music Shop in a drawer behind the checkout counter.
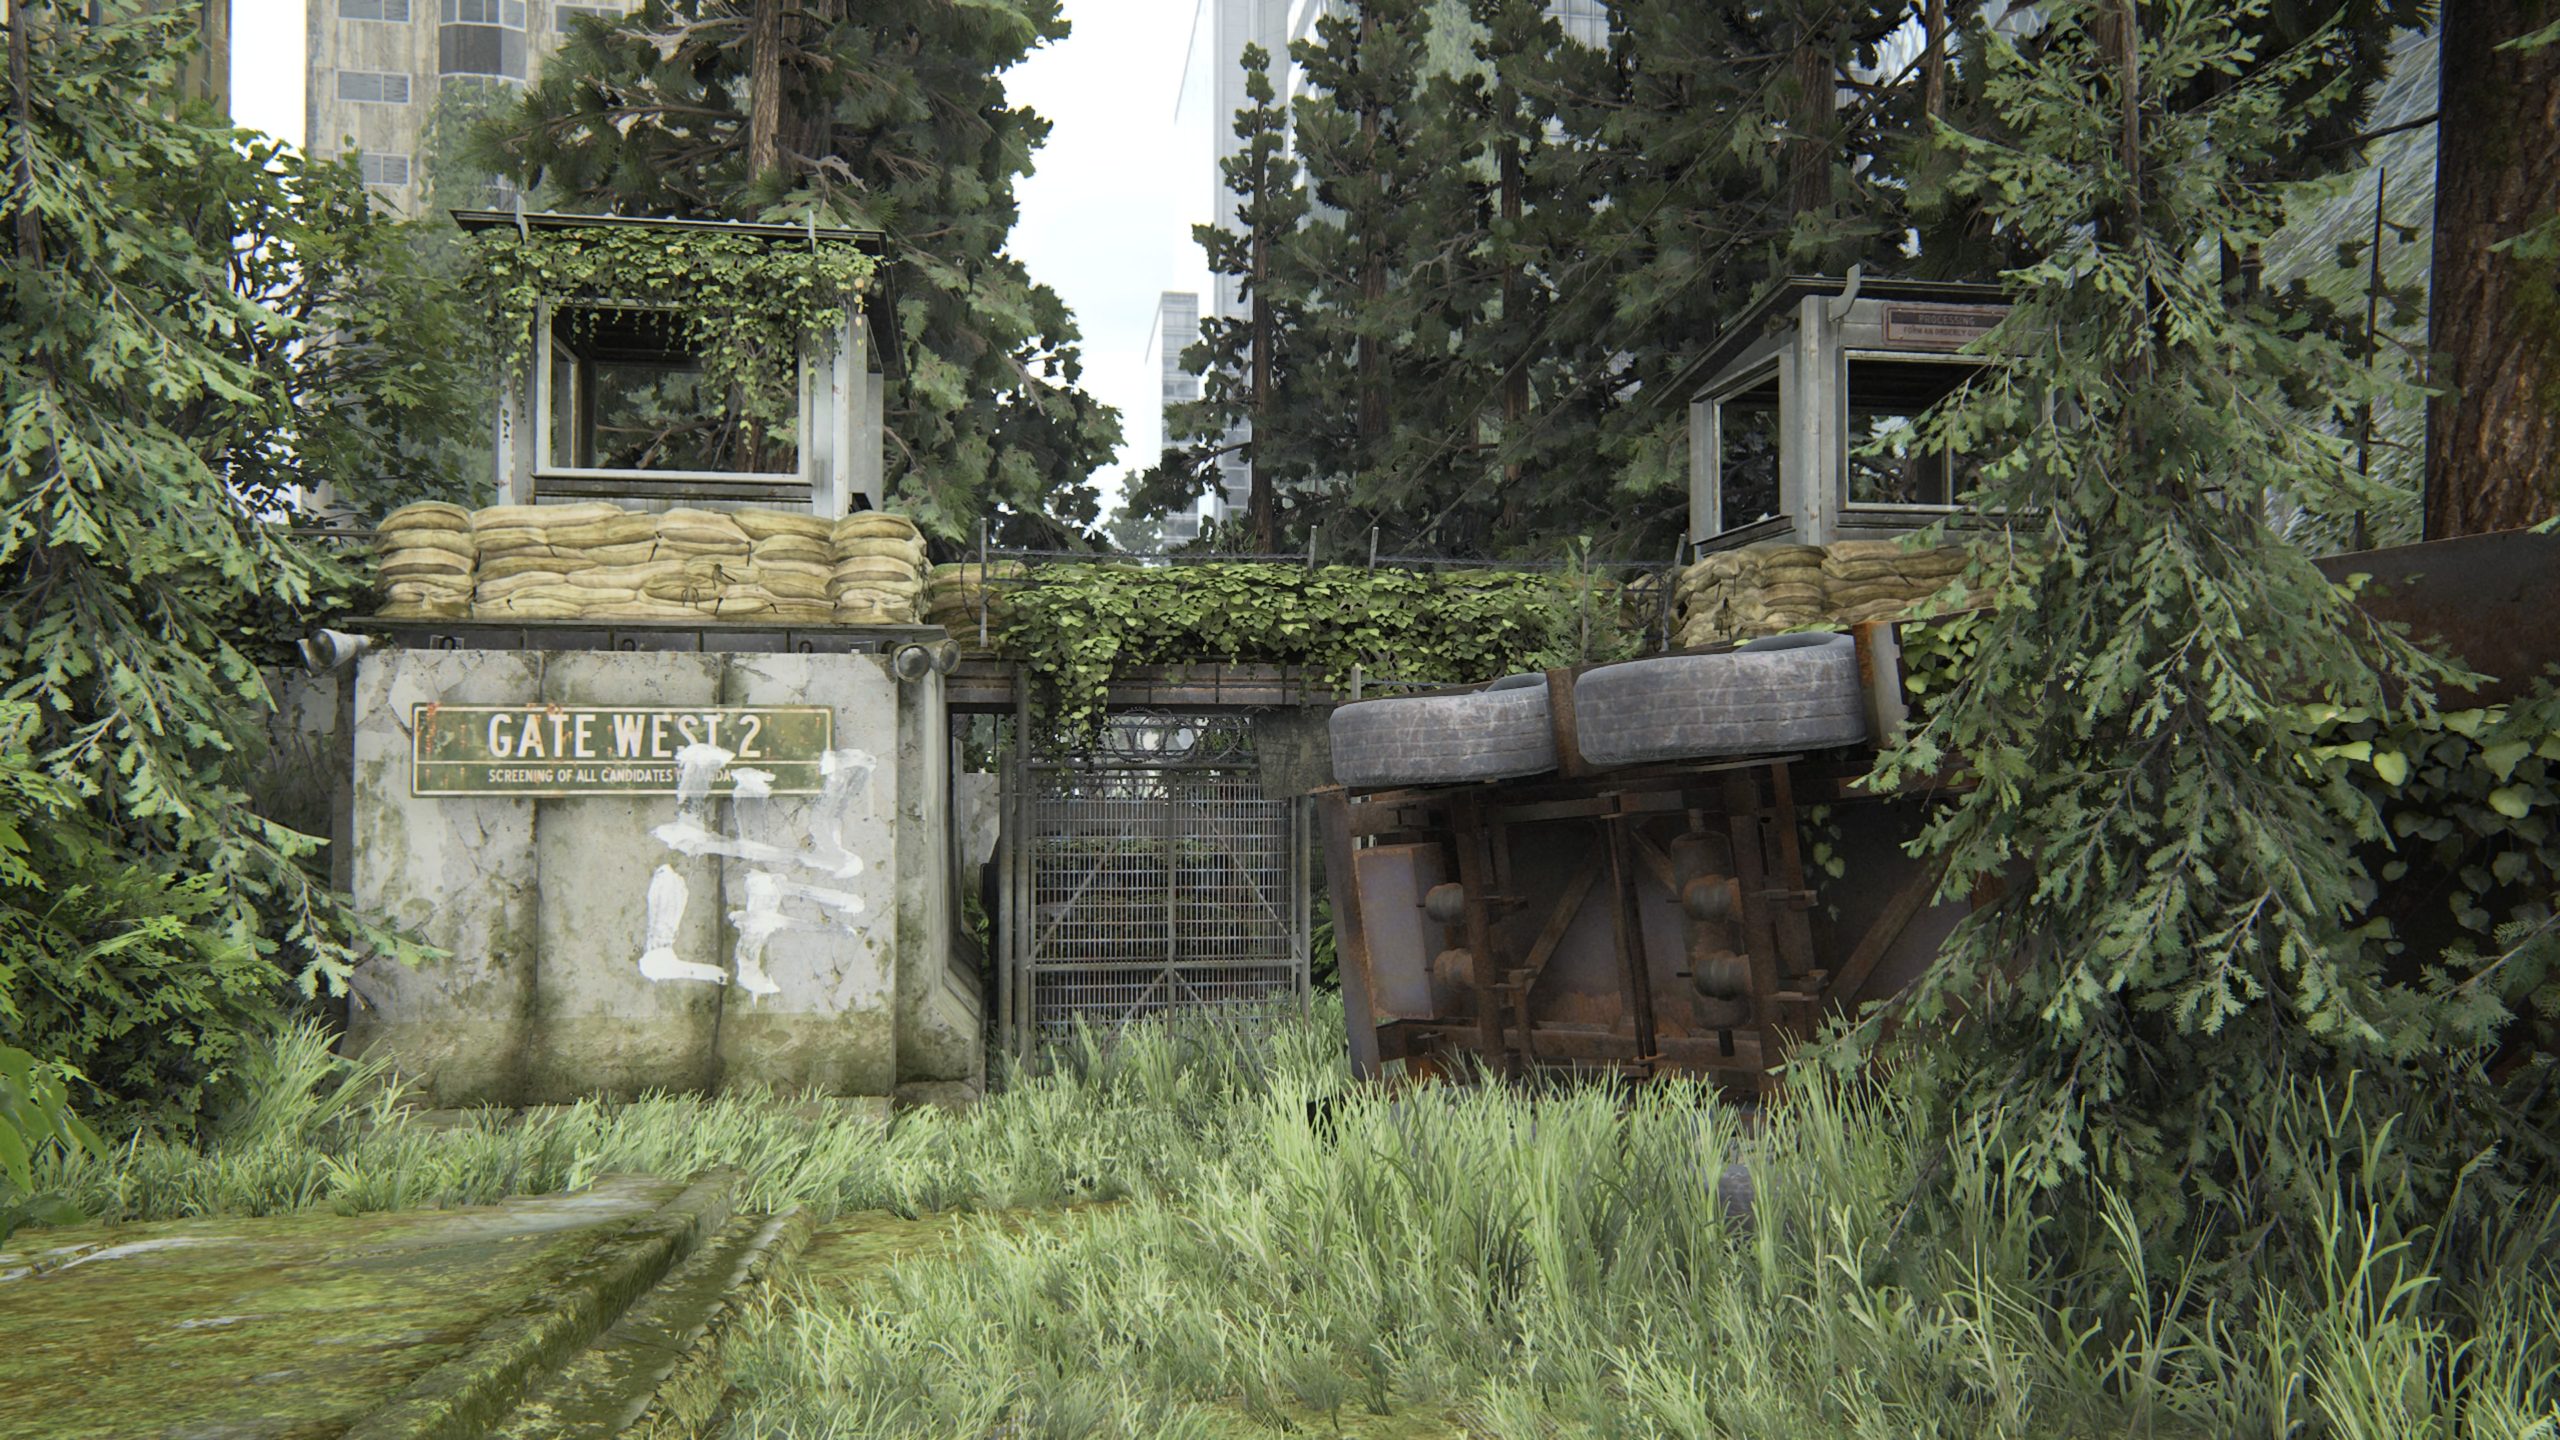
Safe
This safe is located behind Gate West 2 (Madison Street) on a porch. The code to open the safe is 0451.
Trading Card – Flo
This card can be found in the above safe.
Artifact – WLF Safe House Supply Note / Trading Card – Big Blue / Artifact – Pet Store Key
These are all located in a coffee shop on the corner of Spring Street and 5th Avenue. The note can be found on the counter, the card can be found in a drawer behind the counter and the key can be found in the bathroom on a diaper changing station.
Weapon – Stun Bomb
This can be found in a drawer on a military lookout when you enter/exit the dome.
Artifact – Emergency Protocols Memo
This artifact can be found on a table in the dome on the second level, which is reachable using the cart after picking up the gas can.
Artifact – Rabbi Saunders’ Letter / Journal Entry
This artifact can be found in an office in the dome on the second level, reachable via swinging on a rope. The journal entry will trigger automatically after reading the artifact.
Artifact – WLF Community Supply Chest Note
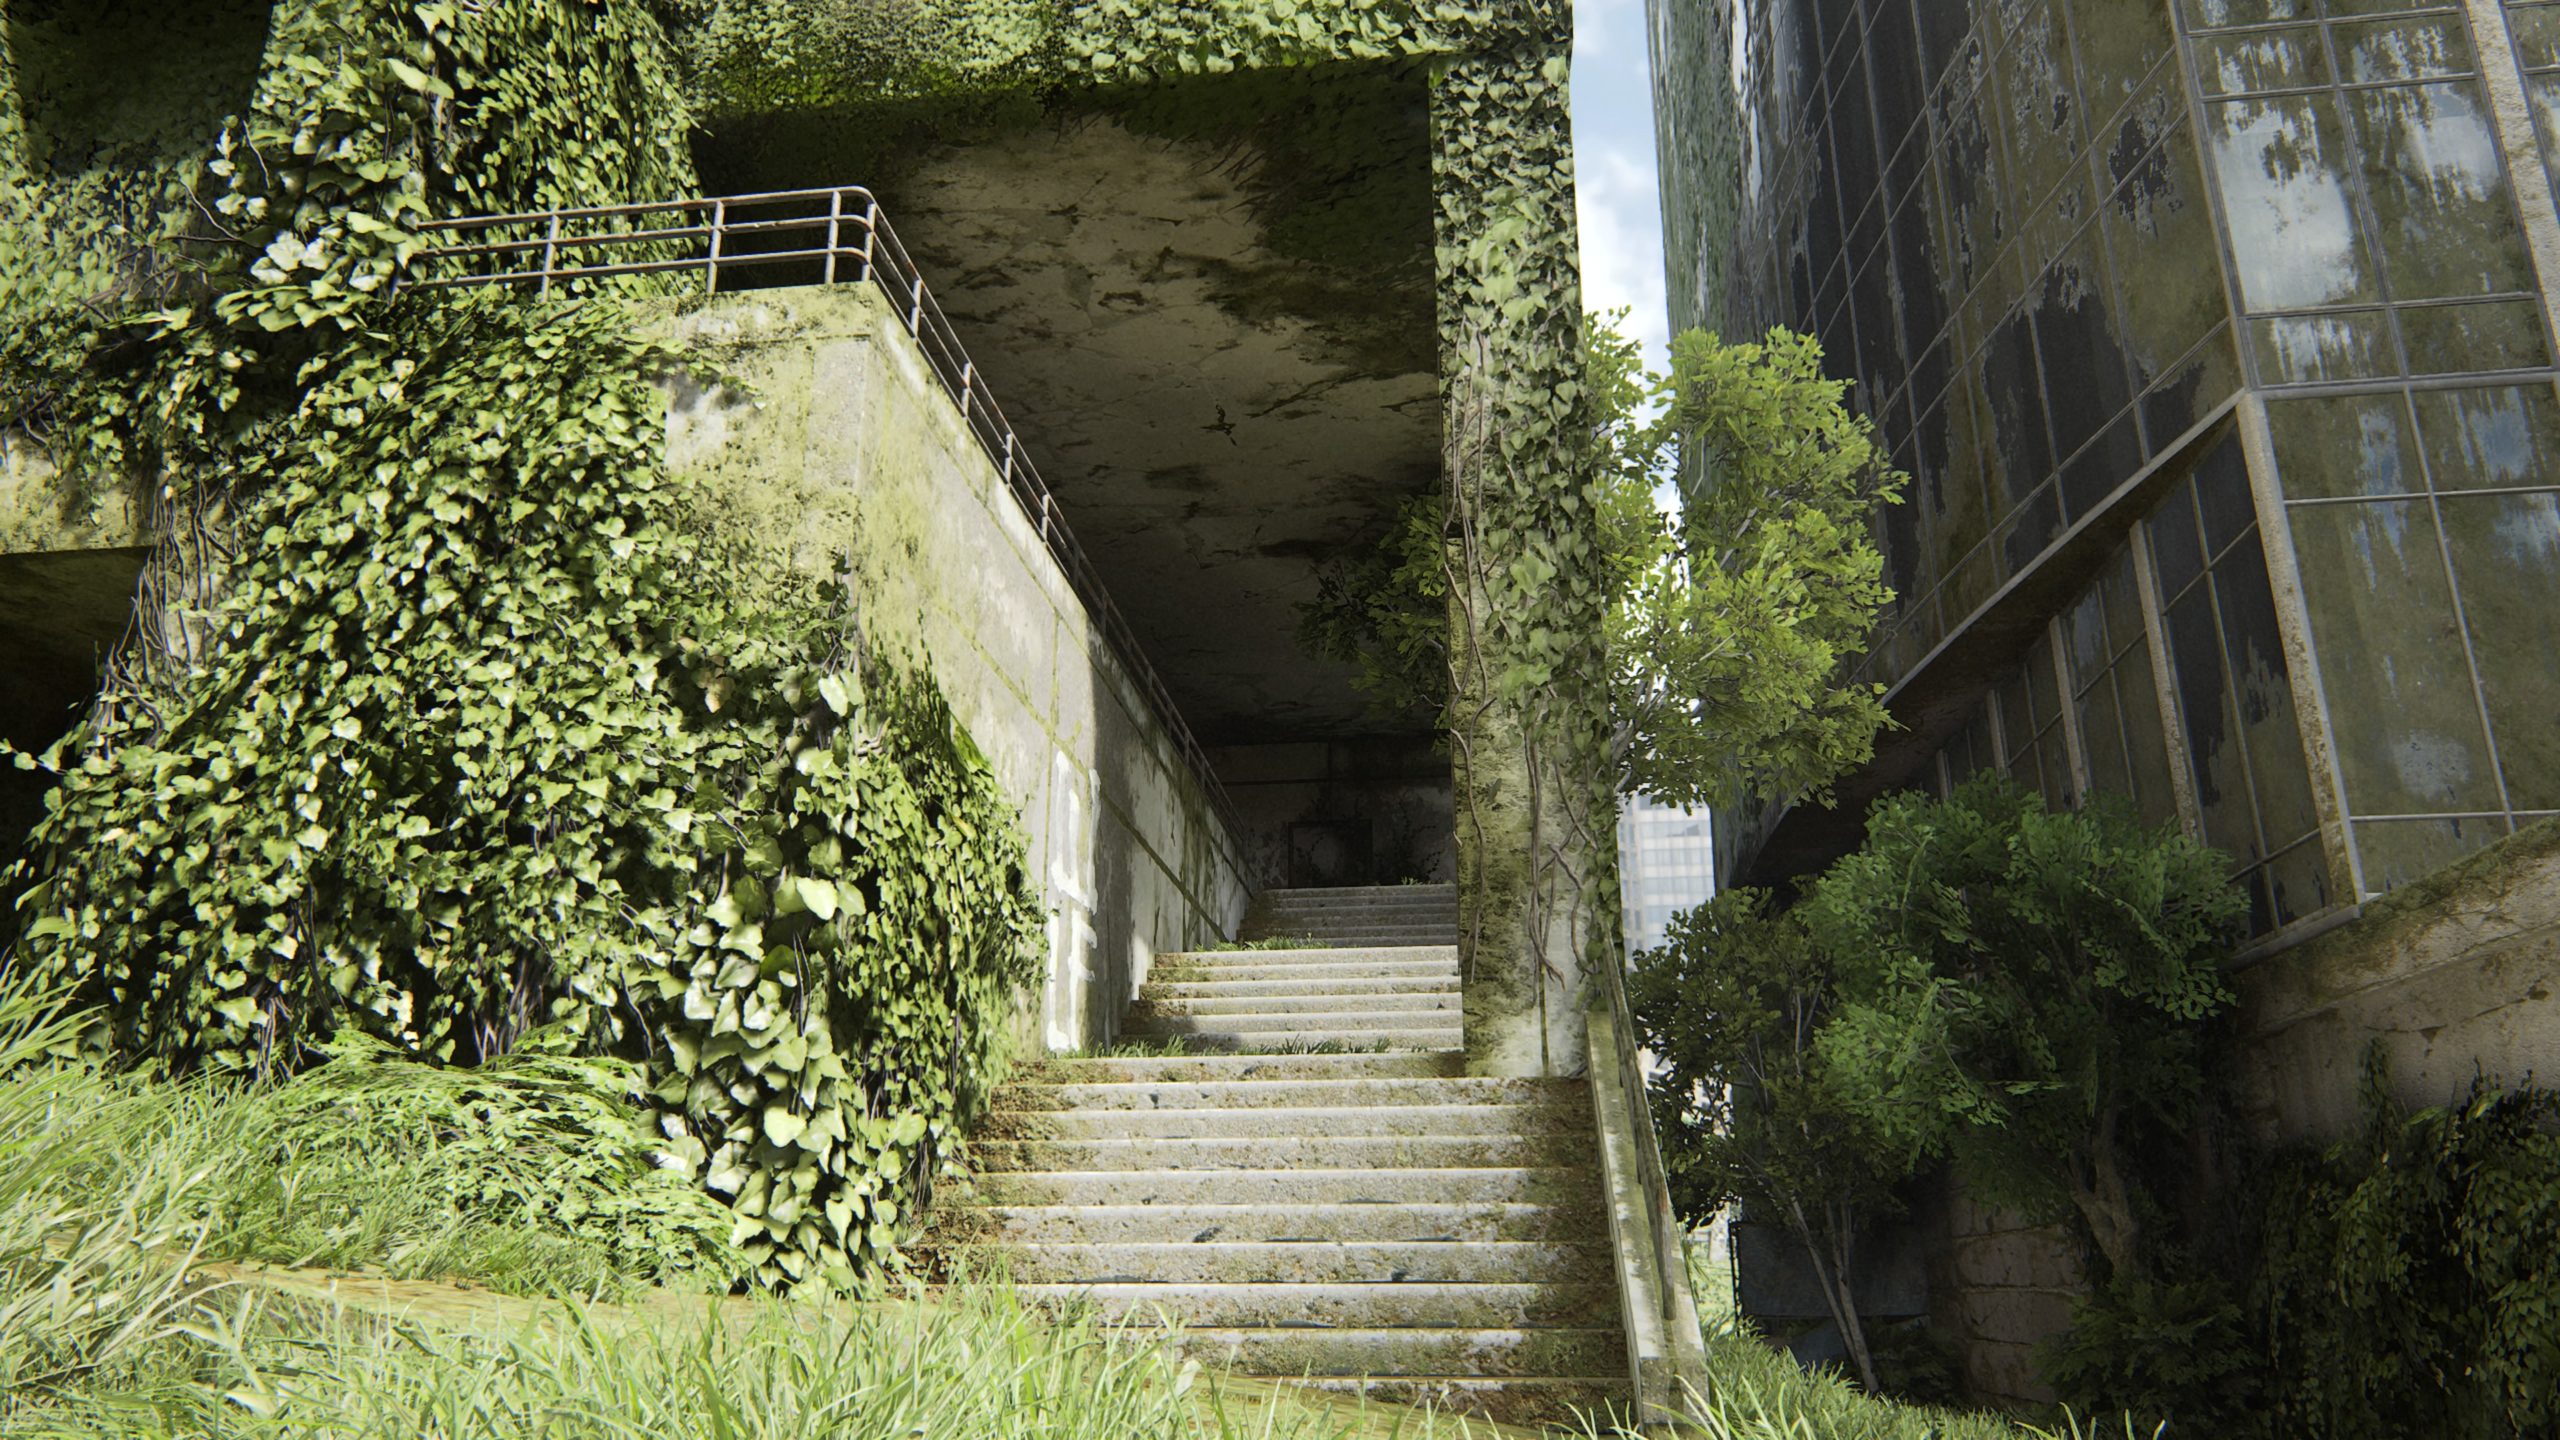
This artifact can be found in a satchel at the top of a flight of stairs leading up to a sky scrapper on Madison Street between 5th and 6th Avenue.
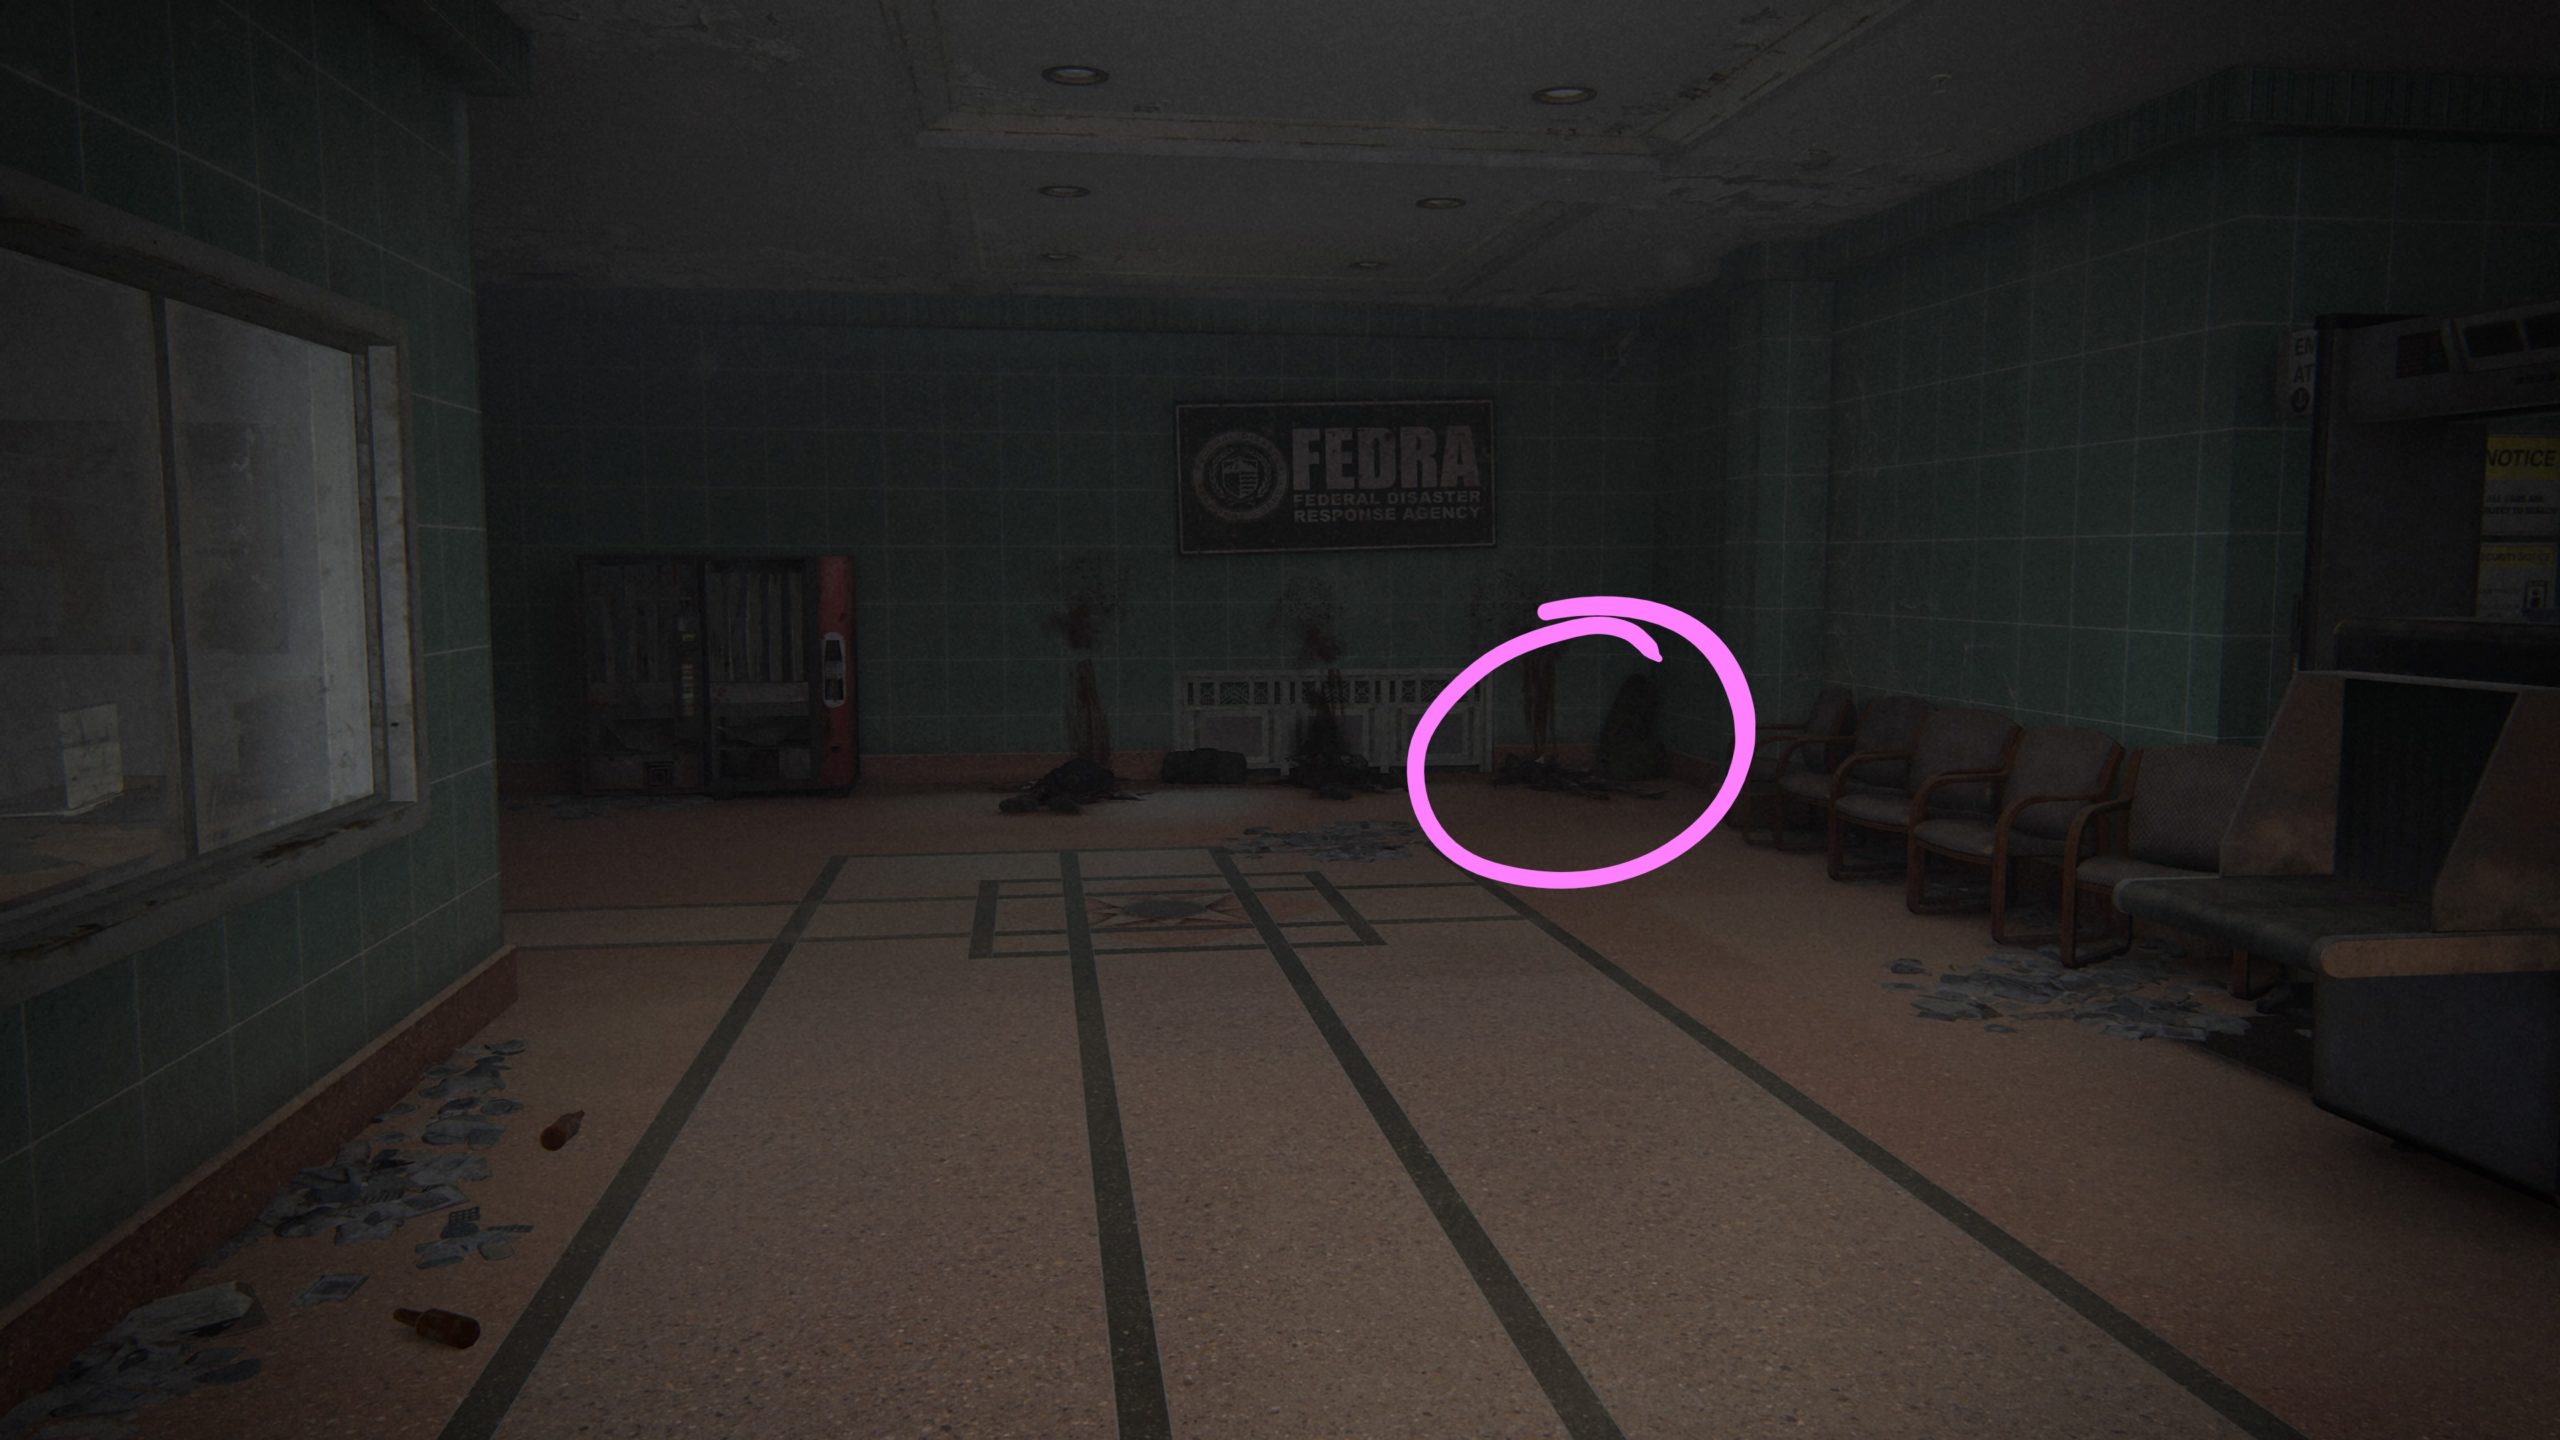
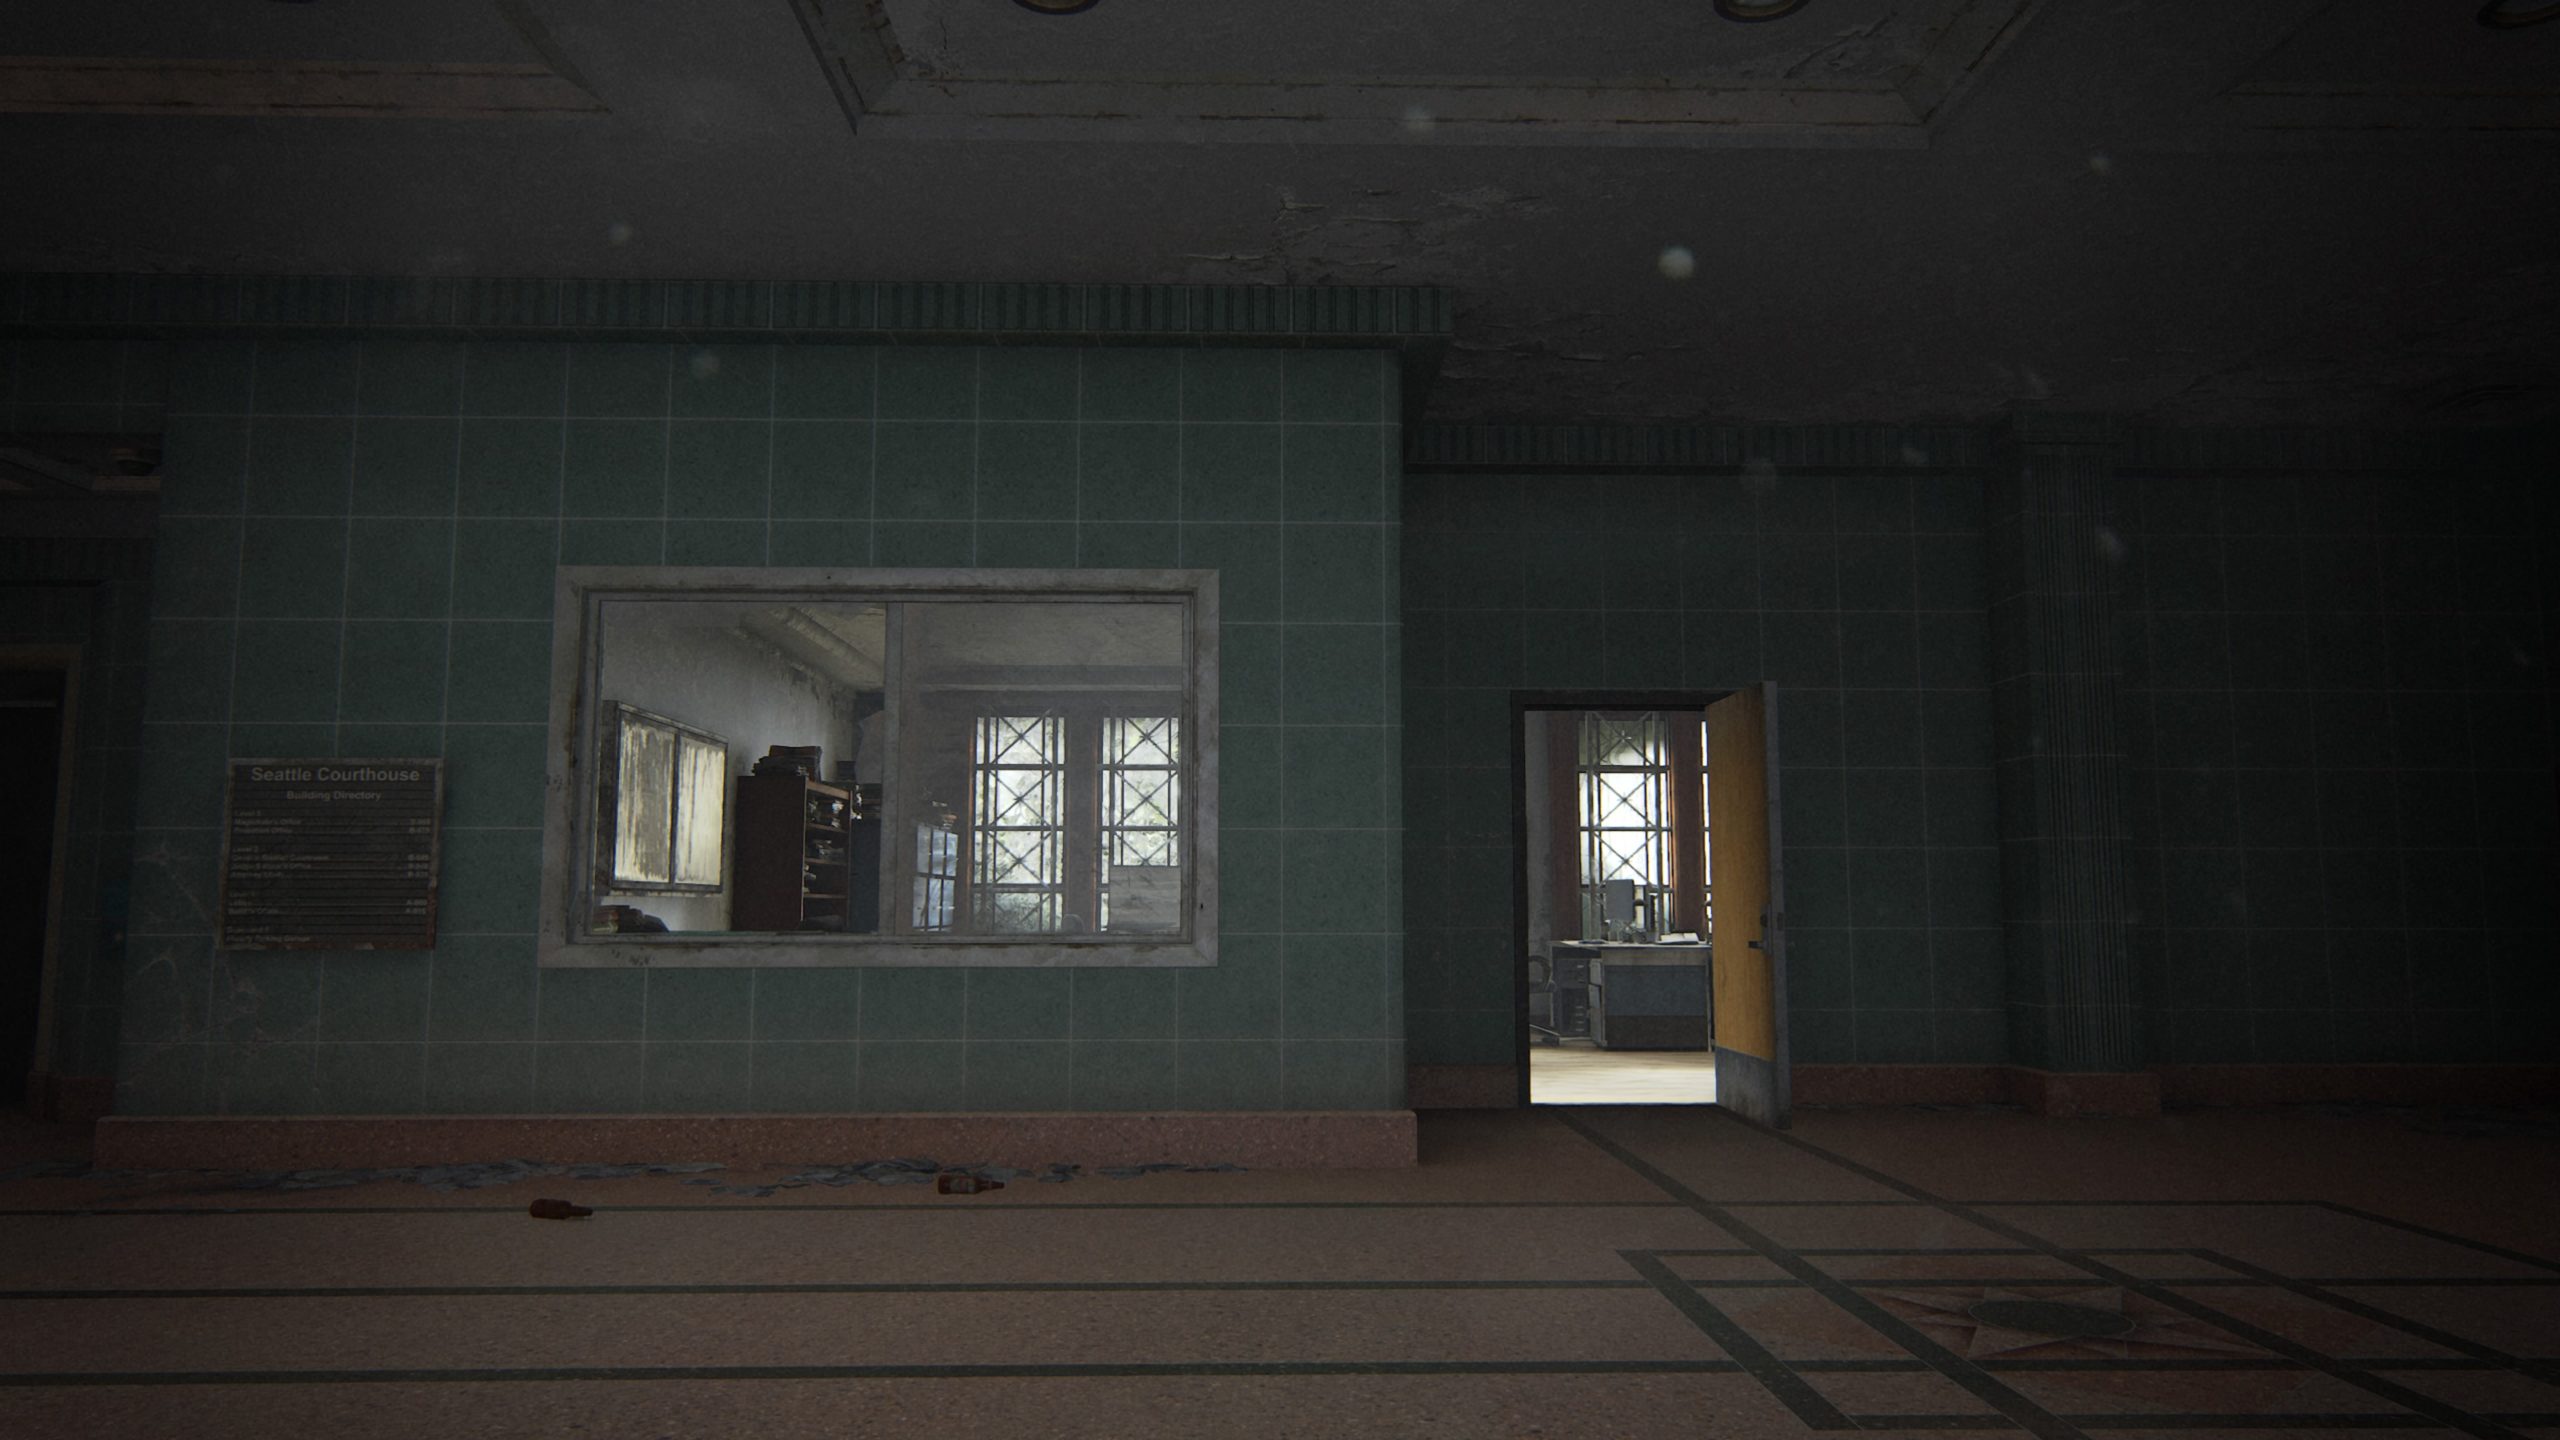
Artifact – Plea to a Friend Letter
This artifact can be found on a corpse in the basement of the courthouse underneath a FEDRA sign.
Artifact – List of Known WLF Agitators / Artifact – Lt. Torres’ Final Memorandum / Safe
These can be found in a large room in the basement of the courthouse with lots of desks. The List of Known WLF Agitators can be found in a filing cabinet to the left of the whiteboard. The other artifact can be found by taking out the machete from the corpse underneath the whiteboard. The letter will fall to the ground. The safe can be found underneath the window and the code to the safe of 860722, which is provided on the List of Known WLF Agitators artifact. It can also be found on the whiteboard.
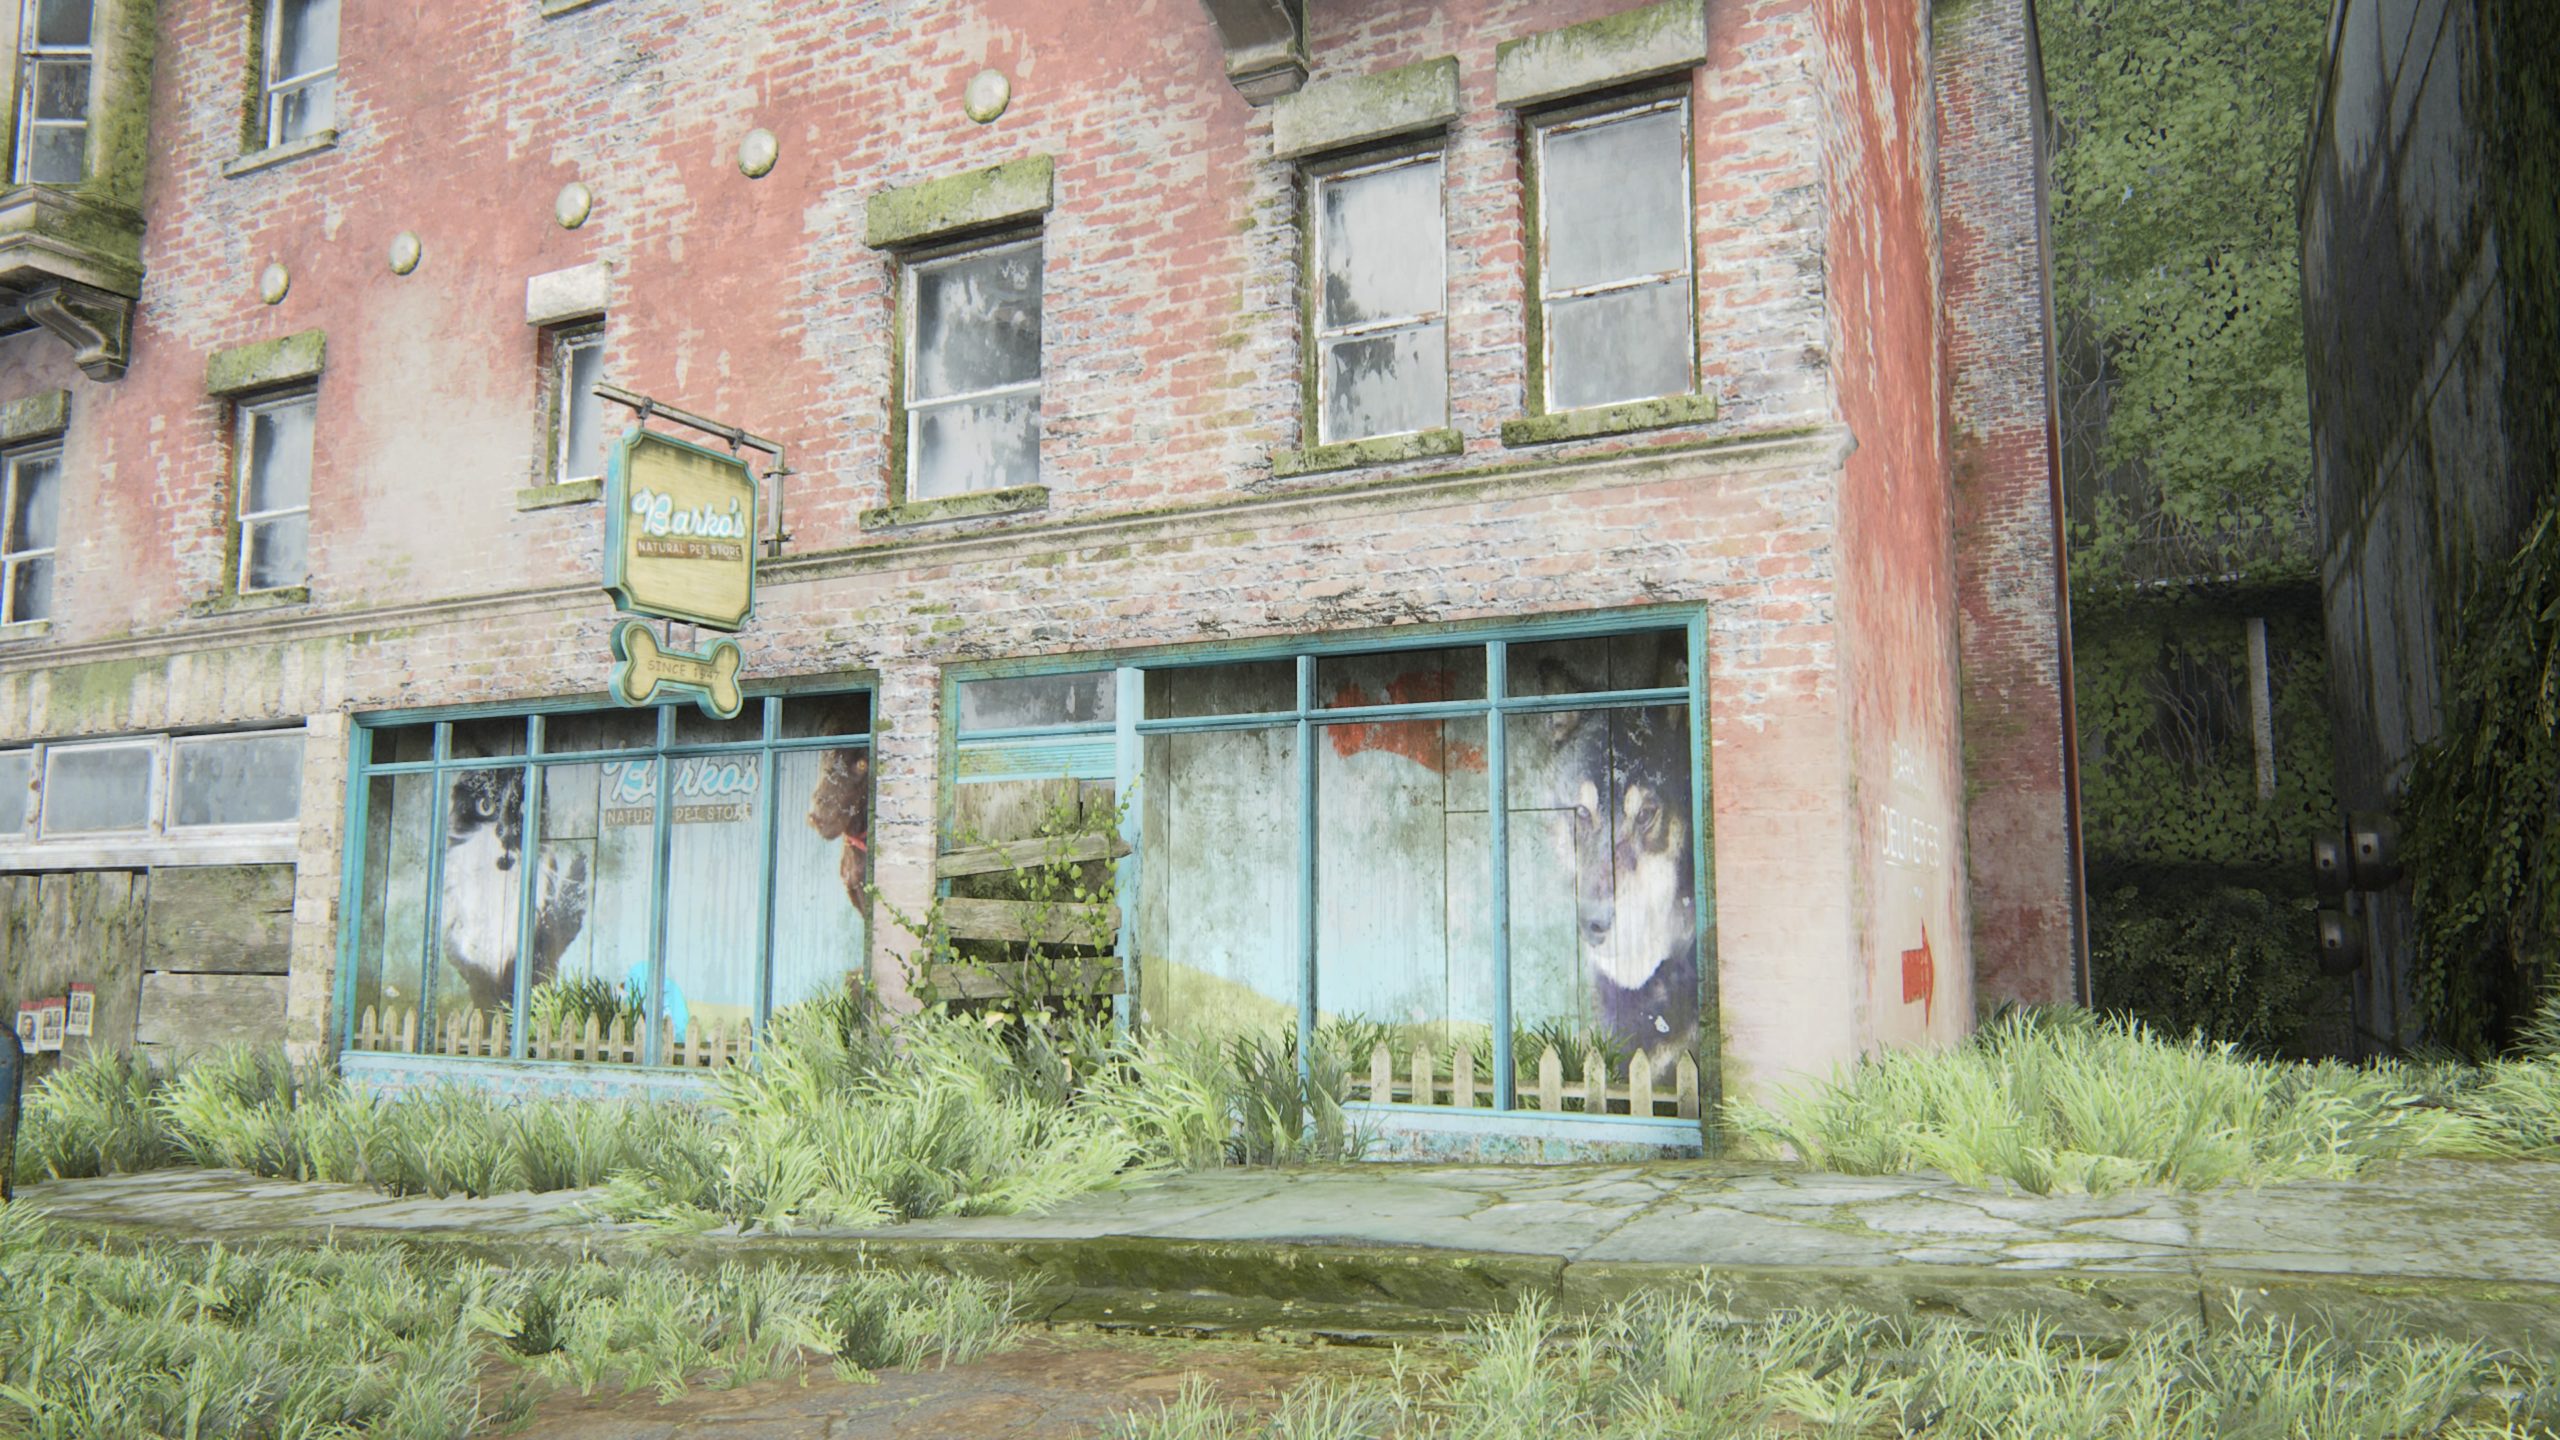
Artifact – Join WLF Note
This can be found in the pet store at the corner of Marion Street and 6th Avenue on the printer.
Upgrade – Long Gun Holster
This can be found in the pet store at the corner of Marion Street and 6th Avenue.
Artifact – Note to Informant
This artifact can be found in the back of a truck in front of the waterfall in the north between 6th and 7th Avenue.
Stealth Training Manual
We found this manual on the second floor of the hotel on a table in the first bedroom closest to the stairs.
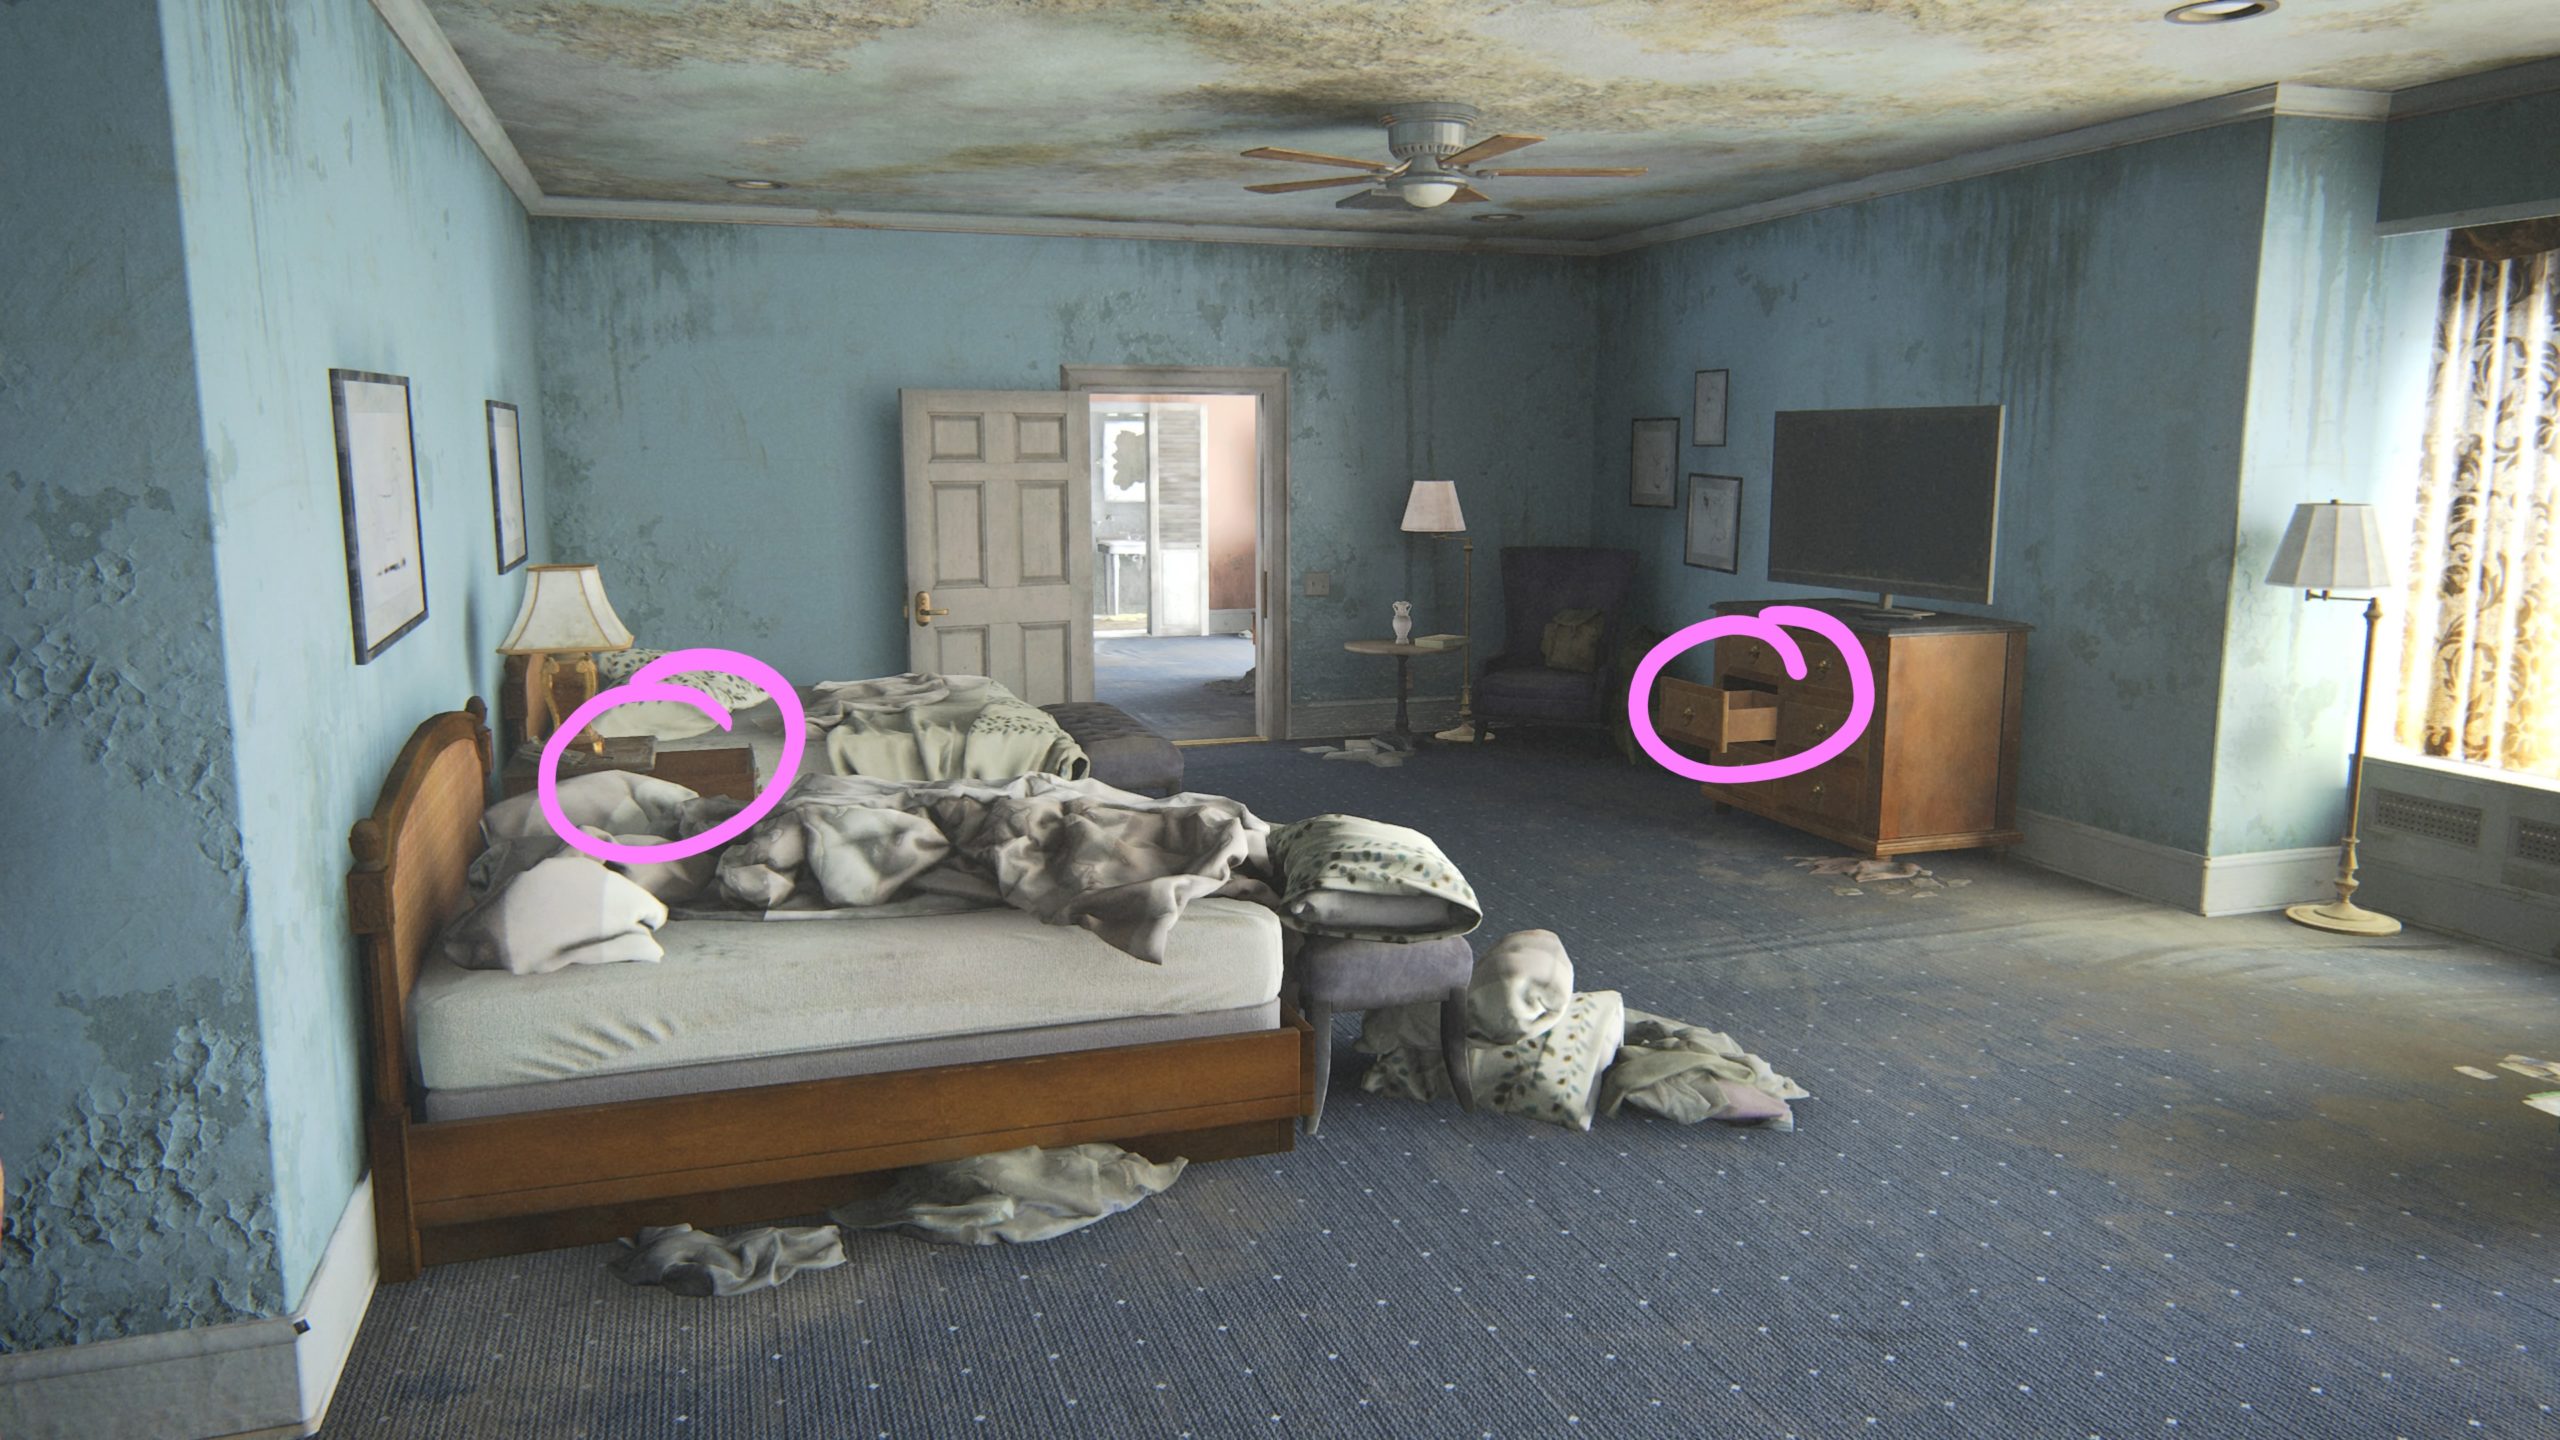
Trading Card – Know it All / Artifact – WLF Recruiter Journal
These can be found in a bedroom with two beds on the second floor of the hotel. The card can be found in the nightstand and the artifact can be found in the drawer under the TV.
Below is a guide on the 6 artifacts, 1 journal entry and 4 trading cards that can be found during The Gate chapter in The Last of Us Part II.
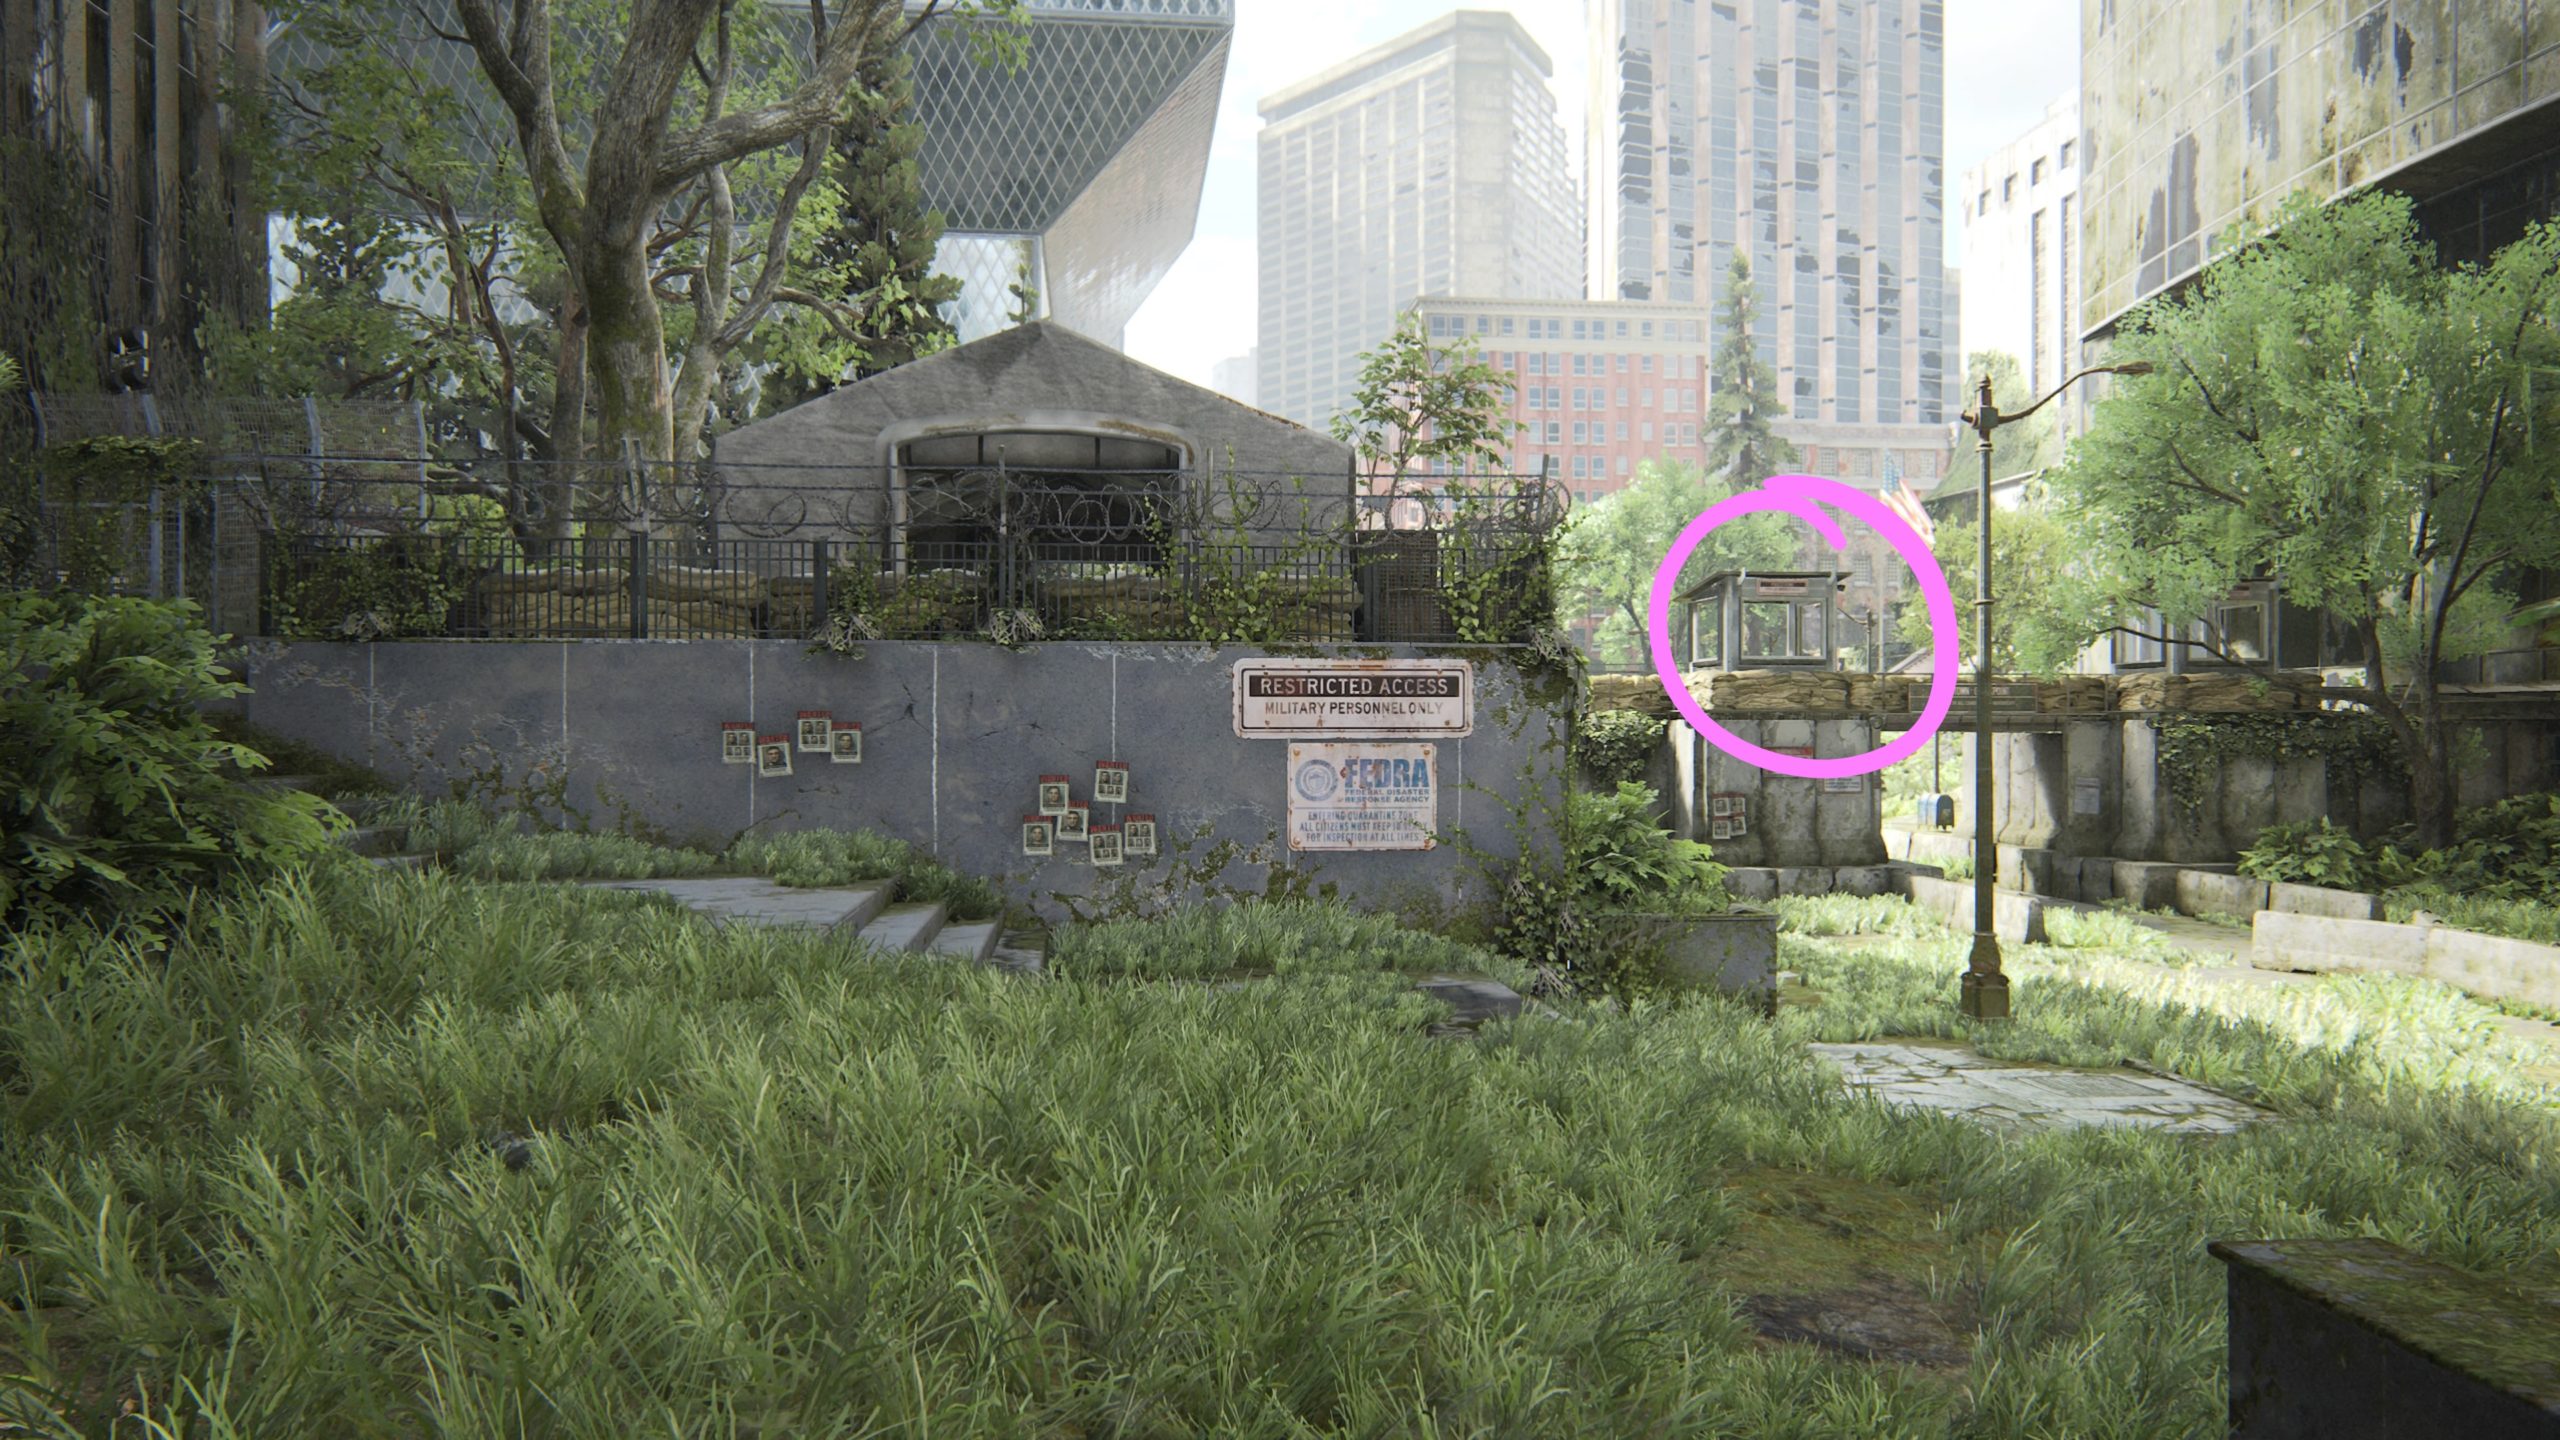
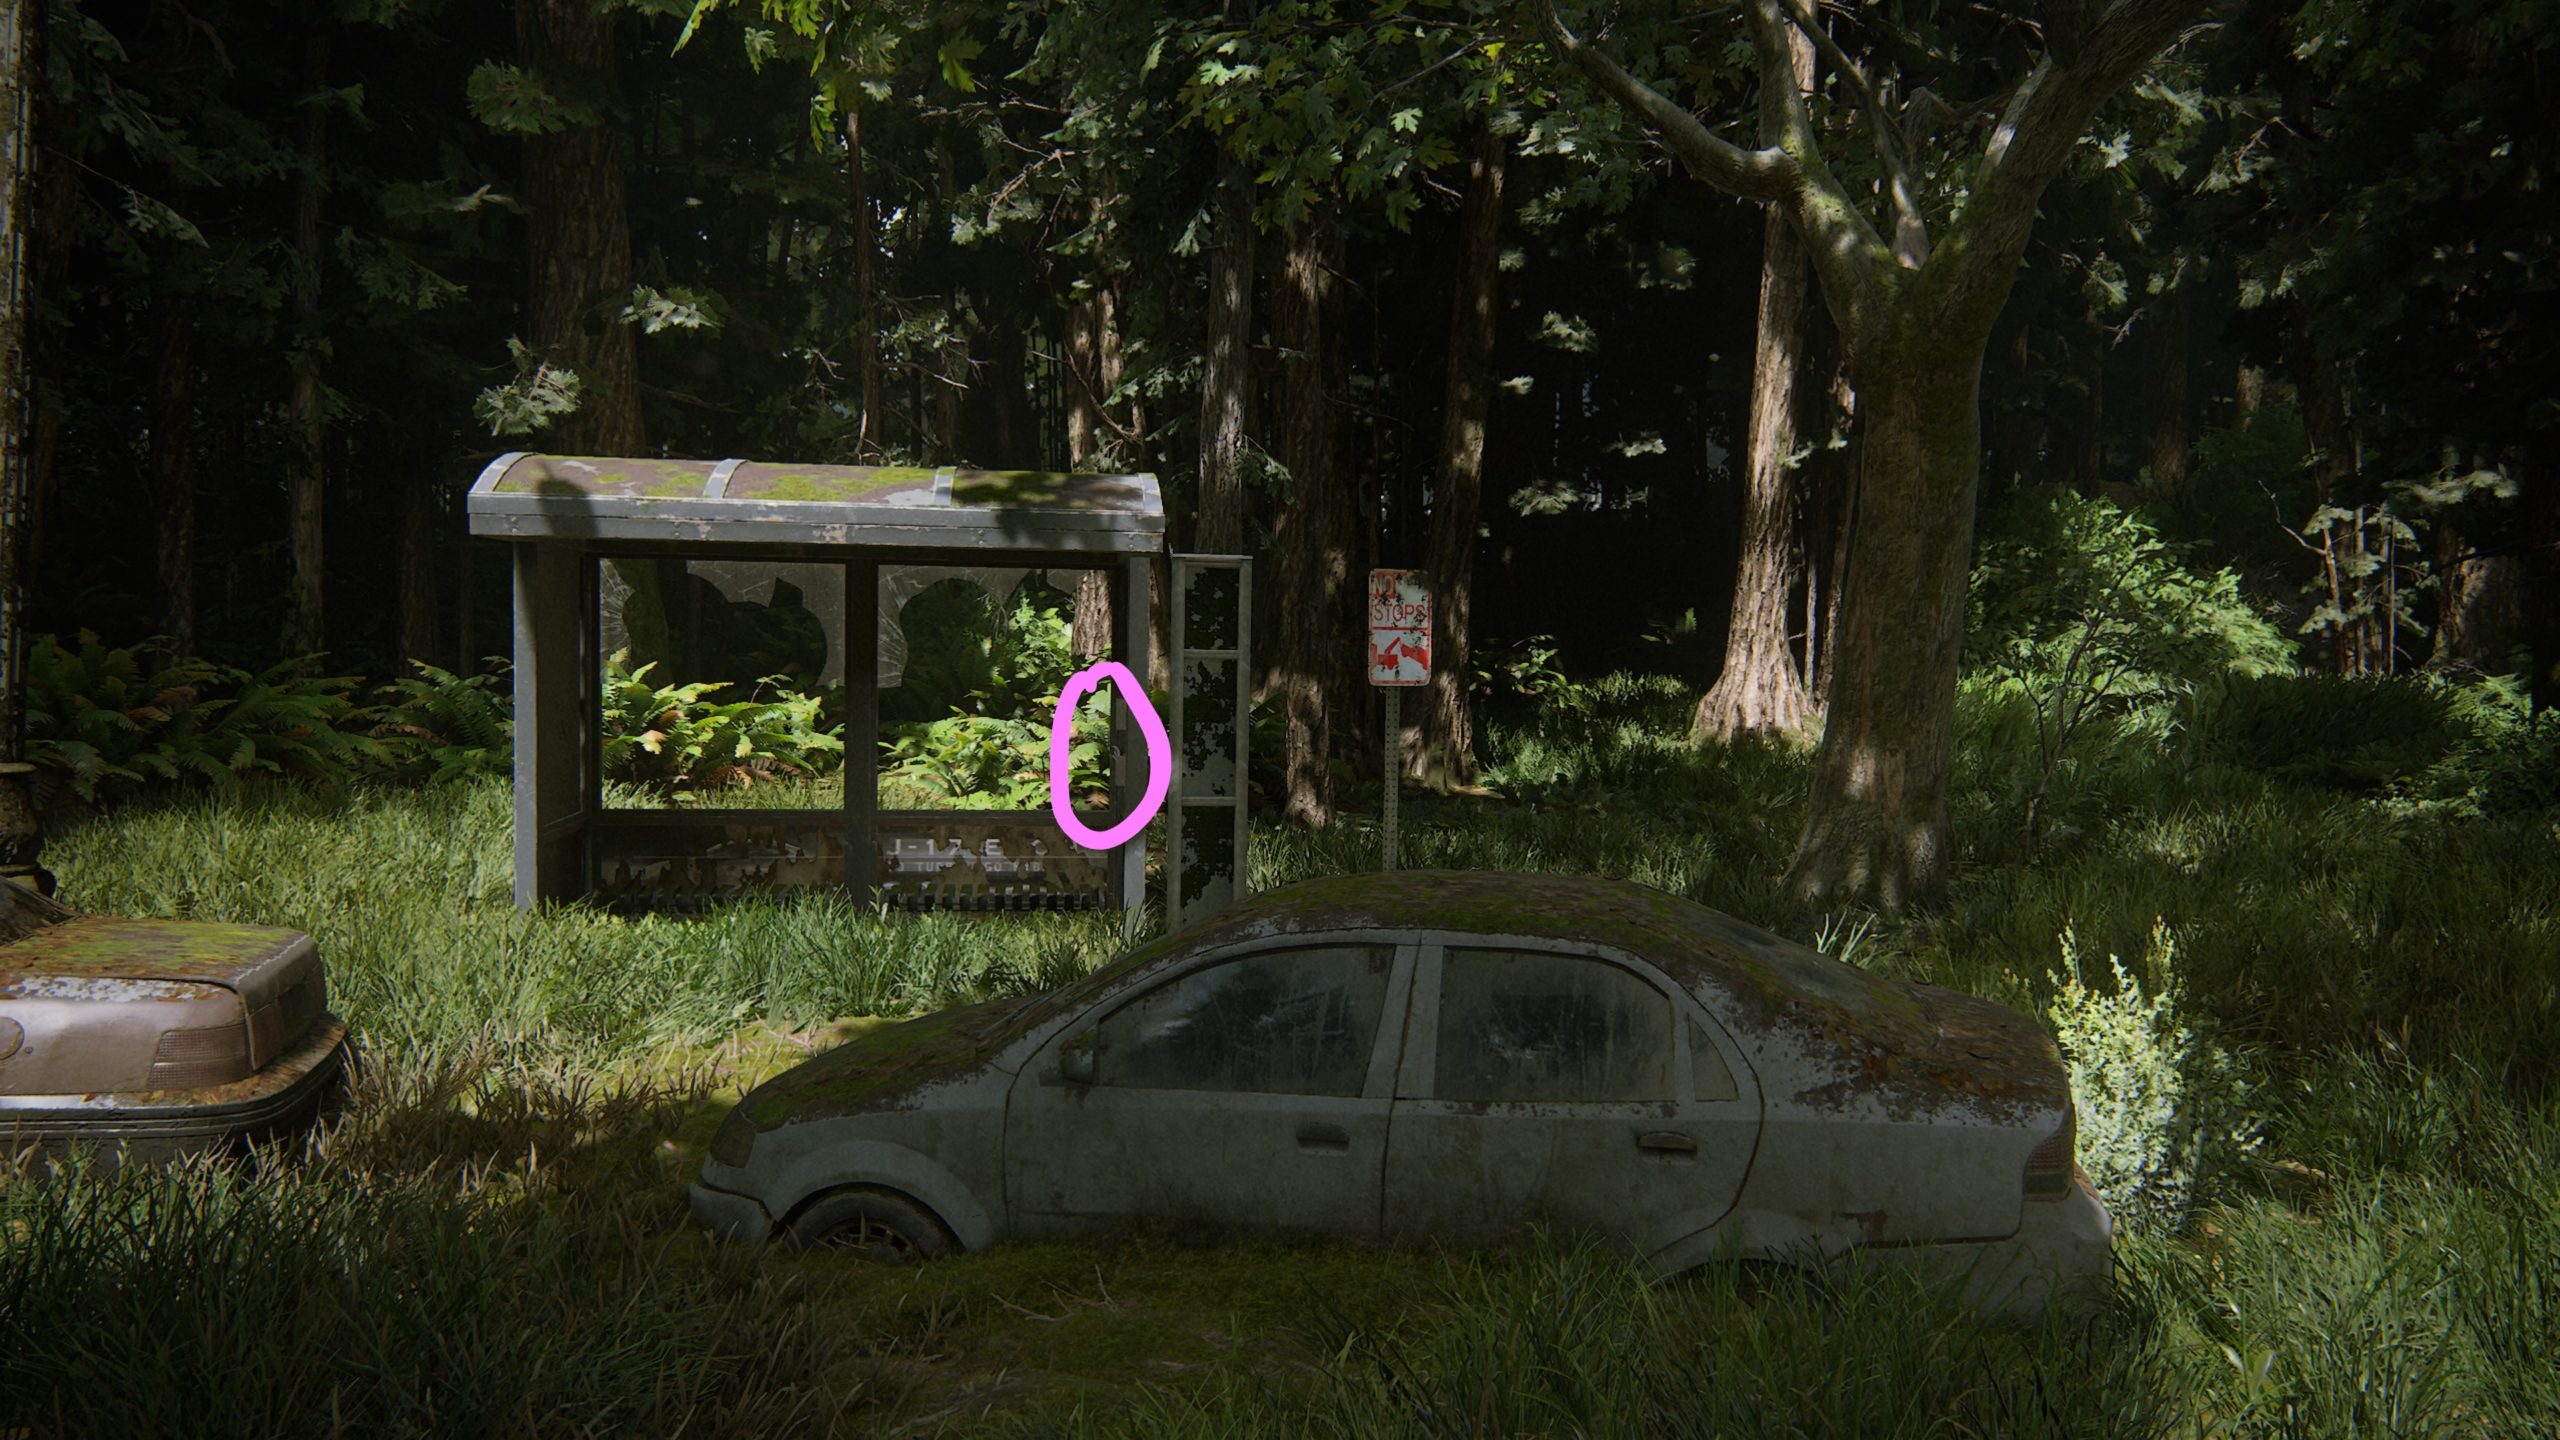
Trading Card – Motivator
The card can be found in a bus stop in a pamphlet container on the inner wall. This will be shortly after starting the level when you reach a section with cars in the forest.
Trading Card – The Starfire Kids
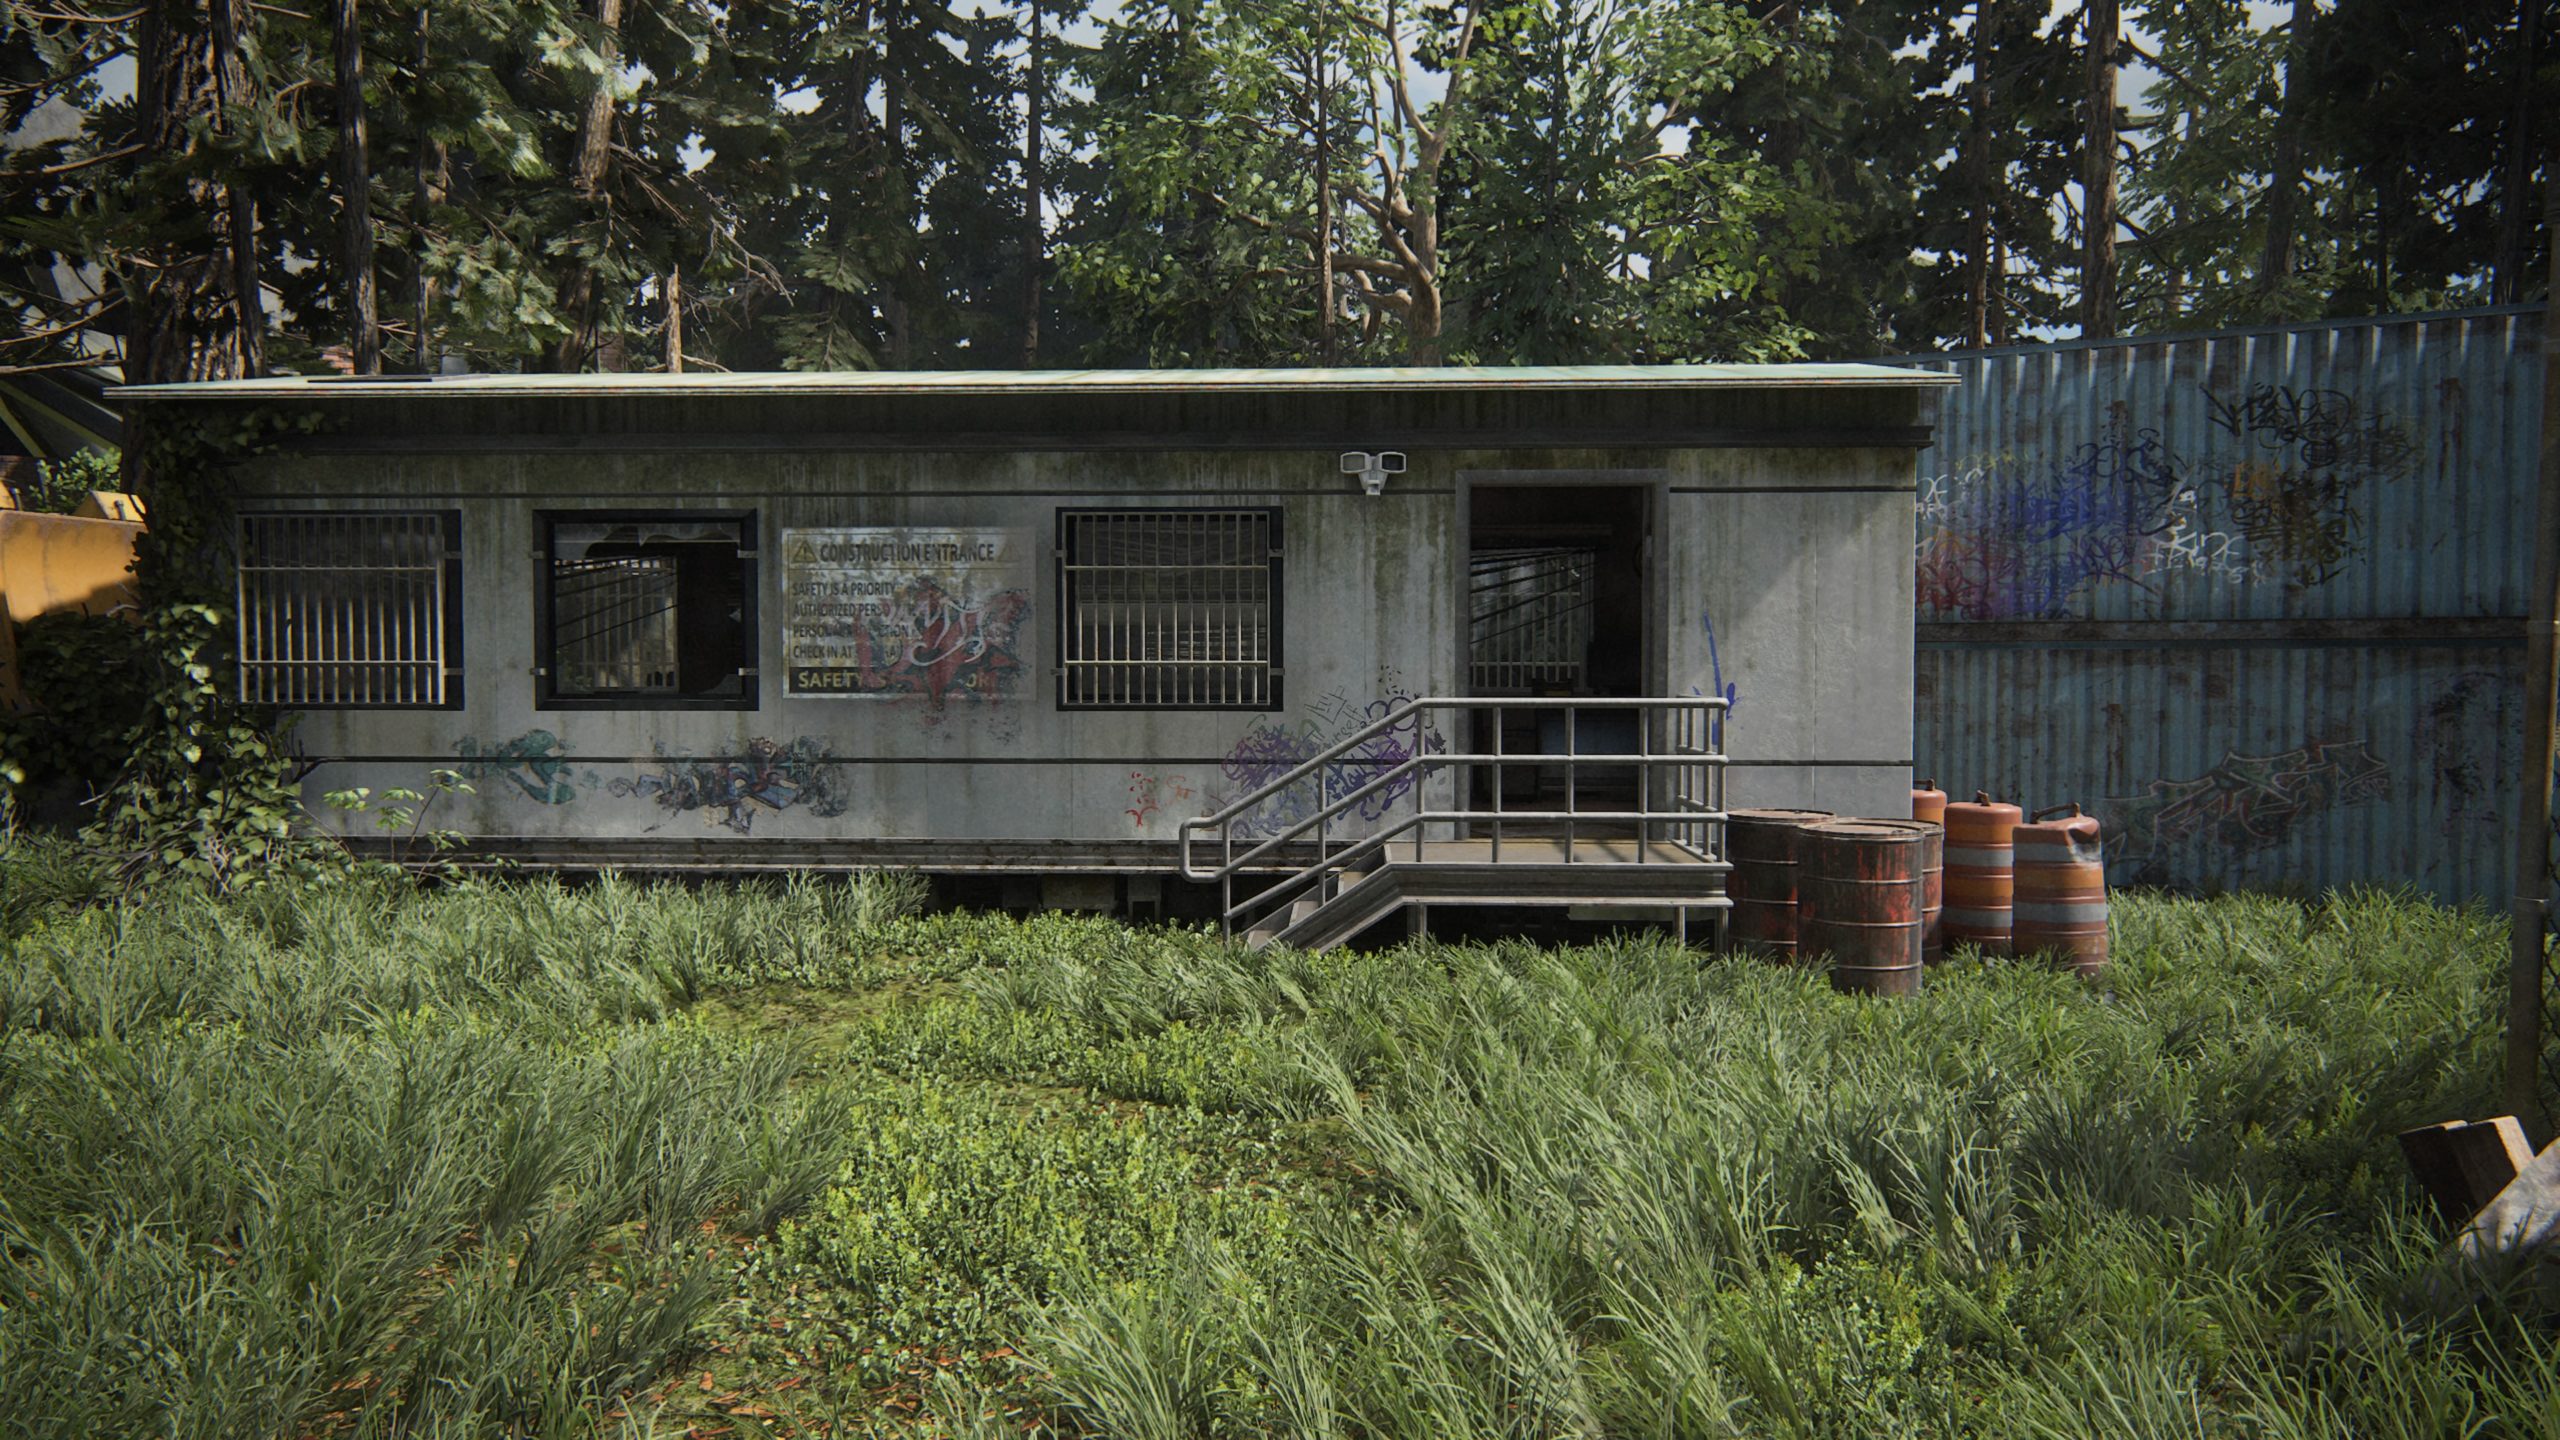
When you reach the highway filled with cars in the forest, follow the road under the overpass to reach a construction trailer on the left side of the road. The card will be in the trailer on a bulletin board.
Artifact – Map of Seattle
This can be found in the same trailer as the above collectible in the back room.
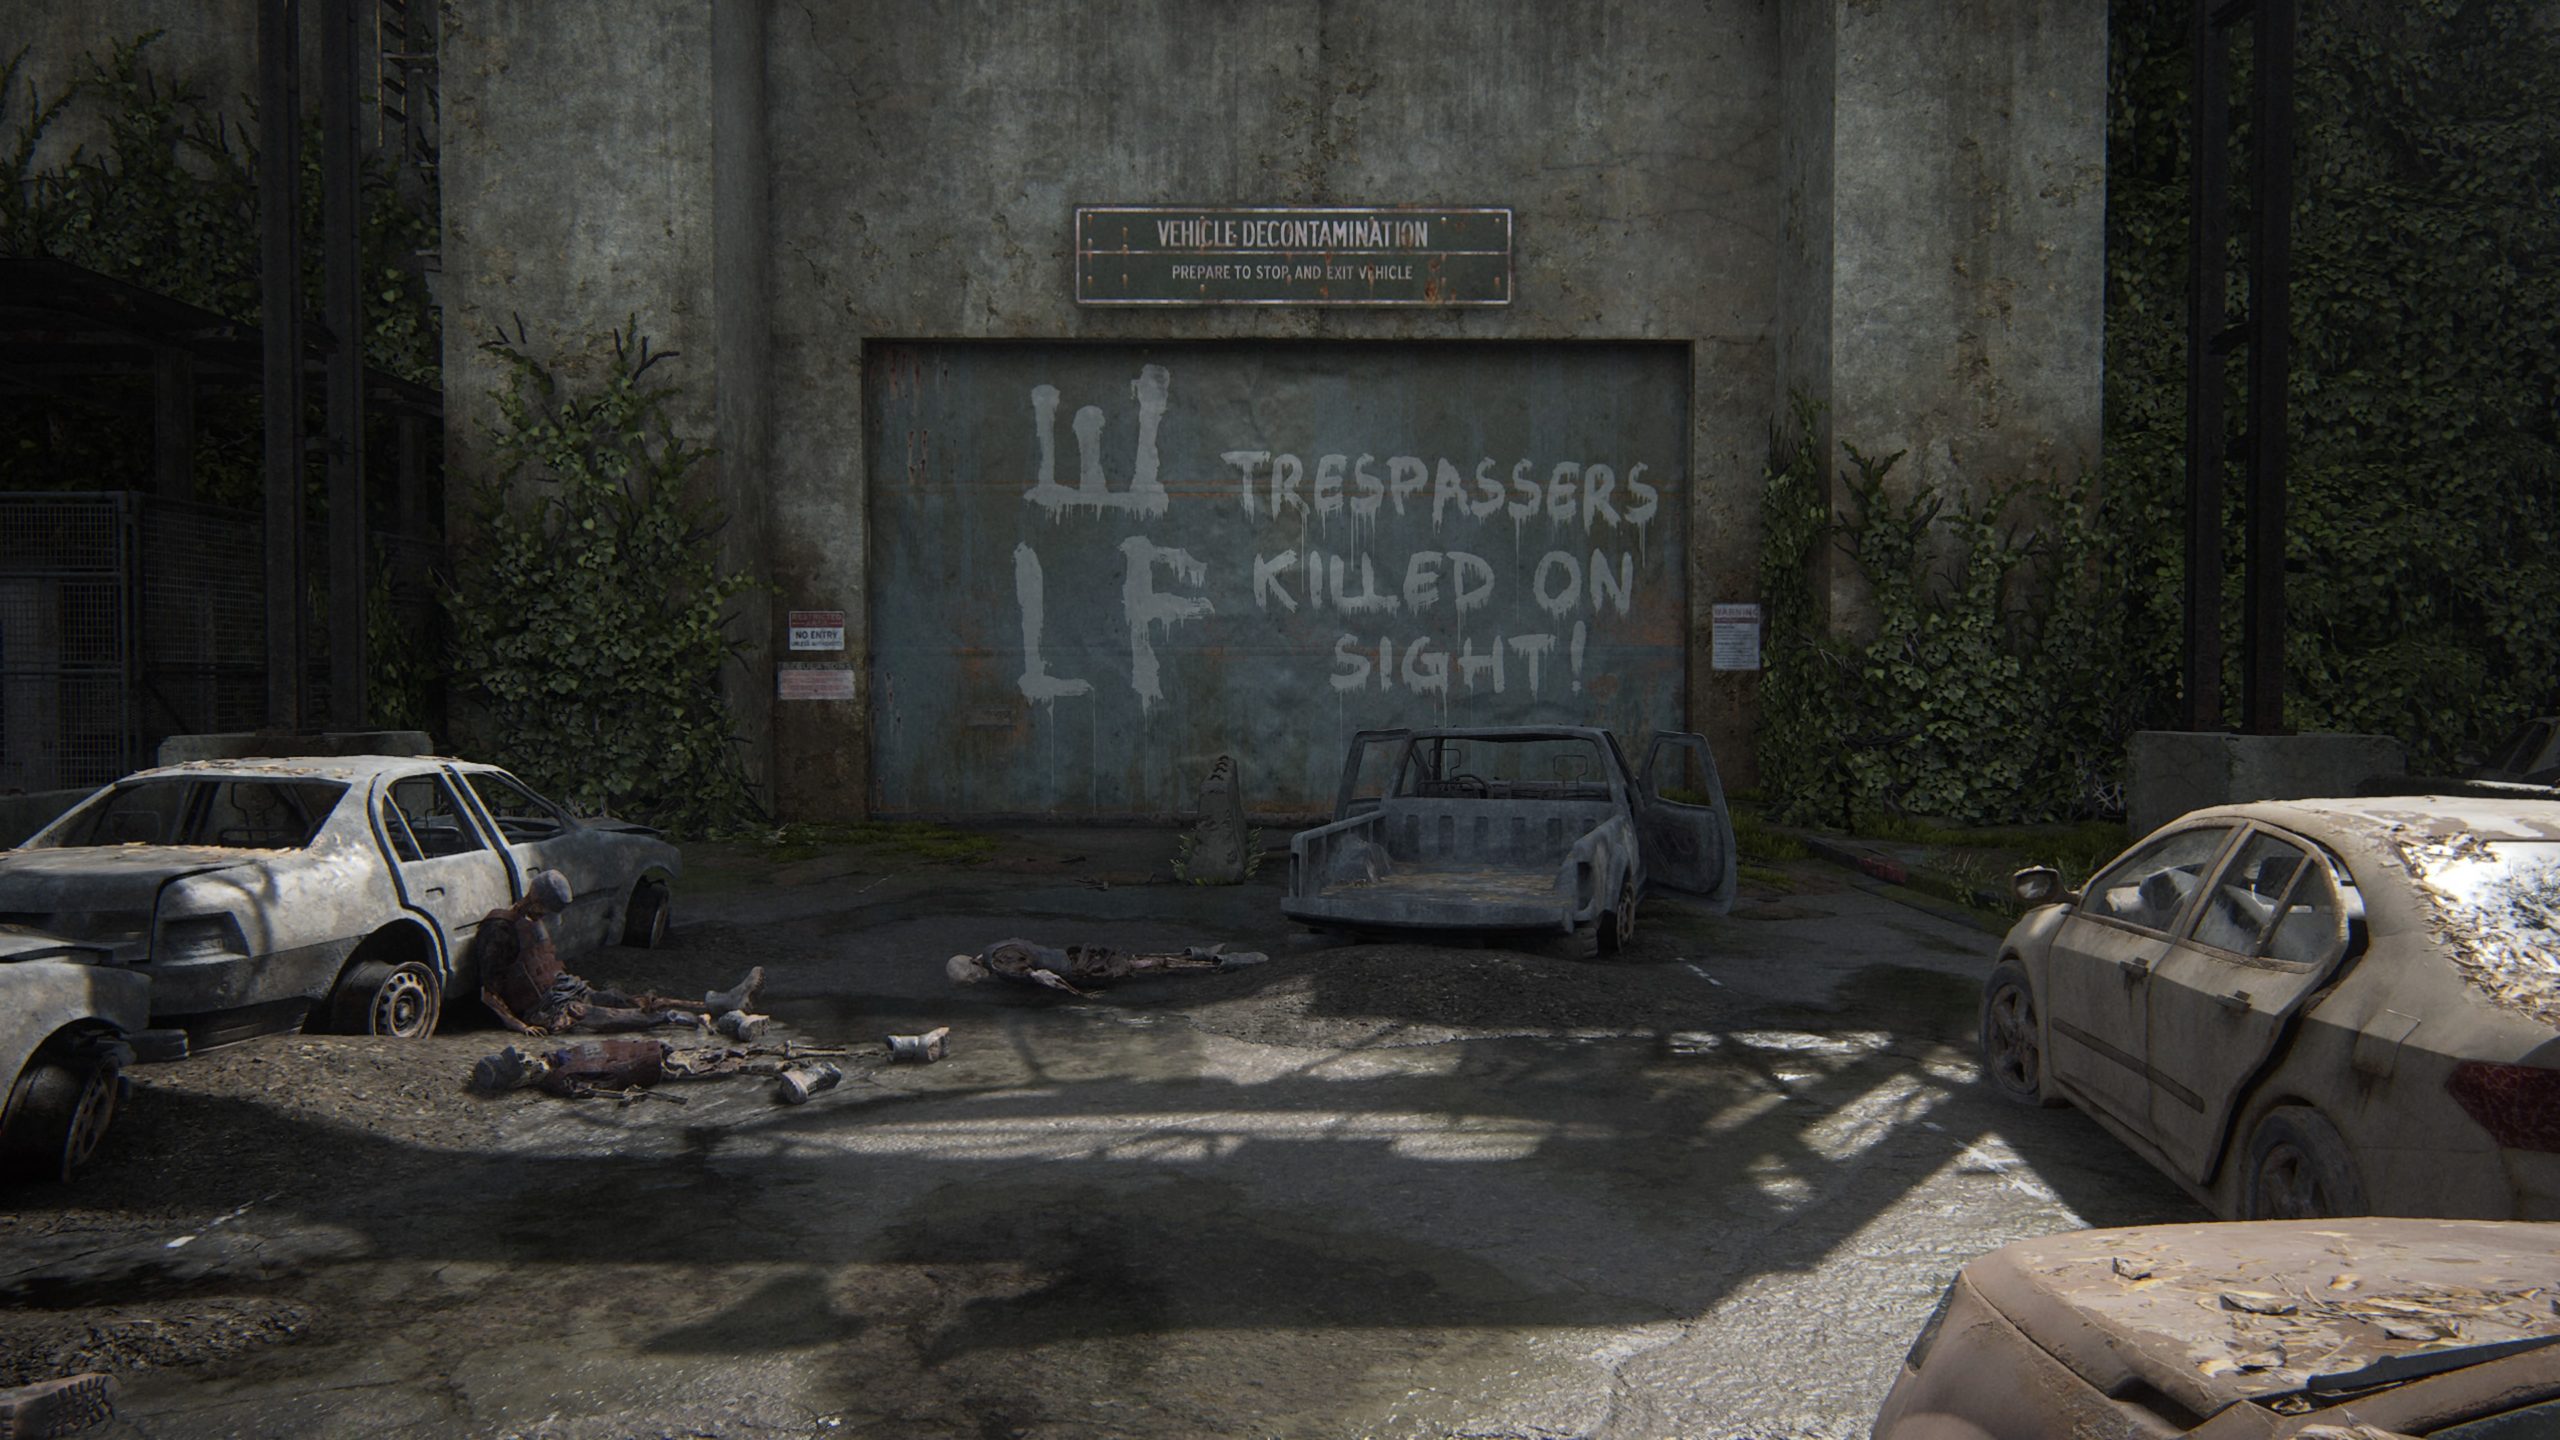
Journal Entry
When you reach the military zone with the WLF Trespassers Killed on Sight sign, interact with the sign to receive the entry.
Artifact – Refugee Note
This artifact can be found on a table in the structure to the left of the WLF Trespassers Killed on Sight sign.
Artifact – Infected Infographic
This artifact can be found on a table in the structure furthest from the WLF Trespassers Killed on Sight sign.
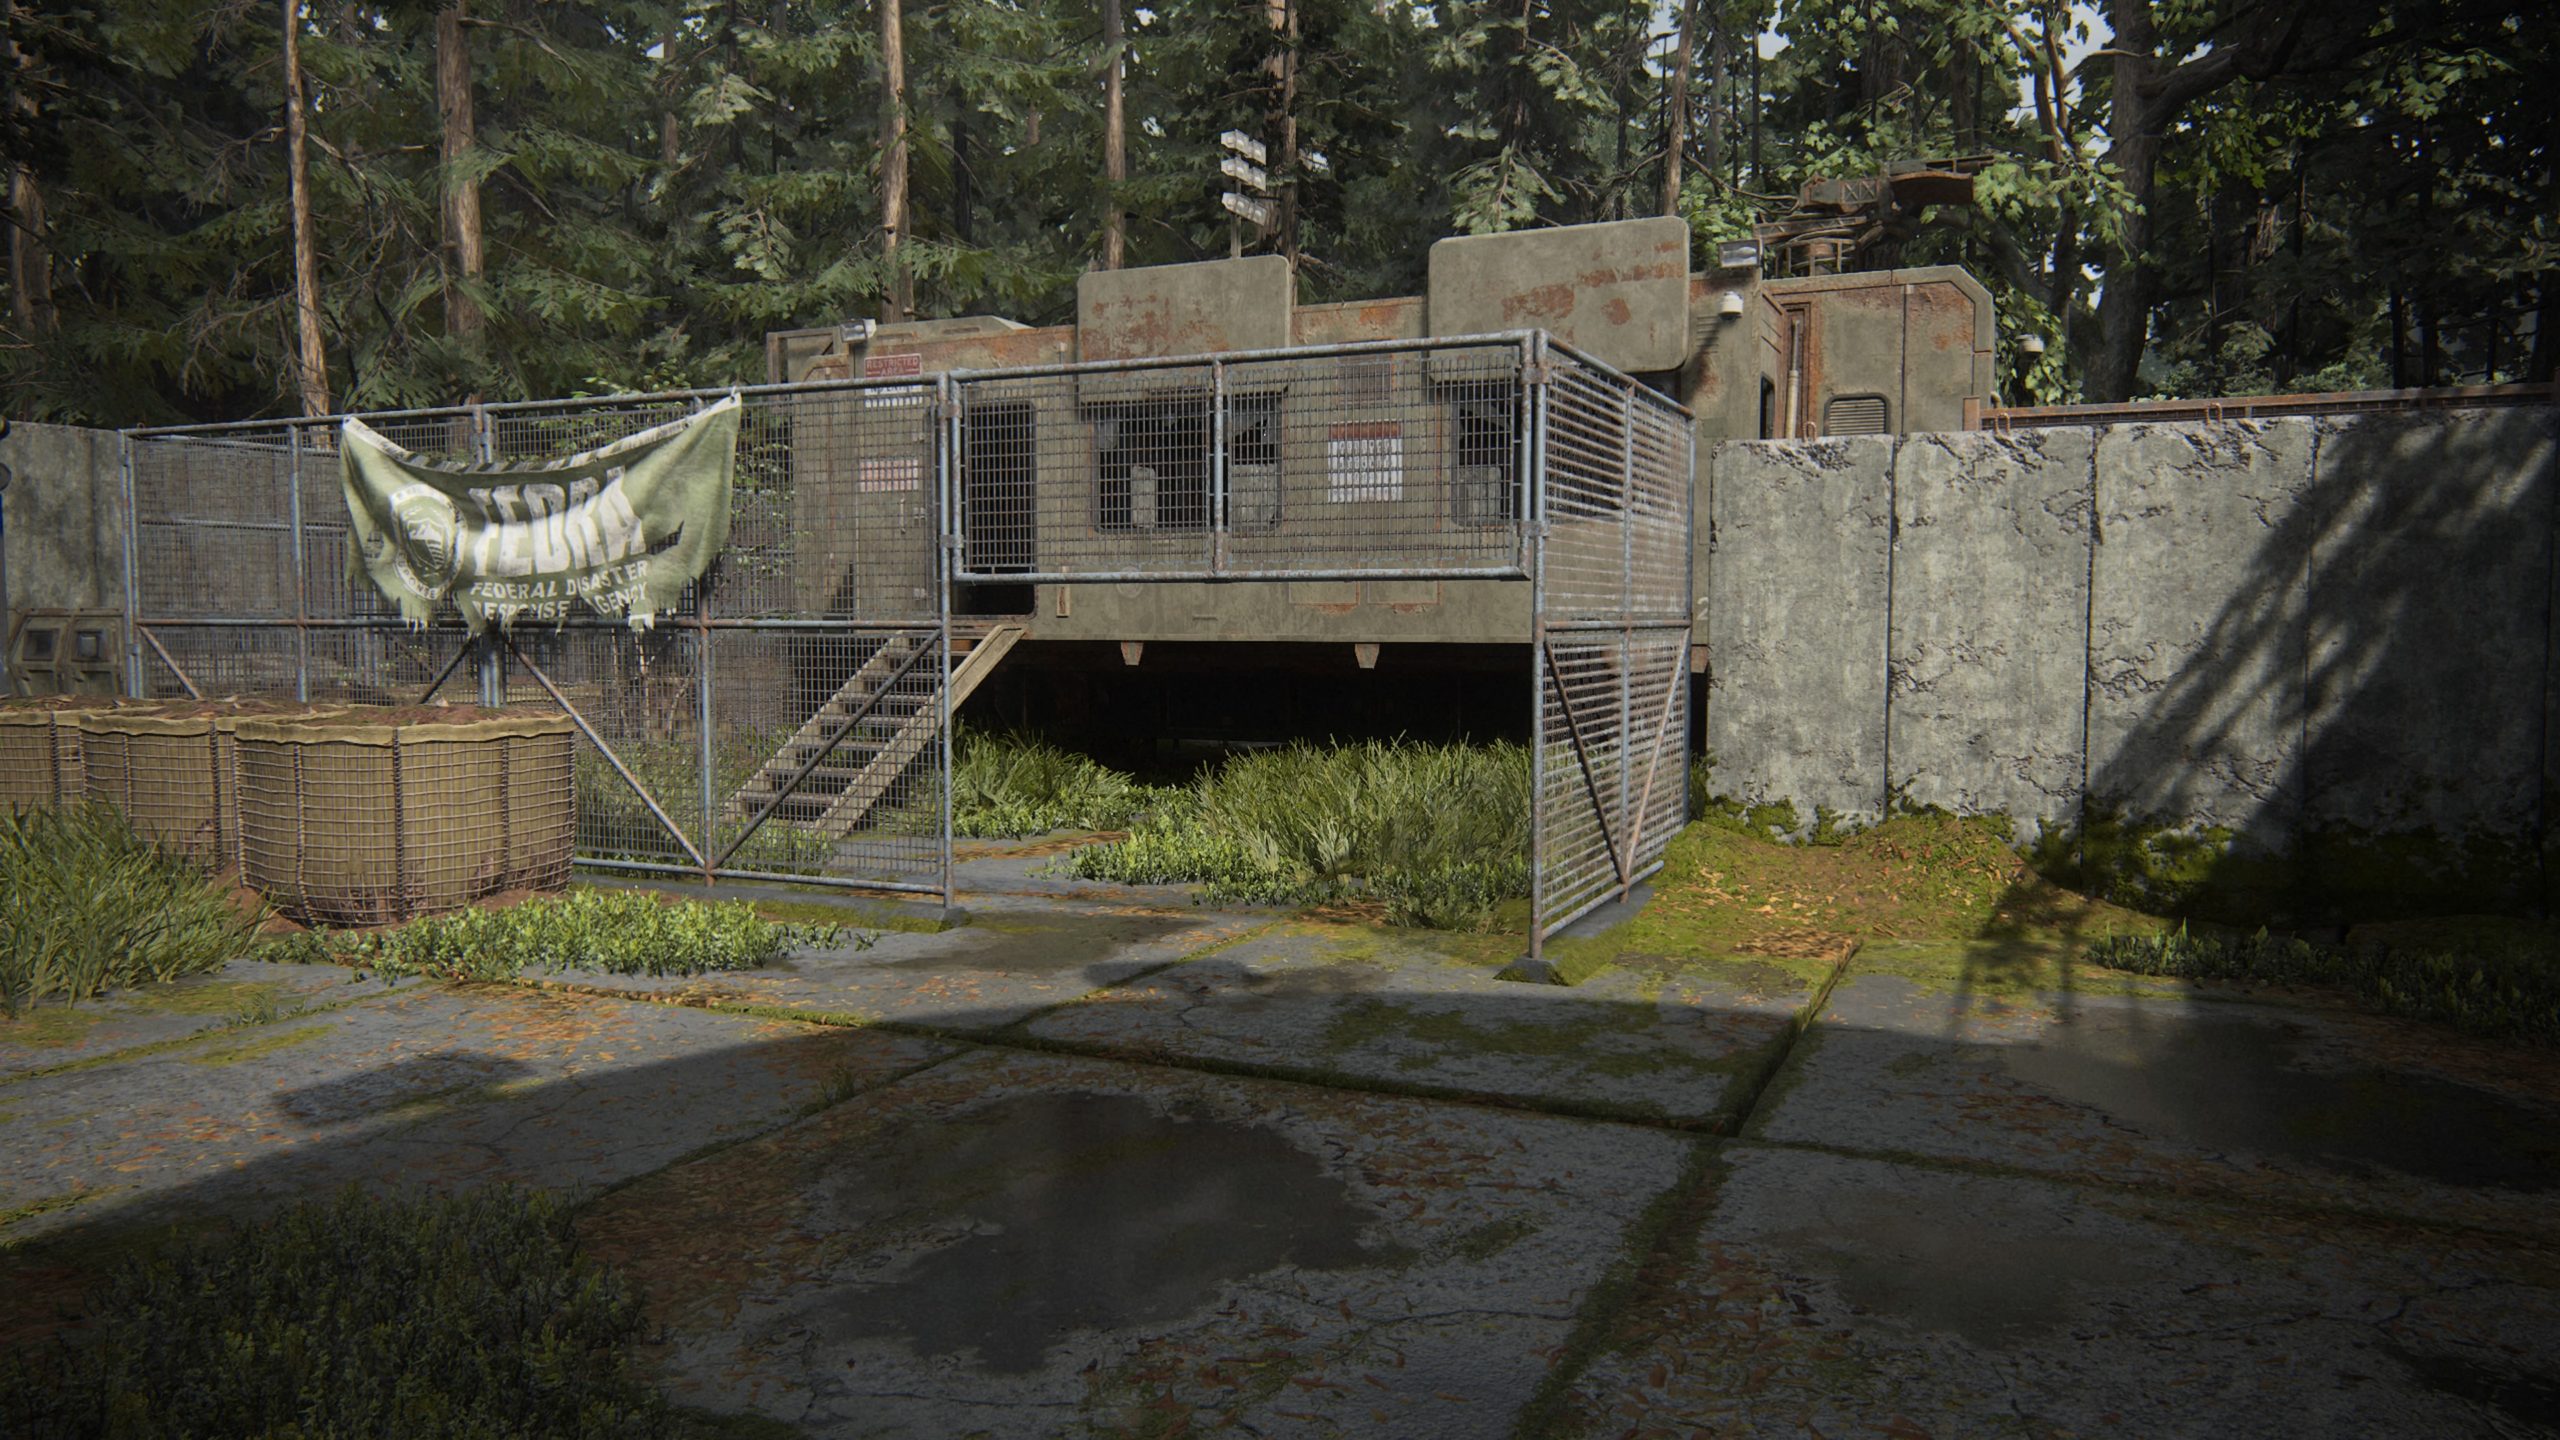
After you climb over the wall, head across the narrow walkway to enter a room with a ladder leading down. If you turn left in that room, you’ll see another ladder heading up. Climb up that ladder to find the card and artifact in the lookout tower on tables.
Artifact – Checkpoint Gate Codes
From the above collectibles, head back down the ladder then take another ladder down to reach the ground floor. The artifact can be found in the military structure straight ahead in a filing cabinet.
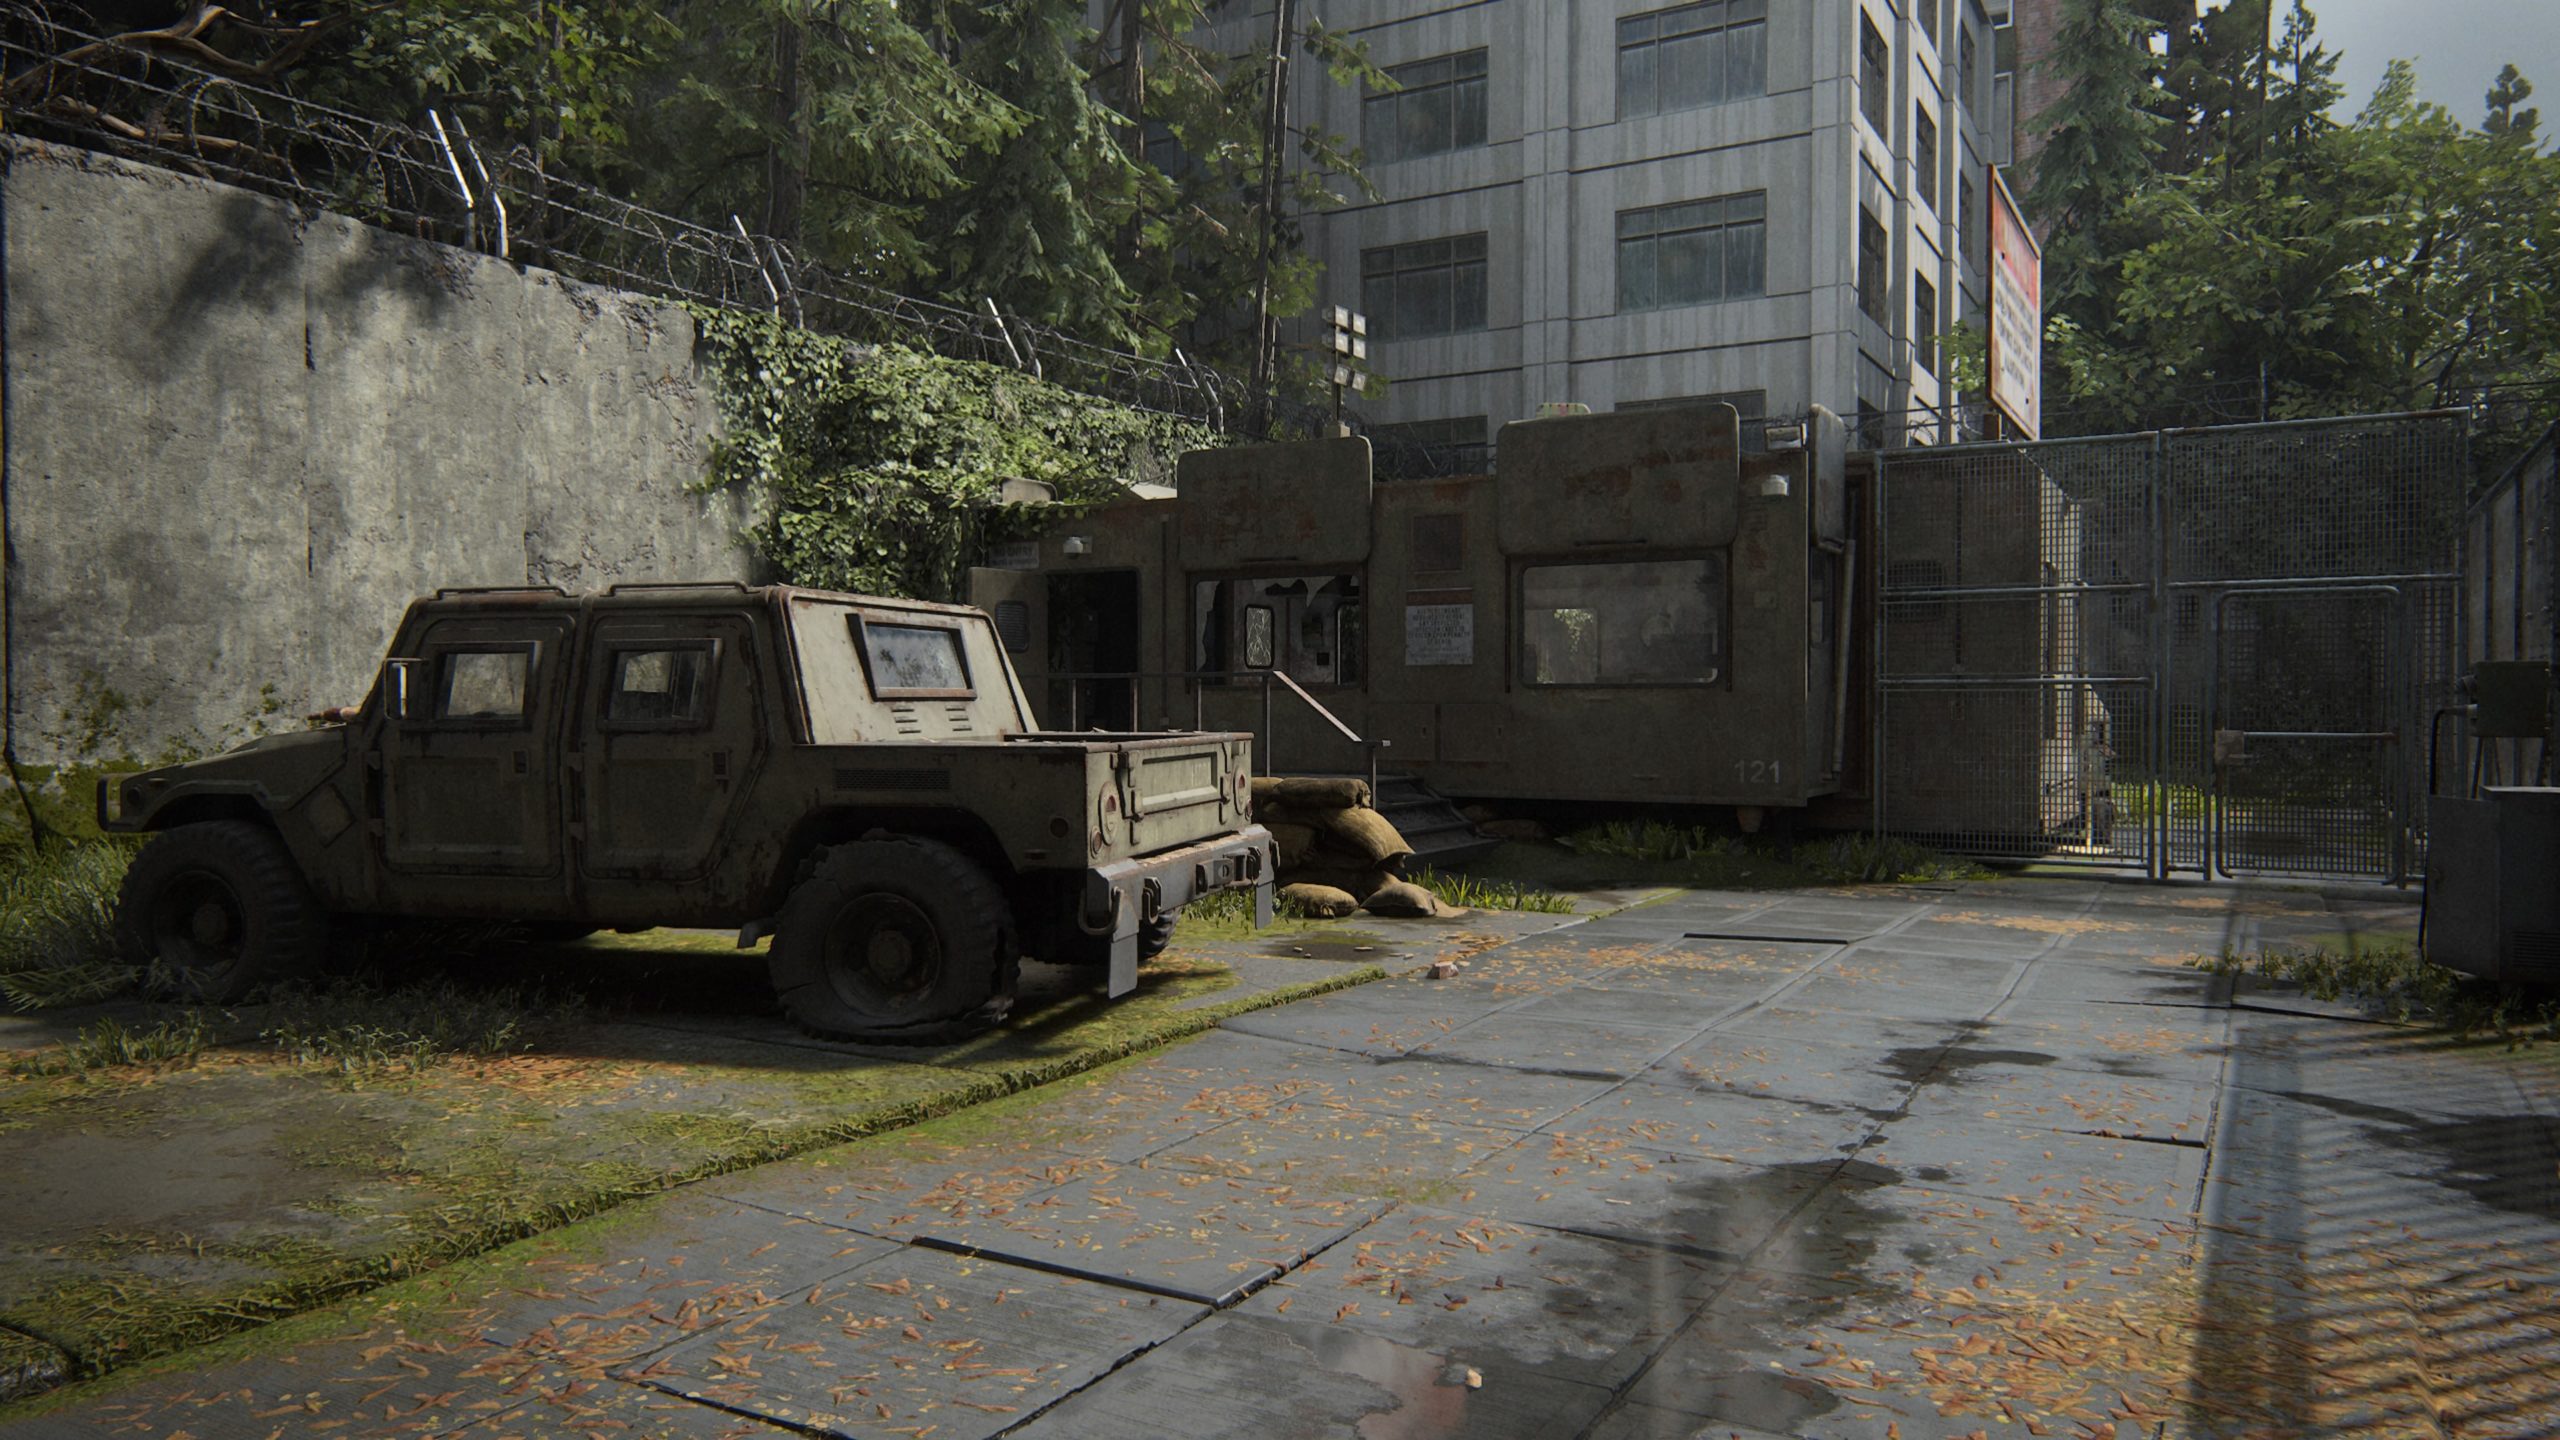
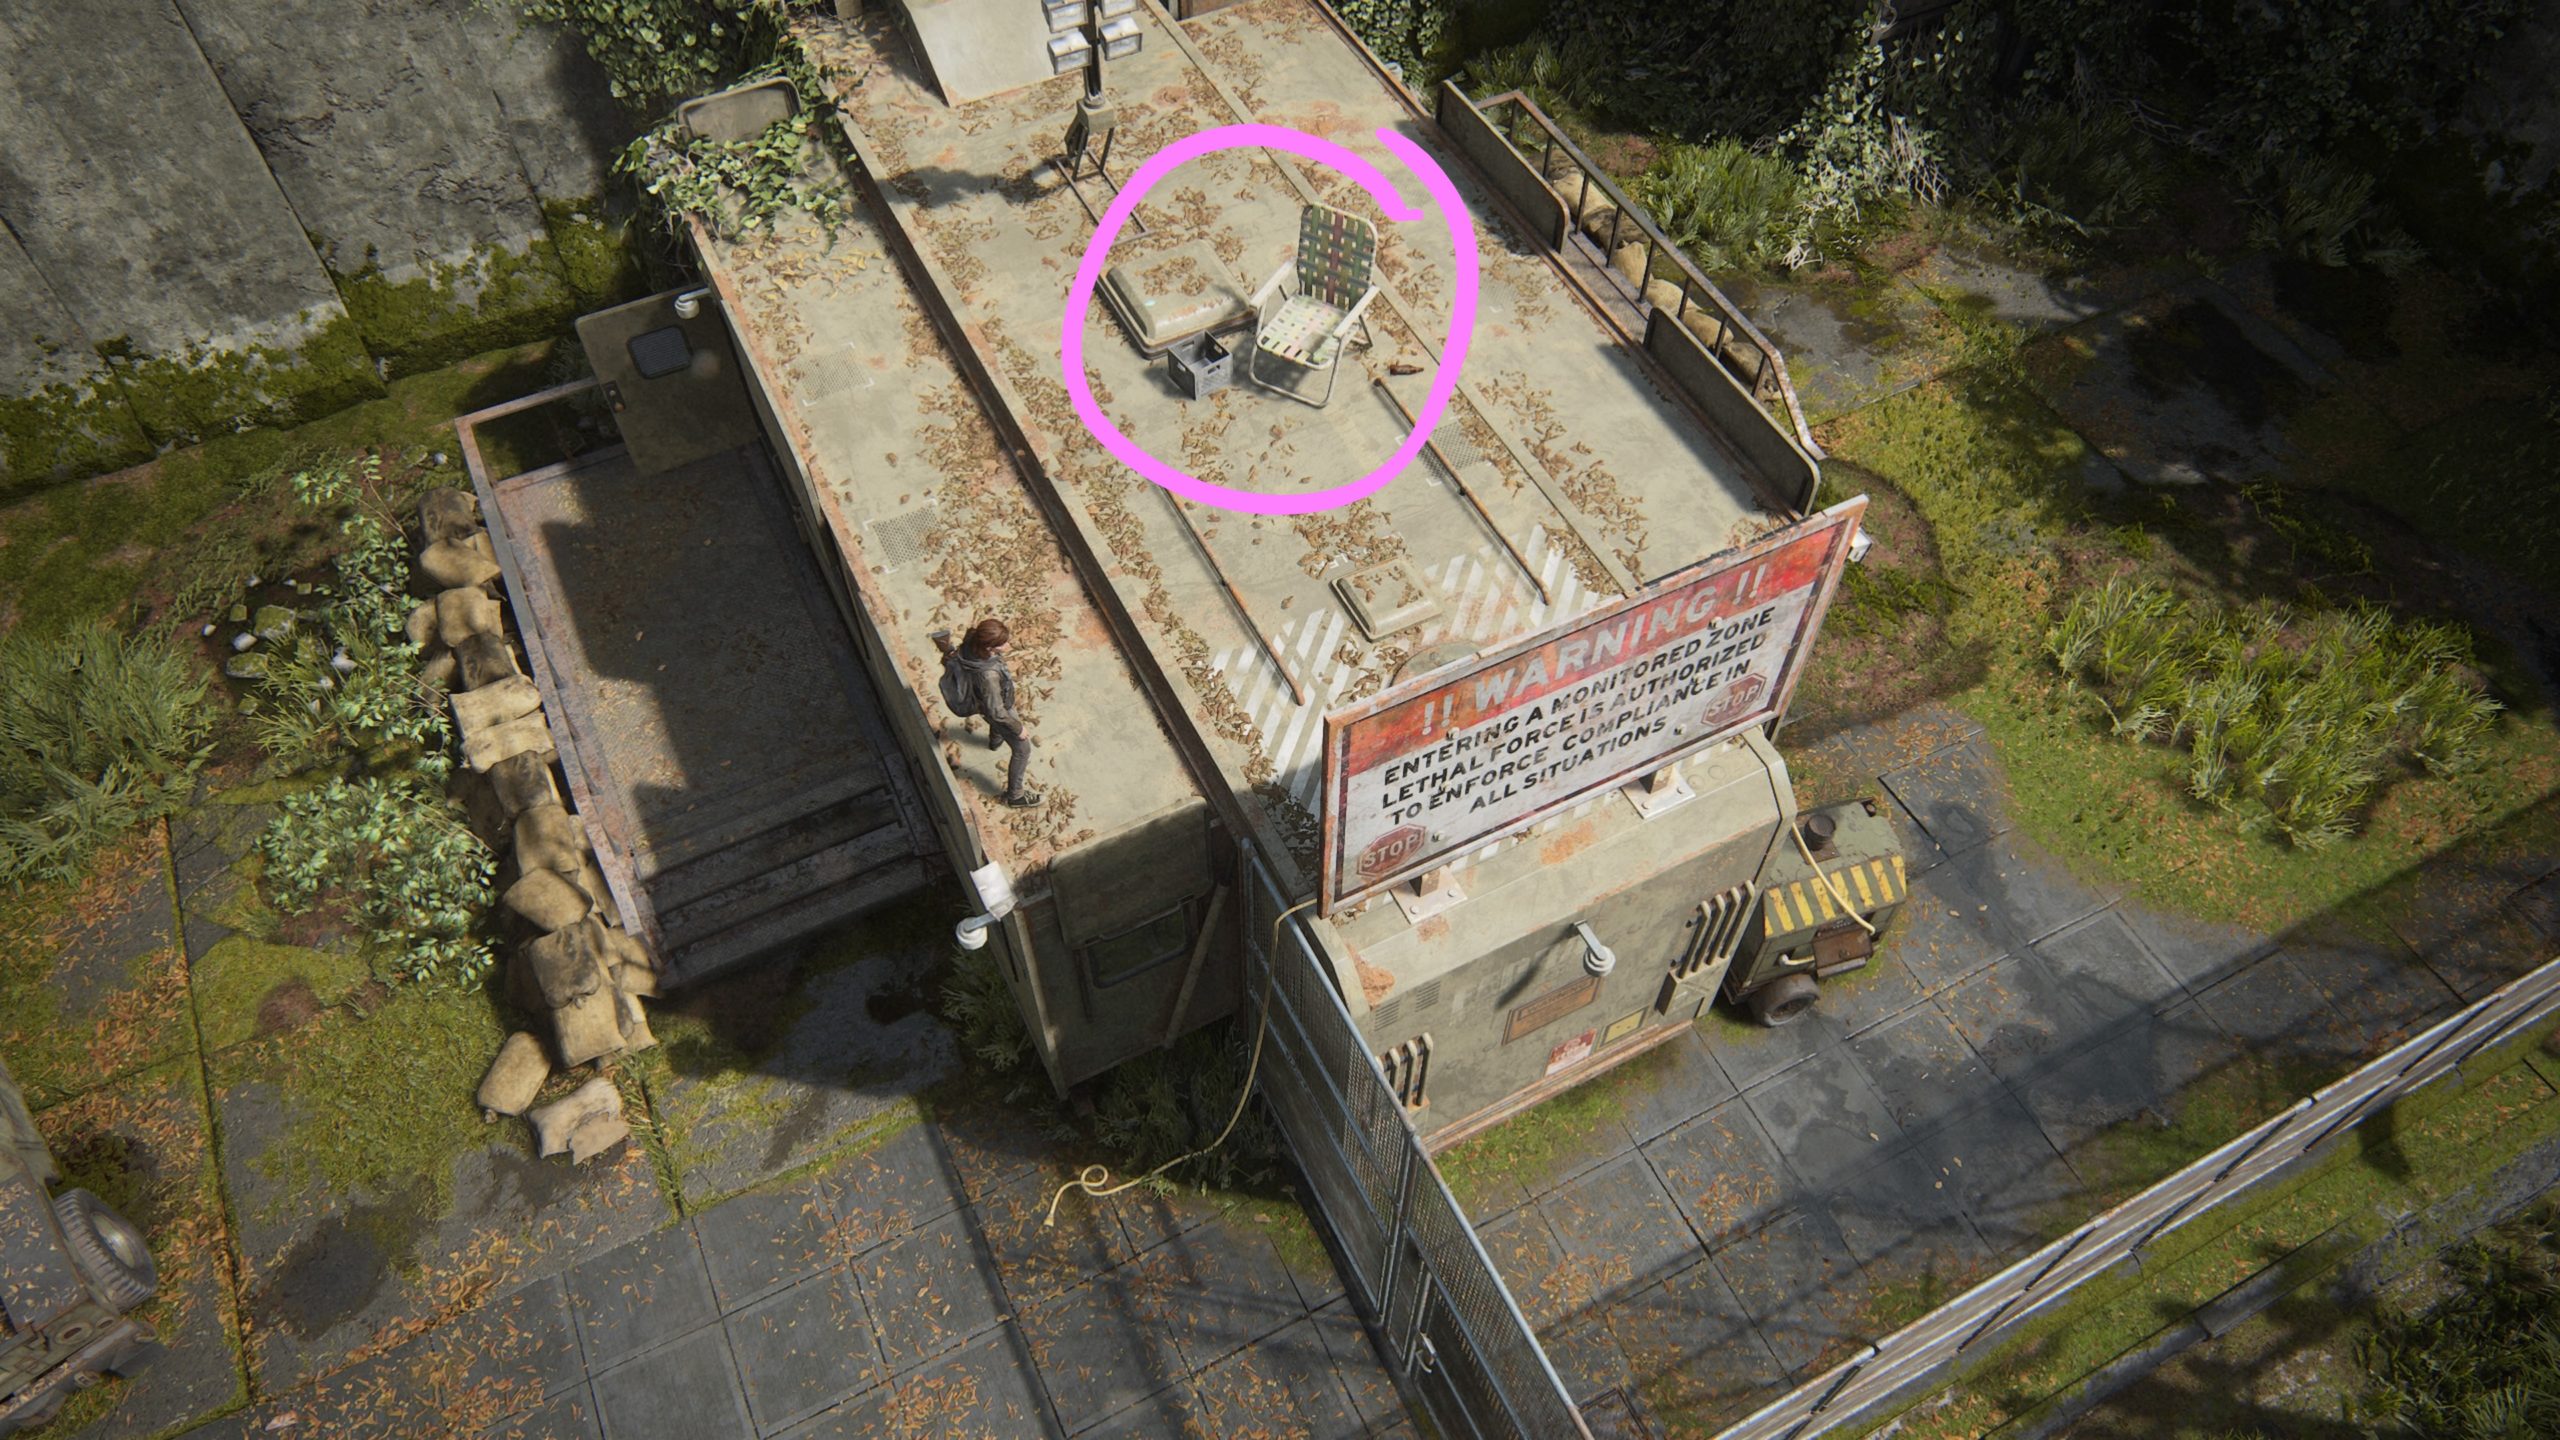
Trading Card – Oozer & Artifact – Rooftop Note
After you start the generator and throw the yellow cable over to the other side, head to the other side of the military structure and climb up the cable you just threw over. The card can be found on a table next to a lawn chair on the roof.
Below is a guide on the 6 artifacts, 2 trading cards, 2 journal entries, 1 safe and 1 workbench that can be found in the Patrol chapter in The Last of Us Part II.
Journal Entry
After taking in the scenery with Dina as part of the main story, back away from the edge then look out back towards the mountains. You will see a prompt to enter a journal entry in Ellie’s journal.
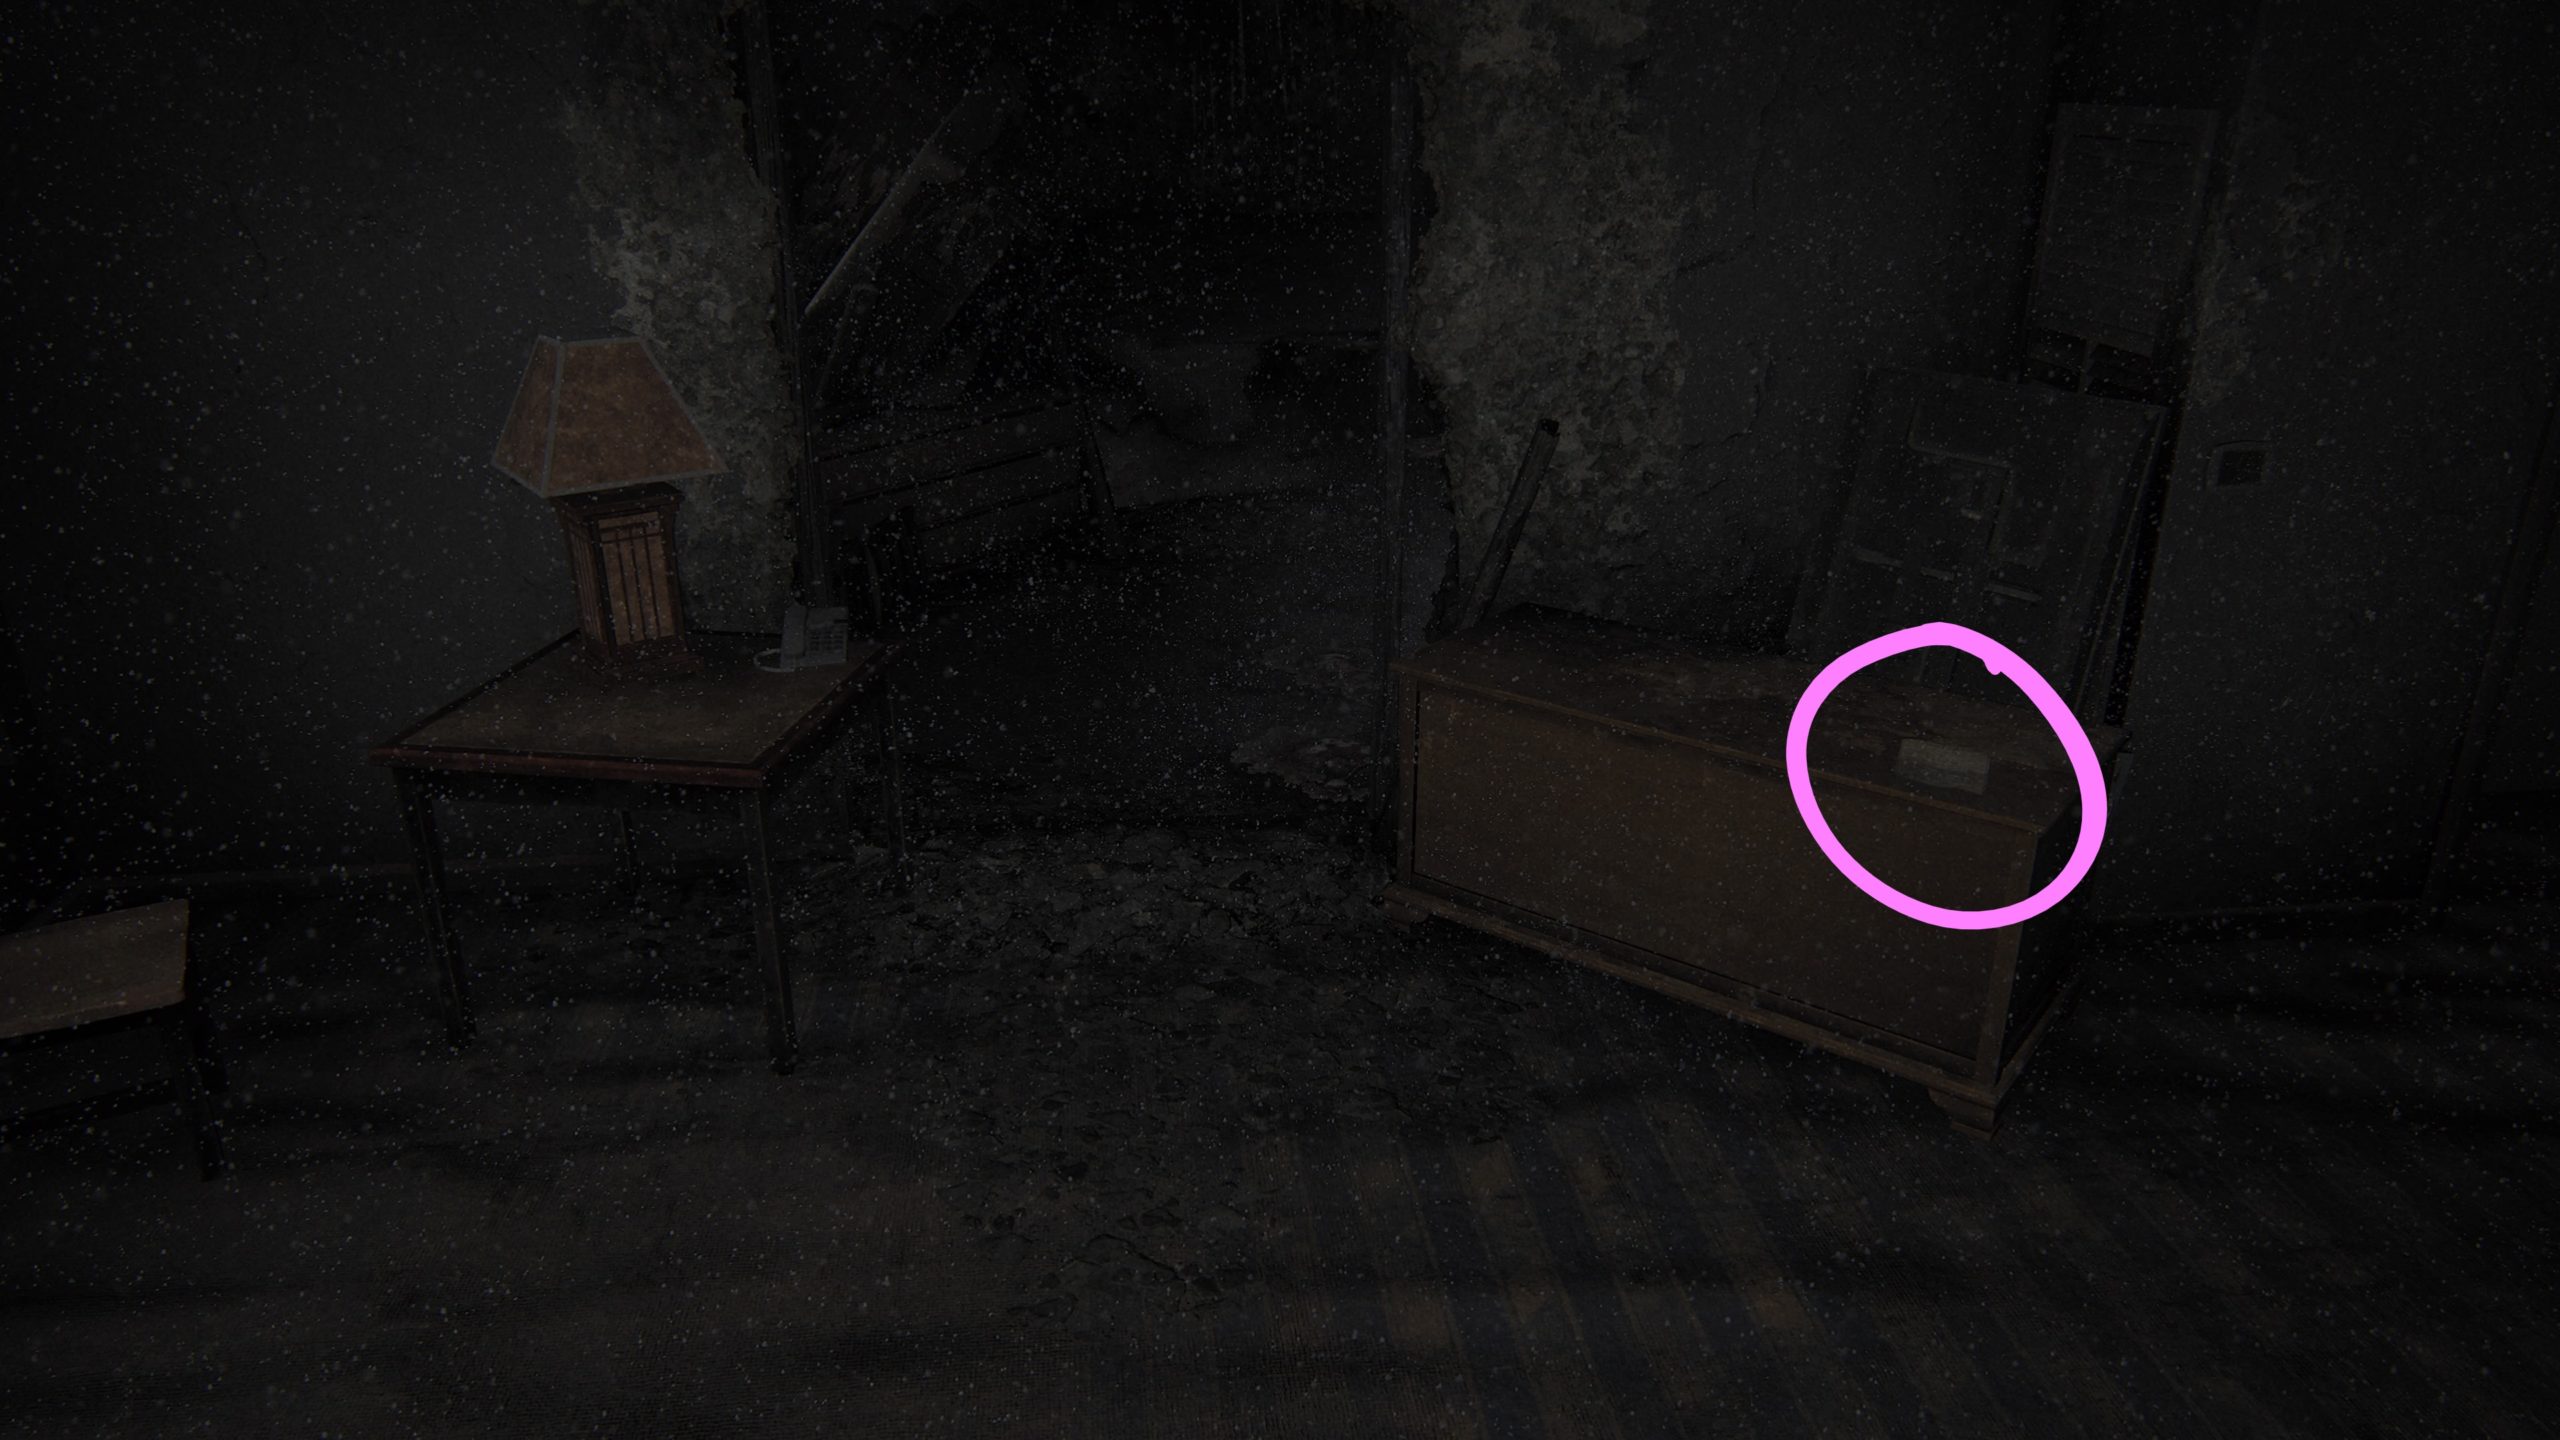
Artifact – A Note to Santa
After dismounting from the houses in a residential area, look for the ruined house in the picture above on the left side of the road. Climb up the broken stairs inside the house to reach the second level then open the drawer of the nightstand to the right of the bed.
Trading Card – Tesseracter
From the above collectible, head to the house across the street and use the vehicle stuck in the snow to climb up to the porch roof. Climb in through the hole in the wall to enter a bedroom. The card can be found on a bookshelf in the closet on the left side of the room.
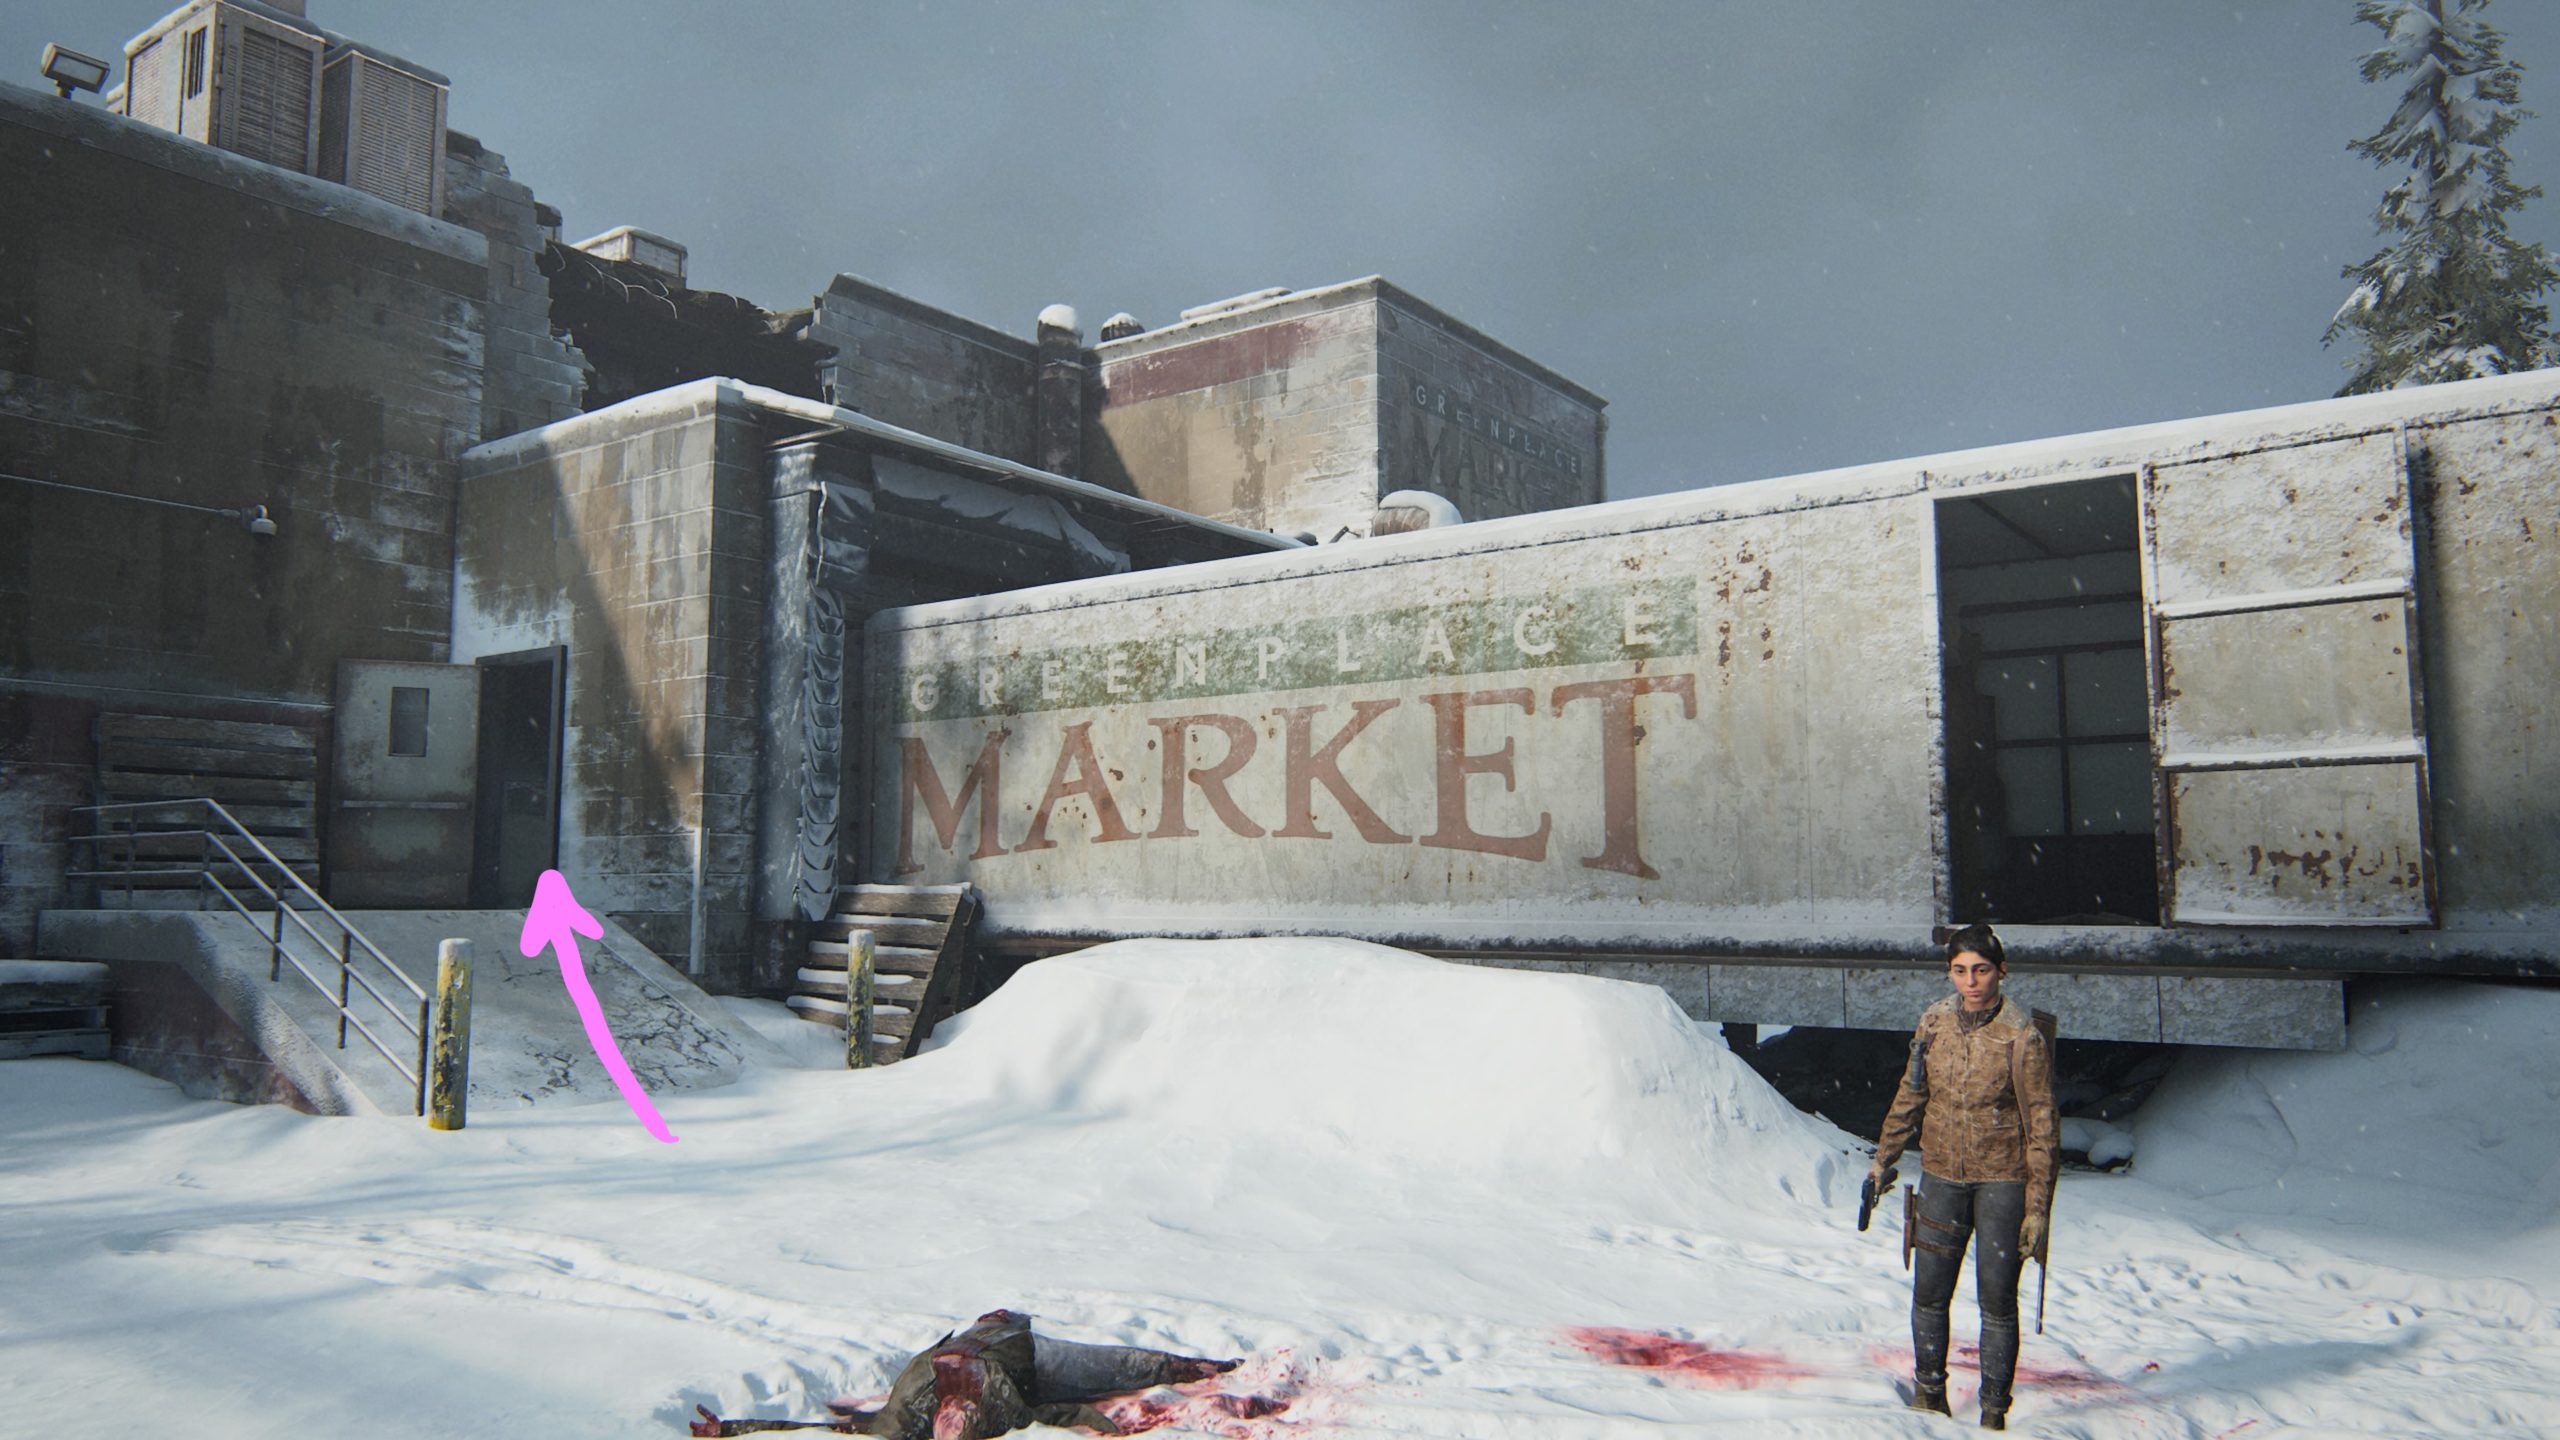
Artifact – Supermarket Apology
As part of the story, you’ll need to climb under a Greenplace Market semi-truck blocking the path behind the supermarket. When you emerge, you’ll need to deal with an Infected. Afterwards, head up the small ramp to the loading dock to find the artifact inside the back of the semi-truck on a stack of cardboard boxes.
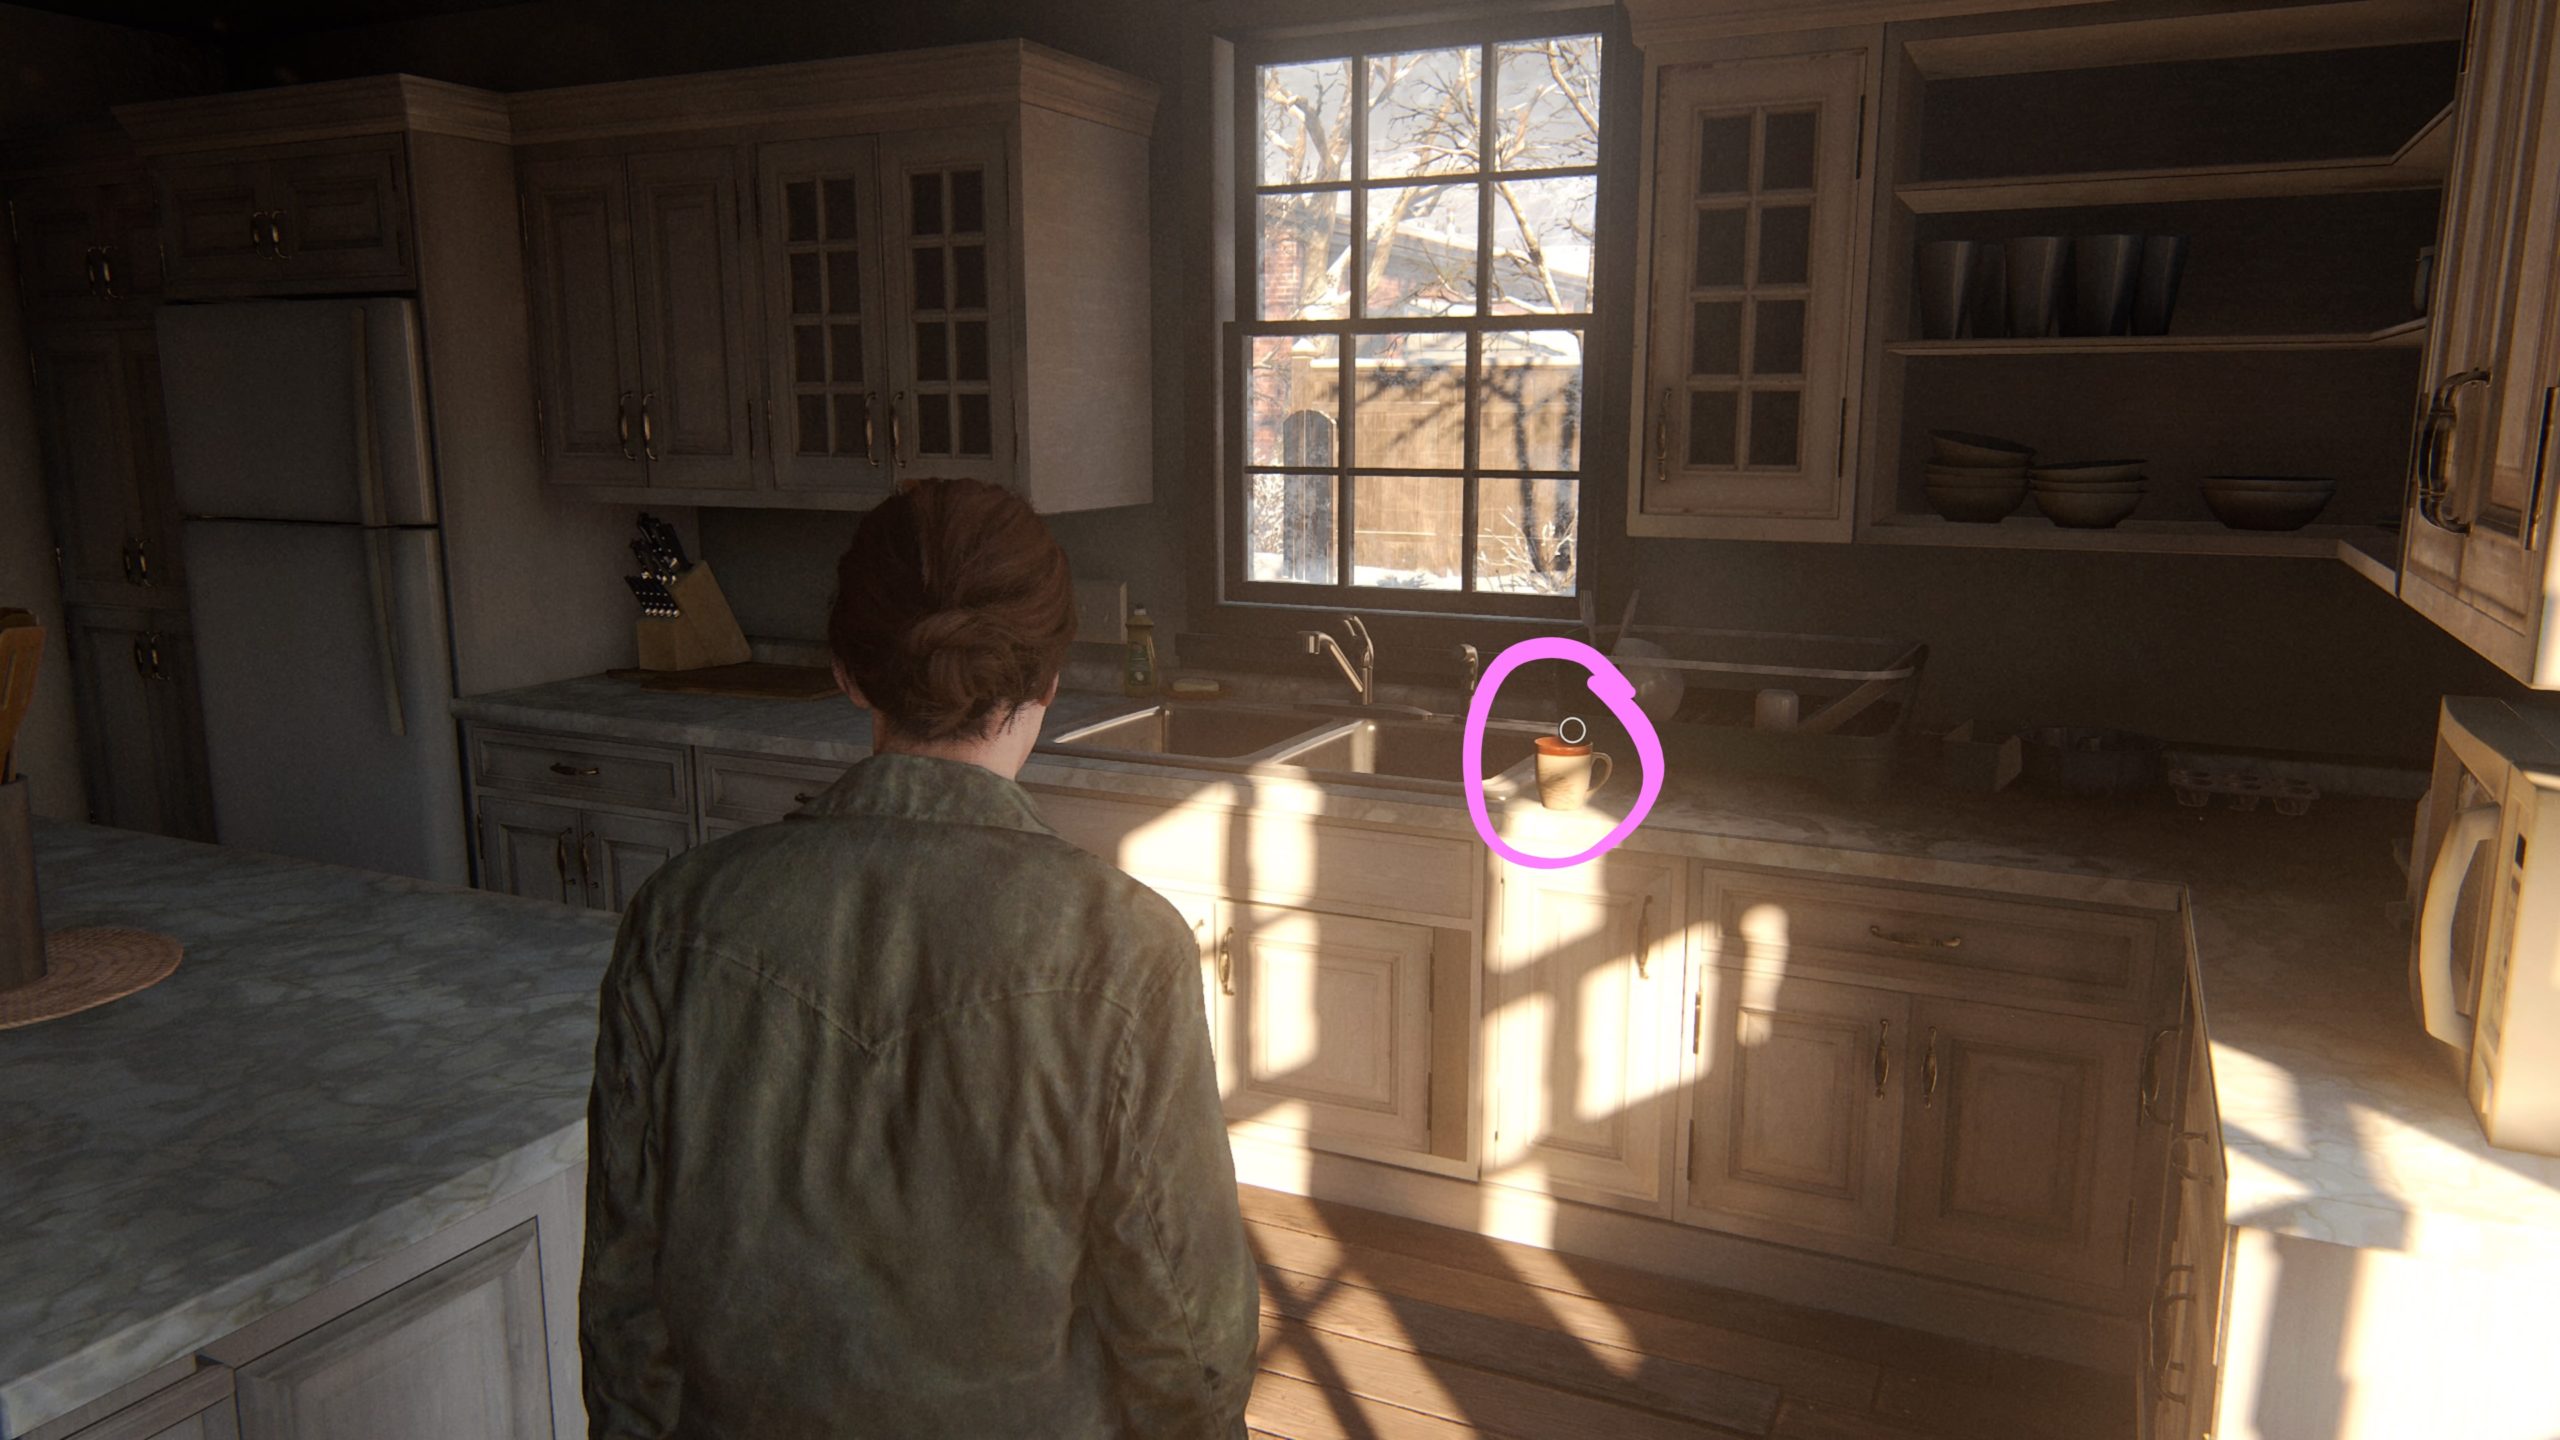
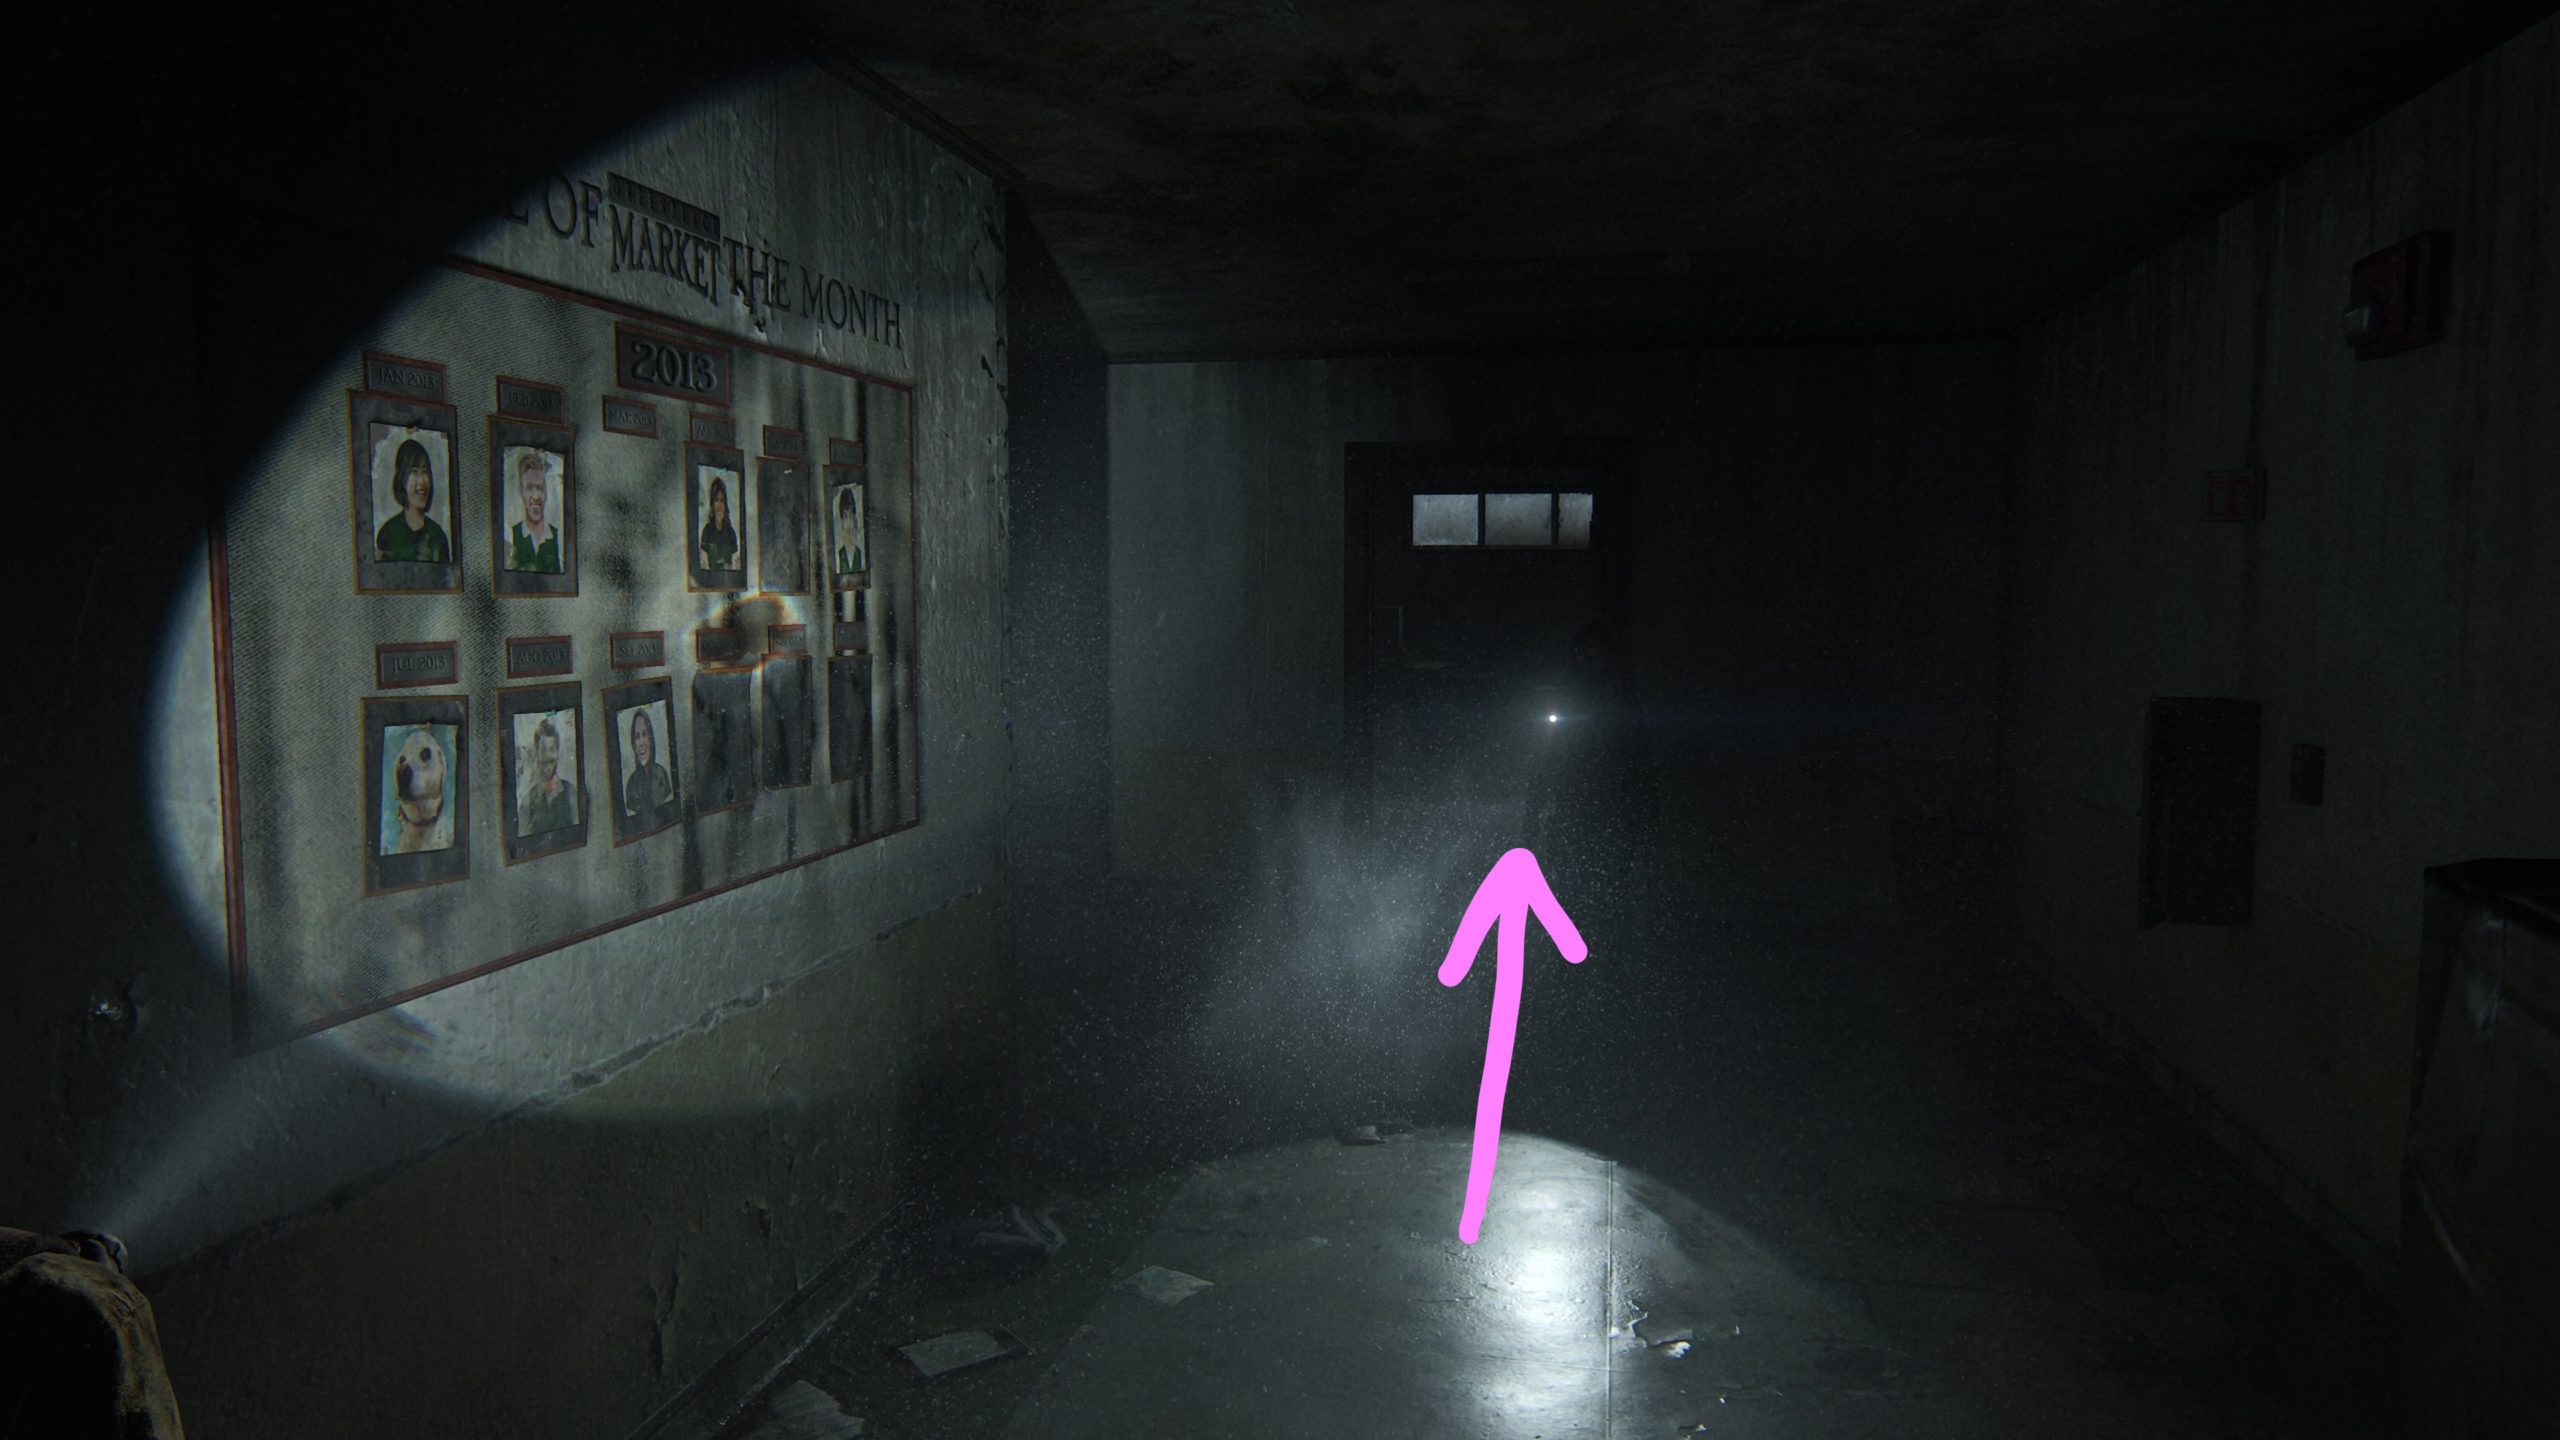
Artifact – Good Boy Combo
As part of the story, you’ll put on your face masks then will need to proceed through a crack in the wall. There will be an Employee of the Month board in front of you on the wall. Turn right down the hallway and head through the door straight ahead to find the artifact on a desk in the room.
Safe
The safe can be found be found in the same room as the above collectible. The code is 07 20 13. The Good Boy Combo artifact says that the combination to the safe is the month that Mina’s goodest boy got Employee of the Month. If you head to the Employee of the Month board outside of the room, you’ll see the “goodest boy” got employee of the month in 07/2013.
Artifact – Eugene’s Firefly Pendant
Obtained automatically as part of the story when you’re in the library.
Journal Entry
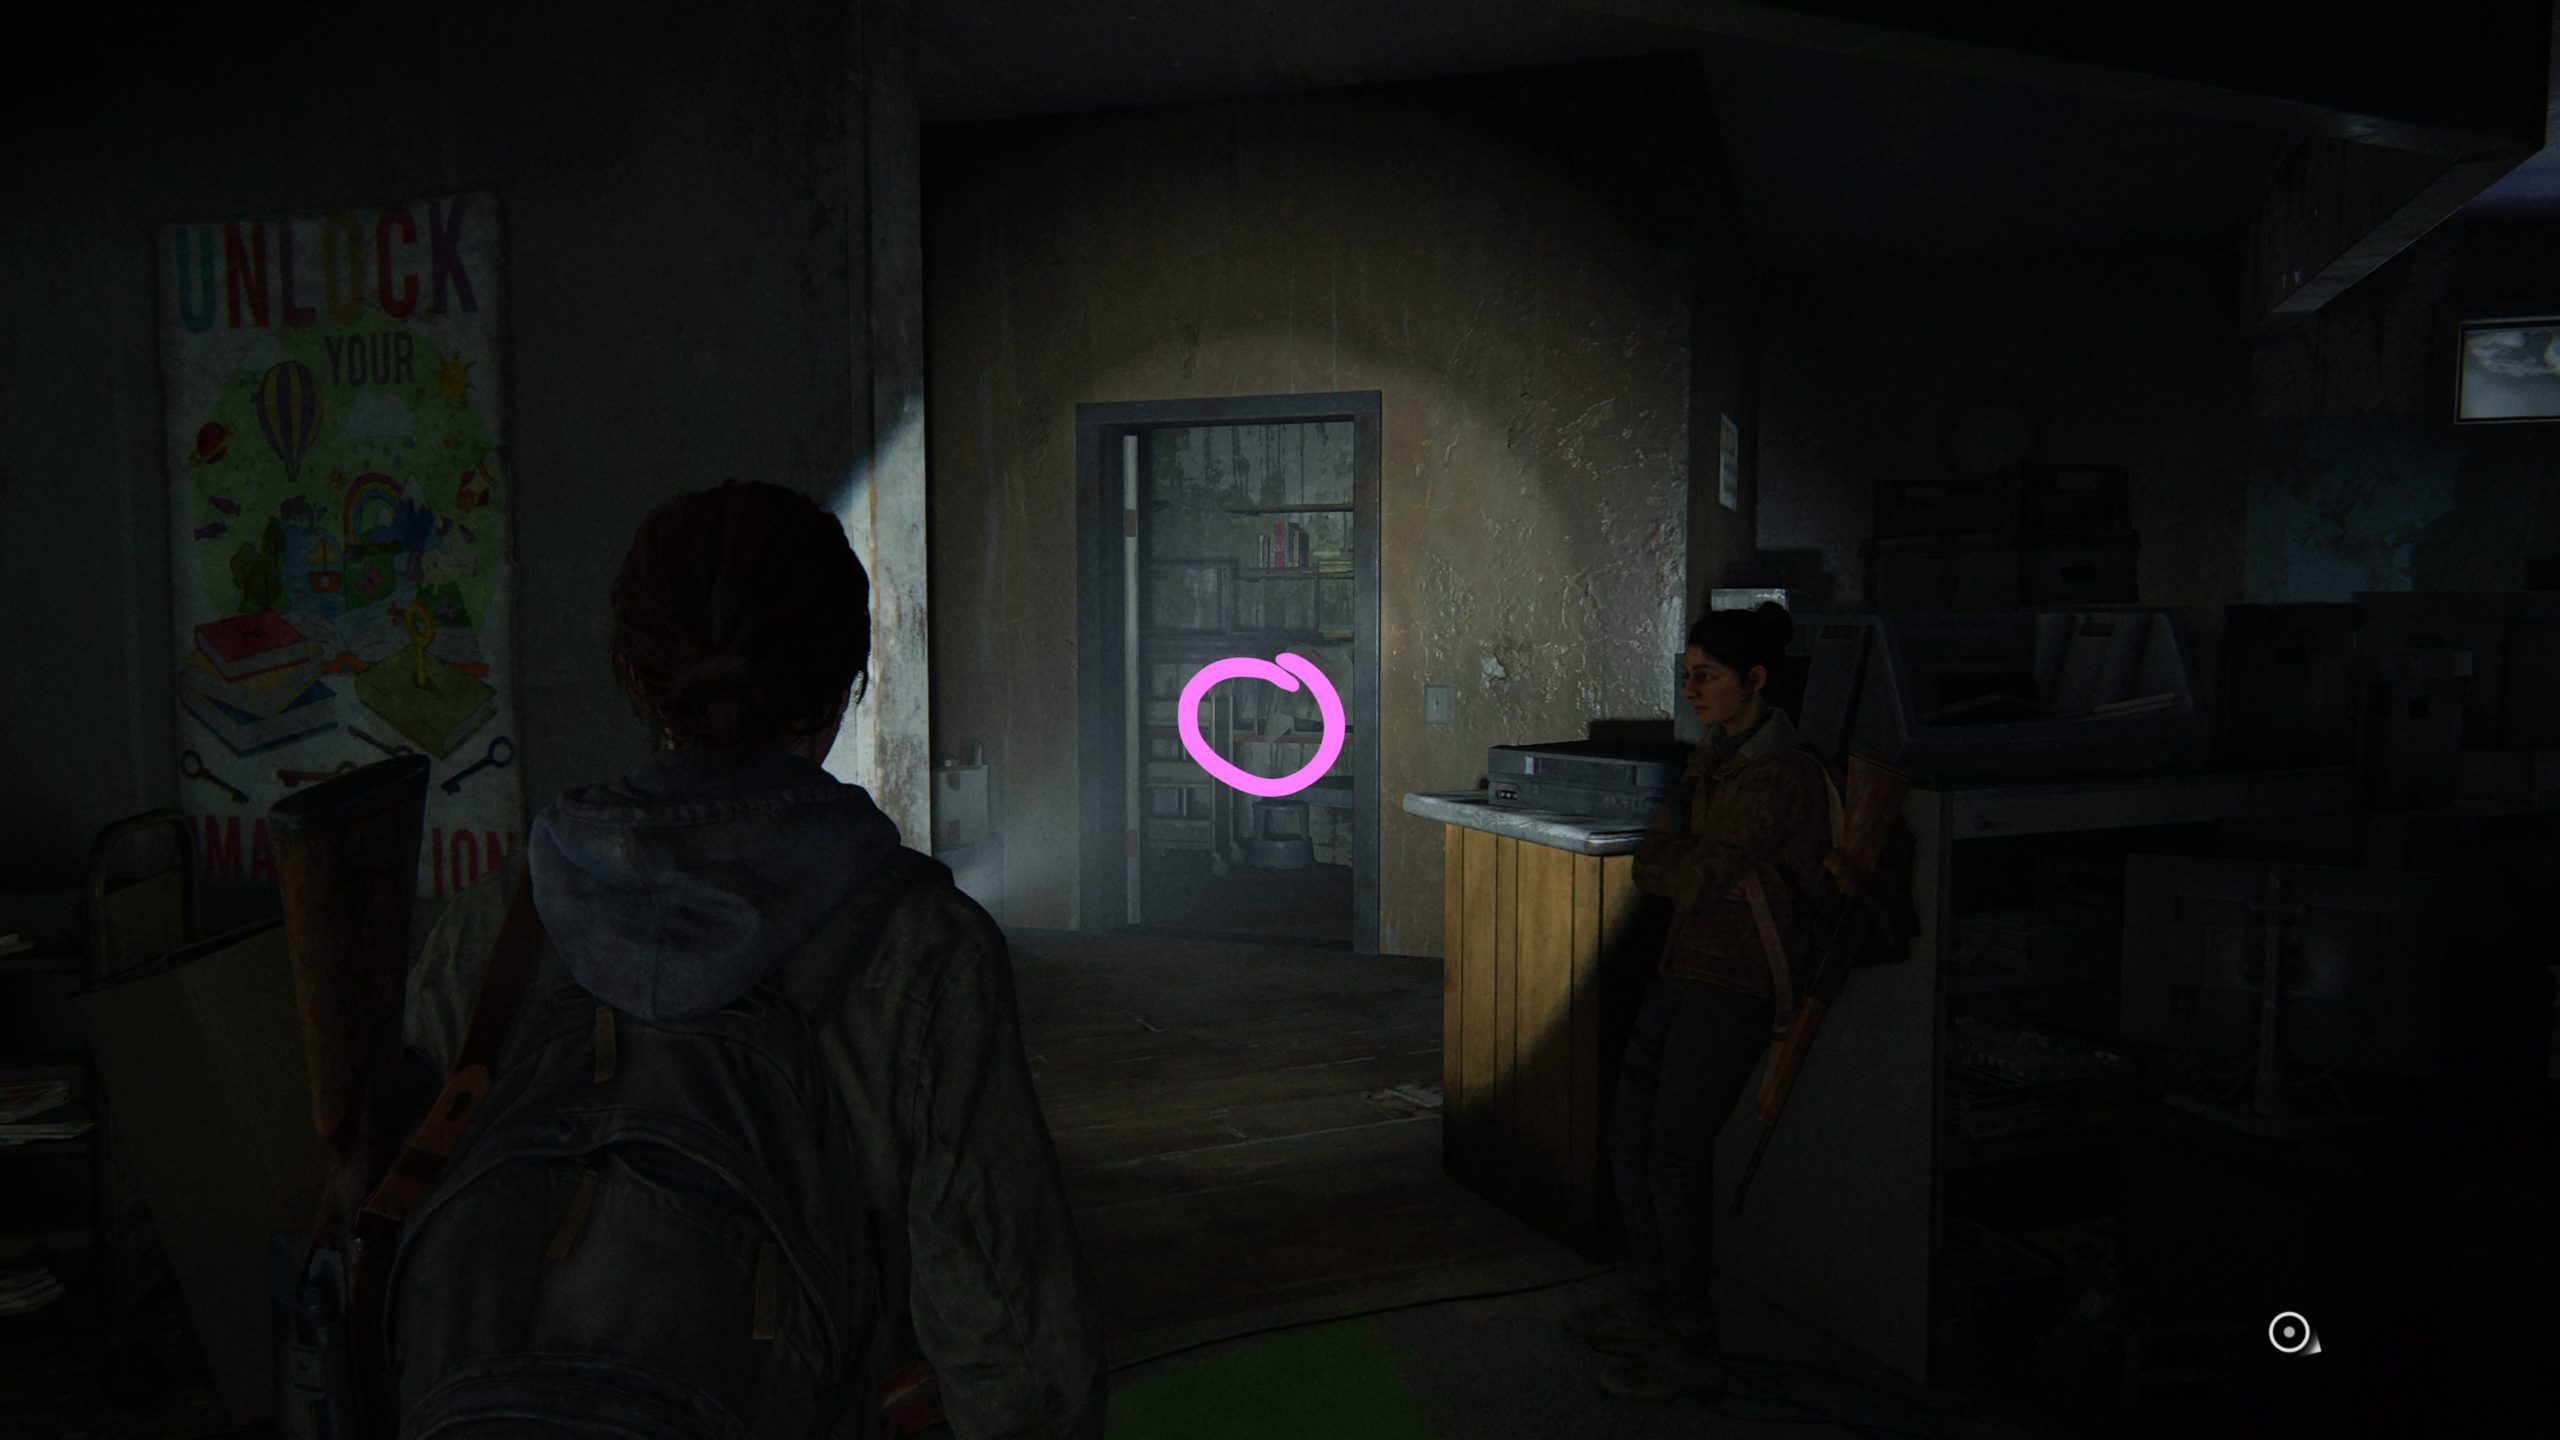
This entry can be found in the children’s section of the library on a bookshelf next to a giraffe immediately after getting Eugene’s Firefly Pendant.
Trading Card – Laurent Foucault, CEO SPARK
This entry can be found in the same room as the above collectible in the storage room behind the checkout counter on a table.
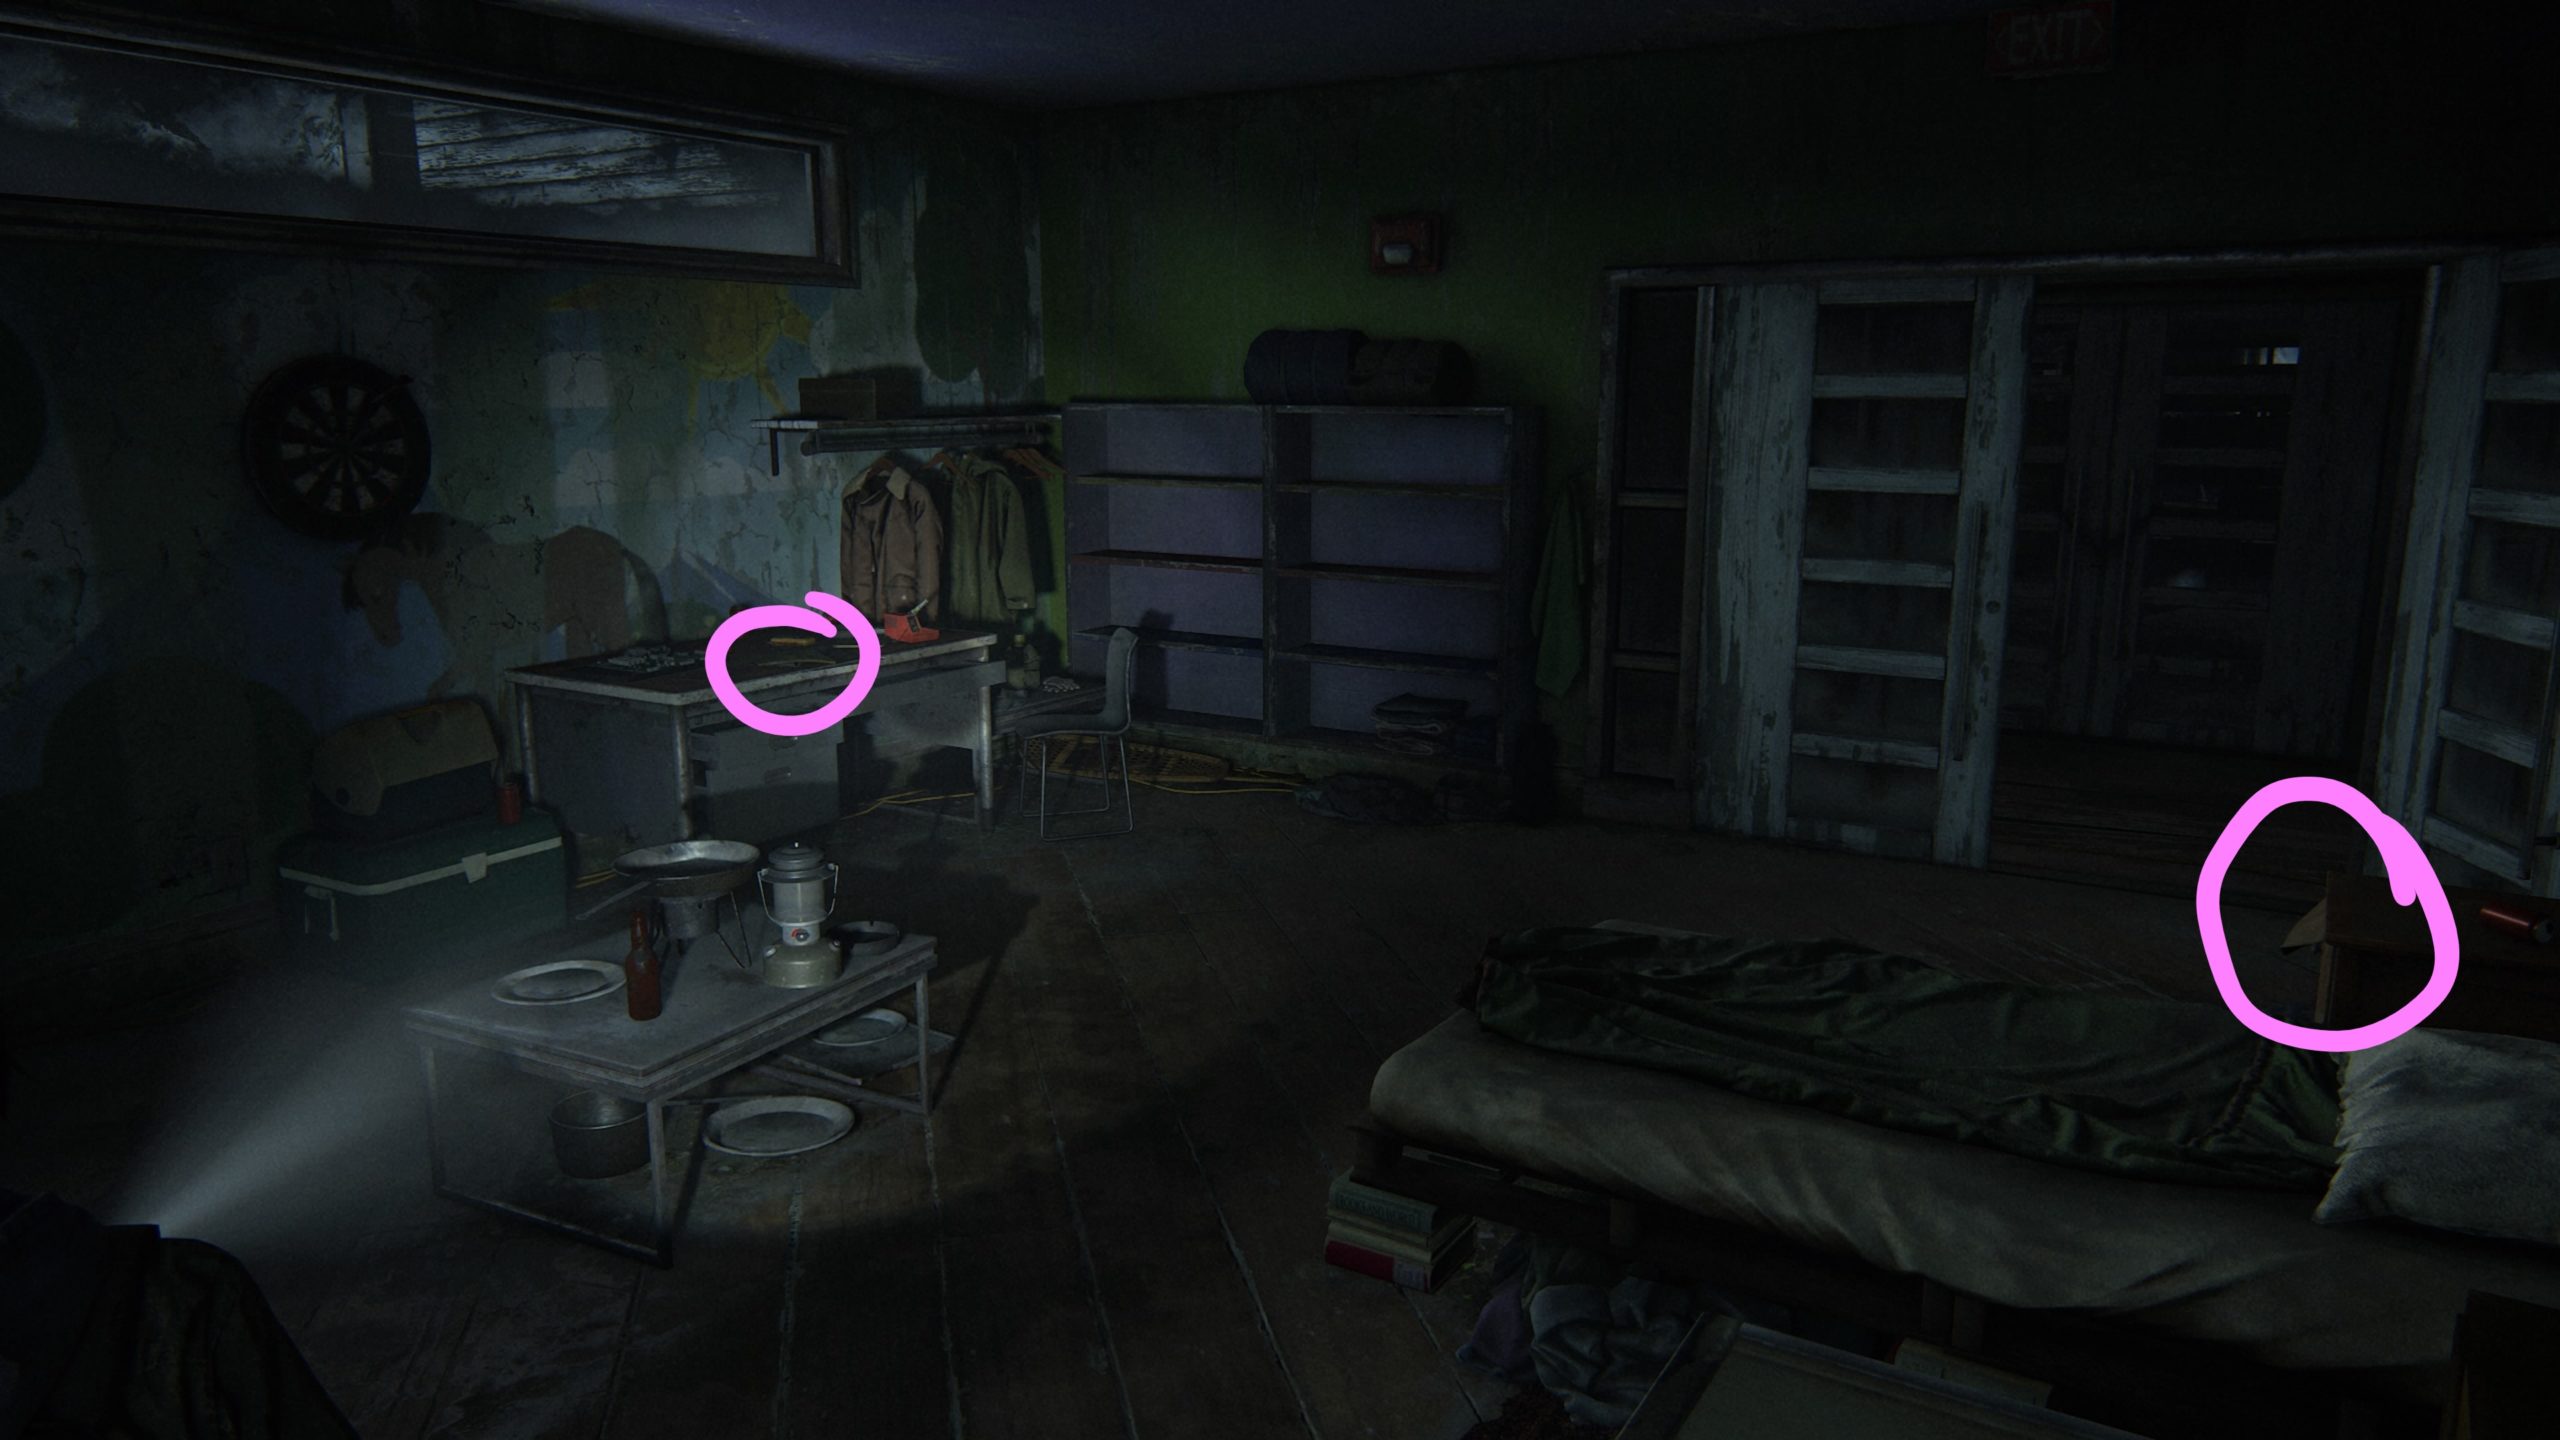
Artifacts – Photo of Eugene and Tommy & Eugene’s Ultimatum
The two artifacts can be found on the other side of the children’s section in a room with a bed. The first artifact is located on a desk across from the bed. The second artifact is in the drawer of the nightstand next to the bed.
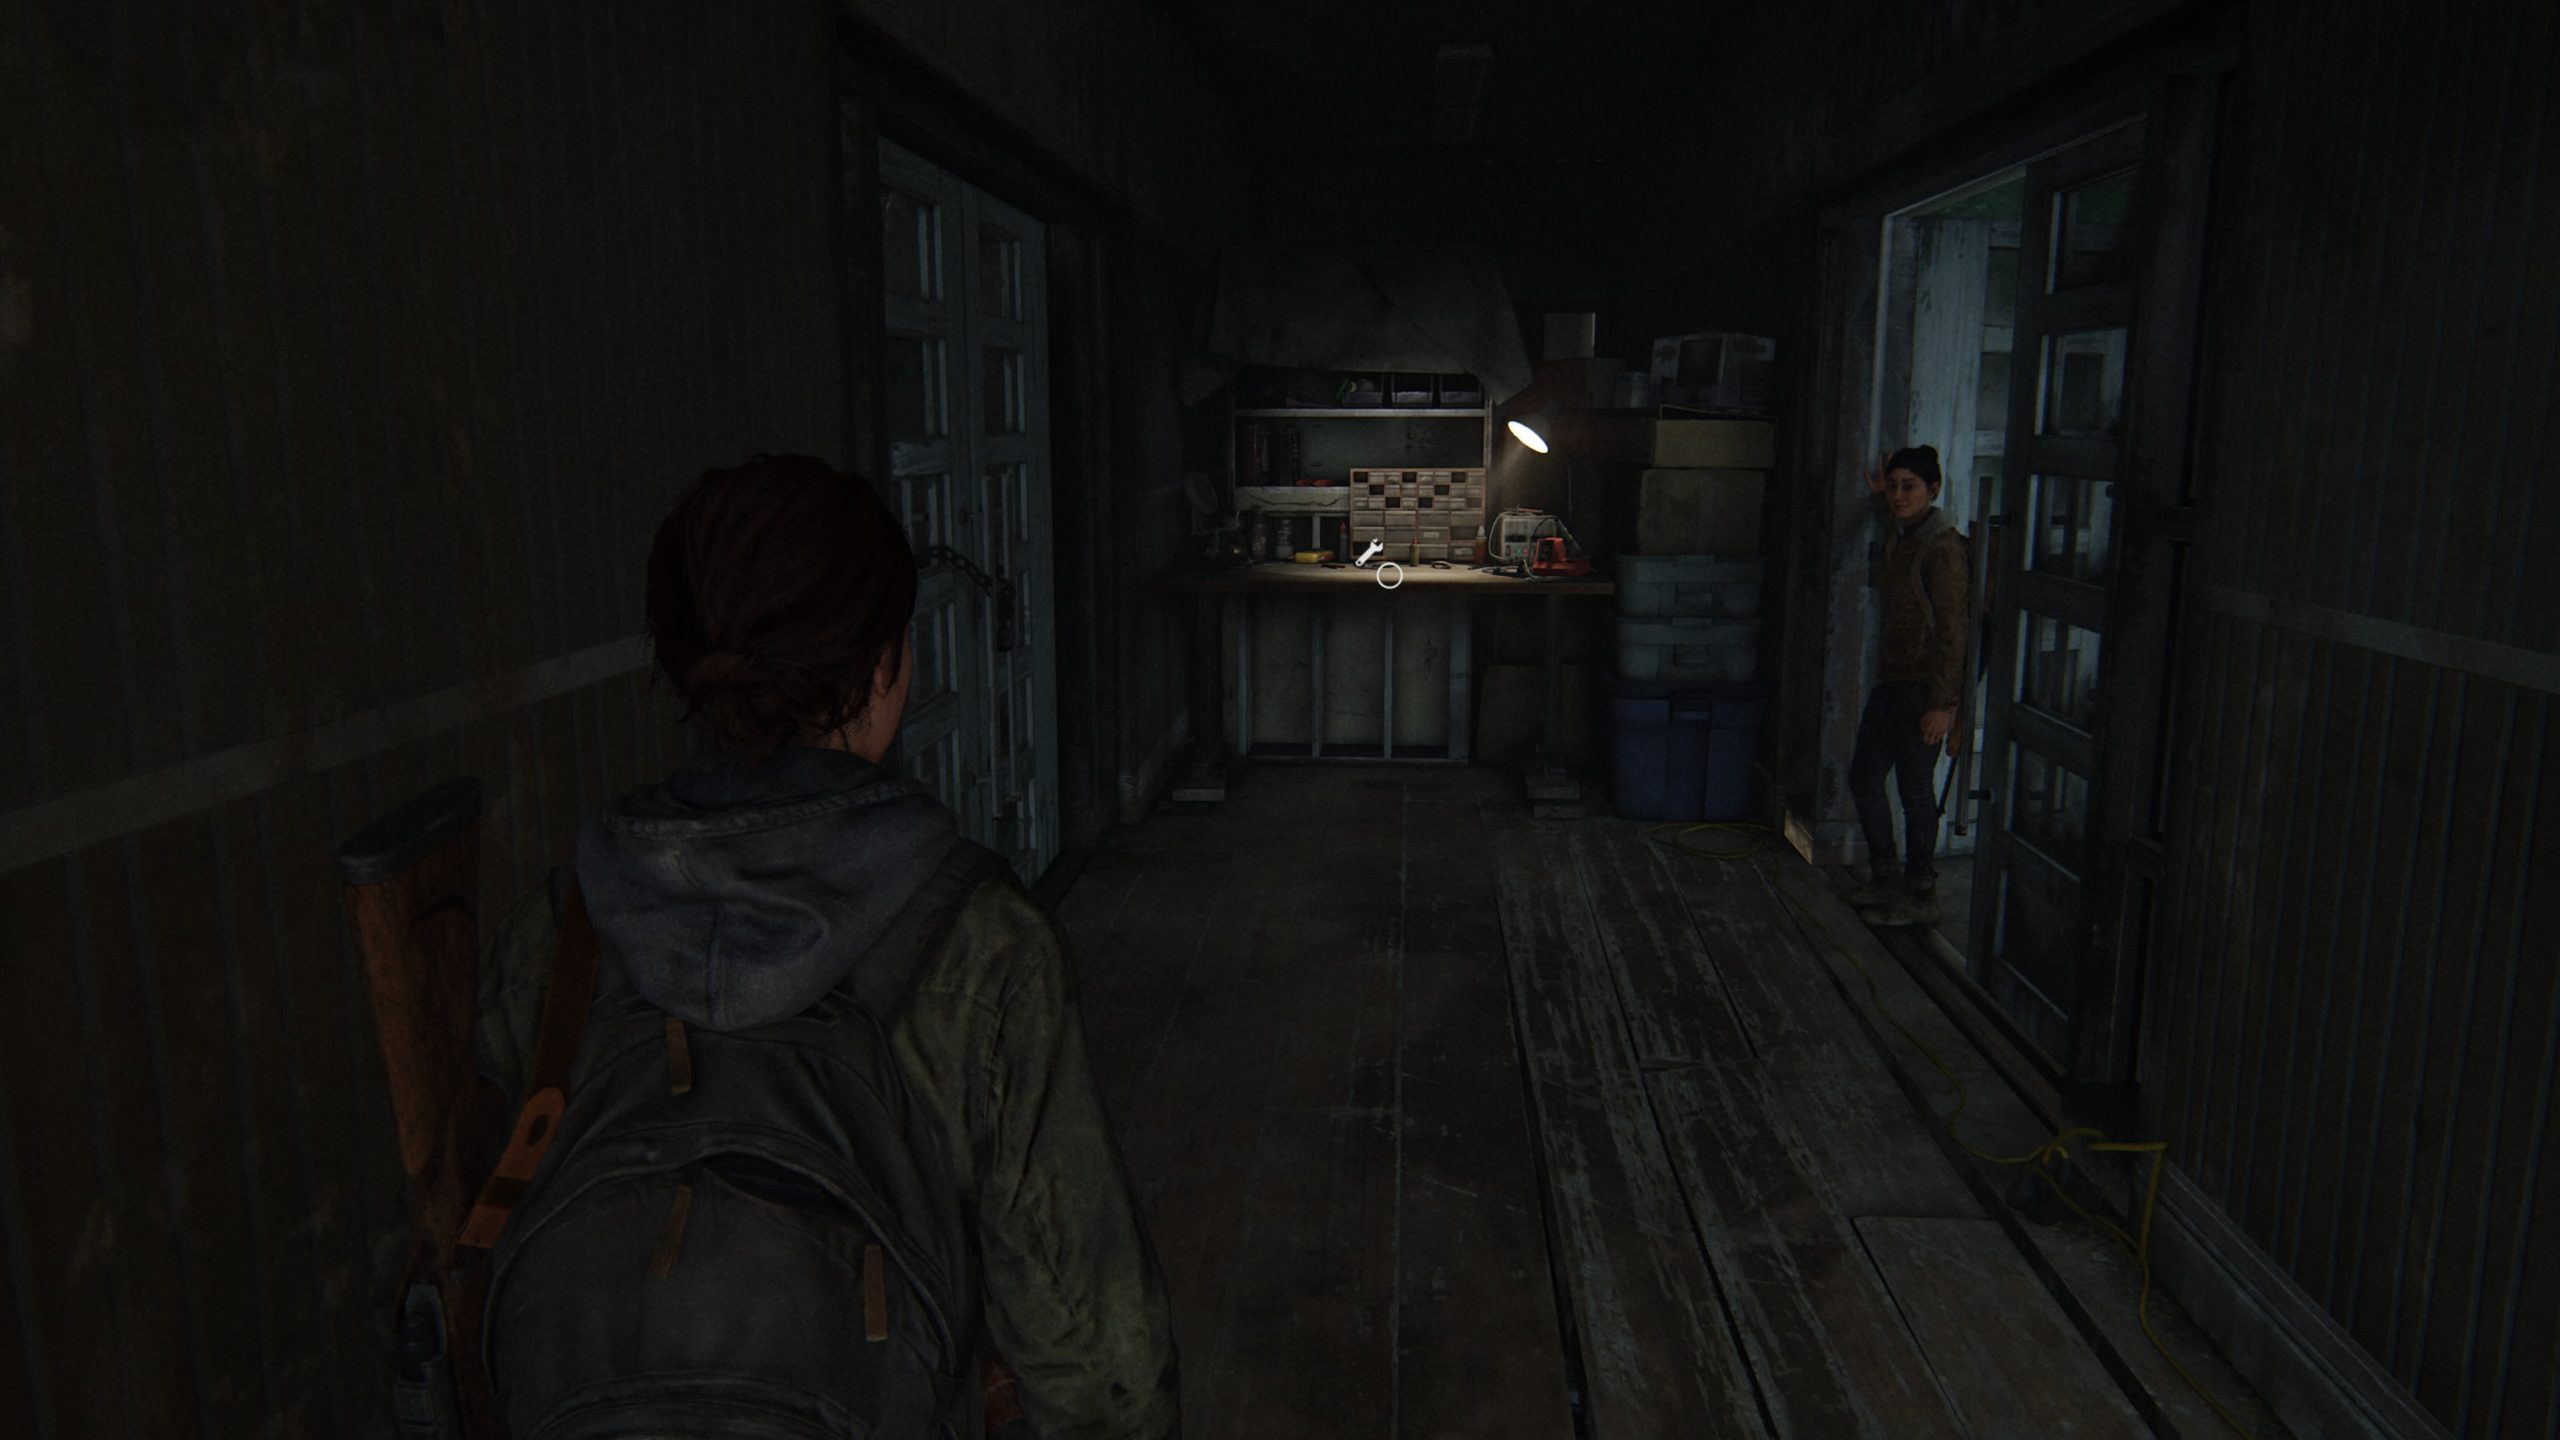
Workbench
After starting up the generator in the library, the workbench will be illuminated as part of the story. Head on over and interact with it.
This site uses cookies. By continuing to use this website, you are giving consent to cookies being used. For more information on cookies, view our Privacy Policy.OkPrivacy Policy