In God of War Ragnarok (GOWR), lore in the form of Rune Reads can be found throughout the realms! Below are the locations of these Rune Reads.
Winter-Man?
This lore can be found in the Lower Wildwoods engraved in the side of a cliff shortly after an area where you’ll have to slide down a zipline then fight a group of enemies. After you defeat them, you’ll squeeze between two cracks in a rock wall.
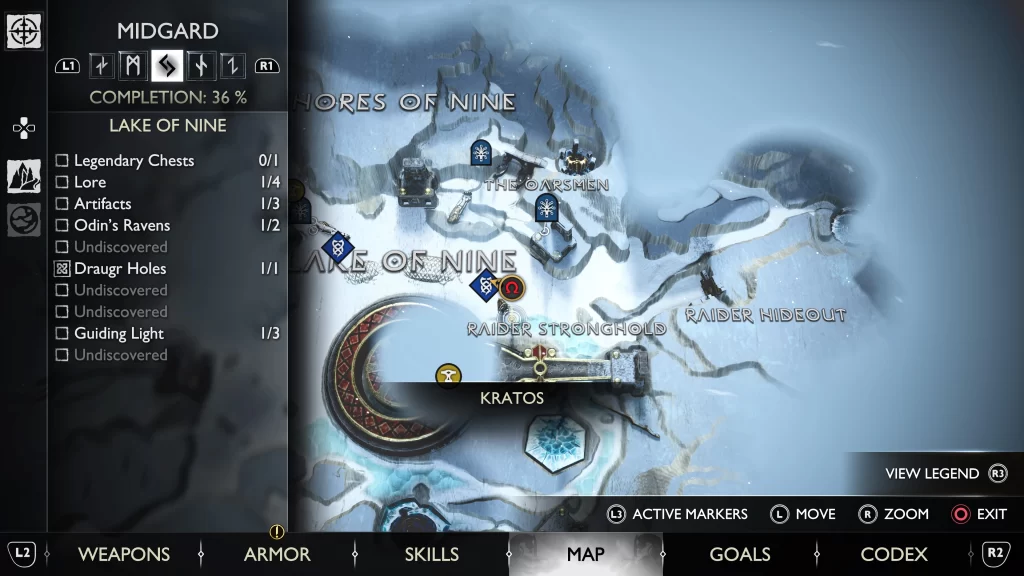
Tyr’s Helmet
Lake of Nine – This rune read can be found on the side of a giant helmet north of the Raider Stronghold.
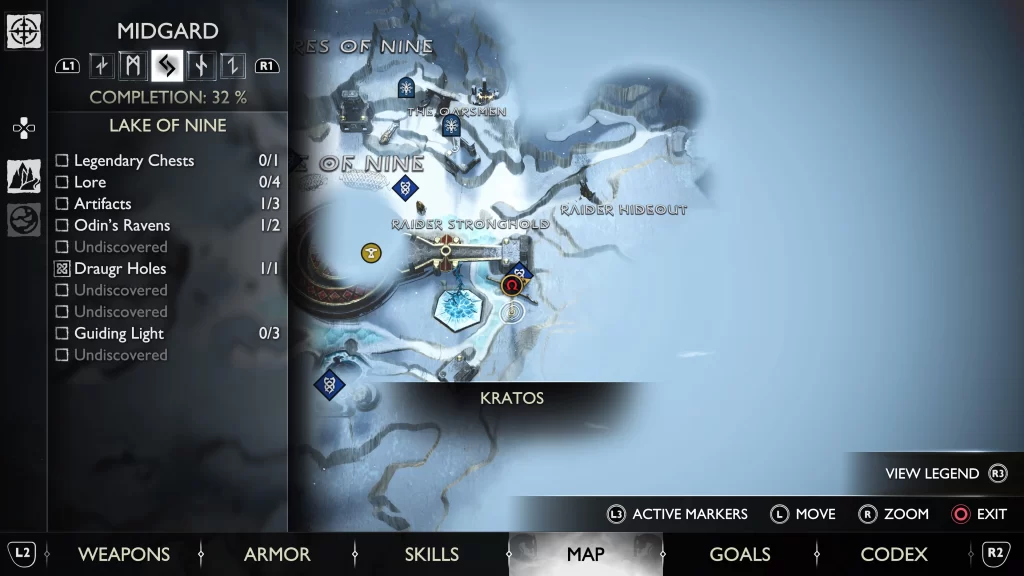
Tyr’s Spear
Lake of Nine – This rune read can be found on the side of a giant weapon in the southeastern corner of the area.
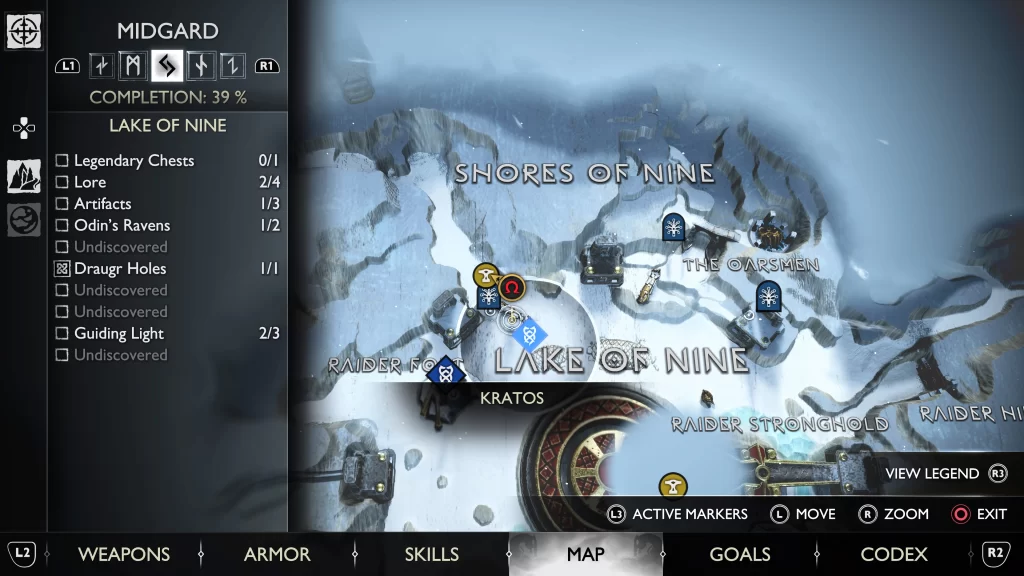
Tyr’s Left Bracer
Lake of Nine – This rune read can be found near the shop and Lake of Nine Mystic Gateway.
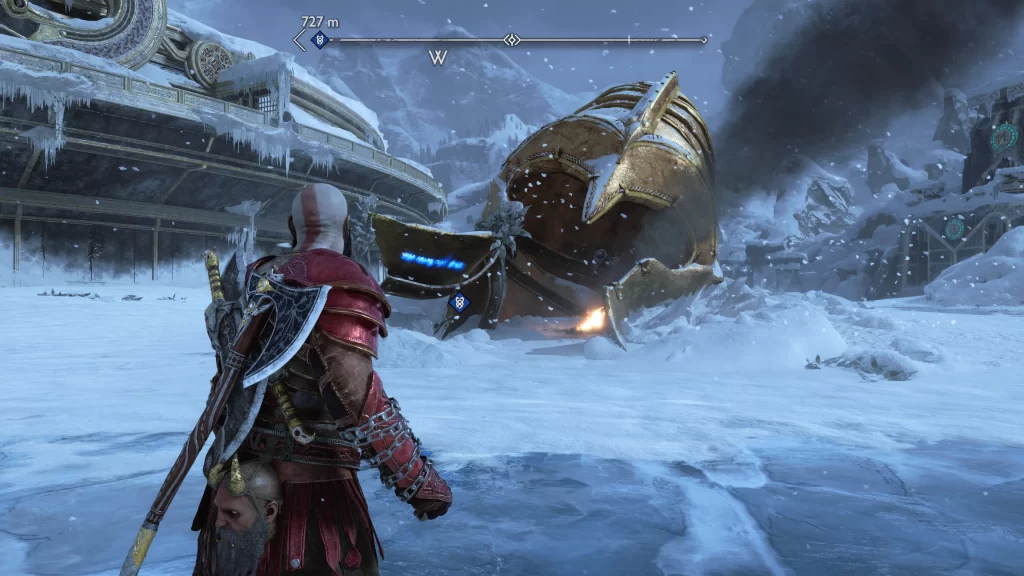
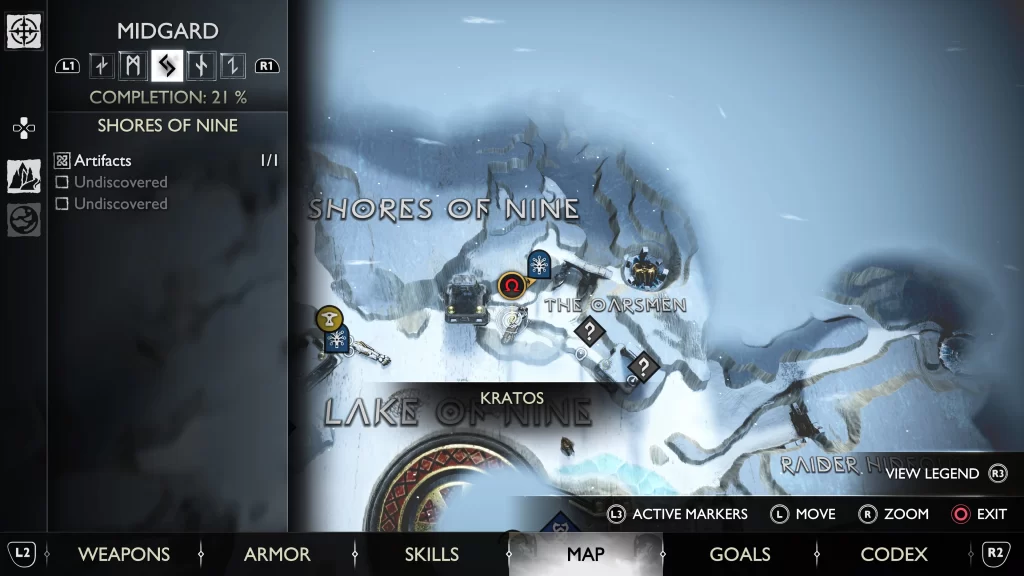
Tyr’s Right Bracer
Shores of Nine – This rune read can be found on the side of a giant fallen metal arm near The Oarsmen.
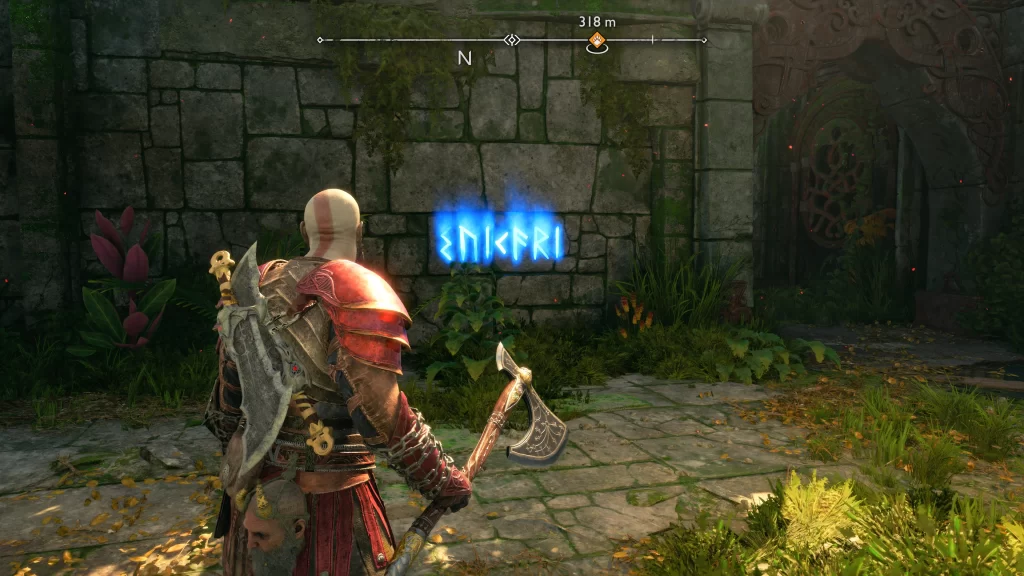
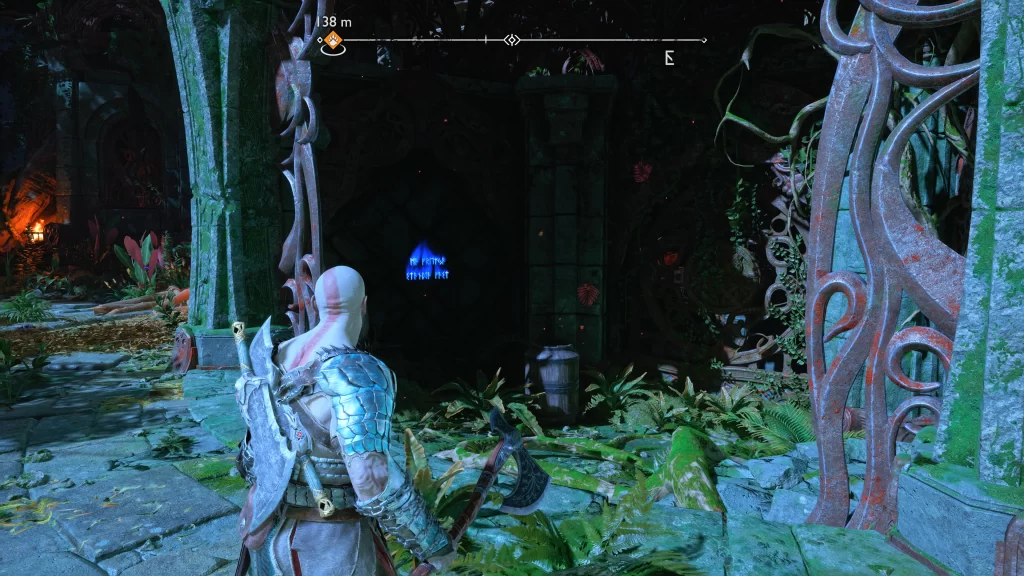
Traitor
Vanir Shrine – This Rune Read can be found on the wall after heading past the central gate at the beginning of the shrine.
Prayer to Freya
The Abandoned Village – This Rune Read can be found on the wall of the great hall.
Vanaheim Lullaby
Freyr’s Camp – This Rune Read can be just west of the central fire on the backside of the rock.
Verdant
Eastern Barri Woods – This Rune Read can be found on a stone wall in a ruined structure along the northern path heading to the abandoned village.
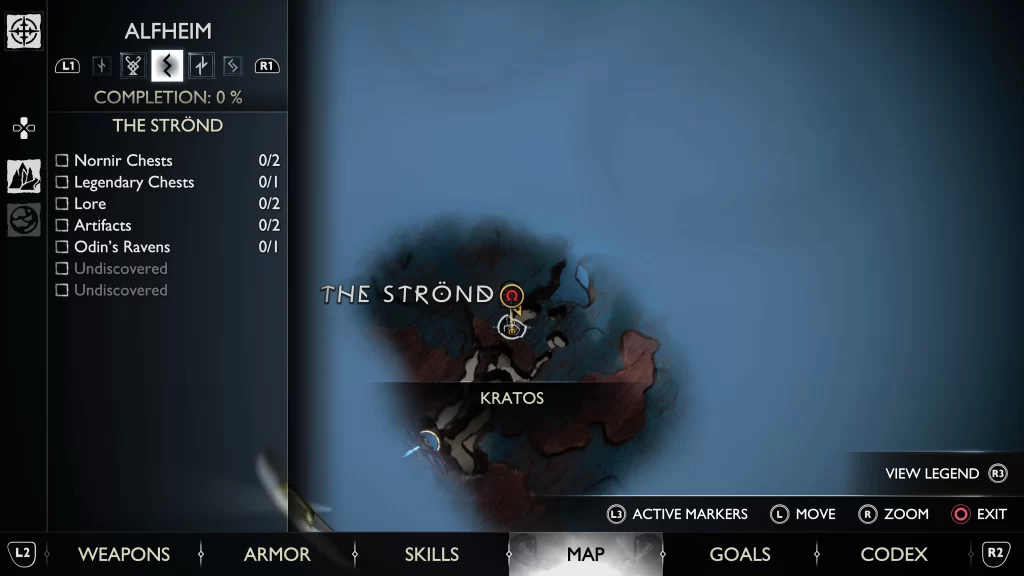
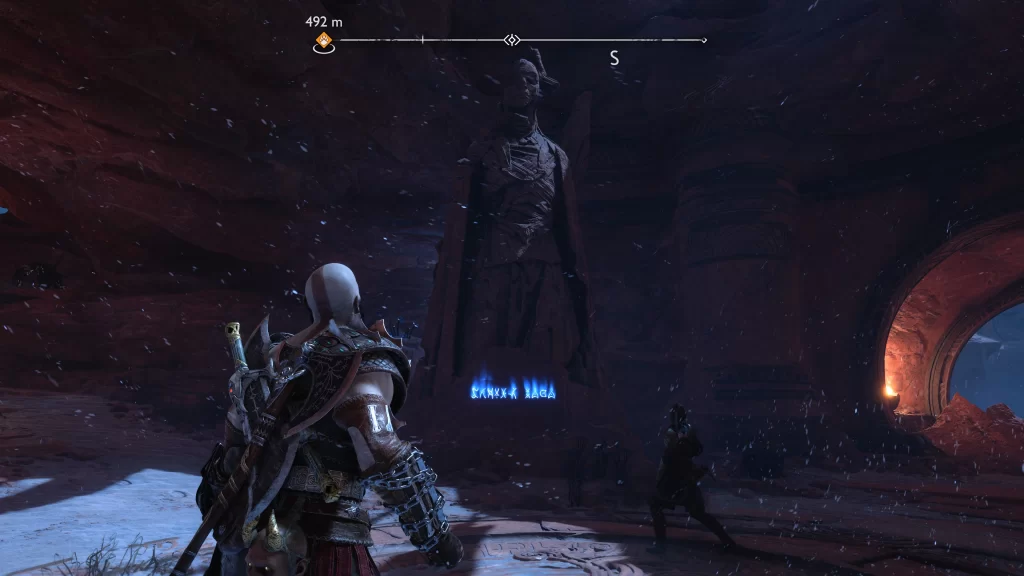
Broken History
The Strond – Immediately at the start of the area, this Rune Read can be found on the statue.
Limitless
Temple of Light – This lore can be found on the right arm of a giant statue near the light puzzle where Tyr will jump on the hanging crystal so Kratos can hit it. The statue to the right is the one you want to look at. Head up the stairs and face it to find a point where you can use the Sonic Arrows to cause a grapple point to drop. Swing across to reach it!
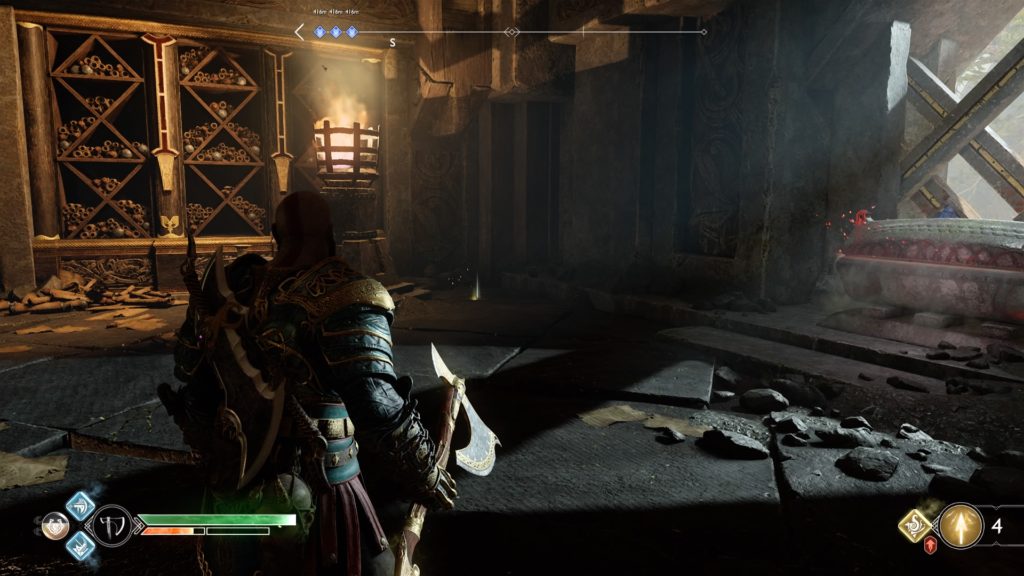
Sacrifice
The Burrows – This rune read can be found on the wall of the cave in the area where you fight the Cursed Grim and Light Elves. It’s along the main path.
Patience
This Rune Read can be found next to a chest hidden by three growths with a red orb in the middle of them. To destroy the growths, climb up the crack in the wall near a crystal then line the orbs up and throw your axe through them all in one go.
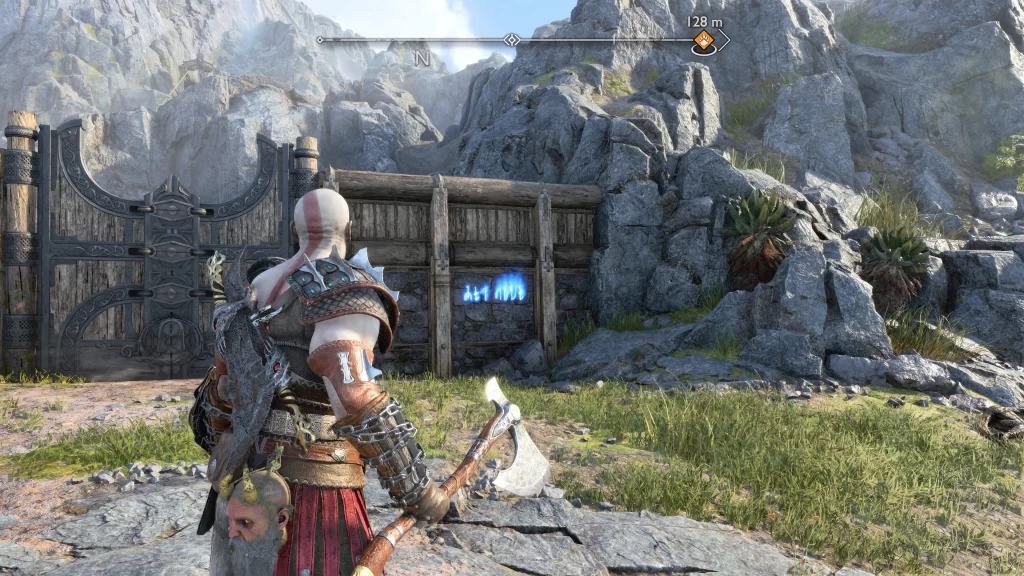
The Forge
The Forge – After squeezing through a crack in the rocks, take a right and head up the mountain. Climb up the ledge on the right then head behind the building in the sunken area to find this lore on a rock wall.
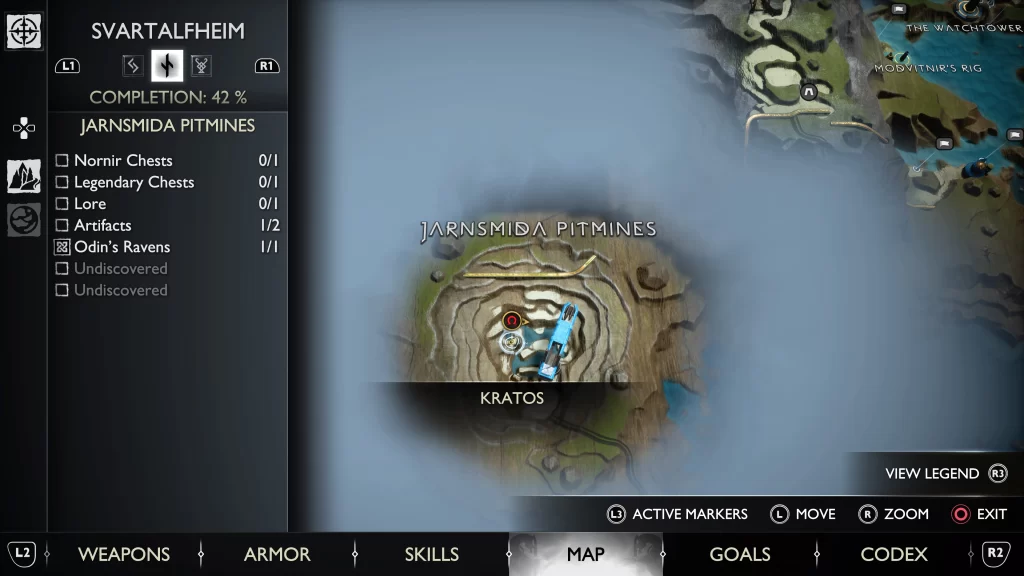
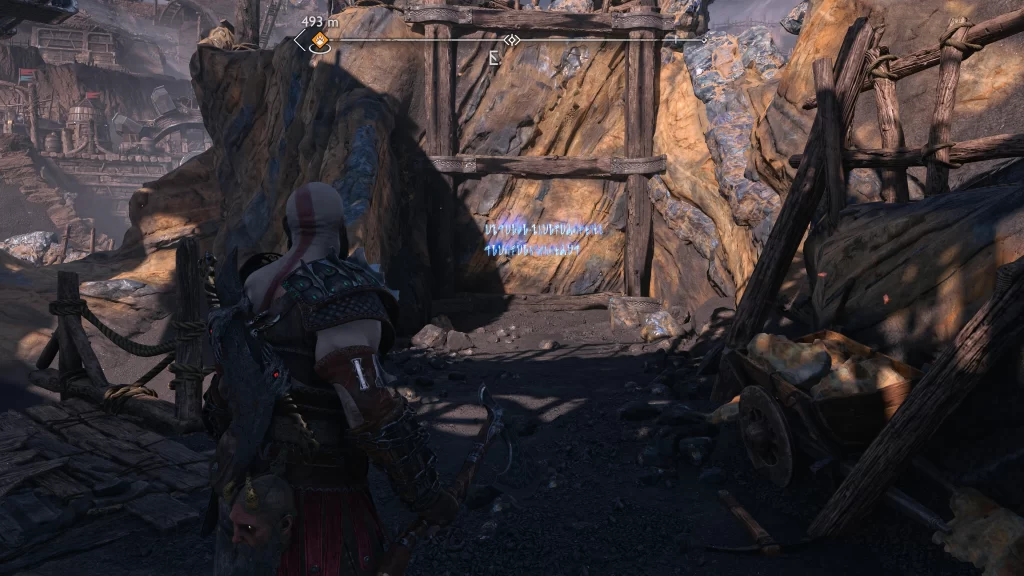
The Pit-Mine
Jarnsmida Pitmines – From the Nornir chest, drop down to the left side of it then use the grapple point under the water wheel to jump the gap. Once you land on the other side, take a left to find it carved into the rock.
The Vault
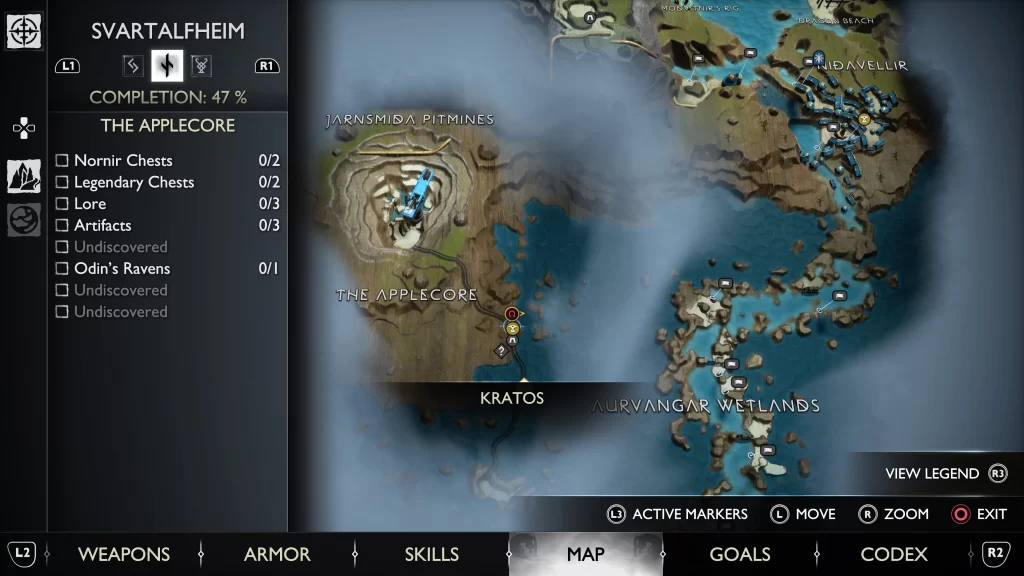
The Applecore – From Sindri’s shop, follow the path to the end. There will be a wall you can hit with a Sonic Arrow revealing a Rune Reads on the other side.
Don’t Breath
Dragon Beach – This lore can be found at the base of the bridge on the eastern part of the island.
The Squasher
Althjof’s Rig – This lore can be found after slamming through the breakable floor.
Prayer to Hraesvelgr
Helgrind – This rune read can be found on an upper platform where you’ll have to blow up a chunk of ice in order to proceed forward at the beginning of the area.
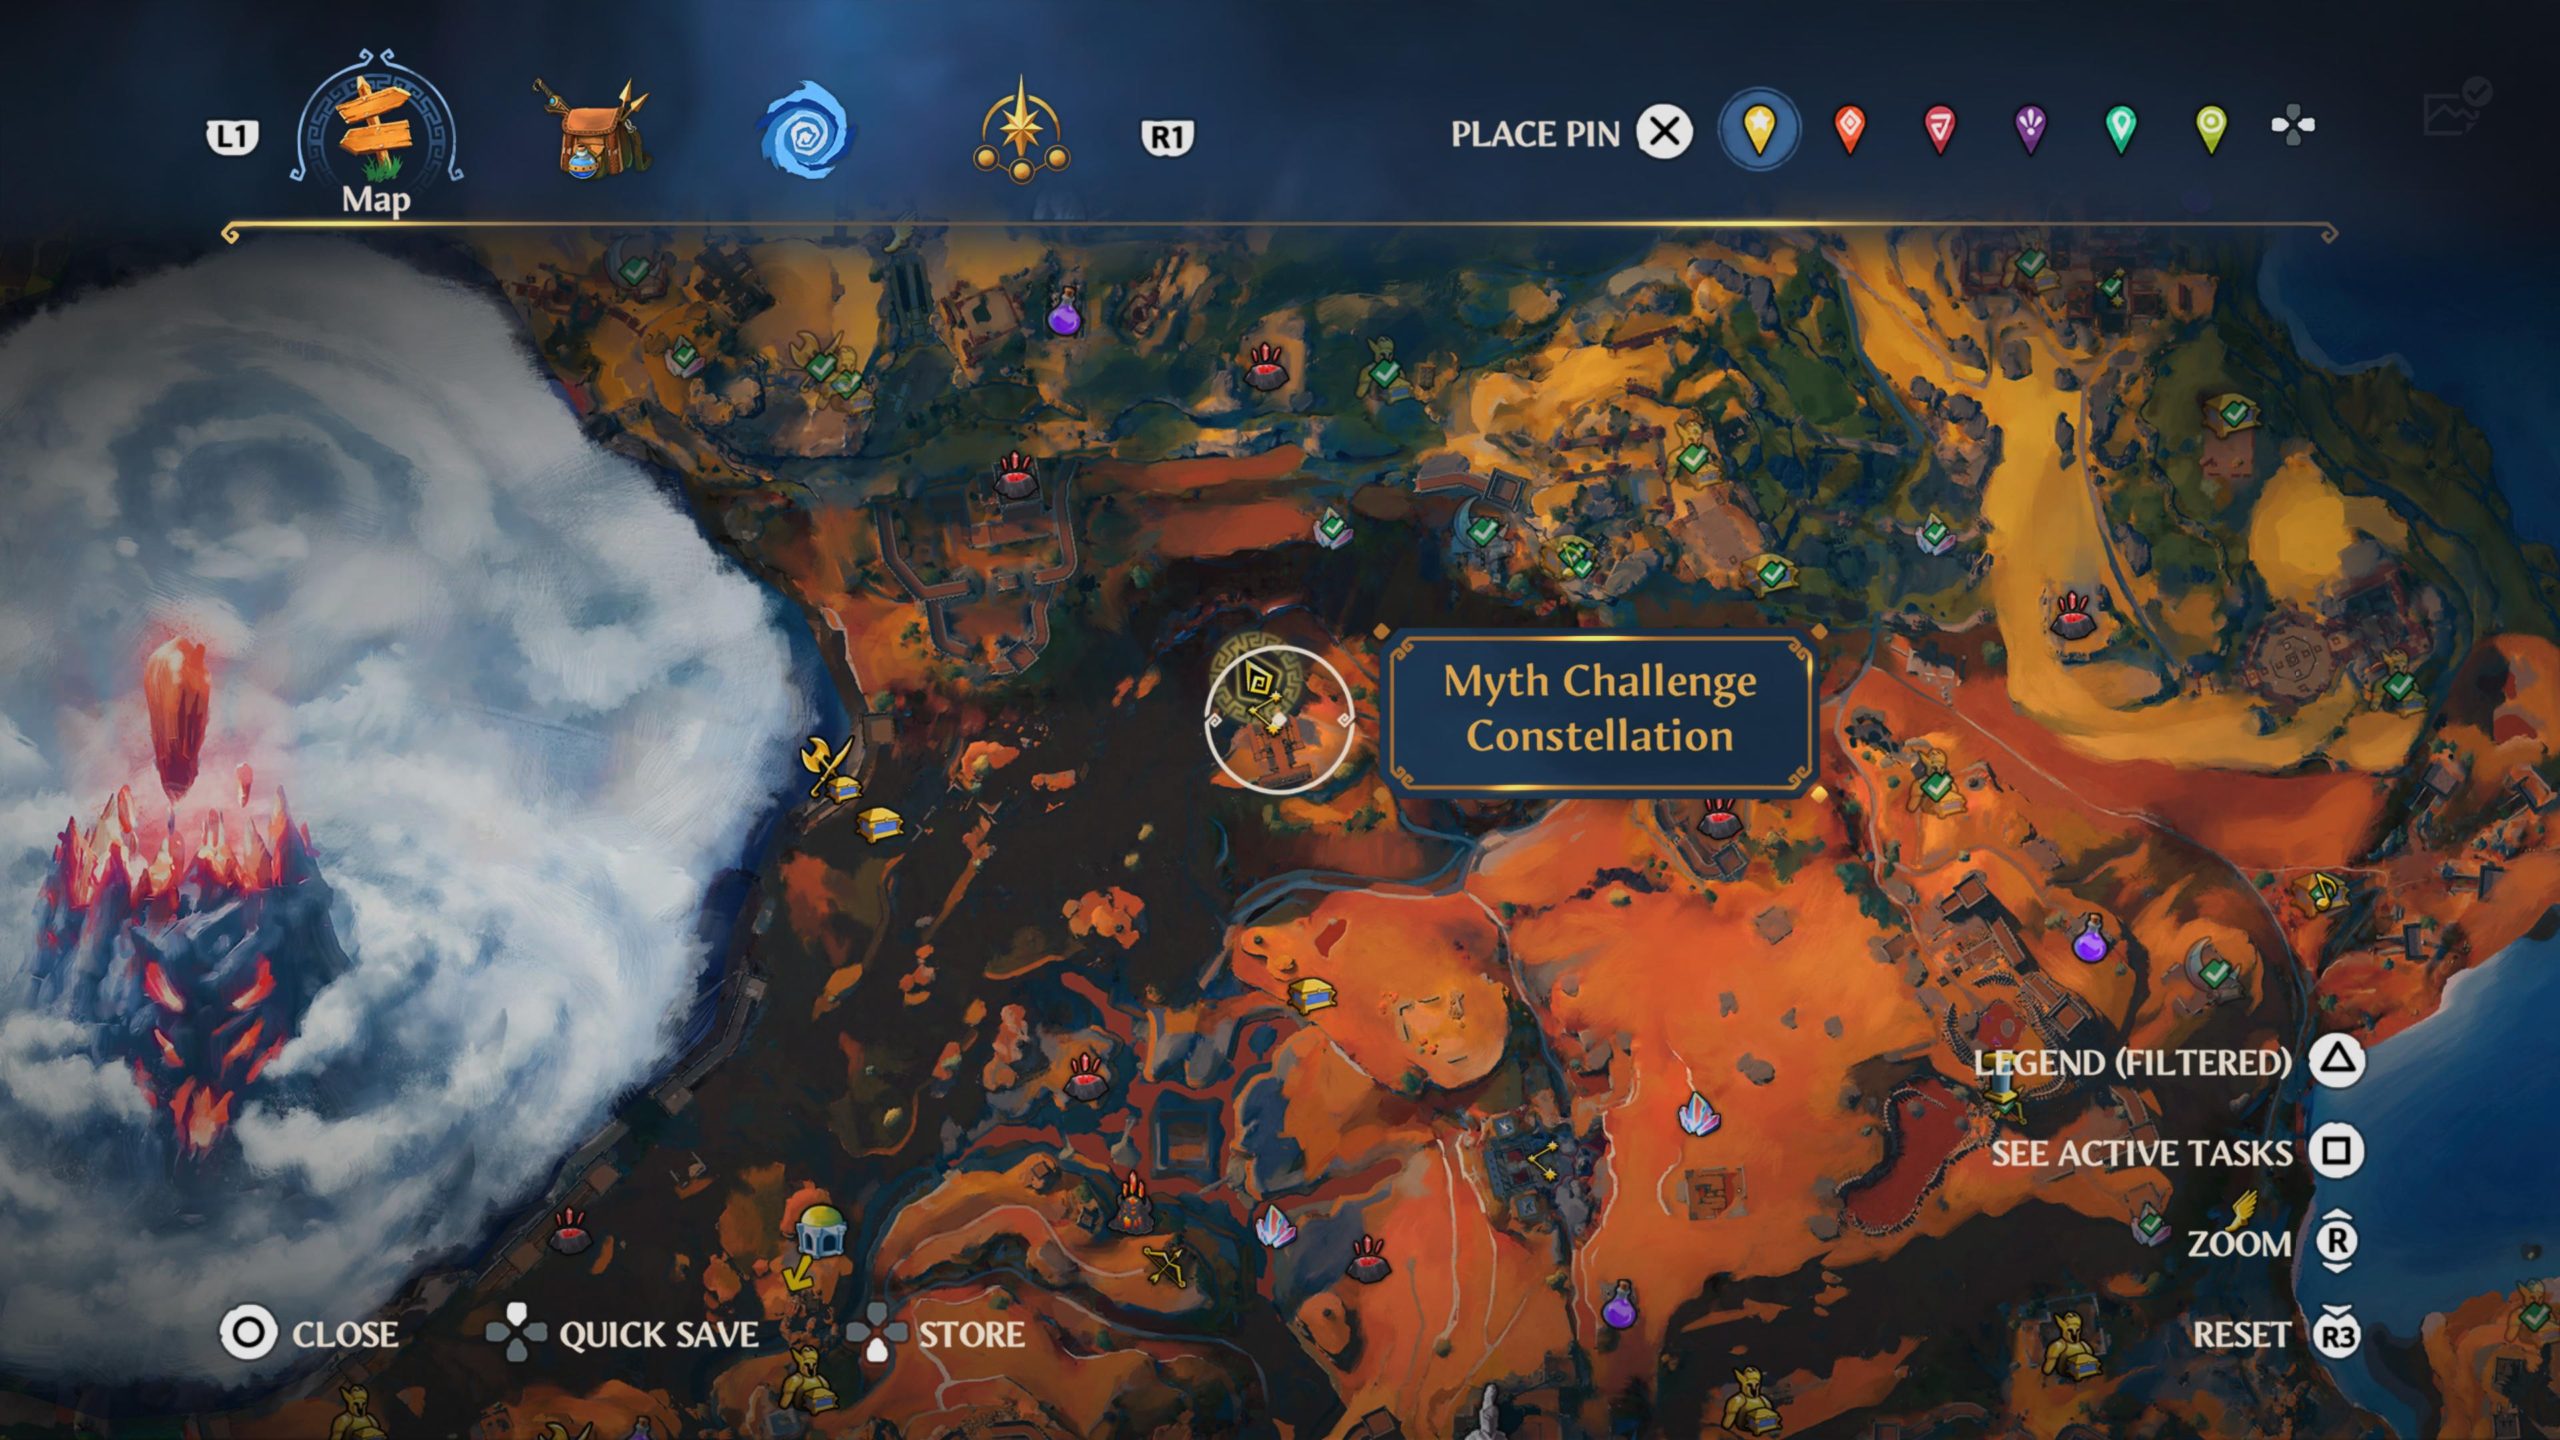
This constellation can be found in the northern part of War’s Den near the border with The Forgelands.
Use the image on the wall to place the glowing orbs in the correct locations on the ground. You can find the orbs in the following locations:
1. For the first orb, head to the second level of cave north of the puzzle. Head into the cave on the far left. Place a duplicate of yourself on the lightweight platform then climb up ontop of the barrier to find a breakable wall. Use your axe to smash the wall then pull the metal cube towards you to make it fall through the hole in the floor. Grab the cube then stand on the circular platform and throw it onto the platform that was behind the barrier to release the orb.
2. Head into the next cave on the second level in the side of the cliff to find 2 barriers. Head past the 2 light to the right then swing around the gold box to find a breakable wall. Smash the wall then grab activate the pedestal to release one of the barriers. Grab the cube hidden behind the barrier then climb to the top of the other barrier to find 2 platforms. Bring this cube onto one platform and the other cube can be found above where the breakable wall was. Jump down then grab the orb.
3. Head to the third level up on the cliffside to find another cave on the right. This one contains some lasers inside. Place a copy of yourself on the lightweight platform then head inside towards the orb and take a left. Stand on the circular platform to release the orb then grab it.
4. Head to the third level up on the cliffside to find a cave on the left that contains 2 platforms. Put the giant metal cube on the heavy one and a clone of yourself on the light one. Once both have been activated, the orb will release.
5. The last orb is behind the puzzle to the south behind the wall depicting the placement of the orbs. To unlock it, head to the northeast cave on the first level to find a breakable wall inside. Smash the wall then grab the circle and drop it under the unlocked orb. Head to the second square to the left to see that this one is missing its circle, which you can find directly in front of it. Drop it onto the square to release the orb.
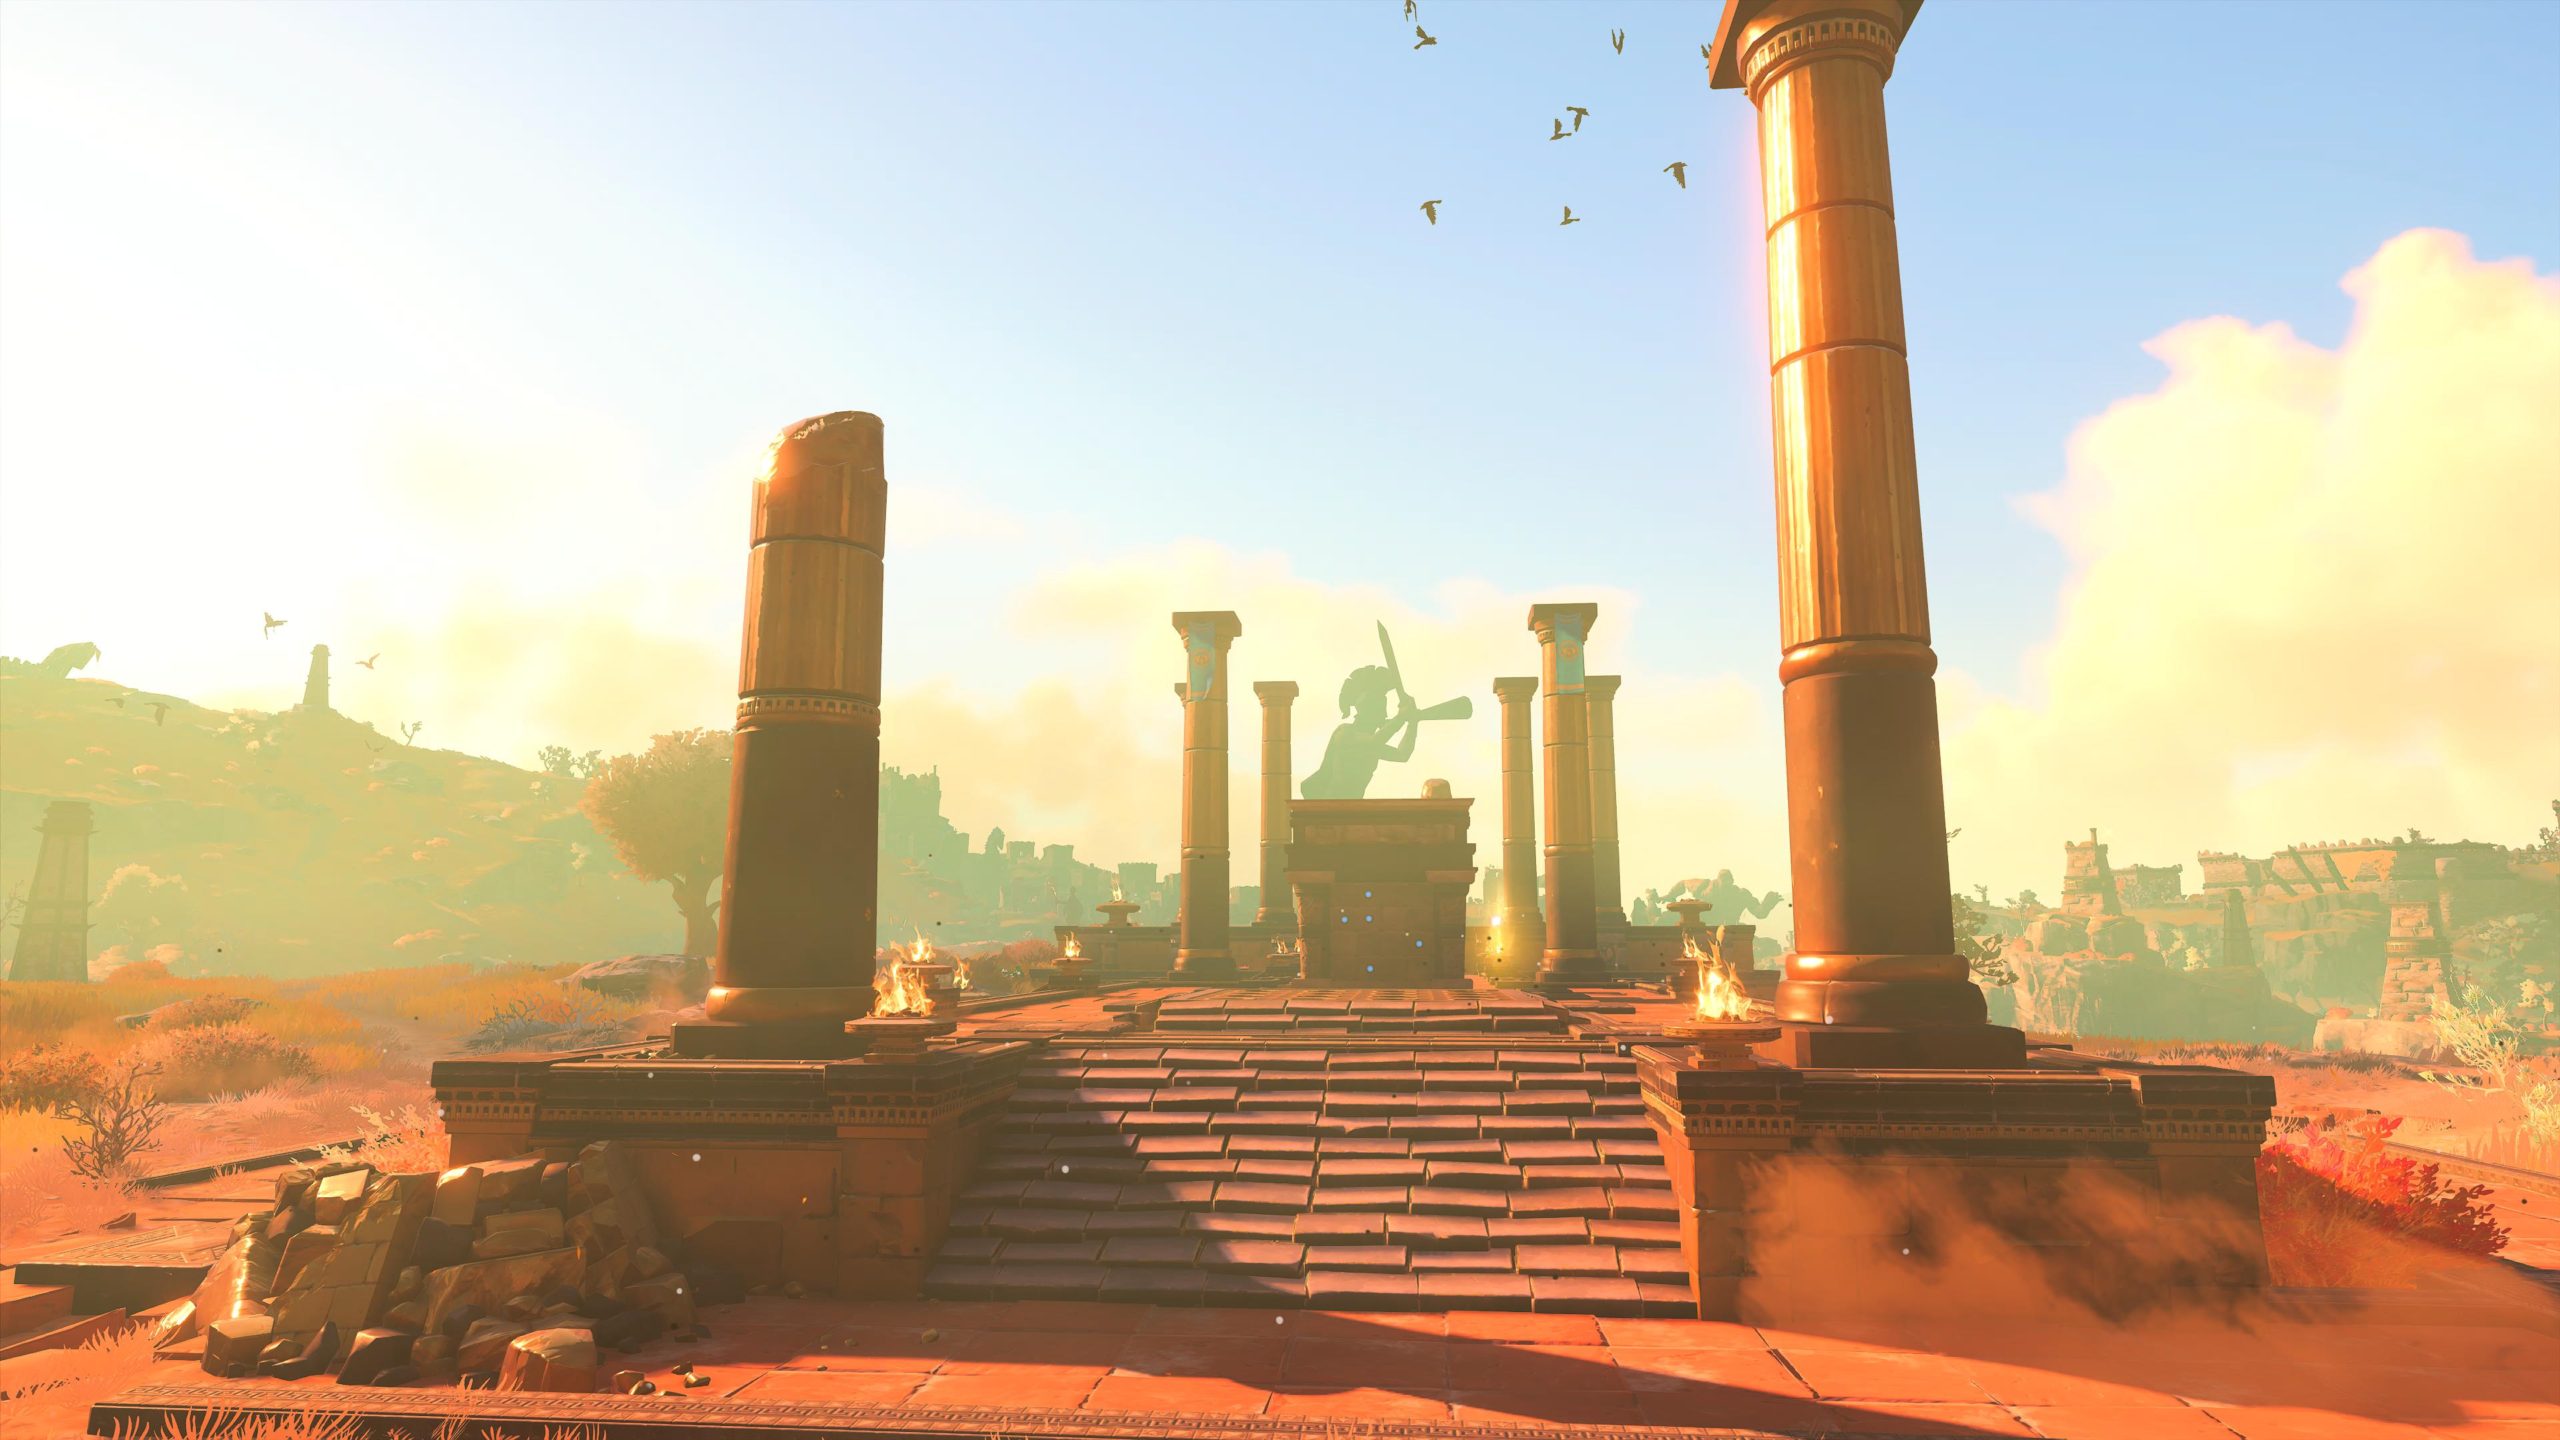
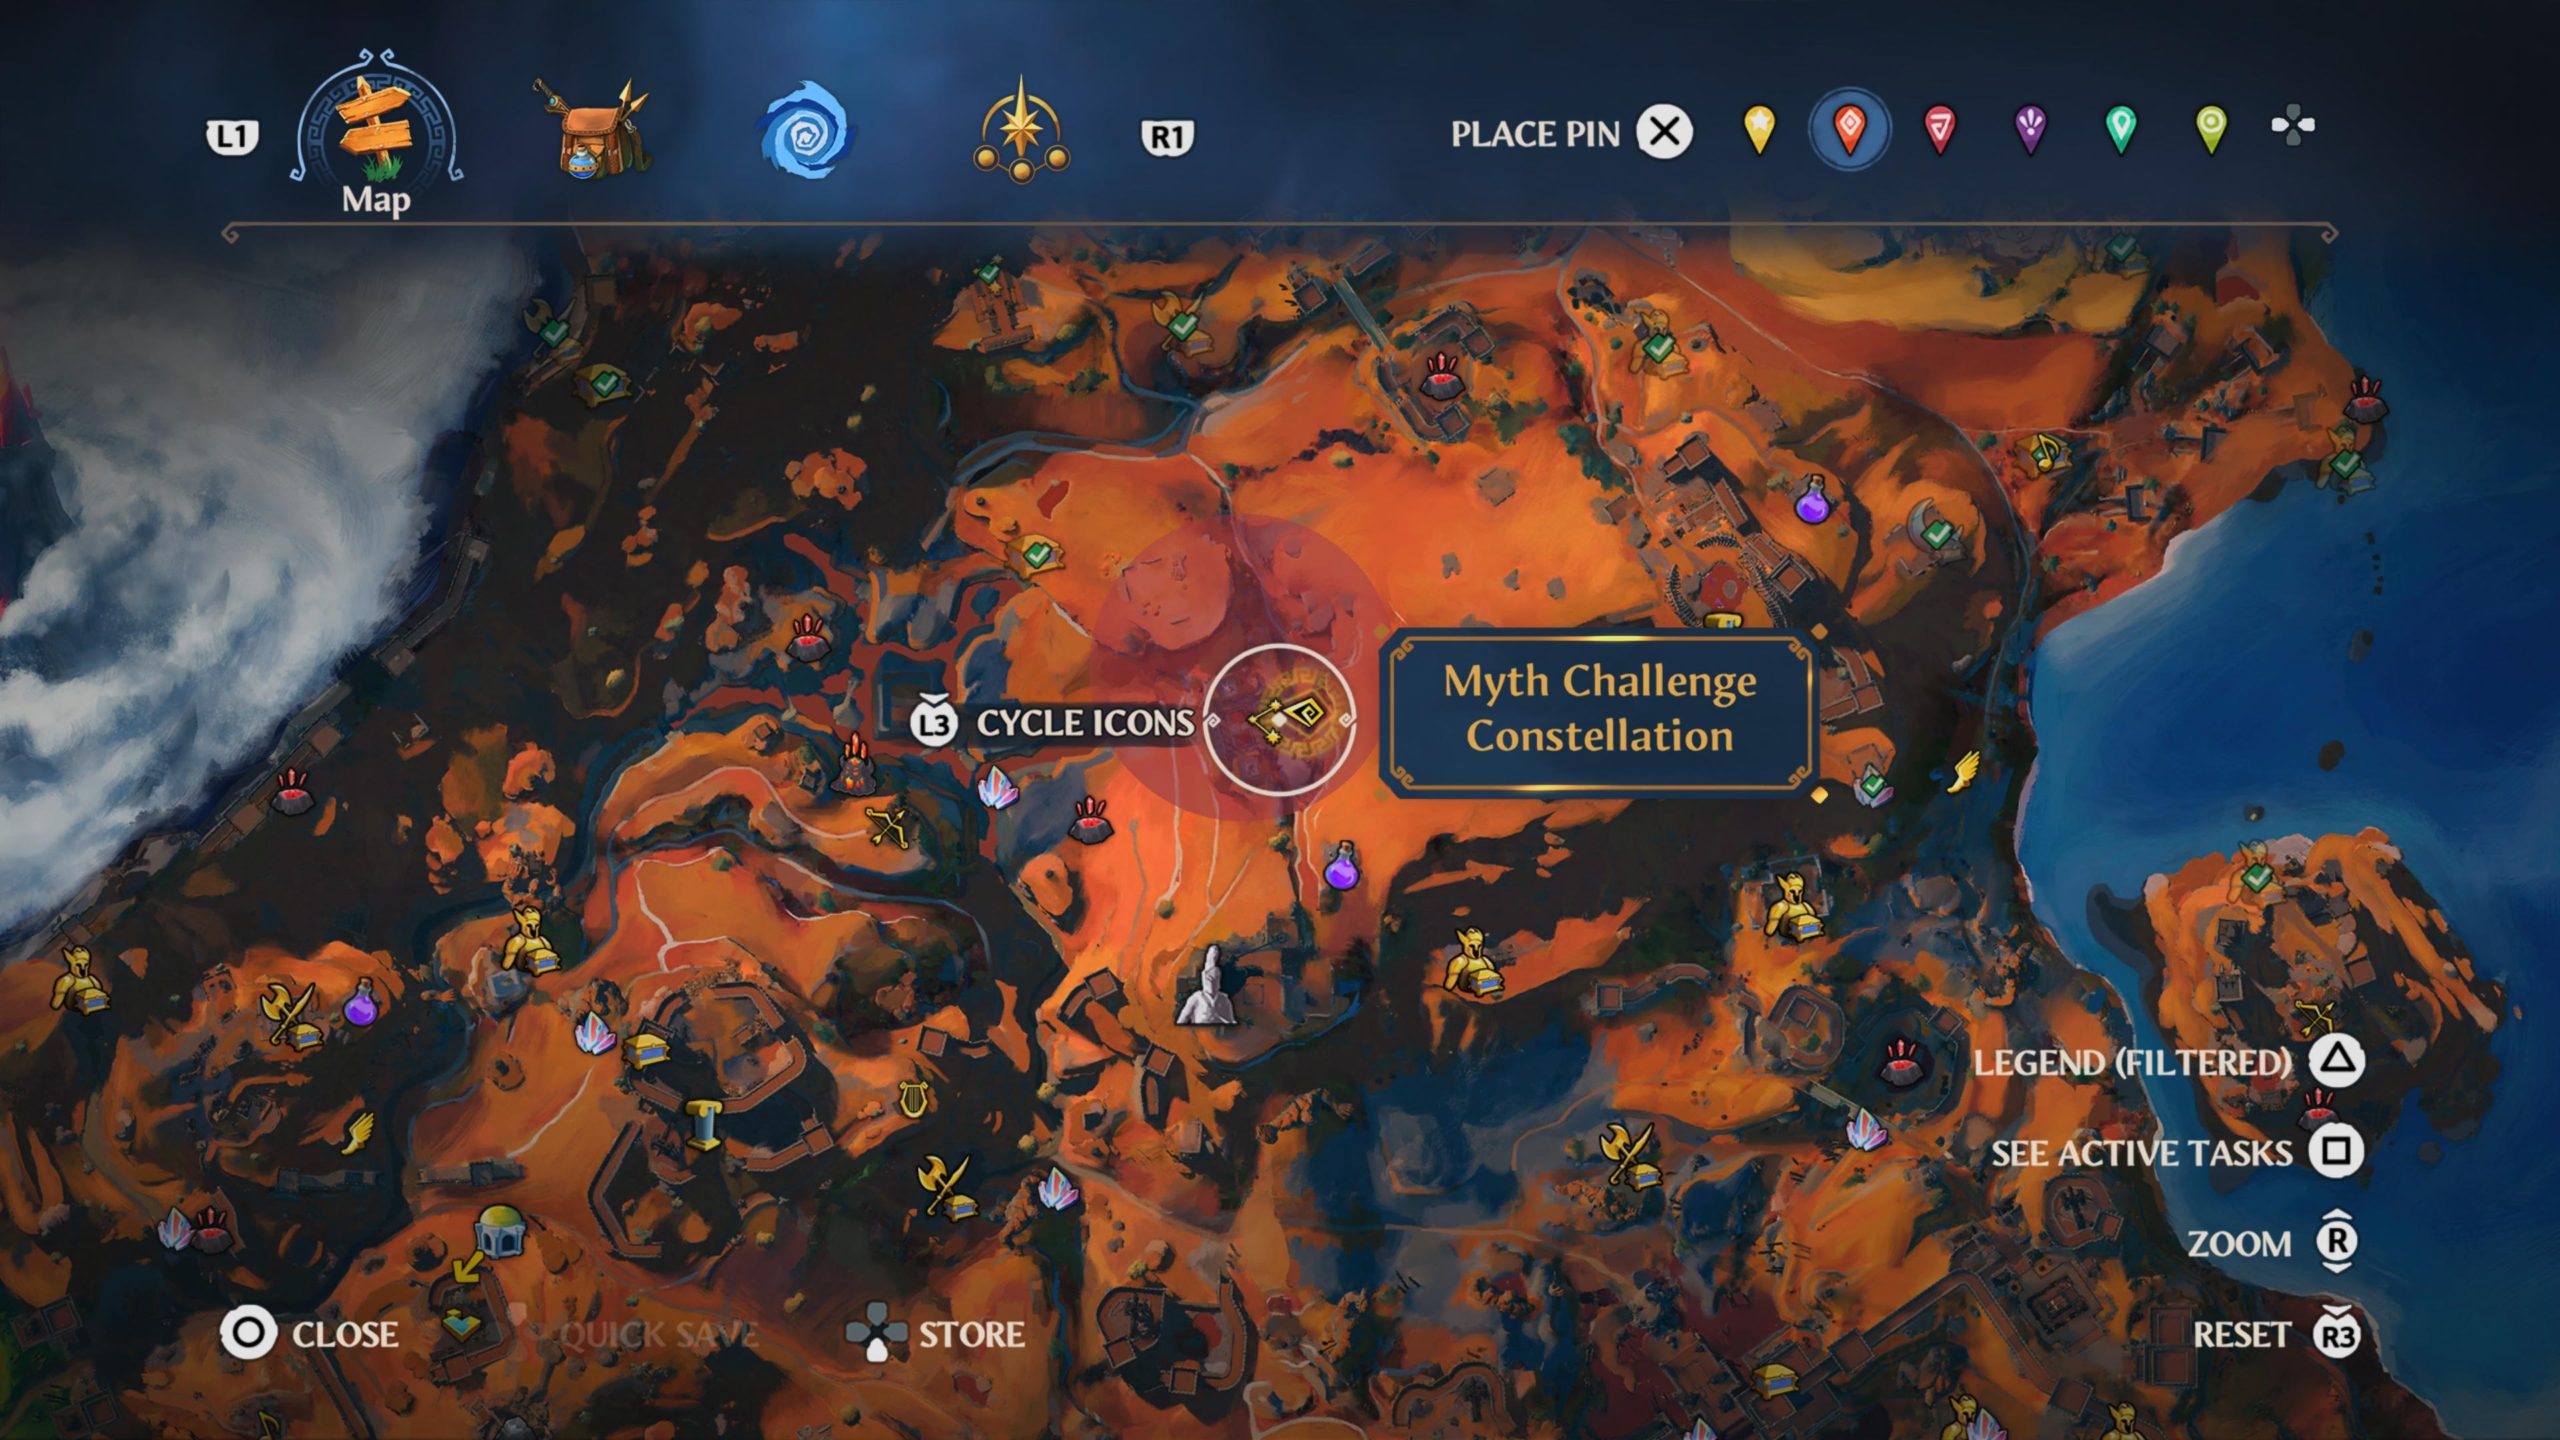
God of War Constellation
This constellation can be found north of the God of War fast travel point.
Use the image on the wall to place the glowing orbs in the correct locations on the ground. You can find the orbs in the following locations:
1. The first orb can be found behind the wall with the image on it depicting where to place the orbs. To unlock it. Stare at the columns containing medallions. From left to right start, step on the circles in the following order: 3, 1, 2, 4.
2. & 3. Both orbs can be found in the belt of the giant statues guarding the puzzle.
4. East of the puzzle stand on the circular platform then shoot the 2 targets above the barrier. Once both targets have been hit, the orb will release.
5. Face east of the puzzle to spot a face in the cliff. Head to the right of the face and hug the wall to find a breakable spot in the cliff. Smash the cliff then head inside to retrieve the orb.
Last year was a solid year for gaming filled with an abundance of games for every kind of gamer. With all of those games, there were a few that stood out to me as the best. Here is my Top 10 Games of 2018 derived from all of the games I played throughout the year.
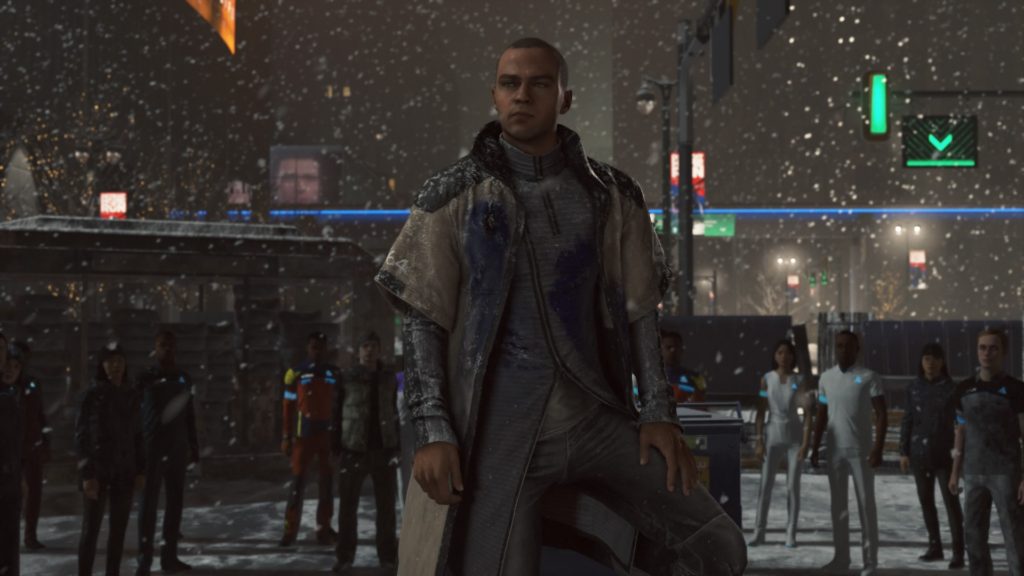
10. Detroit Become Human
Detroit Become Human set the bar for interactive games with spot-on storytelling and a wide variety of player choices that shape its outcome. Over the course of the game, you’ll find yourself in control of 3 different characters whose fate is determined by the choices that you make. The game takes place in Detroit (if you couldn’t tell) and focuses on the tension between humans and androids following an outbreak of deviant (self-aware) androids. All of this coupled with a great supporting cast makes Detroit Become Human a game worth playing.
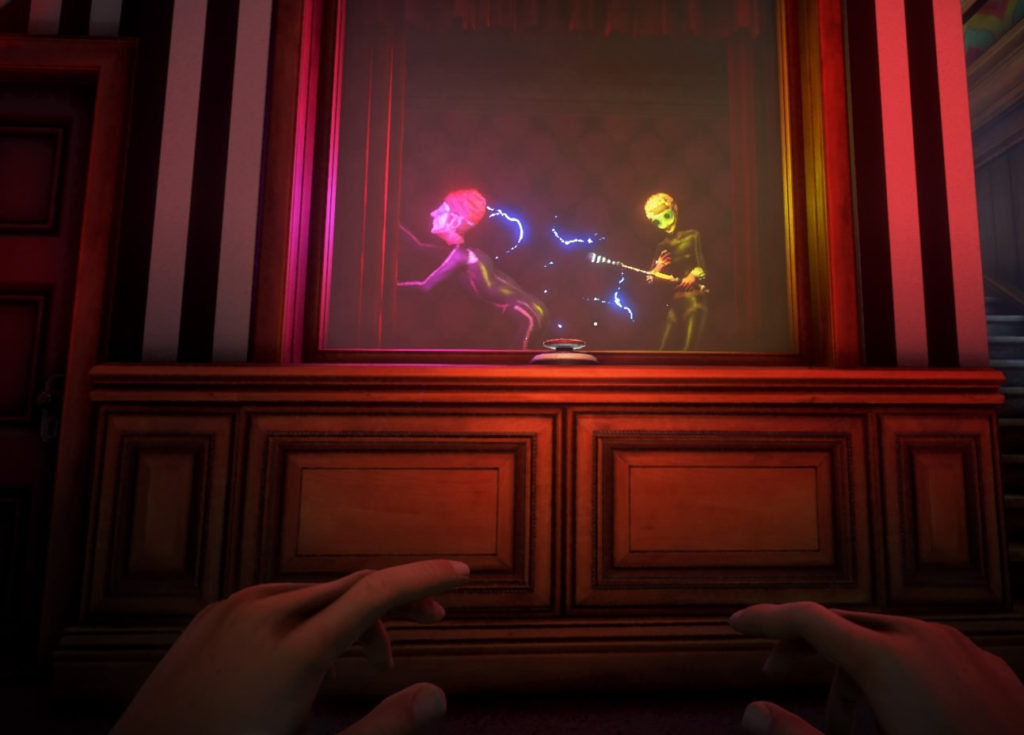
9. We Happy Few
We Happy Few is set in a world based on an alternate history of World War II where Germany managed to invade England. In order to end Germany’s occupation, England ends up making a deal with them. This deal gets Germany to pull their forces from England at a cost so bad no one speaks of it. Eventually, the government is forced to make a new drug called Joy that forces anyone who takes it to be happy with the side effect of also causing them to forget their past. The game follows 3 different characters on their journey to fulfill their own goals and to escape the city known as Wellington Wells. The charm in this game is how appearances can be misleading. When hopped up on Joy, the city is full of color and everyone seems happy and pleasant. When its effects wear off, the city’s true nature is exposed as it is run down, dull and not a happy place at all. Couple that with side quests so interesting that they will make you push off the main story and you get a charming survival game with an open world atmosphere.
8. Super Smash Bros Ultimate
Even though it hasn’t been out a month yet, I put enough time (around 100 hours) into Smash Bros before the new year that I felt it deserved a spot on this list. After my time with it, I have determined that this is the smash game we wanted and the smash game we deserved. It comes with the largest roster in a smash game to date with 74 fighters and over 100 stages to duke it out with your friends on. Of those 74 characters, only the starting characters from the original smash are unlocked, which I thought was a nice touch as I quite enjoy unlocking characters. Smash Ultimate also saw the introduction of over 1000 Spirits themed from various games that can be equipped to your fighters to give them different abilities or starting items in battle. On top of all the fighters, stages and spirits, Smash Ultimate also came with what I consider the bread and butter of the game, the World of Light story mode. In it, Kirby must free his captive comrades to battle the evil masters of light and dark to save the world from destruction in an adventure that took me well over 30 hours to complete on normal mode. While playing World of Light, you can unlock all of the fighters as well as a good chunk of the spirits in one playthrough. Adding the cherry to the top, Joker from Person 5 will be the first DLC character for the season pass (and my new main). With all of this content, Super Smash Bros Ultimateis a must have for every Switch owner.
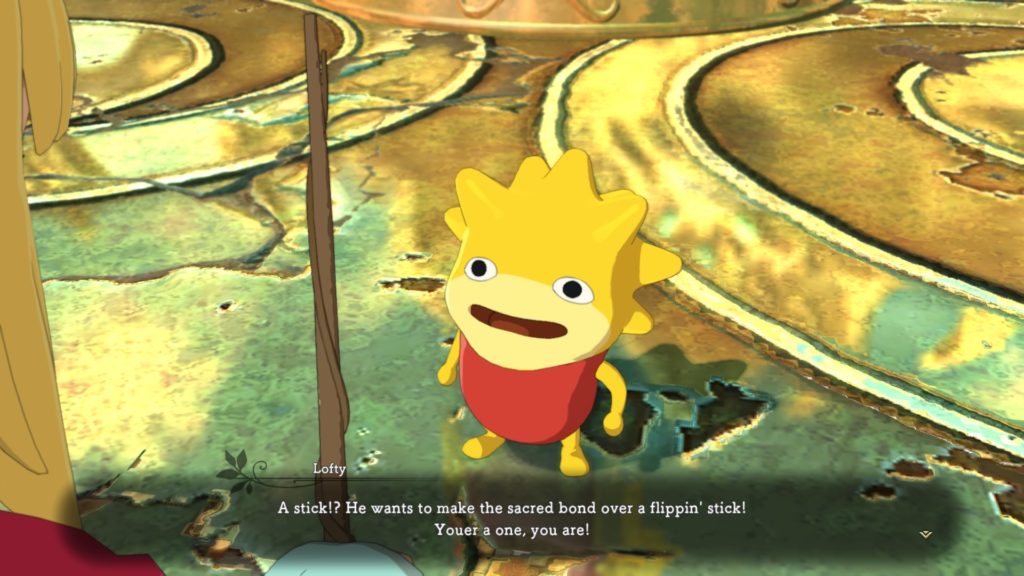
7. Ni No Kuni II Revenant Kingdom
Compared against the original, Ni No Kuni II Revenant Kingdomtook the charm of Ni No Kuni Wrath of the White Witch and crafted a beautiful Studio Ghibli inspired world with a solid story and fluid gameplay. It follows Evan Pettiwhisker Tildrum on his quest to form a new kingdom following the uprising of the Mousekin (rat-people) who overthrew him from the throne of his previous kingdom of Ding Dong Dell. Over the course of the game, Evan meets a wide variety of interesting characters that help him on his journey as he discovers a darker plot around the game’s major events. Outside of the main story, there are plenty of other things to do like building up the new kingdom or collecting elemental spirits know as Higgledies that support Evan and friends during combat. The only thing I really didn’t care for in this game was those pesky skirmish matches. Skirmish is a game mode where you control a chibi Evan and fight enemies using squads of troops at your disposal. This particular game mode can get old really quick and is quite the grind if you are trying for the platinum trophy. Overall, Ni No Kuni II was one of my favorite games released last year.
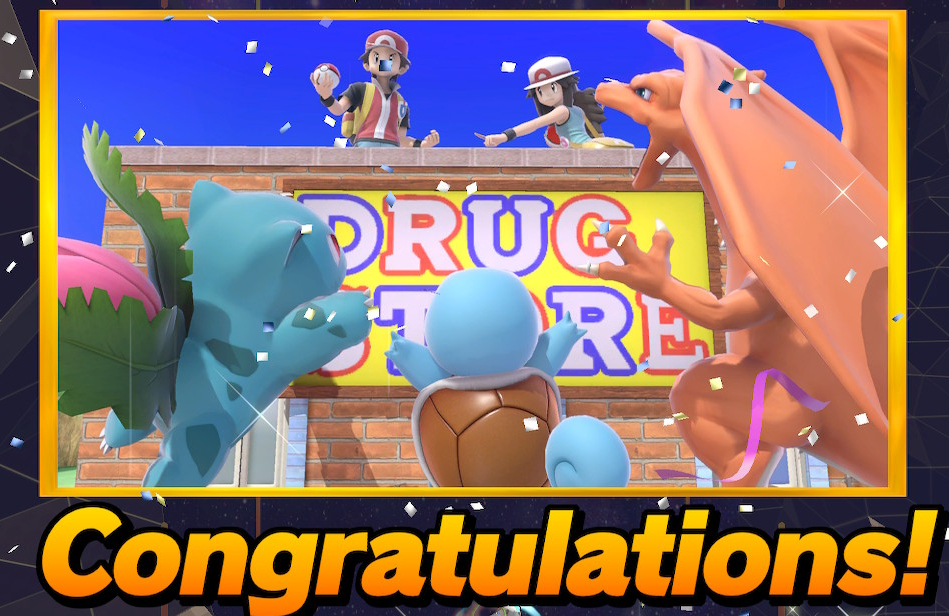
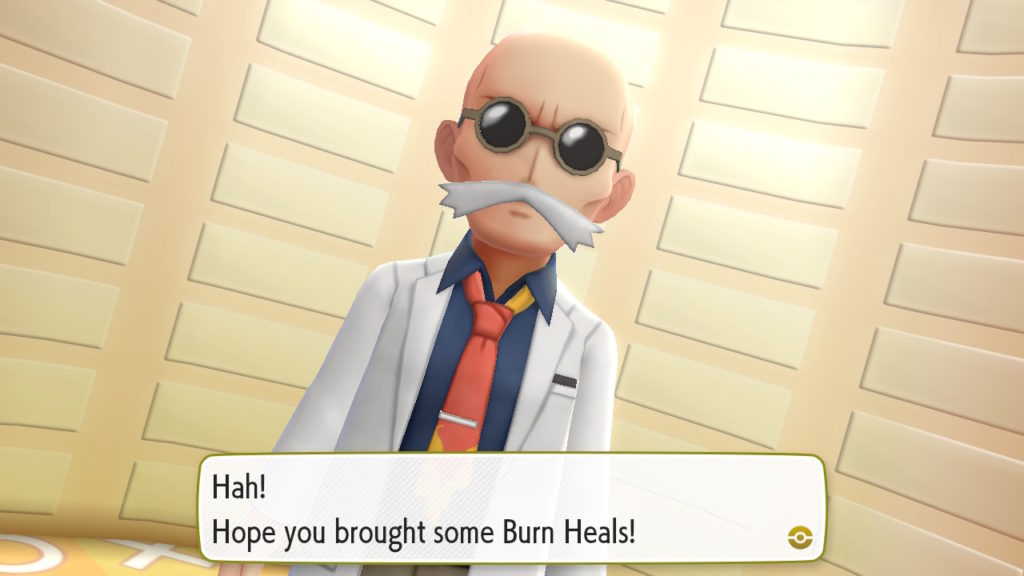
6. Pokemon Let’s Go Pikachu and Eevee
I want to start this section off by mentioning that I am a huge Pokemon fan. Pokemon was the game that really got me into gaming all those years ago when Red and Blue originally launched. So when another game was set in Kanto, I tried to be optimistic about it and boy was I impressed. While Pokemon Let’s Go Pikachu and Eevee wasn’t the new core game we were hoping for, changing up how catching and leveling Pokemon worked in these games made for an exciting unique way to exploring the original games while also being a good entry game for gamers new to the series. I found myself broke more often in these games than any other game because I spent so much time catching Pokemon that I was using all of my money on Pokeballs. You may not openly admit it, but every past and preset Pokemon fan has imagined at one point or another what it would be like to catch a Pokemon and this game does well at providing that experience (when the joy cons are working correctly that is). This game is another one that would make a good addition to any Switch owner’s library.
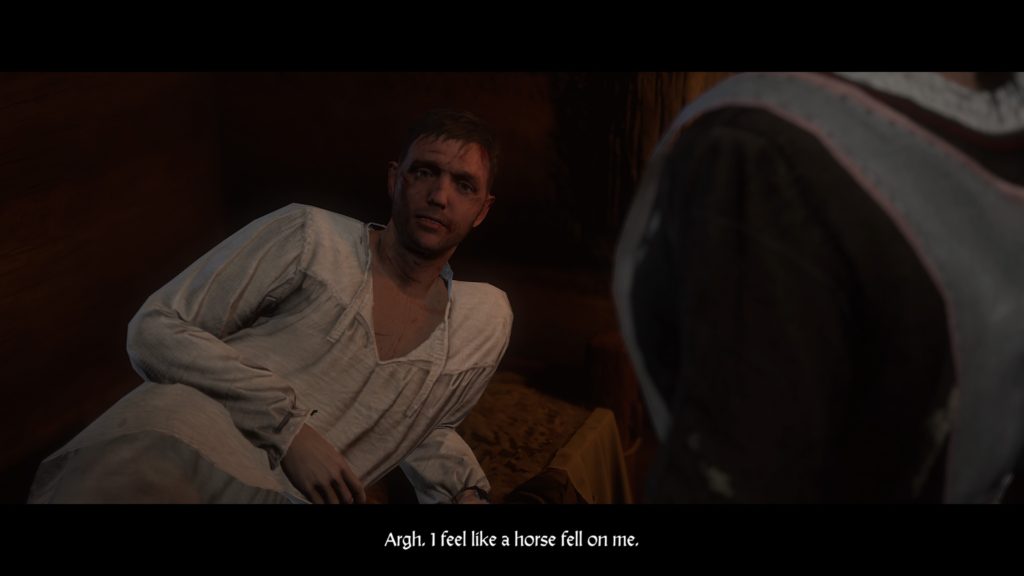
5. Kingdom Come Deliverance
If you are into open world RPGs and have not heard of or know anything about Kingdom Come Deliverance, then you need to step up your game. Now, I will be the first to admit that this game isn’t for everyone. There are not powerful creatures to battle or magical powers you possess. You aren’t even the chosen one who has to save everyone from some world ending threat. No, you play as a peasant named Henry who happens to be the son of a blacksmith set in the Kingdom of Bohemia during 1403. Henry finds himself on a quest for revenge as everything he’s ever known is taken from him. This journey won’t be easy as Henry is a peasant who doesn’t have any skills giving the player a blank slate to shape him how they see fit. The game itself has a pretty decent story with many side quests and places to explore that I found myself sinking over 100 hours into the game. One thing to note is when the game originally released in early 2018, there were a lot of quest and game-breaking bugs that have been mostly patched. Playing the game compared to then is like a brand new experience.
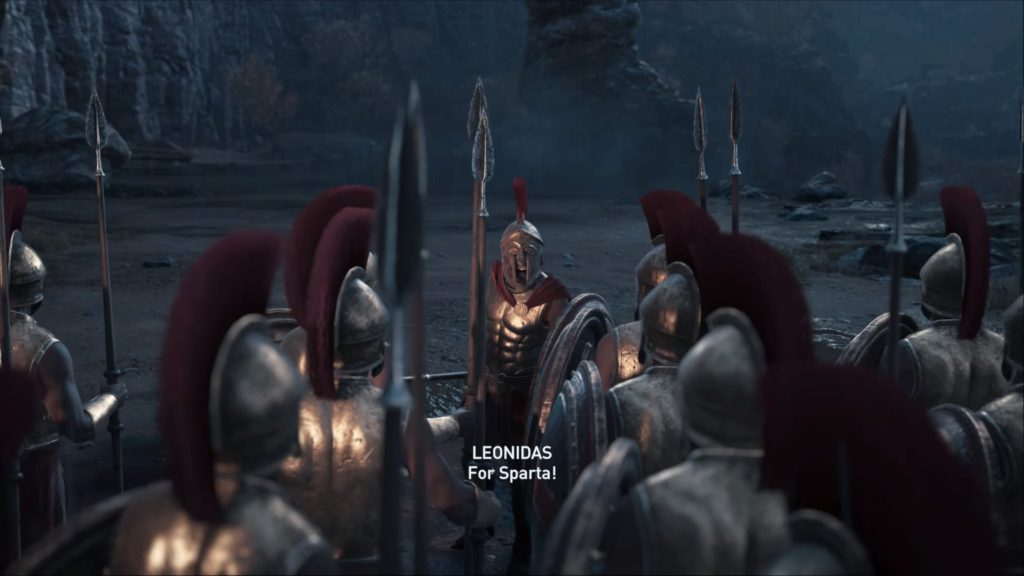
4. Assassin’s Creed Odyssey
Have you ever wonder what it would be like to play as a Spartan warrior wreaking havoc in ancient Greece with your own crew of battle-hardened seamen (or sealadies)? Well so did Ubisoft and the resulting product is called Assassin’s Creed Odyssey. A game where you play not only as a Spartan, but more specifically as a grandchild of King Leonidas wielding his legendary spear on a quest for vengeance. Along the way you will face many enemies, complete a large number of side quests (like the one where you go fetch some viagra plants for a blacksmith), pillage and plunder enemy ships and even battle some of the deadliest creatures from Greek Mythology. Add in one of the best stories to be in Assassin’s Creed and you have a game that easily ranks in my top 10 games of 2018.
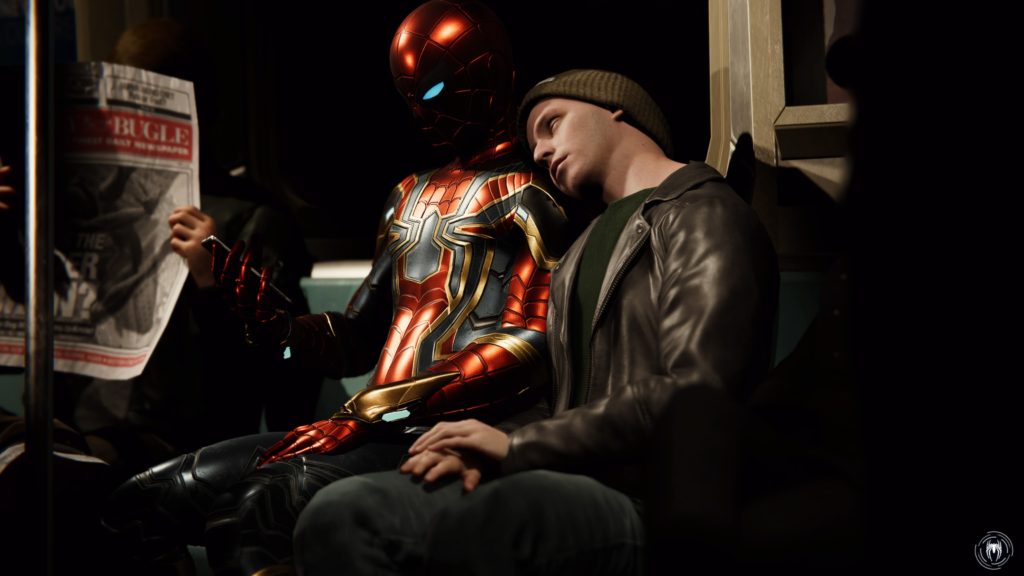
3. Marvel’s Spider-Man
Spider-Man has been my favorite superhero dating back to 1995 watching the cartoon as a kid, so you can believe me when I say that I was beyond ecstatic when they announced a game for PlayStation being developed by Insomniac and man did they kill it. Focusing on an older Peter Parker, Marvel’s Spider-Man tells a story unique to the game while giving gamers an authentic Spider-Man experience. From fighting criminals to making gadgets and web-slinging around the city, everything was so well put together and that made the game really enjoyable for me. I spent at least an hour at the beginning of the game just web-slinging around because it was easy to do and so natural. In fact, it was so enjoyable to me that for the rest of the game I really didn’t do any fast traveling. I even went as far as collecting all of the collectibles as soon as I could just so I could keep swinging around. Getting away from the web-slinging, the game also contains some really fun boss fights, a wide variety of gadgets just waiting to be used, and a whole lot of awesome spider suits to keep you going for quite a while. Along with that, the story was just as good as the rest of the game making it hard for me sometimes to pull myself away from it to take on some of the side content. This game easily earned a spot in the top 3 games on this list.
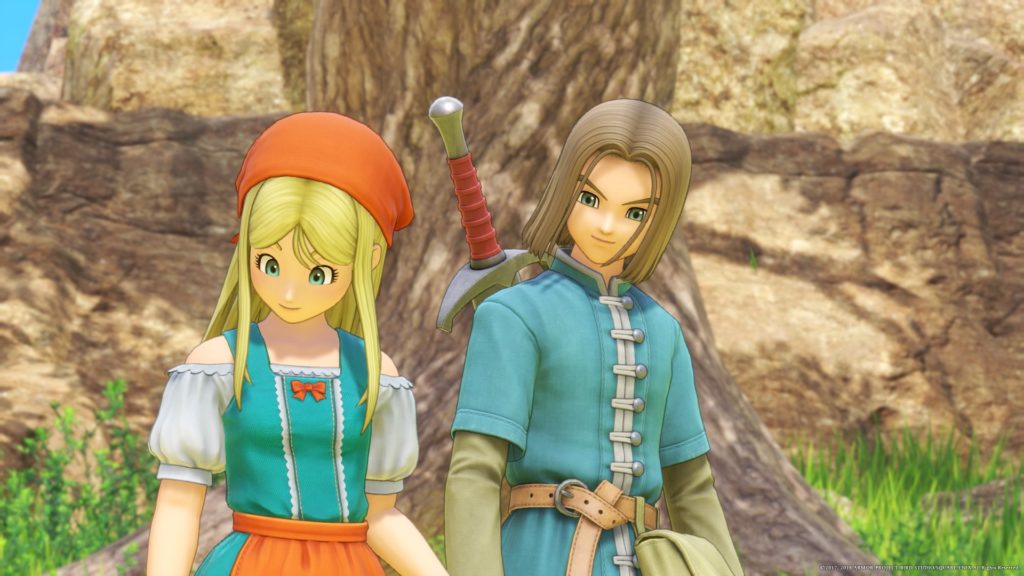
2. Dragon Quest XI Echoes of an Elusive Age
Dragon Quest XI was my first Dragon Quest game and it really blew me away. It follows a teenage boy who also happens to be the Luminary, the chosen champion of the world tree who is destined to defeat an evil threat and bring light back to that world. On this journey, he is joined by a colorful entourage of party members that each have their own unique skills and are so evenly balanced that I found myself switching the party around pretty constantly. Some other things I really enjoyed included the good old fashioned turn-based combat, the multitude of side quests and the level grinding up to level 99 (it’s not a real RPG if there’s no grinding involved). The whole game took me 120 hours to beat and really stood out as one of the best RPGs of 2018.
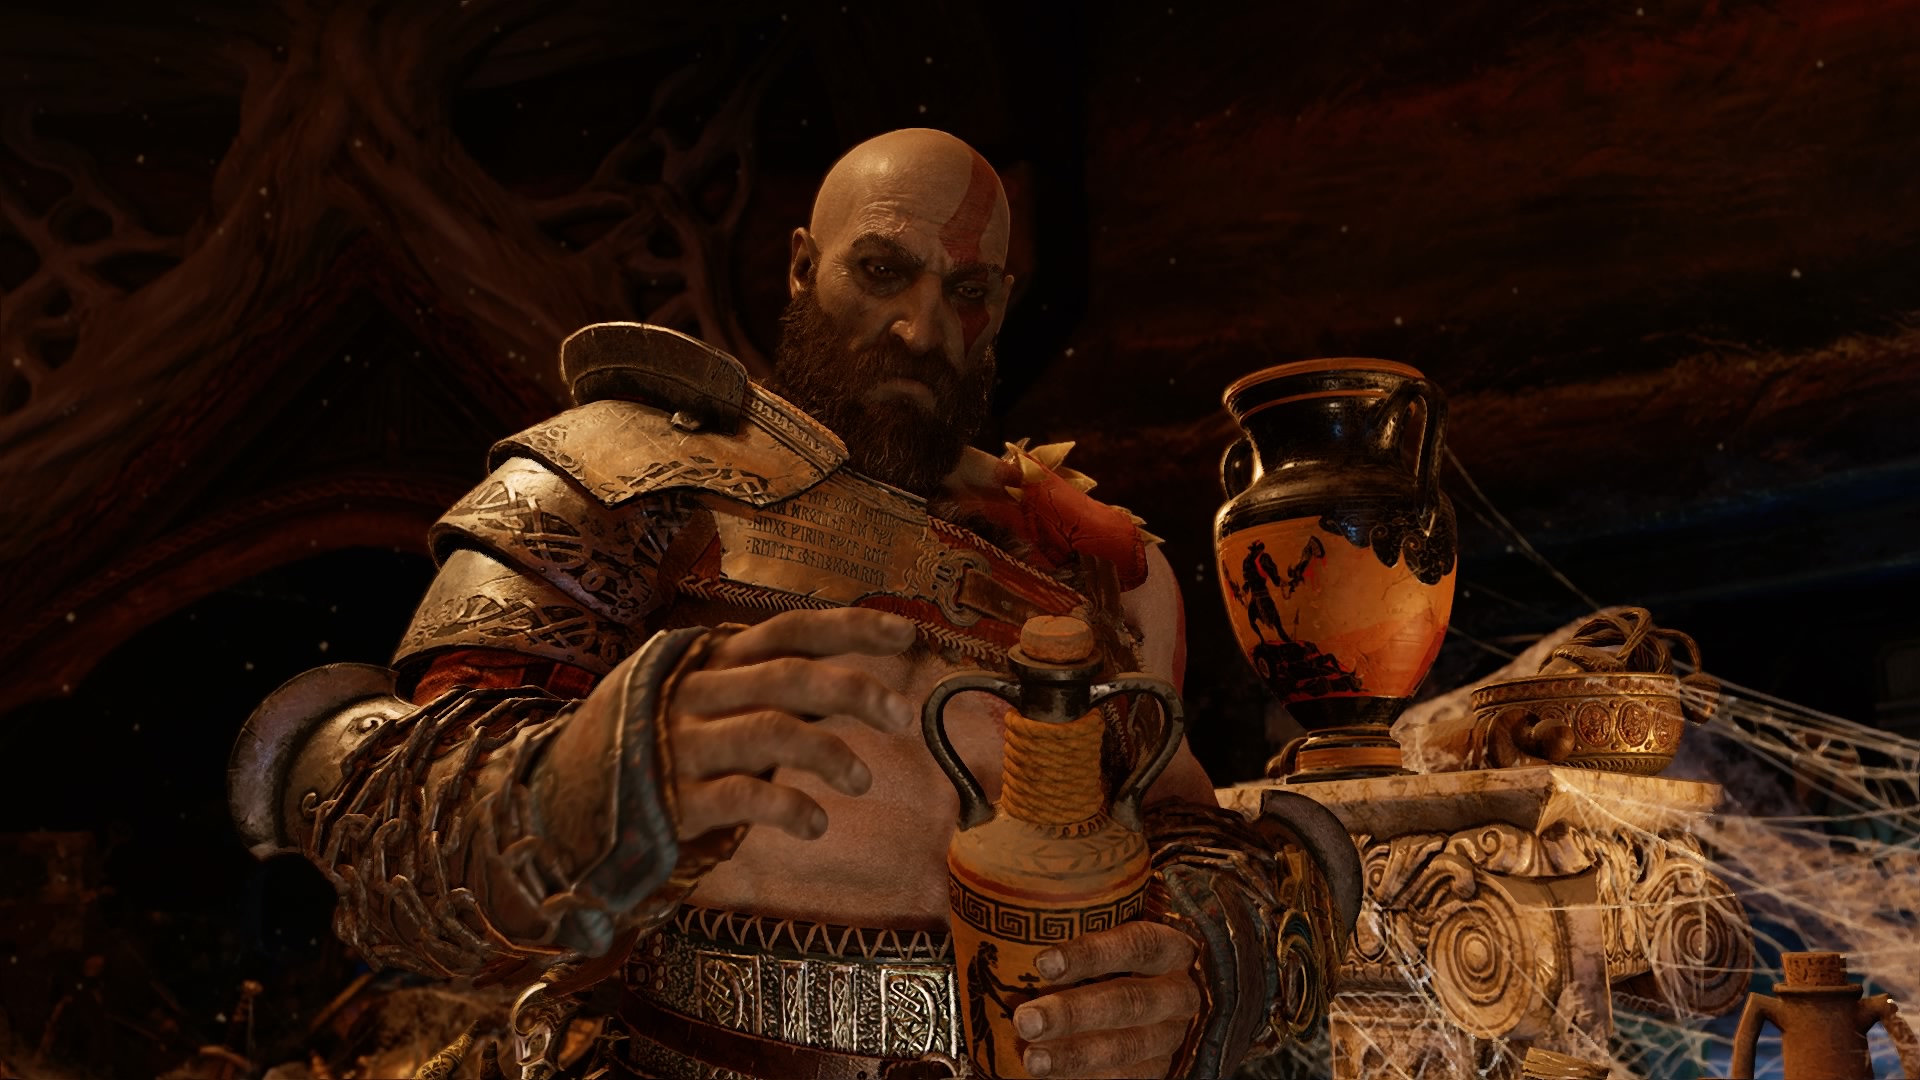
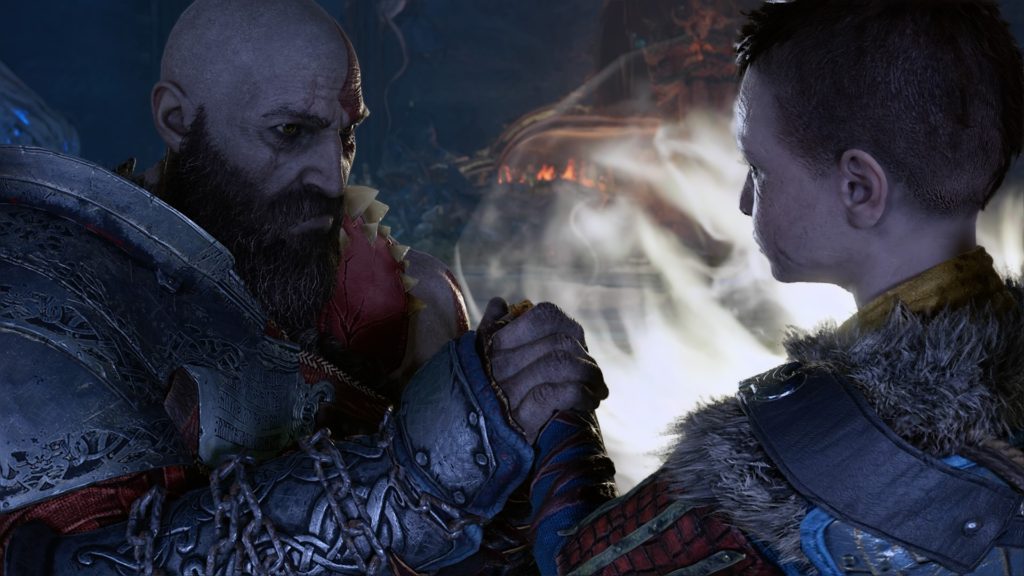
1. God of War
The only thing I can really say about God of War is BOY! Seriously, though. We got to play as Kratos again in an action-adventure game focused on Norse Mythology and he’s a dad. There are also giant monsters, memorable side characters and let’s not forget the brief and purposeful stories. What more could we want? How about a fantastic story where we get to see not only the boy, but Kratos grow as characters and form a deep bond by the end that all started after the passing of Kratos’ wife. Her last request was for both Kratos and Atreus to cremate her and scatter her ashes from the tallest peak in the Nine Realms. I really don’t want to go into much more in case there are some people that haven’t played it yet, just know that this game was hands down my number 1 game of 2018.
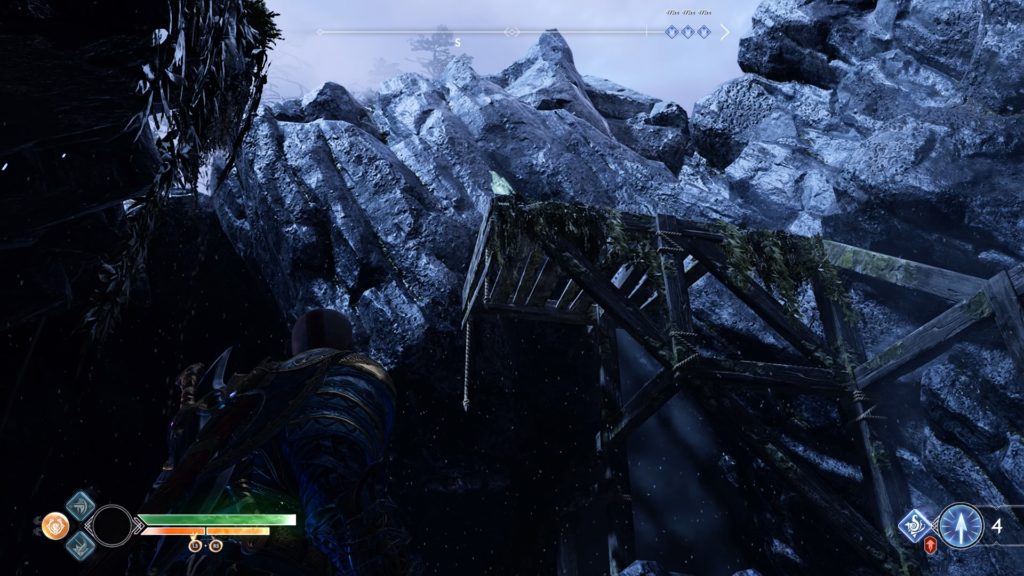
These ravens are located at the Landsuther Mines and there are 2 in total.
Raven 1
This raven is located to the left of the entrance to the Landsuther Mines on the top of an old wooden scaffold.
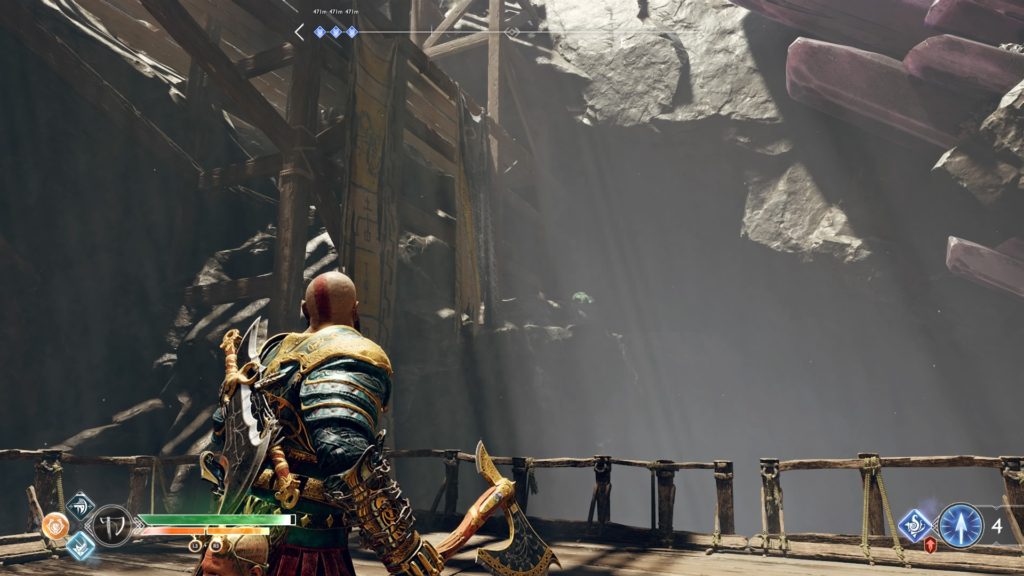
Raven 2
Head back to the first room in the mines after you cleared it. Climb up the chain to the north side of the room. Take the first right to find the raven on a rock on the east side next to two banners (last room of mine).
These ravens are located in Helheim and there are 6 in total.
Raven 1
Head straight from the entrance to Helheim to find the raven in middle of structure that holds the horn on the bridge.
Raven 2
Head straight from entrance following the bridge north until you reach an area filled with statues and souls. Before the next door, turn left and head down a side path, walking across the ledge. Once you emerge, head up the climbing wall to the left. Crawl to the top of the rock and climb left to find the way down to another level. Once at the bottom, swing to the right and look down. The raven will be flying around underneath the bridge.
Raven 3
Head straight from the entrance and follow the bridge north through the area filled with statues and souls. Crouch under the rock to proceed and climb up the wall straight ahead. Destroy the sap on the right to reveal the raven standing on the stone ledge above a chest.
Raven 4
From the previous raven head back down the wall and turn left. Follow the path past the helwind container. Climb up the stone steps to the north and turn east to shoot the red sap revealing the raven outside the hidden chamber.
Raven 5
From Raven 3, climb out of the pit using the north wall to find this raven straight ahead.
Raven 6
Head into the hidden chamber and take the elevator down. Head up the stairs on either side past the Mystic Gateway to find the raven top of an archway.
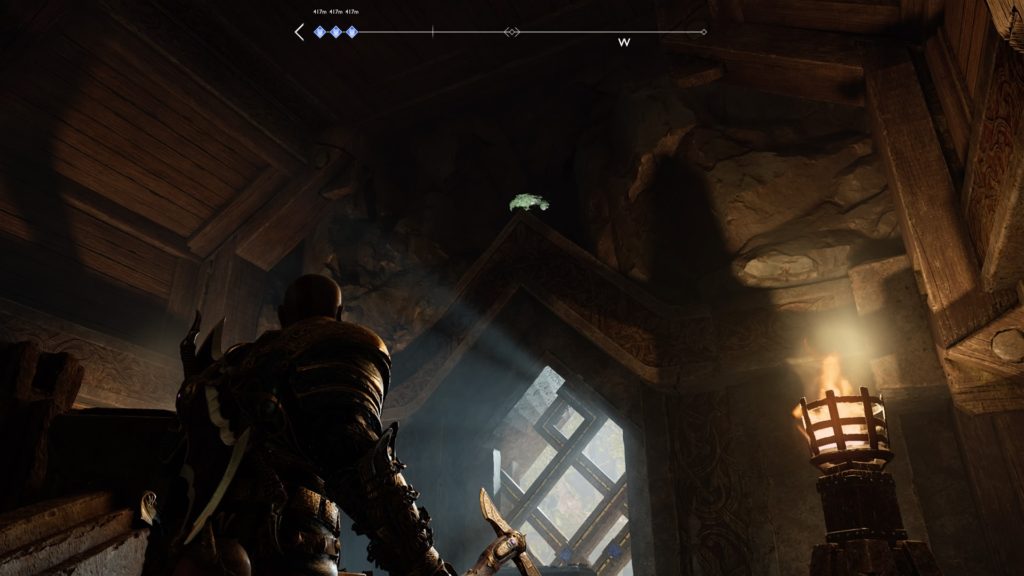
Head straight from entrance following the bridge north until you reach an area filled with statues and souls. Before the next door, turn left and head down a side path, walking across a ledge. Once you emerge, head up the climbing wall to the left. Crawl to the top of the rock and climb left to find the way down to another level. Once at the bottom, head to the first pillar on the right to find the black vines. Burn the vines to reveal the hidden artifact.
Family Heirloom 2
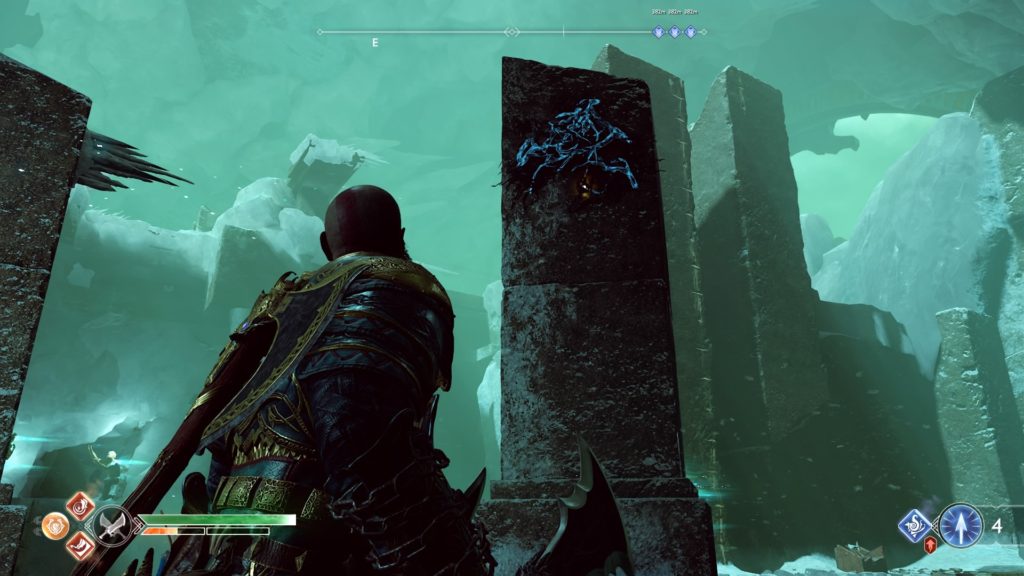
Head straight from the entrance and follow the bridge north through the area filled with statues and souls. Crouch under the rock past the doorway along the bridge there and turn right. Follow the path past the helwind container. Climb up the stone steps to the north and turn east to shoot the red sap revealing the artifact right outside the hidden chamber.
Family Heirloom 3
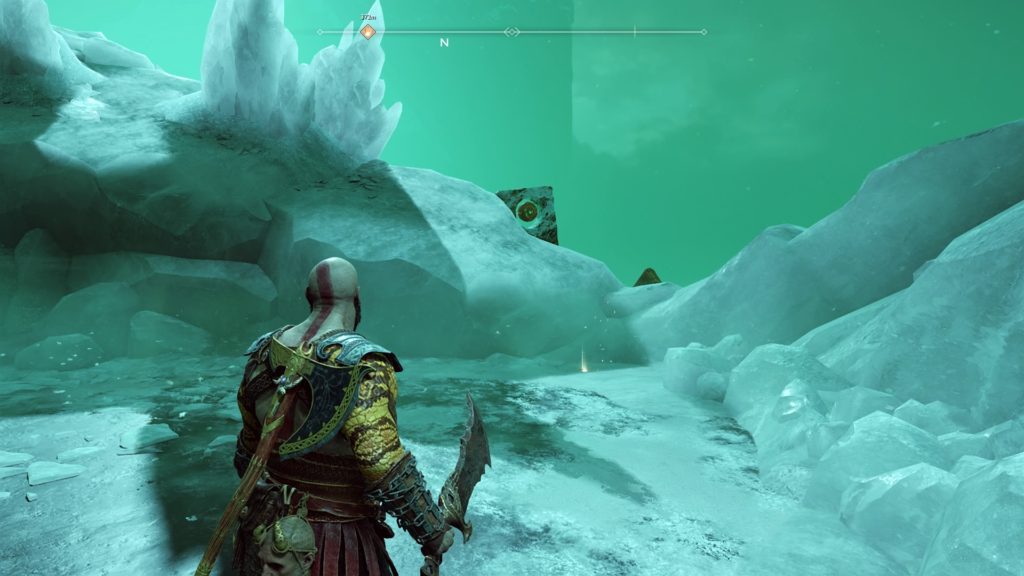
Upon entering Helheim, this artifact will be to the right before crossing the bridge
Family Heirloom 4
Head into the hidden chamber and take the elevator to the bottom. Head up either set of stairs and find the artifact on the left side of the room.
Family Heirloom 5
Head straight from entrance following the bridge north until you reach an area filled with statues and souls. Before the next door, turn left and head down a side path, walking across the ledge. Once you emerge, head up the climbing wall to the left. Crawl to the top of the rock and climb left to find the way down to another level. Once at the bottom, swing to the right and climb down into the pit below. Climb up the eastern wall and head in the cave between the two statues. Look up and to the left to see thorns under the bridge that you can burn with the blades of chaos, dropping the hidden artifact.
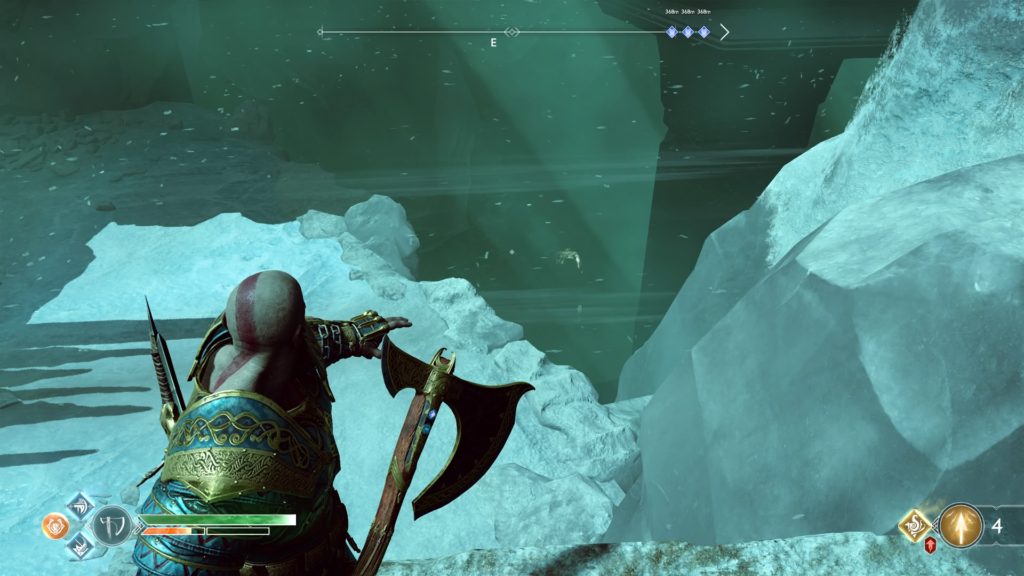
These ravens are located at Thamur’s Corpse and there are 2 in total.
Raven 1
As soon as you dock the boat at Thamur’s Corpse, look up past to the Mystic Gateway to find the raven perched on a stone ledge.
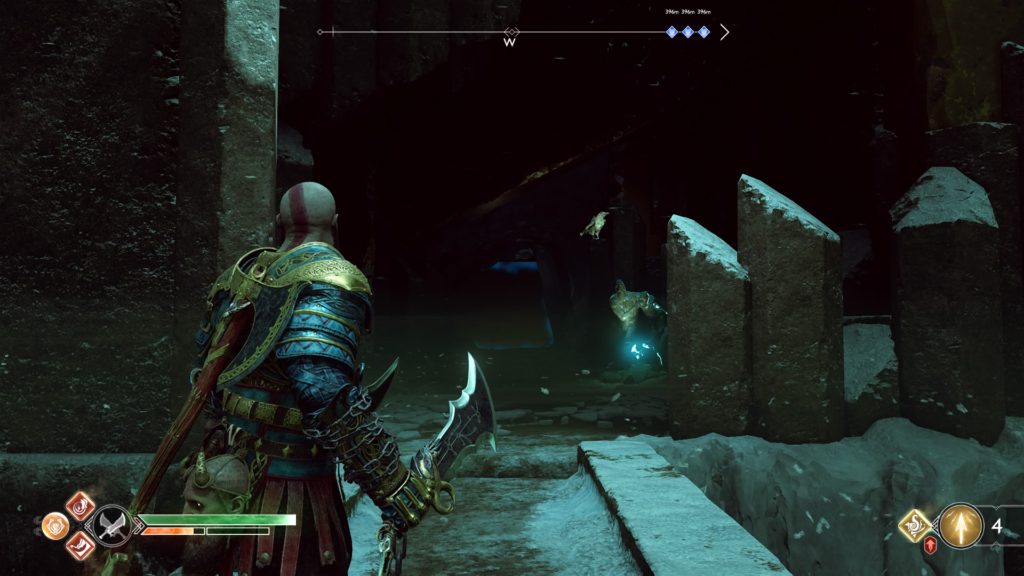
Raven 2
Head into the hidden chamber at Thamur’s Corpse and follow the path to make your way to the room holding the Valkyrie. The raven will be located on a branch on the right side of the tree.
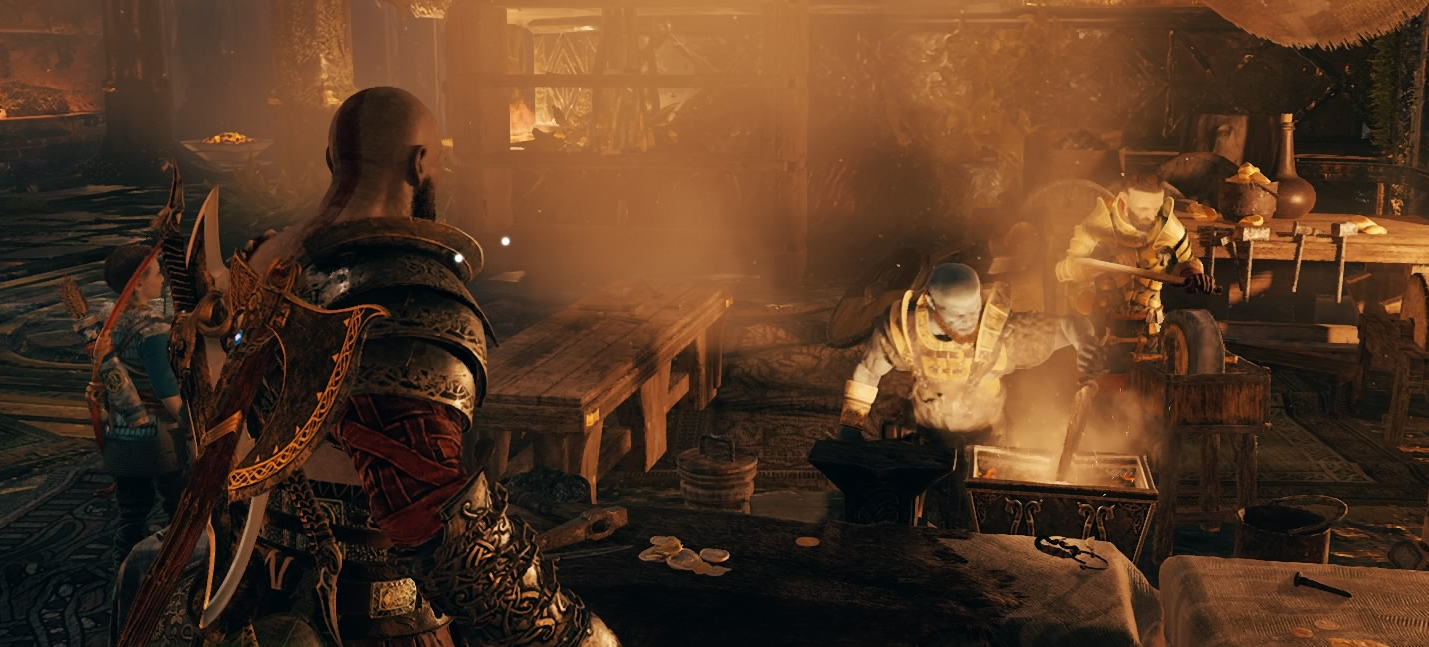
Summary: Brok and Sindri want to use the hammer and whetstone to craft the Dwarven Armor of Legend. To do this we need to go to Konunsgard to learn about the items needed to craft the armor.
Objective(s):
Go to the Konunsgard stronghold
Collect keys to enter Stronghold
Entry Stone 1
Entry Stone 2
Entry Stone 3
Enter the Motsognir’s Stronghold
Explore the Stronghold
Return to Brok and Sindri’s Shop
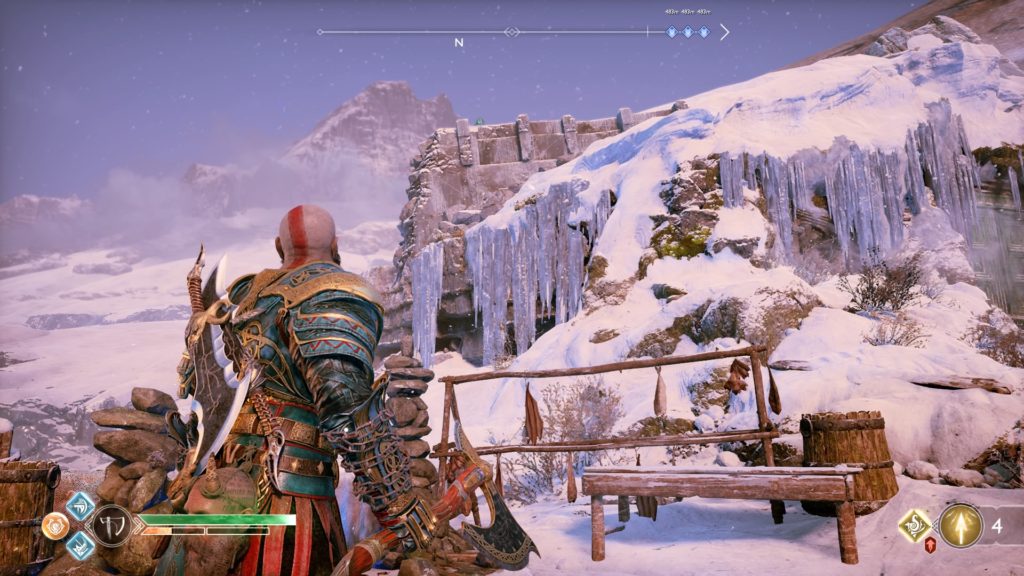
Go to the Konunsgard stronghold
Head to the Konunsgard stronghold and use the keystone to gain entry. It is located in the Shores of Nine between the Ruins of the Ancient and the Light Elf Outpost. Follow the path into the stronghold to end up at a chain covered in vines. Used the Blades of Chaos do burn them away and climb down the chain to proceed. Head forward to a rock wall and climb up it. Keep following the path to end up at Sindir’s shop. Keep moving past Sindir’s shop on the path until it splits. Take the right path over a wooden bridge and keep moving forward. You will pass a Mystic Gateway off to the left of the next wooden bridge. Head over that bridge and passed the poison totem to find the front door of the stronghold.
Collect keys to enter Stronghold / Entry Stone 1
To open the door to the stronghold, you must find 3 entry stones. The first one is located next to the pedestal near the corpse of the fallen warrior.
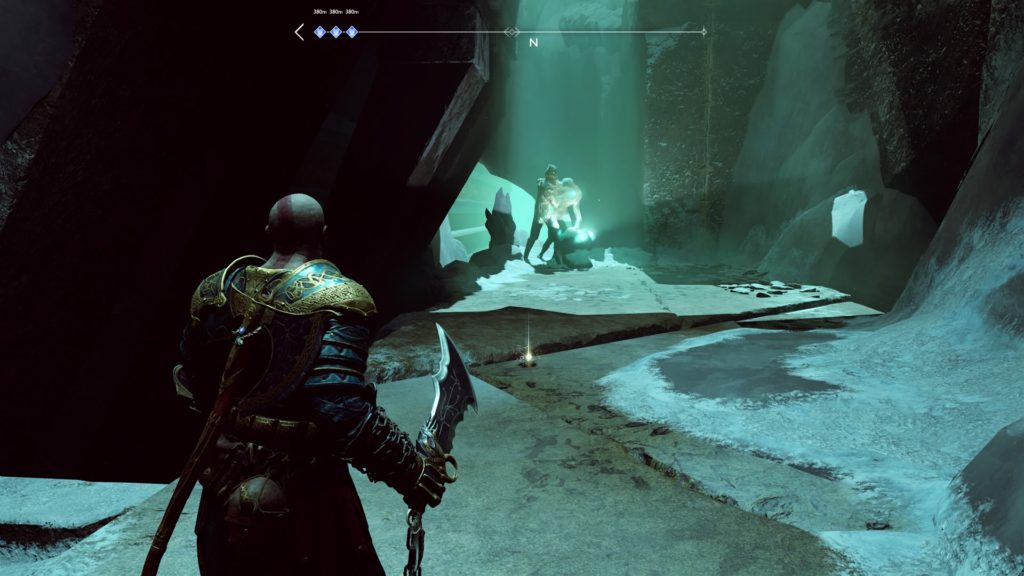
Entry Stone 2
From there take the path to the left past the poison totem. Follow that path, burning the vines blocking your way and leaping across the pit in the floor to reach a pair of wulvers. Defeat them and keep pressing on to end up in a stonehenge like area with a soul devourer in the middle. Keep going ahead, walking along the edge of the cave wall up to the goat statue with a blue flame. Look across the river to see a crystal hanging in the air. Throw the axe at it and jump down the ledge near the goat statue to pick up the crystal. Take it back to the area you fought the to wulvers and place it in the crystal holder. Shoot the crystal with Atreus’ bow to create a light bridge above. Make your way back to the area where the soul devourer was and absorb the winds of hel into the Blades of Chaos. Take the wind to the green door passed the goat statue to open it. Head through the doorway and climb up the stone wall to reach the next entry stone at the end of the path.
Entry Stone 3
Head back to the front of the stronghold, this time take the right path. Vault over the log blocking the path and keep moving forward. You will vault over another log, then cross a small wooden bridge bringing you to an ogre in the middle of a snack on the right. Defeat it and his ranged friends to proceed. At the end of the path, you will climb up a stone wall and then jump across a broken stone bridge to get to the other side. Head northeast towards the dragon activating the Fire of Reginn favor to free it. Make your way to the northwest of the area with the dragon to find a rune door. Open it and follow the path to the third entry stone one a stone pedestal. If you need help opening the rune door, check out the Fire of Reginn guide for the solution.
Enter the Motsognir’s Stronghold
Return to the pedestal in front of the stronghold and use the 3 entry stones to open the door. Enemies will spawn, so defeat them and make your way into the stronghold.
Explore the Stronghold
Head up the stairs of the stronghold and take the first left (a shrine is to the first right). Follow the path to a pair of wooden doors between two statues. Open the door to be greeted by a Traveler. Defeat him and his friends then head to the throne and move it out of the way to reveal a secret passage. A cutscene occurs and Kratos finds what Brok and Sindri are looking for.
Return to Brok and Sindri’s Shop
Follow the path with the king’s corpse to end up back at the Mystic Gateway. Take the gateway to Brok’s shop in Tyr’s Temple. Talk to Brok and Sindri to complete the quest.
Search
This site uses cookies. By continuing to use this website, you are giving consent to cookies being used. For more information on cookies, view our Privacy Policy.OkPrivacy Policy