Guides

Metro Exodus – Sam’s Story Diary Pages

by Chappie in

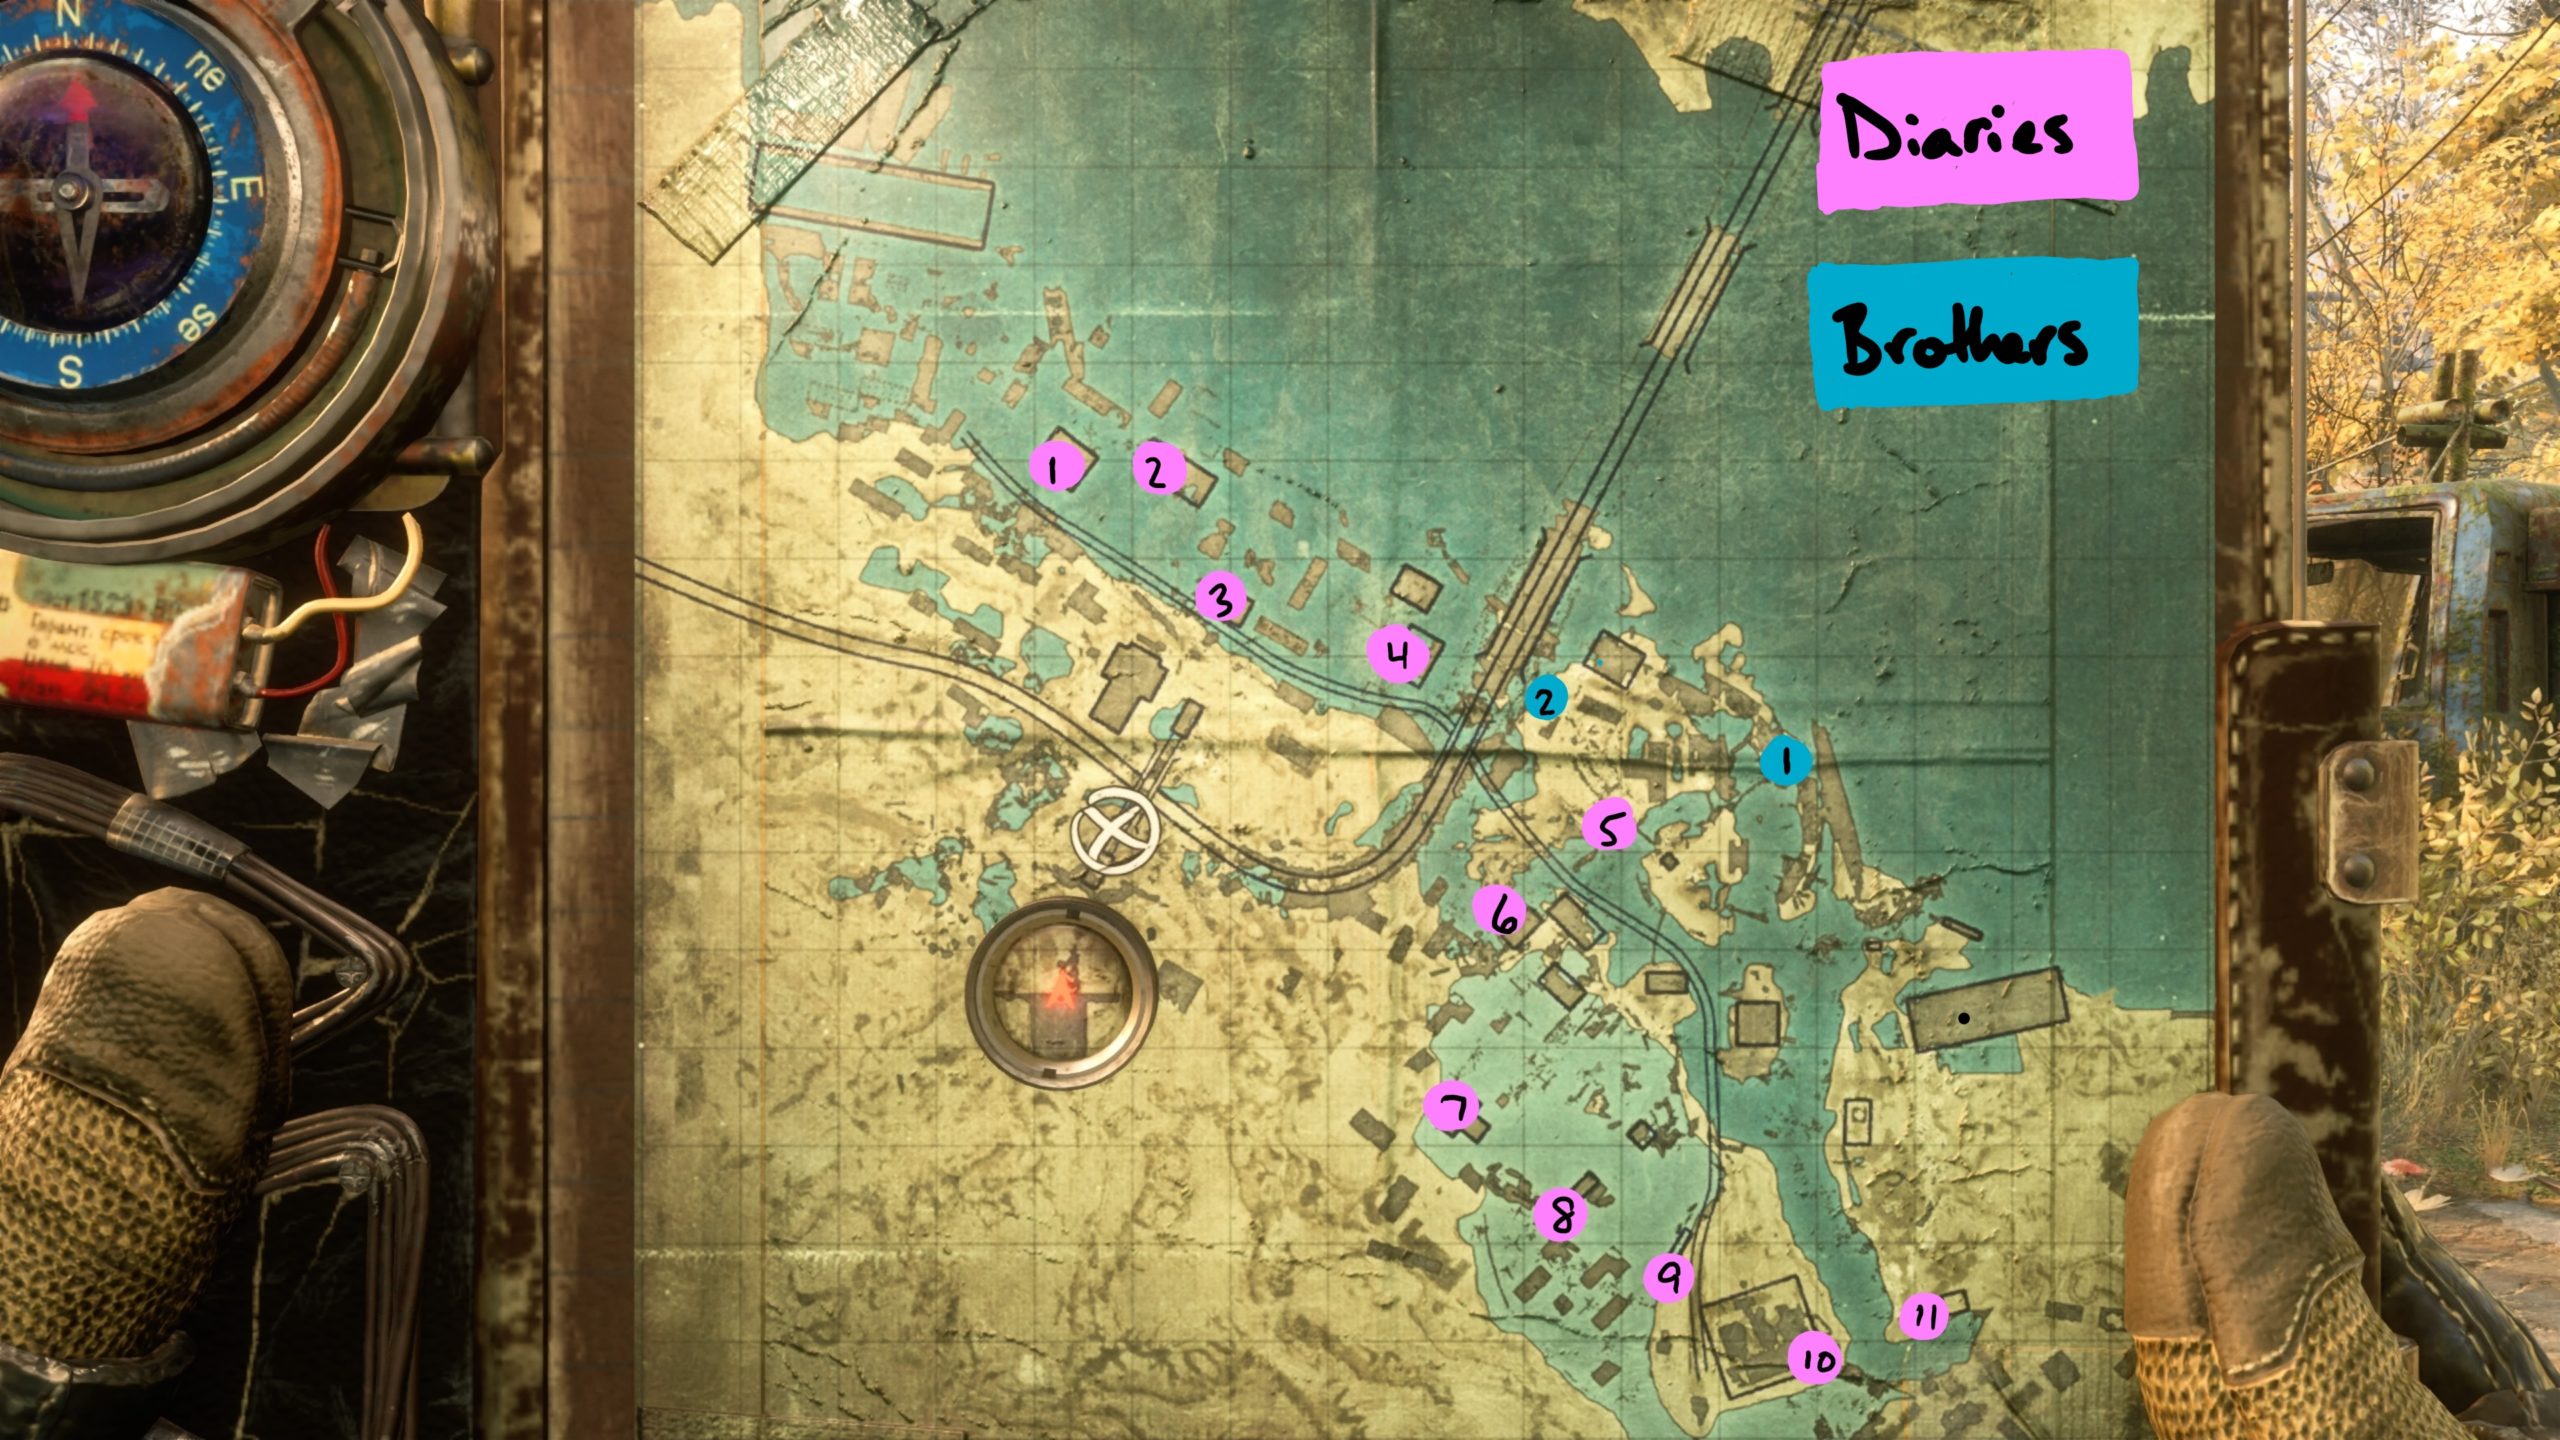
*NOTE: There are 11 diaries to collect in the Metro Exodus Sam’s Story DLC. The diaries are listed below in the order that they can be obtained during the main story. Please make sure to collect them as you go. If you progress too far in the story, you will be locked out of the locations that contain the diaries.


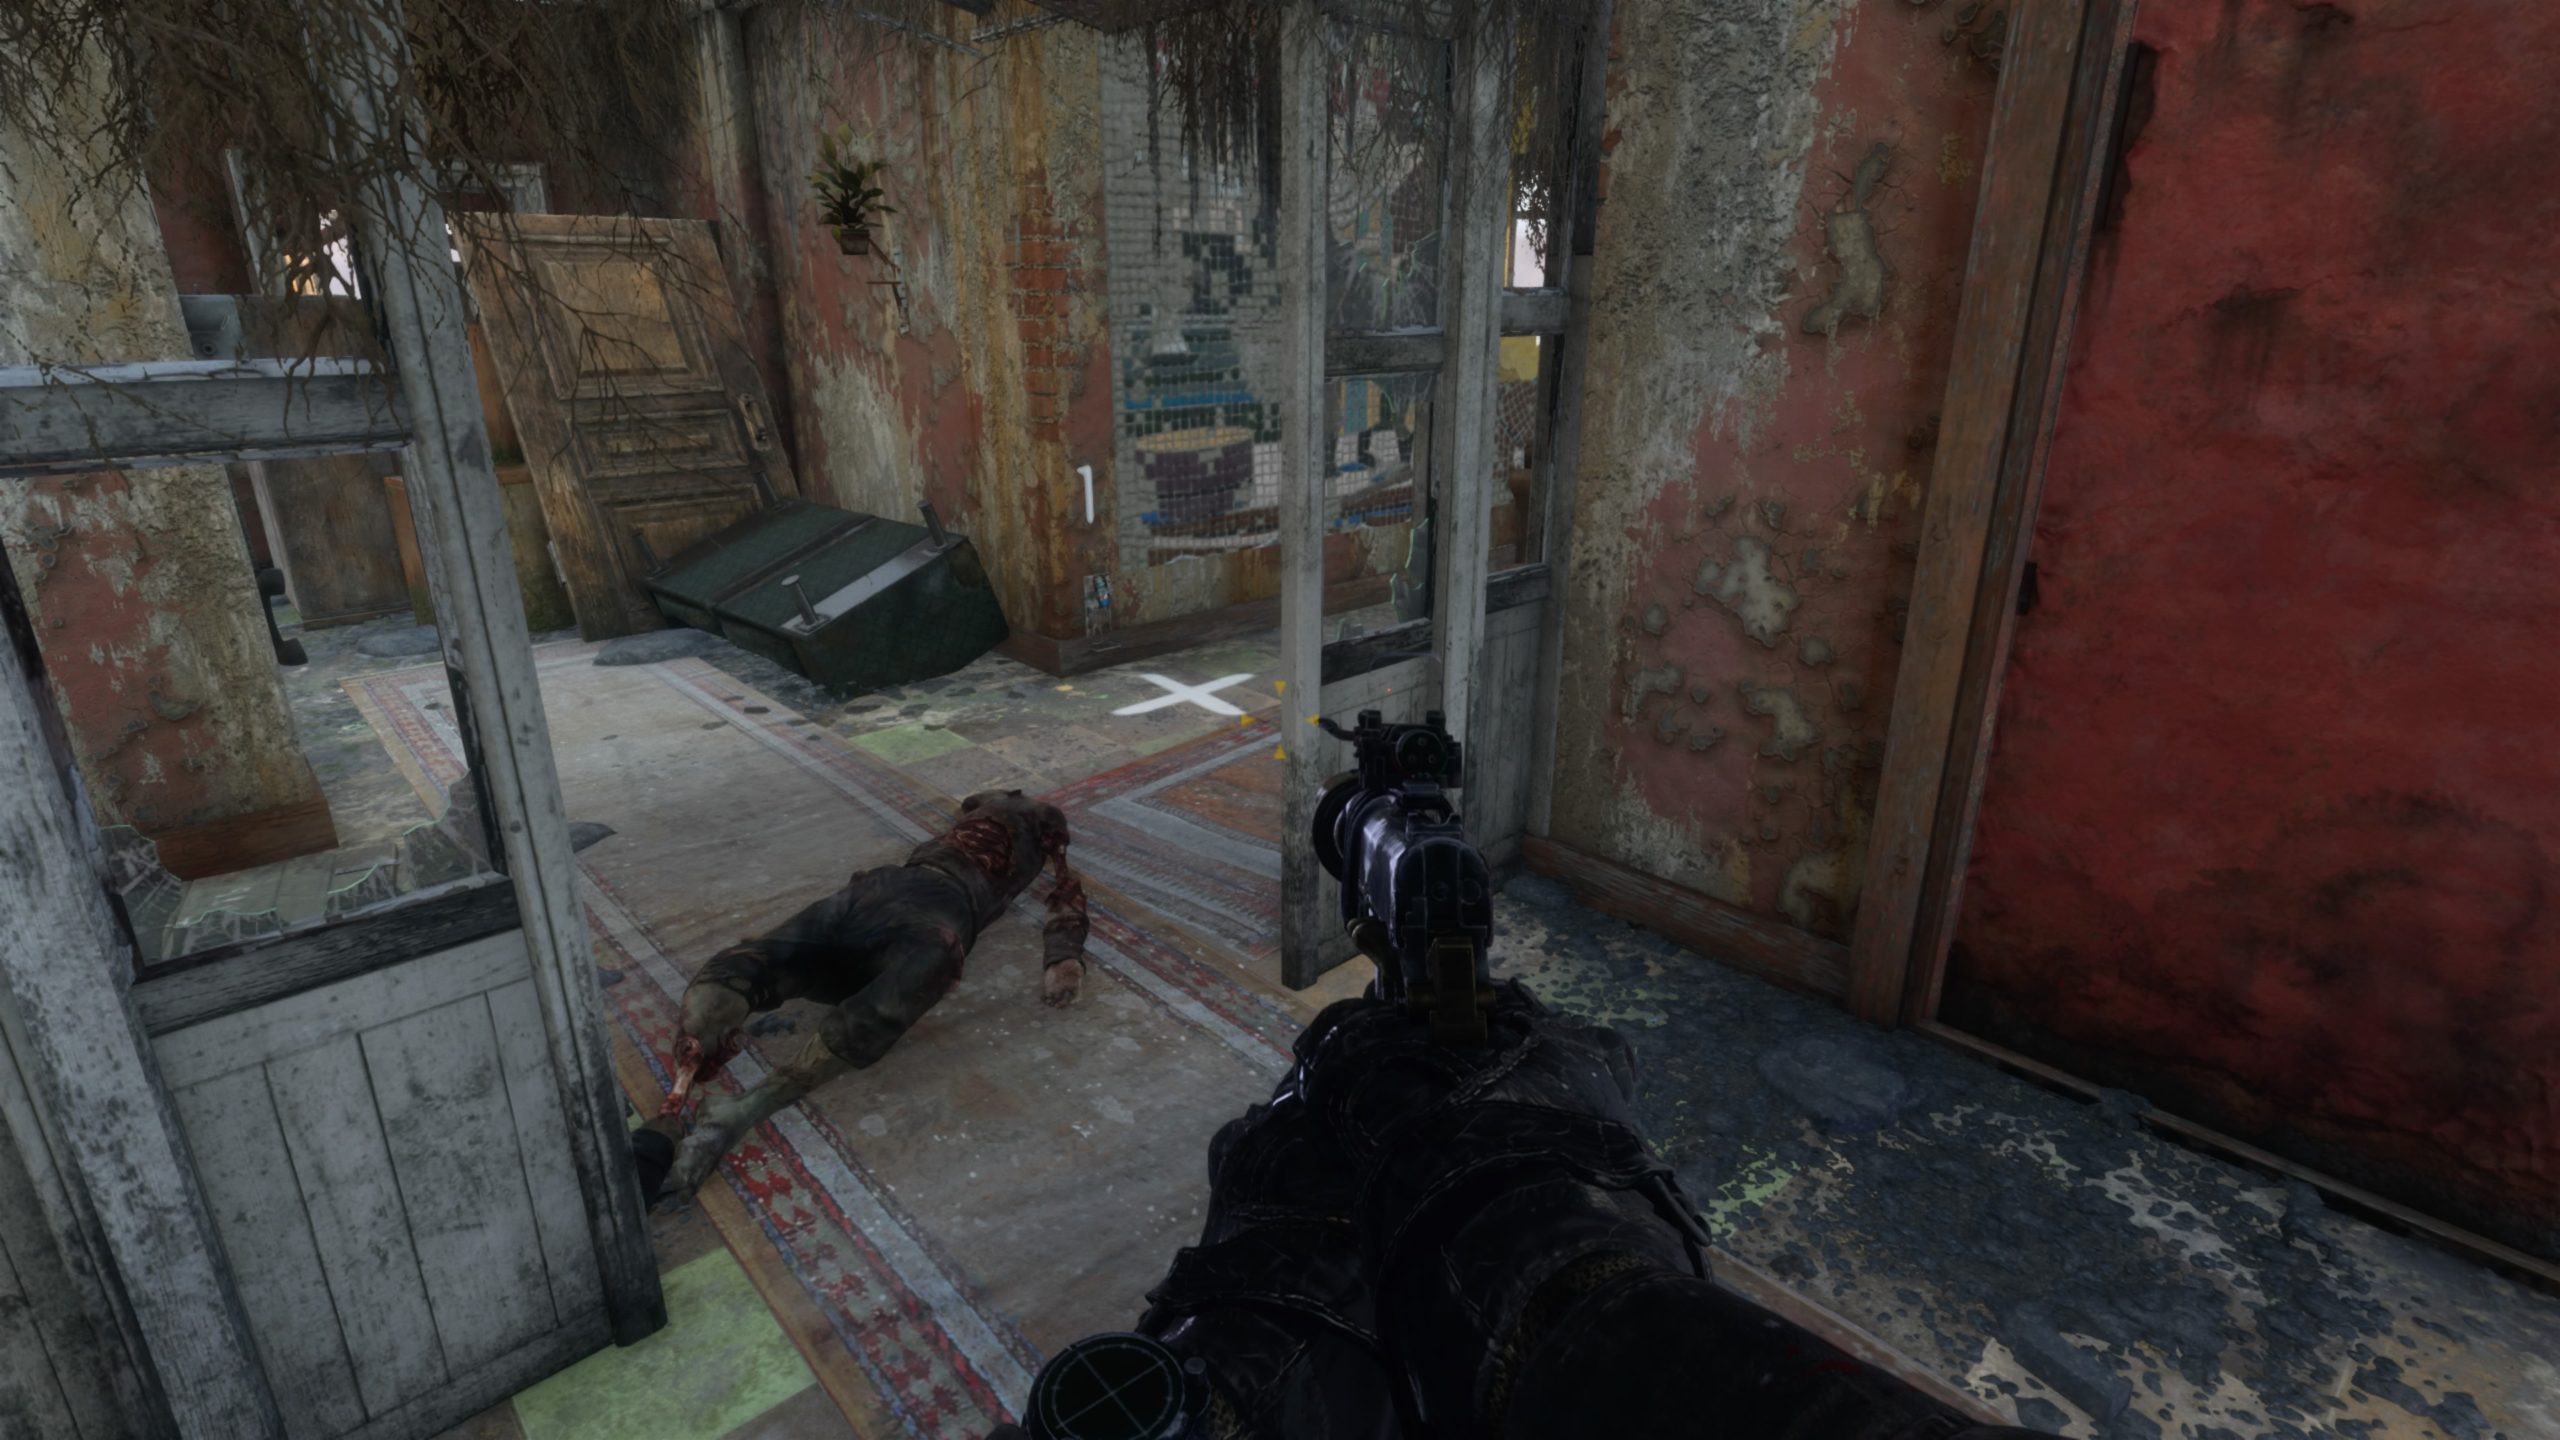
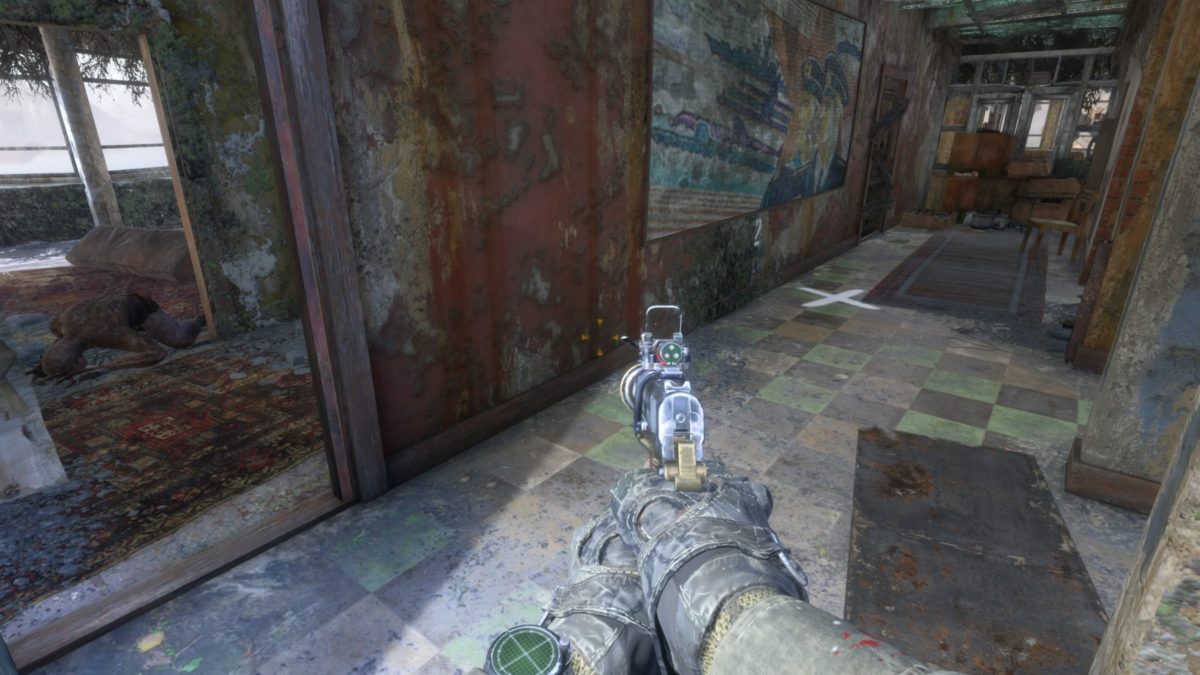
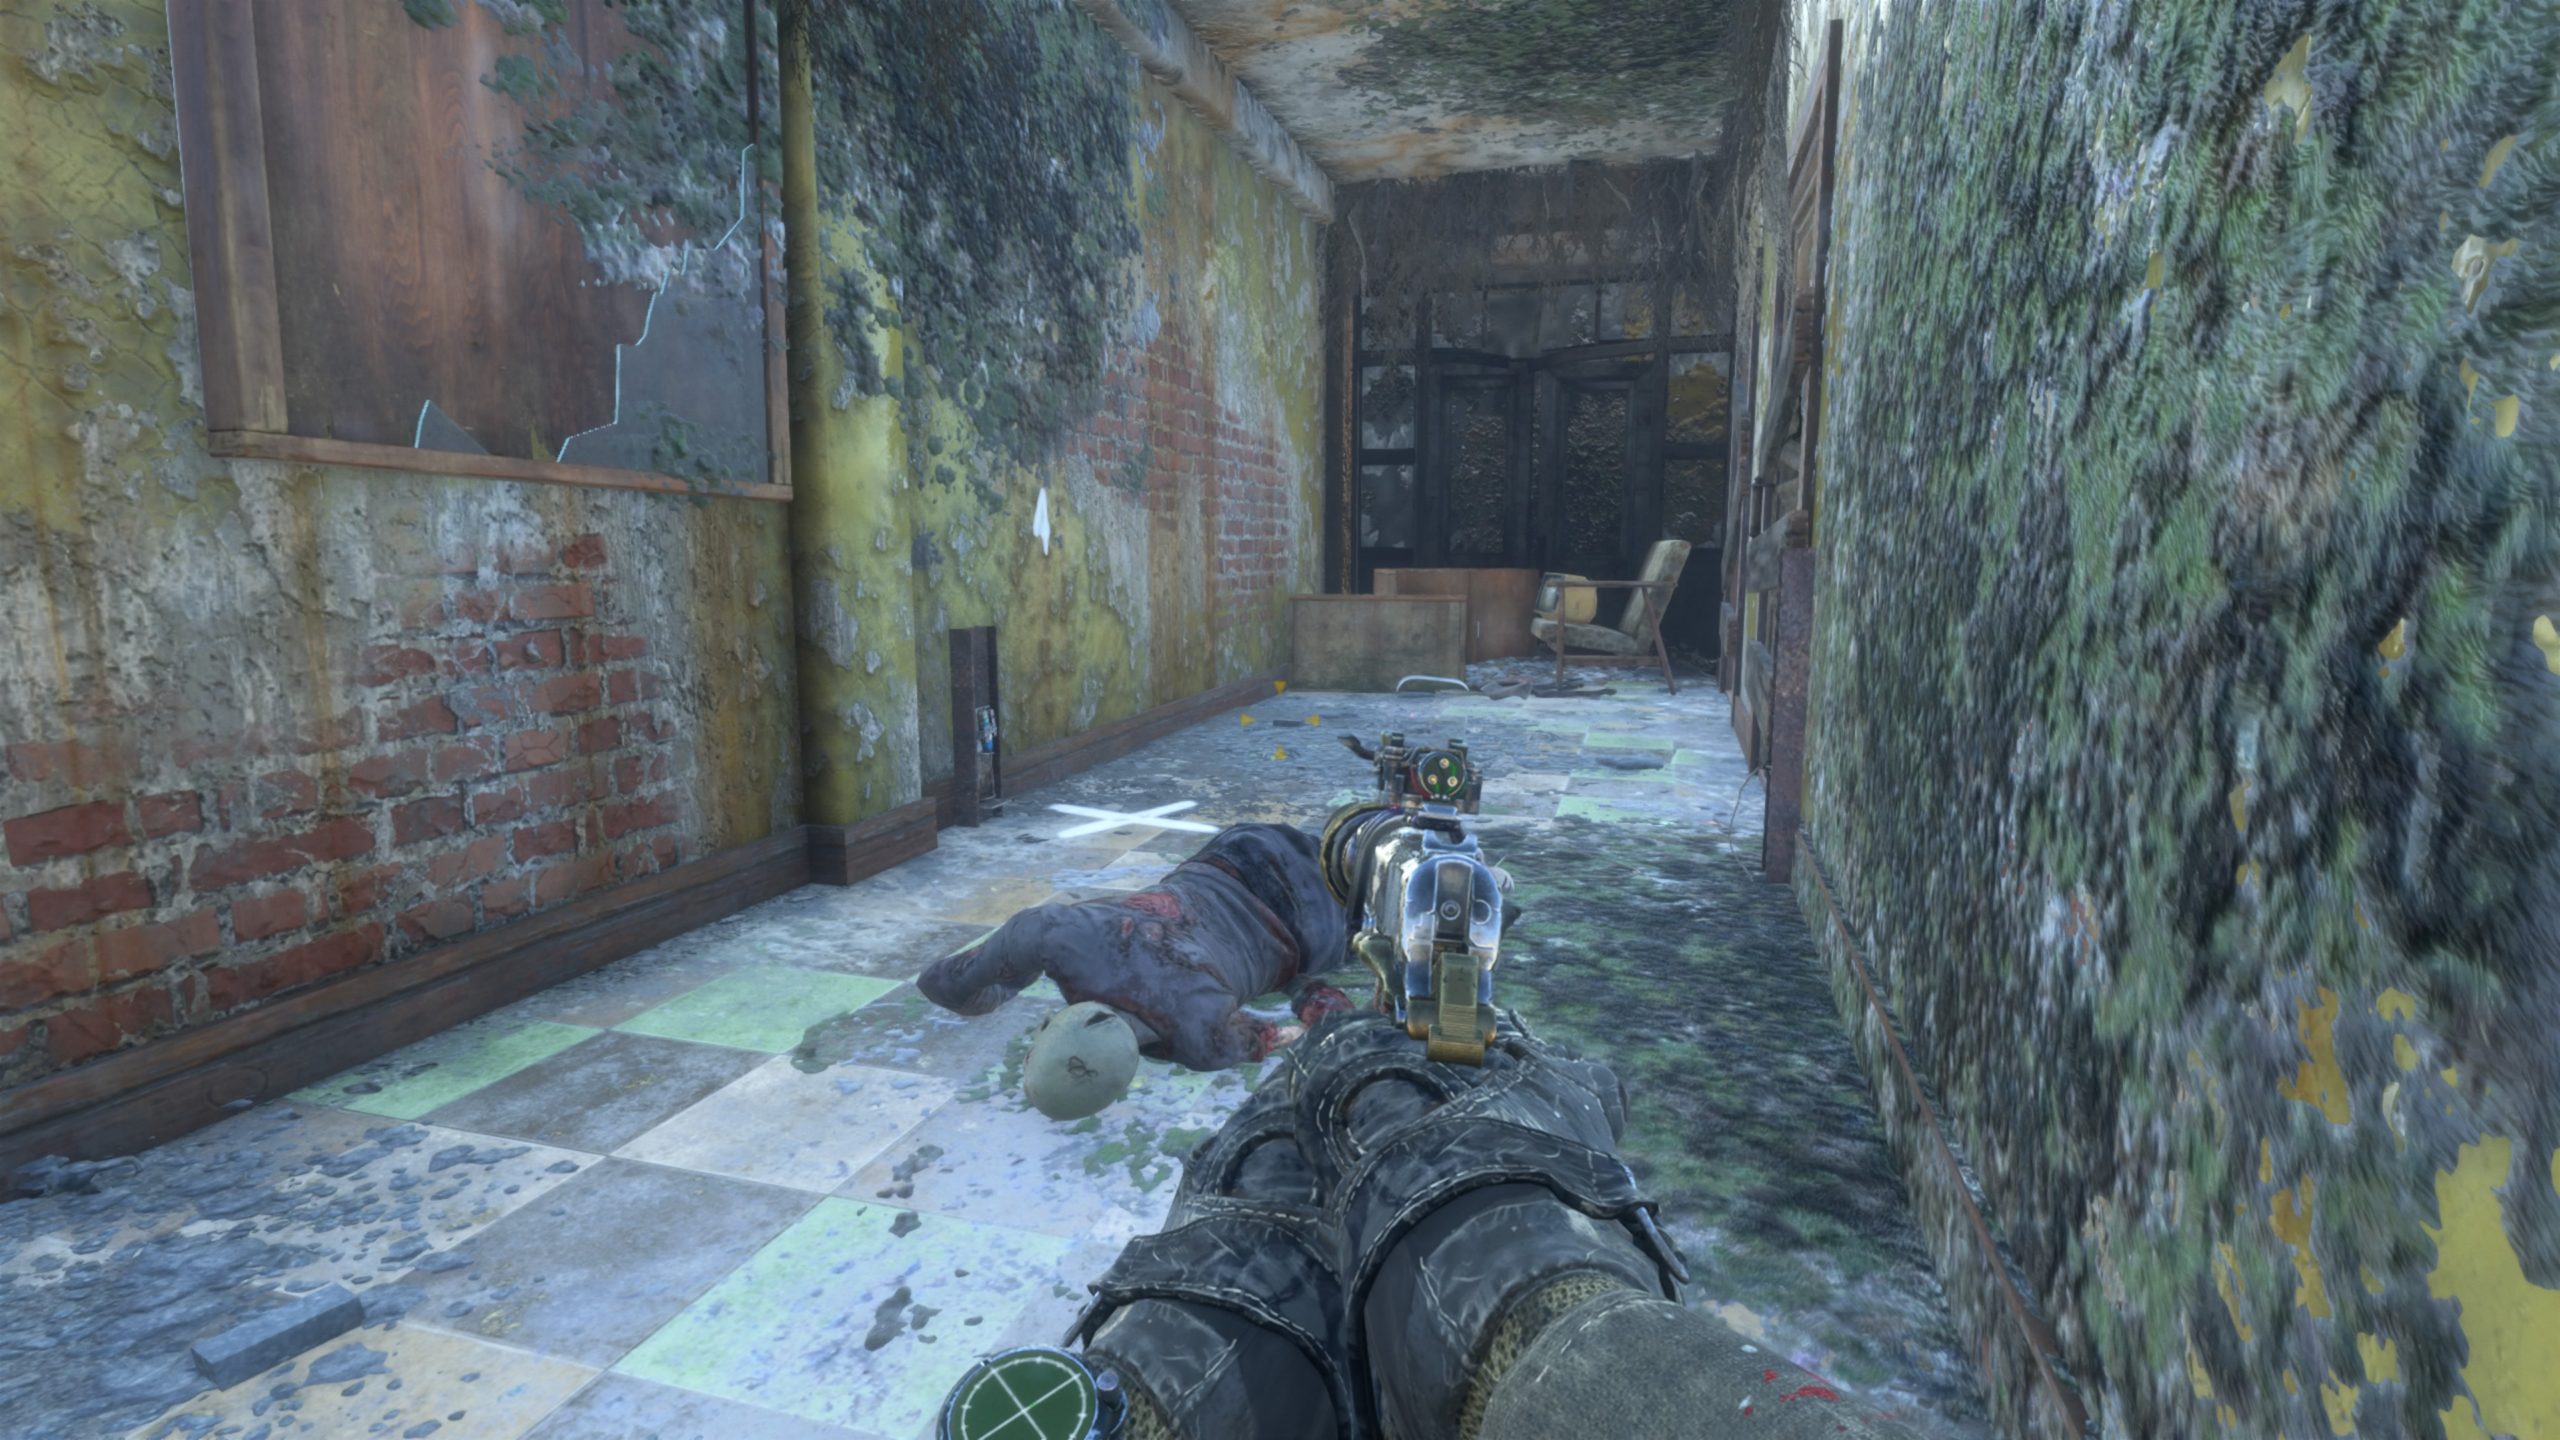
Note to Korzh (Diary 1)

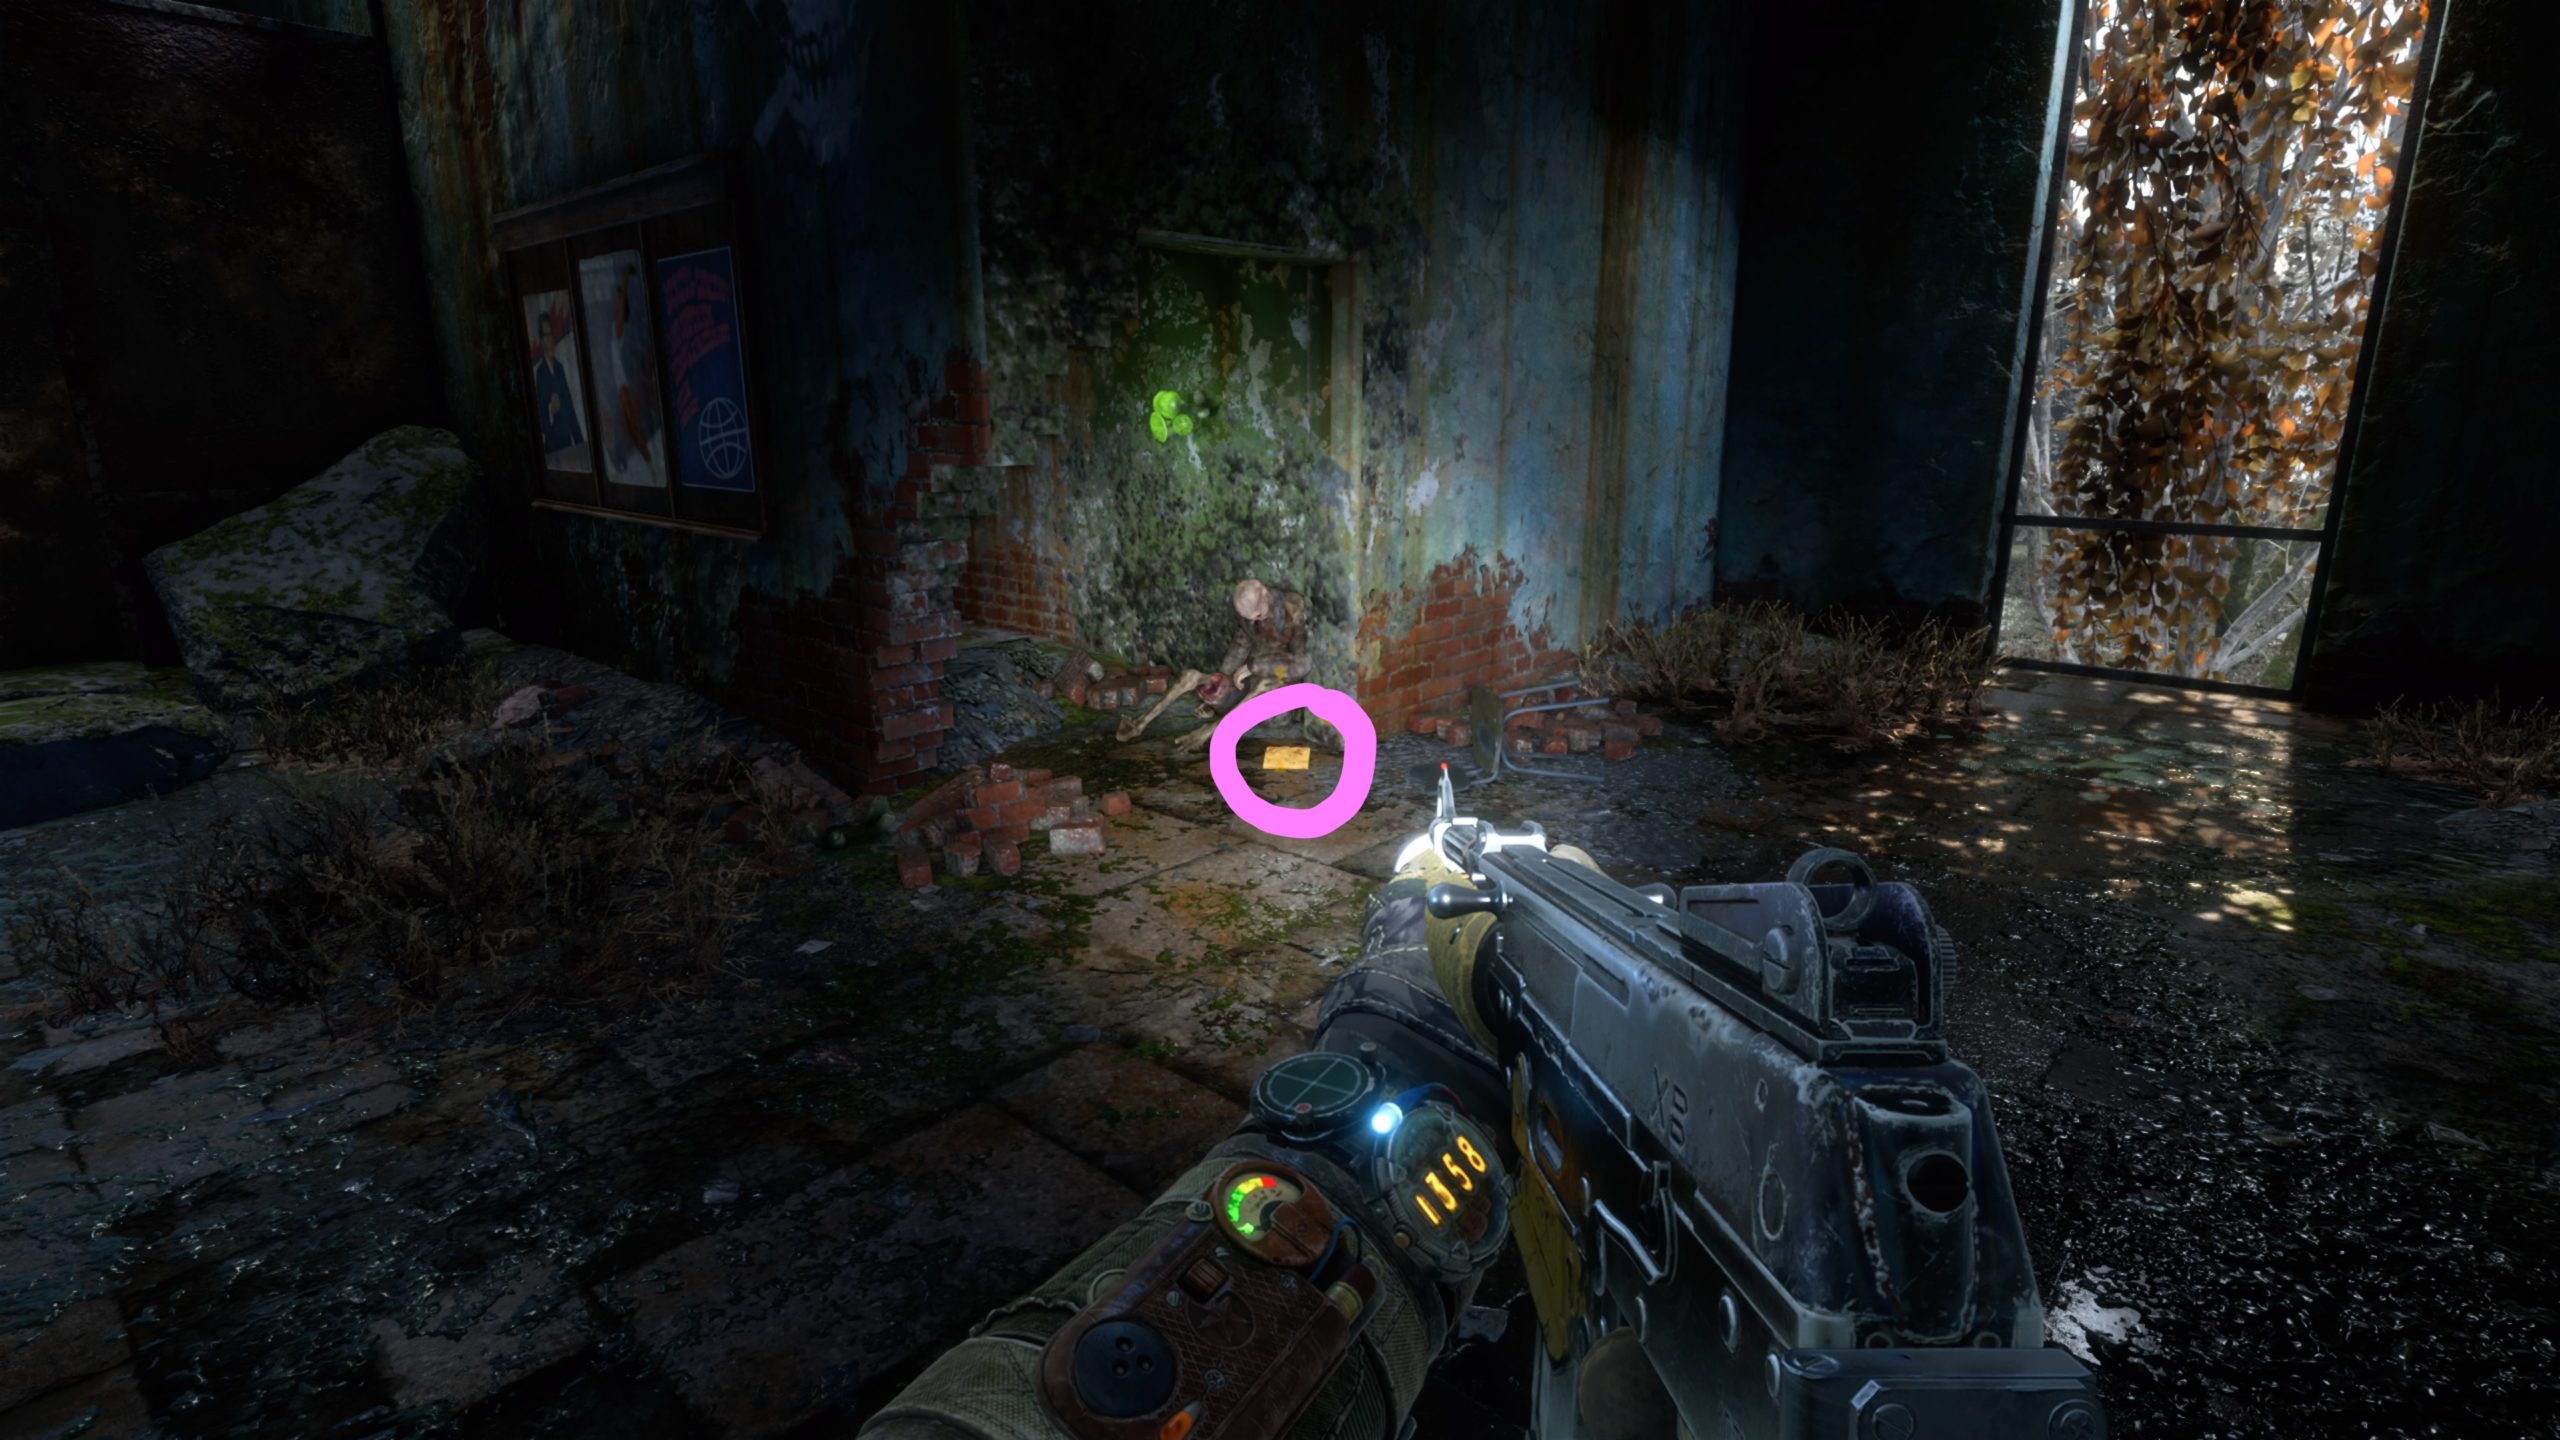
The diary can be found next to a corpse in a doorway on the second level of the building. As soon as you dock the boat, head up the stairs and take a left at the top. Follow the hallway to the end, heading through the doorway, to find the diary on the left side in the doorway/broken section of wall.


Absence Note (Diary 2)

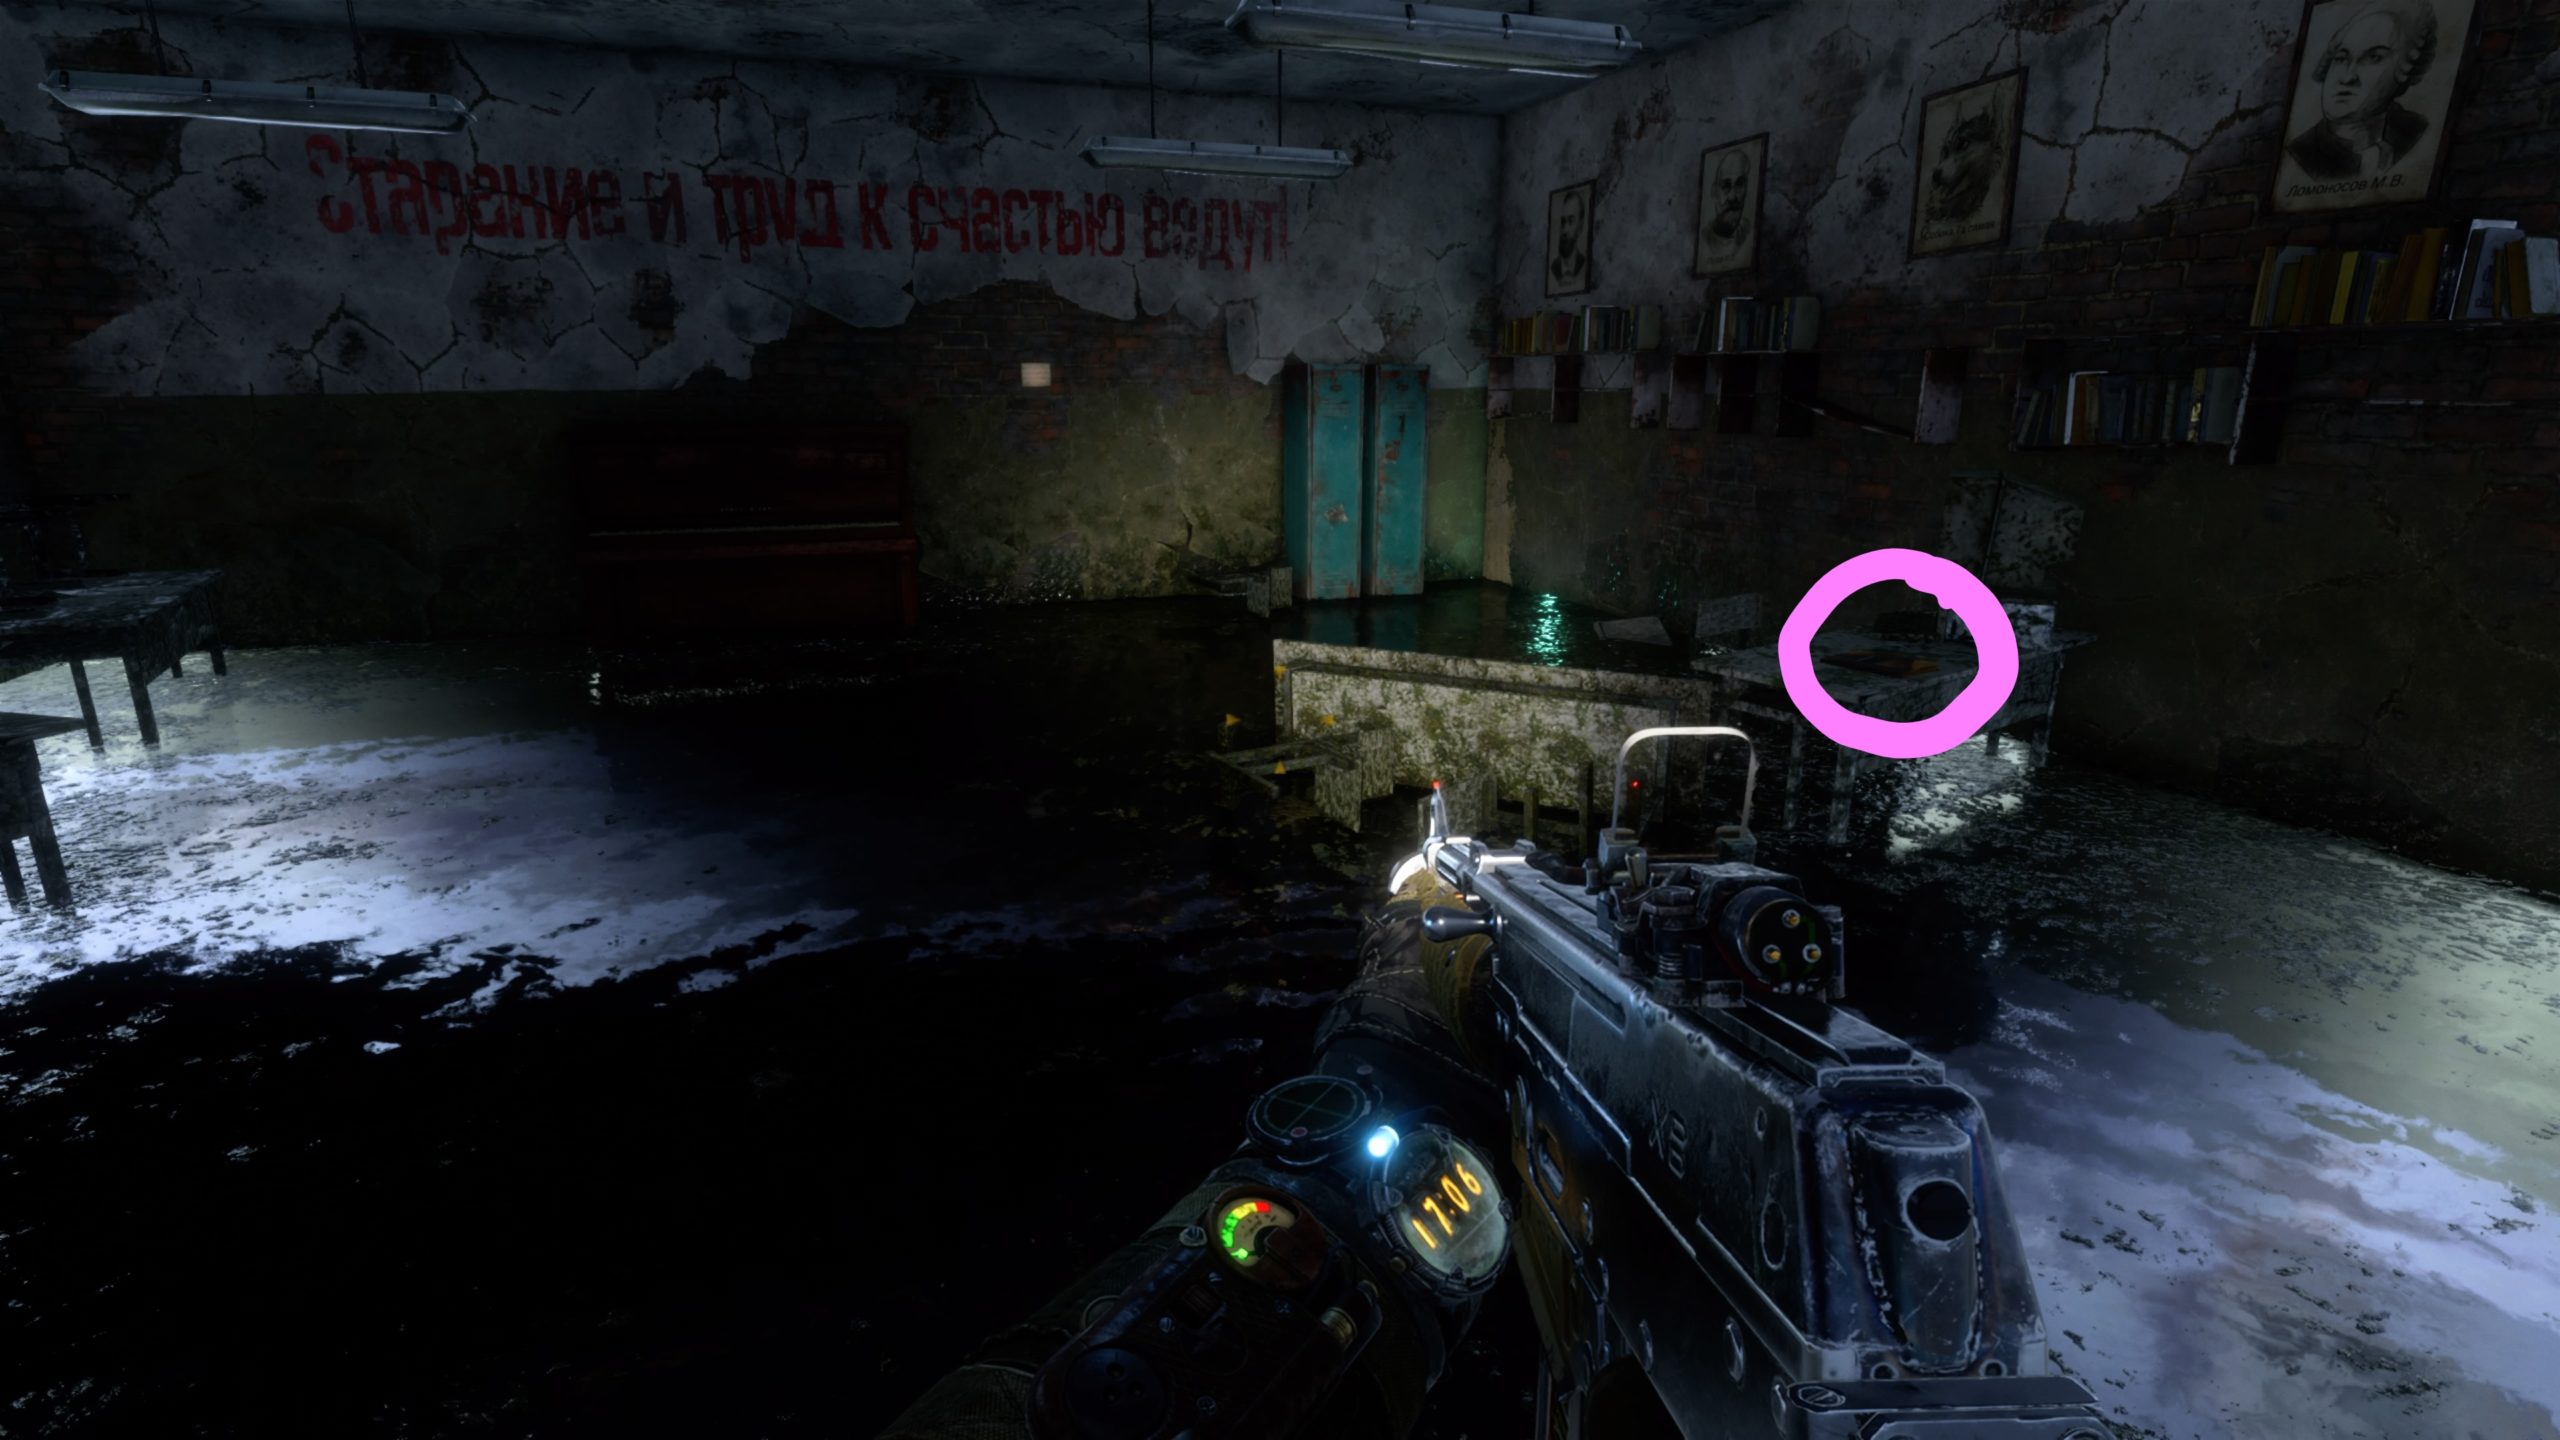
After you dock the boat, enter the school via a window and work your way to the part of the building containing a set of stairs leading to the second level. Facing the stairwell leading up, follow the hallway right and take the first left into a classroom to find the diary on a desk next to a computer.


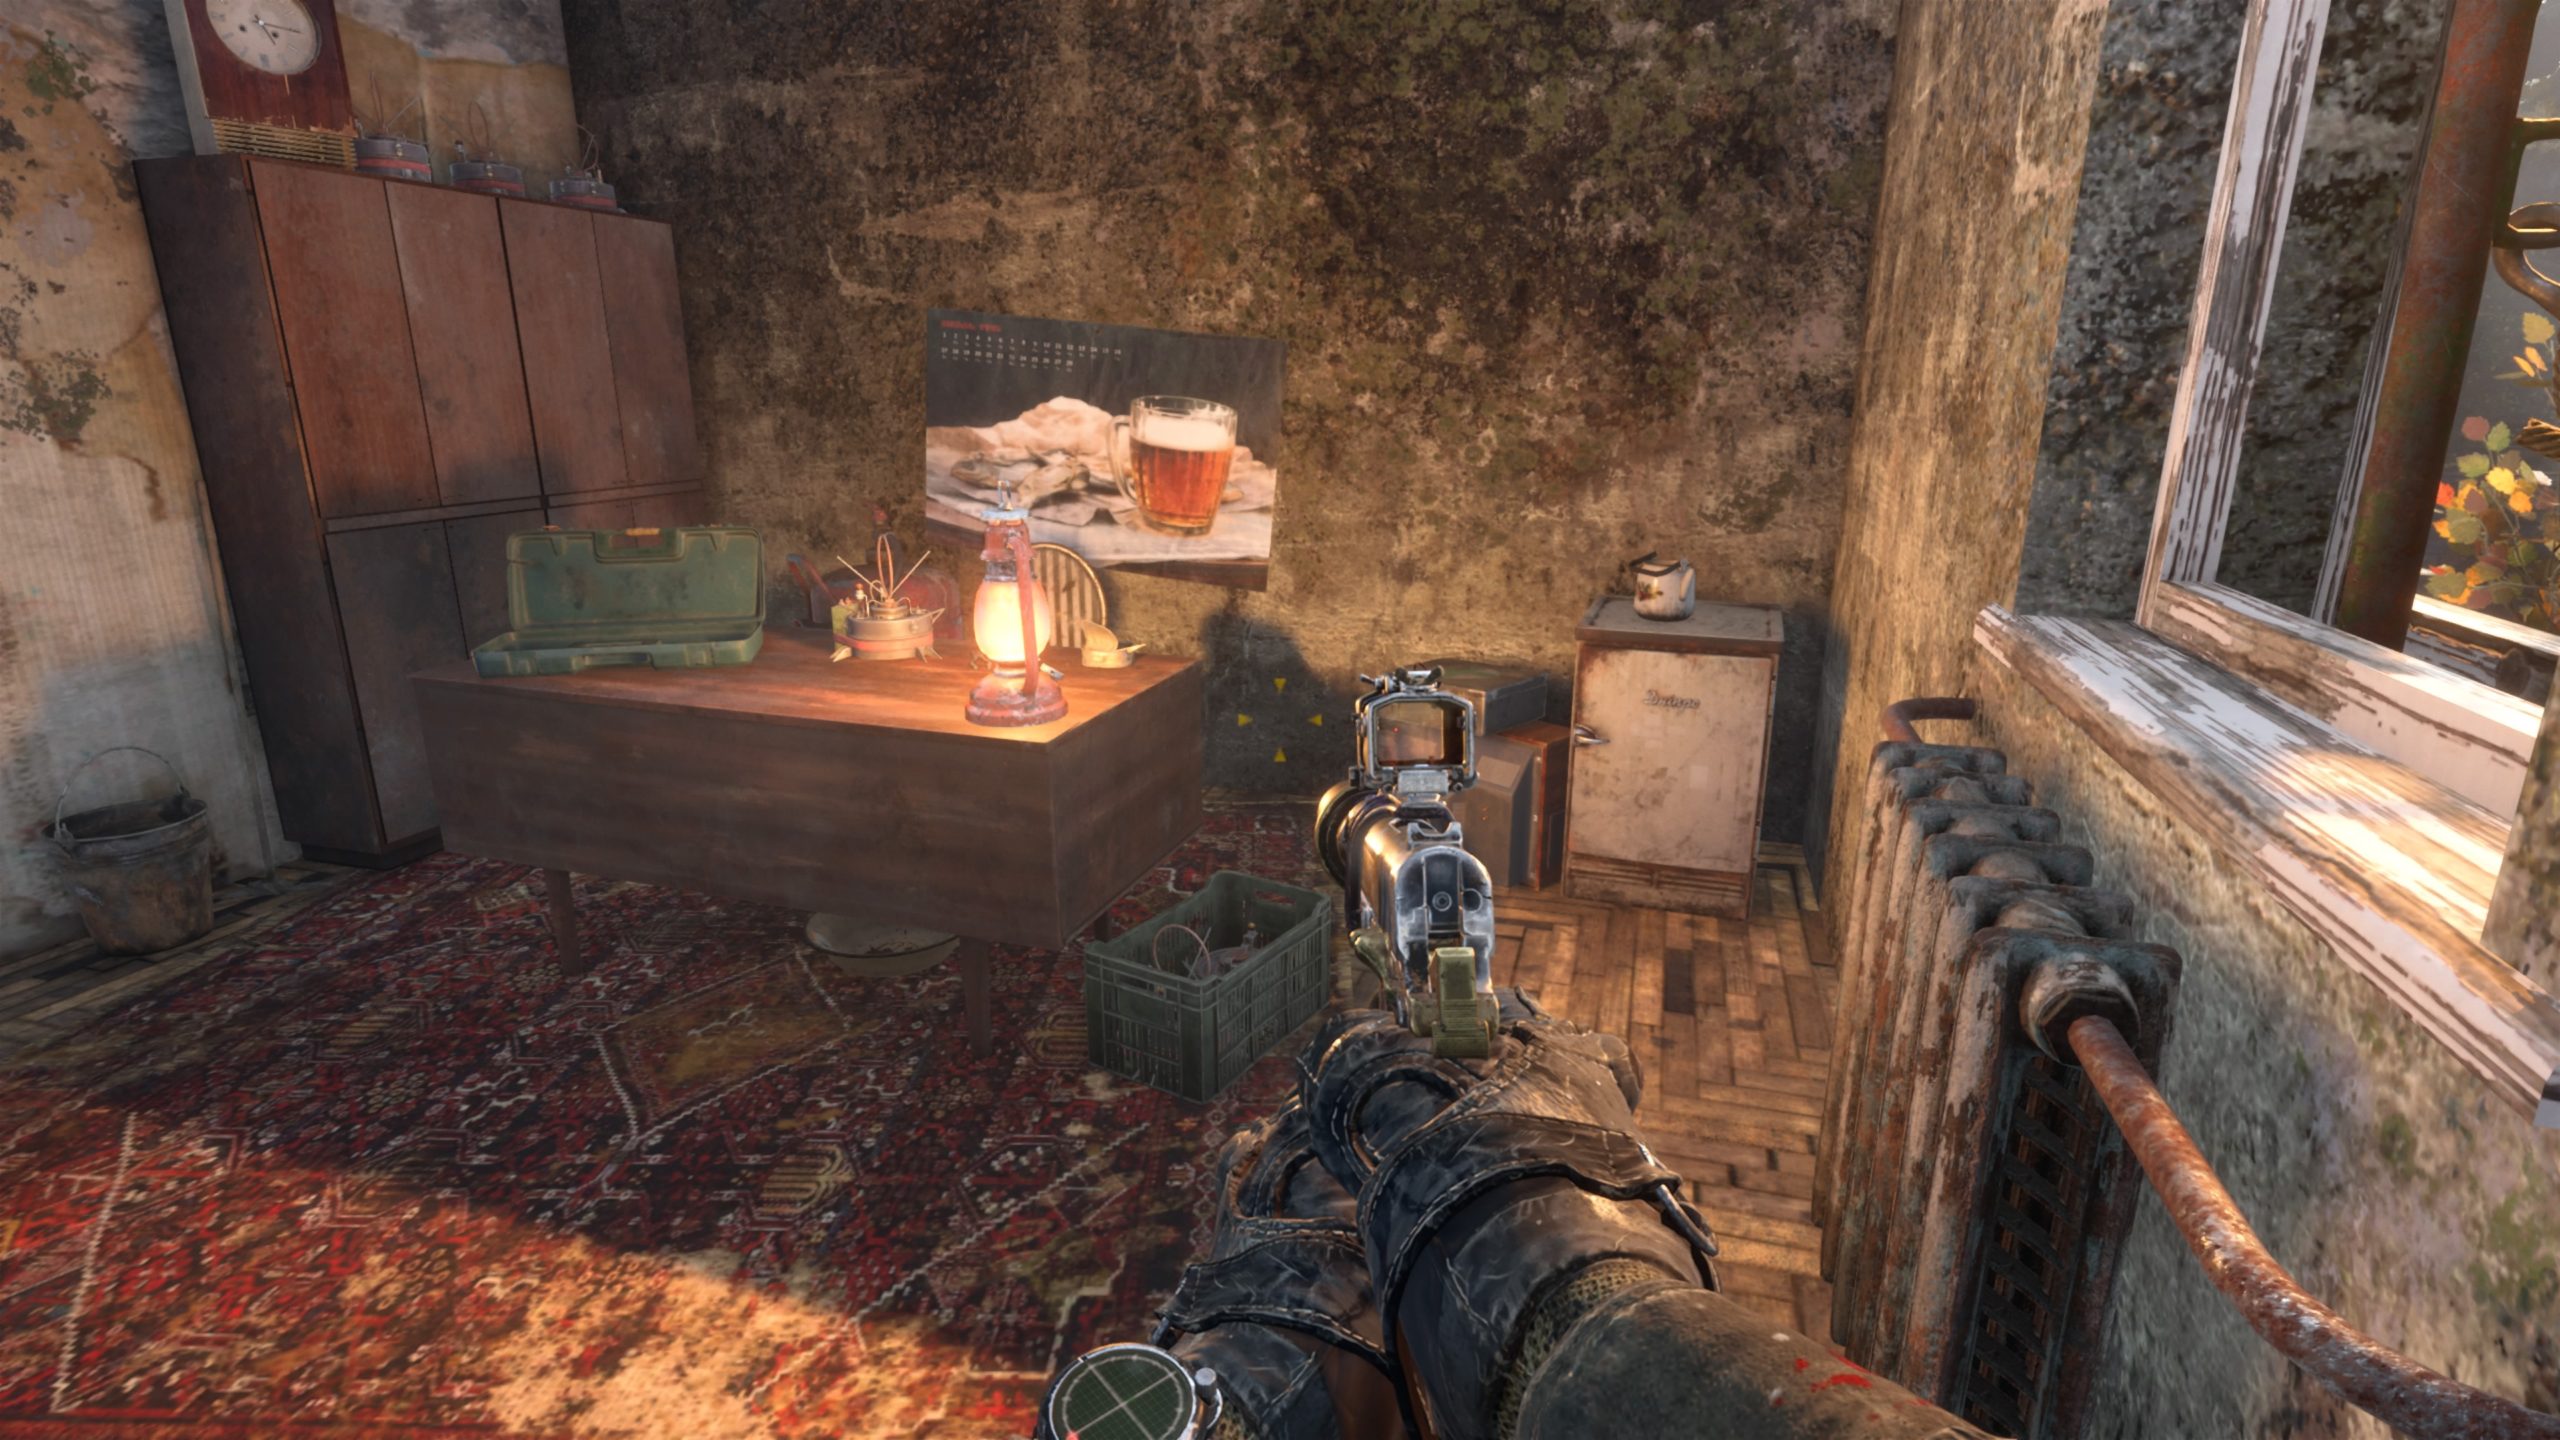
Survivor’s Note (Diary 3)

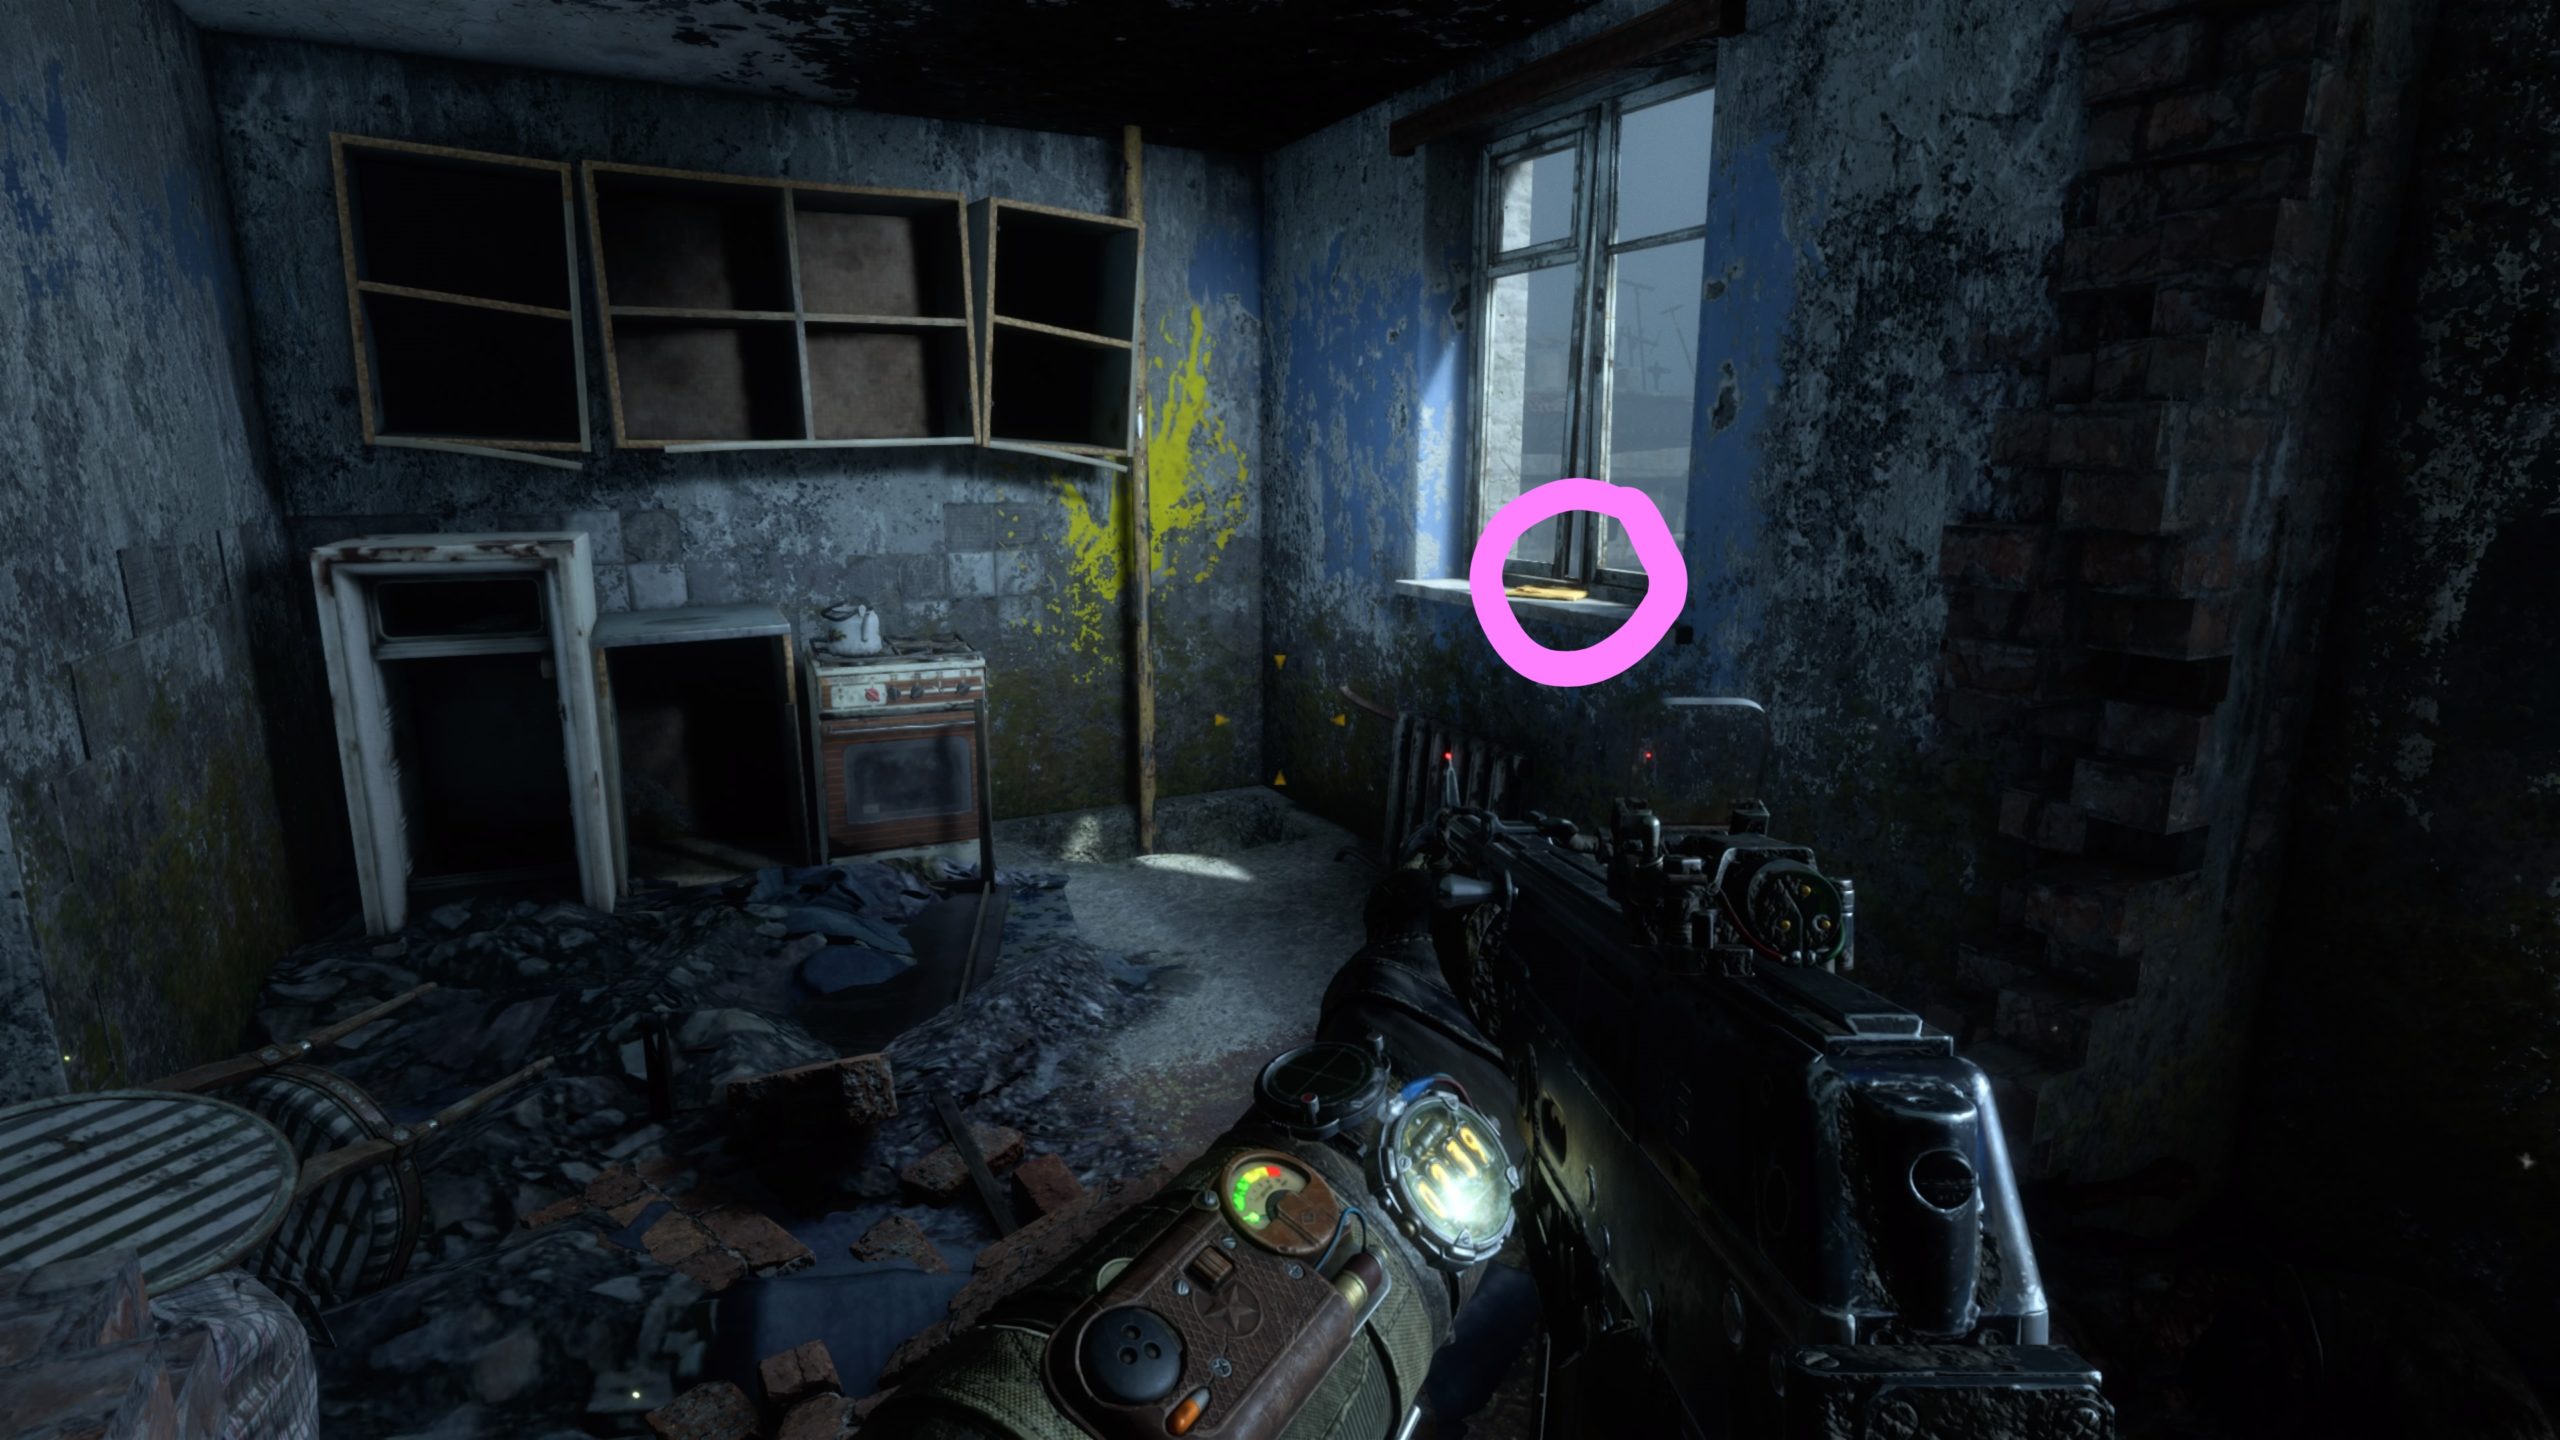
During the main story, you will be required to slide down a yellow pole located in a kitchen near the top of the building to find the Captain. The diary will be located on the window sill to the right of the yellow pole.


A Note from Korzh (Diary 4)

After you exit the Captain’s boat, head into the partially submerged building to find a bedroom. Exit through the doorway on the far side of the room and take a left at the end of the hallway. Take an immediate left and pass through this room to enter another room with a ladder on the left side. Climb up the ladder to find the diary on a chair in the corner of the room.


Company Charter (Diary 5)

In order to obtain this diary, you will need to open the safe located at the car dealership. To open the safe you will need to get the password from each brother. You can reach the first brother via boat in the location marked on the map above. There will be a dock next to the first brother’s boat. After you exit your boat, speak to the brother inside to learn that his half of the password is 1, 2, 3, 4. The second brother can be found in a truck in a barn after you fight the Batwing in the junkyard. Speak with him to learn that his half of the safe code is also 1, 2, 3, 4. Once you have received both codes, head to the car dealership. The diary is located in a safe behind a blue door.


Engineer’s Notes (Diary 6)

After you defeat the Batwing in the junkyard, you will be able to access this area. Watch out for all the traps leading up to this building. Climb up the ladder on the side of the building and head into the room. The diary will be on the safe in the corner of the room behind the desk.


A Note from the Boss (Diary 7)

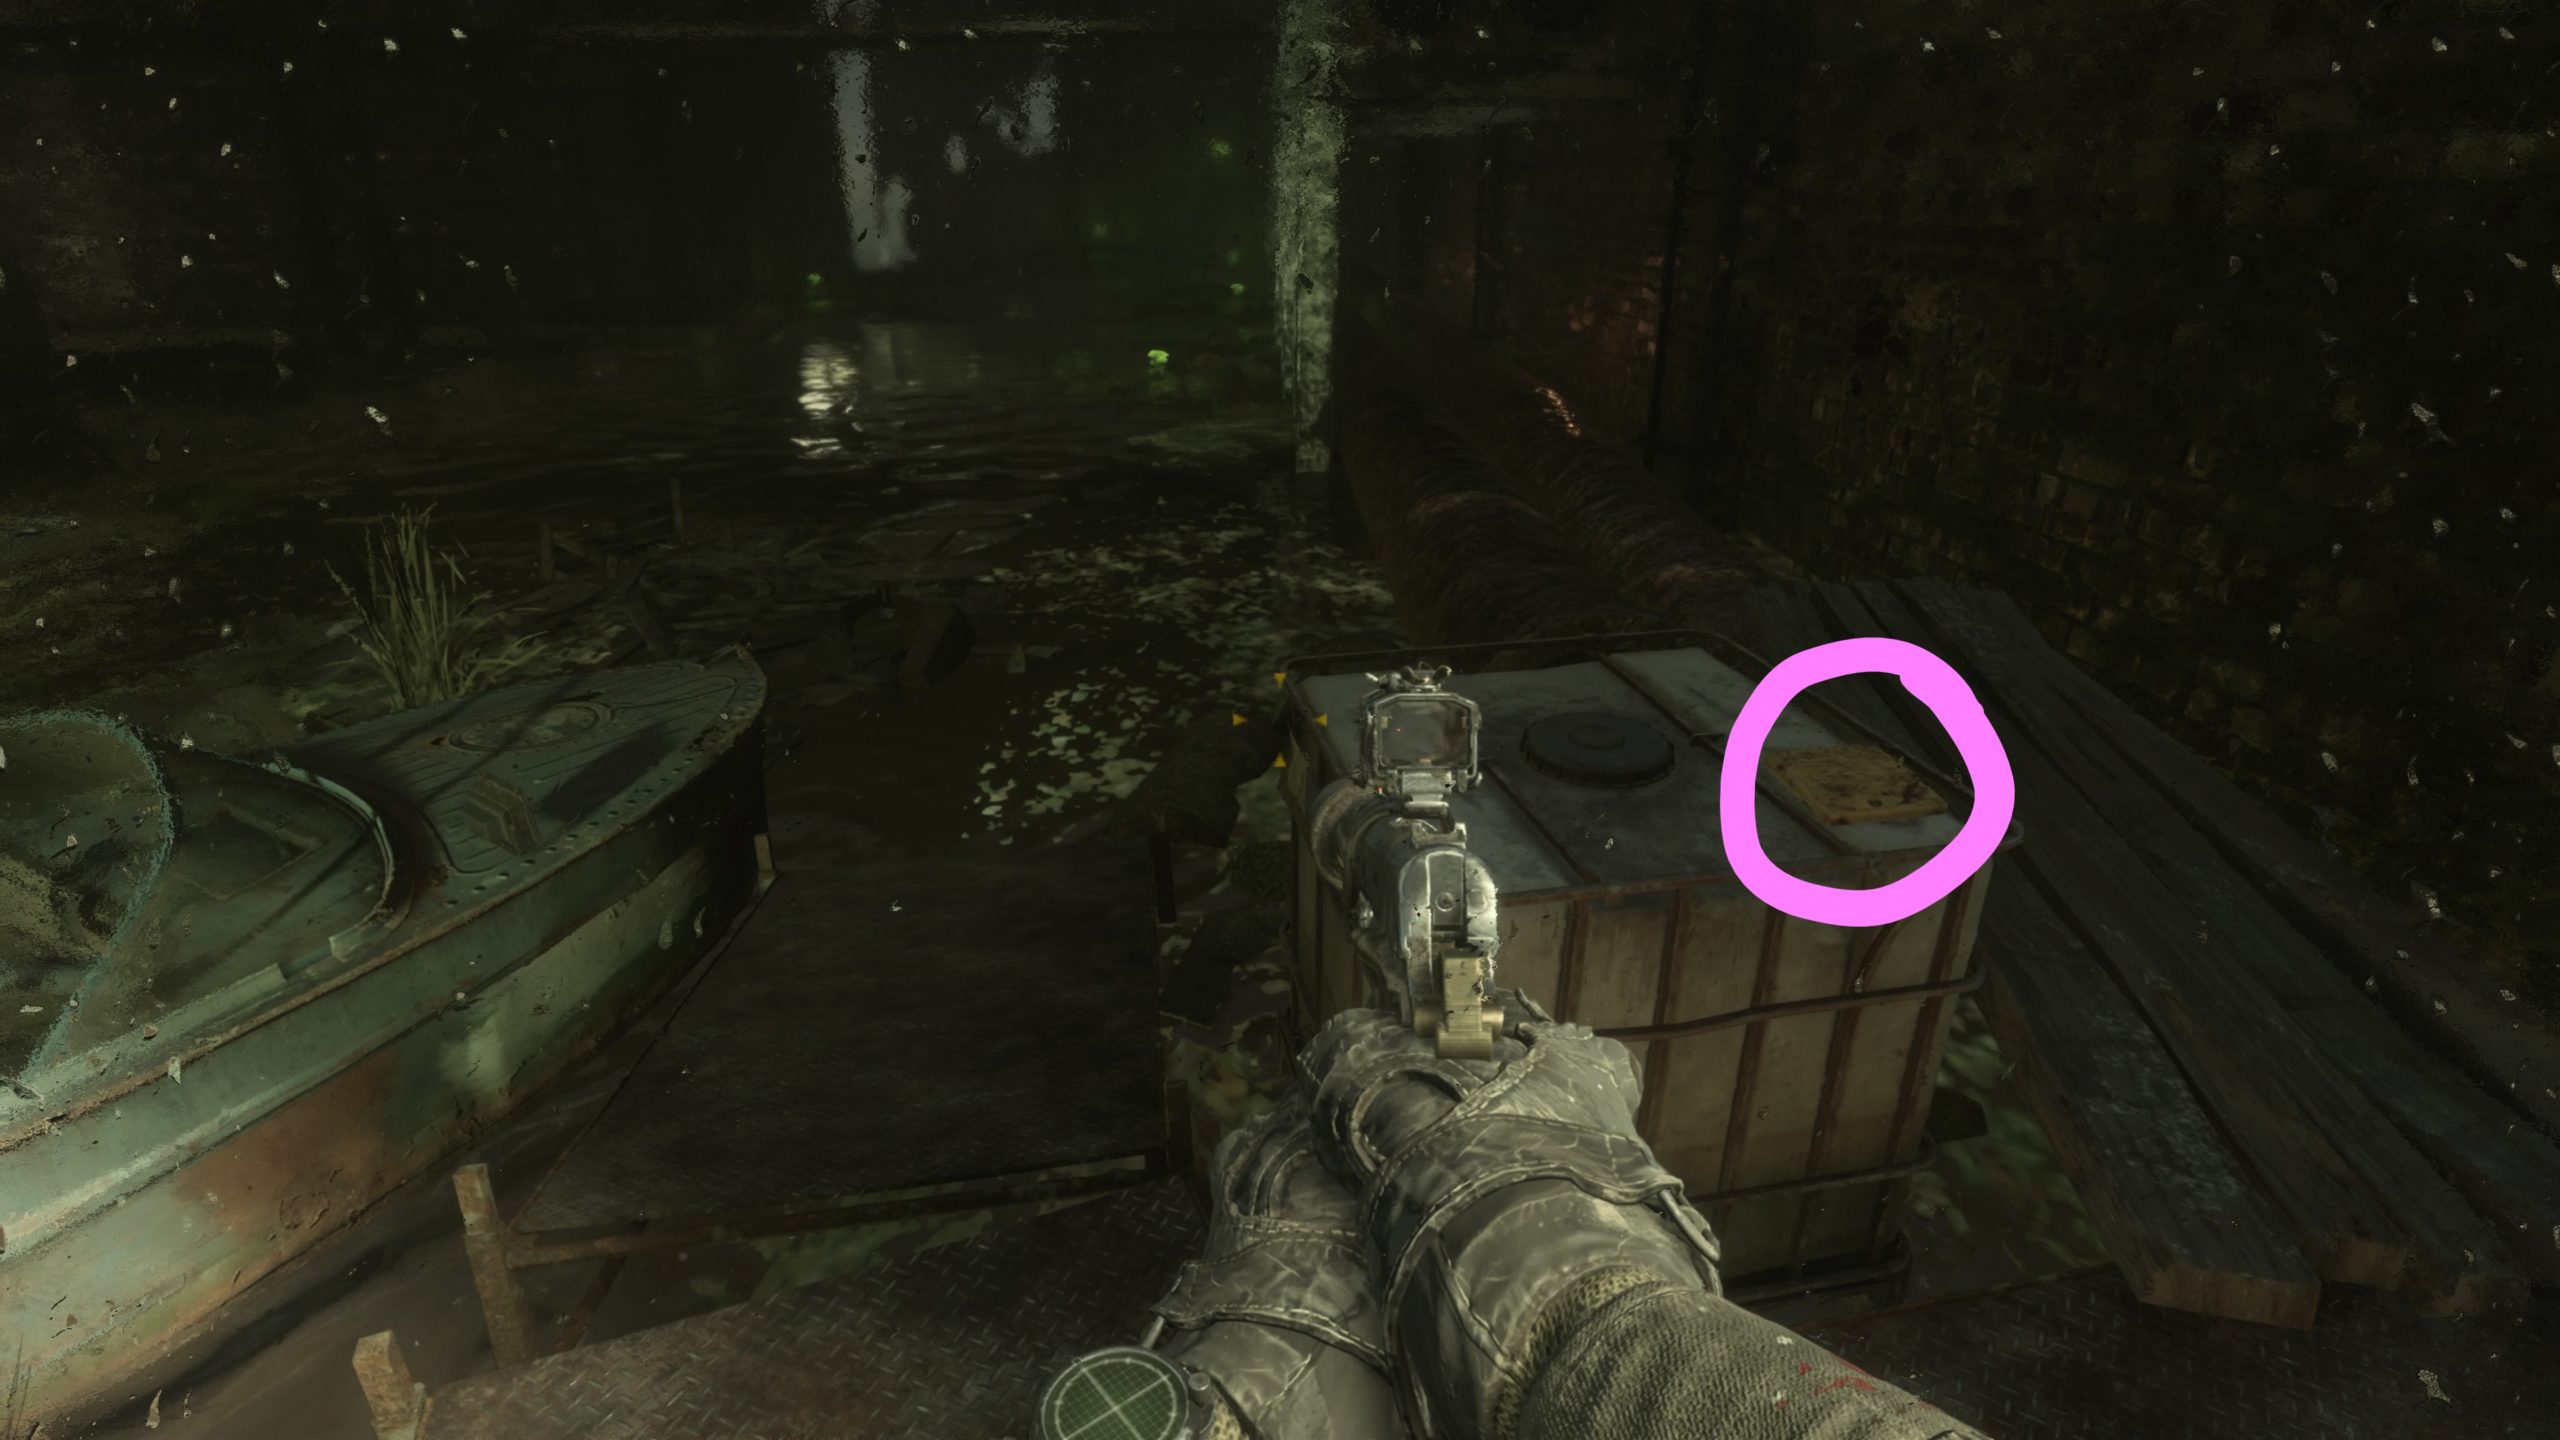
After you pass through the bandit hideout, raise the draw bridge and hope in your new boat, head to the T-shaped building slightly southwest. Once you dock your boat in the T-shaped building, you can find the diary on the dock on top of a large crate.


Tail’s Diary (Diary 8)

This diary is located on a table next to a guitar near the roof of the medical building.


A Guard’s Journal (Diary 9)

After you dock the boat, head up the stairs and into a bus. The diary is located on a table across from the workbench.


Boss’ Notice (Diary 10)

After you grab the fire suits, head up the stairs and cross the room. Pass through a metal gate to find the diary on a table at the base of a staircase.


Seryi’s Note (Diary 11)

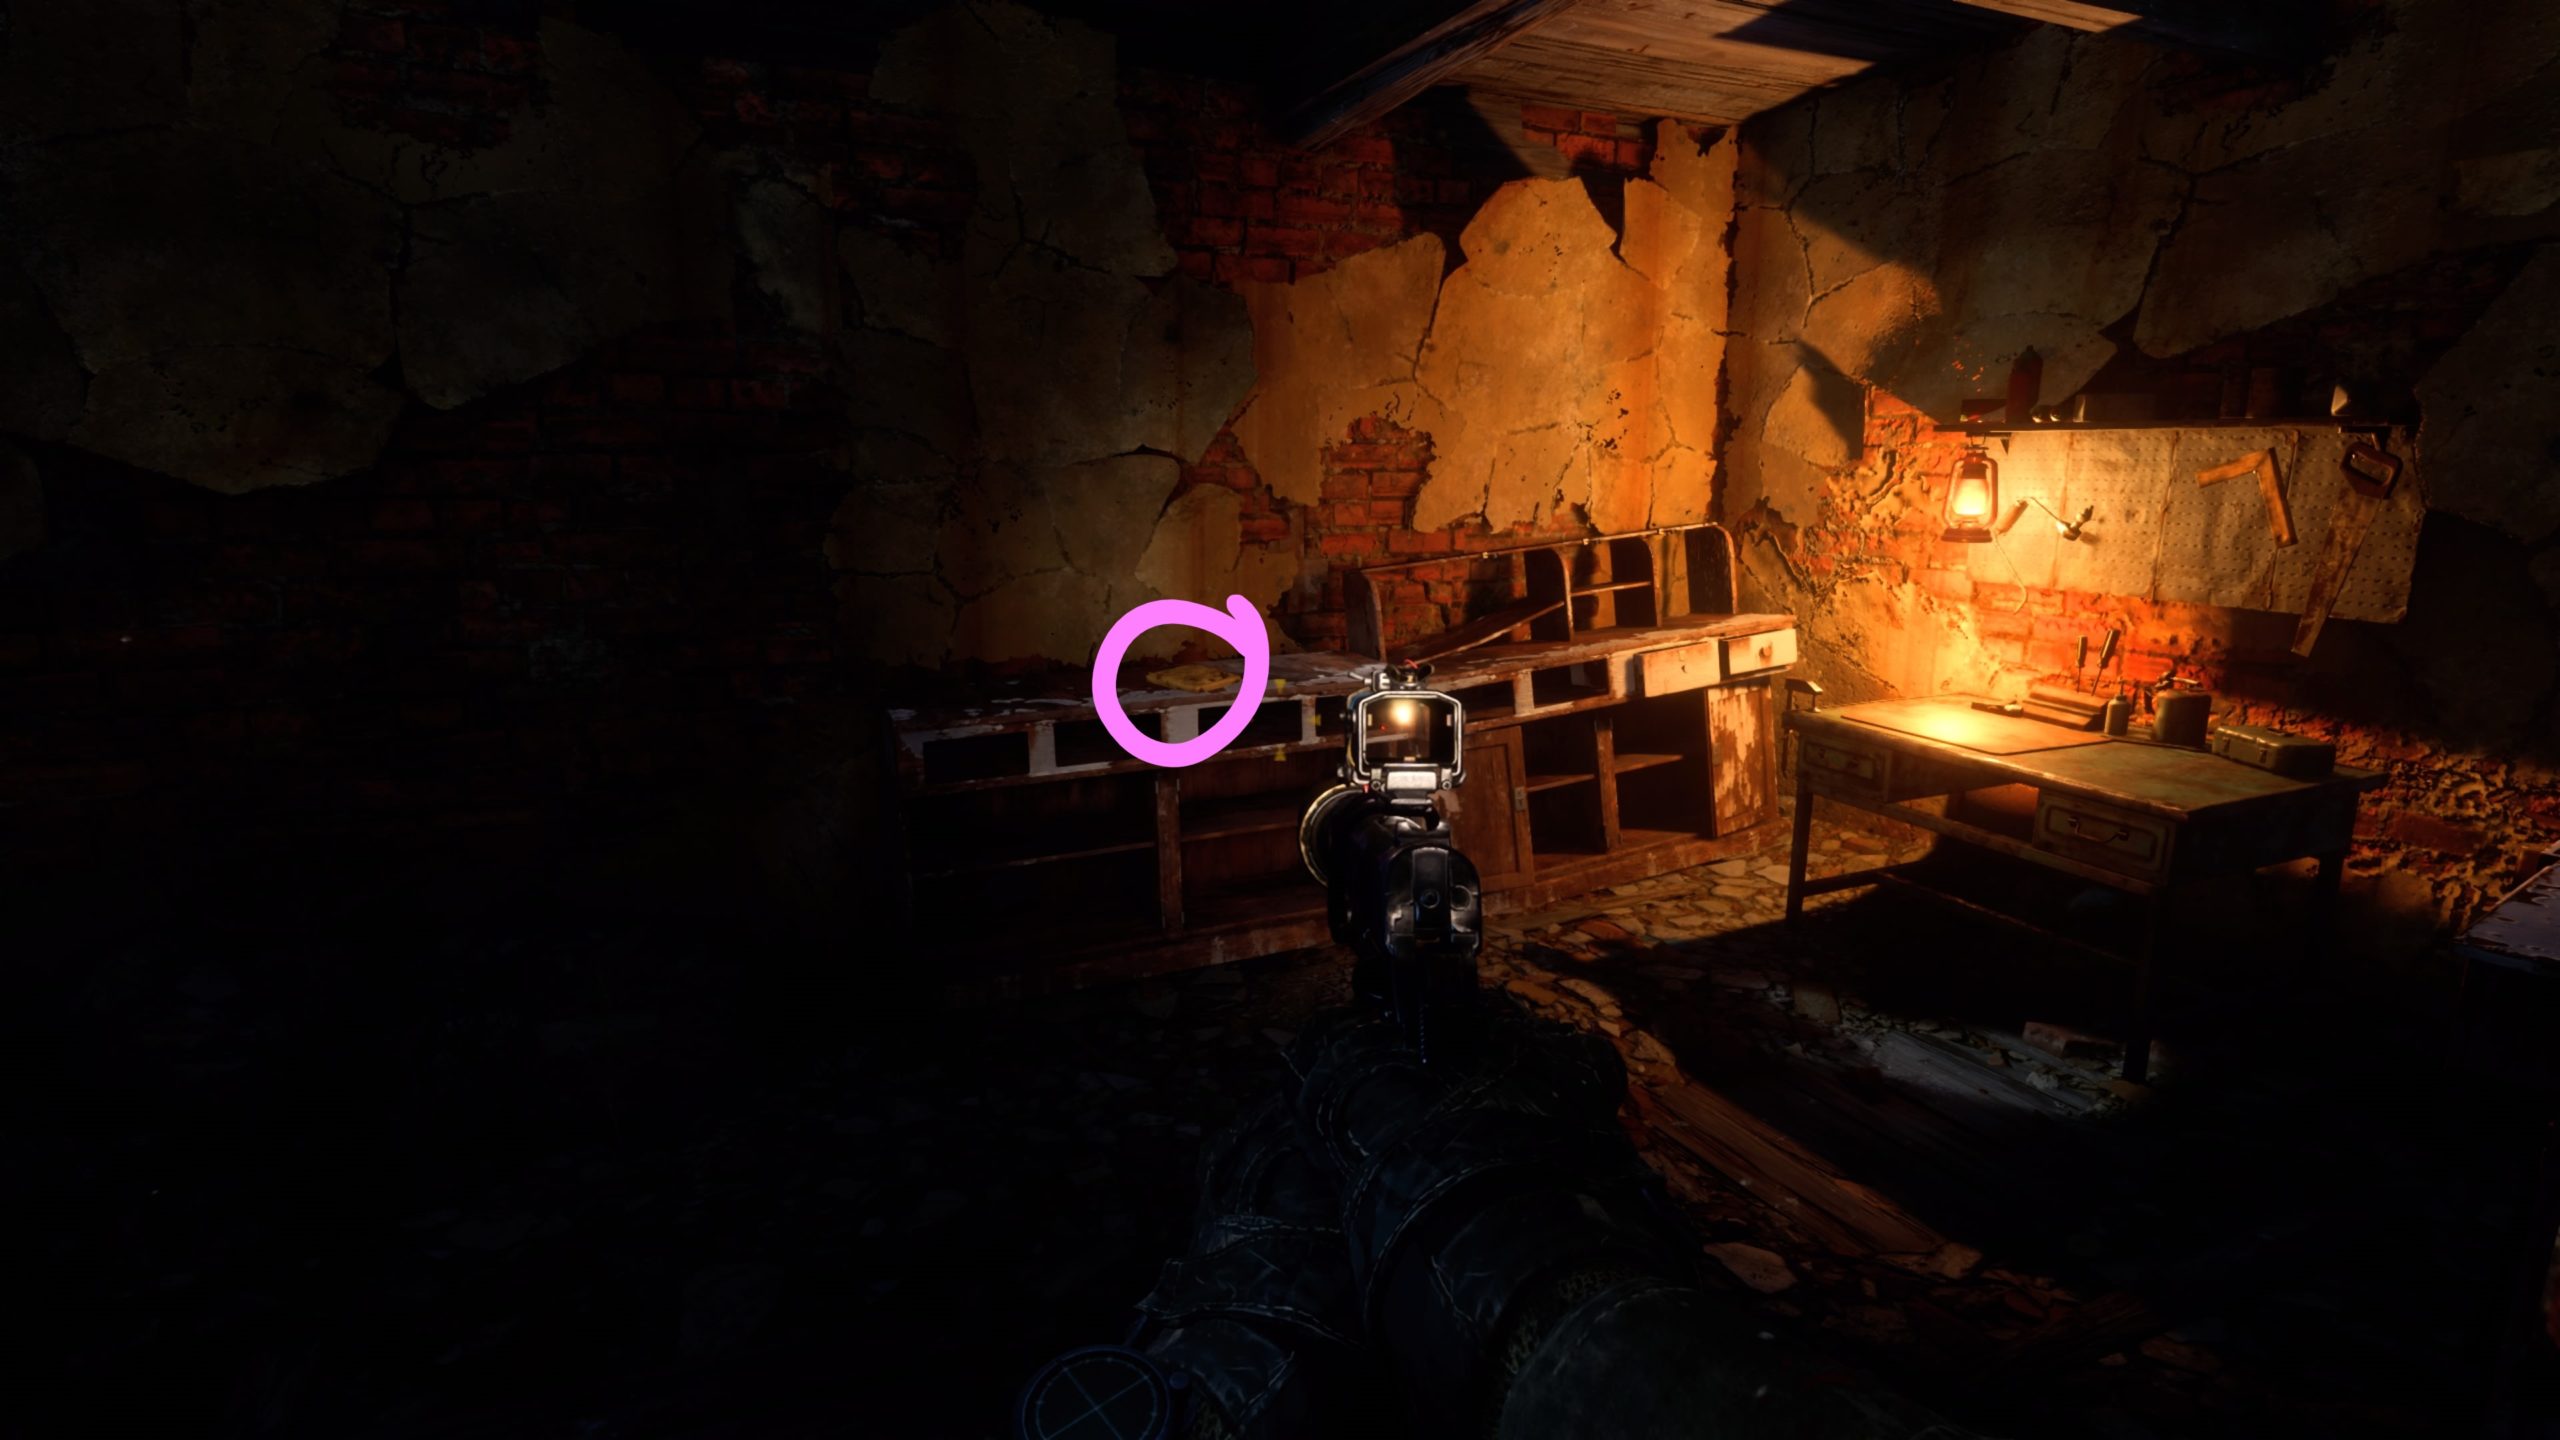
After you collect the above diary, head up the stairs to the roof and use the zip line. Head forward towards the old, crumbly building (make sure you dismantle the mines). The diary is located on a table near the workbench.


Guides

Metro Exodus – Trapper Trophy Trap Locations

by Chappie in

*NOTE: During the main story, the Captain will task you with setting traps in his hideout. If you set all five traps, you will earn the Trapper Trophy. Below is a complete listing of all 5 traps.


Trap 1

After your drunken adventures with the Captain, you will be tasked with setting up traps in his base. Head to the floor below his sleeping quarters via the stairwell then head through the doorway, passing a red door on your right, to find the first trap to set.


Trap 2

From the previous trap, head forward down the hallway towards the brown sofa. Jump over the wall to the left marked by the yellow paint. Proceed through the rest of the floor. Eventually you will pass through two bathtubs and come to a staircase leading down to the next level. Instead of going down the stairs, take a left to find the trap in the middle of the hallway on the left side.


Trap 3

From the previous trap, take the stairs in the hallway down. When you reach the bottom, take a right and head down the hallway to find the location of the third trap just before the doorway.


Trap 4

From the previous trap, head down the hallway to the wooden scaffolding. Pass over the scaffolding and through several rooms until you reach a room with a painting leaning against the wall and a white skull painted on the wall (location of Secret Stash 5). Enter through the doorway to the left of the skull and exit through another doorway to head outside. Travel across the wooden scaffolding and follow the path forward until you reach a room with a bright red door. Open the door and take a left to find the location of the trap near a corpse.


Trap 5

From the previous trap, head back down the hallway towards the red door and take a left to enter a room with cans hanging from the ceiling. Pass through this room and exit through a broken section of wall to arrive in a bathroom. Work your way through the bathroom to reach a red door. Open the door and go down the stairs. The location to set the trap will be at the bottom of the stairs next to the doorway.


Tokyo Mirage Sessions
Guides

Tokyo Mirage Sessions – Dangerous Relations

by MrsChappie in

*NOTE: Recommended level is 52.


Obtained: When Yashiro reaches Stage Rank 9, he will send you a Topic. When your ready, head to the Lesson Studio in Shibuya and speak with Yashiro.


After the cutscene, head to the Idolasphere in Daiba Studio. When you enter the Idolasphere, a brief cutscene will trigger. Yashiro will race on ahead so teleport to LCD Panels: Door 2 and enter Door 2. *NOTE: You will need to have Yashiro and Eleonora in your party before you take on the boss waiting on the other side of the door.


Upon entering the door, you will be challenged by Whampa (level 53) and Pale Warrior (level 51). Make sure to use Ellie and Yashiro’s new skills (The culprit is… and The clues…) against the boss. It’s a slow fight but each time you use the new skills, you do more and more damage. Have Itsuki focus on healing Yashiro and Ellie plus killing the Pale Warrior each time it spawns.


Defeat the Whampa to trigger a cutscene in which Yashiro earns a new Radiant Skill called Door of Possibility. Afterwards, head on over to the Bloom Palace to unlock it.


Tokyo Mirage Sessions
Guides

Tokyo Mirage Sessions – Lucky Spot 5

by MrsChappie in


Obtained: During Chapter 5, talk to Urabe who will appear in Shibuya near the Lesson Studio.


She will give you a clue that the item is located behind the misty stage. After you have received the ability to unlock sealed areas during the main story mission (after Tiki wakes up in Chapter 5), head on over to Daitou TV Studio and teleport to Film Set B: Indoors (1F). Follow the path east and turn left around the corner to arrive at a barrier that can now be opened on the east side of the room. Once you break the barrier, the door will be marked with an “E” above it. After you enter the door, take a right and enter the door with a “N” above it. The item, a Treasure Key, will be located on the ground in this room. After collecting the item, return to Urabe near the Lesson Studio to complete the request.


Reward: Kiddie Candy


Tokyo Mirage Sessions
Guides

Tokyo Mirage Sessions – Dating Disaster

by MrsChappie in


Obtained: Speak with the Stood-Up Boy in Daitou TV Station.


Momoko (aka Waiting Girl) has stood up this poor boy again. If you speak to him again, he’ll tell you that she has an exhibit opening soon somewhere in Harajuku (but she is not there). She can actually be found on the Toubo Rooftop. Once you find her, head back to the boy to report her location “Toubo Department Store”. Follow him to the Toubo Rooftop, and just like last time, she will move again.


This time head to Shibuya 106 to find the Waiting Girl standing near the stairs leading to the Idolasphere. Once you find her again, head back to the boy at Toubo Rooftop and report her location. Follow after him again to find out that she of course moved again.


Travel to Daitou TV Station to find the girl waiting by the stage. Travel back to the boy near Shibuya 106 to report her location. Travel back to Daitou TV Station and talk to the boy yet again.


Since there is only one place she could have disappeared to here, head into the Daitou TV Station Idolasphere. Thankfully, you won’t have to travel far as she is standing near the entrance. *NOTE: You won’t see her at first when you enter the Idolasphere. Once you head to the teleport pad, she will spawn a little ways ahead. Speak with her and tell her “He’s waiting outside.” to get her to leave.


Follow her out of the Idolasphere and speak to the couple near the stage.


Reward: Detritus x10


Guides

Code Vein – Achilles Core Fragments

by Chappie in


Achilles Core Fragment A

Location: Depths: Fiery Oblivion

From the Fiery Oblivion mistle, follow the path north and take a right after the large rock. Defeat the group of enemies here then keep heading straight until you reach a ledge leading into a cave. Drop into the cave to find the vestige in the white grass. As you approach the vestige, you will be ambushed by a whole bunch of enemies!


Achilles Core Fragment B

Location: Depths – Fiery Oblivion

From Achilles Core Fragment C, jump off the small cliff and follow the path through a tunnel on the right. Follow the ramp on the other side of the tunnel up to reach the top of the tunnel. The fragment will be here in a patch of white grass.


Achilles Core Fragment C

Location: Depths – Fiery Oblivion

Follow the path west from the Fiery Oblivion mistle until you come to a rock archway. Pass through the archway and take the right path to locate the fragment at the end of the path.


Code Vein
Guides

Code Vein – Asclepius Vestige Parts

by Chappie in


Asclepius Vestige Part A

Location: Depths – Fiery Oblivion

Defeat the Blazing Heretic mini-boss located in the northern part of the map.


Asclepius Vestige Part B

Location: Depths – Fiery Oblivion

Defeat the Abyssal Doppleganger mini-boss located in the southwestern part of the map.


Asclepius Vestige Part C

Location: Depths – Celestial Ice Prison

The vestige can be obtained from defeating the Mud Gorger (with the group of moneys that spawn).


Asclepius Vestige Part D

Location: Depths – Celestial Ice Prison

The vestige can be obtained from defeating Argent Wolf Berserker.


Asclepius Vestige Part E

Location: Sealed Depths – Eternal Abyss

Defeat the Dusty Cloud Bandit to receive this vestige.


Asclepius Vestige Part F

Location: Sealed Depths – Eternal Abyss

Defeat the Queen’s Vanuard Puppet to receive this vestige.


Asclepius Vestige Part G

Location: Crypt Spire – Upper Level

From the Crypt Spire mistle, head north passing the areas where you fought the Blade Bearer, Cannoneer and Juzo Mido. This will bring you to a long hallway with lights leading down it on both sides. Head through that hallway and make a left at the end going down a side set of stairs. (There is another set of stairs that keeps leading north. Don’t go that way!) The vestige will be at the bottom of the steps in the middle of the floor.


Guides

Code Vein – How to Reach the Hellfire Knight DLC?

by Chappie in


In order to reach the Hellfire Knight DLC in Code Vein, you will need to make your way to the Crypt Spire – Upper Level mistle. From there, head north passing through the areas where you fight the Blade Bearer, Cannoneer and Juzo Mido to reach a long hallway with lights leading down it on both sides. Head down the hallway and take a left or right (don’t go down the stairs heading north) to reach a side set of stairs. Head down those stairs to reach a purple door. Unseal the door and head through another hallway to reach a room. It will contain the Fiery Oblivion map. Head back to Home Base with the map in hand and speak to Davis to unlock the Fiery Oblivion depths.


Tokyo Mirage Sessions
Guides

Tokyo Mirage Sessions – Iori’s in Love Again

by MrsChappie in


Obtained: During Chapter 5 speak to Iori near the Idolasphere in Daiba Studio.


After the cutscene, head to Shibuya Station and speak with Iori again to learn he’s fallen in love with another Mirage. He describes the Idolasphere in Daiba Studio so make your way to there. Teleport to LCD Panels: Door 2 and head to Door 3. Once you enter through the door, you will find a Mirage standing across from you on the other side of the walkway. Speak with her then head back to Iori to complete the request.


Reward: Spd Incense x2


Tokyo Mirage Sessions
Guides

Tokyo Mirage Sessions – Scarlet Armor Delivery

by MrsChappie in


Obtained: Speak to the Masked Salesclerk behind Door 3 in the Daiba Studio Idolasphere.


You will need to defeat 4 Regal Knights to find the Scarlet Armor. *Best spawn point for the Regal Knights was on the walkway near Door 4. After you have obtained all the items, head back and speak with her at Hee Ho Mart in Shibuya to complete the request.


Remark: Melmark x3 and Attack Mirror