Obtained: During the Chapter 5 Intermission, speak with Ayaha in Fortuna Office.
After the cutscene, head on over to Daiba Studio and interact with the girl hunched over near the map transition. She is wearing a white long-sleeve top with a plaid green skirt. After you speak with the girl, head back to Ayaha to report the news then head on over to Daiba Studio’s Idolasphere to search for the thief.
Once in the Idolasphere, head through the door on the left to arrive in the Monitor Room. Head in through the door under the monitors and look at your map. Make your way towards the little red boss head to find the glowing Mirage.
Head up to the Mirage to trigger a fight with a Regal Knight (level 55) and two Red Shamans (level 55). Defeat them all to trigger a brief dialog scene.
Exit the Idolasphere and check on Tamae Manai (previously hunched over girl) in Daiba Studio.
After you confirm everything is ok with Manai, travel to Fortuna Office and speak with Ayaha to complete the request.
Obtained: During the Chapter 5 Intermission, you’ll receive a Topic from Barry. After you read the Topic, head to Bloom Palace and speak with Tiki.
After Barry’s little tantrum, travel to Daiba Studio’s Idolasphere. After the cutscene, head to the door on the right that was previously blocked by a barrier. Once in the Back Monitor Room, you should see screens numbered 0 to 9.
The code for the order of rooms you need to go in is as follows: 018769. Start working your way through the rooms until you reach the last room.
Behind the last door lies a boss fight with Greed (level 52) and Hirudineans (level 50). Greed is weak against Axe, Bow and Electric. It resists Fire, Frost, Wind and Red Skull. Sword, Spear and Mind are all neutral against Greed. Defeat Greed then head to the Lessons Studio in Shibuya.
Speak with Mamori outside of the Lessons Studio to trigger a cutscene. Afterwards, the side story will complete. Barry will acquire the Backup Skill “Ninja’s Escape”, which increases our chances of escaping battle. Barry and Mamori also acquire the Duo Art “The Tunnel Home”.
Obtained: During the Chapter 5 Intermission, speak with the man wearing a suit near the entrance of the Daiba Studio’s Idolasphere.
The Upset Producer will request that you head to Doc Camera in Shibuya to purchase a Soothing Pack for 9,200 yen for him. Agree and the man will give you 10,000 yen.
Doc Camera is located next to Jewelry Carabia. The building has two entrances with red banners above the doors. Speak to the woman wearing a white/grey jacket standing in front of the building to learn that they are sold out of Soothing Packs.
Head back to the Upset Producer in Daiba Studio to report the news. This crazy guy is absolutely desperate for a Soothing Pack and gives us another 15,000 yen to find one using any means necessary.
Travel back to Doc Camera to speak with the lady again. She won’t be there so speak with the girl wearing a maroon top, black skirt and brown boots. She has a Soothing Pack but declines your offer to purchase it.
Speak to the man wearing a suit diagonally from the above lady. This man also bought a Soothing Pack! When you speak with him, he agrees to sell you the pack but wants 49,800 yen. If you tell him that you won’t buy it, he will reduce the price to 29,800 yen.
Once you purchase the Soothing Pack, head back to Daiba Studio and give it to the Upset Producer to complete the request.
Chapter 2 of Snack World The Dungeon Crawl Gold contains 8 story quests with the ultimate goal of releasing the Krapen. Below you will find guides for all 8 quests so grab your Jaras and get ready for a snack attack! Let the dungeon crawl begin!
Release the Krapen
Quest Giver: The King
Objective: Locate the Krapen in the desert!
Head towards the oasis in Succotash Sands to search for the Krapen. When you arrive, you’ll be attacked by a couple of Merman. Defeat them to complete the quest.
Go Get the Golden Lamp!
Quest Giver: Penne (after talking with Sam Witch the fortune teller)
Objective: Catch Alfredo the thief!
Pursue Alfredo to the Falafel Flats: South and head for the bridge on the west side of the map to trigger a brief cutscene. Following the cutscene, defeat 15 Alfredos to make the true Alfredo spawn on the sandbar by the river in the middle of the map. Defeat him to complete the request.
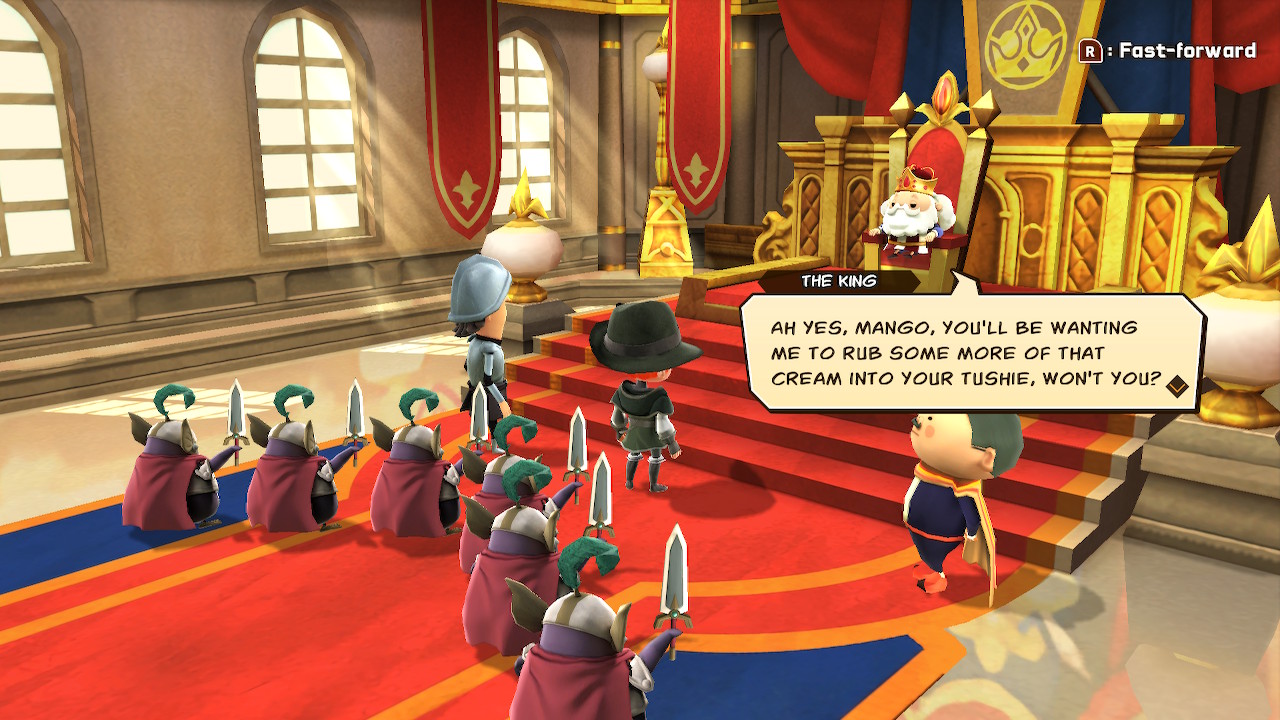
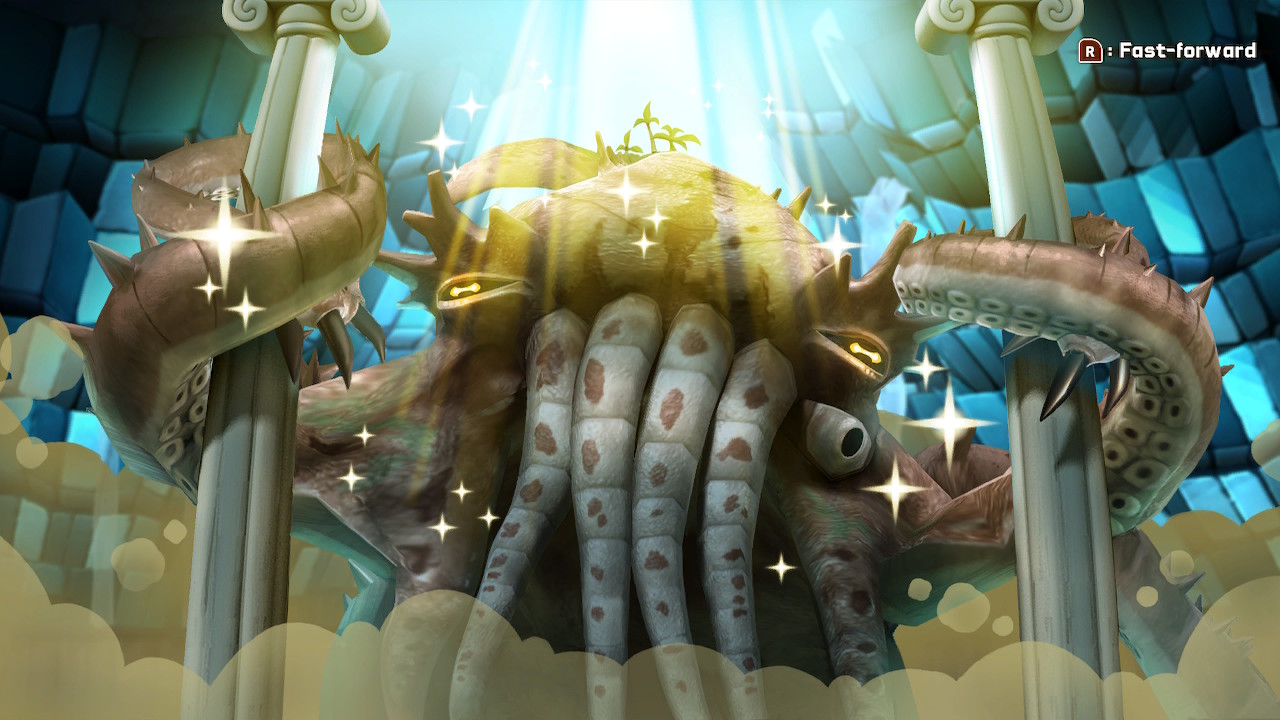
Glean the Moisturizing Cream!
Quest Giver: The King (after completing Go Get the Golden Lamp! story quest)
Objective: Defeat the Krapen!
This quest takes you to Gumbo Grotto! Head through the grotto in search of the illustrious Cavern of Calm. Once you find it, head through its doors to face the Krapen in battle. This battle takes place on a circular landmass surrounded by water. Throughout the fight, the Krapen will submerge underwater then spring up in a new location to attack from all angles. For its long-ranged attacks, the Krapen will shoot bubbles and spikes all over the arena. For close combat, it slams its tentacles down, crushing everything in its path. The Krapen also has a moved called Fully Loaded Lavage in which it shoots water from its mouth and does a massive amount of damage. Try to avoid that attack at all cost! About halfway through, the Krapen will jump onto the arena and move in a circle with its tentacles stretched out. You will need to run with it to avoid the tentacles much like how you would move with a revolving door. When the Krapen’s health drops down to around 1/3, he gets a buff that makes increases his stats. Defeat the Krapen to trigger a cutscene completing the quest.
Hotpot Hooley
Quest Giver: Crock Ness (in a plaza on the west side of Tutti-Frutti, south of the armor store)
Objective: Gather rapeseed buds!
For this quest, you’ll head to The Falafel Flats: South in search of 3 rapeseed buds. Follow the “!” on the mini map to locate them. Once you have all 3, head back up to the northern part of the map where you started to encounter the Valkyrie. Defeat her to complete the quest.
Journey for a Journal
Quest Giver: Maskmelon (in Covfefe Cafe)
Objective: Find the secret journal!
Follow the marker on the mini map and search the area to spawn the Spinx who has the missing journal. After you battle her, she will flee to a different part of the area. You will need to search for her and engage in combat with her for a total of 3 times. When fighting the Spinx, try and keep your distance as her attacks do a lot of damage and can reduce your party’s HP to 0 really quick.
The Gatling’s Gone
Quest Giver: Cdr. Ciderfella (speak with her in her house after talking to Sam Witch)
Objective: Catch the thief that grabbed the gun!
For this quest, you’ll traverse the Gorgonzola Ruins in search of the Madusa Gate on a lower floor. Once you find it, pass through the gate to encounter a boss fight with a group of Bats. Once you defeat the Bats, Gladiatasaur will spawn. Defeat him to trigger an interesting cutscene and complete the quest.
The Key to Questing
Quest Giver: Ms. Yamamoto (speak with her in the inn after completing the Go Get the Golden Lamp! story quest)
Objective: Catch the thief that grabbed the gun!
For this quest, Ms. Yamamoto has you scouring Gumbo Grotto looking for some tasty shrimp for her to cook. Work your way down to level 3 of the grotto to find the “shrimp”. Defeat the group of enemies that show up to complete the quest.
Crowd Control
Quest Giver: Mermaido! (speak with her near the fountain in the town square after completing the Go Get the Golden Lamp! story quest)
Objective: Protect the mermaido!!
Head on over to Gumbo Grotto and make your way to the Cavern of Calm, which should be around the third floor. After you’re all healed up, head through the doors leading to a boss battle with 3 Merman. Defeat them all to spawn a Landshark. Defeat it to complete the quest!
Below are the side quests in Chapter 2 of Snack World Dungeon Crawl Gold. Side quests are quests that you can do online with other people. Be sure to make a cool online profile for yourself in PIX-e PALS before you dabble in the side quests.
The Southern Falafel Flats Free-For-All
Quest Level: Beginner
Quest Giver: Cdr. Ciderfella
Grand Prize:Leather Wristband
Objective: Explore at will before returning to base
For this quest you will be once again exploring the Falafel Flats: South. You goal is to collect any items you see while fighting all the monster you want. When you feel like you’ve thinned out their ranks enough, head to the warp point near the southern part of the map and use it to complete the quest.
Madusa’s Mad Hair
Quest Level: Beginner
Quest Giver: Cdr. Ciderfella
Grand Prize: VaCATion Staff
Objective: Defeat the boss in the deepest depths!
This quest starts you out in Succotash Sands and has you fighting your way across the area to reach the Gorgonzola Ruins. Once there, explore every inch of the ruins, working your way towards the Madusa Gate. When you find it, head through the gate to give Madusa another thrashing. Defeat her then teleport out to complete the quest.
The Southern Falafel Flats Strike
Quest Level: Beginner
Quest Giver: Cdr. Ciderfella
Grand Prize: Knife
Objective: Take out as many monsters as possible!
The goal here is to defeat 30 monsters around the Falafel Flats: South area. Once you do, the quest will complete.
Penguin Paladin Prowess
Quest Level: Beginner
Quest Giver: Cdr. Ciderfella
Grand Prize: VaCATion Shield
Objective: Defeat all the bosses in the deepest depths!
For this quest, you will need to work your way down through the Gorgonzola Ruins to reach the Madusa Gate. Once there, head through the gate to fight 6 Penguin Paladins again. Give them a good thrashing to complete the quest.
Chapter 1 of Snack World The Dungeon Crawl Gold contains 6 story quests with the ultimate goal of obtaining the Purple Eye for Princess Melonia. Below you will find guides for all 6 quests so grab your Jaras and get ready for a snack attack! Let the dungeon crawl begin!
The Road to Gorgonzola: Crossing the Plain
Quest Giver: The King
Objective: Head to the Gorgonzola Ruins!
This is the first story quest of the game with a quest level of 1 and acts as the game’s tutorial on combat. Commander Ciderella will be accompanying you into the field to bark orders at you while traversing the Falafel Flats: South heading south towards the Gorgonzola Ruins. When you get towards the end, a giant pig called the Logged Lupine stands in your way. After dispatching of him, proceed to the area he was guarding and touch the warp point to complete the quest.
The Road to Gorgonzola: No Dessert-ing!
Quest Giver: The King
Objective: Head to the Gorgonzola Ruins!
For this quest, you will be fighting your way west across the Succotash Sand, defeating enemies as you go. This is a small map that will have you facing the Scopeion that is blocking the entrance to the ruins in no time. After you defeat it, travel to the ruins via the entrance behind the Scopeion. Once there, touch the warp point to complete the quest.
The Power of the Purple Eye
Quest Giver: The King
Objective: Defeat Madusa!
To reach Madusa, you’ll need to work your way through the Gorgonzola Ruins. The ruins are procedurally generated and enemies will keep spawning while you explore. When you reach the Madusa Gate, heal up at the terminal then cross through the gate to start the battle. That battle with Madusa is pretty straight forward. She moves around the area quickly and uses her tail and claws to attack. She can also shoot beams out of her eyes and will throw purple exploding orbs at you from a distance. Her big attack involves her charging up and blasting you to the other side of the area. As you rush back to her, she will try to turn you to stone. When this happens, duck behind a pillar. When her heath reaches 0, the quest will complete.
Goo for Broke!
Quest Giver: Old Man in Bar (Speak with him in the Tutti-Frutti Cafe after completing the No Dessert-ing! story quest)
Objective: Defeat the slimes!
This quest will bring you to The Falafel Flats: South. Your goal will be to defeat the 30 slimes in this area. Keep running around the map, defeating enemies as they spawn. After you defeat 30, a powered up slime will appear. Defeat it to complete the quest.
Just Timber in Lake?
Quest Giver: Carpenter (Speak to him next to the Inn after completing the No Dessert-ing! story quest)
Objective: Gather up the dropped timber!
When you arrive at the Succotash Sands, the Carpenter will inform you that he lost 3 pieces of timber. You will come across them as you follow the path east. They will be like normal items you collect, but instead of being blue, they are pink and marked on the mini-map with “!”. When you collect all 3 piece of timber, the Carpenter will ask you to wash them off in the nearby oasis. Back track a bit to reach it and be ready for a fight. As you approach the middle of the oasis, 3 Tree Huggees will show up looking to cause some trouble. Defeat them to complete the quest.
Temple Takeover! Six Suspicious Suits!
Quest Giver: Maj. Mango (Speak with him in the castle after completing the No Dessert-ing! story quest)
Objective: Take out the six “suits”!
For this quest, you will have to work your way down 3 levels in the Gorgonzola Ruins to reach the Madusa Gate. Once inside, you will need to defeat the 6 Penguin Paladins to complete the quest. *NOTE: The ruins are procedurally generated and enemies will keep spawning while you explore.
Obtained: During Chapter 5, talk to Ayaha in Fortuna Office.
Since Ayaha wants us to check on Kuzu, head on over to the Daitou TV Station and speak to him. He will be the hunched over man in a suit near a side exit door.
Report back to Ayaha that his Performa was stolen.
Head to the Shibuya 106 Idolasphere and teleport to 3F. Make your way to the pink mannequin and enter the sleeve. Head towards the the blue mannequin and enter the sleeve. After you exit the sleeve, continue straight ahead to find a glowing Mirage. Two Worms (level 53) and a Dark Shaman (level 53) will challenge you to a battle. Defeat them then head back to check on Kuzu at Daitou TV Station.
After you discover that Kuzu is find, head back to Fortuna Office and speak with Ayaha to complete the request.
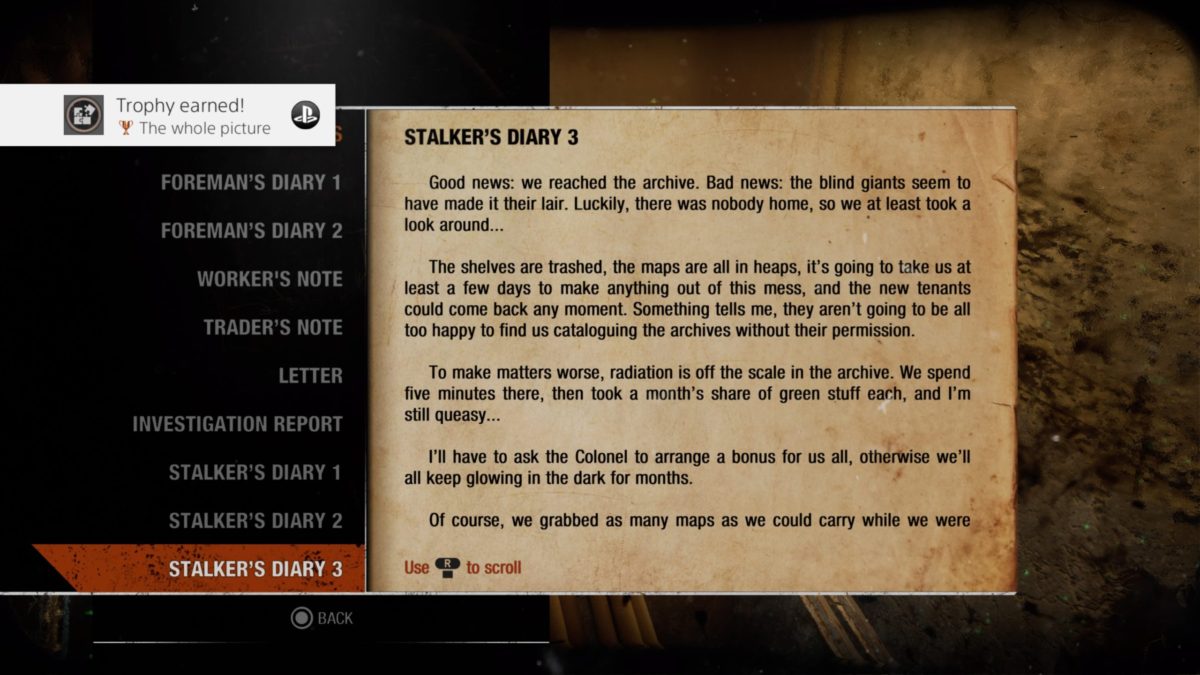
The Two Colonels DLC in Metro Exodus has 9 diary pages to collect. If you obtain all 9 diary pages, you will receive The Whole Picture Trophy/Achievement. Below is a listing of the locations for all the diary pages. You will need to collect them in this order, since you can get locked out of areas as you progress through the story.
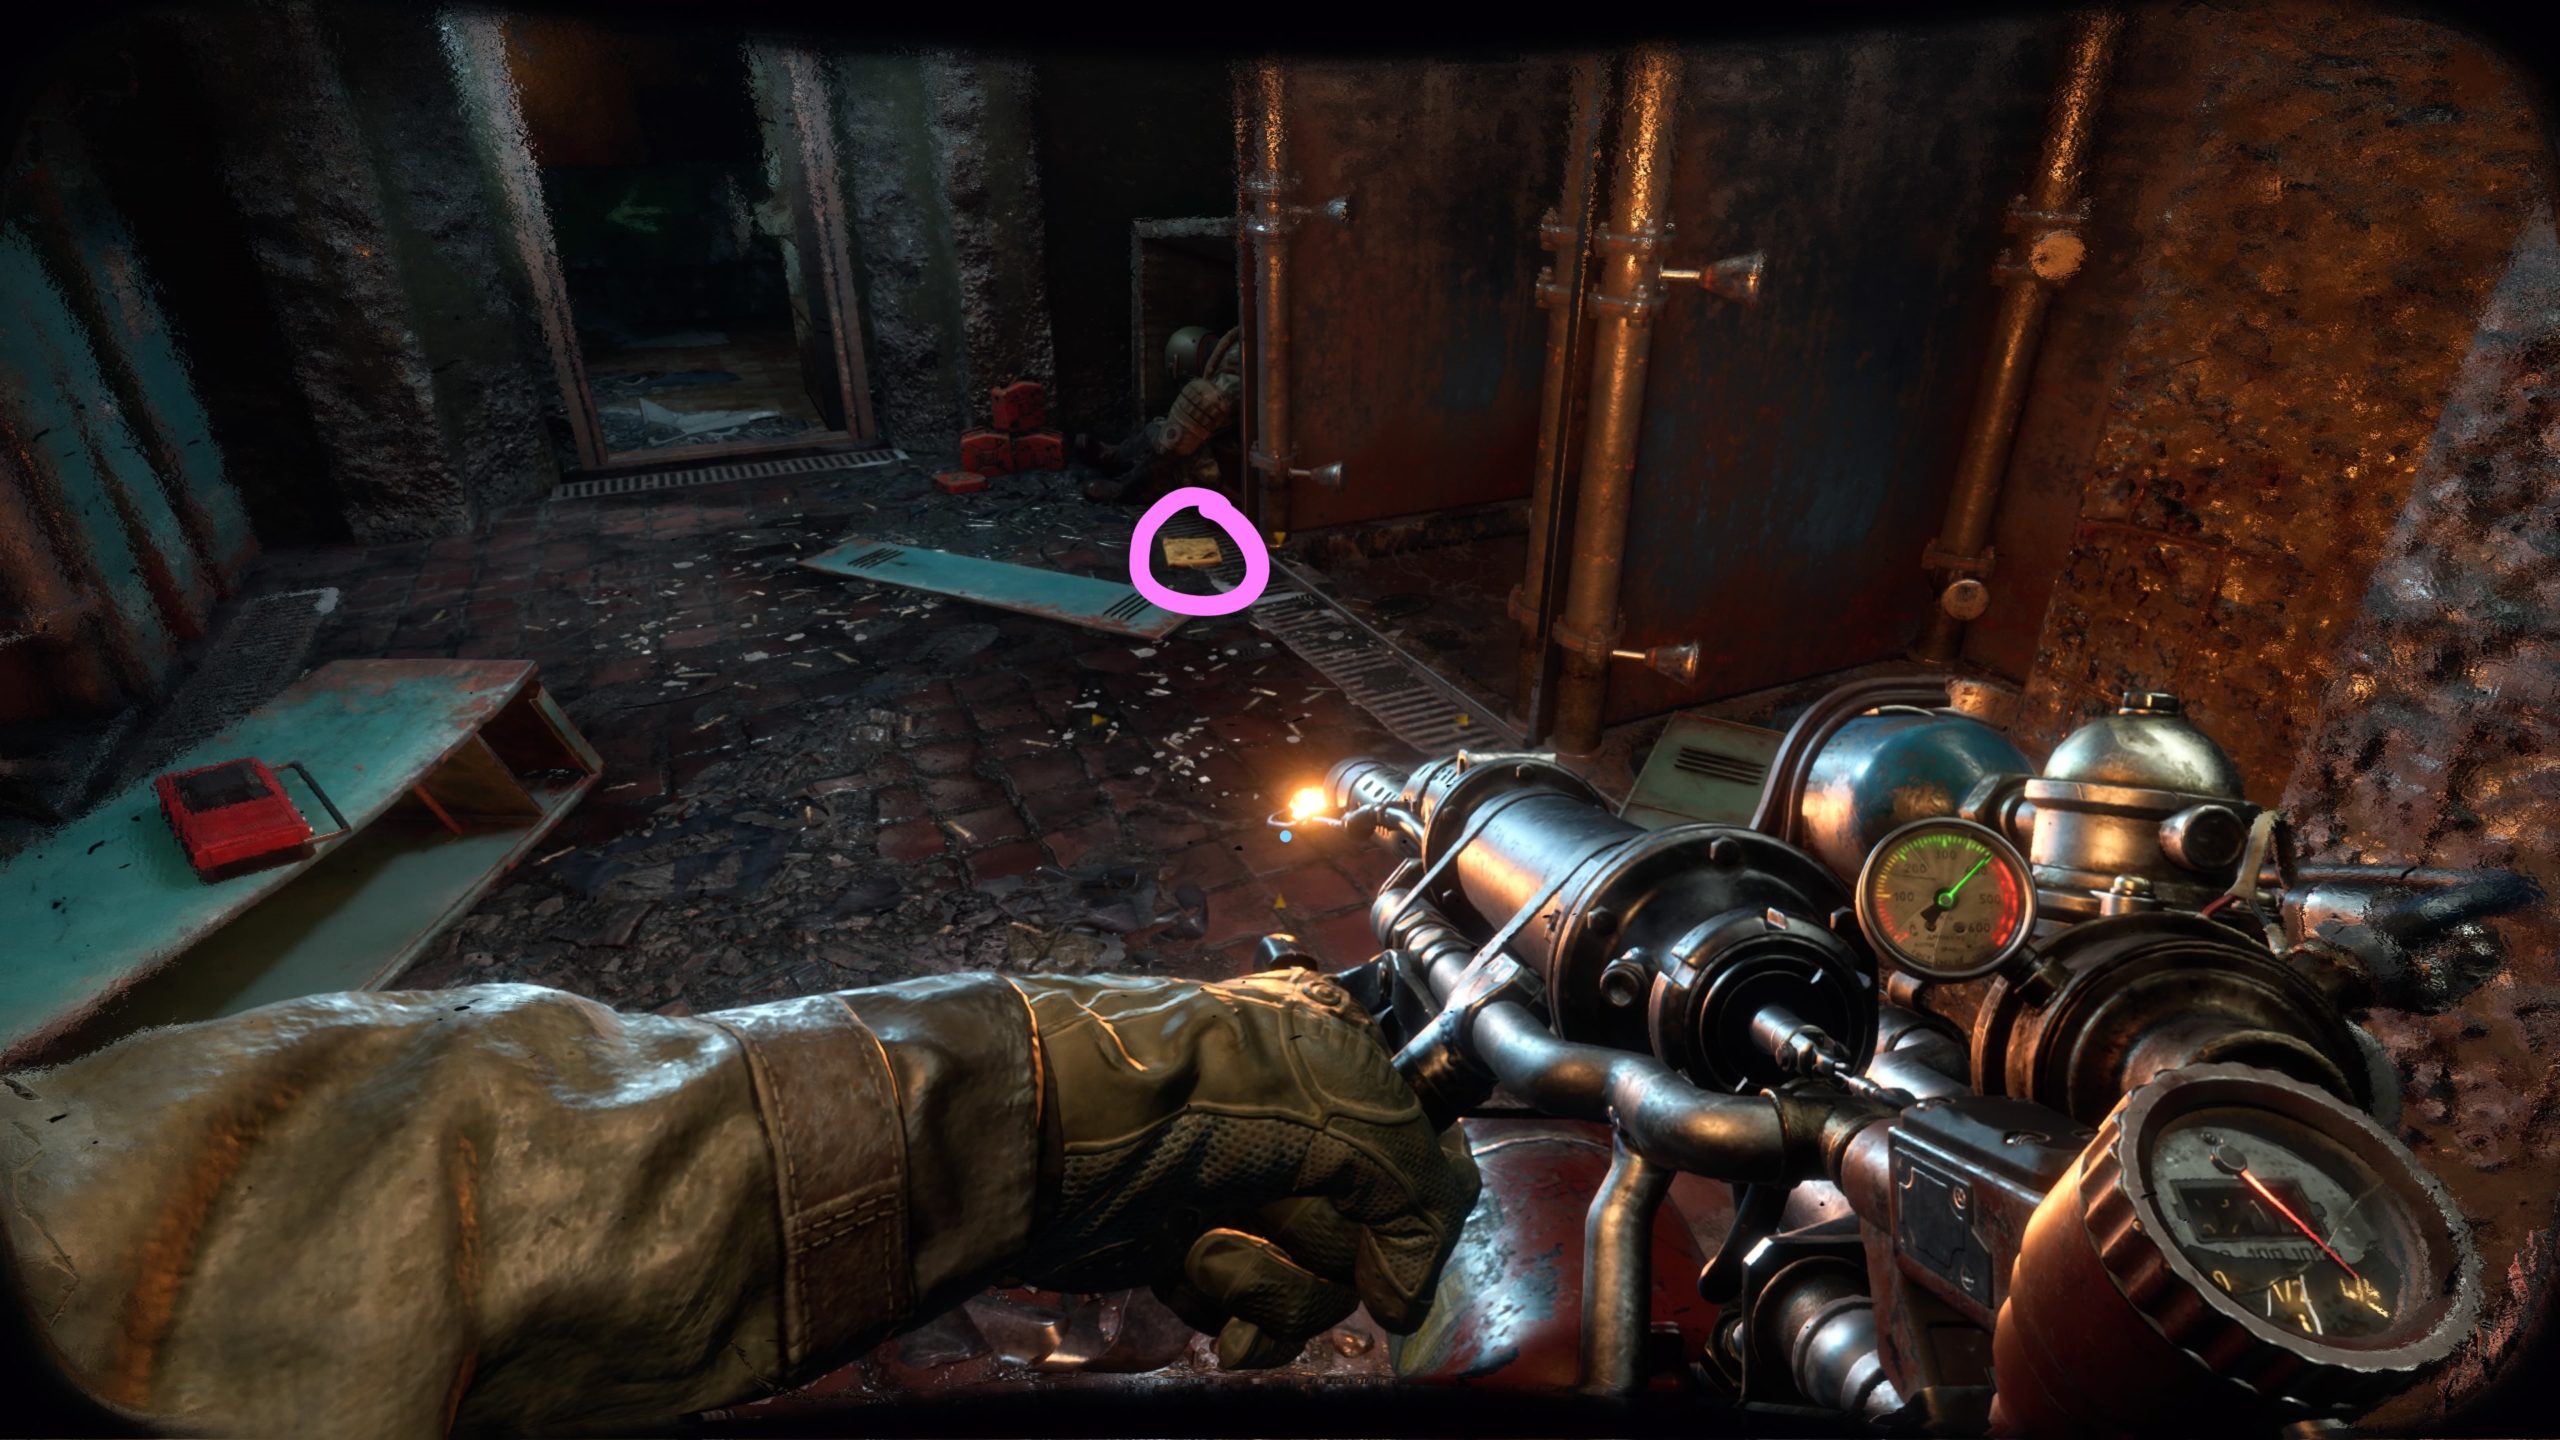
Foreman’s Diary 1
When you first gain control, head down the stairs and proceed forward through the hallway, burning the slime as you go. At the end of the hallway, turn right and head through an open doorway to find the diary on a metal table straight ahead.
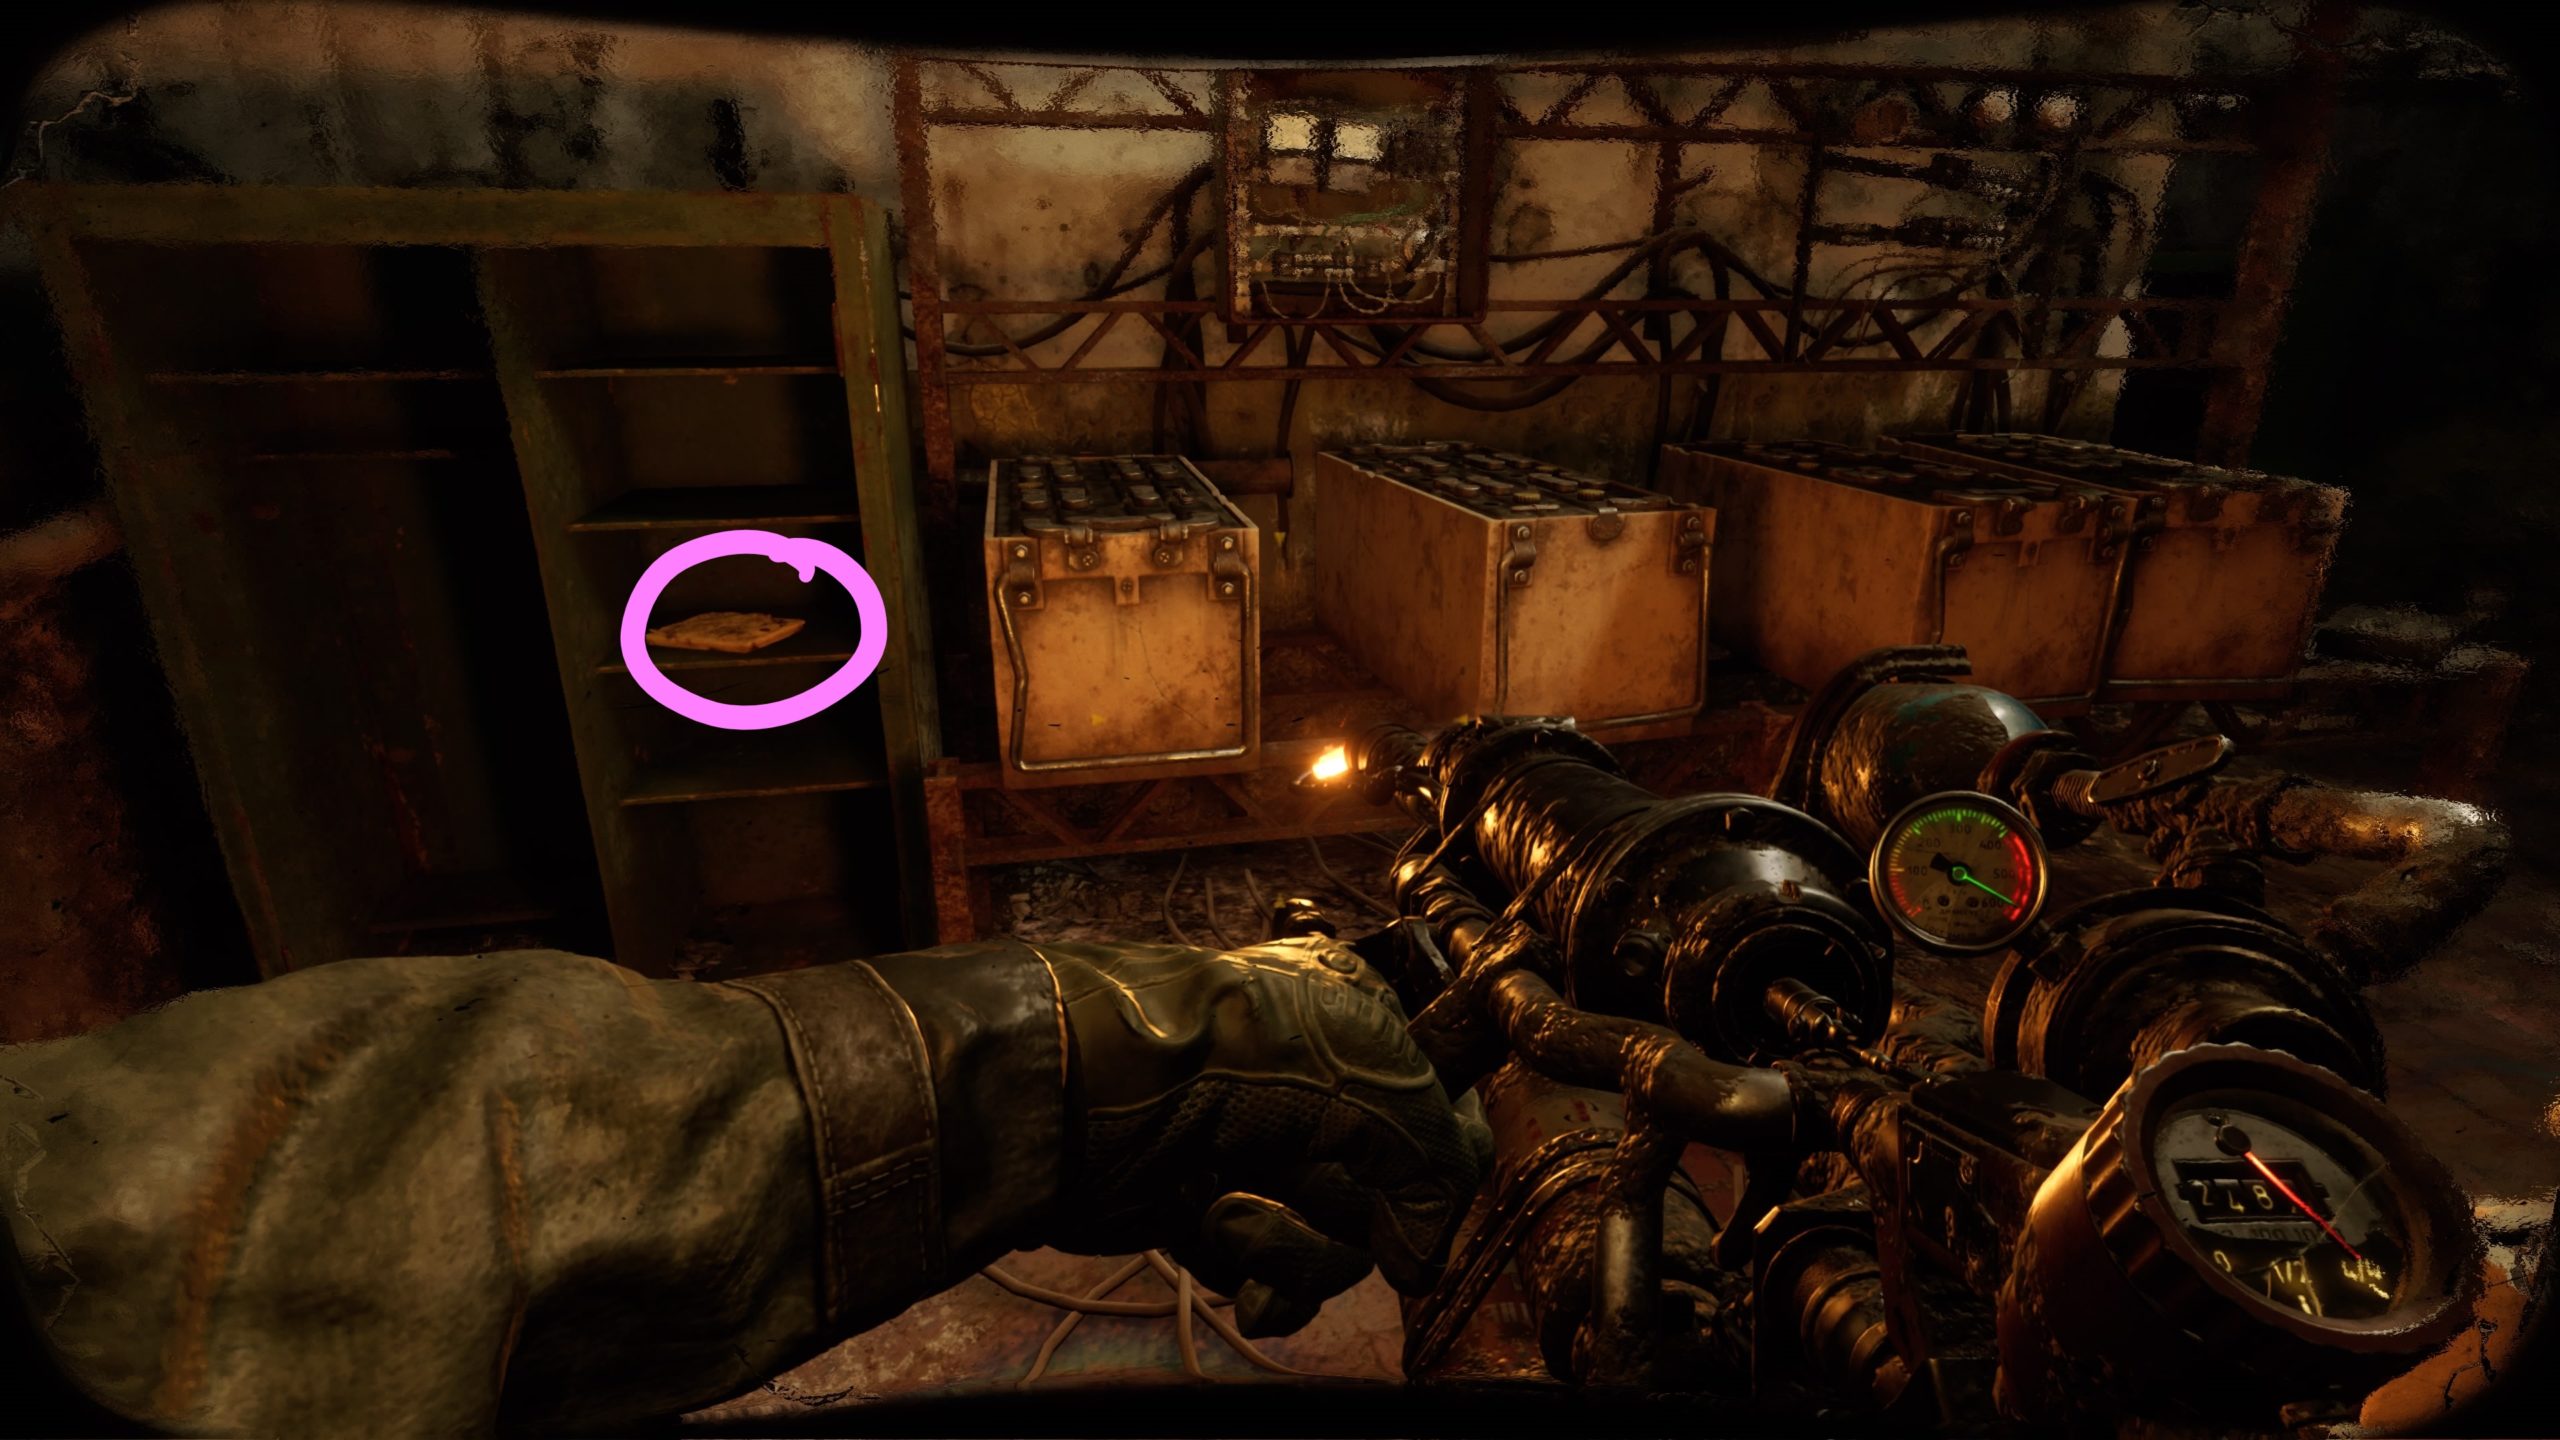
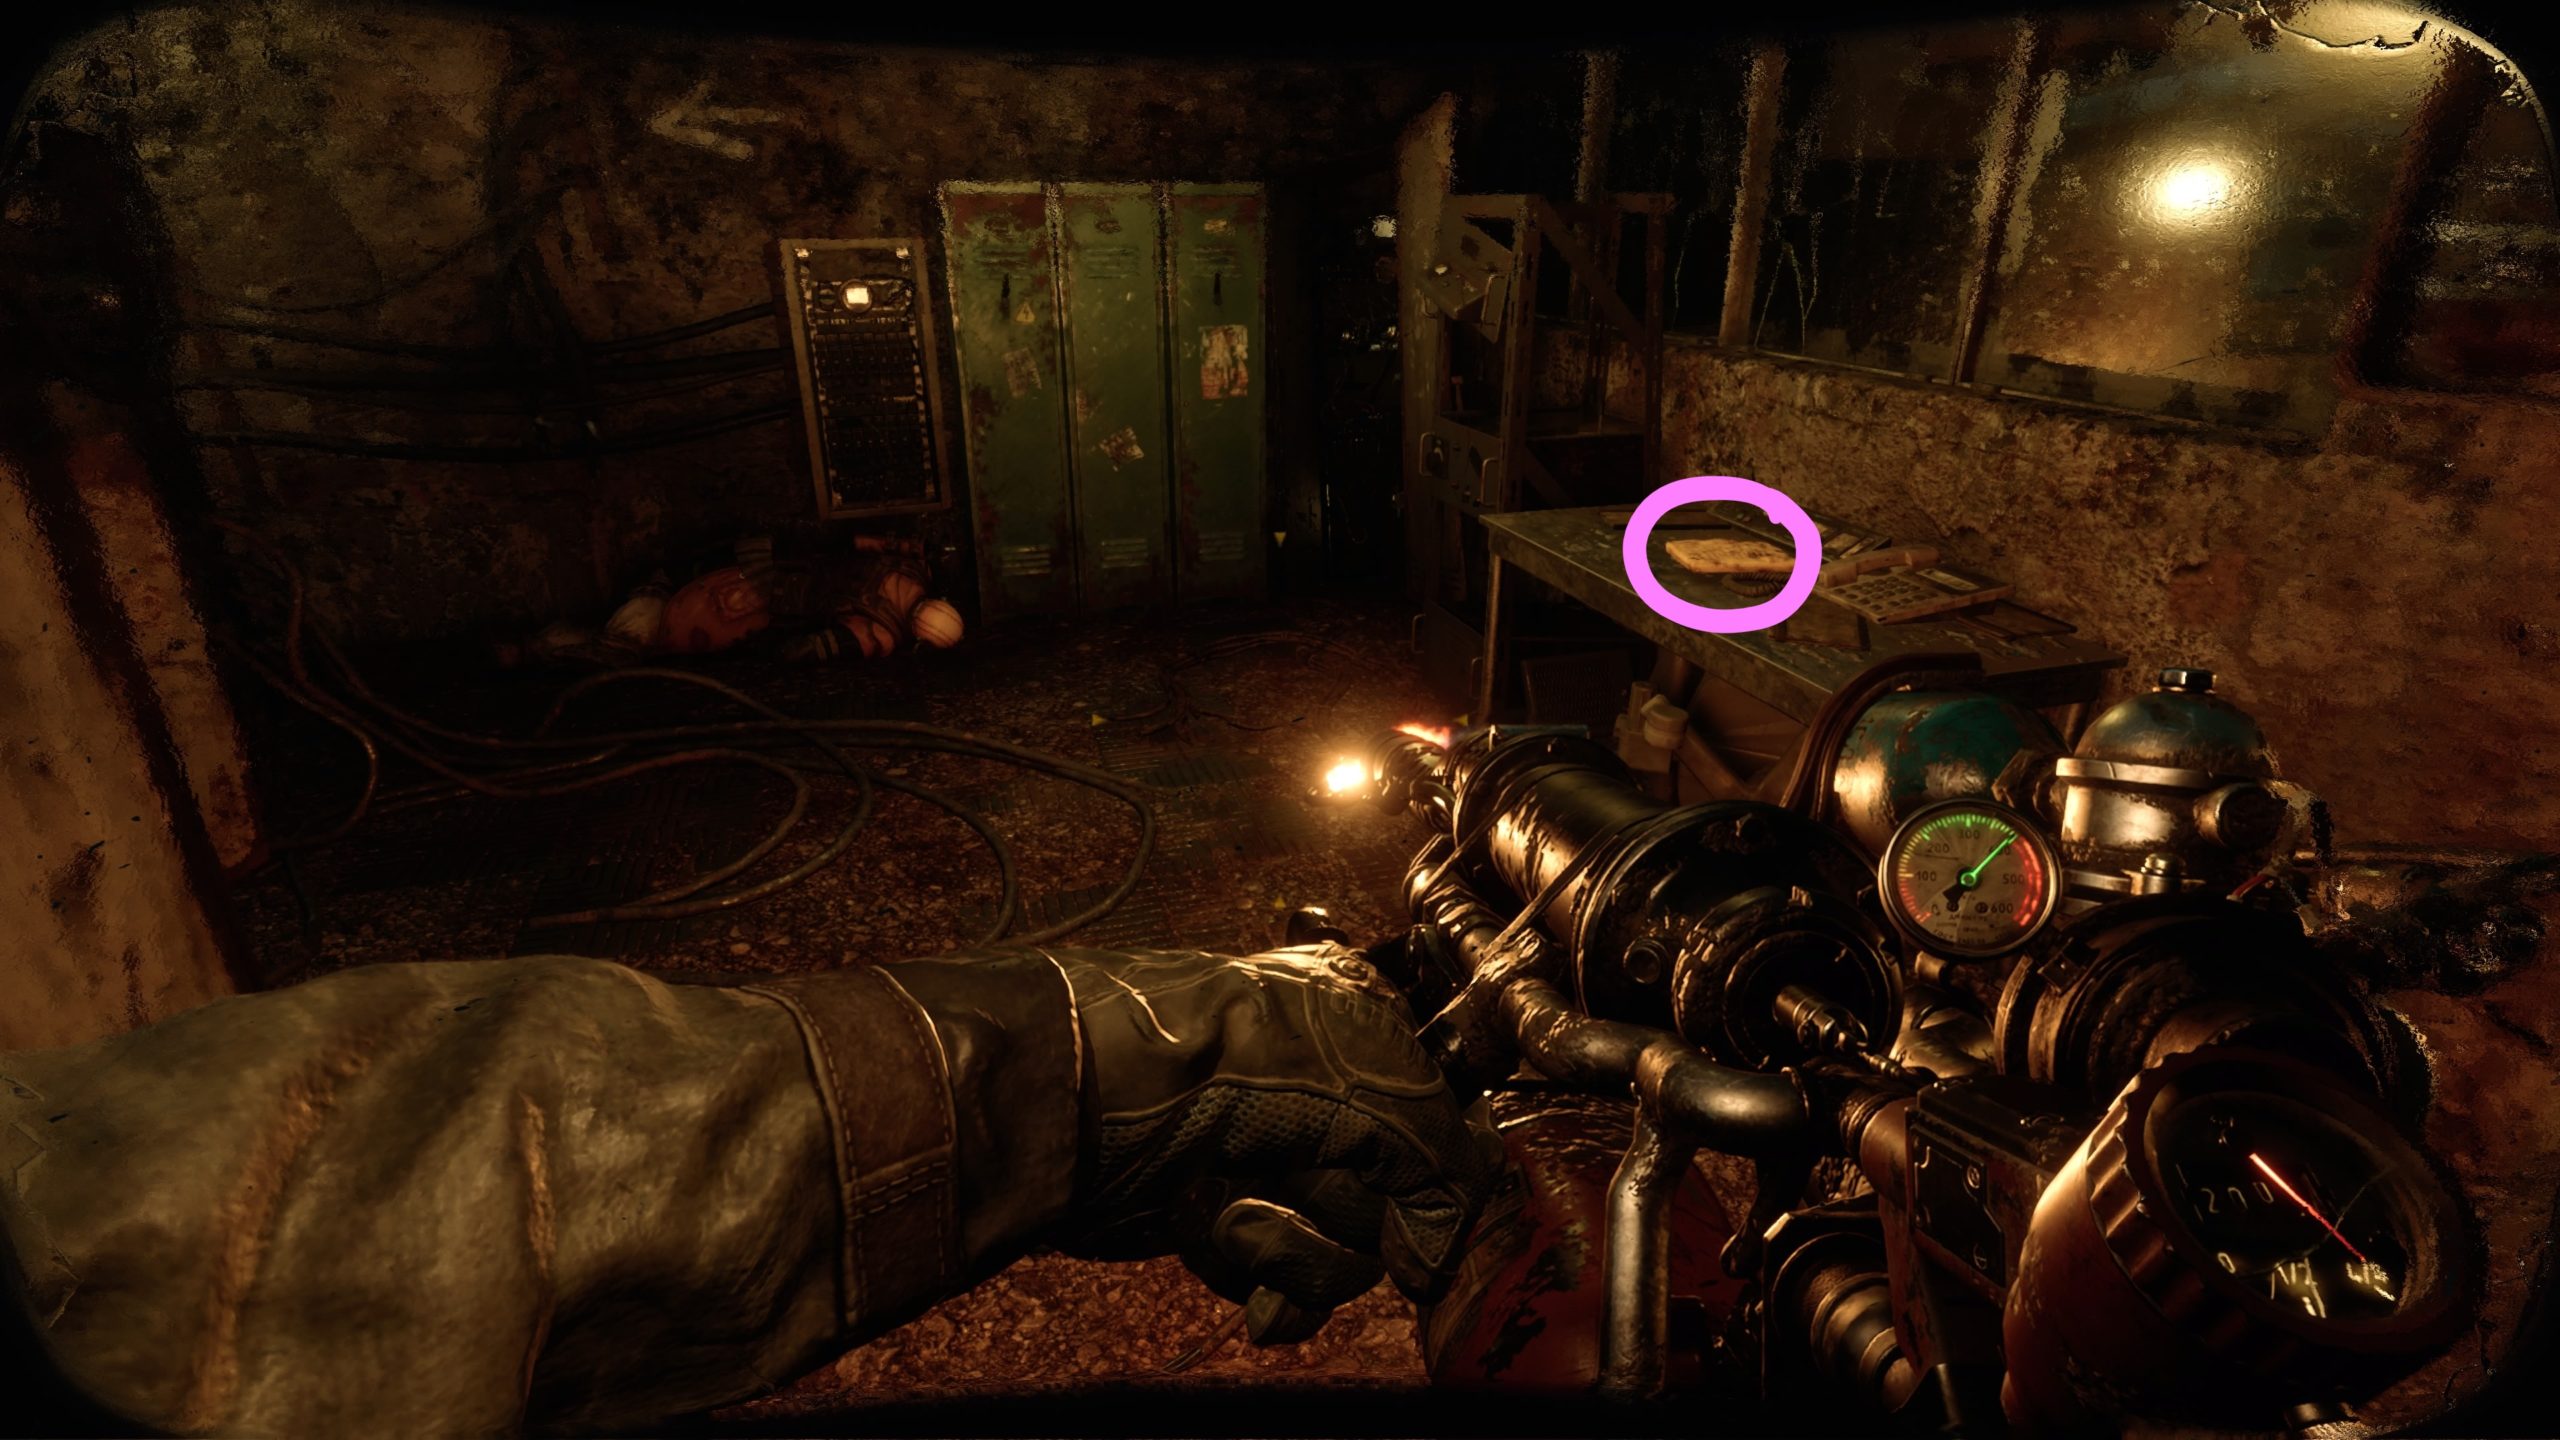
Foreman’s Diary 2
When you reach the room with the first workbench and a generator, take the door to the right of the workbench and follow the hallway to reach a storage room containing the diary on a green metal shelf next to a table containing large boxes.
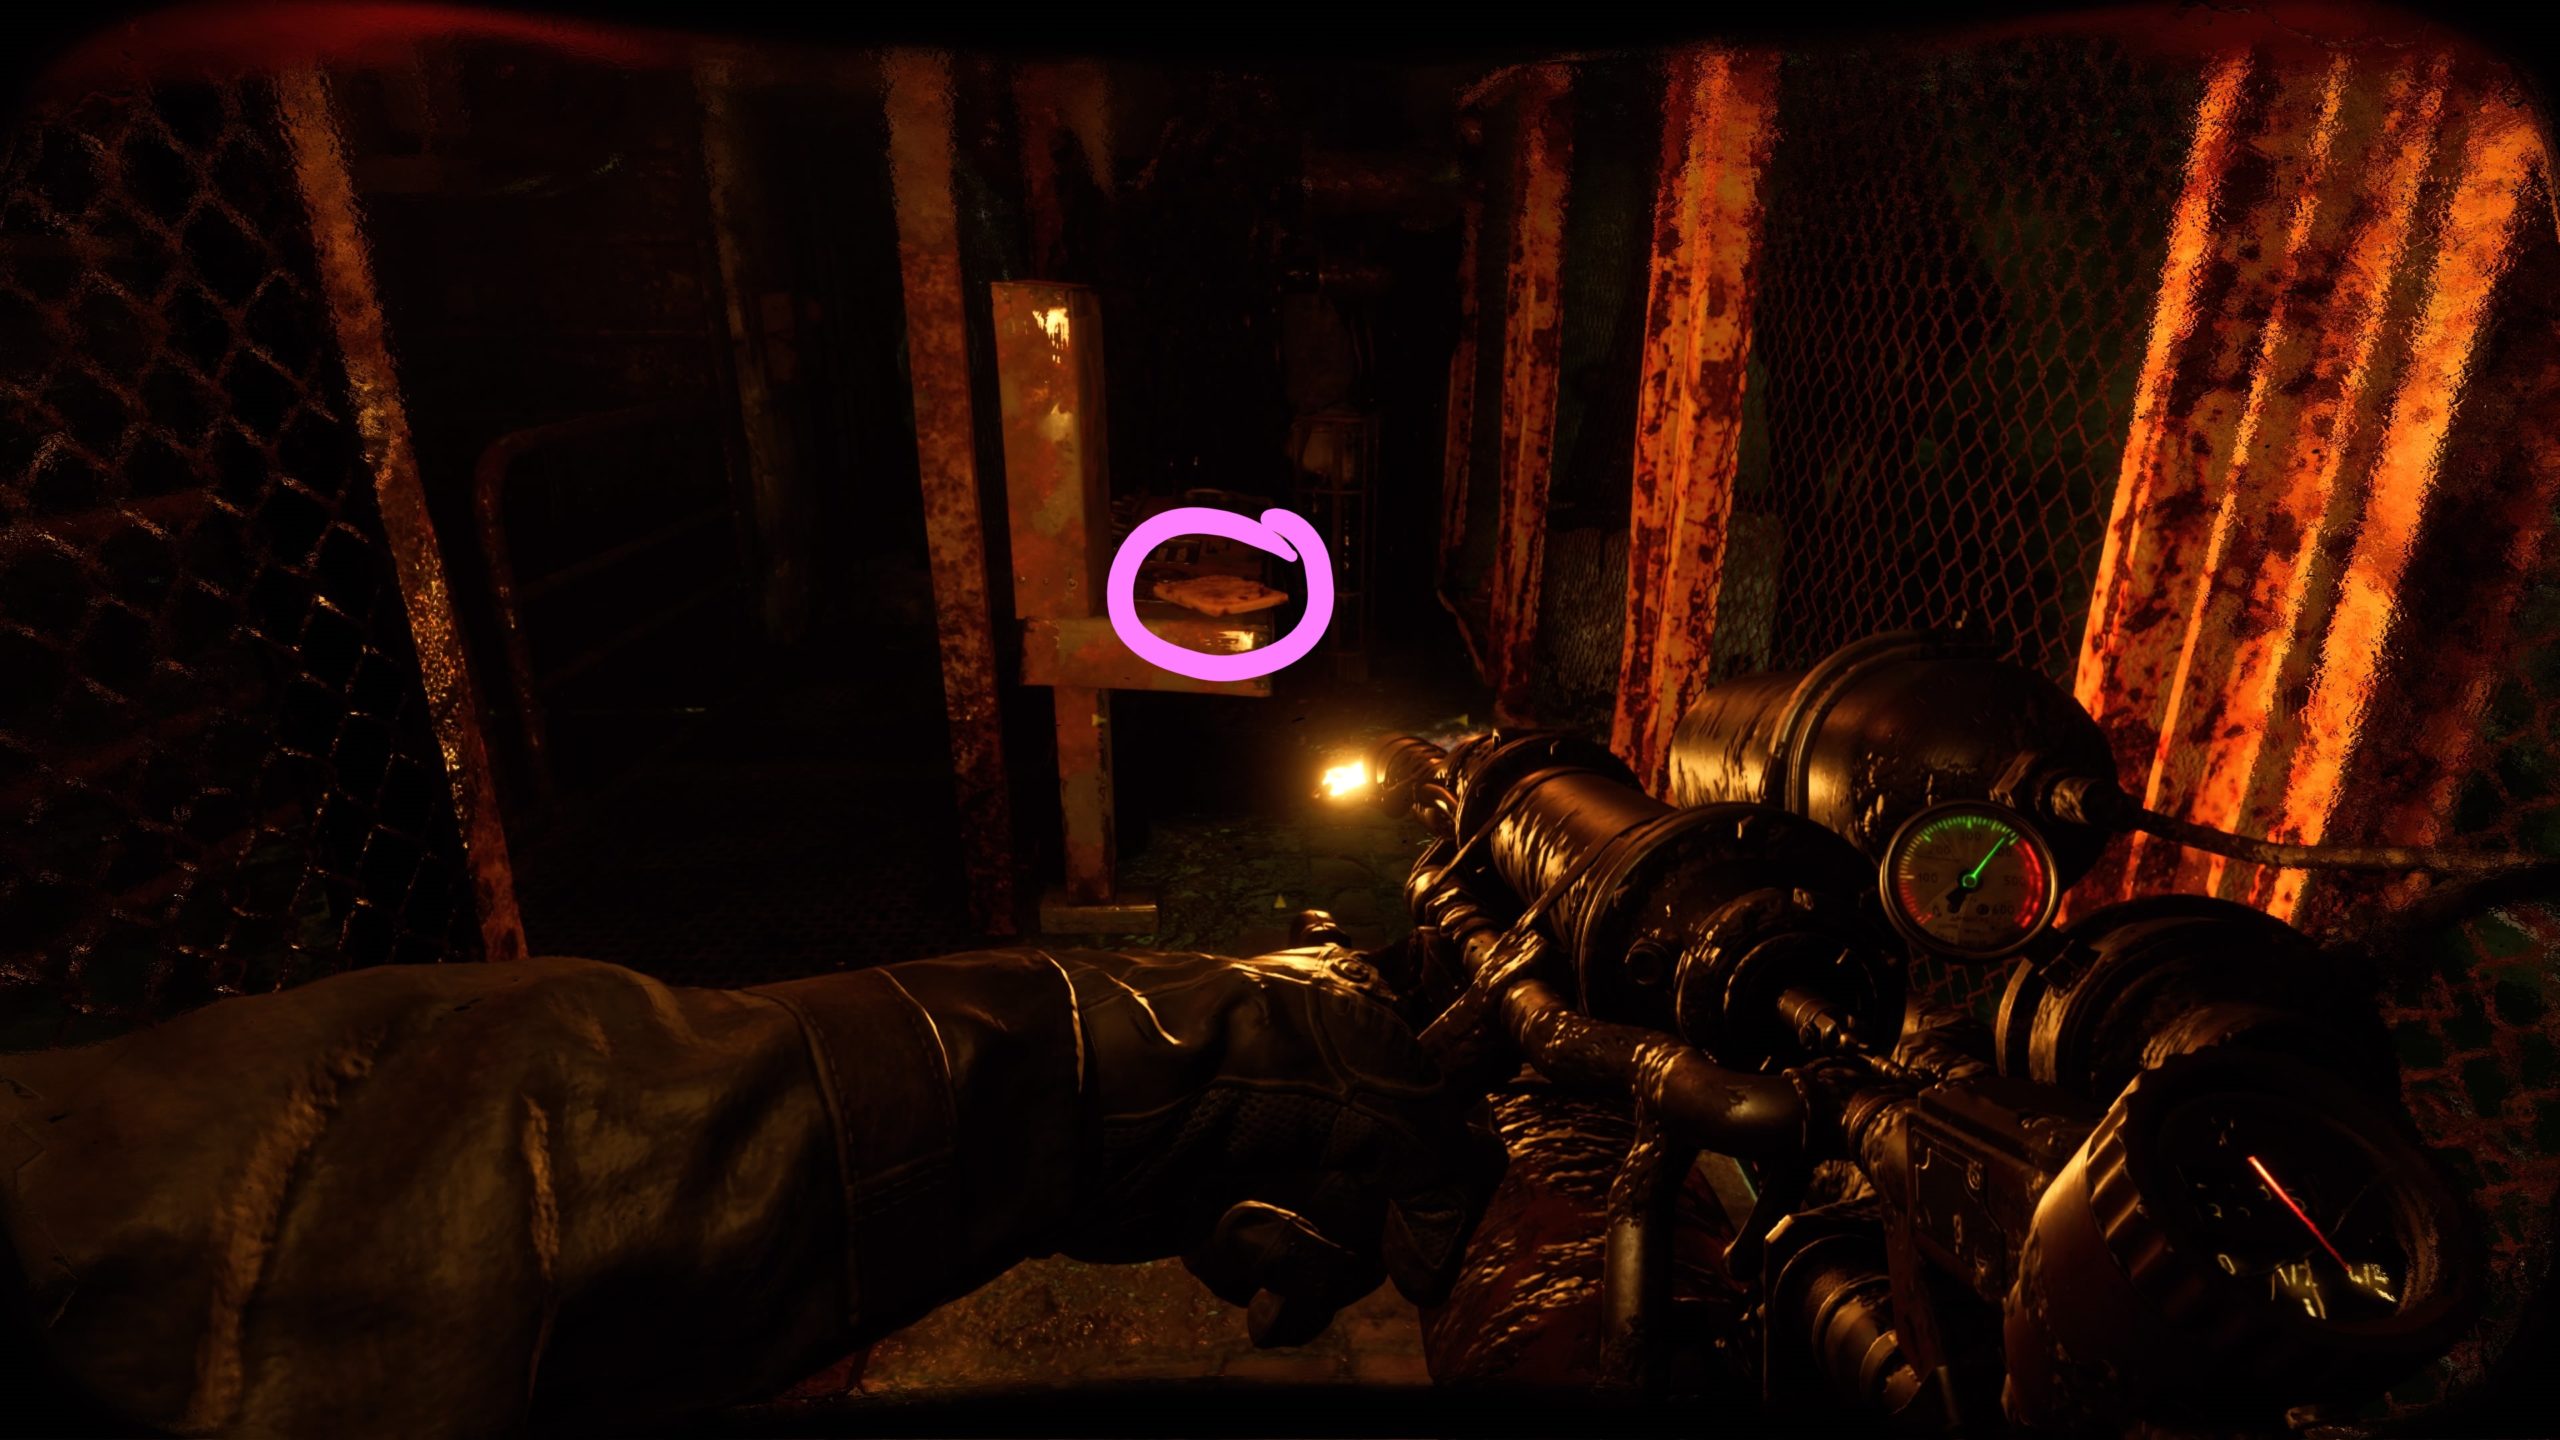
Worker’s Note
Starting at the second workbench (accessed by going through a hole in a bathroom wall), head through the door leading to a hallway and follow the hallway to the end. Once at the end of the hallway, kick open the door on the right side and head through it onto a metal walkway. Take the first left to find the diary sitting on a metal console.
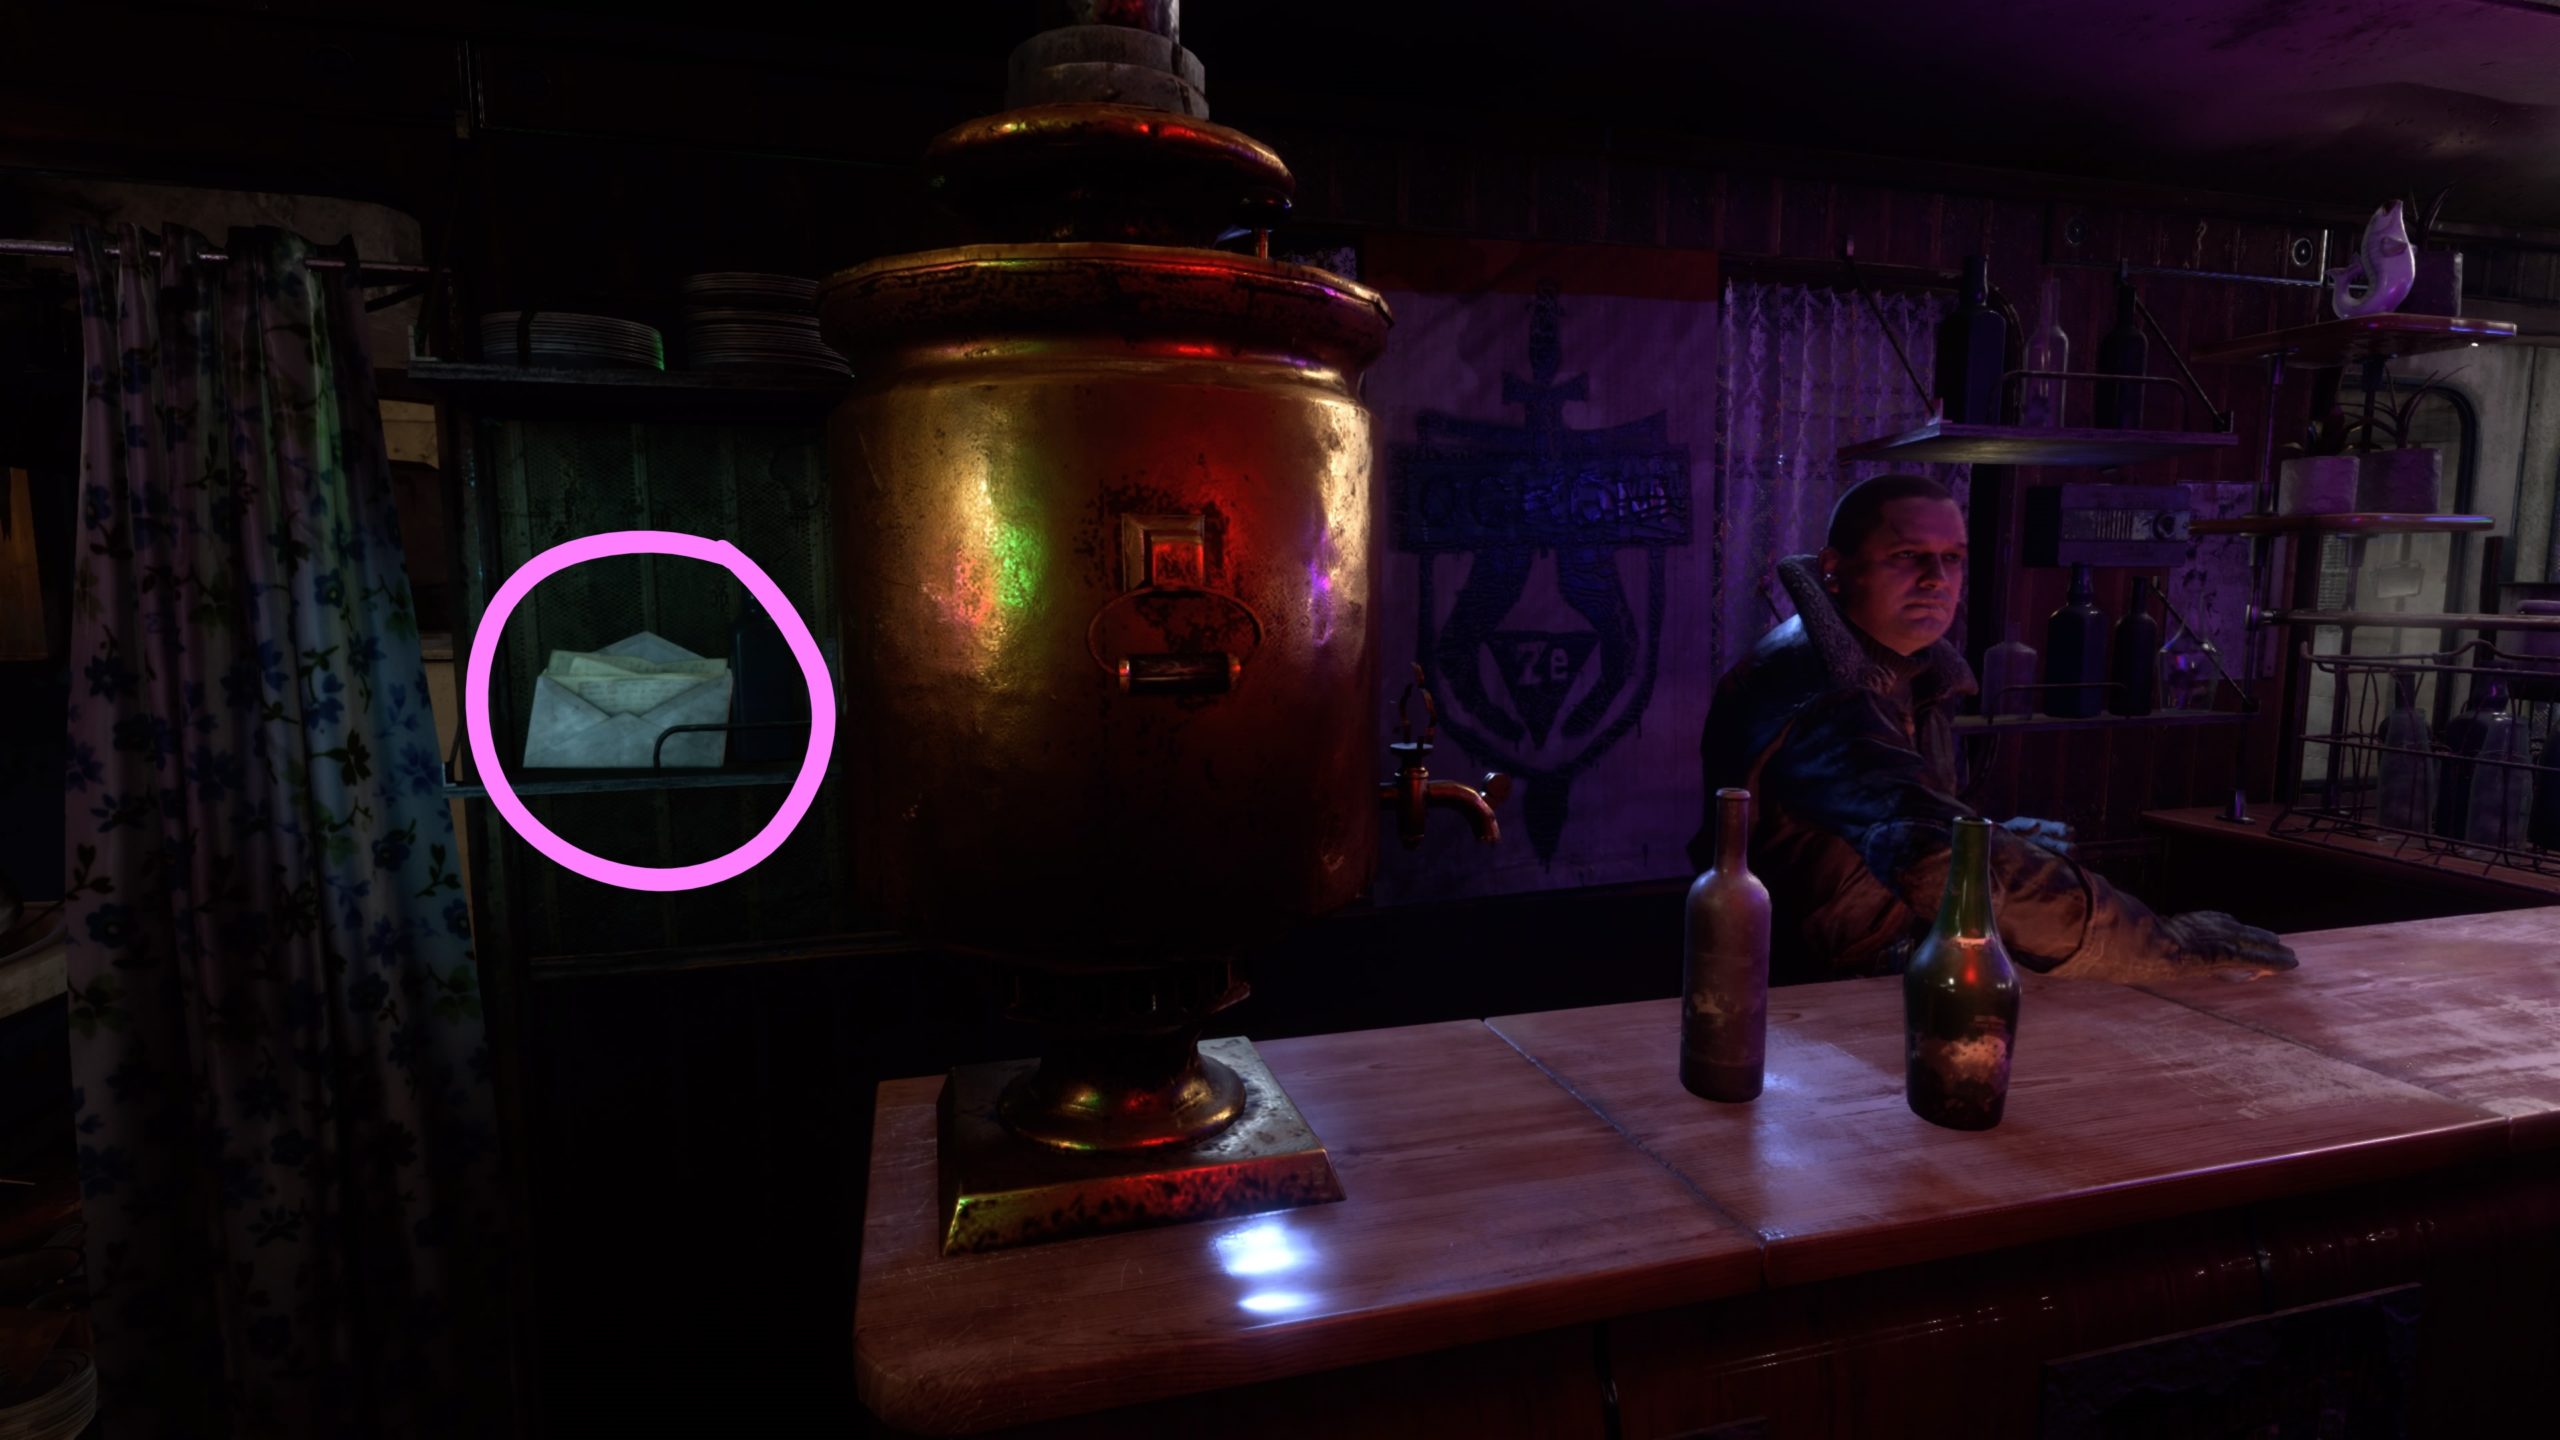
Trader’s Note
After you speak with the General, you’ll head home to your son. On the way, you’ll pass through a bar. The note is located to the left of the bar on a shelf.
Letter
After you leave Petrovich’s house, head to the table across the way on the other side of the railing. The diary will be located on this table next to a scale.
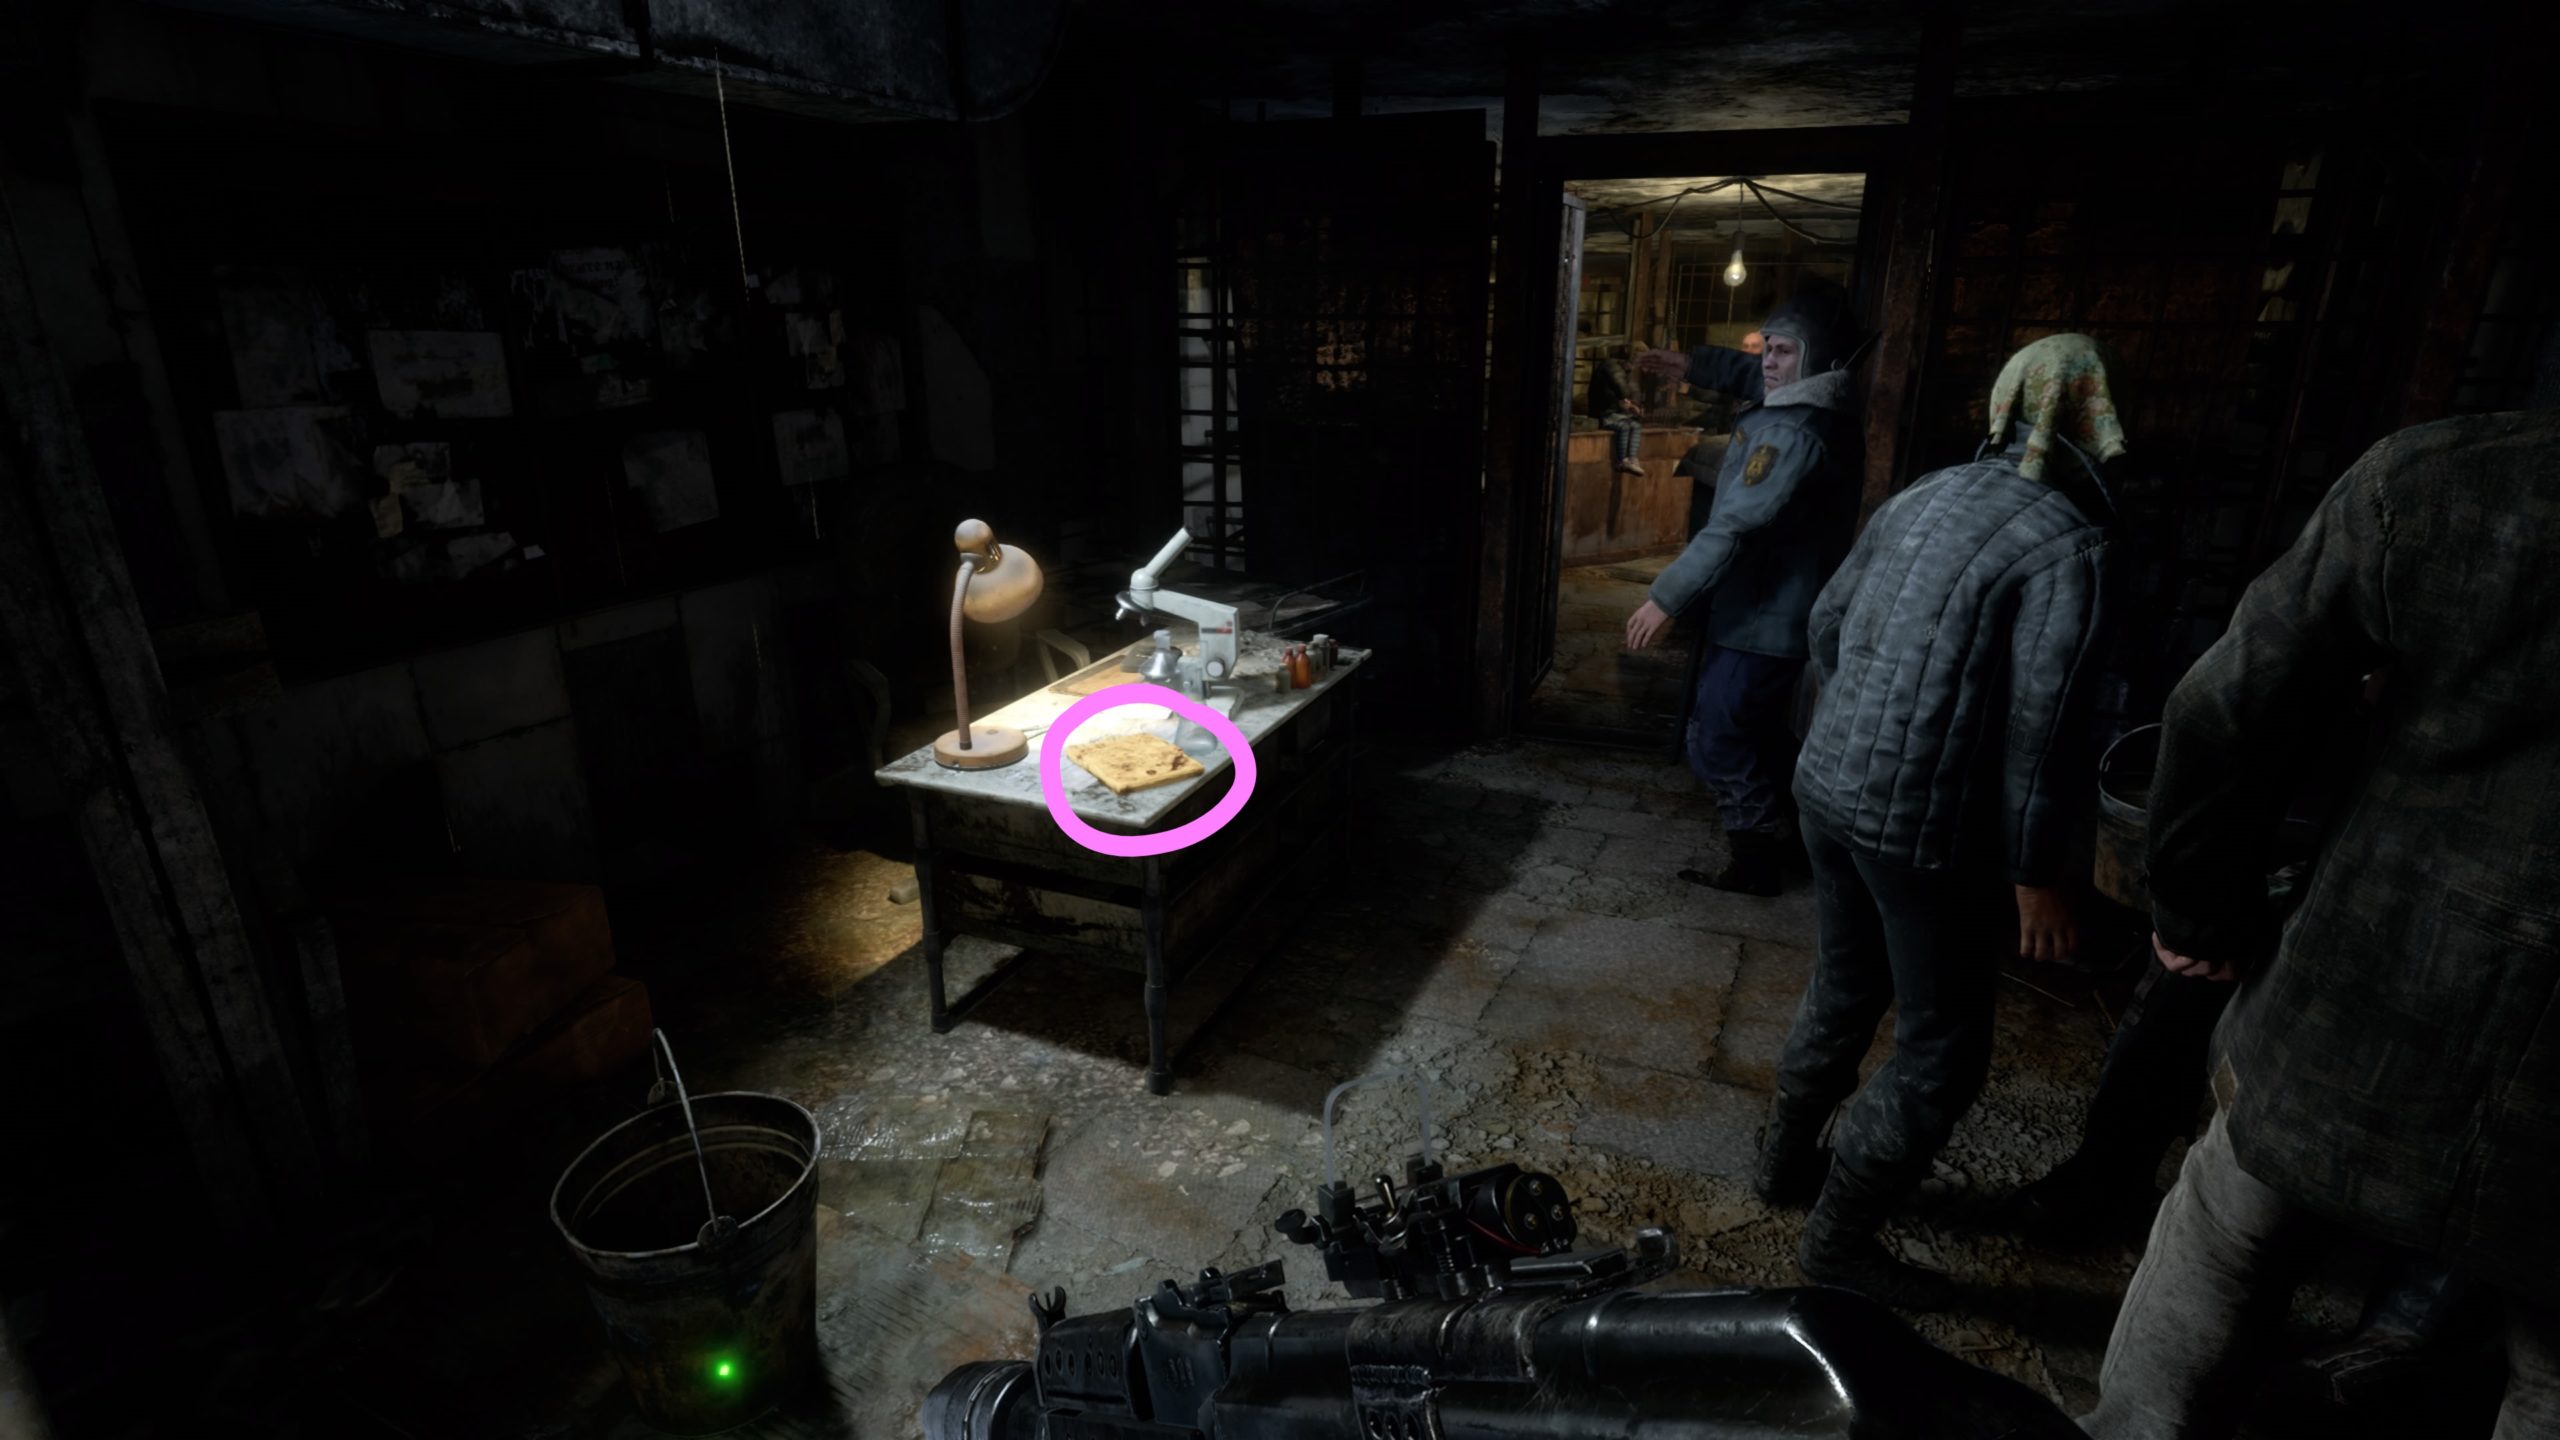
Investigation Report
When you take control of the Colonel during the rioting, exit the armory with the workbench and head right down the hallway to enter the med bay. The diary will be located on a table under a lit lamp just before the door the soldiers opened for you.
Stalker’s Diary 1
When you gain control of the Colonel after the cutscene where everyone was gassed, head down the concrete stairs to enter a shower room. The diary will be located on the ground.
Stalker’s Diary 2
After fending off the hordes of enemies in the big, open, garage-like room, head through the newly opened giant metal door. Take a right and head through a doorway to enter a stairwell. Descend down the stairs to reach a room with three sets of elevator doors (all marked with an “X”. Take a left, passing through a giant doorway, followed by a right through an open door. Head down the flight of stairs to arrive in a flooded room. Turn left and make your way through this room then head up the flight of stairs. Turn right to find the diary on a metal table.
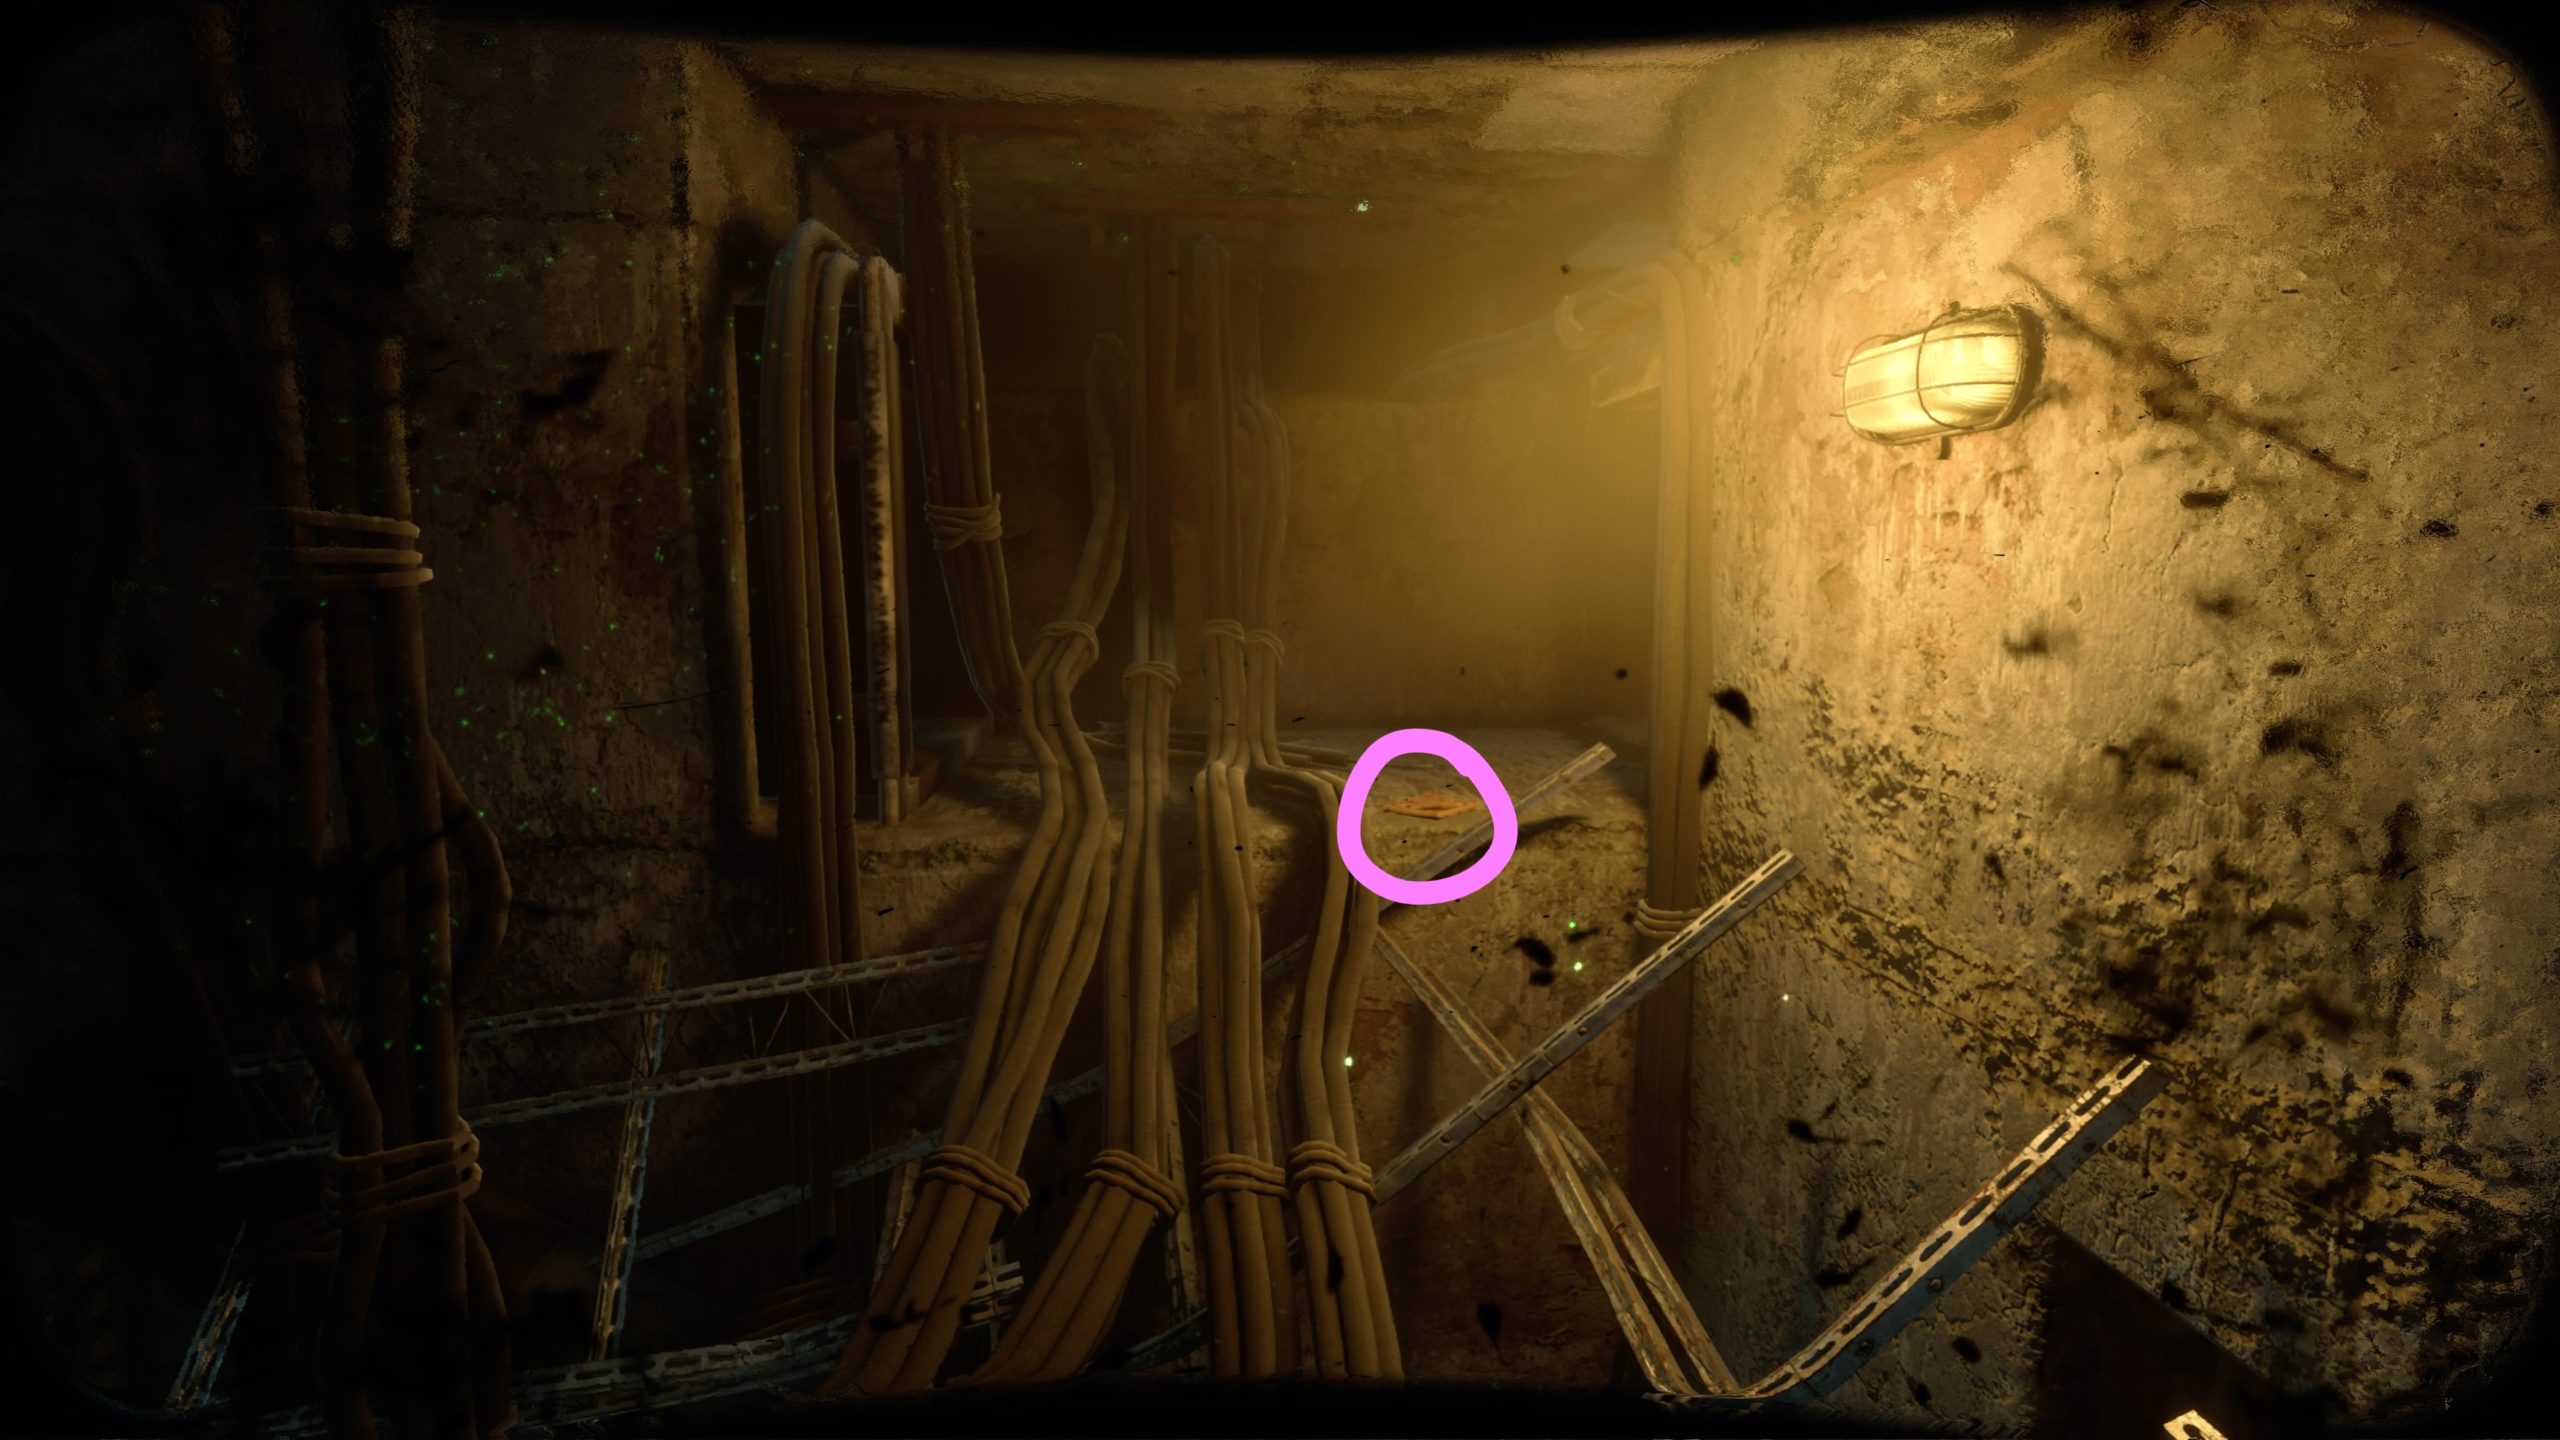
Stalker’s Diary 3
After fighting the Blind One and falling down the elevator shaft, you’ll find yourself in a dark room filled with metal scrap. Head up a metal frame of the drop ceiling towards the yellow light to find the diary on a concrete ledge next to some tubing.
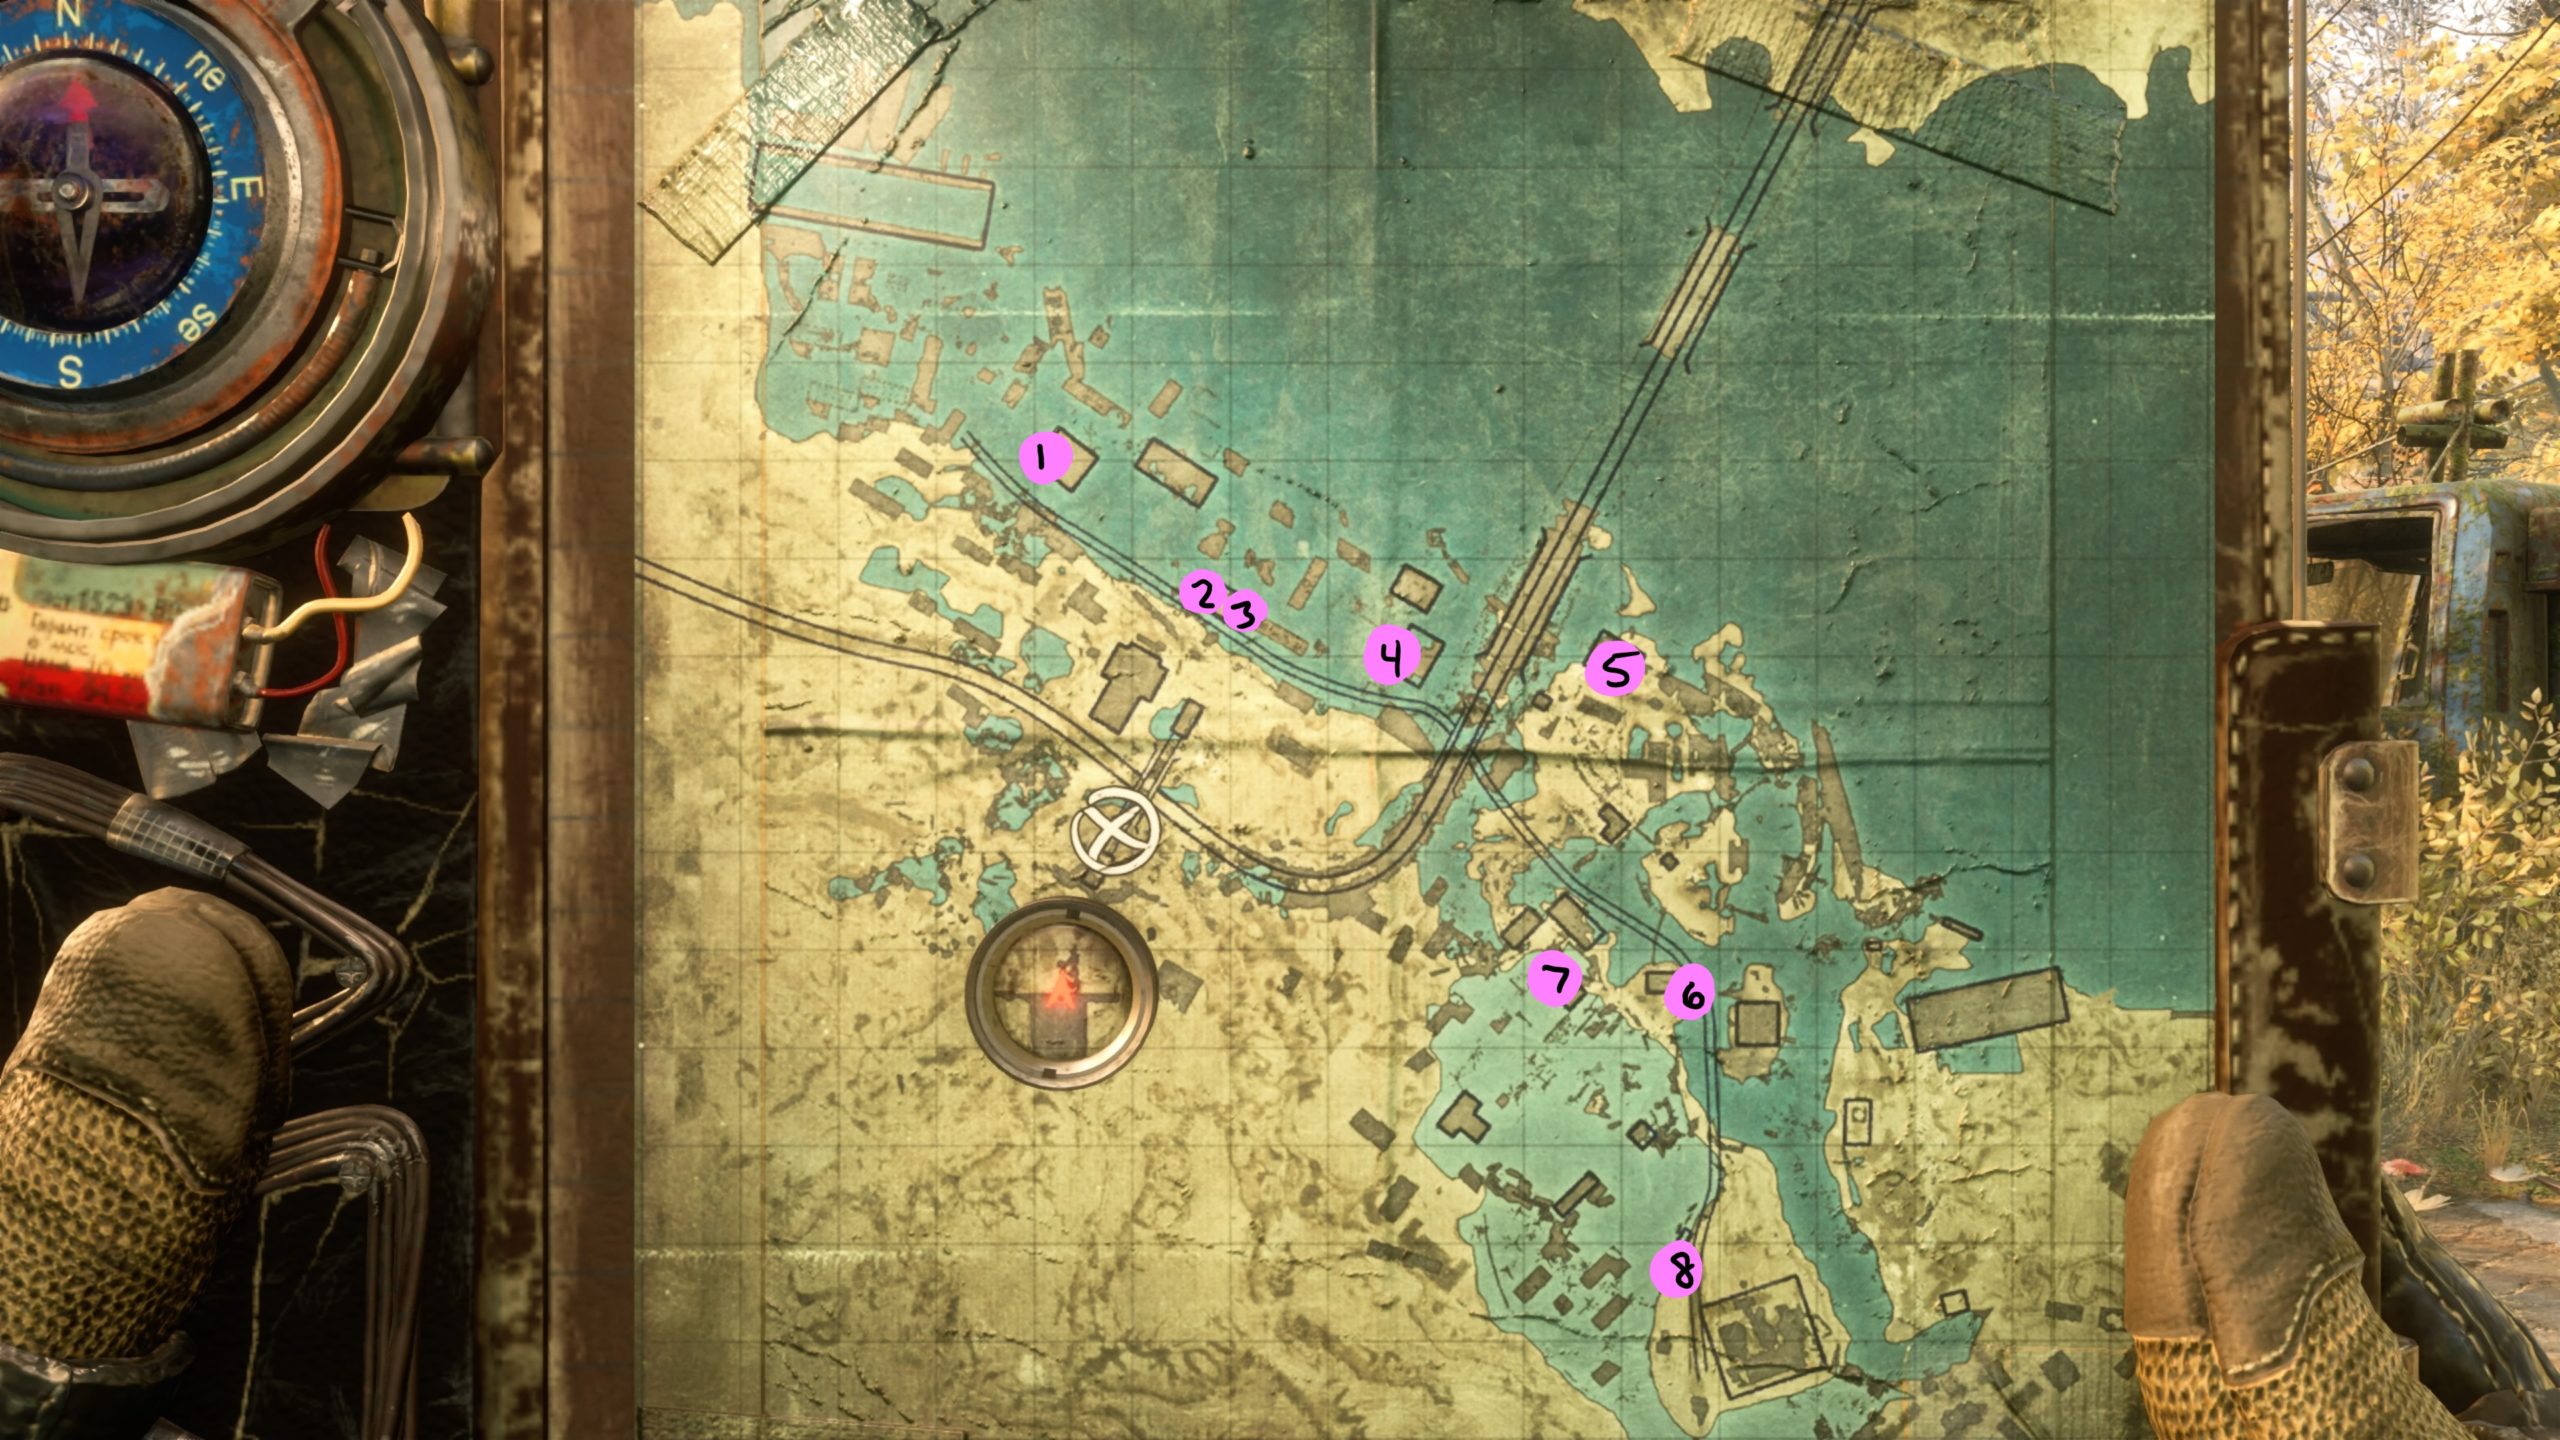
*NOTE: There are 8 Night Hunters’ secret stashes to collect in the Metro Exodus Sam’s Story DLC. The stashes are listed below in the order that they can be obtained during the main story. Please make sure to collect them as you go. If you progress too far in the story, you will be locked out of the locations that contain the stashes.
Secret Stash 1
As soon as you dock the boat, head up the stairs and take a left at the top. Follow the hallway to the end, passing through a doorway. Take a left through the doorway to reach an office-like room. Exit out the door on the other side of the room to come to a large open room filled with water. Head straight across the wooden plank to reach a stone platform (middle platform). On this platform, drop down to the wooden planks below and crouch through the small opening. Head across the flooded room then go up the stairway at the end to find the stash at the top of the stairs.
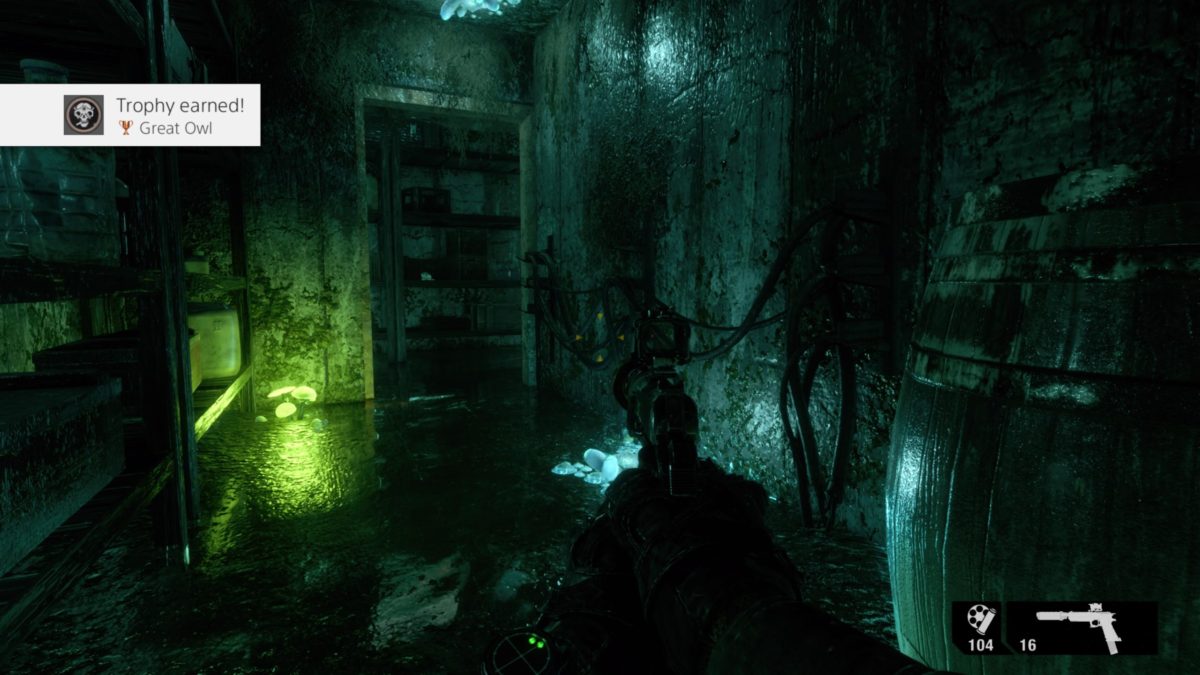
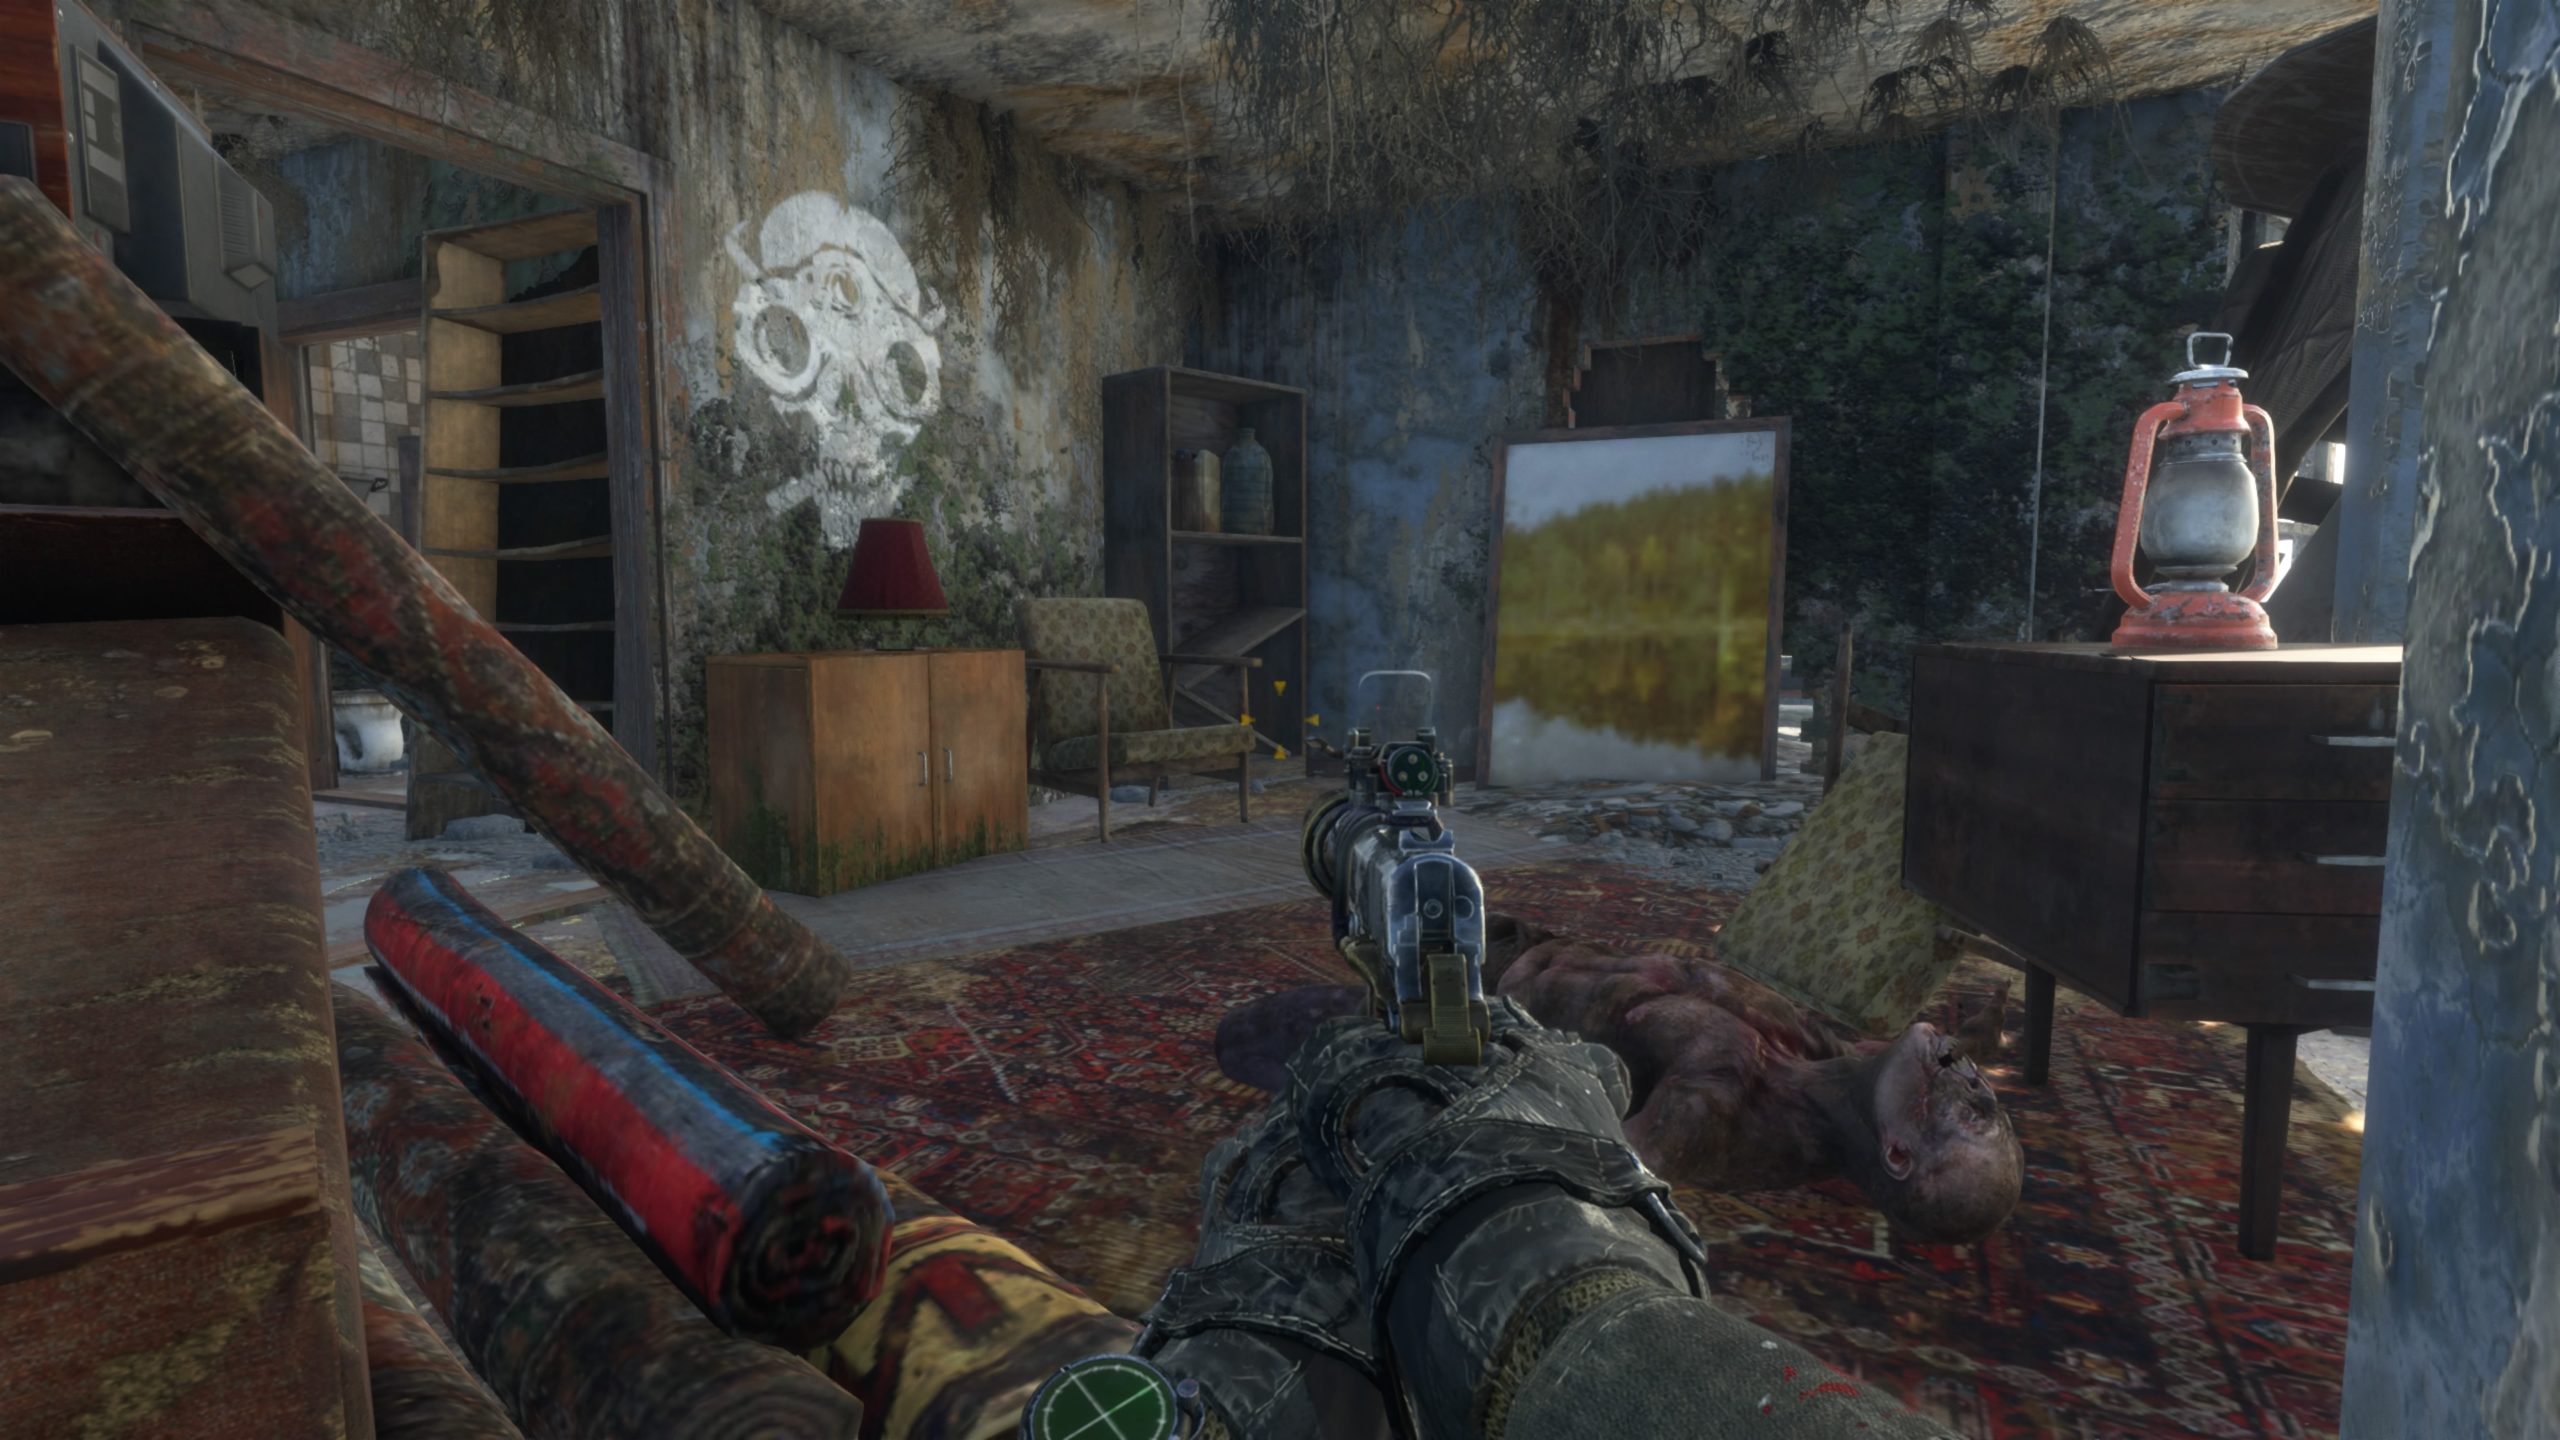
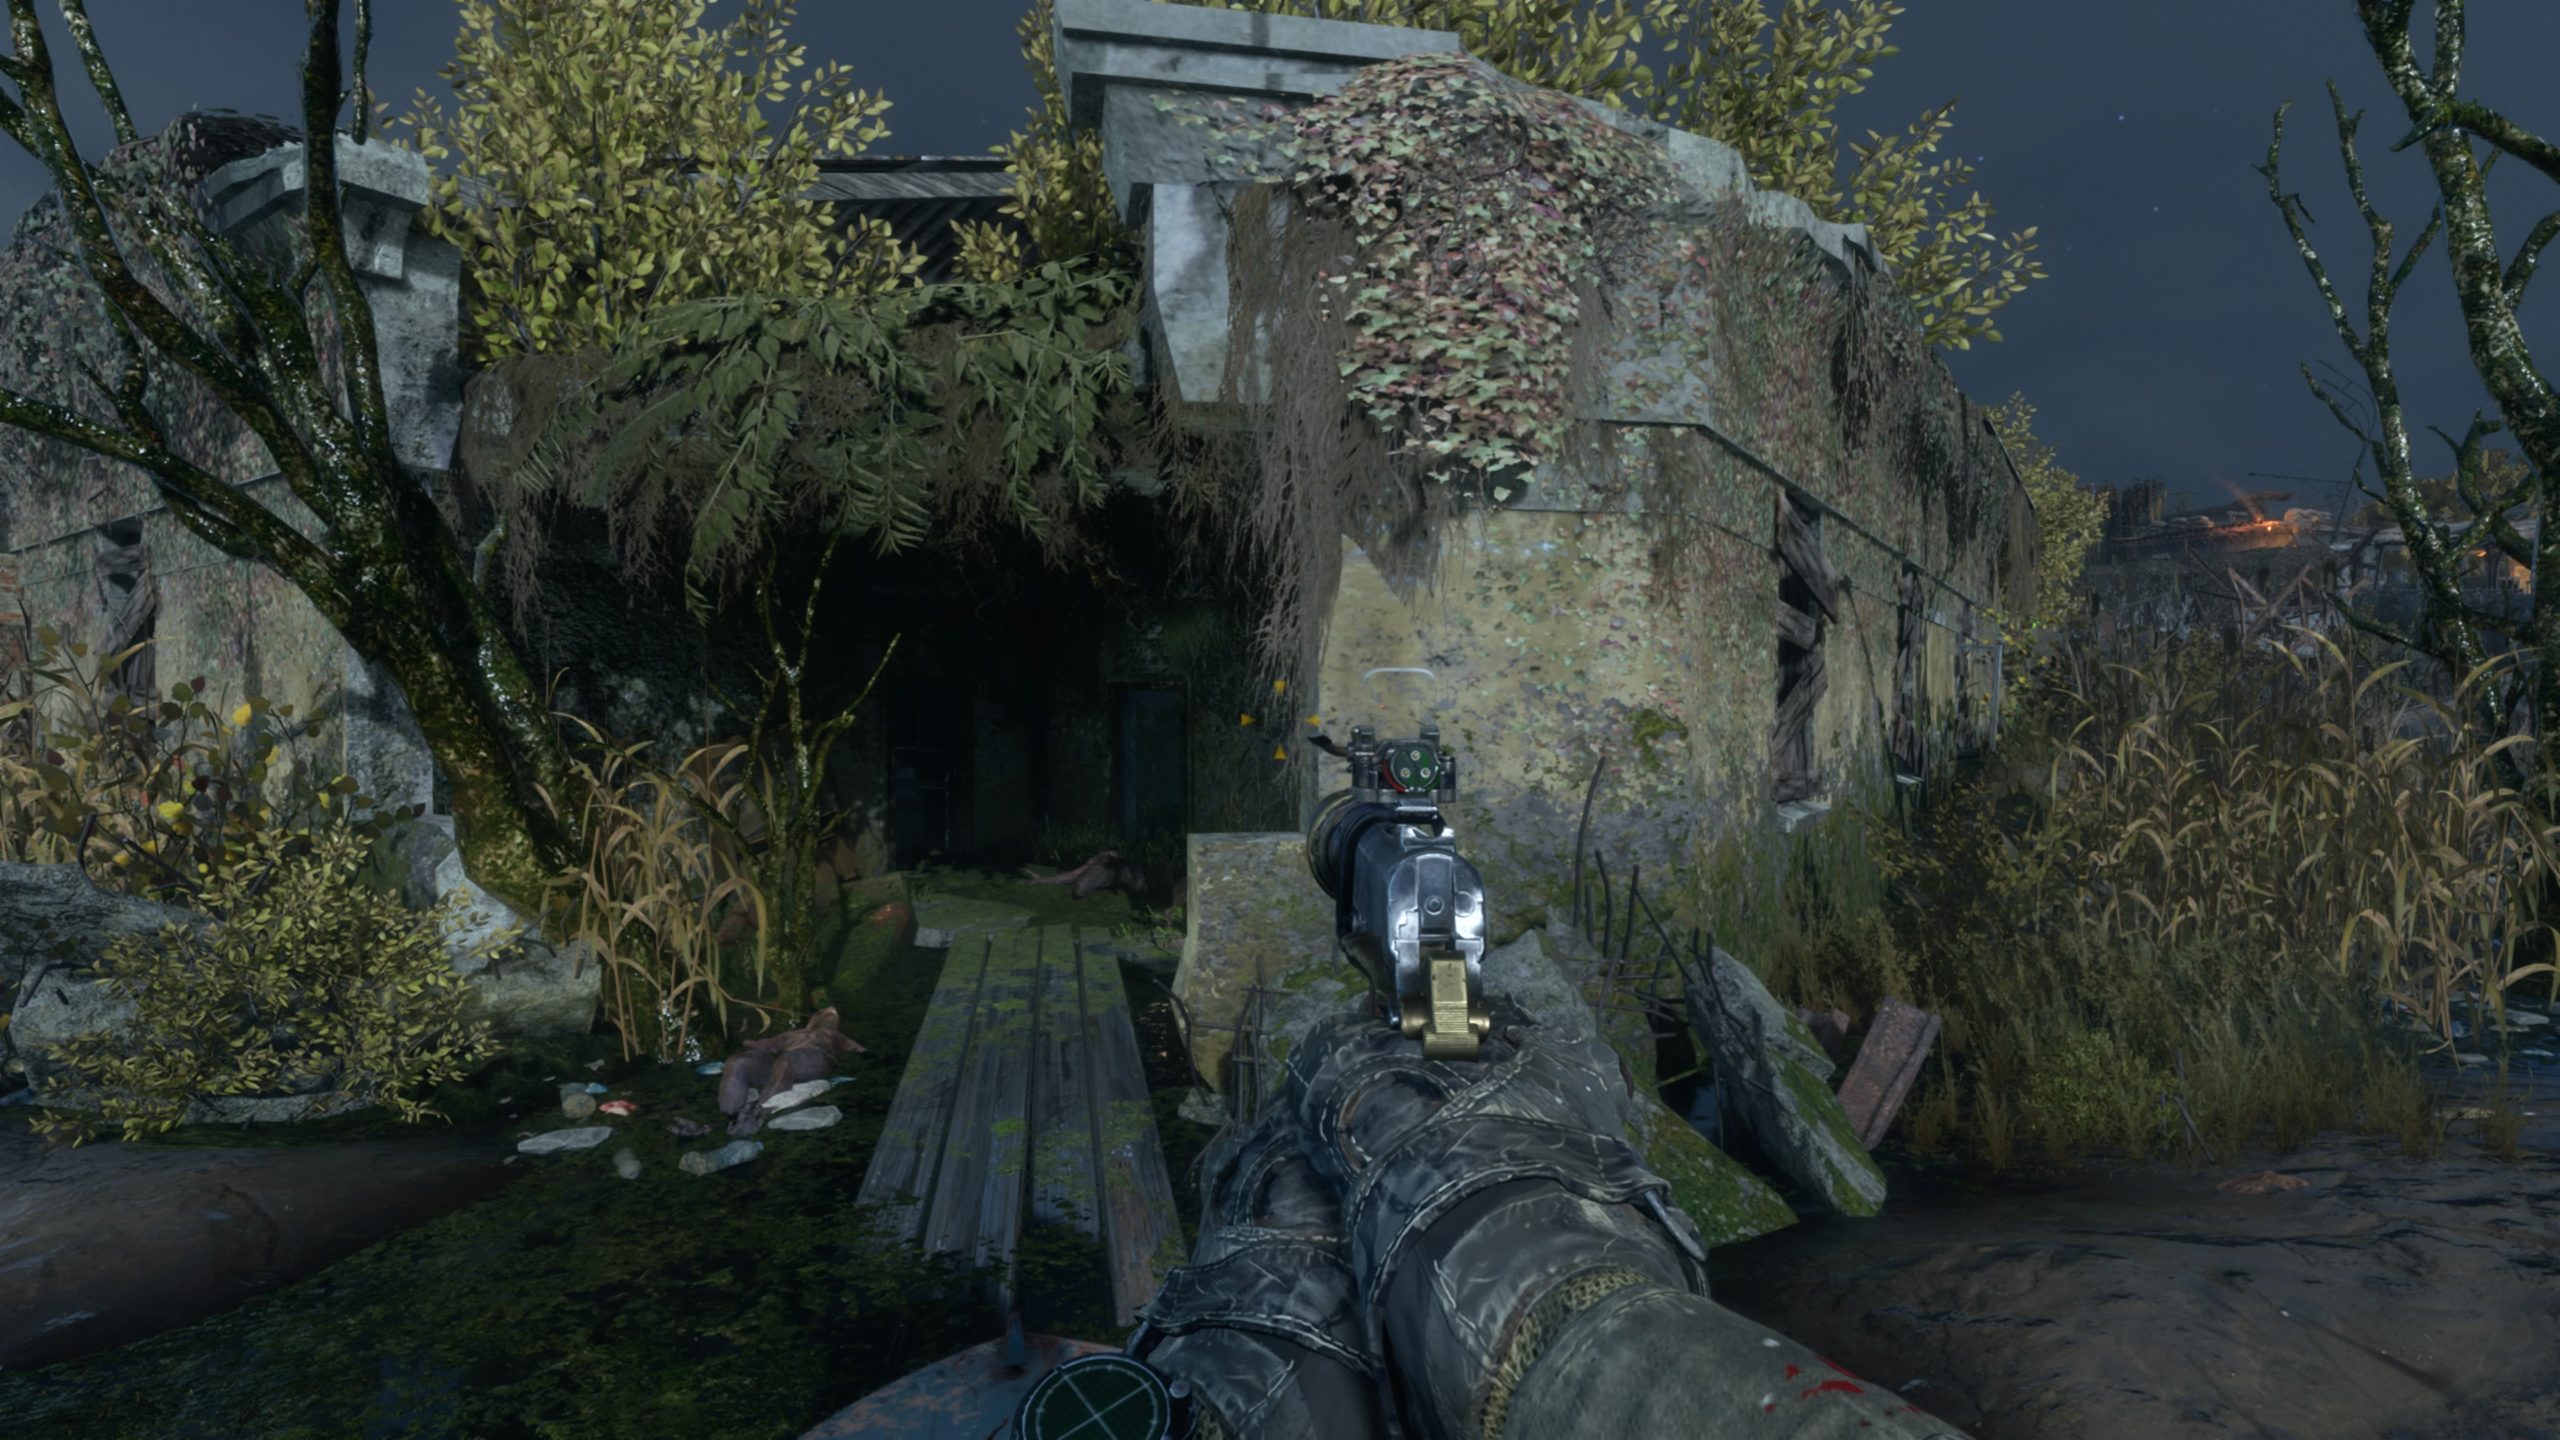
Secret Stash 2
After you dock the boat, head into the submerged building just past the red flag. Work your way through the partially submerged level until you reach a doorway with a white skull above the threshold. Enter through this doorway to find a red door on the left side of the room. To the left of the red door, look for the hole in the brick to find a rope. Cut the rope to gain access to the room behind the red door that contains the stash.
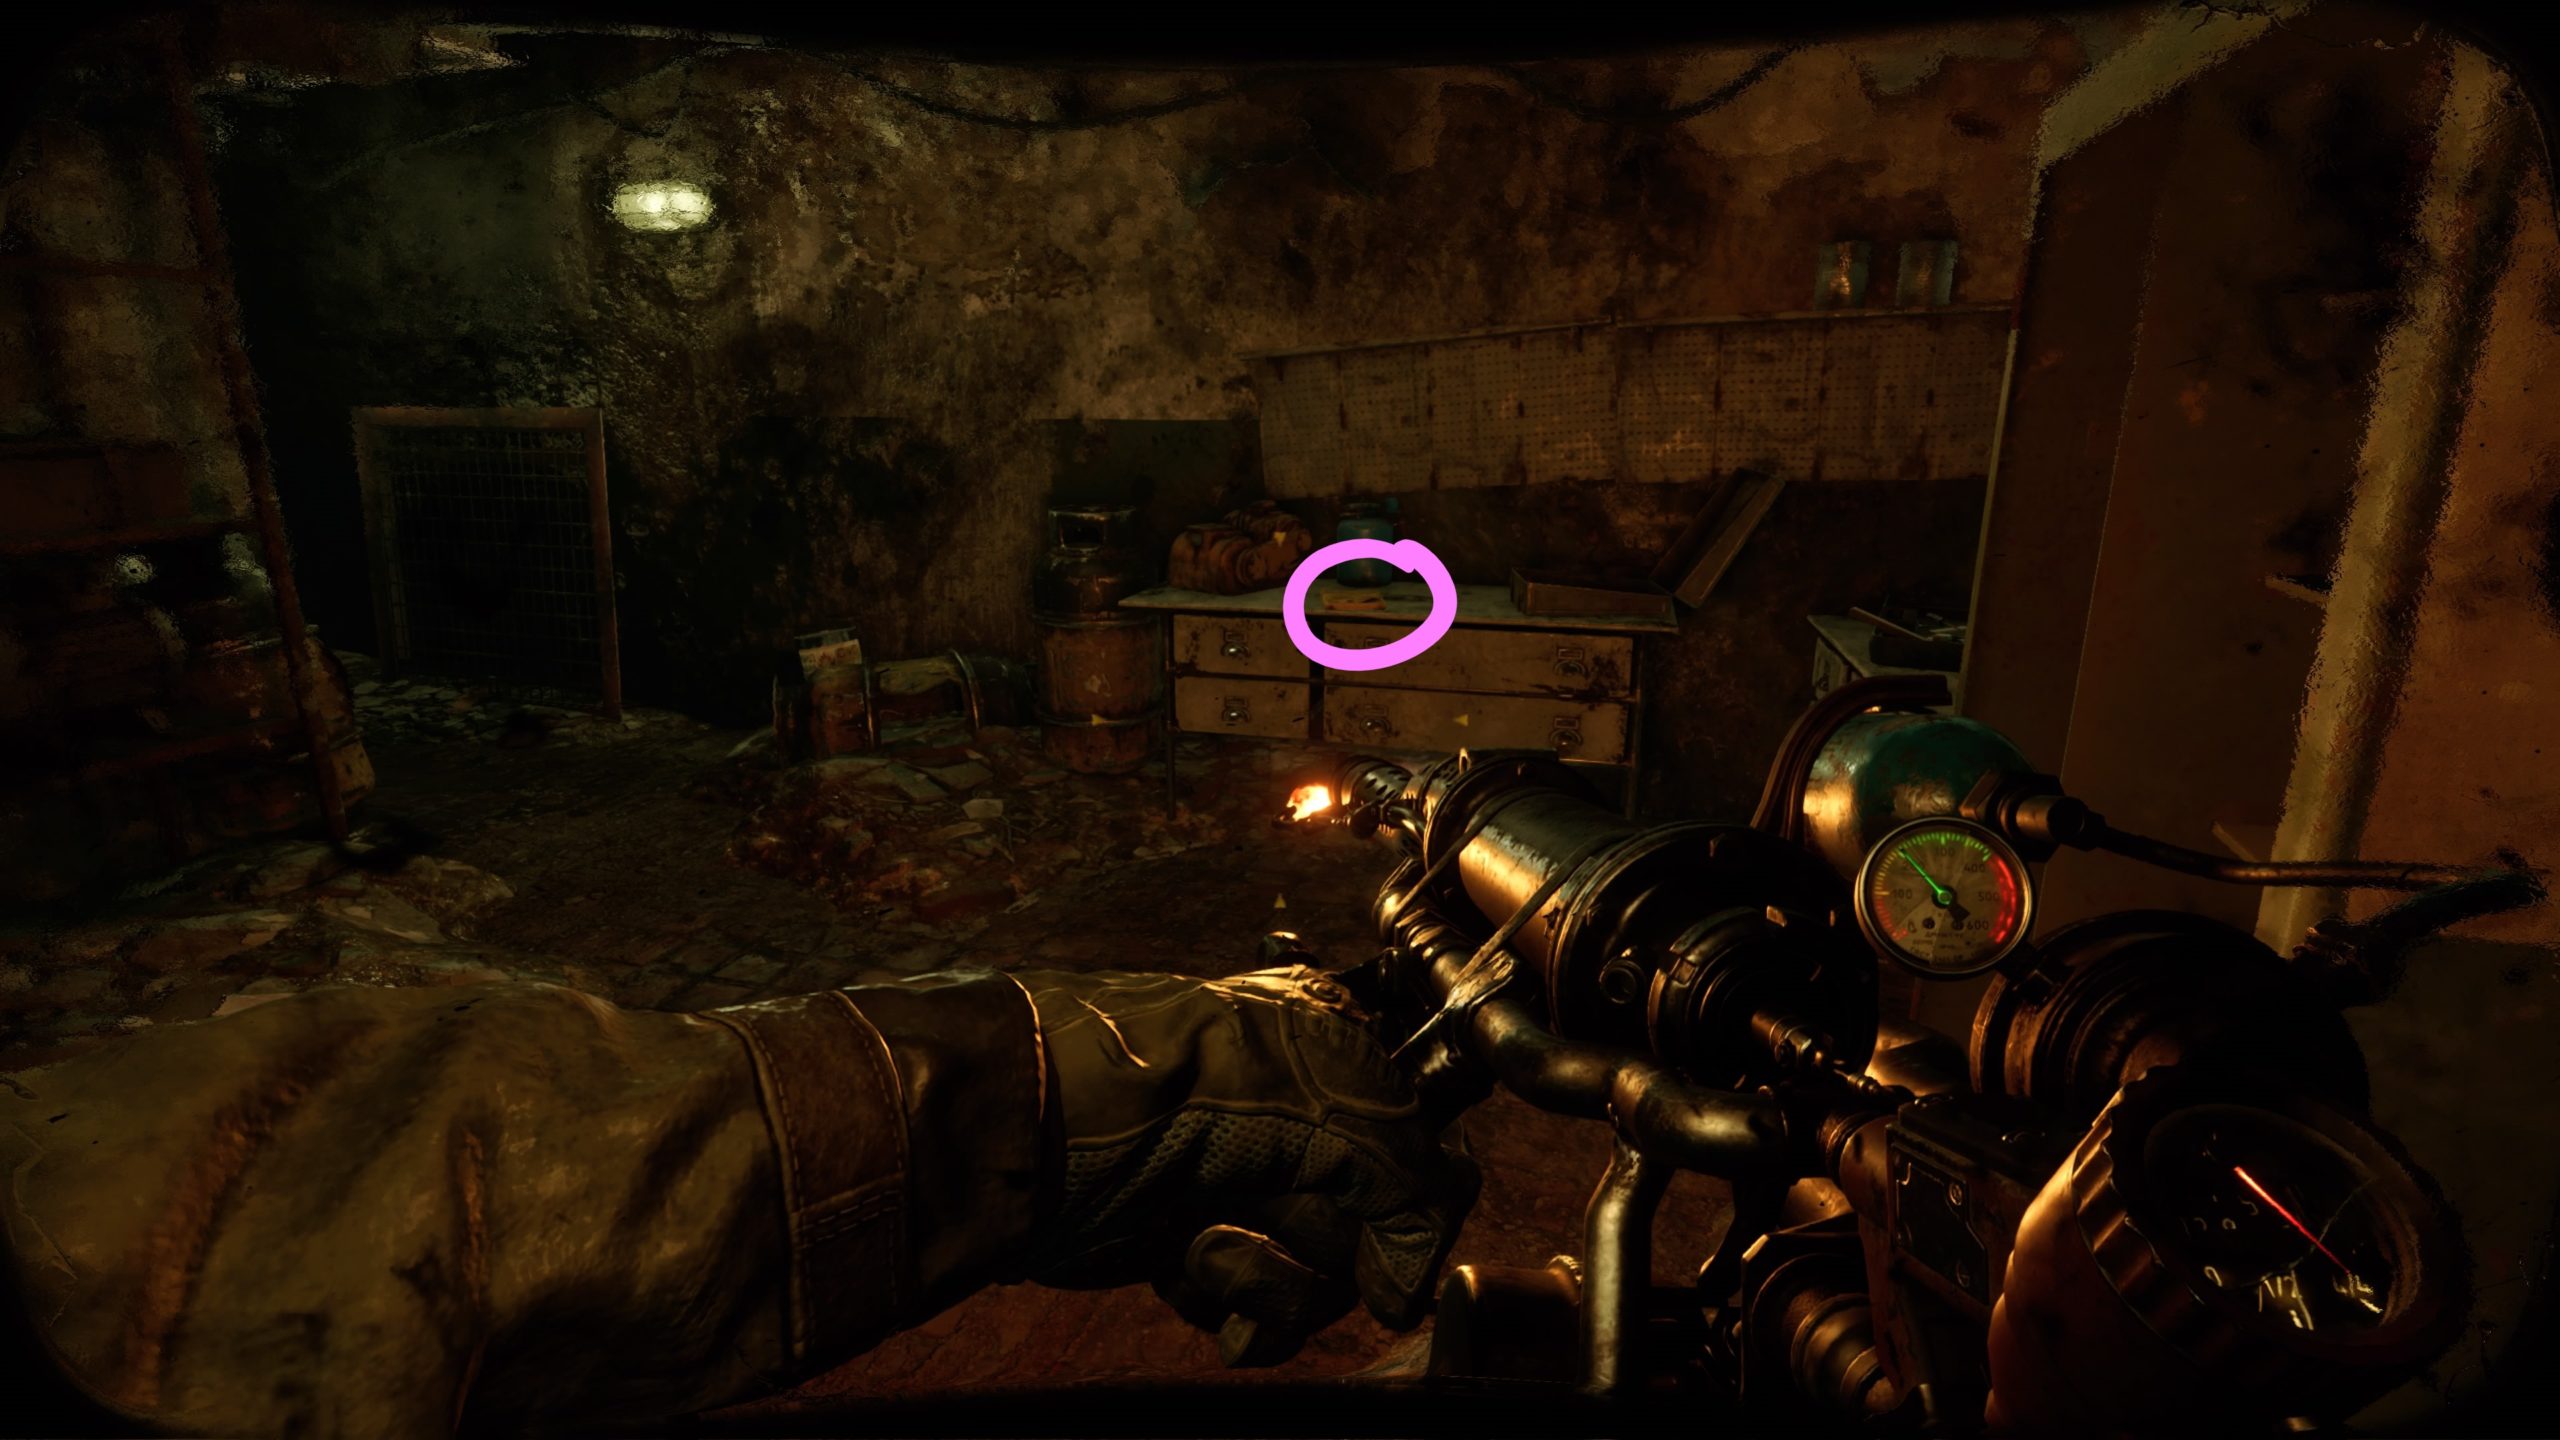
Secret Stash 3
From the previous stash, keep working your way through the partially submerged first level until you reach a ladder at the end. Take the ladder up to reach the second level of the building. Head through the doorway and take a right to find a set of stairs near a bookshelf. Take the stairs up to reach the third level. Enter the open doorway in the corner of the room near some yellow paint smudged on the wall. Head through the blue door straight ahead to enter a room with a workbench in the corner. Exit out of the right side of the room through a hole in the wall onto a balcony. Head past the first doorway to find a second doorway with a white skull painted on the right of it. Kick down the cabinet to enter this room. Shoot the middle jar on the bottom shelf to reveal the stash.
Secret Stash 4
After exiting the Captain’s boat, jump down into the half submerged bedroom and exit out of the doorway on the far right side of the room. Head down the hallway and take a left at the end to enter a big open room with stairs on the right side. Head up the stairs to come to a wall with a white skull on it. Take a right and pass through the cloth hanging from the ceiling to find a hidden ledge to climb up on. Enter this small room with some beat up furniture and a mattress. Crawl under the table to reach the room containing the stash.
Secret Stash 5
After your drunken adventures with the Captain, you will be tasked with setting up traps in his base. After you find the location for Trap 3, head down the hallway to reach wooden scaffolding. Pass over the scaffolding to enter another room on the same level. Head forward through a couple of rooms to reach a larger room at the end with a painting leaning against the wall. Kick the painting to find a secret room that contains the stash.
Secret Stash 6
Dock on the western tip of the building near a good section of the wall that is missing. There will be a wooden plank to walk up. Walk across the plank and take the first door on the right, passing through the next room, to arrive in a hallway. Take the first right then head behind a bookshelf to find a small opening underneath a table. Climb under there to reach a secret room containing the stash.
Secret Stash 7
During the main story, you’ll have to sneak through a bandit camp to reach the Fire Depot. You’ll enter the bandit camp by traveling along a makeshift wooden bridge that connects to a hole in the side of a building. Once in the building, head through a doorway to enter a hallway filled with can traps hanging from the ceiling. Head down the hallway disabling the traps as you go. When you reach the end, head through the doorway and take a right up a pair of stairs to get to the second floor. At the top of the stairs, swing right heading through two doorways and bringing you to a room with two open windows. Head through the window on the right to locate a building with a white skull across from it. Enter the doorway to the left of the white skull then take a right to head into a storage area that contains three switches on the wall. Turn on the switches in the following order: right, left then middle. This will unlock the metal door behind you, allowing you to gain access to the stash.
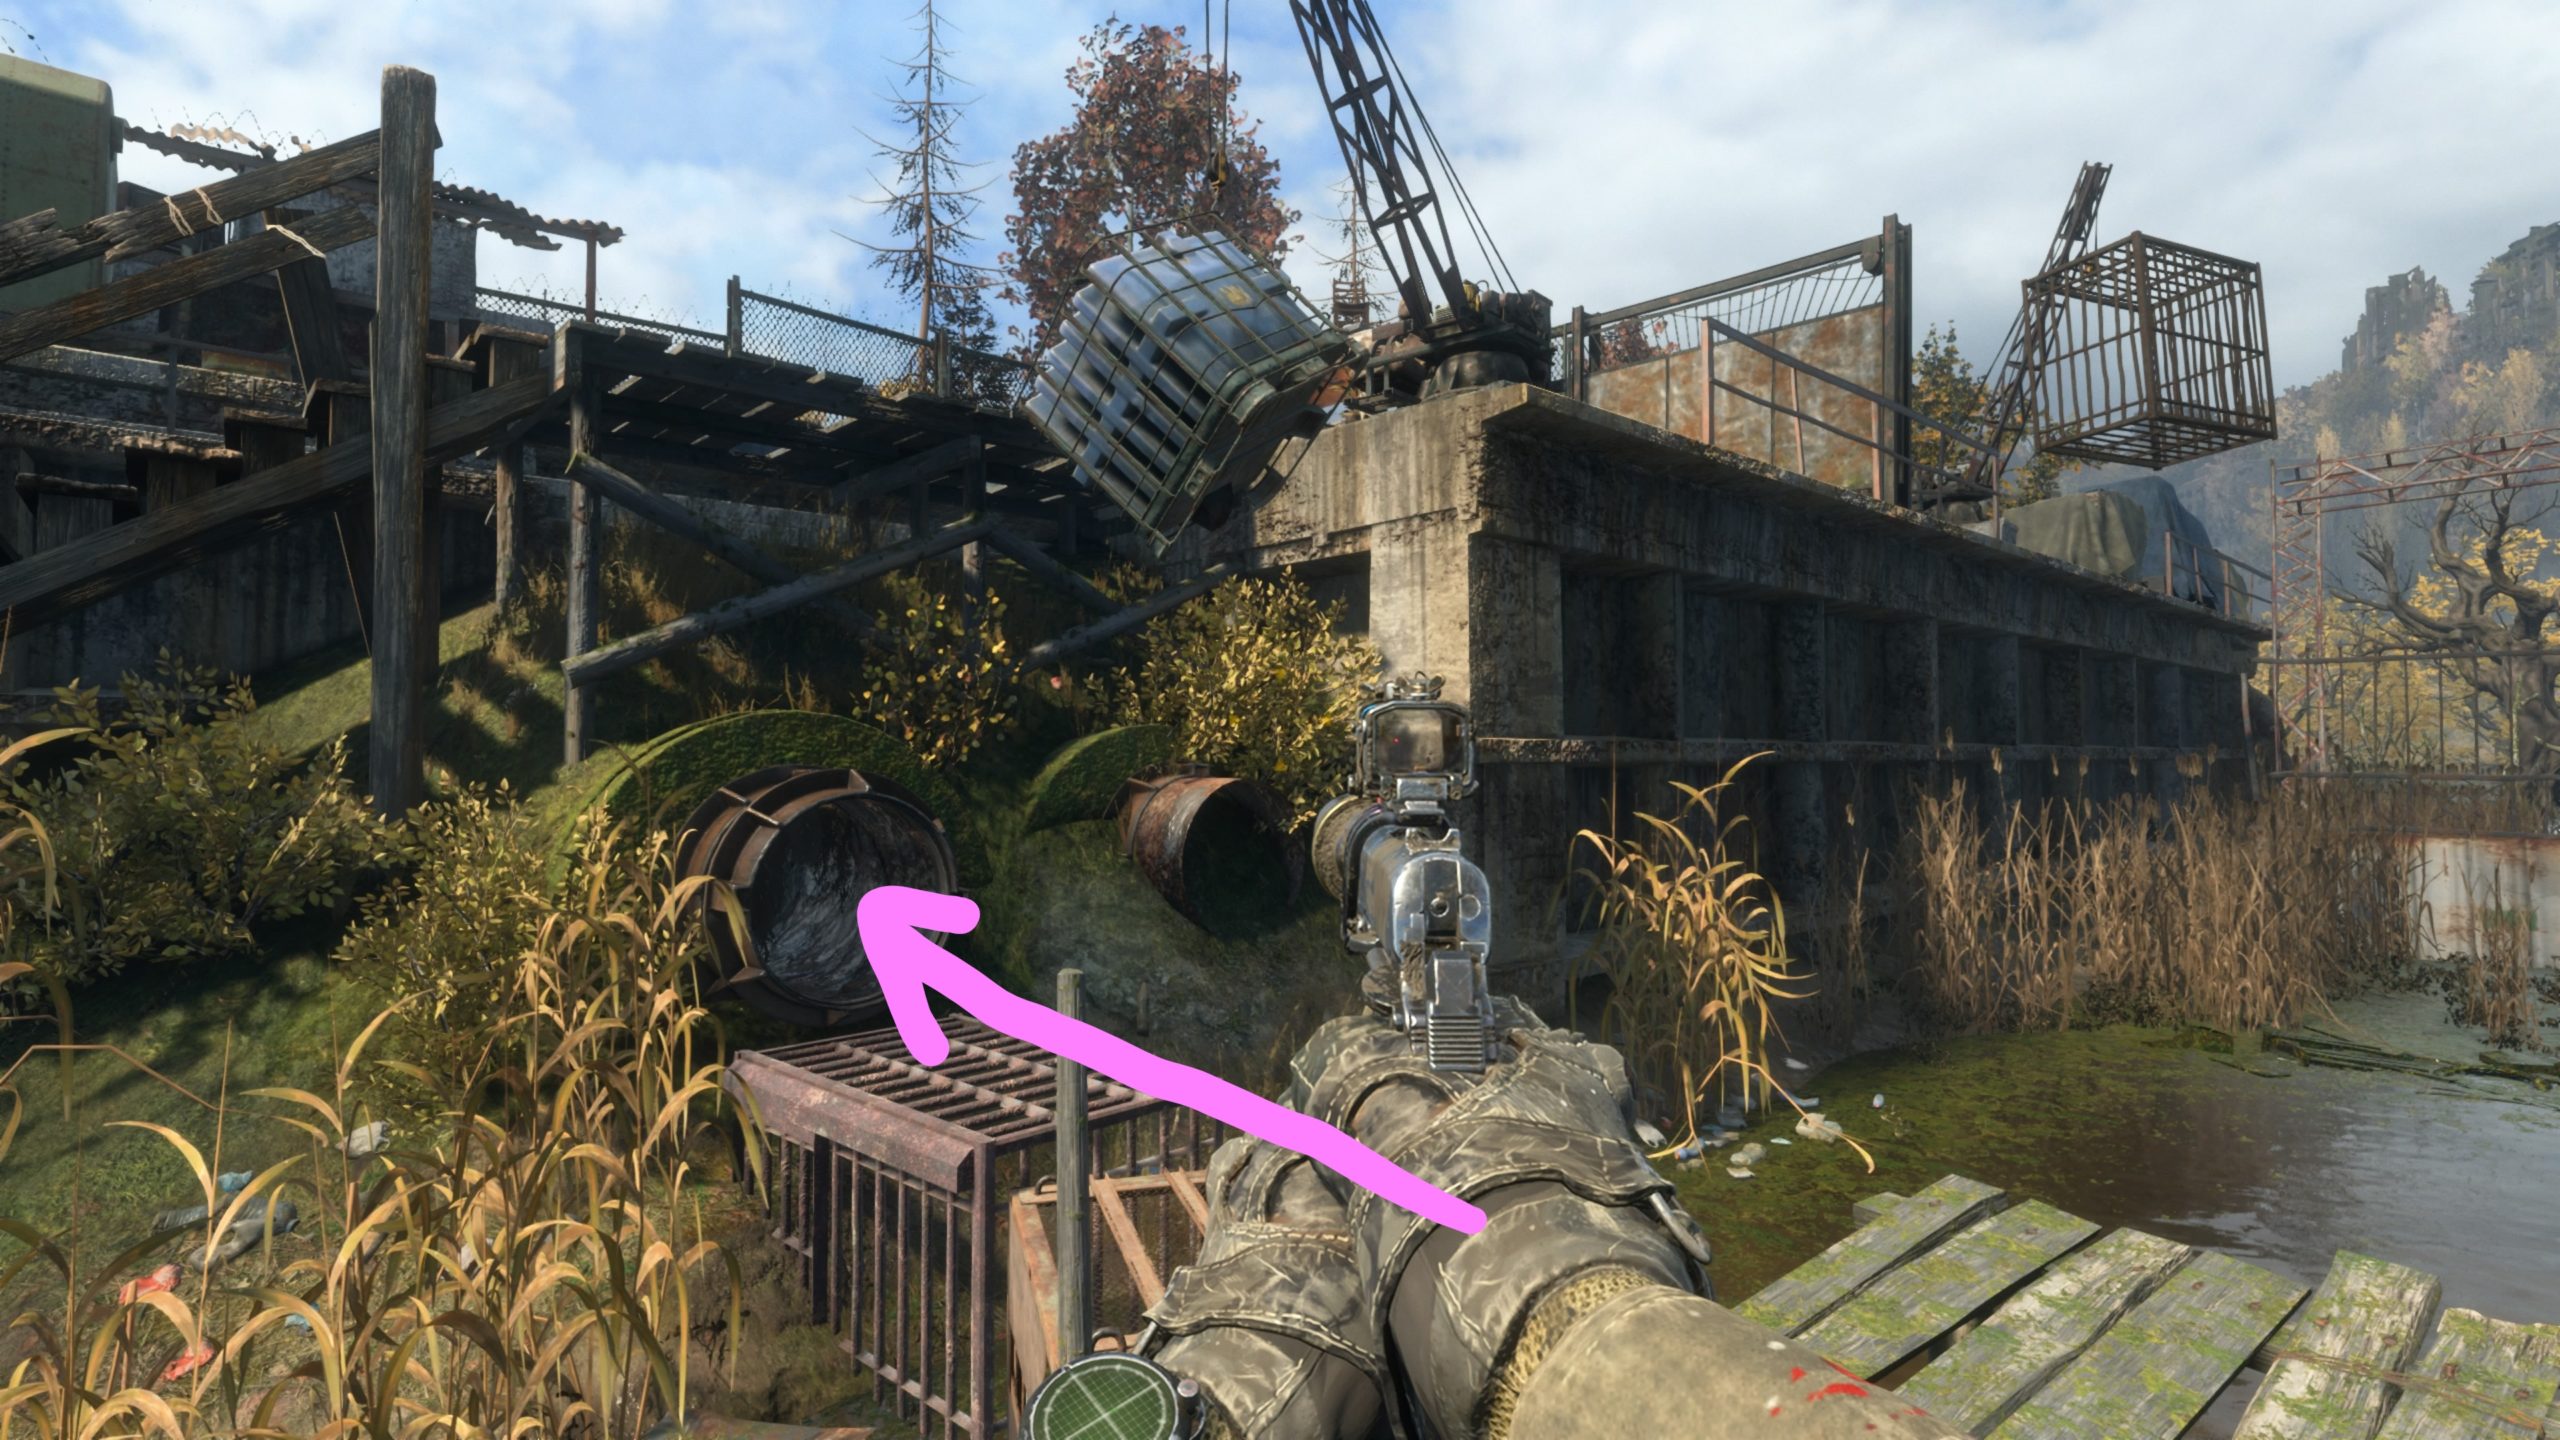
Secret Stash 8
After you dock the boat, head up the stairs and take a left to find a gas can near a couch. Use the gas can to fuel the generator in front of the bus. Head back down the stairs towards where your boat is docked and head towards the blue container hanging from the crane to locate a pipe. Approach the pipe for a prompt to climb through it. The pipe will lead you to a secret room containing the stash.
*NOTE: There are 9 harmonic melodies (sheet music) to collect in the Metro Exodus Sam’s Story DLC. The melodies are listed below in the order that they can be obtained during the main story. Please make sure to collect them as you go. If you progress too far in the story, you will be locked out of the locations that contain the melodies.
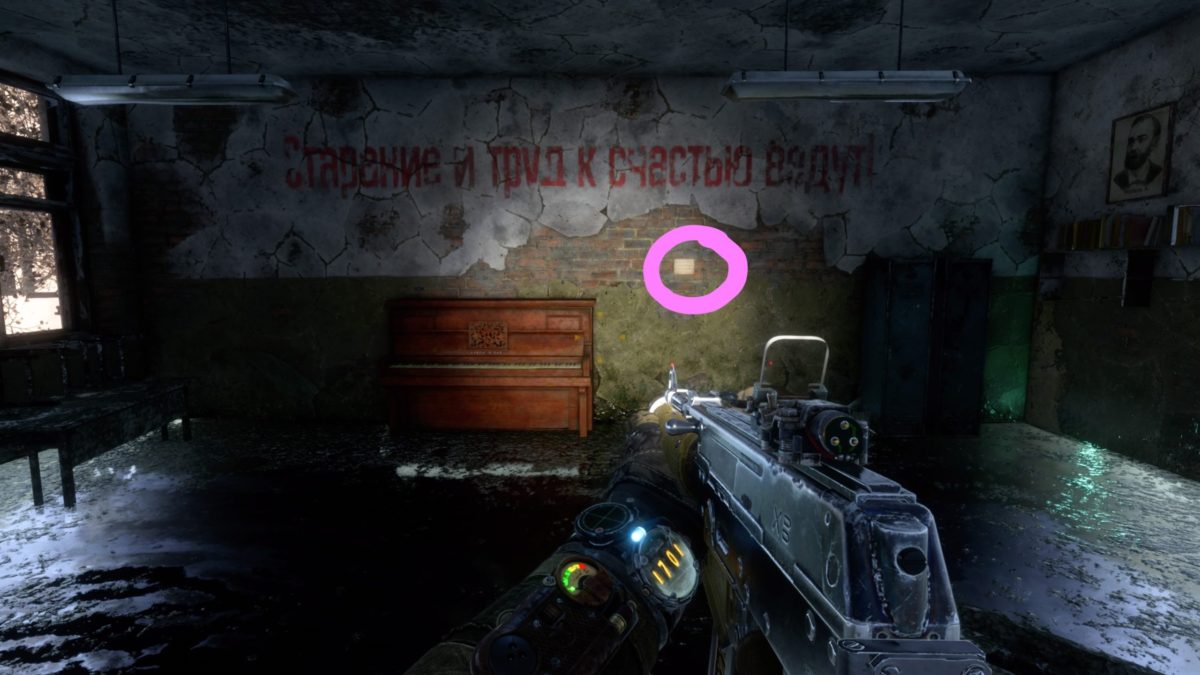
Melody 01
After you dock the boat, enter the school via a window and work your way to the part of the building containing a set of stairs leading to the second level. Facing the stairwell leading up, follow the hallway right and take the first left into a classroom to find the sheet music hanging on the wall next to a piano.
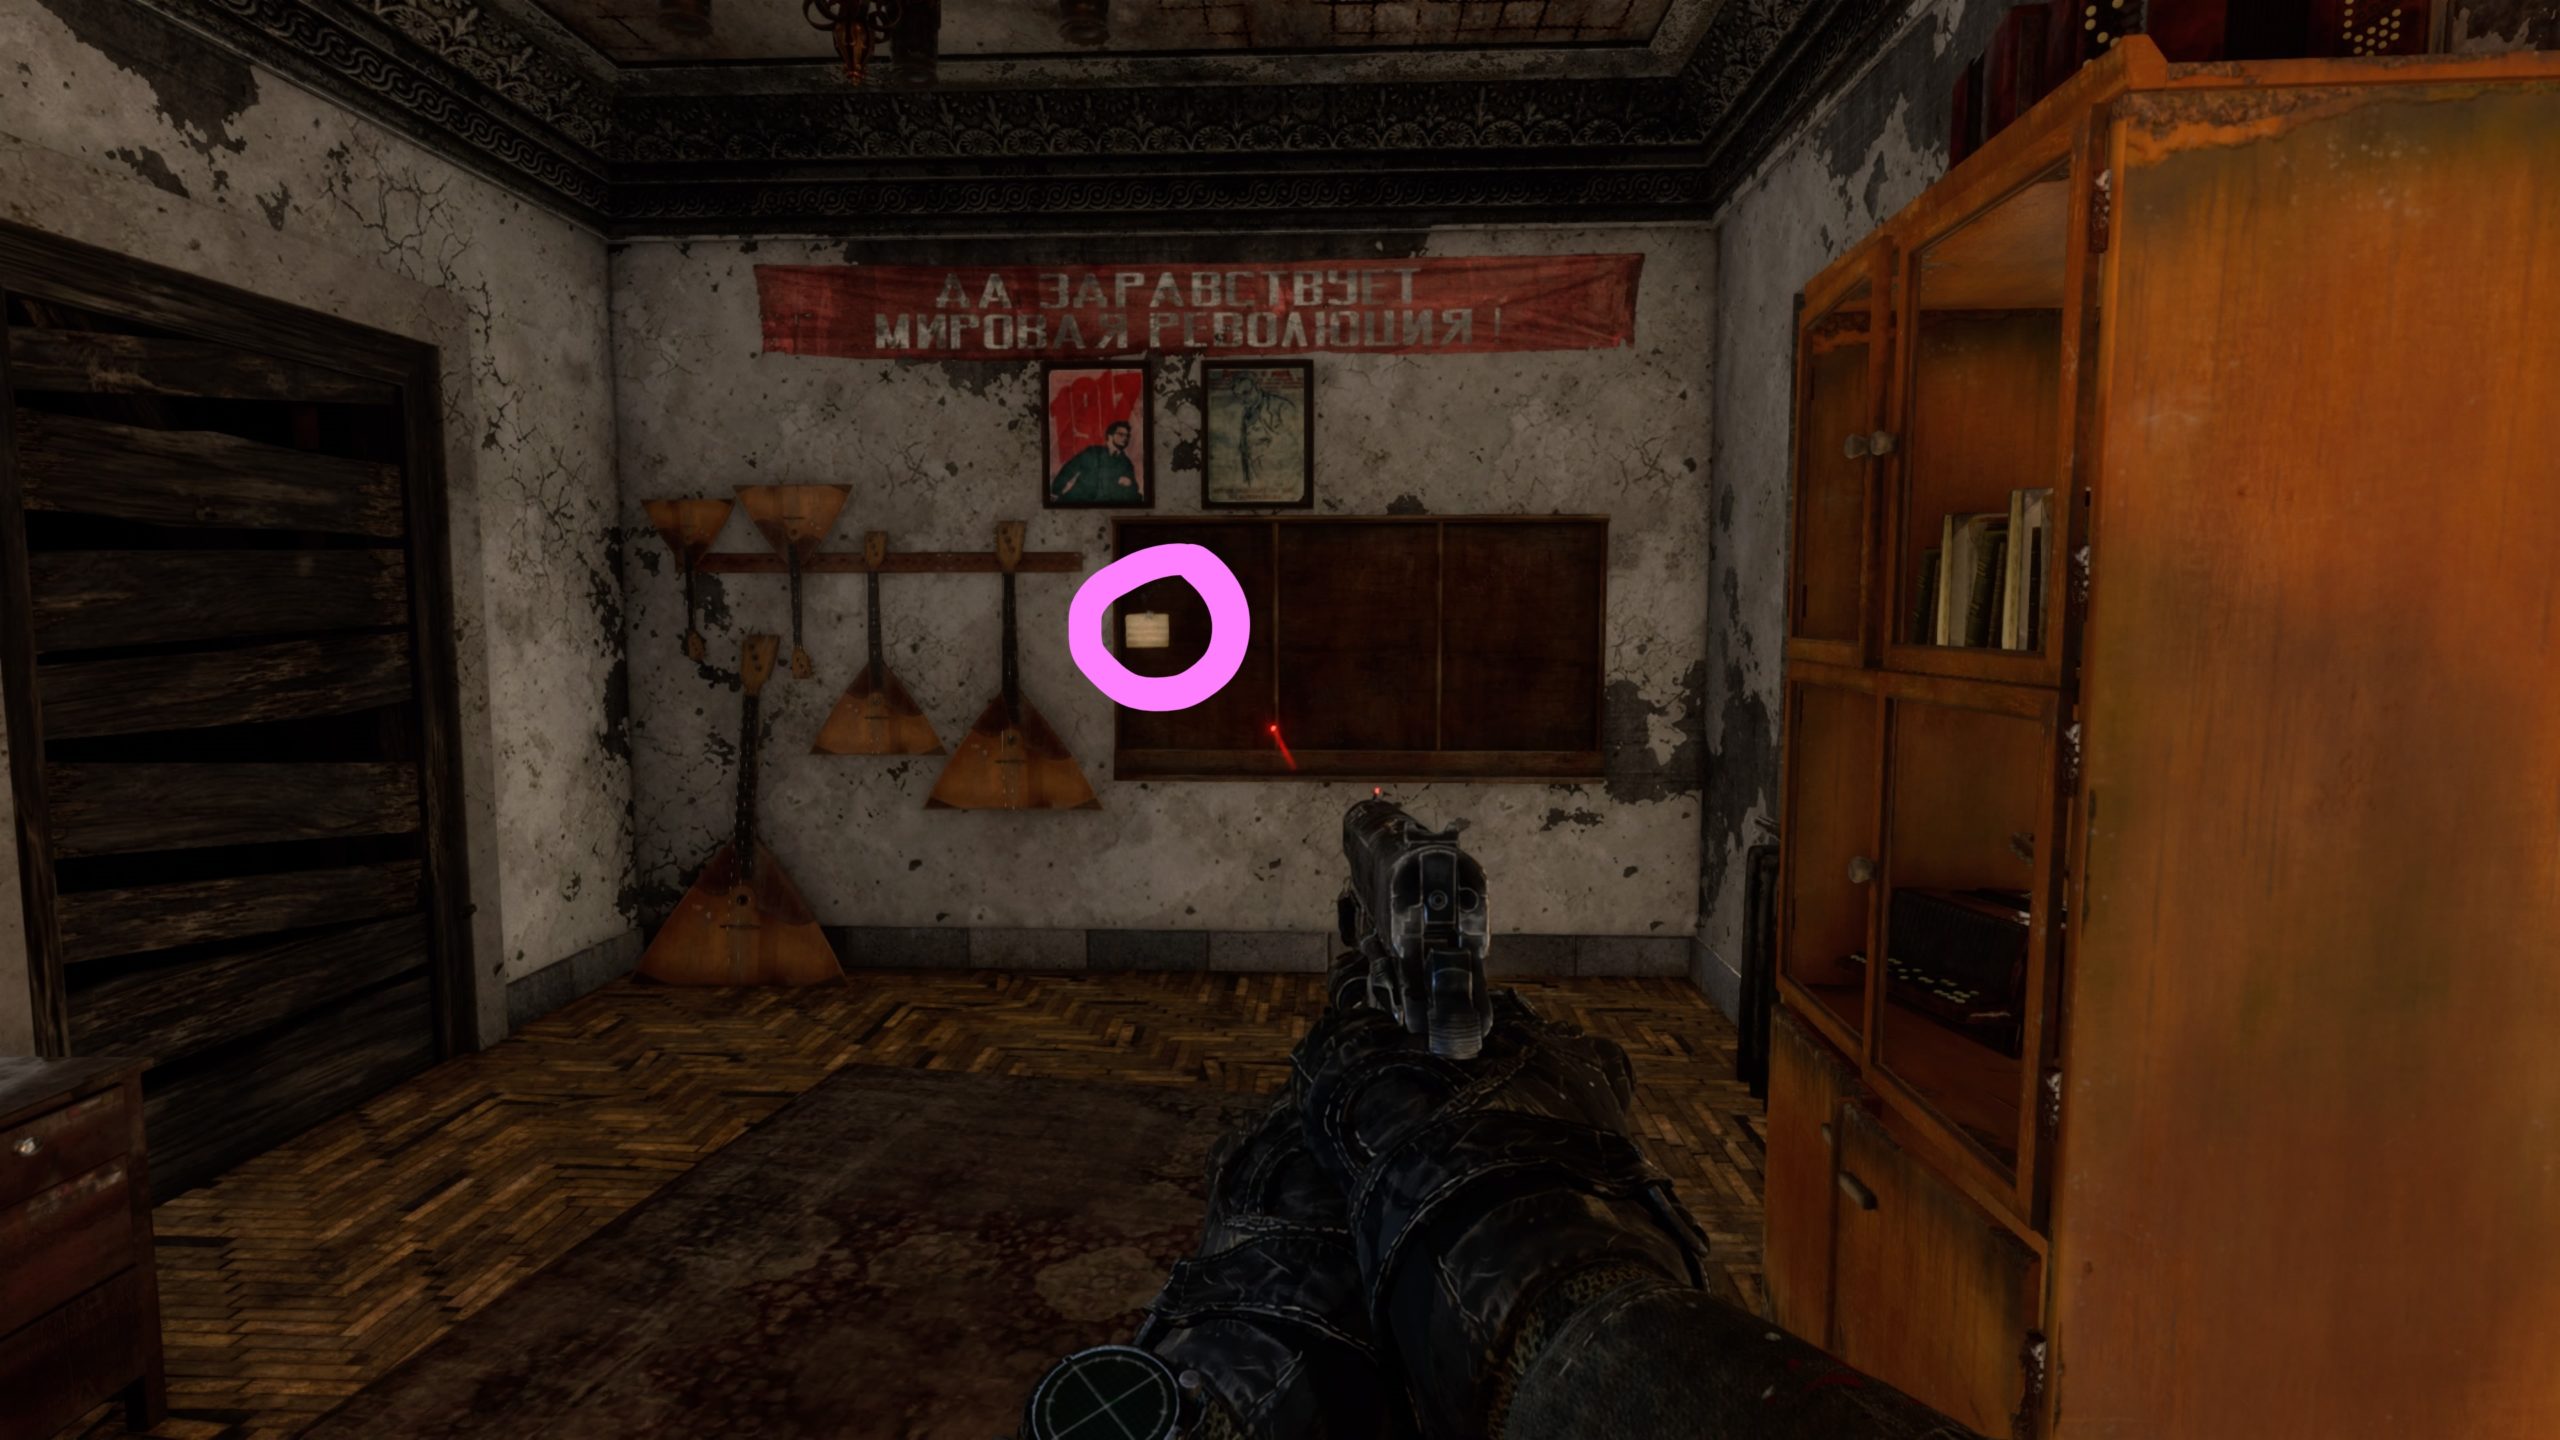
Melody 02
Head to the theater occupied by bandits and make your way to the second level. Once on the second level, make your way to the east side of the building to find a room filled with bookshelves. Just outside this room, there will be a window in the hallway with planks connecting it to another window in a sealed off room. Head across the planks and enter the sealed off room to find the sheet music on a bulletin board near some triangular guitars.
Melody 03
After you defeat the sniper, exit the door and head towards the boat. Instead of entering the boat, take a left in front of the boat and follow the walkway to a blue door. Enter the door to find the sheet music on the wall straight ahead.
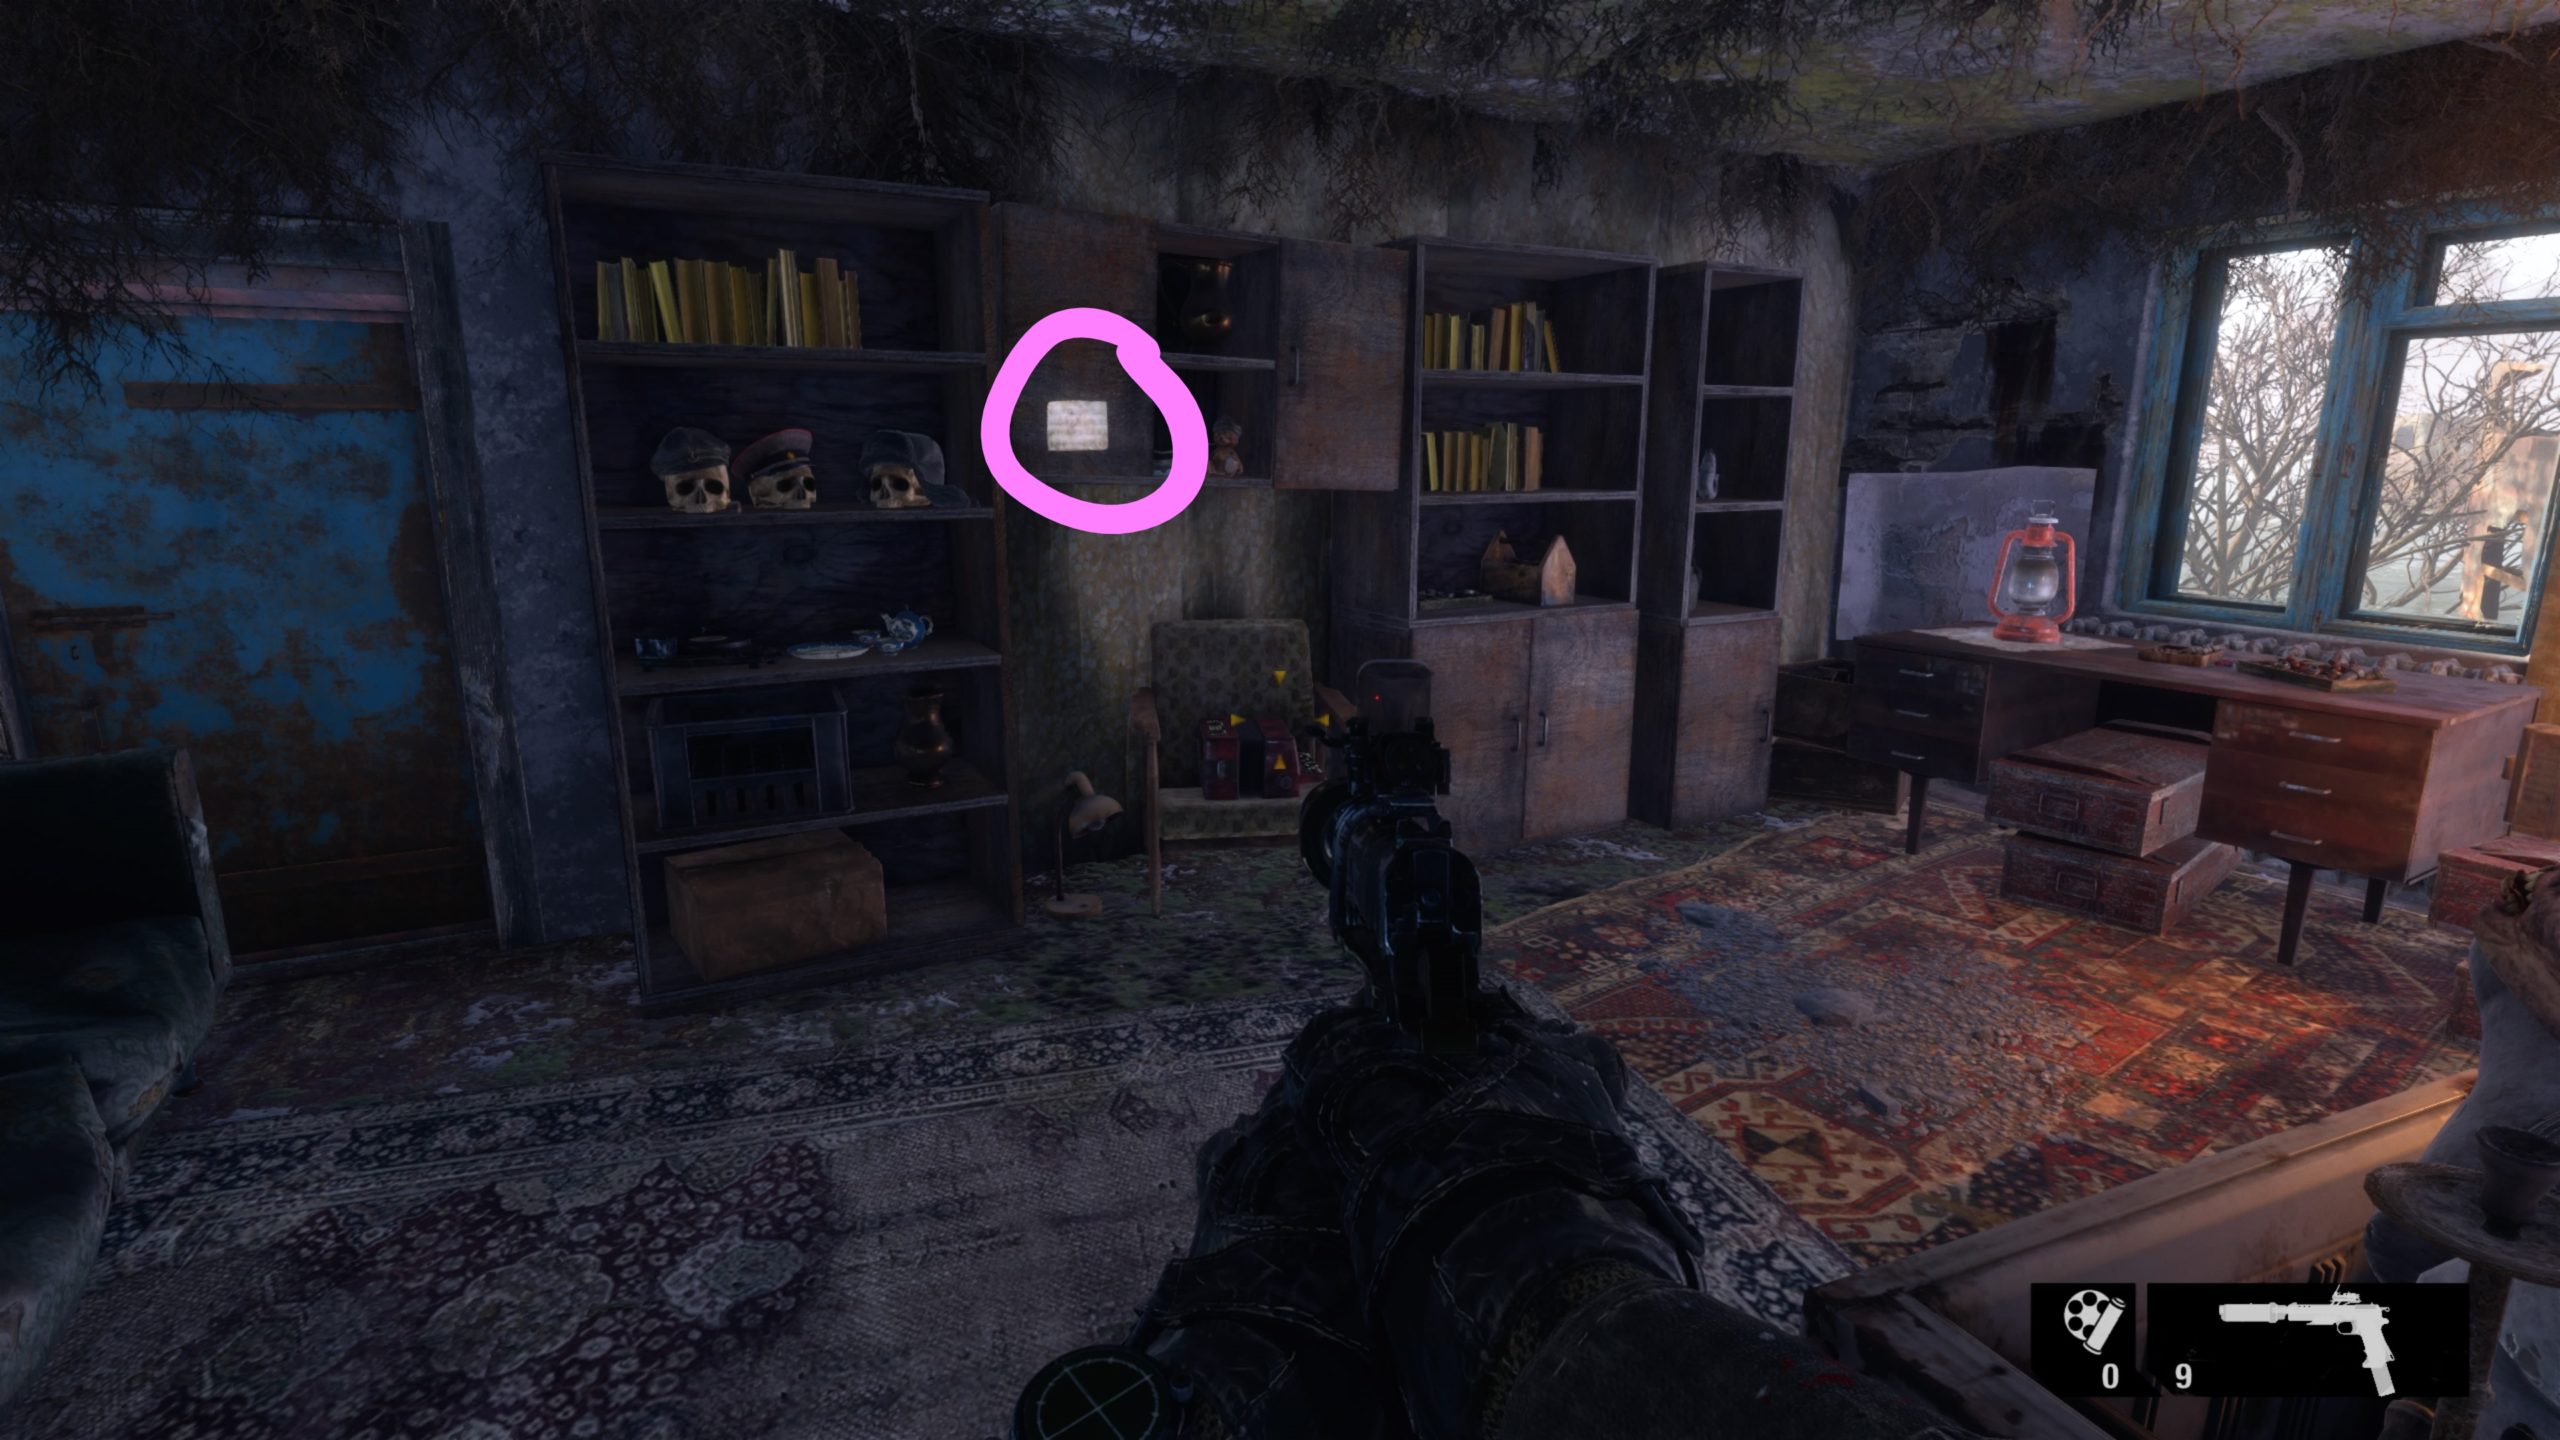
Melody 04
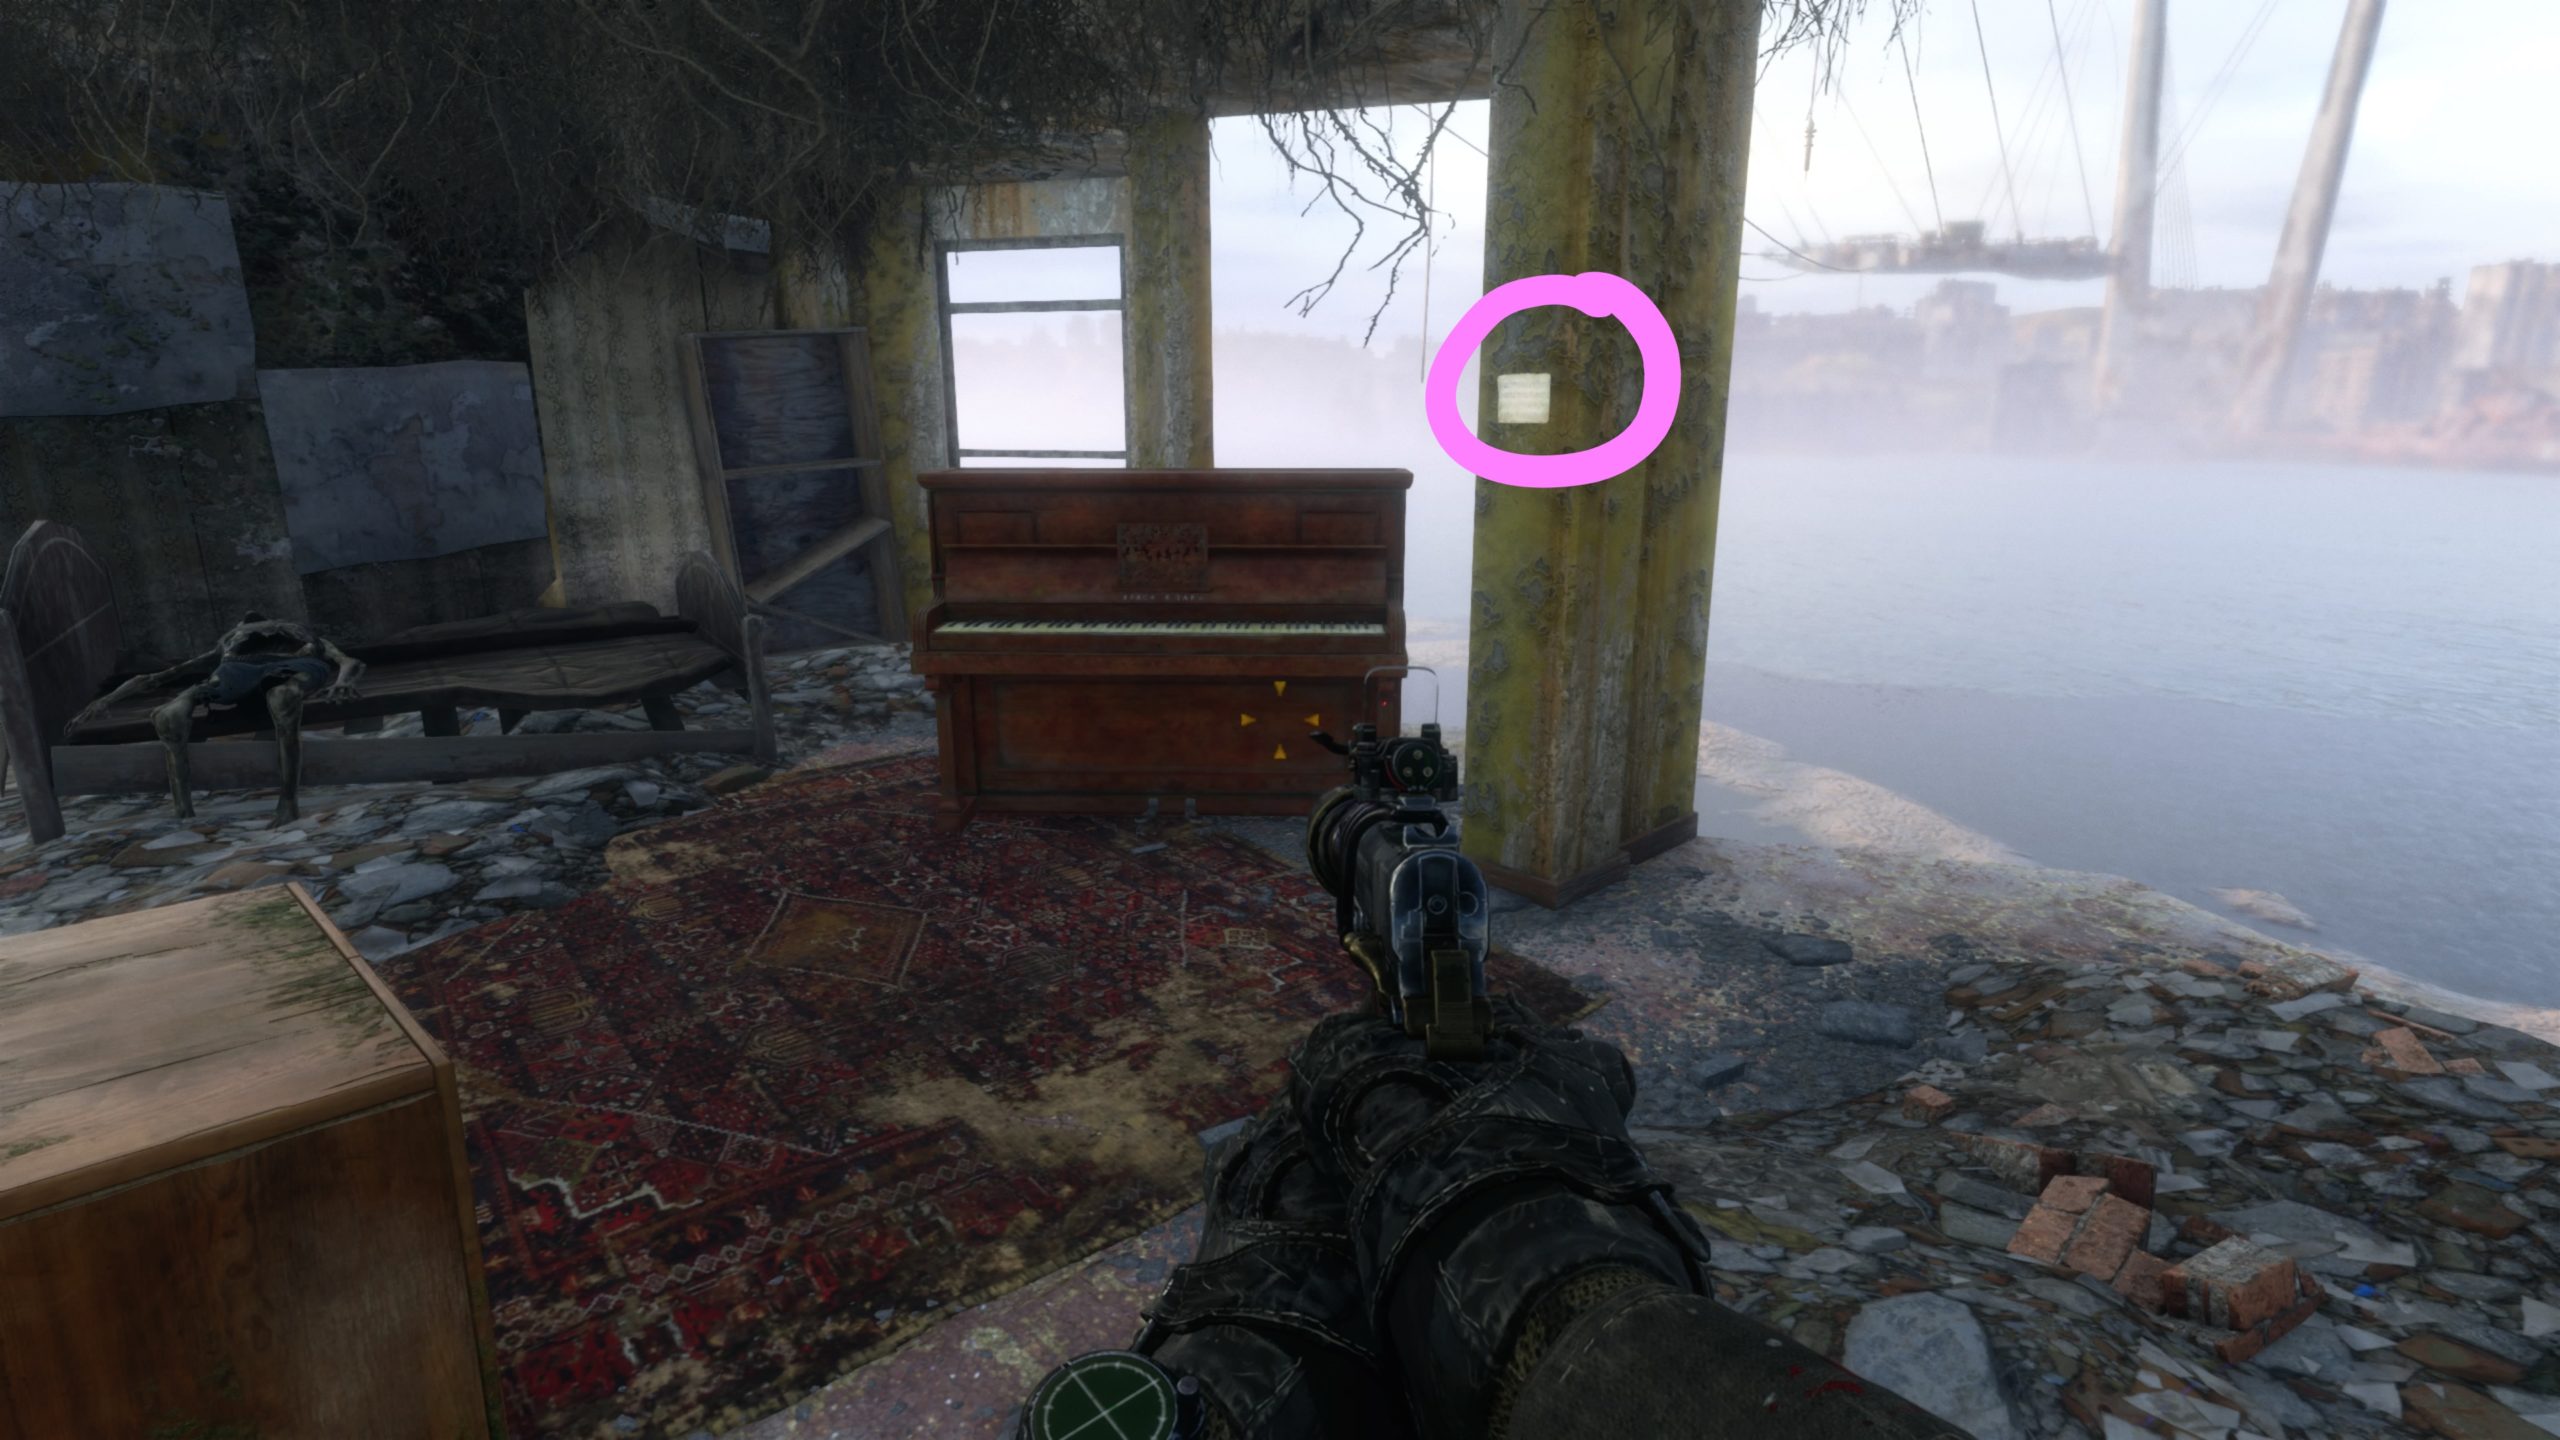
After your drunken adventures with the Captain, you will be tasked with setting up traps in his base. Head to the floor below his sleeping quarters via the stairwell. Next, head through the doorway, passing a red door on your right, and take a right to reach a brown sofa at the end of the room. Facing the sofa, jump over the wall to the left marked with yellow paint. Follow the path forward to reach a room with a piano and a corpse resting on a bed. The sheet music will be located on a pillar next to the piano.
Melody 05
The sheet music is located at the scout outpost. After you dock your boat, head towards the outpost and make your way to the ramps. The sheet music will be located on the wall next to a workbench.
Melody 06
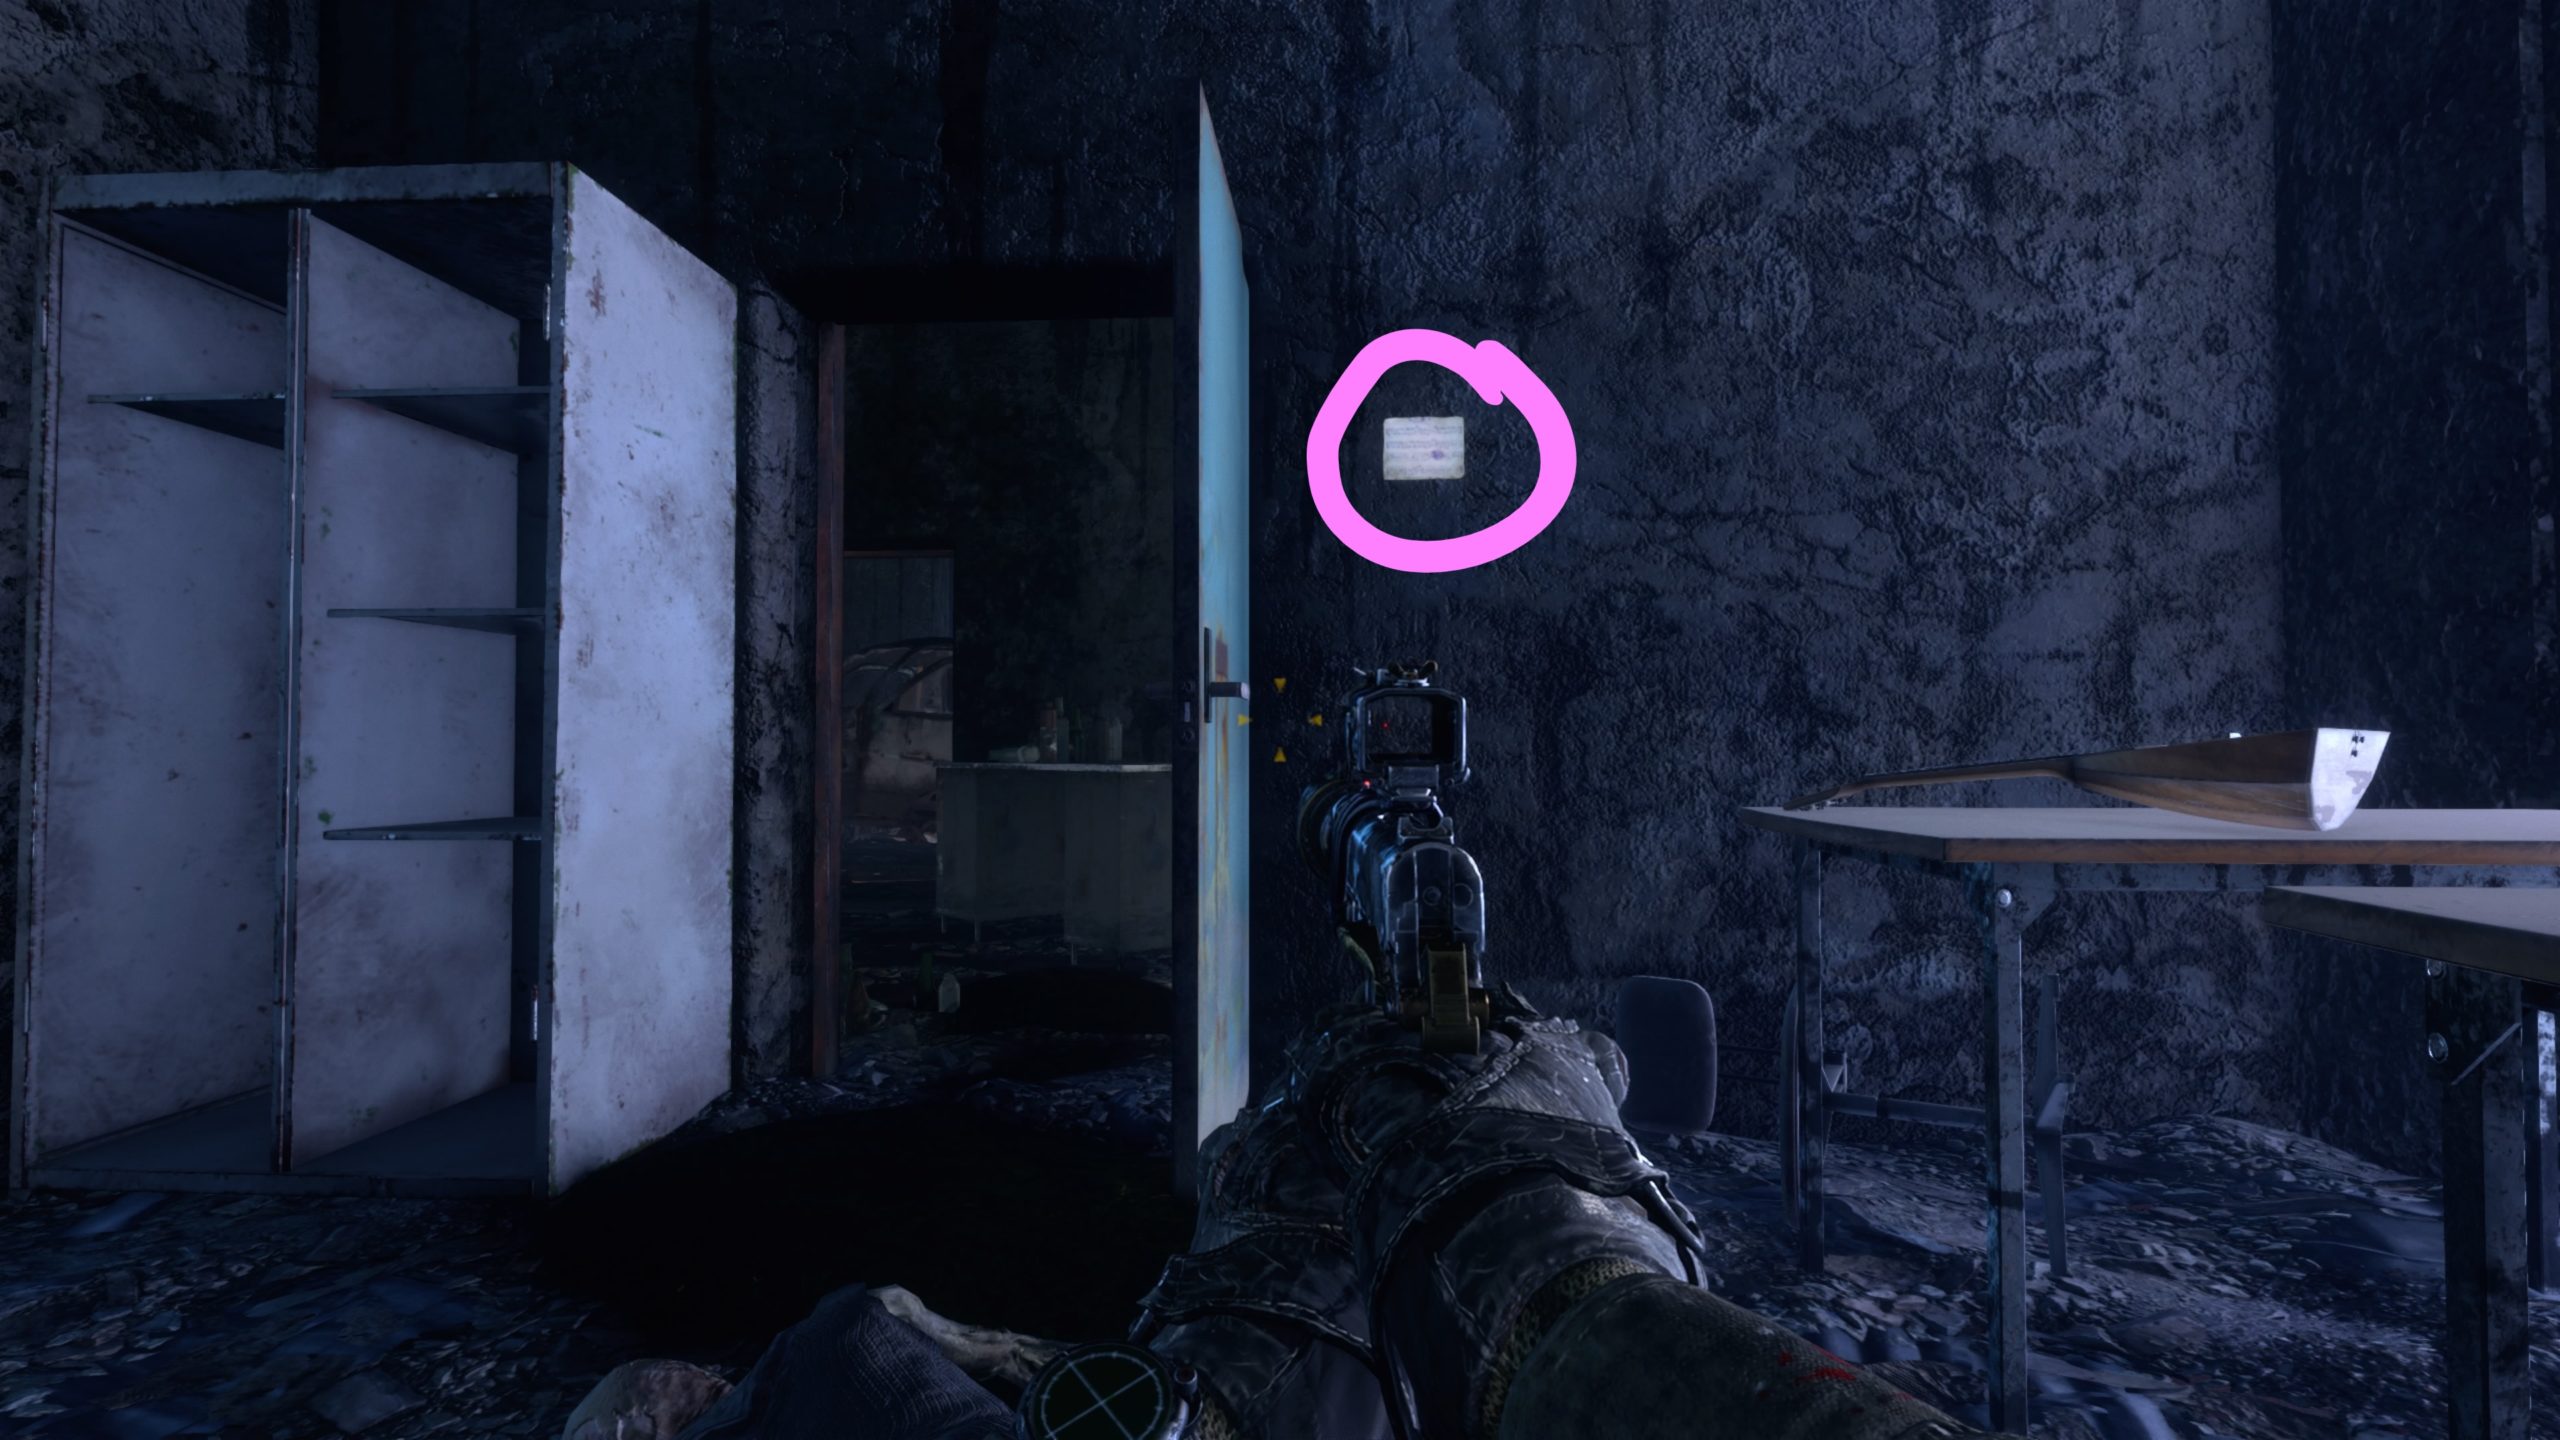
The sheet music is located at the car dealership on the wall behind a blue door in a break room.
Melody 07
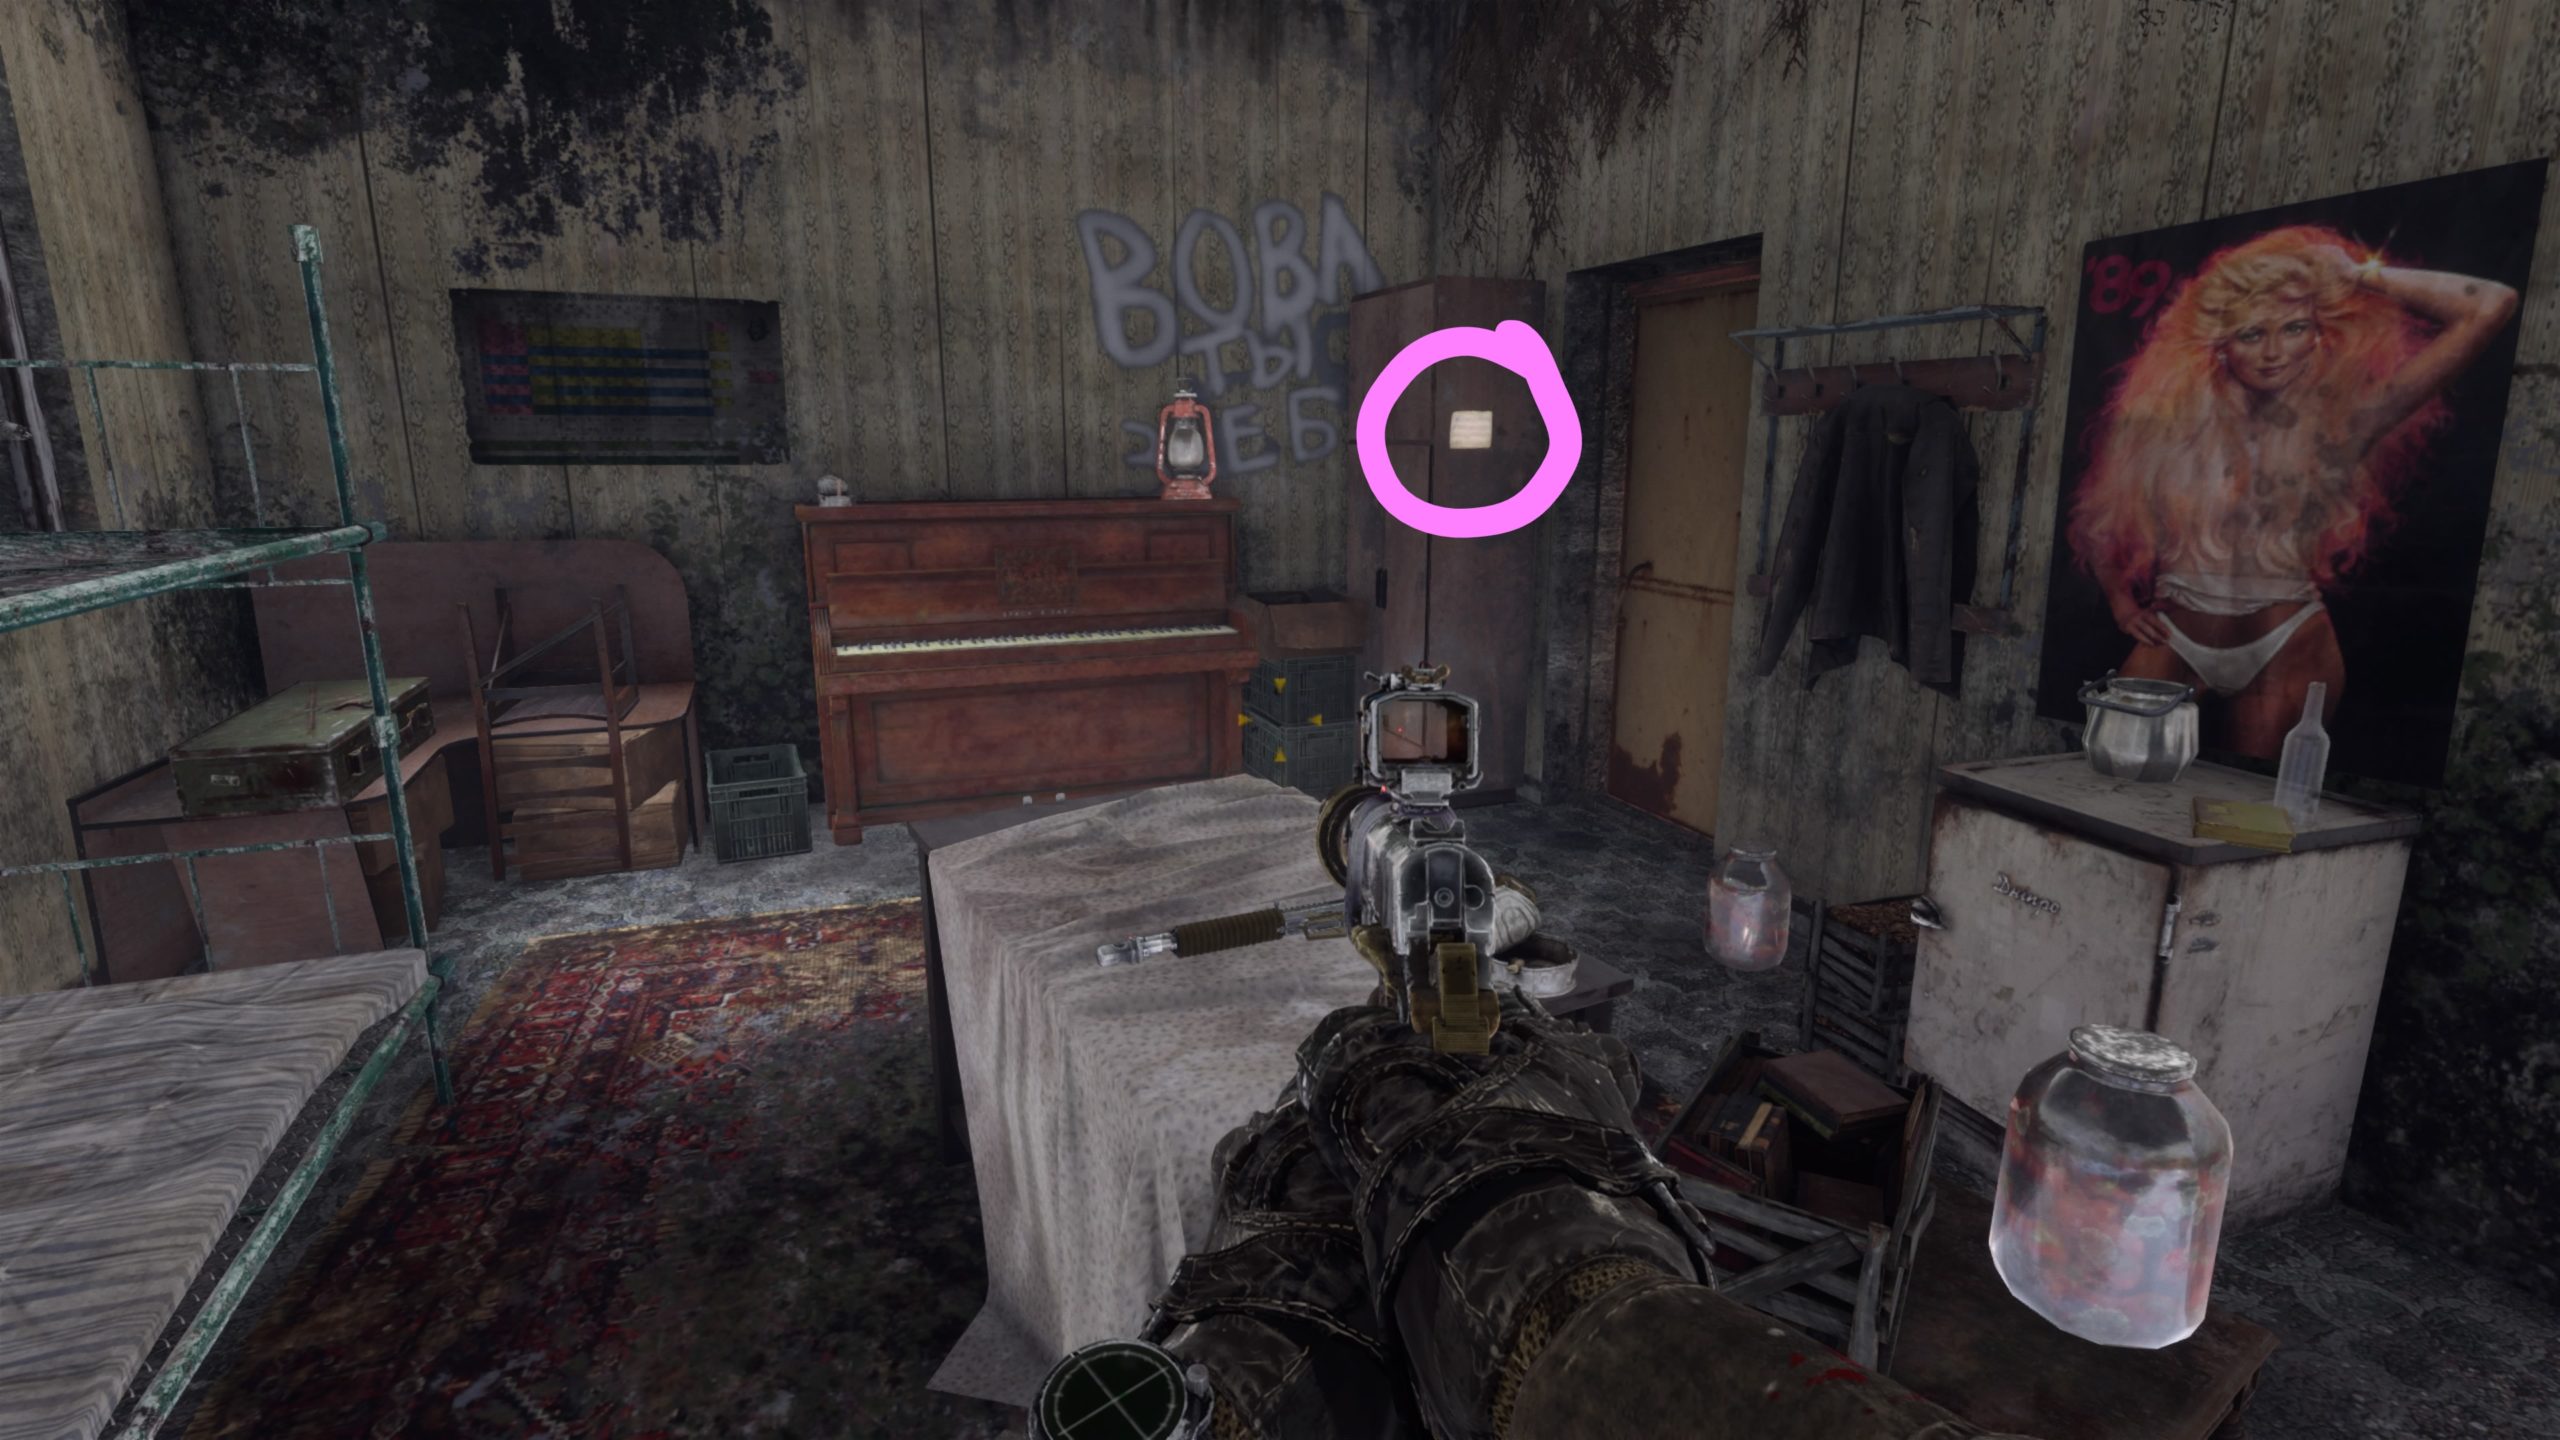
This sheet music is located on a wooden cabinet to the right of a piano.
Melody 08
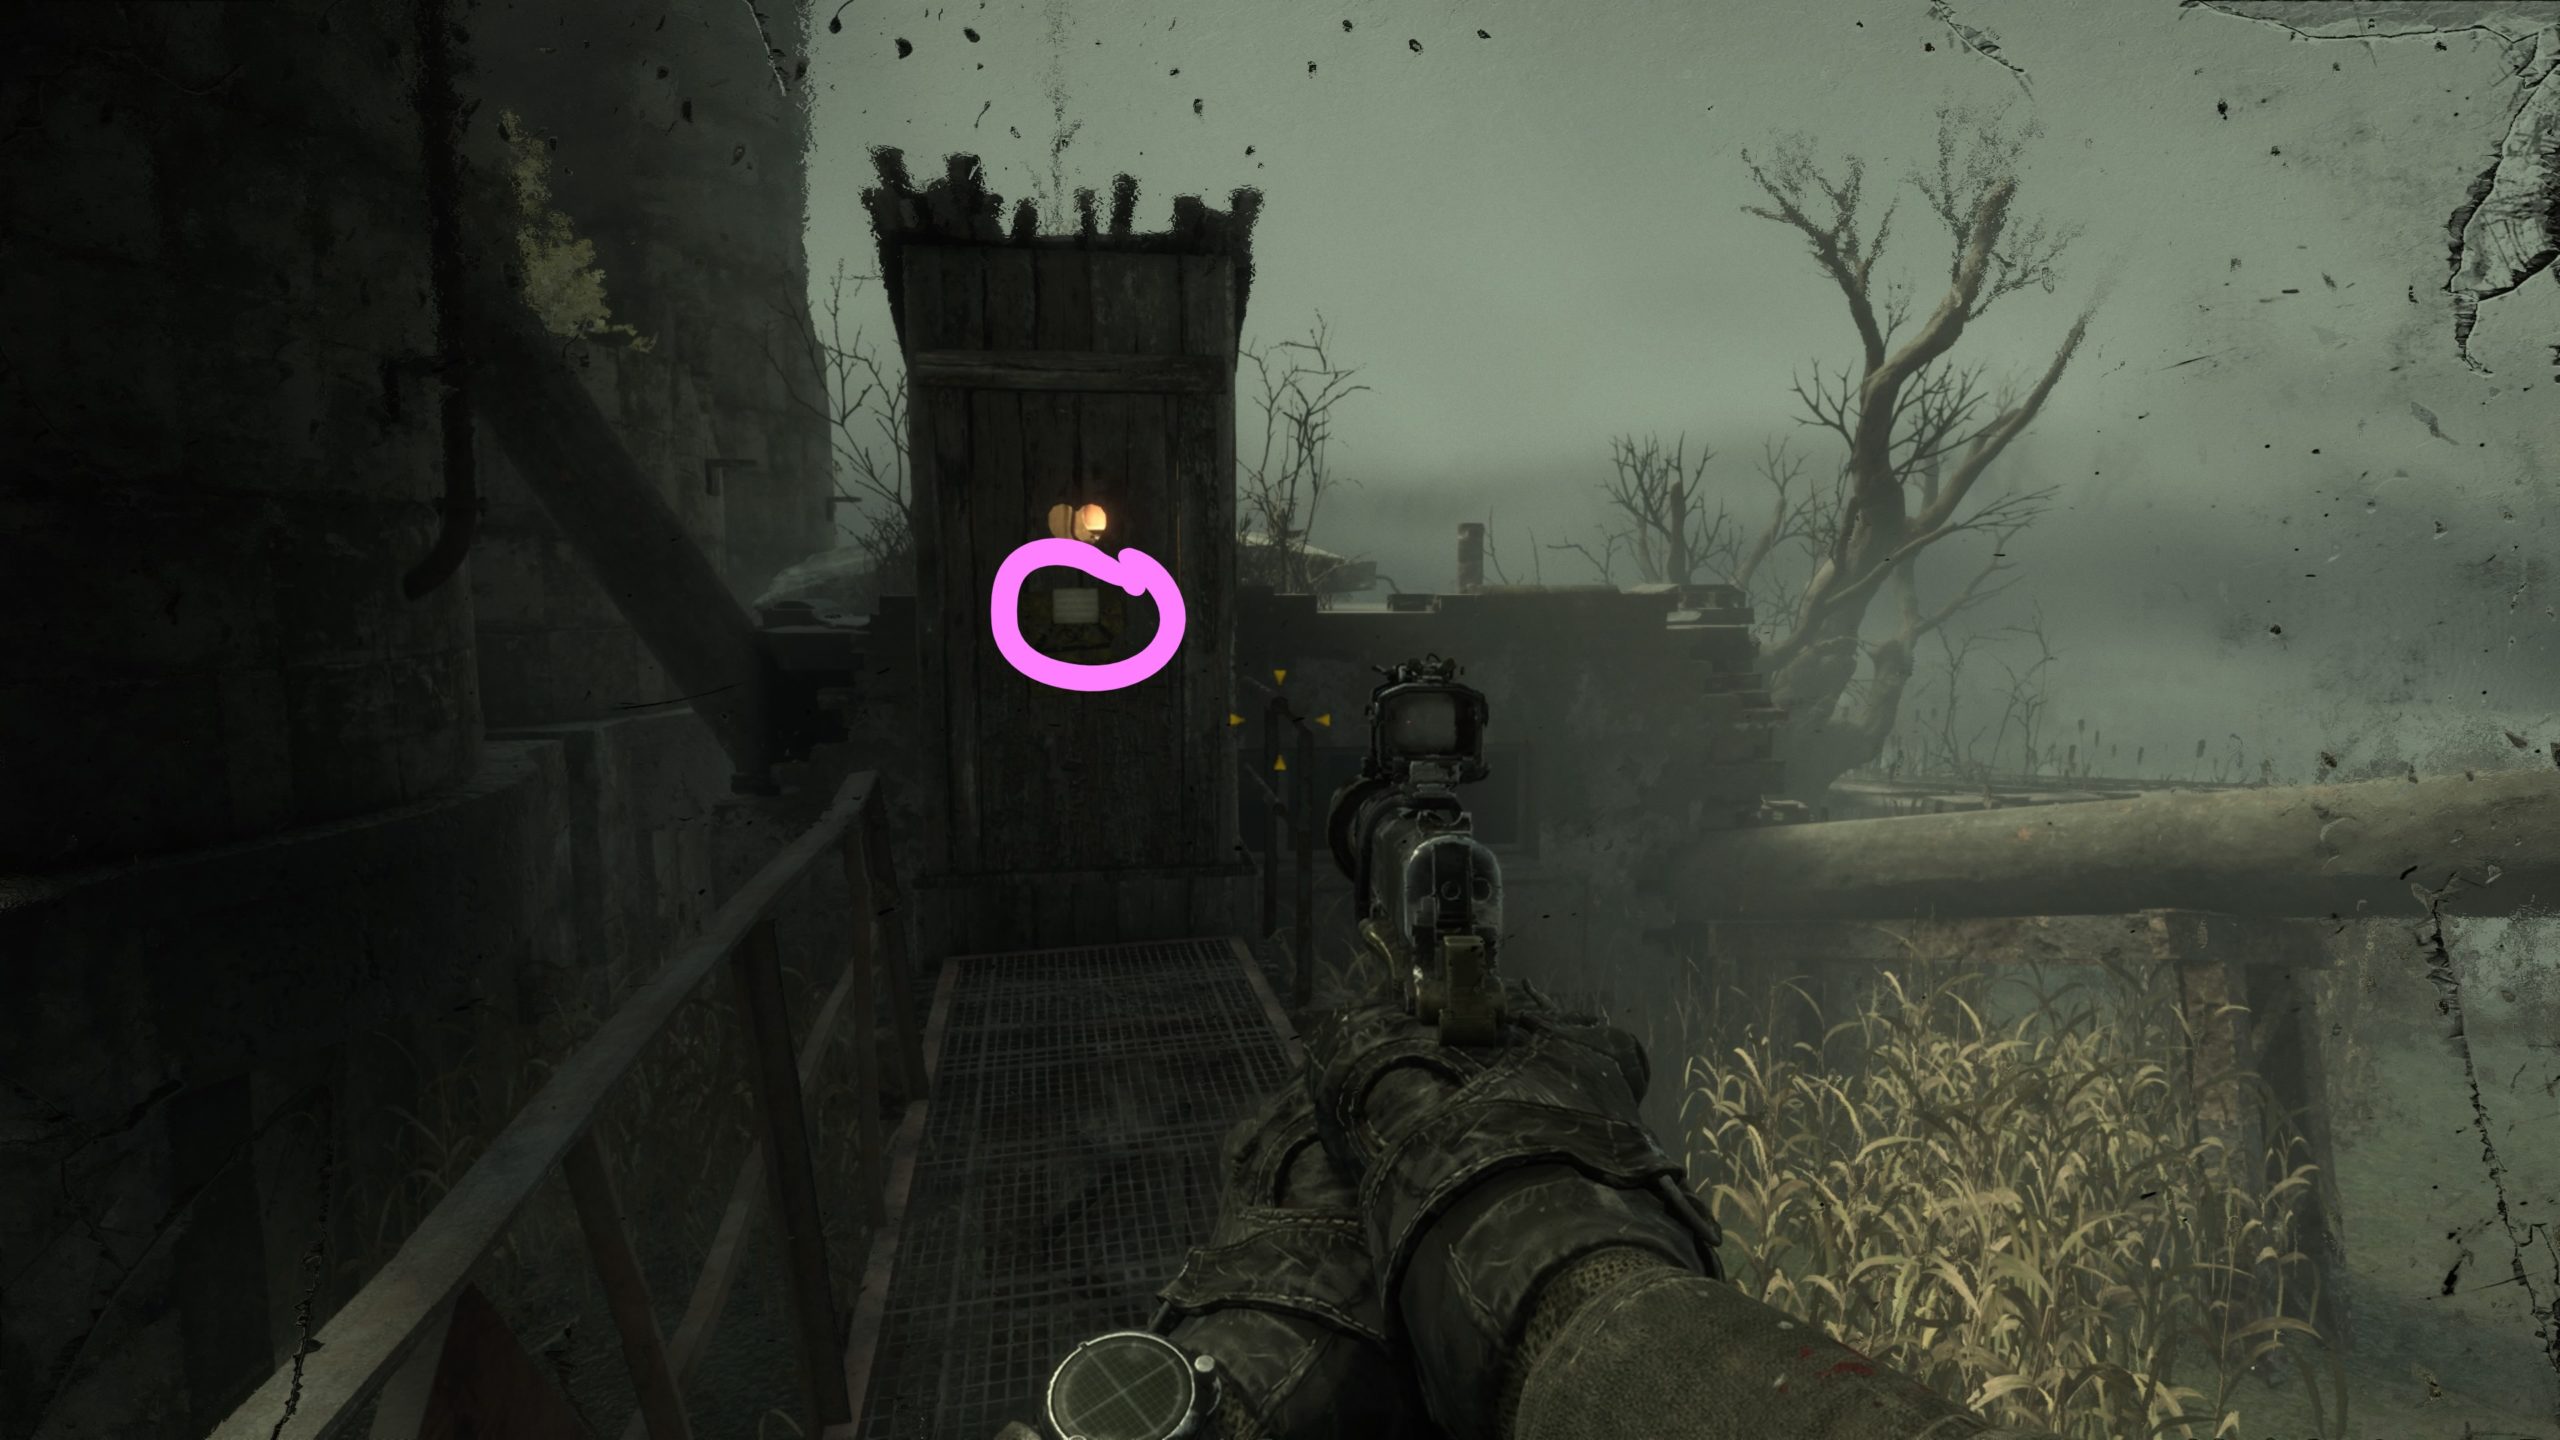
The sheet music is located on the door of an outhouse which is reachable via a walkway connected to the roof of the medical building.
Melody 09
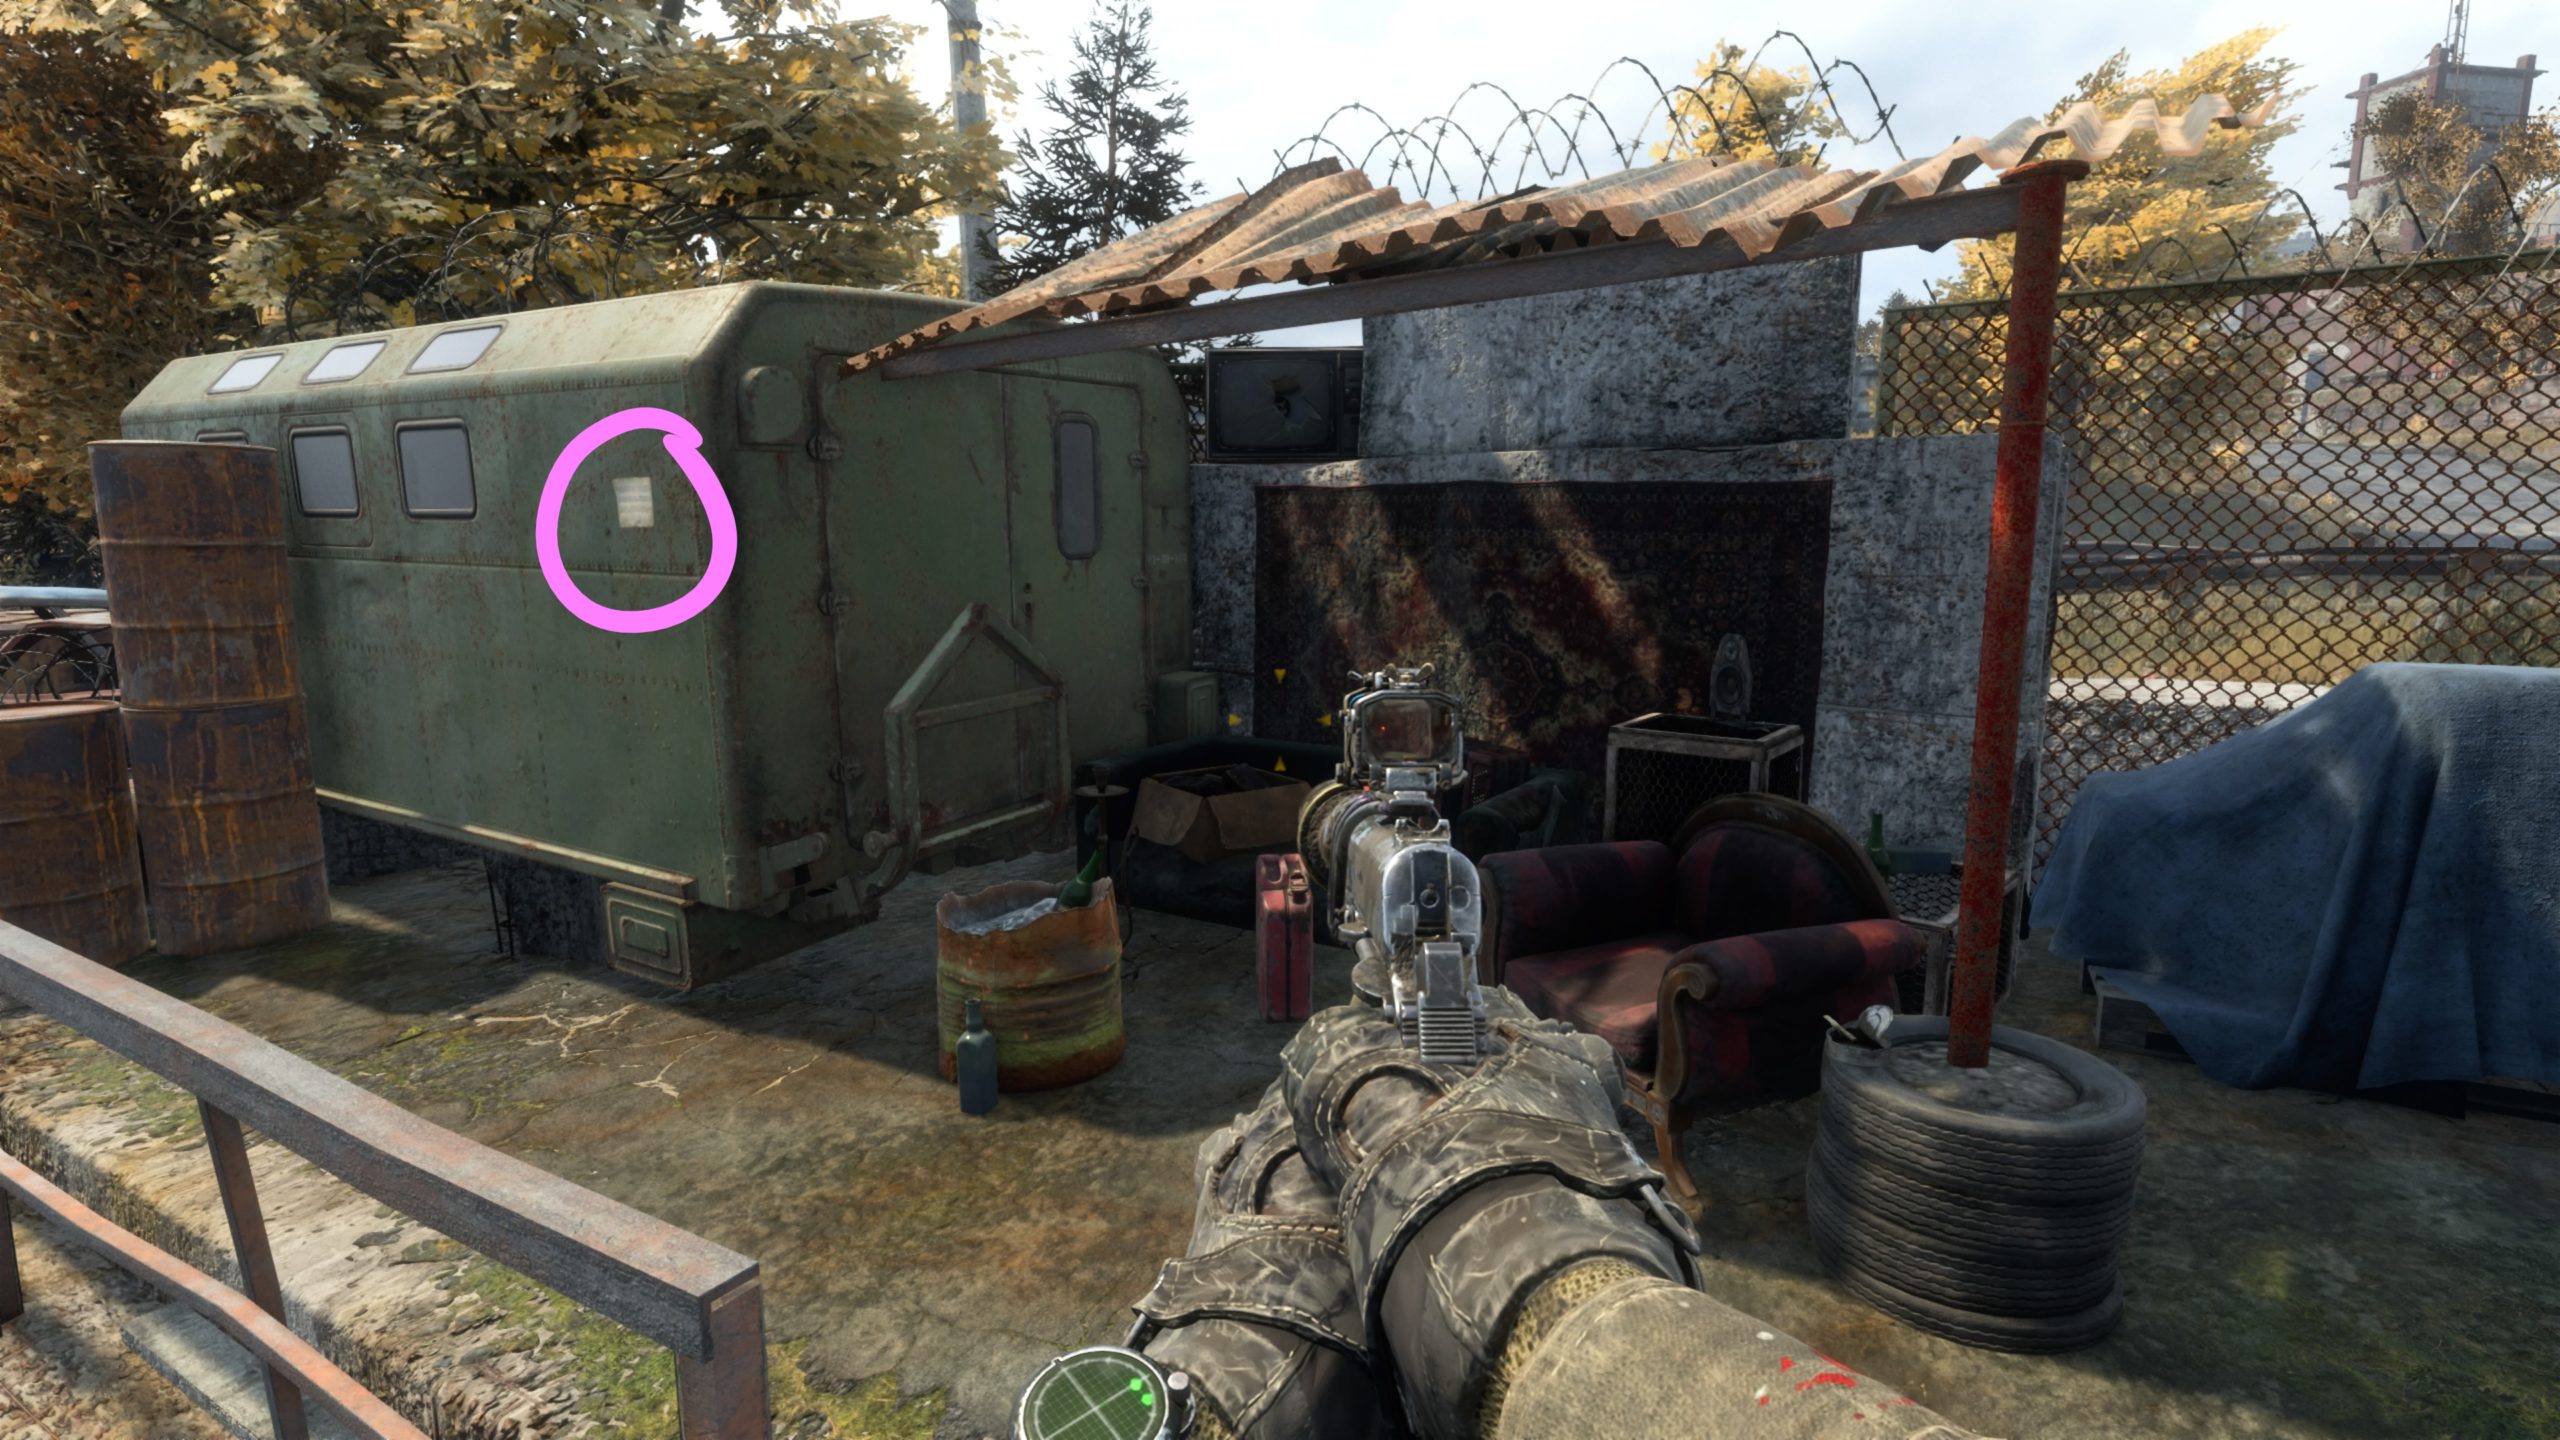
After you dock the boat, head up the stairs and take a left to find the note on the side of a large green container.
Search
This site uses cookies. By continuing to use this website, you are giving consent to cookies being used. For more information on cookies, view our Privacy Policy.OkPrivacy Policy