Guides

Snack World – Chapter 5 Story Quests

by Chappie in


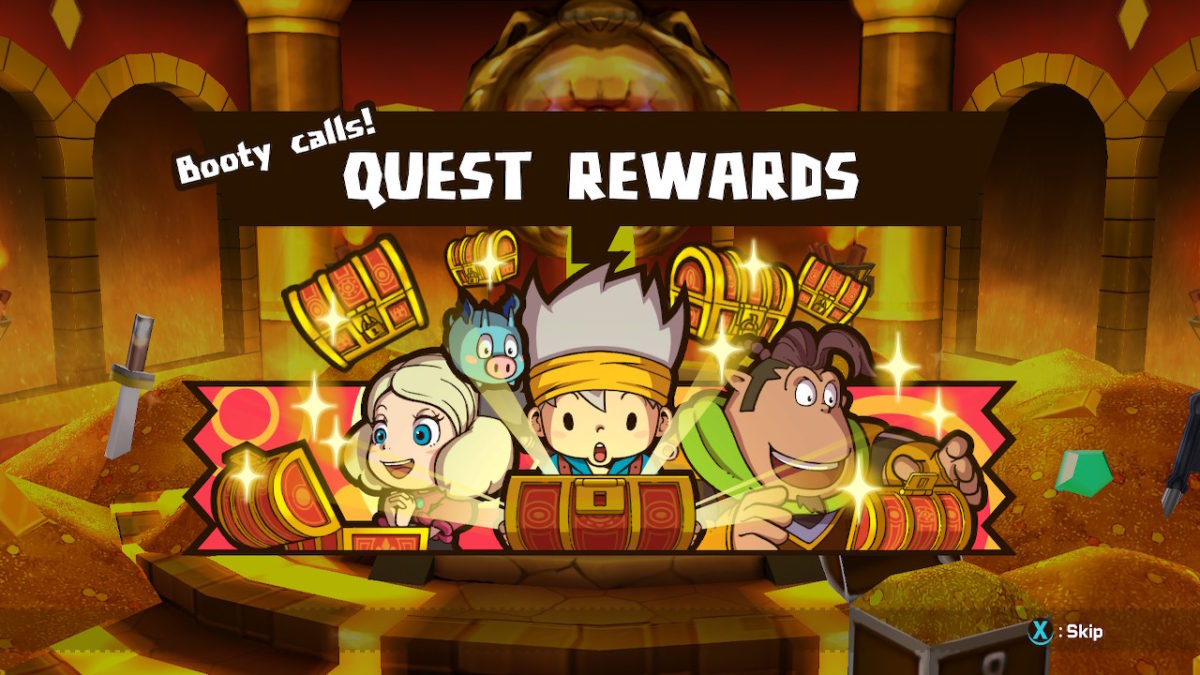
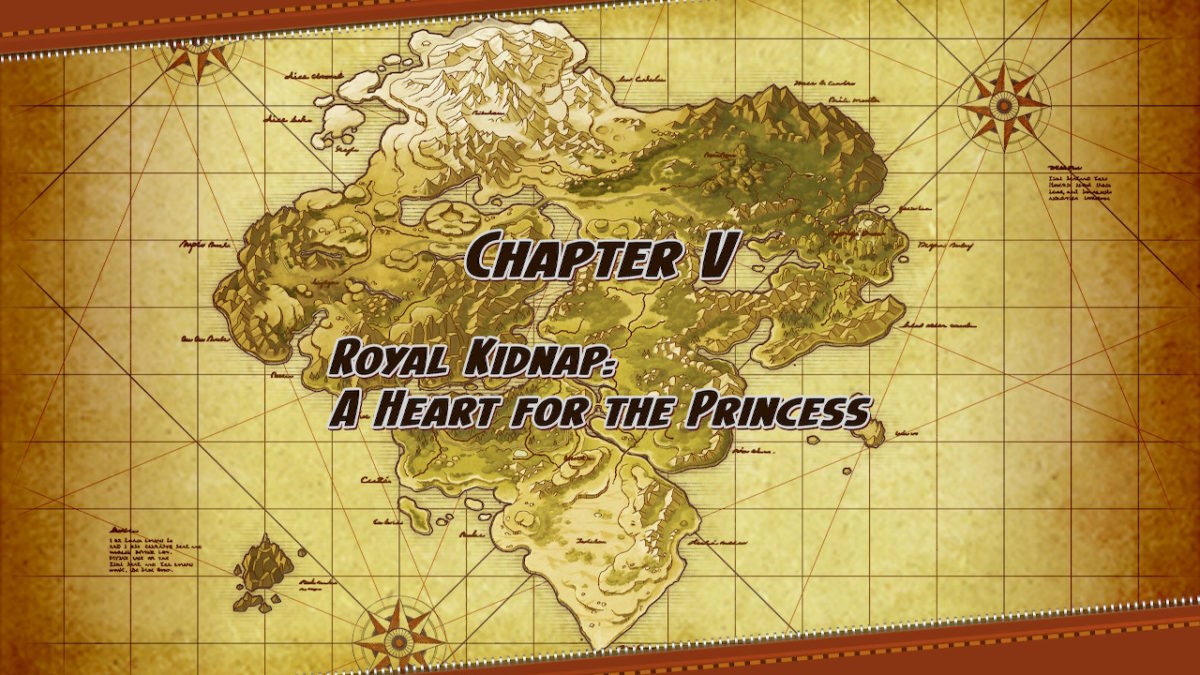
Chapter 5 of Snack World The Dungeon Crawl Gold contains 8 story quests with the ultimate goal of retrieving the kidnapped princess. Below you will find guides for all the quests so grab your Jaras and get ready for a snack attack! Let the dungeon crawl begin!


Catch Chup!

Quest Giver: The King

Grand Prize: Oaken Knife

Objective: Capture Chup and any accomplices!

This quest has you heading to the Black Forest and working your way to the Songstress’s Waiting Room where you will encounter Chup and Bearny. Defeat them to trigger a cutscene and complete the quest.


Road to the Ancient City

Quest Giver: The King

Grand Prize: Chpped Pix-e Ring

Objective: Head for Chicken Itza!

For this quest, you’ll head to Marsh Mallow and need to make your way to the end of the first level. Once there, head through the transition to reach Chicken Itza. Activate the warp point to complete the quest.


Pigsy Pursuit

Quest Giver: The King

Grand Prize: Crystal Sword

Objective: Track down Pigsy in Chicken Itza!

This quest will have you head to Chicken Itza where you will need to work your way to the Gateway to the Underworld. When your ready, head through the doors to encounter Bigwigsy Pigsy. This dragon does a fire ball attack from its mouth and breathes fire. Defeat it to trigger a cutscene. Afterwards, a battle with Dullardhan, the real boss of this quest, will begin. This guy has dual swords, which he will swing at you. He also does a charge move that causes a streak of damage across the map. Watch out for the pillars that he will summon as they divide the map with electrical beams. Dullardhan will also jump up and then slam down in a blast radius. Try to avoid these areas as they can do a lot of damage to you. Defeat the boss to complete the quest.


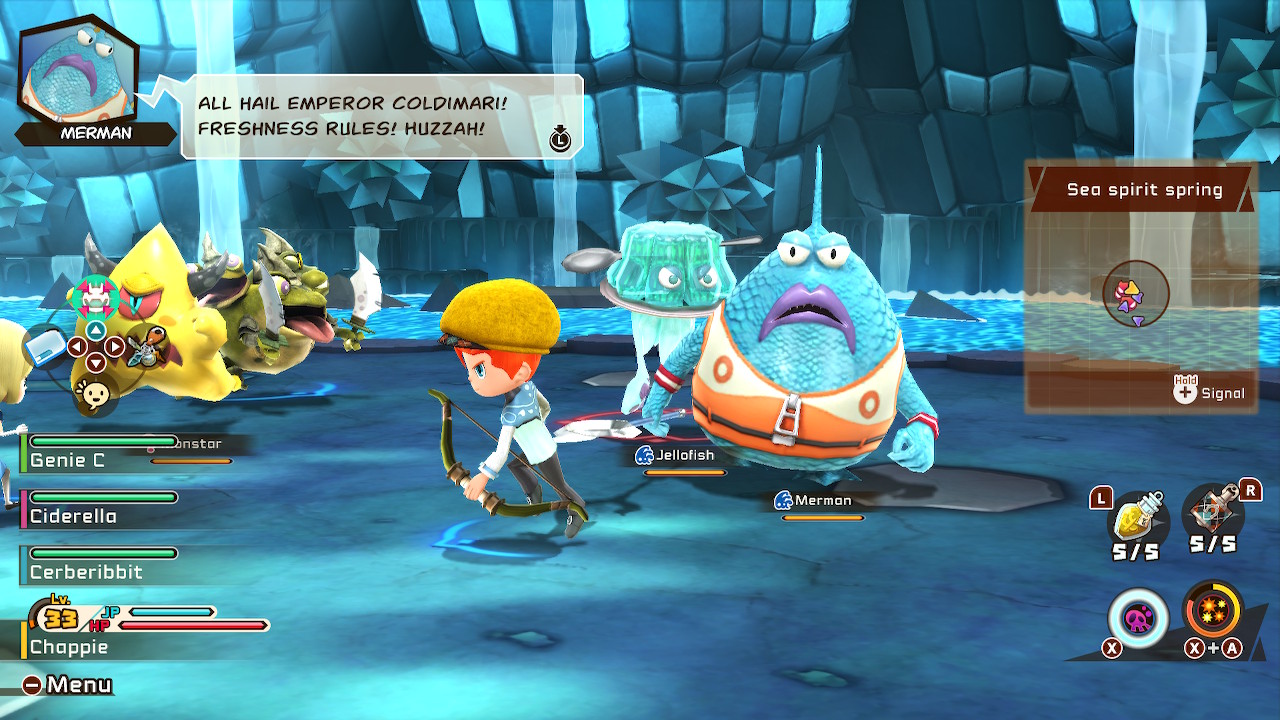
Seafood Service Shutdown

Quest Giver: The King (Speak with him in the castle)

Grand Prize: PacLap Ti Staff

Objective: Condemn Coldimari!

You’ll head to Gumbo Grotto for this quest. Once there, make your way to the Cavern of Calm and head through the door to encounter a Jellofish, Monstar and Merman. Defeat all three enemies to spawn a Fantail, Knight Diver and Landshark. Once you defeat these enemies, Coldimari will spawn. This fight is just like the Krapen fight so be on your toes! Defeat Coldimari to complete the quest.
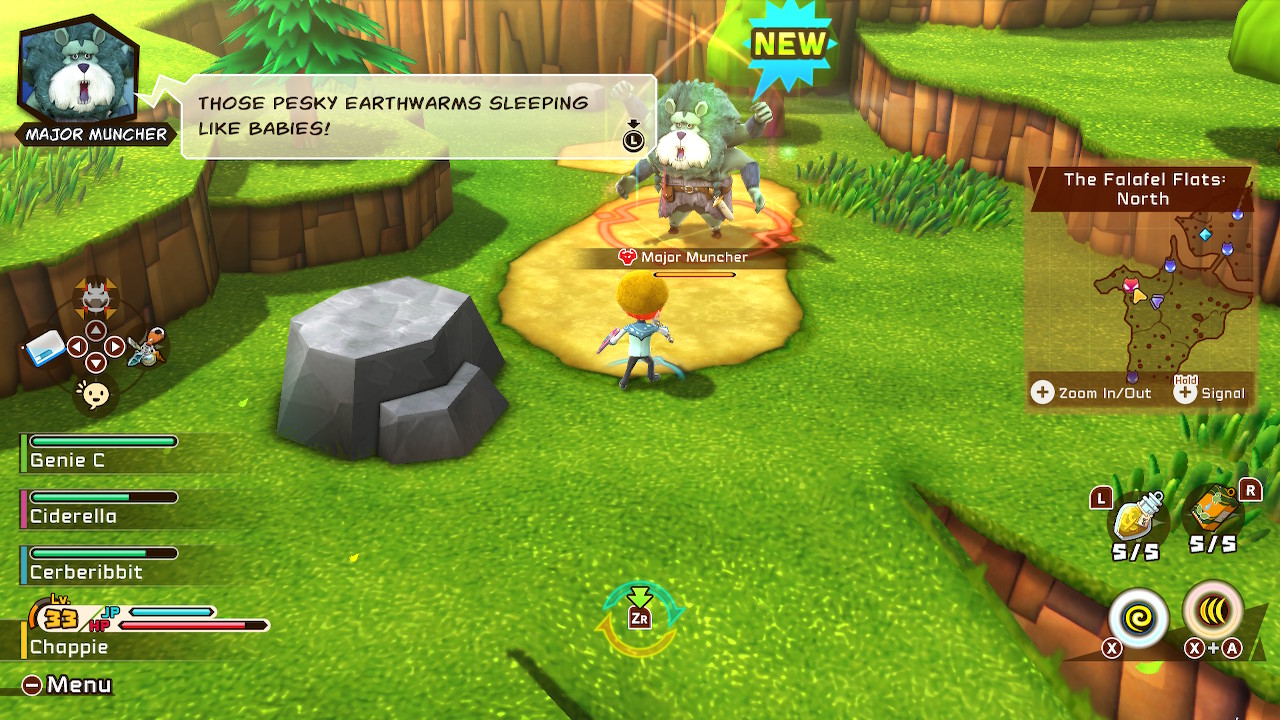


The Warm War

Quest Giver: Maj. Mango (Speak with him in the castle)

Grand Prize: VaCATion Knife

Objective: Eradicate the earthworm obstruction!

Defeat 10 Earthworms in the Falafel Flats: North. Once they’re defeated, follow the marker to discover Major Muncher and defeat him to complete this quest.


Dessert Storm

Quest Giver: Fruit Sorbear (Speak with him on the northwest side of town after completing Catch Chup! story quest)

Grand Prize: Ebony Sword

Objective: Source the survey respondents!

For this quest, you’ll head to the Frappe Fields. Make your way to the end of the first level to locate 3 Lagged Lupines. Defeat them then follow the marker to find 3 Yetini. Defeat these creatures then follow the marker to defeat 3 Valkyries. Defeating them will complete the quest.


Spicy Hostage Situation

Quest Giver: Peter Pancake (Speak with Peter Pancake on the west side of town near the Spice Gals after completing the Road to the Ancient City story quest)

Grand Prize: PacLap Ti Bow

Objective: Rescue Nutmegg Spicy!

This quest will take you to Chicken Itza. Once there, make your way to the Gateway to the Underworld. Head through the door and fight the Mountain Gorilla. Mountain Gorilla does spinning attacks so try to dodge them as they can do a lot of damage. Once you defeat him, a warp point will appear and the quest will complete.

Search for the Smacker

Quest Giver: Sporf (Speak with Sporf on the right side of the Cider House after completing the Road to the Ancient City story quest)

Grand Prize: Flowery Pendant

Objective: Hunt out the handsome monsters!

You’ll head to Chicken Itza for this quest and will need to make your way to the Gateway to the Underworld. Once there, head through the door to encounter Selfie, Maskedmelon and Elf-Obsessed. Defeat them all to complete the quest.


Tokyo Mirage Sessions
Guides

Tokyo Mirage Sessions – Sleepless in Shibuya

by MrsChappie in

*NOTE: Recommended level is 53.


Obtained: Tiki’s last side story becomes available after completing the first trial in Chapter 6. Once you defeat all four of the bosses, you’ll receive a Topic from Tiki. After you read it, head to Bloom Palace and speak with her.


After the cutscene, head to the map transition in Fortuna Office to receive more instructions on how to create a song for Tiki. Chrom suggests speaking to Tiki=Waifu so head to Cafe Seiren in Shibuya and enter through the door to trigger a cutscene. During the cutscene, you learn that Tiki=Waifu might have wondered into the 106 Shibuya Idolasphere so head on over there to check it out! Teleport to B3F then head down the stairs to reach the boss room on B4F. When you enter the door, a cutscene will trigger and you will face Cervantes (level 55), Platinum Swordmaster (level 54) and Regal Paladin (level 58). Cervantes is fond of his Attribute Shift skill, which changes his weaknesses. Focus your attention on Cervantes as he will just keep spawning adds as they die. Defeat Cervantes to trigger a cutscene then head back to Cafe Seiren to speak with Tiki=Waifu who is inside the cafe. After you complete the song, head to Bloom Palace and let Tiki listen to it to trigger a cutscene and complete the quest.


Tokyo Mirage Sessions
Guides

Tokyo Mirage Sessions – Closing the Distance

by MrsChappie in


Obtained: During Chapter 6, head to Daitama Observatory and speak with Katao twice.


You should already have the Nan-no Special in your inventory, however, if you don’t head to Fortuna Office and check out the magazine rack.


Reward: Mag Incense


Guides

Snack World – Chapter 4 Side Quests

by Chappie in


Below are the side quests in Chapter 4 of Snack World Dungeon Crawl Gold. Side quests are quests that you can do online with other people. Be sure to make a cool online profile for yourself in PIX-e PALS before you dabble in the side quests.


The Northern Falafel Flats Free-For-All

Quest Level: Beginner

Quest Giver: Cdr. Ciderfella

Grand Prize: EnigCATic Earring

Objective: Explore at will before returning to base!

As you could have probably guessed, this quest takes you to the Falafel Flats: North. Explore this area, following the marker, to reach the warp point. Once you activate the warp point, the quest will complete.


Besting the Bandshees

Quest Level: Intermediate

Quest Giver: Cdr. Ciderfella

Grand Prize: PacLap Ti Shield A

Objective: Defeat the boss in the deepest depths!

For this quest, you’ll embark on a trip to the Falafel Flats: North. Work your way to the end of the area to head into the Black Forest. You’ll then need to proceed to the third level to find the Songstress’s Waiting Room. When you’re ready, head through the doors to face the Bandshees. Once you defeat them, the quest will complete!


The Northern Falafel Flats Strike

Quest Level: Intermediate

Quest Giver: Cdr. Ciderfella

Grand Prize: VaCATion Lance

Objective: Take out as many monsters as possible!

Defeat 30 enemies in the Falafel Flats: North to complete this quest.


Beauty and the Beast

Quest Level: Intermediate

Quest Giver: Cdr. Ciderfella

Grand Prize: Ebony Shield

Objective: Defeat all the bosses in the deepest depths!

This quest takes you to the Black Forest where you will need to make your way over to the Songstress’s Waiting Room. When you’re ready, head through the doors to battle Sloe White and Peter Pancake. Defeat them both to complete the quest.


Guides

Snack World – Chapter 4 Story Quests

by Chappie in


Chapter 4 of Snack World The Dungeon Crawl Gold contains 8 story quests with the ultimate goal of getting some medicine for the sick princess. Below you will find guides for all the quests so grab your Jaras and get ready for a snack attack! Let the dungeon crawl begin!


The Road to Macaroon: Through the Marsh

Quest Giver: The King

Objective: Make for the Macaroon Mountains!

For this quest, you’ll head to Marsh Mallow. Follow the marker to the warp point in the northwestern part of the map. As you approach it, P-gnacchi-O will start to malfunction due to the moisture in the air leading to a battle. Defeat him then use the warp point to complete the quest.


The Road to Macaroon: Across the Ice Fields

Quest Giver: The King

Objective: Make for the Macaroon Mountains!

You’ll travel to the Frappe Fields for this quest. Follow the marker to the end of the map to locate Fruit Sorbear. Defeat it then head to the next area where you will run into Chup and the gang. Defeat all four to complete the quest.


In Search of Immortality

Quest Giver: The King

Objective: Take out the Fearnix!

For this quest, you’ll head to the Macaroon Mountains. Once there, make your way through the dungeon until you reach the Bottomless Pit. When you’re ready, head through the doors to defeat the Fearnix! To attack, the Fearnix flies up then slams down creating a damage ring under it. Make sure to dodge the ring! During your fight a memory will trigger and you will be transported to Stilton Silva. Follow the path north to trigger another cutscene. Afterwards, you will need to defeat 3 Livid Dragons. Once you defeat the dragons, you’ll be teleported back to the Fearnix to finish your fight. This time, the Fearnix will fly low, doing a streak of damage. It also will lay eggs that contain adds. Lastly, it pecks at the ground trying to get you! Defeat it to complete the quest.


Mwah! Makeover Madness

Quest Giver: The Genies (Speak with the Genies in the Inn)

Objective: Eradicate Euriley!

This quest has you embarking to Gorgonzola Ruins. Head through the dungeon to reach the Madusa Gate then go through the door to encounter Euriley. She not only looks like Madusa, but does the same moves as well. She will tail whip you, throw orbs at you and try to give you a big hug. Run from her quick shot laser eyes as they can petrify you. When she does the move that throws you back, hide behind pillars because she will follow up that attack with the laser eyes attack. When she reaches half health, her attacks will become faster, and when she gets to a fourth of health, she’ll get a massive buff increasing her stats temporarily! Defeat her to complete the quest.


A Three-Headed Beast!

Quest Giver: The King (Speak with the king in the castle)

Objective: Take out the three-headed beast!

For this quest, you’ll head to Marsh Mallow where you will be hunting Cerberus’ soldiers. When they are all defeated, follow the objective to the southwest to locate the 3-Toad Warrior. Watch out for its attacks as they can one shot you if you are not prepared. Defeat it to complete the quest.


I Scream for Ice Cream!

Quest Giver: Gunky Punk (Speak with him to the right of the Weapon’s Shop after completing The Road to Macaroon: Through the Marsh story quest)

Objective: Catch the Ice Cream Toads!

Defeat 20 Dessert Toads in the Frappe Fields to complete this quest.


Penne in a Pinch!

Quest Giver: Fredo (Speak with him to the right of the Outfitter after completing The Road to Macaroon: Across the Ice Fields story quest)

Objective: Rescue Penne!

For this quest, you’ll head to the Macaroon Mountains to find Penne. Work your way to the third level to arrive at the Bottomless Pit then head through the door to trigger a quick cutscene. Afterwards, you’ll fight Minotaurax. Finish him off ASAP as his attacks hit hard and can put your health down to zero in one shot! After you defeat him, the quest will complete.


Lame Naming Game

Quest Giver: Young Dad (Speak with him in the Outfitter after completing The Road to Macaroon: Across the Ice Fields story quest)

Objective: Defeat the geriatryx!

This quest takes you to the Macaroon Mountains. Make your way to the third level to find the Bottomless Pit. When you’re ready head through the doors to face the Geriatryx! Defeat it to complete the quest.


Guides

Snack World – How to get the Grand Prize in a Quest?

by Chappie in


Getting the grand prize from completing quests can be a bit of a challenge. It all comes down to luck, so the best you can do is maximize the number of chests you receive from completing the quest. Based on our experiences, normal chests seem to have a low chance of containing the grand prize while silver chests have a greater chance and gold chests always seem to contain one. Below are the extraordinary feats you can do while adventuring to receive extra chests after completing a quest. *NOTE: You can also randomly find a chest that contains the grand prize while exploring the area.


Extraordinary Feats

  • Bonus! (Randomly shows up?)
  • Finished the final enemy with a jara burst
  • Inflicted the most damage of all party members
  • No one in the party was KO’d
  • No status ailments contracted
  • No tonics used
  • Not KO’d once
  • Send 10 enemies flying with smash hits
  • Transformed into a pocket snack
  • Quest cleared


Guides

Snack World – Chapter 3 Side Quests

by Chappie in


Below are the side quests in Chapter 3 of Snack World Dungeon Crawl Gold. Side quests are quests that you can do online with other people. Be sure to make a cool online profile for yourself in PIX-e PALS before you dabble in the side quests.


Succotash Sands Safari!

Quest Level: Beginner

Quest Giver: Cdr. Ciderfella

Grand Prize: Ebony Brooch

Objective: Explore at will before returning to base!

For this quest, you’ll be exploring Succostash Sands much like you could have guess based on the objective! Once you reach the end of the first area, activate the Waystone to complete the quest.


Beating the Krapen

Quest Level: Beginner

Quest Giver: Cdr. Ciderfella

Grand Prize: Oaken-Helved Axe

Objective: Defeat the boss in the deepest depths!

This quest first takes you to Succotash Sands. Make your way to the marker on the map and interact with the Waystone. Using the Waystone will teleport you to Gumbo Grotto where the Krapen awaits. Head to the Cavern of Calm and proceed through the door to encounter the Krapen again. Defeat the Krapen to complete the quest.


Dessert Storm

Quest Level: Beginner

Quest Giver: Cdr. Ciderfella

Grand Prize: Oaken Staff

Objective: Take out as many monsters as possible!

For this quest, you will head to Succostash Sands. Once you arrive, you’ll need to defeat 30 enemies in this area to complete the quest.


Chup the Chicken

Quest Level: Beginner

Quest Giver: Cdr. Ciderfella

Grand Prize: VaCATION Axe

Objective: Defeat all the bosses in the deepest depths!

This quest takes us to the Gorgonzola Ruins! Make your way through the dungeon to the Madusa Gate and enter the door. Defeat Mayonna, Chup, Gobson and Bearny to complete the quest. Be wary of these four enemies as they can do a lot of damage.


Guides

Snack World – Chapter 3 Story Quests

by Chappie in


Chapter 3 of Snack World The Dungeon Crawl Gold contains 8 story quests with the ultimate goal of getting a love potion for Princess Melonia. Below you will find guides for all 8 quests so grab your Jaras and get ready for a snack attack! Let the dungeon crawl begin!


To the Black Forest

Quest Giver: The King

Objective: Head to the Black Forest!

This quest has you exploring the Falafel Flats: North. During your expedition, you’ll come across a guy with brown hair wearing a green outfit wielding a bow. Defeat him then continue on your way. Touch the stone in the Path into the Black Forest to complete the quest.


Slumbering Princess

Quest Giver: Peter Pancake

Objective: Find the so-called “Princess of the Forest”!

For this quest, you’ll scour the Black Forest for the Princess of the Forest. Eventually, you’ll wind up in the Songstress’s Waiting Room. Head through the door to engage in a boss fight with Sloe White. During the fight, she will keep spawning adds so just ignore them and focus your attention on her. Defeat her to complete the quest.


Sister Secrets

Quest Giver: The King

Objective: Take out the Bandshees!

This quest takes you back to Black Forest. Work your way through the dungeon to reach the Songstress’s Waiting Room then head through the door where you will encounter Ban and Shee. These bosses do an Adoration Attack in which they charge at you and do a spinning attack. They can also do a move that creates whirlwinds on the field. Try and avoid the whirlwinds! About halfway through, they do a mist attack that blankets the whole screen in white. The bosses also use a move called Lashing of Love, which is a simple slashing attack. The move Explosion of Excitement is a dangerous attack to watch out for as it does a lot of damage and is used back to back. Whenever the fight drops down to one boss, the damage for the remaining boss is increased and it can move faster. Defeat the bosses to complete the quest.


Complaint Quest

Quest Giver: Hero Mart Staff (Speak with him in the Convenience Store)

Objective: Subdue the complaints committee!

Head to the location on the map in Falafel Flats: North to be attacked by a handful of Kobolts. Once you defeat them, an Orcward appears. Defeat the Orcward to complete the quest.


Home Run Hits!

Quest Giver: Yetini (Speak with him near the entrance of Tutti-Frutti)

Objective: Send the yetinis home!

For this quest, you’ll embark on a trip to Succotash Sands. Once there, knock 40 Yetinis out of the park to complete the quest.


Britannia Encheap

Quest Giver: Gelatto (Speak with him in the Weapons Shop after completing the To the Black Forest story quest)

Objective: Capture the trickster trader!

This quest begins in the Falafel Flats: North. Head towards the red enemy marked on the mini map to find Sus Salesman. After you defeat him, he’ll flee to another part of the area. Again, use the mini map to locate him then engage with him in battle once more. Repeat this one more time. The third time you find him, he’ll spawn two large Pandamonias. Defeat them all to complete the quest. Be careful as the Sus Salesman can deal a lot of damage quickly.


Guilty Until Proven Innocent

Quest Giver: Fredo (Speak with him to the right of the Outfitter shop)

Objective: Go apple picking in the forest!

For this quest, you will head to the Black Forest. Once there, make your way to the Songstress’s Waiting Room and proceed through the door. In the next room, you’ll need to defeat the Apple Haggler to complete the quest.


Stop ze Vor!

Quest Giver: Kobolt (Speak with him on the east side of town in the farming area)

Objective: Make the monsters stop their arguing!

You’ll head back to the Black Forest for this quest. Make your way to the deepest, darkest part of the dungeon (the Songstress’s Waiting Room) and head through the door to locate 3 Gobblins and 3 Kobolts. Once you defeat the Gobblins and Kobolts, they’ll just keep spawning. In order to complete this quest, you’ll need to defeat 30 of them.


Tokyo Mirage Sessions
Guides

Tokyo Mirage Sessions – Golden Child/Monster

by MrsChappie in


Obtained: After Mamori reaches Stage Rank 10 and you reach the Chapter 5 Intermission, you will receive a Topic from Mamori. Mamori wants you to meet her in Daitama so head on over!


Tiki needs an ore from the Illusory Daitou TV Station to make the pairing knife for Mamori. After the cutscene, head to the Idolasphere and teleport to Film Set B: Indoors (1F). Take a right and head down the hall. Exit through the door at the end of the hall and take an immediate right. Follow the path forward towards the stairs leading up. Instead of taking the stairs up, head through the door to the right of the stairs. The Illusory Obsidian will be located on the ground diagonally left from you next to stacks of boxes.


Once you retrieve the item, travel back to Bloom Palace and give the Illusory Obsidian to Tiki to trigger a cutscene. Afterwards, return to Bloom Palace and speak with Tiki to obtain Mamori’s new Radiant Skill “Door of Dreams”, which will complete the side story.


Tokyo Mirage Sessions
Guides

Tokyo Mirage Sessions – Godmother

by MrsChappie in


Obtained: During the Chapter 5 Intermission, Maiko will send you a Topic. After you read it, head to Fortuna Office and speak with her.


Maiko wants you to give Nobu some documents at Daiba Studio. Once you accept, you’ll receive an A4 Leather Case. Head towards the map transition to receive an urgent Topic from Kiria. Agree to meet Kiria then travel to Cafe Seiren in Shibuya and speak with her outside to trigger a brief cutscene.


After the cutscene, travel to Daiba Studio to speak with Mr. Horinozawa who is standing in the middle of the room. After the cutscene, you’ll send a Topic to Kiria. To obtain the lens capturing soul, head to the Shibuya 106 Idolasphere. Once inside the Idolasphere, enter the door on the right leading to the Underground Stairs. Head down the passage on the left side of B1F to find the pink mannequin. Enter the sleeve to find yourself on B2F. Follow the path until you reach a T split. Take the path on the right to reach a circular room. The item will be on the ground in this room.


Once you obtain the Illusory Dougen Gem, travel to Bloom Palace and hand it over to Tiki so she can turn it into a lens. Next, travel to Daiba Studio and give the Soulfocus Lens to Mr. Horinozawa who will give you back some documents. Afterwards, head to Fortuna Office and speak with Maiko to trigger a cutscene, completing the side story.