Welcome to NGB and our guide for the Mob Mentality mission in Starfield! This guide will walk you through starting the mission and detail the necessary steps for its completion. If you need help with a specific mission objective, check the quick links section to easily find the information needed.
Some of the planets referenced in our guides and walkthroughs may not match yours due to how Starfield was created. In these situations, what you do and the places you visit on those planets should remain the same.
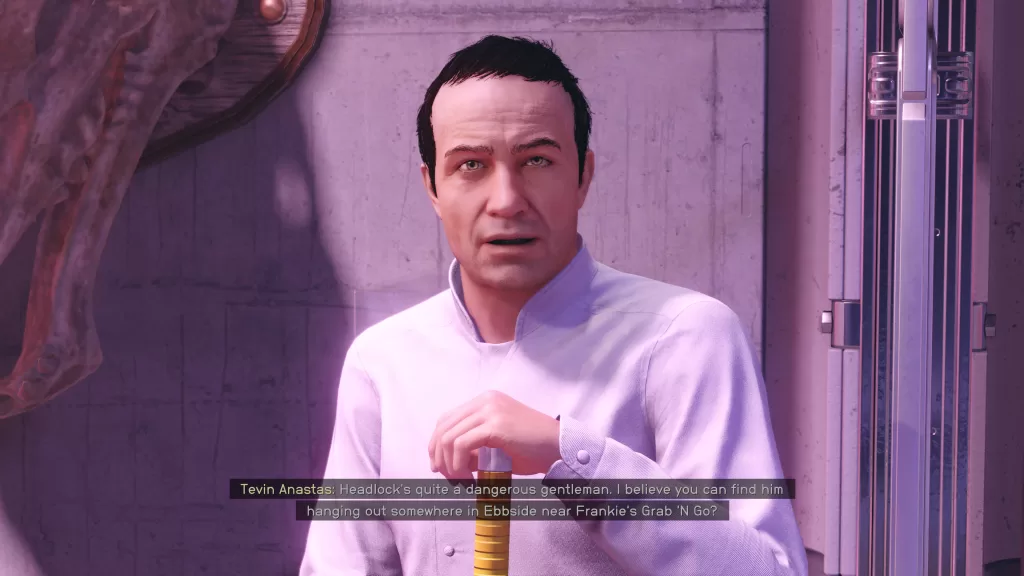
Mob Mentality is one of the missions you can pick up in Neon on the planet Volii Alpha of the Volii System. To start the mission, head into The Emporium and speak with Tevin Anastas. Exhaust his dialog options and he’ll mention Headlock, a member of the syndicate, has been coming into his store harassing him.
Mob Mentality Walkthrough
Ask Frankie About Headlock
You’ll find Frankie in her shop, Frankie’s Grab and Go. To reach it, head through the Ebbside door to the right of Enhance! and head straight to reach the Sleep Crates. Take a left and you’ll see the store.
Head inside and speak with Frankie. Ask her about Headlock then exhaust her dialog options to learn his location. Exit the shop heading east to the other side of the area to find Warehouse 04. Head inside then drop down to the lower floor to find Headlock. Interact with him to begin the conversation. You’ll be given the choice to attack him or to talk it out. If you talk to him, you’ll have to pass a persuasion check to get him to leave the Emporium alone peacefully.
Return to Tevin
Either way, return to Tevin afterward and tell him it is done to complete the mission. You’ll be rewarded with 100 EXP and some credits.
Additional Starfield Guides and Walkthroughs
Be sure to check our main Starfield Guides and Walkthroughs page for additional content on Starfield, such as additional guides to assist you during your adventures in the Settled Systems!
Welcome to NGB and our guide for the Relief Run mission in Starfield! This guide will walk you through starting the mission and detail the necessary steps for its completion. If you need help with a specific mission objective, check the quick links section to easily find the information needed.
Some of the planets referenced in our guides and walkthroughs may not match yours due to how Starfield was created. In these situations, what you do and the places you visit on those planets should remain the same.
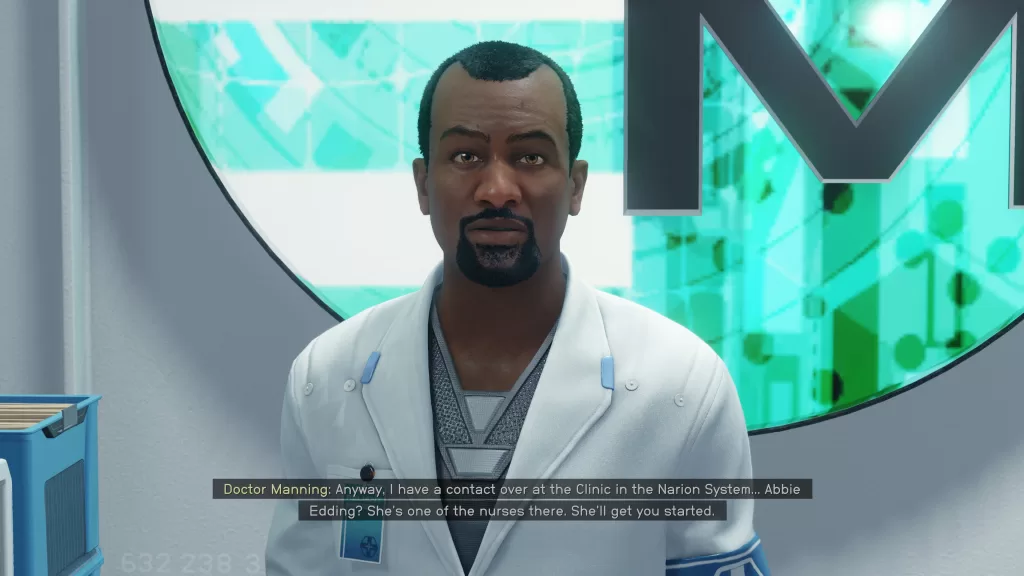
Relief Run is one of the missions you can pick up in Neon on the planet Volii Alpha of the Volii System. To start the mission. To start the mission, head to Reliant Medical and speak with Doctor Manning. When he mentions running low on supplies, ask him about it then offer to help.
Relief Run Walkthrough
Speak with Abbie Edding
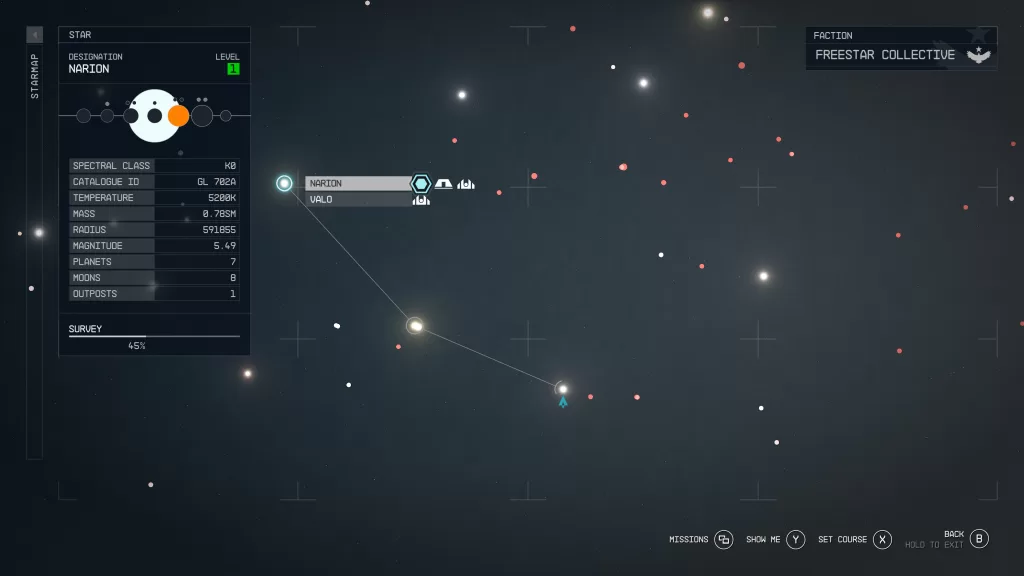
Head back to your ship and set a course for the Narion System. Your destination is the Clinic orbiting Deepala. Dock there then disembark from the ship.
You’ll be able to find Abbie somewhere near the lobby. Speak with her to get the shipment. If you want, you can try to pass a persuasion check for additional supplies. They will be loaded onto your ship for you.
Return to Joseph
Travel back to Neon and pay Joseph a visit at Reliant Medical to deliver the supplies. This will complete the mission and you’ll be awarded 100 EXP and some credits.
Additional Starfield Guides and Walkthroughs
Be sure to check our main Starfield Guides and Walkthroughs page for additional content on Starfield, such as additional guides to assist you during your adventures in the Settled Systems!
Welcome to NGB and our guide for the Starfield Commitment: Sarah Morgan mission! This guide will walk you through starting the mission and detail the necessary steps for its completion. If you need help with a specific mission objective, check the quick links section to find the most relevant information easily.
Commitment: Sarah Morgan is a companion mission for Sarah Morgan. To start it, you’ll need to have completed her In Memoriam mission. In addition to that, you’ll also need to have started dating Sarah and committed to her when she brought up the subject. By actively increasing her affection for you and making choices that she likes, After committing to Sarah and leveling her affection some more, she’ll tell you she’s ready to get married! You’ll also have the choice to invite Sarah’s mom to the ceremony.
Starfield Commitment: Sarah Morgan Mission Guide
Proceed to Paradiso
To reach Paradiso, you’ll need to set a course for the Porrima System which is east of Alpha Centauri on the starmap. Once there, head to the planet Porrima II and land at Paradiso. Once you arrive, speak with Sarah who will want confirmation that this is what you want. If you invited her mother along, you’ll need to speak with her next.
Speak to Abigail / Aja
Exit the ship and follow the marker northeast past the Welcome Parasiso building to find her.
Speak with Abigail to introduce yourself. After that, speak with Aja who will be standing nearby to start the ceremony.
Welcome to NGB and our guide for the Return to the Fold mission in Starfield! This guide will walk you through starting the mission and detail the necessary steps for its completion. If you need help with a specific mission objective, check the quick links section to easily find the information needed.
Some of the planets referenced in our guides and walkthroughs may not match yours due to how Starfield was created. In these situations, what you do and the places you visit on those planets should remain the same.
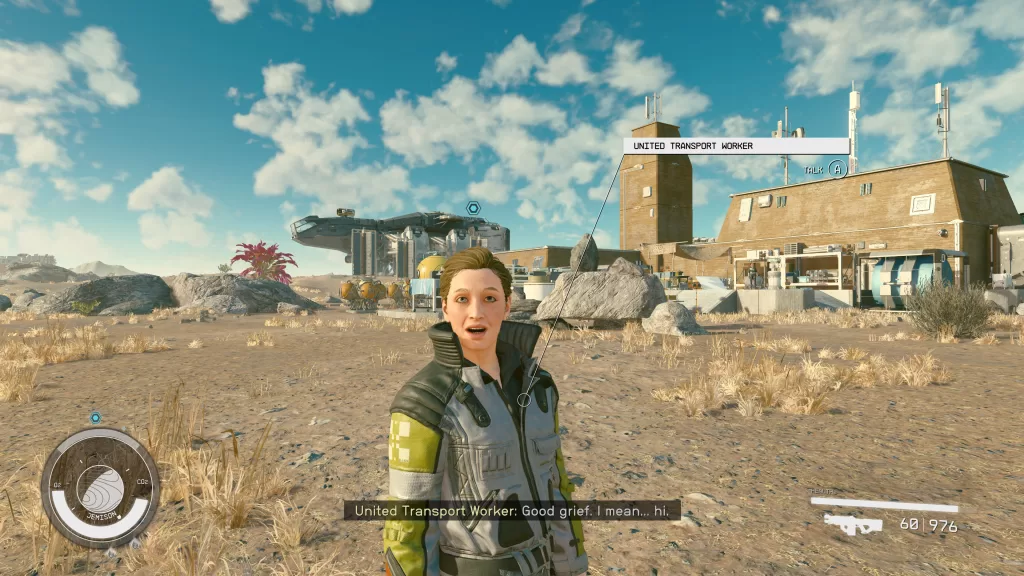
Return to the Fold is one of the missions you can pick up at the Industrial Outpost on Jemison in the Alpha Centauri System. To start the mission, speak with a United Transport Worker there.
Return to the Fold Walkthrough
Find and Convince United Transport Worker to Return
To reach the United Transport Worker, head south from the Industrial Outpost across the desert until you reach a Civilian Outpost.
Speak with her and she’ll say she’s not coming back. You’ll then have the option to persuade her, pay her to come back (2500 credits) or tell her you’ve given up on trying to convince her. You’ll have to convince her to return otherwise the quest will fail. Once you do, lead her back to the Industrial Outpost and speak with the mission giver to complete the mission. You’ll be rewarded with 150 EXP and some credits.
Additional Starfield Guides and Walkthroughs
Be sure to check our main Starfield Guides and Walkthroughs page for additional content on Starfield, such as additional guides to assist you during your adventures in the Settled Systems!
Welcome to NGB and our guide for the In Starfield In Memoriam mission! This guide will walk you through starting the mission and detail the necessary steps for its completion. If you need help with a specific mission objective, check the quick links section to find the most relevant information easily.
In Memoriam is a compilation mission for Sarah Morgan. To start the mission, you’ll need to have raised Sarah’s affection for you high enough by making choices that she likes. This, in turn, will lead to about 3 to 4 conversations where she’ll eventually ask for your help. Sarah will be locked in your party after starting this mission until its completion.
Starfield In Memoriam Mission Guide
Speak to Admiral Logan
Admiral Logan can be found at the MAST office in the MAST District of New Atlantis, situated on the planet Jemison within the Alpha Centauri System, just above the NAT station. Go inside and use the elevator to travel to the Central Command / Office of the President / Systems Defense floor, then pass through the doorway marked ‘Central Command’. Proceed to the back left side of the room to find the Admiral’s office. Upon entering the office, Sarah will converse with the Admiral, who will eventually involve you. Choose whatever option you like, as your choices do not affect the outcome.
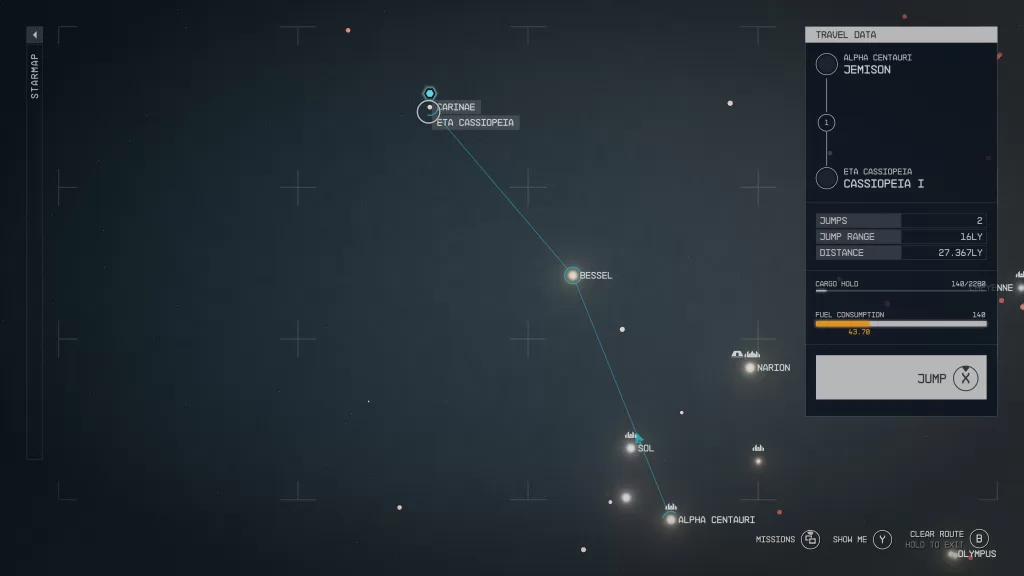
Proceed to Cassioppeia I
Return to your ship and set a course for Cassiopeia I. It can be found in the ETA Cassiopeia System. You’ll want to land at the Ship market on the planet and then speak with Sarah afterward.
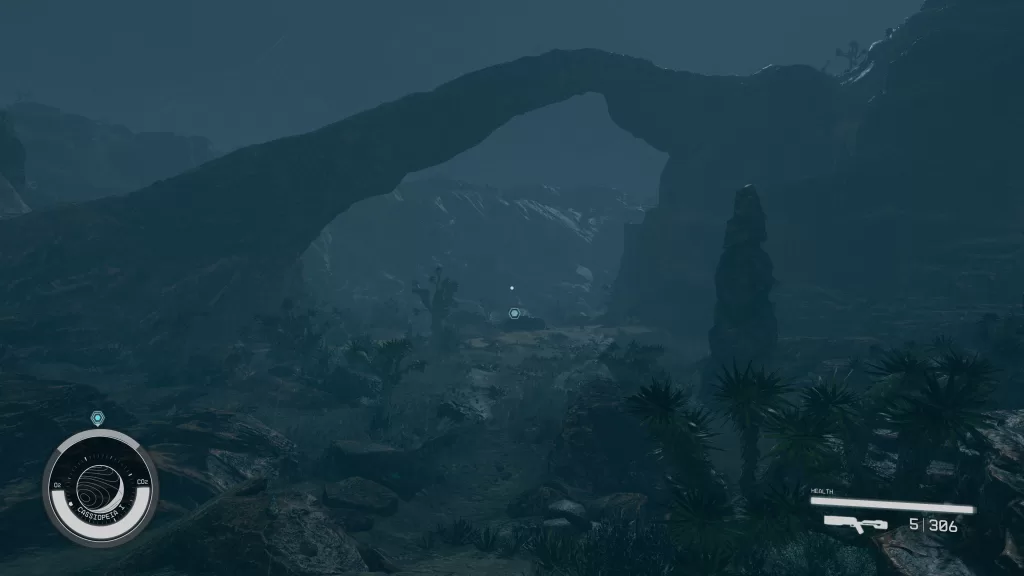
Proceed to Sarah’s Old Campsite
Exit your ship and follow the objective marker east to reach Sarah’s Old Crashsite. Head in far enough until the objective updates, and then you’ll want to speak with Sarah.
Locate and Install the Emergency Power Cell
After the conversation, start climbing up to the top of the plateau to snag the power cell Sarah had mentioned. You’ll be attacked by a trio of Level 30 enemies as soon as you grab it.
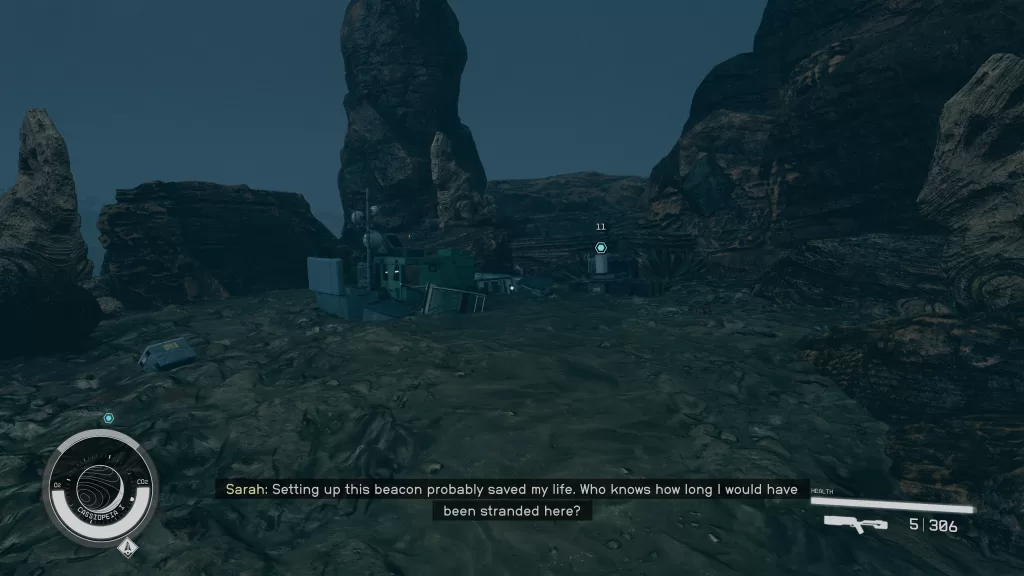
After dealing with them (or not because they like to run away), head back down to the ship’s remnants, then install the power cell to get inside. You’ll then be able to access the Escape Shuttle 03 Computer. You can peruse the other files if you want, but to proceed, you’ll need to select the ‘Telemetry Data’ folder and select both ‘Object Alpha’ and ‘Object Beta.’ Talk with Sarah again afterward, and she’ll head to the other shuttle. Before returning to your ship, you can grab a magazine in this room.
Investigate the Shuttle Crash Site
Exit the ship to be attacked by the surviving Stonewalker Stalkers from earlier. Deal with them, then open your Starmap and travel to the new ship marker that has just appeared on the planet.
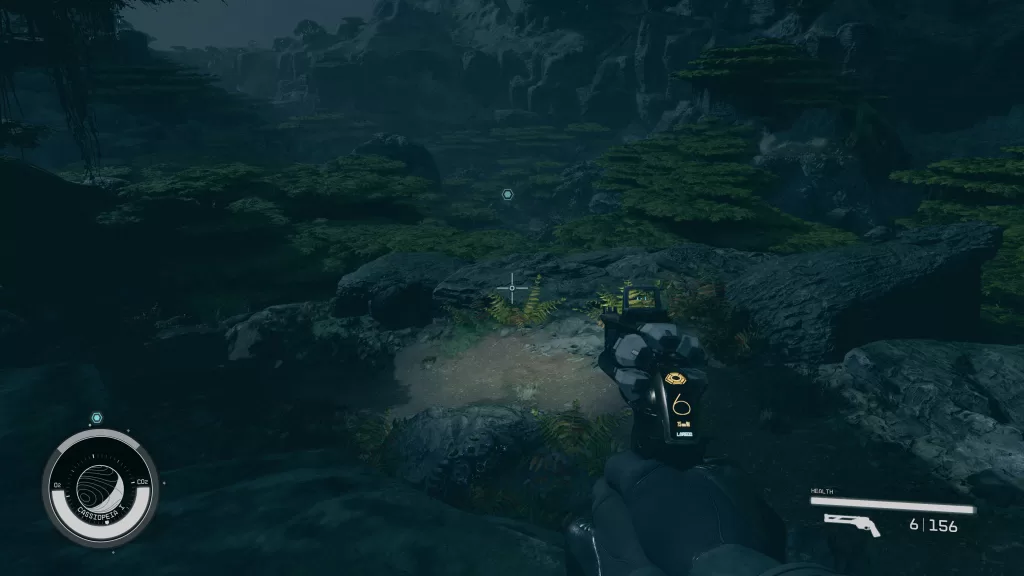
Follow the objective marker southwest through a tunnel to get an overview of the area where you’ll spot the shuttle off in the distance. Make your way there to learn that parts of the shuttle had been salvaged and dragged away somewhere else. Follow the path southeast to find a makeshift shelter.
Enter the shelter to meet Sona, who is not happy to see you. Exhaust her dialog options, then speak with Sarah again (another magazine is also on the table).
Collect Genetags
Exit the shelter following the long path that leads behind it, and eventually reach the graveyard. You’ll have to fight quite a few insects along the way. Once you arrive, collect the Dauntless Crew Genetag from each of the tombstones.
After collecting the last one (#9), a giant t-rex-like beast shows up that you’ll need to take down. Loot it for the last Genetag, then take them back to Sarah in the shelter.
Convince Sona to Leave or Let Her Stay
Back in the shelter, Sarah is trying to convince Sona to leave the planet, but she’s not having it. Sarah will then ask that you speak with Sona and get her to leave. There are no persuade options; this is done just through dialog options. There really isn’t a big difference if you let her stay or not, so go with what your gut tells you. After making the decision, speak with Sarah once more.
Proceed to the Overlook
Exit the shelter, then head for the overlook above the entrance to the path leading to the shelter.
Speak with Sarah once last time before heading back to the ship.
Return to New Atlantis
Travel back to New Atlantis and visit Admiral Logan in Central Command. Head back to his office and speak with him to hand over the Genetags. When you’re done, if you brought Sona with you to New Atlantis, she’ll be at the Lodge. Make your way there and speak with her. To finish the mission, take Sarah to the Colony War Memorial near the ramp leading to the NAT.
Talk with her, and she’ll ask for a moment of silence, then ask you to bring her to the waterfall. You can get there by taking the NAT to the Spaceport and then riding the elevator by Jemison Mercantile to the Waterfall Promenade. Follow the walkway all the way to the end. This will cause the objective to be updated, and Sarah will temporarily leave the party. Approach her to begin a conversation where you’ll finally be able to decide if you want to remain friends or start a relationship with Sarah. After making your decision, the mission will be complete, and you’ll be awarded 250 EXP and some credits.
Welcome to NGB and our guide for the Captain’s Bounty mission in Starfield! This guide will walk you through starting the mission and detail the necessary steps for its completion. If you need help with a specific mission objective, check the quick links section to easily find the information needed.
Some of the planets referenced in our guides and walkthroughs may not match yours due to how Starfield was created. In these situations, what you do and the places you visit on those planets should remain the same.
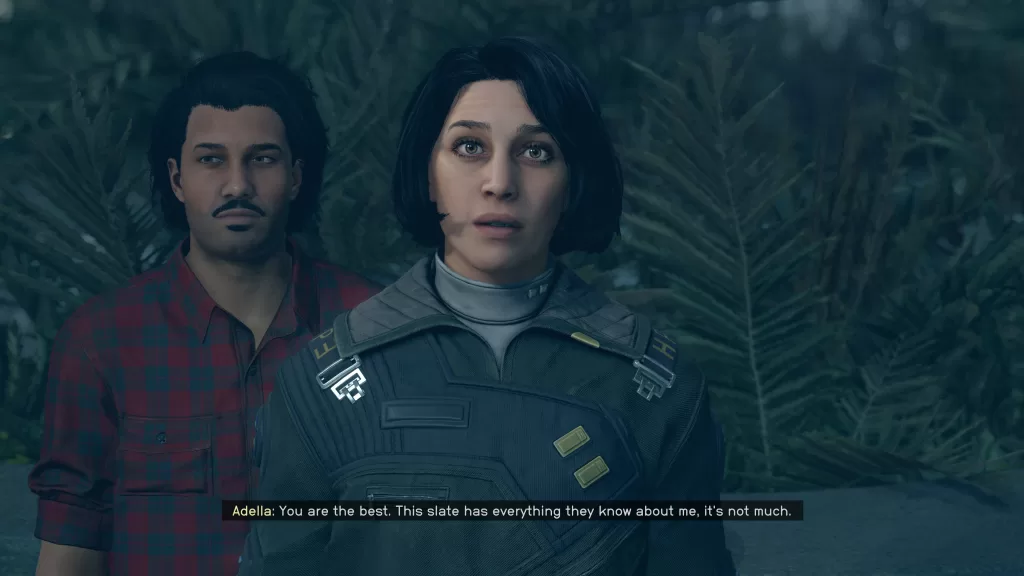
Captain’s Bounty is one of the missions you can complete in HopeTown on the planet Polvo of the Valo System. To pick up the mission, speak with Adella near the Best Defense and agree to help her.
Captain’s Bounty Walkthrough
Find the Tracker Hunting Captain Faheem
To find the tracker, enter the Pit Stop which is the the left of Adella when looking at her.
Head over to the bar and speak with Ernesto who is wearing a cowboy hat and leaning against the counter. Tell him your name is Faheem and he’ll say he’s after your bounty. You’ll get a couple of options to counter with. You can attack him or try to persuade him to let you go. If you have the Bounty Hunter background, there is an option where he will let you go without a fuss. Trying to convince him you’re not really the Captain or trying to buy him off won’t work.
Return to Adella Faheem
Head back outside to Adella and let her know that you’ve dealt with the Tracker. This will complete the mission. If you killed him, then you’ll be awarded 50 EXP and 2500 credits. If you convince him to let her go, then you’ll be awarded 50 EXP and 3300 credits. A thing to note, if you have the Commerce perk, then there will be a special dialog you can follow up with here.
Additional Starfield Guides and Walkthroughs
Be sure to check our main Starfield Guides and Walkthroughs page for additional content on Starfield, such as additional guides to assist you during your adventures in the Settled Systems!
Welcome to NGB and our guide for The Bounty That Got Away mission in Starfield! This guide will walk you through starting the mission and detail the necessary steps for its completion. If you need help with a specific mission objective, check the quick links section to find the information needed easily.
Some planets referenced in our guides and walkthroughs may not match yours due to how Starfield was created. In these situations, what you do and the places you visit on those planets should remain the same.
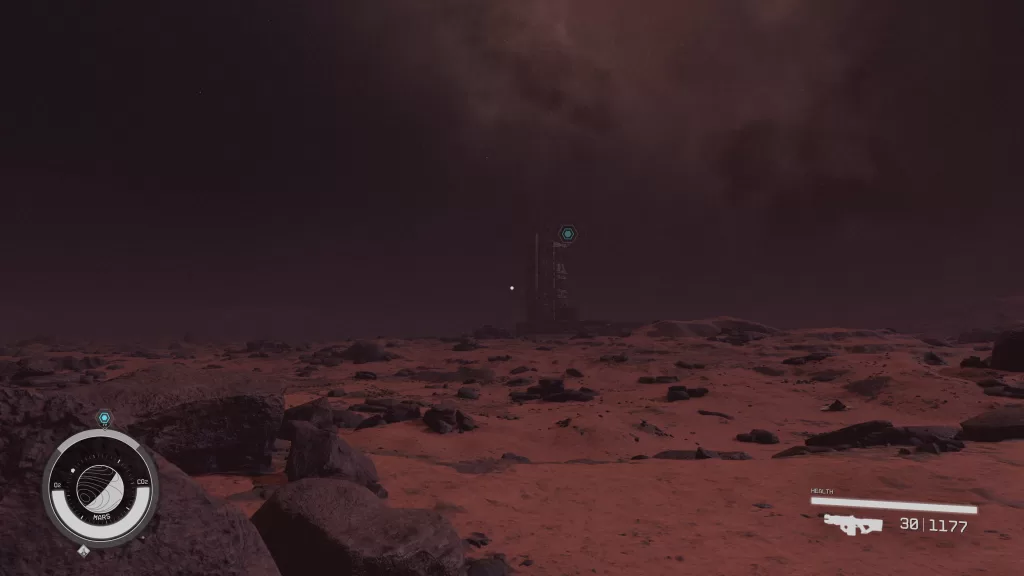
The Bounty That Got Away is one of the misc missions you can pick up in Cydonia on Mars of the Sol System. To start the mission, speak with the Tracker Agent who will ask you to help her place a sensor on her target. She can be found leaning against a wall across from the entrance to the bar.
The Bounty That Got Away Walkthrough
Place the Sensor
Exit Cydonia to Mars’ surface, then head east of the city towards a tall structure in the distance (Mars Launchpad).
Once you reach it, you’ll need to climb inside it all the way to the top by jumping on boxes and walking up fallen metal. At the top, walk across the long piece of metal to reach the edge where you’ll place the sensor, then return to the Tracker Agent.
Speak with her to complete the mission, and you’ll be rewarded with 50 EXP and some credits.
Additional Starfield Guides and Walkthroughs
Be sure to check our main Starfield Guides and Walkthroughs page for additional content on Starfield, such as additional guides to assist you during your adventures in the Settled Systems!
Welcome to NGB and our guide for the Starfield Mantis mission! This guide will walk you through starting the mission and detail the necessary steps for its completion. If you need help with a specific mission objective, check the quick links section to easily find the most relevant information for you.
Mantis is one of the misc missions you can pick up on planet Jemison. To start it, you’ll need to read the Secret Outpost! note on a dead Spacer. We found ours during the Security Concerns mission at the Abandoned Deimos Scrapyard.
Starfield Mantis Mission Guide
Read the Secret Outpost Slate
Open your Inventory screen and select the Secret Outpost! text log in your Notes section. This will update the objective and give you the coordinates of where you need to go: Denebola I-b.
Go to the Secret Outpost at Denebola I-B
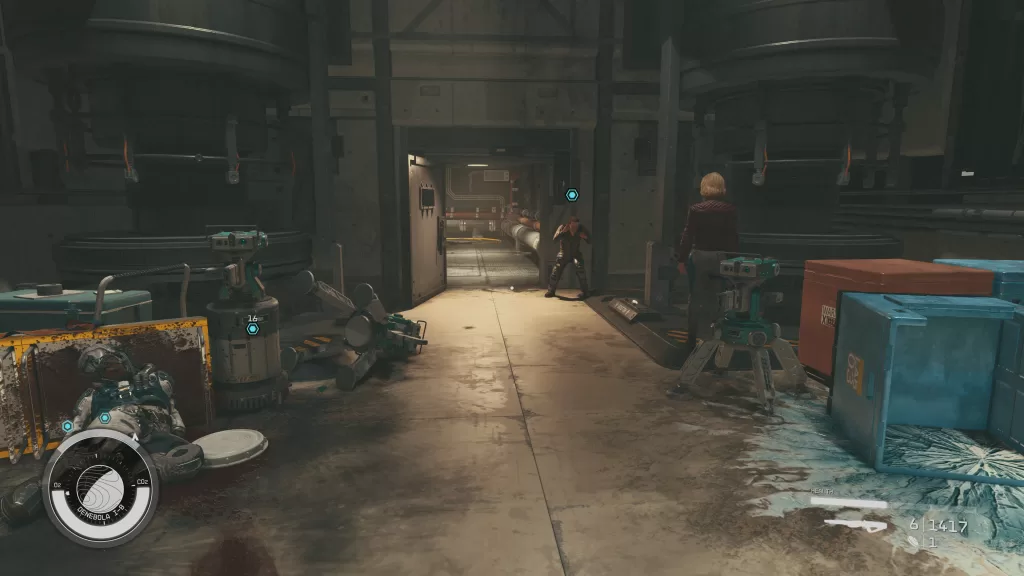
When you’re ready, travel to the Secret Outpost on Denebola I-b, which is the moon of Denebola I in the Denebola System. Be prepared to fight as soon as you land. The area has a handful of Spacers that will attack you if you get close. Head southwest from your ship to find the entrance to the Lair of the Mantis. Make your way inside if you dare!
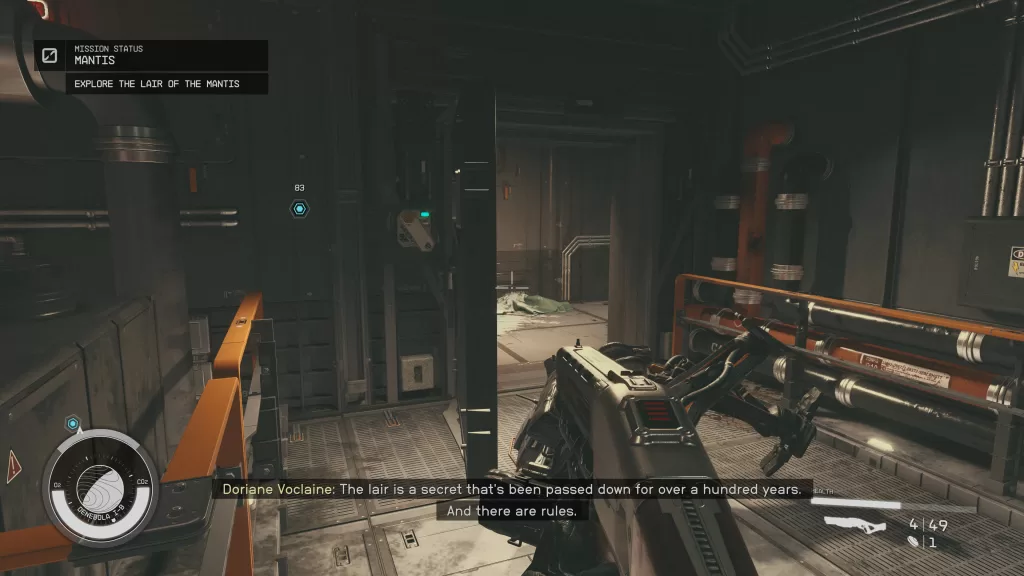
Explore the Lair of the Mantis
Exploring the Lair of the Mantis is pretty straightforward, you’ll just need to follow the only path forward while dealing with the Spacers and looting things to your heart’s content. When you find Leon, you’ll get an optional objective to speak with Livvey who can be found nearby. He’ll say that he knows how to disarm the traps and asks to go along with you (for only a small fraction of the treasure). You can also kill him if you want.
If this is a NG+ run, then you’ll have a special dialog option which results in you fighting Livvery.
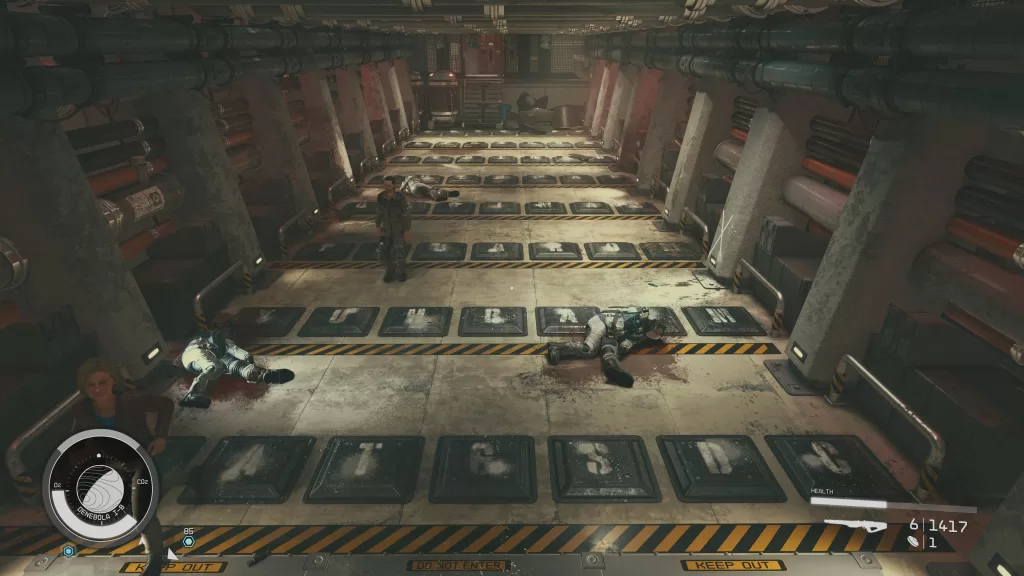
Just past Livvey, you’ll reach a room of floor plates with letters transcribed on them and turrets on the other end. If you step on the wrong plate, you’ll be gunned down. Luckily we have the word you need to spell out: T-Y-R-A-N-N-I-S. Step on the tiles in that order and you’ll make it to the other side safely. Alternatively, you can shoot and take out the turrets then walk across.
Continuing on, you’ll head up a flight of stairs past the floor puzzle and take a left through a doorway. This will bring you into a hallway with a turret and leads to a room with two robots. There will be an automated message you can listen to by interacting with the intercom on the left side of the doorway in this room which will satisfy the Learn More About the Lair optional objective.
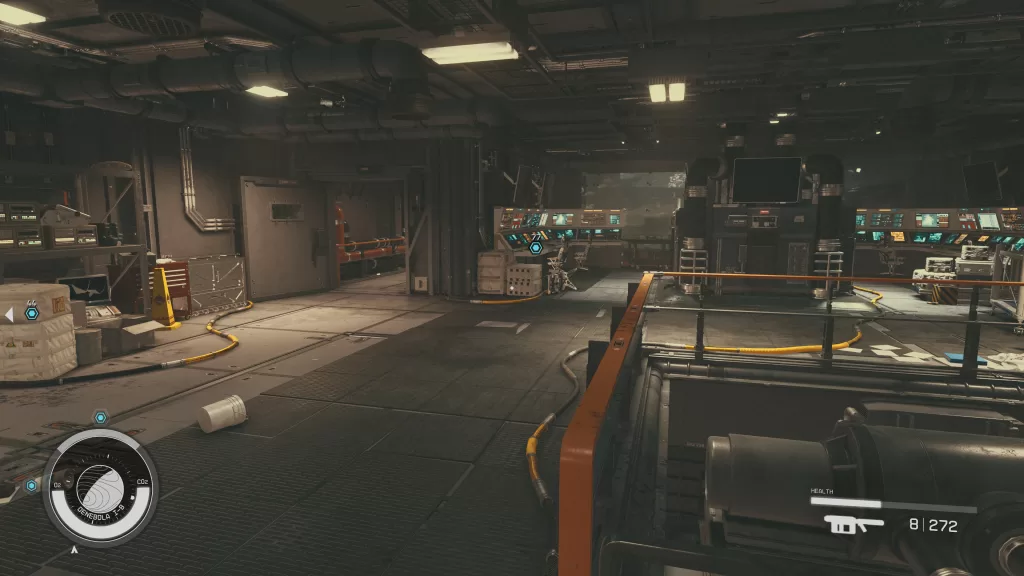
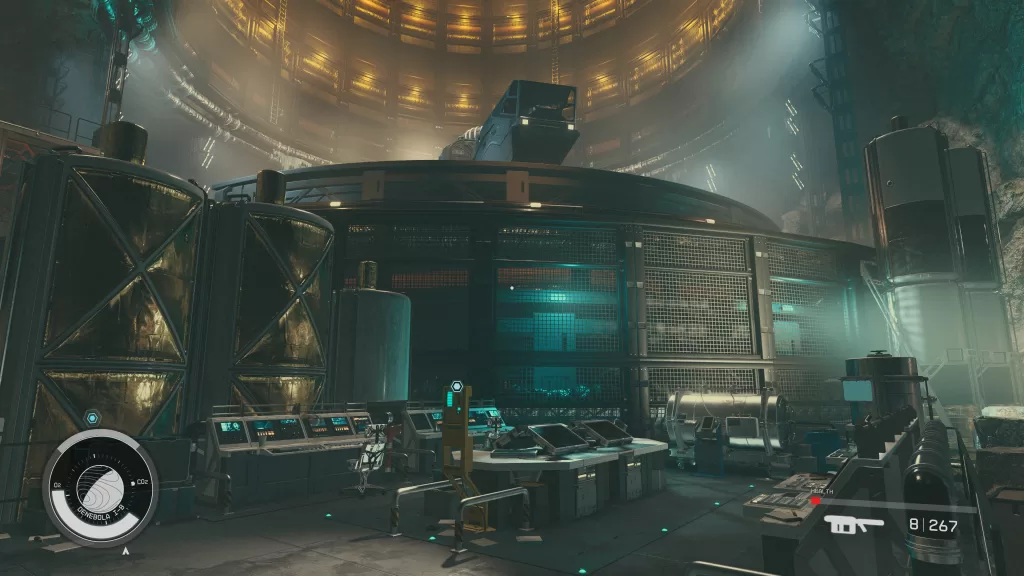
Head through through the doorway following along another hallway to the room at the end. There you’ll have to fight one last robot. If you brought Livvey with you, he’ll seal you in the room with the robot claiming to take all of the treasure for himself (a decision that blows up in his face). After you defeat it, head through the door near the computers to reach the hanger (which also has a few death robots).
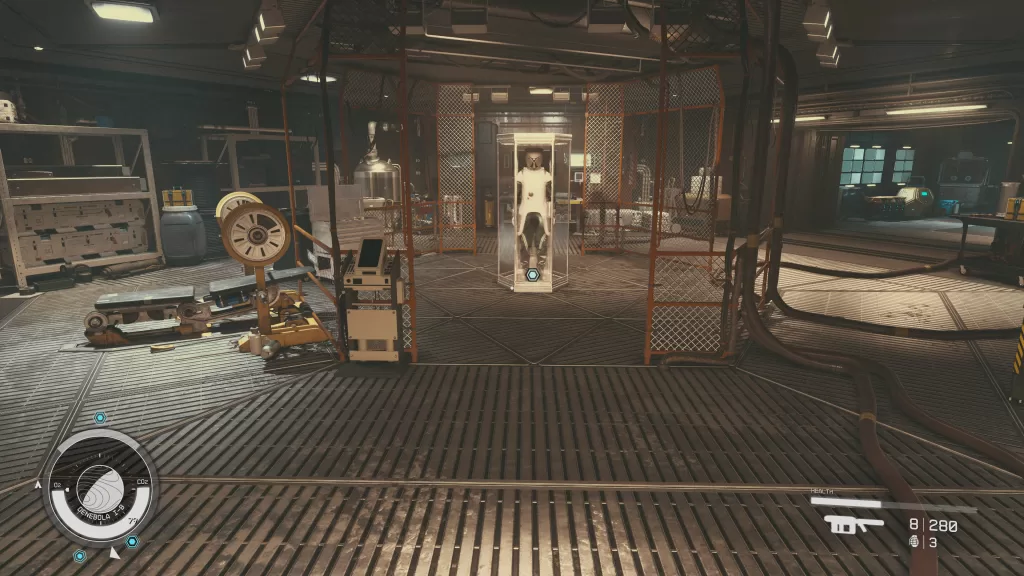
After heading down the ramp in the hanger, take a left to head through the Mantis’ room. You’ll be able to find her suit in a case in a connecting room along with some chests.
Head to the other end of the hangar, to find the Mantis Ship. Interact with the Starship Lift Controls to claim it as your own. You’ll then need to exit the hangar and take the elevator in the command room up to reach the entrance of the building.
Exit the building and approach the ship to complete the mission.
Welcome to NGB and our guide for the My North Star mission in Starfield! This guide will walk you through starting the mission and detail the necessary steps for its completion. If you need help with a specific mission objective, check the quick links section to easily find the information needed.
Some of the planets referenced in our guides and walkthroughs may not match yours due to how Starfield was created. In these situations, what you do and the places you visit on those planets should remain the same.
My North Star is one of the misc missions you can pick up in Cydonia on Mars of the Sol System. To start the mission, speak with Sivan in the Central Hub and exhaust her dialog options. We found her leaning on the rail overlooking the mining operation below. She’ll talk to you about looking for the North Star. Respond by telling her that you have a ship and wouldn’t have a problem taking her to get a closer look.
My North Star Walkthrough
Take Sivan to Mars’ Orbit
After accepting this quest, Sivan will start following you. Head back to your ship and take off to Mars’ orbit. This will prompt some dialog from Sivan. When she’s done talking, land back on Mars and speak with her in your ship. You’ll then need to return to Cydonia and speak with her once more to complete the quest. You’ll be rewarded with 150 EXP and some credits.
Additional Starfield Guides and Walkthroughs
Be sure to check our main Starfield Guides and Walkthroughs page for additional content on Starfield, such as additional guides to assist you during your adventures in the Settled Systems!
Welcome to NGB and our walkthrough for the Sowing Discord mission in Starfield! This guide will walk you through starting the mission and detail the necessary steps for its completion. If you need help with a specific mission objective, check the quick links section to easily find the information needed.
Some of the planets referenced in our guides and walkthroughs may not match yours due to how Starfield was created. In these situations, what you do and the places you visit on those planets should remain the same.
Sowing Discord is one of the faction missions for Ryujin Industries. You’ll automatically begin this mission after completing the Access is Key mission.
Sowing Discord Walkthrough
Influence Arthur Cruz Against Infinity LTD
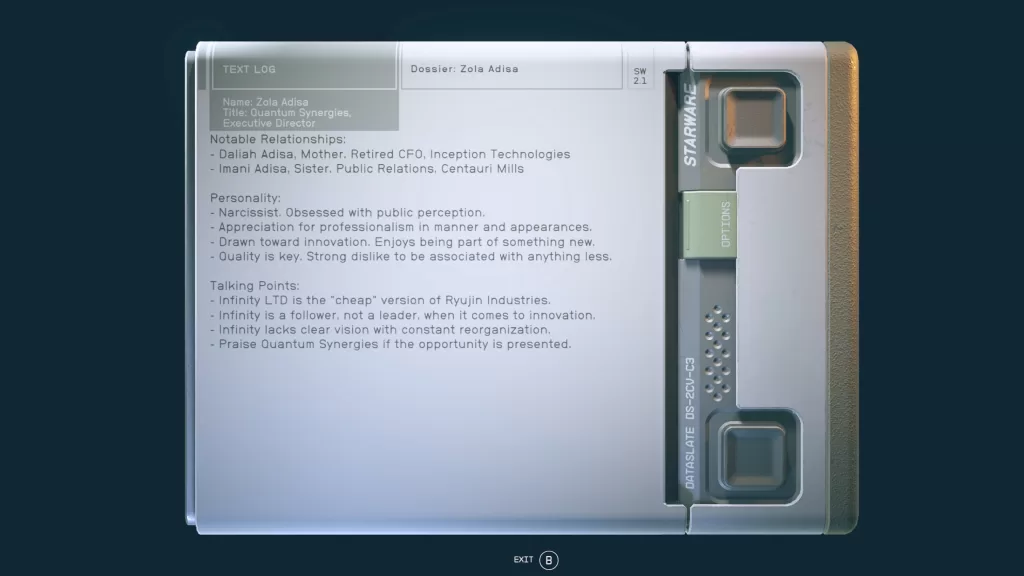
Afterwards, read the dossiers. You can do this by opening up your Inventory and reading Dossier: Arthur Cruz and Dossier: Zola Adisa. Also make sure to equip the Fitted Business Suit so you blend in!
Now that you look snazzy and have studied up on your targets, head to the Astral Lounge. Once inside, turn left and enter the VIP Elevator. Ride it to the VIP Balcony. Exit the elevator and take a right. Enter Booth 1 to find Arthur Cruz. Speak with him then you can persuade him using the talking points in his dossier.
Influence Zola Adisa Against Infinity LTD
Return to the elevator and take it down to the Dance Floor. Head straight across the dance floor to find Zola Adisa sitting on a couch people watching. Speak with her then persuade her using her talking points.
Switch Nina Hart’s Presentation
With both targets persuaded, it’s time to make the switch. Return to the VIP Elevator and take it up to the VIP Balcony. Take a left and follow the hallway around to reach a locked VIP Booth. Use a Digipick to pick the novice lock then head inside. Interact with the presentation on the coffee table to switch it then your job is done.
Return to Imogene at Ryujin Tower
Report back to Imogene to complete the mission. As a reward, you’ll receive 10000 Credits, 250 XP and Digipicks.
Additional Starfield Guides and Walkthroughs
Be sure to check our main Starfield Guides and Walkthroughs page for additional content on Starfield, such as additional guides to assist you during your adventures in the Settled Systems!
Search
This site uses cookies. By continuing to use this website, you are giving consent to cookies being used. For more information on cookies, view our Privacy Policy.OkPrivacy Policy