Welcome to NGB and our guide for the Doctor’s Orders Starfield mission! This guide will walk you through starting the mission and detail the necessary steps for its completion. If you need help with a specific mission objective, check the quick links section to easily find the information needed.
PLEASE NOTE: Some of the planets referenced in our guides and walkthroughs may not match yours due to how Starfield was created. In these situations, what you do and the places you visit on those planets should remain the same.
Doctor’s Orders is one of the faction missions you can pick up for the Crimson Fleet. To start this mission, speak with Samina Mizrah at her clinic on The Key and ask her about the supply issue.
Doctor’s Orders Walkthrough
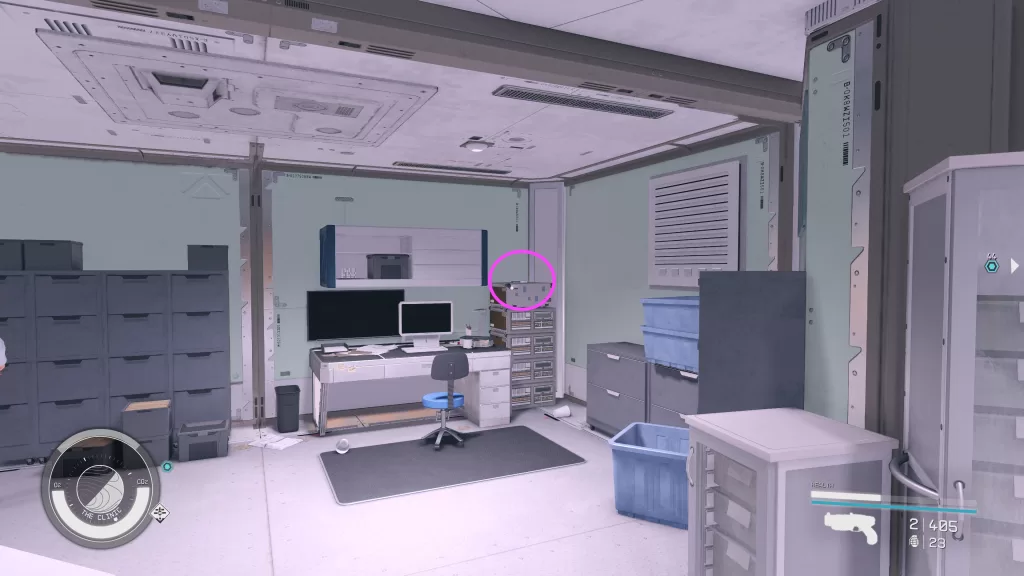
Speak to Gennady Ayton at the Clinic
For the Doctor’s Orders mission, travel to the Narion System and head to the Clinic orbiting Deepala. Dock with the station then head through reception to the office to find Gennady (he’ll be wandering around nearby if he’s not there). Talk with him and ask about the supplies to which he’ll respond that he wants to stop the deal. In order to get the supplies you’ll need to persuade him to follow through. After doing so, he’ll tell you where the supplies are and hand you some keys. Before you leave, make sure to grab the Gennady Ayton (Evidence) from a stack next to a computer desk in the corner of the Office area.
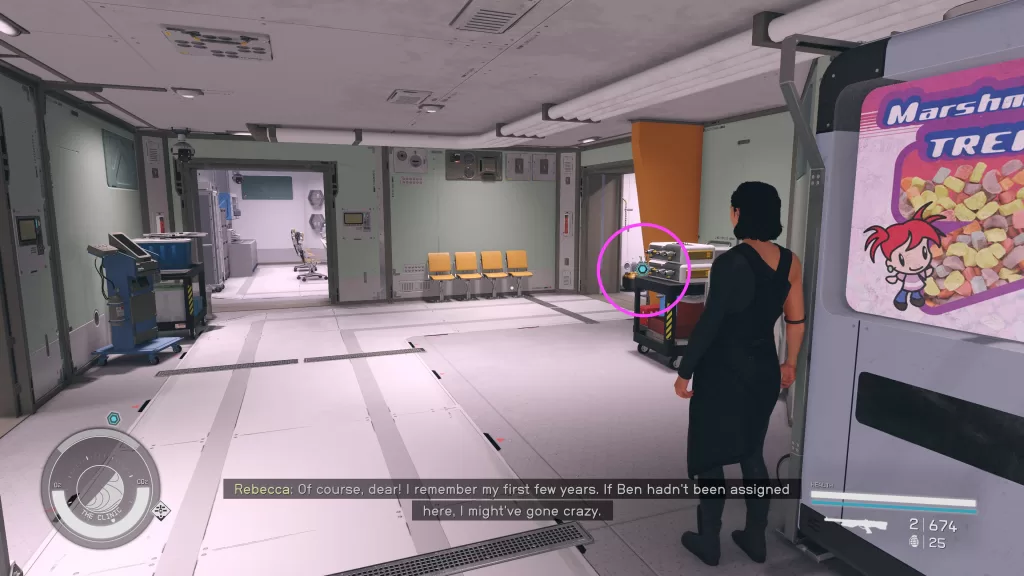
Get the Medical Supplies
Exit the office and head right down the hall following it right. When you reach the end, there should be a group of four chairs against a wall. The chest with the supplies can be found just past the doorway to their right.
Return to Samina at the Key
Return to the Key in the Kryx System and return to Samina then speak with her to hand over the supplies. This will complete the Doctor’s Orders Starfield mission and you’ll be rewarded with 100 EXP and some credits.
Additional Starfield Guides and Walkthroughs
Be sure to check our main Starfield Guides and Walkthroughs page for additional content on Starfield, such as additional guides to assist you during your adventures in the Settled Systems!
Welcome to NGB and our guide for the Starfield Echoes of the Past mission! This guide will walk you through starting the mission and detail the necessary steps for its completion. If you need help with a specific mission objective, check the quick links section to easily find the information needed.
PLEASE NOTE: Some of the planets referenced in our guides and walkthroughs may not match yours due to how Starfield was created. In these situations, what you do and the places you visit on those planets should remain the same.
Echoes of the Past is one of the missions for the Crimson Fleet faction. You’ll start it automatically after completing the Rook Meets King mission.
Echoes of the Past Walkthrough
Proceed to the Surface of Suvorov
For the Echoes of the Past Starfield mission, you’ll need to travel down to planet Survorov and land at the Lock. Approach Delgado to get things started. Follow along the ice path to reach the Lock taking out the enemies that spawn along the way. When you reach the outer door, speak with Delgado. He’ll open the door allowing you to enter, but your companion will have to wait outside.
Continue Exploring the Lock
Follow the group through the Lock. When you reach the big open room, you’ll be ambushed by the same creatures from outside. Deal with them then speak with Del. Take Mathis and head for the control room to the south. Speak with him after the roof caves in. him who will want to team up to take out Delgado. Answer however you like then head through the nearby loose panel. Follow the linear path through a couple of rooms to reach the control room where Del we’ll be trying to reach you through the intercom. Interact with it to get your order then examine the Transfer Area Control Workstation nearby. Access the Security Controls and use them to override the lockdown.
Head through the newly opened Secure Access door and down the stairs into the intake room. Interact with the Prisoner Intake Workstation. Access the Power System Controls and activate the auxiliary power for D-Block. Continue heading forward to reach the guard tower overlooking the cell block. In the tower, your new buddy will ask you again about his proposal. Again, answer how you like then interact with the D-Block Post Workstation. Make sure to check out all of the files so you can pick up some of the optional objectives along with the cell block that Kryx was placed in.
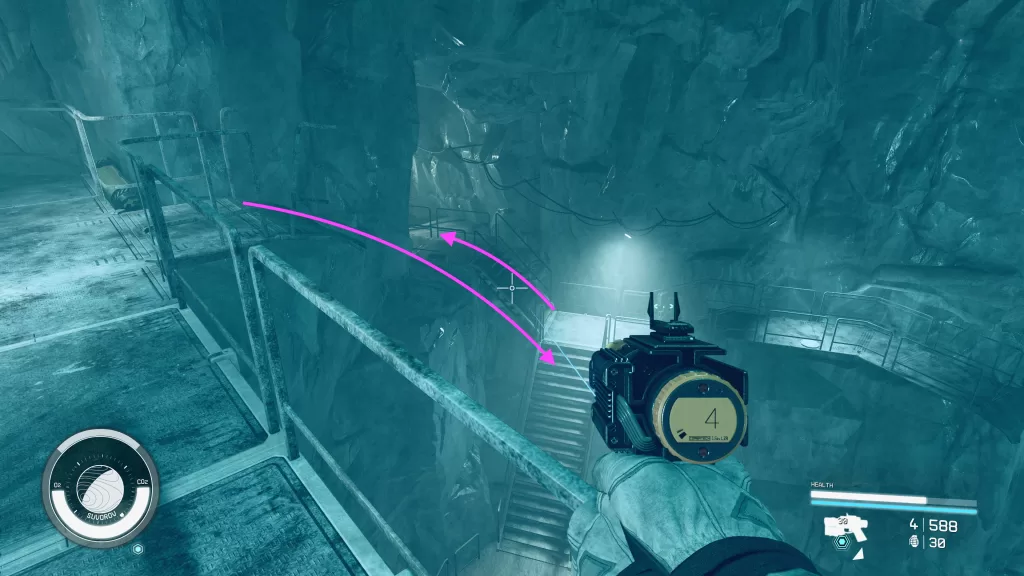
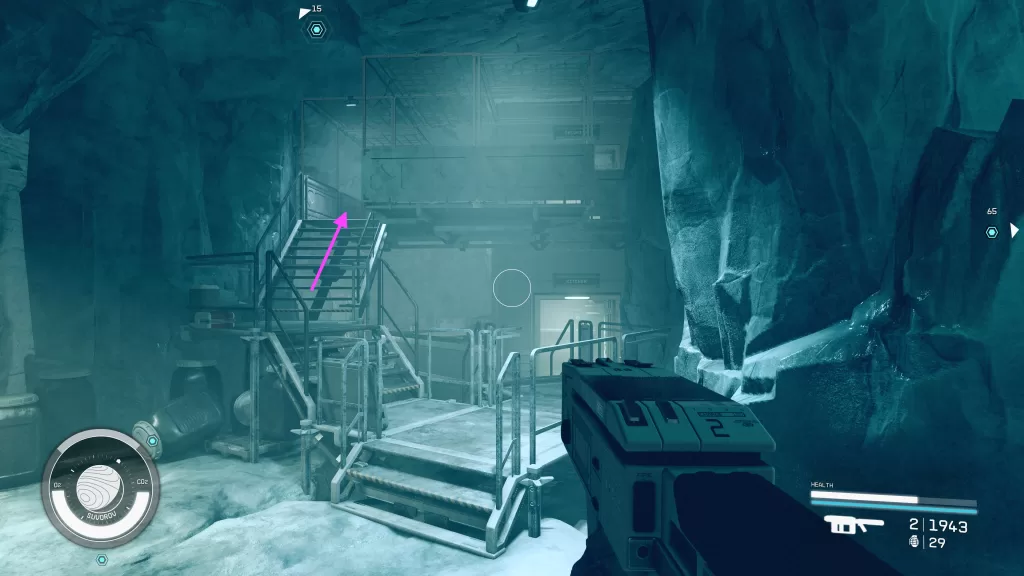
Locate the Cache in Cell D-02-106
You’ll need to backtrack a little bit to reach cell D-02-106. Head back along the path you took to reach the guard tower looking for the broken section of stairs in the image below.
Jump off that section to the stairs below and follow the stairs up. Take a left going up another set of stairs brining you to a split.
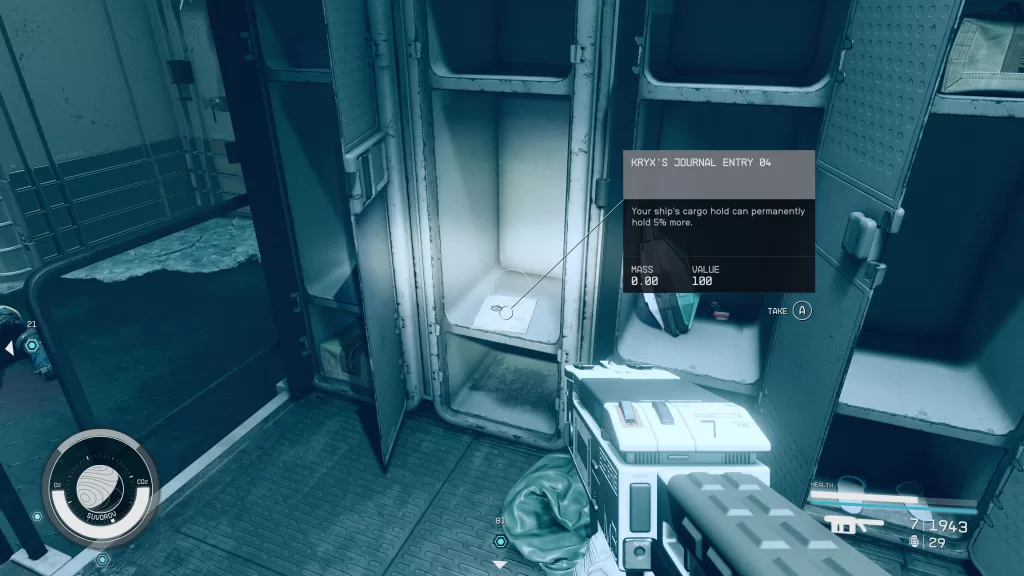
The right has another set of stairs leading down and the left leads to Cell D-02-106. Take the right set of stairs down then take a right at the bottom to spot the kitchen. Across from the Kitchen, you’ll find the Showers. In one of the lockers, you’ll find the Kryx’s Journal Entry 04 magazine.
Exit this room and face the Kitchen. You’ll want to take the stairs on the left just before the Kitchen to reach the Security Room.
Inside you’ll find a switch on the wall that unlocks cell D-02-106. You can then return to the split and head to the cell to access the cache.
Open Cells in D-Block Section 3
Head back up to the guard tower and jump across the broken walkway. Head down the stairs, take a right then follow that with another right to reach the D-Block Section 03 Cell Release Switch. Interact with it to open Kryx’s cell then make your way there and head inside (it should be the next cell on the left). Activate the lamp then choose the first option to pry open the base. Listen to the Best Laid Plans slate that you find there.
Search Carter’s Locker
Head back to the Kitchen near block D section 2 to find the showers. This is where you previously found the Kryx’s Journal Entry 04 magazine. Use the code you got for Carter’s Locker to open it. Grab the Carter’s Gig slate to listen to it. Exit the showers and head left passing through the kitchen.
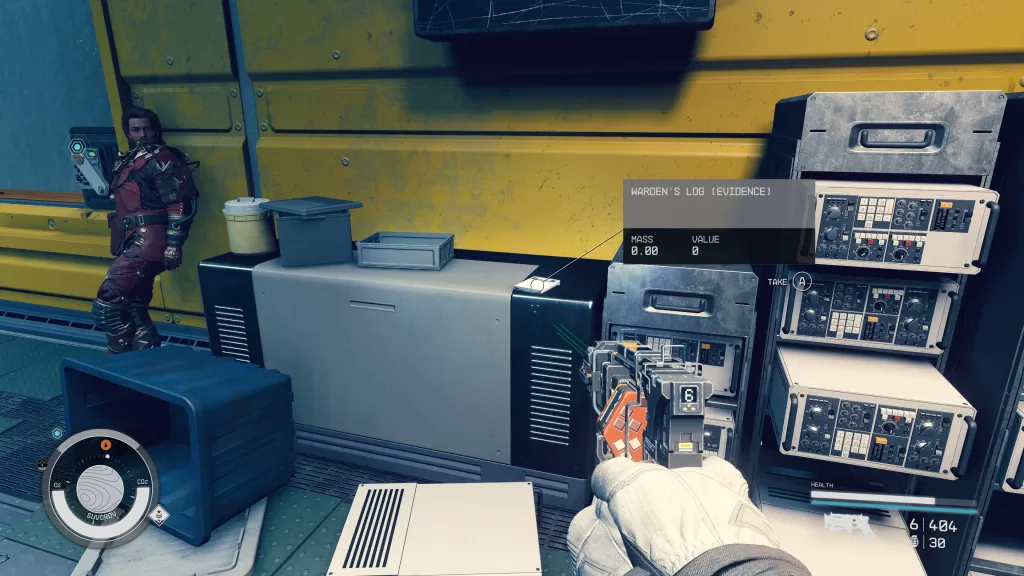
You’ll then need to cross over to the north side of the area to reach Ventilation. Enter the room interacting with the Maintenance Access Computer on the other side. Use it to open the door to the closet on your left. Head inside and interact with the loose panel then follow the tunnel to eventually end up in the Warden’s Office. Delgado will be in an adjacent room trying to hail you on the intercom. Interact with it to speak with him to tell the bossman what you found. He’ll then open the way to the shuttle bay for you. Before leaving, make sure to grab the Warden’s Log evidence.
You’ll also need to speak with Mathis. Head to the Shuttle Bay and be prepared for a fight. You’ll need to secure the area before you can enter the ship. This time the bugs will be accompanied by their ridiculously high level queen.
Travel to the Key
Once the pests have been exterminated, fly back up to the Key and speak with Delgado in the Operations Center. Hand over the slate and he’ll reward you with a legendary pistol. You’ll then be given your next task. Make your way to the Last Nova (under the Operations Center) and speak with Mathis there. When you’re done, locate Naeva in the same place and chat her up.
Report Mission Progress on the UC Vigilance
Leave the Key and head back to the UC Vigilance in the Sol System. Dock with the ship then head to Commander Ikande to update him on your progress. The mission will be completed afterwards and you’ll be rewarded with 350 EXP and some credits.
Additional Starfield Guides and Walkthroughs
Be sure to check our main Starfield Guides and Walkthroughs page for additional content on Starfield, such as additional guides to assist you during your adventures in the Settled Systems!
Welcome to NGB and our guide for the Rook Meets King Starfield mission! This guide will walk you through starting the mission and detail the necessary steps for its completion. If you need help with a specific mission objective, check the quick links section to easily find the information needed.
PLEASE NOTE: Some of the planets referenced in our guides and walkthroughs may not match yours due to how Starfield was created. In these situations, what you do and the places you visit on those planets should remain the same.
Rook Meets King is one of the faction missions for the Crimson Fleet. You’ll start this mission automatically after completing the Deep Cover mission.
Rook Meets King Walkthrough
Rendezvous with the Astraea at Europa
For the Rook Meets King Starfield mission, you’ll first need to travel to the Astraea orbiting Jupiter’s moon, Europa. Hail the ship to begin conversing with Naeva Mora. She’ll tell you that in order you join THE Crimson Fleet, you’ll need to complete a task for her.
Find the Ragana Near Enceladus
Plot a course for Saturn’s moon Enceladus to find the Ragana. You’ll receive a hail asking why you are there. If you are trying to minimize casualties, you can pick the UC SysDef option. Otherwise, you can use the Crimson Fleet option or just attack the ship. If you board the ship, speak with Dimitri. This will give you the options to resolve this issue without violence, convince him to kill Austin or attack them all.
Return to Naeva in Europa’s Orbit
When the issue has been dealt with, return to the Astraea. As soon as you reach it, some Ecliptic Fighters will show up. Deal with them then hail the Astraea. Report that Rake was taken care of to be given the coordinates to the Crimson Fleet’s base.
Report to the Vigilance
Head back to the UC Vigilance orbiting Mars’ moon Phobos and board it. Follow the recruit to the Operations Center and speak with Commander Ikande.
Travel to the Key
Return to your ship and set a course for the Key orbiting Suvorov in the Kryx system. Dock with the station then board it.
Speak to Naeva
Speak with Navea nearby after the two Crimson Fleet members finish their business. After the conversation, follow her for a tour of the Key ending at Shinya Voss.
Speak to Shinya Voss
After speaking with him, take the elevator behind him to reach the Operations Center. Locate and speak with Delgado to officially join the Crimson Fleet. He’ll then give you your first set of instructions. The Rook Meets King Starfield mission will complete and you’ll be rewarded with Pirate Swashbuckler Gear, Grey Leather Jumpsuit, 250 EXP and some credits.
Additional Starfield Guides and Walkthroughs
Be sure to check our main Starfield Guides and Walkthroughs page for additional content on Starfield, such as additional guides to assist you during your adventures in the Settled Systems!
Welcome to NGB and our guide for the Deep Cover Starfield mission! Deep Cover is one of the faction missions for the Crimson Fleet. This guide will walk you through starting the mission and detail the necessary steps for its completion. If you need help with a specific mission objective, check the quick links section to easily find the information needed.
PLEASE NOTE: Some of the planets referenced in our guides and walkthroughs may not match yours due to how Starfield was created. In these situations, what you do and the places you visit on those planets should remain the same.
To start the mission, commit a crime then let the UC escort you to the UC Vigilance. You’ll be taken to a cell and Commander Ikande will show up to interrogate you. Work your way through his dialog then accept the offer when presented. You’ll then need to follow the guard to the operations center. Speak with the commander there to get the details on the mission.
Finish Grunt Work
Alternatively, finish the Grunt Work faction quest then Commander Tuala will just give you this quest and have you report to the UC Vigilance. Once you board, speak with Sysdef Guard who welcomes you aboard the ship then follow him to the command center. Take the elevator up then speak with Commander Ikande.
Deep Cover Walkthrough
Speak to Lt. Toft
No matter how you started the Deep Cover Starfield mission, you’ll need to speak with Lt. Toft after being briefed by Commander Ikande.
Proceed to Cydonia
Head to your ship and set a course for Cydonia on Mars in the Sol System. Once you land, make your way to the Trade Authority and speak with Saoirse Bowden. She’ll tell you that the stuff is too hot to handle but for a small fee of 1,000 credits, she’ll set up a buyer for you.
Speak to Adler Kemp at the Broken Spear
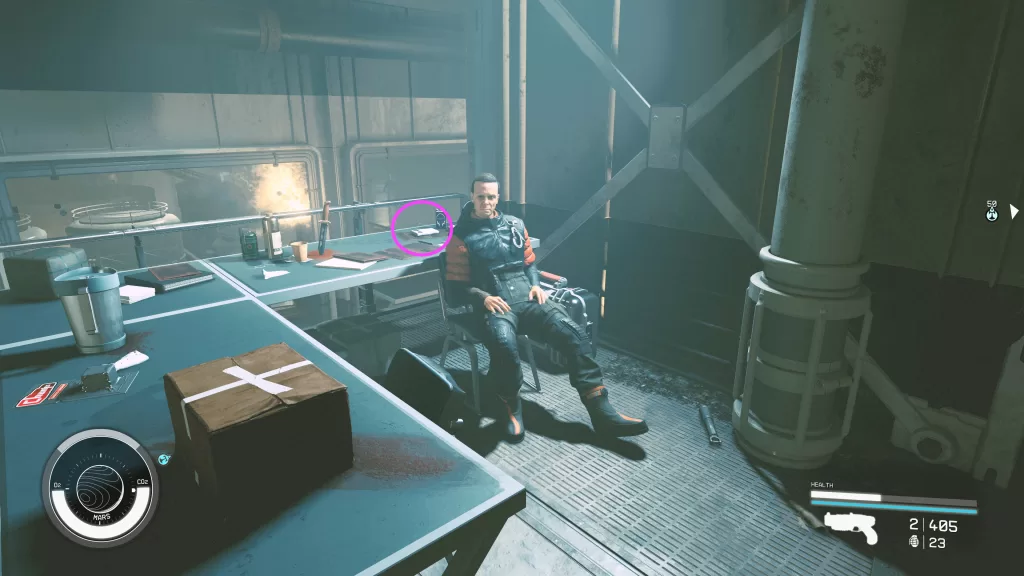
Make your way over to the Broken Spear bar to locate and speak with Adler Kemp. Choose to give him the sample when prompted. Before agreeing to move the product, you’ll need to settle a matter for Adler. Make sure to pick up the Naeva Meetup (Evidence) on the table behind him for the Burden of Proof mission.
Recover Karl Fielding’s Debt
Make sure this quest is active so you can track down Karl Fielding (for us he was near the Luxe Condos in the residential area). Speak with Karl about his debt. After you remind him who Adler is, you’ll have a couple of options. You can pay the debt for him, persuade him to pay up or attack him and take it afterward. How you do it doesn’t matter, just make sure to deliver the credits to Adler. He’ll then invite you to join the fleet. After you accept, the Deep Cover Starfield mission will complete. You’ll be rewarded with 250 EXP and some credits.
Additional Starfield Guides and Walkthroughs
Be sure to check our main Starfield Guides and Walkthroughs page for additional content on Starfield, such as additional guides to assist you during your adventures in the Settled Systems!
Welcome to NGB and our guide for the Starfield Proper Tea Theft mission! In this guide, we’ll cover how you can start the Proper Tea Theft mission along with the steps you’ll need to take to complete it. If you’re looking for help with a particular objective, please see our quick links section which can help point you in the right direction!
PLEASE NOTE: Some of the planets referenced in our guides and walkthroughs may not match up with yours due to how Starfield was created. In these situations, what you do and the places you visit on those planets should still be the same.
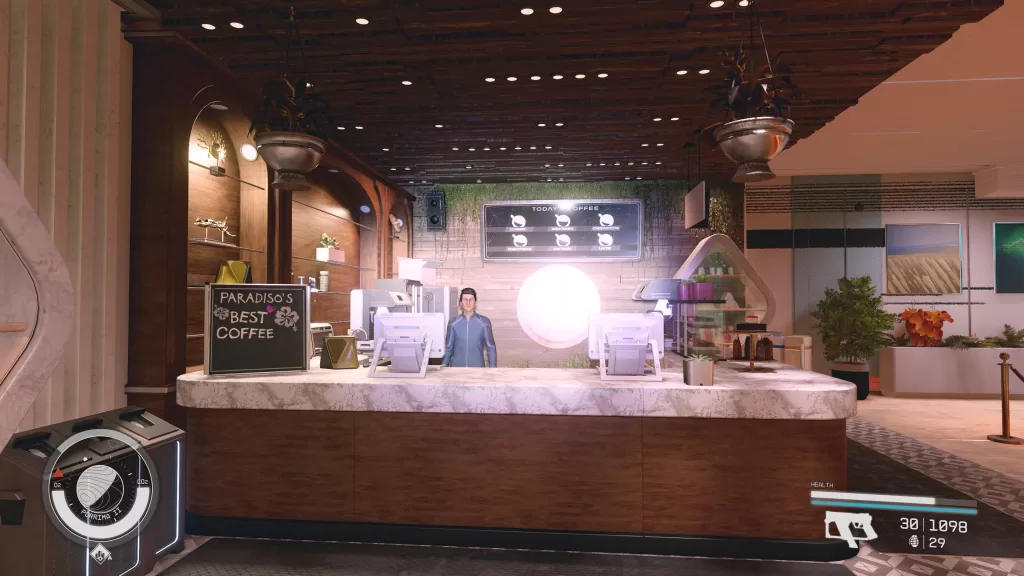
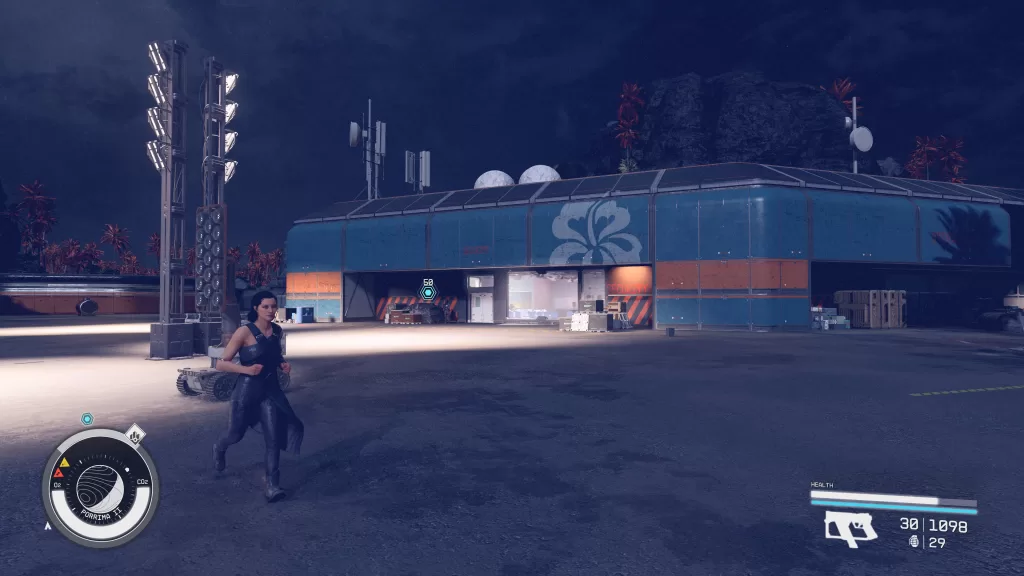
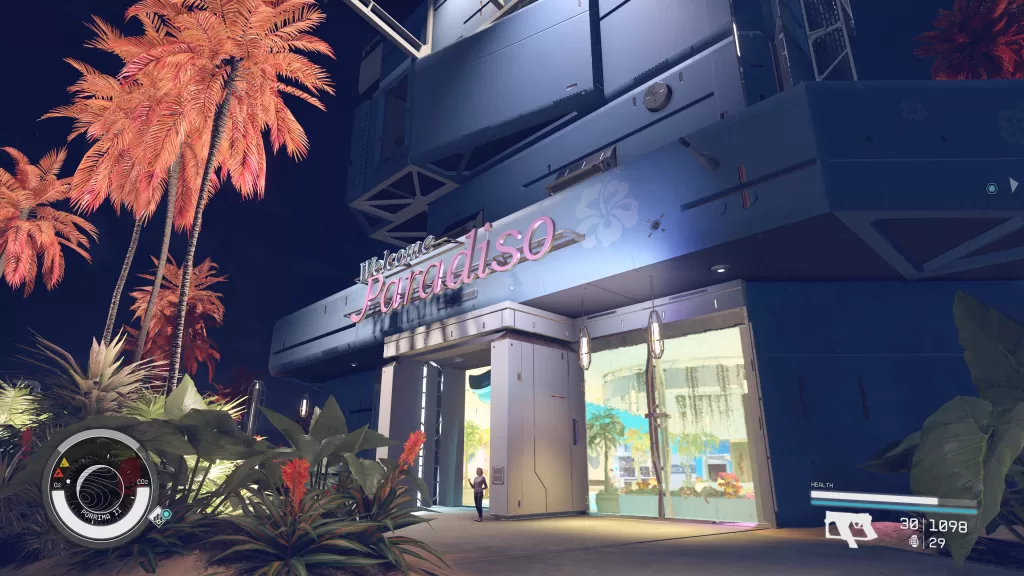
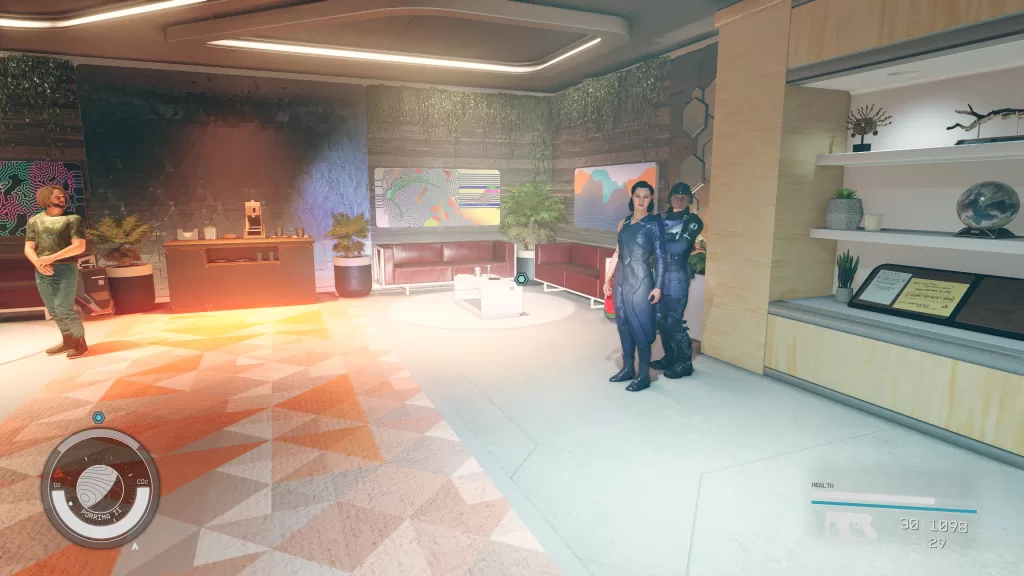
Proper Tea Theft is one of the missions you can pick up in Paradiso on Porrima II in the Porrima System. To start this mission, speak with Kumar Sharma behind the Cafe Luxe counter in the Welcome Paradiso building.
Proper Tea Theft Guide
Obtain the Tranquilitea Secret Recipe
To find the secret recipe, you’ll first need to take the elevator up to the Rooftop Terrace. Once there, take a left heading southeast past the Chez Simon Bar and speak with Rowan Masterson sitting on a chair under an umbrella. You can either pay her 4,000 credits for the secret drink recipe or persuade her to hand it over!
Return to Kumar
Once you have the recipe, deliver it to Kumar on the Lobby floor. After your conversation with him wraps up, the Proper Tea Theft Starfield mission will be completed and you’ll receive some credits as a reward! If you have the Persuasion perk, you can try and persuade him to give you more credits for all of your hard work!
Welcome to NGB and our guide for the Starfield Last Resort mission! In this guide, we’ll cover how you can start the mission and the steps you’ll need to take to complete it. If you’re here looking for help with a specific objective, please check out the quick links section to be pointed in the right direction!
PLEASE NOTE: Some of the planets referenced in our guides and walkthroughs may not match up with yours due to how Starfield was created. In these situations, what you do and the places you visit on those planets should still be the same.
Last Resort is one of the missions you can pick up in Paradiso on Porrima II in the Porrima System. To start this mission, speak with Emilian Vasilescu who can be found next to some bungalows on the beach.
Startfield Last Resort Walkthrough
Give the Recall Claim to Akachi
For the Last Resort Starfield mission, you will need to travel to planet Gagarin in the Alpha Centauri System. Once there, land at the Gagarin Landing then speak with Akachi Rosenblum who can be found wandering around behind building 03. She’ll tell you about a computer problem she’s having preventing her from looking up the order. You’ll need to wait until 1100 hours local time for the repair guy to show up unless you have the Security or Persuade perks you can avoid waiting.
Wait Until 11:00 Gagarin Local Time
If you have to wait, there is a nearby bench you can sit at to pass the time or follow the objective to a local eatery and wait there.
(Optional) Fix Akachi’s Computer
With the Security perk, you can offer to fix the computer for her. Considering her current predicament, she will allow it. The computer in question can be found next to the loading zone between a cart and a crate with parts in it. Interact with the PC to locate and fix the error.
Speak with Akachi
Once 1100 hours local time has arrived, speak with Akachi to receive the parts. If you choose to repair the computer then you can let her know it’s fixed and you’ll receive the shipment earlier.
Return to Emilian
Once you have the parts, report back to Emiliano at Paradiso to complete the Last Resort Starfield mission!
Welcome to NGB and our guide on the First Contact Starfield mission! In this guide, we’ll cover how to start the quest and the steps you’ll need to take to complete it. If you’re here looking for help with a certain objective, then our quick links section should be able to point you in the right direction.
PLEASE NOTE: Some of the planets referenced in our guides and walkthroughs may not match up with yours due to how Starfield was created. In these situations, what you do and the places you visit on those planets should still be the same.
Starting First Contact Starfield Mission
First Contact is one of the misc. missions you can pick up in the Porrima System. To start this mission, travel to the Porrima System then head to Porrima II. You’ll then receive a distress call from Paradiso. Land at the resort and head inside the security building to find Chief Sugiyama.
For the First Contact Starfield mission, you’ll first need to enter the security building on the launch pad and then speak with Chief Sugiyama. He’ll make you swear not to disclose any details about what he is about to tell you.
Hail the Unidentified Ship
Return to orbit above Paradiso then hail the Unidentified Ship. When you’re attempts are unsuccessful, dock at the ship and then board it.
Speak with the Ship’s Captain
After speaking with the captain, follow her to the Command Bay then speak with her again.
Negotiate with Oliver Campbell
Return to the Welcome Paradiso building then take the elevator to the Executive Floor. Speak with Keavy behind the desk then enter the board room and talk to Oliver to begin the negotiations. Essentially, you’ll need to decide whether to convince the colonists to take the settlement deal in which they essentially become indentured servants, purchase a Grav Drive, and tell them to find a different planet to settle on or make the problem disappear by destroying their ship.
Settlement Deal
Return to the ECS Constant and speak with Captain Brackenridge. She’ll find the arrangement agreeable. You’ll then be able to persuade her for resources. If you choose to do so, speak with Daisuke in the Mess Hall. He’ll reduce the amount of materials you will need to gather to the following:
Lithium (4/10)
Iron (30/80)
Sealant (8/20)
Fiber (15/40)
If you are unable to persuade the Captain, you’ll need to gather the full amount of resources!
Once you’ve collected the necessary materials, report back to Captain Brackenridge. Now that they’re ready to visit the planet, ferry down some of the colonists to Paradiso. You’ll get to watch them experience fresh air for the first time ever. Once they stop, speak with the Captain again. She’s hopeful about their future stating that once they work off their debt they’ll be able to freely explore other planets. The mission will complete and you’ll receive 300 EXP, Antique Piggy Bank, Antique Earth Soccer Ball x2, Antique Earth Hockey Stick x3, Antique Earth Basketball, and Antique Earth Baseball x2.
If you speak with her again, you’ll learn that the ship has most likely been hauled away and turned into a museum. She’ll also state that she knows this wasn’t the perfect solution but she’s confident it was the right solution. She’ll also say how she could do without some terms of the agreement but that they will manage!
Purchase Grav Drive
For this option, travel to Hopetech in Hopetown on Polvo in the Valo System. Once there, speak with Bennu St. James. You can outright buy the Grav Drive for 40,000 credits or persuade him to drop the price down to 25,000 credits. When the Grav Drive is in your possession, return to the ECS Constant and speak with Amin in Engineering. You’ll then need to prepare the ship for the Grav Drive by interacting with the following:
Engineering Control Computer Alpha = “Turbopump – Port” to “Cyrogenic Radiator – Auxiliary”
Engineering Control Computer Beta = “Plasma Run-Off Inhibiter” to “5%
Once you’ve correctly prepared the ship, speak with Captain Brackenridge. She doesn’t seem to mind at all that Paradiso won’t been their home planet! They received a Starmap and new communication equipment. The Starfield First Contact mission will complete and you’ll receive 300 EXP, Antique Piggy Bank, Antique Earth Soccer Ball x2, Antique Earth Hockey Stick x3, Antique Earth Basketball, and Antique Earth Baseball x2.
If you speak with her again, you’ll get more dialog on how her crew is holding up and how she believes the best course of action is to find their own home instead of assimilating into modern society.
Destroy Ship
Return to the ECS Constant and make your way to Engineering. Once inside, take a left to find the Reactor Computer on the wall. This computer requires the ECS Constant Reactor Terminal Key to unlock it. This key can be found on Admin Kazemi! To pickpocket him, you must have the Theft skill, which can be found under the Social category.
Once you have the ECS Constant Reactor Terminal Key, use it on the Reactor Computer to unlock the computer then select “Reactor Computer”. Adjust the power level to “Emergency Reactor Overdrive”.
Next, head to the Captain’s Bridge Computer in the Command Bay control room. You’ll need to unlock it using advanced lockpicking. Select “Urgent Actions” then “Confirm Request”. Quickly escape to your ship then watch the destruction.
Next, report back to Oliver. The First Contact Starfield mission will complete and you’ll receive 300 EXP and 6500 credits.
Welcome to NGB and our walkthrough for the Starfield Lost and Found mission! In this walkthrough, we’ll cover how to start the mission along with the steps you need to take to complete it. If you are here looking for help with a specific objective, please check out our quick links section to be pointed in the right direction!
PLEASE NOTE: Some of the planets referenced in our guides and walkthroughs may not match up with yours due to how Starfield was created. In these situations, what you do and the places you visit on those planets should still be the same.
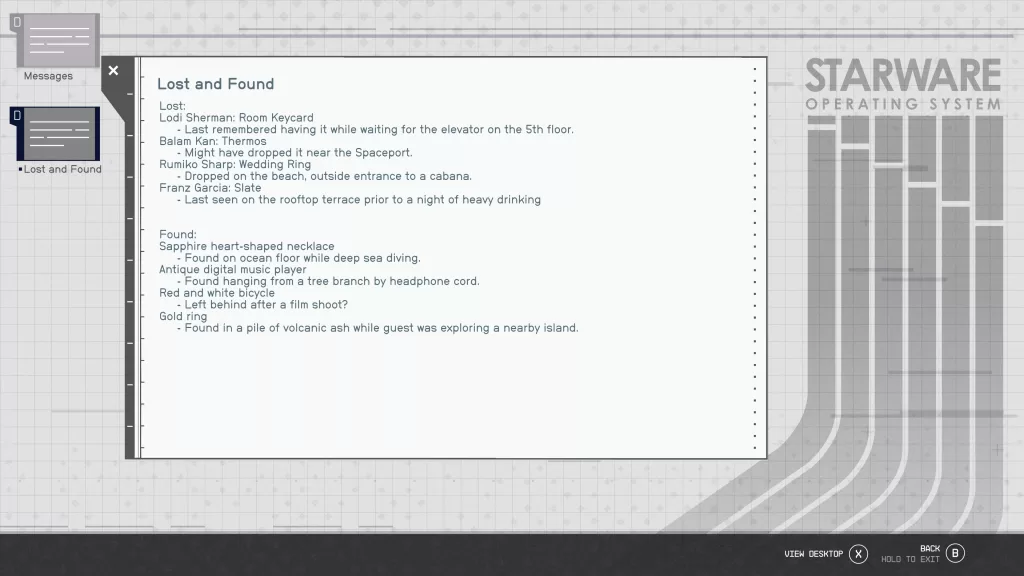
Lost and Found is one of the missions you can pick up in Paradiso on Porrima II in the Porrima System. To start this mission, speak with Dirk Huddleston in the Welcome Paradiso building behind the concierge counter. You’ll then need to interact with the Concierge Computer at the other end of the desk and select the “Lost and Found” folder.
Starfield Lost and Found Walkthrough
Find the Lost Slate
Starting in the Welcome Paradiso building, take the elevator in the lobby up to the Rooftop Terrace. Take a right to reach the dance floor then face the direction you just came from to spot the Lost Slate on the ground half under a couch.
Find the Lost Wedding Ring
Next, exit the Welcome Paradiso building and head towards the beach. Go to the second circular building on the left to find the ring in the foliage to the right of the stairs.
Find the Lost Thermos
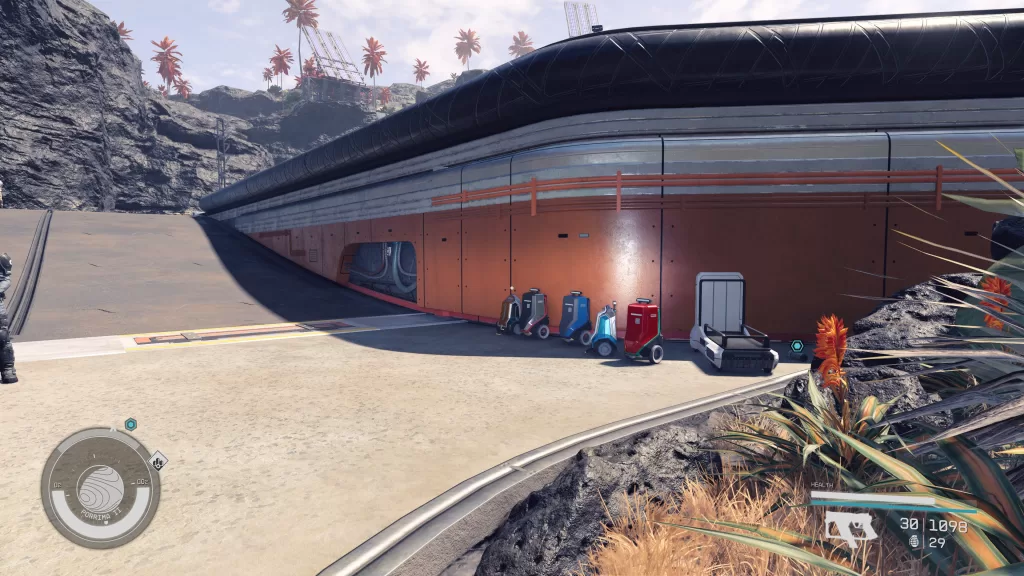
To find the lost thermos, head back along the path leading toward the spaceport. On the right side just before the ramp leading up to the launch pad, you’ll find the Lost Thermos with some luggage.
Find the Lost Room Keycard
Finally, to find the lost room keycard, return to the Welcome Paradiso building and enter the elevator taking it to the 5th-floor Premium Suites. Exit the elevator and head straight ahead towards the 2 red couches on the right. You’ll find the Lost Room Keycard on the ground between them!
Return the Lost Items to Dirk
Once you’ve found all four of the items, return to Dirk to complete the Lost and Found Starfield mission. You’ll be rewarded with some credits for all of your hard work.
Welcome to NGB and our guide for the Apex Predator Starfield mission! In this guide, we’ll cover how you can start the mission along with the steps you’ll need to take to complete it. If you’re here looking for help with a particular objective, please check out our quick links section which should point you in the right direction!
PLEASE NOTE: Some of the planets referenced in our guides and walkthroughs may not match up with yours due to how Starfield was created. In these situations, what you do and the places you visit on those planets should still be the same.
Apex Predator is a faction mission for the United Colonies that you can begin by speaking with Percival at the TMD Headquarters on Mars in the Sol System after completing the A Legacy Forged mission.
Apex Predator Starfield Walkthrough
Collect Samples
The planet you travel to for this mission will be different than ours, but the landing site and how you go about completing it will be the same!
For the Apex Predator Starfield mission, you’ll first need to travel to the Stone Pillars on Groombridge VIII-a, a moon of Groombridge VIII in the Groombridge system. Once there, mark your mission as active then follow the objective markers to the specific beasts you need to gather the samples from. If you use a non-lethal gun you can retrieve the samples without killing the creatures! One can be purchased at the Ryuhin Industries weapon shop on Neon.
Return the Samples
After you’ve collected all of the samples, return to the TMD HQ on Mars in the Sol system then hand the samples over to the United Colonies Xenobiologist. This will complete the mission netting you some credits!
Post Mission
Please note this mission is repeatable! Just speak with Percival to get the location for more samples. You’ll go collect the samples and then return them for rewards!
Welcome to NGB and our walkthrough for the Vanguard: Bug Hunt Starfield mission! This guide will walk you through starting the mission and detail the necessary steps for its completion. If you need help with a specific mission objective, check the quick links section to easily find the information needed.
PLEASE NOTE: Some of the planets referenced in our guides and walkthroughs may not match yours due to how Starfield was created. In these situations, what you do and the places you visit on those planets should remain the same.
Vanguard: Bug Hunt is a faction mission for the United Colonies that you can begin by speaking with Commander Tuala after competing the A Legacy Forged mission.
Vanguard: Bug Hunt Walkthrough
Eliminate the Terrormorphs on Codos
For the Vanguard: Bug Hunt Starfield mission, you’ll first need to travel to Codos, a moon of Akila in the Cheyenne system. Once there, land at the Deserted Relay Station. Take out the Terrormorphs marked by the objective to complete the mission.
Post Mission
Please note this mission is repeatable. Just return to Commander Tuala and tell him that you’d like to clean up some Terrormorphs. He’ll send you to a different location. When you arrive, defeat the Terrormorphs to complete the quest!
Additional Starfield Guides and Walkthroughs
Be sure to check our main Starfield Guides and Walkthroughs page for additional content on Starfield, such as additional guides to assist you during your adventures in the Settled Systems!
Search
This site uses cookies. By continuing to use this website, you are giving consent to cookies being used. For more information on cookies, view our Privacy Policy.OkPrivacy Policy