Welcome to NGB and our walkthrough for the Starfield Short Sighted mission! This guide will walk you through starting the mission and detail the necessary steps for its completion. If you need help with a specific mission objective, check the quick links section to find the most relevant information easily.
PLEASE NOTE: Some of the planets referenced in our guides and walkthroughs won’t match yours due to how Starfield was created. In these situations, what you do and the places you visit on those planets should be the same.
Short Sighted is one of the main missions you must complete to beat the game. You’ll start it automatically after completing the main mission for Further Into the Unknown.
Starfield Short Sighted Mission Guide
Go to the Eye
Head up to orbit then dock and board at the Eye. Head to the room with Vladimir. You’ll then need to speak with and help Barrett, Sam, Andrea and Sarah. Save using the wrench for last because it will progress the mission.
Barrett – test the connection using the nearby computer on the wall
Sam – help weld the panel by interacting with the welder
Andreja – help sort the box of parts on the other table
Sarah – use the wrench to tighten things
Speak to Vladimir
Once you’ve helped the others, speak with Vladimir to complete the Short Sighted Starfield mission. You’ll be rewarded with 700 EXP and a few resources.
Welcome to NGB and our walkthrough for the Starfield Further Into the Unknown mission! This guide will walk you through starting the mission and detail the necessary steps for its completion. If you need help with a specific mission objective, check the quick links section to find the most relevant information easily.
How to Start the Starfield Further Into the Unknown Mission
Further Into the Unknown is one of the main missions you must complete to beat the game. You’ll start it automatically after completing the Starborn main mission.
Starfield Further Into the Unknown Walkthrough
Talk to Vladimir
Speak with Vladimir at the Lodge to get two more locations for you to explore.
Go to Locations
Travel to a location given to you by Vladimir. Please note this location is completely unique to you! Once you land, make your way to the area the objective marker indicates. You may or may not need to defeat enemies! Once you find the artifact, collect it, and then return it to your ship and head to the next location. Essentially, you’ll do the same there with your goal of snatching the artifact!
Add the Atrifacts to the Collection
With both artifacts in your possession, return to the Lodge in New Atlantis and place them on the table in the Library. This will trigger a conversation between a few of the Constellation members. Vladimir will also request that you help out with some repairs on the eye. Agree with his request to complete the missions. You’ll be rewarded with 750 EXP and some credits.
Welcome to NGB and our walkthrough for the Starfield Starborn mission! In this walkthrough, we’ll cover how to start the mission and the steps you’ll need to take to complete it. If you’re looking for help with a specific mission objective, please check out the quick links section, which should point you to the right section!
Starborn is one of the main missions you must complete to beat the game. You’ll start this mission automatically after completing the All That Money Can Buy main mission.
Starfield Starborn Mission Walkthrough
Grav Jump Anywhere / Take Them Out
If this is an NG+ run, you’ll have a special option to make the Starborn leave without the need to persuade or fight them.
At the start of the mission, you’ll be confronted by the Starborn on their ship, the Helix. The game will tell you to grav jump away, or you can fight them. If you grav jump, they won’t follow you, and if you manage to defeat them, they will leave before their ship is destroyed.
Either way, head back to the Lodge and speak with Noel to kick off a team meeting. Add the latest artifact to the table to complete the mission when it ends. You’ll be rewarded with 300 EXP, some credits, and the Advanced Constellation Space Helmet.
Additional Starfield Guides and Walkthroughs
Be sure to check our main Starfield Guides and Walkthroughs page for additional content on Starfield, such as additional guides to assist you during your adventures in the Settled Systems!
Welcome to NGB and our walkthrough for the Starfield All That Money Can Buy mission! In this walkthrough, we’ll cover all the steps you need to complete the mission! If you’re looking for help with a specific mission objective, please check out the quick links section, which should point you to the right section!
How to Start the Starfield All That Money Can Buy Mission
All That Money Can Buy is one of the main missions you’ll need to complete to beat the game. It will be started automatically after completing The Empty Nest, Back To Vectera, and Into the Unknown main missions.
Starfield All That Money Can Buy Walkthrough
Talk to Walter Stroud
To kick off the Starfield All That Money Can Buy mission, speak with Walter, who can be found wandering around the Lodge. He’ll request you help him with negotiations on an artifact he is trying to purchase on Neon. Agree to this then tell him you’re ready to set out.
Travel to Neon / Check In at Stroud-Eklund HQ
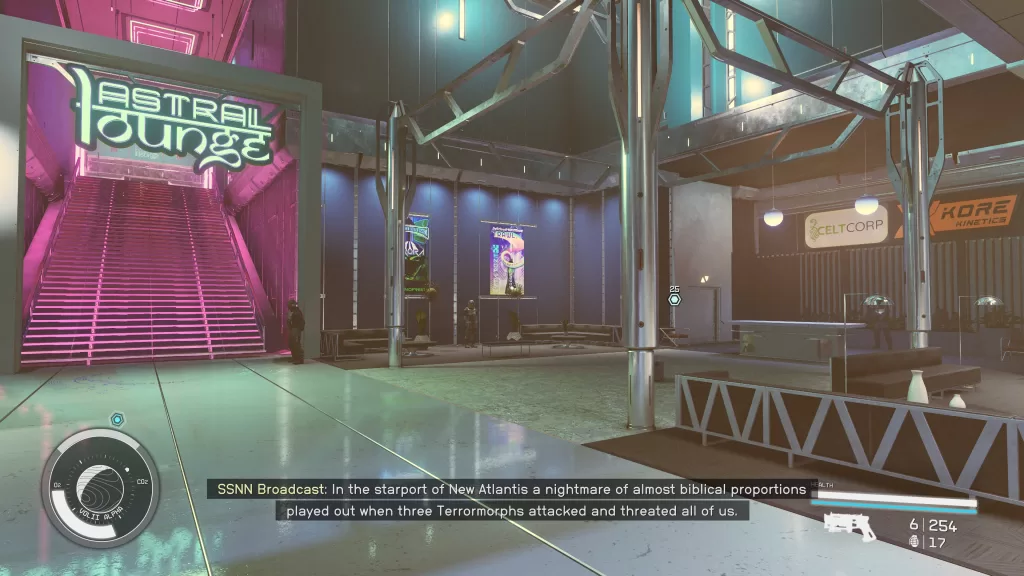
Return to your ship and set a course for Neon on Volii Alpha in the Volii System. Once you dock, disembark from your ship and speak with Watler on the landing pad. After learning about people getting high on fish, travel to the Neon Core and head for the Astral Lounge (northwest part of the area).
When facing the stairs leading to the lounge, head right to find an elevator. Go inside and ride it to the Stroud-Eklund Corporate HQ floor. Follow behind him to meet his partner (and wife) Issa.
Reconnaissance!
To begin your reconnaissance, take the elevator back down to the lobby. Head to the Astral Lounge to learn more about security and Newill’s Goods to investigate the seller. Once you’ve completed both objectives, return to Walter.
Ask About Security
If you’re playing NG+, you’ll have a special dialog option while speaking with Boone.
Head into the Astral Lounge and speak with Boone Morgan behind the bar to ask about the security. When asking about security being on your side during a fight, Boone will recommend the VIP Package. You can pay 4,000 credits for the package, persuade him to give it to you for 1,000 credits, or decline it. Also, make sure to exhaust all of the dialog options regarding security. When you’ve finished speaking with him, use the VIP Elevator on the north side of the room to reach the VIP section, then head to the south side of the floor and locate the computer in one of the rooms. Interact with it, then hack the novice look using a digipick. Once you gain access to the computer, select the Remote Door Control folder to access the door controls.
Investigate the Seller
If you’re playing NG+, you’ll have a special dialog option that skips the persuade check when learning about Sleepcreate 1!
Head to the Neon Core and locate and enter Newill’s Goods. Speak with James Newill and ask him about the meeting he set up for Stroud. You’ll then need to persuade him or pay 2,500 credits to get the information you want. Head to Sleepcrate 1 by passing through the EBBSIDE doors to the left of the Trade Authority, bringing you to the upper platform. Locate the elevator in the middle of the area, and you’ll find the Sleepcrate nearby.
Use a digipick to hack the novice lock, gaining access to the room. Loot the Termination Notice off a shelf, then interact with the computer, where you’ll want to view all three of the files.
Talk to Watler Stroud
With your tasks complete, return to Walter at the Stroud-Sklund Corporate HQ and let him know the results of your investigation. Pick any options (minus the bottom), and then head to the Astral Lounge to make a deal!
Go to the Astral Lounge
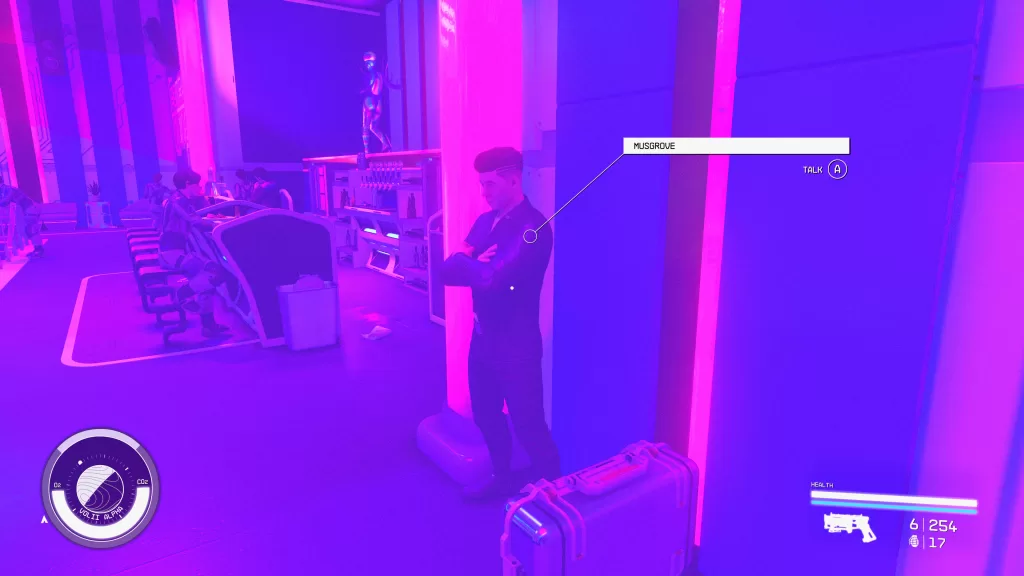
Make your way to the Astral Lounge and talk to Walter inside. He’ll suggest splitting up to locate the seller. Make your way to the bar in the back, and then locate Musgrove standing to the right of the bar near the Astral Lounge sign.
When talking with him, use the “I’m with Ramsay and Travers” dialog option. Then, head over to the VIP Elevator to find Walter. Speak with him there to review the ground rules before starting the negotiation.
Negotiate for the Artifact
If this is an NG+ run, you’ll have a special option when speaking with the seller. This will bypass all of the theatrics, netting you the artifact for the original price!
Use the VIP Elevator to reach the VIP Balcony, then head to the south side of the area and enter the room Musgrove is in to begin the negotiation. The seller will then ask you to sit down and want to double the money, as Walter predicted. Most of the options don’t matter too much. The only real thing Walter won’t like is if you attack and kill the seller. The rest of the options basically pressure Musgrove into selling.
Head to the Entrance
If this is an NG+ run, you’ll have a special option when speaking with the Slayton Agent. This option will allow you to head straight to Slayton Aerospace without any hassle from his goons in the Astral Lounge.
When you exit the room, a Slayton Agent will stop you and demand you hand over the artifact. You’ll need to pass a persuade check, signal neon security (if you got the VIP Package), or attack them. Take the elevator back down to the Dance Floor and approach the exit to be greeted by Issa. Slayton had your ship impounded and has put a bounty on your head. Leave the Astral Lounge and take the Trade Tower elevator to Slayton Aerospace.
Reaching Nicolaus Slayton
There are two ways to go about meeting with Slayton. You choose violence or try to walk your way up there. If you choose violence, at the end of the quest, almost all of Constellation will dislike your choice.
During an NG+ Run, you’ll have a special option available when speaking with Ryleigh, which results in her handing you the elevator key.
Start out by speaking with Ryleigh behind the counter. You can persuade her to set up an appointment for you or just attack. If you attack, you’ll need to loot the Executive Level Access Code off of her and deal with security. If you persuade her, she will give you the key. Either way, head to the elevator and use the elevator to reach the executive level… or not!
Issa will come to the rescue and free you from the elevator. Follow her instructions by entering a vent duct to the right just after exiting the elevator and following along the shaft. Continue listening to her, and she’ll lead you outside, where you can climb up to the executive level. If you choose violence, take care of the guards in the room behind the desk near the elevator, and then use the switch on the wall near them to open the gate. You’ll then need to work your way through the floor, fighting security to reach the door leading outside.
Once you’re on the roof, head left along the roof, taking the last stairwell up. Take a left, following along this higher roof to reach the door leading to the Executive Floor. Guards are patrolling the roof, so if you can’t sneak past them, you’ll need to take them out.
Confront Nicolaus Slayton
Follow along the maintenance hallway to reach the elevators; Issa will bring up an elevator, allowing you to reach Slayton. As soon as you pass through the elevator shaft, you’ll begin a dialog with him, Here you can come to a business agreement or attack Slayton and his goons. You’ll be free to leave after you take him out. If you choose to talk, he’ll let you keep the artifact, but you’ll need to decide what to do with Musgrove. Walter will ask you to go easy on him, but ultimately, the choice is yours. Once you decide Musgrove’s fate, you’ll be free to head back to the ship. You can also loot a chest in the same room as him.
Return to Your Ship
Head back to your ship and speak with Walter inside. For us, he didn’t quite load into the ship. To get around that, jump into the pilot’s seat to force the dialog. You’ll then need to take off from Neon. In orbit, you’ll be approached by the Helix. This will complete the Starfield All That Money Can Buy mission. You’ll be rewarded with 400 EXP, the Fiscal Quarter rifle, and some credits.
Welcome to NGB and our walkthrough for the Starfield Sure Bet mission! This guide will walk you through starting the mission and detail the necessary steps for its completion. If you need help with a specific mission objective, check the quick links section to find the most relevant information easily.
PLEASE NOTE: Some of the planets referenced in our guides and walkthroughs may not match up with yours due to how Starfield was created. In these situations, what you do and the places you visit on those planets should remain the same.
Sure Bet is one of the missions you can pick up at Gagarin Landing on Gagarin in the Alpha Centuri System. To start this mission, speak with Lizzy Ajello at her bar and ask her if she has any work.
Starfield Sure Bet Mission Walkthrough
Collect Lizzy’s Liquor
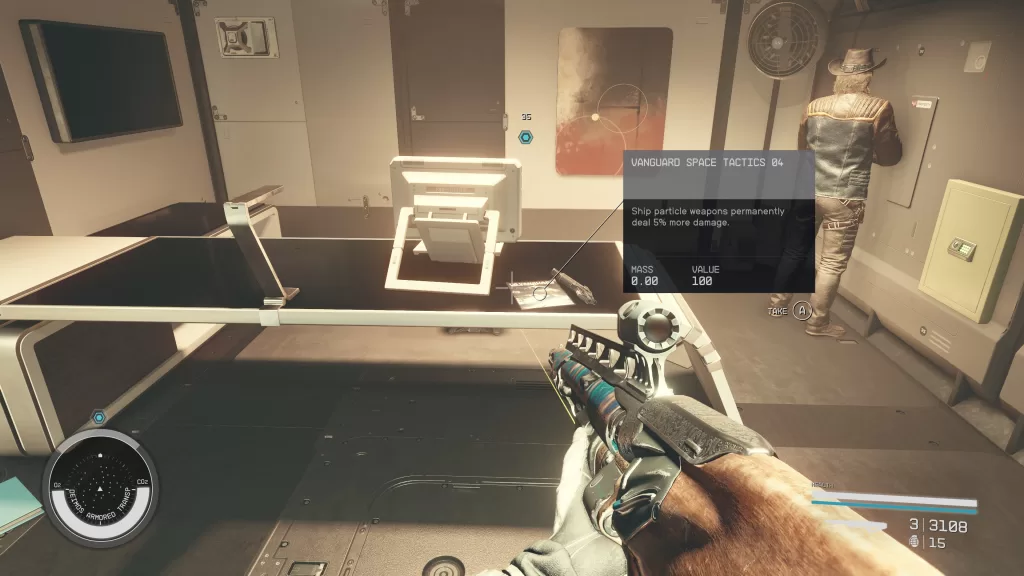
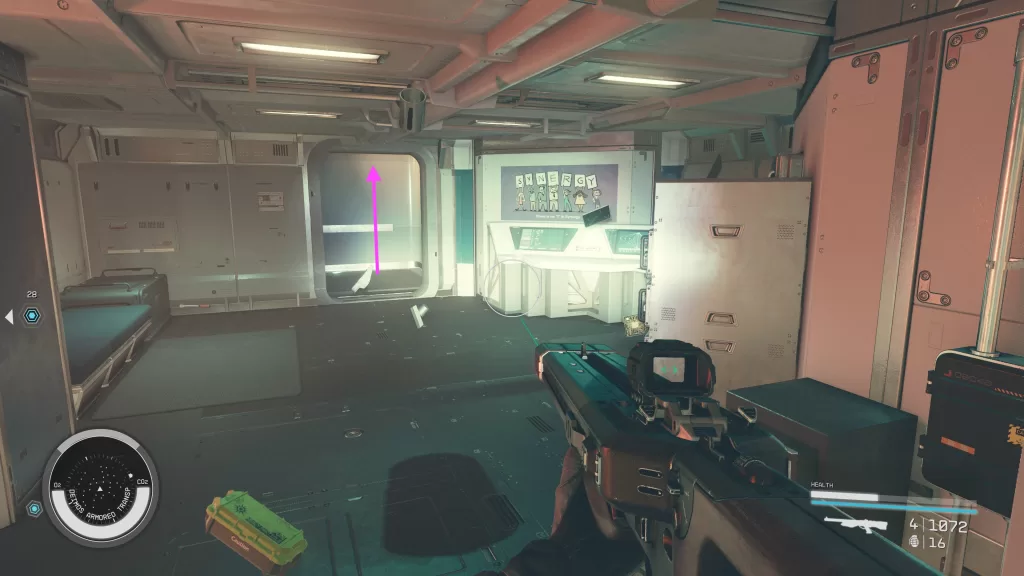
For the Sure Bet Starfield mission, you’ll first need to travel to a derelict spaceship drifting around Grissom, a moon of Bondar in the Alpha Centauri System. Once there, dock at the Deimos Armored Transport then board the ship. After entering the ship, immediately head up the stairs and enter the room in the center room to find the Vanguard Space Tactics 04 on the desk.
Navigate your way through the ship, passing a large white sealed door, until you spot an elevator. Wait for 0 gravity to take effect then fly through the roof of the elevator up to the top of the elevator shaft where you’ll find an open door.
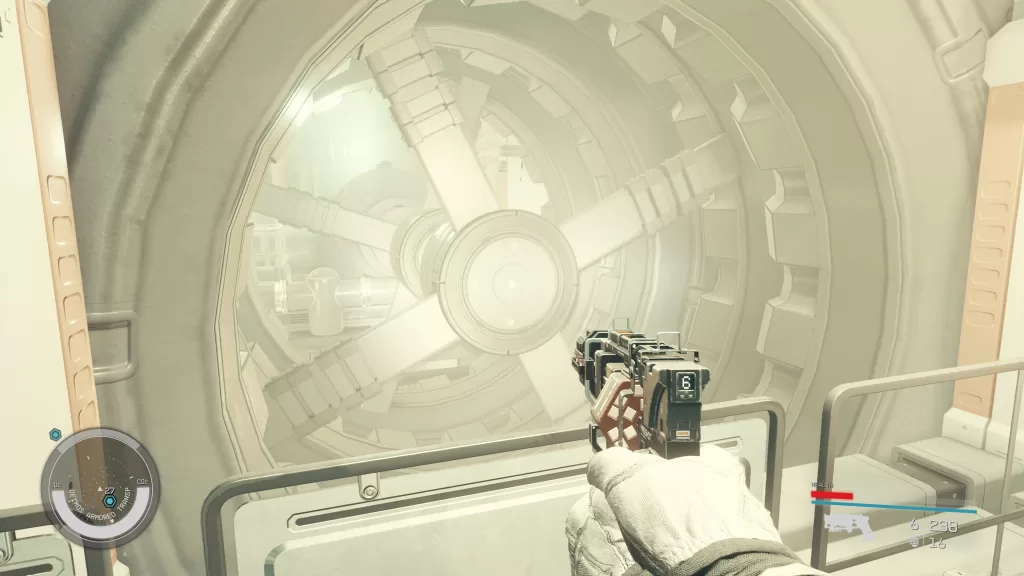
Head on through and continue following the path until you reach a spinning fan. Again, wait for 0 gravity then head on through.
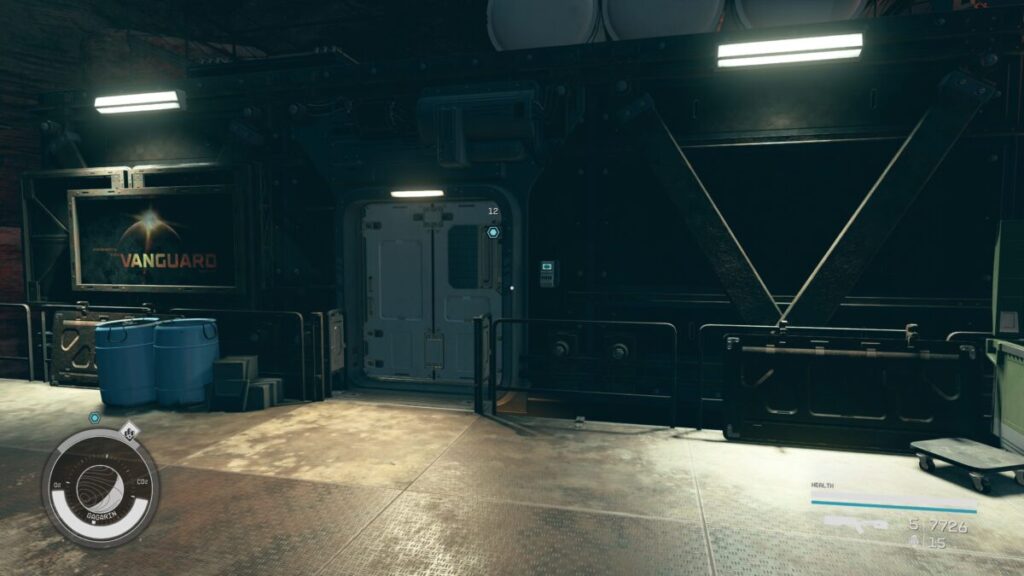
Continue downward until you finally reach the computer. Use it to open the door. Backtrack through the fan and take a left exiting the room. Take another left to find a red door. Use the computer on the wall next to the door to open it. Head down the elevator shaft and enter the elevator. Backtrack until you reach that giant white door that was previously sealed. It is now open! Head on in then use 0 gravity to head on up to the top where you’ll find 3 circular doors. Open the middle one to find Bogdonov’s Boutique Liquor (Box Set).
Return to Lizzy
Travel back to Lizzy and hand over the liquor. You can persuade her for more credits if you wish. Once you’re done speaking with her, the Sure Bet Starfield mission will complete.
Welcome to NGB and our guide on the Starfield UC Wants You! mission! In this guide, we’ll cover how you can start the mission and the steps you’ll need to do to complete it. If you’re here looking for help with a particular mission objective, be sure to check out our quick links section which should point you in the right direction!
To start the mission, you’ll want to travel to Gagarin Landing on planet Gagarin in the Alpha Centauri System. Once you’ve arrived head to the Vanguard Recruitment Office and speak with Zinaida Kuipers there. Tell her you’re looking for work and she’ll ask you to help deliver recruitment materials to several local businesses. She also mentions that she’ll throw in a bonus if you can convince them to actually put out the materials.
Starfield UC Wants You Mission Guide
Drop off the Recruitment Materials
For this mission, you’ll need to deliver some recruitment materials to 3 local businesses and as stated in the how-to section above, if you can convince them to actually put out the materials, you’ll receive a bonus reward.
Lizzy Ajello
The first stop on the distribution list is the watering hole on the north side of Gagarin Landing. Speak with Lizzy behind the bar and tell her you’re dropping some recruitment materials. You’ll then need to pass a persuasion check to get her to actually put them up, otherwise, they’ll be making a trip to the incinerator.
Dr. Keala
Head south from the watering hole to reach the Clinic. Head inside and speak with Dr. Keala to drop off the recruitment materials. Just like with Lizzy, you’ll need to pass a persuasion check to get her to put them up.
Chief Pretorius
Exit the Clinic and continue heading north to arrive at the UC Security Office. Enter the building and speak with Chief Pretorius letting her know you’re here to drop off the recruitment materials. Unlike the others, she will just put them up on her own!
Return to Zinaida
Return to Zinaida in the recruitment office to let her know that the job is done (and hopefully that the materials will all be displayed). She’ll thank you for your help rewarding with some credits. If you managed to convince them all to put up the flyers, she’ll give you a little extra money.
Welcome to NGB and our guide on the Missed the Mark Starfield mission! This guide will cover how to start the mission and the steps needed to complete it. If you’re here looking for help with a particular mission objective, be sure to check out our quick links section, which should point you in the right direction!
PLEASE NOTE: Some of the planets referenced in our guides and walkthroughs may not match up with yours due to how Starfield was created. In these situations, what you do and the places you visit on those planets should still be the same.
How to Start the Missed the Mark Starfield Mission
Missed the Mark is one of the missions you can pick up at Gagarin Landing on Gagarin in the Alpha Centauri System. This mission will automatically begin after completing the Missed Connections mission if you agree to help Helena track down her missing employee.
Missed the Mark Starfield Mission Guide
Find Bonifac Maksimov on Hawley
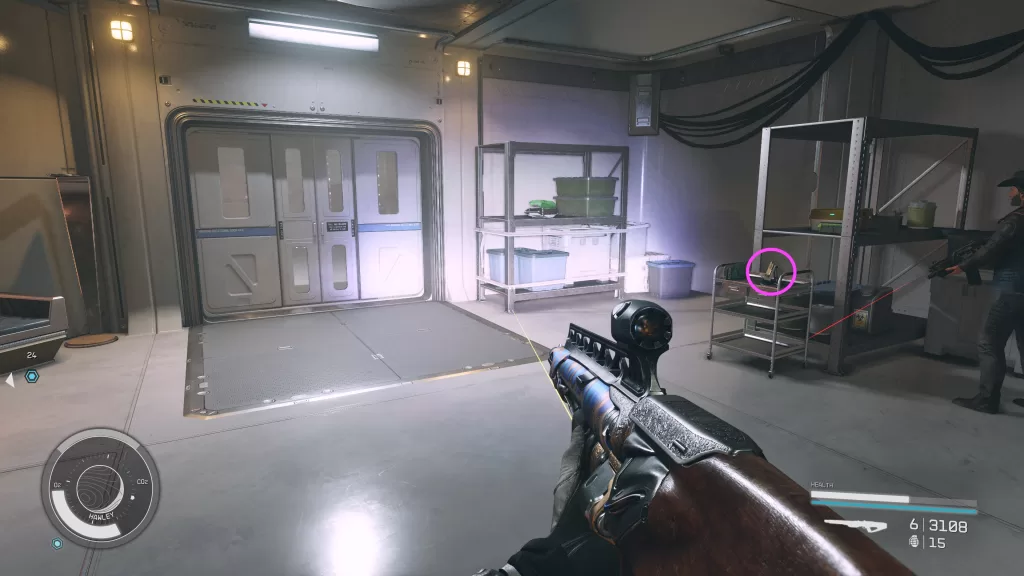
For the Missed the Mark Starfield mission, you’ll first need to travel to the Reclaimed Outpost on Hawley, a moon of Olivas in the Alpha Centauri System. Once there, you’ll be greeted by some Ecliptic. Take them out, then head inside the largest building where more enemies will be waiting, so be prepared for a fight! You’ll then want to loot the Office Key from the shelving unit near the Industrial Workbench.
You’ll need this key to unlock the room on the opposite side of the area. In this particular room, you’ll find a bunch of goodies! Head up the stairs near the room filled with goodies, then take a right and proceed through the door to find Bonifac.
It’s also possible that Bonifac is in a room on the second level. If that’s the case, you shouldn’t need a key to enter it.
Speak to Bonifac
Talk to Bonifac to learn what happened to him, and then set out to look for Maldonado.
Find Maldonado
Head to the room directly across from Bonifac to continue through the facility. When you reach the end of the area, you’ll need to deal with more enemies. After you take them out, speak with Stephen Maldonado. He’ll offer you a deal.
If you can’t get through the door that says it needs the Entry Key to unlock, head up to the walkway above it and then go through the door on the right. There will be a wall panel where you can cut loose with your cutter to reach a vent shaft leading to the room behind the locked door.
Take the Deal
If you side with Maldonado and kill Bonifac, Maldonado will give you 4000 credits. You’ll then need to report back to Helena. You’ll receive 100 EXP and 3,000 credits no matter which option you tell her.
Don’t Take the Deal
If you don’t take his deal, he’ll turn hostile. Take him out, then loot the Private: Reliant Medical stolen data from him. You’ll then need to report back to Helena. Select either option to receive 100 EXP and 7,600 credits!
Return to Helena
When it’s time to return to Helena, head across the room and grab the Entryway Key from the cart next to the locked door.
Use this key to open the door to create a shortcut to the entrance. Return to Helena to complete the Missed the Mark Starfield mission.
Welcome to NGB and our guide on the Missed Connections Starfield mission! In this guide, we’ll cover how you can start the mission and the steps you’ll need to do to complete it. If you’re here looking for help with a particular mission objective, be sure to check out our quick links section which should point you in the right direction!
PLEASE NOTE: Some of the planets referenced in our guides and walkthroughs may not match up with yours due to how Starfield was created. In these situations, what you do and the places you visit on those planets should still be the same.
How to Start the Missed Connections Starfield Mission
Missed Connections is one of the missions you can pick up at Gagarin Landing on Gagarin in the Alpha Centuri System. To start this mission, speak with Helena Strickland in Reliant Medical about her missing courier. Agree to help her find him then follow her to the intercom on the wall and listen to her conversation.
Missed Connections Starfield Mission Guide
Search for the Courier Along His Route
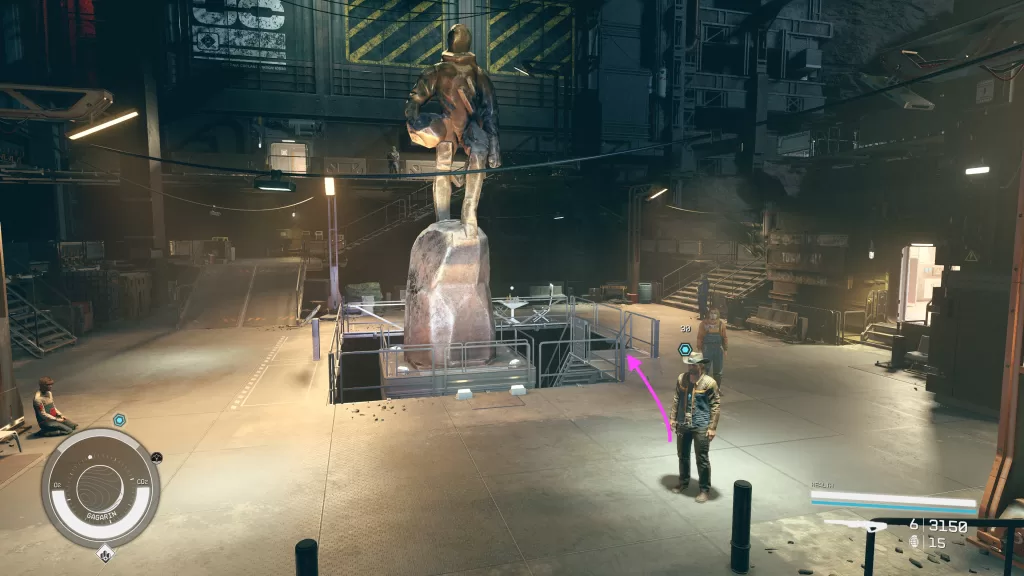
For the Missed Connections Starfield mission, you’ll first need to check the courier’s stops along his route to see where he might’ve gone wayward. If you’d like to check each one, be our guest but the one you really need to find is down the stairs to the right of the giant bronze statue. At the bottom of the stairs head through the door on the right to find a bloody scene.
Speak to Helena about the Package
Loot the courier’s body for the package then return to Helena and speak with her. Afterwards, the Missed Connections Starfield mission will be completed and you’ll be given another mission: Missed the Mark.
Welcome to our NGB and guide for The Hammer Falls mission in Starfield! This guide will walk you through starting the mission and detail the necessary steps for its completion. If you need help with a specific mission objective, check the quick links section to find the most relevant information easily.
The Hammer Falls is one of the faction missions you’ll have to complete during the Freestar Collective questline. You’ll start it automatically after you complete the First to Fight, First to Die Freestar Collective faction mission.
Starfield The Hammer Falls Missin Guide
Go to HopeTown
Head back to the ship and set a course for HopeTown on planet Polvo in the Valo System. Leave your ship and enter HopeTech.
Confront Ron Hope
Speak with Mr. Hope about what you’ve learned. He can be found at the back of the shop floor behind the main desk. You’ll then be presented with a couple of options during the conversation.
Accept Hope’s Offer
If you take Hope’s offer, you’ll be given 20,000 credits in exchange for the slate. Then you’ll return to the Marshal and inform the Marshal that the Major took his secrets with him to the grave. He’ll be disappointed, but nothing serious will happen. If you choose this option and Sam is with you, he will really hate it.
Attack Him
If you choose to attack Hope, you’ll have to kill him and his guards. Afterward, talk with Birgit then leave HopeTown and return to the Rock. Speak with the Marshal to fill him in on all of the details.
Take Him In
If you try to take him (Sam loves “You’re going to turn yourself in…”) he’ll make it clear that that’s not an option. You’ll be forced to either agree with him and hand over the slate or attack him. They will end the same way as the above choices.
Talk to Marshal Blake
Regardless of the choice, you must return to the Marshal and tell him what happened. This will complete The Hammer Falls mission and the Freestar Collective faction mission questline. You’ll be rewarded 150 EXP, credits, a Freestar Ranger Badge, the Justifier rifle, Ranger Duelwear, Ranger Skip Pack, Ranger Space Helmet, and a Ranger Spacesuit along with a Star Eagle starship.
Welcome to NGB and our guide for the Starfield Legacy’s End mission! This guide will walk you through starting the mission and detail the necessary steps for its completion. If you need help with a specific mission objective, check the quick links section to find the most relevant information easily. During this mission, you’ll finally have to choose whether to side with the Crimson Fleet or SysDef!
PLEASE NOTE: Some of the planets referenced in our guides and walkthroughs may not match yours due to how Starfield was created. In these situations, what you do and the places you visit on those planets should remain the same.
Legacy’s End is the final faction mission for the Crimson Fleet. You’ll start it automatically after completing The Eye of the Storm mission.
Starfield Legacy’s End Mission Guide
Siding with the Crimson Fleet
Destroy SysDef Ships to Secure the Key
As soon as you reach the Key, it will be under assault by SysDef. Defeat the enemy ships then board the Key and speak with Naeva. When she’s done wasting your time, report to Delgado in the Command Center.
Secure the Defensive Batteries
Return to your ship then head for the Alpha, Beta and Gamma Defensive Batteries. You’ll need to secure each one from SysDef forces. They will be spread out in the orbit of Suvorov.
Return to the Key
Return to the Key for the final onslaught led by the US Vigilance herself. You’ll need to defeat her escorts first. After defeating most of them, more will spawn for a couple of waves. Once they are all dealt with, the entire Crimson Fleet will target the Vigilance herself. Once she’s been incapacitated, board her.
Confront Commander Ikande
Make your way to the Operations Center stopping by the brig along the way. Defeat the SysDef members there then loot the password from Armin Petrosyan and use it to release the prisoners. Continue fighting your way to the commander. You’ll be assisted by different members of the fleet in each of the sections. When you reach Ikande, a conversation will start as soon as you enter the room. He’ll tell you that he’s initiated the self-destruction of the Vigilance. You’ll be able to persuade him to turn it off or attack him and loot the codes from him and Toft to do it yourself using the UC Vigilance Command Station terminal.
Return to the Key
With SysDef stopped, return to the Key and speak with Delgado in the Command Center. This will complete the mission and you’ll be awarded 350 EXP and 250000 credits.
Siding with SysDef
Defeat the Crimson Fleet Scouts
We highly recommend making a save before you set course for the Vigilance! As soon as you reach the Vigilance, it will be attacked by the Crimson Fleet. Take out their scouts, and then dock with the Vigilance.
When we docked at the Vigilance we experienced a bug where we couldn’t board the ship. To fix this, close out of the game entirely then reopen it from your last save!
Once on the ship, speak with the commander. After the conversation, hand any evidence you’re carrying over to Lt. Toft then return to your ship.
Disable Defensive Battery Alpha / Beta / Gamma
Jump to the Alpha battery in the Kryx System then take out the battery and Crimson Fleet guarding it. You’ll need to do this for both the Beta and Gamma batteries as well.
Join the Battle at the Key
With all three batteries destroyed, jump to the Key to help with the assault. Once you get there, you’ll learn that the Vigilance is tied up fighting with Naeva. Deal with the enemies ships. Once all of the enemy ships have been dealt with, you’ll be free to dock at the Key.
Reach the Operations Center and Deal with DELGADO
Once on the Key, fight your way to the main area and enter Ship Services. Use Jasmine’s Computer to unlock the doors allowing you to move forward. Pass through the Depo fighting your way past the vendor and your best bud. Head into the Last Nova and work your way to the bar. Access the Last Nova Bar Computer to open the doors to the Operations Center.
Speak with Shinya Voss there to learn that his bomb has been activated. You’ll then have the option to try and deactivate it for him. To do this, you’ll need to Delgado’s ID. He’ll then open a door through the firing range for you. Fight your way through the Bunks to reach the Command Center where you’ll come face to face with Delgado. Speak with him to learn that he’s overloaded the reactors which will cause the Key to explore. You’ll then have the option to persuade him to stand down or attack. If you choose the latter, you’ll need to reset all three reactors to stop it. Then you’ll be able to take down Delgado. Head into the room he was locked in to disable the lockdown and the bomb in Shinya’s chest using Delgado’s Computer. If you decided to persuade him to stop, he will stop the reactor overload and you’ll be able to access is terminal to disable Shinya’s bomb.
Return to the Vigilance
Leave the Key and board the Vigilance which can be found nearby. Report to the commander to complete the Starfield Legacy’s End mission. You’ll be rewarded with 350 EXP, 250000 credits and a SysDef Formal Uniform.
This site uses cookies. By continuing to use this website, you are giving consent to cookies being used. For more information on cookies, view our Privacy Policy.OkPrivacy Policy