Welcome to NGB and our Eiyuden Chronicle: Hundred Heroes guides and walkthroughs! Here you’ll find everything you’ll need to easily breeze through the main story.
Game Guides
Baten Kaitos I and II HD Remaster Guides and Walkthroughs
Welcome to NGB and our Baten Kaitos I & II HD Remaster guides and walkthroughs page.
Baten Kaitos
Miscellaneous Guides
Area Guides
- Sadal Suud
- Diadem
- Anuenue
- Mira
- Alfard
Baten Kaitos Walkthroughs
Baten Kaitos Origins
Coming Soon!!!
Guides
Starfield – One Small Step
Welcome to our walkthrough for the One Small Step main mission in Starfield! In this guide we’ll cover all the objectives and the rewards you’ll receive from completing the One Small Step mission.
One Small Step Mission
Follow Supervisor Lin
When you gain control of your character at the start of the One Small Step mission, follow Supervisor Lin until you reach the cutter create. Grab yourself one then head down the tunnel to the left of the crate and mine the 5 deposits.
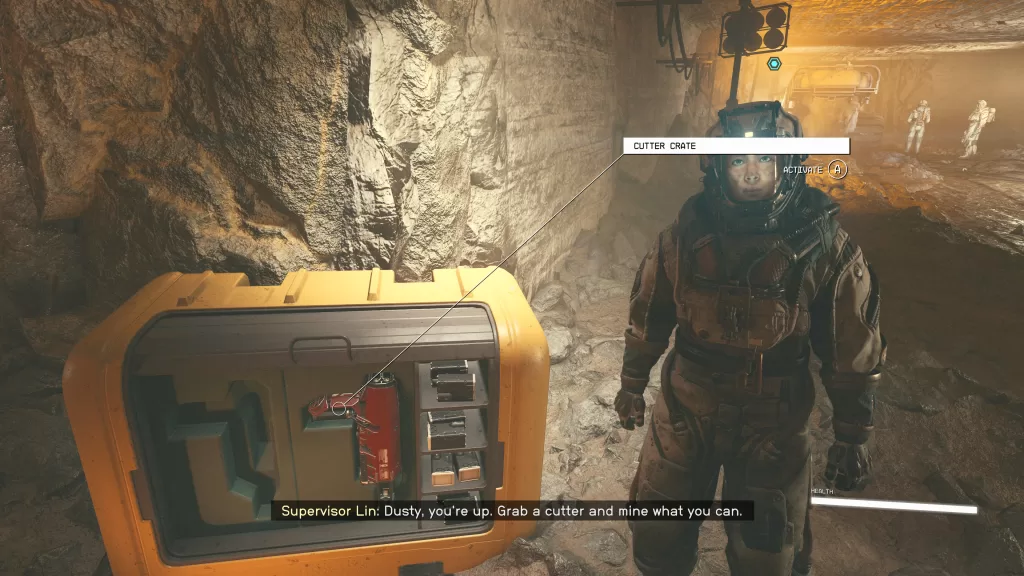
When you’re done, return to Lin near the crate.
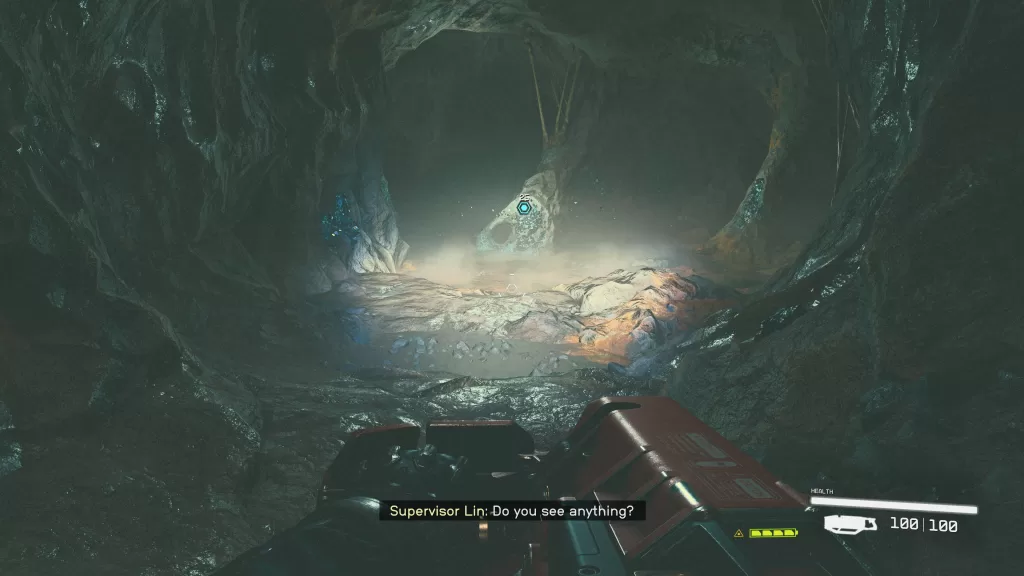
Follow Supervisor Lin (Again)
Afterwords, follow Lin to where Heller and Isabelle are working the mining machine. After they clear the machine, continue following Lin through the new tunnel. After a bit, Lin will send you to explore the cavern on your own. Keep following the main path until you reach the glowing rock. Use your cutter on the Caelumite Deposit to free the strange object then grab it to trigger a strange vision.
Choose Your Character
You’ll now be able to customize your character!
Follow Supervisor Lin (Thrice!)
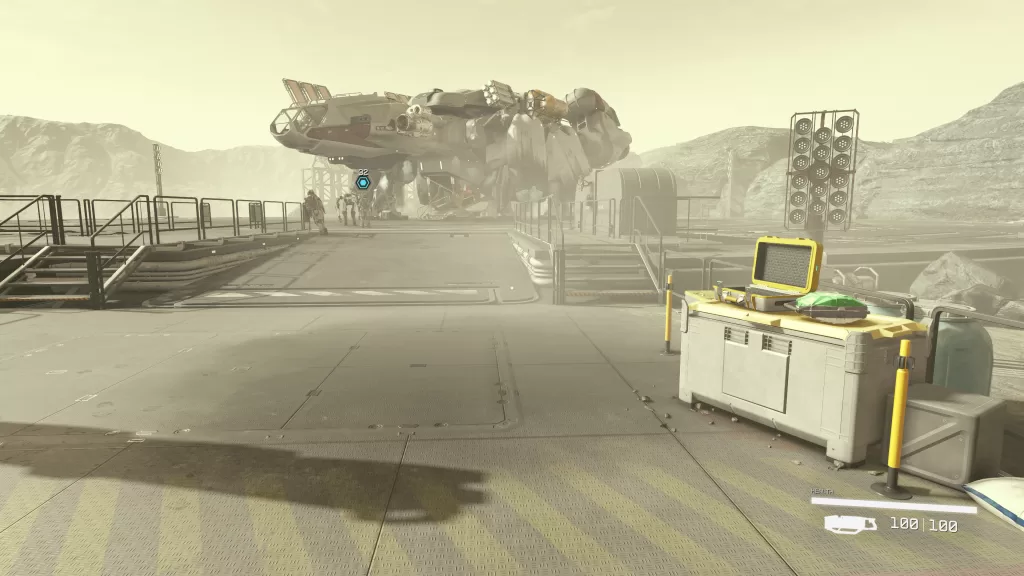
After creating your character, Lin will make sure you are okay then you’ll have to follow her again. Before heading out, you can look around for loot if you want. Watch out for First Aid Medical Kits which contain some healing items. When you’re ready, continue following Lin. After you reach the airlock, you’ll need to go into your inventory and equip a helmet to continue on outside where you and Lin will meet the client. Just before the bridge leading to the ship, there will be a container with a weapon and med kit you can loot.
After speaking with Barrett you’ll be attacked by the Crimson Fleet. Deal with them then speak with Barrett afterward. He’ll then invite you to join Constellation and send you to the Lodge in his place.
Board the Ship
Head up the ramp to the ship and use the ladder to board. Head for the cockpit. Take your seat in the pilot’s chair then blast out of there! Once in space, you’ll be introduced to the tutorial on how to fly. Follow the prompts to complete it. When that’s done, you’ll be attacked by a Crimson Fleet ship then two more will show up. Engage them in a space battle!
Travel to Kreet
After the battle, our robot companion will determine we need to deal with a local Crimson Fleet Captain if we are going to make it to the lodge safely. Travel to Kreet (the Moon of Anselon). You can do this by opening the Planet Map, choosing “Back to the System” and then selecting Kreet. From there you can hover over the Kreet Research Lab and set it as the course which will let you fast travel there. You’ll then need to interact with the lab again to choose to land.
Deal with the Crimson Fleet Captain
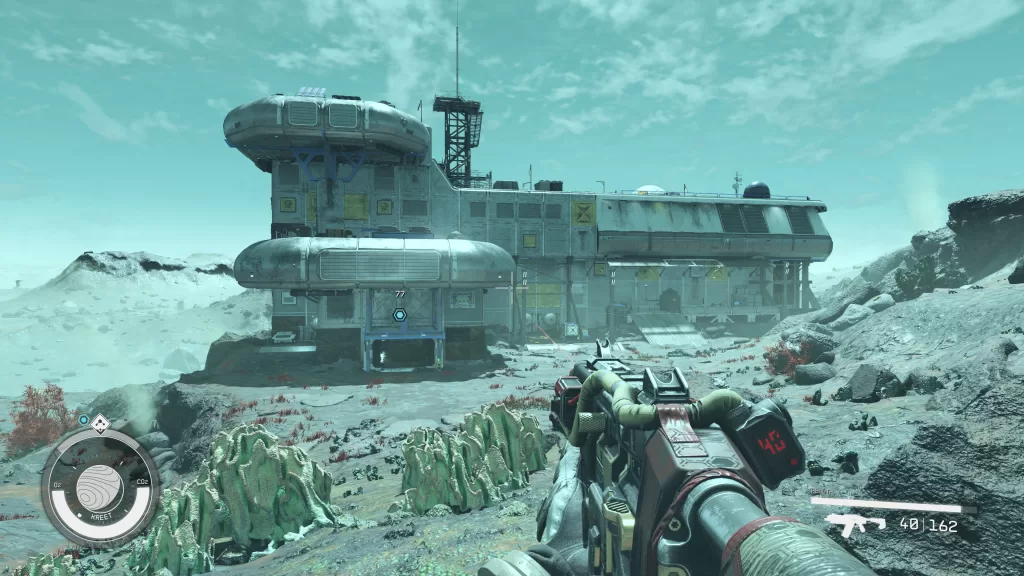
After landing on the planet, work your way to the Research Lab. Along the way, you can collect samples from the local plants and mine ore such as Iron or Silver. Vasco will also show you how to use the scanner. Once you reach the lab, head inside and work your way through dealing with the Crimson Fleet as you go.
When you reach the Roof Access ladder, there will be a safe there you can try and unlock using digipicks. Climb up the ladder and head through the door at the top to finally find the captain. Approach him to begin some dialog where you’ll be able to try and persuade him to walk away. Fail and a firefight ensues. Either way, after dealing with the captain, head back to the ship (via fast travel using your scanner) then take off.
Grav Jump to Jemison
Once in space, divert power to your grav drive then start flying towards the objective. You’ll be prompted to travel to the mission area which will engage the drive when you accept. After you reach your destination, open the star map and choose to land at New Atlantis. You’ll then want to exit the ship and speak with the Ship Service Tech. Next, head over to the New Atlantis Transit and ride it to the MAST District.
Go to the Lodge (Mast District)
Head up the ramp then take a right at the big tree and follow the walkway heading toward the objective marker to reach the lodge. Go inside and pass through the door to meet Sarah and the rest of the bunch. When prompted, place the artifact on the table. After a brief event, Sarah will officially invite you to join Constellation. The mission will complete after you accept. As a reward, you’ll receive the following:
- Constellation Pack
- 400 EXP
- 8,000 credits
- Lodge Key
Guides
Immortals of Aveum – Chapter 2: The Magnus Collectibles Guide
Welcome to our Chapter 2: The Magnus Collectibles Guide for Immortals of Aveum! In this guide we’ll cover all the collectibles that you can find during Chapter 2.
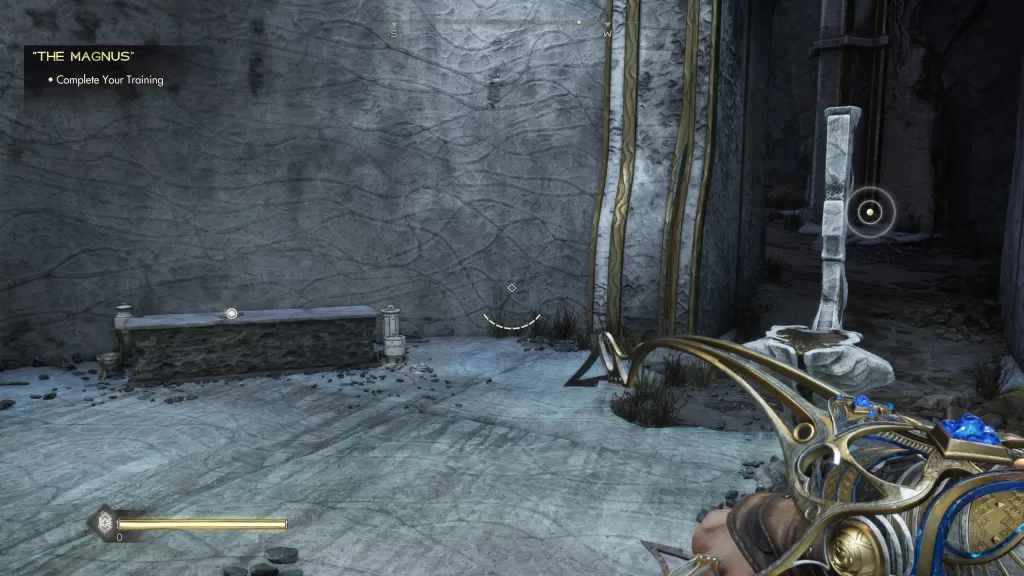
Complete Your Training
Lore: Lost Diary
This collectible can be found on the stone bench in the room where you grab the health crystal.
Lore: Case Report: Changewinds
This lore can be found on a pedestal in a small nook in the same room you get your Shatter ability.

Guides
Trails Into Reverie – Finale Walkthrough
Welcome to our collectibles walkthrough on the Finale: Hope in Reverie in The Legend of Heroes: Trails into Reverie! In this walkthrough, we’ll cover enemies you can scan, noteworthy items, character notes, shops and treasure chest locations. Please note that the game dictates who you’ll be playing as during this final act so you don’t need to worry about switching between the routes yourself!
Character Notes
Automatically at the start of the act:
- Rean 3
- Commander Baelz 2
Automatically after fighting the first group of enemies:
- Sully 1
Lloyd’s Route
Station Street
Shops
- Genten Orbal Store – Wendy shows up and you can get the typical items from her in case you need to stock up. She has nothing noteworthy!
Enemies to Scan
- Helmord
Rufus’ Route
West Street
Shops
- Oscar’s Temp Support Section – Oscar shows up and you can get the typical items from him to stock up. He has nothing noteworthy!
Enemies to Scan
- D-Bestial
Rean’s Route
East Street
Shops
- Business Owners’ Association – Roy shows up and you can buy the typical items from him to stock up. He has nothing noteworthy!
Rean / Lloyd’s Route
Enemies to Scan
- Asmodyne Menace
Rufus’ Route
Enemies to Scan
- Supreme Leader Rufus
All Routes
Enemies to Scan
- Supreme Leader Rufus
- Ilya the Dusken Dancer
Final Preparation Period
During this final preparation period, you’ll be able to go anywhere and everywhere! Take advantage of this to clean up your notebook entries, do some shopping and level up your characters! For our guide on what the shops have, click here! For our guide on the Reverie Garden / Stratums, click here!
Character Notes
Automatically at the start of the final preparation period:
- Lloyd 3
- Rixia 3
- Rufus 3
- Ilya 3
- Father Thomas 1
Administrative District
Character Notes
Speak with the group in the Administrative District plaza:
- Elliot 2
- Emma 2
- Squire Scarlet 1
Speak with the group in the Civic Center:
- Jusis 2
Speak with Millium in the Civic Center:
- Millium 2
Noteworthy Items
- Recipe: Bitter Red Soda – Purchase for 1,700 mira from Chroma’s Juice Stall
Harbor District
Character Notes
Speak with the group in the plaza:
- Laura 2
- Fie 2
Speak with the duo on the dock:
- Vivi 1
- Rex 1
Noteworthy Items
- Hard Genkotsu Ramen x4 – Speak with Koki at Ozelle’s Noodle Stand
- Recipe: Hard Genkotsu Ramen – Purchase from Ozelle’s Noodle Stand
Fishing
From the fishing point on the dock closest to the stairs:
- Cangiru
From the fishing point on the dock closest to the lighthouse:
- Sky Gill
- Kasagin
East Street
Character Notes
Speak with the duo in the Business Owners’ Association:
- Becky 1
- Hugo 1
Interact with the group in the Bracer Guild:
- Michel 1
- Sara 2
Noteworthy Items:
- Various Ingredients – Speak with Tucker at Tucker’s Vegetable Stall
- Dragon Fried Rice x5, Blazing Mapo Tofu x5 – Speak with Shanshan at Long Lao Tavern & Inn
Central Plaza
Character Notes
Speak with Chief Sergei near the entrance to the Orbal Store:
- Sergei 2
Speak with Zeit on the roof of the SSS Building:
- Zeit 2
Noteworthy Items
- Book: Crossbell Times – Emergency Special – Purchase from Southwark General Store
- Books: Moonless Morn – Chapters 15, 16, 17 – Purchase from Southwark General Store
- Power Potion II x3, Shield Potion II x3, Mind Potion II x3 – Speak with Harold in front of Vingt-Sept Cafe
- Recipe: Nature Breeze Pasta – Purchase for 2,100 mira from Vingt-Sept Cafe
West Street
Character Notes
Speak with the group near West Crossbell Road:
- Renne 2
Noteworthy Items
- Tearal Balm x5, EP Charge III x5, Celestial Balm x5 – Speak with Elsa in Tallys’ General Store
Side Quests
- Speak with Oscar in Morges Bakery to find out that he needs Native Bellberries from Ursula Road. Travel to Ursula Road – Field Ex. Camp and interact with the shiny object on the ground to acquire the Native Bellberries. Return to Oscar in Morges Bakery to hand them over. As a reward, you’ll receive Os-Ben Special x4.
West Crossbell Road
Enemies to Scan
- Cool Pom
- Rainbow Mosquito
- Scorpion King
Fishing Point
- Gold Salmon
Chests

| Location | Loot |
|---|---|
| Northeastern nook | Zeram Capsule |
| Northwestern nook | Sleep IV |
East Crossbell Highway 1
Chests

| Location | Loot |
|---|---|
| North central path | Dragon Incense |
Armorica Village
Noteworthy Items
- Tearal Balm, Fresh Egg x5, Fresh Milk x5, Mature Cheese x5 – Speak with Jake at Jake’s General Store
Ancient Battlefield – Depths
Enemies to Scan
- Heidrun – Defeat it then pick up the Black Zemurian Ore Shard from the ground!
Moon Temple – Depths
Enemies to Scan
- Unsurtr Malice – Defeat it then loot the Black Zemurian Ore Shard from the ground!
Underground Freight Line
Head to the RF Military Factory – Underground Platform to reach this area!
Enemies to Scan
- Goliath Lugh – Defeat it then loot the Black Zemurian Ore Shard from the ground!
Chests

| Loot | Location |
|---|---|
| Dead end tunnel west of the Underground Freight Line – Passage | Skanda Gem |
| Along the southwestern path | Freeze IV |
| Along the southwestern path | Dragon Incense |
| Along the southwestern path | Nohval Gem |
Knox Forest 1
Enemies to Scan
- Ginosha-Zanak – Defeat it then loot the Black Zemurian Ore Shard from the ground!
Prison – Depths
This area can be found at Crossbell Police Academy. Once there, travel to the Prison – Depths and interact with Dudley for an event.
Ursula Road 1
Enemies to scan
- Harpoon Hornet
- Spineedler
- Saccharine Tomartian
- Nauseating Tomartian
- Goldflier
- Massibrus
Fishing
- Northern Arowana
- Tiger Arowana
- Elecantus
Chests

| Location | Loot |
|---|---|
| Eastern nook near fishing point | Amberl Gem |
| Nook on western side | Carnelia Gem |
| Southern dead end | Vital Divine Water |
Ursula Road – Field Ex. Camp
Enemies to Scan
- Forest Snail
Ursula Road 2
Enemies to Scan
- Killer Shmark
Chests

| Location | Loot |
|---|---|
| Along the main path | Powerful Divine Water |
| Eastern side across Stargazer’s Tower | Esmelas Gem |
| On the southeastern beach | Fortuitous Divine Water |
| On the southeastern beach | Sapphirl Gem |
Event
- Interact with the group on the southeastern beach
Fishing
In order to catch the special fish from the southeastern fishing point on the beach, you’ll need to catch 25 other fish!
- Jeweled Cancer
- As a reward for catching this fish, the 3 fisherman will give you a Dragon Incense!
Stargazer’s Tower
Enemies to Scan
- Grunoja – Defeat it then loot the Black Zemurian Ore Shard from the ground!
- Simiamanita
- Bracken Monkey
- Cauliflamonkey
Ursula Road 3
Enemies to Scan
- Granpam Ossa
Fishing
- Marble Snakehead
- Cobrahead
- Cangiru
Chests

| Location | Loot |
|---|---|
| Eastern edge near Ursula Road 2 | Magical Divine Water |
| Northern dead end | Diabolos Gem |
| Western edge of main path | Spiritual Divine Water |
| Southwestern corner | Goldia Gem |
| Next to the southern fishing point | Manly Munchies – Assorted Hotpot |
St. Ursula Medical CollEGE
Character Notes
Speak with Linde / Doctor Seiland on the roof then select to visit Mirelle:
- Linde 1
Event
- Visit Ilya’s room
Lake Elm Wetlands 1
Enemies to scan
- Galliosaurus – Defeat it then pick up the Black Zemurian Ore Shard it drops!
Fishing
- Pearlglass
- Sky Gill
Chests
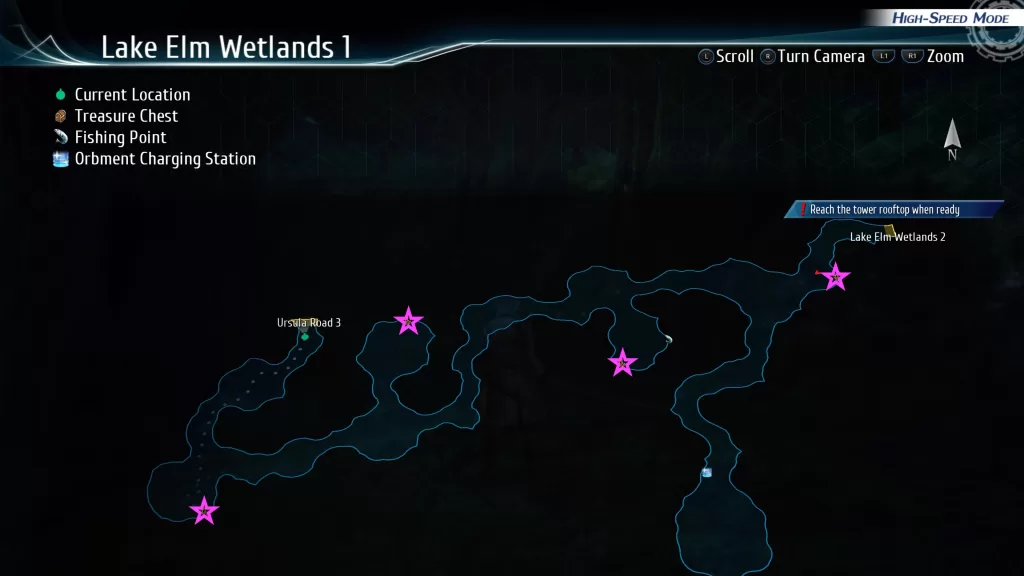
| Location | Loot |
|---|---|
| Next to the fishing point near the center of the area | Spirit Incense |
| Northwestern side of the area | Ocean Bell |
| Southwestern corner of the area | Argem Gem |
Castle of Mirrors Depths
Character Notes
Speak with the group of people:
- Squire Rosine 1
Orchis Tower
Character Notes
Speak with the group at Orchis Tower – 35F in a conference room:
- Gaius 2
Final Mission
When you’ve completed everything and are ready to finish the story, select to begin the operation! After a very lengthy cutscene, you’ll need to divide your characters into two teams: Team A and Team B. Each team will have 20 characters. Team A will have to have Lloyd, Rufus and Nadia while Team B has Rean, Swin and Lapis.
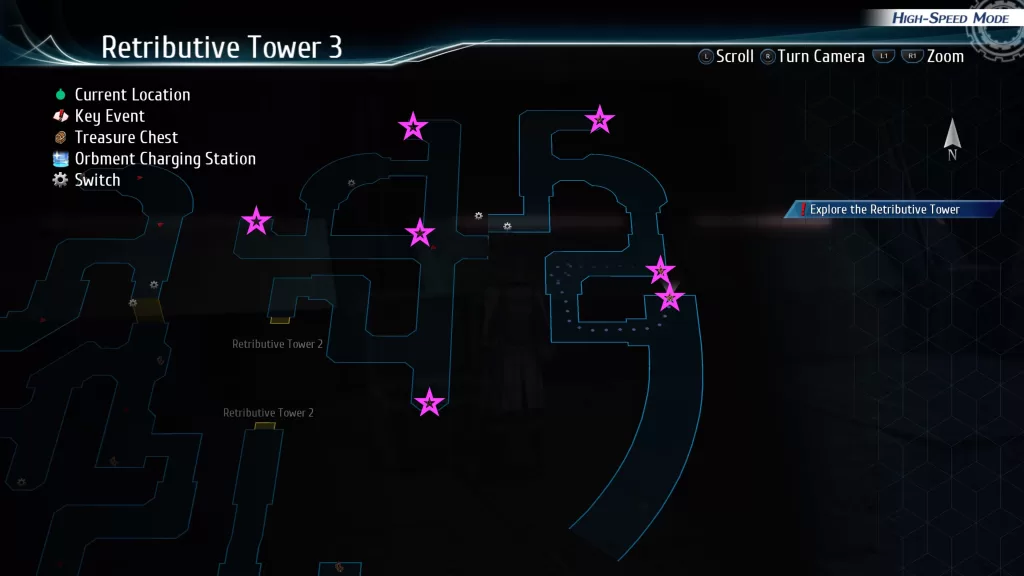
Retributive Tower
Character Notes
Automatically after dividing the characters into Team A and Team B:
- Prince Olivert 2
- Speaker MacDowell 2
Enemies to scan
- Dovon Ace
- Tri-Attacker V2
- Gun Buster Type-A
- Tri-Attacker SS
- El Cubile
- Cubile
- Zero Timelord
- Pale Apache X
- Zero Sorcerer
- Zero Warrior
- Harpy
- Ancient Dogger
- Sneak Gunner R-0
- Sneak Gunner M-0
- Sneak Gunner G-0
- Gespard Gerrod Sigma
- Gun Buster Type-B
- Gun Buster Type-C
- Gundharva
- Aurgelmir
- Torturer
- Divine Delf
- Weiss Clown
- Yyd Vanas
- Yyd Vats
- Plutus Bennu
- Angry Maggot
- Magic Knight Dynagram
- magic Knight Isra-Zamiel
- Magic Knight Sigheim
- Magic Knight Regulus-Zamiel
- Cubelion Telos
- Melphegor Nix
- Ishmelga Rean
- Ishmelga of the End
Chests
| Location | Loot |
|---|---|
| Lloyd – Tower 2 – Just north of the map transition to Retributive Tower 1 | Dazzling Amberl Gem |
| Lloyd – Tower 2 – Along the main path just north of the previous chest | Seiryuu |
| Lloyd – Tower 2 – Along the main path | Spiritual Divine Water |
| Lloyd – Tower 2 – Along the main path | Tear All Balm |
| Lloyd – Tower 2 – Behind a door on the eastern side of the map near the central Retributive Tower 3 marker on the map | Black Zemurian Ore |
| Lloyd – Tower 2 – Along the main path | Celestial Balm EX |
| Lloyd – Tower 2 – Central part of the area just off the main path | Dazzling Esmelas Gem |
| Rean – Tower 2 – Northern side of the map | Steel Bell |
| Rean – Tower 2 – Along the main path on the northwestern side of the area | Vital Divine Water |
| Rean – Tower 2 – Along the main path on the western side of the area | Umbral Gyre |
| Rean – Tower 2 – Along the main path on the western side of the area | Fortuitous Divine Water |
| Rean – Tower 2 – Southwestern corner of the area | Dazzling Sapphirl Gem |
| Rean – Tower 2 – Along the southern main path | Tearal Balm Celestial Balm EP Charge III |
| Rean – Tower 2 – Eastern side of the area near the switch to Lloyd | Dazzling Carnelia Gem |
| Lloyd – Tower 3 – Near the starting point of the floor down the eastern path | Solar Gyre |
| Lloyd – Tower 3 – Along the main path near the south-central part of the area | Zeram Capsule |
| Lloyd – Tower 3 – Along the main path near the center of the area | Power Potion Omega Shield Potion Omega Mind Potion Omega |
| Lloyd – Tower 3 – Western side of the area | Dazzling Argem Gem |
| Lloyd – Tower 3 – Northern side of the area | Dazzling Golden Gem |
| Lloyd – Tower 3 – Western side of the area | Astral Bell |
| Lloyd – Tower 3 – Western side of the area long the main path | Magical Divine Water |
| Rean – Tower 3 – Southern side of the area just after the Retributive Tower 2 map transition | Dazzling Nohval Gem |
| Rean – Tower 3 – Along the main path at a crossroad | Powerful Divine Water |
| Rean – Tower 3 – Western side of the area | Zeus Gem |
| Rean – Tower 3 – Northern side of the area | Brave Soul |
| Rean – Tower 3 – Northeastern side of the area | Mars Gem |
| Rean – Tower 3 – Along the main path | EP Charge IV |
| Rean – Tower 3 – Along the main path on the eastern side | Dragon Incense |
Lloyd – Tower 2

Rean – Tower 2

Lloyd – Tower 3

Rean – Tower 3
Character Notes
Automatically after Lloyd returns to the Retributive Tower to save Rufus:
- Lloyd 4
- Rean 4
- Crow 2
- Rufus 4
- Lapis 3
For more guides on The Legend of Heroes: Trails into Reverie, click here!
Guides
Digimon Story Cyber Sleuth – Chapter 15 Walkthrough
Below is a walkthrough for Chapter 15: Parallel World in Digimon Story Cyber Sleuth: Complete Edition.
Detective Agency
At the start of the chapter, there will be 5 new cases available for you to take on. They are listed below and you can find a guide for them here. When you are ready to push the story forward, travel to the EDEN Free Area.
- A Pet Digimon
- Nanimon on Sunday
- Numemon Strikes Back
- Problems at Digippedia Continued
- Uncovering the Seventh Riddle
EDEN Free Area
Use an access point to log in to EDEN then head for the EDEN Free Area. Follow the path all the way to the right to trigger an event leading to a scripted fight with the Royal Knight Kentaurosmon. After a couple of turns another event will trigger sending you back to the detective agency. You’ll then want to visit Mirei at the DigiLab who will tell you to find Haronious Will and Steel will to be able to travel to a parallel world.
Shibuya
Travel to Shibuya then head for the subway affected by a digital shift. You’ll need to use the Stealth Hide Hacking Skill to sneak past the guards protecting the subway.
Shibuya: Digital Shift
Work your way through the area until you reach a blocked section. There will be an orb down the path north of it guarded by the vaccine-type Crowmon. This will clear the way allowing you to reach Magnamon. Approach him to trigger an event leading to a fight with the data-type Dynasmon. Defeat the Royal Knight to trigger an event and receive the Harmonious Will.
Digimon
- Aquilamon
- Crowmon
- Garudamon
- Gigadramon
- Megadramon
- Ogremon
- Wizardmon
Ueno
Upon entering the area, you’ll be treated to an event with a Tought-Looking Digimon and a Training Digimon. Speak with them to trigger another event the follow Hackmon into the digital rift (you’ll need to use your Stealth Hide Hacking Skill to sneak through).
Uneo: Digital Shift
Once in the digital shift, head to the access point then go left making your way into the next room. You’ll need to take out an orb on the left side of the area to clear the stuff blocking your path. It’s protected by the vaccine-type WereGarurumon. Return to the room with the Access Point and head north into the next area. Make sure to heal up and save as there is a boss fight in your future.
Digital Shift Digimon
- GrapLeomon
- Ikkakumon
- Meteormon
- ShogunGekomon
- Sorcerimon
- WereGarurumon
- Zudomon
Digital Space Digimon
- Datamon
- GrapLeomon
- RizeGreymon
- ShogunGekomon
- Whamon
Boss Fight: BanchoLeomon
Follow the path to the back of the area to trigger a cutscene resulting in a fight against the vaccine-type Digimon BranchoLeomon. Defeating him will reward you with a Memory also triggering another cutscene that brings you back to the agency.
Digilab
When you regain control of your character, head to the Digilab and speak with Mirei who will send you back to the agency to work on some cases while she prepares. Exit the lab to spot your good buddy Ryota chilling in the hallway. Talk with him to learn about more sitings of the “White Boy”.
Kowloon
Make your way over to Kowloon Lv. 1 then head for the park. Speak with the guy there who has a ! above his head. This Chatterbox Hacker will mention that Yuugo was spotted in Jowloon Lv 1. Following the conversation, Kyoko will call asking you to return to the agency to help with a new case.
Detective Agency
Back at the agency, interact with the case board and pick up the Yuuko and Yuugo case.
Yuuko and Yuugo Case
After taking the case, travel to Central Hospital and then speak with the Busy Nurse behind the counter near the magazine rack. This will take you to Yuugo’s room where a cutscene will trigger. Follow the below steps:
- Head to Kowloon Lv. 1
- Make your way to the 2nd area of Kowloon LV1
- Speak with the two guys that have locks on their heads using the “Yuugo’s Whereabouts” keyword
- Head to the 3rd area of Kowloon LV1
- Speak with the two guys that have locks on their heads using the “Yuugo’s Whereabouts” keyword
- The one in the middle of the area near the green elevator leading to Kowloon Lv. 2 has the info you need
- Travel to Kowloon Lv. 2
- Head to the 2nd area of Kowloon Lv. 2 and approach Yuuko to trigger a cutscene
After completing the above steps, you’ll be thrown into battle against Yuugo and his virus-type Machinedramon. Defeating him will trigger another scene leading to the completion of the case. Turn it in at the board to receive your rewards.
Digibank
With the case solved, check back in with Mirei at the Digibank. Speaking with her will trigger a cutscene sending you to a parallel world!
Shinjuku: Digital Shift
Work your way through the digital shift by destroying the orbs you come across to keep progressing. When you reach the end, you’ll have to face the virus-type Barbamon. Defeating him will trigger and event bringing you back to the Digilab with a powerful new ally.
Digimon
- Andromon
- Ankylomon
- Dorumon
- Gigadramon
- Gotsumon
- Guardromon
- Mamemon
- MetalMamemon
- Tsumemon
EDEN Free Area
It’s finally time to show Kentaurismon who the real boss is. Travel to the EDEN Free Area by doing a Connect Jump into EDEN. Follow the path all the way to the left to find the Royal Knight. This will trigger a cutscene leading to a battle against the vaccine-type Digimon. After you emerge victorious, another cutscene will trigger.
Asakusa
When you regain control of your sleuth, head on over to Asakusa. Once there, use your Stealth Hide Hacking Skill to slip past the guards into the Asakusa: Digital Shift.
Asakusa: Digital Shift
Make your way to the second area of the Digital Shift. Once there, you’ll have 3 chests you can loot. At the other end of the area, your way forward will be blocked. You can remove the obstacle by destroying both orbs on either side of the doorway. They are reachable via nearby alleys. After you clear the way, proceed to the deepest part of the Digital Shift. Approach the Eater to trigger a cutscene leading to a fight against the creature. After you take down the beast another (scripted) fight ensues. Once that is done a final cutscene will trigger leading to the end of the chapter.
Digimon
- Cherrymon
- Frigimon
- Gotsumon
- Kuwagamon
- Lilamon
- Lillymon
- MegaKabuterimon
- Okuwamon
- Panjyamon
- Piximon
- Sunflowmon
- Taomon
- Togemon
- Woodmon
Guides
Rain Code – Ch. 2 A Silent Curtain Call Walkthrough
Welcome to our walkthrough for Chapter 2 – A Silent Curtain Call in Master Detective Archives: Rain Code!
Nocturnal Detective Agency
When you gain control of Yuma, speak with Halara who is sitting at the chief’s desk to trigger a cutscene. Soon after the chief will bust in through the door. Speak with him to see what’s up. Afterwards, you’ll need to clean up. Interact with the following:
- Clean floor
- Speak with Vivia
- Clean bookshelf
- Clean ashtray
After cleaning out the agency, you’ll be tasked with procuring some nourishment. The map will now open up and you’ll be able to collect requests! For a guide on these requests, click here!
Kamasaki District
Once in the Kamasaki District, head to the southwestern side of the street level and approach the stall. After the quick cutscene, interact with the Meat Bun Shop. You’ll then need to follow Shinigami to the Underground Sector. Make sure to press the quick time event prompts as you make your way through the area! After a lengthy cutscene, interact with the Bus Stop to board the bus.
Aetheria Academy
Follow Kurumi up the stairs then speak with her. Before speaking with her again, head down the stairs to find a Memory Shard – Let’s Meet in Front of the Fountain next to the fountain! When you’re ready, speak with Kurumi again where Yuma will officially accept the request. After Shinigami refuses to help, Yuma will think about alternative detectives to assist him in the investigation and you’ll be prompted with a choice. Select the resident chick magnet, Desuhiko!
Ginma District
To find Desuhiko, speak with the following women:
- Melancholic Woman next statue near the bus stop
- Red Raincoat and Blue Jeans. Coat with white line
- Composed Woman across the street from the above and to the left
- Black Boots, No accessories
- Long-Haired Woman down the alley next to Composed Woman
- Red Coat. and Black Turtleneck. Metal on coat
- Cheery Woman in the alley before the western stairs
- Practice Dance at the Art Gallery
Make your way over to the Art Gallery where there will be 5 people dancing near the fossils. Speak with the guy dancing behind the right dinosaur fossil wearing the red coat, black turtle neck, blue jeans, black boots and no necklace. You’ll be rewarded 20 Detective Points for guessing the right one! When you’re ready, return to the academy by heading to the northeastern exit in the Ginma District.
Aetheria Academy
When you approach the gate leading to the school grounds, the game will prompt you with a warning that you’ll be stuck at the school for a while. Once you’re ready to progress the story, accept the prompt!
Aetheria Academy
Follow Kurumi to the theater and head inside.
Theater Hall
After the long cutscene, you’ll need to investigate the crime scene. Interact with the following:
- On Stage
- Karen’s Corpse
- Table
- Glass
- Bottle
- Poison Vial
- Kurumi
- Yoshiko
- Waruna
- Kurane
- Karen
- Theater Hall Backstage
- Misplaced Script
- Approach stairs
After inspecting all of the above objects, end the investigation to trigger an event. When it ends, speak with Martina then approach Desuhiko. The Cheerful Theater Member will quickly interrupt you then you’ll be able to speak with Desuhiko. During this conversation, you’ll need to select who you want to be disguised as. We selected Yoshiko first!
Yoshiko
As Yoshiko, head downstairs and avoid Yoshiko who is sitting on a bench behind the greenery. In the Theater Hall (Underground Storage), speak with the Prop Master and interact with the Water Gun Prop.
In the Theater Hall (Makeup Room), you’ll get yelled at by Waruna so prepare yourself then head on in.
Next up is the Theater Hall (Staff Room). You’ll find the Lighting Staff inside. Speak with her then interact with Yoshiko’s Locker. Afterwards, speak with Kurane. You’ll then be able to end the investigation! You’ll return to Desuhiko to select another girl.
Waruna
As Waruna, head downstairs and speak with Yoshiko on the bench behind the greenery.
Next, head to the Theater Hall (Staff Room). Inside, speak with the Production Manager and Kurane then interact with Waruna’s locker.
Afterwards, enter the Theater Hall (Underground Storage). Interact with the Water Gun Prop and speak with the Prop Master.
Last up, interact with the door to the Theater Hall (Makeup Room). Head to the hallway north of the Makeup Room to trigger an event. When it concludes, you’ll be able to enter the Makeup Room. Inside speak with the Foul-Mouthed Waruna Groupie and the Scared Waruna Groupie. Now that you’ve done everything that you can, end the investigation. You’ll return to Desuhiko to select another girl.
Kurane
As Kurane, head downstairs and speak with Yoshiko on the bench behind the greenery.
Next, head to the Theater Hall (Underground Storage). Inside, interact with the Water Gun Prop and speak with the Prop Master then the Costume Staff. When prompted, tell her to come grab us from the break room later. She’ll grab the real Kurane so head inside the break room! Speak with the Production Manager and the two whispering girls. Afterwards, interact with Kurane’s locker.
When you’re ready, make your way to the Makeup Room. Waruna will yell at you! Now that you’ve done everything, end the investigation.
Theater Hall
Enter the Administrative Office. Inside you’ll need to choose who to disguise yourself as. Select Martina! Once you’re Martina, enter Aetheria Academy.
Aetheria Academy
When in Aetheria Academy, you’ll begin your investigation. Head outside in the courtyard to find the Chubby Peacekeeper (has a 29 on his mask). Enter the Chemistry Lab next to check it out. Inspect the following:
- Eyedropper
- Medicine Bottle
- Paintbrush
- Speak with Loyal Peacekeeper
Make sure to grab the Memory Shard – Let’s Peek at the Microscopic World from the desk next to a microscope.
Next, you’ll be transported to the Staff Room. Interact with Karen’s locker and Waruna’s locker. Next, speak with the two whispering girls, Production Manager, Lighting Staff and Kurane.
Now that you’ve investigated everything, end the investigation and return to Desuhiko. After a cutscene, you’ll enter the Mystery Labyrinth.
Mystery Labyrinth
Once in the Mystery Labyrinth, follow along the long hallway and head through the door at the end. Next, head up the stairs to find a Mystery Phantom.
RDM: Repel
For this Reasoning Death Match, you’ll be introduced to the Repel mechanic. You’ll need to repel the following statement:
- It’s clear who the culprit is
| Statement | Solution Key |
|---|---|
| At that moment, she mixed in the poison to commit the crime. | Chemistry Lab Poison |
Reasoning Death Match
Immediately after you defeat the above Phantom Ghost you’ll be thrown into another Reasoning Death Match!
| Statement | Solution Key |
|---|---|
| I put real poison in the vial… | Poison Vial |
Afterwards, you’ll need to choose between 3 routes.
How was the poison mixed into the glass?
Make your way through the blue door to choose this route then proceed down the long hall. Enter through the door at the end. Yuma will run from the boulders by slipping through the door that opens based on the answer you provide to the question. Below are the correct answers!
| Question | Answer |
|---|---|
| When was the glass set on the stage? | Before the play |
| When was the poison placed in the glass? | During the play |
Reasoning Death Match
After you survive the boulder, you’ll jump into back to back Reasoning Death Matches!
| Statement | Solution Key / Repel |
|---|---|
| She shot the poison straight into the glass! | Wine Glasses |
| Then it has to have been Kurane! | REPEL |
| She dripped the poison right in… | Lighting Staff Testimony |
| She added the poison from her pocket! | Costume Staff Testimony |
How was the poison brought to the theater hall?
Make your way through the red door to choose this route then head down the long hallway. At the end, enter through the door. You’ll fly down the hall in a cart and again you’ll have to correctly answer the questions to escape.
| Question | Answer |
|---|---|
| What was used to transport the poison? | Paintbrush |
| What was the poison brushed onto? | Another glass |
| What happened to the other glass? | Switched with the used glass |
Culprit Selection
After you survive the cart ride, you’ll need to select who the culprit is. It’s Yoshiko. She’ll take off down the hall. Chase after her to a classroom!
Mystery Labyrinth Option
When you arrive in the classroom, you’ll be presented with a question: What was the glass put in to be transported? The correct answer is A Pouch.
Reasoning Death Match
Next up is you guessed it… a Reasoning Death Match!
| Statement | Solution Key / Repel |
|---|---|
| Secretly in the dark! | Yoshiko’s Actions |
Once you’ve finished the match, continue down the long hall. At the end, you’ll find a dead end. Use her magic spell to leave.
How was the poisoned glass chosen?
Make your way through the orange door to choose this route then head down the long hallway. At the end, enter through the door. You’ll once again need to survive by correctly answering the below questions.
| Question | Answer |
|---|---|
| Who shuffled the glasses during the Duel of Poisoned Cups? | Waruna and Karen |
| Who chose a glass first? | Karen |
| Which glass had the poison? | The glass Karen chose |
After you survive the room by jumping on the correct desks, continue down the long hall and enter the door at the end.
Mystery Labyrinth Option
Inside the door you’ll find Kurane and will be presented with the following question: Did Waruna know which glass had the poison? Select “No”. Afterwards, leave the classroom and continue down the hall.
Spot Selection
For this Spot Selection, look up at the spotlight above the stage and select it.
Culprit Selection
Choose Kurane during the culprit selection!
Reasoning Death Match
After you make your selection, you’ll partake in a Reasoning Death Match!
| statement | Solution key |
|---|---|
| You slipped the poison into the glass didn’t you! | Lighting Staff Testimony |
Mystery Labyrinth Option
Now that you’ve solved all the doors, press forward and head up the stairs. You’ll be asked the below questions.
| Question | Answer |
|---|---|
| Was Aiko’s death six months ago suicide or homicide? | Homicide |
| Where was Aiko murdered? | Flower bed |
| What weapon was used to kill Aiko? | Brick from the flower bed |
| Who murdered Aiko? | Karen |
After you successfully make it across the gap, continue down the hall and open the door at the end. Inspect the following items on the roof:
- Peek in
- Look into the distance
- Look into the distance
Shinigami Puzzle
For this puzzle the question is “The only way the crime was possible was by having an …”. The answer is AC – CO – MP – LI – CE!
Mystery Labyrinth Option
After you solve the puzzle, you’ll be transported back to the room with the 3 colored doors. Select the following options when prompted:
- Red door
- Handed it to Waruna
- Kurane guided to it
- Yoshiko, Waruna, and Kurane
Now that you’ve discovered the Who room, head down the green hallway and enter the door at the end.
Last Stand
You’ll reach the phantoms’ fort. Charge at the fortress kicking balls, tackling through walls and jumping over the spikes. As you go you’ll come across walls with phrases that you’ll need to use a solution key on. These solutions can be found below.
| Phrase | Solution Key |
|---|---|
| There’s no reason for us to team up! | Two Shot Photo with Yoshiko |
| There’s nothing connecting us! | Two Shot Photo with Waruna |
| We have nothing to do with each other! | Two Shot Photo with Kurane |
| There is…no bond between us! | Group Photo |
Deduction Denouement
With all the mysteries solved, it’s time to put everything together. To solve how the whole crime played out, you’ll need to create the book. The table below lists which Solution Key goes on which page. When you’re done a scene will play out going through the whole incident.
| Page | Solution |
|---|---|
| Part 01 Origin of the Case (1) | Brick |
| Part 01 Origin of the Case (2) | Suicide by Jumping |
| Part 03 Poisoned Glass (Left) | Poison |
| Part 03 Poisoned Glass (Right) | Chemistry Lab |
| Part 04 Swapped Glasses | Glasses are Swapped |
| Part 05 Guidance to Glass (1) | Spotlight |
| Part 05 Guidance to Glass (2) | Note in Script |
| Part 06 Culprit’s Identity | Aiko |
Abandoned Building (Rooftop)
After the long cutscene, speak with Kurumi to learn more about Amaterasu’ research.
???
After the long cutscene, you’ll find yourself in a mysterious room. Explore the room then exit the room via the double doors to trigger another cutscene during which the chapter will end!
For more guides and walkthroughs on Master Detective Archives: Rain Code, click here!
Guides
Rain Code – Prologue WDO vs. Amaterasu Corporation Walkthrough
Welcome to our walkthrough for Prologue – WDO vs. Amaterasu Corporation in Master Detective Archives: Rain Code! Having narrowly avoided being framed for the murder of his fellow detectives, Yuma was saved by Yakou Furio, the head of the Nocturnal Detective Agency in Kanai Ward. Join Yuma in this prologue chapter where he’ll learn why the Master Detectives were summoned to Kanai Ward.
Abandoned Building (Rooftop)
When you regain control of Yuma, you’ll be on the roof of a building. Interact with the one object listed below for some Detective Points then speak with Yakou.
- View
After the conversation, head over to the elevator and speak with him again to leave.
Kamasaki District / Underground Sector
Follow Yakou down the street, taking in the sights. For the next little bit, you’ll be following him until he stops then have to talk with him to get him going again. Keep doing this until you reach the agency.
Nocturnal Detective Agency
When you gain control of Yuma, you can speak with the other detectives if you wish. There are also 3 objects you can interact with for Detective Points.
- Map
- Bookshelf
- Shower Room
When you’re ready, sit down on the couch to progress the story. After a lengthy dialog event, answer the phone when prompted to complete the prologue.
For more guides on Master Detective Archives: Rain Code, click here!!
Guides
Rain Code – Ch. 0 Massacre on the Amaterasu Express Walkthrough
Welcome to our walkthrough for Ch. 0 Massacre on the Amaterasu Express in Master Detective Archives: Rain Code! Our hero Yuma awakens in a strange room with no memory of who he is or what he’s doing there. With only a note and ticket for passage on a train, Yuma heads for the train in hopes of figuring out what’s going on.
??? (Train Station)
Select whichever difficulty you’d like as it does not matter. All will result in the same outcome! When you gain control of Yuma Kokohead, interact with the items listed below in the storage room to earn 10 Detective Points each. After that, you are free to go outside via the door.
- Cardboard Box
- Back of the Room
- Shelf with Umbrellas
- Items Scattered on Shelf
- Toy Robot
Once you’re in the hallway, Yuma will reflect on the room he was just in and you’ll be presented with three choices. Choose the Station’s Lost and Found option to receive 30 Detective Points, increasing your Detective Rank to 2.
Amaterasu Express Car 1
After a brief cutscene, Yuma will find his way aboard the Amaterasu Express. You’ll then be shown a tutorial on how the notebook works and given the main objective to find the Master Detectives in the train. Start by Interacting with the below objects on the train car to get 10 Detective Points from each one and fully explore Car 1.
- Guide Map
- Train Door
- Connecting Door
- Main Control Room A
- Restroom
- Mirror
- Window
- Toilet Door
- Infirmary
- Main Control Room B
When you’re done, approach the connecting door at the southern end of the car to trigger a cutscene.
Amaterasu Express Car 2
Hurray! You found the other Master Detectives! When you regain control of Yuma, speak with the people listed below.
- Detective wearing the black hat with ears
- All 5 of the Master Detectives
- Zilch a second time
- Pucchi
After getting to know your fellow detectives, Yuma will be presented with three choices:
- About Amaterasu Corporation
- About Kanai Ward
- About the Amaterasu Express
Select each one to learn a little more about the situation and they will also reward you with 10 Detective Points each.
After another cutscene, Yuma will ask himself who is the most suspicious person on the train. You’ll only get to pick one and each choice rewards 10 Detective Points which should get you to Detective Rank 3. The choice doesn’t matter so pick who you want (I chose Yuma).
To wrap things up speak with Zange to learn more about his Forte. Now make your way to the infirmary in Car 1.
Amaterasu Express Car 1
Approach the infirmary to trigger an event where you’ll be introduced to the Objective Display 2 tutorial. After being tasked with finding the key to the infirmary, proceed down the hall and into the restroom to trigger an event. Before leaving, make sure to interact with the objects below in the restroom to earn 10 more Detective Points for each object (you already examined them but do it again!).
- Mirror
- Window
- Toilet Door
When you’re ready, leave the restroom then approach the infirmary to trigger a cutscene. To investigate the scene, explore the following to get 10 Detective Points for each one:
- Medical Equipment
- AED
- Fire Extinguisher
- Corpse
Now that you’ve examined the scene, leave the infirmary and head back to Car 2.
Amaterasu Express Car 2
After the shocking turn of events in Car 2, you’ll need to examine the crime scene. Check each of the below to earn yourself 10 Detective Points for each one.
- Liquor Bottle
- Corpse
- Bar Counter
Once you’ve examined everything, make your way to Car 3.
Amaterasu Express Car 3
When in Car 3, continue your investigation by examining the items below.
- Room 301
- Stuffed Bear
- Cat Ear Headphones
- Trolley Bag
- Corpse
- Room 302
- Suitcase
- Clothes Brush
- Animal Print Glasses Case
- Backup Control Room
- Control Device
- Monitoring Device
- Backup Control System
- Route Map
- Intercom
When you’re done, proceed to the next train car.
Amaterasu Express Car 4
Once in this car, continue exploring.
- Room 401
- Tissues
- Jacket
- Magazine
- Room 402
- Bag
- Notebook and Fountain Pen
- Corpse
- Room 403
- Travel Bag
- Clothes
- Cosmetics Pouch
When you’ve explored this train car, head to the next one to trigger a cutscene.
Amaterasu Express Car 5
Once inside this car, examine the below!
- Corpse
- Main Control Room B
- Connecting Door
- Infirmary
- Door Key
- Fire Extinguisher
- Medical Equipment
- AED
- Burned Bed
- Restroom
- Train Car Plate
- Main Control Room A
After you get to the end of the car, the investigation will finish and a cutscene triggers. During the cutscene, you’ll be introduced to the Danger Dodge. Successfully perform the quick time events by pressing the correct prompts to continue fleeing.
Train Station
When you make it off the train, another cutscene triggers. After it ends, you’ll find yourself in the Mystery Labyrinth leading to another cutscene.
Mystery Labyrinth
During the cutscene, you’ll earn Solution Keys and will also receive a tutorial on the Playable Loop. When you regain control of Yuma, Shinigami will task you with solving the Amaterasu Express mystery!
Reasoning Death Match
Start off by following along the long unending hallway until another cutscene triggers leading to a Reasoning Death Match. You’ll need to dodge the word coming at you until the phrase You’re the only one who could’ve done the crime! shows up. Rebuttal it to counter the statement (the game will load the Inflammable Statement for you this time). You’ll then have to go through another round of dodging words until And only pretended to drink it! shows up. Rebuttal it with the Thoughtography Image solution key. This will bring a close to the Reasoning Death Match.
Mystery Labyrinth Options
Continue to head down the hallway to trigger an event when you reach the door. You’ll come to a fork in the road so to speak and be introduced to the Mystery Labyrinth Options mechanic. The question presented to Yuma will be Was the culprit one of the six?. The door to the left will say “Yes” and the door to the right will say “No”. You’ll want to head through the door that says Yes.
Reasoning Death Match
Congratulations! You’ve chosen the right door and your prize is ANOTHER REASONING DEATH MATCH!!! The table below has the Inflammable Statements you’ll get in order going top down with which Solution Key you’ll need to use to rebuttal the claim. Counter both statements with the Solution Key to emerge victorious!
| Inflammable Statement | Solution Key |
|---|---|
| You must have had an accomplice! | Testimonies of Two Detectives |
| You secretly stopped the train and let your partner board! | Operation Log |
Mystery Labyrinth Options
Once again continue heading down the long hallway passing through the doorway at the end. This will trigger another event leading to your second fork in the road posing the question Everyone was dead, so how did the culprit pull it off?. Follow Shinigami to the right door then head over to the left. This will trigger another event where Shinigami will lead you through the correct door! Proceed down the hallway (let’s see how many different ways I can say that!) until another event triggers introducing the concept of Dead Ends. After another event, you’ll be placed back at the fork. Head through the Commit suicide after the crime door.
Mystery Labyrinth Options
Venture on down the correct hallway until yet another event occurs. Yuma will fall through the floor landing in a mine cart that will take off speeding down the track. You’ll then be asked a series of questions that you’ll need to answer correctly to continue the investigation. Those questions and their answers are listed in the table below. Answering all the questions correctly will bring you to the goal!
| Question | Answer |
|---|---|
| Who was the last person to die during this incident? | The Culprit |
| Who set fire to the dead culprit? | The Culprit |
| Who was the last person to be burned to death? | Zilch |
Reasoning Death Match
After another cutscene plays out, you’ll be given two options: “Open the conclusion door” or Demolish the conclusion door. You’ll want to follow Yuma’s gut and choose the latter option to demolish the door. This will lead to one last Reasoning Death Match where you’ll be introduced to the Noise mechanic which obstructs your vision of the statement. You’ll need to use the Solution Balde to cut through them. You’ll also get a capped bonus for each Noise you destroy. With that in mind, use the below table to finally take down the Mystery Phantom Swank. Also note that in each round, there will be multiple Inflammable Statements, but only one is Rebuttable.
| Inflammable Statement | Solution Key |
|---|---|
| Died of Immolation | Knife in Corpse |
| Y-yeah! It was to knock himself out! | Coffee in Dining Car |
Crime Scene Re-Creation
Thanks to Shingami’s punch to the face, you have a chance to re-examine the Infirmary from Car 1 on the train. Inspect the two items below to gain a pair of new Solutions Keys.
- Cushion
- Burned Blanket
Shinigami Puzzle
With this new evidence, Shinigami will start her puzzle game to help Yuma with the case. You’ll be given a question and have to fill in the missing letters hangman style before the time runs out. The letters you’ll want are as follow: R – E – D. This will solve the puzzle and you’ll now be able to loot the treasure chest for a new Solution Key! Now backtrack to the “wrong end” from before. After a short time, you’ll be given two options (Z*OM and EV*C) and Shinigami will teleport you back there to save time. Pick whatever option you would like to continue.
Solution Key Selection
Finally nearing the end! This final section is kicked off by introducing the Solution Key Selection mechanic where you’ll need to use the correct Solution Key to open the door to the truth!! Interact with the door and choose the Red Herring Solution Key to break the lock. Head through and follow the new path…
Mystery Labyrinth Options
…until it starts to fall apart and Yuma must jump onto different floating stones to reach safety! Answer the questions correctly as you go to reach the other side triggering an event.
| Question | Answer |
|---|---|
| Was what Yuma saw through the window actually Zilch? | Yes |
| Was the burnt corpse in Car 1 actually Zilch? | No |
| Zilch swapped places with the corpse in the infirmary… | Before Yuma entered |
Spot Selection
You’ll now be introduced to the Spot Selection mechanic where Yuma will have to deduce where the corpse was hidden. You’ll want to select under the sheet on the bed. This will return you to the hallway for another cutscene which leads to…
Reasoning Death Match
A REASONING DEATH MATCH!!! There is only one round this time and the Inflammable Statement you want will be the third one. After rebutting it, you’ll win this Reasoning Death Match and being climbing up a ladder.
| Inflammable Statement | Solution Key |
|---|---|
| There was no corpse to replace anyway! | Aphex’s Corpse |
Mystery Labyrinth Options
When you reach the top, you’ll find yourself on top of the train. Chase after Zilch until you reach the end of the train. This will trigger another event placing you on the track. Follow along the track until you reach the fork where you’ll be presented with a question: When moving the body from Car 1 to Car 5, the culprit… You’re two answers are “Moved through the train” or “Did not move through the train”. You’ll want to choose the Moved through the train option. Know what comes next?
Reasoning Death Match
Yep! A REASONING DEATH MATCH!!! You know what to do!
| Inflammable Statement | Solution Key |
|---|---|
| No issues occurred during the train’s operation… | Blackout and Shaking |
| The blackout was just a bad contact! | Backup Control System |
Shinigami Puzzle
After the death match, you’ll pursue the phantom down a hallway via cutscene which leads to another Shinigami Puzzle. This time the sentence you’ll need to complete is The main control system was lost when Car 1 was _ _ _ _ _ _ _. Choose the letters D – E – T – A – C – H – ED to solve the puzzle then continue pursuing the phantom! You’ll get a bit down the hallway when another puzzle shall appear! The body was transported along with the entire _ _ _. Choose the letters: C – A – R to solve the puzzle leading right into another…
Reasoning Death Match / Shinigami Puzzle
REASONING DEATH MATCH!!! Time to take down the phantom once and for all! Use the table below to rebut the phantom’s Inflammable Statement. Once that’s done you’ll kick off a Shinigami Puzzle to close the investigation.
| Inflammable Statement | Solution Key |
|---|---|
| There’s no way to shuffle the train cars around! | Route Map |
The question for the puzzle is From the start, the Amaterasu Express was a _-car train. Select the number 4. After solving the puzzle another cutscene will trigger and you’ll end up back in the long hallway. Follow it to the end then take the stairs all the way to the top to reach the fort guarding the truth.
Last Stand
Approach the fort to begin your assault!!! The area will transform sending you to the desert where you’ll begin the attack aboard the Great Onset Destroyer! Charge at the fortress kicking balls, tackling through walls and jumping over the spikes. After a while, you’ll come to a wall with the phrase There’s no evidence they ever swapped! on it. Use the Distorted Plate Key Solution to smash through it. Once you reach the fort, you’ll need to use a solution key to destroy the fortress. The phrase You have no hard evidence proving that location was the first car! will be on the front of the fort. Use the Bloodstains on Interior Lock solution key to bring down the fort! To wrap up the case you’ll have one last Spot Selection. Choose Main Control Room A when prompted to begin the Deduction Denouement.
Deduction Denouement
During the Deduction Denouement, you’ll have to piece together everything to show the full picture of the crime that has transpired. To start only a couple of the Solution Keys available with more unlocking as you place them in the correct locations. The table below lists which solution key goes on which page. When you’re done a scene will play out going through the whole incident.
| Page | Solution Key |
|---|---|
| Part 01 The Train Departs | Amaterasu Express |
| Part 02 Four Muderers 1 | Knockout Drug |
| Part 03 Corpse Red Herring (Right) | Fire Extinguisher |
| Part 03 Corpse Red Herring (Left) | Knife and Cushion |
| Part 04 The First Body | Under the Bed |
| Part 05 Car 1 Red Herring (1) (Right) | Train Detachment |
| Part 05 Car 1 Red Herring (1) (Left) | Blackout |
| Part 05 Car 1 Red Herring (3) (Right) | Car Number Plate |
| Part 05 Car 1 Red Herring (3) (Left) | Attachment of Car 1 |
| Part 06 The Last Body | Aphex’s Body |
| Part 08 Culprit’s Identity | Zilch |
Kanai Station (Interior)
When you return from the Mystery Labyrinth a cutscene will trigger. When it ends, speak with your rescuer near the train for one last cutscene closing out the chapter.
For more guides on Master Detective Archives: Rain Code, click here!!
Guides
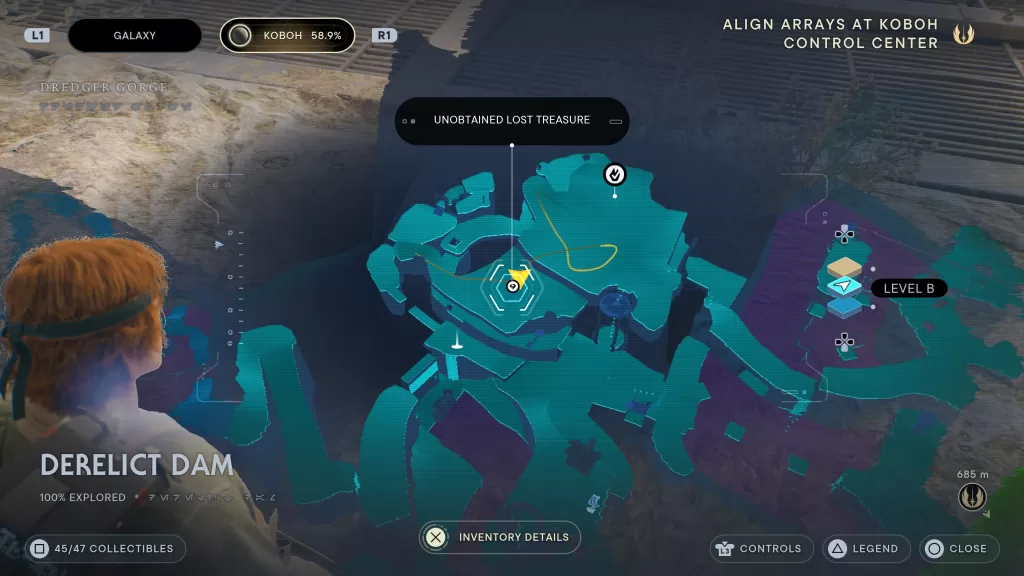
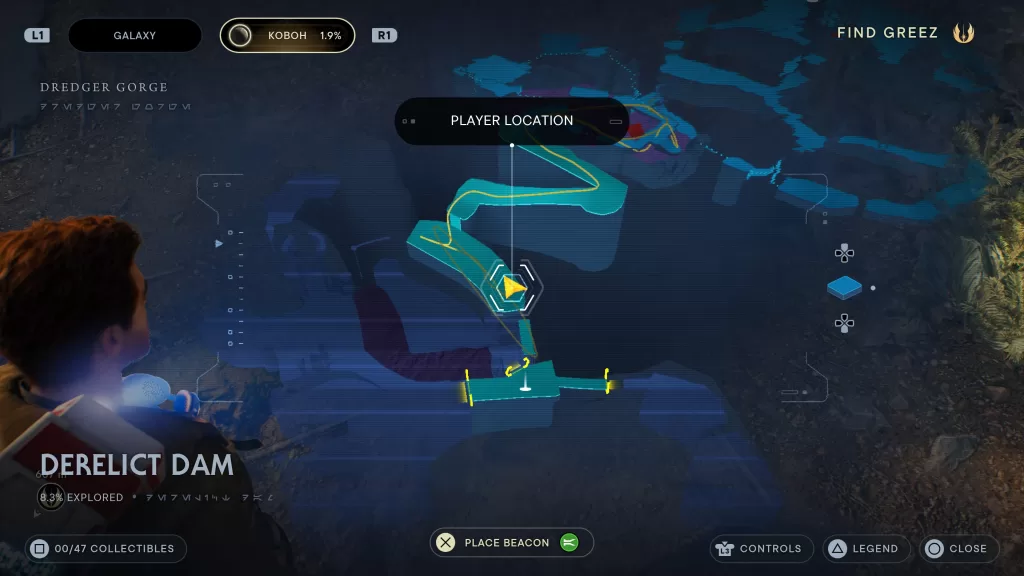
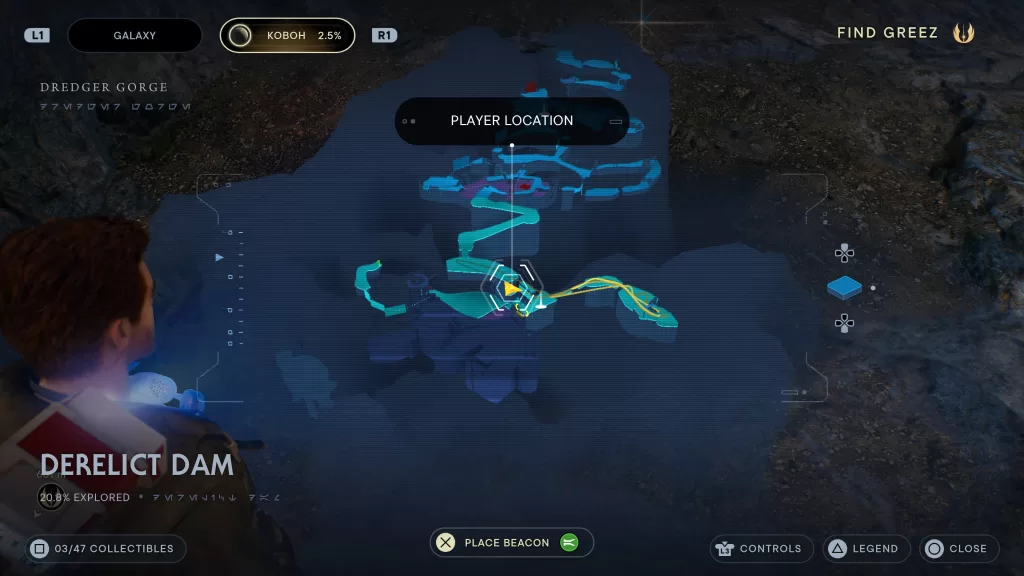
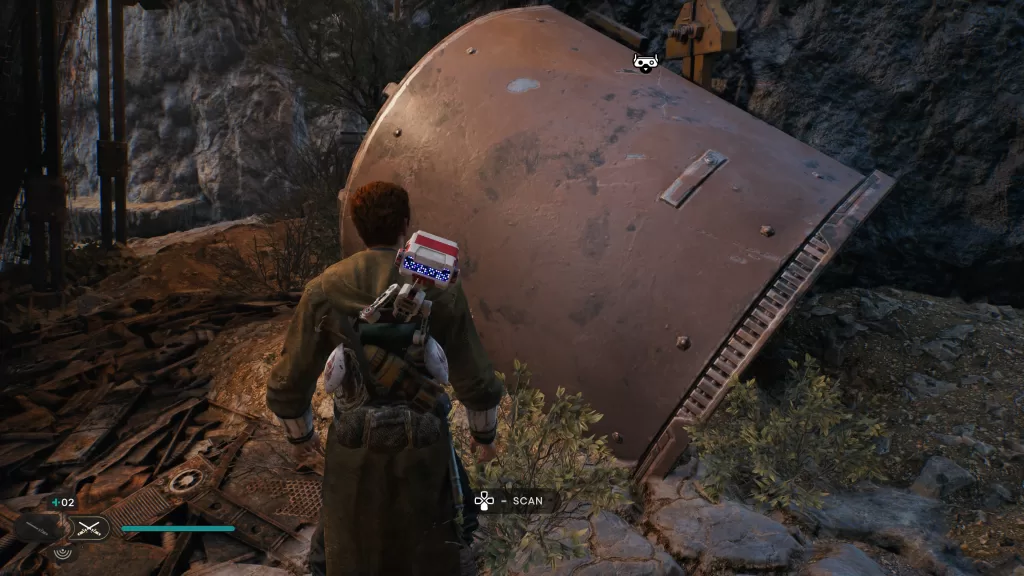
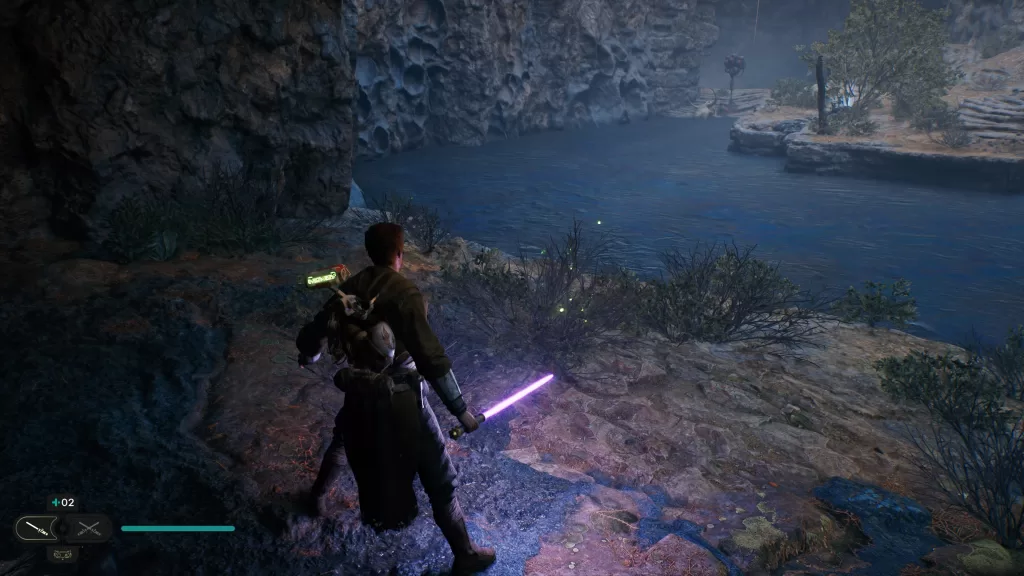
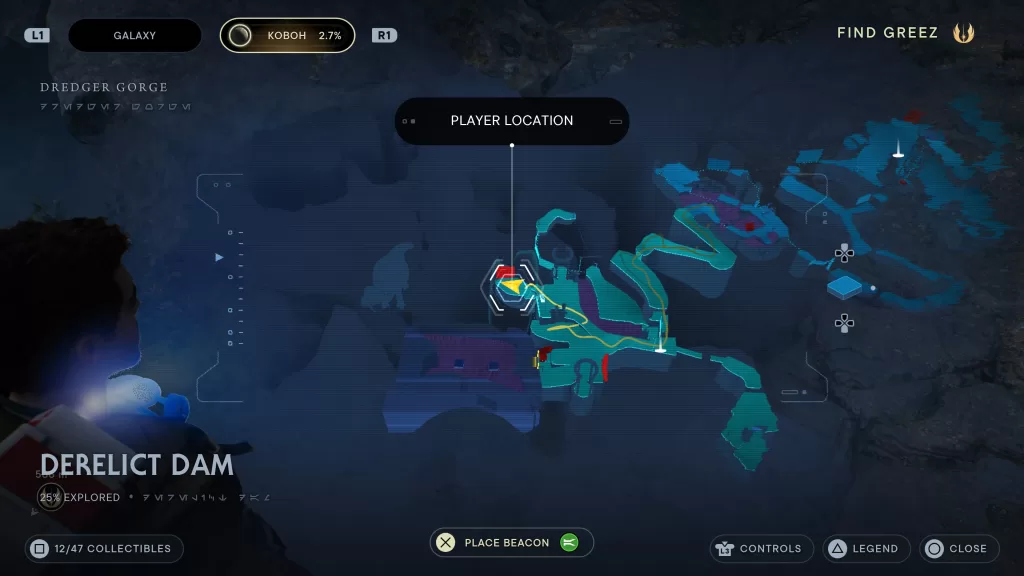
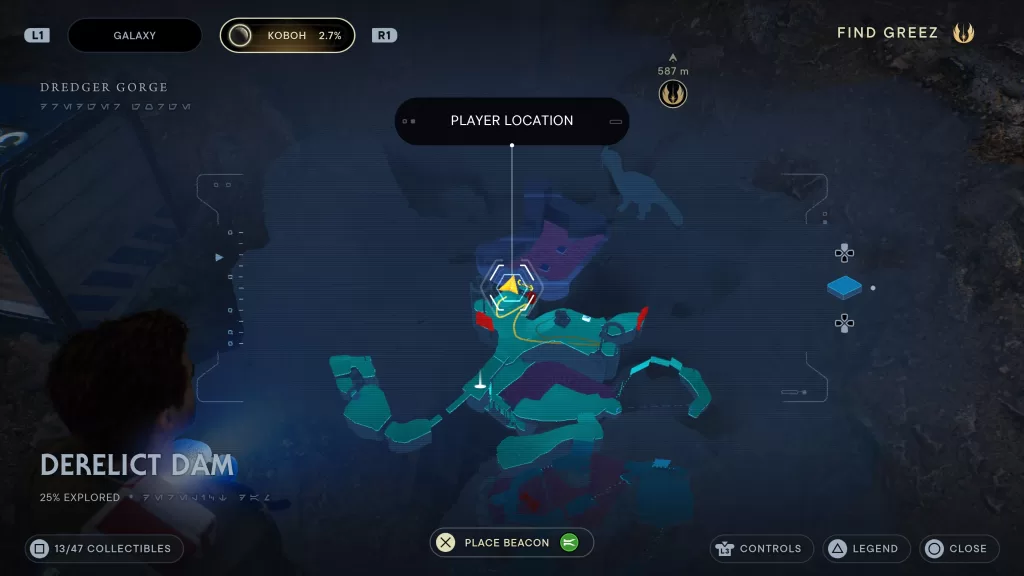
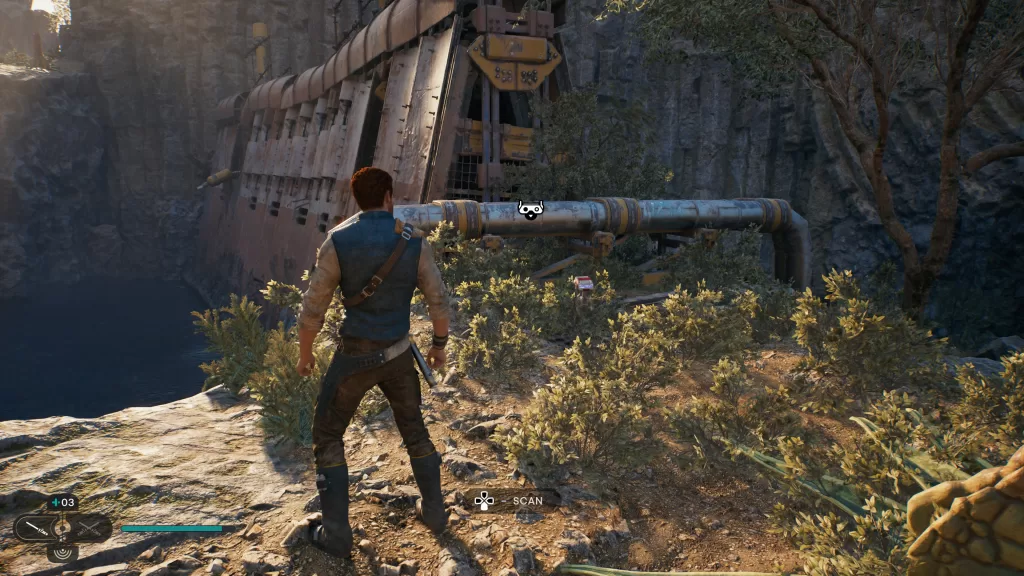
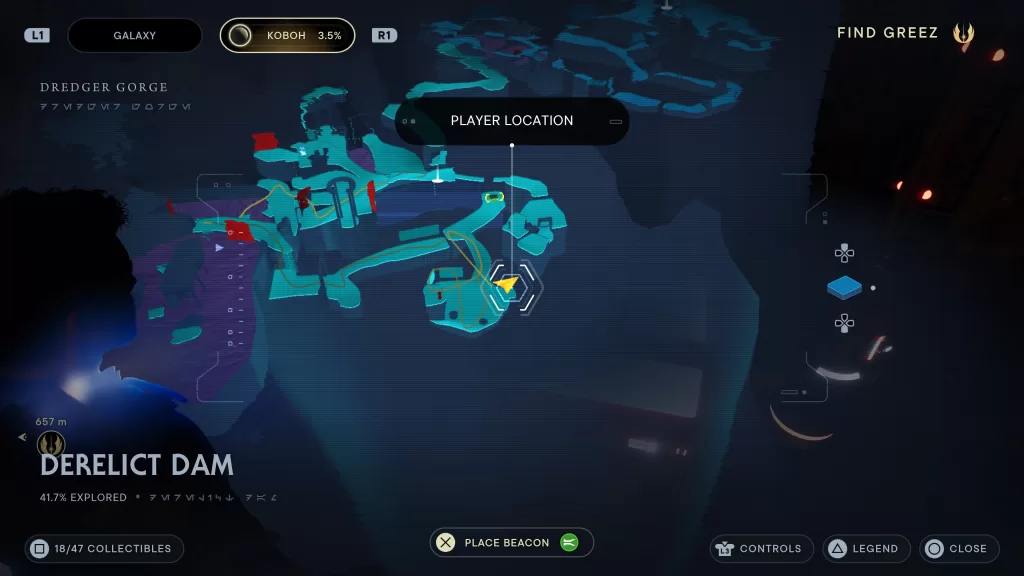
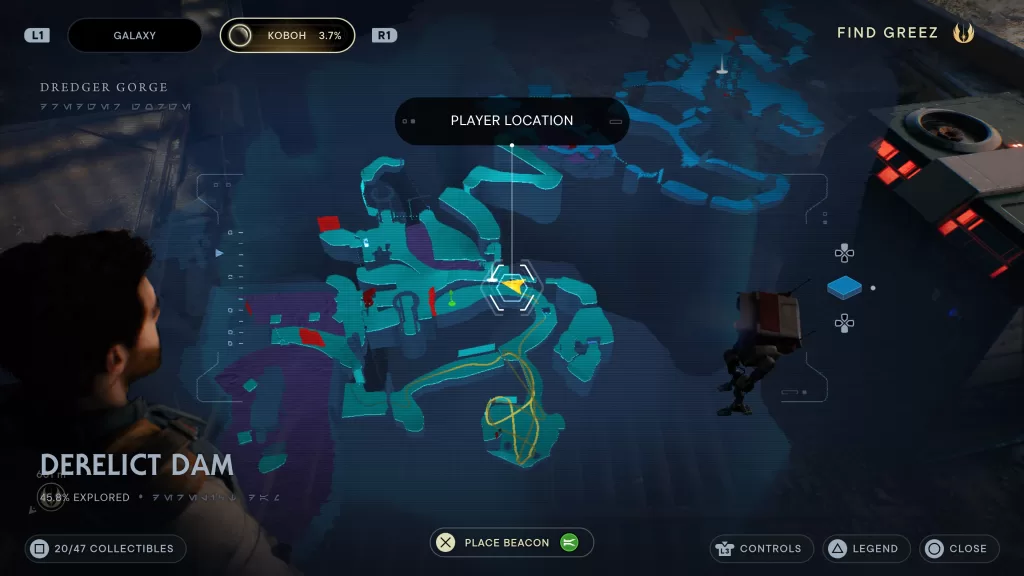
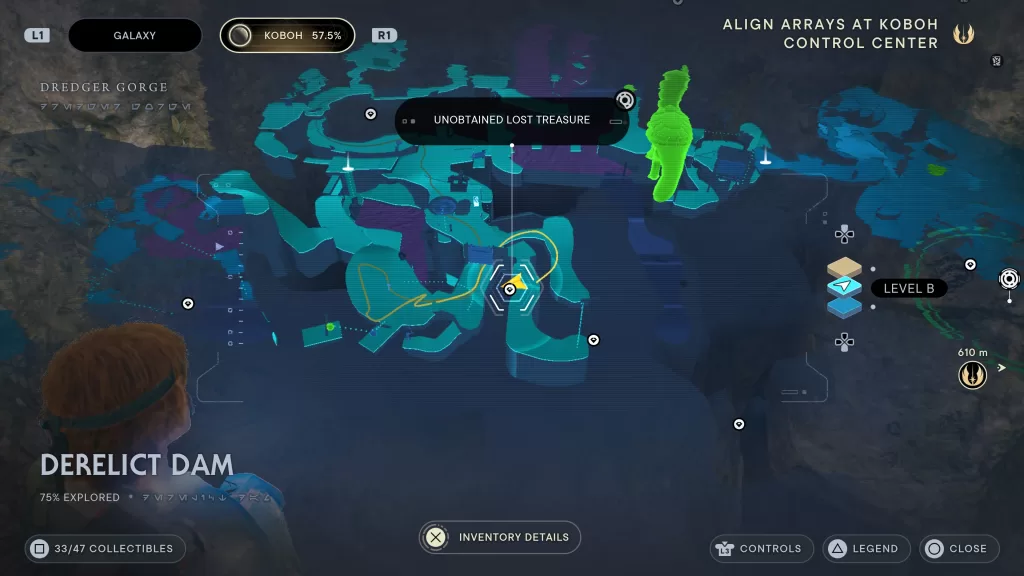
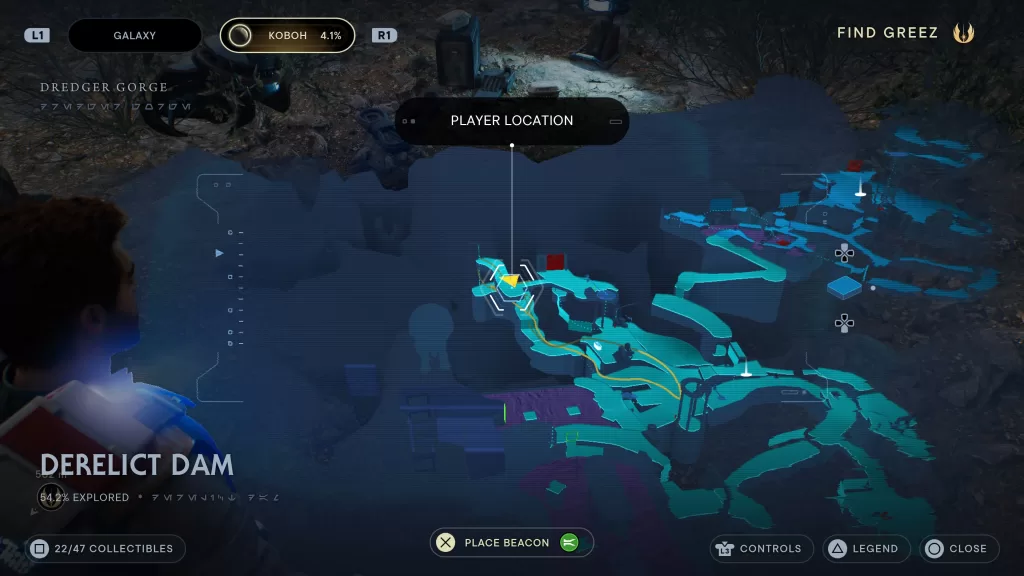
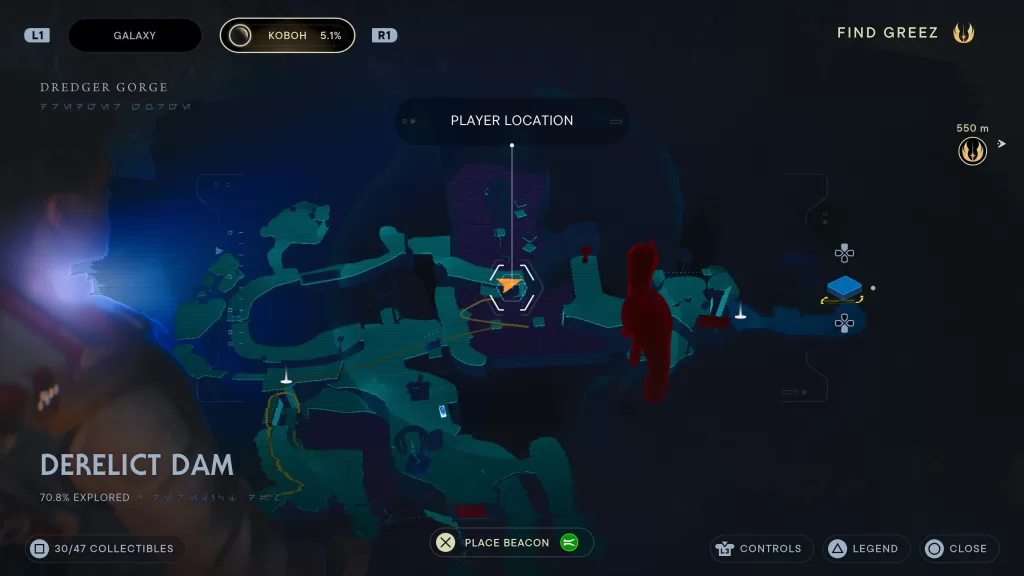
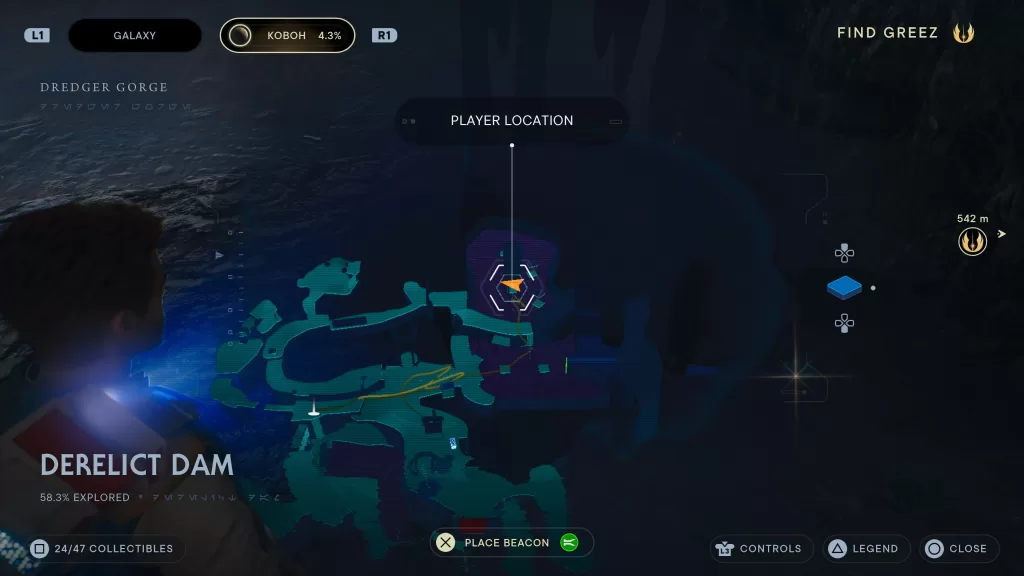
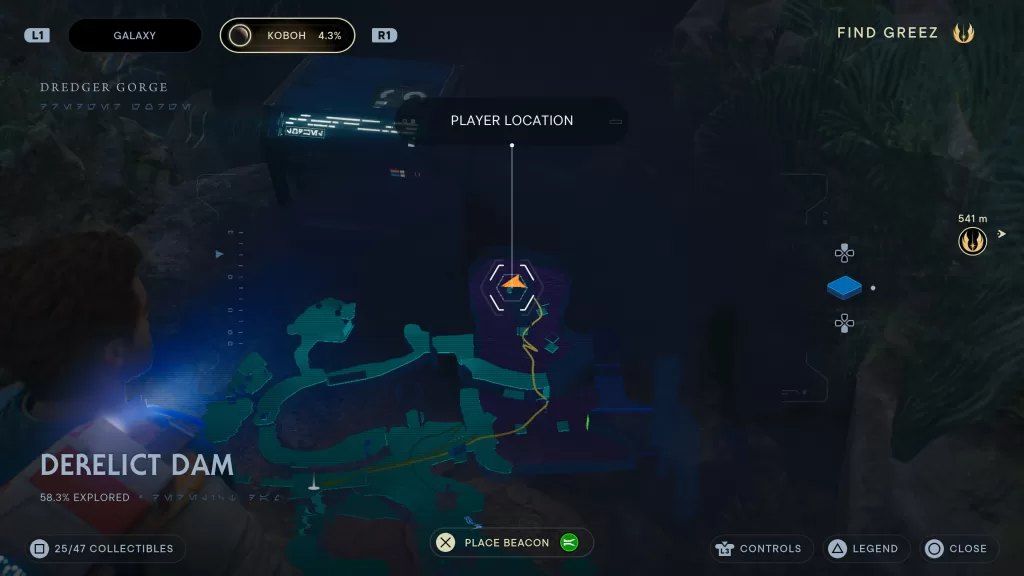
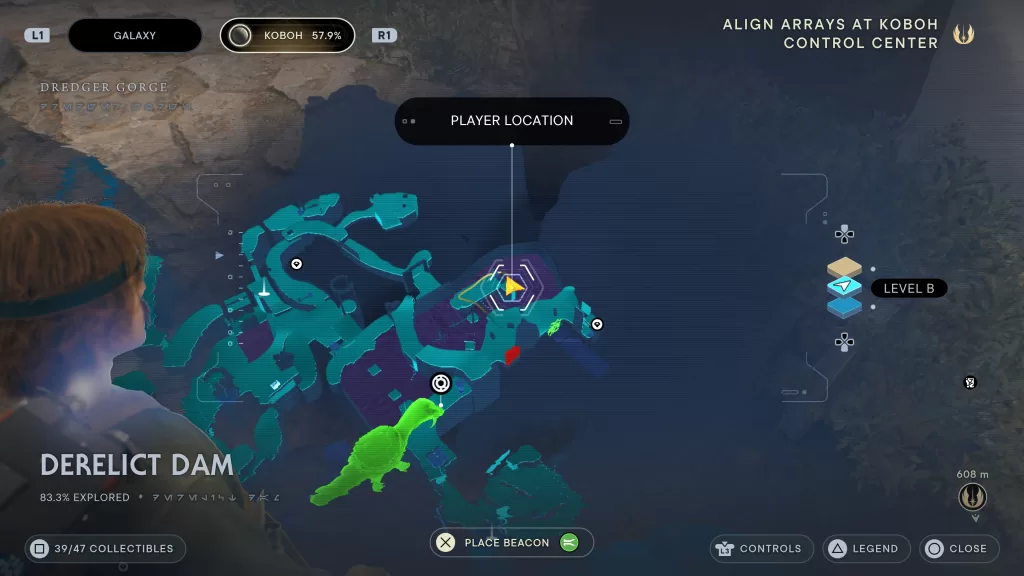
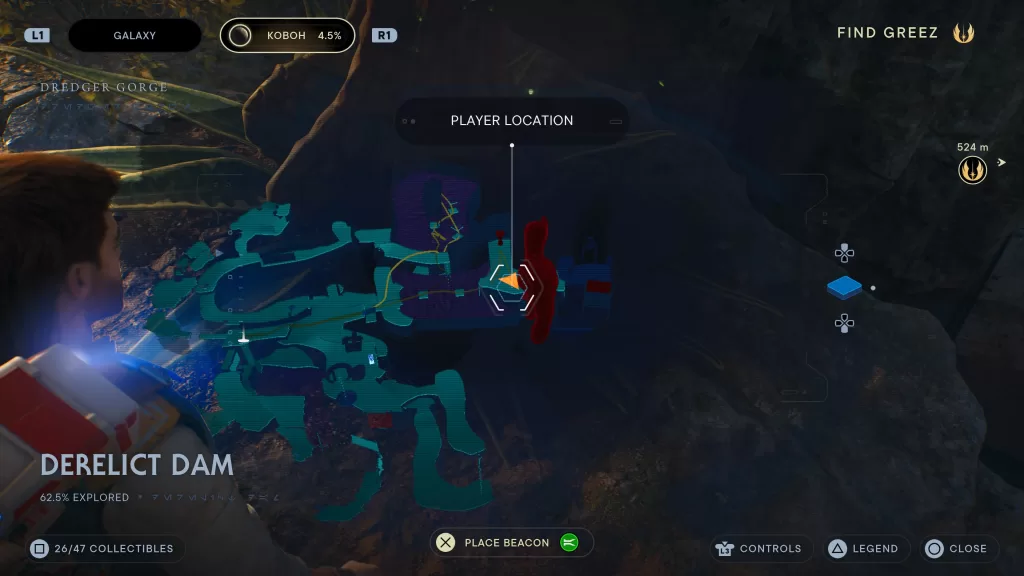
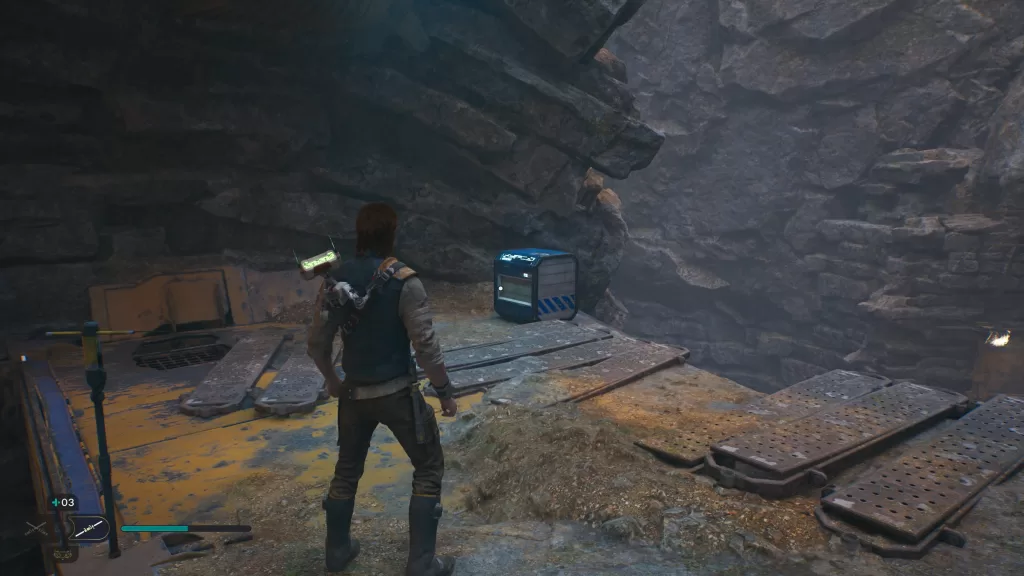
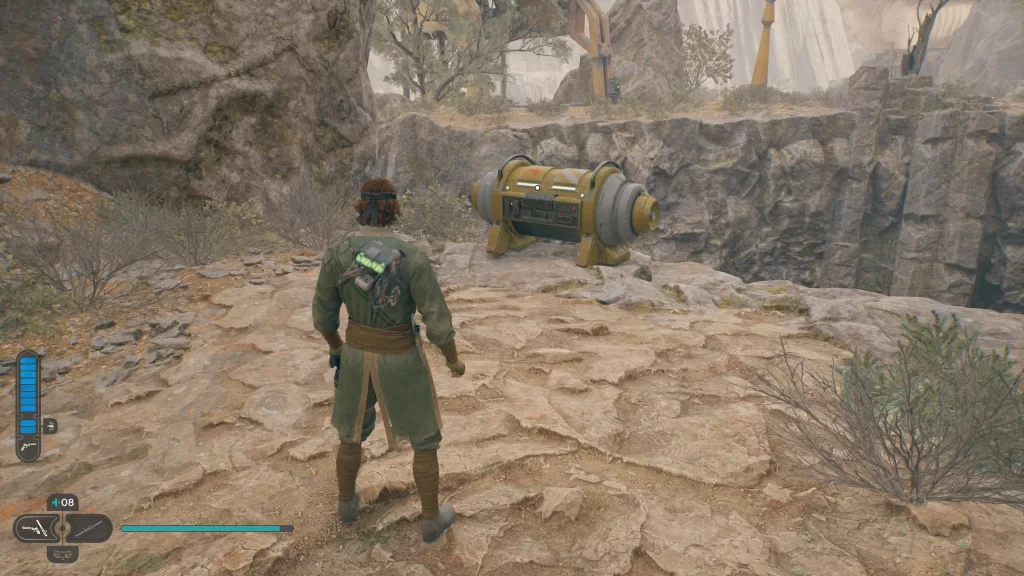
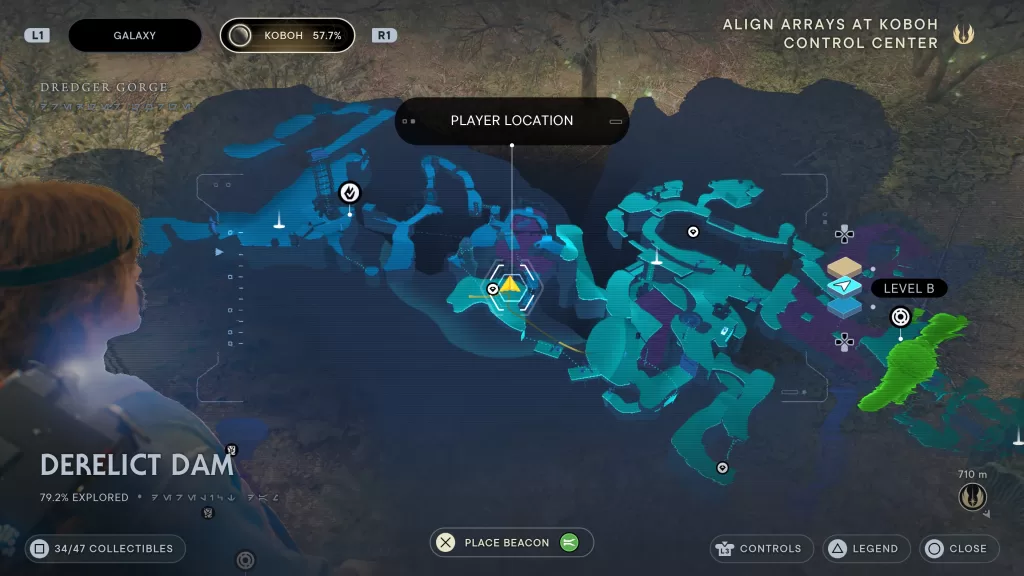
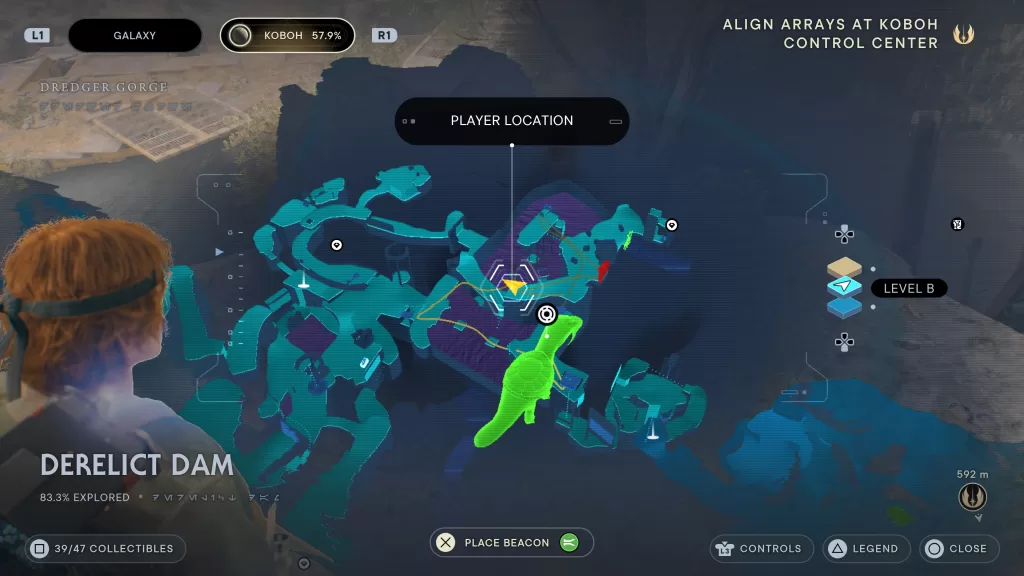
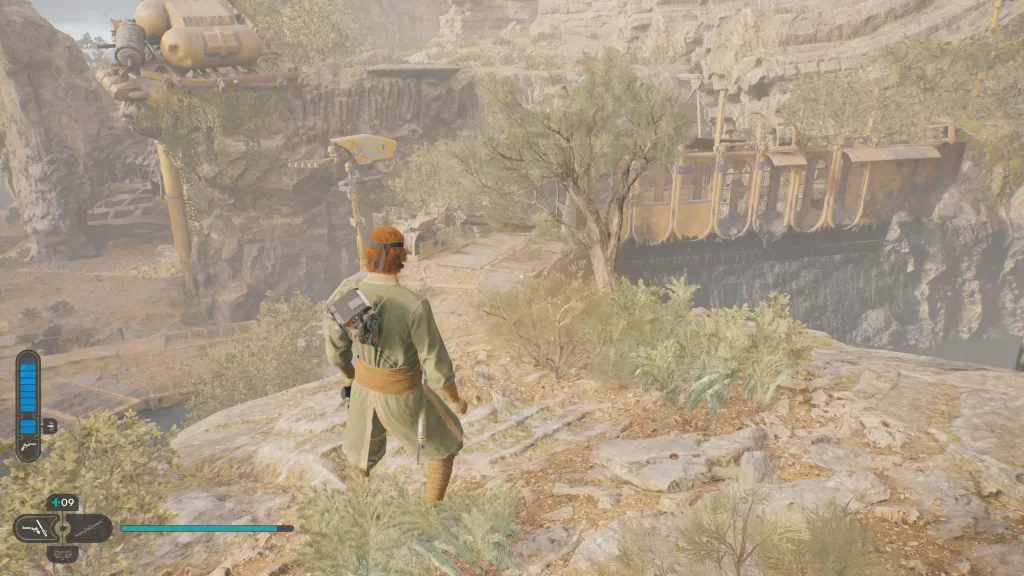
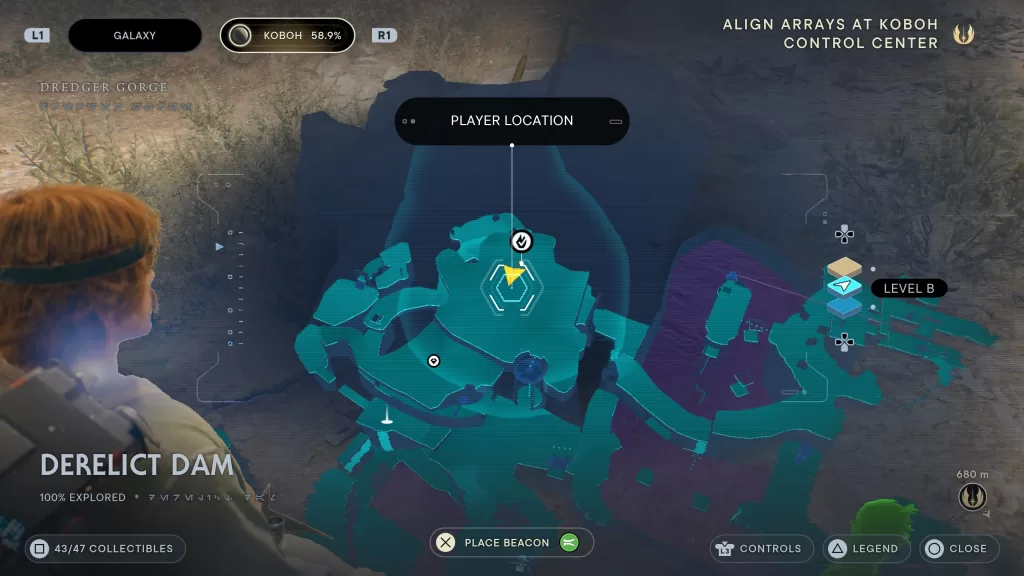
Jedi Survivor – Koboh Derelict Dam Collectibles
Need help finding the collectibles in the Derelict Dam on Koboh? Check out our Koboh Derelict Dam collectibles guide below!
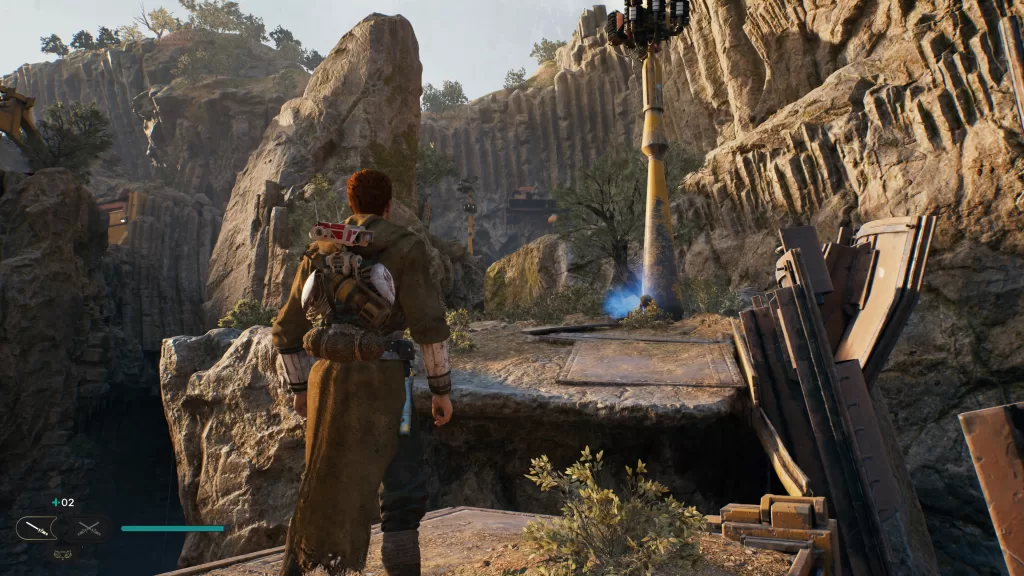
Databank – Murdered Prospecter
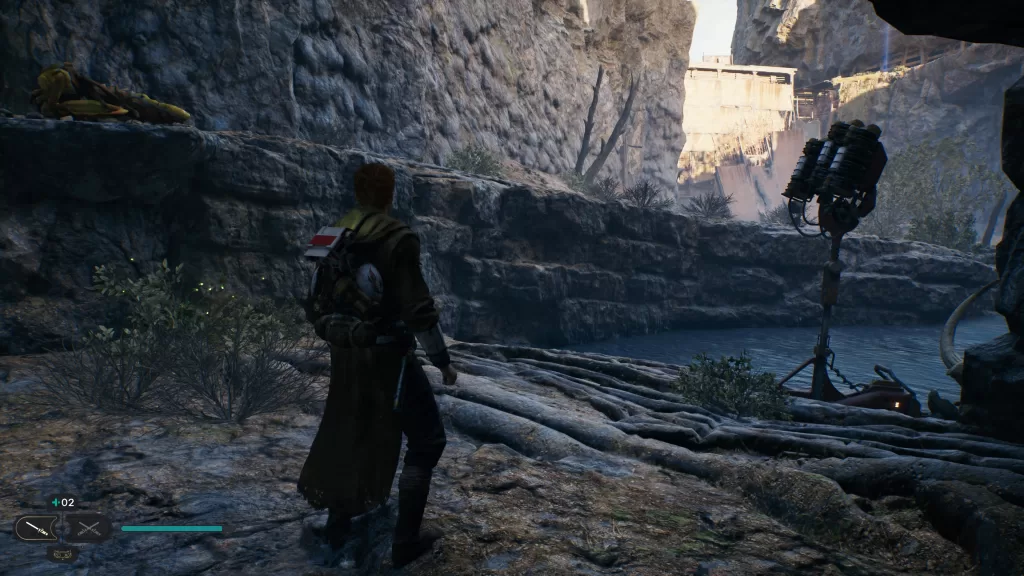
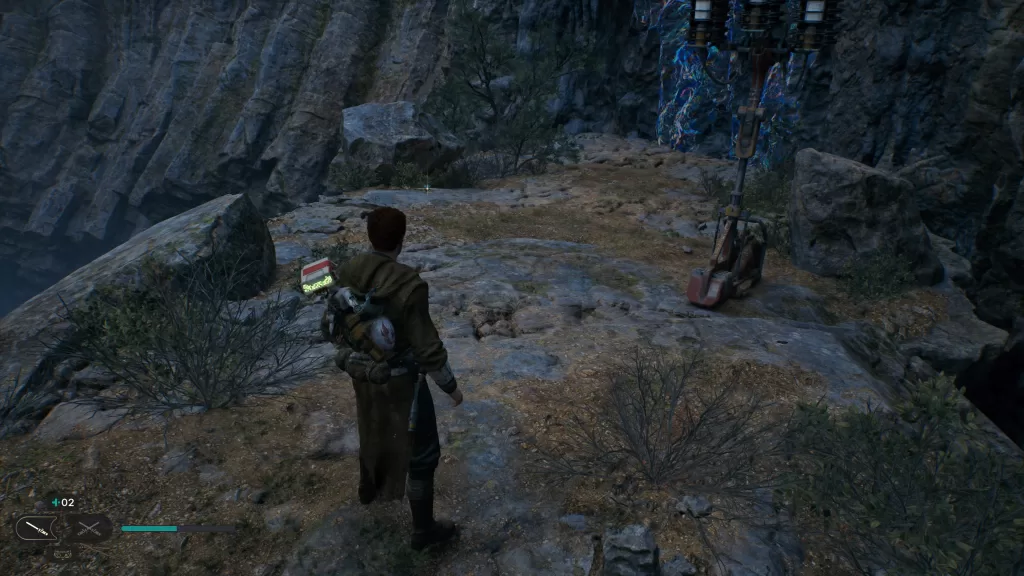
From the Meditation Point, look to the path leading back to the Gorge Crash Site. You’ll need to jump onto and walk across the broken bridge. You’ll then find a corpse leaning against a yellow light post.
Databank – Gorocco Nest
From the Meditation Point facing the broken bridge, head right crossing a metal bridge with a gap. Follow the path to a dead end then use the Force to lower a section of wall to make a ramp. Climb up the ledge to find the databank.
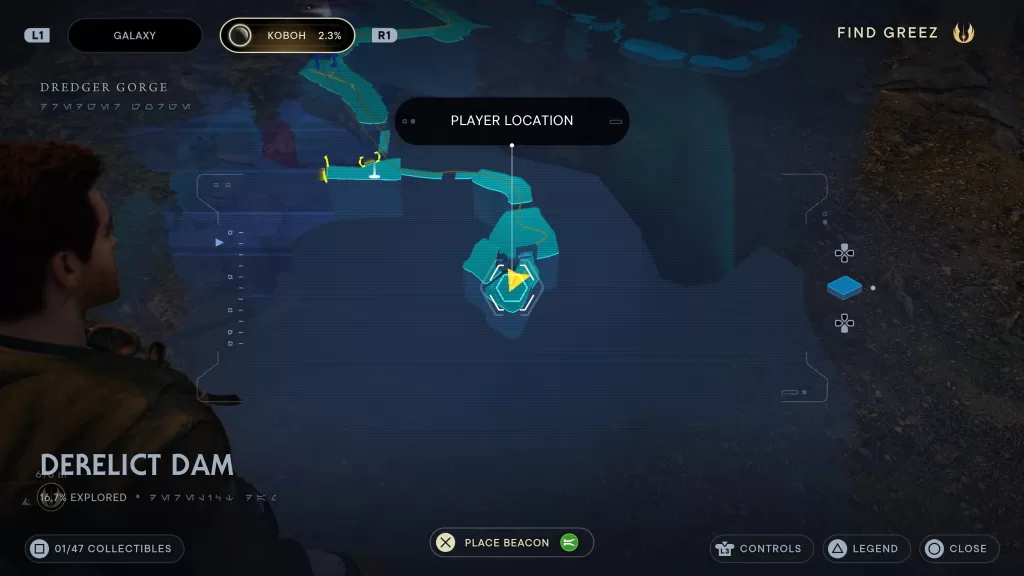

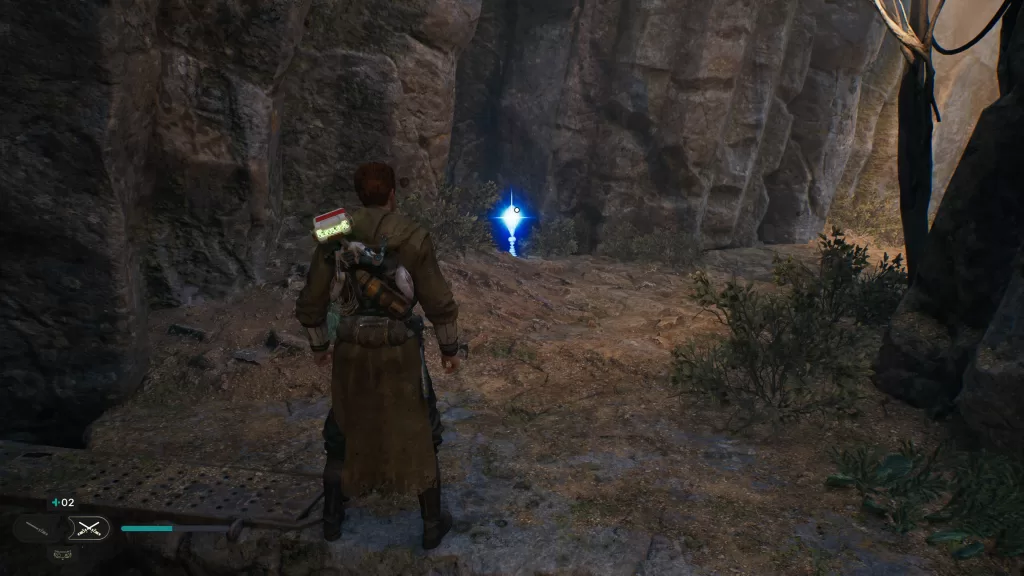
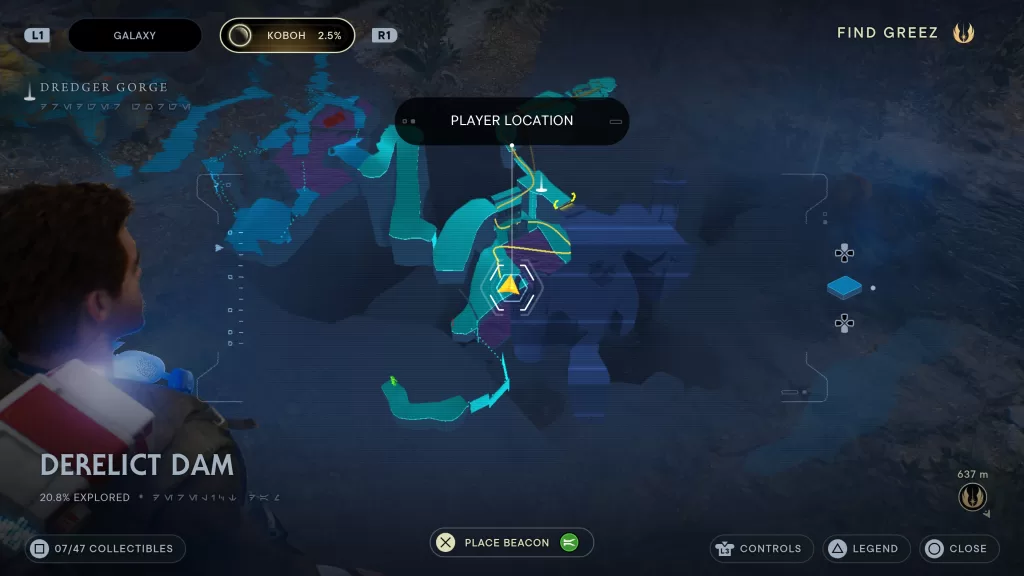
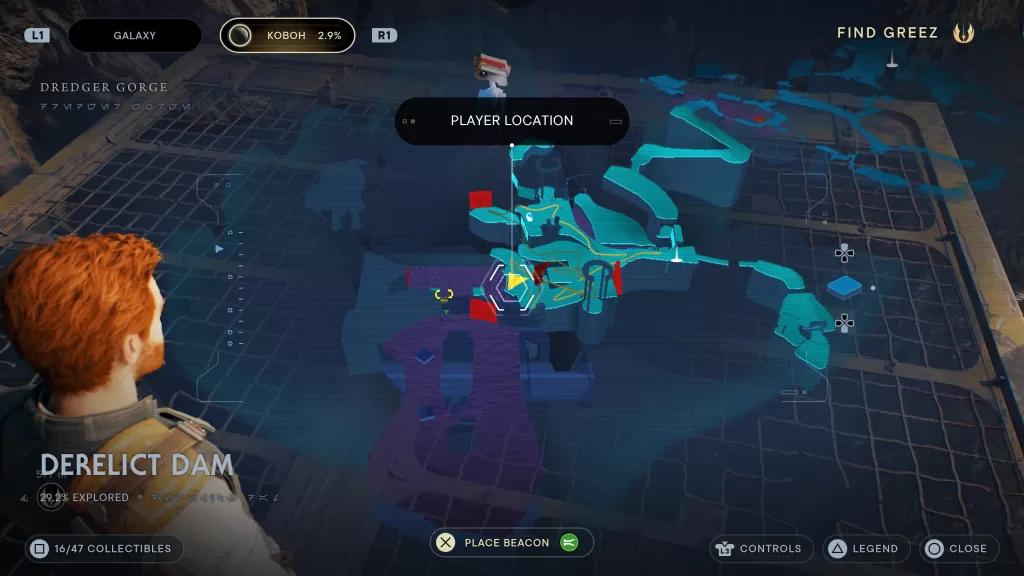
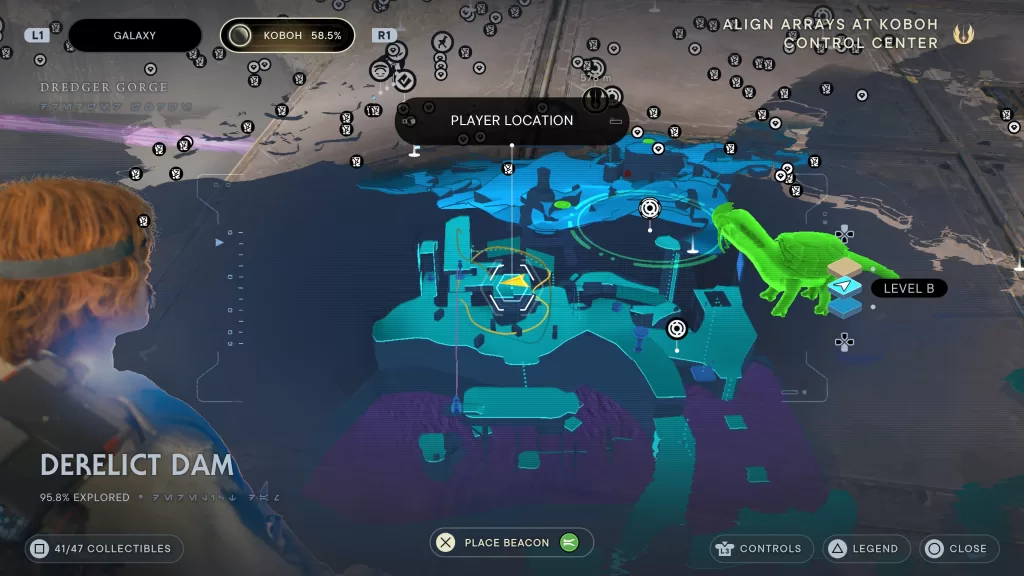
Essense – Health
When facing the above collectible, it can be found to the right after climbing up a small ledge (see above map picture).
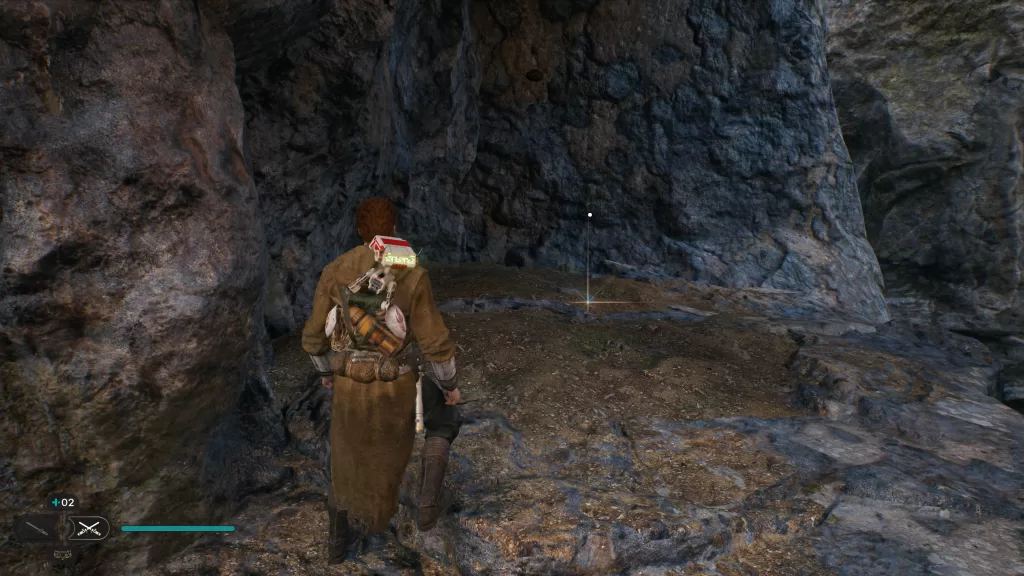
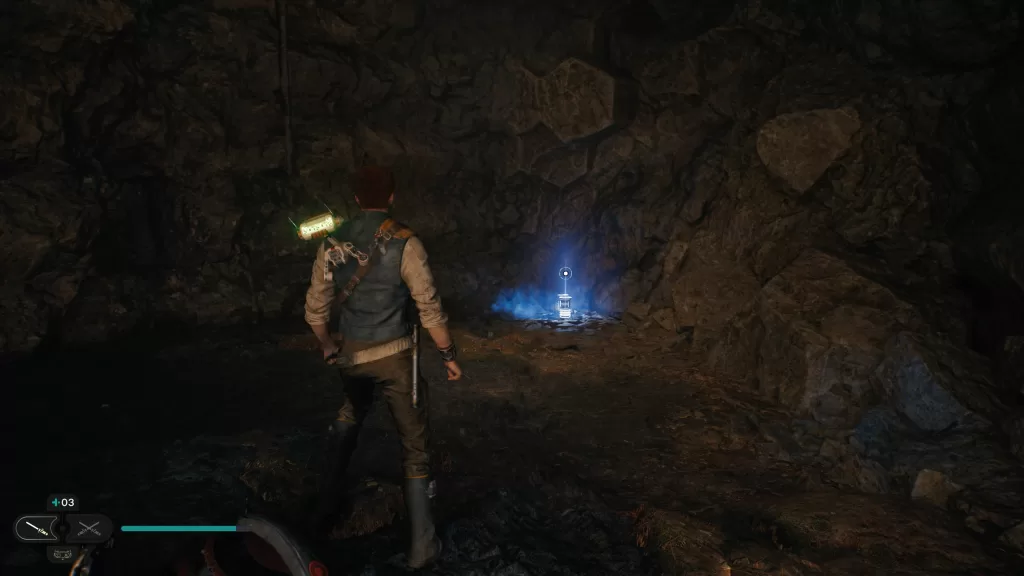
Treasure – Priorite Shard
From the Mediation Point, jump to the middle platform of the broken bridge then head on down to find the treasure on a ledge.
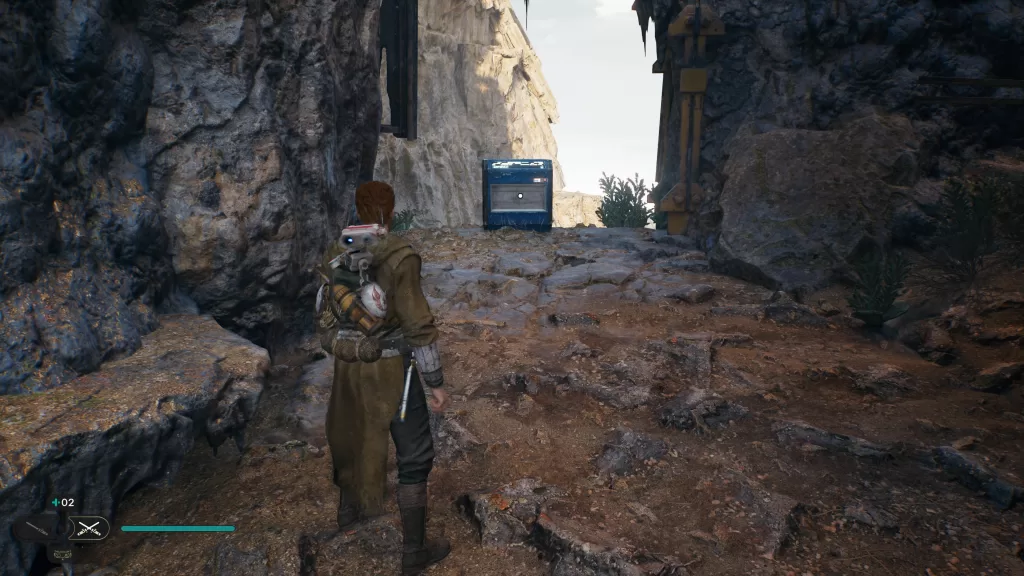
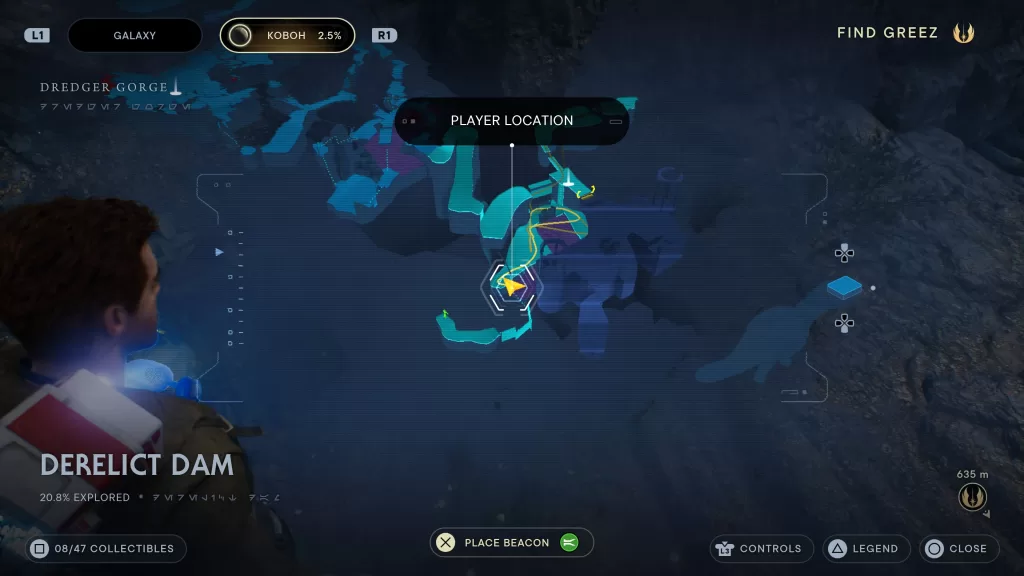
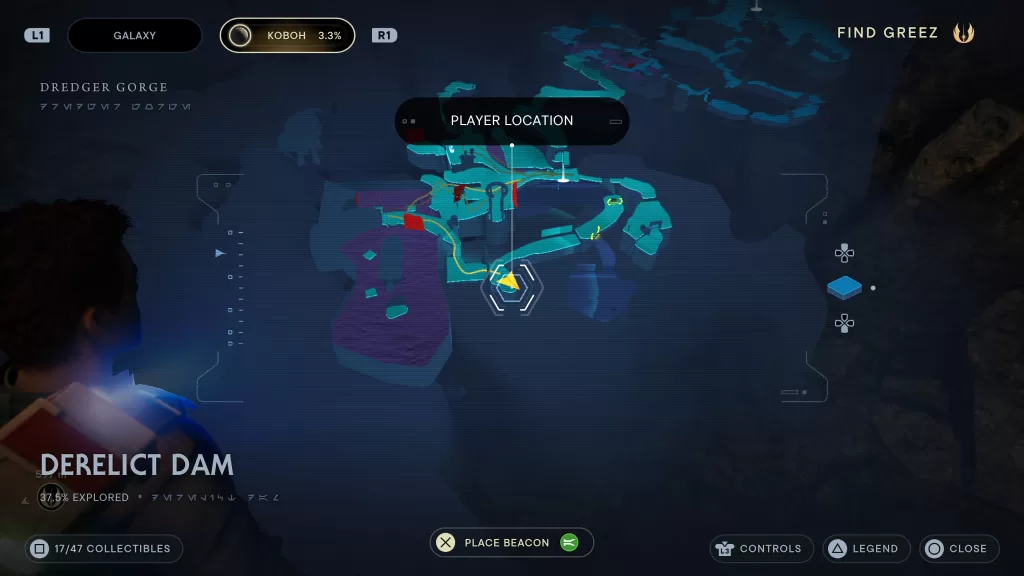
Chest – Body: Scrapyard
From the previous collectible drop down to find the chest (see above map picture).
Databank – Destroyed Dam
Facing the above chest, head right to find this collectible just before the climbable vines.

Seed Pod – Cactus Ball: Felucian Yellow
From the previous collectible, look at the hanging vines then head right to find the plant along the tar.
Databank – Drowned Prospector
From the above collectible, swing around to the other side of the tar to find this corpse next to a bush.

Seed Pod – Cactus Ball
From the above collectible, keep following along the tar until you find a rope you can swing on. Instead of swinging on it, drop down to find the plant.
Essence – Skill Point
From the above collectible, use the rope to swing over to a runnable wall. Get as high as you can to reach the high ledge containing this collectible.

Databank – Dead Bedlam Raider
From the Meditation Point face the grates in the wall then follow the path to the right. Jump down then continue straight going down a short ways to find this collectible.

Seed Pod – Cactus Ball
This collectible can be found across the above collectible (see above pictures).
Treasure – Priorite Shard
Facing the workbench, head down the path to the right then jump down. You’ll find this treasure here.
Chest – Weapon Material: Light Metal
From the Meditation Point, face the grates in the wall then follow the path to the right, jump down then take a left. Head down the slope to find the chest.
Seed Pod – Fire Pineapple: Felucian Yellow
Next to the above collectible under some crystalized tar.
Databank – Dam Flow Pipes
From the above collectible, head up the slight hill then take a left. Jump across the gap on to a metal ledge next to the crystalized tar then head right. The databank will be at the end of the path.

Databank – CRumbling Dam Wall
From the above pipes, turn around and follow the path in the opposite direction looking for the tar coming out the side of a cliff. Walk over to the edge of the metal walkway to reach the scan point.

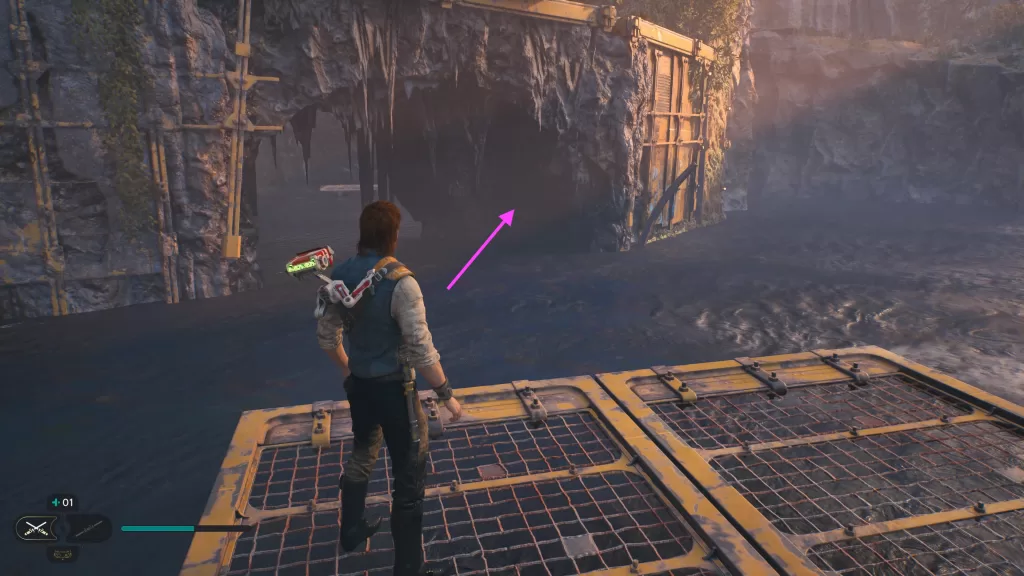
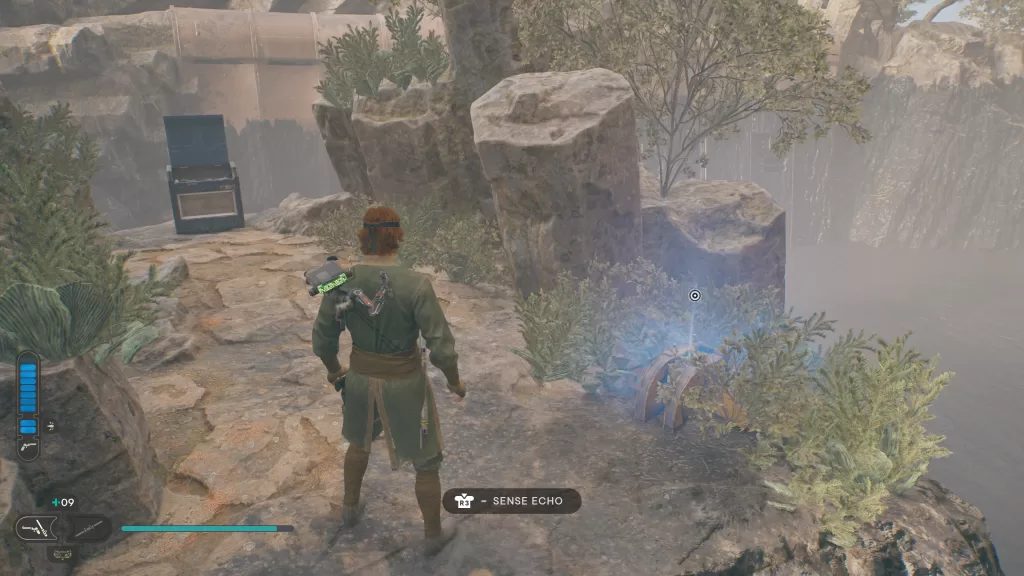
Databank – A Desperate Escape
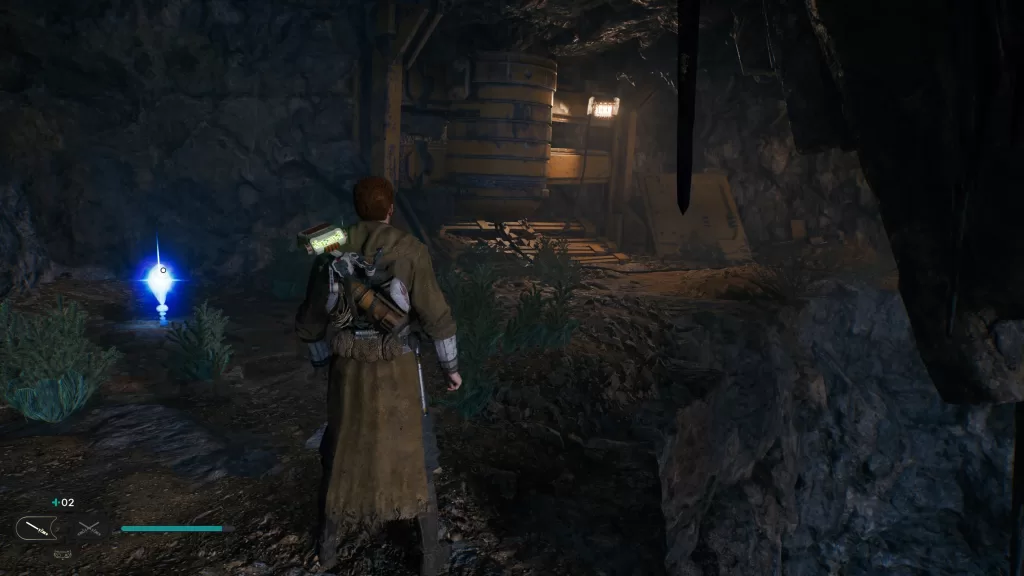
Starting at the Crumbling Dam Wall, drop down into the tar pit below then head for the platform. From there, use your grapple to reach some vines. Climb up to the top and follow the path left. When you reach the mines, take a right in side to spot the echo.
Chest – Weapon Materials: Two-Toned Metal
From the above databank, head further into the mine where you’ll encounter the first BX Droid. Climb up the ledge past it then take a right to reach a big open room with a lit brazier in it. The chest will be on the left side of the room across from the brazier. You won’t be able to open it until you progress further in the game after you obtain the electro dart. Please note that after we opened this chest we got jumped by Vashtan Wolfe.

Chest – BD-1 Materials: Anodized Metal
Still in the same room as the above chest, look for the runnable wall on the other side. Use it to reach a ledge containing the next chest.

Treasure – Priorite Shard
Again, we are still in the same room as the two above chests. This shard can be found in the unlit brazier.

Chest – Jacket: Tactical
From the above collectible, exit the room and take a right follow the path deeper through the tunnel. You’ll then drop through a hole in the ground and keep following the path to find this chest next to a window on the right overlooking the meditation point.
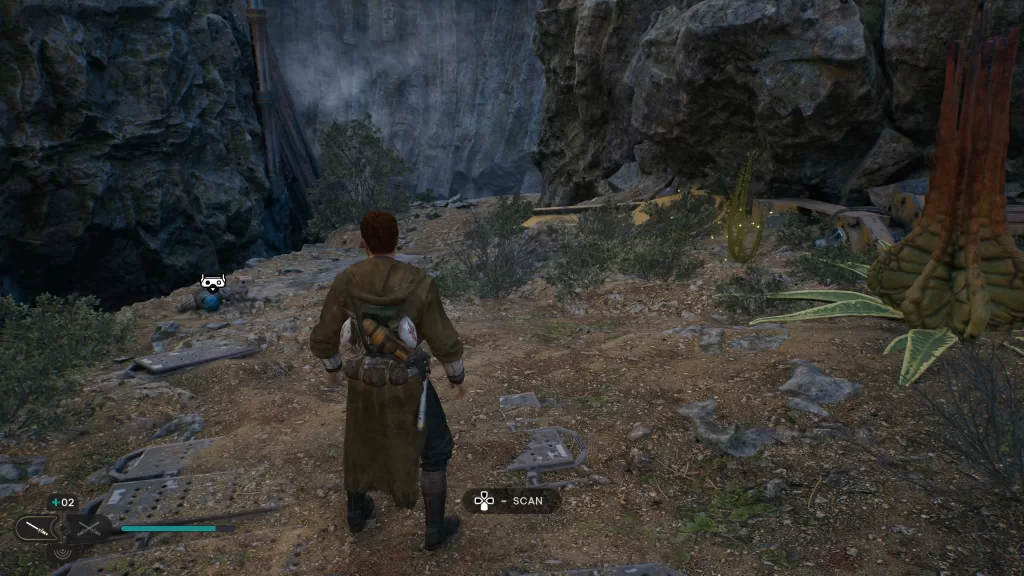
Databank – Creature Bones
After gaining access to the Roller Mine spawn in the room behind the meditation point, lead one down the path to the right of the workbench and throw it at the crystalized tar on the ledge below. Follow the newly revealed path to a rope and scant the bones in the wall behind it.


Treasure – Priorite Shard
Climb up the rope near the Creature Bones. Look to the left of the light pole to find a small rock bridge you can jump down to. It will be at the end of this bridge in some grass.

Databank – Abandoned Encampment
Head back up to the main path then follow it until the path winds left. It will be on the ground at the curve.

Seed Pod – Cactus Ball
This plant can be found right behind the above collectible.
Essence – Force Essence
From the above collectible, follow that path left then take a right towards the elevator to locate the essence.


Obtainable after destroying the crumbling dam wall and raising the tar level
Treasure – Priorite Shard
Under the crumbling dam after blowing it up. There will be a cave under it on the right side. To have enough time to reach the cave, jump out into the tar.
Treasure – Priorite Shard
From the Meditation Point facing the grate windows in the wall, head right and jump down. Keep going straight up the metal ramp. From there jump onto a platform in the tar. Make your way to the vines on the side of the cliff on the left. Climb up to the top and deal with the 2 enemies there. Look for a pipe you can jump onto straight ahead. Follow the pipes, drop hanging under the rock to continue to the collectible.

Chest – Hair: Mullet
From the above collectible, face the giant rock and look to the right to spot platform in the tar. Head to it then look to the left to find a climbable wall. Head to the top to find the chest.

Databank – The Dredger Run
This echo can be found in the grass just before the above chest. You may need to progress in the story for it to show up.
Seed Pod – Fire Pineapple
From the Meditation Point, face the grated windows and head right. Jump down then continue heading straight over the metal ramp. When you reach the tar pit, jump on both platforms to reach the vines at the other end of the tar pit. Climb up onto the ledge then head forward a short way to find the plant under our new big friend.

Chest – Head: Scrapyard
After dropping down the elevator, follow the path around to reach a small area where you’ll fight a handful of droids. You’ll find a giant metal cube here. Use it to reach a running wall on the other side of the area. Do so then use the running wall to reach the chest.

Treasure – Priorite Shard
From the Southern Reach Meditation Point, look towards the elevator shaft then wall jump to the top of the shaft to reach the shard.


After Unlocking Opening Doors with the Force and Floating Grapple Points
Chest – Max Stims Increased
Starting at the workbench, take the shortcut elevator near it up. At the top, follow the path to reach a giant yellow door. Use the Force to open it then follow the path. You’ll need to fight a Gorocco Matriarch. If you look at the ledge facing the elevator, you’ll find a chest.

Seed Pod – Fire Pineapple x3 / Treasure – Priorite Shard / Essence – Skill Point
From the chest, turn around and locate the floating grapple points. Use them to reach the other side. Climb up to the top where you’ll find multiple collectibles. At the top of the ledge, hug the right wall to find 3 Seed Pods. If you follow the ledge to the left of the seed pods, there will be a tree with a Priorite Shard at its base. On the other side of the tree, you’ll find the essence.
Seed Pod – Fire Pineapple: Alderaanian Blue
Near the giant dinosaur looking thing there will be a lift you need to use the Force to lower. Once you do, jump on top of it to reach the higher ledge. At the top, follow the path to the left to find this pod at the end on the right.
Treasure – Priorite Shard
From the above collectible, head back up the path heading towards the lift. Take a left at the end of the path and keep heading straight. When you reach the light post, look to the right to find an orb on a pedestal between two rock walls. Climb up the wall to reach the treasure.

Essence – New Perk Slot
From the above collectible, drop down the ledge. Grab the orb on the pedestal and bring it to the mining device across the gap where the droids were. Place it in the device to turn on a laser. This will open a new area. Head to that area and follow the laser to find a device you can splice under it. Splicing this machine causes a Roller Mine to spawn. You’ll want to quickly jump up the ledge with it following you then use the Force to lift it up. Don’t throw it, just let it go. Guide it between the yellow crates. Use it to destroy the breakable wall. Head through the opening and stop just before the edge (don’t use climbable walls). Use Koboh Grinder ability to spray a path using the purple matter from the laser up the wall to destroy the matter on the climbable wall. You’ll now be able to use the two runnable walls to reach the newly opened climbable wall. Climb on up then follow the path to reach the outdoor balcony where you’ll find the essence.


In order to get the below collectibles, you’ll need to have progressed to the Forest Array and saved the giant bird.
FORCE TEAR

Travel to the Boiling Bluff Meditation Point. There will be a creature you can mount.
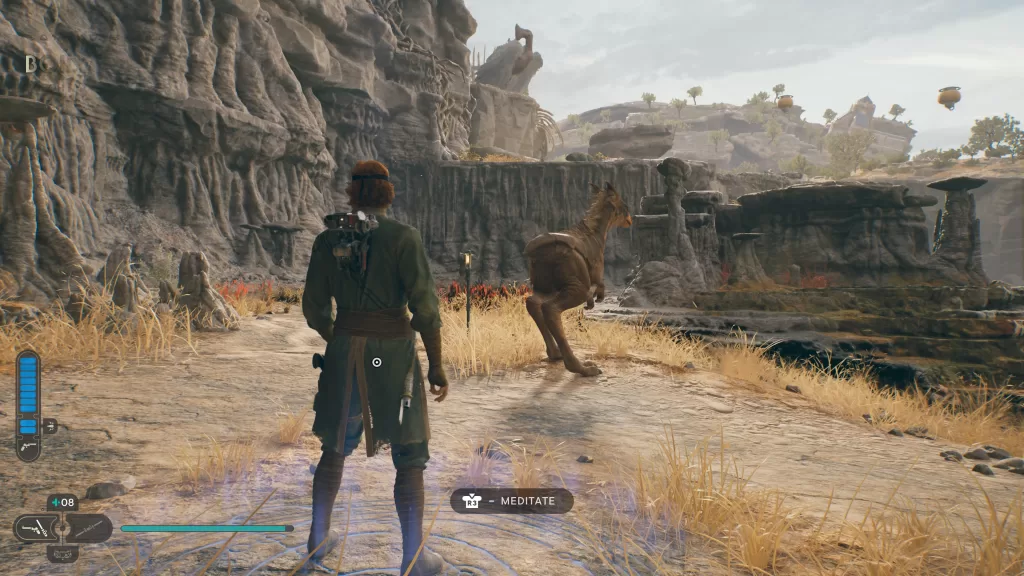
Hop on then use it to jump to the top of the ledge just past where it was at. If you look to the right, you’ll find a couple of floating grapple points with a device that spawns them. Grab one and toss it near the other two. Use it to reach the stone pillar in front of the giant bird.
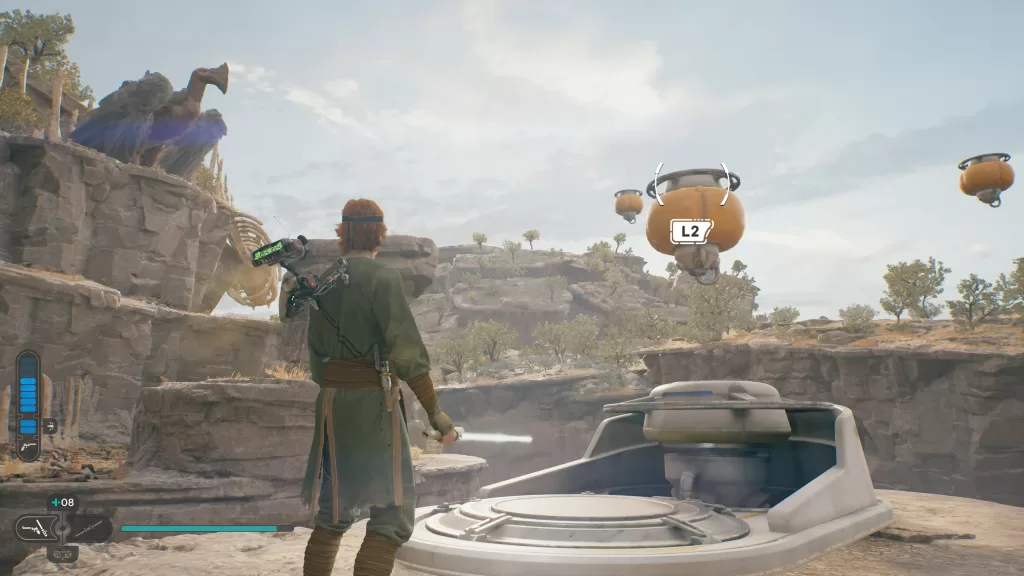
You should then be prompted with pushing a button to travel. Press it to be dropped off at a new location in the Derelict Dam. If you head forward towards the brick-looking wall, you’ll find it on the ground. This tear is quite challenging as it’s an obstacle course using your Force powers.
Seed Pods – Fire Pineapple: Dathomirian Red / Fire Pineapple x2
These 3 Seed Pods can all be found around the Force Tear.
Treasure – Priorite Shard
From the above collectible, drop down to the ledge below with the metal grate to find the droid and take it out.