Kingdom Come Deliverance Logo
Guides

Kingdom Come Deliverance – Unexpected Visit Walkthrough

by Chappie in

Welcome to NGB and our Kingdom Come Deliverance walkthrough for the Unexpected Visit quest! Here you’ll find everything you’ll need to easily breeze through this quest.

Unexpected Visit Overview

Acquired: Starting quest of the game

Objective(s):

Unexpected Visit Walkthrough

Go to Your Father

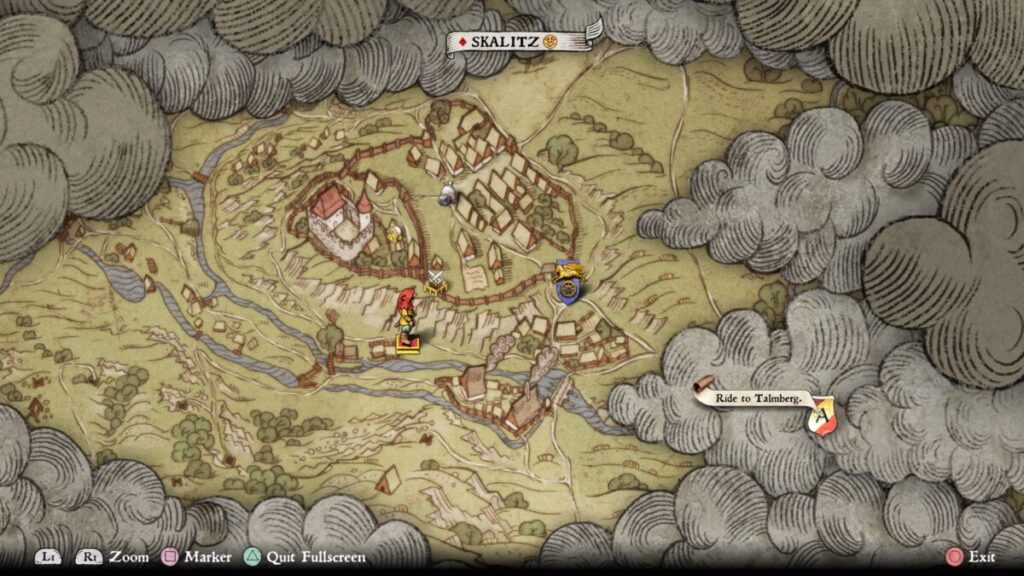
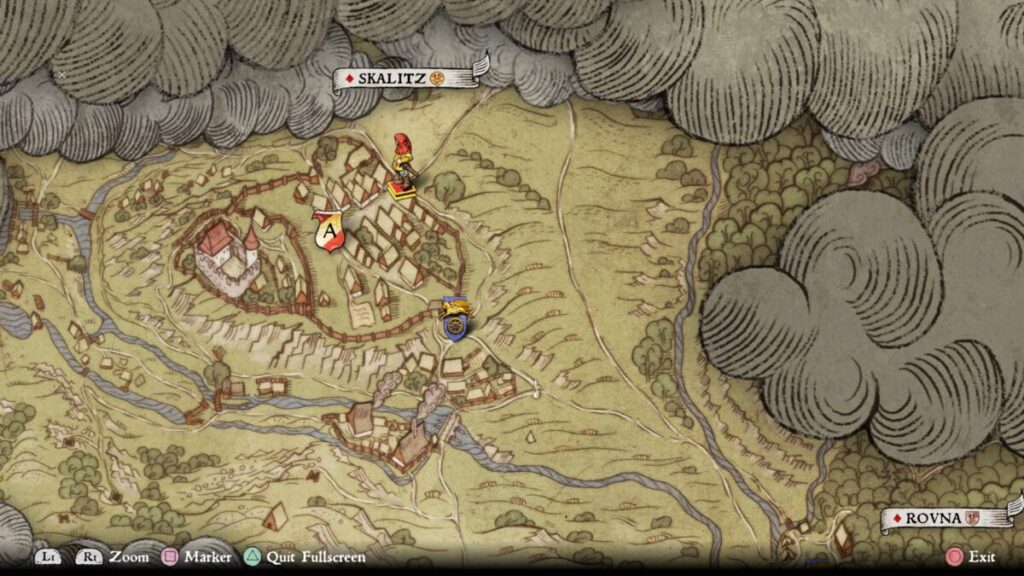
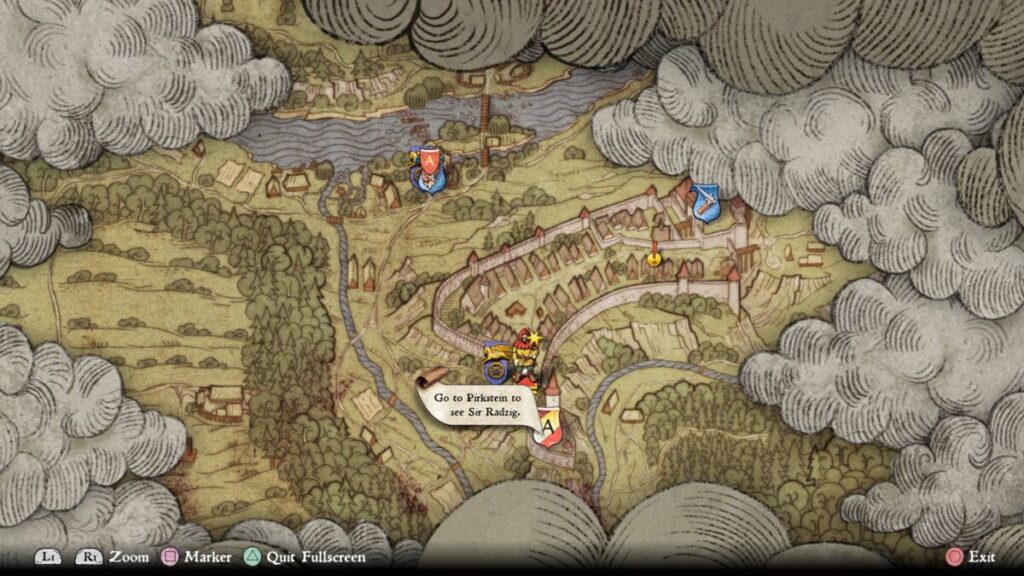
At the start of the Unexpected Visit main quest, exit Henry’s house and take a right heading north a short way to reach the forge where Henry’s father is working. Talk with him to get a list of errands that Henry needs to run in town.

Kingdom Come Deliverance Unexpected Visit Main Quest Skalitz Map

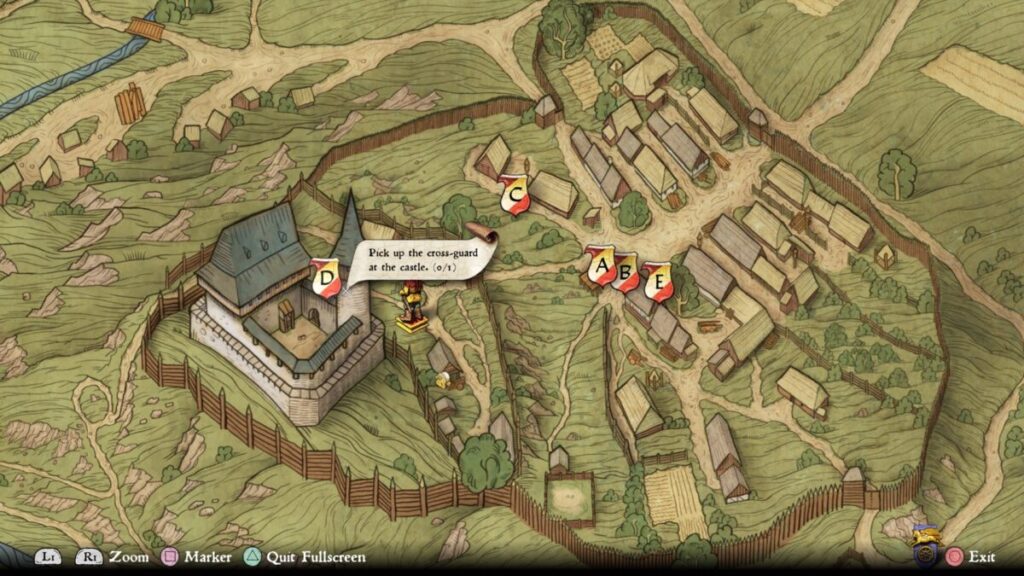
Pick Up the Cross-Guard at the Castle

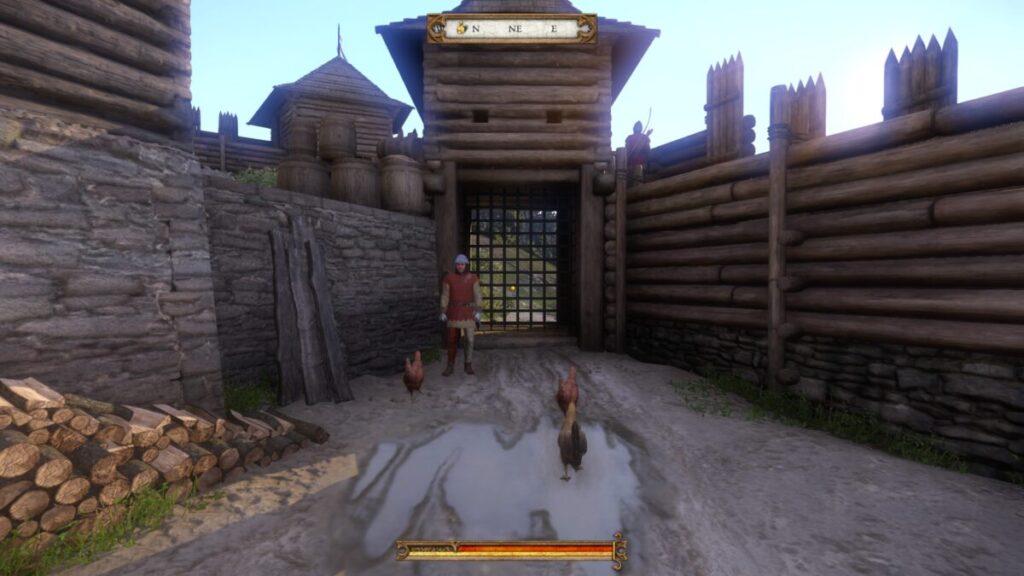
For this first task on Hal’s list during the Unexpected Visit main quest, follow the road northwest from the forge to reach the castle. Once there, speak with the two guards (Janek and Jaroslav) at the castle gate to obtain the cross-guard.

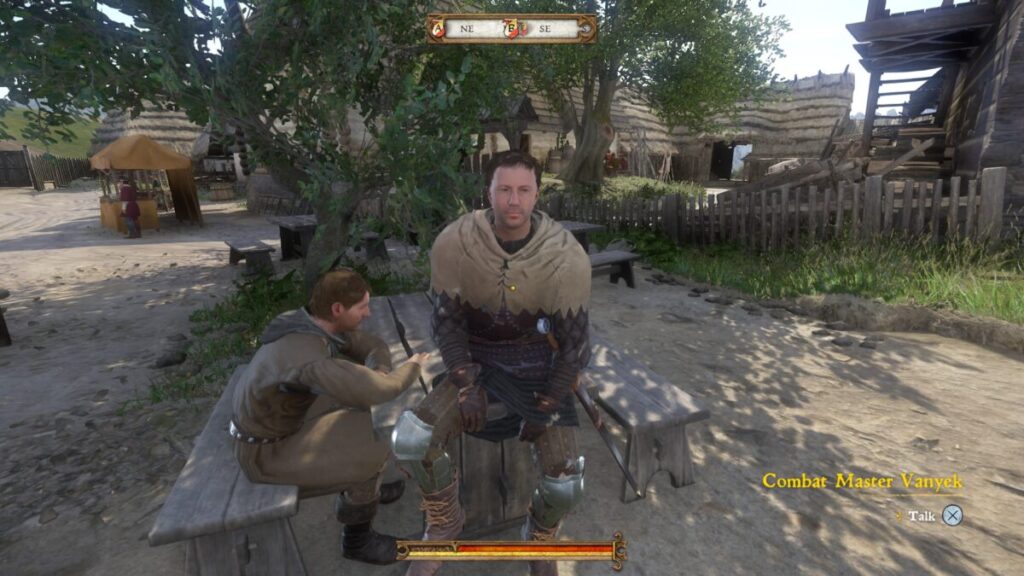
Go to the Sword-Fighting Lesson

With the cross-guard now in our possession, it’s time for a sword-fighting lesson. Head east into town and when you reach the well, take a right by the gallows to find Combat Master Vanyek sitting on a picnic table (next to the dice table). Speak with Vanyek and tell him you’re ready for some training. Follow him southwest towards the herd of sheep to reach the combat arena then talk with him once again to begin the combat tutorial where you’ll learn the basics of sword-fighting.

Kingdom Come Deliverance Unexpected Visit Main Quest Combat Master Vanyek

Collect the Debt from Kunesh

Next up on Henry’s list of things to do during the Unexpected Visit quest is collecting the debt from Kunesh. You can find him working outside his house near the stables northwest of the gallows. Talk to him about collecting the debt to enter a persuasion dialog event. The generic and the speech dialog option will lead to the “Try to Get the Axe, Hammer and Nails Back Another Way” objective.  The strength dialog option will lead to a fight and the objective “Find Something at Kunesh’s Worth Selling”. If you win the fight, you will obtain Kunesh’s keys.

(Optional) Try to Get the Axe, Hammer and Nails Back Another Way

If you chose the strength dialog option, just take the items. If you pick the generic or speech dialog options, knock Kunesh out and take Kunesh’s keys to open the chest in his house. Inside, you’ll find the hammer, nails, and an axe to steal.

(Optional) Find Something at Kunesh’s Worth Selling

If you fought Kunesh and won, you can grab his axe from the wood splitting stump and enter his house. Go through the first door on the right, unlock the trunk under the window with the key, and take the hammer and nails. Getting the axe, hammer, and nails completes this goal.

(Optional) Get a Lockpick from Fritz to Open Kunesh’s Chest

If you choose the generic or speech dialogue options, sneak into Kunesh’s house and locate the locked chest to complete this task. Head towards the town center, past the wooden tables, into the fenced area near the tavern to trigger a cutscene. Your friends will ask for your help with a lousy job. Choose “I’ll do it, but I need your help in return.”

(Optional) Go with Your Friends to Deutsch’s House

Follow your friends to Deutsch’s house located on the eastern side of town.

(Optional) Discuss the Plan of Attack With Your Friends

Once at Deutsch’s house, talk with your friends to come up with a plan.

(Optional) Lure Deutsch’s Wife Away

Speak with Deutsch’s wife sitting on a bench near the house next to the chicken coup.  Mention to her that Deutch is running his mouth at the tavern and she will leave to deal with him.

(Optional) Go and Get Revenge on Deutsch

A cutscene will automatically trigger, followed by a good old-fashioned fistfight.

(Optional) Run from the Catchpole

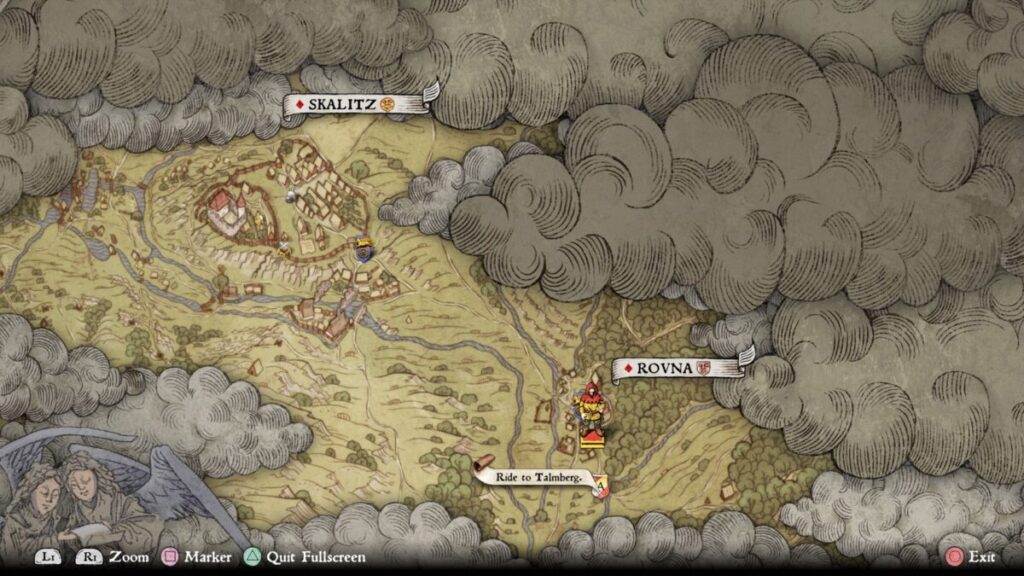
Flea from the catchpole by following the guys southeast towards the fence surrounding Skalitz.

(Optional) Meet the Lads at Kunesh’s

Head over to Kunesh’s house and talk to the guys there. Fritz will give you a lockpick to open Kunesh’s chest if you asked for help dealing with Kunesh before the objective “Go with Your Friends to Deutsch’s House” is triggered. Talk to the guys again to complete the objective. Check out the objective “Try to Get the Axe, Hammer and Nails Back Another Way” above if you haven’t finished it yet.

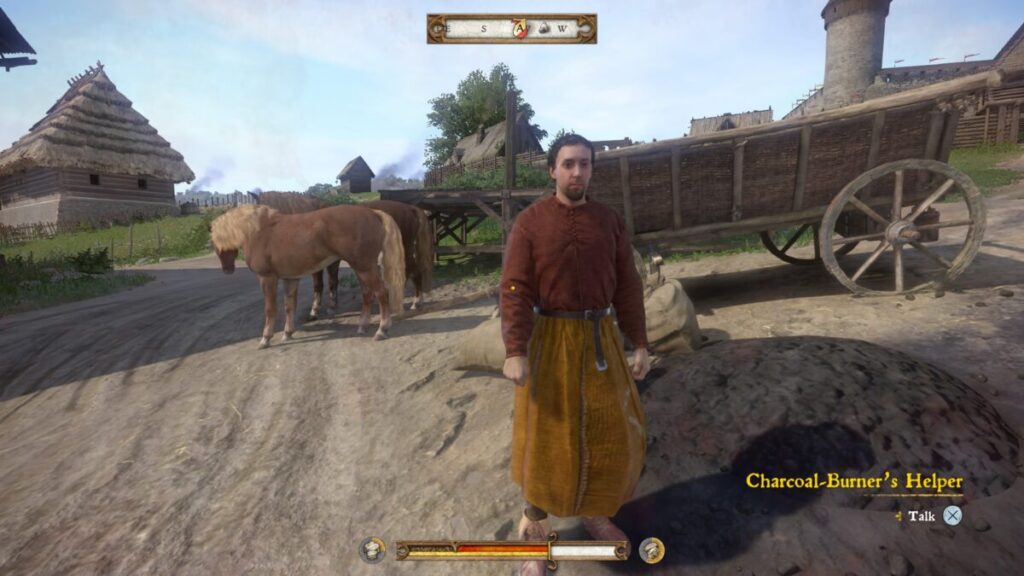
Buy a Bag of Charcoal at Market

The Charcoal-Burner’s Helper in the middle of Skalitz standing in front of the gallows. Speak with him to trade and sell the axe, hammer and nails you got from Kunesh to buy 10 charcoals.

Kingdom Come Deliverance Unexpected Visit Main Quest Charcoal-Burner's Helper

Buy Ale at the Tavern

The last thing on Henry’s list is to grab some ale from the tavern. Travel to it in the fenced-in area near the center of Skalitz. If this is your first time there, a cutscene will trigger between Henry and his friends. Once it concludes, you’ll have the option then to help your friends teach Deutsch a lesson via the “Go with Your Friends to Deutsch’s House” objective above. Choosing to not go will lower Hal’s reputation a bit while going could land him in some hot water. Either way, head inside Bianca’s Tavern when you’re ready and speak with Bianca to obtain a pitcher of ale. She will also give you 5 Saviour Schnapps, which is a consumable item used in Kingdom Come Deliverance to save the game.

Kingdom Come Deliverance Unexpected Visit Main Quest Bianca's Tavern

Go Back to Father at the Forge

With Hal’s shopping list for the Unexpected Visit main quest completed, it’s time to head back to your father at his forge near Henry’s house.  Speak with him when you get there and tell him you’re ready to start forging to trigger a cutscene.

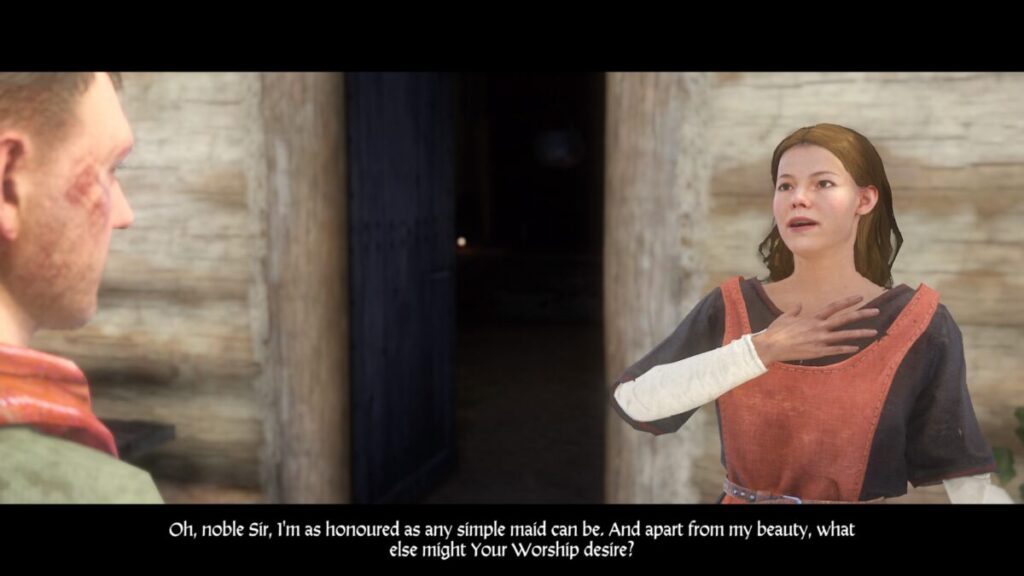
Go and Get Nails for Theresa

When you regain control of Henry, head into his house and take a left through the door to locate the trunk containing the nails and grab them (along with the rest of the chest’s contents). Head back to Theresa and speak with her to complete the Unexpected Visit quest.

Kingdom Come Deliverance Guides and Walkthroughs

For more Kingdom Come Deliverance guides and walkthroughs, click here!

Kingdom Come Deliverance Logo
Guides

Kingdom Come Deliverance – Keeping the Peace

by NightlyGamingBinge in

Welcome to NGB and our Kingdom Come Deliverance walkthrough for the Keeping the Peace quest! Here you’ll find everything you’ll need to easily breeze through this quest.

Keeping the Peace Overview

Acquired: Automatically after finishing Train Hard, Fight Easy

Objective(s):

(Optional) Pick Up Your Kit in the Lower Room of the Armoury

Exit the Bailiff’s and go down the stairs. Head east past the stockades following the objective. The Rattay Armoury is near the archery range. Go past the chicken coops to the outer wall of the castle and the Armoury will be on the right. Talk to guard sitting on the bench to retrieve your gear.

Join Nightingale on Patrol Between 11:00 and 19:00

Follow the objective to the west end of Rattay. Nightingale will be leaning against a wagon.

Follow Nightingale

Follow Nightingale as he walks around Rattay on patrol.

Solve the Dispute Between the Armourer and the Beggarwoman

Head up to talk to the bickering pair to trigger a cutscene. Choose whatever option you would like. Continue on your patrol with Nightingale afterwards

Sit Down With Nightingale

Play dice with Nightingale until it gets dark.

Ring the Bell

Head back to the Bailiff’s and ring the bell on the front of the building.

Close the Traders’ Tavern by the Market Square

Head to the middle of Rattay.  When you near the tavern, a cutscene will trigger. Afterwards, you will fist fight Hans Capon until another cutscene triggers and this will complete the Keeping the Peace quest.

Kingdom Come Deliverance Guides and Walkthroughs

For more Kingdom Come Deliverance guides and walkthroughs, click here!

Kingdom Come Deliverance Logo
Guides

Kingdom Come Deliverance – Train Hard, Fight Easy

by NightlyGamingBinge in

Welcome to NGB and our Kingdom Come Deliverance walkthrough for the Train Hard, Fight Easy quest! Here you’ll find everything you’ll need to easily breeze through this quest.

Train Hard, Fight Easy Overview

Acquired: Starts automatically after finishing Awakening

Objective(s):

Go to the Training Ground and Talk to Captain Bernard

Follow the objective east of Rattay to the combat arena outside of Rattay and talk to Captain Bernard.  Afterwards a combat tutorial will ensue until you are interrupted by Sir Hans. After he leaves, the training will resume until Bernard finishes showing you the basics.

Follow Bernard to the Shooting Range

Follow Captain Bernard west back into Rattay to the archery range.

Undertake Archery Training

Take a few shots at the target until a cutscene triggers.

Compete with Hans Capon in Archery

Try and beat Hans Capon in a friendly archery contest.  If you win or lose, Hans Capon will challenge you to a swordfight. If you’re having issues shooting the arrow, try aiming the arrow down and right a bit from your target.

Sword Fight with Hans Capon

Try and beat Hans Capon in a friendly sword fight using real swords.  If you beat Hans Capon in archery and sword fighting, you will get Hans Capon’s bow and he will make a couple excuses on why he lost.

Speak with Bernard

Talk to Captain Bernard.

Report to the Bailiff

Take the stairs across from the tailor to reach the second level above the tailor’s shop where you will find the Bailiff.  Talk to the Bailiff to trigger a cutscene that will complete the Train Hard, Fight Easy quest.

Kingdom Come Deliverance Guides and Walkthroughs

For more Kingdom Come Deliverance guides and walkthroughs, click here!

Kingdom Come Deliverance Logo
Guides

Kingdom Come Deliverance Run Walkthrough

by Chappie in

Welcome to NGB and our Kingdom Come Deliverance walkthrough for the Run quest! Here you’ll find everything you’ll need to easily breeze through this quest.

Run Overview

Acquired:  Starts automatically after finishing Unexpected Visit

Objective(s):

Get a Horse

Follow the trail heading south down the hillside towards Objective A. You will need to hurry because an enemy will be on your tail.

Kingdom Come Deliverance Run Walkthrough Get a Horse Map Location

(Optional) Help Theresa Escape from the Rapists

As you run by Theresa on the way to the horse, whistle to draw the attention of the attackers giving her time to escape (on PlayStation, this is the triangle button). Alternatively, you can sneak past them to get to the horse and ignore this, but it could come back to bite you in future quests.

Ride to Talmberg

Steal a horse from the attackers and follow Objective A east to trigger a cutscene.  After the cutscene, you will need to continue to follow the objective towards Talmberg. Henry will also be chased by men on horseback, but it’s best to ignore them. When you get close to Talmberg, another cutscene will trigger.

Kingdom Come Deliverance Run Walkthrough Ride to Talmberg Map Location

Talk to Sir Robard

Following Objective B, exit the room of the Talmberg Castle and turn right down the stairs leading to the central courtyard. Once at the bottom, talk with Sir Robard.

Go with Sir Robard to the Kitchen

Follow Sir Robard as he heads towards a door under the stairs. Entering the door will trigger a cutscene.

Eat

Go on, eat all of the food on the table, You’ve earned it!

Go to the Courtyard Lodge and Sleep There Until Morning

Exit the kitchen and follow Objective A across the courtyard passing the well to find the lodge.  Interact with the bed to sit down then select the prompt to sleep and move the dial to the wee hours of the morning. In the middle of the night, the lady of the house will stop by to check in on Henry. You’ll then be given the option to tell her what happened during the attack or refuse to speak about it. The choice is yours.

Kingdom Come Deliverance Run Walkthrough The Inner Lodge

(Optional) Take the Torch from the Table

The torch is on the table that is located next to your bed. Pick it up and that game will provide a tutorial on how to use it.

Go to the Battlements via the Gateway Stairs

Exit the lodge and swing around ot the left side of the courtyard, heading towards the main gate of the inner castle.

Go to the Battlements and Talk to Captain Robard

Once at the gate, turn left and take the steps up towards the battlements. Keep following the battlements until you reach Sir Robard. Speak with him and choose “What’s going on?” to trigger a cutscene.

Kingdom Come Deliverance Run Walkthrough Captain Robard on the Battlements

Talk to Sir Robard

Talk to Sir Robard to learn more about the situation and to start the next objective.

Keep Watch on the Battlements

Keep wandering around on the battlements until a guard stops to talk to you.

Wait Until Morning

Use the time skip button to wait until 7 am in the morning.

Go to the Battlements of the Outer Bailey

Head back down the stairs towards the gate to the outer battlement and cross the bridge to trigger another cutscene.

Talk to Sir Robard

From the outer battlement, head south following Objective A to find Sir Robard walking towards the castle following the cutscene. You will come across a persuasion check that may be too high to pass (my stats were at 4,5,5) but he’ll give you some more information about the current situation.

Get Out of the Castle

There are a couple of ways to escape from Talmberg Castle. The first option is to talk to Guard Radim near the outer battlement gate to the north. If you pass the persuasion check, he will let you pass through the gate if you are dressed as a Talmberg soldier (see next objective below).

Kingdom Come Deliverance Run Walkthrough Guard Radim

The second option would be to jump off the bridge near the gate leading to the center of the castle. The other option I found was to get yourself thrown in jail. After 24 in game hours, you will be released from jail outside of the castle.

(Optional) Get Talmberg Armour from the Guardhouse Above the Gate

Head back to the gate leading to the inner part of the castle and take a right up the stairs to the battlement where Henry was a lookout the night before. The guardhouse is the room to the right once at the top of the stairs. You will need to open the chest with a very easy lock to loot the Talmberg Armour. Be careful of the guards that pass by (they have Superman-level hearing). Equip the gear and return to Guard Radim and then talk to him. He will let you pass through the gate.

(Optional) Get a Horse

You can also steal a horse from the stables located in the inner portion of the stable near the lodge you stayed in before leaving the castle. Once you have it, take it to the bridge and jump down under the metal chains to escape

Flee the Castle and Get to Skaliz

If you left the castle with the help of Guard Radim, you are in good shape.  If you choose to jump off the bridge, the alarm will sound and the guards will start chasing you.  Once you leave the castle, start making your way north/northwest to Skaliz. If you manage to get caught by a guard, you’ll have a chance to persuade them to let you go. If that fails, you should be free once you’re released from jail.

Bury Your Loved Ones in Skalitz

On your way to Skaliz, a cutscene will trigger completing the quest.

Kingdom Come Deliverance Guides and Walkthroughs

For more Kingdom Come Deliverance guides and walkthroughs, click here!

Kingdom Come Deliverance Logo
Guides

Kingdom Come Deliverance – Homecoming Walkthrough

by NightlyGamingBinge in

Welcome to NGB and our Kingdom Come Deliverance walkthrough for the Homecoming quest! Here you’ll find everything you’ll need to easily breeze through this quest.

Homecoming Overview

Acquired: Starts automatically after finishing Run

Objective(s):

Find Your Parents

When you gain control of Henry, make your way toward Objective A, which is northwest towards Skalitz.  There will be bandits along the way that you will have to deal with if they see you. The entrance to Skalitz is on the northwestern side of the town. Enter it and head towards the smoking castle until a cutscene triggers when approaching Henry’s parents.

Kingdom Come Deliverance Homecoming Walkthrough Find Your Parents Map Location

Find a Spade

After the cutscene, head northeast towards the entrance you used to enter Skalitz.  When you hear the sound of a barking dog, follow the barking to its source in a nearby building to trigger a cutscene.  The end of cutscene will most likely end in a fight depending on your level of persuasion. Defeat your opponent in a fistfight to collect the spade. Drawing your blade will cause him to run.

Kingdom Come Deliverance Homecoming Walkthrough Find a Spade Map Location

Dig a Grave Under the Linden Tree and Bury Your Parents

With a spade in hand, head the tree to the right of Henry’s house. Interact with the ground under the tree to start digging for another cutscene that will lead into a scripted fight that you will lose. Once Henry has been brought to his knees, one more cutscene will kick off leading to the completion of the Homecoming quest.

Kingdom Come Deliverance Homecoming Walkthrough Digging a Grave Map Location

Kingdom Come Deliverance Guides and Walkthroughs

For more Kingdom Come Deliverance guides and walkthroughs, click here!

Kingdom Come Deliverance Logo
Guides

Kingdom Come Deliverance – Awakening Walkthrough

by NightlyGamingBinge in

Welcome to NGB and our Kingdom Come Deliverance walkthrough for the Awakening quest! Here you’ll find everything you’ll need to easily breeze through this quest.

Awakening Overview

Acquired:  Starts automatically after finishing Homecoming

Objective(s):

Save Your Parents

When you gain control of Henry, you will be in the middle of a nightmare.  Follow the objective marker through the remains of Skalitz to find your parents. You will have to deal with enemies along the way until a cutscene triggers. You’ll then briefly wake up to talk with Thersa a bit before passing out again.

(Optional) Get Your Things From the Trunk

Interact with the trunk next to your bed to obtain your items.

Go to Pirkstein to see Sir Radzig

Make your way to Rattay following Objective A.  Talk to the gate guard and use a persuasion option to enter Rattay.  After passing the guards, take a right and cross the bridge to arrive at Pirkstein.  A cutscene will trigger when approaching the stairs. Afterward, head up to the top of the stairs and take a right following the walkway to the end. Pass through the door there into a hallway to trigger a cutscene leading to the completion of the Awakening main quest.

Kingdom Come Deliverance Guides and Walkthroughs

For more Kingdom Come Deliverance guides and walkthroughs, click here!

Guides

Pokemon Let’s Go – Pokemon Location Guide

by Chappie in


*Version exclusive Pokemon will be marked by (Pikachu) or (Eevee).


This is a guide listing the Pokemon in Pokemon Let’s Go Pikachu and Eevee and where they can be found.


  1. Bulbasaur
    • Viridian Forest
    • Cerulean City
      • The lady in the house to the left of the Pokemon Center will give you one for catching 30 or more Pokemon
  2. Ivysaur
    • Evolve Bulbasaur at level 16
  3. Venusaur
    • Evolve Ivysaur at level 32
  4. Charmander
    • Route 3 and 4
    • Route 24
      • Given to you by a trainer for catching 50 or more Pokemon
    • Rock Tunnel
  5. Charmeleon
    • Evolve Charmander at level 16
  6. Charizard
    • Evolve Charmelon at level 36
    • Can be found at most places by flying after beating the Elite 4
  7. Squirtle
    • Route 24 and 25
    • Vermilion City
      • Office Jenny will give you one for catching 60 or more Pokemon
    • Seafoam Islands
  8. Wartortle
    • Evolve Squirtle at level 16
  9. Blastoise
    • Evolve Wartortle at level 36
  10. Caterpie
    • Route 2
    • Viridian Forest
  11. Metapod
    • Evolve Caterpie at level 7
    • Viridian Forest
  12. Butterfree
    • Evolve Metapod at level 10
    • Viridian Forest (Pikachu)
  13. Weedle
    • Route 2
    • Viridian Forest
  14. Kakuna
    • Evolve Weedle at level 7
    • Viridian Forest
  15. Beedrill
    • Evolve Kakuna at level 10
    • Viridian Forest (Eevee)
  16. Pidgey
    • Route 1, 2 , 5, 6 , 7, 8, 11, 12, 13, 14, 15, 16, 17, 18, 21, 24 and 25
    • Viridian Forest
    • Can be found at most places by flying after beating the Elite 4
  17. Pidgeotto
    • Evolve Pidgey at level 18
    • Route 5, 6, 7, 8, 11, 12, 13, 14, 15, 16, 17, 18 and 21
    • Can be found at most places by flying after beating the Elite 4
  18. Pidgeot
    • Evolve Pidgeotto at level 36
    • Can be found at most places by flying after beating the Elite 4
  19. Rattata
    • Route 1, 2, 3, 4, 5, 6, 7, 8, 9, 10, 11, 16, 17, 18, 21 and 22
    • Pokemon Mansion
    • Alolan Form – Trade a Kantonian Rattata at the Pokemon Center in Cerulean City
  20. Raticate
    • Evolve Rattata at level 20
    • Route 7, 8, 9, 10, 11, 16, 17, 18 and 21
    • Pokemon Mansion
    • Alolan Form – Evolve Alolan Rattata at level 20
  21. Spearow
    • Route 3, 4, 9, 10, 22 and 23
  22. Fearow
    • Evolve Spearow at level 20
    • Route 9, 10 and 23
    • Route 3 and 22 while flying after beating the Elite 4
  23. Ekans (Eevee)
    • Route 3 and 4
  24. Arbok (Eevee)
    • Evolve Ekans at level 22
  25. Pikachu
    • Viridian Forest
  26. Raichu
    • Evolve Pikachu using a Thunder Stone
    • Alolan Form – Trade a Kantonian Raichu at the Pokemon Center in Saffron City
  27. Sandshrew (Pikachu)
    • Route 3 and 4
    • Alolan Form – Trade a Kantonian Sandshrew at the Pokemon Center in Celadon City
  28. Sandslash (Pikachu)
    • Evolve Sandshrew at level 22
    • Alolan Form – Evolve Alolan Sandshrew using an Ice Stone
  29. Nidoran (female)
    • Route 9, 10, 22 and 23
  30. Nidorina
    • Evolve Nidoran (female) at level 18
    • Route 9, 10 and 23
  31. Nidoqueen
    • Evolve Nidorina using a Moon Stone
  32. Nidoran (male)
    • Route 9, 10, 22 and 23
  33. Nidorino
    • Evolve Nidoran (male) at level 18
    • Route 9, 10 and 23
  34. Nidoking
    • Evolve Nidorino using a Moon Stone
  35. Clefairy
    • Mt. Moon
  36. Clefable
    • Evolve Clefairy using a Moon Stone
    • Mt. Moon
  37. Vulpix (Eevee)
    • Route 5, 6, 7 and 8
    • Alolan Form –  Trade a Kantonian Vulpix at the Pokemon Center in Celadon City
  38. Ninetales (Eevee)
    • Evolve Vulpix using a Fire Stone
    • Route 7 and 8
    • Alolan Form – Evolve Alolan Vulpix using an Ice Stone
  39. Jigglypuff
    • Route 5, 6, 7 and 8
  40. Wigglytuff
    • Evolve Jigglypuff using a Moon Stone
  41. Zubat
    • Mt. Moon
    • Diglett’s Cave
    • Cerulean Cave
    • Rock Tunnel
    • Pokemon Tower
    • Seafoam Islands
    • Victory Road
  42. Golbat
    • Evolve Zubat at level 22
    • Cerulean Cave
    • Rock Tunnel
    • Pokemon Tower
    • Seafoam Islands
    • Victory Road
  43. Oddish (Pikachu)
    • Route 1, 2, 12, 13, 14, 15, 21, 24 and 25
    • Viridian Forest
  44. Gloom (Pikachu)
    • Evolve Oddish at level 21
    • Route 12, 13, 14, 15 and 21
  45. Vileplume (Pikachu)
    • Evolve Gloom using a Leaf Stone
    • Route 21
  46. Paras
    • Mt. Moon
  47. Parasect
    • Evolve Paras at level 24
  48. Venonat
    • Route 14, 15, 24 and 25
  49. Venomoth
    • Evolve Venonat at level 31
    • Route 14 and 15
  50. Diglett
    • Diglett’s Cave
    • Alolan Form – Trade a Kantonian Diglett at the Pokemon Center in Lavender Town
  51. Dugtrio
    • Evolve Diglett at level 26
    • Diglett’s Cave
    • Alolan Form – Evolve Alolan Diglett at level 26
  52. Meowth (Eevee)
    • Route 24 and 25
    • Alolan Form – Trade a Kantonian Meowth at the Pokemon Center in Cinnabar Island
  53. Persian
    • Evolve Meowth at level 28
    • Pikachu Only – Talk to the Sailor in Vermilion City after catching 5 Growlithes to receive one
    • Alolan Form – Evolve Alolan Meowth at level 28
  54. Psyduck
    • Route 4, 6, 17, 18, 24 and 25
  55. Golduck
    • Evolve Psyduck at level 33
    • Cerulean Cave
  56. Mankey (Pikachu)
    • Route 3 and 4
  57. Primeape (Pikachu)
    • Evolve Mankey at level 28
  58. Growlithe (Pikachu)
    • Route 5, 6, 7 and 8
  59. Arcanine
    • Evolve Growlithe using a Fire Stone
    • Route 7 and 8
    • Eevee Only – Talk to the Beauty in Vermilion City after catching 5 Meowths to receive one
  60. Poliwag
    • Route 22, 23 and 25
    • Cerulean Cave
  61. Poliwhirl
    • Evolve Poliwag at level 25
    • Route 22, 23 and 25
    • Cerulean Cave
  62. Poliwrath
    • Evolve Poliwhirl using a Water Stone
    • Cerulean Cave
  63. Abra
    • Route 5, 6, 7 and 8
  64. Kadabra
    • Route 7 and 8
  65. Alakazam
    • Trade a Kadabra to make it evolve
  66. Machop
    • Rock Tunnel
    • Victory Road
  67. Machoke
    • Evolve Machop at level 28
    • Victory Road
  68. Machamp
    • Trade a Machoke to make it evolve
  69. Bellsprout (Eevee)
    • Route 1, 2, 12, 13, 14, 15, 21, 24 and 25
    • Viridian Forest
  70. Weepinbell (Eevee)
    • Evolve Bellsprout at level 21
    • Route 12, 13, 14, 15 and 21
  71. Victreebel (Eevee)
    • Evolve Weepinbell using a Leaf Stone
    • Route 21
  72. Tentacool
    • Route 4, 10, 11, 12, 13, 18, 19, 20, 21 and 24
  73. Tentacruel
    • Evolve Tentacool at level 30
    • Route 4, 10, 11, 12, 13, 18, 19, 20, 21 and 24
  74. Geodude
    • Mt. Moon
    • Cerulean Cave
    • Rock Tunnel
    • Victory Road
    • Alolan Form – Trade a Kantonian Geodude at the Pokemon Center in Vermilion City
  75. Graveler
    • Evolve Geodude at level 25
    • Cerulean Cave
    • Rock Tunnel
    • Victory Road
    • Alolan Form – Evolve Alolan Geodude at level 25
  76. Golem
    • Trade a Graveler to make it evolve
    • Alolan Form – Trade an Alolan Graveler to make it evolve
  77. Ponyta
    • Route 17
  78. Rapidash
    • Evolve Ponyta at level 40
    • Route 17
  79. Slowpoke
    • Seafoam Island
  80. Slowbro
    • Evolve Slowpoke at level 37
    • Seafoam Island
  81. Magnemite
    • Power Plant
  82. Magneton
    • Evolve Magnetite at level 30
    • Power Plant
  83. Farfetch’d
    • Route 12 and 13
  84. Doduo
    • Route 16, 17 and 18
  85. Dodrio
    • Evolve Doduo at level 31
    • Route 16, 17 and 18
  86. Seel
    • Seafoam Islands
  87. Dewgong
    • Evolve Seel at level 34
    • Seafoam Islands
  88. Grimer (Pikachu)
    • Power Plant
    • Pokemon Mansion
    • Alolan Form – Trade a Kantonian Grimer at the Pokemon Center in Cinnabar Island
  89. Muk (Pikachu)
    • Evolve Grimer at level 38
    • Power Plant
    • Pokemon Mansion
    • Alolan Form – Evolve Alolan Grimer at level 38
  90. Shellder
    • Seafoam Islands
  91. Cloyster
    • Evolve Shellder using a Water Stone
    • Seafoam Islands
  92. Gastly
    • Pokemon Tower
  93. Haunter
    • Evolve Gastly at level 25
    • Pokemon Tower
  94. Gengar
    • Trade Haunter to make it evolve
  95. Onix
    • Mt. Moon
    • Rock Tunnel
    • Victory Road
  96. Drowzee
    • Route 11
  97. Hypno
    • Evolve Drowzee at level 26
  98. Krabby
    • Route 10, 12 and 13
  99. Kingler
    • Evolve Krabby at level 28
    • Route 12 and 13
  100. Voltorb
    • Power Plant
  101. Electrode
    • Evolve Voltorb at level 30
    • Power Plant
  102. Exeggcute
    • Route 23
  103. Exeggutor
    • Evolve Exeggcute using a Leaf Stone
    • Route 23
  104. Cubone
    • Rock Tunnel
    • Pokemon Tower
  105. Marowak
    • Evolve Cubone at level 28
    • Alolan Form – Trade a Kantonian Marowak at the Pokemon Center in Fuchsia City
  106. Hitmonlee
    • Defeat the Karate Master at the Fighting Dojo in Saffron City
  107. Hitmonchan
    • Defeat the Karate Master at the Fighting Dojo in Saffron City
  108. Lickitung
    • Cerulean Cave
  109. Koffing (Eevee)
    • Power Plant
    • Pokemon Mansion
  110. Weezing (Eevee)
    • Evolve Koffing at level 35
    • Power Plant
    • Pokemon Mansion
  111. Rhyhorn
    • Cerulean Cave
    • Rock Tunnel
    • Victory Road
  112. Rhydon
    • Evolve Rhyhorn at level 42
    • Cerulean Cave
    • Victory Road
  113. Chansey
    • Can be found pretty much everywhere starting at Route 5 onwards.
  114. Tangela
    • Route 21
  115. Kangaskhan
    • Rock Tunnel
  116. Horsea
    • Route 11, 12 and 13
  117. Seadra
    • Evolve Horsea at level 32
    • Route 11, 12 and 13
  118. Goldeen
    • Route 6
  119. Seaking
    • Evolve Goldeen at level 33
    • Route 6
  120. Staryu
    • Route 18, 19 and 21
  121. Starmie
    • Evolve Staryu using a Water Stone
    • Route 18, 19 and 21
  122. Mr. Mime
    • Route 11
  123. Scyther
    • Route 14 and 15
  124. Jynx
    • Seafoam Islands
  125. Electabuzz
    • Power Plant
  126. Magmar
    • Pokemon Mansion
  127. Pinsir
    • Route 14 and 15
  128. Tauros
    • Route 14 and 15
  129. Magikarp
    • Route 4, 6, 11, 12, 13,18, 19, 20, 21, 22, 23, 24 and 25
    • Cerulean Cave
    • Seafoam Islands
  130. Gyarados
    • Evolve Magikarp at level 20
    • Route 20
  131. Lapras
    • Given to you on the 7th floor of Silph Co. in Saffron City
  132. Ditto
    • Pokemon Mansion
    • Cerulean Cave
  133. Eevee
    • Route 17
  134. Vaporeon
    • Evolve Eevee using a Water Stone
  135. Jolteon
    • Evolve Eevee using a Thunder Stone
  136. Flareon
    • Evolve Eevee using a Fire Stone
  137. Porygon
    • Given to you by a guy in front of the Saffron City Pokemon Center after defeating Team Rocket at Silph Co.
  138. Omanyte
    • Have the Helix fossil revived into a Pokemon on Cinnabar Island
  139. Omastar
    • Evolve Omanyte at level 40
  140. Kabuto
    • Have the Dome fossil revived into a Pokemon on Cinnabar Island
  141. Kabutops
    • Evolve Kabuto at level 40
  142. Aerodactyl
    • Have the Old Amber revived into a Pokemon on Cinnabar Island
  143. Snorlax
    • Route 12 and Route 16
  144. Articuno
    • Seafoam Islands
  145. Zapdos
    • Power Plant
  146. Moltres
    • Victory Road
  147. Dratini
    • Route 10
  148. Dragonair
    • Evolve Dratini at level 30
    • Route 10
  149. Dragonite
    • Evolve Dragonair at level 55
    • Can be found on all routes while flying around after beating the Elite 4
  150. Mewtwo
    • Cerulean Cave
  151. Mew
    • Buy a Pokeball Plus and use the Mystery Gift Feature


Guides

Pokemon Let’s Go – Indigo Plateau Guide

by Chappie in


This is a guide for the items, Pokemon and trainers found in Indigo Plateau.


Indigo Plateau

  • Pokemon
    • Alolan Exeggutor – Trade a Kantonian Exeggutor to the Super Nerd
  • Trainers
    • Elite Four Lorelei
      • Dewgong – level 51
      • Jynx – level 51
      • Cloyster – level 51
      • Lapras – level 52
      • Slowbro – level 51
    • Elite Four Bruno
      • Onix – level 52
      • Hitmonchan – level 52
      • Machamp – level 53
      • Hitmonlee – level 52
      • Poliwrath – level 52
    • Elite Four Agatha
      • Arbok – level 53
      • Weezing – level 53
      • Gengar – level 53
      • Golbat – level 53
      • Gengar – level 54
    • Elite Four Lance
      • Seadra – level 54
      • Aerodactyl – level 54
      • Gyarados – level 54
      • Charizard – level 54
      • Dragonite – level 55
    • Rival
      • Pidgeot (Mega) – level 56
      • Vileplume – level 56
      • Slowbro – level 56
      • Rapidash – level 56
      • Marowak – level 56
      • Raichu (Eevee) / Jolteon (Pikachu) – level 57
  • Item(s)
    • Mega Stones – Can be bought from a Pokemon Maniac after you beat the Elite Four for 30,000 each.


Click Victory Road Guide to view the next area.


Guides

Pokemon Let’s Go – Route 23 Guide

by Chappie in


*Version exclusive Pokemon will be marked by (Pikachu) or (Eevee).


This is a guide for the items, Pokemon and trainers found throughout Route 23.


Route 23

  • Pokemon
    • Exeggcute
    • Fearow
    • Nidoran (female)
    • Nidoran (male)
    • Nidorina
    • Nidorino
    • Spearow
  • Pokemon (Using Sea Skim)
    • Magikarp
    • Poliwag
    • Poliwhirl
  • Item(s) – Remember to pay attention to Eevee or Pikachu’s tail to detect nearby hidden items.
    • Golden Nanab Berries x 3
    • Golden Nanab Berries x 5
    • Golden Pinap Berries x 3
    • Golden Pinap Berries x 5
    • Golden Razz Berries x 3
    • Golden Razz Berries x 5


Click Route 22 Guide or Victory Road Guide to view the next area.


Guides

Pokemon Let’s Go – Elite 4 / Champion Guide

by Chappie in


*Version exclusive Pokemon will be marked by (Pikachu) or (Eevee).


This is a guide for each member of the Elite 4 and Champion covering which Pokemon they use and what their levels are.


Elite Four Lorelei

  • Dewgong – level 51
  • Jynx – level 51
  • Cloyster – level 51
  • Lapras – level 52
  • Slowbro – level 51


Elite Four Bruno

  • Onix – level 52
  • Hitmonchan – level 52
  • Machamp – level 53
  • Hitmonlee – level 52
  • Poliwrath – level 52


Elite Four Agatha

  • Arbok – level 53
  • Weezing – level 53
  • Gengar – level 53
  • Golbat – level 53
  • Gengar – level 54


Elite Four Lance

  • Seadra – level 54
  • Aerodactyl – level 54
  • Gyarados – level 54
  • Charizard – level 54
  • Dragonite – level 55


Pokemon Champion

  • Pidgeot (Mega) – level 56
  • Vileplume – level 56
  • Slowbro – level 56
  • Rapidash – level 56
  • Marowak – level 56
  • Raichu (Eevee) / Jolteon (Pikachu) – level 57