SD Gundam Battle Alliance Walkthroughs Guides
Guides

SD Gundam Battle Alliance – DLC Mobile Suit List

by Chappie in


This is a guide on the DLC Mobile Suits that can be acquired in SD Gundam Battle Alliance. They are sorted based on which DLC pack they are acquired from. Please note that this guide is a work in progress and will be updated as we progress in the game.


Update 1.1

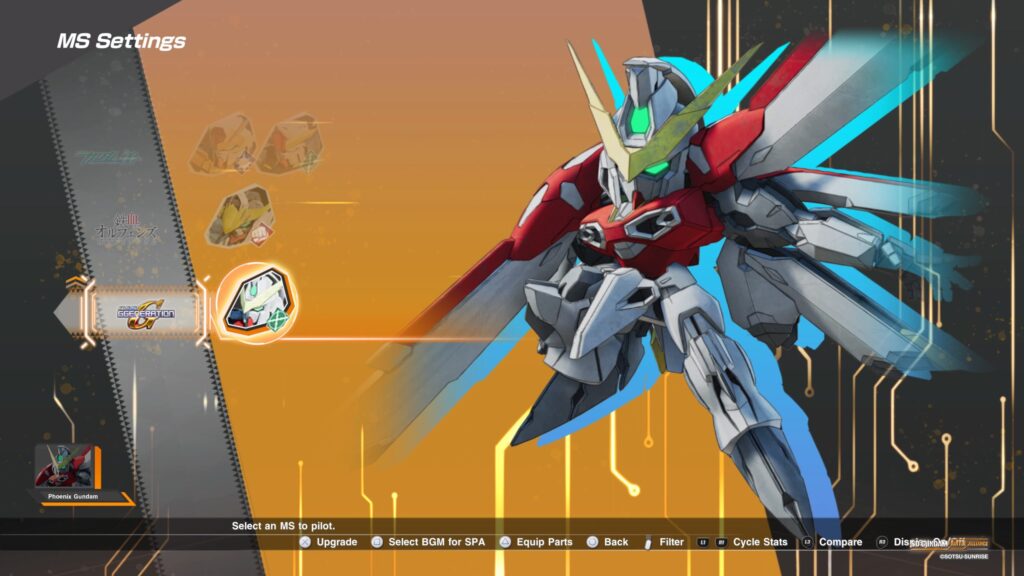
Phoenix Gundam (G Generation)

This mobile suit was added to the game as part of the first update. It’s a free distribution everyone gets after installing the update.


SD Gundam Battle Alliance Unit and Scenario Pack 1


Gundam AGE-FX


Nattative Gungam C-Packs


Soul Hackers 2
Guides

Soul Hackers 2 – Last Stop

by Chappie in


Below is a walkthrough for the Last Stop DLC request in Soul Hackers 2. This quest will unlock after completing the A Girl’s Resolve request. To obtain it, head to Club Cretaceous.


Client: Nana

Location: Karakucho

Ideal Lv: 55

Reward: Original Flame, Abyssal Grimoire


Find What’s Causing the Abnormalities

Travel to Hachigaya Training Field from the world map to trigger a dialog event. When it concludes, work your way down to the 3rd floor. In the center of the room, you’ll find a lost number. Approach it to start a battle against a level 51 Zoma Lost Samurai. Its resists all attack types so you’ll want to bring a couple of demons that remove resistance to attacks. Once you defeat him, continue heading lower to the 7th floor to find another Lost Number in the center of the room. Approach it to start a boss fight against two level 56 Zoma Zenon Type-0 demons. These enemies don’t have a weakness. As they get low on health, they’ll summon other Lost Numbers to help. Defeat them then return to the Madame at the club to complete the request.


Shin Megami Tensei V
Guides

Shin Megami Tensei V – DLC Subquests

by Chappie in

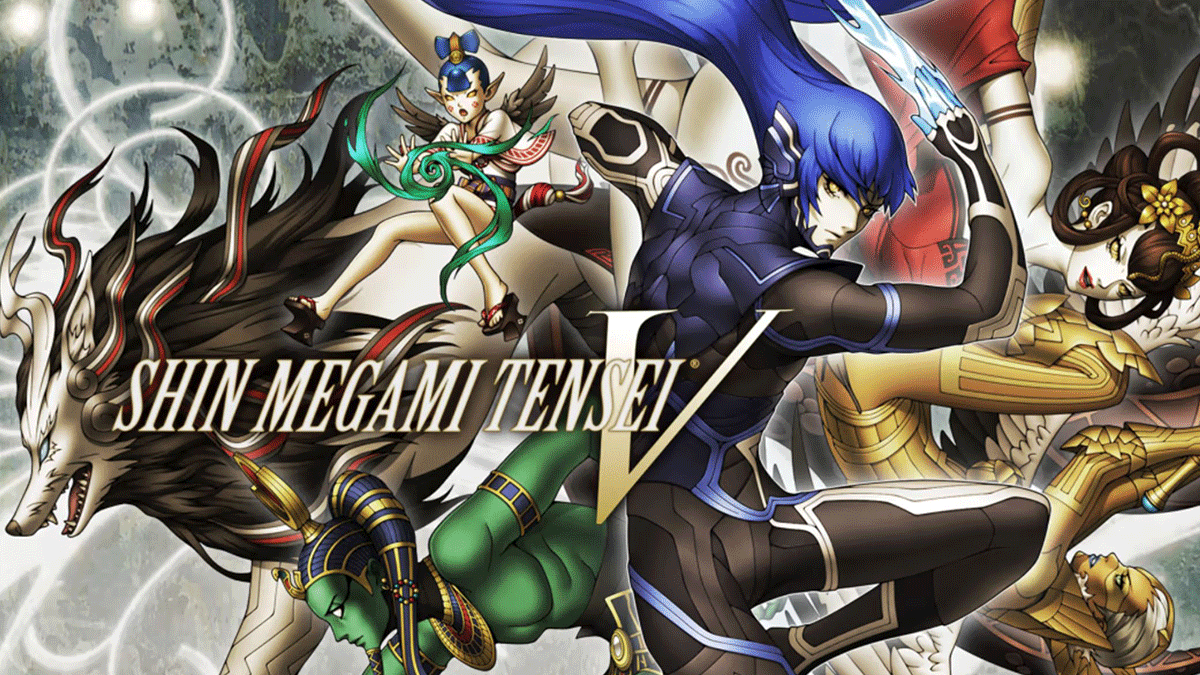
Welcome to NGB and our Shin Megami Tensei V guide on the DLC subquests. Here you’ll find everything you’ll need to easily breeze through these DLC subquests.

DLC Subquests

Return of the True Demon

Client: Sophia (World of Shadows)

Reward: 666,666 Macca

Summary: Sophia handed you an item called a menorah and said it attacks avatars of death.

After meeting Sophia for the first time at the Mita Leyline Fount, you’ll be able to access the World of Shadows. Return there and Sophia will give you the Menorah of Knowledge starting this subquest. You’ll have to investigate certain points to fight powerful demons to obtain their menorah.

Matador (Level 24)

The Matador can be found at the purple beam of light near the Tamachi Leyline Fount in Da’at: Minato. At the start of the battle, the Matador will cast a support skill boosting his accuracy and evasion for the first few turns. He also uses a Force skill that hits the whole party and supports that with physical attacks. The demon resists light and dark skills but has a weakness to Electric.

Rewards: Large Glory Crystal, Luck Balm and Aiding Sutra for defeating him along with the Menorah of Foundation and the ability to fuse him

Daisoujou (Level 30)

Daisoujou can be found in a purple beam of light on a hill west of the Tennozu Leyline Fount in Da’at: Shinagawa. He uses a combination of Physical, Dark and Light skills and also blocks Holy and Dark skills. His weakness is Fire so make sure to use that to your advantage.

Rewards: Large Glory Crystal, Magic Balm, Dark Sutra along with the Menorah of Eternity and the ability to fuse him

Hell Biker (Level 36)

Hell Biker can be found in a purple beam of light on the highway east of Mitatebashi Leyline Fount in Da’at: Shinagawa. He’s weak to ice, blocks force and fire and resists light and dark. He uses a physical, force and fire attacks that hit all party members. He can also cause the confusion status ailment and can negate any debuffs on him.

Rewards: Large Glory Crystal, Agility Balm, Force Sutra along with the Menorah of Dignity and the ability to to fuse with him

NOTE: Progress through the story. When you reach Kanda Bridge in Chiyoda, a cutscene will trigger with the Horsemen.

White Rider (Level 43)

White Rider can be found in a purple beam of light in the ravine north of the Ginza leyline. It summons 2 Level 40 Dominion to fight with him. White Rider is weak to Electric, resists Dark and Light and repels Fire. He uses Fire and Light skills. The Dominion are weak to Force, block Electric and Light and resist Dark.

Red Rider (Level 47)

Fast travel to the Kanda leyline then make your way east to Iwamotocho to find the purple beam of light. Red Rider summons 2 Level 45 Power. Red Rider is weak to Ice, resists Dark and Light, repels Electric and absorbs Force. He also uses Physical, Electric and Force skills. Power is weak to Force and Dark, resists Electric and blocks Light.

Rewards: Menorah of Insight and the ability to fuse with him

Black Rider (Level 52)

Fast travel to the Akihabara Electric Town leyline then make your way south to the rooftop containing the purple beam. Black Rider summons 2 Level 50 Legion. Black Rider is weak to Force, resists Light and Dark and repels Ice. He also uses Ice and Almighty skills. Legion is weak to Electric and Light and blocks Dark.

Rewards: Menorah of Wisdom and the ability to fuse with him

Pale Rider (Level 57)

Fast travel to the Tokyo Station leyline and make your way to the southwest to find the purple beam. Pale Rider summons 2 Level 54 Loa. Pale Rider is weak to Fire, resists Light and Dark and blocks Ice. He uses Ice and Physical attacks. Loa is weak to Light and blocks Dark.

Rewards: Menorah of Majesty and the ability to fuse with him

Mother Harlot (Level 64)

Head north up the road from the Ueno leyline to find the purple beam in Ueno Park. She is weak to Force, resists Fire, Light and Dark, repels Physical and absorbs Electric. She use Almighty, Electric and Fire skills. She can also seal your skills.

Rewards: Menorah of Beauty and the ability to fuse with her

Trumpeter (Level 73)

Head to the eastern hillside in Kuramae to find the purple beam. He resists Fire, Light, Ice and Force and blocks Light and Dark. He uses Fire, Electric, Ice, Force and Almighty skills that target the whole party.

Rewards: Menorah of Glory and the ability to fuse with him

After beating the Trumpeter, head to the World of Shadows and speak with Sophia who will unlock a Hall of Chaos leyline.

Demi-Fiend (Level 99)

Once in the Hall of Chaos proceed forward towards the objective to trigger a battle with the Demi-fiend. He will summon allies to assist him in battle, namely a Level 90 Pixie, Level 90 Girimekhala and Level 90 Cu Chulainn. The Demi-fiend resists all skills. Good luck! 🙂

Rewards: Menorah of Compassion and the ability to fuse with him

In the Hall of Chaos, you can acquire the following items from chests:

  • Whittled Goat
  • Gospel x1
  • Grimoire x4
  • Amrita Shower
  • Bead Chain

The Doctor’s Last Wish

Client: Researcher A (Tokyo Diet Building in Da’at: Minato)

Reward: Health Balm x3

Summary: Located Doctor Nitta who went missing after a supposed meeting with Mephisto

NOTE: You cannot get this quest until after you clear the Tokyo Diet Building as part of the story.

To start this quest, speak with the Female Researcher near the entrance to the Tokyo Diet Building at Da’at: Minato twice then choose the option to offer assistance. This will then allow you to pick up the quest from another researcher in the same area.

Once you have the quest, travel to the Kamiyacho Leyline Fount in Da’at: Minato and head into the building northwest of the leyline via the alleyway to the doctor and Mephisto. Approach them then when prompted choose “Yes” to start a battle with a Level 79 Mephisto. He’s weak to Light, drains Dark and blocks Physical. He uses Dark and Fire skills.

After you defeat him, you’ll receive the Dark Contract. Return to Researcher A to complete the quest. Afterwards, head down the stairs to speak with the Female Researcher. Choose the request allies option to have Mephisto join your party!

The Rage of a Queen

Client: Researcher B (Tokyo Diet Building in Da’at: Minato)

Reward: Stamina Balm x3

Summary: Head to Mita in Minato to find Cleopatra and deal with her

NOTE: You cannot get this quest until after you clear the Tokyo Diet Building as part of the story.

To start this quest, speak with the Female Researcher near the entrance to the Tokyo Diet Building at Da’at: Minato twice then choose the option to offer assistance. This will then allow you to pick up the quest from another researcher in the same area.

Once you have the quest, travel to the Mita Leyline Fount in Da’at: Minato then head west and approach the bus in the road. When prompted, choose “Yes” to start a fight with a Level 61 Cleopatra. She’s weak to Dark, drains Light and resists Electric, Force, Ice and Fire. She uses Force, Ice and Light attacks. After you defeat her, choose the option to stop her. She will then join your party and you’ll unlock here for fusion. Return to the Diet Building to complete the quest.

A Goddess In Training

Client: Researcher C (Tokyo Diet Building in Da’at: Minato)

Reward: Vitality Balm x5

Summary: Investigate the magic power reading in Minato near the Tokyo Tower

NOTE: You cannot get this quest until after you clear the Tokyo Diet Building as part of the story.

To start this quest, speak with the Female Researcher near the entrance to the Tokyo Diet Building at Da’at: Minato twice then choose the option to offer assistance. This will then allow you to pick up the quest from another researcher in the same area.

Once you have the quest, travel to the Tokyo Tower Leyline Fount and head north towards the tower to find a demon there. Speak with her to be tasked with defeating a Quetzalcoatl which can be found north of the Nagatacho Leyline Fount on a giant rock in front of the Tokyo Diet Building. It’s Level 34 and uses Fire and Force skills. The beast can also lower your party’s accuracy and evasion along with inflicting the poison status. The demon blocks Fire skills but is weak to Electric.

After it’s slain, return to Artemis to report the beast’s defeat. Talk with her once more to start a fight with a Level 37 Artemis. She uses Physical and Ice skills while resisting Dark and Light skills and blocks Electric and Ice skills. Her only weakness is Fire so make sure to exploit that for the win. After being defeated, Artemis will join your party then you can return to the research in the Tokyo Diet Building to complete the subquest.

Shin Megami Tensei V Guides and Walkthroughs

For other Shin Megami Tensei V guides and walkthroughs, click here!

Guides

Immortals Fenyx Rising: A New God DLC – Gear Sets

by Chappie in


Below is a guide on the locations of the gear in Immortals Fenyx Rising: A New God for the Wardrobe Warrior trophy!
 

Helmets

???


Armor

Vestment of Trials

+1 Wings of Daidalos use & +50 Stamina regeneration

  • Vestment of the Horai
    • This armor is obtained from a chest as part of the story during the Trial of Hermes.


Guides

Doom Eternal – The Holt Collectibles

by Chappie in


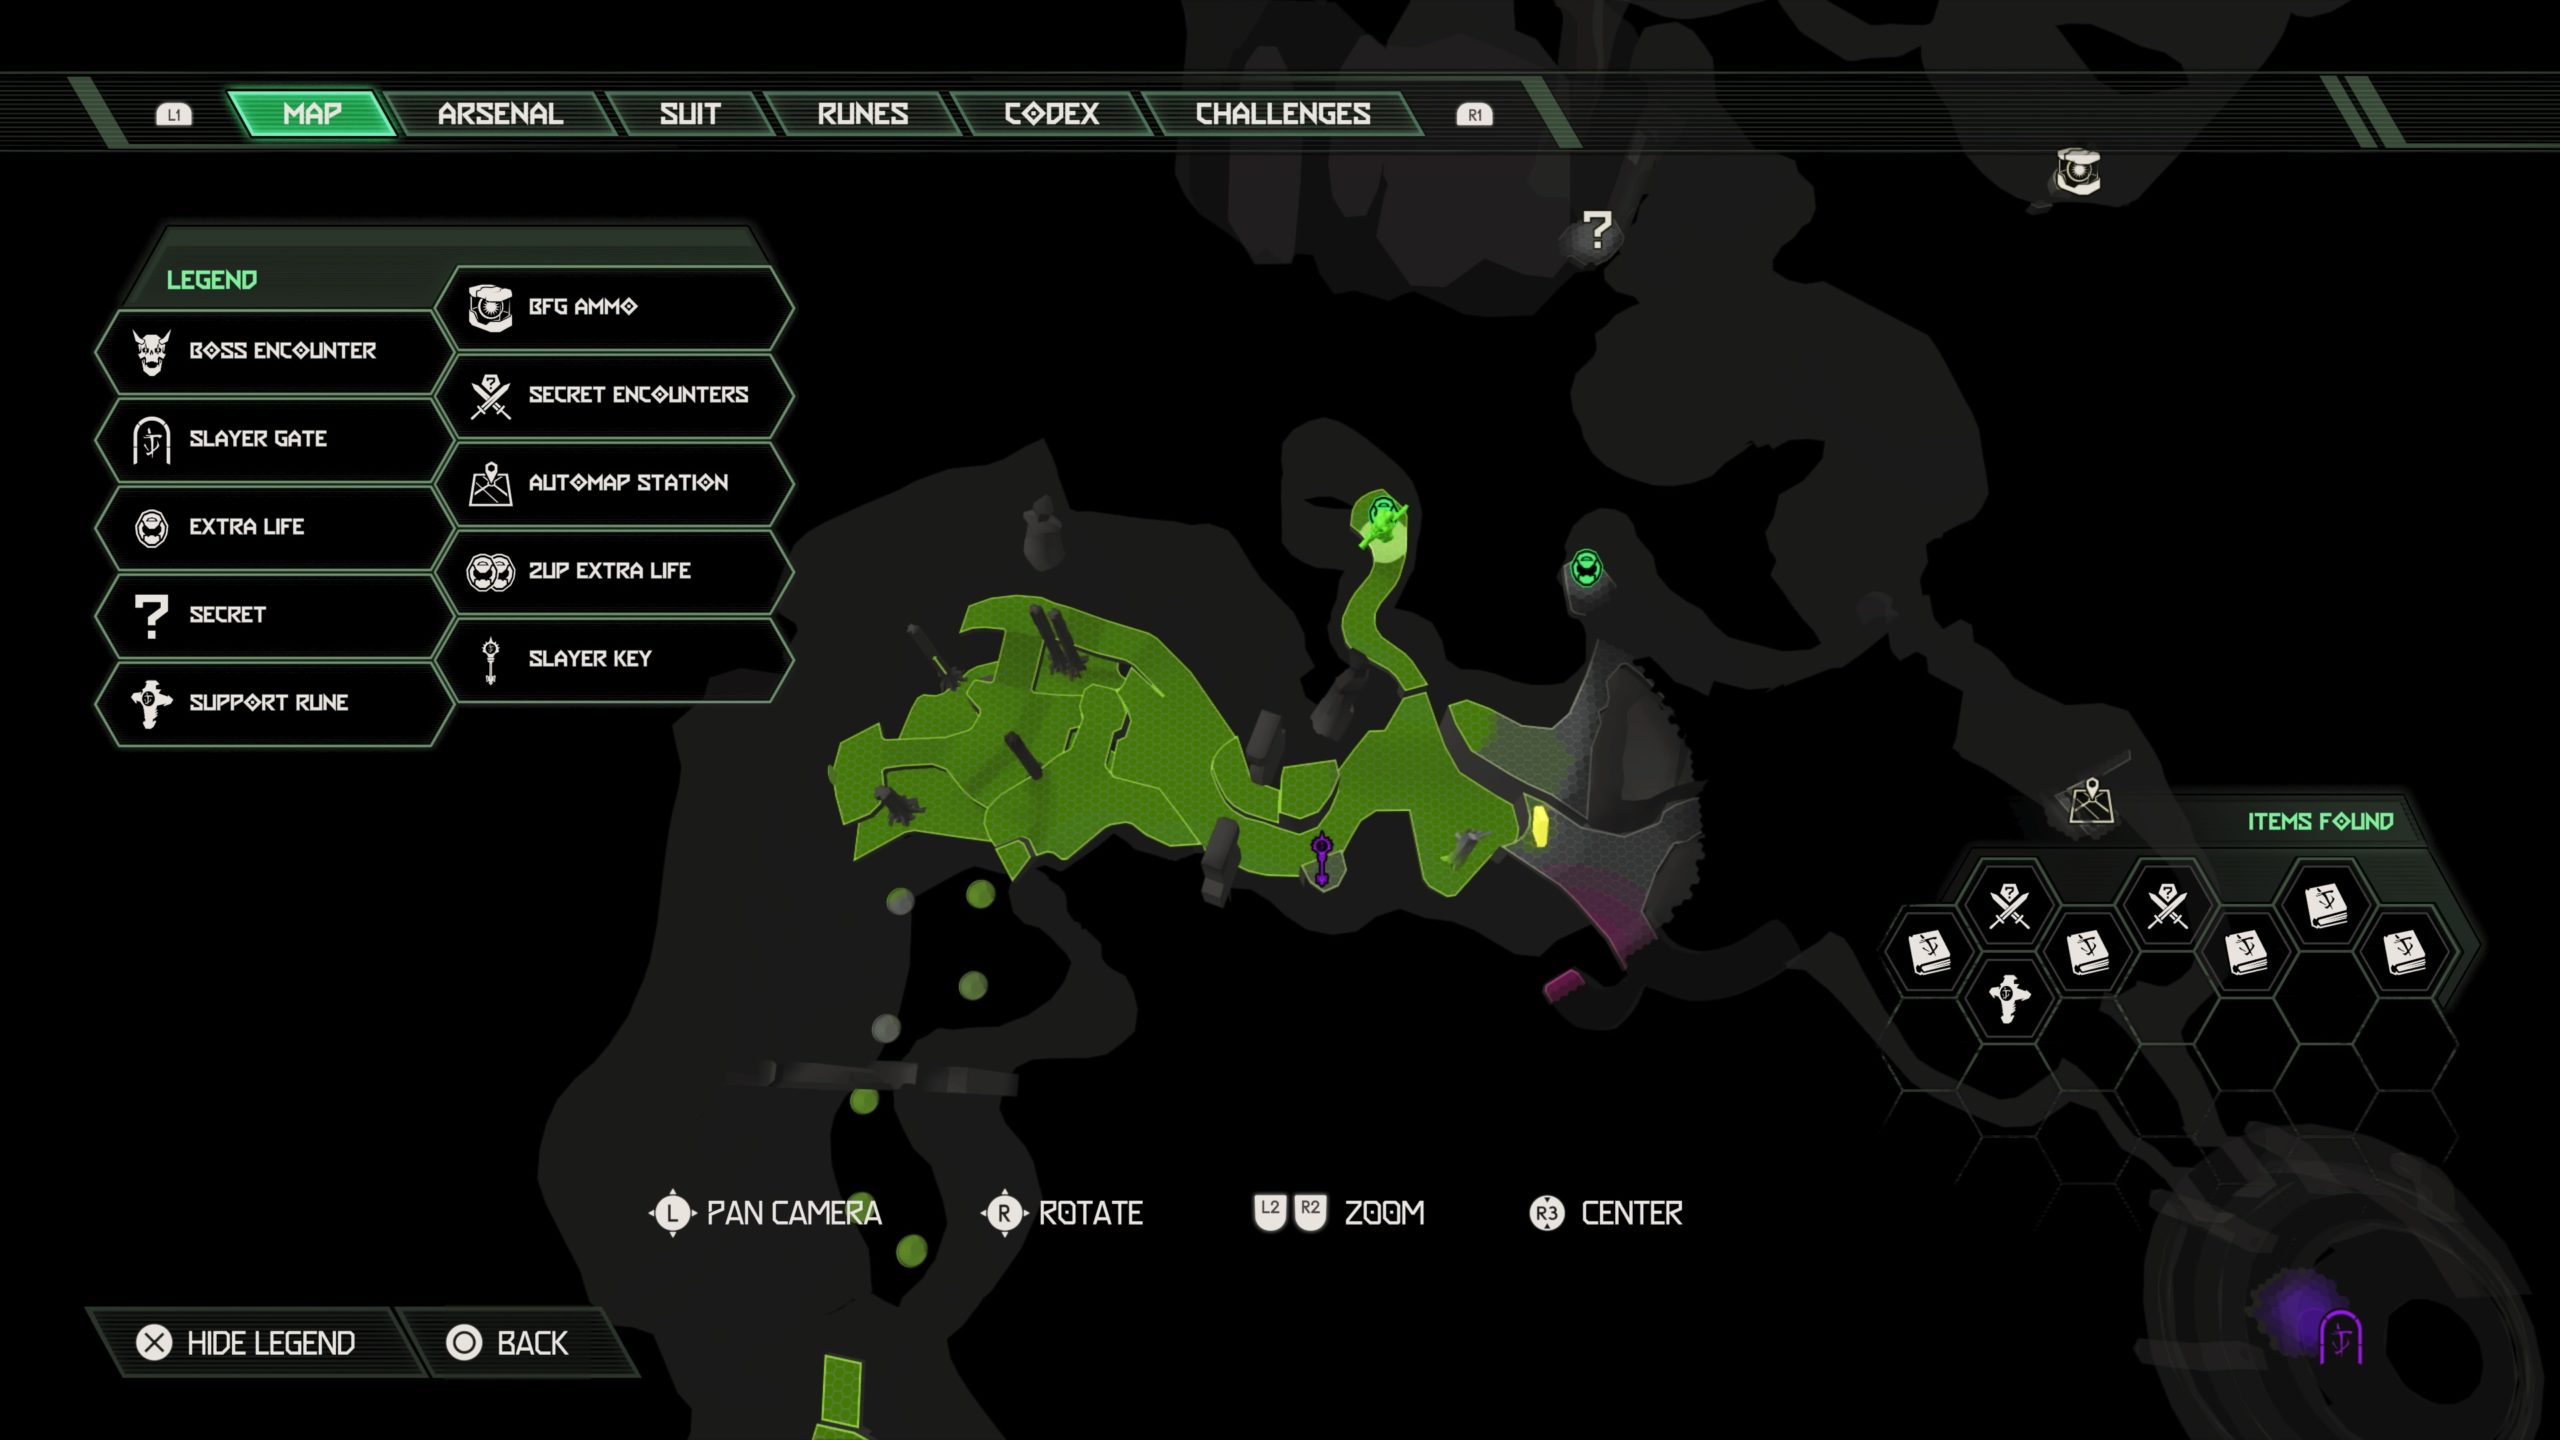
Below are the collectibles that can be found during The Holt campaign in Doom Eternal: The Ancient Gods Part 1. You will need to collect the codex pages to earn the Required Reading trophy and the Support Runes for the Lucky Charm Bracelet trophy. Locating all the secret encounters will reward you with the Hypersonic trophy!


Resurrect the Dark Lord

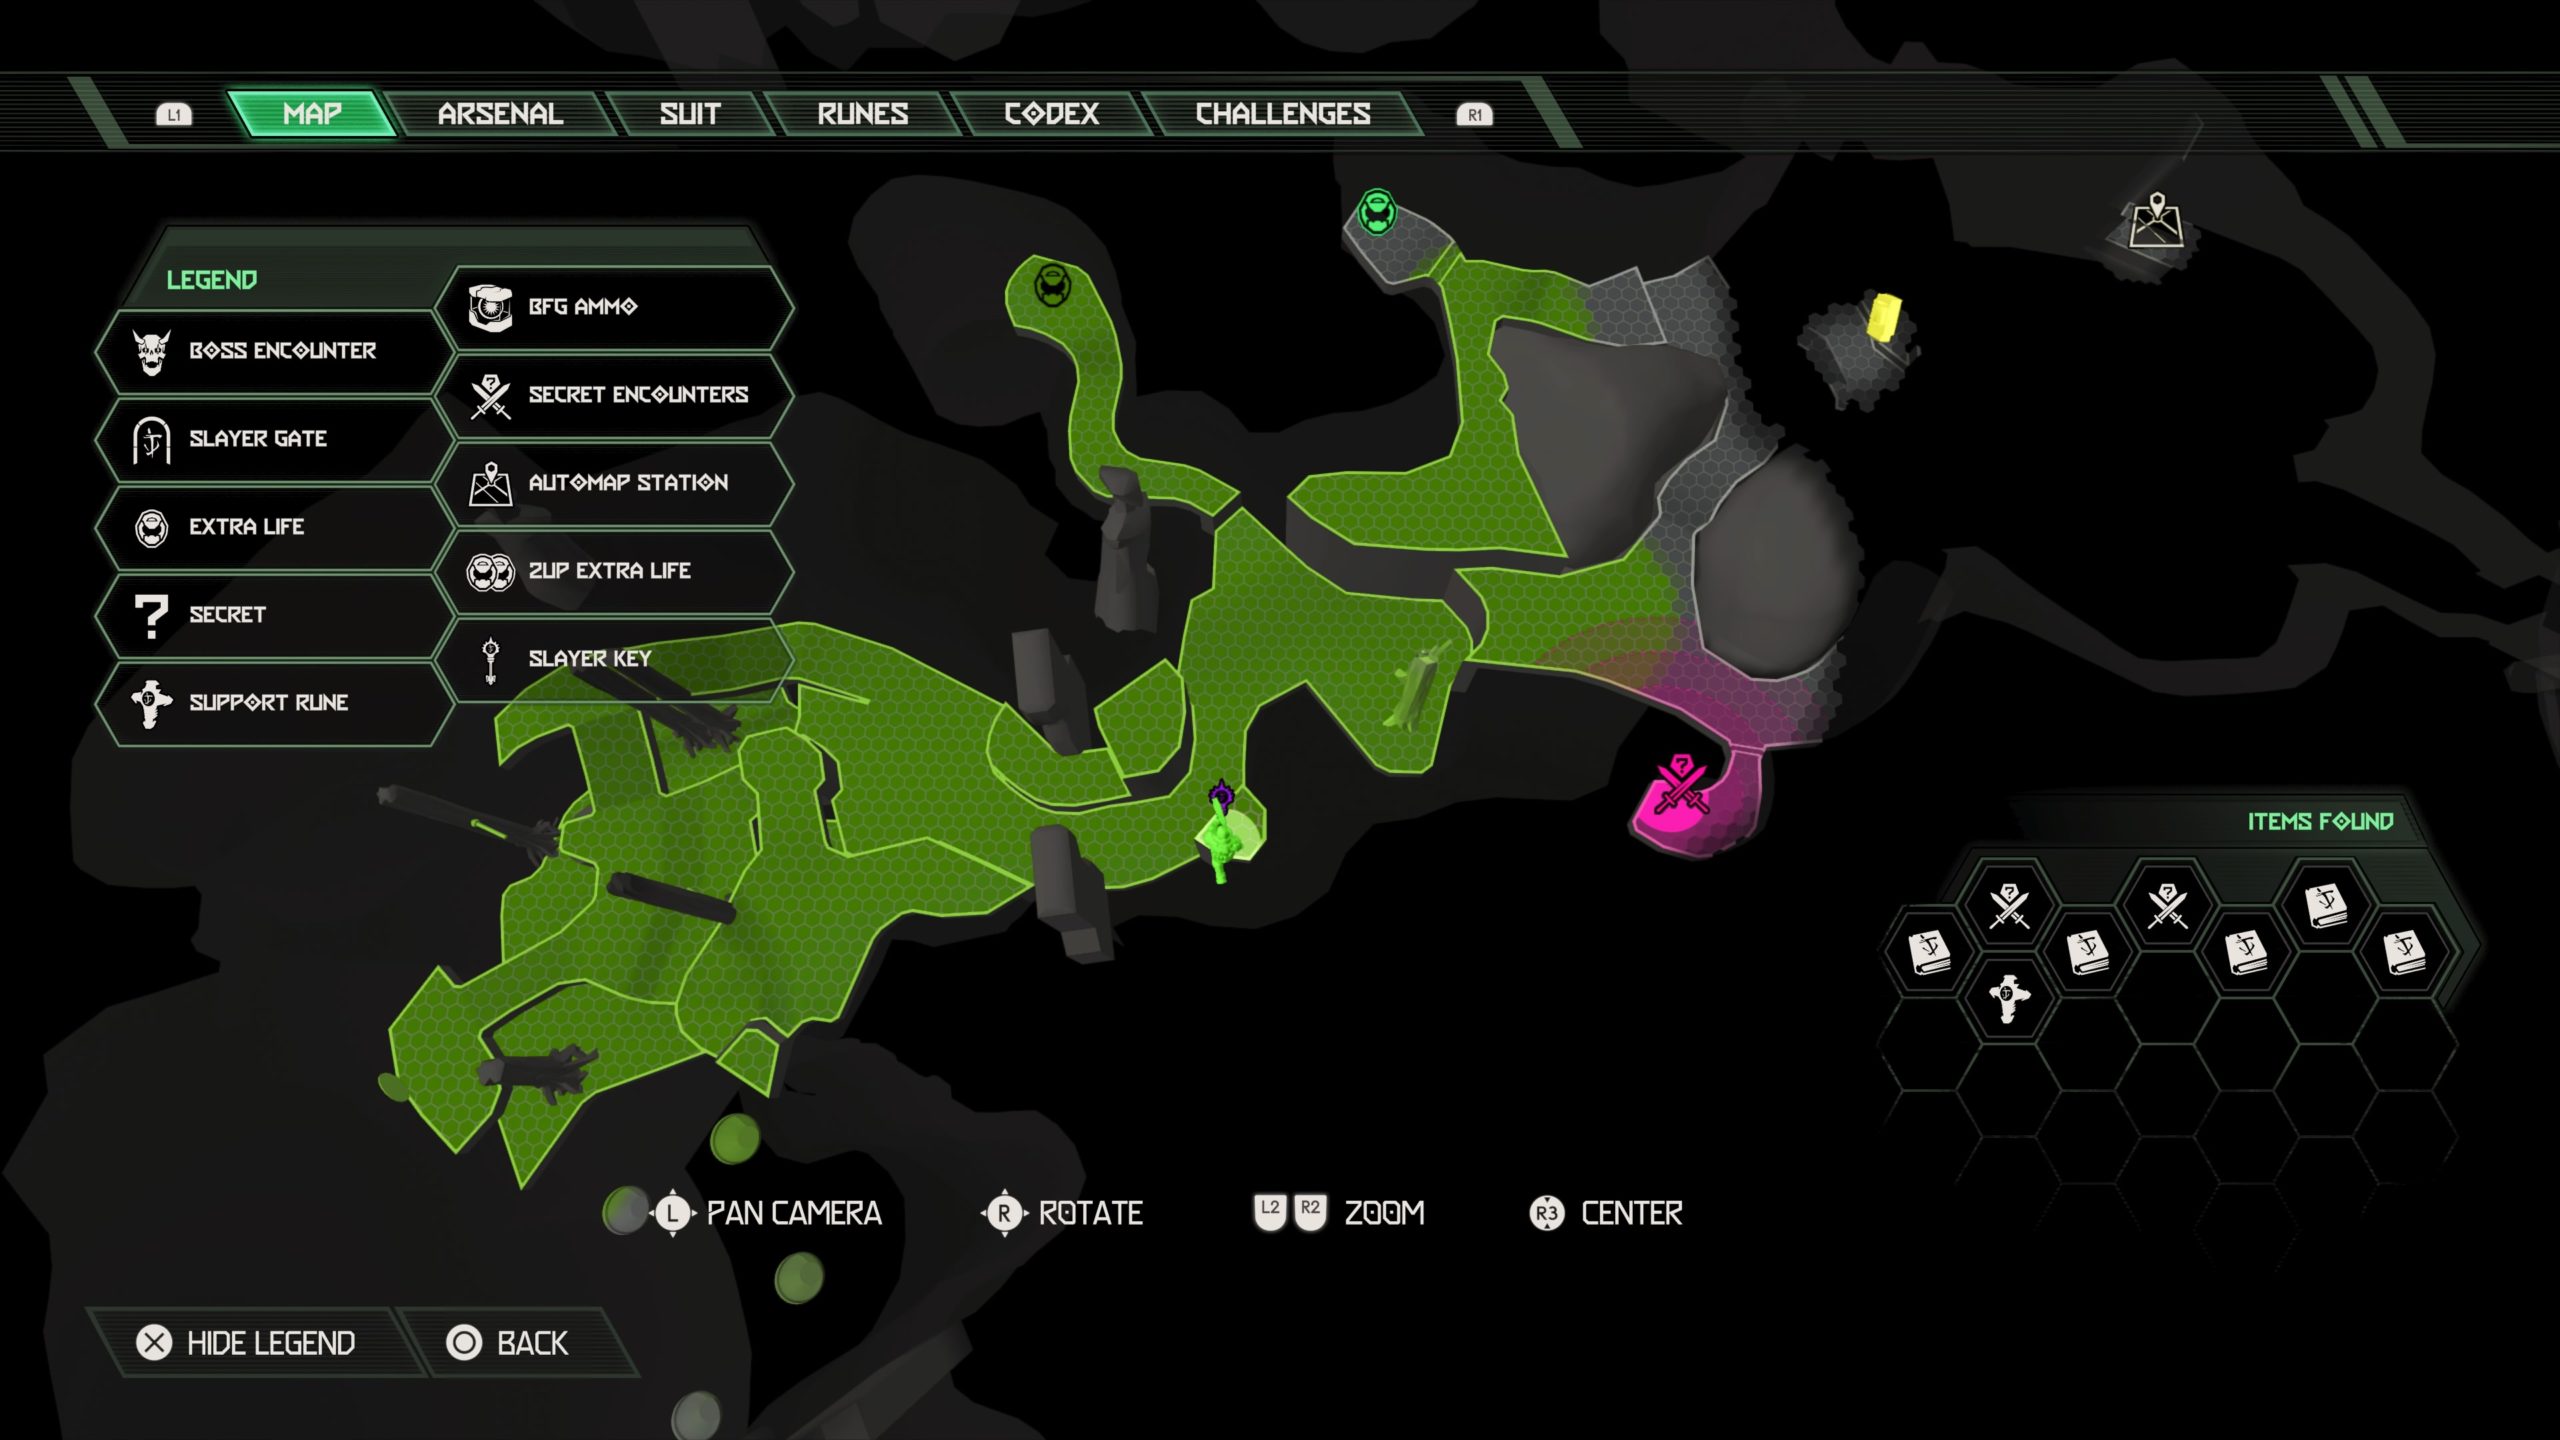
Extra Life

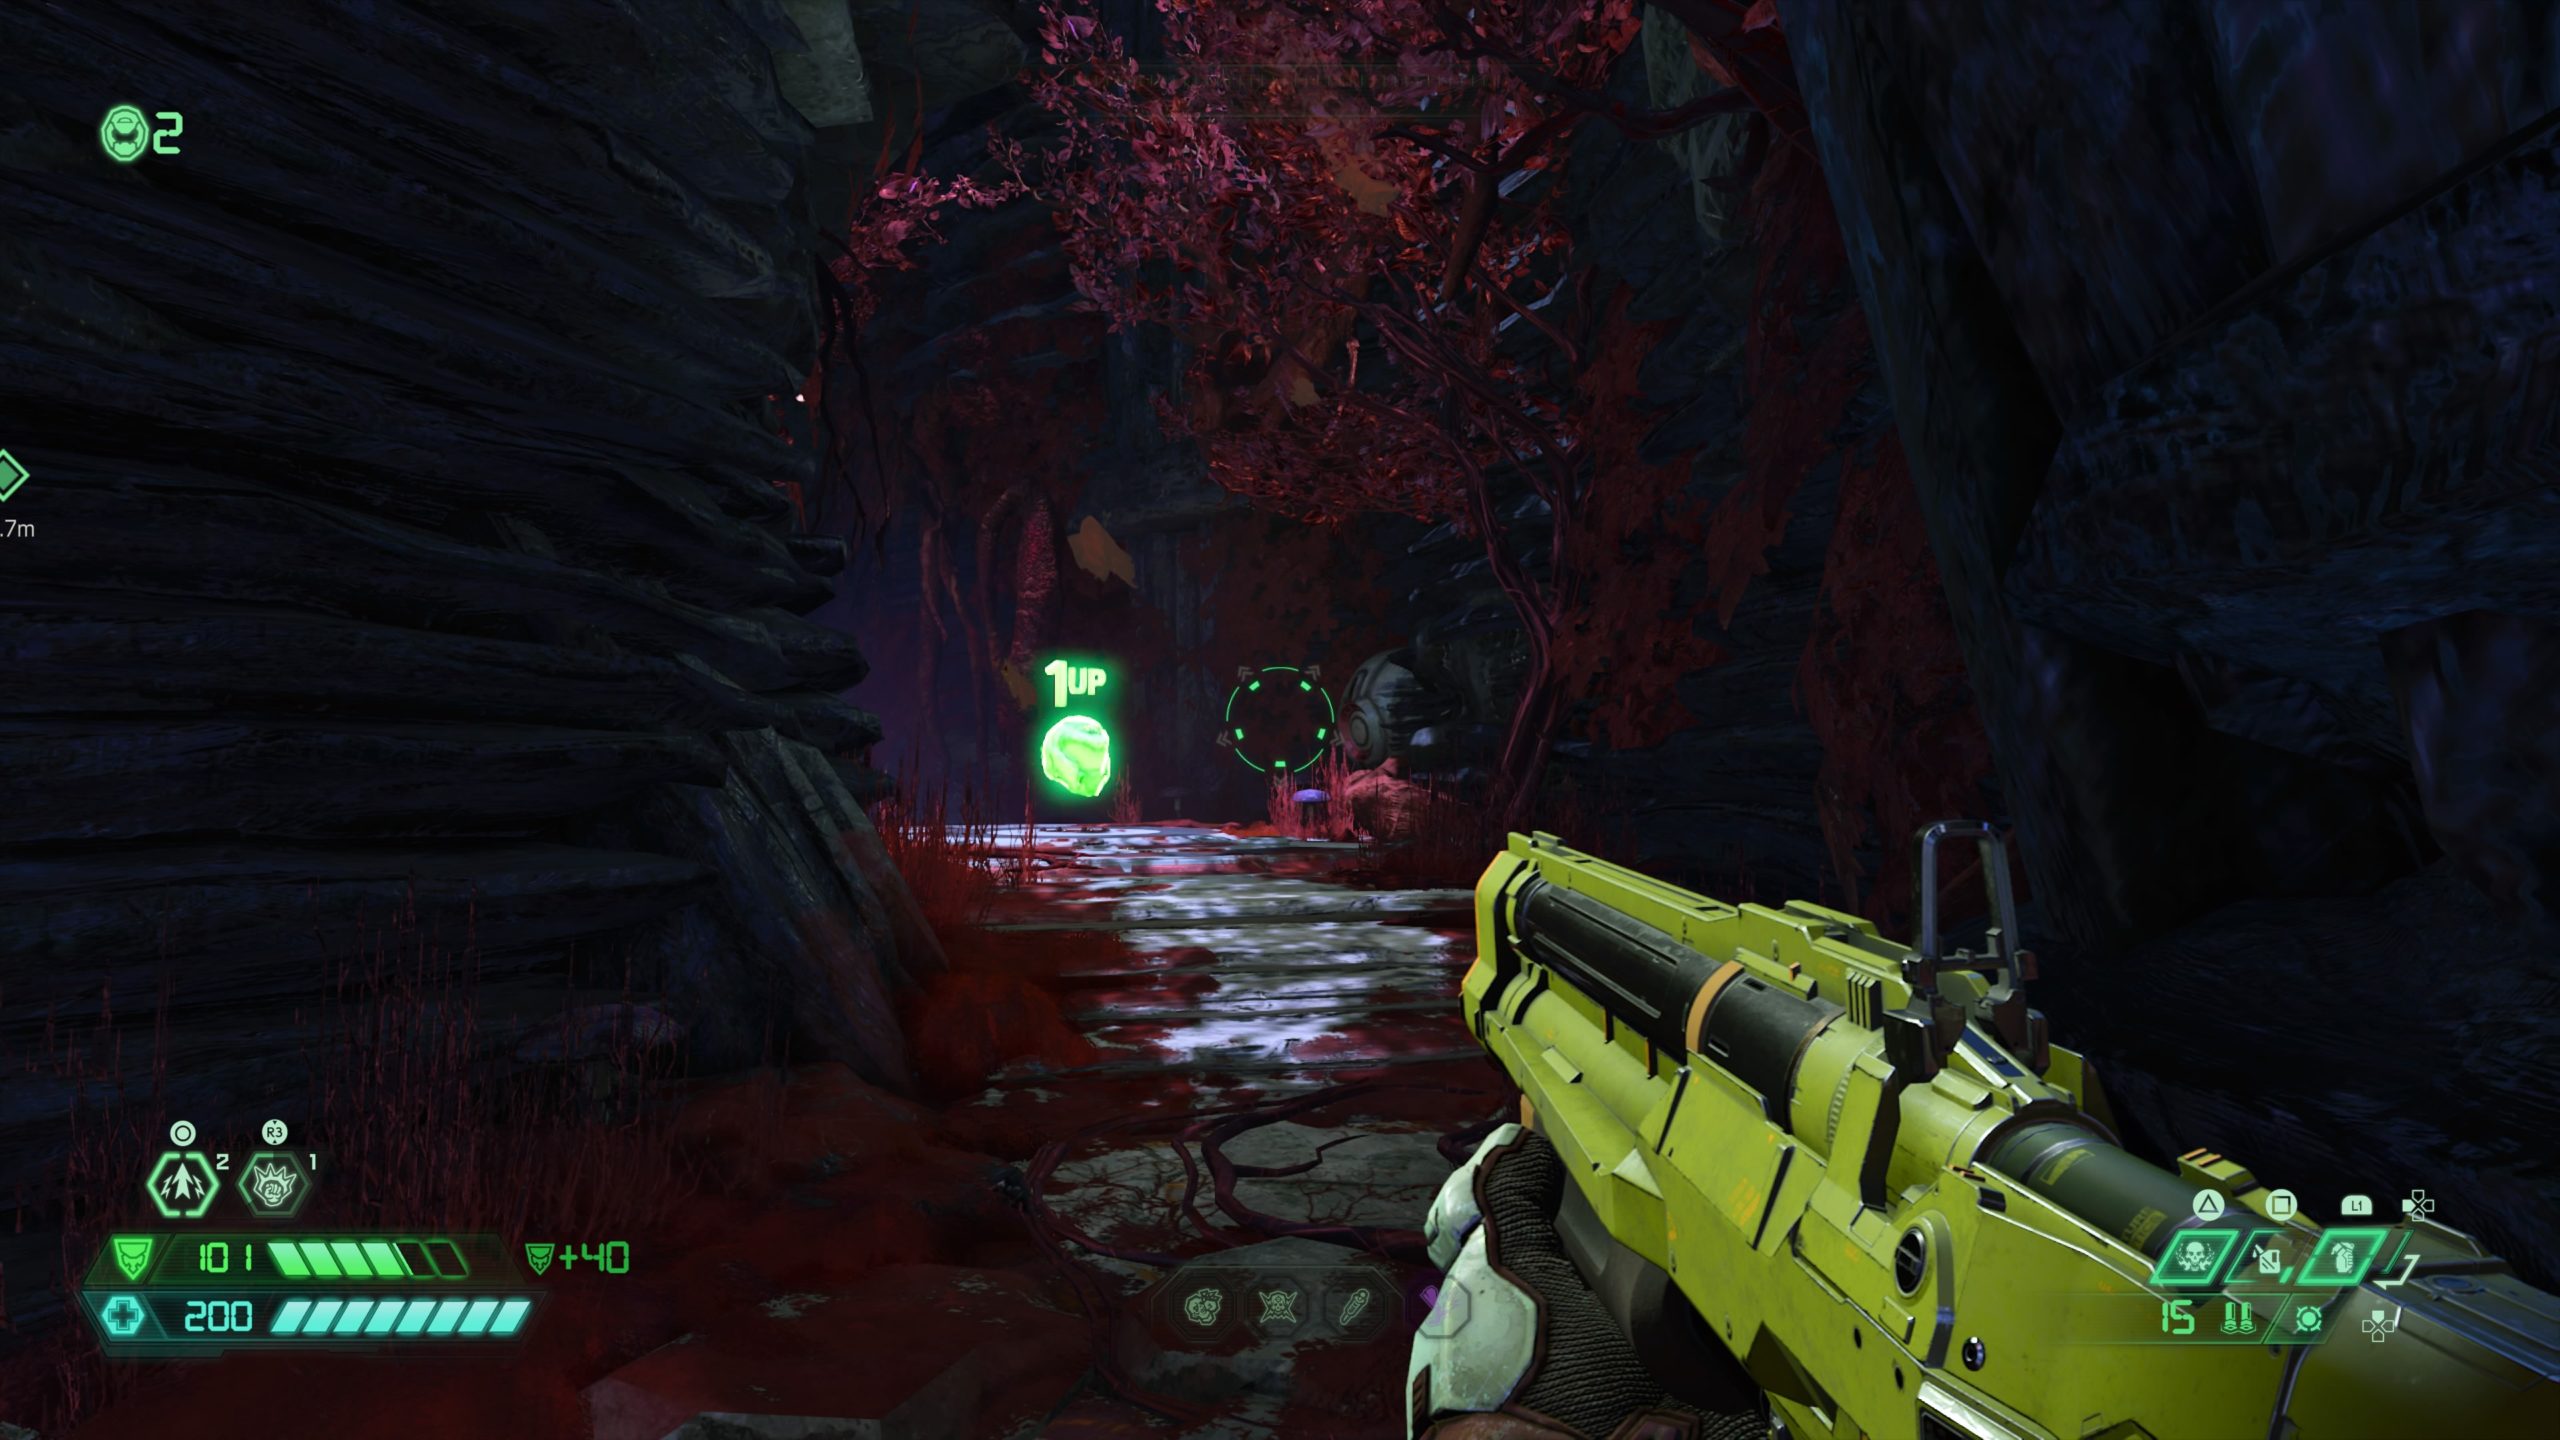
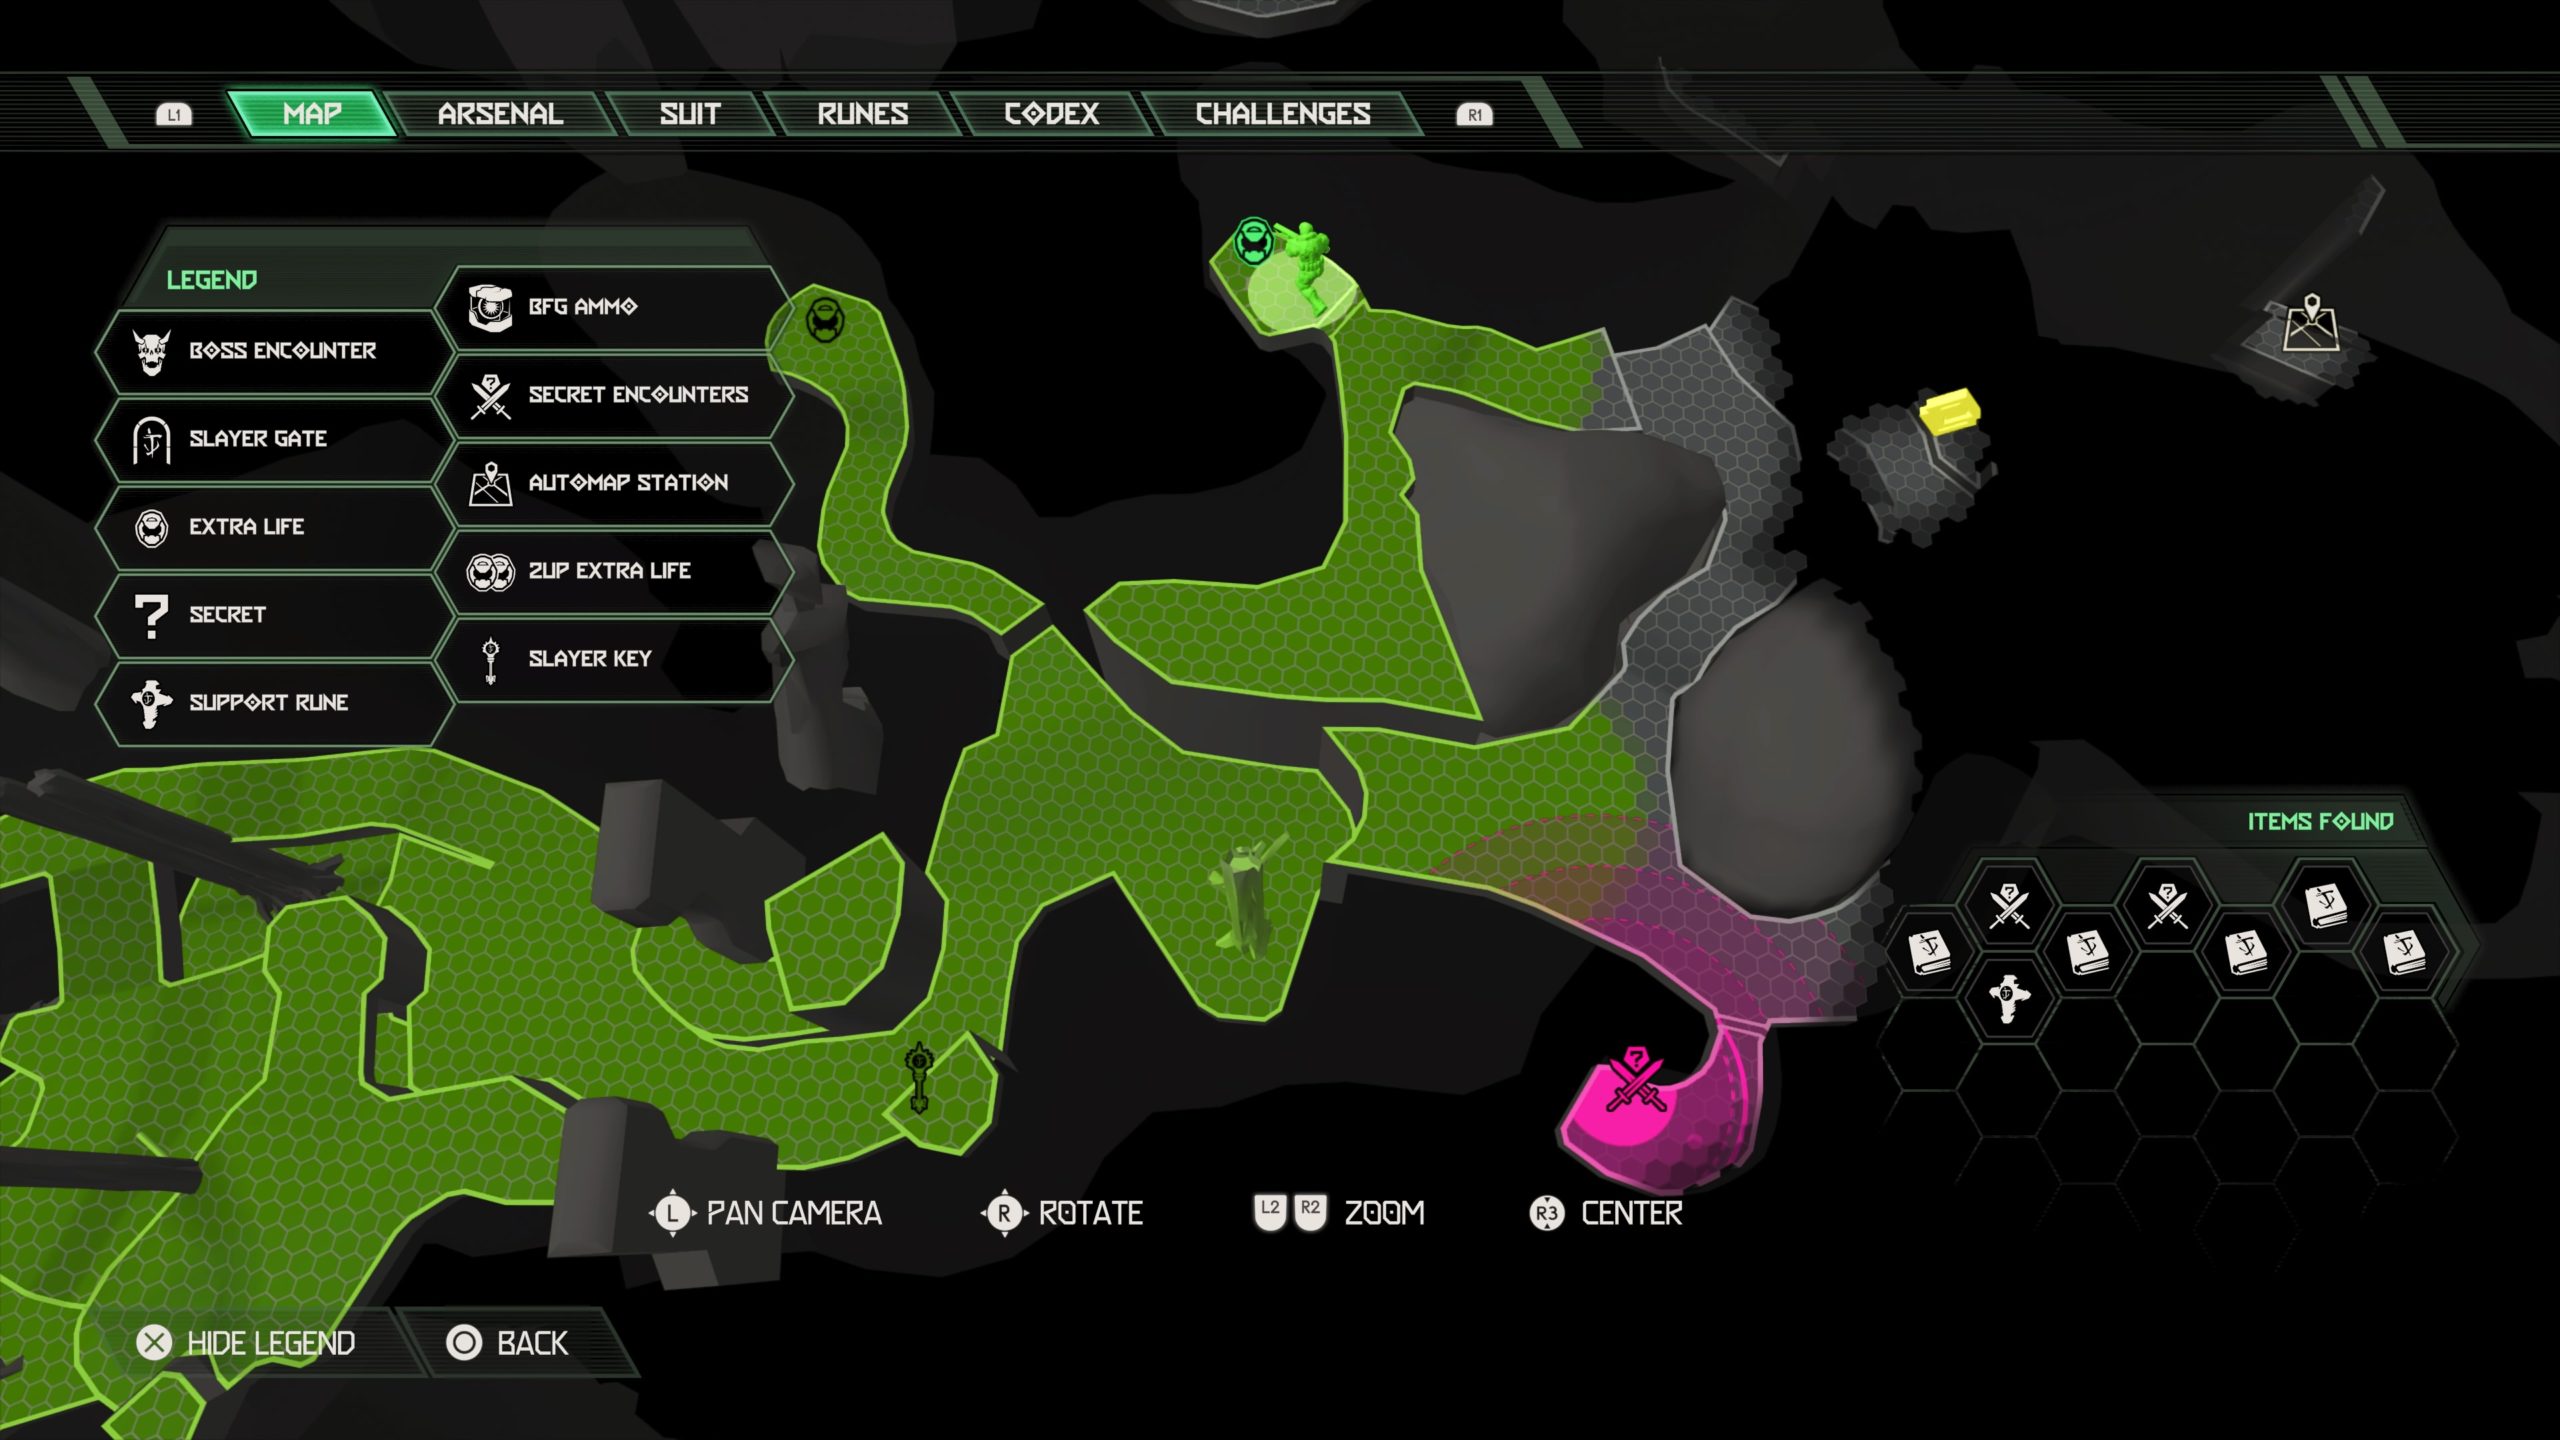
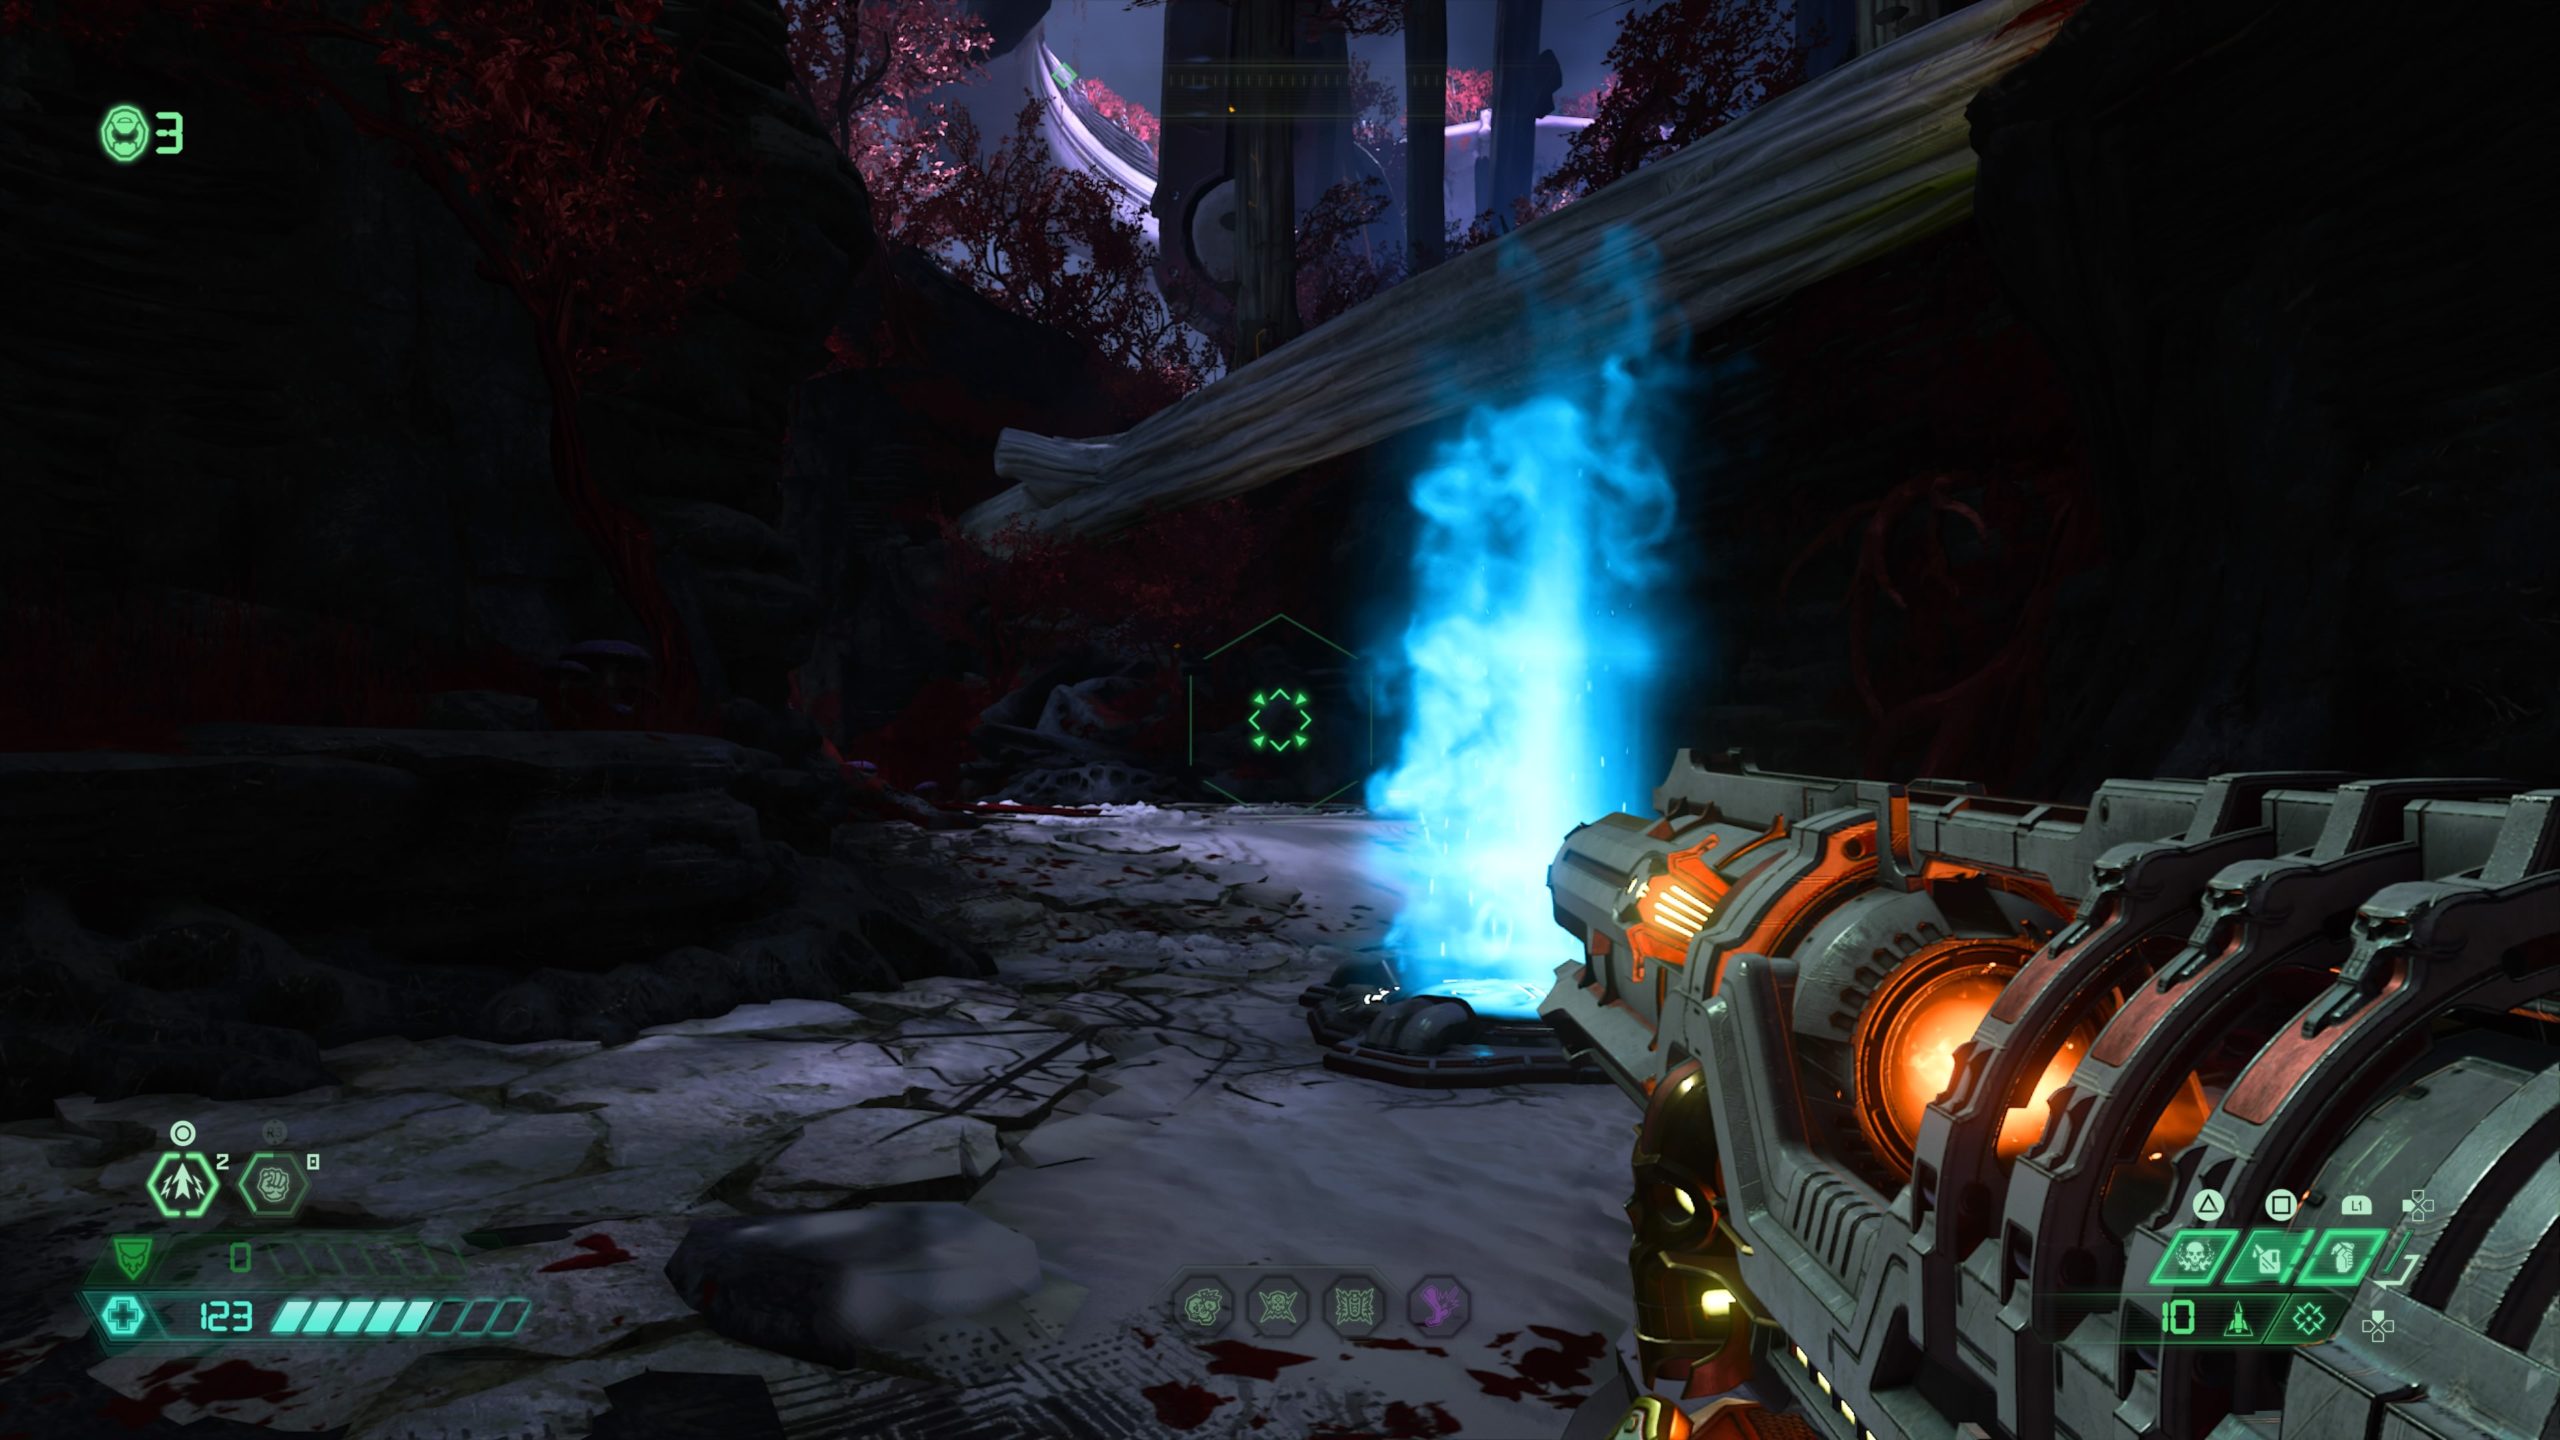
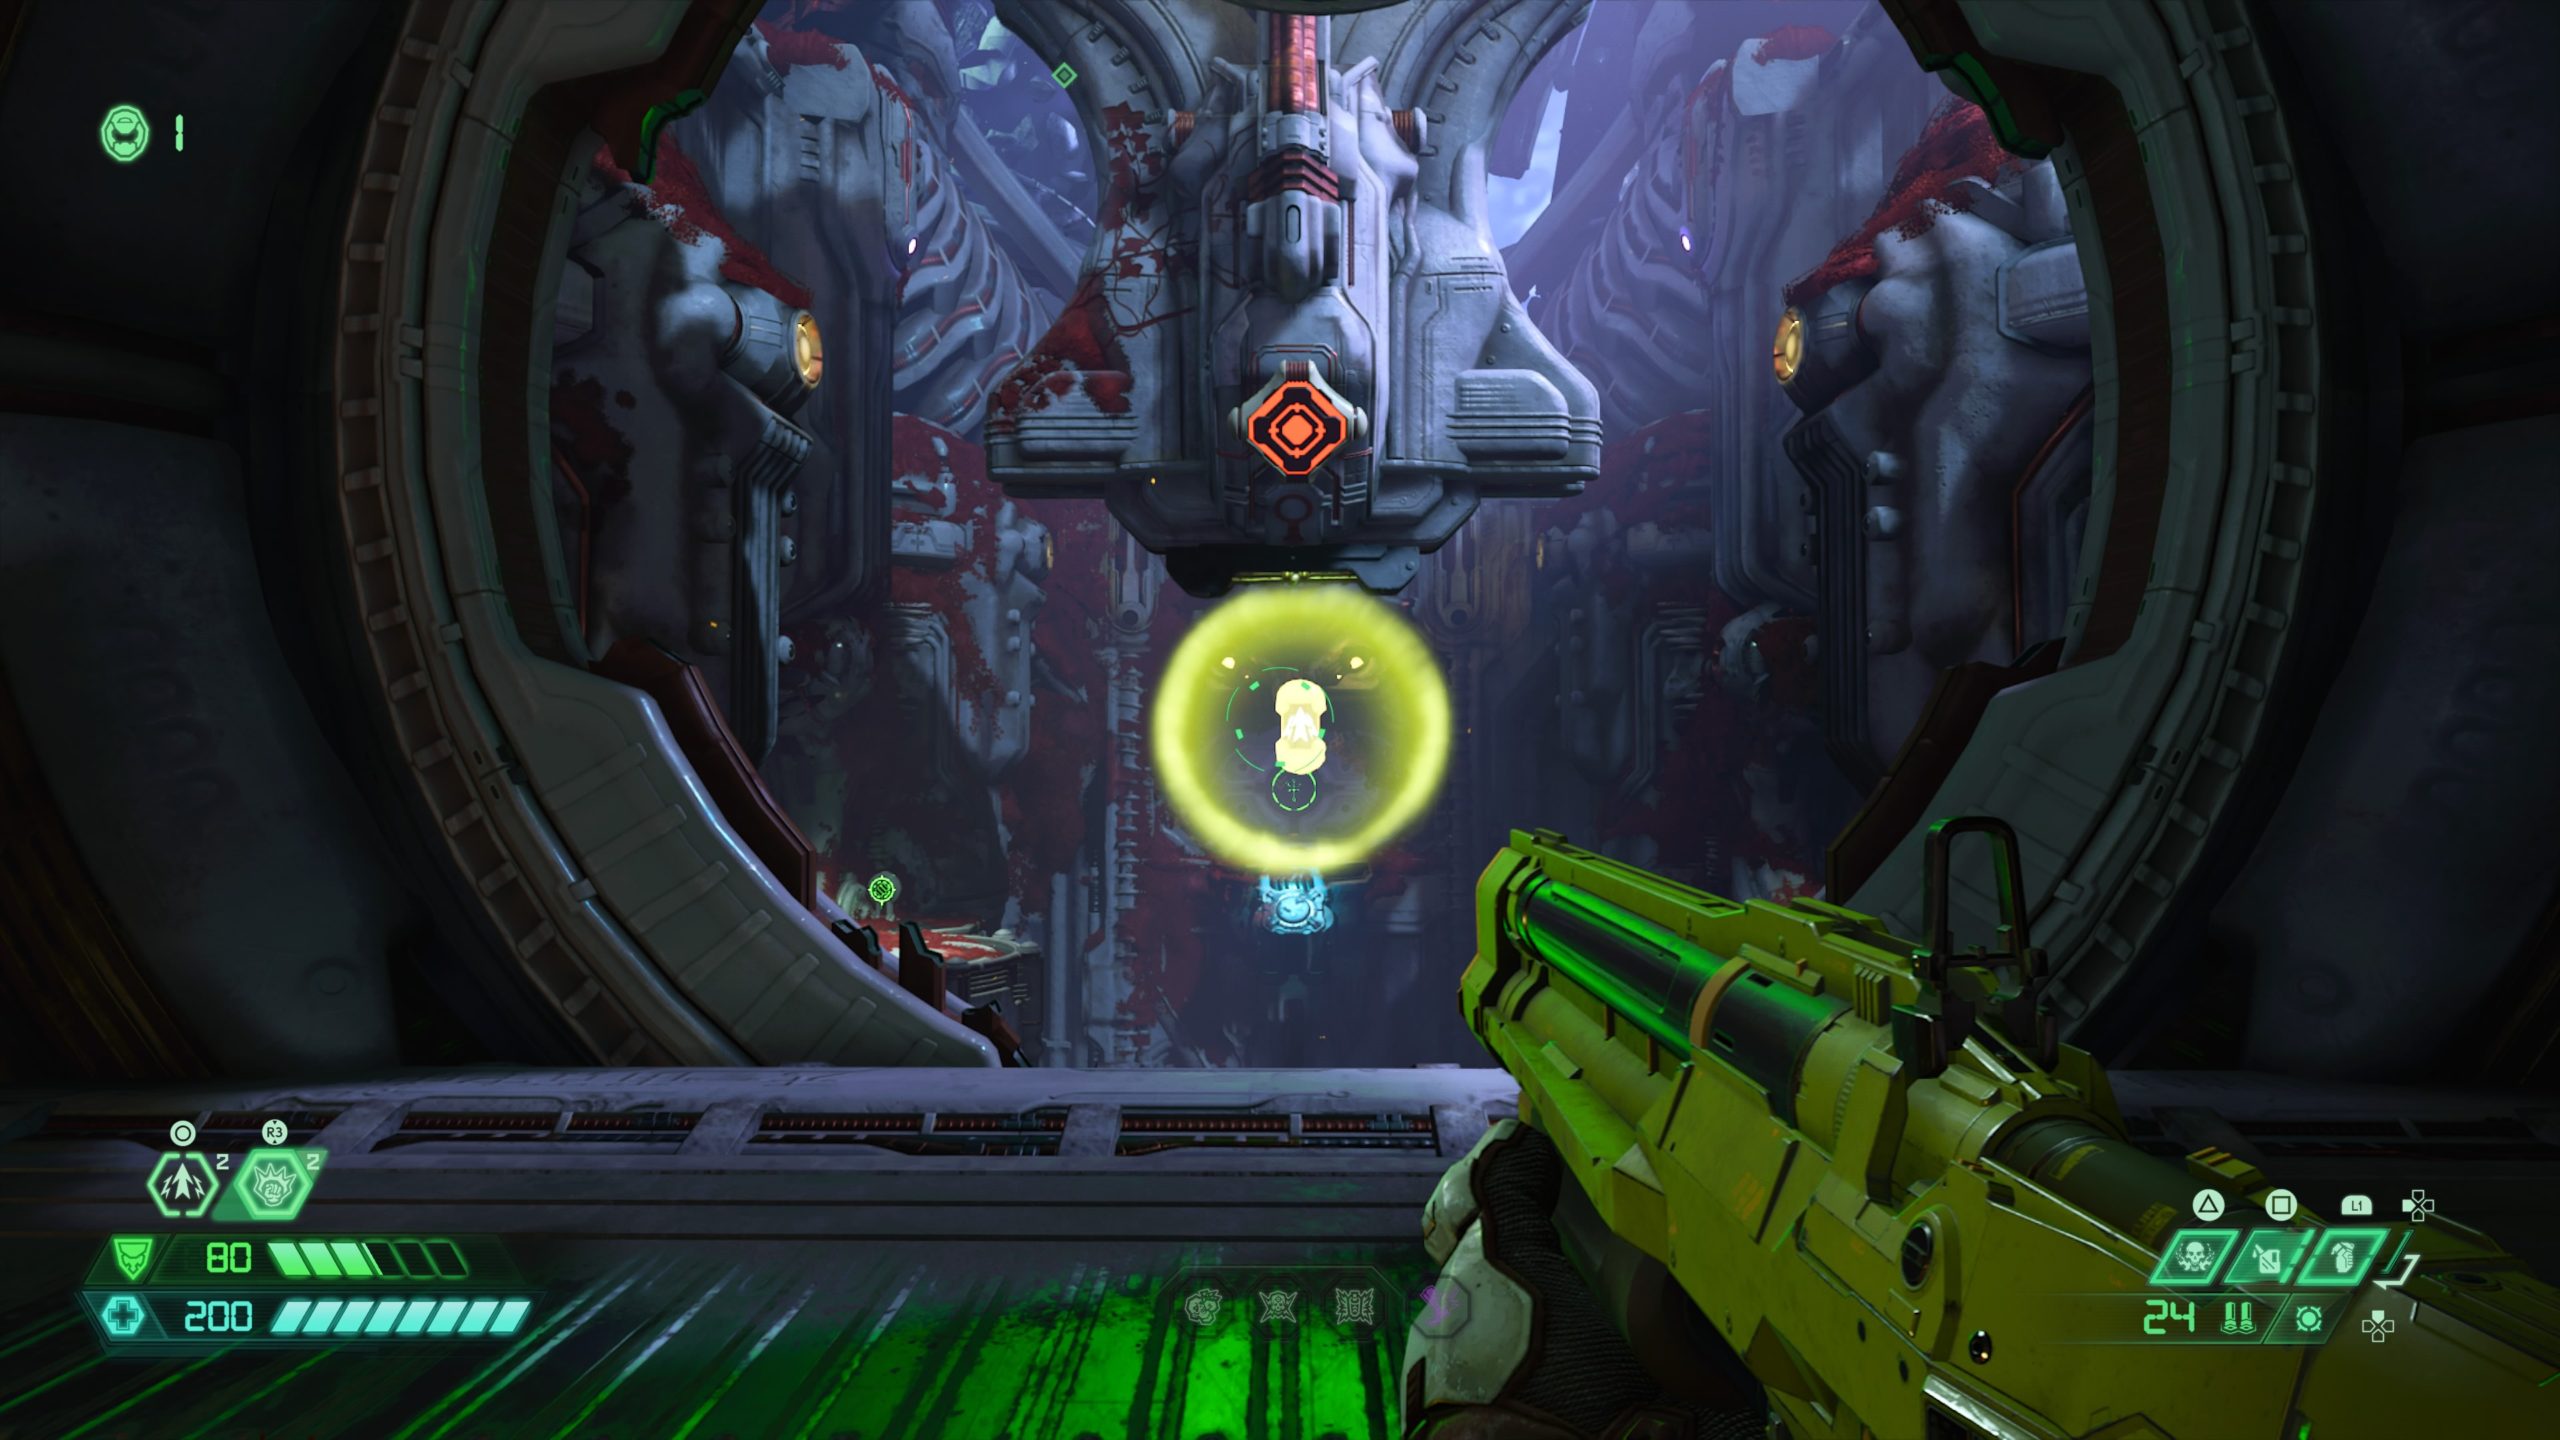
When you reach a dead end with a waterfall where you will need to melee a dead tree to create a path forward, turn around to find a ledge off to the right. Climb up it to find the extra life.


Slayer Key

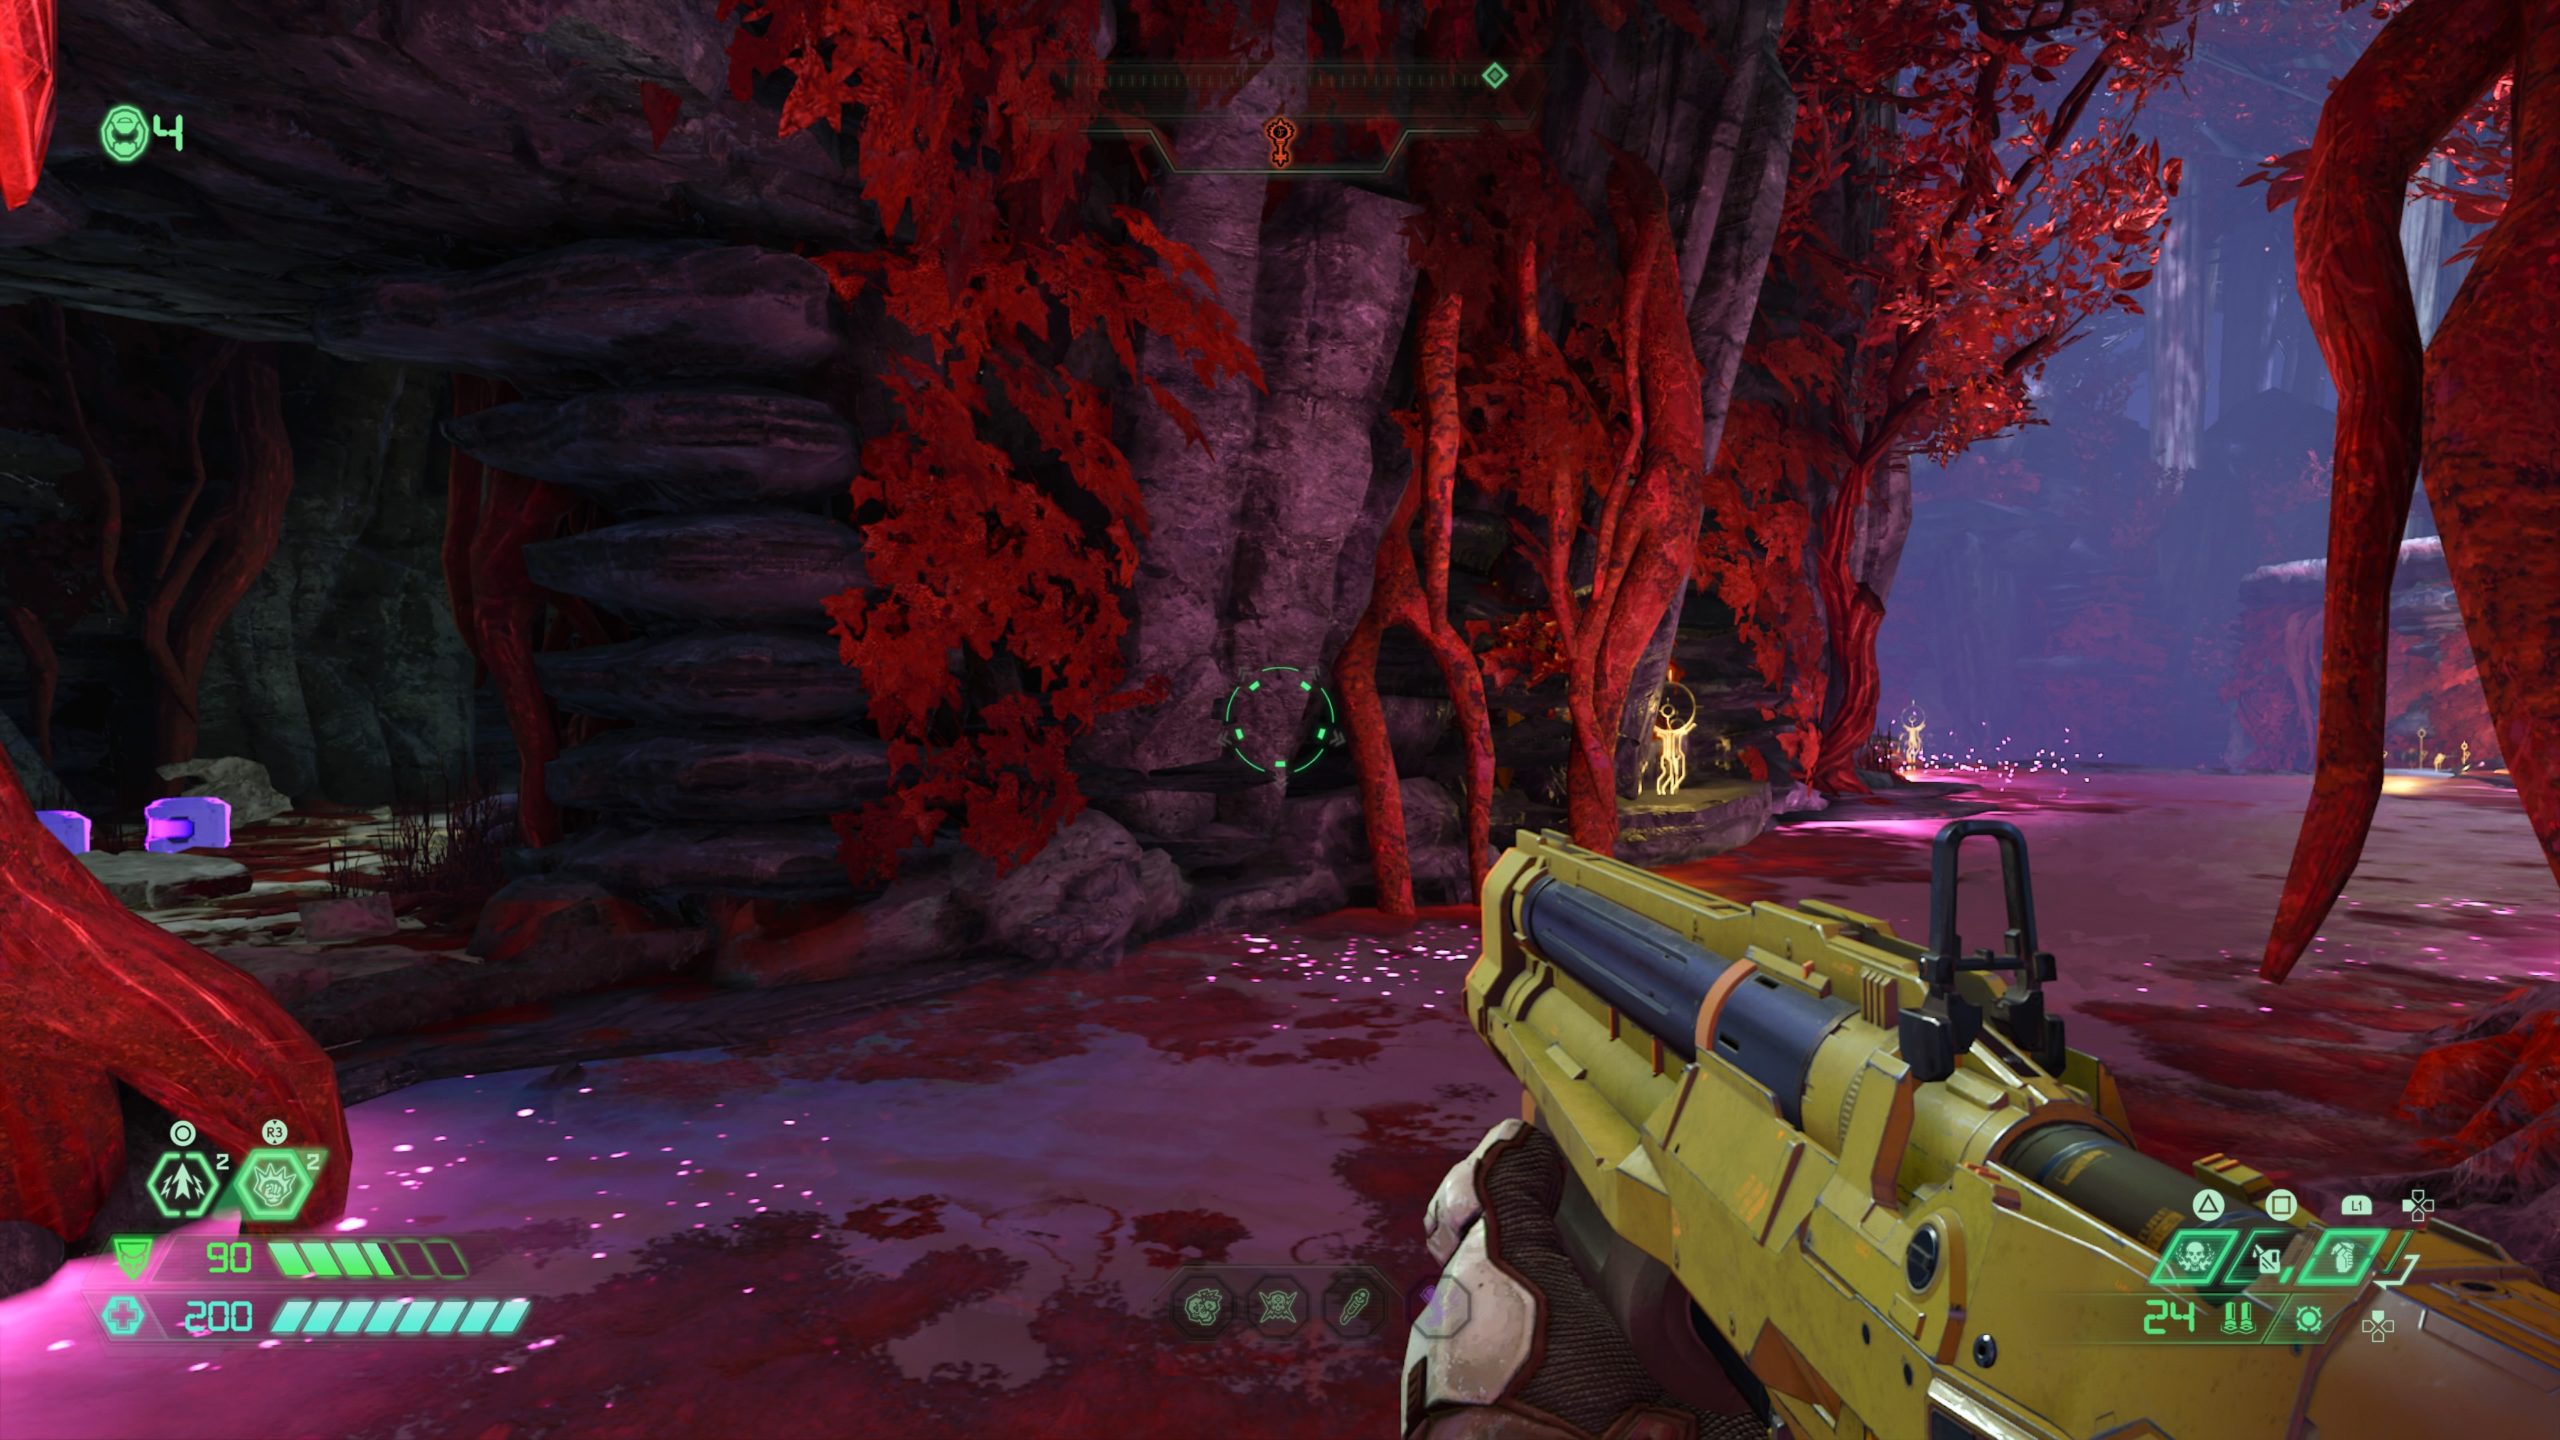
From the above tree trunk, climb up the trunk to reach the top of the waterfall. From there look to the left to find a ledge you can climb up. At the top, take a left and jump across the gap to reach a rock platform. Jump across the small gap to reach the key.


Extra Life

From the above tree trunk, climb up the trunk to reach the top of the waterfall. From there look to the left to find a ledge you can climb up. At the top, head forward and melee the breakable wall at the end of the path to reveal a cave which contains the extra life.


Secret Encounter

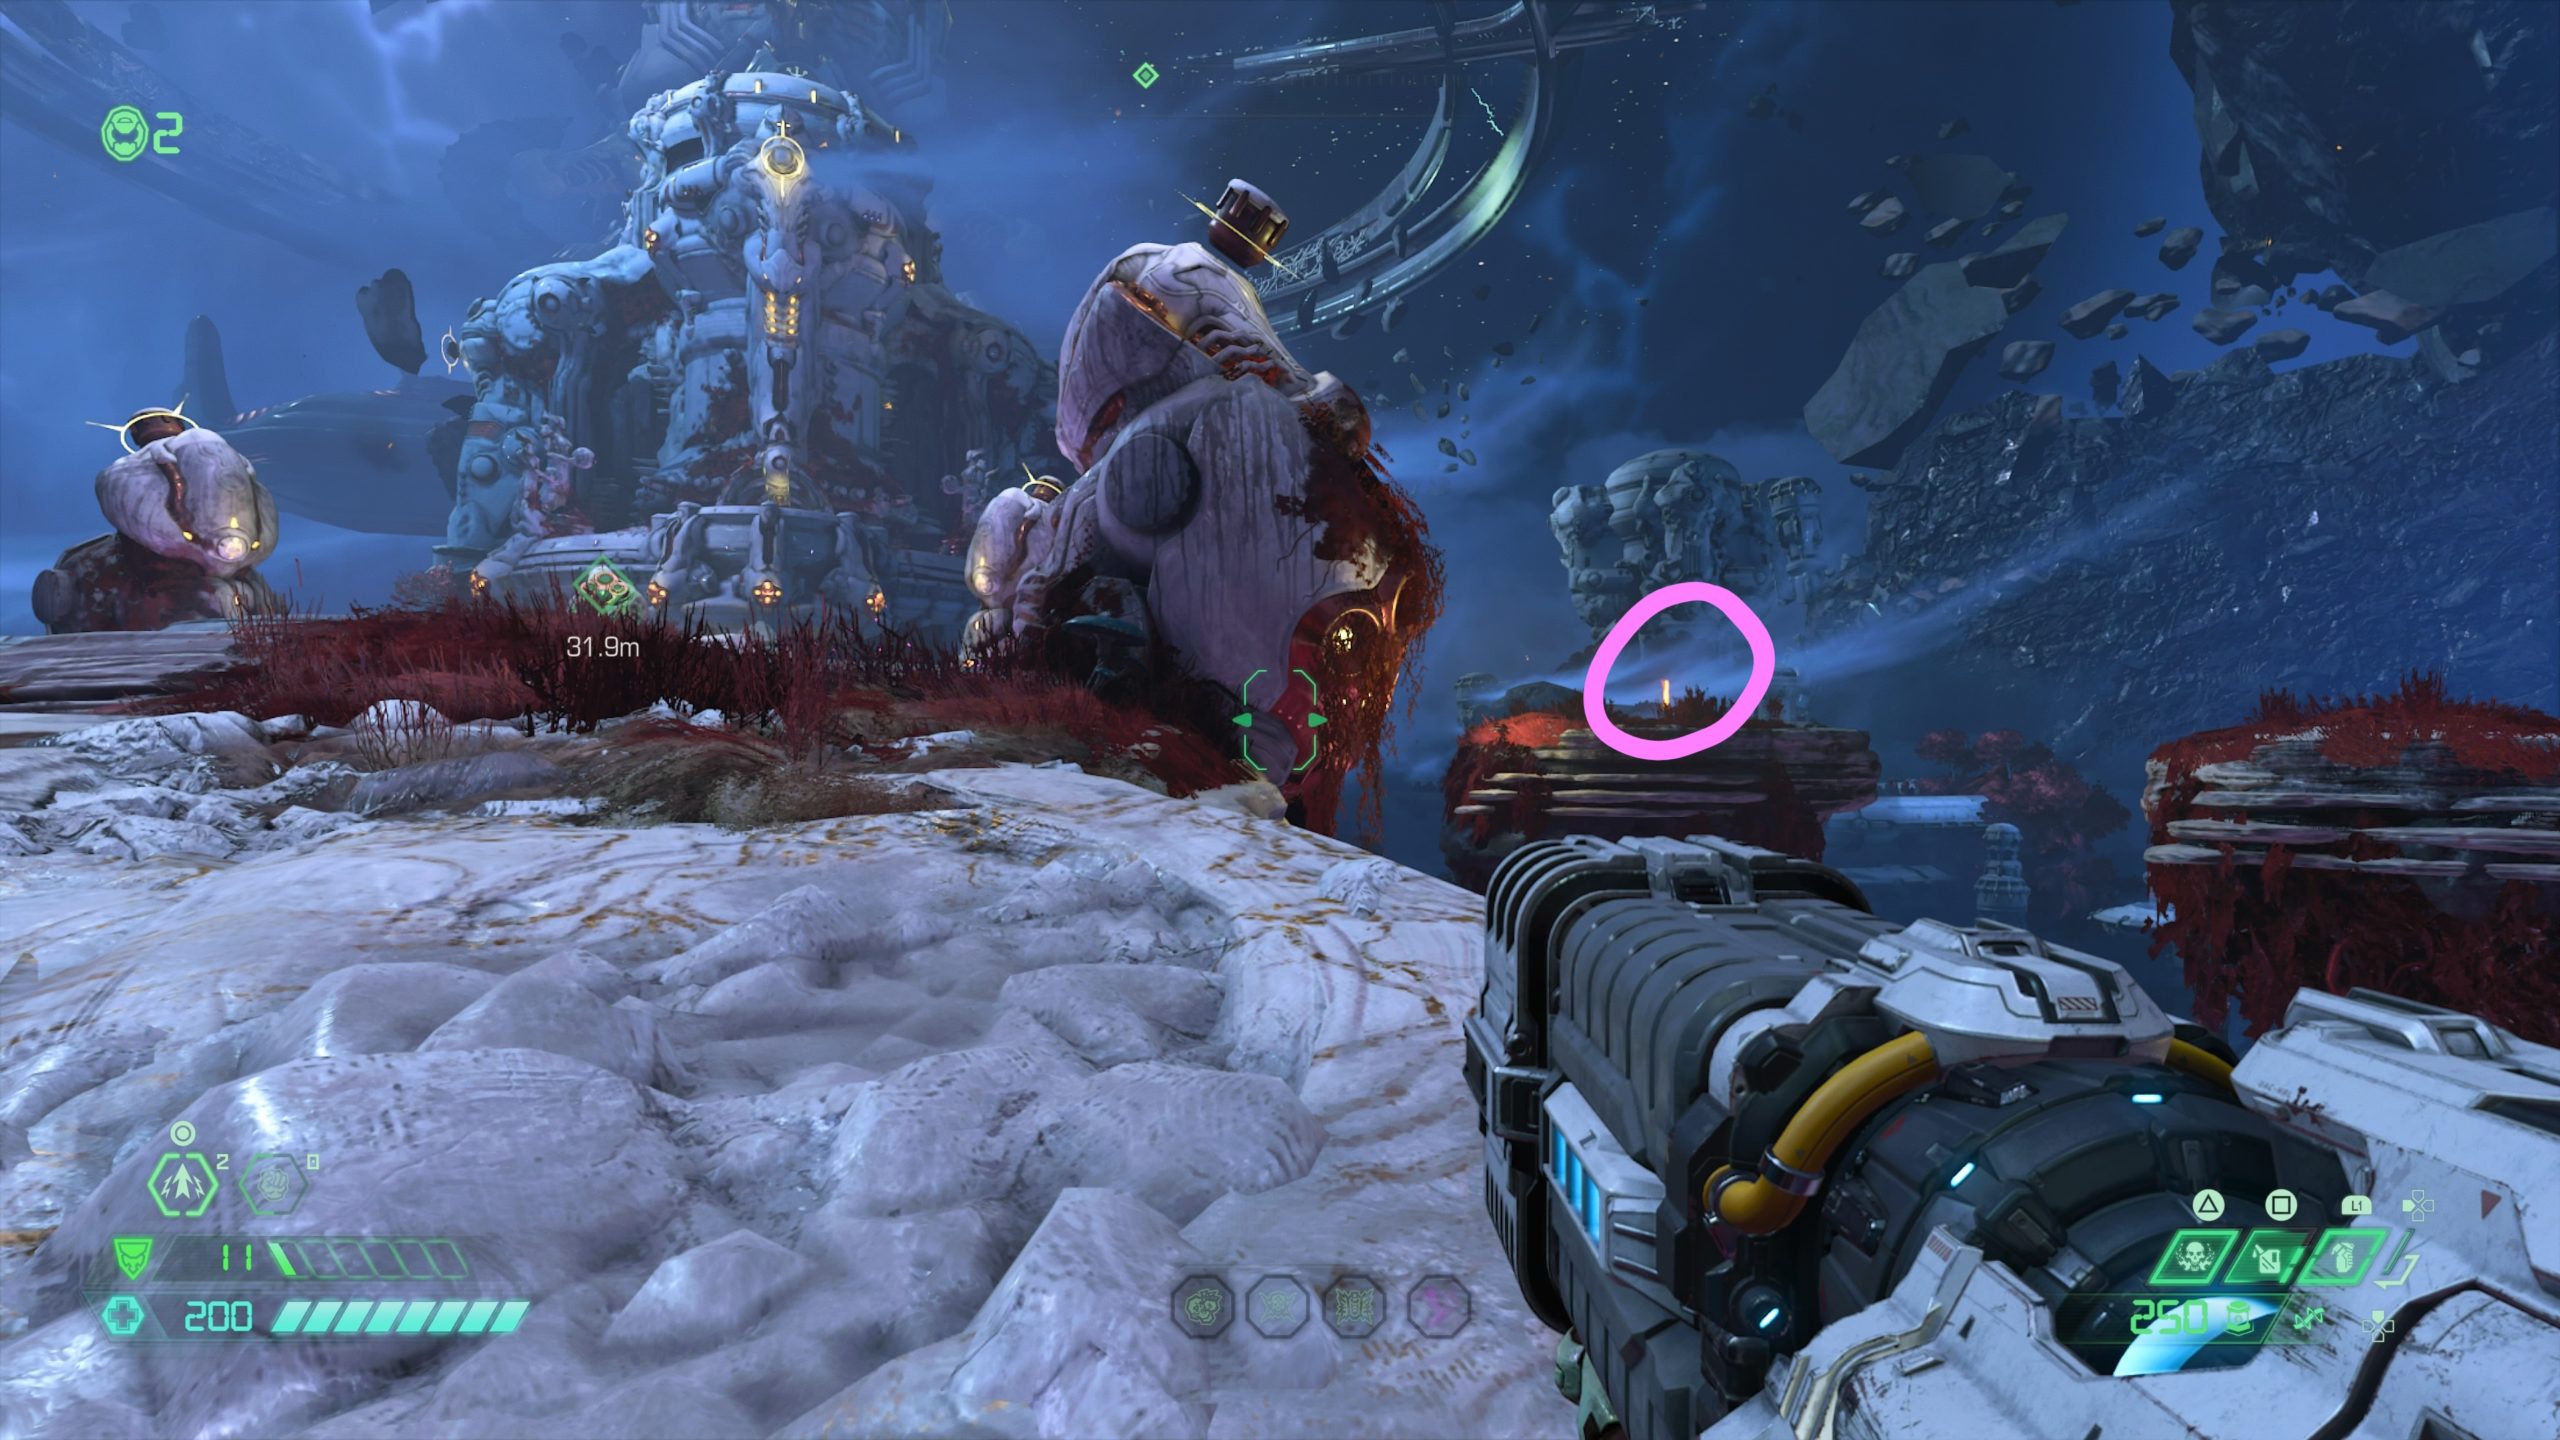
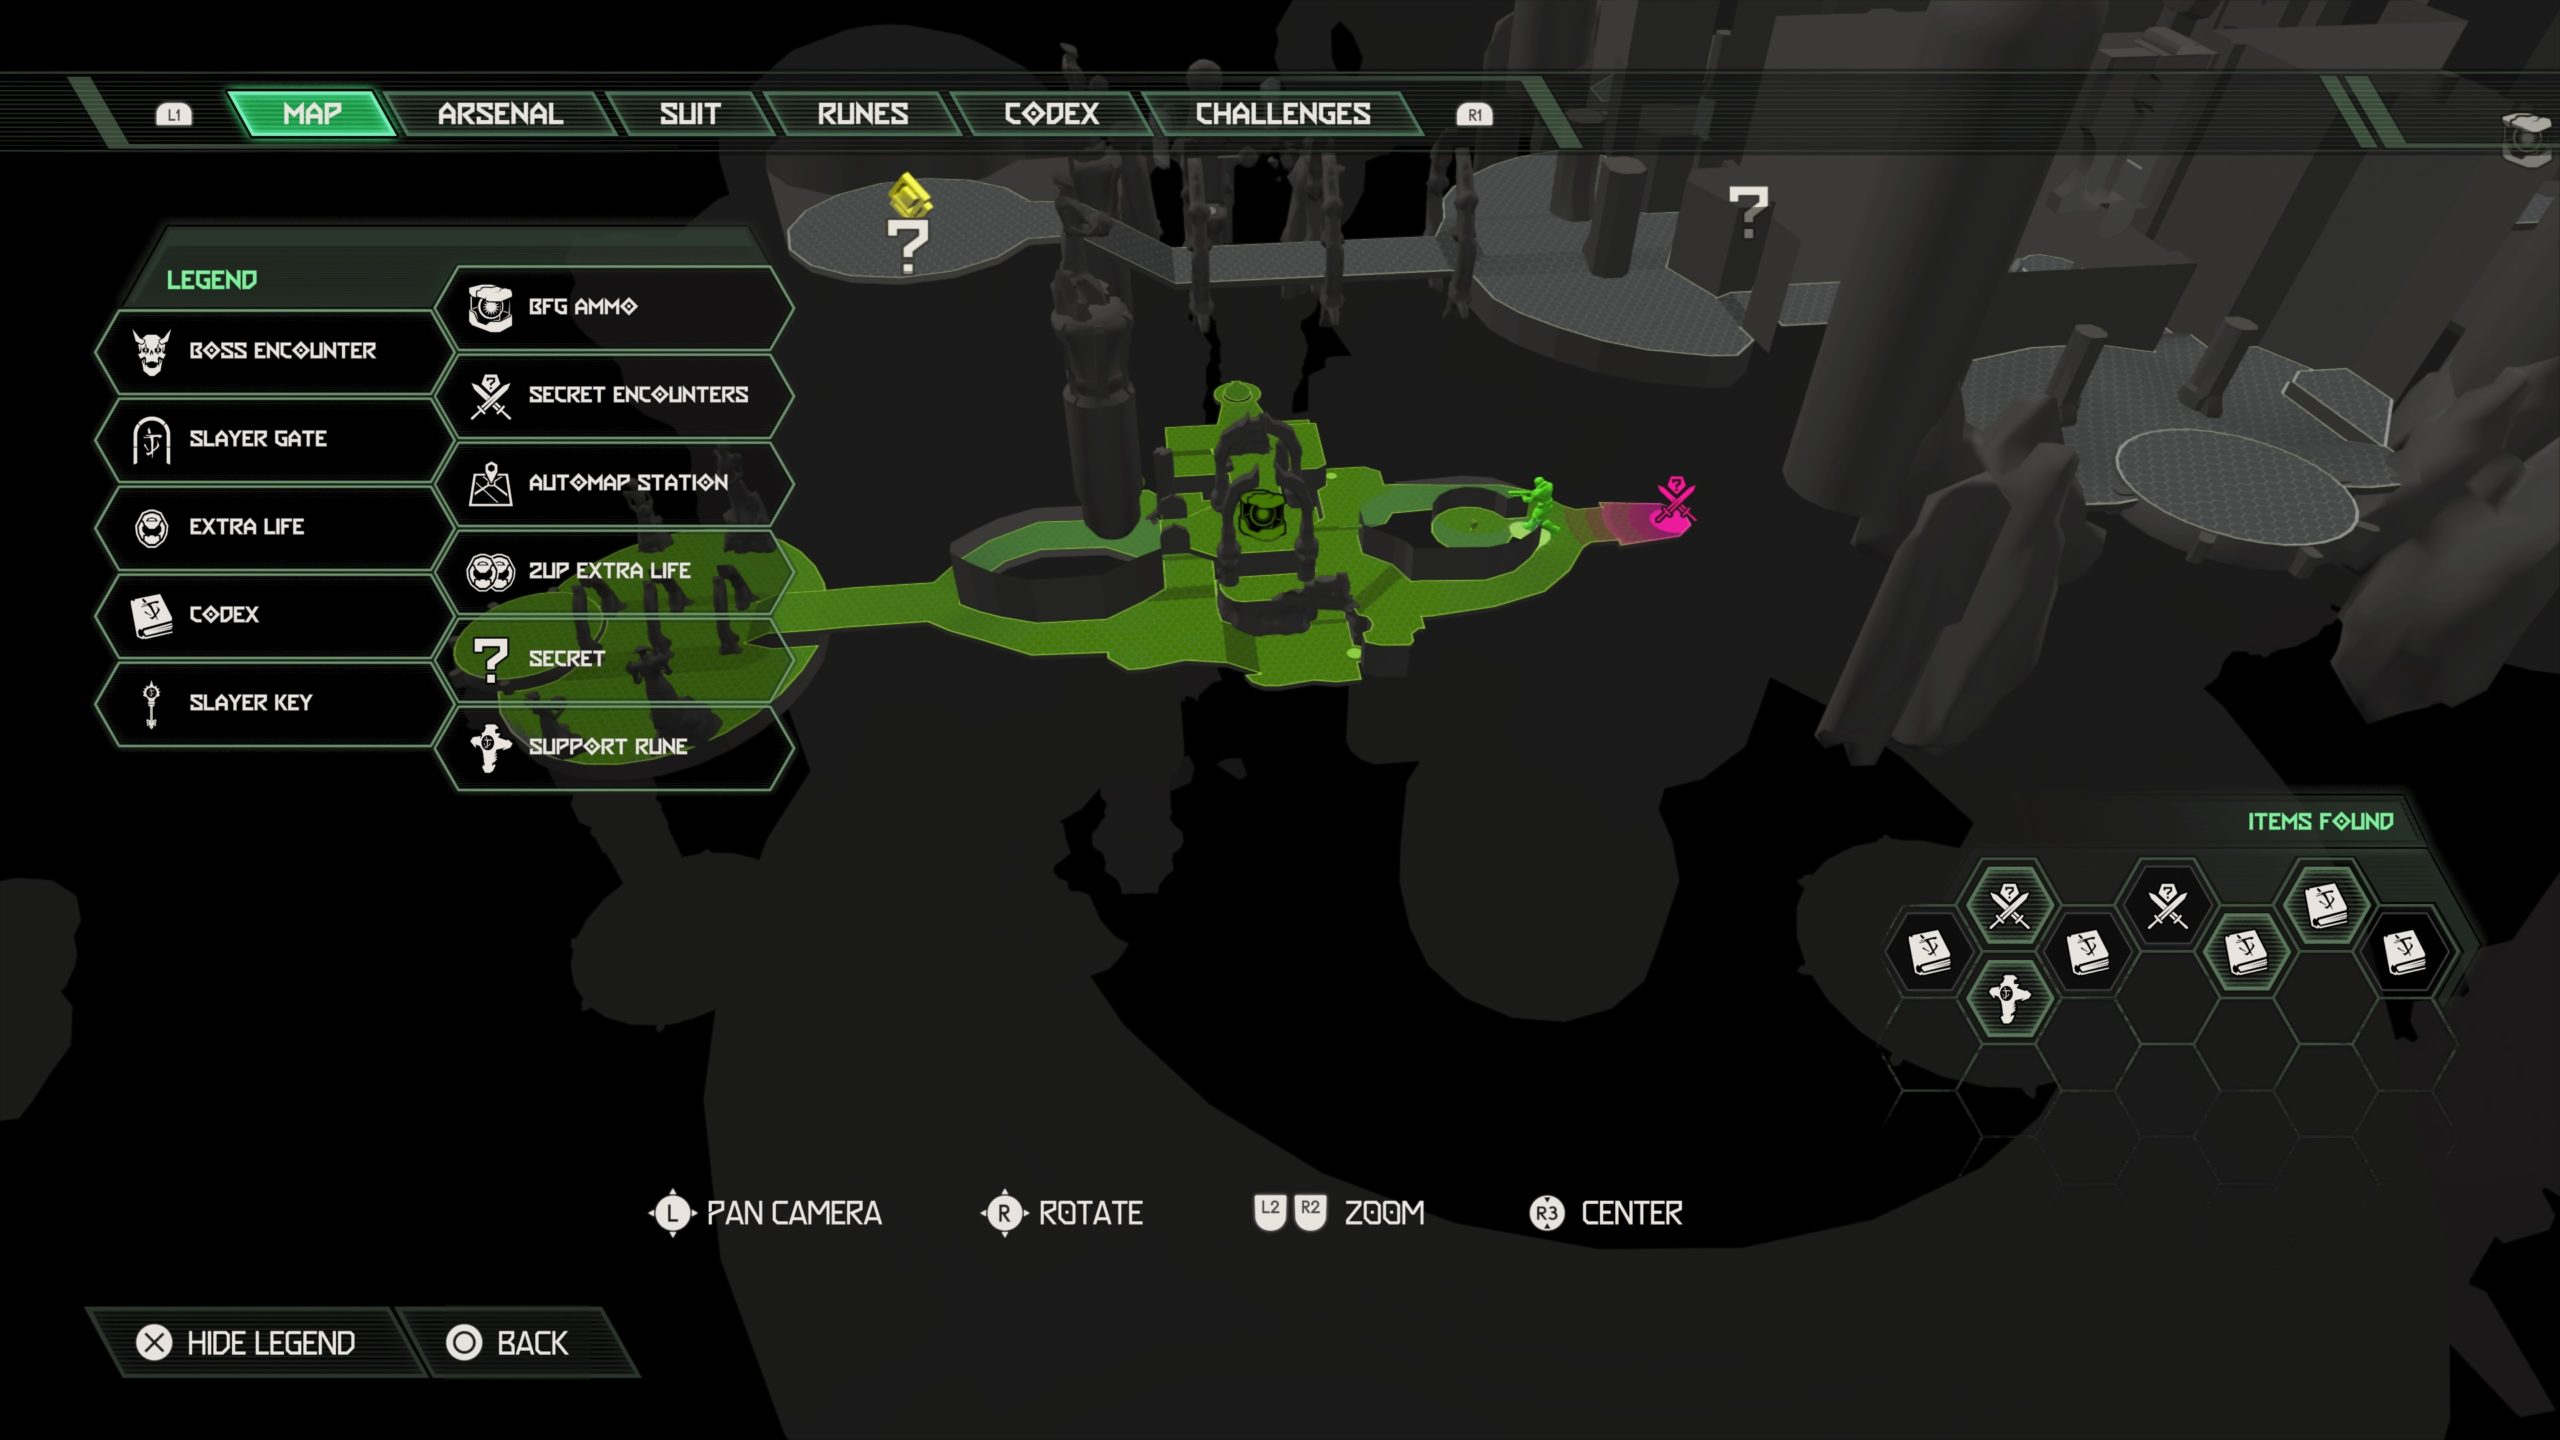
From the top of the waterfall, follow the path along the water to find a breakable wall on the right side. Melee it to reveal a cave containing the encounter.


Support Rune

Complete the Slayer Gate located near the central eastern side of the map just past the first secret encounter then collect the rune.


Codex: Book of the Seraphs Part IX

The codex can be found on a lower ledge in the center of the map. You know you’re in the right place when you see a lift pad near a tree you can knock down. The codex is guarded by 3 tentacles that pop up to attack you.


Codex: Book of the Seraphs Part X

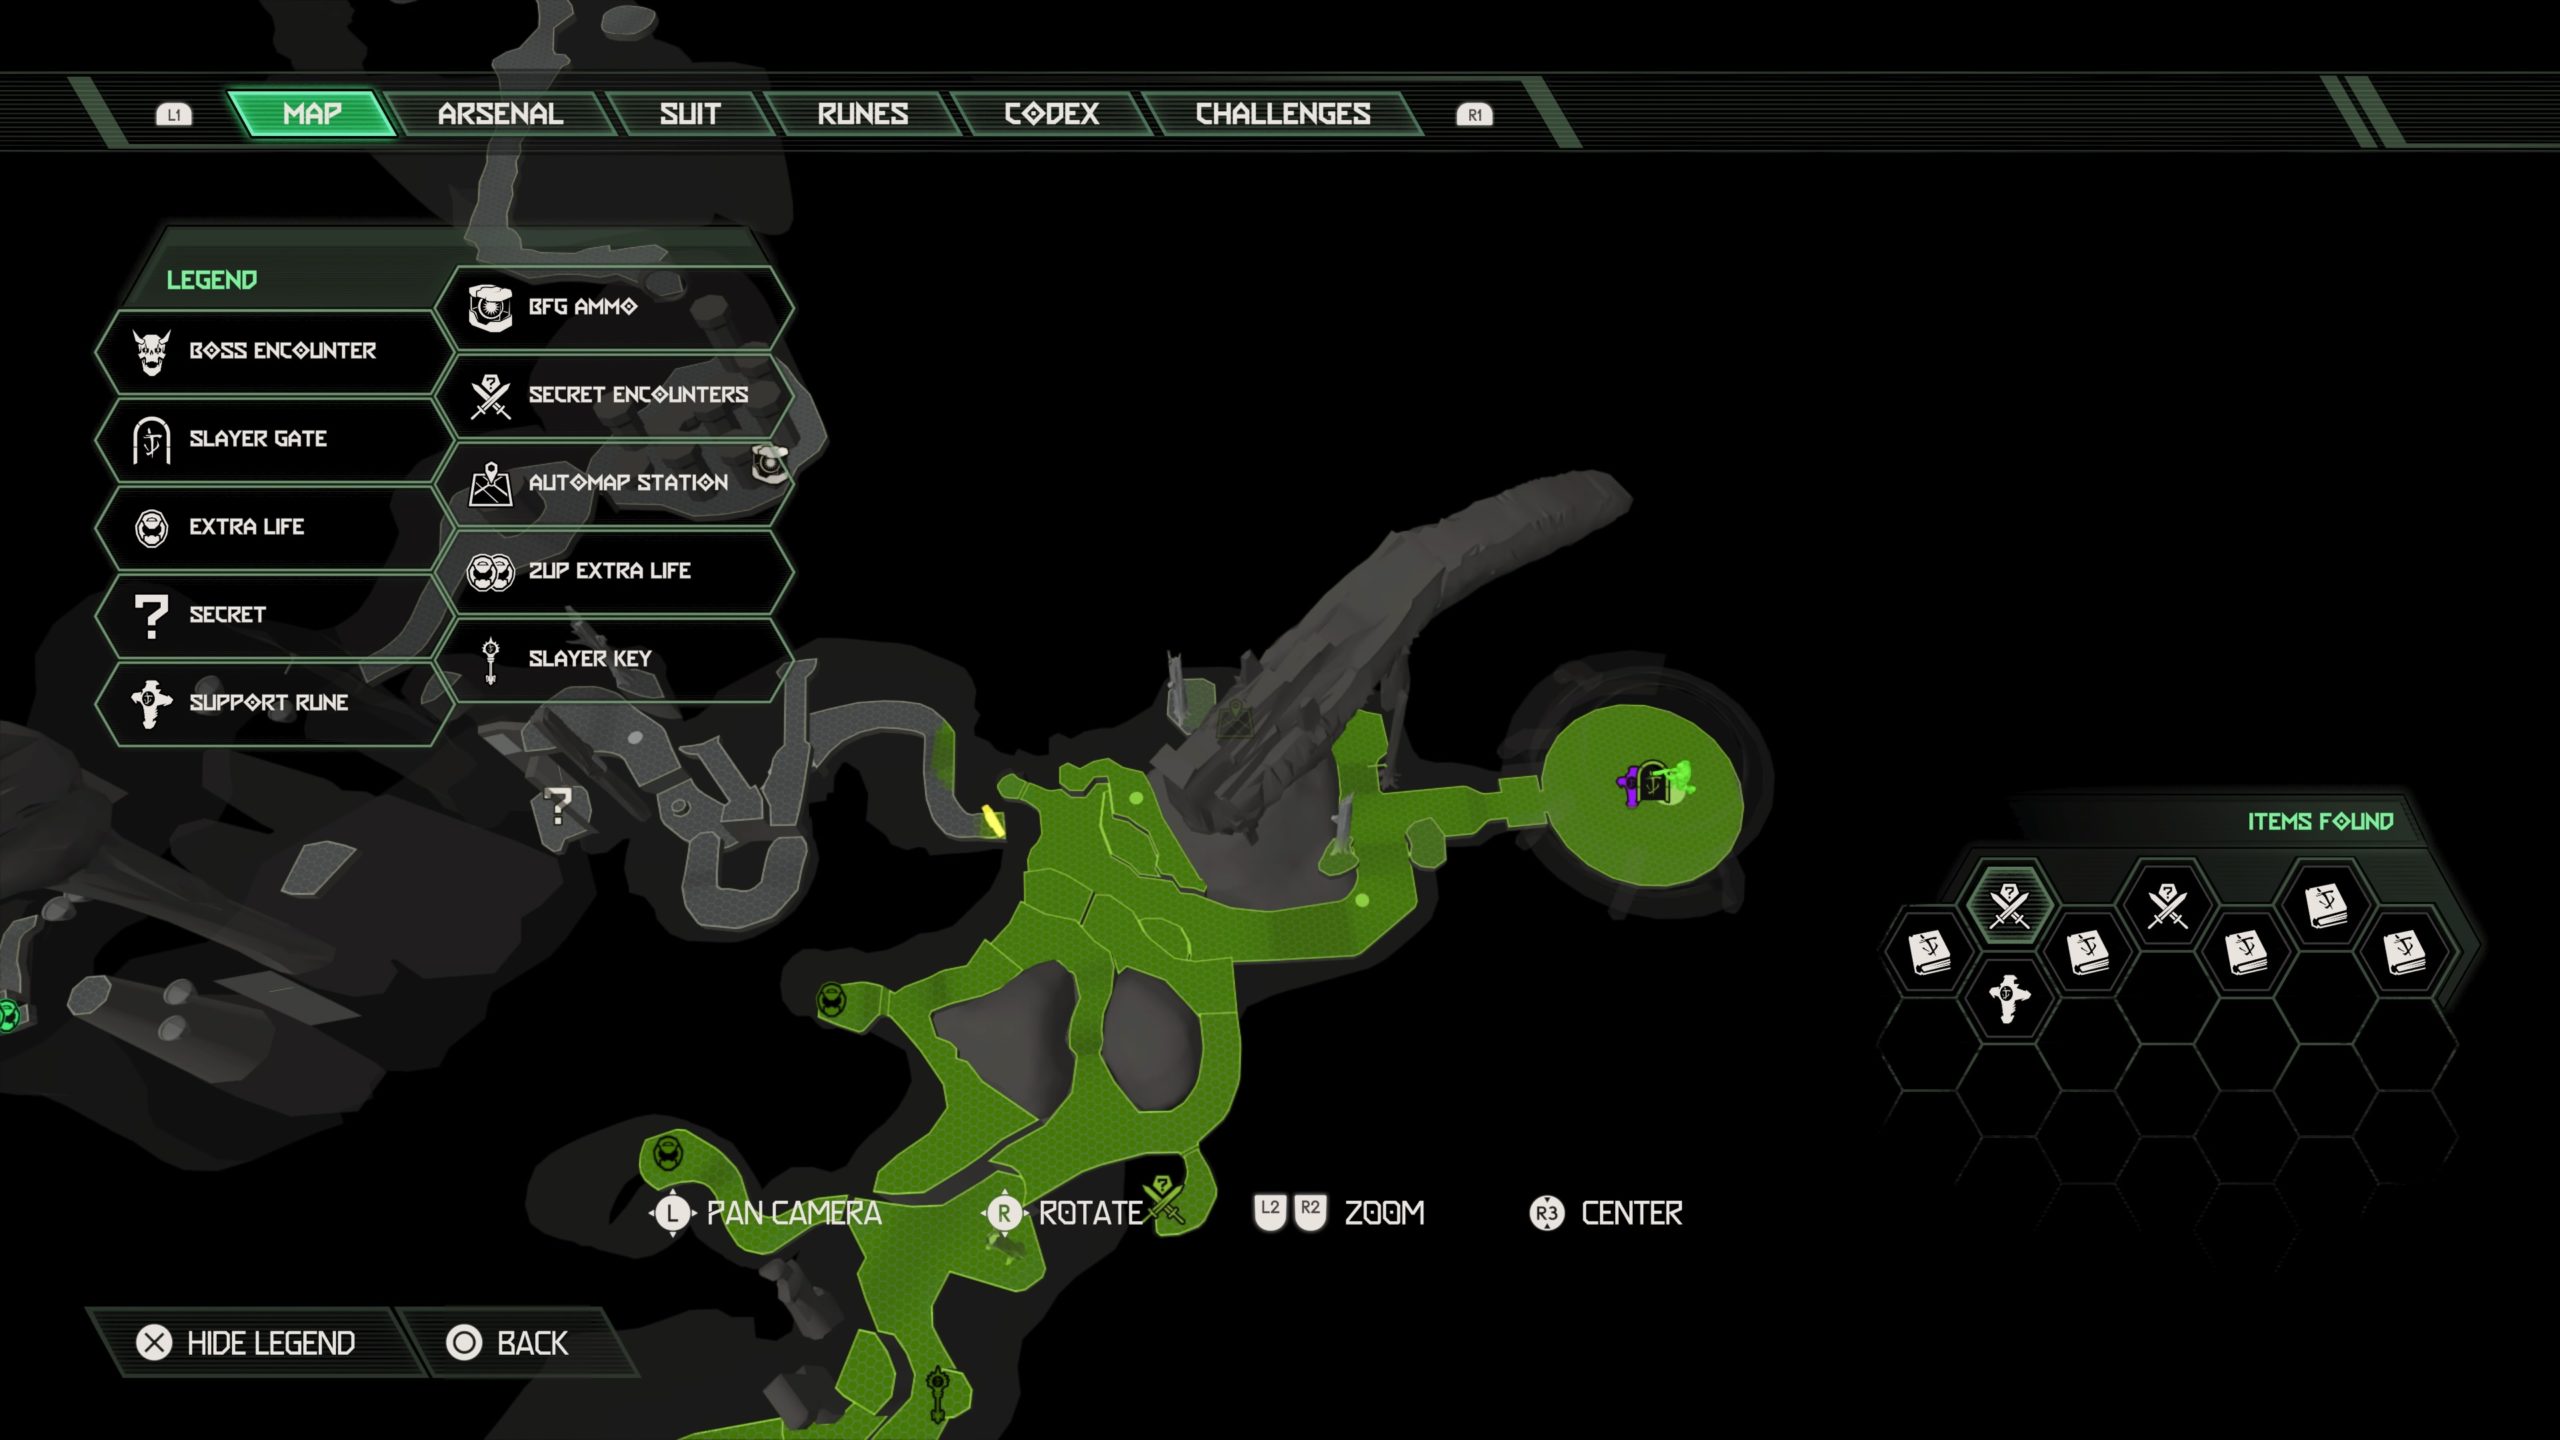
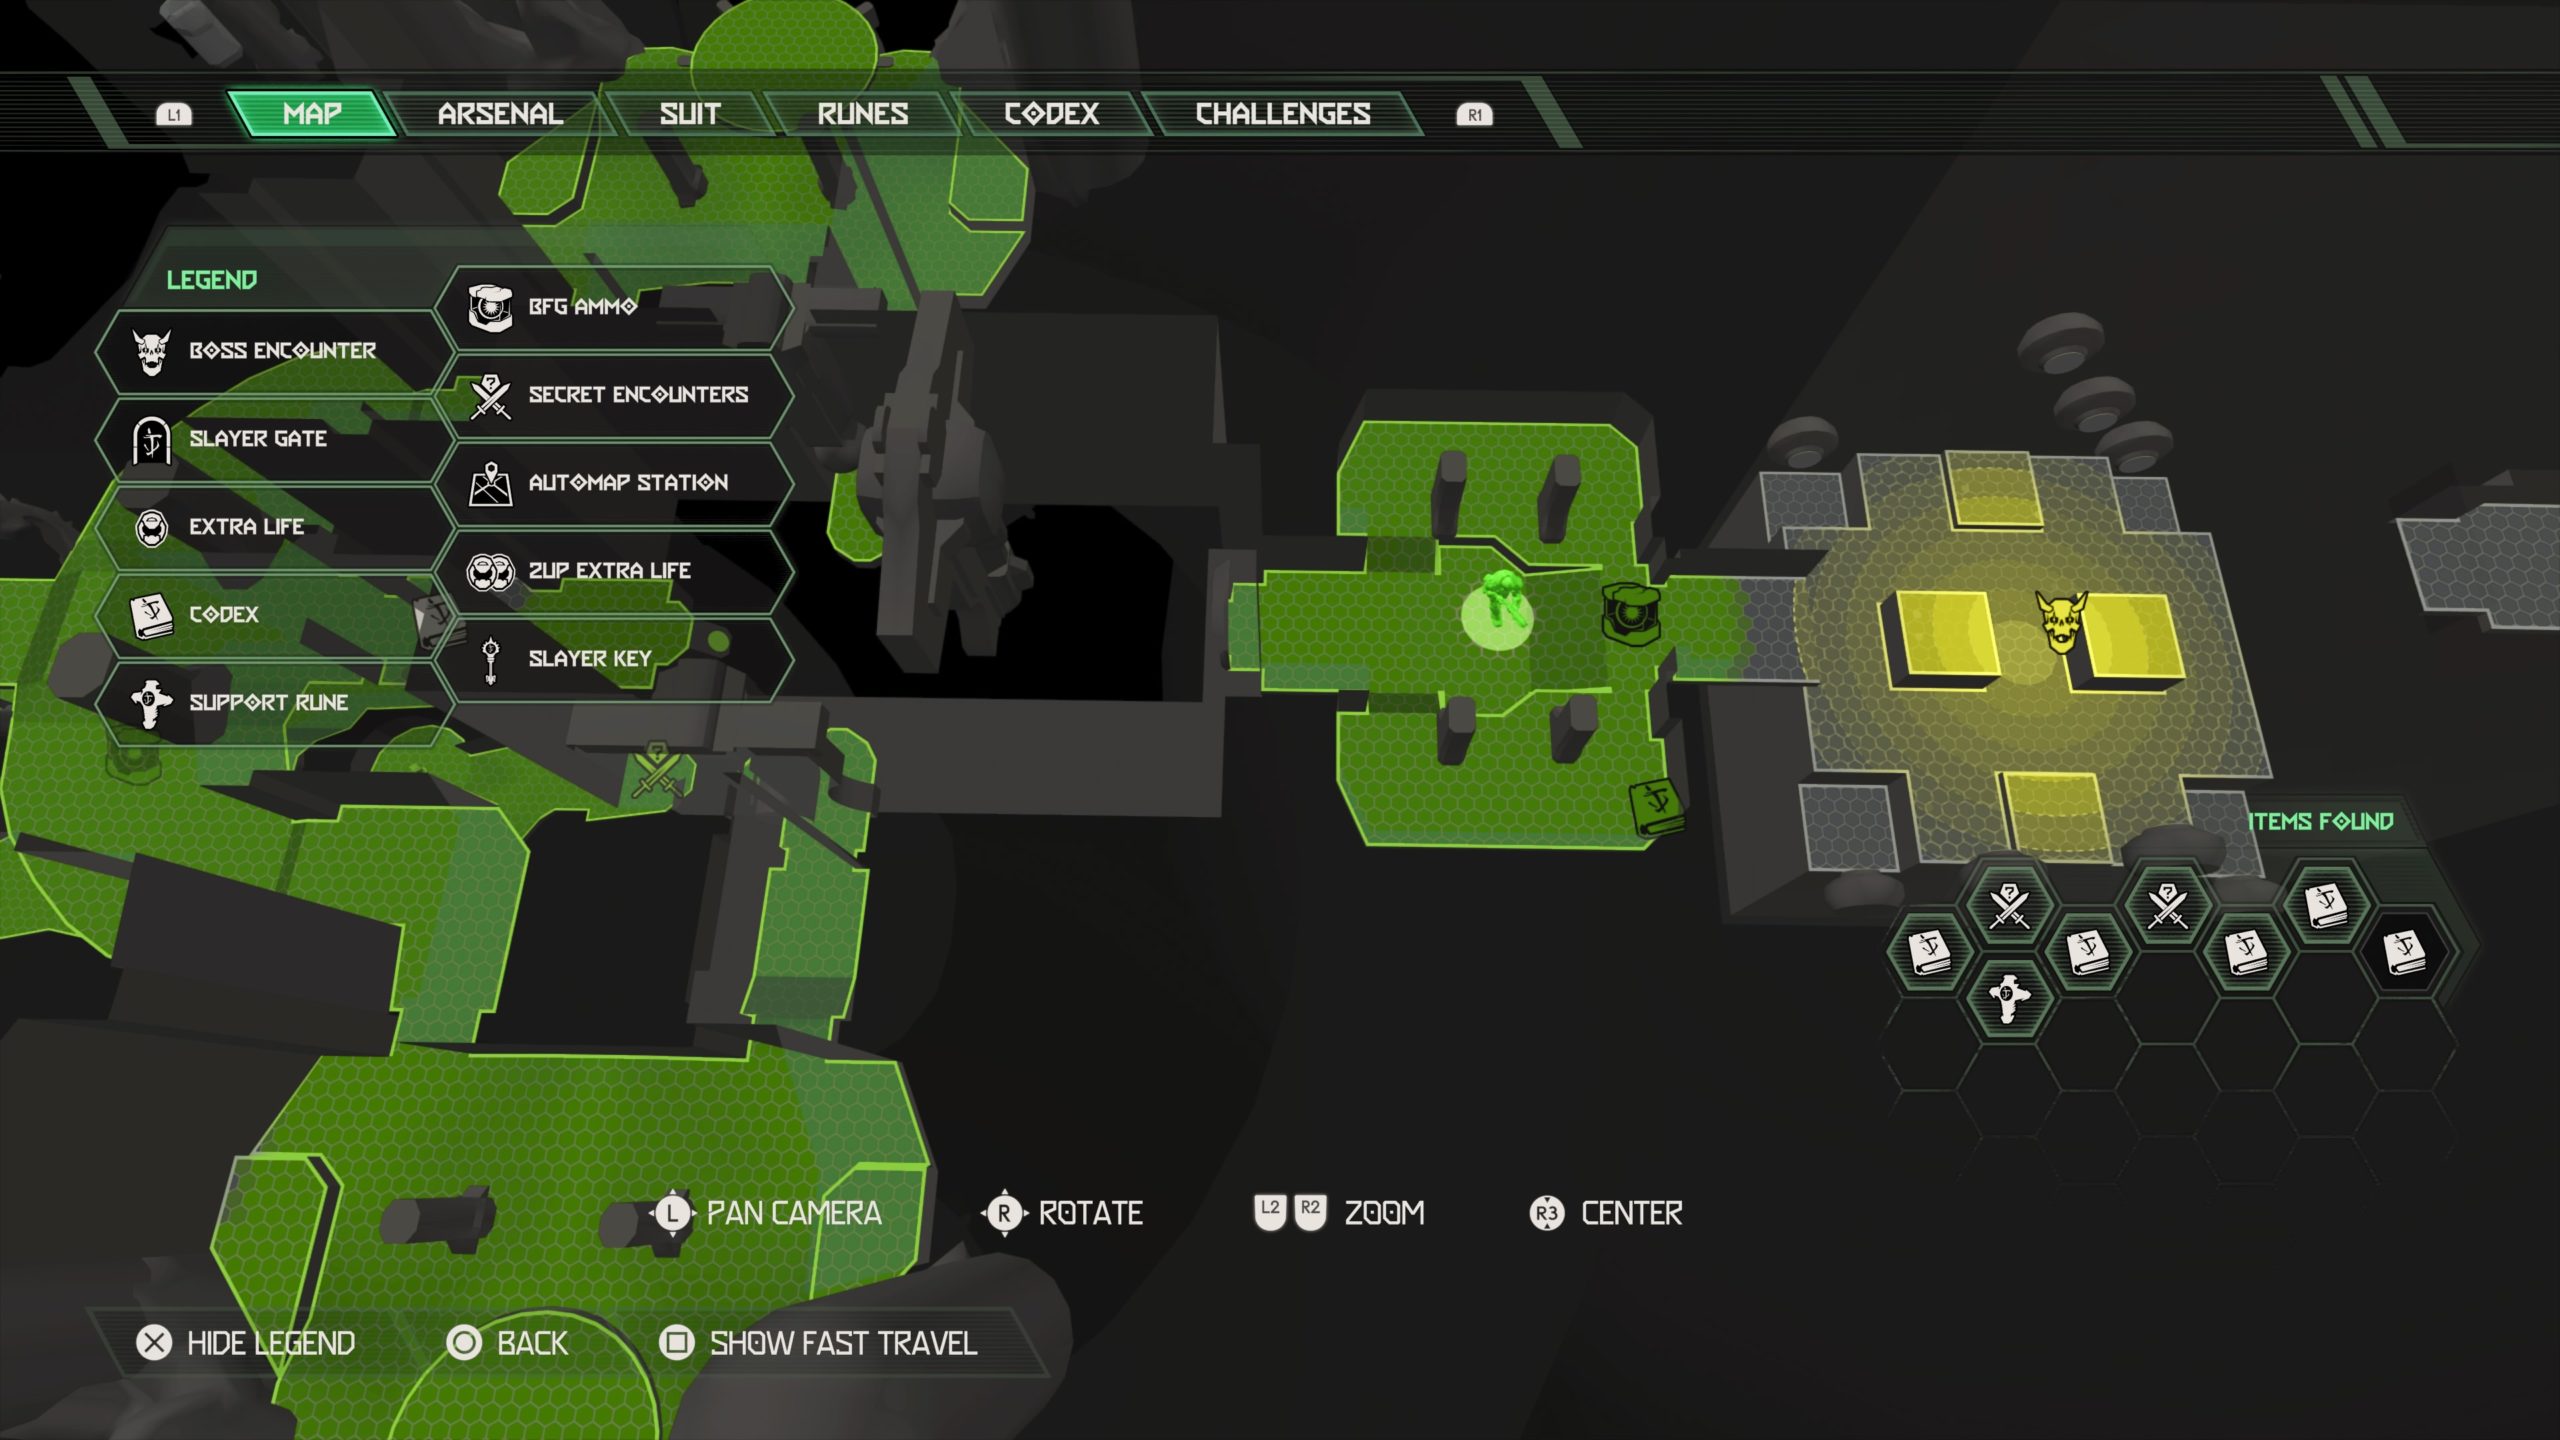
This codex is located on a floating platform to the right of the bridge leading to the tower containing the Father.


Secret Encounter

You’ll come across this secret encounter just before a courtyard filled with Maker statues. Activate the console directly across from the encounter then look at the ceiling directly above. Shoot the green diamond to unlock the gate concealing the secret encounter.


Codex: Book of the Seraphs Part XI

You’ll see this codex next to a switch you need to activate as part of the story at the very top of the structure. Once you activate the switch, the Father will talk to you briefly followed by the Intern.


Codex: Characters and Locations – The Father

The codex is located in the Holy Chamber (room just before boss) on the right side.


Codex: Seraphim

From the Holy Chamber, head backwards towards the doorway to see a green diamond on the pillar in front of you. Shoot it to unlock the door on the other side of the room containing the codex.


Guides

Borderlands 3 – Lost and Found

by Chappie in


Location: Obsidian Forest

Obtained: Interact with the poster in Tallyway Station


Speak with Oletta

Speak with her near the train station.


Take Pants

Grab the Titus’s Pants from Oletta.


Get Prime Devil Meat

Head up the nearby ladder and run across the roof to reach a cavern containing a bunch of devils. Defeat them to get 4 electric prime devil meat and 4 radioactive prime devil meat.


Lure Bella out with Prime Devil Meat

Use either the electric meat or the radioactive meat to draw Bella out.


Place Titus’ Pants

Place the pants in front of her on the ground.


Protect Bella

Defeat the Beliks that spawn once Bella is done sniffing the pants.


Follow Bella

After defeating the enemies, follow after Bella. You’ll need to protect her from Beliks that spawn along the way.


Talk to Oletta

Speak with Oletta to complete the quest.


Guides

The Isle of Armor – Fields of Honor Digletts

by Chappie in


A new side quest in the Isle of Armor DLC for Pokemon Sword and Shield is given to you automatically when you approach the bridge to the dojo. You are tasked with tracking down 150 Digletts! Below is a guide on the locations of the 19 Digletts in the Fields of Honor.


1. Received automatically when you approach the bridge to the dojo


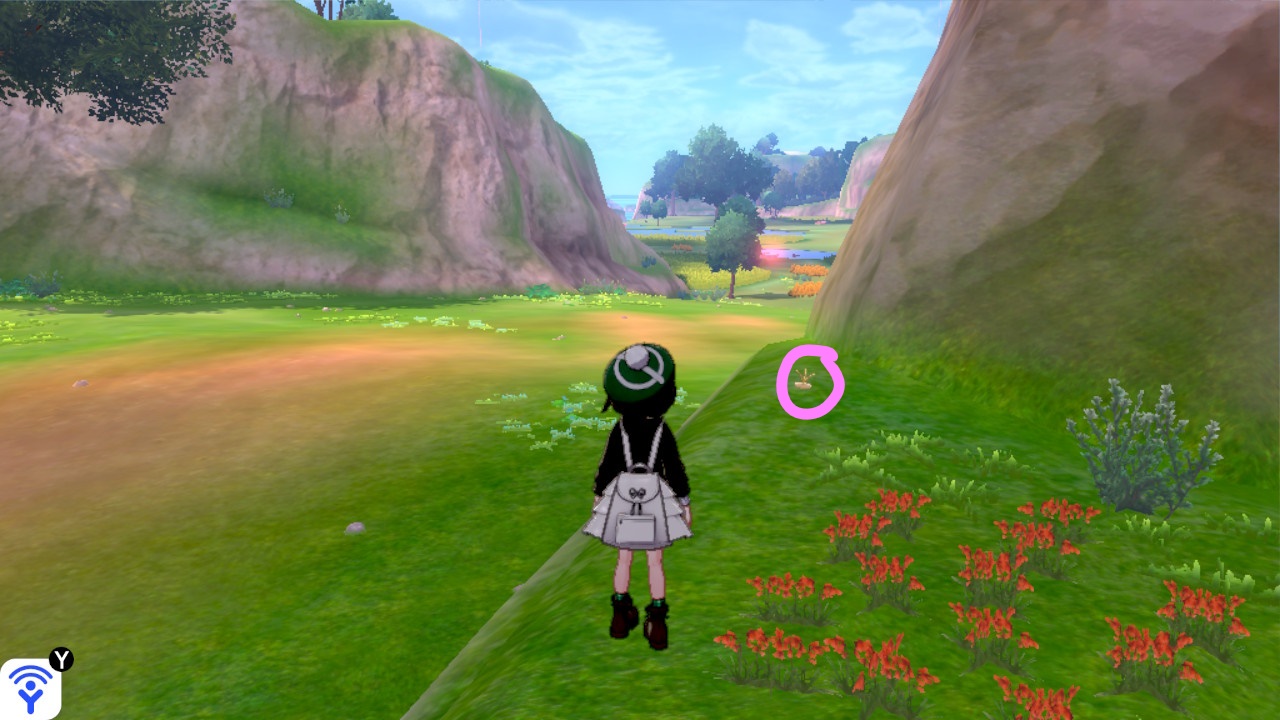
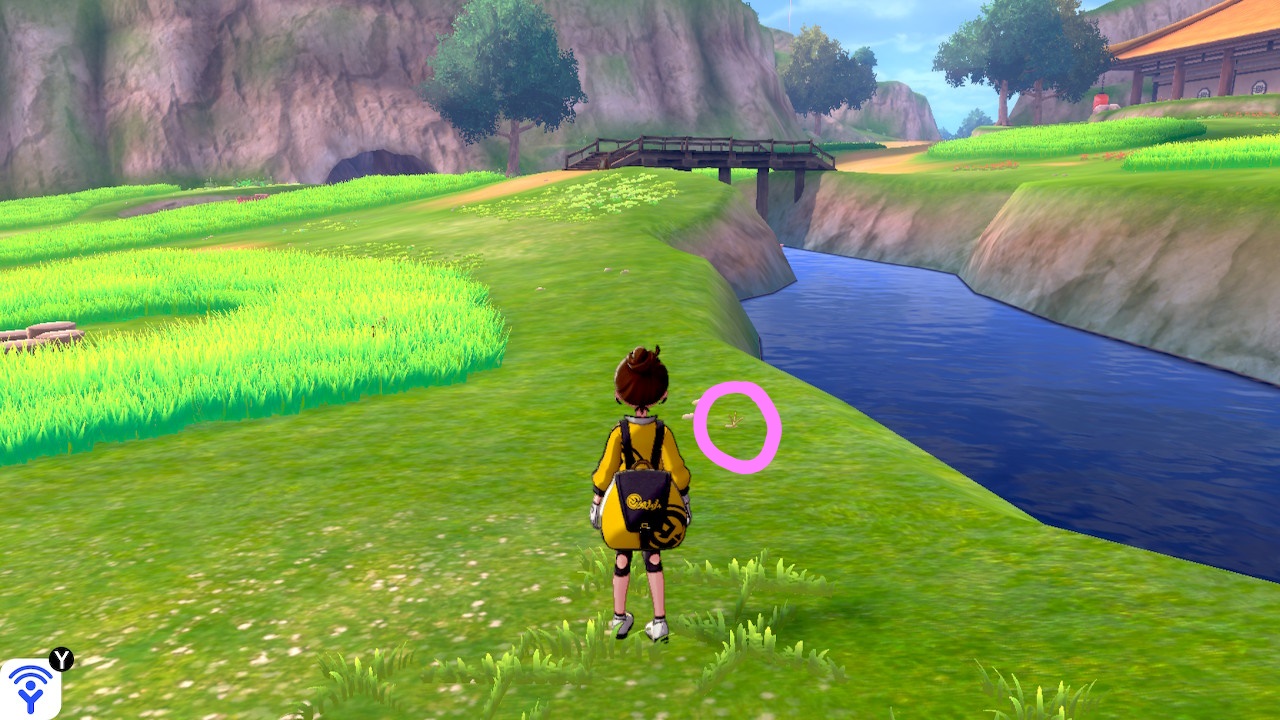
2. After crossing the bridge and facing the dojo, take an immediate right to find the Diglett in a small dirt patch surrounded by 2 patches of red flowers.


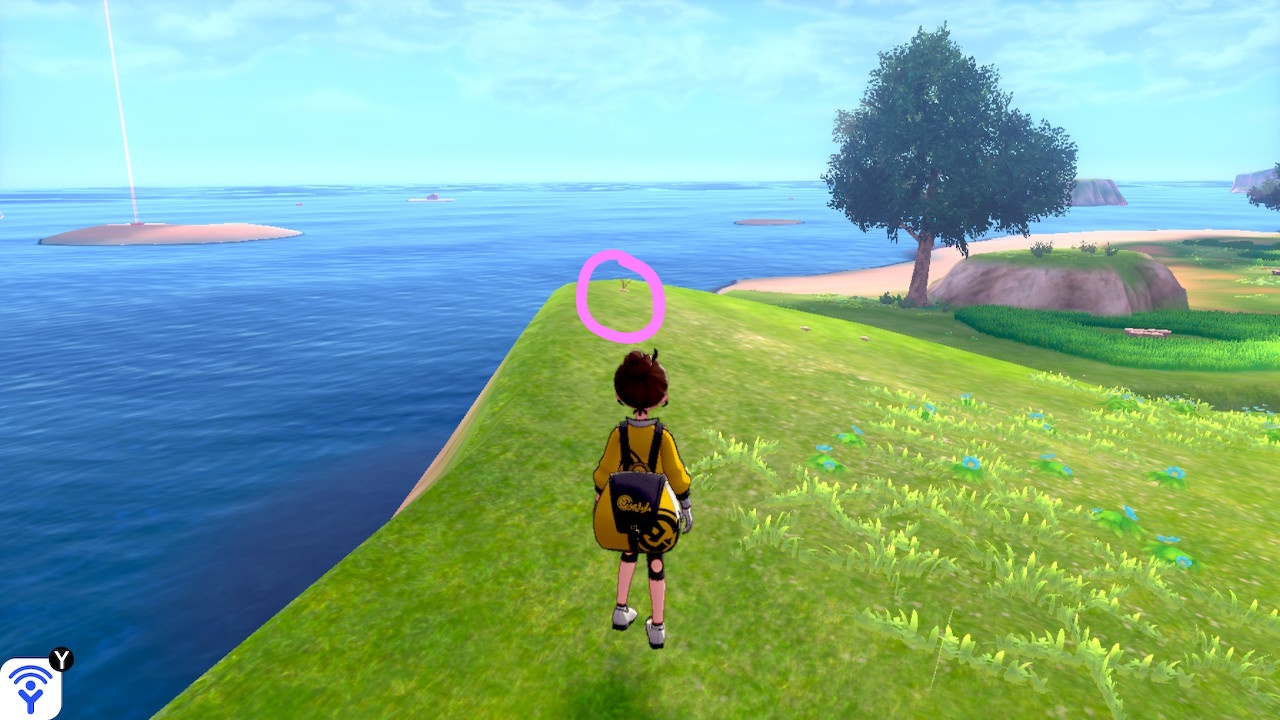
3. From the above Diglett, keep heading along the cliff to reach the tip overlooking the sea where the Digett can be found.


4. In the dirt along the main path from the bridge to the dojo


5. In the grass between the garden by the dojo and a small cliff


6. In the dirt in the corner of the unplanted garden by the dojo


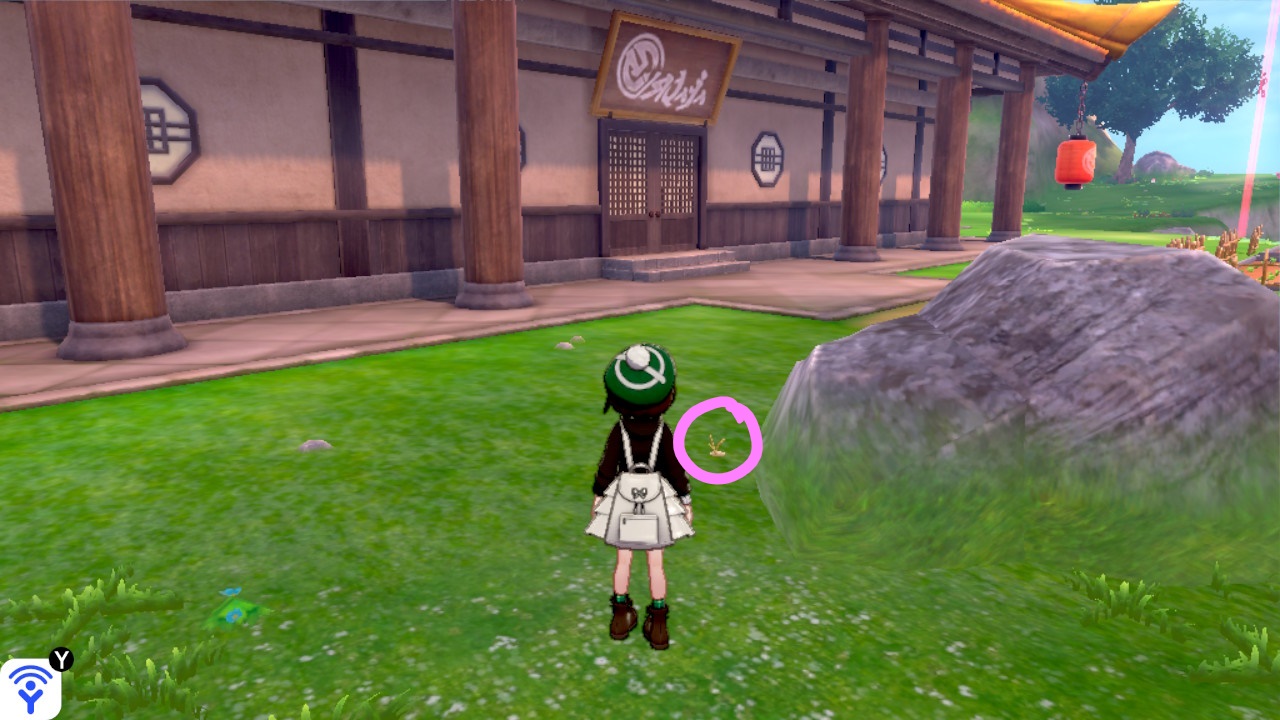
7. In the grass next to the large rock to the left of the dojo’s entrance


8. In the grass next to the cliff at the end of the path to the left of the dojo’s entrance


9. In the grass next to the tree at the end of the path to the right of the dojo’s entrance


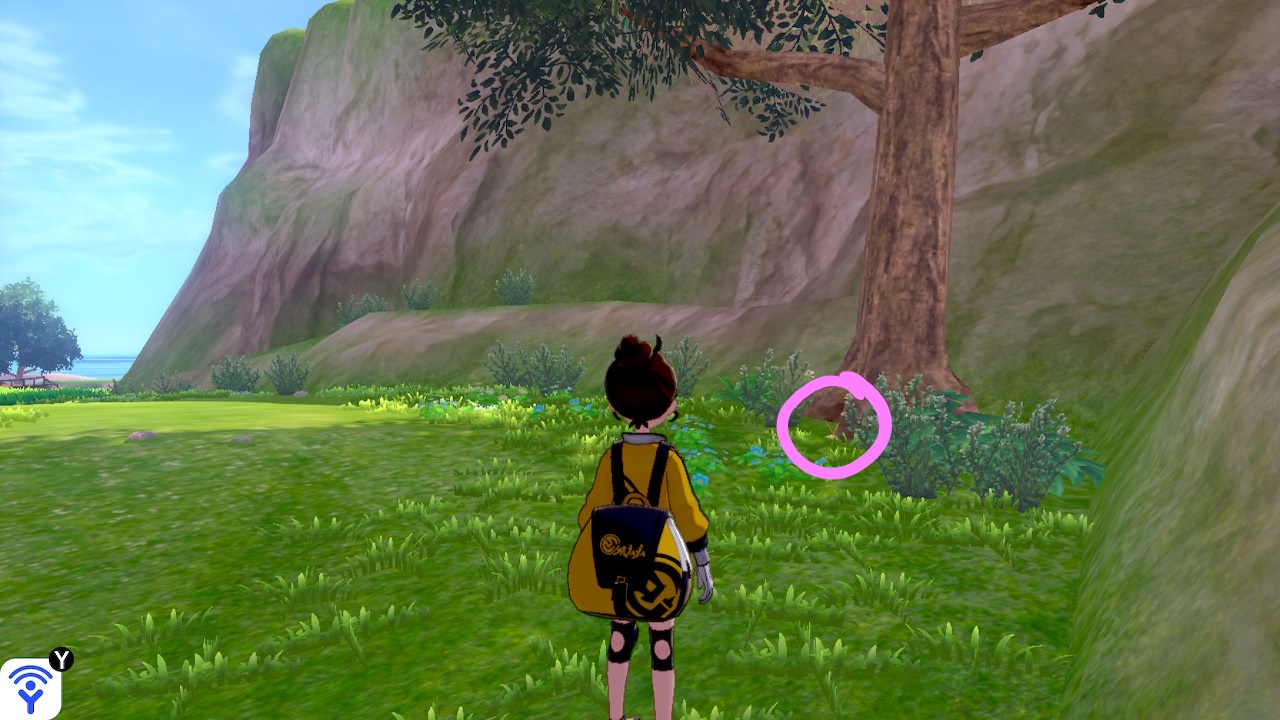
10. Underneath a tree along the cliff near the entrance to the Soothing Wetlands


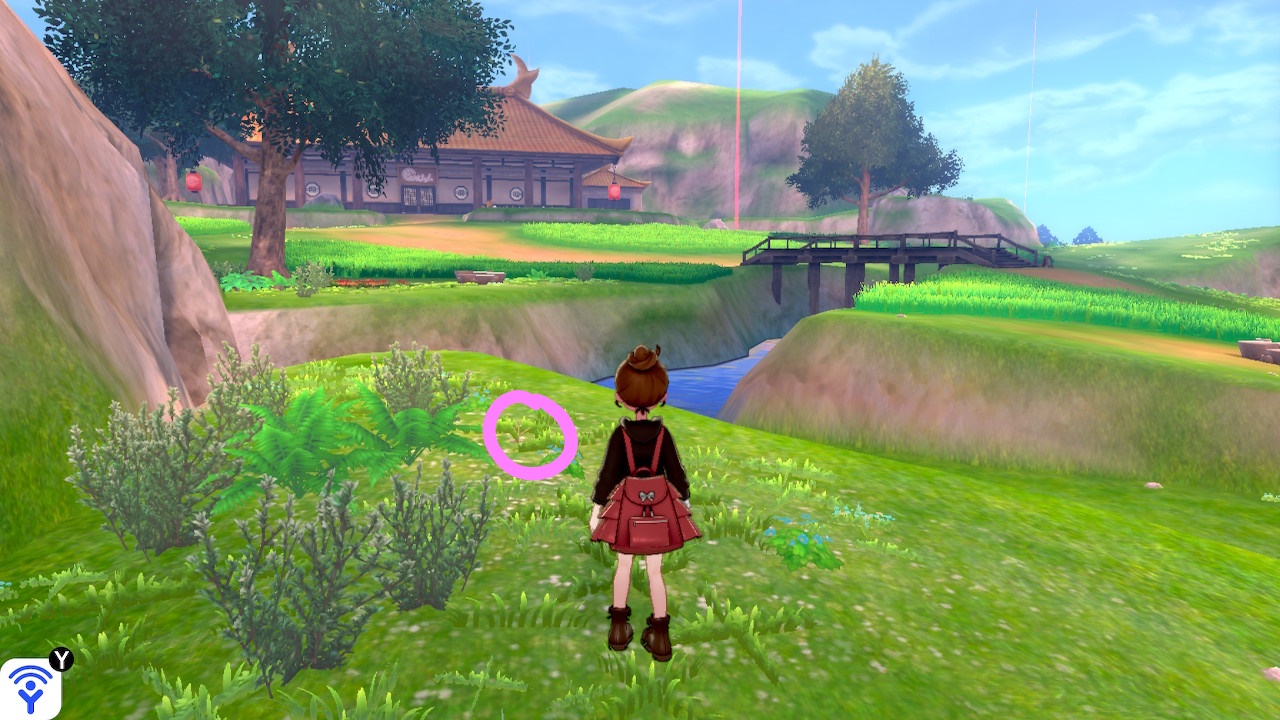
11. Southwest of the bridge on the higher level along the cliff near the path to the river


12. Southwest of the bridge behind the giant rock near the cliff


13. Southeast of the bridge along the river


14. Southeast of the bridge on a ledge overlooking the ocean


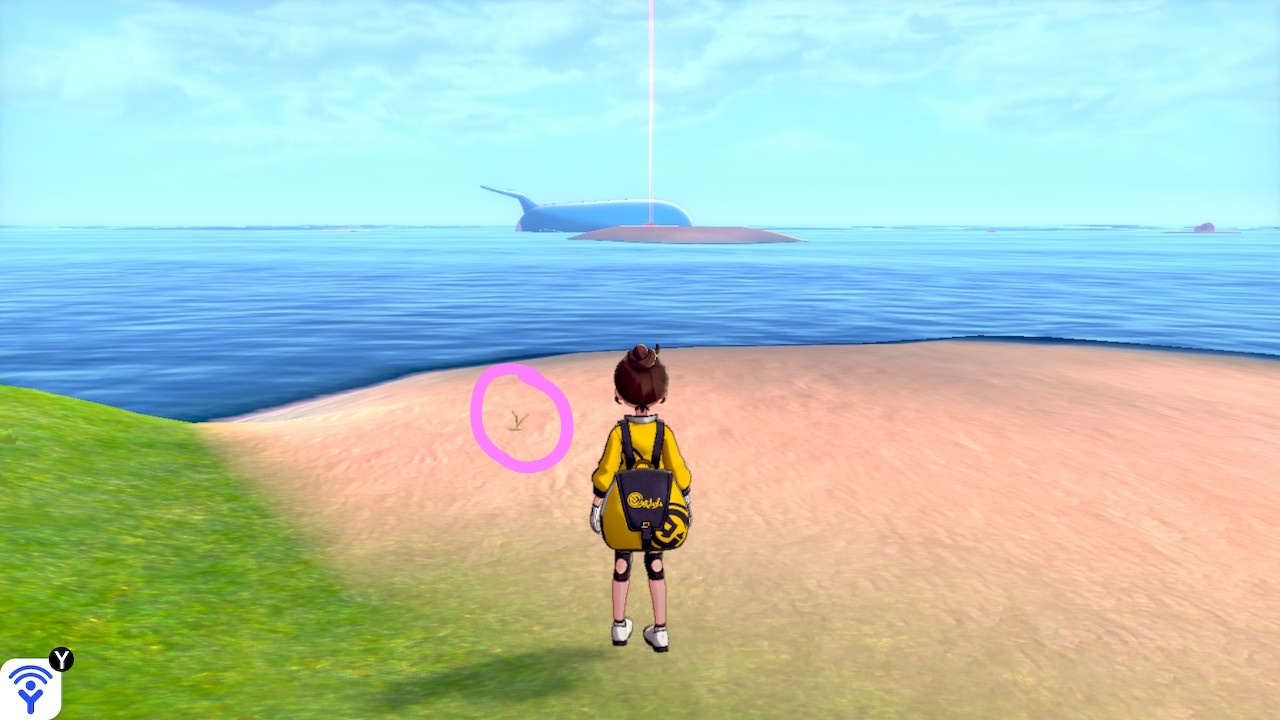
15. On the beach in the sand near the giant rock


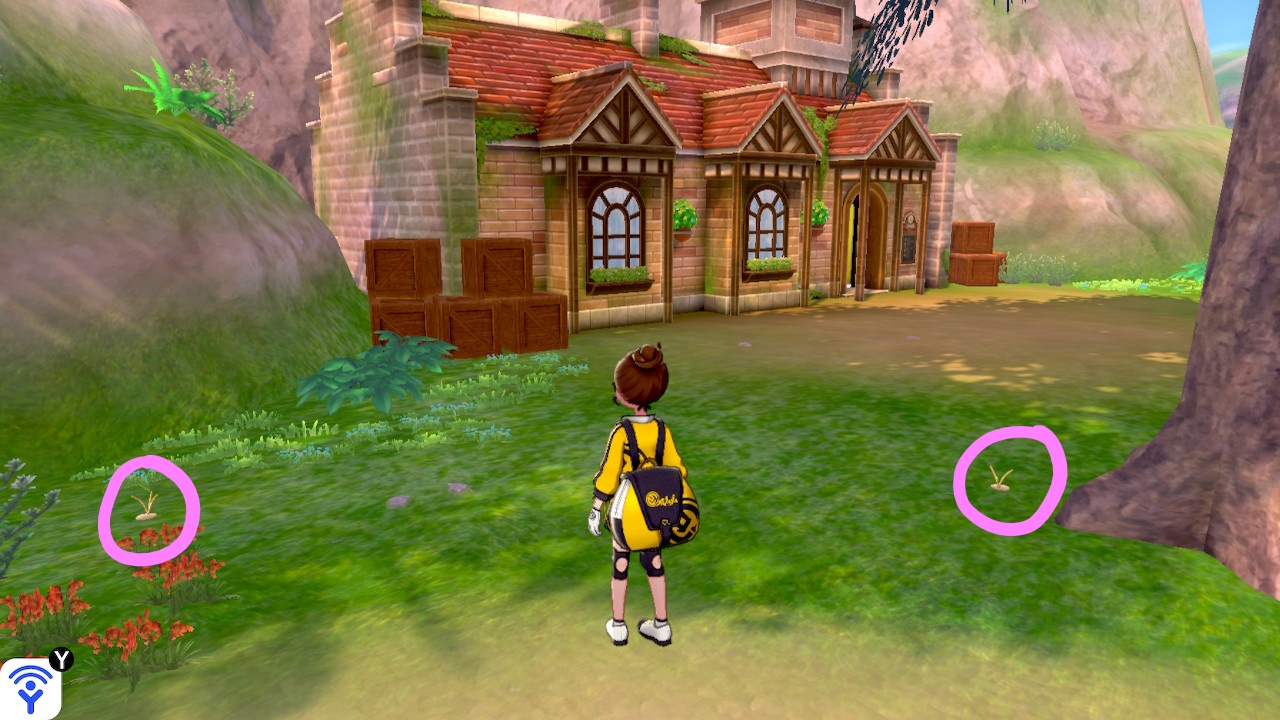
16. & 17. Near the station


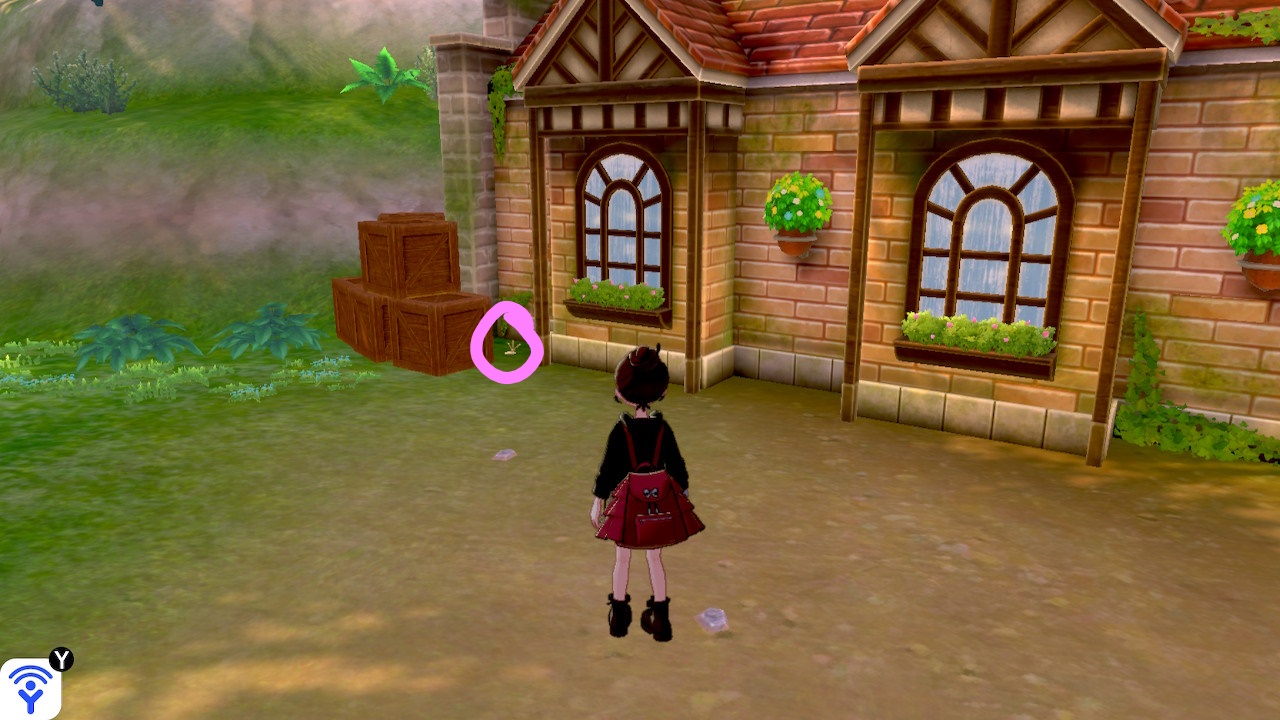
18. Behind the stacked boxes to the left of the station


19. Along the narrow path to the south of the station in a patch of red flowers


Click here for a guide on the locations of the Digletts in Soothing Wetlands!


Guides

Metro Exodus – Trapper Trophy Trap Locations

by Chappie in

*NOTE: During the main story, the Captain will task you with setting traps in his hideout. If you set all five traps, you will earn the Trapper Trophy. Below is a complete listing of all 5 traps.


Trap 1

After your drunken adventures with the Captain, you will be tasked with setting up traps in his base. Head to the floor below his sleeping quarters via the stairwell then head through the doorway, passing a red door on your right, to find the first trap to set.


Trap 2

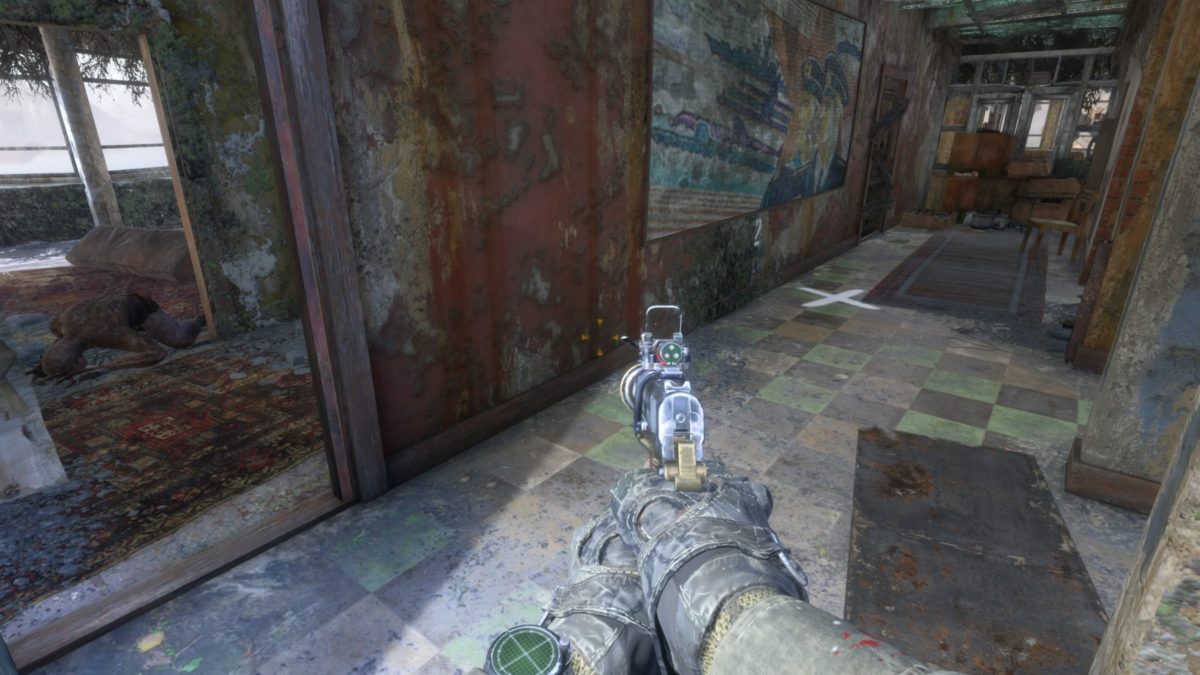
From the previous trap, head forward down the hallway towards the brown sofa. Jump over the wall to the left marked by the yellow paint. Proceed through the rest of the floor. Eventually you will pass through two bathtubs and come to a staircase leading down to the next level. Instead of going down the stairs, take a left to find the trap in the middle of the hallway on the left side.


Trap 3

From the previous trap, take the stairs in the hallway down. When you reach the bottom, take a right and head down the hallway to find the location of the third trap just before the doorway.


Trap 4

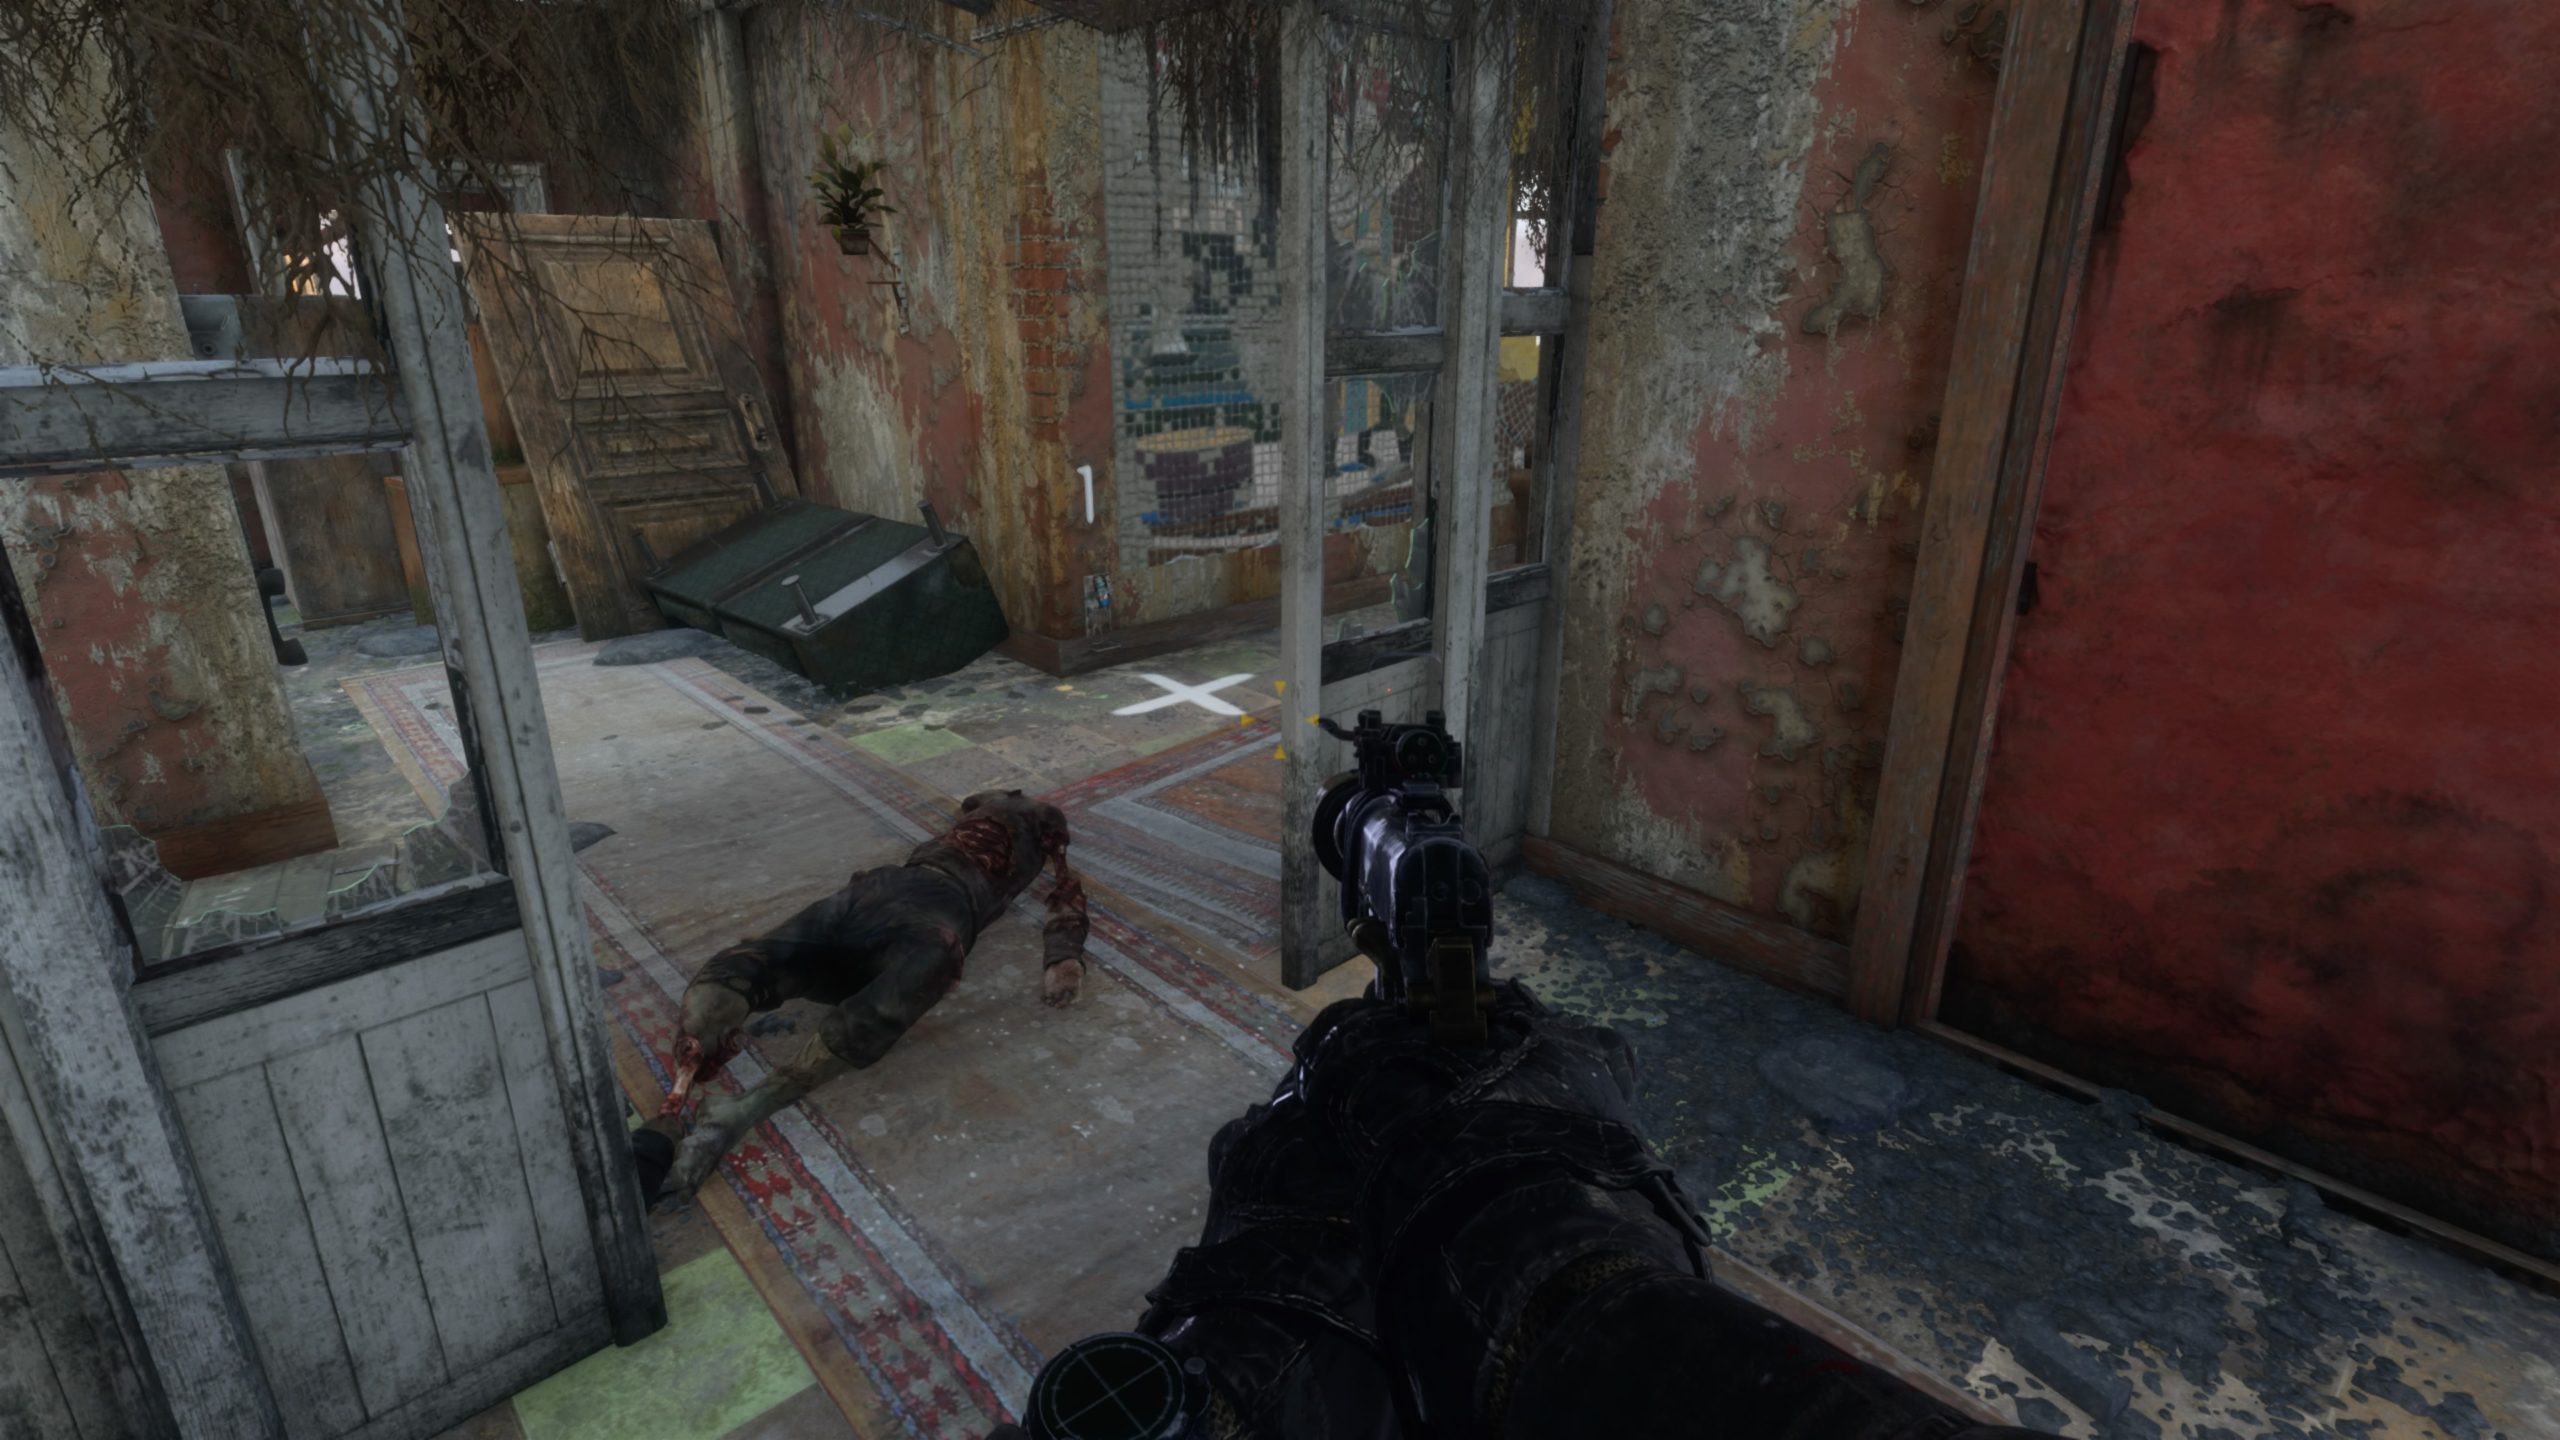
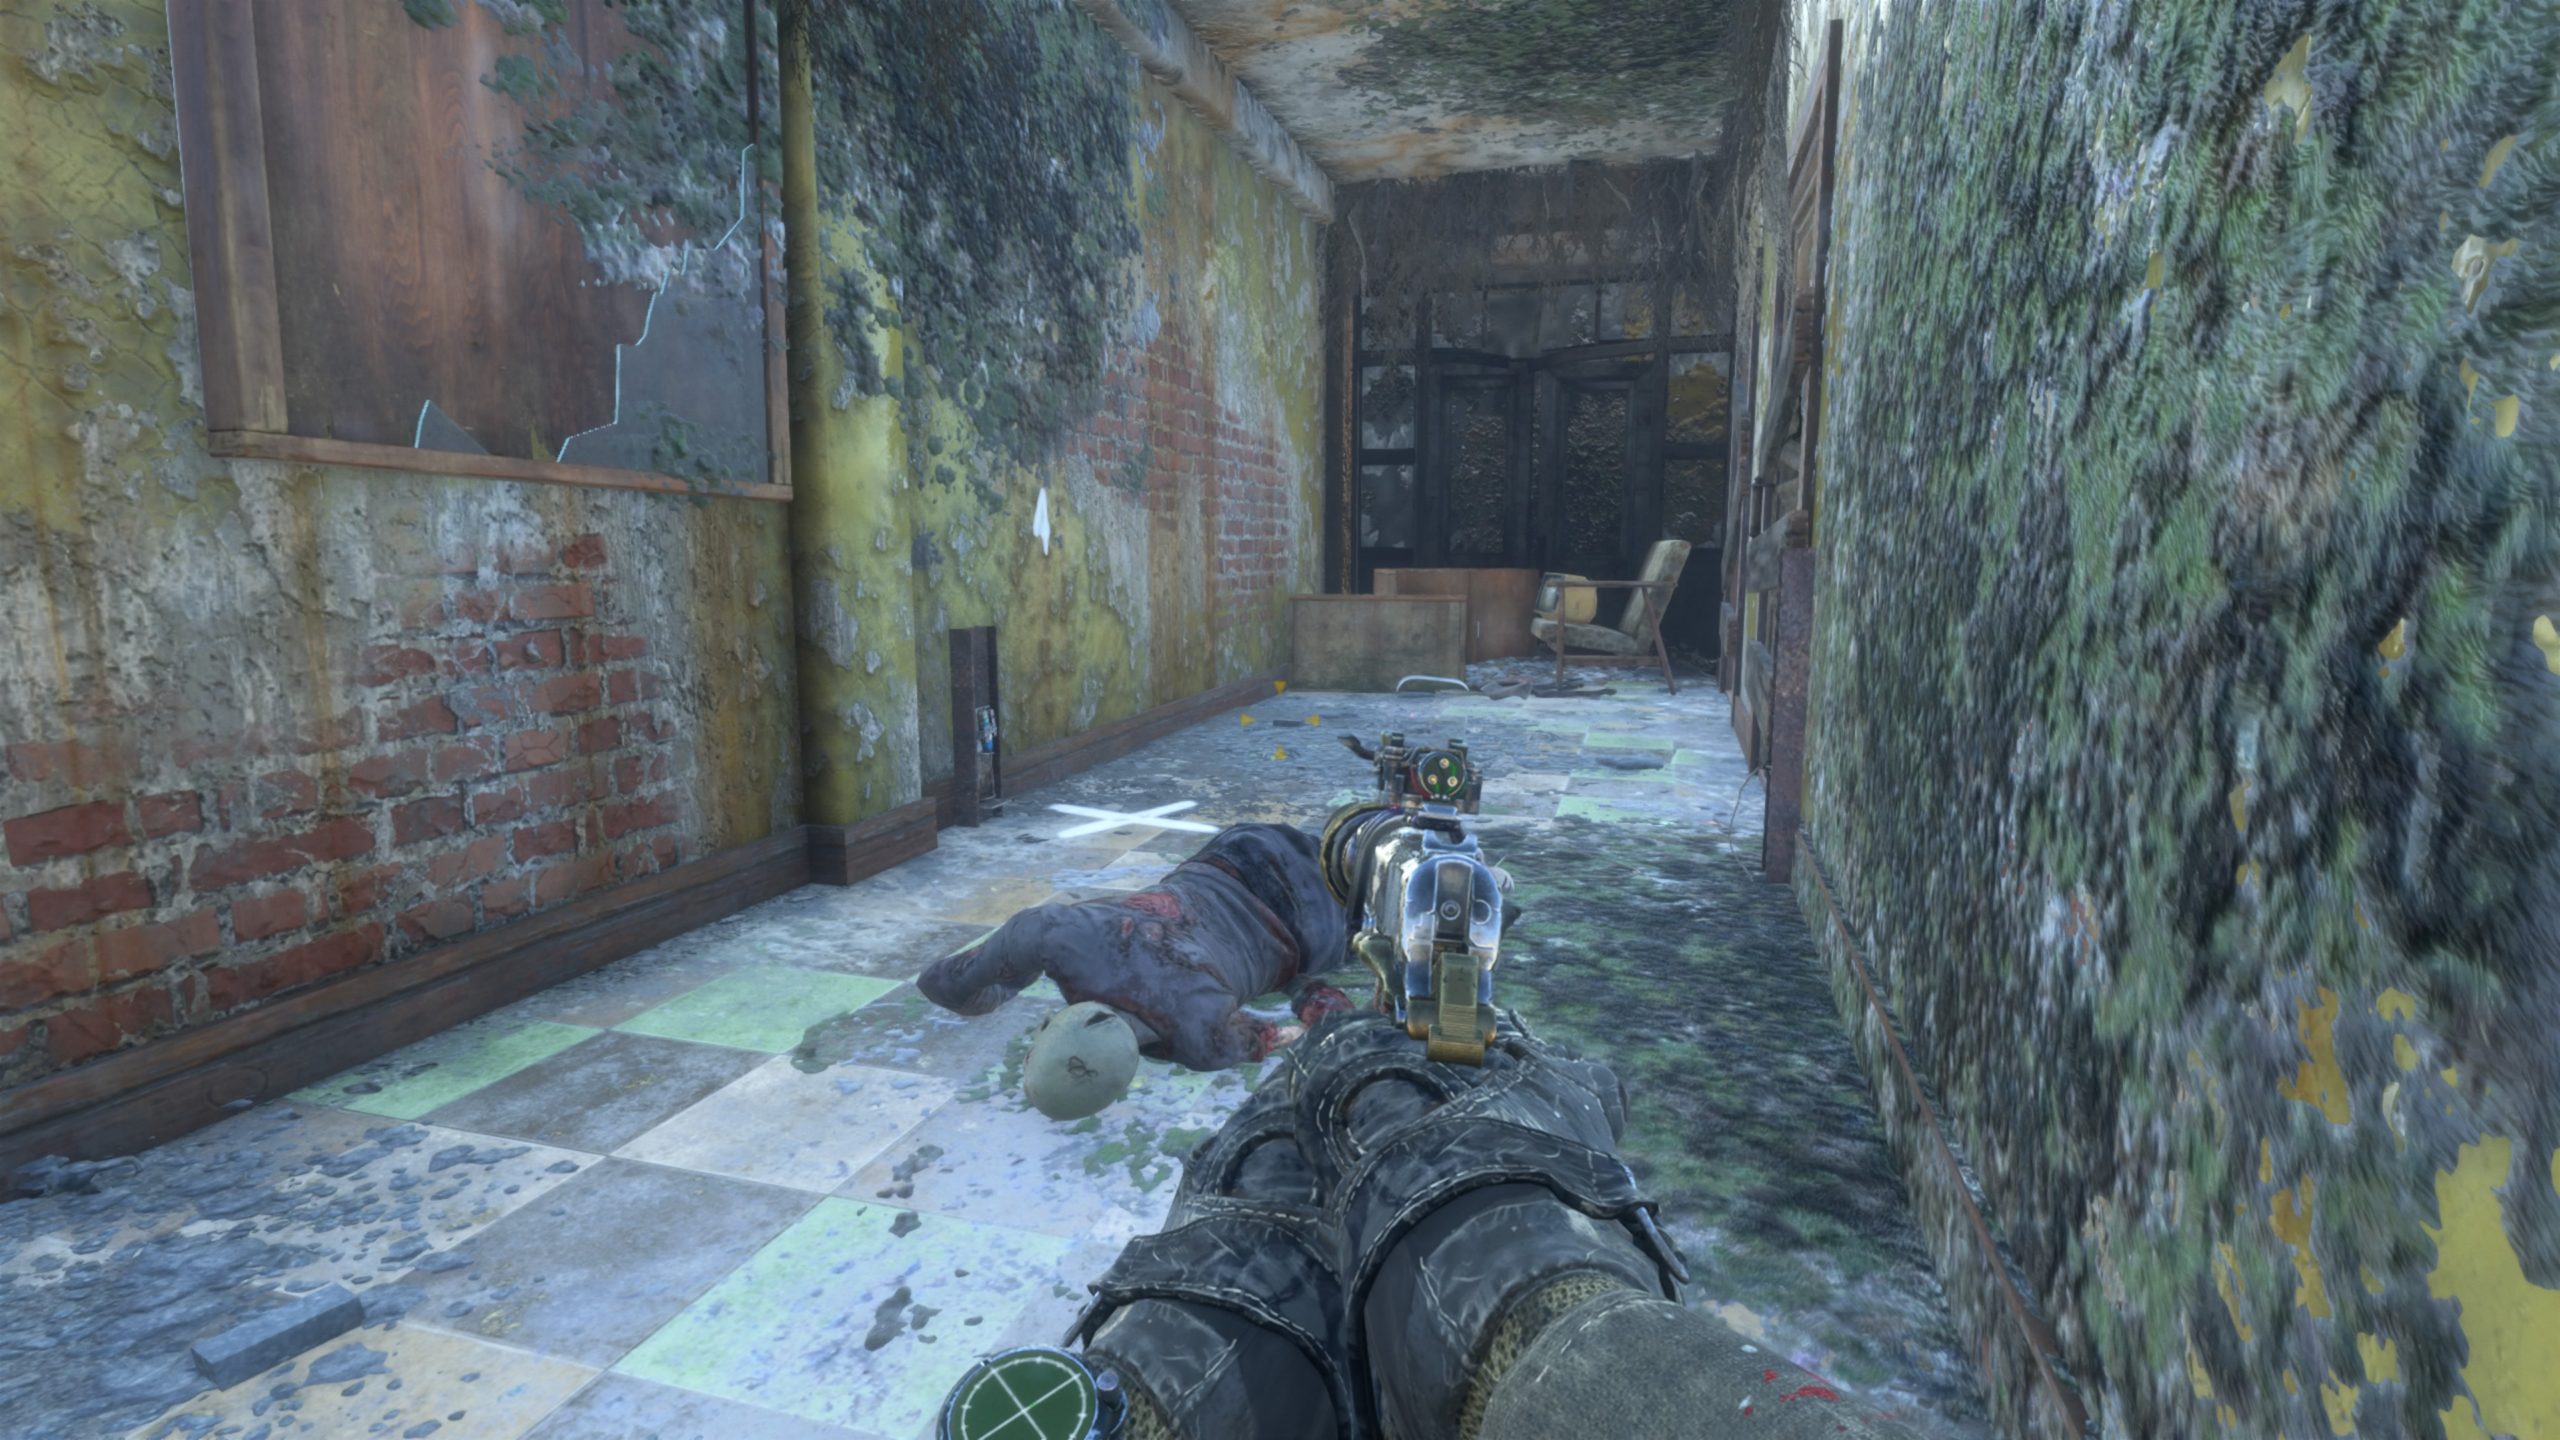
From the previous trap, head down the hallway to the wooden scaffolding. Pass over the scaffolding and through several rooms until you reach a room with a painting leaning against the wall and a white skull painted on the wall (location of Secret Stash 5). Enter through the doorway to the left of the skull and exit through another doorway to head outside. Travel across the wooden scaffolding and follow the path forward until you reach a room with a bright red door. Open the door and take a left to find the location of the trap near a corpse.


Trap 5

From the previous trap, head back down the hallway towards the red door and take a left to enter a room with cans hanging from the ceiling. Pass through this room and exit through a broken section of wall to arrive in a bathroom. Work your way through the bathroom to reach a red door. Open the door and go down the stairs. The location to set the trap will be at the bottom of the stairs next to the doorway.


Code Vein
Guides

Code Vein – Asclepius Vestige Parts

by Chappie in


Asclepius Vestige Part A

Location: Depths – Fiery Oblivion

Defeat the Blazing Heretic mini-boss located in the northern part of the map.


Asclepius Vestige Part B

Location: Depths – Fiery Oblivion

Defeat the Abyssal Doppleganger mini-boss located in the southwestern part of the map.


Asclepius Vestige Part C

Location: Depths – Celestial Ice Prison

The vestige can be obtained from defeating the Mud Gorger (with the group of moneys that spawn).


Asclepius Vestige Part D

Location: Depths – Celestial Ice Prison

The vestige can be obtained from defeating Argent Wolf Berserker.


Asclepius Vestige Part E

Location: Sealed Depths – Eternal Abyss

Defeat the Dusty Cloud Bandit to receive this vestige.


Asclepius Vestige Part F

Location: Sealed Depths – Eternal Abyss

Defeat the Queen’s Vanuard Puppet to receive this vestige.


Asclepius Vestige Part G

Location: Crypt Spire – Upper Level

From the Crypt Spire mistle, head north passing the areas where you fought the Blade Bearer, Cannoneer and Juzo Mido. This will bring you to a long hallway with lights leading down it on both sides. Head through that hallway and make a left at the end going down a side set of stairs. (There is another set of stairs that keeps leading north. Don’t go that way!) The vestige will be at the bottom of the steps in the middle of the floor.