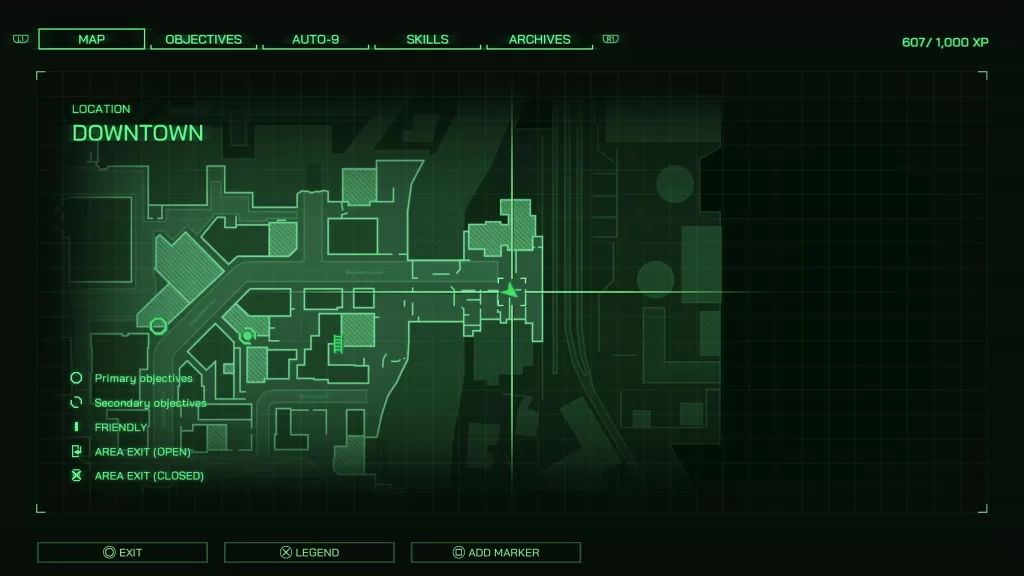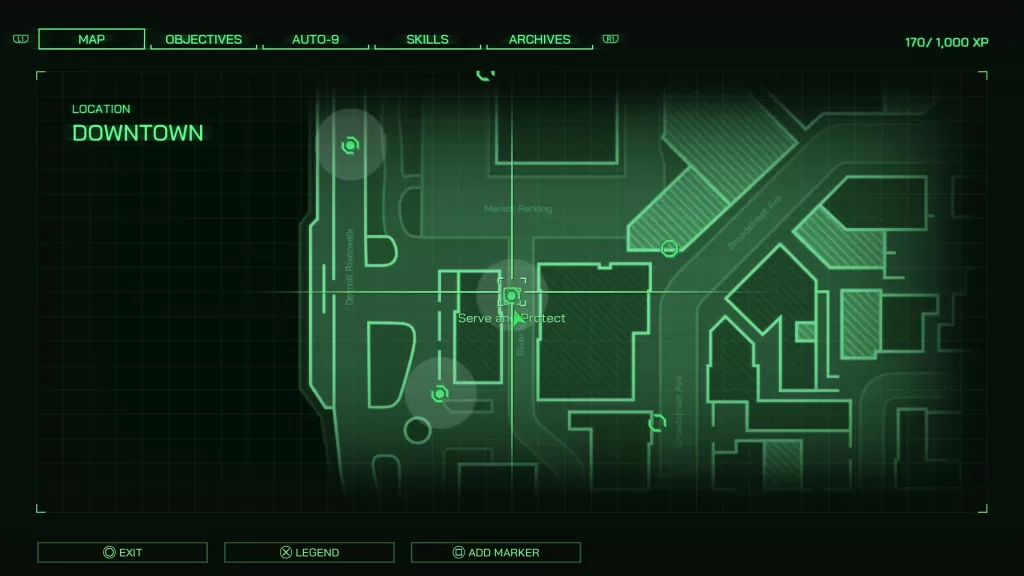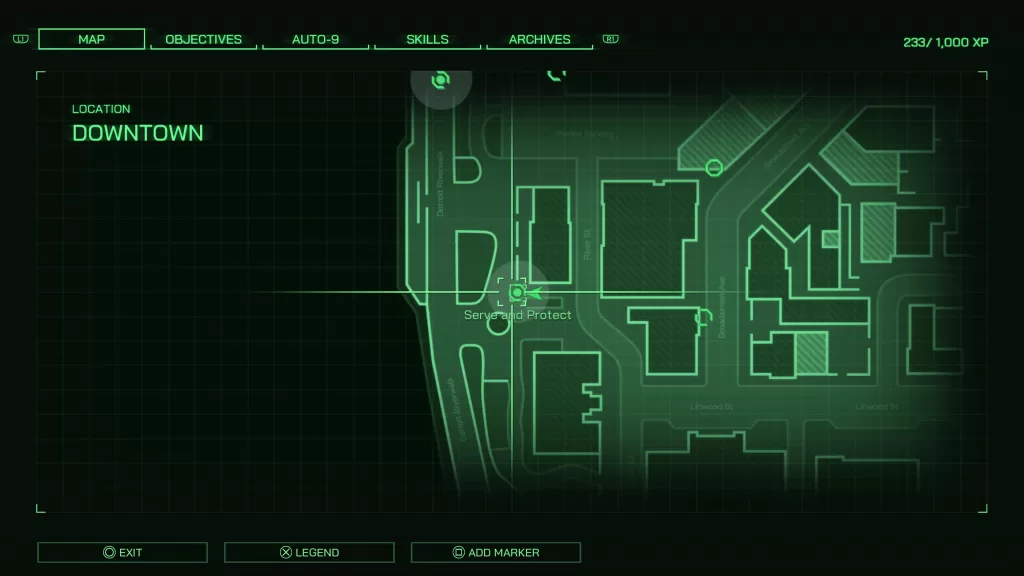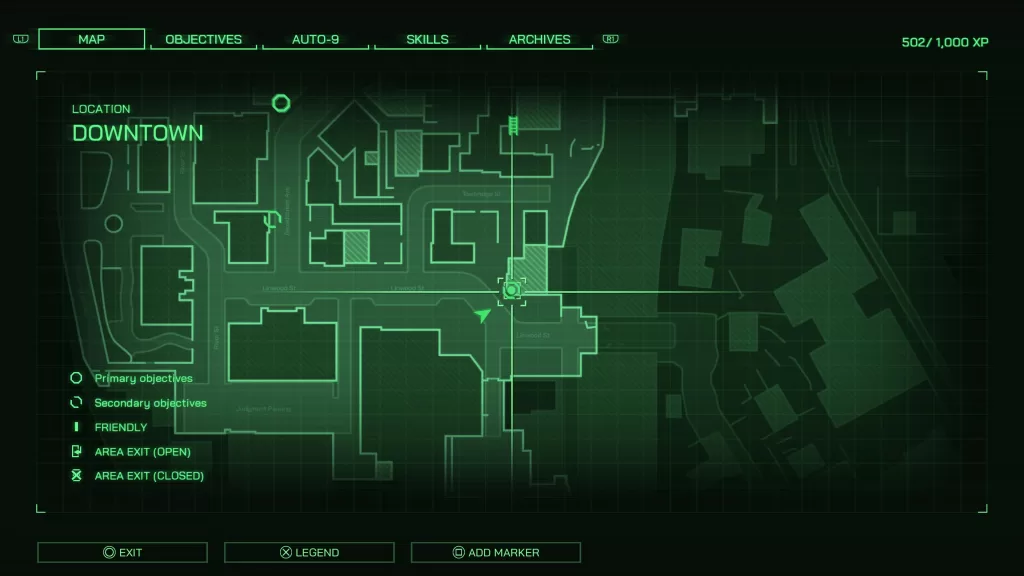
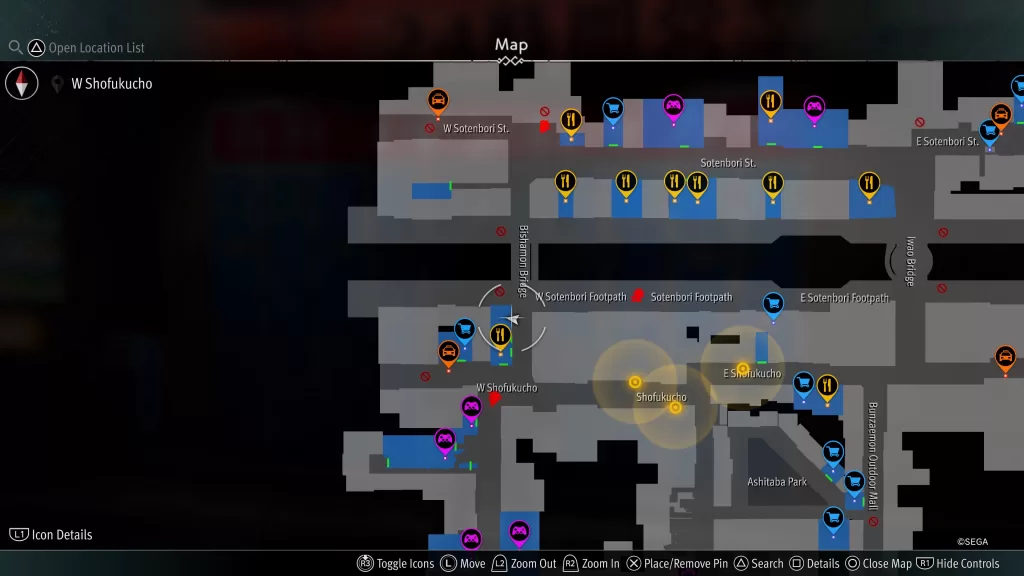
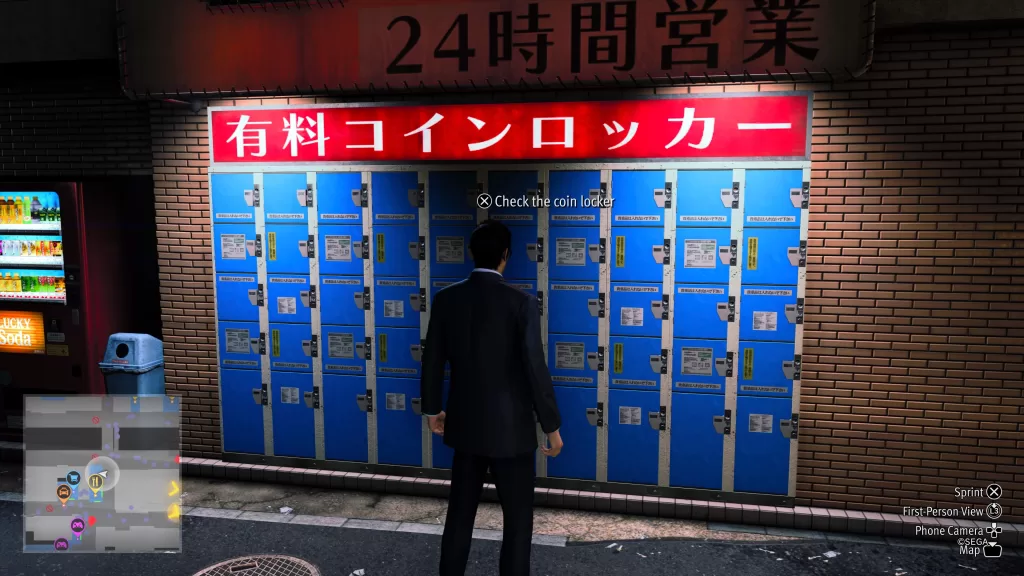
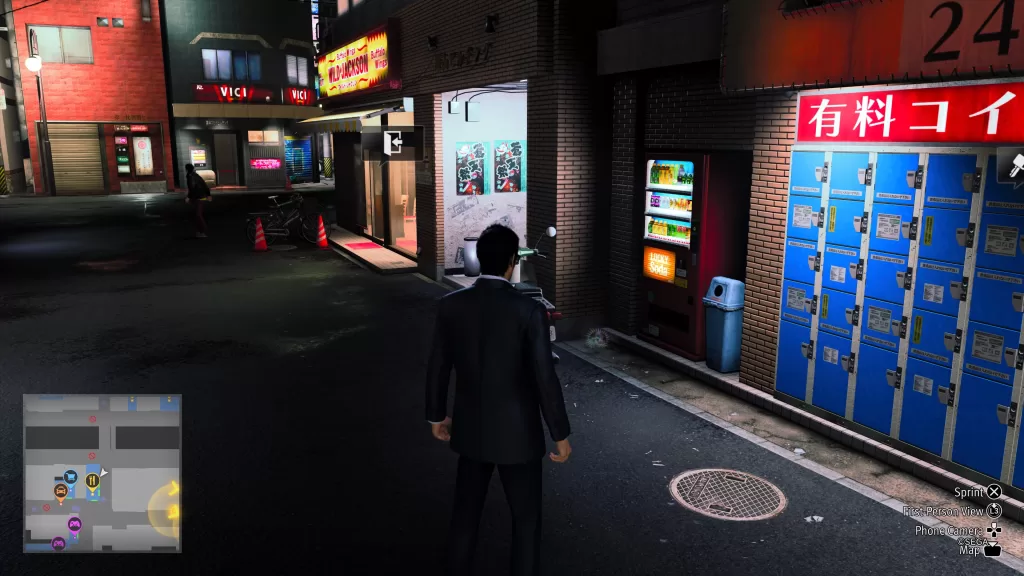
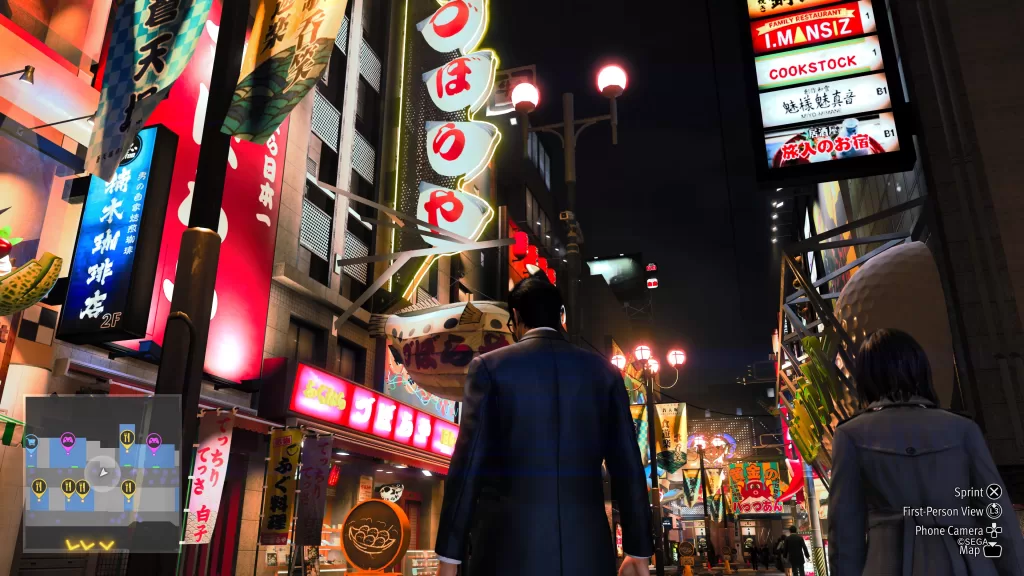
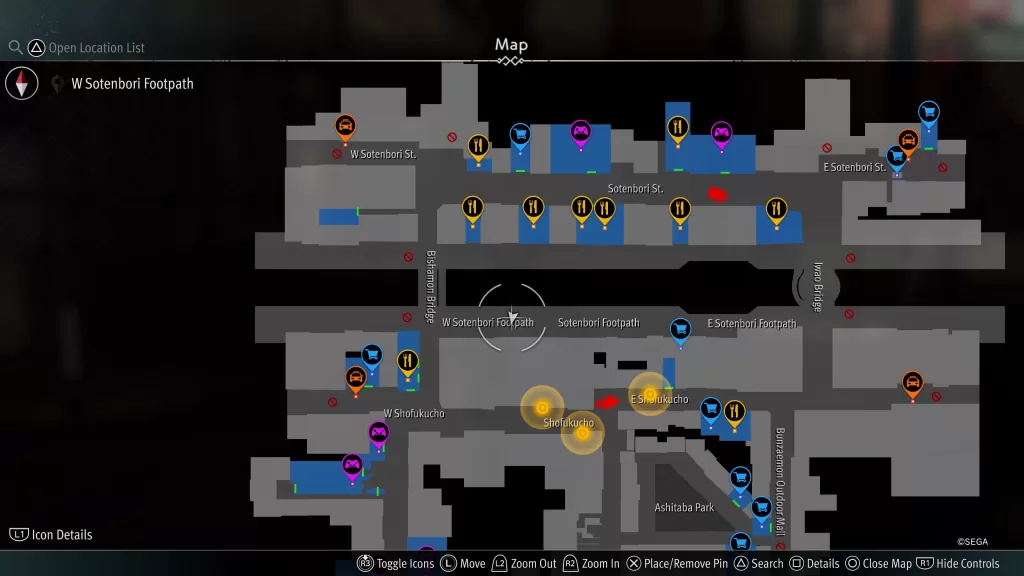
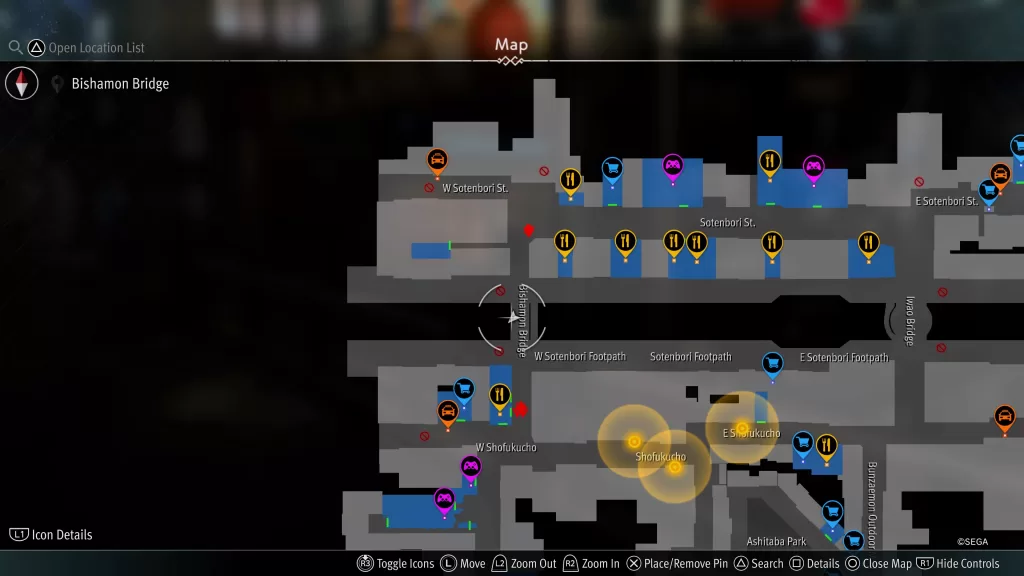
Welcome to our Like a Dragon Gaiden locker keys guide. In this guide you’ll find the locations of the Sotenbori locker keys! In Sotenbori, you can find a wall of coin lockers between W Sotenbori Footpath and W Shofukucho in Sotenbori.
You’ll need to locate the corresponding Sotenbori Locker Key to unlock it! For a guide on what each locker unlocks, click here! Below you’ll find the location of all the Sotenbori Locker Keys!
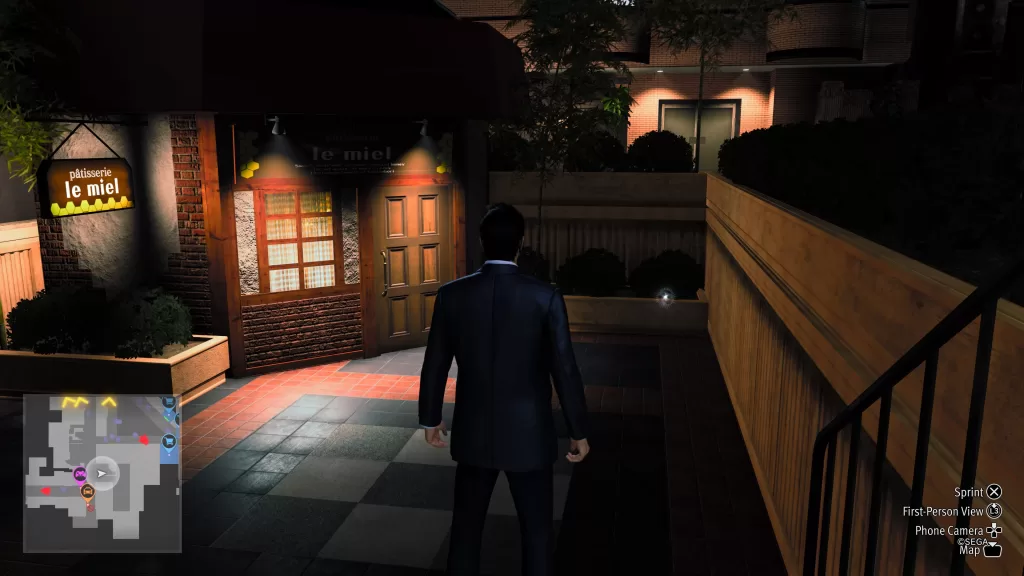
A1
Location: Sotenbori
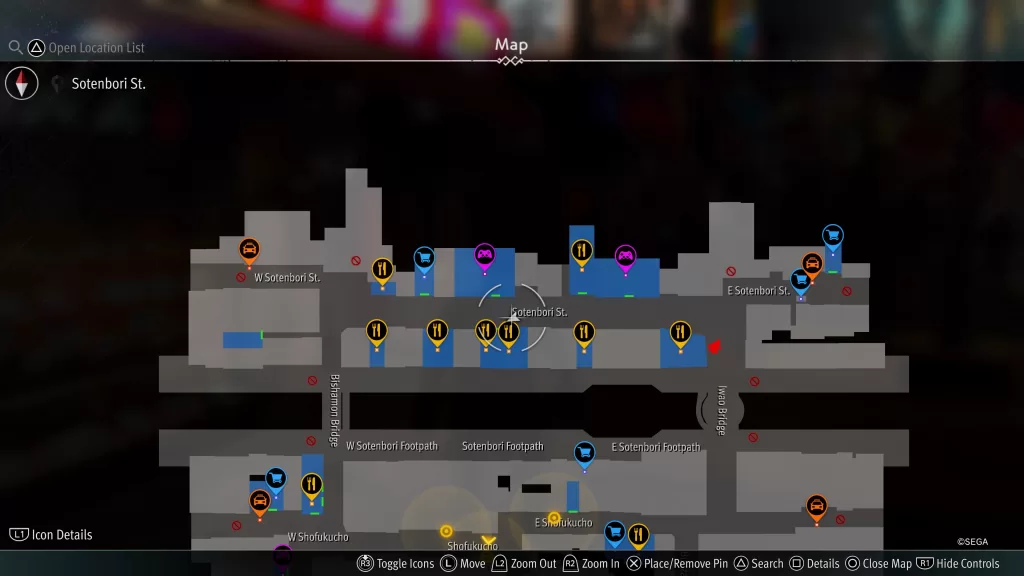
The Sotenbori Locker Key A1 can be found on the ground down the stairs near a building labeled as “le miel”.

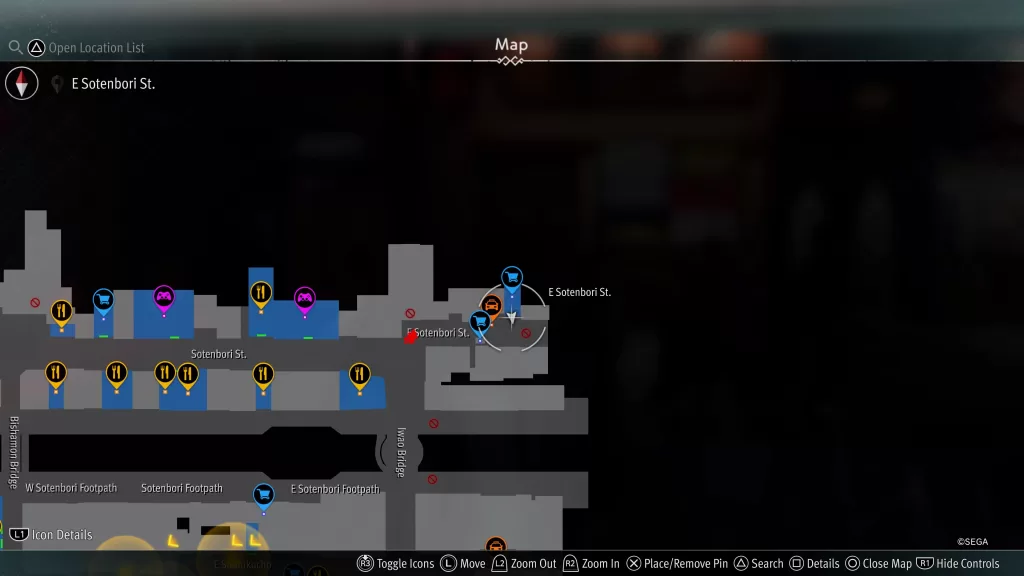
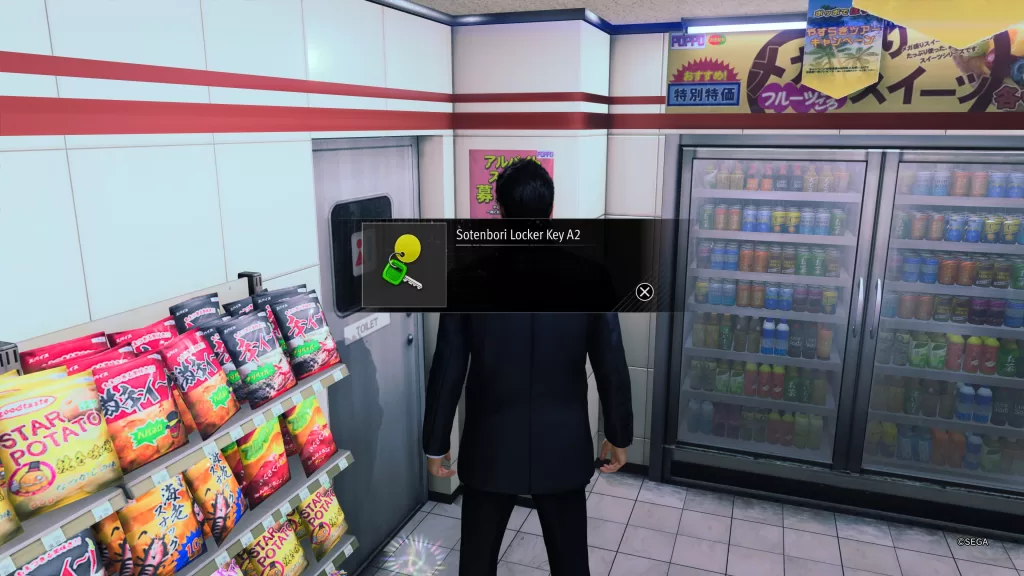
A2
Location: Sotenbori
The Sotenbori Locker Key A2 can be found on the ground in Poppo (Sotenbori St.).
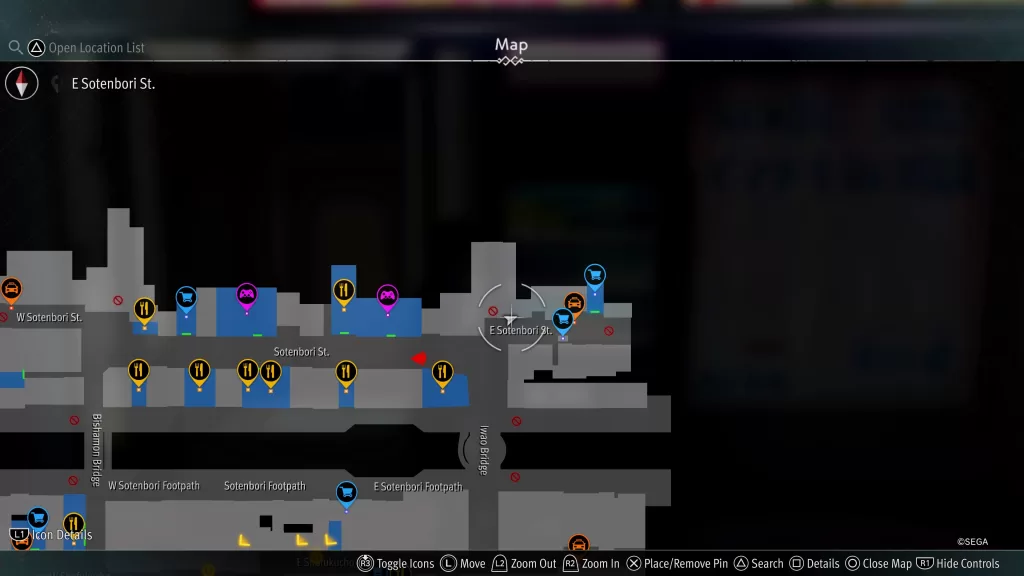
A3
Location: Sotenbori
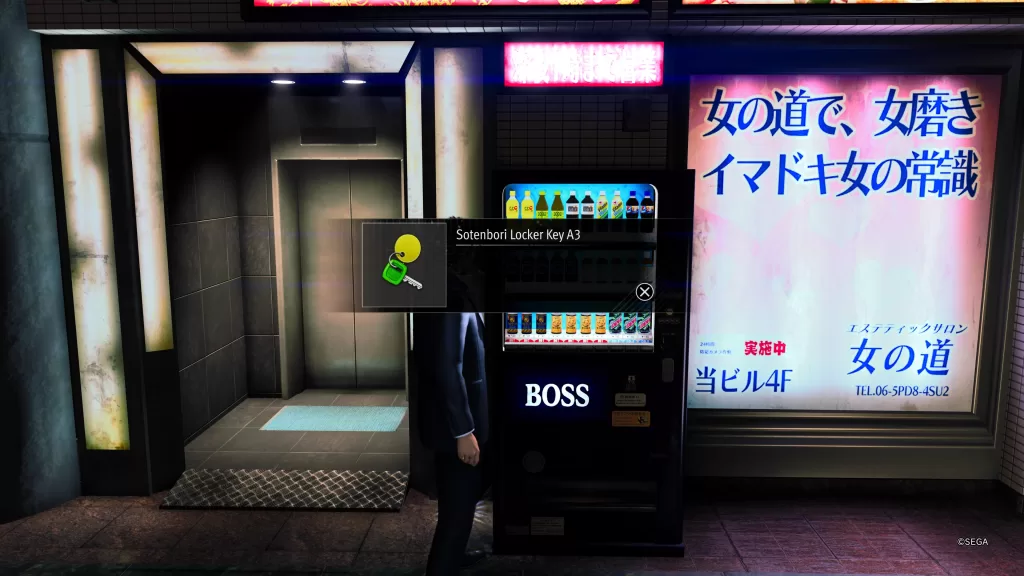
The Sotenbori Locker Key A3 can be found just west of Poppo (Sotenbori St.) in front of a vending machine.
A4
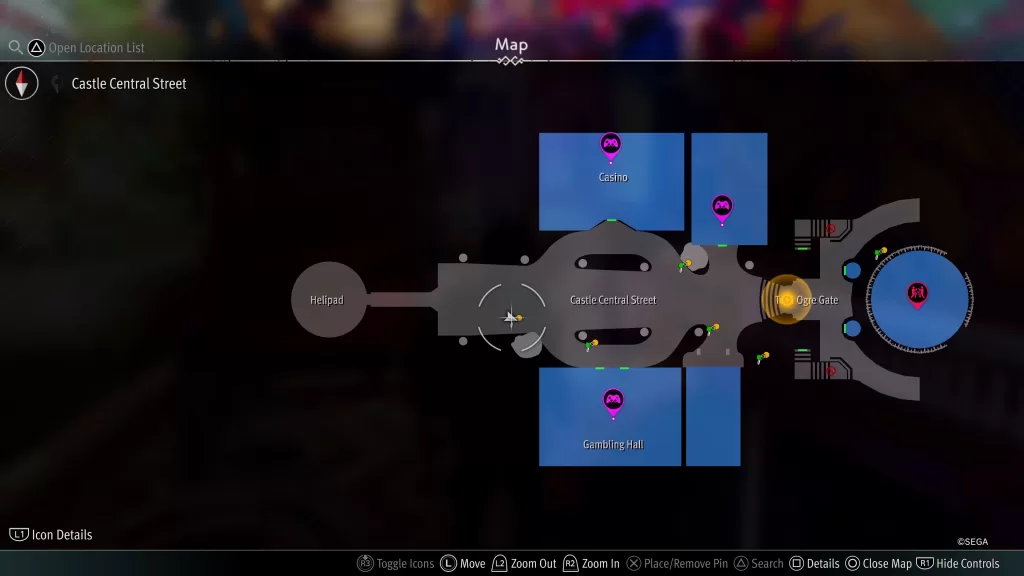
Location: Castle
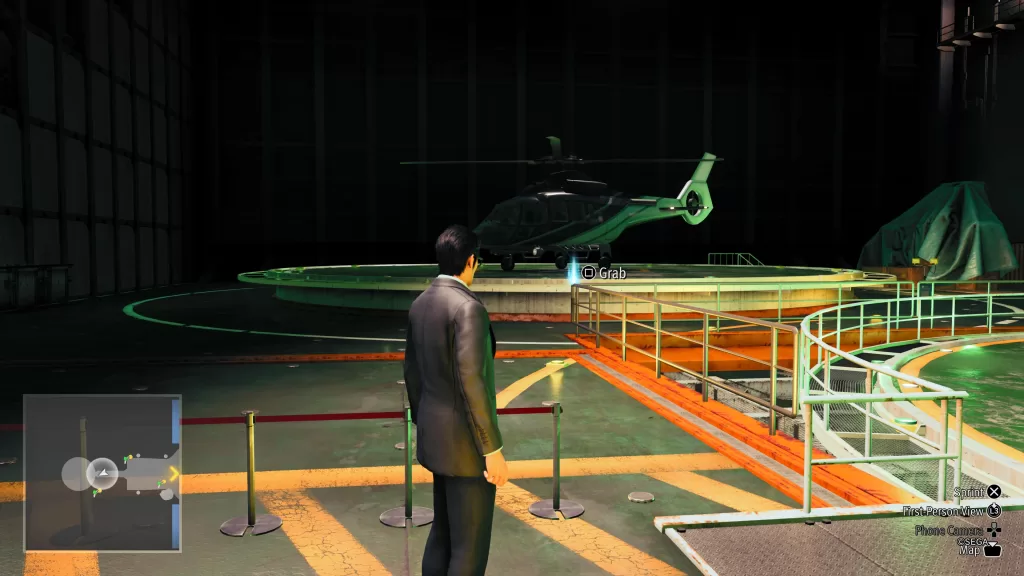
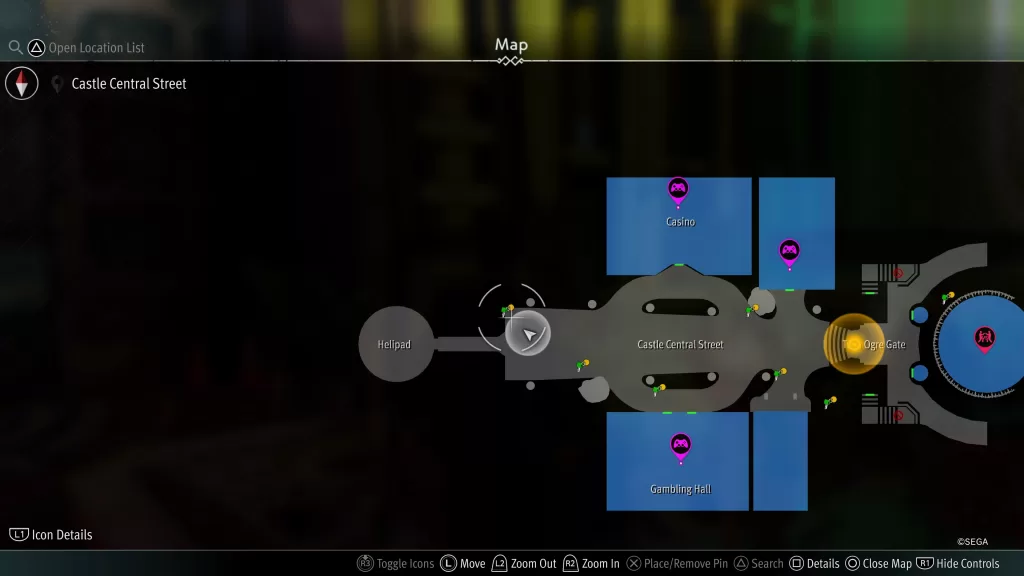
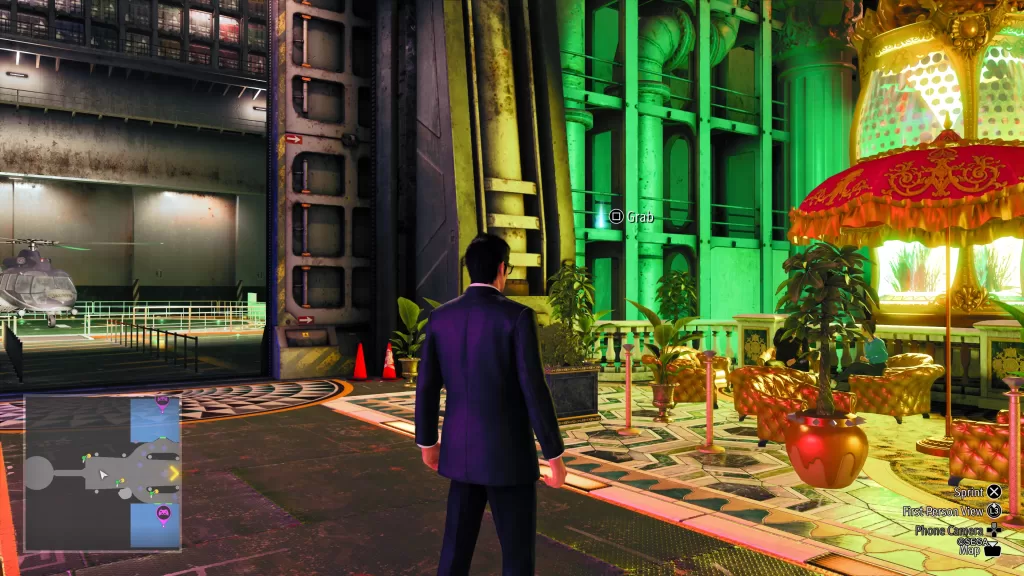
The Like a Dragon Gaiden Locker Key A4 can be found as a blue orb on a rail near a helicopter on the Helipad.
A5
Location: Sotenbori
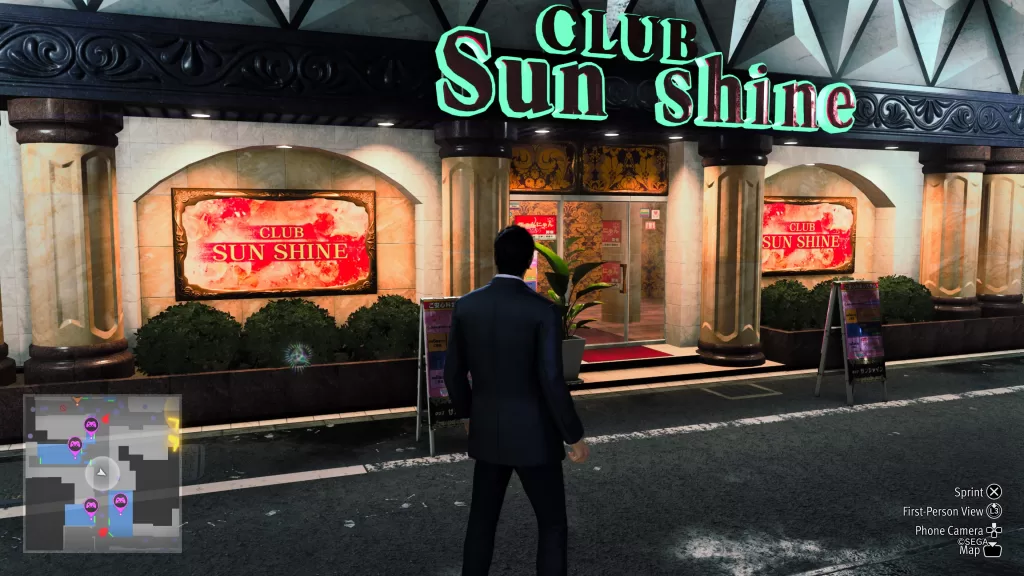
Sotenbori Locker Key A5 can be found on the ground outside of Club Sunshine.
B1
Location: Sotenbori
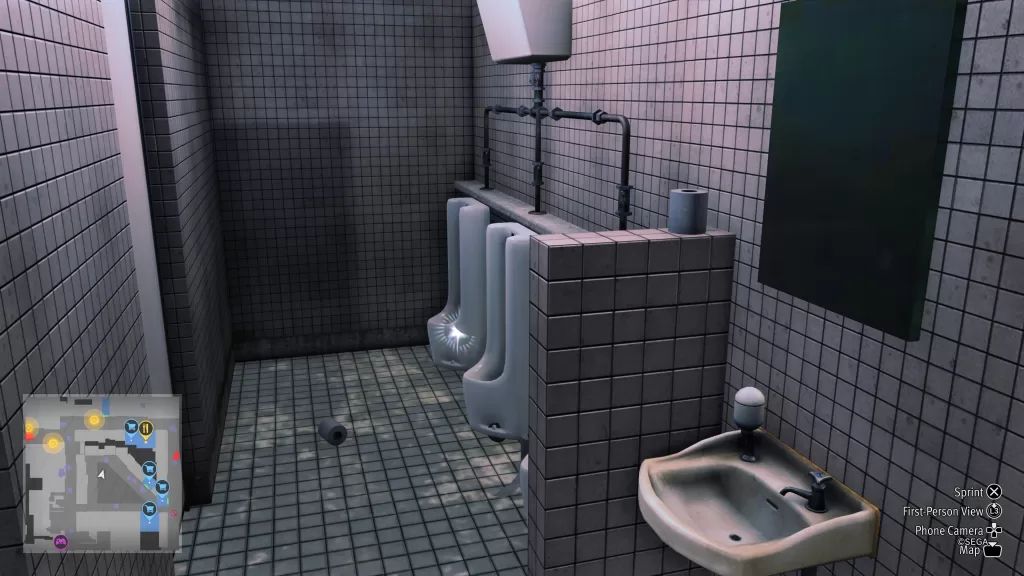
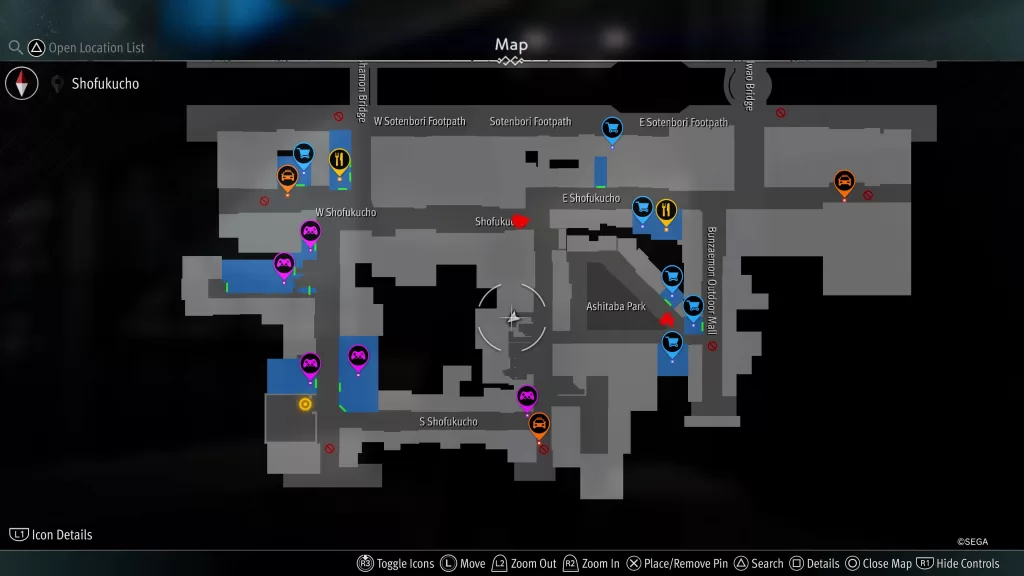
The B1 Locker Key can be found on the northern side of Ashitaba Park on a urinal in the bathroom.
B2
Location: Sotenbori
The B2 Locker Key can be found on the ground in front of a white car near the southeast taxi.
B3
Location: Sotenbori
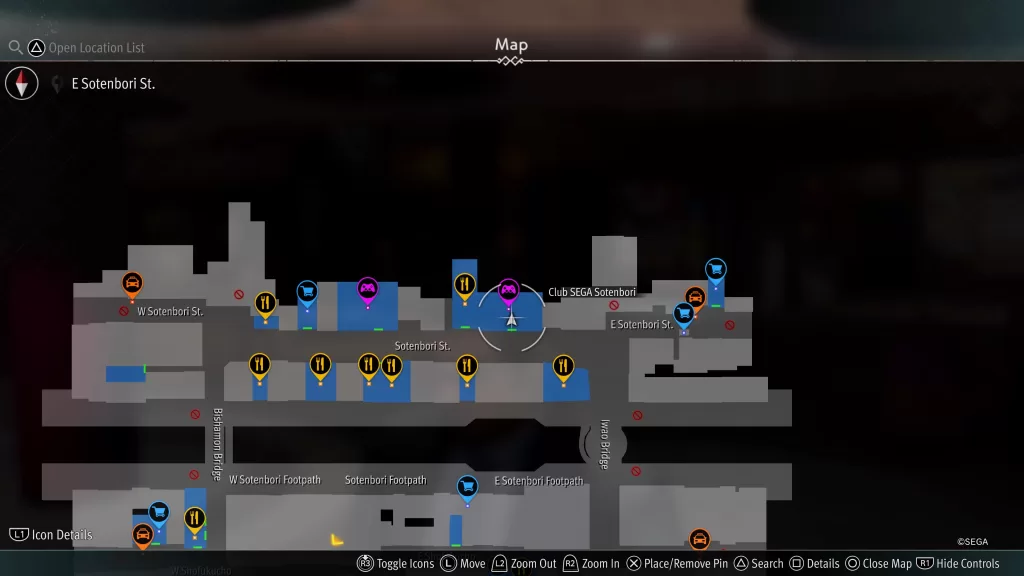
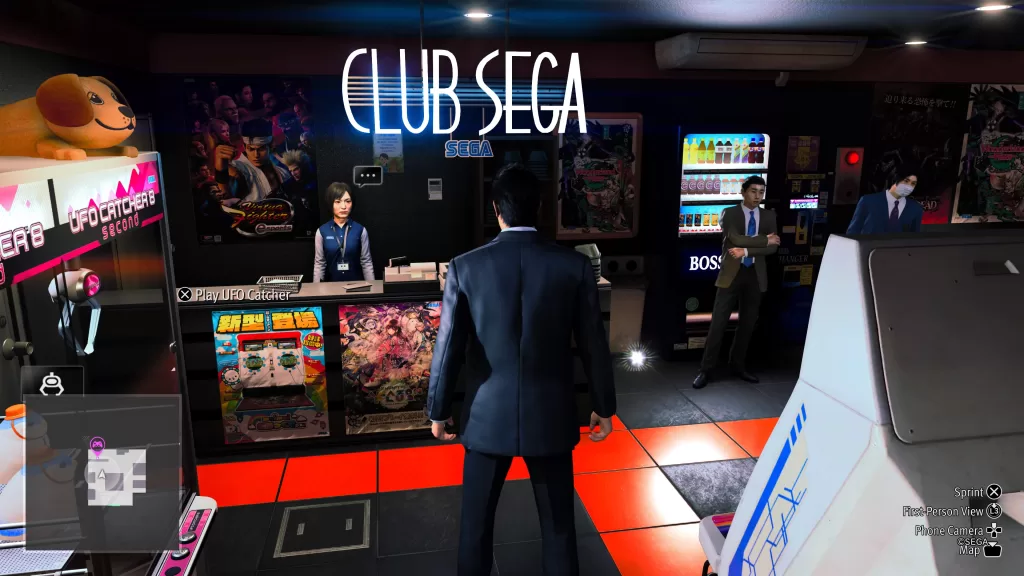
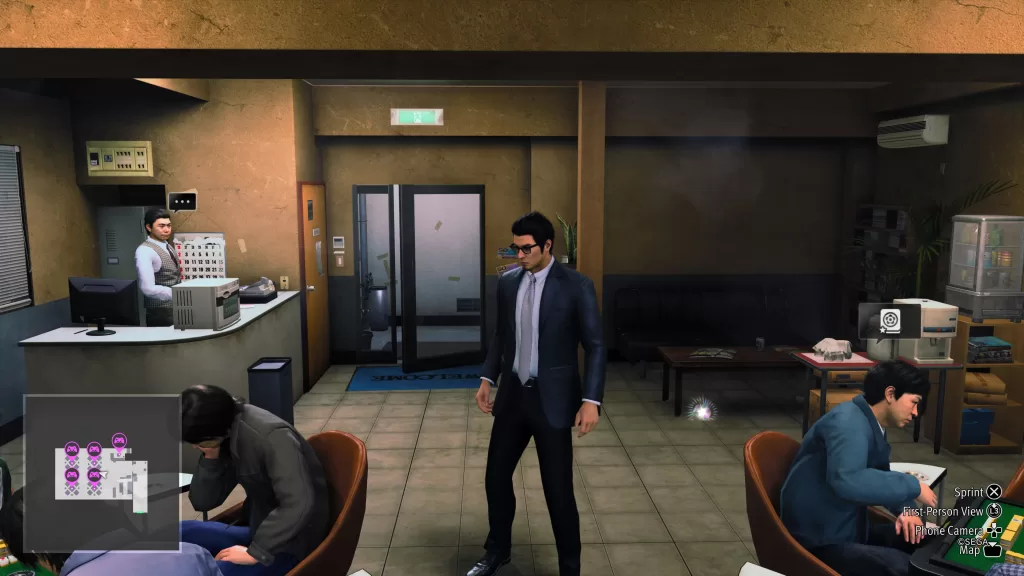
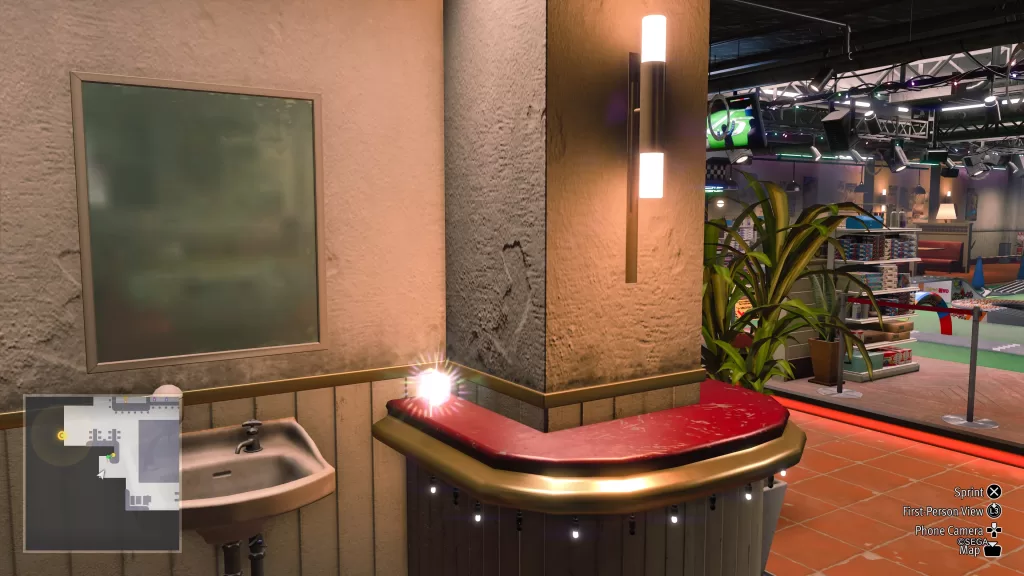
The B3 Locker Key can be found in Club SEGA Sotenbori between the counter and the vending machine.
B4
Location: Sotenbori
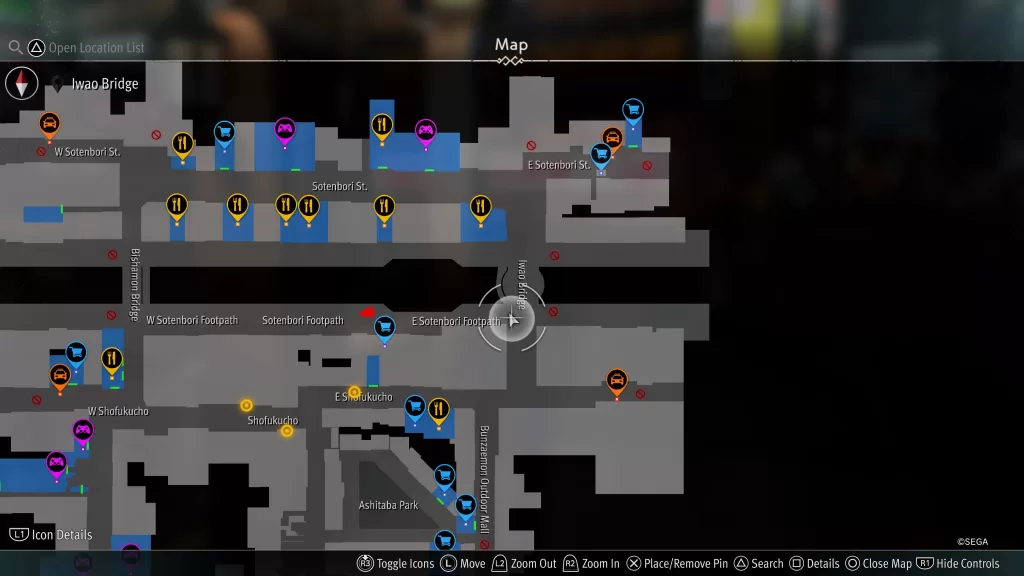
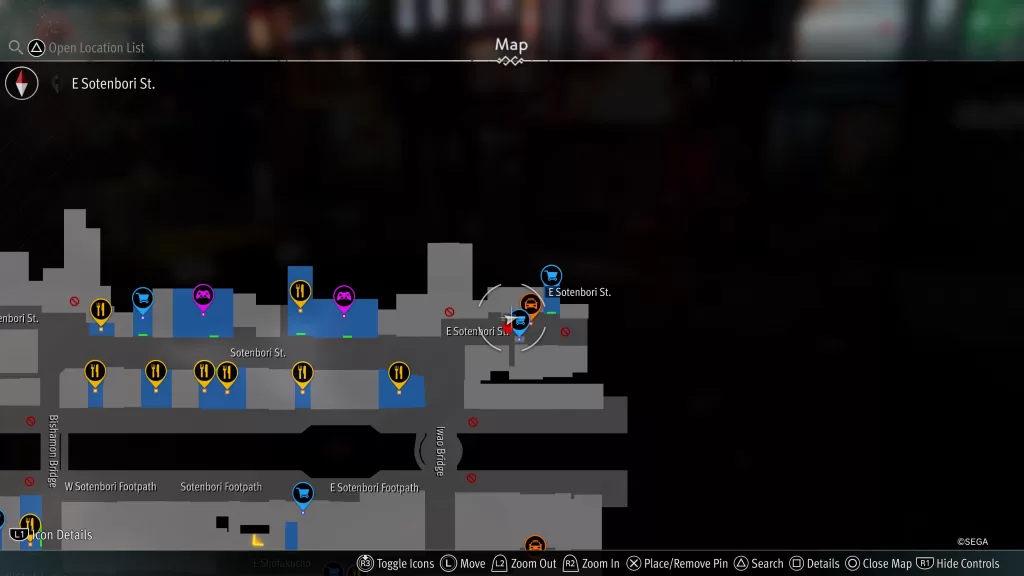
The Sotenbori Locker Key B4 can be found as a blue orb on the bell at the end of the E Sotenbori Foothpath.
B5
Location: Castle
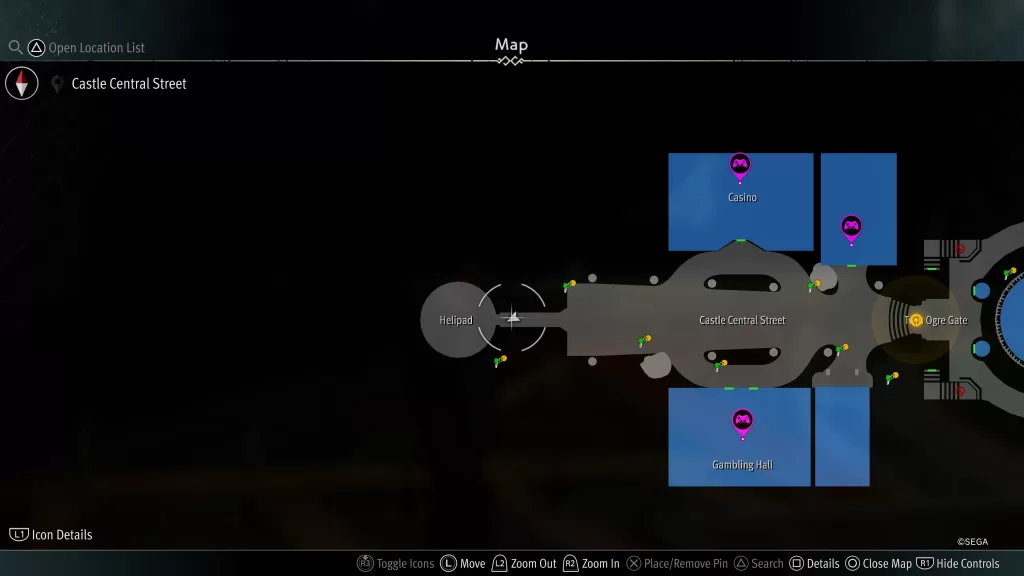
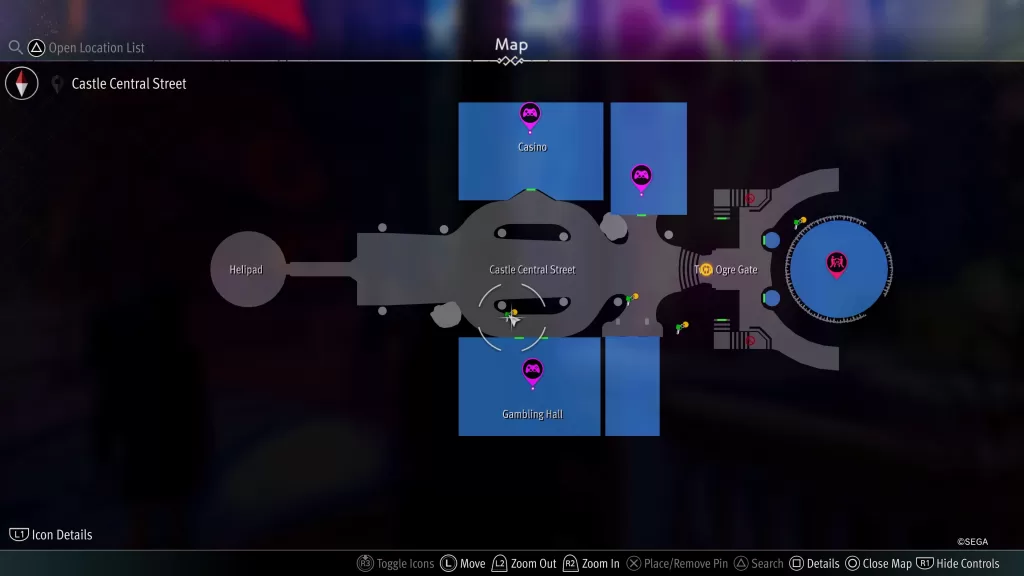
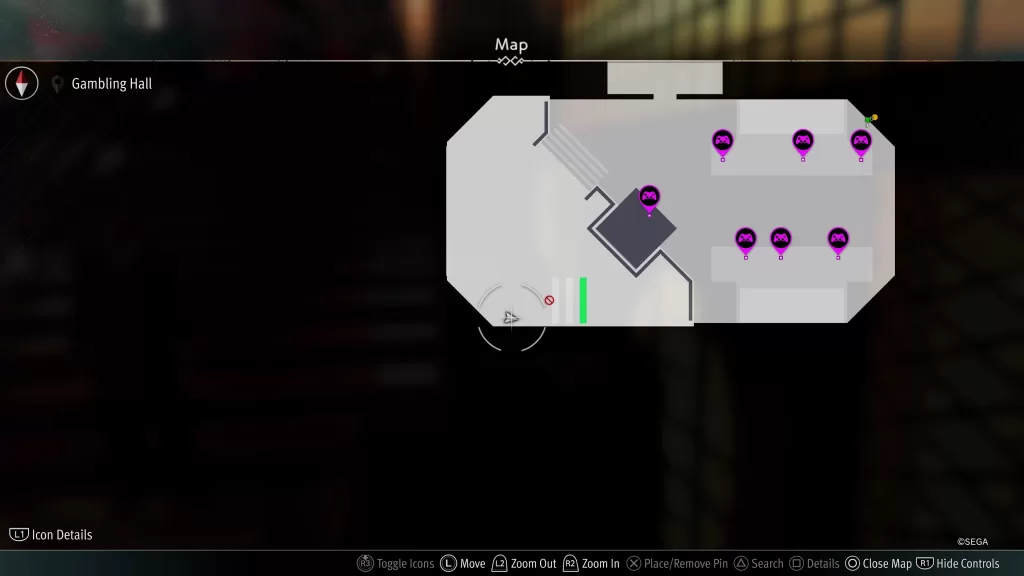
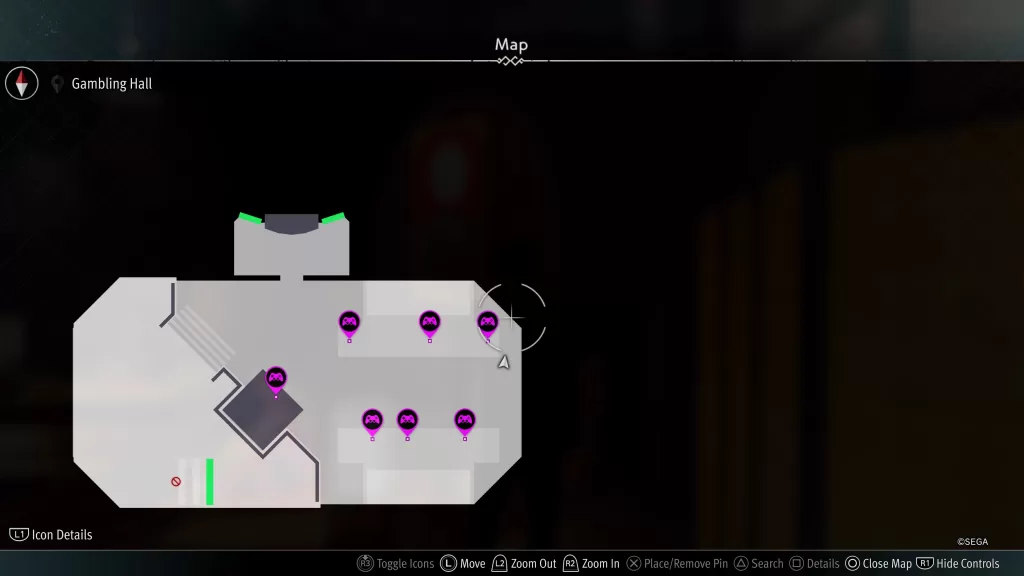
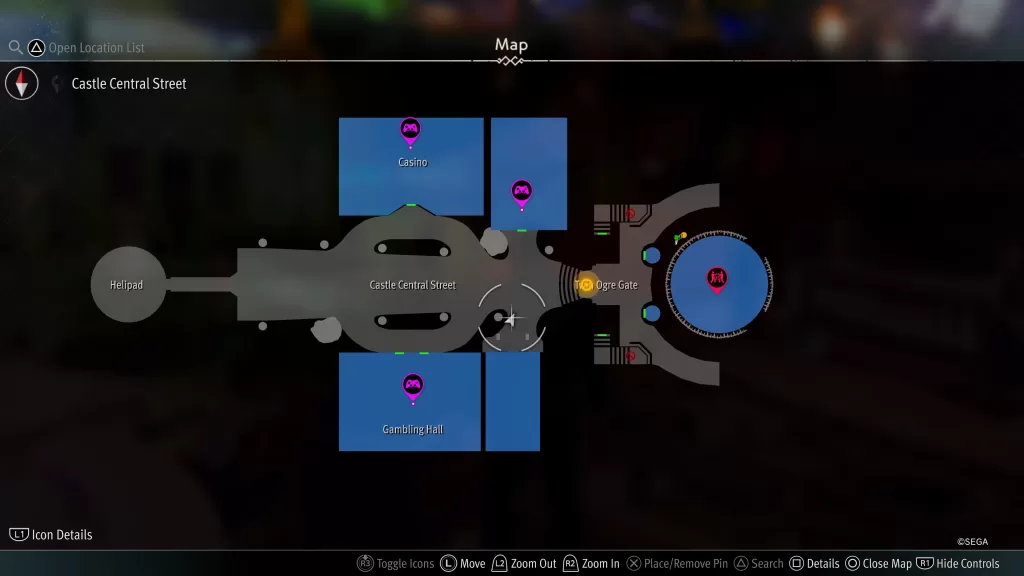
The Sotenbori Locker Key B5 can be found just outside of the Gambling Hall along the railing.
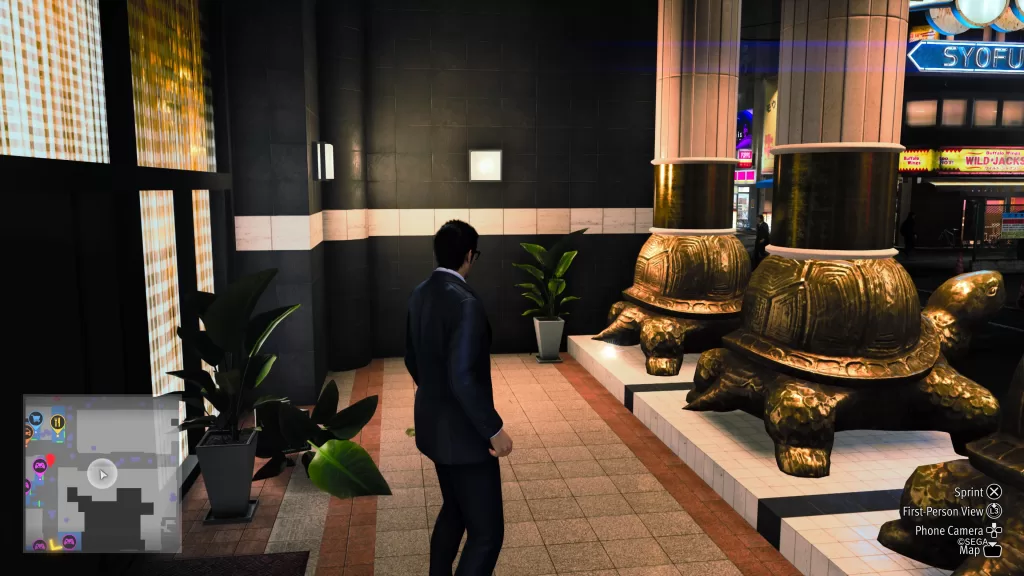
C1
Location: Sotenbori
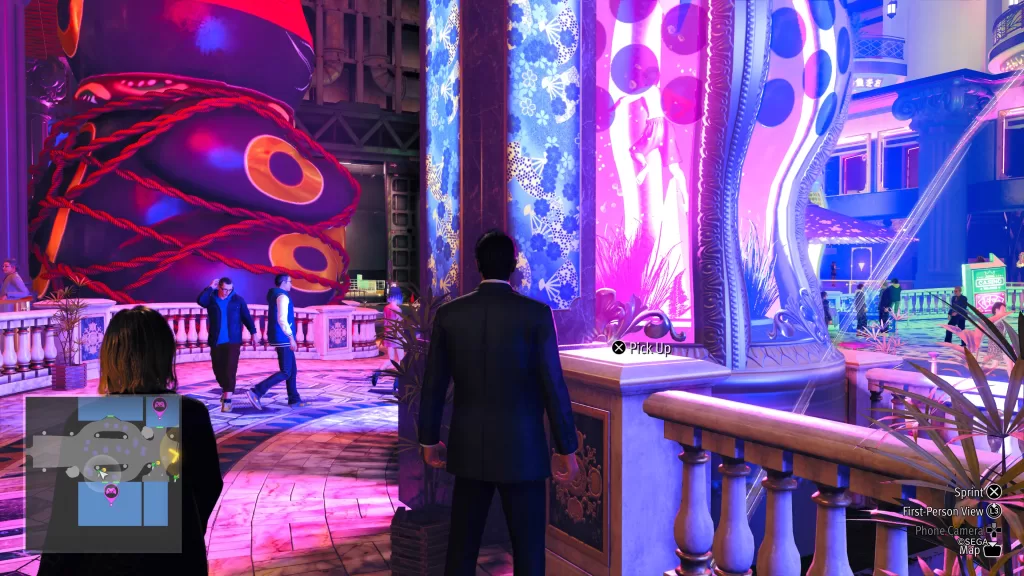
The C1 Sotenbori Locker Key can be found behind the giant turtle columns.
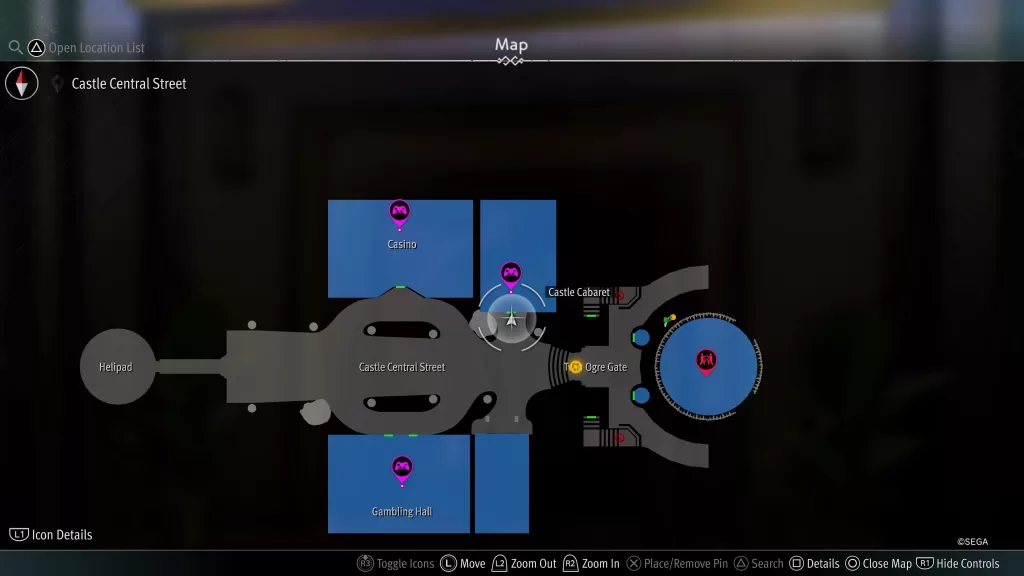
C2
Location: Castle
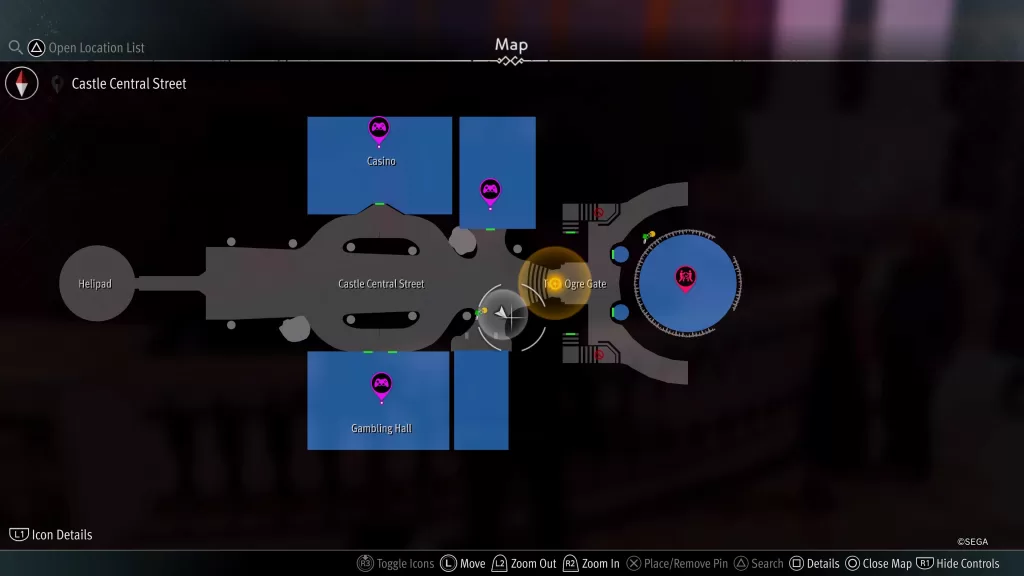
This key can be found as a blue orb on a tray held by a girl in a bunny outfit on the northeastern side of the Twin Ogre Gate.
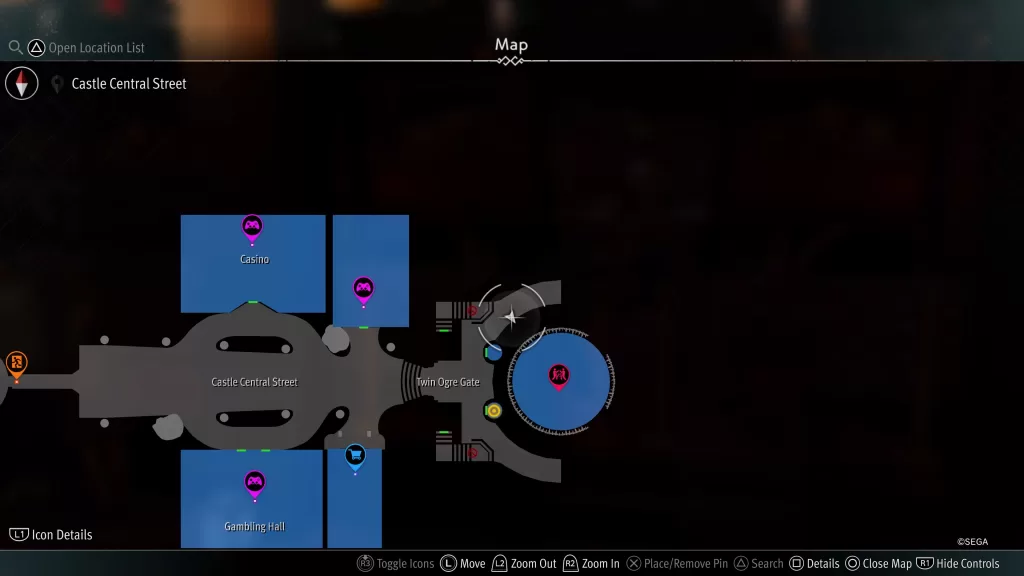
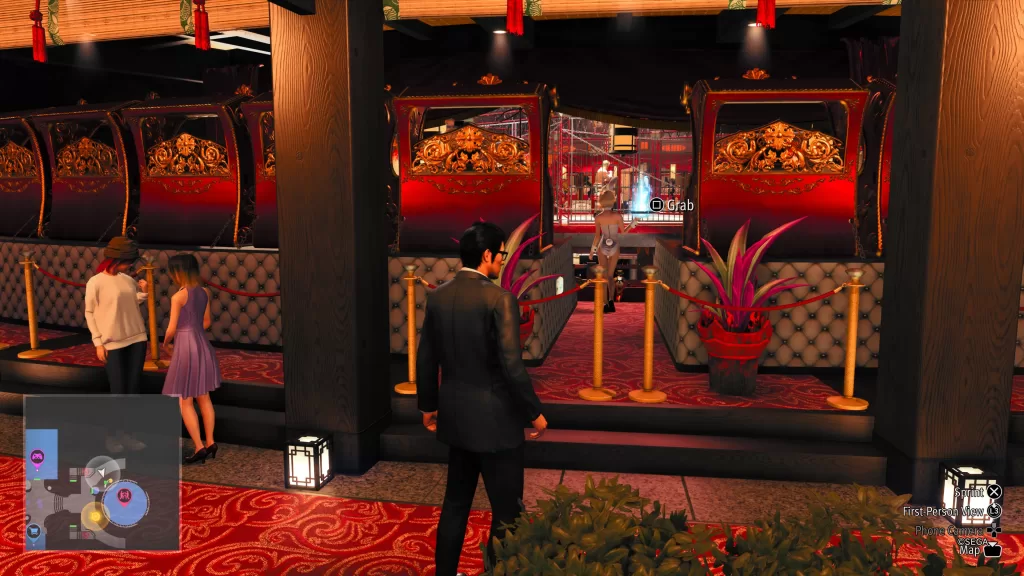
C3
Location: Castle
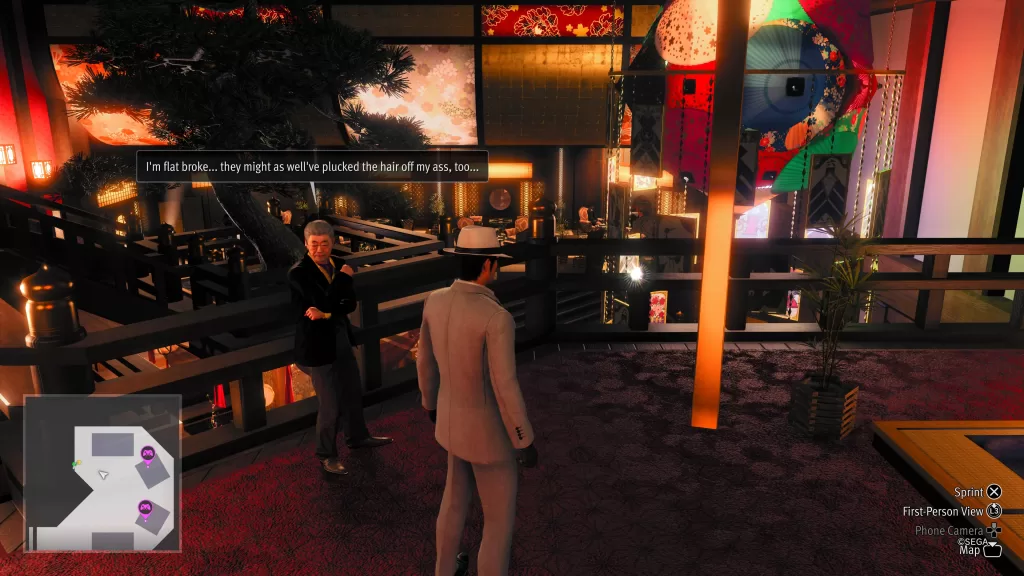
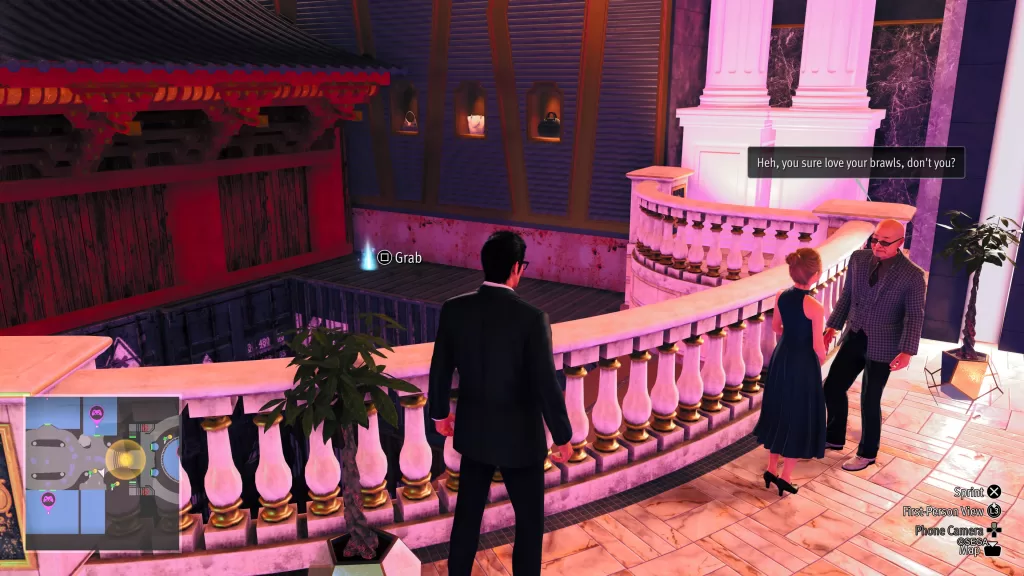
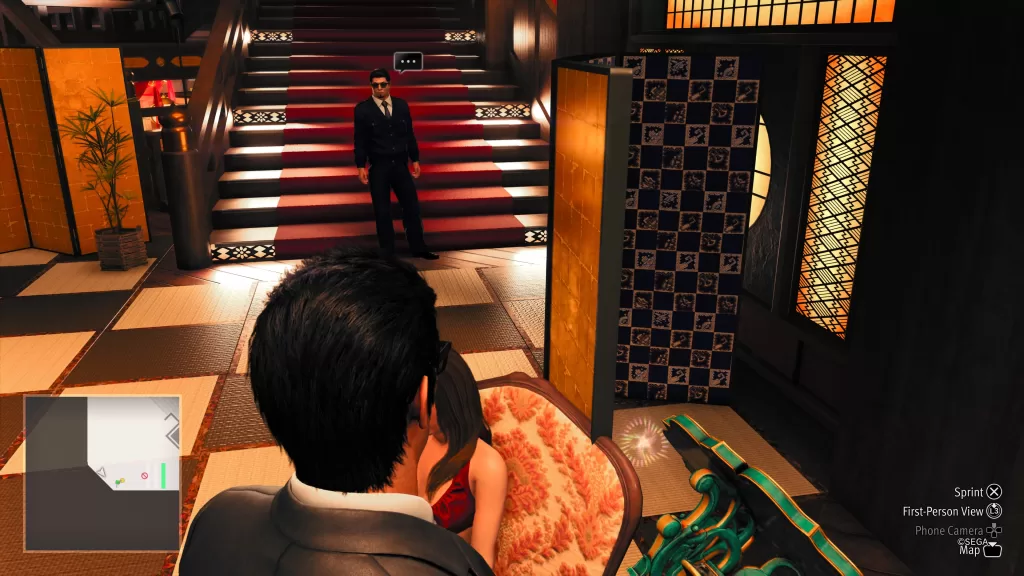
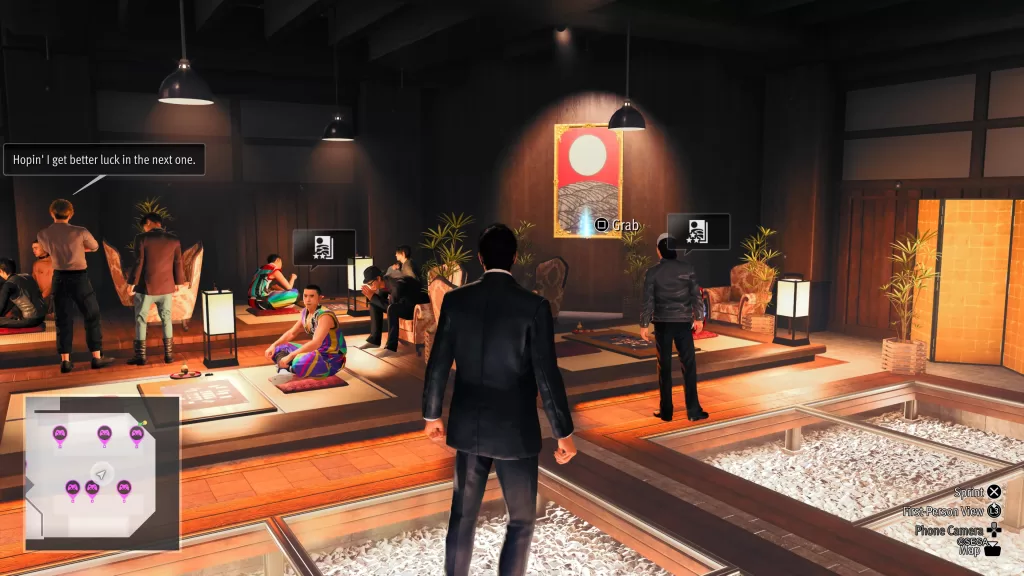
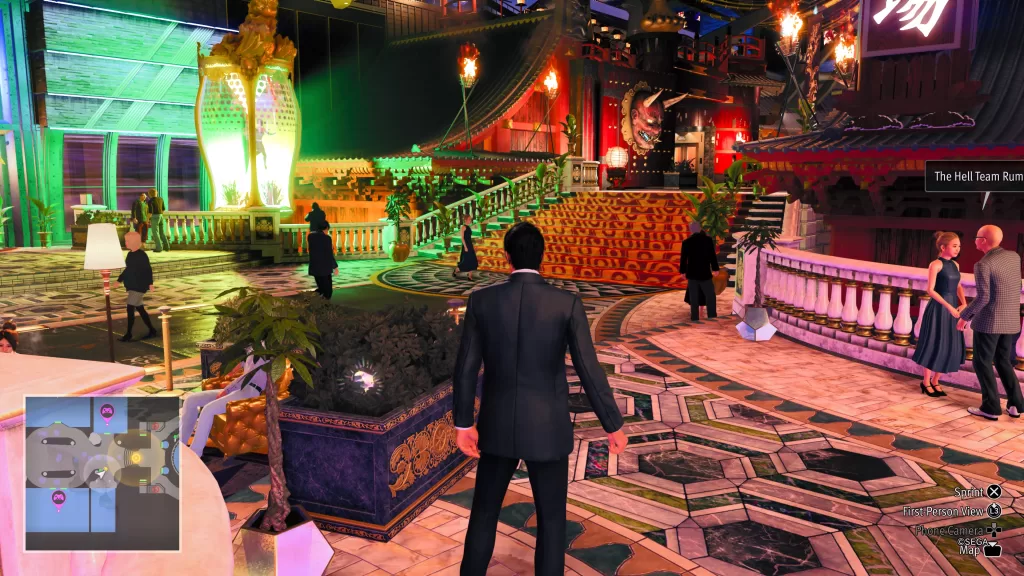
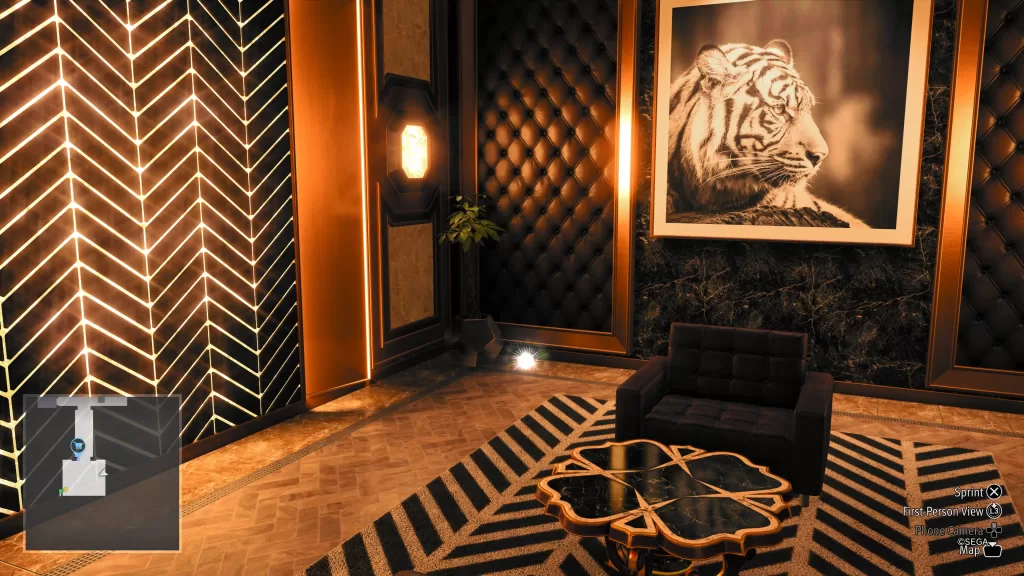
The Sotenbori Locker Key C3 can be found resting in a black chair in the Castle Cabaret!
C4
Location: Castle
The Locker Key C4 will become accessible after obtaining Platinum Rank in the Coliseum. To locate this key, travel to the second level of the Gambling Hall in the Castle then look for the key on the northern side of the rail.

C5
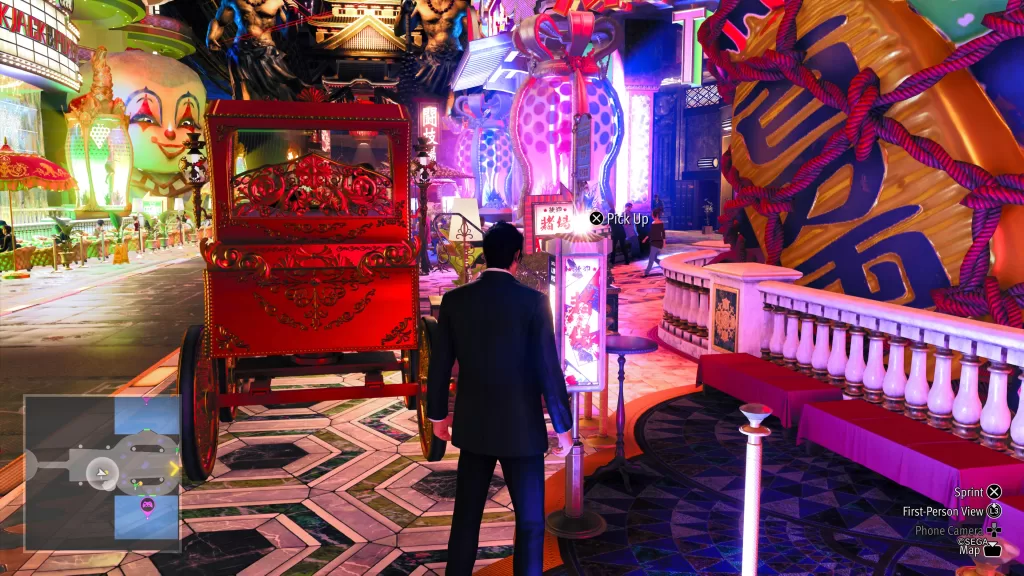
Location: Castle
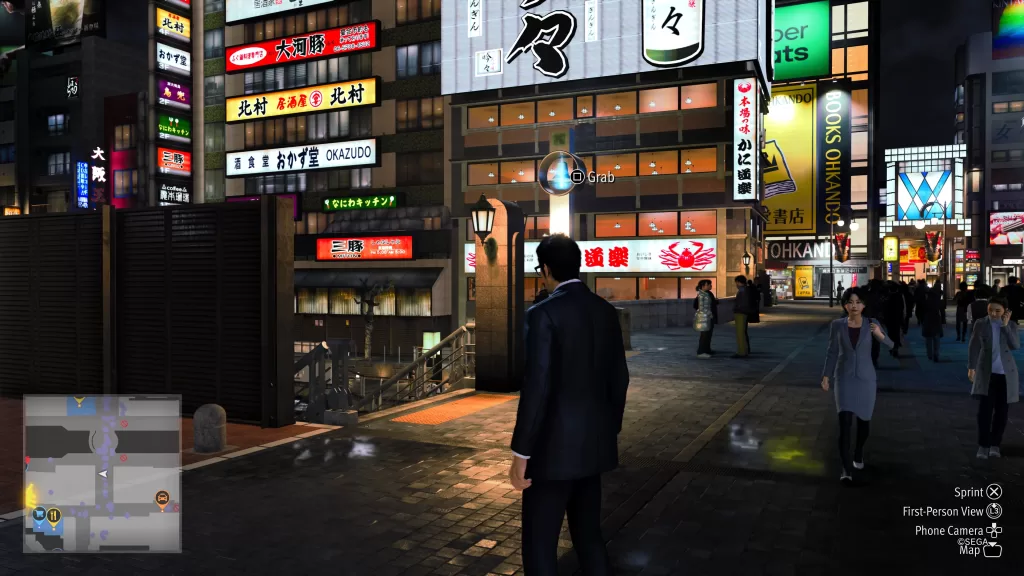
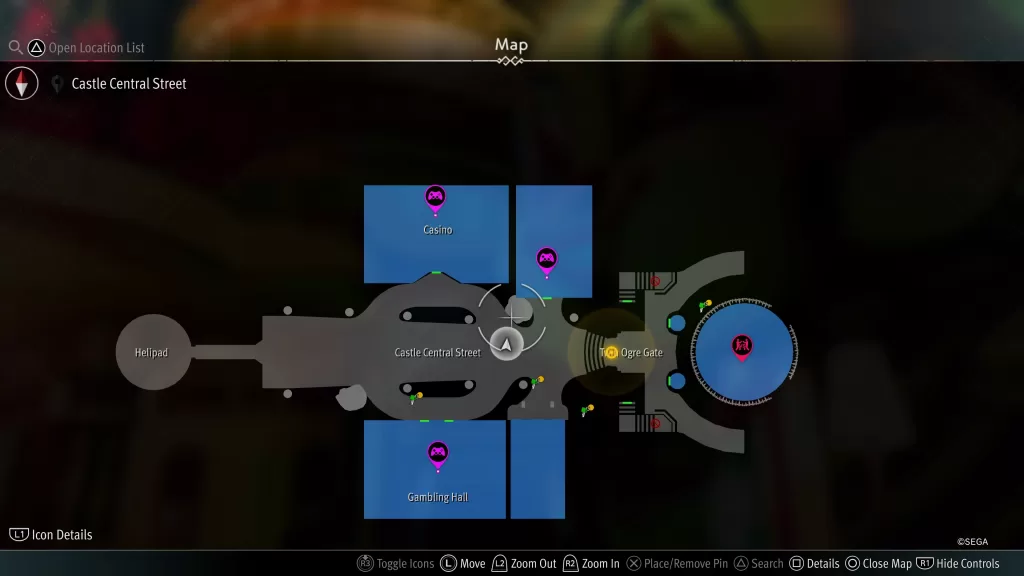
The Sotenbori Locker Key C5 can be found on the sign behind the carriage on the western side of Castle Central Street.
D1
Location: Sotenbori
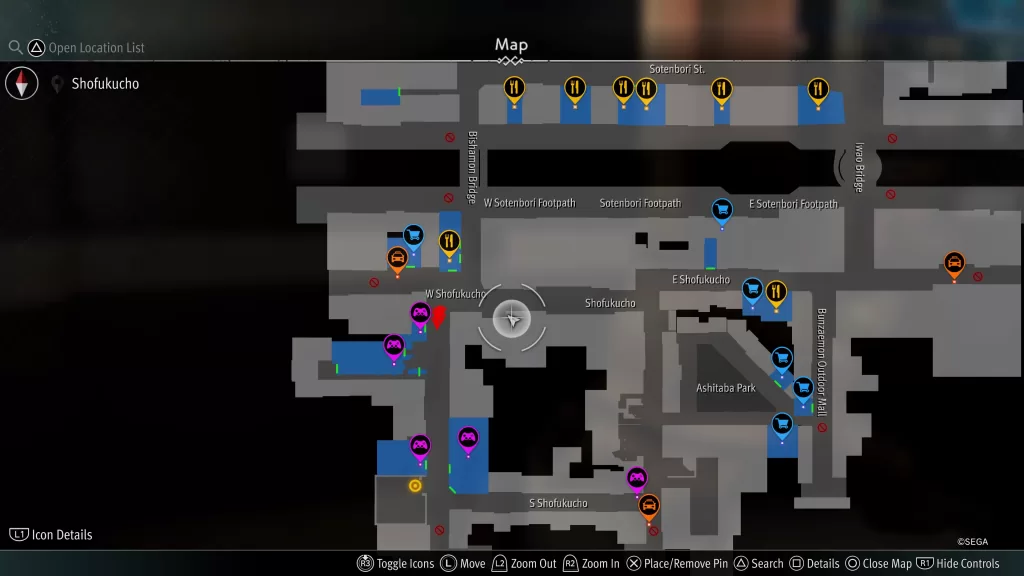
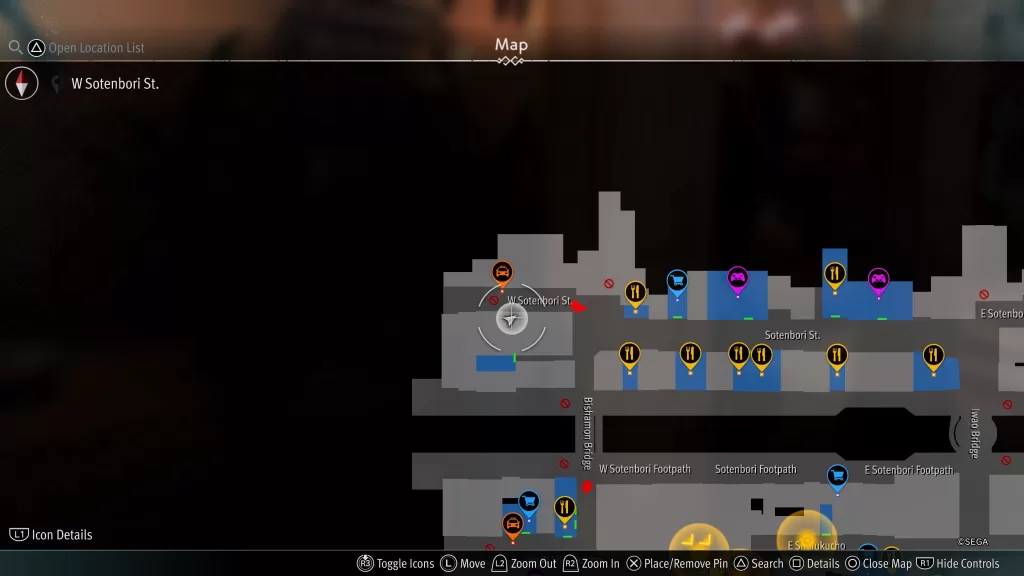
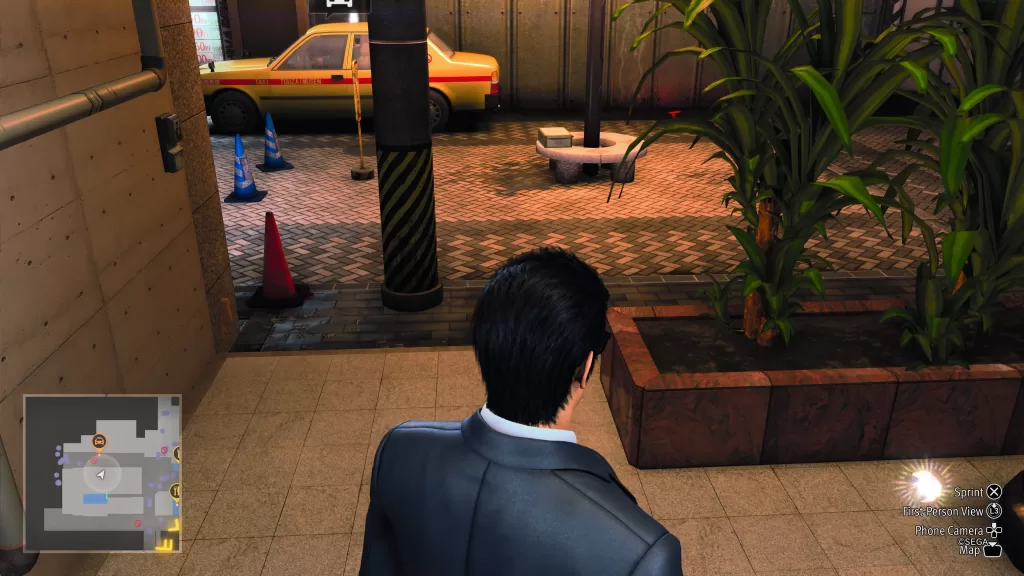
The D1 Locker Key can be found on the ground on W Sotenbori St across from the taxi.
D2
Location: Sotenbori
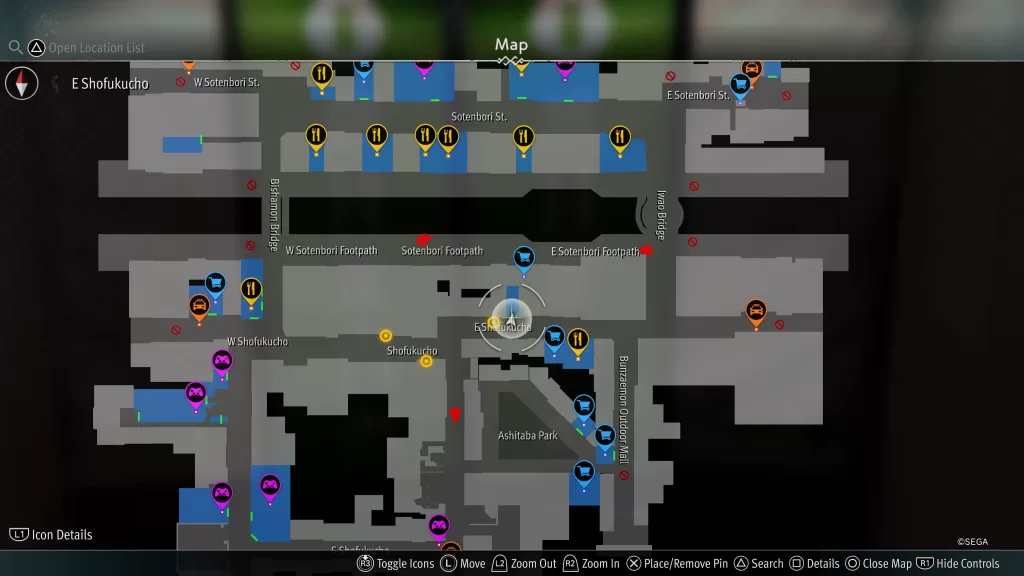
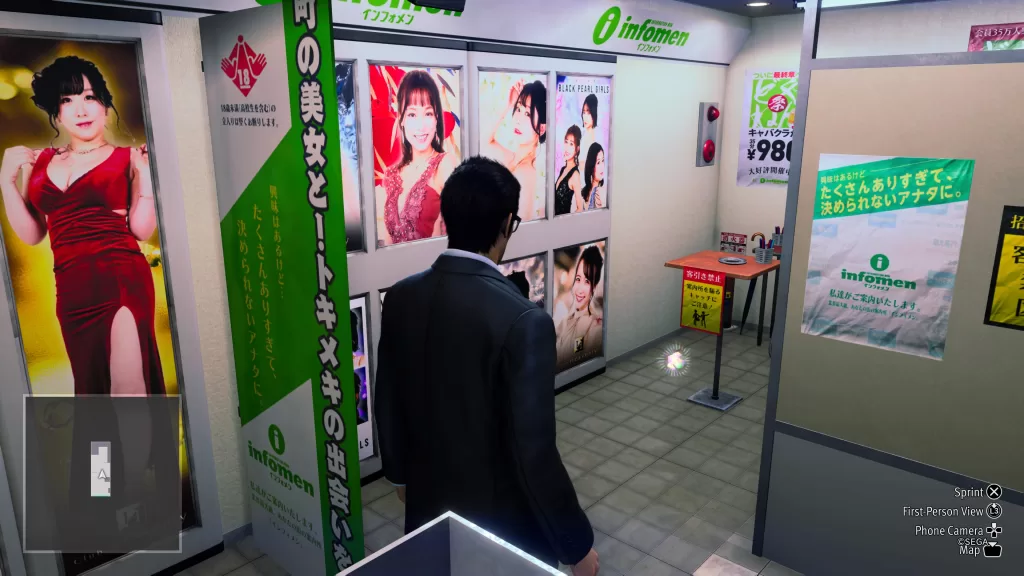
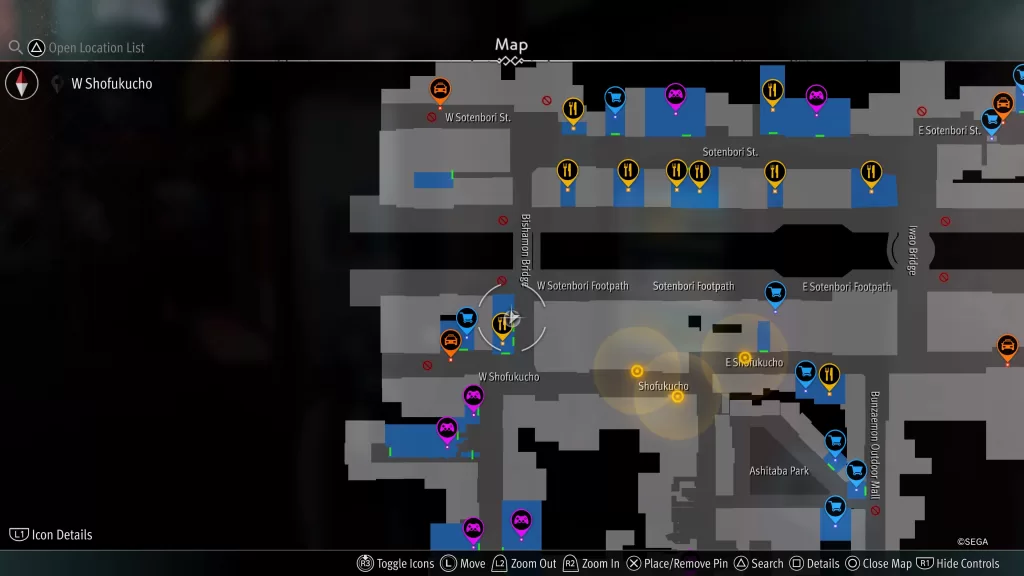
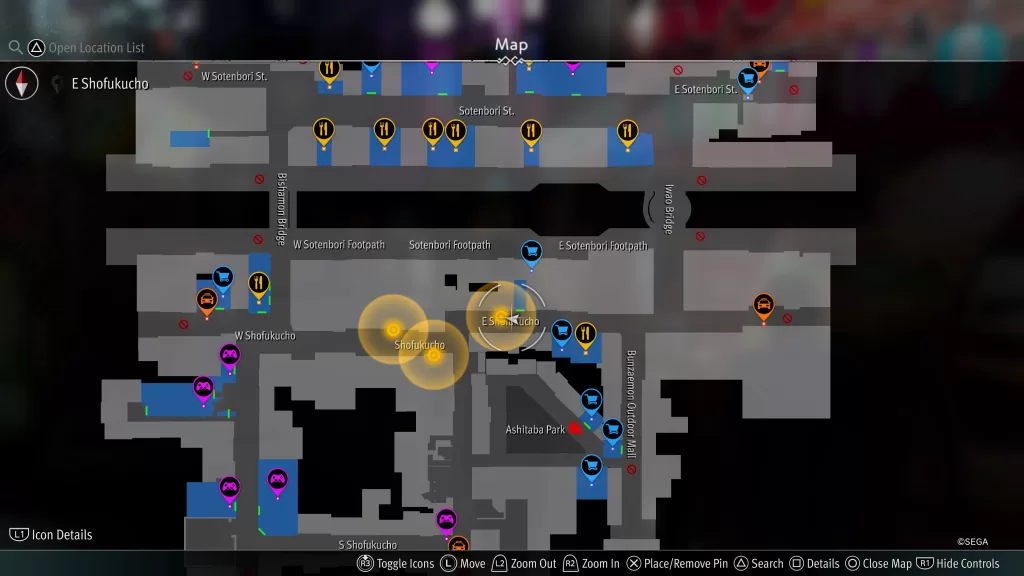
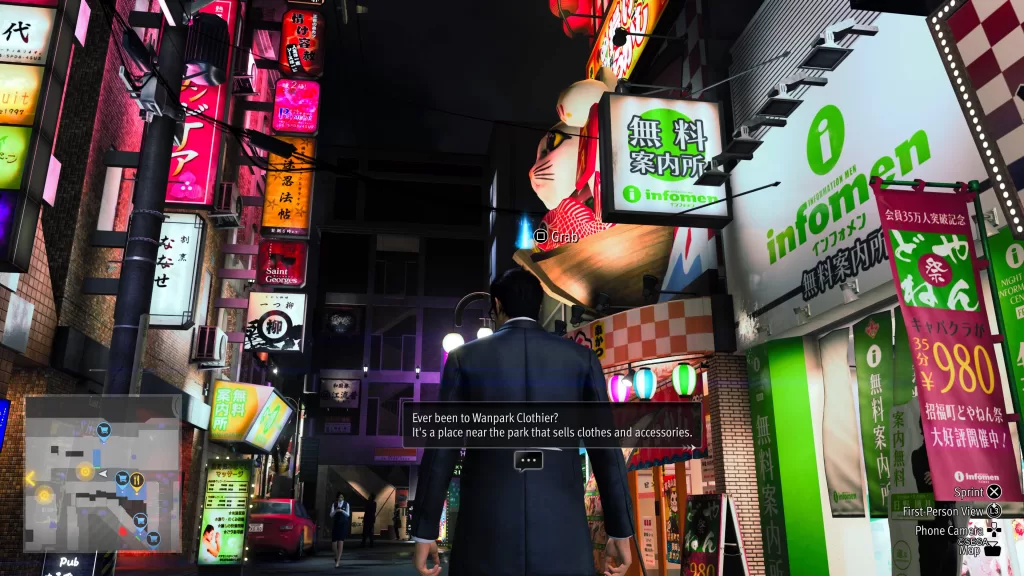
The D2 Locker Key can be found in Infomen on E Shofukucho.
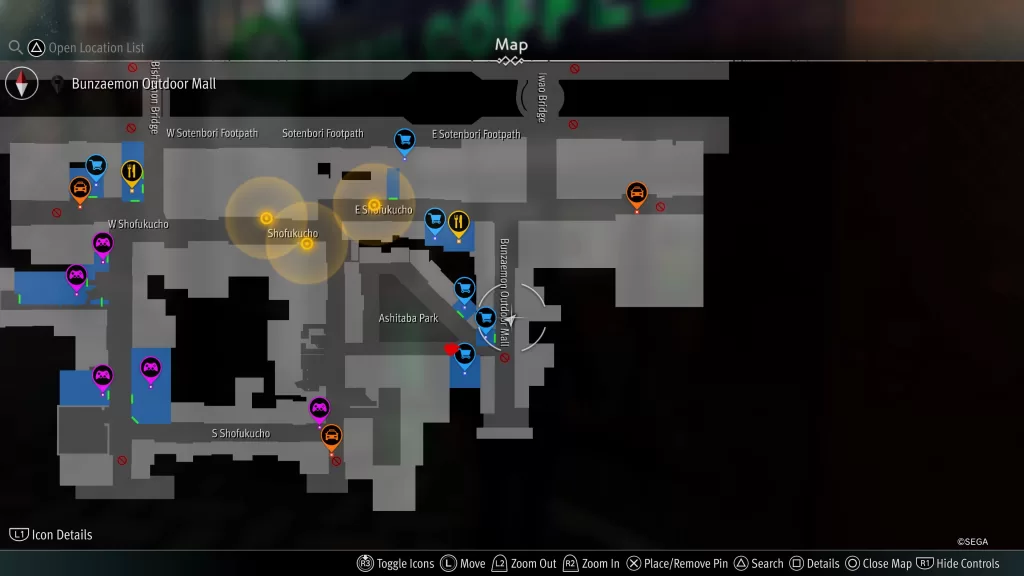
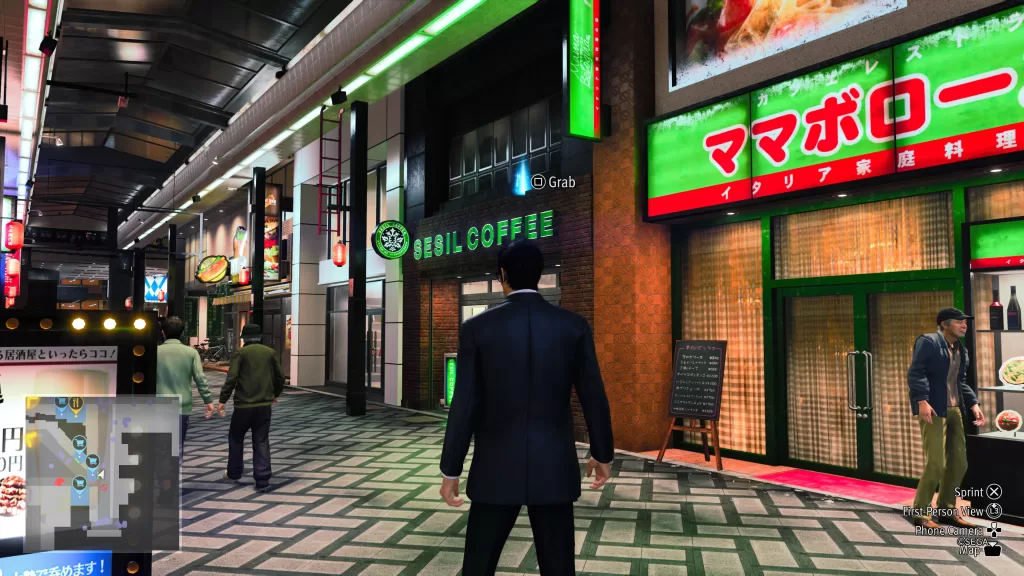
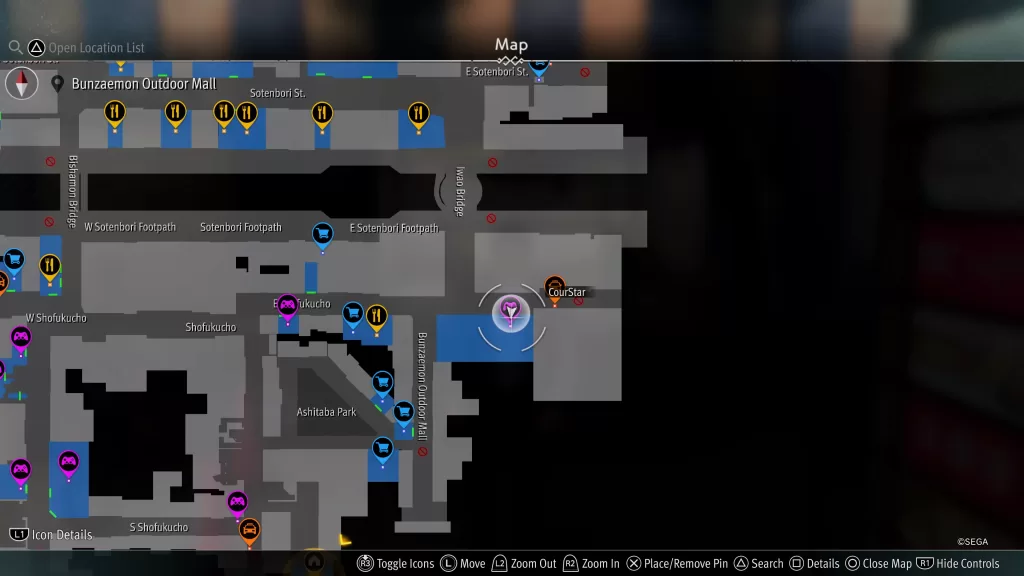
D3
Location: Sotenbori
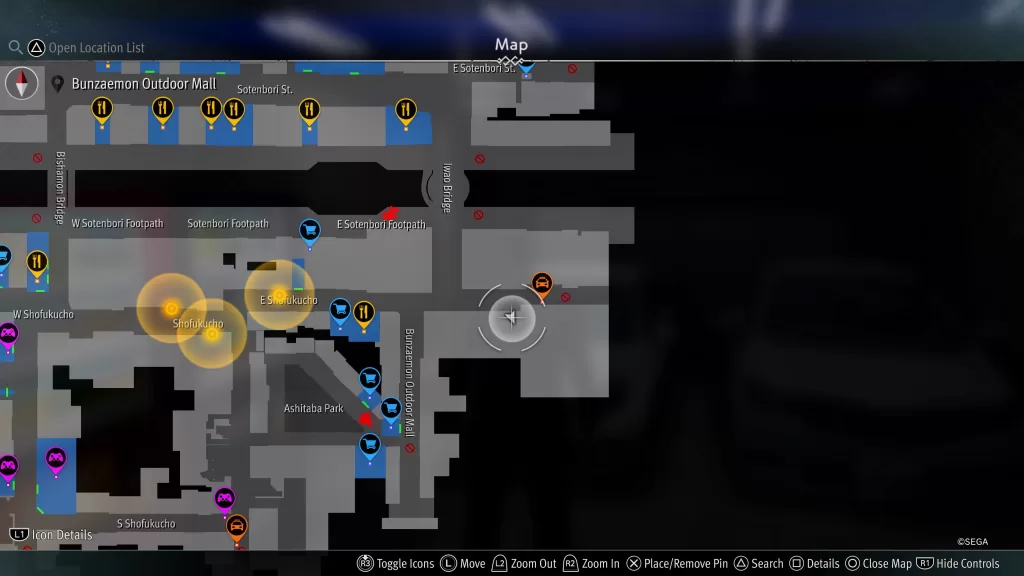
The Sotenbori Locker Key D3 can be found as a blue orb just above the Sesil Coffee sign on a building located on Bunzaemon Outdoor Mall.
D4
Location: Castle
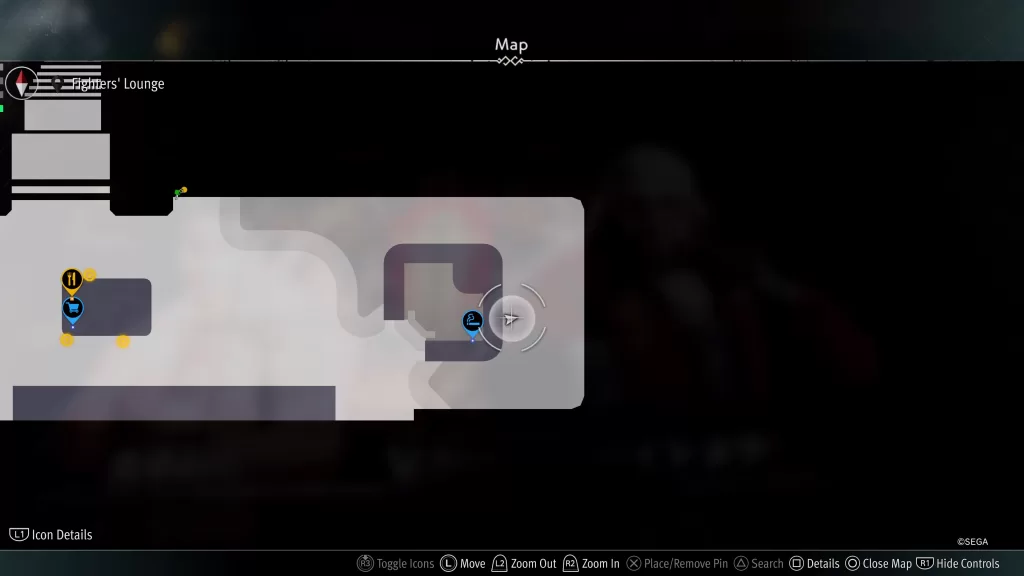
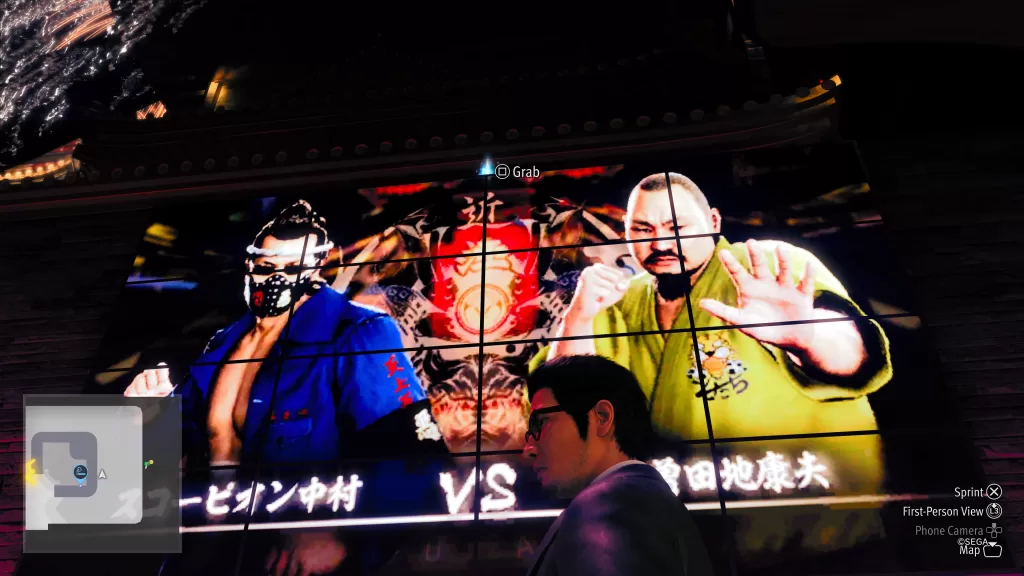
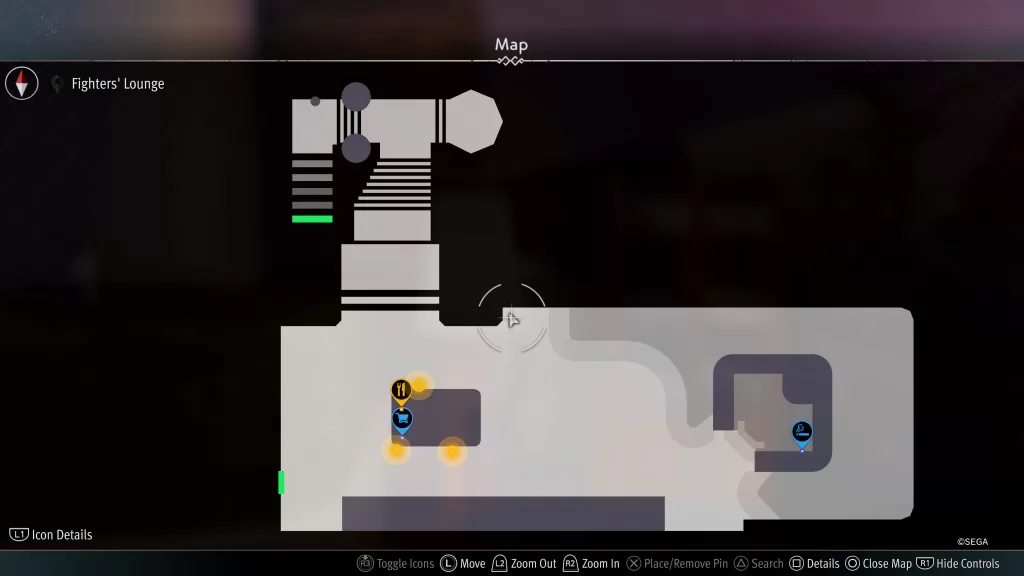
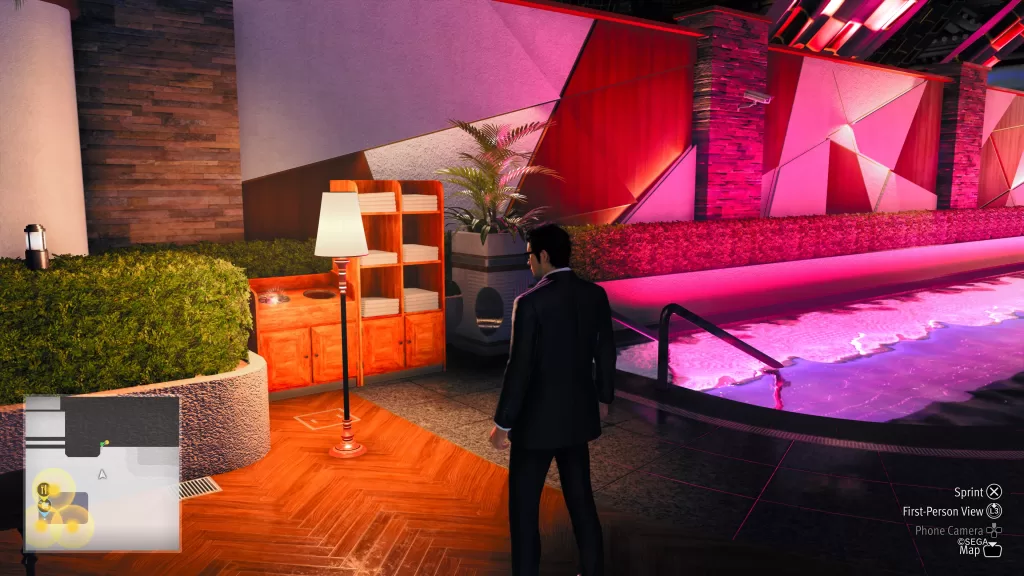
This Gaiden Locker Key can be found on the big screen hanging above the pool on the east side of the Fighters’ Lounge. The Fighters’ Lounge will become available during the main story after fighting Hammerhead.
D5
Location: Castle
The Sotenbori Locker Key D5 can be found just before the Twin Ogre Gate on the southern side. It’s a blue orb on top of a shipping container.
E1
Location: Sotenbori
The E1 Locker Key can be found on the ground next to the Coin Lockers.
E2
Location: Sotenbori
The Sotenbori Locker Key E2 can be found on the ground in Shofukucho Commerce Building B1F.
E3
Location: Sotenbori
The Sotenbori Locker Key E3 can be found as a blue orb on the giant kitty sign next to Infomen on E Shofukucho.
E4
Location: Castle
The Sotenbori Locker Key E4 can be found as a blue orb on the wall by the entrance to the Helipad.
E5
Location: Castle
The Sotenbori Locker Key E5 can be found behind a gold room divider on the southwestern side of the Gambling Hall just before a set of stairs leading up.
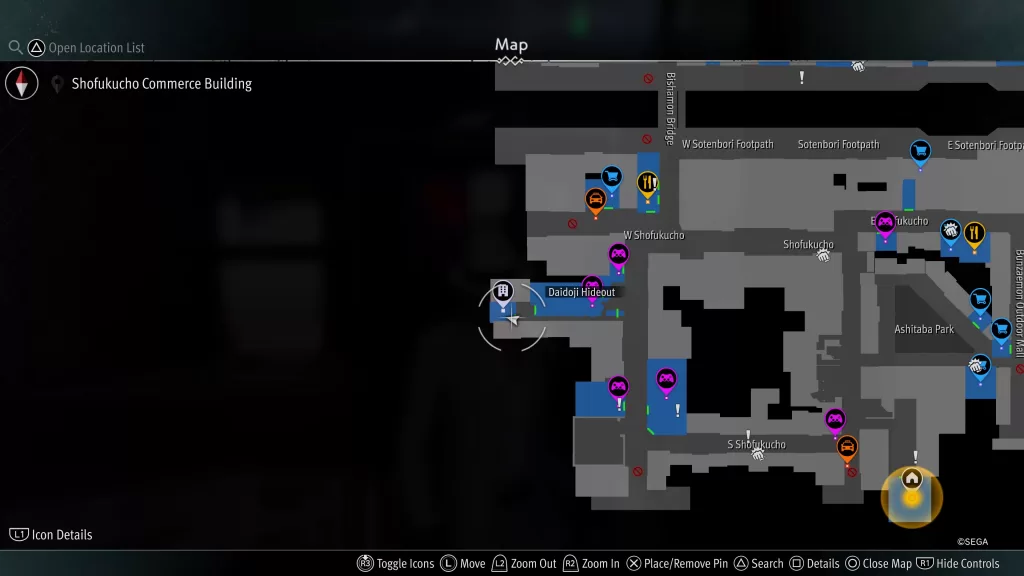
F1
Location: Sotenbori
The Sotenbori Locker Key F1 can be found in the Daidoji Hideout on the other side of the stairs near the exit. This area will become accessible at the beginning of Chapter 3.
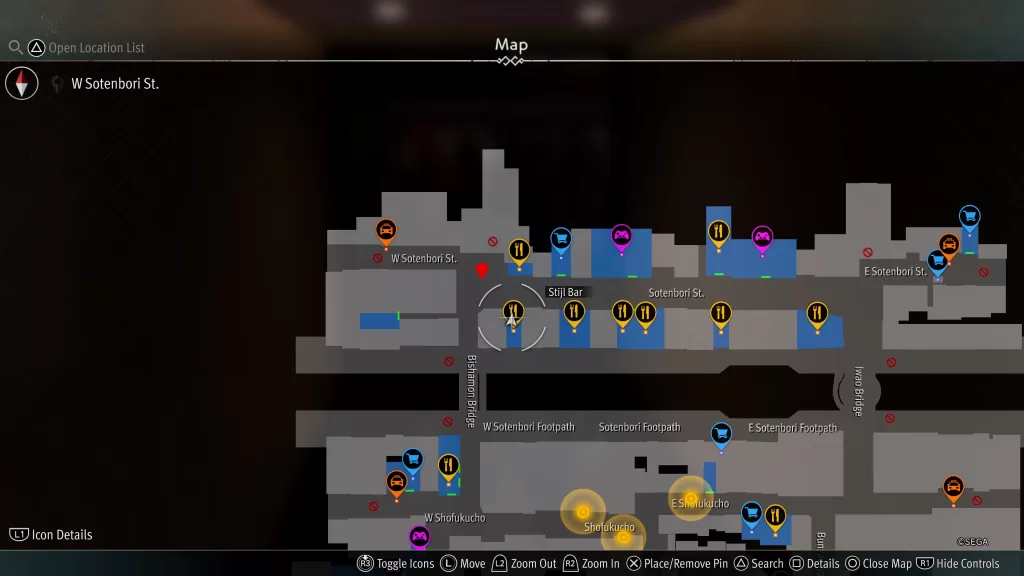
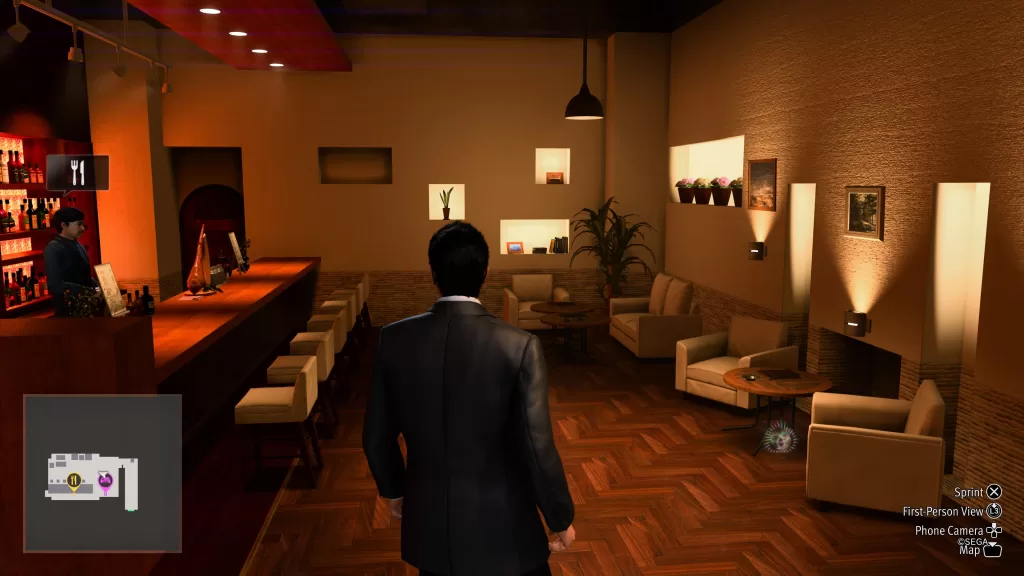
F2
Location: Sotenbori
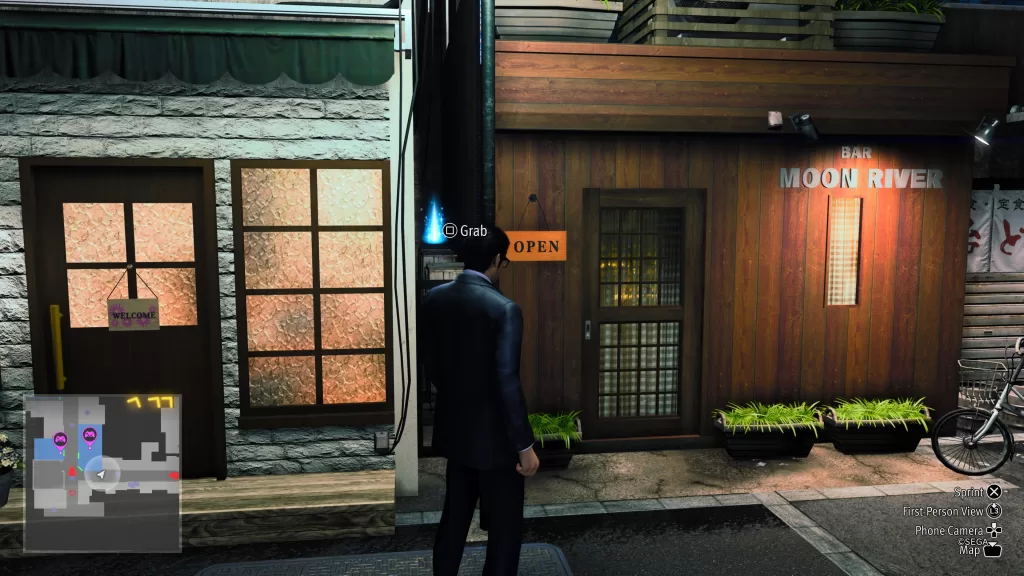
The F2 Locker Key can be found on the ground in Stijl Bar.
F3
Location: Castle
The Sotenbori Locker Key F3 can be found as a blue orb on the northeastern wall of the Gambling Hall.
F4
Location: Sotenbori
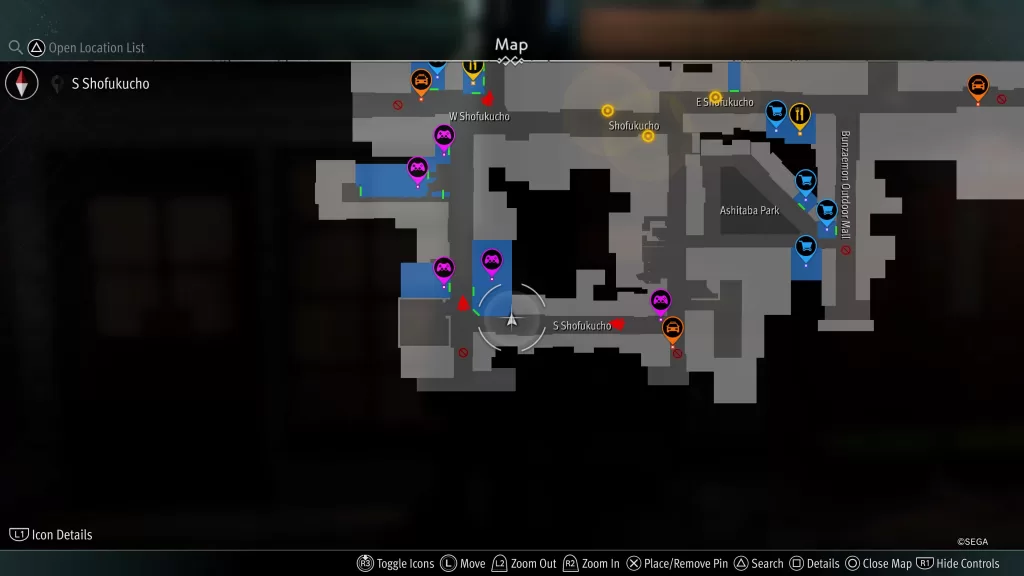
The F4 Locker Key can be found as a blue orb smooshed between two buildings on the western side of S Shofukucho.
F5
Location: Castle
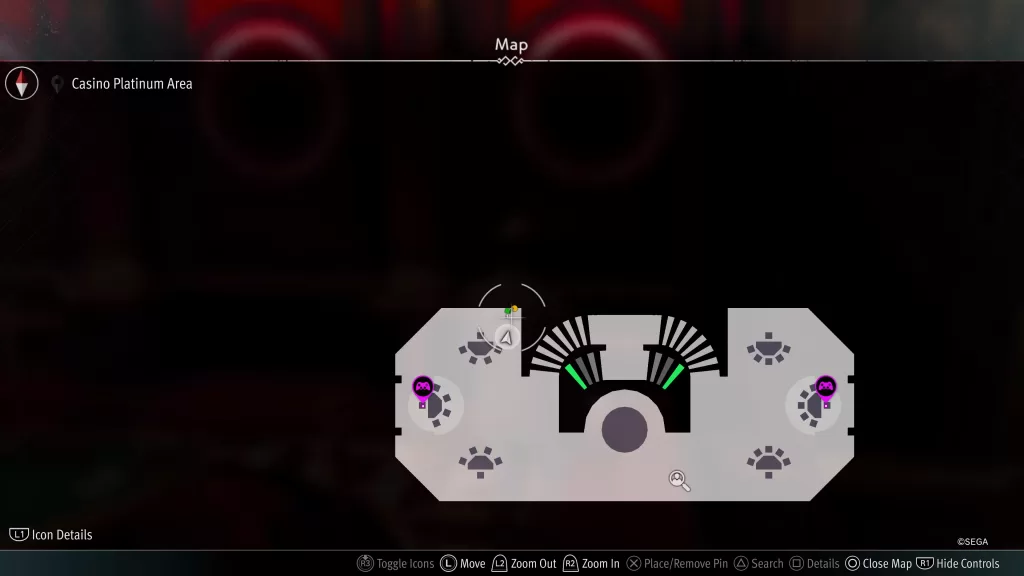
The F5 Locker Key becomes available after reaching Platinum Rank in the Coliseum. To locate this key, head to the second floor of the Casino to find a shiny object on the ground in the northwestern side along the rail.

G1
Location: Sotenbori
This locker key can be found up some stairs west of Ashitaba Park.

G2
Location: Sotenbori
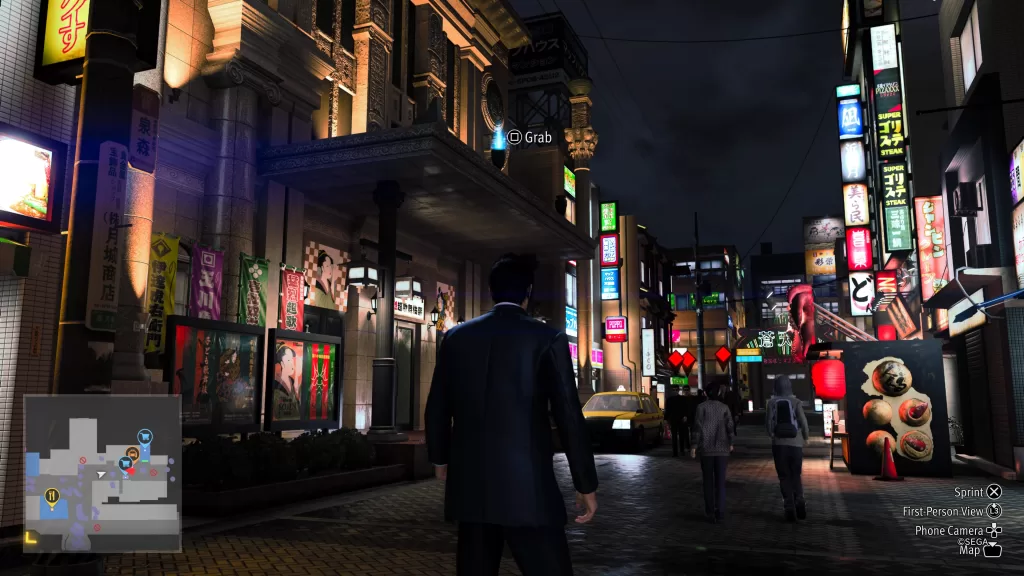
The Sotenbori Locker Key G2 can be found as a blue orb on a restaurant sign on Sotenbori St.
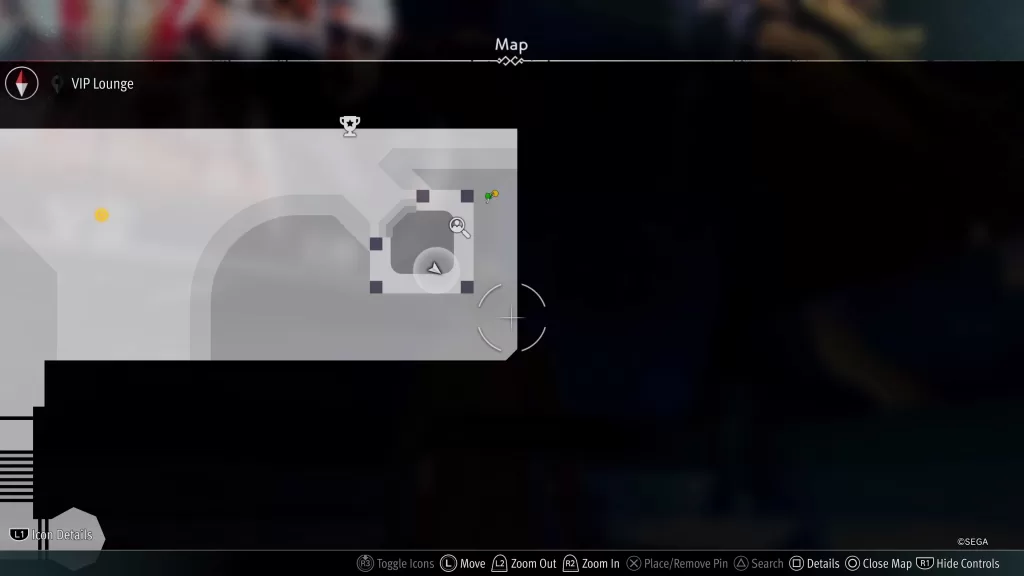
G3
Location: Castle – VIP Lounge
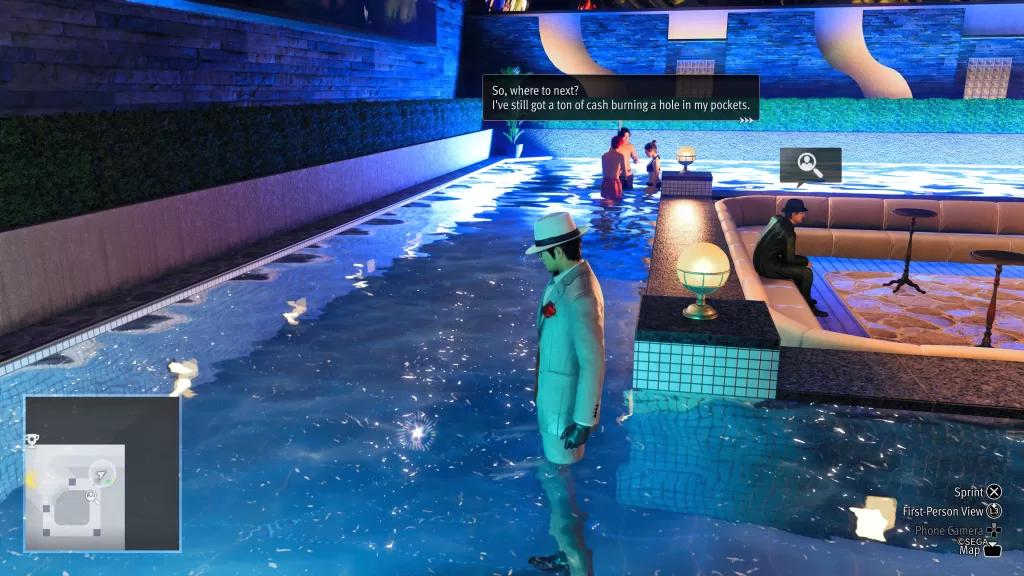
This key can be found in the water of the pool.

G4
Location: Castle
The Sotenbori Locker Key G4 can be found in some potted bushes just southwest of the Twin Ogre Gate.
G5
Location: Castle
The G5 Locker Key can be found in the Castle Boutique after reaching Gold Rank in the Coliseum. The orb will be located on the far southern point of the store in the newly accessible area.
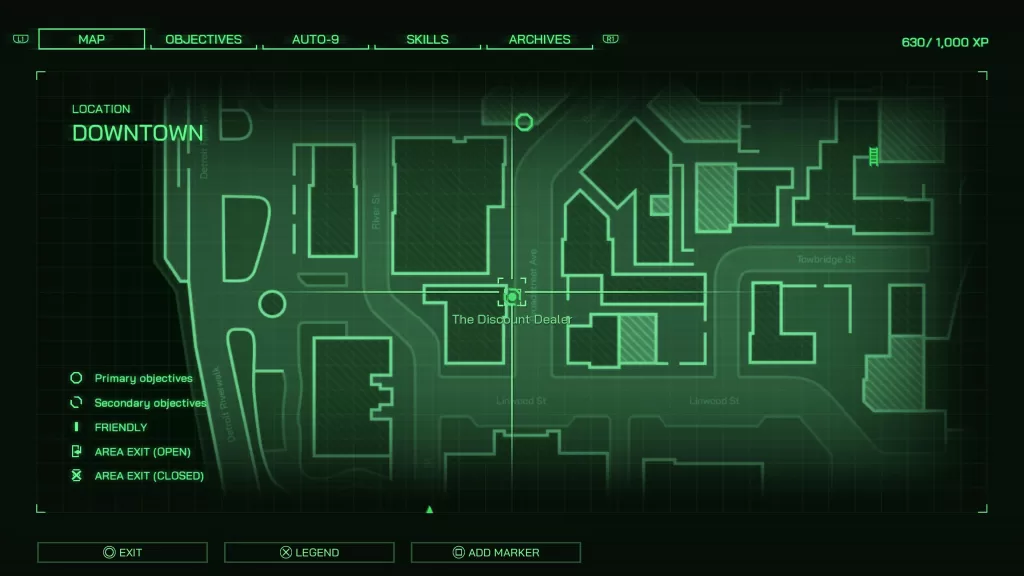
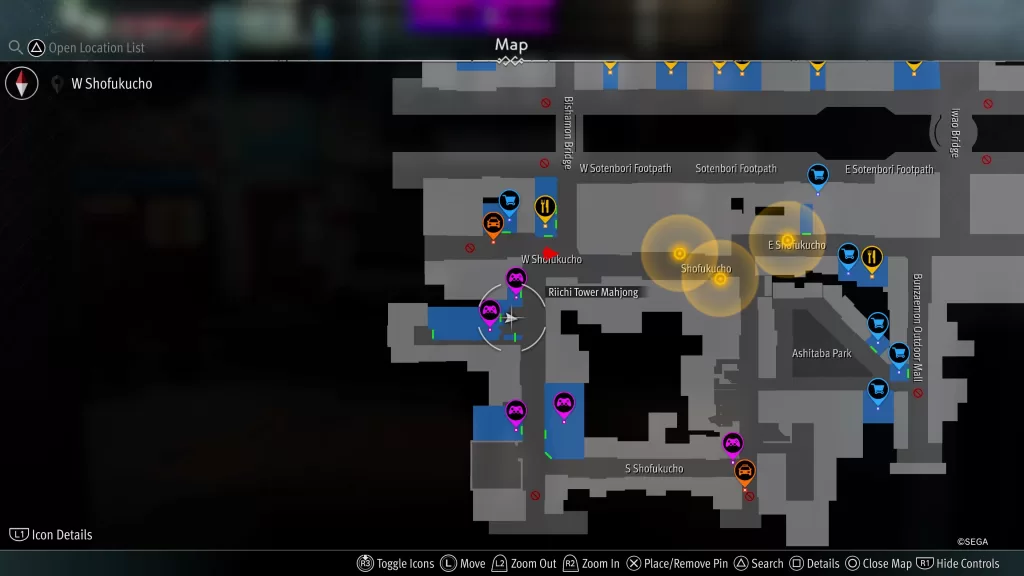
H1
Location: Sotenbori
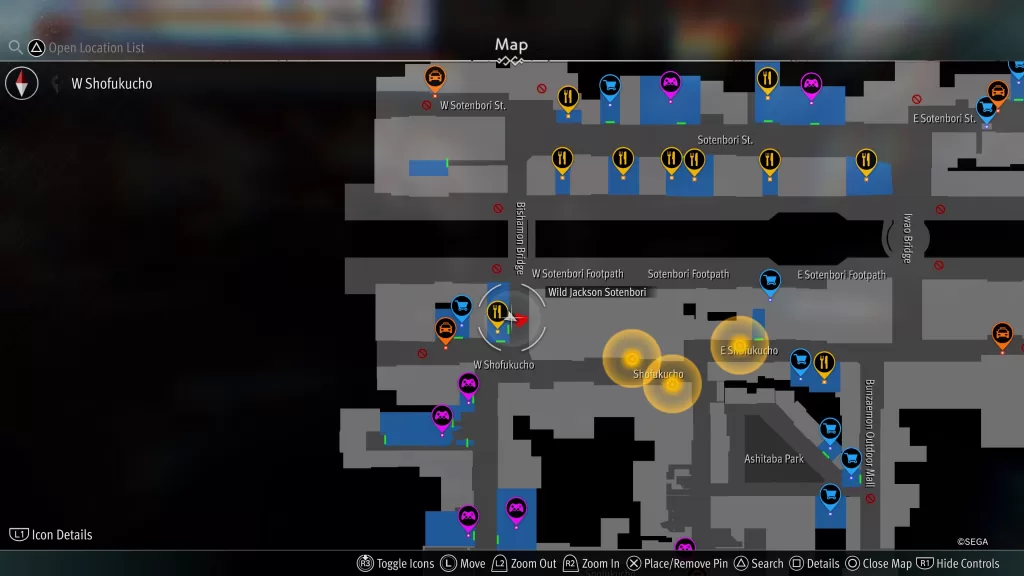
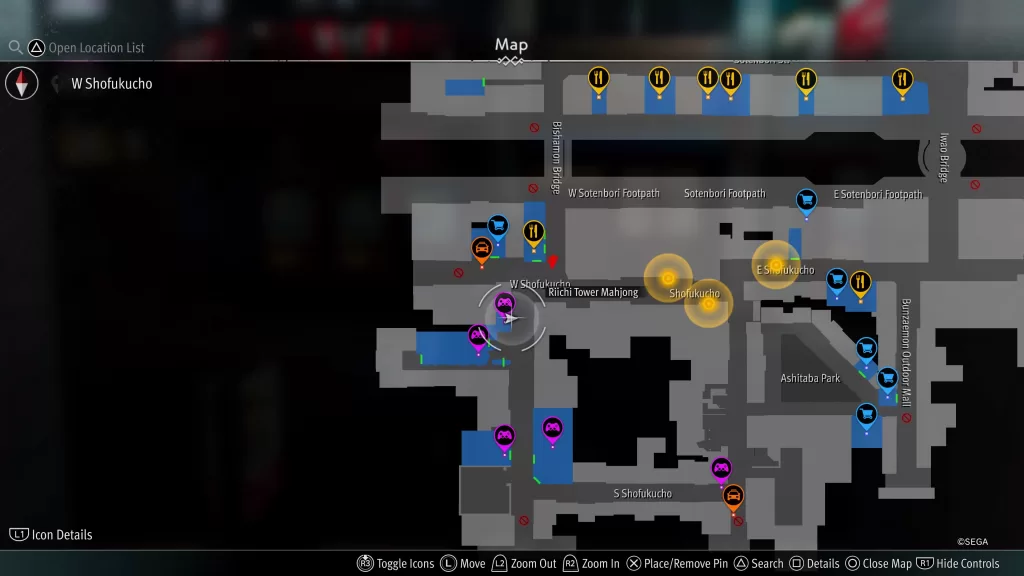
The H1 Locker Key can be found on the ground near the stairwell in the Midoriyama Building 2F, which is located near the coin lockers between the Sotenbori Footpath and W Shofukucho.
H2
Location: Sotenbori
The H2 Locker Key can be found on the ground in the Riichi Tower Mahjong just south of W Shofukucho.
H3
Location: Sotenbori
The H3 Gaiden Locker Key can be found as a blue orb on the roof of a building on E Sotenbori St.
H4
Location: Castle
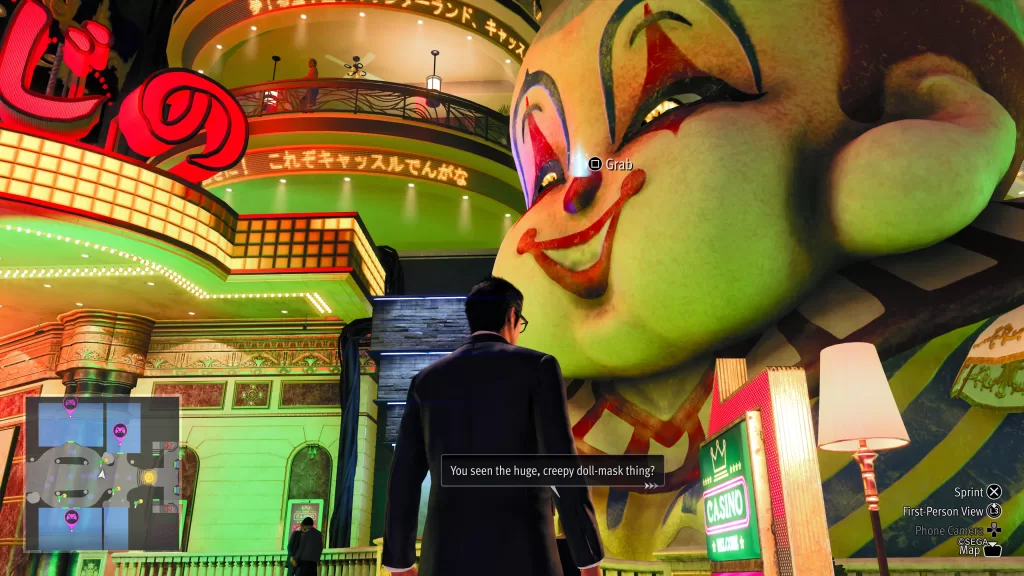
The Sotenbori Locker Key H4 can be found as a blue orb on the face of the giant clown just southeast of the Casino on Castle Central Street.
H5
Location: Sotenbori
The Locker Key H5 can be found on the ground behind the bar on Yotsudera Kaikan 4F, which is on the southwestern corner of the map.
I1
Location: Sotenbori
The Sotenbori Locker Key I1 can be found on the western side of CourStar near a sink. You’ll come to this place as part of the story during Chapter 2.
I2
Location: Sotenbori
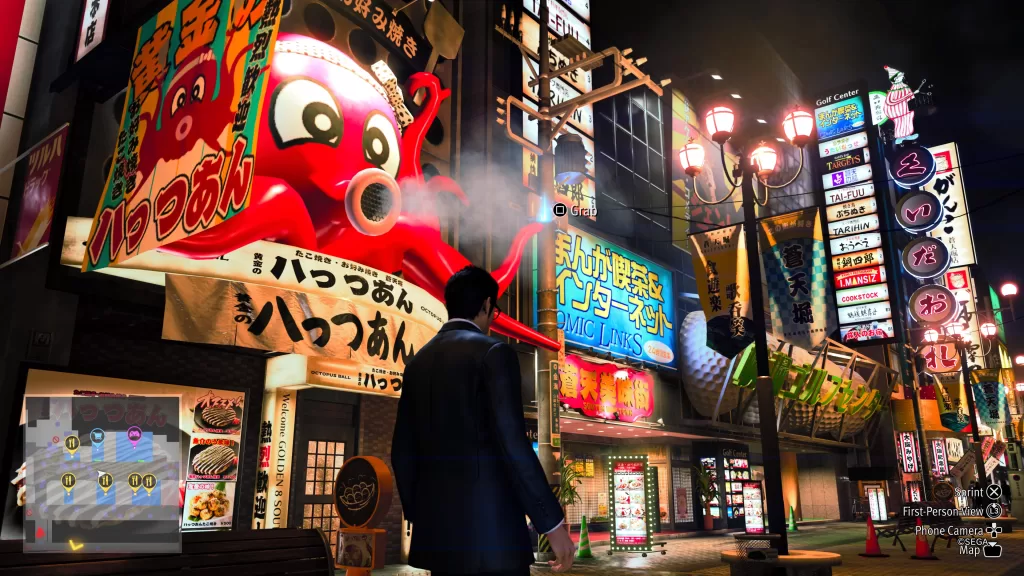
The Gaiden Locker Key I2 can be found as a blue orb on the electrical pole in front of an octopus sign.
I3
Location: Sotenbori
The Sotenbori Locker Key I3 can be found as a blue orb on the vent of a building on the western side of S Shofukucho.

I4
Location: Sotenbori
The Sotenbori Locker Key I4 can be found as a blue orb in a tree on the W Sotenbori Footpath.

I5
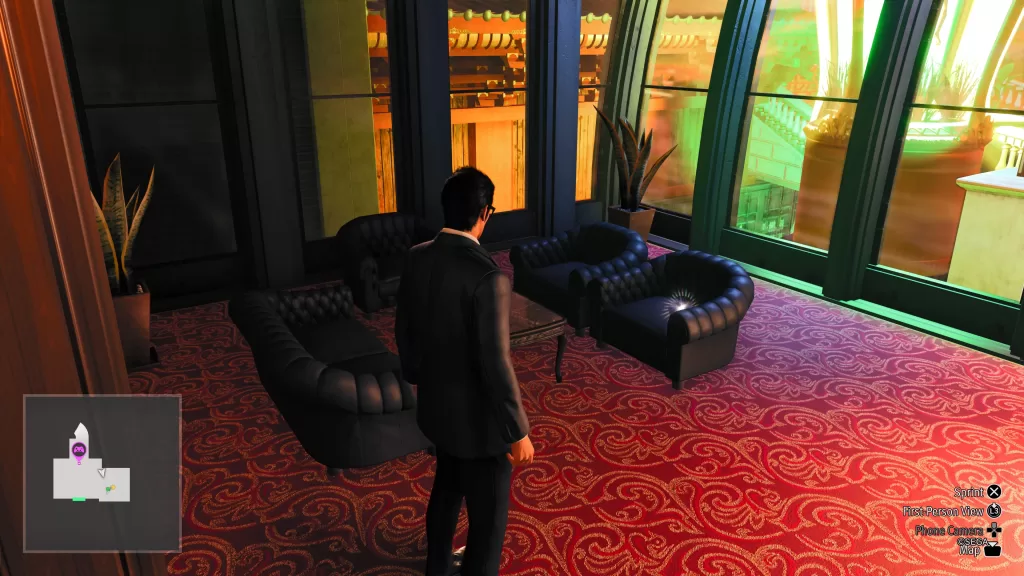
Location: Castle
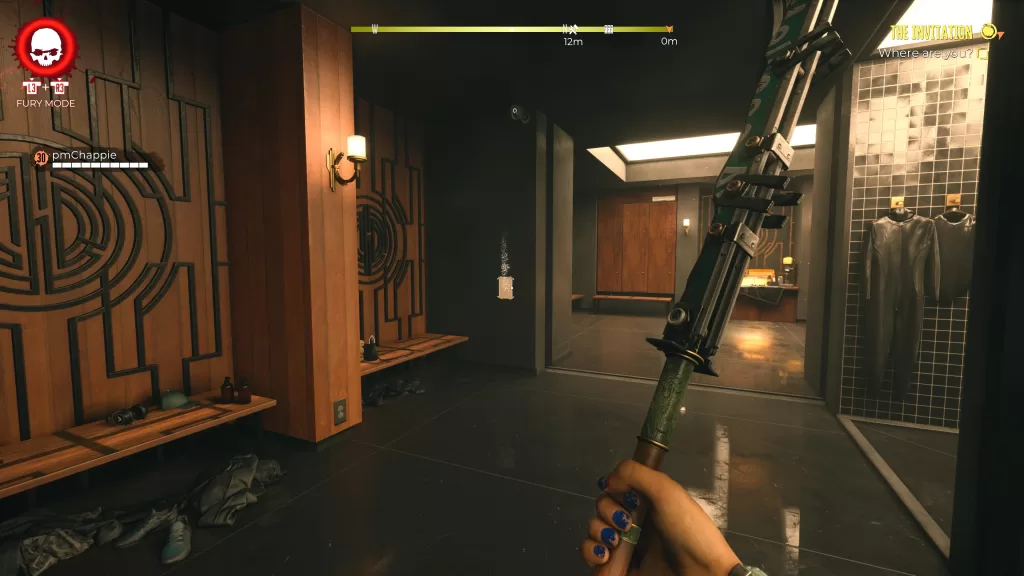
The Gaiden Locker Key I5 can be found in the Fighters’ Lounge next to some towels by an entrance to the pool. The Fighters’ Lounge will become available during the main story after fighting Hammerhead.
J1
Location: Sotenbori
The J1 Locker Key can be found on the ground in the Kiss Shot Billiards & Bar, which is in the southwestern corner of the map.

J2
Location: Sotenbori
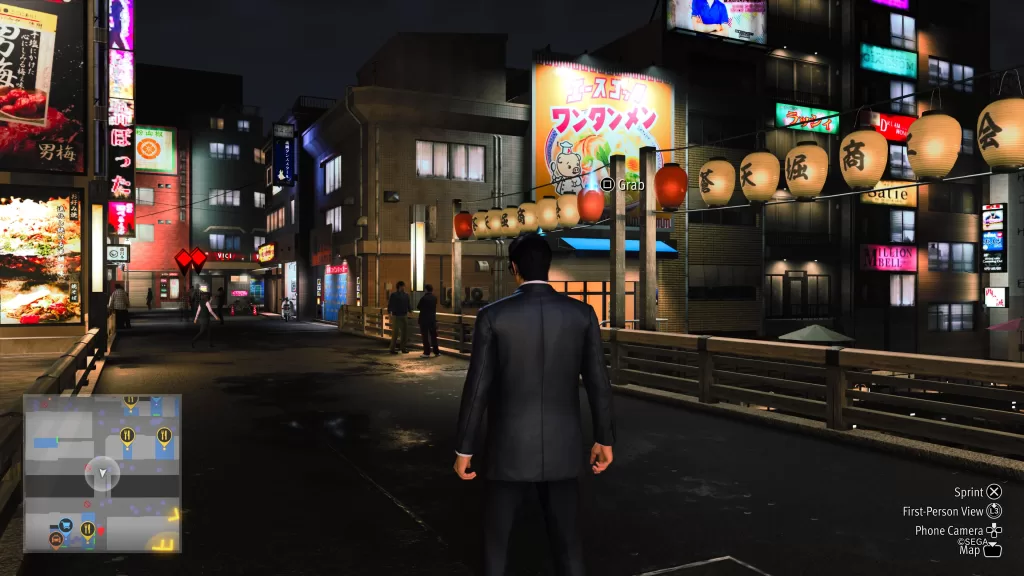
The J2 Locker Key can be found as a blue orb on Bishamon Bridge.
J3
Location: Castle
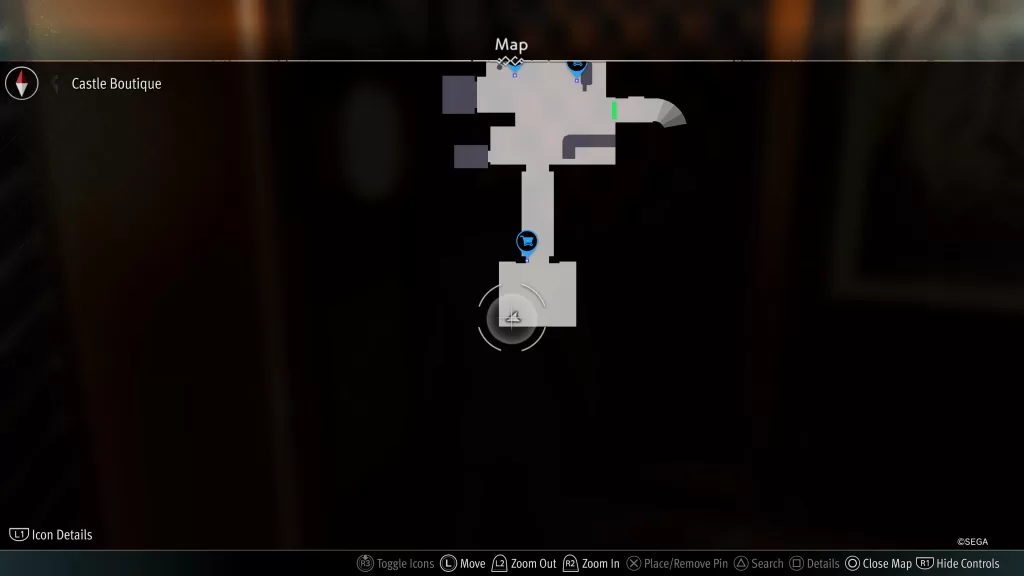
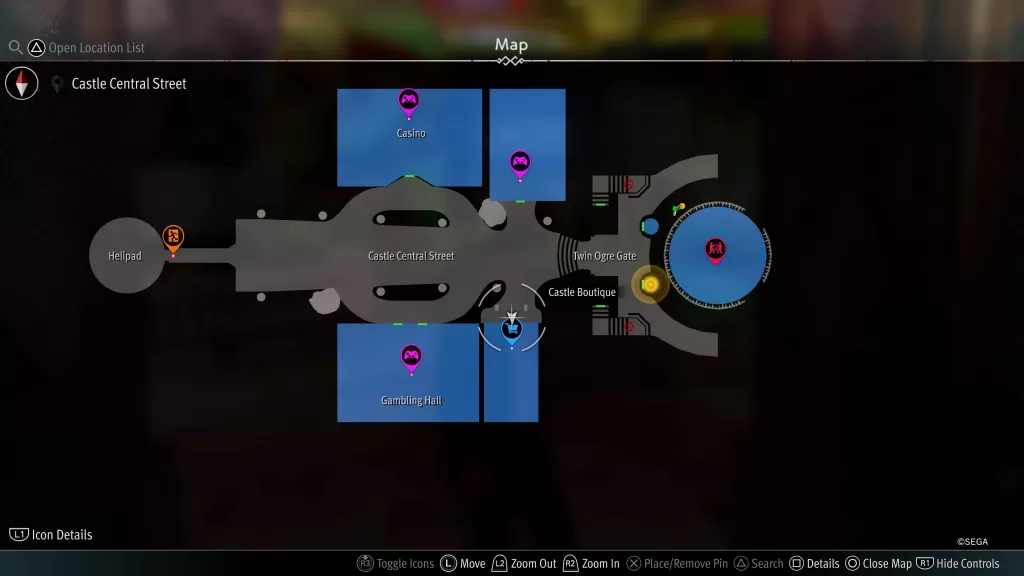
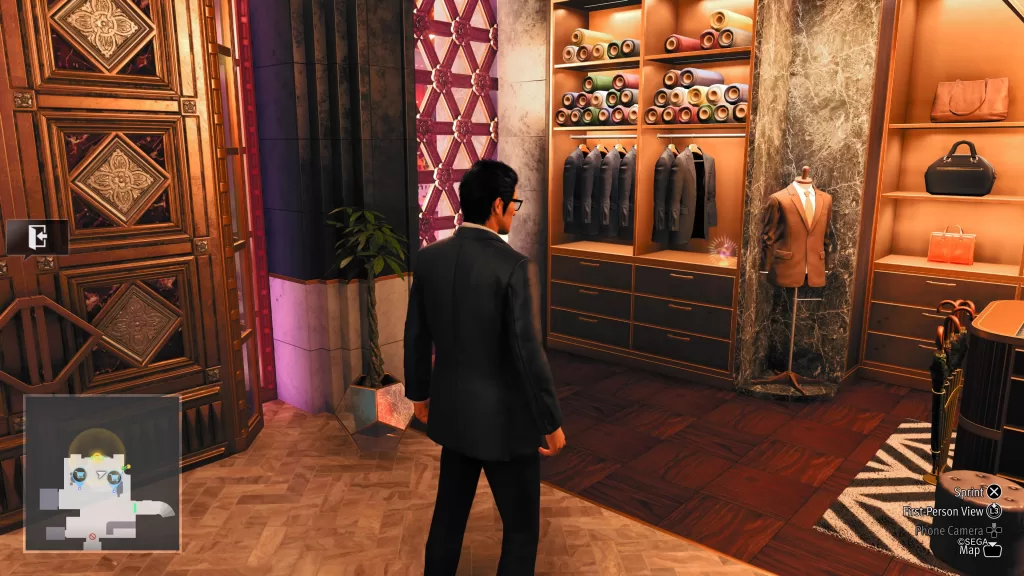
The Sotenbori Locker Key J3 can be found in the Castle Boutique by a row of suits. The Castle Boutique will unlock after returning to the Castle.
J4
Location: Castle – VIP Lounge
This key can be found as a blue orb on the wall next to the big screen above the pool.

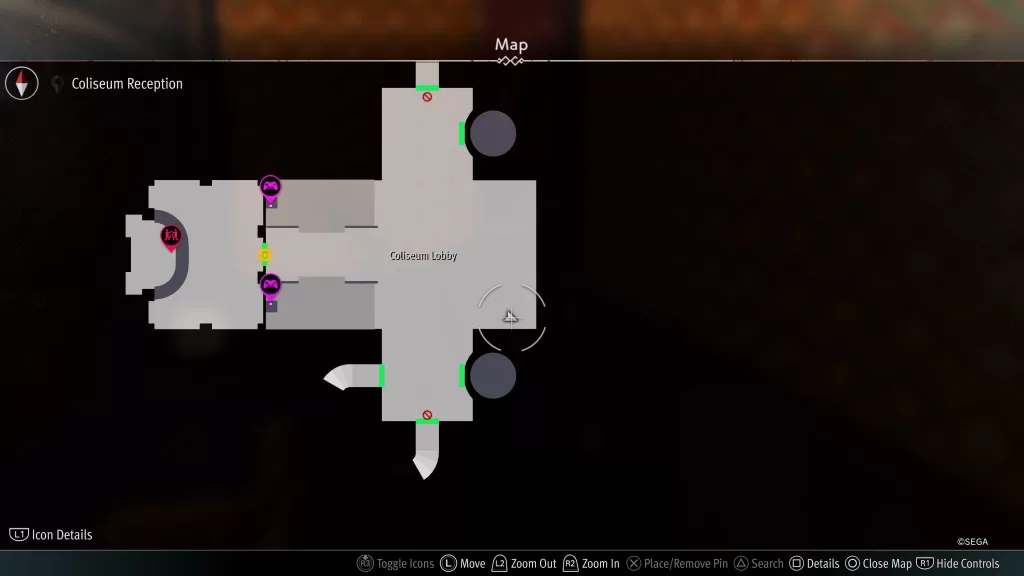
J5
Location: Castle
This locker key can be found on the ground behind some chairs in the Coliseum Lobby.
For more Like a Dragon Gaiden guides and walkthroughs, click here!