Avatar Frontiers of Pandora Logo
Guides

How to Obtain Designs & Recipes in Frontiers of Pandora

by NightlyGamingBinge in

Hello! Welcome to our guide on how to obtain designs and cooking recipes in Avatar: Frontiers of Pandora. Most cooking recipes can be obtained by completing quests and most designs can be received from various shops via the designs tab. Make sure to check out the below designs as they are all free from the shops! For a guide on where to purchase materials and ingredients for the crafting recipes, click here! For a guide on where to purchase weapons and gear, click here!

Recipes

RecipeQuestEffectsIngredients
Cheesy SahenaFleet-Footed – Gain +10% movement speed;
Fighter’s Boon II – Deal +40% damage against RDA
Zakru Milk (Fine)
Fiery Herbs (Fine)
Creamy SeafoodStealthy I – Gain +35% to stealthAny Fish (Fine)
Any Milk (Fine)
Egg-Stuffed MushroomAmbush I – Deal +35% stealth damageAny Mushroom (Fine)
Any Egg (Fine)
Fruity Egg FryBlast Resistance I – Gain +35% blast resistanceAny Egg (Fine)
Any Fruit (Fine)
Glazed FruitsFirewalk I – Gain +35% resistance to fireAny Nectar (Fine)
Any Fruit (Fine)
Meat & Fruit RoastBark Skin I – Take 30% less damage from wildlife and RDAAny Fatty Meat (Fine)
Any Fruit (Fine)
Mixed Meat SkewerFury I – Deal +35% damageAny Lean Meat (Fine)
Any Fatty Meat (Fine)
Mushrooms & Fruit SaladA Meal and a MemoryHearty I – Gain +30% base healthAny Fruit
Any Mushroom
Novao’s NiktsyeyClan ContributionGatherer’s Guidance – Clearly see Superior and Exquisite gatherables without activating Na’vi senses;
Hearty II – Gain +35% base health
Pod Fruit (Superior)
Feather Blade Seed (Superior)
Relun’s Fish StewClan ContributionAdept Forager – Always gain the Gathering Condition Bonus;
Stealthy I – Gain +35% to stealth
Mudcrawler Fish (Superior)
Crimson Mushroom (Superior)
Revitalizing PorridgeLost and FoundImmunity – Gain immunity to elemental and pollution effects;
Hearty II – Gain +35% base health;
Blaze Fruit
Forest Nectar Comb
Stormglider SoupHunters Hunted Main QuestIkran Rider II – Your ikran has +20% stamina;
Blast Resistance III – Gain +45% blast resistance
Stormglider Egg (Fine)
Octofin Fish (Fine)
Sweetened NiktsyeyFleet-Footed – Gain +10% movement speed;
Firewalk I – +35% resistance to fire
Swamp Hive Nectar (Fine)
Shelter Fruit (Fine)

Designs

DesignRegionLocationShop
Akru’s Ankle GuardsUpper PlainsMother of Rivers – The Circle – Maker’s TentAkru
Akru’s ArmguardUpper PlainsMother of Rivers – The Circle – Maker’s TentAkru
Akru’s CuirassUpper PlainsMother of Rivers – The Circle – Maker’s TentAkru
Akru’s HeadbandUpper PlainsMother of Rivers – The Circle – Maker’s TentAkru
Dyer WaistwrapKinglor ForestSilk Woods – Hometree – Weaver’s DenKoranu
Fearless Warrior Spear-throwerClouded ForestStone Cloud Valley – Resistance HideoutSo’lek
Heykinak’s Relentless ShortbowClouded ForestStone Cloud Valley – The HollowsHeykinak
Kitangi’s Heavy BowKinglor ForestSilk Woods – Hometree – Maker’s DenKitangi
Kitangi’s Venomous LongbowKinglor ForestSilk Woods – Hometree – Maker’s DenKitangi
Koranu’s ShawlKinglor ForestSilk Woods – Hometree – Weaver’s DenKoranu
Koranu’s SleeveKinglor ForestSilk Woods – Hometree – Weaver’s DenKoranu
Rajinder’s Ankle GuardsClouded ForestStone Cloud Valley – Resistance HideoutRajinder
Rajinder’s BracerKinglor ForestSpinner’s Circle – Resistance HQ – Living QuartersRajinder Singh Grewal
Rajinder’s Defense VestKinglor ForestSpinner’s Circle – Resistance HQ – Living QuartersRajinder Singh Grewal
Rajinder’s HeadbandClouded ForestStone Cloud Valley – Resistance HideoutRajinder
Rajinder’s ShortsKinglor ForestSpinner’s Circle – Resistance HQ – Living QuartersRajinder Singh Grewal
So’lek’s Furtive LongbowClouded ForestStone Cloud Valley – Resistance HideoutSo’lek
So’lek’s Lightning Heavy BowKinglor ForestSpinner’s Circle – Resistance HQ – Maintenance So’lek
So’lek’s Lightning LongbowKinglor ForestSpinner’s Circle – Resistance HQ – Maintenance So’lek
So’lek’s Merciless ShortbowClouded ForestStone Cloud Valley – Resistance HideoutSo’lek
So’lek’s Survivor Heavy BowClouded ForestStone Cloud Valley – Resistance HideoutSo’lek
Solali’s Spear-throwerUpper PlainsMother of Rivers – The Circle – Hunter’s TentSolali
Solali’s Venomous Heavy BowUpper PlainsMother of Rivers – The Circle – Hunter’s TentSolali
Uniluk’s Ankle GuardsClouded ForestStone Cloud Valley – The HollowsUniluk
Uniluk’s CapeClouded ForestStone Cloud Valley – The HollowsUniluk
Uniluk’s CuffClouded ForestStone Cloud Valley – The HollowsUniluk

For more Avatar: Frontiers of Pandora guides and walkthroughs, click here!
Avatar Frontiers of Pandora Logo
Guides

Where to Purchase Materials & Ingredients in Frontiers of Pandora

by NightlyGamingBinge in

Hello! Welcome to our guide on where to purchase materials and ingredients in Avatar: Frontiers of Pandora. These materials and ingredients can be used when crafting! Please note there is a perk called Renowned Crafter that you can acquire which enables Na’vi crafting experts to entrust you with their best materials. The tables below will reflect the materials available with this perk in play. For a guide on how to obtain cooking recipes and designs, click here! For a guide on where to purchase weapons and gear, click here!

Clouded Forest

Stone Cloud Valley – The Hollows

Heykinak

MaterialsRarityStatsPrice
Clouded Lily BastExquisite37 Damage
10% Stealth damge
3 Clan Favors
Bone Helm Rhino HornSuperior24 Damage
10% RDA damage
2 Clan Favors
Hollow Tree ResinSuperior34 Damage
Reflex Shot – Gain snap aim-assist
2 Clan Favors

Okul

Location: Hearth

IngredientsRarityStatsPrice
Creamy Plant MilkExquisite25% Energy
Fighter’s Boon II – Deal +40% damage against RDA
Long Effect Duration
1 Clan Favor
Sweet Plant MilkExquisite25% Energy
Fighter’s Boon III – Deal +45% damage against RDA
Long Effect Duration
1 Clan Favor
Earthy HerbsExquisite25% Energy
Tracker’s Boon III – Deal +45% damage against wildlife
1 Clan Favor

Uniluk

MaterialRarityStatsPrice
Stormglider ToothExquisite66 Health
15% Elemental resistance
3 Clan Favors
Forest Pine ConeExquisite66 Health
15% Ikran stamina
3 Clan Favors
Bone Helm Rhino Light HideSuperior51 Health
3% Ranged resistance
2 Clan Favors
Snakewood ConeSuperior41 Health
5% Melee resistance
2 Clan Favors
Crimson BarkSuperior41 Health
5% Melee resistance
2 Clan Favors

Kinglor Forest

Silk Woods – Hometree

Kitangi

Location: Maker’s Den

MaterialRarityStatsPrice
Forest Seaweed BastSuperior15 Damage
5% Wildlife Damage
2 Clan Favors
Kinglor Forest Sol’s Delight BastSuperior15 Damage
5% RDA damage
2 Clan Favors
Stormsky Bamboo ShootsSuperior33 Damage
Powerful Draw – +20% damage when your longbow is fully drawn
2 Clan Favors

Koranu

Location: Weaver’s Den

MaterialRarityStatsPrice
Viperwolf ToothSuperior24 Health
5% Wildlife damage
2 Clan Favors
Stairfoot BarkSuperior24 Health
10% Elemental resistance
2 Clan Favors
Lionberry FiberSuperior30 Health
5% Weakspot damage
2 Clan Favors
Scarab Crawler Heavy HideSuperior28 Health
2% Stealth
2 Clan Favors

Relun

Location: The Hearth

IngredientsRarityStatsPrice
Spineberry FruitExquisite25% Energy
Hearty I – Gain +30% base health
Long Effect Duration
1 Clan Favor
Crimson MushroomExquisite25% Energy
Ambush I – Deal +35% stealth damage
Long Effect Duration
1 Clan Favor
Fragrant HerbsExquisite25% Energy
Tracker’s Boon I – Deal +35% damage against wildlife
Long Effect Duration
1 Clan Favor
Mudcrawler FishExquisite25% Energy
Stealthy I – Gain +35% to stealth
Long Effect Duration
1 Clan Favor
Blaze FruitExquisite25% Energy
Hearty II – Gain +35% base health
Long Effect Duration
1 Clan Favor

Upper Plains

Mother of Rivers – The Circle

Akru

Location: Maker’s Tent

IngredientsRarityStatsPrice
Blood Leaf BarkExquisite44 Health
15% Elemental resistance
3 Clan Favors
Cloacked Panther ToothSuperior26 Health
8% Wildlife damage
2 Clan Favors
River Rock ShellSuperior32 Health
3% Stealth
2 Clan Favors
Arrow Deer Light HideSuperior32 Health
2% Ranged resistance
2 Clan Favors
Rain Thistle FiberSuperior32 Health
2% Ranged resistance
2 Clan Favors

Novao

Location: Living Area

IngredientsRarityStatsPrice
Fresh Zakru MilkExquisite25% Energy
Fighter’s Boon II – Deal +40% damage against RDA
Long Effect Duration
1 Clan Favor
Mild HerbsExquisite25% Energy
Tracker’s Boon III – Deal +45% damage against wildlife
1 Clan Favor
Fiery HerbsExquisite25% Energy
Tracker’s Boon II – Deal +40% damage against wildlife
Long Effect Duration
1 Clan Favor
Tangy Plant MilkExquisite25% Energy
Fighter’s Boon I – Deal +35% damage against RDA
Long Effect Duration
1 Clan Favor

Solail

Location: Hunter’s Tent

MaterialsRarityStatsPrice
Shaded Waterweed BastExquisite28 Damage
8% Wildlife damage
3 Clan Favors
Bladehead HornSuperior18 Damage
8% RDA damage
2 Clan Favors
Petrified BoneSuperior112 Damage
Powerful Throw – Increased range
2 Clan Favors

For more Avatar: Frontiers of Pandora guides and walkthroughs, click here!
Avatar Frontiers of Pandora Logo
Guides

How to Complete Resistance Field Labs – Avatar Frontiers of Pandora

by NightlyGamingBinge in

Welcome to NGB and our guide for the Resistance Field Labs side quest in Avatar: Frontiers of Pandora. Here’ll we cover how to start the quest and what all you’ll need to do in order to complete it.

How to Start Resistance Field Labs

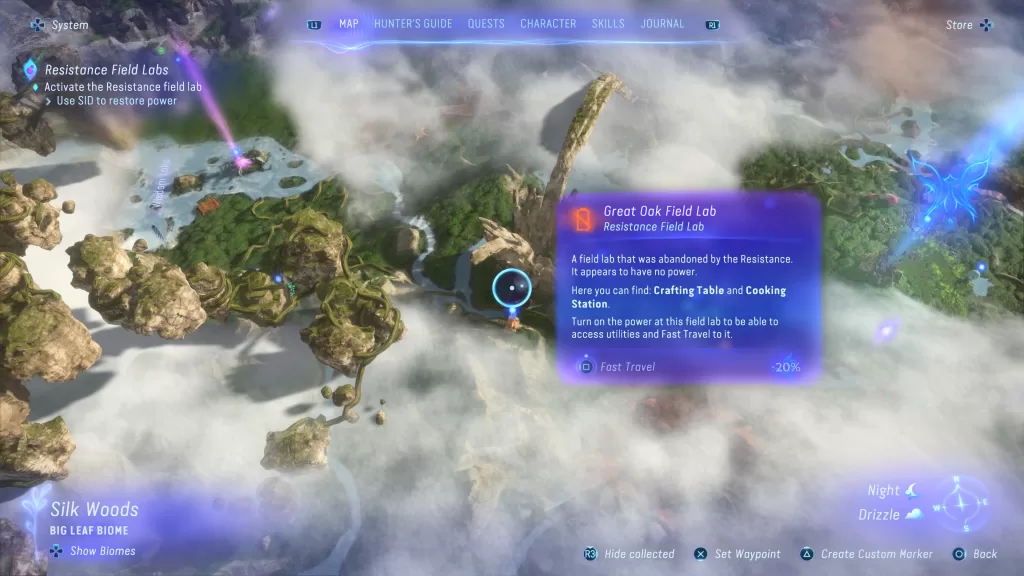
In order to start this quest, you’ll need to find the Great Oak Field Lab which is west of Hometree, past the Glade of Light.

Great Oak Field Lab Location

Resistance Field Labs Objectives

Activate the Resistance Field Lab

Once you reach the lab, climb up to the railing of the building and scan the power junction box with your scanner. One is located on the northeast side of the structure and the other is on the southwest side.

Once you’ve turned both of them on, head inside and use your scanner to follow the wires to where they meet. Use your scanner to configure the fuse to send power to the next one. Use your scanner to send it to the opposite way then head to the last fuse on the floor to activate the building.

Doing this will give you access to a workbench, spare parts chest and a Comms Terminal. Answer the call on the Comms Terminal to complete the quest.

Click here for more walkthroughs and guides on Avatar: Frontiers of Pandora!

Avatar Frontiers of Pandora Logo
Guides

How to Complete The Unsung Hunter in Frontiers of Pandora

by NightlyGamingBinge in

Welcome to NGB and our guide for The Unsung Hunter side quest in Avatar: Frontiers of Pandora. Here’ll we cover how to start the quest and what all you’ll need to do in order to complete it.

How to Start The Unsung Hunter

In order to start this quest, you’ll first need to progress with the main story until you reach the “Eywa’s Blessing” main quest. Once you’ve done that, speak with the hunter in the Weaver’s Den at Hometree.

The Unsung Hunter Objectives

Speak with Aleyum Neyan

After speaking with the Hunter, head up the ramp behind the Hunter in Hometree to reach the Commons. When you get there, look for the two Na’Vi arguing; they will be Aleyum and Neyan. Speak with them to learn about a crash site that she wants to check out to the disagreement of Neyan.

Locate the Crash Aleymun Mentioned

For this objective, head southeast from Hometree across the Threaded River to find the crash site at Construction Site Echo. Once there, speak with Aleymun near the spotlight.

Investigate Construction Site Echo

First Clue

Inspect the pair of items listed below.

  • RDA corpses
  • Broken spear

RDA corpses can be found leaning against the tire of the bulldozer. The broken spear can be found stuck in a crate near the smoking mech. After doing so, link the two together to get the first clue.

Second Clue

  • Aircraft debris
  • Broken tree

The aircraft debris can be found by the smoldering mech on top of a pile of rocks. The broken tree is directly north of the aircraft debris. After you’ve inspected both items and linked them together, you’ll get your next clue!

Third Clue

  • RPG Launcher
  • Ikran prints

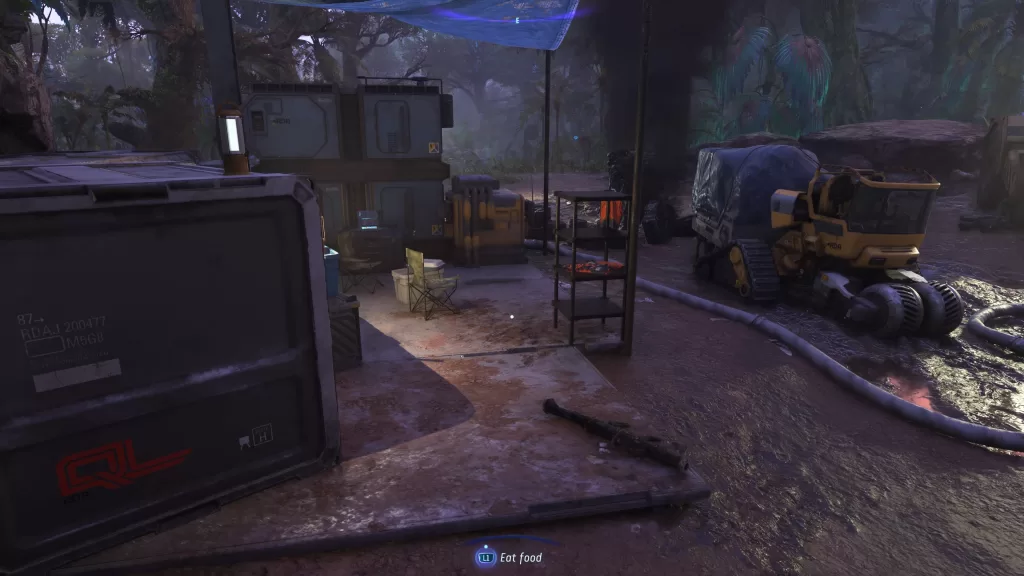
The Ikran prints can be found near where Aleymun was standing. The RPG launcher can be found under the makeshift tent. Link both together to get your final clue.

After you’ve found all 3 clues, speak with Aleymun to report your findings.

Track Scent of Aircraft Fuel

Before leaving camp, hack the tablet under the makeshift tent with your scanner.

Unsung Hunter RDA Scan

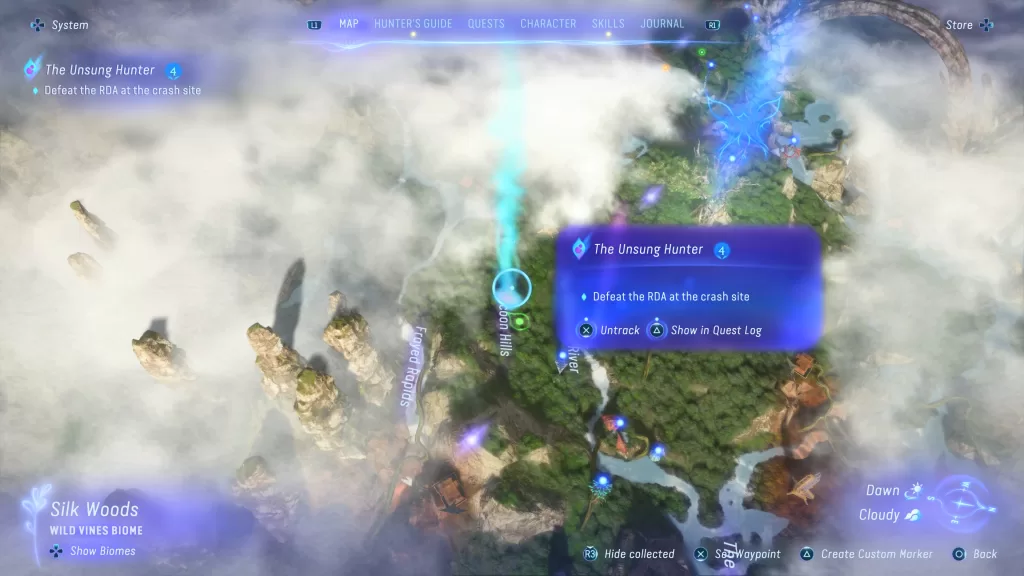
When you’re ready, use your Na’vi senses to locate the scent of the fuel and follow it south to the Cocoon Hills.

Unsung Hunter Objective Defeat the RDA at Cocoon Hills

Defeat the RDA

Once at the location, take out the remnants of the RDA who can be found waiting around a tree. There will be 3 soldiers total, one of which is in an armored suit.

After you begin the fight, 4 armored reinforcements will show up so take down the initial RDAs before they arrive. We took out the reinforcements quickly by using a Staff Sling with the grenade ammo when they landed!

Once you take them all out, loot the chests at the base of the tree they were guarding! You’ll receive a shotgun from the giant chest!!

Talk to Aleymun

Travel back to Hometree and speak with Aleymun to complete the quest.

Unsung Hunter Rewards

  • Neyan’s Hunting String (Longbow – String Mod)
    • 15% Wildlife damage

For more Avatar: Frontiers of Pandora guides and walkthroughs, click here!
Avatar Frontiers of Pandora Logo
Guides

Complete List of Side Quests in Avatar: Frontiers of Pandora

by NightlyGamingBinge in

Welcome to our complete listing of all the side quests available in Avatar: Frontiers of Pandora! In the table below, you’ll find the location of each side quest. If you click the link, you’ll be taken to our walkthrough on how to complete said quest! Please note that the quests found at a Na’vi camp might be available from other camps! Also, if the quest isn’t there yet just check back later after progressing through the story and other side quests!

Avatar Side Quests

QuestRegionLocation
A Father’s FearUpper PlainsMother of Rivers – The Circle
A Match Made in PandoraClouded Forest
A Meal and a MemoryKinglor ForestSilk Woods – High Loom Na’vi Camp
A Mysterious GuestKinglor ForestShadow Wood – River’s Run Na’vi Camp
A Shadow and a ThreatUpper PlainsThe Stone Hold – Mountain’s Shadow Field Lab
Breathing RoomKinglor ForestSilk Woods – Weaver’s Flourish Na’vi Camp
CrushKinglor ForestSilk Woods – Hometree (Main Entrance – Outside)
Deadly HuntKinglor ForestSilk Woods – The High Loom Na’vi Camp
Field ResearchKinglor ForestSpinner’s Circle – Resistance HQ
Flavor of the PastClouded ForestCradling Pines – Blue Stone Haven
Flight of MemoriesKinglor ForestSilk Woods – The High Loom Na’vi Camp
Gatherer GoneKinglor ForestSilk Woods – Hometree (Weaver’s Den)
HomecomingClouded ForestStone Cloud Valley – The Hollows
Laser Ore Processor AlphaKinglor ForestStoneblade Ridge – Laser Ore Processor Alpha
Lost and FoundKinglor ForestSilk Woods – Weaver’s Flourish Na’vi Camp
Memory Painting
PenanceClouded ForestStone Cloud Valley – Resistance Hideout
Resistance Field LabsKinglor ForestGossamer Lakes – Great Oak Field Lab
Sarentu Totems
Severed BondsKinglor ForestSilk Woods
Special DeliveryKinglor ForestShadow Wood – Tangled Stream
Steady WingsKinglor ForestSilk Woods – Hometree
Stories Old and NewClouded ForestCascading Stones – Stone Bridge Station
System Reboot
Teachable MomentKinglor ForestSilk Woods – Hometree
The Black Wind
The Celebration MuralUpper PlainsMother of Rivers – The Circle
The Dark Theater
The Gentle GiantClouded ForestThe Cut – Sheltering Log Station
The Memorial WallClouded ForestStone Cloud Valley – Resistance Hideout
The Sound of NightKinglor ForestSilk Woods – Weaver’s Flourish Na’vi Camp
The Sound of Night Part 2Kinglor ForestShadow Wood – Shaded Grove Na’vi Camp
The Unsung HunterKinglor ForestSilk Woods – Hometree (Weaver’s Den)
The Wind Will Carry UsUpper PlainsMother of Rivers – The Circle
To Build a HomeKinglor ForestSpinner’s Circle – Resistance HQ
To Friends DepartedKinglor ForestSilk Woods – Hometree (The Hearth)
Tracking the PastClouded ForestStone Cloud Valley – The Hollows
We Stand TogetherUpper PlainsThe Stone Hold – Stone Lake

For more Avatar: Frontiers of Pandora guides and walkthroughs, click here!
Avatar Frontiers of Pandora Logo
Guides

How to Complete Crush – Frontiers of Pandora Guide

by NightlyGamingBinge in

Welcome to NGB and our guide for the Crush side quest in Avatar: Frontiers of Pandora. Here’ll we cover how to start the quest and what all you’ll need to do in order to complete it.

How to Start Crush

In order to start this quest, you’ll first need to progress with the main story until you reach the “Eywa’s Blessing” main quest. Once you’ve done that, speak with Nawuk outside near the entrance to Hometree.

Crush Objectives

  • Locate the island where Nawuk saw the human
  • Investigate the Island for Clues
  • Hack the tablet for clues
  • Pick up the dropped Resistance tablet
  • Ask Alexander at Resistance HQ if he knows anything about the tablet
  • Ask around Resistance HQ

Locate the Island Where Nawuk Saw the Human

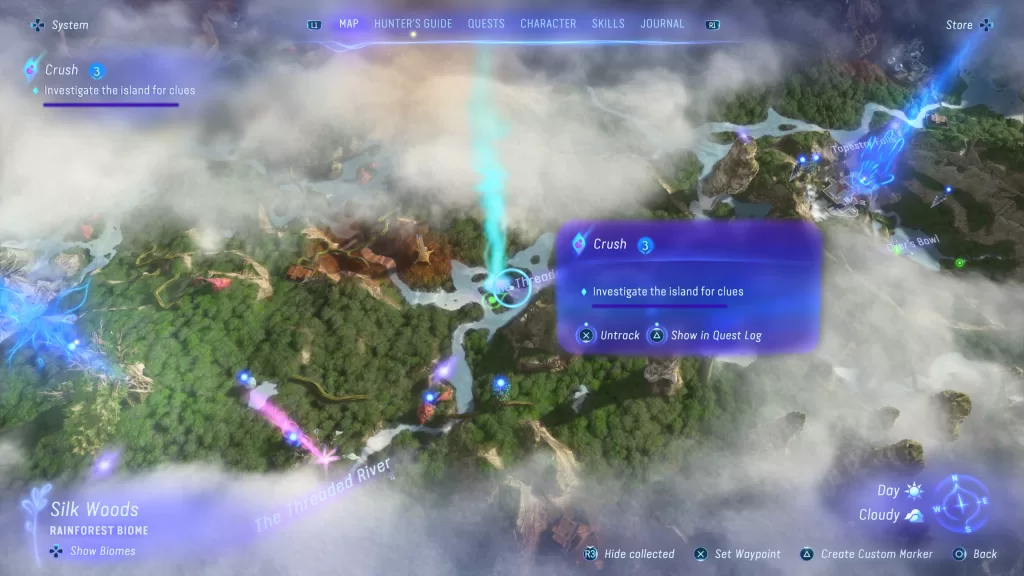
Exit Hometree then head east towards Resistance HQ. About halfway between the two, you’ll reach the Threaded River. The crash site can be found in the middle of it near a giant fallen log.

Crush Avatar Frontiers of Pandora Crash Site

Investigate the Island for Clues

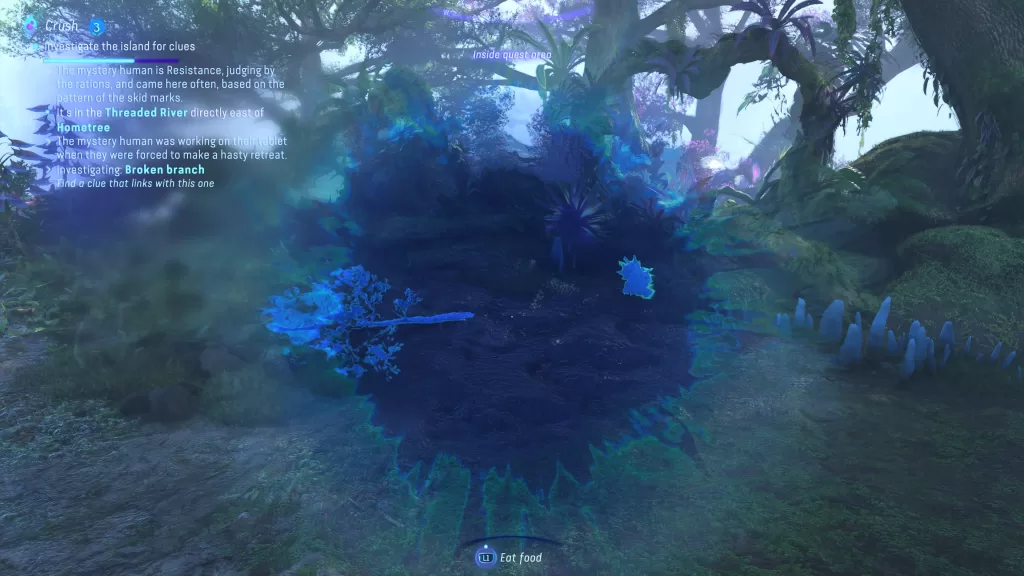
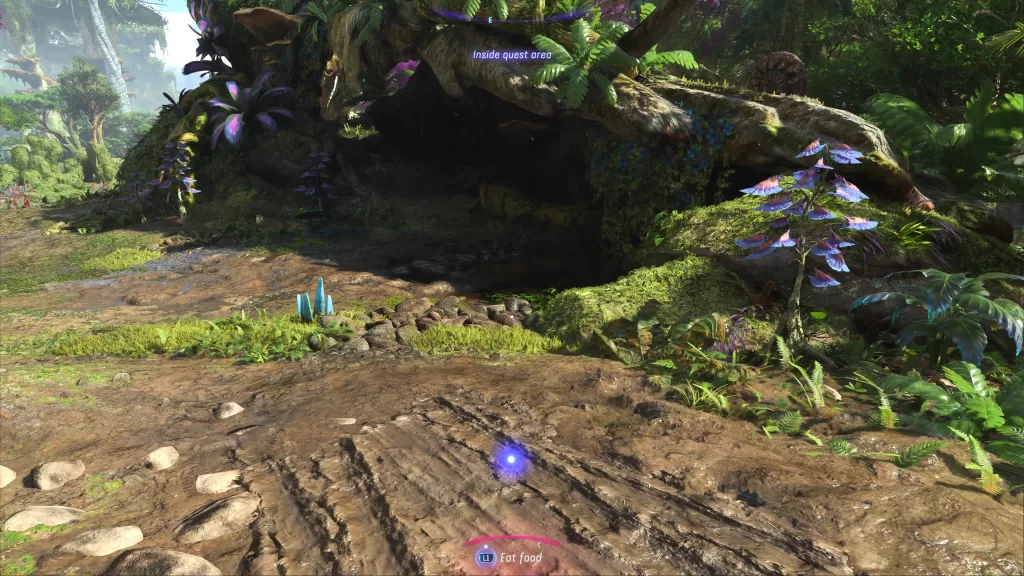
You’ll need to investigate the area to figure out what’s going on. Start by inspecting the two items below. You’ll then need to interact with the box of rations then link it with the skid marks to find the first clue. The skid marks are located outside of the log on the southwestern side. You can find the box of rations under the log next to a backpack with a musical instrument leaning on it.

  • Aircraft Skid Marks
  • Box of Resistance Rations
Avatar: Frontiers of Pandora Crush Side Quest Skid Marks Area Location

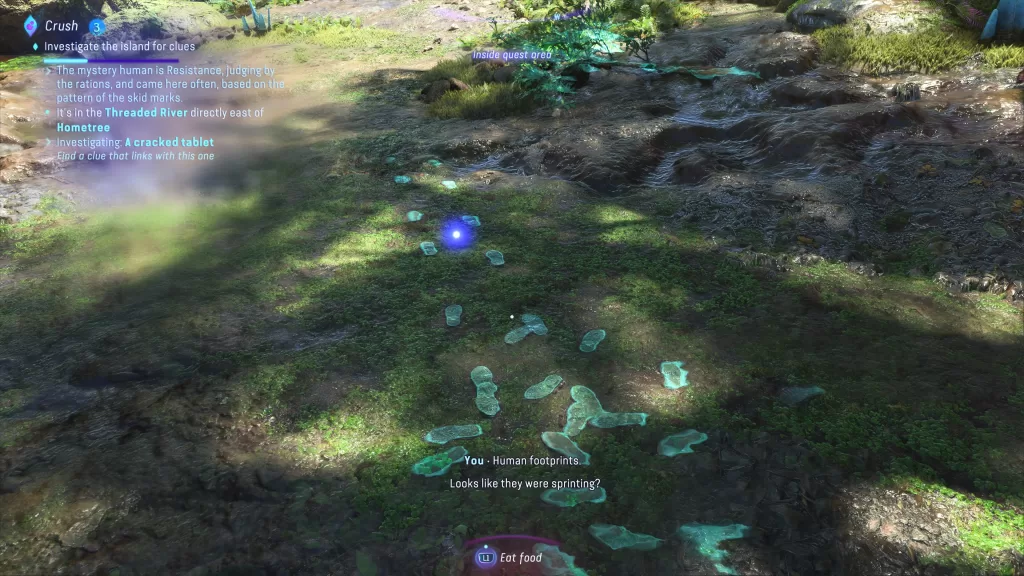
For the next clue, you’ll need to inspect the two items listed below. The cracked tablet can be found near the skid marks from the previous clue while the wide footprints are northeast of the tablet near the broken branch. After finding and inspecting both, interact with the footprints and link them to the tablet.

  • A Cracked Tablet
  • Wide Footprints
Avatar: Frontiers of Pandora Crush Side Quest Wide Footprints Area Location

The last clue can be found across the opening of the fallen log to the northwest. The branch and wasphive will both be on the ground next to each other. Inspect them both then interact with the branch and link it with the hive.

  • Broken Branch
  • Broken Wasphive
Avatar: Frontiers of Pandora Crush Side Quest Broken Branch and Broken Wasphive Area Location

Hack the Tablet for Clues / Pick it Up

Return to the broken tablet then break out your handy hacking tool and use it to hack the device. This will cause an audio recording to play. After it ends, collect the tablet and bring it to Alexander at the Resistance HQ. For us, he was in the Research Area on one of the upper floors. Speak with him about the device and in return he’ll offer a prayer and good luck!

Ask Around Resistance HQ

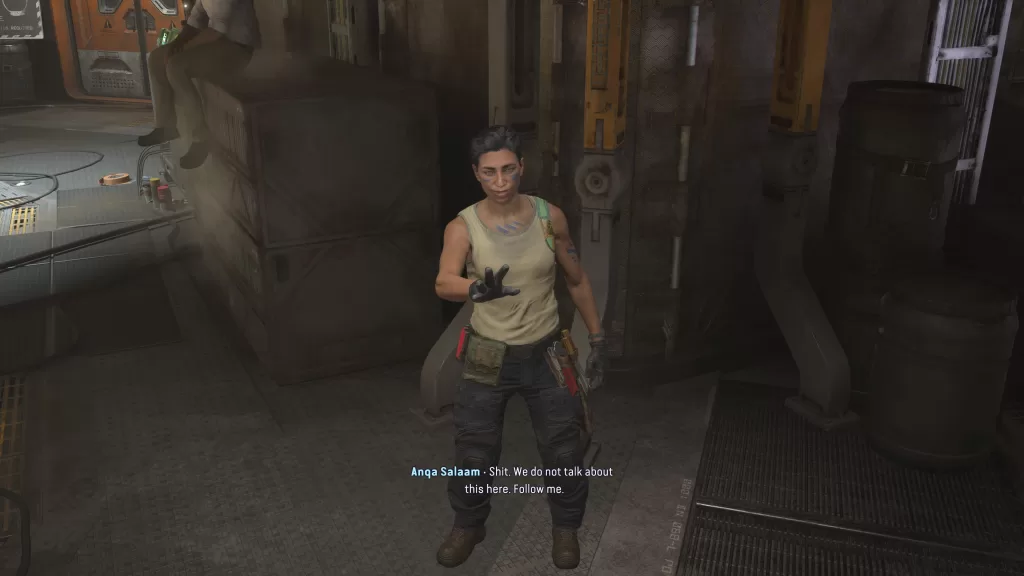
There are a number of people around HQ you can ask about the tablet so feel free to look around if you want to see everyone’s dialog options. If you just want to progress the quest, head down to Maintenance on the 1st level of HQ and speak with Anqa Salaam near the northeastern air lock. After the initial conversation, you’ll need to speak with her once more to confront her about the tablet. This will cause her to lead you nearby to Living Quarters where you’ll have to speak with her once more about the poem. After a brief conversation, the quest will complete.

Avatar: Frontiers of Pandora Crush Side Quest Anqa Salaam Area Location
Avatar Frontiers of Pandora Logo
Guides

How to Complete Gatherer Gone in Frontiers of Pandora

by NightlyGamingBinge in

Welcome to NGB and our guide for the Gatherer Gone side quest in Avatar: Frontiers of Pandora. Here’ll we cover how to start the quest and what all you’ll need to do in order to complete it.

How to Start Gatherer Gone

In order to start this quest, you’ll first need to progress with the main story until you reach the “Eywa’s Blessing” main quest. Once you’ve done that, speak with Neytu in the Weaver’s Den at Hometree.

Gatherer Gone Objectives

  • Ask the People at Shaded Grove camp about Vu’an
  • Locate Vu’an’s gathering spot
  • Investigate the Gathering Spot
  • Track the scent of herbs from the strange viperwolf attack
  • Talk to Vu’an at Wildwood Den
  • Clear the area of viperwolves
  • Meet Vu’an at Hometree

Ask the People at Shaded Grove Camp About Vu’An

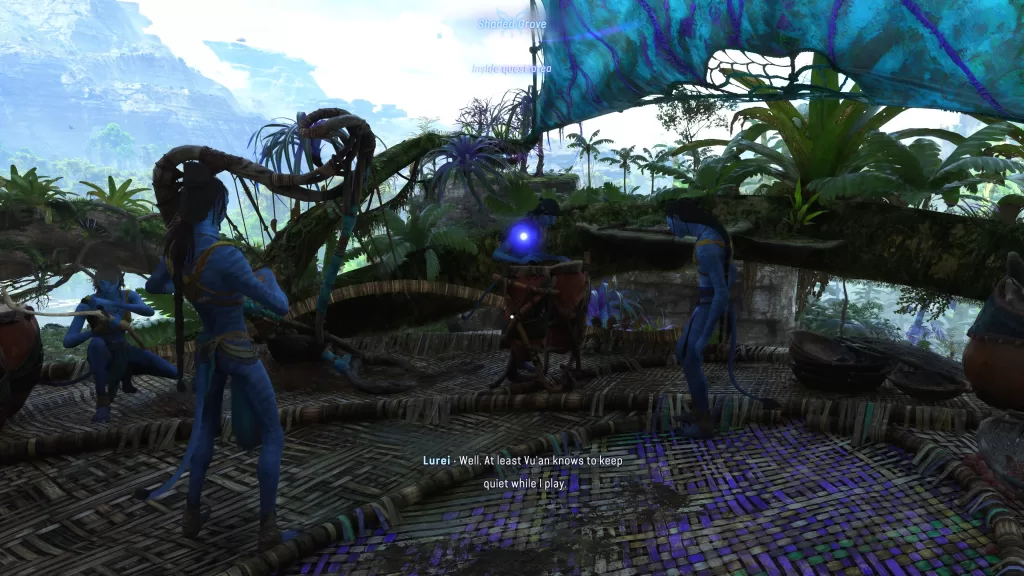
After accepting the quest, set out for the Shaded Grove which can be found west of Hometree. When you get there, you’ll want to find Lurei playing some giant bongos on the upper level of the Shaded Grove. Speak with her and she’ll tell you about Vu’an’s favorite gathering spot.

Avatar: Frontiers of Pandora Gatherer Gone Side Quest Lurei Area Image

Locate Vu’an’s Gathering Spot

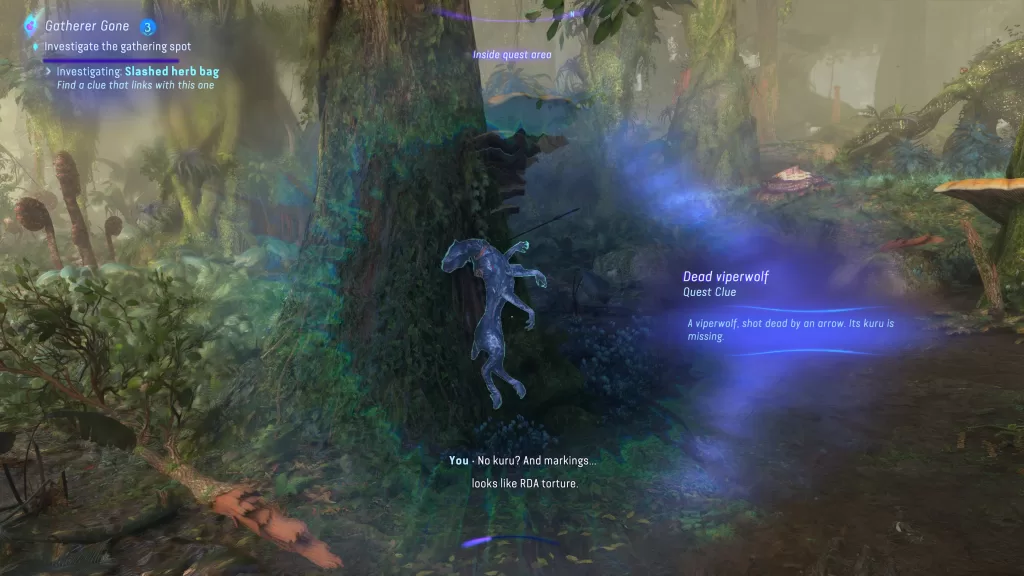
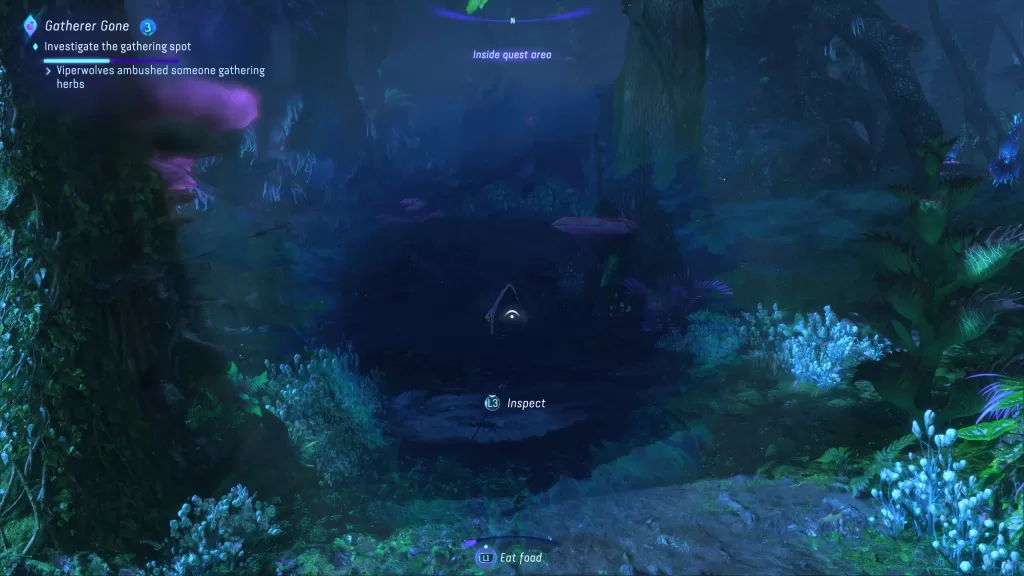
Leave Shaded Grove and travel north (and slightly west) to reach the Gossamer Lakes. You’ll find the gathering spot on the north side under some giant tree roots. Start out by inspecting the herb bag in the water then travel northwest and inspect the dead viperwolf stuck to the tree by arrows. Link those to items together to receive the first clue.

  • Slashed Herb Bag
  • Dead Viperwolf
Avatar: Frontiers of Pandora Gatherer Gone Side Quest Dead Viperwolf Area Image

Next, inspect the scattered arrows near the herb bag stuck in the ground and the broken bow leaning against a rock down the path to the right of the tree with the viperwolf. You’ll then want to link the two together to receive the 2nd clue.

  • Scattered Arrows
  • Broken Bow
Avatar: Frontiers of Pandora Gatherer Gone Side Quest Bow Area Image

Track the Scent of Herbs from the Strange Viperwolf Attack

After collecting both clues, use your Na’vi sense to follow the scent of herbs. This will lead you to a den in the Wildwood where Vu’an is taking refuge. Approach her to trigger a cutscene where you’ll offer to deal with the viperwolves.

Clear the Area of Viperwolves

Now you’ll have to fight off three groups of the viperwolves. If you use your senses on them, you’ll see their weak point is in their neck. Once you finish a group, you’ll have to wait a bit for the next one to spawn. Try circling the den to make this happen a bit faster. Once they have all been taken care of, return to Vu’an in the Wildwood Den and speak with her.

Meet Vu’an at Hometree

Travel back to Homtree then speak with Vu’an and Neytu in the Weaver’s Den to complete the quest.

Gatherer Gone Rewards

  • Vu’an’s Sleeve (Armguard)
    • 40 Health
    • 15% Bonus health
    • 2% Melee resistance
    • 1% Ranged resistance
RoboCop Rogue City Logo
Guides

Complete Election Night Riots Objective RoboCop Rouge City

by NightlyGamingBinge in

Welcome to our “Election Night Riots” guide for RoboCop Rouge City. Here we’ll go over the optional objectives and miscellaneous things you can find/do during the Election Night Riots primary objective. At this point in the game, there will be no more RoboCop Evaluations.

Election Night Riots Objectives

Listed below are the optional side objectives during the Election Night Riots primary objective that Robo can complete to earn some additional XP.

  • Secondary
    • Shooting at the Arcade
    • Shooting at the Video Rental
  • Misc
    • Save the Wash & Go Owner
    • Save Ben at Ben’s Garage

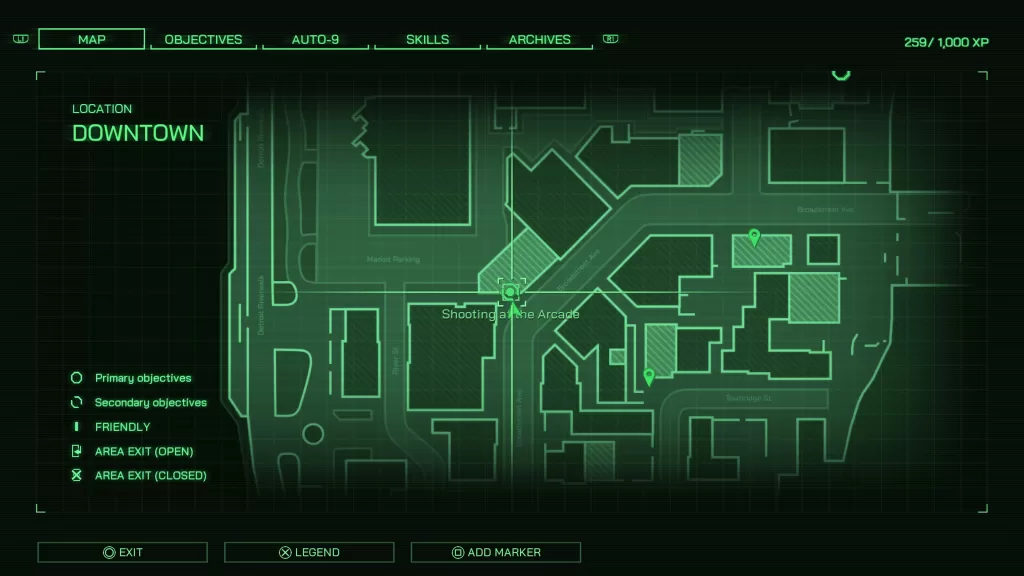
Shooting at the Arcade

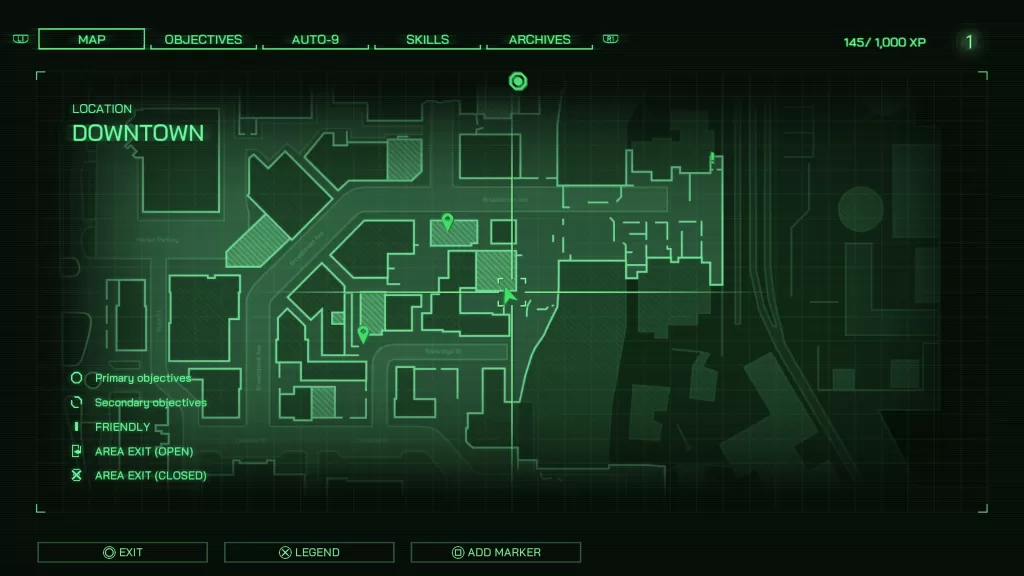
RoboCop Rouge City Election Night Riots Arcade Map Location

While wondering down Broadstreet Ave, you’ll get a call from the new arcade owner as you close in on the arcade. He’ll ask for help as the arcade is under attack. Head there and enter the arcade. Defeat all of the enemies in the main arcade room then bust through the bathroom door to take out the last two holding the owner hostage. Speak with him then exit the arcade to complete the objective.

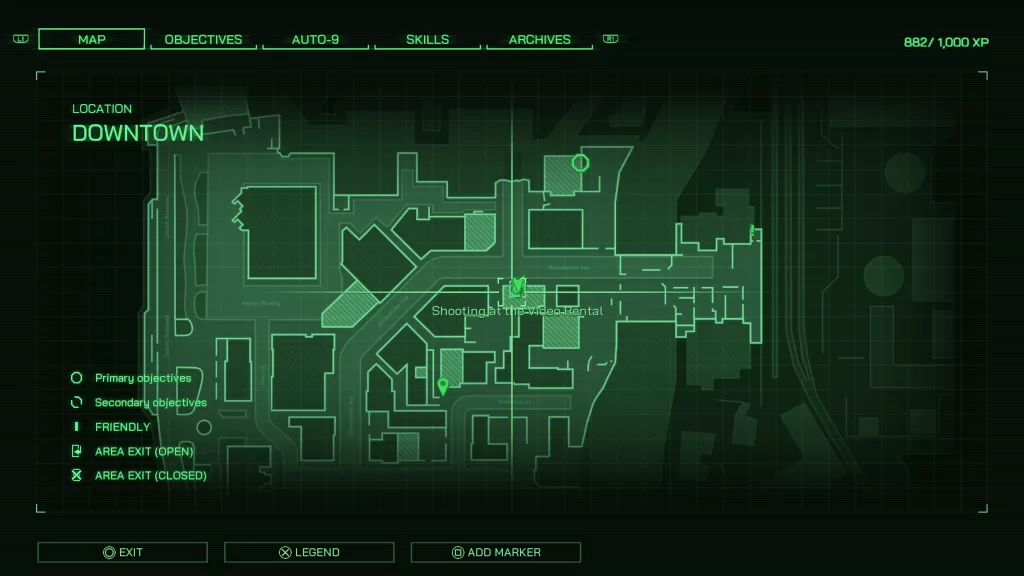
Shooting at the Video Rental

RoboCop Rouge City Election Night Riots Video Store Map Location

To start this objective, you’ll need to reach the Video Rental store on Broadstreet Ave. The clerk will call Robo asking for help. Enter the store and eliminate all of the thugs. In addition to the main area of thee store, there will be a couple in the side room as well. Once they have all bene dealt with, speak with the clerk at the front of the store then leave to complete the objective.

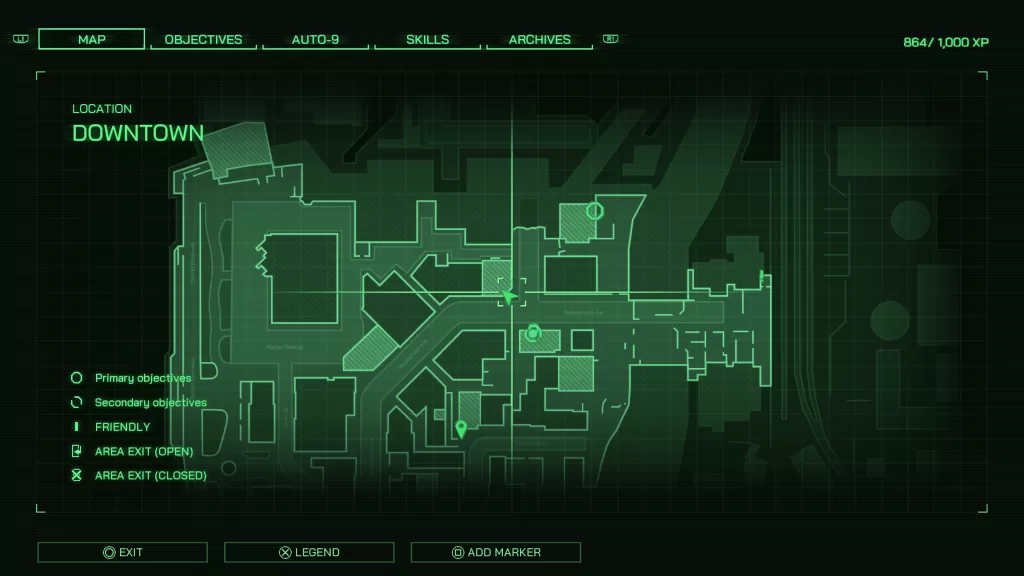
Election Night Riots – Save the Wash & Go Owner

RoboCop Rouge City Election Night Riots Wash & Go Map Location

As you approach the Wash & Go on Broadstreet Ave, Robo will get a call from the owner asking for help. Make your way there and head inside. Deal with the thugs then breach the office door in the back and take out the two additional enemies there to save the owner.

Election Night Riots – Save Ben at Ben’s Garage

RoboCop Rouge City Election Night Riots Ben's Garage Map Location

When you are close to Ben’s Garage between Broadsteet and Towbridge St, you’ll receive a call from Ben saying there is nothing going on at his shop. Head there anyway and deal with the Street Vultures in the garage. After that, head up the stairs and breach the office to take out the rest and save Ben.

For more RoboCop: Rogue City guides and walkthroughs, click here!
RoboCop Rogue City Logo
Guides

Complete The Man Himself Guide RoboCop Rouge City

by NightlyGamingBinge in

Welcome to our “The Man Himself” guide for RoboCop Rouge City. Here we’ll go over the optional objectives and miscellaneous things you can find/do during the The Man Himself primary objective. At this point in the game, there will be no more RoboCop Evaluations.

The Man Himself Objectives

Listed below are the optional side objectives during The Man Himself primary objective that Robo can complete to earn some additional XP.

  • Secondary
    • Samantha’s Investigation
  • Misc
    • Sticky Note Trio
    • Suicide Note
    • Optimal Temperature Sticky Note
    • PCB (for Auto-9)

Samantha’s Investigation

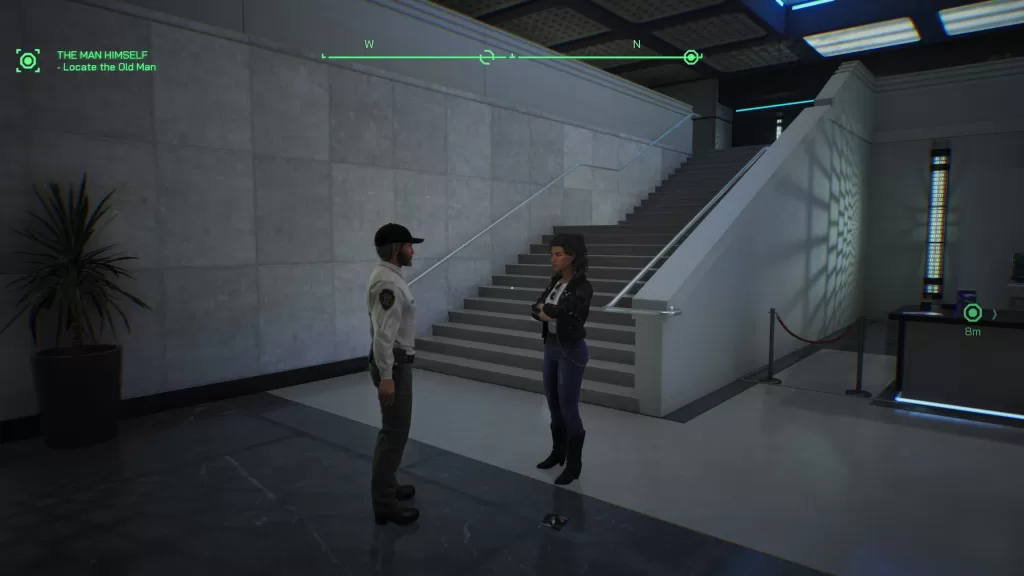
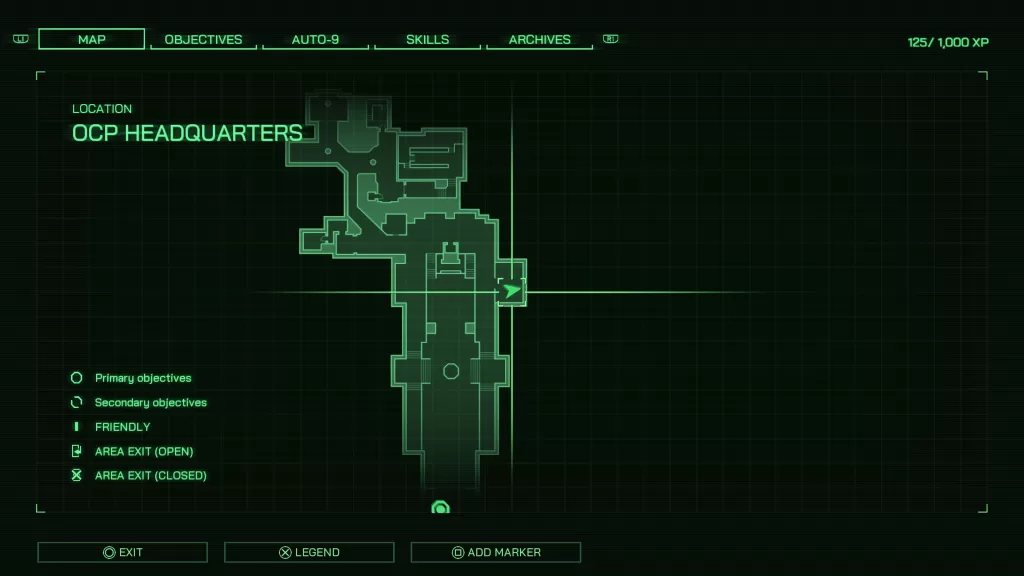
RoboCop Rouge City The Man Himself Samantha's Investigation Area Location

At OCP Headquarters, Robo will encounter Samantha near the receptionist desk talking to a security guard. The guard will request Robo’s help in dealing with her. Talk to the guard to find out about a security breach. He will leave you to handle her and go to the security room. Then, Samantha will ask Robo to assist her in obtaining the necessary data.

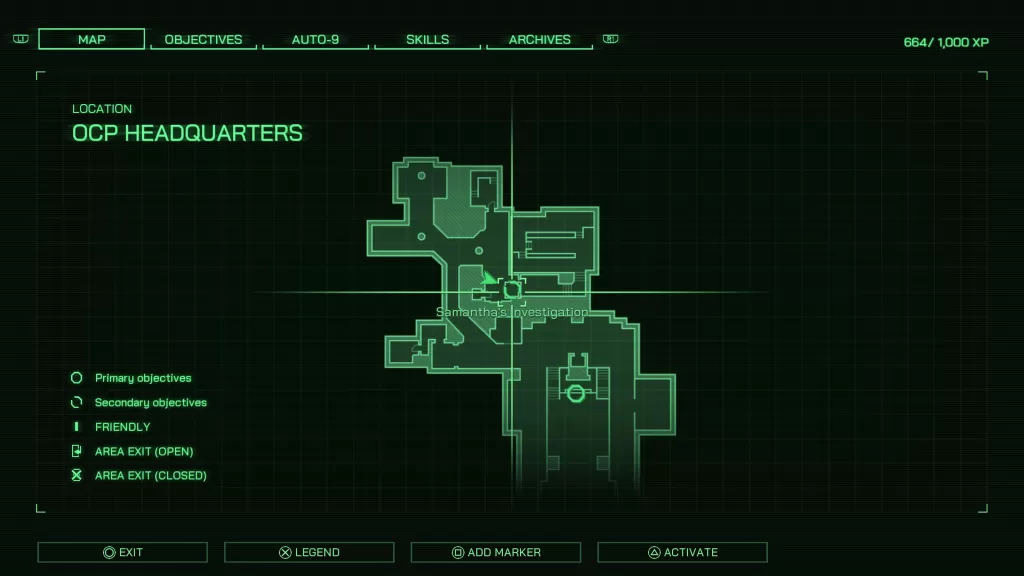
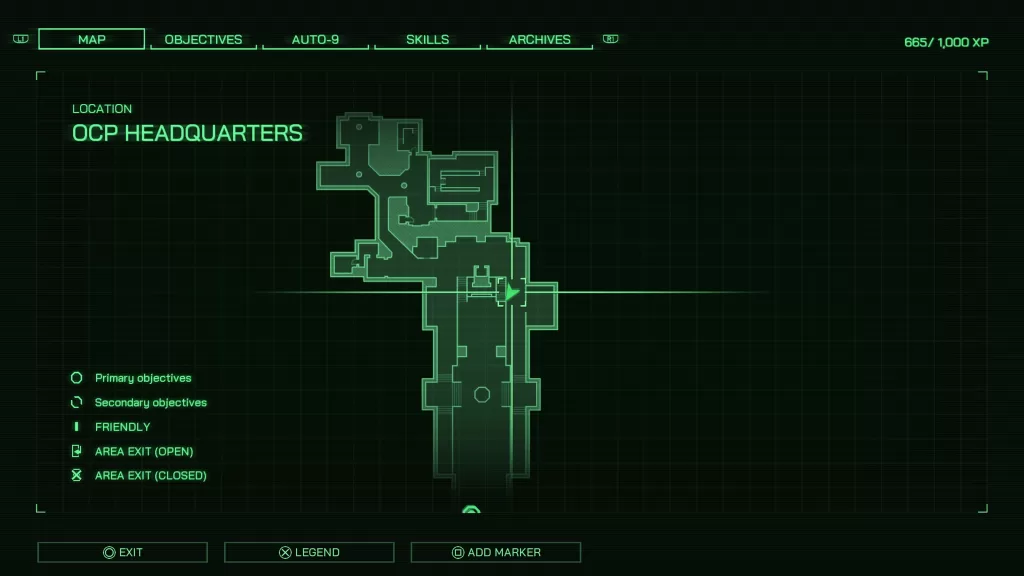
RoboCop Rouge City The Man Himself Samantha's Investigation Security Room Map Location

Go to the security room on the north side of the main level by turning left at the elevators. When you arrive, the guard will ask Robo to assist in opening the doors. Use Robo to scan the electric lock on the side of the door and then interact with it to breach. You’ll receive a prompt that a warrant is needed. The guard will then give you permission to proceed. Interact with the doors again to actually breach them. Once inside, go down to the area with the servers.

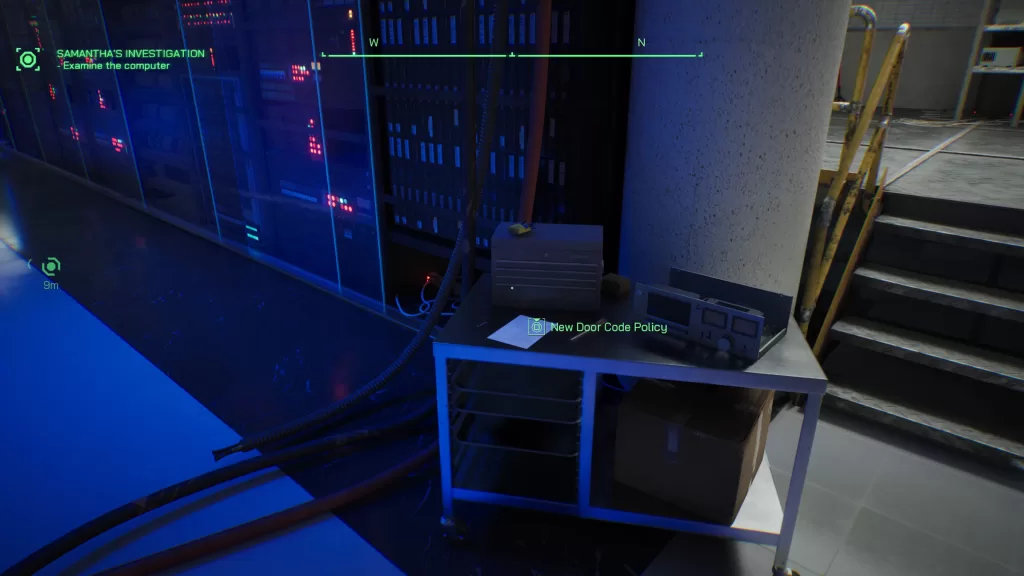
Down where the servers are, you can find the New Door Code Policy document on a cart near one of the servers. Read it to get some extra XP and learn about door codes!

RoboCop Rouge City The Man Himself Samantha's Investigation New Door Code Policy Document Area Location

Go down the first row of computers and then check the one in the middle when prompted. The guard will instruct you not to touch the computer, which will update the objective to distract the guard. You can do this by retracing your steps toward the front of the building and walking through the recently activated metal detectors. This will make a noise that alerts the guard to go check it out. Return to the server room and interact with the computer to obtain the necessary data.

Alternatively, if your Engineering skill is at level 7, you can inform the guard that a computer network may have been affected. This will cause him to leave, allowing you to access the data.

Return to Samantha to deliver the data or not. If you choose to hand it over, then she’ll ask Robo to delete the security footage. If you choose to help with that as well, head back up the nearby stairs and go left to reach the security room. Interact with the keypad to try and enter a code. Once it comes back as denied, scan the OCP HR Team behind you to learn the access code. Use it to enter the room and connect to the computer to destroy the footage. Return to Samantha one last time to complete the objective. Choosing to help Samantha out will result Robo earning some brownie points with her.

Go back to Samantha with the data. If you decide to give it to her, she’ll ask Robo to delete the security footage. If you choose to help with that, go back up the nearby stairs and turn left to get to the security room. Use the keypad to try to enter a code. When it’s denied, look at the OCP HR Team poster behind you to find the access code. You will need to scan the poster to learn the code. Use it to enter the room and connect to the computer to destroy the footage. Finally, go back to Samantha to finish the task. Helping Samantha will earn Robo some points with her.

The Man Himself – Sticky Note Trio

RoboCop Rouge City The Man Himself Sticky Note Trio Map Location

On the main floor of OCP Headquarters, you can find three sticky notes on a wall in a room on the east side of the lobby.

The Man Himself – Suicide Note

RoboCop Rouge City The Man Himself Suicide Note Map Location

This note can be found on a table outside the room with the above sticky notes.

The Man Himself – Optimal Temperature Sticky Note

RoboCop Rouge City The Man Himself Optimal Temperature Sticky Note Map Location

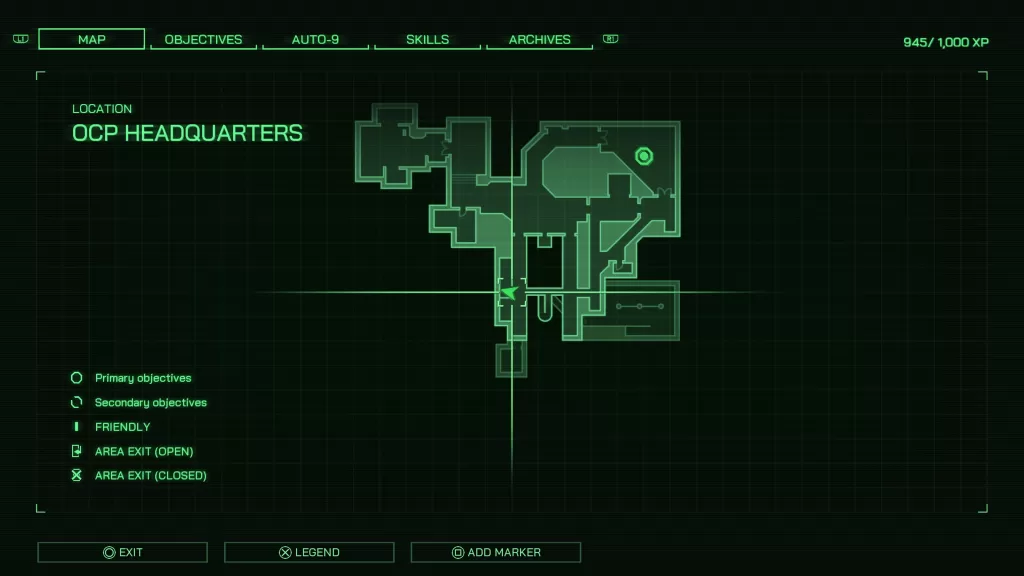
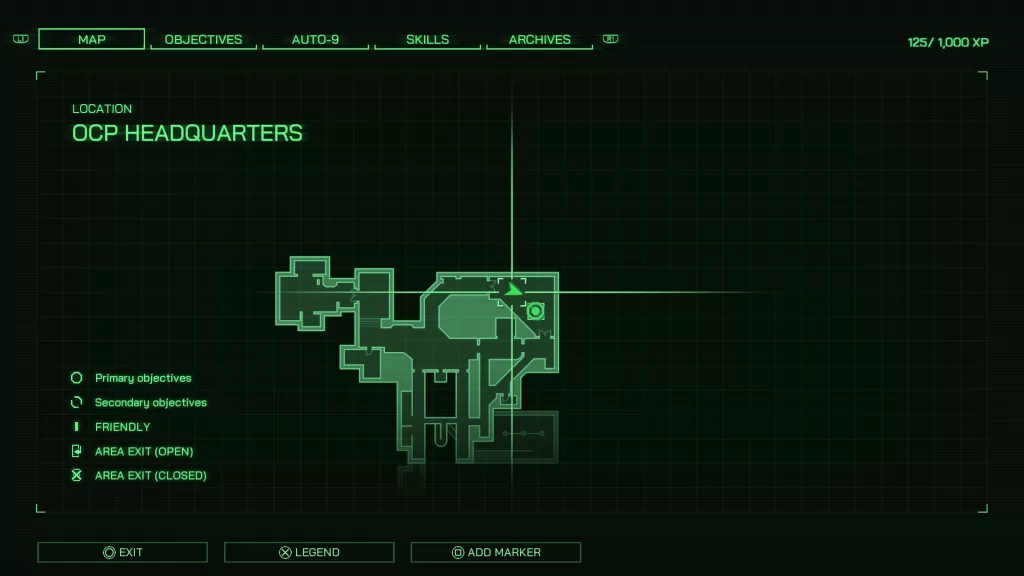
After you ride up the elevator with Mills, exit it and swing a left heading through a doorway heading south. It will be on the wall to the right of the pair of employees talking about sleeping in the office.

PCB (for Auto-9)

RoboCop Rouge City The Man Himself PCB Map Location

This PCB can be found in the meeting room on the table where the head sits (opposite side from the computer).

For more RoboCop: Rogue City guides and walkthroughs, click here!
RoboCop Rogue City Logo
Guides

Complete Cyber Trail Objective Guide for RoboCop Rouge City

by NightlyGamingBinge in

Welcome to our “Cyber Trail” guide for RoboCop Rouge City. Here we’ll go over the optional objectives and miscellaneous things you can find/do during the Cyber Trail primary objective. At this point in the game, there will be no more RoboCop Evaluations.

Cyber Trail Objectives

Listed below are the optional side objectives during the Cyber Trail primary objective that Robo can complete to earn some additional XP.

  • Secondary
    • Fishy Situation
    • Who Killed Simon Page?
  • Police Work
    • Pieces of Crime Evidence Collected
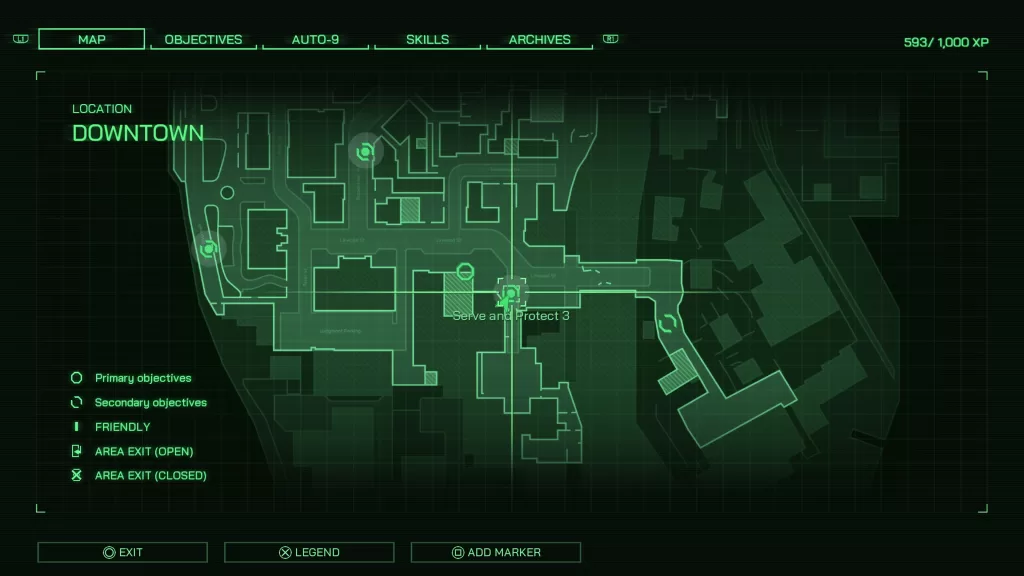
    • All Violations Found (Server and Protect 3)

Police Work – Pieces of Crime Evidence Collected

During the “Cyber Trail” objective, you’ll need to keep an eye out for crime evidence to collect. Your goal is to reach 400 points of evidence by the end of the objective. These will be in the form of Fake ID Cards, Nuke, Stolen Wallets, Fake Money, Incriminating Documents/Pictures and Stolen Handbags. You can find them pretty much anywhere so be sure to keep an eye out for them.

Police Work – Serve and Protect 3

Obstruction of a Fire Hydrant

RoboCop Rouge City Cyber Trail Obstruction of a Fire Hydrant Map Location

This violation can be found on the eastern side of Linwood St near the Hell gas station under the train tracks. Scan the fire hydrant then place the ticket on the driver’s side front windshield.

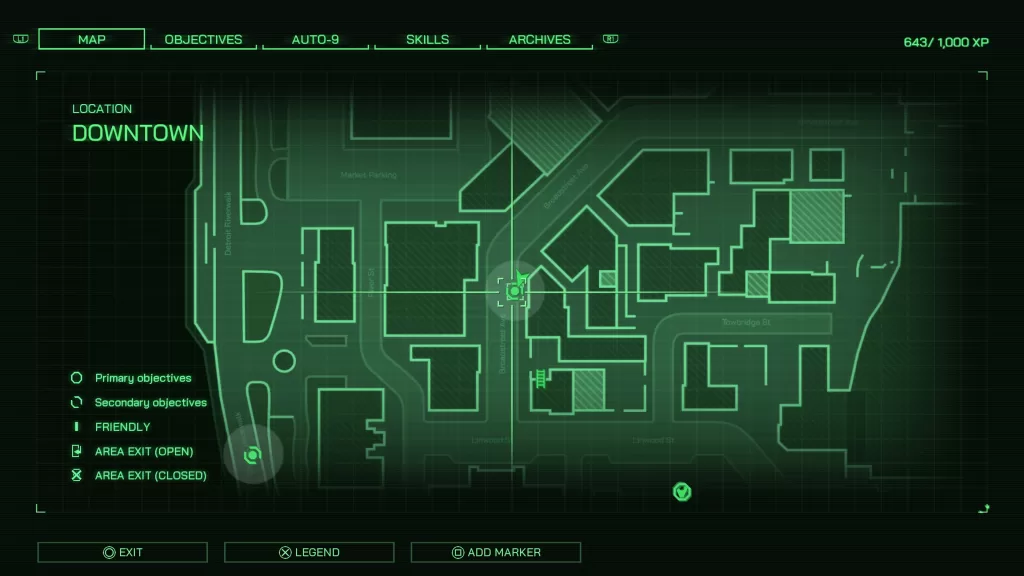
Hazardous Oil Spillage

RoboCop Rouge City Cyber Trail Hazardous Oil Spillage Map Location

To find this violation, travel north down Broadstreet Ave just before the arcade to find a vehicle leaking oil from the front. Scan the oil then place the ticket on the driver’s side windshield.

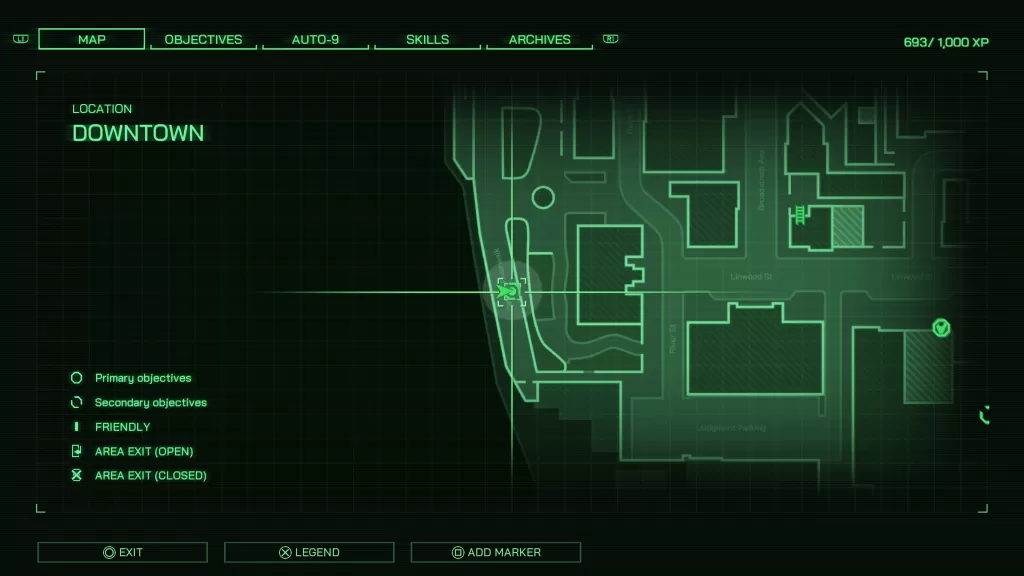
Drinking in Public

RoboCop Rouge City Cyber Trail Drinking In Public Map Location

Head to the southern part of the Detroit Riverwalk to find this violation. Look for a man sitting on a park bench drinking then scan the bottle on the ground at his feet. This will begin a conversation with the man where you’ll have to decide if you want to give him a ticket or a warning.

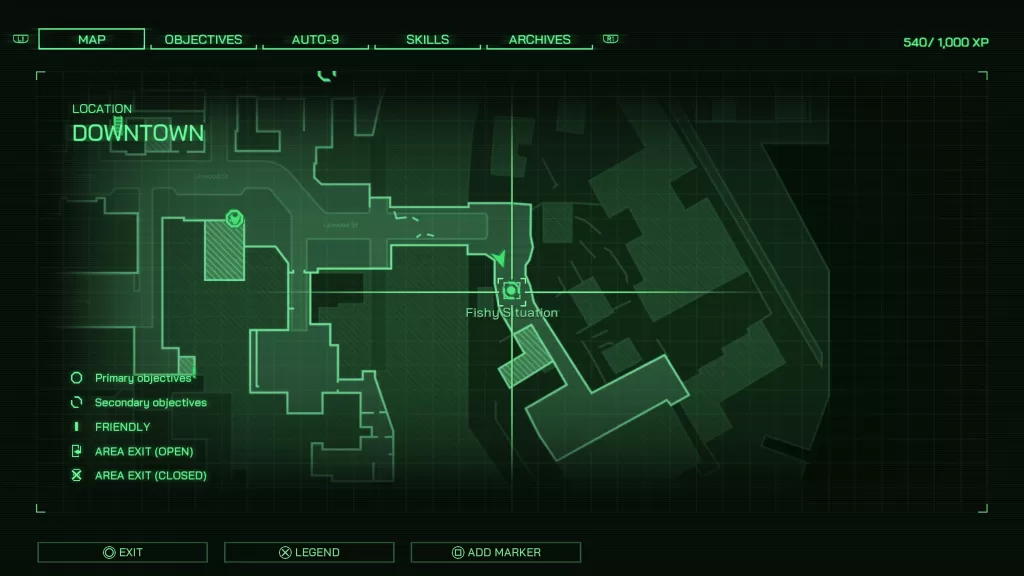
Cyber Trail – Fishy Situation

RoboCop Rouge City Cyber Trail Fishy Situation Map Location

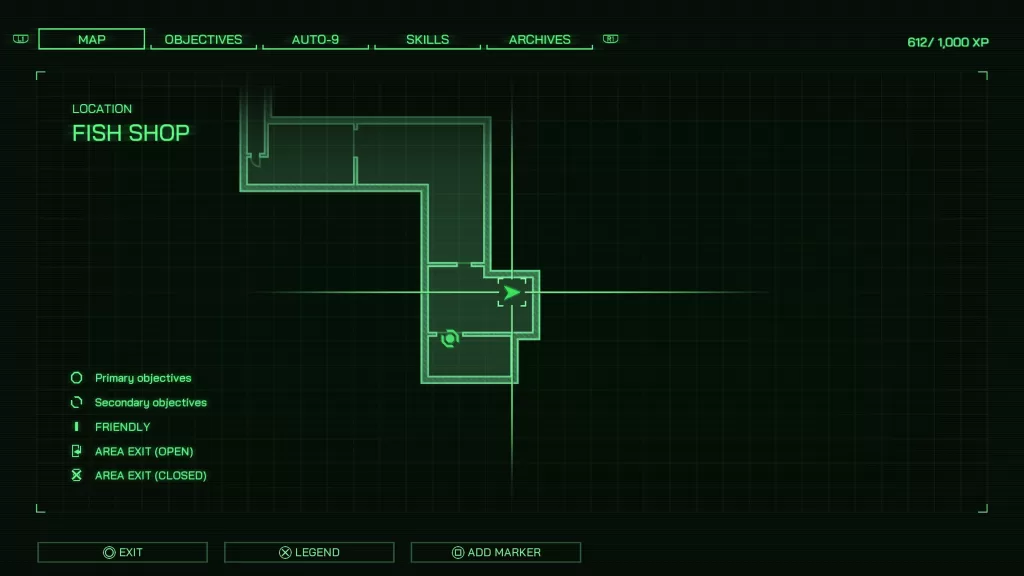
For this objective, you’ll have needed to have started it during the “Regrouping” objective back at the precinct. When you reach Downtown, head to the southeastern part of the area past Linwood St to find Officer Washington. Speak with him to get things underway then choose to bring Washington with you.

Enter the Fish Shop then head room to room clearing out the goons. When you get to the back and hear the old man yelling at the thugs, look on the left side of the room to spot a bookcase. On it you’ll find a chest with an OCP Training Disk in it.

RoboCop Rouge City Cyber Trail Fishy Situation OCP Training Disk Map Location

Grab the disk then interact with the doors. Pick the options you want then Robo will breach. Take out the one guy to save Lawerence. Exit the fish shop to complete the objective.

Cyber Trail – Who Killed Simon Page?

RoboCop Rouge City Cyber Trail Who Killed Simon Page? Map Location

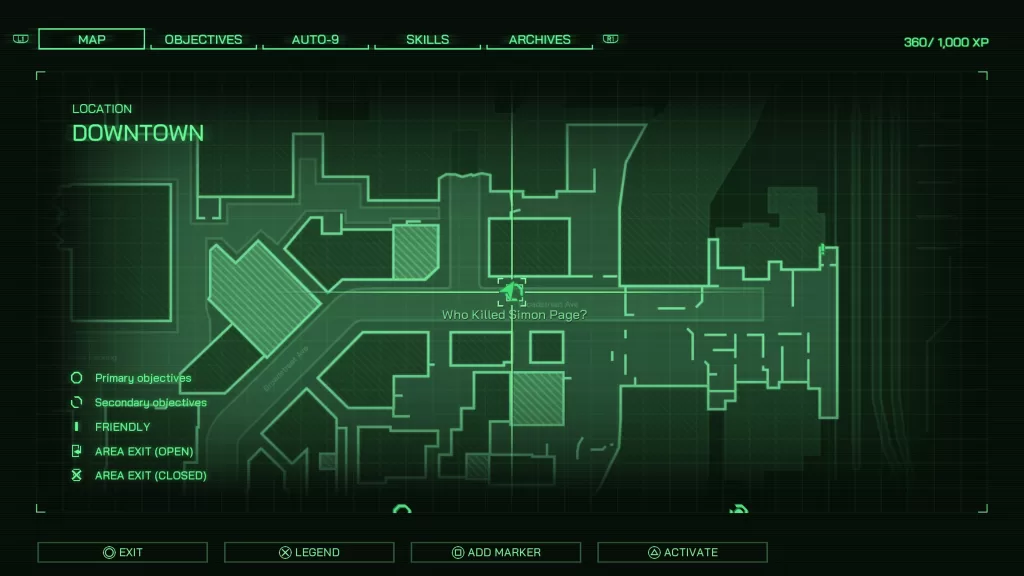
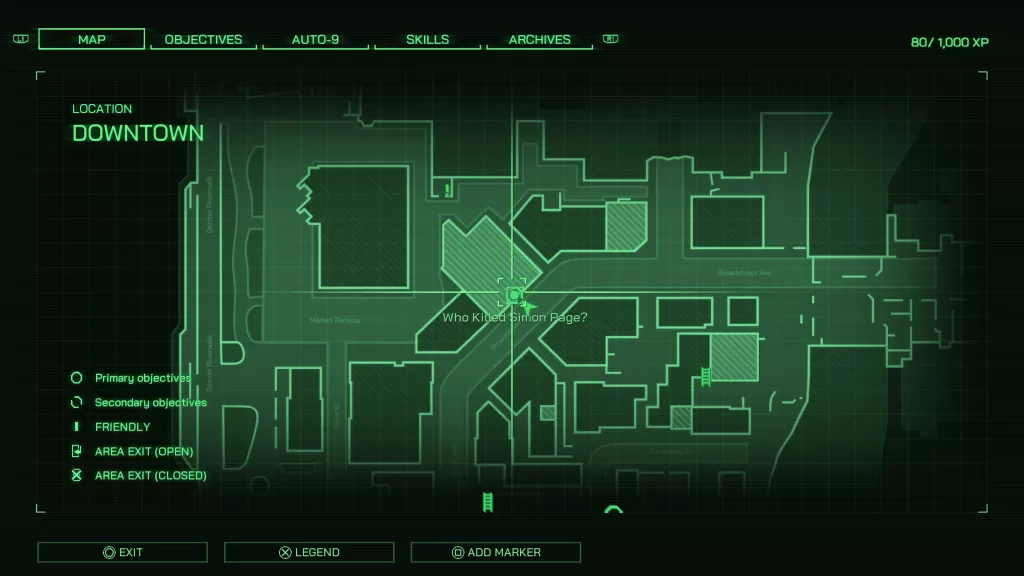
Make your way to the northeastern corner of Broadstreet Ave to find Officers Kurtz and O’Neal. Approach them and they will ask Robo to help them with a case. Start out by scanning hood of the car with the victim in it then scan the MagnaVolt logo on the back passenger side door. Once that’s done, go to the driver’s door and interact with it to discharge the battery opening the door.

Scan the body then analyze the phone in his hand, the earring on the front seat and the rope around his neck. Once all three of the clues have been analyzed, you’ll go over the case so far with the officers. Exhaust all of O’Neal’s dialog options then head across the street and speak with the witness. He’ll give you a description of a girl who was in the car with the victim. Next, travel to Simon Page’s office west down Broadstreet Ave.

RoboCop Rouge City Cyber Trail Page's Office Map Location

Enter the building then head up to room 12 on the 3rd floor. Speak with Agatha there to gain access to Simon’s office by breaching the door. Once inside, check the answering machine on Agatha’s desk then scan the box on the ground behind it. After that, head into Page’s office. Scan/interact with the items listed below. Once you’ve finished with the computer desk, Agatha will send Robo to Gloria’s apartment. Exit the building to give O’Neal an update then be on your way.

  • Mill’s Speech Pointers (small round table)
  • Sailboat Picture (bookshelf)
  • Books on Bookshelf (by the window)
  • Computer Desk
    • Computer Monitor
    • Schedule Book
    • Receipts
RoboCop Rouge City Cyber Trail Gloria's Appartment Map Location

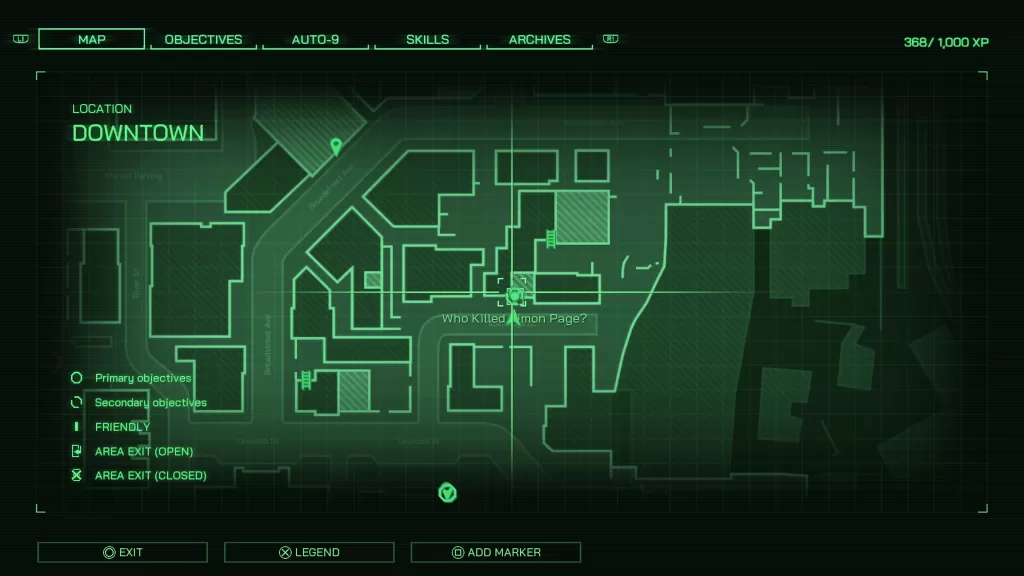
Travel to Towbridge St to reach Gloria’s apartment. Enter the building but before heading up to her room, go downstairs. You’ll find a OCP Chest there. After you grab that, go up two flights of stairs (from the basement) then follow the hallway around to room 18. Knock on the door to speak with Gloria. When prompted, choose the clue option using the witness testimony. Once inside, scan the following objects. This will lead to another conversation with Gloria. Return to Page’s office afterwards.

  • Bottle of Wine (table by couch)
  • Earring (in the bathroom)
  • Medication (on counter by sink)
  • Kuzak’s Speach – draft #1 (on dining room table)
  • schedule (on desk in the bedroom)
  • photo (on nightstand in bedroom)
  • rope (stool in bedroom closet)

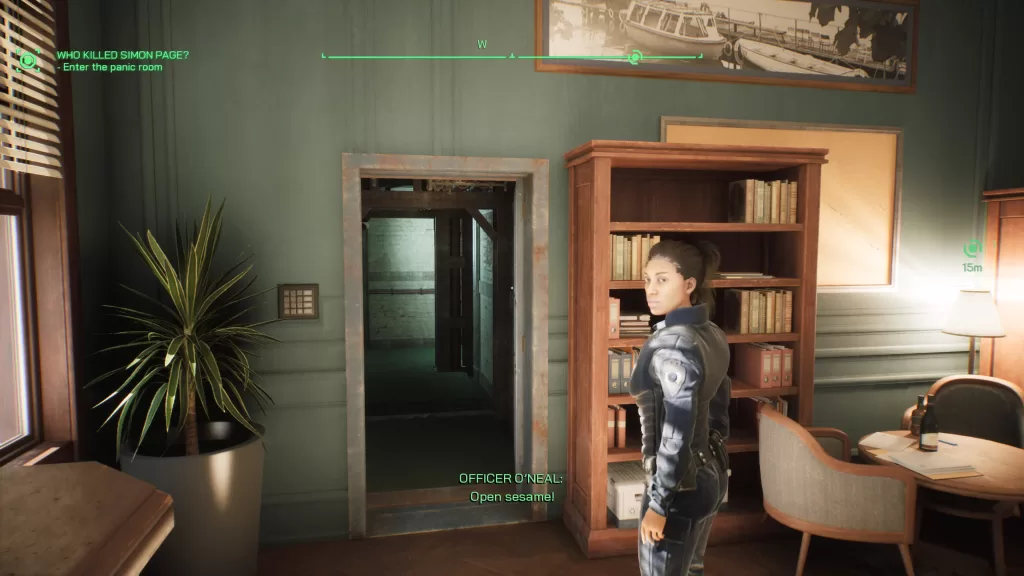
Back at the office, Robo will speak with O’Neal and Kurtz then head to Page’s office. Facing his computer, look on the right side of the desk to find a hidden button. Scan then press the button to reveal a hidden door! Interact with the computer to learn the access code to the panic room, then use the code to gain entry.

RoboCop Rouge City Cyber Trail Who Killed Simon Page? Secret Door Area Image

Follow that path to reach Agatha. This will trigger a cutscene. During it, if you have Engineering at level 6, Robo can respond that the gun is not loaded. This will cause her to be arrested. Otherwise, it doesn’t end to well for her. Make sure to grab the PCB off of the desk and the nearby OCP Chest before returning to the streets to complete the objective.

For more RoboCop: Rogue City guides and walkthroughs, click here!