Starfield Logo
Guides

Starfield | Defensive Measures Mission Guide

by NightlyGamingBinge in

Welcome to NGB and our walkthrough for the Starfield Defensive Measures mission! This guide will walk you through starting the mission and detail the necessary steps for its completion. If you need help with a specific mission objective, check the quick links section to easily find the information needed.

Some of the planets referenced in our guides and walkthroughs may not match yours due to how Starfield was created. In these situations, what you do and the places you visit on those planets should remain the same.

How to Start the Defensive Measures Mission

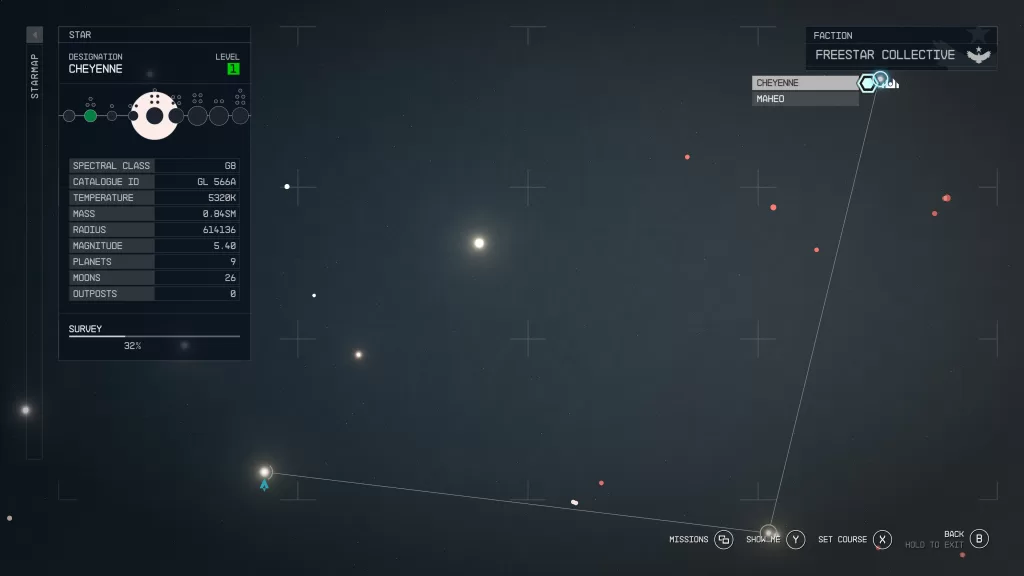
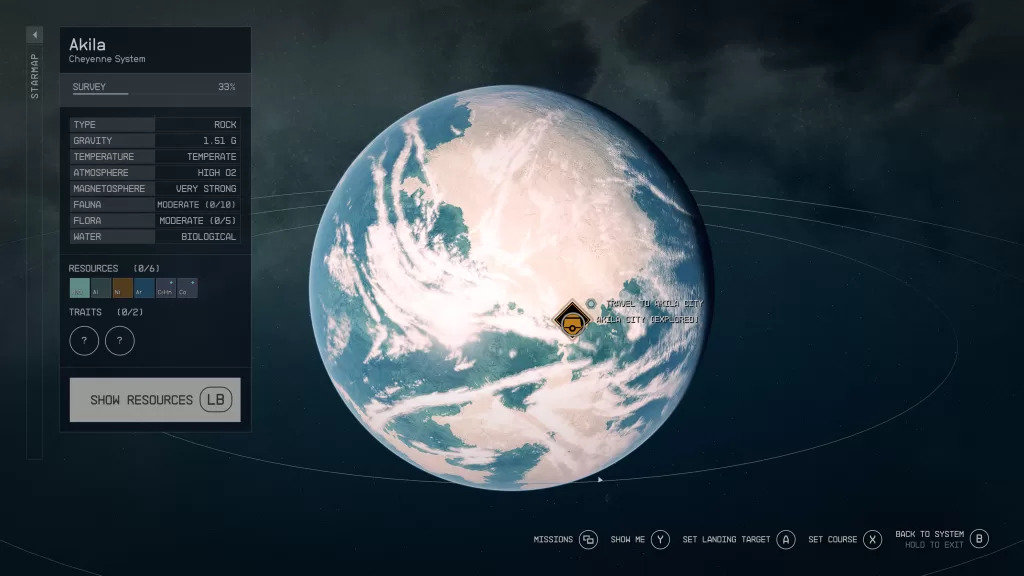
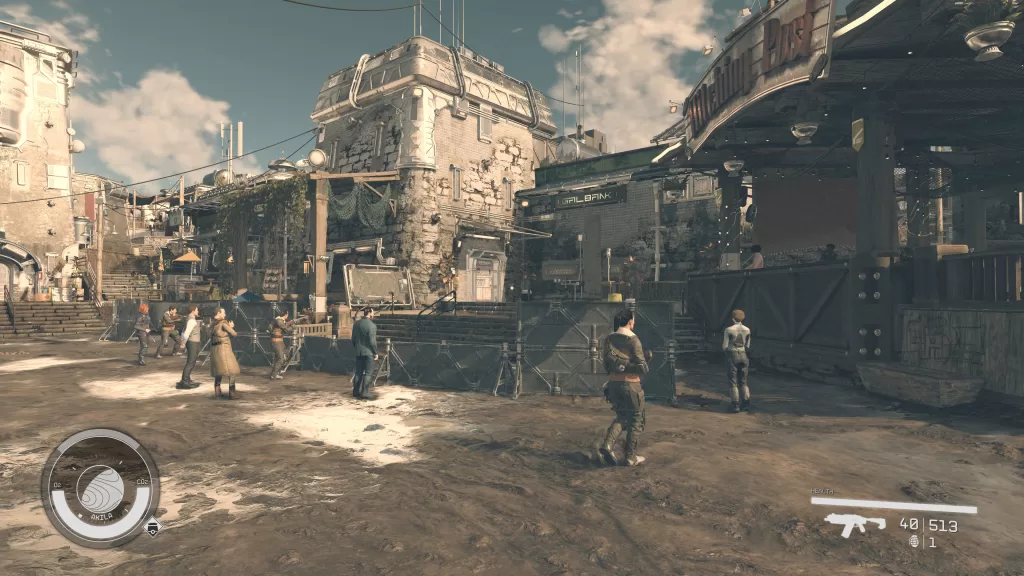
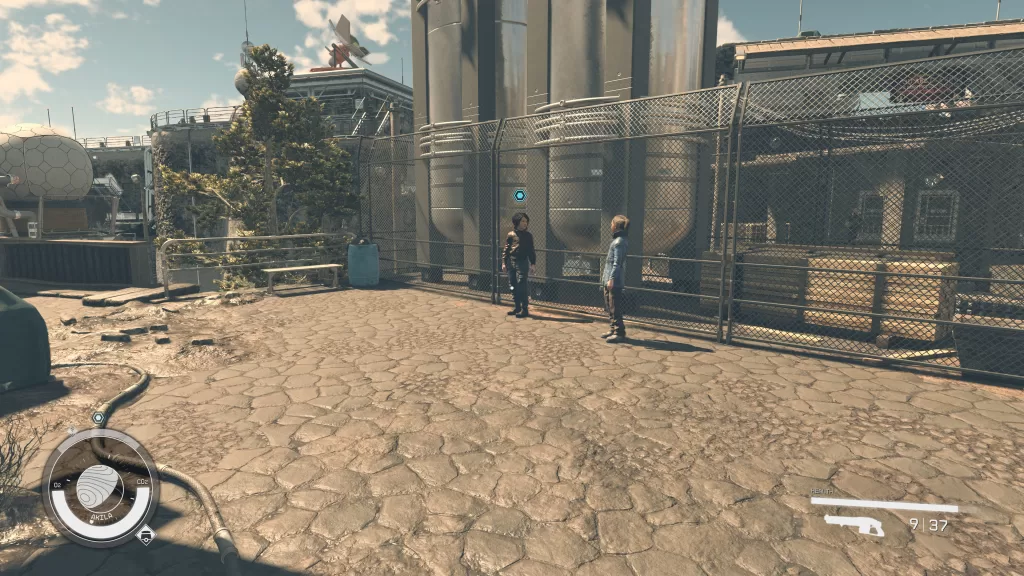
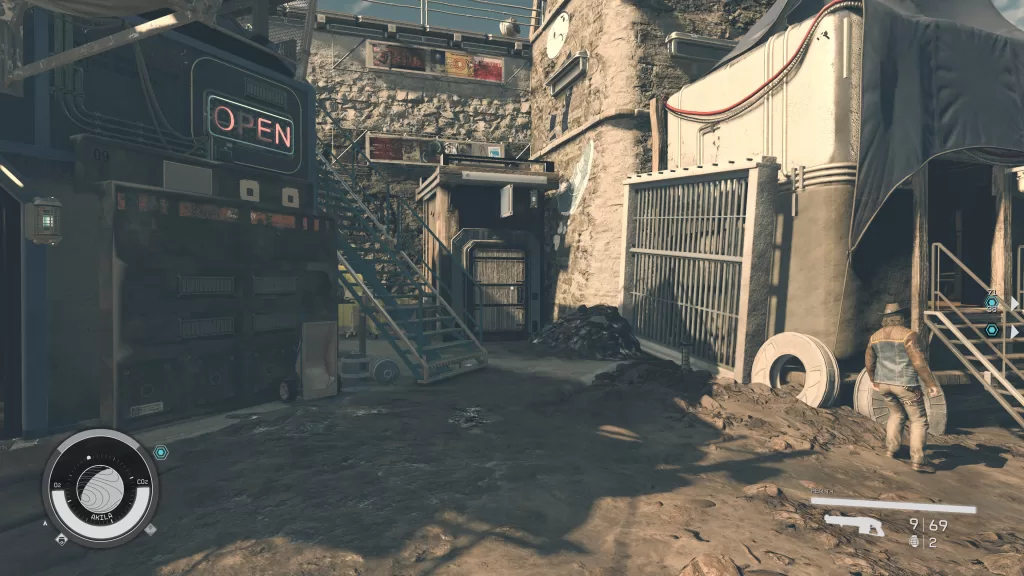
Defensive Measures is one of the misc missions you can pick up in Akila City on planet Akila in the Cheyenne System. To start this misison, pass by the Barracks to witness Keoni Alpin and Davis Wilson arguing. To reach the Barracks, head to Shepherd’s General Store and follow the stairs to the right of it.

Defensive Measures Walkthrough

Listen to Davis Wilson’s Argument

As you approach the Barracks, David Wilson can be seen getting into an argument with Keoni Alphin. When they are done arguing, speak with Davis and ask what that argument was about. After you’re done with that, head down the stairs near David to find Kenoi and talk with her. She’ll say that she just wants to help by using some tech and then ask if you’d be willing to help by placing some sensors on the wall in specific locations.

starfield defensive measures

Place Keoni’s Sensors

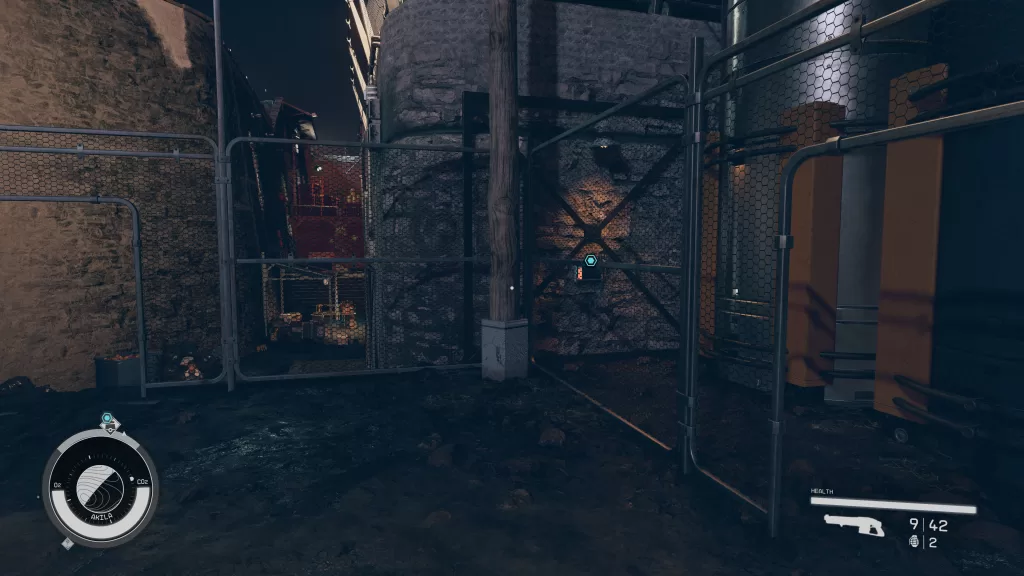
Travel to the northeastern part of the city near Aggie’s to start placing sensors. The first one goes into the ground in front of the light pole near Aggie’s.

Defensive Measures Starfield

You can place the second one in the ground next to a section of the gate on the other side of Aggie’s.

defensive measures

The third one goes in front of the house to the right of the Jansen home.

Defensive Measures Objective

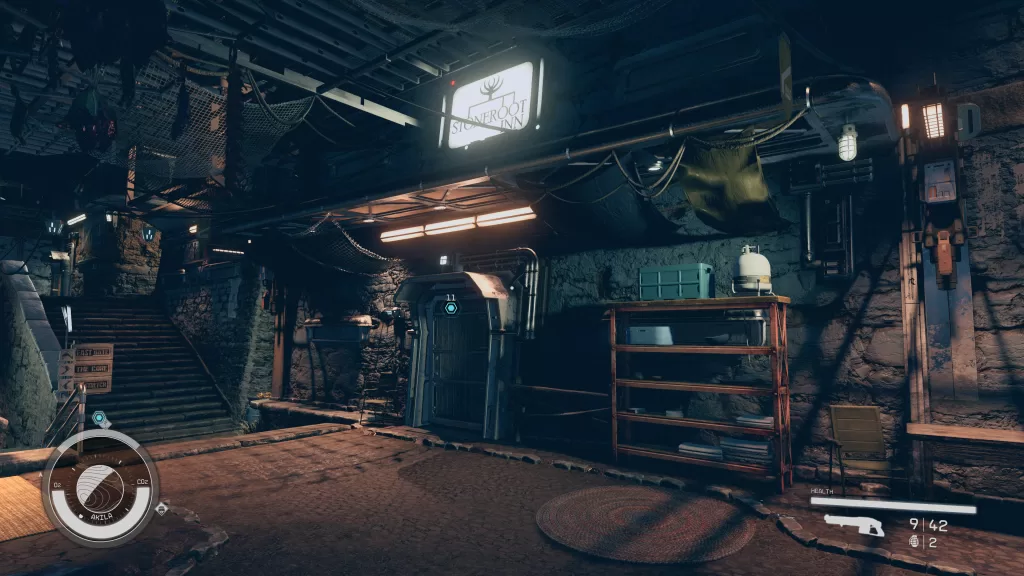
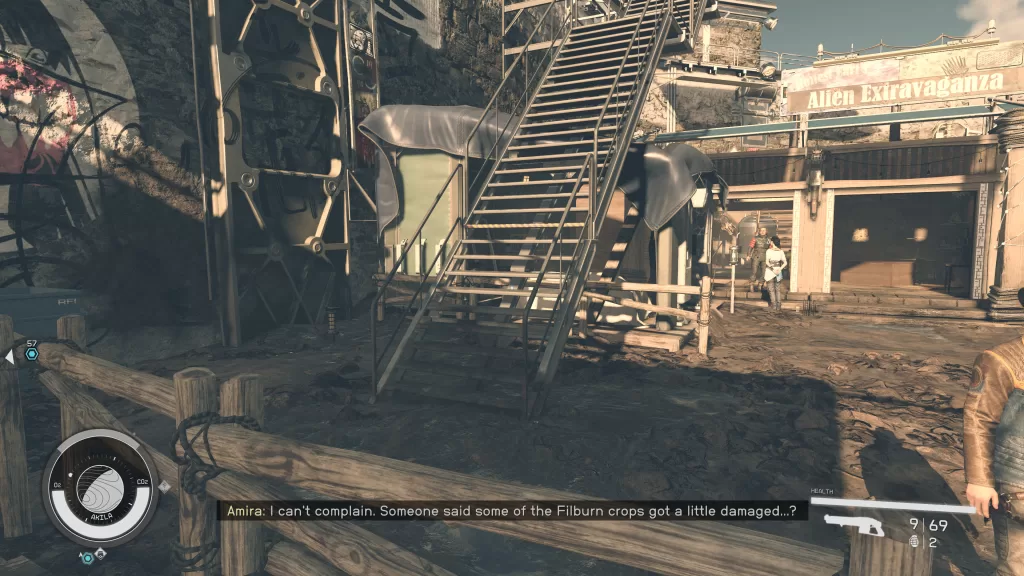
The last one can be placed into the ground near the stairs by Alien Extravaganza.

Allen Extravaganza

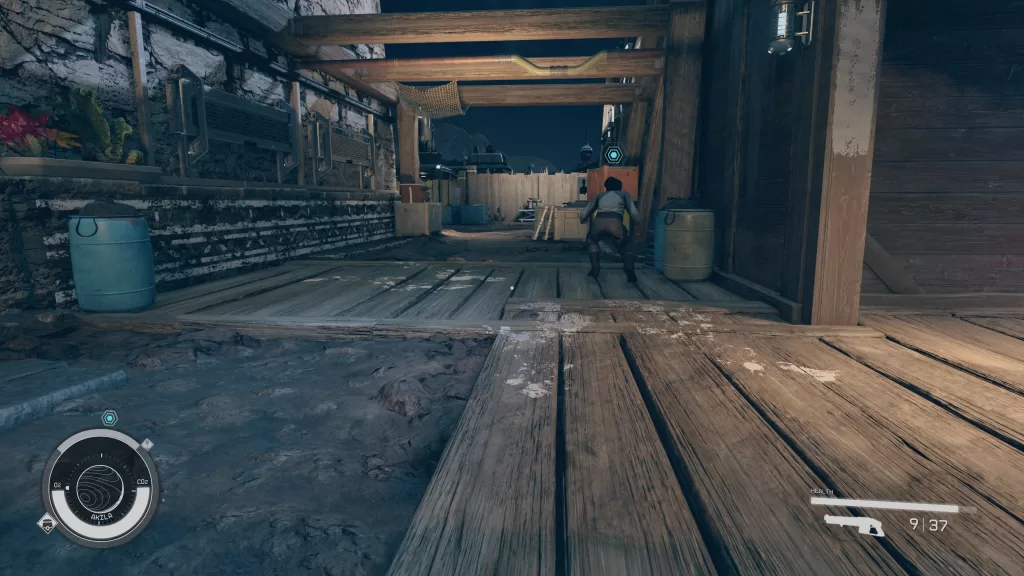
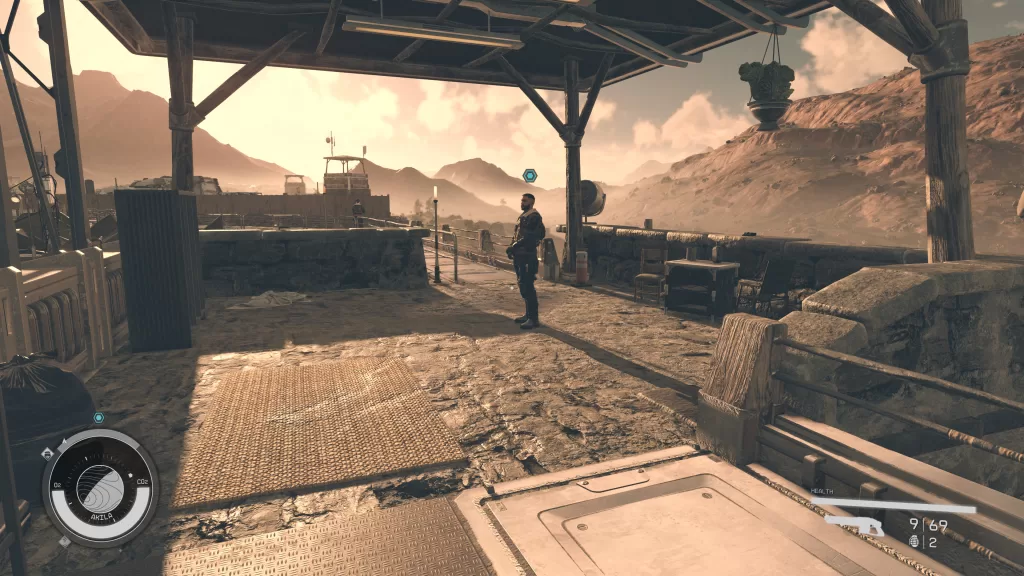
Get the Guard to Leave the Tower

Return to Keoni nearby in the slums and speak with her. She’ll then tell you she needs to get into a nearby tower and slightly modify the terminal there. Climb up the stairs across from her to find the guard. Speak with him and you’ll be presented with some options. If you pass a persuasion check, the guard will leave at no cost to you. If not you’ll need to pay him 1000 credits to get him to leave. Alternatively, you can steal something in front of the guard. He will then arrest you and take you to jail, giving Kenoi time to mess with the terminal. You’ll have to pay a fine and they will take whatever you stole.

Get the guard to leave the tower

As soon as the guard leaves, head back down and speak with Keoni. This will complete the Starfield Defensive Measures mission and you’ll be rewarded with 100 EXP and some credits.

Additional Starfield Guides and Walkthroughs

Be sure to check our main Starfield Guides and Walkthroughs page for additional content on Starfield, such as additional guides to assist you during your adventures in the Settled Systems!

Starfield Logo
Guides

Starfield | Beer Run Mission Guide

by NightlyGamingBinge in

Welcome to our guide for the Beer Run mission in Starfield! This guide will walk you through starting the mission and detail the necessary steps for its completion. If you need help with a specific mission objective, check the quick links section to easily find the information needed.

Some of the planets referenced in our guides and walkthroughs may not match yours due to how Starfield was created. In these situations, what you do and the places you visit on those planets should remain the same.

How to Start the Beer Run Mission

Beer Run is one of the missions you can pick up in Akila City on planet Akila in the Cheyenne System. You’ll start it automatically after one of the security guards talks about hearing Sarah Filburn arguing with Henry.

Beer Run Walkthrough

Talk to Sarah Filburn

Travel to the southern part of town near Filburn Agriculture to find Weston Filburn’s House. Head inside and speak with Sarah. She’ll ask that you sabotage the latest batch of her brother-in-law’s beer to force him to work with IntelliWheat.

Starfield Beer Run Objective

Sabotage the Beer / Witness the Results

Head down two flights of stairs just outside Sarah’s house and follow the path left around the building to reach the back of the brewery. Interact with the Filburn Agricultural Brewing Computer and use it to ruin the beer. You’ll need to select either “Increase temperature by 20C” or “Increase IBU to 160” (this one is the best option) to do so. If you select “Increase alcohol content” you’ll make the beer better.

Beer Run Starfield

Wait 24 hours after that (by sitting in a chair) then head to the Stoneroot Inn on the north side of town. Head inside and observe the taste test by speaking with Kate Foley.

Beer Run Mission

Talk to Sarah Filburn

Return to Weston Filburn’s House and speak with Sarah telling her about the problem with the beer. This will complete the mission and you’ll be rewarded with 50 EXP and 2500 credits.

Additional Starfield Guides and Walkthroughs

Be sure to check our main Starfield Guides and Walkthroughs page for additional content on Starfield, such as additional guides to assist you during your adventures in the Settled Systems!

Starfield Logo
Guides

Starfield | The Empty Nest Mission Guide

by NightlyGamingBinge in

Welcome to NGB and our walkthrough for the Starfield The Empty Nest mission! In this walkthrough, we’ll cover everything you need to know to complete the mission. If you’re here looking for help with a specific mission objective, please check out the quick links section, which should point you to the right section! The Empty Nest is one of the main missions you’ll need to complete to beat the game. To start it, simply complete The Old Neighborhood main mission to receive it automatically.

Starfield The Empty Nest mission starmap of the Cheyenne System

Starfield The Empty Nest Walkthrough

Talk to Sam Coe

Head in the greenhouse just off the library in the Lodge to find Sam and his daughter. Approach them to begin a conversation where he’ll introduce himself and go over the mission in Akila. Tell him you’re ready to start to cause Sam and Cora to travel to your ship. Make your way there when you’re ready and set a course for Akila City on planet Akila in the Cheyenne System. When you land on the planet, exit your ship and speak with Sam to kick things off. Please note that proceeding with the mission will lock Sam as your party member until it’s done.

Starfield The Empty Nest Mission orbit view of planet Akila

Complete the Job Gone Wrong Mission

To locate the potential artifact on Akila, we’ll need to get ahold of Solomon’s maps which are in GalBank. Unfortunately, the bank is currently being robbed, so you’ll need to take care of that first. You can check out our guide on the Job Gone Wrong here. Once that’s done, head into the bank and go downstairs to reach the vault. Sam will give you a key and three storage containers are flagged on the hud. Interact with the right one to find a Note for Sam. Grab and read the note, then speak with Sam. During the conversation, you’ll have the option to persuade him to tell you who Jacob is if you’re feeling so inclined.

If this is an NG+ run, you’ll have a special option while talking with Sam. He will like that option if you choose to use it.

Talk to Jacob

Exit the bank, then head east through town to reach the Coe Estate. Head inside to get introduced to Jacob then check in with Sam after to come up with a way to get the map. The options presented to you are: Persuade Jacob to hand them over, Have Sam distract Jacob and then steal the map, or Ask Cora for help.

Persuade Jacob

Speak with Jacob and choose the persuade option to go this route. You’ll need to fill up the persuasion meter to successfully convince him to give up the maps. Jacob will then give you the key to his office and let you go in to grab the map off of the filing cabinet to the right of the desk.

Steal Maps

If you choose to steal the maps, you’ll need to speak with Jacob and tell him that Sam wants a word. This will cause Jacob and Sam to step away allowing you to pick the novice lock to the door Jacob was guarding. Head inside the room then grab the maps which are resting on the filing cabinet to the right of the desk.

Have Cora Help

Sam will be against having Cora help in an effort to keep her away from Jacob. He will relent and agree to bring her, but he will dislike that option. Head back to the ship and speak with Cora at the landing pad to ask for help (Cole will hate this). She will happily agree and then take off to the Coe Estate. Follow after her. After entering the Coe Estate watch the scene play out after which Jacob will give you the maps.

If this is your NG+ run, then you’ll have an additional option when talking to Jacob. If you choose that option, he’ll hand over the maps without a fight.

Whatever option you go with, speak with Sam once you have the maps.

Before you leave, loot Solomon’s Adventures 01 from the nightstand in Jacob’s room!

Travel to the Empty Nest

To reach the Empty Nest, head southeast from Akila City. Once there, deal with the Shaw Gang, their turrets and one robot then head inside.

Once inside, there will be more members of the Shaw Gang spread throughout the cave you’ll need to deal with them as you proceed. When you come to the locked gate, you’ll need a card to open it. It can be found on a counter next to a Contraband Chest.

Pass through the gate and follow the cave to the end where you’ll locate the artifact. Use a cutter or something similar to break it free of the ore then grab it to witness another vision. Now that we have what we came for, it’s time to leave the Empty Nest.

Outside, you’ll have a confrontation with Shaw, and boy she’s not happy. You’ll either need to persuade her to let you go, pay her 4000 credits to let you walk away, or attack her. Regardless of what decision you make, head for the Lodge afterward.

If this is an NG+ run, then you’ll have an additional option to choose which will allow Sam and yourself to walk away without fighting Shaw. This is the exact same outcome as persuading her.

Persuade

If you choose to persuade her, the Ashta will show up and she’ll ask for your help in defeating them. It’s up to you if you want to. If you do, you’ll receive the Smuggler’s Razorback pistol from her.

Fight

If you choose to fight her, you’ll also have some local wildlife to deal with as well.

Return to the Lodge

Back at the Lodge, head into the Library and add that artifact to your collection. After some dialog amongst the members of Constellation, speak with Sam to complete the mission. You’ll be rewarded with 350 EXP, some credits, a Modified Calibrated Ratter, and Sam will become available as a party member.

Additional Starfield Guides and Walkthroughs

Be sure to check our main Starfield Guides and Walkthroughs page for additional content on Starfield!

Starfield Logo
Guides

Starfield | The Great Laredo Caper Mission Guide

by NightlyGamingBinge in

Welcome to NGB and our guide for The Great Laredo Caper mission in Starfield! This guide will walk you through starting the mission and detail the necessary steps for its completion. If you need help with a specific mission objective, check the quick links section to easily find the information needed.

Some of the planets referenced in our guides and walkthroughs may not match yours due to how Starfield was created. In these situations, what you do and the places you visit on those planets should remain the same.

How to Start The Great Laredo Caper Mission

The Great Laredo Caper is one of the missions you can pick up at in Akila City on planet Akila in the Cheyenne System. To start it, you’ll need to pass by two girls talking down the steps behind the Trade Authority.

The Great Laredo Caper Walkthrough

Talk to the Girl

Head over to the talking girls and speak with Annie Wilcox. She’ll tell about a robbery that the adults don’t believe is happening then ask if you will assist with it.

Starfield The Great Laredo Caper

Apprehend the Laredo Arms Theif at Midnight

Head for Laredo Arms which is up the stairs and to the left when looking to the right from where the girls are standing. Go to the left side of the building to find the side entrance. You’ll then need to wait around until just before midnight so you can catch the thief in the act. If you head to the firing range, there is a chair you can sit on there to pass the time. Speak with the thief when he tries to sneak by.

The Great Laredo Caper Starfield

A member of the local security will show up after receiving a tip and will tell you she can take it from here.

Report back to Annie Wilcox

Return to Annie to tell her she was right (she can be found in the Rock). This will complete the mission and you’ll be rewarded with 50 EXP and some credits.

Additional Starfield Guides and Walkthroughs

Be sure to check our main Starfield Guides and Walkthroughs page for additional content on Starfield, such as additional guides to assist you during your adventures in the Settled Systems!

Starfield Logo
Guides

Starfield | The Old Neighborhood Mission Guide

by NightlyGamingBinge in

Welcome to NGB and our walkthrough on the Starfield The Old Neighborhood main mission! In this walkthrough, we’ll go over everything you need to know to complete the mission! If you’re here looking for help with a specific mission objective, please check out the quick links section which should be able to point you to the right section! The Old Neighborhood is the second main mission of the game that you’ll start by speaking with Sarah at the Lodge in the MAST District at New Atlantis.

Starfield The Old Neighborhood Walkthrough

Talk to Sarah

Speak with Sarah in the Lodge to get your first assignment. She can typically be found in the library but depending on the time of day, Sarah could also be found in her room. She’ll give you the rundown of what you’ll need to do and the game will warn that if you proceed, Sarah will be locked as your party member for a bit.

Talk to Sarah’s Contact

Starfield The Old Neighborhood mission MAST building

If you previously have spoken to Commander John Tuala and exhausted all his dialog options plus joined the Vanguard (by completing the Supra Et Ultra faction mission), you’ll not need to speak with him again about the artifact and can just proceed to your ship!

Exit the Lodge making your way over to the MAST building above the NAT then head inside. Speak with Commander John Tuala under the Vanguard sign. He’ll try to get you to join (which is up to you) but focus on the Constellation task at hand. Commander Tuala will then give you a lead on an artifact sending you to Cydonia. Exit the building then travel to the Spaceport and enter your ship. It’s time to blast off!

Ask About Moara in Cydonia

Starfield The Old Neighborhood mission Cydonia Entrance

Set course for the SOL system and then land in Cydonia on Mars. Head through the main airlock to reach the city then Make your way to the Broken Spear bar to speak with Jack asking about Moara (he’s the bartender behind the bar). He’ll then ask you to settle the man’s tab. You could also persuade him out of it or let Sarah handle the situation. When it’s resolved, Jack will tell you that Moara’s patrol route was the planet Venus. Return to your ship and make your way there.

If this is a NG+ run, then you’ll have a unique dialog option you can choose which will get you the info you need without having to persuade or pay for it. Sarah will also like this response.

Go to Venus

Starfield The Old Neighborhood mission satellite near the zealots

When you get to Venus, Sarah will point out the zealots orbiting the planet. You’ll then be tasked with examining a nearby satellite with the optional objective of doing it while avoiding detection. To stay sneaky, you’ll need to power the engine down to 1 or 2 and turn everything else all the way down to 0. When you get close to it, the game will have you cycle to the satellite and then activate it. A message will play where you’ll learn that Moara went to the Nova Galactic Staryard orbiting Earth’s moon Luna.

Go to Noca Galactic Staryard

When you arrive, Sarah will tell you a bit about the staryard and earth if you wish then you’ll be shown a quick tutorial on how to dock. Fly over to the station and dock with it.

Find any Clues about Moara

Fight your way through the raiders and spacers to reach another dock where a ship is confined. In a room overlooking this area, you’ll find the Nova Galactic Manual 02 on a desk.

Starfield The Old Neighborhood mission Nova Galactic Manual 02 on a desk

Enter the ship and read Vanguard Moara’s Slate on the table to learn he went to Neptune. Return to the ship and set course for your new destination.

Starfield The Old Neighborhood mission ship with a slate in it

Go to Neptune

When you reach Neptune, Sarah will point out a ship just floating there. As you get close, its weapons will turn on and it will attack. You’ll need to damage the ship enough to disable its engines so you can dock and board the ship. You can target the engines specifically by pressing the Target Lock button on your display.

Starfield The Old Neighborhood mission Mora's Ship in Netptune's orbit

Once aboard, take out the spacers while fighting your way to the cockpit. You’ll need to loot the key to open it off one of the enemies. Inside you’ll find Moara who is happy to see you. Speak with him and he’ll happily give you the artifact for saving him. Collect it from the wall near the cockpit then take it back to the Lodge.

Return to the Lodge

Travel back to New Atlantis in Alpha Centauri then head for the Lodge in the MAST District. Enter the library and add the artifact to the collection. Sarah will officially welcome you to Constellation and you’ll be able to have her as a traveling companion now. You’ll also complete the Starfield The Old Neighborhood mission mission and be rewarded with the following:

  • Constellation Spacesuit
  • Constellation Space Helmet
  • 400 EXP
  • 9500 credits

Additional Starfield Guides and Walkthroughs

Be sure to check our main Starfield Guides and Walkthroughs page for additional content on Starfield!

Starfield Logo
Guides

Starfield | Freight Fright Mission Guide

by NightlyGamingBinge in

Welcome to NGB and our guide for the Freight Fright mission in Starfield! This guide will walk you through starting the mission and detail the necessary steps for its completion. If you need help with a specific mission objective, check the quick links section to find the information needed easily.

Some planets referenced in our guides and walkthroughs may not match yours due to how Starfield was created. In these situations, what you do and the places you visit on those planets should remain the same.

How to Start the Freight Fright Mission

Freight Fright is one of the missions you can pick up in Cydonia. To start, speak with Denis Averin at the UC Exchange. Agree to help him look for his missing shipment to begin this mission officially.

Freight Fright Walkthrough

Enter the Ship

Starfield Freight Fright

Exit the town and travel to the Freighter Site near Cydonia to the north. Once there, board the ship.

Check the Cargo

While you’re looking for the cargo, exterminate all the Heat Leeches. When you locate the cargo, you’ll need to check out each one. Please note that some will cause a Heat Leech to spawn so be prepared to take it out!

Freight Fright Starfield

Return to Denis

Once the cargo has been checked and all the Heat Leeches exterminated, report back to Denis. As a reward, you’ll receive some credits and 100 XP.

Additional Starfield Guides and Walkthroughs

Be sure to check our main Starfield Guides and Walkthroughs page for additional content on Starfield, such as additional guides to assist you during your adventures in the Settled Systems!

Starfield Logo
Guides

Starfield | Heart of Mars Mission Guide

by NightlyGamingBinge in

Welcome to our walkthrough for the Heart of Mars mission in Starfield! This guide will walk you through starting the mission and detail the necessary steps for its completion. If you need help with a specific mission objective, check the quick links section to easily find the information needed.

Some of the planets referenced in our guides and walkthroughs may not match yours due to how Starfield was created. In these situations, what you do and the places you visit on those planets should remain the same.

How to Start the Heart of Mars Mission

Heart of Mars is one of the misc missions you can pick up at Cydonia. To start it, speak with Layla Pulaski in the Residential section of Cydonia about the Heart of Mars. She can also be found in the Central Depot mining ore.

Starfield Heart of Mars

Heart of Mars Walkthrough

Find the Heart of Mars

Head for your ship and use it to return to space. When looking at Mars, land at the Cave. Head inside the cave where you’ll find the Heart of Mars (Titanium Deposit) on the ground in the form of a small rock.

Heart of Mars Starfield

Use your Cutter to extract the ore.

Return to Laylah

Report back to Laylah in Cydonia. As a reward, you’ll get to keep the titanium and earn 100 XP.

Additional Starfield Guides and Walkthroughs

Be sure to check our main Starfield Guides and Walkthroughs page for additional content on Starfield, such as additional guides to assist you during your adventures in the Settled Systems!

Starfield Logo
Guides

Starfield | Runaway Mission Guide

by NightlyGamingBinge in

Welcome to our guide on the Runaway mission in Starfield! This guide will walk you through starting the mission and detail the necessary steps for its completion. If you need help with a specific mission objective, check the quick links section to easily find the information needed.

Some of the planets referenced in our guides and walkthroughs may not match yours due to how Starfield was created. In these situations, what you do and the places you visit on those planets should remain the same.

How to Start the Runaway Mission

Runaway is one of the missions you can pick up in Cydonia. To start the mission, speak with Rivkah and ask her about her cough. You’ll then need to tell her that you’ll speak with her father to officially start the quest.

You cannot start this quest until you complete all three quests for Trevor: Red Tape Blues, Red Tape Runaround, Red Tape Reclamation

Runaway Walkthrough

Obtain Red Harvest Reserve Whiskey

Speak with Jack at the bar by the main entrance of Cydonia to ask him about the Red Harvest Reserve Whiskey. To obtain the whiskey, you can either steal it from Governor Hurst’s office, persuade Jack to reduce the price to 600 credits or pay 15,000 credits for it. Unfortunately, it’s hard to steal it without being caught as the governor is always in his office.

Go to Hotel Volii

Once you’ve obtained the whiskey, travel to Neon on Volii Alpha in the Volii System. You’ll find the hotel next to Reliant Medical.

Find Out Which Room Natan Is In

Speak with Minerva Clement behind the desk and tell her that you have a delivery for Natan. She’ll tell you that he’s up on the third floor and will let him know you are coming.

Speak With Natan

Head into the nearby elevator and select the 3rd Floor. After exiting the elevator head into the door on the left to find Natan and speak with him. You’ll be then given a choice to persuade, talk or attack him.

Return to Rivkah

Report back to Rivkah to complete the quest. As a reward, you’ll receive some credits and 100 EXP.

Additional Starfield Guides and Walkthroughs

Be sure to check our main Starfield Guides and Walkthroughs page for additional content on Starfield, such as additional guides to assist you during your adventures in the Settled Systems!

Starfield Logo
Guides

Starfield | Red Tape Reclamation Mission Guide

by NightlyGamingBinge in

Welcome to NGB and our guide for the Red Tape Reclamation mission in Starfield! This guide will walk you through starting the mission and detail the necessary steps for its completion. If you need help with a specific mission objective, check the quick links section to easily find the information needed.

Some of the planets referenced in our guides and walkthroughs may not match yours due to how Starfield was created. In these situations, what you do and the places you visit on those planets should remain the same.

How to Start the Red Tape Reclamation Mission

Red Tape Reclamation is one of the missions you can pick up in Cydonia. You’ll automatically begin this quest after completing the Red Tape Runaround mission.

Red Tape Reclamation Walkthrough

Speak with Trevor

Head down to the mining area and speak with Trevor who will have another problem he needs your help with. Agree to look for the missing guy then exit Cydonia and head to the Ship Services Tech near the Spaceport.

If this is an NG+ run, you’ll have a special option when speaking with Trevor that will alert you to skip to the Speak with Trevor objective below.

Speak with Ship Services

Starfield Red Tape Reclamation

Exit Cydonia. After the long hallway, take a right. Head down the ramp and speak with the Ship Services Technician outside a small building. Tell him that you’re looking for information on Hank Ferraro.

Speak with Trevor

Head back inside and speak with Trevor. Tell him that you’ll look for the missing equipment.

Find Hank Ferraro

We found Hank in the bar on the surface level of Cydonia, but you might need to mark the quest as active to find him since he might move around. You’ll need to ask him about the new equipment. He’ll admit that he took the equipment to get out of his contract. You can tell him it was a terrible plan or ask him to hand the equipment over to you. Either way, he’ll tell you he’ll lead you to the equipment.

Follow Hank

Follow Hank out to the middle of nowhere. Of course, when you arrive at the ship, he’ll pull a gun on you. Either persuade him to stand down or attack him. If you persuade him, you can turn him into Booth in security. If you kill him, it’s simple… he dies!

Again, if this is an NG+ run, you’ll have a special option when Hank pulls his gun that forces him to surrender. You’ll then be able to make him do what you want.

Speak with Trevor

Report back to Trevor. No matter your decision with Hank, you’ll receive the Deimos Spacesuit, Deimos Balanced Pack, Deimos Space Helmet, Deimos Cap, Iron x50, some credits, and 100 XP.

Additional Starfield Guides and Walkthroughs

Be sure to check our main Starfield Guides and Walkthroughs page for additional content on Starfield, such as additional guides to assist you during your adventures in the Settled Systems!

Starfield Logo
Guides

Starfield | Red Tape Runaround Mission Guide

by NightlyGamingBinge in

Welcome to NGB and our guide for the Red Tape Runaround mission in Starfield! This guide will walk you through starting the mission and detail the necessary steps for its completion. If you need help with a specific mission objective, check the quick links section to find the information needed easily.

Some of the planets referenced in our guides and walkthroughs may not match yours due to how Starfield was created. In these situations, what you do and the places you visit on those planets should remain the same.

How to Start the Red Tape Runaround Mission

Red Tape Runaround is one of the missions you can pick up at Cydonia. You’ll automatically begin this quest after completing the Red Tape Blues mission.

Red Tape Runaround Walkthrough

Report to Work for Peter Brennan

Head upstairs and speak with Peter Brennan in his office (assuming you are still in Cydonia on Mars) which is on the top floor overlooking the mining area below.

Speak with Governor Hurst

Exit the Deimos Staryard Corporate Quarters. Instead of taking the stairs down, follow the path straight ahead. Enter the first door on the left and head to the back to speak with Governor Glen Hurst. Tell him you’re here on behalf of Peter Brennan. Before he turns over the shipment, he’ll want you to do him a little favor.

Find the Stolen Ship

You’ll find the ship near Umbriel, Uranus’ moon, in the Sol System. When you approach the ship, accept its hail or hold A to hail the ship. When speaking with them, you can lie and say you’re a Crimson Fleet pirate to board the ship or tell them you have strict orders to destroy them.

If you lied, dock with the ship, then board it. The pirates will know you’re not one of them and will give you two options. You can either attempt to persuade them or attack and kill them all. You’ll actually have a time limit to decide, so make your decision quickly! If you persuade him, you’ll learn he has an incriminating letter from Governor Hurst himself. He’ll then say that you can have it as long as they get to keep the ship. You can either make the deal or attack them (make sure to loot the Pirate Leader for the evidence). Either way, you’ll be able to explore the ship. Head down to the bottom level to find a deceased Sylvija Schloss. Loot “This is it” off of her.

Return to Hurst

It’s up to you if you want to destroy the ship. We chose not to and just made our way back to Hurst. Speak with him, letting him know that you took care of his little problem. You have several options for handling this!

  • [Lie] I destroyed the ship. Whatever it is, your secret is safe.
    • Says he’ll defer Brennan’s taxes as a bonus, but you get no credits, just the package.
    • If you go this route, you can give the evidence from the pirates to Booth’s boss.
  • I found your ship, but the pirates got away.
    • Since we didn’t hold up the deal, he wants us to give him 10,000 credits. If you fork it over, he’ll give you the package.
  • I found your note to the pirates. Seems like it’d be real bad for you if people knew.
    • Deal. Take the note, and I’ll stay quiet.
      • 12000 credits and package
    • No deal. I like the idea of having leverage on you.
      • He says you have nothing and you’ll be taken back to the previous options.
  • How about you pay me a little extra to keep this all quiet?
    • 5000 Credits, then you’ll go back to the previous options

If you’re looking to get the maximum amount of credits from Hurst, select the following options:

  • How about you pay me a little extra to keep this all quiet?
  • I found your note to the pirates. Seems like it’d be real bad for you if people knew.
  • Deal. Take the note, and I’ll stay quiet.

By selecting those options, you’ll get 17,000 credits!

Deliver the package to Peter

Return to Peter Brennan and hand over his package.

Approve the equipment request

Head into Brennan’s office and interact with his computer. Open the Requests folder, then go to the Replacement Mining Equipment tab. Approve the request! You’ll receive some credits and 150 EXP. This will then start the Red Tape Reclamation mission.

Additional Starfield Guides and Walkthroughs

Be sure to check our main Starfield Guides and Walkthroughs page for additional content on Starfield, such as additional guides to assist you during your adventures in the Settled Systems!