Starfield Logo
Guides

Starfield | Background Checks Mission Guide

by NightlyGamingBinge in

Welcome to our walkthrough for the Background Checks mission in Starfield! This guide will walk you through starting the mission and detail the necessary steps for its completion. If you need help with a specific mission objective, check the quick links section to easily find the information needed.

PLEASE NOTE: Some of the planets referenced in our guides and walkthroughs may not match yours due to how Starfield was created. In these situations, what you do and the places you visit on those planets should remain the same.

How to Start the Background Checks Mission

Background Checks is one of the faction missions for Ryujin Industries. You’ll automatically begin this mission after completing the Top Secrets mission.

Background Checks Walkthrough

Talk to Dalton Fiennes

Head to the middle floor of the Executive Offices then speak with Dalton.

Meet Nyx at Madame Sauvage’s Place

Exit the building and take the door to EBBSIDE that is located to the left of Mining League. From there enter Madame Sauvage’s Place and speak with Nyx. He’ll only give you the program for a price or a favor. Thankfully, the price is only 2500 credits and you can persuade him to lower it to 1000. If you don’t want to pay, you can select to do that favor. He’ll want you to put the program on Camden Cho’s computer, too. We chose to just cough up the 1,000 credits as this would be going against Ryujin.

Find a Way into Ryujin Tower

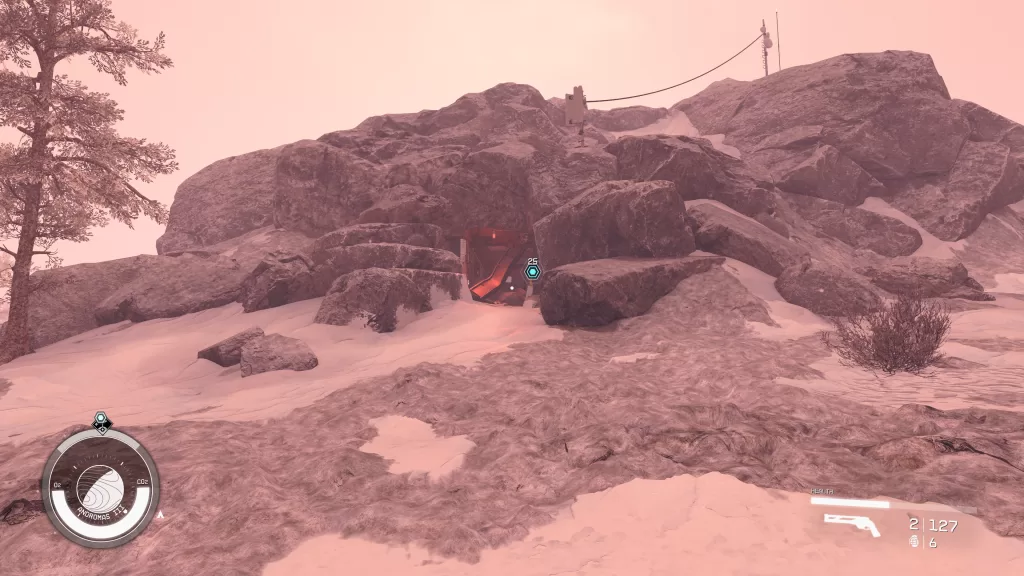
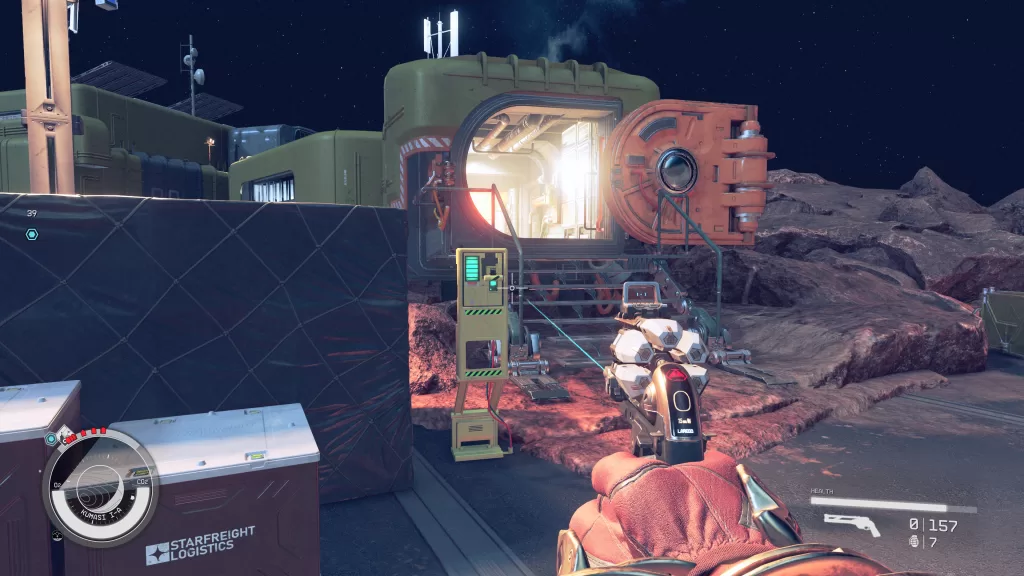
Make sure to equip the Novablast Disruptor you received to prevent deaths as the guards will become hostile if they catch you sneaking around like Dalton warned. When you’re ready, exit Madame Sauvage’s Place then take a left. At the end of the path, take the really long staircase to the top where you’ll find a button. Activate it to turn the structure around. Hop on the new path and follow it to enter Ryujin Industries HQ!

Run Nyx’s Program on Ularu’s Computer

Follow the vent to emerge in an empty room. Head towards the Out of Order door to find some crates you can jump on to enter the vents.

Vents giving access to Ularu's Computer

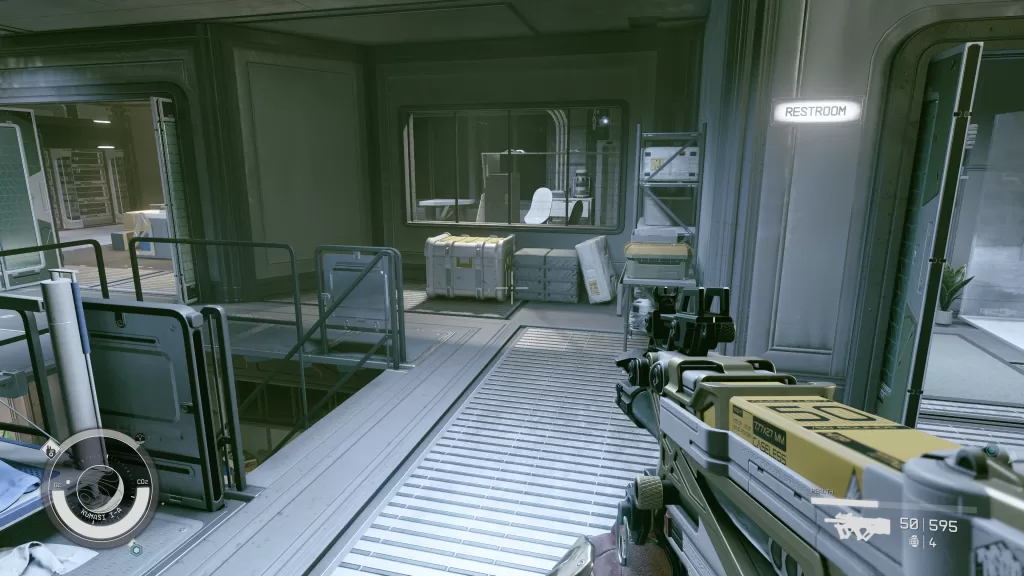
Once in the vents, head forward and interact with the Panel Door on the wall just after a window. You’ll then be able to power down the floor lights. With the lights turned off, continue through the vents and drop down the hole at the end to reach an empty supply closet. Open the door then sneak your way past the guards to another door that has a set of stairs behind it. Take these stairs all the way up to the top. At the top, sneak across to a supply closet where you’ll find a hatch in the ceiling.

How to sneak past Ryujin security guards

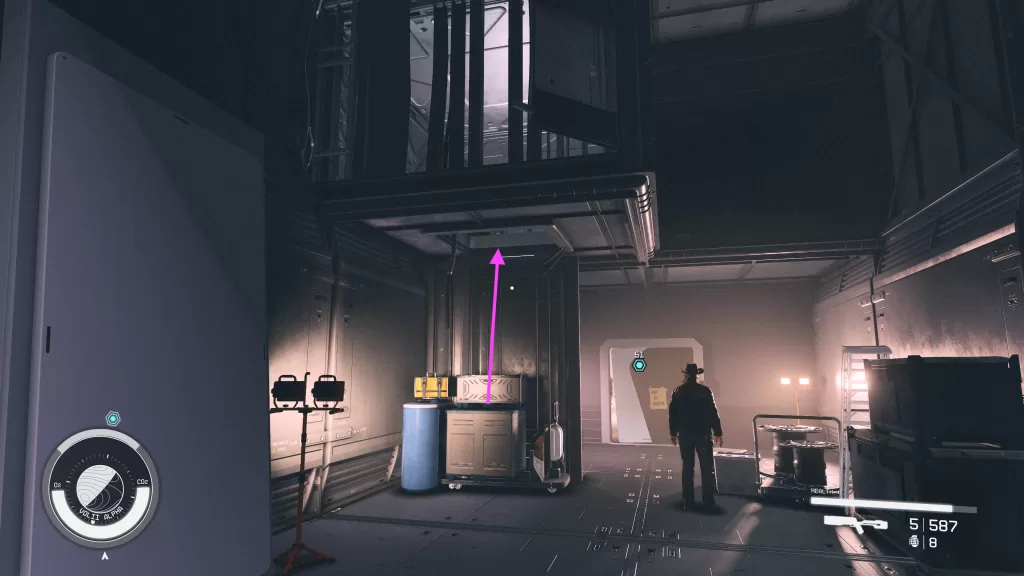
Open it then jump up into the vents. Right next to the hatch, you’ll find the box to power down the floor lights. Activate it then hug the left wall. Take the hatch on the left side to reach a cafeteria. Drop down into this area then head straight through the hallway. At the end, you’ll need to be extremely mindful of the guard on the right side. (For us the game glitched and the lights did not go off. We were able to make it past the guard by sprinting without a companion!)

Run Nyx's Program on Ularu's Computer

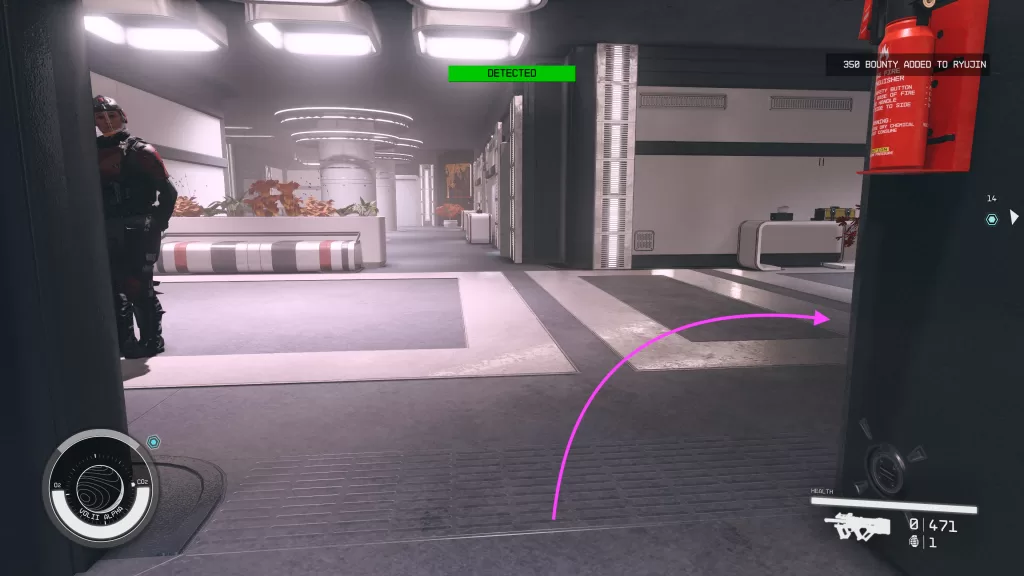
When you’re able, take a right turn and open (then shut) the door. This will lead to another vent. Head up into the vent and follow the linear path. Head through the door then be careful in this area as there are A LOT of guards!! Head straight then hug the left side.

Run Nyx's Program on Ularu's Computer

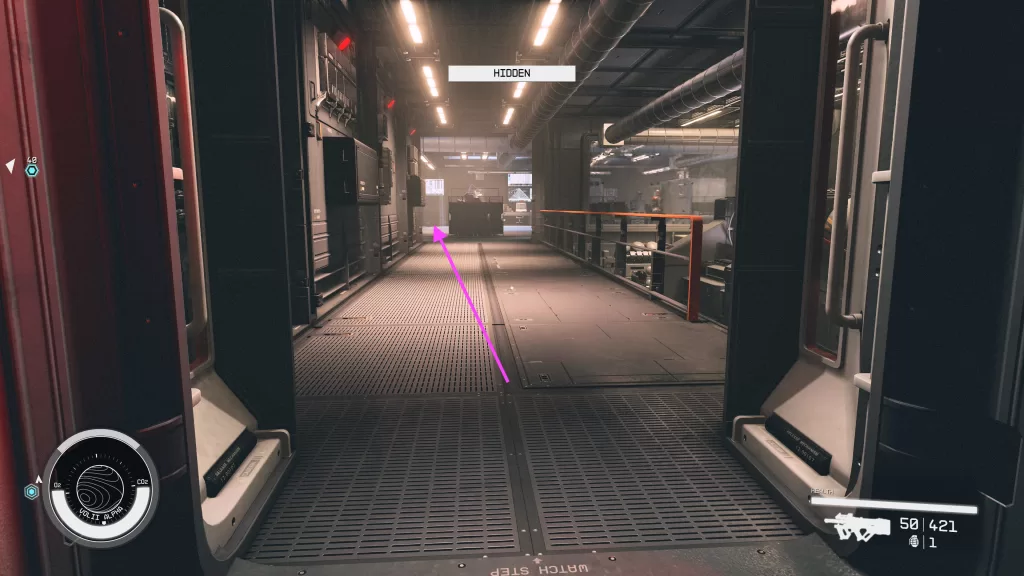
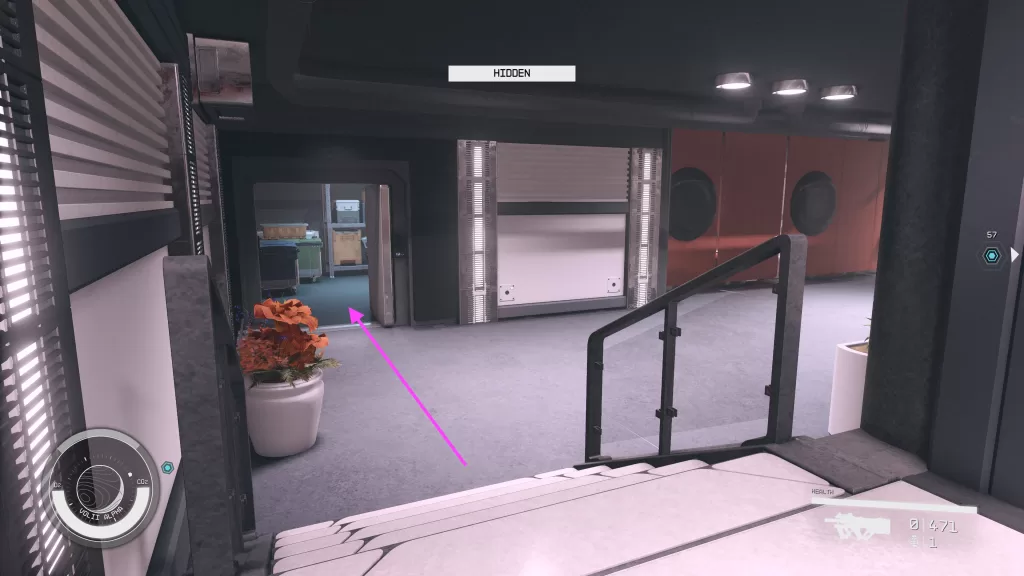
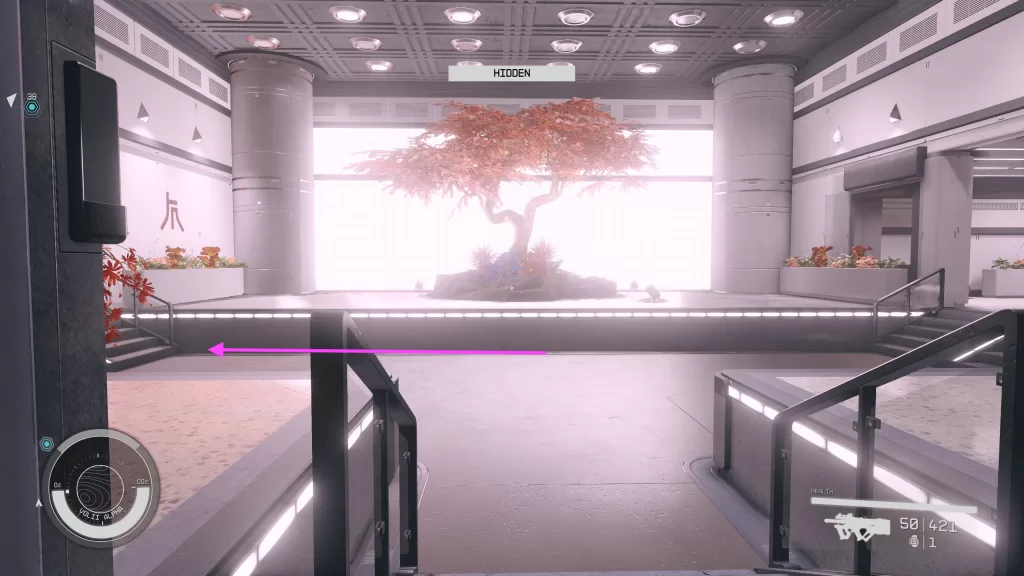
You’ll emerge into a big open room with a giant tree in the middle. Head left!

Starfield Background Checks Objective

In the next room, head up the stairs and take a right to find another vent. Be mindful of the guard on the left side of the stairs!! (We sprinted up the stairs, took a right and jumped up to the vent without being caught after several tries of being sneaky!) Once in the vent, follow it to reach the rafters. Head to the right and follow the rafters to reach the vent in the center of the room on the other side.

Background Checks Starfield

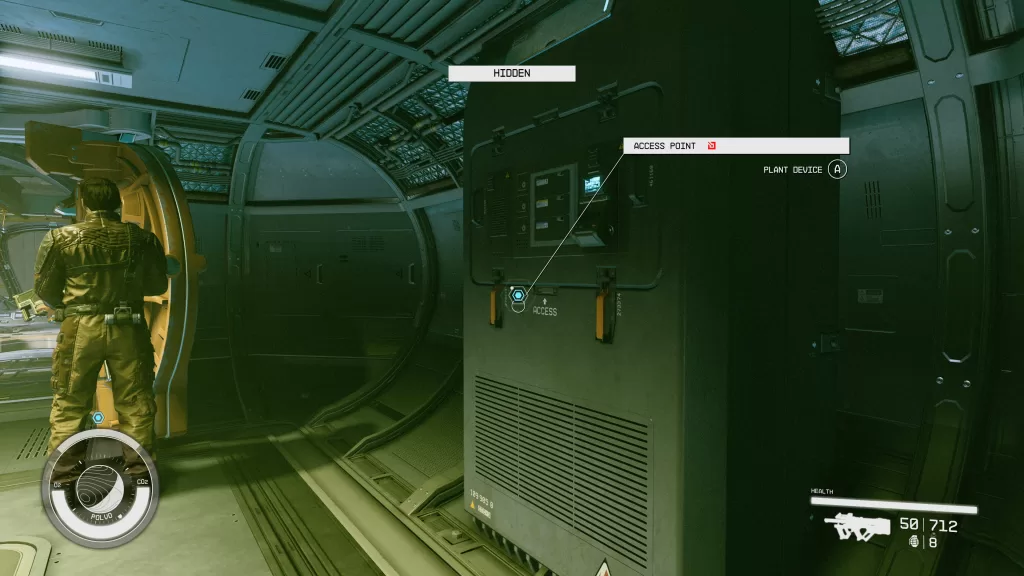
At the end of this vent, you’ll find a locked panel door. Use a digipick to unlock it so you can turn off the lights. When you jump down into the next room, there will be a guard behind you so quickly make your way straight ahead to the stairs leading up (we hugged the right side a bit to get out of the guard’s line of sight)! Once at the top of the stairs, hug the left side to find Ularu’s office. Interact with her computer and select the bottom file to run Nyx’s program on Ularu’s computer.

Exit Ryujin Tower

We just peaced out by teleporting to our ship, however, you can also use the ceiling vent in her office to exit the building.

Meet Nyx at his Apartment

When looking at Madame Sauvage’s Place, take a left and curve around the alley. When you see the red wall in front of you with Strikers written on it, take a right followed by an immediate right.

Meet Nyx at his apartment

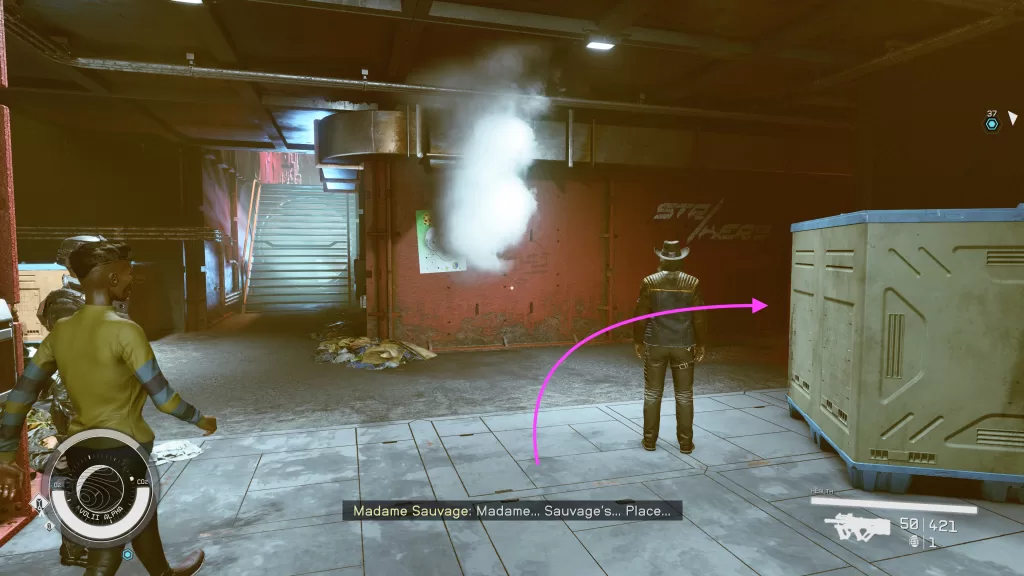
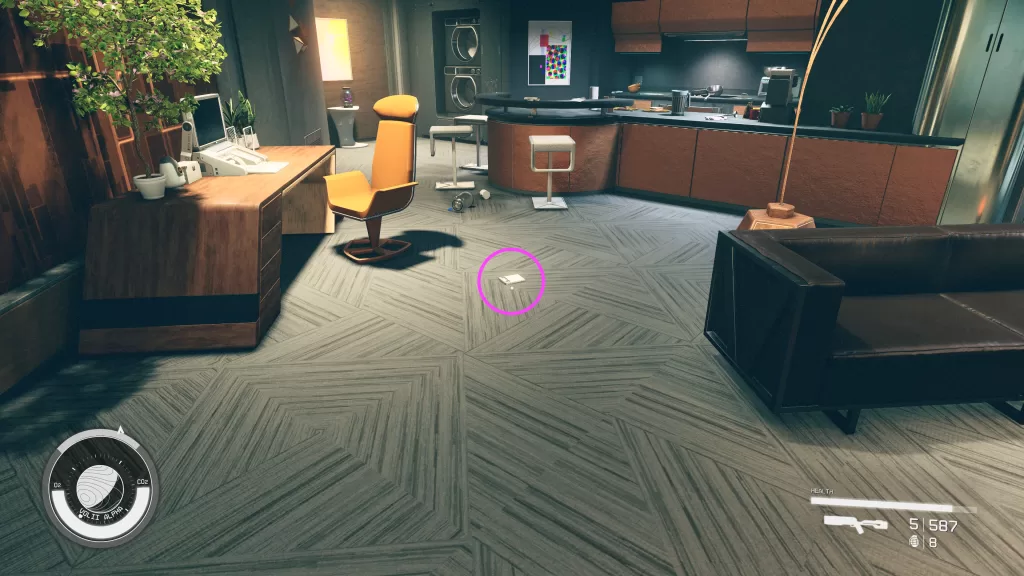
Head down the hallway. Just before the set of stairs leading up, look to your right to find another set of stairs. Take them up to reach Nyx’s apartment. Head inside and speak with Nyx. You’ll then need to wait for him to do his thing! When he finishes, speak with him again to retrieve the slate.

Return to Dalton at Ryujin Tower

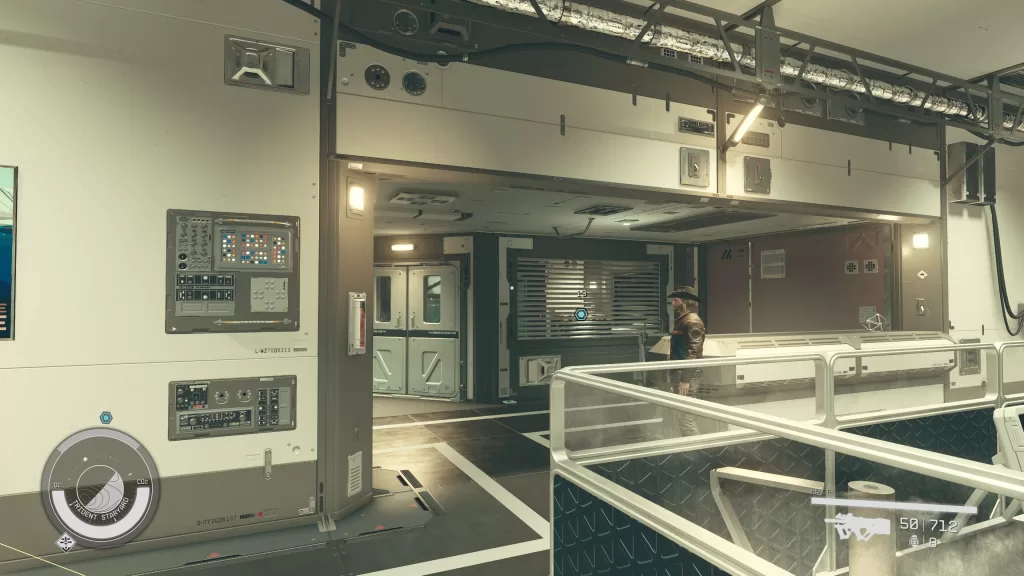
Make your way back to Ryujin Tower (this time via the front door!) and head up to the Executive Offices. Head up the stairs and speak with Dalton Fiennes in the security office then wait for him to peruse the files. Speak with him when he’s through to learn who the culprit is. Afterwards, the mission will complete!

Additional Starfield Guides and Walkthroughs

Be sure to check our main Starfield Guides and Walkthroughs page for additional content on Starfield, such as additional guides to assist you during your adventures in the Settled Systems!

Starfield Logo
Guides

Starfield | Matters of Hart Mission Guide

by NightlyGamingBinge in

Welcome to NGB and our walkthrough for the Matters of Hart mission in Starfield! This guide will walk you through starting the mission and detail the necessary steps for its completion. If you need help with a specific mission objective, check the quick links section to easily find the information needed.

PLEASE NOTE: Some of the planets referenced in our guides and walkthroughs may not match yours due to how Starfield was created. In these situations, what you do and the places you visit on those planets should remain the same.

How to Start the Matters of Hart Mission

Matters of Hart is a companion mission for Sam Coe. To start the mission, you’ll need to have raised Sam’s affection for you high enough by making choices that he likes. This in turn will lead to various conversations where he’ll eventually ask you to speak with him and Cora. Simply head to your ship to speak with the two of them together. Cora needs your help looking for her mom whom she believes is in trouble. Sam will be locked in your party after starting this mission until its completion.

Matters of Hart Mission Walkthrough

Proceed to Neon

Travel to Neon on Volii Alpha in the Volii System then head to the Ranger Outpost and speak with Jaylen Pryce. Afterwards, head around the corner and enter through the door to reach Lillian’s desk. Interact with the Confidential Informant Financial Disclosure next to the computer. Next, speak with Sam to share what you found!

Look for Lillian’s Confidential Informant

Exit the building then head across the street to Ryujin Apartments. Take the elevator up then approach the door to trigger a cutscene. When it completes, investigate the apartment to find information about Lillian. Specifically, interact with Victor Compound text log on the floor near the desk.

Starfield Matters of Hart Lillian's confidential informant's text log

Return to Sam and show him the slate.

Go to Victor Compound

Return to your ship then set sail for Victor Compound on McClure II in the McClure System. Approach Sam to trigger a cutscene. Afterwards, speak with Sam.

Find Lillian Hart

Approach the compound then take out all of the enemies. Once you’ve cleared the camp, head inside. There will be more enemies so take them out as you move through the compound! In the far back, you’ll find Lillian Hart.

Talk with Lillian Hart

Speak with her then return to your ship and speak with her again!

Get Cache Location from the Dumas

Travel to Rasalhague II in the Rasalhague System to find the Dumas and hail it upon your arrival. You’ll then need to engage in battle with the Level 34 ship. (Thankfully for us they did not fire back as we were a much lower level at the time!). After you reduce the shields and take out the engine, you’ll be able to board the ship. Take out the enemies inside then make your way up to the cockpit where you’ll be able to loot the Message to Dumas from the Captain’s Locker.

The location of the locker may be different in your playthrough.

Dumas Captain's Locker that contains cache location in Matters of Hart

Talk with Lillian Hart

Return to your ship and speak with Lillian.

Approach Valerie’s Cache on Andromas III

Travel to Andromas III in the Andromas System then land at Valerie’s Cache. Once there, head to the little cave and interact with the broken yellow box on the wall.

Valerie's Cache on Andromas III

Defeat Valerie and the Syndicate Forces

Turn around to spot a ship landing. This will be the first of many! Take out all the enemy forces! Please note that there will be some level 32 enemies scattered in!

Speak with Everyone

After you’ve finally defeated all of the waves, speak with Lillian and then Sam. Afterwards, you’ll receive some EXP and credits!

Talk to Sam Coe near Solomon Coe’s statue in Akila City

Travel to Akila and speak with Sam behind the statue in front of the Rock. At this point, you’ll have the option to romance him! It’s completely your choice! Once you’ve made your decision, the Matters of Hart mission will end and you’ll receive the Explorer Adventure Hat!

Additional Starfield Guides and Walkthroughs

Be sure to check our main Starfield Guides and Walkthroughs page for additional content on Starfield, such as additional guides to assist you during your adventures in the Settled Systems!

Starfield Logo
Guides

Starfield | Top Secrets Mission Guide

by NightlyGamingBinge in

Welcome to NGB and our walkthrough for the Top Secrets mission in Starfield! This guide will walk you through starting the mission and detail the necessary steps for its completion. If you need help with a specific mission objective, check the quick links section to easily find the information needed.

PLEASE NOTE: Some of the planets referenced in our guides and walkthroughs may not match yours due to how Starfield was created. In these situations, what you do and the places you visit on those planets should remain the same.

How to Start the Top Secrets Mission

Top Secrets is one of the faction missions for Ryujin Industries. You’ll automatically begin this mission after completing the Maintaining the Edge mission.

Top Secrets Walkthrough

Meet Ularu Chen

Take the elevator across from Lane Garza’s desk up to the Executive Offices. Head all the way up the flights of stairs to reach the top of the Executive Offices. Once there, speak with Maeve at the desk outside of the main office. Follow Imogene up the stairs and wait with her outside of the office. You’ll overhear the tail end of the previous meeting. Head inside when it concludes to meet Ularu.

Travel to Cydonia on Mars in the Sol System

Make your way over to Cydonia. Once there speak with Simon Ryczek. When he asks about sports, say “Razor derby is the only real sport.” You’ll then be able to persuade him to pay 8,000 credits or pay him 10,000 credits outright Alternatively, you can hear about a side job he has.

For this side job, he’ll want you to kill Malai and bring her gun back as proof. You can find her ship, the Datura, in orbit around Saturn.

Find Datura

Make your way to Saturn in the Sol System to find the Datura. Accept the hail then speak with Malai. If you decide not to kill her, you’ll board her ship to acquire her gun, Ember. Head inside and work your way up to the cockpit to find Malai and speak with her in person. She’ll of course want to kill you so you’ll need to either persuade her or attack her.

Return to Simon in Cydonia

Report back to Simon.

Study up on Stanley McMillan

Open your inventory and listen to Audio: Stanley McMillan and read File: Stanley McMillan.

Retrieve the Project Dominion Files

Head across the way from Simon to the Deimos Staryard Corporate Quarters. Inside you’ll find Stanley sitting at his computer. If you speak with him and have the Security skill, you’ll say that “Deimos tech support. I need to verify your PC is secure.” He’ll leave his computer and just give you access. Alternatively, you can use one of the other options to get him to leave. Go to the “Deimos Staryards Presentation” then open “Project Dominion”. You’ll need to hack the novice lock on this file. Next, download the file.

Return to Ryujin Tower

Report back to Ularu then follow her across the way to Masako. Speak with Masako Imada to complete the mission.

Additional Starfield Guides and Walkthroughs

Be sure to check our main Starfield Guides and Walkthroughs page for additional content on Starfield, such as additional guides to assist you during your adventures in the Settled Systems!

Starfield Logo
Guides

Starfield | Maintaining the Edge Mission Guide

by NightlyGamingBinge in

Welcome to NGB and our walkthrough for the Maintaining the Edge mission in Starfield! This guide will walk you through starting the mission and detail the necessary steps for its completion. If you need help with a specific mission objective, check the quick links section to easily find the information needed.

PLEASE NOTE: Some of the planets referenced in our guides and walkthroughs may not match yours due to how Starfield was created. In these situations, what you do and the places you visit on those planets should remain the same.

How to Start the Maintaining the Edge Mission

Maintaining the Edge is one of the faction missions for Ryujin Industries. You’ll automatically begin this mission after completing the Accidents Happen mission.

Maintaining the Edge Walkthrough

Travel to Trident Luxury Lines Staryard

Travel to the Trident Luxury Lines Staryard. For us it was orbiting Akila in the Cheyenne System. Upon finding it, dock and board the ship.

Obtain the Schematic

Once inside, head down the stairs across from the reception desk. You’ll come to an area with a bunch of cubicles. Just past the cubicles you’ll find a locked room.

Starfield Maintaining the Edge

You’ll need to break into this room and loot the locked chest inside.

Return to Imogene at Ryujin Tower

Once you’ve collected the schematics, report back to Imogene to complete the mission.

Additional Starfield Guides and Walkthroughs

Be sure to check our main Starfield Guides and Walkthroughs page for additional content on Starfield, such as additional guides to assist you during your adventures in the Settled Systems!

Starfield Logo
Guides

Starfield | Accidents Happen Mission Guide

by NightlyGamingBinge in

Welcome to NGB and our walkthrough for the Accidents Happen mission in Starfield! This guide will walk you through starting the mission and detail the necessary steps for its completion. If you need help with a specific mission objective, check the quick links section to easily find the information needed.

PLEASE NOTE: Some of the planets referenced in our guides and walkthroughs may not match yours due to how Starfield was created. In these situations, what you do and the places you visit on those planets should remain the same.

How to Start the Accidents Happen Mission

Accidents Happen is one of the faction missions for Ryujin Industries. You’ll automatically begin this mission after completing the Sowing Discord mission.

Accidents Happen Walkthrough

Travel to HopeTech

Hop over to HopeTown on Polvo in the Valo System. Once there, head straight ahead to HopeTech, which is just past the Rangers building.

Starfield Accidents Happen

Once inside, work your way to the factory in the back of the building on the main level. In the factory you’ll find a ship. Make your way over to it then head inside. On the upper level of the ship, you’ll find a guard. You’ll need to install the device without him stopping you. To do this, we waited for him to turn around then snuck up behind him!

accidents happen starfield

Return to Imogene at Ryujin Tower

Report back to Imogene to complete the Accidents Happen mission.

Additional Starfield Guides and Walkthroughs

Be sure to check our main Starfield Guides and Walkthroughs page for additional content on Starfield, such as additional guides to assist you during your adventures in the Settled Systems!

Starfield Logo
Guides

Starfield | Superfan Mission Guide

by NightlyGamingBinge in

Welcome to NGB and our guide for the Superfan mission in Starfield! This guide will walk you through starting the mission and detail the necessary steps for its completion. If you need help with a specific mission objective, check the quick links section to easily find the information needed.

Some of the planets referenced in our guides and walkthroughs may not match yours due to how Starfield was created. In these situations, what you do and the places you visit on those planets should remain the same.

How to Start the Superfan Mission

Superfan is one of the missions you can pick up in Neon on the planet Volii Alpha of the Volii System. To start the mission, head to the Astral Lounge then use the elevator to reach the VIP Balcony. Locate and enter the Staff Only room to find BorealUS. Speak with her and exhaust her dialog options to learn someone stole her slate. Offer to help BorealUS to start the mission.

Starfield Superfan ojective

Superfan Walkthrough

Speak to Myka

Leave the Astral Lounge then head for the Emporium. Pass through the EBBSIDE doors to the right of it and enter Euphorika. Myka can be found behind the bar. Speak with her about the missing slate. She’ll only give you the information if you pay her 1,500 credits. Myka will then tell you that the person who took the slate is a man named Stratos and that he can be found at Madame Savage’s Place.

Recover the Music Slate

Head to Madame Savege’s Place (pass through the EBBSIDE doors next to Mining League) and locate Stratos. Talk with him and exhaust his dialog a bit then you’ll be able to ask for the slate back. You’ll either need to trade him some Aurora for it (bought at the Astral Lounge) or pass a persuasion check.

Superfan Starfield recover the music slate

Return the Music Slate

With the slate in hand, return to BorealUS at the Astral Lounge. Hand over her slate to complete the mission. You’ll be rewarded 100 EXP and some credits.

Additional Starfield Guides and Walkthroughs

Be sure to check our main Starfield Guides and Walkthroughs page for additional content on Starfield, such as additional guides to assist you during your adventures in the Settled Systems!

Starfield Logo
Guides

Starfield | Dirty Laundry Mission Guide

by NightlyGamingBinge in

Welcome to NGB and our guide for the Dirty Laundry mission in Starfield! This guide will walk you through starting the mission and detail the necessary steps for its completion. If you need help with a specific mission objective, check the quick links section to easily find the information needed.

Some of the planets referenced in our guides and walkthroughs may not match yours due to how Starfield was created. In these situations, what you do and the places you visit on those planets should remain the same.

How to Start the Dirty Laundry Mission

Dirty Laundry is one of the missions you can pick up in Neon on the planet Volii Alpha of the Volii System. To start the mission, speak with Manaia Adams in the Astral Lounge. Ask her why she’s there then see if she needs any help and take the job when she offers it.

Starfield Dirty Laundry

Dirty Laundry Walkthrough

Pick up the Merchandise

Head to the Neon Core then make your way over to Neon Tactical. Pass through the EBBSIDE door to the right of the store then take a left down the alley to reach Warehouse 03.

Dirty Laundry Starfield

Enter the warehouse then head up to the storage area on the top floor. Loot the Discarded Sidestar from the Pharacetualc Kit there. Exit the warehouse and make your way to the Trading Authority in the Neon Core. Head inside and sell the item to Kolman Lang by choosing ‘I was wondering if you’d be interested in this Sidestar. He’ll agree to take the gun but will only give you 500 credits for it since it’s hot. If you have Weapon Engineering you can convince him to pay you for what it is worth (1500 credits).

Return to Manaia

Go back to the Astral Lounge and speak with Manaia there to let her know the job is done. This will complete the mission and you’ll be rewarded 100 EXP and some credits.

Additional Starfield Guides and Walkthroughs

Be sure to check our main Starfield Guides and Walkthroughs page for additional content on Starfield, such as additional guides to assist you during your adventures in the Settled Systems!

Starfield Logo
Guides

Starfield | Bare Metal Mission Guide

by NightlyGamingBinge in

Welcome to NGB and our guide for the Bare Metal mission in Starfield! This guide will walk you through starting the mission and detail the necessary steps for its completion. If you need help with a specific mission objective, check the quick links section to easily find the information needed.

Some of the planets referenced in our guides and walkthroughs may not match yours due to how Starfield was created. In these situations, what you do and the places you visit on those planets should remain the same.

How to Start the Bare Metal Mission

Bare Metal is one of the missions you can pick up in Neon on the planet Volii Alpha of the Volii System. To start the mission, speak with Frank Renick at Neon Tactical who’ll tell you about how his security bot was vandalized by a local gang member. Offer to track down the punk and teach him a lesson.

Starfield Bare Metal

Bare Metal Walkthrough

Kill / Speak to Warlord

To find Warlord, head through the Ebbside doors to the right of The Emporium in Neon Core. This will bring you right in front of Euphorika which you’ll want to enter.

Bare Metal Starfield

Speak with Warlord there and tell him that Frank Renick wants retribution! You’ll then be able to decide to kill him (and his friend) or persuade him to give you the credits. Either option doesn’t matter, so go with what you’re feeling. Take the credits back to Frank to complete the mission. You’ll be rewarded with 100 EXP and some credits.

Additional Starfield Guides and Walkthroughs

Be sure to check our main Starfield Guides and Walkthroughs page for additional content on Starfield, such as additional guides to assist you during your adventures in the Settled Systems!

Starfield Logo
Guides

Starfield | Refurbished Goods Mission Guide

by NightlyGamingBinge in

Welcome to NGB and our guide on the Refurbished Goods mission in Starfield! Refurbished Goods is one of the misc missions you can pick up in Cydonia. This guide will walk you through starting the mission and detail the necessary steps for its completion. If you need help with a specific mission objective, check the quick links section to easily find the information needed.

Some of the planets referenced in our guides and walkthroughs may not match yours due to how Starfield was created. In these situations, what you do and the places you visit on those planets should remain the same.

How to Start the Refurbished Goods Mission

To start the Refurbished Goods mission, speak with Denis in Cydonia after completing the Freight Fright mission.

Refurbished Goods Walkthrough

Go to Deserted Relay Station

The location for the Deserted Relay Station you’ll need to go to is randomized, so follow your objective to the correct planet and land there.

Obtain 5 Items: (Pacifier)

There will be enemies around the building. Take them out then flip the switch near the entrance to head inside.

Starfield Refurbished Goods Deserted Relay Station

You’ll need to defeat all the enemies (ours had some high level enemies scattered in!) inside then look for the Military Crate. We found ours next to the restroom by the stairs leading down.

Starfield Refurbished Goods Military Crate containing Pacifier

Bring Denis 5 Items: (Pacifier)

Return to Cydonia and speak with Denis to hand over the items. Afterwards, the Starfield Refurbished Goods mission will be completed!

Additional Starfield Guides and Walkthroughs

Be sure to check our main Starfield Guides and Walkthroughs page for additional content on Starfield, such as additional guides to assist you during your adventures in the Settled Systems!

Starfield Logo
Guides

Starfield | Juno’s Gambit Mission Guide

by NightlyGamingBinge in

Welcome to our guide for the Juno’s Gambit mission in Starfield! Juno’s Gambit is one of the misc missions you can pick up in space. This guide will walk you through starting the mission and detail the necessary steps for its completion. If you need help with a specific mission objective, check the quick links section to easily find the information needed.

Some of the planets referenced in our guides and walkthroughs may not match yours due to how Starfield was created. In these situations, what you do and the places you visit on those planets should remain the same.

How to Start the Juno’s Gambit Mission

To start the mission, we entered the space around Kumasi I-a, a moon of Kumasi I in the Kumasi System, and encountered an enemy ship.

Juno’s Gambit Walkthrough

DESTROY Ecliptic Ship

Take out the Ecliptic ship then dock on the Mysterious Ship.

Investigate Voices on Board

After docking, board the ship then explore it.

Talk to Ryujin Operatives

Speak with Operative Khambatta. If you’ve started the Ryujin Industries quest line, you’ll be able to tell them that you’re an operative, too! Exhaust all the dialog.

Talk to Juno

Interact with the Juno Probe. You’ll need to make a decision: “You are a person, with your own thoughts and desires.” or “You are a machine, made of electronics and programmed by code.” Your choice here really doesn’t matter. Afterwards, you’ll need to make another decision:

Attach control board

If you choose to attach the control board, interact with Juno again. She’ll beg you not to as she doesn’t want to change. Afterwards, you’ll need to speak with Operative Khambatta. Next, leave the ship and undock. Back away from the ship and observe what happens to Juno and your fellow operatives…Juno disabled the oxygen and life support then warped away with them still on board. The mission will complete and you’ll receive 200 XP and some credits.

Deal with Ryujin Operatives

If you deal with the guys, you’ll convince them to leave the AI alone and will agree to give them a ride back to Neon. Afterwards, speak with Juno again. She’ll reassure you that you’ll meet again. Next, return to your ship and undock. Back away from the ship and observe Juno. She says she has much to process and needs time to think alone. When she warps away, make your way to Neon in the Volii System. Once you land on Neon, the quest will complete. As a reward, you’ll receive 200 XP and more credits than the above option.

Additional Starfield Guides and Walkthroughs

Be sure to check our main Starfield Guides and Walkthroughs page for additional content on Starfield, such as additional guides to assist you during your adventures in the Settled Systems!